
SC 1 - Camcorder Praktica - Free user manual and instructions
Find the device manual for free SC 1 Praktica in PDF.


| Product Type | Camcorder |
| Model | SC 1 |
| Brand | Praktica |
| Dimensions | 42.7 (H) x 59.2 (W) x 26.4 (D) mm (without lens) |
| Weight | Approx. 78 ± 3 g (without waterproof case) |
| Power Supply | Rechargeable 1130 mAh Li-ion battery |
| Charging Time | Approx. 240 minutes via USB |
| Storage Media | Internal 256MB flash memory; micro SDHC card (up to 32GB, Class 6) |
| Image Sensor | 1/2.5" CMOS 5.0 Megapixel |
| Video Resolution | 1080p (1920x1080, 30fps); 960p (1280x960, 30fps); 720p (1280x720, 60fps) |
| Photo Resolution | 5 Megapixels |
| Lens | Fixed wide-angle, F2.8, f=2.5mm; 170° ultra-wide angle |
| Field of View (FOV) | Ultra or Wide (Photo mode); always Ultra in Video mode |
| WiFi | IEEE 802.11 b/g/n, compatible with ActionCam! app |
| Waterproof Case | IPX8 rated, up to 60m for 60 minutes |
| Remote Control | RF wrist strap remote (optional), range up to 5m |
| Shooting Modes | Video, Photo, Burst (10 shots), Time Lapse (1-60 sec intervals), Self-Timer (10 sec delay) |
| PC Interface | USB 2.0 (Micro USB) |
| TV Output | HDMI |
| Auto-Off Timer | 1/3/5/10/30/60 minutes or Off |
| Operating Temperature | 0°C to 40°C (32°F to 104°F) |
| System Requirements | Windows 8/7/Vista/XP (SP2) or MAC OS X 10.5+ |
Frequently Asked Questions - SC 1 Praktica
User questions about SC 1 Praktica
0 question about this device. Answer the ones you know or ask your own.
Ask a new question about this device
Download the instructions for your Camcorder in PDF format for free! Find your manual SC 1 - Praktica and take your electronic device back in hand. On this page are published all the documents necessary for the use of your device. SC 1 by Praktica.
USER MANUAL SC 1 Praktica
thank you for choosing the PRAKTICA SC 1.
In case of questions, problems or failures of your PRAKTICA camera, please contact us directly per e-mail at:
support@praktica.de
or phone us on our hotline at +49-(0)351-2589-250
Monday-Thursday: 8 a.m. - 6 p.m. / Friday: 8 a.m. - 5 p.m.
or fax: +49(0)351-2589-285.
We are glad to assist you.
PENTACON GmbH
Operating conditions......vii
Notes on Waterproof Case...... viii
Before You Start.... xi
1 Introducing the Camcorder ....1
1.1 System Requirements...... 1
1.2 Features.... 1
1.3 Unpacking the Camcorder...... 2
1.4 About the Camcorder......6
1.4.1 Camcorder Views......6
1.4.2 Button Functions 7
1.4.3 LED Indicators....8
2 Getting Started....9
2.1 Installing the Micro SD Card....9
2.1.1 Removing the Micro SD card.... 10
2.2 Installing the Battery.... 10
2.2.1 Removing the battery.... 11
2.3 Charging the Battery.... 12
2.4 Turning ON/OFF the Camcorder...... 13
2.5 OLED Screen.... 14
2.6 Changing Modes.... 17
2.7 Connecting to TV (HDMI Cable)...... 18
2.8 Connecting to PC (Micro USB Cable) 18
3 Capturing Videos and Photos......19
3.1 Recording Videos.... 19
3.2 Taking Photos.... 19
3.2.1 WiFi.... 20
3.2.2 Burst Shooting 20
3.2.3 Time Lapse Shooting.... 21
3.2.4 Self-Timer.... 21
4 Adjusting the Settings ......22
4.1 Video Resolution 24
4.2 Field of View (FOV) 25
4.3 Shooting Interval.... 26
4.4 Up/Down 27
4.5 Delete.... 28
4.6 OSD Up/Down 31
4.7 LED 32
4.8 Brightness.... 33
4.9 Beep.... 34
4.10 Auto-Off.... 35
4.11 Date and Time.... 36
4.12 RF.... 38
4.13 Factory Default.... 39
5 Using the Accessories......41
5.1 Waterproof Case.... 41
5.1.1 Using the Waterproof Case...... 41
5.1.2 Changing the T Tip Adapter...... 42
5.1.3 Changing the Housing Back Door...... 43
5.2 Velcro Strap.... 43
5.3 Assembling the Camcorder Accessories ...... 43
5.4 RF Wrist Strap Remote Control...... 45
Appendix......47
Specifications...... 47
Troubleshooting 49
FCC Statement 50
Preface
Congratulations on your purchase of this advanced camcorder. Ensure that you read this manual carefully and keep it in a safe place for future reference.
About this manual
Every effort has been made to ensure that the contents of this manual are correct and up to date. However, no guarantee is made regarding the accuracy of the contents. The manufacturer reserves the right to change the contents, technology, and specifications without notice.
Copyright
© Copyright 2013.
All rights reserved. No part of this publication may be reproduced, transmitted, transcribed, stored in a retrieval system or translated into any language or computer language, in any form or by any means, electronic, mechanical, magnetic, optical, manual or otherwise, without the prior written permission of the manufacturer.
Precautions
General precautions
- Do not store the product in dusty, dirty, or sandy areas, as its components may be damaged.
- Do not store the product in a hot environment. High temperatures can shorten the life of electronic devices, damage batteries and warp or melt certain plastics.
- Do not store the product in cold areas. When the product warms up to its normal temperature, moisture can form inside, which may damage the electronic circuits.
- Do not attempt to open the casing or attempt your own repairs. High-voltage internal components create the risk of electric shock when exposed.
- Do not drop or knock the product. Rough handling may damage the internal components.
- Do not use harsh chemicals, cleaning solvents or strong detergents to clean the product. Wipe the product with a slightly damp soft cloth.
- Do not open the battery cover while an image is being recorded. Doing so will not only make storage of the current image impossible, it can also corrupt other image data already stored on file.
- If the product or any of its accessories are not working properly, take them to your nearest qualified service center. The personnel there will assist you and if necessary, arrange for the product to be repaired.
- Test for proper operation before using the camcorder.
Operating conditions
- This camcorder is designed for use in temperatures ranging from 0° C to 40° C ( 32° F to 104° F).
- Do not use or keep the camcorder in the following areas:
- In areas subject to direct sunlight
- In areas subject to high humidity or dust
- Near air conditioners, heaters, or other areas subject to temperature extremes
- Inside of a closed vehicle, especially one parked in the sun.
- In areas subject to strong vibration
Power supply
- Use only the type of battery that came with your camera.
Using any other type of battery may damage the equipment and invalidate the warranty. - Do not short the battery terminals. The battery could overheat.
- Do not attempt to split or peel the outer casing.
- Remove the battery if the camera is not going to be used for a long time. If the battery is left unused for more than 3 months, you need to charge the battery before use.
Notes on Waterproof Case
Waterproof Case performance
- The waterproof case performance is equivalent to IPX8 (60m/1hr).
- Underwater time limit: Do not use the waterproof case underwater for more than 60 minutes and 60 meters to ensure water resistance.
- The waterproof case is not dust-proof.
- The camera and other accessories are not waterproof unless enclosed by the waterproof case.
- When using the camcorder in cold or humid environments or when going underwater, use the anti-fog insert to prevent fogging. The anti-fog insert only provides a certain degree of prevention, results vary depending on the actual environment. The anti-fog insert is not for long-term use, it must be replaced regularly.
Notes before going underwater:
(Do the following actions indoors. Do not do these actions on sandy or dusty environment or near the water's edge.)
- Check if the area surrounding the waterproof case lock is clean, do not allow dirt or sand or foreign objects around it.
- Ensure that the waterproof case is closed.
- Ensure that the waterproof case has no cracks or scratches. If the waterproof case has been dropped, contact your dealer for a replacement.
Notes for general use:
- Avoid opening or closing the waterproof case near the water's edge (sea, lake, beach, lake, etc.). Do not open or close the waterproof case lock with wet hands, or hands with sand or dust.
- The accessories (batteries, etc.) used with the camcorder are not water resistant, be careful in using them.
- Do not drop the waterproof case to ensure waterproof durability.
- Do not place the waterproof case in temperatures above 40° C or below 0° C to ensure waterproof durability.
- Do not attempt to make alterations on the waterproof case or seal the vents yourself, doing so may damage its ability to maintain the camera waterproof.
When using the camcorder
- The waterproof properties of the waterproof case apply to fresh water and saltwater only; they do not apply to cleaning substances, chemicals, or water from spas, etc. Any such liquids should be wiped off immediately.
- Do not immerse the waterproof case in water at a depth greater than 60 meters.
- Do not subject the waterproof case to highly pressurized water.
- Do not immerse in water for longer than 60 minutes. After 60 minutes of use in water, allow the waterproof case to dry for at least 10 minutes.
- Do not immerse in water warmer than 40°C (104°F).
- Do not open or close the waterproof case lock with wet hands.
- Do not open the waterproof case lock next to water or a pool.
- The waterproof case is not dust-proof.
- Do not bump or knock the waterproof case underwater, otherwise the lock may open.
Notes on waterproof case maintenance
- The waterproof of sealing material is replaceable for a fee. The material should be replaced once a year to maintain its water resistance.
After using the waterproof case
- Be sure to come ashore within 60 minutes after going underwater, this will maintain the appearance, quality and water resistance of the waterproof case.
- After taking pictures underwater, clean the waterproof case with running tap water. Do not use any soapy water, mild detergents, alcohol or similar liquids to clean the case.
- Wipe off water drops on the waterproof case with a soft lint-free cloth (avoid fiber). Be sure to wait until the waterproof case is completely dry before opening the waterproof case lock.
- After removing the camcorder from the waterproof case, soak the waterproof case in a bucket of clean water for about 10 minutes. After 10 minutes, wipe the waterproof case dry with a lint-free cloth. Place the waterproof case in a well ventilated cool place to dry naturally (do not place under direct sunlight).
Other notes
- If water accidentally enters the camcorder or any problem occurs when it is in water, please get it out of the water immediately and take proper actions. Dry the camcorder and send it for repair, if required.
- Information is subject to change without notice. Refer to the important notes in the manual supplied with the camcorder.
Before You Start
Take some test shots before you use your camcorder.
Before taking pictures with this camcorder, test the camcorder beforehand to ensure that it functions properly. Any additional loss caused by the malfunction of this product (such as costs of photography or any loss of benefit generated by the photography) is not the responsibility of the manufacturer and no compensation will be given for it.
Copyright information
Take care to observe "No Photography" notices in certain locations. In these cases, you cannot record any live performance, improvisation or exhibits, even for personal purposes. Any transfer of pictures or memory card data must be conducted under the constraints of copyright law.
1 Introducing the Camcorder
Read this section to learn about the features and functions of the camcorder. This chapter also covers system requirements, package contents, and descriptions of the hardware components.
1.1 System Requirements
The camcorder requires a PC with the following specifications for full HD 1080p 30fps and 720p 60fps playback:
- Windows 8 /Windows 7 /Vista / XP (SP2) / MAC OS X 10.5 or later
- Intel / AMD Dual-Core CPU or higher
- At least 1 GB of RAM or higher
- At least DirectX 9 video card, DirectX 10 is recommended
- Standard USB 1.1 port or higher
- At least 2GB or greater available hard disk space
- Note:
A USB 1.1 port will enable you to transfer files to and from your host PC, but transfer speeds will be faster with a USB 2.0 port.
1.2 Features
The camcorder offers a variety of features and functions including:
• Full HD 1080p (30fps.)
• H.264 Video Clip
- 170° Wide Angle Lens
- WLAN 802.11 b/g/n
- Up to 5 Megapixel Photos
• Sports Camera functionality
• Li-ion Rechargeable Battery
• External Waterproof Case/Standard Mounts/Wrist Remote
• Smartphone App Supported
1.3 Unpacking the Camcorder
The following items should be present in the package. If any item is missing or appears damaged, contact your dealer immediately.
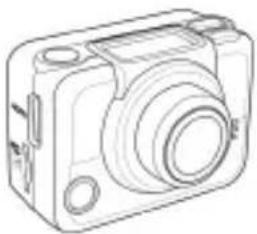 |  |  |
| Camcorder Li-ion Battery User Manual | ||
 |  | 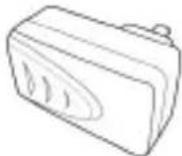 |
| CD-ROM Micro USB Cable | AC Adapter | |
Standard Accessories
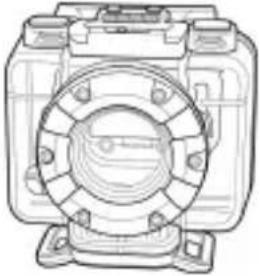 | 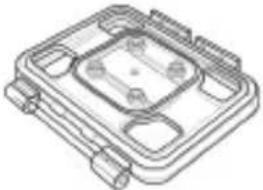 |  |
| Waterproof Case | Vented Housing Backdoor | Waterproof Housing Backdoor |
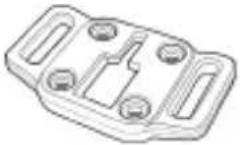 |  | 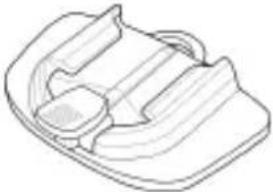 |
| T Tip Adapter Flat Adhesive Socket | Curved Adhesive Socket | |
 |  | 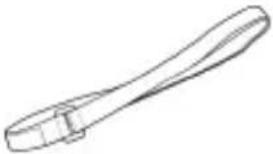 |
| Lens Cap Secure Tether Velcro Strap | ||
 |  | |
| Swivel T Tip Anti-fog Inserts | ||
Optional Accessories
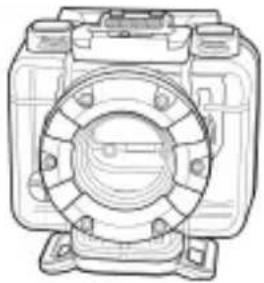 |  |  |
| Diving Case Chest Mount Adhesive Anchor | ||
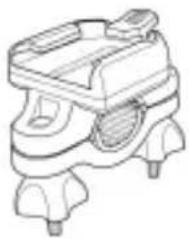 |  | 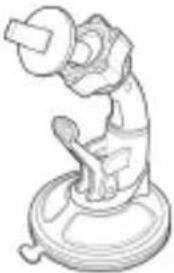 |
| Bike Mount Adhesive Ball Head T Tip | Ball Head T Tip with Suction Cup | |
 |  | 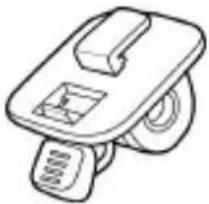 |
| Swivel Camera Tip with Suction Cup | Vented Head Mount | T Tip Mount (compatible with GoPro mounts) |
| Camera Holder RF Wrist Strap Remote Control | Standard Tripod Adapter | |
 | ||
| HDMI Cable | ||
More information and replacement adhesive pads you will find on our website www.praktica.de
1.4 About the Camcorder
Refer to the following illustrations to familiarize yourself with the buttons and controls of this camcorder.
1.4.1 Camcorder Views


1.4.2 Button Functions
| Power/ Mode Button | Press and hold for 3 seconds to turn the camcorder on or off.Press to switch to different modes: Video, Photo, WiFi, Burst, Time Lapse, Self-timer, and Set mode.In Set mode, press to scroll through menu items. |
| Shutter Button | In Video mode, press to start/stop video recording.In Photo mode, press to take a photo.In Set mode, press to select an item. |
1.4.3 LED Indicators
The camcorder has four LED indicators.
The Power/Status LEDs are located on top, on the bottom, and on the back of the camcorder. These LEDs are designed for users to see the status of the camcorder whichever way the camcorder is held or mounted.
| LED Color Description | ||
| Power / Status LED | Green Power is on | |
| Green Blinking Taking photos | ||
| Red Blinking Video recording in progress / RF remote control in progress | ||
| Red Blinking Rapidly | Self-timer | |
| Battery LED | Red Blinking | Battery is charging |
| Off Full charge | ||
2 Getting Started
Read this section to learn how to start using the camcorder. This section covers basic functions such as switching on, installing the battery and micro SD card, and configuring preliminary settings. See later chapters for advanced functions.
2.1 Installing the Micro SD Card
A micro SD card is required to capture photos and videos. The camcorder supports micro SDHC cards up to 32GB.
- Insert the micro SD card into the card slot with the gold contacts facing the front of the device.

- Push the micro SD card until it clicks into place.
- Warning: Do not remove the micro SD card while data is being recorded. Doing so may corrupt the saved data and damage the card.
2.1.1 Removing the Micro SD card
-
Turn off the camcorder.
-
With a fingertip, push the micro SD card to eject it from the slot.
-
Remove the micro SD card.
2.2 Installing the Battery
- Warning: Use only the supplied battery or a similar battery recommended by the manufacturer or the dealer.
- Push down the battery compartment cover to open it.

- Align the battery contacts and then insert the battery into the compartment with the ribbon underneath the battery.
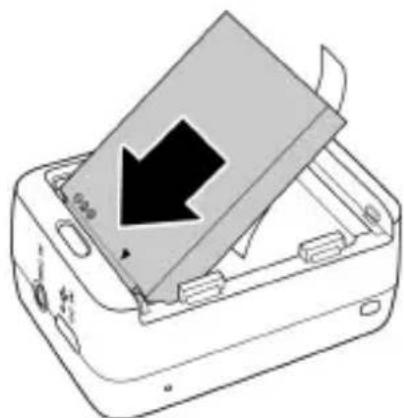
- Close the battery compartment cover.

2.2.1 Removing the battery
- Open the battery compartment cover.
- Pull the ribbon to remove the battery.
2.3 Charging the Battery
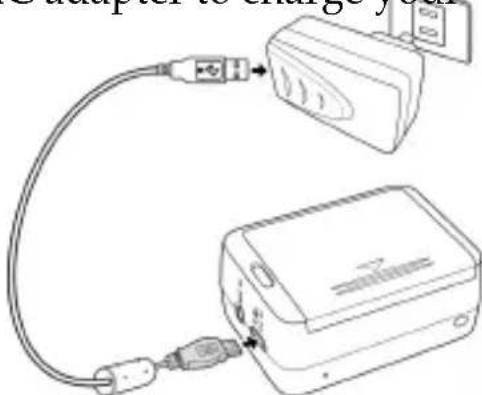
You can charge the battery using the micro USB cable that came with the camcorder. Follow the steps below to charge the battery.
-
Install the battery into the battery compartment.
-
Plug the micro-USB connector to the USB port of your device.
-
Plug the other end of the USB cable to a computer.

The battery LED blinks red. After a full charge, the LED turns off.
Approximate charging time is 240 minutes with a USB connection. Actual charging time depends on current battery capacity and charging conditions.
You may also use the supplied AC adapter to charge your camera battery.
2.4 Turning ON/OFF the Camcorder
- To turn on the camcorder, press the Power button. The Power/Status LED indicator lights green for 3 seconds.
• To turn off the camcorder, press and hold the Power button for 3 seconds.

2.5 OLED Screen
When the camcorder is turned on, the OLED screen displays the following information:

| 1 | Current Mode | Displays the current mode of the camcorder. | |
 | Video Mode | Use this mode to record videos. The icon also indicates the current video recording settings. | |
 | Photo Mode | Use this mode to capture photos. The icon also indicates the current capture settings. | |
 | WiFi Mode | Select to connect the camcorder to a smartphone using WiFi connection. With this feature, videos and photos recorded from the camcorder can be viewed on the smartphone. | |
| 1 |  | Burst Mode | Use this mode to capture 10 continuous photos with one press of theShutterbutton. The icon also indicates the current capture settings. |
 | Time Lapse Mode | In this mode, photos are continuously captured with a specific interval time when theShutterbutton is pressed. To stop capturing, press theShutterbutton again. The icon also indicates the current capture settings. | |
 | Self-timer Mode | In this mode, photos are taken 10 seconds after pressing theShutterbutton. The icon also indicates the current capture settings. | |
 | Set Mode | Use this mode to adjust the settings of your camcorder. | |
| 2 | Button Function | Indicates the operation that the camcorder will do when theShutterbutton is pressed. The displayed icon varies depending on the mode. | |
 | Record | Press theShutterbutton to record videos. | |
 | Capture | Press theShutterbutton to capture photos. | |
| 3 | Field of View (FOV) | Indicates the field of view of the camera lens: Wide or Ultra. | |
 | Indicates the remaining memory space left in the memory card. | ||
| 4 | Number of Files | Indicates the total number of videos and photos saved in the micro SD card. | |
| 5 | Battery Indicates the battery capacity. | ||
- Note: The item 3 icon shown on the display will be automatically switched every three seconds.
2.6 Changing Modes
Press the Mode button repeatedly to switch modes.
![graph TD A["Setting Mode Setup"] --> B["Self-Timer Mode SET"] B --> C["Time Lapse Mode"] D["Photo Mode 1080P"] --> E["Video Mode"] E --> F["Photo Mode WiFi Mode"] F --> G["Off"] G --> H["Burst Mode"] H --> I["Time Lapse Mode"] I --> J["Time Lapse Mode"] style A fill:#f9f,stroke:#333 style B fill:#cc…](/content/2026/05/838255/images/1146752383dcbf59c3c40775675005fa59cc9e1e4396d94ce4d664b2e8bb5919.jpg)
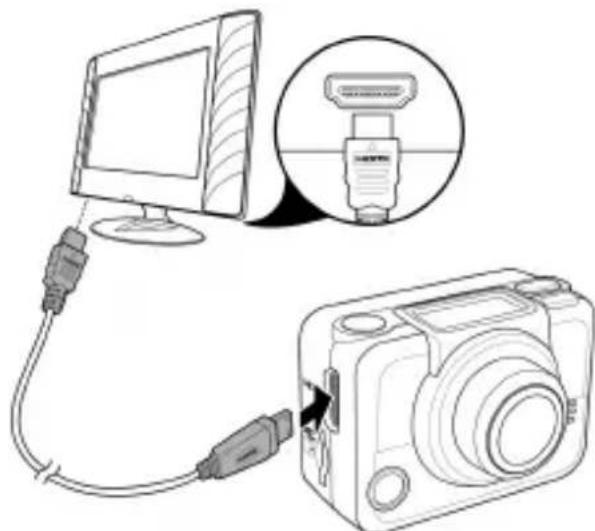
2.7 Connecting to TV (HDMI Cable)
You can also connect the camcorder to a TV using the HDMI cable (optional).
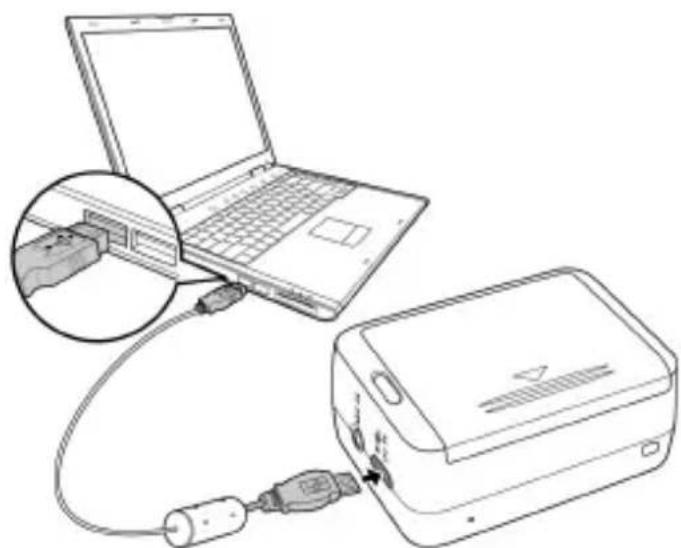
2.8 Connecting to PC (Micro USB Cable)
Connect the camcorder to a computer with the micro USB cable provided as shown.
3 Capturing Videos and Photos
3.1 Recording Videos
Your camcorder supports Dual Stream recording. When a video is recorded, two video files of different file size are automatically saved in the memory card. The smaller file is used to view videos using a smartphone.
-
Turn on the camcorder. By default, the camcorder automatically opens to Video mode.
-
Press the Shutter button to start recording.
-
Press the Shutter button to stop recording.

3.2 Taking Photos
-
Turn on the camcorder.
-
Press the Mode button to switch to Photo mode.

- Press the Shutter button to capture a photo.
3.2.1 WiFi
This menu allows you to connect your camcorder to a smartphone using WiFi connection and view the videos and photos recorded from your camcorder on the smartphone.
- Note: Before using this feature, download the ActionCam! app from AppStore (iOS) or Google Play (Android OS) on your smartphone.
- Press the Mode button repeatedly to switch to WiFi mode.
- Press the Shutter button to toggle WiFi ON or OFF.
- Press the Mode button to exit the WiFi screen.
- Wait for 30 seconds until the LED flashes to indicate Wi-Fi connection is established.
- On your smartphone, enable Wi-Fi connection, then search and connect to the Wi-Fi network IRONX.
- When prompted for a password, enter the default password "1234567890".
- Use the ActionCam! app to view videos and photos from your camcorder.
3.2.2 Burst Shooting
This feature allows you to capture 10 photos with one press of the Shutter button.
- Press the Mode button repeatedly to switch to Burst mode.
- Press the Shutter button to start capturing photos.


3.2.3 Time Lapse Shooting
This feature allows you to continuously capture photos with one press of the Shutter button at the preset interval time (1/3/5/10/30/60 seconds). Shooting only stops when the Shutter button is pressed again. Those continuous shots are combined and saved into one video automatically. The recorded video is played back in fast motion (faster than the normal playback speed). You can use this feature to record videos such as evolution of a construction project, weather changes, or flower blossom.
- Press the Mode button repeatedly to switch to Time Lapse mode.
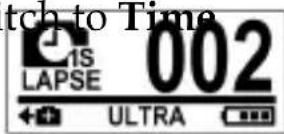
- Press the Shutter button to start capturing photos.

Recording time Number of recorded frames
- Press the Shutter button again to stop capturing photos.
3.2.4 Self-Timer
This feature allows you to capture a photo after a 10-second delay.
-
Press the Mode button repeatedly to switch to Self-timer mode.
-
Press the Shutter button. The photo is captured after 10 seconds.

4 Adjusting the Settings
To adjust the camcorder settings, press the Mode button repeatedly to switch to Set mode and then press the Shutter button to confirm. The screen below is displayed:

| 1 | SETUP Menu | Select SETUP to adjust capture settings. | |
 | Video Select to | adjust the video resolution. | |
 | FOV | Select to adjust the field of view of the camera. | |
 | Time Lapse | Select to adjust the interval time between capturing photos in Time Lapse mode. | |
 | Up/Down | Select to set the camcorder direction upside down. This feature is useful when using the camcorder as a vehicle recorder. | |
 | Delete | Select to delete captured videos or photos from the micro SD card. | |
 | Exit | Select to close the SETUP menu and return to the previous menu screen. | |
| 2 | MORE Menu | Select MORE to adjust basic camera settings. | |
 | Up/Down | Select to set the direction of the OSD screen display. | |
 | LED Select to turn the LED on or off. | ||
 | Bright | Select to adjust the screen brightness. | |
 | Beep Select to adjust the beep volume. | ||
 | Auto-Off | Select to set the time for the camcorder to automatically turn off when not in use. | |
 | Time | Select to set the camcorder date and time. | |
 | RF | Select to pair with the RF remote control. | |
 | Default | Select to set the camcorder to default factory settings. | |
 | Exit | Select to close the MORE menu and return to the previous menu screen. | |
| 3 |  | Confirm | Press the Shutter button to confirm a highlighted item. |
| 4 |  | Select | Press the Mode button to scroll and highlight menu items. |
4.1 Video Resolution
Your camcorder supports Dual Stream recording. When a video is recorded, two video files of different file size are automatically saved in the memory card. The smaller file is used to view videos using a smartphone. The camcorder captures photos with a fixed resolution of 5M and supports three resolution options for videos.
Do the following to select the video resolution.
- Press the Mode button repeatedly to change to SET mode.
- Press the Shutter button to enter SET mode.
- Press the Mode button to highlight SETUP.
- Press the Shutter button to enter the SETUP menu.
- Press the Shutter button to enter the VIDEO submenu.
![graph LR A["SETUP"] --> B["..."] B --> C["MORE"] C --> D["SEL"] D --> E["→"] E --> F["FOV"] F --> G["OK"] F --> H["VIDEO"] F --> I["SEL"]](/content/2026/05/838255/images/28a14faea51167a5ef8596813563db58638e8aed588ea46e3b10b9305d29dca0.jpg)
- Press the Mode button repeatedly to scroll through the resolution options.
 | 16:9 Full HD Video, 1080P (1920x1080, 30fps) |
 | 4:3 Widest HD Video, 960P (1280x960, 30fps) |
| 16:9 HD video,720P (1280x720, 60fps) |
-
Press the Shutter button to confirm.
-
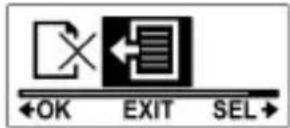
To exit the menu, press the Mode button repeatedly until the EXIT screen appears.
-
Press the Shutter button to exit SET mode.
4.2 Field of View (FOV)
This menu allows you to select the view angle of the camcorder lens.
Do the following to select the FOV.
-
Press the Mode button repeatedly to change to SET mode.
-
Press the Shutter button to enter SET mode.
-
Press the Mode button to highlight SETUP.
-
Press the Shutter button to enter the SETUP menu.
-
Press the Mode button to highlight FOV.
-
Press the Shutter button to enter the FOV submenu.
![graph LR A["SETUP"] --> B["..."] B --> C["MORE"] C --> D["SEL"] E["FOV"] --> F["OK"] G["FOV"] --> H["SEL"]](/content/2026/05/838255/images/7f6901c6f49cc3f4881ec1fbacb470e069a0856d45b8d345fdcd9cca5d01d647.jpg)
- Press the Mode button to select ULTRA or WIDE.
 | Ultra wide angle lens |
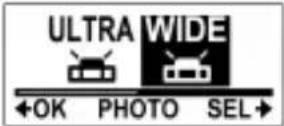 | Wide angle lens |
-
Press the Shutter button to confirm.
-
To exit the menu, press the Mode button repeatedly until the EXIT screen appears.
-
Press the Shutter button to exit SET mode.
- Note: Ultra and Wide are only available in Photo mode. The FOV for Video mode is always Ultra.

4.3 Shooting Interval
This menu allows you to select the interval options when capturing photos using Lapse mode.
Do the following to select the shooting interval.
-
Press the Mode button repeatedly to change to SET mode.
-
Press the Shutter button to enter SET mode.
-
Press the Mode button to highlight SETUP.
-
Press the Shutter button to enter the SETUP menu.
- Press the Mode button to highlight LAPSE.
- Press the Shutter button to enter the LAPSE submenu.
![graph LR A["SETUP"] --> B["..."] B --> C["MORE"] C --> D["SEL"] E["FOV"] --> F["OK"] F --> G["LAPSE"] G --> H["SEL"]](/content/2026/05/838255/images/86f0ffcdf11f870367be0c9178e8874065f10e20472b5339a54a3c8a6e5d5cc9.jpg)
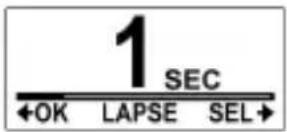
- Press the Mode button repeatedly to scroll through the shooting interval options: 1 SEC, 3 SEC, 5 SEC, 10 SEC, 30 SEC, and 60 SEC.
-
Press the Shutter button to confirm.
-
To exit the menu, press the Mode button repeatedly until the EXIT screen appears.
-
Press the Shutter button to exit SET mode.
4.4 Up/Down

This menu allows you to capture videos and photos upside down. You can enable this feature when you mount the camera upside down so that the captured shots appear right side up when you review it on your computer or TV.
Do the following to enable this feature.
-
Press the Mode button repeatedly to change to SET mode.
-
Press the Shutter button to enter SET mode.
- Press the Mode button to highlight SETUP.
- Press the Shutter button to enter the SETUP menu.
- Press the Mode button to highlight UP/DOWN.
- Press the Shutter button to enter the UP/DOWN submenu.
![graph LR A["SETUP"] --> B["..."] B --> C["MORE"] C --> D["OK"] C --> E["SEL"] F["UP/DOWN"] --> G["OK"] F --> H["UP/DOWN"] F --> I["SEL"]](/content/2026/05/838255/images/488a5e170e2de5484b25d2bec00af13f0de9697b59068f33cfdd8184455e0107.jpg)
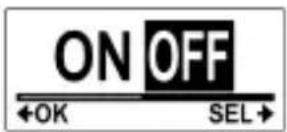
- Press the Mode button to select ON or OFF.
-
Press the Shutter button to confirm.
-
To exit the menu, press the Mode button repeatedly until the EXIT screen appears.
-
Press the Shutter button to exit SET mode.
4.5 Delete
This menu allows you to delete all files in the Micro SD card. Do the following to delete all files.
- Press the Mode button repeatedly to change to SET mode.

- Press the Shutter button to enter SET mode.
- Press the Mode button to highlight SETUP.
- Press the Shutter button to enter the SETUP menu.
- Press the Mode button repeatedly to highlight DELETE.
- Press the Shutter button to enter the DELETE submenu.
![graph LR A["SETUP"] --> B["..."] B --> C["MORE"] C --> D["OK"] C --> E["SEL"] F["DELETE"] --> G["<<"] G --> H["←"] H --> I["OK"] H --> J["DELETE"] J --> K["←"]](/content/2026/05/838255/images/db26604cef205dafbef468db9234e37e16aa26b3388694cb48306a8f5344ab38.jpg)
- Press the Mode button repeatedly to scroll through the delete options.
 | To delete the last captured video or photo. |
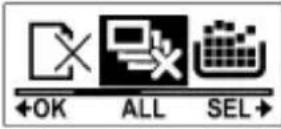 | To delete all files in the micro SD card. |
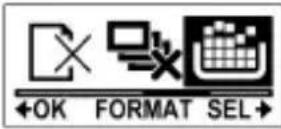 | To format the micro SD card. |
- Press the Shutter button to confirm.
- Press the Mode button to select √ to confirm deletion.

-
Press the Shutter button to confirm.
-
To exit the menu, press the Mode button repeatedly until the EXIT screen appears.

- Press the Shutter button to exit SET mode.
4.6 OSD Up/Down
This menu allows you to display the OLED screen upside down. Do the following to enable this feature.
- Press the Mode button repeatedly to change to SET mode.
- Press the Shutter button to enter SET mode.
- Press the Shutter button to enter the MORE menu.
- Press the Shutter button to enter the UP/DOWN submenu
![graph LR A["SETUP MORE"] --> B["OK SEL"] C["LED"] --> D["OK UP/DOWN SEL"]](/content/2026/05/838255/images/9eb0eed5da2b2a669d2a0196c8e2260f1faf270651ca53534cd4503f2eefc764.jpg)
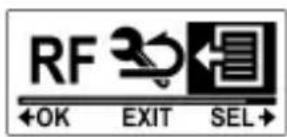
- Press the Mode button to select OSD UP or OSD DOWN.

- Press the Shutter button to confirm.
- To exit the menu, press the Mode button repeatedly until the EXIT screen appears.
- Press the Shutter button to exit SET mode.
4.7 LED
This menu allows you to turn the LED on or off.
Do the following to turn the LED on or off.
- Press the Mode button repeatedly to change to SET mode.
- Press the Shutter button to enter SET mode.
- Press the Shutter button to enter the MORE menu.
- Press the Mode button to highlight LED.
- Press the Shutter button to enter the LED submenu.
![graph LR A["SETUP MORE"] --> B["OSD LED OSD"] A --> C["OK SEL"] D["OK"] --> E["LED SEL"]](/content/2026/05/838255/images/6e4ba317805bcec758cc07919f534aa16555e86c1dc6cf7ec58bac3877fb342d.jpg)
- Press the Mode button to select ON or OFF.

- Press the Shutter button to confirm.
- To exit the menu, press the Mode button repeatedly until the EXIT screen appears.
- Press the Shutter button to exit SET mode.
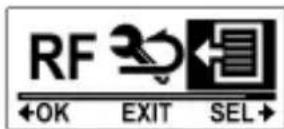
4.8 Brightness
This menu allows you to adjust the OLED screen brightness. Do the following to adjust the screen brightness.
-
Press the Mode button repeatedly to change to SET mode.
-
Press the Shutter button to enter SET mode.
-
Press the Shutter button to enter the MORE menu.
-
Press the Mode button repeatedly to highlight BRIGHT.
-
Press the Shutter button to enter the BRIGHT submenu.
![graph LR A["SETUP MORE"] --> B["LED"] style A fill:#f9f,stroke:#333 style B fill:#bbf,stroke:#333](/content/2026/05/838255/images/75ec9b0efdc350c8838dcd1c893a8fd68ff5229df1b7a30f6c0b8813bbc86dd4.jpg)
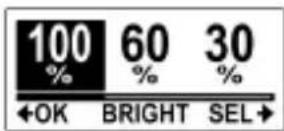
- Press the Mode button repeatedly to select 100%, 60%, or 30%.
-
Press the Shutter button to confirm.
-
To exit the menu, press the Mode button repeatedly until the EXIT screen appears.
-
Press the Shutter button to exit SET mode.

4.9 Beep
This menu allows you to enable or disable the beep sound when you press the Power/Mode or Shutter buttons.
Do the following to enable or disable the beep sound.
- Press the Mode button repeatedly to change to SET mode.
- Press the Shutter button to enter SET mode.
- Press the Shutter button to enter the MORE menu.
- Press the Mode button repeatedly to highlight BEEP.
- Press the Shutter button to enter the BEEP submenu.
![graph LR A["SETUP MORE"] --> B["OK SEL"] C["Speaker Icon"] --> D["BEEP SEL"]](/content/2026/05/838255/images/fc477e454abad61bc46d2a1c08c19cb854b7711981ec2c9a01102c6adb112b3a.jpg)
- Press the Mode button repeatedly to scroll through the beep options.
 | To set the beep volume to its loudest. |
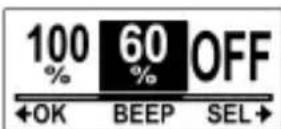 | To set the beep volume to middle range. |
 | To turn off beep. |
-
Press the Shutter button to confirm.
-
To exit the menu, press the Mode button repeatedly until the EXIT screen appears.

- Press the Shutter button to exit SET mode.
4.10 Auto-Off
This menu allows you to program the camcorder to automatically turn off after being idle for a specific period of time, or you can set the setting to OFF to keep the camcorder on until you manually turn it off.
Do the following to select the auto-off option.
- Press the Mode button repeatedly to change to SET mode.
- Press the Shutter button to enter SET mode.
- Press the Shutter button to enter the MORE menu.
- Press the Mode button repeatedly to highlight AUTO-OFF.
- Press the Shutter button to enter the AUTO-OFF submenu.
![graph LR A["SETUP MORE"] --> B["→"] B --> C["OK AUTO-OFF SEL"]](/content/2026/05/838255/images/93ecfbc3cdac4456c1c97180e652dbf8a1cbb6cb071ded336526468102815ce7.jpg)
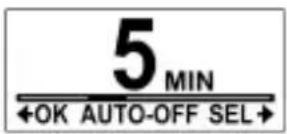
- Press the Mode button repeatedly to select 1 MIN, 3 MIN, 5 MIN, 10 MIN, 30 MIN, 60 MIN, or OFF.
-
Press the Shutter button to confirm.
-
To exit the menu, press the Mode button repeatedly until the EXIT screen appears.
-
Press the Shutter button to exit SET mode.
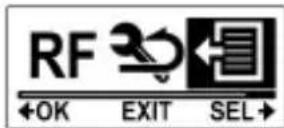
4.11 Date and Time
This menu allows you to set the camcorder date and time settings. Do the following to set the camcorder date and time.
-
Press the Mode button repeatedly to change to SET mode.
-
Press the Shutter button to enter SET mode.
-
Press the Shutter button to enter the MORE menu.
-
Press the Mode button to highlight TIME.
![graph LR A["SETUP MORE"] --> B["OK SEL"] C["→"] --> D["OK TIME SEL"] style A fill:#f9f,stroke:#333 style B fill:#ccf,stroke:#333 style C fill:#cfc,stroke:#333 style D fill:#fcc,stroke:#333](/content/2026/05/838255/images/98d51cab7c0c57ef534fd3711ec70a97352b192de4247cf6795d23aab4a84cae.jpg)
-
Press the Shutter button to enter the TIME submenu. The Year is highlighted.
-
Press the Shutter button repeatedly to adjust the year.
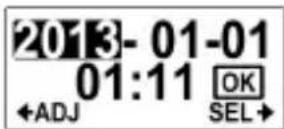
- When done, press the Mode button to go to the month field.
![Month Year —2013-[0]-01—Day Hour —01:11 OK ←ADJ SEL→ Minute](/content/2026/05/838255/images/1282dca32350aa86333d0c67e2e2997451153125a6448340181590235cd614e6.jpg)
-
Press the Shutter button repeatedly to adjust the month value, and then press the Mode button to go to the day field.
-
Press the Shutter button repeatedly to adjust the day value, and then press the Mode button to go to the hour field.
-
Press the Shutter button repeatedly to adjust the hour value (in 24 hr or military time), and then press the Mode button to go to the minute field.
-
Press the Shutter button repeatedly to adjust the minute value, and then press the Mode button to highlight OK.
-
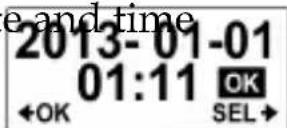
Press the Shutter button to complete the date and time setting.
-
To exit the menu, press the Mode button repeatedly until the EXIT screen appears.
-
Press the Shutter button to exit SET mode.
4.12 RF
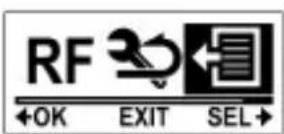
This menu allows you to pair your camcorder with the RF wrist strap remote control (optional accessory). When the devices are paired, you can record videos or capture photos by pressing the corresponding buttons on the RF wrist strap remote control.
Do the following to pair your RF wrist strap remote control.
- Press the Mode button repeatedly to change to SET mode.
- Press the Shutter button to enter SET mode.
- Press the Shutter button to enter the MORE menu.
- Press the Mode button to highlight BINDING.
- Press the Shutter button to enter the BINDING submenu.
![graph LR A["SETUP MORE"] --> B["RF BINDING SEL"] A --> C["SEL"] A --> D["OK"]](/content/2026/05/838255/images/b203135a6a740ddb57a7fb3cff4003ad337dd4c35d295549e355fce0a7ee7658.jpg)
- The camcorder RF antenna is enabled and ready to be paired with the RF wrist strap remote control.
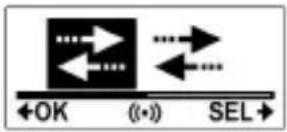
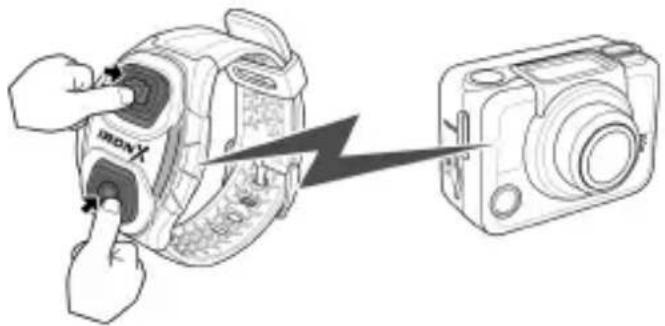
- Press both the video and photo buttons on your RF wrist strap remote control to process pairing. When the red LED on the RF wrist strap remote control flash once, pairing is complete.
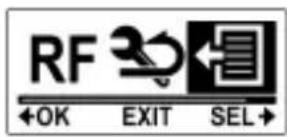
- To exit the menu, press the Mode button repeatedly until the EXIT screen appears.

- Press the Shutter button to exit SET mode.
4.13 Factory Default
This menu allows you to restore the default factory settings of your camcorder.
Do the following to restore the factory default settings.
- Press the Mode button repeatedly to change to SET mode.
- Press the Shutter button to enter SET mode.
- Press the Shutter button to enter the MORE menu.
-
Press the Mode button to highlight DEFAULT.
-
Press the Shutter button to enter the DEFAULT submenu.
![graph LR A["SETUP MORE"] --> B["RF"] style A fill:#f9f,stroke:#333 style B fill:#bbf,stroke:#333](/content/2026/05/838255/images/2dbee82582ab3d885d86b9cafce298e9707ec302b2da6580a9b91f248aca4371.jpg)
- Press the Mode button to select √.

-
Press the Shutter button to confirm.
-
To exit the menu, press the Mode button repeatedly until the EXIT screen appears.
-
Press the Shutter button to exit SET mode.
5 Using the Accessories
The camcorder comes with rugged accessories for all your sporting needs.
5.1 Waterproof Case
The waterproof case allows you to take underwater shots or use it with the surface mount, bike mount, or chest strap to capture other water sports activities.
5.1.1 Using the Waterproof Case
- Release the case lock and flip open the waterproof case.

- Install the camcorder inside the waterproof case.
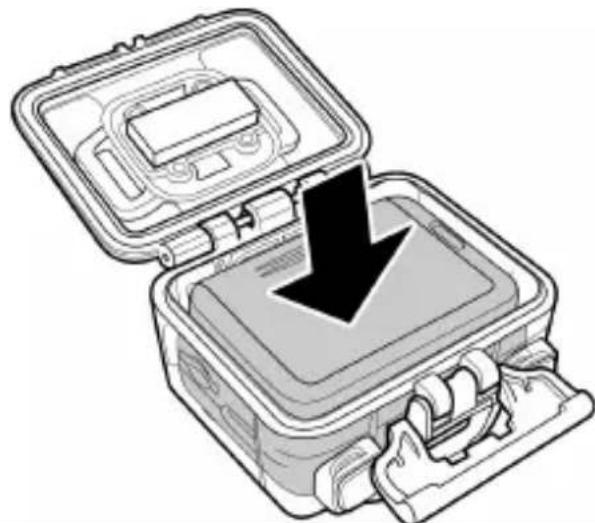
- Secure the waterproof case lock.
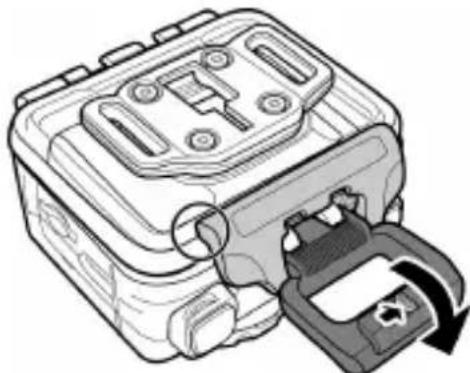
The waterproof case can be used with other accessories such as the swivel T tip, bike mount, chest mount, head mount, etc.
5.1.2 Changing the T Tip Adapter
Depending on the accessories that you want to use with the case, the T tip adapter may be detached and attached to another housing back door or location. To detach the T tip adapter, remove the four screws securing each tip adapter to the case.

5.1.3 Changing the Housing Back Door
Depending on the accessories that you want to use with the case, you may need to change the housing back door. Two back doors are included in the standard package: the waterproof housing back door, and the vented housing back door.
Do the following to change the housing back door:
-
Open the back door completely.
-
Pull to detach the back door from the case.
-
Detach the T tip adapter from the current back door and install the T tip adapter to the back door you want to use.
-
Install the back door.

5.2 Velcro Strap
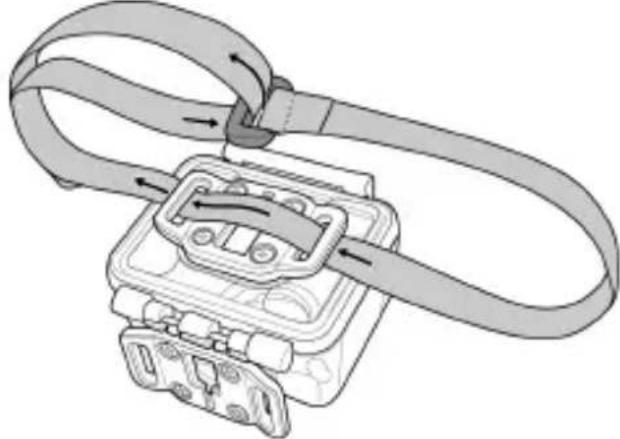
The Velcro strap can be used to secure the waterproof case onto any object to conveniently record photos and videos.
To install the Velcro strap, insert the strap through the strap holes of the tip adapter as shown below.
5.3 Assembling the Camcorder
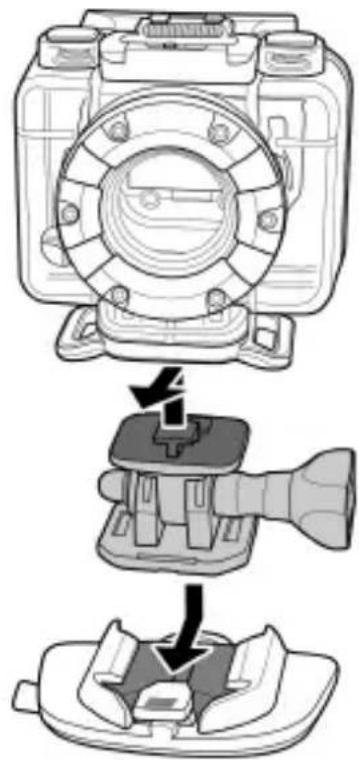
Accessories
Lock the T tip adapter to the T tip of the adjoining accessories to install them to your camcorder.
5.4 RF Wrist Strap Remote Control
Before using the RF wrist strap remote control, you must pair it with the camcorder. Take note that only one camcorder can be paired to the RF wrist strap remote control at a time.
Do the following to pair your RF wrist strap remote control.
- On the camcorder, press the Mode button repeatedly to change to SET mode.
- Press the Shutter button to enter SET mode.
- Press the Shutter button to enter the MORE menu.
- Press the Mode button to highlight BINDING.
- Press the Shutter button to enter the BINDING submenu.
![graph LR A["SETUP MORE"] --> B["RF BINDING SEL"] style A fill:#f9f,stroke:#333 style B fill:#bbf,stroke:#333](/content/2026/05/838255/images/f16018694e441b9c833bafc5dea92f1e36f84a7c5a5639af34bc190963d2d276.jpg)
- The camcorder RF antenna is enabled and ready to be paired with the RF wrist strap remote control.
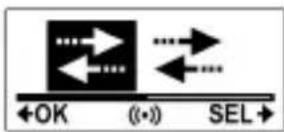
- On your RF wrist strap remote control, press both the Video and Photo buttons at the same time. When the red LED flash once, pairing is complete.

-
Press the Video button to start and stop video recording. To take photos, press the Photo button.
-
Note 1: To take photos using burst mode, time lapse, or self-timer, switch to the respective mode on your camcorder and then press the Photo button on your RF wrist strap remote control. However, only one photo can be taken in time lapse mode when using the RF wrist strap remote control.
- Note 2: Even if your camcorder is in Video mode, you can still take photos by pressing the Photo button on your RF wrist strap remote control.
- Note 3: The maximum operation distance of the remote control is approximately 5m when the RF wrist strap remote control is pointed at the remote control sensor of the camcorder.
Specifications
| General | |
| Imaging sensor 1/2.5" CMOS 5.0 Megapixel Sensor | |
| Active pixels 5.0 Megapixel | |
| Storage media Internal: Built-in 256MB Flash Memory microSD Card, SDHC compatible (up to SDHC 32GB Class6) | |
| Sensor sensitivity Auto | |
| Camera Optics Fixed lens Wide: F2.8, f=2.5mm 110°/1080p, 150°/720p, 162°/960p, 165°/ 5M Photo | |
| Focus range 30cm ~ infinity | |
| Still image Format: JPEG (EXIF 2.2), DCF Resolution: 5M Mode: Signal shot 10 Photo Burst, Time-Lapse (every 1, 3, 5, 10, 30, 60 sec) | |
| Movie clips Format: H.264 (MP4) Resolution: 1080p: 1920x1080 (30fps), 960p: 1280x960 (30fps), 720p: 1280x720 (60fps) | |
| Zoom NA | |
| Exposure Setting Auto | |
| EV Compensation | -2.0EV ~ +2.0EV (Auto) |
| PC interface USB 2.0 (High Speed) | |
| Wireless IEEE 802.11 b/g/n | |
| TV out format HDMI | |
| Shutter speed Still: 1/30 ~ 1/4000 sec.Video: 1/30 ~ 1/2000 sec. | |
| Auto power off 1min / 3min / 5min / 10min / 30min / 60min / Off | |
| Power supply Rechargeable 1130 mAh Li-ion Battery | |
| Dimensions 42.7 (H) x 59.2 (W) x 26.4 (D) mm(without lens) | |
| Weight | Approx. 78±3g (without Waterproof Case) |
Troubleshooting
| Problem Possible Cause Solution | ||
| The battery LED is flashing red. | The battery is almost used up. | Replace with a new battery or charge the battery. |
| Nothing happens when the Shutter button is pressed. | The Micro SD card is full. You cannot take photos or record videos at this point. | Transfer the Micro SD card files to the computer or delete the files in the Micro SD card. |
| Nothing happens when the Shutter button is pressed. “000” appears on the screen. | The Micro SD card may have compatibility issues. | Format the Micro SD card first using the camcorder (Delete menu). If it still does not work, format the Micro SD card using the PC. |
| Nothing happens when the Shutter button is pressed. “000” appears on the screen. | The Micro SD card is not inserted. | Insert the Micro SD card. |
FCC Statement
This device complies with Part 15 of the FCC Rules. Operation is subject to the following two conditions: (1) This device may not cause harmful interference, and (2) this device must accept any interference received, including interference that may cause undesired operation.
Modifications not approved by the party responsible for compliance could void user's authority to operate the equipment.
This equipment has been tested and found to comply with the limits for Class B digital device, pursuant to part 15 of the FCC Rules. These limits are designed to provide reasonable protection against harmful interference in a residential installation. This equipment generates and can radiate radio frequency energy and, if not installed and used in accordance with the instructions, may cause harmful interference to radio or television reception, which can be determined by turning the equipment on and off.
The user is encouraged to try to correct the interference by one or more of the following measures:
- Reorient or relocate the receiving antenna.
- Increase the separation between the equipment and the receiver.
- Connect the equipment into an outlet on a circuit different from that to which the receiver is connected.
- Consult the dealer or an experienced radio/TV technician for help.
FCC Caution: Any changes or modifications not expressly approved by the party responsible for compliance could void the user's authority to operate this equipment.
Radiation Exposure Statement:
The product comply with the FCC portable RF exposure limit set forth for an uncontrolled environment and are safe for intended operation as described in this manual. The further RF exposure reduction can be achieved if the product can be kept as far as possible from the user body or set the device to lower output power if such function is available.
Battery Recycling notes
Information for Users on Collection and Disposal of Old Equipment and Used Batteries

This symbol on the products, packaging and/or accompanying documents mean that used electrical and electronic equipments and batteries should not be mixed with general household waste. Used electrical/electronic equipments and batteries must be treated separately and in accordance with legislation that requires proper treatment, recovery and recycling of these products. Following the implementation by member states, private households within the EU states may return their used electrical/electronic equipments and batteries to designated collection facilities free of charge*. In some countries your local retailer may also take back your old product free of charge if you purchase a similar new one. *Please contact your local authority for further details. By disposing of this product correctly you will help ensure that the waste undergoes the necessary treatment, recovery and recycling and thus prevent potential negative effects on the environment and human health which could otherwise arise due to inappropriate waste handling.
Trademarks and licenses

HIGH-DEFINITION MULTIMEDIA INTERFACE

SDHC Logo is a trademark of SD-3C, L
- 1 INTRODUCING THE CAMCORDER ....1
- 2 GETTING STARTED....9
- 3 CAPTURING VIDEOS AND PHOTOS......19
- 4 ADJUSTING THE SETTINGS ......22
- 5 USING THE ACCESSORIES......41
- APPENDIX......47
- PREFACE
- ABOUT THIS MANUAL
- COPYRIGHT
- PRECAUTIONS
- GENERAL PRECAUTIONS
- OPERATING CONDITIONS
- POWER SUPPLY
- NOTES ON WATERPROOF CASE
- WATERPROOF CASE PERFORMANCE
- NOTES BEFORE GOING UNDERWATER
- NOTES FOR GENERAL USE
- WHEN USING THE CAMCORDER
- NOTES ON WATERPROOF CASE MAINTENANCE
- AFTER USING THE WATERPROOF CASE
- OTHER NOTES
- BEFORE YOU START
- COPYRIGHT INFORMATION
- 1 INTRODUCING THE CAMCORDER
- 1.1 SYSTEM REQUIREMENTS
- NOTE
- 1.2 FEATURES
- 1.3 UNPACKING THE CAMCORDER
- 1.4 ABOUT THE CAMCORDER
- 1.4.1 CAMCORDER VIEWS
- 1.4.2 BUTTON FUNCTIONS
- 1.4.3 LED INDICATORS
- 2 GETTING STARTED
- 2.1 INSTALLING THE MICRO SD CARD
- 2.1.1 REMOVING THE MICRO SD CARD
- 2.2 INSTALLING THE BATTERY
- 2.2.1 REMOVING THE BATTERY
- 2.3 CHARGING THE BATTERY
- 2.4 TURNING ON/OFF THE CAMCORDER
- 2.5 OLED SCREEN
- 2.6 CHANGING MODES
- 2.7 CONNECTING TO TV (HDMI CABLE)
- 2.8 CONNECTING TO PC (MICRO USB CABLE)
- 3 CAPTURING VIDEOS AND PHOTOS
- 3.1 RECORDING VIDEOS
- 3.2 TAKING PHOTOS
- 3.2.1 WIFI
- 3.2.2 BURST SHOOTING
- 3.2.3 TIME LAPSE SHOOTING
- 3.2.4 SELF-TIMER
- 4 ADJUSTING THE SETTINGS
- 4.1 VIDEO RESOLUTION
- 4.2 FIELD OF VIEW (FOV)
- 4.3 SHOOTING INTERVAL
- 4.4 UP/DOWN
- 4.5 DELETE
- 4.6 OSD UP/DOWN
- 4.7 LED
- 4.8 BRIGHTNESS
- 4.9 BEEP
- 4.10 AUTO-OFF
- 4.11 DATE AND TIME
- 4.12 RF
- 4.13 FACTORY DEFAULT
- 5 USING THE ACCESSORIES
- 5.1 WATERPROOF CASE
- 5.1.1 USING THE WATERPROOF CASE
- 5.1.2 CHANGING THE T TIP ADAPTER
- 5.1.3 CHANGING THE HOUSING BACK DOOR
- 5.2 VELCRO STRAP
- 5.3 ASSEMBLING THE CAMCORDER
- ACCESSORIES
- 5.4 RF WRIST STRAP REMOTE CONTROL
- FCC STATEMENT
- RADIATION EXPOSURE STATEMENT
- BATTERY RECYCLING NOTES
- TRADEMARKS AND LICENSES
Brand : Praktica
Model : SC 1
Category : Camcorder