
TSA0501 - Manucure / Pédicure Teesa - Free user manual and instructions
Find the device manual for free TSA0501 Teesa in PDF.


| Product Type | Electric Foot File / Callus Remover |
| Brand | Teesa |
| Model | TSA0501 |
| Power Supply | 2 x AA batteries (1.5V) (not included) |
| Rotation Speed | 40 rps |
| Water Resistance | Yes (can be rinsed under tap) |
| Safety Lock | Yes (safety switch lock) |
| Automatic Shut-off | Yes (when pressed too hard) |
| Replaceable Roller Heads | Yes |
| Included Accessories | Electric file, additional grinding head, cleaning brush |
| Cleaning | Rinse under water, clean with brush, wipe with damp cloth |
| Usage Area | Feet and heels only |
| Recommended Use Duration | 2-3 seconds per spot |
| Battery Cover Lock | Rotate 90 degrees to open/close |
| Medical Contraindications | Not for diabetics, poor circulation, pacemaker users, or on irritated skin |
Frequently Asked Questions - TSA0501 Teesa
User questions about TSA0501 Teesa
0 question about this device. Answer the ones you know or ask your own.
Ask a new question about this device
Download the instructions for your Manucure / Pédicure in PDF format for free! Find your manual TSA0501 - Teesa and take your electronic device back in hand. On this page are published all the documents necessary for the use of your device. TSA0501 by Teesa.
USER MANUAL TSA0501 Teesa
natural_image
Close-up of a human foot and ankle, showing detailed skin texture and leg structure (no text or symbols visible)Bedienungsanleitung
DE
Owner's manual
EN
Instrukcja obsługi
PL
Manual de utilizare
RO
Návod na použitie
SK
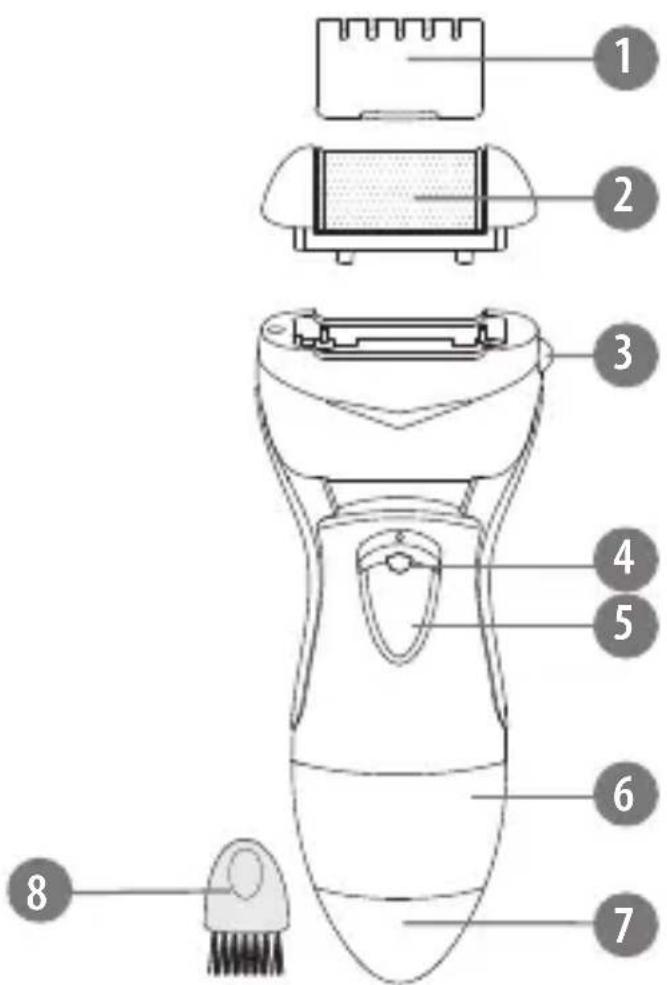
| DE EN PL RO SK | ||||
| 1 | Schutzabdeckung Protective cover Pokrywka ochronna Capac protectie Ochranný kryt | |||
| 2 | Rollenschleifkopf | Roller grinding head | Głowica Rola Brúsiaca hlava | |
| 3 | Auslöseknopf Release button Przycisk zwalniający | Buton de eliberare role | Uvolňovacie tlačidlo | |
| 4 | Sicherheitssperre | Safety switch lock | Przycisk zabezpieczający | Buton siguranta Bezpečnostné tlačidlo |
| 5 | EIN/AUS Schalter On/Off switch | Przycisk włącz/wyłącz | Comutator pornire/oprire Tlačidlo VYP/ZAP | |
| 6 | Batterieabdeckungs-Verriegelung | Battery cover lock | Zabezpieczenie klapki baterii | Inchizator capac baterie Kryt na batérie |
| 7 | Batterieabdeckung Battery cover Klapka baterii | Capac baterie | Zámok krytu batérii | |
| 8 | Reinigungsbürste | Cleaning brush | Szczoteczka | Perie de curatare Čistiaca kefka |
natural_image
Diagram showing two stages of a biological or mechanical process with arrows indicating direction (no text or symbols)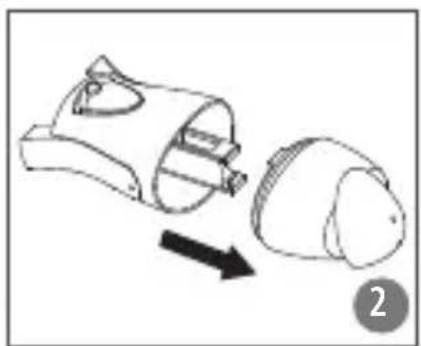
natural_image
Diagram showing a device being processed into a circular component, with an arrow indicating process direction (no text or symbols)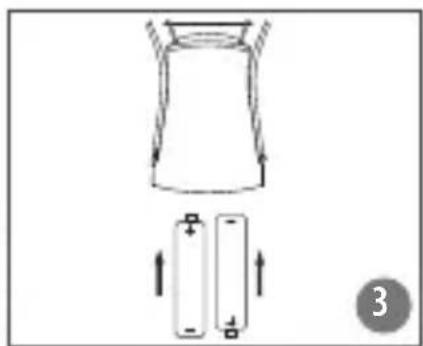
natural_image
Diagram showing a cylindrical container with upward arrows and two battery cells below, labeled '3' (no text or symbols on the diagram itself)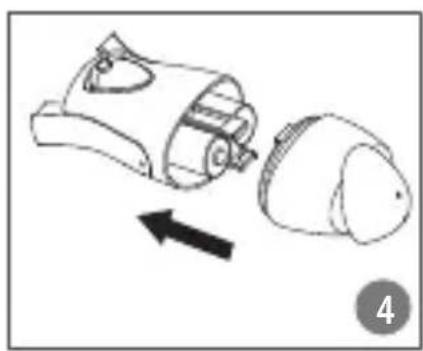
natural_image
Diagram of a vacuum cleaner with a device emitting air, showing internal components and airflow direction (no text or symbols)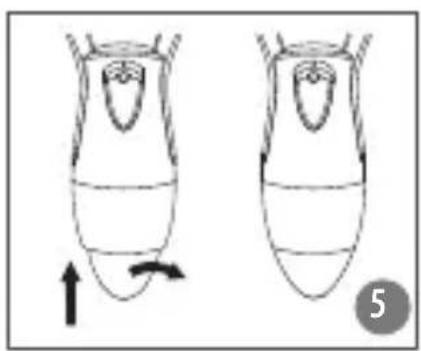
natural_image
Illustration of two insect anatomical structures with directional arrows, no text or symbols presentBEDIENUNG
natural_image
Hand holding a handheld device with directional arrows indicating motion (no text or symbols)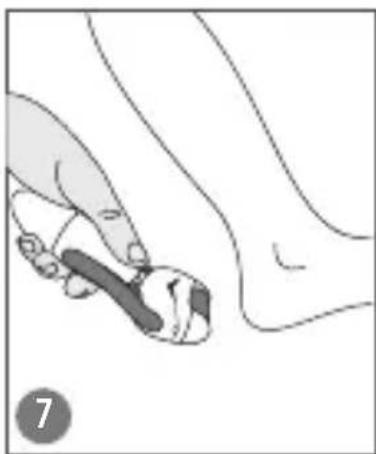
natural_image
Illustration of a hand holding a small object near the foot, with no visible text or symbols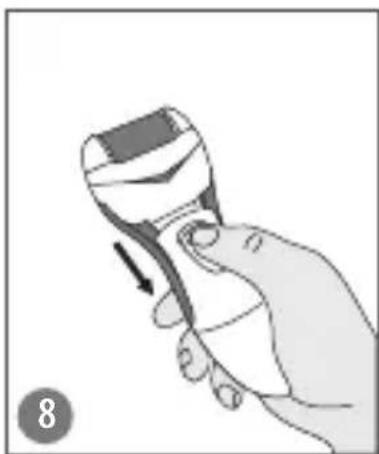
natural_image
Illustration of a hand holding a handheld device with an arrow indicating motion (no text or symbols)natural_image
Illustration of hands performing a medical or repair procedure with a bandage and arrow (no text or symbols)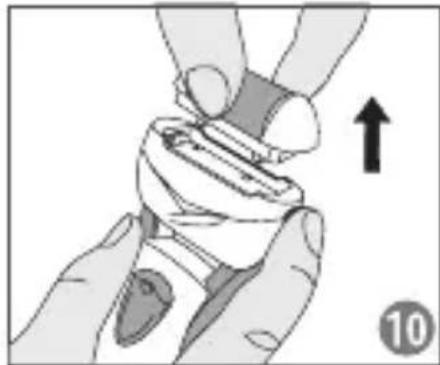
natural_image
Illustration of hands holding a device with an upward arrow indicating motion (no text or symbols)natural_image
Illustration of hands assembling a mechanical component (no text or symbols visible)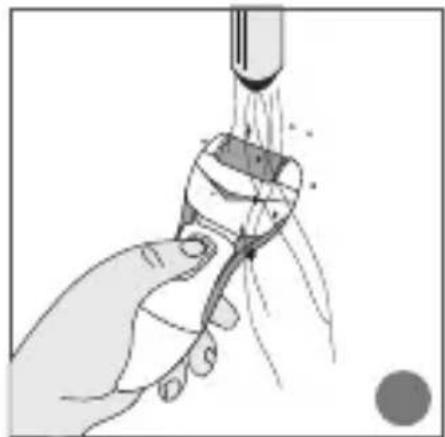
natural_image
Illustration of a hand holding a tool with a pipette inserted, showing liquid flow (no text or symbols)WARNUNG
Thank you for purchasing TEESA appliance. Please read this operation instruction carefully before use, and keep it for future use. Distributor does not take responsibility for damages caused by inappropriate handling and use of the product.
SAFETY INSTRUCTION
In order to reduce the risk of fire, electric shock, or any other injury, follow basic safety precautions applied when using any electrical device, including the following:
- Read this instruction manual carefully before first use, and keep it for future reference.
- This device is recommended for one person use only. For hygienic reasons, rollers grinding should not be shared with others.
• ALWAYS turn off the device:
- if it's not operating correctly
- if there's an uncommon voice when using
- before cleaning
- when not in use
- Do not attempt to repair this appliance yourself, only authorized and qualified personnel may repair this device.
- Only use original parts. Usage of parts not supplied by manufacturer may cause permanently damage the device.
- Product was designed for use on the feet and heels only. Do not use this device anywhere else on the body.
- Do not use this device if you have diabetes, poor blood circulation, or have had a pacemaker fitted..
- Do not use the appliance for more than 2-3 seconds at a time in the same place.
- If you have any medical/dermatological issues, please consult with your physician prior to use.
- Do not use on skin that is red, irritated, inflamed, infected or blistered. Do not use on warts, sores or open wounds.
- Discontinue use immediately if you experience any pain or irritation.
• Excessive use may cause skin irritation.
- Seek medical advice if skin becomes severely irritated or bleeds after use.
• Product for household use only.
- This appliance is not intended for use by persons (including children) with reduced physical, sensory or mental capabilities, or lack of experience and knowledge, unless they have been given supervision or instruction concerning the use of the appliance by a person responsible for their safety.
- Do not place or store your unit in direct sunlight. Store it in at a cool, dry place, in moderate temperature. Keep the appliance dry.
- Do not turn the unit ON if the roller grinding head is not attached.
• Do not use your unit outdoors.
• Children should be supervised to ensure that they do not play with this appliance. Keep this device out of reach of children.
• To prevent accidents and injury, or damage, make sure to keep this device away from the hair, clothes, brushes, wires, etc.
- Do not continually rub the unit on the same area or apply strong pressure.
- Keep the protective cover on your unit when it is not in use.
- Do not disassemble this device.
- Producer is not responsible for any injuries or damages resulting from incorrect use or handling of the product.
- Do not use rollers that are worn, damaged or in any other way unsuitable for use.
BATTERY INSTALLATION
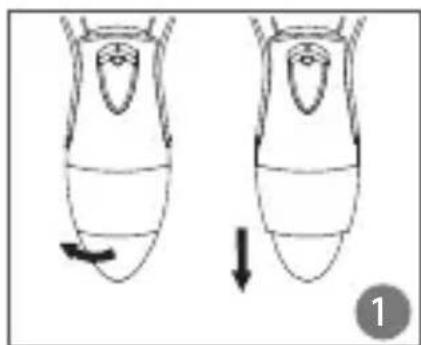
- Rotate the battery cover lock by 90 degrees to the left until it clicks into place (fig. 1) and then pull it down (fig. 2).
- Insert 2x AA alkaline batteries in the battery compartment following the battery direction indications (fig. 3) as imprinted on the back of the unit.
- Close the battery cover by turning it 90 degrees to the right (fig. 4) until the cover clicks into place and locks (fig.5).
natural_image
Diagram showing two stages of a biological or mechanical process, with arrows indicating direction (no text or symbols)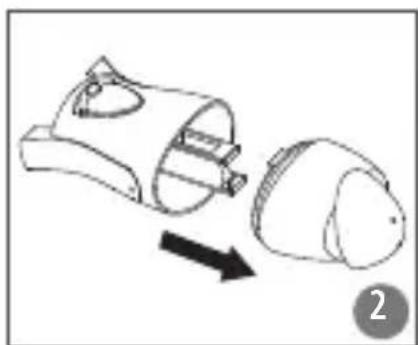
natural_image
Diagram showing a device being opened into a closed lid, with an arrow indicating the process (no text or symbols present)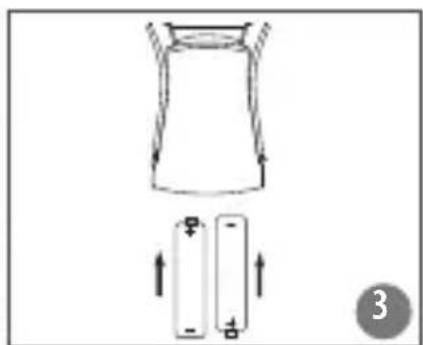
natural_image
Simple line drawing of a shirt with two side panels, one above and one below, showing measurement arrows (no text or symbols)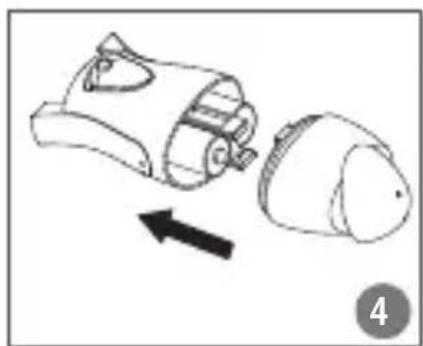
natural_image
Illustration of a device with a handle and a separate cover, showing an arrow indicating direction (no text or symbols)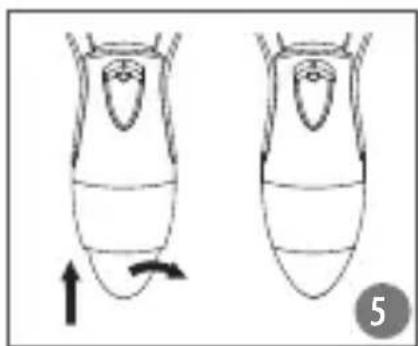
natural_image
Diagram showing two stages of a mechanical or biological process with an arrow indicating rotation (no text or symbols present)EN
OPERATION
- Wash and clean the skin and dry fully.
- Make sure the appliance is correctly assembled (the batteries are inserted, protective cover removed, rolling grinding head placed in its place).
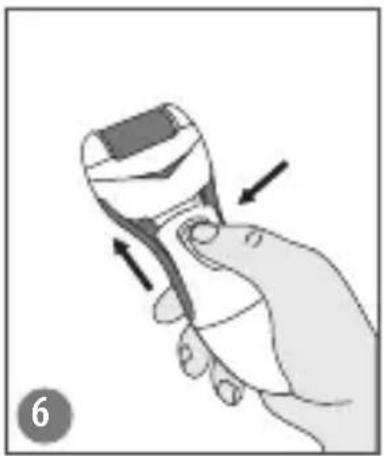
- Press the safety switch lock, and at the same time push the switch up (fig. 6).
- Gently press the appliance against the skin on your foot (fig.7) for about 2-3 seconds. Do not use excessive strength,
gently glide the unit over the desired area. The unit will stop if it is pressed too hard on the skin.
- Stop and check if you have achieved the softness you desire. If not, go over the area for 2-3 more seconds and check again. Continue to use this method until the level of smoothness is obtained.
- Turn the unit off (fig 8).
- Rinse the skin or use a wet towel to get rid of dead skin.
- Clean the device.
- Keep the protective cover on your unit when it is not in use.
natural_image
Illustration of a hand holding a handheld device with arrows indicating motion (no text or symbols)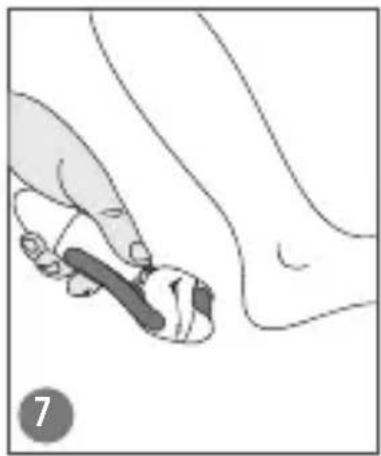
natural_image
Illustration of a foot and ankle with a hand holding the ankle (no text or symbols)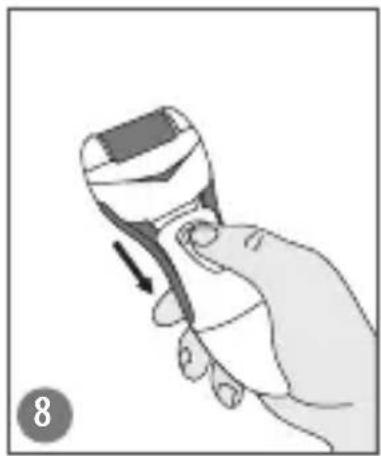
natural_image
Hand holding a handheld device with a black arrow indicating motion (no text or symbols)CHANGING THE ROLLERS GRINDING HEAD
- Make sure the unit is turned off before replacing the rollers grinding head.
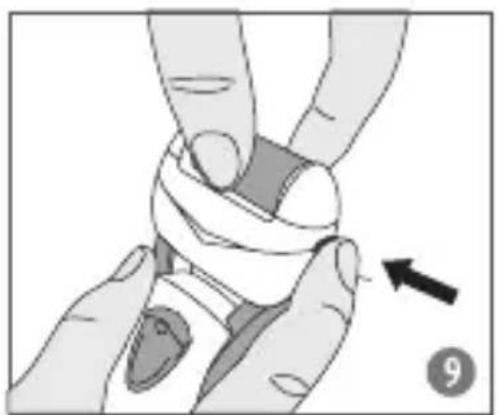
- Hold the head with one hand; another hand press on the release button (fig. 9 &10).
- Place a new roller grinding head into the unit until you hear a 'click'. Make sure the new head has been installed firmly.
natural_image
Illustration of hands performing a finger manipulation or repair operation (no text or symbols visible)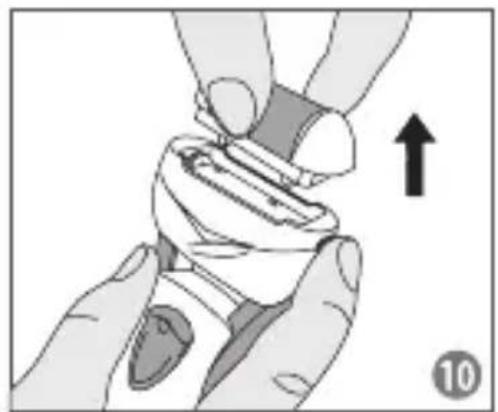
natural_image
Illustration of hands holding a tool or device with an upward arrow indicating motion (no text or symbols)CLEANING AND MAINTENANCE
This appliance is water resistant, and can be rinsed with water to clean:
- Remove the protective cover from the head.
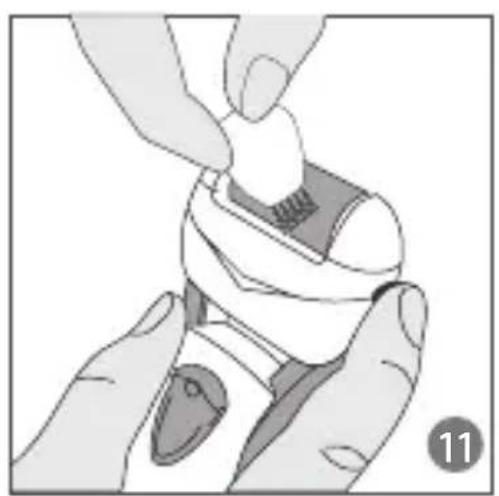
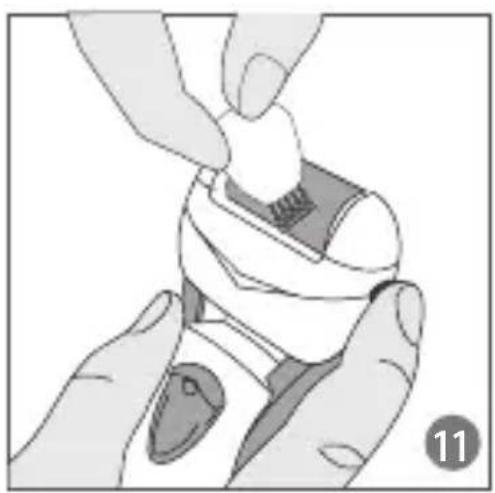
- Clean the roller head with the cleaning brush (fig.11).
Do not switch the appliance ON while brushing. - Rinse the unit under the tap (fig.12).
- Wipe the body of the unit with a soft, slightly damp cloth.
- Replace the protective cover.
natural_image
Illustration of hands assembling a small electronic component (no text or symbols visible)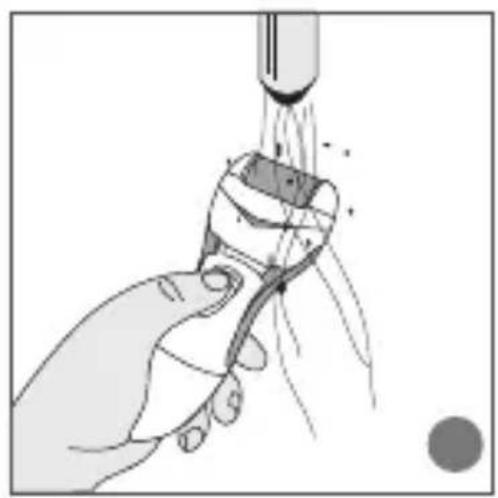
natural_image
Illustration of a hand holding a tool with a tool tip, emitting particles from a pipe (no text or symbols)WARNING
- Stop using if skin becomes sore or Inflamed.
- Do not use on skin for more than 2-3 seconds at a time.
- Clean the appliance after each use to ensure best possible performance.
TECHNICAL SPECIFICATIONS
- Rotation speed 40 rps
- Easy to use
- Replaceable roller grinding heads
- Waterproof
- Set includes electric file, additional grinding head, cleaning brush
• Power supply: 2x AA batteries 1,5 V
English
Correct Disposal of This Product
(Waste Electrical & Electronic Equipment)
(Applicable in the European Union and other European countries with separate collection systems) This marking shown on the product or Its literature, indicates that It should not be disposed with other household wastes at the end of its working life. To prevent possible harm to the environment or human health from uncontrolled waste disposal, please separate this from other types of wastes and recycle it responsibly to promote the sustainable reuse of material resources.
Household users should contact either the retailer where they purchased this product, or their local government office, for details of where and how they can take this item for environmentally safe recycling. Business users should contact their supplier and check the terms and conditions of the purchase contract This product should not be mixed with other commercial wastes for disposal.
Made in China for LECHPOL Zbigniew Leszek, Miętne, 1 Garwolińska Street, 08-400 Garwolin.
natural_image
Diagram showing two stages of a biological or mechanical process, with arrows indicating direction (no text or symbols)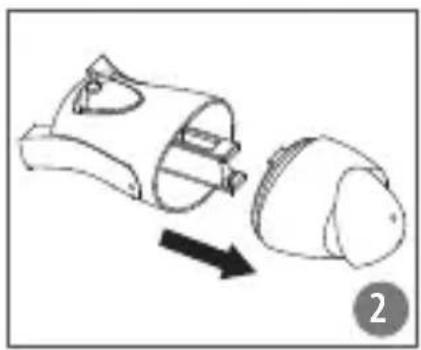
natural_image
Diagram showing a device being processed into a larger device, with an arrow indicating process direction (no text or symbols)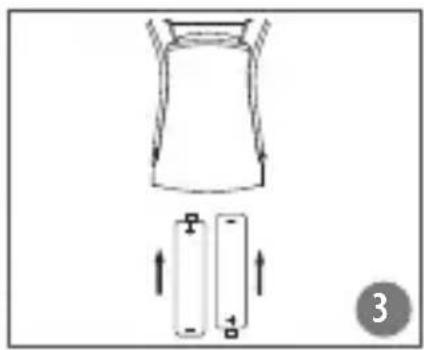
natural_image
Diagram showing a cylindrical container with upward arrows and two rectangular blocks below, no text or symbols present.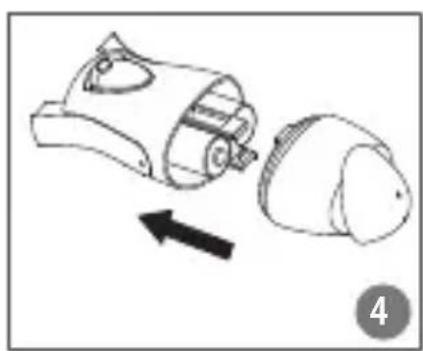
natural_image
Line drawing of a vacuum cleaner with a separate component, showing internal components and an arrow indicating motion (no text or symbols)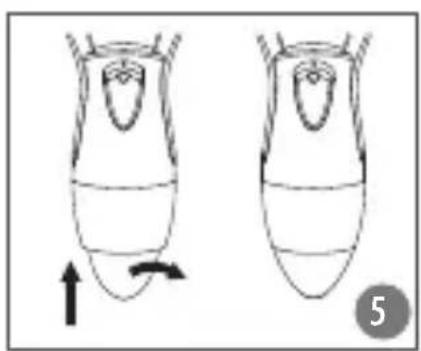
natural_image
Two anatomical diagrams of insect body parts with directional arrows indicating movement (no text or labels)OBSŁUGA
natural_image
Illustration of a hand holding a handheld device with directional arrows indicating motion (no text or symbols)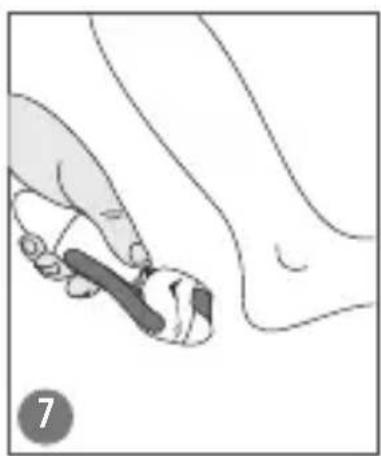
natural_image
Illustration of a foot and ankle joint, showing a hand holding the ankle (no text or symbols present)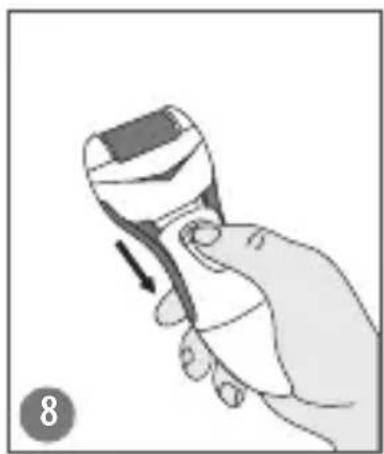
natural_image
Hand holding a handheld device with a curved arrow indicating motion (no text or symbols)WYMIANA GŁOWIC
natural_image
Illustration of hands performing a medical or surgical procedure on a curved object, with an arrow indicating direction (no text or symbols present)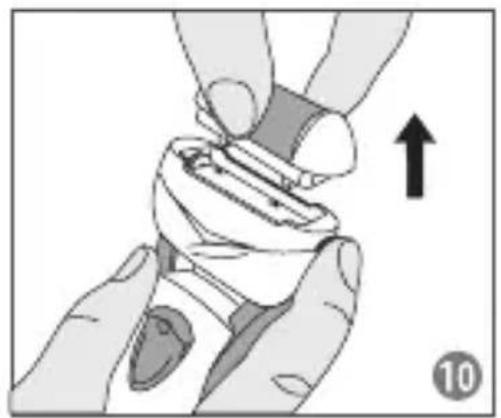
natural_image
Illustration of hands holding a mechanical component with an upward arrow indicating motion (no text or symbols)CZYSZCZENIE
natural_image
Illustration of hands assembling a mechanical component (no text or symbols visible)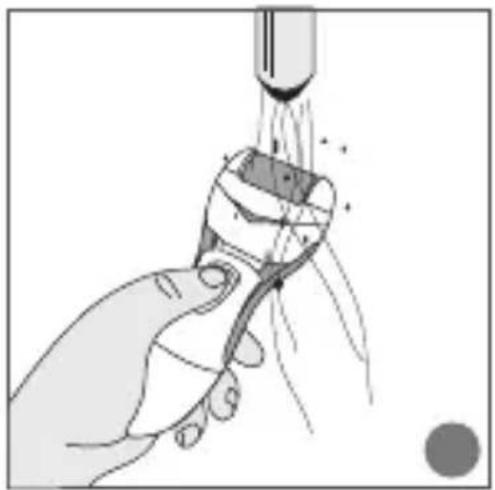
natural_image
Illustration of a hand holding a tool with liquid flowing through a funnel (no text or symbols)UWAGA
natural_image
Diagram showing two stages of a mechanical or biological process with arrows indicating direction (no text or symbols)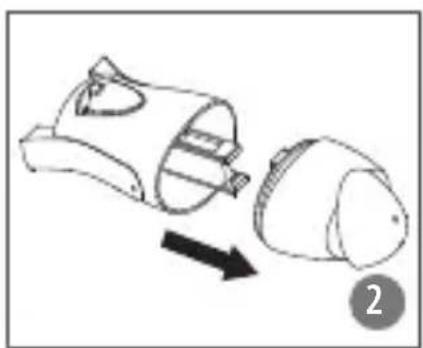
natural_image
Diagram showing a device being processed from a fan or socket, with an arrow indicating process direction (no text or symbols)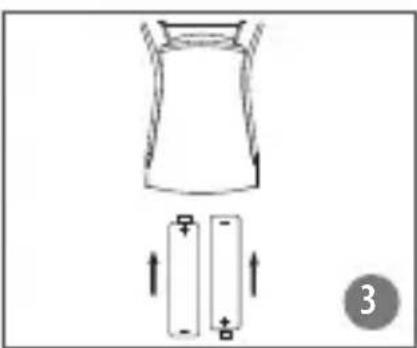
natural_image
Diagram showing a container with two batteries and an upward arrow indicating rotation (no text or symbols)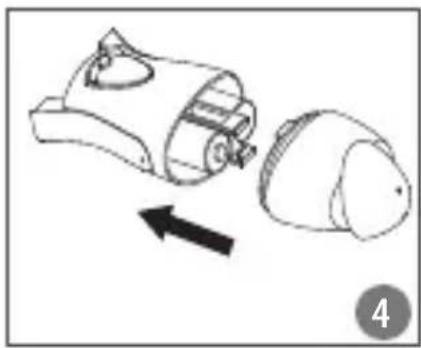
natural_image
Diagram showing a device being opened into a closed lid with an arrow indicating motion (no text or symbols)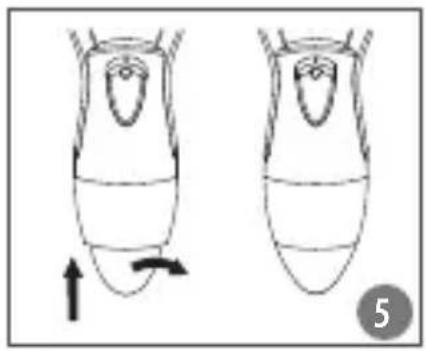
natural_image
Two identical line drawings of insect anatomical structures with an arrow indicating movement or rotation (no text or symbols)UTILIZARE
natural_image
Illustration of a hand holding a handheld device with arrows indicating motion (no text or symbols)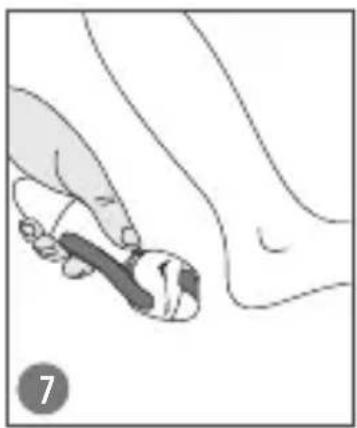
natural_image
Illustration of a foot and ankle joint, showing a finger pressing on the lower leg (no text or symbols present)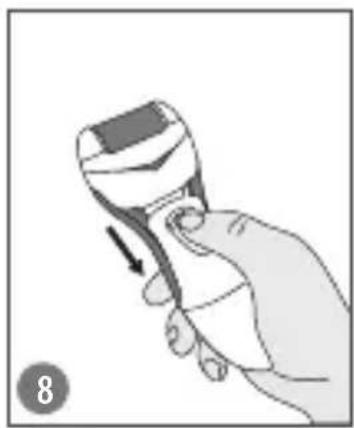
natural_image
Hand holding a handheld device with an arrow indicating motion (no text or symbols)SCHIMBARE ROLE
natural_image
Illustration of hands performing a medical procedure on a wrist, with an arrow indicating direction (no text or symbols present)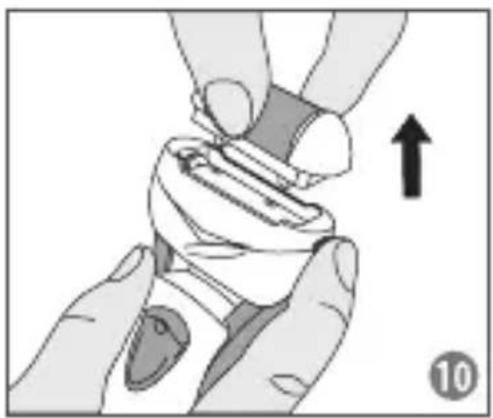
natural_image
Illustration of hands holding a device with an upward arrow indicating motion (no text or symbols)CURATARE SI INTRETINERE
Aparatul este rezistent la apa, puteti clati unitatea sub jet de apa:
natural_image
Illustration of hands assembling a small electronic component (no text or symbols visible)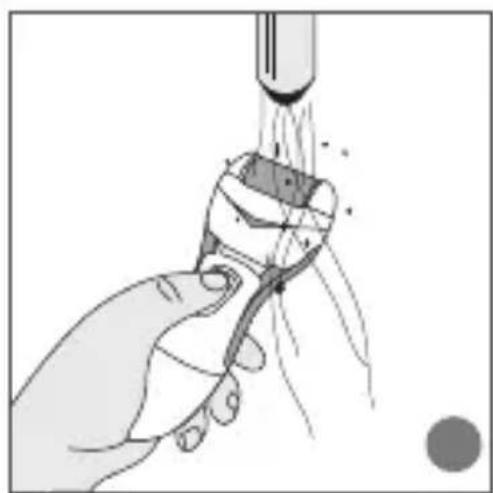
natural_image
Illustration of a hand holding a tool with a pipette inserted, showing fluid flow (no text or symbols)ATENTIE
natural_image
Diagram showing two stages of a mechanical or fluidic process with arrows indicating direction (no text or symbols)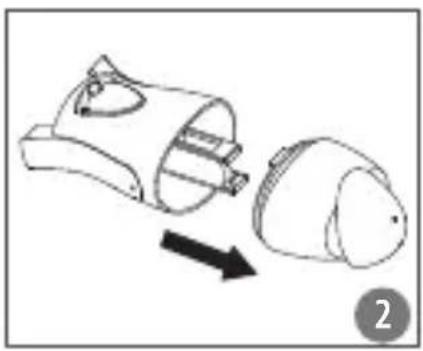
natural_image
Diagram showing a device being processed into a housing, with an arrow indicating process direction (no text or symbols)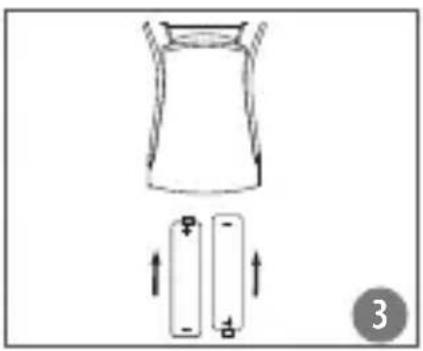
natural_image
Simple line drawing of a cup with two batteries and an upward arrow indicating rotation (no text or symbols)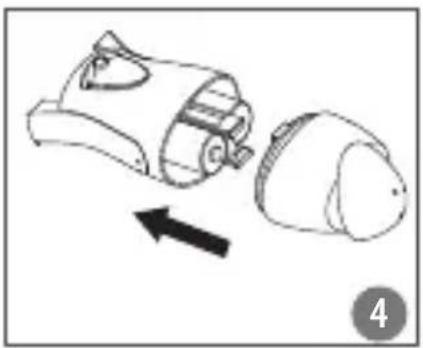
natural_image
Line drawing of a vacuum cleaner with a magnified view showing internal components and an arrow indicating motion (no text or symbols)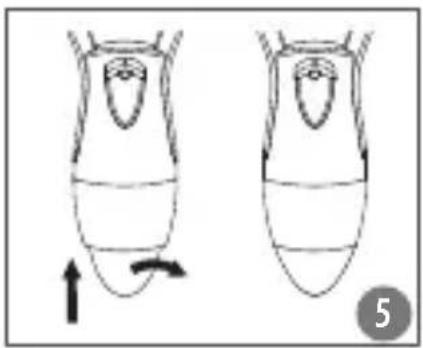
natural_image
Two identical line drawings of a stylized insect head with an arrow indicating movement or change (no text or symbols)POUŽITIE
natural_image
Hand holding a handheld device with arrows indicating motion (no text or symbols)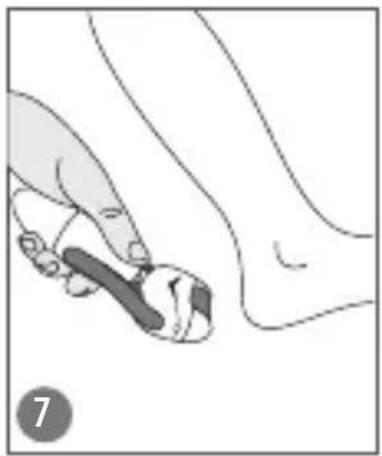
natural_image
Illustration of a hand holding a small object near the foot, with no visible text or symbols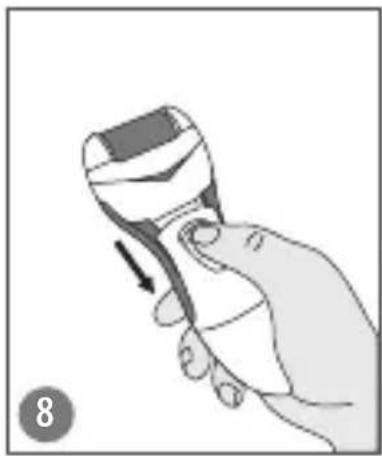
natural_image
Illustration of a hand holding a handheld device with a downward arrow, labeled '8' in the corner (no text or symbols on the device itself)VÝMENA BRÚSIACEJ HLAVY
natural_image
Illustration of hands performing a medical procedure on a circular object, with an arrow indicating direction (no text or symbols present)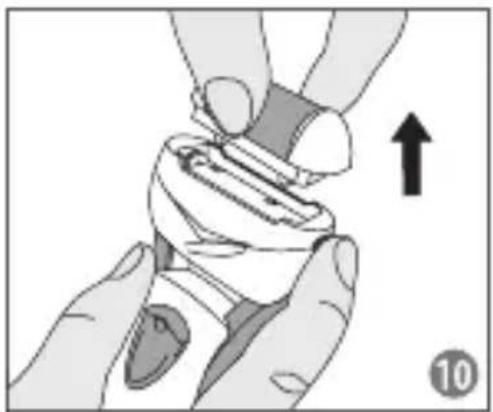
natural_image
Illustration of hands holding a tool with an upward arrow, no text or symbols presentČISTENIE
Toto zariadenie je odolné voči vode, a možno ho opláchnuť vodou:
- Odstráňte ochranný kryt.
- Vyčistite brúsiacu hlavu kefkou (obr. 11). Nezapínajte zariadenie!
- Potom opláchnite pod tečúcou vodou. (obr. 12).
- Utrite telo zariadenia mäkkou, mierne navlhčenou handričkou.
- Pripevnite ochranný kryt.
natural_image
Illustration of hands assembling a small object with a tool, no text or symbols present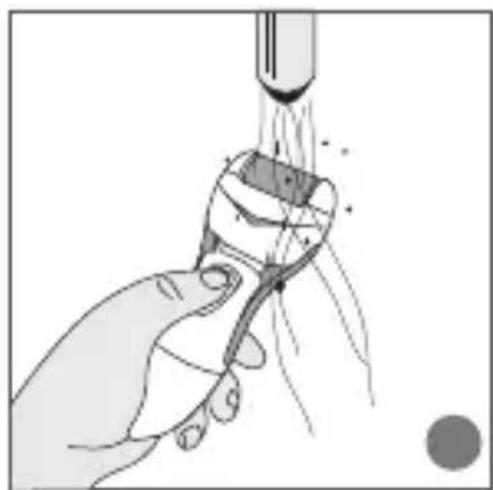
natural_image
Illustration of a hand holding a tool with a pipette inserted, showing fluid flow (no text or symbols)VAROVANIE
- BEDIENUNG
- WARNUNG
- SAFETY INSTRUCTION
- In order to reduce the risk of fire, electric shock, or any other injury, follow basic safety precautions applied when using any electrical device, including the following:
- BATTERY INSTALLATION
- EN
- OPERATION
- CHANGING THE ROLLERS GRINDING HEAD
- CLEANING AND MAINTENANCE
- WARNING
- TECHNICAL SPECIFICATIONS
- English
- Correct Disposal of This Product
- (Waste Electrical & Electronic Equipment)
- OBSŁUGA
- WYMIANA GŁOWIC
- CZYSZCZENIE
- UWAGA
- UTILIZARE
- SCHIMBARE ROLE
- CURATARE SI INTRETINERE
- ATENTIE
- POUŽITIE
- VÝMENA BRÚSIACEJ HLAVY
- ČISTENIE
- VAROVANIE
Brand : Teesa
Model : TSA0501
Category : Manucure / Pédicure