USER MANUAL BP27M75 BLAUPUNKT
CONTENTS
| General | Safety | |
| Installation | | 8 |
| Wall | Mounting | Instructions |
| Controls | and | Connections |
| Menus | | 11 |
| Picture | Settings |
| Colour | Settings |
| Audio | Settings |
| Gaming | Settings |
| OSD | Menu |
| System | Settings |
| Information | |
| Specifications | | |
Customer
Helpline
Last Page
GENERAL SAFETY
Read this manual thoroughly before you start using the Monitor.
Store this manual, the completed warranty card, your receipt and the product packaging.
The safety precautions instructions reduce the risk of fire, electric shock and injury when correctly complied to.
Please follow all instructions and take notice of all warnings.
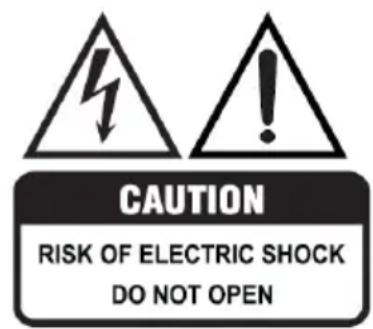
The cover (or back) of the unit should not be removed to prevent risk of electric shock.
This unit must be serviced by a qualified service personnel only.


The lightning flash with symbol within the triangle is intended to warn you of a non-insulated dangerous voltage in the product's enclosure that could be of sufficient magnitude to generate a risk of electric shock to persons.
The exclamation point within the triangle is intended to warn you to the presence of important operating and maintenance instructions in the documents included with the product.
The lightning flash symbol within the triangle is intended to warn you of non-insulated dangerous voltage the product's enclosure that could be of sufficient magnitude to generate a risk of electric shock to persons.
- Use cabinets or stands recommended by the monitor manufacturer.
- Only use furniture that can safely support the Products.
- Ensure the Product does not overhang the edge of the supporting furniture.
- Do not place the product on tall furniture without securing both the furniture and the product to a stable support.
- Do not place the product on cloth or other conductive materials.
- Warn children of the dangers of climbing on furniture to reach the monitor or its controls, and tell them to ask an adult for help.
GENERAL SAFETY (CONT.)
- Do not expose this appliance to rain or moisture, as it may result in fire or an electric shock hazard.
- Do not tamper with, change, or modify the product in any way.
- Only use accessories outlined and recommended by the manufacturer.
- Do not expose the product to splashing or water contact.
- Do not place any object on top of the product, including objects filled with liquids such as vases.
Installation
Follow the instructions when installing this product in accordance with the instruction manual. This product must be positioned in a sufficiently stable location; it can be potentially hazardous due to falling and can cause injury, particularly to children, if positioned incorrectly.
- Before installing this monitor, make sure your outlet voltage corresponds to the voltage stated on the product rating label.
- Do not use a damaged power cord, plug, or loose outlet. Doing so may cause an electric shock.
- Do not plug several devices into the same outlet. Doing so may cause the outlet to overheat and start a fire. Make sure the outlet is readily accessible during operation of the equipment.
- Do not bend, twist, or kink the power cord excessively.
- Do not allow anything to rest on or roll over the power cord and antenna cable. Doing so may cause a fire or an electric shock.
- Do not run the power cord near heat-producing appliances such as radiators, stoves, or irons. The excessive heat could melt the insulation and expose live wires, resulting in fire or electric shock.
- Unplug this monitor during lightning storms or when unused for long periods of time. Not doing so may result in fire or electric shock.
- Do not cover the ventilation openings of the product with items such as newspapers, tablecloths, curtains, etc., or insert objects into the slots available on the product. This could result in the product temperature rising and could cause a fire.
- If you notice any unusual odors or smoke around the unit, immediately disconnect the unit from the outlet and contact the service center. Failure to do so may result in fire or electric shock.
- When not using the unit for long periods of time or when moving the unit, ensure to disconnect the power cord from the wall socket.
GENERAL SAFETY (CONT.)
- Please be aware that dust could accumulate over time on the unit and cause it to generate heat and/or deteriorate insulation, which in turn may result in an electrical fire.
- The product is not intended for use by persons (including children) with reduced physical, sensory, or mental capabilities, or by young children of any age. They must be supervised by a person responsible for their safety.
- To maintain the product, do not use any chemical or cleaning agent or wet cloth. Only use a dry cloth to wipe it down from marks or dust, and only after unplugging the product from the power socket.
- Please ensure to contact our call center for any repair or service required for the product.
- Always carry the Monitor from the sides. Do not carry it from the middle.
GENERAL SAFETY (CONT.)
When positioning this product, ensure the location is:
- Not wet or damp, and well ventilated.
- Away from direct sunlight or heaters.
- Away from splashes or food.
- Protected from excessive dust or grease.
- Do not install this equipment in a confined space such as a bookcase or similar unit.
- Do not install the Monitor near heat sources such as radiators, stoves, or other audio-visual equipment that produce heat.
- Do not place containers with liquids; if liquid falls inside the product, it may result in short-circuit, fire, or electric shock.
- Do not use or store flammable or combustible materials near the unit. Doing so may result in fire or explosion. Do not place any naked flame sources, such as lit candles, cigarettes, or incense sticks, on top of the Monitor. Install the unit at a reasonable distance from the wall to ensure sufficient ventilation.
- If a mains plug or an appliance coupler is used as the disconnect device, the disconnect device shall remain readily operable.

HIGH-DEFINITION MULTIMEDIA INTERFACE
"HDMI, the HDMI logo, and High-Definition Multimedia Interface are trademarks or registered trademarks of HDMI Licensing LLC."
INSTALLATION
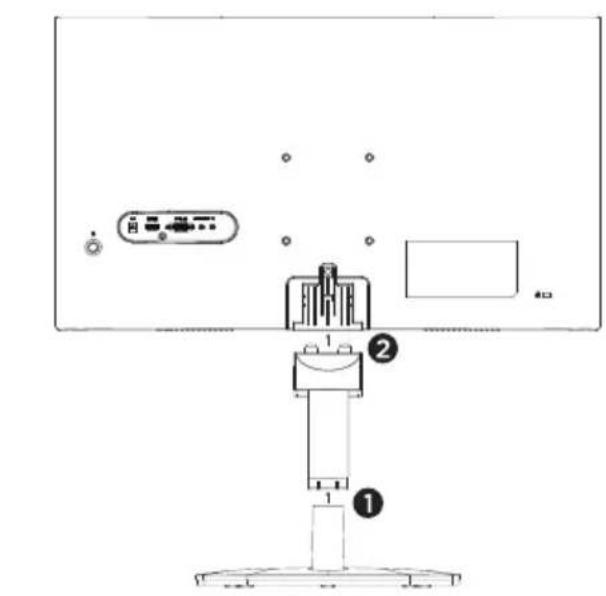
Install the stand as described below, or if you want to mount it to a wall, please contact a professional installer. Please ensure the monitor is not plugged into the wall socket and furthermore we recommend to get another person to assist in the following task.
Attaching the monitor base
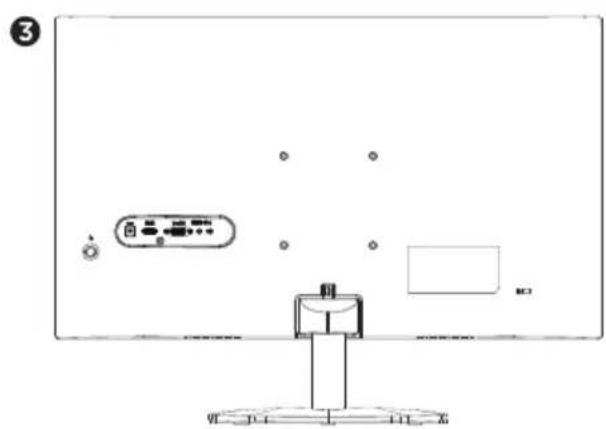
Step 1 - Attach the monitor stand arm to the base. Secure the base to the arm of the monitor stand base.
Step 2 - Remove the monitor from the box and lay it face down on a table on top of a soft towel to protect the screen. Secure the base to the arm of the monitor stand base.
Step 3 - You can stand the monitor upright and commence to the next step.
CAUTION!
INSTALLATION (CONT.)
Wall-Mounting or Monitor Arm Brackets for Desk Instructions
Please ensure the Monitor is not plugged into the wall socket and furthermore we recommend to get another person to assist in the following task.
• We recommend you use a professional installer as we assume no liability for any eventual damage to the product or injury to yourself if you mount the Monitor on your own.
BACK OF Monitor
VESA PATTERN: 100 (w) x 100 (h) mm
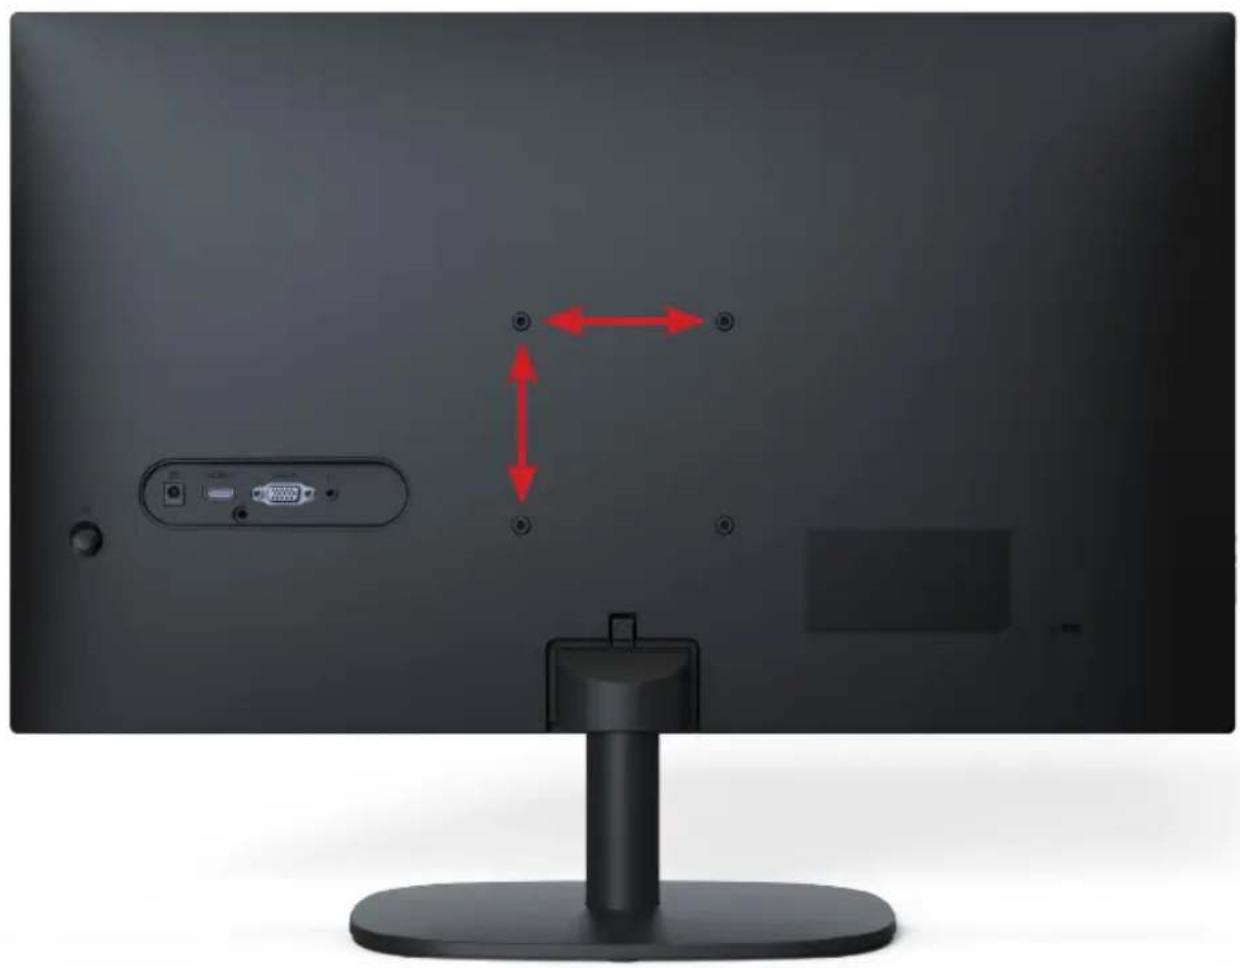
NOTE: If you are wall-mounting the Monitor, this should be done by a qualified installer.
CONTROLS AND CONNECTIONS
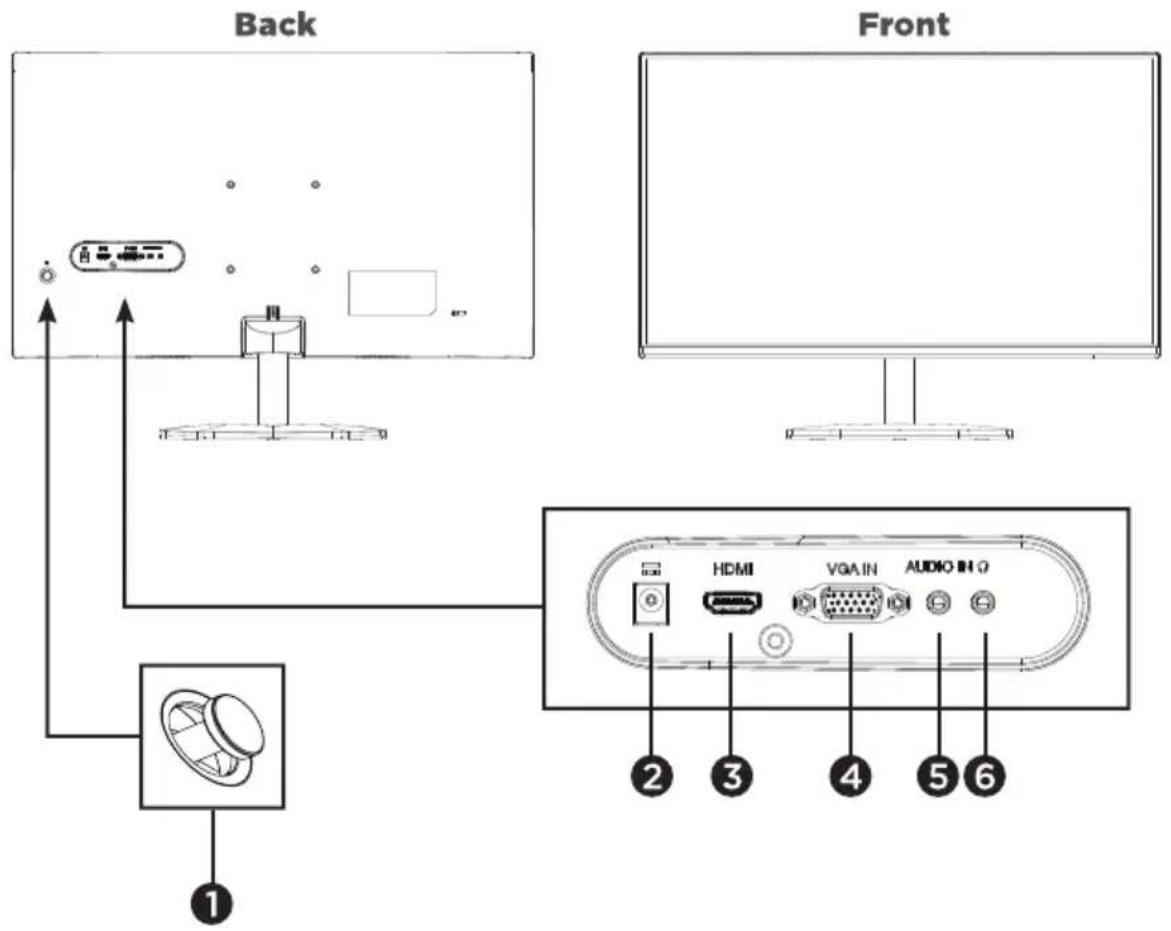


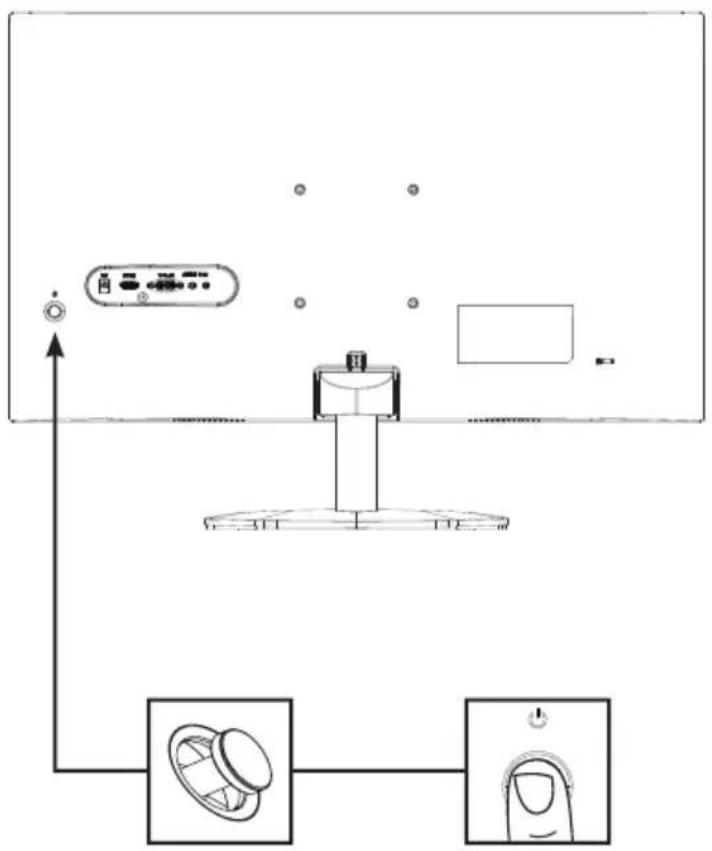
Joystick button: Power On/Off, Menu Control (long press the button for power off).
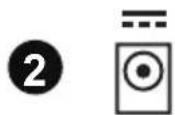

Connect the power cord to the monitor, then into a properly grounded AC outlet.
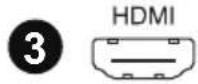

The digital interface is used to transmit uncompressed video and audio signals from the monitor to an external device simultaneously.
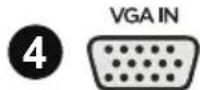

This is an analog connector that connects the monitor to the system unit.


Connect the audio cable.

Headphones.
Find more details.
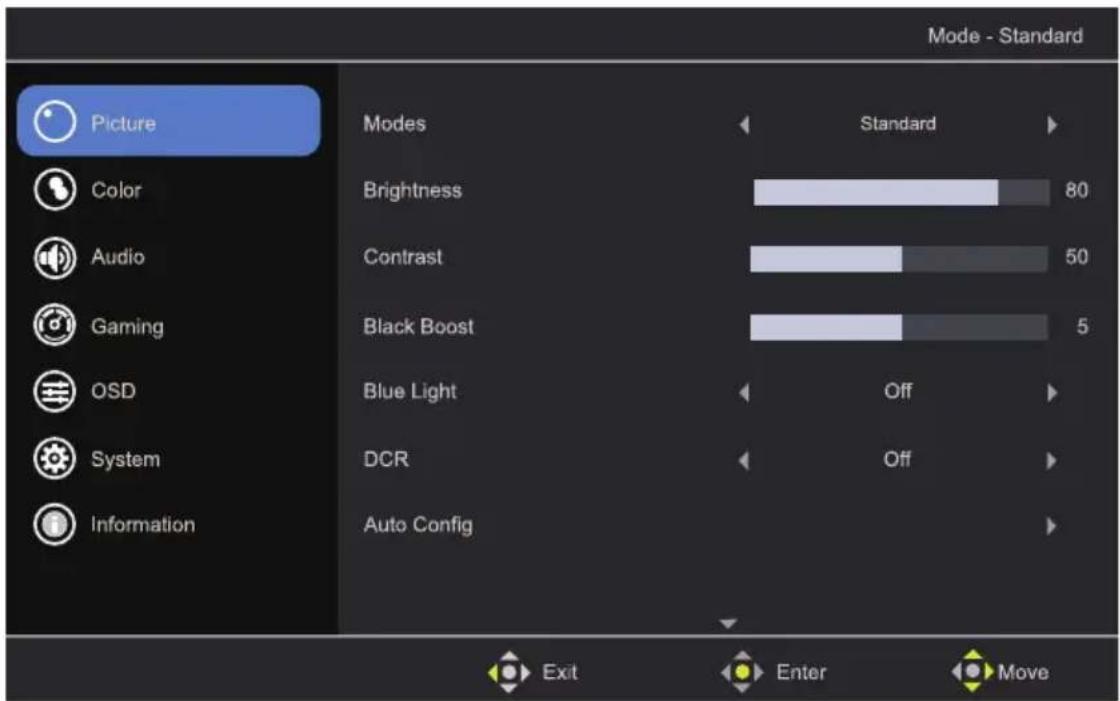
Press the MENU button and personalize the Picture, Color, and other settings to best fit your viewing needs.
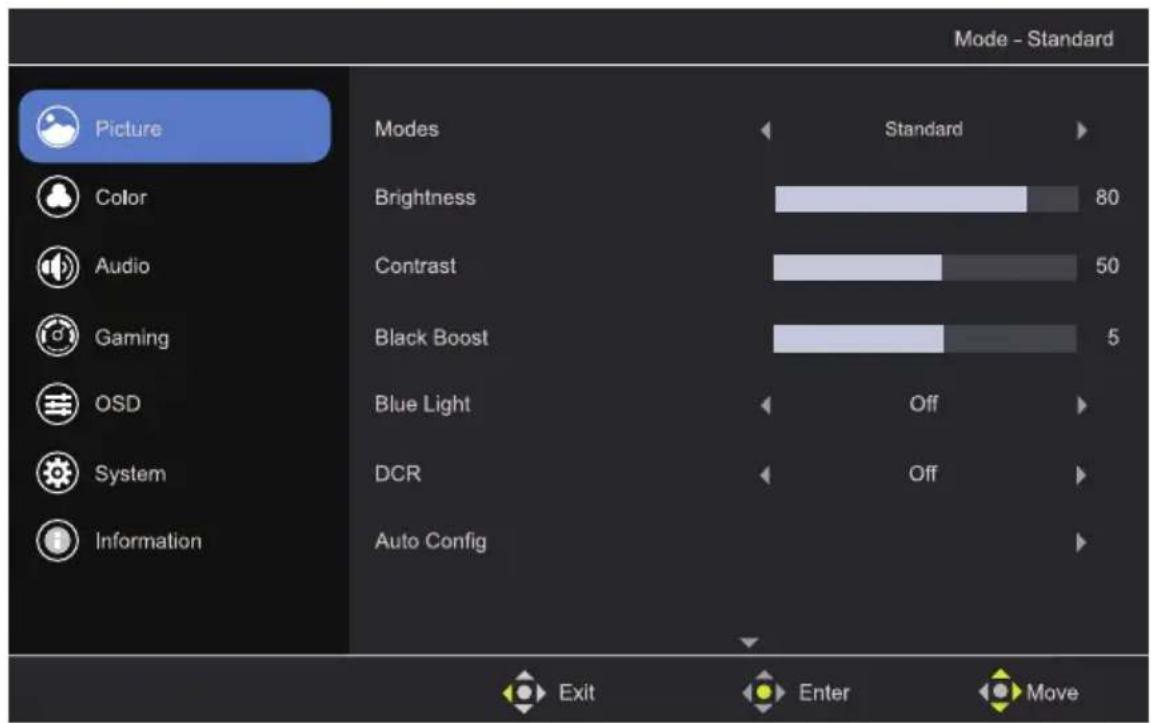
PICTURE
- Modes - Action, Racing, Sports, Use, Standard, ECO, Graphics, Movie
- Brightness
- Contrast
- Black Boost
- Blue Light • DCR
- Auto Config (VGA connection is optional, but HDMI connection is not.) • H.Position (VGA connection is optional, but HDMI connection is not.) • V.Position (VGA connection is optional, but HDMI connection is not.)
- Focus (VGA connection is optional, but HDMI connection is not.)
- Clock (VGA connection is optional, but HDMI connection is not.)
Button located at the back lower right hand side of monitor.
Middle button - ENTER
Left button - EXIT
Up/Down/Right - MOVE
![graph LR A["Exit"] --> B["Enter"] B --> C["Move"]](/content/2026/05/837641/images/a4bd54cc97fc9e25b4eb1a4b91ff1885f537e36b0c41f3ce6ed13afd8b35ac3f.jpg)
COLOUR
- Gamma
- Colour Temp. (R.G.B can be adjusted only in the User state, but not in the Warm, Normal, and Cool states.)
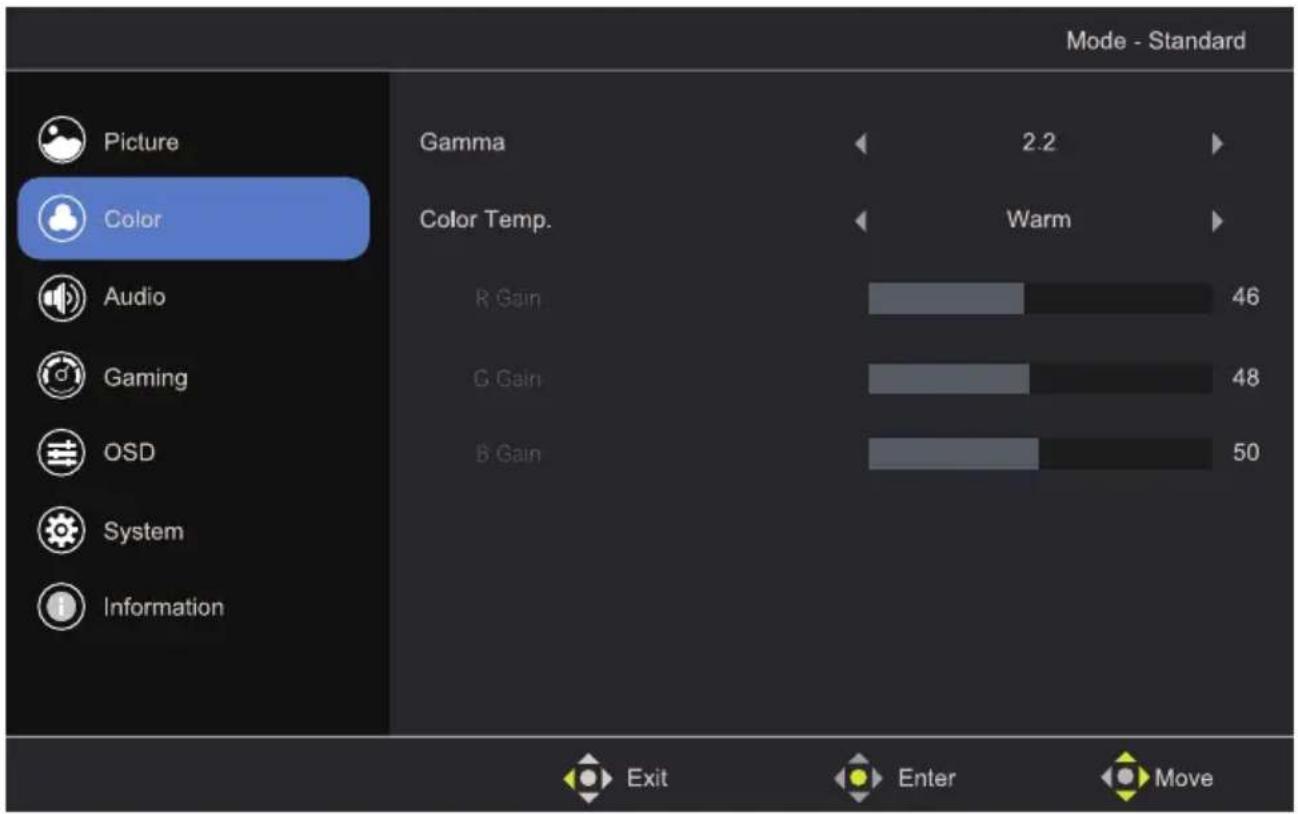
Button located at the back lower right hand side of monitor.
Middle button - ENTER
Left button - EXIT
Up/Down/Right - MOVE
![graph LR A["Exit"] --> B["Enter"] B --> C["Move"]](/content/2026/05/837641/images/2752a172527f9b7af56397dbca1b57ca399652b68d1ae6cbece9951bd5ddf2aa.jpg)
AUDIO
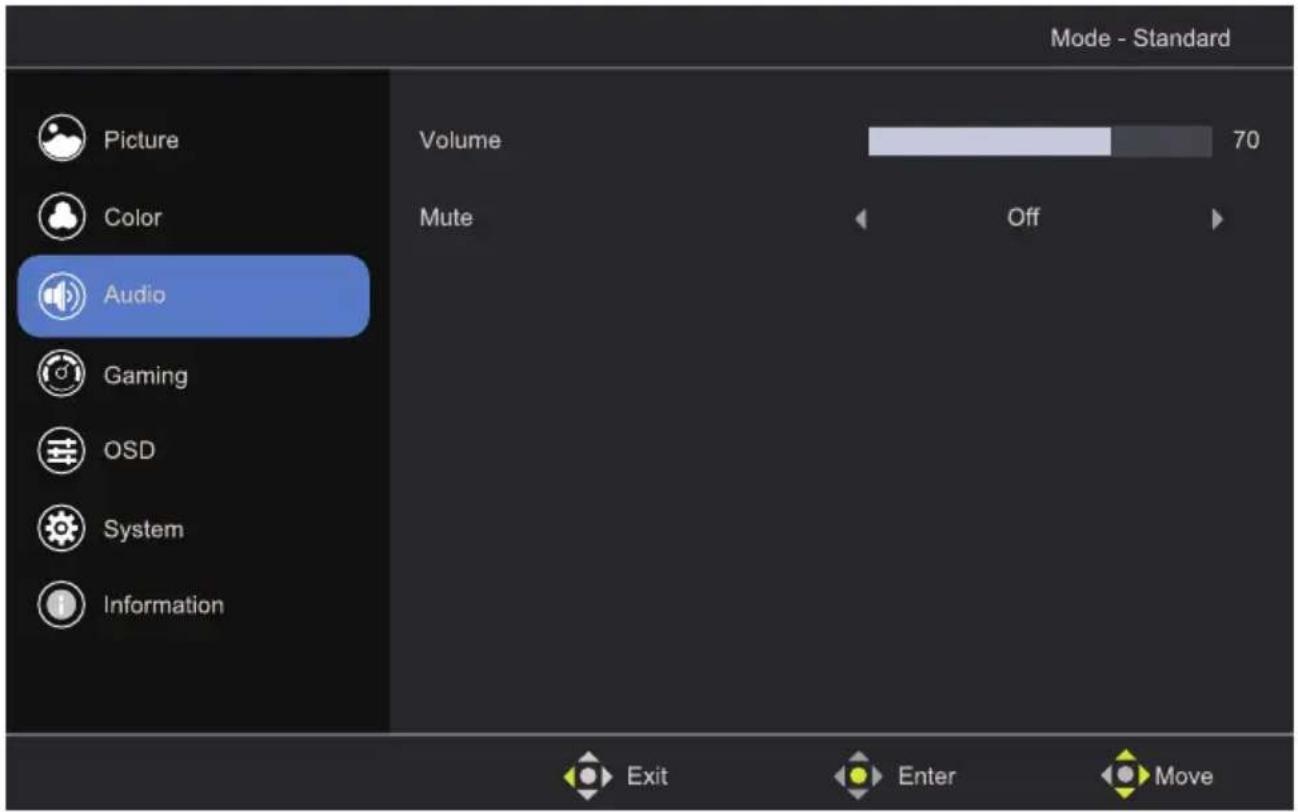
Button located at the back lower right hand side of monitor.
Middle button - ENTER
Left button - EXIT
Up/Down/Right - MOVE
![graph LR A["Exit"] --> B["Enter"] B --> C["Move"]](/content/2026/05/837641/images/86f601f205fcf0623629846c2d87ba3837de542a9b83ca5b420b72024932a778.jpg)
GAMING
• OVER DRIVE - Response time overdrive allows you to push the monitor's response time speed (pixel transition time) in order to decrease the trailing/ghosting artifacts behind fast-moving objects. - ADAPTIVE SYNC - (The VGA source does not support adaptive-sync.) - Dynamically sync the monitor's refresh rate to the GPU's frame rate to eliminate screen tearing and reduce game stuttering. - TR-1MS - (The TR-1MS can only be turned on if the computer's refresh rate is at least 75Hz.) - Dynamic screen response time. - REFRESH RATE NUMBER - Display refresh rate on monitor. - AIM POINT - Select different types of the aim point.
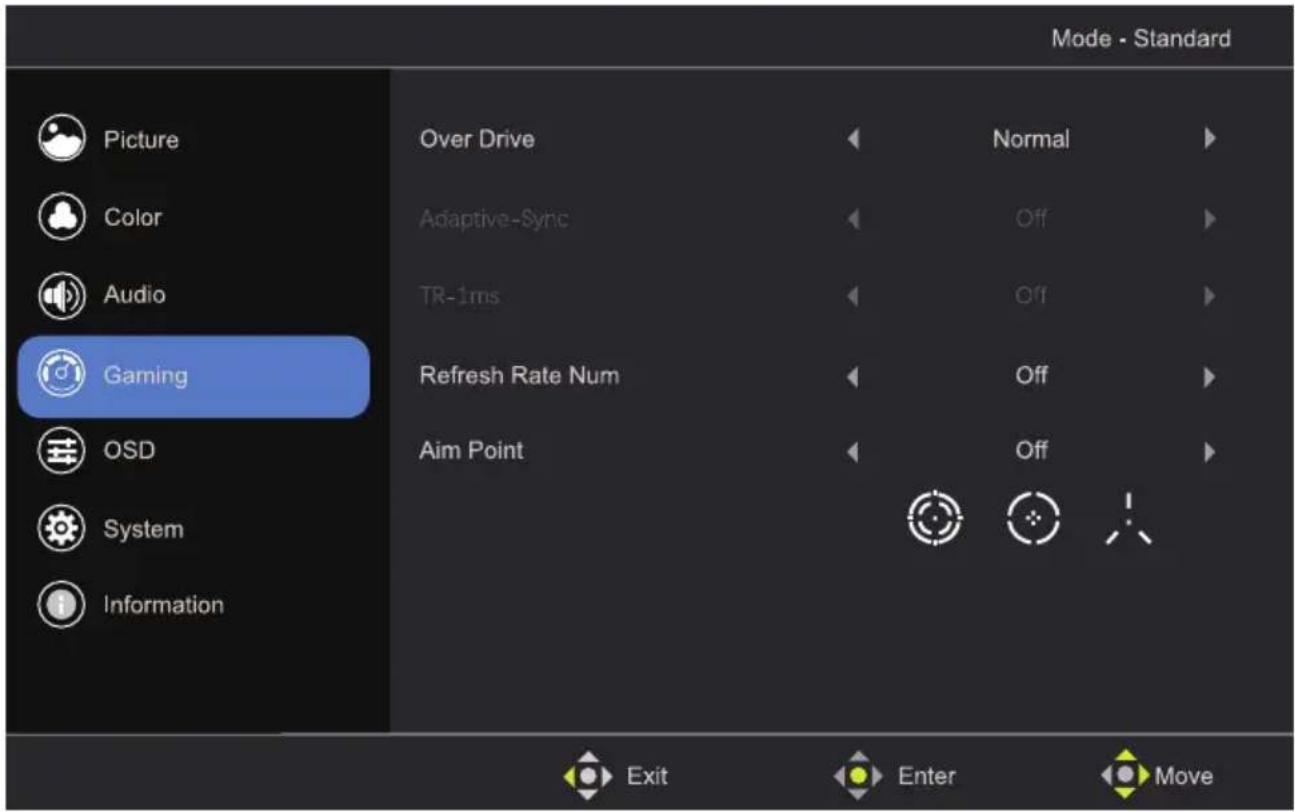
Button located at the back lower right hand side of monitor.
Middle button - ENTER
Left button - EXIT
Up/Down/Right - MOVE
![graph LR A["Exit"] --> B["Enter"] B --> C["Move"]](/content/2026/05/837641/images/f36ec2c6519b9b149b1e540397cb4c198596322a4d44f2052c38ae7793e37bdf.jpg)
- Language
- OSD Timeout
- Transparency
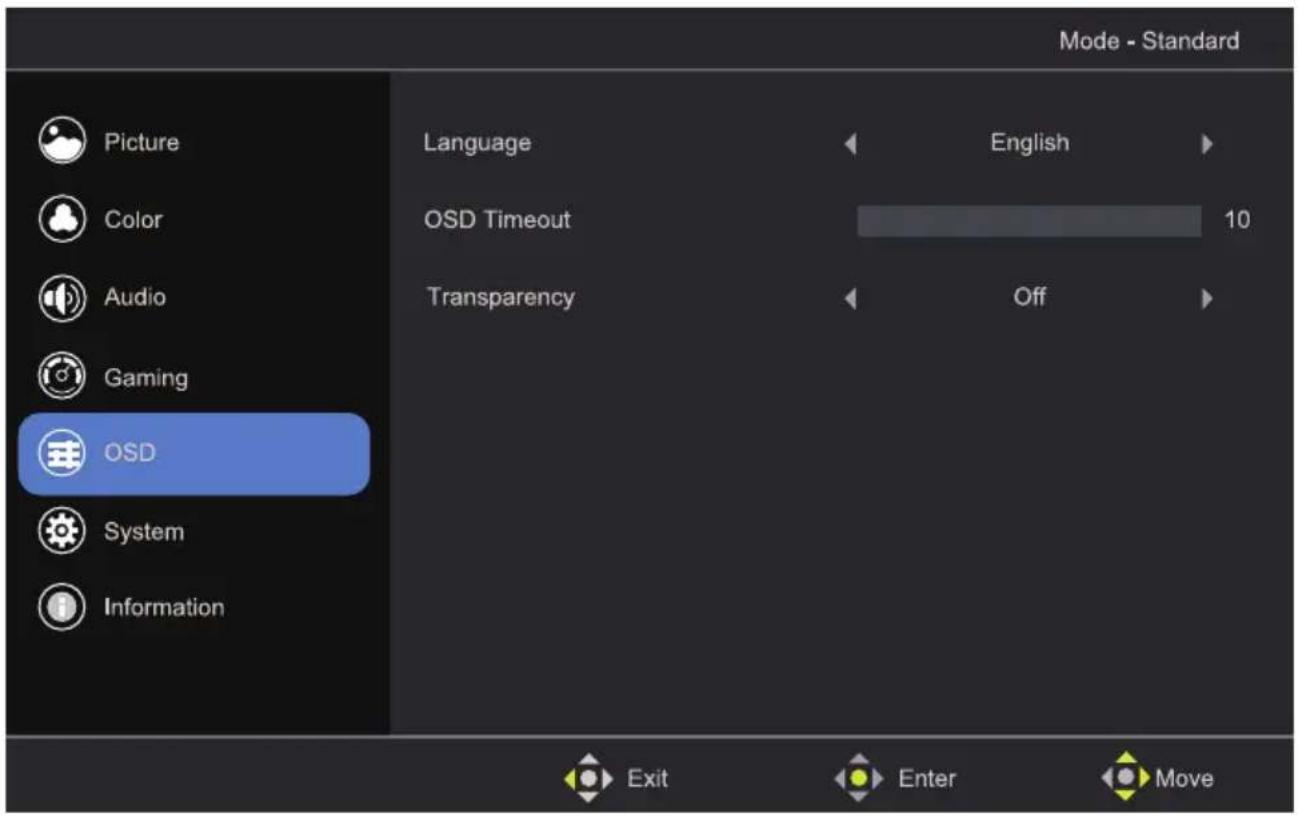
Button located at the back lower right hand side of monitor.
Middle button - ENTER
Left button - EXIT
Up/Down/Right - MOVE
![graph LR A["Exit"] --> B["Enter"] B --> C["Move"]](/content/2026/05/837641/images/c617eb2273210272f0f82c49782b34d2ff3263b23f39da1db408920558f22dbf.jpg)
SYSTEM
- Input
- Auto Source
- Wide Mode
- DDC/CI
- Quick Start Mode
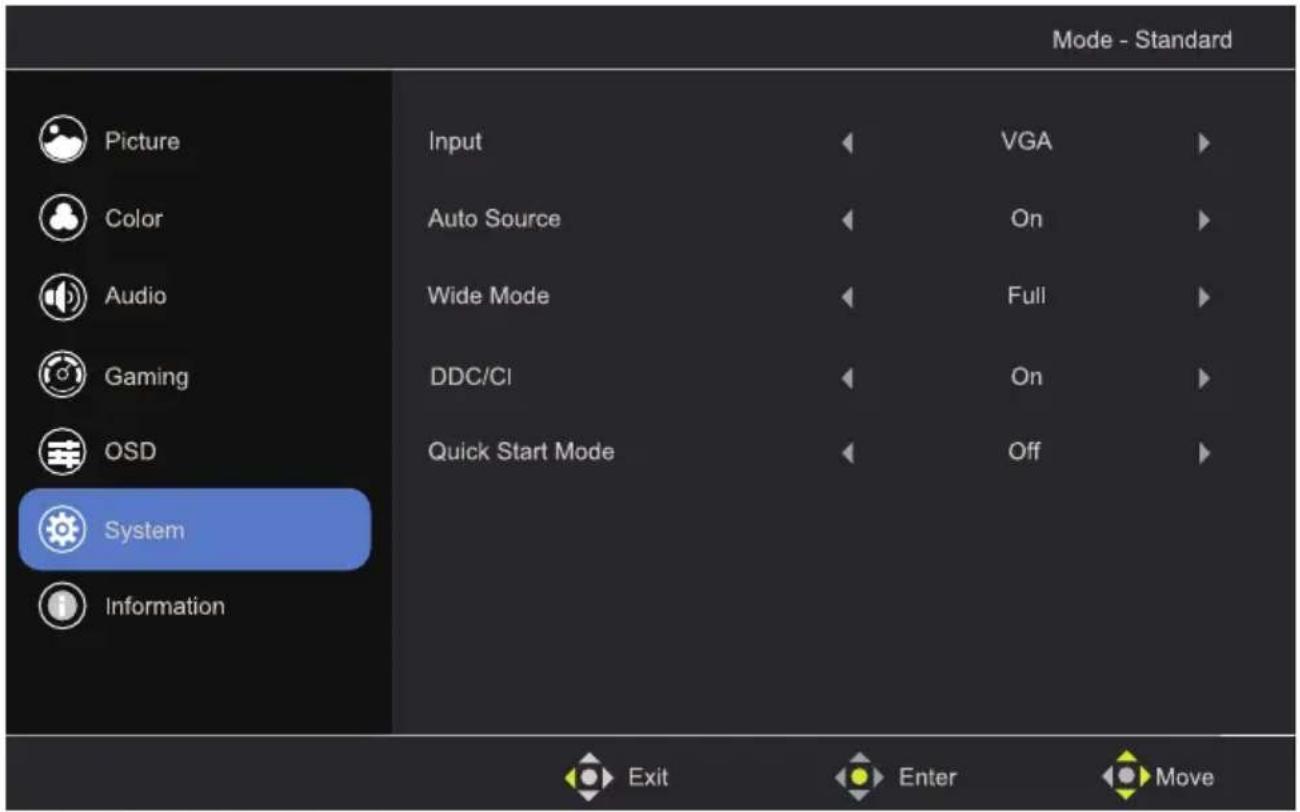
Button located at the back lower right hand side of monitor.
Middle button - ENTER
Left button - EXIT
Up/Down/Right - MOVE
![graph LR A["Exit"] --> B["Enter"] B --> C["Move"]](/content/2026/05/837641/images/d17442cb261fcfb2c101b2236acbb48593e7b6e677073ac4e7f8600a3c261696.jpg)
- Main Source
- Resolution
- H/V Frequency
- Mode
- Series Number
- Reset all settings
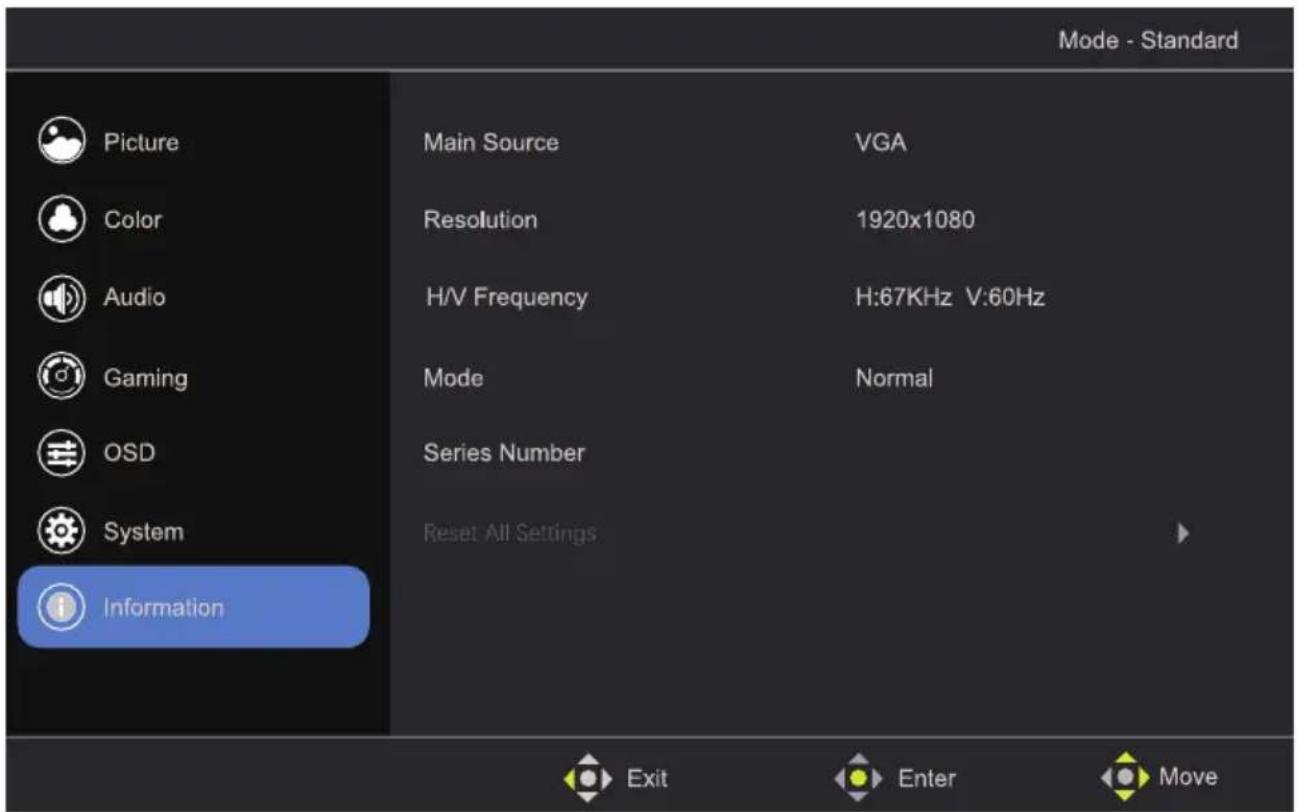
Button located at the back lower right hand side of monitor.
Middle button - ENTER
Left button - EXIT
Up/Down/Right - MOVE
![graph LR A["Exit"] --> B["Enter"] B --> C["Move"]](/content/2026/05/837641/images/9496015959f5e184cf44d16061db2722519f6a59c024050fd0ea45089f59cdd8.jpg)
SPECIFICATIONS
| Resolution 1920 x 1080 | |
| Display Colours 16.7M | |
| Contrast ratio: 4000: 1 | |
| Refresh Rate 75Hz | |
| Brightness 250 cd/m2 | |
| Power Source 12V | == 3.5A or 4A |
| Dimensions | With stand: 613.4 (w) × 224.5 × 456.4 (h) mm |
| Without stand: 613.4 (w) × 39.9 × 360.8 (h) mm |
| Weight | Net: 3.6 kg |
| Gross: 5 kg |

BLAUPUNKT
CUSTOMER HELPLINE:
info@ayonz.com
DISTRIBUTED BY:
Ayonz Pty Ltd



