
GT100.1 - Freezer PKM - Free user manual and instructions
Find the device manual for free GT100.1 PKM in PDF.


| Product Type | Upright Freezer (with Fridge mode option) |
| Brand | PKM |
| Model | GT100.1 |
| Total Net Volume | 98 L |
| Energy Efficiency Class | F |
| Annual Energy Consumption | 211 kWh |
| Noise Level | 40 dB(A) - Class C |
| Climate Class | SN / N / ST (10 °C to 38 °C) |
| Freezing Capacity | 5 kg per 24 hours |
| Storage Time in Power Failure | 13 hours |
| Star Rating | 4 stars (****) |
| Refrigerant | R600a (flammable) - 40 g |
| Adjustable Thermostat | Yes |
| Defrosting | Manual |
| Number of Wire Baskets | 1 |
| Adjustable Feet | Yes, 2 in front |
| Dimensions (H x W x D) | 85.5 x 54.5 x 48 cm |
| Net Weight | 21 kg |
| Integrated Door Handle | Yes |
| Control Panel | Electronic with ON/OFF and SET TEMPERATURE buttons and indicators |
| Fast Freeze Function | Yes |
| Dual Mode (Fridge/Freezer) | Yes, user-selectable |
Frequently Asked Questions - GT100.1 PKM
User questions about GT100.1 PKM
0 question about this device. Answer the ones you know or ask your own.
Ask a new question about this device
Download the instructions for your Freezer in PDF format for free! Find your manual GT100.1 - PKM and take your electronic device back in hand. On this page are published all the documents necessary for the use of your device. GT100.1 by PKM.
USER MANUAL GT100.1 PKM
natural_image
Front view of a white refrigerator with a small control panel and indicator lights (no visible text or symbols)| A 1 = HÖHE / B 1 = BREITE / C 1 = TIEFE | |||
| A 1mind. 1450 mm | B 1mind. 585 mm | C 1mind. 565 mm | DWand |
| F = TÜRÖFFNUNGSWINKEL | |||
natural_image
Diagram showing a mechanical device with rotating components and a cart with wheels, connected by an arrow (no text or symbols)MILCHPRODUKTE UND EIER
| A | WASSERABLASS / WASSERABLASSSCHRAUBE |
| X | BEDIENFELD |
Dear customer! We would like to thank you for purchasing a product from our wide range of domestic appliances. Read the complete instruction manual before you operate the appliance for the first time. Retain this instruction manual in a safe place for future reference. If you transfer the appliance to a third party, also hand over this instruction manual.
Index
- Safety information....52
1.1 Signal words....53
1.2 Safety instructions....53
-
Climatic classes....58
-
Installation....58
3.1 Unpacking and positioning....58
3.2 Space and ventilation requirements....59
3.2.1 Space requirement....59
3.2.2 Ventilation....60
3.3 Levelling....62
- Operation....63
4.1 Before initial operation 63
4.2 Description of the appliance....64
4.3 Control panel: operating buttons and indicators 65
4.4 On / Off - button....67
4.5 Setting of the fridge or freezer mode 68
4.6 Temperature setting....69
4.6.1 Fridge mode: setting of the cooling temperature (cooling level)....70
4.6.2 Freezer mode: setting of the freezing temperature (freezing level) ..... 71
4.6.3 Setting of the Fast - Freezing Mode (freezer mode only) 71
4.6.4 Recommended setting of the cooling or freezing level 73
4.7 Power failure....73
4.8 The fridge mode 73
4.9 The freezer mode....74
4.9.1 Meaning of the *-labelling of freezers....76
4.10 Storage of food....77
- Environmental protection 82
5.1 Environmental protection: disposal 82
5.2 Environmental protection: energy saving....82
5.3 Operational parameters....83
- Cleaning and maintenance....83
6.1 Defrosting....84 - Troubleshooting....87
- Decommissioning....91
- Technical data....92
- Waste management....93
- Guarantee conditions....94

Do not dispose of this appliance together with your domestic waste. The appliance must be disposed of at a collecting centre for recyclable electric and electronic appliances. Do not remove the symbol from the appliance.
The figures in this instruction manual may differ in some details from the current design of your appliance. Nevertheless, follow the instructions in such a case. Delivery without content.
i Any modifications, which do not influence the functions of the appliance. shall remain reserved by the manufacturer.
i Please dispose of the packaging with respect to your current local and municipal regulations.
The appliance you have purchased may be an enhanced version of the unit this manual was printed for. Nevertheless, the functions and operating conditions are identical. This manual is therefore still valid.
i Technical modifications as well as misprints shall remain reserved.
EU - DECLARATION OF CONFORMITY
★ The products, which are described in this instruction manual, comply with the harmonised regulations.
★ The relevant documents can be requested from the final retailer by the competent authorities.
MAKE SURE THAT THIS MANUAL IS AVAILABLE TO ANYONE USING THE APPLIANCE AND MAKE SURE THAT IT HAS BEEN READ AND UNDERSTOOD PRIOR TO USING THE DEVICE.
READ THE SAFETY INFORMATION AND THE SAFETY INSTRUCTIONS CAREFULLY BEFORE YOU OPERATE THE APPLIANCE FOR THE FIRST TIME.
All information included in those pages serve for the protection of the operator. If you ignore the safety instructions, you will endanger your health and life.
Store this manual in a safe place so you can use it whenever it is needed. Strictly observe the instructions to avoid damage to persons and property.
Check the technical periphery of the appliance! Do all wires and connections to the appliance work properly? Or are they time-worn and do not match the technical requirements of the appliance? A check-up of existing and newly-made connections must be done by an authorised professional. All connections and energy-leading components (incl. wires inside a wall) must be checked by a qualified professional. All modifications to the electrical mains to enable the installation of the appliance must be performed by a qualified professional.
The appliance is intended for private use only as well as to be used (1) in staff kitchen areas of shops, offices and other working environments; (2) by clients in hotels, motels, B&B and other residential type environments; (3) for catering and similar non-retail applications.
i The appliance is intended for cooling food only.
i The appliance is intended for indoor-use only.
The appliance is not intended to be operated for commercial purposes, during camping and in public transport.
i Operate the appliance in accordance with its intended use only.
Do not allow anybody who is not familiar with this instruction manual to operate the appliance.
This appliance may be operated by children aged from 8 years and above as well as by persons with reduced physical, sensory and mental capabilities or lack of experience and knowledge if they are supervised or have been instructed concerning the safe use of the appliance and do comprehend the hazard involved. Children between 3 and 8 years are allowed to load and unloan refrigerators. Children must not play with the appliance. Cleaning and user-maintenance must not be carried out by children unless they are supervised.
1.1 Signal words
⚠️ DANGER! indicates a hazardous situation which, if ignored, will result in death or serious injury.
⚠ WARNING! indicates a hazardous situation which, if ignored, could result in death or serious injury.
CAUTION! indicates a hazardous situation which, if not avoided, may result in minor or moderate injury.
NOTICE! indicates possible damage to the appliance.
1.2 Safety instructions
DANGER!
To reduce the risk of electrocution.
- Non-compliance of the orders of this instruction manual will endanger the life and health of the operator and/or can result in damages to the appliance.
- Do not connect the appliance to the mains if the appliance itself or the power cord or the plug are visibly damaged.
- The technical data of your energy supplier must meet the data on the rating plate of the appliance.
- Do not modify the plug provided with the appliance, if it will not fit the outlet, have a proper outlet installed by a qualified electrician (not covered by the guarantee).
- Never try to repair the appliance yourself. If the appliance does not operate properly, please contact the aftersales service or the shop you purchased the appliance at. ^19 Original spare parts should be used only.
- Always check that the power cord is not placed under the appliance or damaged by moving the appliance.
- When the power cord is damaged, it must be replaced by the manufacturer or an authorised aftersales service or a qualified professional only.
- Never pull the power supply cable to unplug the appliance. Always use the power plug itself to unplug the appliance. RISK OF ELECTRIC SHOCK!
- Never touch the power plug, the power switch or other electrical components with wet or damp hands. RISK OF ELECTRIC SHOCK!
To reduce the risk of burns, electrocution, fire or injury to persons.
- This appliance is equipped with the environmental-friendly refrigerant R600a. The refrigerant R600a is inflammable. The components of the cooling circuit must neither be damaged during transport nor use.
- If any part of the cooling circuit is damaged, the appliance must not stand near a fire, naked light or spark-generating devices. Contact the aftersales service or the shop you purchased the appliance at immediately. ^20
- If gas is set free at the installation site:
a) open all windows.
b) do not unplug the appliance and do not use the control panel or thermostat.
c) do not touch the appliance until all the gas has gone.
d) otherwise, sparks can be generated which will ignite the gas.
- Keep all components of the appliance away from fire and other sources of ignition when you dispose of or decommission the appliance.
- Do not install the appliance near of volatile or combustible materials (e.g., gas, fuel, alcohol, paints) and in rooms which may have poor air circulation (e.g., garage).
- EXPLOSION HAZARD! Do not store any explosive materials or sprays, which contain flammable propellants, in your appliance. Explosive mixtures can explode there.
- While unpacking, the packaging materials (polythene bags, polystyrene pieces, etc.) should be kept away from children and pets. CHOKING HAZARD! RISK OF INJURY!
- Always observe the required minimum distances for proper ventilation.
- Do not connect the appliance to the electric supply unless all packaging and transit protectors have been removed.
- Operate the appliance with 220\~240V/50Hz/AC only. All connections and energy-leading components must be replaced by an authorised professional.
- Do not use a socket board or a multi socket when connecting the appliance to the mains.
-
Never place portable multiple sockets or portable power supplies behind the appliance. RISK OF FIRE!
-
Do not connect the appliance to an energy saving plug (e.g., Sava Plug) and to inverters which convert direct current (DC) into alternating current (AC), e.g., solar systems, power supply of ships.
- A dedicated and properly grounded socket meeting the data of the plug is required to minimise any kind of hazard. The appliance must be grounded properly.
- Always check that the power cord is not placed under the appliance or damaged by moving the appliance.
- The technical data of your energy supplier must meet the data on the model plate of the appliance.
- Your domestic circuit must be equipped with an automatic circuit breaker.
- Do not modify the appliance.
- Turn off the power before you install the appliance and before you connect it to the mains. RISK OF FATAL ELECTRIC SHOCK!
- Disconnect the appliance from the mains before you clean or maintain it. RISK OF ELECTRIC SHOCK!
- Remove possible dust accumulation at the power plug, at the safety power socket and at all plug connectors regularly. RISK OF FIRE!
- Keep the cord away from heated surfaces.
- The power plug must always be accessible after installation.
- Do not use any electric appliances inside the food storage compartments of your appliance unless they are recommended by the manufacturer of your refrigerator.
- Do not put any heat-radiating appliances onto your appliance.
- Do not install the appliance in a place where it may come in contact with water/rain; otherwise, the insulation of the electrical system will be damaged.
- Do not put a water-boiler or vases onto your appliance. The electrical components of your appliance can be seriously damaged by water over-boiling or spilled water.
- Do not use any steam cleaners to clean or defrost the appliance. The steam can get into contact with the electrical parts and cause an electrical short. RISK OF ELECTRIC SHOCK!
- Never use mechanic devices, knives or other sharp-edged items to remove encrusted ice inside the appliance. RISK OF ELECTRIC SHOCK caused by damaging the interior of the appliance.
- Do not eat food which is still frozen. Children should not eat ice-cream straight from the freezer. The coldness can cause injuries in the mouth.
- Contact with frozen food, ice and metal components in the freezer compartment can cause injuries similar to burns.
-
Children must never play with the appliance.
-
If you decommission your appliance (even temporarily), ensure that children cannot get into the appliance. Strictly observe the corresponding safety instructions numbers. 1 and 4, chapter DECOMMISSIONING, ultimate
-
Strictly observe the instructions in chapter INSTALLATION.
CAUTION!
- The condenser and the compressor, located at the rear of the appliance, can reach high temperatures during ordinary operation. Carry out the installation according to this manual. An insufficient ventilation of the appliance will impair its operation and will damage the appliance. Do not cover or block the ventilation slats at any time.
- Freezer mode: do not store any bottled or canned beverages (neither still nor carbonated) inside the appliance as their containers could explode.
- Do not touch the extremely cooled surfaces with wet or damp hands, because your skin may stick on these surfaces.
- Never stow food and / or storage containers, especially containers made of metal, in the freezer while your hands are damp or wet. Ensure that your hands are always dry. RISK OF FROSTBITE!
- Always ensure that your fingers are not between the door and the housing of the appliance while closing the door. RISK OF CRUSHING!
NOTICE!
- Do not store dry ice in the appliance.
- 1- (*), 2- (**), and 3-stars (***) freezers are not suitable for freezing fresh food (see also chapter MEANING OF THE *-LABELLING OF FREEZERS).
- 2-stars ( ^ ) and 3-stars ( ^ ) freezers are suitable for the storing of frozen food (pre-frozen) and ice or for the making of ice and ice cubes (see also chapter MEANING OF THE -LABELLING OF FREEZERS).
- When you move the appliance, hold it at its base and lift it carefully. Keep the appliance in an upright position.
- When you move the appliance using the rollers (depending on model), only move it forwards or backwards as the rollers are not pivotable and do not allow any lateral motion. Lateral motion can damage the appliance and floor seriously.
- Do not tilt the appliance more than 45^0 .
-
If the appliance is transported in a horizontal position, some oil may flow from the compressor into the refrigerant circuit.
-
Leave the appliance in an upright position for 4 - 6 hours before you switch it on to ensure, that the oil has flowed back into the compressor.
- If you use the appliance for the first time or the appliance has been disconnected from the mains for a longer period of time, allow the appliance to cool down for 3 until 4 hours at following temperature setting before you place any fresh or frozen food in the appliance: fridge mode, cooling level 2 / freezer mode, cooling level 3. If you place food in the appliance before it has reached its normal operating temperature, the food can thaw and / or spoil.
- Never use the door for moving the appliance as you will damage the hinges.
- The appliance must be transported and installed by at least two persons.
- When you unpack the appliance, you should take note of the position of every part of the interior accessories in case you have to repack and transport it at a later point of time.
- Do not operate the appliance unless all components are installed properly.
- Do not stand or lean on the base, the drawers, the doors etc of the appliance.
- Never close the door(s) of the appliance while shelves or drawers are extended, otherwise you will damage the shelves / drawers and the appliance.
- Do not put hot liquids or hot foodstuff into the appliance.
- The air vents of the appliance or its built-in structure (if the appliance is suitable for being built-in) must be completely open, unblocked and free of any kind of dirt.
- Do not place any food directly against the air outlet on the rear wall.
- Do not overfill the shelves / drawers /door trays ^22 to protect them from damage.
- Clean the appliance at least once a month (s. chapter CLEANING AND MAINTENANCE).
- The rating plate must not be removed or made illegible, otherwise all terms of the warranty become invalid!
SAVE THESE INSTRUCTIONS.
★ The manufacturer and distributor are not responsible for any damage or injury in the event of failure to comply with these instructions.
2. Climatic classes
Look at chap. « TECHNICAL DATA » for information about the CLIMATIC CLASS of your appliance. Your appliance can be operated in rooms with relevant room temperatures as named below.
| CLIMATIC CLASS | AMBIENT TEMPERATURE | |
| SN | +10 ^0 →+32 ^0 C | c.g., unheated cellar |
| N | +16 ^0 →+32 ^0 C | inner home temperature |
| ST | +16 ^0 →+38 ^0 C | inner home temperature |
| T | +16 ^0 →+43 ^0 C | inner home temperature |
3. Installation
i All dimensions in these chapters are given in millimetres.
The minimum distances required for proper ventilation can be found in chapter 3.2.2 VENTILATION.
3.1 Unpacking and positioning
WARNING! While unpacking, the packaging materials (polythene bags, polystyrene pieces, etc.) should be kept away from children and pets. CHOKING HAZARD! RISK OF INJURY!
- This appliance is not intended for built-in installation.
- Unpack the appliance carefully. Dispose of the packaging as described in chapter waste management.
- Remove all packaging materials.
- The accessories of your appliance can be protected from damage due to transportation (adhesive tapes etc.). Remove such tapes very carefully. Remove remains of such tapes with a damp cloth using lukewarm water and a mild detergent (see also chapter CLEANING AND MAINTENANCE). Never remove any components of the back of the appliance!
- Install the appliance in a suitable position with an adequate distance from sources of heat and cold.
- If installation near a heat source is unavoidable, use a suitable insulation plate or keep the following minimum distances to the heat source:
| To another refrigerators: | min. 20 mm |
| To electric cookers: | min. 30 mm |
| To radiators or ovens: | min. 300 mm |
- Install the appliance in a dry and well-ventilated place.
- Protect the appliance from direct sunlight.
- The door(s) must open completely and without hindrance.
- Install the appliance on a level, dry and solid floor. Check the correct installation with a bubble level.
- Check that the appliance and the power cord are not damaged.
- Connect the appliance to the mains properly.
- The rating plate is inside the appliance or on the back.
3.2 Space and ventilation requirements
i Observe the required minimum distances for proper ventilation.
3.2.1 Space requirement
SPACE REQUIREMENT OF THE APPLIANCE WHEN THE DOOR IS CLOSED


| A = HEIGHT / B = WIDTH / C = DEPTH | ||
| A | B | C |
| 845 mm | 545 mm | 545 mm |
i Please observe the additional top space requirement of the open door relevant to the door opening angle of your appliance (s. fig. below).


| A 1 = HEIGHT / B 1 = WIDTH / C 1 = DEPTH | ||
| A 1min. 1450 mm | B 1min. 545 mm | C 1min. 545 mm |
| F = DOOR OPENING ANGLE | ||
3.2.2 Ventilation
i Observe the required minimum distances for proper ventilation.
| MINIMUM DISTANCES REQUIRED FOR PROPER VENTILATION | |
| Back ↔ wall | min. 20 mm |
| Sides ↔ wall | min. 20 mm |
| Free space above | min. 100 mm |
SPACE REQUIREMENT OF THE APPLIANCE WHEN THE DOOR IS CLOSED (INCL. MINIMUM DISTANCES FOR PROPER VENTILATION)


| A = HEIGHT / B = WIDTH / C = DEPTH | |||
| A | B | C | D |
| min. 945 mm | min. 585 mm | min. 565 mm | Wall |
SPACE REQUIREMENT OF THE APPLIANCE WHEN THE DOOR IS OPEN (INCL. MINIMUM DISTANCES FOR PROPER VENTILATION)
i Please observe the additional top space requirement of the open door relevant to the door opening angle of your appliance.


| A 1 = HEIGHT / B 1 = WIDTH / C 1 = DEPTH | |||
| A 1min. 1450 mm | B 1min. 585 mm | C 1min. 565 mm | DWand |
| F = DOOR OPENING ANGLE | |||
The following minimum distances are recommended by the manufacturer to ensure optimum efficiency of the appliance:
| back ↔ wall | min. 100 mm |
| right / left ↔ any piece of furniture / wall | min. 100 mm |
| free space above | min. 100 mm |
These minimum distances may be less, but to do so can increase the power consumption of the appliance.
3.3 Levelling
Use the adjustable supporting feet for proper levelling and for proper air circulation in the lower sectors of the appliance. Adjust the supporting feet using a suitable spanner.

natural_image
Diagram showing a mechanical device with rotating components and a separate circular view of a mechanical arm (no text or symbols)Fig. similar: fig. serves as an example only.
The appliance must stand in a stable and level position to ensure proper operation. The supporting feet must stand firmly on the ground so that the appliance does not wobble. Adjust the supporting feet accordingly. The firm contact of the supporting feet with the ground also ensures that the appliance does not vibrate or move unintentionally.
If you have to move the appliance, set the adjustable feet to minimum position so the appliance can be moved on its rollers ^23 easily. Readjust the appliance when transport has been completed.
NOTICE! The rollers (depending on model) are no castors and intended to move the appliance forward and backwards only. Lateral movements can damage your floor and the rollers.
4. Operation
⚠ WARNING! To disconnect the appliance from the mains, you must unplug the appliance or use a cut-off device.
4.1 Before initial operation
⚠ WARNING! While unpacking, the packaging materials (polythene bags, polystyrene pieces, etc.) should be kept away from children and pets. CHOKING HAZARD! RISK OF INJURY!
NOTICE! Leave the appliance in an upright position for at least 4 - 6 hours before you connect it to the mains to ensure, that the oil has flowed back into the compressor.
NOTICE! If you use the appliance for the first time or the appliance has been disconnected from the mains for a longer period of time, allow the appliance to cool down for 3 until 4 hours at following temperature setting before you place any fresh or frozen food in the appliance: fridge mode, cooling level 2 / freezer mode, cooling level 3 (s. chapter 4.6 TEMPERATURE SETTING et seq.). If you place food in the appliance before it has reached its normal operating temperature, the food can thaw and / or spoil.
- Remove all packaging materials.
- Adjust the feet and clean the appliance (see chapter CLEANING AND MAINTENANCE).
- Do not start the appliance immediately after installation. Wait at least 4 - 6 hours to ensure proper operation.
- Connect the appliance to the mains properly.
-
The temperature setting (setting of the cooling or freezing level) of the appliance can be adjusted manually by pressing the relevant button until the desired cooling or freezing level will be indicated (s. chapter 4.6 TEMPERATURE SETTING et seq.).
-
The noise generated by the compressor and the gases / liquids of the appliance is normal.
- If operation was interrupted, wait 5 minutes before restart.
- The appliance needs some time to balance temperatures when you have changed the settings before or when you have stored additional food in the appliance. The duration of this period of time depends on the range of the change, the ambient temperature, the amount of food and the frequency of door-openings. When you set the temperature of the appliance (= cooling / freezing level) these aspects should be considered.
- Due to the difference of pressure, the door may be difficult to open shortly after closing. Wait a few minutes and you can open the door easily.
- Operate the appliance according to the instructions described in the following chapters.
4.2 Description of the appliance
The appliance can be used as a fridge or freezer (fridge mode / freezer mode).

Fig. serves as an example only: modifications are possible.
| FRIDGE OR FREEZER | |
| 1 | INTEGRATED DOOR HANDLE |
| 2 | WIRE BASKET for the cooling or freezing of food |
| 3 | CONTROL PANEL |
| 4 | WATER OUTLET / WATER DRAIN SCREW➢ S. chapter 6.1 DEFROSTING |
| 5 | ADJUSTABLE FEET / 2 IN FRONT |
4.3 Control panel: operating buttons and indicators
⚠ WARNING! To disconnect the appliance from the mains, you must unplug the appliance or use a cut-off device.
◆ Operate the appliance according to the instructions about the control of the functions and modes described in the following paragraphs.
The appliance can be used as a fridge or freezer (fridge mode / freezer mode).
When you connect the appliance to the mains, all indicators of the control panel go on for one second.
- After 30 minutes without using any operating buttons, the lighting intensity of the currently lit indicators is reduced.
The FREEZER MODE of the appliance is factory-set. ^24
The temperature (= cooling or freezing level) and the mode (FAST - FREEZING MODE) can be set manually if required (s. chapter 4.6 TEMPERATURE SETTING et seq.).
CONTROL PANEL: OPERATING BUTTONS AND INDICATORS

Fig. similar: modifications are possible.
| OPERATING BUTTONS | |
| A | « ON / OFF » - BUTTON➢ Switches the compressor of the appliance on / off.➢ S. chapter 4.4 ON / OFF - BUTTON. |
| B | « SET TEMPERATURE » - BUTTON➢ Setting of the cooling or freezing temperature.➢ Activation / deactivation of the Fast - Freezing Mode.➢ S. chapter 4.6 TEMPERATURE SETTING et seq. |
| INDICATORS | |
| 1 | OPERATIONAL STATUS INDICATOR of the fridge / freezer |
| 2 | OPERATIONAL STATUS INDICATOR OF THE FRIDGE MODE➢FRIDGE MODE➢Two settings can be selected in fridge mode (cooling levels 1 - 2). |
| 3 | OPERATIONAL STATUS INDICATOR OF THE FREEZER MODE➢FREEZER MODE➢Five settings can be selected in freezer mode (freezing levels 1 - 5). |
| 4 | OPERATIONAL STATUS INDICATOR of the FAST - FREEZING MODE |
4.4 On / Off - button
You can switch the cooling of the freezer / fridge on or off using the « ON / OFF » - BUTTON: = compressor on / off.
| HOW TO SWITCH THE COOLING (COMPRESSOR) OF THE FRIDGE / FREEZER ON | |
| 1. Press and hold the « ON / OFF » - BUTTON (A) for 3 seconds to switch the cooling (compressor) of the fridge / freezer on. |  |
| 2. The operational status indicator of the fridge / freezer goes on (green light). The cooling (compressor) is switched on. |  |
- After 30 minutes without using any operating buttons, the lighting intensity of the currently lit indicators is reduced.
| HOW TO SWITCH THE COOLING (COMPRESSOR) OF THE FRIDGE / FREEZER OFF | |
| 1. Press and hold the « ON / OFF » - BUTTON (A) for 3 seconds to switch the cooling (compressor) of the fridge / freezer off. |  |
| 2. The operational status indicator of the fridge / freezer goes off. The cooling (compressor) is switched off. |  |
- After 30 minutes without using any operating buttons, the lighting intensity of the currently lit indicators is reduced.
⚠ WARNING! The setting « OFF » switches off the compressor only. You must unplug the appliance to disconnect it from the mains.
4.5 Setting of the fridge or freezer mode
❖ The appliance can be used as a fridge or freezer (fridge mode / freezer mode).
The FREEZER MODE of the appliance is factory-set. ^25
HOW TO SET THE FRIDGE MODE
- Press the « SET TEMPERATURE » - BUTTON repeatedly until the operational status indicator of the fridge mode (blue) goes on.
- The fridge mode is activated and cooling level 1 is set at the same time (s. fig. on the right).


Cooling level 1
HOW TO SET THE FREEZER MODE
- Press the « SET TEMPERATURE » - BUTTON repeatedly until the operational status indicator of the freezer mode (blue) goes on.
- The freezer mode is activated and freezing level 1 is set at the same time (s. fig. on the right).


Freezing level 1
To return to FRIDGE MODE, press the « SET TEMPERATURE » - BUTTON (« 📄 ») repeatedly until the operational status indicator of the FRIDGE MODE (« ») goes on again (blue).
4.6 Temperature setting
⚠ WARNING! To disconnect the appliance from the mains, you must unplug the appliance or use a cut-off device.
NOTICE! If you want to switch off the appliance for a longer period of time, disconnect it from the mains (unplug!). S. also Chapter « DECOMMISSIONING, TEMPORARILY ».
The temperature of the appliance (= cooling or freezing level) can be set manually by pressing the relevant button until the desired cooling or freezing level will be indicated on the control panel (s. chapter 4.3 CONTROL PANEL: OPERATING BUTTONS AND INDICATORS).
When you set a temperature (= cooling or freezing level), you set an average temperature for the whole appliance. Temperatures inside each area may vary, depending on how much food you store and where you place them. Ambient temperature may also affect the actual temperature inside the appliance. When you set the temperature of the appliance (= cooling or freezing level) these aspects should be considered.
i PLEASE NOTE: the colder the selected temperature setting (= high cooling / freezing level), the longer the compressor operates to reach the set cooling / freezing temperature.
i The set cooling / freezing level can be changed as needed.
You can check the temperature inside the appliance using a suitable thermometer (not included in the scope of delivery).
When the ambient temperature is extremely high (please observe the climatic class of your appliance in chapter « TECHNICAL DATA »!), you can set the temperature (= cooling / freezing level) to a colder setting if needed; the energy consumption may be increased. If the colder setting should cause strong formation of encrusted ice, please select a lower setting.
i Extremely high ambient temperatures and simultaneously operating at the coldest setting may make the compressor operate permanently to keep the temperature constant inside the appliance. Please observe the climatic class of your appliance in chapter « TECHNICAL DATA »!
i Please observe chapter 4.6.4 « RECOMMENDED SETTING OF THE COOLING OR FREEZING LEVEL ».
4.6.1 Fridge mode: setting of the cooling temperature (cooling level)
- Two settings can be selected in fridge mode (cooling levels 1 - 2).
| TWO SETTINGS (COOLING LEVELS) ARE AVAILABLE | ||
| Cooling level 1 |  | lower / slighter cooling |
| Freezing level 2 |  | higher / stronger cooling |
i You can check the cooling temperature inside the appliance using a suitable thermometer (not included in the scope of delivery).
HOW TO SET THE COOLING TEMPERATURE (COOLING LEVEL)
| 1. The FRIDGE MODE must be set (s. chapter 4.5 SETTING OF THE FRIDGE OR FREEZER MODE).2. The operational status indicator of the fridge mode is on (blue); cooling level 1 is set at the same time. | 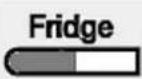 Cooling level 1 Cooling level 1 |
| 3. To set cooling level 2, press the « SET TEMPERATURE » - BUTTON once. The operational status indicator (blue) of the set cooling level goes on (s. fig. on the right). |  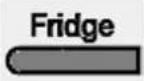 Cooling level 2 Cooling level 2 |
| 4. After 5 seconds without using any operating buttons, the set cooling level (e.g., cooling level 2) will be activated. | 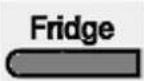 E.g., cooling level 2 E.g., cooling level 2 |
-
The set cooling level is in operation.
-
After 30 minutes without using any operating buttons, the lighting intensity of the currently lit indicators is reduced.
i Please observe chapter 4.6.4 « RECOMMENDED SETTING OF THE COOLING OR FREEZING LEVEL ».
4.6.2 Freezer mode: setting of the freezing temperature (freezing level)
◆ Five settings can be selected in freezer mode (freezing levels 1 - 5).
HOW TO SET THE FREEZING TEMPERATURE (FREEZING LEVEL)
-
The FREEZER MODE must be set (s. chapter 4.5 SETTING OF THE FRIDGE OR FREEZER MODE).
-
The operational status indicator of the freezer mode is on (blue); freezing level 1 is set at the same time.
-
Press the « SET TEMPERATURE » - BUTTON repeatedly until the operational status indicator (blue) of the desired freezing level goes on: e.g., freezing level 5 (s. fig. on the right).
-
After 5 seconds without using any operating buttons, the set freezing level (e.g., freezing level 5) will be activated.
-
The set freezing level is in operation.
-
After 30 minutes without using any operating buttons, the lighting intensity of the currently lit indicators is reduced.
i Please observe chapter 4.6.4 « RECOMMENDED SETTING OF THE COOLING OR FREEZING LEVEL ».
⚠️ CAUTION! Freezer mode: do not store any bottled or canned beverages (neither still nor carbonated) inside the appliance as their containers could explode.
4.6.3 Setting of the Fast - Freezing Mode (freezer mode only)
i In FAST - FREEZING MODE, the compressor operates continuously.
The FAST - FREEZING MODE decreases the freezing temperature rapidly and makes sure that the food will be frozen faster as usual. Thereby this function helps to preserve vitamins and nutrients of fresh food for a longer period of time.
i Select this mode when you like to freeze fresh meat or fish for long term storage.
i If you are planning to freeze a larger quantity of food at the same time, activate the FAST - FREEZING MODE about 24 hours in advance.
| HOW TO ACTIVATE THE FAST - FREEZING MODE | |
| 1. Press the « SET TEMPERATURE » - BUTTON repeatedly until the operational status indicator of the FAST - FREEZING MODE (blue) goes on (s. fig on the right). |  |
 | |
| 2. After 5 seconds without using any operating buttons, the FAST - FREEZING MODE will be activated. |  |
- After 30 minutes without using any operating buttons, the lighting intensity of the currently lit indicators is reduced.
⚠️ CAUTION! Fast - Freezing Mode: do not store any bottled or canned beverages (neither still nor carbonated) inside the appliance as their containers could explode.
| HOW TO DEACTIVATE THE FAST - FREEZING MODE | |
| 1. Press the « SET TEMPERATURE » - BUTTON repeatedly until the operational status indicator of the desired freezing level (blue) goes on: e.g., freezing level 1 (s. fig on the right). |  |
 Freezing level 1 Freezing level 1 | |
| 2. The operational status indicator of the FAST - FREEZING MODE goes off. |  |
- The FAST - FREEZING MODE is deactivated.
- After 30 minutes without using any operating buttons, the lighting intensity of the currently lit indicators is reduced.
NOTICE! Please note: if you deactivate the FAST - FREEZING MODE, the appliance switches to fridge mode first. You must press the « SET TEMPERATURE » - BUTTON repeatedly until the freezer mode is activated again.
4.6.4 Recommended setting of the cooling or freezing level
The following cooling or freezing level setting is recommended for the appliance.
| MODE | COOLING / FREEZING LEVEL | INDICATOR BAR |
| Fridge mode | Cooling level 2 |  |
| Freezer mode | Freezing level 3 |  |
4.7 Power failure
In the case of a power failure, the current settings will be secured and maintained.
If the appliance is supplied with power again, it continues to work with the settings adjusted before.
Max storage time in case of malfunctions: s. chapter TECHNICAL DATA.
i In the event of an unpredictable power failure:
➢ reduce the opening frequency of the door(s).
➢ do not put any new food in the appliance to avoid a rapid rise of the temperature inside the appliance.
i IN FREEZER MODE ONLY: in the event of a predictable power failure, you can activate the FAST - FREEZING MODE and decrease the temperature of the freezer as a precautionary measure to set the appliance to the lowest temperature (= strongest cooling) so that it is maximally cooled at the time of the power failure.
NOTICE! In an event of a power failure, do not open the door so your food can remain in the appliance for -x- hours (-x-: see chapter TECHNICAL DATA).
4.8 The fridge mode
The fridge mode is not intended for storing food for a longer period of time. So, use the fridge mode for short-term storage only. Different temperature areas due to the air circulation occur in the appliance. Use these different temperature areas to store different kinds of food.
| COMPARTMENT | STARS (*) | TARGET STORAGE TEMPERATURE | SUITABLE FOOD |
| FRIDGE MODE | - | +2 ^ - +8 ^ | ➤ Eggs, ready meals, packaged foods, fruits and vegetables, dairy products, cakes, drinks and other food that is not suitable for freezing. |
Store covered or packaged food in the appliance only so the smell or taste of the food will not diffuse. The following materials are suitable for proper packaging:
◆ Food safe cling film / airtight bags and aluminium foil.
◆ Food safe covering hoods.
◆ Food safe containers made of plastic / glass / ceramics.
- Store fresh, packaged food on the shelves, fresh fruit and vegetable in the crisper ^26 .
◆ Store fresh meat packaged in protective foil for max. 2 days.
Let warm food such as cooked meals cool down before you store them in the appliance.
- Store food in such a way that the cooled air can circulate properly.
Do not place heavy bottles in the bottle pocket ^27 as it can come off the door.
NOTICE! Food (especially oily and fatty food) must not come into direct contact with the inner lining of the appliance. The direct contact with the inner lining can cause stains or damages. If liquids have been spilled in the interior of the appliance, remove them immediately using warm water to prevent damages.
4.9 The freezer mode
⚠ WARNING! Do not eat food which is still frozen. Children should not eat ice-cream straight from the freezer. The coldness can cause injuries in the mouth.
⚠ WARNING! Contact with frozen food, ice and metal components in the freezer can cause injuries similar to burns.
⚠️ CAUTION! Do not touch the extremely cooled surfaces with wet or damp hands, because your skin may stick on these surfaces.
⚠️ CAUTION! Freezer mode or Fast - Freezing Mode: do not store any bottled or canned beverages (neither still nor carbonated) inside the appliance as their containers could explode.
The freezer mode is intended for long-term storage of food. Please observe the advice for max. storage time on the packaging of frozen food products. Do not refreeze defrosted food.
Protect fresh food you want to freeze using aluminium foil, cling film, air and watertight plastic bags, polyethylene containers or other suitable plastic containers with a lid.
Leave some free space between the single pieces of frozen food as proper air circulation is required.
The food is frozen completely after 24 hours (you find the relevant information about the maximum freezing capacity within 24 hours in chapter TECHNICAL DATA).
Only buy frozen food when its packaging is not damaged. Damaged packaging may indicate an interruption of the cold chain.
Avoid or reduce variations in temperature: buy frozen food at the end of shopping and transport it in thermally insulated bags.
Do not refreeze defrosted and semi-defrosted food. Consume within 24 hours.
- Observe the complete information on the packaging of frozen food.
NOTICE! Food (especially oily and fatty food) must not come into direct contact with the inner lining of the appliance. The direct contact with the inner lining can cause stains or damages. If liquids have been spilled in the interior of the appliance, remove them immediately using warm water to prevent damages.
HOW TO MAKE ICE CUBES
- Fill the ice cube tray ^28 2/3 full and place it in the freezer horizontally. Dry the form before, so it cannot freeze-up.
- Do not use any sharp-edged or pointed items to remove the ice cube tray if it is frozen to the inside of the freezer compartment.
- Hold the ice cube tray under flowing cold water and twist the ice cube tray slightly to remove the ice cubes.
4.9.1 Meaning of the \*-labelling of freezers
i 1- (*), 2- (**), and 3-stars (***) freezers are not suitable for freezing fresh food.
2-stars (**) and 3-stars (***) freezers are suitable for storing frozen food (prefrozen) and ice or for making ice and ice cubes.
| COMPARTMENTS | STARS(*) | TARGET STORAGE TEMPERATURE | SUITABLE FOOD |
| FREEZER | (***)* | ≤ -18 °C | ➢Suitable for seafood (fish, shrimps, shellfish), freshwater and meat products.➢Recommended storage period: 3 months.iSuitable for freezing fresh food. |
| FREEZER | *** | ≤ -18 °C | ➢Suitable for seafood (fish, shrimps, shellfish), freshwater and meat products.➢Recommended storage period: 3 months.iNot suitable for freezing fresh food. |
| FREEZER | ** | ≤ -12 °C | ➢Suitable for seafood (fish, shrimps, shellfish), freshwater and meat products.➢Recommended storage period: 2 months.iNot suitable for freezing fresh food. |
| FREEZER | * | ≤ -6 °C | ➢Suitable for seafood (fish, shrimps, shellfish), freshwater and meat products.➢Recommended storage period: 1 month.iNot suitable for freezing fresh food. |
| 0*-COMPARTMENT | - | -6 °C - 0 °C | ➢Suitable for fresh meat products (pork, beef, chicken, etc.) and processed food consumed or processed within the same day or within the next three days after storage (max.).iNot suitable for freezing food or for storing frozen food. |
4.10 Storage of food
The operation of your appliance is described generally in the chapters « OPERATION » et seq.; the following explanations will help you to store your food properly.
i Food must not get in touch with the surfaces inside the appliance directly. It must be wrapped separately in aluminium foil or in cellophane foil or in airtight plastic boxes.
STORING FOOD IN THE FRIDGE
The fridge helps to extend the storage times of fresh perishable foods.
PROPER STORAGE OF FRESH FOOD ENSURES BEST RESULTS
➢ Store food that is very fresh and of good quality only.
➢ Ensure that food is well wrapped or covered before it is stored. This will help to maintain the freshness of food and prevent it from dehydrating, deteriorating in colour or losing taste It will also prevent odour transfer.
- Vegetables and fruit need not be wrapped if they are stored in the crisper of the fridge compartment.
Make sure that strong smelling food is wrapped or covered in storage and kept away from foods such as butter, milk and cream as they can be spoiled by strong odours.
➢ Cool hot food down before placing it in the fridge compartment.
DAIRY FOODS AND EGGS
Most pre-packed dairy foods have a recommended „use by / best before / best by / date stamped on them. Store them in the fridge compartment and use within the recommended time.
- Butter can be spoiled by strong smelling food so it is best stored in a sealed container.
➢ Eggs should be stored in the fridge compartment.
RED MEAT
➢ Place fresh red meat on a plate and cover it with waxed paper, plastic wrap or foil.
Store cooked and raw meat on separate plates. This will prevent any juice lost from the raw meat from contaminating the cooked product.
POULTRY
➢ Fresh whole birds should be rinsed inside and outside with cold running water, dried and placed on a plate covered with plastic wrap or foil.
➢ Poultry pieces should also be stored this way.
Whole poultry must only be filled immediately before cooking to avoid food poisoning.
FISH AND SEAFOOD
Whole fish and fillets should be used on the day of purchase. Until required, they should be stored in the fridge on a plate which is covered with plastic wrap, waxed paper or foil loosely.
If storing overnight or longer, take particular care to select very fresh fish.
Whole fish should be rinsed in cold water to remove loose scales and dirt and then patted dry with paper towels. Place whole fish or fillets in a sealed plastic bag.
Keep shellfish chilled at all times. Use within 1 – 2 days.
PRECOOKED FOOD AND LEFTOVERS
These should be stored in suitable covered containers so that the food will not dry out.
▶ Keep for 1-2 days only.
➢ Reheat leftovers once only and until steaming hot.
CRISPER
The crisper is the optimum storage location for fresh fruit and vegetables.
➢ Take care not to store the following food at temperatures of less than 7 °C for long periods: citrus fruit, melons, pineapple, papaya, passion fruit, cucumber, peppers, tomatoes.
➢ Undesirable changes will occur at low temperatures such as softening of the flesh, browning and/or accelerated decaying.
➢ Do not refrigerate avocados (until they are ripe), bananas and mangoes.
FREEZING AND STORING OF FOOD IN THE FREEZER
To store deep-frozen food.
To make ice cubes.
To freeze food.
NOTICE! Ensure that the door of the freezer has been closed properly.
PURCHASING OF FROZEN FOOD
The packaging must not be damaged.
➢ Use by the „use by /best before/best by/“ date.
If possible, transport deep-frozen food in an insulated bag and place quickly in the freezer compartment.
STORING OF FROZEN FOOD
➢ Store at -18 °C or colder.
- Avoid opening the freezer door unnecessarily.
FREEZING OF FRESH FOOD
➢ Freeze fresh and undamaged food only.
To retain the best possible nutritional value, flavour and colour, vegetables should be blanched before freezing. Aubergines, peppers, zucchini and asparagus do not require blanching.
NOTICE! Keep food to be frozen away from food which is already frozen.
THE FOLLOWING FOOD IS SUITABLE FOR FREEZING
➢ Cakes and pastries.
▶ Fish and seafood.
▶ Meat, game and poultry.
▶ Vegetables, fruit and herbs.
Eggs without shells.
➢ Dairy products such as cheese and butter.
➢ Ready meals and leftovers such as soups, stews, cooked meat and fish.
▶ Potato dishes and soufflés.
▶ Desserts.
THE FOLLOWING FOOD IS NOT SUITABLE FOR FREEZING
➢ Types of vegetables, which are usually consumed raw, such as lettuce or radishes.
Eggs in shells.
▶ Grapes, whole apples, pears and peaches.
➢ Hard-boiled eggs, yogurt, soured milk, sour cream, and mayonnaise.
To prevent food from losing its flavour or drying out, place food in airtight packaging.
- Place food in packaging.
- Remove air.
- Seal the wrapping.
- Label packaging with contents and dates of freezing.
SUITABLE PACKAGING
➢ Plastic film, tubular film made of polyethylene, aluminium foil.
i These products are available from specialist outlets.
RECOMMENDED STORAGE TIMES OF FROZEN FOOD IN THE FREEZER
These times vary depending on the type of food.
The food that you freeze can be preserved from 1 to 12 months (minimum at -18 °C).
| FOOD | STORAGE TIME |
| Bacon, casseroles, milk | 1 month |
| Bread, ice cream, sausages, pies, prepared shellfish, oily fish | 2 months |
| Non-oily fish, shellfish, pizza, scones and muffins | 3 months |
| Ham, cakes, biscuits, beef and lamb chops, poultry pieces | 4 months |
| Butter, vegetables (blanched), eggs whole and yolks, cooked crayfish, minced meat (raw), pork (raw) | 6 months |
| Fruit (dry or in syrup), egg whites, beef (raw), whole chicken, lamb (raw), fruit cakes | 12 months |
IMPORTANT INSTRUCTIONS!
When you freeze fresh foods with a „use by / best before / best by“ date, you must freeze them before this date expires.
Check that the food was not already frozen. Indeed, frozen food that has thawed completely must not be refrozen.
i Once defrosted, food should be consumed quickly.
5.1 Environmental protection: disposal
Appliances bearing this symbol « 📄 » must not be disposed of together with household waste throughout the EU. To prevent potential damage to the environment or human health from uncontrolled waste disposal and to promote the sustainable reuse of material resources, responsibly supply the appliance to a recycling centre.
5.2 Environmental protection: energy saving
❖ Install the appliance in a dry and well-ventilated place.
- Install the appliance in a suitable position with an adequate distance from sources of heat and cold.
◆ Protect the appliance from direct sunlight.
Do not line the drawers with aluminium foil, waxed paper or paper layers; otherwise, optimum circulation of the cold air is impeded so the appliance cannot work at best performance.
◆ Cooked food can be stored in the appliance. Let it cool down to room temperature before you put it into your appliance.
- Store your food in colourless, airtight and tasteless materials.
Some food like meat, fish etc. may become dry and release strong odours. You can avoid these by wrapping them into aluminium foil or plastic wrap or putting them into an airtight bag or container.
Allow ample storage place for your food. Do not overfill your appliance.
- Wrap your food in plastic wrap or suitable paper and place each kind of food in a particular location in your appliance. This will prevent any contamination, a loss of water and a mingling of odours.
Let warm or hot food cool down to room temperature before you put it into your appliance. Otherwise, the energy consumption will increase and encrusted ice will be generated.
If you buy frozen food, the packaging must not be damaged and the product must be stored properly (sales container -18 °C or lower).
Put the frozen food you want to defrost into the cooling-compartment of your appliance.
How to defrost frozen food depends on your kitchen-equipment and the purpose, you want to use the frozen food for.
√ room temperature
√ in the cooling-compartment of your appliance
√ in an electrical oven ^29
√ in a microwave ^30
❖ Try opening the door as little as possible, especially when the weather is warm and humid. If you open the door, close it as fast as possible.
To reduce energy consumption, drawers, glass shelves, door trays, wire shelves, etc. ^31 should be left in their original positions.
- Permanently check, that the appliance is well-ventilated. The appliance must be well-ventilated from all sides.
◆ Defrost the appliance periodically as encrusted ice will decrease the power and increase the energy consumption of the appliance.
5.3 Operational parameters
The appliance can only reach the relevant temperatures when:
- the ambient temperature meets the climatic class.
- the doors close properly.
- you do not open the doors too often or too long.
- the door seals are in proper condition.
- the appliance is properly positioned.
- you have not overfilled the appliance.
- you do not store warm or hot food in the appliance.
6. Cleaning and maintenance
⚠️ DANGER! Never touch the power plug, the power switch or other electrical components with wet or damp hands. RISK OF ELECTRIC SHOCK!
⚠ WARNING! Disconnect the appliance from the mains before you clean or maintain it. RISK OF ELECTRIC SHOCK!
⚠ WARNING! To disconnect the appliance from the mains, you must unplug the appliance or use a cut-off device.
⚠ WARNING! Remove possible dust accumulation at the power plug, at the safety power socket and at all plug connectors regularly. RISK OF FIRE!
NOTICE! Clean the appliance at least once a month.
- Always keep the appliance clean so that unpleasant odours do not occur.
- Dust deposits on the condenser will increase the energy consumption. Clean the condenser twice a year with a vacuum cleaner or a soft brush.
- Take off all rings and bracelets before cleaning or maintaining the appliance; otherwise, you will damage the surface of the appliance.
DETERGENT
Do not use any harsh, abrasive or aggressive detergents.
Do not use any solvents.
Do not use any abrasive detergents! Do not use any organic detergents! ^32 Do not use essential oils!
These instructions are valid for all surfaces of your appliance.
EXTERNAL CLEANING
- Use a moist cloth and a mild, non-acidic detergent. Use a suitable detergent for stubborn stains.
- Use clear water to rinse.
- Dry the cleaned surfaces with a cloth.
INTERNAL CLEANING
- Clean the shelves and the inside with warm water and a mild detergent.
- Use clear water to rinse.
- Dry the cleaned surfaces with a cloth.
- Check the water drain and clean it if needed.
DOOR SEALS
Clean with warm water and a mild, non-acidic detergent. Do not restart the appliance until the door seals have dried completely.
6.1 Defrosting
⚠ WARNING! Switch off the appliance (« On / Off » - button) and disconnect it from the mains.
⚠ WARNING! To disconnect the appliance from the mains, you must unplug the appliance or use a cut-off device.
⚠ WARNING! Never use any mechanical items, knives or other sharpedged objects to remove the encrusted ice. Never use a steam cleaner. RISK OF ELECTRICAL SHOCK!
⚠ WARNING! Do not use hairdryers, electrical heaters or other technical devices to accelerate the defrosting-progress. RISK OF ELECTRICAL SHOCK!
HOW TO DEFROST THE APPLIANCE (FRIDGE MODE / CONDENSATION)
In FRIDGE MODE, condensation may form inside the appliance. In such a case, please proceed as follows.
a. LOW CONDENSATION: Wipe the interior dry thoroughly using a soft and dry cloth.
b. A LOT OF CONDENSATION: please proceed exactly as described below under « HOW TO DEFROST THE APPLIANCE (FREEZER MODE) ».
HOW TO DEFROST THE APPLIANCE (FREEZER MODE)
✿ FREEZER MODE: the appliance should be defrosted regularly to ensure proper operation.
i The defrosting process can take several hours.
- Remove the content, wrap it in several layers of newspaper and store it in a cooling box or a cool place.
- Switch off the appliance using the « On / Off » - BUTTON (see chapter 4.4) and disconnect it from the mains.
- Leave the door of the appliance open.
- Place a container under the water outlet / water drain screw (A) to collect the defrost water (s. fig. below).

Fig. similar: modifications possible.
| A | WATER OUTLET / WATER DRAIN SCREW |
| X | CONTROL PANEL |
-
Remove the water drain plug inside the freezer.
-
Pull out the water drain screw (A) on the outside of the appliance (s. fig. below, arrow).

| A | WATER DRAIN SCREW |
| B | WATER DRAIN OPENING |
- Turn the water drain screw (A) through 180^ (clockwise, s. arrow) so that the water drain opening (B) points downwards (s. fig. below).

-
Drain the defrost water via the water drain opening.
-
Keep the container for the collection of the defrost water under supervision so that it does not overflow.
-
When the defrosting process is finished, turn the water drain screw (A) through 180^ (anticlockwise, s. arrow) so that the water drain opening (B) points upwards again (s. fig. below).

- Push the water drain screw (A) back into the appliance carefully and properly (s. fig. below, arrow).

- Reinstall the water drain plug inside the freezer!
- Wipe and dry the appliance (in- and outside) and door seals using dry and soft cloths. Dry thoroughly!
- After cleaning leave the door open for a while to aerate the appliance.
- Connect the appliance to the mains again.
- Switch on the appliance again using the « On / Off » - BUTTON (s. chapter 4.4).
- If needed, set a new temperature (= cooling / freezing level); s. chapter 4.6 TEMPERATURE SETTING et seq.)
NOTICE! Never forget to reinstall the water drain plug inside the freezer after the defrosting process!
NOTICE! If the appliance has been disconnected from the mains for a longer period of time, allow the appliance to cool down for 3 until 4 hours at following temperature setting before you place any fresh or frozen food in the appliance: fridge mode, cooling level 2 / freezer mode, cooling level 3 (s. chapter 4.6 TEMPERATURE SETTING et seq.). If you place food in the appliance before it has reached its normal operating temperature, the food can thaw and / or spoil.
7. Troubleshooting
| MALFUNCTION | |
| POSSIBLE CAUSE | MEASURE |
| THE COMPRESSOR OPERATES FOR TOO LONG. | |
| 1. The appliance has been switched off for a while.2. Too much or too hot food in the appliance.3. Door opened too often or too long. | 1. The appliance needs some time to reach the preset cooling / freezing temperature.2. Remove any hot food.3. Do not open the door too often / too long. |
| THE APPLIANCE DOES NOT WORK AT ALL. | |
| 1. The plug of the appliance is not connected to the socket.2. The plug has become loose.3. The socket is not supplied with energy.4. The fuse is switched off.5. The voltage is too low. | 1. Connect the appliance to the mains properly.2. Check the plug.3. Check the corresponding socket by connecting it with another appliance.4. Check the fuse box.5. Compare the data on the model plate with the data of your energy supplier. |
| THE COMPRESSOR DOES NOT WORK AT ALL. | |
| 1. Incorrect energy supply. | 1. Check the energy supply. |
| THE COMPRESSOR OPERATES FOR TOO LONG. | |
| 2. The appliance has been switched off for a while.4. Too much or too hot food in the appliance.5. Door opened too often or too long. | 3. The appliance needs some time to reach the preset cooling / freezing temperature.4. Remove any hot food.4. Do not open the door too often / too long. |
| FORMATION OF ENCRUSTED ICE. | |
| 1. The appliance is set too cold.2. The door is not properly closed.3. The door seal is damaged or soiled. | 1. Set the appliance to a warmer setting2. Close the door properly.3. Clean and / or replace the door seal. |
| THE DOOR MAKES A STRANGE SOUND WHEN OPENED. | |
| 1. The door seals are soiled. | 1. Clean the door seals. |
| UNCOMMON NOISE. | |
| 1. The appliance is not installed on a flat and level ground. The appliance touches a wall or another object.2. Food is stored improperly.3. Items have dropped behind the appliance. | 1. Install the appliance properly.2. Store food properly.3. Remove the items. |
MALFUNCTION
| POSSIBLE CAUSE | MEASURE |
| WATER DRIPS ON THE FLOOR. | |
| 1. The water outlet / water drain screw is not closed properly. | 1. Close the water outlet / water drain screw properly. |
| 2. The water drain plug inside the appliance is not or not installed properly. | 2. Install the water drain plug inside the appliance properly. |
| THE FOOD IS NOT FROZEN COMPLETELY. | |
| 1. The appliance is set too warm.2. The door is opened too often or too long.3. The appliance is installed near a heat source.4. Too much or too warm food in the appliance within the last 24 hours. | 1. Set the appliance to a colder setting.2. Close the door properly.3. Please always observe the installation instructions in chapter « INSTALLATION » et seq.4. Set the appliance to a colder setting. |
If the appliance shows a malfunction not noted on the schedule above or if you have checked all items on the above schedule but the problem still exists, please contact the aftersales service.
TEMPERATURE SENSOR ERROR ^33
The appliance is equipped with a TEMPERATURE SENSOR. ^34
If the temperature sensor has a short circuit or the connection is interrupted, the temperature indicator bar flashes every half second from the left to the right. In this case, please contact the aftersales service.

THE OPERATING CONDITIONS DESCRIBED BELOW ARE NORMAL AND DO NOT INDICATE A MALFUNCTION.
❖ The refrigerant generates a sound similar to flowing water.
- Sometimes you may hear a sound which is generated by the injection process of the cooling circuit.
❖ The sides of the appliance may get warm while the appliance is running.
DISTINCT NOISE
When you operate the appliance for the first time or the temperature falls below a certain level, the appliance will operate with high power to reach the preset temperature.
CONDENSED WATER IN / ON THE APPLIANCE
may be generated inside or outside the appliance by high humidity or very warm ambient temperatures.
CLICKING
You will hear the compressor click if it is activated or deactivated.
HUM
is caused by the compressor while running.
KNOCKING / SNAPPING
may be generated by sequential expansion and shrinkage of the components of the cooling system. It is caused by variation of temperature before and after the compressor is activated or deactivated.
DECOMMISSIONING, TEMPORARILY
IF THE APPLIANCE IS NOT USED FOR A LONGER PERIOD OF TIME:
- disconnect the appliance from the mains. To disconnect the appliance from the mains, you must unplug the appliance or use a cut-off device.
- remove all food stored in the appliance.
- dry the inside of the appliance with a cloth and leave the door open for a few days.
WHILE AWAY ON AN AVERAGE VACATION / HOLIDAY (14-21 DAYS):
- do the same as described above, or
- let the appliance operate.
IF YOU WANT TO MOVE THE APPLIANCE:
- secure all removable parts and the contents of the appliance. Pack them separately if necessary.
- transport the appliance in an upright position only. All other positions can cause damage to the compressor.
- do not damage the feet of the appliance.
DECOMMISSIONING, ULTIMATE
- Disconnect the appliance from the mains. To disconnect the appliance from the mains, you must unplug the appliance or use a cut-off device.
- Cut off the power cord at the appliance.
- Completely remove every door of the appliance.
- Leave the shelves, trays, drawers, wire baskets, etc. in their position so that children are not able to get into the appliance.
- Follow the advice for the disposal of the appliance in chapter WASTE MANAGEMENT.
9. Technical data
| TECHNICAL DATA* | |
| Model | Fridge / Freezer |
| Climatic class | SN / N / ST(ambient temperature 10 - 38 °C) |
| Energy efficiency class** | F |
| Annual energy consumption in kW/h*** | 211.00 |
| Energy efficiency index (EEI) | 125 |
| Voltage / frequency | 220 - 240 V AC / 50 Hz |
| Volume net in l | 98 |
| Net volume fridge or freezer in l | 98 |
| Stars | 4**** |
| Max. freezing capacity within 24 h | 5.00 kg |
| Max. storage time / malfunction | 13.00 h |
| Noise emission | 40 dB/A re 1 pW |
| Noise emission class**** | C |
| Adjustable thermostat | yes |
| Compressor | 1 |
| Refrigerant / total quantity | R600a / 40 g |
| Handle | integrated |
| Internal light | - |
| Extra storage in the appliance | 1 wire basket |
| Indicator lamp: operation | yes |
| Indicator lamp: Fast - Freezing Mode | yes |
| Adjustable supporting feet | 2 / in front |
| Defrosting process: fridge / freezer | manual / manual |
| Appliance dimensions: H*W*D in cm | 85.50*54.50*48.00 |
| Weight net / gross in kg | 21.00 / 23.00 |
◆ Technical modifications reserved.
| * | According to regulation (EU) No. 2019/2016 |
| ** | On a scale from A (highest efficiency) to G (lowest efficiency) according to the new EU standard. |
| *** | Based on standard measurement results within 24 hours. The current energy consumption depends on the way the appliance is used as well as on its site. |
| **** | On a scale from A (highest) to D (lowest). |
10. Waste management
- Dispose of the appliance relevant to the current legislation in view of explosive gases. The cooling systems and insulation of refrigerators and freezers contain refrigerants and gases which must be deposed of properly. Do not damage the cooling fins and tubes. If refrigerants escape, there is FIRE HAZARD!
- While unpacking, the packaging materials (polythene bags, polystyrene pieces, etc.) should be kept away from children and pets. CHOKING HAZARD! RISK OF INJURY!
- Old and unused appliances must be sent for disposal to the responsible recycling centre or contact the retailer you purchased the appliance at. They may accept the appliance for environmentally sound recycling. Never expose to open flames.
- Before you dispose of an old appliance, render it inoperative. Unplug the appliance and cut off the entire power cord. Dispose of the power cord and the plug immediately. Remove the door completely so children are not able to get into the appliance as this endangers their lives!
- Dispose of any paper and cardboard into the corresponding containers.
- Dispose of any plastics into the corresponding containers.
- If suitable containers are not available at your residential area, dispose of these materials at a suitable municipal collection point for waste-recycling.
- Receive more detailed information from your retailer or your municipal facilities.
REFRIGERANT
- The refrigerant circuit of the appliance contains the refrigerant R600a, a natural gas of high environmental compatibility.
- ⚠ WARNING! Do not damage any components of the refrigerant circuit while transporting the appliance. FIRE HAZARD!

Materials marked with this symbol are recyclable.

Please contact your local authorities to receive further information.

The refrigerant R600a is flammable!
This appliance includes a 24-month guarantee for the consumer given by the manufacturer, dated from the day of purchase, referring to its flawless material-components and its faultless fabrication. The consumer is accredited with both the dues of the guarantee given by the manufacturer and the vendor's guarantees. These are not restricted to the manufacturer's guarantee.
Any guarantee claim has to be made immediately after the detection and within 24 months after the delivery to the first ultimate vendee. The guarantee claim has to be verified by the vendee by submitting a proof of purchase including the date of purchase and/or the date of delivery. The guarantee does not establish any entitlement to withdraw from the purchase contract or for a price reduction. Replaced components or exchanged appliances demise to us as our property.
The guarantee claim does not cover:
- fragile components as plastic, glass or bulbs;
- minor modifications of the PKM-products concerning their authorised condition if they do not influence the utility value of the product;
- damage caused by handling errors or false operation;
- damage caused by aggressive environmental conditions, chemicals, detergents;
- damage caused by non-professional installation and haulage;
- damage caused by non common household use;
- damages which have been caused outside the appliance by a PKM-product unless a liability is forced by legal regulations.
The validity of the guarantee will be terminated if:
- the prescriptions of the installation and operation of the appliance are not observed.
- the appliance is repaired by a non-professional.
- the appliance is damaged by the vendor, the installer or a third party.
- the installation or the start-up is performed inappropriately.
- the maintenance is inadequately or incorrectly performed.
- the appliance is not used for its intended purpose.
- the appliance is damaged by force majeure or natural disasters, including, but with not being limited to fires or explosions.
The guarantee claims neither extend the guarantee period nor initiate a new guarantee period. The geographical scope of the guarantee is limited with respect to appliances, which are purchased and used in Germany, Austria, Belgium, Luxembourg and the Netherlands.
Aftersales service information on the leaflet inside this instruction manual.
- MILCHPRODUKTE UND EIER
- Index
- EU - DECLARATION OF CONFORMITY
- READ THE SAFETY INFORMATION AND THE SAFETY INSTRUCTIONS CAREFULLY BEFORE YOU OPERATE THE APPLIANCE FOR THE FIRST TIME.
- Signal words
- Safety instructions
- DANGER!
- To reduce the risk of electrocution.
- To reduce the risk of burns, electrocution, fire or injury to persons.
- CAUTION!
- NOTICE!
- SAVE THESE INSTRUCTIONS.
- Climatic classes
- Installation
- Unpacking and positioning
- Space and ventilation requirements
- Space requirement
- Ventilation
- Levelling
- Operation
- Before initial operation
- Description of the appliance
- Control panel: operating buttons and indicators
- On / Off - button
- Setting of the fridge or freezer mode
- HOW TO SET THE FRIDGE MODE
- HOW TO SET THE FREEZER MODE
- Temperature setting
- Fridge mode: setting of the cooling temperature (cooling level)
- Freezer mode: setting of the freezing temperature (freezing level)
- HOW TO SET THE FREEZING TEMPERATURE (FREEZING LEVEL)
- Setting of the Fast - Freezing Mode (freezer mode only)
- Recommended setting of the cooling or freezing level
- Power failure
- The fridge mode
- The freezer mode
- HOW TO MAKE ICE CUBES
- Meaning of the \*-labelling of freezers
- Storage of food
- STORING FOOD IN THE FRIDGE
- PROPER STORAGE OF FRESH FOOD ENSURES BEST RESULTS
- DAIRY FOODS AND EGGS
- RED MEAT
- POULTRY
- FISH AND SEAFOOD
- PRECOOKED FOOD AND LEFTOVERS
- CRISPER
- FREEZING AND STORING OF FOOD IN THE FREEZER
- PURCHASING OF FROZEN FOOD
- STORING OF FROZEN FOOD
- FREEZING OF FRESH FOOD
- THE FOLLOWING FOOD IS SUITABLE FOR FREEZING
- THE FOLLOWING FOOD IS NOT SUITABLE FOR FREEZING
- SUITABLE PACKAGING
- RECOMMENDED STORAGE TIMES OF FROZEN FOOD IN THE FREEZER
- IMPORTANT INSTRUCTIONS!
- Environmental protection: disposal
- Environmental protection: energy saving
- Operational parameters
- Cleaning and maintenance
- NOTICE! Clean the appliance at least once a month.
- DETERGENT
- EXTERNAL CLEANING
- INTERNAL CLEANING
- DOOR SEALS
- Defrosting
- HOW TO DEFROST THE APPLIANCE (FRIDGE MODE / CONDENSATION)
- HOW TO DEFROST THE APPLIANCE (FREEZER MODE)
- Troubleshooting
- TEMPERATURE SENSOR ERROR 33
- THE OPERATING CONDITIONS DESCRIBED BELOW ARE NORMAL AND DO NOT INDICATE A MALFUNCTION.
- DISTINCT NOISE
- CONDENSED WATER IN / ON THE APPLIANCE
- CLICKING
- HUM
- KNOCKING / SNAPPING
- DECOMMISSIONING, TEMPORARILY
- IF THE APPLIANCE IS NOT USED FOR A LONGER PERIOD OF TIME:
- WHILE AWAY ON AN AVERAGE VACATION / HOLIDAY (14-21 DAYS):
- IF YOU WANT TO MOVE THE APPLIANCE:
- DECOMMISSIONING, ULTIMATE
- Technical data
- Waste management
- REFRIGERANT
- The guarantee claim does not cover:
- The validity of the guarantee will be terminated if:
Brand : PKM
Model : GT100.1
Category : Freezer