
PanaCast 2 - Video Conferencing System JABRA - Free user manual and instructions
Find the device manual for free PanaCast 2 JABRA in PDF.


| Product Type | Video Conferencing System (Camera) |
| Brand | Jabra |
| Model | PanaCast 2 |
| Field of View | 180° panoramic |
| Video Resolution | Up to 4K (Panoramic-4K) |
| Image Sensor | Three imagers for panoramic stitching |
| Connectivity | USB 3.0 (compatible with USB 2.0) |
| Plug-and-Play | Yes (UVC compliant, no drivers needed) |
| Microphone | Built-in stereo microphone |
| Power Supply | 120V AC power adapter (included) or USB bus power |
| LED Indicators | Blinking blue (initializing), solid blue (standby), solid white (streaming) |
| Mounting Options | Wall mount, table stand, or monitor-mount (bracket included) |
| Package Contents | Camera, USB 3.0 cable (3ft), power adapter cable (5ft), power adapter, metal bracket |
| Tools Required | Philips screwdriver and 14-inch screws (for wall mount) |
| Operating Temperature | Not to exceed 90°F (32°C); avoid direct sunlight |
| Recommended Height | 3–6 feet above floor (eye level) |
| Recommended Distance | 3–6 feet from closest participant |
| Suitable Room Sizes | Huddle rooms (2–5 people) to large conference rooms |
| Software Compatibility | Works with any UVC-compatible video conferencing app |
| Special Features | 180° seamless panoramic view, no distortion |
Frequently Asked Questions - PanaCast 2 JABRA
User questions about PanaCast 2 JABRA
0 question about this device. Answer the ones you know or ask your own.
Ask a new question about this device
Download the instructions for your Video Conferencing System in PDF format for free! Find your manual PanaCast 2 - JABRA and take your electronic device back in hand. On this page are published all the documents necessary for the use of your device. PanaCast 2 by JABRA.
USER MANUAL PanaCast 2 JABRA
The PanaCast ^® 2 Camera Installation Guide is for system administrators and network engineers to learn how to properly setup and install the PanaCast 2 Camera.
The PanaCast® 2 Video Camera is a Plug-and-Play device that uses USB ports on a Mac or PC to deliver a high-quality, 180^ field-of-view, HD quality, panoramic video stream, along with a HD stereo microphone Producing a natural looking video stream by combining video streams from three imagers the PanaCast® 2 simultaneously achieves an extended field of view without sacrificing resolution. This UVC compliant device requires no additional drivers or software to operate properly.

Table of Contents
1) Preparing for Installation: 3
a) Package Contents .... 3
b) Tools Needed for Installation 3
c) Safety Recommendations....3
2) Installing the PanaCast 2 Camera .... 4
a) LED Status 4
b) Camera Setup....4
c) Camera Placement....5
I. General Recommendations....5
VI. Wall Mount Placement Recommendations: 7
VII. Table Stand Placement Recommendations: 9
d) Powering up the Camera 12
I) Preparing for Installation:
a) Package Contents

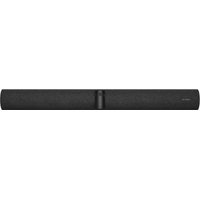
PanaCast ^® 2 Camera

USB 3.0 Cable (3ft)
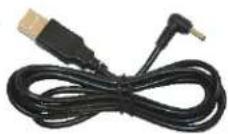
Power Adapter Cable (5ft)

Power Adapter

natural_image
Metal bracket with mounting holes and a central threaded hole (no text or symbols visible)Wall Mount (optional)
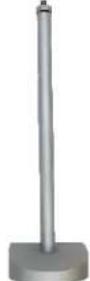
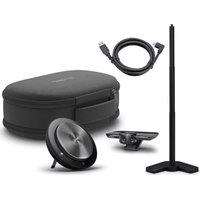
Camera Stand (optional)
b) Tools Needed for Installation
- A Philips screwdriver and 14 inch size screws are required to attach the wall mount to the wall.
- To periodically tighten the base of the camera stand, you will require the same screwdriver.
c) Safety Recommendations
- Heat: Be sure to keep the camera out of direct sunlight and environments with a temperature greater than 90^ as this will heat up the exterior of the camera, making it too hot to hold and causing malfunctions. .Do not place the camera near the vents of a monitor or TV screen as this will overheat the camera and cause malfunction.
Electricity: The camera works best when used with a 120 V outlet. If this is not possible, attain an adapter that can convert the voltage of the outlet available to 120 V. If this requirement is not met, the camera may be under or over powered. If underpowered, the camera will not function to full capacity or at all. If the camera is overpowered, it will fry the circuits and cause the camera to malfunction and break.
• Water: Keep the camera, wires, and outlet it is plugged into away from all damp sources as over exposure to dampness could cause the camera to short circuit and produce sparks.
2) Installing the PanaCast 2 Camera
a) LED Status
- The LED indicators represent the state of the camera.
- Blinking blue: Camera is initializing
• Solid blue: Camera in standby mode
• Solid white: Camera is streaming video

natural_image
Exterior view of a modern security camera with dual lenses and a blue pointer (no text or symbols visible)LED Indicators
b) Camera Setup
Step I: Plug USB cable into camera head USB 3.0 Port
Step 2: Push the USB cable in the slot at the back of the stem
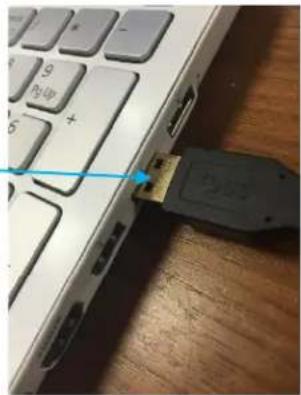
Step 3: Plug the USB cable into a USB 3.0 or 2.0 port of the PC
natural_image
Close-up of a laptop keyboard with an attached USB port, showing no visible text or symbols on the device surface.
natural_image
Pure diagram of a vertical black rod with blue arrows indicating direction, no text or symbols presentc) Camera Placement
I. General Recommendations
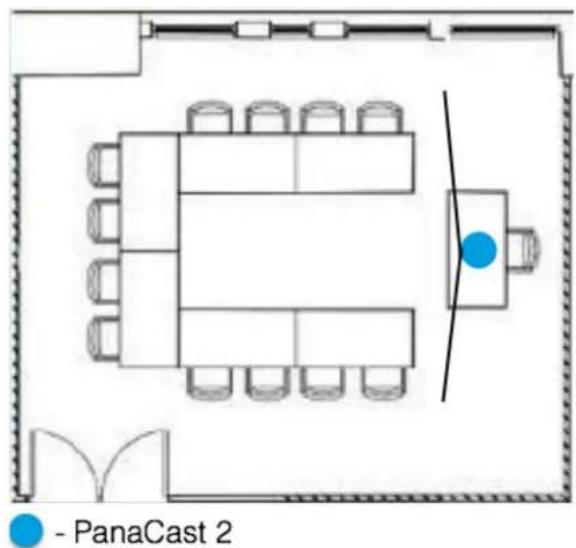
- There are several locations to position the PanaCast 2 camera in a room. We have provided examples of room layouts to help get started. We recommend placing the camera directly in front of the monitor so as not to capture it in the video stream.

II. Light: We do not recommend placing the camera anywhere it may face direct sunlight. This will ruin the preset camera white balance leading to a compromised image and video stream. Below is a scenario in which the camera should not be placed. However, if this is unavoidable, make sure that there are blinds to ensure limited direct sunlight on the lenses.
a. Proper Lighting: To ensure the best video quality, it is important that the camera is placed in the best lighting situation possible. Proper lighting can be defined as office lighting (incandescent bulbs in an indoor setting). If the camera is used outdoors or is in direct contact with firelight, the lenses will not work properly and the integrity of the video will be compromised.
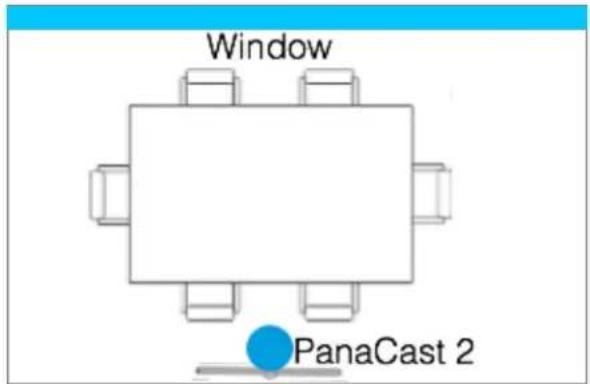
III. Power: When setting up the PanaCast 2 camera, another factor to account for is its proximity to the nearest Power Outlet or USB 3.0 port. The PanaCast 2 comes with a 1m (3-foot) power chord and a 1m (3-foot) USB chord. Longer 3m cords However, longer chords that are 3m (10 feet) long can be ordered as well from our website. We do not recommend placing the camera more than 10 feet away from the closest outlet or USB 3.0 port as this will suck too much power.
IV. Vibration: Another factor to account for is vibrations in a given room. If there is a section of the room that seems to vibrate constantly, do not place the camera here as it will interfere with the camera's preset settings and focus.
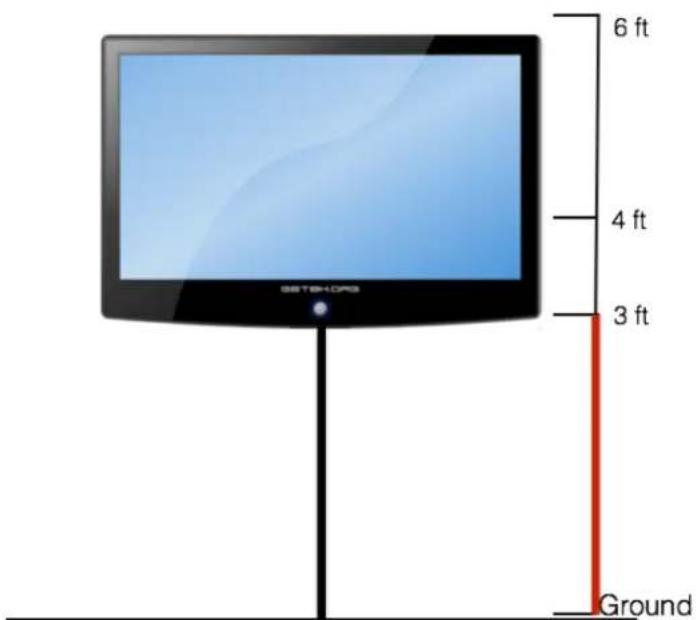
V. Room Placement: As a general rule of thumb position the camera about 3 to 6 feet off the ground. This will allow the camera to sit at eye level so the callers get the best and most immersive collaboration experience possible.
VI. Wall Mount Placement Recommendations:
a. Height: Based on the set up provided, the camera should be mounted to the wall at about 3 to 6 feet from the floor, as this will give the best display of the room at eye level.
b. Distance: The camera should be roughly 3 to 6 feet away from the closest participant in the room. Any more and the video will start to granulate and any closer and the participants will be affected by the imager stitching. The PanaCast 2 camera has a panoramic view of 180^ and 54^ wide. When positioning the camera, make sure the imagers are in front of the monitor. This will prevent the camera from capturing the monitor, giving the best possible video collaboration experience.

c. Recommended Rooms: With a wall mount, we recommend the camera be used in most sized conference rooms, office spaces, and collaboration rooms.
natural_image
Top-down diagram of a conference room layout with rows of chairs and two blue spheres at the bottom (no text or symbols)
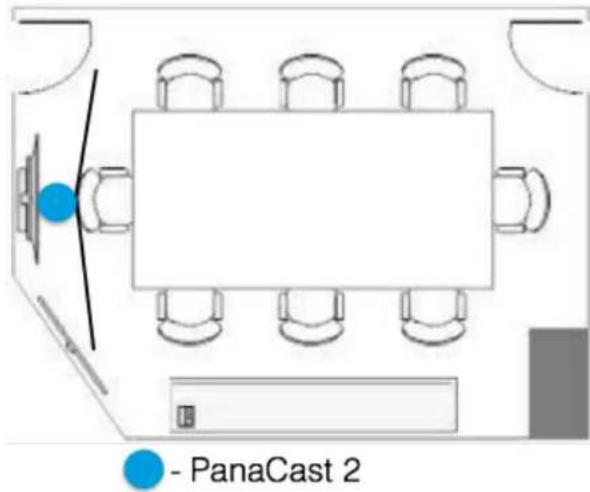
- PanaCast 2
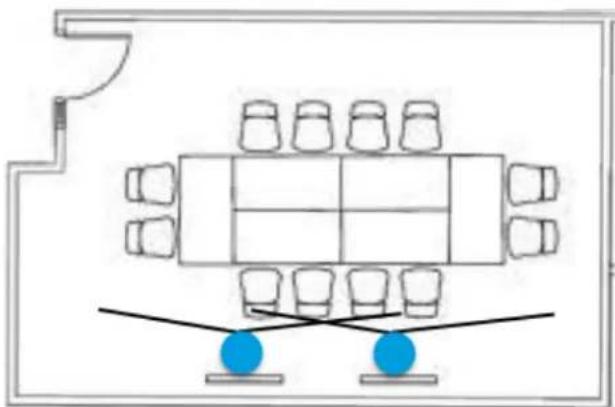
Note for figure above: Only one camera is needed
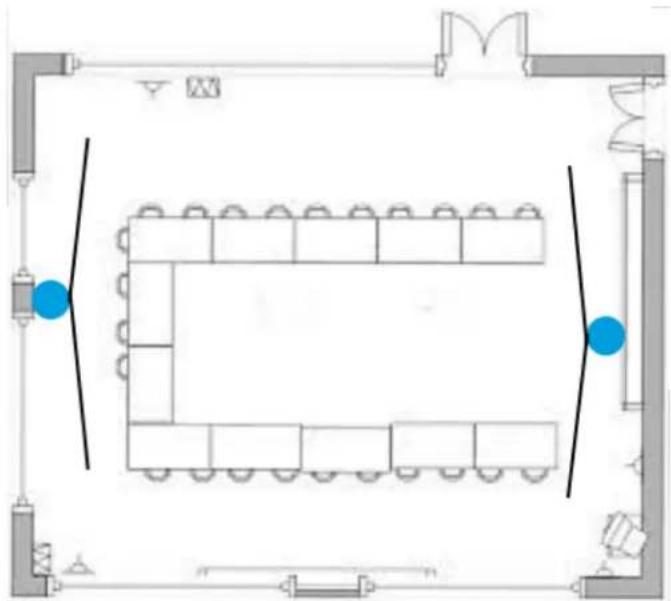
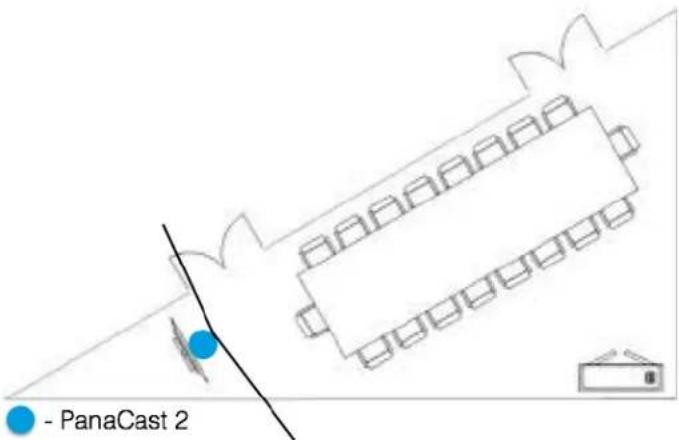
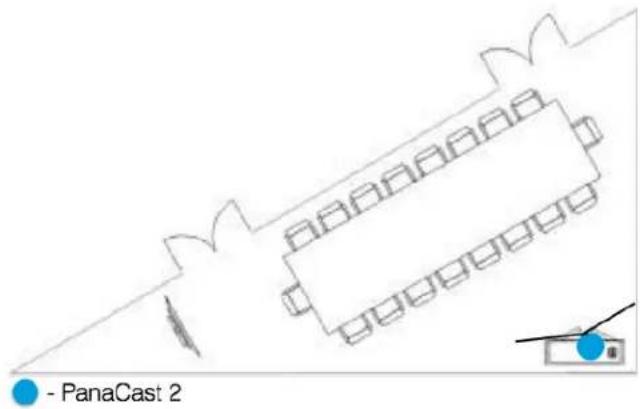
d. Unconventional Rooms: If the room the camera will be set up in is an extremely large room, it may be a good decision to set up 2 cameras to get a full and clear video of the entire room. If the room is smaller, we recommend placing the camera in the corner of the room so as to maximize the Panoramic-4K capabilities of the camera.
natural_image
Top-down architectural floor plan showing a large rectangular room with rows of furniture and two blue circular markers, enclosed by corner brackets (no text or symbols)
- PanaCast 2
Note: Due to size of room, two cameras are needed

natural_image
Top-down architectural floor plan showing a central room with furniture arrangement and a blue dot (no text or symbols)
- PanaCast 2
VII. Table Stand Placement Recommendations:
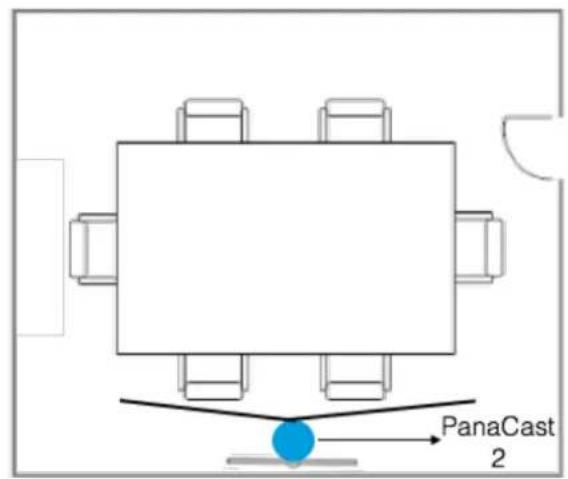
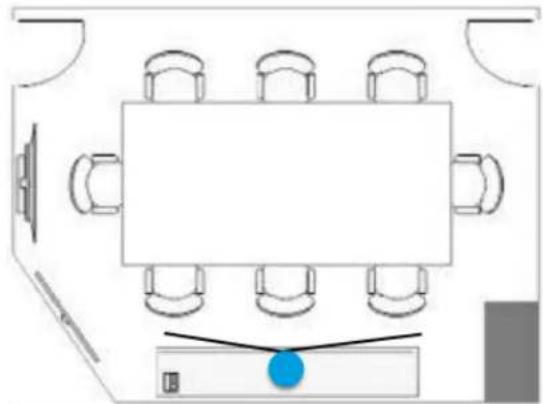
a. Distance: When using the camera stand in conjunction with a laptop, it is recommended to place the camera right behind the monitor of the screen and sit 3 – 6 feet away. It is also important to ensure that the camera is close enough to a USB 3.0 port or power outlet as mentioned earlier.
b. Height: Place the camera at a height just above the monitor (in most scenarios, laptop screens) being used. This height usually ranges between between 3 to 4.5 feet from the floor.
c. Recommended Rooms: We recommend the camera be used in huddle rooms (2-5 people) or anywhere on the go.
natural_image
Top-down diagram of a conference room with six chairs and a blue dot on the floor (no text or symbols)- PanaCast 2
natural_image
Top-down diagram of a meeting room with two chairs and two blue dots, no text or symbols present- PanaCast 2
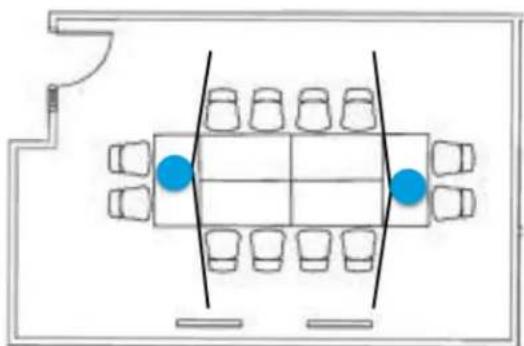
Note for figure above: Only one camera is needed
d. Unconventional Rooms: If the cameras need to be used temporarily in a large room, we recommend trying to use as little of the room as possible (distance-wise). But if the cameras are to be stationed permanently, we recommend the same procedure as for the wall mount.

Note: Due to size of room, two cameras can be used
d) Powering up the Camera
- Refer to the set up guide for further information on powering up the camera and running it on an operating system.
About Altia Systems

Altia Systems, Inc. 10020 N. De Anza Blvd, Suite 200 Cupertino, CA 95015 1-408-996-9710 www.getpanacast.com

Altia Systems® (altiasystems.com) is a venture-backed company based in Cupertino, CA, and is the creator of the PanaCast® Experience solution. The award-winning PanaCast® offers a unique experience that enables anyone on desktop or mobile to communicate in interactive, real-time Panoramic-HD 200° field-of-view video that replicates the human panoramic perspective.
- Table of Contents
- I) Preparing for Installation:
- a) Package Contents
- b) Tools Needed for Installation
- c) Safety Recommendations
- 2) Installing the PanaCast 2 Camera
- a) LED Status
- b) Camera Setup
- c) Camera Placement
- General Recommendations
- Wall Mount Placement Recommendations:
- Table Stand Placement Recommendations:
- d) Powering up the Camera
- About Altia Systems
Brand : JABRA
Model : PanaCast 2
Category : Video Conferencing System