
Aspiri Power - Vacuum Cleaner Overmax - Free user manual and instructions
Find the device manual for free Aspiri Power Overmax in PDF.


| Product Type | Bagless Vacuum Cleaner |
| Brand | Overmax |
| Model | Aspiri Power |
| Dimensions (L x W x H) | 25 x 25 x 45 cm |
| Weight | 3.5 kg |
| Power Supply | 2000W mains powered |
| Dust Capacity | 1.5 L |
| Filtration System | HEPA filter |
| Main Functions | Dry vacuum cleaning, crevice tool, brush tool |
| Noise Level | 75 dB |
| Maintenance | Empty dust container after each use; wash HEPA filter monthly |
| Safety Features | Overheat protection, automatic shut-off |
| Spare Parts | HEPA filter, dust container, brush roll |
| Repairability | User-replaceable filters and brush roll |
| General Information | Intended for household use; cord length 6 m |
Frequently Asked Questions - Aspiri Power Overmax
User questions about Aspiri Power Overmax
0 question about this device. Answer the ones you know or ask your own.
Ask a new question about this device
Download the instructions for your Vacuum Cleaner in PDF format for free! Find your manual Aspiri Power - Overmax and take your electronic device back in hand. On this page are published all the documents necessary for the use of your device. Aspiri Power by Overmax.
USER MANUAL Aspiri Power Overmax
natural_image
Black and white home vacuum cleaner with blue handle and black handle, no visible text or symbols on device bodyAspiri Power
Thank you for placing trust in us and choosing Overmax Home.
We provide you with a product perfect for everyday use thanks to the use of high-quality materials and modern solutions.
We are convinced that they product will satisfy your requirements as it has been designed with utmost care.
Before the first use, please read this manual carefully.
Should you have any remarks or questions concerning the product, please do not hesitate to contact us: pomoctechniczna@overmax.pl
IMPORTANT!
Please read this manual before you start using the device to see all its functions and use them in accordance with intended use.
A failure to follow the safety instructions or use at variance with the manual may lead to electric shock, fire or serious injuries.
IMPORTANT! KEEP THIS MANUAL FOR FUTURE REFERENCE!
-
Do not repair or modify the device. Only an authorized service technician is allowed to perform these operations.
-
Do not switch the device on if you have noticed any damage.
-
Do not use the device if it acts up, has been dropped or wetted, overheats extensively, is discolored or deformed, emits abnormal sounds, odors and when other atypical circumstances occur. This being the case, contact the manufacturer's authorized service center immediately.
-
Every time you finish using the device, unplug it.
-
The device is intended for home use (dusting) only. Do not use it outdoors. The vacuum cleaner is not intended for industrial surfaces.
-
The device is not intended for cleaning wet surfaces. Otherwise it may get damaged.
-
The device should not be used by persons with limited physical or mental capabilities.
-
This device is not a toy. Do not let children play with it.
-
Children are allowed to use the device if supervised by an adult.
-
The device must work at the room temperature. Do not start the device if the temperature is low. Before you start the device, leave the device at the room temperature for at least 30 minutes.
-
The device is not waterproof, do not immerse in water and do not keep it in a humid place.
-
Place the device on a flat and horizontal surface and avoid slopes. Do not place it on very smooth surfaces.
-
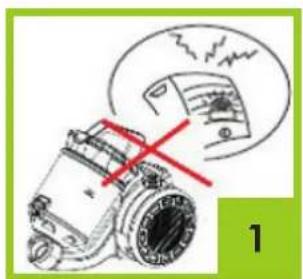
Use the device away from sources of heat, high temperatures, hot surfaces, direct sunlight, sources of ignition, naked flame, oils and sharp edges (fig. 1)
-
Do not use the device in the inflammable, explosive or toxic atmosphere.
-
Do not use chemicals to clean the device.
-
Do not use the device for other purposes than designed.
-
Do not bend, stretch or pull the flexible hose. Do not use the cleaner if the hose is damaged (fig. 2).
-
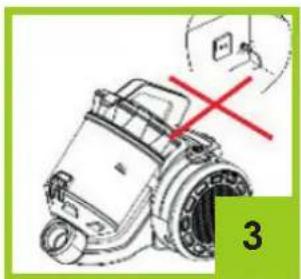
Unplug the device after every use. To unplug, grab the plug, not a wire (fig. 3).
-
Do not suck mud, paste-like elements, ash, plaster and sharp items. It may damage the dust tank, filter and motor (fig. 4).
-
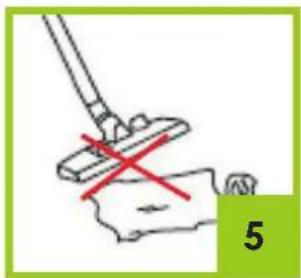
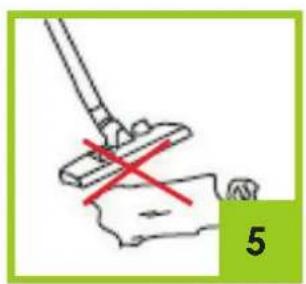
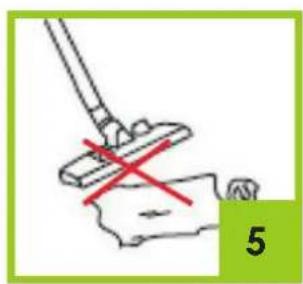
Do not suck hair, large paper, plastic bags which may clog suction tube (fig. 5).
-
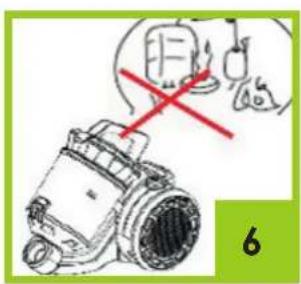
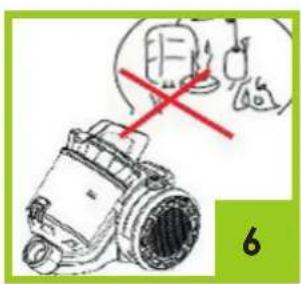
Do not block air outlet located at the back of the device. It may cause the device to overheat and damage (fig. 6).
-
Do not use the cleaner when the feeder is damaged.
-
Do not grab a cable to pull or move the device. Do not place any items on it. Do not pull it through sharp edges of walls and furniture and do not wrap it too tight.
-
Do not use the device and do not touch the plug if your hands are wet.
natural_image
Illustration of a mechanical device with a magnified view showing internal components (no text or symbols)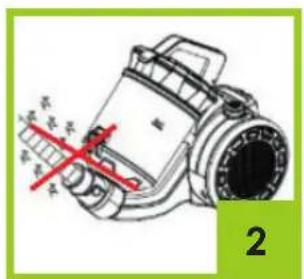
natural_image
Technical line drawing of a mechanical device with no visible text or symbols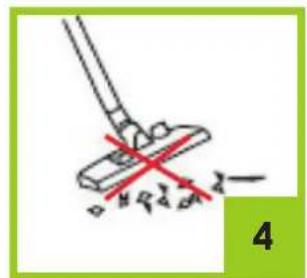
natural_image
Simple line drawing of a mop with a red X mark on a surface, no text or symbols present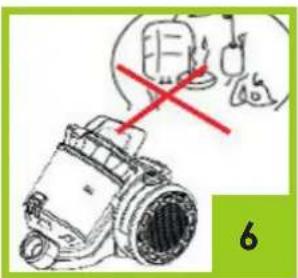
natural_image
Illustration of a mechanical device with a red X mark and a circular inset showing a device (no text or symbols present)VACUUM CLEANER OUTLINE
EN
HOW TO ASSEMBLE
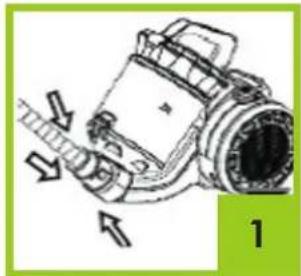
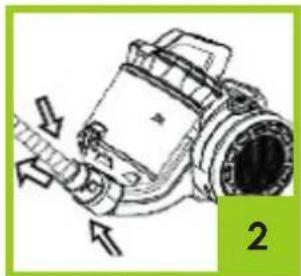
- To assemble the vacuum cleaner hose, press two buttons and insert the hose until it locks in place.cooled and that water tank is empty or water level is minimum.
natural_image
Technical line drawing of a mechanical device with directional arrows indicating motion (no text or symbols)- To take the hose out, press two buttons and remove it.
natural_image
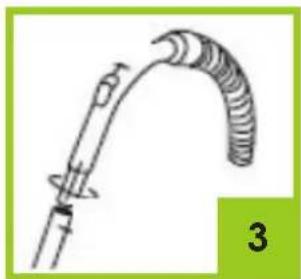
Technical diagram of a mechanical device with directional arrows indicating motion or force (no text or symbols present)- When connecting the tube with a hose, insert he larger tube tip to the hose handle and turn to make a strong connection.
natural_image
Simple line drawing of a curved mechanical device with a looped end, labeled with number 3 (no text or symbols on the diagram itself)- To connect the tube with pads, insert the smaller pipe tip to the pad and turn to make the strong connection.
HOW TO USE
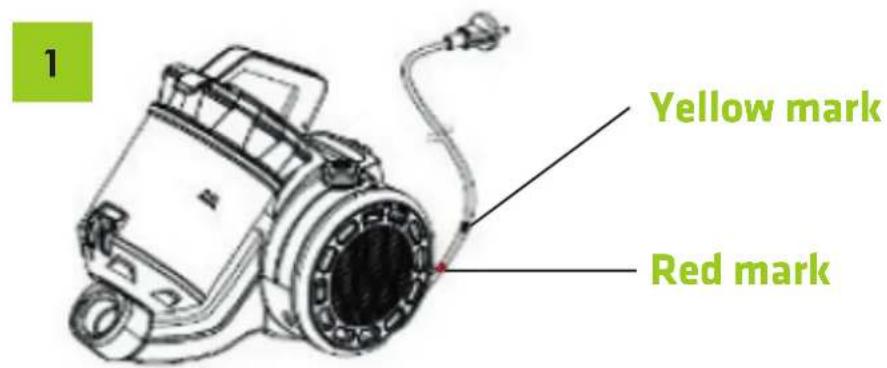
- Uncoil the feeder to reach the yellow mark. It is forbidden to cross the red mark when uncoiling.
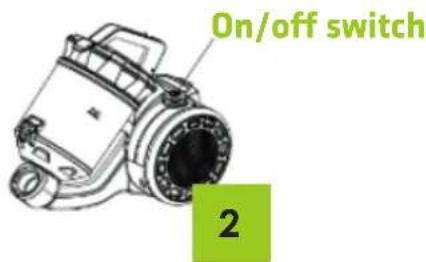
- Once you have inserted the plug, press the on/off switch.
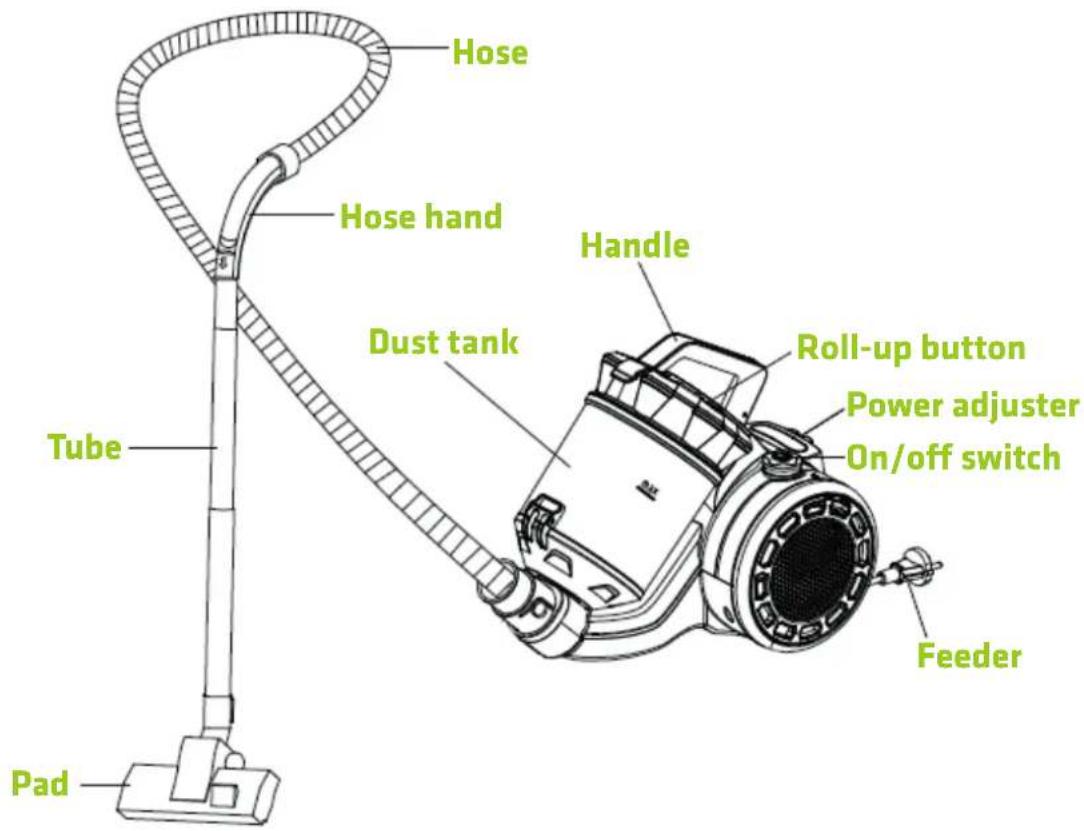
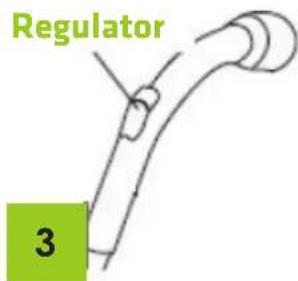
- You can adjust the suction power by shifting the adjuster on the hose handle.
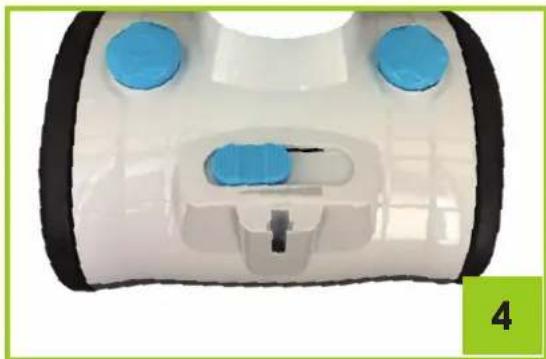
- To adjust the power of the vacuum cleaner, slide the power adjuster.
natural_image
Close-up of a white plastic device with two blue circular buttons and a black handle, no visible text or symbols.VACUUM CLEANER PADS
natural_image
Close-up of a black vacuum cleaner with a green circular badge labeled '1' (no text or symbols on the device itself)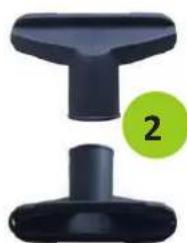
natural_image
Close-up of a black T-shaped mechanical component with a green circular badge labeled '2' (no text or symbols on the object itself)
natural_image
Two black plastic spray holders with a green circular badge containing the number 3 (no text or symbols on the devices themselves)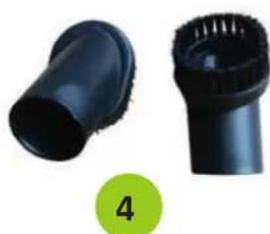
natural_image
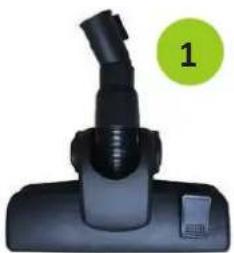
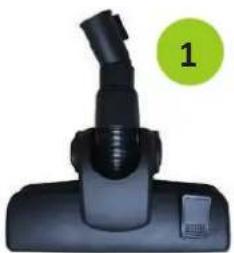
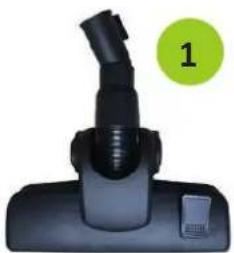
Two black plastic push-button buttons with textured caps, one labeled '4' in a green circle (no other text or symbols)1 A pad for hard and soft floors (carpets, padding).
2 A pad intended to clean soft surfaces, such as sofas, armchairs, upholstered chairs.
3 Hollow pad for hard-accessible places.
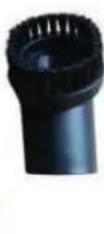
4 Round pad with horsehair intended for irregular surfaces.
HOW TO EMPTY DUST TANK AND FILTER
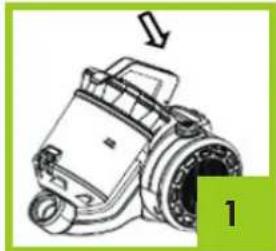
When the dust reaches the mark in the tank, empty it and clean the filter.
To empty the tank and clean the filter:
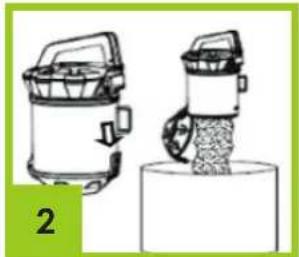
- Press the button the handle and remove the tank from the vacuum cleaner.
natural_image
Technical line drawing of a mechanical device with an arrow pointing to a component (no text or symbols present)- Press the interlock button to open the tank and empty out the content.
natural_image
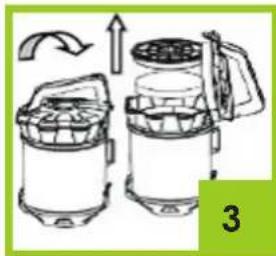
Two hand-drawn illustrations of industrial steamers or pumps, one with a handle and the other with a lid, placed on a cylindrical base (no text or symbols)- Open the top part of the tank and remove filters.
natural_image
Illustration of two portable steamers with different internal compartments and directional arrows indicating process flow (no text or symbols)- Clean the filter in water and dry it outdoors.
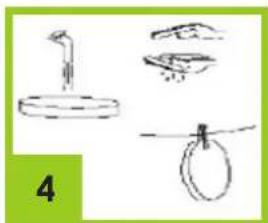
natural_image
Simple line drawings of four different objects or objects, including a stick figure, a bowl, a tray, and a hanging ring, arranged on a green background with the number 4 below (no text or symbols on the objects themselves)- To clean the air outlet filter, remove it from the vacuum cleaner and rinse in running water. Wipe the filter with a paper towel and dry outdoors.
NOTE: Do not dry the filter with the warm or hot air (e.g. drier).
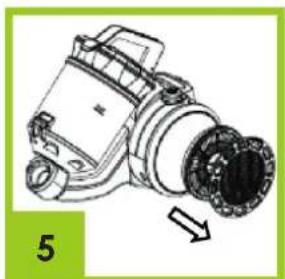
natural_image
Mechanical component diagram showing a cylindrical assembly with a flanged end and an arrow indicating direction (no text or symbols)HOW TO ROLL UP AND STORE CABLE
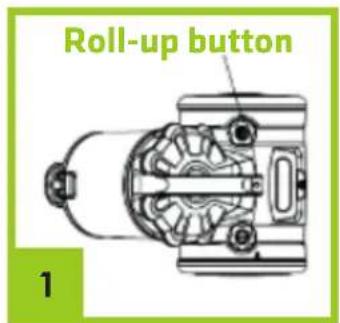
- To roll up the cable, unplug it and press the roll-up button.
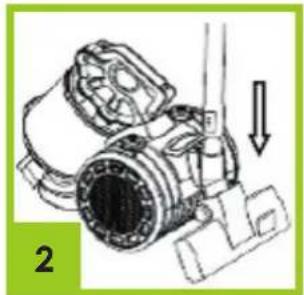
- To store the vacuum cleaner, insert the floor and carpet pad into the vacuum cleaner handle.
natural_image
Technical line drawing of a mechanical device with an arrow indicating direction (no text or symbols)The pictures and diagrams are for reference only. The real design of the products may differ from the pictures and diagrams presented.
Wprowadzenie
Drogi Kliencie!
natural_image
Technical illustration of a mechanical component with a magnified inset showing internal features (no text or symbols)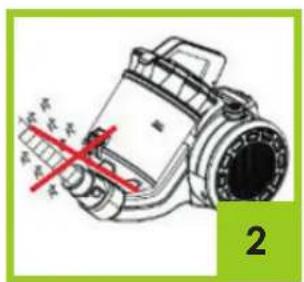
natural_image
Diagram of a mechanical device with a red X mark and green label '3' (no readable text or symbols)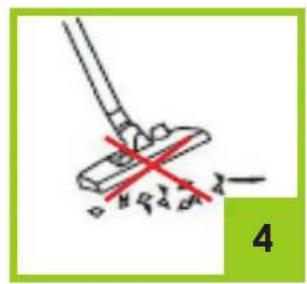
natural_image
Illustration of a camera with a red X mark and a magnified inset showing a device (no text or symbols)SCHEMAT ODKURZACZA
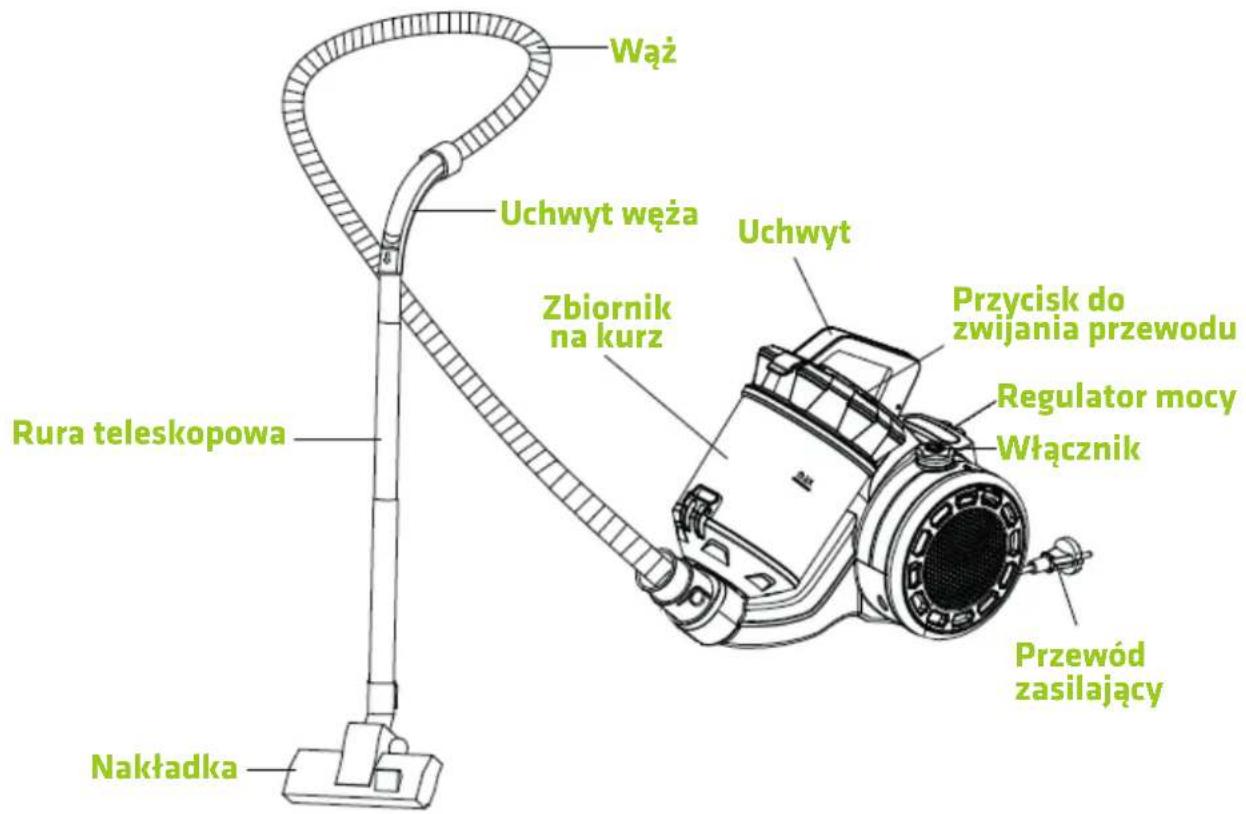
natural_image
Diagram of a mechanical device with directional arrows indicating motion or force (no text or symbols)natural_image
Technical line drawing of a mechanical component with directional arrows indicating motion (no text or symbols)natural_image
Simple line drawing of a medical or laboratory device with a curved arm and loop (no text or symbols)natural_image
Close-up of a white medical device with blue circular buttons and a black handle, no visible text or symbols.NAKŁADKI ODKURZACZA
natural_image
Close-up of a black vacuum cleaner with a green circular badge labeled '1' in the corner (no text or symbols on the device itself)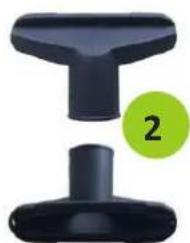
natural_image
Close-up of a black T-shaped mechanical component with a green circular badge labeled '2' (no text or symbols on the object itself)
natural_image
Two black plastic spray bottles with different shapes and surfaces, one labeled with the number 3 (no text or symbols on the products themselves)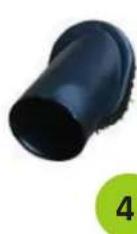
natural_image
Technical line drawing of a mechanical device with no visible text or symbolsnatural_image
Two industrial machines with different internal structures, one with a handle and the other with granular material inside a container (no text or symbols visible)natural_image
Illustration of two portable kitchen appliances with upward arrows indicating rotation (no text or symbols)natural_image
Simple line drawings of objects including a stick, bowl, and ring (no text or symbols)natural_image
Mechanical component diagram showing a valve or pump assembly with an arrow indicating direction (no text or symbols present)natural_image
Technical line drawing of a mechanical device with an arrow indicating direction (no text or symbols present)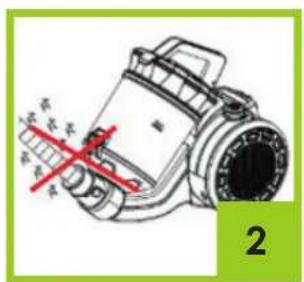
natural_image
Diagram of a mechanical device with a red X mark and green label '3' (no readable text or symbols)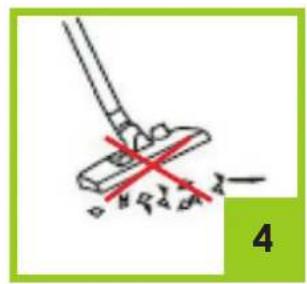
natural_image
Illustration of a camera with a red X mark and a magnified inset showing a device (no text or symbols present)SCHEMA DES STAUBSAUGERS
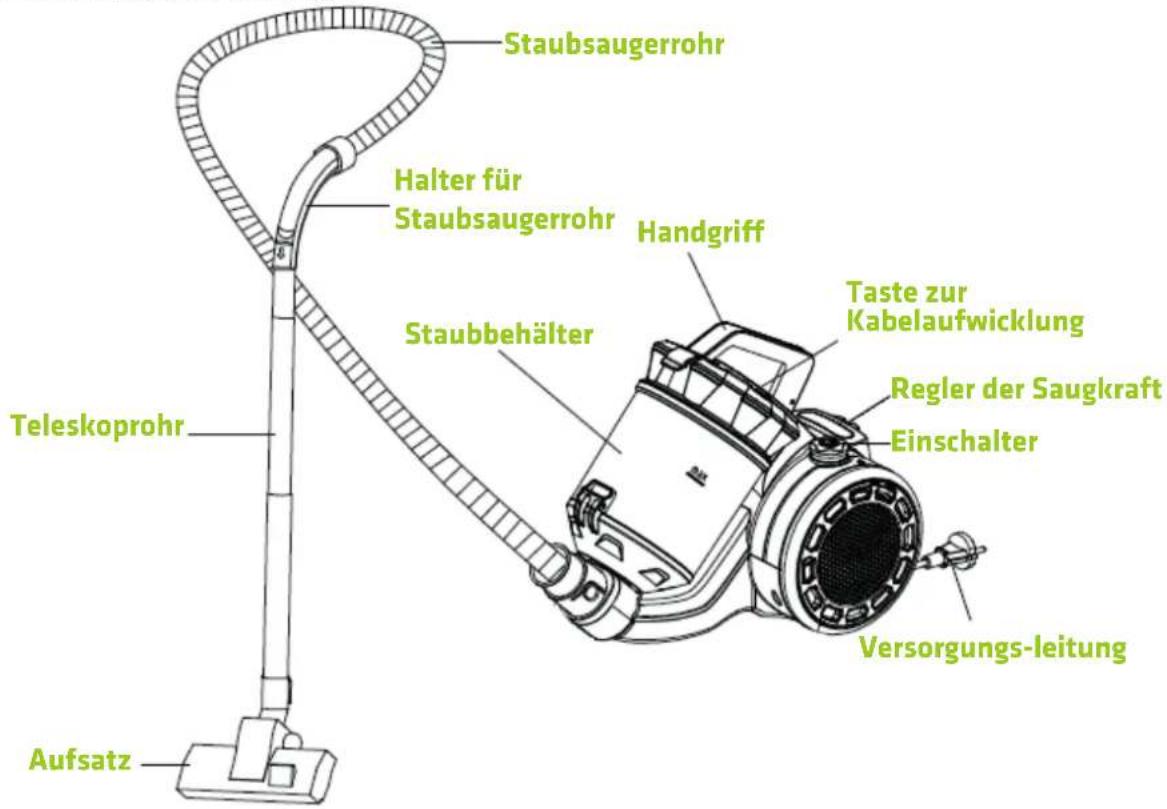
natural_image
Technical line drawing of a mechanical device with directional arrows indicating movement (no text or symbols)natural_image
Technical line drawing of a mechanical component with directional arrows indicating motion (no text or symbols)natural_image
Simple line drawing of a medical or laboratory device with a curved arm and loop (no text or symbols)natural_image
Close-up of a white and blue medical device component with a black base and central connector (no visible text or symbols)STAUBSAUGERAUFSÄTZE
natural_image
Close-up of a black vacuum cleaner with a green circular badge labeled '1' in the corner (no text or symbols on the device itself)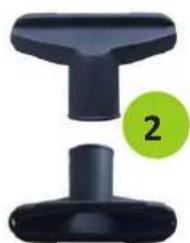
natural_image
Close-up of a black T-shaped mechanical component with a green circular badge labeled '2' (no text or symbols on the object itself)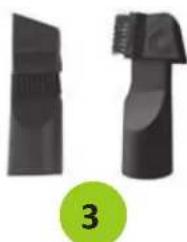
natural_image
Two black plastic spray holders with a green circular badge containing the number 3 (no text or symbols on the devices themselves)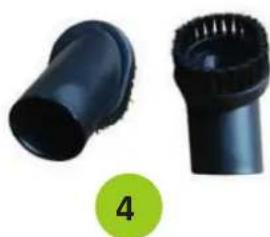
natural_image
Two black plastic spray applicators with textured caps, one labeled with number 4 (no text or symbols on the devices themselves)natural_image
Technical line drawing of a mechanical device with no visible text or symbolsnatural_image
Two handbells with handles and a base, one standing upright and one lying flat (no text or symbols)natural_image
Illustration of two kitchen appliances with a handle and fan, showing a step with an arrow indicating rotation (no text or symbols)natural_image
Simple line drawings of a stick figure, a bird, and a hanging object with a string (no text or symbols)natural_image
Technical line drawing of a mechanical device with an arrow indicating direction (no text or symbols present)natural_image
Technical line drawing of a mechanical device with an arrow indicating direction (no text or symbols present)Declaration of Conformity
Product details
For the following
Product : ASPIRI POWER
Model(s): OVH-ASPIRI POWER

Declaration & Applicable standards
We, BrandLine Group Sp. z o.o., hereby declare under our sole responsibility that the of the above referenced product complies the following directives:
EN 55014-1: 2006+A1: 2009+A2: 2011
EN 55014-2: 1997+A1: 2001+A2: 2008
EN 55014-2: 2015
EN 61000-3-2: 2014
EN 61000-3-3: 2013
EMC Directive 2014/30/EU
EN 60335-2-2:2010+A11:2012+A1:2013
EN 60335-1:2012+A11:2014
EN 62233:2008
IEC 60335-2-2:2009 + A1:2012
IEC 60335-1:2010, 2:2011 + A1:2013

BrandLine Group Sp. z o.o.
natural_image
Solid green vertical rectangle with no text, symbols, or patterns

- Aspiri Power
- IMPORTANT!
- IMPORTANT! KEEP THIS MANUAL FOR FUTURE REFERENCE!
- VACUUM CLEANER OUTLINE
- EN
- HOW TO ASSEMBLE
- HOW TO USE
- VACUUM CLEANER PADS
- HOW TO EMPTY DUST TANK AND FILTER
- HOW TO ROLL UP AND STORE CABLE
- Wprowadzenie
- Drogi Kliencie!
- NAKŁADKI ODKURZACZA
- STAUBSAUGERAUFSÄTZE
- Declaration of Conformity
- Declaration & Applicable standards
Brand : Overmax
Model : Aspiri Power
Category : Vacuum Cleaner