
FD6211DDB - Car kit Scosche - Free user manual and instructions
Find the device manual for free FD6211DDB Scosche in PDF.


| Product Type | ISO Double DIN Installation Kit |
| Compatible Vehicles | 2014-Up Ford Transit (with removable passenger airbag indicator) |
| Material | Steel mounting brackets |
| OEM Display Support | Accommodates base models and vehicles with 4.3" OEM dash display |
| Included Components | Steel brackets, cylinder guides, hardware |
| Tools Required | Panel removal tool (PRT), screwdriver, Torx bit |
| Installation Difficulty | Moderate; dash modification required on base model |
| Safety Precautions | Disconnect negative battery terminal; avoid all factory airbag wiring |
| Aftermarket Radio Fitment | Double DIN or single DIN with pocket (not specified) |
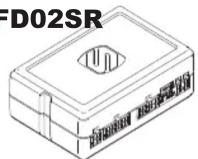
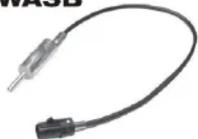
| Sold Separately | FD02SR (Ford stereo replacement interface), VWA3B (Euro/Fakra antenna adapter) |
| Technical Support | Toll-free: 1-800-621-3695 x3, Mon-Fri 8AM-5:30PM PST, Sat 8AM-2PM PST |
| Manual Pages | 4 |
| Warranty | Not specified; contact support for replacement parts |
Frequently Asked Questions - FD6211DDB Scosche
User questions about FD6211DDB Scosche
0 question about this device. Answer the ones you know or ask your own.
Ask a new question about this device
Download the instructions for your Car kit in PDF format for free! Find your manual FD6211DDB - Scosche and take your electronic device back in hand. On this page are published all the documents necessary for the use of your device. FD6211DDB by Scosche.
USER MANUAL FD6211DDB Scosche
ISO Double DIN Installation Kit for
2014-UP Ford Transit
(w/removable PASSENGER airbag indicator)
natural_image
Interior view of a car dashboard with air filters and a digital display (no visible text or symbols)Tools Required:
• PRT (Panel Removal Tool)
- Screwdriver
INTRODUCTION/PRELIMINARY
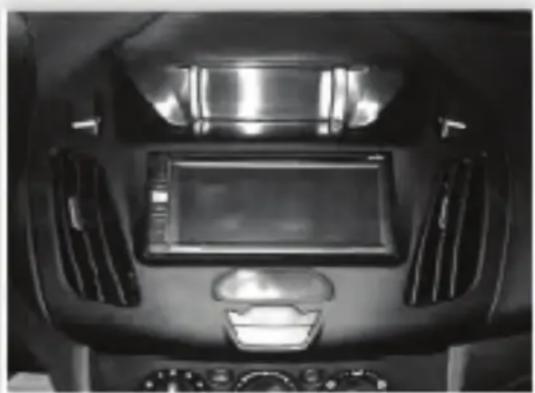
This premium installation kit is for 2014-UP Ford Transit vehicles (w/removable PASSANGER airbag indicator) with base model radio (dash modification required). Included are all the parts you need to mount your car stereo or CD player into your vehicle's dash. Refer to individual instruction in this manual to remove your vehicles factory radio and assemble the kit.
CAUTION: DISCONNECT YOUR VEHICLE NEGATIVE BATTERY TERMINAL BEFORE THE INSTALLATION TO HELP PREVENT ELECTRICAL DAMAGE. WE RECOMMEND THE USE OF A VOLT/OHM METER OVER A TEST LIGHT TO CHECK WIRING. A TEST LIGHT OR GROUNDED WIRE PROBE CAN CAUSE DAMAGE TO THE VEHICLE'S COMPUTER AND/OR DIAGNOSTIC SYSTEMS. AVOID ALL FACTORY AIRBAG WIRING - AIRBAGS CAN ACCIDENTALLY DEPLOY CAUSING SERIOUS INJURY OR DEATH.
NOTES
- See your vehicle's instructions for any special tools your installation might require.
- Read all instructions accompanying your car stereo for proper wiring and mounting instructions.
STOP
IMPORTANT!
DO NOT RETURN PRODUCT TO THE RETAILER
IF YOU NEED ASSISTANCE OR REPLACEMENT PARTS CALL US TOLL FREE: 1800-621-3695 X3
HOURS: MON-FRI 8AM-5:30PM (PST) SATURDAY 8AM-2PM (PST)
LIABILITY DISCLAIMER
This instruction booklet is based on carefully documented data and research of automobile disassembly, wire harness/codes and information pertaining to the installation of this kit. Scosche Industries, Inc. cannot be held responsible for discrepancies/inconsistencies that may occur due to the automobile manufacturing changes or options, or damage that may occur in the automobile during the installation of components while using this booklet.
If you have any further questions, call our toll free technical help line at:
1-800-621-3695x3
FEATURES
• Steel Mounting Brackets
- Accomodated Base and Vehicles with 4.3" OEM dash display
SOLD SEPARATELY
PROVIDE EASY CONNECTION OF YOUR CAR STEREO TO FACTORY WIRING HARNESS.
FD02SR
2012-UP Ford Stereo
Replacement Interface
VWA3B
1997-UP Euro/
Fakra Antenna Adapter
FD02SR
VWA3B
INSTALLATION GUIDE
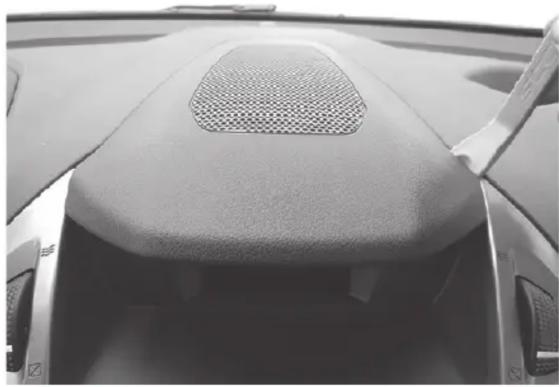
Step 1
Use a panel removal tool to pop up center dash panel (hood) above stereo and remove.
natural_image
Top-down view of a car's rear intake manifold and vent, showing mesh grille and seat (no text or symbols visible)Step 2
Extract (2) screws from panel exposed in step #1.
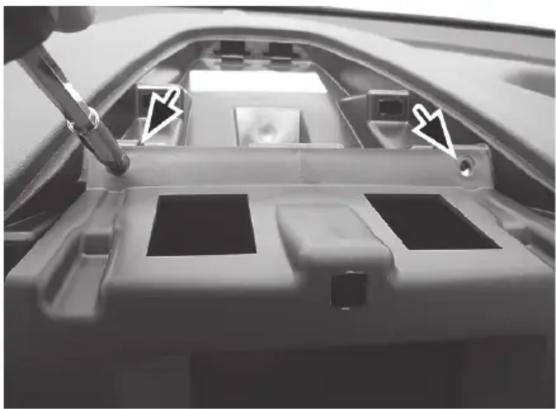
natural_image
Interior view of a car showing a vehicle chassis with a tool inserted, no visible text or symbolsStep 3
Use a panel removal tool to pop out dash/Stereo control panel.
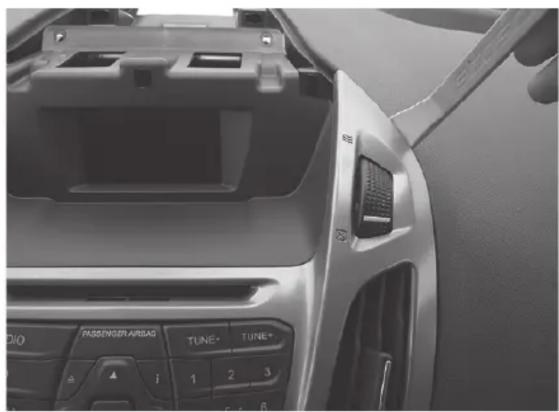
natural_image
Interior view of a car showing the front and rear dashboard with visible controls (no text or symbols)INSTALLATION GUIDE
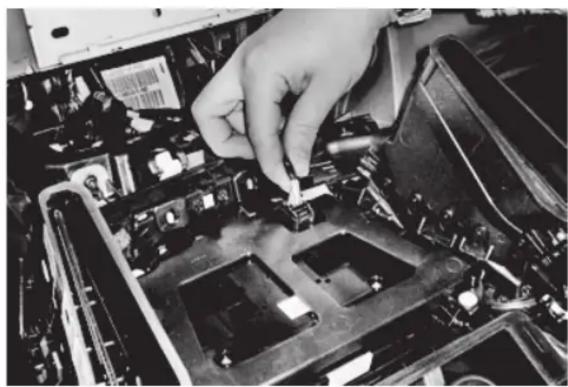
natural_image
Close-up of a hand inserting a small electronic component into an open electronic device casing (no visible text or symbols)Step 4
Unplug connectors and remove control panel from vehicle.
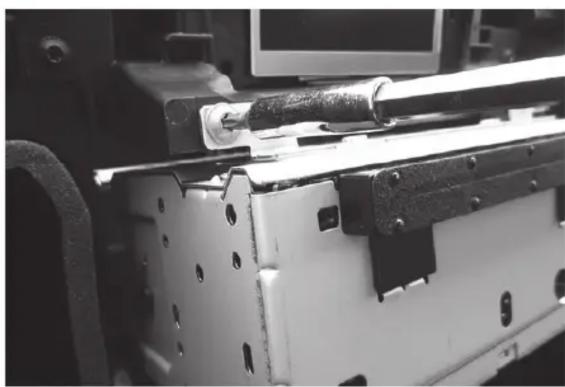
natural_image
Close-up of a mechanical assembly with visible components and mounting holes (no text or symbols)Step 5
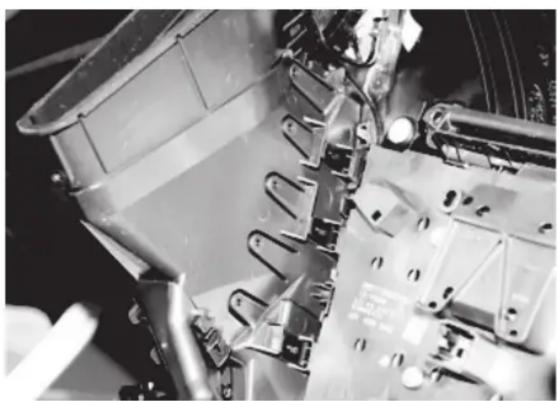
Remove (2) Torx bolts at top of OEM radio chassis. Unplug and remove from vehicle.
natural_image
Close-up of a mechanical assembly with visible brackets and bolts (no text or symbols)Step 6
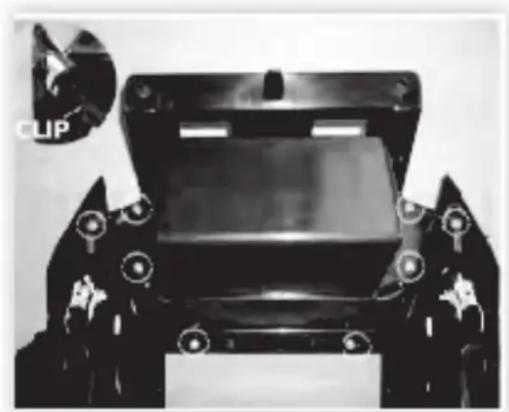
Unclip and remove Factory air vents hazard /airbag indicators from the original panel.
natural_image
Top-down view of a black robotic car with visible structural components and a 'CLIP' label (no readable text or symbols on the car itself)Step 7
Remove panel mounting clips to re-install on new stereo panel
INSTALLATION GUIDE
Step 8
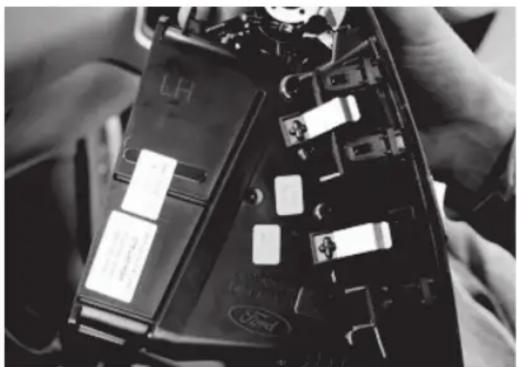
Use a panel removal tool to pop up center dash panel (hood) above stereo and remove.
natural_image
Close-up of hands assembling a battery pack with visible circuit breakers and components (no text or symbols)INSTALLATION NOTE:
Base model units need no further assembly. Re-use storage tray above stereo. 4.3" OEM Display units: Attach the separate sub-panel designed to accommodate the Factory OEM dash display to upper rear of new stereo panel with hardware provided.
Step 9
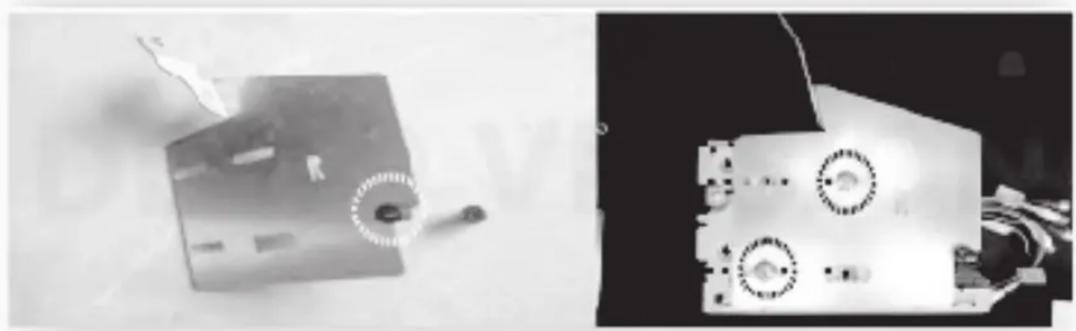
Attached included cylinder guides (1) on each bracket as shown. Mount left/right brackets to aftermarket radio.
natural_image
Two technical diagrams showing a device with a sensor and a mechanical component with circular features (no text or symbols visible)Step 10
Follow installation steps in reverse order to re-assemble the vehicle.
If you have any further questions, call our toll free technical help line at:
1-800-621-3695x3

- ISO Double DIN Installation Kit for
- 2014-UP Ford Transit
- (w/removable PASSENGER airbag indicator)
- Tools Required:
- INTRODUCTION/PRELIMINARY
- NOTES
- STOP
- IMPORTANT!
- DO NOT RETURN PRODUCT TO THE RETAILER
- LIABILITY DISCLAIMER
- FEATURES
- SOLD SEPARATELY
- FD02SR
- VWA3B
- INSTALLATION GUIDE
- Step 1
- Step 2
- Step 3
- Step 4
- Step 5
- Step 6
- Step 7
- Step 8
- INSTALLATION NOTE:
- Step 9
- Step 10
Brand : Scosche
Model : FD6211DDB
Category : Car kit