
Opsix native - Uncategorized KORG - Free user manual and instructions
Find the device manual for free Opsix native KORG in PDF.


| Product Type | Software Synthesizer (VST/AU/AAX) |
| Platform | Windows 7 or later, macOS 10.12 or later |
| Format | 64-bit only |
| Sound Engine | 6-operator FM synthesis with 40 algorithms |
| Polyphony | Up to 32 voices |
| Effects | 14 types including reverb, delay, chorus, flanger, phaser, EQ, compressor, limiter, etc. |
| Presets | Over 200 factory presets |
| Arpeggiator | 6-pattern arpeggiator with user editing |
| Modulation | 3 envelopes, 2 LFOs, key tracking, velocity |
| MIDI Support | MIDI CC, MIDI program change, MIDI clock sync |
| License System | Activation via KORG Software Pass (online authorization) |
| Update Policy | Free updates for registered users |
| System Requirements | Intel Core i5 or AMD equivalent, 4GB RAM, 1GB free disk space, internet connection for activation |
| Supported DAWs | Ableton Live, Logic Pro, Cubase, FL Studio, Pro Tools, and more |
| Dimensions (Physical) | Not applicable (software only) |
| Weight | Not applicable (software only) |
| Power Supply | Not applicable (runs on computer power) |
| Maintenance | Use KORG Software Pass for updates and license management |
| Safety | No special safety precautions required; follow standard computer usage guidelines |
| Spare Parts / Repairability | Not applicable; software cannot be repaired, only reinstalled |
Frequently Asked Questions - Opsix native KORG
User questions about Opsix native KORG
0 question about this device. Answer the ones you know or ask your own.
Ask a new question about this device
Download the instructions for your Uncategorized in PDF format for free! Find your manual Opsix native - KORG and take your electronic device back in hand. On this page are published all the documents necessary for the use of your device. Opsix native by KORG.
USER MANUAL Opsix native KORG
KORG opsix native
Owner's Manual
E1
Table of Contents
Introduction......4
Main Features....4
About the sound generator of the opsix ....5
Operator (modulator, carrier)....5
Algorithms....5
Operator modes ....5
Part Names and functions....9
Header 10
Basic operations....12
Keyboard 12
Pitch bend/Modulation Wheel....12
Knob....12
Value slider....12
Toggle Switch....12
Combo box....13
Menu button....13
Graphical envelope....13
Browser functions 14
MENU 16
Quick Start 17
Playing the synthesizer ....17
Using the arpeggiator....17
Using the Step Sequencer ....17
Using the Motion Sequencer....17
Edit the Tone of the Synthesizer 18
Saving a sound....18
Parameter Guide ....19
OPERATORS: MODE....19
MODE....19
OPERATORS: PITCH 25
PITCH (Operator Pitch) 25
OPERATORS: P.MOD 27
P.MOD (Operator Pitch Modulation)......27
OPERATORS: L.MOD....28
L.MOD (Operator Level Modulation) 28
OPERATORS: ENV 29
EG (Operator Level/EG) 29
K.TRACK (Operator Level Key Track)....30
Algorithm.... 32
USER ALG (User Algorithm)....32
ARP (Arpeggiator) 34
ARPEGGIATOR 34
FILTER 36
FILTER 36
K. Track (Filter Keyboard Tracking)....38
ENVELOPE, LFO 39
EG1 PITCH, EG2 Filter, EG3 (Assignable).... 39
LFO 39
EFFECT 42
FX 1, 2, 3 (Effect 1, 2, 3)....42
VIRTUAL PATCH....43
Virtual Patch 1...12....43
SEQUENCER....44
SEQUENCER 44
Note Sequencer 45
MOTION 46
Motion Sequencer 46
MISC/RANDOM 47
PROGRAM PITCH....47
GLIDE 47
MISC 47
RANDOM....48
Controller....50
SETTINGS 51
SETTINGS....51
MIDI 51
Algorithm List....52
Waveform List.... 53
Control Source List 54
Motion Destination List.... 55
Virtual Patch Source List 57
Virtual Patch Destination List 58
Effect Parameter List....60
Appendices......65
Troubleshooting....65
No sound 65
The sound has clicks, pops, or noise 65
Sound is delayed 65
Can't control the software synthesizer from a MIDI device con-
nected to the computer 66
Specifications 67
Operating requirements 67
for Mac....67
for Windows....67
Support and service....68
Information to provide when contacting us 68
Before you contact us....68
- All product names and company names are the trademarks or registered trademarks of their respective owners.
Introduction
Thank you for purchasing the KORG software synthesizer- opsix native. To help you get the most out of your new instrument, please read this manual carefully.
Main Features
- This is the plugin version of the opsix, KORG's altered FM synthesizer. The plugin features the same synthesizer engine as the hardware version.
- The opsix features an FM sound generator that produces complex harmonics by rapidly modulating the basic waveforms of its oscillators using other oscillators.
- In addition to FM synthesis, the opsix also features various Operator modes such as a ring modulator, wavefolder and so on. The six Operators can be combined to create a wide variety of sounds.
- The opsix includes a rich selection of filters including Polysix and MS-20 models, which covers the bases for making sounds like those generated with subtractive synthesis.
- Three high-definition multi-effects are available, and you can select from 30 types for each.
- 350 preset programs are included in this plugin, including 30 template programs. These programs are compatible with the hardware version of this synth, and you can use sound librarian software to receive and transmit the program data.
- A powerful 16-step polyphonic sequencer is also included.
About the sound generator of the opsix
The principles of FM sound generation were discovered and established by Dr. John Chowning at Stanford University in the 1970s, when he was experimenting with vibrato. FM sound generation was later packaged into an LSI chip and put into practical use by Yamaha Corporation. From the beginning of the 1980s, FM tone generation was used as an internal sound source on the DX series, personal computers, game machines and cellphones.
Operator (modulator, carrier)
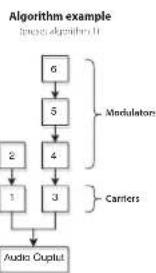
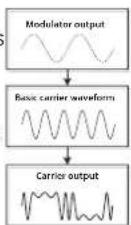
The FM (Frequency Modulation) sound generator is based on synthesis elements called "Operators." Operators are modulated using simple input waveforms (WAVE) such as sine waves, outputting sounds with complex harmonics. Operators can act as either a modulator or a carrier. The output sound from a modulator feeds into another Operator and modifies that Operator's output. Carriers receive the output sound from modulators and output the modulated result as audio.
Algorithms
In the FM sound generator, the combination of the roles and connections of the Operators is called an "algorithm." Selecting an algorithm is a good starting point for creating sound. The opsix sound generator includes six Operators, and more than 40 preset algorithms are provided. You can use the user algorithm function to create new combinations as well.
flowchart
graph TD
    A["6"] --> B["5"]
    B --> C["4"]
    C --> D["3"]
    D --> E["1"]
    E --> F["2"]
    F --> G["Audio Output"]
    H["Modulators"] --> C
    I["Carriers"] --> D
What happens when modulators modulate the carriers
Operator modes
Although the basis of the opsix is the FM sound generator, you can change the Operator mode to perform different kinds of modulation besides FM. The combination of ring modulator, filter, and wavefolder makes it possible to create new kinds of sounds that surpass the range of typical FM sounds.
An Operator includes an input, an output and an oscillator. The carrier's Operator mode determines how the oscillator is modulated by the input of the modulator. This modulation gives the sound its character. To add to the FM, Ring Mod, Filter, Filter FM, Wave Folder and Effect Operator modes, the opsix features Mute and Bypass modes that are useful when editing.
FM
flowchart
graph TD
    A["FM"] --> B["CARRIER"]
    B --> C["MODULATOR"]
    C --> D["OUTPUT"]
    D --> E["Modulator"]
    E --> F["+"]
    F --> G["FB"]
    G --> H["Oscillator"]
    H --> I["Output"]
    H --> J["WIDTHPhase"]
    J --> K["Pitch"]
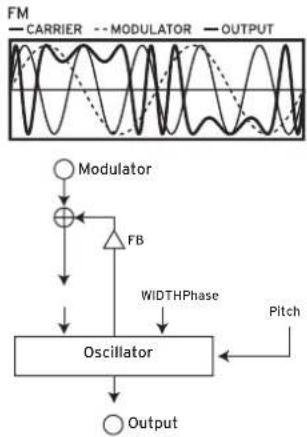
As an example, when the LFO is used to raise and lower the pitch, you will hear a vibrato-like effect. FM (Frequency Modulation) is an ultra high-speed vibrato. The phase of an oscillator is modulated using the input signal from the modulator, which rapidly raises and lowers its pitch. (This works the same as Korg's VPM tone generator and typical FM synthesizers.)
As modulation is incredibly fast, we hear the result not as vibrato, but as a change in tone.
In this Operator mode, we can use the FB and WIDTH parameters to control the amount of self-feedback and the width of the oscillator waveform.
Ring Mod.
flowchart
graph TD
    A["RING MOD"] --> B["CARRIER"]
    A --> C["MODULATOR"]
    A --> D["OUTPUT"]
    B --> E["Modulator"]
    C --> E
    D --> E
    E --> F["OscillatorRectifier"]
    F --> G["×"]
    G --> H["DEPTH1-DEPTH"]
    H --> I["⊕"]
    I --> J["Output"]
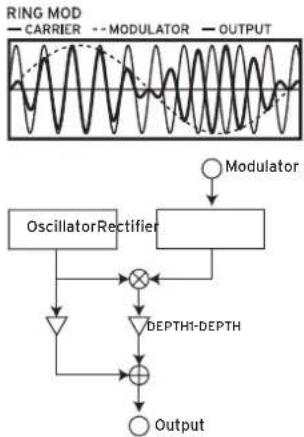
Modulating the amplitude of a signal creates tremolo. Ring modulation, or Ring Mod for short, is ultra-fast tremolo. It is historically called this because of the shape of the electrical circuit originally used to create the effect. The input signal from the modulators are multiplied with the carrier oscillator to rapidly change the amplitude of the signal. As with FM, the extremely fast modulation is perceived as a change in tonal character. The input from the modulator(s) can be processed by a rectifier, where the "SHAPE" parameter controls the amount of rectification. The larger the value, the more overtones will be added.
• Typical program:: 057: Strum Down, 327: 20P FM
• Typical program: 134: Ring It On, 331: Ring Mod
Filter
FILTER
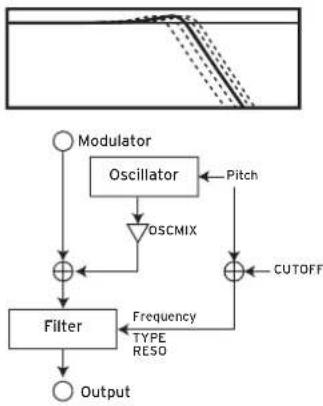
flowchart
graph TD
    A["Modulator"] --> B["Oscillator"]
    B --> C["OSCMIX"]
    C --> D["Filter"]
    D --> E["Output"]
    F["Pitch"] --> C
    G["CUTOFF"] --> C
    H["Frequency TYPE RESO"] --> D
This is a filter with a key tracking function. The input signals from the oscillator and modulator(s) are input into the filter. The "OSCMIX" parameter controls the amount of the oscillator signal fed to the filter. The cutoff frequency is synchronized to the oscillator pitch and the "CUTOFF" parameter adds an offset.
• Typical program: 178: Formant Pad, 324: Reso Noise
Filter FM
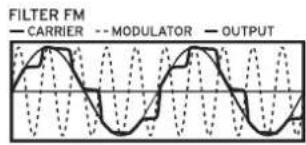
Modulating a filter's cutoff with an LFO creates an effect like a wah pedal. Filter FM creates an ultra high-speed wah effect. The cutoff frequency is modulated using the input signals from the modulator(s), and the oscillator signal is used as audio input for the filter. As with Filter mode, the modulation center frequency is synchronized with the oscillator pitch, and you can use the CUTOFF parameter to add an offset.
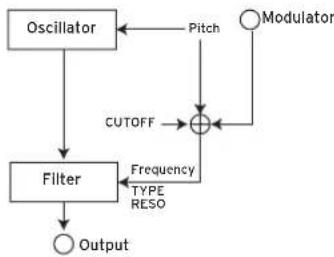
flowchart
graph TD
    A["Oscillator"] --> B["Filter"]
    B --> C["Output"]
    D["Pitch"] --> E["+"]
    F["Modulator"] --> E
    E --> G["CUTOFF"]
    G --> H["Frequency TYPE RESO"]
    H --> I["Feedback to Filter"]
• Typical program: 157: FilterFM Pad, 335: Filter FM
Wave Folder
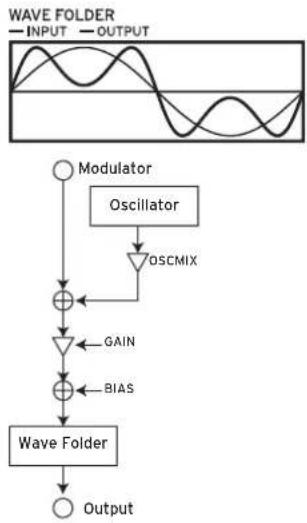
flowchart
graph TD
    A["Wave Folder INPUT"] --> B["Modulator"]
    B --> C["Oscillator"]
    C --> D["OSCMIX"]
    D --> E["+"]
    E --> F["GAIN"]
    F --> G["+"]
    G --> H["BIAS"]
    H --> I["Wave Folder"]
    I --> J["Output"]
• Typical program: 024: Dynamik, 334: Wavefolder
This is a waveshaping effect. The wave folder circuit generates harmonics by inverting the waveform of the input signals from the oscillator and the modulator at a fixed threshold. The "OSCMIX" parameter controls the amount of the oscillator signal fed into the wavefolder.
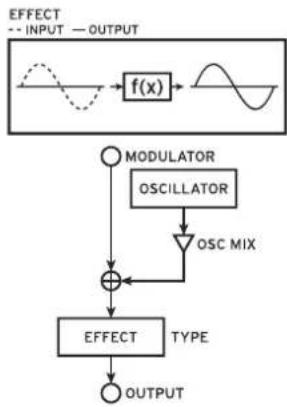
Effect
flowchart
graph TD
    A["EFFECT"] --> B["INPUT"]
    B --> C["OUTPUT"]
    D["f(x)"] --> E["Waveform"]
    F["MODULATOR"] --> G["OSCILLATOR"]
    G --> H["OSC MIX"]
    H --> I["+"]
    I --> J["EFFECT"]
    J --> K["TYPE"]
    K --> L["OUTPUT"]
In this mode, the operator functions as an effect like delay, comb filter or distortion. The signal from the oscillator and the input signal from the modulator are inputted into the effect. The OSCMIX parameter controls the input level of the oscillator. Other effect parameters differ depending on the type of effect you select.
• Typical program:
Peaking EQ 020: Ana Eleki Piano, 240: Dirty Trautonium
Shelving EQ 311: KONG's Footstep
Phaser 087: Snow Ball, 340: Phaser Noise
Short Delay 314: Delay Modulator, 337: Delay Mod
Comb Filter 022: Comb Piano, 338: Comb Flanger
Distortion 238: Thick Screamer, 266: Purple Dist EG
Drive 237: Cinematic FB Doom
Decimator 313: Cockpit Emergency
Waveshaper 007: Waveshape EP, 336: Waveshape
Punch 009: Punchy Wire Piano, 086: FM Airy Bell
Part Names and functions
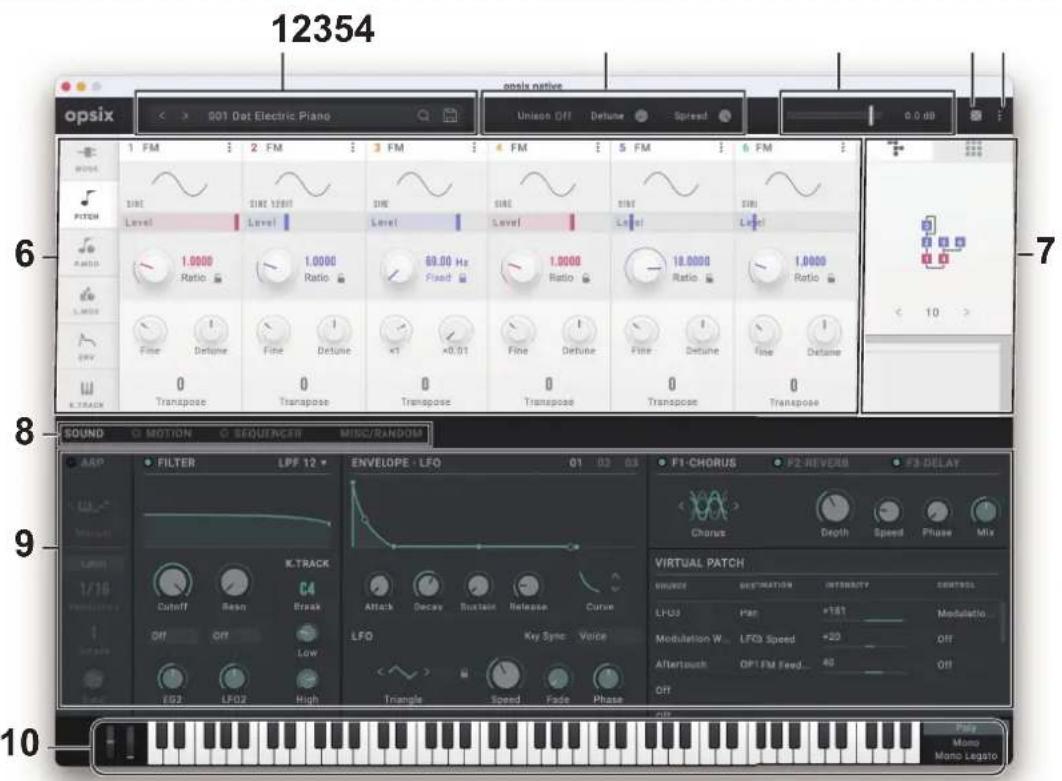
Header
1. Display
Shows the names of the programs that are currently loaded.

a. Select button
Use the Select buttons to switch to the programs that are previous or next in the list.
b. Sound Name
Shows the name of the currently selected sound. Tap the display to show the program browser. You can also specify a category to quickly select programs. (p.12 "Browser functions")
c. Save
Overwrites the currently selected program.
2. Unison
This configures the settings for making multiple voices sound.
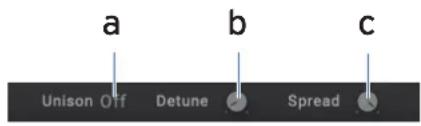
a. Unison
Off: Unison is off, and Stereo Spread and Detune do not apply.
2...8: Specifies the number of voices that will sound for each note you play. When this is off, voices will not sound in unison, and "Spread" and "Detune" cannot be applied. You can make up to eight voices play in unison.
b. Detune (Unison Detune)
This controls the chorus feeling for the unison voice (UNISON VOICES). The pitch width between voices is adjustable in one-cent steps (1/100 of a semitone).
c. Spread (Unison Spread)
The spread (UNISON SPREAD) controls how widely the sounds are spread over the stereo field in Unison mode.
3. Volume
Used to adjust the overall volume.
4. Randomize button
This button randomizes all of the parameters in the current program. The strength is the same as that set in the MISC/RANDOM section. (p.48 "RANDOM")
5. MENU
Use this to initialize a program, recall or save the controller settings and perform other operations. (p.16 "MENU")
6. OPERATOR Edit
Use this to edit the parameters of the six operators. The parameters are separated into six groups, and you can select the groups from the tabs on the left edge of the screen.
7. Algorithm select
Along with the 40 preset algorithms, this plugin features user algorithms that let you configure your own modulation routings for the operators. Use the tabs at the top to switch between the two modes.
8. Parameter Group SELECT buttons
Switches between the parameter groups in the edit area (8).
SOUND: SWITCHES TO THE SCREEN WHERE YOU CAN CONFIGURE THE ARPEGGIATOR, FILTER, EGS, LFOS, EFFECTS AND V.PATCH.
MOTION: The opsix has a "motion sequence" feature that lets you automatically "play" the parameters. THIS SWITCHES TO THE SCREEN WHERE YOU CAN CONFIGURE THE SETTINGS. USE THE POWER BUTTON ON THE LEFT SIDE OF THE SCREEN TO TURN AUTO-PLAY ON/OFF.
SEQUENCER: The opsix can automatically play back notes. THIS SWITCHES TO THE SCREEN WHERE YOU CAN CONFIGURE THE SETTINGS. USE THE POWER BUTTON ON THE LEFT SIDE OF THE SCREEN TO TURN AUTO-PLAY ON/OFF.
MISC/RANDOM: This switches to the screen where you can configure and randomize the other parameter settings.
9. Edit area
Here you can edit the parameters that are shown in each edit page. Drag or tap each controller to select it, and then edit its parameter.
10. Controllers
These are the on-screen controllers used when playing (keyboard, wheel, switch). When operating these controllers from an external MIDI device, it is convenient to set the MIDI control numbers in GLOBAL page.
Basic operations
Use the mouse to edit the values of various controllers and parameters.
Keyboard
- Click on the keyboard to play notes.

natural_image
Close-up of a black and white keyboard with standard keys (no text or symbols visible)Pitch bend/Modulation Wheel
- Drag the wheel up and down to control it.
Knob
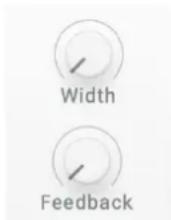
- Drag the knob to adjust its value.
- Double-clicking knobs allows you to edit the parameter value via computer keyboard.
Value slider
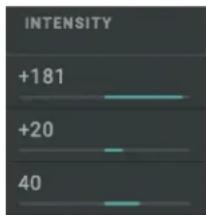
- Drag the value of the slider up and down to adjust a value.
Toggle Switch
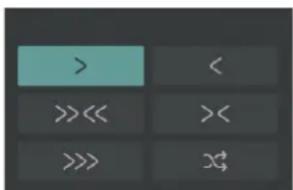
- Click to toggle the setting ON or OFF.
Combo box
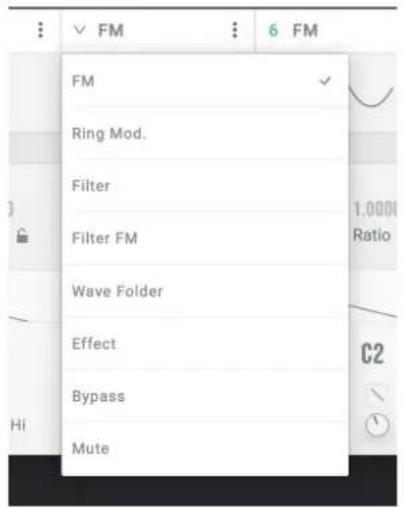
- Click on the combo box to select a value from the pop-up menu that appears.
Menu button
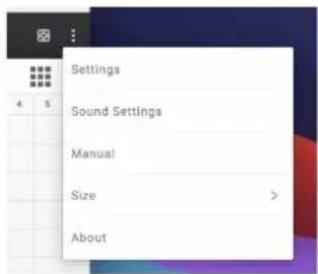
- Click to select a command from the pop-up menu that appears.
Graphical envelope
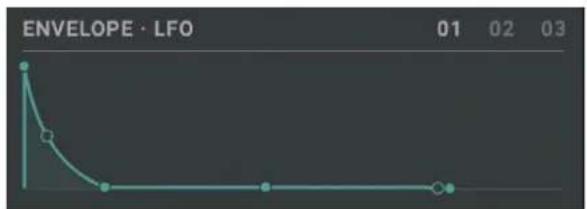
- Drag each point to adjust its value (level or time).
Browser functions
The opsix native features a browser search function that lets you quickly find and choose the sounds you want out of the wide range of options, filtering by category.
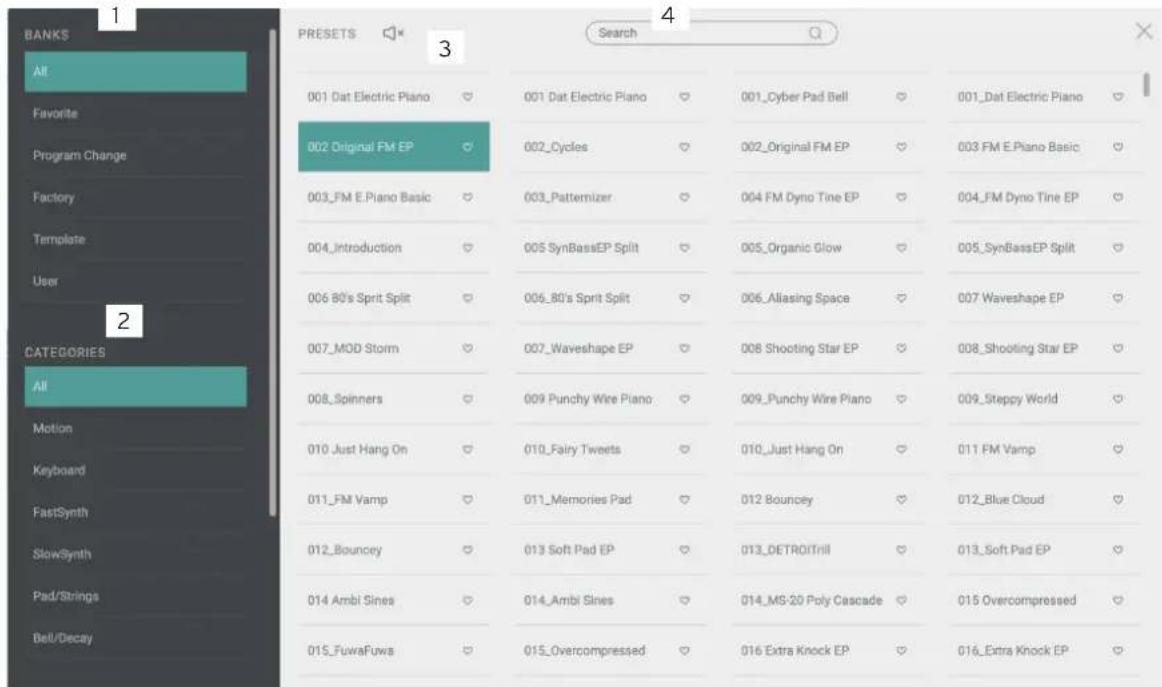
1. BANKS
All
Displays all program data.
Favorites
Displays only the programs that are added as favorites in the browser. Click the heart (♥) icon to the right of the program name to add or remove that program from the favorites.
Program Change
Displays the program you want to change with program change messages. To add a program, use the right-click context menu in the Programs tab.
Factory
Displays the factory-set (preset) programs. You can't overwrite the factory-set programs.
Template
Displays templates that are useful when creating programs. You can't overwrite the template programs.
User
Displays the programs that are saved. User programs are saved in the folders shown below.
[macOS]
\~/Documents/KORG/opsix native/Presets/User
[Windows]
\~/Documents/KORG/opsix native/Presets/User
2. Categories
Use the categories when you want to narrow down your selection of programs for the selected bank. Only programs that are registered in categories are shown in "PRESETS."
3. PRESETS
Selects the program you want to use. You can also register favorites or program changes, or edit the program information.
Right-click to add a preset program to a favorite or to a program change. You can also edit the information for user programs.
The preset programs feature audio previews. Select a program and then click the button to preview the selected program. Click the button again to stop the preview.
4. Search
You can search for programs by typing some text.
MENU
| Settings | |
| Sound Settings | |
| Manual | |
| Size | > |
| About | |
Settings
Displays the Settings pages, where you can set the master tuning and MIDI message receive settings. (p.51 "SETTINGS")
Sound Settings
Displays a dialog box for connecting MIDI controllers, configuring the audio output settings, etc.
Manual
Displays the manual for the software.
Size
Changes the screen size. Any changes to this setting will take effect the next time the softsynth is launched.
About
Shows the software version.
Quick Start
Playing the synthesizer
Use the on-screen keyboard or an external MIDI keyboard to play sounds with the opsix native.
- Click the program name in the display to open the browser screen.
- Select the desired program from the list.
- Use the on-screen keyboard or an external MIDI keyboard to play sounds with the opsix native.
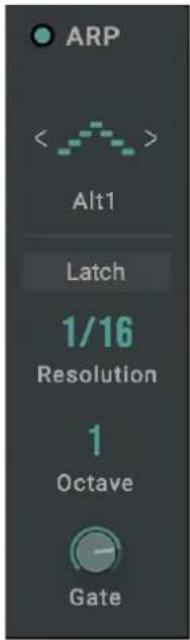
Use the arpeggiator to play the opsix native software synthesizer's sounds. This arpeggiator features seven patterns (Manual, Up, Down, Alt1, Alt2, Random and Trigger).
- Use the Parameter Group Select buttons to press SOUND, which displays the SOUND parameters.
- Press the ARP button. The button will light up. This turns the arpeggio function on. Now, when you play a note on the keyboard, you'll hear an arpeggio.
- Use TEMPO to set the desired tempo.
- Use PATTERN to switch between arpeggio patterns. Play the chords you like, and see what kind of note patterns are played.
- To stop the arpeggiator, press the ARP button. The button will go dark.
Using the Step Sequencer
- Use the Parameter Group Select buttons to press SEQUENCER, which displays the SEQUENCER parameters.
- Press the ⏻(on/off) button to the left of SEQUENCER to switch to the on position.
- The sequence plays back transposed to the same key that you played when you play the keyboard or an external MIDI keyboard.
- To stop the step sequencer, press the ⏻ button (on/off) to the left of SEQUENCER to switch to the off position.
Using the Motion Sequencer
- Use the Parameter Group Select buttons to press MOTION, which displays the Motion parameters.
- Press the ⏻ button (on/off) to the left of MOTION to switch to the on position, which starts the step sequencer.
- The sequencer starts when you play the keyboard or on an external MIDI keyboard, and the parameters change according to the step.
- To stop the sequencer, press the ⏻ button (on/off) to the left of MOTION to switch to the off position.
Edit the Tone of the Synthesizer
Now, let's try editing sounds on the opsix native.
- Select sound 110, "MS-20 Poly Cascade" from the "All" bank on the browser
- Use the Parameter Group Select buttons to press SOUND, which displays the Sound parameters.
The synth edit screen will be displayed. The main parameters necessary for editing are found on the SOUND page. - Use the on-screen knobs and buttons to edit sounds.
Try operating the CUTOFF knob in the FILTER section. By doing this, you'll hear how the sound changes in brightness.
Saving a sound
Save the sounds you create, so that you can recall them anytime.
- Press the Save button on the header.

- Edit the name of your sound in the dialog shown.
- Press the Save button.
Parameter Guide
OPERATORS: MODE
MODE
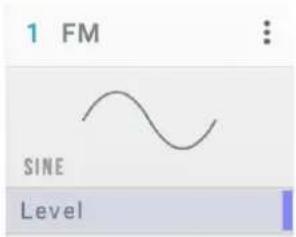
Mode
Selects the Operator mode. (→p.5 "Operator modes")
Wave
This selects the waveform of the oscillator. (→p.53 "Waveform List")
Level (OP Level)
Sets the output level of the Operator.
When "MODE" is set to FM (Frequency Modulation)
The pitch of an oscillator can be changed using the input signal from the modulator.
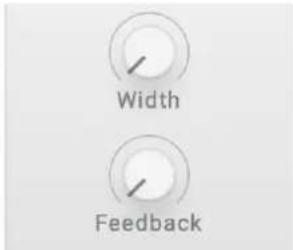
WIDTH (Wave Width)
This sets the width of the waveform that was configured using the "WAVE" parameter. You can control the value using V.Patch to get distinctive sounds like those used in dance music.

Feedback
Adjusts the amount of self-feedback from the Operator. When "WAVE" is set to "SIN", the sound will become brighter the closer that the feedback value gets to 75%, sounding more like a sawtooth wave. When the feedback value exceeds 75%, the sound will become more like complex noise as the value gets larger.
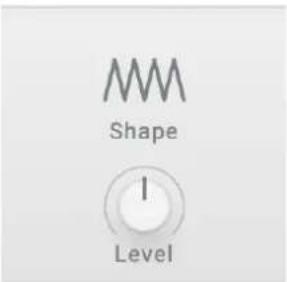
When "MODE" is set to RING MOD. (Ring Modulation)
This uses AM (amplitude modulation) to multiply the input signal from the modulator with the oscillator.
Shape
This is used to rectify the input signal from the modulator. A setting of 50% rectifies the waveform halfway, and a setting of 100% produces a fully rectified waveform. The higher the value, the brighter the tone will sound.
Level (Ring Depth)
Sets the balance between the ring modulator and oscillator signals. A setting of 100% outputs only the ring modulator signal, and a setting of 0% outputs only the oscillator signal.
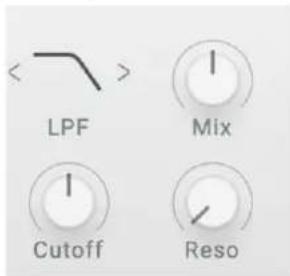
When "MODE" is set to FILTER (Filter)
Filters the input signal to cut out a specified tonal range. You can also mix in the oscillator sound for output. The cutoff frequency works in conjunction with the oscillator pitch.
Filter Type
Sets the type of filter used in the Operator.
Mix (Filter OSC Mix Level)
Sets the oscillator level inputted into the filter.
Cutoff (Filter Cutoff)
Although the filter cutoff frequency works in conjunction with the oscillator pitch, you can use this parameter to add an offset. This is set in semitones.
Reso (Filter Resonance)
Emphasizes the frequencies around the cutoff frequency.
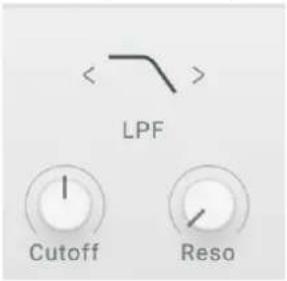
When "MODE" is set to FILTER FM (Filter FM)
In Filter FM, the oscillator signal is used as audio input for the filter. The cutoff frequency is modulated using the input signals from the modulator(s). Depending on the cutoff and filter type settings, this may not have any effect, as the sound outputted from the oscillator may not pass through the filter.
The variations in sound are easier to understand if you set the WAVE parameter to SAW and then change the filter type.
Filter Type
Sets the type of filter used in the Operator.
Cutoff (Filter Cutoff)
Although the filter cutoff frequency changes with the modulator's input signal, the center frequency changes along with the oscillator pitch, so you can use this parameter to add an offset. This is set in semitones.
Reso (Filter Resonance)
Emphasizes the frequencies around the cutoff frequency.
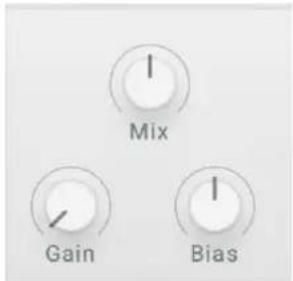
When "MODE" is set to WAVE FOLDE (Wave Folder)
This "folds" the waveform to create a powerful distortion effect.
Mix (Wave Folder OSC Mix Level)
Sets the oscillator level inputted into the Wave Folder.
Gain (Wave Folder Gain)
Adjusts the strength of the Wave Folder effect. Increasing this value will increase the number of times that the waveform is folded.
Bias (Wave Folder Bias)
Applies a DC offset to the input signal to change the harmonics.
When "MODE" is EFFECT
In this mode, the operator functions as an effect like delay, comb filter or distortion. The signal from the oscillator and the input signal from the modulator are inputted into the effect.
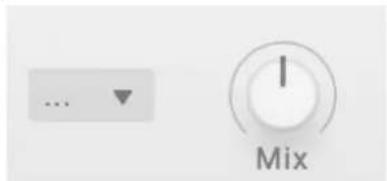
FX (Effect Type)
Sets the type of effect used in the operator.
Mix (Effect OSC Mix Level)
Sets the oscillator level inputted into the effect.
The effect parameters for the E and F knobs differ depending on the effect type.
P. EQ (Peaking EQ)
Increases or decreases the level of frequencies within a specific range.
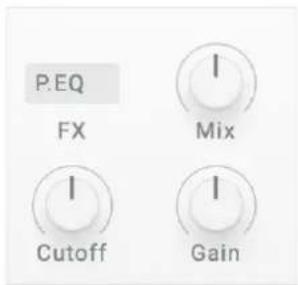
Cutoff (Peaking EQ Frequency)
Adjusts the center frequency that's increased or decreased. This effect works in conjunction with the oscillator pitch.
Gain (Peaking EQ Gain)
Increases or decreases the level of center frequencies.
S.EQ (Shelving EQ)
This is a shelving-type equalizer. This equalizer boosts or cuts the low- and high-end frequencies.
Low (Shelving EQ Low Gain)
Adjusts the low-end frequency level.
High (Shelving EQ High Gain)
Adjusts the high-end frequency level.
Phas (Phaser)
Alters the phase of the sound to create a swelling effect.
Speed (Phaser Frequency)
Adjusts the frequency at which the effect is applied. This effect works in conjunction with the oscillator pitch.
Tip: If you don't want the frequency to be linked with the pitch, set "FREQ" in "PITCH OP1..6" (→p. 25) to "FIXED". This sets the frequency at a fixed frequency, regardless of the note number.
Feedback (Phaser Feedback)
Adjusts the amount of feedback.
Dely (Short Delay)
This effect adds a time delay to the sound.
Time (Short Delay Feedback)
Sets the delay time.
Feedback (Short Delay Feedback)
Adjusts the amount of feedback.
Comb (Comb Filter)
This is a continuous bandpass and band cut filter, which adds a unique character to the sound.
Feedback (Comb Filter Feedback)
Adjusts the amount of feedback.
Cutoff (Comb Filter Frequency)
Adjusts the frequency at which the effect is applied. This effect works in conjunction with the oscillator pitch.
Tip: If you don't want the frequency to be linked with the pitch, set "FREQ" in "PITCH OP1..6"(→p. 25) to "FIXED". This sets the frequency at a fixed frequency, regardless of the note number.
Dist (Distortion)
A distortion effect that heavily distorts the sound.
Amount (Distortion Amount)
Adjusts the amount of distortion by adjusting the input level of the distortion circuit.
Gain (Distortion Low Gain)
Adjusts the low-frequency region.
Driv (Drive)
A drive effect that adds a heavier distorted feel. Effective for bass guitar and kick drum sounds.
Drive (Drive Amount)
Applies drive to the input signal, which works as a booster to create natural distortion.
Gain (Drive Low Gain)
Adjusts the low-frequency region.
Deci (Decimator)
Creates a cheap and rough sampled effect by lowering the sampling frequency and bit rate.
Cutoff (Decimator Frequency)
Adjusts the sampling frequency. Lower values give a more lo-fi sound. This effect works in conjunction with the oscillator pitch.
Tip: If you don't want the frequency to be linked with the pitch, set "FREQ" in "PITCH OP1..6" (→p. 25) to "FIXED". This sets the frequency at a fixed frequency, regardless of the note number.
Bit (Decimator Bit)
Adjusts the bit length. Lower values give a more lo-fi sound.
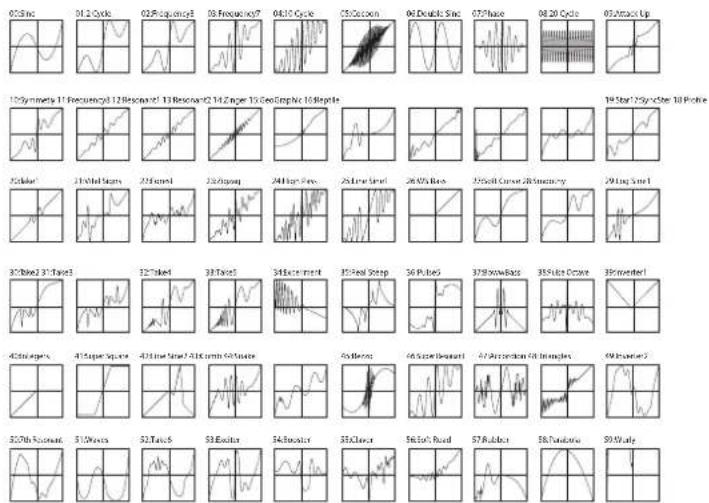
Shap (Waveshaper)
Recreates the waveshaping method of creating sounds that was used on Korg's "01/W" music workstation, released in 1991.
This effect runs the input sound through a waveshaping table to alter the waveform.
Use the modulator level or OSC MIX to adjust the depth of the waveshaper effect.
Type
Selects the waveshaping table type.
Damp (Wave Shaper High Damp)
Adjusts the high-frequency region. The higher the setting, the more the high-frequency components are cut off.
Punc (Punch)
This sets an effect that emphasizes the attack volume of the input signal.
Punch (Punch Amount)
Adjusts the amount of emphasis.
Gain (Punch High Gain)
Adjusts the high-frequency region.
OPERATORS: PITCH
PITCH (Operator Pitch)
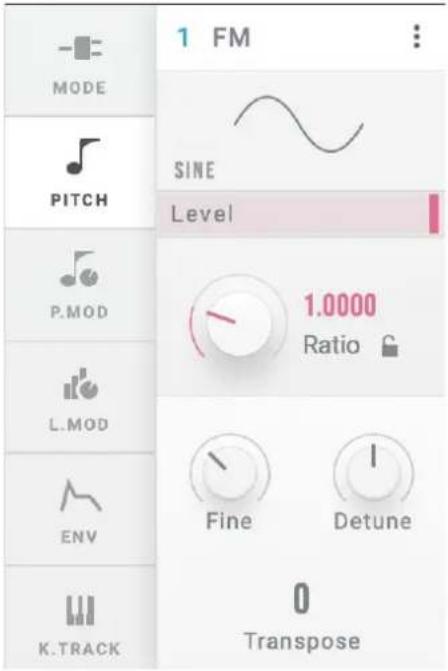
FREQ (Frequency Mode)
Use this to select how the oscillator pitch will be set.
Fixed: With this setting, the oscillator pitch will stay at the same frequency regardless of the note number.
Ratio: With this setting, the frequency of the note number will be multiplied with the ratios set in Coarse Ratio and Fine (Fine Ratio) to set the oscillator pitch.
Transpose
Shifts the oscillator pitch in semitones over a range of +1 octave. This setting is enabled only when FREQ (Frequency Mode) is set to "RATIO".
When "FREQ" is FIXED
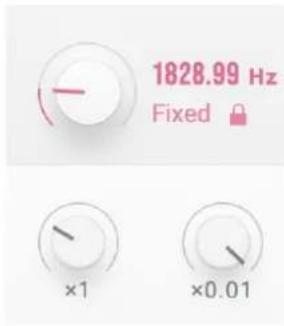
x100, x1, x0.01
This sets the oscillator frequency over a range of 0.01 to 9999.99 Hz.
When "FREQ" is RATIO
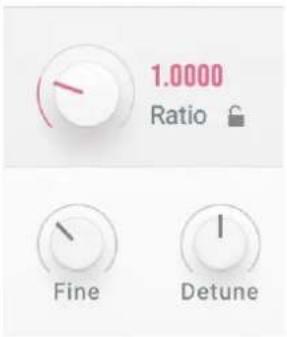
Coarse Ratio
This is used for coarse adjustments of the oscillator pitch. When this setting is "1", the frequency is the same as the note number. When this setting is less than "1", the pitch will shift down in units of octaves. When this setting is more than "1", the pitch will shift up in integer units according to the frequency of the note number.
Fine (Fine Ratio)
Fine-tunes the oscillator pitch. The oscillator frequency is equal to the Coarse Ratio, Fine (Fine Ratio) and note number frequency values, all multiplied together.
Detune
Detunes the pitch of the oscillator in one-cent steps.
OPERATORS: P.MOD
P.MOD (Operator Pitch Modulation)
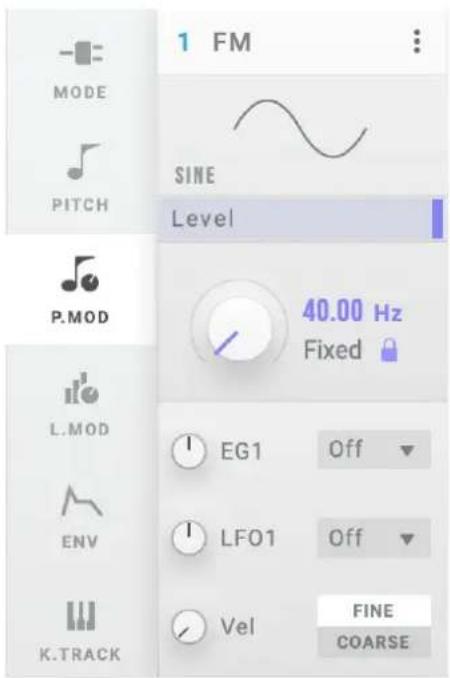
EG1 (Pitch EG1 Intensity)
Sets the effect of the EG1 applied to the pitch, in semitone steps.
CTRL (Pitch EG1 Ctrl Src)
Selects the modulation source that controls the EG1 Int. The value selected here is multiplied with EG1 (EG1 Int) to determine the amount of pitch modulation. (→p.54 "Control Source List")
LFO1 (Pitch LFO1 Intensity)
Sets how much the LFO1 will affect the pitch, in semitone steps.
CTRL (Pitch LFO1 Ctrl Src)
Selects the modulation source that controls the LFO1 Int. The value selected here is multiplied with LFO1 (LFO1 Int) to determine the amount of pitch modulation. (→p.54 "Control Source List")
Vel (Pitch Velocity Sens)
Sets how much the velocity will affect the pitch.
DEST (Pitch Velocity Mod. Dest.)
Sets which parameter will be affected by the effect of the velocity on the pitch. This is enabled only when FREQ (Frequency Mode) is set to "RA-TIO".
FINE: The effect will be applied to FINE (Fine Ratio). The pitch will be changed continuously by changes in velocity.
COARSE: The effect will be applied to COARSE (Coarse Ratio). Changes to the pitch will be made in stages, with the ratio between the note number and pitch remaining as integers. Using this on Operators that are modulators lets you change the harmonics without muddying the sound.
OPERATORS: L.MOD
L.MOD (Operator Level Modulation)
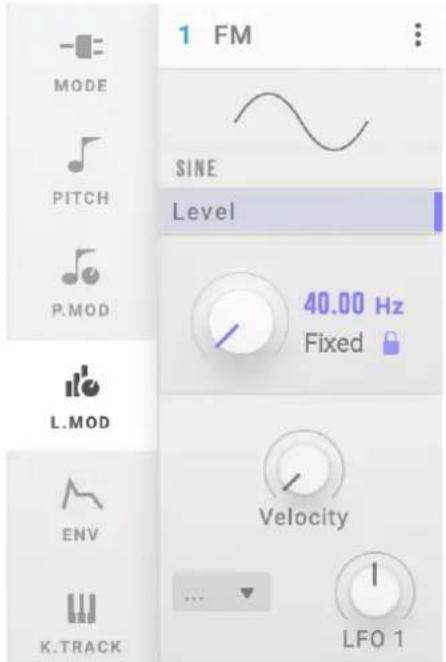
This sets how the effect applied to the Operator's output level will change with the velocity.
CTRL (Level LFO1 Ctrl Src)
Selects the modulation source that controls the LFO1 Int. The value selected here is multiplied with LFO1 (Level LFO1 Intensity) to determine the amount of output level modulation. (→p.54 "Control Source List")
LFO1 (Level LFO1 Intensity)
This sets how the effect applied to the Operator's output level will change with the LFO1.
OPERATORS: ENV
EG (Operator Level/EG)
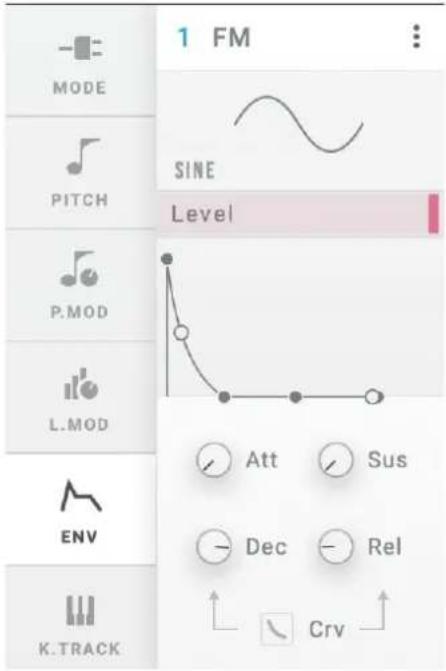
Att (Attack Time)
Specifies the time from note-on until the maximum level is reached.
Sus (Sustain Level)
This sets the level at the end of the Decay time.
When the sustain level is reached, this level is maintained until note off.
Dec (Decay Time)
This sets how long it takes to settle from the peak to the Sustain level.
Rel (Release Time)
This sets how long it takes the envelope to fall to 0 after releasing a note.
Crv (EG Curve)
This sets the decay and release curves.
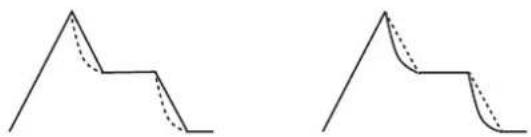
natural_image
Two abstract line diagrams with solid and dashed lines, no text or symbols presentCurve=0 (LIN) Curve=10 (EXP)
OPERATORS: K.TRACK
K.TRACK (Operator Level Key Track)
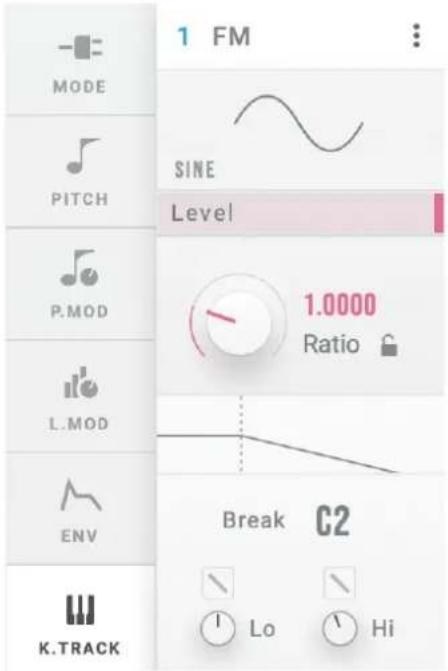
CENTER (Keytrack Center Key)
This sets the note on the keyboard that is used as a reference for keyboard tracking. The depth of the effect will change according to how far the note you play is from the CENTER (Center Key).
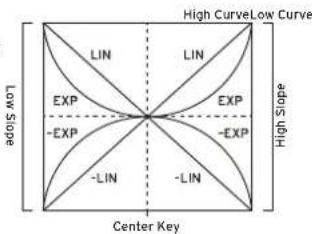
Low Curve (Keytrack Low Curve)
This sets how the effect will change as
you play lower notes in relation to the CENTER (Center Key). Setting this to "LIN" will make the effect progressively stronger at a fixed ratio.
Setting this to "EXP" will make the effect gradually deeper around the CENTER (Center Key), but the effect will become exponentially stronger for notes played further away from the CENTER (Center Key).
Lo (Keytrack Low Slope)
Sets the depth of keyboard tracking for notes that are lower than the CENTER (Center Key). When this is set to a positive value, the lower the note is from the CENTER, the greater the Operator's output level will be. When this is set to a negative value, lower notes will produce correspondingly lower output levels.
High Curve (Keytrack High Curve)
This sets how the effect will change as you play higher notes in relation to the CENTER (Center Key). Setting this to "LIN" will make the effect progressively stronger at a fixed ratio. Setting this to "EXP" will make the effect gradually deeper around the CENTER (Center Key), but the effect will become exponentially stronger for notes played further away from the CENTER (Center Key).
Hi (Keytrack High Slope)
Sets the depth of keyboard tracking for notes that are higher than the
CENTER (Center Key). When this is set to a positive value, the higher the note is from the CENTER, the greater the Operator's output level will be. When this is set to a negative value, the higher notes will produce correspondingly lower output levels.
Algorithm
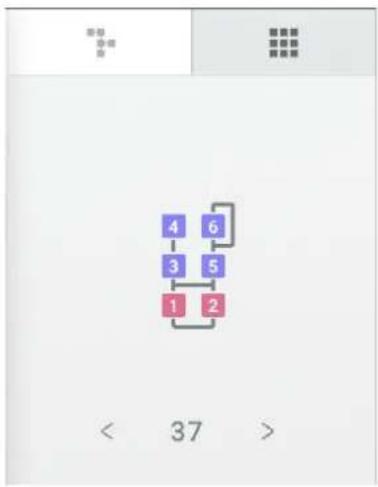
Selects the algorithm. (→p.52 "Algorithm List")
USER ALG (User Algorithm)
| ■■■ ■■■ | ■■■ ■■■ | |||||
| × | 1 | 2 | 3 | 4 | 5 | 6 |
| 1 | ||||||
| 2 | ||||||
| 3 | ||||||
| 4 | ||||||
| 5 | 100 | |||||
| 6 | 55 | 100 | ||||
| OUT | ↓ | ↓ | ↓ | ↓ | ↓ | ↓ |
Select this page to edit the user algorithms. To finish editing, go to a different page.
FM MATRIX
This configures how the operators are connected and how strongly they connect. The rows show how the operators are lined up, and the columns show whether they send their signals to other operators.
For example, operator 1 is shown in the leftmost column.
The six spaces shown from top to bottom show the signal feed level going from operator 1 to operators 1-6.
The lowest row shows whether the operator itself will output to the filter of the next row. The downward arrow (↓) indicates that the operator is outputting.
Editing the user algorithms
Set how much signal is sent to the operators by adjusting the numbers in the matrix.
This has the same effect as the FB (Feedback) parameter when the operator mode is "FM", but can also be used in other modes besides FM.
In row 1, column 2, set the modulation signal level that's sent from OP2 to OP1.
| × | 1 | 2 | 3 | 4 | 5 | 6 |
| 1 | 100 | |||||
| 2 | ||||||
| 3 | ||||||
| 4 | ||||||
| 5 | ||||||
| 6 | ||||||
| OUT | ↓ | ↓ | ↓ | ↓ | ↓ | ↓ |
Setting this to 100% will set the same level as when the preset algorithm is connected.
The OUT in the final row determines whether the operator's output signal is output as audio or not.
| × | 1 | 2 | 3 | 4 | 5 | 6 |
| 1 | 100 | |||||
| 2 | ||||||
| 3 | ||||||
| 4 | ||||||
| 5 | ||||||
| 6 | ||||||
| OUT | ↓ | ↓ | ↓ | ↓ | ↓ | ↓ |
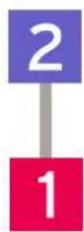
In this example, OP2 modulates OP1 100%, and the OP1 signal is output as audio.
ARP (Arpeggiator)
ARPEGGIATOR
Arpeggiator Run
Switches the arpeggiator between on, off and latch.
Off: The arpeggiator will not operate.
On: The arpeggiator will only operate when a note is played.
Latch: The arpeggiator will begin operating when a note is played, and will keep going even after the note is released.
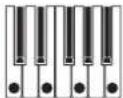
Pattern (Arpeggiator Pattern)
This parameter specifies the note pattern of the arpeggiator.
MANUAL: The arpeggio is played in the order that note-on signals held down together are played.
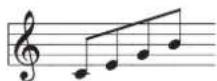
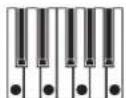
UP: The arpeggio is played from the lower tone (note) to the higher note.
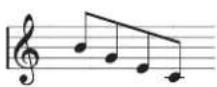
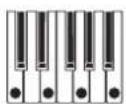
DOWN: The arpeggio is played from the higher tone (note) to the lower note.
ALT1: The arpeggio repeatedly plays up and down. (The highest and lowest notes will be played once.)
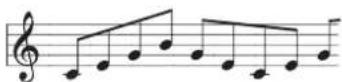
ALT2: The arpeggio repeatedly plays up and down. (The highest and lowest notes will be played twice.)
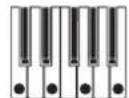
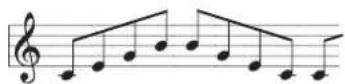
RANDOM: The notes are played randomly.
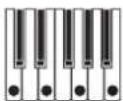
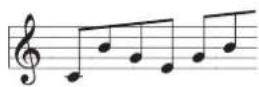
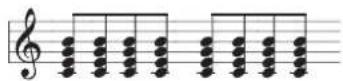
TRIGGER: The notes you hold down will be played simultaneously at the tempo and "RESO" timing.
Resolution
This controls the speed of the Arpeggiator.
Octave
This controls the range of the arpeggiated notes.
Gate (Gate Time)
This sets the length of the arpeggiated notes, as a percentage of the Resolution.
FILTER
FILTER
ENABLE
Switches the filter effect on/off.
TYPE (Filter Type)
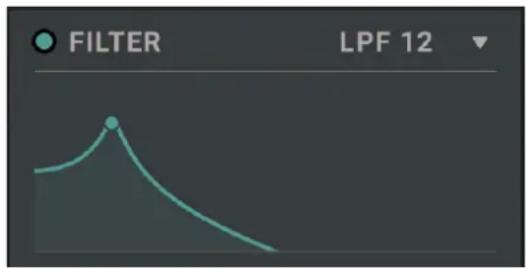
This is used to select the filter type. The resulting sound will be different depending on the selected filter type. For LPF, HPF, BPF and BRF, the digits at the end of the filter name (6, 12, 24) indicates the filter characteristics (dB/oct). The larger the value, the more abruptly that the filter will cut off the sound at the cutoff frequency.
LPF 12, LPF 24: This cuts out the parts of the sound which are higher than the cutoff frequency. Low Pass is the most common type of filter, and is used to make bright timbres sound darker.
LPF MS-20, HPF MS-20: Both of these are 12dB/oct filters that can self-oscillate and replicate the distinctive tonal character of the Korg MS-20. If the input level is high, raising Resonance will cause increasing amounts of saturation and overdrive, creating a more aggressive
tone.
LPF Poly6: This is a 24dB/oct filter that can self-oscillate, which replicates the powerful yet sweet tonal character of the Korg Polysix.
HPF 12, HPF 24: This cuts out the parts of the sound which are lower than the cutoff frequency. These filters are effective when the low end is too strong, or when you want a thinner sound.
BPF 6, BPF 12: This cuts out all parts of the sound, both highs and lows, except for the region around the cutoff frequency. Because of this, the sound can change dramatically depending on the cutoff setting and the Operator's sound settings. With low resonance settings, you can use the Band Pass filter to create telephone or vintage phonograph sounds. With higher resonance settings, it can create buzzy or nasal timbres.
BRF 6, BRF 12: These are also called "notch filters" because of the dip in the midrange levels. Only the parts of the sound at and directly around the cutoff frequency are cut off. Try modulating the cutoff with an LFO to create phaser-like effects.
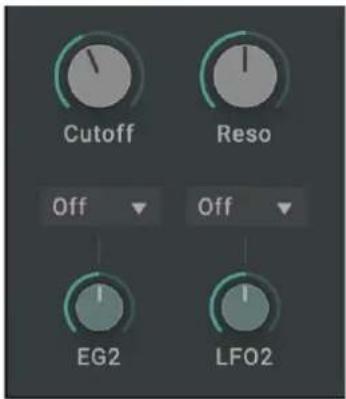
Cutoff
Sets the cutoff frequency of the filter in Hz. As explained above, the cutoff frequency effect will differ depending on the type you select. The range of most filter types is from 6.489 Hz to 23.68 kHz, but the range of the MS-20 LPF/HPF and LPF Poly6 is from 12.98 Hz to +21.10 kHz.
Reso (Resonance)
Resonance emphasizes the frequencies around the cutoff frequency, as shown in the diagram below.
This will have no effect with a setting of 0.
At medium settings, the resonance will alter the timbre of the filter, making it sound more nasal, or more extreme.

line
| Time | Low resonance value | |------|---------------------| | 0 | 100 | | 1 | 95 | | 2 | 90 | | 3 | 85 | | 4 | 80 | | 5 | 75 | | 6 | 70 | | 7 | 65 | | 8 | 60 | | 9 | 55 | | 10 | 50 | | 11 | 45 | | 12 | 40 | | 13 | 35 | | 14 | 30 | | 15 | 25 | | 16 | 20 | | 17 | 15 | | 18 | 10 | | 19 | 5 | | 20 | 0 |Note: For some filter types, oscillation may occur within the filter when RESO (Resonance) is set to a high value. This may cause
the oscillation to continue even after note-off. To avoid this kind of oscillation, use V.Patch to control the resonance value using an EG, or use a filter on the Operator Mode side.
EG2 (EG2 Intensity)
This sets the amount that the EG2 modulates the cutoff parameter.
CTRL (EG2 Ctrl Source)
Selects the modulation source that controls the EG2 Int. The source selected here is multiplied with EG2 Int to determine the amount of cutoff modulation. (→p.54 "Control Source List")
LFO2 (LFO2 Intensity)
This sets the amount that the LFO2 modulates the cutoff parameter.
CTRL (LFO2 Ctrl Source)
Selects the modulation source that controls the LFO2 Int. The source selected here is multiplied with LFO2 Int to determine the amount of cutoff modulation. (→p.54 "Control Source List")
K. Track (Filter Keyboard Tracking)
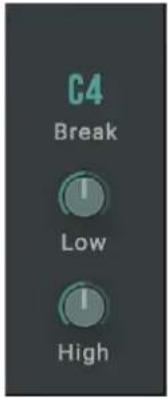
Center Key (KeyTrk Center Key)
This sets the note used as a reference for keyboard tracking. The cutoff frequency will change according to the distance between the inputted note and the reference note. When you play the same note as the reference note, the cutoff frequency will be the same as the setting on the Filter page.
Low (KeyTrk Low Slope)
Sets the depth of key tracking for notes that are lower than the Center Key. When this is set to a positive value, the cutoff frequency correspondingly increases for lower notes. When this is set to a negative value, the cutoff frequency correspondingly decreases for lower notes. A setting of “-1.00” will make the cutoff frequency change with the same slope as the key pressed on the keyboard.
High (KeyTrk High Slope)
Sets the depth of key tracking for notes that are higher than the Center Key. When this is set to a positive value, the cutoff frequency correspondingly increases for higher notes. When this is set to a negative value, the cutoff frequency correspondingly decreases for higher notes. A setting of "+1.00" will make the cutoff frequency change with the same slope as the key pressed on the keyboard.
ENVELOPE, LFO
EG1 PITCH, EG2 Filter, EG3 (Assignable)
The opsix features three EGs in addition to the EGs that control the levels of each Operator.
By default, EG1 is connected to the Operator pitch and EG2 is connected to the filter. EG3 is not connected to anything, but can be connected with V.Patch.
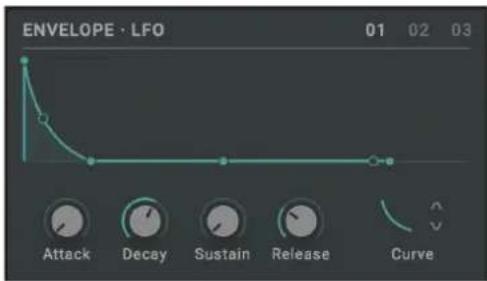
Attack (Attack Time)
Decay (Decay Time)
Sustain (Sustain Level)
Release (Release Time)
Curve
(→p.29 "EG (Operator Level/EG)")
LFO
The opsix native features three LFOs. By default, LFO1 is connected to the Operator pitch and level, and LFO2 is connected to the filter. LFO3 is not connected to anything, but can be connected with V.Patch (→p.43 "Virtual Patch 1...12".)
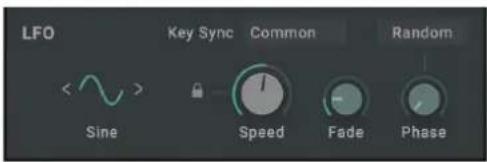
Wave
This selects the LFO waveform.
- LFO Wave List
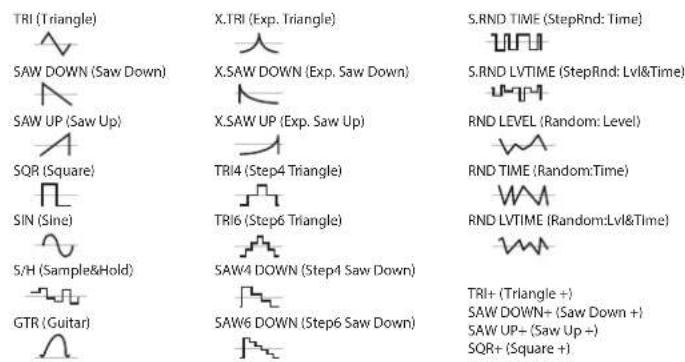
Take a look at the comments below on some of the waveforms.
GTR (Guitar): This is for guitar vibrato. The value is positive only, and when it is set using pitch, only a pitch bend up effect will result.
S/H (Sample&Hold): This is a typical sample/hold waveform, on which the level changes at random in fixed intervals.
S.RND LVTIME (StepRnd: Lvl&Time): Randomly changes the level and timing.
S.RND TIME (StepRnd: Time): Generates a pulse wave at a random timing.
RND LEVEL (Random: Level), RND TIME (Random: Time), RND
LVTIME (Random: Lvl&Time): Different from step-based changes, these are smoothed versions of S/H, S.RND TIME and S.RND LVTIME that create non-linear changes. Use these for gradual random changes.
Triangle + ... Square +: This outputs only positive values, as opposed to the waveforms from Triangle to Square that output values from +1 to +1. This is useful when you want a cyclical pitch-up or pitch-down effect.
Tempo Sync
On: The note length will be set using SPEED. The LFO frequency will synchronize to the system tempo, as it is controlled by this speed.
Off: The LFO speed is controlled by the SPEED parameter, in Hz.
Speed (Speed (Frequency))
When Tempo Sync is on, this sets the base LFO speed as a note length. When Tempo Sync is off, this sets the LFO speed in Hz.
Key Sync
Specifies how the LFO will be applied to a voice when note-on occurs. Off: The LFO phase will not be reset when note-on occurs. It will only be reset when selecting a program or starting step sequencer playback.
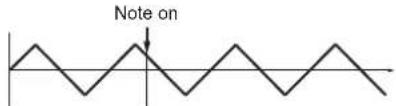
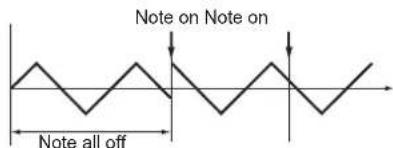
Common: The phase of the LFO will be reset by the first note-on that occurs from a condition of no keys being held; it will not be reset for subsequently played voices.
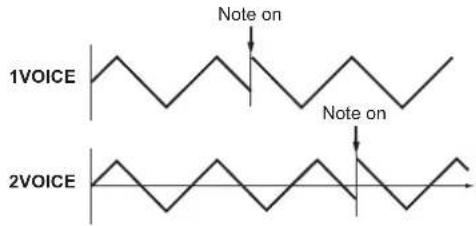
VOICE: The LFO phase will be reset with each note-on, and modulation will be applied in differing phases to each voice.
Fade
The LFO can fade in gradually, instead of starting immediately at full strength. This sets the time from note-on until the LFO reaches maximum amplitude.
Note: This will have no effect when "KSYNC" is off.
Phase
This sets the phase when the LFO is reset. When the Random button is on, the LFO will start with a different phase for each note-on message, regardless of the phase setting.
EFFECT
FX 1, 2, 3 (Effect 1, 2, 3)
The opsix features three multi-effectors. These three effectors are connected in a series.
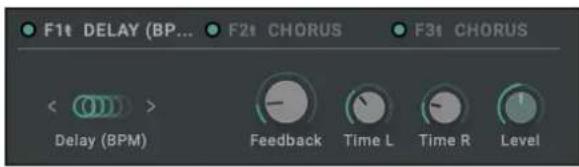
ENABLE
Switches the effect on/off. You can listen and compare how the effects sound by switching them on and off.
Effect Type
Selects the effect type.
Effect Parameter 1...4
This configures the parameters of each effect.
For more on the parameters, see →p.60 "Effect Parameter List".
VIRTUAL PATCH
Virtual Patch 1...12
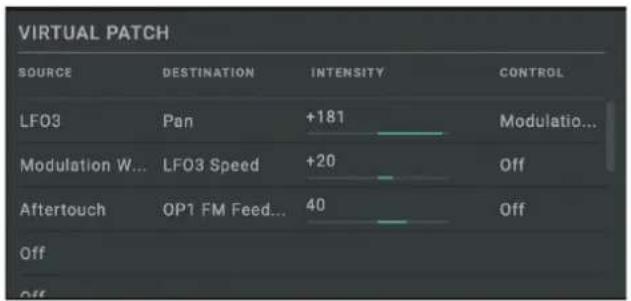
SOURCE (Source Scope), SRC (Source)
Selects the modulation source signal.(→p.57 "Virtual Patch Source List")
DESTINATION (Dest Scope, Destination)
This sets the parameters and groups to be changed by modulation. (→p.58 "Virtual Patch Destination List")
INTENSITY (Mod Int)
Specifies the depth of the effect produced by the modulation source.
CONTROL (Mod Ctrl Src)
Selects the modulation source that controls Mod Int. The source value selected here is multiplied with Mod Int to determine the depth of the modulation effect. (→p.54 "Control Source List")
SEQUENCER
SEQUENCER
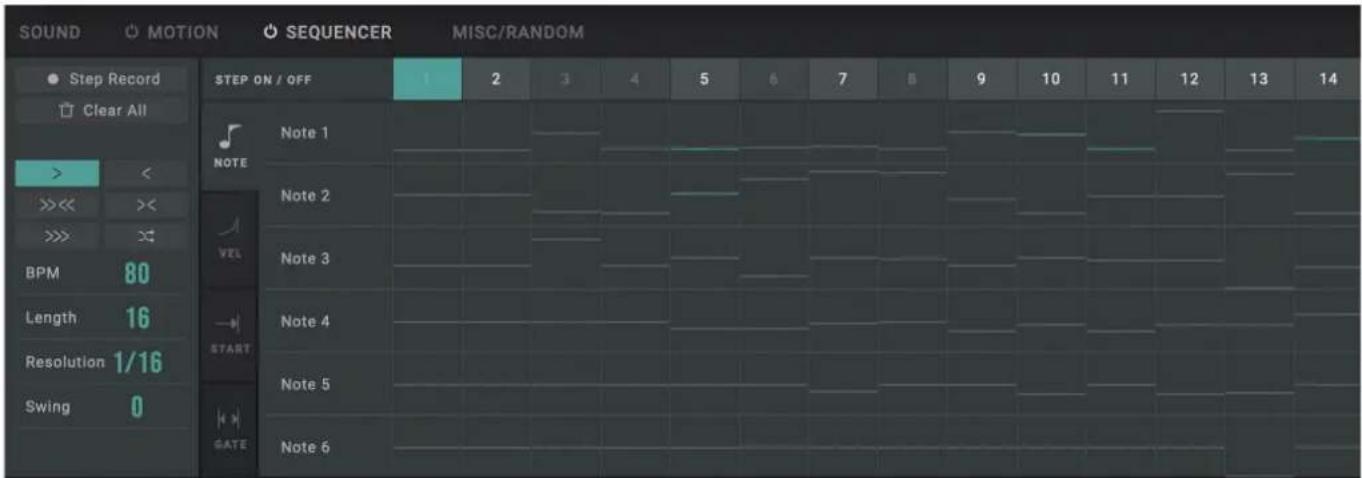
Step Mode
Specifies how steps advance during playback.
(Forward): Makes the sequencer play back forward.
<< (Backward): Makes the sequencer play back in reverse.
<< (Bounce): Makes the sequencer play back forward, and then in reverse.
× (Center): Playback will occur in the following order: 1, 16, 2, 15, 3, 14...(Even/Odd): The sequencer plays back only odd-numbered or even-numbered steps.
(X)(Random): Makes the sequencer play back randomly.
BPM (Tempo)
Specifies the tempo for the selected program. This setting is applied not only to the sequencer but also to the arpeggiator, LFO and effects that synchronize with the tempo.
If you are synchronizing the tempo with your DAW, the word "SYNC" appears. You can set whether to turn off synchronization from the SETTINGS page.
Length
Sets the number of steps used in the sequence.
Resolution (Step Resolution)
Sets the length of a step in relation to the tempo.
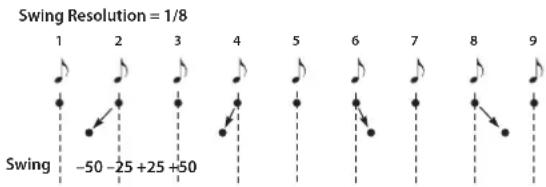
Swing
Adjusts the intensity of the swing.
Tip: Setting this to "+33%" gives you nearly a full shuffle timing.
line
Swing Resolution = 1/8 | Time Point | Value | | :--- | :--- | | 1 | 1 | | 2 | -50 | | 3 | -25 | | 4 | +25 | | 5 | +50 | | 6 | | | 7 | | | 8 | | | 9 | |Key Sync (Motion Key Sync)
This parameter affects how the motion sequencer behaves in relation to the note sequencer.
TRIG (TRIGGER): the motion sequencer will reset to the beginning of the sequence and begin playback whenever a new note is played.
LEGA (LEGATO): the motion sequencer will reset to the beginning of the sequence and begin playback the first time the note sequencer is triggered, after which it will continue independently until no notes are being played.
FREE: the motion sequencer will run independent of the note sequencer, modulating the destination values for as long as opsix native is running.
Note Sequencer
LANE
Up to six notes can be used in one step on the opsix native. Select the lane where the note will go, from 1 to 6.
ACTIVE
Sets whether this step is triggered or not.
NOTE (Lane Note)
This sets the note number for the selected step and lane.
VEL (Velocity)
Sets the velocity of the selected step and lane.
START (Start Offset)
Sets the timing used to trigger a step, as a percentage of the step length.
Increasing the Resolution (Step Resolution) lets you easily create the timings often used in hip-hop and neo-soul music, as well as sounds like strumming and flams.
GATE (Gate Time)
Sets the note length of the selected step and lane. When you want to make a note sound for longer than the step length, use a tie to connect the note to the next step.
MOTION
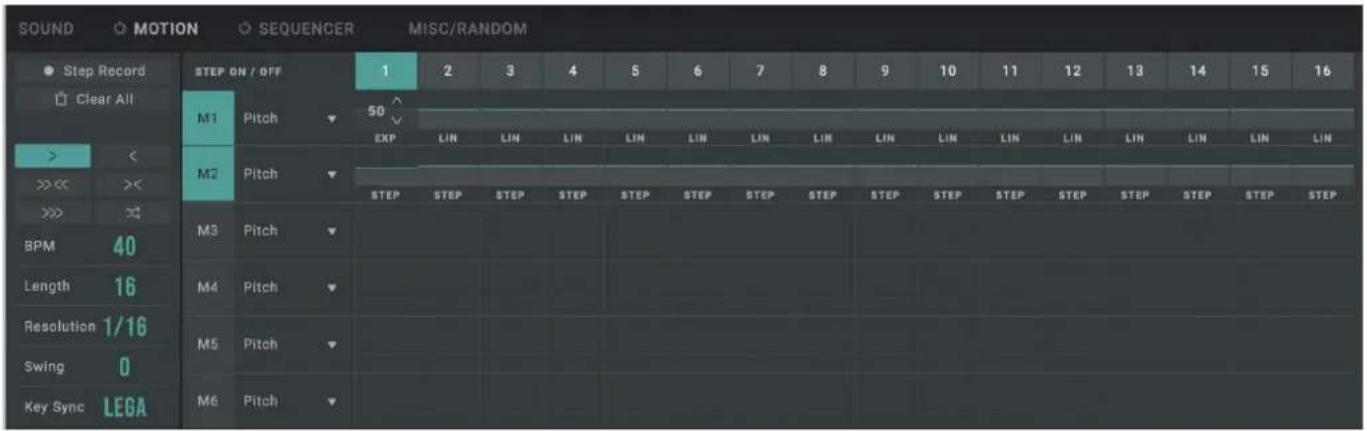
Motion Sequencer
LANE
The opsix uses six lanes that automatically "play" the parameters (motion sequences). Select a motion sequence lane from 1 to 6.
DEST (Dest Scope, Destination)
This sets the parameters and groups to be changed by the motion sequence. Refer to "Motion Destination List" ( p.79) for details.
VALUE
This specifies the value of the selected lane and step.
CURVE
Select the curve that connects the values from the selected steps of the currently selected lane to the next step.
You can select "STEP" (no curve), "EXP (Exponential)", "LIN (Linear)" or "LOG (Logarithmic)".
To make smooth changes to the parameters, select either "EXP (Exponential)", "LIN (Linear)" or "LOG (Logarithmic)". On the other hand, for parameters like "WAVE" and "PTRN", select "STEP" so that the parameter changes at the beginning of the step in question to produce the desired effect.
MISC/RANDOM
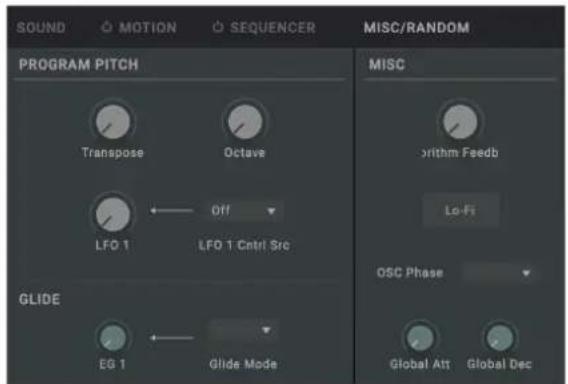
PROGRAM PITCH
Transpose
Adjusts the overall pitch in semitone steps over a range of ÷1 octave for the entire program.
Octave
This sets the basic pitch, in octaves. The default is 0.
LFO1 (LFO1 Int)
This controls the initial effect of the LFO1 on the pitch, in semitones.
CTRL (LFO1 Ctrl Src)
Selects the modulation source that controls the LFO1 Int. The source value selected here is multiplied with LFO1 Int to determine the depth of
the modulation effect. (→p.54 "Control Source List")
GLIDE
Glide Time
Sets the amount of time it takes to move from one pitch to the next.
Glide Mode
Glide mode makes the pitch change smoothly between different notes.
Off: The glide effect will be disabled, and notes will always play at their correct pitch.
On: The pitch will change smoothly between notes.
Legato: The pitch will change smoothly between notes only when playing legato.
MISC
Algorithm Feedback
Aside from the user algorithms, feedback algorithms are connected like a feedback loop that sends signals upwards through the algorithm.
(ALGO X, X, ..X) This parameter sets the signal level that flows through the feedback loop. The feedback loop is picked up following the LEVEL (Program Level) of the Operator, which lets you use the changes in LEVEL (Program Level) to affect the feedback as well, creating complex effects.
Lo-Fi
When this is turned on, the oscillator waveform and level control signals are tuned more roughly, creating a slightly noisy sound that is like an older digital synth.
OSC Phase
This sets this oscillator's phase for each note-on as follows.
Sync: Sets the oscillator phase to "0".
Free: Sets the value for all oscillators to the same random value.
Random: Sets and changes the value for each oscillator's phase randomly.
Global Atk (Global Attack)
Sets the attack time (how quickly the note starts) for all Operators.
Global Dec (Global Decay)
Sets the decay/release time (how quickly the note fades out) for all Operators.
RANDOM
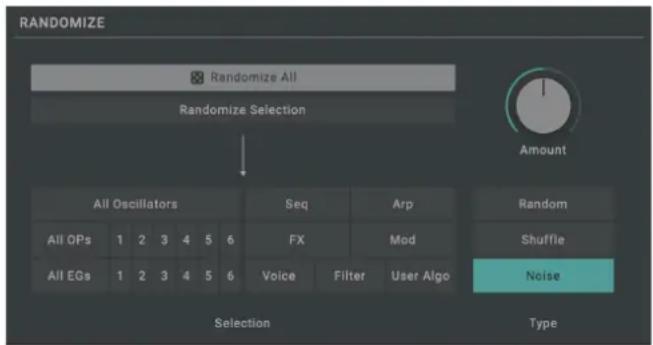
Randomize All
Randomizes all the parameters.
Randomize Selection
Randomizes all the parameters selected using "Selection".
Amount
Use "Amount" to adjust the randomization strength.
Selection
Select the scope of parameters to randomize.
Type
Set how the randomization will be done with the "Type" parameter. Random: Changes the selected range of parameters by randomly creating values for each. Shuffle: Randomly shuffles (exchanges) the values of the selected range of parameters.
Noise: Adds a random noise value to the selected range of parameters.
Controller
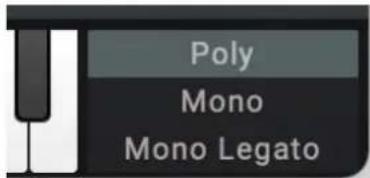
ASSIGN (Voice Assign)
Specifies how notes are produced.
Poly: Play polyphonically. The program can be played using chords.
Mono: Play monophonically. Only one note can be played at a time with the program.
Mono Legato: Play monophonically. When you play a legato phrase by pressing the next key while the previous key is still pressed down, the first note in the phrase sounds normally, but the following notes sound without a break in the note. As an example, the notes sound but the envelope is not restarted.
SETTINGS
This page is for configuring the overall settings of the opsix native.
SETTINGS
![SETTINGS Master Tune +11 CENTS Velocity Curve 4 [NORMAL] Sync To DAW Off MIDI Control Change Receive/On Program Change Receive/On Pitch Bend Receive/On](/content/2026/05/828223/images/881bd28661f4d9d2d806bc2c31e9640d8628f08f3c8626b751c12ba1dca825fb.jpg)
Master Tune
This adjusts the overall tuning for the entire opsix in one-cent units (semitone = 100 cents), over a range of ±50 cents.
When the value is set to 0 cents, A4 is equal to 440 Hz.
Velocity Curve
This controls how the volume and/or tone responds to variations in keyboard playing dynamics (velocity). Choose the curve that is most
appropriate for your playing strength and style.
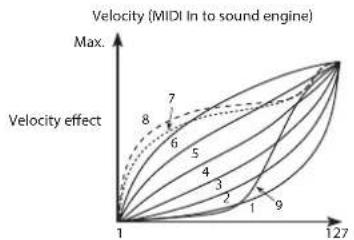
line
| Velocity | Value | | -------- | ----- | | Max. | 8 | | Max. | 7 | | Max. | 6 | | Max. | 5 | | Max. | 4 | | Max. | 3 | | Max. | 2 | | Max. | 1 | | Max. | 9 |Sync To DAW
Enable this when you want to sync the tempo of the opsix native with your DAW.
When this is OFF, each program will sound using their own tempo values.
MIDI
Control Change
Selects whether MIDI control change messages will be received.
Tlp: CC#1 (Modulation Wheel), CC#64 (Damper) and CC#120 onward cannot be controlled using this setting.
Program Change
Selects whether MIDI program change messages will be received.
Pitch Bend
Selects whether MIDI pitch bend messages will be received.
Algorithm List
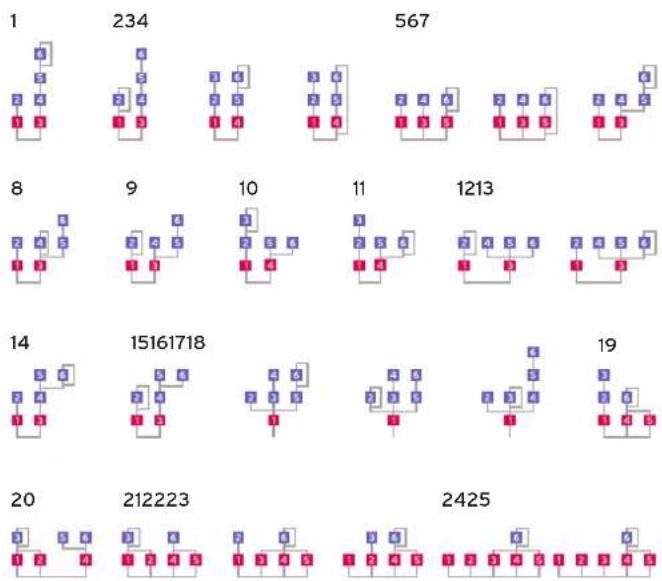
26

27

2829

[Non-Text]

3031

[Non-Text]
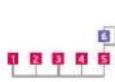
32
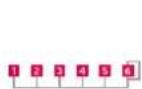
33

343536

37

38

3940


Waveform List
| Full name Notes | |
| Sine | Generates a sine wave. This is the basic waveform used in FM synthesizers, as it contains a fundamental tone but no overtones. |
| Sine 12bit | Generates a sine wave with coarse resolution such as that used in old digital synthesizers. |
| Sine 8bit | Generates a sine wave with even coarser resolution. This is effective for making sounds with noise. |
| Triangle | Generates a triangle wave. Unlike the sine wave, this waveform contains harmonics, but also has a rounder feel than the sawtooth or square wave. |
| Saw | Generates a sawtooth wave. This waveform is used to create sounds typical of analog synthesizers, such as synth basses and brass. |
| Saw HD | Generates a sawtooth wave with richer high-end overtones than the normal sawtooth wave, by using a large amount of CPU power. |
| Square | Generates a square wave. This waveform is used for electronic and wind instrument sounds. |
| Square HD | Generates a square wave with richer high-end overtones than the normal square wave, by using a large amount of CPU power. |
| Additive Saw3 | Generates the first three harmonics of a sawtooth wave. |
| Additive Sqr3 | Generates the first three harmonics of a square wave. |
| Additive Tri3 | Generates the first three harmonics of a triangle wave. |
| Additive 12345 | Generates an amplitude equal to the first through fifth harmonics. This is like a filtered sawtooth wave. |
| Additive 1+2 | Generates a wave with an amplitude equal to the fundamental tone and second harmonic. This is like the 8' and 4' stops on an organ. |
| Additive 1+3 | Generates an amplitude equal to the fundamental tone and third harmonic. This is like the 8' and +2/3' stops on an organ. |
| Additive 1+4 | Generates a wave with an amplitude equal to the fundamental tone and fourth harmonic. This is like the 8' and +2' stops on an organ. |
| Additive 1+5 | Generates an amplitude equal to the fundamental tone and fifth harmonic. This is like the 8' and +1 3/5' stops on an organ. |
| Full name Notes | |
| Additive 1+6 | Generates a wave with an amplitude equal to the fundamental tone and sixth harmonic. This is like the 8' and +1 1/3' stops on an organ. |
| Additive 1+7 | Generates an amplitude equal to the fundamental tone and seventh harmonic. |
| Additive 1+8 | Generates a wave with an amplitude equal to the fundamental tone and eighth harmonic. This is like the 8' and +1' stops on an organ. |
| Noise S/H | Generates noise with a musical element, by means of a sample hold circuit. |
| Noise White | Generates white noise. A certain level of noise is added to the sound throughout the frequency spectrum. |
| Noise Pink | Generates pink noise. Noise is added to the sound in inverse proportion to the frequency. |
| Noise Blue | Generates blue noise. Noise is added to the sound in proportion to the frequency. |
Control Source List
| Full name |
| Modulation Wheel |
| Pitch Wheel |
| Pitch Wheel + |
| Pitch Wheel – |
| Damper Pedal |
| Note Number |
| Velocity |
| Exp. Velocity |
| Release Velocity |
| Aftertouch* |
| EG1 (Pitch) |
| LG2 (Filter) |
| EG3 (Assignable) |
| LFO1 (Operator) |
| LFO2 (Filter) |
| LFO3 (Assignable) |
Motion Destination List
| Scope Destination | Notes | |
| Off --- --- | ||
| Program | Pitch --- | |
| Octave --- | ||
| Transpose --- | ||
| Level --- | ||
| Pan Controls the fixed left-right PAN position. | ||
| Attack Time | This is the Attack parameter on the ALGO page. This controls the relative decay and release times for all Operators. | |
| Decay Time | Controls the relative decay times for all Operators. | |
| Release Time | Controls the relative release times for all Operators. | |
| Sustain Level | Controls the relative sustain levels for all Operators. | |
| Decay/Release | This is the Decay/Release parameter on the ALGO page. This controls the relative decay and release times for all Operators. | |
| Glide Mode --- | ||
| Glide Time --- | ||
| Unison Voices --- | ||
| Unison Detune --- | ||
| Unison Spread | --- | |
| Tempo --- | ||
| Algorithm --- | ||
| Algorithm FB --- | ||
| Scope Destination | Notes | |
| OP1...6 | Pitch --- | |
| Coarse Ratio | --- | |
| Fine Ratio | --- | |
| Detune | --- | |
| Transpose --- | ||
| Fixed Frequency | --- | |
| Level --- | ||
| Attack Time --- | ||
| Decay Time --- | ||
| Release Time | --- | |
| Sustain Level | --- | |
| FM Feedback | --- | |
| FM Wave Width | --- | |
| Ring Mod. Depth | --- | |
| Ring Mod. Shape | --- | |
| Filter Cutoff --- | ||
| Filter Resonance | --- | |
| Filter OSC Mix | --- | |
| Wave Folder Gain | --- | |
| Wave Folder Bias | --- | |
| WaveFolder OSCMix | --- | |
| Effect OSC Mix | --- | |
| Peak.EQ Frequency | --- | |
| Peak.EQ Gain --- | ||
| Shelv.EQ Low Gain | --- | |
| Shelv.EQ High Gain | --- | |
| Phaser Frequency | --- | |
| Phaser Feedback | --- | |
| S.Delay Time | --- | |
| S.Delay Feedback | --- | |
| Comb Frequency | --- | |
| Comb Feedback | --- | |
| OP1...6 | Distortion Amount --- | |
| Distortion Low Gain --- | ||
| Drive Amount --- | ||
| Drive Low Gain --- | ||
| Decimator Freq. --- | ||
| Decimator Bit --- | ||
| WS High Damp --- | ||
| Punch Amount --- | ||
| Punch High Gain --- | ||
| Keytrack Low --- | ||
| Keytrack High --- | ||
| Level Mod Velocity --- | ||
| EG1..3 | Attack Time --- | |
| Decay Time --- | ||
| Release Time | --- | |
| Sustain Level | --- | |
| LFO1..3 | Wave | --- |
| Speed | --- | |
| Sync Speed --- | ||
| Fade | --- | |
| Filter | Cutoff | --- |
| Resonance | --- | |
| FX1..3 | Depends on the effect type. | |
| Arpeggiator | Run | --- |
| Pattern | --- | |
| Resolution | --- | |
| Gate Time | --- | |
| Octave | --- | |
| Sequencer | Swing | --- |
| User algorithm | 1 1..6 5 | --- |
| MIDI | Pitch Wheel --- | |
| CC 1...118 | --- |
Virtual Patch Source List
| Scope Source | Notes | |
| Off | --- | |
| Controller Modulation | ion Wheel | --- |
| Pitch Wheel | --- | |
| Pitch Wheel + | This effect will be applied when the PITCH wheel is moved in the 1 direction (away from you). | |
| Pitch Wheel - | This effect will be applied when the PITCH wheel is moved in the - direction (towards you). | |
| Damper Pedal | --- | |
| Keyboard Note Number | The effect will be applied according to the note number. The center note is 60 (C4). | |
| Velocity | --- | |
| Exp. Velocity The effect will be applied exponentially in relation to the velocity. The effect will not be readily evident at lower velocity values, but will be applied at a steep curve with higher velocity values. | ||
| Release Velocity The effect will be applied according to release velocity (how quickly you release the key after you play a note). | ||
| EG/LFO LG1 (Pitch) | --- | |
| EG2 (Filter) | --- | |
| EG3 (Assignable) | --- | |
| LFO1 (Operator) | --- | |
| LFO2 (Filter) | --- | |
| LFO3 (Assignable) | --- | |
| CC + (Unipolar) CC | 1..119 + | When the CC value is "0", the V.Patch effect will also be "0". When the intensity is a positive value, increasing the CC value will result in a positive effect only. (this works the opposite with a negative value). |
| CC +/- (Bipolar) CC | 1..119 +/- | When the CC value is "64", the V.Patch effect will be "0". When the intensity is a positive value, increasing the CC value above 64 will result in a positive effect, and reducing the value will result in a negative effect. (this works the opposite with a negative value). |
| MIDI Aftertouch | --- | |
| Poly Aftertouch | --- | |
Virtual Patch Destination List
| Scope Destination Notes | ||
| Off --- | ||
| Program Pitch --- | ||
| Octave --- | ||
| Transpose --- | ||
| Level --- | ||
| Pan Controls the left-right position in the stereo field. | ||
| Attack Time | Controls the relative attack times for all Operators. | |
| Decay Time | Controls the relative decay times for all Operators. | |
| Release Time | Controls the relative release times for all Operators. | |
| Sustain Level | Controls the relative sustain levels for all Operators. | |
| Tempo --- | ||
| Algorithm --- | ||
| Algorithm Feedback --- | ||
| Glide Time --- | ||
| Unison Voices --- | ||
| Unison Detune --- | ||
| Unison Spread --- | ||
| OP1...6 Pitch --- | ||
| Coarse Ratio | --- | |
| Octave --- | ||
| Transpose --- | ||
| Level --- | ||
| Attack Time | --- | |
| Decay Time | --- | |
| Release Time | --- | |
| Sustain Level | --- | |
| FM Feedback | --- | |
| FM Wave Width | --- | |
| Scope Destination Notes | ||
| OP1...6 Ring Mod. | Depth --- | |
| Ring Mod. Shape --- | ||
| Wave Folder Gain | --- | |
| Wave Folder Bias | --- | |
| Wave Folder OSCMix | --- | |
| Filter Cutoff | --- | |
| Filter Resonance | --- | |
| Filter OSC Mix --- | ||
| Effect OSC Mix | --- | |
| PeakEQ Frequency | --- | |
| PeakEQ Gain | --- | |
| Shelv.EQ Low Gain | --- | |
| Shelv.EQ High Gain | --- | |
| Phaser Frequency | --- | |
| Phaser Feedback | --- | |
| S.Delay Time | --- | |
| S.Delay Feedback | --- | |
| Comb Frequency | --- | |
| Comb Feedback | --- | |
| Distortion Amount | --- | |
| Distortion Low Gain | --- | |
| Drive Amount | --- | |
| Drive Low Gain | --- | |
| Decimator Freq. | --- | |
| Decimator Bit | --- | |
| WS High Damp | --- | |
| Punch Amount | --- | |
| Punch High Gain | --- | |
| EG1..3 | Attack Time | --- |
| Decay Time | --- | |
| Release Time | --- | |
| Sustain Level | --- | |
| LFO1..3 Waveform — | ||
| Speed — | ||
| Phase — | ||
| Fade — | ||
| Filter Cutoff — | ||
| Resonance — | ||
| FX1..3 Param1..4 Depends on the effect type. | ||
| Arpeggiator Arpeggiator Resolution — | ||
| Arpeggiator Gate Time — | ||
| Arpeggiator Octave — | ||
| Sequencer | Swing — | |
Effect Parameter List
| Effect name Parameter name | Range | |||
| Display Full name Display Full name | ||||
 | Chorus | Mix Dry:Wet Mix 0-100 | ||
| Depth Depth 0-100 [%] | ||||
| Speed Speed 0.020-20.000 [Hz] | ||||
| Phase LFO Phase 0.0-100.0 [%] | ||||
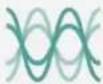
| Varies the delay time of the input signal to create a thicker or warmer sound. Use the PHASE parameter to shift the left and right LFOs for control of how the sound spreads out. | ||||
 | Unison Ensemble | Mix Dry:Wet Mix 0-100 | ||
| Depth Depth 0-100 [%] | ||||
| Rate Rate 0-100 [%] | ||||
| Voices Voices 2-8 | ||||
| Creates a rich, wide sound like multiple oscillators playing in unison. The DEPTII and RATE parameters simulate the detuning of the oscillators, and the VOICE parameter is used to simulate the number of oscillators. | ||||
 | Phaser/Phaser (BPM) | Mix Dry:Wet Mix 0-100 | ||
| Depth Depth 0-100 [%] | ||||
| Speed Speed 0.020-20.000 [Hz] / 1/48 | 4/1 | |||
| Reso Resonance 0.0-100.0 [%] | ||||
| Alters the phase of the sound to give the sound a swelling effect. This is effective for electric pianos and similar sounds. Use the PHASE parameter to shift the left and right LFOs for control of how the sound spreads out. | ||||
 | Auto Pan/Auto Pan (BPM) | Depth Depth 0-100 [%] | ||
| Waveform | Waveform Type | Triangle, Sine, Vintage, Up, Down, Square | ||
| Speed Speed 0.020-20.000 [Hz] / 1/48 | 4/1 | |||
| Phase LFO Phase 0.0-100.0 [%] | ||||
| This is an auto pan that moves the sound to the left and right. Moving the left and right LFOs gives effects such as both channels crossing past or following each other. | ||||
 | Flanger/Flanger (BPM) | Mix Dry:Wet Mix 0-100 | ||
| Depth Depth 0-100 [%] | ||||
| Speed Speed 0.020-20.000 [Hz] / 1/48 | 4/1 | |||
| Feedback | Feedback | -100 +100 [%] | ||
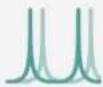
| An effect that creates a wild swelling sound and a sense of motion in pitch. This is effective for sounds that contain many overtones. | ||||
 | Rotary Speaker | Balance Hone/Rotor Balance R100:H0-R0:H100 [%] | ||
| Speed Sw. Speed Switch Slow, Fast | ||||
| Speed Speed -100.0 - +100.0 [%] | ||||
| Type Speaker Type | Natural, Natural + Direct, Resonant, Resonant + Direct, Bright, Bright + Direct, Original CX-3 | |||
| An effect that realistically simulates a vintage rotary speaker. By assigning the MODULATION wheel on the VPATCH page to the SPD SW parameter, you can use the wheel to switch between slow and fast, which is effective for performance. | ||||
 | Auto Wah | Mix Dry:Wet Mix 0-100 | ||
| Sens | Envelope Sens | 0.0-100.0 [%] | ||
| Shape | Envelope Shape | -100 - +100 [%] | ||
| Reso | Resonance | 0-100 [%] | ||
| This effect simulates an auto-wah. The effect swoeps according to changes in input signal strength (the envelope). This sound is often used in funk music for choppy guitar rhythms, clay sounds and so on. | ||||
 | Exciter | Mix Dry:Wet Mix 0-100 | ||
| Freq | Emphasis Frequency | 3000-24000 [Hz] | ||
| Blend | Blend | -100 - +100 [%] | ||
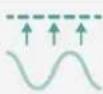
| This effect adds dynamics to the sound and emphasizes its clarity. FREQ controls the frequencies to be emphasized, and BLEND controls the effect depth. | ||||
 | Enhancer | Mix Dry:Wet Mix 0-100 | ||
| Depth Depth 0-100 [%] | ||||
| Delay | Delay | 0.0-100.0 [%] | ||
| Spread | Spread | 0.0-100.0 [%] | ||
| This effect widens out and adds presence to the sound. | ||||
 | LFO Filter | Cutoff | Cutoff frequency 0-100 [%] | |
| Reso | Resonance | 0-100 [%] | ||
| Depth LFO Depth 0-100 [%] | ||||
| Speed LFO Speed 0.020-20.000 [Hz] | ||||
| This effect uses an LFO to shift the cutoff frequency of the low-pass filter. Effective for adding a sense of motion to a phrase. | ||||
 | 3-Band EQ | Lo Gain Band1 Low Gain -18.0 - +18.0 [dB] | ||
| Hi Gain Band3 High Gain -18.0 - +18.0 [dB] | ||||
| Mid Gain Band2 Mid Gain -18.0 - +18.0 [dB] | ||||
| Mid Freq Band2 Mid Frequency 20-20000 [Hz] | ||||
| This is a three-band equalizer. Used to adjust the sound at the final stage. | ||||
 | Distortion | Drive Drive 0-100 [%] | ||
| Level | Level | -Inf, -84.9 - 0.0 [dB] | ||
| Freq PLQ Frequency 20-20000 [Hz] | ||||
| Gain | PEQ Gain | -18.0 - +18.0 [dB] | ||
| Use the DRIVE parameter to get effects from a gentle vacuum tube-like distortion to a powerful wave-crunching distorted sound. A parameter equalizer is placed later in the series, which lets you create a diverse range of sounds. | ||||
 | Guitar Amp | Drive Drive 0.0-100.0 [%] | ||
| Model | Amp Type | VOX AC15, VOX AC15TB, VOX AC30, VOX AC30TB, UK Blues, UK 70'S, UK 80'S, UK 90'S, UK Modern, US Modern, US HiGain, Boutique OD, Boutique CL, Black 2x12, Tweed 1x12, Tweed 4x10 | ||
| High EQ | High EQ | 0-100 [%] | ||
| Volume | Volume | Inf, -84.9 - +12.0 [dB] | ||
| This monaural effect models guitar amp and speaker effects ranging from delicate saturation to roaring distortion. | ||||
 | Decimator | Mix | Dry:Wet Mix | 0-100 |
| Freq Sampling Frequency 1000-40000 [Hz] | ||||
| Reso | Bit Resolution | 4.0-24.0 | ||
| Damp | High Damping | 0-100 [%] | ||
| This monaural effect models guitar amp and speaker effects ranging from delicate saturation to roaring distortion. | ||||
 | Grain Shifter | Mix | Dry:Wet Mix | 0-100 |
| Time | Time Frame | 0-100 [%] | ||
| Speed | LFO Speed | 1/48-4/1 | ||
| Retrig | Retrigger | Off, Mod Whl, Damper, Note On, Volocity, LFO1, LFO2, LFO3 | ||
| This cuts out the short waveforms from the input signal and plays them back repeatedly, for an effect that changes the signal into a mechanical sound. The TIME parameter sets the length of the waveform to cut, and the SPEED parameter sets how fast to switch between the waveforms. | ||||
 | Master Limiter | Threshold Threshold -30.0 - 0.0 [dB] | ||
| Ceil Out Ceiling -30.0 - 0.0 [dB] | ||||
| Release Release 0.65-1000.00 [msec] | ||||
| This effect averages out the changes in volume of the input signal. Only signals that exceed the specified level will be compressed, which brings down unnecessary peaks in sound. The THRE parameter sets the level at which the compression is applied, and the CEIL parameter sets the output level. | ||||
 | Compressor | Mix Dry:Wet Mix 0-100 | ||
| Sens Sensitivity 0-100 | ||||
| Attack Attack 0-100 | ||||
| Level | Output Level | -Inf, -84.9-0.0 [dB] | ||
| This compressor models the extremely popular clean-sounding pedal effects. | ||||
 | Delay/Delay (BPM) | Level | Delay Level | 0-100 |
| Feedback | Feedback | 0-100 [%] | ||
| Time L | Delay Time L | 0 [msec] - 2.73 [sec] / 1/48-4/1 | ||
| Time R | Delay Time R | 0 [msec] - 2.73 [sec] / 1/48-4/1 | ||
| This is a simple stereo delay with feedback. | ||||
 | Autopan Dly/Autopan Dly(BPM) | Level | Delay Level | 0-100 |
| Depth Auto Pan Depth 0-100 [%] | ||||
| Delay | Delay Time | 0 [msec] - 1.36 [sec] / 1/48-4/1 | ||
| Speed Speed 0.020 | 20.000 [Hz] / 1/48-4/1 | |||
| A stereo delay that pans the delay sound left and right using an LTO. | ||||
 | Tape Echo/Tape Echo (BPM) | Level | Delay Level | 0-100 |
| Feedback | Feedback | 0-100 [%] | ||
| Time | Delay Time | 0 [msec] - 2.7000 [sec] / 1/48-4/1 | ||
| Damping | Damping | -100.0 - +100.0 [%] | ||
| This effect models tape saturation and tape echo. The DAMP parameter sets the amount of high-end and low-end attenuation. | ||||
 | Early Reflection | Level Reverb | Level 0–100 | |
| Type Type Sharp, Loose, Modulated, Reverse | ||||
| Time Reverb | Time 10 [msec] – 1.600 [sec] | |||
| High EQ High EQ Gain –15.0 – 115.0 [dB] | ||||
| This effect extracts only the initial reflections of the sound from the simulated reverb sounds, giving a feeling of intimacy and presence. You can select the decay curve of the reverb using the TYPE parameter. | ||||
 | Reverb | Level Reverb | Level 0–100 | |
| Type Type Hall, Large Hall, Smooth Hall | Chamber, Plate, Room, Wet Room, Space | |||
| Time Reverb | Time | 200 [msec] – 10.000 [sec](note: this differs with each reverb type) | ||
| Tone Tone 500–20000 [Hz] | ||||
| A smooth, high-definition reverb with a natural echoing sound. A "Space" type is also available with a long pre-delay and release, to add to the standard Room, Hall, Chamber and Plate types. | ||||
 | Shimmer Reverb | Level Reverb | Level 0–100 | |
| Type Type C | car, Riser, Submarine, Horror | |||
| Time Reverb | Time 0–100 [%] | |||
| Tone Tone 0–100 [%] | ||||
| A reverb with an added pitch-shifter effect. The pitch shift width changes depending on the TYPE parameter, with sounds ranging from sparkling to mysterious effects. | ||||
 | Spring Reverb | Level Reverb | Level 0–100 | |
| Length Spring | Length 0–100 [%] | |||
| Time Reverb | Time 49 [msec] – 4.0000 [sec] | |||
| Chirp | Chirp | 0–100 [%] | ||
| This reverb simulates the spring reverb sound used in some guitar amps and organs. You can control the characteristics of the spring to be modeled using the LENGTH and CHIRP parameters. | ||||
Appendices
Troubleshooting
Please check the following points if you experience problems.
No sound
- Are the "Audio/MIDI Settings" (shown when you select "Sound Settings" for the menu) correctly configured?
- Is the Master Level or any other volume-related parameters set to 0?
• Is your computer set to produce sound?
If you're using Windows, open the Control Panel and check [Sound and Audio Device Properties].
If you're using macOS, check [System Settings] → [Sound] and Application folder → Utility folder → [Audio MIDI Settings] → [Audio Devices]. - If you're using your computer's sound card, is the sound card set up correctly?
- If you've connected an audio device to your computer, is the audio device set up so that sound can be output from it?
The sound has clicks, pops, or noise
You may experience clicks, pops, or noise if your computer's CPU is experiencing a heavy load.
If you are having this type of problem, try the following.
- If other applications are running, close them.
- Reduce the maximum polyphony of the synthesizer you're using.
- In the "Audio/MIDI Settings" (shown when you select "Sound Settings" for the menu), increase the audio buffer size. However, increasing this too much will also increase the latency (delay before you hear sound).
Sound is delayed
- Latency is determined by "the number of samples" x "the number of buffers." In the "Audio/MIDI Settings" (shown when you select "Sound Settings" for the menu), set the "Audio buffer size" and the "Sample rate" to the lowest setting that still allows stable operation.
Can't control the software synthesizer from a MIDI device connected to the computer
- Are your computer and MIDI device connected correctly?
- Is the connected MIDI device detected by your computer?
If you're using Windows, open the Control Panel and check [Sound and Audio Device Properties] → [Hardware].
If you're using macOS, open the Application folder Utility folder [Audio MIDI Settings] [MIDI Device], and make sure that your MIDI device is detected.
- Are the "Audio/MIDI Settings" (shown when you select "Sound Settings" for the menu) correctly configured?
Specifications
• Maximum polyphony: 32 notes (depending on the computer's CPU)
- Presets: 350
- Standalone operation or as a VST3/AU/AAX plug-in instrument
• Realtime MIDI control and automation is supported
Operating requirements
for Mac
• OS: macOS 10.14 Mojave or later (Latest updates)
- CPU: Apple M1 or better, or Intel Core i5 or better (Core i7 or better recommended)
• Memory: 8 GB RAM or more (16 GB RAM or more recommended)
- Storage: 8 GB or more free space (SSD recommended)
- Internet connection
- Plug-in: AU, VST3, AAX (Only 64bit plug-in is supported)
for Windows
- OS: Windows 10 64bit* or later (Latest updates)
* This software will not run on a 32-bit OS.
• CPU: Intel Core i5 or better (Core i7 or better recommended)
• Memory: 8 GB RAM or more (16 GB RAM or better recommended)
• Storage: 8 GB or more free space (SSD recommended) - Internet connection
- Plug-in: VST3, AAX (Only 64bit plug-in is supported)
* Appearance and specifications of this product are subject to change without notice.
Support and service
If you have questions about the product, please contact the Korg distributor for the country in which you purchased it.
Information to provide when contacting us
In order for us to help you, we'll need the following information since product support cannot be provided without it:
- Your name
- The name and version of the product (How to check the version)
• The name of the device that you're using
• The version of the operating system - Your question (provide as much detail as possible)
Before you contact us
- Before you contact us, check whether this manual or KORG app Help Center has an answer for your question.
- Please be aware that we cannot answer questions about products that are not made by Korg, such as basic operation of your hardware device, or general questions about creating songs or sounds.
KORG INC.
4015-2 Yanokuchi, Inagi-City, Tokyo 206-0812 JAPAN
© 2022 KORG INC.
Published 03/2022
- KORG opsix native
- Table of Contents
- Introduction......4
- Part Names and functions....9
- Basic operations....12
- Browser functions 14
- MENU 16
- Quick Start 17
- Parameter Guide ....19
- Appendices......65
- Specifications 67
- Support and service....68
- Introduction
- Main Features
- About the sound generator of the opsix
- Operator (modulator, carrier)
- Algorithms
- Operator modes
- • Typical program:
- Header
- Display
- a. Select button
- b. Sound Name
- c. Save
- Unison
- a. Unison
- b. Detune (Unison Detune)
- c. Spread (Unison Spread)
- Volume
- Randomize button
- MENU
- OPERATOR Edit
- Algorithm select
- Parameter Group SELECT buttons
- Edit area
- Controllers
- Basic operations
- Keyboard
- Pitch bend/Modulation Wheel
- Knob
- Value slider
- Toggle Switch
- Combo box
- Menu button
- Graphical envelope
- Browser functions
- BANKS
- All
- Favorites
- Program Change
- Factory
- Template
- User
- Categories
- PRESETS
- Search
- MENU
- Settings
- Sound Settings
- Manual
- Size
- About
- Quick Start
- Playing the synthesizer
- Using the Step Sequencer
- Using the Motion Sequencer
- Edit the Tone of the Synthesizer
- Saving a sound
- Parameter Guide
- OPERATORS: MODE
- MODE
- Wave
- Level (OP Level)
- When "MODE" is set to FM (Frequency Modulation)
- WIDTH (Wave Width)
- Feedback
- When "MODE" is set to RING MOD. (Ring Modulation)
- Shape
- Level (Ring Depth)
- When "MODE" is set to FILTER (Filter)
- Filter Type
- Mix (Filter OSC Mix Level)
- Cutoff (Filter Cutoff)
- Reso (Filter Resonance)
- When "MODE" is set to FILTER FM (Filter FM)
- When "MODE" is set to WAVE FOLDE (Wave Folder)
- Mix (Wave Folder OSC Mix Level)
- Gain (Wave Folder Gain)
- Bias (Wave Folder Bias)
- When "MODE" is EFFECT
- FX (Effect Type)
- Mix (Effect OSC Mix Level)
- EQ (Peaking EQ)
- Cutoff (Peaking EQ Frequency)
- Gain (Peaking EQ Gain)
- S.EQ (Shelving EQ)
- Low (Shelving EQ Low Gain)
- High (Shelving EQ High Gain)
- Phas (Phaser)
- Speed (Phaser Frequency)
- Feedback (Phaser Feedback)
- Dely (Short Delay)
- Time (Short Delay Feedback)
- Feedback (Short Delay Feedback)
- Comb (Comb Filter)
- Feedback (Comb Filter Feedback)
- Cutoff (Comb Filter Frequency)
- Dist (Distortion)
- Amount (Distortion Amount)
- Gain (Distortion Low Gain)
- Driv (Drive)
- Drive (Drive Amount)
- Gain (Drive Low Gain)
- Deci (Decimator)
- Cutoff (Decimator Frequency)
- Bit (Decimator Bit)
- Shap (Waveshaper)
- Type
- Damp (Wave Shaper High Damp)
- Punc (Punch)
- Punch (Punch Amount)
- Gain (Punch High Gain)
- OPERATORS: PITCH
- PITCH (Operator Pitch)
- FREQ (Frequency Mode)
- Transpose
- When "FREQ" is RATIO
- Coarse Ratio
- Fine (Fine Ratio)
- Detune
- OPERATORS: P.MOD
- P.MOD (Operator Pitch Modulation)
- EG1 (Pitch EG1 Intensity)
- CTRL (Pitch EG1 Ctrl Src)
- LFO1 (Pitch LFO1 Intensity)
- CTRL (Pitch LFO1 Ctrl Src)
- Vel (Pitch Velocity Sens)
- DEST (Pitch Velocity Mod. Dest.)
- OPERATORS: L.MOD
- L.MOD (Operator Level Modulation)
- CTRL (Level LFO1 Ctrl Src)
- LFO1 (Level LFO1 Intensity)
- OPERATORS: ENV
- EG (Operator Level/EG)
- Att (Attack Time)
- Sus (Sustain Level)
- Dec (Decay Time)
- Rel (Release Time)
- Crv (EG Curve)
- OPERATORS: K.TRACK
- K.TRACK (Operator Level Key Track)
- CENTER (Keytrack Center Key)
- Low Curve (Keytrack Low Curve)
- Lo (Keytrack Low Slope)
- High Curve (Keytrack High Curve)
- Hi (Keytrack High Slope)
- Algorithm
- USER ALG (User Algorithm)
- FM MATRIX
- Editing the user algorithms
- ARP (Arpeggiator)
- ARPEGGIATOR
- Arpeggiator Run
- Pattern (Arpeggiator Pattern)
- Resolution
- Octave
- Gate (Gate Time)
- FILTER
- ENABLE
- TYPE (Filter Type)
- Cutoff
- Reso (Resonance)
- EG2 (EG2 Intensity)
- CTRL (EG2 Ctrl Source)
- LFO2 (LFO2 Intensity)
- CTRL (LFO2 Ctrl Source)
- Track (Filter Keyboard Tracking)
- Center Key (KeyTrk Center Key)
- Low (KeyTrk Low Slope)
- High (KeyTrk High Slope)
- ENVELOPE, LFO
- EG1 PITCH, EG2 Filter, EG3 (Assignable)
- LFO
- Tempo Sync
- Speed (Speed (Frequency))
- Key Sync
- Fade
- Phase
- EFFECT
- FX 1, 2, 3 (Effect 1, 2, 3)
- Effect Type
- Effect Parameter 1...4
- VIRTUAL PATCH
- Virtual Patch 1...12
- SOURCE (Source Scope), SRC (Source)
- DESTINATION (Dest Scope, Destination)
- INTENSITY (Mod Int)
- CONTROL (Mod Ctrl Src)
- SEQUENCER
- Step Mode
- BPM (Tempo)
- Length
- Resolution (Step Resolution)
- Swing
- Key Sync (Motion Key Sync)
- Note Sequencer
- LANE
- ACTIVE
- NOTE (Lane Note)
- VEL (Velocity)
- START (Start Offset)
- MOTION
- Motion Sequencer
- DEST (Dest Scope, Destination)
- VALUE
- CURVE
- MISC/RANDOM
- PROGRAM PITCH
- LFO1 (LFO1 Int)
- CTRL (LFO1 Ctrl Src)
- GLIDE
- Glide Time
- Glide Mode
- MISC
- Algorithm Feedback
- Lo-Fi
- OSC Phase
- Global Atk (Global Attack)
- Global Dec (Global Decay)
- Randomize All
- Randomize Selection
- Amount
- Selection
- Controller
- ASSIGN (Voice Assign)
- Master Tune
- Velocity Curve
- Sync To DAW
- MIDI
- Control Change
- Pitch Bend
- Control Source List
- Appendices
- Troubleshooting
- No sound
- The sound has clicks, pops, or noise
- Sound is delayed
- Can't control the software synthesizer from a MIDI device connected to the computer
- Specifications
- Operating requirements
- for Mac
- for Windows
- Support and service
- Information to provide when contacting us
- Before you contact us
- KORG INC.
Brand : KORG
Model : Opsix native
Category : Uncategorized