
KA0070 - Juicer Rommelsbacher - Free user manual and instructions
Find the device manual for free KA0070 Rommelsbacher in PDF.


| Product Type | Juicer |
| Brand | Rommelsbacher |
| Model | KA0070 |
| Motor Power | 800 W |
| Speed Settings | 2 speeds (low/high) |
| Juice Extraction Method | Centrifugal |
| Filter Material | Stainless steel micro-mesh |
| Pulp Container Capacity | 2 L |
| Juice Jug Capacity | 1 L |
| Feeding Tube Diameter | 75 mm |
| Dimensions (W x D x H) | 30 x 20 x 40 cm |
| Weight | 4.5 kg |
| Power Cable Length | 1.2 m |
| Non-slip Feet | Yes |
| Safety Locking Arm | Yes |
| Anti-drip Function | Yes |
| Dishwasher Safe Parts | Filter, jug, lid, pulp container |
| BPA Free | Yes |
| Cleaning Brush Included | Yes |
| Spare Parts Availability | Filter, jug, lid available |
Frequently Asked Questions - KA0070 Rommelsbacher
User questions about KA0070 Rommelsbacher
0 question about this device. Answer the ones you know or ask your own.
Ask a new question about this device
Download the instructions for your Juicer in PDF format for free! Find your manual KA0070 - Rommelsbacher and take your electronic device back in hand. On this page are published all the documents necessary for the use of your device. KA0070 by Rommelsbacher.
USER MANUAL KA0070 Rommelsbacher
natural_image
Abstract geometric pattern with vertical lines inside a circle (no text or symbols)ROMMELSBACHER
natural_image
Rommelsbacher water grainer with lemon cutouts and fresh citrus in background (no text or symbols on main subject)ZP 40
Electric Citrus Juicer
Produktbeschreibung / Product description
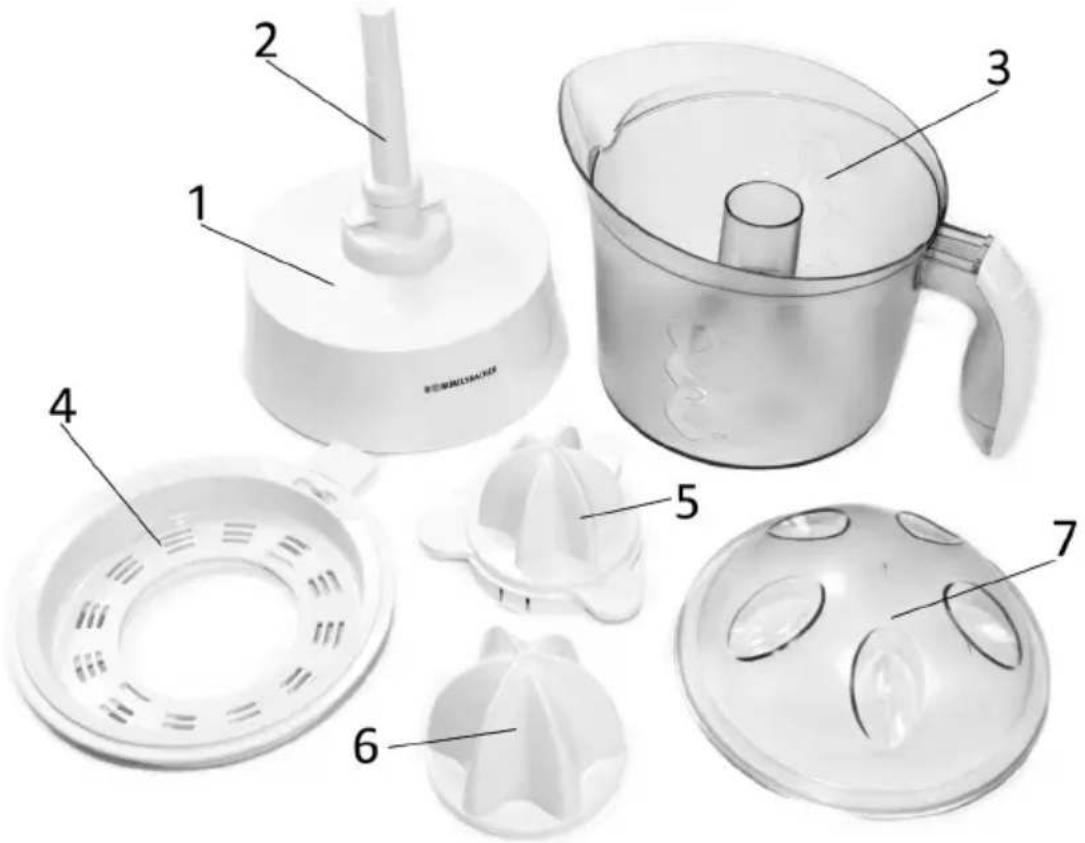
| GB Suitable for dishwasher | ||
| 1 Base unit NO | ||
| 2 Motor shaft NO | ||
| 3 Juice container with scaling YES | ||
| 4 Adjustable strainer YES | ||
| 5 Small press cone with wipe-off finger | YES | |
| 6 Large press cone | YES | |
| 7 Top cover | YES | |
Product description ......2
Einleitung....4
Disposal/recycling 10
For your safety 11
General safety advices 11
Safety advices for using the appliance....12
Prior to initial use....12
How to demount your appliance ....13
How to assemble your appliance....13
How to operate your appliance ....13
Cleaning and maintenance ....14
Tips and notes ......14
natural_image
Close-up of a circular mechanical component with a star-shaped center and red arrows pointing to features (no text or symbols visible)natural_image
Hand holding a transparent container with a red curved arrow indicating rotation (no text or symbols visible)natural_image
Close-up of a circular mechanical component with a star-shaped center and red directional arrows (no text or symbols)natural_image
Hand pouring liquid into a kitchen pot with a red arrow indicating the process (no text or symbols)natural_image
Hand pouring liquid into a clear stand mixer with red upward arrow (no text or symbols)We are pleased you decided in favour of this versatile citrus juicer and would like to thank you for your confidence. Its easy operation and wide range of applications will certainly fill you with enthusiasm as well. To make sure you can enjoy using this appliance for a long time, please read through the following notes carefully and observe them. Keep this instruction manual safely.
Hand out all documents to third persons when passing on the appliance. Thank you very much.
Intended use
The appliance is designed for extracting citrus fruits (domestic use only). With this appliance, fresh, vitamin-packed fruit juice is obtained easily. Other uses or modifications of the appliance are not intended and harbour considerable risks. For damage arising from not intended use, the manufacturer does not assume liability. The appliance is not designed for commercial use.
Technical data
Only connect the appliance to a power socket installed according to regulations. The rated voltage must comply with the details on the rating label. Only connect to alternating current.
Nominal voltage: 220 – 240 V\~ 50/60 Hz
Nominal power: ca. 40 W
Standby consumption: 0 W
Capacity juice container: ca. 1.0 l
Max. continuous operation time: 4 minutes
Scope of supply
Check the scope of supply for completeness as well as the soundness of the product and all components (see product description page 2) immediately after unpacking.
Packing material
Do not simply throw the packing material away but recycle it.
Deliver paper, cardboard and corrugated cardboard packing to collecting facilities.
Also plastic packing material and foils should be disposed of in the intended collecting containers.
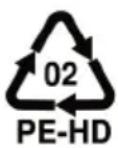

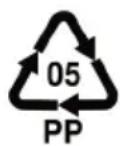
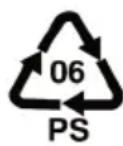
In the examples for the plastic marking: PE stands for polyethylene, the code figure 02 for PE-HD, 04 for PE-LD, PP for polypropylene, PS for polystyrene.
Disposal/recycling
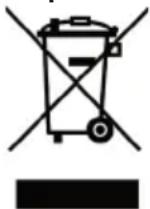
According to the Waste Electrical and Electronic Equipment Directive, this product must not be disposed of with your normal domestic waste at the end of its lifespan. Therefore, please deliver it at no charge to a municipal collection point (e.g. recycling center) for the recycling of electrical and electronic equipment.
Please approach your local authorities for all disposal options.

WARNING: Read all safety advices and instructions! Non-observance of the safety advices and instructions may cause electric shock, fire and/or bad injuries!
General safety advices:
• Always keep children under 8 away from the product and the power cord.
- Children from the age of 8 must be supervised when cleaning or maintaining the appliance.
- Children from the age of 8 and persons not having the knowledge or experience in operating the appliance or having handicaps of physical, sensorial or mental nature must not operate the appliance without supervision or instruction by a person, responsible for their safety. Never leave the appliance unattended during operation.
• Children must not play with the appliance.
- Packing material like e. g. foil bags should be kept away from children.
- Prior to each use, check the appliance and the attachments for soundness, it must not be operated if it has been dropped or shows visible damage. In these cases, the power supply must be disconnected and the appliance has to be checked by a specialist.
- When laying the power cord, make sure that no one can get entangled or stumble over it in order to avoid that the appliance is pulled down accidentally.
- Keep the power cord away from hot surfaces, sharp edges and mechanical forces. Check the power cord regularly for damage and deteriorations. Damaged or entangled cords increase the risk of an electric shock.
- Do not misuse the power cord for unplugging the appliance!
- Never immerse the appliance, power cord and power plug in water for cleaning.
- Do not store the appliance outside or in wet rooms.
- This electrical appliance complies with the relevant safety standards. In case of signs of damage to the appliance or the power cord, unplug the appliance immediately. Repairs may be affected by authorised specialist shops only. Improper repairs may result in considerable dangers for the user.
- Improper use and disregard of the instruction manual void all warranty claims.
Safety advices for using the appliance:
- Place the appliance on a stable and even surface and do not operate it in the vicinity of sources of heat (oven, gas flame etc.) or in explosive environments where inflammable liquids or gases are located.
- During operation do not use any object to stir in the strainer and never touch the running press cone. To avoid injuries it is imperative to keep away your hair, hands and clothes from the running press cone. Never touch the press cone directly with your hands.
- Do not at all operate this unit with an external timer or a separate telecontrol system.
- Avoid any no-load operation and do not handle it with hands wet.
Prior to initial use
For a start, please clean the appliance as well as all accessories. For more detailed information please refer to "Cleaning and maintenance".
How to demount your appliance
- Pull the mains plug!
- Remove the top cover.
- Remove the large press cone.
- Remove the strainer with the small press cone.
| · Detach the small press cone from the strainer. For this, carefully press the 3 retention clips on the back of the press cone to the inside. | |
| · Detach the juice container from the base unit. Turn the juice container anticlockwise and lift it. |
- Separate the motor shaft from the base unit
How to assemble your appliance
- Pull the mains plug!
- Connect the motor shaft to the base unit.
| Place the juice container on the base unit.Position the juice container and turn it clockwise until it engages audibly. | |
| Assemble the strainer and the press cone.For this, insert the press cone carefully in the designated opening of the strainer. Make sure the 3 retention clips engage. |
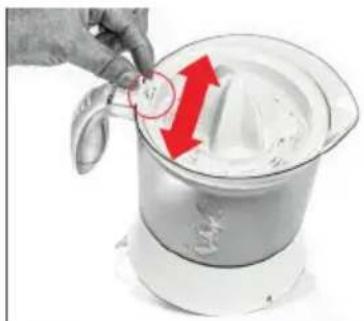
- Place the strainer with the press cone on the juice container. Make sure the retention clips of the strainer are positioned in the designated indentations. The press cone is connected with the motor shaft by slightly swaying it. Make sure the strainer fits properly.
- Place the large press cone on the small one. In doing so, make sure that the indentations on the larger press cone match with the wipe-off fingers of the smaller one.
- Place the top cover.
How to operate your appliance

- The appliance is designed for a max. continuous operation time of 4 minutes. If this time has been reached, the appliance will have to cool down for at least 2 minutes. If this is not observed, the motor might be damaged!
- Before connecting this appliance to the mains make sure that there are no foreign objects in the juice container and in the strainer!
NOTE: We recommend the following range: press for 15 seconds, afterwards make a break of 15 seconds.
- Connect the mains plug!
- The rest of the cable which is not needed can be stored in the cord take-up at the underside of the base unit.
- Remove the top cover.
- Choose the press cone. 2 differently sized press cones are available: The larger one is suitable for fruits like oranges, grapefruits, the smaller one is suitable for citrons etc.
natural_image
Hand pouring white cream into a metal mixing bowl with a red upward arrow (no text or symbols visible)- Choose the pulp concentration.
The pulp concentration can be chosen by adjusting the fruit pulp regulator at the strainer.
Small gap means less pulp and less flow – large gap means more pulp in the juice container.
- Turn the appliance on or off (press the fruits).
natural_image
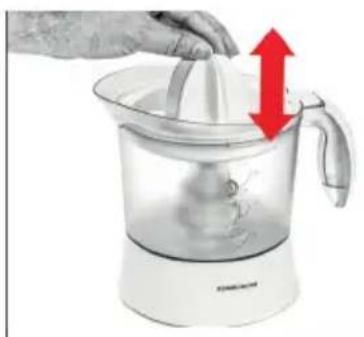
Hand using a hand mixer to clean food in a clear glass water heater, with red arrows indicating the process (no text or symbols visible)- Press halved citrus fruit with the cut face on the press cone and hold it. The appliance starts whenever pressure is applied on the press cone and stops as soon as the pressure is released.
If the pressure is too heavy, the press cone will pause – reduce the pressure until the press cone starts running again.
The press cone can turn clockwise or anticlockwise, the direction of rotation can change during pressing.
Cleaning and maintenance

• Always unplug the appliance before cleaning!
- Never immerse base unit, power cord and plug in water or clean them under running water!
- Clean the appliance immediately after use so that residues will not dry up.
- Remove all detachable accessories from the base unit.
- Clean all detachable accessories in hot water with some dishwashing detergent or in the dishwasher.
- Clean the base unit with a moist cloth and wipe it dry.
- Do not use any abrasives or solvents!
- Never use a steam jet appliance for cleaning!!
Tips and notes
- For optimal juice extraction, press the fruit on the cone all around with your fingers.
- When making larger quantities of juice, empty and clean the strainer occasionally.
- Consume the juice as fresh as possible, only that way vitamins are preserved.
- Do not keep citrus juice in metal vessels.
Notizen - Notes


- ROMMELSBACHER
- ZP 40
- Product description ......2
- Einleitung....4
- For your safety 11
- Prior to initial use....12
- How to demount your appliance ....13
- How to assemble your appliance....13
- How to operate your appliance ....13
- Cleaning and maintenance ....14
- Tips and notes ......14
- Intended use
- Technical data
- Scope of supply
- Packing material
- Disposal/recycling
- WARNING: Read all safety advices and instructions! Non-observance of the safety advices and instructions may cause electric shock, fire and/or bad injuries!
- General safety advices:
- Safety advices for using the appliance:
- Prior to initial use
- How to demount your appliance
- How to assemble your appliance
- How to operate your appliance
- Cleaning and maintenance
- Tips and notes
- Notizen - Notes
Brand : Rommelsbacher
Model : KA0070
Category : Juicer