
DO 65 - Can opener Rommelsbacher - Free user manual and instructions
Find the device manual for free DO 65 Rommelsbacher in PDF.


| Product Type | Electric Can Opener |
| Brand | Rommelsbacher |
| Model | DO 65 |
| Dimensions (approx.) | 20 x 10 x 15 cm |
| Weight (approx.) | 1 kg |
| Power Supply | 220–240 V, 50/60 Hz |
| Power Consumption | 100 W |
| Housing Material | Stainless steel and plastic |
| Blade Material | Hardened stainless steel |
| Opening Mechanism | Automatic, with magnetic lid holder |
| Can Size Compatibility | Standard round cans, diameter up to 12 cm |
| Additional Functions | Built-in knife sharpener, bottle opener |
| Safety Features | Automatic shut-off, non-slip feet, safety switch |
| Cleaning | Removable cutting mechanism for easy cleaning under running water |
| Maintenance | Regularly clean blade and magnet; lubricate moving parts if needed |
| Spare Parts Available | Replacement blade, magnet, and cutting wheel |
| Repairability | User-replaceable parts; service center for motor issues |
| Energy Efficiency | Energy-saving automatic stop after operation |
| Color | Silver and black |
| Warranty | 2 years (depending on region) |
Frequently Asked Questions - DO 65 Rommelsbacher
User questions about DO 65 Rommelsbacher
0 question about this device. Answer the ones you know or ask your own.
Ask a new question about this device
Download the instructions for your Can opener in PDF format for free! Find your manual DO 65 - Rommelsbacher and take your electronic device back in hand. On this page are published all the documents necessary for the use of your device. DO 65 by Rommelsbacher.
USER MANUAL DO 65 Rommelsbacher
natural_image
Abstract geometric pattern with vertical lines inside a circle (no text or symbols)ROMMELSBACHER
natural_image
Black-and-white photo of a Rommelsbacher openpan with two cans and a glass bowl of ice cubes (no text or symbols visible on the main objects)DO 65
Dosenöffner
Tin opener
Produktbeschreibung / Product description
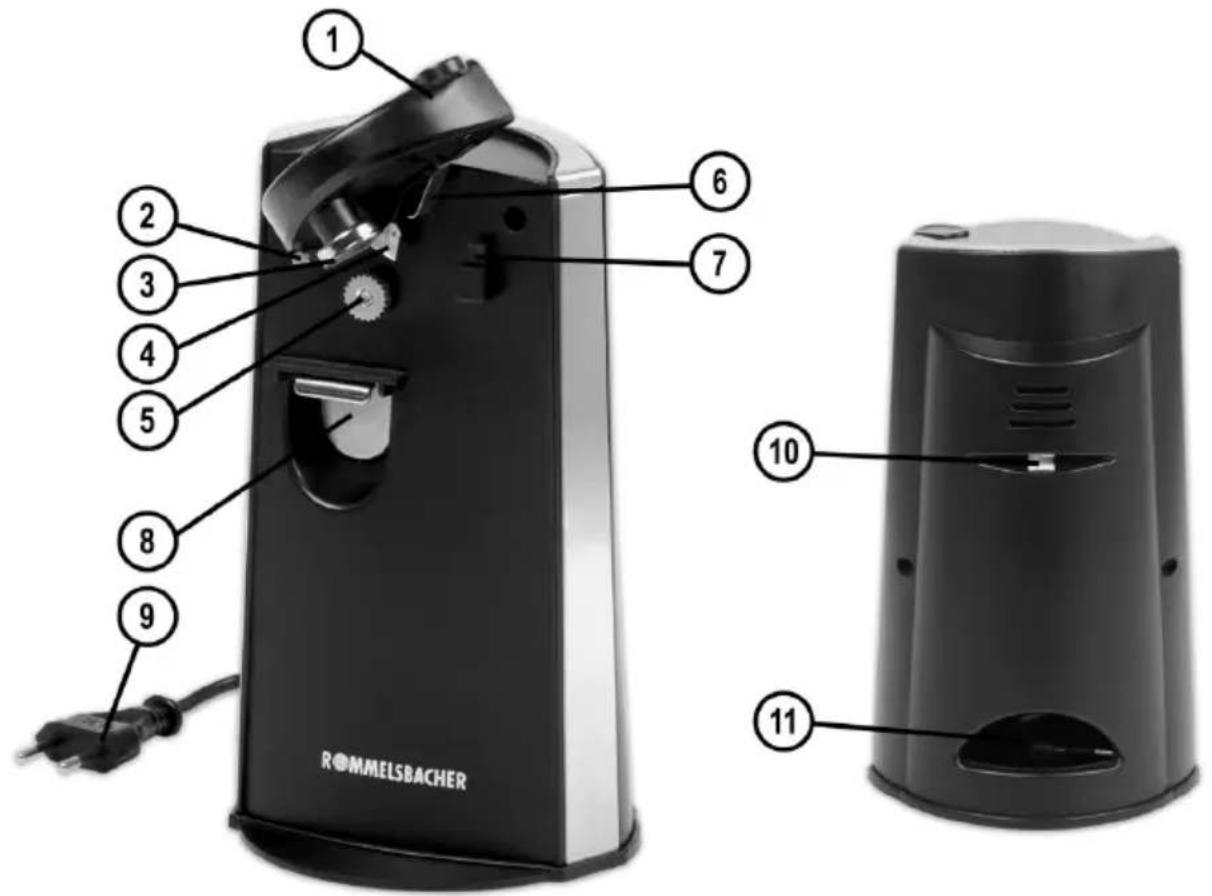
Scope of supply....10
Packing material 10
For your safety 11
Prior to initial use....12
Attaching and detaching the front lever ... 13
Opening Tins 13
Fixing the tin....13
Switching the appliance on and off.....14
Taking the tin out....14
Opening bottles 14
Sharpening knives....15
Cleaning and maintenance 15
Einleitung

natural_image
Close-up of a hand pressing a black button on a device (no visible text or symbols)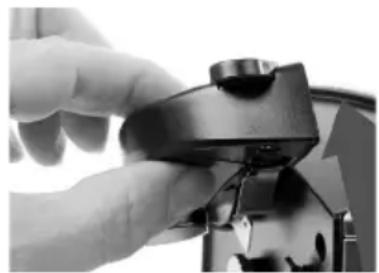
natural_image
Close-up of a hand adjusting a mechanical component (no visible text or symbols)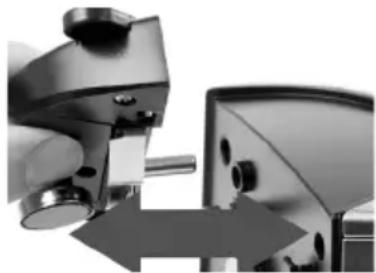
natural_image
Close-up of a hand using a mechanical tool to adjust or install a component, with no visible text or symbols.natural_image
Close-up of a kitchen fan with three circular insets showing mechanical components (no text or symbols visible)natural_image
Close-up of hands operating a black electronic device with a scroll wheel (no visible text or symbols)natural_image
Close-up of a hand holding a black cylindrical device with a screwdriver inserted, showing internal components (no text or symbols visible)We are pleased you decided in favour of this practical tin opener and would like to thank you for your confi dence. Its easy operation will certainly fi ll you with enthusiasm as well. To make sure you can enjoy using this appliance for a long time, please read through the following notes carefully and observe them. Keep this instruction manual safely. Hand out all documents to third persons when passing on the appliance. Thank you very much.
Intended use
The appliance is designed for opening tins, for opening bottles with crown cap as well as for sharpening knives (domestic use only). Other uses or modifications of the appliance are not intended and harbour considerable risks. For damage arising from not intended use, the manufacturer does not assume liability. The appliance is not designed for commercial use.
Technical data
Only connect the appliance to an isolated ground receptacle installed according to regulations.
The rated voltage must comply with the details on the rating label. Only connect to alternating current.
Nominal voltage: 220–240 V\~ 50 Hz
Nominal power: 60 W
Standby-consumption: < 0.5 W
Protection class: II
Max. continuous operation time: 3 minutes
Max. weight of tin (gross): 850 g
Max. size of tin: 175 mm height, 100 mm ∅
Scope of supply
Check the scope of supply for completeness as well as the soundness of the product and all components (see product description page 2) immediately after unpacking.
Packing material
Do not simply throw the packing material away but recycle it.
Deliver paper, cardboard and corrugated cardboard packing to collecting facilities. Also plastic packing material and foils should be put into the intended collecting basins.




In the examples for the plastic marking PE stands for polyethylene, the code fi gure 02 for PE-HD, 04 for PE-LD, PP for polypropylene, PS for polystyrene.

WARNING! Read all safety advices and instructions! Non-observance of the safety advices and instructions may cause electric shock, fire and/or bad injuries!
General safety advices
• Always keep children under 8 away from the product and the power cord.
- Children from the age of 8 must be supervised when cleaning or maintaining the appliance.
- Children from the age of 8 and persons not having the knowledge or experience in operating the appliance or having handicaps of physical, sensorial or mental nature must not operate the appliance without supervision or instruction by a person, responsible for their safety. Never leave the appliance unattended during operation.
- Children should be supervised in order to ensure that they do not play with the appliance.
- Packing material like e. g. foil bags should be kept away from children.
- Do not operate this unit with an external timer or a separate telecontrol system.
- Prior to each use, check the appliance and the attachments for soundness, it must not be operated if it has been dropped or shows visible damage. In these cases, the power supply must be disconnected and the appliance has to be checked by a specialist.
- When laying the power cord, make sure that no one can get entangled or stumble over it in order to avoid that the appliance is pulled down accidentally.
- Keep the power cord away from hot surfaces, sharp edges and mechanical forces. Check the power cord regularly for damage and deteriorations. Damaged or entangled cords increase the risk of an electric shock.
- Do not misuse the power cord for unplugging the appliance!
- Never immerse the appliance, power cord and power plug in water for cleaning.
- Do not store the appliance outside or in wet rooms.
- This electrical appliance complies with the relevant safety standards. In
case of signs of damage to the appliance or the power cord, unplug the appliance immediately. Repairs may be effected by authorised specialist shops only. Improper repairs may result in considerable dangers for the user.
- Improper use and disregard of the instruction manual void all warranty claims.
Safety advices for using the appliance:

WARNING Hazard of injury! The blade for opening and the edges of the opened tins are sharp. To avoid injuries, handle them with care!
Thus, act with caution:
- Place the appliance on a stable and even surface.
- Place it beyond children's reach.
- Avoid any no-load operation and do not handle it with hands wet!
- During operation do not use any object to stir in the appliance and never touch the running driving wheel. To avoid injuries it is imperative to keep away your hair, hands and clothes from the running driving wheel.
- Do not open tins that are pressurized or contain flammable liquids.
- ATTENTION! After sharpening a knife, it will be especially sharp. In order to avoid injuries, handle it with care!
- ATTENTION! Fix the appliance with one hand on the worktop when opening a bottle to ensure a stable position. Handle glass bottles with care!
- Do not operate the appliance in the vicinity of sources of heat (oven, gas flame etc.) or in explosive environments, where inflammable liquids or gases are located.
- Pull the power plug after each use for safe switch-off.
- Also pull the power plug before attaching or detaching the front lever, prior to each use of the knife sharpener and the bottle opener and before cleaning.
Prior to initial use
For a start, please clean the appliance as well as all accessories. For more detailed information please refer to "Cleaning and maintenance".
Attaching and detaching the front lever
natural_image
Close-up of a hand pressing a button on a device (no visible text or symbols)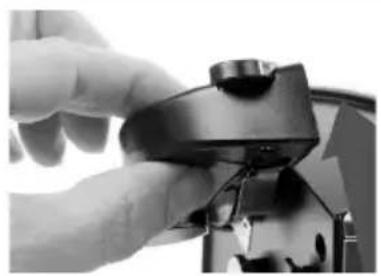
natural_image
Close-up of a hand adjusting a mechanical component (no visible text or symbols)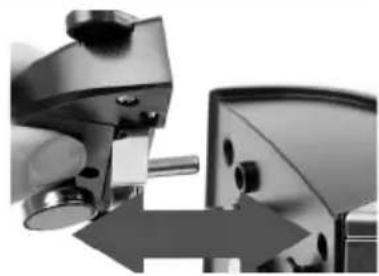
natural_image
Close-up of a hand using a mechanical tool to adjust or install a component, with no visible text or symbols.• Make sure that the appliance has been unplugged.
- For detaching the front lever fold it up as far as it will go and pull it forwards out of the mounting.
- For attaching, insert the pin of the front lever into the corresponding opening at the unit, then push the front lever to the back as far as it will go
Opening tins

ATTENTION! The appliance is designed for a max. continuous operation time of 3 minutes. If this time has elapsed, the appliance has to cool down for at least 2 minutes. If this is not observed, the motor might get damaged!
ATTENTION! Do not touch the running driving wheel or the blade! In order to avoid injuries, handle the blade with care!
NOTE: If the opening of a tin is successful, depends heavily on the tin's quality. For opening, a tin with a sufficient rim on the upper side is necessary. Furthermore, the tin should not be damaged or dented. The tin must not have a pull tab lid. Several attempts might be necessary for opening the tin.
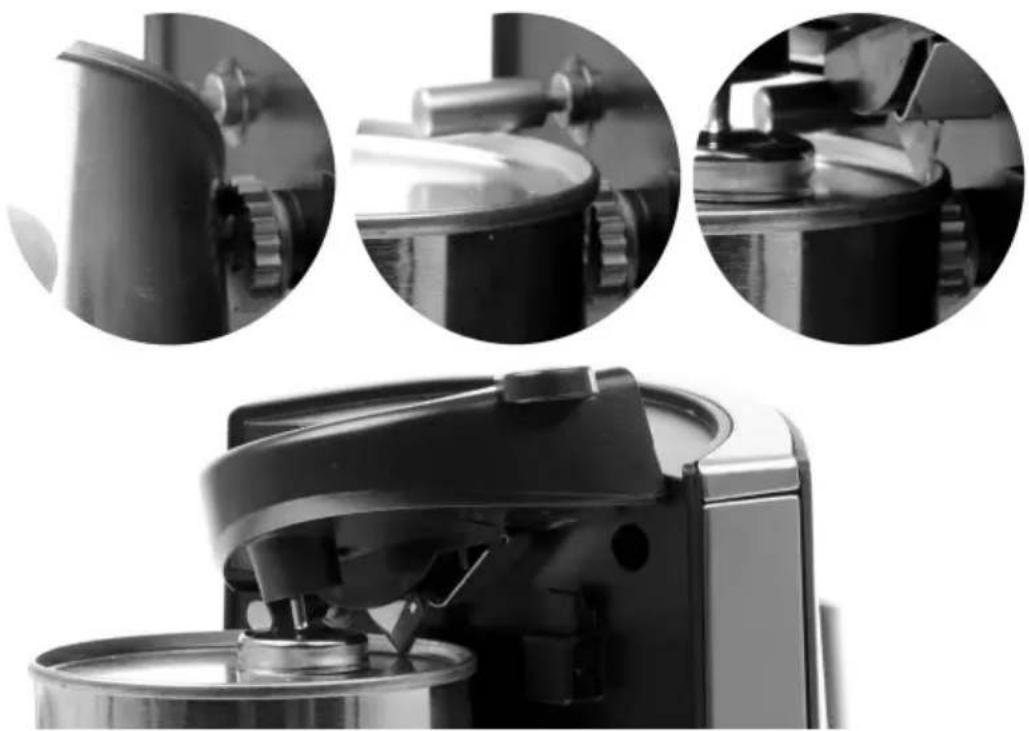
1.) Fixing the tin
natural_image
Close-up of a kitchen fan with three circular insets showing mechanical components (no text or symbols visible)- Connect the appliance to the mains. Cord not in use can be stored in the cable storage on the rear side of the appliance.
- Clean the tin's upper side.
• Fold the front lever up and hold it. - Place the tin's outer edge slightly aslant on the driving wheel.
- Now, press the tin with light pressure against the guiding spike and the driving wheel.
- Then slowly fold the front lever down. Make sure that the blade is on the inside of the tin's edge. The magnetic lid holder snaps the lid.
2.) Switching the appliance on and off
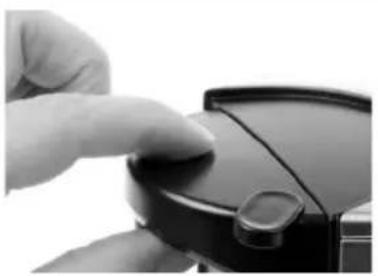
- For starting the appliance, push the front lever firmly down. If the tin is correctly fixed, the appliance will start automatically.
• After finishing the opening process, the appliance stops automatically.
NOTE: During this process you can release tin and front lever. However, we recommend leaving one hand near the tin in order to catch a tin which loosens.
3.) Taking the tin out

ATTENTION: The tin's lid and rim can be sharp-edged. In order to avoid injuries, handle the opened tin with care!
• Before folding the front lever up, make sure you hold the tin.
- By folding the front lever up, the tin is released and can be taken out cautiously.
• The lid is held by the magnetic holder and can also be taken away cautiously.
• Always pull the mains plug when the opening process is finished.
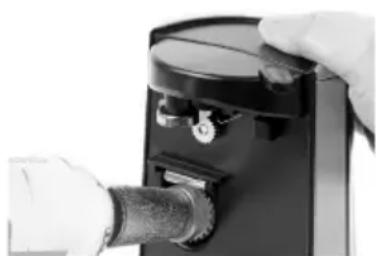
Opening bottles
natural_image
Close-up of hands operating a black mechanical device with a handle and lever (no visible text or symbols)• Make sure that the appliance has been unplugged.
- Place the appliance at the edge of your worktop and press it on with one hand.
- Put the bottle neck with the crown cap in the opening and press the bottle down with slight pressure.
Sharpening knives

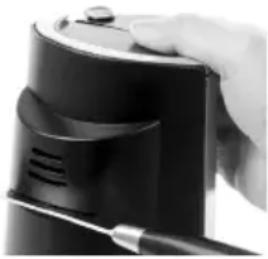
ATTENTION: Hazard of injury! The knife is very sharp after sharpening. In order to avoid injuries, handle sharpened knives with special care!
natural_image
Close-up of a hand holding a black cylindrical device with a handle, showing internal components (no text or symbols visible)• Make sure that the appliance has been unplugged.
- Place the appliance on the worktop and press it on with one hand.
- Insert the knife into the sharpening unit and draw it forth and back under slight pressure.
- Remove the abrasive dust with a tissue.
NOTE: Knives of non-alloyed steel, without serrated edge, can be well sharpened. The knife sharpener of this appliance is not a professional grinding machine. Therefore, we recommend not treating superior knives like fillet knives, Damascene blades etc. so that these are not scratched or damaged.
Cleaning and maintenance

ATTENTION! Always unplug the appliance before cleaning!
ATTENTION! Never immerse the appliance and the mains plug in water or clean them under running water!
ATTENTION Hazard of injury! Do not touch the blade! In order to avoid injuries, handle the blade with care!
- Clean the appliance as well as the detached front lever with a damp cloth and wipe dry.
- Do not use any abrasives or solvents!
• Never use a steam jet appliance for cleaning!
- ROMMELSBACHER
- Einleitung
- Intended use
- Technical data
- Scope of supply
- Packing material
- WARNING! Read all safety advices and instructions! Non-observance of the safety advices and instructions may cause electric shock, fire and/or bad injuries!
- General safety advices
- Safety advices for using the appliance:
- Thus, act with caution:
- Prior to initial use
- Attaching and detaching the front lever
- Opening tins
- 1.) Fixing the tin
- 2.) Switching the appliance on and off
- 3.) Taking the tin out
- ATTENTION: The tin's lid and rim can be sharp-edged. In order to avoid injuries, handle the opened tin with care!
- Opening bottles
- Sharpening knives
- Cleaning and maintenance
Brand : Rommelsbacher
Model : DO 65
Category : Can opener