
302MKII - Cassette player TASCAM - Free user manual and instructions
Find the device manual for free 302MKII TASCAM in PDF.


| Type de produit | Double Auto Reverse Cassette Deck |
| Fonctionnalités principales | Double auto reverse, lecture/enregistrement continu, dubbing haute vitesse, système de recherche CPS, commande à distance optionnelle |
| Poids | 7.8 kg (17.19 lbs) |
| Consommation électrique | 33 Watts |
| Tension d'alimentation | 120/230 V AC (50-60 Hz) commutable (sauf modèles UK/Europe/Australie) |
| Formats de cassette | Compact Cassette C-30/60/90 (Normal, High Position, Metal) |
| Format de piste | 4 pistes, 2 canaux |
| Vitesse de bande | 4.76 cm/s (1.87 ips) ou 9.5 cm/s (3.74 ips) en dubbing haute vitesse |
| Contrôle de hauteur | ±10% (Pitch Control) |
| Réduction de bruit | Dolby B et C, HX Pro |
| Connectiques d'entrée | RCA (line) - niveau nominal -10 dBV (0.3V), impédance 24 kΩ |
| Connectiques de sortie | RCA (line) - niveau nominal -5 dBV (0.6V), impédance 1.5 kΩ; sortie casque 1/4" (7 mW/32 Ω) |
| Connectique cascade | RCA - niveau nominal -10 dBV (0.3V), impédance 100 Ω |
| Entrée de contrôle externe | Mini-jack 3.5 mm |
| Télécommande | Entrée REMOTE IN (mini-jack 2.5 mm) pour RC-322A |
| Réponse en fréquence | 63 Hz - 18 kHz ±3 dB (Metal), 63 Hz - 16 kHz ±3 dB (Normal/High Position) |
| Rapport signal/bruit | 59 dB (sans NR), 69 dB (Dolby B), 79 dB (Dolby C) |
| Taux de pleurage et scintillement | Moins de 0.15% WRMS |
| Entretien | Nettoyage des têtes et galets toutes les 6 heures d'utilisation; dégaussage recommandé |
| Sécurité | Ne pas exposer à l'eau, utiliser une prise polarisée, débrancher avant nettoyage |
| Accessoires optionnels | Télécommande RC-322A, câble synchro WR-7000, kit de nettoyage TZ-261/HC-1/RC-1, démagnétiseur de têtes |
| Montage en rack | Standard 19 pouces avec vis fournies (M5 x 12) |
| Nombre d'unités en cascade | Jusqu'à 10 (avec TASCAM 322 ou 302MKII) |
Frequently Asked Questions - 302MKII TASCAM
User questions about 302MKII TASCAM
0 question about this device. Answer the ones you know or ask your own.
Ask a new question about this device
Download the instructions for your Cassette player in PDF format for free! Find your manual 302MKII - TASCAM and take your electronic device back in hand. On this page are published all the documents necessary for the use of your device. 302MKII by TASCAM.
USER MANUAL 302MKII TASCAM
TEAC Professional Division
302MKII
Double Auto Reverse Cassette Deck
9101443100
OWNER'S MANUAL

CAUTION
RISK OF ELECTRIC SHOCK DO NOT OPEN

CAUTION: TO REDUCE THE RISK OF ELECTRIC SHOCK, DO NOT REMOVE COVER (OR BACK). NO USER-SERVICEABLE PARTS INSIDE. REFER SERVICING TO QUALIFIED SERVICE PERSONNEL.

The lightning flash with arrowhead symbol, within an equilateral triangle, is intended to alert the user to the presence of uninsulated “dangerous voltage” within the product’s enclosure that may be of sufficient magnitude to constitute a risk of electric shock to persons.

The exclamation point within an equilateral triangle is intended to alert the user to the presence of important operating and maintenance (servicing) instructions in the literature accompanying the appliance.
This appliance has a serial number located on the rear panel. Please record the model number and serial number and retain them for your records.
Model number
Serial number
WARNING: TO PREVENT FIRE OR SHOCK HAZARD, DO NOT EXPOSE THIS
APPLIANCE TO RAIN OR MOISTURE.
Important Safety Precautions
IMPORTANT (for U.K. Customers)
DO NOT cut off the mains plug from this equipment.
If the plug fitted is not suitable for the power points in your home or the cable is too short to reach a power point, then obtain an appropriate safety approved extension lead or consult your dealer.
If nonetheless the mains plug is cut off, remove the fuse and dispose of the plug immediately, to avoid a possible shock hazard by inadvertent connection to the mains supply.
If this product is not provided with a mains plug, or one has to be fitted, then follow the instructions given below:
IMPORTANT: DO NOT make any connection to the larger terminal which is marked with the letter E or by the safety earth symbol ± or coloured GREEN or GREEN-and-YELLOW.
The wires in the mains lead on this product are coloured in accordance with the following code:
BLUE : NEUTRAL
BROWN : LIVE
As these colours may not correspond with the coloured markings identifying the terminals in your plug proceed as follows:
The wire which is coloured BLUE must be connected to the terminal which is marked with the letter N or coloured BLACK.
The wire which is coloured BROWN must be connected to the terminal which is marked with the letter L or coloured RED.
When replacing the fuse only a correctly rated approved type should be used and be sure to re-fit the fuse cover.
IF IN DOUBT — CONSULT A COMPETENT ELECTRICIAN.
For U.S.A
TO THE USER
This equipment has been tested and found to comply with the limits for a Class A digital device, pursuant to Part 15 of the FCC Rules. These limits are designed to provide reasonable protection against harmful interference when the equipment is operated in a commercial environment. This equipment generates, uses, and can radiate radio frequency energy and, if not installed and used in accordance with the instruction manual, may cause harmful interference to radio communications.
Operation of this equipment in a residential area is likely to cause harmful interference in which case the user will be required to correct the interference at his own expense.
CAUTION
Changes or modifications to this equipment not expressly approved by TEAC CORPORATION for compliance could void the user's authority to operate this equipment.
For CANADA
AC POWER CORD CONNECTION
CAUTION:
TO PREVENT ELECTRIC SHOCK, MATCH WIDE BLADE OF PLUG TO WIDE SLOT, FULLY INSERT.
CORDE DE CONNEXION CA
ATTENTION:
POUR ÉVITER LES CHOCS ÉLECTRIQUES, INTRODUIRE LA LAME LA PLUS LARGE DE LA FICHE DANS LA BORNE CORRESPONDANTE DE LA PRISE ET POUSSER JUSQU'AU FOND.
IMPORTANT SAFETY INSTRUCTIONS
CAUTION:
- Read all of these Instructions.
- Save these Instructions for later use.
- Follow all Warnings and Instructions marked on the audio equipment.
1) Read Instructions — All the safety and operating instructions should be read before the product is operated.
2) Retain Instructions — The safety and operating instructions should be retained for future reference.
3) Heed Warnings— All warnings on the product and in the operating instructions should be adhered to.
4) Follow Instructions — All operating and use instructions should be followed.
5) Cleaning — Unplug this product from the wall outlet before cleaning. Do not use liquid cleaners or aerosol cleaners. Use a damp cloth for cleaning.
6) Attachments — Do not use attachments not recommended by the product manufacturer as they may cause hazards.
7) Water and Moisture—Do not use this product near water — for example, near a bath tub, wash bowl, kitchen sink, or laundry tub; in a wet basement; or near a swimming pool; and the like.
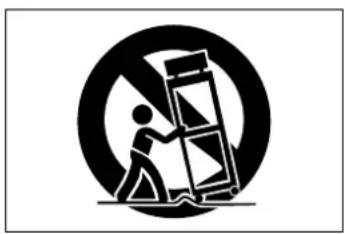
8) Accessories — Do not place this product on an unstable cart, stand, tripod, bracket, or table. The product may fall, causing serious injury to a child or adult, and serious damage to the product. Use only with a cart, stand, tripod, bracket, or table recommended by the manufacturer, or sold with the product. Any mounting of the product should follow the manufacturer's instructions, and should use a mounting accessory recommended by the manufacturer.
9) A product and cart combination should be moved with care. Quick stops, excessive force, and uneven surfaces may cause the product and cart combination to overturn.
natural_image
Symbolic icon of a person pushing a large object through a circular frame (no text or symbols)10) Ventilation — Slots and openings in the cabinet are provided for ventilation and to ensure reliable operation of the product and to protect it from overheating, and these openings must not be blocked or covered. The openings should never be blocked by placing the product on a bed, sofa, rug, or other similar surface. This product should not be placed in a built-in installation such as a bookcase or rack unless proper ventilation is provided or the manufacturer's instructions have been adhered to.
11) Power Sources — This product should be operated only from the type of power source indicated on the marking label. If you are not sure of the type of power supply to your home, consult your product dealer or local power company. For products intended to operate from battery power, or other sources, refer to the operating instructions.
12) Grounding or Polarization — This product may be equipped with a polarized alternating-current line plug (a plug having one blade wider than the other). This plug will fit into the power outlet only one way. This is a safety feature. If you are unable to insert the plug fully into the outlet, try reversing the plug. If the plug should still fail to fit, contact your electrician to replace your obsolete outlet. Do not defeat the safety purpose of the polarized plug.
13) Power-Cord Protection—Power-supply cords should be routed so that they are not likely to be walked on or pinched by items placed upon or against them, paying particular attention to cords at plugs, convenience receptacles, and the point where they exit from the product.
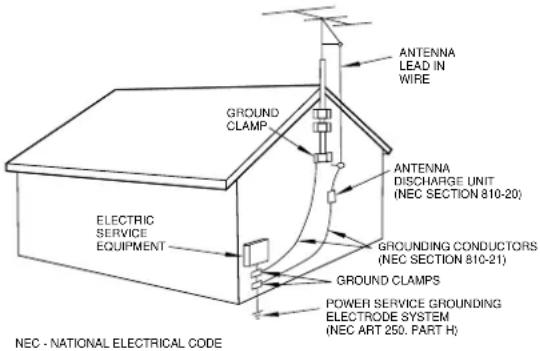
14) Outdoor Antenna Grounding — If an outside antenna or cable system is connected to the product, be sure the antenna or cable system is grounded so as to provide some protection against voltage surges and built-up static charges. Article 810 of the National Electrical Code, ANSI/NFPA 70, provides information with regard to proper grounding of the mast and supporting structure, grounding of the lead-in wire to an antenna discharge unit, size of grounding conductors, location of antenna-discharge unit, connection to grounding electrodes, and requirements for the grounding electrode.
"Note to CATV system installer:
This reminder is provided to call the CATV system installer's attention to Section 820-40 of the NEC which provides guidelines for proper grounding and, in particular, specifies that the cable ground shall be connected to the grounding system of the building, as close to the point of cable entry as practical.
Example of Antenna Grounding as per
National Electrical Code, ANSI/NFPA 70
15) Lightning — For added protection for this product during a lightning storm, or when it is left unattended and unused for long periods of time, unplug it from the wall outlet and disconnect the antenna or cable system. This will prevent damage to the product due to lightning and power-line surges.
16) Power Lines — An outside antenna system should not be located in the vicinity of overhead power lines or other electric light or power circuits, or where it can fall into such power lines or circuits. When installing an outside antenna system, extreme care should be taken to keep from touching such power lines or circuits as contact with them might be fatal.
17) Overloading — Do not overload wall outlets, extension cords, or integral convenience receptacles as this can result in risk of fire or electric shock.
18) Object and Liquid Entry — Never push objects of any kind into this product through openings as they may touch dangerous voltage points or short-out parts that could result in a fire or electric shock. Never spill liquid of any kind on the product.
19) Servicing — Do not attempt to service this product yourself as opening or removing covers may expose you to dangerous voltage or other hazards. Refer all servicing to qualified service personnel.
20) Damage Requiring Service — Unplug this product from the wall outlet and refer servicing to qualified service personnel under the following conditions:
a) when the power-supply cord or plug is damaged.
b) if liquid has been spilled, or objects have fallen into the product.
c) if the product has been exposed to rain or water.
d) if the product does not operate normally by following the operating instructions. Adjust only those controls that are covered by the operating instructions as an improper adjustment of other controls may result in damage and will often require extensive work by a qualified technician to restore the product to its normal operation.
e) if the product has been dropped or damaged in any way.
f) when the product exhibits a distinct change in performance – this indicates a need for service.
21) Replacement Parts — When replacement parts are required, be sure the service technician has used replacement parts specified by the manufacturer or have the same characteristics as the original part.
Unauthorized substitutions may result in fire, electric shock, or other hazards.
22) Safety Check — Upon completion of any service or repairs to this product, ask the service technician to perform safety checks to determine that the product is in proper operating condition.
23) Wall or Ceiling Mounting— The product should be mounted to a wall or ceiling only as recommended by the manufacturer.
24) Heat — The product should be situated away from heat sources such as radiators, heat registers, stoves, or other products (including amplifiers) that produce heat.
Before Getting Started
The TASCAM 302MKII is a double auto reverse cassette deck primarily designed for continuous playback of background music or tape dubbing needs. A maximum of ten 302MKIIs can be hooked up to form a sequential play loop or to synchronize them, with one serving as the master/source machine and the others serving as the slave/target machines, for simultaneous tape dubbing.
Table of Contents
General Guide to the Controls and Connectors ....5
Using a Single 302MKII 9
Recording on either deck, or both at the same time ....9
Continuous recording on both decks....10
Dubbing from deck 1 onto deck 2 ....10
Playback....11
Using just one of the two available decks......11
Continuous play on both decks....11
Using the CPS function....12
Erasing recordings....12
Multiple-302MKII System Operation....13
Sequential link play....13
Simultaneous dubbing onto multiple cassettes ....14
Recording an external source onto multiple cassettes simultaneously ....15
Care and Maintenance....17
Troubleshooting....18
Error Messages....18
Specifications ....19
Block Diagram....20
Optional Accessories :
- RC-322A Remote Control Unit
○ WR-7000 synchro cable (for interconnecting two or more 302MkIIs, as shown on pp.12 and 13)
○ TZ-261 cleaning kit (except for U.S.A.)
○ HC-1 head cleaner & RC-1 rubber cleaner (U.S.A. only)
○ Head demagnetizer
Rack Mounting
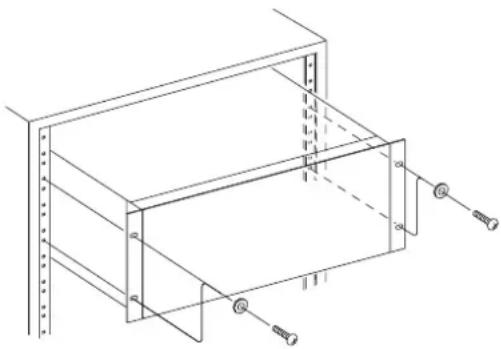
The 302MKII can be installed in a standard 19" rack, using the provided 4 pairs of screws (M5 x 12) and 4 washers, as shown.
natural_image
Technical line drawing of a mechanical assembly with mounting holes and bolts (no text or symbols)VOLTAGE CONVERSION
NOTE : Voltage conversion is not possible on models sold in the U.K., Australia or Europe.
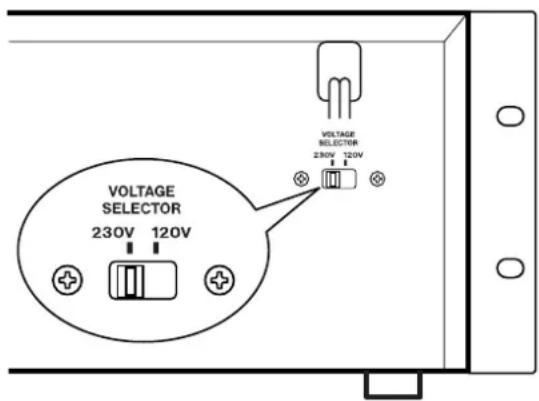
Be sure to remove the power cord from the AC outlet before repositioning the voltage converter switch.
- Locate the voltage selector on the rear panel.
- Using a flat-bladed screwdriver, set to the appropriate 230 V or 120 V position according to your area.
IN NORTH AMERICA USE ONLY ON 120 V SUPPLY.
DANS L'AMÉRIOUE DU NORD: UTILISABLE SUR 120 V D'ALIMENTATION UNIQUEMENT.
General Guide to the Controls and Connectors
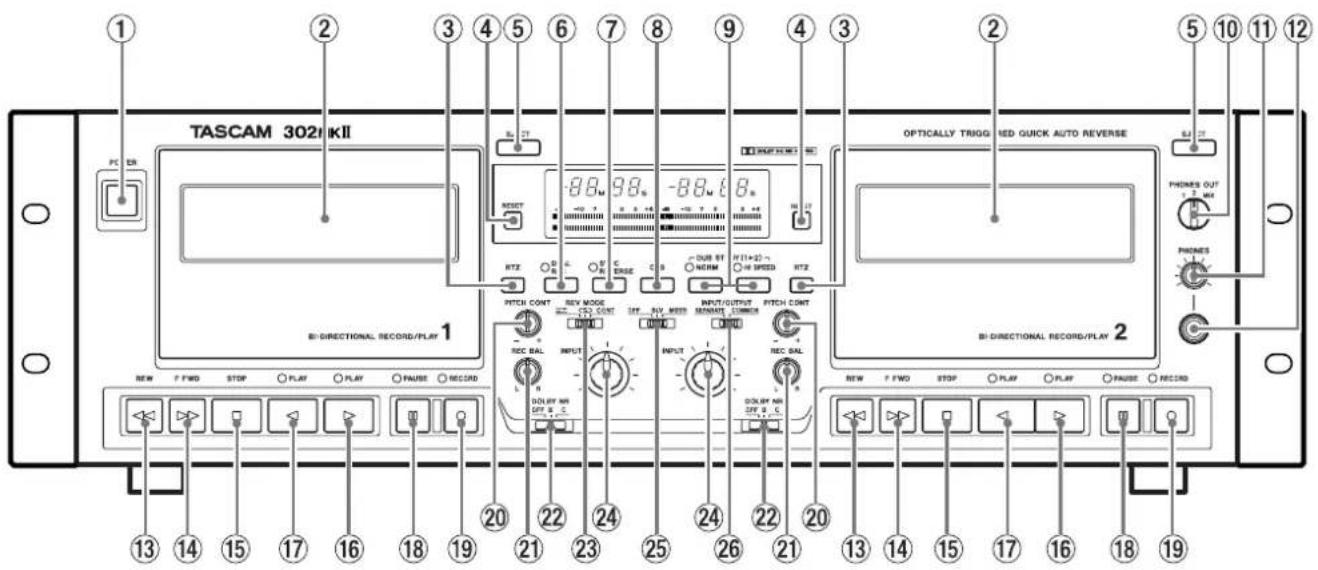
Front Panel
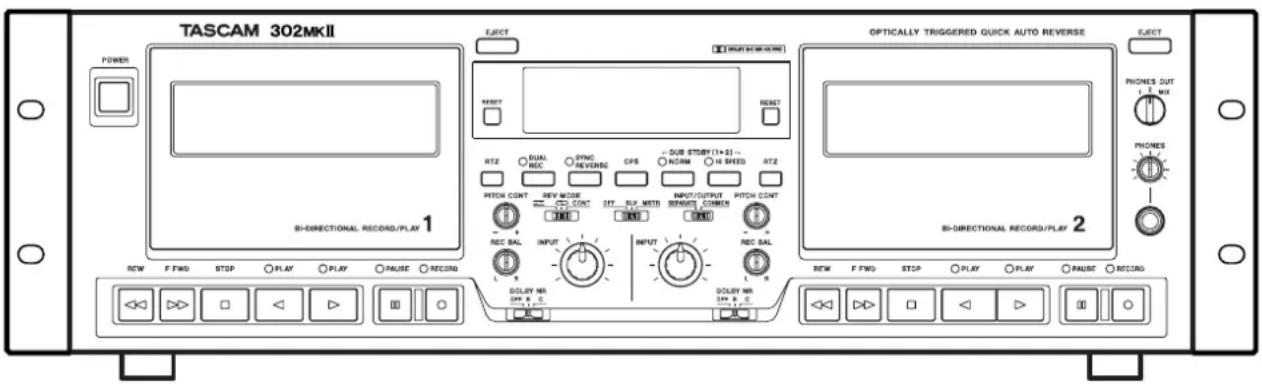
① POWER switch : Turns the unit on and off.
NOTE
The equipment draws nominal nonoperating power from the AC outlet with its POWER switch in the OFF position.
② Cassette Compartment : Opens upon pressing the EJECT button.
③ RTZ (Return-To-Zero) button : Fast-winds the tape to a zero reference point selected by pressing RESET. You can press PLAY after RTZ for the tape to automatically start playing at the end of the search function. If PAUSE is pressed instead of PLAY, the deck goes into Play Ready mode.
The tape will go slightly past the 0000 point on the counter because of inertia.
RTZ cannot operate unless it is pressed when the tape counter reads 0003 or higher numbers.
④ RESET button : Resets the counter to 0000 to mark any point on the tape which you can access by pressing RTZ.
⑤ EJECT button : Opens the cassette compartment.
⑥ DUAL REC button : If pressed when the tape is stopped, puts both decks into Record Ready mode ; and pressing PLAY on either deck starts recording via deck 1's input. This function is used only for single-unit operation.
⑦ SYNC REVERSE switch : Used for tape dubbing, causing two or more tapes to be switched to their reverse sides in synchronization with each other.
⑧ CPS switch : Can be operated while in Stop, Play Ready, and Play modes to access specific programs on the tape.
⑨ DUB STDBY switches : In NORM mode, you can locate the source tape to the point you want to next start dubbing from, while keeping the target tapes waiting at the end of the previous recording. You can't do this in HI SPEED mode.
⑩ PHONES OUT switch : Selects a headphone monitor source. Set to 1 for monitoring tape signals from deck 1, 2 for monitoring tape signals from
deck 2, or MIX for monitoring a mix of two tape signals. During Record Ready or Record modes, you can monitor input signals, as selected with this switch.
⑪ PHONES control : Adjusts the listening level of the headphones plugged into the PHONES jack.
⑫ PHONES jack : For connection to 3-conductor stereo headphones.
⑬ REW button : Winds the tape at high speed in reverse. When pressed while in Play Ready mode, offers cueing to an earlier point.
⑭ F FWD button : Winds the tape at high speed in the forward direction. When pressed while in Play Ready mode, offers forward cueing.
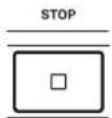
⑮ STOP button : Used to stop the tape and exit the current operation modes.
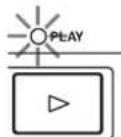
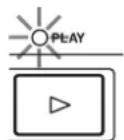
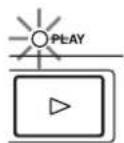
⑯ Forward PLAY (▶) button : plays the forward side of the tape. The associated LED blinks during Stop, and lights steadily during Play Ready and Play. If pressed when the tape is ready for record or play on the reverse side, switches the tape to be ready for record or play on the forward side.
⑰ Reverse PLAY (◀) button: Similar to the forward play button, but plays the reverse side of the tape or switches the tape to be ready for record or play on the reverse side.
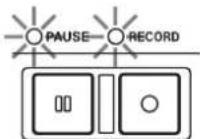
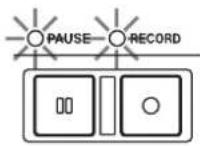
⑱ PAUSE button : Interrupts record or play. If pressed when the tape is stopped, puts the deck into Play Ready mode. If pressed while holding down RECORD, puts the deck into Record Ready mode. Recording starts upon pressing PLAY-the associated LED of which is lit.
⑲ RECORD button : Holding down this button and pressing PLAY starts recording. Pressing STOP while holding down RECORD records a 4-second silence.
⑳ PITCH CONT knob : Varies play speed about +/-10 % to match pitch or to produce special effects. For normal play operation, be sure to set this knob to the center position.
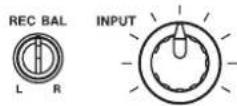
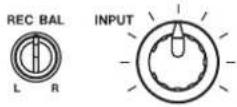
②1 REC BAL knob : Used to balance the left and right input levels.
General Guide to the Controls and Connectors
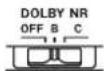
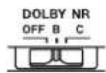
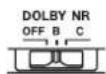
②2 DOLBY NR switch : Selects the Dolby B or C Noise Reduction system or defeats them. When listening to a recording, set this switch to the setting used for the original recording.
Dolby noise reduction and HX Pro headroom extension manufactured under license from Dolby Laboratories Licensing Corporation. HX Pro originated by Bang & Olufsen.
"DOLBY", the double-D symbol ☐ and "HX PRO" are trademarks of Dolby Laboratories Licensing Corporation.
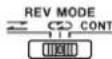
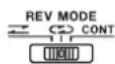
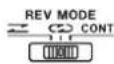
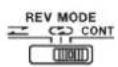
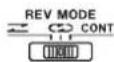
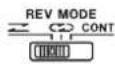
②3 REV MODE switch : In non-reverse mode (—), the tape stops recording or playing at the end of the current tape side.
In reverse mode (CD), both sides of the tape continue to play over and over until you press STOP. Recording automatically continues from the forward side of the tape to the reverse side, stopping at the end of the reverse side. If started from the reverse side, recording stops at the end of that side — the same as in non-reverse mode.
The CONT position is for continuous play or record from deck 1 to deck 2 with either a single or multiple 302MKII system.
②4 INPUT controls : Adjust record level for the individual deck 1 and deck 2.
25 SLV/MSTR switch : Normally, leave this switch OFF. Only when dubbing a tape onto, or recording from an external single source on multiple units, select SLV or MSTR.
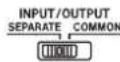
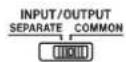
②6 INPUT/OUTPUT switch : Set to SEPARATE for deck 1 and deck 2 to operate independently from each other. With SEPARATE engaged, the inputs and outputs on the rear panel are independent for each deck. Only in DUAL REC mode, the inputs to deck 1 have access to deck 2 as well.
In COMMON mode, the F FWD, REW, STOP, or PLAY PAUSE buttons have the same effect on both deck 1 and deck 2, at the same time. But, if deck 1 is playing and you press PLAY on deck 2, deck 1 stops. Only the inputs and outputs on deck 1 can be used.
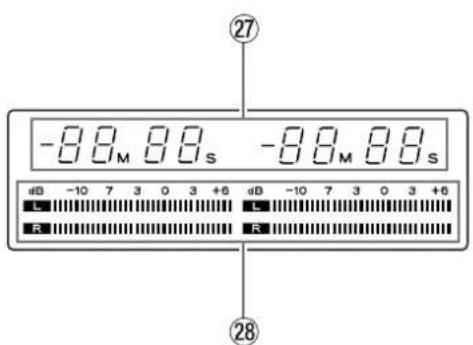
⑳ Tape Counter : Indicates in minutes and seconds the elapsed time from any point on the tape selected by RESET.
NOTE
The tape counter is not a clock. The reading on the tape counter is affected by the tape length, reel hub diameter, and other mechanical factors.
28 Peak Level Meters : Indicate tape signal levels during playback, or input levels during Record Ready and Record modes.
General Guide to the Controls and Connectors
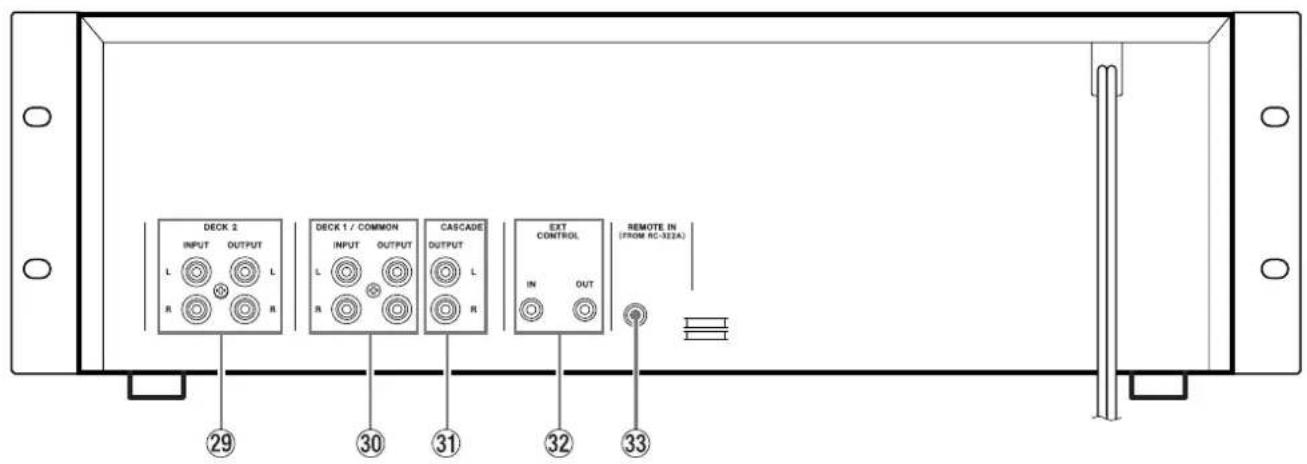
Rear Panel
⑲ DECK 2, INPUT and OUTPUT jacks : These jacks are independent from deck 1 all the time.
NOTE
These jacks are only operational when the INPUT/OUTPUT switch is set to the SEPARATE position.
③0 DECK 1/COMMON, INPUT and OUTPUT jacks: When the INPUT/OUTPUT switch is set to COMMON, inputs to deck 1 are taken into deck 2 as well, and outputs from deck 2 are sent to the deck 1's output jacks as well.
③1 CASCADE OUTPUT jacks : Used for dubbing from a deck onto, or recording from an external single source on multiple decks, as shown in the diagram on page 13.
③2 EXT CONTROL jack : Used to connect a multiple-unit system, as shown in the diagram on page 12.
③ REMOTE IN jack : For connection to the optional control (RC-322A).
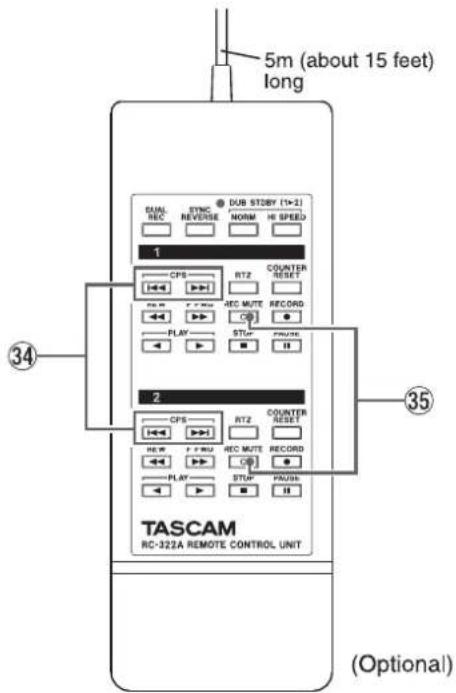
RC-322A Remote Control Unit (Option)
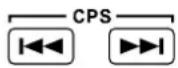
③4 CPS buttons : Can operate when the transport is in Stop, Play Ready or Play modes to access specific programs on the tape. See, also Using the CPS Function, page 11.
③5 REC MUTE button : You can terminate recording by pressing this button. A 4-second silence is then recorded to the end of the recording. After this interval, the deck goes into Record Ready mode. All the other controls on the remote are duplicates of the corresponding controls on the main unit.
NOTE
The remote unit is powered from the main unit. Don't attempt to open the lid on the remote unit.
Recording on Either Deck, or Both at the Same Time
Unless you use multiple 302MkII units connected in series, set the OFF/SLV/MSTR switch to the left OFF position all the time.
-
Check to see that the source is connected to the DECK 1 INPUT connectors if you intend to record on deck 1 only or on deck 1 and deck 2 simultaneously. Use the DECK 2 INPUT connectors if you intend to record on deck 2 only.
-
Press POWER to turn on the unit.
-
Press either or both EJECT buttons to open the cassette compartments, insert cassettes, and close the compartments.

- Press either or both RESET buttons so you can use the RTZ (return-to-zero) function to locate the record start point.

- Make the following switch settings :
REV MODE switch to ☑ if you intend to record on one side of the tape(s) only or ☑ to record on both sides continuously;
INPUT/OUTPUT switch to SEPARATE ;
DOLBY NR switch to the desired position.
- If you intend to record on both deck 1 and deck 2 simultaneously, press the DUAL REC button. Its LED will turn on and both decks will go into Record Ready mode.

If you are using only one of the two decks, put it into Record Ready mode by holding down RECORD and pressing PAUSE.
- Start the external source and adjust the INPUT control(s) so that the meter reading is around 0 dB. Use the REC BAL control(s) to balance the left and right input levels.
- To start recording, press PLAY on the deck in use. If DUAL REC is activated, you can press PLAY on either deck to start recording on both decks.
To stop recording, press STOP. If DUAL REC is activated, you can press STOP on either deck to stop both tapes. The DUAL REC LED will then turn off.
To audition the recording just completed, press RTZ, then press PLAY for the deck whose LED is blinking.
Suggestion: You can record a 4-second silence by holding down RECORD and pressing STOP (or by pressing the optional remote REC MUTE button) after program material as been recorded. The CPS (Computer-controlled Program Search) function (discussed below) identifies specific programs by counting a blank space of 4 seconds or more between programs.
Continuous Recording on Both Decks
When the tape on deck 1 records up to the end of the reverse side, the tape on deck 2 will start recording, stopping at its end of the reverse side.
The signal connected to DECK 1 is automatically routed to DECK 2.
The procedure is essentially the same for Recording on Either Deck, or Both at the Same Time, except:
- The REV MODE switch must be set to CONT.
- The INPUT/OUTPUT switch must be set to SEPARATE.
DUAL REC cannot be used in this application; put both decks into Record Ready mode separately by holding RECORD and pressing PAUSE on the individual decks. (The INPUT and REC BAL controls and the DOLBY NR switch also must be set on the individual decks.)
Dubbing from Deck 1 onto Deck 2
If you want to use an amp/speaker system to monitor the source tape as it plays, connect your monitor system to the output of deck 1.
- Insert the source tape into deck 1 and a target tape into deck 2.
- Locate the source tape to the beginning of the program material you intend to dub, and the target tape to the point you want to start recording from.
- Set the REV MODE switch to to limit dubbing to one side only or for dubbing to continue onto the reverse side automatically.
- Press the DUB STDBY NORM button if you intend to dub selected portions or materials.
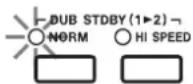
Use the HI SPEED mode when dubbing the entire tape without interruption.
Upon selecting either DUB STDBY mode, deck 1 goes into Play Ready mode, and deck 2 goes into Record Ready mode.
At this moment, PLAY, STOP, F FWD and REW can operate on deck 1 if in NORM mode. In HI SPEED mode, only PLAY can operate to change the record direction (STOP can also operate but only serves to disengage the dubbing mode).
- If you have connected a monitor speaker system to the output of deck 1, and have selected the HI
SPEED mode, set the INPUT/OUTPUT switch to SEPARATE.
- Press the SYNC REVERSE button if you want whichever tape first reaches the end of the forward side to go into Play Pause or Record Pause mode (depending on whether the tape is the source or target), thus waiting for the other tape to reach its end of the forward side, so that both tapes are simultaneously switched to start their respective functions on their reverse sides.

SYNC REVERSE can function only when :
- REV MODE is set to ☐;
- DUB STDBY is pressed before SYNC REVERSE; and
-
Both tapes start from their forward sides.
-
To start dubbing, press the ▶ button on deck 2.
- If you are in NORM mode :
When dubbing of a selection is complete, locate the tape to the beginning of the next selection to dub. When you press PAUSE, STOP, F FWD or REW on deck 1, deck 2 invariably goes into Record Pause mode.
You can press PAUSE on deck 2 to put deck 1 into Play Pause mode and deck 2 into Record Pause mode.
- To stop dubbing in NORM mode and exit this mode, press STOP on deck 2. In HIGH SPEED mode, you can press STOP on either deck.
Playback
Using Just One of the Two Available Decks
- Connect the amp/speaker system to the OUTPUT connectors of the deck you intend to use.
- Insert the tape into either deck 1 or 2.
- Make the following switch settings :
- REV MODE switch to to play only one tape side or to play both sides continuously.
- DOLBY NR switch depending on the tape in use.
If REV MODE is set to ≡ and you intend to play only the reverse tape side, press the ◀ button to have the associated LED start blinking.
- To start play, press PLAY whose LED is blinking.
Continuous Play on Both Decks
You can either connect a single amp/speaker system to the deck 1's output or an additional amp/speaker system can be connected to the deck 2's output as well.
To have both decks play sequentially :
- Set the INPUT/OUTPUT switch to SEPARATE if both decks' outputs are in use or COMMON if only deck I's output is in use.
- Set the REV MODE switch to CONT.
-
Insert the tapes into both decks.
-
Set the DOLBY NR switch on both decks depending on the tapes in use.
- To start sequential play, press PLAY on deck 1.
When deck 1 plays up to the end of the reverse side, deck 2 automatically starts. When deck 1 plays up to the end of the reverse side, deck 2 automatically starts playing. When deck 2 plays up to the end of the reverse side, deck 1 again starts playing. This process continues until you press STOP on either deck.
Using the CPS Function
CPS (Computer-controlled Program Search) autolocates the tape to the beginning of specific program materials. The tape will automatically start playing after completing autolocation.
To identify specific programs, CPS counts a blank space of about 4 seconds between programs.
To access a program on the other side of the tape, the REV MODE switch must be set to ☐.
- When the tape is stopped or is playing or is in Play Ready, press the CPS button. The tape counter will be switched to read CP 01.

- To autolocate the tape, say to the fifth program ahead, press the CPS button repeatedly until 05 is displayed. Then, press F FWD.

If you press REW instead of F FWD, the tape will be autolocated to the fifth program back.
If you are using the optional remote control :
The instant either CPS button is pressed once, the search function starts. Press the button the necessary number of times running while the tape is running.
Erasing Recordings
Turn the INPUT control all the way to the left and put the deck into Record mode. To erase the entire tape (except metal tapes), we recommend that you use the optional TEAC bulk eraser device.
Multiple-Unit System Operation
A maximum of ten compatible units (TASCAM 322 or 302MkII) can be interconnected to provide the following possibilities :
○Sequential link play of multiple cassettes.
○Dubbing onto multiple cassettes simultaneously.
○Recording an external source onto multiple cassettes simultaneously.
Sequential Link Play
WARNING : Make all connections with power off.
flowchart
graph TD
    subgraph Top_Section
        A["DECK 2"] --> B["INPUT"]
        A --> C["OUTPUT"]
        D["DECK 1 / COMMON"] --> E["INPUT"]
        D --> F["OUTPUT"]
        G["CASCADE"] --> H["OUTPUT"]
        G --> I["OUT"]
        J["EXT CONTROL"] --> K["IN"]
        J --> L["OUT"]
        M["REMOTE IN (FROM RC-322A)"] --> N["WR-7000"]
    end
    subgraph Bottom_Section
        O["DECK 2"] --> P["INPUT"]
        O --> Q["OUTPUT"]
        R["DECK 1 / COMMON"] --> S["INPUT"]
        R --> T["OUTPUT"]
        U["CASCADE"] --> V["OUTPUT"]
        U --> W["OUT"]
        X["CD"] --> Y["IN"]
        X --> Z["OUT"]
        AA["TROL"] --> AB["IN"]
        AA --> AC["OUT"]
        AD["REMOTE IN (FROM RC-322A)"] --> AE["WR-7000"]
    end
    style Top_Section fill:#f9f,stroke:#333
    style Bottom_Section fill:#f9f,stroke:#333
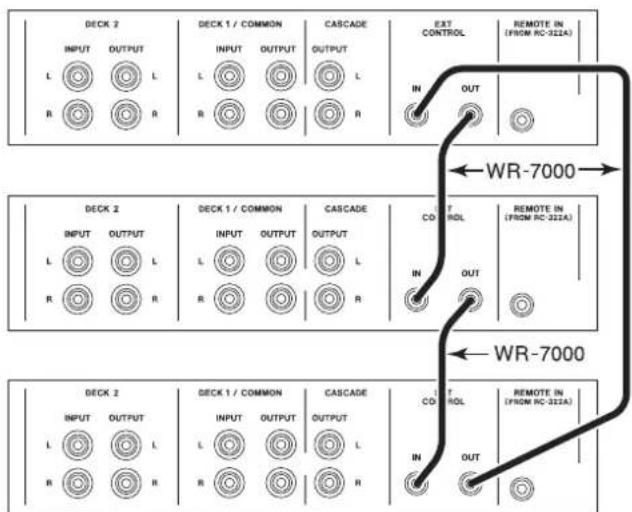
Each time one cassette plays up to the end of the reverse tape side, the next cassette will start.
-
Check to see that all the units are turned off.
-
Refer to the diagram above, and connect the first units EXT CONTROL OUT to the second units EXT CONTROL IN, the second units EXT CONTROL OUT to the third units EXT CONTROL IN, and so on. Finally, connect the last units EXT CONTROL OUT to the first units EXT CONTROL IN.
-
Switch on power to all the units.
-
Make the following switch settings on each unit :
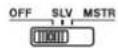
○OFF/SLV/MSTR switch to OFF ;
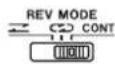
oREV MODE switch to CONT.
-
Insert pre-recorded tapes into decks 1 and 2 of every unit.
-
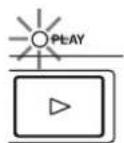
To start sequential link play, press PLAY on either deck of any unit.
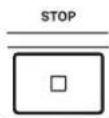
- To stop play, press STOP on the deck which is currently in play.
NOTE
If there is a slave unit which has no tape inserted, sequential link play will stop when this slave is detected.
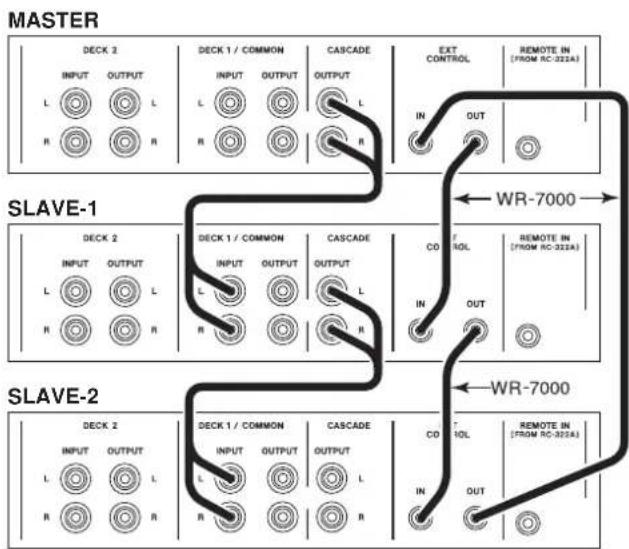
Simultaneous Dubbing onto Multiple Cassettes
WARNING : Make all connections with power off.
flowchart
graph TD
    subgraph MASTER
        A["DECK 2"] --> B["INPUT OUTPUT L"]
        A --> C["DECK 1 / COMMON INPUT L"]
        A --> D["CASCADE OUTPUT L"]
        E["EXT CONTROL IN"] --> F["OUT"]
        G["SLAVE-1"] --> H["DECK 2"]
        G --> I["DECK 1 / COMMON INPUT L"]
        G --> J["CASCADE OUTPUT L"]
        K["CD CONTROL IN"] --> L["OUT"]
        M["SLAVE-2"] --> N["DECK 2"]
        M --> O["DECK 1 / COMMON INPUT L"]
        M --> P["CASCADE OUTPUT L"]
        Q["CD CONTROL IN"] --> R["OUT"]
    end
    style MASTER fill:#f9f,stroke:#333
    style SLAVE-1 fill:#ccf,stroke:#333
    style SLAVE-2 fill:#cfc,stroke:#333
- Refer to the diagram above, and interconnect multiple units through the EXT CONTROL OUT and IN and the CASCADE OUTPUT and DECK 1 INPUT connectors.
- Switch on power to each unit.
- Make the following switch settings :
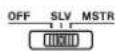
○ OFF/SLV/MSTR switch to MSTR on one unit, and SLV on all the other units (any but only one unit can be designated as the master).
○REV MODE switch to CD on each unit.
- Insert the source tape into deck 1 of the master unit, and target tapes into all the other decks in use.
Suggestion : There is no problem if there are slaves into which no tape is inserted.
- If the reverse PLAY LED is blinking on any slaves, press the ▶ button on deck 2 of the master unit.
If the reverse PLAY LED is blinking on deck 1 of the master unit, press the ▶ on that deck.
Bear in mind that, in a multiple-unit system, the transport control buttons on deck 1 of the master unit are independent from all the other decks, while the buttons on deck 2 of the master unit have effect on decks 1 and 2 of every slave unit
- If need be, rewind the source tape to the beginning with the REW button on deck 1 of the master.
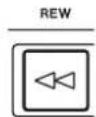
Pressing the REW button on deck 2 of the master rewinds all the target tapes to their beginnings.
- Press the DUB STDBY NORM or HI SPEED button on the master unit, as required. For an explanation, see steps 4 and 8 under the heading Dubbing From Deck 1 Onto deck 2.
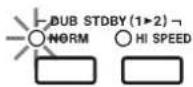
Upon pressing either DUB STDBY button, deck 1 of the master goes into Play Ready mode, and all the other decks go into Record Ready mode.
If you have pressed a wrong button or changed your mind and want to switch NORM to HI SPEED, or vice versa, first press STOP on deck 2 of the master. Then, press HI SPEED or NORM, as required.
- Press the SYNC REVERSE button on the master unit.

The LED above the button will light steadily, while the same LED on all the slaves will start blinking.
Multiple-unit System Operation
- To start dubbing, press PLAY on deck 2 of the master unit. Deck 2 of the master and all the slave decks will go into Record mode, simultaneously.
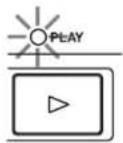
The target decks all configure themselves to the Dolby system and the record level settings used when originally recording the source tape. Settings of the INPUT and REC BAL controls and the DOLBY NR switch on the individual target decks are overridden.
- To stop dubbing, press STOP on deck 2 of the master.
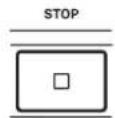
NOTE
Upon pressing STOP on deck 1 or deck 2 of any slave unit, that deck cannot function any more. To use it as a slave again, first press EJECT.
Suggestion: You can hold down RECORD and press STOP on deck 2 of the master to record a 4-second silence on all the target tapes at the same time. Alternatively, you can press the REC MUTE button for deck 2 on the optional remote control unit connected to the master.
Recording an External Source onto Multiple Cassettes Simultaneously
In this application, deck 1 of the master is left unused.
- If you haven't done so yet, interconnect the units, as shown on page 13, then connect the line output from the source unit to the DECK 2 INPUT jacks on the first unit.
- Switch power on to all the units.
- Set the OFF/SLV/MSTR switch to MSTR on the unit to which the source unit is connected, and SLV on all the other units.
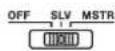
- Set the REV MODE switch to on each unit.
- Insert cassette tapes into deck 2 of the master unit and decks 1 and 2 of the slaves.
Suggestion: There is no problem if there are slaves into which no tape is inserted.
- If need be, locate the tapes to their beginnings by pressing the REW button on deck 2 of the master unit.
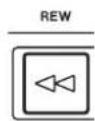
- Check to see that all the tapes are ready for recording on their forward sides, as confirmed by the forward PLAY LED blinking on the individual decks. If any reverse PLAY LEDs are blinking, press the ▶ button on deck 2 of the master.
- Hold down PAUSE and press RECORD on deck 2 of the master. This puts all the slaves into Record Ready mode.
Multiple-unit System Operation
- Adjust the INPUT control on deck 2 of the master so the meter reading is around 0 dB. Balance the left and right input levels with the REC BAL control.
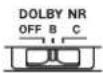
- Set the DOLBY NR switch on deck 2 of the master to the desired position.
All the slave decks configure themselves to the level and balance on deck 2 of the master. Settings on the individual decks are overridden.
- To start recording, press the ▶ button on deck 2 of the master.
If the tape on deck 2 of the master reaches the end of the forward side before any tapes on the slaves, recording continues on these tapes up to the end of their forward sides.
You can interrupt recording on all the decks by pressing STOP on deck 2 of the master.
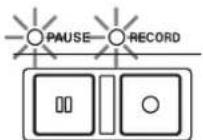
- When all the tapes reach the end of their forward sides, hold down RECORD and press PAUSE on deck 2 of the master to put all the decks into Record Ready mode.
- Press the ◀ button on deck 2 of the master so that all the tapes are ready for recording on their reverse sides.
- To continue to record, press the ◀ button once more on deck 2 of the master.
- To terminate recording, press STOP on deck 2 of the master.
Cleaning the Heads and Tape Guides
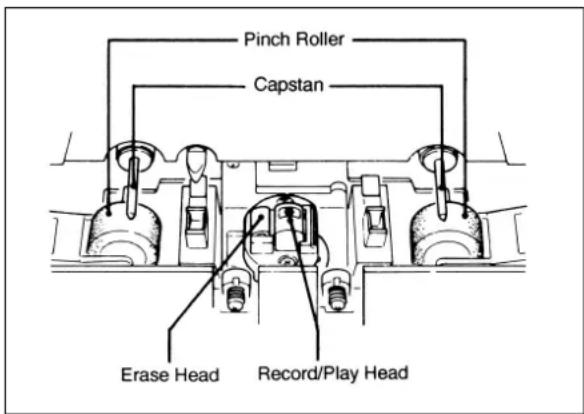
All heads and metal parts in the tape path must be cleaned after every 6 hours of operation, or before starting and after ending a recording session.
- Open the cassette compartment.
- Using a good head cleaning fluid and a cotton swab, clean the heads and tape guides until the swab comes off clean. Wipe off any excess cleaning fluid with a dry swab.
Cleaning the Pinch Rollers
Clean the pinch rollers at least once each day the deck is used. Use a good rubber cleaner
-
Clean the pinch rollers with a cotton swab moistened with rubber cleaner, until there is no visible residue on the pinch rollers.
-
Using a clean cotton swab, wipe off all excess rubber cleaner from the pinch rollers. Make certain that there is no foreign matter remaining on the pinch rollers.
Cleaning the Capstan Shafts
After cleaning the pinch rollers, clean the capstan shafts with a cotton swab moistened with head cleaning fluid.
Degaussing the Tape Path
The degausser should be turned on at least 1 meter (3ft) away from the unit and the unit must be OFF.
Slowly move in to the tape path. Move the degausser slowly back and forth, touching lightly all metal parts in the tape path. Slowly move it away again to at least 1 m (3 feet) from the recorder before turning if off.
Troubleshooting
| Problem Possible | Cause Solution | |
| Continuous record/play impossible | REV MODE switch set to = or . Set | switch to CONT. |
| OFF/SLV/MSTR switch set to SLV or MSTR. | Set switch to the left OFF position. | |
| Poor sound quality | Heads are dirty. Clean them, as stated above. | |
| Inappropriate DOLBY NR switch setting. | Set switch to the setting used for original recording. | |
| Heads are magnetized. Demagnetize them, as stated above. | ||
| Recording impossible | Erase-protection tabs broken off the cassette. | Cover tab holes with plastic tape. |
Error Messages
The following messages are displayed on the tape counter when two or more 302MkII units are in use, one serving as the master machine and the others as the slave machines, and an error is detected :
| Display Problem | Solution | |
| Err2 | Commands interrupted somewhere because of incoherent switch settings | Make settings coherent throughout the system. |
| Err3 Incorrect EXT CONTROL connection | Correct connection. |
Tape : Compact cassette tape C-30/60/90 (Normal/High Position/Metal)
Track Format : 4-track, 2-channel
Head Configuration : 4-track, 2-channel ; Record/repro combination rotary head (DECK 1 x1, DECK 2 x1, permally) Erase head (DECK 1 x1, DECK 2 x1, ferrite)
Motor : DC servo capstan motor (DECK 1 x1, DECK 2 x1) DC reel motor (DECK 1 x1, DECK 2 x1)
Tape Speed : 4.76 cm/sec (1.87 ips) or 9.5 cm/sec (3.74 ips) at HIGH SPEED dubbing
Pitch Control : approx. +/- 10 %
Line Input - RCA jack
Nominal Input Level : -10 dBV (0.3V)
Minimum Input Level: -18 dBV (0.1V)
Input Impedance : 24k ohms
Line Output - RCA jack
Nominal Output Level : -5 dBV (0.6V)
Output Impedance : 1.5k ohms
Cascade Output - RCA jack
Nominal Output Level: -10 dBV (0.3V)
Output Impedance : 100 ohms
Headphone Output - 1/4" jack
Output Power : 7 mW max./32 ohms
Bias/Erase Frequency : 100 kHz
Repro Equalization :
3180 μs + 70 μs (High Position/Metal)
3180 s + 120 s (Normal)
Reference Record Level :
250nWb / m = 0 VU (315 Hz) (JEITA)
EXT CONTROL : 3.5 mm mini jack
REMOTE IN (FROM RC-322A) : 2.5 mm mini-mini jack
Power Requirements :
USA/Canada/General Export Model : 120/230 V AC (50-60 Hz), switchable
U.K./Europe : 230 V AC (50 Hz)
Australia : 240 V AC (50 Hz)
Consumption : 33 Watts
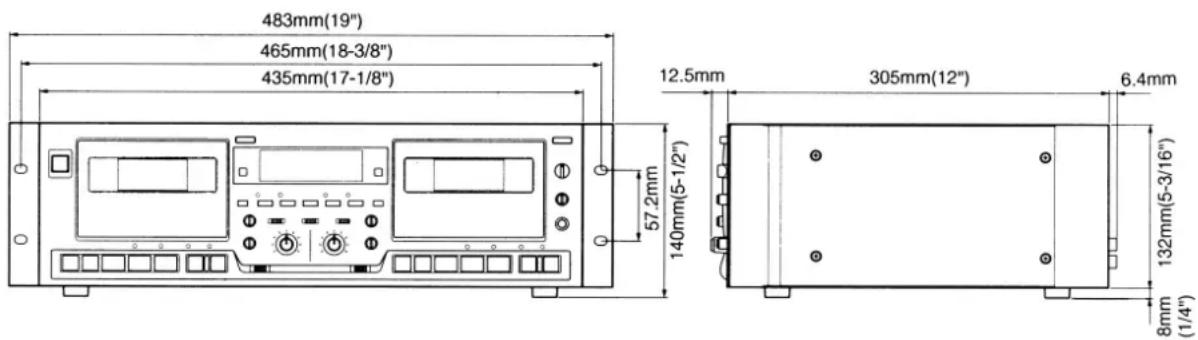
Dimensions : ( See drawings below)
Weight : 7.8 kg (17.19 lbs)
Typical Performance
Speed Accuracy : Less than +/-3.0%
Wow and Flutter : Less than 0.15% WRMS
Fast Winding Time :
120 sec. (approx.) with C-60 cassette
Frequency Response, Overall (JEITA, without NR):
63 Hz to 18 kHz, +/-3 dB (Metal)
63 Hz to 16 kHz, +/- 3 dB (High Position)
63 Hz to 16 kHz, +/-3 dB (Normal)
Distortion : Less than 2.5%, at 1kHz, 160 nWb/m (Metal)
Signal-to-Noise Ratio :
59 dB (without NR, ref. 3% THD, WTD) (Meta])
69 dB (with Dolby-B NR, CCIR ARM) Noise level
79 dB (with Dolby-C NR, CCIR ARM) Noise level
Channel Separation :
Better than 30 dB (at 1 kHz)
Erase Ratio : Better than 65 dB (at 1 kHz)
Specifications and features subject to change without notice or obligation.
Dimensional Drawings
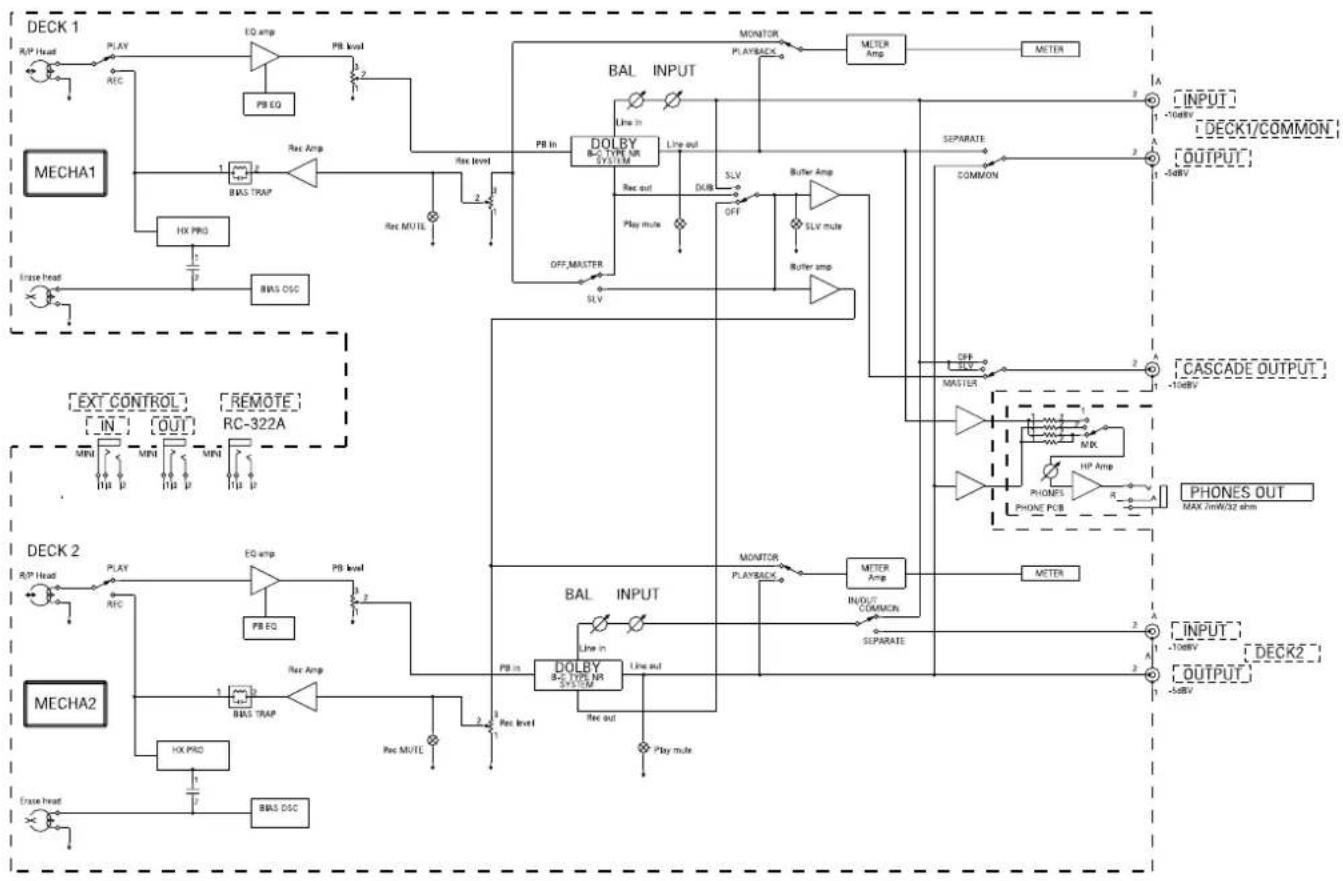
flowchart
graph TD
    subgraph DECK1
        A["R/P Head"] --> B["PLAY"]
        B --> C["REC"]
        C --> D["EQ amp"]
        D --> E["PB EQ"]
        E --> F["PB level"]
        F --> G["RBAS TRAP"]
        G --> H["Max MUL"]
        H --> I["RBAS DSC"]
        I --> J["Extr head"]
        J --> K["HX PRO"]
        K --> L["Line in"]
        L --> M["DOLBY B-TYPE MR SYSTEM"]
        M --> N["Line out"]
        N --> O["RBAS"]
        O --> P["OFF MASTER"]
        P --> Q["SLV"]
        Q --> R["Buffer Amp"]
        R --> S["SLV mule"]
        S --> T["Buffer amp"]
        T --> U["SO Box"]
    end

    subgraph DECK2
        V["R/P Head"] --> W["PLAY"]
        W --> X["REC"]
        X --> Y["EQ amp"]
        Y --> Z["PB level"]
        Z --> AA["PB EQ"]
        AA --> AB["Bias TRAP"]
        AB --> AC["Max MUL"]
        AC --> AD["RBAS DSC"]
        AD --> AE["Extr head"]
        AF["MECHA1"] --> AG["1"]
        AG --> AH["2"]
        AH --> AI["RBAS TRAP"]
        AI --> AJ["Line in"]
        AJ --> AK["DOLBY B-TYPE MR SYSTEM"]
        AK --> AL["Line out"]
        AL --> AM["RBAS"]
        AM --> AN["Buffer Amp"]
        AN --> AO["SLV"]
        AO --> AP["Buffer amp"]
    end

    subgraph DECK1
        AQ["METER"] --> AR["METER Amp"]
        AR --> AS["METER"]
    end

    subgraph DECK2
        AT["A INPUT -10dBV"] --> AU["CASCADE OUTPUT -10dBV"]
        AU --> AV["PROCES OUT MAX 3mW/32 ohm"]
        AW["MIN"] --> AX["MK"]
        AY["HP Amp"] --> AZ["R"]
        BA["PHONE"] --> BB["R"]
        BC["PHONE PCB"] --> BD["R"]
        BE["METER"] --> BF["METER Amp"]
        BG["IN/OUT"] --> BH["SEPARATE"]
    end

    style DECK1 fill:#f9f,stroke:#333
    style DECK2 fill:#f9f,stroke:#333
TEAC CORPORATION
Phone: (0422) 52-5082 3-7-3, Nakacho, Musashino-shi, Tokyo 180-8550, Japan
TEAC AMERICA, INC.
Phone: (323) 726-0303 7733 Telegraph Road, Montebello, California 90640
TEAC CANADA LTD
Phone: 905-890-8008 Facsimile: 905-890-9888 5939 Wallace Street, Mississauga, Ontario L4Z 1Z8, Canada
TEAC MEXICO, S.A. De C.V
Phone: 5-851-5500 Campesinos No. 184, Colonia Granjas Esmeralda, Delegacion Iztapalapa CP 09810 Mexico DF Mexico
TEAC UK LIMITED
Phone: 01923-819699 5 Marlin House, Croxley Business Park, Watford, Hertfordshire. WD18 8TE, U.K.
Phone: (03) 9644-2442 106 Bay Street, Port Melbourne, Victoria 3207, Australia

- TEAC Professional Division
- 302MKII
- Double Auto Reverse Cassette Deck
- OWNER'S MANUAL
- Important Safety Precautions
- IMPORTANT (for U.K. Customers)
- DO NOT cut off the mains plug from this equipment.
- For U.S.A
- TO THE USER
- CAUTION
- For CANADA
- AC POWER CORD CONNECTION
- CAUTION:
- CORDE DE CONNEXION CA
- ATTENTION:
- IMPORTANT SAFETY INSTRUCTIONS
- "Note to CATV system installer:
- Before Getting Started
- Table of Contents
- Optional Accessories :
- Rack Mounting
- VOLTAGE CONVERSION
- General Guide to the Controls and Connectors
- Front Panel
- NOTE
- Rear Panel
- RC-322A Remote Control Unit (Option)
- Recording on Either Deck, or Both at the Same Time
- Continuous Recording on Both Decks
- Dubbing from Deck 1 onto Deck 2
- Playback
- Using Just One of the Two Available Decks
- Continuous Play on Both Decks
- Using the CPS Function
- If you are using the optional remote control :
- Erasing Recordings
- Multiple-Unit System Operation
- Sequential Link Play
- Simultaneous Dubbing onto Multiple Cassettes
- Recording an External Source onto Multiple Cassettes Simultaneously
- Cleaning the Heads and Tape Guides
- Cleaning the Pinch Rollers
- Cleaning the Capstan Shafts
- Degaussing the Tape Path
- Troubleshooting
- Error Messages
- Typical Performance
- TEAC CORPORATION
Brand : TASCAM
Model : 302MKII
Category : Cassette player