
PS101 - Print Server NETGEAR - Free user manual and instructions
Find the device manual for free PS101 NETGEAR in PDF.


| Product Type | Print Server |
| Brand | NETGEAR |
| Model | PS101 |
| Dimensions | 110 x 65 x 28 mm |
| Weight | 180 g |
| Power Supply | External AC adapter, 5V DC |
| Network Interface | 10/100 Mbps Ethernet (RJ-45) |
| Printer Interface | IEEE 1284 parallel port |
| Supported Protocols | TCP/IP, IPX/SPX, NetBEUI, AppleTalk |
| Management | Web-based, SNMP, Telnet |
| Operating Systems | Windows, Mac OS, Unix/Linux |
| LED Indicators | Power, Status, Link, Parallel |
| Operating Temperature | 0°C to 40°C |
| Storage Temperature | -20°C to 70°C |
| Humidity | 10% to 90% non-condensing |
| Safety Certifications | FCC, CE |
| Package Contents | Print server, power adapter, Ethernet cable, Quick Install Guide, CD-ROM |
| Additional Features | Supports multiple protocols, auto-negotiation, flash upgradeable firmware |
Frequently Asked Questions - PS101 NETGEAR
User questions about PS101 NETGEAR
0 question about this device. Answer the ones you know or ask your own.
Ask a new question about this device
Download the instructions for your Print Server in PDF format for free! Find your manual PS101 - NETGEAR and take your electronic device back in hand. On this page are published all the documents necessary for the use of your device. PS101 by NETGEAR.
USER MANUAL PS101 NETGEAR
To register your product, get product support or obtain product information and product documentation, go to http://www.NETGEAR.com/register.
You will find technical support information at http://www.NETGEAR.com through the Customer Support area. If you want to contact technical support by telephone, see the support information card for the correct telephone number for your country.
Technical support is available 24 hours a day, 7 days a week.
NETGEAR, INC.
E-mail: support@NETGEAR.com
www.NETGEAR.com
©2002 by NETGEAR, Inc. All rights reserved.
NETGEAR and AutoUplink are trademarks or registered trademarks of NETGEAR, Inc. in the United States and/or other countries. Other brand and product names are trademarks or registered trademarks of their respective holders. Information is subject to change without notice.
Introduction
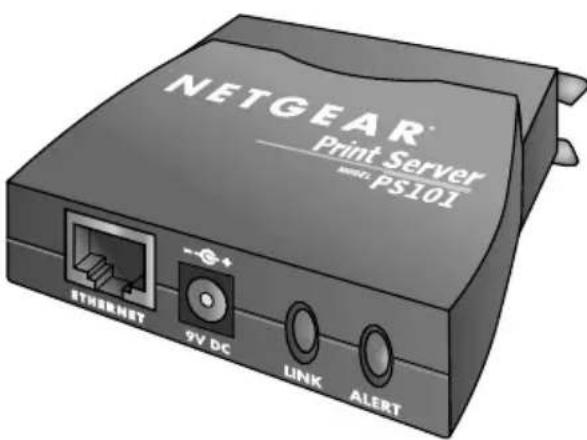
Thank you for purchasing a NETGEAR PS101 Mini Print Server. With this print server you can share your printer with all the computers in your home or office that run Microsoft® Windows® 95 OSR2, 98, 2000, NT 4.x, Me, or XP operating system.
This installation guide shows you how to connect the print server to your printer and configure it to use with your computers. Setup is easy – if you follow the instructions in this guide, the print server will soon be up and running for your computers.
If you have problems, there is a troubleshooting section on page 9 to help you. You can get more detailed troubleshooting information from the Reference Manual on the CD or online at www.NETGEAR.com in our Support section.
Installation Procedure Overview
Estimated time: 30 minutes
- Unpack the box and verify the contents.
- Connect the print server to the printer and to the network.
- Configure the print server to be recognized on the network.
- Configure each computer to print through the print server.
Note: You only need to go through procedures 1 through 3 once. Repeat procedure 4 for each computer that will share the printer with the print server. It takes less than 5 minutes to configure and test each computer.
On the PS101 Resource CD, you will find a Reference Manual containing more detailed information about installation, troubleshooting and configuration.
1 Unpack the Box and Verify the Contents
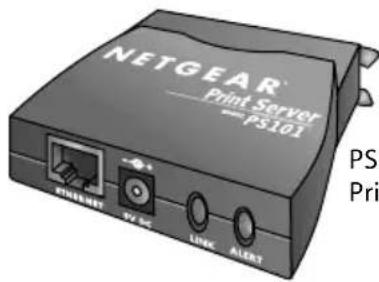
PS101 Mini
Print Server
natural_image
Stacked books with one CD and a circular cover, no visible text or symbols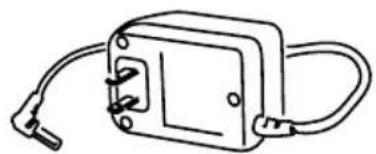
natural_image
Simple line drawing of an electrical enclosure with wires and connectors (no text or symbols)Power adapter
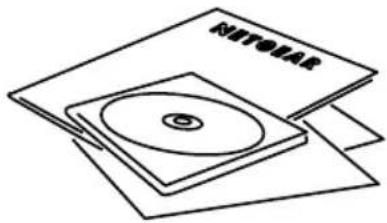
PS101 Mini Print Server Resource CD, installation guide, support information card & warranty/registration card
When you open the box, verify that you received everything.
The package includes:
• PS101 Mini Print Server
- AC power adapter
• PS101 Resource CD, including a full Reference Guide and print server software
• PS101 Installation Guide (this document)
• Warranty and registration card
• Support information card
2
Connect the Print Server
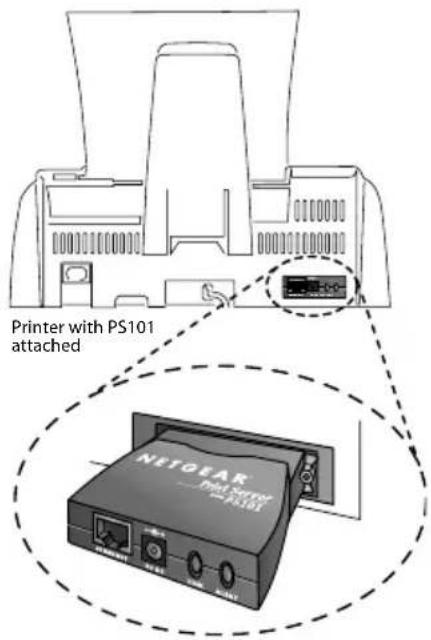
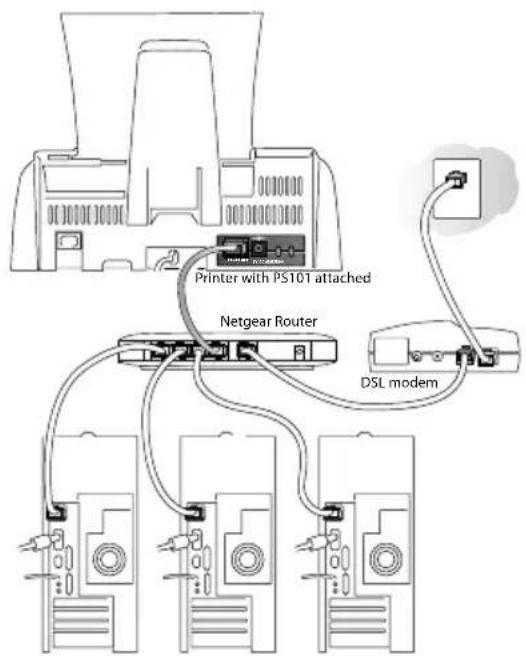
The PS101 Mini Print Server connects directly to the Centronics parallel port on your printer. After connecting it to your printer, you then connect the print server to a network device (like a hub, router, or switch).
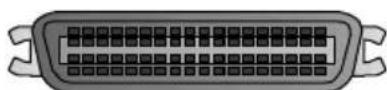
Centronics parallel port on the printer
Before you share the printer with the NETGEAR PS101 Mini Print Server, you should have at least one computer connected to an Ethernet network and have one unused port on an Ethernet hub, switch, or router.
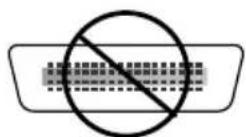
Not Compatible with Mini Centronics-C Printers
Note: For printers with a Mini-Centronics C port, you will need to use one of the other NETGEAR Print Servers such as the PS111W, PS110 or PS113 along with the correct cable.
Note: The procedures described in this guide are for a TCP/IP-based network environment. For NetBEUI protocol printing, please see the Reference Manual.
- With the printer turned off, connect the print server to the Centronics connector on the printer.
- Insert one end of an Ethernet patch (or straight-through) cable into an open Ethernet port in the network device (hub, switch, or router) and insert the other end into the Ethernet port on the print server.
Note: You may use a Category 3 (or higher) Ethernet cable.
- Turn the printer on.
- Connect the power adapter's cord into the back of the print server and then plug the adapter into a power source (such as a wall socket or power strip).
When power has been applied to the print server: The LINK light (green) should light up and may blink to show network activity.
The ALERT light (yellow) should be off.
Note: If any light does not operate as indicated, go to the Troubleshooting section on page 9.
3 Install Printer Server Software and Setup the Print Server
The PS101 comes with several software components that allow you to set up the print server and use administrative tools. You should install all the software onto one Windows computer to act as the print server administrator. For the other computers, only install the NETGEAR Add Printer Wizard as described in procedure 4.
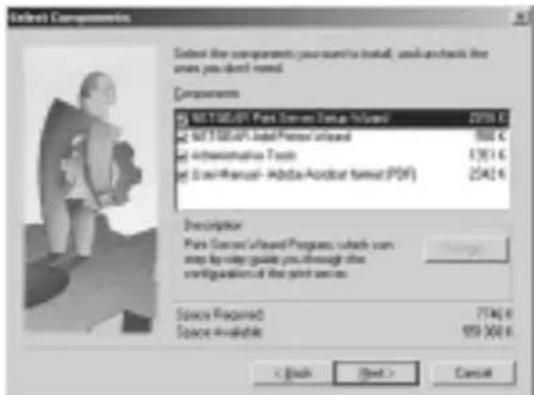
To install the NETGEAR Print Server software:
-
Insert the PS101 Printer Server Resource CD in the CD-ROM drive. NETGEAR Print Server Software Installation wizard starts up automatically. If it doesn't, double-click My Computer, double-click your CD-ROM drive, and double-click Setup.exe.
-
Follow the instructions in the installation wizard to install the software.
-
For the administrative computer, install all components.
Note: If this computer will just use the printer, only select the NETGEAR Add Printer Wizard. See procedure 4: Configure a Computer To Access the Print Server for details.
- Click Finish.
To set up the print server:
-
Click Start. Point to Programs and click NETGEAR Print Server>NETGEAR Print Server Setup Wizard.
-
Follow the instructions in the installation wizard to set up the print server. \If you have questions, click Help for information about a specific screen.
Note: The PS101 Print Server, by default, automatically obtains an IP address from the network. However, NETGEAR recommends you use a fixed IP address to be able to use a Web browser to print a test page or to make configuration changes later. For a home or small office, use IP address information compatible with your router setup. The IP address for the print server needs to be unique in the network. If you don't know what to use, you may click Suggest New Values to get a useable IP address. If you are using a NETGEAR router with default settings, the following settings should work:
IP address: 192.168.0.150 (The first three numbers should match the numbers for the network device. Make sure the last 3 digits are unique on your network.)
Subnet mask: 255.255.255.0
Gateway IP address: 192.168.0.1 (the address of your router)
-
When complete, click Finish.
-
When asked if you want to set up a printer right away, click Yes and continue to procedure 4: Configure a Computer To Access the Print Server. You have already completed the software installation and are running the NETGEAR Add Printer Wizard.
Advanced Settings
Advanced users may want to change the default name of the Print Server or make other changes in the settings. There are 2 ways to administer your NETGEAR Print Server. The Reference Manual on the Resource CD has full instructions.
a. Open a Web browser and go to the IP address for the print server. (For example, type http://192.168.0.150 and click Go.) or
b. You can use the NETGEAR Print Server Administration program. Click Start. Point to Programs and click NETGEAR Print Server>NETGEAR Print Server Administration.
4 Configure a Computer To Access the Print Server
Before using the PS101 on your network, each computer that needs to access the print server must have:
• A connection to the network.
- The printer added using the NETGEAR Add Printer Wizard.
- Either the printer driver software already installed or, if this is a new printer, access to the printer driver software (either on a CD or downloaded to a disk).
To install the Add Printer Wizard (for a non-administrative computer):
![Select Components Select the components you must not install, unless authentic they are you don't need. Components NUTOS/PCI Park Server Setup Required 0 K NUTOS/PCI Audio Provider Required 998 K Administrative Tools 0 K C:\mnt-ware - Applicable Optical Setup (PSU) 0 K Description For some side studies available in version Browse Space Required: 7 [4.6] Space Available: 959 360.6 < Back Next > Cancel](/content/2026/05/823224/images/7b40b8cf10deda7c7bf333084ee5e000460f382586c9584a2db8961ef79c8c49.jpg)
Note: You can skip ahead "To configure computers..." if you have already installed the NETGEAR software on this computer.
- Insert the PS101 Printer Server Resource CD in the CD-ROM drive. NETGEAR Print Server Software Installation wizard starts up automatically. If it doesn't, double-click My Computer, double-click your CD-ROM drive, and double-click Setup.exe.
-
Follow the instructions in the installation wizard to install the software.
-
When asked, select only the NETGEAR Add Printer Wizard.
- Click Finish.
To configure computers running Windows NT, 2000, and XP:
-
Click Start, point to Programs> NETGEAR Print Server and click NETGEAR Add Printer Wizard.
-
Read, follow the instructions, and click OK in the Setup message window.
-
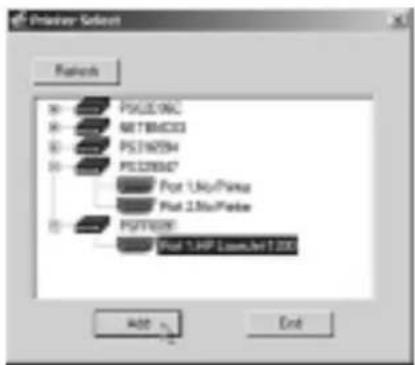
In the list, select the print server port with the printer you want to add to this computer and click Add. When you see the AddPort screen, write down the port name (such as PSFF0091_P1).
Printer port name:
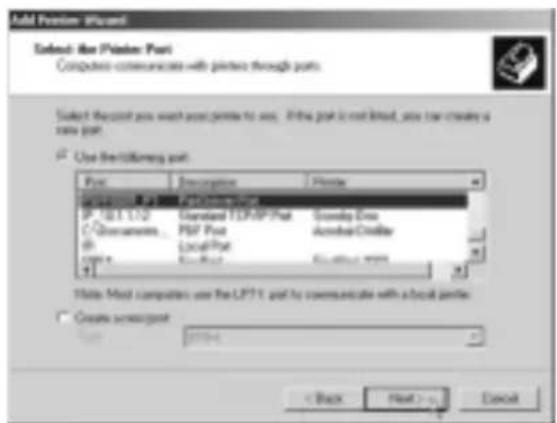
- Scroll down in Add Printer Wizard screen. Select the Print Server port with port name as written above. Click Next.
Note: Do NOT select the default port "LPT1."
-
Select the printer manufacturer on the left and the model on the right or, if you need to install the printer driver, click Have Disk and follow the instructions.
-
If you have installed the printer driver for this printer, you will be asked to keep the existing driver or replace it. Select either one and click Next. Follow the instruction on screen if any.
-
Type a name for this printer and determine whether you want this as the default printer. Click Next.
-
Select No when asked about sharing the printer and click Next.
Note: The print server will perform this function.
-
Select Yes when asked about printing a test page and click Next.
-
Click Finish.
If you cannot print the test page, go to Troubleshooting on page 9.
If you successfully printed the test page, you can configure other computers to access this printer by repeating procedure 4 on each computer.
To configure computers running Windows 95, 98, and Me:
-
Click Start, point to Programs> NETGEAR Print Server and click NETGEAR Add Printer Wizard.
-
Read, follow the instructions, and click OK in the Setup message window.
-
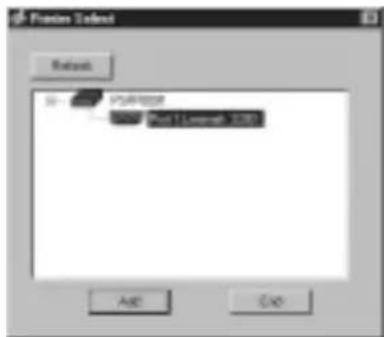
Select the port with the printer you connect and click Add in the Printer Select screen. When the AddPort screen shows, write down the port name ( such as PSFF0091_P1).
Printer port name: ____.
-
Select the printer manufacturer on the left and the model on the right or, if you need to install the printer driver, click Have Disk and follow the instructions.
-
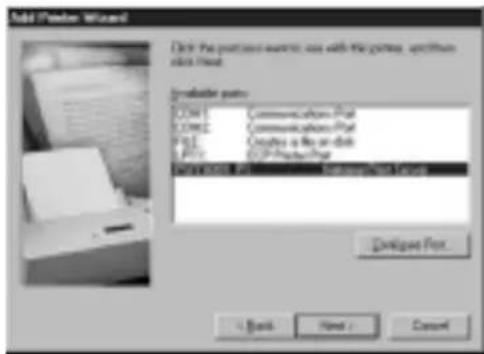
Click Next and select the print server in the Available ports list. This should match the port name from step 3. Then click Next.
Note: Do NOT select the default port "LPT1."
-
Type a name for this printer and determine whether you want this as the default printer.
-
Select Yes when asked about printing a test page.
-
Click Finish.
If you cannot print the test page, go to Troubleshooting on page 9.
If you successfully printed the test page, you can configure other computers to access this printer by repeating procedure 4 on each computer.
Troubleshooting
The LINK light is not lit
The print server has no power.
- Make sure the power adapter is properly connected to the print server.
- Make sure the power adapter is properly connected to a functioning power outlet. If it is in a power strip, make sure the power strip is turned on. If it is plugged directly into the wall, verify that it is not a switched outlet.
- Make sure you are using the correct NETGEAR power adapter supplied with your print server.
The printer is not on or there is a connection problem.
- Make sure the printer is turned on.
- Make sure the connector is securely plugged in at the print server and the printer.
There is a network hardware connection problem.
- Make sure the connectors are securely plugged in at the print server and the network device (hub, switch, or router).
- Make sure the network device is turned on.
- Be sure the correct cable is used. In most instances, use a Category 3 (or higher) Ethernet patch cable. If the network device has Auto Uplink™ (MDI/MDIX) ports, you may use a cross-over cable.
The ALERT light is lit.
- Turn the printer off and unplug the print server's power adapter. Turn the printer on and then plug in the print server's power adapter.
- Contact NETGEAR if this doesn't solve the problem.
I can not print from my computer
• You may not have selected the correct printer in the Print dialog box.
- You may not have configured the computer to work with the print server. Go through procedure 4 on page 6 for each computer that will use the print server.
- The computer may not be communicating to the print server. To test for printing directly from the print server:
- Open a browser and go to the IP address for the print server. (For example, type http://192.168.0.150 and click Go.)
Note: If you do not know the IP address, you use the NETGEAR Print Server Administration program. Click Start. Point to Programs and click NETGEAR Print Server>NETGEAR Print Server Administration. The Reference Manual on the Resource CD has full instructions.
- Click Printer Ports on the left.
- Click Print Test Page.
- After the test page prints, click Logout.
- Click Yes (or OK) if asked about closing the browser window.
Could print previously but can no longer print from my computer
- If the print server is set up to ‘obtain IP address automatically’, the IP address may have changed. Restart your computer. You may also use the IP Setup program on the administrative computer to assign a fixed IP address to the print server. Click Start. Point to Programs and click NETGEAR Print Server>IPSetup.
- The print server may be overheated. Unplug the power adapter and then plug it in again. Remove any paper or other material that may be restricting ventilation. Lower the temperature in the surrounding environment.
Glossary of Terms
Category 3 (CAT3): A twisted pair cable that meets specified requirements for 10 Mbps networking up to 328 ft. (100m).
Category 5 (CAT5): A shielded twisted pair cable that meets requirements for 10 and 100 Mbps networking up to 328 ft. (100m).
Local Area Network (LAN): A communications network within a limited area, such as one building.
TCP/IP: Transfer Control Protocol (TCP) with Internet Protocol (IP). The main internetworking protocol used in the Internet.
Mini Print Server System Requirements
- Windows 95 OSR2, 98, Me, NT 4.x, 2000, XP
• A printer with a Centronics parallel port - Network software
Mini Print Server Specifications
Network Protocols: IEEE 802.3i, 10BASE-T CSMA/CD Interface, NetBEUI and TCP/IP
Electromagnetic Emissions: CE mark, commercial; FCC Part 15, Class A; EN 55 022
(CISPR 22), Class A; VCCI Class A ITE; EN50082-1, C-Tick N10947
Safety Agency Approvals: CE mark, commercial, UL listed, CSA certified, TUV licensed, T-Mark
Dimensions Width 1.3 in. (6.2 cm)
Height 0.8 in. (2.0 cm)
Depth 2.3 in. (6.0 cm)
Weight 0.4 lb. (0.1 kg)
Status LEDs Link and Alert lights
Power Adapter 9 V DC, 0.50A (customized power plug for individual countries)
Environmental Specifications
Operating temperature 32^ to 104^ F ( 0^ to 40^ C)
Operating humidity 10 to 90%, noncondensing
Warranty Limited 2-year warranty
Statement of Conditions
In the interest of improving internal design, operational function, and/or reliability, NETGEAR reserves the right to make changes to the products described in this document without notice. NETGEAR does not assume any liability that may occur due to the use or application of the product(s) or circuit layout(s) described herein.
Certificate of the Manufacturer/Importer
It is hereby certified that the Model PS101 Mini Print Server has been suppressed in accordance with the conditions set out in the BMPT-AmtsblVfg 243/1991 and Vfg 46/1992. The operation of some equipment (for example, test transmitters) in accordance with the regulations may, however, be subject to certain restrictions. Please refer to the notes in the operating instructions. Federal Office for Telecommunications Approvals has been notified of the placing of this equipment on the market and has been granted the right to test the series for compliance with the regulations.
VCCI Statement
This equipment is in the Class A category (information equipment to be used in a residential area or an adjacent area thereto) and conforms to the standards set by the Voluntary Control Council for Interference by Data Processing Equipment and Electronic Office Machines aimed at preventing radio interference in such residential areas. When used near a radio or TV receiver, it may become the cause of radio interference. Read instructions for correct handling.
Federal Communications Commission (FCC) Compliance Notice: Radio Frequency Notice
This device complies with part 15 of the FCC Rules. Operation is subject to the following two conditions:
-
This device may not cause harmful interference.
-
This device must accept any interference received, including interference that may cause undesired operation.
Note: This equipment has been tested and found to comply with the limits for a Class A digital device, pursuant to part 15 of the FCC Rules. These limits are designed to provide reasonable protection against harmful interference in a residential installation. This equipment generates, uses, and can radiate radio frequency energy and, if not installed and used in accordance with the instructions, may cause harmful interference to radio communications. However, there is no guarantee that interference will not occur in a particular installation. If this equipment does cause harmful interference to radio or television reception, which can be determined by turning the equipment off and on, the user is encouraged to try to correct the interference by one or more of the following measures: (1) Reorient or relocate the receiving antenna, (2) Increase the separation between the equipment and receiver, (3) Connect the equipment into an outlet on a circuit different from that to which the receiver is connected, (4) Consult the dealer or an experienced radio/TV technician for help.
EN 55 022 Statement
This is to certify that the Model PS101 Mini Print Server is shielded against the generation of radio interference in accordance with the application of Council Directive 89/336/EEC, Article 4a. Conformity is declared by the application of EN 55 022 Class A (CISPR 22). Compliance is dependent upon the use of shielded data cables.
Canadian Department of Communications Radio Interference Regulations
This digital apparatus (Model PS101 Mini Print Server) does not exceed the Class A limits for radio-noise emissions from digital apparatus as set out in the Radio Interference Regulations of the Canadian Department of Communications.


- Introduction
- Installation Procedure Overview
- Unpack the Box and Verify the Contents
- 2
- Connect the Print Server
- Install Printer Server Software and Setup the Print Server
- Advanced Settings
- Configure a Computer To Access the Print Server
- To install the Add Printer Wizard (for a non-administrative computer):
- To configure computers running Windows NT, 2000, and XP:
- To configure computers running Windows 95, 98, and Me:
- Troubleshooting
- The LINK light is not lit
- The ALERT light is lit.
- I can not print from my computer
- Could print previously but can no longer print from my computer
- Glossary of Terms
- Mini Print Server System Requirements
- Mini Print Server Specifications
- Environmental Specifications
- Statement of Conditions
- Certificate of the Manufacturer/Importer
- VCCI Statement
- EN 55 022 Statement
- Canadian Department of Communications Radio Interference Regulations
Brand : NETGEAR
Model : PS101
Category : Print Server