
AWT 2267 - Washing machine WHIRLPOOL - Free user manual and instructions
Find the device manual for free AWT 2267 WHIRLPOOL in PDF.


User questions about AWT 2267 WHIRLPOOL
0 question about this device. Answer the ones you know or ask your own.
Ask a new question about this device
Download the instructions for your Washing machine in PDF format for free! Find your manual AWT 2267 - WHIRLPOOL and take your electronic device back in hand. On this page are published all the documents necessary for the use of your device. AWT 2267 by WHIRLPOOL.
USER MANUAL AWT 2267 WHIRLPOOL
DETERGENTS AND ADDITIVES
CLEANING THE FOREIGN BODY TRAP
DRAINING RESIDUAL WATER
CARE AND MAINTENANCE
TROUBLESHOOTING GUIDE
AFTER-SALES SERVICE
TRANSPORT AND HANDLING
INSTALLATION
BEFORE USING THE WASHING MACHINE
1. Remove the packaging and check
a. Cut and remove the shrink-wrap.
b. Remove the top protection and the protective corners.
c. Remove the bottom protection by tilting and turning the appliance on one rear bottom corner.
2. Remove the transport bracket
- The appliance is fitted with transport screws and a transport bracket to prevent damage during transport. Before using the washing machine you must remove the transport bracket (see "Installation/Remove the transport bracket").
Do not forget to screw back 4 screws to the rear panel by which was fixed the transport bracket - to avoid noisy and vibration of the machine.
3. Install the washing machine
- Place the appliance on a flat and stable floor surface.
- Adjust the feet to ensure that the machine is stable and level (see “Installation/Adjust the feet”).
4. Water supply
- Connect the water supply inlet hose in accordance with the regulations of your local water company (see "Installation/Connect the water inlet hose").
• Water supply: Cold water only - Tap: 3/4" threaded hose connection
• Pressure: 100-1000 kPa (1-10 bar).
"For Great Britain & Ireland only:
- Water inlet: hot and cold fill. The warm water inlet temperature must not exceed 60° C."
5.Drain hose
- Connect the drain hose to the siphon or hook it over the edge of a sink with the "U" bend (see "Installation/Connect the water drain hose").
- If the washing machine is connected to a built-in drainage system, ensure the latter is equipped with a vent to avoid simultaneous loading and draining of water (siphoning effect).
6. Electrical connection
- Electrical connections must be carried out by a qualified technician in compliance with the manufacturer's instructions and the current standard safety regulations.
- The technical data (voltage, power and fuses) are given on the rating plate on the rear of the appliance.
- The appliance must be connected exclusively by means of a socket with an earth connection in accordance with current regulations. The appliance must be earthed by law. The manufacturer declines all liability for damage to persons or property deriving directly or indirectly from failure to observe the directions.
- Do not use extension leads or multi sockets.
- Before any maintenance on the washing machine disconnect it from the mains supply.
- Access to the mains plug or to disconnection from the mains supply via a double-pole switch must be ensured at all times following the installation.
- Do not operate the washing machine if it has been damaged during transport. Inform the After-Sales Service.
- Mains cable replacement is only to be carried out by After-Sales Service.
- The appliance must be connected to an effective earthing installation, in compliance with the regulations in force. In particular, appliances installed in premises containing a shower or a bath must be protected by a differential residual current device of at least 30 mA. Earthing the appliance is obligatory under the law. The manufacturer declines all liability for damage to persons or property deriving either directly or indirectly from failure to observe the directions above.
- The washing machine may only be used in the household for the prescribed uses.
Dimensions:
Width: 400 mm
Height: 900 mm
Depth: 600 mm
FIRST WASH CYCLE
We recommend that the first wash cycle be carried out empty. This will remove any residual water used in the factory checks.
- Turn on the tap.
- Close the drum flaps.
- Pour a small amount of detergent (about 30 ml) into the detergent dispenser
- Select a short programme and low spin speed (see programme chart).
- Switch on the appliance.
PRECAUTIONS AND GENERAL RECOMMENDATIONS
1.Packing
- The packaging materials are 100% recyclable and bear the recycling symbol. Adhere to local regulations when disposing of packaging material.
2. Energy saving tips
- Achieve the best use of energy, water, detergent and time by using the recommended maximum load size.
- Do not exceed the detergent dosages indicated in the manufacturer's instructions.
- The Eco Ball - a special system in the outlet - will prevent detergent loss from the drum to avoid detergent loss into the environment.
- Use "Prewash" for heavily soiled laundry only! Save detergent, time, water and energy consumption by not selecting "Prewash" for slight to normally soiled laundry.
- Pretreat stains with stain remover or soak dried in stains in water before washing to reduce the necessity of a hot wash program.
- Save energy by using a 60°C instead of a 90°C wash programme or a 40°C instead of a 60°C wash programme.
- Save energy and time by selecting a high spin speed to reduce the water content in laundry before using a tumble dryer (for machines with adjustable spin speed).
3. Disposing of packaging and old appliances
- The washing machine is built from reusable materials. The washing machine must be disposed of in compliance with current local waste disposal regulations.
- Before scrapping old machine, cut of the power cable so that the washing machine cannot be connected to the mains.
- Remove detergent from compartment if you intend scrapping your appliance.
4. Child safety
- Children must not be allowed to play with or in the appliance.
5.General recommendations
- Do not leave the appliance connected when not in use. Turn off the tap.
- Before cleaning or carrying out maintenance switch off the washing machine and disconnect it from the mains supply.
- To clean the outside of the washing machine, use a neutral detergent and a damp cloth.
- Do not use abrasive detergents.
- Do not attempt to force the lid open.
- If necessary, the power cable may be replaced with an identical one obtained from our After-Sales Service. The power cable must only be replaced by a qualified technician.
6.EC Declaration of Conformity
- This washing machine has been designed, constructed and distributed in compliance with the safety requirements of EC Directives: 73/23/EEC Low Voltage Directive 89/336/EEC EMC Directive 93/68/EEC CE Marking Directive CE
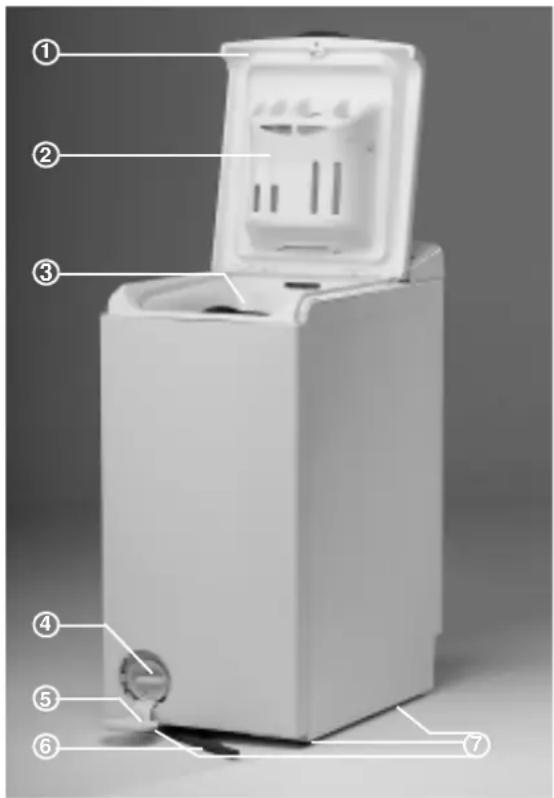
DESCRIPTION OF THE WASHING MACHINE
1.Lid
2. Detergent dispenser
3. Drum flaps
• To open the drum press the small flap and hold the large flap.
4. Pump and foreign body trap
5. After-Sales Service sticker (behind the foreign body trap cover)
6. Mobility lever (depending on model)
- To move the appliance: pull the handle out a little bit by hand and pull it out to the stop with the foot.
7. Adjustable feet
text_image
Labeled diagram of a white disposable water heater with seven numbered components for identification.PREPARATION OF THE WASHING
Sort the laundry
- Sort the laundry according to...
• Type of fabric / care label symbol
Cottons, mixed fibres, easy care/synthetics, wool, handwashed items.
- Colour
Separate whites and coloureds. Wash new coloured items separately.
- Size
Wash items of different sizes in the same load to improve efficiency and distribution in the drum.
- Fabric delicacy
Wash delicate articles separately: use a special programme for Pure New Wool, curtains and other delicates. Always remove curtain glides or wash curtains with the glides inside a cotton bag. Use the special program for handwash fabrics. Wash stockings, belts and other small items or articles with hooks (e.g. bras) in special cotton bags for washing machines or in zipped pillow cases.
- Empty pockets
Coins, safety pins and similar items can damage your appliance drum and tub.
- Fasteners
Close zips and fasten buttons or hooks; loose belts or ribbons should be tied together.
Stain removal
• Blood, milk, egg and other organic substances are generally removed by the enzyme phase of the programme.
- To remove red wine, coffee, tea, grass and fruit stains etc. add a stain removing agent in detergents dispenser compartment or chlorine bleach in compartment (depending on model).
• Particularly stubborn stains should be treated before the wash.
Dyeing and bleaching
Products usually consist of dye colour, fixing agent and salt. Pour the dye colour, the fixing agent and then the salt directly into the empty drum. Load the laundry only afterwards.
- Only use dyes and bleaches recommended for washing machines.
- Follow the manufacturer's instructions.
- Plastic and rubber parts of the machine may be stained by dyes or bleaches.
Starching
- Dissolve/dilute the starch, powder or liquid, in approximately 1 litre water outside of the washing machine in a small container. Load the washing machine, close the drum flaps and pour the dissolved starch directly on the drum. Then close the lid, select the programme "Rinse and Spin" and start.
Loading the laundry
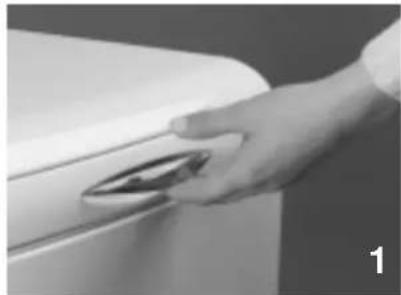
- Lift the machine lid.
- Open the drum by pressing the small flap and holding the large flap.
- Place the items of laundry in the drum one by one without compressing them. Follow loads recommended in the "programme chart": overloading will result in unsatisfactory washing results and creased laundry.
- Close the drum flaps and check that they are properly locked.
natural_image
Hand placing a circular button on a white appliance (no text or symbols visible)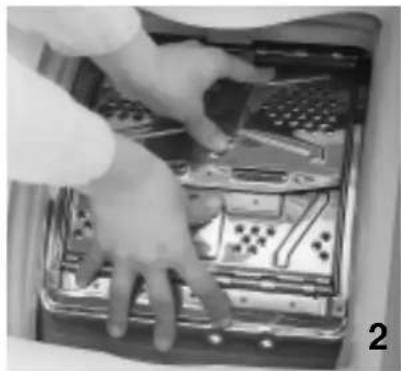
natural_image
Close-up of hands operating a computer motherboard with visible circuitry and components (no text or symbols)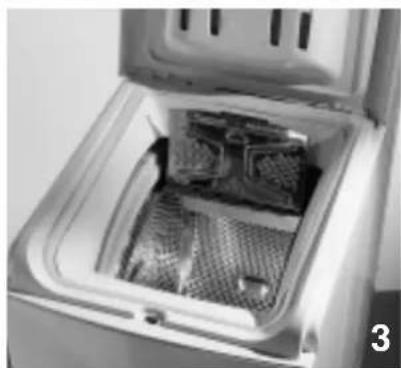
natural_image
Interior view of a microwave oven with open lid and mesh insulation (no text or symbols visible)DETERGENTS AND ADDITIVES
Choice of the right detergents and additives
The type of detergent depends on:
- type of fabric (cottons, easy care/synthetics, delicate items, wool).
Note: use only specific detergents for wool.
- colour;
- washing temperature;
• degree and type of soiling.
Notes:
Whitish residues on dark fabrics are caused by insoluble detergents components used in modern phosphate-free powder detergents. If you notice this problem, shake or brush the affected items or use a liquid detergents.
Keep detergents and additives in a dry place and out of reach of children.
Use only detergents and additives specifically produced for domestic washing machines.
If you use descaling agents, dyes or bleaches, make sure they are suitable for washing machine use. Descaler could contain components that can attack parts of your washing machine.
Do not use solvents (turpentine, benzine, etc.). Do not machine wash fabrics that have been treated with solvents or flammable liquids.
Dosage
Follow the instructions on the detergent pack in relation to:
• the degree and type of soiling;
- the size of the load;
- full load: follow the detergent manufacturer's instructions;
- half load: 3/4 the amount used for a full load;
- minimum load (about 1 kg): half the amount used for a full load;
- water hardness in your area (ask for information from your water company): soft water requires less detergent than hard water.
Notes:
Too much detergent can result in excess foam formation, and the reduction of washing efficiency. If the appliance detects excessive foam it may prevent spinning.
Insufficient detergent may result in: grey laundry, deposits on the drum, tub and heater. When using concentrated fabric softeners, add water in the detergents dispenser up to "MAX" level mark.
To prevent dispensing problems when using highly concentrated powder and liquid detergents, use the special detergent ball or bag supplied with the detergent and place it inside the drum.
WATER HARDNESS CHART
| WATER HARDNESS CATEGORY | CHARACTERISTICS GERMAN | FRENCH °fH | ENGLISH °eH | |
| °dH | ||||
| 1 | soft | 0-7 | 0-12 | 0-9 |
| 2 | medium | 7-14 | 12-25 | 9-17 |
| 3 | hard | 14-21 | 25-37 | 17-26 |
| 4 | very hard | over 21 | over 37 | over 26 |
Filling up with detergents and additives
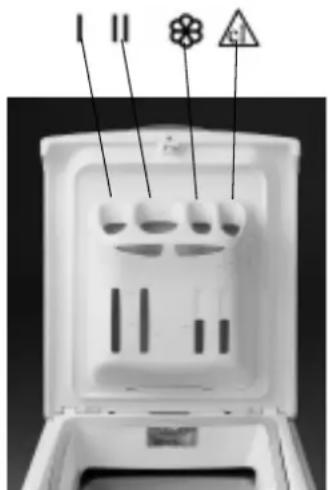
The dispenser will have three or four compartments depending on model.
Pour in the detergent:
- Washing powder for prewash and main wash
- Washing powder for main wash without prewash
- Fabric softeners and starch products, no more than to "MAX" mark.
- Chlorine bleach, no more than to "MAX" mark. (only four compartments model)
- Stain removers
• Water softeners (water hardness class 4)
• Starch (dissolved in water)
Be careful not to fill more than the "MAX" level mark. Do not use liquid detergents for programmes with prewash. For programmes without prewash and temperatures from cold to 40^ , it is recommended to use liquid detergents in chamber II for main wash to avoid whitish residues on the laundry.


text_image
Diagram of a white plastic waste bin with labeled components including inlet, outlet, warning symbol, and warning sign.CLEANING THE FOREIGN BODY TRAP
The appliance is provided with a self-cleaning pump. The foreign body trap keeps objects like buttons, coins, safety-pins etc. which have been left in the laundry.
- Unplug the appliance.
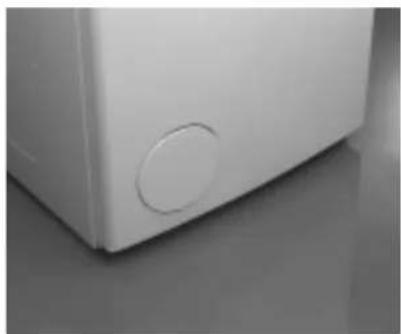
- Open the foreign body trap cover with a coin.
- Place a bowl beneath it.
- Turn the foreign body trap slowly anti-clockwise until the grip is vertical; do not remove it as yet.
- Wait until all the water has drained out.
- Now unscrew the foreign body trap completely and extract it.
- Remove any foreign items from the foreign body trap.
- Make sure the pump impeller (in the housing behind the foreign body trap) is not obstructed.
-
Insert the foreign body trap again and screw it fully down in a clockwise direction to the stop (until the grip is horizontal).
-
Pour 0.5 litres of water into the machine via the drum and check that water does not leak from the foreign body trap.
-
Close the foreign body trap cover.
-
Reconnect the appliance.
Check the foreign body trap if the appliance is not draining correctly or if it fails to perform spin cycles.
The machine has safety device which stops the washing machine before each filling, when water was not removed completely from the tub in previous part of washing programme.
Check the foreign body trap regularly, two or three times a year and clean it if necessary.
IMPORTANT: Make sure the water has cooled before emptying the foreign body trap.
natural_image
Close-up of a white appliance with a circular button on the side (no visible text or symbols)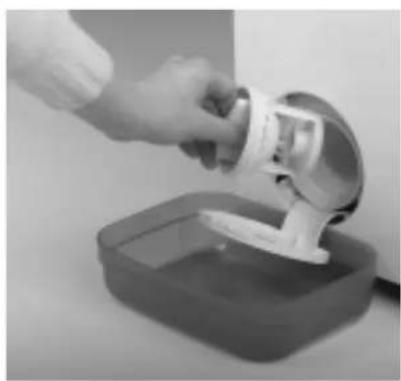
natural_image
Hand pouring liquid into a container with a small container (no text or symbols visible)DRAINING RESIDUAL WATER
When should I drain residual water (draining problem)?
- Before transporting (moving) the machine.
- If the appliance is installed in a room subject to sub-zero temperatures. It is best in this case to drain the machine after every wash.
- Stop the appliance and unplug it.
- Turn off the tap, disconnect the water supply hose from the machine and allow the water to drain into a basin.
- Open the foreign body trap, let the water drain into a small shallow basin and close the trap.
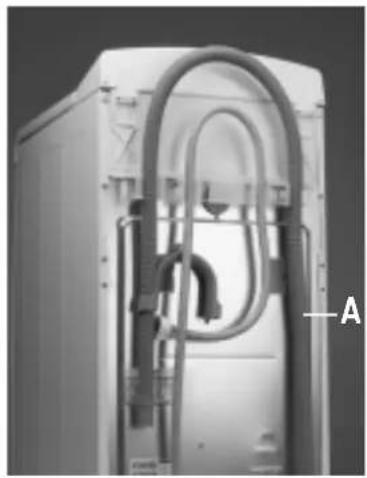
- Release the drain hose then open the fixing clip located at the rear of the machine (see arrow A).
- Let the residual water flow into a shallow basin.
- Wait until the flow stops.
- Fix the drain hose again with the clip A and connect it back to the sink.
- Reconnect the water supply hose and the power plug.
Important:
- After draining the residual water, screw on the machine's water supply hose by hand. Check water-tightness of appliance connections by turning the tap completely on.
natural_image
Close-up of a white industrial machine casing with coiled tubing and labeled component A (no text or symbols on the main body)CARE AND MAINTENANCE
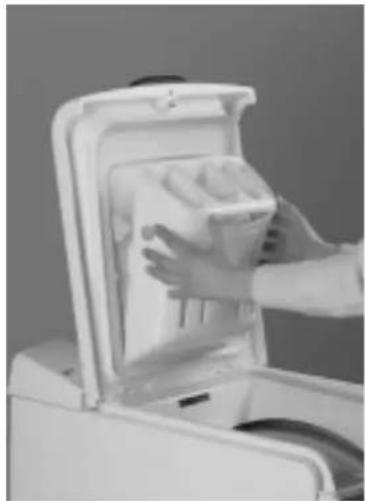
Detergent dispenser
- Push in the buttons on each side of the dispenser.
- Pull the dispenser towards you and remove. A small quantity of water can remain in the dispenser. It is advisable to carry the dispenser in an upright position.
- Wash the dispenser using running water. You can also remove the siphon caps in the dispenser for cleaning.
- Replace the siphon caps in the dispenser (if removed). Make sure that they lock in place.
- Replace the dispenser by locating the bottom tabs in the lid holes and pivot until both of the upper buttons lock. Note: ensure that the detergent dispenser is correctly reinstalled.
natural_image
Person washing a small appliance into a clean appliance (no text or symbols visible)Water inlet hose filter
Check and clean regularly (at least two or three times a year).
- Unplug the appliance.
- Turn off the tap.
- Unscrew the hose from the tap.
- Carefully clean the filter located at the end of hose, without assembling it, for example with a tooth-brush.
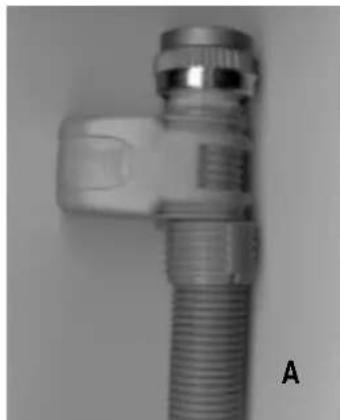
Note: For machines equipped with hose type "A", it must not be submerged in water. - Screw the flexible hose back onto the tap by hand. Do not use pliers (risk of squashing the joint).
- Turn on the tap and check that the connections are water-tight. (on the tap and on the washing machine).
- Plug the appliance back in.
natural_image
Close-up of a metallic mechanical connector with threaded tube and flange (no visible text or symbols)Recovering an object that falls between the drum and the tub
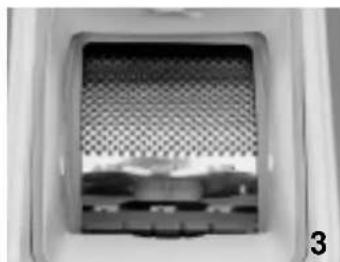
If an object accidentally falls between the drum and the tub, you can recover it thanks to one of the removable drum blades:
- Unplug the appliance.
- Remove the laundry from the drum.
- Close the drum flaps turn the drum a half-turn.
- Using a spanner, press on the plastic tip while sliding the blade from left to right.
- It will fall into the drum.
- Open the drum: you can recover the object through the hole in the drum.
- Refit the blade from inside the drum: Position the plastic tip above the hole on the right side of the drum.
- Then slide the plastic blade from right to left until it clips.
- Close the drum flaps again, turn the drum through half a turn and check if all 6 hooks of the lifter is properly anchored into the drum.
- Plug the appliance in again.
natural_image
Close-up of a perforated metal grille viewed through a white frame (no text or symbols visible)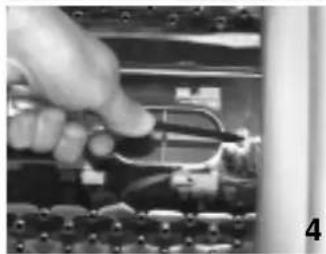
natural_image
Close-up of a hand using a tool to adjust or install electronic components (no visible text or symbols)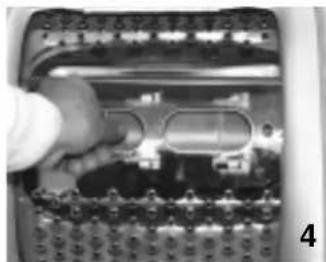
natural_image
Close-up of a hand pressing down on a mechanical component with no visible text or symbols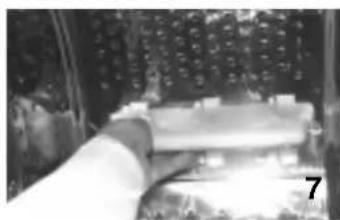
natural_image
Close-up of a hand holding a rectangular object with a grid-patterned background (no visible text or symbols)Appliance exterior and control panel
- Clean using normal household cleaner (do not use abrasive products or paint-thinners).
- Wipe with a soft cloth.
Lid seal
- Clean from time to time with a damp cloth.
Water inlet hose(s)
- Check the hose regularly for brittleness and cracks. Replace if necessary.
TROUBLESHOOTING GUIDE
This appliance is equipped with safety functions which detect faults at an early stage and react appropriately.
Often, however, the faults detected are small enough to be solved in a matter of minutes.
The appliance will not start, no lamp lights up.
Check whether:
• The appliance is plugged in;
• a programme has been selected;
• the programme is started;
• the water tap is open.
The appliance stops during the programme.
Check whether:
- the "Rinse Hold" button is pressed: terminate this option;
• the water tap is open; - the pump / foreign body trap are blocked (see "Removing the Foreign Body Trap");
Insufficient or no water supply.
Check whether:
- the water tap is completely open, and the water supply pressure is sufficient;
• the water inlet hose is kinked; - the mesh filters are clogged (see "Maintenance and Cleaning"/"Water Hose Mesh Filters");
• the water inlet hose is frozen.
Reselect the desired programme and start again to continue with the programme (do not add detergent for this programme).
The appliance does not drain out the water.
Check whether:
- drain hose is kinked (see "Installation Instructions");
- the pump/ foreign body trap are blocked (see "Removing the Foreign Body Trap");
IMPORTANT: Before draining, allow the wash water to cool down.
• the drain hose is frozen.
Reselect the desired programme and start again to continue with the programme (do not add detergent for this programme).
If the fault re-occurs, contact After-Sales Service (see "After-Sales Service").
- the "Rinse Hold" button is pressed: terminate this option.
Detergent and additive product residues in dispenser at end of wash.
Check whether:
- the siphon is correctly installed and clean (see "Maintenance and Cleaning"/"Dispenser Cleaning Instructions");
- enough water is being supplied. The mesh filters could be clogged (see "Maintenance and Cleaning" / "Water Hose Mesh Filters").
The appliance vibrates during the spin cycle.
Check whether:
- the appliance is level and solidly installed on all feet (see "Installation instructions");
- the transport screws and transport bar have been removed. Before starting up the appliance, the transport screws and the transport bracket must be removed (see "Installation instructions") and 4 screws have to be screwed back to the rear panel.
Final spin results are poor.
Check whether:
- the appliance has an imbalance detection and correction system (depending on model).
- If individual heavy articles are loaded (bathmat, bathrobe, etc.) this system may reduce the spin speed automatically to protect the appliance. It may even interrupt the spin cycle altogether, if the imbalance is too great after several spin starts;
- if the laundry is too humid at the end of the cycle, add more articles of laundry to balance the load and repeat the spin cycle;
- excessive foam formation may prevent spinning. Use less detergent.
Check whether:
- the pump impeller is obstructed (see "Removing the Foreign Body Trap");
- the lid was opened during the delicate or wool programme. Close the lid and select a spin programme.
AFTER-SALES SERVICE
Before contacting After-Sales Service:
- Try to remedy the problem yourself (see "Troubleshooting Guide").
- Restart the programme to check whether the problem has solved itself.
- If the machine continues to function incorrectly, call After-Sales Service.
Specify:
• The nature of the problem.
• The exact model of the appliance.
- The service code (number after the word SERVICE).
SERVICE
0000 000 00000
The After-Sales Service sticker is in the lid of the foreign body trap or on the rear of the machine.
- Your full address.
- Your telephone number and area code. As a priority, you should contact the After-Sales Service of the retailer who supplied you with the appliance.
TRANSPORT AND HANDLING
- Unplug the appliance.
- Turn off the tap.
- Remove the water supply and drain hose.
- Eliminate all water from the hoses and the appliance (see "Draining residual water"). Wait for the water to cool so as to avoid any accidents.
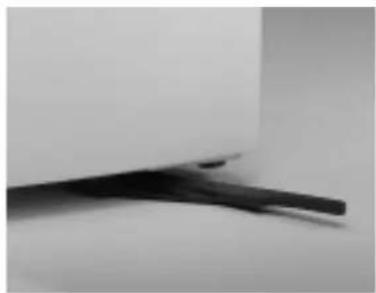
- To facilitate moving the machine, pull the handle situated at the bottom front (optional on certain models) out a little by hand and pull it out to the stop with the foot. Afterwards push the handle back into the original stable position.
- Transport the washing machine upright.
IMPORTANT: Do not use the appliance while the handle is pulled out.
natural_image
Close-up of a dark, elongated object with a small protrusion on the left side (no visible text or symbols)INSTALLATION
Removal of transport bracket
The appliance is fitted with a transport bracket to avoid any possible damage during transport.
Before using the appliance, the transport bracket at the back MUST be removed.
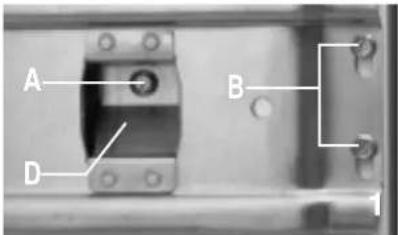
- Unscrew the two screws A and the four screws B with a flat screwdriver or a No. 8 hex nut box spanner.
- Remove the transport bracket.
- Replace the four outer screws B on the machine and tighten them.
- Remove the two seals C from the hose holder and clip them into the openings of the machine D.
Note: do not forget screw back and tighten the four outer screws B.
text_image
A B D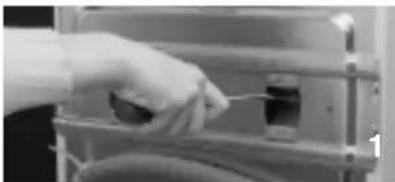
natural_image
Close-up of a hand inserting a cable into a metal rack (no visible text or symbols)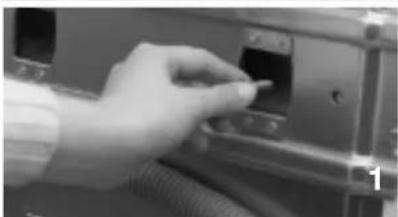
natural_image
Close-up of a hand inserting a small component into a device panel (no visible text or symbols)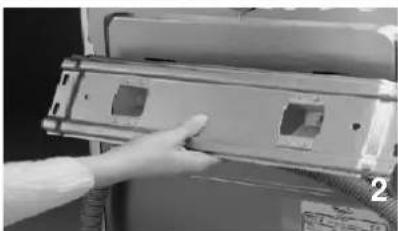
natural_image
Close-up of a hand inserting a component into a device panel (no visible text or symbols)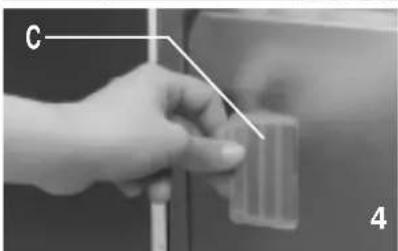
text_image
C 4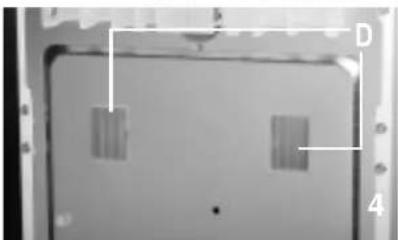
natural_image
Close-up of a mechanical component with two rectangular cutouts and labeled points D and 4 (no readable text or symbols)Adjust the feet
Install the appliance on a level surface, near to electrical, water and drain connections.
If the floor is uneven, adjust the feet (do not insert pieces of wood, cardboard etc. under the feet):
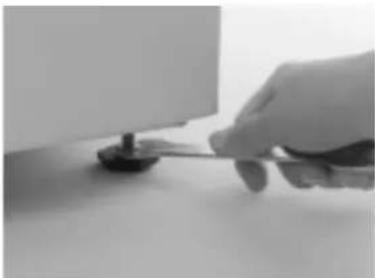
- Loosen the locknut using the wrench provided.
- Adjust the height of the foot by hand.
- Retighten the locknut by turning it anti-clockwise.
Make sure that all feet are resting correctly on the floor and that the appliance is perfectly level and stable (use a spirit level).
The appliance can be installed in an area 40 cm wide and 63 cm deep.
Note: if you install the machine on thick carpet, adjust the feet to ensure that there is sufficient space under the machine for the air to circulate.
natural_image
Close-up of a hand holding a small object near a surface, possibly a tool or component (no visible text or symbols)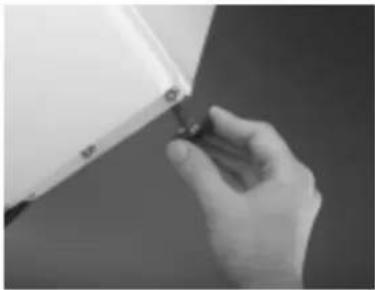
natural_image
Close-up of a hand holding a small object with a pointed tip, against a plain background (no text or symbols visible)Connect the water inlet hose.
- Carefully screw the water inlet hose onto the tap by hand.
- Make sure there are no kinks in the hose.
- Check water-tightness of tap and appliance connections by turning the tap completely on.
If the hose is too short, replace it with a suitable length of pressure resistant hose (minimum 1000 kPa - EN 50084 approved type).
Periodically check the hose for brittleness and cracks. Replace if necessary.
The appliance can be connected without a non-return valve.
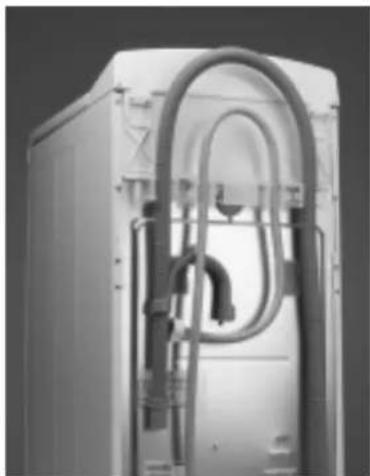
natural_image
Close-up of a white refrigerator interior with visible tubing and ventilation duct (no text or symbols)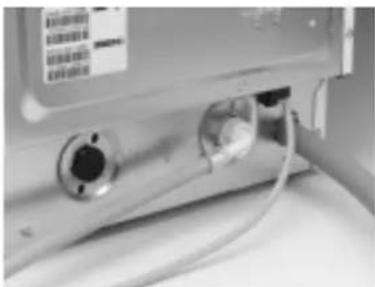
natural_image
Close-up of a medical device with attached tubing and a small component (no visible text or symbols)Water stop anti-flooding system
(depending on model)
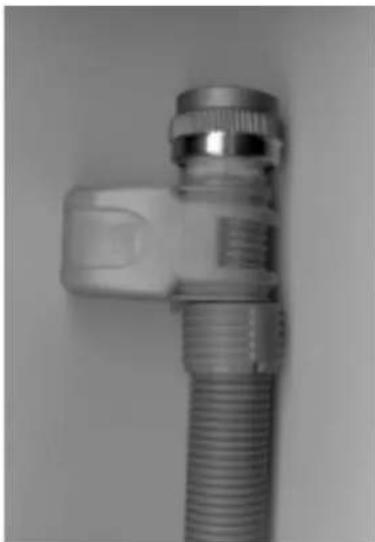
- Screw the hose to the water supply tap. Turn the tap fully on and check the water-tightness of the connection.
- The appliance must not be connected to the mixing tap of a non-pressurized water heater!
- The inlet hose and the plastic enclosure contain electrical components: Do not cut the hose and do not immerse the enclosure in water.
- If the flexible hose is damaged, unplug the appliance from the mains immediately and replace it.
If the flexible hose is too short, replace it with a 3 m Water Stop hose (available from After-Sales Service or from your dealer). This operation must be carried out exclusively by a qualified technician.
natural_image
Close-up of a metallic mechanical connector with threaded tube and cap (no visible text or symbols)Connect the water drain hose
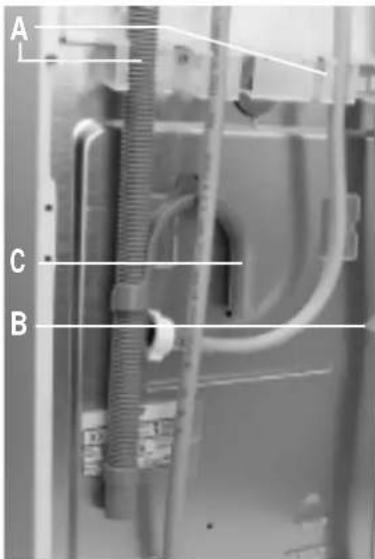
- Unhook the drain hose from the left and right hose connections, see arrow A in figure.
Important:
Do NOT loosen the drain hose connection from the left side, see arrow B in figure. Otherwise, there is the risk of leakage and of scalding with hot water.
-
Fix the "U" bend (C) to the free end of the drain hose.
-
Connect the drain hose to the siphon or hook it over the edge of a sink with the "U" bend. Small hand basins are not suitable. The edge of the sink must be no more than 100 cm from the floor.
If you need to add an extension, use a flexible hose of the same size and secure the unions with screw-on hose clips.
Maximum overall drain hose length: 2.50 m. Maximum drain height ("U" bend): 100 cm. Minimum drain height: 55 cm.
Important:
Make sure there are no kinks in the drain hose and take precautions against it falling while the appliance is running.
text_image
A C BELECTRICAL CONNECTION
text_image
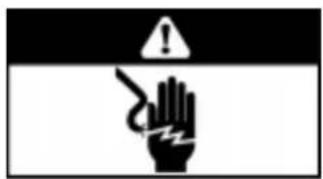
Warning symbol image showing a hand with a lightning bolt and exclamation mark above itDo not use extension leads or multi sockets. Electrical connections must be made in accordance with local regulations.
1) Warning - this appliance must be earthed
This appliance is normally supplied with a mains lead having a plug fitted in the factory which has been checked for correct earth continuity. If the fitted plug is not suitable for your socket outlet, or if the machine's mains lead is not fitted with a plug, you should fit a suitable new, good quality plug by following the instructions in (2) below. Any unsuitable plug should be cut off and disposed of in order to avoid a possible shock hazard should it be inserted into a socket.
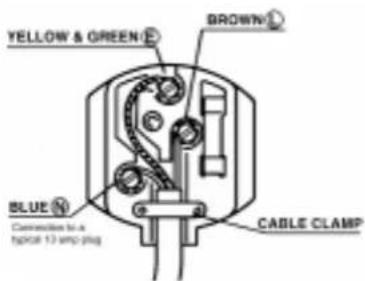
2) CONNECTION TO A REWIRABLE PLUG - to be carried out only by a qualified electrician The wires in the mains lead are coloured in accordance with the following code:
BLUE - "NEUTRAL" ("N")
BROWN - "LIVE" ("L")
GREEN AND YELLOW - "EARTH" ("E")
text_image
YELLOW & GREEN BROWN BLUE Connection to a typical 13 amp plug CABLE CLAMPVALID ONLY FOR GREAT BRITAIN AND IRELAND
To fit a new plug, proceed as follows:
2.1 Polarized Plugs (e.g. 3 pin, 13 amp plug conforming to BS 1363A)
a. The GREEN AND YELLOW wire must be connected to the terminal in the plug which is marked with the letter "E" or by the Earth symbol or coloured green and yellow.
b. The BLUE wire must be connected to the terminal which is marked with the letter "N" or coloured blue.
c. The BROWN wire must be connected to the terminal which is marked with the letter "L" or coloured brown.
2.2) Non-polarized plugs (e.g. 2 pin with side earth contact)
The wire which is coloured GREEN AND YELLOW must be connected to the earth contact. The other two wires should be connected to the two pins, irrespective of colour.
text_image
Technical diagram of a mechanical or electrical component with labeled parts A and B, showing internal structure and directional arrows.FUSE REPLACEMENT
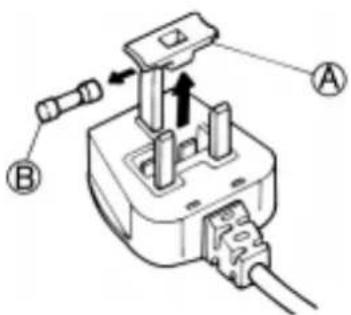
If the mains lead of this appliance is fitted with a BS 1363A 13 amp fused plug, replace the fuse only with an A.S.T.A. approved type conforming to BS 1362 and proceed as follows:
Remove the fuse cover (A) and the fuse (B).
Fit the replacement 13 A fuse into the fuse cover.
Refit both into the plug.
For all other types of plug, the supply socket should be protected by a 16 A fuse or circuit breaker at the distribution board.