
E01 - Alarm BLAUPUNKT - Free user manual and instructions
Find the device manual for free E01 BLAUPUNKT in PDF.


| Product Type | Car Security System / Alarm |
| Brand | Blaupunkt |
| Model | E01 |
| Power Supply | 12V DC (vehicle battery) |
| Operating Frequency | 433 MHz (typical) |
| Remote Control Range | Up to 30 meters (open area) |
| Dimensions (Module) | Approx. 80 x 60 x 25 mm |
| Weight (Module) | Approx. 100 g |
| Main Functions | Arm/Disarm, Panic, Silent Arm, Auto Relock, Passive Immobilizer, Valet Mode, Trunk Release (optional), Door Open Detection, Exit Delay 5/30 sec |
| Shock Sensor | 3-wire dual zone (optional) |
| LED Indicator | Red LED for arm/disarm/memory |
| Central Lock Integration | Yes (lock/unlock outputs) |
| Ignition/Starter Disable | Via external 30A relay (optional) |
| Siren Output | 45 sec alarm cycle with 5 sec pause |
| Memory Function | 3 independent trigger zones with memory |
| Maintenance | Keep dry, ventilated; replace remote battery (CR2032) when weak |
| Safety Precautions | Professional installation recommended; do not drop; use equivalent battery |
| Spare Parts / Accessories | Remote transmitters, siren, shock sensor, relay |
| Repairability | Consult authorized Blaupunkt dealer for service |
| General Information | Designed and engineered by Blaupunkt Competence Centre; not for sale in USA/Canada |
Frequently Asked Questions - E01 BLAUPUNKT
User questions about E01 BLAUPUNKT
0 question about this device. Answer the ones you know or ask your own.
Ask a new question about this device
Download the instructions for your Alarm in PDF format for free! Find your manual E01 - BLAUPUNKT and take your electronic device back in hand. On this page are published all the documents necessary for the use of your device. E01 by BLAUPUNKT.
USER MANUAL E01 BLAUPUNKT
CA2.0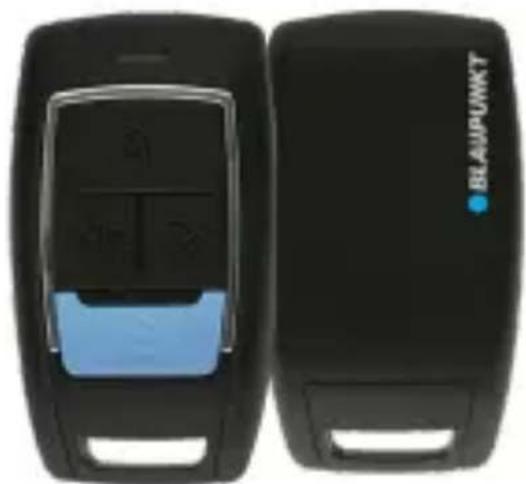
Enjoy it.
Safety Notes
This vehicle security system has been manufactured according to established safety guidelines. However, dangers may still occur if the safety notes in this manual are not observed. This manual is intended to familiarize the user with the vehicle security system's important functions. Read this carefully prior to using the vehicle security system. Keep this manual in an easily accessible location. In addition, do observe the instructions of the devices used in conjunction with this vehicle security system.
Attentions
- Keep the device in a dry and well-ventilated environment.
- Do not drop the device or subject it to physical shock.
- Improper use or replacement of the battery may cause an explosion hazard. Replace with the equivalent type only.
- The vehicle security system is a complicated technical device implying connection to the car circuits related to engine operation. It is strongly advised to have a professional car mechanic install the system.
This manual may be updated from time to time without any notice.
Disclaimer
In no event shall Blaupunkt be liable for any direct, indirect, punitive, incidental, special consequential damages to property or life and whatsoever arising out of or connected with the use or misuse of our products.
USA & CANADA: This product is not intended for sale in the United States and Canada. If purchased in the U.S. or Canada, this product is purchased on an as-is basis. No warranty, whether expressed or implied, is provided in the U.S. or Canada.
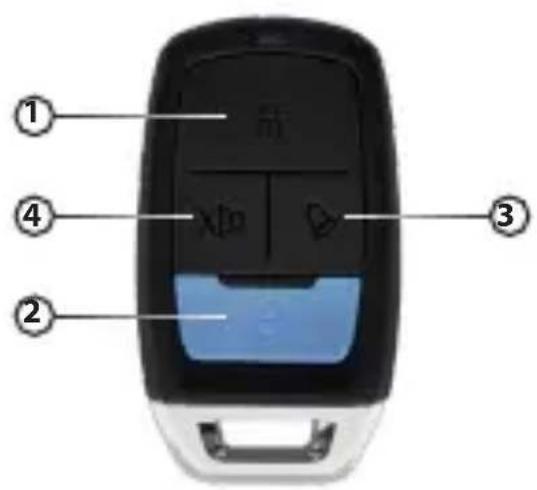
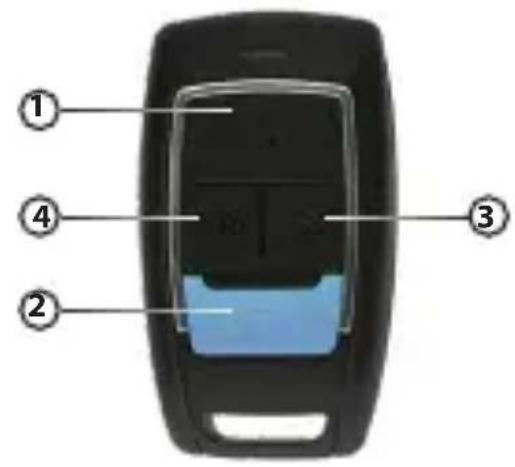
CA1.0 CA2.0
| Function | Button | Ignition Status |
| Arm | Button 1 | OFF |
| Disarm | Button 2 | OFF |
| Panic | Button 3 | OFF |
| Trunk Release | Hold Button 2 /4 | OFF |
| Beep Sound (Silent) | Button 1 & 2 | OFF |
| Auto Relock (Default: Activated) | Hold Button 1 | ON (Deactivate) |
| Foot Brake Lock (Default: Activated) | Hold Button 2 | ON (Deactivate) |
| Valet Mode (Default: Activated) | Hold Button 1 & 2 | ON (Deactivate) |
| Exit Delay Time (5 & 30Sec) (Default: Activated) | Hold Button 3 | ON (Deactivate) |
SPECIFICATIONS
• Remote Arm, Disarm and Panic • Remote Silent Arm and Disarm • Remote Boot Release • Beep Sound (Remote Selectable) • Auto Relocking / Auto Rearming (Remote Selectable) • Foot Brake Lock (Remote Selectable) • Valet Mode (Remote Selectable) • Door Not Closed Warning (Remote Selectable)
- Exit Delay Time 5 or 30 sec. (Remote Selectable)
- Door Open Detection • 2 Ports Three Wire Dual Zone Shock Sensor • Passive Immobilizer • Code Learning Technology
1. Arm (Lock)
- Press Button 1 to arm.
- The central lock will be locked, the alarm will beep once, hazard lights will flash, and the LED light will turn on.
- The immobilizer will function if the ignition is turned ON.
2. Disarm (Unlock)
- Press Button 2 to disarm.
- The central lock will be unlocked and the alarm will beep twice.
- Hazard lights will flash twice and the LED light will turn off.
3. Beep Sound (Remote Selection)
- Press Button 1 and 2 simultaneously to disable the beep sound; the hazard lights will flash twice.
- Repeat the same step to enable the beep sound.
- The alarm will beep and the hazard lights will flash.
4. Panic
- Press Button 3 to trigger the alarm and hazard light for approx. 45 sec. instantly in case of emergency.
- Press buttons other than Button 3 to turn off the alarm, alarm system will remain armed and locked.
5. Auto Relock/ Auto Rearm (Remote Selection)
- After 30 seconds of disarming the alarm system and no doors are being open, the system will automatically relock / rearm the vehicle.
- If the central locking was accidentally unlocked after 15 sec. second alarm will beep and hazard light flashes, indicating the system will be rearmed and the door will be relocked in another 15 sec.
- To disable this function, turn on the ignition, press and hold Button 1 for 2 sec., the alarm will beep twice and hazard light flashes.
- Repeat the same step to enable this function again, alarm will beep once and hazard light flashes.
6. Passive Immobilizer
- This function will be activated either after the ignition is turned off for 60 sec. at disarm mode or 60 sec. passed after Button 2 is pressed.
- The passive immobilizer sends out signal to stop the electronic start/ ignition circuit in order to immobilize the vehicle. The blinking LED indicates the function is enabled.
- To Cancel the passive immobilizer, press Button 2; the LED will stop blinking indicating the function is disabled. Note: The auto-relock function will override passive immobilizer function.
7. Doors/ Boot/ Bonnet Zone Protection
- The alarm will be triggered if any zones are opened while the alarm status is in armed mode.
- The siren will last for 45 sec. and 5 sec. break, every time the system check for the zone status.
- Upon completion of 3 zone status checking, the violated port is ignored and the system will be rearmed.
8. Key on Trigger Zone
- The alarm will be triggered if the alarm is in arm mode and the ignition is ON.
- The siren will continue for 45 sec. before it takes 5 sec. to check on the ignition status, the siren will continue if alarm is still in arm mode while ignition is ON.
9. Manual Override System
- To set off the alarm system without using the remote in case of missing/malfunction remote, turn on the ignition and press the Reset switch once.
10. Ignition / Starter Disable (External Heavy Duty 30A Relay)
- When the alarm system is in arm mode and ignition is ON, the system will halt the ignition (subject to relay connection) and the alarm will be triggered. This will immobilize the vehicle to prevent car from being stolen.
11. 3 Independent Triggering Zones with Memory
- There are sensors on the doors/ bonnet/ boot & ignition key zones.
- The alarm will beep 3 times after the alarm is disarmed, indicating doors/bonnet/boot zone is triggered; 4 times indicate sensor, 5 times indicate ignition key zone triggered.
- The memory will automatically be erased when the ignition is turned on in disarm mode.
12. LED Indicator shows the Status of the Security System
- A dashboard mounted red arm and memory LED will light up to indicate when the alarm system is arm, disarm, triggered.
13. Valet Mode (Remote Selection)
- To turn on Valet Mode, turn the ignition ON, then press and hold Buttons 1 and 2 for 2 seconds. The alarm will beep once, the hazard lights will flash, and the arm LED will also flash.
- The alarm system will be disabled when in Valet Mode (not including the central lock system).
- To return to normal mode, repeat the same steps while the ignition is ON.
14. Door Open Detection
- In disarm mode, when the alarm system detects opened doors and the ignition is ON, the hazard lights flash.
- The hazard lights will stop flashing when the doors are closed.
15. Opened Door Warning (Remote Selection)
- When door lock mode is activated, the alarm will beep and the hazard lights will flash when the doors are opened. After 30 seconds, the alarm will trigger.
- To disable this function, follow the Exit Delay Time Selection.
16. Exit Delay Time (Remote Selection)
- Exit delay time (5/30 seconds) can be selected by the remote control.
- For an exit delay time of 5 seconds, turn ON the ignition, then press and hold Button 3. The alarm will beep twice and the hazard lights will flash.
- When selecting an exit delay time of 5 seconds, the opened door warning function will be disabled.
- Repeat the same procedure again to set the exit delay time to 30 seconds. The alarm will beep once and the hazard lights will flash.
17. Trunk Release Activation by Remote (Optional)
- Press and hold Button 2 or 4 (open trunk signal output is required).
- The alarm system will automatically disarm each time the trunk is opened.
18. 3 Wire Dual Zone Shock Sensor (TWDZ) Optional
a) If the vehicle is hit by light impact, the alarm will release a warning beep. b) If the vehicle is hit by high impact, the alarm will release the siren for 45 sec. before it stops.
19. Transmitter Pairing Process
a) Turn the ignition ON & OFF, repeat the steps 5 times, then keep the ignition ON. b) Press any button on the remote, LED light will be on without flashes. Press any button again, the LED light will be off, indicating pairing successful. c) The LED will blink again as a sign for ready learning once more. Repeat step b. again for up to 6 pairing. A maximum of 10 sec. is allowed for each complete learning at one time. d) After completed pairing, turn off the ignition to exit the pairing process.
TROUBLESHOOTING
If any of the following problem occur, please resort to Troubleshooting for the possible solutions. Consult Blaupunkt authorized dealer if problem persist.
| Problems | Possible Causes | Solutions |
| Remote does not work | Remote is not programmed or not pair. | Program remote and check the wire connection. |
| Weak or stale battery. | Replace with a new and equivalent type of battery. | |
| System will not arm | Power supply problem. | Check +12V & ground (earth) at the system module. |
| Remote is not functioning. | Check the battery level of the remote. |
![graph TD A["Shock Sensor (Optional)"] --> B["LED Status Indicator"] B --> C["Reset Switch"] C --> D["Ultra Sonic Sensor (Optional)"] D --> E["Hazard Light"] E --> F["Central Locking"] F --> G["FUSE 15A"] G --> H["7 Orange"] H --> I["Door / Bonnet / Boot"] I --> J["SIREN"] J --> K["9 Brown"] K --> L[…](/content/2026/05/820957/images/18c6e9a9b92a8c8bdc7fbe8988a3ca0b42487e57ff1ae1b44d78bb1fe49c4162.jpg)

Designed and engineered by Blaupunkt Competence Centre
VSS CA1.0
1 521 20 011 23 01
VSS CA2.0
1 521 20 012 23 01


- SAFETY NOTES
- ATTENTIONS
- DISCLAIMER
- SPECIFICATIONS
- ARM (LOCK)
- DISARM (UNLOCK)
- BEEP SOUND (REMOTE SELECTION)
- PANIC
- AUTO RELOCK/ AUTO REARM (REMOTE SELECTION)
- PASSIVE IMMOBILIZER
- DOORS/ BOOT/ BONNET ZONE PROTECTION
- KEY ON TRIGGER ZONE
- MANUAL OVERRIDE SYSTEM
- IGNITION / STARTER DISABLE (EXTERNAL HEAVY DUTY 30A RELAY)
- INDEPENDENT TRIGGERING ZONES WITH MEMORY
- LED INDICATOR SHOWS THE STATUS OF THE SECURITY SYSTEM
- VALET MODE (REMOTE SELECTION)
- DOOR OPEN DETECTION
- OPENED DOOR WARNING (REMOTE SELECTION)
- EXIT DELAY TIME (REMOTE SELECTION)
- TRUNK RELEASE ACTIVATION BY REMOTE (OPTIONAL)
- WIRE DUAL ZONE SHOCK SENSOR (TWDZ) OPTIONAL
- TRANSMITTER PAIRING PROCESS
- TROUBLESHOOTING
Brand : BLAUPUNKT
Model : E01
Category : Alarm