M3R24-2 - Fridge Turbo air - Free user manual and instructions
Find the device manual for free M3R24-2 Turbo air in PDF.


| Product Type | Commercial Reach-In Refrigerator (Solid Door) |
| Model | M3R24-2 |
| Brand | Turbo Air |
| Dimensions (Width x Depth x Height) | Approximately 27" x 36" x 78" (single door section); actual width for 2-section model may vary |
| Weight | 270 lbs |
| Power Supply | 115V / 60Hz / 2.5 Amps |
| Refrigerant | R-290 (Propane) - Flammable |
| Temperature Range | Adjustable from level 1 (warmest) to 7 (coldest); default setting 4 |
| Temperature Display Range | 14°F to 69°F (-10°C to +20°C) |
| Defrost | Automatic defrost cycle controlled by PCB |
| Interior Light | Activated by door switch on grille |
| Evaporator Fan | Runs when doors are completely closed |
| Condenser Cleaning | Every 3 months (or as needed); vacuum or brush |
| Door Reversibility | Reversible door instructions included (for single door models) |
| Safety Features | Grounded plug; flammable refrigerant warnings; child entrapment prevention |
| Warranty | 3 years parts and labor, plus 2 additional years on hermetically sealed compressor |
| Installation Requirements | Indoor use only; level floor; 5" clearance at rear; dedicated outlet |
| Weight Capacity per Shelf | Maximum 110 lbs (50 kg) per shelf |
| Cleaning | Use warm water and mild soap; avoid abrasive cleaners |
| Stainless Steel Care | Clean along polish lines; use non-chloride cleaners; avoid steel wool |
| Disposal | Special disposal required for refrigerant and insulation; do not dispose with household waste |
Frequently Asked Questions - M3R24-2 Turbo air
User questions about M3R24-2 Turbo air
0 question about this device. Answer the ones you know or ask your own.
Ask a new question about this device
Download the instructions for your Fridge in PDF format for free! Find your manual M3R24-2 - Turbo air and take your electronic device back in hand. On this page are published all the documents necessary for the use of your device. M3R24-2 by Turbo air.
USER MANUAL M3R24-2 Turbo air
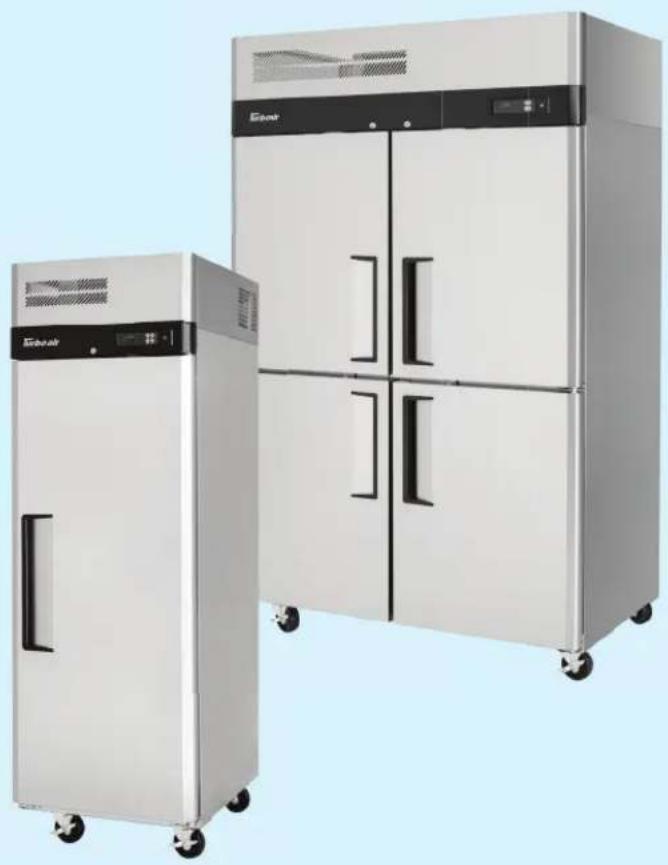
M3 Series Reach-Ins Refrigerators & Freezers Installation and Operation Manual
Please read this manual completely before attempting to install or operate this equipment.
SOLID DOOR REFRIGERATORS
M3R19-1-N
M3R24-1-N M3R24-2-N
M3R47-2-N M3R47-4-N
M3R72-3-N M3R72-6-N
SOLID DOOR FREEZERS
M3F19-1-N
M3F24-1-N M3F24-2-N
M3F47-2-N M3F47-4-N
M3F72-3-N M3F72-6-N
natural_image
Exterior view of two large commercial kitchen cabinets (no visible text or labels)CONTENTS
PAGE
NOTICE 3
IMPORTANT SAFETY INFORMATION 6-9
SPECIFICATIONS / SERIAL NUMBER 10
NOTICE TO CUSTOMER 11
INSTALLATION 11
CLEANING / CAUTION 12
REVERSIBLE DOOR INSTRUCTIONS 17-19
TROUBLESHOOTING 20
STAINLESS STEEL EQUIPMENT CARE & CLEANING 21-22
WARRANTY INFORMATION 23-24
WARRANTY REGISTRATION CARD 27
NOTICE
- This equipment is not intended for use by persons (including children) with reduced physical, sensory or mental capabilities, or lack of experience and knowledge unless they have been given supervision or instructions concerning the use of this equipment and the hazards involved by a person responsible for their safety.
- The special instructions for those persons (including children) with reduced physical, sensory or mental capabilities, or lack of experience and knowledge are not included in this manual and are not required to be included.
• Children shall not play with the appliance. - Cleaning and user maintenance shall not be made by children without supervision.
| This manual uses the following safety symbols. These safety symbols with the words of DANGER, WARNING or CAUTION alert users of the potential hazards that could cause injury or even death. | |
 DANGER DANGER | Indicates hazards of death or serious injury, if the instructions are not followed. |
 WARNING WARNING | Indicates dangers of death or serious injury, if the instructions are not followed. |
 CAUTION CAUTION | Indicates risks of personal injury or material damage, if the instructions are not followed. |
WARNING
This unit uses R-290 (propane), or R-600a (isobutane) as a refrigerant. These hydrocarbon refrigerants are highly environmentally compatible but also are flammable and combustible. Please read this manual thoroughly before installing and operating the unit. Please take cautious measures to avoid risk of fire or explosion.
PLEASE REFER TO THE LABEL INSIDE THE CABINET TO CHECK REFRIGERATION TYPE AND VOLUME.
 | DANGER - Risk of fire or explosion. Flammable refrigerant used. Do not use mechanical devices to defrost refrigerator. Do not puncture refrigerant tubing. |
 | DANGER - Risk of fire or explosion. Flammable refrigerant used. To be repaired only by trained service personnel. Do not puncture refrigerant tubing. |
 | CAUTION - Risk of fire or explosion. Dispose of properly in accordance with federal or local regulations. Flammable refrigerant used. |
 | CAUTION - Risk of fire or explosion. Flammable refrigerant used. Consult repair manual/owner's guide before attempting to service this product. All safety precautions must be followed |
 | CAUTION - Risk of fire or explosion due to puncture of refrigerant tubing; follow handling instructions carefully. Flammable refrigerant used. |
 | WARNING- Keep ventilation openings, in the appliance enclosure or in the built-in structure, clear of obstruction.- Do not use mechanical devices or other means to accelerate the defrosting process, other than those recommended by the manufacturer.- Do not damage the refrigerant circuit.- Do not use electrical appliances inside the food storage compartments of the appliance unless they are of a type recommended by the manufacturer. |
WARNING
- Handle the unit with care in order to avoid any serious damage to the refrigeration system.
- The refrigerant tubing, condenser, and evaporator coils are prone to damage while handling, moving, installing, and cleaning the unit, which may lead to fire or even explosion.
- Refrigerant squirting out of the pipes could ignite or cause an eye injury. If a leak is detected, avoid any naked flames or potential sources of ignition and air the room in which the appliance is located.
- To avoid the creation of a flammable gas-air mixture from a leaking refrigerating circuit, the size of the room in which the appliance is placed depends on the amount of refrigerant used. The room must be 35.31 ft^3 (1 ~m^3) in size for every 0.28oz (8g) of R-600a refrigerant inside the appliance. The amount of refrigerant in your particular appliance is shown on the label inside the cabinet.
This appliance contains a small amount of propane (R-290) or isobutane (R-600a) refrigerant, a natural gas with high environmental compatibility, but it is also combustible. When transporting and installing the appliance, ensure that no part of the refrigerating circuit is damaged.
- Never start up an appliance showing any signs of damage. When in doubt, contact a qualified service professional.
- In case of any hazardous activities such as fire or explosion, move the unit away from any source of ignition to a well ventilated area.
• Further service and repair must be done by a qualified technician who is familiar with the safety standards, and also has thorough understanding and knowledge of the flammable refrigerants.
- Any individuals handling these units must be equipped with proper personal protection and equipment and follow applicable safety measures and precautions to avoid risk of fire or explosion.
SAFETY PRECAUTIONS
To avoid any risk of fire, explosion, electric shock, personal injury, material damage or incorrect use of the appliance, be sure to observe the following safety precautions (After reading these owner's manual instructions, please keep the manual booklet in a safe place for reference. Remember to hand it over to any subsequent owners).
WARNING
- The unit must be installed and located in accordance with the manufacturer's installation instructions.
• Installation work must be performed in accordance with the National Electric Code by qualified and authorized personnel only. - Repairs and replacement work must be performed by a qualified and authorized service professional using only genuine replacement parts (Component parts shall be replaced with like components).
- Do not use an extension cord or an adapter plug. Because of the potential safety hazards under certain conditions, we strongly do not recommend any use of an extension cord or an adapter plug.
- Do not, under any circumstance, cut or remove the ground prong from the power cord. For personal safety, this appliance must be properly grounded.
- Do not store volatile and flammable substances in the refrigerator. The storage of benzene, thinner, alcohol, ether, LP gas, or other explosive substances may cause an explosion.
- Do not store or use gasoline or other flammable vapors and liquids in the vicinity of this appliance as well as any other appliances.
• The appliance is not intended for use by children without supervision. - Do not allow children to climb, stand, or hang on the refrigerator doors or shelves in the refrigerators. They could damage the refrigerator and seriously injure themselves.
• To prevent suffocation and entrapment hazards to children, remove the doors and seals from the refrigerator before disposing of it or discontinuing its use.
INSTALLATION & USAGE

WARNING
- Do not install the unit in a damp place where it could be splashed with water. Incorrect insulation of the electrical parts may cause fire or electric shock.
- Do not plug several appliances into the same sockets. This could cause fire due to overheating.
- Keep the power plug away from the rear of the cabinet. A damaged power plug may cause fire due to overheating.
- Do not spray water directly to the interior or exterior of the appliance. There is a risk of fire or electric shock.
- Do not place any containers filled with water on top of the appliance. If the water spills onto any electrical parts, it may lead to fire or electric shock.
- Do not attempt to repair, disassemble or alter the appliance. It may cause fire or abnormal operations which may lead to injury.
- Unplug the refrigerator before making repairs, replacing a light bulb, or cleaning.
- Plug into a grounded 3-prong outlet. Do not remove the ground prong.

CAUTION
- Do not store too much food in the appliance. When you open the door, an item may fall out and cause personal injury or material damage.
- Do not put bottles or any kind of glass in the freezer. The container may break and cause personal injury.
- Do not disconnect the power cord by pulling on it. This may disconnect a wire and cause a short circuit.
INSTALLATION & USAGE
CAUTION
- There is a risk of death from suffocation if a child puts the packing materials on his or her head.
- Do not store any articles on top of the appliance. Articles may fall while opening or closing the door, and could cause personal injury or material damage.
- Do not store pharmaceutical products, scientific materials or other temperature-sensitive products in the refrigerator. Products that require strict temperature controls must not be stored in the refrigerator.
• Do not let children hang on the door.
- Do not touch any cold surfaces or food containers in the freezer with damp or wet hands. Skin may stick to these extremely cold surfaces and may cause frostbite.
- Remove any foreign matter from the power plug pins. Otherwise, there is a risk of fire.
- Do not insert your hand into the bottom area of appliance. Any sharp edges may cause personal injury.
• After unplugging the appliance, wait at least five minutes before plugging it back in. Abnormal operation of the freezer may cause material damage.
- If the appliance is not used for a long period of time, unplug it from the power supply. Any deterioration in the insulation may cause fire.
- Do not let children touch or play with the control panel on the front of the appliance.
- Do not allow children to play with this appliance.
- Do not stand or lean on the base panel, pull-out parts, or doors.
- Repairs and maintenance of the appliance should only be performed by a qualified technician. Incorrect repairs done by an unqualified person may be a potential source of danger that could have critical consequences for the user of the appliance.
- Never put ice cubes or ice pops straight from the freezer into your mouth. The low temperature may cause cold burns.
PROPER DISPOSAL OF OLD APPLIANCE
For environmental purposes, refrigeration appliances must be properly disposed. This applies to your old appliance, and at the end of its service life, for your new appliance as well.

WARNING
Before disposing of old appliances, make them inoperable. Remove plug from mains, severe the power cable, and remove or destroy any snap or latch closures. This eliminates the danger of any children locking themselves into the appliance (danger of suffocation) or placing themselves into other life-threatening situations.
• The appliance may not be disposed of with domestic waste or bulky refuse.
- The refrigerant circuit, especially the heat exchanger at the back of the appliance, may not be damaged.
• Information concerning collection schedules or locations can be obtained from the local disposal authorities.

CAUTION
The refrigeration used in refrigerator/freezer and the gases in the insulation material require special disposal procedures. Ensure that none of the pipes on the back of the appliance are damaged prior to disposal.
BEFORE YOU CALL FOR SERVICE
Before contacting our Service Department, review the detailed troubleshooting tips in the Owner's manual.
-
Try to remedy the problem. Please read the "Troubleshooting Guide" section.
-
Restart the appliance to check whether the fault repeats. If the malfunction persists, switch off the appliance and try again after an hour.
-
If the malfunction still persists, then contact our Customer Service, specifying:
• The nature of the problem
• The appliance model number and serial number
- Your full address, telephone number and area code
SPECIFICATIONS
Refrigerators
| MODEL | COMP | H.P. | V/Hz | REFRIGERANT | AMPS | WEIGHT | ||
| M3R19-1-N | 1/3 | 115V/60Hz | R-290 | 3.99 | 194 lbs. | |||
| M3R24-1-N | 1/4 | 115V/60Hz | R-290 | 2.5 | 270 lbs. | |||
| M3R24-2-N | 1/4 | 115V/60Hz | R-290 | 2.5 | 270 lbs. | |||
| M3R47-2-N | 1/4 | 115V/60Hz | R-290 | 2.6 | 401 lbs. | |||
| M3R47-4-N | 1/4 | 115V/60Hz | R-290 | 2.8 | 401 lbs. | |||
| M3R72-3-N | 1/2 | 115V/60Hz | R-290 | 5.6 | 559 lbs. | |||
| M3R72-6-N | 1/2 | 115V/60Hz | R-290 | 5.6 | 559 lbs. | |||
Freezers
| MODEL COM | MP H.P. V/Hz | REFRIGERANT | AMPS WEIGHT | ||
| M3F19-1-N | 5/8 115V/60Hz | R-290 4.5 194 lbs. | |||
| M3F24-1-N | 1/2 115V/60Hz | R-290 4.4 280 lbs. | |||
| M3F24-2-N | 1/2 115V/60Hz | R-290 4.4 282 lbs. | |||
| M3F47-2-N | 1/2 115V/60Hz | R-290 6.3 435 lbs. | |||
| M3F47-4-N | 1/2 115V/60Hz | R-290 6.3 435 lbs. | |||
| M3F72-3-N | 1 | 115V/60Hz | R-290 | 7.9 | 571 lbs. |
| M3F72-6-N | 1 | 115V/60Hz | R-290 | 7.9 | 644 lbs. |
SERIAL NUMBER
The serial number is on the rating label located on the left interior wall. Please retain the unit's serial number for service purpose.
NOTICE TO CUSTOMER
Loss or spoilage of products in your refrigerator/freezer is not covered by warranty. In addition to following recommended installation procedures, you must run the refrigerator/freezer 24 hours prior to usage.
INSTALLATION
-
LOCATION - Allow adequate space and install the refrigerator on a firm and level floor. If the appliance is not level, there may be unusual noises and poor cooling performance.
-
GOOD AIR CIRCULULATION - Be sure to avoid any partition and object which may stop the air flow and that air space is allowed to flow to the rear and/or sides of the unit between the refrigerator and the back wall. Insufficient space causes vibration noise, inefficient refrigeration, damage to the refrigeration system, and the waste of electricity (Turbo Air recommends that the rear of the unit should be no less than 5 inches from the wall).
-
PLACE ON STRONG FLOOR - Be sure that the floor on which the unit is to be installed is strong enough to support the total weight of the cabinet and any other contents, before starting the installation.
-
DO NOT PLACE NEAR HEAT - Be sure to avoid hot corners and other locations such as near stoves. High ambient temperature will result in much lower cooling efficiency.
-
INDOOR USAGE ONLY - Be sure to install this unit indoors only, to prevent getting wet from the rain. Do not install the refrigerator in locations where the temperature is over 100^ F ( 43^ C) or below 50^ F ( 10^ C).
-
STABILIZING - Make sure the unit is installed in a stable condition with the front wheels locked while in use.
-
LEVELING - Be sure that the unit levels from the front to the back and side to side.
-
UNIT SHOULD BE ON DEDICATED OUTLET - Plug the refrigerator into a wall socket exclusively for this appliance. Do not run on extension cord.
-
THE ELECTRICAL PLUG MUST BE ACCESSIBLE WITHOUT MOVING THE UNIT.
-
WHEN POSITIONING FOOD FOR STORAGE, A MAXIMUM OF ONE SHELF MAY BE LOADED LESS THAN 110lb (50kg), BUT DO NOT ALLOW LOADS TO OVER HANG FROM THE FRONT AND REAR EDGES OF SHELVES.
CLEANING
Before cleaning, unplug the unit and disconnect the power.
Wipe and clean the inside and outside of appliance with a damp cloth.
1. CLEANING THE INTERIOR AND EXTERIOR
- The interior and exterior of the unit can be cleaned using warm water and soap.
- Do not use an abrasive cleaner because it will scratch the surface.
2. CLEANING THE CONDENSER COIL
- To maintain proper refrigeration performance, the Condenser coil must be free of dust, dirt, and grease. This will require periodic cleaning. Condenser coil should be cleaned at least every three months (90 days) or as needed.
- To clean the condenser, unplug the power cord. Condenser can be cleaned with vacuum, brush, or CO2 (high pressure air).
NOTE: For a self-cleaning condenser equipped model, condenser cleaning is not required. However, it is recommended to blow the condenser coil out with Nitrogen once or twice a year. Note that the condenser cleaner may not remove grease.
3. CLEAN THE DRAIN PAN
- Periodically, empty the drain pan which is located under the unit.
- When reinstalling the Drain Pan, make sure the drain hose is placed back into the pan.
4. CHECK AFTER CLEANING
1) Check the unit again for safety.
2) Plug unit back in and turn on power switch.
3) Check that the unit is operating properly.
CAUTION
1. POWER CORD
- Be sure the power cord is connected to the proper voltage.
-
A protected circuit of the correct voltage and amperage must run for connection of the line cord.
-
Turn 'off' the power switch before disconnected the power cord, whenever performing maintenance functions or cleaning the refrigerated cabinet.
- Compressor warranties are void if compressor burns out due to low voltage.
2. RESTARTING
- If disconnected, wait 5 minutes before restarting.
3. POSITIONING GOODS
- Do not obstruct the air inlet which is located at the back inside of the unit.
BASIC OPERATION
REFRIGERATORS
M3R19-1-N
M3R24-1-N M3R24-2-N
M3R47-2-N M3R47-4-N
M3R72-3-N M3R72-6-N
- Plug in and turn on the power switch located on the control box. The Display panel will be lighted and make a beep sound. The compressor will begin to run.
- The default temperature setting is No. "4".
- The compressor is automatically cycled by the electronic controller (PCB, RD-Sensor).
- The Defrost cycle is automatically controlled by the PCB.
- Set level toward "1" for higher temperature and toward "7" for lower temperature.
- The interior light is activated by the switch at the bottom of the grille when the door is opened.
- Evaporator fan motor(s) will run after all doors are completely closed.
DISPLAY PANEL OF REFRIGERATOR
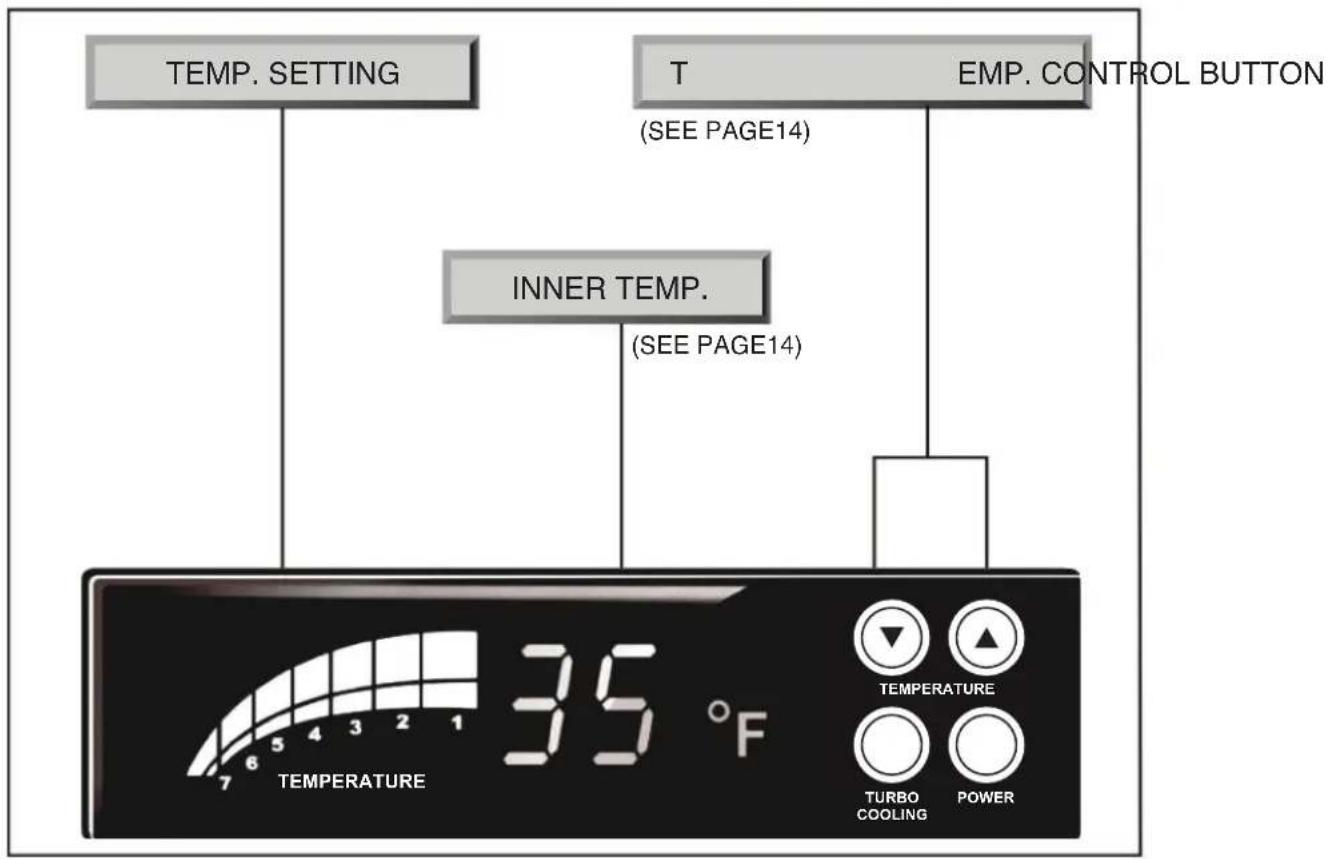
text_image
TEMP. SETTING T (SEE PAGE14) EMP. CONTROL BUTTON INNER TEMP. (SEE PAGE14) TEMPERATURE 35 °F 7 6 5 4 3 2 1 7 TEMPERATURE TEMPERATURE TURBO COOLING POWERUP/DOWN BUTTON (Temperature control button)
- By pushing the up/down button, you can set the inside temperature level from '1' to '7'.
- If you want to lower the temperature, push the Down button to increase and light higher number.
INNER TEMPERATURE DISPLAY
- It displays the inside temperature.
- Display range is 14^ F to 69^ F ( -10^ C \~ +20°C).
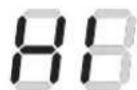
- When the inside temperature is lower than 14^ F, the panel will display 'L0'.
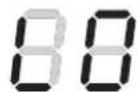
and, higher than 69°F, the panel will display 'H'
FAN RUNNING
- Evaporator fan motor is activated when the door (both doors for M3R47-2-N, M3R47-4-N, all three doors for M3R72-3-N, M3R72-6-N) is closed.
BASIC OPERATION
FREEZERS
M3F19-1-N
M3F24-1-N M3F24-2-N
M3F47-2-N M3F47-4-N
M3F72-3-N M3F72-6-N
- Plug in and turn on the power switch located on the control box. The Display panel will be lighted and make a beep sound. The compressor will begin to run.
- The default temperature setting is No. "4".
- The compressor is automatically cycled by the electronic controller (PCB, RD-Sensor).
- The Defrost cycle is automatically controlled by the F-sensor, and the PCB.
- Set level toward "1" for higher temperature and toward "7" for lower temperature.
- The interior light is activated by the switch at the bottom of the grille when the door is opened.
- Evaporator fan motor(s) will run after all doors are completely closed.
- Good Air Flow in freezer unit is critical.
Be careful to load product so that it neither presses against the back wall, nor reaches within four inches from the evaporator compartment.
DISPLAY PANEL OF FREEZER
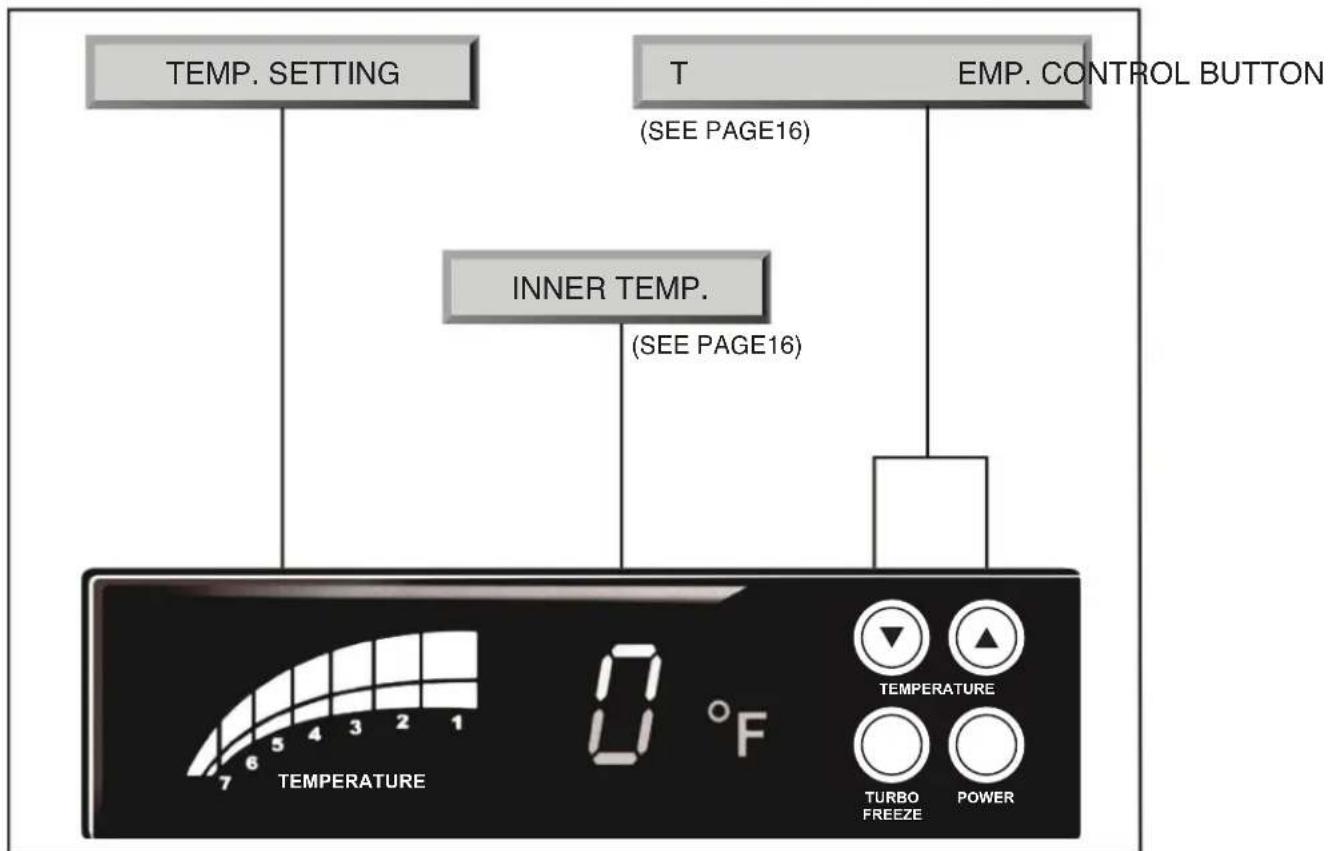
flowchart
graph TD
    A["TEMP. SETTING"] --> B["T"]
    C["EMP. CONTROL BUTTON"] --> D["TEMP. SETTING"]
    E["INNER TEMP."] --> F["TEMPERATURE 7-1"]
    G["TURBO FREEZE"] --> H["0°F"]
    I["POWER"] --> J["0°F"]
UP/DOWN BUTTON (Temperature control button)
- By pushing the up/down button, you can set the inside temperature level from '1' to '7'.
- If you want to lower the temperature, push the Down button to light and increase higher numbers.
DEFROST
- The electronic defrost controller is set at the factory to provide a defrost cycle every 6 hours (4 times per a day).
- The panel displays "dF" during the defrost cycle.
INNER TEMPERATURE DISPLAY
- It displays the inside temperature.
- Display range is -50^ to 50^ ( -45^ +10^ ).
- When the inside temperature is lower than -50^ , the panel will display 'L0'.
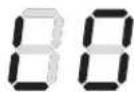
and, higher than 50^ F, the panel will display 'H'.
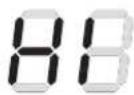
FAN RUNNING
- Evaporator fan motor is activated when the door (both doors for M3F47-2-N, M3F47-4-N, all three doors for M3F72-3-N, M3F72-6-N) is closed.
REVERSIBLE DOOR INSTRUCTIONS
(For M3R19-1-N / M3R24-1-N / M3F19-1-N / M3F24-1-N)
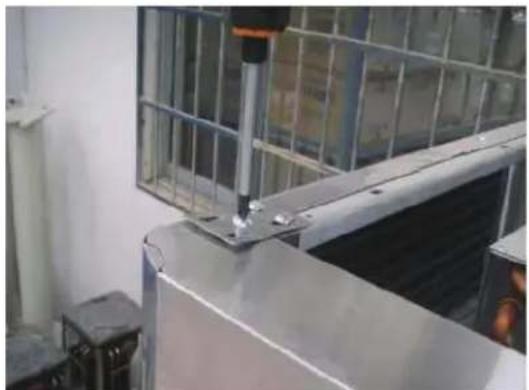
1. TOP GRILLE (T) AND TOP GRILLE (B)
natural_image
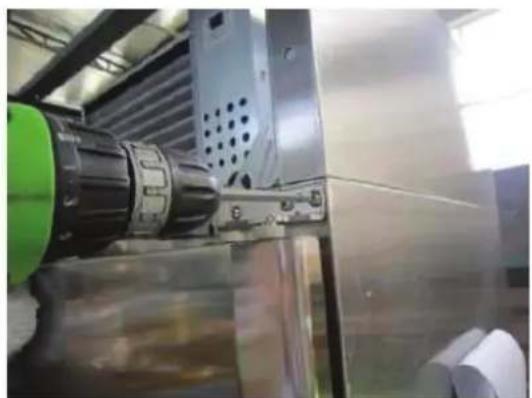
Industrial machine with metal frame and metal bracket, no visible text or symbolsA. Disassemble the top grille fixture as below.

natural_image
Interior view of a kitchen or kitchen appliance with dark walls and a curved ceiling (no visible text or symbols)D. Unscrew the screws located on the bottom of top grille (B).
natural_image
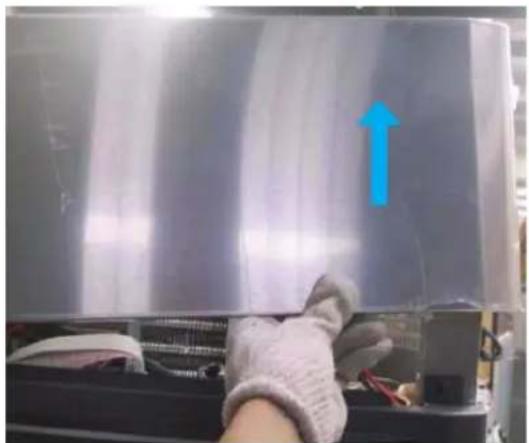
Close-up of a gloved hand holding a transparent plastic panel with a blue upward arrow, no visible text or symbolsB. Lift top grille (T) as illustrated below.
natural_image
Close-up of a gloved hand inserting a white plastic component into a metal bracket (no text or symbols visible)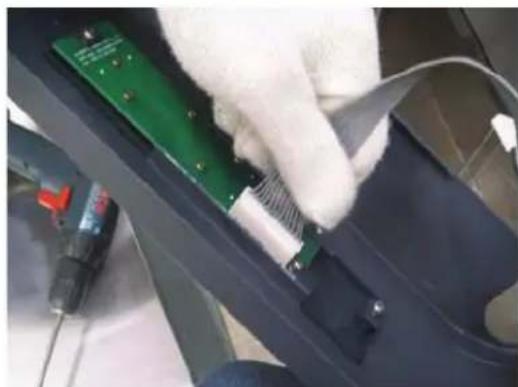
natural_image
Close-up of a gloved hand inserting a green printed circuit board into a car body panel (no visible text or symbols)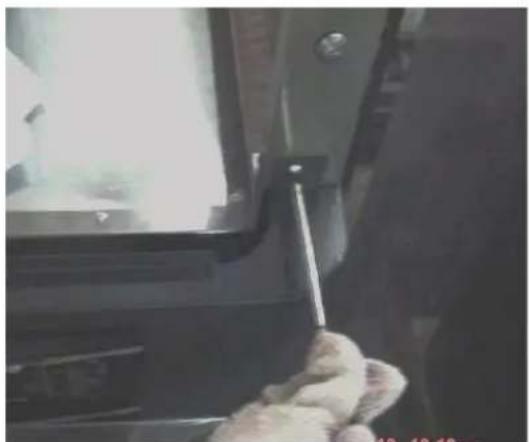
natural_image
Close-up of a hand holding a white object near a black door, with no visible text or symbols.C. Unscrew screws on top grille (B).
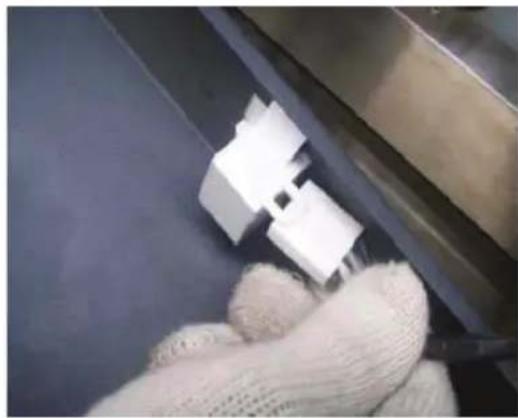
E. Pull out the harness of the display PCB and the harness of the door s/w located on back of top grille (B).
CAUTION: When unscrewing, hold top grille. Falling down the top grille cause bruise.
REVERSIBLE DOOR INSTRUCTIONS
(For M3R19-1-N / M3R24-1-N / M3F19-1-N / M3F24-1-N)
2. REPLACING DOOR
natural_image
Industrial machine component with green and black parts, no visible text or symbolsA. Unscrew screws located on top hinge (right). C-2. Disassemble bottom hinge (left).
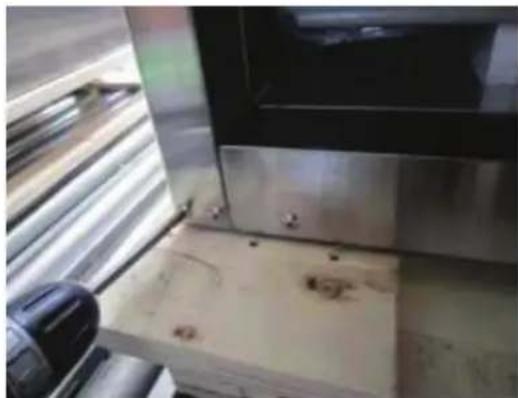
natural_image
Close-up of a metallic industrial machine with visible bolts and mounting brackets (no text or symbols)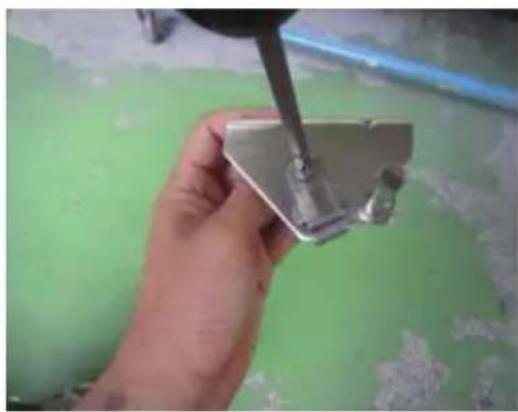
natural_image
Close-up of a hand holding a small metal bracket with a tool, against a green tiled floor (no visible text or symbols)
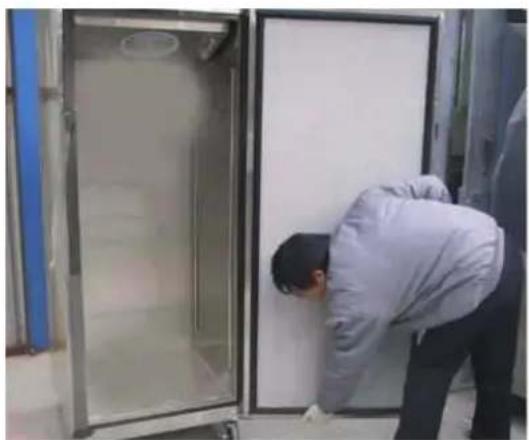
natural_image
Person in lab coat cleaning a glass door (no visible text or symbols)B. Lift the door, then remove it.
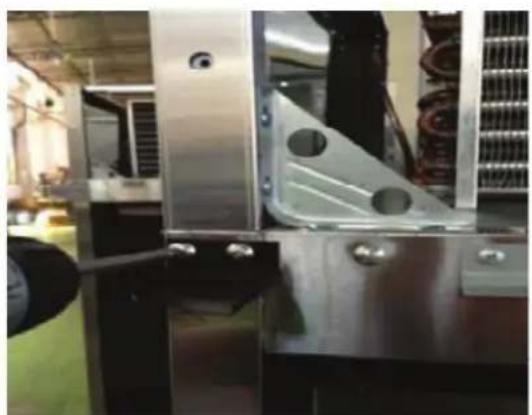
natural_image
Close-up of a metallic industrial machine component with mounting holes and wiring (no visible text or symbols)C-1. Disassemble the top hinge (left). D. Screw stopper plate on top hinge (right).
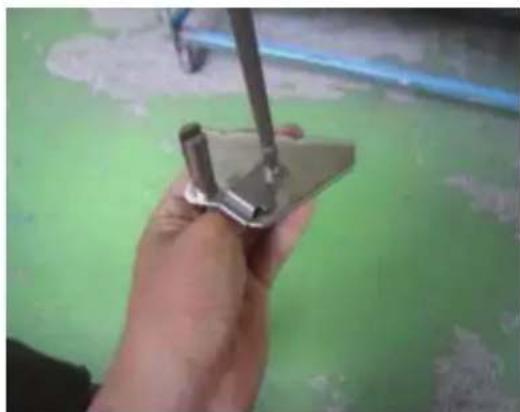
natural_image
Hand holding a small mechanical component with a tool, against a green wall (no visible text or symbols)REVERSIBLE DOOR INSTRUCTIONS
(For M3R19-1-N / M3R24-1-N / M3F19-1-N / M3F24-1-N)
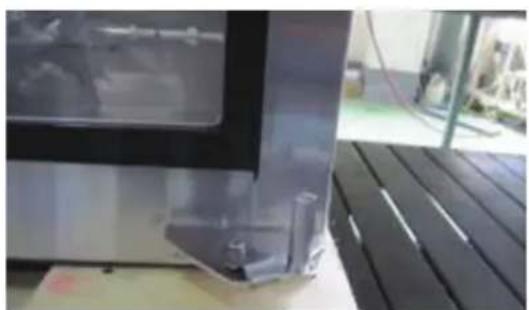
natural_image
Close-up of a metallic industrial machine with a transparent display, mounted on a workbench (no visible text or symbols)↓
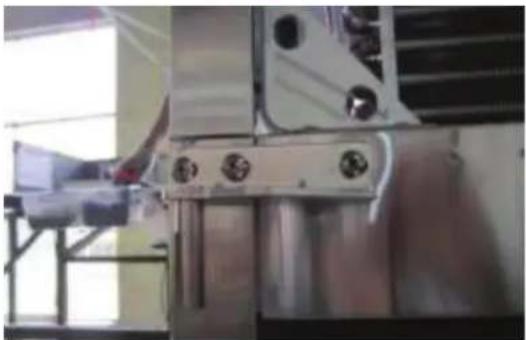
natural_image
Close-up of a metallic industrial machine component with mounting holes and a small inset view (no visible text or symbols)E. Disassemble stopper plate which located on bottom hinge (right), then assemble bottom hinge (right) on position of top hinge (left).
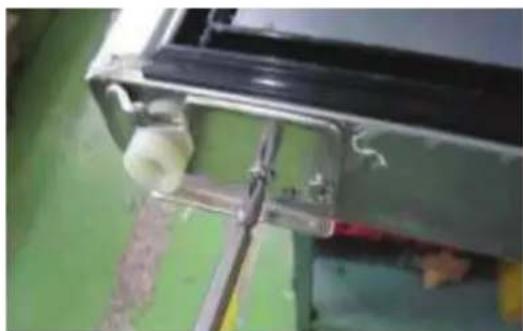
natural_image
Close-up of a mechanical component with a metallic rod and white plastic fitting, mounted on a green wall (no visible text or symbols)↓
natural_image
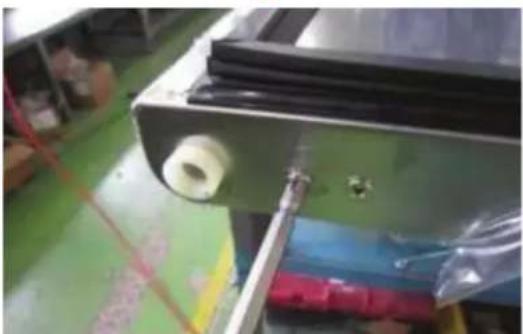
Close-up of a mechanical component with a white cylindrical part inserted, mounted on a green panel (no visible text or symbols)F. Disassemble stopper plate, then tight screws.
natural_image
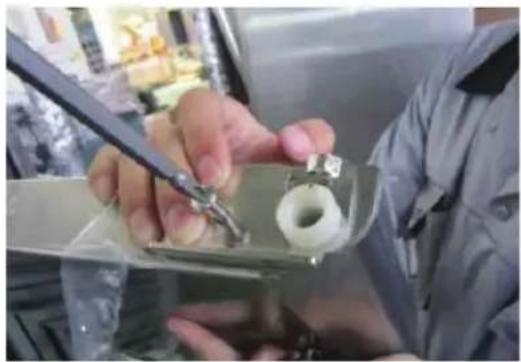
Close-up of a person using a tool to adjust or install a mechanical component, no visible text or symbolsG. Assemble stopper plate in original positions.
natural_image
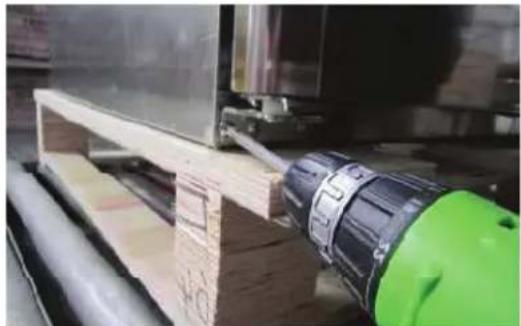
Close-up of a green and black drill bit operating on a wooden cutting board (no visible text or symbols)H. Assemble the door, then rotate it about 180 degrees. Assemble top hinge (right) with stopper plate in bottom hinge (left) position (First, assemble top hinge (left); second, assemble bottom hinge (left) while doors are closed, insert hinge into door bushing (left) with lifting, rotate doors counter-clockwise, screw hinge in original positions).
natural_image
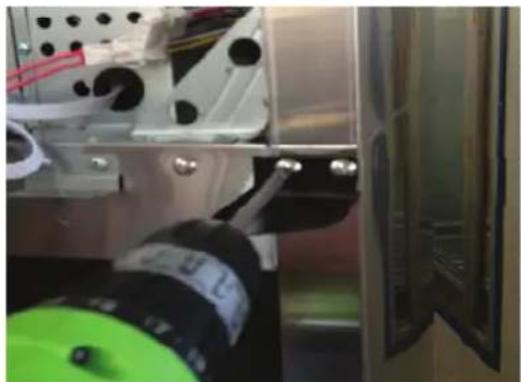
Close-up of a mechanical assembly with a green component and white components, no visible text or symbolsI. Assemble top hinge (right) with fixtures in original positions.
J. Screw top grille (T) and top grille (B) (This process is opposite of disassembling).
TROUBLESHOOTING
| SYMPTOMS CAUSES SOLUTIONS | ||
| Cooler is freezing food. | · Thermostat set too cold. | · Turn the thermostat setting to a higher temperature position |
| The unit does not refrigerate at all. | · There is a power connection failure problem. | · Check the power cord and plug in correctly. |
| The unit does not refrigerate well. | · The unit is in sunlight or near a heating device.· The unit contains hot food or too much food.· The unit door is opened too frequently or left open too long.· The temp. dial is not on the correct position.· The condenser is clogged. | · Check the installation location.· Check the condition of stored food.· Check the position of the temp control dial. |
| There is a loud noise. | · The floor is too weak or the leveling feet are set incorrectly.· The backside of the unit is too close to the wall. | · Check the installation. |
| There are dewdrops on the unit exterior. | · High-moisture air can produce dewdrops during rainy seasons. | · Wipe with a dry cloth. |
| There are dewdrops on the unit interior. | · The door is opened too frequently or left open too long.· Damp food is stored. | · Keep the door closed to remove dewdrops. |
| The door does not close tightly. | · The door is bent.· The unit is not levelde off.· The door gasket has come off. | · Level the unit again.· Reposition the gasket. |
The following points are not malfunctions:
- A water-flowing sound can be heard when the compressor stops.
This is the sound of REFRIGERANT flowing.
• The compressor does not run during the defrost cycle.
Note: Formation of condensation on and around the edge of the door and the front side of the cabinet is normal. Gurgling noises inside the refrigerating circuit are normal.
STAINLESS STEEL EQUIPMENT CARE AND CLEANING
CAUTION : Do not use any steel wool, abrasive or chlorine based products to clean stainless steel surfaces.
There are three basic things which can break down your stainless steel's passivity layer and allow corrosion to occur.
1) Scratches from wire brushes, scrapers, and steel pads are just a few examples of items that can be abrasive to stainless steel's surface.
2) Deposits left on your stainless steel can leave spots. You may have hard or soft water depending on what part of the country you live in. Hard water can leave spots. Hard water that is heated can leave deposits if left to sit too long. These deposits can cause the passive layer to break down and rust your stainless steel. All deposits left from food prep or service should be removed as soon as possible.
3) Chlorides are present in table salt, food, and water. Household and industrial cleaners are the worst type of chlorides to use.
8 step that can help prevent rust on stainless steel:
1. Using the correct cleaning tools
Use non-abrasive tools when cleaning your stainless steel products. The stainless steel's passive layer will not be harmed by soft cloths and plastic scouring pads. Step 2 tells you how to find the polishing marks.
2. Cleaning along the polish lines
Polishing lines or “grain” are visible on some stainless steels. Always scrub parallel to visible lines on some stainless steels. Use a plastic scouring pad or soft cloth when you cannot see the grain.
3. Use alkaline, alkaline chlorinated or non-chloride containing cleaners
While many traditional cleaners are loaded with chlorides, the industry is providing an ever increasing choice of non-chloride cleaners. If you are not sure of your cleaner's chloride content, contact your cleaner supplier. If they tell you that your present cleaner contains chlorides, ask if they have an alternative. Avoid cleaners containing quaternary salts as they can attack stainless steel, causing pitting and rusting.
STAINLESS STEEL EQUIPMENT CARE AND CLEANING
4. Water Treatment
To reduce deposits, soften the hard water when possible. Installation of certain filters can remove corrosive and distasteful elements. Salts in a properly maintained water softener can be to your advantage. Contact a treatment specialist if you are not sure of the proper water treatment.
5. Maintaining the cleanliness of your food equipment
Use cleaners at recommended strength (alkaline, alkaline chlorinated or non-chloride). Avoid build-up of hard stains by cleaning frequently. When boiling water with your stainless steel equipment, the single most likely cause of damage is chlorides in the water. Heating nay cleaners containing chlorides will have the same damaging effects.
6. Rinse
When using chlorinated cleaners you must rinse and wipe dry immediately. It is better to wipe standing cleaning agents and water as soon as possible. Allow the stainless steel equipment to air dry. Oxygen helps maintain the passivity of the film on stainless steel.
7. Hydrochloric acid (muriatic acid) should never be used on stainless steel.
8. Regularly restore/passivate stainless steel.
Recommended cleaners for certain situation/environments of stainless steel:
A) Soap, ammonia and detergent medallion applied with a cloth or sponge can be used for routine cleaning.
B) Arcal 20, Lac-O-Nu Ecoshine provides barrier film for fingerprints and smears.
C) Cameo, Talc, Zud First Impression is applied by rubbing in the direction of the polished lines for stubborn stains and discoloring.
D) Easy-off and De-Grease it oven aid are excellent for removals on all finishes for grease-fatty acids, blood and burnt-on foods.
E) Any good commercial detergent can be applied with a sponge or cloth to remove grease and oil.
F) Benefit, Super Sheen, Sheila Shine are good for restoration/passivation.
THREE (3) YEAR WARRANTY
Warranty Claims...
All claims for parts or labor must be made directly through Turbo Air. All claims should include: model number of the unit, the serial number of the cabinet, proof of purchase, date of installation, and all pertinent information supporting the alleged defect. In case of compressor replacement under warranty, either compressor or compressor tag must be returned to Turbo Air along with above listed information. Failure to comply with warranty policies will result in voiding claims.
Three-Year Parts & Labor Warranty...
Turbo Air warrants all new refrigerated components, the cabinet and all parts, to be free from defects in materials or workmanship, under normal and proper use and maintenance service as specified by Turbo Air and upon proper installation* (indoor building only) and start-up in accordance with the instruction packet supplied with each Turbo air unit. Turbo Air's obligation under this warranty is limited to a period of three (3) years from the date of original installation or thirty nine (39) months after shipment date from Turbo Air, whichever occurs first. Any part, covered under this warranty, that is by Turbo Air to have been found defective within three (3) years of original installation or thirty nine (39) months after shipment date from manufacturer, whichever occurs first, is limited to the repair or replacement, including labor charges, of defective parts or assemblies. The labor warranty shall include standard straight time labor charges only and reasonable travel time, as determined by Turbo Air. (*Installation in unstable, mobile, and enclosed area may not be considered as proper installation.)
Additional Two-Year Compressor Warranty...
In addition to the three (3) year warranty stated above, Turbo Air warrants its hermetically sealed compressor to be free from defects in both material and workmanship under normal and proper use and maintenance service for a period of two (2) additional years from the date of original installation, but not to exceed five (5) years and three (3) months after shipment from the manufacturer. Compressor determined by Turbo Air to have been defective within this extended period will at Turbo Air's discretion, be either repaired or replaced with a compressor or compressor parts of similar design and capacity. The two (2) year extended compressor warranty applies only to hermetically sealed parts of the compressor and does not apply to any other parts or components, including, but not limited to, cabinet, paint finish, temperature control, refrigerant, metering device, driers, motor starting equipment, fan assembly and/or other electrical components.
R-290/R-600a Hydrocarbon Compressor Warranty...
The two-year compressor warranty detailed above will be void if the following procedure is not carefully adhered to:
- This system may contain R290 refrigerant and polyol ester lubricant.
The polyol ester lubricant has rapid moisture absorbing qualities. If it is exposed to ambient conditions for an extended period, the lubricant must be replaced. - Drier replacement is very important and must be changed when a system is opened for servicing. Drier with XH-7 molecular sieve or better must be used.
- Micron level vacuums must be achieved to ensure low moisture levels in the system. 500 microns or lower must be maintained.
- Compressor must be obtained through Turbo Air, unless otherwise specified in writing, through Turbo Air's warranty department.
WARRANTY INFORMATION
What is Not Covered by This Warranty...
Turbo Air's sole obligation under this warranty is limited to either repair or replacement of parts, subject to the additional limitations below. This warranty neither assumes nor authorizes any person to assume obligations other than those expressly covered by this warranty.
NO CONSEQUENTIAL DAMAGES. TURBO AIR IS NOT RESPONSIBLE FOR ECONOMIC LOSS; PROFIT LOSS; OR SPECIAL, INDIRECT, OR CONSEQUENTIAL DAMAGES, INCLUDING WITHOUT LIMITATION, LOSSES, OR DAMAGES ARISING FROM FOOD OR PRODUCT SPOILAGE REGARDLESS OF WHETHER OR NOT THEY RESULT FROM REFRIGERATION FAILURE.
WARRANTY IS NOT TRANSFERABLE. This warranty is not assignable and applies only in favor of the original purchaser/user to whom delivered. ANY SUCH ASSIGNMENT OR TRANSFER SHALL VOID THE WARRANTIES HEREIN AND SHALL VOID ALL WARRANTIES, EXPRESS OR IMPLIED, INCLUDING ANY WARRANTY OF MERCHANTABILITY OR LABOR COVERAGE FOR COMPONENT FAILURE OR OTHER THE WARRANTY PACKET PROVIDED WITH THE UNIT.
Turbo Air will not be held responsible for the following external factors: ALTERATION, NEGLECT, ABUSE, MISUSE, ACCIDENT, DAMAGE DURING TRANSIT OR INSTALLATION, FIRE, FLOOD, ACTS OF GOD, OR IMPROPER ELECTRICAL CONNECTIONS.
TURBO AIR IS NOT RESPONSIBLE FOR THE REPAIR OR REPLACEMENT OF FAILED OR DAMAGED COMPONENTS RESULTING FROM ELECTRICAL POWER FAILURE, THE USE OF EXTENSION CORDS, LOW VOLTAGE, OR VOLTAGE DROPS TO THE UNIT.
Use of NON-OEM parts without manufacturer's approval may void cabinet warranty. NO IMPLIED WARRANTY OF MERCHANTABILITY OR FITNESS FOR A PARTICULAR PURPOSE; THE FOREGOING WARRANTIES ARE EXCLUSIVE AND EXPRESSLY GIVEN IN LIEU OF ALL OTHER WARRANTIES, EXPRESSED, IMPLIED OR STATUTORY. THERE ARE NO WARRANTIES, WHICH EXTEND BEYOND THE DESCRIPTION ON THE FACE HEREOF.
Warranty information card must be submitted via post mail or electronically on our website at www.turboairinc.com/registration within 7 days from the purchase date. Failure to comply may result in your warranty being voided.
All coverage provided within this warranty is applicable only to the United States, including Alaska and Hawaii, and Canada, excluding U.S. Territories; limited parts only warranty in U.S. Territories. Turbo Air is not responsible for any warranty claims made on products sold or used outside the fifty states of the United States.
The extended warranty period specific to each Turbo Air product applies to all units sold by Turbo Air starting December 1, 2016.
NOTE
NOTE
WARRANTY REGISTRATION CARD

MAIL CARD IMMEDIATELY OR GO TO ONLINE REGISTRATION AT www.turboairinc.com/registration
Company Name: ____
Type of Business:
Model Number:
Serial Number:
Phone Number: ____, Email: ____
Address: ____,
(Street / Unit #)
(City) (State)
{
Zip Code)
I, ____ hereby inform and certify to Turbo Air Inc. (Manufacturer) that the product model (Owner's Name)
and serial number mentioned above was purchased on ____ from ____. (Date of Purchase) (Name of the Dealer)
Turbo Air Inc.
4184 E. Conant St., Long Beach, CA 90808
Toll Free: 1-800-381-7770
Fax: 310-900-1033
Email: warranty@turboairinc.com

4184 E. Conant St., Long Beach, CA 90808
Toll Free: 1-800-381-7770
Fax: 310-900-1033
Email: warranty@turboairinc.com
www.turboairinc.com