OPH-5000i - Barcode Reader Opticon - Free user manual and instructions
Find the device manual for free OPH-5000i Opticon in PDF.


User questions about OPH-5000i Opticon
0 question about this device. Answer the ones you know or ask your own.
Ask a new question about this device
Download the instructions for your Barcode Reader in PDF format for free! Find your manual OPH-5000i - Opticon and take your electronic device back in hand. On this page are published all the documents necessary for the use of your device. OPH-5000i by Opticon.
USER MANUAL OPH-5000i Opticon
Using the HTTP POST DEMO on the OPH-5000i
Go to the system menu by pressing Q1 and Q2 at the same time for some time.
Set the wifi parameters on the terminal:
System menu
1 Switch application
2 Settings menu
3 Storage menu
4 Install menu
5 System information
6 Other menus
* Restart
BS Exit
Settings menu
1 Date/Time
2 Key settings
3 Display settings
4 Power management
5 Terminal ID
6 WLAN settings
7 Reset settings
CLRBack
WLAN settings
1 Wireless settings
② TCP/IP settings
3 WLAN diagnostics
CLRBack
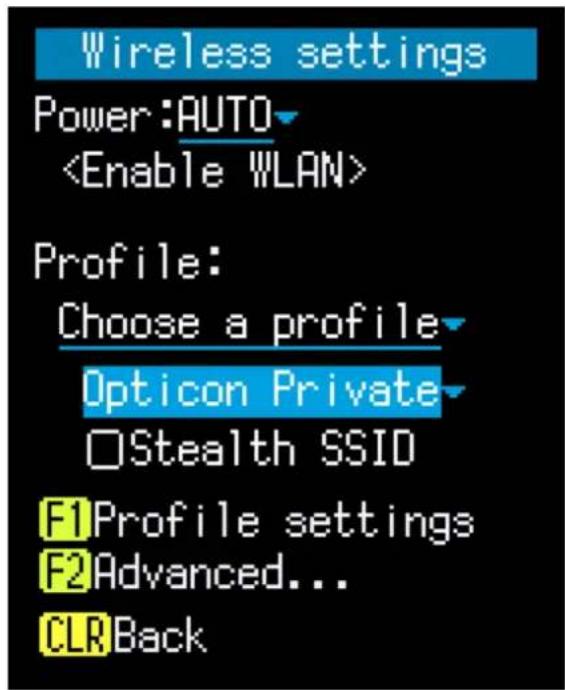
Wireless settings
Power:AUTO
Profile:
Choose a profile
Opticon Private
□Stealth SSID
F1Profile settings
F2 Advanced...
CLRBack
Press the F1 key to go to the profile setting
Profile settings
SSID: Opticon Private
Security:WPA/WPA2 PSK
Passphrase:*****
□Use in Auto-switch
F1Profile list
F2Add new profile
CLR Back
Press F2 to add a new profile (if needed)
Add new profile
1 Input manually
2 Scan AP
CLRBack
You can either scan or input the SSID manually
Once this is doen and the correct profile is selected here:
text_image
Wireless settings Power:AUTOYou can start the demo web server on the PC.
The directory that the webserver is started from is the "root" of your webserver.
All your datafile will be stored in that directory
And the server can serve all the documents from that directory!!!

text_image
CAUTIONThis is a demo web server and should be used on internal networks only.
It is not suitable for production environments.
If you want to use the OPH-5000i with this this kind of application for production then we advise a serious webserver, like Apache, Nginx, IIS or a webserver of your choice.
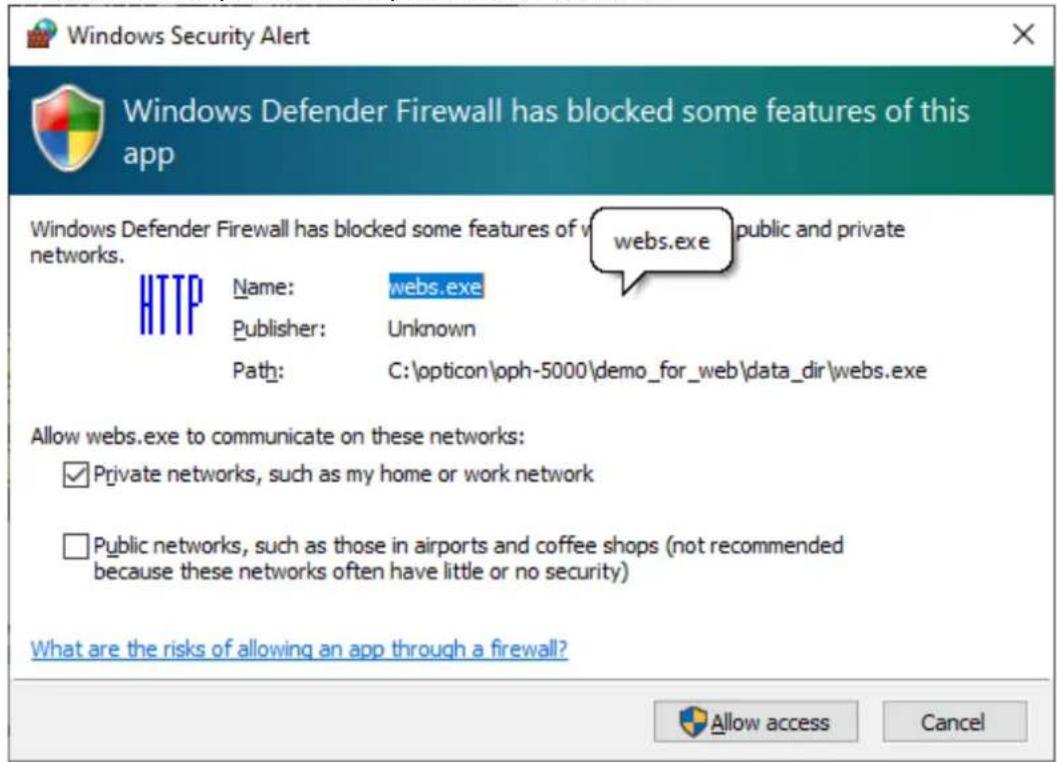
The server uses port 8080, this port needs to be open in the windows firewall.! Windows will ask you this when you start the webserver:
text_image
Windows Security Alert Windows Defender Firewall has blocked some features of this app Windows Defender Firewall has blocked some features of www + public and private networks. webs.exe Name: webs.exe Publisher: Unknown Path: C:\opticon\oph-5000\demo_for_web\data_dir\webs.exe Allow webs.exe to communicate on these networks: ✓ Private networks, such as my home or work network □ Public networks, such as those in airports and coffee shops (not recommended because these networks often have little or no security) What are the risks of allowing an app through a firewall? Allow access CancelAllow the access of the webserver trough the firewall.
If you use a different firewall as the Windows Firewall then you have to enable the webserver yourself to this firewall.
text_image
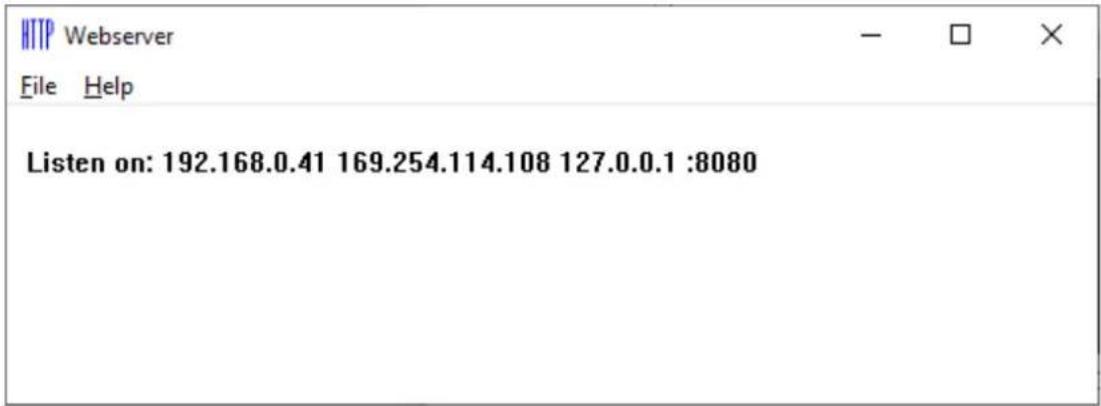
HTTP Webserver File Help Listen on: 192.168.0.41 169.254.114.108 127.0.0.1 :8080Now you can load the demo program on your OPH-5000i
and setup the IP address of your computer.
This IP address is listed in the webservers window.
In my example it is 192.168.0.41

text_image
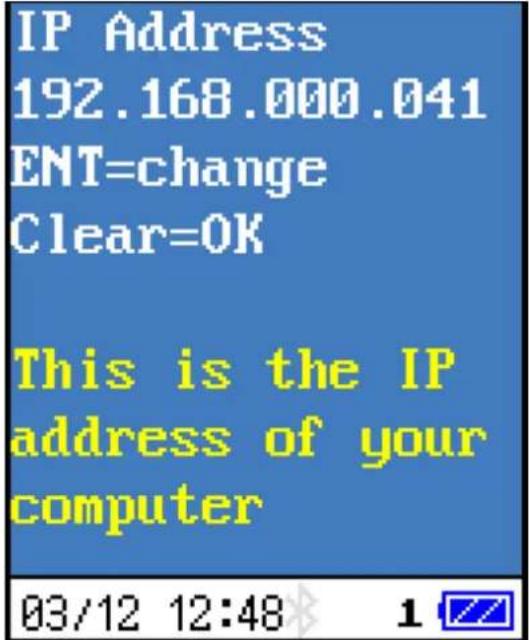
HTTP POST DEMO Scan POST Data Config 03/12 12:46 1This is entered like this in the demo application:
text_image
IP Address 192.168.000.041 ENT=change Clear=OK This is the IP address of your computer 03/12 12:48 1Now you can scan some barcodes:
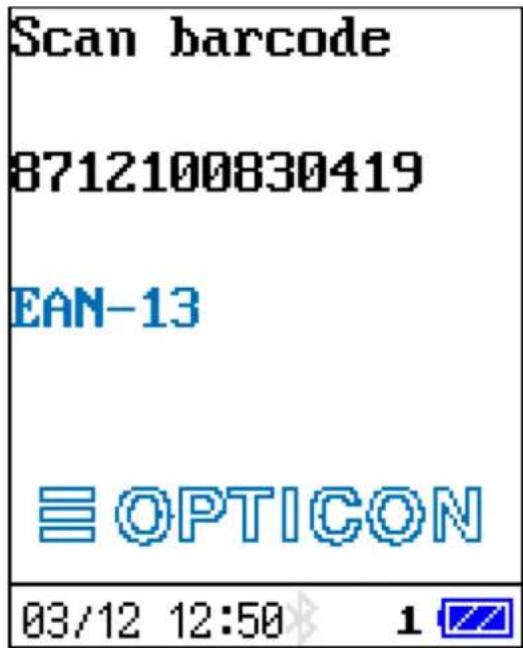
text_image
Scan barcode 8712100830419 EAN-13 ≡ OPTICON 03/12 12:50 1When you are done with scanning, you can POST the scanned barcodes to your webserver.
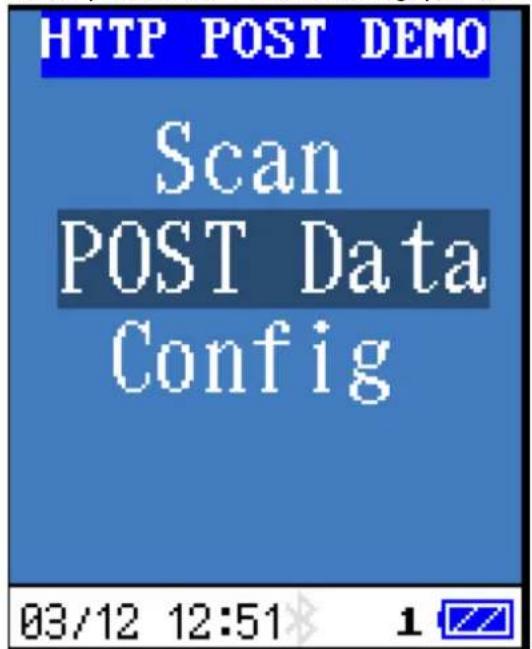
text_image
HTTP POST DEMO Scan POST Data Config 03/12 12:51 1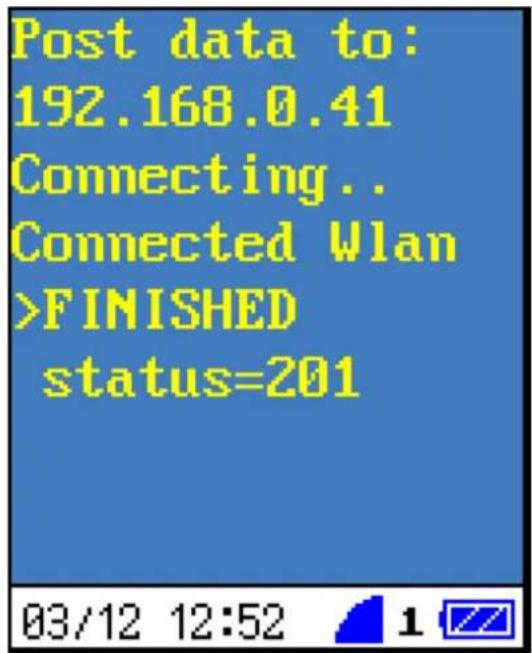
text_image
Post data to: 192.168.0.41 Connecting.. Connected Wlan >FINISHED status=201 03/12 12:52 1HTTP 201 code means created.
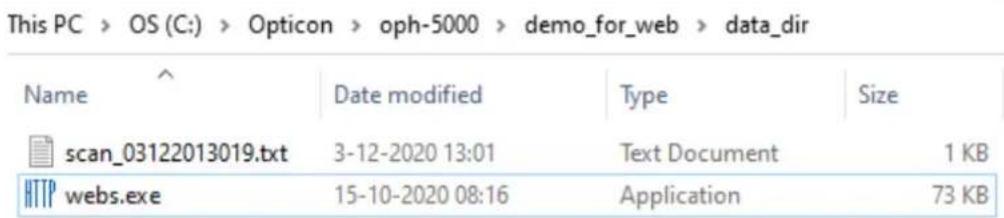
And here is our data:
text_image
This PC > OS (C:) > Opticon > oph-5000 > demo_for_web > data_dir Name Date modified Type Size scan_03122013019.txt 3-12-2020 13:01 Text Document 1 KB HTTP webs.exe 15-10-2020 08:16 Application 73 KBAnd opening with Notepad gives us:

scan_03122013019.txt - Notepad
File Edit Format View Help
8712100830419
8714100770573
8722700210658