Roughhouse 50 - Rollerblades Genuine - Free user manual and instructions
Find the device manual for free Roughhouse 50 Genuine in PDF.


User questions about Roughhouse 50 Genuine
0 question about this device. Answer the ones you know or ask your own.
Ask a new question about this device
Download the instructions for your Rollerblades in PDF format for free! Find your manual Roughhouse 50 - Genuine and take your electronic device back in hand. On this page are published all the documents necessary for the use of your device. Roughhouse 50 by Genuine.
USER MANUAL Roughhouse 50 Genuine
text_image
GENUINE SCOOTER G COMPANY®Owner's Manual
ROUGH HOUSE R50
Notice

This owner's manual contains important safety, operational and maintenance information. Any person operating or riding as a passenger on your scooter should carefully read and fully understand the entire contents of this manual prior to riding the vehicle. For your safety, follow all safety warnings contained within the owner's manual and the labels applied to your scooter. You should keep this owner's manual in your vehicle at all times and it should be considered a permanent part of the vehicle.
If you have any questions, please ask your dealer for assistance.
Safety symbols and notes. Please observe the following:

WARNING
Failure to follow instructions with a WARNING symbol could result in serious injury or death. Precautionary measures are required.

CAUTION
Important instructions and precautionary rules to avoid damage to the vehicle. Non-observance can lead to an unsafe vehicle condition.

NOTE
Special instructions and precautionary measures for better handling during operation, inspection, adjustment and service activities.

WARNING
California Proposition 65
Operating, servicing and maintaining a passenger vehicle or off-road vehicle can expose you to chemicals including engine exhaust, carbon monoxide, phthalates, and lead, which are known to the State of California to cause cancer and birth defects or other reproductive harm. To minimize exposure, avoid breathing exhaust, do not idle the engine except as necessary, service your vehicle in a well-ventilated area and wear gloves or wash your hands frequently when servicing your vehicle. For more information go to www.P65Warnings.ca.gov/passenger-vehicle.
Introduction

Congratulations on your purchase of the Genuine Scooter Company Roughhouse 50.
Please read this manual carefully prior to riding so that you will understand how to safely operate your scooter, understand it's capabilities and limitations and become aware of all vehicle controls and features.
This owner's manual contains important maintenance information. The efficiency and longevity of your scooter will depend heavily on your operating methods and periodic maintenance. Failure to operate and maintain your scooter as instructed in this owner's manual may void the limited warranty and reduce the efficiency and reliability of your vehicle.
The first 500 miles are the most important in the life of your scooter. Proper break-in during this time will ensure maximum life. Please refer to the break-in section for specific break-in procedures prior to riding.
You should always use GENUINE OEM parts for all maintenance and repairs as they have been designed specifically for your vehicle. Use of non-OEM parts on your vehicle may void any warranty.
PRIMA is the official accessory of Genuine Scooter Company. All PRIMA brand accessories have been tested and approved for use on your scooter by Genuine Scooter Company. Be aware that the installation of accessories not approved by Genuine can lead to unsafe operating conditions.
GENUINE MOTOR OIL is the official lubricant of Genuine Scooter Company. All GENUINE MOTOR OILS have been tested and approved for use in your scooter by Genuine Scooter Company. Be aware that the use of lubricants not approved by Genuine for use in your vehicle can lead to damage to your scooter and may void any warranty.
Your authorized Genuine Scooter dealer is the primary resource for information, parts and service. If you have any questions, please ask your dealer for assistance.
Table of Contents
NOTICE.... 1
INTRODUCTION 2
TABLE OF CONTENTS.... 3
VEHICLE SAFETY
Accessories, Modification, Noise Regulation...... 4
Loading, Maintenance, Pre-ride Inspection 5
Carbon Monoxide Gas.... 5
SAFE RIDING
Wear Safety Gear, Make Yourself Visible.... 6
Know Your Limits, Road Conditions.... 6
IDENTIFICATION NUMBERS.... 7
VEHICLE LAYOUT
USB Charging, Ignition Switch.... 8
Dashboard.... 9
Handlebar Controls.... 10
Front and Rear Brake Controls.... 11
Kick Start, Seat Lock.... 12
Storage, Bag Hook.... 13
Helmet Lock, Fuel Fill.... 14
PRE-RIDE INSPECTION
Pre-ride Inspection Checklist.... 15
Front Brake Inspection and Adjustment.... 16
Rear Brake Inspection and Adjustment.... 17

PRE-RIDE INSPECTION (CONTINUED)
Throttle Inspection and Adjustment.... 18
Engine Oil Type, Level Check, and Fill 1
Tire Inspection and Pressure Adjustment 20
Cable Inspection and Lubrication... 21
Vehicle Center and Side Stand, Assembly Check..... 21
Fuel, Lighting, Switches, and Loading.... 22
OPERATION
Engine Starting 23
Engine Run-in, Engine Life 24
Engine Warm-up, Riding, Throttle.... 25
Braking.... 26
Engine Stop, Parking 27
PERIODIC MAINTENANCE
Periodic Maintenance Key 2
Periodic Maintenance Table.... 2
Periodic Maintenance Table Continued......
Air Cleaner, Gear Oil, Transmission.... 31
Spark Plug, Front Brake.... 32
Brake Fluid, Suspension.... 33
Fuses, Battery.... 34
Maintenance Record.... 35
TECHNICAL DATA.... 36
REPORTING SAFETY DEFECTS.... 37
Vehicle Safety

Accessories
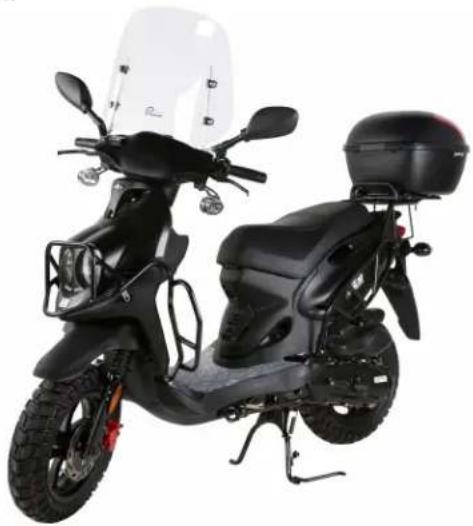
The addition of unsuitable accessories can result in unsafe operating conditions.
Genuine approved accessories, such as Prima brand, have been designed for and approved by Genuine for use on your scooter. Always install Genuine approved accessories on your scooter. Your dealer can assist you in selecting and correctly installing accessories for your scooter.
natural_image
Side view of a black electric scooter with front bumper and rear seat (no visible text or symbols)Modification
Modification of your scooter or removal of original equipment may render the vehicle unsafe or illegal. Obey all applicable equipment laws and regulations. Only use accessories that have been approved by Genuine for this scooter.
Motorcycle Noise Regulation
TAMPERING WITH NOISE CONTROL SYSTEM PROHIBITED
Federal law prohibits the following acts or the causing thereof: (1) The removal or rendering inoperative by any person other than for purposes of maintenance, repair, or replacement of any device or element of design incorporated into any new vehicle for the purpose of noise control prior to its sale or delivery to the ultimate purchaser or while it is in use or (2) the use of the vehicle after such device or element of design has been removed or rendered inoperative by any person.
"AMONG THOSE ACTS PRESUMED TO CONSTITUTE TAMPERING ARE THE ACTS LISTED BELOW".
These acts include tampering with the following systems; i.e., modification, removal, etc.
Exhaust System - Muffler, Exhaust pipe, Silencer Intake System - Air cleaner case, Air filter, Intake duct
Vehicle Safety

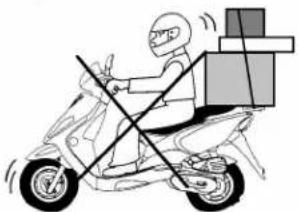
Properly Load Y our Scooter
You and any passengers should utilize the floorboard and footrests for your feet. Do not exceed the load limits of the vehicle. Properly secure all cargo.
natural_image
Illustration of a person riding a scooter with a cross symbol crossed out, carrying a gift box (no text or symbols present)Maintain Y our Vehicle
Perform any maintenance required per the maintenance schedule or as otherwise necessary to keep your scooter in a safe operating condition. If you notice any leaks or notice odd sensations such as vibration, immediately stop your vehicle.
Pre-Ride Inspection
Always perform a pre-ride inspection of your scooter prior to each ride. Review the pre-ride inspection instruction section contained within this manual for more information.
WARNING
Not performing a pre-ride inspection, altering your vehicle from the stock configuration, or failure to properly maintain your vehicle can result in serious injury or death. Check your vehicle regularly and have any problems corrected as soon as possible.
Carbon Monoxide Gas
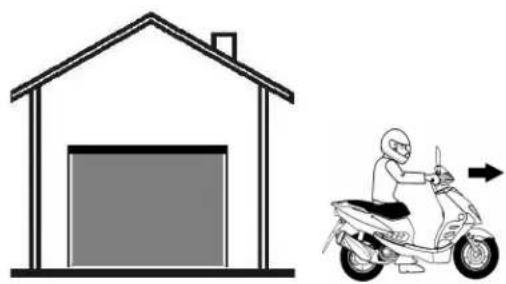
The engine exhaust from this vehicle contains carbon monoxide, a colorless, odorless, and highly toxic gas.
An enclosed area such as a garage can quickly fill up with carbon monoxide gas. Do not run the engine in enclosed areas that are poorly ventilated. Move the vehicle outdoors before operation.
natural_image
Simple line drawing of a garage with a door and a scooter, no text or symbols presentWARNING
Carbon monoxide gas is toxic. Breathing carbon monoxide can cause unconsciousness and even kill you. Avoid running your engine within enclosed areas or activities that expose you to carbon monoxide.
Safe Riding

Your scooter can provide many years of riding enjoyment. You must take responsibility for your own safety and the safety of others. There are many steps you can take to protect yourself and others while riding. Here are some very important safety precautions:
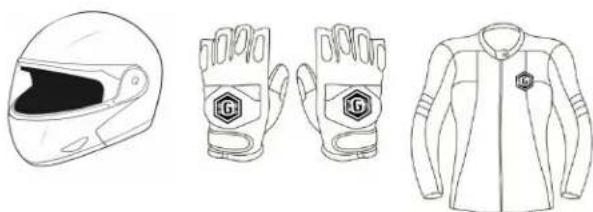
Wear a helmet
Rider safety begins with quality head protection. A head injury is one of the most serious injuries that can occur. Always wear a quality DOT approved helmet that is properly buckled. If the helmet does not have a face shield, wear suitable eye protection.
Wear riding apparel
Choose quality gloves, boots, pants, jackets and other riding apparel specifically designed with protective features. Loose clothing can be unsafe when riding your scooter.
Make yourself visible
Wear bright, reflective apparel to make yourself more visible to fellow drivers. Position yourself on the road where other drivers can easily see you. Use your turn signals, hand signs, horn and other methods to help others locate you and understand your driving actions.
WARNING
Not wearing safety apparel increases the chance of serious injury or death in a crash. Be sure you and your passengers always wear helmets and protective gear and wear them properly.
natural_image
Line drawings of four different sports gear and helmet components (no text or symbols)Know your limits
Ride within the boundaries of your own skill at all times. Do not ride under the influence of drugs or alcohol. Strictly observe all traffic regulations. Always adapt your riding to account for traffic and road conditions.
Road conditions
Road conditions can vary greatly with weather, foreign material, elevation etc. Your riding stability and braking power are limited by the grip of the tires on the road surface. When encountering slippery road surfaces, braking distance will increase significantly and riding stability will be reduced. Reduce vehicle speed and perform all actions in a gradual and deliberate manner to prevent accidents. Use extreme caution on painted surfaces or metal objects such as a manhole cover or train rails when they are wet.
Identification Numbers

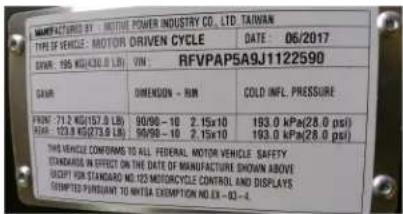
Vehicle Identification Number (VIN)
is located on the VIN plate or inside the inner front cover.
text_image
MANUFACTURING BY: INTIVE POWER INDUSTRY CO., LTD. TAIWAN TYPE OF VEHICLE - MOTOR ORIVEN CYCLE DATE: 06/2017 DAVIN: 195 KG(430.0 L8) VIN: RFVPAP5A9J1122590 CAVIN: DIMENSION - RUN COLD INFL. PRESSURE PUNT: 71.2 KG(157.0 L8) 90/06-10 2.15x10 193.0 kPa(28.0 psi) BEET: 120.8 KG(273.0 L8) 90/06-10 2.15x10 193.0 kPa(28.0 psi) THIS VEHICLE CONFORMS TO ALL PERSONAL MOTOR VEHICLE SAFETY STANDARD IN EFFECT ON THE DATE OF MANUFACTURE SHOWN ABOUT EXCEPT FOR STANDARD NO.123 MOTORCYCLE CONTROL AND DISPLAYS COMPTED PURCHANT TO MINTA EXEMPTION NO. EX - Q3 - 4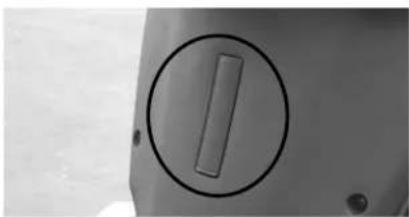
natural_image
Close-up of a mechanical component with a circular mark and a vertical bar, no visible text or symbols.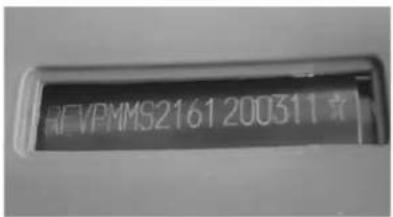
text_image
HPVPMMS2161200311★Record your Vehicle Identification Number: ____
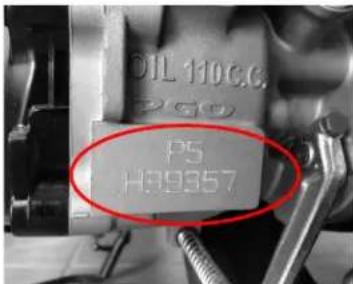
Engine Serial Number (ESN) is located on the back of the engine.
text_image
DIL 110G.C. 250 P5 H39357Record your Engine Serial Number: ____
Vehicle Layout

USB Charging
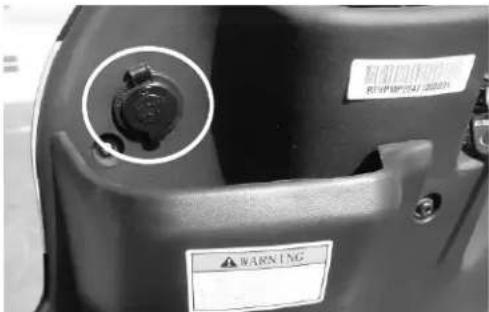
Your vehicle is equipped with a USB charging port as shown in the photo to the right.
Do not charge devices when the engine is not running as this will deplete the battery over time. Do not allow water to enter into the charging port as this may damage the device.
Ignition Switch
Insert the key and select "ON", "OFF", or "LOCK".
Turn key to "ON" position to operate the vehicle. In this position, the key cannot be removed. The vehicle will have power and the engine can be started.
Turn key to "OFF" position to cease vehicle operation. In this position, all vehicle power will be off, the engine will not run, and the key can be removed from the ignition switch.
Turn handle bars fully to the left steering- stop, then turn key to "LOCK" position to lock the handlebars as a theft deterrant. It is suggested you "LOCK" your vehicle whenever you leave the vehicle unattended. The key can be removed from the ignition switch in this position.
text_image
WARNING REV/PERTAIN 202011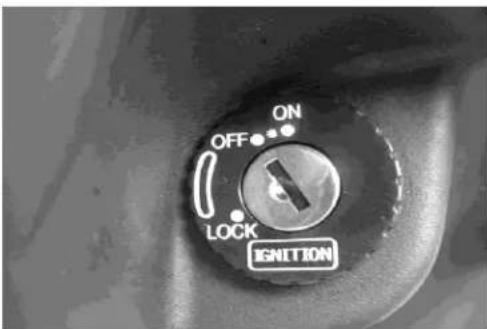
text_image
ON OFF LOCK IGNITIONVehicle Layout

Dashboard
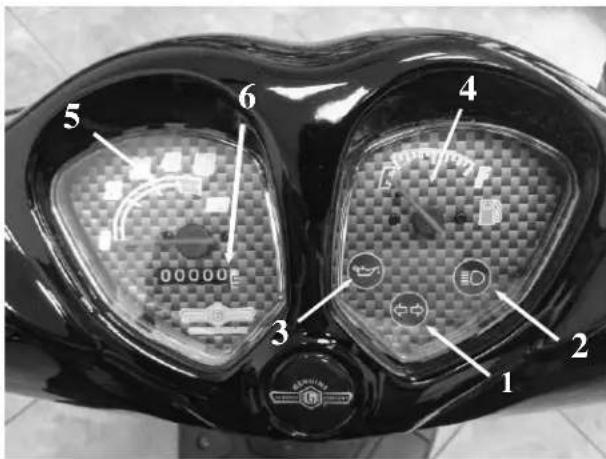
- Directional Indicator - Light will illuminate green when turn signal button is pressed to the left or right.
- High Beam Indicator - Light will illuminate blue when high beam switch is pressed upward.
- Low Oil Warning Indicator - Light will illuminate red when oil level is low. REFILL OIL IMMEDIATELY to prevent major engine damage.
When the ignition switch is first turned to the "ON" position, the low oil warning light will illuminate red for a few seconds and then turn off. This is a bulb check to ensure the bulb is not burned out.
-
Fuel Level Indicator - Gauge will show approximate fuel level in fuel tank. Gauge will move from "F" to "E" as fuel tank depletes. When key is off, gauge will show "E".
-
Speedometer - Gauge will show current speed.
-
Odometer - This will show distance traveled during the life of the vehicle.
text_image
Labeled diagram of a motorcycle front panel showing six key components with icons and numbersWARNING
If you do not see the oil light (3) above illuminate briefly upon turning the key to "ON", replace the bulb immediately. You should purposefully look for this oil light check upon each ride. This tool is an aid to help ensure your vehicle is not operated without oil.
Vehicle Layout

Handlebar Controls
- Headlight
Select for HIGH Beam
Select for LOW Beam
- Turn Signal
Press ← to signal a LEFT turn.
Press to signal a RIGHT turn.
Press middle to turn signal indicator OFF.
- Horn Button
Press ▶ to sound the HORN.
- Engine Kill Switch
Leave this button in the RUN position at all times unless there is an emergency situation.
In an emergency, press to STOP engine!
- Hazard Lights
Press △ to turn on HAZARD lights.
Press ● to turn hazard lights off.
- Starter Button
Press Ⓐ with the key ON to START the engine.

text_image
1 2 3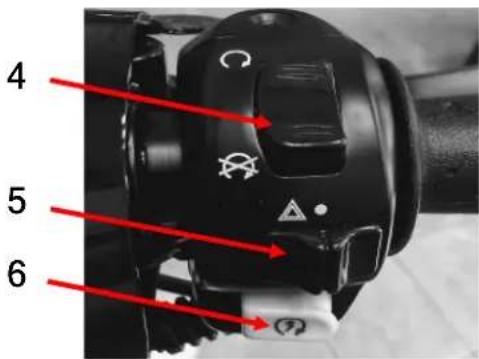
text_image
4 5 6Vehicle Layout

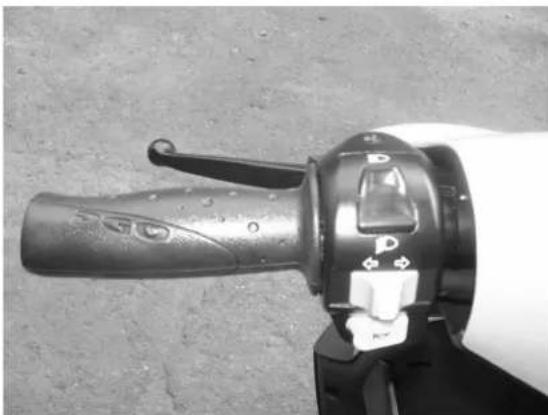
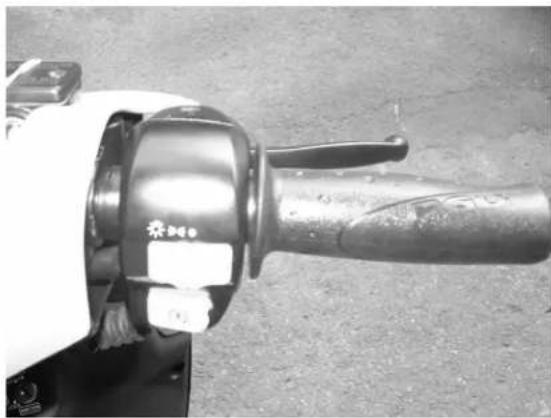
Front & Rear Brake Controls
- Extend your fingers over the brake lever.
- Pull lever toward the grip to actuate brake.
- The brake lever should slow the vehicle with firm pressure.
REAR BRAKE LEVER
natural_image
Close-up of a white hand crank handle with black and white buttons, resting on asphalt (no visible text or symbols)WARNING
The brake lever should not touch the handlebar. If the brake lever feels soft or touches the handlebar, have your brake system inspected and adjusted or repaired immediately.
FRONT BRAKE LEVER
natural_image
Close-up of a white manual tool with a black handle and circular emblem, resting on asphalt (no visible text or symbols)Vehicle Layout

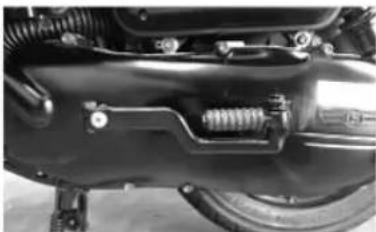
Kick Start
The kick start lever can be used to start your engine as an alternative to the electric-start option.
Pull the the kick start foot peg with rubber sleeve outward, away from the engine cover.
While facing forward and holding both handlebar grips, press down quickly with your foot to start the engine.
Seet Lock
To access the under-seat storage area, insert key into the key fob on the left rear body panel and turn clockwise. The seat will release from it's latch. Raise the seat forward toward the handlebar to expose the storage area.
Return the seat forest on the latch and pressdownward on the seat to securely close it.
natural_image
Close-up of a mechanical assembly with springs and bolts (no visible text or symbols)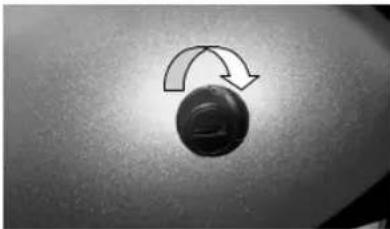
natural_image
Close-up of a circular object with a curved arrow pointing upward, placed on a textured surface (no text or symbols visible)Vehicle Layout

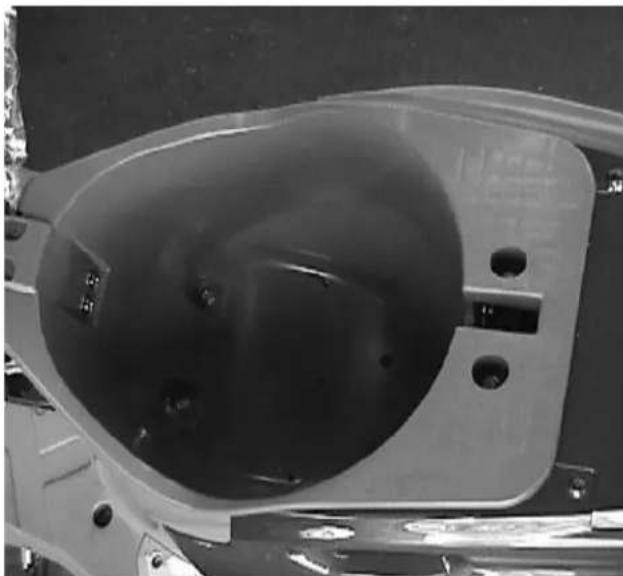
Storage
Storage is located under the seat.
- The maximum loading capacity is 2.5 lbs.
- The under-seat storage compartment can become very hot when the ambient temperature is high and the engine has been operating for a long period of time. Do not put perishable or temperature-sensitive items in the luggage compartment.
- The storage compartment is not water-proof. When it rains or after washing your vehicle, the storage compartment may get wet with moisture. Do not store water-sensitive items in the storage compartment.
natural_image
Close-up of a mechanical component with a circular opening and mounting holes (no visible text or symbols)Vehicle Layout

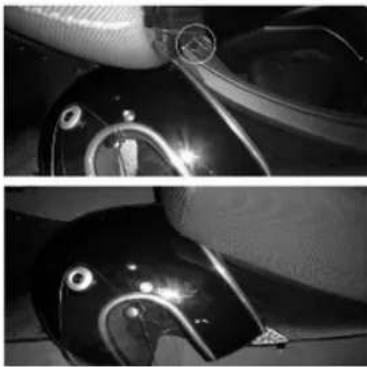
Helmet Lock
The helmet lock is located on either side of the seat hinge area. Locate the two posts to either side of the seat hinge. Place the D-ring on your helmet strap over the post and rest your helmet against the inner bodypanel directly under the front of the seat. Close the seat and lock securely.
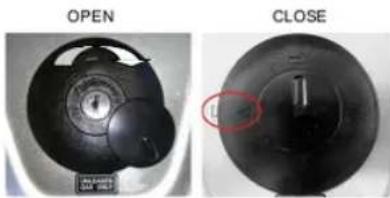
Fuel Fill
Open the keyhole cover by pressing the raised feature on the cover toward the right in the direction of the arrow to expose keyhole.
Insert the key and turn clockwise 1/4 turn. Remove fuel cap. The key will remain captured in the fuel cap until fueling has been completed and the cap properly secured. Fill with premium unleaded fuel only.
Fill with premium unleaded fuel 91 octane or higher.
Take special care not to overfill fuel tank.
Once fueling has been completed, align the arrow on the cap with the arrow on the body. Press cap downward until you hear a "click" then turn the key to the left and remove.
Pre-Ride Inspection

Perform a pre-ride inspection prior to every ride. This is a checklist. More detailed procedures are given in the pages that follow.
| ITEM PROCEDURE | |
| FRONT BRAKE | Check the brake function, clearance, brake-fluid level, inspect for fluid leaks, if necessary, add DOT 4 or higher brake fluid. Check brake lever free-play and adjust if necessary. Check brake pad wear. If the brake pads are worn down past the wear marks, replace pads immediately. |
| REAR BRAKE | Check the brake function, lever free-play and clearance. Make adjustments and lubricate cable if necessary. If the brake shoes are worn, replace immediately. |
| THROTTLE | Check to make sure the throttle actuates freely through the range. Lubricate throttle cable if necessary. Check throttle free-play. Adjust throttle cable tension if necessary. |
| LUBRICANTS | Check the engine oil level before each ride. If the level is low, refill with JASO FD 2-stroke engine oil. |
| TIRES | Check tire pressure in both the front and rear tire, add air if necessary. Inspect tires. |
| CABLES | Check operation of all cables. Lubricate cables and adjust tension as necessary. |
| CENTER / SIDE STAND | Check center and side stands for operation, lubrication and secure mounting. |
| ASSEMBLY | Check all vehicle assembly to ensure fasteners are secure and assemblies function properly. |
| FUEL SYSTEM Check | fuel level. Fill if necessary. Ensure no fuel leaks are present. |
| LIGHTING | Check the function of all lights. Clean lenses as necessary. |
| SWITCHES | Check the function of all switches. |
| LOADING | Ensure your vehicle is not overloaded, is loaded in a balanced manner, and cargo is secured. |
Pre-Ride Inspection

Perform a pre-ride inspection prior to every ride.
Front Brake
The front brake is a hydraulic disk type.
Inspect the brake system prior to each ride.
Properly functioning brake systems are vitally important to your personal safety.
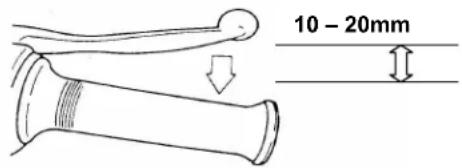
Check for fluid leaks, fluid level, brake pad wear, and rotor condition. Also check lever free-play frequently.
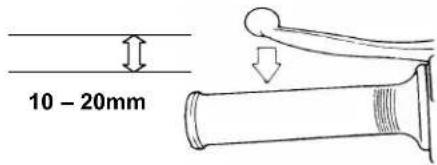
Pull the brake lever lightly until you feel tension, then check the lever free-play.
text_image
10 - 20mmWARNING
A brake lever that is not firm when engaged implies there is a problem with the brake system. Do not drive your vehicle until the problem has been fixed. Bring the vehicle to your authorized Genuine dealer for repair.
Front Brake lever free-play : 10-20mm
If the brake lever has no free-play or is too loose, there is a potential brake system fault. Inspect brake system thoroughly.
Front Brake Fluid
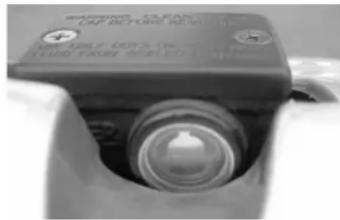
Check all joints along the brake hose for any brake fluid leaking from the joint or the brake cylinder. Leakage has occurred if you see wet or oxidized fluid sludge.
Check brake fluid port to see brake fluid level; add brake fluid if necessary.
Brake fluid specification: DOT4
natural_image
Close-up of a mechanical component with a circular dial and handle (no visible text or symbols)WARNING
Contact your authorized Genuine dealer immediately to repair any brake fluid leaks. A leak could result in losing all hydraulic pressure to your system rendering the brake useless.
Pre-Ride Inspection

Perform a pre-ride inspection prior to every ride.
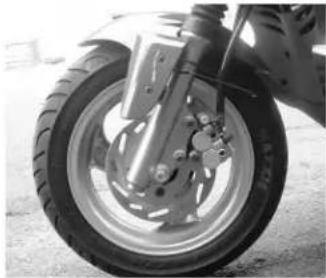
Front Brake Disc
Inspect the brake disc for wear. Inspect the brake pads to ensure the pad thickness is not beyond the wear limit. If the brake pad wears entirely before replacement, damage to the disc and loss of braking ability can occur.
natural_image
Close-up of a motorcycle's wheel and suspension components (no visible text or symbols)RearBrake
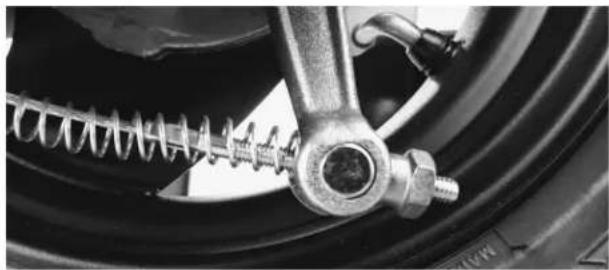
The rear brake is a cable-actuated drum brake system. Inspect the brake system prior to each ride. Properly functioning brake systems are vitally important to your personal safety.
Check rear brake cable condition and brake wear. Check lever free-play and adjust as necessary.
RearBrake Free-Play
Pull the brake lever lightly until you feel tension, then check the lever free-play.
text_image
10 - 20mmIf lever free-play is too large or too little, adjust free-play by turning the adjustment nut on the cable near the rear wheel.
natural_image
Close-up of a car tire with attached spring and screw head (no visible text or symbols)Check cable and pivot for lubricant. Lubricate regularly to ensure cable moves easily, without binding.
Pre-Ride Inspection

Perform a pre-ride inspection prior to every ride.
Rear Brake Wear
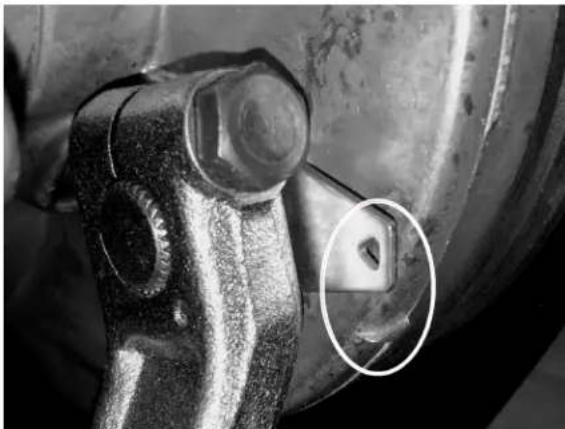
There is a wear indicator installed on the brake actuator shaft. When the opening on the indicator lines up with the triangle on the engine case, your brake shoes have worn beyond the usable range and should be replaced.
Failure to replace the brake shoes can result in damage to the hub and a loss of braking ability.
natural_image
Close-up of a mechanical clamp or bracket component with a magnified inset showing a small hole (no text or symbols visible)Throttle
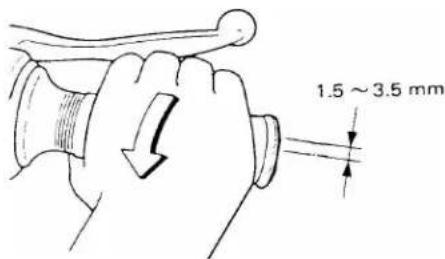
Check the throttle cable for ease of movement by turning the twist grip from fully closed to fully open.
Move the handlebar left to right to ensure throttle is not applied when bars turn.
Measure throttle free-play by opening the grip slightly until resistance can be felt. Throttle free-play: 1.5 - 3.5 mm
text_image
1.5 ~ 3.5 mmAdjust throttle as necessary to ensure proper free-play. Lubricate throttle cable tube and cable ends to ensure ease of operation.

WARNING
An improperly adjusted throttle, non-lubricated or binding throttle cable is an extremely dangerous condition that can result in loss of control of your vehicle. Maintain and inspect frequently.
Pre-Ride Inspection

Perform a pre-ride inspection prior to every ride.
Engine Oil -
Genuine Motor Oil is the oil brand recommended by Genuine Scooters. Your scooter has a high-performance engine and requires very specific lubricant to withstand the high RPM and heat generated during operation.
Only use JASO FD rated 2-stroke oil in your engine. All other oil may severely damage your engine and void the warranty. All JASO rated oils will display the JASO oil classification on the bottle within an outlined border. Above the rating, a 9 character oil code provided by JASO will be displayed. This oil code is in the following format ###ABC###.
Many oils claim to "meet or exceed" JASO ratings. If an oil does not have the 9 character oil code and the JASO FD rating prominently displayed on the I abel (either front or back) then the oil has NOTofficially been tested by JASO. All JASO FD oils will be full synthetic or semi-synthetic blends.

CAUTION
Using oil that is below JASO FD rating and of poor lubricity will damage your engine over time and void your warranty.
Engine Oil Fill
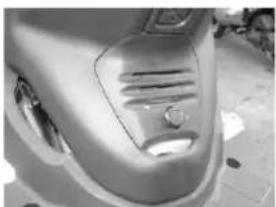
The engine oil fill access door is located on the front of the panel under the seat. Turn thumb screw counterclockwise to remove the door. Remove the cap and fill oil tank with JASO FD 2-stroke engine oil. Replace cap and access door.
natural_image
Close-up of a car's front bumper with ventilation grille and handle (no visible text or symbols)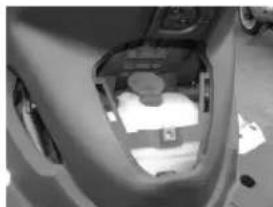
natural_image
Close-up of a car's front and side view showing internal compartments (no visible text or symbols)Check oil level prior to each ride. Fill as necessary. If the oil light on the dashboard illuminates while riding, stop the vehicle immediately and fill oil tank.

CAUTION
If your vehicle is operated without engine oil, severe engine damage will occur.
Pre-Ride Inspection

Perform a pre-ride inspection prior to every ride.
Tires
Perform a physical inspection of both the front and rear tire.
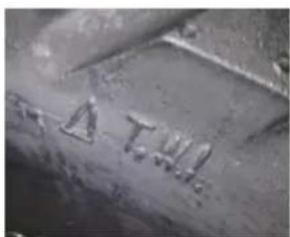
Inspect the tread depth to gauge tire wear. Locate the initials T.W.I. on the tire sidewall. This is the location of the Tread Wear Indicator. Move inward toward the center of the tire to find the raised portion of the tire groove. This is the Tread Wear Indicator. Replace tire when tread wear indicators come in contact with the road surface.
Inspect the tire for foreign material such as nails, screws, glass or other objects that may have become lodged in the tire. Visit a Genuine dealer for tire replacement if necessary.
text_image
ATH!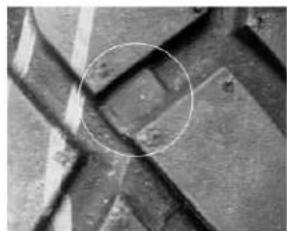
natural_image
Close-up of metallic mechanical components with a circled area highlighting a specific feature (no text or symbols visible)Tire Pressure
Perform tire pressure checks while the tires are cold:
- Remove the valve caps.
- Check the tire pressure.
Standard Tire Pressure
Front: 28 psi
Rear: 28 psi
- Adjust the tire pressure according to the total weight load.
- Re-install the valve caps.
! WARNING
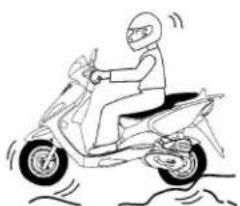
Never exceed the rated total weight or the bearing capacity of the tires. Incorrect tire pressure will have a considerable effect on the riding properties of the scooter and can cause an accident.

natural_image
Line drawing of a person riding a scooter with motion lines indicating speed (no text or symbols)TIRE PRESSURE TOO HIGH
natural_image
Line drawing of a person riding a scooter with motion lines indicating speed (no text or symbols)TIRE PRESSURE TOO LOW
Pre-Ride Inspection

Perform a pre-ride inspection prior to every ride.
Cables
Check all cables for integrity, connection and lubrication. If any fraying or other cable damage is observed, replace cable immediately.
Use a cable specific lubricant on the braided portion of the cable. Use waterproof grease on the cable ends and pivot locations.
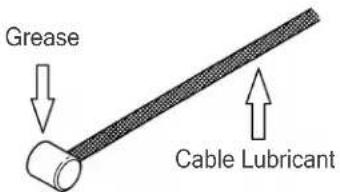
text_image
Grease Cable LubricantCenter Stand and Side Stand
Inspect both the center stand and the side stand to ensure the mounting bolts securely fasten the stands to the frame and both stands are not loose.
Check spring tension to ensure stands will remain in stowed position when riding.
Assembly
Check all assemblies to ensure they are fastened tightly. This includes both a visual and physical inspection.
Visually inspect the engine, fork assembly, wheel assemblies, handlebar, and other critical components.
Apply pressure in all directions for each assembly to check for unusual movement. If you notice any unusual vibration, shake or other indication that a problem may exist, have your vehicle towed to a Genuine dealer for inspection and resolution.
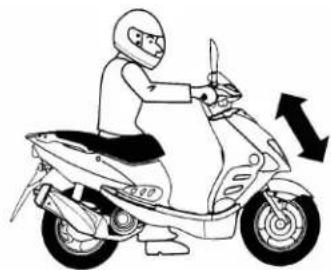
natural_image
Illustration of a person riding a scooter with motion arrows indicating speed (no text or symbols)FUNCTION CHECK
Pre-Ride Inspection

Perform a pre-ride inspection prior to every ride.
Fuel System
Check your fuel level prior to each ride.
Fuel Tank capacity: 5 liters
Fuel specification: Unleaded 91 octane or higher
Do not fill your fuel tank over the neck-line on the fuel tank inlet.
Fuel expands under the influence of heat. An over-filled fuel tank can cause fuel to spill when the vehicle is warm.
Inspect your fuel system including tank, hoses, petcock and filter for leaks. If a leak is found, repair immediately.
WARNING
Both fuel and fuel vapor are highly flammable. Do not smoke or bring an open flame near the fuel tank. Explosions can occur.
Lighting
Lighting is a very important safety feature that helps you navigate at night and communicate your actions with other drivers.
Properly functioning lighting can make you more visible to other drivers, reducing the possibility of an accident.
Check the front and rear turn signal indicators, head light, tail-light, brake light, speedometer backlighting, and all indicator lights to assure they are in proper working order.
Make sure the lenses are clean of dirt and debris.
Switches
Check the function of all switches for lighting, signals, horn, etc. Repair as necessary.
Loading
Load your scooter properly. An improperly loaded scooter can cause an accident.
- Make sure the left-to-right weight distribution is balanced.
- Check that all fasteners are correct and tight.
- Do not transport bulky loads.
- Do not load your vehicle in a manner that covers lighting or impedes the movement of any vehicle component.
Operation

Vehicle Operation
Before starting your vehicle, you should be familiar with all operations and functions of this vehicle. You should have completed the pre-ride inspection, and you should be wearing safety gear.
If this is the first time you are operating your vehicle, you should thoroughly review the "Initial EngineRun-In" section on the next page.
If you have any questions, contact your Genuine dealer for assistance.
Vehicle Start U sing Electric -Start Method
1) Ensure the kill switch is in the RUN position.
2) Insert the key into the Ignition Switch and turn to ON.
3) With the throttle completely closed, pull in either brake lever & simultaneously push and hold the start button. Once the engine starts, release the start button.
Do not press and hold the start button for more than 5 seconds at a time as this can damage the start system.
If the vehicle has difficulty starting after pressing the start button for 5 seconds, release the start button. Wait 10 seconds between attempts. Try to start the vehicle again for up to 5 seconds at a time.
If your vehicle does not start after several attempts, start your vehicle using kick start method.
Vehicle Start U sing Kick- Start Method
1) Place vehicle on the center stand.
2) Ensure the kill switch is in the RUN position.
3) Insert the key into the ignition and turn to ON position.
4) Open the kick start lever footpeg.
5) Grasp both handlebar grips firmly, place your foot on the kick start lever footpeg, and kick downward in a rapid motion.
6) Kick repeatedly until engine starts.
7) After starting, return kick start lever footpeg to normal position.

NOTE
It is not necessary to hold the brake lever in when starting your vehicle with the kick-start method
If your vehicle does not start after trying both the electric and kick start methods, you should contact your Genuine dealer for assistance.
Operation

Initial Engine Run-In
When your engine is new or when you have installed new engine components, it is very important to follow this run-in procedure. During this period of operation, each part within the engine will obtain proper operating tolerances.
Following the run-in procedure will maximize the life of your engine.

CAUTION
During the first 500 miles of operation, avoid wide-open throttle operation or any operation that may cause high engine temperatures.
0 - 100 miles
Avoid opening the throttle beyond 1/2 throttle. Cool down the engine for 10 minutes, after every 30 minutes of operation. Do not operate at a constant speed; change your speed regularly.
100 - 300 miles
Avoid opening the throttle beyond 1/2 throttle for extended periods of time. Do not open throttle beyond 3/4 throttle.
300 - 500 miles
Avoid opening the throttle beyond 3/4 throttle.
Over 500 miles
Avoid long periods of wide-open throttle operation.
Engine Life
Your engine life is highly dependent upon how you operate and maintain your vehicle.
Your scooter is equipped with a CVT transmission and your engine will operate at maximum RPM when you are at maximum speed at wide-open throttle.
If you operate your scooter at maximum RPM for long periods of time, you will damage your engine. This is not considered normal operation.
Keep your maximum speed operation to short periods of time. If you are travelling a longer distance, slow or stop your vehicle regularly to allow the engine to cool.
The quality of oil that you use in your vehicle will also determine longevity. Please reference the Engine Oil section in this manual for the proper specification.

CAUTION
Operating your vehicle at wide open throttle for any long duration generates excessive heat which can damage your engine. Be aware of the length of full throttle operation and slow down periodically to allow the engine to cool especially in hot climates. Always use full synthetic or semi-synthetic JASO FD oil in your vehicle.
Operation

Engine Warm-Up
After engine start, allow the engine to come up to operating temperature by idling the engine for at least 1 minute and then using mild acceleration during the first 3 minutes of operation.
While the engine is warming up, sit on the scooter and adjust the rearview mirrors to be able to see clearly behind you from both the right and left sides.
Riding
After engine warm up, you are ready to ride. Be sure you have completed the pre-ride checklist before each ride.
Use the throttle for controlling the general speed of your vehicle.
Use the brakes for slowing and stopping your vehicle. Use the handlebars to control the direction of the vehicle.
Rider inputs will determine the behavior of the vehicle. Make sure you take into account the weather, riding surface, traffic and all other circumstances that may alter the amount of time it will take to accelerate, stop and turn your vehicle.
Hold the rear brake lever and push the vehicle forward off of the center stand.
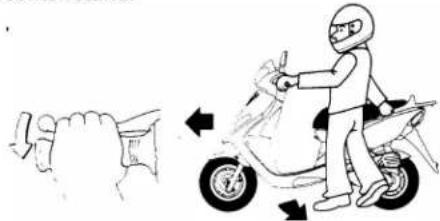
text_image
Illustration showing a person riding a scooter with motion arrows indicating speed or change, alongside a hand gesture.Throttle
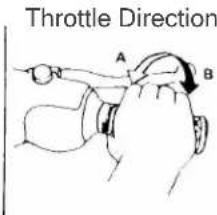
Gradually turn the throttle to accelerate.
A) Turning the throttle toward your body will increase your speed.
B) Turning the throttle away from your body will decrease speed.
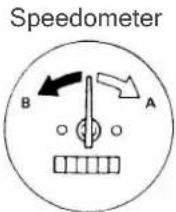
text_image
Throttle Direction A BOperation

Braking
You should be prepared to use your brakes at all times. Unexpected behavior of fellow motorists, road debris, animals and other obstacles can arise without notice. Becoming familiar with and actively covering your brakes while riding can drastically reduce braking distances and improve safety.
Applying the brakes
-
Release the throttle
-
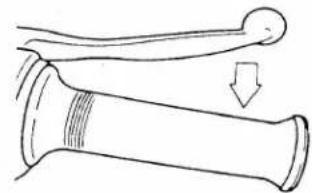
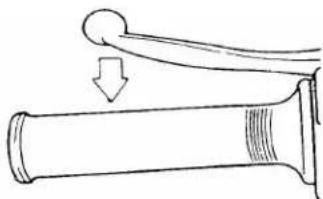
Gradually pull the brake lever(s) toward the handlebar to apply the brake. Applying both brakes simultaneously will result in a shorter stopping distance than actuating either brake individually.
The right-hand brake lever actuates the front brake.
natural_image
Diagram of a mechanical component with a downward arrow indicating motion (no text or symbols)The left-hand brake lever actuates the rear brake.
natural_image
Simple line drawing of a cylindrical object with an arrow indicating downward motion (no text or symbols)
WARNING
Applying the brake lever abruptly or forcefully can cause the wheel to stop suddenly which can result in a loss of control of your vehicle. This effect is more prominent when the road surface is wet, covered in dirt or other debris, or you are traveling over metal objects. Always maintain acute awareness and full control of the braking force you are applying. Consider all environmental circumstances when braking.
Operation

Engine Stop
To stop the engine, turn ignition key to OFF.
Remove the key.
It is not recommended to use the kill switch for normal engine stops. Leave the kill switch in the RUN position under all normal vehicle operation. Use the kill switch for emergency engine stops.
Parking
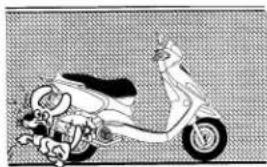
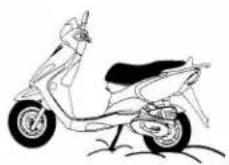
Park your vehicle with the exhaust facing away from any pedestrian traffic.
natural_image
Illustration of a person riding a scooter (no text or symbols visible)Correct
natural_image
Illustration of a scooter with a person riding it, no visible text or symbolsIncorrect
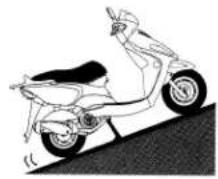
Place vehicle on the center stand whenever possible for the most stability.
If possible, park in front of larger vehicles so they can visibly see your parked vehicle.
Consider the firmness of the parking surface and any incline that may cause your vehicle to fall over.
Periodic Maintenance

Periodic Maintenance and Repair
To ensure safe and effective performance of your vehicle, please check, adjust and lubricate your vehicle periodically. Safety should be every rider's priority and the maintenance table provided is an important guide.
Your vehicle is designed to be operated on normal paved surfaces. If you operate your vehicle in dusty, dirty and/or wet conditions, you will need to alter the maintenance frequency to account for the harsh operating conditions.
Failure to increase maintenance under harsh conditions will result in damage to the engine and other critical vehicle components.
If you are not technically skilled enough to perform any specific maintenance task, you should have the maintenance completed by an authorized Genuine dealer.
Periodic Maintenance Table
The following two pages contain a periodic maintenance table. Please review this thoroughly and follow all maintenance procedures as scheduled.
Once your vehicle exceeds the distances posted in the maintenance schedule, continue with the same periodic intervals for each item on the table.
Periodic Maintenance Key
○ Inspect, then clean, adjust, or replace as necessary
■ Mandatory replacement
* Service should be performed by a Genuine dealer
Periodic Maintenance Table

| Item Action | Months / Distance (miles) | ||||||
| 1 mo / 500 miles | 3 mo / 1,875 miles | 6 mo / 3,750 miles | 9 mo / 5,625 miles | 12 mo / 7,500 miles | 15 mo / 9,375 miles | 18 mo / 11,250 miles | |
| Engine Oil | Add JASO FD 2-cycle engine oil when oil tank is low. DO NOT wait for oil warning light. GENUINE MOTOR OIL is recommended. | Daily Stop immediately and add oil if you see oil warning light | |||||
| Fuel Add Premium unleaded fuel | Daily Low tank - Add Premium Unleaded fuel - 91 octane or higher | ||||||
| Air Cleaner | Clean housing, inspect gaskets, replace as needed | ○ | ○ | ○ | ○ | ○ | |
| Air Filter | Inspect, replace every 4000 mi or sooner | ○ | ■ | ○ | ■ | ○ | |
| Gear Oil * | Replace. Use 85w140 gear oil (90cc replacement volume, total 110cc) | ■ | ■ | ■ | ■ | ||
| Disk & Drum Brake | Check for wear - replace brake pads, drum and/or discs as necessary. Check fluid level. | ○ | ○ | ○ | ○ | ○ | |
| Transmission Variator / Clutch | Check rollers, sliders, clutch pads, and other transmission parts. Replace as necessary. | ○ | ○ | ○ | ○ | ○ | |
| Rear Brake Arm | Check, adjust if necessary | ○ | ○ | ||||
| Tires | Check for wear, replace as necessary | ○ | ○ | ○ | ○ | ○ | |
| Axle / Wheel Bearings * | Tighten axle if loose. Check wheel runout / bearing free-play and replace if necessary. | ○ | ○ | ○ | ○ | ○ | |
| Front Fork * | Check for leaks / functionality. | ○ | ○ | ○ | ○ | ○ | ○ |
| Steering Head Bearing | Check for play. Adjust if necessary. | ○ | ○ | ||||
Periodic Maintenance Table

| Item | Action | Months / Distance (miles) | ||||||
| 1 mo/500 miles | 3 mo/1,875 miles | 6 mo/3,750 miles | 9 mo/5,625 miles | 12 mo/7,500 miles | 15 mo/9,375 miles | 18 mo/11,250 miles | ||
| Rear Shock Absorber | Check for leaks / functionality | ○ | ○ | ○ | ○ | |||
| Main / Side Stand | Check functionality, tighten, repair or replace as necessary | ○ | ○ | ○ | ○ | ○ | ○ | ○ |
| Nuts, Bolts, Fasteners | Tighten if required | ○ | ○ | ○ | ○ | ○ | ○ | ○ |
| Battery | Battery voltage should exceed 12.8V. Recharge the battery / clean poles if required. | ○ | ○ | ○ | ○ | ○ | ○ | |
| Tire Pressure | Check and adjust when necessary | Check daily, adjust when necessary | ||||||
| Carbon Cleaning * | Clean carbon build-up when engine output is reduced. | ○ | ○ | ○ | ||||
| Spark Plug * | Set gap, clean or replace when required. | ○ | ○ | ○ | ○ | ○ | ○ | |
| V Belt * | Inspect. Replace every 4,000 miles or sooner. | ○ | ■ | ○ | ■ | ○ | ■ | |
| Fuel Supply System | Inspect for hose cracks, fuel filter blockages. | ○ | ○ | ○ | ○ | ○ | ○ | ○ |
| Engine Idle Speed * | Check engine idle speed set: 1900±100 rpm | ○ | ○ | ○ | ○ | ○ | ○ | ○ |
| Cables | Check and adjust free play. Lubricate. | ○ | ○ | ○ | ○ | ○ | ○ | ○ |
| Wiring | Inspect wiring for damage / connection integrity | ○ | ○ | ○ | ○ | ○ | ○ | ○ |
| Engine Compression * | Engine compression pressure check | ○ | ○ | |||||
Periodic Maintenance

Air Cleaner and Air Filter
- Remove screws from air cleaner cover.
- Clean housing of dirt and debris with a clean cloth.
- Inspect gasket for integrity.
- Inspect air filter and replace if dirty or maintenance interval has been reached.
- Reinstall air filter and cleaner cover.
- Secure air cleaner screws.
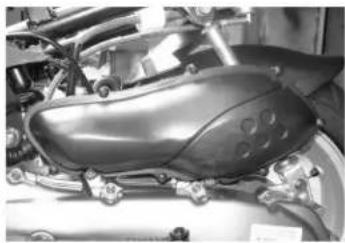
Gear Oil
- GENUINE MOTOR OIL is the lubricant brand recommended for use in your Genuine Scooter.
- Change the gear oil per the maintenance schedule.
- Check level periodically and inspect for leaks on the seals inside the transmission and on the output shaft near the rear wheel. If there is a leak, you will notice a build-up of oil and dirt. Resolve the leak immediately to prevent damage to the gear box.
- Normal gear oil change volume is 90cc
- Gear oil specification 85W140
natural_image
Close-up of a car's engine bay with visible mechanical components and no text or symbols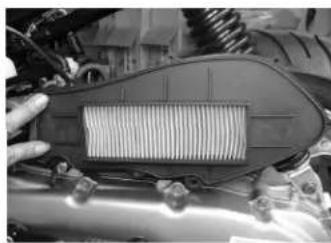
natural_image
Close-up of a mechanical component with a mesh grille and attached parts (no visible text or symbols)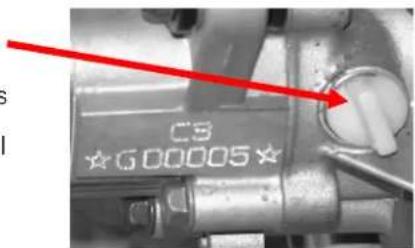
text_image
CS ☆600005☆Transmission
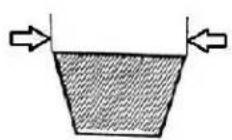
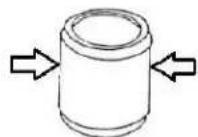
- Check the transmission for belt and roller wear.
- Rollers should not have major flat spots.
- Measure belt width to determine wear.
- Inspect belt for cracks, frays or other damage.
- Inspect clutch pads for wear, glazing.
Periodic Maintenance

Spark Plug
The spark plug is one of the most important parts of the engine and it is easy to inspect.
The condition and color of your spark plug can provide important clues about the running condition of your engine. The ideal electrode color of a properly running vehicle is light brown. If the spark plug is white or black and wet, there may be a problem with your vehicle that needs to be resolved. Ask your Genuine dealer for assistance.
Standard spark plug: NGK BPR7HS
- Inspect the spark plug electrode. Replace if you see damage or extreme wear to the electrode.
- Clean the surface of the spark plug gently to avoid damage.
- Measure spark plug gap.
Spark plug gap : 0.6 - 0.7mm
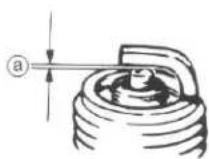
- Reinstall spark plug and torque.
Torque: 11.7 N-m (8 ft-lb)
Front Brake Check
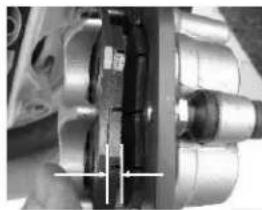
Actuate the front brake for inspection. Observe the grooves in the pads. If the groove is gone or nearly gone, your brake pads need to be replaced.
1 Visually determine if the brake pads are worn to the bottom of the groove or measure the pad thickness.
If pad thickness is less than 2mm, replace the brake pads.
2 Visually inspect the brake rotor for scratches, warping, hot-spots, or foreign material. Any significant damage can indicate there is a problem with your brake system. Have your vehicle inspected immediately by an authorized Genuine dealer if any damage is observed.
natural_image
Close-up mechanical assembly showing internal components and shafts (no visible text or symbols)
natural_image
Mechanical assembly diagram showing a rotating wheel with gear and shaft (no text or labels)Periodic Maintenance

Brake Fluid Check
Insufficient brake fluid will allow air into the brake system and may cause the brake system to fail. Please check the brake fluid level regularly and refill it if necessary.
- When checking the fluid level, please turn the handle bar to ensure the brake fluid indicator is horizontal.
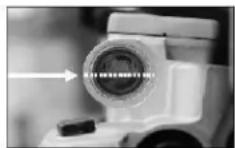
- Only use specified brake fluid, otherwise the oil seals will deteriorate. Deterioration can cause fluid leaks & loss of brake function.
Standard brake oil: FMVSS DOT4.

Caution: Do not mix brake fluid types.
- Clean up any spilled brake fluid immediately with clean water. Brake fluid will erode painted surfaces and/or plastic.
- If any problems are noticed with the fluid color, volume, leaking or any other problem with the brake system, have your Genuine dealer inspect immediately.
Suspension
Suspension is very important in vehicle stability. Malfunctioning suspension can cause your vehicle to behave in an unpredictable manner. Check regularly.
- Check the inner surface of the front fork and rear shock for any wear, damage, or leakage.
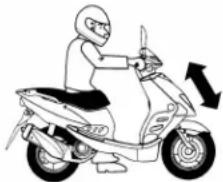
- Park the vehicle on a flat surface prior to inspection. Hold the handlebar and keep the vehicle in a vertical position. Apply the front brake.
- Press and release the vehicle's front fork several times to check the front fork.
natural_image
Illustration of a person riding a scooter with an arrow indicating motion (no text or symbols)- Hold the rear grab-rail and press up and down several times to check the rear shock.
Caution If the suspension functions are not smooth or any component is damaged, immediately contact your authorized Genuine dealer.
Periodic Maintenance

Fuse Replacement
- The main fuse is located next to the battery inside the floorboard section.
- In the event of a broken fuse, disconnect the main switch and any switch connected to circuits that have failed. Install a new fuse corresponding to the correct Amperage. Turn on the switch to check the function. If the new fuse burns immediately, contact your authorized Genuine dealer for service.
Caution
Do not use fuses that are out of specification compared to the original fuse. Any fuse installed that is not to specification can seriously damage the electrical system.
Battery
- It is unnecessary to add any electrolyte or distilled water into the sealed battery installed on the vehicle. In case of any sign of leakage of battery acid, immediately contact your authorized Genuine dealer.
- If the engine has difficulty starting, weak horn, dim lights, etc., remove the battery from the vehicle and follow the standard procedure to charge the battery.
Battery Maintenance
A trickle / maintenance charger is highly recommended if you do not use your vehicle on a daily basis. The battery will deplete over time if the vehicle is not run on a regular basis. Your Genuine dealer can recommend and install an appropriate charging device. You will be unable to start the vehicle with your electric start button if the battery has been depleted. Use the manual start option to start your vehicle.
Charge the vehicle's battery and fully disconnect the battery from the vehicle for long term storage such as winter. Store the battery in a warm location if possible. Charge the battery once every three months during this period.
Caution
Disassembling any sealed component on the battery can damage the battery. Never jump start the battery as this can damage vehicle electronics.
Periodic Maintenance Record

Warranty coverage is contingent upon proper maintenance of your vehicle. Please record all maintenance performed on your vehicle. Always ensure that you use Genuine recommended parts, accessories and fluids.
| Maintenance Plan Mileage | Actual Mileage | Date | Dealer Signature | Maintenance Plan Mileage | Actual Mileage | Date | Dealer Signature |
Technical Data

| Engine | Chassis | ||
| Type | Single Cylinder 2-stroke gas engine | Length | 1803 mm / 71 in |
| Displacement | 49cc | Width | 635 mm / 25 in |
| Bore | 40 mm | Height | 1118 mm / 44 in |
| Stroke | 39.2 mm | Wheelbase | 1173 mm / 46.2 in |
| Compression Ratio | 6.8:1 | Curb Weight | 87 kg / 196 lb |
| Cooling | Forced Air | Max Loading | 108 kg / 238 lb |
| Lubrication Method | Separated Pump | GVWR | 195 kg / 430 lb |
| Carburetor | Keihin | GAWR - Front | 71 kg / 137 lbs |
| Idle Speed | 1900 ± 100 rpm | GAWR - Rear | 124 kg / 298 lbs |
| Spark Plug | NGK BPR7HS | Front Tire | 120/70-12 |
| Electrode Gap | 0.6-0.7 mm | Rear Tire | 130/70-12 |
| Start System | Electric and Manual Kick-Start | Electrical | |
| Transmission | Ignition System | CDI | |
| Type Continuously Variable (CVT) | Generator | Flywheel Magnet Stator | |
| Clutch Dry, Centrifugal | Battery Type | TX4L-BS | |
| Fluids | Main Fuse | 15A Tube | |
| Engine Oil Type | JASO FD 2-stroke (2-cycle) oil | ||
| Engine Oil Capacity | 1.0 Liter | ||
| Gear Oil Type | Hypoid-oil SAE 85W-140 | ||
| Gear Oil Capacity | 110cc (90cc replacement volume) | ||
| Fuel Type | Unleaded fuel, 91 Octane or higher | ||
| Fuel Capacity | 5 liters | ||
Warranty Information
Your vehicle is covered by a Manufacturer's Limited Warranty and an EPA Emissions Related Components Warranty. If you purchased your vehicle in the state of California, you are also covered by a California Emission Control System Warranty. Detailed warranty information can be found in your warranty booklet provided separately from this manual.
Reporting Safety Defects
If you believe that your vehicle has a defect which could cause a crash or could cause injury or death, you should immediately inform the National Highway Traffic Safety Administration (NHTSA) in addition to notifying Genuine Scooter Company.
If NHTSA receives similar complaints, it may open an investigation, and if it finds that a safety defect exists in a group of vehicles, it may order a recall and remedy campaign.
However, NHTSA cannot become involved in individual problems between you, your dealer, or Genuine Scooter Company.
To contact NHTSA, you may either call the Vehicle Safety Hotline toll-free at 1-888-327-4236 / Hearing Impared (TTY): 1-800-424-9153; go to http://www.safercar.gov; download the SaferCar mobile application; or write to Administrator, NHTSA, 1200 New Jersey Avenue, SE, Washington, DC 20590. You can also obtain other information about motor vehicle safety from http://www.safercar.gov
This owner's manual should remain in your vehicle at all times for reference. This manual should be considered a permanent part of your vehicle. The information contained within this manual is the latest available at the time of publication. Genuine reserves the right to make changes to products and publications at any time without notice. There may be information in this manual that differs slightly from your vehicle as improvements and changes occur regularly.