Lattensia+ - Coffee maker K-fee - Free user manual and instructions
Find the device manual for free Lattensia+ K-fee in PDF.


User questions about Lattensia+ K-fee
0 question about this device. Answer the ones you know or ask your own.
Ask a new question about this device
Download the instructions for your Coffee maker in PDF format for free! Find your manual Lattensia+ - K-fee and take your electronic device back in hand. On this page are published all the documents necessary for the use of your device. Lattensia+ by K-fee.
USER MANUAL Lattensia+ K-fee
natural_image
Modern coffee machine setup with glass and milk bottles, no visible text or symbolsLATTENSIA +
MULTI-BEVERAGE CAPSULE MACHINE

SWISS
ENGINEERED
Contents
| Contents | Page 03 |
| Safety information | Page 04 |
| Appliance overview | Page 08 |
| Setting up the drip tray for beverage spout | Page 09 |
| Using the steam system drip tray | Page 10 |
| Explanation of the display and functions | Page 11 |
| Menu structure | Page 12 |
| Introduction to the overview of beverages | Page 13 |
| Overview of beverages | Page 14 |
| Initial start-up | Page 16 |
| Preparing beverages – Example 1: Cappuccino 270 ml | Page 18 |
| Preparing beverages – Example 2: Filter coffee (variable reference quantity) | Page 20 |
| Preparing beverages – Example 3: Chari latte | Page 21 |
| Creating favourites | Page 22 |
| Managing favourites | Page 23 |
| Alerts and errors | Page 24 |
| Easy Clean milk system/rinsing the coffee system | Page 25 |
| Cleaning the coffee system (cleaning capsule) | Page 26 |
| Cleaning the milk system (liquid cleaner) | Page 27 |
| Manually cleaning the coffee system | Page 28 |
| Manually cleaning the milk system | Page 29 |
| Descaling | Page 30 |
| Optional: Inserting and replacing the water filter (sold separately) | Page 32 |
| Evaporating residual water | Page 34 |
| Setting the water hardness | Page 35 |
| Setting the language and auto off | Page 37 |
| Factory reset / other settings | Page 38 |
| Technical data / Service | Page 39 |
| FADs / Disposal information | Page 40 |
Symbols and warning signs Safety information

SAFETY NOTE!
This warning triangle is displayed at all places in this manual where failure to observe the safety information could result in hazards for the user or for the appliance.

PROHIBITED! Do not reach inside

WARNING!
Electric shock

PROHIBITED! Do not drink

WARNING!
Scalding hazard

INSTRUCTION! Read the instructions

INFO! General information

NOTE! Recommended action
Safety information
This operating manual and the safety information it contains will enable you to use the appliance safely. Failure to observe them could result in danger. Please keep this manual in a safe place. If you pass this appliance on to another owner, please include the manual with it.
This appliance is designed for preparing hot beverages as described in the instruction manual.
It is intended for domestic use only and for use in recreation areas and common rooms in offices and shops and in accommodation such as bed and breakfast, motels or hotel rooms.
The manufacturer accepts no liability for any consequences arising from commercial use, use other than for the intended purpose or failure to follow the instructions in this manual.
Requirements for correct operation:
Ensure that the appliance is undamaged and in proper working order before using it. If the appliance becomes defective, disconnect it from the power supply immediately and contact our customer services. Place the appliance on a stable, level and water-repellent surface out of the reach of children. Never place it on hot surfaces (e.g. hobs or hotplates) and never less than 50 cm from sources of fire or heat (such as microwave ovens). Do not operate the appliance from within cupboard.
Before connecting the unit to the mains, ensure that the supply voltage corresponds to the voltage stated on the rating plate. The appliance must only be connected to an earthed, three-pin socket. Connecting to the electricity supply in any other way may void the warranty.
To ensure that the power cable does not become damaged, observe the following:
- Do not make contact with sharp-edged or hot objects
• Do not stand the appliance on the cable - Do not pull the plug out of the socket by the supply cord
- Do not allow the supply cord to trail loosely as this poses a trip hazard
If the power supply cord becomes damaged, have it repaired by the manufacturer, its customer care or a similarly qualified person before using the appliance again.
If you expect to be away for a longer period or the appliance could be exposed to frost, please empty the appliance and remove the residual water (see p. 34–35: defrosting/purging the system with steam), unplug from the electricity supply and clean the appliance.
This appliance may be used by children of 8 years or older and also by persons with limited physical, sensory or mental capabilities or a lack of knowledge or experience provided that they have been adequately instructed in the safe use of the appliance and have understood the potential hazards arising from it. Do not let children play with the appliance. Do not let children carry out cleaning and user maintenance unless they are 8 years of age or older and under supervision.
Avoid scalding or injury:
Do not leave the appliance unattended while preparing hot beverages. Never open the handle on the appliance during the brewing, rinsing, cleaning or descaling processes. When opening the handle after completing the relevant process, never hold your finger underneath the beverage spout - risk of scalding due to residual liquid continuing to drip.
Safety information Safety information
When opening the handle to eject the capsule once the brewing process is complete, never bend the capsule insertion opening - risk of hot liquids spraying out! In addition, never insert your finger into the capsule opening - risk of injury. Never lift the appliance using the handle. Do not open it and ensure that children do not insert any objects into the appliance openings.
Always use the appliance with the drip tray and drip grid. In the event that in particular cases the drip tray is removed to prepare extra-large cups or glasses, take care to ensure that this is replaced immediately after the beverage is prepared. Do not overfill the water tank. For health reasons, only ever use fresh drinking water to fill the appliance.
Cleaning and maintenance:
Cleaning and descaling the appliance may only be carried out using the intended cleaning and descaling products. Proceed in accordance with the operating manual and safety instructions. Before cleaning the outside of the appliance, unplug it from the electricity supply and allow it to cool. Do not wet-clean the appliance, power cable or mains plug; do not place them under running water and do not immerse in liquid.
Caution: Alkaline cleaning products can damage the appliance. Never place the appliance or parts of it in the dishwasher. If you expect to be away for a longer period and at the end of each day, unplug the appliance from the power socket.
Apart from normal brewing and maintenance operation, all other measures such as the repair and replacement of the power cable may only be carried out by customer care authorised by the manufacturer.
Ensuring hygiene:
As it is possible to prepare beverages containing milk, there is an increased risk of germs forming within the milk system, which can be hazardous to health. Therefore, you must press the CLEAN button to briefly rinse out the milk system with hot water after every beverage containing milk is prepared. Always store the filled milk bottle in the refrigerator (at 4 to 6°C) and only retrieve it for the preparation of beverages. Always use fresh whole or semi-skimmed milk. Do not use fortified, flavoured milks or milk made from milk powder. You must clean the components of the milk system daily (in the dishwasher or by hand with a mild cleaning product, a soft cloth and using the supplied washing-up brush). In addition, activate the "Clean milk system" program as soon as possible if a corresponding error message appears on the display.
Use of beverage capsules:
To avoid hazards, never insert damaged or deformed beverage capsules. Should you experience any unusual interruptions to the brewing process, please contact our customer services.
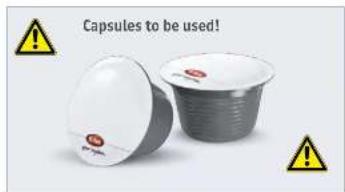
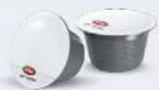
In addition, use only original K-fee ^® – your system beverage capsules with the red K-fee ^® – your system logo and the characteristic grooved capsule shape.
In addition, this can damage the appliance and may void the warranty.
If non-original capsules are used in this appliance, the manufacturer and their sales partners do not accept any liability for injuries or material damages that occur as a direct consequence of this. This instruction is also available on: www.k-fee.com.au
text_image
Capsules to be used!The use of non-original capsules can cause hot water and steam to escape due to the differences in the brewing processes and capsule structure – risk of scalding!
text_image
WARNING! The appliance produces extremely hot water (while brewing, descaling, cleaning, rinsing and purging system with steam). To avoid injuries, always take care to ensure that the handle is completely closed when the appliance is in operation. Never reach un- der the spout and do not remove the drip tray during operation – risk of scalding!Appliance overview Setting up the drip tray for the beverage spout
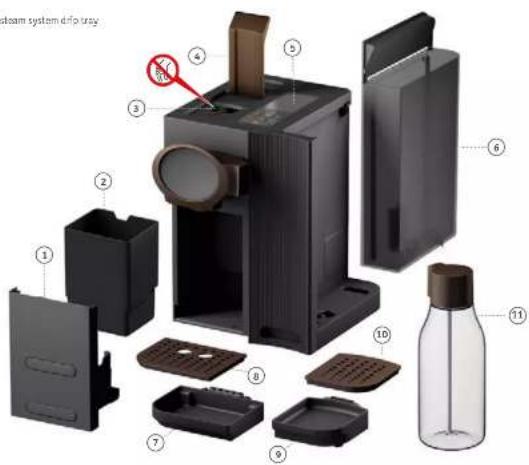
1 Front cover with drip tray and steam system drip tray
- Used capsule container
3 Capsule Insertion opening
- Lever / Handle
§ Display
5 Water tank
7 Drip tray for beverage spout
8 Drip tray grid
- Drip tray for milk spout
10 Drip tray grid
11 Milk bottle
text_image
steam system drip tray ① ② ③ ④ ⑤ ⑥ ⑦ ⑧ ⑨ ⑩ ⑪

PROHIBITED!
Four sharp needles are used to open the capsules in the appliance. To avoid injuries, do not reach into the capsule insertion opening – risk of injury!

NOTE! INFO!
Before using the appliance for the first time, remove the protective film from the drip grids (8 and 10).

All parts shown here and the original instruction manual are included in the delivery. Before using the appliance for the first time, please check the delivery for completeness. Optionally included 1 water filter and 2 cleaning capsules.
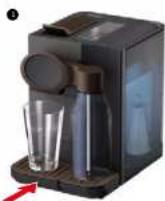
Before preparing a beverage, you must always adjust the drip tray for the spout to the selected beverage and cup size.
① Insert the drip tray into the lower slot if extra large cups and glasses are used.
The upper drip tray slot is intended for espresso beverages and for the use of all small cups.

Please note: To insert the drip tray into the selected slot, position it at a slight angle from above, then push it in until it clicks into place. When pulling out the drip tray, first lift it slightly and then remove.
1
Lower slot
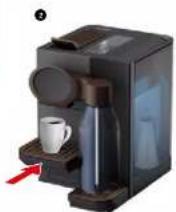
Upper slot.
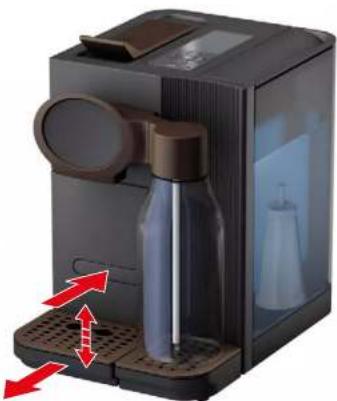
natural_image
Exterior view of a modern coffee maker with glass bottle and control panel (no visible text or symbols)Using the steam system drip tray Explanation of the display and functions

WARNING!
Very hot water - risk of scalding!

Please note:
The display does not indicate if the drip tray for the steam system is full. Therefore, please amply it at regular intervals.
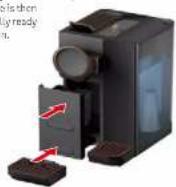
The drip tray for the steam system is fixed to the inside of the front cover. It collects hot water and condensate resulting from the following applications: the preparation of all beverages containing milk, the activation of the CLEAR button, rinsing and cleaning the milk and coffee system as well as purging the system with steam. We therefore recommend emptying the steam system drip tray at regular interests. The use of the steam system drip tray is only indicated automatically by the relevant program during descaling. Please follow the instructions on the display at this point.
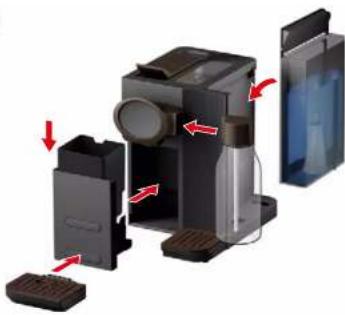
1 Open the handle to eject the inserted capsule (a). Then remove the drip tray for the coffin spout (b). Now remove the front cover by gripping the drip tray slot with your fingers and pull the cover forwards (c). Finally, please remove the used capsule container (d).
Caution: The steam system drip tray can contain very hot water!
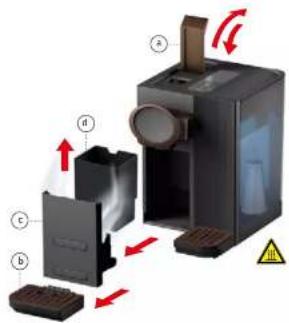
text_image
Diagram of a device with labeled components and directional arrows indicating motion or flow, including warning symbol.- Now empty the removed drip tray and dry it using a soft cloth.
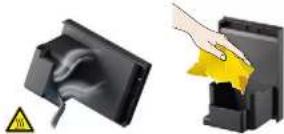
3 Finally, please place all components back in the machine return the used capsule container to the slot above the steam system drip tray, push the front cover back in front of the opening until it clicks into place, and finally press the drip tray for the coffee spout back into the slot.
The machine is then automatically ready for use again.

Note:
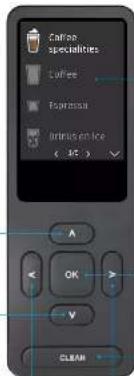
Some operating buttons have several functions depending on the active menu. Multiple functions of individual operating buttons are distinguished by 1, 2 or 3 in this overview.

To switch on the appliance, press any operating button, open the handle or remove the used capsule container.
Up and down arrows:
- In generals intended for scrolling up and down within each menu list and for selecting the required menu item
- When managing favourites: pressing can shift the order of the favourites
- In case of information messages, pressing the arrow buttons confirms instructions such as descending and starts the corresponding program (up* arrow) or postpones until later (down* arrow)
Left arrows
- During the preparation of beverages press once to return to the previous menu/press and hold to return to the main menu
- During the operation of settings: press and hold to return to the main menu
- During the management of favourites: to delete the selected beverage from the list of favourites
text_image
Coffee specialties Coffee Pressica Intricate en Ice ( 30 °C ) OK CLEARRight arrow:
For scrolling down quickly: Press once to jump down four positions on the activated page
Menu structure Introduction to the overview of beverages
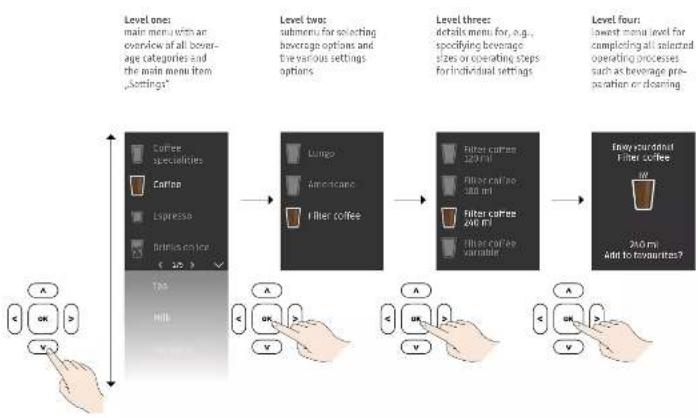
The menu structure using the example of beverage selection
In principle, the entire menu is split into a maximum of four levels – for remarkably simple and extremely quick beverage preparation. At each level, there are always four menu items shown on the display. To see more, simply scroll down using the "down arrow" operating button.
flowchart
graph LR
    A["Level one: main menu with an overview of all beverage categories and the main menu from 'Settings'"] --> B["Level two: submenu for selecting beverage options and the various settings options"]
    B --> C["Level three: details menu for, e.g., specifying beverage sizes or operating steps for individual settings"]
    C --> D["Level four: lowest menu level for completing all selected operating processes such as beverage preparation or doanging"]

Notes:
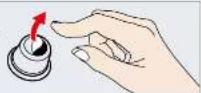
Certain K-fee ^® – your system capsules may have a narrow adhesive strip (tab) on the bottom. This tab must be peeled off before the capsule is added into the machine!
This appliance features preprogrammed instructions for the creation of different beverages in a variety of sizes. All you have to do is follow the instructions on the display for the easiest way possible to indulge yourself. The overview on the next four pages provides a quick overview of the large selection of possible beverages.

Tip
for more enjoyment
Note on using bottled fresh water:
If you prefer to prepare your coffee using still bottled water, please note that depending on its origin, this is not necessarily softer than drinking water from the tap. Your appliance can calcify just as quickly.
Check the water hardness with special test strips and set the water hardness accordingly on the appliance (see p. 36). Please do not use carbonated mineral water under any circumstances.
Overview of beverages
text_image
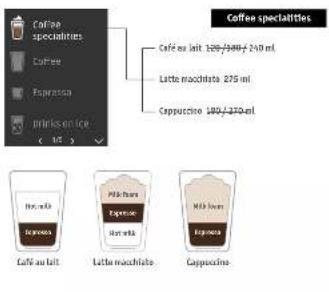
Coffee specialities Coffee Expression Brinks on ice Café au lait 100/-340/-240 ml Lette macchrate 275 ml Cappuccino 180/-370 ml Hoc mela Egencina Mild mela Expense Hoc mela Mild mela Expense Café au lait Little macchrate Cappuccina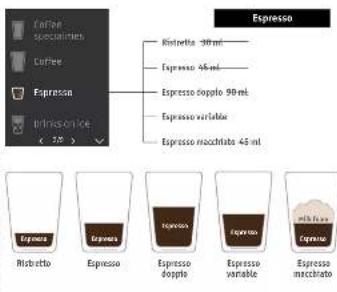
text_image
Carbon specialties Coffee Expressur Drinks on ice ( +2 ) Drinks on ice Coffee on ice 100/480/260 ml Americano on ice 30/120 ml Café au lait on ice 120/100/260 ml Tea on ice 100/240 ml Coffee on ice Americano on ice Café au lait Tea on iceOverview of beverages
text_image
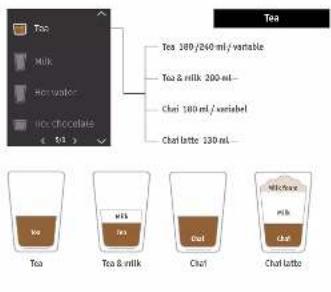
Tea Milk Hormwater nic chocolate Tea 100/240 ml / variable Tea & milk 200 ml— Chat 100 ml / variable Chat latte 130 ml— Tea Tea & milk Chat Chat Tea Tea Chat Tea Tea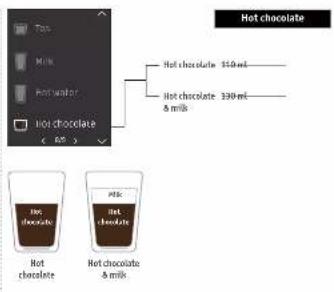
text_image
Hot chocolate Hot chocolate 150 ml Hot chocolate 390 ml & milk Hot chocolate Not chocolate Not chocolate & milk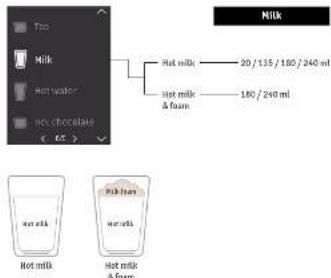
text_image
Milk Hot milk 20/135/180/240 ml Hot milk & foam 180/240 ml Hot milk Hot milk & foam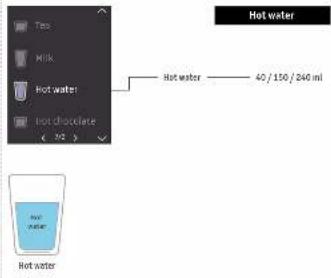
text_image
Hot water Hot water 40 / 150 / 240 ml Hot water Hot waterInitial start-up Initial start-up

SAFETY NOTES
Before using this appliance for the first time, read the safety information on pages 4–7.

WARNING!!
Before using this appliance for the first time, check that the voltage of your supply corresponds to that stated on the rating plate (on underside of appliance).

WARNING:
Very hot water - scalding hazards

NOTE!
-
If the appliance has been subjected to very cold temperatures or frost, please wait at least three hours before switching it on. Allow the appliance to warm up to room temperature first - risk of malfunctions.
-
We recommend using a water filter for long-lasting, maximum coffee enjoyment. Please insert this as part of the initial start-up. For more information, please read the instructions on pages 32-33.
1 Before using the appliance for the first time, please remove the water tank and milk bottle, close them out with a mild cleaning solution and dry using a soft cloth.
2 Connect the appliance to the electricity supply. The handle must be closed. The appliance recognises when it is operated for the first time and automatically guides you through the initial operation. Simply follow the instructions on the display.

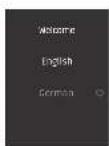
3 First select the desired language.
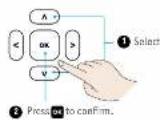
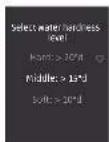
4 Set your local water hardness.
4.1. The appliance allows you to choose between various water hardnesses (including hard, middle, soft). Test your domestic water hardness using the supplied test strips.
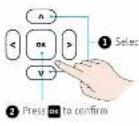
4.2 Scroll up or down using the arrow buttons until you have found the appropriate water hardness. When this lights up, press on to confirm. For more information on water hardness see p. 36.
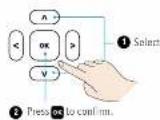
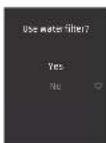
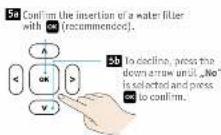
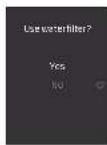
5a The appliance now asks if you would like to use a water filter. If yes, press OK to confirm. Continue from point 6.
5b If no or later, select the down arrow and press OK to confirm. Continue from point 7.
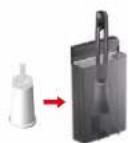
6 When using a water filter for the first time, please place a heat-resistant cup under the beverage spout. First. Then remove the water tank, insert the water filter and fill the tank with water. Then put the tank back in the appliance and press on to confirm.
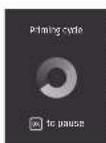
The appliance is rinsed automatically.
for more information on using and replacing the water filter, please refer to pages 32-33.
After rinsing, empty the cup, the appliance is ready for use. If you would like to prepare a beverage, please press OK first.
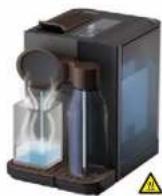
7 If you do not want to insert a water filter now, please place a heat-resistant cup under the beverage spout first. Then remove the water tank, fill with water and place back in the machine. Press on to confirm. The system is rinsed automatically and is then ready for use.

NOTE:
Initial start-up from standby mode
To start the system from standby mode, press any operating button, open the handle or remove the capsule container.
The K-foo® - your system logo appears on the display while the appliance is heating up. The system is ready for use when it reaches 60°C.

Preparing beverages – Example I: Cappuccino 270 ml Preparing beverages – Example I: Cap

WARNING:
Very hot water – scalding hazard!

PROHIBITED!
Do not reach inside - risk of injury?

Caution: Peel off the bottom tab on the capsule before use!

INFO:
Before preparing a beverage for the first time from stand-by mode, please ensure that you rinse the milk system (press CLEAN button once, see p. 25) and rinse the coffee system (see p. 25).

INFO:
-
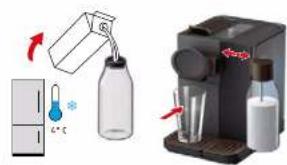
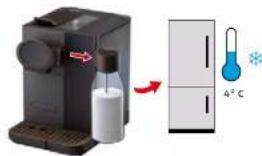
For the best taste and perfect loam as well as for hygiene reasons, we recommend that milk is always stored in the refrigerator (4°C) when not in use.
-
Always use fresh whole or semi skimmed milk. Do not use fortified, flavoured milks or milk prepared from powder. Do not use the milk bottle to store other liquids.

INFO:
To stop the brewing process, press any button. Press the left arrow button to return to the previous menu level. Press and hold the left arrow button to access the main menu.

NOTE:
Preparation sequence for beverages containing milk:
-
Heat and dispense milk
-
Milkloam (if selected) and
-
Coffee, Espresso or Cha
1 Switch on the appliance by pressing any operating button or opening the handle.
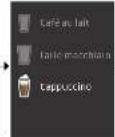
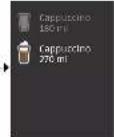
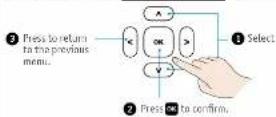
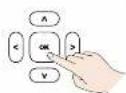
2 In the main menu, select "Coffee specialities", on the next level select "Cappuccino", on the third level select "270 ml". Confirm each step by pressing os.

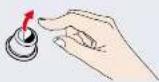
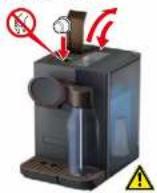
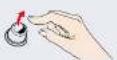
3 Open the handle, add the desired capsule (here: espresso, e.g., Milano ^1 ), then close the handle and press again to confirm.
nl
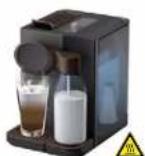
- Now place a heat-resistant coffee glass on the drip tray under the beverage spout. Then either remove the empty milk bottle, fill with fresh, cold milk and insert in the appliance again. Or take the filled milk bottle from the refrigerator and insert it. Then press to confirm.
text_image
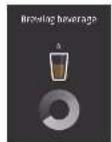
Diagram illustrating a chemical experiment setup with a bottle, gas collection, and a digital water dispenser.5 First the milk is heated, then hot milk is dispensed into the glass followed by warm milk foam. Finally, hot espresso is brewed and dispensed into the glass. The brewing process is indicated by the rotating wheel.
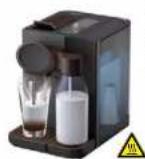
6 The system reports when the beverage is finished. To conclude, it asks if you would like to add this beverage to your favourites. One press on the no button is sufficient. Please see p. 22 - 23 for more information on favourites.

text_image
Diagram showing a coffee machine with a bottle and a refrigerator, connected to a thermometer at 4°C.
NOTE:
Please place the filled milk bottle back in the refrigerator once the beverage is prepared, if is no longer required.
Preparing beverages – Example 2: Filter coffee (variable reference quantity)

WARNING:
Very hot water - scalding hazard!

PROHIBITED:
Do not reach inside - risk of injury!

PROHIBITED
Do not remove or place the film on the capsule under any

CAUTION:
Peel off the bottom tab on the
capsule before use

INTO.
before preparing a beverage for the first time from standby
mode, please ensure that you have the mine system [press CIE]
1 Switch on the appliance by pressing any operating button or opening the handle, and place a cup under the beverage spout.
2 In the main menu, select "Coffee", on the next level select "Filter coffee", on the third level select "Filter coffee variable". Confirm each step by pressing 68.
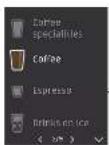
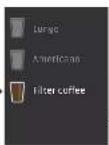
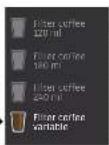
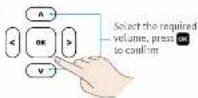
3 The reference quantity "variable" gives you the option to specify the matter quantity yourself in 5 ml increments. The range of the reference quantity spans from a minimum of 75 ml to a maximum of 360 ml. Press OK to confirm the required volume.
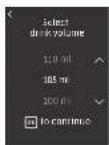
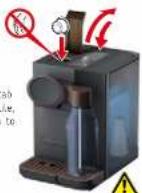
4 Open the handle, peel the bottom tab off the litter coffee capsule, add the capsule, then close the handle and press on again to confirm.
5 The end of the brewing process is indicated on the display. If you want to save this custom reference quantity beverage, you must simply confirm using the on button to add it to your favourites.

Preparing beverages – Example 3: Chai latte

WARNING:
very hot water - scalding hazard!

2014年7月
Do not reach inside - risk of injury?

PROHIBITED:
Do not remove or pierce the film on the capsule under any

CAUTION:
Feel off the bottom tab on the
capsule before the
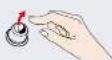

INFD:
Before preparing a beverage for the first time from starting
mode, please ensure that you rinse the mini system [press (LEAN
1 Switch on the appliance by pressing any operating button or opening the handle. Place a teacup under the beverage spout.
2 In the main menu, select "Chat & milk" and press app confirm. The reference quantity here is preset to 150 ml.
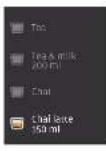
3 Add capsule, press OK confirm.
4 Then either remove the empty milk bottle, fill with fresh, cold milk and insect in the appliance again. Or take the filled milk bottle from the refrigerator and insect it. Then press us to confirm.
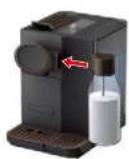
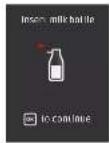
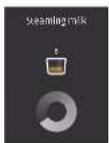
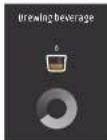
5 First the milk is heated, steamed and dispensed. Finally, the chai is brewed and dispensed into the class. Then enjoy your Chai Latte.
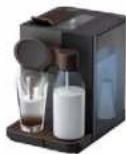
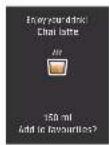
You can store a maximum of four beverages as favourites with this capsule machine. When the appliance is switched on, these automatically appear in first position on the main menu so that you can select your favourite beverages straight away. It couldn't be any more personal or convenient.
Save new favourites
Once your beverage has finished brewing, the system indicates this on the display. At the same time, the system asks if you would like to save this beverage as your new favourite.
Here, too, simply pres
to do so.

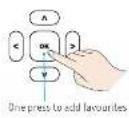
Each new favourite is automatically placed in first position on the list of favourites. The others then slip down one position. If more than four favourites have been saved, the last beverage on the list is then automatically deleted from the list of favourites.
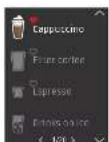
Managing favouritesCreating favourites
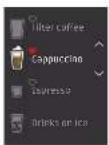
It is remarkably simple to manage your favourites. To do so, you must first select "Settings" from the main menu and press on to confirm and then select the "favourites" submenu from there.
1 Organising favourites
It is easy to reorder the individual beverages within the favourites menu. This ensures that your absolute favourite is always in first place.
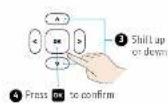
To do so, use the up and down arrows to select the beverage and press as to confirm, use the arrow buttons again to shift this up or down and then press as to confirm the new position in your list of favourites.
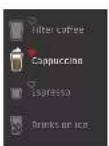
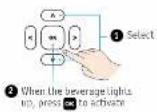
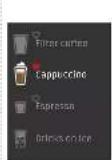
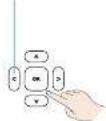
2. Deleting favourites
Once you have selected the required (illuminated) beverage, press or and then use the left arrow to delete it from the list of favourites.
Alerts
Your new K-foo® – your system LATTENSIA + automatically recognises whether all basic requirements for maximum drinking pleasure and optimal appliance condition are ensured at all times. If this is no longer the case in certain areas, a corresponding warning appears on the display — an easy to recognise white exclamation mark on a red background. You must observe this and follow the system's suggested actions.
These alerts can be:
General, helpful information - for example if the water tank is almost empty. This alert remains on the display until you either press any button or refill the water tank. As such, the system ensures that you have not overlooked the information;
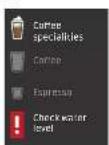
Instructions for upcoming operating steps: Please do scale, clean coffee system, clean milk system, replace water filter. In such cases, the system always asks if you would like to initiate the respective process immediately or later. In these cases, you must actively make a selection using the up and down arrow keys.
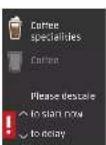
Instructions that must be performed immediately because otherwise the appliance is no longer ready for use. These could be fill the empty water tank, empty the overfilled capsule container of filled drip tray, or also the warning that the appliance has overheated and must be switched off.

Error messages
In addition to these alerts the appliance display informs you of technical errors, malfunctions and faults. These clear, comprehensible messages are always accompanied by an instruction – such as disconnect the appliance from the power supply and try again in one hour.
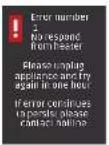
There is a total of 5 possible errors: 1. Heater / Thermoblack not heating 2. Temperature sensor (NTC) defect 3. Ceramic valve defect 4. PCB failure 5. Heater / Thermoblack too cold
Easy Clean milk system / rinsing the coffee systemAlerts and errors

WARNING: Very hot water - scalding hazard!

NOTE: Each activation of the Easy Clean process conducts some steam and hot water to the steam system drip tray. Therefore, empty this regularly.
1. Easy Clean
For hygiene reasons, the system recommends performing a quick clean of the milk system using the Easy Clean program - 180 seconds after each beverage containing milk is prepared as well as after each time the machine is switched on.
We recommend always activating the Easy Clean program after each beverage containing milk is prepared (if several beverages are prepared at once, after the last beverage). To do so, all you have to do is press the CLEAN button and proceed as follows:
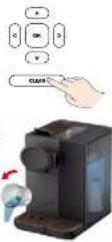
1 After pressing the CLEAN button or by pressing on to confirm the request on the display, place a heat-resistant cup under the spout. Then remove the milk bottle (if it will not be used, place it back in the refrigerator). Press on to confirm.
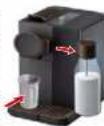
2 The system is rinsed with hot water. The rinse cycle is indicated by the rotating circle.

3 Finally, empty the cup. Press OK to confirm. The system reports "Easy Clean complete". Press OK to return to the main menu.
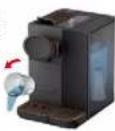
2. Rinsing the coffee system
Each time the appliance is switched on from standby mode, you must briefly rinse the coffee system with hot water.
1 To do this, in the "Settings menu" select the submenu "Maintenance / Cleaning" and from there select the program "Rinse coffee system".
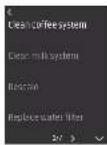
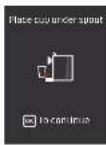
2 Place a cup under the spout. Press or to confirm.
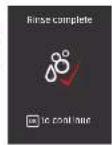
9 The system is rinsed. Finally, remove the container, confirm by pressing OK then complete the process by pressing OK.

Please use only cleaning capsules suitable for K-fee® - your system capsule machines. More information is available on our website: www.k-fee.com.au

INFOI For hygiene reasons, we recommend performing a cleaning process using cleaning capsules when an information message is displayed or at least two times a month.

SAFETY NOTE1 Before using the cleaning capsule, carefully read the instructions for use and comply with the warning information.

WARNING: Very hot water - scalding hazard!

PROHIBITED: Do not reach inside – risk of injury!

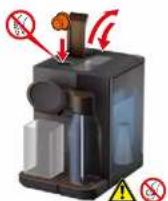
PROHIBITED: Do not remove or pierce the film on the capsule under any circumstances.
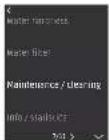
1 There are two ways to clean the coffee system: Follow the corresponding information message or activate the process individually by selecting the appropriate maintenance program (Settings - Maintenance / cleaning - Clean coffee system).
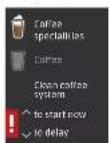
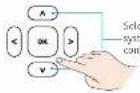
2 Take care to ensure that the water tank has been filled.
3 Add the cleaning capsule and press OK to confirm.
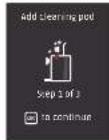
4 Place a heat-safe cup under the spout. Press on continue. The system is cleaned. The rotating circle indicates the cleaning cycle.
5 Once the cycle has completed, press on set the capsule by lifting the handle and press on to confirm.
6 The system is now automatically rinsed with hot water. After rinsing, empty the cup. Confirm each step by pressing on. Finally, press can return to normal operation.
Cleaning the milk system (liquid cleaner) Cleaning the coffee system (cleaning capsule)

NOTE1
Please use only bound cleaners suitable for k-fee® - your system appliances. More information is available on our website: www.k-fee.com.au. Clearing interval: Please note and follow the information messages on the display.

SAFETY NOTE!
Before using the liquid cleaner, carefully read the instructions for use and comply with the warning information.

WARNING
very hot water - scalding hazard!

PROHIBITED:
Do not drink cleaning fluid - health hazard!
1 You must observe the information message to clean the milk system and comply with it as soon as possible.
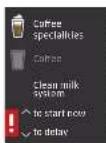
3 Place a suitable cup under the spout.
4. Remove the (empty) milk bottle. Fill with the specified ratio of cleaning solution and water and place the milk bottle back in the appliance. Then press or to activate the cleaning process.
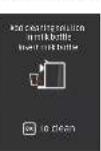
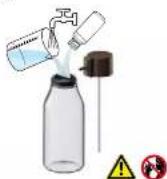
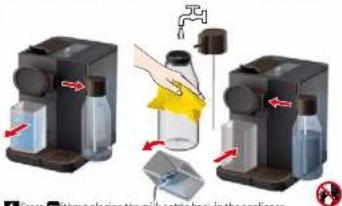
5 Once the cleaning process is complete (observe the rotating circle), remove the milk bottle again and rinse with a mild clearing solution by hand.
text_image
Lines without placing the plastic bottle lock in the spray can7 The appliance now performs a quick clean, like with the Easy Clean process, to rinse out any cleaning residue. Press on to confirm the completion of the cleaning process, empty the cup and place the milk bottle back in the appliance.

SAFETY NOTE!
Risk of damage: Use only a moist cloth and, if required, a mild cleaning solution. Do not use scouring agents or aggressive clearing agents. Do not put appliance parts in the dishwasher under any circumstances.

WARNING!
Electric shock

PROHIBITED!
Do not reach inside - risk of injury!

INFO:
To clean components easily, please use the supplied brush.
We recommend that the coffee system is cleaned manually every two weeks.
1 Unplug the appliance from the power socket. Open the handle to remove any capsules inside. Then close the handle again and remove the milk bottle.
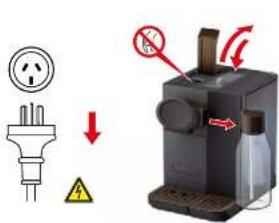
text_image
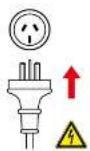
Diagram showing a plug, warning symbol, and electrical hazard with arrows indicating safety or resistance.2 Now remove the front cover. Then untwist and remove the spout.
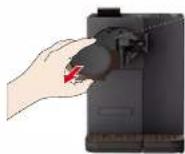
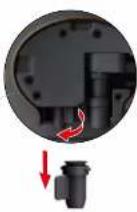
3 Finally, remove the drip tray, used capsule container, steam system drip tray and the water tank. If you use a water filter, remove this from the water tank. Cantors: Take care when removing the drip tray, steam system drip tray and used capsule container: they may contain residual hot water.
4 Clean and dry all components.
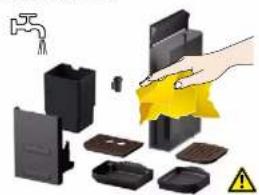
natural_image
Illustration of a hand cleaning or cleaning device with a yellow cloth, showing components like a faucet, battery pack, and warning symbol (no text or labels present)5 Finally, reinstall all components in the appliance again.
Manually cleaning the milk system Manually cleaning the coffee system
We recommend that the milk system is cleaned every day when beverages containing milk are prepared. Here, too, please use only a moist cloth and, if required, a mild cleaning agent. Alternatively, the components can also be cleaned in the dishwasher.
1 Unplug the appliance from the power socket. Open the handle to remove any capsules inside. Close the handle again.
2 Remove the milk bottle.
3 Pull the bottle lid off and carefully disassemble all components.
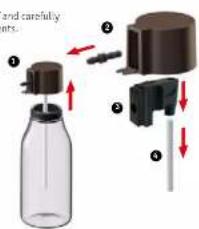
text_image
and carefully inlets.- Then remove the front cover of the capsule machine and remove the complete milk foam system (the Cappuccinatore) in one piece.
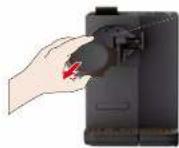
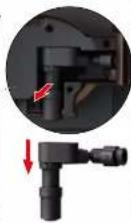
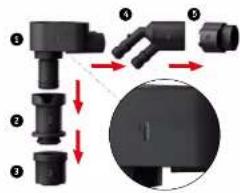
5 Dismantle the five parts of the Cappuccionator. The stamped numbers indicate the correct order of the components.
text_image
Diagram showing mechanical assembly steps with numbered components and directional arrows indicating motion or movement.6 After cleaning all components (see steps 3 and 5) manually or in the dishwasher, they must be reassembled before you insert them back in the appliance or milk bottle.
7 Finally, press on the front cover again and put the milk bottle back in the appliance.
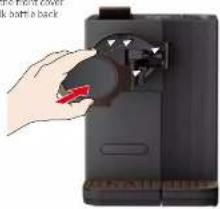
text_image
Take back to switch k turn a back
NOTE
Please use only descaling agents suitable for K-fee* - your system capsule machine. More information is available on our website: www.k-fee.com.au. Descaling interval: Please note and follow the information messages on the display.

SAFETY NOTE!
Before using the descaling agent, carefully read the instructions for use and comply with the warning information.

WARNING:
Very hot water - scalding hazard!

PROHIBITED1
Do not drink cleaning fluid - risk to health!
1 There are two ways to descale the coffee system: follow the corresponding information message or activate the process individually by selecting the appropriate maintenance program (Settings - Maintenance / cleaning - descale).
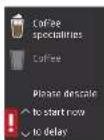
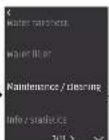
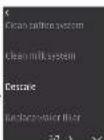
2 Open the handle to eject any used capsules inside.
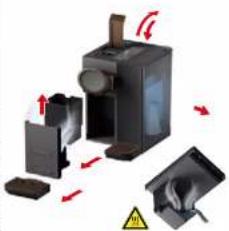
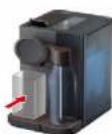
3 Remove and employ the steam water drip tray as well, as the used capsule container. Then insert them again.
natural_image
Diagram of a mechanical device with directional arrows indicating motion, no text or symbols present
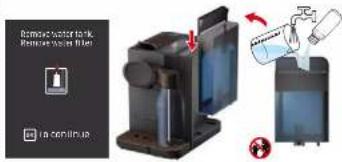
4 Remove the water tank. If you use a water filter, remove this from the water tank now. Then fill water tank with the specified ratio of cescaling agent and water and place this back in the appliance again. Press can to continue.
text_image
Removed water filter Remove water filter is continueDescalingDescaling

INFO:
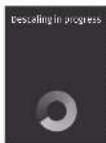
Descaling takes place automatically in cycles. For each 50 ml of descaling agent run into the system there is a 30 second break for it to take effect, then liquid is dispensed repeatedly until the water tank is empty.
5 Then please place a cup under the spout. Press or to confirm. The desca ling process begins. Observe the rotating circle.
- Finally, empty the cup.
7 Now remove, empty and reinsert the used capsule container and steam system drip tray. Press on to continue.

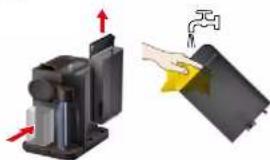
- Now remove the water tank, press on confirm, then clean it thoroughly and insert the water filter again. Insert the water tank in the appliance again. Press on to continue.
natural_image
Diagram showing a mechanical device with red arrows indicating force and a hand holding a yellow object, next to a water tap (no text or symbols present)9 Now place a cup under the spout again. Press and the system is now rinsed with hot water.
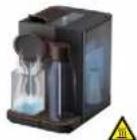
10 Then empty the container again, remove, empty and reinsert the used capsule container and steam system drip tray. Press OK to confirm everything.
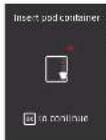

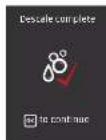

SAFETY NOTE!
Carefully read the instructions for use and safety information for the water filter. For hygiene reasons, we recommend replacing the water filter at least every 3 months.

TNFO!
1 This water filter protects your appliance from timescale and reduces the number of times descaling is required. It also removes unwanted smells and tastes such as chlorine etc. and thereby improves the quality of your beverages. Please use only water filters suitable for K-fee ^4 – your system capsule machines. All relevant information can be found on our website: www.k-fee.com.au

NOTE:
When inserting a water filter, you must also activate the appliance for the water filter and set the water hardness. For more information, please read page 36.
The easiest way to insert the water filter is to use the supplied water filter tool.
- 1a) The use of a water filler has already been recommended by the system during the course of the initial start-up. Press on to access the installation program from here.
(b) You can, however, postpone the insertion of a water filter until later. Then you must trigger the installation program manually: in the main menu „Settings“, go to the „Water Filter" submenu and press OK to confirm both.
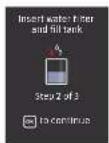
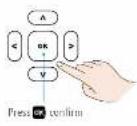

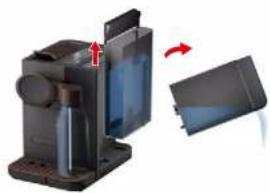
2 Remove and empty the water tank.
natural_image
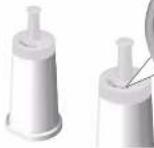
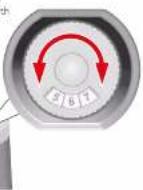
Mechanical device with a slide and arrow indicating rotation (no text or symbols visible)3 On the water filter, set the date of insertion by turning the month dial. This automatically displays the month of replacement.
Replacing the water filterOptional: Inserting the water filter (sold separately)
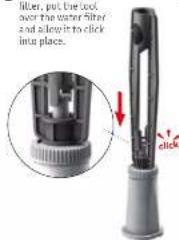
4 Now insert the water filter into the empty water tank. To do so, please use the supplied water filter tool:

To grip the water filter, put the tool over the water filter and allow it to click into place.
2 To loosen after insertion, press both arms of the tool together.
text_image
filter, put the tool over the water filter and allows it to click into place.
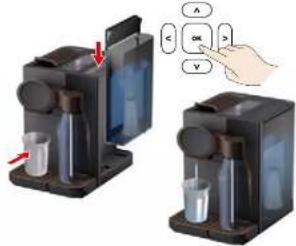
5 Now fill the water tank with water and place it back in the appliance. Then please place a cup under the spout. Press no to confirm. This starts the rinsing process and the water filter is simultaneously filled with water.
text_image
Diagram showing two containers with liquid and a hand pressing a button labeled A, B, C, D, E, F, G, H, I, J, K, L, M, N.6 Finally, press OK and empty the cup.
Replacing the water filter
The appliance recognises when the water filter must be replaced and provides a corresponding alert on the display. You can, however, also find the date on the set range of the water filter. As a general rate, the filter must be replaced every three months.
If there is an alert, use the up and down arrow buttons to either carry out the water filter replacement immediately or to postpone it. Then press us to confirm your decision.
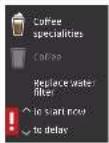
In case of an individual replacement, please begin the program via Settings ^* – “Water filter” – “Replace water litter” and press OK to confirm.
1 Remove and empty the water tank.
2 Remove the water filter using the water filter
3 From this point on, please follow steps 3 to 6 of the instructions on the initial insertion of the water filter (see end of page 32 to 33).


INFO!
If the appliance is not going to be used for a longer period of time, germs that are harmful to health can form in the residual water. There is the risk that the appliance is subjected to frost and functionality can be impaired due to frozen residual water. In both cases, residual water must be emptied from the appliance by purging the system with steam.

WARNING!
Purging the system with steam produces hot steam (up to 132°C) and hot water - risk of scalding! Do not reach under the spout and maintain a safe distance from the spout. The cup under the spout contains very hot water - please handle with care!

SAFETY NOTE!
Risk of damage: Use only a camp cloth and, if required, a mild cleaning solution. Do not use scouring agents or aggressive cleaning agents. Do not put appliance parts in the dishwasher under any circumstances.
1 The "Steam out" program can be found under the main menu, "Settings", then select "Maintenance / Cleaning" followed by "Steam out". Press or to confirm.
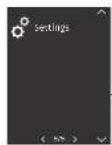
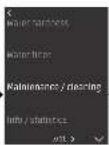
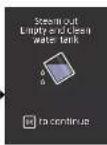
2 Empty and clean the water tank, then place it back in the appliance when empty. This automatically leads to the next step.
3 Open the handle to remove a capsule inside and close it again.
4 Place a highly heat-resistant cup under the spout. Once this is in position, you must press or to confirm this. Only then can the steaming off process continue.
5 The system steams of tail residual water from the coffee system. The process progress is indicated by the rotating circle.
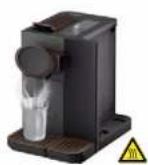
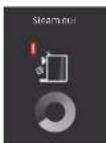
6 Finally, empty the cup.
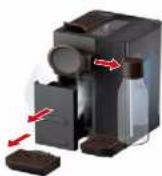
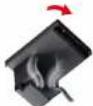
7 Then remove, empty, clean and dry the milk bottle, used capsule container, steam system drip tray and spots.

Evaporating residual water Evaporating residual water
8a If you would then like to continue to use the appliances now place all components back in the system, put on the front cover and finally press me to confirm.

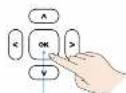
Shut down the appliance: press OK to confirm.
natural_image
Exploded view diagram of a device showing internal components and directional arrows (no text or symbols)8b If the appliance will then no longer be used for a longer period, you must take the following measures:
- After purging the system with steam, cleaning all recommended components and placing them back in the appliance, please unplug the appliance and disconnect from the power supply.
- Then remove, dismantle, clean, dry and reinsert the parts of the Capsuccinataore as described on page 29.
• Take the same steps with the components of the milk system. For more information, see the instructions on page 29.
- Finally, place the appliance on a dry, level surface - away from sources of heat such as gas or electric heaters and ovens and also protected from damp and frost.

INFO:
The water hardness essentially indicates how much calcium carbonate your water contains. The more calcium and magnesium ions it contains (these then forming insoluble compounds such as timescale or lime soaps when dissolved in water), the harder the water. Hard water leads to timescale deposits and calcification of the appliance while soft water is ideal for heating and better protects the appliance.

INFO:
It therefore essential to set the water handress, because this influences the descaling intervals and other functions recommended by the system, among other things - for optimal protection to ensure the unimpaired functionality of your capsule machine.

NOTE:
Use the supplied test strip to determine the hardness of your local water, fill a cup with water from the water supply. The colour change on the test strip indicates the water hardness. Then set this accordingly in the appliance.

The water hardness setting has been specified by the system during course of the initial start-up. The appliance cannot be used without this access to access the program from here.

You can, however, also modify the water hardness at a later date (for example after a house move). Then you must trigger the installation program usually. In the main menu "Settings", go to the "Water hardness" submenu press on to confirm both.
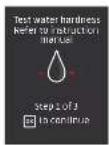
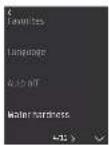
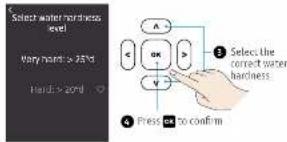
2 Five different water hardnesses are provided by the system: very hard, hard, middle, soft, super soft.

flowchart
graph TD
    A["Select watermarking level"] --> B["Hand: > 20d"]
    B --> C["Middle: > 12d"]
    C --> D["Soft: > 30d"]
    D --> E["Press to confirm"]
3 En the program, select the water hardness corresponding to your measurement and press to confirm.
text_image
Select water hardness level vary heart > 250° Hand > 250° A OK V Select the correct water hardness. Press on to confirmSetting the language and auto off Setting the water hardness
Setting the language

NOTE:
You can change the set language at any time.
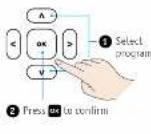
1a The operating language setting has been specified by the system during the course of the initial start-up. The appliance cannot be used without this. Press on to access the program from here.
1b You can, however, also change the language at a later date. Then you must trigger the installation program manually: In the main menu „Settings“, go to the „Language“ submenu and press ✗ to confirm both.

Auto off
By default, your K-fee ^® - your system capsule machine shuts down if not used for 5 minutes and switches to standby mode.
This prevents unnecessary energy consumption, saves electricity and protects the environment.
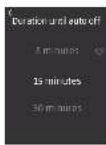
You can, however, change this presetting to your personal preference at any time. Three shot down limits are available: 5, 15 or 30 minutes.
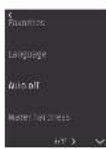
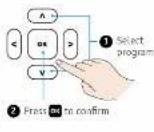
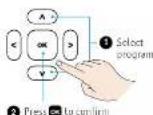
1 Select program: In the main menu, Settings ^2 , go to the Auto OFF ^™ submenu and press to confirm both.
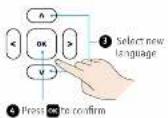
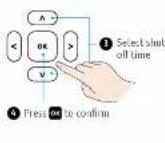
2 Then use the up/down arms to select the required shut down time and press on to confirm.

Factory reset / other settings

NOTE:
Activating the factory reset deletes all your customised parameters, Language, water hardness, water filter insertion, auto off, favourites and more must than be set again or saved from scratch.
The initial start-up process must then also be initiated again.
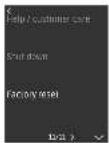
To perform a factory reset of all parameters set, proceed as follows: In the main menu, Settings, go to the "Factory Reset" submenu and press on to confirm both. There, use the up/down arrow buttons to select "Yes" or "No" and press on to confirm again.
Advanced settings

immediate shut down
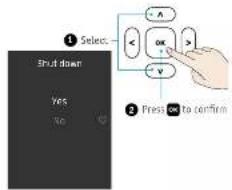
To shut down the appliance immediately, in the main menu „Settings“ go to the „Shut down“ submenu and select „Yes“ there. Presses to confirm each selection.

Statistics
To check how often the appliance has been destated so far or how often the water filter has been replaced, simply look under Settings" - Statistics", exit the menu by pressing any button.
text_image
① Select: Shut down Yes No OK Press OK to confirm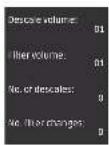
Technical data / Service
 | Plug: 270-240V, 50-60Hz, max.1455W |  | Max height: 150 mm |
 | Cable: 1 m | ||
| Pmax | max: 19 bar | ||
| [×HT3] | Tanks approx. 2.0 L |  | Temps 10° C-40° C |
| — | Weight: approx. 5.5 kg | ||
 | Dimensions:A = approx. 208 mmB = approx. 300 mmC = approx. 301 mm(365 mm when the handle is open) |  | Beverage temp: max. 55°C |
After Sales Support:
If you have any queries or suggestions, please send us an email or call us on
info@k-fee.com.au
⑦ AU: 1800 469 373
We advise you to keep the original packaging so that you can return the ma-
chive to an authorized customer car bus in case repairs and necessary

SAFETY INFORMATION!
The appliance only functions correctly with capsules from any brand that are labelled with the K-fee ^® – your system logo. The use of non-original capsules can result in the following risks: risks to health, damage to the appliance and possible loss of warranty claims.
Many malfunctions can be detected quickly, easily and early thanks to the comprehensive automatic alerts. As a general rule, it is sufficient to follow the corresponding instructions on the display to remedy the fault. If this is unsuccessful in rare cases, these questions and answers may help further.
Beverages are not dispensed properly?
Check whether the handle has been completely pressed down. If the error continues to persist, you must clean the appliance (see instructions on p. 26) and descale (see instructions on p. 30/31).
Beverage dispensing is delayed?
The appliance is heating up. Please be patient.
Liquid capacity during beverage preparation is insufficient?
The system could be calcified. Descale the appliance in accordance with the instructions on p. 30/31. If the problem continues to persist, please perform a factory reset on the appliance (see instructions on p. 38).
Beverage is not hot enough?
The heating element could be calcified. Descalc the appliance in accordance with the instructions on p. 30/31. If the error continues to persist, please contact our service centre.
Does the appliance need to be destalled even if a water filter is used?
Although the use of a water filter extends the descaling intervals considerably, it is no real substitute for such intervals. The appliance must be descaled regularly in any case because mineral deposits can occur depending on your regional water hardness and the installation site. An instruction message will be shown on the display if descaling is required. Regardless of this, we recommend descaling with the K-fee ^® -your system descaling agent once a year.
What should I do if the handle does not fully close once a capsule has been inserted?
First, ensure that there are no more used capsules in the brewing chamber and that the used capsule container has not been overfilled. Take care to ensure that the new capsule you have inserted is in the correct position.
What should I do if the used capsule container has been overfilled and jams?
Attempt to remove the used capsule container by rattling it slightly.
Frequently asked questions / Disposal information Frequently asked questions
What is the purpose of the auto off?
If the appliance is not in use, it will switch off automatically after either 5 minutes (factory setting) or after the time set by you under the "Auto off" feature (your programming – see instructions on p. 38). This reduces the energy consumption of your K-fee ^4 – your system capsule machine considerably. The appliance consumes considerably less power (under U. 5 W) than in operating mode. If you are absent for extended periods and at the end of each day, unplug the unit from the power socket.
Why is the CLEAN button flashing?
After each time a beverage containing milk is prepared, we recommend rinsing the milk system using the CLEAN button. Therefore, the button lights up as such as your beverage is finished. As a reminder to rinse, the button begins to flash after 180 seconds.
Why is the appliance dispensing no milk?
- Ensure that there is enough milk in the milk bottle and that the components of the milk system are all connected correctly (see p. 29 for more information).
- If necessary, rinse the milk system by pressing the CLEAN button (see p. 25) and clean it by hand (see p. 29).
- The appliance could be calcified. Descal the appliance in accordance with the instructions on p. 30/51.
Milk foam is unsatisfactory?
- The quality of the milk foam may vary depending on the type of milk and its temperature. Always use fresh, cold milk (whole or semi-skimmed) from the refrigerator.
- Residue from cleaning agent in the milk bottle could impair the result. Rinse the milk system by pressing the CLEAN butter (see p. 25) and rinse the milk bottle and the components of the milk system again thoroughly.
- The appliance could be calcified. Destale the appliance in accordance with the instructions on p. 30/31.
What do I need to do if there are error messages on the display?
Under no circumstances should you remedy error messages on the display yourself.
Please disconnect the appliance from the power supply immediately and try again one hour later. If the error message then continues to persist, please contact K-fee customer care.
There is a total of 5 possible errors (please report the applicable error to K-fee ^® – your system customer care):
- Heater / Thermoblack not hearing
-
Temperature range (NTO) defined
-
Temperature sensor (1)
-
Ceramic value defect
-
PCE failure
-
Heater / Thermoblack too cold

Disposal Information
The packaging is recyclable. Contact the appropriate department in your municipality for further information on local recycling. Protecting the environment is our greatest common responsibility.
The appliance contains valuable materials that can be recycled and reused. You should therefore dispose of the appliance at a public recycling centre in your local area.
Notes
If you have any queries or suggestions, please send us an email or call us on:
info@k-fee.com.au
© AU: 1800 469 373 (free of charge on land lines; for information on mobile phone surcharges, please contact your mobile phone provider.)
www.k-fee.com.au
Model: K-fee 25-363
We advise you to keep the original packa ging so that you can return the machine to an authorised customer centre in case repairs are necessary.
30134458_AUVI