TUP992-24 - Label printer TV Star - Free user manual and instructions
Find the device manual for free TUP992-24 TV Star in PDF.


| Product Type | Label Printer |
| Brand | TV Star |
| Model | TUP992-24 |
| Print Technology | Thermal (heat-sensitive) |
| Paper Width Support | 111.5 mm, 82 mm, 79.5 mm |
| Paper Core Inner Diameter | 25.4 mm, 50.8 mm, 76.2 mm |
| Power Supply | 24 VDC, PS60L-24A (included) |
| Power Cord | US standard grounded (110 V) |
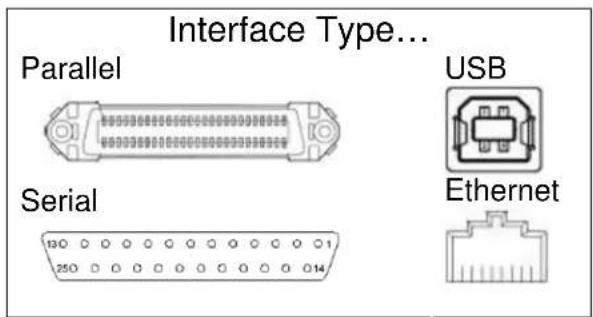
| Interface Options | Parallel, Serial, USB, Ethernet |
| Supported Operating Systems | Windows 9x/Me/NT/2000/XP, Mac OS X, Linux, JavaPOS, OPOS |
| Self-Test Function | Yes (built-in diagnosis printout) |
| Paper Loading | Semi-auto with hinged mechanism |
| Status Monitoring | Optional via Star Language Monitor |
| Included Accessories | Paper shaft, 1"/2"/3" core adapters, shaft weight, mounting screws |
| Paper Roll Holder Adjustment | Yes (for different paper widths) |
| Additional Manuals | Specification, Installation, Technical, Line Mode Programmer |
Frequently Asked Questions - TUP992-24 TV Star
User questions about TUP992-24 TV Star
0 question about this device. Answer the ones you know or ask your own.
Ask a new question about this device
Download the instructions for your Label printer in PDF format for free! Find your manual TUP992-24 - TV Star and take your electronic device back in hand. On this page are published all the documents necessary for the use of your device. TUP992-24 by TV Star.
USER MANUAL TUP992-24 TV Star
Thank you for choosing Star Micronics as your provider for printing solutions.
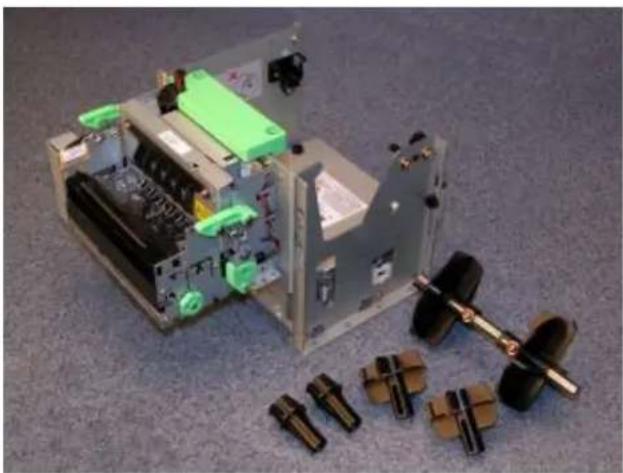
Unpacking the Unit
natural_image
Disassembled electronic device with green components and black hardware parts, placed on a textured floor (no visible text or symbols)Assembly – Installing the Interface
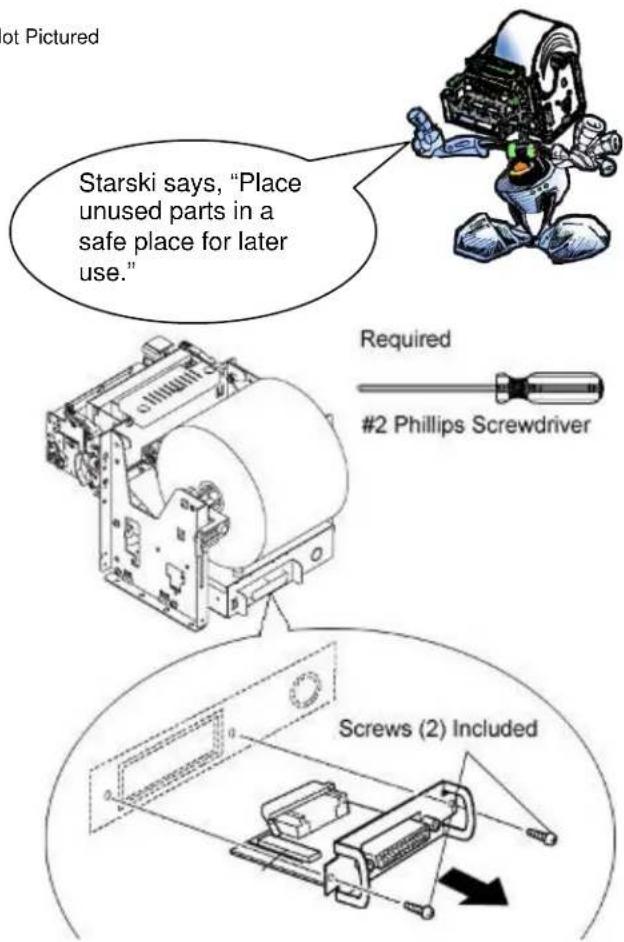
Place the interface sub-assembly into the interface slot as shown. Take care to be sure the interface cartridge is seated properly into its connector.
Using a #2 Phillips screwdriver, install the mounting screws included with the printer.
Contents
a. Printer
b. Paper Shaft
c. 1" Paper Core Adapter
d. 2" Paper Core Adapter
e. 3" Paper Core Adapter
f. Shaft Weight*
g. Interface Mounting Screws(2)*
h. Paper Core Adapter Screws(2)
*Not Pictured
It is necessary to adjust the paper roll holder for the width of the paper you use. If the setting position is incorrect, the paper roll will be supplied improperly to the mechanism which in turn causes paper transport problems. Thus, it is should be properly adjusted.
The following table shows the paper roll holder and paper core inner diameter range.
| Paper roll Holder Types | Paper Core Diameter Ranges |
| Paper roll Holder (1) | 25.4 mm ± 1 |
| Paper roll Holder (2) | 50.8 mm ± 1 |
| Paper roll Holder (3) | 76.2 mm ± 1 |
Note 1) The unit is assembled for 1 inch paper cores when shipped from the factory. Also, it is set for a paper width of 111.5 ± 0.5 (take-up width of 112 + 0.5/-1 ) when the printer is shipped from the factory.

Starski says, "The size of the core used is related to the thickness of the paper used."
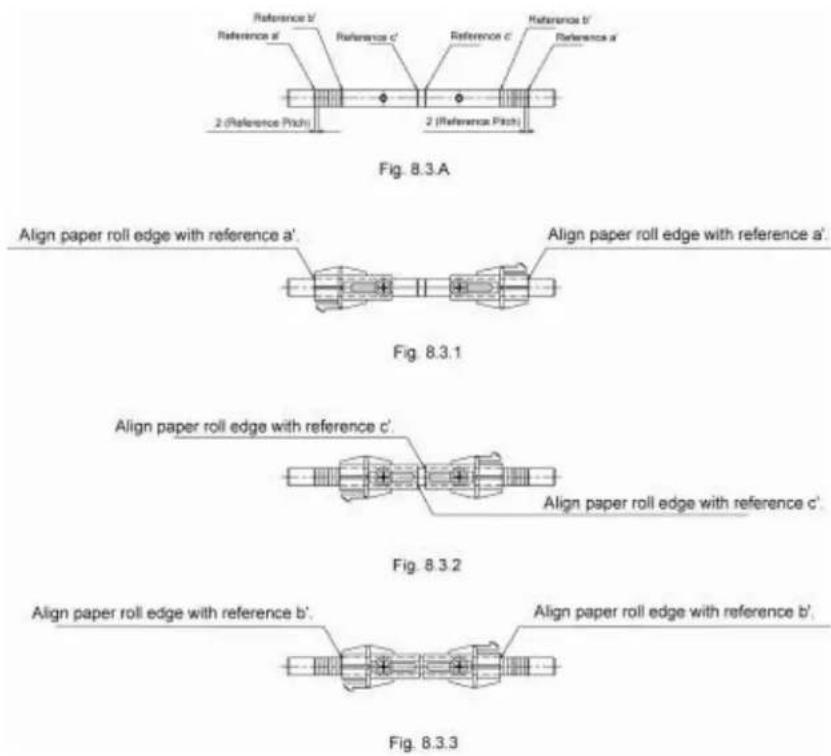
8.3 A is a reference for the paper roll holder unit paper roll shaft position. Adjust or mount the paper roll holder unit for the core diameter and width of the paper you intend to use.
8-3-1 Handling 111.5 mm Paper Width
See Fig. 8.3.1 for the paper roll holder setting position to handle paper widths of 111.5 ± 0.5 ~mm . Position the edge of the paper roll holder onto the central position of the references a and a'.
See the figure to assembly at the correct position.
Note 1) The paper roll holder is assembled to that position when shipped from the factory.
8-3-2 Handling 82 mm Paper Width
See Fig. 8.3.2 for the paper roll holder setting position to handle paper widths of 82 ± 0.5 ~mm . Position the edge of the paper roll holder onto the central position of the references c and c'. See the figure to assembly at the correct position.
Note 1) In this case, be careful because the edge of the paper roll holder positioned on the reference is the opposite.
8-3-3 Handling 79.5 mm Paper Width
See Fig. 8.3.3 for the paper roll holder setting position to handle paper widths of 79.5 ± 0.5 ~mm . Position the edge of the paper roll holder onto the central position of the references b and b'. See the figure to assembly at the correct position.
Assembly – Paper Roll Setup Continued
Once the paper roll holder is properly configured for the roll to be used, simply insert the roll holder into the paper core as show.
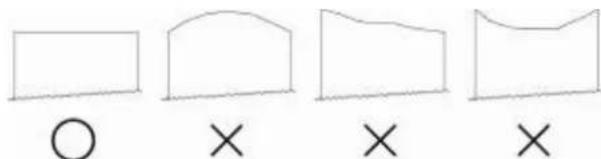
Be sure that the cut end of the paper roll is properly cut to ensure proper paper loading.
natural_image
Four abstract geometric shapes with circles and crosses below, no text or symbols present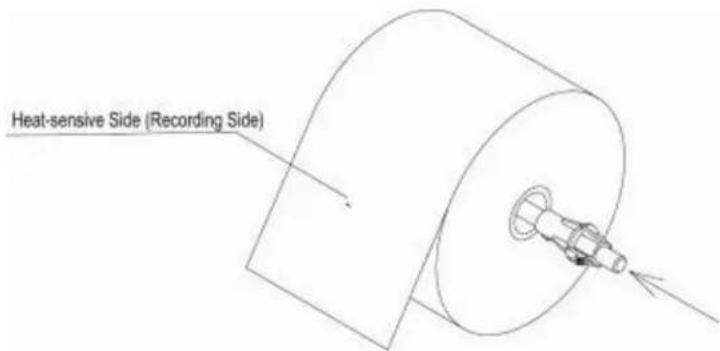
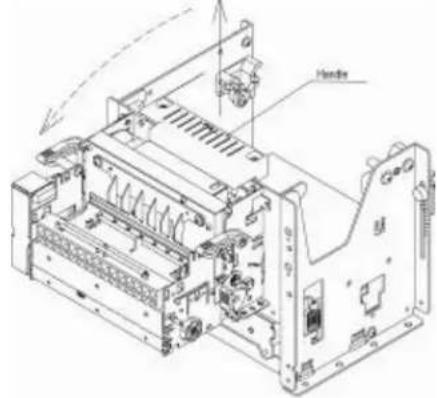
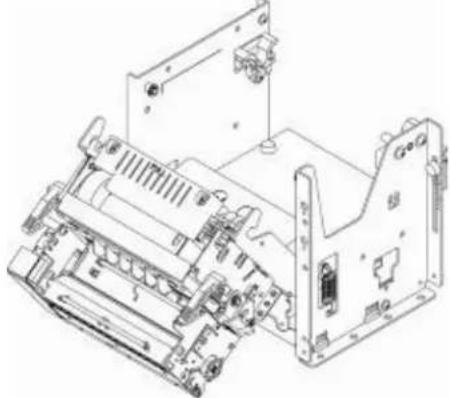
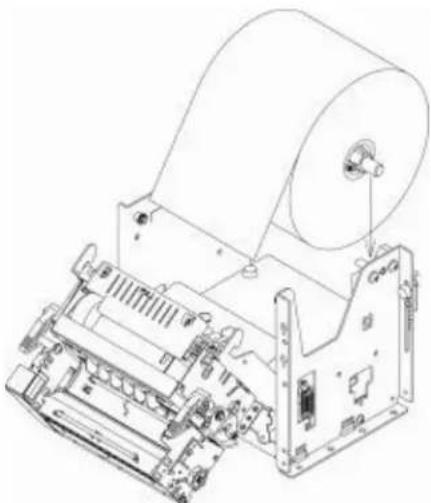
To aid in the installation of the paper roll, the TUP900's mechanism is hinged to the base of the printer allowing the unit to fold open for easier access to the paper inlet path (see below)
natural_image
Technical line drawing of an electronic device chassis with internal components (no text or symbols)Lift handle and pull unit forward.
natural_image
Technical line drawing of a mechanical printer with paper roll and circuit board (no text or symbols)In this position, it will be much easier to access the paper inlet for loading of paper.
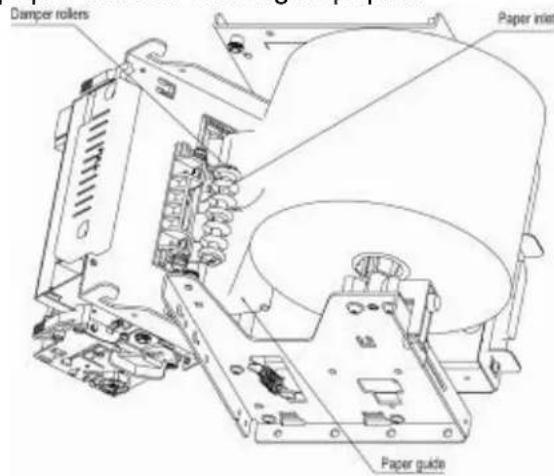
Position the paper roll as shown.
Slide the cut end of the paper roll into the paper inlet being careful to feed the paper underneath the damper rollers.
NOTE: The semi-auto paper loading of the TUP900 can sometimes cause the printer to enter an error condition if paper is not allowed to feed smoothly into the paper inlet path. In the event of an error, reset the printer by turning the power switch OFF and then ON again.
Assembly – Connecting the Power Supply
The TUP900 requires a 24 VDC power source for proper operation. Star recommends use of the PS60L-24A (pt. no. 30781440) universal power supply.
The PS60L-24A power supply is supplied with a US standard grounded power cord.
The printer end of the power supply cable is the mating Hoshiden connector for the TUP900. Simply connect the Hoshiden power connection to the TUP900 by sliding back its collar and inserting the power supply's male connector into the matching female connector on the back of the TUP900. Finally, connect the 3-pronged power cord to a 110-volt grounded power source.
Note: Be sure the power switch of the TUP900 is switched to the OFF position when connecting the power supply.
Driver Installation
Driver packages are available for the following platforms:
Windows 9x, Me, NT, 2000 and XP
Mac OS X
Linux
JavaPOS ^1
OPOS
Driver Software
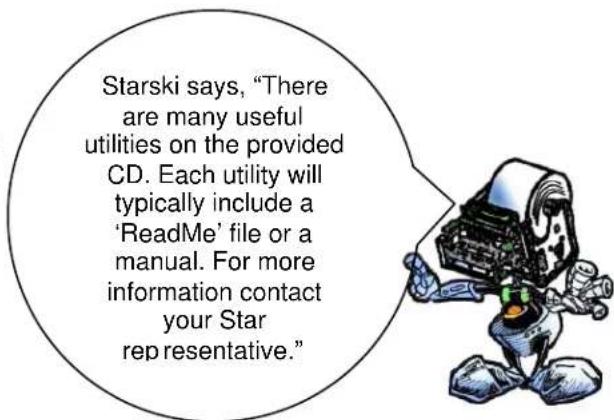
A product support CD was supplied with this manual. On this disc there is a "Drivers" folder in which you will find all of the available drivers listed above.
Note: In the event that the CD is misplaced, the most current versions of Star printer drivers are always available on our website at www.starmicronics.com.
Windows Driver Installation
The following example shows the installation of a parallel TUP900 series printer connected to the parallel printer port (LPT1) and using the Star Line Mode Windows 2000/XP driver.
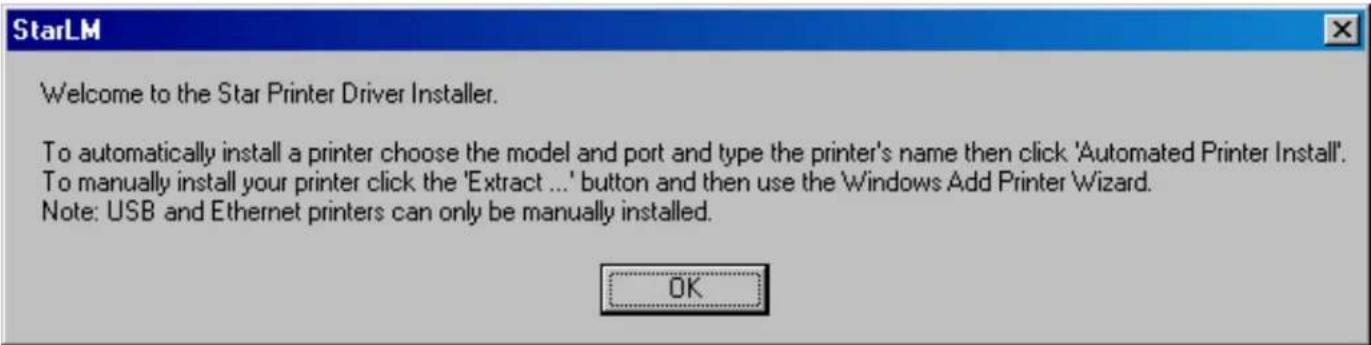
When the installation setup file is executed, the above dialogue will be shown. Click "OK" to continue.
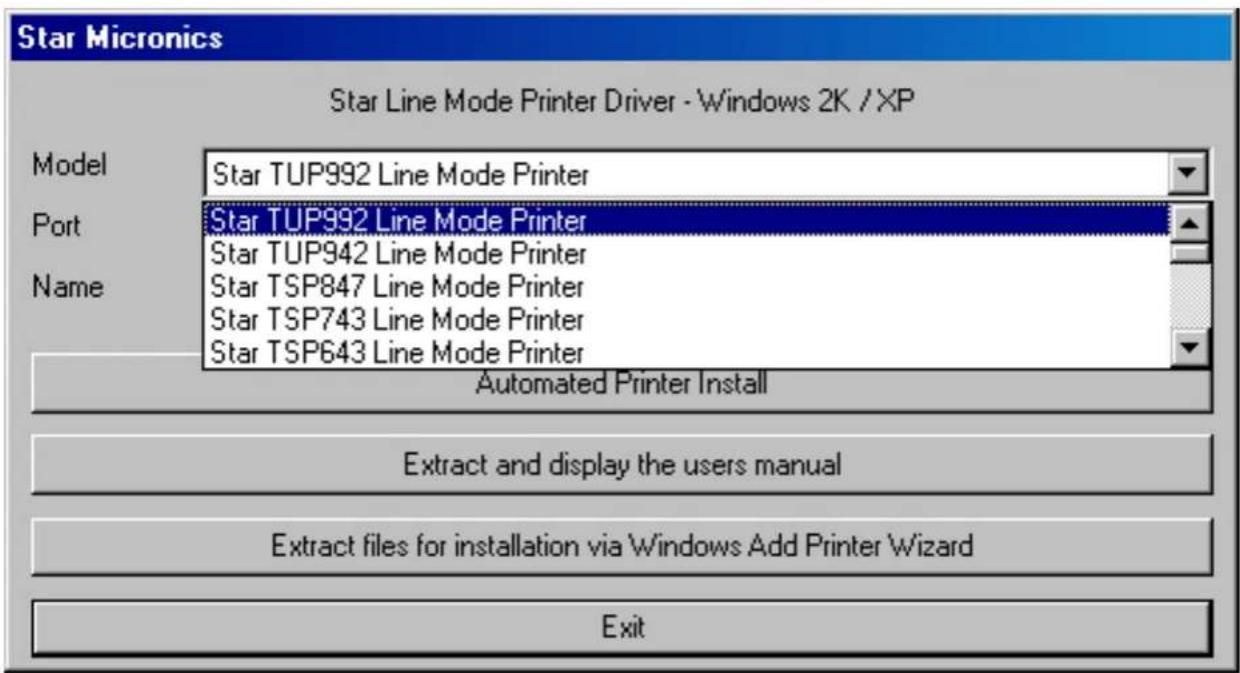
To begin, simply select the printer for which you are installing the driver. In this case; we are installing the TUP992 (TUP900 series kiosk printer with presenter attached).
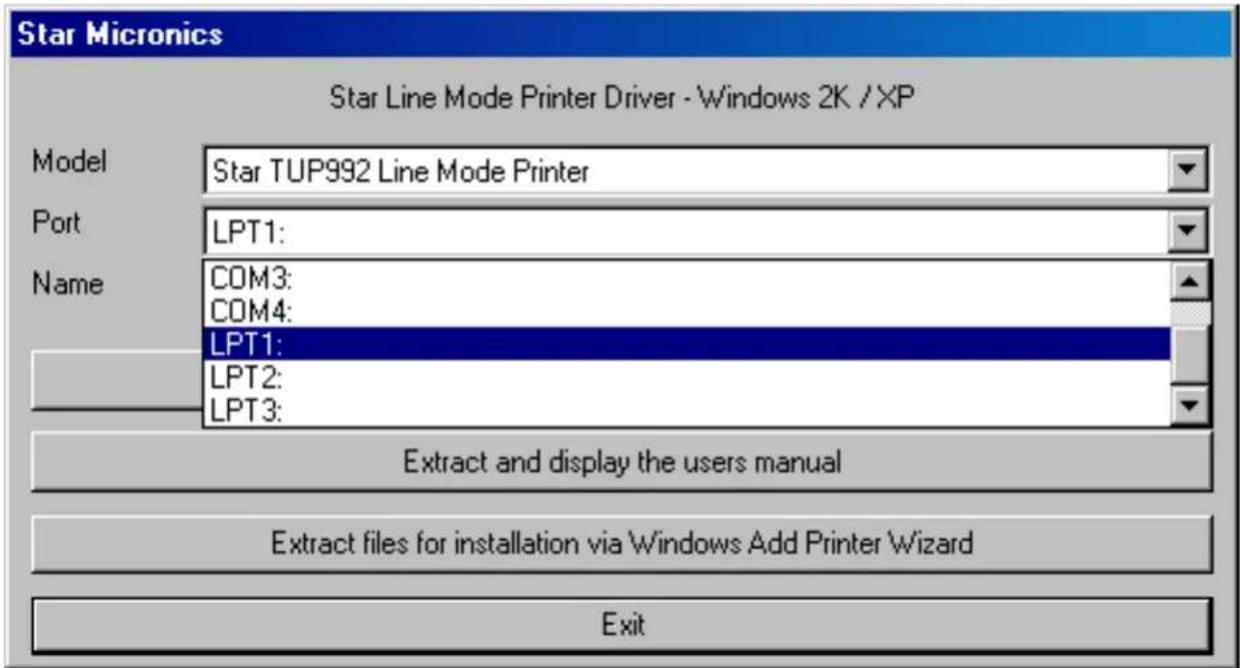
Next, select the port to which the printer is connected. Here we will select the "LPT1" parallel printer port.
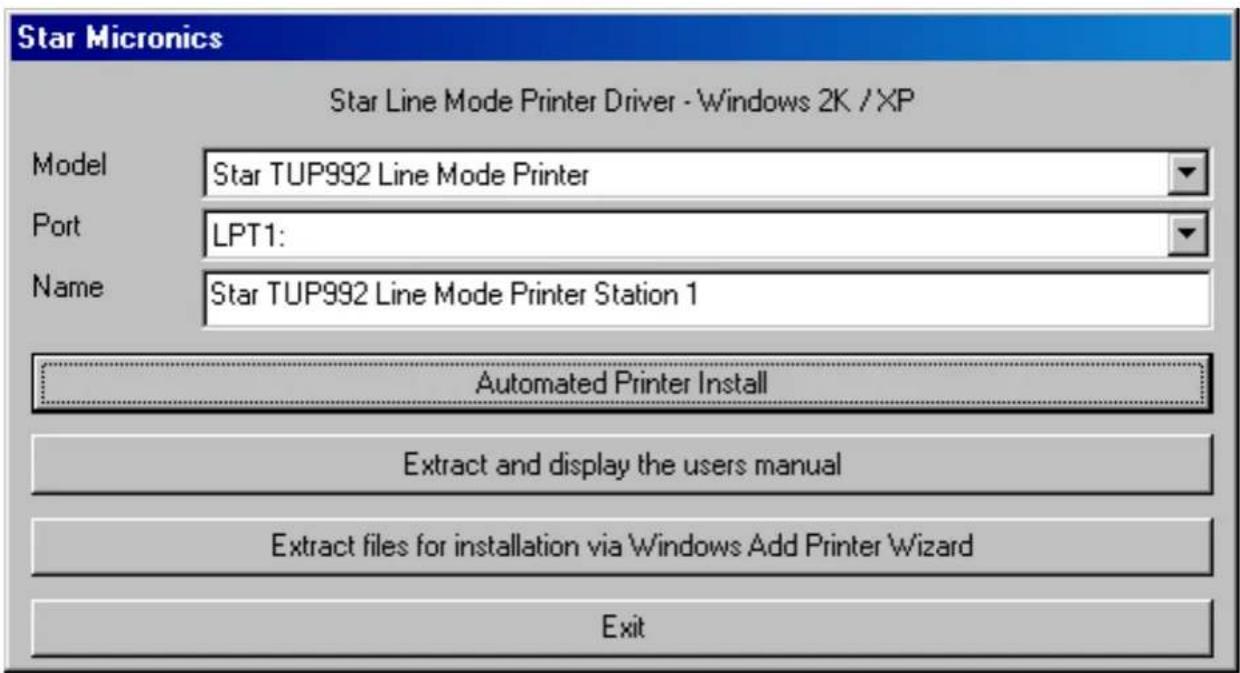
Once the printer and port have been selected, an easily recognizable name for the printer should be assigned. This name will show up in the Printer and Faxes dialogue of the Windows Control Panel.
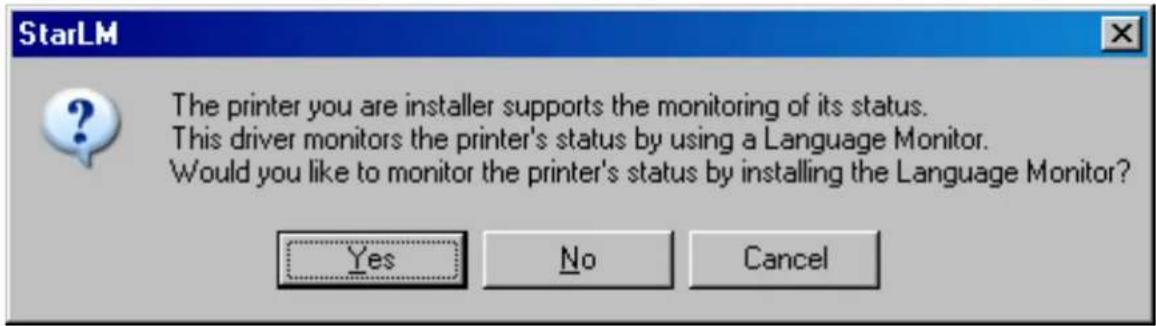
The Star Language Monitor allows for reporting of the status of the printer. (Paper out, paper low, etc.) Installation of this component is optional, but recommended.
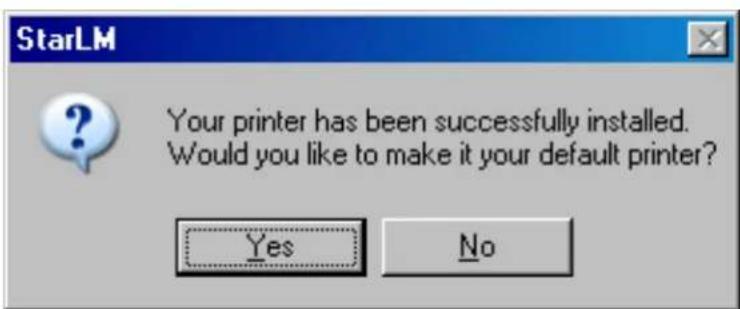
Setting the printer as the default Windows printer is also optional. Using the printer as default is required by some applications that use the Windows printing system.
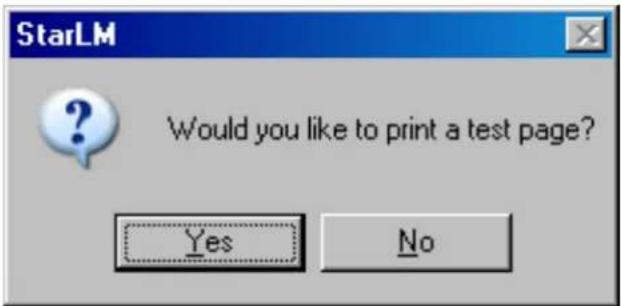
Printing a test page will allow for confirmation that correct installation and communication are established and working properly.
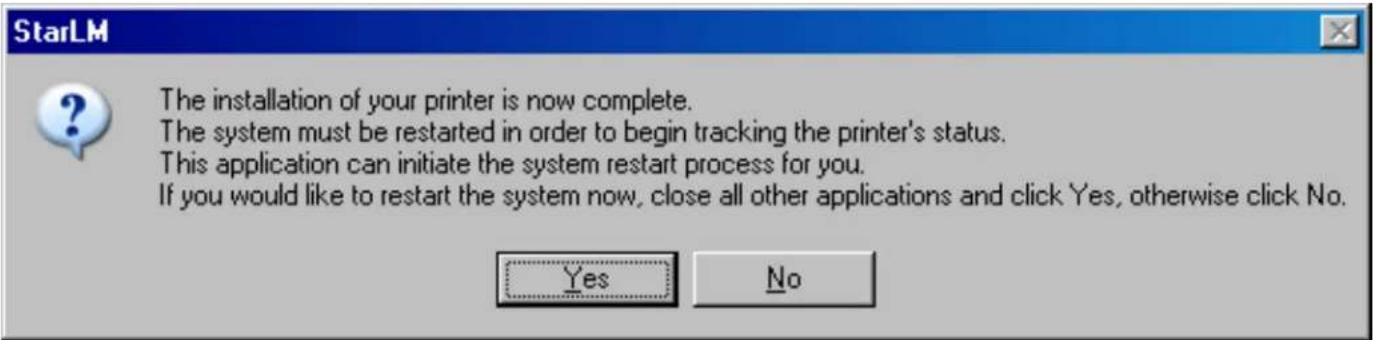
Installation is complete. Click "Yes" to let the installer restart the system. Click "No" to restart the system manually.
Testing – Printing a Printer Self-Test Page
The TUP900, like all Star printers, has a built-in diagnosis printout that can be manually printed to check the printer's current configuration. This "Self-Test" page also allows the user to confirm that the printer is in fact operating properly.
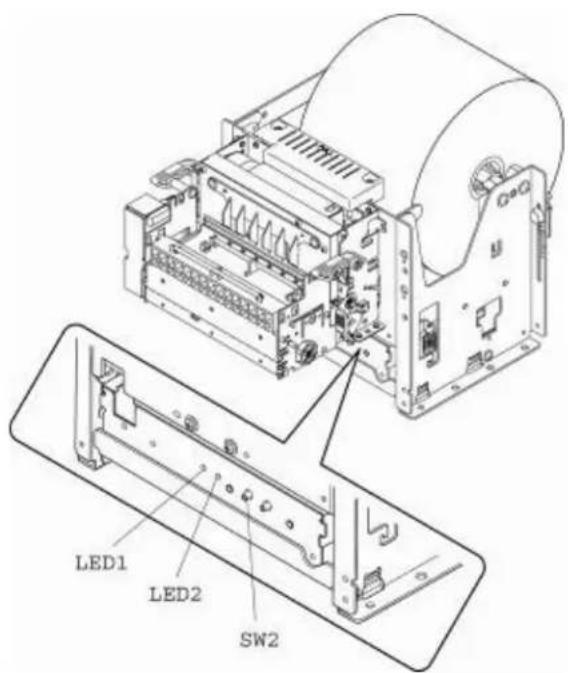
To print a printer self-test, simply follow the steps listed below.
- Turn the printer's power switch to the OFF position
- Press and hold the paper feed switch (SW1)
- Turn the printer's power switch to the ON position
- Release the paper feed switch (SW1)
NOTE: In order to print a self-test page, the printer must be properly loaded with paper and must have its power supply connected to a live power source.
Additional Documentation
This “Quick Setup Guide” is a condensed summary of the information available from all of the manuals available on the provided CD. Listed below are the manuals available on the CD:
TUP900 Specification Manual (tup900sm.pdf) – This manual provides detailed specification for the configuration and use of the TUP900. Also included are dimensional drawings, electrical specifications, usage examples and ideal operating environment specifications.
TUP900 Installation Manual (tup900im.pdf) – This manual provides details instructions for installing the shaft weight. The proper installation of this weight ensures proper paper feed and looping functionality of the TUP900's document presenter.
TUP900 Technical Manual (tup900tm.pdf) – This manual is designed as a technical reference for periodic inspection and maintenance of the TUP900 series printers. Users of this manual should possess a technical aptitude that is typical of service personnel. This manual is not intended for the general user.
Line Mode Programmer's Manual (lindemodepm.pdf) – This reference manual provides the command specification for Star Line Mode for all thermal line printers from Star. It provides detailed commands and examples for controlling Star printers directly by command, without drivers.

- Unpacking the Unit
- Assembly – Installing the Interface
- Contents
- 8-3-1 Handling 111.5 mm Paper Width
- 8-3-2 Handling 82 mm Paper Width
- 8-3-3 Handling 79.5 mm Paper Width
- Assembly – Paper Roll Setup Continued
- Assembly – Connecting the Power Supply
- Driver Installation
- Driver Software
- Windows Driver Installation
- Testing – Printing a Printer Self-Test Page
- Additional Documentation
Brand : TV Star
Model : TUP992-24
Category : Label printer