Aurora - Vacuum Cleaner Dibea - Free user manual and instructions
Find the device manual for free Aurora Dibea in PDF.


User questions about Aurora Dibea
0 question about this device. Answer the ones you know or ask your own.
Ask a new question about this device
Download the instructions for your Vacuum Cleaner in PDF format for free! Find your manual Aurora - Dibea and take your electronic device back in hand. On this page are published all the documents necessary for the use of your device. Aurora by Dibea.
USER MANUAL Aurora Dibea
Robotic Vaccum Cleaner
Instruction Manual

text_image
CLEAN Dibea Aurora- Safety Instructions Safety Instructions 2
- Product ComponentsProduct.Components 3
2.1 Main body 3
2.2 Charging accessories 5
2.3 Remote control....5
2.4 CLEAN button 6
- Product operationProduct operation 7
3.1 Considerations 7
3.2 Quick operation 8
3.3 Cleaning modes 9
3.4 Scheduling 12
3.5 Using water tank 14
- Product maintenance Product maintenance 15
4.1 Clean side brush, rolling brush and mop 15
4.2 Clean dust tank and filters 15
4.3 Clean sensors and charging poles 15
- TroubleshootingTroubleshooting....16
5.1 Error sheet 16 - Product specificationsProduct specifications 17
- In the box 18
Before using this product, please read the safety instructions and follow all those regular safety precautions.
- Only authorized technicians can disassemble the product. Users are not allowed to disassemble or repair the product.
- Only use the original battery and power adapter of the product for charging. Using other un-matched adapter may cause electric shock, fire or product damage.
- Do not touch the power cord, plug or adapter with wet hands.
- Do not use this product in wet or moist environment (any environment with liquid), e.g. bathroom or laundry.
- Do not use near curtains, wrapping materials, or any objects that may be winded in the drive wheels.
- Before use, collect the floor environment (remove all the fragile objects and cords, clothing, papers, loose cables, as well as make sure to lift curtains and drapes off the floor to avoid any possible accidents. In case that a loose cable is tangled with the product, the cable might move around with the product as it works and topple down the table, chairs, or cabinet and might cause hurt or properly damage.)
- Do not use this product near cigarette, lighter, match or any flammables.
- Never use the product to clean combustible or highly volatile liquids, such as gasoline.
- Only use the product indoors, do not use outdoors.
- If the product needs cleaning, clean it after it's fully charged.
- Do not over-bend or put anything heavy or sharp onto the charging cord.
- Do not sit on top of this product or attach an object on the top of it. Beware of children or pets while the product is in operation.
- Do not place this product where it is easy to drop off (tables, chairs, etc).
- Turn off the power switch during product transportation or when you don't need to use this product for a long time.
- Before charging, check whether adapter and outlet are properly connected.
- To avoid tripping, inform all the people in the house when this product is working.
- When dust bin is full, empty it before using.
- Use this product in temperature from 0°C to 40 °C
- Do not use this product in high-temperature environment or under direct sunlight for a long time.
- The battery must be removed from the product before it is scrapped.
- The battery should be disposed of properly for safety.
- The adaptor must be removed from the socket-outlet before cleaning or maintaining the appliance or removing the battery.
Warning:
This appliance can only be used by children of 8 years old and above. For persons with reduced physical, sensory or mental capabilities or lack of experience and knowledge, proper supervision or instruction should be given concerning use of the appliance in a safe way to help them understand the hazards involved. Children should not play with the appliance. Cleaning and user maintenance should not be made by children without supervision.
2、Product Components Product Components Dibea 地贝清洁 时尚便捷
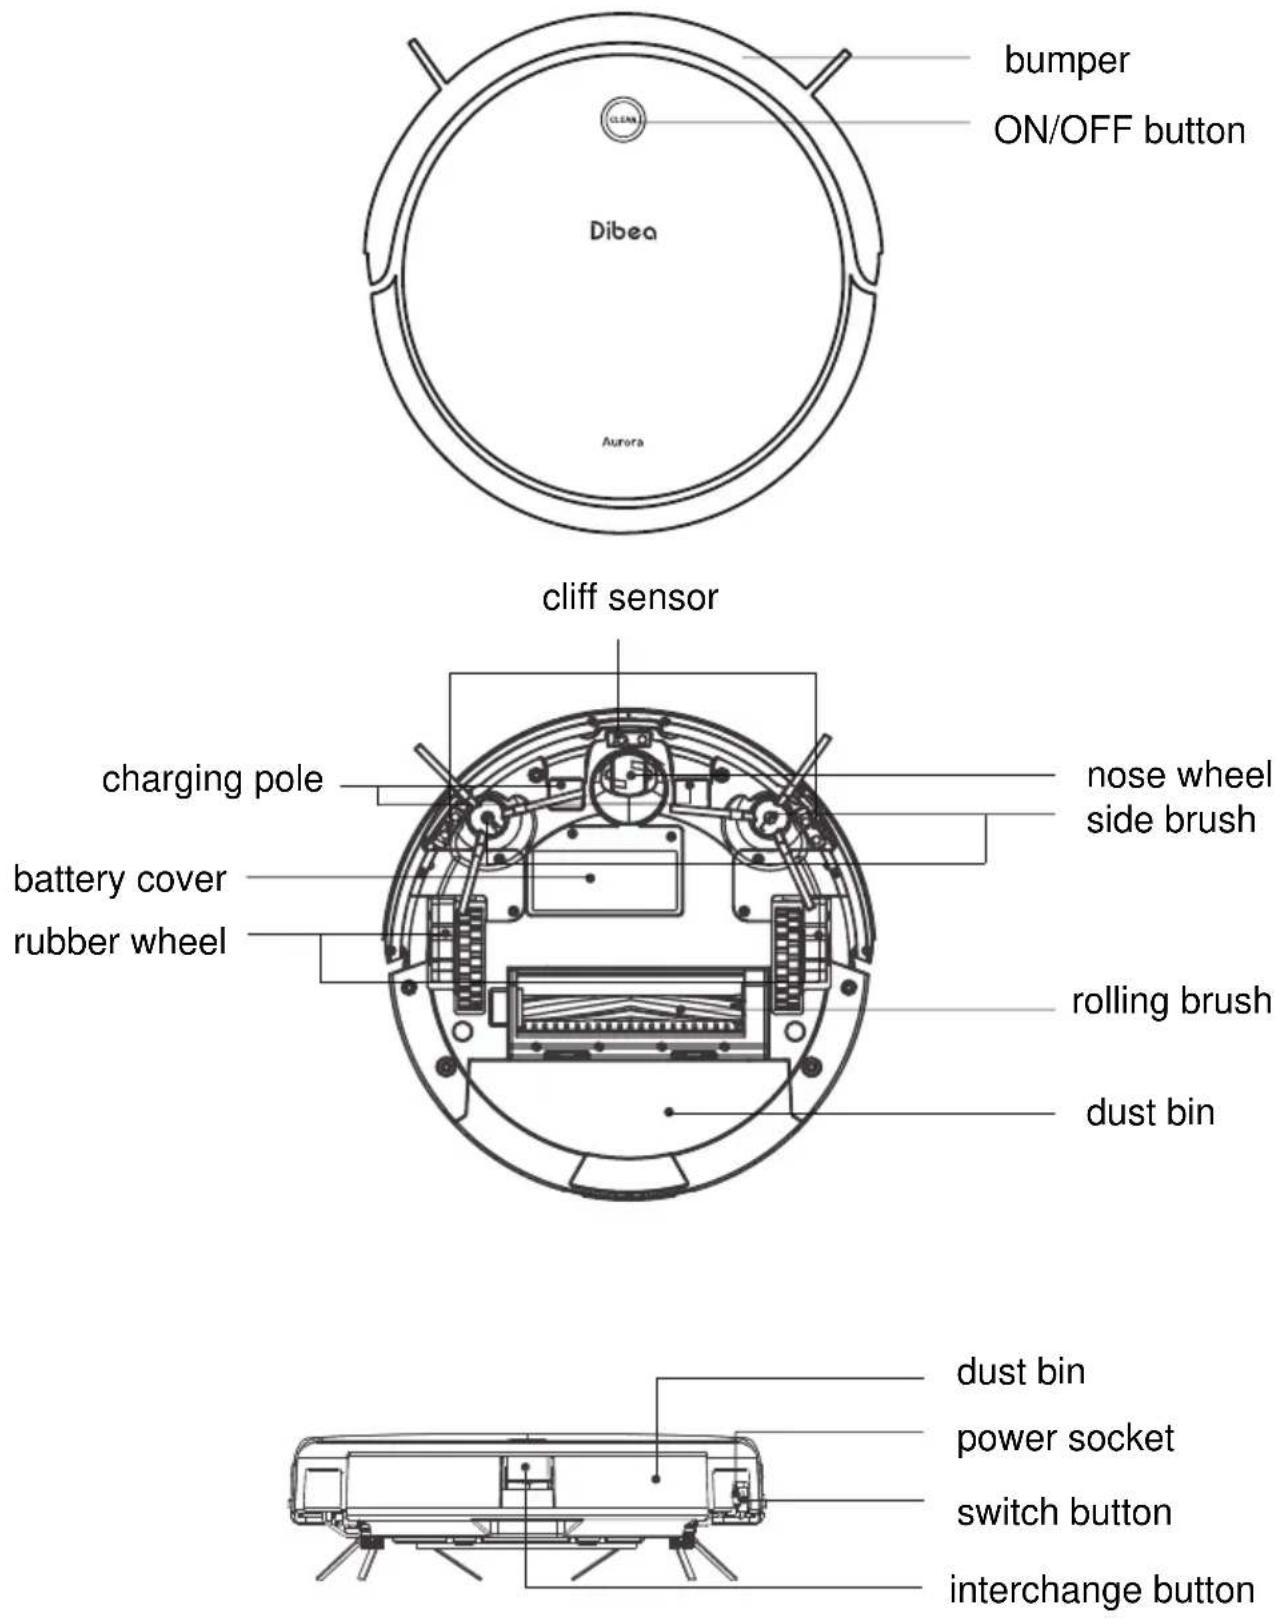
2.1 Main body
text_image
bumper ON/OFF button Dibea Aurora cliff sensor charging pole battery cover rubber wheel nose wheel side brush rolling brush dust bin dust bin power socket switch button interchange button2、Product Components
Dust bin

text_image
primary filter fine dust filter HEPA filter dust bin cover dust bin switch buttonWater tank
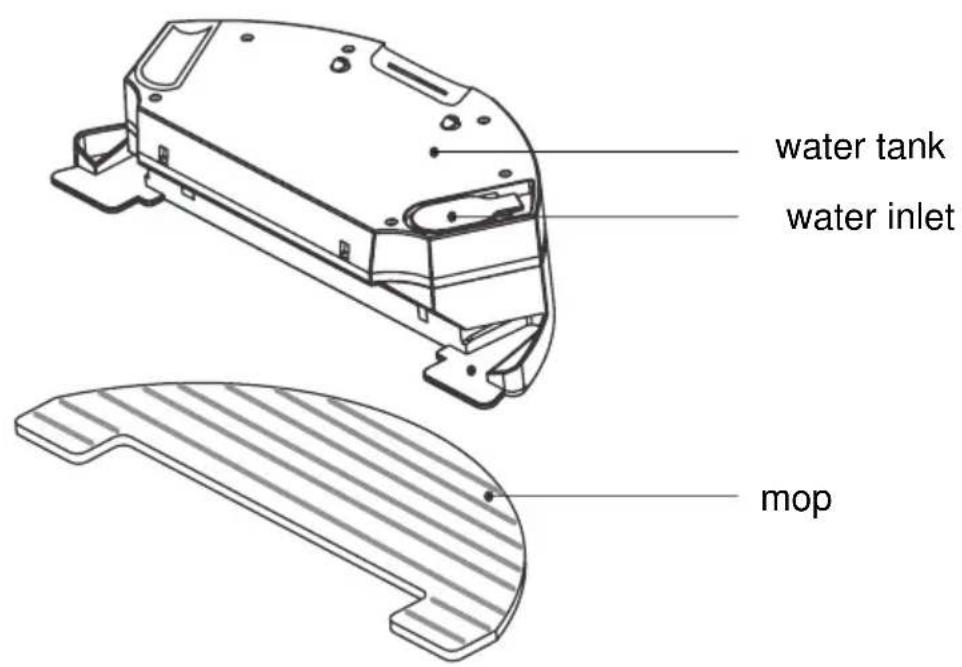
text_image
water tank water inlet mop2、Product Components Product Components Dibea
2.2 Charging base
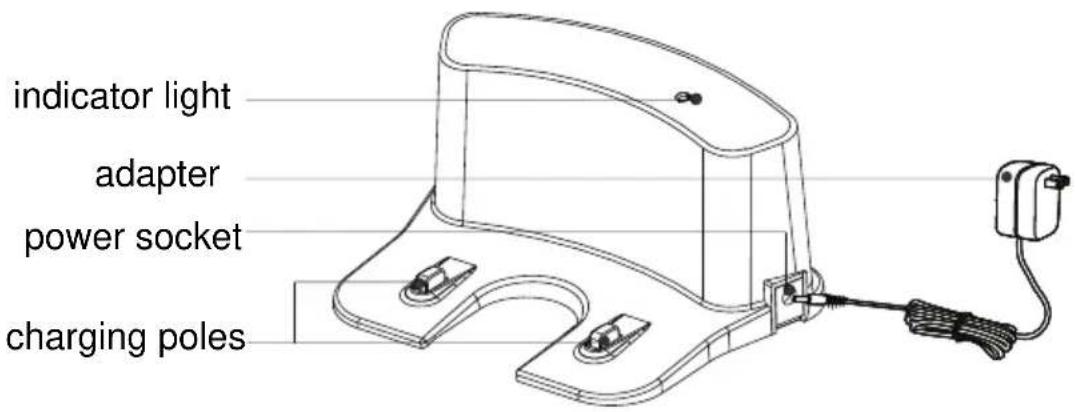
text_image
indicator light adapter power socket charging poles2.3 Remote control
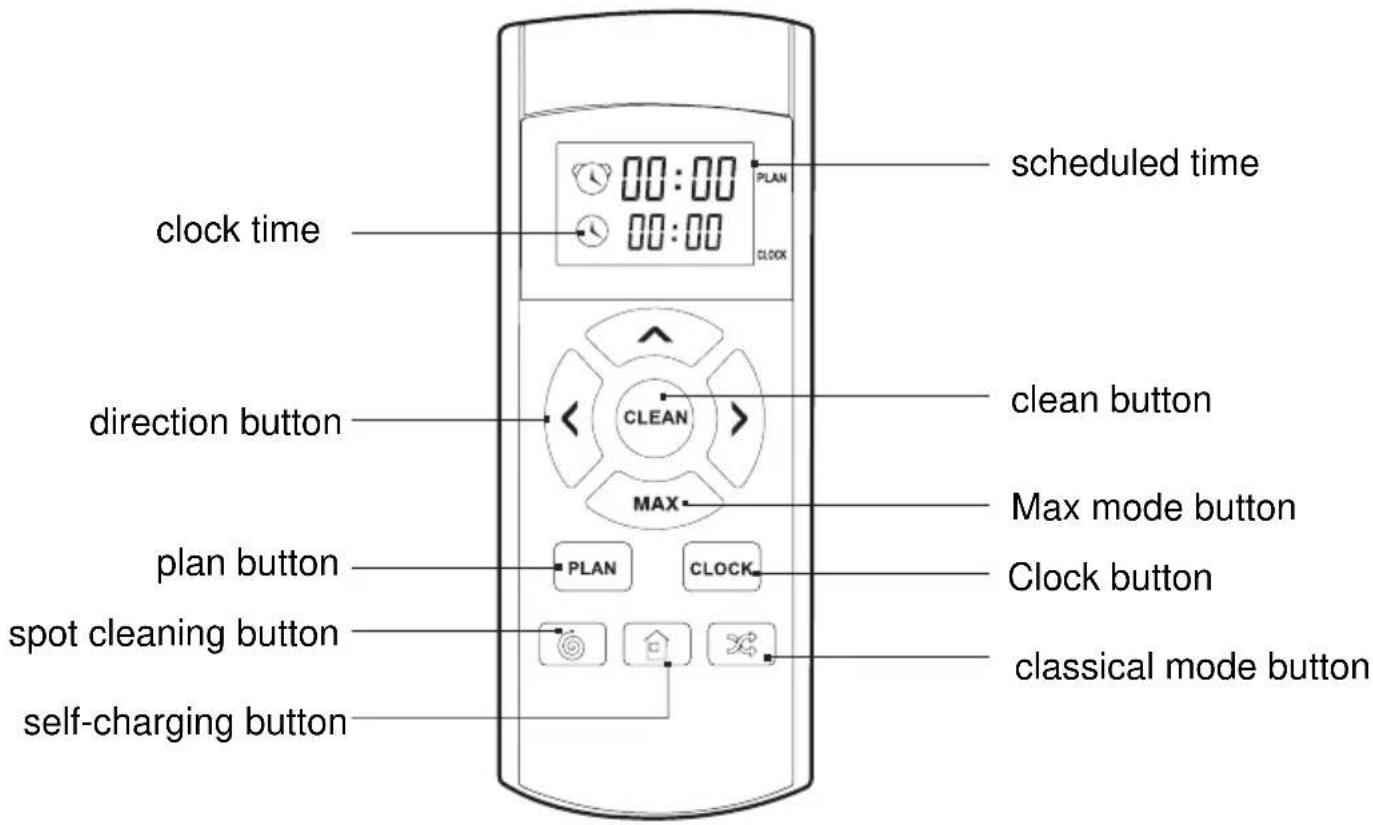
text_image
scheduled time 00:00 plan CLOCK clock time direction button clean button CLEAN MAX plan button PLAN CLOCK Max mode button Clock button spot cleaning button classical mode button self-charging button2、Product Components Product Components Dibea
2.4 CLEAN button on main body
| state | indicator light |
| charging | flashing orange light |
| finish charging | green light |
| selecting mode | flashing green light |
| occurring error | red light |
| low power | orange light |
| normally working | green light |
3、Product Operation Product Operation
3.1 Considerations
Before starting the vacuum cleaner, please check the environment as followed.
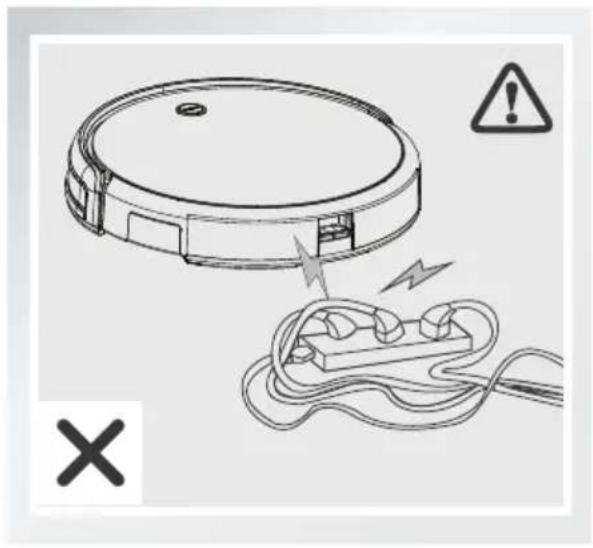
natural_image
Diagram showing a circular device connected to an electrical plug with warning symbols (no text or labels)Move away the cables and cords around to avoid tangling
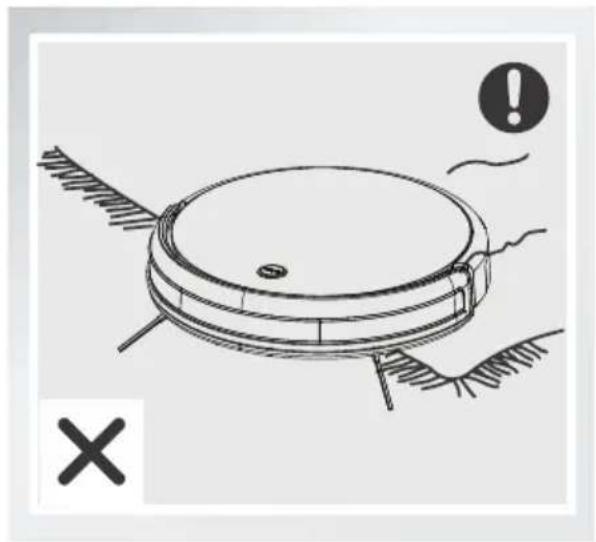
natural_image
Diagram of a robotic vacuum cleaner with warning symbol and cross mark (no text or labels)Make sure the carpet fringing won't tangle the machine.
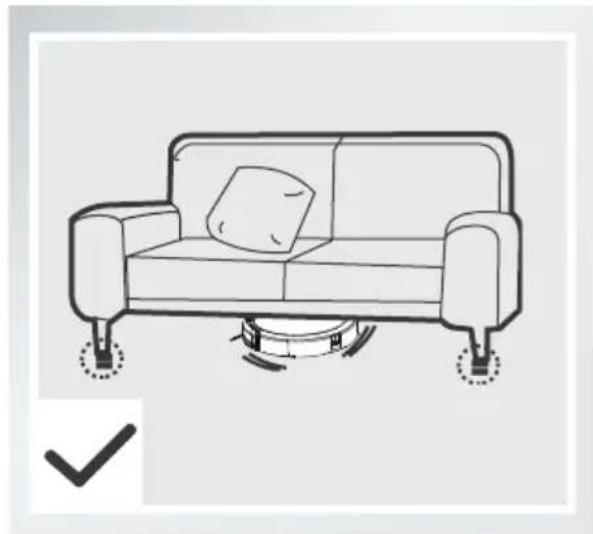
natural_image
Line drawing of a sofa with a pillow placed on the back and wheels on both sides, indicating floor positioning (no text or symbols)Lift up the furniture if it is lower than 8cm height when cleaning.
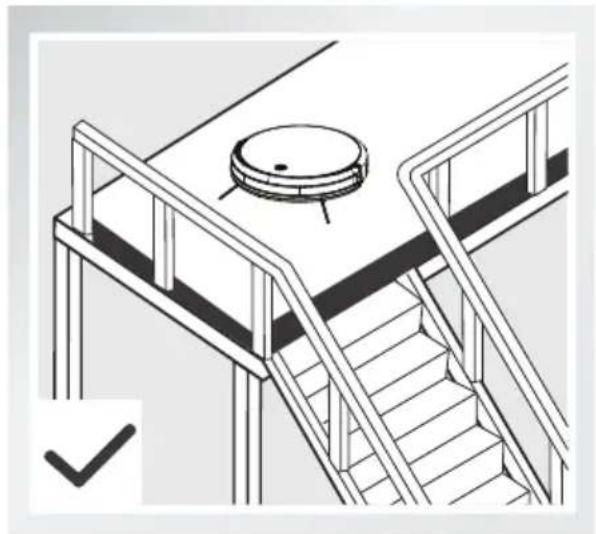
natural_image
Isometric line drawing of a staircase with railings and a circular top (no text or symbols)Make sure there are protective railings when it cleans on stairs.
3、Product Operation Product Operation
3.2 Quick operation
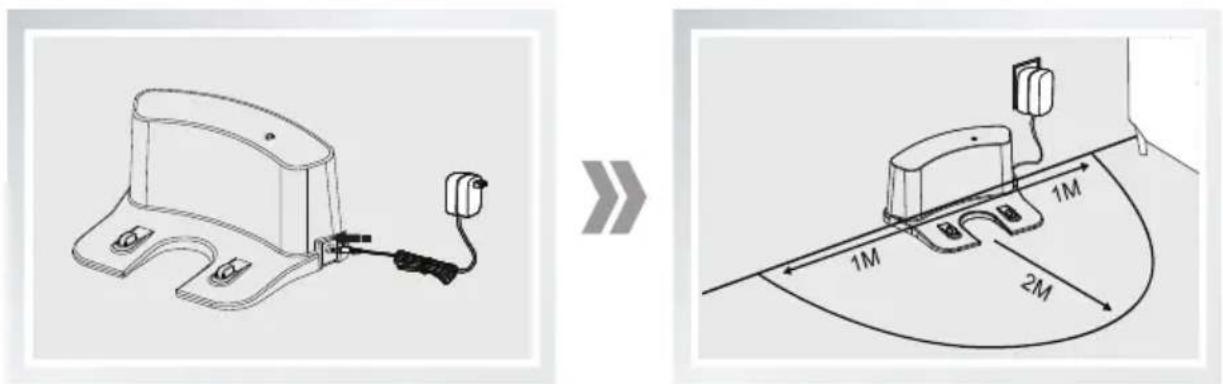
1 charging prepair
- connect the adapter with the charging base
- place the charging base against the wall and remove obstacles about 1 meter at two sides and about 2 meters forward
■ plug the adapter into an outlet
text_image
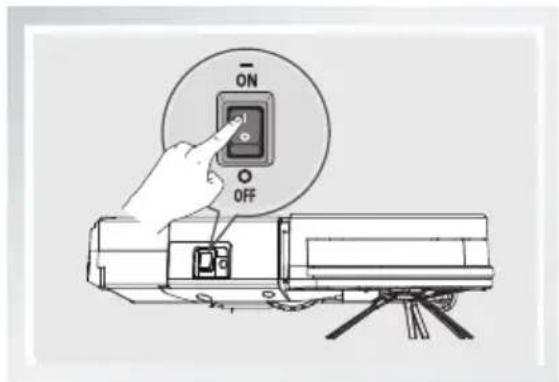
Technical diagram showing a device connected to a cable with an arrow indicating transformation, alongside its 2M and 1M dimensional annotations.2 turn on the power button
■ turn on the power button on the side of the machine
text_image
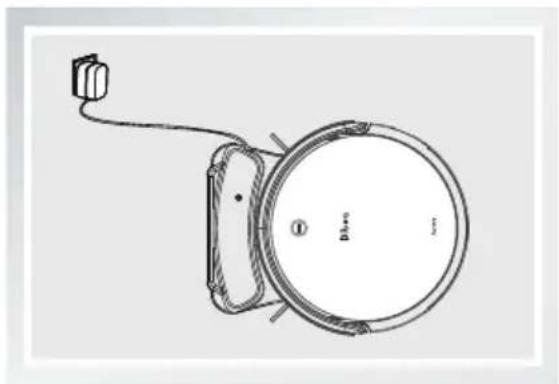
ON OFF3 charging
- place the vacuum cleaner on the charging base correctly
the CLEAN light turns orange means on charging, green means fully-charged.
natural_image
Technical line drawing of a circular mechanical component with a cable and housing, no text or symbols present3、Product Operation Product Operation
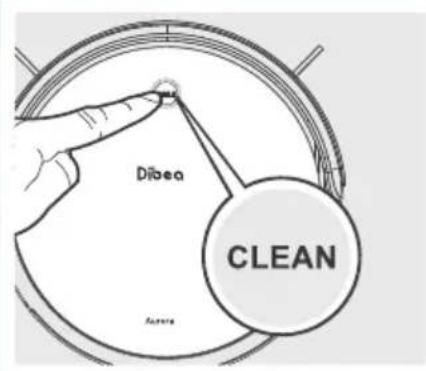
4 Start CleaningStart Cleaning
- Start cleaning by pressing the CLEAN button on the main body.
text_image
Dibea CLEAN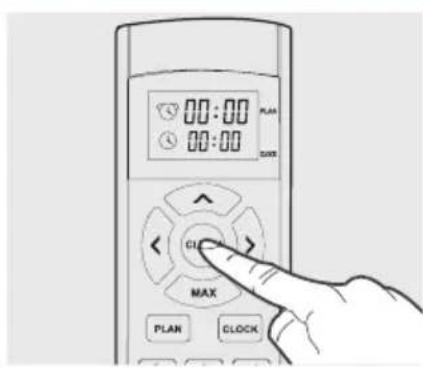
text_image
00:00 00:00 PLAN SUNT CLOCK MAX PLAN CLOCK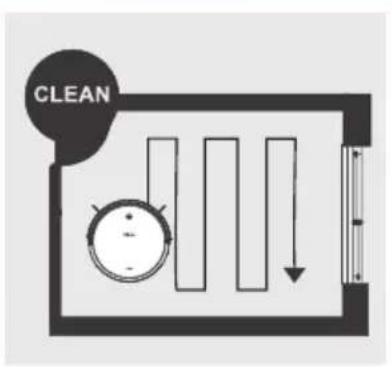
text_image
CLEANBefore starting cleaning, make sure the machine is not in sleeping mode. If yes, short press the CLEAN button to wake it up.
5 Stop CleaningStop Cleaning
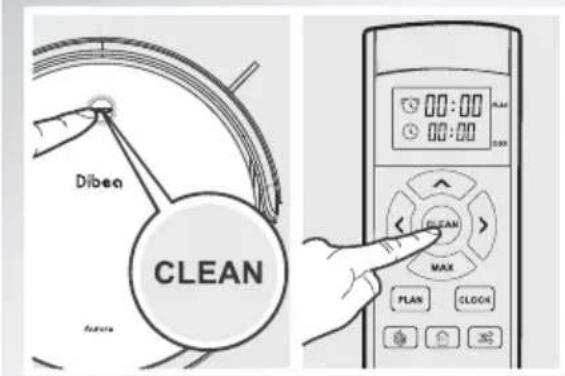
- Press the CLEAN button on the main body to stop working.
text_image
Dibea CLEAN Plano 00:00 00:00 PLAN CLOCK PLAN CLOCK3.3 Cleaning Modes
* Use the remote control to change modes. If the robot is in standby mode, please press the CLEAN button to wake it up first.
3、Product Operation
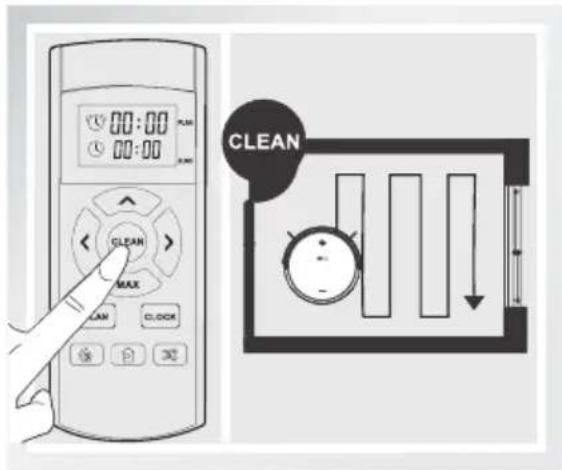
1 CLEAN mode
- In auto cleaning mode, the robot will clean the room automatically. Also, it will adjust the suction according to different surfaces.
text_image
00:00 00:00 GLEAN MAX LAM CLOCK C C E E E E E E E E E E E E E E E E E E E E E E E E E E E E E E E E E E E E E E E E E E E E E E E E E E C C C C C C C C C C C C C C C C C C C C C C C C C C C2 Spot mode
- The robot will spiral intensely when it detects a dirtier area.
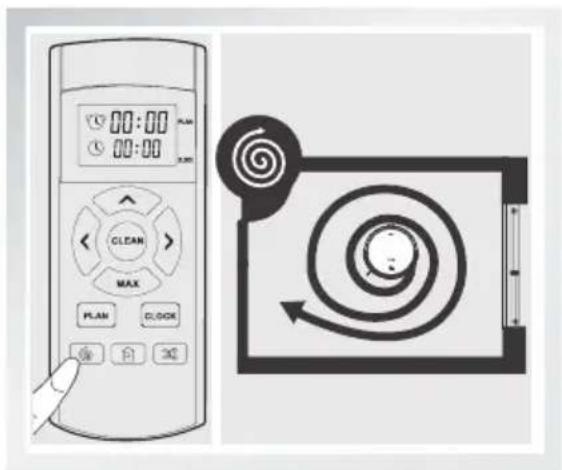
text_image
Diagram showing a remote control with digital display and a circular device with spiral pattern and directional arrows.3 Scheduling mode
- You can preset the cleaning time and the robot will start to clean at the certain time you scheduled everyday.
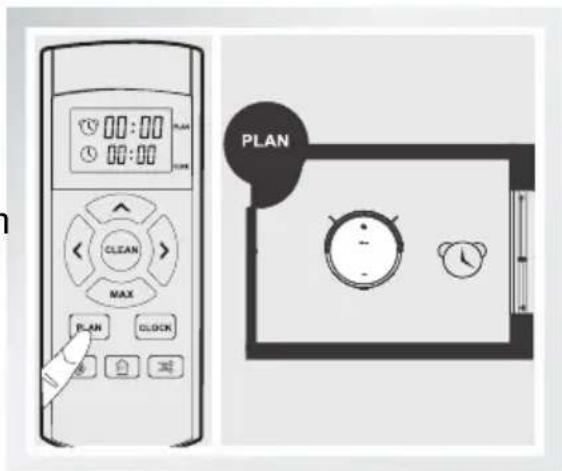
text_image
PLAN 00:00 00:00 00:00 00:00 00:00 00:00 00:00 00:00 00:00 00:00 00:00 00:00 00:00 00:00 00:00 00:00 00:00 00.00 01.00 02.00 03.00 04.00 05.00 06.00 07.00 08.00 09.00 10.00 11.00 12.00 13.00 14.00 15.00 16.00 17.00 18.00 19.00 20.00 21.00 22.00 23.00 24.00 25.00 26.00 27.00 28.00 29.00 30.00 31.00 32.00 33.00 34.00 35.00 36.00 37.00 38.00 39.00 40.00 41.00 42.00 43.00 44.00 45.00 46.00 47.00 48.00 49.00 50.00 51.00 52.00 53.00 54.00 55.00 56.00 57.00 58.00 59.00 60.00 61.00 62.00 63.00 64.00 65.00 66.00 67.00 68.00 69.00 70.00 71.00 72.00 73.00 74.00 75.00 76.00 77.00 78.00 79.00 80. 81 82 83 84 85 86 87 88 89 93、Product Operation
4 Self-charging
- When the power is lower than 20%, the robot will go back to the charging base automatically.
* You can also press the 📋 button to make it go charging.
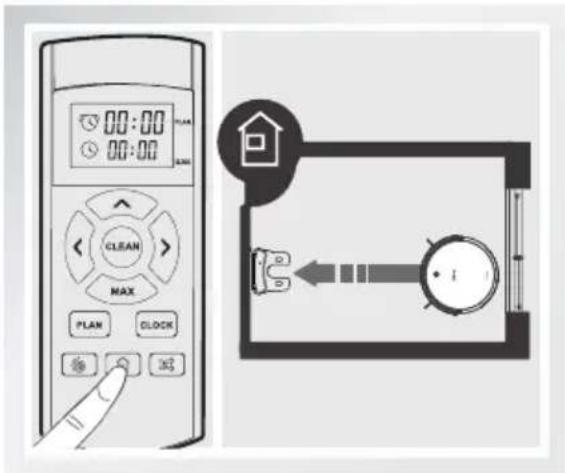
text_image
Diagram showing a digital control panel with timer and function buttons, alongside an electrical meter device with a home icon and directional arrows.5 Classical mode
- The frequently used mode. The robot will clean automatically and avoid obstacles.
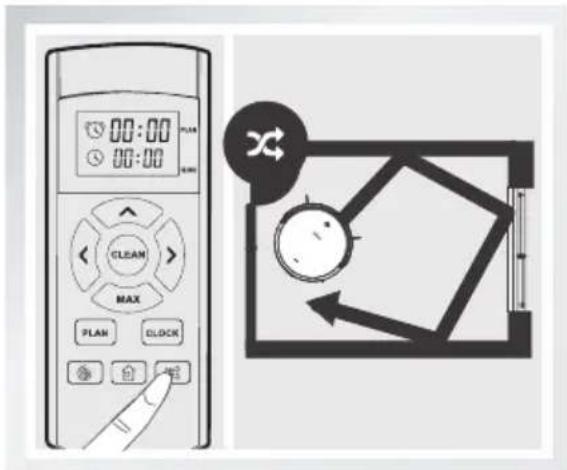
text_image
00:00 00:00 PLAN 000 CLEAN MAX PLAN CLOCK 返回按钮6 Max mode
- Suitable for a dirty area. In this mode, the robot will turn to the largest suction.
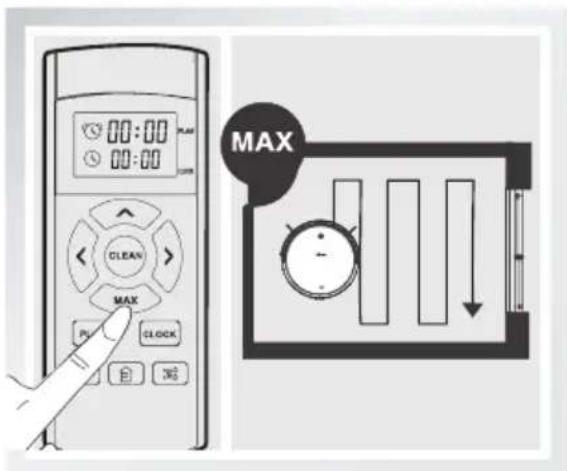
text_image
00:00 00:00 PLAN CLOCK GREEN MAX P CLOCK OK MAX3、Product Operation
3.4 Scheduling setting
Make sure the robot is not in standby or sleeping mode. If yes, press the CLEAN button to wake it up first. Then, you can set the scheduling time.
1 Set the clock time
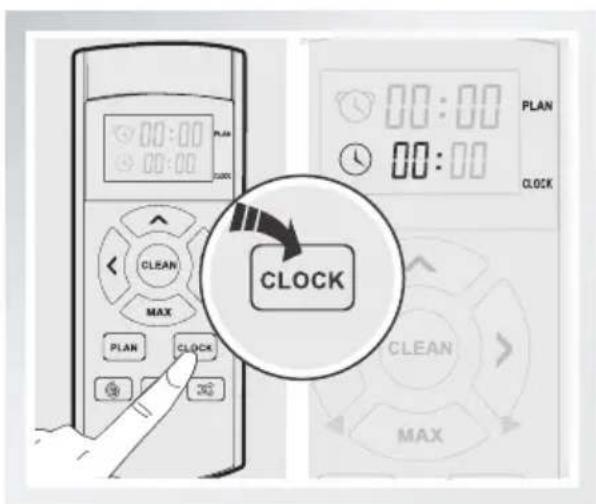
text_image
00:00 00:00 PLAN CLOCK CLOCK PLAN CLOCK 302 PLAN CLOCK CLOCK MAX MAXShort press the PLAN button, the left 00 of 00:00 will flash.
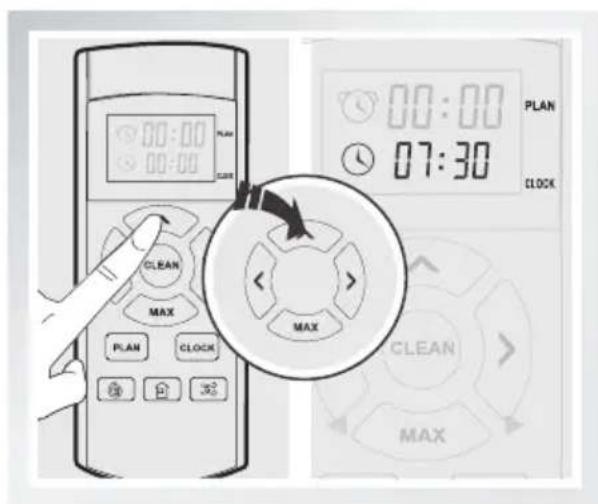
text_image
00:00 00:00 PLAN 07:30 CLOCK CLEAN MAX PLAN CLOCK MAX CLEAN MAXChange between hour an minute by pressing the directional buttons.
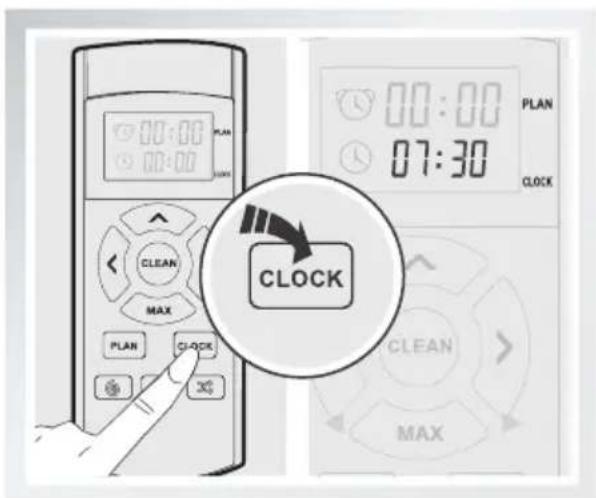
text_image
00:00 PLAN 07:30 CLOCKPress the PLAN to save the settings.
* If you don't press PLAN, settings won't be saved.
3、Product Operation
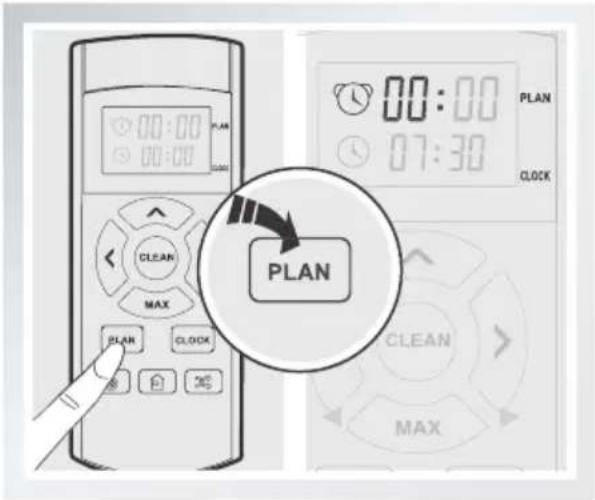
2 Scheduling
text_image
00:00 00:00 PLAN CLOCK 07:30 PLAN CLOCK MAX PLAN CLOCK MAXShort press the PLAN button, the left 00 of 00:00 will flash.
Set the certain time, press the PLAN button to save the settings.
* If you don't press PLAN, settings won't be saved.
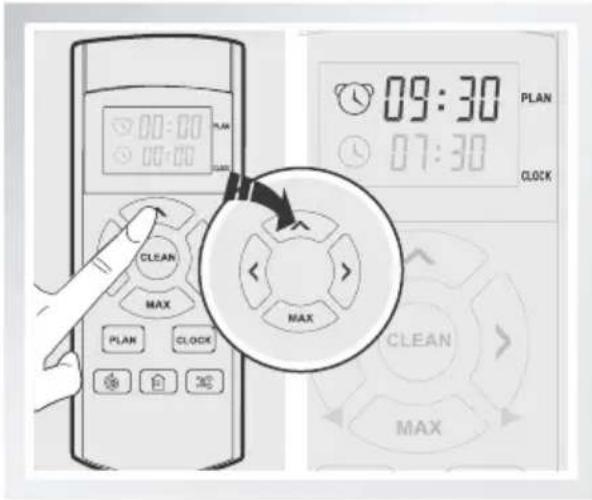
text_image
09:30 07:30 PLAN CLOCK CLEAN MAX PLAN CLOCK CLEAN MAXChange the time by pressing directial buttons.
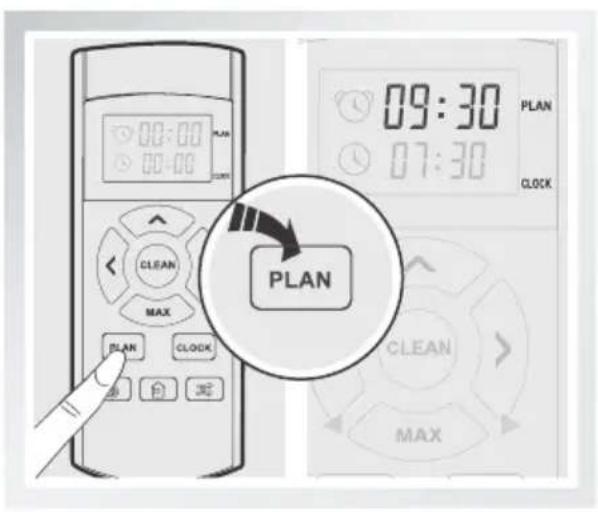
text_image
09:30 07:30 PLAN CLOCK PLAN CLOCK MAX PLAN MAX3 Cancel scheduling
Set the scheduling time as 00:00, and the scheduling will be cancelled.
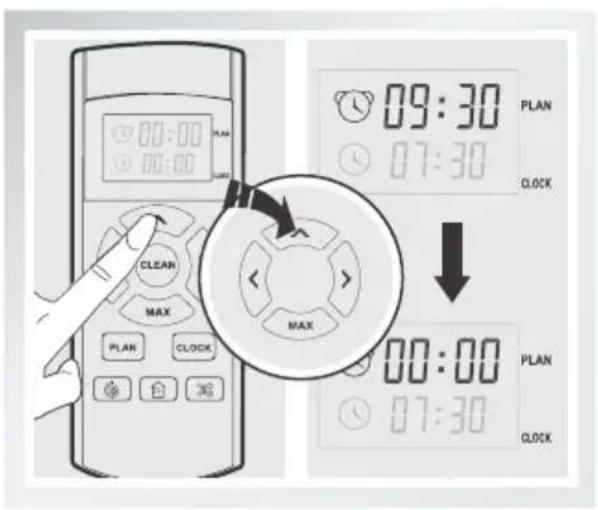
text_image
09:30 PLAN 07:30 CLOCK 00:00 PLAN 07:30 CLOCK3、Product Operation
3.5 Water tank
The water tank and dust bin of GT100 are interchageable. For correct installment, please refer to related operation instructions.
* Do not use mopping fuction on carpets or rugs.
When the robot is mopping, please pay attention to the water and add more when needed.
Do not install the water tank with water when the robot is charging.
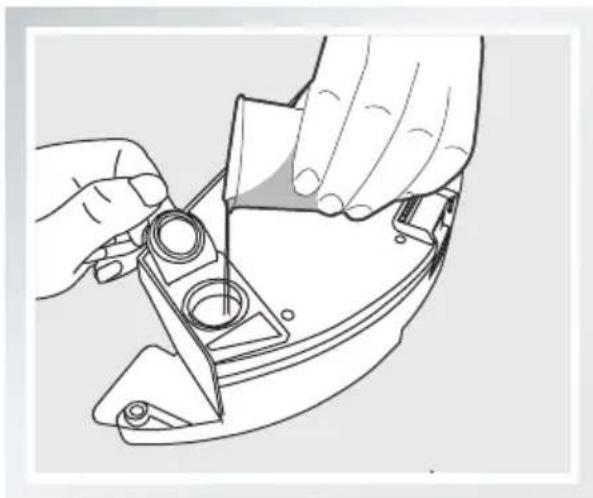
1 Add water
Add enough water through the inlet
natural_image
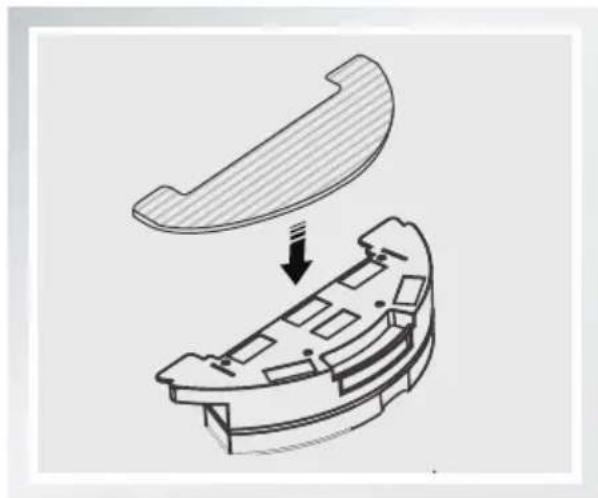
Line drawing of hands using a tool to adjust or install a mechanical component (no text or symbols visible)2 Install the mop
Attach the mop to the bottom of the water tank
natural_image
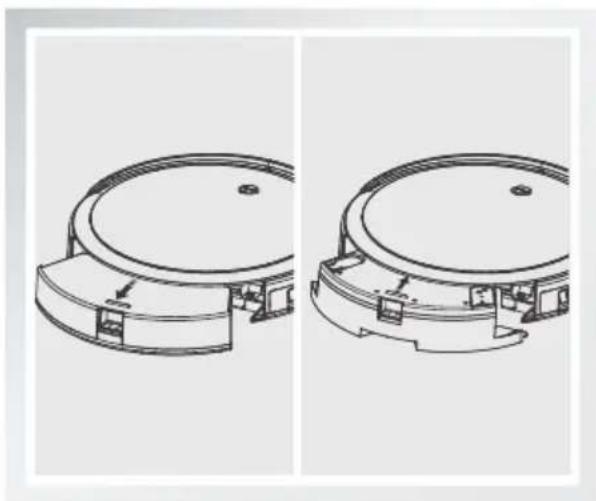
3D mechanical component diagram showing a curved housing with a downward arrow indicating force or movement (no text or symbols)3 Install water tank accessories
Press to take out the dust bin, and install the water tank
natural_image
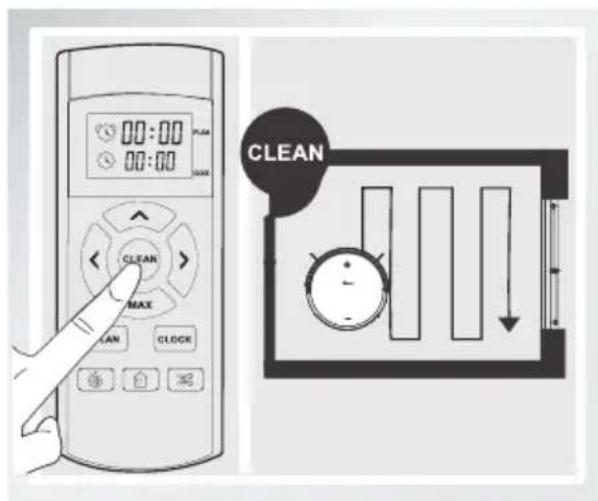
Technical line drawing of two circular mechanical components with mounting brackets (no text or symbols)4 Start mopping
Start auto cleaning, and it will mop at the same time
text_image
00:00 PLAN 00:00 MAX CLEAN MAX CLOCK CLEAN4、Product Maintenance Product Maintenance Dibea 贝清洁 时尚便捷
4.1 Clean side brush, rolling brush and mop
Clean side brushes, rolling brush and mop once getting dirty. Replace them once damaged.

Notes:
Remove the rolling brush from the main body by pressing the lock and wash it. Remove the mop from the water tank and wash it with water.
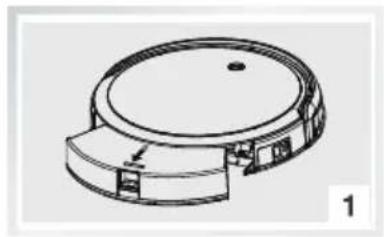
4.2 Clean dust bin and filters
Clean the dust bin and filters as following tips after every use.
natural_image
Technical line drawing of a circular mechanical component with internal components and mounting holes (no text or symbols)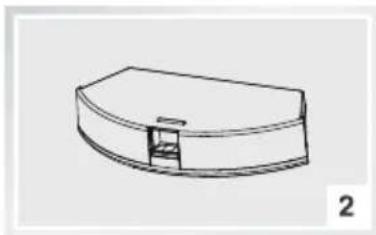
natural_image
Simple line drawing of a curved mechanical component with a small protrusion, labeled '2' in the corner (no text or symbols on the object itself)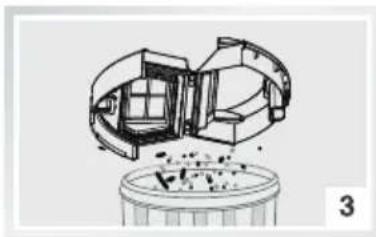
natural_image
Technical line drawing of a mechanical assembly with no visible text or symbols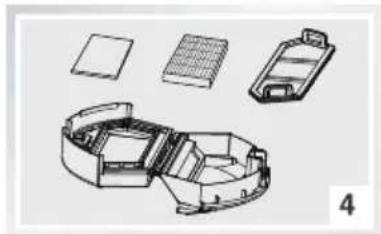
natural_image
Exploded view diagram of a smart home module showing internal components and housing (no text or labels)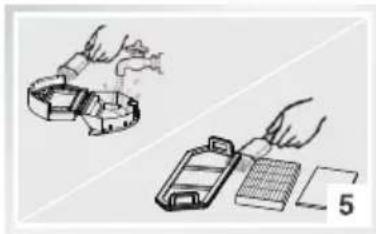
natural_image
Illustration of a hand using a tool to clean a small object, with no visible text or symbols.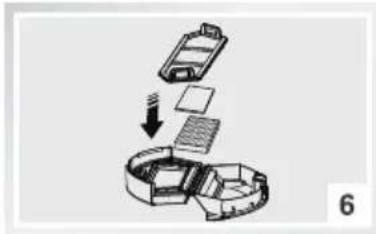
natural_image
Exploded view diagram of a mechanical assembly (no text or symbols)
Notes:
* check the suction and clean the obstacles
* wash the primary filter every 15-30 days and install it after drying
* clean the HEPA filter with wet mop instead of washing it with water directly
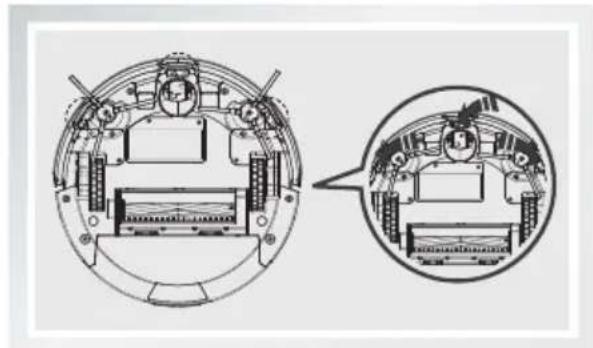
4.3 Clean sensors and charging poles
clean the sensors and charging poles with soft dry mop cloth as followed:
natural_image
Technical diagram of a mechanical assembly with cross-sectional and top views (no text or labels)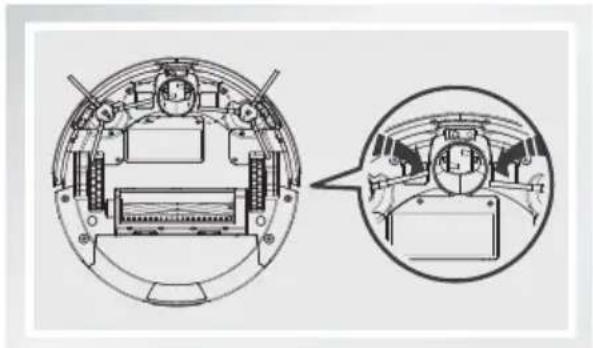
natural_image
Technical line drawing of a mechanical component with cross-sectional view (no text or symbols)5、Troubleshooting Troubleshooting
5.1 Error sheet
| times of beep | cause | solution | |
| 01 | ● | wheel failure | check the wheels |
| 02 | ●● | cliff sensor or bumper failure | check the cliff sensor and bumper |
| 03 | ●●● | main body gets stuck | move it to a new place and restart |
| 04 | ●●●● | side brush failure | check the side brush |

Notes
In case you still can't solve the problem, please follow this:
- Press the power button on the side of the machine to restart it.
- If the problem can't be solved by restarting, please contact the after-service team.
6、Product Specifications Product Specifications
| Main body | |
| Voltage (V) | 14.4 === |
| Power (W) | 22 |
| Adapter | |
| Input voltage (V) | 100-240V ~ |
| Output voltage (V) | 19 === |
| Charging base | |
| Output voltage (V) | 19 === |
| Output current (A) | 0.6 |
| Remote control | |
| Input voltage (V) | 3 === |
7、In the Box In the Box
| Item | Quantity | |
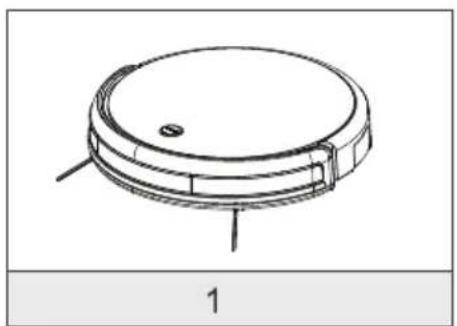
| 1 | Main body | 1 |
| 2 | Charging base | 1 |
| 3 | Remote control | 1 |
| 4 | Adapter | 1 |
| 5 | Cleaning brush | 1 |
| 6 | User manual | 1 |
| 7 | Side brush | 2 |
| 8 | HEPA filter | 1 |
| 9 | Mop | 1 |
| 10 | Water tank | 1 |
natural_image
Technical line drawing of a circular mechanical component with mounting holes and a base labeled '1' (no text or symbols on the diagram itself)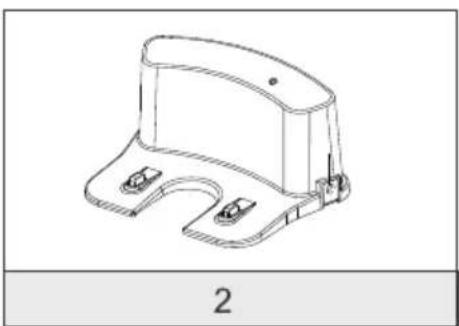
natural_image
Technical line drawing of a mechanical bracket component (no text or symbols)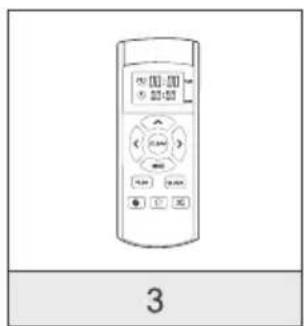
text_image
3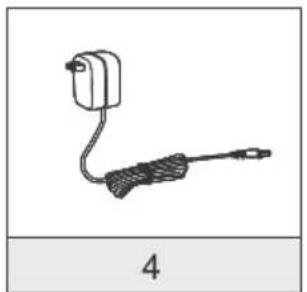
natural_image
Simple line drawing of a handheld device with a cable and connector, labeled '4' below (no text or symbols on the device itself)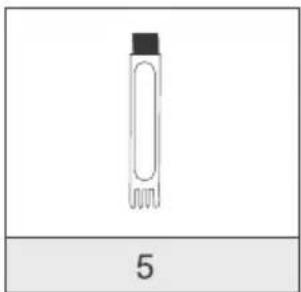
natural_image
Simple line drawing of a test tube with a black cap and two leads, labeled '5' below (no text or symbols on the tube itself)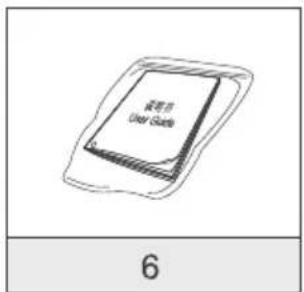
text_image
说明书 User Guide 6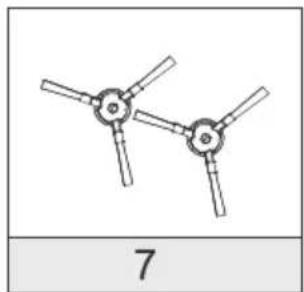
natural_image
Simple line drawing of two propeller-like components with three blades, labeled '7' below (no text or symbols on the diagram itself)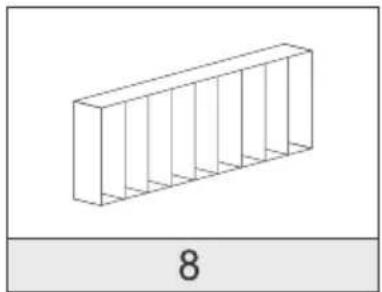
natural_image
Simple line drawing of a rectangular prism with vertical supports, labeled '8' below (no text or symbols on the diagram itself)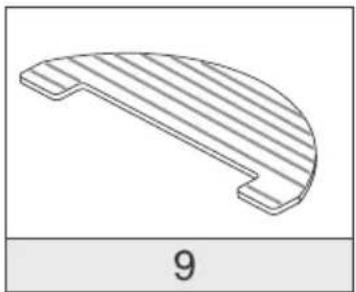
natural_image
3D diagram of a curved mechanical part with horizontal grooves, labeled '9' below (no text or symbols on the object itself)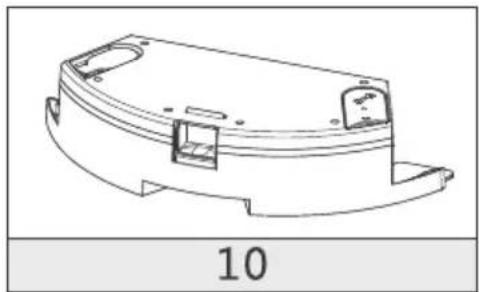
natural_image
Technical line drawing of a mechanical component with curved surfaces and mounting holes (no text or symbols)Dibea|地贝
Suzhou Dibea Electrical Technology Co., Ltd.
www.dibea.com