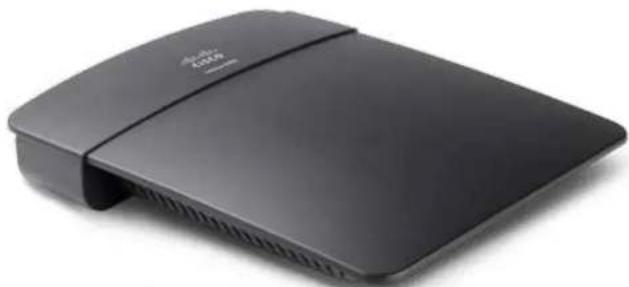
E3200 - Router CISCO - Free user manual and instructions
Find the device manual for free E3200 CISCO in PDF.


| Product Type | High Performance Dual-Band N Router |
| Model Number | E3200 |
| Brand | Cisco (Linksys) |
| Radio Frequency | 2.4 GHz and 5 GHz |
| Number of Antennas | 6 (3 per band) |
| Switch Port Speed | 10/100/1000 Mbps (Gigabit Ethernet) |
| Ports | Internet, Ethernet (1-4), USB, Power |
| Buttons | Reset, Wi-Fi Protected Setup |
| LEDs | Power/Wi-Fi Protected Setup, Internet, Ethernet (1-4) |
| Security Features | WEP, WPA, WPA2; SPI firewall |
| Security Key Bits | Up to 128-bit encryption |
| USB Storage File System Support | FAT, NTFS, HFS+ |
| Dimensions | 170 x 25 x 190 mm (6.69 x 0.98 x 7.48 in) |
| Unit Weight | 216 g (7.62 oz) |
| Power | 12V, 2A |
| Operating Temperature | 0 to 35°C (32 to 95°F) |
| Storage Temperature | -20 to 60°C (-4 to 140°F) |
| Operating Humidity | 10 to 80% non-condensing |
| Storage Humidity | 5 to 90% non-condensing |
| Certifications | FCC, IC, CE, Wi-Fi A/B/G/N |
| UPnP Supported | Yes |
| Dual-Band | Simultaneous 2.4 GHz and 5 GHz |
| Guest Network | Yes, separate password-protected network |
| Parental Controls | Yes, time and content restrictions |
| IPv6 Supported | Yes |
Frequently Asked Questions - E3200 CISCO
User questions about E3200 CISCO
0 question about this device. Answer the ones you know or ask your own.
Ask a new question about this device
Download the instructions for your Router in PDF format for free! Find your manual E3200 - CISCO and take your electronic device back in hand. On this page are published all the documents necessary for the use of your device. E3200 by CISCO.
USER MANUAL E3200 CISCO
natural_image
Exterior view of multiple black and silver wireless routers displayed against a blue background (no visible text or symbols on the devices themselves)User Guide
Linksys E-Series
E900
E1200
E1500
E2500
E3200
E4200
E900 Contents
Product overview
E900. 1
Package contents 1
Features 1
Back view 2
Bottom view 2
Setting Up: Basics
How to create a home network. 13
What is a network? 13
How to set up a home network 13
Where to find more help....13
How to set up your router....13
How to start Cisco Connect 14
How to improve your wireless connection speed .....15
How to test your Internet connection speed .....15
How to connect devices to your network .....16
How to connect a computer to your network 16
How to connect a printer 18
How to connect other devices 18
How to change your router's name and password. . . . . . . . 24
Setting Up: Advanced
How to open the browser-based utility .....25
How to manually set up your router. . . . . . . . . . . . . . . . . . . . . . . . 26
How to manually set up your Internet connection 26
How to set up the DHCP server on your router....29
How to set up DHCP reservation 30
How to find your network on the Internet. . . . . . . . . . . . . . . . 30
How to clone a MAC address ....31
How to connect to your corporate office using a VPN .....32
How to optimize your router for gaming and voice .....32
How to remotely change your router settings .....34
How to enable Voice over IP on your network .....35
How to configure UPnP ....35
How to use a router as an access point....36
How to put your new router behind an existing router. . . . . 37
To add your router to an existing router or gateway 38
To share an Internet connection 38
To extend your network 39
How to expose a device to the Internet .....40
Improving Security
How do I know if my network is secure?....42
Network security following a manual setup. . . . . . . . . . . . . . 42
How to set up wireless security using Wi-Fi Protected Setup . . 43
Wi-Fi Protected Setup activity light 43
Connecting a device using the Wi-Fi Protected Setup button 43
How to connect a device using its Wi-Fi Protected Setup PIN 44
How to connect a device using the router's Wi-Fi Protected Setup PIN 44
How to connect a device manually 44
How to control access to your wireless network .....45
How to improve security using the built-in firewall 46
Port Forwarding and Port Triggering
How to set up port forwarding....57
How to set up port forwarding for a single port 57
How to set up port forwarding for multiple ports 58
How to set up port forwarding for a range of ports 58
How to set up port range triggering for online gaming .....59
How to configure your Xbox for online gaming .....60
Maintaining and Monitoring
How to back up and restore your router configuration. . . . . . 61
How to restore factory defaults 61
How to upgrade the router's firmware ....62
How to check the status of your router. . . . . . . . . . . . . . . . . . . . . . . . . . . . . . . . . . . . . . . . . . . . . . 64
How to disable the Ethernet port status lights 65
How to test your Internet connection 66
How to configure and use logs 67
Browser-based Utility Menu Structure
E900....69
Specifications
Linksys E900....74
E1200/E1500 Contents
Product overview
E1200/E1500 3
Package contents 3
Features 3
Back view 4
Bottom view 5
Determining your router's version 5
Setting Up: Basics
How to create a home network. 13
What is a network? 13
How to set up a home network 13
Where to find more help....13
How to set up your router....13
How to start Cisco Connect 14
How to improve your wireless connection speed .....15
How to test your Internet connection speed .....15
How to connect devices to your network .....16
How to connect a computer to your network 16
How to connect a printer 18
How to connect other devices 18
How to change your router's name and password. . . . . . . . . 24
Setting Up: Advanced
How to open the browser-based utility .....25
How to manually set up your router. 26
How to manually set up your Internet connection 26
How to set up the DHCP server on your router....29
How to set up DHCP reservation 30
How to find your network on the Internet....30
How to clone a MAC address ....31
How to connect to your corporate office using a VPN .....32
How to optimize your router for gaming and voice .....32
How to remotely change your router settings .....34
How to enable Voice over IP on your network .....35
How to configure UPnP ....35
How to use a router as an access point....36
How to put your new router behind an existing router. . . . . .37
To add your router to an existing router or gateway 38
To share an Internet connection 38
To extend your network 39
How to expose a device to the Internet .....40
Improving Security
How do I know if my network is secure?....42
Network security following a manual setup. . . . . . . . . . . . . . . 42
How to set up wireless security using Wi-Fi Protected Setup . . 43
Wi-Fi Protected Setup activity light 43
Connecting a device using the Wi-Fi Protected Setup button 43
How to connect a device using its Wi-Fi Protected Setup PIN 44
How to connect a device using the router's Wi-Fi Protected Setup PIN 44
How to connect a device manually 44
How to control access to your wireless network .....45
How to improve security using the built-in firewall 46
Port Forwarding and Port Triggering
How to set up port forwarding....57
How to set up port forwarding for a single port 57
How to set up port forwarding for multiple ports 58
How to set up port forwarding for a range of ports 58
How to set up port range triggering for online gaming .....59
How to configure your Xbox for online gaming .....60
Maintaining and Monitoring
How to back up and restore your router configuration. . . . . . 61
How to restore factory defaults 61
How to upgrade the router's firmware . . . . . . . . . . . . . . . . . . . . . . . . . . . . . . . . . . . . . . . . . . . . . 62
How to check the status of your router. . . . . . . . . . . . . . . . . . . . . . . . . . . . . . . . . . . . . . . . . . . . . 64
How to disable the Ethernet port status lights 65
How to test your Internet connection 66
How to configure and use logs 67
Browser-based Utility Menu Structure
E1200/E1500 70
Specifications
Linksys E1200....75
Linksys E1500....76
E2500 Contents
Product overview
E2500....6
Package contents 6
Features 6
Back view 7
Bottom view 7
Setting Up: Basics
How to create a home network. 13
What is a network? 13
How to set up a home network 13
Where to find more help....13
How to set up your router....13
How to start Cisco Connect 14
How to improve your wireless connection speed .....15
How to test your Internet connection speed .....15
How to connect devices to your network .....16
How to connect a computer to your network 16
How to connect a printer 18
How to connect other devices 18
How to change your router's name and password. . . . . . . . 24
Setting Up: Advanced
How to open the browser-based utility .....25
How to manually set up your router. 26
How to manually set up your Internet connection 26
How to get the most out of your dual-band router .....27
How to set up the DHCP server on your router....29
How to set up DHCP reservation 30
How to find your network on the Internet....30
How to clone a MAC address .....31
How to connect to your corporate office using a VPN .....32
How to optimize your router for gaming and voice .....32
How to remotely change your router settings .....34
How to enable Voice over IP on your network .....35
How to configure UPnP ....35
How to use a router as an access point....36
How to put your new router behind an existing router. . . . . .37
To add your router to an existing router or gateway 38
To share an Internet connection 38
To extend your network 39
How to expose a device to the Internet .....40
Improving Security
How do I know if my network is secure?....42
Network security following a manual setup. . . . . . . . . . . . . . . 42
How to set up wireless security using Wi-Fi Protected Setup . .43
Wi-Fi Protected Setup activity light 43
Connecting a device using the Wi-Fi Protected Setup button 43
How to connect a device using its Wi-Fi Protected Setup PIN 44
How to connect a device using the router's Wi-Fi Protected Setup PIN 44
How to connect a device manually 44
How to control access to your wireless network .....45
How to improve security using the built-in firewall 46
Port Forwarding and Port Triggering
How to set up port forwarding....57
How to set up port forwarding for a single port 57
How to set up port forwarding for multiple ports 58
How to set up port forwarding for a range of ports 58
How to set up port range triggering for online gaming .....59
How to configure your Xbox for online gaming .....60
Maintaining and Monitoring
How to back up and restore your router configuration. . . . . .61
How to restore factory defaults 61
How to upgrade the router's firmware . . . . . . . . . . . . . . . . . . . . . . . . . . . . . . . . . . . . . . . . . . . . 62
How to check the status of your router....64
How to disable the Ethernet port status lights 65
How to test your Internet connection 66
How to configure and use logs 67
Browser-based Utility Menu Structure
E2500....71
Specifications
Linksys E2500....77
E3200 Contents
Product overview
E3200....8
Package contents 8
Features 8
Back view 9
Bottom view 9
Setting Up: Basics
How to create a home network....13
What is a network? 13
How to set up a home network 13
Where to find more help....13
How to set up your router....13
How to start Cisco Connect 14
How to improve your wireless connection speed . . . . . . . . 15
How to test your Internet connection speed .....15
How to connect devices to your network .....16
How to connect a computer to your network 16
How to connect a printer 18
How to connect other devices 18
How to change your router's name and password. . . . . . . . 24
Setting Up: Advanced
How to open the browser-based utility .....25
How to manually set up your router. 26
How to manually set up your Internet connection 26
How to get the most out of your dual-band router .....27
How to set up the DHCP server on your router. . . . . . . . . . . . . 29
How to set up DHCP reservation 30
How to find your network on the Internet. . . . . . . . . . . . . . . . . 30
How to clone a MAC address .....31
How to connect to your corporate office using a VPN .....32
How to optimize your router for gaming and voice .....32
How to remotely change your router settings .....34
How to enable Voice over IP on your network .....35
How to configure UPnP ....35
How to use a router as an access point. . . . . . . . . . . . . . . . . . . . . 36
How to put your new router behind an existing router. . . . . .37
To add your router to an existing router or gateway 38
To share an Internet connection 38
To extend your network 39
How to expose a device to the Internet .....40
Improving Security
How do I know if my network is secure? . . . . . . . . . . . . . . . . . . . 42
Network security following a manual setup. . . . . . . . . . . . . . . 42
How to set up wireless security using Wi-Fi Protected Setup . .43
Wi-Fi Protected Setup activity light 43
Connecting a device using the Wi-Fi Protected Setup button 43
How to connect a device using its Wi-Fi Protected Setup PIN 44
How to connect a device using the router's Wi-Fi Protected Setup PIN 44
How to connect a device manually 44
How to control access to your wireless network .....45
How to improve security using the built-in firewall 46
Using an External Drive
How to configure storage .....48
How to create shared folders 48
How to manage group and user access to shared folders 49
How to create a group 49
How to create a new user 50
How to grant group access to a share 51
How to configure your router's storage for remote access. . . .52
How to configure the FTP server 52
How to share folders and set access rights 53
How to access files remotely .....54
Port Forwarding and Port Triggering
How to set up port forwarding....57
How to set up port forwarding for a single port 57
How to set up port forwarding for multiple ports 58
How to set up port forwarding for a range of ports 58
How to set up port range triggering for online gaming . . . . . 59
How to configure your Xbox for online gaming . . . . . . . . . . . 60
Maintaining and Monitoring
How to back up and restore your router configuration. . . . . .61
How to restore factory defaults 61
How to upgrade the router's firmware . . . . . . . . . . . . . . . . . . . . . . . . . . . . . . . . . . . . . . . . . . . . . . . . . 62
How to check the status of your router. . . . . . . . . . . . . . . . . . . . . . . . . . . . . . . . . . . . . . . . . . . . . 64
How to disable the Ethernet port status lights 65
How to test your Internet connection 66
How to configure and use logs 67
Browser-based Utility Menu Structure
E3200....72
Specifications
Linksys E3200....78
E4200 Contents
Product overview
E4200....10
Package contents 10
Features 10
Top view 11
Back view 11
Setting Up: Basics
How to create a home network....13
What is a network? 13
How to set up a home network 13
Where to find more help....13
How to set up your router....13
How to start Cisco Connect 14
How to improve your wireless connection speed .....15
How to test your Internet connection speed .....15
How to connect devices to your network .....16
How to connect a computer to your network 16
How to connect a printer 18
How to connect other devices 18
How to change your router's name and password. . . . . . . . . 24
Setting Up: Advanced
How to open the browser-based utility .....25
How to manually set up your router. . . . . . . . . . . . . . . . . . . . . . . . . . . . . 26
How to manually set up your Internet connection 26
How to get the most out of your dual-band router .....27
How to set up the DHCP server on your router. . . . . . . . . . . . . 29
How to set up DHCP reservation 30
How to find your network on the Internet. . . . . . . . . . . . . . . . . 30
How to clone a MAC address .....31
How to connect to your corporate office using a VPN .....32
How to optimize your router for gaming and voice .....32
How to remotely change your router settings .....34
How to enable Voice over IP on your network .....35
How to configure UPnP ....35
How to use a router as an access point....36
How to put your new router behind an existing router. . . . . .37
To add your router to an existing router or gateway 38
To share an Internet connection 38
To extend your network 39
How to expose a device to the Internet .....40
Improving Security
How do I know if my network is secure? . . . . . . . . . . . . . . . . . . . 42
Network security following a manual setup. . . . . . . . . . . . . . . . 42
How to set up wireless security using Wi-Fi Protected Setup . . 43
Wi-Fi Protected Setup activity light 43
Connecting a device using the Wi-Fi Protected Setup button 43
How to connect a device using its Wi-Fi Protected Setup PIN 44
How to connect a device using the router's Wi-Fi Protected Setup PIN 44
How to connect a device manually 44
How to control access to your wireless network .....45
How to improve security using the built-in firewall 46
Using an External Drive
How to configure storage .....48
How to create shared folders 48
How to manage group and user access to shared folders 49
How to create a group 49
How to create a new user 50
How to grant group access to a share 51
How to configure your router's storage for remote access. . . .52
How to configure the FTP server 52
How to share folders and set access rights 53
How to access files remotely .....54
How to set up your router as a media server .....54
How to connect your UPnP device to the media server 56
Port Forwarding and Port Triggering
How to set up port forwarding....57
How to set up port forwarding for a single port 57
How to set up port forwarding for multiple ports 58
How to set up port forwarding for a range of ports 58
How to set up port range triggering for online gaming .....59
How to configure your Xbox for online gaming . . . . . . . . . . . 60
Maintaining and Monitoring
How to back up and restore your router configuration. . . . . .61
How to restore factory defaults 61
How to upgrade the router's firmware . . . . . . . . . . . . . . . . . . . . . . . . . . . . . . . . . . . . . . . . . . . . . . . . . . 62
How to check the status of your router. . . . . . . . . . . . . . . . . . . . . . . . . . . . . . . . . . . . . . . . . . . . . 64
How to disable the Ethernet port status lights 65
How to test your Internet connection 66
How to configure and use logs 67
Browser-based Utility Menu Structure
E4200....73
Specifications
Linksys E4200....79
Product overview
E900
natural_image
Black wireless router device with network ports and ventilation slots (no visible text or symbols)Package contents
In addition to your router, your router package includes:
• Network (Ethernet) cable
- AC power adapter
- Setup CD containing router setup software and documentation
Features
Wireless-N technology
Built with leading 802.11n technology, create a powerful home wireless network in minutes. Connect your computers, Internet-ready TVs, game consoles, smartphones, and other Wi-Fi devices at fast transfer rates for an unrivaled experience.
Advanced security
Keep Wi-Fi freeloaders and Internet threats at bay with WPA2 encryption and SPI firewall to help keep your network protected.
Benefits of Fast Ethernet
Use the four Fast Ethernet (10/100) ports for quick file sharing between computers and servers.
Home network ready
Connect computers, printers, and more to your wireless network and the Internet. QoS traffic prioritization technology delivers maximum speed and performance so you can enjoy fast downloads and reliable gaming.
Easy to manage
Cisco Connect software helps you customize your settings and quickly add multiple devices to your network:
IPv6 enabled
Supports the latest Internet protocol technology to future-proof your network.
Back view
text_image
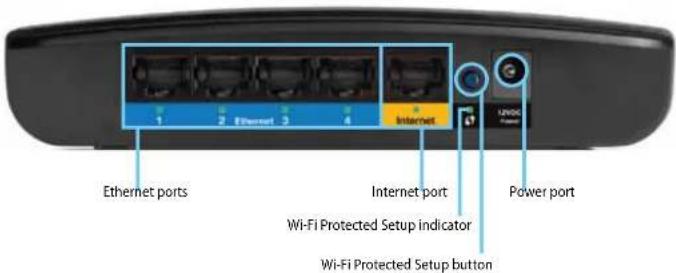
Ethernet ports 2 Ethernet 3 4 Internet Internet port Wi-Fi Protected Setup indicator Wi-Fi Protected Setup button Power port- Ethernet ports—Connect Ethernet cables (also called network cables) to these Fast Ethernet (10/100) ports, color coded blue, and to wired Ethernet network devices on your network.
- Internet port—Connect an Ethernet cable (also called a network or Internet cable) to this port, color coded yellow, and to your modem.
- Wi-Fi Protected Setup™ button—Press this button to easily configure wireless security on Wi-Fi Protected Setup-enabled network devices. For more information, see "How to set up wireless security using Wi-Fi Protected Setup" on page 43.
- Power indicator—Stays on steadily while power is connected and following a successful Wi-Fi Protected Setup connection. Flashes slowly during bootup, during firmware upgrades, and during a Wi-Fi Protected Setup connection. Flashes quickly when there is a Wi-Fi Protected Setup error.
• Power—Connect the included AC power adapter to this port.
CAUTION
Use only the adapter that came with your router.
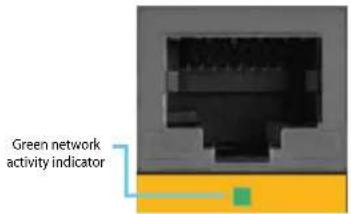
Port activity indicator
text_image
Green network activity indicatorNetwork and Internet port
- Green activity indicator—On Ethernet ports, stays on when a cable connects the port to another Ethernet port. On the Internet port, stays on while connected to a modem. On both port types, it flashes while transferring data.
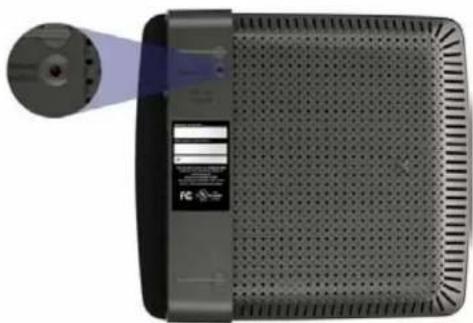
Bottom view
natural_image
Exterior view of a black rectangular electronic device with ventilation grille and indicator light (no text or symbols visible)- Reset button—Press and hold this button for 5-10 seconds (until the port lights flash at the same time) to reset the router to its factory defaults. You can also restore the defaults using the browser-based utility. For more information, see "How to restore factory defaults" on page 61.
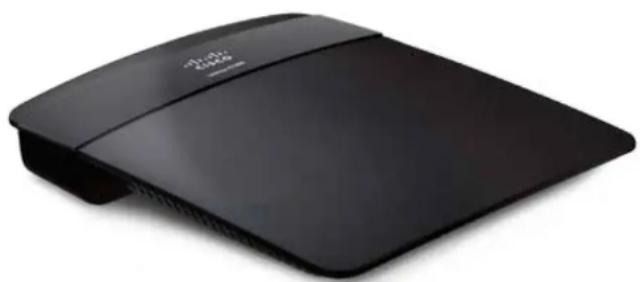
E1200/E1500
natural_image
Black wireless router device with visible brand logo (no text or symbols on body)Package contents
In addition to your router, your router package includes:
• Network (Ethernet) cable
- AC power adapter
- Setup CD containing router setup software and documentation
Features
Wireless-N technology
Built with leading 802.11n technology, create a powerful home wireless network in minutes. Connect your computers, Internet-ready TVs, game consoles, smartphones, and other Wi-Fi devices at fast transfer rates for an unrivaled experience.
SpeedBoost
Higher quality antenna technology helps maintain high speeds across greater distances throughout your home. (E1500 only; not on E1200)
Advanced security
Keep Wi-Fi freeloaders and Internet threats at bay with WPA2 encryption and SPI firewall to help keep your network protected.
Benefits of Fast Ethernet
Use the four Fast Ethernet (10/100) ports for quick file sharing between computers and servers.
Home network ready
Connect computers, printers, and more to your wireless network and the Internet. QoS traffic prioritization technology delivers maximum speed and performance so you can enjoy fast downloads and reliable gaming.
Easy to manage
Cisco Connect software helps you customize your settings and quickly add multiple devices to your network:
Separate guest network
Create a separate, password-protected network for guests.
Parental controls
Limit access time and websites with parental controls.
IPv6 enabled (E1200V2 and E1500)
Supports the latest Internet protocol technology to future-proof your network.
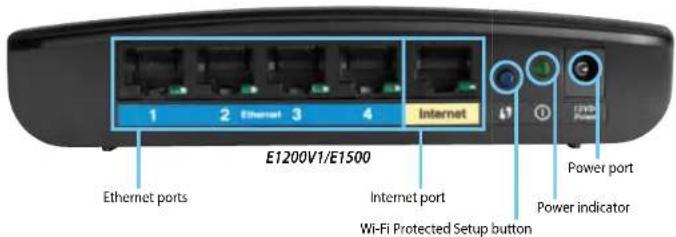
Back view
text_image
E1200V1/E1500 Ethernet ports Internet port Wi-Fi Protected Setup button Power port Power indicator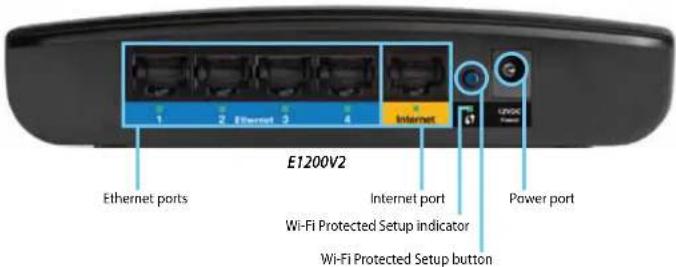
text_image
E1200V2 Ethernet ports Internet port Wi-Fi Protected Setup indicator Wi-Fi Protected Setup button- Ethernet ports—Connect Ethernet cables (also called network cables) to these Fast Ethernet (10/100) ports, color coded blue, and to wired Ethernet network devices on your network.
- Internet port—Connect an Ethernet cable (also called a network or Internet cable) to this port, color coded yellow, and to your modem.
-
Wi-Fi Protected Setup™ button—Press this button to easily configure wireless security on Wi-Fi Protected Setup-enabled network devices. For more information, see "How to set up wireless security using Wi-Fi Protected Setup" on page 43.
-
Power indicator—Stays on steadily while power is connected and following a successful Wi-Fi Protected Setup connection. Flashes slowly during bootup, during firmware upgrades, and during a Wi-Fi Protected Setup connection. Flashes quickly when there is a Wi-Fi Protected Setup error.
• Power—Connect the included AC power adapter to this port.
CAUTION
Use only the adapter that came with your router.
Port activity indicator
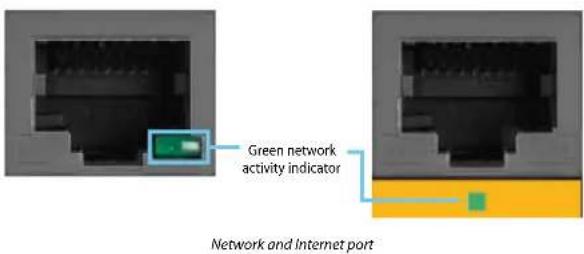
text_image
Green network activity indicator Network and Internet port- Green activity indicator—On Ethernet ports, stays on when a cable connects the port to another Ethernet port. On the Internet port, stays on while connected to a modem. On both port types, it flashes while transferring data.
Bottom view
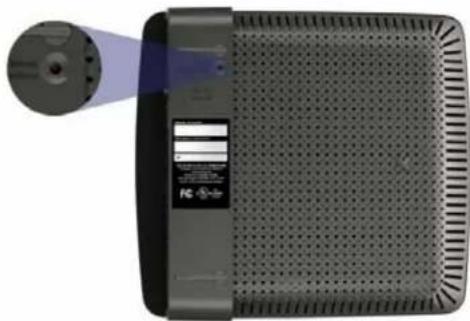
natural_image
Illustration of a portable electronic device with a screen and indicator light (no text or symbols visible)- Reset button—Press and hold this button for 5-10 seconds (until the port lights flash at the same time) to reset the router to its factory defaults. You can also restore the defaults using the browser-based utility. For more information, see "How to restore factory defaults" on page 61.
Determining your router's version
To determine your router model's version, either examine the back panel (differences are shown on the preceding page) or the system label on the bottom of the router. If your router is version 2, a V2 appears on the label.
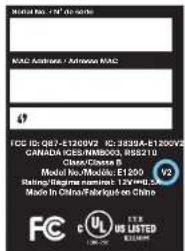
text_image
MASC: A##e / Adm##e MAC FCC IS: Q87-E1200V2 EC: 3593A-E1200V2 CANADA: FCS/NB/SQ3 WSS/TV Class/Classes N Model No./Modelo: E1200 V2 Rating/Rigmatique: E2V*H.D.SX Made in China/Folkswagen en China FC C U S LISTED 1.0K 1.0KE2500
natural_image
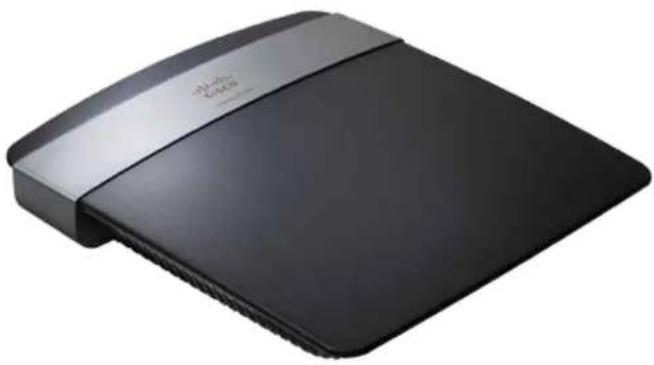
Black and silver wireless router device with 'White Cable' branding on top (no additional text or symbols visible)Package contents
In addition to your router, your router package includes:
• Network (Ethernet) cable
- AC power adapter
- Setup CD containing router setup software and documentation
Features
Wireless-N technology
Built with leading 802.11n technology, create a powerful home wireless network with double the capacity for surfing the Internet, streaming multimedia, and running applications simultaneously. Connect your computers, Internet-ready TVs, game consoles, smartphones, and other Wi-Fi devices at fast transfer rates for an unrivaled experience.
The power of dual band
Double your network bandwidth with simultaneous dual-band N (2.4 and 5 GHz). The dual-band feature is designed to avoid interference and optimize throughput for smoother and faster HD video streaming, file transfers, and wireless gaming.
Advanced security
Keep Wi-Fi freeloaders and Internet threats at bay with WPA2 encryption and SPI firewall to help keep your network protected.
Benefits of Fast Ethernet
Use the four Fast Ethernet (10/100) ports for quick file sharing between computers and servers.
Network ready
Connect computers, printers, scanners, and more to your wireless network and the Internet. QoS traffic prioritization technology delivers maximum speed and performance so you can enjoy fast downloads and reliable VoIP.
Easy to manage
Cisco Connect software helps you customize your settings and quickly add multiple devices to your network:
Separate guest network
Create a separate, password-protected network for guests.
Parental controls
Limit access time and websites with parental controls.
IPv6 enabled
Supports the latest Internet protocol technology to future-proof your network.
Back view
text_image
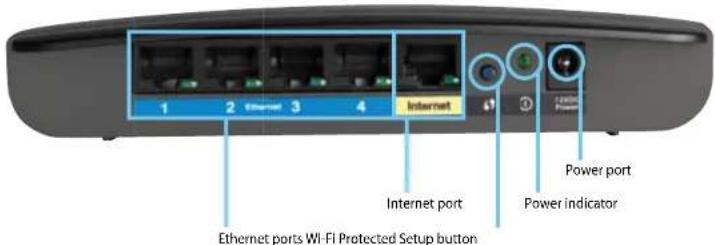
1 2 Ethernet 3 4 Internet Internet port Power port Power indicator Ethernet ports Wi-Fi Protected Setup button- Ethernet ports—Connect Ethernet cables (also called network cables) to these Fast Ethernet (10/100) ports, color coded blue, and to wired Ethernet network devices on your network.
- Internet port—Connect an Ethernet cable (also called a network or Internet cable) to this port, color coded yellow, and to your modem.
- Wi-Fi Protected Setup™ button—Press this button to easily configure wireless security on Wi-Fi Protected Setup-enabled network devices. For more information, see "How to set up wireless security using Wi-Fi Protected Setup" on page 43.
- Power indicator—Stays on steadily while power is connected and following a successful Wi-Fi Protected Setup connection. Flashes slowly during bootup, during firmware upgrades, and during a Wi-Fi Protected Setup connection. Flashes quickly when there is a Wi-Fi Protected Setup error.
• Power—Connect the included AC power adapter to this port.
CAUTION
Use only the adapter that came with your router.
Port activity indicator
text_image
Green network activity indicatorNetwork and Internet port
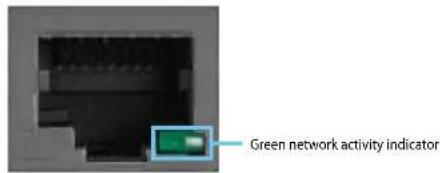
- Green activity indicator—On Ethernet ports, stays on when a cable connects the port to another Ethernet port. On the Internet port, stays on while connected to a modem. On both port types, it flashes while transferring data.
Bottom view

natural_image
Exterior view of a black rectangular electronic device with ventilation grille and indicator light (no text or symbols visible)- Reset button—Press and hold this button for 5-10 seconds (until the port lights flash at the same time) to reset the router to its factory defaults. You can also restore the defaults using the browser-based utility. For more information, see "How to restore factory defaults" on page 61.
E3200
natural_image
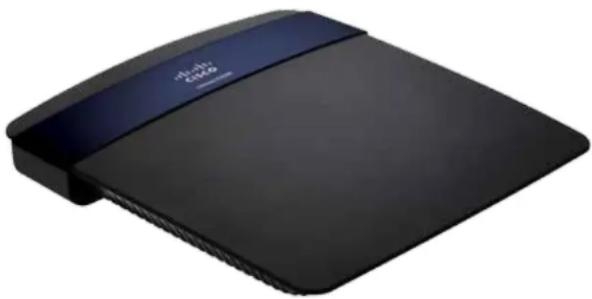
Black wireless router device with blue top and black body, no visible text or symbols on the device surface.Package contents
In addition to your router, your router package includes:
• Network (Ethernet) cable
- AC power adapter
- Setup CD containing router setup software and documentation
Features
Wireless-N technology
Built with leading 802.11n technology, create a powerful home wireless network optimized for video, music, and multi-player gaming. Connect your computers, Internet-ready TVs, game consoles, smartphones, and other Wi-Fi devices at blazingly fast transfer rates for an unrivaled experience.
The power of dual band
Double your network bandwidth with simultaneous dual-band N (2.4 and 5 GHz). The dual-band feature is designed to avoid interference and optimize throughput for smoother and faster HD video streaming, file transfers, and wireless gaming.
SpeedBoost
Higher quality antenna technology helps maintain high speeds across greater distances throughout your home.
Advanced security
Keep Wi-Fi freeloaders and Internet threats at bay with WPA2 encryption and SPI firewall to help keep your network protected.
Benefits of gigabit
Use the four Gigabit Ethernet (10/100/1000) ports for quick file sharing (up to 10× faster than standard Ethernet) between other Gigabit-enabled devices like computers and servers.
Built-in USB port
The USB port lets you add an external USB drive to your network and share files at home or over the Internet. You can also connect a USB printer and share it across your network.
Home theater ready
Bring the ultimate entertainment experience to your home by connecting computers, Internet-ready TVs, game consoles, media players, and more to your wireless network and the Internet. Simultaneous dual-band N and QoS traffic prioritization technology delivers maximum speed and performance so you can enjoy fast downloads, smooth video and music streaming, and reliable gaming and VoIP.
Easy to manage
Cisco Connect software helps you customize your settings and quickly add multiple devices to your network:
Separate guest network
Create a separate, password-protected network for guests.
Parental controls
Limit access time and websites with parental controls.
IPv6 enabled
Supports the latest Internet protocol technology to future-proof your network.
Back view
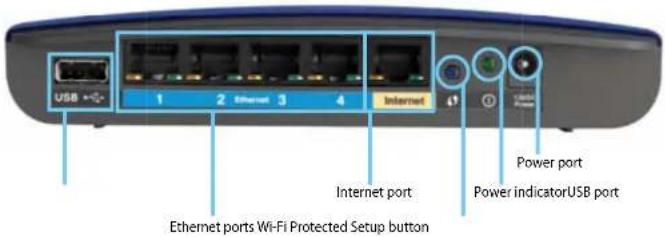
text_image
USB +Q- 1 2 Ethernet 3 4 Internet Internet port Power port Power indicatorUSB port Ethernet ports Wi-Fi Protected Setup button- USB port—To easily share disk storage with other users on your network or on the Internet, connect a USB drive to this port. For more information, see "Using an External Drive" on page 48. You can also connect a USB printer and share it across your network. For more information, see "How to connect a printer" on page 18.
- Ethernet ports—Connect Ethernet cables (also called network cables) to these Gigabit (10/100/1000) ports, color coded blue, and to wired Ethernet network devices on your network.
- Internet port—Connect an Ethernet cable (also called a network or Internet cable) to this port, color coded yellow, and to your modem.
- Wi-Fi Protected Setup™ button—Press this button to easily configure wireless security on Wi-Fi Protected Setup-enabled network devices. For more information, see "How to set up wireless security using Wi-Fi Protected Setup" on page 43.
- Power indicator—Stays on steadily while power is connected and following a Wi-Fi Protected Setup connection. Flashes slowly during bootup, during firmware upgrades, and during a Wi-Fi Protected Setup connection. Flashes quickly when there is a Wi-Fi Protected Setup error.
• Power—Connect the included AC power adapter to this port.
CAUTION
Use only the adapter that came with your router.
Port activity indicators
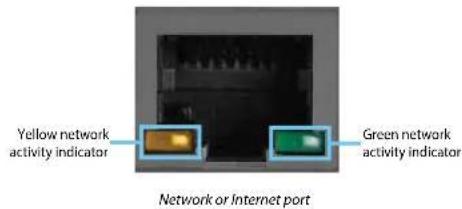
text_image
Yellow network activity indicator Green network activity indicator Network or Internet port- Green network activity indicator—On Ethernet ports, turns on when a cable connects the port to another Gigabit Ethernet port. On the Internet port, turns on while connected to a modem.
- Yellow activity indicator—Flashes to indicate network activity over that port.
Bottom view
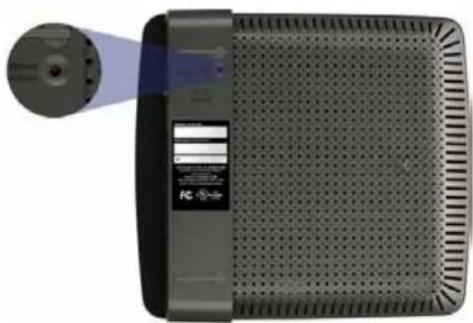
natural_image
Exterior view of a black rectangular electronic device with ventilation grille and indicator lights (no visible text or symbols)- Reset button—Press and hold this button for 5-10 seconds (until the port lights flash at the same time) to reset the router to its factory defaults. You can also restore the defaults using the browser-based utility. For more information, see "How to restore factory defaults" on page 61.
E4200
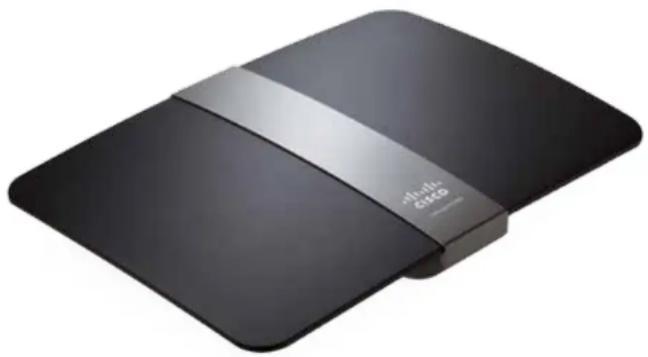
natural_image
Black rectangular electronic device with a silver strap and 'chips' logo, shown against a white background (no text or symbols on the device itself)Package contents
In addition to your router, your router package includes:
• Network (Ethernet) cable
- AC power adapter
- Setup CD containing router setup software and documentation
Features
Wireless-N technology
Built with leading 802.11n wireless technology, your router offers maximum speed and range to create an ultra-powerful network designed for home theater performance. Connect your computers, Internet-ready TVs, game consoles, smartphones and other Wi-Fi devices at blazingly fast transfer rates for an unrivaled experience.
The power of dual band
Double your network bandwidth with simultaneous dual-band N (2.4 and 5 GHz). The dual-band feature is designed to avoid interference and optimize throughput for smoother and faster HD video streaming, file transfers, and wireless gaming.
SpeedBoost
Higher quality antenna technology helps maintain high speeds across greater distances throughout your home.
Advanced security
Keep Wi-Fi freeloaders and Internet threats at bay with WPA2 encryption and SPI firewall to help keep your network protected.
Benefits of gigabit
Use the four Gigabit Ethernet (10/100/1000) ports for quick file sharing (up to 10× faster than standard Ethernet) between other Gigabit-enabled devices like computers and servers.
Built-in USB port and UPnP media server
The USB storage port lets you add an external USB drive to your network and share files at home or over the Internet. It also features a built-in UPnP AV media server for seamless streaming of your video and media files to an Xbox 360, PS3, or other UPnP-compatible device. You can also connect a USB printer and share it across your network.
Home theater ready
Bring the ultimate entertainment experience to your home by connecting computers, Internet-ready TVs, game consoles, media players, and more to your wireless network and the Internet. Simultaneous dual-band N and QoS traffic prioritization technology delivers maximum speed and performance so you can enjoy fast downloads, smooth video and music streaming, and reliable gaming and VoIP.
Quick to install
Cisco Connect software helps you easily set up your router.
IPv6 enabled
Supports the latest Internet protocol technology to future-proof your network.
Easy to manage
Cisco Connect software helps you customize your settings and quickly add multiple devices to your network:
Separate guest network
Create a separate, password-protected network for guests.
Parental controls
Limit access time and websites with parental controls.
Top view
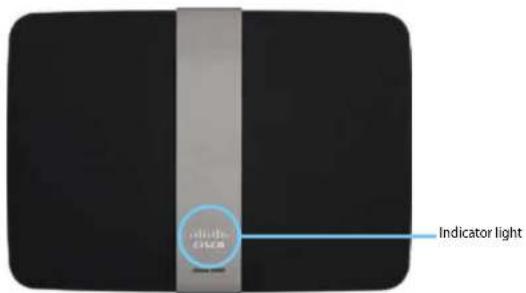
text_image
indicate EFSER Indicator light- Indicator light—Stays on steadily while power is connected and following a successful Wi-Fi Protected Setup connection. Pulses slowly during bootup, during firmware upgrades, and during a Wi-Fi Protected Setup connection. Flashes quickly when there is a Wi-Fi Protected Setup error.
Back view
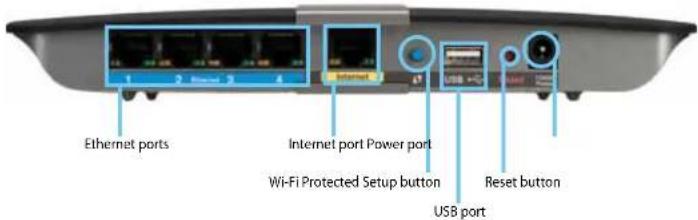
text_image
Ethernet ports Internet port Power port Wi-Fi Protected Setup button Reset button USB port- Ethernet ports—Connect Ethernet cables (also called network cables) to these Gigabit (10/100/1000) ports, color coded blue, and to wired Ethernet network devices on your network.
- Internet port—Connect an Ethernet cable (also called a network or Internet cable) to this port, color coded yellow, and to your modem.
- Wi-Fi Protected Setup™ button—Press this button to easily configure wireless security on Wi-Fi Protected Setup-enabled network devices. For more information, see "How to set up wireless security using Wi-Fi Protected Setup" on page 43.
- USB port—To easily share disk storage with other users on your network or on the Internet, connect a USB drive to this port. For more information, see "Using an External Drive" on page 48. You can also connect a USB printer and share it across your network. For more information, see "How to connect a printer" on page 18.
- Reset button—Press and hold this button for 5-10 seconds (until the port lights flash at the same time) to reset the router to its factory defaults. You can also restore the defaults using the browser-based utility. For more information, see "How to restore factory defaults" on page 61.
• Power—Connect the included AC power adapter to this port.
CAUTION
Use only the adapter that came with your router.
Port activity indicators
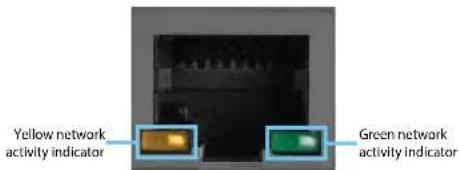
text_image
Yellow network activity indicator Green network activity indicatorNetwork or Internet port
- Green network activity indicator—On Ethernet ports, turns on when a cable connects the port to another Gigabit Ethernet port. On the Internet port, turns on while connected to a modem.
- Yellow network activity indicator—Flashes to indicate network activity over that port.
Setting Up: Basics
How to create a home network
For ALL
What is a network?
A network is any group of devices that can communicate with each other. A home network can also include Internet access, which requires a router like this one.
A typical home network may include multiple computers, a printer, a modem, and a router. A large home network may also have a switch, additional routers, access points, and many Internet-capable media devices such as TVs, game consoles, and web cameras.
- Modem—Connects a computer or a router to your ISP (Internet Service Provider).
- Router—Connects your wireless and wired network devices to each other and to the modem (and to your ISP).
- Switch—Allows you to connect several wired network devices to your home network. Your router has a built-in network switch (the Ethernet ports). If you have more wired network devices than available Ethernet ports on your router, you will need an additional switch to consolidate the wired connections.
How to set up a home network
- Purchase the proper equipment. For a network that includes Internet access, you'll need:
• Computers with an Ethernet port or wireless networking capabilities
- A modem for connecting to your ISP (typically supplied by your ISP)
- A router to connect your computers with each other and to the modem
- Internet service to your home, provided by an ISP (Internet Service Provider)
- Make sure that your modem is working. Your ISP can help you set up your modem and verify that it's working correctly.
- Set up your router. See "How to set up your router" on page 13.
- To connect a computer or other network device to the network, see "How to connect a computer to your network" on page 16 and "How to connect other devices" on page 18.
Where to find more help
For ALL
In addition to this User Guide, you can find help at these locations:
- Linksys.com/support (documentation, downloads, FAQs, technical support, live chat, forums)
- Setup CD (Troubleshooting Guide, legal and regulatory notices)
- Cisco Connect help (run Cisco Connect, then click Learn More where available)
- Browser-based utility context-sensitive help (open the utility, then click Help in the right-side column.)
How to set up your router
For ALL
The easiest and fastest way to set up your router is to run the Cisco Connect setup software. You can find Cisco Connect on the CD that came with your router or download it from the router's support site at Linksys.com/support. Cisco Connect shows you how to connect your router to your home network, step by step. To get started, see "How to start Cisco Connect" below.
If you are an advanced user, you can set up your router manually using the browser-based utility. To get started, see "How to open the browser-based utility" on page 25.
How to start Cisco Connect
When you run the setup CD, Cisco Connect (your router's setup software) is automatically installed onto your computer. You can then use Cisco Connect to easily manage your router. To install Cisco Connect on another computer after your router has been set up, see "How to install Cisco Connect on another computer" on page 12.
NOTES:
Your Cisco Connect CD works with only this router model.
If you lose your setup CD, you can download the software from Linksys.com/support.
To start Cisco Connect for the first time:
- Insert the CD into your CD or DVD drive.
- Click Set up your Linksys Router.
If you do not see this:
- For Windows, click Start, Computer, then double-click the CD drive and the Setup icon.
-
For Mac, double-click the CD icon on your desktop, then double-click the Setup icon.
-
Follow the on-screen instructions to complete your router setup. When setup has finished, Cisco Connect has also been installed onto your hard drive.
After your router has been set up and Cisco Connect has been installed, you can use Cisco Connect to easily manage many of your router's settings.
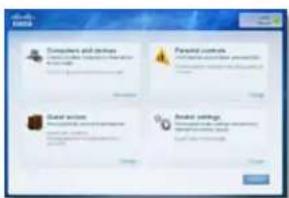
text_image
Computers and Settings Personal custom General settings Audio settingsTo start Cisco Connect on a Windows computer:
- Click Start, All Programs, then click Cisco Connect. The Cisco Connect main menu opens.

To start Cisco Connect on a Mac OS X computer:
- Open the Applications folder, then double-click the Cisco Connect icon. The Cisco Connect main menu opens.
To install Cisco Connect on another computer:
- See "How to connect a computer using an Easy Setup Key" on page 16. When finished, Cisco Connect has also been installed onto the computer's hard drive.
CAUTION
After your router has been set up, do not run the setup CD to install Cisco Connect to another computer. If you run the setup CD again, you will be prompted to enter the router's network name (SSID) and password.
How to improve your wireless connection speed
For ALL
Follow these tips to improve your network's wireless connection speed:
• Make sure that your router is in a good location:
- For the widest coverage area, install your router near the center of your home, and near the ceiling, if possible.
- Avoid placing the router on or near metal objects (such as file cabinets and metal furniture), reflective surfaces (such as glass or mirrors), or masonry walls.
- Any obstruction can weaken the wireless signal (even non-metallic objects), so the fewer obstructions between the router and the wireless device, the better.
- Place the router in a location away from other electronics, motors, and fluorescent lighting.
- Many environmental variables can affect the router's performance, so if your wireless signal is weak, place the router in several locations and test the signal strength to determine the ideal position.
- If possible, upgrade wireless network interfaces (such as wireless network cards in computers) from older wireless standards to 802.11n. If a wirelessly networked device uses an older standard, the performance of the entire wireless network may be slower.
How to test your Internet connection speed
For ALL
To test your Internet connection speed:
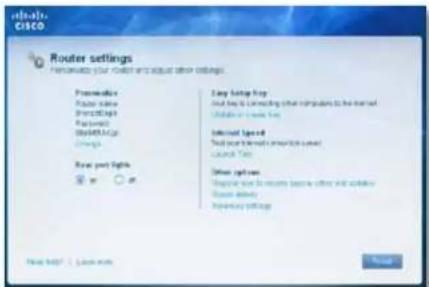
- Run Cisco Connect, then click Change under Router settings. The Router settings screen opens.
text_image
CISCO Router settings Permanently your router and adjust other settings. Promoterable Router Name (Nett361) Router (Nett450) Options New port rights Easy Debug Help How help can connecting other computers to the network <|vision_start|> user or server type Internet Open You have been a network user Launch Type Other options: Regular bus to receive before or after which available Show details Temporary settings New help? Live new Stop- Click Launch Test under Internet Speed. The Internet speed test screen opens.
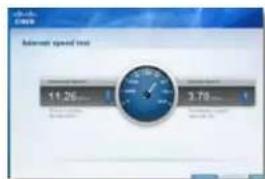
- Follow the on-screen instructions to complete the test.
text_image
Admiral speed limit 11.26 3.70 1How to connect devices to your network
For ALL
How to connect a computer to your network
You can connect a computer to your network using an Easy Setup Key (the easiest way) or manually.
How to connect a computer using an Easy Setup Key
To use an Easy Setup Key, you first need to create one using any available USB drive. After it has been created, you can use the same key to connect several computers to your network.
TIP
The Easy Setup Key stores network information (name, password, security type, and security key) so you don't have to remember them.
To create an Easy Setup Key:
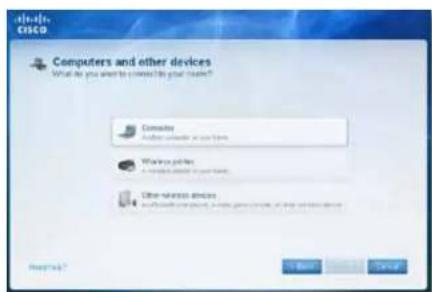
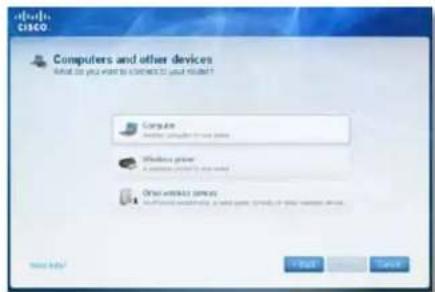
- Run Cisco Connect, then click Add device under Computers and devices. The Computers and other devices screen opens.
text_image
Cisco CISCO Computers and other devices What do you want to connect the Google Server? Computer Windows 系统 Other Services devices Reset Now? Next Cancel2. Click Computer.
text_image
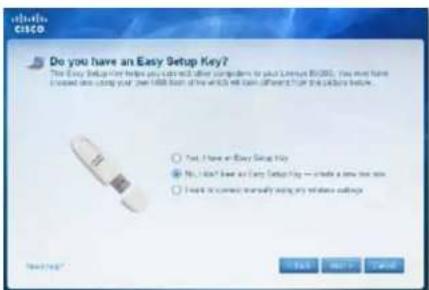
Do you have an Easy Setup Key? This Easy Setup is here you can't allow computers to your Linux 80/80. You must have I created once using your .net 1488 from all the which will learn different times the package before. • Yes, I have an Easy Setup Key • No, I don't have an Easy Setup Key -- create a new user now • I need it correct internally using any wireless buttons- Select No, I don't have an Easy Setup Key, then click Next.
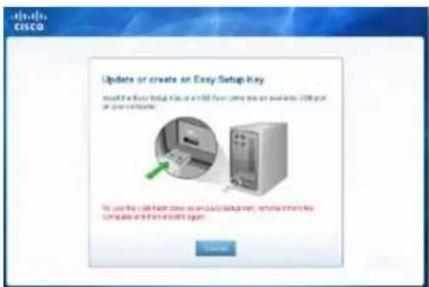
- Insert a USB drive into an available USB port on your computer. This USB drive will be your new Easy Setup Key.
Cisco Connect detects the newly attached USB drive and copies the router's settings and a copy of Cisco Connect to it.
text_image
Update or create an Easy Setup Key I would find easy setup key as a 3.5x speedup when you are available (3.5x) but or your computer. To use the 3.5x faster mode on a daily setup, which offers the complete or more efficient option.- When the files have finished copying, remove the Easy Setup Key from your computer. You can now use it to install Cisco Connect onto other computers and to connect them to the network.
- Click Close.
To use your Easy Setup Key to connect a computer to your network:
- Run Cisco Connect, then click Add device under Computers and devices. The Computers and other devices screen opens.
- Click Computer.
text_image
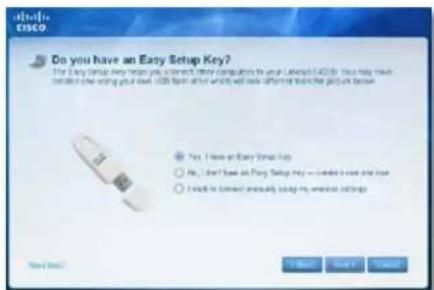
Do you have an Easy Setup Key? For a Easy Setup key helps you connect your computers to your Lenovo 4.02.0. You may have select this key using your level. USB flash at the website will also offer that the quick or better. Yes: I have an Easy Setup Key No: I don't have an Easy Setup key -- create a new and new I need to connect manually using my setup settings Next Step? OK Cancel Apply- Select Yes, I have an Easy Setup Key, then click Next. The Connecting another computer screen opens.
- Insert the Easy Setup Key into an available USB port on the computer that you want to connect to the network. The Connecting another computer screen opens.
If you do not see this, use Windows Explorer or Finder to view the Easy Setup Key files, then double-click Connect.
- Click Connect to your router, then follow the on-screen instructions.
- Return to the computer running Cisco Connect, then click Next.
- Enter a name for the newly connected computer, then click Finish.
How to connect a computer manually
To connect a computer without using an Easy Setup Key, you will need to print or take note of some information.
IMPORTANT
When you manually connect a computer to the network, the computer will not have Cisco Connect installed on it.
To manually connect a computer to your network:
- Run Cisco Connect, then click Add device under Computers and devices. The Computers and other devices screen opens.
text_image
Cisco Computers and other devices NAME: US dollars TO CONNECT TO your website? Computer Microsoft Windows Windows power A network configuration is used to use the following functions: Other wireless services Microsoft Windows is used to access these services for your website. Next > Cancel- Click Computer.
- Select I want to connect manually using my wireless settings, then click Next. A screen opens that displays network information.
- Write down the Network name (SSID), Security Key, and Security Type information, or click Print these settings if you have a printer attached.
- At the computer you want to connect, enter the network information into your wireless manager.
- After that computer connects to your network, return to the computer running Cisco Connect, then click Next.
- Click Connect to your Linksys router, then follow the on-screen instructions.
- When you are prompted to enter a name for the newly connected computer, enter the name, then click Finish.
How to connect a printer
When you install a printer that requires a cable, you can:
- Follow the printer's instructions for setting it up, then follow your computer's operating system instructions to share the printer with your network.
TIP
Setting up your printer this way does not require Cisco Connect.
- OR -
- If your router is a Linksys E3200 or E4200, you can connect a USB printer to the router's USB port to make the printer available to any networked computer.
When you set up a wireless printer, you need to make sure that:
- Your printer has been completely set up except for being connected to the network.
- Your printer supports the WPA/WPA2 wireless encryption standard.
- If your wireless printer supports WPS (Wi-Fi Protected Setup), you should use WPS to connect it to your network. See "How to set up wireless security using Wi-Fi Protected Setup" on page 43.
To connect a wireless printer to your network:
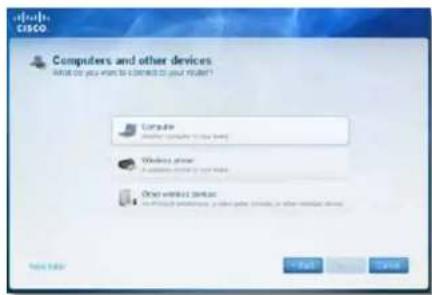
- Run Cisco Connect, then click Add device under Computers and devices. The Computers and other devices screen opens.
text_image
Computers and other devices What do you want to access to your website? Computer Windows server Other wireless devices Next page Finish Cancel- Click Printer, then click Wireless printer. A screen opens that displays network information.
- Write down the Network name (SSID), Security Key, and Security Type information, or click Print these settings if you have a different printer already connected.
- Follow your printer's instructions for entering the wireless network information into your printer.
- After the printer connects to your network, click Next in Cisco Connect.
- Return to the computer running Cisco Connect, then click Next. The Name your printer screen opens.
- Enter a name for the printer, then click Finish.
- Follow your computer operating system's instructions for adding the new printer to your list of available printers.
To connect a USB printer to your network through the router's USB port: For E3200B4200
- Run Cisco Connect, then click Add device under Computers and devices. The Computers and other devices screen opens.
- Click Printer, then click USB Printer.
- Follow the on-screen instructions for connecting the printer. This process may take several minutes.
- Repeat Steps 1-3 on each computer you want to print from. For information on installing Cisco Connect onto other computers, see "To install Cisco Connect on another computer:" on page 14.
How to connect other devices
Many other types of wireless network devices can connect to your home network, including:
- Game consoles
• Internet-capable TVs and media players
• Digital music players - Smart phones
Because of the wide variety of devices and methods of connecting, you must manually enter network information into the devices for a successful network connection.
To manually connect a device to your network:
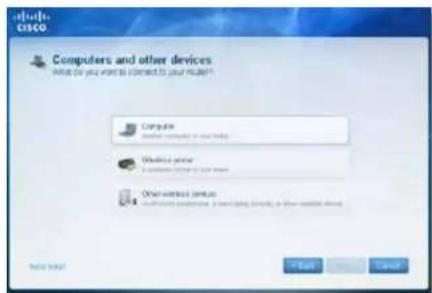
- Run Cisco Connect, then click Add device under Computers and devices. The Computers and other devices screen opens.
text_image
CSCO Computers and other devices What do you want to connect to your status? Computer Other devices Bluetooth server Other devices (Windows, Windows, or Other) connected to the network.- Click Other wireless devices. A screen opens that displays network information.
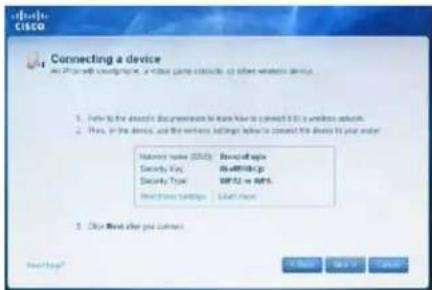
- Write down the Network name (SSID), Security Key, and Security Type information, or click Print these settings if you have a printer attached.
text_image
Connecting a device • Use PC with connectivity, a virtual game console, or other wireless devices. 1. Refer to the device's documentation to learn how to connect it in a wireless network. 2. Thus, in the device, and the wireless settings below to connect the devices to your order. Honeywell Name (HON): Davonette Security Key: Wi-Fi/8003p Security Type: Wi-Fi/8003p Network type: Wi-Fi/8003p 3. Click Next after you connect.- Follow your device's instructions for entering the wireless network information into the device.
- After the device connects to your network, return to the computer running Cisco Connect, then click Next.
- Enter a name for device, then click Finish.
For more instructions on connecting a game console to your network, see also:
• "How to optimize your router for gaming and voice" on page 32
• "How to set up port forwarding" on page 57
• "How to set up port range triggering for online gaming" on page 59
How to set up parental controls
For E1200 E1500 E2500 E3200 E4200
With your router, you can use parental controls to:
- Set the times that Internet access is allowed.
• Block websites that you specify or based on their content. - Set the above restrictions for specific computers.
TIPS
- You can also set parental controls in the browser-based utility. On the E4200, click the Access Restrictions tab. On other Linksys routers, click the Access Restrictions tab, then click the Parental Controls page.
- When someone tries to open a blocked website, a window opens asking for the parental controls password. Enter the password to view the blocked content.
How to access parental controls
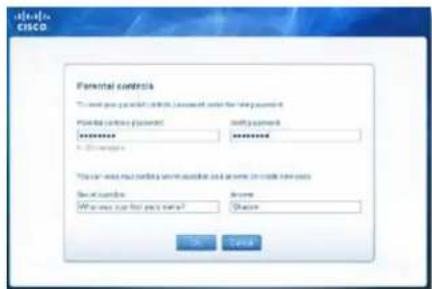
The first time you try to access parental controls, you are asked to set a password.
To access parental controls for the first time:
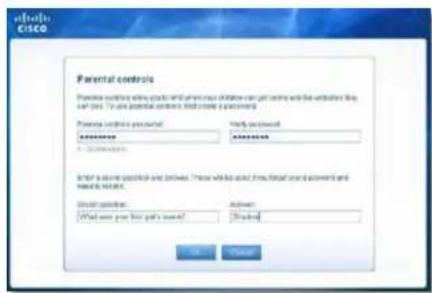
- Run Cisco Connect, then click Change under Parental controls. The Parental controls password screen opens.
text_image
CISCO Parental controls Parental controls existing student and where most children can get inside and get outside they are out. To be potential controls, they create a program. Parental controls provider: Valid password ########: ######## #OR: to use the client and other. These will also be found if filled your password and needs to access. Out of this: Answer: What was you that got a home? [Shared]-
Enter a password (from 4 to 32 characters), then enter a secret question and answer.
-
The password must contain from 4 to 32 valid characters, which are A-Z, a-z, and 0-9.
-
The answer to the secret question should be something not easily guessed by others. If you forget your password, you can reset it by correctly answering your secret question.
-
To save your settings, click OK. The Parental controls main screen appears.
To access parental controls after the first time:
- Run Cisco Connect, then click Change under Parental controls. The Enter the parental controls password screen opens.
- Enter the parental control password, then click OK.
NOTE
If you forgot the password, click I forgot my password and enter the answer to your secret question.
The Parental controls main screen appears.

text_image
Cisco Parental controls List when your children get articles and what was used (Try can be Parenter server access on Google Server) Check server access Name Always Specific Info Screen rights 10.0000 Password 10.0000 Check specific info 1:00 Change parental create params Next Page? > Next page FinishTo change the parental controls password:
- In the Parental controls main screen, click Change parental controls password, then follow the on-screen instructions.
text_image
CSCO Parental controls This was your parent code (accessed) for the password. Parental controls password: password • Password: ******** • Password: ******** • This was your parent code (accessed) and so as to create new user. Device number: Account If you have your first user name? ShareHow to select the computers to have parental controls
It's not necessary to set parental controls over each computer on your home network. You can set the controls on only those computers that children can access.
To select computers that will have parental controls:
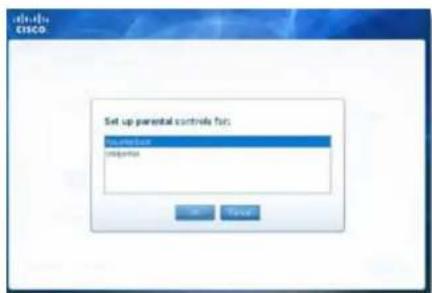
- In the Parental controls main screen, click + (add) under the Restrict Internet access on box.
text_image
Studio CISCO Set up parental controls func: Form/Description Instructions OK Cancel- Click the computer name, then click OK. The computer is added to the list of computers with parental controls.
- To remove parental controls from a computer, click the computer name in the Restrict Internet access on box, then click – (remove).
How to set parental controls
- In the Parental controls main screen, click the computer name to set parental controls for.
- Under Block Internet access, specify when the computer's Internet access will be blocked:
• Never does not block Internet access.
• Always blocks Internet access at all times.
- Specific times blocks Internet access only during specific times. If you select this option, set the schedule for School nights (Monday through Friday) and Weekends (Saturday and Sunday).
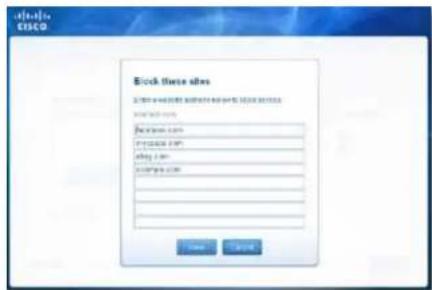
3. To create or change a list of specific websites to block, click Edit next to Block specific sites. The Block these sites screen opens.
text_image
Stock these sites STOCK NAME: CSCOPE & COGNIC RESOURCES stock.com Bancorp.com Investor.com Alloy's.com Investor.com Save Createa. On a blank line, enter a website address that you want to block.
b. Click Save to save the list and return to the Parental controls main screen.
-
To save your changes, click Finish.
-
Repeat the above steps for each computer that you want to set parental controls for.
How to set up guest access to your network
For E1200 E1500 E2500 E3200 E4200
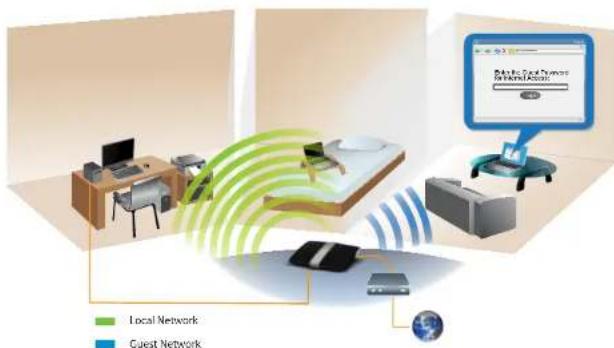
You can use your router's guest access feature to provide your guests with access to the Internet, while restricting their access to other resources on your local network. The guest network is shown as an open, unsecure wireless network that your guests can easily connect to. To prevent unauthorized users from using your Internet access, your guest network requires that a password be entered for Internet access. The guest network is enabled by default.
text_image
Local Network Guest NetworkLocal Access and Guest Access Diagram
To set up guest access to your network:
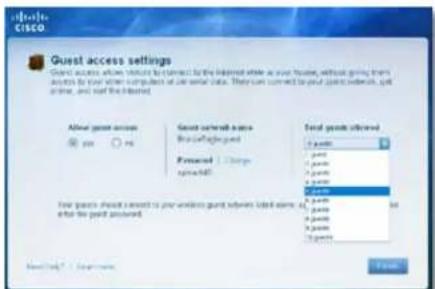
- Run Cisco Connect, then click Change under Guest Access. The Guest Access screen opens.
text_image
Cloud CISCO Guest access settings Guest access allows features by correct for the internet while at your home, without going from access for your own computer or on-site sites. They can be connected to your guest resources, get online, and read the internet. About guest access • 500 • 100 Guest access details • 2000-2003 Personal Change • spread/All Final guest allowed • 1 point • 2 points • 3 points • 4 points • 5 points • 6 points • 7 points • 8 points • 9 points • 10 points • 11 points • 12 points • 13 points • 14 points • 15 points • 16 points • 17 points • 18 points • 19 points • 20 points • 21 points • 22 points • 23 points • 24 points • 25 points • 26 points • 27 points • 28 points • 29 points • 30 points • 31 points • 32 points • 33 points • 34 points • 35 points • 36 points • 37 points • 38 points • 39 points • 40 points • 41 points • 42 points • 43 points • 44 points • 45 points • 46 points • 47 points • 48 points • 49 points • 50 points • 51 points • 52 points • 53 points • 54 points • 55 points • 56 points • 57 points • 58 points • 59 points • 60 points • 61 points • 62 points • 63 points • 64 points • 65 points • 66 points • 67 points • 68 points • 69 points • 70 points • 71 points • 72 points • 73 points • 74 points • 75 points • 76 points • 77 points • 78 points • 79 points • 80 points • 81 points • 82 points • 83 points • 84 points • 85 points • 86 points • 87 points • 88 points • 89 points • 90 points • 91 points • 92 points • 93 points • 94 points • 95 points • 96 points • 97 points • 98 points • 99 points- Under Allow guest access, click yes (default) to allow guest Internet access. Otherwise, click no to disable guest access.
- Take note of the Guest account's network name and password. You will need to provide this information to your guests.
TIPS
To keep your guest network secure, click Change to change the guest password when the guest no longer needs access to the account.
You can view the Guest account's name and password in Cisco Connect's main screen.
- In the Total guests allowed drop-down box, select the number of simultaneous guest network users you want to allow.
- Click Finish to apply your changes.
TIP
The first time your guest tries to access the Internet through a web browser, they will see the Guest access screen. To continue, they must enter the password you provided in the Password field, then click LOGIN.
How to change your router's name and password
For ALL
You can change the name and password of your router, but if you do so, all wireless devices connected to your router will lose their Internet connection until you reconnect them using the new router name and password.
CAUTION
If you change your router's name and password using the browser-based utility, you may not be able to manage your router using Cisco Connect. We recommend using the procedure below to change your router's login information.
To change your router's name and password:
- Run Cisco Connect, then click Change under Router settings.
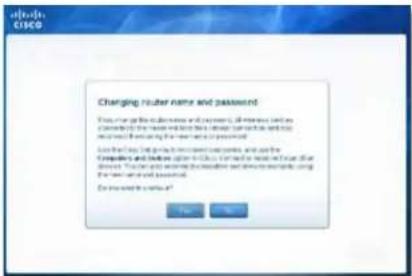
- Under Personalize, click Change. A Changing router name and password warning appears
text_image
Charging router name and password Please change the router name and password, all reference lists are componentally. The server contains the default key for the network and is not being any other key or password. Allow that any details are common as common, and use the computer and device access to a CSCO file with the server found that otherwise. You can also receive the computer and device access using the server name and password. For more than 100%? Yes No- Click Yes if you want to continue.
- Enter the new router name and password, then click Change.
TIP
After you make changes, update your Easy Setup Key to make it easier to reconnect all of the other computers on the network.
Setting Up: Advanced
How to open the browser-based utility
For ALL
To access some advanced settings, you need to open the browser-based utility.
CAUTION
If you change settings in the browser-based utility, you might not be able to run Cisco Connect later.
To open the browser-based utility:
- Run Cisco Connect, click Change under Router settings, click Advanced settings, then click OK.
-or-
Open a web browser on a computer connected to your network, then go to 192.168.1.1. If your router is version 2 (look for V2 on router's bottom label), you can go to myrouter.local instead.
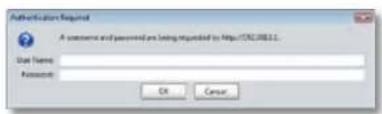
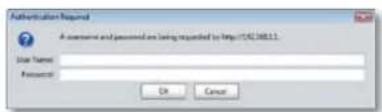
The router prompts you for a user name and password.
text_image
Authentication Request A comment and password are being requested to https://82.0811. Start Name: Password: OK Cancel- Enter the user name and password, then click OK. The utility's main menu opens.
TIPS
If you set up your router without using Cisco Connect, your router's default username and password is admin.
If you used Cisco Connect to set up your router, you can see your router's user name and password by running Cisco Connect, then clicking Router settings.
text_image
Setup Setup Name: Design Form Name: Form Type: Form Date: Form Date: Form Date: Form Date: Form Date: Form Date: Form Date: Form Date: Form Date: Form Date: Form Date: Form Date: Form Date: Form Date: Form Date: Form Date: Form Date: Form Date: Form Date: Form Date: Form Date: Form Date: Form Date: Form Date: Form Date: Form Date: Form Date: Form Date: Form Date: Form Date: Form Date: Form Date: Form Date: Form Date: 100 Form Date: 100 Form Date: 100 Form Date: 100 Form Date: 100 Form Date: 100 Form Date: 100 Form Date: 100 Form Date: 100 Form Date: 100 Form Date: 100 Form Date: 100 Form Date: 100 Form Date: Form Date: Form Date: Form Date: Form Date: Form Date: Form Date: Form Date: Form Date: Form Date: Form Date: Form Date: Form Date: Form Date: Form Date: Form Date: Form Date: Form Date: Form Date: Form Date: Form Date: Form Date: Form Date: Form Date: Form Date: Form Date: System Setup System Setup Type Standard Settings Standard Settings Standard Settings Standard Settings Standard Settings Standard Settings Standard Settings Standard Settings Standard Settings Standard Settings Standard Settings Standard Settings Standard Settings Standard Settings Standard Settings Standard Settings Standard Settings Standard Settings Standard Settings Standard Settings Standard Settings Standard Settings Standard Settings Standard Settings Standard Settings Standard Settings Standard Settings Standard Settings Standard Settings Standard Settings Standard Settings Standard Settings Standard Settings Standard Settings System Setup System Setup Type Standard Settings Standard Settings Standard Settings Standard Settings Standard Settings Standard Settings Standard Settings Standard Settings Standard Settings Standard Settings Standard Settings Standard Settings Standard Settings Standard Settings Standard Settings Standard Settings Standard Settings Standard Settings Standard Settings Standard Settings Standard Settings Standard Settings Standard Settings Standard Settings Standard Settings Standard Settings Standard Settings Standard Settings Standard Settings Standard Settings Standard SettingsHow to manually set up your router
For ALL
Although running Cisco Connect is the easiest way to set up and maintain your router, advanced users may want to manually configure their router. Be careful when changing settings using this method.
To manually set up your router:
- If you have started the Cisco Connect setup, exit Cisco Connect.
- Connect your router's power adapter to a power outlet.
- Connect an Ethernet cable to the computer and to an available numbered Ethernet (blue) port on the back of your router.
- Open a web browser on the computer and open the address 192.168.1.1. A login window appears. If your router is version 2 (look for V2 on router's bottom label), you can go to myrouter.local instead.
text_image
Authentication Request A certificate and password are being requested to http://42.36811. User Name: Password: OK Cancel- Enter the default password (admin). If your router is the E4200 V2 (check the version number on the bottom of your router), you must enter admin as the user name. Otherwise, you can leave the user name blank. The browser-based utility opens to the main menu.
- After you finish changing settings, click Save Settings at the bottom of the screen.
- To exit the browser-based utility, close the web browser window.
TIP
For field descriptions, click Help in the right side of the screen.
How to manually set up your Internet connection
In most cases, Cisco Connect automatically sets up your Internet connection (see "How to start Cisco Connect" on page 14). For some ISPs (Internet Service Providers), especially those outside of the United States, you may need to manually configure your router's Internet connection. Your router supports six types of Internet connections.
Basic Internet connection settings
To manually configure your router's Internet connection:
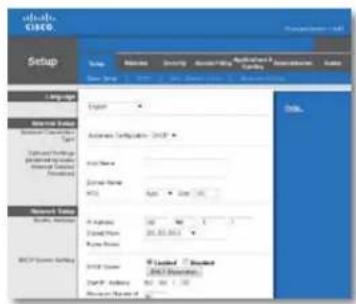
Setup > Basic Setup
- Log into the browser-based utility (see "How to open the browser-based utility" on page 25).
- Click the Setup tab, then click the Basic Setup page.
- In the Internet Connection Type drop-down list, click the type of Internet connection provided by your ISP. (Telstra Cable not available on the E4200.)
TIP
For field descriptions, click Help on the right side of the screen.
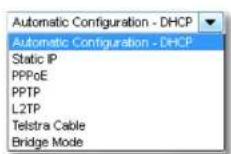
• Complete the fields required by your ISP.
- Complete the Optional Settings only if required by your ISP.
- Click Save Settings at the bottom of the page.
IPv6 Internet connection settings
For E900 E1200V2 E1500E2500E3200E4200
IPv6 is a new IP protocol that uses simplified packet headers and requires IPSec. It also has improved support for mobile IP and computing devices. If your router model supports IPv6, an IPv6 Setup page is available under the Setup tab.
NOTE
To use your router's IPv6 Internet connection settings, IPv6 service from your ISP (Internet service provider) is required. For more information on this service, ask your ISP.
To manually configure your router's IPv6 settings:
Setup > IPv6 Setup
- Log into the browser-based utility (see "How to open the browser-based utility" on page 25).
- Click the Setup tab, then click the IPv6 Setup page.
- IPv6 - Automatic—Select Enabled to automatically use IPv6 for all network addressing.
-
6rd Tunnel—Allows your router to send IPv6 IP addresses over IPv4 networks. To enable this option, IPv6 - Automatic must be set to Disabled. To let your router handle the 6rd Tunnel settings (such as prefixes and address masks), change the 6rd Tunnel setting to Automatic Configuration. Select Manual Configuration to change these settings manually.
-
Prefix—Enter the prefix address used for the tunnel provided by your ISP.
- Prefix Length—Enter the prefix length used for the tunnel provided by your ISP.
- Border Relay—Enter the border relay address used for the tunnel provided by your ISP.
-
IPv4 Address Mask—Enter the IPv4 address mask length used for the tunnel provided by your ISP.
-
Click Save Settings at the bottom of the page.
How to get the most out of your dual-band router
For E2500E8200E4200
I bought a dual band router, but I'm not sure that I'm getting the most out of it. What should I check? Of the many reasons for owning a dual-band router, the most common is to ensure available bandwidth for streaming high-definition video. At the same time, owners want to make sure that their video streams won't be interrupted by other wireless network traffic. To get the most out of your dual-band router, you can:
- Upgrade your wireless clients
- Split your traffic
Upgrade your wireless clients
If you have network adapters that support only legacy wireless network standards such as 802.11b, you should consider upgrading them with Wireless-N (802.11n) network adapters. Wireless-B (802.11b) devices can slow your entire wireless network. For the best performance, all of your wireless devices should support Wireless-N. You can then select Wireless-N Only as your Network Mode below.
NOTE
If you select Wireless-N Only, you may need to temporarily change your network settings to Mixed to provide access to guests without Wireless-N networking.
Split your traffic
The best way to improve your multimedia wireless performance is to split your wireless traffic between your router's two bands (ranges of radio frequencies). Your router supports the 2.4 GHz band and the 5 GHz band, and handles the two bands as two separate wireless networks to help manage the traffic.
The most common way to split wireless traffic is to use the 2.4 GHz band for basic Internet tasks such as web browsing, email, and downloads, and use the 5.0 GHz band for streaming multimedia. There are several reasons for this approach:
Linksys E-Series
Setting Up: Advanced
- Although the 2.4 GHz band may be more crowded with wireless traffic from your neighbors, it's fine for basic Internet traffic that is not time-sensitive (such as e-mail).
- Even though you are connected to your own wireless network, you are still sharing "air time" with nearby networks.
- The 5 GHz band is much less crowded than the 2.4 GHz band, so it's ideal for streaming multimedia.
- The 5 GHz band has more available channels, so it is more likely that you will have your own, interference-free channel for your wireless network.
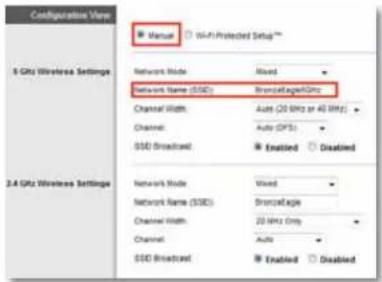
By default, your dual-band router uses the same network name on both the 2.4 GHz band and the 5 GHz band. If you are connecting to your router with a computer that has a dual-band wireless network adapter, you might not be able to determine which band you're using. The easiest way to segment your traffic is to rename one of your wireless networks. With a separate, descriptive name, it will be easy to connect to the right network.
To reconfigure your wireless network:
Wireless > Basic Wireless Settings or Wireless Settings
- Log into the browser-based utility (see "How to open the browser-based utility" on page 25).
- Click the Wireless tab, then click the Basic Wireless Settings or Wireless Settings page.
- Click Manual. This enables you to make changes to all of the fields below.
text_image
Configuration View ■ Manual □ Wi-Fi Protected Setup** 5 GHz Wireless Settings Network Mode Mixed Network Name (SSD) Broadage/SSD Channel Width: Auto (20 MHz or 40 MHz) Channel: Auto (GPS) SSD Broadband Enabled Disabled 2.4 GHz Wireless Settings Network Mode Mixed Network Name (SSD) Broadage Channel Width: 20 MHz Only Channel: Auto SSD Broadband Enabled Disableda. Network Mode—Your choice depends upon the clients that will connect to your network. If all of your devices are Wireless-N capable, you can select Wireless-N Only for either or both bands.
On the 5 GHz band, you can select:
- Mixed (default), which accepts connections from 802.11a or 802.11n clients
• Wireless-A Only (802.11a only)
• Wireless-N Only (802.11n only)
• Disabled, which disables the 5.0 GHz band on this router
On the 2.4 GHz band, you can select:
- Mixed
- Wireless-B/G Only
- Wireless-B only
- Wireless-G Only
- Wireless-N Only
- Disabled
b. Network Name (SSID)—Provide a unique SSID for your 5 GHz wireless network. The name must not exceed 32 keyboard characters. In the example above, the 5 GHz wireless network was renamed BronzeEagle5GHz.
c. Channel Width—We recommend that you keep the default (Auto) settings. In Auto mode, the router and the network clients automatically switch to the 40 MHz mode if:
- Your wireless clients support the 40 MHz mode (sometimes called Bonded mode) in which two 20 MHz channels are bonded together for better performance.
• There is no adjacent interference.
With more available channels and less chance of interference on the 5 GHz band, you have the option to force the 40MHz mode.
On the 5GHz band, you can select:
• Auto (20 MHz or 40 Mhz)
• 20 MHz Only
• 40 MHz Only
On the 2.4 GHz band, you can select:
• Auto (20 MHz or 40Mhz) • 20 MHz Only
d. Channel—Choose the operating channel for each band. Your router will automatically select the channel with the least amount of interference if you leave the default Auto or Auto (DFS) setting. We recommend keeping the default settings for both bands.
e. SSID Broadcast—When wireless clients look for wireless networks to connect to, they detect the SSID (wireless network name) broadcast by the router. To broadcast your router's SSID, keep the default setting (Enabled). If you do not want to broadcast the router's SSID, select Disabled. We recommend keeping the default setting (Enabled) for both bands.
f. Security Mode (setting is on this page for the E4200, and on the Wireless > Wireless Security page for other routers)—The 5 GHz and 2.4 GHz networks can use different security options. Select the security option for each wireless network. If the security mode you select requires a passphrase, a Passphrase field appears, and you must enter a passphrase.
TIP Wireless-N networks should use the WP2-Personal security mode for best performance.
- To apply your changes, click Save Settings at the bottom of the screen.
How to set up the DHCP server on your router
For ALL
Your router can be used as a DHCP (Dynamic Host Configuration Protocol) server to automatically assign an IP address to each computer or device on your network. The DHCP server is enabled by default. If you already have a DHCP server on your network, or if you do not want to use your router as a DHCP server, you should disable this setting.
To configure your router's DHCP server settings:
Setup > Basic Setup > DHCP Server Settings
- Log into the browser-based utility (see "How to open the browser-based utility" on page 25).
- Click the Setup tab, then click the Basic Setup page.
-
Review the DHCP Server Setting fields (in the middle of the screen). You can:
-
Enable or disable the DHCP server.
-
Change the starting address for the DHCP server.
• Change the number of users (253 maximum). -
If you change any of the settings, click Save Settings at the bottom of the page.
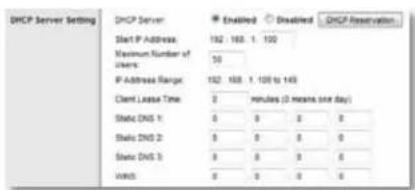
text_image
DHCP Server Setting Start IP Address: 192.168.1.100 Maximum Number of Users: 50 IP Address Range: 192.168.1.100 to 145 Client Lease Time: 0 minutes (3 means one day) Static DNS 1: 0 0 0 0 Static DNS 2: 0 0 0 0 Static DNS 3: 0 0 0 0 Watts: 0 0 0 0TIP
For field descriptions, click Help on the right side of the screen.
How to set up DHCP reservation
Why would I use it? DHCP reservation allows you to assign a unique, fixed IP address to a specific device on your network. Assigning a fixed IP address is a good way to manage devices such as print servers, web cameras, network printers, and game consoles. A fixed IP address is also recommended if you want to use port forwarding for devices that need to receive inbound traffic from the Internet ("How to set up port forwarding" on page 57).
To configure DHCP reservation:
Setup > Basic Setup > DHCP Reservation
- Log into the browser-based utility (see "How to open the browser-based utility" on page 25).
- Click the Setup tab, then click the Basic Setup page.
- Click DHCP Reservation (in the middle of the screen).
- Click Select next to the client you want to create a DHCP reservation for.
- Click Add Clients. The client you selected is added to the Clients Already Reserved table.
You can also manually enter a client name, IP address, and MAC address of a device to create a DHCP reservation.
- Click Save Settings.
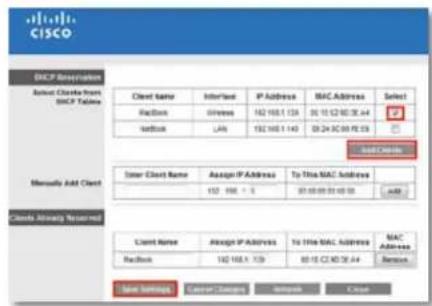
text_image
CISCO DHCP Subscription Select Channels from DHCP Settings Client Name InterName P Address MAC Address Select FACBox Express 192 165.1 139 04 10 12 00 32 44 Netbox LAB 192 165.1 140 09 24 30 00 78 55 Add Clients Enter Client Name Assign IP Address To This MAC Address 152 166 - 5 07:00:00 00:00:00 Add Clients Already Reserved Client Name Assign IP Address To This MAC Address MAC Address FACBox 192 165.1 139 03-15 C2 00 32 44 Session Save Settings Center Settings Session CancelTIP
For field descriptions, click Help on the right side of the screen.
How to find your network on the Internet
For ALL
Why would I need to find my network on the Internet? If you want to remotely access a USB drive attached to your router or view a web camera, you need to find your network on the Internet.
Working with several DDNS service providers, your router's DDNS feature lets you configure a domain name for your network, which you can then use to easily find your network on the Internet. If your ISP changes your network's IP address, the DDNS service providers detect the address change and continue to route your domain name to that address.
TIP
Before you configure DDNS on your router, you must sign up for DDNS service from a DDNS service provider that's supported by your router.
To set up DDNS:
Setup > DDNS
- Sign up for DDNS service at either www.dyndns.org or www.tzo.com.
- Log into the browser-based utility (see "How to open the browser-based utility" on page 25).
- Click the Setup tab, then click the DDNS page.
- In the DDNS Service drop-down list, click your DDNS service provider. The examples below are based on TZO.com. The settings used by DynDNS.org are slightly different.
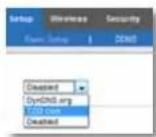
- Complete the fields with information provided by your DDNS provider, then click Save Settings. The Status field tells you what actions have been taken.
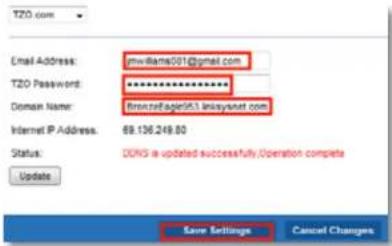
text_image
T20.com Email Address: mw-llama001@gmail.com T20 Password: ********** Domain Name: BronzeFager651 linearynet.com Internet P Address: 89.136.249.00 Status: DONG is updated successfully Operation compete Update Save Settings Cancel ChangesIn this example, the domain name registered with TZO.com is BronzeEagle953.linksysnet.com. If an Internet camera had been configured (see "How to set up port forwarding for a single port" on page 57), you could access the camera by typing the domain name into the address bar of your web browser followed by the port number used for the device. For example, if the camera in the above example used port 1024, the URL would be:
BronzeEagle953.linksysnet.com:1024
How to clone a MAC address
For ALL
On any home network, each network device has a unique MAC (Media Access Control) address. Some ISPs register the MAC address of the device (usually a router or a computer) connected directly to the modem. If your computer's MAC address is registered with your ISP and you do not want to re-register the MAC address, then you can clone the address (assign the registered MAC address of your previous device to your new router). If you want to use the MAC address from an old router that you are replacing with your new router, you should first determine the MAC address of your old router, then manually enter it into your new router.
NOTE
For many ISPs that provide dynamic IP addresses automatically, the stored MAC address in the modem is reset each time you reset the modem. If you are installing this router for the first time, reset your modem before connecting the router to your modem. To reset your modem, disconnect power for about one minute, then reconnect power.
To clone a MAC address from your computer:
Setup > MAC Address Clone
- Log into the browser-based utility (see "How to open the browser-based utility" on page 25).
- Click the Setup tab, then click the MAC Address Clone page.
- Click Enabled.
- Click either Clone My PC's MAC or enter the 12-digit MAC address of your old router.
- Click Save Settings.
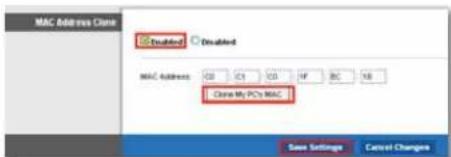
text_image
MAC Address Clone Disabled Disabled MAC Address: GB C1 CD HF BC NB Close My PC's MAC Save Settings Cancel ChangesHow to connect to your corporate office using a VPN
For ALL
What is a VPN, and do I need to change my router settings? A VPN (Virtual Private Network) is a network that uses a public network, such as the Internet, to provide secure communications between a remote computer and another network. Corporations often provide VPN access to their networks to enable employees to work from remote offices or while traveling. Most corporate VPNs use the Internet to provide connectivity between remote employees and the corporate network.
For a typical VPN, the corporation installs a VPN gateway on their corporate network. Employees authorized to work remotely connect to the VPN gateway through the Internet using VPN software and security methods provided by their employers. Robust security and authentication schemes ensure a secure connection and access by only authorized users.
The default VPN settings in your router have been configured to pass through (allow) the most common types of VPN protocols, so usually no changes are needed.
To change your VPN passthrough settings:
Security > VPN Passthrough
- Log into the browser-based utility (see "How to open the browser-based utility" on page 25).
- Click the Security tab, then click the VPN Passthrough page.
- Select each setting that you want to change.
TIP
For brief descriptions of the VPN passthrough field settings, click Help in the right side of the screen. More complete descriptions are provided below.
- IPSec Passthrough – IPSec (Internet Protocol Security) is a suite of protocols used to implement secure exchange of packets at the IP layer. The VPN clients on the local network can establish an IPSec VPN tunnel through the router. This option is enabled by default.
- PPTP Passthrough – PPTP (Point-to-Point Tunneling Protocol) allows the PPP (Point-to-Point Protocol) to be tunneled through an IP network. The VPN clients on the local network can establish a PPTP VPN tunnel through the router. This option is enabled by default.
-
L2TP Passthrough – L2TP (Layer 2 Tunneling Protocol) enables point-to-point sessions using the Internet on the Layer 2 level. The VPN clients on the local network can establish an L2TP VPN tunnel through the router. This option is enabled by default.
-
Click Save Settings to save your changes.
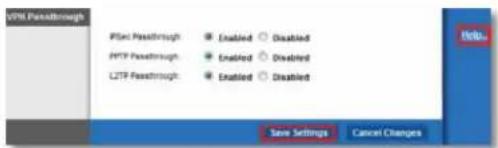
text_image
PFTP Passthrough PFTP Passthrough Enabled Disabled PFTP Passthrough Enabled Disabled LFTP Passthrough Enabled Disabled Save Settings Cancel ChangesHow to optimize your router for gaming and voice
For ALL
How does my router prioritize traffic to the Internet? Your router has QoS (Quality of Service) settings that can prioritize traffic from your network out to the Internet. Performance for demanding, real-time applications, such as online gaming, VoIP calls, video streaming, and videoconferencing, can be improved by configuring Internet access priorities.
QoS is applied only to traffic that is uploaded to the Internet. The router cannot control the quality of the traffic after it reaches the Internet.
TIP
For more information on optimizing your router for online gaming, see "Port Forwarding and Port Triggering" on page 57.
To configure QOS:
Applications & Gaming > QoS
- Log into the browser-based utility (see "How to open the browser-based utility" on page 25).
- Click the Applications & Gaming tab, then click the QoS page.
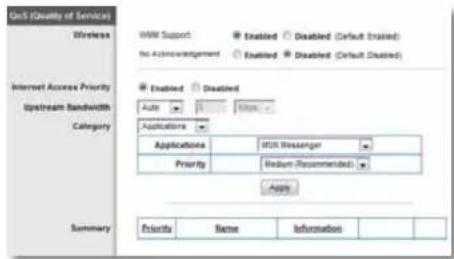
text_image
On Data Quality of Services Wireless Internet Access Priority Upstream Bandwidth Category Enabled Enabled Enabled (Default Drusted) No Acknowledgement Enabled Enabled (Default Drusted) Enabled Enabled Auto H10 H20 Applications Applications MSN Messenger Priority Medium (Recommended) Apply Summary Priority Before InformationTIP
For field descriptions, click Help on the right side of the screen.
- To help manage traffic priority with devices that support WMM, select Enabled under WMM Support. Otherwise, select Disabled.
TIP
WMM (Wi-Fi MultiMedia) Support is a wireless QoS feature based on the IEEE 802.11e standard. WMM improves quality for audio, video, and voice applications by prioritizing wireless traffic. This feature requires that the wireless client devices in your network also support WMM.
- To have the router re-send data if an error occurs, select Disabled under No Acknowledgement. Otherwise, select Enabled.
- To set access priorities for a specific device or application, select Enabled next to Internet Access Priority.
- In the Category drop-down list, select the type of item you want to set a priority for. A list of installed items fitting that description appears.
TIP
Do not set all priorities to High, because all items will have the same priority, and it would be easier to disable Internet Access Priority for the same result.
- Applications and Online Games—Let you assign a priority for an application or online game.
a) Select the application or online game that you want to add from the drop-down list, then select the priority.
b) Click Apply, then click Save Settings.
TIP
If you want to add a new application or game, you need to know its port and protocol information (see the application or game's documentation for help).
- MAC Address and Voice Device—Let you prioritize network traffic based on the device that is accessing the network. For example, if you want your gaming console to have higher priority than your computer for accessing the Internet, you can assign a higher priority to your game console using its MAC address. We recommend giving any voice devices a high priority.
a) Select MAC Address or Voice Device from the drop-down list, then enter the name of the device you want to add.
b) Enter the device's 12-digit MAC address, then select the priority.
c) Click Apply, then click Save Settings.
TIP
You can often find a device's 12-digit MAC address on the bottom of the device. Or, if the device is connected to your network and turned on, you can click the Administration tab in the router's browser-based utility, click the Local Network page, then click DHCP Client Table.
-
Configure Upstream Bandwidth.
-
To allow the router to detect the maximum, select Auto (default). Auto sets speeds in multiples of 512 Kbps.
- To specify the maximum, select Manual, then select the bandwidth you want it to use.
CAUTION
If you specify a maximum bandwidth that is too high, the router cannot apply priorities correctly, and QoS problems may result.
- When you are done setting priorities, click Save Settings.
How to remotely change your router settings
For ALL
Why would I want to remotely change my router settings? There may be times when you want to change parental control settings, or change settings for remote file access, while you are away from home.
To set up remote access:
Administration > Management
- Log into the browser-based utility (see "How to open the browser-based utility" on page 25).
- Click the Administration tab, then click the Management page and locate the Remote Management Access settings in the middle of the screen.
- For Remote Management, select Enabled.
- For Access via, select HTTP (default) or select HTTPS to use SSL (Secure Socket Layer) to encrypt data transmitted for higher security.
- To be able to upgrade your router's firmware remotely, select Enabled next to Remote Upgrade.
-
To allow remote access from anywhere on the Internet, select Any IP Address (default) next to Allowed Remote IP Address. Otherwise, enter a range of allowed IP addresses.
-
For Remote Management Port, keep the setting of 8080 (default) unless you already have a device on your network that uses port 8080 (such as a web camera).
- Click Save Settings at the bottom of the screen to accept your changes.
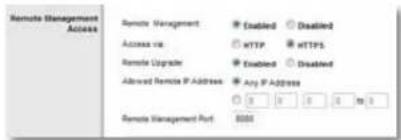
text_image
Remote Management Access Remote Management Enabled Disabled Access via HTTP HTTPS Remote Upgrade Enabled Disabled Allowed Remote IP Address Any IP-020199 Remote Management Port 8000- Click the Administration tab, then click the Management page and take note of the Internet IP Address and the Remote Management Port settings. You will use this information to access your router remotely.
To access your router remotely:
-
Open a web browser and enter the Internet address of your router, then press Enter.
-
If you selected HTTP for your Access via setting, enter http:// then the IP address.
- OR -
-
If you selected HTTPS for your Access via setting above, enter https://then the IP address.
-
Add a colon (:), then the Remote Management Port number. Example: https://69.192.16.170:8080
TIP
If you enabled the Dynamic Domain Name Service (see "How to find your network on the Internet" on page 30), you could type in your domain name in place of your router's Internet IP address. For example:
https://BronzeEagle953.linksysnet.com:8080
You are prompted for a user name and the password. Use the same login information that you use to access your router at home. After you have logged into your router's browser-based utility remotely, you can change any router setting, just as you would normally from your local network.
How to enable Voice over IP on your network
For ALL
Do I need to configure Voice over IP? VoIP (Voice over Internet Protocol) is a technology for using the Internet as an interface for telephone communications. To use VoIP, you need to get an account with a VoIP service provider. The VoIP service provider typically provides you with a telephone adapter (TA) that connects to your network. If you do not use your network to make phone calls, you don't need to change the default settings.
The SIP (Session Initiation Protocol) ALG (Application Layer Gateway) feature allows SIP packets, used by some VOIP service providers, to traverse (go through) your router's firewall.
To configure the router for VoIP:
Administration > Management
- Log into the browser-based utility (see "How to open the browser-based utility" on page 25).
- Click the Administration tab, then click the Management page.
- If your VoIP service uses SIP, select Enabled next to SIP ALG.
- OR -
If your VoIP service uses other NAT traversal solutions such as STUN (Session Traversal Utilities for NAT), TURN (Traversal Using Relay NAT), or ICE (Interactive Connectivity Establishment), select Disabled (default).

NOTE
You may need to contact your VoIP service provider to determine the type of NAT traversal configuration they use.
How to configure UPnP
For ALL
What is UPnP? UPnP (Universal Plug and Play) allows devices connected to a network to discover each other and automatically create working configurations. Examples of UPnP-capable devices include web cameras, online gaming applications, and VoIP devices. UPnP is enabled by default.
To configure UPnP:
Administration > Management
- Log into the browser-based utility (see "How to open the browser-based utility" on page 25).
- Click the Administration tab, then click the Management page.
- To use UPnP, select Enabled (default) next to UPnP. Otherwise, select Disabled.
- To allow changing router settings while using UPnP, select Enabled (default) next to Allow Users to Configure. Otherwise, select Disabled.
- To prevent local network users from disabling your Internet connection through UPnP, select Disabled (default) next to Allow Users to Disable Internet Access. Otherwise, select Enabled.

How to use a router as an access point
How can I use this new router as an access point? If you have a large area to cover with your wireless signal, or if part of your home has weak signals due to interference, you can use this router to extend the range of your old router's wireless network.
For ALL
To set up your new router as an access point:
Setup > Basic Setup
- Use a network cable to connect this router's Internet port to the Ethernet or LAN port on the router that is connected to your modem.
- Log into the browser-based utility (see "How to open the browser-based utility" on page 25).
- Click the Setup tab, then click the Basic Setup page.
- For Internet Connection Type, select Bridge Mode.
- Click Save Settings to apply the changes. The new router's LAN IP address will be changed and obtained from the router that is connected to your modem.
IMPORTANT
While in Bridge Mode, the following browser-based utility pages will be unavailable:
- Setup tab: IPv6 Setup, DDNS, MAC Address Clone, Advanced Routing
• Security tab: all pages
• Access Restrictions tab: all pages
• Applications & Gaming tab: all pages
• Administration tab: Log
For ALL
How can I use my old router as an access point? If you have a large area to cover with your wireless signal, or if part of your home has weak signals due to interference, you can use your old router to extend the range of your wireless network. This is a complex process, so this procedure assumes that you have some networking knowledge.
TIP
Check the documentation for your old router. Some brands of routers include either a switch on the outside of the case or a software option to convert it to an access point. If either of these options is available, follow your old router's instructions to convert it to an access point.
You need to take note of your new router's settings, then apply some of those settings to the old router so it can work as an access point.
To view your new router's settings:
Wireless > Basic Wireless Settings (non-E4200)
Wireless > Wireless Security (non-E4200)
Wireless > Wireless Settings (E4200)
Status > Wireless Network
Setup > Basic Setup
- Make sure that your new router is connected to the Internet.
- In the browser-based utility, click the Wireless tab
- For the E4200, click Wireless Settings and take note of the Network Name (SSID), Security Mode, and Passphrase.
Or, for other Linksys router models:
a. Click the Basic Wireless Settings page and take note of the Network Name (SSID).
b. Click the Wireless tab, then click the Wireless Security page and take note of the Security Mode and the passphrase.
- Click the Status tab, then click the Wireless Network page and take note of the Channel.
- Click the Setup tab, then click the Basic Setup page and take note of the DHCP server's IP Address range (192.168.1.100 to 192.168.1.149 by default)
To use your old router as an access point:
- With your computer connected to your old router, log into its browser-based administration utility.
NOTE
Save your changes after finishing each step below.
- Open the setup page for the local network (LAN).
- In the Router IP address field, enter an unused IP address for the LAN network of your new router.
For example, if your new router has an IP address of 192.168.1.1, you should choose an IP address on the 192.168.1.0 network. You can choose any address within the range of 192.168.1.2 to 192.168.1.254. You should exclude addresses in the range that will be used by the DHCP Server of your new router (192.168.1.100 to 192.168.1.149). A safe choice might be 192.168.1.250. Take note of this address, because this will be the address that you will use to manage your old router in the future.
- In the Subnet Mask field, enter 255.255.255.0 or, if available, select that subnet mask from a drop-down list.
- Disable the DHCP server on your old router. (Because your old router will be operating as an access point instead of a router, you don't want it to distribute IP addresses. There should be only one active DHCP server on your network, and that should be your new router.)
- To reconfigure the wireless network on your old router:
a. Open the wireless network setup page.
b. Change the network name (SSID) to match the name of your new network. Having the same network name and security settings enables you to seamlessly roam between your new router and your old router.
c. Change the security mode to match the security mode on your new router.
d. Change the passphrase (sometimes called the pre-shared key) on your old router to match the passphrase on your new router.
e. Change the wireless channel to a non-conflicting channel. Some manufacturers have an "Auto" function for channel selection that automatically selects a wireless channel that does not interfere with other nearby wireless networks. If your old router supports an Auto function, select that. Otherwise, you may need to manually select the wireless operating channel on your old router. In the 2.4 GHz wireless spectrum, there are only three non-overlapping channels: 1, 6, and 11. Pick a channel that does not overlap the operating channel of your new router. For example, if your new router is operating on channel 11, configure your old router for either channel 1 or channel 6.
- Connect an Ethernet network cable to one of the LAN/Ethernet ports on your old router and an Ethernet port on your new router.
CAUTION
Do not connect the cable to the Internet port on your old router. If you do, you may not be able to set up the router as an access point on the current network.
How to put your new router behind an existing router
For ALL
Why would I put my new router behind an existing router? There are several possible scenarios in which you might want to use your new router "behind" another router:
- You might be in an environment that shares the landlord's Internet connection with all tenants. In this case, you should put your own router behind the landlord's router in order to create your own private network and to isolate computers on your network from the rest of the building.
- You are sharing an office building Internet connection, and you want to control Internet access or the content viewed by your employees.
- You already have an existing network and you want to extend the network's range or add wireless capabilities to your network.
- You want to separate older, less secure network devices from the rest of the network.
To add your router to an existing router or gateway
In most cases, you can easily add your router to an existing wireless network by running Cisco Connect. If you are unable to set up the additional router using the instructions below, see "To share an Internet connection" on page 38 or "To extend your network" on page 39.
To add a router to your existing wireless network:
- Insert the Cisco Connect setup CD into a CD/DVD drive on your computer, then follow the on-screen instructions.
- When you are told to connect your router's Internet port to the LAN/Ethernet port on your modem, connect your router's Internet port to the LAN/Ethernet port on your existing (upstream) router or gateway.
- Follow the on-screen instructions until setup is complete.
To share an Internet connection
NOTE
This is a complex process, so this procedure assumes that you have some networking knowledge.
To add another router to share an Internet connection:
This topic covers cases one and two above
- Determine the IP address range for your upstream (office or building) network.
To determine the address range by using a Windows computer:
a. Connect your computer into your upstream network's router.
b. Click Start, Run, type CMD, then click OK. The command prompt window appears.
c. Type ipconfig, then press Enter.
text_image
Command Prompt Ethernet adapter Local Area Connection: Connection-specific 300 buffer : . . . . . . . . . . . . . . . . . . . . . . . . . . . . . . . . . . . . . . . . . . . . . . . . . . . . . . . . . . . . . . . . . . . . . . . . . . . . . . . . . . . . . . . . . Open Access: 100.000.000.000.000.000.000.000.000.000.000.000.000.000.000.000.000.000.000.000.000.000.000.000.000.000.8 [Lock Address]....../172,168,188,192. Cutoff Mask....../172,168,188,192. Default Gateway....../172,168,188,192.TIP
Although you can determine your computer's IP address in many ways, this method is very fast.
d. Take note of the IP address. In this example, the IP address is 192.168.100.192.
To determine the address range by using a Mac computer:
a. Connect your computer into your upstream network's router.
b. From the Dock, click System preferences, click Network, then click Ethernet in the window to the left. A network status window appears.
text_image
Internet Connected FireWire AirPort Off Status: Connected Ethernet is currently active and has the IP address 192.168.100.139. Configure IPv4: Using DHCP* IP Address: 192.168.100.139 Submit Mask: 255.255.255.0 Router: 192.168.100.3c. Take note of the IP address. In this example, the IP address is 192.168.100.139.
Example: The above examples show that upstream IP addresses are on the 192.168.100.0 network. (The "0" indicates the entire network.) Your upstream network's address may be different. The default address of your new Linksys router is 192.168.1.1. In setting up one router behind another, you must make sure that the local network on your new router is different than the network of your upstream router. In the above example, because the default local network on your Linksys router 192.168.1.0 is on a different subnet than the office network's 192.168.100.0, you will be able to place your Linksys router behind the other router.
- Connect an Ethernet network cable to a LAN/Ethernet port on your upstream network to the yellow Internet port on your router.
CAUTION
Connect the upstream network to your router's yellow Internet port, not one of the blue Ethernet ports. If you connect to an Ethernet port, you create IP addressing problems for the office network.
TIPS
An office network often has a wall plate with an Ethernet port that you can connect to.
If you are doing this in a home environment (without wall ports), connect an Ethernet network cable between a LAN port on your upstream router and the Internet port on your Linksys router.
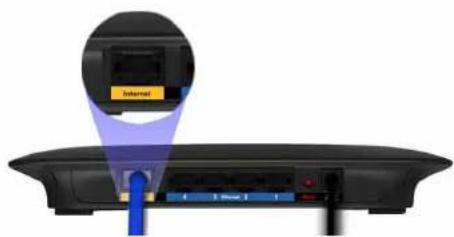
text_image
Selected- Run Cisco Connect on each computer that you want to connect to the Linksys router. Each computer needs either a wired or wireless connection to the Linksys router. For more information, see "How to connect a computer to your network" on page 16.
The computers that are connected to the Linksys router are now on the same network, and are isolated from the upstream network. However, you will still have access to the Internet through the upstream router (by way of your Linksys router). Because two routers are between your computer and the Internet, Internet traffic undergoes two network address translations. This is sometimes referred to as Double NAT.
Your computers can also use the built-in capabilities of your Linksys router, such as parental controls. If you need further control over the type of content your employees or family access, you can create an account with an Internet filtering site such as www.opendns.com or www.bsecure.com. After you create an account with them, use their DNS in place of your ISP's DNS.
To use their DNS:
Setup > Basic Setup
- Log into the browser-based utility (see "How to open the browser-based utility" on page 25).
- Click the Setup tab, then click the Basic Setup page.
- Complete the Static DNS fields with the information provided by your content filtering provider.
Static DNS 1:
Static DNS 2:
Static DNS 3:
0 . 0 . 0 . 0
- Click Save Settings.
To extend your network
This topic covers cases three and four above.
NOTE
This is a complex process, so this procedure assumes that you have some networking knowledge.
To extend your network or add wireless capabilities:
- If you want to extend your network, you may also follow the instructions above. One example of this might be to provide a separate wireless network for your children to keep their wireless network traffic separate from your wireless network. You might also want to isolate one network from another network so that network shares aren't visible across networks. In this case, use an Ethernet cable to connect the Internet port of the downstream router to one of the LAN ports of the upstream router. Make sure that the local network subnets on the two routers are different.
- OR -
You can extend your network by turning the downstream router into an access point. (See "How to use a router as an access point" on page 36). When you use a router as an access point, computers connected to the access point are on the same IP subnet as all other devices connected to the router. File, printer, and media sharing is much easier if all devices are on the same subnet.
How to expose a device to the Internet
For ALL
Why would I expose a device to the Internet? If you are operating a web server, a mail server, or a web camera, you may want to expose that device to the Internet so anybody can access it. Your router includes a DMZ (Demilitarized Zone) feature that forwards all inbound ports presented on the WAN interface, except those that are specifically forwarded, to an individual IP address or MAC address. This feature is normally not used, because it presents significant security risks to the device that you designate for the DMZ. The DMZ device is not protected by the built-in firewalls, Internet filters, or router web filters, and is open to attacks from hackers.
A much better way of "exposing" devices to the Internet would be to use port forwarding. See "How to set up port forwarding" on page 57.
To set up a device in the DMZ:
Applications & Gaming > DMZ
- Configure your device with a static IP address. See your device's documentation for help with setting a static IP address or use DHCP reservation (see "How to set up the DHCP server on your router" on page 29).
- Log into the browser-based utility (see "How to open the browser-based utility" on page 25).
- Click the Applications & Gaming tab, then click the DMZ page.
-
Select Enabled.
-
In the Source IP Address section, select Any IP Address to allow access to your DMZ device from the entire Internet, or select the source range button and enter a range of allowed source addresses.
- In the Destination section, enter the last three digits of the IP address of the device that will be in the DMZ. The rest of the IP address is already completed.
- Click Save Settings to apply your changes.
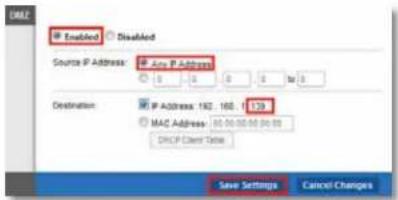
text_image
Enabled Disabled Source IP Address: Any IP Address 0 0 0 0 for 0 Destination: IP Address: 192 160 139 MAC Address: 85.50.50.50.50.50 GROUP Client Total Save Settings Cancel ChangesIf you prefer to specify the 12-digit MAC address of the device you want to place in the DMZ instead of setting up a DHCP address reservation, you can replace Step 6 with the following steps:
a. Click Enabled.
b. In the Source IP Address section, select Any IP Address (default) to allow access to your DMZ device from the entire Internet, or select the source range button and enter a range of allowed source addresses.
c. In the Destination section, select MAC Address, then click DHCP Client Table. A separate window opens showing the current DHCP client list.
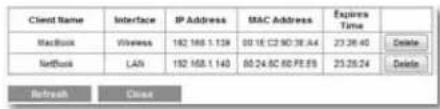
text_image
Client Name Interface IP Address MAC Address Expires Time MacBook Vivewes 182 168.1 139 00:1E C2 9D 3E A4 23:26:40 Delete NetBank LAN 182 168.1 140 00:24:5C 8D PE E9 23:26:24 Delete Refresh CloseTIP
The DHCP Client Table is only available if you select MAC Address.
Linksys E-Series
Setting Up: Advanced
d. Click Select next to the device that you want to place in the DMZ. In this example, the first device was selected. The corresponding MAC address was copied into the MAC Address field as shown below.
e. Click Save Settings to apply your changes.
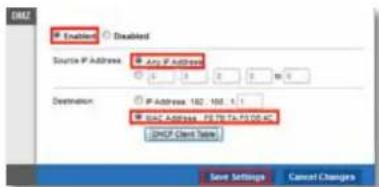
text_image
Enabled Defaulted Source IP Address Any IP Address Destination IP Address: 162, 108, 9.1 Base Address: F8 70 To F3 00.45 GROUP Client Name Save Settings Cancel ChangesImproving Security
How do I know if my network is secure?
For ALL
If you configured your router using Cisco Connect, your network is secure. During setup, Cisco Connect creates a name for your network, enables industry-standard WPA/WPA2 wireless security, and assigns a highly secure password for your wireless network and the administrator's account.
To confirm that your network is secure:
- Run Cisco Connect.
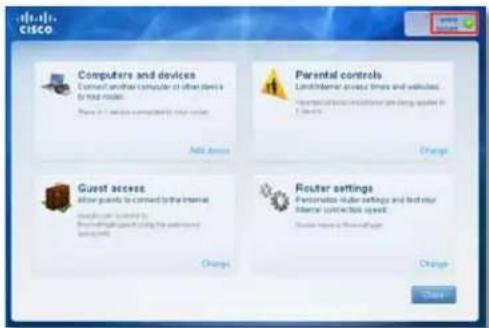
text_image
CISCO Computers and devices Connect another computer or other device to test mode. Have it a service computer only your mode. Add device Parental controls Local/Internal device times and vehicleless Habitatrical control is limited to being taken in 1 device. Change Guest access Allow guidance to connect by the internal Computer user connected to the internal language using the external user platform. Change Router settings Permutations under settings and find our Internal control bit speed. Change Share- In the upper-right corner of the screen, check for the green light that indicates your router is online and secure. If the green light is on, no additional action is required to secure your network.
Network security following a manual setup
For ALL
If you configured your router manually (not recommended), you must manually configure security.
To manually set your router's password:
Administration > Management
- Log into the browser-based utility (see "How to open the browser-based utility" on page 25).
- Click the Administration tab, then click the Management page.
- In the Router Access section, enter a secure password for your router, then re-enter the password to confirm it. Your password should be at least eight characters in length. The most secure type of password should include a mix of uppercase and lowercase letters, numbers, and punctuation.
- Click Save Settings at the bottom of the screen.
To manually set your router's network name (SSID):
Wireless > Wireless Settings (E4200)
Wireless > Basic Wireless Settings (non-E4200)
- Log into the browser-based utility (see "How to open the browser-based utility" on page 25).
- Click the Wireless tab, then click the Wireless Settings page (for E4200 routers) or Basic Wireless Settings page (for non-E4200 routers).
- For Configuration View, select Manual.
- Enter a new network name in the Network Name (SSID) field, then click Save Settings at the bottom of the screen.
To manually set your router's wireless security settings:
Wireless > Wireless Settings (E4200)
Wireless > Wireless Security (non-E4200)
- Log into the browser-based utility (see "How to open the browser-based utility" on page 25).
- Click the Wireless tab, then click the Wireless Settings page (for E4200 routers) or Basic Wireless Settings page (for non-E4200 routers).
- Select your preferred security type from the Security Mode drop-down list For most home networks, we recommend WPA2/WPA Mixed Mode.
- Enter a passphrase (security key) for your wireless network in the Passphrase field. The most secure type of security key should include a mix of uppercase and lowercase letters, numbers, and punctuation.
- Click Save Settings at the bottom of the screen.
How to set up wireless security using Wi-Fi Protected Setup
For ALL
Why would I use Wi-Fi Protected Setup? Wi-Fi Protected Setup™ is a feature of your router that makes it easy to add devices to your wireless network. If you have network devices, such as wireless printers, that support Wi-Fi Protected Setup, then you can use Wi-Fi Protected Setup to add the devices.
Wi-Fi Protected Setup activity light
The power indicator light on the back of the router (or on top for the E4200) indicates the status of Wi-Fi Protected Setup while you are connecting devices.
- When Wi-Fi Protected Setup is connecting a network device, the light flashes slowly.
- If there is an error, the light flashes quickly for two minutes. Wait until it stops flashing, then try again.
- When Wi-Fi Protected Setup has finished connecting a device, the light is continuously lit.
- Wait until the light is continuously lit before starting the next Wi-Fi Protected Setup session.
Connect network devices using one of the three methods below.
NOTE
Wi-Fi Protected Setup configures one device at a time. Repeat the instructions for each device that supports Wi-Fi Protected Setup.
Connecting a device using the Wi-Fi Protected Setup button
Use this method if your device has a Wi-Fi Protected Setup button or prompts you to press the Wi-Fi Protected Setup button on your router.
To connect a device using the Wi-Fi Protected Setup button:
Wireless > Basic Wireless Settings
- Press the Wi-Fi Protected Setup button on the network device you are connecting to.
- Press the Wi-Fi Protected Setup button on the back of the router.

natural_image
Back view of a computer interface with ports, buttons, and a display (no readable text or symbols)- OR -
a. Log into the browser-based utility (see "How to open the browser-based utility" on page 25).
b. Click the Wireless tab, then, if your router is not an E4200, click the Basic Wireless Settings page.
c. Click Wi-Fi Protected Setup.
d. Click the Wi-Fi Protected Setup button in the router's Wi-Fi Protected Setup screen.
- If your client device has a Wi-Fi Protected Setup™ button, click or press that button and then click the button on the right.

e. After the device has been configured, click OK.
How to connect a device using its Wi-Fi Protected Setup PIN
Use this method if your device has a Wi-Fi Protected Setup PIN (Personal Identification Number).
To connect a device using the device's Wi-Fi Protected Setup PIN: Wireless > Basic Wireless Settings
- Log into the browser-based utility (see "How to open the browser-based utility" on page 25).
- Click the Wireless tab, then, if your router is not an E4200, click the Basic Wireless Settings page.
- Click Wi-Fi Protected Setup.
- Enter the PIN from the device into the PIN field on the router's Wi-Fi Protected Setup screen, then click Register.

- After the device has been connected, click OK.
How to connect a device using the router's Wi-Fi Protected Setup PIN
Use this method if your client device asks for the router's PIN.
To connect a device using the device's Wi-Fi Protected Setup PIN: Wireless > Basic Wireless Settings
- Log into the browser-based utility (see "How to open the browser-based utility" on page 25).
- Click the Wireless tab, then, if your router is not an E4200, click the Basic Wireless Settings page.
-
Click Wi-Fi Protected Setup.
-
On the client device, enter the PIN listed on the router's Wi-Fi Protected Setup screen. It is also listed on the bottom of the router. In the example below, the router's PIN is 32744781.

- Follow the device's instructions to complete setup.
How to connect a device manually
If you have devices that do not support Wi-Fi Protected Setup, note the wireless settings in the Basic Wireless Settings screen, then manually configure those devices.
For each wireless network, the Network Name (SSID), Security, and Passphrase are displayed at the bottom of the screen.
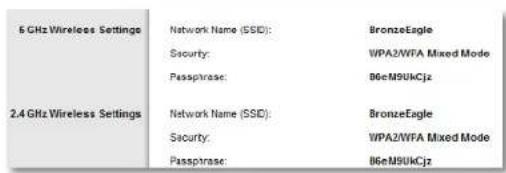
text_image
5 GHz Wireless Settings Network Name (SSID): BronzeEagle Security: WPA2/WFA Mixed Mode Passphrase: B6eM9UkCjz 2.4 GHz Wireless Settings Network Name (SSID): BronzeEagle Security: WPA2/WFA Mixed Mode Passphrase: B6eM9UkCjzHow to control access to your wireless network
For ALL
Why would I need to control access to my wireless network? If you used Cisco Connect to configure your router, your wireless network is already secure. By default, Cisco Connect enables industry-standard WPA (Wi-Fi Protected Access) security using WPA2/WPA mixed mode. Cisco Connect configures your network with a complex, 10-character password that is almost impossible to compromise. If you set up your wireless network manually and have not enabled wireless security, your wireless network will be an "open" network that almost anyone nearby with a Wi-Fi-enabled device could access.
What is MAC filtering? The best way to secure your wireless network is to use Cisco Connect to automatically configure and secure it. However, if you choose not to use the built-in security features of your router, you can still control access to your wireless network using MAC filtering.
Every network device has a unique, 12-digit MAC (Media Access Control) address. Using MAC filtering, you can allow only known MAC addresses onto your network. You can also exclude specific MAC addresses or deny them access to your wireless network.
Example: Because each MAC filtering configuration is unique, the following procedure uses the simplified example of setting up MAC filtering to allow one wireless device access to the network.
To set up MAC filtering to allow one wireless device access to your network:
Wireless > Wireless MAC Filter
- Log into the browser-based utility (see "How to open the browser-based utility" on page 25).
- Click the Wireless tab, then click the Wireless MAC Filter page.
- Click Enabled.
4. Select Permit.
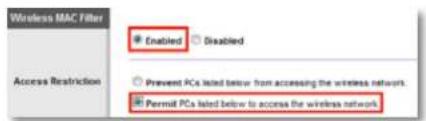
text_image
Wireless MAC Filter Enabled Disabled Access Restriction Prevent PCs listed below from accessing the wireless network. Permit PCs listed below to access the wireless networkTIP
You can also use MAC filtering to prevent specific PCs from accessing your network by selecting Prevent. However, it's easier to permit only known devices than to exclude unknown devices.
- Click Wireless Client List. A separate window opens and displays the currently connected devices. In the example below, the only device permitted onto the network is the MacBook. However, two other devices are also connected to the network.
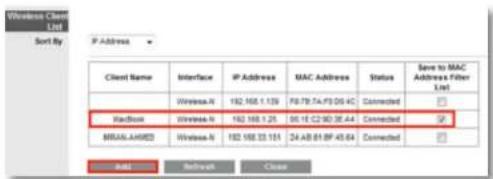
text_image
Windows Client Sort By IP Address Client Name Interface IP Address MAC Address Status Save to MAC Address Wireless N 192.168.1.139 70.79.7A.F9.05.4C Corrected ☑ MacDisk Wireless N 192.168.1.25 05.1E C2:90.3E.44 Corrected ☑ BIRAL-AHIND Wireless N 192.168.22.151 24.A8 01.BF-03.64 Corrected ☑ Add Refresh Close- Next to the device entry, select Save to MAC Address Filter List, then click Add. The Mac Address Filter List is updated with the MAC address of the device you added.
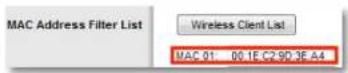
- Click Save Settings at the bottom of the page.
- Click Wireless Client List again to check the updated device list. Only the device you selected remains on the network.
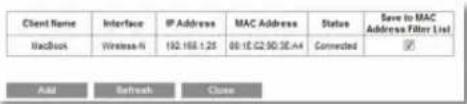
text_image
Client Name Interface IP Address MAC Address Status Save to MAC MacBus Wireless Ni 192.168.1.25 08:1E:G2 50:3E:A4 Connected ✓ Add Refresh CloseHow to improve security using the built-in firewall
Why would I need to change my security settings? By default, the firewall settings in your router have been optimized for most home environments, so no changes are needed. The SPI (Stateful Packet Inspection) firewall is enabled by default. In addition, anonymous Internet requests and IDENT requests are filtered by default. All web filters are disabled, because enabling them may cause problems for sites that depend on ActiveX controls, Java, or cookies.
General firewall settings
To change your firewall settings:
Security->Firewall
- Log into the browser-based utility (see "How to open the browser-based utility" on page 25).
- Click the Security tab, then click the Firewall page. (Not all routers have the options shown here.)
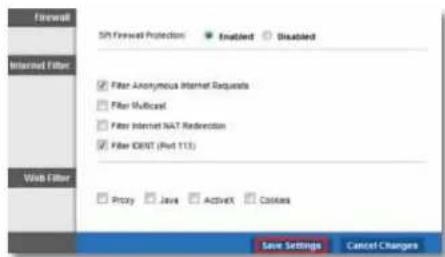
text_image
Firewall SN Firewall Protection Enabled Disabled Internet Filter Filter Anonymous Internet Requests Filter Multicell Filter Internet NAT Redirection Filter IDENT (Port 113) Web Filter Proxy Java ActiveX Contains Save Settings Cancel Changes- Select each setting that you want to change.
TIP
For descriptions of the filters, click Help on the right side of the screen. More complete descriptions are included below.
- SPI Firewall Protection—This helps protect your local network from Internet threats. This option is enabled by default. On some router models, this setting is separated into IPv6 and IPv4 options so that each can be handled separately.
CAUTION
To help protect your network, you should keep this option enabled.
- Filter Anonymous Internet Requests—This filter blocks Internet requests from unknown sources such as ping requests. This option is enabled by default.
- Filter Multicast—Multicasting allows a single transmission to simultaneously reach specific recipients within your local network. Select this option to block multicasting. This option is disabled by default.
- Filter Internet NAT Redirection for IPv4 Internet Only—This filter prevents a local computer from using a URL or Internet IP address to access the local server. Select this option to enable the filter. This option is disabled by default. On some router models, this setting applies to IPv4 Internet only.
- Filter IDENT (Port 113)—This filter prevents port 113 from being scanned by devices from the Internet. This option is enabled by default.
- Proxy—This filter blocks the use of Internet proxy servers. To deny proxy requests, select this option. Proxy access is allowed by default. (Not available on the E4200.)
- Java—This filter blocks Java, so you may not be able to access Java content on websites. To deny Java requests, select this option. Java content is allowed by default. (Not available on the E4200.)
Linksys E-Series
Improving Security
- ActiveX—This filter blocks ActiveX, so you may not be able to access ActiveX content on websites. To deny ActiveX requests, select this option. ActiveX content is allowed by default. (Not available on the E4200.)
-
Cookies—This filter blocks cookies, which are data stored on your computer and used by websites when you interact with them. To deny cookie requests, select this option. Cookie usage is allowed by default. (Not available on the E4200.)
-
Click Save Settings to update your changes.
IPv6 firewall settings
For E900 E1200V2 E1500E2500E3200E4200
On some router models, the IPv6 firewall lets you customize IPv6 port services for applications. When users send these types of requests to your network via the Internet, the router will allow those requests to the appropriate computers.
NOTE
To use your router's IPv6 Internet connectino settings, IPv6 service from your ISP (Internet service provider) is required. For more information on this service, ask your ISP.
To set IPv6 firewall settings:
Applications & Gaming->IPv6 Firewall
- Log into the browser-based utility (see "How to open the browser-based utility" on page 25).
- Click the Applications & Gaming tab, then click the IPv6 Firewall page.
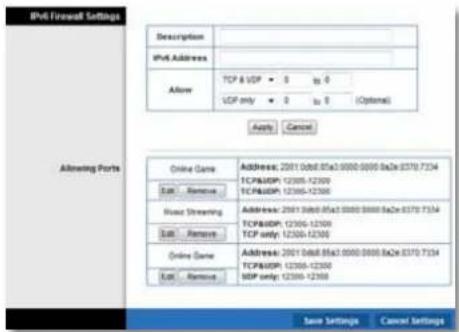
text_image
IPv6 Firewall Settings Description: IPv6 Address: Allow TCP & UDP 0 to 0 LCP only 0 to 0 (Optional) Apply Cancel Attaining Ports Online Game Address: 2001 0db8 05a3 0000 0000 0a2e 0370 7334 TCP&UDP: C2308-12309 TCP&UDP: U2308-12308 Host Streaming Address: 2001 0db8 05a3 0000 0000 0a2e 0370 7334 TCP&UDP: C2308-12309 TCP only: U2308-12308 Online Game Address: 2001 0db8 05a3 0000 0000 0a2e 0370 7334 TCP&UDP: U2308-12309 UDP only: U2308-12308 Save Settings Cancel Settings- Select each setting that you want to change.
• Description—Enter a description of the application.
- IPv6 Address—Enter the IPv6 address of the computer that should receive the traffic.
- Allow—Select the protocol(s) and range of port(s) used by incoming traffic.
-
Click Apply to save your changes. The Allowing Ports section lists the settings you have saved.
-
To change a saved setting, click Edit. To delete a saved setting, click Remove.
Using an External Drive
How to configure storage
For E3200E4200
Why would I need to configure storage? By default, when you connect a storage device to your router, the entire contents of the device are available for read and write access to anyone on your local network (no login credentials are required). However, you can also create shared folders that you can configure to share only with specified groups.
To control access to the USB drive attached to your router, you need to perform two tasks:
- Create one or more shared folders (see "How to create shared folders" below)
- Manage group and User Access to Shared Folders (see "How to share folders and set access rights" on page 53)
How to create shared folders
To create a shared folder:
Storage > Disk
- Log into the browser-based utility (see "How to open the browser-based utility" on page 25).
- Click the Storage tab, then click the Disk page.
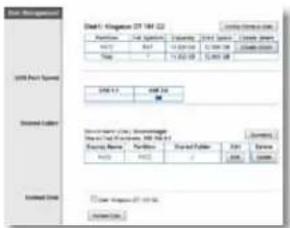
text_image
File Management File1: C:\Program Files\2014\22 Category: C:\Program Files\2014\22 Part Number: 10.0000 Type: Normal Size: 10.0000 Name: Normal Date: 2014-03-27 Current Status: Normal Current Subtitle: Normal Current Subtitle: Normal Current Subtitle: Normal Current Subtitle: Normal Current Subtitle: Normal Current Subtitle: Normal Current Subtitle: Normal Current Subtitle: Normal Current Subtitle: Normal Current Subtitle: Normal Current Subtitle: Normal Current Subtitle: Normal Current Subtitle: Normal Current Subtitle: Normal Current Subtitle: Normal Current Subtitle: Normal Current Subtitle: Normal C:\Program Files\2014\22 Location: C:\Program Files\2014\22- Click Create Share next to the partition you want to share. The Shared Folder screen opens.
- If you want to share the entire partition, select Share Entire Partition, then click Save Settings at the bottom of the screen.
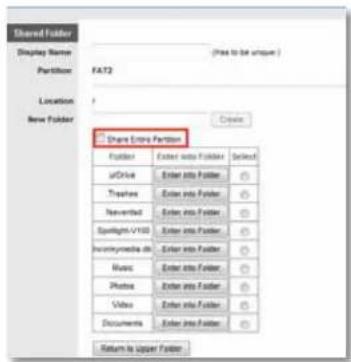
text_image
Shared Folder Display Name Partition FAT2 Location New Folder Delete Entire Partition Folder Enter into Folder Select uDrive Enter into Folder TreatBox Enter into Folder Non-erated Enter into Folder Spotlight-VIHD Enter into Folder Incomycinemia db Enter into Folder Music Enter into Folder Photos Enter into Folder Video Enter into Folder Documents Enter into Folder Return to Upper Folder- OR -
If you want to share a specific folder:
a. Enter a unique name in the Display Name field.
b. Click Select next to the folder name you want to share.
• To open a subfolder, click Enter into Folder.
• To navigate to a previous folder, click Return to Upper Folder.
- To create a new folder, type the name into the New Folder field, then click Create.
c. Click Save Settings at the bottom of the screen, then repeat the above steps to add more folders that you want to share.
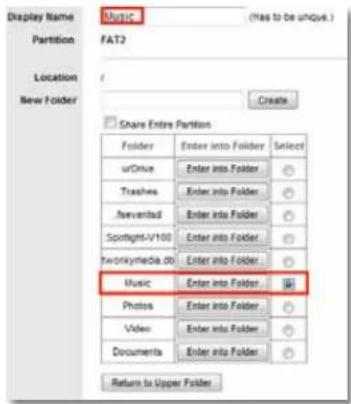
text_image
Display Name Music (Has to be unique.) Partition FAT2 Location New Folder Create Share Entire Partition Folder Enter into Folder Select uDrive Enter into Folder Trashes Enter into Folder ./eventlad Enter into Folder Spotlight-V100 Enter into Folder Twonymedia 00 Enter into Folder Music Enter into Folder Photos Enter into Folder Video Enter into Folder Documents Enter into Folder Return to Upper FolderHow to manage group and user access to shared folders
To manage access to shared folders, you need to disable Anonymous Disk Access, then create groups and user accounts on your router. Access to the router is controlled by user accounts, but access to shared folders is controlled by groups.
- Disable Anonymous Disk Access (see "How to disable anonymous disk access" on page 49).
- Create a group that you will use to assign rights to a shared folder.
- Create users and assign those users to the group.
- Add the group to the shared folder that you want to control.
How to disable anonymous disk access
By default, no password is needed for read and write access to the drive. Before you can manage group and user access to shared folders, you must disable anonymous disk access.
To disable anonymous disk access:
Storage > Administration
- Log into the browser-based utility (see "How to open the browser-based utility" on page 25).
- Click the Storage tab, then click the Administration page.
- Next to Anonymous Disk Access, select Disabled.
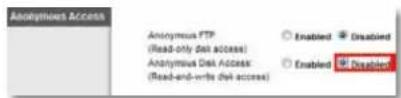
text_image
Annotyptics Access Anonymous FTP (Read-only del access) Anonymous Disk Access (Read-end-write del access) Enabled Enabled Enabled Enabled- Click Save Settings at the bottom of the screen.
How to create a group
By default, the default Admin group has read and write access to all shared folders. By default, the Guest group has read only access and has no access rights to any of the shared folders.
IMPORTANT
More than one group can be configured with access to a shared folder, but a user can be a member of only one group.
To create a group:
Storage > Administration
- Log into the browser-based utility (see "How to open the browser-based utility" on page 25).
-
Click the Storage tab, then click the Administration page.
-
Under Group Management, click Create New Group.
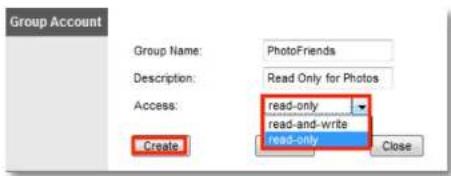
text_image
Group Account Group Name: PhotoFriends Description: Read Only for Photos Access: read-only read-and-write Create: read-only Close- Complete the Group Name and Description fields.
- From the Access drop-down list, select read-only to grant read-only rights to the group, or select read-and-write to grant read and write rights to the group.
- Click Create. The group is now created, and its access rights are displayed in the Access column.
- To change a group's name or access rights, click Edit next to the group name.
- To delete a group, click Delete next to the group name.
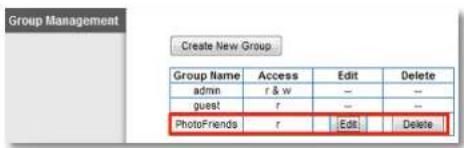
text_image
Group Management Create New Group Group Name Access Edit Delete admin r & w -- -- guest r -- -- PhotoFriends r Edit DeleteHow to create a new user
Two user accounts (Admin and Guest) are preconfigured for router access. The password for the Admin user is the same password that you use to access the router. By default, the user Admin is a member of the group named Admin, and the user Guest is a member of the group named Guest. To keep it simple, consider creating user accounts on your router that use the same user names and passwords that are used by your computer's operating system.
NOTE
Users can be a member of only one group.
To create a new user:
Storage > Administration
- Log into the browser-based utility (see "How to open the browser-based utility" on page 25).
- Click the Storage tab, then click the Administration page.
- Under User Management, click Create New User.

text_image
User Management Create New User User Name Group Edit Delete admin admin Edit - guest guest Edit -- Complete the Name, Full Name, and Description fields.
-
Enter and confirm a password.
-
From the Group Member drop-down list, select the group to assign the user to, then click Create. The new user is displayed in the user list.
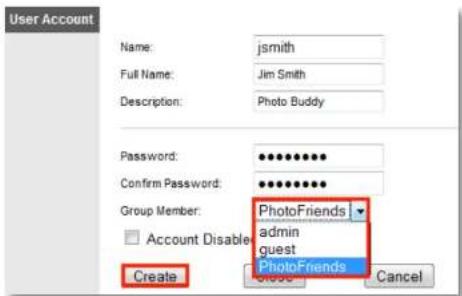
text_image
User Account Name: jsmith Full Name: Jim Smith Description: Photo Buddy Password: ••••••••• Confirm Password: ••••••••• Group Member: PhotoFriends admin Account Disable guest Create PhotoFriends Cancel- To change the user name, description, or group membership, or to temporarily disable the account, click Edit.
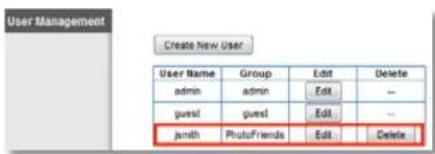
text_image
User Management Create New User User Name Group Edit Delete admin admin Edit — guest guest Edit — jmith PhotoFriends Edit Delete- To delete the user, click Delete.
How to grant group access to a share
To grant group access to a share
Storage > Disk
- Log into the browser-based utility (see "How to open the browser-based utility" on page 25).
- Make sure that Anonymous Disk Access has been disabled. (See "How to disable anonymous disk access" on page 49.)
-
Click the Storage tab, then click the Disk page.
-
In the Shared Folder section, click Edit next to the shared folder you want to change group access for.
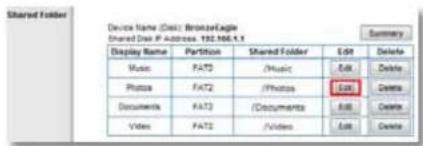
text_image
Shared Folder Device Name (Disk) BrokerEagle Shared Disk IP Address: 192.106.1.1 Summary Display Name Partition Shared Folder Edit Delete Music FAT2 /Music Edit Delete Photos FAT2 /Photos Edit Delete Documents FAT2 /Documents Edit Delete Video FAT2 /videos Edit Delete- To grant a group access the shared folder, click the group's name in the Available Groups column, then click >> to move the group to the Groups with Access column.
- To remove a group's access to the shared folder, click the group's name in the Groups with Access column, then click << to move the group to the Available Groups column.
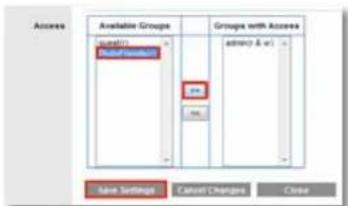
text_image
Access Available Groups Group with Access Save Settings Cancel Changes Close- Click Save Settings to apply your changes.
How to configure your router's storage for remote access
For E3200E4200
Why would I need to access my router's storage remotely? If your router's storage is set up for remote access, you can access your files anywhere you have an Internet connection. To do this, you must enable the router's built-in FTP (File Transfer Protocol) server. After your router is set up, you can access files from anywhere by using either a web browser or FTP software.
To set up your router for remote file access, you need to:
- Configure the FTP server
- Select folders (or the entire drive) to share and set access rights for those folders
How to configure the FTP server
To configure the FTP server:
Storage > FTP Server
- Log into the browser-based utility (see "How to open the browser-based utility" on page 25).
- Click the Storage tab, then click the FTP Server page.
3. Next to FTP Server, click Enabled.
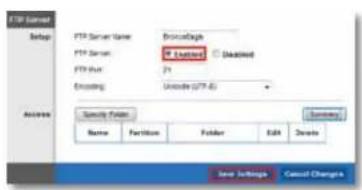
text_image
FTP Server Setup FTP Server Name: BroadBags FTP Server: IP Options FTP Plus: 71 Encoding: Unicode (UTF-8) Access Sundry Folder Name Furniture Folder Edit Delete Save Settings Cancel ChangesTIP
If you used Cisco Connect to set up your router, the FTP Server Name field is already completed with the name of your wireless network. If you set up your router manually, the default name is Cisco followed by the last five digits of the router's serial number.
4. You can also:
- Change the FTP Port (default is 21) for the FTP server
- Change the Encoding (character set) for the transfer of files in other languages. The router supports:
- Unicode (UTF-8) (default)
• Chinese Simplified (GB18030)
• Vietnamese (CP1258) - ISO 8859_1.
TIP
For field descriptions, click Help on the right side of the screen.
5. To apply your changes, click Save Settings.
How to share folders and set access rights
You can select which folders to share. You can also select which users can access the folders. For more information on managing access rights, see "How to configure storage" on page 48.
To configure FTP and control folder access:
Storage > FTP Server
- In the Storage tab's FTP Server page, click Specify Folder.
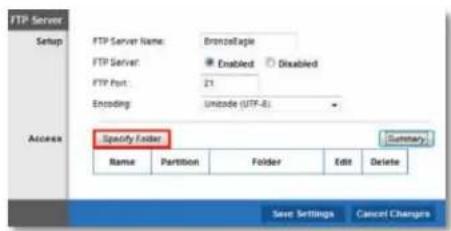
text_image
FTP Server Setup FTP Server Name: BronzePage FTP Server: Enabled Disabled FTP Port: 21 Encoding: Unicode (UTF-8) Access Specify Folder Summary Name Partition Folder Edit Delete Save Settings Cancel ChangesThe FTP Folder screen opens in a separate window.
- In the Display Name field, enter a unique name for the FTP folder. The name must use only alphanumeric characters (letters A to Z and numbers 0 to 9) and can be up to 15 characters long.
- To share the entire drive, click Share Entire Partition.
- OR -
To share only specific folders:
- Click Select next to the folder you want to share.
• To navigate to a previous folder, click Return to Upper Folder. -
To view and select folders within a folder, click Enter into Folder next to the folder name.
-
To create a folder, enter a unique folder name into the New Folder box, then click Create.
-
To change group access, select a group in the Available Groups or Groups with Access column, then click >> or << to move the group to the other column.
-
To apply your changes and enable FTP access, click Save Settings.
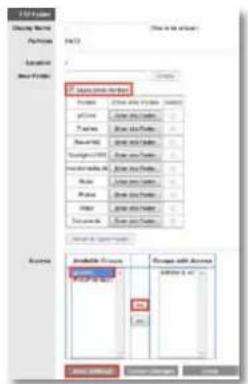
text_image
File Manager Design Name Properties V473 Location New Provider New Product Manager Form 1: New Product Manager Form 2: New Product Manager Form 3: New Product Manager Form 4: New Product Manager Form 5: New Product Manager Form 6: New Product Manager Form 7: New Product Manager Form 8: New Product Manager Form 9: New Product Manager Form 10: New Product Manager Form 11: New Product Manager Form 12: New Product Manager Form 13: New Product Manager Form 14: New Product Manager Form 15: New Product Manager Form 16: New Product Manager Form 17: New Product Manager Form 18: New Product Manager Form 19: New Product Manager Form 20: New Product Manager Form 21: New Product Manager Form 22: New Product Manager Form 23: New Product Manager Form 24: New Product Manager Form 25: New Product Manager Form 26: New Product Manager Form 27: New Product Manager Form 28: New Product Manager Form 29: New Product Manager Form 30: New Product Manager Form 31: New Product Manager Form 32: New Product Manager Form 33: New Product Manager Form 34: New Product Manager Form 35: New Product Manager Form 36: New Product Manager Form 37: New Product Manager Form 38: New Product Manager Form 39: New Product Manager Form 40: New Product Manager Form 41: New Product Manager Form 42: New Product Manager Form 43: New Product Manager Form 44: New Product Manager Form 45: New Product Manager Form 46: New Product Manager Form 47: New Product Manager Form 48: New Product Manager Form 49: New Product Manager Form 50: New Product Manager Form 51: New Product Manager Form 52: New Product Manager Form 53: New Product Manager Form 54: New Product Manager Form 55: New Product Manager Form 56: New Product Manager Form 57: New Product Manager Form 58: New Product Manager Form 59: New Product Manager Form 60: New Product Manager Form 61: New Product Manager Form 62: New Product Manager Form 63: New Product Manager Form 64: New Product Manager Form 65: New Product Manager Form 66: New Product Manager Form 67: New Product Manager Form 68: New Product Manager Form 69: New Product Manager Form 70: New Product Manager Form 71: New Product Manager Form 72: New Product Manager Form 73: New Product Manager Form 74: New Product Manager Form 75: New Product Manager Form 76: New Product Manager Form 77: New Product Manager Form 78: New Product Manager Form 79: New Product Manager Form 80: New Product Manager Form 81: New Product Manager Form 82: New Product Manager Form 83: New Product Manager Form 84: New Product Manager Form 85: New Product Manager Form 86: New Product Manager Form 87: New Product Manager Form 88: New Product Manager Form 89: New Product Manager Form 90: New Product Manager Form 91: New Product Manager Form 92: New Product Manager Form 93: New Product Manager Form 94: New Product Manager Form 95: New Product Manager Form 96: New Product Manager Form 97: New Product Manager Form 98: New Product Manager Form 99: New Product Manager- To apply your changes and create the shared folder for FTP access, click Save Settings. You are returned to the FTP Server page, where a summary of shared folders is displayed.
-
To modify shared folder settings:
-
To change a FTP folder's name or group access, click Edit.
• To delete an FTP folder, click Delete. - To see a detailed summary of FTP folders, click Summary. A separate window opens and shows the folder's Display Name, Partition, Share Folder, and Groups with Access. Click Close to close the window.
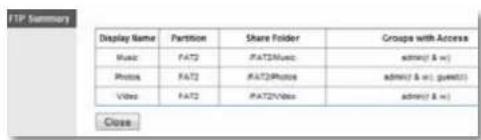
text_image
FTP Summary Display Name Partition Share Folder Groups with Access Music FAT2 /FAT2Music admin( & w) Photos FAT2 FAT2Photo admin( & w) (guests) Video FAT2 FAT2Video admin( & w) CloseHow to access files remotely
For E3200E4200
To access files remotely, you must first attach a USB drive to your router and set up that storage for remote access. For instructions, see "How to configure your router's storage for remote access" on page 52. You can then access files from anywhere on the Internet.
To access files remotely:
- Make sure that your router is configured to share files. For more information, see "How to configure your router's storage for remote access" on page 52.
- Make sure that your router has user accounts set up, and that you have taken note of the user name and password you will use to access the router's storage. If you have enabled Anonymous FTP (not recommended), you will not need a user name and password. For more information, see "How to configure storage" on page 48.
- Take note of the IP address of your router. To view your router's IP address, open the browser-based utility, click the Status tab, then click the Router page and take note of the numbers in the Internet IP Address field.
- OR -
If you have DDNS (Dynamic Domain Name Service), take note of the domain name registered to your router. For more information, see "How to find your network on the Internet" on page 30.
- At any remote location where you can access the Internet, you can:
- Use FTP (File Transfer Protocol) client software to connect to your router. You will need to enter your router's IP address. If access to your router requires a user name and password, you will also need to enter those details. For more information on using the FTP client software, see its documentation or help.
- OR -
- Type the router's IP address into a web browser's Internet address field, press Enter, then enter your user name and password.
FTP software and web browsers display FTP content in many ways, but you can usually use these common actions to navigate through FTP folders:
- Click a folder name to open it.
- Click a double period (..) or Up to a higher level directory to open a parent folder.
- Click or right-click a file to download or view it.
- Drag a file from another window and drop it into the FTP window to upload it. (To upload a file, your user account must have write access.)
How to set up your router as a media
server
For E4200
What is a media server and how would I use it? A media server lets you share media content across your network. Your router can act as a media server if it has a USB drive attached and if you have UPnP AV (Audio and Video)-enabled or DLNA (Digital Living Network Alliance)-certified devices in your home. Examples of UPnP AV-enabled devices include digital media players, gaming consoles with a built-in media player, and digital picture frames.
For example, if you have a digital media adapter that sends content to your entertainment system, and if your router's set up as a media server, then the digital media adapter can access your router's attached USB drive.
You can specify which folders are used by the media server, add and delete folders, and specify how often the folders are scanned for new content.
To configure your router as a media server:
Storage > Media Server
- Log into the browser-based utility (see "How to open the browser-based utility" on page 25).
- Click the Storage tab, then click the Media Server page.
- Click Enabled to enable the media server.
Media Server Name:
UPnP Media Server:

Disabled
- Enter a name for your media server in the Media Server Name box. The name must use only alphanumeric characters (letters A to Z and numbers 0 to 9) and can be up to 15 characters long.
- Click Specify Folder to Scan. A new window opens.
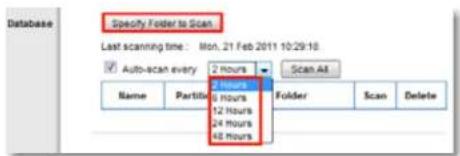
text_image
Specify Folder to Scan Last scanning time: Mon. 21 Feb 2011 10:29:18 Auto-scan every 2 Hours Scan All Name Partitions 2 Hours 6 Hours 12 Hours 24 Hours 48 Hours Folder Scan Delete- In the Display Name field, enter a unique name for the media folder. The name must use only alphanumeric characters (letters A to Z and numbers 0 to 9) and can be up to 15 characters long.
- To share the entire drive, click Share Entire Partition.
- OR -
To share only specific folders:
- Click Select next to each folder you want to share.
• To navigate to a previous folder, click Return to Upper Folder. -
To view and select folders within a folder, click Enter into Folder next to the folder name.
-
To create a folder, enter a unique folder name into the New Folder box, then click Create.

text_image
Media Folder Display Name FAT2 Location New Folder Music Search to be unique 1 Browse Choose Share Extra Folder Folder Enter into Folder Select eDrive Enter into Folder ○ Translate Enter into Folder ○ Named Enter into Folder ○ Spangfa-V100 Enter into Folder ○ Inocycmedia ID: Enter into Folder ○ Music Enter into Folder ○ Photo Enter into Folder ○ Video Enter into Folder ○ Documents Enter into Folder ○ Return to User Folder Save Settings Cancel Changes Close- To save your selections and create the media folder, click Save Settings. A summary of shared folders is displayed
- To delete an individual media folder, click Delete.
NOTE
If you delete a media folder, you are not deleting the folder's contents. You are only removing it as a folder that the media server will use.
- To manually scan all shared folders, click Scan All.
- OR -
To scan an individual folder, click Scan next to the folder.
- To schedule a scan of the media folder for new media content, select Auto-scan every, then select a time interval from the drop-down list.
How to connect your UPnP device to the media server
After you set up your router's media server, you need to connect an UPnP-compatible device (such as an UPnP-compatible game console or digital media player) to the network so that you can play the media server's content.
To connect an UPnP device to your router's media server:
- Connect your UPnP device to your home network with wired (Ethernet cable) or wireless networking. If you are connecting wirelessly, you need to know your network's name and password. See your device's documentation for help.
- On your UPnP device, change the media source to the media server name you specified on your router. (See "How to set up your router as a media server" on page 54)
- See your UPnP device's documentation for help with playing media on the device.
Port Forwarding and Port Triggering
How to set up port forwarding
For ALL
Why would I use port forwarding? Port forwarding is a feature that forwards inbound traffic from the Internet on a specific port or ports to a specific device or port on your local network. You can set up port forwarding for:
• A single port (see "How to set up port forwarding for a single port" below)
- Multiple ports (see "How to set up port forwarding for multiple ports" on page 58)
- A range of ports (see "How to set up port forwarding for a range of ports" on page 58)
How to set up port forwarding for a single port
Why would I use port forwarding for a single port? Single port forwarding is a feature that forwards inbound traffic from the Internet on a specific port to a single device on your local network. An example of single port forwarding would be to forward inbound web requests, typically on port 80, to a web server.
To set up single port forwarding:
Applications & Gaming > Single Port Forwarding
- Follow your device's instructions for configuring it with a static IP address or use DHCP reservation to assign it a permanent address (see "How to set up the DHCP server on your router" on page 29).
-
Log into the browser-based utility (see "How to open the browser-based utility" on page 25).
-
Click the Applications & Gaming tab, then click the Single Port Forwarding page.
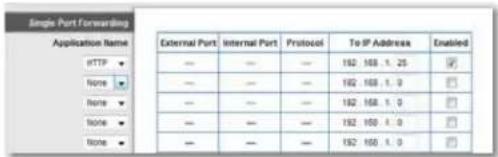
text_image
Single Port Forwarding Application Name PTTP None None None External Port Internal Port Protocol To IP Address Enabled — — — 192 168.1.25 ✓ — — — 192 168.1.0 ☐ — — — 192 168.1.0 ☐ — — — 192 168.1.0 ☐ — — — 192 168.1.0 ☐ — — — 192 168.1.0 ☐- Select the type of application from the Application Name drop-down list. One of the more common types to select is HTTP, but see your device's documentation for recommendations.
- In the To IP Address field, enter the last three digits of the IP address you have reserved for the computer you want to forward Internet traffic to. The rest of the IP address has already been completed for you.
- Select Enabled next to the IP Address field.
- Click Save Changes at the bottom of the screen.
TIP
For other devices not included in the Application Name drop-down list, see the device's documentation for port and protocol information.
How to set up port forwarding for multiple ports
Why would I set up port forwarding for multiple ports? Port forwarding is a feature that forwards inbound traffic from the Internet on a specific port to a single device on your local network. Unlike a web camera that typically only requires a single port to be forwarded, some applications require forwarding of multiple ports. VNC (Virtual Network Computing) software that allows you to operate your computer remotely from anywhere on the Internet is an example of an application that requires multiple ports to be forwarded. To forward to multiple ports, just create additional entries to forward additional ports to the same IP address.
Example: You want to set up your computer so you can remotely access it using VNC software. By default, VNC uses TCP ports 5800 and 5900.
To set up single port forwarding for multiple ports:
Applications & Gaming > Single Port Forwarding
- Make sure that the software you want to use has been installed onto a networked computer.
- Log into the browser-based utility (see "How to open the browser-based utility" on page 25).
- Set up DHCP reservation for the IP address of the computer on which you installed the software. (See "How to set up the DHCP server on your router" on page 29).
- Click the Applications & Gaming tab, then click the Single Port Forwarding page.
- For each entry, enter a descriptive name in the Application Name field.
- For each entry, enter in the same port number for the External Port and the Internal Port.
-
In the To IP Address field, enter the last three digits of the IP address you have reserved for the computer you want to forward Internet traffic to. The rest of the IP address has already been completed for you.
-
Select Enabled next to the IP Address field.
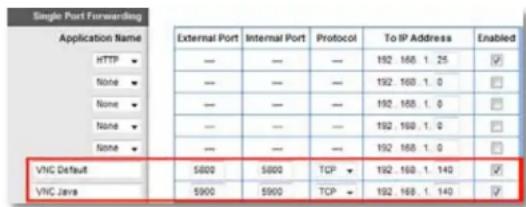
text_image
Single Port Forwarding Application Name External Port Internal Port Protocol To IP Address Enabled HTTP — — — 192 168 1. 25 ✓ None — — — 192 168 1. 0 ☐ None — — — 192 168 1. 0 ☐ None — — — 192 168 1. 0 ☐ None — — — 192 168 1. 0 ☐ VNC Default 5000 5000 TCP 192 168 1. 140 ✓ VNC Java 5900 5900 TCP 192 168 1. 140 ✓- Click Save Changes at the bottom of the screen.
NOTE
If you want to use software such as VNC on multiple computers, you will need to reconfigure the default ports that VNC uses on each additional computer. Then, create additional port forwarding entries for each additional computer. See your software's documentation for help.
How to set up port forwarding for a range of ports
Why would I set up port forwarding for a range of ports? Port forwarding is a feature that forwards inbound traffic from the Internet on a range of ports to a single device on your local network. Unlike a web camera that typically only requires a single port to be forwarded, some applications require forwarding to a range of ports.
Example: You want to set up your computer so you can use BitTorrent, a popular peer-to-peer file sharing application. BitTorrent uses port 6881 by default. If that port is busy, the requesting BitTorrent client tries the next port in sequence. The most common configuration for home routers with a single BitTorrent computer is to set up port forwarding using a range of ports starting with 6881 and ending with port 6889.
To set up port range forwarding:
Applications & Gaming > Port Range Forwarding
-
Log into the browser-based utility (see "How to open the browser-based utility" on page 25).
-
Set up a DHCP reservation for the IP address of the computer on which you installed the software. (See "How to set up the DHCP server on your router" on page 29). In this example, the IP address of the desktop computer with BitTorrent installed is 192.168.1.140.
-
Click the Applications & Gaming tab, then click the Port Range Forwarding page.
-
Enter a descriptive name, then enter the Start Port and the End Port values to specify the range. In this example, the range is 6881 to 6889.
-
Select TCP as the protocol.
-
In the To IP Address field, enter the last 3 digits of the IP address of the device running the software. The rest of the IP address fields already completed. In this example, you would enter 140.
-
Select Enabled next to the To IP Address field.
| Port Range Forwarding | |||||
| Application Name | Start - End Port | Protocol | To IP Address | Enabled | |
| BitTorrent - Desktop | 6881 to 6889 | TCP ▼ | 192 168 1 140 | ☑ | |
| BitTorrent - MacBook | 6890 to 6899 | TCP ▼ | 192 168 1 142 | ☑ | |
- Click Save Settings at the bottom of the page.
NOTES:
To use software like BitTorrent on multiple computers on your network, create additional entries with a unique range of ports as shown above. BitTorrent only works with ports between 6881 and 6999.
Depending on your computer's firewall software, you may need to open a range of ports in your firewall to enable software that uses port range forwarding
How to set up port range triggering for online gaming
For ALL
Why would I use port triggering instead of port forwarding? Port range triggering allows the router to watch outgoing data for specific port numbers. The IP address of the computer that sends the matching data is remembered by the router, so that when the requested data returns through the router, the data is routed back to the proper computer. An example of port range triggering would be to enable a USB or Bluetooth headset for online chat and gaming.
To set up port range triggering for multiple entries:
Applications & Gaming > Port Range Triggering
- Log into the browser-based utility (see "How to open the browser-based utility" on page 25).
- Click the Applications & Gaming tab, then click the Port Range Triggering page.
- See your device documentation for information on the ports that the device uses.
-
For each entry in the Port Range Forwarding table:
-
Enter a descriptive name (such as PS3 Headset)
- For single ports, enter the same port number in each Triggered Range and Forwarded Range box.
- For port ranges, enter the same number ranges in each Triggered Range and Forwarded Range column.
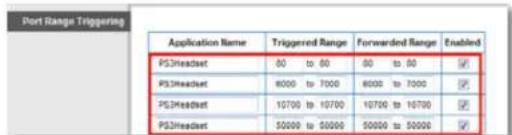
text_image
Port Range Triggering Application Name Triggered Range Forwarded Range Enabled PS3Headset 00 to 00 00 to 00 ✓ PS3Headset 8000 to 7000 6000 to 7000 ✓ PS3Headset 10700 to 10700 10700 to 10700 ✓ PS3Headset 50000 to 50000 50000 to 50000 ✓- Click Save Settings at the bottom of the page.
How to configure your Xbox for online gaming
For ALL
Why would I set up my Xbox for online gaming? Online gaming adds another dimension to using your Xbox. As with other online gaming applications and gaming consoles, you need to forward multiple ports to use your Xbox for online gaming. The procedure for setting up your Xbox is almost identical to setting up multiple port forwarding for VNC remote control. (See "How to set up port forwarding for multiple ports" on page 58).
NOTE
For more information on configuring your router for online gaming, see "How to optimize your router for gaming and voice" on page 32.
Refer to your game console documentation to determine the ports used by your device. The Xbox uses four ports:
- TCP port 80
- UDP port 88
- TCP/UDP port 53
- TCP/UDP port 3074
To set up an Xbox using multiple entries of single port forwarding:
Applications & Gaming > Single Port Forwarding
- Connect your Xbox 360 to your router.
- Log into the browser-based utility (see "How to open the browser-based utility" on page 25).
- Set up a DHCP reservation for the IP address of the Xbox. (See "How to set up the DHCP server on your router" on page 29).
- OR -
Refer to your game console's documentation to set a static IP address for your device.
-
Click the Applications & Gaming tab, then click the Single Port Forwarding page. The Xbox uses four ports, so create four port forwarding entries on this page.
-
Enter the port and protocol information as shown in the image below.
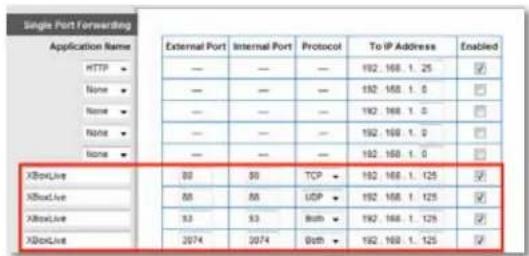
text_image
Single Port Forwarding Application Name HTTP ▼ None ▼ Name ▼ None ▼ XBoxLive XBoxLive XBoxLive XBoxLive External Port Internal Port Protocol To IP Address Enabled —— — — 192.168.1.25 ✓ —— — — 192.168.1.0 ✓ —— — — 192.168.1.0 ✓ —— — — 192.168.1.0 ✓ —— — — 192.168.1.0 ✓ 80 80 TCP 192.168.1.125 ✓ 88 88 UDP 192.168.1.125 ✓ 93 93 Both 192.168.1.125 ✓ 2074 2074 96th 192.168.1.125 ✓- In the To IP Address field, enter a 1- to 3-digit number that corresponds to the last three digits of the IP Address of the Xbox 360. The rest of the IP address is already completed.
- Select Enabled next to the To IP Address field for each entry.
- Click Save Settings at the bottom of the page.
Maintaining and Monitoring
How to back up and restore your router configuration
For ALL
Why do I need to back up my router configuration? As with any valuable data, you should back up your router configuration. Your router might contain many customized settings. Those settings would be lost if you reset your router to its factory defaults, and you would need to re-enter all of them manually. If you back up your router configuration, restoring settings is easy.
To back up your router configuration:
Administration > Management
- Log into the browser-based utility (see "How to open the browser-based utility" on page 25).
- Click the Administration tab, then click the Management page.
- Click Back Up Configurations at the bottom of the screen.

You are prompted to save the file.
- Click OK or Save.
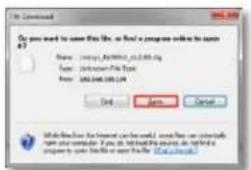
text_image
Do you want to run this file, or find a program outline to run this file. Name: longy_fundm_2013-01-08 Type: short-term file type File: 100.000.000.000.000.000.000.000.000.000.000.000.000.000.000.000.000.000.000.000.000.000.000.000.000.000.- Specify a file location, then click Save.
To restore your router configuration:
Administration > Management
- Log into the browser-based utility (see "How to open the browser-based utility" on page 25).
- Click the Administration tab, then click the Management page.
- Click Restore Configurations at the bottom of the screen.

A separate window opens.
- Click Browse to navigate to the location of your configuration file, then select the file and click Open.
- To restore the configuration, click Start to Restore.

How to restore factory defaults
Why would I need to restore to factory defaults? If you are experiencing difficulties with the router and have exhausted all other troubleshooting measures, you may want to reset the router to factory defaults. Resetting the router erases all of your settings, so you must restore the settings after. We recommend that you back up your configuration before resetting your router to factory defaults. See "How to back up and restore your router configuration" on page 61.
You can use the Reset button or the router's browser-based utility to restore your router to factory defaults.
To reset your router to factory defaults with the reset button:
CAUTION
Whenever you restart the router, all logs that are not saved will be lost.
- With your router connected to power and turned on, press and hold the Reset button on the bottom of your router for 5-10 seconds.
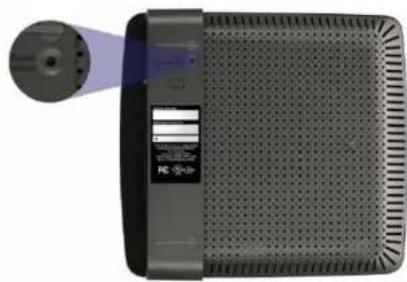
natural_image
Front view of a black electronic device with ventilation grille and indicator light (no visible text or symbols)E1200, E1500, E2500, and E3200 Reset Button

text_image
Device rear panel with labeled ports and a highlighted indicator box showing a measurement or status.E4200 Reset Button
To reset your router to factory defaults using the browser-based utility: Administration > Factory Defaults
- Log into the browser-based utility (see "How to open the browser-based utility" on page 25).
- Click the Administration tab, then click the Factory Defaults page.
3. Click Restore Factory Defaults.
A confirmation window opens.
- Click OK.

How to upgrade the router's firmware
For ALL
Why would I need to upgrade my router's firmware? Linksys may periodically publish a firmware upgrade either to fix a problem or to add features to your router.
IMPORTANT
Do not interrupt the upgrade process. You should not turn off the router or press the Reset button during the upgrade. Doing so may permanently disable the router.
If you are upgrading from a laptop computer, make sure that the laptop is connected to a power source or that the battery is fully charged.
Disable your computer's Sleep mode. It might interrupt the upgrade process.
If you are upgrading from a computer with a wireless network connection, make sure that you have strong wireless signal strength. If not, move your computer closer to your router.
TIPS
Each time you run Cisco Connect, it checks for software updates and installs them, if available. Use the following instructions only if you don't run Cisco Connect.
To upgrade the router's firmware:
For E900 E1200 E1200V2 E1500E2500E3200
Linksys.com/support
Administration > Firmware Upgrade
- Log into the browser-based utility (see "How to open the browser-based utility" on page 25).
- Click the Status tab, then click the Router page and take note of the current firmware version for your router.
- Using your web browser, connect to Linksys.com/support, then find your router model.
- Click the Downloads tab, then select the hardware version for your router from the Select Hardware Version drop-down list.
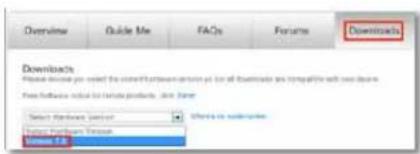
text_image
Overview Guide Me FAQs Forum Downloads Downloads Please choose you to select the website or more as for all downloads are compatible with your own. Free software tool for basic products, free content Select Microsoft Excel Browse Microsoft Excel Browse Excel- Compare the latest available firmware version on the website with your current version. If there is a newer version, click Release Notes to see if the newer version contains new features you want or solves a problem you are having.
- If you want the new version, click Download and save the file to your computer. Take note of the file location.
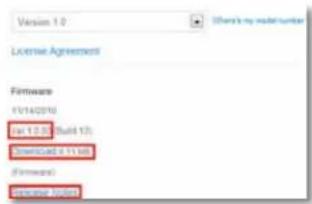
text_image
Version 1.0 Copyright's my reader number License Agreement Firmware V1/4/2010 For 12.0% Build 1/3: Downloaded 4.11 items (Firmware) Remove locationDuring the upgrade process, the router may lose the settings you have changed. Make a backup of your router configuration before starting the upgrade process. See "How to back up and restore your router configuration" on page 61.
- In the browser-based utility, click the Administration tab, then click the Firmware Upgrade page.
- Click Browse, then go to the location where you saved the upgrade file.
- Select the upgrade file, then click Start Upgrade and follow the on-screen instructions. The upgrade process begins, and a progress bar appears. When the firmware has been uploaded, a new page opens with an "Upgrade is successful" notice, and the router reboots.
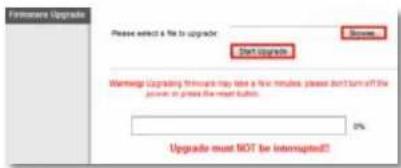
text_image
Formen Upgrade Please select a file to upgrade Don't upgrade Warning Upgrade firmware may test a few minutes, please don't turn off the power or press the next button. 3% Upgrade must NOT be interrupted?To upgrade the router's firmware:
For E4200
Administration > Firmware Upgrade
- Log into the browser-based utility (see "How to open the browser-based utility" on page 25).
- Click the Administration tab, then click the Firmware Upgrade page.
- Click Check For Updates, then follow the on-screen instructions for installing any available updates.
TIP
To have your router automatically check for updates, select Update Automatically. The router will check for updates at midnight according to the time zone setting on the Basic Setup page. If an update is found, it will be immediately installed, then the router will restart.
How to check the status of your router
For ALL
Why would I want to check the status of my router? Your router status tells you whether you have a secure Internet connection and informs you about the status of your network-connected devices.
To check your router status using Cisco Connect:
- In Windows, click Start, All Programs, then click Cisco Connect.
- OR -
On a Mac, open the Applications folder, then click Cisco Connect.
The Cisco Connect main menu opens.
- Look in the upper-right corner of the Cisco Connect main menu. If your router is online and secure, you see online secure and a green indicator.
To check your router status using the browser-based utility:
Status > Router
Status > Local Network
Status > Wireless Network
Status > Ports
-
Log into the browser-based utility (see "How to open the browser-based utility" on page 25).
-
Click the Status tab, then click the Router page. Detailed information about your router status is displayed. (Screen from IPv6-enabled router shown.)
TIP
For field descriptions, click Help on the right side of the screen.
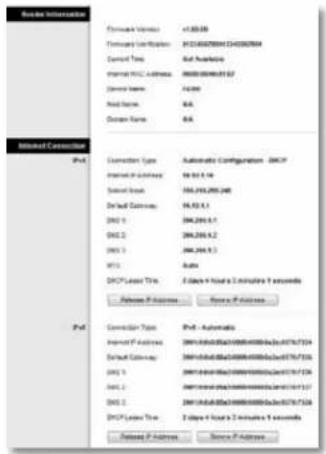
text_image
System Information Forward Version: <10.00 Forward Link Address: 01245678900013445678900 Control Time: Not Available Internal URL: Address: 0000-0000-01-07 Control Name: 14200 Read Name: R/A Open Name: R/A Mineral Connection Port Connection Type: Automatic Configuration - DHCP Internal Connection: 56.52.1.14 Serial link: 194.210.200.240 Dialial Connection: 56.52.1.1 DNS 9: 194.210.1.1 DNS 2: 194.210.1.2 DNS 3: 194.210.1.3 WTL: Auto DHCP Laser Time: 2 bytes + load in 3 instructions 5 seconds Access P Address: Save P Address Port Connection Type: Port - Automatic Internal P Address: 1991-1993-1994-1995-1996-1997-1998 Dialial Connection: 1991-1993-1994-1995-1996-1997-1998-1999-199A-199B-199C-199D-199E-199F-199G-199H-199I-199J-199K-199L-199M-199N-199O-199P-199Q-199R-199S-199T-199U-199V-199W-199X-199Y-199Z-199A-199A-200A-200B-200C-200D-200E-200F-200G-200H-200I-200J-200K-200L-200M-200N-200O-200P-200Q-200R-200S-200T-200U-200V-200W-200X-200Y-200Z-200A-200A-200A-200A+- Click the Status tab, then click the Local Network page. Your local network's IP address information and the DHCP server settings are displayed. (Screen from IPv6-enabled router shown.)
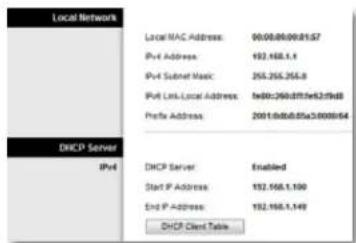
text_image
Local Network Local IAC Address: 00:08:06:00:57 IPv4 Address: 192.168.1.1 IPv4 Subnet Magic: 265.265.265.8 IPv4 Link Local Address: fe80:260.0f80e62f8d8 Prefix Address: 2001.0d8b.05a3000864 DHCP Server IPv4 DHCP Server Enabled Start IP Address: 192.168.1.100 End IP Address: 192.168.1.149 DHCP Client Table- Click DHCP Client Table to display the currently assigned IP addresses.
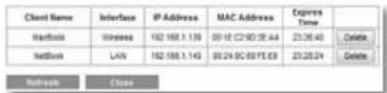
- Click the Status tab, then click the Wireless Network page. Your wireless network status is displayed.
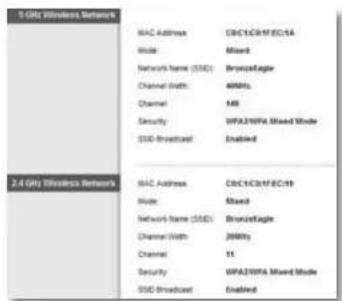
text_image
1 GHz Wireless Network MAC Address CBC1CAVIEC-5A Mode Mixed Network Name (SSD) BronzeFagle Channel Width: 48MHz Channel 148 Security WPA20WFA Mixed Mode SSD Broadcast Enabled 2.6 GHz Wireless Network MAC Address CBC1CAVIEC-19 Mode Mixed Network Name (SSD) BronzeFagle Channel Width: 26MHz Channel 11 Security WPA20WFA Mixed Mode SSD Broadcast Enabled- Click the Status tab, then click the Ports page. The link status and speed (speed data available only for the E3200 and E4200) for each of the Ethernet ports and the Internet port are displayed.
How to disable the Ethernet port status lights
Why would I want to disable the Ethernet port status lights? Depending on the placement of the router in a home, some users might find the lights distracting. You can easily disable the lights using Cisco Connect, but you can also disable them using the browser-based utility.
To disable the lights using Cisco Connect:
- In Windows, click Start, All Programs, then click Cisco Connect.
-
OR - On a Mac, open the Applications folder, then click Cisco Connect The Cisco Connect main menu opens.
-
Under Router Settings, click Change.
- Under Port lights, click Off, then click Finish.
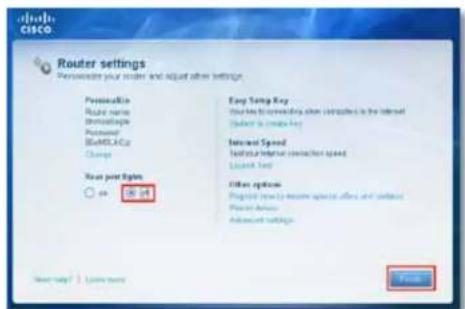
text_image
chobe cisco Router settings Perewinder your router and adjust after settings. Personal key Router name Demographic Protocol SvMSLAC2 Change New port types OK OK Easy Setup Key You have to receive any instructions in the Internet Desktop to create key Internet Speed Institute your network connection speed Liquid Text Other options Program currently requires special offers and updates Power Devices Advanced settings FinishTo disable the lights using the browser-based utility:
For E900 E1200 E1200V2 E1500E2500E320
Status >Ports
- Log into the browser-based utility (see "How to open the browser-based utility" on page 25).
- Click the Status tab, then click the Ports page.
- In the Rear Port Lights section, click Off, then click Save Settings.
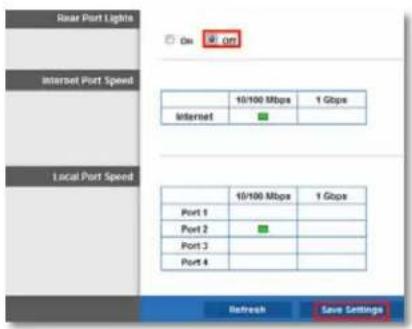
text_image
Near Port Lights On Off Internet Port Speed 10/100 Mbps 1 Gbps Internet Local Port Speed 10/100 Mbps 1 Gbps Port 1 Port 2 Port 3 Port 4 Refresh Save SettingsTo disable the lights using the browser-based utility:
For E4200
Setup > Basic Setup
- Log into the browser-based utility (see "How to open the browser-based utility" on page 25).
- Click the Setup tab, then click the Basic Setup page.
- Set Rear Port Lights to Off, then click Save Settings at the bottom of the page.
How to test your Internet connection
What utilities are included in my router to test my Internet connection?
Your router includes two diagnostic tests, Ping and Traceroute, that let you check network connections, including network devices and your Internet connection.
To diagnose your Internet connection:
Administration > Diagnostics
- Log into the browser-based utility (see "How to open the browser-based utility" on page 25).
- Click the Administration tab, then click the Diagnostics page.
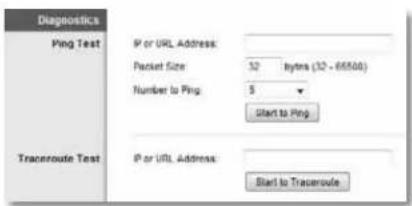
text_image
Diagnostics Ping Test IP or URL Address: Packet Size: 32 bytes (32 - 66500) Number to Ping: 5 Start to Ping Traceroute Test IP or URL Address: Start to Traceroute- To check whether an address can be reached, enter an IP address or URL, a packet size, and number of times to ping in the Ping Test section, then click Start to Ping.
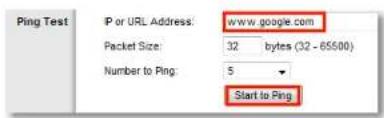
text_image
Ping Test IP or URL Address: www.google.com Packet Size: 32 bytes (32 - 65500) Number to Ping: 5 Start to PingA window opens showing the ping test results. You will see a response for each successful ping.
NOTE
If an Internet URL fails to respond to ping, it doesn't necessarily mean that the site is down. For security reasons, some sites are configured to not respond to ping requests.
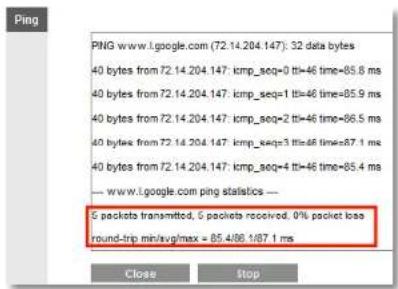
text_image
PING www.l.google.com (72.14.204.147): 32 data bytes 40 bytes from 72.14.204.147: icmp_seq=0 tti=46 time=85.8 ms 40 bytes from 72.14.204.147: icmp_seq=1 tti=46 time=85.9 ms 40 bytes from 72.14.204.147: icmp_seq=2 tti=46 time=86.5 ms 40 bytes from 72.14.204.147: icmp_seq=3 tti=46 time=87.1 ms 40 bytes from 72.14.204.147: icmp_seq=4 tti=46 time=85.4 ms — www.l.google.com ping statistics — 5 packets transmitted, 5 packets received, 0% packet loss round-trip min/avg/max = 85.4/86.1/87.1 ms Close Stop- To trace the route that packets take between your router and a specific address, enter an address in the IP or URL Address field of the Traceroute Test section, then click Start to Traceroute.

A window opens with the test results.
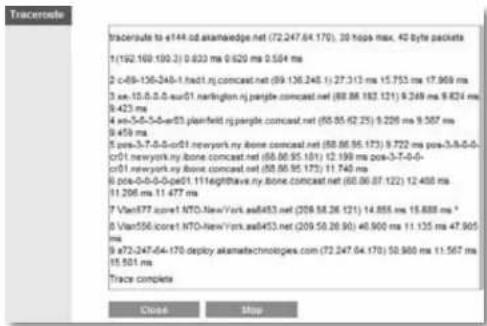
text_image
Traceroside Traceroside to e144.0d akamawedge.net (72.247.04.170), 30 hops max, 40 byte packets 1(192.100.100.2) 0.620 ms 0.620 ms 0.584 ms 2 c-69-136-348-1.rad1.nj.comcast.net (09.136.248) 11 27.313 ms 15.753 ms 17.969 ms 3 sec 10.0-0.0-sur01 narthington.nj.parjale.comcast.net (88.88.183.121) 9.249 ms 9.824 ms 4 ns-5-0-5-0-sur03 plainfield.nj.purple.comcast.net (80.95.42.25) 9.226 ms 9.587 ms 5 459 ms 6 pres-3-7-0-5-0-sur01.newyork.ny.bone.comcast.net (88.86.95.173) 9.722 ms pres-3-8-0-0- cr01.newyork.ny.bone.comcast.net (88.86.95.181) 12 199 ms pos-3-7-0-0- cr01.newyork.ny.bone.comcast.net (88.90.95.173) 11.740 ms 6 bde-0-0-0-0-ges01.111eightthava.ny.bone.comcast.net (88.86.97.122) 12.480 ms 11 206 ms 11 477 ms 7 Van556.icoret NTO.NewYork.asi453.net (208.58.26.121) 14.855 ms 15.888 ms 8 Van556.icoret NTO-NewYork.asi453.net (209.50.26.90) 40.900 ms 11.135 ms 47.905 ms 9 a72-247-04-170 deploy akamatestchnologies.com (72.247.04.170) 50.900 ms 11.567 ms 15 501 ms Trace complete Close StopHow to configure and use logs
What kind of logging capabilities does my router have? Your router can track all traffic for your Internet connection. Your router supports four types of logs:
CAUTION
All logs that are not saved will be lost whenever the router restarts.
To enable and view router logs:
Administration > Log
- Log into the browser-based utility (see "How to open the browser-based utility" on page 25).
- Click the Administration tab, then click the Log page.
-
To monitor traffic between the local network and the Internet, select Enabled (default), then click Save Settings.
-
To view the logs, click View Log. The Log window opens.
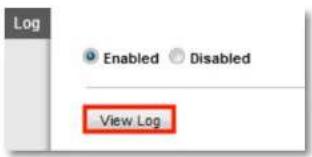
text_image
Log Enabled Disabled View Log- Select the log you want to see from the Type drop-down list.
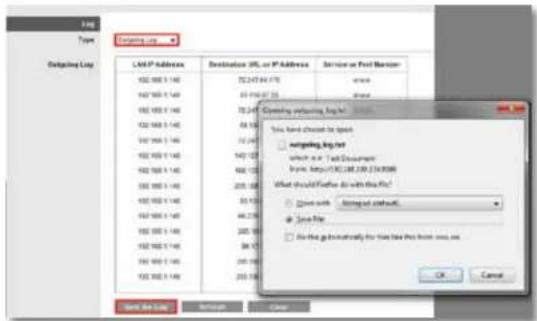
text_image
Outgoing Log LAN IP Address Destination URL or IP Address Service or Print Manager 102.100 5.140 102.100 5.140 102.100 5.140 102.100 5.140 102.100 5.140 102.100 5.140 102.100 5.140 102.100 5.140 25.247 64.178 35.194 67.255 35.247 49.188 52.247 543.123 668.123 205.188 33.193 44.278 205.188 38.173 245.188 255.188 Send the Log Send to Cancel Comming verification log file... You can check for speed notgging.log.net which is: Text Document. By: https://iCJ.CS/23435888 What should either do with this file? □ Store with Stringed default. □ Save File □ No file, customically for file type that from user.sse. OK Cancel- Incoming Log—The source IP addresses and destination port numbers for incoming Internet traffic
-
Outgoing Log—Local IP addresses, destination URLs/IP addresses, and service/port numbers for outgoing Internet traffic
• Security Log—Logins for the browser-based utility
• DHCP Client Log—Local DHCP server status information -
To save the log, click Save the Log, then click OK or Save.
CAUTION
All logs that are not saved will be lost whenever the router restarts.
Browser-based Utility Menu Structure
E900
Setup
Basic Setup
Language
Internet Setup
Internet Connection Type
Optional Settings
Network Setup
Router Address
DHCP Server Setting
Time Settings
Time Zone
Reboot
IPv6 Setup
Internet Setup
Internet Connection Type
Network Setup
6rd Tunnel
DDNS
DDNS
DDNS Service
MAC Address Clone
MAC Address Clone
Advanced Routing
NAT
Dynamic Routing (RIP)
Static Routing
Wireless
Basic Wireless Settings
Configuration View
Wireless Security
Wireless Security
Wireless MAC Filter
Wireless MAC Filter
Access Restriction
MAC Address Filter List
Security
Firewall
Firewall
Internet Filter
Web Filter
VPN Passthrough
VPN Passthrough
Applications & Gaming
Single Port Forwarding
Single Port Forwarding
Port Range Forwarding
Port Range Forwarding
Port Range Triggering
Port Range Triggering
DMZ
DMZ
IPv6 Firewall
QoS
QoS (Quality of Service)
Wireless
Internet Access Priority
Upstream Bandwidth
Category
Summary
Administration
Management
Router Access
Local Management Access
Remote Management Access
Advanced features
UPnP
Back up and Restore
Log
[Non-Text]
Diagnostics
Diagnostics
Ping Test
Traceroute Test
Factory Defaults
Factory Defaults
Firmware Upgrade
Firmware Upgrade
Status
Route
Router Information
Internet Connection
IPv4
IPv6
Local Network
Local Network
DHCP Server
IPv4
DHCP Client Table
Wireless Network
Wireless Network
Ports
Rear Port Lights
Internet Port Link
Local Port Link
E1200/E1500
Setup
Basic Setup
Language
Internet Setup
Internet Connection Type
Optional Settings
Network Setup
Router Address
DHCP Server Setting
Time Settings
Time Zone
Reboot
IPv6 Setup (E1200V2/E1500 only)
Internet Setup
Internet Connection Type
Network Setup
6rd Tunnel
DDNS
DDNS
DDNS Service
MAC Address Clone
MAC Address Clone
Advanced Routing
NAT
Dynamic Routing (RIP)
Static Routing
Wireless
Basic Wireless Settings
Configuration View
Wireless Security
Wireless Security
Guest Access
Guest Access
Wireless MAC Filter
Wireless MAC Filter
Access Restriction
MAC Address Filter List
Security
Firewall
Firewall
Internet Filter
Web Filter
VPN Passthrough
VPN Passthrough
Access Policy
Parental Controls
Target Devices
Schedule
Block Specific Sites
Applications & Gaming
Single Port Forwarding
Single Port Forwarding
Port Range Forwarding
Port Range Forwarding
Port Range Triggering
Port Range Triggering
DMZ
DMZ
IPv6 Firewall (E1200V2/E1500 only)
QoS
QoS (Quality of Service)
Wireless
Internet Access Priority
Upstream Bandwidth
Category
Summary
Administration
Management
Router Access
Local Management Access
Remote Management Access
Advanced features
UPnP
Back up and Restore
Log
Log
Diagnostics
Diagnostics
Ping Test
Traceroute Test
Factory Defaults
Factory Defaults
Firmware Upgrade
Firmware Upgrade
Status
Router
Router Information
Internet Connection
IPv4
IPv6 (E1200V2/E1500 only)
Local Network
Local Network
DHCP Server
IPv4
DHCP Client Table
Wireless Network
Wireless Network
Ports
Rear Port Lights
Internet Port Link
Local Port Link
E2500
Setup
Basic Setup
Language
Internet Setup
Internet Connection Type
Optional Settings
Network Setup
Router Address
DHCP Server Setting
Time Settings
Time Zone
Reboot
IPv6 Setup
Internet Setup
Internet Connection Type
Network Setup
6rd Tunnel
DDNS
DDNS
DDNS Service
MAC Address Clone
MAC Address Clone
Advanced Routing
NAT
Dynamic Routing (RIP)
Static Routing
Wireless
Basic Wireless Settings
Wi-Fi Protected Setup
5 GHz Wireless Settings
2.4 GHz Wireless Settings
Configuration View
Wireless Security
5 GHz Wireless Security
2.4 GHz Wireless Security
Guest Access
Guest Access
Wireless MAC Filter
Wireless MAC Filter
Access Restriction
MAC Address Filter List
Security
Firewall
Firewall
Internet Filter
Web Filter
VPN Passthrough
VPN Passthrough
Access Policy
Parental Controls
Target Devices
Schedule
Block Specific Sites
Applications & Gaming
Single Port Forwarding
Single Port Forwarding
Application Name
Port Range Forwarding
Port Range Forwarding
Application Name
Port Range Triggering
Port Range Triggering
DMZ
DMZ
IPv6 Firewall
QoS
QoS (Quality of Service)
Wireless
Internet Access Priority
Upstream Bandwidth
Category
Summary
Administration
Management
Router Access
Local Management Access
Remote Management Access
Advanced features
UPnP
Back Up and Restore
Log
Log
Diagnostics
Diagnostics
Ping Test
Traceroute Test
Factory Defaults
Factory Defaults
Firmware Upgrade
Firmware Upgrade
Status
Router
Router Information
Internet Connection
IPv4
Local Network
Local Network
DHCP Server
IPv4
DHCP Client Table
Wireless Network
5 GHz Wireless Network
2.4 GHz Wireless Network
Ports
Rear Port Lights
Internet Port Link
Local Port Link
E3200
Setup
Basic Setup
Language
Internet Setup
Internet Connection Type
Optional Settings
Network Setup
Router Address
DHCP Server Setting
Time Settings
Time Zone
Reboot
IPv6 Setup
Internet Setup
Internet Connection Type
Network Setup
6rd Tunnel
DDNS
DDNS Service
MAC Address Clone
Advanced Routing
NAT
Dynamic Routing (RIP)
Static Routing
Wireless
Basic Wireless Settings
Wi-Fi Protected Setup
5 GHz Wireless Settings
2.4 GHz Wireless Settings
Configuration View
Wireless Security
5 GHz Wireless Security
2.4 GHz Wireless Security
Guest Access
Wireless MAC Filter
Wireless MAC Filter
Access Restriction
MAC Address Filter List
Security
Firewall
Firewall
Internet Filter
Web Filter
VPN Passthrough
Storage
Disk
Disk Management
Shared Folder
Format Disk
FTP Server
Setup
Access
Administration
Information
Anonymous Access
User Management
Group Management
Access Policy
Parental Controls
Target Devices
Schedule
Block Specific Sites
Applications & Gaming
Single Port Forwarding
Application Name
Port Range Forwarding
Application Name
Port Range Triggering
DMZ
IPv6 Firewall
OoS
QoS (Quality of Service)
Wireless
Internet Access Priority
Upstream Bandwidth
Category
Summary
Administration
Management
Router Access
Local Management Access
Remote Management Access
Advanced features
UPnP
Back Up and Restore
Log
Diagnostics
Ping Test
Traceroute Test
Factory Defaults
Firmware Upgrade
Status
Router
Router Information
Internet Connection
IPv4
IPy6
Local Network
Local Network
DHCP Server
IPv4
DHCP Client Table
Wireless Network
5 GHz Wireless Network
2.4 GHz Wireless Network
Ports
Rear Port Lights
Internet Port Link
Local Port Link
E4200
Setup
Basic Setup
Language
Internet Setup
Internet Connection Type
Network Setup
Router Address
DHCP Server Setting
Time Settings
Time Zone
Port Lights
Reboot
IPv6 Setup
Internet Setup
Internet Connection Type
Network Setup
6rd Tunnel
DDNS
DDNS Service
MAC Address Clone
Advanced Routing
NAT
Dynamic Routing (RIP)
Static Routing
Wireless
Wireless Settings
Configuration View
5 GHz Wireless Settings
2.4 GHz Wireless Settings
Guest Access
Wireless MAC Filter
Wireless MAC Filter
Access Restriction
MAC Address Filter List
Security
Firewall
Firewall
Internet Filter
VPN Passthrough
Storage
Disk
Disk Management
USB Port Speed
Shared Folder
Media Server
UPnP Media Server
Setup
Database
FTP Server
Setup
Share
Administration
Information
User Management
Group Management
Access Restrictions
Parental Controls
Target Devices
Schedule
Block Specific Sites
Applications & Gaming
Single Port Forwarding
Application Name
Port Range Forwarding
Application Name
Port Range Triggering
DMZ
IPv6 Firewall
QoS
QoS (Quality of Service)
Wireless
Internet Access Priority
Upstream Bandwidth
Category
Summary
Administration
Management
Router Access
Local Management Access
Remote Management Access
ALG
UPnP
Back Up and Restore
Log
Diagnostics
Ping Test
Traceroute Test
Factory Defaults
Firmware Upgrade
Status
Router
Router Information
Internet IPv4 Connection
Internet IPv6 Connection
Local Network
Local Network
DHCP Server
Wireless Network
5 GHz Wireless Network
2.4 GHz Wireless Network
Ports
Internet Port Speed
Local Port Speed
Specifications
Linksys E900
Model Name Linksys E900
Description Wireless-N300 Router
Model Number E900
Switch Port Speed 10/100 Mbps (Fast Ethernet)
Radio Frequency 2.4 GHz
# of Antennas 2
Ports Power, Internet, and Ethernet (1-4)
Buttons Reset, Wi-Fi Protected Setup™
LEDs Power/Wi-Fi Protected Setup, Internet, Ethernet (1-4)
UPnP Supported
Security features WEP, WPA, WPA2
Security Key Bits Up to 128-bit encryption
Environmental
Dimensions 188.7 × 151.7 × 31.2 mm (7.43" × 5.97" × 1.23")
Unit Weight 202.0g (7.13 oz.)
Power 12V,0.5A
Certifications FCC, UL/cUL, ICES-003, RSS210,
CE, Wi-Fi (IEEE 802.11b/g/n),
WPA2™, WMM®, Wi-Fi Protected
Setup, Windows 7
Operating Temp. 0 to 40°C (32 to 104°F)
Storage Temp. -20 to 60°C (-4 to 140°F)
Operating Humidity 10 to 80% non-condensing
Storage Humidity 5 to 90% non-condensing
NOTES
For regulatory, warranty, and safety information, see the CD that came with your router or go to Linksys.com/support.
Specifications are subject to change without notice.
Maximum performance derived from IEEE Standard 802.11 specifications. Actual performance can vary, including lower wireless network capacity, data throughput rate, range and coverage. Performance depends on many factors, conditions and variables, including distance from the access point, volume of network traffic, building materials and construction, operating system used, mix of wireless products used, interference and other adverse conditions.
Linksys E1200
Model Name Linksys E1200
Description Wireless-N Router
Model Number E1200
Switch Port Speed 10/100 Mbps (Fast Ethernet)
Radio Frequency 2.4 GHz
# of Antennas 2
Ports Power, Internet, and Ethernet (1-4)
Buttons Reset, Wi-Fi Protected Setup™
LEDs Power/Wi-Fi Protected Setup, Internet, Ethernet (1-4)
UPnP Supported
Security features WEP, WPA, WPA2
Security Key Bits Up to 128-bit encryption
Environmental
Dimensions 188.7 × 151.7 × 31.2 mm
(7.43" × 5.97" × 1.23")
Unit Weight V1: 252.7g (8.91 oz.)
V2: 202.0g (7.13 oz.)
Power 12V, 0.5A
Certifications FCC, UL/cUL, ICES-003, RSS210,
CE, Wi-Fi (IEEE 802.11b/g/n),
WPA2™, WMM®, Wi-Fi Protected
Setup, Windows 7
Operating Temp. 0 to 40°C (32 to 104°F)
Storage Temp. -20 to 60°C (-4 to 140°F)
Operating Humidity 10 to 80% non-condensing
Storage Humidity 5 to 90% non-condensing
NOTES
For regulatory, warranty, and safety information, see the CD that came with your router or go to Linksys.com/support.
Specifications are subject to change without notice.
Maximum performance derived from IEEE Standard 802.11 specifications. Actual performance can vary, including lower wireless network capacity, data throughput rate, range and coverage. Performance depends on many factors, conditions and variables, including distance from the access point, volume of network traffic, building materials and construction, operating system used, mix of wireless products used, interference and other adverse conditions.
Linksys E1500
Model Name Linksys E1500
Description Wireless-N Router with SpeedBoost
Model Number E1500
Switch Port Speed 10/100 Mbps (Fast Ethernet)
Radio Frequency 2.4 GHz
# of Antennas 3
Ports Power, Internet, and Ethernet (1-4)
Buttons Reset, Wi-Fi Protected Setup
LEDs Power/Wi-Fi Protected Setup, Internet, Ethernet (1-4)
UPnP Supported
Security features WEP, WPA, WPA2
Security Key Bits Up to 128-bit encryption
Environmental
Dimensions 188.7 × 151.7 × 31.2 mm
(7.43" × 5.97" × 1.23")
Unit Weight 254.1g (8.96 oz.)
Power 12V,0.5A
Certifications FCC, UL/cUL, ICES-003, RSS210,
CE, Wi-Fi (IEEE 802.11b/g/n),
WPA2, WMM, Wi-Fi Protected
Setup, Windows 7
Operating Temp. 0 to 40°C (32 to 104°F)
Storage Temp. -20 to 60°C (-4 to 140°F)
Operating Humidity 10 to 80% non-condensing
Storage Humidity 5 to 90% non-condensing
NOTES
For regulatory, warranty, and safety information, see the CD that came with your router or go to Linksys.com/support.
Specifications are subject to change without notice.
Maximum performance derived from IEEE Standard 802.11 specifications. Actual performance can vary, including lower wireless network capacity, data throughput rate, range and coverage. Performance depends on many factors, conditions and variables, including distance from the access point, volume of network traffic, building materials and construction, operating system used, mix of wireless products used, interference and other adverse conditions.
Linksys E2500
Model Name Linksys E2500
Description Advanced Dual-Band N Router
Model Number E2500
Switch Port Speed 10/100 Mbps (Fast Ethernet)
Radio Frequency 2.4 and 5 GHz
# of Antennas 4 (2 per band)
Ports Power, Internet, and Ethernet (1-4)
Buttons Reset, Wi-Fi Protected Setup
LEDs Power/Wi-Fi Protected Setup, Internet, Ethernet (1-4)
UPnP Supported
Security features WEP, WPA, WPA2
Security key bits Up to 128-bit encryption
Environmental
Dimensions 225 x 35 x 180 mm (8.86" x 1.38" x 7.09")
Unit Weight 452 g (15.94 oz)
Power 12V, 1A
Certifications FCC, IC, CE, Wi-Fi A/B/G/N
Operating Temp. 0 to 40°C (32 to 104°F)
Storage Temp. -20 to 60°C (-4 to 140°F)
Operating Humidity non-condensing 10 to 80%, relative humidity,
Storage Humidity 5 to 90% non-condensing
NOTES
For regulatory, warranty, and safety information, see the CD that came with your router or go to Linksys.com/support.
Specifications are subject to change without notice.
Maximum performance derived from IEEE Standard 802.11 specifications. Actual performance can vary, including lower wireless network capacity, data throughput rate, range and coverage. Performance depends on many factors, conditions and variables, including distance from the access point, volume of network traffic, building materials and construction, operating system used, mix of wireless products used, interference and other adverse conditions.
Linksys E3200
Model Name Linksys E3200
Description High Performance Dual-Band N Router
Model Number E3200
# of Antennas 6 (3 per band)
Switch Port Speed 10/100/1000 Mbps (Gigabit Ethernet)
Radio Frequency 2.4 and 5 GHz
Ports Internet, Ethernet (1-4), USB, Power
Buttons Reset, Wi-Fi Protected Setup
LEDs Power/Wi-Fi Protected Setup, Internet, Ethernet (1-4)
UPnP Supported
Security features WEP, WPA, WPA2
Security key bits Up to 128-bit encryption
Storage File System Support FAT, and NTFS, and HFS+
Environmental
Dimensions 6.69" x 0.98" x 7.48" (170 x 25 x 190 mm)
Unit Weight 7.62 oz (216 g)
Power 12V, 2A
Certifications FCC, IC, CE, Wi-Fi A/B/G/N
Operating Temp. 32 to 95°F (0 to 35°C)
Storage Temp. -4 to 140°F (-20 to 60°C)
Operating Humidity non-condensing 10 to 80% relative humidity,
Storage Humidity 5 to 90% non-condensing
NOTES
For regulatory, warranty, and safety information, see the CD that came with your router or go to Linksys.com/support.
Specifications are subject to change without notice.
Maximum performance derived from IEEE Standard 802.11 specifications. Actual performance can vary, including lower wireless network capacity, data throughput rate, range and coverage. Performance depends on many factors, conditions and variables, including distance from the access point, volume of network traffic, building materials and construction, operating system used, mix of wireless products used, interference and other adverse conditions.
Linksys E4200
Model Name Linksys E4200
Description Maximum Performance Dual-Band N Router
Model Number E4200
Switch Port Speed 10/100/1000 Mbps (Gigabit Ethernet)
Radio Frequency 2.4 and 5 GHz
# of Antennas 6 (3 per band)
Ports Power, USB, Internet, Ethernet (1-4)
Buttons Reset, Wi-Fi Protected Setup
LEDs Top panel: Power
Back panel: Internet, Ethernet (1-4)
UPnP Supported
Security Features WEP, WPA, WPA2
Security Key Bits Up to 128-bit encryption
Storage File System Support FAT, and NTFS, and HFS+
Environmental
Dimensions 8.86" x 0.98" x 6.30" (225 x 25 x 160 mm)
Unit Weight 12.7 oz (0.36 g)
Power 12V, 2A
Certifications FCC, IC, CE, Wi-Fi a/b/g/n, Windows 7, DLNA
Operating Temp. 32 to 104°F (0 to 40°C)
Storage Temp. -4 to 140°F (-20 to 60°C)
Operating Humidity non-condensing 10 to 80% relative humidity,
Storage Humidity 5 to 90% non-condensing
NOTES
For regulatory, warranty, and safety information, see the CD that came with your router or go to Linksys.com/support.
Specifications are subject to change without notice.
Maximum performance derived from IEEE Standard 802.11 specifications. Actual performance can vary, including lower wireless network capacity, data throughput rate, range and coverage. Performance depends on many factors, conditions and variables, including distance from the access point, volume of network traffic, building materials and construction, operating system used, mix of wireless products used, interference and other adverse conditions.
Visit linksys.com/support for award-winning 24/7 technical support
Cisco, the Cisco logo, and Linksys are trademarks or registered trademarks of Cisco and/or its affiliates in the United States and other countries. A listing of Cisco's trademarks can be found at www.cisco.com/go/trademarks. All other trademarks mentioned in this document are the property of their respective owners.
© 2012 Cisco and/or its affiliates. All rights reserved.
3425-01486
111216M/S