
My Cloud WDBCTL0080HWT - NAS WESTERN DIGITAL - Free user manual and instructions
Find the device manual for free My Cloud WDBCTL0080HWT WESTERN DIGITAL in PDF.


| Product Type | Network Attached Storage (NAS) |
| Brand | Western Digital |
| Model | My Cloud WDBCTL0080HWT |
| Storage Capacity | 8 TB (single drive) |
| Drive Form Factor | 3.5-inch SATA HDD |
| Processor | 1.2 GHz Marvell ARMADA 385 |
| Memory | 512 MB DDR3 RAM |
| Network Interface | Gigabit Ethernet (802.3ab) |
| USB Ports | 2 x USB 3.0 (back) |
| Dimensions (H x W x D) | 5.5 x 1.9 x 6.6 inches (139.3 x 48.3 x 168.3 mm) |
| Weight | 2.2 lbs (1.0 kg) |
| Power Supply | 12V DC, 3A external adapter |
| Power Consumption | 10 W typical (active), 3 W (sleep) |
| RAID Support | None (single drive, JBOD) |
| File System | EXT4 |
| Supported Protocols | SMB/CIFS, AFP, NFS, FTP, WebDAV |
| Operating System | WD My Cloud OS 3 |
| Mobile Apps | WD My Cloud (iOS/Android), WD Backup |
| Cloud Access | Remote access via WD My Cloud.com |
| Backup Features | Automatic USB backup, Time Machine support (Mac) |
| Security | Password protection, private and public shares, HTTPS |
| Operating Temperature | 5°C to 35°C |
| Storage Temperature | -20°C to 65°C |
| Warranty | 2 years limited |
Frequently Asked Questions - My Cloud WDBCTL0080HWT WESTERN DIGITAL
User questions about My Cloud WDBCTL0080HWT WESTERN DIGITAL
0 question about this device. Answer the ones you know or ask your own.
Ask a new question about this device
Download the instructions for your NAS in PDF format for free! Find your manual My Cloud WDBCTL0080HWT - WESTERN DIGITAL and take your electronic device back in hand. On this page are published all the documents necessary for the use of your device. My Cloud WDBCTL0080HWT by WESTERN DIGITAL.
USER MANUAL My Cloud WDBCTL0080HWT WESTERN DIGITAL
natural_image
White wireless device labeled 'My Cloud' with a blue indicator button (no additional text or symbols visible)For use with My Cloud devices on firmware 04.xx.xx
WD® Service and Support
Should you encounter any problem, please give us an opportunity to address it before returning this product. Most technical support questions can be answered through our knowledge base or e-mail support service at http://support.wd.com. If the answer is not available or if you prefer, please contact WD at the best telephone number shown below.
Your product includes 30 days of free telephone support during the warranty period. This 30-day period starts on the date of your first telephone contact with WD Technical Support. E-mail support is free for the entire warranty period and our extensive knowledge base is available 24/7. To help us keep you informed of new features and services, remember to register your product online at http://register.wd.com.
Accessing Online Support
Visit our product support website at http://support.wd.com and choose from these topics:
- Downloads—Download drivers, software, and updates for your WD product.
- Registration—Register your WD product to get the latest updates and special offers.
- Warranty & RMA Services—Get warranty, product replacement (RMA), RMA status, and data recovery information.
- Knowledge Base—Search by keyword, phrase, or answer ID.
- Installation—Get online installation help for your WD product or software.
- WD Community—Share your thoughts and connect with other WD users.
- Learning Center — Start here to get the most out of your personal cloud storage device (http://mycloud.com/learn).
Contacting WD Technical Support
When contacting WD for support have your WD product serial number, system hardware, and system software versions available.
North America Asia Pacific
| English | 800.ASK.4WDC(800.275.4932) | Australia | 1800 429 861 |
| China | 800 820 6682 / 400 627 6682 | ||
| Spanish | 800.275.4932 | Hong Kong | +852 3057 9031 |
| India | 1800 419 5591/1800 200 5789 | ||
| Europe (toll free)* | 00800 ASK4 WDEU(00800 27549338) | Indonesia | 001 803 852 3993 |
| Japan | 0800 805 7293/ 0120 934 453 | ||
| Malaysia | 1800 817 477 | ||
| New Zealand | 0508 555 639 | ||
| Middle East | +31 880062100 | Philippines | 1800 1855 0277 |
| Africa | +31 880062100 | Singapore | 1800 608 6008 |
| Taiwan | 0800 225 593 | ||
| Thailand | 00 1800 852 5913 |
* For a list of WD support numbers see http://support.wdc.com/contact/contact.asp?lang=en
Registering Your WD Product
Register your WD product to get the latest updates and special offers. You can easily register your device online at http://register.wd.com or by using the My Cloud Personal Cloud Storage installer, available on the online Learning Center.
Table of Contents
WD® Service and Support....ii
Registering Your WD Product .... ii
1 Important User Information 1
Important Safety Instructions .... 1
Recording Your WD Product Information.... 2
2 Product Overview 3
About the System....3
About the Learning Center 4
Package Contents 4
Requirements 5
Product Components 6
LEDs 7
Pre-installation Instructions 9
Handling Precautions 9
3 Getting Started 10
Preparing Your Device for Use....10
Setting Up Your Device 11
Accessing Content 17
Getting to the Public Share 19
4 Backing Up and Retrieving Files 21
Synchronizing Your Files and Folders with WD Sync 21
Using WD SmartWare Pro (Windows Only) 24
Using Windows 7 Backup and Restore ....25
Using Windows 8 File History....25
Using Apple Time Machine....26
5 The Dashboard At a Glance 30
Launching the Dashboard 30
The Dashboard Home Page 31
Obtaining Customer Support 38
Basic Administrative Tasks.... 39
6 Managing Users 40
About Users 40
Viewing Users.... 40
Creating a User....42
Changing a User's Password....42
Editing User Settings 43
Removing a User 43
7 Managing Shares 44
About Shares 44
Viewing a List of Shares 44
Creating a New Share....45
Making a Share Private....46
Deleting a Share 47
Accessing the Contents of a Share Locally 47
8 Accessing Your My Cloud Device Remotely 49
Enabling Cloud Access for the My Cloud Device. 49
Enabling Cloud Access for a User 49
Mobilizing Your Files with the My Cloud Mobile App 51
The Pathway to Your Personal Cloud 52
Accessing Your Personal Cloud on the Web 52
9 Configuring Settings 54
General 54
Network 59
Media 62
Utilities 63
Notifications 67
Firmware....69
10 Managing Safepoints 71
About Safepoints 71
Creating a Safepoint....71
Updating a Safepoint 76
Recovering a Safepoint 76
Deleting a Safepoint 78
11 Playing/Streaming Videos, Photos & Music 79
Media Servers....79
Media Storage 80
Enabling/Disabling DLNA and iTunes. 81
Accessing Your Personal Cloud Using Media Players 83
Accessing Your Personal Cloud Using iTunes 84
12 Connecting a USB Hard Drive 85
Overview 85
Connecting A USB Drive 85
Mapping A USB Drive (Windows Only). 86
Creating a Shortcut to the USB Drive (Windows only) 86
13 Appendix A: My Cloud Device URLs and Names 87
87
14 Appendix B: Specifications 88
15 Appendix C: Troubleshooting 90
First Steps Checklist....90
Resetting the My Cloud Device 90
Specific Problems and Corrective Actions 91
16 Appendix D: Regulatory and Warranty Information 96
Regulatory Compliance 96
Warranty Information (All Regions Except Australia/New Zealand) 97
Warranty Information (Australia/New Zealand only) 98
17 Index 100
1
Important User Information
Important Safety Instructions
Recording Your WD Product Information
Important Safety Instructions
This device is designed and manufactured to assure personal safety. Improper use can result in electric shock or fire hazard. The safeguards incorporated into this unit will protect you if you observe the following procedures for installation, use, and servicing.
■ Follow all warnings and instructions marked on the product.
- Unplug this product from the wall outlet before cleaning. Do not use liquid cleaners or aerosol cleaners. Use a damp cloth for cleaning.
- Do not use this product near any liquids.
- Do not place this product on an unstable surface. The product may fall, causing serious damage to the product.
■ Do not drop the product.
- Do not block the slots and openings on the top and bottom of the chassis; to ensure proper ventilation and reliable operation of the product and to protect it from overheating, these openings must not be blocked or covered. Making sure the device is standing upright also helps prevent overheating.
- Operate this product only from the type of power indicated on the marking label. If you are not sure of the type of power available, consult your dealer or local power company.
- Do not allow anything to rest on the power cord. Do not locate this product where persons will walk on the cord.
If an extension cord is used with this product, make sure that the total ampere rating of the equipment plugged into the extension cord does not exceed the extension cord ampere rating. Also, make sure that the total rating of all products plugged into the wall outlet does not exceed the fuse rating.
- Never push objects of any kind into this product through the chassis slots as they may touch dangerous voltage points or short out parts that could result in a fire or electric shock.
- Unplug this product from the wall outlet and refer servicing to qualified service personnel under the following conditions:
- When the power cord or plug is damaged or frayed.
- If liquid has been spilled on the product.
- If the product has been exposed to rain or water.
- If the product does not operate normally when the operating instructions are followed. Adjust only those controls that are covered by the operating instructions since improper adjustment may result in damage and require extensive work by a qualified technician to the product to normal condition.
- If the product has been dropped or the chassis has been damaged.
- If the product exhibits a distinct change in performance, contact WD Customer Support at http://support.wd.com.
Recording Your WD Product Information
Remember to write down the following WD product information, which is used for setup and technical support. Your WD product information is found on the label on the bottom of the device.
- Serial Number
■ Model Number
Purchase Date
■ System and Software Notes
2
Product Overview
About the System
Features
About the Learning Center
Package Contents
Requirements
Product Components
LEDs
Pre-installation Instructions
Handling Precautions
About the System
The My Cloud cloud storage system is a high-performance system providing secure wireless access to your media and files from any computer, tablet, or smartphone when it is connected to a wireless router.
Connect this powerful system to your wireless router for shared storage on your home network and accessing your files from within and outside the home. Share files with your Mac and PC, stream media to your DLNA-compatible devices, and access your files remotely with the My Cloud apps and the MyCloud.com web site.
This user manual provides step-by-step installation instructions and other important information about your WD product. For more information and news about this product, visit our website at http://www.wd.com/.
Features
Finally, a cloud of your own. Save everything on your storage device and access it from anywhere.
Centralized storage for your family's media collection – Store and organize all your family's photos, videos, music, and important documents in one secure place on your home network.
Access from anywhere – Enjoy your personal cloud no matter where you are from any PC, Mac, tablet, or smartphone. With WD's apps, your personal cloud is always with you.
Automatic file backup for all your computers – Back up of all the files on your PC and Mac computers to your My Cloud device. Get peace of mind knowing that all your files are securely and automatically backed up on your network. For PC users, WD SmartWare™ Pro offers options for backing up your files to multiple devices on your network. Mac users, take advantage of all the features of Apple Time Machine backup software to protect your data.
Directly upload from your mobile devices – Are your mobile devices at maximum capacity? Save valuable space on your tablets and smartphones with easy photo, video and file uploads direct to your personal cloud device.
Connect to Dropbox™ and more – Easily transfer files between your personal cloud, Dropbox, and other public cloud accounts.
Expandable storage with the USB expansion port – Easily expand your storage capacity with the USB 3.0 expansion port. Simply plug-in your USB 3.0 or USB 2.0 external hard drive to instantly add more storage for all your photos, videos, music, and documents.
Fast file transfers for high-performance streaming – Gigabit Ethernet and dual-core processor deliver high-performance media streaming and blazing-fast file transfers. Seamlessly stream your videos, photos and music to your connected DLNA-compatible TV's, media players, and gaming consoles without skipping a beat.
Serve up your music with iTunes® – The My Cloud storage device includes iTunes support so you can centralize your music and video collection and play it on any PC or Mac computer with iTunes.
Password protection for privacy – Your data is always under your control. Protect your personal cloud from unauthorized access with password protection available for every user.
Easy to set up, easy to find on your network – Get up and running in minutes with WD's rich web-based user interface for seamless web-guided setup.
Need help setting up? – We're with you every step of the way. Visit http://mycloud.com/setup or contact the WD customer support team to walk you through the installation of the My Cloud device and WD's apps for your computers and mobile devices. Contact information is on page ii of this manual and in the Quick Install Guide.
Add an extra layer of protection for your files – You can automatically make a second copy, or safepoint, of your personal cloud on another NAS device or a Windows PC on your LAN, or on a USB device connected to the My Cloud device. With extra protection for all your media, you get peace of mind.
About the Learning Center
WD's online Learning Center (visit http://mycloud.com/learn) provides the latest information, instructions, and software to help users get the most out of their personal cloud. This web-based guide offers step-by-step help with setting up remote access, backing up data, monitoring drive status, and more. It's an interactive resource to walk users through installing and using their My Cloud device. The Learning Center allows you to:
- Learn about your new cloud storage product.
■ Download the latest software for your product. - Find in-depth, interactive information on how to explore each of your product's features.
- Update your product whenever new features become available.
■ Access an always-available resource online, without a manual or CD.
Package Contents
My Cloud device
- Ethernet cable
- AC power adapter
■ Quick Install Guide
For information on additional accessories for this product, visit:
| US www.wdstore.com |
| Europe www.wdstore.eu |
| All others Contact WD Technical Support in your region. For a list of Technical Support contacts, visit http://www.support.wdc.com . |
Requirements
Operating System
Windows®
Windows 10
Windows 8.1
Windows 8
Windows 7
Windows Vista®
Mac OS X®
■ Yosemite (Mac OS 10.10)
■ Mavericks (Mac OS 10.9)
■ Mountain Lion (Mac OS 10.8)
■ Lion (Mac OS 10.7)
Note: Compatibility may vary depending on your computer's hardware configuration and operating system.
Note: Your best experience using the My Cloud device is with Windows 7 and higher.
Web Browsers
- Internet Explorer 10.0 and later on supported Windows computers.
- Safari 6.0 and later on supported Windows and Mac computers.
■ Firefox 29 and later on supported Windows and Mac computers. - Google Chrome 31 and later on supported Windows and Mac computers.
Local Network
Router/switch (Gigabit is recommended to maximize performance.)
Internet
Broadband Internet connection is required for initial setup and software downloads, as well as for remote access and mobile apps.
Product Components
My Cloud Front View
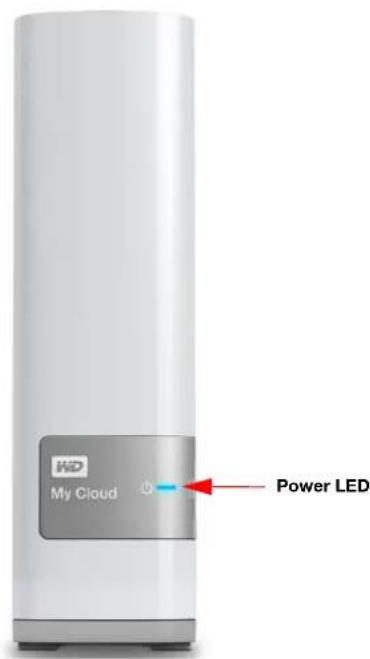
text_image
HiD My Cloud Power LEDMy Cloud Back View
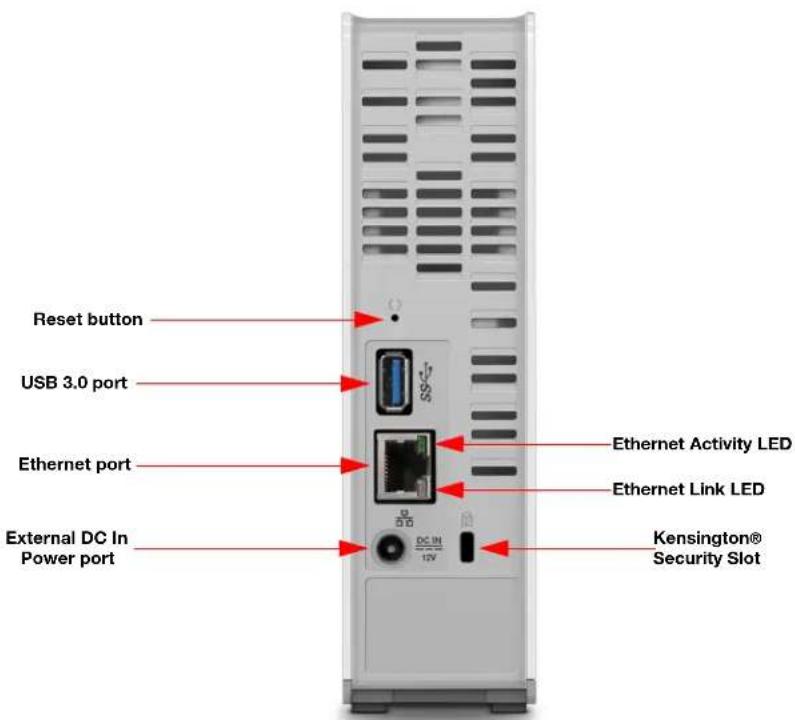
text_image
Reset button USB 3.0 port Ethernet port External DC In Power port Ethernet Activity LED Ethernet Link LED Kensington® Security Slot| Component Icon Description | ||
| Gigabit Ethernet port |  | Connects the device to a local network. |
| USB 3.0 port Co | [3448] | a USB hard drive for additional storage. |
| Reset button Restores settings such as the admin user name and password for the device. | ||
| Power port Conn | [1Y2TK] | device to an AC adapter and the power outlet. |
| Kensington security slot |  | For device security, the device is equipped with a security slot that supports a standard Kensington security cable.Visit http://www.kensington.com/ for more information. |
LEDs
Front Panel LED
The following table describes the front panel (red/white/yellow/blue) LED behavior.
| State | Color | Appearance | State Description |
| Power Off None Displays if the device is unplugged. | |||
| Powering Up | White | Blinking | Displays when you first apply power to the unit.Reset pressed. |
| Initializing White Solid | Device has begun loading the Operating System (OS).Firmware update in progress. | ||
| Ready | Blue | Solid | The OS is now ready. |
| Standby | Blue | Pulsing | Unit is in HDD standby mode. |
| Attention | Red | Solid | The following circumstances trigger this state:Disk thermal warning threshold exceeded (under or over temp)Ethernet cable not connected |
| Fault/action required | Red | Solid | The following faults trigger this state:Disk SMART failureData volume does not existSystem volume does not existSystem thermal shutdown (75°C) |
Back Panel (Network) LEDs
The following table describes the network state and activity LEDs.
Note: Looking at the port, with the LEDs on the bottom, the LED on the top is the Activity LED, and the one on the bottom is the Link LED.
| State | LED | Appearance | State Description |
| Link down | Link | Off | Cable or device is not plugged in, or other end of link is not operational. |
| Link up – 100 Mbps Link Yellow Cable is plugged in, and both ends of the link have successfully established communications. Network negotiated at 100 Mbps. | |||
| Link up – 1000 Mbps | Link | Green | Cable is plugged in, and both ends of the link have successfully established communications. Network negotiated at 1000 Mbps. |
| Link idle Activity Off Active communication is not in progress. | |||
| Link busy | Activity | Green - Blinking | Active communication is in progress. |
Pre-installation Instructions
Before installing the device, select a suitable place for it for maximum efficiency. Place it in a place that is:
■ Near a grounded power outlet
- Clean and dust free
■ On a stable surface free from vibration
■ Well ventilated, with nothing blocking or covering the slots and openings on the top and bottom of the device, and away from sources of heat
■ Secluded from electromagnetic fields from electrical devices such as air conditioners, radio and television receivers.
Handling Precautions
WD products are precision instruments and must be handled with care during unpacking and installation. Rough handling, shock, or vibration can damage the device. Observe the following precautions when unpacking and installing your external storage product:
■ Do not drop or jolt the device.
- Do not move the device while it is powered on.
- Do not use this product as a portable drive.

Getting Started
Preparing Your Device for Use
Setting Up Your Device
Getting Started Using the Dashboard
Accessing Content
Getting to the Public Share
It's easy to set up the My Cloud device — just unpack your device, connect it, and wait for the Power LED on the front of your device to turn a solid blue. Then set up your device from your web browser at: http://mycloud.com/setup.
Preparing Your Device for Use
There are a few steps you need to take in order to get your device up and running. Follow the steps outlined below to prepare your device for use.
Physically Connecting Your Device
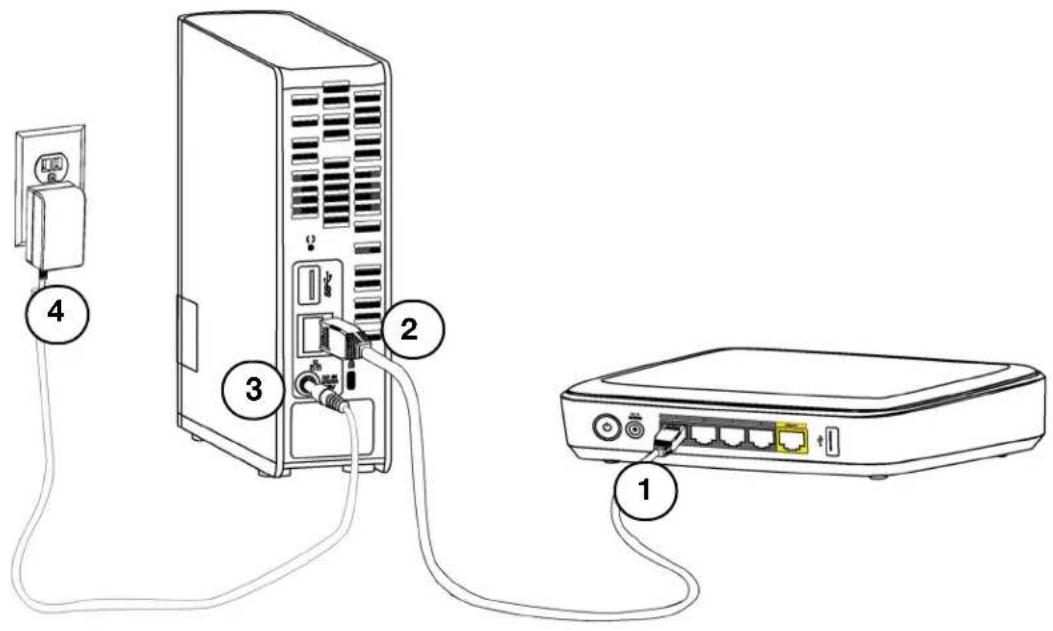
text_image
Diagram showing connection between a server tower and a network device, labeled with numbered components.Follow the steps below to connect the My Cloud device to a home or small office network.
Important: To avoid overheating, make sure the device is upright as shown in the illustration above and nothing is blocking or covering the slots and openings on the top and bottom of the device. In the event of overheating, the device will perform a safe shutdown, interrupting all processes currently being performed. If this occurs, data may be lost.
Important: We recommend that you use the enclosed Ethernet cable for optimal performance.
- Using the provided Ethernet cable, connect one end of the Ethernet cable into a router or network switch port.
- Connect the other end of the Ethernet cable directly into the Ethernet port located on the back of the device.
- Connect one end of the power adapter into the power supply socket on the back of the device.
- Plug the other end of the power adapter into a power outlet. The unit powers up automatically.
Important: Wait for the My Cloud device to finish powering up (approximately three minutes) before configuring it. The device is ready when the power LED stops blinking and turns a solid blue.
- When the power LED on your device turns a solid blue, you can proceed to set up your device.
Setting Up Your Device
To set up your My Cloud device, continue to Getting Started.
If you chose not to set up the software for your device, you can still:
- Use your My Cloud device as an external hard drive, dragging and dropping files to and from it.
- Configure the device using the My Cloud device's dashboard. (See "The Dashboard At a Glance" on page 30.)
- Back up files using Windows 8 File History, Windows 7 Backup and Restore, or Apple Time Machine. (See "Backing Up and Retrieving Files" on page 21.)
Getting Started
The online setup software walks you through the steps to easily connect your device to your home or small office network. Use the following steps to run the online setup software, discover the device, and get started using it.
Connecting to the Network and Creating a Personal Cloud
- Open a web browser and type http://mycloud.com/setup to display the welcome page.
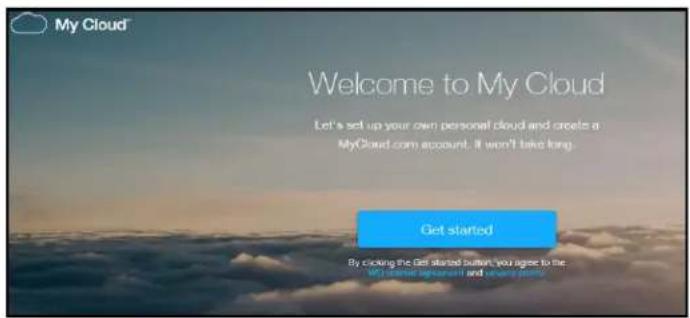
text_image
My Cloud™ Welcome to My Cloud Let's set up your own personal cloud and creates a MyCloud.com account. It won't take long. Get started By clicking the Get started button, you agree to the Let's start button and end next.- On the Welcome page, click Get Started.
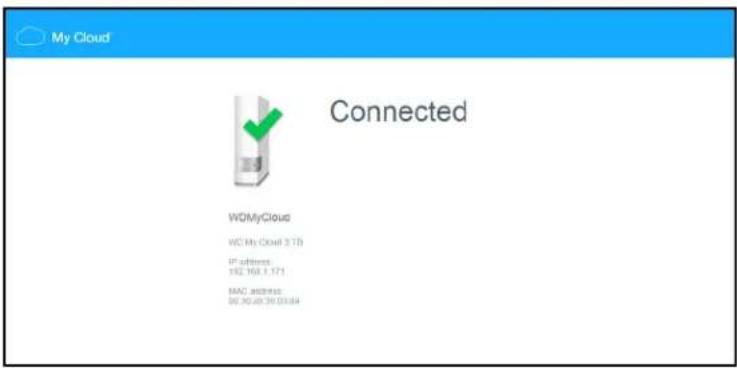
The setup software begins searching for your My Cloud device. When your device is found, a screen displays showing your device and its IP and MAC addresses.
text_image
My Cloud Connected WDMyCloud WC My Cloud 3.73 IP address 192.169.1.171 MAC address 00.00.00 00.03.04Note: If your device is not detected, follow the on-screen directions.
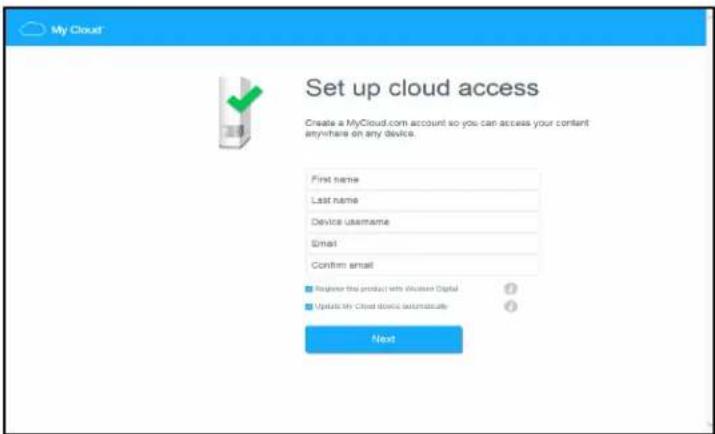
In a few seconds the Set up cloud access screen appears.
text_image
My Cloud Set up cloud access Create a MyCloud.com account so you can access your content anywhere on any device. First name Last name Device username Email Confirm email ■ Request the product with Occlusion Digital ■ Update my Cloud device automatically Next- Fill in the required information to create your My Cloud.com account and click Next.
Note: The My Cloud device creates the administrator user from the information you enter on this page.
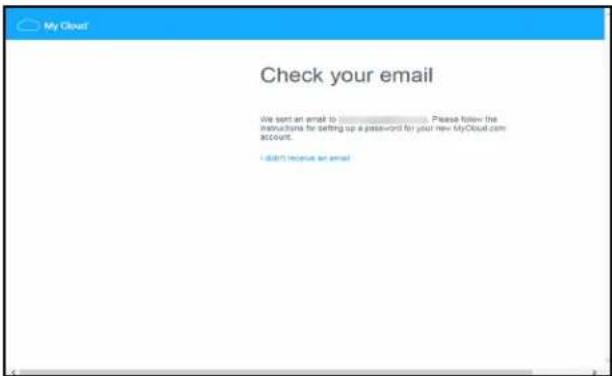
After your My Cloud account is created, a message screen displays asking you to check your email.
text_image
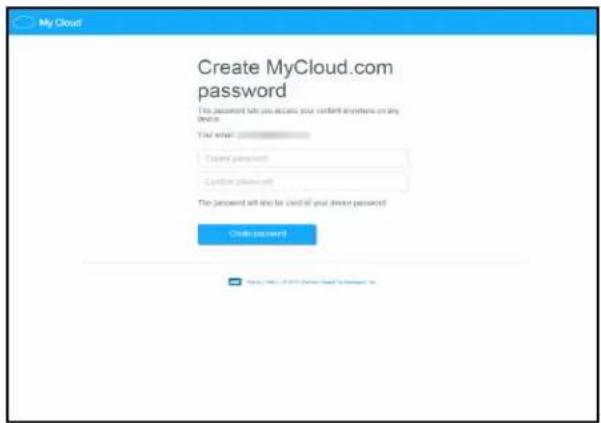
My Cloud Check your email We sent an email to: Please follow the instructions for setting up a password for your new MyCloud.com account. I'm unable to receive an email- Browse to your email service provider web page, open the My Cloud email message and follow the instructions for creating a password for your My Cloud.com account.
text_image
My Cloud Create MyCloud.com password This password helps you access your content anything on any device. Your email: ____ Create password: Custom password: The password will also be created by your device password! Create password: © MyCloud.com Myanmar Web Password- Enter your password, confirm it, and click Create password.
When your account has successfully been created, the below message displays.
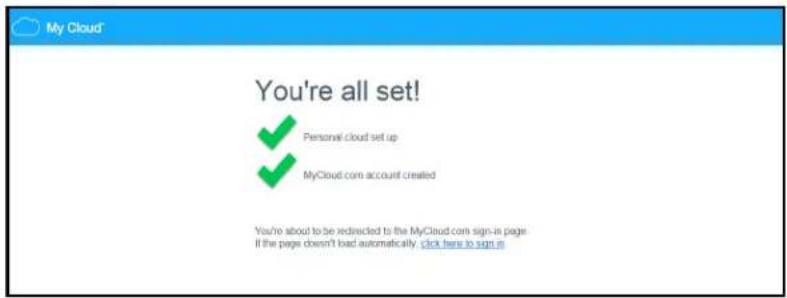
text_image
My Cloud You're all set! ✓ Personal cloud set up ✓ MyCloud.com account created You're about to be redirected to the MyCloud.com sign-in page. If the page doesn't load automatically, click here to sign inNext, you'll be automatically redirected to the MyCloud.com sign-in page shown below.
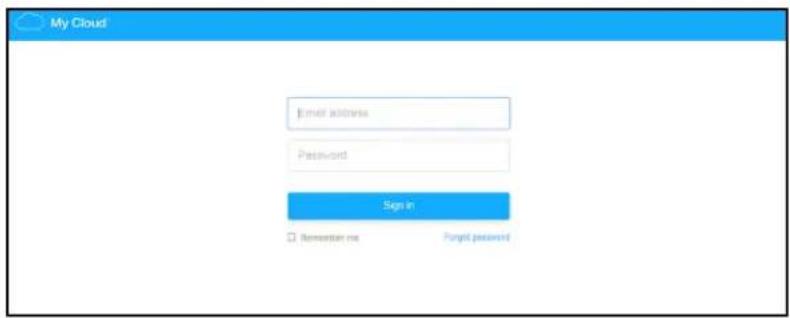
text_image
My Cloud Email address Password Sign In Reception me Forgot password- Sign in to your account using the My Cloud account password you just created. The following screen appears so you can download the WD Sync™ software.

text_image
Upload and sync files Welcome Get WD Sync so you can easily upload files from your computer to your new personal cloud. WD Sync keeps your most important files automatically synchronized across your computers. Download WD Sync- On the WD Sync Welcome screen, click Download WD Sync. WD Sync begins to install.
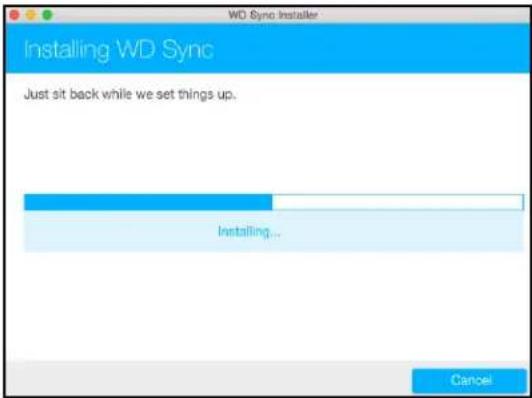
text_image
WD Sync Installer Installing WD Sync Just sit back while we set things up. Installing... Cancel- When the WD Sync installation has completed, the following screen appears.
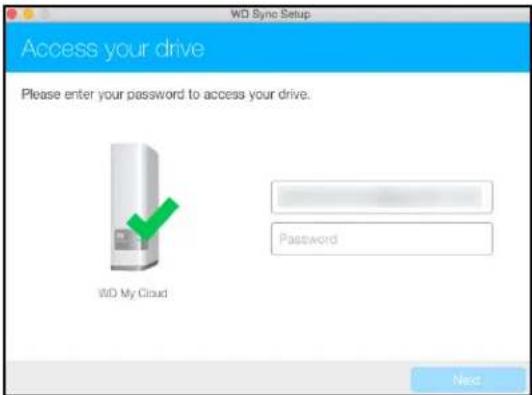
text_image
WD Sync Setup Access your drive Please enter your password to access your drive. WD My Cloud Password Next- Enter your password to access your My Cloud drive.
text_image
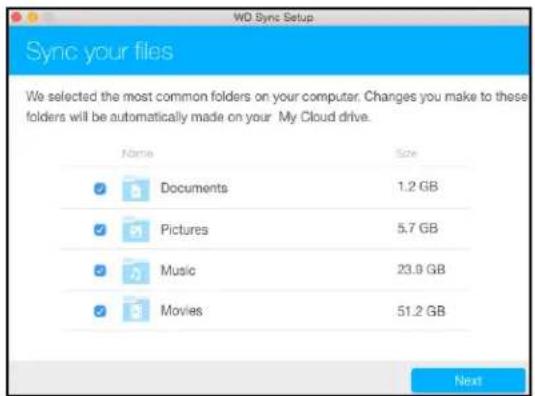
Sync your files We selected the most common folders on your computer. Changes you make to these folders will be automatically made on your My Cloud drive. Name Size Documents 1.2 GB Pictures 5.7 GB Music 23.8 GB Movies 51.2 GB Next- Select the folders on your computer that you want to sync with your My Cloud device and click Next.
text_image
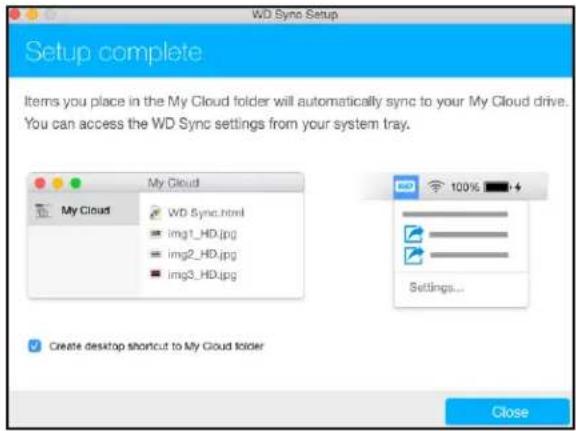
WD Sync Setup Setup complete Items you place in the My Cloud folder will automatically sync to your My Cloud drive. You can access the WD Sync settings from your system tray. My Cloud My Cloud WD 5ync.html img1_HD.jpg img2_HD.jpg img3_HD.jpg 100% Settings... Create desktop shortcut to My Cloud folder Close- WD Sync setup is complete. Click Close to exit WD Sync setup.
For more information on WD Sync, see "Synchronizing Your Files and Folders with WD Sync" on page 21.
Getting Started Using the Dashboard
Use the following steps to set up your device using your web browser instead of the online setup software. For browser requirements, see "Web Browsers" on page 5.
- Open a browser and enter your device URL. See "Appendix A: My Cloud Device URLs and Names" on page 87. Then click Enter.
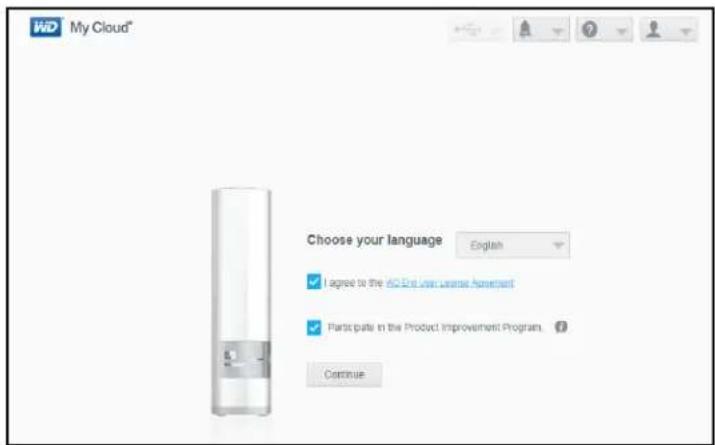
The Choose your language screen appears:
text_image
My Cloud* Choose your language English ✓ I agree to the 3D End User license agreement ✓ Participate in the Product Improvement Program. Continue- From the drop-down list, select the language you'd like to use for the user interface.
Click the WD End User License Agreement link to read the End User License Agreement.
If you agree, let the check box next to the link remain selected. If not, clear the check box.
- If you want to participate in the Product Improvement Program, let the check box remain selected. If not, clear the check box and click Continue.
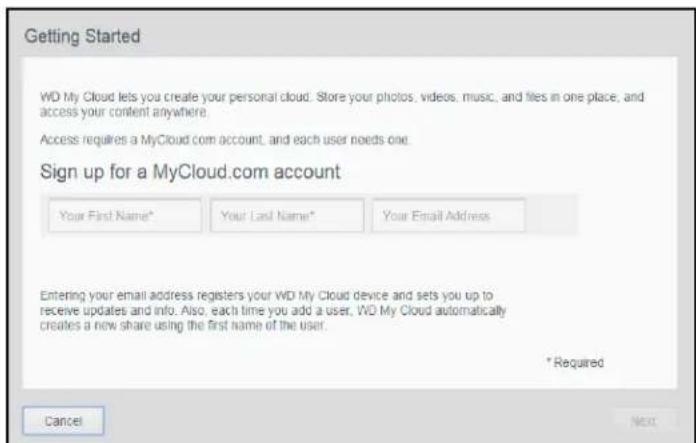
The first Getting Started window appears.
text_image
Getting Started WD My Cloud lets you create your personal cloud. Store your photos, videos, music, and files in one place, and access your content anywhere. Access requires a MyCloud com account, and each user needs one. Sign up for a MyCloud.com account Your First Name* Your Last Name* Your Email Address Entering your email address registers your WD My Cloud device and sets you up to receive updates and info. Also, each time you add a user, WD My Cloud automatically creates a new share using the first name of the user. *Required Cancel Next- At the first Getting Started window, enter your first and last name, and your email address to sign up for your MyCloud.com account. You can also add the name and email address for another user. When finished adding the names and email addresses for users, click Next.
Note: If you entered an email address for another user, make sure that the user checks their email account. They will receive an email with instructions on how to set up and activate a password for cloud access.
Note: The My Cloud app provides free remote access to your My Cloud device. Once you create your account, you can access your device using your mobile devices with Internet access.
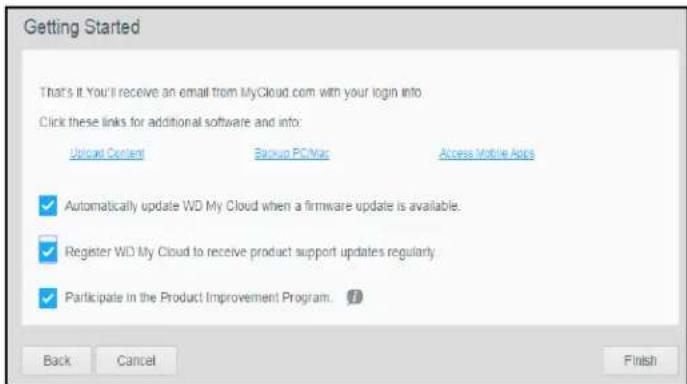
The second Getting Started screen appears:
text_image
Getting Started That's it You'll receive an email from MyCloud.com with your login info. Click these links for additional software and info: Upload Content Backup PC/Mac Access Mobile Apps ✓ Automatically update WD My Cloud when a firmware update is available. ✓ Register WD My Cloud to receive product support updates regularly. ✓ Participate in the Product Improvement Program. Back Cancel FinishThis screen provides the following options:
- To have your device's firmware updated automatically, click the first check box.
- Toregister your product, click the second check box.
■ To participate in the Product Improvement Program, click the third check box.
The screen also provides three links to important processes:
- Upload Content: See "Accessing Content" on page 17.
- Backup PC/Mac: See "Backing Up and Retrieving Files" on page 21.
-
Access Mobile Apps: See "Mobilizing Your Files with the My Cloud Mobile App" on page 51.
-
Click Finish to display the My Cloud dashboard. For instructions on using the dashboard, see "The Dashboard Home Page" on page 31.
Accessing Content
The preferred method to access content anywhere is by using MyCloud.com. However if you want to access content over your local network, your My Cloud drive supports Windows- and Mac-based transfers.
The My Cloud device's Public folder contains Shared Music, Shared Pictures, and Shared Videos subfolders. The existing content of the subfolders are files that you dragged and dropped or files that have been backed up from your computer or an attached USB drive.
Note: Any of the folders can hold any file type.
Once you've physically connected your My Cloud device (see "Preparing Your Device for Use" on page 10), use the following steps to access the contents of your device.
| Your operating systems is... Then... | |
| Windows 8 / Windows 8.1 | 1. On the Start page, typeComputer.2. ClickComputer.3. In the left pane, clickNetwork.4. Double-click the My Cloud device (see “Appendix A: My Cloud Device URLs and Names” on page 87 for a list of device names) and locate the device’s Public folder.5. Double-click the Public folder to display the Shared Music, Shared Pictures, and Shared Videos subfolders. You can now drag and drop files into (and from) the shared media folders using Windows Explorer. |
| Windows Vista / Windows 7 | 1. ClickStart > Computer > Network > My Cloud device(see “Appendix A: My Cloud Device URLs and Names” on page 87 for a list of device names) and, if required, enter your share credentials. The device’s Public and private folders (shares) appear.2. Double-click the Public folder to display the Shared Music, Shared Pictures, and Shared Videos subfolders. You can now drag and drop files into (and from) the shared media folders using Windows Explorer. |
| Mac OS X(Maverick, Mountain Lion, Lion) | 1. In a Finder window, click the My Cloud device (see “Appendix A: My Cloud Device URLs and Names” on page 87 for a list of device names) under the shared items in the side bar.2. If presented with an authorization page, enter your Username and password or selectGuestand clickConnectto display the Public share.3. Double-click the Public folder to display the subfolders: Shared Music, Shared Pictures, and Shared Videos. You can now drag and drop files into the shared folders using Finder.4. If you want to create a shared drive icon permanently on your desktop, create an alias. There are two ways to do this:Note: Before creating an alias, clickFinder > Preferences > Generaland make sureConnected Serversis checked.- Click the item you wish to alias (for example, Shared Music), hold down the mouse button, hold down theCmdandOptionkeys simultaneously, then drag the item to where you’d like to make an alias. Instead of moving the original item, this action creates an alias at the new location.- OR -- Right-click the item you want to alias (for example, Shared Music) and clickFile > Make Alias. |
Getting to the Public Share
The My Cloud device's Public share (folder) contains Shared Music, Shared Pictures, and Shared Videos subfolders.
To get to these folders so you can drag and drop files there or access files that have been backed up from your computer or an attached USB drive, follow one of the procedures described below.
Using Windows 8
- Physically connect the device to your network (see "Physically Connecting Your Device" on page 10).
- On the task bar at the bottom of the screen, click the File Explorer icon
- In the left panel, click Network.
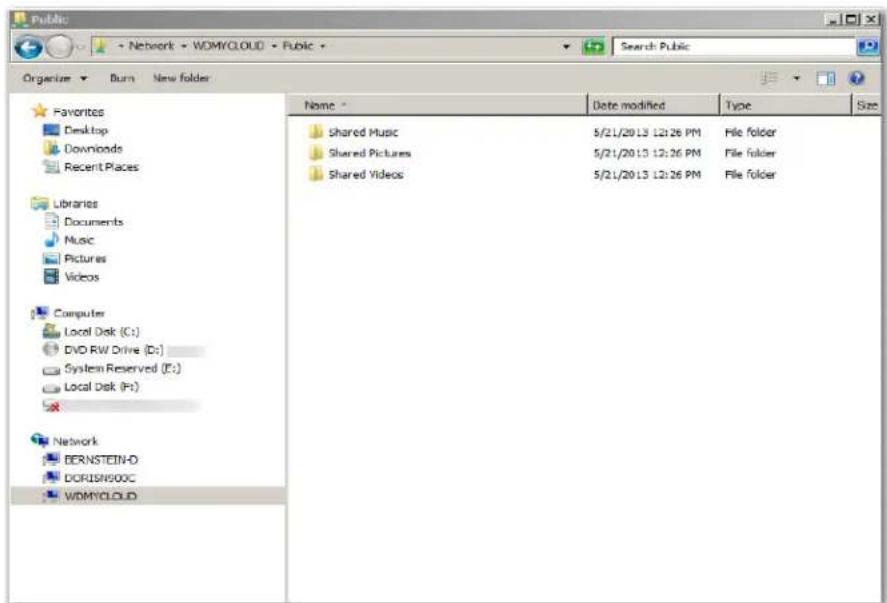
- Double-click WDMyCloud under Network, and then locate the device's Public folder.

text_image
Public Network - WOMYCLOUD - Public Organize Burn New folder Favorites Desktop Downloads Recent Places Libraries Documents Music Pictures Videos Computer Local Disk (C:) DVD RW Drive (D:) System Reserved (E:) Local Disk (P:) Network BERNSTEIN-D DOFISN500C WOMYCLOUD Name: Date modified Type Size Shared Music 5/21/2013 12:26 PM File folder Shared Pictures 5/21/2013 12:26 PM File folder Shared Videos 5/21/2013 12:26 PM File folder- Double-click the Public folder to display the Shared Music, Shared Pictures, and Shared Videos subfolders. You can now drag and drop files into and from the shared media folders using Windows Explorer.
Using Windows XP/Vista/Windows 7
- Physically connect the device to your network.
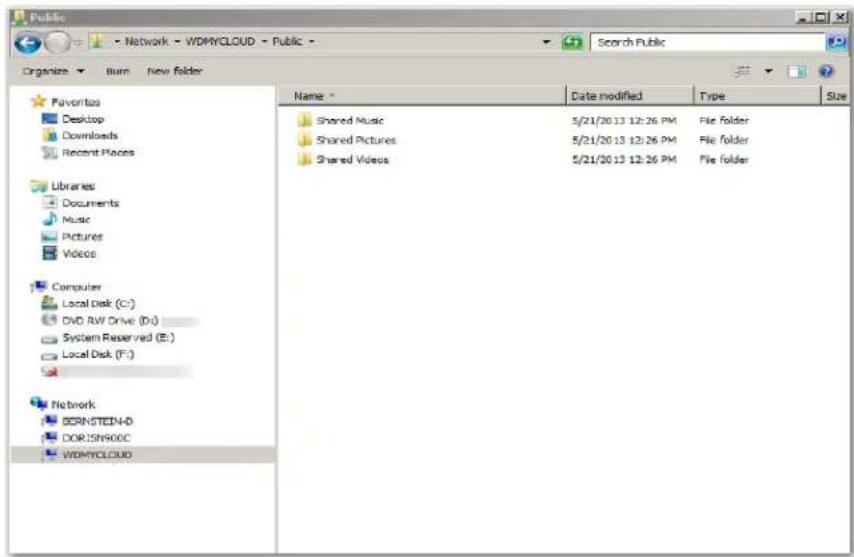
- Click or Start > Computer > Network > WDMyCloud, and locate the device's Public folder.
- Double-click the Public folder to access the Shared Photos, Shared Videos, and Shared Music subfolders.
text_image
Public Network - WORMYCLOUD - Public Organize Burn New Folder Favorites Desktop Downloads Recent Places Libraries Documents Music Pictures Videos Computer Local Disk (C:) DVD RW Drive (D:) System Reserved (E:) Local Disk (F:) Network BCRNSTEIN-D DORJISN900C WORMYCLOUD Name Date modified Type Size Shared Music 5/21/2013 12:26 PM File folder Shared Pictures 5/21/2013 12:26 PM File folder Shared Videos 5/21/2013 12:26 PM File folderMapping the Public Folder (Windows)
To map the My Cloud public folder for quick access in the future:
- In Windows Explorer, under Network, click WDMYCLOUD.
- Right-click the Public folder and select Map Network Drive from the menu.
- Select an available letter from the Drive drop-down list.
- Select the Reconnect at login check box.
- Click Finish. Your Public drive is now mapped.
Using Mac OS X Snow Leopard/Lion/Mountain Lion
- In a Finder window, click WDMyCloud under the shared items in the side panel.
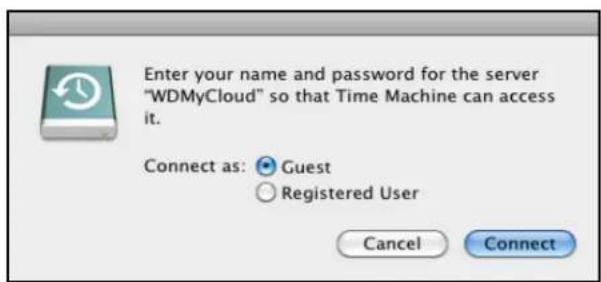
- If presented with an authorization page:
text_image
Enter your name and password for the server "WDMyCloud" so that Time Machine can access it. Connect as: Guest Registered User Cancel Connect- Select Guest and click Connect to display the Public folder.
Note: If you've created an account, you can sign in as a registered user.
4
Backing Up and Retrieving Files
Synchronizing Your Files and Folders with WD Sync Using WD SmartWare Pro (Windows Only) Using Windows 7 Backup and Restore Using Windows 8 File History Using Apple Time Machine
Synchronizing Your Files and Folders with WD Sync
The WD Sync software is a My Cloud application that automatically creates and maintains exact copies of files and folders on multiple computers in a local or wide area network (LAN or WAN) configuration. File synchronization is accomplished by:
■ WD Sync software installed on each computer
■ Firmware on your network-attached My Cloud device.
You can use WD Sync to easily upload files from your computer to your new personal cloud (MyCloud.com account) and to keep your most important files automatically synchronized across your computers.
You can download and install WD Sync as follows:
- When you use the My Cloud OS 3 setup software to set up your My Cloud device (This is recommended).
■ By downloading it from the WD online Learning Center (visit http://mycloud.com/learn).
Syncing Files and Folders
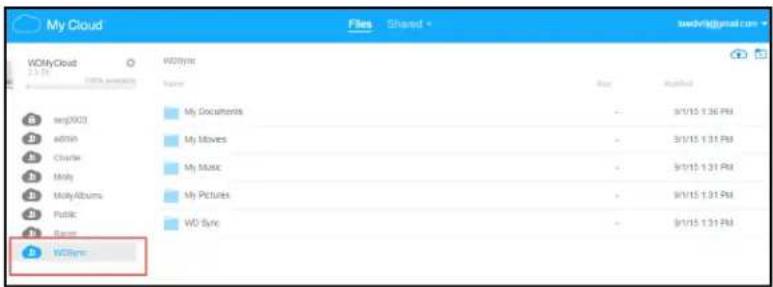
After installing the WD Sync software, to sync a file or folder on your computer, use your computer's file management utility to copy and paste or drag and drop it into the WD Sync folder. The WD Sync software automatically copies it first to the WD Sync folder on your My Cloud device and then to any other computers connected to it. After that, the WD Sync software automatically updates any changes to the file, at any location, on the other configured devices.
text_image
My Cloud WORync WORync WORync WORync WORync WORync WORync WORync WORync WORync WORync WORync WORync WORync WORync WORync WORync WORync WORync WORync WORync WORync WORync WORync WORync WORSync WORSync WORSync WORSync WORSync WORSync WORSync WORSync WORSync WORSync WORSync WORSync WORSync WORSync WORSync WORSync WORSync WORSync WORSync WORSync WORSync WORSync WORSync WORSync WORSync WOR sync WOR sync WOR sync WOR sync WOR sync WOR sync WOR sync WOR sync WOR sync WOR sync WOR sync WOR sync WOR sync WOR sync WOR sync WOR sync WOR sync WOR sync WOR sync WOR sync WOR sync WOR sync WOR sync WOR sync WOR sync WOR sinc WOR sinc WOR sinc WOR sinc WOR sinc WOR sinc WOR sinc WOR sinc WOR sinc WOR sinc WOR sinc WOR sinc WOR sinc WOR sinc WOR sinc WOR sinc WOR sinc WOR sinc WOR sinc WOR sinc WOR sinc WOR sinc WOR sinc WOR sinc WOR sinc WOR sineMy Cloud Folder Created on Your Local System Hard Drive
Installing and configuring the WD Sync software on your computer creates a My Cloud folder on your local system hard drive as described below.
For Windows XP
For Windows 7, Windows 8, Windows Vista and Mac Computers
The My Cloud folder on the local system is paired to a folder on your My Cloud device. The path on the device is:
\WDSync\WD Sync for device admin users named admin \ \WD Sync for: - Device admin users not named admin
- Device nonadmin users who know and used the admin user password
\Public\WD Sync for all others
Copying Into the My Cloud Folder
When you copy a file or folder into the My Cloud folder on your computer, the WD Sync software automatically copies it to the WD Sync folder on:
■ Your My Cloud device
■ Any other computer in your network with the WD Sync software installed.
Then, whenever you change or delete a file in the WD Sync folder on any device, the WD Sync software replicates the change on all of the other devices.
WARNING! The WD Sync software is designed for data files. It is neither intended nor suitable for syncing your applications or executable program files.
Operating System Compatibility
The WD Sync software is compatible with the following operating systems:
Windows
- Windows Vista
- Windows 7
- Windows 8
- Windows 10
Mac
- OS X 10.9
- OS X 10.10
- OS X 10.11
Managing Sync Operations
The WD Sync software provides two methods for accessing and managing sync functions:
■ The WD Sync View menu
■ The WD Sync Setting screen
Displaying the WD Sync View Menu
The WD Sync View menu provides access to all WD Sync software management and control functions. It appears when you click the WD logo icon that is:
In the system tray portion of the Windows task bar
■ At the right side of the Mac menu bar
The WD logo icon looks as shown in the following figure:

For more information on using WD Sync, see the online Help in the WD Sync application on your computer.
Using WD SmartWare Pro (Windows Only)
WD SmartWare software is an easy-to-use tool that gives you the power to:
- Protect your data automatically—Automatic, continuous backup instantly makes a copy whenever you add or change a file.
Note: Automatic backup protection is continuous as long as both your My Cloud device and computer are connected to your network. If you disconnect the device from your network, backup temporarily stops. Once you reconnect, the WD SmartWare software automatically scans your computer for new or changed files and resumes backup protection.
- See your backup as it happens—Visual backup organizes your content into categories and shows the progress of your backup.
- Retrieve lost files effortlessly—Bring back your valuable data to its original location whether you have lost all your data or just overwritten an important file.
Take control—Customize your backups.
You can download and install the WD SmartWare software from the WD online Learning Center at http://mycloud.com/learn.
The installation process gives you the choice of installing standard WD SmartWare or WD SmartWare Pro. Pro enables you to back up to non-WD drives, otherwise unsupported WD drives, and the cloud via Dropbox.
Note: WD SmartWare Pro software is a free upgrade, providing you with three licenses for your household.
My Cloud users will initially download the standard version of WD Smartware, which is then automatically upgraded to the WD SmartWare Pro version. You can choose the WD SmartWare standard version if you prefer.
Launching the WD SmartWare Software After Installation
Use one of the following options for WD SmartWare Software once you have installed it:
- Windows XP and Windows 7: From the Start menu, click Programs > WD SmartWare > WD SmartWare.
- Windows 8: From the Start menu, click WD Smartware.
- WD Quick View Icon: Left- or right-click the WD Quick View icon in the Windows system tray to display the menu, and then select WD SmartWare. (The icon is automatically installed when you download WD SmartWare.)
Info/Online Help Topics
WD SmartWare software provides two kinds of Help:
- Help icon — Each WD SmartWare page provides easy access to online help information to quickly guide you through your backup, retrieve, and settings tasks. Whenever you are uncertain about what to do, just click the info/online Help icon in the upper-right corner of any page.
- Help tab—This tab on the WD SmartWare pages provides more detailed Help. For information on using the Help tab, see Using Windows 7 Backup and Restore, below.
Please refer to the WD SmartWare online Help for further instructions.
Using Windows 7 Backup and Restore
If you choose not to use WD SmartWare software for backing up files to the My Cloud device, you can use Windows 7 Backup and Restore or Windows 8 File History.
Note: The My Cloud device does not support Windows Vista Backup and Restore. Use WD SmartWare software for backing up files to the My Cloud device.
The Windows Backup features of Windows 7 (Professional and Ultimate versions) enable you to back up media files, documents, email, and other personal files to your My Cloud device. If you lose files or your system crashes, you can easily restore the files to your PC. For more information on Windows Backup, consult Microsoft's documentation.
- Click > Control Panel > System and Security.
- Click Backup and Restore.
- Click Set up Backup and follow the steps in the wizard.
- When prompted to select where you want to save your backup, click Save on a network.
- Click the Browse button and select the My Cloud device as the backup destination.
- Select a share where you want the backup to be created and click OK.
- Enter the username and password for the My Cloud device. (See “Creating a User” on page 42.)
- Make sure the backup destination is correct and click Next.
- When prompted for the content you want to back up, select Let Windows choose or select desired content and then click the Next button.
- On the Review your backup settings page, click Save settings and run backup.
Using Windows 8 File History
Windows 8 File History automatically backs up media files, documents, email, and other personal files to your My Cloud device. If you lose files or your system crashes, you can easily restore the files to your Windows computer. For more information on Windows 8 File History, consult Microsoft's documentation.
- In the task bar, click the File Explorer icon

- Click Computer.
- In the Ribbon (top of page) click Computer > Open Control Panel.
- Click System and Security and then File History.
- On the File History page, ensure that File History is On.
- In the left panel, select Select Drive. File History detects your My Cloud device and lists it in the Select a File History drive list.
- Click Add Network Location. A Select Folder pop-up displays your My Cloud device's name.
- Double-click the device name.
- Select a share.
- Click Select Folder and then OK.
- Click Turn On.
Using Apple Time Machine
Backing up
The Apple Time Machine is a built-in feature on Mac OS X Yosemite, Mavericks, Mountain Lion, Lion, and Snow Leopard computers that can back up everything on your computer: music, photos, documents, applications, emails, and system files. The My Cloud device can store these backups, so that if your hard drive or operating system should crash, or you lose a file, you can easily restore it to your computer. You can also specify the maximum amount of space you'd like to use on your Time Machine to back up your files.
Setting Time Machine
Important: Before setting up Time Machine, on the My Cloud dashboard, click Settings to navigate to the Settings General page. Check under Mac Backups to make sure Time Machine is set to ON (default).
To set up Time Machine to back up files to your My Cloud device:
- Use one of the following methods to open Time Machine:
- Click the Time Machine icon in the Dock:

text_image
Screenshot of macOS desktop with app icons and a highlighted 'OK' button- Click the Apple menu > System Preferences and select Time Machine.
-
Click Go > Applications and select Time Machine.
-
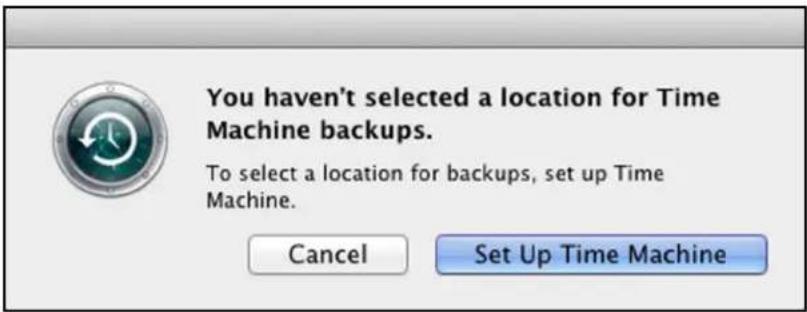
When this is your first time creating a backup, the following page displays:
text_image
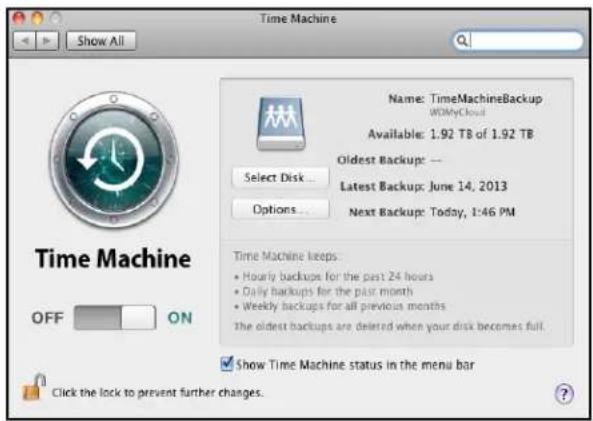
You haven't selected a location for Time Machine backups. To select a location for backups, set up Time Machine. Cancel Set Up Time MachineClick Set Up Time Machine to display the Time Machine Preferences page:
text_image
Time Machine Show All Name: TimeMachineBackup WOMyCloud Available: 1.92 TB of 1.92 TB Oldest Backup: -- Select Disk... Latest Backup: June 14, 2013 Options... Next Backup: Today, 1:46 PM Time Machine keeps • Hourly backups for the past 24 hours • Daily backups for the past month • Weekly backups for all previous months The oldest backups are deleted when your disk becomes full. Show Time Machine status in the menu bar Click the lock to prevent further changes.- To add a Time Machine drop-down menu icon to the menu bar at the top of the page, select the Show Time Machine status in the menu bar check box. This menu enables you to start a backup, enter Time Machine to restore files, or open the Time Machine Preferences page.
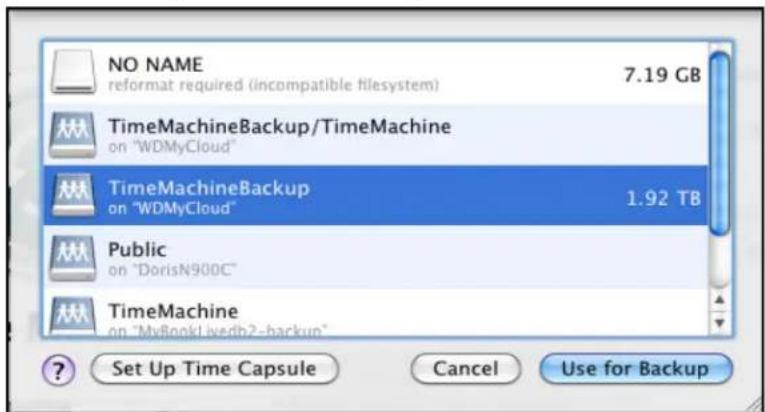
- Slide the Time Machine button to ON and click Select Disk. Select the My Cloud device where you want the backups stored:
text_image
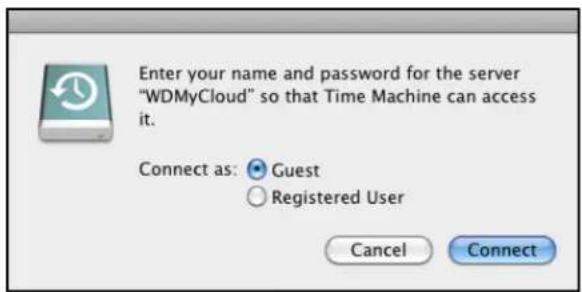
NO NAME reformat required (incompatible filesystem) 7.19 GB TimeMachineBackup/TimeMachine on "WDMyCloud" TimeMachineBackup on "WDMyCloud" 1.92 TB Public on "DorisN900C" TimeMachine on "MyBookLivedb2-backup" Set Up Time Capsule Cancel Use for Backup- Click Use for Backup. A page prompts for your user name and password. Select Guest and click Connect:
text_image
Enter your name and password for the server "WDMyCloud" so that Time Machine can access it. Connect as: Guest Registered User Cancel ConnectThe Preferences page redisplays.
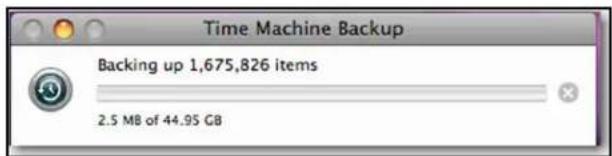
Time Machine begins backing up your files. The first backup may take some time, but subsequent backups are faster because Time Machine only backs up new or changed items. A status bar displays the progress of the backup:
text_image
Time Machine Backup Backing up 1,675,826 items 2.5 MB of 44.95 GBTime Machine backs up your computer every hour and keeps the following backup sets:
■ Every hour for 24 hours
■ Every day for the past month
■ Weekly until the My Cloud device is full.
Note: When a backup is interrupted, for example, when the computer goes into sleep mode, or the My Cloud device is disconnected, the backup will resume automatically once the computer is available.
When you change the name of the My Cloud device, previously set Time Machine backups delay or fail. To fix the problem, resume backing up by re-selecting the device in the Time Machine Preferences page.
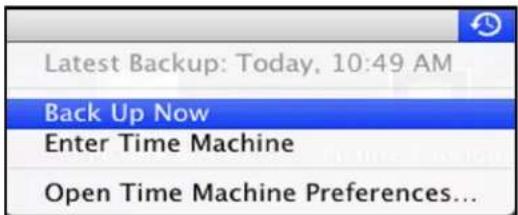
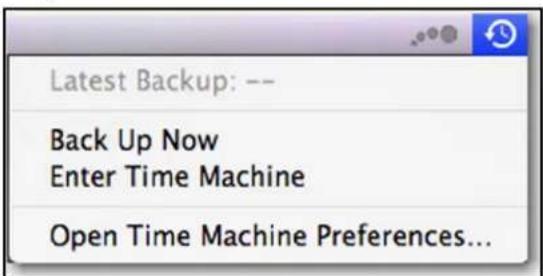
To see information such as available capacity and the date and time of the oldest, latest, and next backup, select Open Time Machine Preferences on the Time Machine drop-down menu:
text_image
Latest Backup: Today, 10:49 AM Back Up Now Enter Time Machine Open Time Machine Preferences...Starting a Backup
To start a backup at any time, select Back Up Now on the drop-down menu (above).
Retrieving Backed-Up Items
You might sometimes want to retrieve files and other items backed up on the My Cloud device. For example, you might have lost a file, or you want to see files from a week ago. You can retrieve individual items, multiple items, shares, or if your system crashes, your entire hard drive.
To retrieve backed-up items to your hard drive:
-
Open the window on your computer where you want the item restored. For example, if you are retrieving a document, open the Documents folder. (If you are restoring an item on your desktop, you do not need to open a window.)
-
Click the Time Machine icon in the Dock, or select Enter Time Machine from the drop-down menu:
text_image
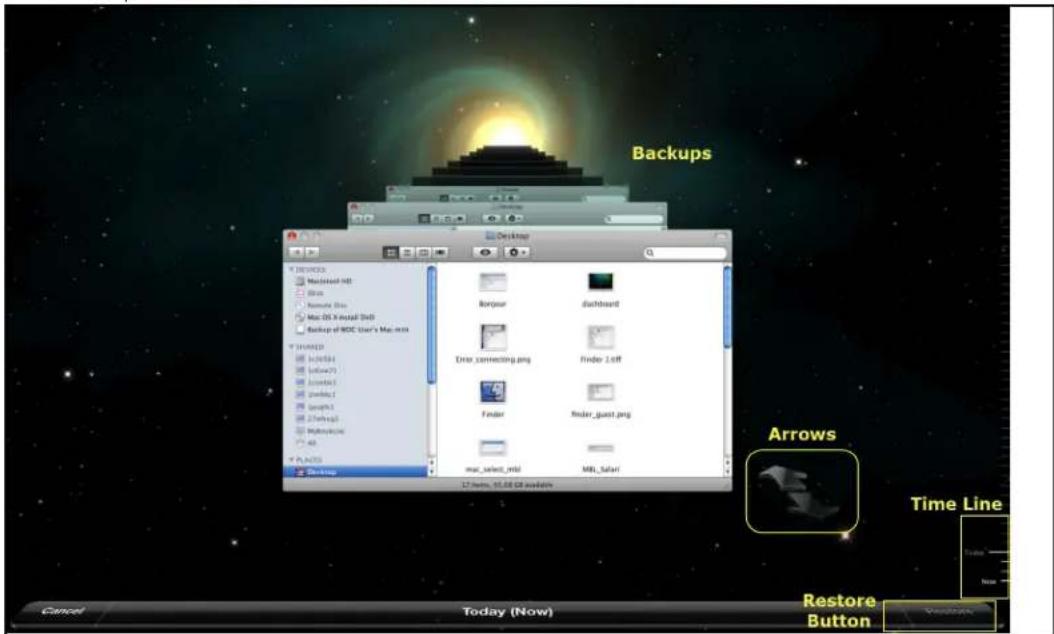
Latest Backup: -- Back Up Now Enter Time Machine Open Time Machine Preferences...All of your backups display in a cascade, with the most recent in front.
- Click the arrows or the time line on the bottom right of the page to browse through all the backups Time Machine has created:
text_image
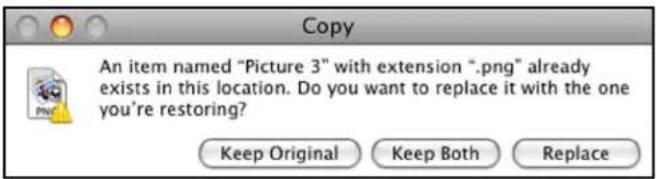
Backups Desktop Borgvar dashboard Error_contesting.png Finder 2.0ff Finder Finder_gust.png mar_salev_inld MBI_salar/ PLACTS Desktop 12 items: 10.00 GB software Arrows Time Line Cancel Today (Now) Restore Button- Select the item you want to restore, and click the Restore button at the bottom right to display the Copy message:
text_image
Copy An item named "Picture 3" with extension ".png" already exists in this location. Do you want to replace it with the one you're restoring? Keep Original Keep Both Replace-
Click the button for the desired option:
-
Keep Original—Does not restore the item from the backup drive.
- Keep Both—The original item remains and the backed-up item is added to the selected location on your computer.
- Replace—The backed-up item replaces the original item.
The Dashboard At a Glance
Launching the Dashboard
The Dashboard Home Page
Obtaining Customer Support
Basic Administrative Tasks
The My Cloud Dashboard home page provides a snapshot of the My Cloud device. You can perform the basic administrative tasks using the home page. For example, you can set up user accounts, restrict access to the files on your My Cloud device, set up folders for storing files, and customize the device to suit your needs.
Launching the Dashboard
Use one of the following methods to launch the dashboard:
| You want to launch from . . . THEN . . . | |
| A browser or Windows Explorer | 1. For Windows, enter http://the device name (default name: WDMyCloud) or the IP address as the URL.For a Mac, enter http://the device name.local (example: WDMyCloud.local) or the IP address as the URL.2. Press Enter. |
| WD Quick View icon 1. Left- or right-click the WD Quick View icon.2. Select your My Cloud device and then Dashboard. | |
| WD SmartWare 1. On the WD SmartWare Home page, select your My Cloud device.2. Click the Settings tab to display the Main Settings page.3. Click Setup Drive. | |
| Windows 8 | 1. In the task bar, click the File Explorer icon2. In the left panel, click Network.3. In the right panel, locate your My Cloud device under Storage.4. Double-click the device, or right-click and select View device webpage from the resulting menu. |
| Windows 7/Vista 1. Click | > Computer > Network.2. In the right panel, locate your My Cloud device under Storage.3. Double-click the device, or right-click and select View device webpage from the resulting menu. |
| Windows XP 1. Click Start | > My Network Places.2. Locate your My Cloud device.3. Double-click the device or right-click and select Invoke. |
You want to launch from . . . THEN . . .
| Mac OS X (shortcut) | 1. Click Safari >Bookmark >Bonjour.2. Double-click the My Cloud device on the network. |
| Mobile devices | 1. Open a browser.2. In the Address bar, enter http://the device name (default name: WDMyCloud) or http://IP address.Note: If the URL fails to display the dashboard, try typing the following URL:http://WDMyCloud.local (for a Mac). |
The Dashboard Home Page
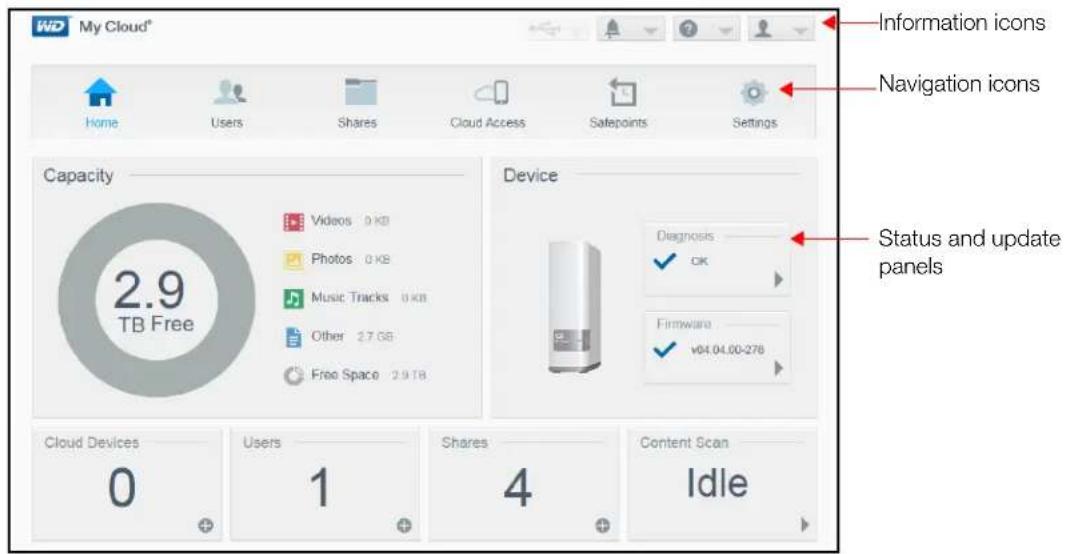
The My Cloud Home page has an information bar at the top right, a navigation icon bar across the top of the page, an instant overview of the status of the device's main functions, and links for updating settings in the body of the page.
text_image
My Cloud® Home Users Shares Cloud Access Safepoints Settings Information icons Navigation icons Capacity 2.9 TB Free Device Diagnosis ✓ OK Firmware ✓ v04.04.00-278 Status and update panels Cloud Devices 0 Users 1 Shares 4 Content Scan IdleInformation Icons
Information icons are at the top right of every page.
Icon Name Actions
USB device on the My Cloud device
Click to display the number of USB devices connected (a hub with multiple devices can be connected to the USB port). Icon is dim if no USB is attached.

Alert Notifications Click to display recent alerts about new firmware and network issues.

Help Click to access the My Cloud Getting Started wizard, Online Help, Support and About information.

User Click to see the user name of the user currently logged into the My Cloud device. You can also shut down, reboot or log out from the My Cloud device.
Navigation Icons
Navigation icons display across the top of every page.
Icon Name Actions

Home Provides a snapshot of the My Cloud device's status, capacity, current firmware, and the number of user, shares, and connected tablet and mobile devices.

Users Create, change and delete user accounts. Grant users full or limited access to particular shares.
Shares Create, change and delete shares and grant specific user accounts full, read only, or no access to particular shares

Cloud Access Set up, change and remove remote cloud access to particular shares. Monitor remote access status.

Safepoints Create safepoints on either a USB drive attached to the My Cloud device or on a different storage device within your network.
Icon Name Actions
Settings Configure advanced settings for your My Cloud device, including:
- General device settings.
• Network configurations.
• Media options.
• Device utility tasks. - Notification settings.
- Firmware update settings.
Viewing Drive Status and Making Updates
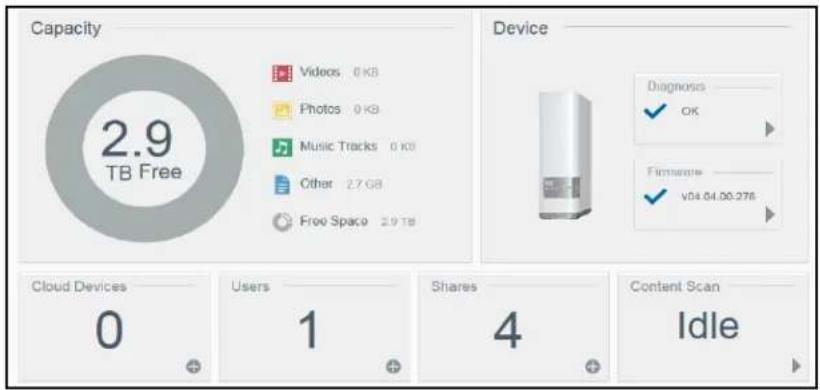
The body of the Home page shows the status of the drive, its functions and shortcuts to the most necessary tasks.
text_image
Capacity 2.9 TB Free Videos 0 KB Photos 0 KB Music Tracks 0 KB Other 2.7 GB Free Space 2.9 TB Device Diagnoses ✓ OK Firmware ✓ v04.04.00.278 Cloud Devices 0 Users 1 Shares 4 Content Scan IdleCapacity
The Capacity panel displays the total amount of free storage left on your My Cloud device and a list of the storage used by videos, photos, music tracks, and other.
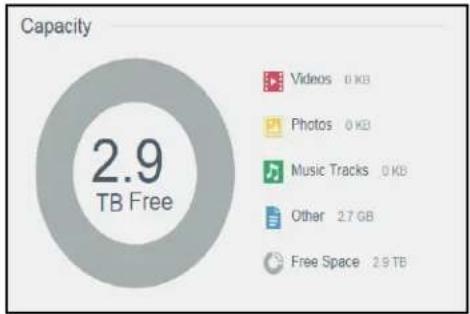
text_image
Capacity 2.9 TB Free Videos 0 KB Photos 0 KB Music Tracks 0 KB Other 2.7 GB Free Space 2.9 TBDiagnosis
The Diagnosis panel displays the overall health of the system.
- To see details about the status of system components, click the arrow in the lower right of the Diagnosis panel:

text_image
Diagnosis ✓ OK- To return to the Home page, click OK.
Firmware
The Firmware panel displays the current version of firmware loaded on your My Cloud device.
- To see whether an updated version of the firmware is available, click the arrow in the lower right of the Firmware panel. To return to the Home page, click OK.
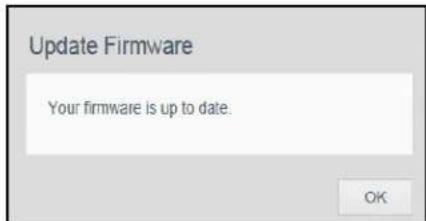
text_image
Update Firmware Your firmware is up to date. OK- If new firmware is available, see "Firmware" on page 69 for information on updating your My Cloud device.
Cloud Devices
MyCloud.com and the My Cloud mobile app allow you to share content via email, but you can manually pair the My Cloud device and one or more cloud devices using the method described in this section.
The Cloud Devices panel displays the number of cloud devices currently registered to the My Cloud device remotely. It enables you to generate an activation code that you need when setting up a mobile device for cloud access.
- To add a mobile device, click the arrow in the lower right of the Cloud Devices panel to display the Add Cloud Access dialog box.
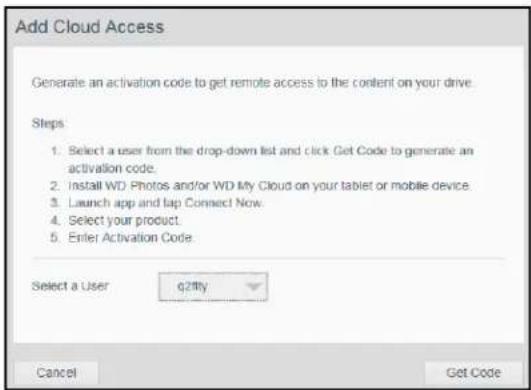
text_image
Add Cloud Access Generate an activation code to get remote access to the content on your drive. Steps: 1. Select a user from the drop-down list and click Get Code to generate an activation code. 2. Install WD Photos and/or WD My Cloud on your tablet or mobile device. 3. Launch app and lap Connect Now. 4. Select your product. 5. Enter Activation Code. Select a User q2fty Cancel Get Code- To generate an activation code, select a user from the drop-down list and click Get Code. The dialog box displays the activation code and the code's expiration date.
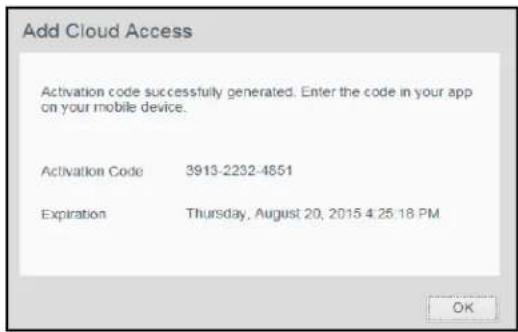
text_image
Add Cloud Access Activation code successfully generated. Enter the code in your app on your mobile device. Activation Code 3913-2232-4851 Expiration Thursday, August 20, 2015 4:25:18 PM OK-
Click OK.
-
Follow the steps listed on the first Add Cloud Access dialog box to connect your tablet or mobile device to the My Cloud device.
Users
The Users panel displays the number of users currently set up to use the My Cloud device.
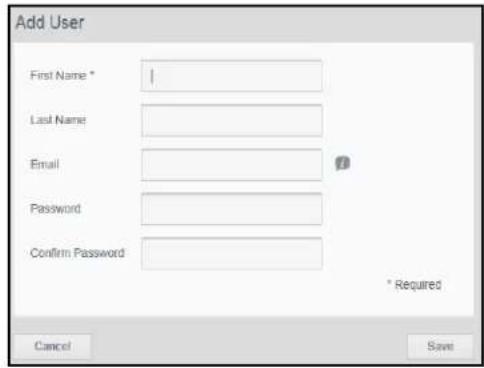
- To add a user, click the plus (+) sign in the lower right of the panel. The Add User dialog box displays:
text_image
Add User First Name * Last Name Email Password Confirm Password * Required Cancel Save- Enter the required information and click Save.
Shares
The Shares panel displays the number of public and private shares that have been created on the My Cloud device.
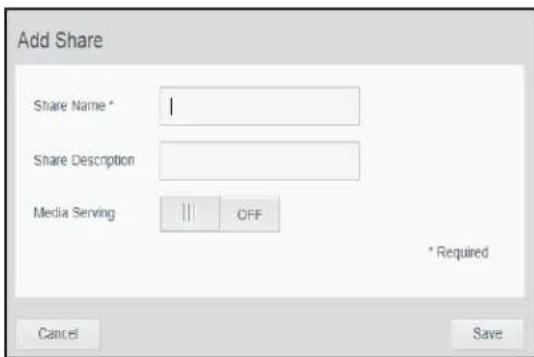
- To add a share, click the plus (+) sign in the lower right of the panel.
text_image
Add Share Share Name * Share Description Media Serving OFF * Required Cancel Save-
Enter the share name and share description (optional).
-
If you want to stream media stored in this share to other devices, switch Media Serving to ON.
-
Click Save.
Content Scan
The Content Scan panel displays information about the latest media scan of the content stored on your My Cloud device and of the videos, music, and photos being streamed to DLNA devices. The scan takes place when the content changes, for example, when files are added.
- To view the results of the latest content scan, click the arrow at the bottom right of the Content Scan panel to display the Contact Scan Status screen:

text_image
Content Scan Status Snapshot of your current Media database scan. Videos Music Tracks Photos Other DUNA Media Server Videos Music Tracks Photos OKNote: The My Cloud device runs two scans:
The first section allows cloud accessed devices (mobile) to see thumbnails for supported files (e.g., jpgs). The second section is what a media server would see and be able to access (e.g., Windows Media Player).
The Media crawler section shows progress bars. They change to check marks when the scan is complete. Hovering the cursor over the check marks in the media scan section displays a progress bar and number of files processed.
The DLNA section shows “scan in progress...” next to the DLNA Media Server text and only shows counts of files as it is scanning. When the scan is complete, a check mark replaces the progress bar. Hovering the mouse over a check mark displays status and number of files scanned.
- Click a category's check mark to see scan results.
- To return to the Home page, click OK.
Obtaining Customer Support
To open the Support page:
-
Click the Help icon ☐ at the top right of each page to display the Help menu.
-
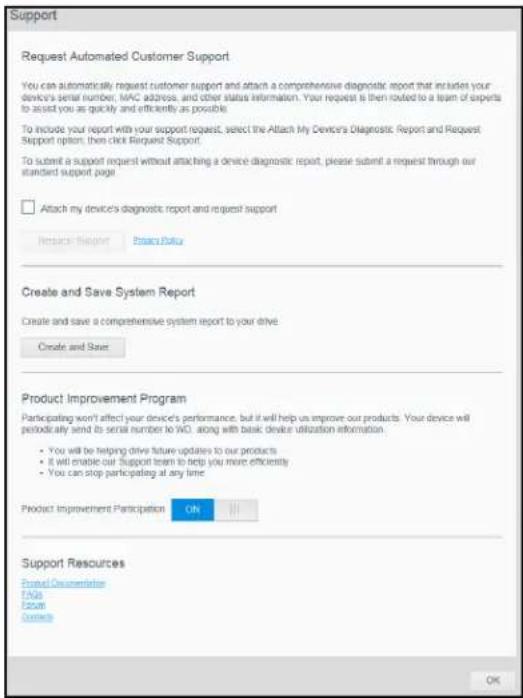
Click Support to display the following page:
text_image
Support Request Automated Customer Support You can automatically request customer support and attach a comprehensive diagnostic report that includes your device's serial number, MAC address, and other status information. Your request is then routed to a team of experts to assist you as quickly and efficiently as possible. To include your report with your support request, select the Attach My Devices Diagnostic Report and Request Support option, then click Request Support. To submit a support request without attaching a device diagnostic report, please submit a request through our standard support page. Attach my device's diagnostic report and request support Create Request Privacy Policy Create and Save System Report Create and save a comprehensive system report to your drive Create and Save Product Improvement Program Participating won't affect your device's performance, but it will help us improve our products. Your device will periodically send its serial number to WO, along with basic device utilization information. • You will be helping drive future updates to our products • It will enable our Support team to help you more efficiently • You can stop participating at any time Product Improvement Participation ON Support Resources Printed Documentation FAQs Forum Contacts OKIf a problem occurs with the My Cloud device, WD Customer Support will need information about your device to troubleshoot and determine the best solution. There are two ways in which you can get your device info and request support:
- Run a system report and send it to WD automatically.
■ Create a system report manually and send it to WD.
Requesting Automatic Support
Note: To use this feature, make sure to disable any pop-up blockers.
In the Request Automated Customer Support section:
- Click the Attach my device's diagnostic report and request support check box if you want to send a diagnostic report and request automated support.
Note: You must click this checkbox to activate the Request Support button.
-
If you want to review WD's privacy policy, click the Privacy Policy link.
-
Click Request Support to display the WD Support web page.
-
Complete and send the request.
Creating and Saving a System Report
In the Create and Save System Report section:
- Click Create and Save.
- Save the report to your computer.
- If desired, email the report to WD Customer Support.
Obtaining Other Support
In the Support Resources section are links to additional resources:
- To obtain the most recently updated user manual, click the Product Documentation link.
- To see answers to frequently asked questions and instructions, click the FAQs link.
■ To discuss your My Cloud device with other users, click the Forum link. - To see WD phone numbers and other contact information, click the Contacts link.
Basic Administrative Tasks
The next few chapters step you through the procedures for configuring and using the My Cloud device. The following table provides shortcuts to instructions for some basic administrative tasks.
| How do I ... See ... | |
| Set up the device on my network page 11 | |
| Access content from the device (public and private shares) page 17 | |
| Upload and back up content to the device page 21 | |
| Create users page 42 | |
| Create shares page 45 | |
| Download WD mobile apps page 51 | |
| Enable or disable remote access for you and people you want to share with page 56 | |
| Enable DLNA and iTunes page 62 | |
| Shut down or reboot the My Cloud device | page 63 |
| Update firmware | page 69 |
| Create and recover safepoints to back up the device | page 71 |
Managing Users
About Users
Viewing Users
Creating a User
Changing a User's Password
Editing User Settings
Removing a User
About Users
As the My Cloud device owner (admin), you have a special user account (admin) that gives you administrative privileges. These privileges enable you to set up and configure the device to your specific needs, as well as give other people access to your personal cloud. You have the power to determine exactly what other users can access. As a default, the admin user name does not have a password. You can add one at any time.
Selecting the Users icon displays a list of current users and enables the admin account to view user details, create new users, create shares, and grant users access to existing shares.
Viewing Users
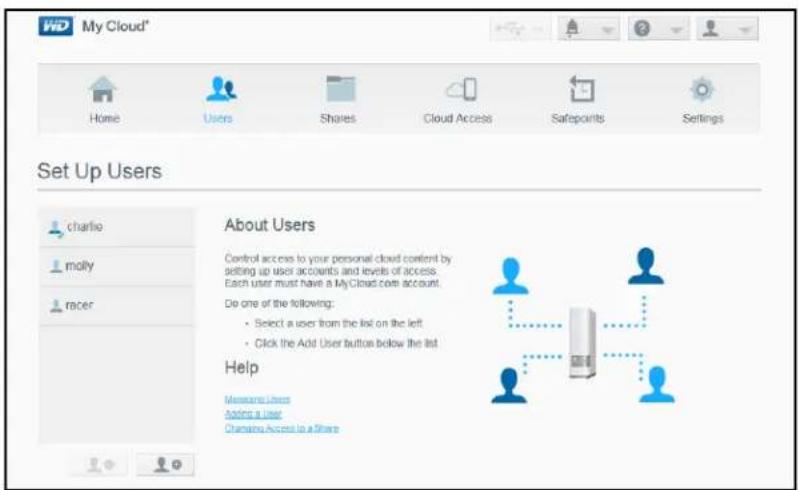
- On the navigation bar, click Users to display the Set Up Users page. You'll see a description of the page and some Help topics.
text_image
My Cloud* Home Users Shares Cloud Access Safepoints Settings Set Up Users Charlie molly racer About Users Control access to your personal cloud content by selling up user accounts and levels of access. Each user must have a My Cloud.com account. Do one of the following: • Select a user from the list on the left • Click the Add User button below the list Help Message User Adding a User Changing Access to a ShareOnly the admin is listed in the Set Up Users pane. Once you create more users, they are listed as well.
Note: If you entered your name when you created your personal cloud, your name rather than "admin" is listed first. The admin account has a check mark beside its name.
text_image
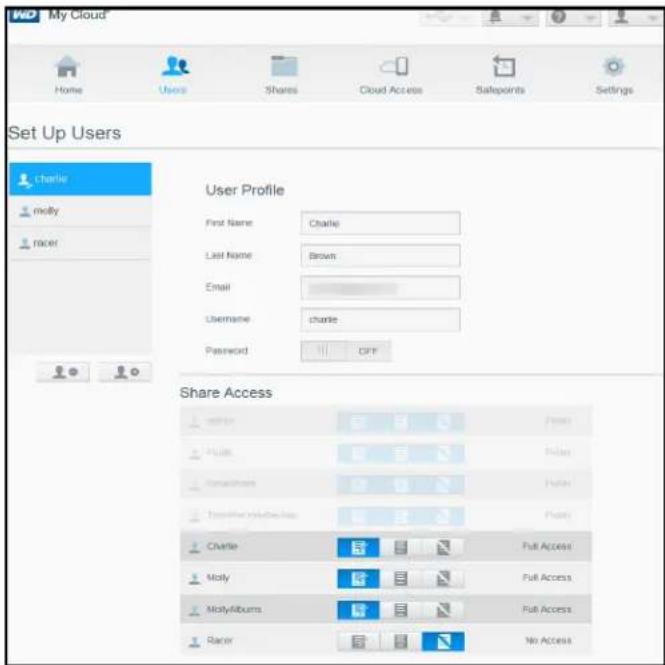
My Cloud Home Users Shares Cloud Access Salepoints Settings Set Up Users Charlie molly mcel User Profile First Name Charlie Last Name Brown Email Username Charlie Password OFF Share Access button Pass file Inlay translation Finish download Finish Charlie Full Access molly Full Access MollyAlbums Full Access Racer No Access- To view user details, click a user name on the left. The user's profile and share access information display. Initially, all the shares are Public and inaccessible, meaning they cannot be changed on the Add a User page.
Note: For information about changing share access, see "Making a Share Private" on page 46.
Creating a User
The administrator creates users and may limit their access to shares.
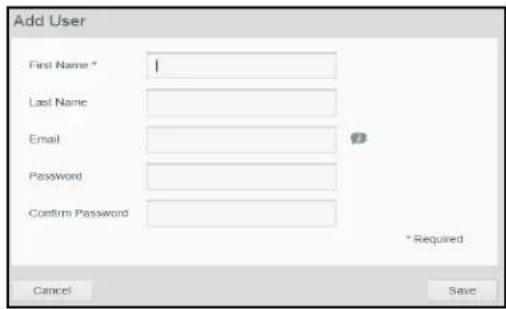
- Click the Add User icon (below the list of users) to display the Add User dialog box.
text_image
Add User First Name * Last Name Email Password Confirm Password * Required Cancel Save- Enter the user's first name, last name, and email address (optional). The first name becomes the user name. If you do not enter an email address, the user will not receive an email confirming MyCloud.com access and instructions.
- To prevent others from accessing the user's private share, you may enter a password for the user.
- Click Save. The Set Up Users page displays a profile of the new user, who is listed on the left.
Note: To assign a private share for the user, see "Making a Share Private" on page 46..
Important: Make sure to inform the user of the name and password, which is needed to access private shares on the LAN.
Changing a User's Password
When viewing details about a user, the administrator can add or change the user's password (no password is the default setting).
- On the Set Up Users page, select the user from the list on the left.
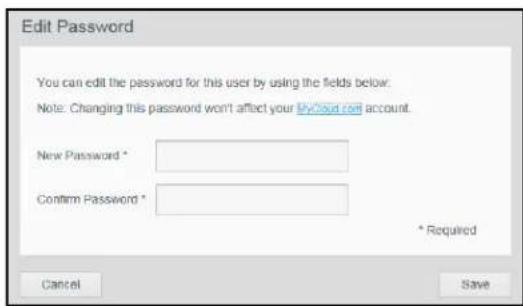
- Click the Edit link to the right of the Password button to display the Edit Password dialog box:
text_image
Edit Password You can edit the password for this user by using the fields below. Note: Changing this password won't affect your MyCloud.com account. New Password * Confirm Password * * Required Cancel Save- Enter the new password in both the Password and Confirm Password fields.
- Click Save.
Editing User Settings
-
On the Set Up Users page, select the user. The User Profile and Share Access panels display.
-
Modify the settings as desired and click Save.
Note: If you change the user's share access level, the change is saved automatically.
Removing a User
You can delete all users except the administrator.
-
On the Set Up Users page, select the user.
-
Click the Remove User icon 📄, and in response to the confirmation message, click OK.
Managing Shares
Managing Shares
Viewing a List of Shares
Creating a New Share
Making a Share Private
Deleting a Share
Accessing the Contents of a Share Locally
About Shares
A share is an area on the My Cloud device for storing files. A share can be public so that all users can access the contents, or private to limit access to selected users. The Shares icon on the navigation panel displays a list of shares on the My Cloud device and enables the administrator to manage shares and user access.
Viewing a List of Shares
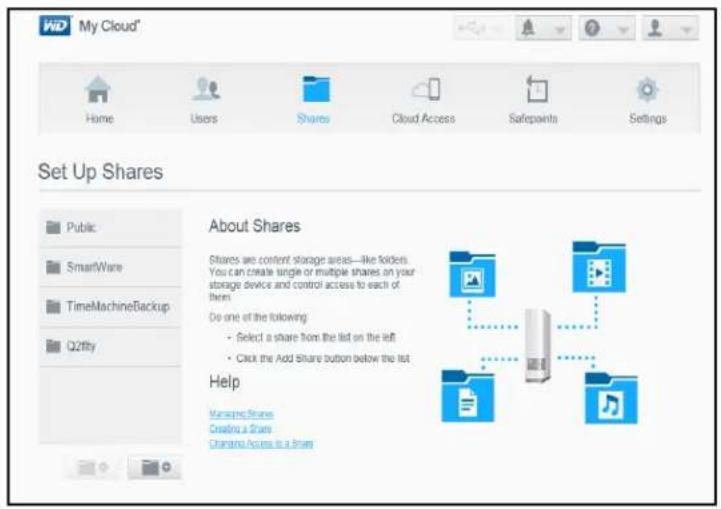
- Click the Shares icon on the navigation bar to display a list of shares on the My Cloud device. For each share name, the description and the media serving and access status display. Included in the list as shares are (WD) SmartWare backup, TimeMachine Backup, and shares on a USB device connected directly to the My Cloud expansion port. The first time you access the page, it displays an explanation, a graphic description, and links to pertinent Help topics.
text_image
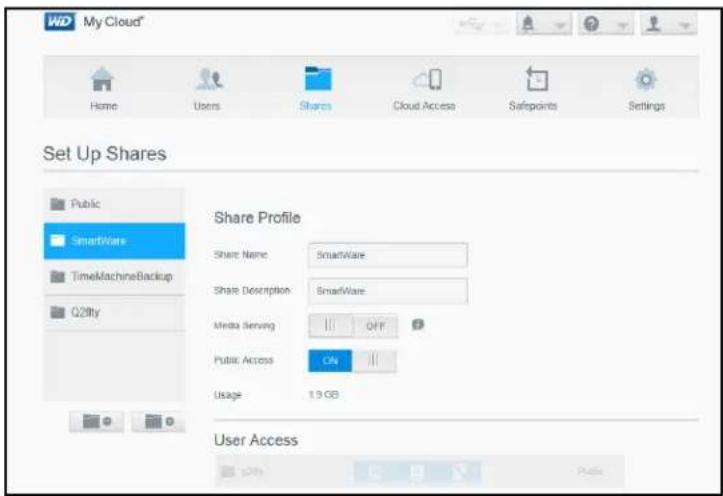
My Cloud* Home Users Shares Cloud Access Safepoints Settings Set Up Shares Public SmartWare TimeMachineBackup Q2ffly About Shares Shares are content/ storage areas—like folders. You can create single or multiple shares on your storage device and control access to each of them Do one of the following: • Select a share from the list on the left • Click the Add Share button below the list Help Managing Shares Creating a Share Change Access to a Share- Click a share to display its profile and user access information. The user access list is inaccessible when Public Access is ON; you can change the user's access to the share when Public Access is OFF.
text_image
My Cloud* Home Users Shares Cloud Access Safopoints Settings Set Up Shares Public SmartWare TimeMachineBackup Q2lty Share Profile Share Name SmartWare Share Description SmartWare Media Serving OFF Public Access CN Usage 1.9 GB User AccessCreating a New Share
You can create a share and designate it as public or private. For example, if the share contains financial information, you may want to make the share private. Or, if there are photos you would like a friend to see, you can make the share public to that friend.
- Click the Shares icon on the navigation bar to display the About Shares page.
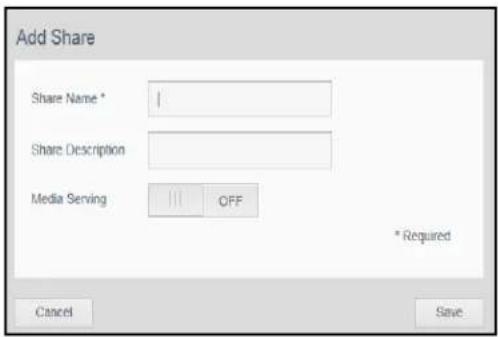
- Click the Add a Share icon.
text_image
Add Share Share Name * Share Description Media Serving OFF * Required Cancel Save- Complete the settings, as follows:
| Share Name Assign a name to the share. (Names must be case sensitive and contain 1-32 alphanumeric characters but no spaces.) | |
| Share Description (optional) | Enter a brief description of the share to remind yourself of what it contains. Share descriptions must begin with an alphanumeric value and can contain up to 256 characters. |
| Media Serving (optional) If you want to stream media stored in this share to other devices, switch Media Serving to ON. (Default is OFF.) | |
-
Click Save. The About Shares window returns. It now lists the new share, showing its profile and user access information.
-
If desired, change the share's access level by clicking the appropriate icon for the share:
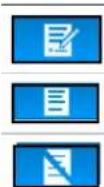
Full Access
Read Access
No Access
Making a Share Private
If you decide there is a reason to limit access to a public share, convert it to a private share.
- Select the share.
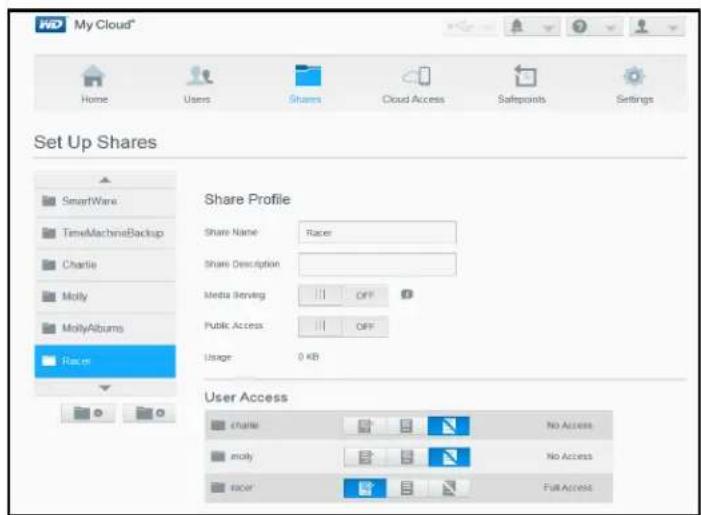
text_image
My Cloud* Home Users Shares Cloud Access Safepoints Settings Set Up Shares SmartWare TimeMachineBackup Charlie Molly MollyAlbums Racer Share Profile Share Name Racer Share Description Media Serving OFF Public Access OFF Usage 0 KB User Access Charlie No Access molly No Access racer FullAccess- On the About Shares page, switch the Public Access button to OFF.
- For each user listed in the User Access section, select the level of access by clicking the appropriate icon for the share (Full Access Read Access, or No Access

Deleting a Share
WARNING! Deleting a share erases all files and folders on the share.
-
Select the share in the list of shares on the About Shares page.
-
Click the Delete Share icon
- In response to the confirmation message, click OK.
Accessing the Contents of a Share Locally
Note: For information on accessing the contents of a share remotely, see "Accessing Your My Cloud Device Remotely" on page 49.
Several options are available for opening a My Cloud share. For a private share, the user must have:
- A user name and password assigned to the share name
- Read-only or full access to the share
| When you want to open a share using . . . | THEN . . . |
| WD Quick View icon in the system tray (Windows) | 1. Left- or right-click the WD Quick View icon to display the main menu.2. Click the My Cloud device name, and then click Open. The shares display in Windows Explorer.3. For a private share, if prompted for a user name and password, enter those associated with your user account.4. For a private share, if the user's name and password are the same as for logging into the computer, a user name and password are not required. |
| WD Quick View in the menu bar (Mac OS X) | 1. Click the WD Quick View icon in the menu bar and move the cursor over the name of your My Cloud device to display the submenu.2. Select Open on the WD Quick View submenu. The shares display in a second submenu.3. Select the desired share.4. For a private share, if prompted for a user name and password, enter those associated with your user account (see “Creating a User” on page 42).5. For a Public share, if prompted for a user name and password, select Guest. |
| Windows 8 1. In the task bar, click the File Explorer icon .2. In the left panel, select Network, and double-click WDMyCloud.3. Double-click a Public or private share on your device. | |
| Windows Vista/Windows 7/Windows XP | 1. Click Start > Computer.2. In the left panel, select Network3. Click WDMyCloud.4. Double-click the Public or private shares on your device. |
When you want to open a share using ... THEN ...
Mac OS X 1. Open a Finder window and locate your My Cloud device under the Shared heading in the side bar. If presented with an authorization page, select Guest, and then click Connect.
- Click the device to display the Public share and any private shares to which you have access.
Accessing Your My Cloud Device Remotely
Enabling Cloud Access for the My Cloud Device
Enabling Cloud Access for a User
Mobilizing Your Files with the My Cloud Mobile App
The Pathway to Your Personal Cloud
Accessing Your Personal Cloud on the Web
A personal cloud is your content, at home, secure and under your control. Unlike public clouds, a personal cloud allows you to keep all your content in one safe place on your home network. Share files, stream media, and access your content anywhere, from the web and from mobile devices. No monthly fees. No mysterious location for your data. Keep your videos, music, photos, and files safe at home and always with you.
This chapter explains how to set up the My Cloud device for remote access and describes some of the ways you can take advantage of its many capabilities.
Enabling Cloud Access for the My Cloud Device
To enable the My Cloud device for remote access and to check the status of its remote connection(s), see "Cloud Access" on page 56.
Enabling Cloud Access for a User
You can assign the user remote access rights to the My Cloud device via the MyCloud.com account and from mobile devices.
- On the navigation bar, click Cloud Access to display the Configure Access page. The admin's name has a check mark beside it to differentiate it from other users.
Note: The first time you access it, the screen provides some helpful information and links.
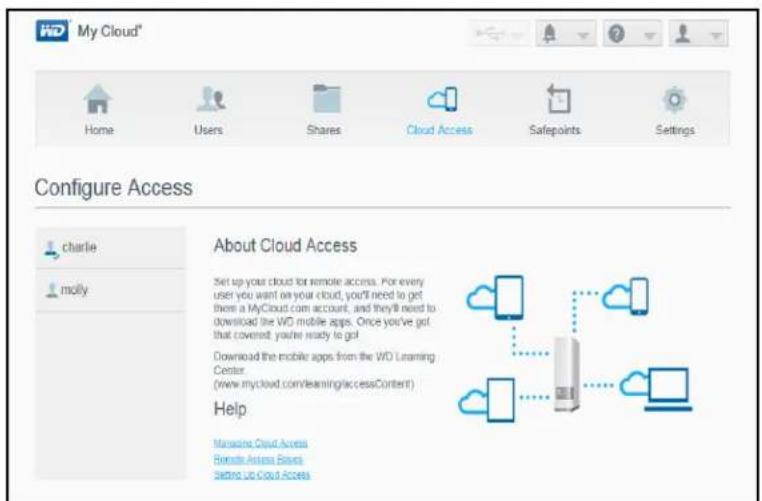
text_image
My Cloud* Home Users Shares Cloud Access Safepoints Settings Configure Access Charlie molly About Cloud Access Set up your cloud for remote access. For every user you want on your cloud, you'll need to get there a MyCloud com account, and they'll need to download the WD mobile apps. Once you've got that covered, you're ready to go! Download the mobile apps from the WD Learning Center (www.mycloud.com/learning/accessContent) Help MaaScare Cloud Access Remote Access Base Setting Up Cloud Access2. Select the user.
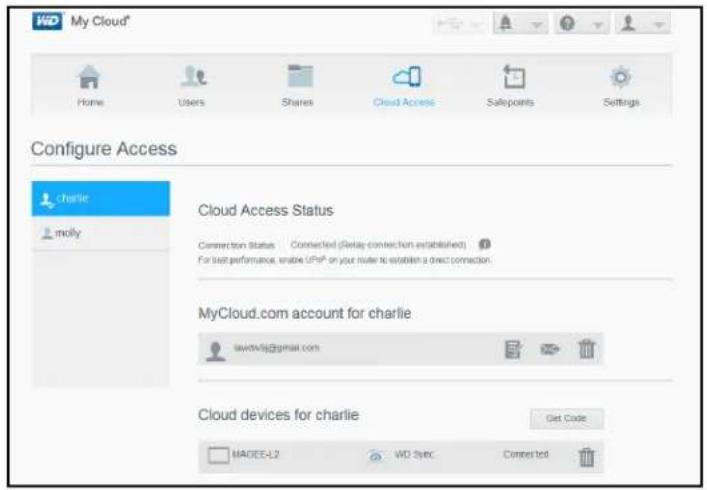
text_image
My Cloud* Home Users Shares Cloud Access Safepoints Settings Configure Access Charlie molly Cloud Access Status Connection Status Connected (Relay connection established) For best performance, enable UPhP on your route to establish a direct connection. MyCloud.com account for charlie lawdcv3j@gmail.com Cloud devices for charlie Get Code MAGEE-L2 WD Sync ConnectedTo give the user access to the MyCloud.com account:
- If the user already has a MyCloud.com login, you can update and/or resend it to the user by clicking the appropriate icon in the MyCloud.com account for [username] section of the Configure Access page.
Note: You can also delete it.
- If the user does not have a MyCloud.com login:
a. Click Sign Up to display the Sign Up for MyCloud.com Account dialog box.
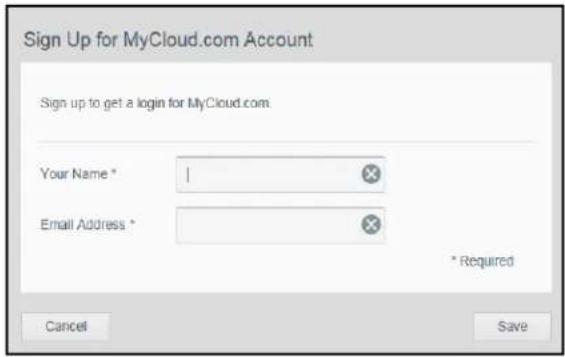
text_image
Sign Up for MyCloud.com Account Sign up to get a login for MyCloud.com. Your Name * Email Address * * Required Cancel Saveb. Enter the user's name and email address and click Save.
c. In response to the confirmation message, click OK. The user receives the email and must follow its instructions.
To generate an activation code for a user's mobile device(s):
Important: Codes are valid for 48 hours from the time of request and can be used one time only.
- Click Get Code. You must generate one code for each app you want to activate. A dialog box displays the user's activation code and its expiration date and time.
Note: Make sure to write down the access codes.
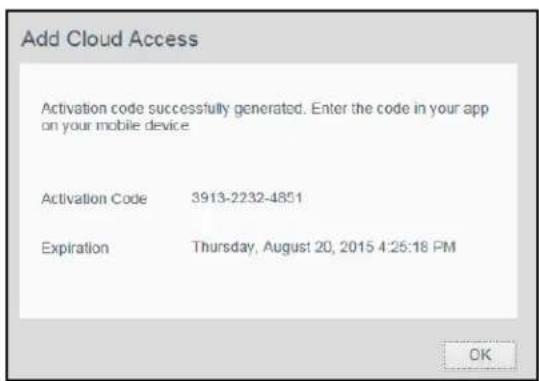
text_image
Add Cloud Access Activation code successfully generated. Enter the code in your app on your mobile device. Activation Code 3913-2232-4851 Expiration Thursday, August 20, 2015 4:26:18 PM OK- Click OK.
- The Configure Access page displays the cloud devices for which the user now has access, along with the activation code and expiration date of each. The device is labeled New Unregistered Device for now.
Mobilizing Your Files with the My Cloud Mobile App
The My Cloud mobile app brings your files to your fingertips on your iOS and Android mobile devices. This mobile app is available for download from various online stores.
Requirements include:
■ My Cloud device connected to the Internet
- Your MyCloud.com email address and password or a mobile device access code generated by your My Cloud device
About My Cloud Mobile App
You are always connected to your personal cloud. Save valuable space on your iOS or Android devices with easy photo and video uploads directly to your personal cloud, and then securely access and share your memories from anywhere. Have a public cloud account? Conveniently expand your personal cloud with full access to your Dropbox and other cloud accounts.
You can download the My Cloud mobile app from the Google Play store or the Apple App store.
For more information about the My Cloud mobile app, go to the online Learning Center athttp://mycloud.com/learn .
The Pathway to Your Personal Cloud
If you can access the Internet from a computer, you can securely access your media and files anywhere in the world. My Cloud.com and the My Cloud mobile app provide free remote access to your My Cloud personal cloud. Once you log in, the My Cloud device displays your remote folders that are available on your Mac or Windows computer.
Accessing Your Personal Cloud on the Web
Note: My Cloud access is not compatible with 64-bit Windows XP.
First-Time Users
-
After a user account is created, the new user receives an email with instructions for creating a password for the MyCloud.com account.
-
Follow the instructions in the email. The My Cloud Sign in page displays.
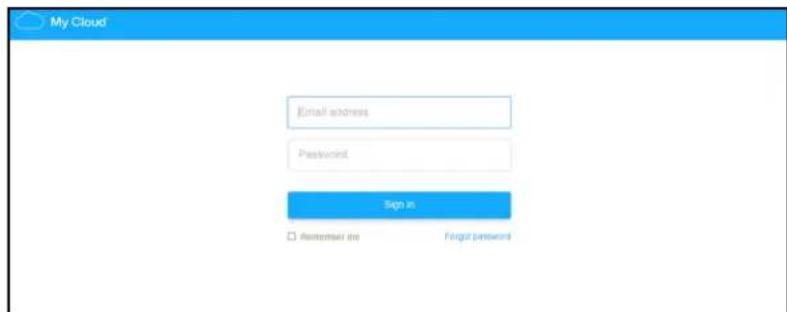
text_image
My Cloud Email address Password Sign in Remember me Forgot passwords-
Enter the email address associated with the user and a password for MyCloud.com, and then click Sign in. The password must be between 8 and 30 characters and contain two of the following: a number (0-9), an uppercase letter (A-Z), or a special character (!@\$%^&*).
-
The MyCloud.com account page opens. Continue to "Using Your Personal Cloud (MyCloud.com)" on page 53.
Returning Users
-
In a browser, sign in to http://www.mycloud.com using the password you created for your MyCloud.com account. The account page opens.
-
Continue to "Using Your Personal Cloud (MyCloud.com)" on page 53.
Using Your Personal Cloud (MyCloud.com)
After you sign in to your MyCloud.com account, the users, files and folders in your account display on the page. A picture of your My Cloud device and its available capacity also display.
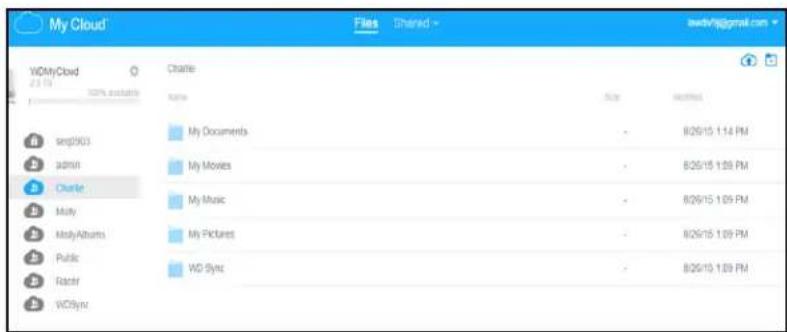
text_image
My Cloud WOMyCloud 2.1.10 100% available Charite My Documents My Movies My Music My Pictures WD Sync 8/26/15 1:14 PM 8/26/15 1:09 PM 8/26/15 1:09 PM 8/26/15 1:09 PM 8/26/15 1:09 PM WOSyncYou can now manage your account as follows:
■ Create new users
- Create folders
- Upload files
■ Copy files and folders
■ Move files and folders
■ Rename files and folders
■ Delete files and folders
■ Download files and folders
■ Share files and folders
Sharing Your Files Remotely
You can easily share files remotely with a family member or friend. When the user is created, an email is sent that provides a link to MyCloud.com and some instructions. The user creates a password and logs in. Only the shares to which the user has access and the Public share display.
If the person is not already a user of the My Cloud device, create a new user, including a password and email address (see "Creating a User" on page 42).

Configuring Settings
General
Network
Media
Utilities
Notifications
Firmware
The Settings option on the navigation bar enables the administrator to view and customize the My Cloud device's system, network, media, utilities, notifications, and firmware settings.
General
Use the General page to view and modify the device name and description, select the language in which the user interface should display, enable or disable cloud access, set energy usage settings, and enable or disable Time Machine backups.
WARNING! Renaming the My Cloud device forces all the network computers to remap their shared network resources. Change the device name only when necessary.
- On the navigation bar, click Settings, and then click General in the left pane. The General page displays:
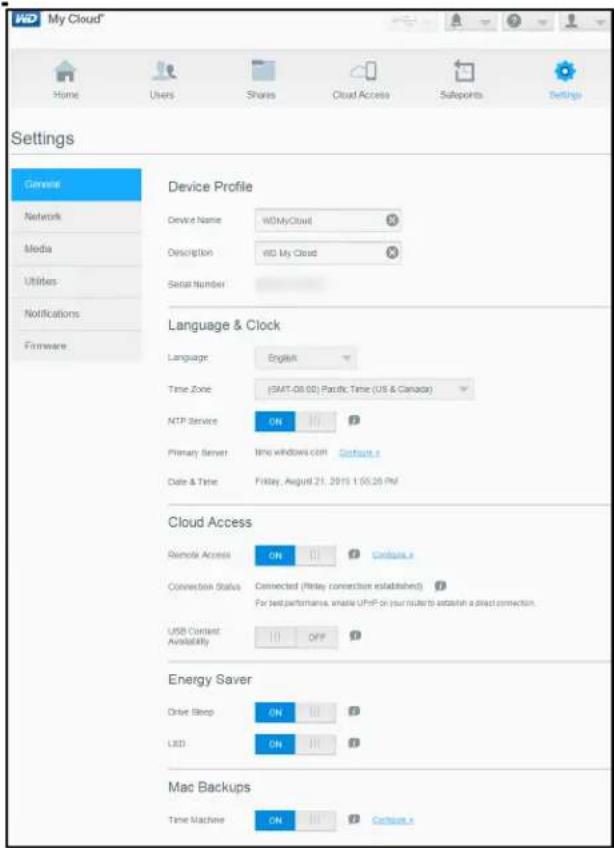
text_image
My Cloud Home Users Shares Cloud Access Subpoints Settings Settings General Network Media Utilities Notifications Firmware Device Profile Device Name WOMyCloud Description WID My Cloud Serial Number Language & Clock Language English Time Zone (SMT-08.00) Pacific Time (US & Canada) NTP Service ON 100 Primary Server Two windows.com Closure.e Date & Time Friday, August 21, 2015 1:05:20 PM Cloud Access Remote Access ON 100 Closure.e Connection Status Connected (Perday connection established) 100 For best performance, enable UFP on your user to attain a direct connection. USB Context OFF Availability Energy Saver Drive Sleep ON 100 Closure.e LED ON 100 Mac Backups Time Machine ON 100 Closure.eDevice Profile
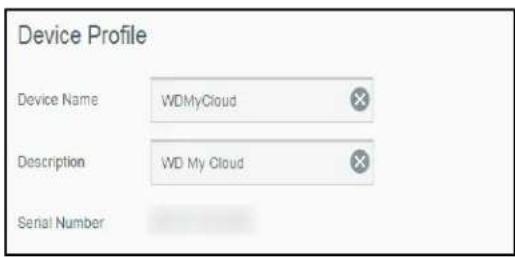
text_image
Device Profile Device Name WDMyCloud Description WD My Cloud Serial Number- In the Device Profile section of the General page, view or modify the following settings:
Device Name Enter a unique name for your device to identify it on the network.
Device Description The default description is WD My Cloud. If desired, enter a different description.
Serial Number Displays the WD-assigned number that identifies the specific unit.
- If you made any changes, click Save (appears below the section).
Note: Throughout the My Cloud dashboard, the Save and Cancel buttons display only if you make changes.
Language and Clock
In this section of the General page, you can change the language displayed in the My Cloud device's interface and set the date and time. The date and time are synchronized to the NTP (network time protocol) server by default. You have the option of setting the date and time manually or allowing the NTP to access the Internet and automatically set the time. If you are not connected to the Internet, you must enter the date and time manually.
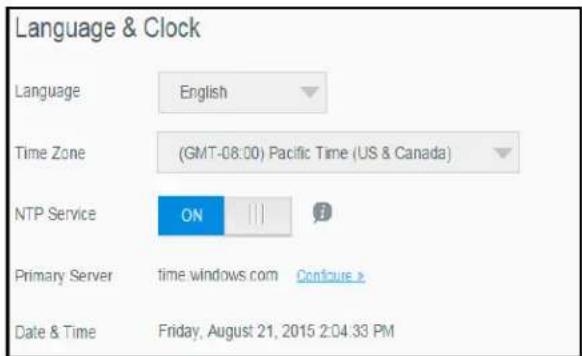
text_image
Language & Clock Language English Time Zone (GMT-08:00) Pacific Time (US & Canada) NTP Service ON |||| ? Primary Serverhrstime.windows.com Continue> Date & Time Fri day, August 21, 2015 2:04:33 PM- View or modify the following settings :
Language From the drop-down list, select the language in which you want the My Cloud web pages to display. The default language is English.
Time Zone From the drop-down list, select the time zone where your device is located.
| NTP Service | Leave NTP (network time protocol) Service ON to automatically synchronize your device to update the time and date. A page displays current NTP servers, and you can add another NTP server if you choose.If you turn NTP Service to OFF, click the Configure link that displays, enter the current date and time, and click Save. |
| Primary Server If you want to change to another primary NTP server, click Add User NTP, and then enter the URL address of the new primary server. | |
| Date & Time The date and time display. They are synchronized to the NTP server by default. | |
- Click Save for each change you make.
Cloud Access
If you are an administrator, you can turn cloud access on or off for the My Cloud device, controlling whether computers and mobile devices can access the content on it.
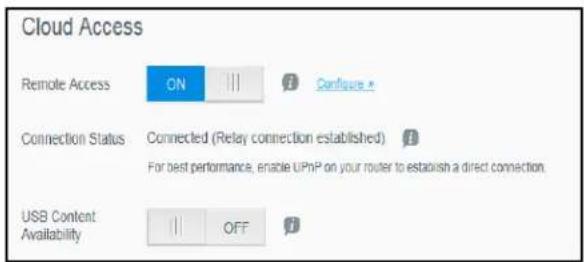
text_image
Cloud Access Remote Access ON || Confuses * Connection Status Connected (Relay connection established) For best performance, enable UPHP on your router to establish a direct connection. USB Content Availability OFF- Toggle the Remote Access switch to enable (ON) or disable (OFF) remote access to the My Cloud device.
Note: For information about turning on cloud access for a single device or user, see "Mobilizing Your Files with the My Cloud Mobile App" on page 51.
-
Connection Status displays information about the status of the remote access connection to the My Cloud device.
-
Toggle the USB Content Availability switch to enable (ON) or disable (OFF) remote access of your USB content plugged into the My Cloud device.
-
Click the Configure link to change the type of connection.
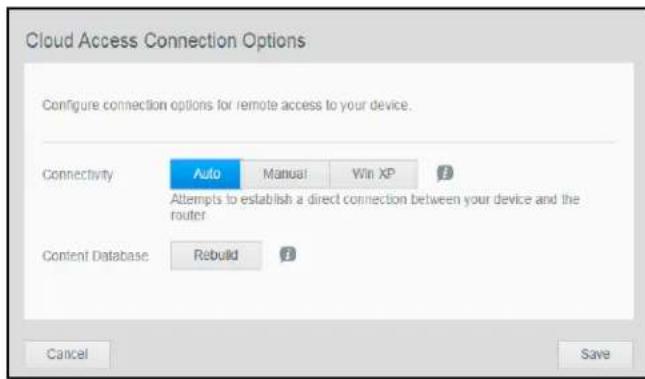
text_image
Cloud Access Connection Options Configure connection options for remote access to your device. Connectivity Auto Manual Win XP Attempts to establish a direct connection between your device and the router Content Database Rebuild Cancel SaveBy default, the My Cloud device automatically establishes a direct connection between your mobile devices and router.
- To change the connection type:
a. To make a manual connection, click Manual. External Port 1 (HTTP) and External Port 2 (HTTPS) numbers display. You can change these port numbers.
b. If you are using the Win XP operating system, click Win XP. The My Cloud device attempts to establish a compatible direct or relay connection
Note: If remote access is enabled through a relay connection (the Connection Status says Connected (Relay), you can improve performance by enabling port forwarding on your My Cloud device.
For more information about connection options, see "Mobilizing Your Files with the My Cloud Mobile App" on page 51.
- For troubleshooting purposes only, when database corruption is suspected, click Rebuild.
Important: Rebuilding will take a considerable amount of time.
- Click Save.
Checking Cloud Access Status
At any time, you can check whether:
■ The My Cloud device is configured for remote access
A remote access to your cloud is enabled through a direct or relayed connection
- A particular mobile device for a certain user is currently enabled to access your cloud remotely
To check cloud access status:
- On the navigation bar, click Cloud Access.
- In the left pane, click a user name.
Energy Saver
You can save power use by the My Cloud device.
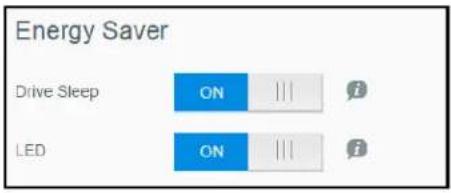
text_image
Energy Saver Drive Sleep ON || | LED ON ||View or change the following settings:
Drive Sleep If this function is enabled, the hard drive goes into standby mode to save power after a designated period of inactivity. Drive Sleep is enabled by default.
LED Turns the device's LED on or off.
Mac Backups
This section of the General page enables or disables Time Machine backups of Mac computers. You can also configure Time Machine Settings.
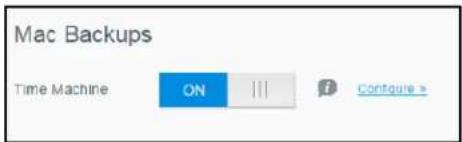
text_image
Mac Backups Time Machine ON || Contour >To configure backup settings:
- With the Time Machine switch ON, click the Configure link to display the Time Machine Settings dialog box:

text_image
Time Machine Settings Configure settings for your Time Machine backups for your Mac. Select a Share TimeMachineBackup Maximum Size 2.9 TB (100%) Increasing the maximum backup value after the initial backup has no effect on existing backups. WD recommends leaving this setting at the maximum value for your initial backup. After the first backup is complete, you can change the backup size by dragging the Maximum Size slider. Cancel Save- From the Select a Share drop-down list, select to back up all of the data on the Mac, or select a specific share to back up.
- Use the slider to indicate the Maximum Size of the backup. Leave the slider at the maximum value (quota) for your first backup (see on-screen note). After that, move the slider to a smaller quota to avoid filling up the entire drive with backups.
4. Click Save.
Important: Once your Time Machine begins to back up your files to a selected share, we recommend that you continue to back up to that same share. Switching shares generates a new backup file which will not contain your previously saved information.
Network
The Network page displays the device's MAC and IP addresses. You can set network options such as network mode, enable FTP protocol for secure file transfer, and create a work group.
Network Profile
On the navigation bar, click Settings, and then click Network in the left panel.
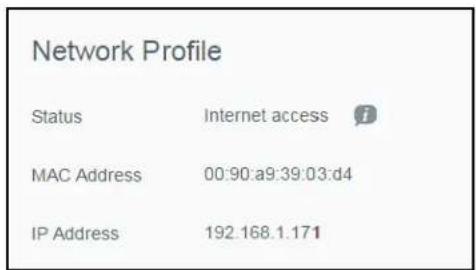
text_image
Network Profile Status Internet access MAC Address 00:90:a9:39:03:d4 IP Address 192.168.1.171The Network Profile section displays the following information:
| Status The current status of Internet connectivity for network functions such as NTP, firmware update checks, and remote access connections. |
| MAC Address Uniquely identifies the device. |
| IP Address Identifies the device's current IP address. |
Network Services
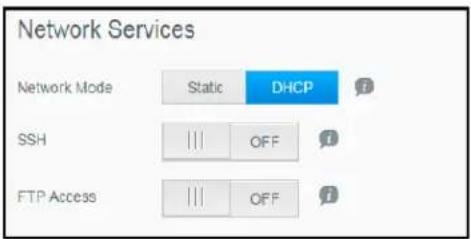
text_image
Network Services Network Mode Static DHCP SSH || OFF FTP Access || OFFReview or update the following:
| Network Mode Select the method of assigning the device's unique IP address:DHCP Client (default) causes the My Cloud device to obtain an IP address and associated settings automatically from the local DHCP server.Static IP lets you set an IP address manually. You will be prompted for IP Address, Netmask, Gateway, and DNS Server.(If you don't know this information, check your router's settings.)For details on changing the network mode, see “Changing Network Mode from DHCP to Static:” on page 61. | |
| SSH | Important:Enable SSH only if you are very familiar with it.Click ON to securely access your personal cloud and perform command-line operations via the Secured Shell (SSH) protocol. SSH is disabled by default. |
| FTP Access File Transfer Protocol enables the transfer of data from one computer to another through a network. FTP is disabled by default.Note:An FTP requires a username and password. Anonymous FTPs are not allowed.You must create a new user for the FTP function to work.See “Creating a User” on page 42 for information on creating a username and password. | |
Changing Network Mode from DHCP to Static:
Note: If you switch from Static Mode to DHCP, you may need to re-discover the device on your network.
- For the Network Mode option, click Static. The Change Network Mode dialog box displays:
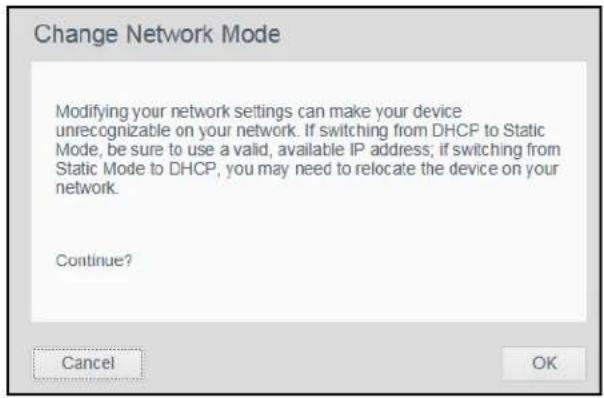
text_image
Change Network Mode Modifying your network settings can make your device unrecognizable on your network. If switching from DHCP to Static Mode, be sure to use a valid, available IP address; if switching from Static Mode to DHCP, you may need to relocate the device on your network. Continue? Cancel OK- Click OK to display the Static Network Mode dialog box and continue with the change:
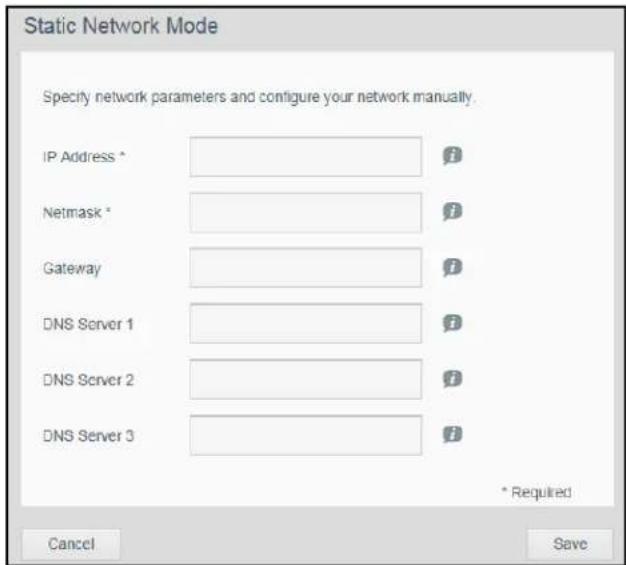
text_image
Static Network Mode Specify network parameters and configure your network manually. IP Address * Netmask * Gateway * DNS Server 1 * DNS Server 2 * DNS Server 3 * * Required Cancel Save- In the Static Network Mode dialog box, enter at least an IP Address and a Netmask. (If you don't know this information, check your router's settings.)
Note: If you do not enter Gateway and DNS Server(s), you will lose connection to the LAN.
- Click Save.
Workgroup (Windows)
A workgroup is a name you assign to each member of a group of computer network devices in a network environment. The devices that have the same workgroup name can easily exchange information through the network. A workgroup does not require a central server.
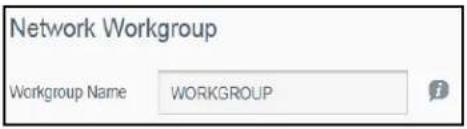
text_image
Network Workgroup Workgroup Name WORKGROUPTo name or rename a workgroup:
- Enter a name for the workgroup (no spaces allowed).
- Click Save.
- Each time you add a device to your network, you can assign it this workgroup name.
Media
On the Media page, you can enter DLNA (Digital Living Network Alliance) media server and iTunes media player settings so that you can enjoy media in every room in your house.
- On the Navigation bar, click Settings, and then click Media in the left panel.
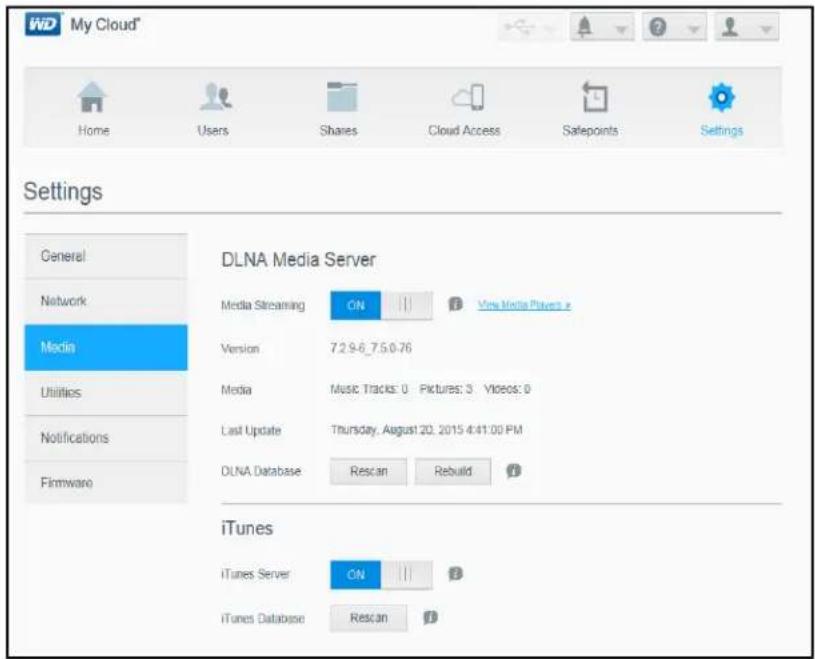
text_image
My Cloud* Home Users Shares Cloud Access Safepoints Settings Settings General Network Media Utilities Notifications Firmware DLNA Media Server Media Streaming ON View Media Players e Version 7.2.9-6_7.5.0-76 Media Music Tracks: 0 Pictures: 3 Videos: 0 Last Update Thursday, August 20, 2015 4:41:00 PM DLNA Database Rescan Rebuild iTunes iTunes Server ON iTunes Database RescanNote: DLNA and iTunes only works on your network.
- For instructions on entering media settings on this page and then displaying or streaming media, see "Playing/Streaming Videos, Photos, & Music" on page 112.
Utilities
On the Utilities page, you can test the My Cloud device and get diagnostic information, restore the device to factory defaults, reboot or shut down the device, and import or export a configuration file.
- On the Navigation Bar, click Settings, and then click Utilities in the left panel.
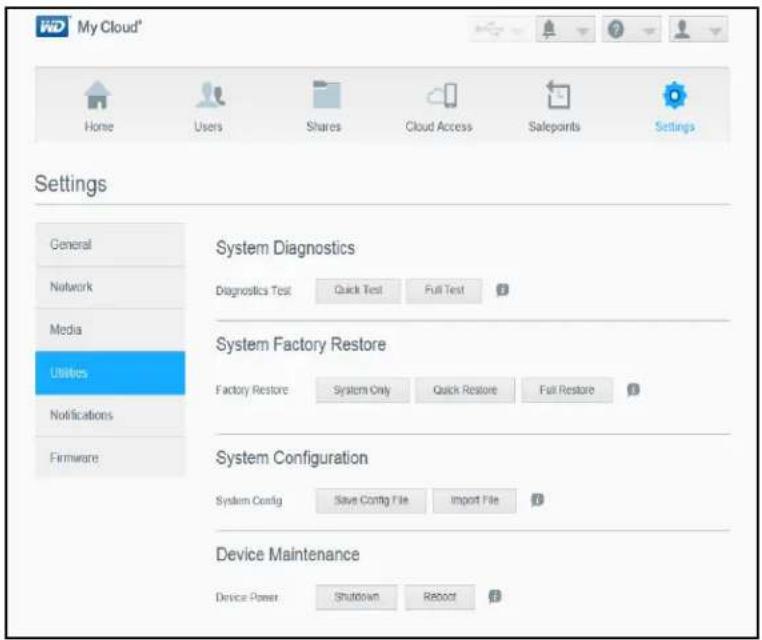
text_image
My Cloud* Home Users Shares Cloud Access Salepoints Settings Settings General Network Media Utilities Notifications Firmware System Diagnostics Diagnostics Test Quick Test Full Test System Factory Restore Factory Restore System Only Quick Restore Full Restore System Configuration System Config Save Config File Import File Device Maintenance Device Power Shutdown Retort- Carry out the functions on each section of the page as described below.
System Diagnostics
Run diagnostic tests if you are having problems with your device. The short test checks the device for major performance problems. The result of a short drive test is a pass or fail evaluation of the drive's condition. The short drive test can take several minutes to complete.
The more comprehensive drive diagnostic is the full test. It methodically tests each and every sector of your drive. You will be informed of the condition of the drive once the test is performed. The full drive test will takes several hours to complete, depending on the size and data configuration of your drive.
To run a test:
text_image
System Diagnostics Diagnostics Test Quick Test Full Test- On the Utilities page, click Quick Test or Full Test. A progress bar displays, indicating test progress and whether the drive passed or failed the test.
- If the drive passed the test, click OK to return to the Utilities page. If the drive fails the test, click the Support icon in the upper right to get assistance.
System Factory Restore
Note: For information about using the Reset button to return the password and network mode to factory settings, see "Resetting the My Cloud Device" on page 90.
In this section of the Utilities page, the administrator can choose a system only, a quick, or a full factory restore.
Important: You might want to export and save the device's current configuration before restoring factory default settings so that you can import it afterwards. Note that importing a configuration in this case does not restore shares or users.
If you want to restore the complete contents of a My Cloud device, including user settings, backups, and data, use the safepoint feature described in “About Safepoints” on page 71. A restore disrupts service to users currently accessing your cloud.
WARNING! Do not unplug your My Cloud device while a restore is in progress.
As an administrator, you can restore the My Cloud device to its original, default settings, as well as wipe out all data securely. Three restore operations are available:
System Only: Changes all settings back to the factory default values, makes private shares public, and returns the administrator password to none. Your content remains untouched and intact.
Note: You can also do a system restore physically. See “Resetting the My Cloud Device” on page 90.
Quick Restore: Reverts all settings to their factory default values, deletes data in shares and sets the shares back to factory defaults, resets the My Cloud system, and erases the drive. It takes several minutes.
Full Restore: Reverts all settings to their default values and permanently overwrites or erases all user data and shares. It could take several hours for the process to complete.
To restore the My Cloud device:
text_image
System Factory Restore Factory Restore System Only Quick Restore Full RestoreWARNING! Interrupting the factory restore process may damage the My Cloud device. Wait until after the reboot to use the device again.
- In the System Factory Restore section, click the desired type of restore: System Only, Quick Restore or Full Restore.
- When asked to confirm the action, click OK.
-
When the progress bar displays, if you selected Full Restore in step 1, but you change your mind, click Switch to Quick to start a Quick Restore from the beginning.
-
At the end of the restore, the "Factory Restore Successful" message displays, and the system reboots. A setup dialog box displays. Follow the wizard's instructions.
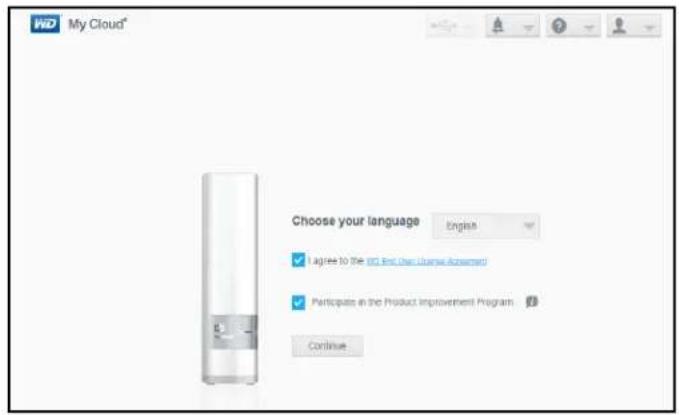
text_image
My Cloud* Choose your language English ✓ Agree to the ICD and User License Answers ✓ Participate in the Product Improvement Program ContinueDevice Maintenance: Reboot and Shutdown
Important: Before rebooting or shutting down, make sure that there are no file transfers in progress. Check the LED on the front of the device to make sure it is not blinking. Blinking indicates that the unit is processing information (for example, backing up or transferring files).
WARNING! Do not unplug the device during reboot or shutdown.
You can safely reboot and shut down your My Cloud device using three methods.
■ Device Maintenance section of the Utilities page (discussed below)
■ WD Quick View icon (see "Utilities" on page 63).
- By selecting Reboot or Shutdown from the User menu on the dashboard. See "Information Icons" on page 32.
If you are unable to shut down by these methods, see "I am having trouble shutting down the My Cloud Device." on page 94.
text_image
Device Maintenance Device Power Shutdown RebootTo reboot your device:
- On the Utilities page, in the Device Maintenance section, click Reboot.
The following message displays:
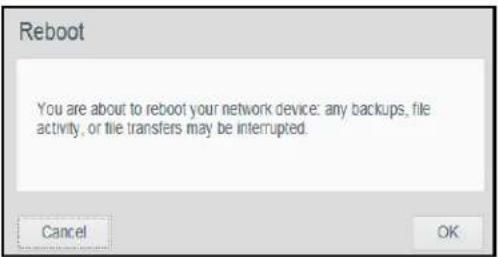
text_image
Reboot You are about to reboot your network device: any backups, file activity, or file transfers may be interrupted. Cancel OK- If the device is not processing information, or it is but you choose to proceed, click the Continue button.
The device shuts down and then restarts. Wait until the LED is solid blue before resuming work with the My Cloud device.
To shut down the device:
-
Click Shutdown Device.
-
A message reminds you that shutting down may interrupt important processes:
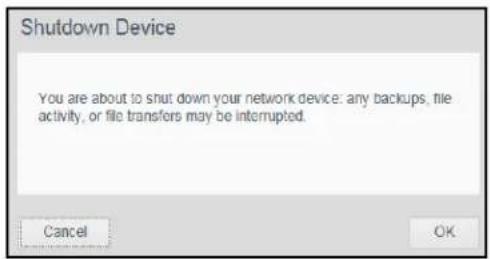
text_image
Shutdown Device You are about to shut down your network device: any backups, file activity, or file transfers may be interrupted. Cancel OK- If the device is not processing information, or it is but you choose to proceed, click OK. The following message displays:
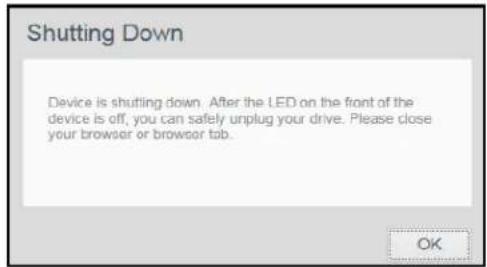
text_image
Shutting Down Device is shutting down. After the LED on the front of the device is off, you can safely unplug your drive. Please close your browser or browser tab.-
Click OK to close the message.
-
When the LED on the front of the device is off, you can safely unplug your device.
-
Close the browser.
Import/Export Current Configuration
text_image
System Configuration System Config Save Config File Import FileImportant: Before doing a factory restore or a system update, you may choose to save your device's current configuration. At a later time, you can import a previously saved configuration. Keep in mind that importing a configuration after restoring factory defaults does not restore shares or users. See "About Safepoints" on page 71.
To save the current configuration:
- Click Save Config File.
- Browse to the location where you want to save the file and click Save.
To replace the current configuration:
- Click Import File.
- Browse to locate the replacement file, select it, and click Open.
- Click Open, and when the Import Configuration File dialog displays, click OK. The My Cloud device reboots.
Notifications
The My Cloud device provides notifications about various events, including whether a firmware update is available, a firmware installation was successful, capacity was exceeded, and so on. The notification may concern system conditions, such as over temperature, or hard drive, volume, and network status. Notifications display in a pop-up panel and are available by email, depending on how your device is configured. Notifications are categorized according to severity:
■ Critical: Problems that need to be addressed immediately.
- Warning: Problems that you need to be aware of; however, they are not as severe as critical ones.
■ Info: Informative details.
The Notification Emails section of the page enables you to set up email addresses for up to five users who will receive notifications. These alerts help the administrator manage and detect events or errors.
As an administrator, you can configure:
■ Event categories you want to be notified of by email
■ Event categories you want to display in the web interface
In the Navigation bar, click Settings and then click Notifications in the left panel.
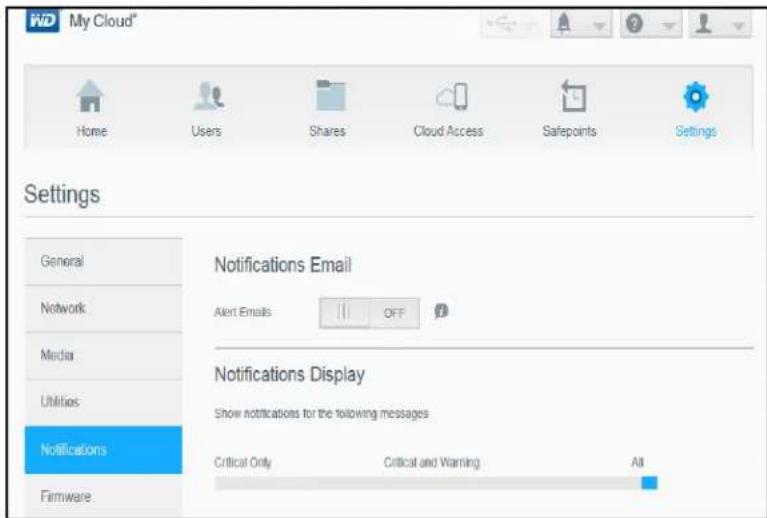
text_image
My Cloud* Home Users Shares Cloud Access Safepoints Settings Settings General Network Media Utilities Notifications Firmware Notifications Email Alert Emails OFF Notifications Display Show notifications for the following messages Critical Only Critical and Warning AllTo configure notifications by email:
You can send notifications to up to five recipients.
- In the Notifications Email section, toggle Alert Emails to ON. The Notifications Configuration dialog box displays.
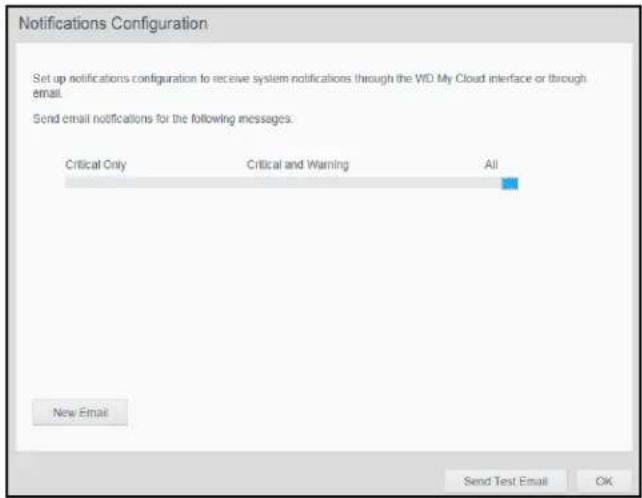
text_image
Notifications Configuration Set up notifications configuration to receive system notifications through the WD My Cloud interface or through email. Send email notifications for the following messages: Critical Only Critical and Warning All New Email Send Test Email OK- Move the slider to choose the severity of notifications to email.
- Click New Email.
-
Enter the email address of a recipient, and then click one of the following:
-
Save
Send Test Email -
(Optional) Add up to five email addresses by repeating steps 3 and 4 as needed.
- (Optional) To delete an email address, click the trash can icon to its right.
- Click OK.
To configure the severity of notifications that display in the web interface:
- In the Notifications Display section, move the slider to choose the severity of notifications to display.
- Click OK.
Firmware
The Firmware page enables you to set up the device to update the My Cloud firmware automatically or to manually check for an update file. The current version number and the date of last update of the My Cloud firmware display.
On the Navigation bar, click Settings, and then click Firmware on the left panel.
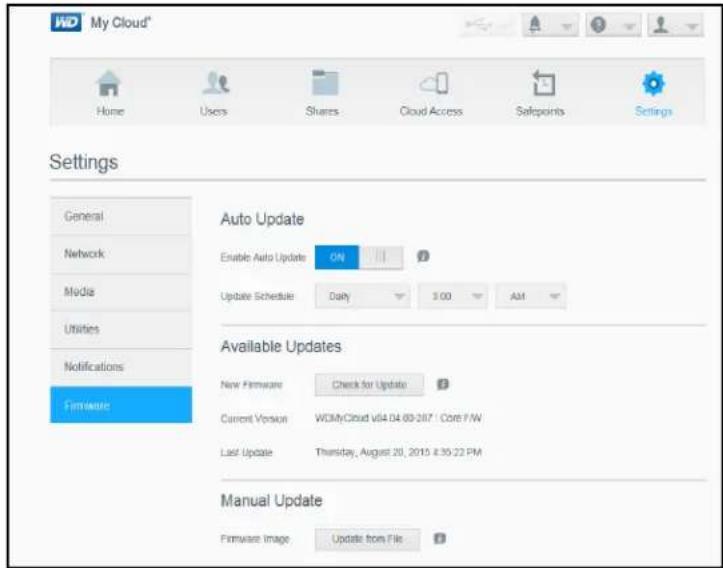
text_image
My Cloud* Home Users Shares Cloud Access Setpoints Settings General Network Media Utilities Notifications Firmware Auto Update Enable Auto Update ON Update Schedule Daily 3:00 AM Available Updates New Firmware Check for Update Current Version WOMyCloud v64.04.00-2017 / Core F/W Last Update Thursday, August 20, 2015 8:35:22 PM Manual Update Firmware Image Update from FileAuto Update
You can schedule the My Cloud device to conveniently check for available software updates and install them automatically. This is the easiest way of ensuring the My Cloud firmware is current.
Note: After a firmware update installs, the My Cloud device reboots. Since a reboot will affect users' ability to access the cloud, you should schedule the updates to occur at times when the likelihood of users accessing the cloud are minimal.
To update My Cloud firmware automatically:
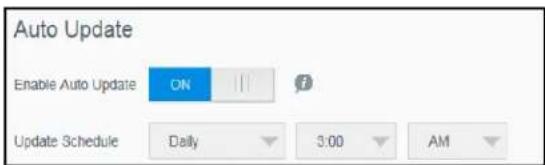
text_image
Auto Update Enable Auto Update ON Update Schedule Daily 3:00 AM- Toggle Enable Auto Update to ON.
- From the drop-down lists, specify the frequency (e.g., daily) and time at which the device should look for an update on the WD website, and if one is available, to automatically install it and reboot.
- Click Save.
Manually Checking for Updates
- In the Available Updates section, click Check for Update. (The button will be labeled Update Now if new firmware is found.)
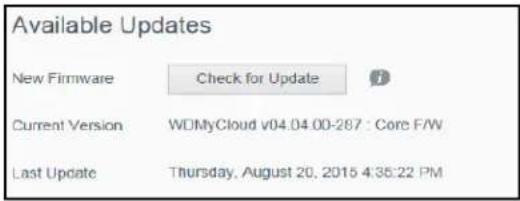
text_image
Available Updates New Firmware Check for Update Current Version WDMyCloud v04.04.00-287 - Core F/W Last Update Thursday, August 20, 2015 4:35:22 PMA New Firmware Available message displays to let you know whether new firmware is available. If it is not available, click OK. If new firmware is available, click Install and Reboot.
Manually Installing an Update
- Go to the WD Tech Support Downloads page at http://support.wd.com/product/download.asp.
- If a later version of My Cloud firmware than your current version is available, select the My Cloud and click the Current Firmware link to go to the product update page.
- Click the Download button.
- Download the firmware file and save it to your desktop.
- Unzip the zip file to access the .deb file.
- If not already on the Firmware page, on the dashboard Navigation bar, click Settings, and then click Firmware on the left panel.
- In the Manual Update section of the Firmware page, click Update from File.
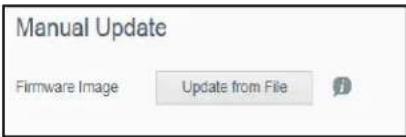
text_image
Manual Update Firmware Image Update from File- Select the .deb file and click Open.
A message prompts for confirmation that you want to update now.
- Click Install and Reboot. A progress bar displays. When the process is complete, the My Cloud device reboots.
Managing Safepoints
About Safepoints
Creating a Safepoint
Updating a Safepoint
Recovering a Safepoint
Deleting a Safepoint
About Safepoints
You can create a complete backup or snapshot of your My Cloud device, called a safepoint, and save it to an external location on your home network or an attached USB drive attached to the USB expansion port. Safepoints can be created or run on a schedule you define. They include a record of users, data, and shares on your device; any backups created using WD SmartWare, Apple Time Machine, Windows 7 Backup, or Windows 8 File History, and any associated device configuration details. Creating a safepoint ensures that you can easily recover your data from a specific point in time to a new My Cloud device in the unlikely event that your My Cloud device fails.
Creating a Safepoint
To create a safepoint for your My Cloud device:
- On the navigation bar, click Safepoints to display the Protect Your Stuff page:
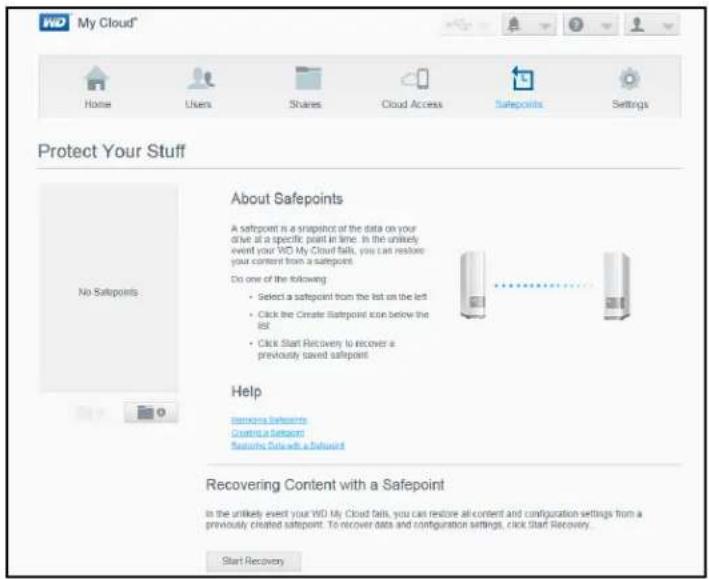
text_image
My Cloud* Home Users Shares Cloud Access Safepoints Settings Protect Your Stuff No Safepoints About Safepoints A safepoint is a snapshot of the data on your drive at a specific point in time. In the unlikely event your VD My Cloud fails, you can restore your content from a safepoint. Do one of the following: • Select a safepoint from the list on the left • Click the Create Safepoint icon below the list • Click Start Recovery to recover a previously saved safepoint. Help Imaging Safepoints Creating a Safepoint Status Data with a Safepoint Recovering Content with a Safepoint In the unlikely event your VD My Cloud fails, you can restore all content and configuration settings from a previously created safepoint. To recover data and configuration settings, click Start Recovery. Start RecoveryNote: The first time you open this page, in addition to a list of existing safepoints, you'll see information and links to Help pages about safepoints.
- Click the Add a Safepoint icon to display the Create a Safepoint screen:
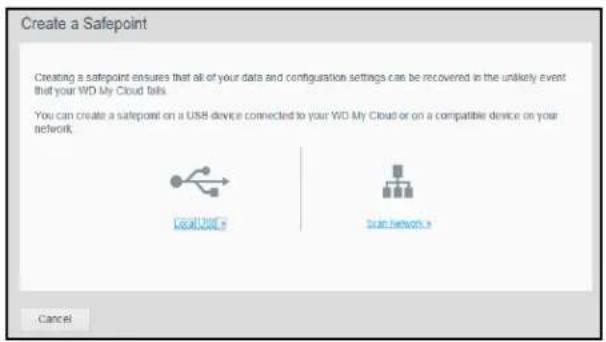
text_image
Create a Safepoint Creating a safepoint ensures that all of your data and configuration settings can be recovered in the unlikely event that your WD My Cloud fails. You can create a safepoint on a USB device connected to your WD My Cloud or on a compatible device on your network. Local/Local Guide Dual Network- Click either Local USB or Scan Network to display a list of available devices on your local USB drive or network:
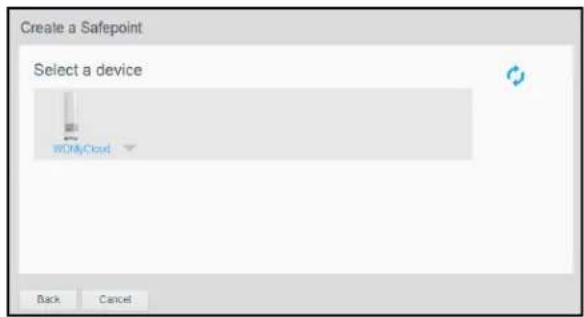
text_image
Create a Safepoint Select a device WOMyCloud Back CancelNetwork Scan
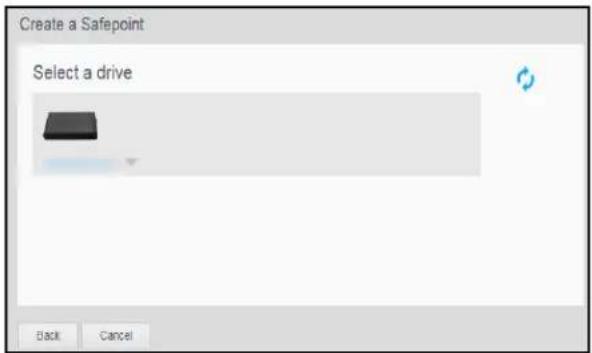
text_image
Create a Safepoint Select a drive Back CancelLocal Scan
Note: To rescan the network at any time, click the blue refresh/rediscover icon on the upper right.
Important: If you create a safepoint with shares you wish to keep private, create the safepoint on a private share.
- Select the target device and the share for the operation and click Next. If the share is password protected, enter appropriate credentials.
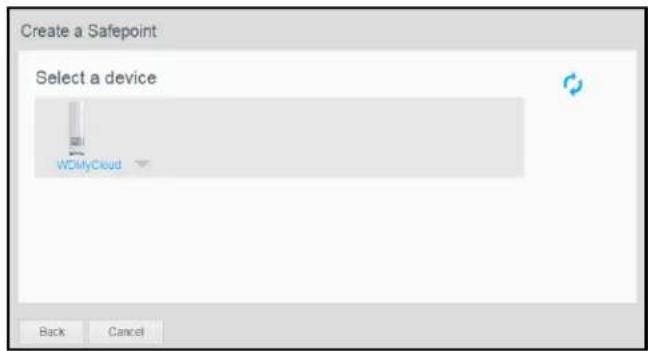
text_image
Create a Safepoint Select a device WCMyCloud Back CancelImportant: If you create a safepoint with shares you wish to keep private, create the safepoint on a private share.
The Create a Safepoint dialog box displays.
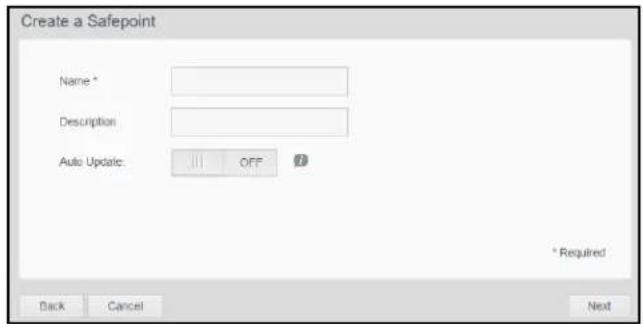
text_image
Create a Safepoint Name * Description Auto Update: OFF * Required Back Cancel Next- Enter a name and description for the safepoint.
Note: The name must include 1-32 characters and cannot contain spaces or symbols except underscores. It is case sensitive.
Auto updates help keep your safepoint up to date with the content on your My Cloud device by copying changes since the last update. If you want the new safepoint to be updated automatically:
a. Turn Auto Update on.
b. Indicate the Frequency, Day, and Time to automatically update the safepoint.
Note: You may choose to enable auto updates at another time. See "Updating a Safepoint" on page 76).
- Click Next. The Create now or later dialog box displays:
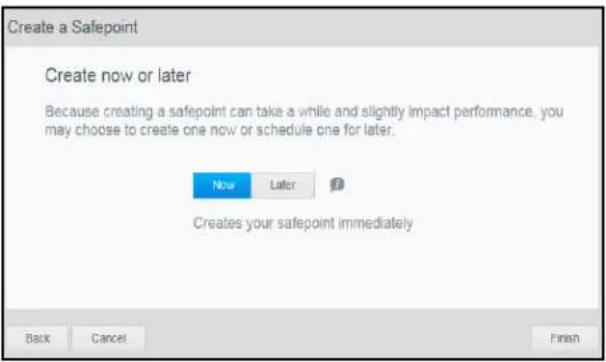
text_image
Create a Safepoint Create now or later Because creating a safepoint can take a while and slightly impact performance, you may choose to create one now or schedule one for later. Now Later Creates your safepoint immediately Back Cancel Finish7. You have two options:
- Create Now: To create a safepoint on the share immediately, click Now, and then click Finish. A progress message and the safepoint profile display:
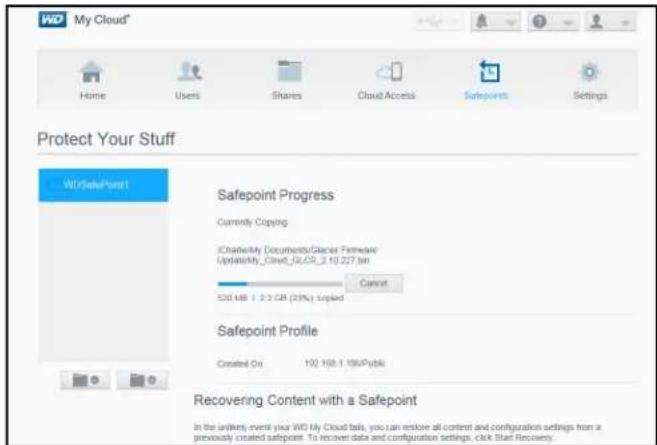
text_image
My Cloud* Home Users Shares Cloud Access Satpoints Settings Protect Your Stuff WDDataPoint Safepoint Progress Currently Copying iCharlieMy Documents/Glacier Firmware UpdateMy_Cloud_GLCR_2.10.277 Bn Cancel 530 MB / 2.3 GB (23%) copied Safepoint Profile Created On 192,168.1 100/Public Recovering Content with a Safepoint In the unlikely event your WD My Cloud fails, you can restore all content and configuration settings from a previously created safepoint. To recover data and configuration settings, click Start Recovery.Note: The time it takes to create a safepoint varies based on the speed of your network and the number and size of files you have stored on your My Cloud device. For a given amount of total data, fewer larger files replicate quicker than many smaller files. Other factors such as what processes are running on the My Cloud device and on the speed and availability of your target have an effect on how long it takes.
- Create Later: If you want to schedule the creation of the safepoint, click Later and enter a date and time you want the safepoint to be created.
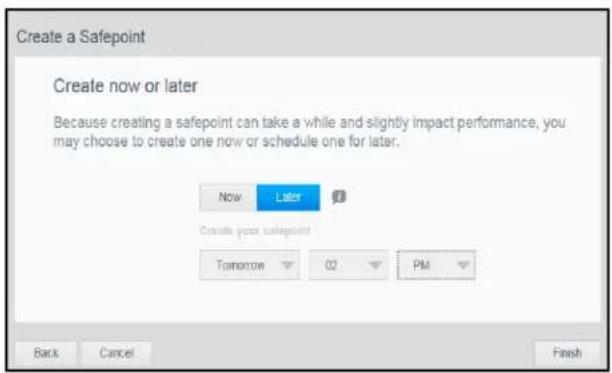
text_image
Create a Safepoint Create now or later Because creating a safepoint can take a while and slightly impact performance, you may choose to create one now or schedule one for later. Now Later Create your safepoint Tomorrow 02 PM Back Cancel FinishImportant: Changes made while safepoint operations are in progress are not guaranteed to be backed up immediately.
Note: If the creation process was not successful or was interrupted, click the safepoint's retry icon to resume the operation.
The safepoint profile and schedule display.
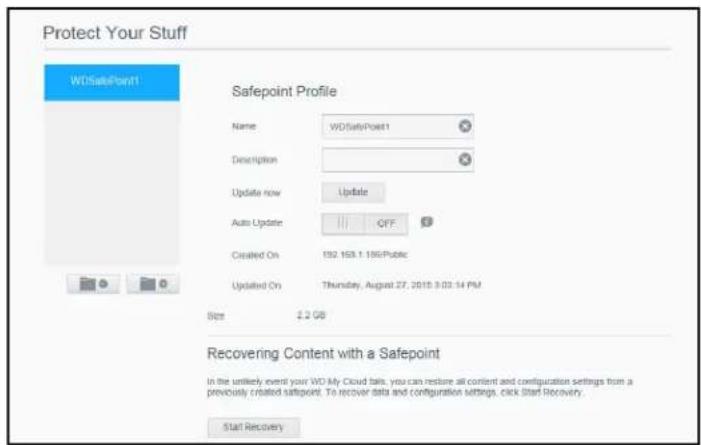
text_image
Protect Your Stuff WDSafePoint1 Safepoint Profile Name WDSafePoint1 Description Update now Update Auto Update OFF Created On 192.163.1.195/Public Updated On Thursday, August 27, 2018.9.02:14 PM Size 2.2 GB Recovering Content with a Safepoint In the unlikely event your WD My Cloud tails, you can restore all content and configuration settings from a previously created safepoint. To recover data and configuration settings, click Start Recovery. Start RecoveryNote: To see the content of the safepoint stored on another device, access the folder on the device where you stored it. The path is /sharename/_WDPROT/WDSAFE/name of safepoint created.
Updating a Safepoint
There are two ways to update a safepoint:
■ Automatically - you set the frequency, date, and time when the update occurs
■ Manually
To update a safepoint automatically:
- On the Navigation bar, click Safepoints to display the Protect Your Stuff page.
- In the left pane, select the safepoint you want to update.
- Turn on Auto Update to display the Safepoint Update Schedule dialog box.
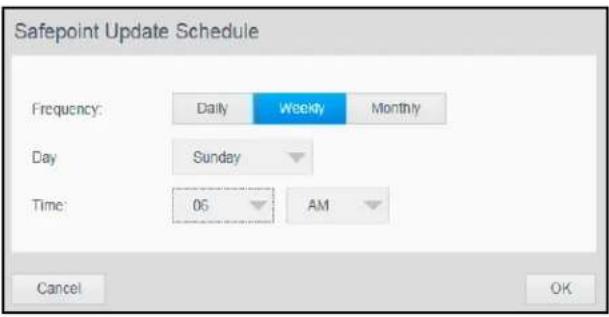
text_image
Safepoint Update Schedule Frequency: Daily Weekly Monthly Day Sunday Time: 06 AM Cancel OK- Indicate the Frequency, Day, and Time to automatically update the safepoint, and then click OK.
To update a safepoint manually now:
- On the Navigation bar, click Safepoints to display the Protect Your Stuff page.
- In the left pane, select the safepoint you want to update.
- Click Update. A progress bar displays.
- In the Safepoint Update Schedule dialog box, make your changes to the safepoint (Frequency, Date, and Time), and then click OK.
The progress bar in the status area displays detailed information about the operation, such as the files being copied and the extent completed.
Important: Changes made to data while safepoint operations are in progress are not guaranteed to be backed up immediately.
Recovering a Safepoint
The Recover section enables you to restore your data from a safepoint to a factory-fresh My Cloud device.
Important: Make sure the replacement My Cloud device is new or is in factory fresh state. (See "System Factory Restore" on page 64.) The capacity of the replacement device must be the same or larger than the safepoint you created.
- Open the dashboard of a factory fresh unit.
- On the Navigation bar, click Safepoints to display the Protect Your Stuff page.
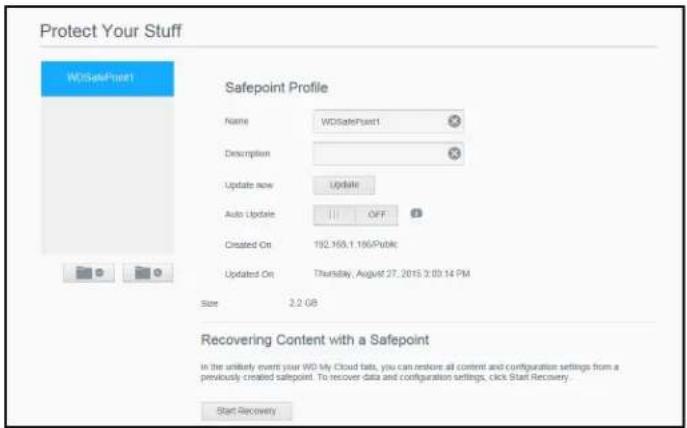
text_image
Protect Your Stuff WOSafePoint1 Safepoint Profile Name: WOSafePoint1 Description: Update now: Update Auto Update: OFF Created On: 192.169.1.186/Public Updated On: Thursday, August 27, 2015 3:03:14 PM Size: 2.2 GB Recovering Content with a Safepoint In the unlikely event your WD My Cloud fails, you can restore all content and configuration settings from a previously created safepoint. To recover data and configuration settings, click Start Recovery. Start Recovery- Click Start Recovery at the bottom of the page to display the Recover Content with a Safepoint dialog box:

text_image
Recover Content with a Safepoint Creating a safepoint ensures that all of your data and configuration settings can be recovered in the unlikely event that your WD My Cloud fails. You can create a safepoint on a USB device connected to your WD My Cloud or on a compatible device on your network. Local USB Scan Network > Cancel- Click Network or Local (for USB devices) to display a list of available devices on your network:
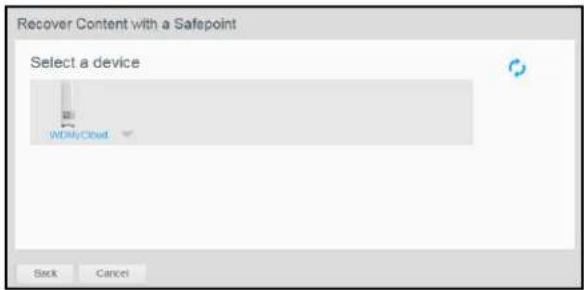
text_image
Recover Content with a Safepoint Select a device W000Cloud Back Cancel- Select a device to display the list of its available shares:
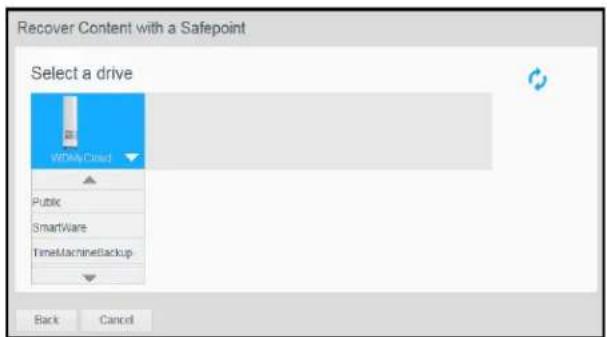
text_image
Recover Content with a Safepoint Select a drive WiFi Cloud Public SmartWare TimeMachineBackup Back Cancel- Select the share that has the safepoint and click the Next button. If the share is password protected, enter appropriate credentials:
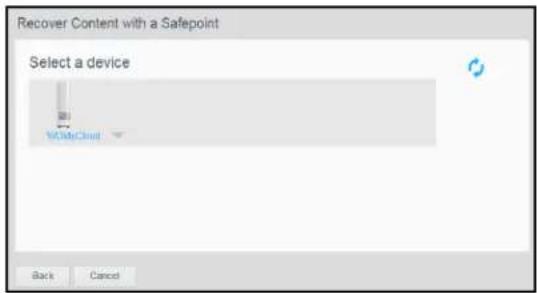
text_image
Recover Content with a Safepoint Select a device MyCloud Back Cancel- Choose the safepoint you want to recover and click Recover:
If the device you are restoring to is not in a factory restored state, a message with instructions appears. (See "Utilities" on page 63.)
- If there are no errors, the recovery operation begins and a progress bar appears. Wait for the operation to finish. Your device restarts after the recovery operation and then can be used in place of your original My Cloud device.
Deleting a Safepoint
- On the navigation bar, select Safepoints to display the Protect Your Stuff page.
- To delete a safepoint and all of its contents, select the safepoint and click the delete safepoint icon .
- In response to the confirmation question, click OK.
Note: The path /sharename/_WDPROT/WDSAFE path remains where you stored your safepoint, but the name of the file is no longer at the end.
Playing/Streaming Videos, Photos & Music
Media Servers
Media Storage
Enabling/Disabling DLNA and iTunes
Accessing Your Personal Cloud Using Media Players
Accessing Your Personal Cloud Using iTunes
Media Servers
The My Cloud device is designed to serve as your home's media server. It enables you to stream photos, music, and videos to your DLNA-compatible devices and music to your iTunes-compatible devices.
Both DLNA-compatible and iTunes-compatible devices search for media stored in any public or private share that has media serving enabled. When the My Cloud device is new, only the Public share defaults to DLNA on. WD SmartWare, Time Machine, and new shares default to DLNA off.
If you do not want DLNA to display specific media files, place them in a private share that is set to disable media sharing. (See “Making a Share Private” on page 46.) Both the DLNA and iTunes servers are pre-set, so you can just transfer your multimedia content to the Public share on your My Cloud device, and you are ready to stream and view content on your home entertainment center, game consoles (for example, Xbox 360 or PlayStation 3), WD TV Live HD media player, DLNA 1.5 Digital Media players, and other PCs on your home network. Visit http://www.dlna.org for further information on DLNA.
TwonkyMedia Overview
The My Cloud device uses TwonkyMedia as its DLNA media server. It streams your music, photos and videos to compatible devices in your home. Playing media on a compatible device is easy.
The TwonkyMedia server searches for all the media stored in the Public share on the My Cloud device connected to your home network. The server is pre-set, so you can just transfer your multimedia content to the Public share on your My Cloud device, and you are ready to stream and view content on your home entertainment center, game consoles (for example, Xbox 360 or PlayStation 3), WD TV HD Live media player, or DLNA 1.5 Digital Media Adapters), and other PCs on your home network. Visit
http://www.twonkymedia.com for further information about TwonkyMedia.
iTunes Overview
You or anyone connected to the My Cloud device can use iTunes to play stored music files. iTunes creates a virtual music library on the device and treats it as an iTunes repository, making it possible to stream music files from the My Cloud device to Windows or Mac computers running iTunes.
iTunes scans any shares that have the Media Serving setting enabled, including the Public share by default.
Media Types Supported by DLNA
 |  |  |
| Audio Files Video Files Image Files | ||
| 3GP | 3GP | BMP |
| AAC | AVI | GIF |
| AC3 | DivX | JPEG |
| AIF | DVR-MS | PNG |
| ASF | FLV | TIF |
| FLAC | M1V | TIFF |
| LPCM | M4V | |
| M4A | MKV | |
| M4B | MOV | |
| MP1 | MP1 | |
| MP2 | MP4 | |
| MP3 | MPE | |
| MP4 | MTS | |
| MPA | MPV | |
| OGG | MPG | |
| WAV | MPEG2 | |
| WMA | SPTS | |
| VDR | ||
| VOB | ||
| WMV | ||
| Xvid | ||
Note: Some devices may not support playback of all these files. Please refer to your device's user manual to see which formats are supported.
Media Types Supported by iTunes
Note: iTunes 10.4 or later only supports music files.
The iTunes Media Server supports the following file extensions: FLAC, M4A, MP3, MP4A and WAV.
Note: Some devices may not support playback of all these files. Please refer to your device's user manual to see which formats are supported.
Media Storage
You can access and store media content on the My Cloud device by means of network shares. Shares, similar to folders or directories, are areas set up to organize media and access them from your network. Shares can be shared with everyone (public) or with selected users on your network (private).
The device comes pre-configured with the Public network share, which contains the following subfolders for media storage:
- Shared Music—Stores music files you want to share with other users
- Shared Pictures—Stores image files you want to share with other users
- Shared Videos—Stores video files you want to share with other users
These folders are for your convenience; you can put any supported media file in any share.
Note: You will notice that the Public share's Shared Music and Shared Pictures shares contain mirrored and uploaded subfolders. These folders are needed by Twonky 7.2. You can now upload all media types to the uploaded subfolder from a DLNA client with "upload" capability.
Go to the Twonky configuration site (NAS_IP:9000) to aggregate content from all NAS devices with DLNA capability on your network to the mirrored folder. Uploading and mirroring are best left to expert users, as these features are not supported by WD customer support.
Enabling/Disabling DLNA and iTunes
The Media page on the My Cloud dashboard allows you to enable or disable the DLNA and iTunes media servers. Media server utilities for re-scanning the NAS or fully rebuilding the DLNA database are also on the Media page.
- On the navigation bar, click Settings and then click Media in the left panel.
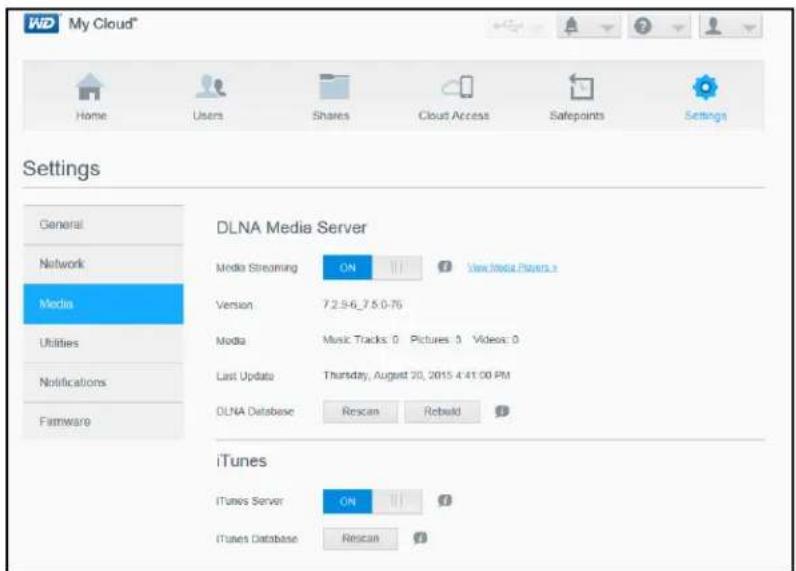
text_image
My Cloud* Home Users Shares Cloud Access Salepoints Settings Settings General Network Media Utilities Notifications Firmware DLNA Media Server Media Streaming ON 111 View Media Players.s Version 7.2.9-6.7.5 0-76 Media Music Tracks: 0 Pictures: 0 Videos: 0 Last Update Thursday, August 20, 2015 4:41:00 PM DLNA Database Rescan Rebuild iTunes iTunes Server ON 111 111 iTunes Database Rescan 111To view all players on the LAN and enable or disable streaming to them:
- Media Streaming is ON for all shares by default. To disable streaming to all shares, switch it to OFF.
You can view the status information, including the version of the DLNA software, the date and time your settings were updated, and the number of music tracks, pictures, and videos that were streamed.
- To view a list of your media players/receivers on your home network, click the View Media Players link. The Media Streaming Options dialog box displays.
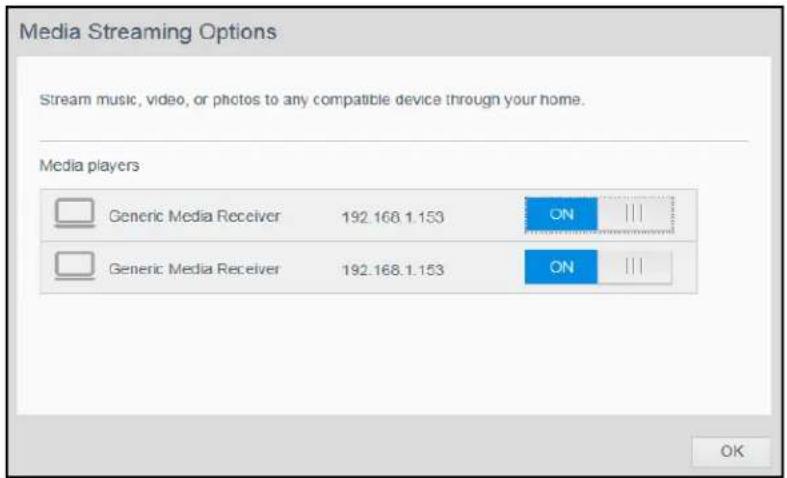
text_image
Media Streaming Options Stream music, video, or photos to any compatible device through your home. Media players Generic Media Receiver 192.168.1.153 ON Generic Media Receiver 192.168.1.153 ON OK- To block or unblock access for a DLNA device on the Media Streaming Options dialog box, find the device whose access you want to change and toggle the switch as appropriate:
■ ON: Allows access (default)
OFF: Denies access
-
Click OK to return to the Media page.
-
If you encounter a mismatch in the amount of My Cloud content accessible or viewable by a DLNA device, you can click one of the following:
Note: Re-scanning and rebuilding take place automatically. You only need to use the buttons if you are having a problem. Only the file types listed on page page 80 are supported and will be counted.
Important: Use caution when completing this procedure. Rebuilding the DLNA server database could take a considerable amount of time, depending on the number and size of the files involved.
- Rescan: The My Cloud device searches for changes made to your media libraries. Try this first.
■ Rebuild: The My Cloud device rebuilds the DLNA database from scratch.
To enable or disable iTunes:
- To enable iTunes to access your music files through your iTunes player, click the iTunes Server toggle switch as appropriate:
■ ON: Allows access (default setting)
OFF: Denies access
- Click Rescan to update your media files. When the "iTunes rescan has been initiated" message displays, click OK.
Adding Media Content to the Folders
1. Open Windows Explorer or Mac Finder:
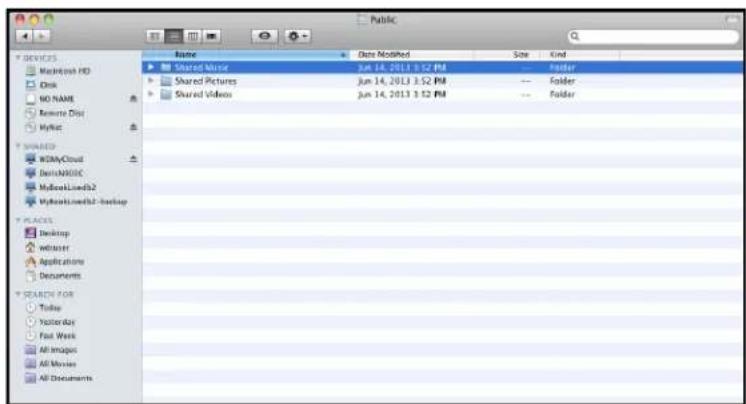
text_image
Public Name Date Modified Size Kind Shared Music Jun 14, 2013 3:52 PM -- Folder Shared Pictures Jun 14, 2013 3:52 PM -- Folder Shared Videos Jun 14, 2013 3:52 PM -- Folder WINHES KOMyCloud DentuNIOEC MyHostLineD2 MyHostLineD2 - backup PLACS Desktop Inituser Applications Documents SEARCH FOR Today Yesterday Fast Work All Images All Movies All Documents- Copy your music files to the Shared Music folder.
- Follow the same process to place your videos and pictures into their respective Pictures and Video folders.
Note: You can put media files in any public and private shares to which you have access.
Accessing Your Personal Cloud Using Media Players
Now that you have copied your files to one of the Shared folders, you can use a variety of DLNA-compatible media players to stream media. The following types are supported:
■ Windows Media Player 11 (comes with Windows Vista)
■ Windows Media Player 12 (comes with Windows 7 and Windows 8)
■ WD TV Live/Live Plus HD Media Players
- XBox 360
■ PlayStation 3
■ Other DLNA-compatible media players:
- Blu Ray players
- Network-connected TVs
- Digital picture frames
- Network music player
Note: For specific information on using and updating the media player, go to the appropriate support site.
WD Media Players
You can connect the various WD Media Players to your home network for access to media content stored in a network drive such as the My Cloud device. For details on using a WD Media Player to access files on your My Cloud device, refer to your WD Media Player User Guide.
Other Media Players
Following are general steps for setting up devices such as digital picture frames, Blu Ray players, network connected TVs, and digital media adapters:
- Make sure that your My Cloud device is connected to your home's local network and is powered on.
- Follow the user instructions provided with your media player to proceed through any initial setup or installation of drivers.
- Using the navigation feature on your player, scan and detect your My Cloud device on your network.
- Depending on the player you have, you may need to access a Settings/Network Setup page in the user interface to establish connection so that your player can link to your My Cloud device. Please refer to your player's user guide for specific instructions.
DLNA Devices
See specific DLNA media device user manuals for instructions on connecting a DLNA device to your local area network so you can access content on the My Cloud device. Go to http://www.dlna.org for a list of DLNA-certified devices and for further information.
Accessing Your Personal Cloud Using iTunes
Streaming Media in iTunes
iTunes is enabled by default in the dashboard. See "Media" on page 62 for more information.
-
Launch iTunes on your computer.
-
Click WDMyCloud under the Shared section of the left pane. If you have copied music to the /Public/Shared Music folder or a video to /Public/Shared Videos, and it is in a format supported by iTunes, it should be listed in the right pane.
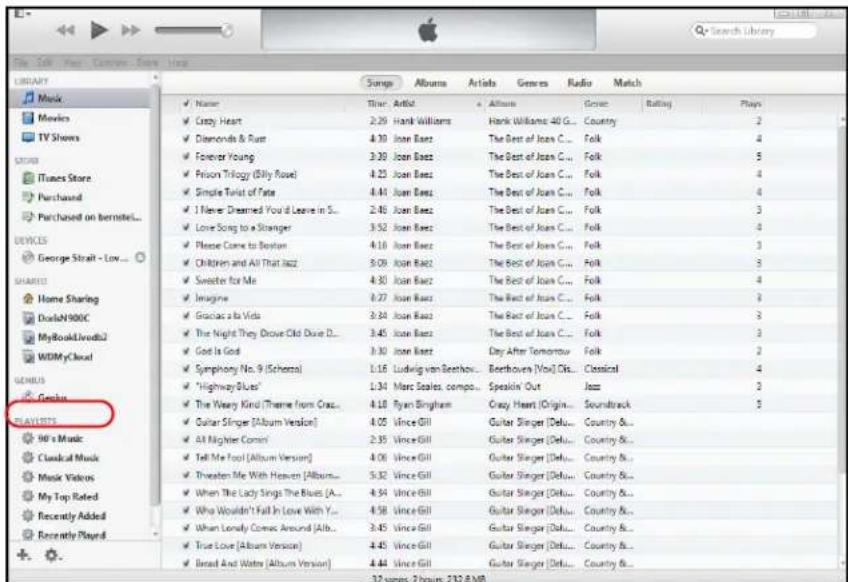
text_image
Search Library Library Music TV Shows iTunes Store Purchased Purchased on bernotel... DEVICES George Strait - Low... SHARED Home Sharing DorlaN900C MyBookLiveda2 WIDMyCloud GENUS Ginger PLAINTERS 90's Music Classical Music Music Videos My Top Rated Recently Added Recently Played ✓ Name Time: Artist Albums Gross Rating Plays ✓ Crazy Heart 2:25 Hank Williams Hank Williams 40 G... Country 2 ✓ Diamonds & Rust 4:30 Joan Baez The Best of Joan C... Folk 4 ✓ Forever Young 3:30 Joan Baez The Best of Joan C... Folk 5 ✓ Prison Trilogy (Billy Rose) 4:25 Joan Baez The Best of Joan C... Folk 4 ✓ Simple Twist of Fate 4:41 Joan Baez The Best of Joan C... Folk 4 ✓ I Never Dreamed You'd Leave in S... 2:45 Joan Baez The Best of Joan C... Folk 3 ✓ Love Song to a Stranger 3:52 Joan Baez The Best of Joan C... Folk 4 ✓ Please Come to Boston 4:16 Joan Baez The Best of Joan C... Folk 3 ✓ Children and All That Jazz 3:05 Joan Baez The Best of Joan C... Folk 3 ✓ Sweeter for Me 4:30 Joan Baez The Best of Joan C... Folk 4 ✓ Imagine 4:27 Joan Baez The Best of Joan C... Folk 3 ✓ Gracias a la Vida 2:24 Joan Baez The Best of Joan C... Folk 3 ✓ The Night They Drove Old Dove... 3:45 Joan Baez The Best of Joan C... Folk 3 ✓ God Is God 3:30 Joan Baez Day After Tomorrow Folk 2 ✓ Symphony No. 9 (Schoza) 1:18 Ludwig van Beethoven... Berthoven (You) Dts... Classical 4 ✓ "Highway/Blue" 1:34 Marc Seales compo... Speakin' Out.Joss 2 ✓ The Wary Kind (Theme from Crus... 4:18 Ryan Brigham Crazy Heart Origin... Soundtrack 3 ✓ Qatar Singer (Album Version) 4:05 Vince Gill Guitar Singer (Delu... Country&... ✓ All Higher Commi 2:35 Vince Gill Guitar Singer (Delu... Country&... ✓ Tell Me Foot (Album Version) 4:06 Vince Gill Guitar Singer (Delu... Country&... ✓ Theater Me With Heaven (Album... 5:32 Vince Gill Guitar Singer (Delu... Country&... ✓ When The Lady Singe The Blues (A... 4:54 Vince Gill Guitar Singer (Delu... Country&... ✓ Who Wouldn't Fall In Love With You... 4:58 Vince Gill Guitar Singer (Delu... Country&... ✓ When Lonely Comes Around (Album... 2:45 Vince Gill Guitar Singer (Delu... Country&... ✓ True Love (Album Version) 4:45 Vince Gill Guitar Singer (Delu... Country&... ✓ Bread And Water (Album Version) 4:44 Vince Gill Guitar Singer (Delu... Country&... 32 series 2 hours 232.8 MB- Double-click a media file to play it.
12
Connecting a USB Hard Drive
Overview
Connecting A USB Drive
Mapping A USB Drive (Windows Only)
Creating a Shortcut to the USB Drive (Windows only)
Overview
When you attach a USB drive to the My Cloud device's USB 3.0 expansion port, it becomes a network drive. Now the USB drive has the following capabilities:
- When you connect an external USB drive such as a My Passport™, a memory stick, or a camera to the My Cloud device, you can access it with Windows Explorer or Mac Finder.
- The USB drive can serve as a target for backups in WD SmartWare, Windows, or Time Machine.
- You can map the drive as a user share drive (Windows) or an alias (Mac).
If a WD external drive has been locked, when it is attached to the My Cloud device, it maintains that security and can be unlocked or relocked using the Dashboard. - You can attach a powered USB hub to the external USB port and attach up to seven USB devices to the hub.
Connecting A USB Drive
Connect a USB hard drive to the USB port on the rear of your My Cloud device for additional storage. The USB drive appears as a share on the My Cloud dashboard. (See “Managing Shares” on page 44.)
The My Cloud device supports the following formats for externally attached USB drives:
FAT32
■ NTFS (read and write capability)
■ HFS+J
- Ext2, Ext3/Ext4
XFS
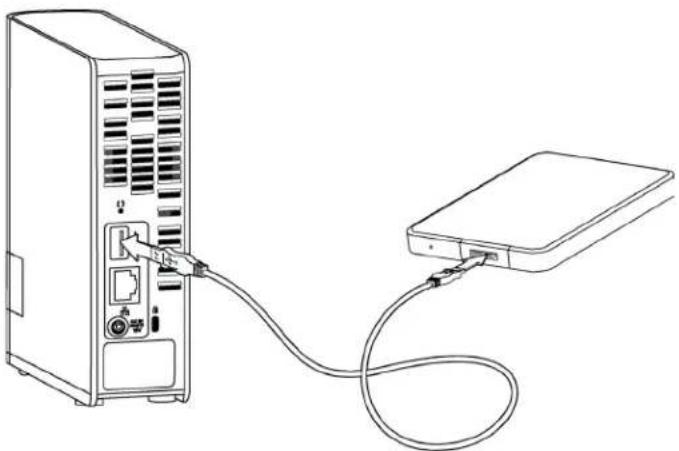
natural_image
Line drawing of a desktop computer tower connected to an external hard drive (no text or symbols)Mapping A USB Drive (Windows Only)
-
Right- or left-click the WD Quick View icon in the system tray to display a menu.
-
Move the pointer over or click to select your USB drive and display a submenu:
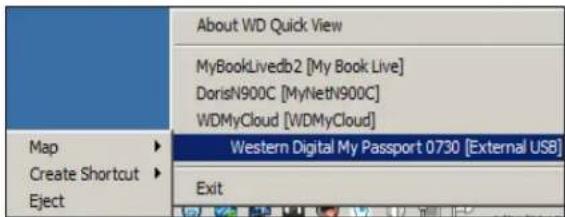
text_image
About WD Quick View MyBookLivedb2 [My Book Live] DorisN900C [MyNetN900C] WDMyCloud [WDMyCloud] Map ▶ Western Digital My Passport 0730 [External USB] Create Shortcut ▶ Exit Eject- Select Map [USB name] on the WD Quick View submenu. The Map Network Drive dialog box displays:
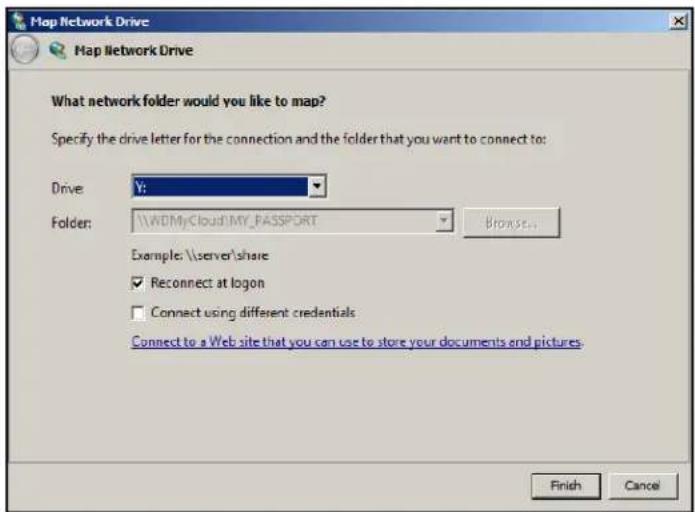
text_image
Map Network Drive Map Network Drive What network folder would you like to map? Specify the drive letter for the connection and the folder that you want to connect to: Drive: Y: Folder: \\WDMyCloud\MY_PASSPORT Browse... Example:\server\share Reconnect at logon Connect using different credentials Connect to a Web site that you can use to store your documents and pictures. Finish Cancel-
Select the desired letter from the Drive drop-down list.
-
Click the Finish button.
Note: When Windows attempts to reconnect a Mapped Network Drive after a restart, the "Unable to reconnect mapped network drives" error may appear. This can occur if the username and password of the My Cloud drive do not match the current Window's username and password information.
During the automatic reconnection process, Windows may attempt to send the current Windows username and password instead of the My Cloud device username and password specified during setup. Attempting to open the mapped network drive prompts a new login window. Enter the My Cloud device username and password to reconnect the share, allowing it to be accessible again (until the next reboot). For more information on this problem, see Knowledge Base Answer ID 6745.
Creating a Shortcut to the USB Drive (Windows only)
Select Create Shortcut on the WD Quick View submenu for your USB Drive. An icon representing the USB drive displays on the desktop.
Appendix A: My Cloud Device URLs and Names
Device URL
Use the device URL to access your device from a web browser.
Note: If you change your device name at any time, the URL also changes to the new name.
| If your device name is... | Your Windows URL is... | Your Mac URL is... |
| WD My Cloud http://wdmycloud | http://wdmycloud.local | |
| Renamed Device | http://.local | http://.local |
Device Name
The device name appears in the Mac Finder and Windows Explorer.
| Device Name Window / Mac Name | |
| WD My Cloud wdmycloud | |
Appendix B: Specifications
| Ethernet High performance (100/1000) Gigabit Ethernet connection | |
| Internal hard drive WD 3.5-inch SATA hard drive | |
| Supported protocols CIFS/SMB, NFS, FTP, AFP | |
| I/O portsData transfer rate | Gigabit Ethernet (RJ-45) portUSB 3.0 up to 5 Gb/sUSB 2.0 up to 480 Mb/s*A USB 3.0 host and USB 3.0 certified cable are required to obtain USB 3.0 performance. |
| CompatibilityNote: Compatibility may vary depending on user's hardware configuration and operating system. | Operating systems:W i n d o w s 1 0Windows 8.1 and earlierWindows 7Windows VistaWindows XP (SP3)*Mac OS X YosemiteMac OS X MavericksMac OS X Mountain LionMac OS X LionBrowsers:Internet Explorer 10.0 and later on supported Windows computersSafari 6.0 and later on supported Mac computersFirefox 29 and later on supported Windows and Mac computersGoogle Chrome 31 and later on supported Windows and Mac computersDLNA®/UPnP® devices for streaming Internet connection |
| Physical dimensions | |
| Width 1.9 in (49 mm) | |
| Length 5.5 in (139.3 mm) | |
| Height 6.7 in (170.6 mm) | |
| Weight 2 TB 2.11 lb (0.96 kg)3 TB 2.11 lb (0.96 kg)4 TB 2.25 lb (1.02 kg)6 TB 2.27 lb (1.03 kg) | |
| Power supply Input voltage: 100V to 240V ACInput frequency: 47to 63 HzOutput voltage: 12V DC, 1.5APower supply: 18W | |
| Temperature Operating temperature: 5°C to 35°C (41°F to 95 °F)Non-operating temperature: -20°C to 65°C (-4°F to 149 °F) | |
| RoHs compliant Yes | |
Appendix C: Troubleshooting
First Steps Checklist
Resetting the My Cloud Device
Specific Problems and Corrective Actions
First Steps Checklist
- Are all cables correctly connected and secured?
Is the WD provided power adapter plugged directly into a wall outlet and the device? - This helps rule out power issues if the wrong adapter is used.
- If a surge protector or extension cord is being used, please plug the device's power cord directly into a wall outlet.
- Is the status indicator solid blue? If not, see "Resetting the My Cloud Device," below.
- For any issue related to function, first ensure that you are using the latest firmware for the My Cloud device. See “Firmware” on page 69 for update instructions.
Resetting the My Cloud Device
Resetting with Power On
If you have set a password or a static IP address on the My Cloud dashboard and have forgotten it, pressing the reset button while the device is powered up resets the password to the default value of none and to default IP settings. The default IP setting is DHCP. Resetting does not erase your files.
Follow the instructions below to reset the device using the reset button:
WARNING! Do not move the unit while it is turned on. If you do not have access to the back of the unit, unplug the device from the power source, turn the device around so you do have access, and then plug the device in again.
- With the device powered on, insert a paper clip or narrow-tipped pen into the reset button slot on the back of the unit:
- Press and hold down the reset button for four seconds. The device will reboot (this may take up to three minutes).
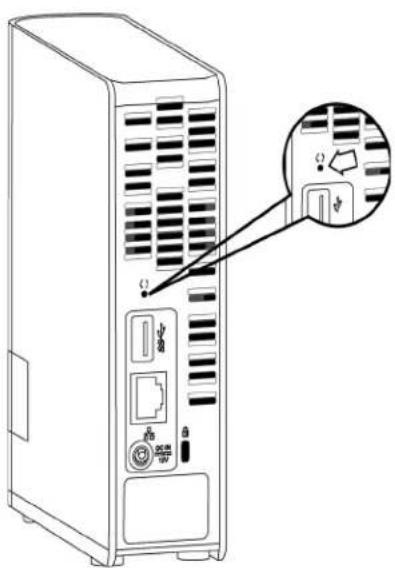
text_image
Diagram of a desktop computer tower with labeled ports and a magnified inset showing internal components.Resetting with Power Off
At the same time as you plug power into the My Cloud device, press the Reset button and hold for about 40 seconds. The device undergoes a system restore and powers on.
Specific Problems and Corrective Actions
The following contains specific problems that may arise during the use of the My Cloud device. Possible solutions are listed for each problem.
LEDs do not light up.
■ Make sure the power cord is connected correctly.
■ Make sure that the wall outlet has power. Test it by plugging in another device.
The My Cloud Device's front panel light is yellow and the unit's Network Adapter LEDs do not light.
- Confirm the network cable is properly connected to the My Cloud device and the network switch or router.
- Make sure the network switch or router has power.
- Use a different network cable and port on the network switch or router. Temporarily swapping the My Cloud device's cable port with a working network device may identify any failing cables and ports.
My router has failed. How do you manually map the drive letter?
- Power down the device.
- Connect the device directly to the computer's Ethernet port.
- Power up the device. Wait until the LED turns blue before proceeding.
- For Windows XP and Windows 7, on the Start menu:
a. Click (My) Computer.
b. Click My Network Places (Windows XP) or Network (Windows Vista/Windows 7).
c. Select wdmycloud.
d. On the Tools menu, click Map Network Drive.
- For Windows 8, click the File Explorer icon

and in the ribbon (top of page), click
Computer > Map Network Drive.
- Select wdmycloud.
- Leave the drive set to the default letter.
- In the Folder box, type the following path: \device name\public.
Note: The default device name is WDMyCloud.
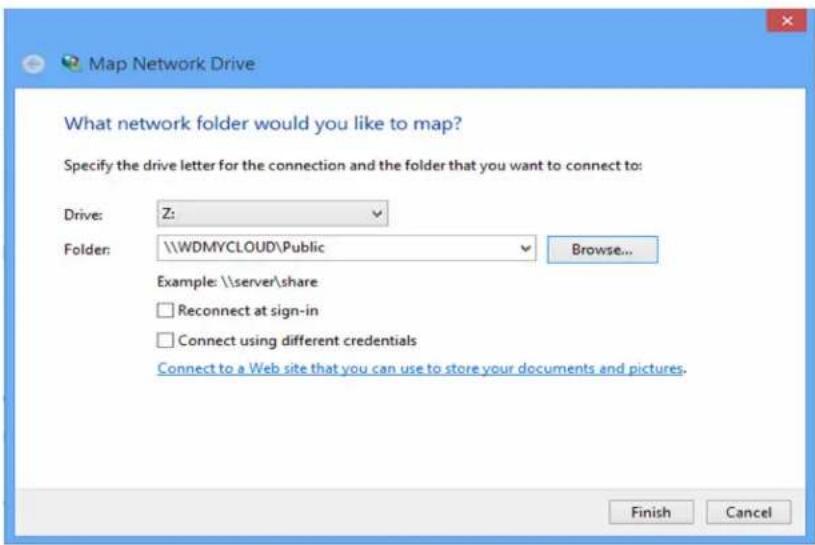
text_image
Map Network Drive What network folder would you like to map? Specify the drive letter for the connection and the folder that you want to connect to: Drive: Z: Folder: \\WDMYCLOUD\Public Browse... Example: \\server\share Reconnect at sign-in Connect using different credentials Connect to a Web site that you can use to store your documents and pictures. Finish Cancel- Click Finish.
- Go back to the opening window of (My) Computer to view the Public folder of your device under Network Drives.
Setup or WD SmartWare is unable to detect a My Cloud device.
If Setup or WD SmartWare is unable to detect a My Cloud device, then certain network protocols may be blocked on the network or the computer. In those cases, the My Cloud device is available through a direct IP or network name connection. For example, you can open the My Cloud dashboard using http://
- If the computer is on a wireless network, connect using an a Ethernet cable and try again.
- Temporarily disable any computer firewalls or security software and retry.
- Check your local router for any firewalls or security software. If present, please check your router documentation on temporarily disabling the software or configuring the software to allow UPnP or UDP traffic.
Important: Disabling your firewalls or security software may leave you vulnerable to security threats on your computer. Remember to restore your firewall/security settings after you perform the above steps.
I am unable to play music, videos and/or view pictures through my digital media adapter.
- There are many kinds of file formats for pictures, videos and music; your particular digital media adapter may not support a format to play or display it. Depending on the digital media adapter device that you have (for example, Xbox 360 or PlayStation 3), you may need to update your device to support the media format that you want to play. Refer to your digital media adapter's user manual for further information.
- Make sure the share containing your media content is enabled to serve that type of media. See “Creating a New Share” on page 45.
■ Try re-encoding the media file. - Test the media file on a PC/MAC running a different media server to help determine if the file is not corrupted, plays on a other media players, etc.
I am having trouble shutting down the My Cloud Device.
If you are unable to shut down the device using the My Cloud dashboard or the WD Quick View icon:
- Double-check every computer on the network to ensure no files are open or transfers are in progress.
-
Check the following:
-
If the LED is solid blue (indicating the device is idle) or pulsing blue (indicating the device is on standby), the device is ready to shut down.
If the LED is white (may look somewhat violet), the firmware is being updated. Do not allow power to be lost to your device as this could corrupt the firmware in the device and cause data loss. Loss of power may also cause the device to become inaccessible. -
If the LED is any other color, wait for it to turn blue. If it does not turn blue, consult "Front Panel LED" on page 7.
-
Disconnect the power cable (if steps 1-3 do not resolve the issue).
- Wait 30 seconds.
- Reconnect the Ethernet cable and power cord, and then power on the device.
I need to migrate a large amount of data (50 GB or more) from a USB external drive to my My Cloud device.
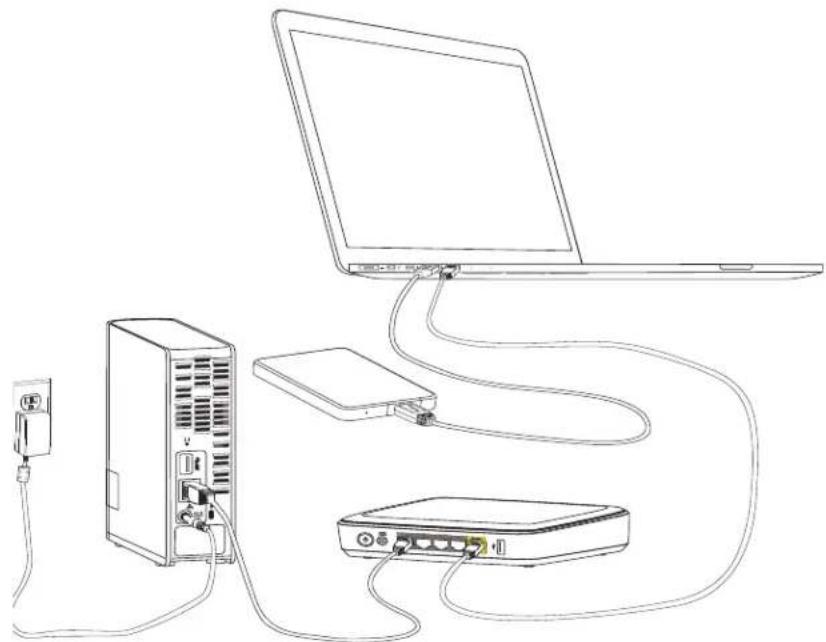
natural_image
Line drawing of a network device with a laptop, server, and USB cable (no text or symbols)- Connect the USB drive to your computer for optimal performance.
- Connect your computer and the My Cloud device directly to your router with a wired Ethernet connection.
- Copy your data from your external USB drive (or your computer) to your My Cloud device.
Network performance optimization guidelines for data migration:
- Data transfer over a wireless connection between your computer and the My Cloud device will generally result in slower data transfer performance.
- A wired connection between your computer and your router is recommended.
■ Using a Gigabit router for optimum performance is recommended. - For wireless data transfer, it is recommended that you move the wireless computer into the same room as your wireless router.
- Data transfer speeds through a wireless connection will be higher if your router and computer are connected using Wi-Fi 802.11n or 802.11ac
Appendix D: Regulatory and Warranty Information
Regulatory Compliance
Warranty Information (All Regions Except Australia/New Zealand)
Warranty Information (Australia/New Zealand only)
Regulatory Compliance
Federal Communications Commission (FCC) Class B Information
Operation of this device is subject to the following two conditions:
- This device may not cause harmful interference.
- This device must accept any interference received, including interference that may cause undesired operation.
Changes or modifications not expressly approved by the party responsible for compliance could void the user's authority to operate the equipment.
FCC Requirements, Part 15
This equipment has been tested and found to comply with the limits for a Class B digital device pursuant to Part 15 of the FCC Rules. These limits are designed to provide reasonable protection against harmful interference in a residential installation. This equipment generates, uses, and can radiate radio frequency energy and, if not installed and used in accordance with the manufacturer's instruction manual, may cause interference with radio communications. However, there is no guarantee that interference will not occur in a particular installation. If this equipment does cause harmful interference to radio or television reception, which can be determined by turning the equipment off and on, you are encouraged to try to correct the interference by one or more of the following measures:
■ Reorient or relocate the receiving antenna.
■ Increase the separation between the equipment and the receiver.
■ Connect the equipment into an outlet on a circuit different from that to which the receiver is connected.
■ Consult the retailer or an experienced radio/television technician for help.
Any changes or modifications not expressly approved by WD could void the user's authority to operate the equipment.
ICES/NMB-003 Compliance
This device complies with Canadian ICES-003 Class B.
Safety Compliance
Approved for US and Canada. CAN/CSA-C22.2 No. 60950-1, UL 60950-1: Safety of Information Technology Equipment.
This product is intended to be supplied by a listed limited power source, double insulated, or direct plug-in power unit marked "Class 2."
CE Compliance for Europe
Marking by the CE symbol indicates compliance of this system to the applicable Council Directives of the European Union, including the EMC Directive (2004/108/EC) and the Low Voltage Directive (2006/95/EC). A "Declaration of Conformity" in accordance with the applicable directives has been made and is on file at Western Digital Europe or can be found at http://www.wdc.com/products/EUDOC.
GS Mark (Germany only)
KC Notice (Republic of Korea only)
Environmental Compliance (China)
Warranty Information (All Regions Except Australia/New Zealand)
Obtaining Service
WD values your business and always attempts to provide you the very best of service. If this Product requires maintenance, either contact the dealer from whom you originally purchased the Product or visit our product support Web site at http://support.wd.com for information on how to obtain service or a Return Material Authorization (RMA). If it is determined that the Product may be defective, you will be given an RMA number and instructions for Product return. An unauthorized return (i.e., one for which an RMA number has not been issued) will be returned to you at your expense. Authorized returns must be shipped in an approved shipping container, prepaid and insured, to the address provided on your return paperwork. Your original box and packaging materials should be kept for storing or shipping your WD product. To conclusively establish the period of warranty, check the warranty expiration (serial number required) via http://support.wd.com. WD shall have no liability for lost data regardless of the cause, recovery of lost data, or data contained in any Product placed in its possession.
Limited Warranty
WD warrants that the Product, in the course of its normal use, will for the term defined below, be free from defects in material and workmanship and will conform to WD's specification therefor. The term of your limited warranty depends on the country in which your Product was purchased. The term of your limited warranty is for 2 years in the North, South and Central America region, 2 years in the Europe, the Middle East and Africa region, and 2 years in the Asia Pacific region, unless otherwise required by law. The term of your limited warranty period shall commence on the purchase date appearing on your purchase receipt. WD may at its discretion make extended warranties available for purchase. WD shall have no liability for any Product returned if WD determines that the Product was stolen from WD or that the asserted defect a) is not present, b) cannot reasonably be rectified because of damage occurring before WD receives the Product, or c) is attributable to misuse, improper installation, alteration (including removing or obliterating labels and opening or removing external enclosures, unless the product is on the list of limited user-serviceable products and the specific alteration is within the scope of the applicable instructions, as found at http://support.wd.com), accident or mishandling while in the possession of someone other than WD. Subject to the limitations specified above, your sole and exclusive warranty shall be, during the period of warranty specified above and at WD's option, the repair or replacement of the Product with an equivalent or better Product.
The foregoing warranty of WD shall extend to repaired or replaced Products for the balance of the applicable period of the original warranty or ninety (90) days from the date of shipment of a repaired or replaced Product, whichever is longer.
The foregoing limited warranty is WD's sole warranty and is applicable only to products sold as new. The remedies provided herein are in lieu of a) any and all other remedies and warranties, whether expressed, implied or statutory, including but not limited to, any implied warranty of merchantability or fitness for a particular purpose, and b) any and all obligations and liabilities of WD for damages including, but not limited to accidental, consequential, or special damages, or any financial loss, lost profits or expenses, or lost data arising out of or in connection with the purchase, use, or performance of the Product, even if WD has been advised of the possibility of such damages. In the United States, some states do not allow exclusion or limitations of incidental or consequential damages, so the limitations above may not apply to you. This warranty gives you specific legal rights, and you may also have other rights which vary from state to state.
Warranty Information (Australia/New Zealand only)
For consumers purchasing products in Australia and New Zealand, please refer to this warranty information.
Nothing in this warranty modifies or excludes your legal rights under the Australian Competition and Consumer Act or the New Zealand Consumer Guarantees Act. This warranty identifies WD's preferred approach to resolving warranty claims which is likely to be quick and simple for all parties.
No other warranties either express or implied by law, including but not limited to those contained in the Sale of Goods Act, are made with respect to the Product. If you purchased your Product in New Zealand for the purposes of a business, you acknowledge and agree that the New Zealand Consumer Guarantees Act does not apply.
In Australia, our goods come with guarantees that cannot be excluded under the Australian Consumer Law. You are entitled to a replacement or refund for a major failure and compensation for any other reasonably foreseeable loss or damage. You are also entitled to have the goods repaired or replaced if goods fail to be of acceptable quality and the failure does not amount to a major failure. What constitutes a major failure is set out in the Australian Consumer Law.
Warranty
WD warrants that the Product, in the course of its normal use, will for the term defined below, be free from defects in material and workmanship and will conform to WD's specifications. The term of your warranty is 2 years in Australia and New Zealand, unless otherwise required by law. The term of your warranty period shall commence on the purchase date appearing on your purchase receipt from an authorized distributor or authorized reseller. Proof of purchase shall be required to be eligible for this warranty and to establish the commencement date of this warranty. Warranty service will not be provided unless the Product is returned to an authorized distributor, authorized reseller or regional WD return center where the Product was first shipped by WD. WD may at its discretion make extended warranties available for purchase. WD shall have no liability for any Product returned if WD determines that the Product was (i) not purchased from an authorized distributor or authorized reseller, (ii) not used in accordance with WD specifications and instructions, (iii) not used for its intended function, or (iv) stolen from WD, or that the asserted defect a) is not present, b) cannot reasonably be rectified because of damage occurring before WD receives the Product, or c) is attributable to misuse, improper installation, alteration (including removing or obliterating labels and opening or removing external enclosures, including the mounting frame, unless the product is on the list of limited user-serviceable products and the specific alteration is within the scope of the applicable instructions, as found at http://support.wd.com), accident or mishandling while in the possession of someone other than WD.
PRODUCTS ARE COMPLEX AND FRAGILE ITEMS THAT MAY OCCASSIONALY FAIL DUE TO (A) EXTERNAL CAUSES, INCLUDING WITHOUT LIMITATION, MISHANDLING, EXPOSURE TO HEAT, COLD, AND HUMIDITY, AND POWER FAILURES, OR (B) INTERNAL FAULTS. SUCH FAILURES CAN RESULT IN THE LOSS, CORRUPTION, DELETION OR ALTERATION OF DATA. NOTE THAT YOU SHALL BE RESPONSIBLE FOR THE LOSS, CORRUPTION, DELETION OR ALTERATION OF DATA HOWSOEVER CAUSED, AND FOR BACKING UP AND PROTECTING DATA AGAINST LOSS, CORRUPTION, DELETION OR ALTERATION. YOU AGREE TO CONTINUALLY BACK UP ALL DATA ON THE PRODUCT, AND TO COMPLETE A BACKUP PRIOR TO SEEKING ANY GENERAL SERVICE AND TECHNICAL SUPPORT FROM WD.
In Australia, if the Product is not of a kind ordinarily acquired for personal, domestic or household use or consumption, provided it is fair and reasonable to do so, WD limits its liability to replacement of the Product or supply of equivalent or better Product.
This warranty shall extend to repaired or replaced Products for the balance of the applicable period of the original warranty or ninety (90) days from the date of shipment of a repaired or replaced Product, whichever is longer. This warranty is WD's sole manufacturer's warranty and is applicable only to Products sold as new.
Obtaining Service
WD values your business and always attempts to provide you the very best of service. Should you encounter any problem, please give us an opportunity to address it before returning this Product. Most technical support questions can be answered through our knowledge base or e-mail support service at http://support.wd.com. If the answer is not available or, if you prefer, please contact WD at the applicable telephone number shown in the front of this document.
If you wish to make a claim, you should initially contact the dealer from whom you originally purchased the Product. If you are unable to contact the dealer from whom you originally purchased the Product, please visit our product support Web site at http://support.wd.com for information on how to obtain service or a Return Material Authorization (RMA). If it is determined that the Product may be defective, you will be given an RMA number and instructions for Product return. An unauthorized return (i.e., one for which an RMA number has not been issued) will be returned to you at your expense. Authorized returns must be shipped in an approved shipping container, prepaid and insured, to the address provided with your RMA number. If following receipt of a qualifying claim under this warranty, WD or the dealer from whom you originally purchased the Product determines that your claim is valid, WD or such dealer shall, at its discretion, either repair or replace the Product with an equivalent or better Product or refund the cost of the Product to you. You are responsible for any expenses associated with a claim under this warranty. The benefits provided to you under this warranty are in addition to other rights and remedies available to you under the Australian Competition and Consumer Act or the New Zealand Consumer Guarantees Act.
Your original box and packaging materials should be kept for storing or shipping your WD product. To conclusively establish the period of warranty, check the warranty expiration (serial number required) via http://support.wd.com.
Western Digital Technologies, Inc.
3355 Michelson Drive, Suite 100
Irvine, California 92612
Phone: 949-672-7000
E-mail: support@wd.com
Index
A
Accessing
personal cloud on the web 52 your personal cloud remotely 49
accessing
content 17
Accessories 9
accessories 4
Alerts
dashboard icons 32
Apple Time Machine 26
B
Backing up
Apple Time Machine 25 Windows 7 Backup and Restore 25 Windows 8 File History 25
box contents 4
C
Capacity 33
China RoHS 97
Cloud access
accessing your cloud remotely 49 enabling for all users 56 status 57
Cloud devices, adding 35
Compliance
regulatory safety 96
connecting
My Cloud device 10
Content scan 37
Customer Support 38
D
dashboard
getting started with the 16
Dashboard Home page 31
Device Name 87
Device set up 10
Device URL 87
Diagnosis 34
Disconnecting safely 94
DLNA devices 84
Drive configurations, saving and importing 66
Drive status 33
E
Enabling cloud access
for a user 49 for the device 49
Energy saver 58
Environmental compliance (China) 97
F
Failed router, troubleshooting 92
Features 3
Firmware updates 34
G
Getting Started with dashboard 16
getting started with the dashboard 16
H
h 97
höchste 97
How do I? 39
http //mycloud.com/setup 10
|
ICES/NMB-003 compliance 96
Icons
information 32 navigation 32
Important
use enclosed Ethernet cable provided 10
Installing
WD SmartWare software 24
internet requirements 5
iTunes
media types supported 80 streaming media 84
L
LAN
configuration 59 requirements 5
Language settings 55
Launching
WD SmartWare 24
LEDs
back panel 8 Back Panel LEDs 8 Front Panel LED 7
Log files, sending to Customer Support 39
Log out option on dashboard User menu 32
M
Mac
Apple Time Machine 25
creating an alias for shared drive 18 enabling backup 58
Making a share private 46
Managing
users and shares 40
Mapping
Public share 20
USB drive 86
mapping public folders 20
Media
enabling streaming 62
Media players
accessing My Cloud 83
media types 80
Media servers
overview 79
settings 81
Media setting, DLNA and iTunes 62
Media streaming in iTunes 84
Mobilizing your files,overview 51
My Cloud
accessing contents of shares locally 47
changing user password 42
configuration settings 66
creating a share 45
deleting a share 47
factory restore 64
managing users 40
media server settings 81
notifications 67
private shares 42
safepoints 71
user settings 40
My Cloud account 13
creating 12
My Cloud Dashboard, launching 30
My Cloud folder 22
My Cloud mobile app
overview 52
My Cloud.com
account 49, 52
login 50
MyCloud.com, accessing 52
N
Navigating through the system 32
Network services settings 60
Network settings 59
Notifications, types 67
0
Obtaining service 97
Online Help for WD SmartWare 24
Online Learning Center 4
operating system compatibility 5
P
Package contents 4
Password, changing 42
Password, changing 42
Personal cloud
accessing on the web 52
Precautions 9
Pre-installation requirements 9
preparing your device 10
Private share
creating for a user 42
making public 46
product components
1-bay back view 6
1-bay front view 6
Product registration ii
Product warranty 97, 98
public folders
mapping 20
Public share
accessing with Mac OS X /Snow Leopard/Lion/Mountain Lion 20
accessing with Windows 8 19
accessing with Windows Vista/Windows 7 20
converting from a private share 46
public share
opening with a Mac OS 18
opening with Windows OS 18
R
Reboot option from dashboard User menu 32
Reboot option on dashboard Utilities page 63
Rebooting safely 65
Registration
online ii
Regulatory compliance 96
Remote access 49
Remote access for sharing files 53
Resetting the My Cloud device 90
Restoring to factory defaults 64
RoHS 97
s
Safepoint
creating 71
deleting 78
managing 71
recovering 76
updating 76
Safety
compliance 96
instructions 1
Scanning content 37
Service,obtaining 97
Settings
configuration 54
general 54
media 62
network services 60
system diagnostics 63
utilities 63
workgroup 62
Share 36
accessing contents locally 47
changing from Public to private 46
creating 45
deleting 47
settings 40
user name and password 42
shared drive
creating a Mac alias for 18
shares
viewing content 17
Sharing files remotely 53
Shortcut
to a USB drive 86
Shutdown option from dashboard User menu 32
Shutdown option on dashboard Utilities page 63
Shutting down safely
troubleshooting 94
using dashboard 65
Specifications 88
Streaming
media in iTunes 84
Support resources 39
System diagnostics 63
T
Time settings 55
Troubleshooting 90
can't shut down 94
cannot play media through digital media adapter 94
checklist 90
drive not connecting to network 91
failed router 92
LEDs don't light up 91
manually mapping the drive letter 92
resetting the system 90
Setup or WD SmartWare cannot detect my drive 93
TwonkyMedia 79
U
USB hard drive
connect and manage 85
creating a shortcut (Windows Only) 86
creating shortcut to 86
mapping 86
User
creating 42
creating private share for 42
enabling cloud access for 49
password 42
settings 40
viewing list of 40
Users 36
Using Mac OS X 18
Utilities 63
V
viewing
device share content 17
W
Warning
deleting a share 47
do not move drive 90
interrupting the factory restore 64
unplugging drive during reboot or shut- down 64, 65
Warranty information
all regions except Australia/New Zealand 97
Australia/New Zealand 98
WD media players 83
WD SmartWare
installing 24
launching 24
online Help 24
overview 24
WD Sync
downloading 21
operating system compatibility 23
overview 21
WD Sync folder 21
Web browser compatibility 5
Windows
mapping a public folder 20
Windows 7 Backup and Restore 25
Windows 8 File History 25
Workgroup setting 62
Information furnished by WD is believed to be accurate and reliable; however, no responsibility is assumed by WD for its use nor for any infringement of patents or other rights of third parties which may result from its use. No license is granted by implication or otherwise under any patent or patent rights of WD. WD reserves the right to change specifications at any time without notice.
Western Digital, WD, the WD logo, My Cloud and My Passport are registered trademarks and WD SmartWare and WD Sync are trademarks of Western Digital Technologies, Inc. in the U.S. and/or other countries. Other marks may be mentioned herein that belong to other companies.
© 2015 Western Digital Technologies, Inc. All rights reserved.
Western Digital
3355 Michelson Drive, Suite 100
Irvine, California 92612 U.S.A.
4779-705103-A02 Oct 2015