
Sentinel DS6100 - NAS WESTERN DIGITAL - Free user manual and instructions
Find the device manual for free Sentinel DS6100 WESTERN DIGITAL in PDF.


User questions about Sentinel DS6100 WESTERN DIGITAL
0 question about this device. Answer the ones you know or ask your own.
Ask a new question about this device
Download the instructions for your NAS in PDF format for free! Find your manual Sentinel DS6100 - WESTERN DIGITAL and take your electronic device back in hand. On this page are published all the documents necessary for the use of your device. Sentinel DS6100 by WESTERN DIGITAL.
USER MANUAL Sentinel DS6100 WESTERN DIGITAL
text_image
WDSENTINEL 192.168.1.101 WD WD SentinelWD®ServiceandSupport
Shouldyouencounteranyproblem,pleasegiveusanopportunitytoaddressitbeforereturningthis product.Mosttechnicalsupportquestionscanbeansansweredthroughourknowledgebaseoremail support service at http://support.wd.com. If the answer is not available or if you prefer, please contactWDatthebesttelephonenumbershownbelow.
WDGuardian™ServicespremiumTechnicalSupportandExtendedWarrantyservicesarealso available for Small Business customers. Contact WD Technical support at http://support.wd.com forinformationaboutthisextralevelofsupportandhowtoobtainit.
Yourproductincludes30daysoffreetelephonesupportduringthe1-yearstandardlimitedwarranty period.This30-dayperiodstartsonthedateofyourfirsttelephonecontactwithWDTechnical Support.Emailsupportisfreefortheentirewarrantyperiodandourextensiveknowledgebaseis available24/7.Tohelpuskeepyouinformedofnewfeaturesandservices,remembertoregister your product on the Registration page on the user interface or online at http://register.wd.com.
WDGuardianServices
Whenyouneedalittlehelpfromanexpert,we'lltakecareofyou!WDGuardianServicesoffers flexible,affordableandhassle-freetechnicalsupportandextendedwarrantyplanswithavarietyof benefits. Choose the plan that works best for your business. Visit www.wdguardian.com for details.
AccessingOnlineSupport
Visitourproductsupportwebsiteathttp://support.wd.comandchoosefromthesetopics:
- Downloads-Downloaddrivers, software, and updates for your WD product.
- Registration-RegistryourWDproducttogetthelatestupdatesandspecialoffers.
- Warranty & RMA Services - Get Warranty, Product Replacement (RMA), RMA Status, and DataRecoveryInformation.
- KnowledgeBase-Enterkeyword,phrase,answerID,orPID.
- Installation-Getmanuals, installationguides, and documentation for your WD product.
- WDCommunity-ShareyourthoughtsandconnectwithotherWDusers.
ContactingWDTechnicalSupport
When contacting WDforsupport, have your WDproductserialnumber, systemhardware, and systemsoftwareversionsavailable.
NorthAmericaEurope(tollfree)*
00800ASK4WDEU
English/Spanish855.556.5117(0080027549338)
SouthAmerica
Chile12300205871
Colombia00980083247788
Venezuela08001002855
Peru080054003
Uruguay0004135983787Australia1800429861/001180022754932
Argentina08004440839
Brazil
08007704932
002180083247788
Europe
+31880062100
MiddleEast
+31880062100
Africa
+31880062100
Russia
81080023355011
AsiaPacific
8008206682/4006276682
HongKong
30579031
India
18002005789/18004195591
Indonesia
0018038523993
Japan
08008057293
Korea
0221203415
Malaysia
1800817477
NewZealand
0508555639/0080022754932
Philippines
180018550277
Singapore
18006086008
Taiwan
0800225593
Thailand
0018008525913
Other countries
+862126037560
* Toll free number available in the following countries: Austria, Belgium, Czech Republic, Denmark, France, Germany, Ireland, Italy, Netherlands, Norway, Poland, Slovakia, Spain, Sweden, Switzerland, United Kingdom.
RegisteringYourWDProduct
RegistryyourWDproducttogetthelatestupdatesandspecialoffers.Youcaneasilyregistryyour product on the user interface of the product software or online at http://register.wd.com.
Table of Contents
WD®ServiceandSupport....ii
WDGuardianServices....ii
1ImportantUserInformation.... 1
ImportantSafetyInstructions....1
HandlingPrecautions....2
RecordingYourWDProductInformation. 2
AboutThisGuide....2
2ProductOverview....3
GettingtoKnowYourWDSentinelDS5100/DS6100Server.....3
KeyFeatures....3
SystemRequirementsandCompatibilityInformation....7
TechnicalSpecifications....8
ProductViews. 10
Indicators. 12
LEDs. 12
WheretoFindHelp. 13
3ConnectingtheServerandGettingStarted.....14
UserRolesandResponsibilities....14
HowtheWDSentinelFitsintoYourOffice....15
ConnectingtheWDSentinelServertoYourNetwork.....16
SettingupyourWDSentinelServer(onetimeonly)....17
ConnectingyourComputers....21
4ManagingtheWDSentinelServer(Dashboard)..25
SettingupWDSentinelServer&ConnectingComputers.....25
AccessingtheDashboard....25
TipsforPerformingDashboardTasks 27
AddingaUserAccount....27
PerformingDashboardTasks....29
UsingtheHomePage....29
ManagingUserAccounts....31
ManagingDevices. 31
ManagingStorage....32
MonitoringApplications....33
MonitoringSystemHealthandAlerts. 33
UpdatingSoftware....37
ManagingServerSettings....39
ShuttingDownandRebootingtheServer....40
5ManagingStorageontheWDSentinelServer....42
WDSentinelServerRAIDStorage....42
StorageSpaces. 43
SettingUpYourDrives. 43
RecoveringfromaFailedDrive. 48
UsingUSBStorage....48
MovingaServerFolder....50
6UsingtheWDSentinelServer'sFeatures.....52
UsingtheLaunchpad(InternalUsers)....52
AccessingSharedFoldersOverYourNetwork....58
AccessingComputersandSharedFoldersRemotely....59
Backingup(WindowsPC)....60
BackingupwithTimeMachine(Mac). 64
Recovering/Restoring(WindowsPC)....67
Recovering/Restoring(Mac). 69
BackingupyourWDSentinelServer....70
RecoveringaWDSentinelServerImageorResettingtheBoot
DrivestoFactoryDefaults. 70
7BestPractices....71
SettinguptheWDSentinelServer....71
SettingupClientComputers....71
UsingtheWDSentinelServerEfficiently. 71
ReplacingDrives. 72
SharingFileswithExternalUsers. 72
ShuttingDown....72
8Troubleshooting 73
FirstStepsChecklist....73
SpecificProblemsandCorrectiveActions....73
9RegulatoryandWarrantyInformation....78
RegulatoryCompliance....78
LimitedWarranty....79
GNUGeneralPublicLicense("GPL").80
10Appendix....8 1
HardwareReplacementProcedures....81
BeforeYouBegin. 81
ReplacingaHardDrive....82
ReplacingaServerFan....85
RemovingtheUnitCover....87
ReplacingtheSODIMMMemoryModule....88
AddingaBootDrive....91
WDRAIDStorageUtility....93
WDSentinelDS5100/DS6100AdministratorReferenceSheet...100
11Index....101
1
ImportantUserInformation
ImportantSafetyInstructions
HandlingPrecautions
RecordingYourWDProductInformation
AboutThisGuide
ImportantSafetyInstructions
This device is designed and manufactured to assure personal safety. Improper use can result in electric shock or fire hazard. Thesafeguards incorporated into this unit will protect you if you observe the following procedures for installation, use, and servicing.
■ Followallwarningsandinstructionsmarkedontheproduct.
- Unplugthisproductfromthewalloutletbeforecleaning.Donotuseliquidcleanersor aerosolcleaners.Useadampclothforcleaning.
■ Donotusethisproductnearanyliquids.
- Donotplacethisproductonanunstablesurface.Theproductmayfall,causingserious damagetotheproduct.
- Donotdropheproduct.
- Donotblocktheslotsandopeningsonthebackorbottomsideofthechassis;to ensureproperventilationandreliableoperationoftheproductandtoprotectitfrom overheating,theseopeningsmustnotbeblockedorcovered.Makingsuretheserveris standinguprightalsohelpspreventoverheating.
- Operatethisproductonlyfromthetypeofpowerindicatedonthemarkinglabel.Ifyou arenotsureofthetypeofpoweravailable,consultyourdealerorlocalpowercompany.
- Donotallowanythingtorestonthepowercord.Donotlocatethisproductwhere personswillwalkonthecord.
- Neverpushobjectsofanykindintothisproductthroughthechassisslotsastheymaytouchdangerousvoltagepointsorshortoutpartsthatcouldresultinafireorelectricshock.
- Ensure that you keep the door lock key that comewith your WDSentinel device in a safe place.
■ Unplugthisproductfromthewalloutletandreferservicingtoqualifiedservicepersonnel underthefollowingconditions:
-Whenthepowercordorplugisdamagedorfrayed.
-Ifliquidhasbeenspilledontheproduct.
- If the product has been exposed to rain or water.
- If the product does not operate normally when the operating instructions are followed. Adjust only those control that are covered by the operating instructions since improper adjustment may result in damage and require extensive work by a qualified technician to return the product on normal condition.
- If the product has been dropped for the chassis has been damaged.
-If the product exhibits distinct change in performance, contact WDCustomer Support at http://support.wd.com.
WARNING!TheWDSentinel™Serverusesalithiumbattery,typeCR2032.There isdangerofanexplosionifthebatteryisincorrectlyreplaced. Replaceonlywiththesameorequivalentbatterytyperecommended bythemanufacturer.Disposeofusedbatteriesaccordingtothe manufacturer'sinstructions.
HandlingPrecautions
WDproductsareprecisioninstrumentsandmustbehandledwithcareduringunpacking andinstallation.TheWDSentinelservermaybedamagedbyroughhandling,shock,or vibration.Beawareofthefollowingprecautionswhenunpackingandinstallingyourexternal storageproduct:
■ DonotdroporjolttheWDSentinelserver.
■ Donotmovetheunitwhileitispoweredon.
■ Donotusethisproductasaportabledrive.
RecordingYourWDProductInformation
RemembertowritedownthefollowingWDproductinformation,whichisusedforsetupand technicalsupport.YourWDproductinformationisfoundonthelabelonthebottomofthe device.
SerialNumber
■ ModelNumber
PurchaseDate
■ SystemandSoftwareNotes
AboutThisGuide
ThisAdministratorandMaintenanceGuideprovidesdetailedinstructionsandinformationfor WD-specificinterfaceelementsandfunctions.Unlessotherwisenoted,referto Microsoft® Online Help for standard interface elements and functions. This guide uses the followingconventions:
| ConventionUsedfor... | |
| BoldfontNamesofitemsonapagesuchasmenus,buttons,optionnames,fields,and tabsthattheusermustclickorcompleteandkeystheusermustpress. | |
| Note:Extra,butnotvital,information | |
| Important:EssentialInformationtoknowortopreventproblemswhenusingthe WDSentinelserver | |
| WARNING!VitalinformationforoperatingtheWDSentinelserverortopreventdamageto theserveroryourcomputer. |
ProductOverview
GettingtoKnowYourWDSentinelDS5100/DS6100Server
KeyFeatures
SystemRequirementsandCompatibilityInformation
TechnicalSpecifications
ProductViews
Indicators
LEDs
WheretoFindHelp
GettingtoKnowYourWDSentinelDS5100/DS6100Server
Congratulations your purchase of the WDSentinelDS5100/DS6100 Ultra-compact StoragePlusServer. Designed for storage plusservercapabilities, the WDSentinelDS5100/DS6100 is idealforsmall businessesthatare looking for an ultra-compact unified storagesolution with an integratediSCSISAN, NASandserver-based backup technology. Featuring hard drives optimized for reliability, quality and performance, an Intel ^ Xeon ^™ processor and Microsoft ^ Windows Server ^ 2012 R2 Essentials operating system, it offers the flexibility to make technology decisions based on individual business needs and provides highly secure access to data and line of business applications, even when working remotely.
KeyFeatures
Ultra-compactstorageplusserverforSmallBusiness:WDSentinelDS5100/DS6100 deviceisidealforsmallbusinessesesthatneedtheirfirstbusinesssservertobeinstalledand on-boardedforfirstuserightoutoftheboxwithanActiveDirectoryandPrimaryDomain Controller.Itiseasytosetupanduseandprovidesaunifiedstoragesolutionwithin integratediSCSISAN,NAS,andserver-basedbackuptechnology.Designedtobe"plug andplay,"theWDSentinelDS5100/DS6100includespre-installedhard-drives,anoperating systemandallofthenecessarysoftwaretoolstocompletetheon-boardingandprotectthe dataonasmallbusinessnetwork.Complexityhasbeenreduced,soonceit'ssetup,it intelligentlymanagesdriveandnetworkstatus,reducingmaintenancetimesoyoucanfocus onyourbusiness.
WindowsServer2012R2Essentials:WDSentinelDS5100/DS6100comespre-installed withWindowsServer2012R2Essentials,anidealoperatingsystemforsmallbusinesses.It providesapowerfulandflexiblesolutionthathelpsprotectyourbusinessdatawhileallowing youtoaccesstheinformationyouneedfromvirtuallyanywherewithalmostanydevice.It providesaneasysetup,installation,andmigrationexperiences,asimplifiedmanagement experienceandbetternetwork-widesecurityfeatures.Italsoincorporatesthelatest Microsofttechnologiesformanagement,networking,datastorageandbackup,security, documentandfoldersharing.WindowsServer2012R2Essentialssupportsupto25users and50devices.Whenyourbusinessneedsexceedthelimit,youcanpurchaseanadditional licenseandupgradetoWindowsServer2012R2Standard.
SupportforLine-of-BusinessApplications: In addition to leveraging the backup, shared storage and cloud-based services capabilities of the WDSentinel DS5100/DS6100 device, small business owners can use it as an application server for running on-premise or cloud-based line-of-business applications, including Office365 ^™ .
Built-inActiveDirectoryandPrimaryDomainController:Smallbusinessesneedto keeptheirdatasecureandmustbeabletorestrictuseraccesstoit.TheActiveDirectory andPrimaryDomainControllerintheWDSentinelDS5100/DS6100providecentralized managementandsecuritybyauthenticatingandauthorizingallusersandcomputersonthe network.Itassignsandenforcessecuritypoliciesforallcomputers,sowthenauserlogsinto acomputerthatispartofaWindowsdomain,ActiveDirectorychecksthesubmitted passwordanddetermineswhatdatatheuserisabletoaccess.
Allinclusivedataprotectionforsmallbusiness:Wecombinedhardwareandsoftware fromindustryleaderstodeliverareliable,secureandeasy-to-manageall-in-oneserver designedspecificallyforsmallofficeenvironments.TheWDSentinelDS5100/DS6100 features:
■ Pre-configuredDatacenter-classharddrivesoptimizedforperformance,qualityandreliability.
- Protectyourdataonthe3.5"WDharddriveswitheitherRAID(0,1,5,10)orWindows StorageSpacesdependingonusersetup.
■ BuiltwithanIntelXeonprocessorinside,WDSentinelDS5100/DS6100keepsyourbusinessrunningssmoothlywithserver-classfeaturesthathelpprotectcriticalbusinessdatawithredundantstoragecapabilitiesandallowsquickrecoveryintheeventofafailure.
WindowsServer2012R2Essentials-Anidealserverforsmallbusinesses, Windows Server2012R2Essentialsprovidesapowerfulandflexiblesolutionthathelpsprotect yourbusinessdatawhileallowingyoutoaccesstheinformationyouneedfromvirtually anywherewithalmostanydevice.Itprovideseasiersetup,installationandmigration experiences,asimplifiedmanagementexperienceandbetternetwork-widesecurity features.ItalsoincorporatesthelatestMicrosofttechnologiesformanagement, networking,datastorageandbackup,andprovidesintegrationcapabilitiesforcloud-basedapplicationsandservices.
Backupserverforupto25usersand50computers:WDSentinelDS5100/DS6100 includesWindowsServer2012R2Essentialssoftware,providingcentralizedautomated server-basedbackupforupto50WindowsorMacclientcomputersinyournetworkso there'snoneedtopurchaseadditionalbackupsoftware.
Easysetupandadministration:WDSentinelDS5100/DS6100includesthehardwareandsoftwareneededtocentralizeyourbusinessfiles.Onceit'ssetup,administrationiseasybecauseitintelligentlymanagesdriveandnetworkstatus,reducingmaintenancetimesoyoucanfocusonyourbusiness.
AnywhereAccessandbuilt-inVPN:WDSentinelDS5100/DS6100isacentralized storagesolutionwithsecureremoteaccess.Inadditiontobeingabletoaccessshared businessdatawhileinsidethelocalnetwork,theserverprovidesan"alwayson"network storagesolutionthatprovidessmallbusinesseswithaccesstodatafromvirtuallyanywhere. Datacanbeaccessedthroughanydevice,includingadesktop,laptop,smartphoneora tablet.Theanywhereaccessfeaturealsosupportsremotesystemadministrationsosmall businessowners,theirtrustedemployeesorITadministratorscanperformadministrative functionswhennotintheoffice.
VirtualizeWDSentinelstorageusingiSCSITarget:WDSentinelDS5100/DS6100 supportsiSCSI.ITPro'sandadvancedusershavetheabilitytopartitiontheirWDSentinel forbothNASFilebasedstorageaswellasIP-SANwiththeiSCSITarget. Thiscapability enablestheadministratorortocreatemultipleiSCSItargetstomeetthespecificneedsoftheir dynamicITenvironments.
Enterprise-gradebackupandrestoresoftware:Thebackupandrestoresoftware includedwiththeWDSentinelDS5100/DS6100savestimeandspacebyperformingafull BareMetalbackupthefirsttimeandthen,throughblock-leveldeduplication,backsuponly thedatathathaschangedsincethepreviousbackup.Intheeventofadatalossoradrive failureonaclientcomputer,theWDSentinelDS5100/DS6100'sfastandeasyrestore functionfindsyourfilesorletsoyourestoreanentiresystemtogetyouupandrunningagain. LocalandremoteautomaticbackupandrestoreissupportedforbothWindowsand MacOS® clients.
Pre-loadedBootDrive(s):WDSentinelDS5100/DS6100comeswiththe2.5-inchboot drive(s)pre-loadedwithWindowsServer2012R2Essentialsandspecializedhardware servicesanddrivers.Thepre-loadedbootdrive(s)providestheabilitytokeeptheOS runningfromthebootdrivewhileredeployingorchangingapplicationsandfoldersrunning onthelargecapacitydatadrives.Thisallowssmallbussessestosavetime,asthereisno needtoinstallfromaDVDorsearchforanyspecializeddriverstoinstallonline.
FlexibleCapacity:WDSentinelDS5100/DS6100offersvariousstoragecapacitiessoyou canchoosethecapacityoptionthat'srightforyourbusiness.Itisalsodesignedtobeuser serviceable,withtheabilitytobuy2TB,3TBand4TBexpansion/replacementkitsand otherparts.
DualGigabitEthernetports: WDSentinelDS5100/DS6100 comes with two Ethernet port that can be configured for fault tolerance, aggregated for high performance, or used for two separate LANs.
Dualpowersupply:WDSentinelDS5100/DS6100offersdualpowersupplies,sointhe eventofapowersurgeorotherfailuredamagetotheinternalpowersupply,thesecond powersupplywilltakeover,providingsmallbusinesseswiththeaddedpeaceofmind knowingthattheirserverwillremainoperational.
ChoiceofDisasterRecoveryOptions:WDSentinelDS5100/DS6100offersachoiceof disasterrecoveryprotectionoptionsprovidingsmallbusinesseswiththepeaceofmindthat theirbusinessdataissecure.Theycanchoosetoprotecttheirdatausinglocaldisaster recoverythroughnetworkshare(LAN&WAN)orlocaldisasterrecoverythroughDAS.
WDGuardianServices-GlobalService&Support: When you need a little help from an expert, we'll take care of you! WDGuardian Services offers flexible, affordable and hassle-freetechnical support and extended warranty plans with a variety of benefits. Choose the plan that works best for your business. With the purchase of the WDSentinelDS5100/DS6100, WDisoffering one FREE year of WDGuardian Pro, which will be auto activated upon product registration. For details about WDGuardian Services, visit www.wdguardian.com.
WhyWD?:WDhasbeenmakingharddrivesforover40years.Weknowhowtobuild drivestostoreandprotectyourdatabecauseweunderstandthatyourcompany'sdatais paramounttoyourbusinesssuccess.
PackageContents
■ Ultra-compactStoragePlusServer
■ 1RJ-45Ethernetcable
■ 1-1.8meterpoweradaptorwithcord(WDSentinelDS5100)
■ 2-1.8meterpoweradaptorswithcords(WDSentinelDS6100)
■ 2doorlockkeys
■ BasicInstallationGuide
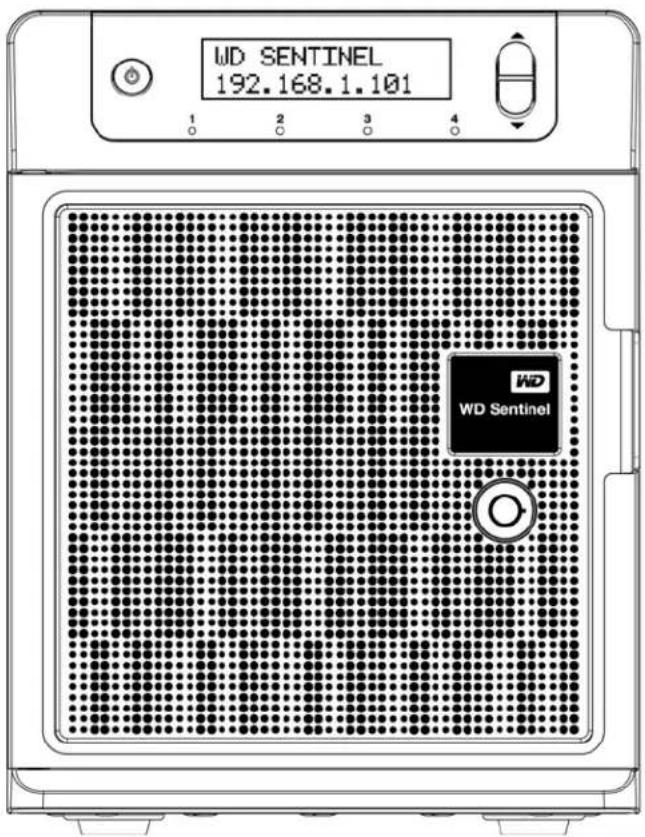
text_image
WD SENTINEL 192.168.1.101 WD WD Sentinel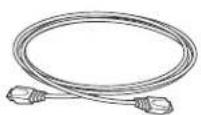
EthernetcableBasicInstallGuide

Forinformationonadditionalaccessories,visit:
| US | www.shopwd.comorwww.wdstore.com |
| Europe•Austria | www.wdstore.deUnitedKingdom:www.wdstore.euFrance:www.wdstore.frItaly:www.wdstore.itGermany:www.wdstore.deSpain:www.wdstore.esNetherlands:www.wdstore.nlRest of EU Countries: www.shopwd.eu or www.wdstore.eu |
| AllothersContact | WDTechnicalSupportinyourregion.ForalistofTechnicalSupportcontacts,visit http://support.wd.comandseeKnowledgeBaseAnswerID1048. |
SystemRequirementsandCompatibilityInformation
| RequirementDescription | |
| ClientOperatingSystem BackupCompatibility (forConnectorSoftware) | Windows8Basic(x86andx64)Pro(x86andx64)Enterprise(x86andx64)Windows7HomeBasic(x86andx64)HomePremium(x86andx64)Professional(x86andx64)Ultimate(x86andx64)Enterprise(x86andx64)Starter(x86)MacOSXLeopardSnowLeopardLionMountainLion |
| FileSharingSupportFilesharings | supportforLinux,UNIX,andotherWindowsoperatingsystems |
| LocalNetwork•Router/switch(GigabitEthernetrecommendedtomaximize performance) | |
| BroadbandAccessRequiredfor | remoteaccessoutsidetheLAN |
| DisplayandPeripherals•SuperV | GA(800x600)orhigher-resolutionmonitorUSBKeyboardUSBMouseorcompatiblepointingdevice |
TechnicalSpecifications
| SpecificationDescription | |
| Interfaces•2Highperformance(10/100/1000)GigabitEthernet connections•4portsofpoweredUSB3.0•2portsofpoweredUSB2.0•1VGAPort | |
| SupportedprotocolsCIFS/SMB,NFS,HTTP,HTTPS,WebDAV,AFP | |
| Internalharddrives4WD3.5-inchSATABestinClassharddriveswithRAID-specificiftime-limitederrorrecovery(TLER)PioneeredbyWD,thisfeaturepreventsdrivefalloutcausedbythe extendedharddriveerror-recoveryprocessescommontodesktop drives.ApprovedDriveModelsForacompletelistofapproveddrivemodels,searchforAnswerID9443intheWDKnowledgeBaseathttp://support.wd.com. | |
| CPU•WDSentinelDS5100:XeonE3-1220Lv2DuelCore•WDSentinelDS6100:XeonE3-1265Lv2QuadCore | |
| Memory•WDSentinelDS5100:2-4GBytesSODIMMDDR3-1600•WDSentinelDS6100:2-8 GBytesSODIMMDDR3-1600 | |
| Drivebays•43.5inchhardrivebays•Hotswapcapable•Traylessdesign | |
| RAIDlevel | •RedundantStoragesupported•WindowsStorageSpaces•RAIDLevels0,1,5,10 |
| Physicaldimensions | •Length:26inches(660mm)•Width:19inches(482.1mm)•Height:1.75inches(44mm) |
| Weight | •8TBand12TB:26.627lbs(12.078kgs)•16TB:27.112lbs(12.298kgs) |
| Capacities | WDSentinelDS5100•4TB(2x2TB)•8TB(4x2TB)WDSentinelDS6100•8TB(2x4TB)•12 TB (4 x 3 TB)•16 TB (4 x 4 TB) |
| Power | WDSentinelDS5100•1externalpowersupply•1externalpowerportforfailover(optional)WDSentinelDS6100•2externalpowersupplies |
| Powersupply | •Inputvoltage:100to240VAC•Inputfrequency:50to60Hz•Outputvoltage:19VDC,upto7.9A |
| Temperature | •Operatingtemperature:0to35°C(32to95°F)•Non-operatingtemperature:-40to70°C(-40to158°F) |
| Switches | •Power•Recovery•LCMScrollbuttons |
SpecificationDescription
| LEDs1PowerLED | •Flashingblueindicatesbootstatus•FlashingsREDindicatesafaultcondition•Solidblueoncebooted,andtherearenopendingfault conditions,indicatesagoodoperationalstate•Blackindicatesinactivestate2EthernetPortLEDs•Flashinggreenindicatesactivity•Solidamberindicatesthatthereisalinkconnection•Blackindicatesinactivestate4DriveTrayLEDs•Flashingblueorsolidblueindicatesdriveactivity•SolidREDindicatesdrivefault(Drivemustbereplaced) |
| OperatingSystemWindowsServer2012R2Essentials | |
| Backups50-clientcomputersupportforbackup(WindowsandMacOS Clientcomputers) | |
| Restore•BaremetalrestoreforWindowsclients•File/folderlevelrestore | |
ProductViews
FrontView
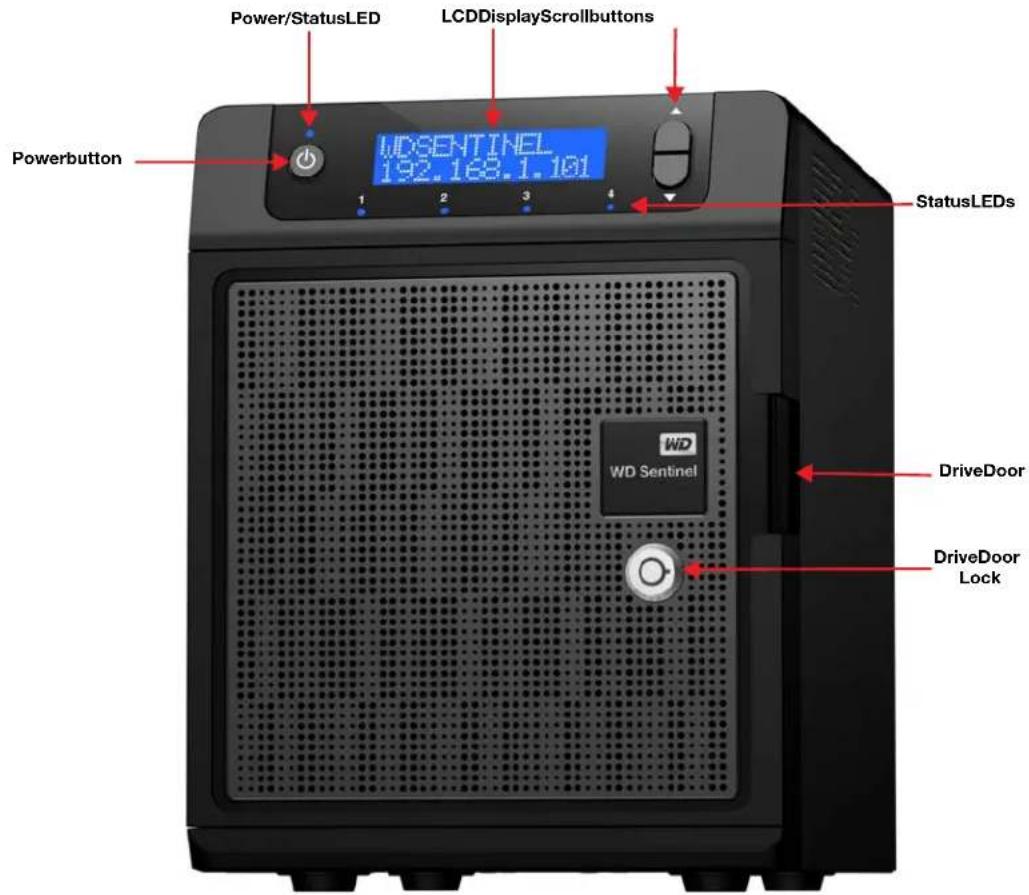
text_image
Power/StatusLED LCDDisplayScrollbuttons WD SENTINEL 192.163.1.101 Powerbutton 1 2 3 4 StatusLEDs WD WD Sentinel DriveDoor DriveDoor LockBackView
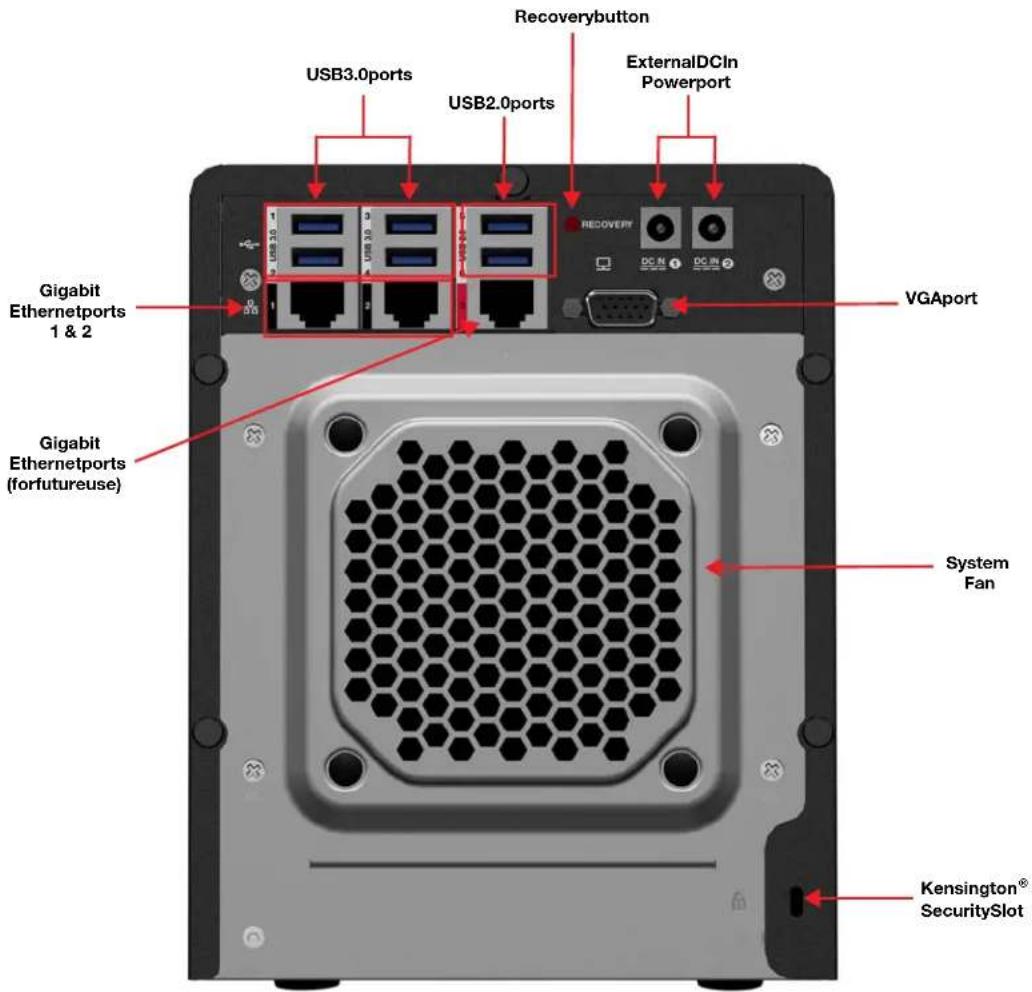
text_image
Recoverybutton USB3.0ports USB2.0ports ExternalDCIn Powerport VGAport Gigabit Ethernetports 1 & 2 Gigabit Ethernetports (forfutureuse) System Fan Kensington® SecuritySlotIndicators
| ComponentIconDescription | ||
| EthernetportsConnect |  device toalocalnetwork. device toalocalnetwork. | |
| DCInconnectorCon |  The device toa DC powercord and the power outlet. The device toa DC powercord and the power outlet. | |
| Recoverybutton | RECOVERY | Button on the back of the server recover the server (including the operating system) while using a USB drive in an event of an OS corruption. |
| USBportsConnect | with USB2.0  | and 3.0 devices such as a USB storage, USB mouse, USB keyboard, or a UPS. |
| VGAportConnectstc |  monitor monitor | |
| Kensington security slot | [3084] | Fordrivesecurity, the device is equipped with a security slot that supports a standard Kensington security cable. Visit http://www.kensington.com/ for more information. |
LEDs
TheLEDsontheWDSentinelidentifythestatusoftheunit.
| LEDColorStateDescription | |||
| Power LED | Black | Off | WD Sentinel server is currently inactive. |
| Blue | Solid | WDSentinelserverhassuccessfullybootedthe softwareandisoperational. | |
| Red | Flashing | Indicatesthataseriousfaulthasoccurredand needsimmediateattention. | |
| Drive LEDs | Black | Off | If the LED is off while other drive LEDs are on, no driveisinstalledinthebay. |
| Blue | Flashing | Drive is currently active. Note that all lights in a RAID systemareactiveatthesametimebydesign. | |
| Red | Solid | Indicatesdrivefailure.Replacethisdriveassoonas possible.ThesystemisnolongerRAIDprotected untilthedriveisreplacedandtheRAIDstructureis repaired. | |
| Ethernet Port | Black | Off | Indicatesaninactivestate. |
| Green | Flashing | Indicateslinkactivity. | |
| Amber | Solid | Indicatesthatthereisalinkconnection | |
WheretoFindHelp
Thismanualprovidesstep-by-stepinstructionsandotherimportantinformationregarding yourWDproduct.Itismeantforthepersonservingastheadministratorofthe WDSentinelDS5100/DS6100.Youcandownloadtranslatedversionsandupdatestothis manualfromhttp://products.wd.com/updates.Formoreinformationandnewsaboutthis product,visitourwebsiteathttp://www.wd.com/.
AdditionalReferenceDescription
| BasicInstallationGuideIncludedintheproductboxoravailableathttp://products.wd.com/WDSentinel-DS5100orhttp://products.wd.com/WDSentinel-DS6100helpsyouinstalltheWDSentinelserver. |
| WDOnlineHelpSpecificdescriptionsandinstructionsaccessedonWD-specific(Monitor)pagesontheDashboard. |
| MicrosoftOnlineHelp•AccessdetailedexplananationsandinstructionsforaparticularpagebyclickingtheHelpbuttonatthetoprightoftheDashboard.•SearchforhelponaspecifictopicortermbyenteringitintheMicrosoftOnlineHelpsearchfieldatthetoprightofthepage.•AccesstheentireMicrosoftOnlineHelpsystembyclickingMicrosoftOnlineHelp. |
Important: NotallMicrosoftOnlineHelpisapplicable to the WDSentinelDS5100/DS6100. The WDOnlineHelpand this Administrator's Guidetake precedence over the Microsoft Online Help.

ConnectingtheServerandGettingStarted
UserRolesandResponsibilities
HowtheWDSentinelFitsintoYourOffice
ConnectingtheWDSentinelServertoYourNetwork
SettingupyourWDSentinelServer(onetimeonly)
ConnectingyourComputers
ThischapterstepsyouthoughtheprocessofconnectingandsettingupyourWDSentinelDS5100/DS6100serverandconnectingittocomputersinyournetwork.
UserRolesandResponsibilities
TypesofWDSentinelDS5100/DS6100Users
Atahighleveltherearetwocategoriesofuserswhoneedtoaccessoneormorefeaturesof yourWDSentinelserver.
- Administrator—Thisisthepersonwhoperformsthesetupandroutine managementtasksontheWDSentinelserver. Thispersonisalsotheholderofthe AdministratorpasswordofyourWDSentinelserver.
-
Users—Youcanhaveupto25useraccountsonyourWDSentinelserver. These canbe:
-
Internal Users – The internal users are typically the employees (including the Administrator)inyouroffice,workinglocallyoroccasionallyfromaremotelocation(e.g.SalesStaff),whoneedtoaccessbusinessdataandserverresources.
- External Users – The external users are the customers and business partners with whom you need to exchange business data.
TheWDSentinelserveroffersdifferentparadigmsforeachctypeofuser. Thetablebelow providesaviewintotheusagemodelandtasksforeachcategoryofusers.
| Administrator (e.g.,BusinessOwner) | InternalUsers (e.g.,Employees) | ExternalUsers (e.g.,ClientsorBusiness Partners) |
| PrimarySetupTasks•Physicallyconnectsthe WDSentinelservertothe network.•Configuresthe WDSentinelserveritself.This isaone-timeprocedure.•CreatestheBusiness Infrastructurebysettingthe PrimaryDomainnamesforthe business.Example:Contoso.com•JoinsaMacorWindowsPCto theDomainandWDSentinel serverstoragebyinstalling Connectorsoftwareonit. | PrimarySetupTasks•None | PrimarySetupTasks•None |
| PrimaryUserInterface•Dashboard-Signsinusingthe Administratorpassword(no usernameerequired). | PrimaryInterface•Launchpad-Signsinusingthe assignedusernameand password.SecondaryInterface•RemoteWebAccess-Whileaccessingremotely, signsinusingtheassigned usernameandpassword. | PrimaryInterface•RemoteWebAccess-Signsin usingtheassignedusername andpassword. |
| DashboardTaskExamples•Setsupuseraccountsand assignspermissions.•Managessharedfolders.•Setsupandmanages automaticbackupschedule.•ManagesWDSentinelserver settings, resolvesanyalerts, andmonitorsserver performance.•SetsupRemoteWebAccess.•Managesupdates.•CreatesandmanagesiSCSI targets. | LaunchpadTaskExamples•Accessesdataonshared storage.•Startsmanualbackups.•LaunchesRemoteWeb Access.RemoteWebAccessTask Examples•Accessesdataonshared storage.•ConnectstothePCsinthe officeremotely. | RemoteWebAccessTask Examples•Accessesdataonshared storage. |
| Note: For each user account, the WD Sentinel server enables the Administrator to set granular permissions for varioussharedfoldersaswellasserverresources,suchasRemoteWebAccess.Atalltimes,the usersareonlyabletoaccessthedataontheserverandotherserverresourcesforwhichtheyhave permissions. | ||
HowtheWDSentinelFitsintoYourOffice
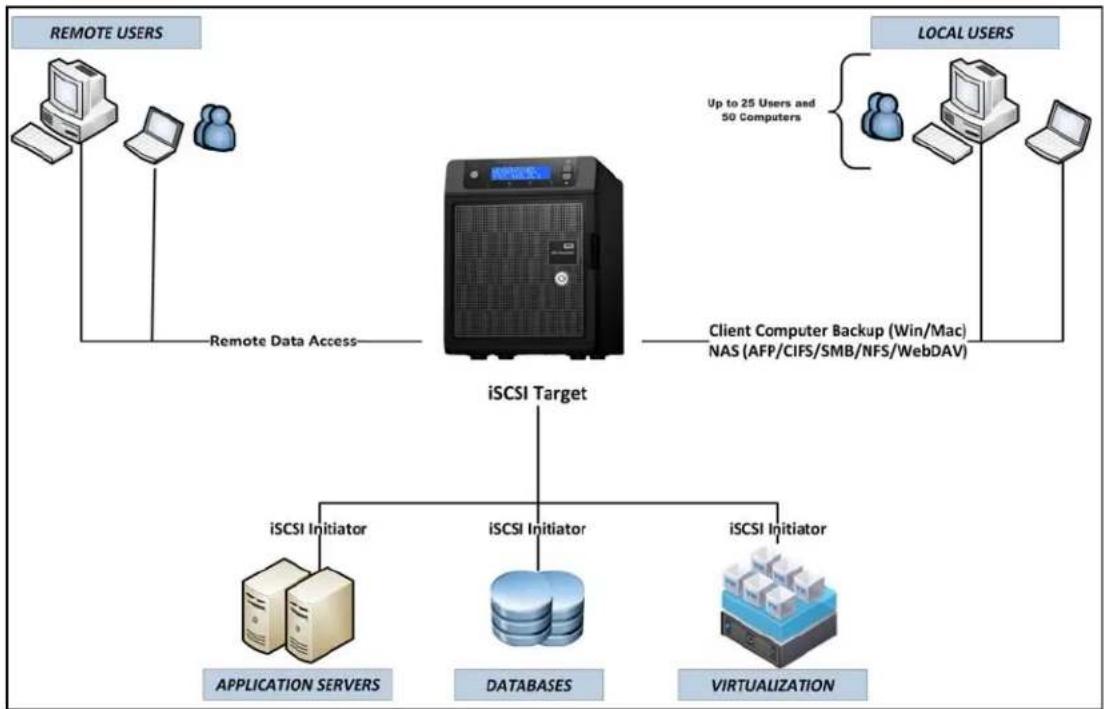
flowchart
graph TD
    A["REMOTE USERS"] --> B["iSCSI Target"]
    C["LOCAL USERS"] --> B
    B --> D["iSCSI Initiator"]
    B --> E["iSCSI Initiator"]
    B --> F["iSCSI Initiator"]
    D --> G["APPLICATION SERVERS"]
    E --> H["DATABASES"]
    F --> I["VIRTUALIZATION"]
    style A fill:#f9f,stroke:#333
    style C fill:#f9f,stroke:#333
    style B fill:#ccf,stroke:#333
    style D fill:#cfc,stroke:#333
    style E fill:#cfc,stroke:#333
    style F fill:#cfc,stroke:#333
ConnectingtheWDSentinelServertoYourNetwork
Use the following stepstophysically connect your WDSentinel IDS5100/DS6100 server to your network.
- Connect your monitor to the VGA portion there are of your WDSentinel server.
- Connect your USB keyboard and USB mouseto the USB portson the back of your WDSentinel server.
- Using the provided ethernet cable, connect the WDS sentinel server (either ethernet port 1 or 2) to a DHCP-enabled LAN.
- Using the provided AC adaptor, connect the WDS sentinel server to an electrical outlet or a UPS.
- Turnonyourmonitor.
6.PressthepowerbuttononthefrontofyourWDSentinelunit. OncetheWDSentinelbootupprocessiscomplete,theWindowsServer2012 EssentialsSettingsscreendisplays.ThePowerLEDonthefrontofthe WDSentinelserverwilldisplayasolidbluelight.
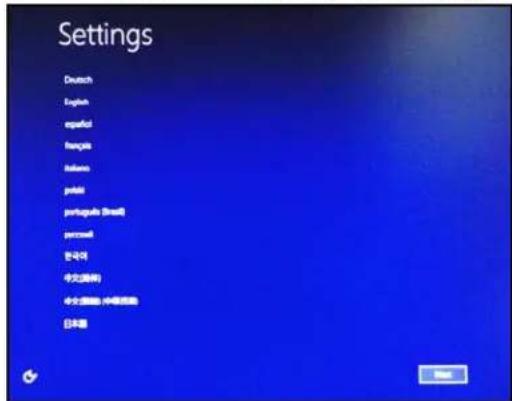
SettingupyourWDSentinelServer(onetimeonly)
YourWDSentinelserverisnowreadytobeconfigured. Thissectiondescribeshowtouse theonetimesetupwizardtoconfigureyourserverforfirstuse.
Important: Ensure that you complete the entire process outlined in steps 1-10 below. If these steps are not followed, your WDSentinel will not work properly.
- Select the server language from the list provided.
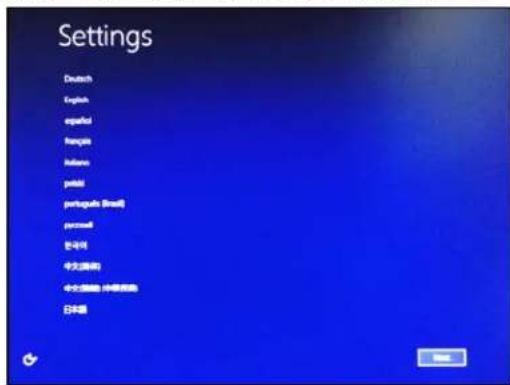
- Verifythelocalizationsettings, or select the correct values from the drop-down lists, then click Next.
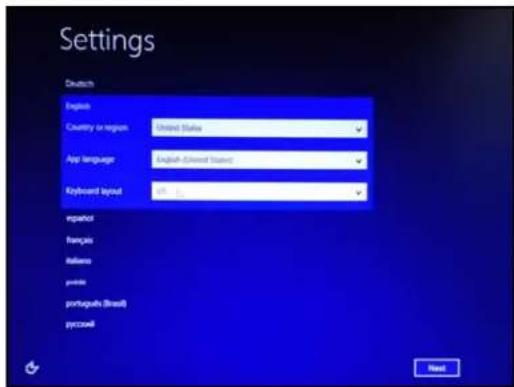
text_image
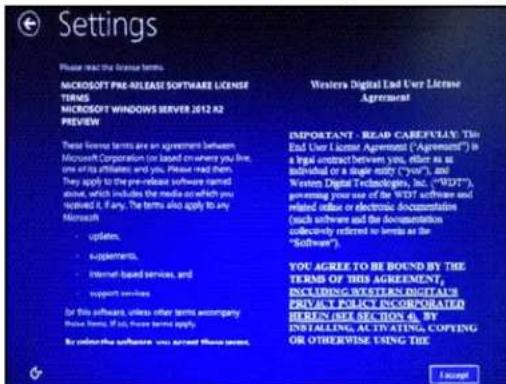
Settings Deutsch English Country or region: United States App language: English-United States Keyboard layout: 0% % language renques Balloos points portugues (Brazil) pycowl Reset- Read the Microsoft and Western Digital license agreements, then click accept.
text_image
Please read the license terms MICROSOFT PRE-RELEASE SOFTWARE LICENSE TERMS MICROSOFT WINDOWS SERVER 2012 A2 PREVIEW These terms are an agreement between Microsoft Corporation (or based on where you live, one or its affiliates and you. Please read them. They apply to the pre-release software stored about, which includes the media on which you received it, if any. The terms also apply to any Microsoft • updates • supplements • Internet-based services, and • support services For this software, unless other terms accompany these terms, if any, please refer to apply. By order the software, you agree these terms. Western Digital End User License Agreement IMPORTANT - READ CAREY/PLAY: This End User License Agreement ("Agreement") in a legal contract between you, either as at individual or a single money ("your"), and Western Digital Technologies, Inc. ("WDT"), gewiring your name of the WDT software and related office or electronic documentation (such software and the documentation collectively referred to terms as the "Software") YOU AGREE TO BE BOUND BY THE TERMS OF THIS AGREEMENT, INCLUDING SYSTEMS DIGITALS PRIVATE POLICE INCORPORATED HEREIN (SEE SECTION 4). BY INSTALLING, ACTIVATING, COPIFING OR OTHERWISE USING THE I acceptTheinstallationbegins.Oncetheinitialprocessiscomplete,you'llseetheConfigure WindowsServerEssentialsscreendisplay.
Important: This process can take 2 - 3 minutes. Do not interrupt the process. Do not poweroffordisconnecttheWDSentinelserver.
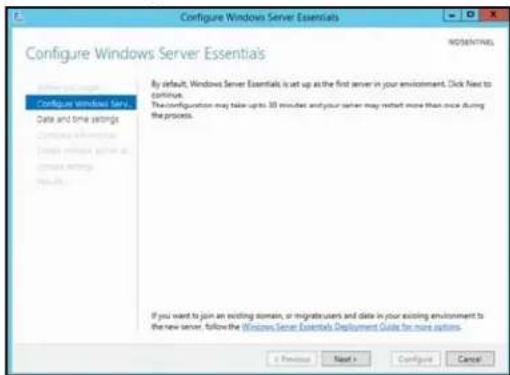
- Review the Configure Windows Server Essentialsscreen, then click Next.
text_image
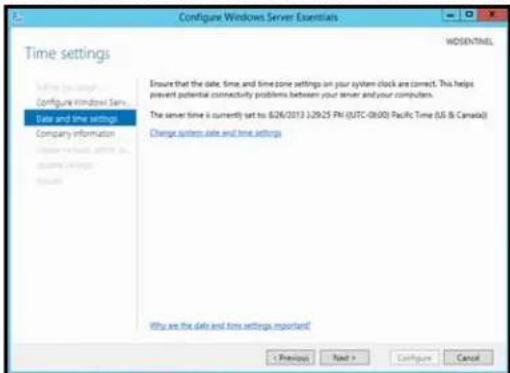
Configure Windows Server Essentials Configure Windows Server Essentials By default, Windows Server Essentials is set up as the first server in your environment. Click Next to continue. The configuration may take ups 30 minutes and your server may restart more than once during the process. If you want to join an existing domain, or navigate users and data in your existing environment to the new server, follow the Windows Server Essentials Deployment Guide for more options.5.Reviewthedateandtimeensuringthatitiscorrect,thenclickNext.
text_image
Configure Windows Server Essentials Time settings WOSENTHEL Define the server Configure Windows Server Date and time settings Company information Choose network, date and time settings Ensure that the date, time, and time zone settings on your system clock are correct. This helps prevent potential connectivity problems between your server and your computers. The server time is currently set to: 6/26/2013 12/9/25 PM (UTC-06/00) Pacific Time (US & Canada) Change start date and time settings Why are the data and time settings important! < Previous Next > Configure Cancel■ Ifyouneedtochangethesystemdateandtimesettings:
-ClickChangesystemdateandtimesettings.
-ClickChangedateandtime...ontheDateandTimescreen.
-Updatethedateandtime,thenclickOK.
-ClickOK,thenclickNext.
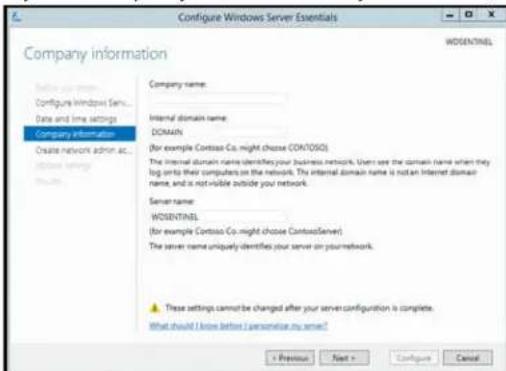
- EnteryourCompanyinformationforyourdevice,thenclickNext.
text_image
Configure Windows Server Essentials Company information WOSENTINEL Configure Windows Service... Date and time settings Company Information Create network admin ac... Database server Company name: Internal domain name: DOMAIN (for example Contoss Co. might choose CONTOSO) The internal domain name identifies your business network. Usn't see the domain name when they log onto their computers on the network. The internal domain name is not an Internet domain name, and is not visible outside your network. Server name: WOSENTINEL (for example Contoss Co. might choose ContossServer) The server name uniquely identifies your server on your network. These settings cannot be changed after your server configuration is complete. What should I know before I personise my server? < Previous Next > Configure Cancela. Enteryourcompanyname. Youcantypeupto254charactersinthisfield.
b. Enteryourinternaldomainname(alsoknownasthePrimaryDomain). This is the internal domaingroupsyourserverandclientcomputershareasacommon databaseofusernames, passwords,and other common information. Then a name can be upto 15 characterslong, can contain letters, numbers and dashes(-), can not start with adash, must not contain spaces, and must not contain only numbers.
c. Asuggested server namewill begenerated for you when you enter your company name. If you'd liketo chan get his server name, entera uniques ver namethatis different than the default name "WDSENTINEL." Then a mean beupto 15 characters long, can contain letters, numbers and dashes (-), cannot start with a dash, must not contains spaces, and must not contain only numbers.
WARNING!THISISTHEONLYTIMEYOUCANNAMEYOUR WDSENTINELSERVER.Youmustassignitauniquenametoavoid namingconflictsshouldyoueverhavemorethanone WDSentinelserveronthenetwork.
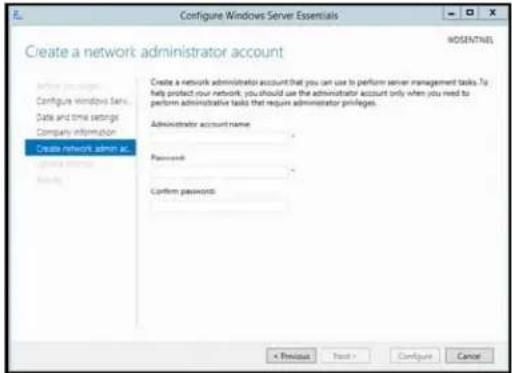
- Create your administrator account information, then click Next. The Administrator account should only be used to administer the server. Use a standard user account for task that do not require administrative credentials.
text_image
Configure Windows Server Essentials Create a network administrator account Configure windows fan: Date and time settings Company information Create network administrator account Configure windows fan: Windows NTSEL Create a network administrator account that you can use to perform server management tasks. To help protect your network, you should use the administrator account only when you need to perform administrative tasks that require administrator privileges. Administrator account name Password: Confirm passwords: < Previous Next > Configure Cancela.EnteranAdministratoraccountname.Thisnamecancontainupto19characters, cannotbethesameastheservernameorthepre-definedusernamessuchas "administrator"or"guest."
b.Enterandconfirmapassword(mustbeatleast8characterslongandcontainat leastthreeofthefollowingcategories:uppercaseletters,lowercaseletters, numbers,andsymbols;spacesareallowed.)ThisistheAdministratorpassword. YouwilluseitlatertoconnecttheclientcomputerstoyourWDSentinelserverand toaccesstheAdministratorDashboard.
WARNING!IfyouforgettheAdministratorpassword,itmaynotbepossibleto recoverit,andyoucouldpotentiallyloseallofyourdata.Makesure torecordthepasswordandkeepitinasafelocation.
- Select your Updatesettings. This specifies how you'd like your device to install system updates.

text_image
Configure Windows Server Essentials Update settings WOSENTINEL Configure Windows Server... Date and time settings Company information Create network admin as... Update settings Use recommended settings Install important and recommended updates, check online for solutions to problems, and help Microsoft improve Windows Server 2012 RZ Essentials. ○ Install updates only ○ Install important and recommended updates. ○ Do not check for updates If you choose this option, your server might be vulnerable to security threats, and problems might be harder to fix. Which option should I choose? Privacy Statement < Previous Start > Configure Cancel9.ClickConfigure.
text_image
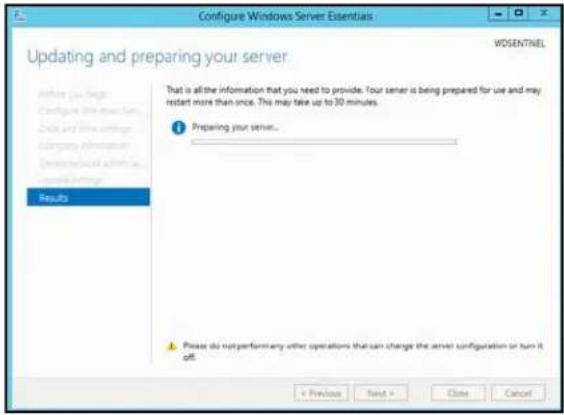
Configure Windows Server Essentials Updating and preparing your server WDSENTINEL Before you begin Configure instructions. Click and write settings Apgaray information Device network admin as control settings Results That is all the information that you need to provide. Your server is being prepared for use and may restart more than once. This may take up to 30 minutes. Preparing your server... Please do not perform any other operations that can change the server configuration or turn it off. < Previous Next > Close CancelImportant: This process can take an hour more and may restart more than once. Do not interrupt the process. Donot power off disconnect the WDSentinel server.
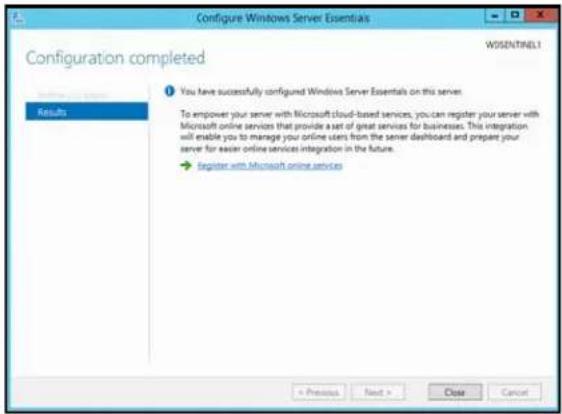
- Review the information on the Configuration Completed screen, then click Close. Windows Server 2012 R2 is now installed.
text_image
Configure Windows Server Essentials Configuration completed WOSENTINEL1 Results You have successfully configured Windows Server Essentials on this server. To empower your server with Microsoft cloud-based services, you can register your server with Microsoft online services that provide a set of great services for businesses. This integration will enable you to manage your online users from the server dashboard and prepare your server for easier online services integration in the future. → register with Microsoft online services + Previous Next > Close CancelConnectingyourComputers
Onceyou'vesetupyourWDSentinelserver,youcanconnectupto50WindowsPCsorMaccomputerstoyourdevice.
InstallingtheConnectorsoftwarejoinstheclientcomputertoyourWDSentinelServerand installsLaunchpadandDashboard.
- UsersuseLaunchpadtoaccessserverresourcesforwhichtheyhavetherights.
- TheAdministrator(you)accessesDashboardforsuchtasksasmanagingtheWDSentinelserver,settingupuseraccounts,andmanagingaccesstoshared folders.
ImportantSteps
BeforeinstallingConnectorsoftwareonacomputer,ensurethat:
- Thecomputershaveallthelatestmandatoryandoptionaloperatingsystem updatesinstalled.
- There are no active backups in progress on the WDSentinel server.
Note: Check for active backups on the Dashboard's Devices tab. The screen displays backupsinprogress.
OncetheConnectorsoftwareisinstalled, setupanautomatedscheduledbackup(forafter workinghours)usingtheDashboard.Runningamanualbackupduringtheinitialconnection processwillimpactoverallsystemperformance.
ConnectingaWindowsPC
UsethefollowingproceduretoconnectaWindowsPCtotheWDSentinelserver.
ForstepsonconnectingaMacusingtheConnectorsoftware,see"ConnectingaMac"on page23.
-
In the address field of an open browser window, enter
http:///connect.Example:http://myserver/connect.
isthenameyougaveyourserverin
"ConnectingtheWDSentinelServertoYourNetwork"onpage16. -
ClickDownloadsoftwareforWindows:

text_image
Download software for Windows- Atthewarningprompts, clickRunandYesasappropriate.
Note: If prompted todos, type the username and password of an account that has administrator permissions on this client computer.
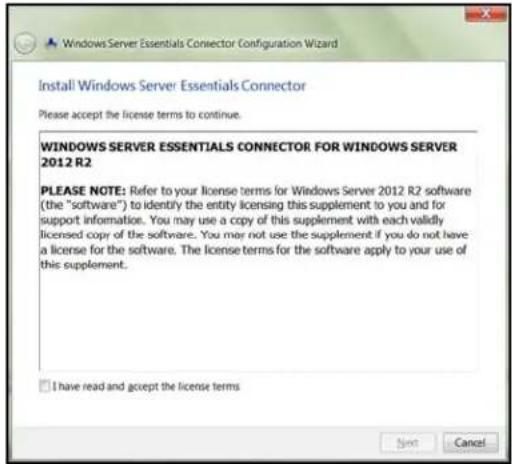
- Review the Windows Server Essentials Connector license terms, then click I have read and accept the license terms checkbox.
text_image
Windows Server Essentials Connector Configuration Wizard Install Windows Server Essentials Connector Please accept the license terms to continue. WINDOWS SERVER ESSENTIALS CONNECTOR FOR WINDOWS SERVER 2012 R2 PLEASE NOTE: Refer to your license terms for Windows Server 2012 R2 software (the "software") to identify the entity licensing this supplement to you and for support information. You may use a copy of this supplement with each validly licensed copy of the software. You may not use the supplement if you do not have a license for the software. The license terms for the software apply to your use of this supplement. I have read and accept the license terms Next Cancel5.ClickNext.
Installationbegins. The progress bar identifies where you are in the installation process. The installation process may take 30 minutes or more to complete.
-
Oncetheinstallationiscompleted, followthestepsoutlinedintheWindowsServer EssentialsConnectorConfigurationWizard.
-
When the Connector Configuration is completed, click Finish.
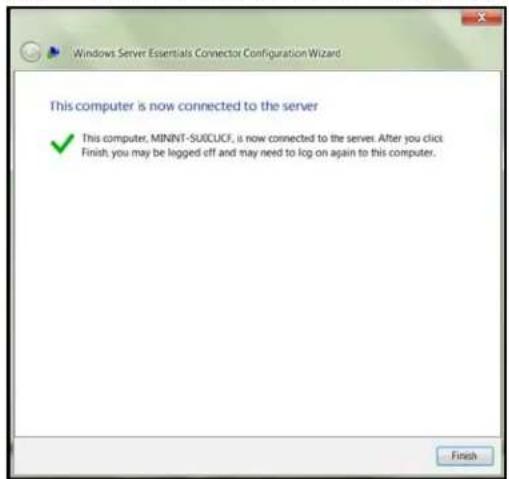
text_image
Windows Server Essentials Connector Configuration Wizard This computer is now connected to the server ✓ This computer, MINNT-SUCCUCF, is now connected to the server. After you click Finish, you may be logged off and may need to log on again to this computer. FinishConnectingaMac
UsethefollowingproceduretoconnectyourMaccomputertotheWDSentinelserver.
ForstepsonconnectingaWindowsPCusingtheConnectorsoftware,see"Connectinga WindowsPC"onpage21.
- In the address field of an open browser window on the Macy you'd like to connect, enter http://
.local/connect.
Example:http://myserver.local/connect
2.ClickDownloadsoftwareforMac:

text_image
Download software for MacTheMacConnectorsoftwaredownloadstoyourDownloaddirectory.
3.ClicktheDownloadiconontheMenubaratthebottomofthescreen:

4.SelectMacConnector.dmg.TheMacConnectorwindowopens.
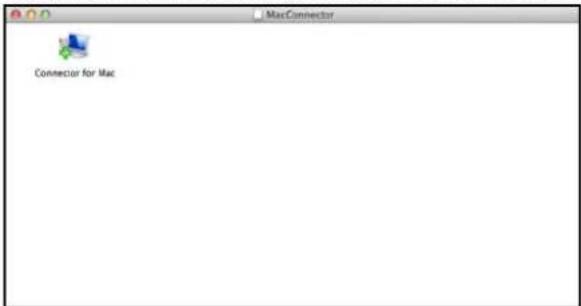
text_image
MacConnector Connector for Mac5.Double-clickConnectorforMac.
6.Reviewthewarningscreen,thenclickOpen.
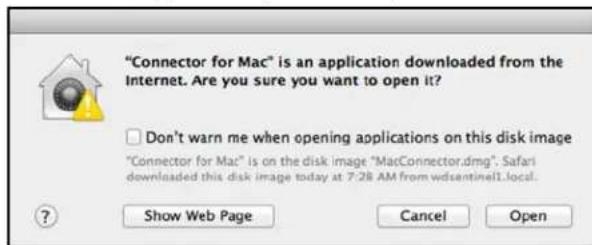
text_image
"Connector for Mac" is an application downloaded from the Internet. Are you sure you want to open it? Don't warn me when opening applications on this disk image "Connector for Mac" is on the disk image "MacConnector.dmg". Safari downloaded this disk image today at 7:28 AM from wdsentinel1.local. Show Web Page Cancel OpenNote: If prompted todos, type the username and password of an account that has administrator permissions on this client computer.
- Review the "ConnectaComputertotheServer" wizard Introduction, then click Continue.
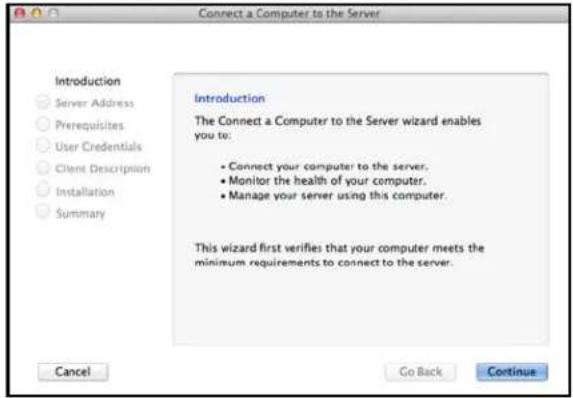
text_image
Connect a Computer to the Server Introduction Server Address Prerequisites User Credentials Client Description Installation Summary Introduction The Connect a Computer to the Server wizard enables you to: • Connect your computer to the server. • Monitor the health of your computer. • Manage your server using this computer. This wizard first verifies that your computer meets the minimum requirements to connect to the server. Cancel Go Back Continue8.Enterthenameyougaveyourserverin"ConnectingtheWDSentinelServertoYour Network"onpage16,thenclickContinue.(Example:companyserver)
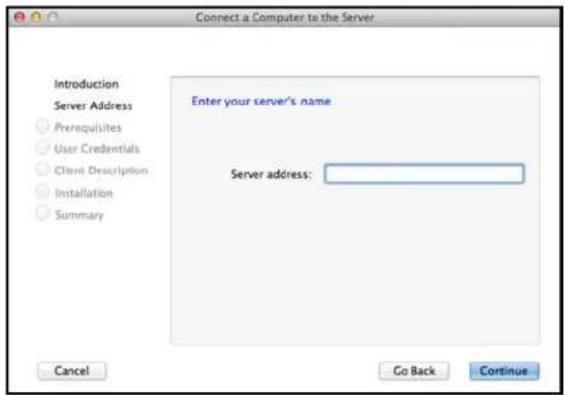
text_image
Connect a Computer to the Server Introduction Server Address Prerequisites User Credentials Client Description Installation Summary Enter your server's name Server address: Cancel Go Back ContinueThesoftwarecheckstoensurethatyourMacmeetstherequiredprerequisites. 9.FollowthestepsoutlinedintheConnectaComputertotheServerWizard. 10.Whentheinstallationiscompleted,selectthecheckboxforopeningtheWindows ServerLaunchpadatstartup,thenclickClose.
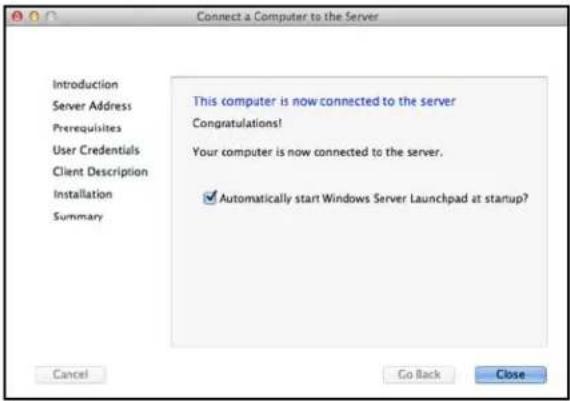
text_image
Connect a Computer to the Server Introduction Server Address Prerequisites User Credentials Client Description Installation Summary This computer is now connected to the server Congratulations! Your computer is now connected to the server. ✓ Automatically start Windows Server Launchpad at startup? Cancel Go Back CloseManagingtheWDSentinelServer(Dashboard)
SettingupWDSentinelServer&ConnectingComputers
AccessingtheDashboard
AddingaUserAccount
PerformingDashboardTasks
UsingtheHomePage
ManagingUserAccounts
ManagingDevices
ManagingStorage
MonitoringApplications
MonitoringSystemHealthandAlerts
UpdatingSoftware
ManagingServerSettings
ShuttingDownandRebootingtheServer
SettingupWDSentinelServer&ConnectingComputers
ThischapterassumesyouhavefollowedtheAdministrator'sBasicInstallGuidetoinitialize theWDSentinelserverandhaveconnectedatleastonecomputertotheserver. Toreview thesetupstepsSee"ConnectingtheServerandGettingStarted"onpage14.ofthis manual.
Important: Asabestpractice, performthetasksoutlined in this guide using a client computer on which you've installed the connector software, not directly from the WDSentinel server.
AccessingtheDashboard
ToaccesstheDashboard:
Note: The Dashboard cannot be accessed from a Maccomputer.
| Ifyouroperatingsystems is... | Then... |
| Windows8 | •Onyourkeyboard,clicktheWindowsbutton. [icon]•OntheStartpage,right-clickinablankareaofthescreen.•SelectAllapps. [icon]•UnderWindowsServerEssentials,clickWindowsServer EssentialsDashboard. |
| Windows7 | •Click>AllPrograms>WindowsServerEssentials>Windows ServerEssentialsDashboard . |
- OntheDashboardSigninpage, enter the Administrator account name and password (created during setup) and click the right arrow:
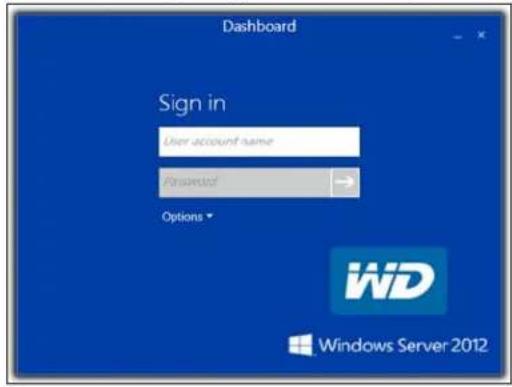
text_image
Dashboard Sign in User account name Password Options WiD Windows Server 2012TheDashboardHomepagedisplays:
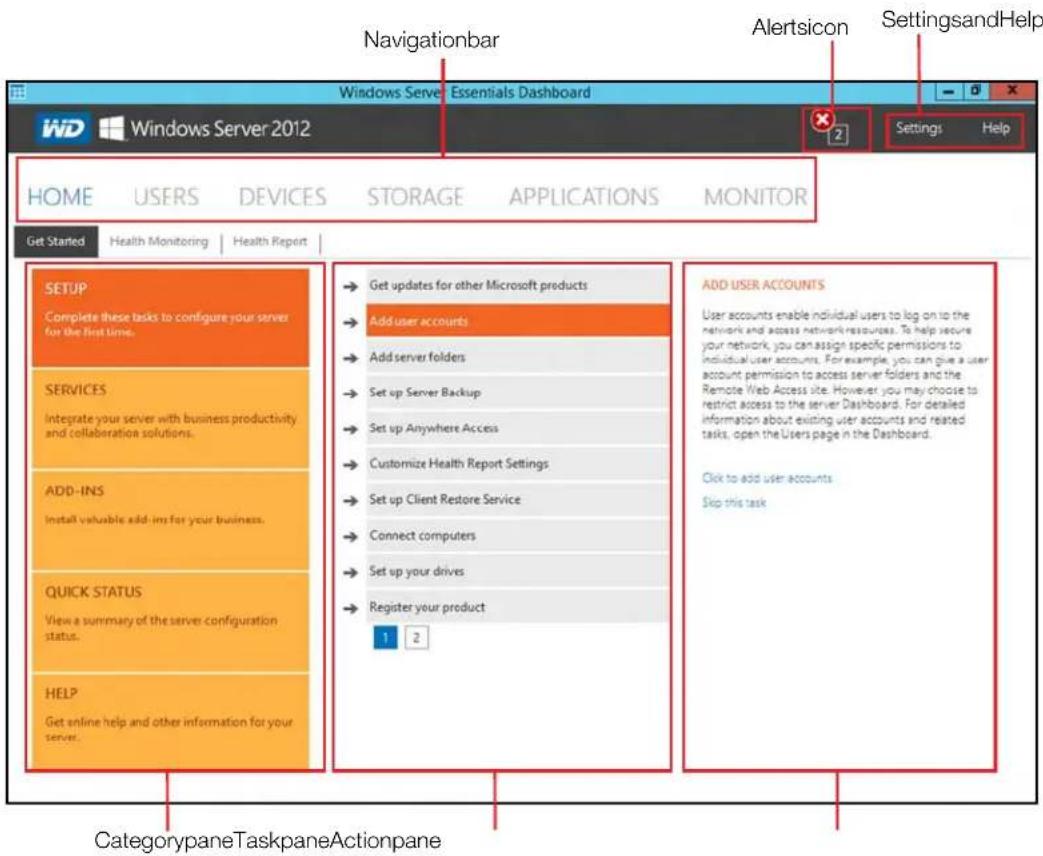
text_image
Navigationbar Alertsicon SettingsandHelp Windows Server Essentials Dashboard Windows Server 2012 HOME USERS DEVICES STORAGE APPLICATIONS MONITOR Get Started Health Monitoring Health Report SETUP Complete these tasks to configure your server for the first time. SERVICES Integrate your server with business productivity and collaboration solutions. ADD-INS Install valuable add-ins for your business. QUICK STATUS View a summary of the server configuration status. HELP Get online help and other information for your server. → Get updates for other Microsoft products → Add user accounts → Add server folders → Set up Server Backup → Set up Anywhere Access → Customize Health Report Settings → Set up Client Restore Service → Connect computers → Set up your drives → Register your product 1 2 ADD USER ACCOUNTS User accounts enable individual users to log on to the network and access network resources. To help secure your network, you can assign specific permissions to individual user accounts. For example, you can give a user account permission to access server folders and the Remote Web Access site. However you may choose to restrict access to the server Dashboard. For detailed information about existing user accounts and related tasks, open the Users page in the Dashboard. Click to add user accounts Skip this task CategorypaneTaskpaneActionpaneTipsforPerformingDashboardTasks
WhenyouinitiallyopentheDashboard,alistoftaskdisplaysontheHomepage.Someof thetaskslistedarenecessarytofinishsettingupyourWDSentinelserverproperly.Tohelp youprioritizethesetasks,we'veprovidedlistoftasksandtheorderthatwesuggestyou performthesetasks.
| TaskPriorityTaskDescription | |||
| 1SetupyourdrivesSettingupyourWDSentineldrivesallowsyoutoconfigureyourdeviceusingeitherRAIDorStorageSpaces.See“SettingUpYourDrives”onpage43. | |||
| 2AddServerFoldersServerfoldersmakeitpossibletogroupfilestogether. | |||
| 3AddUserAccounts | UserAccountsallowyoutoprovideindividualuserswiththeabilitytologontothenetworkandaccessnetworkresources.See“AddingaUserAccount”onpage27. | ||
| 4SetupServerBackup | Helpstopprotectyourserverdatabybackingituponaregularschedule.See“BackingupyourWDSentinelServer”onpage70. | ||
Youcanaccessthetaskslistedabove,fromtheDashboardHomepageontheTaskspane.
AddingaUserAccount
UsethefollowingstepstoaddauseraccounttotheWDSentinelserver.
- OpentheWDSentinelDashboard(See "AccessingtheDashboard" on page 25.)
2.ClickUsersontheNavigationmenu. - SelectAddauseraccountintheUsersTaskssectionoftheTaskPane.
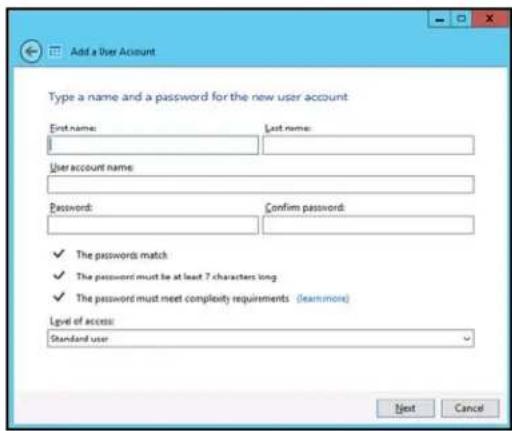
text_image
Add a User Account Type a name and a password for the new user account First name: Last name: User account name: Password: Confirm password: ✓ The passwords match ✓ The password must be at least 7 characters long ✓ The password must meet complexity requirements (learnmore) Level of access: Standard user Next Cancel4.Enterthefollowinginformation:
a. FirstName, LastName: Entertheuser'sfirstandlastname.
b.Useraccountname:Enterauseraccountname.Thisisusedtologintothe Launchpad.
c. Password, Confirm Password: Enter your password for the assigned user, then enterthesamepasswordtoconfirmthepassword.
d. Level of access: Select Standard user or Administrator.
5.ClickNext.
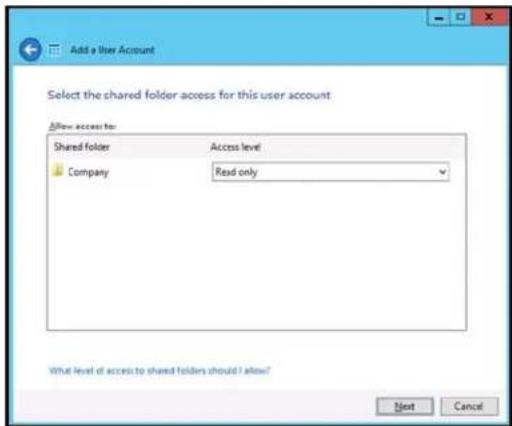
text_image
Add a User Account Select the shared folder access for this user account Allow access to: Shared folder Access level Company Read only What level of access to shared folders should I allow? Next Cancel-
Select the access levels for the user account from the pull-down menu.
-
ReadOnly: Allowstheusertoonlyreadtheinformationintheassociatedfiles.
- Read/Write:Allowstheusertocreate,change,anddeletetheinformationinthetothe associatedfiles.
NoAccess: Choosethissetting to denyaccesstoashared folder.
7.ClickNext.
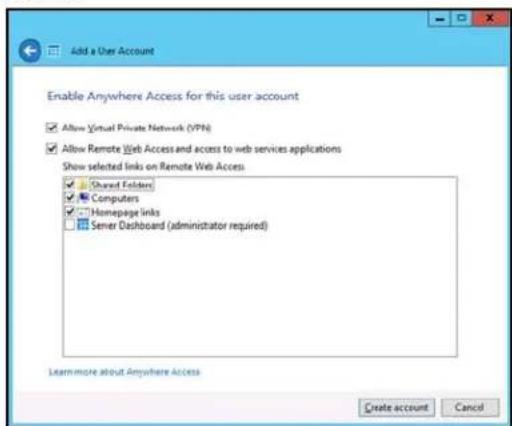
text_image
Add a User Account Enable Anywhere Access for this user account ✓ Allow Virtual Private Network (VPH) ✓ Allow Remote Web Access and access to web services applications Show selected links on Remote Web Access ✓ Shared Folders ✓ Computers ✓ Homepage links ✓ Server Dashboard (administrator required) Learn more about Anywhere Access Create account Cancel-
Placeachecknexttotheinformationyou'dliketheusertoaccessusingtheAnywhereAccessfeature.
-
SelectVirtualPrivateNetwork(VPN)toallowVPNaccessforthisuser.
- Select Allow Remote Web Access you want to allow web access for this user, then select the links you will allow this user once they have web access.
9.ClickCreateAccount.
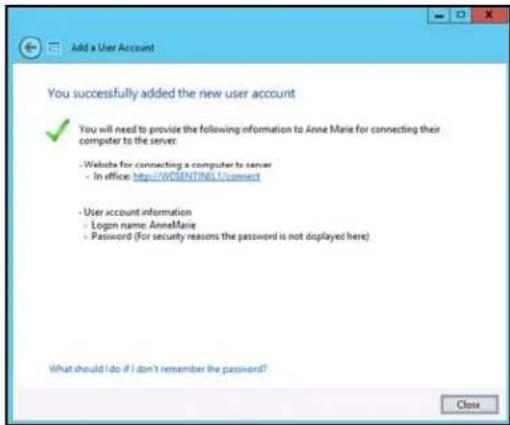
text_image
Add a User Account You successfully added the new user account ✓ You will need to provide the following information to Anne Marie for connecting their computer to the server: - Website for connecting a computer to server - In office: http://WSENTING12/connect - User account information - Login name: Anne Marie - Password (For security reasons the password is not displayed here) What should I do if I don't remember the password? Close- ClickClose.Providetheuserwiththeirnewusernameandpassword.
PerformingDashboardTasks
TheAdministratorusestheDashboardtoperformmanagementandmaintenancetasksyou usetocontrolhowyourserverbehavesonyournetwork,whocanaccessit,what informationcanbestoredandretrieved,howitisorganized,protected,andmadeavailable remotely.
Forinformationaboutanadditionaltask, backingupacomputertotheWDSentinelserver, see "Backingup(WindowsPC)" onpage60.
UsingtheHomePage
text_image
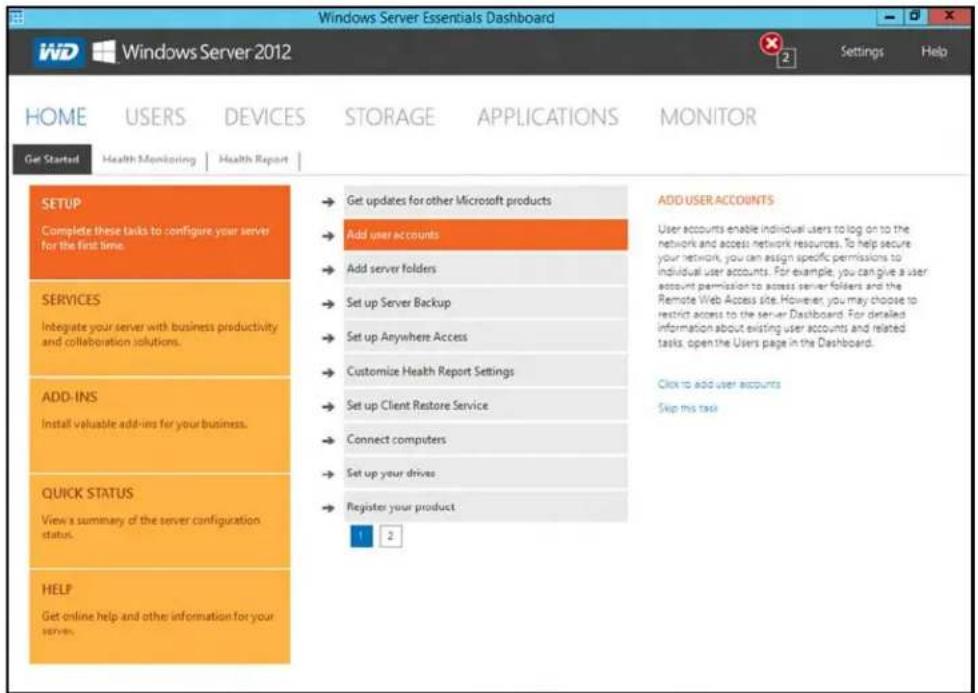
Windows Server Essentials Dashboard IWD Windows Server 2012 Settings Help HOME USERS DEVICES STORAGE APPLICATIONS MONITOR Get Started Health Monitoring Health Report SETUP Complete these tasks to configure your server for the first time. SERVICES Integrate your server with business productivity and collaboration solutions. ADD-INS Install valuable add-ins for your business. QUICK STATUS View a summary of the server configuration status. HELP Get online help and other information for your server. → Get updates for other Microsoft products → Add user accounts → Add server folders → Set up Server Backup → Set up Anywhere Access → Customize Health Report Settings → Set up Client Restore Service → Connect computers → Set up your drives → Register your product ADD USER ACCOUNTS User accounts enable individual users to log on to the network and access network resources. To help secure your network, you can assign specific permissions to individual user accounts. For example, you can give a user account permission to access server folders and the Remote Web Access side. However, you may choose to restrict access to the server Dashboard. For detailed information about existing user accounts and related tasks, open the Users page in the Dashboard. Click to add user accounts Skip this taskThe Homepage provides quick access to tasks and information that help you customize your server and configure key features.
- TheCategorypane,ontheleftsideofthepage,providesquickaccessto informationandconfigurationtoolsthathelpyousetupandcustomizetheserver. Clickacategorytodisplaytasksandresourcesthatareassociatedwiththat category.
- The Task pane in the middle of the page, lists some of the recommended tasks to perform the first time you sign into the Dashboard. Toperform these tasks from the Homepage, just click there relevant links.
- TheActionpaneontherightsideofthepage,providesabriefdescriptionofthe taskandofferslinkstoassociatedactions.
TherestofthischapterdiscussesthetaskstheAdministratorcanperformonthe Dashboard.
Important: Ensure that you perform the tasks outlined on the Homepage Task pane prior to performing other tasks.
Forafulldescriptionofthetypicalcomponentsofapage,includingtheCritical,Warning, andInformationalAlerticons,seetheMicrosoftOnlineHelp.
HomePageCategoryPane
The Homepagecontainsfiveareas, summarizedbelow:
| TabDescription | |
| SetupCompletebasictasksthatwillgetyoustartedwiththeWDSentinelserver.Forinformationaboutthesetasks,seetheMicrosoftOnlineHelp.BestPractices:•CompletetheSetuptasksontheHomepageofthe Dashboard.•Createleastoneactiveuseraccountthefirst timeyouaccesstheDashboard. | |
| Services | IntegratedyourWDSentinelserverwithbusiness productivityandcollaborationsolutions. |
| Add-Ins | Selectadd-instoenhanceyourserverandbusiness. |
| QuickStatus | Displayhigh-levelserverstatus.Clickastatustoview informationandconfigurationoptionsforthatfeature.WhenyoucompleteallofthetasksintheSETUP category,thiscategoryappearsatthetopofthe Categorypane. |
| HelpClickalinktovisittheMicrosoftOnlineHelp.YoucanalsoenterawordortermintheSearchboxtosearch forhelponwithintheMicrosoftOnlineHelp. | |
HomePageTasksPane
Thecenterpanedisplaysthevarioustasksthatcanbeperformedtoenhancetheproperties oftheWDSentinelserver. Thislistoftaskandinformationchangesdependingonthe categoryselectedintheleftCategorypane.
HomePageActionPane
TheActionpanedisplaysabriefdescriptionoftheselectedtask.Youarealsopresented withtheopportunitytoopenconfigurationwizardstoactontheselectedtaskor,insome cases,skipatask.
ManagingUserAccounts
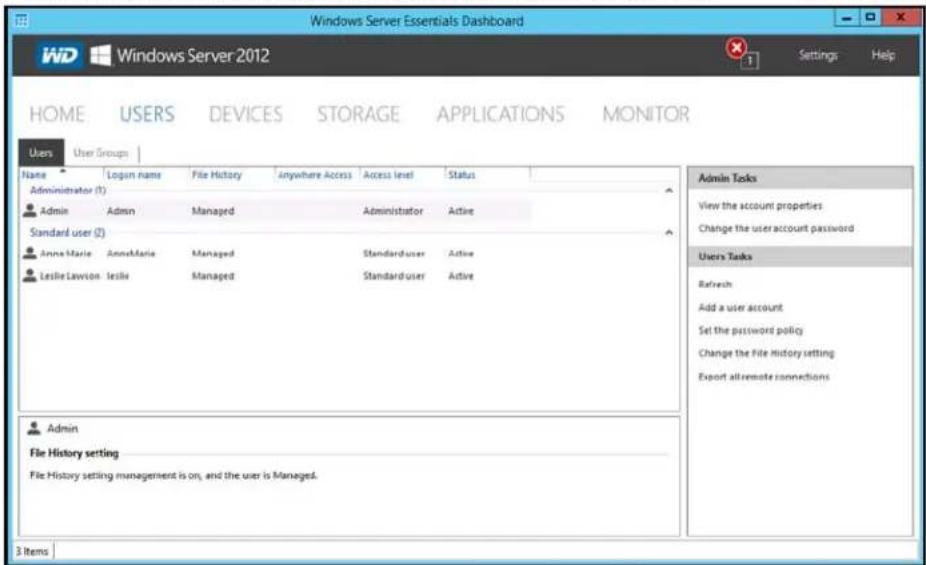
TheUserstaballowsyoutoaddandmanageupto25useraccounts.
Onthenavigationbar,clickUsers.
Youcannow:
■ View, add, manage, delete, and activate/deactivateuseraccounts.
- Managedomainuseraccounts(ifjoinedtoanActiveDirectoryDomain).
■ Managepasswords.
- Setpasswordpolicies.
■ ManageAnywhereAccess.
- Assignuseraccessprivilegestosharedfoldersandserverresources.
■ Viewremoteconnectionstatus.
Fordetailedinstructionsonperforminganyofthesetasks,consult
MicrosoftOnlineHelp.
text_image
Windows Server Essentials Dashboard WD Windows Server 2012 Settings Help HOME USERS DEVICES STORAGE APPLICATIONS MONITOR Users User Groups Name Login name File History Anywhere Access Access level Status Administrator (1) Admin Admin Managed Administrator Active Standard user (2) Anne Marie AnneMaria Managed Standarduser Active Leslie Lawson Leslie Managed Standarduser Active Admin File History setting File History setting management is on, and the user is Managed. 3 Items Admin Tasks View the account properties Change the user account password Users Tasks Refresh Add a user account Set the password policy Change the file history setting Export all remote connectionsManagingDevices
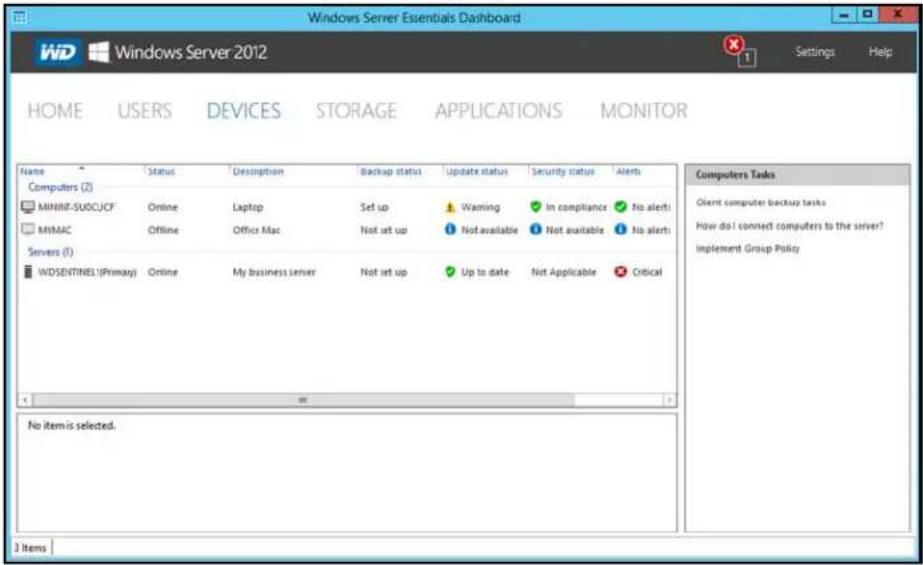
AfteryouconnectyourcomputerstotheWindowsServer2012Essentialsnetwork,youcan viewthehealthandbackupstatusofcomputersonthenetworkandconfigurebackupsfor theserverandclientcomputers.YoucanalsoapplygrouppolicyestoWindows7and Windows8clientcomputerstohelpmakethemmoresecure.Availabletasksinclude:
■ Viewingalistofcomputersconnectedtoyourserver.
■ Viewingcomputerpropertiesandhealthalertsforeachconnectedcomputer.
■ Settingupandmanagingcomputerbackups.
■ Restoringfilesandfolderstocomputers.
■ EstablishaRemoteDesktopconnectiontoacomputer
- CustomizeComputerBackupandFileHistorysettings
For detailed instructions on performing any of these tasks, consult Microsoft Online Help.
text_image
Windows Server Essentials Dashboard Windows Server 2012 Settings Help HOME USERS DEVICES STORAGE APPLICATIONS MONITOR Name Status Description Backup status Update status Security status Alerts Computers (Z) MINIINF-SUOCUCF Online Laptop Set up ⚠ Warning ✓ In compliance ✓ No alerts MVMAC Offline Office Mac Not set up ⚠ Not available ⚠ Not available ⚠ No alerts Servers (I) WDSENTINEL!(Primary) Online My business server Not set up ✓ Up to date Not Applicable ✓ Critical Computers Tasks Client computer backup tasks How do I connect computers to the server? Implement Group Policy No item is selected. ItemsManagingStorage
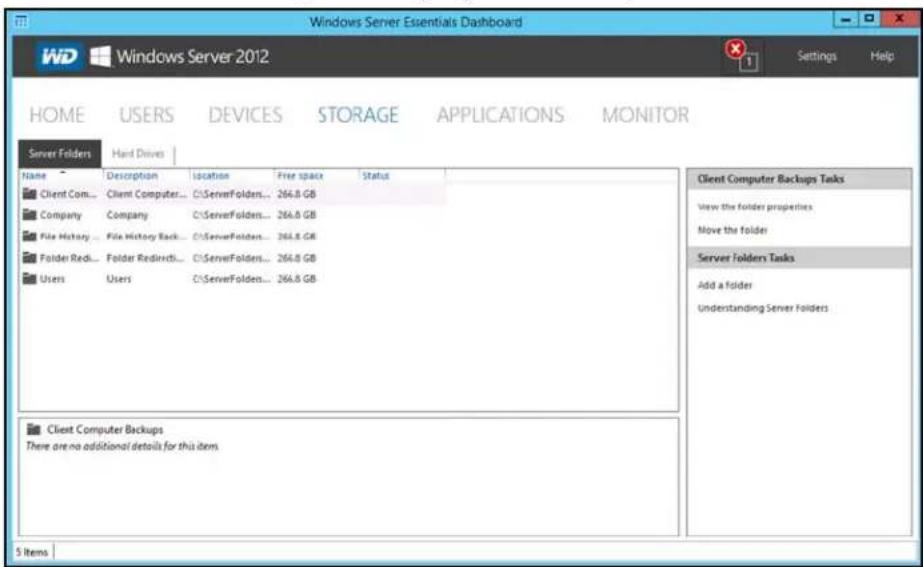
TheStoragesectioncontainstwotabs:
- TheServerFolderstaballowsyoutoviewandmanagethepropertiesofthe serverfolders.Thispagealsoincludestaskstoopenandaddserverfolders.
Note: If you have data file less saved on the C: drive (your boot drive), See "Movinga ServerFolder" on page 50. to mov these file st your data drives.
- TheHardDrivestaballowsyoutoviewandcheckthehealthofthedrivesthat areattachedtoyourserver.
Fordetailedinstructionsonperforminganyofthesetasks,consult MicrosoftOnlineHelp.
text_image
Windows Server Essentials Dashboard WD Windows Server 2012 Settings Help HOME USERS DEVICES STORAGE APPLICATIONS MONITOR Server Folders Hard Drives Name Description location Free space Status Client Com... Client Computer... C:\ServerFolders... 264.8 GB Company Company C:\ServerFolders... 264.8 GB File History ... File History Back... C:\ServerFolders... 264.8 GB Folder Red... Folder Redirect... C:\ServerFolders... 264.8 GB Users Users C:\ServerFolders... 264.8 GB Client Computer Backups Tasks View the folder properties Move the folder Server Folders Tasks Add a Folder Understanding Server Folders Client Computer Backups There are no additional details for this item. 5 ItemsMonitoringApplications
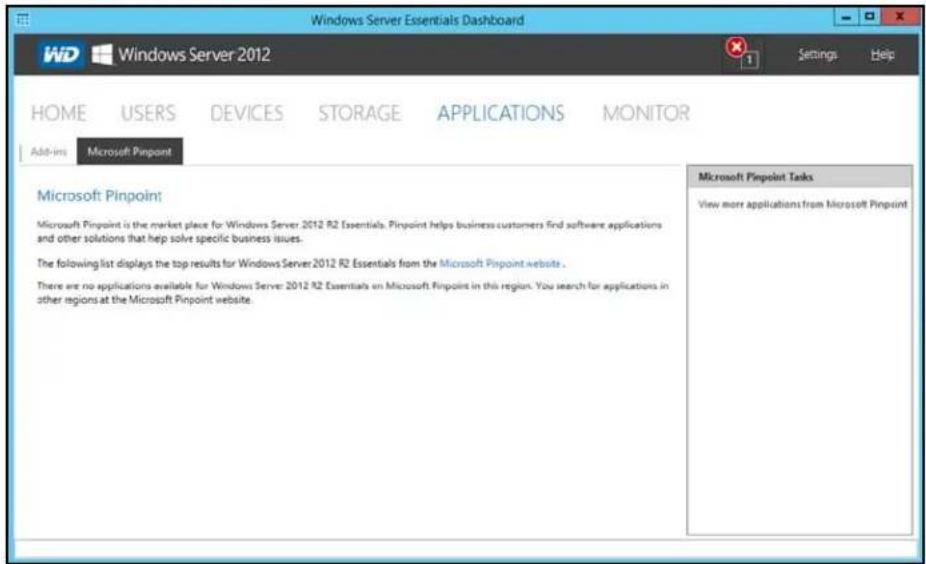
TheApplicationssectionoftheWindowsServer2012EssentialsDashboardincludestasks that help you view and manage the Add-in that are installed on the server and to discover new add-ins Microsoft Pinpoint ®.
Fordetailedinstructionsonmonitoringadd-insandusingMicrosoftPinpoint,consult MicrosoftOnlineHelp.
text_image
Windows Server Essentials Dashboard Windows Server 2012 Settings Help HOME USERS DEVICES STORAGE APPLICATIONS MONITOR Add-ins Microsoft Pinpoint Microsoft Pinpoint: Microsoft Pinpoint is the market place for Windows Server 2012 R2 Essentials. Pinpoint helps business customers find software applications and other solutions that help solve specific business issues. The following list displays the top results for Windows Server 2012 R2 Essentials from the Microsoft Pinpoint website . There are no applications available for Windows Server 2012 R2 Essentials on Microsoft Pinpoint in this region. You search for applications in other regions at the Microsoft Pinpoint website. Microsoft Pinpoint Tasks View more applications from Microsoft PinpointMonitoringSystemHealthandAlerts
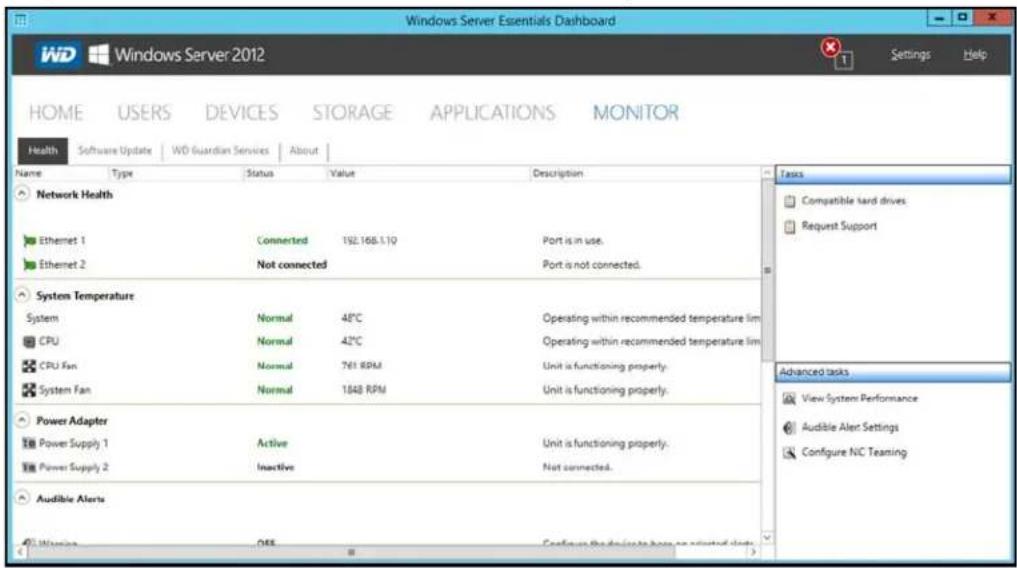
TheMonitorpageoftheDashboardincludestasksthathelpyouviewandmanagetheWD Sentinelserverstoragesystem.ToopentheMonitormodule,clicktheMonitoricononthe navigation bar. The Monitor module includes two tabs, Health and Software Update, and relatedtasksinthepanelontheright.
HealthTab
TheHealthtabandrelatedtasksenableyoutomonitorthestatusofthestoragedrives, RAIDconfiguration,powersupplies,temperatures,fans,CPU,audiblealerts,andnetwork connections.
ToopentheHealthtab, clicktheMonitoricononthenavigationbar:
text_image
Windows Server Essentials Dashboard WD Windows Server 2012 HOME USERS DEVICES STORAGE APPLICATIONS MONITOR Health Software Update WD Guardian Services About Name Type Status Value Description Network Health Ethernet 1 Connected 192.168.1.10 Port is in use. Ethernet 2 Not connected Port is not connected. System Temperature System Normal 48°C Operating within recommended temperature lim CPU Normal 42°C Operating within recommended temperature lim CPU Fan Normal 761 RPM Unit is functioning properly. System Fan Normal 1848 RPM Unit is functioning properly. Power Adapter Power Supply 1 Active Unit is functioning properly. Power Supply 2 Inactive Not connected. Audible Alerts Windows OEE Confucs the devices have an adjusted slot Tasks Compatible hard drives Request Support Advanced tasks View System Performance Audible Alert Settings Configure NC Teaming| SettingsDescription | |
| NetworkHealthEthernet 1 & 2 | Displaysthestatus(ConnectedorNotconnected)oftheserver's networkconnection(s).IfyouusebothEthernetportsandone fails,theothertakesover,allowingtheWDSentinelserver to remainsoperationaloverthenetwork. |
| SystemTemperatureSystem:Thetemperaturewithintheserverenclosure.CPU:Thestatus,temperature,andstatusdescriptionforthe CPU.Thestatusmaybe:NormalWarmHotCPUFan :Thestatus,fanRPMandstatusdescriptionfortheCPU fan.Thestatusmaybe:NormalWarmHotSystemFan :Thestatus,fanRPM,andstatusdescriptionofthe Systemfan.Thestatusmaybe:NormalWarmHot | |
| PowerAdapter1 & 2 | Theserverhastwopowerports.Ifyouusebothandonefails,the othertakesoverandtheWDSentinelserverremainsoperational.Thestatusmaybe:ActiveInactive |
| AudibleAlertsThestatusofthewarningandcriticalalertsforWDSentinelserver.Theaudiblealertsmaybe:OnOffAction:ClickConfiguretosetAudibleAlerts(See“Setaudible alerts”onpage37.). | |
| InternalStorage | DisplaysstorageinformationassociatedwiththeWDSentinel server.TheWDSentinelserverholdsuptofourofWD’shard drivesoptimizedforquality,reliabilityandperformance.DataDrives&BootDrivesDisplaysthetype,status,size,andmodelnumberofthedata drivesusedbyyourWDSentinelserver.Foralistofcompatible datadrives,visithttp://support.wd.comandseeKnowledgeBase AnswerID9443.TypeofDrives:Thetypeofdriveusedwithinyourdevice:Preferred:Indicates that this is a preferred drive. Preferred drives preformoptimallywithyourdeviceandshouldalwaysbeused wheneverpossible.Preferreddrivesarefullytestedandapproved forusewithyourdevice.Themessagetextdisplayingreen.Supported:Indicatesthatthisisasupporteddrive.Supported drivesarenottheoptimaldrivesforyourdevicebutarepartofthe samedrivefamily.Thesedrivesarenotfullytestedwiththis device.Themessagetextdisplayingreen.Unsupported:Indicatesthatthisisanunsupporteddrive. Unsupporteddriveshavenotbeentestedwiththisdeviceand shouldbeusedatyourownrisk.Themessagetextdisplaysin red.WARNING:Usinganunsupporteddriveinyourdevice immediatelyvoidsyourwarrantyandmaycausedamagetoyour deviceanddata.StatusofDrives:Thestatusofadrivemaybe:NormalFailed!:VisitWDStoretoreplace.CAUTION:Imminentfailuredetected.Pleasereplacethishard driveimmediately.Action:ClickConfiguretosetupyourdatadrives(See“Setting UpYourDrives”onpage43.) |
HealthTasks
Findcompatibleharddrives
ToviewalistofWDdrivesthatcanbeusedintheWDSentinelserver:
- ClickCompatibleHardDrivesintheTaskpane.Apop-upscreenlistseachdrive withitsmodelnumber,description,andmaximumcapacity.
- ClickWDStoretopurchasecompatibledrives.
- ClickOKtoexit.
TobuyacompatibleWDdrivesthatcanbeusedintheWDSentinelserver:
- ClickBuyontherightsideoftheInternalStorageareaoftheHealthtab.
■ FollowtheinstructionsonthescreentopurchaseyourWDcompatabledrive.
RequestSupport
TheRequestSupportfunctioncollectsinformationaboutyourWDSentineldeviceand sendsadiagnosticreporttotheWDSupportserver.ItthenopenstheWDSupportwebsite, whereyoucanenterafewdetailsregardingtheproblemtorouteittotheappropriate supportteam.
Note: If you donotwant to submit the diagnostic logs, us theregular WDSupportpage at http://support.wd.com.
ToaccessWDCustomerSupportautomatically:
- ClickRequestSupportintheTaskspane.TheRequestSupportwindowdisplays.
- Afterreadingtheinformationonthescreen, click the "lagreeandwouldliketo proceed." check box, then click Proceed. The WD Support Ask a Question page displays.
Note: The first time you do this, an Internet Explorer Security Screendisplays. Clear the checkbox and click Close.
- CompletheonlineformandclickSubmitQuestion.Adiagnosticreportofthe WDSentinelserverisautomaticallyattachestotheform.Yourrequestisaddedtothe WDSupportqueueandassignedaconfirmationnumber.Youwillreceiveanemail fromWDSupportregardingyourquestion.
Important: Forfasterservice/phoneservice, callWDSupport. Forthelatest phonenumber and contact information in your region, see "ContactingWDTechnicalSupport" on page iiior http://support.wd.com. Have your confirmation ready when you call.
Viewsystemperformance
MonitoryoursystemperformanceusingtheWindowsResourceMonitorwhichisavailable fromtheAdvancedtaskspane.TheResourceMonitorallowyoutoseeandcontrolhow yoursystemresources(suchastheCPU, memory,disk,andnetwork)arebeingusedby processesandservices.
ToaccesstheWindowsResourceMonitor:
- Click subsystemPerformanceintheAdvancedtaskspane.TheResource Monitordisplays.
ForcompleteinstructionsonhowtousetheWindowsResourceMonitor,clickF1withinthe WindowsResourceMonitorapplication.
Setaudiblealerts
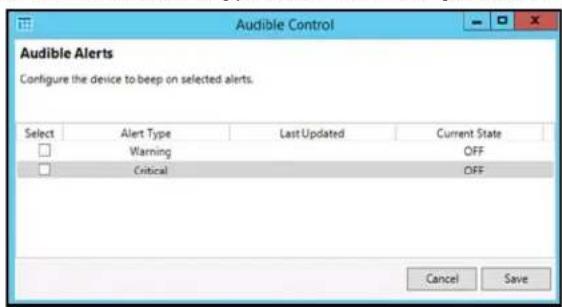
The Audible Alert provides audiblenotification from your WDSentinelserver when there are warnings or critical alert to the server.
TosetAudibleAlerts:
-
ClickAudibleAlertsSettingsintheAdvancedtaskspane.TheAudibleControl windowdisplays.
-
ClickSelectnexttothetypeofalertforwhichyouliketohearanalarm.
text_image
Audible Control Audible Alerts Configure the device to beep on selected alerts. Select Alert Type Last Updated Current State □ Warning OFF □ Critical OFF Cancel Save■ Warning:Thealarmsoundsforallwarningalerts.

■ Critical: Thealarmsoundsforallcriticalalerts.

- ClickSave. Youraudiblealarmhasbeenset. Whenanalertofthetypeyouselected occurs, anaudiblesoundwillemitfromyourWDSentinelserver.
UpdatingSoftware
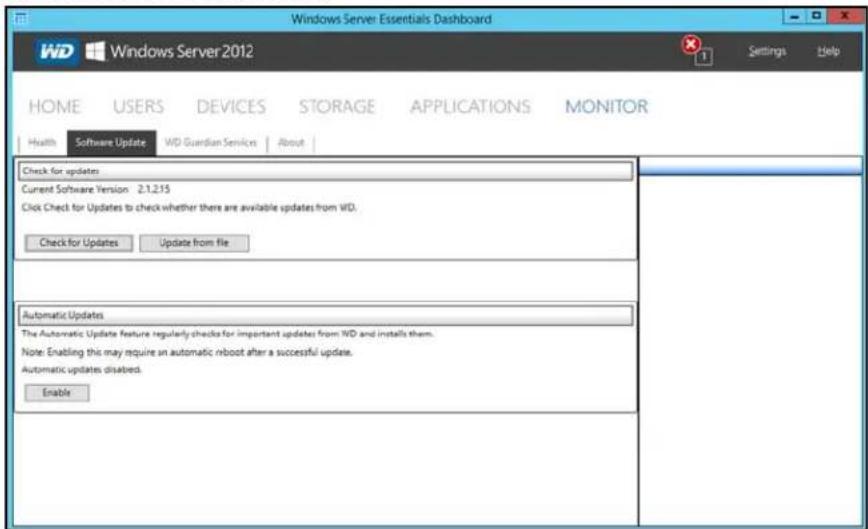
Periodically, WDissuessoftwareupdatesforyourWDSentinelserver.TheSoftwareUpdate tabwithintheMonitormoduleallowsyoutoupdateWDSentineldevicesoftware automaticallyormanually.Pleasenotethatthistabonlyallowsyoutoapplysoftware updatesissuedbyWD.TomanageorapplyMicrosoftsoftwareupdates,gotoServer SettingsontheDashboard.
Abestpracticetoensurethatyoursystemsoftwarestayscurrentistoenableautomatic updatesonyourWDSentinelserver(See"AutomaticUpdatesofWDSoftware"on page38.)
ManualUpdatesofWDSoftware
Tocheckforsoftwareupdatesandupdatethesoftware:
1. ClicktheSoftwareUpdatestab.
text_image
Windows Server Essentials Dashboard WD Windows Server 2012 Settings Help HOME USERS DEVICES STORAGE APPLICATIONS MONITOR Health Software Update WD Guardian Service About Check for updates Current Software Version 2.1.2.15 Click Check for Updates to check whether there are available updates from WD. Check for Updates Update from file Automatic Updates The Automatic Update feature regularly checks for important updates from WD and installs them. Note: Enabling this may require an automatic reboot after a successful update. Automatic updates disabled. Enable- You havetwo options. You may check for updates online or update from a file:
Tousetheonlineupdate:
a.ClickCheckforUpdates.
b. If an update is available, click Download and Install to update your WDSentinelserver.
Toupdatefromafile:
a. ThesoftwareupdatefilescanalsobedownloadedfromtheWDSupportsiteat http://support.wd.com. OnceyoudownloadtheavailablefirmwareupdatesfortheWDSentinelserver, copythefiletoasharedfoldersuchastheDocumentsshare ontheserverandselectthefiletoupdate.
b. Click Update from file and then locate and select the update file you copied to yourserver.
c.ClickOpen. Thesystemappliesthesoftwareupdate. Thesystemautomatically restartstheserverifarebootisrequiredtocompletethesoftwareupdate.
AutomaticUpdatesofWDSoftware
EnablingAutomaticUpdatesonyourWDSentinelservercausestheservertocheckfor availablesoftwareupdatesfromWDonascheduledbasisandapplytheupdates automatically.
Tosetascheduleforautomaticupdates:
1. IntheAutomaticUpdatessection, clickEnable.
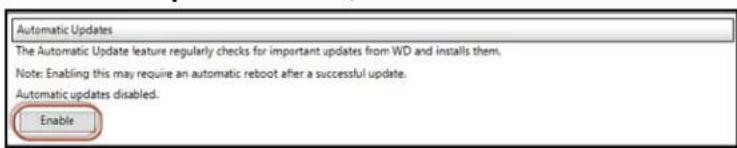
text_image
Automatic Updates The Automatic Update feature regularly checks for important updates from WD and installs them. Note: Enabling this may require an automatic reboot after a successful update. Automatic updates disabled. Enable- ClicktheChangelinkandselectthedayandtimeyouwanttheWDSentinelserverto checkforupdateseveryweek,andifanupdateisavailable,installit.(Example:every Sundayat3:00AM)

text_image
Automatic Updates The Automatic Update feature regularly checks for important updates from WD and installs them. Note: Enabling this may require an automatic reboot after a successful update. Automatic updates enabled. Updates will occur every Sunday at 1:00 AM Change Disable Apply3.ClickApply.
UpdatingMicrosoftSoftware
YoucanupdatetheMicrosoftsoftwarefortheWDSentinelDS5100/DS6100usingtheServerSettingspage.See"ManagingServerSettings,"below.
ManagingServerSettings
Important: Unless otherwise noted, Microsoft Online Help provides complete instructions for using these pages.
- ClickSettings on the icon barto enable, setup, and control WDSentinel server settings.
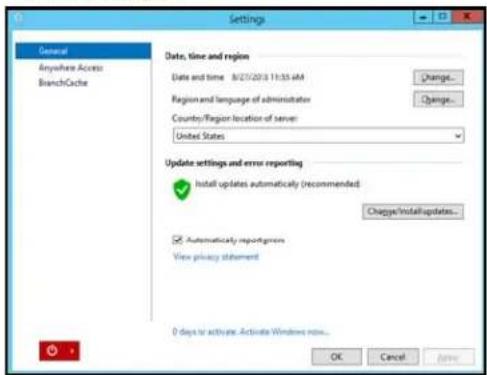
- The Generalpagedisplays. The left panel contains link to the rest of the Server Settingspages.
text_image
Settings General Anywhere Access BranchCache Date, time and region Date and time 8/27/2013 11:35 AM Change... Region and language of administrator Change... Country/Region location of server: United States Update settings and error reporting Install updates automatically (recommended) Change/Installupdates... Automatically reporters View privacy statement D days to activate. Activate Windows now... OK Cancel Apply...FollowingisasummaryofthepurposeofeachoftheServerSettingspages.
General
- Shutdownorrestarttheserver—Thisisthesafestmethodtoshutdownor restarttheserver.ItinsuresthattheRAIDsystemshutsdowncleanly.See "ShuttingDownandRebootingtheServer"onpage40forinstructions.
- Changethedralate, time, and location of the server — You can change the settings you established at initialization.
- ChangethebehavioroftheWindowsupdate—Youcanchangethesettings forupdatingtheMicrosoftsoftware.
AnywhereAccess
AnywhereAccessenablesyournetworkuserstoaccessWDSentinelserverresourcesfromanylocationwithanInternetconnection,atanytime,andonanydevice.Youcanaccesssharedfoldersandfiles(thatyouhavepermissionfor)ontheserveraswellasonyournetworkedcomputer.
EnablingAnywhereAccess
UsethefollowingstepstoenableAnywhereAccessontheSettingspage.AnywhereAccessisturnedoffbydefault.
Note: The Homepage provides a setup task forenabling Anywhere Access by clicking the SettingUp AnywhereAccesslink.

text_image
Settings General Anywhere Access BranchCache Anywhere Access Configure... Repair... Domain name The domain naming will set up. Set up... Web site settings For customer or change your website settings, click Customize... Customize... Router Router IP: Unknown Model: Unknown Set up... More details Understanding Anywhere Access View privacy statement OK Cancel Apply- UnderSettings, clickAnywhereAccessinthepanelontheleft.
- ClickConfigure and completethewizardtosetupyourrouter, setadomainname, and changelInternetsettings.
- Grant Remote Web Access privileges if you want a user to access the WDSentinelserver, shared folders, computers, media, Homepagelinks, and the Dashboard (administrator only) when you create or update a user account. Toviewauser's current privileges, click the Users icon in the Navigation bar.
Note: The Guest account cannot have Remote Web Access.
Note: Refer to Microsoft Online Help for detailed information about setting up remote web accessandfortroubleshootingconnectionissues.
ShuttingDownandRebootingtheServer
TheWDSentinelserverisintendedtobeonatalltimes,providingshareddataandbackup services.Abestpracticeistoavoidturningtheunitoff.However,ifitdoesbecome necessary(forexample,movingtheservertoadifferentlocation),followtheprocedures belowtoshutdownorreboottheserver
ItisveryimportantthattheWDSentinelserverbeshutdownorrestartedinacleanand gracefulmannerthroughtheSettingssectionintheDashboard.
WARNING!Toavoidapotentiallyuncleanshutdownthatcouldcorruptthe RAIDconfiguration,shutdowntheserverthroughtheDashboard.
ToshutdownorrestartusingtheDashboard(Preferredmethod):
-
ClickSettingsintheiconbar.
-
Toshutdown, right-clicktheredbuttoninthelowerleftcornerofthepageandselect Shutdown.

-
Torestart, right-click the arrow and select Restart
-
Whentheconfirmationmessageappears, click Yes.
Note: You can also shutdown your WDS sentinel server by holding the power button on the front of the device for a few seconds and then releasing it. The "Shutting Down" messaged display on the front of the unit.
RebootingtheWDSentinelServer
FollowingisthecleanestprocedureforrebootingtheWDSentinelserver.
Note: This procedures should only be used after you've logged into the Dashboard and created a user account.
- OntheDashboardHomepage, clicktheSettingslinkontheupperrightofthe window.
- On the bottom left of the Generalscreen, click the shutdown narrow and select Restart:
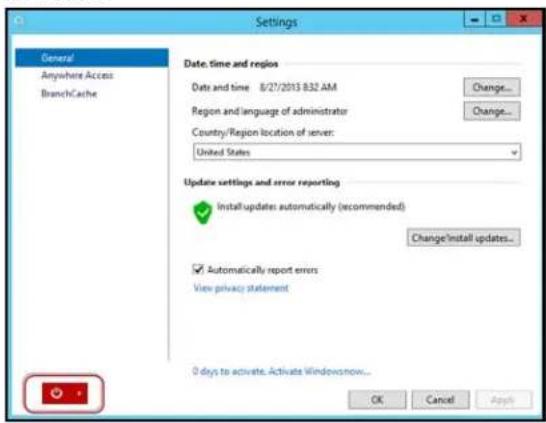
text_image
Settings General Anywhere Access BranchCache Date, time and region Date and time 8/27/2013 B32 AM Change... Region and language of administrator Change... Country/Region location of server: United States Update settings and error reporting Install updates automatically (recommended) Change Install updates... Automatically report errors View privacy statement 0 days to activate. Activate Windowsnow... OK Cancel Apply5
ManagingStorageontheWDSentinelServer
WDSentinelServerRAIDStorage
StorageSpaces
SettingUpYourDrives
UsingUSBStorage
MovingaServerFolder
WDSentinelServerRAIDStorage
RAIDistheacronymforRedundantArrayofIndependentDisks.TheWDSentinelserver providesautomaticRAIDservicetoassuretheintegrityofthestoragesystem.For redundancy,aminimumoftwodrivesmustbeactive.Theoperatingsystemandalldataare protectedbytheRAIDstructure.TheserverautomatesthemanagementoftheRAID.
YourWDSentinelserverusesRAID5, which offers fast performance by striping data across all drives, This RAID level provides the system with both redundancy and optimum capacity.
| 2TBDrives3TB | Drives4TB | Drives | |
| RAIDLevel5(4 Drives) | 8TBCapacity12TB | Capacity | 16TB Capacity |
If a drive in the array fails, the data and operating system are still intact, and the WDSentinel server continues to provide service.
Important: If you have one baddrive, the server operates normally. However, if a second drive fails, the server will no longer operate. You will need to recover the server and/or replace the failed drive(s). A best practice is to have a replacement drivereadily available.
TheWDSentinelserverletssyouknowwhenadrivefailsinthefollowingways:
■ TheLEDbelowthebaddriveissolidred.
ThePowerLEDontheWDSentinelserverflashesred, indicating aseriousfault.
AnemailAlertispostedifyouhavesetituptodoso.(See"MonitoringSystem HealthandAlerts"onpage33.)
Torecoverfromafaileddrive, simplyreplacethedrive(theonewiththeredLEDoverthe drive)withanapproveddrivefortheWDSentinelserver(see "Findcompatibleharddrives" onpage36)
Oncereplaced, completethestepsoutlined in "RecoveringfromaFailedDrive" on page 48 to integrate the new drive into the RAID array. This process takes many hours to accomplish. Progress of this operation appears on the Dashboard. While the server is verifying the RAID array, your data continues to be available although the performance may be impacted.
TheWDSentinelserverRAIDsystemhasnodowngradeoptions.Onceavailablecapacity hasbeenincreased,theAdministratorcannotdecidetosubsequentlyreducecapacityby removingadrive.TheremovalofadrivedegradestheRAIDandmakesitvulnerableto singledrivefailure.
StorageSpaces
StorageSpacesisaWindowsstoragevirtualizationtechnologywhichsucceedsLogical DiskManagerandallowsfortheorganizationofphysicaldisksintologicalvolumessimilarto LogicalVolumeManager(Linux),RAID1orRAID5,butatahigherabstractionlevel.
Astoragespacebehaveslikeaphysicaldisktotheuser,withthinprovisioningofavailable diskspace.Thespacesareorganizedwithinastoragepool,i.e.acollectionofphysical disks,thatcanspanmultipledisksofdifferentsizes,performanceortechnology(USB, SATA,SAS).Thesamestoragepoolcanhostmultiplestoragespaces.StorageSpaces havebuilt-inresiliencyfromdiskfailures,whichisachievedbyeitherdiskmirroringorstriping withparityacrossthephysicaldisks.
SettingUpYourDrives
UsethefollowingstepstosetupyourWDSentineldevicedrives.
- OntheDashboardHomepage, clickSetup>Setupyourdrives.
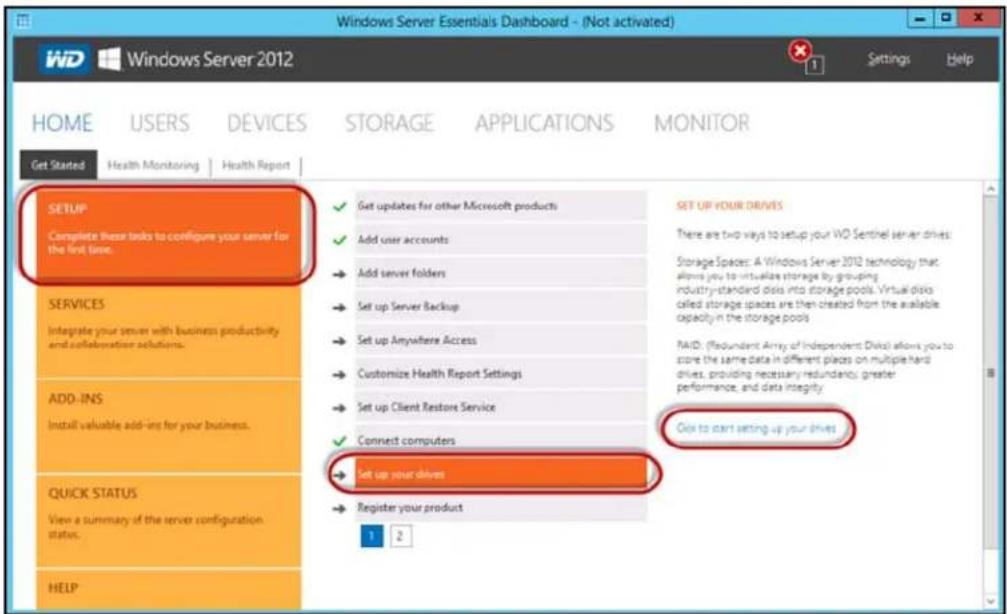
text_image
Windows Server Essentials Dashboard - (Not activated) WD Windows Server 2012 Home USERS DEVICES STORAGE APPLICATIONS MONITOR Get Started Health Monitoring Health Report SETUP Complete these tasks to configure your server for the first time. ✓ Get updates for other Microsoft products ✓ Add user accounts → Add server folders → Set up Server Backup → Set up Anywhere Access → Customize Health Report Settings → Set up Client Restore Service ✓ Connect computers → Set up your drives → Register your product 1 2 SET UP YOUR DRIVES There are two ways to setup your WO Sentinel server drives Storage Spaces: A Windows Server 2012 technology that allows you to virtualize storage by grouping industry-standard disks into storage pools. Virtual disks called storage spaces are then created from the available capacity in the storage pools MAID: (Redundant Array of Independent Disk) allows you to store the same data in different places on multiple hard drives, providing necessary redundancy, greater performance, and data integrity. Click to start setting up your drives SERVICES Integrate your server with business productivity and collaboration solutions. ADD-INS Install valuable add-ins for your business. QUICK STATUS View a summary of the server configuration status. HELP- SelectClicktostartsettingupyourdrives.TheSetUpYourDriveswizard displays.
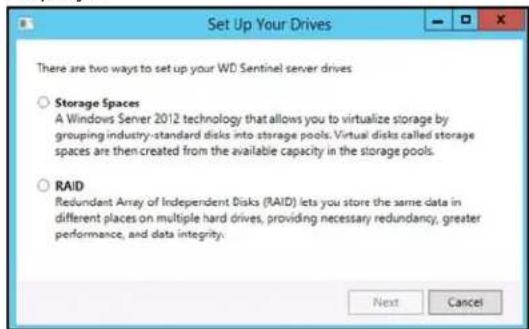
text_image
Set Up Your Drives There are two ways to set up your WD Sentinel server drives ○ Storage Spaces A Windows Server 2012 technology that allows you to virtualize storage by grouping industry-standard disks into storage pools. Virtual disks called storage spaces are then created from the available capacity in the storage pools. ○ RAID Redundant Array of Independent Disks (RAID) lets you store the same data in different places on multiple hard drives, providing necessary redundancy, greater performance, and data integrity. Next Cancel-
Select your storagemethod. Options are:
-
StorageSpaces: A Windows Server 2012 technology that allows you to virtualize storage by grouping industry-standard disks into storage pools. Virtual disk called storagespaces are then created from the available capacity in the storage pools.
- RAID: RedundantArrayofIndependentDisks(RAID)letsyoustorethesamedata indifferentplacesonmultipleharddrives, providingnecessaryredundancy, greater performance, and data integrity.
4.ClickNext.
- ForStorageSpaced,continueto"SettingupStorageSpaces"onpage44
ForRAID,continueto"SettingUpRAIDStorage"onpage45.
SettingupStorageSpaces
- OntheStorageSpacesscreen, click Createanewpoolandstoragespace.
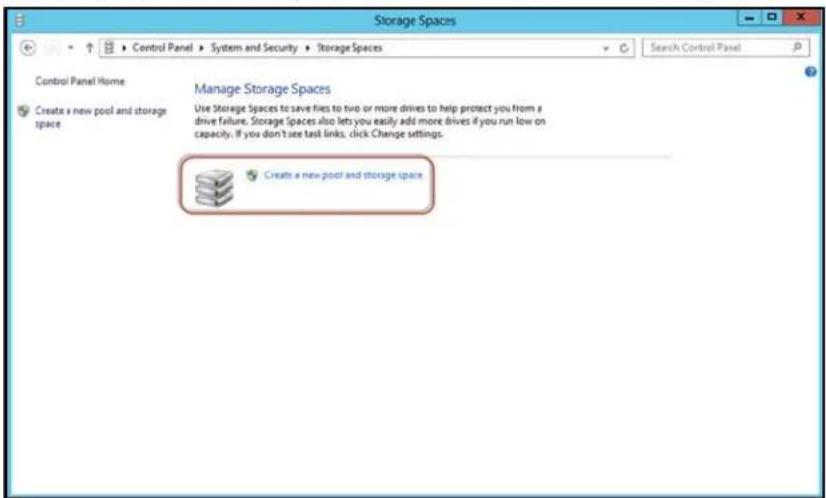
text_image
Storage Spaces Control Panel Home Create a new pool and storage space Manage Storage Spaces Use Storage Spaces to save files to two or more drives to help protect you from a drive failure. Storage Spaces also lets you easily add more drives if you run low on capacity. If you don't see task links, click Change settings. Create a new pool and storage space- Atthewarning prompts, click Yes.
- Selectthedrive(s)you'dliketosetupwithStorageSpaces,thenclickCreatePools.
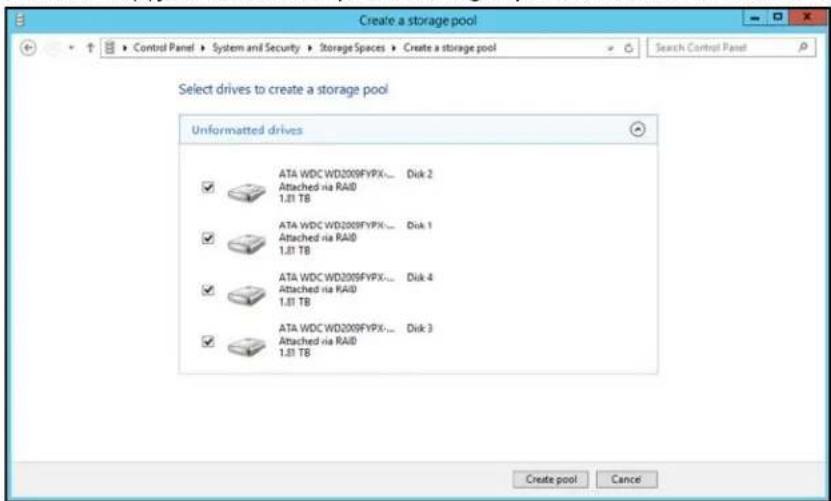
text_image
Create a storage pool Select drives to create a storage pool Unformatted drives ATA WDC WD2009FYPX-... Disk 2 Attached via RAID 1.31 TB ATA WDC WD2009FYPX-... Disk 1 Attached via RAID 1.31 TB ATA WDC WD2009FYPX-... Disk 4 Attached via RAID 1.31 TB ATA WDC WD2009FYPX-... Disk 3 Attached via RAID 1.31 TB Create pool Cancel4.Enterthesize,resiliencytype,andsizeofyournewstoragespace.thenclickCreate StorageSpace.Yourstoragespaceiscreated.
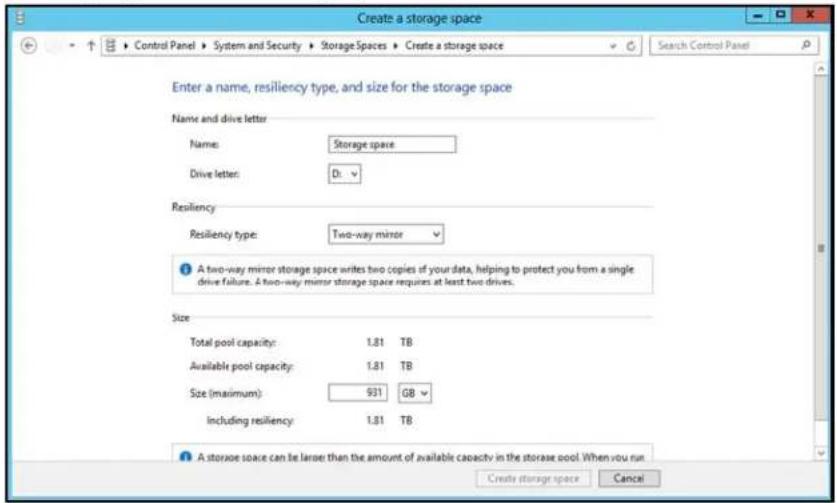
text_image
Create a storage space Enter a name, resiliency type, and size for the storage space Name and drive letter Name: Storage space Drive letter: D: Resiliency Resiliency type: Two-way minor A two-way mirror storage space writes two copies of your data, helping to protect you from a single drive failure. A two-way mirror storage space requires at least two drives. Size Total pool capacity: 1.81 TB Available pool capacity: 1.81 TB Size (maximum): 931 G8 Including resiliency: 1.81 TB A storage space can be larger than the amount of available capacity in the storage pool. When you run Create storage space CancelSettingUpRAIDStorage
- OntheWDRAIDStorageUtilityscreen, intheStoragearea, selectAdapter0.
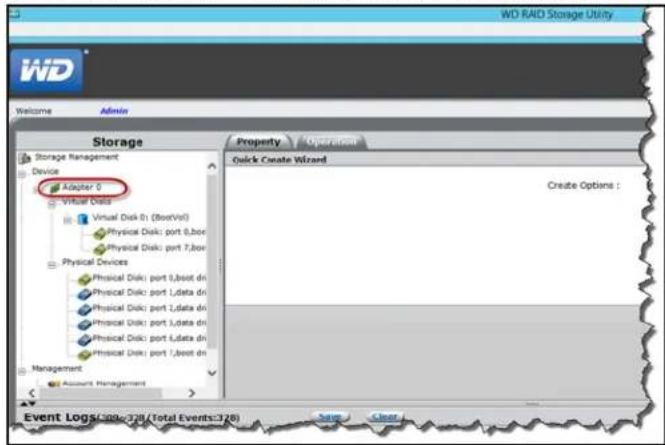
text_image
WD RAD Storage Utility Welcome Admin Storage Storage Management Device Adapter 0 Virtual Data Virtual Disk 0 (BootVit) Physical Disk: port 0,box Physical Disk: port 7,box Physical Devices Physical Disk: port 1,boot dn Physical Disk: port 1,data dn Physical Disk: port 2,data dn Physical Disk: port 3,data dn Physical Disk: port 4,data dn Physical Disk: port 5,boot dn Management Account Management Property Operation Quick Create Wizard Create Options : Event Logs: 396-378 /Total Events:378 Save Clear- HoveryourmouseovertheOperationstab, thenselectCreateRAID.
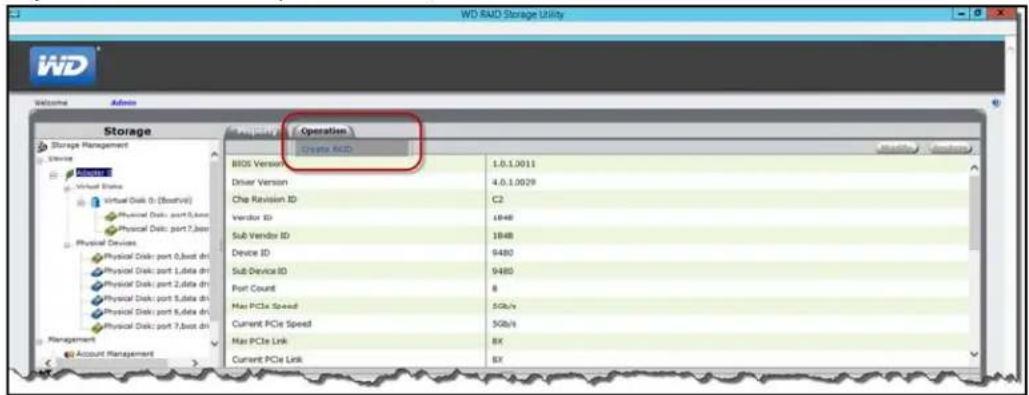
text_image
WD RAID Storage Utility iWD Welcome Admin Storage Storage Management Operating Operation BIOS Version Driver Version Che Revision ID Vendor ID Sub Vendor ID Device ID Sub Device ID Port Count Max PCIe Speed Current PCIe Speed Max PCIe Link Current PCIe Link 1.0.1.0011 4.0.1.0029 C2 1848 1848 9480 9480 8 5Gb/s 5Gb/s BX BX- OntheCreateOptionspull-downmenu, selectaRAIDoption.
- ItisabestpracticetoselectRAID5foryourWDSentinelserverstorage.
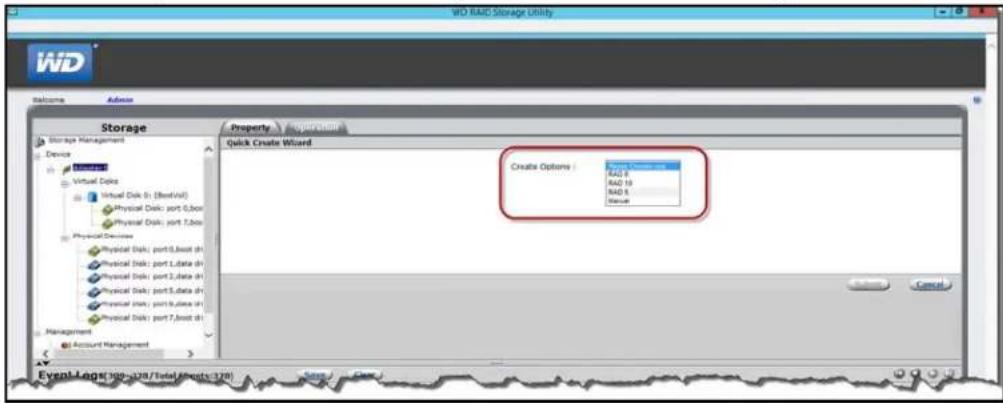
text_image
WD RAID Storage Utility Welcome Admin Storage Storage Management Device Virtual Disk Virtual Disk 01 (BestVal) Physical Disk: port 5,Box Physical Disk: port 7,Box Physical Devices Physical Disk: port 5,Box sh Physical Disk: port 1,Data sh Physical Disk: port 1,Data sh Physical Disk: port 5,Data sh Physical Disk: port 5,Box sh Physical Disk: port 7,Box sh Management Account Management Property Quick Create Wizard Create Options: RAD 3 RAD 10 RAD 5 Status Event Log (WD-2018/Total) (Results: 370) Cancel4.ClickSubmit.
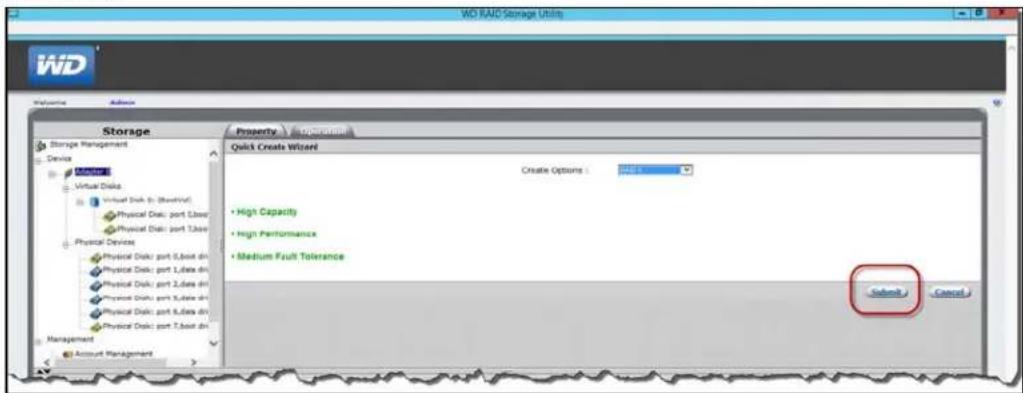
text_image
WD RAID Storage Utility Storage Device Virtual Disk Virtual Disk (R: Virtual) Physical Disk: port 1,box dir Physical Disk: port 2,box dir Physical Disk: port 3,box dir Physical Disk: port 4,box dir Physical Disk: port 5,box dir Physical Disk: port 6,box dir Physical Disk: port 7,box dir Management Account Management Property - Acquisition Quick Create Wizard Create Options : High Capacity High Performance Medium Fault Tolerance Submit Cancel5.ClickOK.YourRAIDstorageiscreated.Now,letsmountyournewdisk.
6.Right-clickthelower-leftcornerofyourdesktop,thenselectDiskManagement.
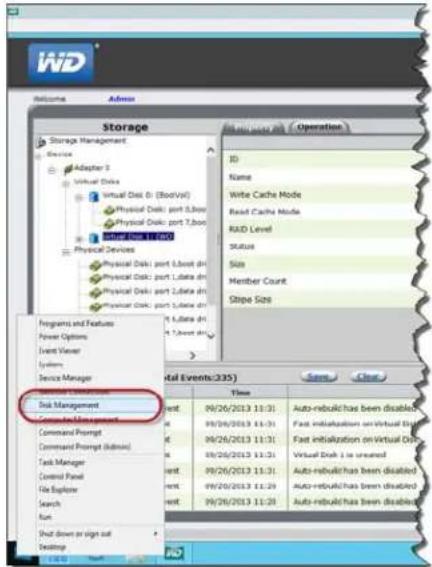
text_image
Storage Storage Management Adaptar 3 Virtual Disk Virtual Disk D (BoolVal) Physical Disk: port 5,Boot Physical Disk: port 7,Boot SUPPORT FOR ALL Physical Devices Physical Disk: port LBoot dns Physical Disk: port LBoot dns Physical Disk: port LBoot dns Programs and Features Power Options Event Viewer Systems Service Manager Disk Management Command Prompt Command Prompt (Admin) Task Manager Control Panel File Explorer Search Run Shut down or sign out Desktop ID Name Write Cache Mode Read Cache Mode RAD Level Status Size Member Count Stope Size Total Events(235) Score Clear Time 9/26/2013 11:31 Auto-rebuild has been disabled. 9/26/2013 11:31 Fast initialization on Virtual Batch 9/26/2013 11:31 Fast initialization on Virtual Data 9/26/2013 11:31 Virtual Dock 1 is created 9/26/2013 11:31 Auto-rebuild has been disabled. 9/26/2013 11:29 Auto-rebuild has been disabled. 9/26/2013 11:28 Auto-rebuild has been disabled- OntheInitializeDiskscreen, clickOK.
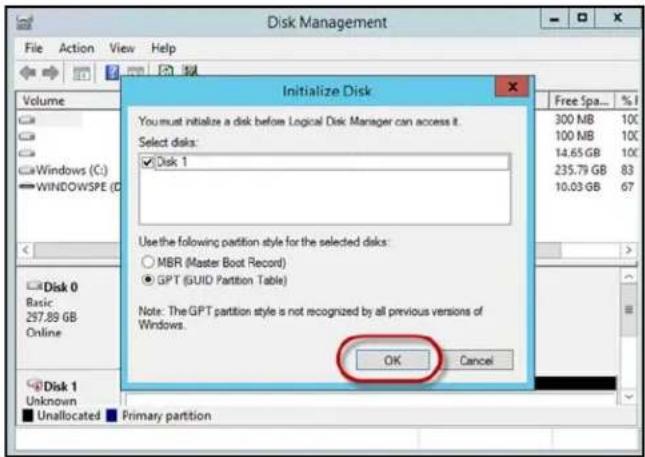
text_image
Disk Management File Action View Help Volume Windows (C:) WINDOWSPE (D:) Initialize Disk You must initialize a disk before Logical Disk Manager can access it. Select disks: ✓Disk 1 Use the following partition style for the selected disks: ○MBR (Master Boot Record) ●GPT (GUID Partition Table) Note: The GPT partition style is not recognized by all previous versions of Windows. OK Cancel Free Spa... %1 300 MB 100 100 MB 100 14.65 GB 100 235.79 GB 83 10.03 GB 67 Disk 0 Basic 297.89 GB Online Disk 1 Unknown Unallocated Primary partition- OntheDiskManagementscreen, right-clickyourinitializedddisk(Disk1).thenselect NewSimpleVolume.
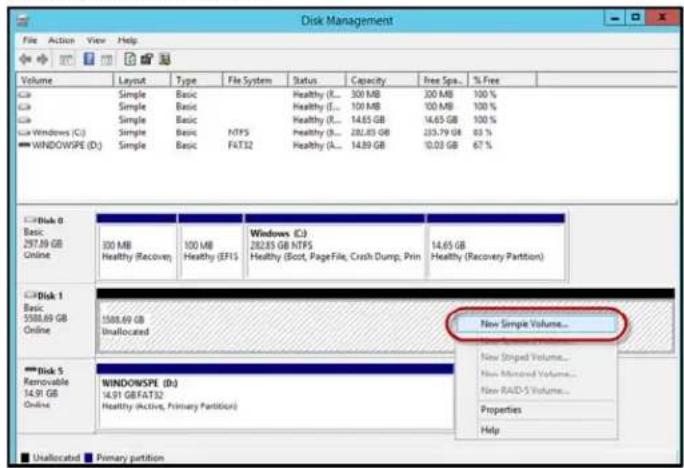
text_image
Disk Management File Action View Help Volume Layout Type File System Status Capacity Free Spa... % Free Simple Basic Healthy (E)... 300 MB 300 MB 100 % Simple Basic Healthy (E)... 100 MB 100 MB 100 % Simple Basic Healthy (E)... 14.65 GB 14.65 GB 100 % Windows (C:) Simple Basic NTPS Healthy (E)... 282.83 GB 253.79 GB 63 % WINDOW/SPE (D:) Simple Basic FAT32 Healthy (A)... 14.89 GB 10.03 GB 67 % Disk 0 Basic 297.89 GB Online 300 MB Windows (C:) Healthy (Recovery) Healthy (EFIS) Healthy (Boot, PageFile, Crash Dump, Print) Healthy (Recovery Partition) Disk 1 Basic 5588.69 GB Online 1508.69 GB Unallocated Disk 5 Removable 14.91 GB Online WINDOWSPE (D:) 14.91 GB/FAT32 Healthy (Active, Primary Partition) New Simple Volume... New Striped Volume... New Modified Volume... New RAID-S Volume... Properties Help Unallocated Primary partition- FollowthestepsoutlinedintheNewSimpleVolumeWizard.
text_image
New Simple Volume Wizard Welcome to the New Simple Volume Wizard This wizard helps you create a simple volume on a disk. A simple volume can only be on a single disk. To continue. click Next.-
Oncethevolumeiscreated, clickthetoclosetheDiskManagementscreen.
-
OntheWDRAIDStorageUtility, clickthetoclosethescreen. YourRAIDvolumeis nowcreatedandmounted.
RecoveringfromaFailedDrive
Usethefollowingstepstorecoverfromafaileddrive.
- Replacethedrive(theonewiththeredLEDoverthedrive)withanapproveddrivefor theWDSentinelserver(see"Findcompatibleharddrives"onpage36).
- Oncereplaced, accessthedeviceDashboardMonitorpage.
- ClicktheConfigurelink, located on the Healthtabin the Internal Storage area.
- Complethestepsoutlined in "SettingupStorageSpaces" on page 44 or "Setting UpRAIDStorage" on page 45 to integrate the new drive into the RAID array.
UsingUSBStorage
TheWDSentinelserverhastwoUSB2.0portandfourUSB3.0portsonthebackpanelof theunit.TheUSB3.0portscanconnecttoexternalUSB2.0orUSB3.0storagedevicesor toaUPSdeviceforpoweroutageconditions.Forexample,WDMyPassportorWDMy PassportEssentialsmaybeusedtoconnecttotheWDSentinelserver.Youcansharethis dataonyourUSBdrivewithotherusersconnectedtotheserverbyusingtheDashboard, whichtreatstheUSBdriveasashare.Youcansetuserprivilegesjustasyoudowithshared foldersontheWDSentinelserver'sdrives.TheservermanagesUPScapabilitythrougha USBportforcommunicationandtoensureanorderlyshutdown.
BackView
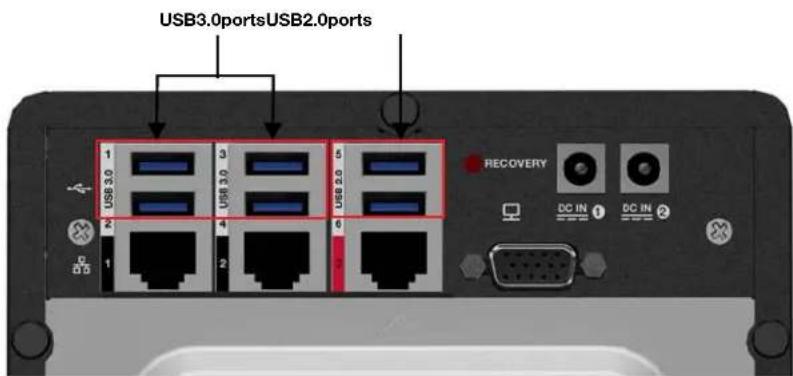
text_image
USB3.0portsUSB2.0ports 1 3 5 RECOVERY DC IN ① DC IN ② 1 2 3 4 5 6 7 8 9 10 11 12 13 14 15TosharedataonaUSBdrive:
- ConnectaUSBdrivetooneofthesixUSBports.
- OntheDashboard, clicktheStorageicon.
-
ClicktheServerFolderstab.
-
In the Taskbar, click Addafolder.
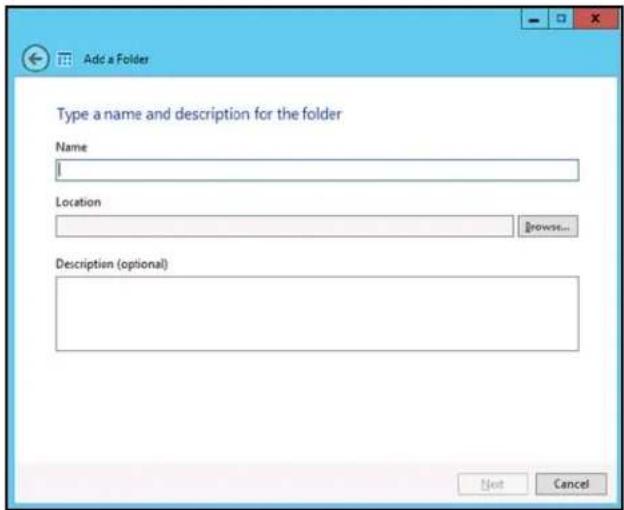
text_image
Add a Folder Type a name and description for the folder Name Location Browse... Description (optional) Next Cancel5.Enteranameforthefolder.
6. ClickBrowse and select a folder on the USB drive. Not that a shared folder cannot be created at the root of the USB drive.
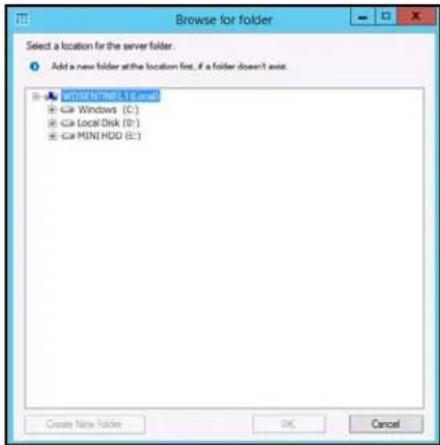
text_image
Browse for folder Select a location for the server folder. Add a new folder at the location first, if a folder doesn't exist. WORKS & INFLA Excel Windows (C:) Local Disk (D:) MINI HDD (E:) Create New Folder OK Cancel- ClickOK and follow the instructions on the screen.
TostopsharingdataonaUSBdrive:
- OntheDashboard, click the ServersFolders and Hard Drivesicon.
- ClicktheServerFolderstab, thenselectthefolderyouwanttostopsharing.
3. On the Taskbar, click Stopsharingthefolder.
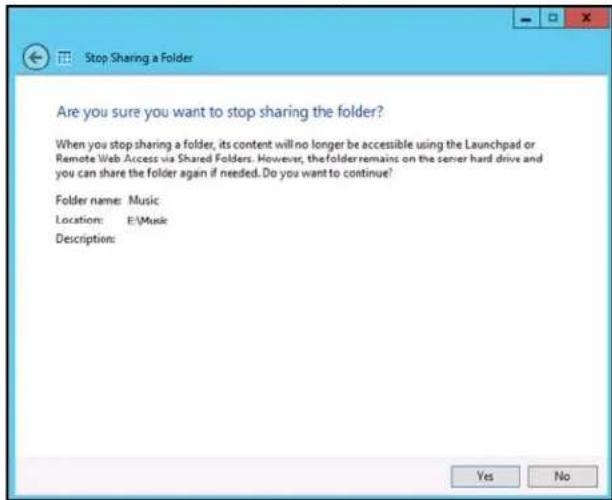
text_image
Are you sure you want to stop sharing the folder? When you stop sharing a folder, its content will no longer be accessible using the Launchpad or Remote Web Access via Shared Folders. However, the folder remains on the server hard drive and you can share the folder again if needed. Do you want to continue? Folder name: Music Location: E:\Music Description: Yes No4. ClickYes, thenclickClose.
MovingaServerFolder
Itisabestpracticetomoveanyfoldersyoumayhaveonyourserverbootdrive(C:)toyour shareddatadrives.Usethefollowingstepstomoveafolderonyourserverortoanother locationonyourserver.Whenyouperformthistask,ensurethatthenewlocationhasa maximumamountoffreespace.
Note: If possible, avoid moving ashared foldertoy our server's system drive (such as C:) This may take away then necessary drives pacerequired for your operating system and its updates.
Note: Avoidmovingsharefolderstoanexternalharddrive. Oncemoved, you may not be able to access these files in a folder on an external drive because they can be easily disconnected. Instead creating the folder on an internal drive is recommended.
Aserverfolder cannot be removed to the following locations and will result in an error if any one of these locations is selected for a move:
- aharddrivethatisnotformattedwiththeNTFSorReFSfilesystem.
the%windir%folder.
■ amappednetworkdrive.
■ afolderthatcontainsasharedfolder. - aharddrivethatislocatedunderDevicewithRemovableStorage.
■ asub-folderofasharedfolder.
Beforeyoumoveafolderensurethat:
- You'vebackedupyourdevice(See"BackingupyourWDSentinelServer"on page70.).
Noneofthefileswithinthefolderyou'dliketomovearecurrentlyinuse.
Usethefollowingstepstomoveaserverfolder.
- OntheDashboard, clickStorage.
- OntheServerFolderstab, select the folder that you want to move.
-
In the Taskspan, click Movethefolder.
-
FollowthestepsoutlinedintheMoveafolderwizard.
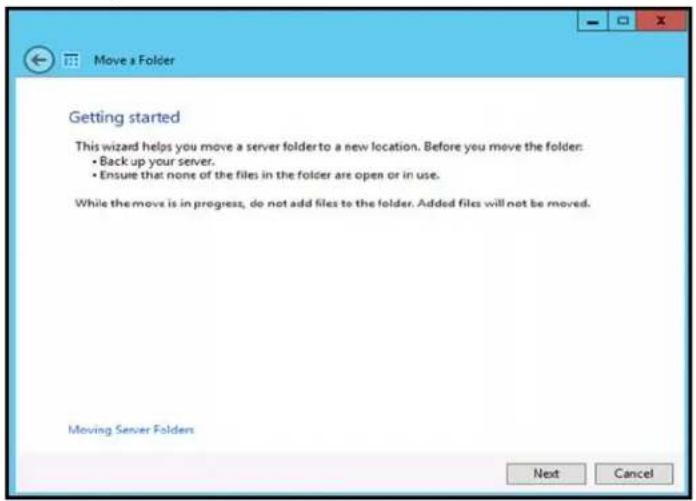
text_image
Move a Folder Getting started This wizard helps you move a server folder to a new location. Before you move the folder: • Back up your server. • Ensure that none of the files in the folder are open or in use. While the move is in progress, do not add files to the folder. Added files will not be moved. Moving Server Folders Next Cancel
UsingtheWDSentinelServer'sFeatures
UsingtheLaunchpad(InternalUsers) AccessingSharedFoldersOverYourNetwork AccessingComputersandSharedFoldersRemotely Backingup(WindowsPC) BackingupwithTimeMachine(Mac) Recovering/Restoring(WindowsPC) Recovering/Restoring(Mac) BackingupyourWDSentinelServer RecoveringaWDSentinelServerImageorResettingtheBootDrivestoFactoryDefaults
ThischapterdescribesteroutinetasksthatboththeAdministratorandpermittedusers performontheWDSentinelserver.
UsingtheLaunchpad(InternalUsers)
Afteryou,theAdministrator,usetheDashboardtosetupuserswithausername, password,andpermissions,theycanaccesstheLaunchpadSign-inpageusingoneofthe followingmethods:
BestPractice: Ideally, you setup a username and password for yourself and have given all access privileges by out of can use the Launchpad shortcuts.
AccessingtheLaunchpad
ToaccesstheLaunchpad(Windows):
| Ifyouroperatingsystems is... | Dooneofthefollowing... |
| Windows8FromAppsPage: | Onyourkeyboard,clicktheWindowsbutton.OntheStartpage,right-clickinablankareaofthescreen.SelectAllapps.UnderWindowsServerEssentials,clickWindowsServerLaunchpad.FromDesktop:Double-clicktheLaunchpadicon.FromSystemTray :Right-clicktheLaunchpadicon launchpad.Open LaunchpadOpen DashboardExit |
| Ifyouoperatingsystems is... | Dooneofthefollowing... |
| Windows7FromStartMenu: | Click>AllPrograms>WindowsServer2012 Essentials>WindowsServerLaunchpad . FromDesktop:Double-clicktheLaunchpadicon.FromSystemTray :Right-clicktheLaunchpadiconandselectOpen Launchpad. |
Onceyou'veaccessedtheLaunchpadSignInscreen,usethefollowingsteptosigninand usetheLaunchpad.
- Enteryourusernameandpassword.
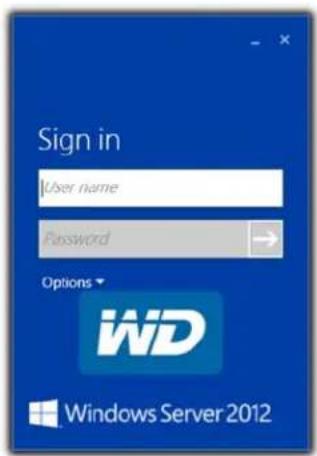
text_image
Sign in User name Password Options iWD Windows Server 2012- Click the arrow to display the Launchpad.
TheLaunchpadlistsfourtasksthataauthorizeduserscanperform: Backup, RemoteWeb Access, SharedFoldersandDashboard.
Note: The Dashboard option is only useful to a user with Administrative privileges and knowledgeoftheAdministratorpassword.
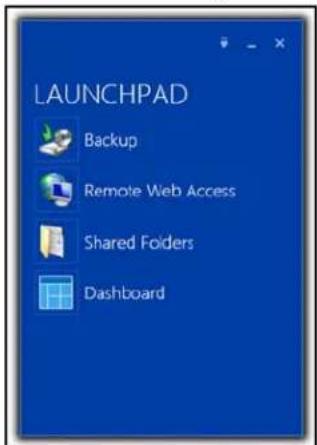
text_image
LAUNCHPAD Backup Remote Web Access Shared Folders DashboardToaccesstheLaunchpad(Mac):
1. Dooneofthefollowing:
■ Double-clicktheLaunchpadicononyourMacToolbar.
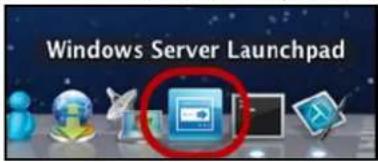
text_image
Windows Server Launchpad- SelectFinder>Applications>WindowsServerLaunchpad
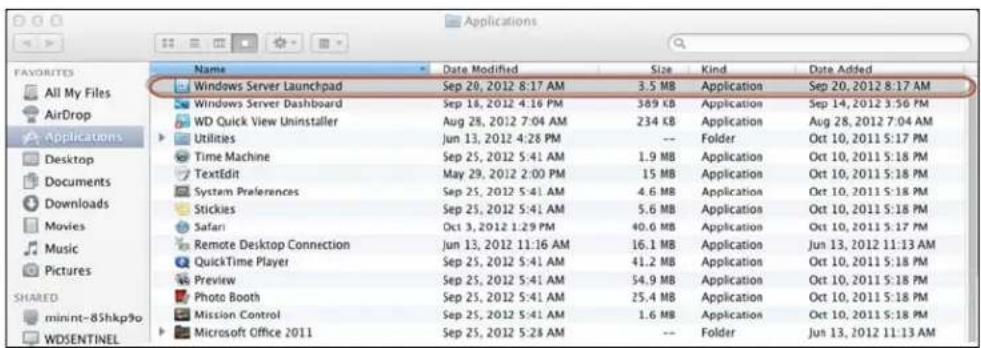
text_image
FAVORITES All My Files AirDrop Applications Desktop Documents Downloads Movies Music Pictures SHARED minint-8Shkp9o WDSENTINEL Name Date Modified Size Kind Date Added Windows Server Launchpad Sep 20, 2012 8:17 AM 3.5 MB Application Sep 20, 2012 8:17 AM Windows Server Dashboard Sep 18, 2012 4:16 PM 369 KB Application Sep 14, 2012 3:56 PM WD Quick View Uninstaller Aug 28, 2012 7:04 AM 234 KB Application Aug 28, 2012 7:04 AM Utilities Jun 13, 2012 4:28 PM -- Folder Oct 10, 2011 5:17 PM Time Machine Sep 25, 2012 5:41 AM 1.9 MB Application Oct 10, 2011 5:18 PM TextEdit May 29, 2012 2:00 PM 15 MB Application Oct 10, 2011 5:18 PM System Preferences Sep 25, 2012 5:41 AM 4.6 MB Application Oct 10, 2011 5:18 PM Stickies Sep 25, 2012 5:41 AM 5.6 MB Application Oct 10, 2011 5:18 PM Safari Oct 3, 2012 1:29 PM 40.6 MB Application Oct 10, 2011 5:17 PM Remote Desktop Connection Jun 13, 2012 11:16 AM 16.1 MB Application Jun 13, 2012 11:13 AM QuickTime Player Sep 25, 2012 5:41 AM 41.2 MB Application Oct 10, 2011 5:18 PM Preview Sep 25, 2012 5:41 AM 54.9 MB Application Oct 10, 2011 5:18 PM Photo Booth Sep 25, 2012 5:41 AM 25.4 MB Application Oct 10, 2011 5:18 PM Mission Control Sep 25, 2012 5:41 AM 1.6 MB Application Oct 10, 2011 5:18 PM Microsoft Office 2011 Sep 25, 2012 5:28 AM -- Folder Jun 13, 2012 11:13 AMOnceyou'veaccessedtheLaunchPadSignInscreen,usethefollowingstepstosigninand usetheLaunchpad.
- Enteryourusernameandpassword.
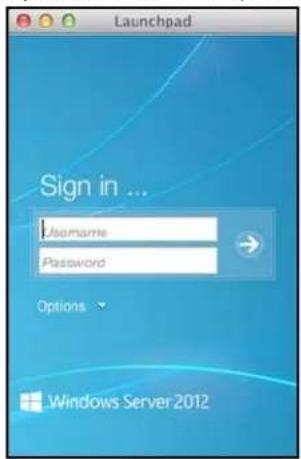
text_image
Launchpad Sign in ... Username Password Options Windows Server 2012- Click the arrow to display the Launchpad. It lists four tasks: Backup, Remote Web Access, and SharedFolders.
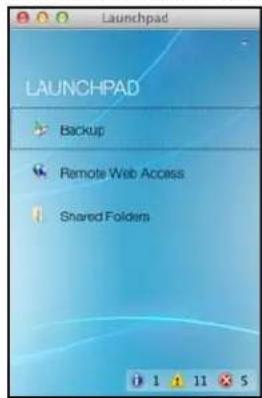
text_image
LAUNCHPAD Backup Remote Web Access Shared FoldersSelectingLaunchpadOptions(WindowsPCorMacComputer)
ToselectLaunchpadoptions:
| IFyouwantto...THEN...AND... | ||
| BackupyourWindowsPCtotheWDSentinel servermanually | ClickBackup.Continueto“Backingup(Windows PC)”onpage60. | |
| BackupyourMacto theWDSentinelServer usingTimeMachine | Click Backup.Continueto“BackingupwithTime Machine(Mac)”onpage64. | |
| UseRemoteWeb Access:Enableremoteweb accessforuserswith RemoteAccess PrivilegesAccesstheserver fromaremotelocation (allusers)Changeauser password(bythe user) | ClickRemoteWeb Access. | Continueto“AccessingComputers andSharedFoldersRemotely”on page59. |
| Accesssharedfolders ontheserver | ClickShared Folders. | Continueto“AccessingShared FoldersOverYourNetwork”on page58. |
| Managetheserver (WindowsPCsand Administratorsonly) | ClickDashboard. | EntertheAdministratorpassword andcontinueto“ManagingtheWD SentinelServer(Dashboard)”on page25. |
ManagingtheLaunchpad
TodisabletheLaunchpadaftersigningin(Windows):
-
SignintotheLaunchpad.
-
Click the menu arrow at the top right and select Settings from the drop-down menu.
text_image
LAUNCHPAD Backup Remote Web Access Settings About- CleartheAutomaticallyruntheConnectorwhenIsignintoWindowscheck box, and click OK.
text_image
Settings General Start up option □ Automatically run the Connector when I sign in to Windows. □ Automatically enter offline mode OK Cancel ApplyTodisabletheLaunchpadaftersigningin(Mac):
-
SignintotheLaunchpad.
-
Click the menu arrow at the top right and select Settings from the drop-down menu.
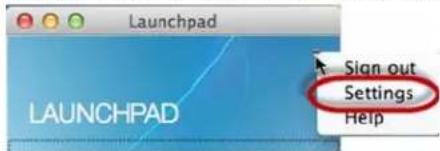
text_image
Launchpad LAUNCHPAD Sign out Settings Help3.CleartheAutomaticallyrunWindowsServerLaunchpadwhenIlogincheck box, and click theClosebutton.
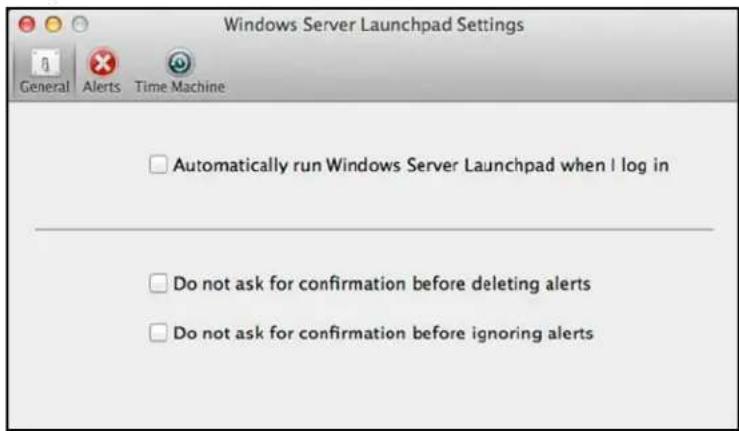
text_image
Windows Server Launchpad Settings General Alerts Time Machine □ Automatically run Windows Server Launchpad when I log in □ Do not ask for confirmation before deleting alerts □ Do not ask for confirmation before ignoring alertsYoucanalsochangethetypeofalertsthatdisplayontheLaunchpadselectingwhethertoallow Microsofttosendyouinformationaboutitinthiswindow,andsetupyourTimeMachinebackups.
TouninstalltheLaunchpad(ConnectorSoftware)onaWindowsPC:
Note: When you uninstall Launchpad, you alsouninstall Dashboard. They can not be uninstalled separately.
| Ifyouroperatingsystems is... | Then... |
| Windows8 | •Onyourkeyboard,clicktheWindowsbutton. [icon: 1]•OntheStartpage,right-clickinablankareaofthescreen.•SelectAllapps. [icon: 2]•UnderWindowsServer2012Essentials,right-clickWindows ServerLaunchpad.•SelectUninstall. [icon: 3] |
| Windows7 | •Click>ControlPanel(Windows7/Vista).•ClickStart>ControlPanel(WindowsXP).•ClickUninstallaProgram.•Fromthelist,selectWindowsServer2012EssentialsConnector.•ClickUninstall.- If the User Account Control window displays, click Allow.- IftheWindowsServer2012EssentialsConnectorpagedisplays suggestingthatyouclosetheLaunchpad,clickOK.Note: Youmustrebootthecomputerbeforeinstallinganother Connector. |
TouninstalltheLaunchpad(ConnectorSoftware)onaMac:
YoumustuninstallLaunchpadfromthreeMacintosh®HDfolders:Users,Applications,and Library.
- QuittheLaunchpad.
- In the Finder pane, click Applications. Drag and drop Windows Server Launchpad intotheTrashicon.TheLaunchpadiconnolongerappearsinthedock.
- ClickFinder>Devices>MacintoshHD.
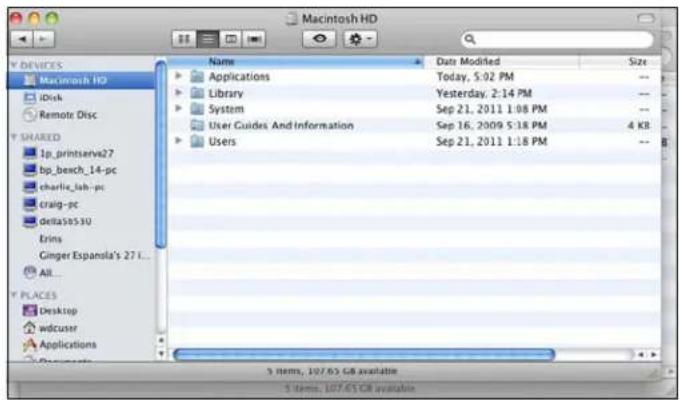
text_image
Macintosh HD Name Data Modified Size Applications Today, 5:02 PM -- Library Yesterday, 2:14 PM -- System Sep 21, 2011 1:08 PM -- User Guides And Information Sep 16, 2009 5:18 PM 4 KB Users Sep 21, 2011 1:18 PM -- 3 items, 107.65 GB available 3 items, 107.65 GB available- Click Library>Application Support>Microsoft. Drag and drop Launchpad into the Trashicon.
- Click Library>Preferences. Drag and drop "com.microsoft.launchpad.plist" into theTrashicon.
6.Right-clicktheTrashiconandselectEmptyTrash.
AccessingSharedFoldersOverYourNetwork
Launchpad(Windows)
- OntheLaunchpad, click SharedFolders.Asetoffolderssimilartotheonebelow displays:
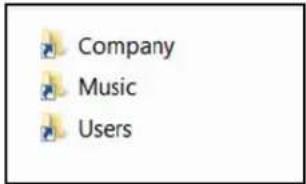
text_image
Company Music Users- Double-clickafoldertoopenit, thenclickthefileyouwanttoaccess. Your access (as ageneraluser) depends on the permissions assigned to you by the Administrator.
Launchpad(Mac)
-
OntheLaunchpad, clickSharedFolders.
-
Select the shared foldery you'd liketomountony our Mac, then click
OK.
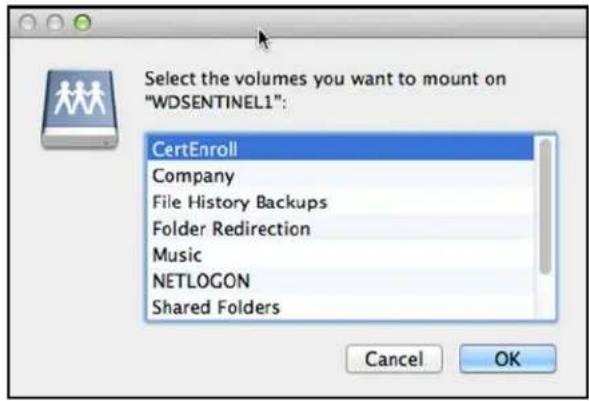
text_image
Select the volumes you want to mount on "WDSENTINEL1": CertEnroll Company File History Backups Folder Redirection Music NETLOGON Shared Folders Cancel OK- IfallsharedfoldersaremountedonyourMac,clickCancel,thenopenFinder.ClicktheIP AddressofyourWDSentinelunderSharedtodisplayyourSharedFolders.
- TheselectedsharedfolderdisplaysinFinder.
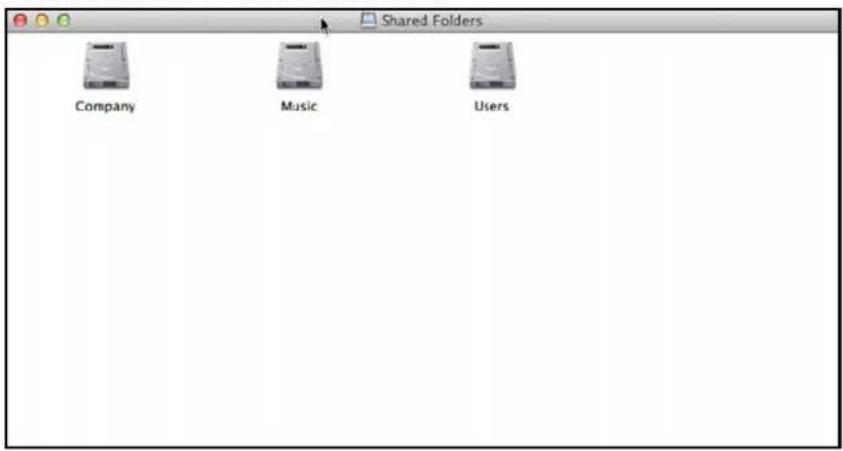
text_image
Shared Folders Company Music UsersAccessingComputersandSharedFoldersRemotely
ThissectionassumesthattheAdministratorhascompletedthesetupandconfigurationfor RemoteWebAccessthroughtheDashboard.
YoucanaccessfilesstoredontheWDSentinelDS5100/DS6100anywhere,aslongasyou haveaccesstothelInternet.
Note: You must use Internet Explorer 8 or higher to access a PC using the Remote Web Access feature. See "Specific Problems and Corrective Actions" on page 73.
LoggingIn
- On the Launchpad, click Remote Web Access or on a web browser, enter the domainaddressforyourWDSentinelserver. Thisisthedomainaddresssthe AdministratorconfiguredwhilesettingupRemoteWebAccessoryyourWDSentinel server. The followingwebpagedisplaysinyourbrowser.
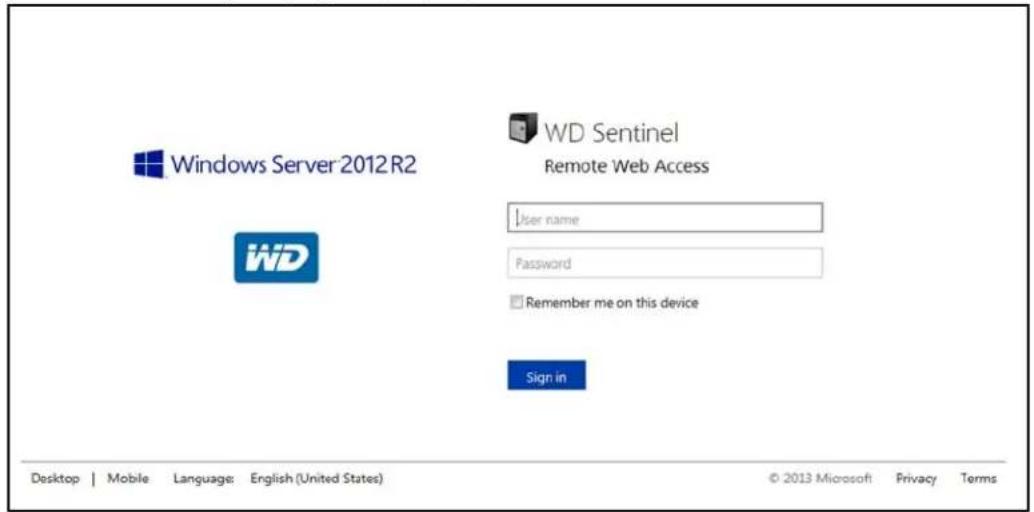
text_image
Windows Server 2012 R2 WD Sentinel Remote Web Access User name Password Remember me on this device Sign in Desktop | Mobile Language: English (United States) © 2013 Microsoft Privacy Terms2.EntertheWDSentinelserverusernameandpasswordsetupwiththeappropriate permissions,thenclicktheSignintodisplaytheRemoteWebAccess:Home window:
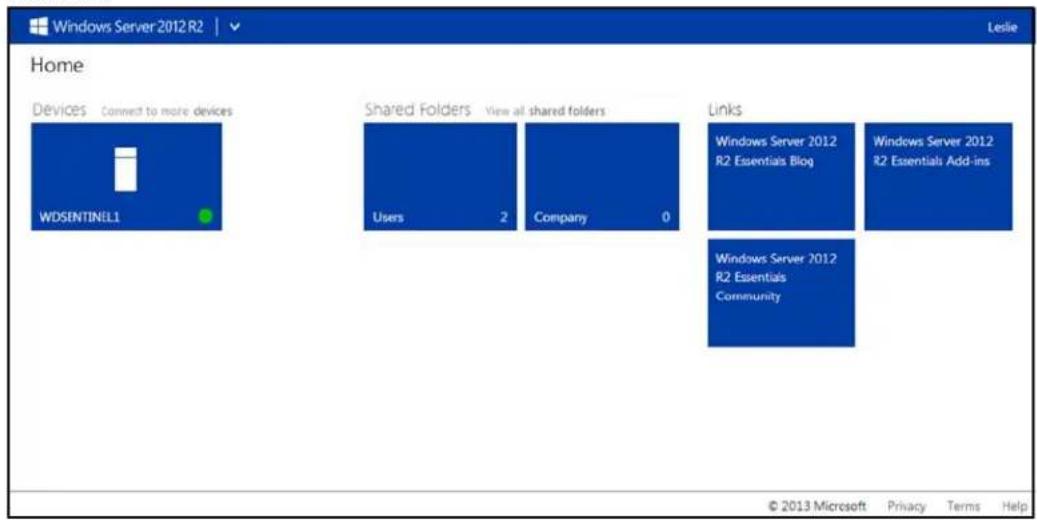
text_image
Windows Server 2012 R2 Home Devices Connect to more devices WDSENTINELL Shared Folders View all shared folders Users 2 Company 0 Links Windows Server 2012 R2 Essentials Blog Windows Server 2012 R2 Essentials Add-ins Windows Server 2012 R2 Essentials Community © 2013 Microsoft Privacy Terms HelpRemoteWebAccessHomePage
The Remotewindow include the following sections:
Note: You can also set the navigation links at the top of the window to view these sections.
Devices
Note: ConnectingtocomputersortheWDSentinelserverusingRemoteWebAccess requirestheInternetExplorerbrowser.
- ClickConnecttoconnecttoyourWDSentinelserverortoacomputeronyour network.
- If the Internet Explorer you are using does not have Active XClient, click install it, then complet the XWizard.
OKto
SharedFolders
AccesssharedfoldersontheWDSentinelserver.Auserwith"Read&Write"accesstoa particularsharedfolderisabletomodifythecontentsoftheexistingfiles,uploadnewfiles, ordeletefilesfromthefolder.
Note: Only the folders for which the user has permissions are displayed under Shared Folderson Remote Web Access.
Links
DisplaysusefullinkstoMicrosoftinformation.
Backingup(WindowsPC)
TheWDSentinelserverbackupisbaseduponblocklevelde-duplication,aprocessthat backsupdatawithoutunnecessarilybackingupthesamedatamorethanonce.This powerfulprocessuseslessnetworktrafficforexecution,providesafullback-upateach backuptime(althoughitbehavesasifitisincremental),andbyexecutingde-duplication acrossallclientcomputers,thestoragecapacityrequirementsaresignificantlyreduced. BackupbecomesanautomaticprocessforacomputeronceyouinstallConnectorsoftware onit.WithConnectorsoftwareinstalled,allvolumesandallNTFSdataonthatcomputerare backedup.
Note: For information on backing up your Mac using TimeMachine, See "Backing up with TimeMachine(Mac)" on page 64.
SchedulingAutomaticBackups(Dashboardonly)
Tosetascheduleforfuturebackups:
- AccesstheDashboard.
- ClicktheDevicesicononthenavigationbartodisplayalistofcomputersandservers onyournetwork:
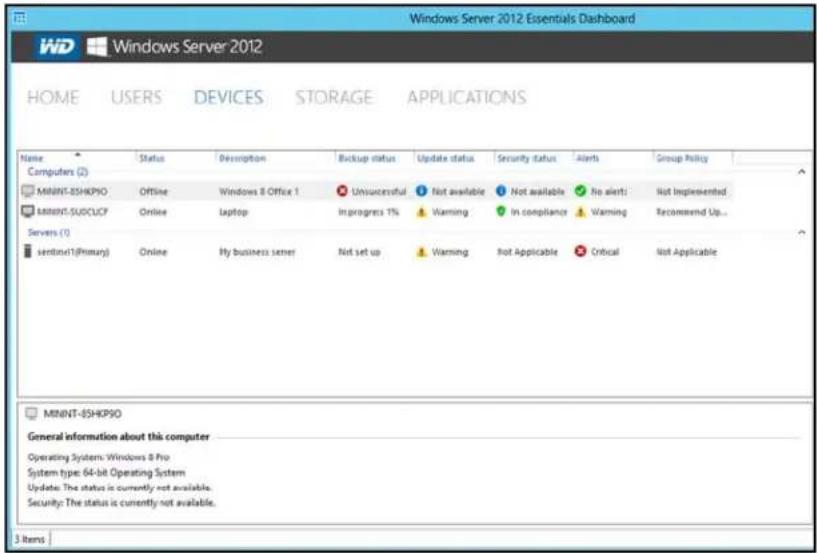
text_image
Windows Server 2012 Essentials Dashboard WD Windows Server 2012 HOME USERS DEVICES STORAGE APPLICATIONS Name Status Description Backup status Update status Security status Alerts Group Policy Computers (Q) MINNT-8SHKP50 Offline Windows 8 Office 1 Unsuccessful Not available Not available No alerts Not Implemented MINNT-SUDCUCF Online laptop In progress 1% Warming In compliance Warming Recommend Up... Servers (Y) sentinel(1)(Primary) Online My business server Not set up Warming Not Applicable Critical Not Applicable MINNT-8SHKP50 General information about this computer Operating System: Windows 8 Pro System type: 64-bit Operating System Update: The status is currently not available. Security: The status is currently not available. 3 items- Click Customize Backup for the computer in the Device Taskspannel.
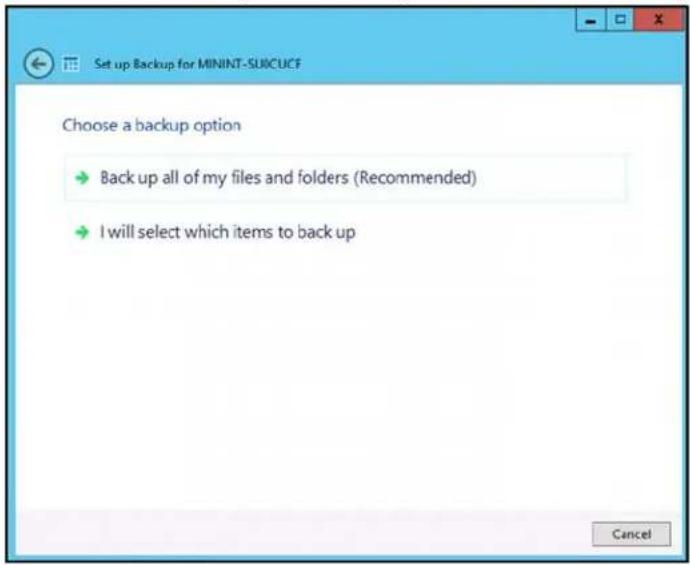
text_image
Set up Backup for MININT-SU0CUCF Choose a backup option → Back up all of my files and folders (Recommended) → I will select which items to back up Cancel4. Select Backupallofmyfilesandfolders(Recommended).
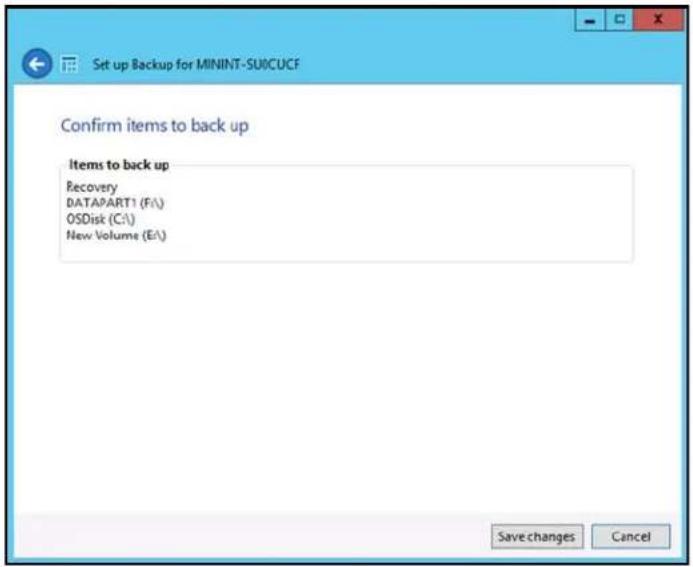
text_image
Set up Backup for MININT-SU0CUCF Confirm items to back up Items to back up Recovery DATAPART1 (Fi\) OSDisk (C:\) New Volume (E:\) Save changes Cancel5. Review the backup information to ensure that it is correct, then click Save changes. These selected computer is now setup for automatic backup.
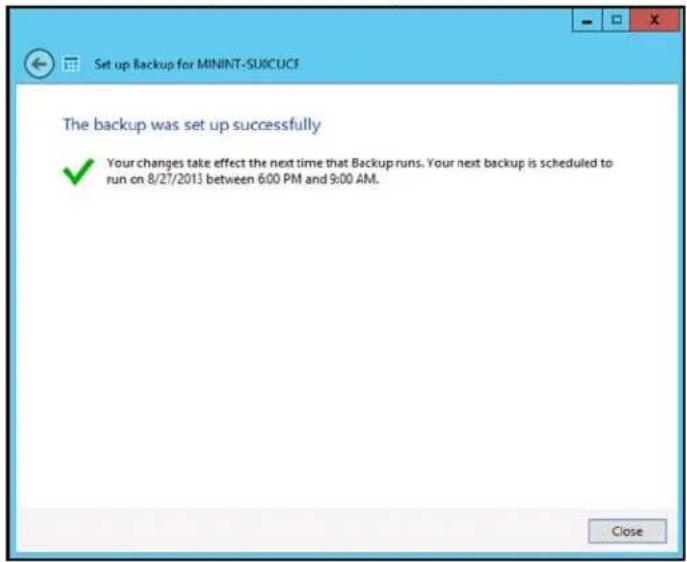
text_image
Set up Backup for MININT-SUICUCF The backup was set up successfully ✓ Your changes take effect the next time that Backup runs. Your next backup is scheduled to run on 8/27/2013 between 6:00 PM and 9:00 AM. Close6.ClickClose.
InitiatingBackups
Bydefault, backupsareperformedatnightforupto50clientcomputersinasequential order. If the client computer is asleep or hibernating at that time, the backup software can be enabled to wake up the client computer, backup, and put it back to sleep.
YoumaystartamanualbackupeitherthroughtheLaunchpadonthecomputerbeing backeduporthroughtheDashboard.
BackupUsingtheLaunchpad
Note: For information on accessing the Launchpad, see "Using the Launchpad (InternalUsers)" on page 52).
- OntheLaunchpad, click Backup. The Backup Properties pagedisplays:
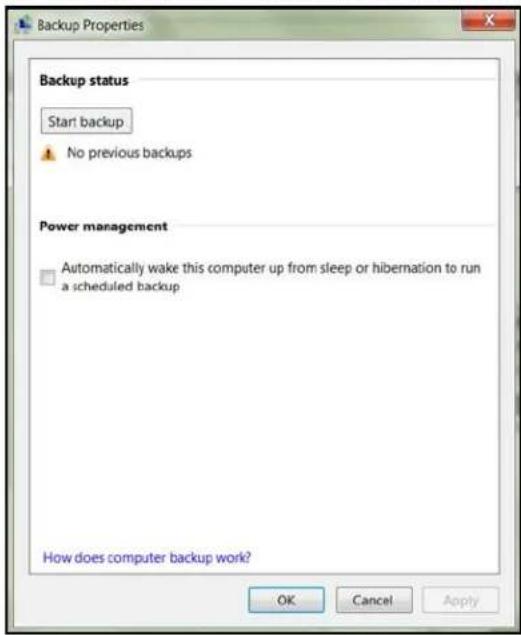
text_image
Backup Properties Backup status Start backup No previous backups Power management Automatically wake this computer up from sleep or hibernation to run a scheduled backup How does computer backup work? OK Cancel ApplyNote: If you want the computer to automatically wakeup for scheduled backups, select the checkbox.
- ClickStartbackup.
3.EnteranameforthebackupandclickOK.
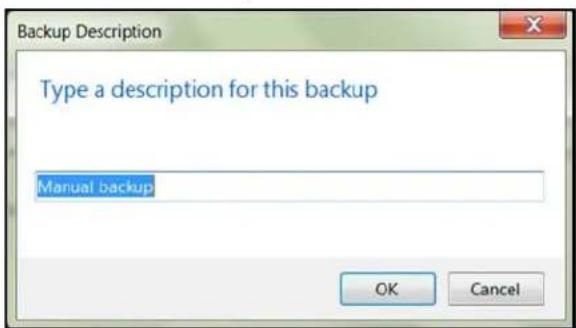
text_image
Backup Description Type a description for this backup Manuel backup OK CancelTheBackupPropertiespagere-displaysandtrackstheprogressofthebackup.
- Click OK to apply the change, closethe page, and return to the Launch pad while the backup continues.
Themessagethatthebackupwassuccessfuldisplaysonthepageandonthe Dashboard.Formoreinformationaboutthebackupprocess,seeMicrosoftOnline Help.
BackupUsingtheDashboard
- Click Devices on thenavigation bartodisplayalist of computers and server on your network:
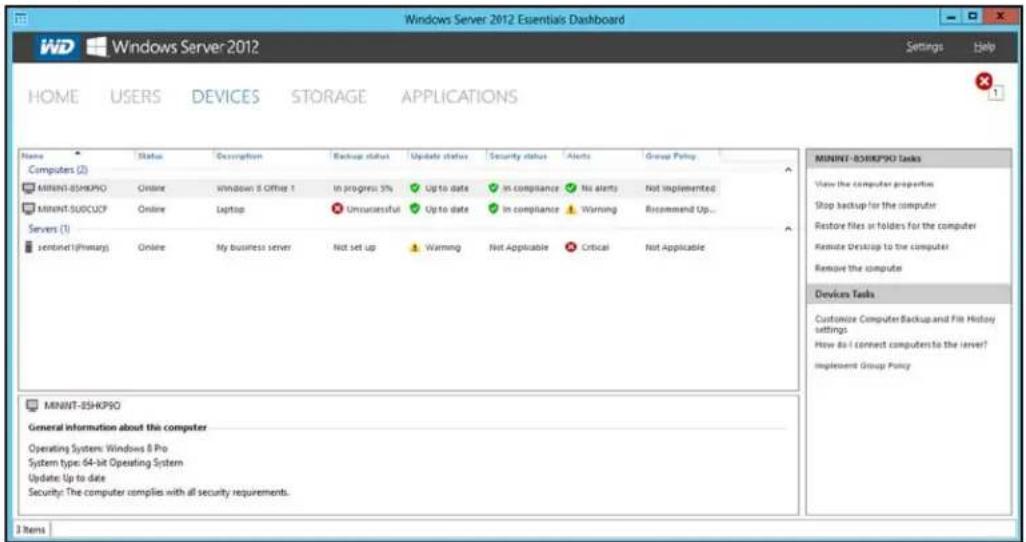
text_image
Windows Server 2012 Essentials Dashboard WD Windows Server 2012 Settings Help HOME USERS DEVICES STORAGE APPLICATIONS Name Status Description Backup status Update status Security status Alerts Group Policy Computers (2) MINNT-85HKP90 Online Windows 8 Office 1 In progress 5% Up to date In compliance No alerts Not implemented MINNT-SUSCUOP Online Laptop Unsuccessful Up to date In compliance Warning Recommend Up... Servers (1) sentinel(1)(Primary) Online My business server Not set up Warning Not Applicable Critical Not Applicable MINNT-85HKP90 Tasks View the computer properties Stop backup for the computer Restore files or folders for the computer Remote Desktop to the computer Remove the computer Devices Tasks Customize Computer Backup and File History settings How do I connect computers to the server? Implement Group Policy MINNT-85HKP90 General information about this computer Operating Systems: Windows 8 Pro System type: 64-bit Operating System Update: Up to date Security: The computer complies with all security requirements. 3 Items-
Select the computery you want to backup.
-
ClickStartaBackupforthecomputerintheTaskpane.Forfurtherinstructions, seeMicrosoftOnlineHelp.
BackingupwithTimeMachine(Mac)
ForMacusers, TimeMachine® allowsyoutobackupdatatoyourWDSentinelserver.Time MachineautomaticallybacksupyourentireMac,includingsystemfiles,applications,accounts,preferences,emailmessages,music,photos,movies,anddocuments.
Note: TimeMachinekeepshourlybackupsforthepast24hours, dailybackupsforthe pastmonth, and weeklybackupsuntilyourbackupdriveisfull.
TotakeadvantageoftheTimeMachinebackupcapabilities,youmustinstalltheserver connectorsoftwareonyourMac(see"ConnectingaMac"onpage23)andcreateauser accountwithintheWDSentinelserver(see"AddingaUserAccount"onpage27).
Note: Your MacmustbeconnecttothesamenetworkasyourWDSentinelserver.
For additional information on Time Machine, consult your MacOS documentation.
Note: For information on backing up your PC, See "Backingup(WindowsPC)" on page 60.
SchedulingAutomaticBackups(TimeMachine)
TosetupandscheduleTimeMachinetobackupfilestoyourWDSentinelserver:
- UseoneofthefollowingmethodstoopenTimeMachine.
- ClicktheTimeMachineiconintheDock:

text_image
Screenshot of a macOS desktop with app icons and a highlighted camera icon, likely from an older application.- Click the Apple® menu > System Preferences and select Time Machine.
- ClickGo>ApplicationsandselectTimeMachine.
- If this is your first time creating a backup, the following screen displays:
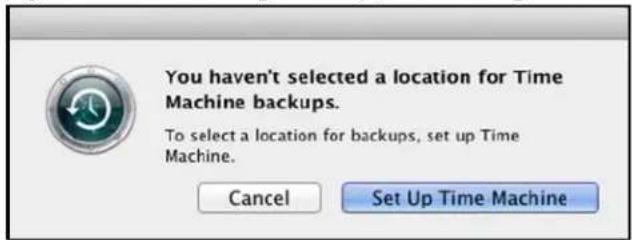
text_image
You haven't selected a location for Time Machine backups. To select a location for backups, set up Time Machine. Cancel Set Up Time Machine- ClickSetUpTimeMachinetodisplaytheTimeMachinePreferenceesscreen:
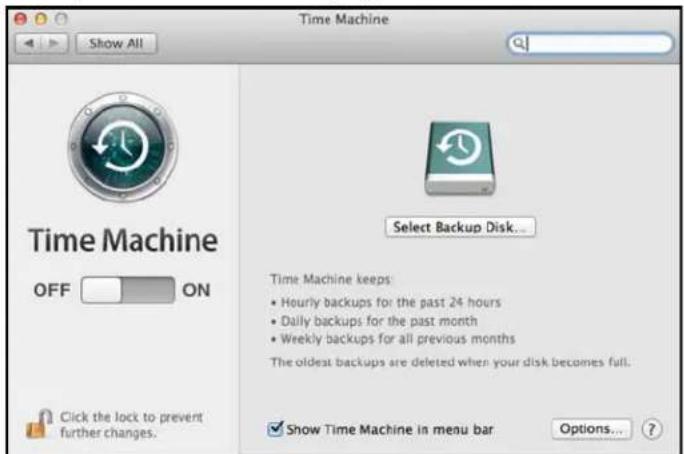
text_image
Time Machine OFF ON Click the lock to prevent further changes. Select Backup Disk... Time Machine keeps: • Hourly backups for the past 24 hours • Daily backups for the past month • Weekly backups for all previous months The oldest backups are deleted when your disk becomes full. Show Time Machine in menu bar Options... ?- ClickSelectBackupDisk and select the WDSentinel server for your backups.
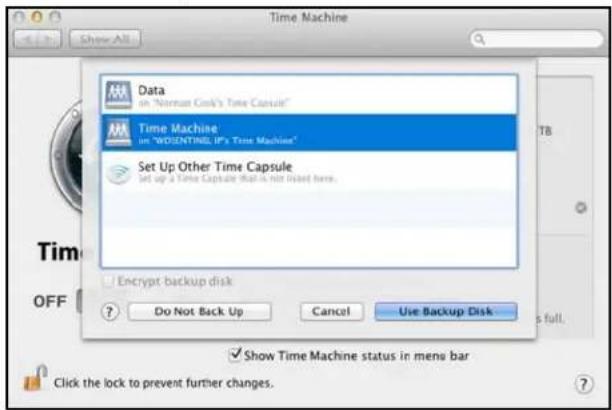
text_image
Time Machine Data on "Nirman Cok's Time Capsule" Time Machine on "WOSINTING UP's Time Capsule" Set Up Other Time Capsule set up a Time Capsule that is not listed here. Encrypt backup disk Do Not Back Up Cancel Use Backup Disk Show Time Machine status in menu bar Click the lock to prevent further changes.5.ClickUseBackupDisk.Ascreenpromptsforyourusernameandpassword.
6.Entertheusernameandpasswordofanaccountthathasadministratorpermissionson thisclientcomputer,thenclickOK.
text_image
Time Machine wants to make changes. Type your password to allow this. Name: Password: Cancel OK-
Select RegisteredUser.
-
EnteryourassignedWDSentinelUserNameandPasswordintheNameand Passwordfields:
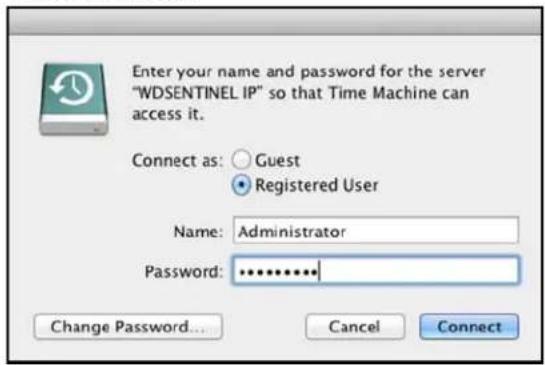
text_image
Enter your name and password for the server "WDSENTINEL IP" so that Time Machine can access it. Connect as: Guest Registered User Name: Administrator Password: ************ Change Password... Cancel Connect-
ClickConnect. The Preference screen returns.
-
Tostartautomaticbackups, movetheslidertoON.
TimeMachinebeginsbackingupyourfiles.Thefirstbackupmaytakesometime,but subsequentbackupsarefasterbecauseTimeMachineonlybacksupneworchanged items.
TimeMachinebacksupyourcomputereveryhourandkeepsthefollowingbackupsets:
■ Everyhourfor24hours
■ Everydayforthepastmonth
■ WeeklyuntiltheWDSentineldriveisfull.
Note: If a backup is interrupted,forexample,if the computer goes intosleepmode,it will resume automatically on cethe computer is available.
Toseeinformationsuchasavailablecapacityandthedateandtimeoftheoldest,latest,and next backup, select Open Time Machine Preferences on the Time Machine drop-down menu:
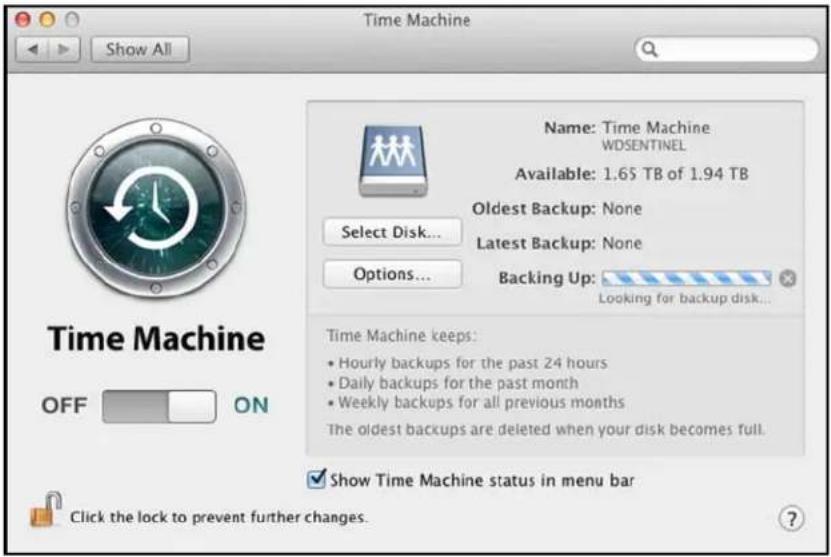
text_image
Time Machine Show All Name: Time Machine WDSENTINEL Available: 1.65 TB of 1.94 TB Oldest Backup: None Latest Backup: None Options... Backing Up: Looking for backup disk... Time Machine keeps: • Hourly backups for the past 24 hours • Daily backups for the past month • Weekly backups for all previous months The oldest backups are deleted when your disk becomes full. Show Time Machine status in menu bar Click the lock to prevent further changes.Recovering/Restoring(WindowsPC)
TheWDSentinelserverprovidestwooptionsforrecoveringlostorcorrupteddata:
- RestoreaComputer — RestoresalldataandsettingsofaWindowsPC computerorastoragedeviceconnectedtotheWDSentinelserver.
■ RecoverFile/Folders—Recoversindividualfilesorfolders.
Note: For information on recovering/restoring data on your Mac using TimeMachine, See "Recovering/Restoring(Mac)" on page 69.
RestoringWindowsPCComputers
Usethefollowingstepstorefiles,versionsoffiles,oryourentiresystemforyour WindowsPC.
- Click Devices on thenavigation bar.
- Select the computer that was backed up.
- In the panel on the right, click Restore files or folders for the computer
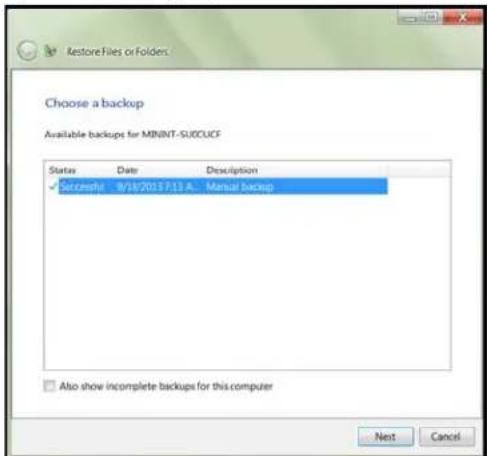
text_image
Restore Files or Folders Choose a backup Available backups for MININT-SUCCUCF Status Date Description ✓ Successful 9/18/2017/7/13 A... Manual backup Also show incomplete backups for this computer Next Cancel4.ClickNext.
5. Selecttheinformationyou'dliketorestorefromthelistprovided,thenclickNext.
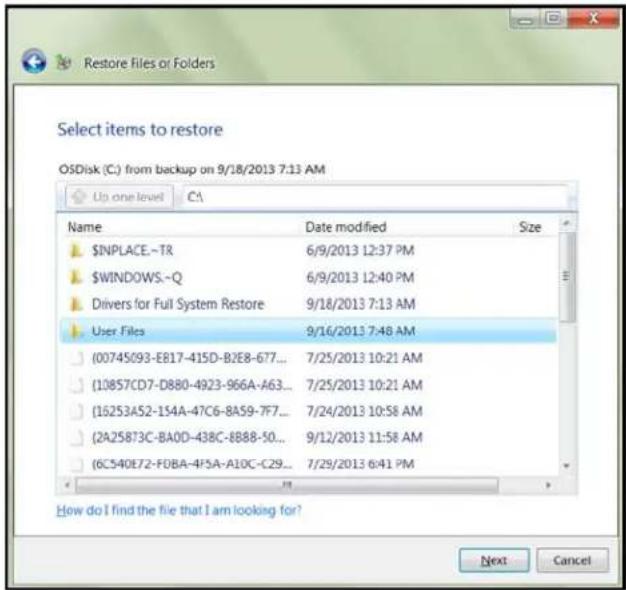
text_image
Select items to restore OSDisk (C:) from backup on 9/18/2013 7:13 AM Up one level C:\ Name Date modified Size $NPLACE.-TR 6/9/2013 12:37 PM $WINDOWS.-Q 6/9/2013 12:40 PM Drivers for Full System Restore 9/18/2013 7:13 AM User Files 9/16/2013 7:48 AM (00745093-E817-415D-B2E8-677... 7/25/2013 10:21 AM (10857CD7-D880-4923-966A-A63... 7/25/2013 10:21 AM (16253A52-154A-47C6-8A59-7F7... 7/24/2013 10:58 AM (2A258T3C-BA0D-438C-8B88-50... 9/12/2013 11:58 AM (6C540E72-F0BA-4P5A-A10C-C29... 7/29/2013 6:41 PM How do I find the file that I am looking for? Next Cancel- Selectalocationforyourrestoredbackup. Youcanacceptthelocationprovidedinthe field,orclickBrowseandselectanotherlocation.Onceyou'veselectedadifferent location,clickOKtoclosetheBrowsewindow.
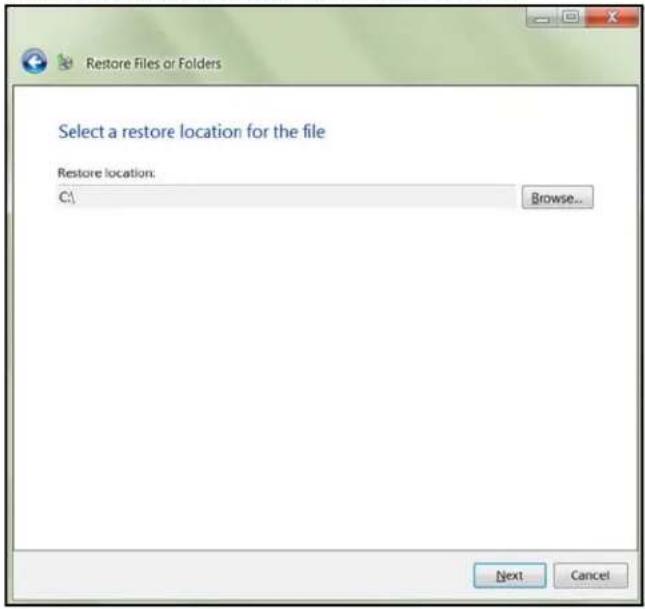
text_image
Restore Files or Folders Select a restore location for the file Restore location: C:\ Browse... Next Cancel- ClickNext. Therestoredbackupiscopiedtotheselectedlocation. Oncedone, the successfullyrestoredscreenappears.

text_image
Restore Files or Folders The items are successfully restored ✓ Restore location C:\sample Open the restore location Restore more files or folders Close8.Dooneofthefollowing:.
- ClickOpentheRestorelocationtoviewyourrestoredinformation.
- ClickRestoremorefilesorfolderstorestoremoreinformation.
- ClickClosetoclosetheRestoreFilesorFoldersscreen.
Recovering/Restoring(Mac)
TimeMachineallowsyoutorestorefiles,versionsoffiles,oryourentiresystem.For additionalinformationonrecoveringorrestoringyoursystemfiles,consultyourAppledocumentation.
Note: For information on recovering/restoring data on your PC, See "Recovering/Restoring (WindowsPC)" on page 67.
- OntheLaunchpad, click Backup. Your Time Machine backups display.
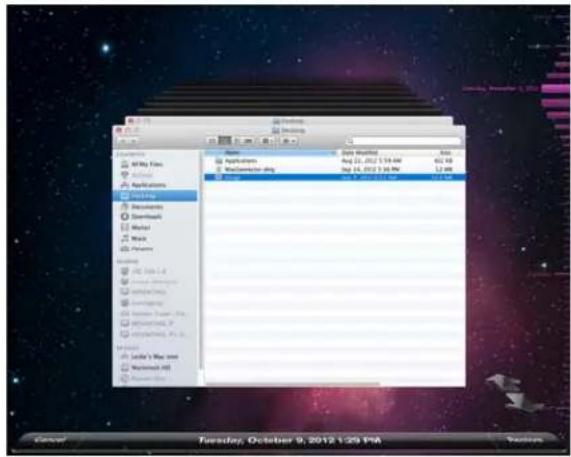
text_image
Mac My Info Applications Help Documents Download Word Music Phases History 12.0 KB - 1.8 Internet Explorer Internet Log Averaging Windows Server Pro My Documents (F) My Documents (R) Internet Apple's Mac One Microsoft HD Mac OS X File Edit View Help Auto Tools Help Auto Tools Help Auto Tools Help Auto Tools Help Auto Tools Help Auto Tools Help Auto Tools Help Auto Tools Help Auto Tools Help Auto Tools Help Auto Tools Help Auto Tools Help Auto Tools Help Auto Tools Help Auto Tools Help Auto Tools Help Auto Tools Help Auto Tools Help Auto Tools Help Auto Tools Help Auto Tools Help Auto Tools Help Auto Tools Help Auto Tools Help Auto Tools Help Auto Tots Help Auto Tots Help Auto Tots Help Auto Tots Help Auto Tots Help Auto Tots Help Auto Tots Help Auto Tots Help Auto Tots Help Auto Tots Help Auto Tots Help Auto Tots Help Auto Tots Help Auto Tots Help Auto Tots Help Auto Tots Help Auto Tots Help Auto Tots Help Auto Tots Help Auto Tots Help Auto Tats Help Auto Tats Help Auto Tats Help Auto Tats Help Auto Tats Help Auto Tats Help Auto Tats Help Auto Tats Help Auto Tats Help Auto Tats Help Auto Tats Help Auto Tats Help Auto Tats Help Auto Tats Help Auto Tats Help Auto Tats Help Auto Tats Help Auto Tats Help Auto Tats Help Auto Tats Help Auto Tts Help Auto Tts Help Auto Tts Help Auto Tts Help Auto Tts Help Auto Tts Help Auto Tts Help Auto Tts Help Auto Tts Help Auto Tts Help Auto Tts Help Auto Tts Help Auto Tts Help Auto Tts Help Auto Tts Help Auto Tts Help Auto Tts Help Auto Tts Help Auto Tts Help Auto Tts Help Auto Ttys Help Auto Ttys Help Auto Ttys Help Auto Ttys Help Auto Ttys Help Auto Ttys Help Auto Ttys Help Auto Ttys Help Auto Ttys Help Auto Ttys Help Auto Ttys Help Auto Ttys Help Auto Ttys Help Auto Ttys Help Auto Ttys Help Auto Ttys Help Auto Ttys Help AutoTts Help AutoTts Help AutoTts Help AutoTts Help AutoTts Help AutoTts Help AutoTts Help AutoTts Help AutoTts Help- Selectthedateyou'dliketorestoretofromthetimelineontherightofthescreen.
- ClickRestoreinthebottomright-handsideofyourscreen.
BackingupyourWDSentinelServer
BackingupyourWDSentinelserverallowsyoutoprotectyouoperatingsystem,system state,volumes,files,andapplicationdata.Forinformationonhowtobackupyour WDSentinelserver,seeMicrosoftOnlineHelp/ManageBackupandRestore/ManageServer Backup.
RecoveringaWDSentinelServerImageorResettingtheBoot DrivestoFactoryDefaults
ThisfeaturerecoversyourWDSentinelserverimagefromapreviouslycreatedWindows serverbackup.lfaWindowsserverbackupcannotberetrieved,thisprocesswillrestorethe unittoitsfactorydefaultsettings.
Use the following step store recovery your WDSentinelServer image or reset the boot driver to factory defaults.
1.From your WDSentinel server desktop, move your mouset other right corner of the screen.
2. OntheCharmsbar, selectSettings.
3. ClickPower.

- HolddowntheShiftkeyonyourkeyboard, thenclickRestart.
5.ClickContinue.
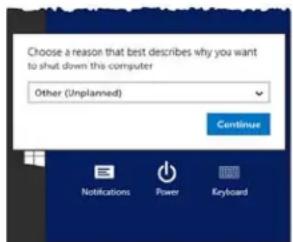
text_image
Choose a reason that best describes why you want to shut down this computer Other (Unplanned) Continue Notifications Power Keyboard- SelectTroubleshootfromtheoptionsdisplayed.
- Selectoneofthefollowingoptions,dependingonthetypeofrecoveryyou'dliketo perform:
- WDFactoryRestore: This options will re - imagetheoperatingsystem/boot drivesto their factory default levels.
WARNING!Allpriorinformation/dataonthebootdriveswillbelost.Datadrives arenotaffectedbythisaction.
- AdvancedOptions: This option provides you with additional troubleshooting options.
-SelectSystemImageRecoverytorecoveryyourdatafromaprevious backup. Oncethisoptionisselected, youwillbepromptedforyour Administratorpassword.
-Followtheinstructionsdisplayedonyourscreentocompletetheprocess.
- Oncetheprocessiscomplete, yourWDSentinelserverreboots. Logintothedevice usingyourAdministratorpassword.
7
BestPractices
SettinguptheWDSentinelServer
SettingupClientComputers
UsingtheWDSentinelServerEfficiently
ReplacingDrives
SharingFileswithExternalUsers
ShuttingDown
The following practices help you use the WDSentinel server and protect your data efficiently and safely.
SettinguptheWDSentinelServer
- ChangethedefaultnameofWDSentineltosomethingunique. Thisavoids conflictswhenanotherWDSentinelserverisaddedtoyournetworkinthefuture.
■ MakesureEthernet1 and Ethernet2 are on the samenetwork subnet. - Addtheservertoyourdomain.Thisallowsuserstousethesameloginand passwordforboththeLaunchpadandtheircomputer.
- Ifyoudecidetolockthedrives,makesurethepasswordisstoredinasafeplace.
- Setuserpasswordpolicytoatleastmediumsecurity.
- EnableMicrosoftAutomaticUpdatestofindandapplythelatestMicrosoft softwareupdate.
■ EnableWDAutomaticUpdatestofindandapplythelatestWDsoftwareupdate. - SetupAutomaticAlertNotificationforreal-timenotificationsofanyproblemswith theWDSentinelserver.
- SetupRemoteWebAccessusingPorts443andPort80.IfyourrouterorIP providerblocktheseports,youmayneedtoconsultwithyourIPproviderfor assistance.
- DonotremovetheWindowspagefile!Somecriticalfunctionsusethesystem'spagingfile.Removingthepagefilecanpotentiallyleaveyoursystem unusablewiththepossibilityofdataloss.Tomaintainthereliabilityofyoursystem anditsredundantresources,donotmodifythepagingfilewhatsoever.
SettingupClientComputers
BeforeloadingtheConnectorsoftwaretoaddacomputertotheWDSentinelserverforbackup,besurethatthecomputer'soperatingsystemisfullyup-to-date.
- WhenaddingclientcomputerstotheWDSentinelserver,itisbestnottohaveany backupsactive.
UsingtheWDSentinelServerEfficiently
- TheWDSentinelserverhasmanyjobstoperform.Sharedataduringbusiness hours,andbackupthecomputersduringhoursofinactivity.Keeptheserver poweredon24/7todoitswork.
■ ToavoidRAIDissues,alwaysuseSentinelwithaUPS. - Enablee-mailalerts.Receivingyouralertsbyemailallowsyoutomonitorcertain serverissuesastheyoccur.
ReplacingDrives
- Theonlineremovalofadriveforcesarebuildwhenthedriveisreplaced. Untilthe rebuilddiscomplete, theRAIDsystemisdegradedandunrecoverablefailurewill occurshouldanotherdriveberemoved. Onlyremoveonedriveatatimebetween rebuilds.
■ Avoidpullingadriveoutunlesssthereisafailure. - Whenadriveneedsreplacement,theWDSentinelserverisstillfunctionalbut subjecttoaseconddrivefailurethatwouldresultinthelossofdata.Tominimize thisvulnerabletime,agoodpracticeistohaveanotherdrivereadytoreplacethefaileddrive.
SharingFileswithExternalUsers
- CreateEmployee-SpecificPrivateFolders/AssignPermissions – Depending on the nature of your business and organizational structure, you may want to create a shared folder for each employee and give her respective employee Read/Write permissions for that folder.
- CreateSharesforVendorsorClients/AccessRemotely — Thebuilt-inRemoteWeb Accessfeatureenablescollaborationonfilesanddatanotonlyamongyour employeesbutalsowithyourclientsandvendors.
Asabestpractice,createauniqueuseraccountforeachclientandvendoryou wanttoexchangedatawithandcreateadedicatedSharedFolderforeachsuch externaluser.Topreventgivingexternalusersaccesstoyoursensitizedata,make surethattheuseraccountsyoucreatehavetheappropriatepermissionsforonly thefoldersyouhavecreatedforthem.
Tostartcollaboratingwithyourexternalusers,justprovidethemwiththedomain addressofyourWDSentinelserverandtheirusernameandpassword.
ShuttingDown
- UncleanshutdownsarehardonRAIDedsystems.TheWDSentinelserver recognizesanuncleanshutdownanduponthereapplicationofpower,beginsa longsequenceofexaminingtheRAIDforerrorsandbringingtheRAID configurationbackintoalignment. Thissequencecantakemanyhours.Toavoid thissituationandtoassurethattheunitalwaysexperiencescleanshutdownsand thebestdataintegrity,useanUninterruptiblePowerSupply(UPS).
Note: PerformanceisaffectedduringaRAIDrebuildandverification.
- To avoid possible corruption, donotunplug the power from the unit while it is running.

Troubleshooting
FirstStepsChecklist SpecificProblemsandCorrectiveActions
Foranyissue, firstensurethatyouareusingthelatestfirmwareforthe WDSentinelserver.See"UpdatingSoftware"onpage37forinstructions.
FirstStepsChecklist
■ Isthepowersupplypluggedintothewalloutletandthedrive?
■ Areallcablescorrectlyconnectedandsecured?
■ Isthepoweron?Ifnot,see"LEDs"onpage12.
SpecificProblemsandCorrectiveActions
The following section contains specific problem that may be raised during the use of the WDSentinel server and provides possible solutions.
LEDsdonotlightup
- Makesurethepowercordisconnectedcorrectly.
- Makesure that the wall outleth as power. Testit by plugging in another device.
- ConfirmthenetworkcableisproperlyconnectedtotheWDSentinelserverandthe networkswitchorrouter.
- Makesurethenetworkswitchorrouterhaspower.
- Useadifferentnetworkcableandportonthenetworkswitchorrouter. Temporarily swappingtheWDSentinel'scableportwithaworkingnetworkdevicemayidentifyany failingcablesandports.
ConnectingtoSharedFoldersonaWDSentinelserverfroma WindowsPConwhichLaunchpadisnotinstalled
Windows8:
- On your keyboard, click the Windows log key + E
- On the Computer screen toolbar, select Map Network Drive, then select Map NetworkDrive.
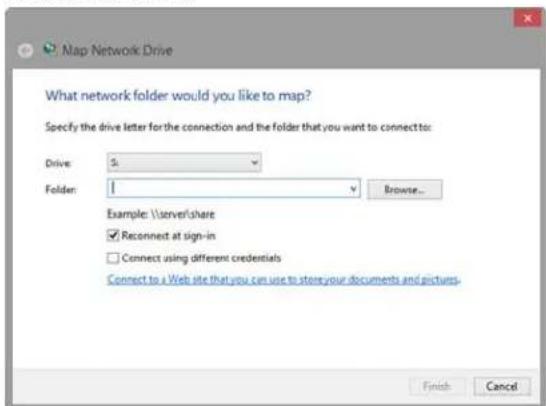
text_image
Map Network Drive What network folder would you like to map? Specify the drive letter for the connection and the folder that you want to connect to: Drive: 5 Folder: Browse... Example: \server/share Reconnect at sign-in Connect using different credentials Connect to a Web site that you can use to store your documents and pictures. Finish Cancel-
From the Drivedrop-downlist, choose the letter that you want the WDSentinelserver to have in Computer .
-
ClickBrowseofindthefolderthatyouwanttomap,ortypethepathtotheserver usingtheformat\ServerName\FolderName.Forexample,iftheshareiscalled Documents,andyourserveriscalledMyServer,youwouldenter \MyServer\Documents.
-
If you want the drivetoreconnect whenever the computer is rebooted, click the Reconnectatlogon checkbox.
6.ClickFinish.
Windows7:
1.Right-clickComputerandselectMapNetworkDrive.
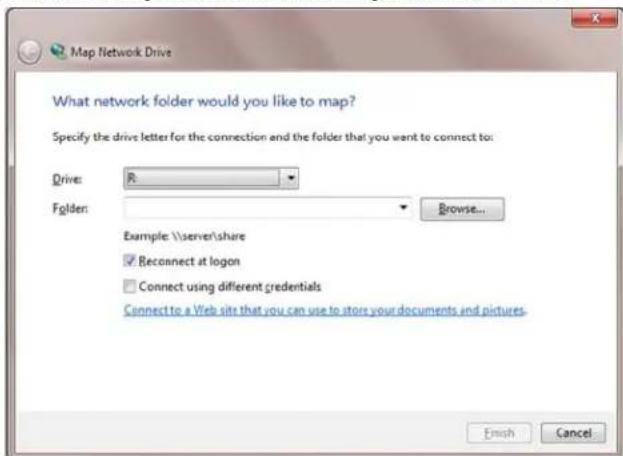
text_image
Map Network Drive What network folder would you like to map? Specify the drive letter for the connection and the folder that you want to connect to: Drive: R Folder: Browse... Example: \\server\share Reconnect at logon Connect using different credentials Connect to a Web site that you can use to store your documents and pictures. Finish Cancel-
From the Drivedrop-downlist, choose the letter that you want the WDSentinelserver to have in Computer.
-
ClickBrowseofindthefolderthatyouwanttomap,ortypethepathtotheserver usingtheformat\ServerName\FolderName.Forexample,iftheshareiscalled Documents,andyourserveriscalledMyServer,youwouldenter \MyServer\Documents.
-
If you want the drivetoreconnect whenever the computer is rebooted, click the Reconnectatlogon checkbox.
5.ClickFinish.
CannotaccessWindowsPCsviaRemoteAccess
InternetExplorer8orgreaterisrequiredtoaccessaWindowsPCusingtheRemoteWeb AccessfeatureoftheWDSentinelserver.ThereisanActiveXClientrequirementthatcomes standardwiththesebrowsers.Formoreinformation,seeKnowledgeBaseAnswerID8578.
LCDMessages
TheLCDdisplaysvariousmessagesforyoutoreview.Providedbelowisalistofmessages, adescriptionofthemessageandpossibleresponsesforthatmessage.
| LCDDescriptionTroubleshooting | ||
| DisplaysthenameofyourWDSentinelserver. | ||
| DisplaysthelPaddresssofyourWDSentinelserver. | IfthelPaddressdoesnotdisplay,ensurethatyourdeviceisconnectedbyethernetcabletoyourrouter. | |
| BackupFailed | Thesoftwarebackuphasfailed.Thiserroroccurswhenthebackupyouarerunningisunsuccessful.Rerunthebackuptoclearthisproblem. | |
| BIOS Corrupted | Your BIOS is corrupted | ContactTechnical Supportforassistance. |
| BIOS Degraded | Your BIOS is degraded | The system is unable to boot from theprimaryBIOSandiscurrentlyrunningonthesecondaryBIOS. |
| BIOSRepaired Reboot Required | Yoursystemiscurrentlyrunningon thesecondaryBIOS.ArebootisrequiredtoattemptarepairofyourBIOS. | Yoursystemisrunningonthe secondaryBIOS.An attempt willbe madeduringthereboottorunthesystemontheprimaryBIOS. |
| BIOSUpdated Reboot Required | TheprimaryBIOShasbeen updated,Asystemrebootis required. | Rebootthesystem.ThisallowstheupdatedBIOStotakeaffect. |
| BIOS Updating | The BIOS is updating. | Your system BIOS is currently updating.Donotdisconnectthe powerorinterrupttheprocessuntil theupdateiscomplete. |
| BMC Updating | The BMC is updating. | The BMC is currently updating. Do notdisconnectthepoweror interrupttheprocessuntilthe updateiscomplete. |
| BootDriveFailed | Theoperatingsystem(OS)boot drivehasfailedtobootinto Windows. | Replaceidentifiedbootdrive.AccesstheDashboard(See “AccessingtheDashboard”on page25.)ClickMonitoronthenavigation bar.CheckInternalStorage>Boot Driveareatoreviewthestatusof yourdrive.Obtainandinstallacomparable bootdrive. |
| BootDrive<DriveName>OverTemp | Theoperatingsystem(OS)boot drivehasexceededthenormal operatingtemperature. | Checktheairflowaroundyour deviceandthesystemfan operation. |
| BootVolume Degraded | Oneoftheoperatingsystem(OS) driveshasfailed.Thesystemwill operatebutinadegradedstate. | Replacetheidentifiedbootdrive.•AccesstheDashboard(See “AccessingtheDashboard”on page25.)•ClickMonitoronthenavigation bar.•CheckInternalStorage>Boot Driveareatoreviewthestatusof yourdrive.•Obtainandinstallacomparable bootdrive. |
| CapacityLowAvailablediskspaceislow.Storagecapacityonyourdeviceislow.Youwillneedtoaddadditional drivestoexpandthedevice storage. | ||
| DriveCountDisplaysthenumberofdrives currentlyonyourdevice. | Thetotaldrivecountinthesystem.Thisincludesthebootdrive(s)and thedatadrives. | |
| DriveFailedOneofthedatadrivesfailed.YourdatadrivesarecurrentlyrunninginRAIDprotectionmode.Replacethefaileddrive.•AccesstheDashboard(See “AccessingtheDashboard”on page25.)•ClickMonitoronthenavigation bar.•CheckInternalStorage>Data Driveareatoreviewthestatusof yourdrive.•Obtainandinstallacomparable datadrive. | ||
| DriveOverTempThedatadrivehasexceededthe normaloperatingtemperature. | Checktheairflowaroundyour deviceandthesystemfan operation. | |
| Ethernet<port#>Disconnected | Ethernetport1orport2is disconnected. | Reconnecttheethernetcableto theidentifiedport. |
| FanFailedThesystem’sprimaryfan(DS5100/DS6100)ortheCPUfan(DS6100) hasfailed. | TheprimaryorCPUfanhasfailed.Replaceheapplicablefailedfan. | |
| ImminentDrive Failure | S.M.A.R.Tearlydetectionfounda prematuredrivefailureconditionon oneofthedatadrives. | Replacethedefectedriveassoon aspossiblestopRAIDfrom goingintoadegradedstate. |
| ImminentFailureBootDrive | S.M.A.R.Tearlydetectionfoundaprematuredrivefailureconditionononeofthebootdrives. | ReplacethedefectedriveassoonaspossiblestopRAIDfromgoingintoadegradedstate. |
| InvalidDriveTheinserteddriveisnotcompatiblewiththedevice. | Replacetheinserteddrivewithanapproveddrive.SeeDashboard>Monitor>Tasksforalistofapproveddrives. | |
| InvalidDriveCapacity | Thenewdrivecapacityiseithergreaterorsmallerthanthedriveyoureplaced. | Replacetheinserteddrivewithadrivethasthæcorrectdrivecapacity. |
| NetworkDisconnected | Theethernetportdoesnothavenetworkactivity. | Restorenetworkconnectivity. |
| PowerSupplyFailed | Powersupply1or2failed.Replacethedefectivepowersupply.·AccesstheDashboard(See“AccessingtheDashboard”onpage25.)·ClickMonitoronthenavigationbar.·CheckthePowerAdapterareatoreviewthestatusofyourpowersupply.·Obtainandinstallacomparablepowersupply. | |
| RebootRequired | Thesystemrequiresareboot.Safelyrebootthesystem. | |
| SoftwareUpdateComplete | Thesoftwareupdateprocessiscomplete. | ChecktheAlertViewertoverifythecompletionofthesoftwareupdate. |
| SoftwareUpdateDownloading | Asoftwareupdateisbeingdownloadedtothesystem. | Allowtheprocessstofullycomplete.Noactionisrequired. |
| SoftwareUpdateRebootRequired | Thesoftwareupdateiscomplete.Thesystemrequiresareboot. | Therebootisnormallyautomatic.Ifitdoesnotoccur,performamanualreboot. |
| WDSoftwareUpdateAvailable | ThereisaWDsoftwareupdateavailablefordownload. | Accessandperformtheupdate.·AccesstheDashboard(See“AccessingtheDashboard”onpage25.)·ClickMonitoronthenavigationbar.·ClicktheSoftwareUpdatetab.·ClickCheckforUpdates.·ClickDownloadandInstalltopudatethesoftware. |
| WDSoftwareUpdateFailed | TheWDsoftwareupdatefailed.RepeattheSoftwareupdateprocessagain. | |
RegulatoryandWarrantyInformation
RegulatoryCompliance
LimitedWarranty
GNUGeneralPublicLicense("GPL")
RegulatoryCompliance
FCCClassBInformation
Operationofthisdeviceissubjecttothefollowingconditions:
Thisdevicemaynotcauseharmfulinterference.
This device must accept any interference received, including interference that may cause undesired operation.
This device has been tested and found to comply with the limit sofa Class Digital device, pursuant to Part 15 of the FCC Rules. These limits are designed to provide reasonable protection against harmful interference in a residential installation. This unit generates, uses, and can radiate radio frequency energy and, if not installed and used in accordance with the instructions, may cause harmful interference or radio ortelevision reception. However, there is no guarantee that interference will not occur in particular installation. If this equipment does cause harmful interference or radio ortelevision reception, which can be determined by turning the equipment off and on, you are encouraged to try to correct the interference by one or more of the following measures:
■ Reorientorrelocatethereceivingantenna.
■ Increase these separation between the equipment and thereceiver.
- Connecttheequipmentintoanoutletoracircuitdifferentfromthattowhichtherceiverisconnected.
- Consultthedealeroranexperiencedradio/televisiontechnicianforhelp.
AnychangesormodificationsnotexpresslyapprovedbyWDcouldvoidtheuser'sauthority tooperatethisequipment.
Changesormodificationsnotexpresslyapprovedbythepartyresponsibleforcompliance couldvoidtheuser'sauthoritytooperatetheequipment.
ICES/NMB-003Compliance
CetappareildelaclasseBestconformeàlanormeNMB-003duCanada.
ThisdevicecomplieswithCanadianICES-003ClassB.
SafetyCompliance
Approved for US and Canada. CAN/CSA-C22.2 No. 60950-1: Safety of Information Technology Equipment.
CAUTION! Dangerofexplosionifthebatteryisincorrectlyreplaced.Replaceonly withthesameorequivalenttyperecommendedbytheequipmentmanufacturer. Disposeofusedbatteriesaccordingtomanufacturer'sinstructions.
CEComplianceforEurope
Verified to comply with EN55022 for RF emission; EN-55024 for Generic Immunity, as applicable; and EN-60950-1 for Safety.
EnvironmentalCompliance(China)
WDvaluesyourbusinessandalwaysattemptstoprovideyoutheverybestofservice.Ifthis Productrequiresmaintenance,eithercontactthedealerfromwhomyouoriginally purchasedtheProductorvisitourproductsupportwebsiteathttp://support.wd.comfor informationonhowtoobtainserviceoraReturnMaterialAuthorization(RMA).Ifitis determinedthattheProductmaybedefective,youwillbegivenanRMAnumberand instructionsforProductreturn.Anunauthorizedreturn(i.e.,oneforwhichanRMAnumber hasnotbeenissued)willbereturnedtoyouatyouexpense.Authorizedreturnsmustbe shippedinanapprovedshippingcontainer,prepaidandinsured,totheaddressprovidedon yourreturnpaperwork.Youroriginalboxandpackagingmaterialsshouldbekeptforstoring orshippingyourWDproduct.Toconclusivelyestablishtheperiodofwarranty,checkthe warranty expiration (serial number required) via http://support.wd.com. WD shall have no liabilityforlostdataregardlesssofthecause,recoveryoflostdata,ordatacontainedinany Productplacedinitspossession.
LimitedWarranty
WDwarrantsthattheProduct,inthecourseofitsnormaluse,willforthetermdefined below,befreefromdefectsinmaterialandworkmanshipandwillconformtoWD's specificationtherefor.Thetermofyourlimitedwarrantydependsonthecountryinwhich yourProductwaspurchased.Thetermofyourlimitedwarrantyisfor1yearsintheNorth, SouthandCentralAmericaregion,2yearsintheEurope,theMiddleEastandAfricaregion, and1yearsintheAsiaPacificregion,unlessotherwiserequiredbylaw.Thetermofyour
limitedwarrantyperiodshallcommenceonthepurchasedateappearingonyourpurchase receipt.WDmayatitsdiscretionmakeextendedwarrantiesavailableforpurchase.WDshall havenoliabilityforanyProductreturnedifWDdeterminesthattheProductwasstolenfrom WDorthattheasserteddefecta)isnotpresent,b)cannotreasonablyberectifiedbecause ofdamageoccurringbeforeWDreceivestheProduct,orc)isattributabletomisuse, improperinstallation,alteration(includingremovingorobliteratinglabelsandopeningor removingexternalenclosures,includingthemountingframe,unlesstheproductisonthelist oflimiteduser-serviceableproductsandthespecificalterationiswithinthescopeofthe applicableinstructions,asfoundat http://support.wd.com),accidentormishandlingwhilein thepossessionofsomeoneotherthanWD.Subjectttothelimitationsspecifiedabove,your soleandexclusivewarrantyshallbe,duringtheperiodofwarrantyspecifiedaboveandat WD'soption,therepairorreplacementoftheProductwithanequivalentorbetterProduct. TheforegoingwarrantyofWDshallextendtorepairedorreplacedProductsforthebalance oftheapplicableperiodoftheoriginalwarrantyorninety(90)daysfromthedateofshipment ofarepairedorreplacedProduct,whicheverislonger.Theforegoinglimitedwarrantyis WD'ssolewarrantyandisapplicableonlytoproductssoldasnew. Theremediesprovided hereinareinlieuofa)anyandallotherremediesandwarranties,whetherexpressed,implied orstatutory,includingbutnotlimitedto,anyimpliedwarrantyofmerchantabilityorfitnessfor aparticularpurpose,andb)anyandallobligationsandliabilitiesofWDfordamages including,butnotlimitedtoaccidental,consequential,orspecialdamages,oranyfinancial loss,lostprofitsorexpenses,orlostdataarisingoutoforinconnectionwiththepurchase, use,orperformanceoftheProduct,evenifWDhasbeenadvisedofthepossibilityofsuch damages.IntheUnitedStates,somestatesdonotallowexclusionorlimitationsof incidentalorconsequentialdamages,sothelimitationsabovemaynotapplytoyou.This warrantygivesyouspecificlegalrights,andyoumayalsohaveotherrightswhichvaryfrom statetostate.
GNUGeneralPublicLicense("GPL")
Firmwareincorporatedintothisproductmayincludethirdpartycopyrightedsoftware licensedundertheGPLorLesserGeneralPublicLicense("LGPL")(collectively,"GPL Software")andnotWesternDigital'sEndUserLicenseAgreement.Inaccordancewiththe GPL,ifapplicable:1)thesourcecodefortheGPLSoftwaremaybedownloadedatno chargefrom http://support.wd.com/download/gpl/orobtainedonCDforanominalchargefrom http://support.wd.com/download/gpl or by calling Customer Support within three years of the dateofpurchase;2)youmayre-use,re-distribute,andmodifytheGPLSoftware;3)with respectsolelytotheGPLSoftware,nowarrantyisprovided,totheextentpermittedby applicablelaw;and4)acopyoftheGPLSincludedherewith,maybeobtainedat http://www.gnu.org, and may also be found at http://support.wd.com/download/gpl.
ModificationofortamperingwiththeSoftware,includingbutnotlimitedtoanyOpenSource Software,issolelyatyourownrisk.WesternDigitalisnotresponsibleforanysuch modificationortampering.WesternDigitalwillnotsupportanyproductinwhichyouhaveor haveattemptedtomodifytheSoftwaresuppliedbyWesternDigital.

Appendix
HardwareReplacementProcedures
WDRAIDStorageUtility
WDSentineIDS5100/DS6100AdministratorReferenceSheet
HardwareReplacementProcedures
BeforeYouBegin
ReplacingaHardDrive
RemovingtheUnitCover
ReplacingtheSODIMMMemoryModule
AddingaBootDrive
Thischapterprovidesthestepsnecessarytoreplacethefollowingcomponentsdesignedfor replacementfortheWDSentinelDS5100/DS6100.
HardDrive
Fans
■ SODIMMMemoryModule
PowerSupply
- BootDrive
TheWDSentinelisalsodesignedtobeeasilymountedonarack.
BeforeYouBegin
- Ensure that you have the correct replacement unit.
■ Review the procedures before beginning to replace apart.
ReplacingaHardDrive
ItissimpletoreplaceadriveinyourWDSentinelserver.First,makesuretogototheWD Storetopurchaseacompatiblereplacementdrive.Foracompletelistofapproveddrive models,searchforAnswerID9443intheWDKnowledgeBaseathttp://support.wd.com.
ThedrivesintheWDSentinelserverare"hotswappable."Thismeansthatthe WDSentinelservercanremainpoweredonwhileyoureplacethedrive.Oncereplaced, completethestepsoutlinedin"RecoveringfromaFailedDrive"onpage48tointegratesthe newdriveintotheRAIDarray.
DriveTypes
Providedbelowisadescriptionofthetypesofharddrivesyoucanusetoreplaceanexisting drive. The type of drive used in your device can be found within on the device Dashboard MonitorPageontheHealthtab.
| HardDriveTypeDescription | |
| PreferredPreferreddrivespreform | optimallywithyourdeviceandshouldalwaysbeusedwheneverpossible.Preferreddrivesarefullytestedandapprovedforusewithyourdevice. |
| SupportedSupporteddrivesarenot | theoptimaldrivesforyourdevicebutarepartofthesamedrivefamily.Thesedrivesarenotfullytestedwiththisdevice. |
| UnsupportedUnsupporteddrivesh | havenotbeentestedwiththisdeviceandshouldbeusedatyourownrisk.TheLEDonthefrontofyourdeviceisRed.WARNING!Usinganunsupporteddriveinyourdeviceimmediatelyvoidsyourwarrantyandmaycausedamagetoyourdeviceanddata.Unsupporteddrivesmustbeenabledbeforethedrivecanbeusedwithyourdevice.Ifyouchoosetouseanunsupportedharddrive,usethefollowingstepsafterthedrivehasbeenreplacedinthedevicetoenablethedrive.Note:Therearecertainunsupportedharddrivesthatyoucannotenable.Forthosedrives,thereisaLearnMorelinkwithinformationonhowtoobtainaWDpreferreddrive.1.AccessthedeviceDashboardMonitorpage.2.SelecttheHealthtab,ifnotalreadyselected.3.IdentifytheunsupporteddriveintheInternalStoragearea.UnsupportedddisplaysinredintheTypecolumn.4.ClickEnable,locatedtotherightofthedriveType.5.Readthealertdisclaimer,thenselectYesfyou’dliketoenableyourcurrentunsupporteddrive.6.ClickConfigureatthetopoftheInternalStoragearea.7.Setupyourharddrive(See“SettingUpYourDrives”onpage43.)TheLEDonthefrontofyourdevicewillchangetoblue. |
Whatyou'llNeed:
■ Replacementtharddrive
ReplacingaHardDrive
UsethefollowingstepstoreplaceadriveinyourWDSentinelserver.
- Unlockandopenthedrivedoor(Figure1).
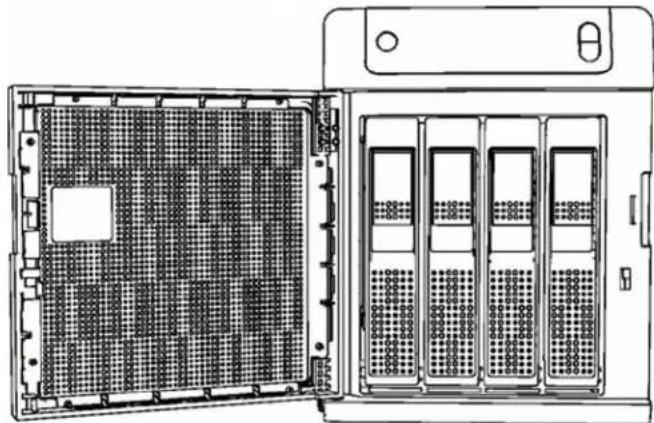
natural_image
Technical line drawing of a server rack with multiple drive bays and a front-mounted tower (no text or symbols)Figure1. Opendrivedoor
- For a failed drive, verify that the LED for the failed drive is solid red.
- Pull the handle on the front of the hard drivetoward you.
- When its snaps open, pull the hard drivetoward you to remove it. (Figure2).
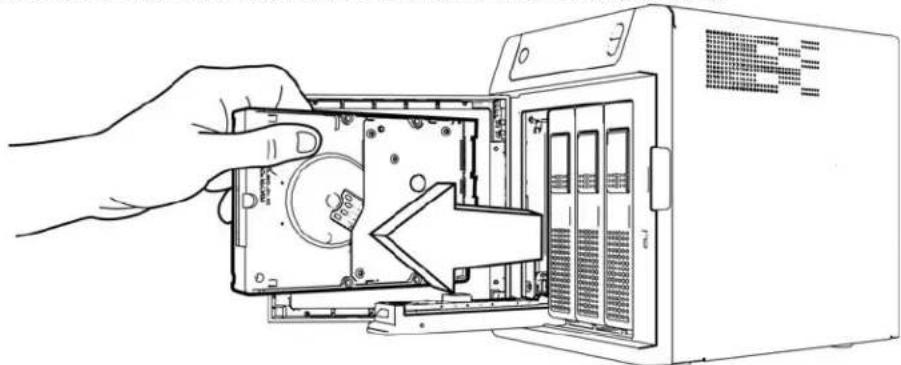
natural_image
Line drawing of a hand inserting into a computer drive into a server rack (no text or symbols visible)Figure2.Removeharddrive
5.Slidetheapprovedreplacementdriveintothedrivebay,makingsurethatitisproperly seatedandisfacingthecorrectdirection.
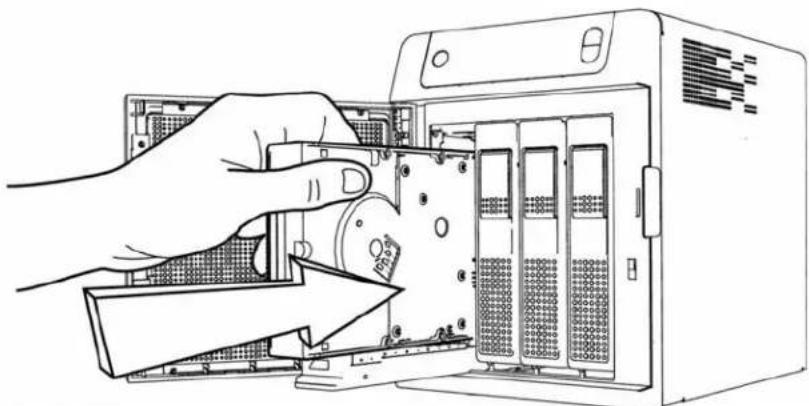
natural_image
Illustration of hands installing or adjusting a server rack into an industrial machine (no text or symbols visible)Figure3.Replaceharddrive
- Usingsomeforce, snapthedrivehandleshut.
- Closeandlockthedooronthefrontoftheserver, makingsureitsnapsshut.
- The LED remains blank until there build discomplete. There build percentaged displays on the LCD.
ReplacingaServerFan
Whenafanrequiresreplacement,youwillreceiveane-mailAlertindicatingthatthereisa problemwithoneofyourWDSentinelserverfans.
ThefansintheWDSentinelserverare“coldswappable.”ThismeansthattheWDSentinel servermustbeshutdownpriortoyourfanreplacement.ToshutdownyourWDSentinel server,followthestepsoutlinein“ShuttingDownandRebootingtheServer”onpage40.
Important: To avoidelectrostaticdischarge(ESD)problems,groundyourselfby touchingmetalbeforehandlingthedevice.
Whatyou'llNeed:
- Phillipsscrewdriver
■ Replacementserverfan
ReplacingaServerFan
1.Shutdowntheserver.
2. Disconnectal external connections.
3. Placetheunitonacleanandstablesurface.
4. Onthebackoftheunit, loosenandremovethefour(4)FanPlatemountingscrews (Figure5).
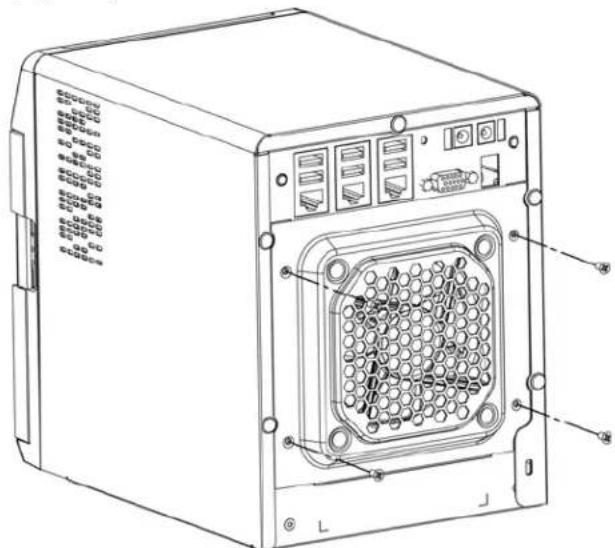
text_image
Technical line drawing of a server rack with labeled ports and connectorsFigure4.RemoveFanPlatemountingscrews
- Carefully lower the fan platetoward you then lift the fan plate out of the unit (Figure 5).
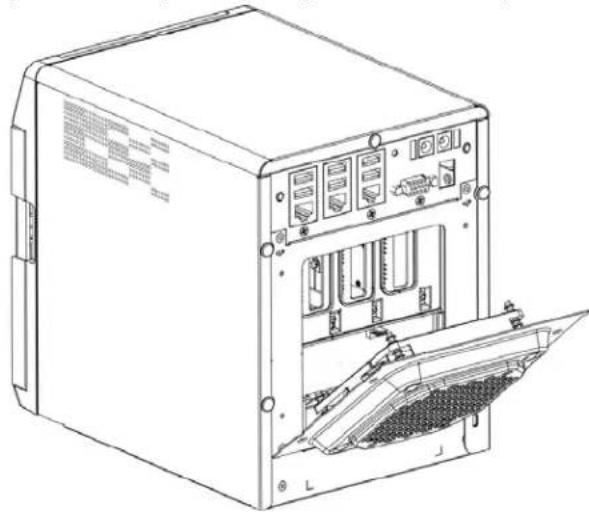
natural_image
Technical line drawing of a server rack unit with internal components and ventilation slots (no text or labels)Figure5.Removefan
WARNING! Before removing the fan plate completely from the unit, detach the fan interface connector from the backplane PCBA.
- Gently placethereplacement fan into the unit, ensuring that the orientation of the fan is correct and that the fan interface connector is connected.
- Replace and tight the four (4) Fan Platemountingscrews.
- Donotover-tightenthemountingscrews.
- Reconnectallofthecablesforthedevice.
10.Restarttheserver.
Important: Donotdisassemblethefan. Return the entire assembly intact to WD, if instructed to do so.
RemovingtheUnitCover
Use the following steps removed the cover on the WDSentinel IDS5100/DS6100 device. These steps are necessary to replace certain internal parts.
Important: To avoidelectrostaticdischarge(ESD)problems,groundyourselfby touchingmetalbeforehandlingthedevice.
ToshutdownyourWDSentinelserver, followthestepsoutlinein"ShuttingDownand RebootingtheServer"onpage40.
Whatyou'llNeed:
- Phillipsscrewdriver
RemovingtheUnitCover
- Beforegettingstarted, shutdowntheserveranddisconnectalexternalconnections.
- Placetheunitonacleanandstablesurface, with the back of the unit facing you.
- Releasefive(5)screwsonthebackoftheunit(Figure6).
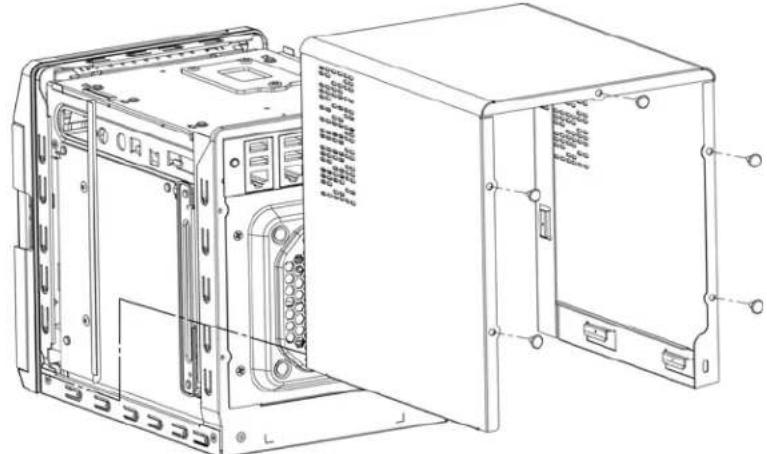
natural_image
Technical line drawing of an internal server or network device with ports and connectors (no text or symbols)Figure6.Unscrewandremoveunitcover
- Pulltheunitcovertowardyouuptoreleasethecover. (Figure6).
ReplacingtheSODIMMMemoryModule
TheSODIMMmemorymoduleintheWDSentinelserveris"coldswappable."Thismeans thattheWDSentinelservermustbeshutdownpriortoyourmodulereplacement.Toshut downyourWDSentinelserver,followthestepsoutlinein"ShuttingDownandRebootingthe Server"onpage40.
Important: To avoid electrostatic discharge (ESD) problems, ground yourself by touching metal before handling the device.
Whatyou'llNeed:
- Phillipsscrewdriver
■ ReplacementSODIMMMemorymodule
ReplacingaSODIMMMemoryModule
1.Shutdowntheserver.
2. Disconnectal external connections.
3.Followthestepsoutlinedin"RemovingtheUnitCover"onpage87.
4. Disconnectallcablesattachedtotheassembly.
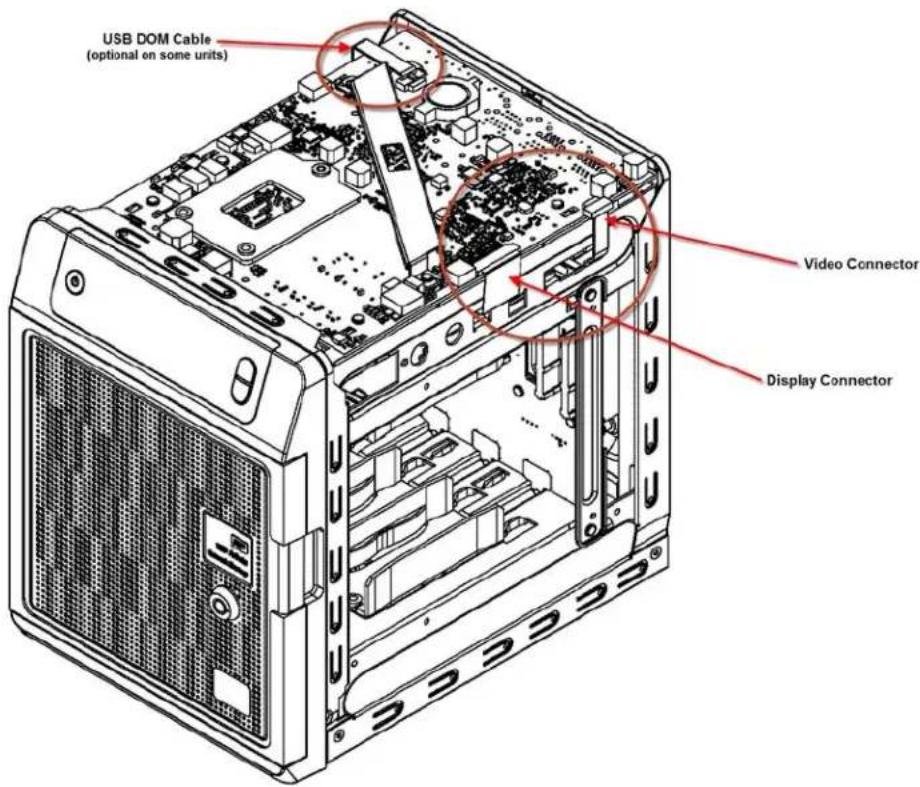
text_image
USB DOM Cable (optional on some units) Video Connector Display ConnectorImportant: Ensure that you carefully lift the ZIF connector gate and remove the ZIF Display Connector.
- Onthetopoftheunit, loosenandremovethesix(6)screwsholdingthePCBAunitin place.
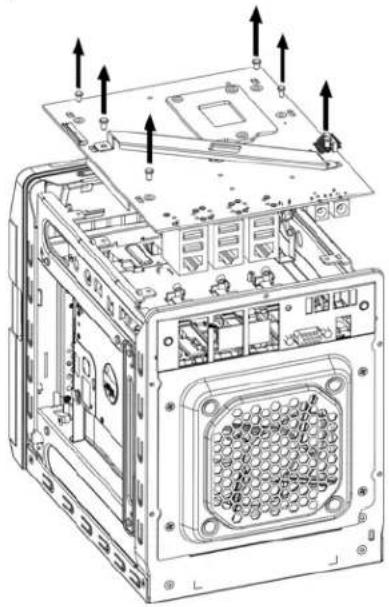
natural_image
Technical line drawing of an internal computer case with mounting hardware and ventilation slots (no text or symbols)Figure7.RemovescrewsfromPCBAunit
- Carefully lift the PCBA up and away from therest of the unit, thengently placethe flipped assembly on a stable flatsurface.
WARNING! Ensure that the connector clear the plate when removing the assembly.
- Remove and replace or add additional 2PL-SODIMM module(s).
Note: This unit uses memory in coordinated pairs and are color-coded. For a list of validmemoryconfigurations, searchforAnswerID9999intheWDKnowledgeBase athttp://support.wd.com.
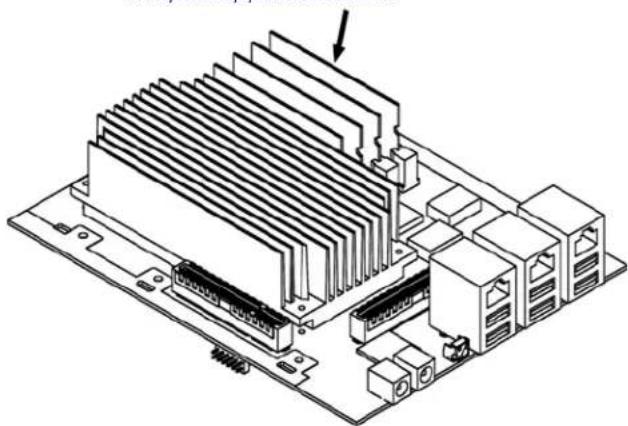
natural_image
Isometric technical diagram of a computer motherboard with heat sinks and connectors (no text or labels)Figure8.Replace4PL-SODIMMmodule
- Oncethe2PL-SODIMMmodulehasbeenaddedorupdated,replacethePCBAback ontheWDSentineldevice,ensuringthatthecablesareagainattachedtothe assemblyandthatthePCBAisproperlyseated.Replaceandtightenthesis(6)screws holdingthePCBAinplace.
Note: Donotover-tightenthePCBAscrews.
- Replacetheunitcoverandreplaceandtightenthefive(5)exterior screws.
Note: Donotover-tightentheexteriorscrews.
- Connectallexternalconnections.
11.Restarttheserver.
AddingaBootDrive
TheWDSentinelservercomeswitheitherone(DS5100)ortwo(DS6100)2.5-inchboot drivepre-loadedwithWindowsServer2012R2Essentialsandspecializedhardware servicesanddrivers.Thepre-loadedbootdrive(s)providestheabilitytokeeptheOS runningfromthebootdrivewhileredeployingorchangingapplicationsandfoldersrunning onthelargecapacitydatadrives.
ThebootdriveintheWDSentinelDS5100serverare"coldswappable."Thismeansthatthe WDSentinelservermustbeshutdownpriortoaddingabootdrive.ToshutdownyourWD Sentinelserver,followthestepsoutlinein"ShuttingDownandRebootingtheServer"on page40.
Important: To avoid electrostatic discharge (ESD) problems, ground yourself by touching metal before handling the device.
Whatyou'llNeed:
- Phillipsscrewdriver
- Flat-headscrewdriver
- BootDrivekit
AddingaBootDrive
- Prepareyourbootdriveforinsertion:
■ Usingaflat-headscrewdriver, attachthebracebartothebootdrive.
2.Shutdowntheserver.
3. Disconnectal external connections.
4. Followthestepsoutlined in "RemovingtheUnitCover" on page 87.
5. Ontherightorleftsideoftheunit, findanemptybracketforyourbootdrive.

text_image
Emptybootdrive bracket- With the boot drive pins facing the back of the device, gently push your boot drive into the empty boot drive bracket.
-
Placeandtightentwo(2)screws, attachingthebracebaronthebootdrivetotheunit.
-
Replacetheunitcoverandreplaceandtightenthefive(5)exterior screws.
Note: Donotover-tightentheexteriorscrews.
- Connectallexternalconnections.
10.Restarttheserver.
WDRAIDStorageUtility
TheWDRAIDStorageUtilityallowsyoutoconfigureandmaintaintheRAIDstorageonyourWDSentinelserver.
AccessingtheWDRAIDStorageUtility
TherearetwomainwaystoaccesstheWDRAIDStorageUtility:
- Initially, when setting up your drives, you're able to access the utility from the Dashboard Homepage by clicking Setting up your drives in the Task pane and Selecting RAID from the Set Up your Drives wizard.
- OnceyourdriveshavebeensetupforRAIDstorage,youcanaccesstheutility fromtheDashboardStoragetabbyselectingConfigureinthelInternalStorage area.
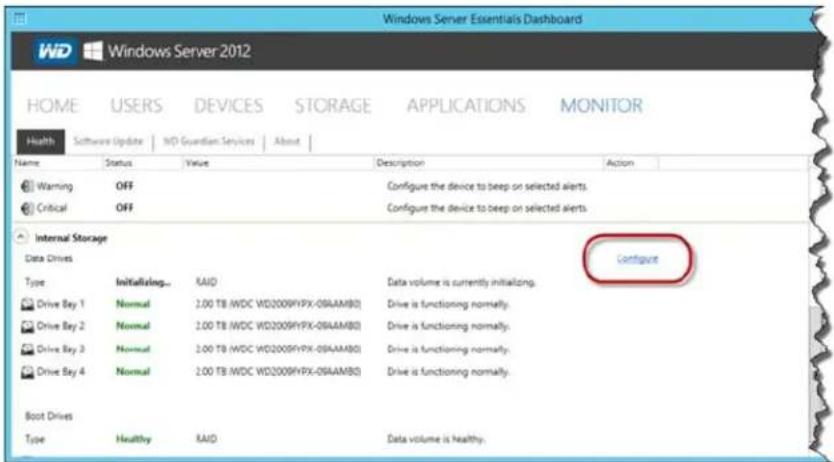
text_image
Windows Server Essentials Dashboard WD Windows Server 2012 HOME USERS DEVICES STORAGE APPLICATIONS MONITOR Health Software Update WD Guardian Services About Name Status Value Description Action Warning OFF Configure the device to beep on selected alerts. Critical OFF Configure the device to beep on selected alerts. Internal Storage Data Drives Type Initializing... RAID Data volume is currently initializing. Drive Bay 1 Normal 2.00 TB (WDC WD2009YIPX-08AAMBO) Drive is functioning normally. Drive Bay 2 Normal 2.00 TB (WDC WD2009YIPX-08AAMBO) Drive is functioning normally. Drive Bay 3 Normal 2.00 TB (WDC WD2009YIPX-08AAMBO) Drive is functioning normally. Drive Bay 4 Normal 2.00 TB (WDC WD2009YIPX-08AAMBO) Drive is functioning normally. Boot Drives Type Healthy RAID Data volume is healthy.- OnyourWDSentinelserverdesktop, double-clicktheWDRAIDStorageUtility iconintheWindowstray.
UsingtheHomePage
The Homepageallowsyoutoaccessthetasksandinformationthathelpyouconfigureand manageyourWDSentinelserverRAIDstorage.
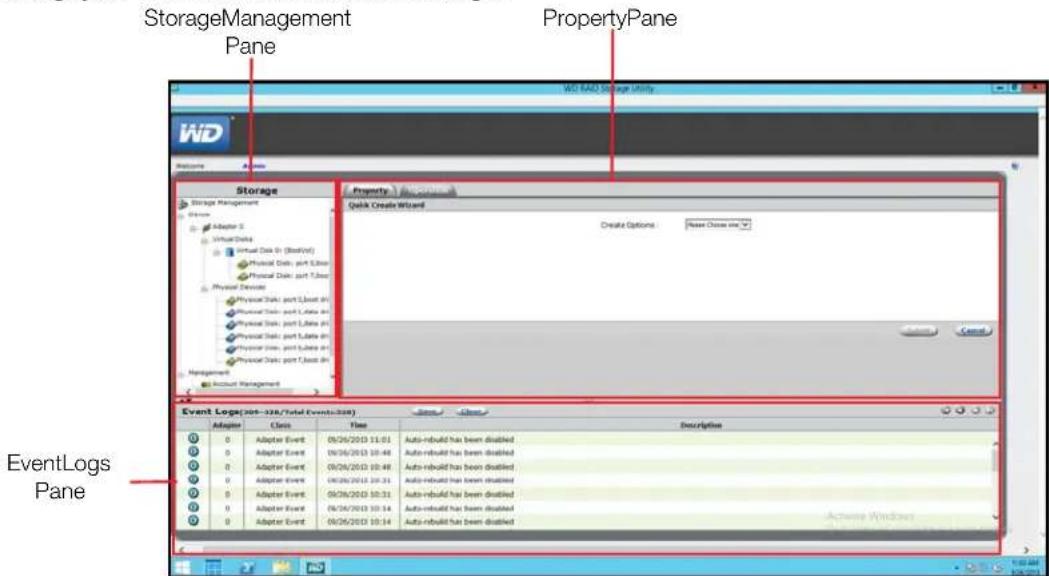
text_image
StorageManagement Pane PropertyPane WD RAD Storage Utility WD Storage Storage Management Adapter 5 Virtual Data Virtual Data (Setpoint) Physical Data: part Linear Physical Data: part Linear Physical Data Physical Data: part Linear Physical Data: part Linear Physical Data: part Linear Physical Data: part Linear Management Account Management Property Quick Create Wizard Create Options: None Choose it Event Logs Pane Event Log(s) (201-328/Total Events) (202) Adapter Cells Time Description 0 Adapter Event 09/26/2013 11:01 Auto-rebuild has been disabled 0 Adapter Event 09/26/2013 10:48 Auto-rebuild has been disabled 0 Adapter Event 09/26/2013 10:48 Auto-rebuild has been disabled 0 Adapter Event 09/26/2013 10:31 Auto-rebuild has been disabled 0 Adapter Event 09/26/2013 10:31 Auto-rebuild has been disabled 0 Adapter Event 09/26/2013 10:14 Auto-rebuild has been disabled 0 Adapter Event 09/26/2013 10:14 Auto-rebuild has been disabledStorageManagementPane
TheStorageManagementpaneusesatreeviewtolistandshowphysicalandvirtual devicesattachedtotheWDSentinelserver,including:
Adapter
■ VirtualDisks
■ PhysicalDevices
PropertiesPane
ThePropertiespanliststhepropertiesofthedeviceselectedintheStorageManagement pane.ThePropertiespanecontainstwotabsatthetop:
- Property: SelectPropertytoviewormodifythepropertiesofthedeviceselected intheStorageManagementpane.
Operation: RollovertheOperationtabtoviewamenuofoperationsthatcanbe performedonthedeviceselectedintheStorageManagementpane.
EventLogsPane
TheEventsLogspanelistsadaptererevents. Theeventsarecategorizedintoinformational, warning, anderrorevents.
OperationsTabTasks
UsethefollowingstepstoperformtasksonyourRAIDvirtualdisks.
Initialization
UsethefollowingstepstocreateabackgroundinitializationofyourRAIDvirtualdisks.
- OntheWDRaidStorageUtilityHomescreen, intheStorageManagementpane, selecttheVirtualDisk.
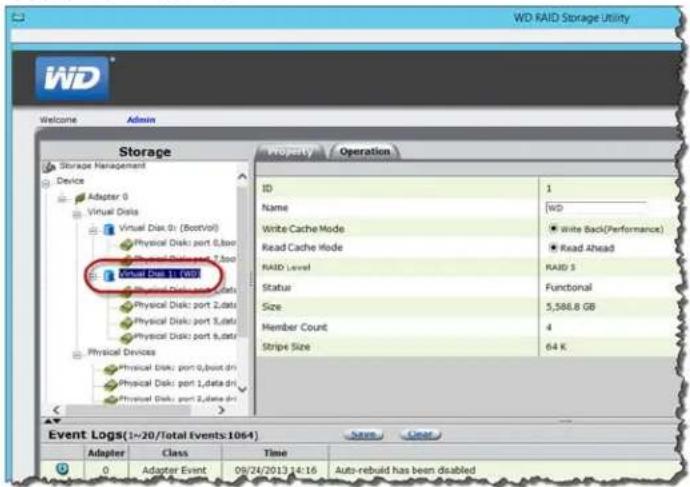
text_image
WD RAID Storage Utility Welcome Admin Storage Storage Management Device Adapter 0 Virtual Disk Virtual Disk 0 (BootVol) Physical Disk: port 0,box Physical Disk: port 2,data Physical Disk: port 3,data Physical Disk: port 4,data Physical Devices Physical Disk: port 0,box.dn Physical Disk: port 1,data.dn Physical Disk: port 2,data.dn ID Operation Name WD Write Cache Mode Write Back(Performance) Read Cache Mode Read Ahead RAID Level RAID S Status Functional Size 5,586.8 GB Member Count 4 Stripe Size 64 K Event Logs(1->20/Total Events 1064) Save Clear Adapter Class Time Adapter Event 09/24/2013 14:16 Auto-rebuild has been disabled2.HoverovertheOperationtabandselectInitializationfromthemenu.
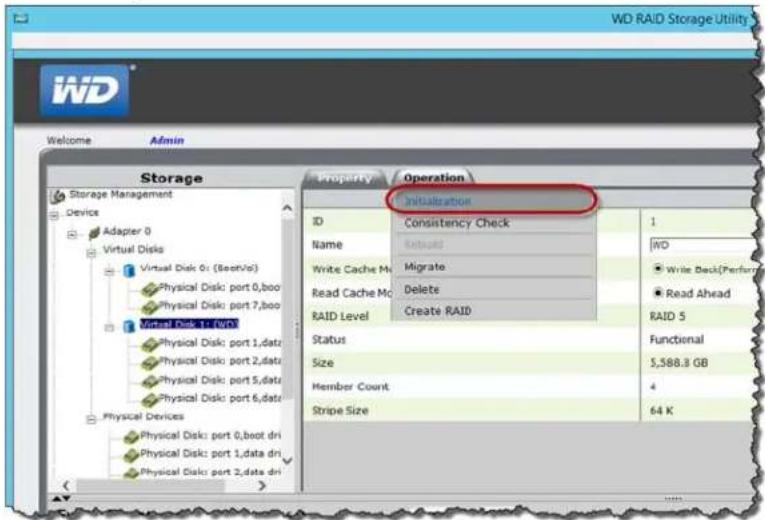
text_image
WD RAID Storage Utility Welcome Admin Storage Storage Management Device Adapter 0 Virtual Disk Virtual Disk 0: (Beet/Vc) Physical Disk: port 0,boo Physical Disk: port 7,boo Virtual Disk 1: VpV Physical Disk: port 1,datr Physical Disk: port 2,datr Physical Disk: port 5,datr Physical Disk: port 6,datr Physical Devices Physical Disk: port 0,boot dri Physical Disk: port 1,data dri Physical Disk: port 2,data dri Property Operation Initialization ID Consistency Check Name Retreat Write Cache Mc Migrate Read Cache Mc Delete RAID Level Create RAID Status Size Member Count Stripe Size 1 WD Write Back(Perfurr) Read Ahead RAID 5 Functional 5,588.8 GB 4 64 K- Ensure that Background Initialization is selected, then click Start. Background Initialization begins.
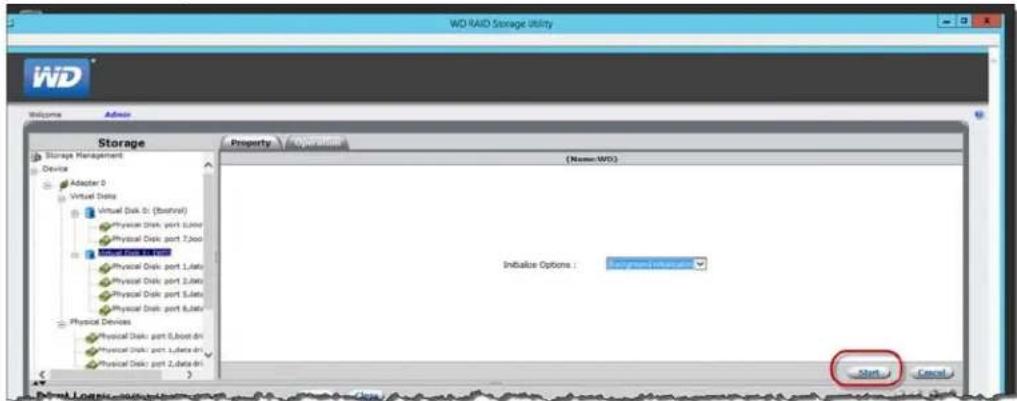
text_image
WD RAID Storage Utility Welcome Admin Storage Storage Management Device Adapter 0 Virtual Disk Virtual Disk D: (Stacked) Physical Disk part 1,Node Physical Disk part 2,Node Physical Disk part 3,Node Physical Disk part 4,Node Physical Disk part 5,Node Physical Disk part 6,Node Physical Disk part 7,Node Physical Disk part 8,Node Physical Disk part 9,Node Physical Disk part 10,Node Physical Disk part 11,Node Physical Disk part 12,Node Physical Disk part 13,Node Physical Devices Physical Disk part 14,Node Physical Disk part 15,Node Physical Disk part 16,Node Physical Disk part 17,Node Physical Disk part 18,Node Physical Disk part 19,Node Physical Disk part 20,Node Property Operator (Name: WDO) Initiative Options: Management Interface Start CancelToPauseInitialization:
- OntheWDRaidStorageUtilityHomescreen, intheStorageManagementpane, selecttheVirtualDisk
- HoverovertheOperationtabandselectPauseBackgroundInitializationfrom themenu.
ToStopInitialization:
- OntheWDRaidStorageUtilityHomescreen, intheStorageManagementpane, selecttheVirtualDisk
- HoverovertheOperationtabandselectStopBackgroundInitializationfrom themenu.
Migration
UsethefollowingstepstomigrateavirtualdriveintoaRAIDconfiguration.
- OntheWDRaidStorageUtilityHomescreen, intheStorageManagementpane, selecttheVirtualDiskwherethedrive(s)you'dliketomigratereside.
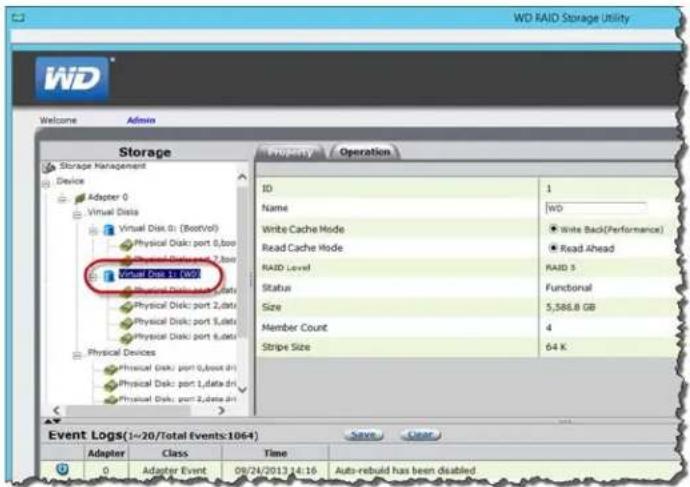
text_image
WD RAID Storage Utility Welcome Admin Storage Storage Management Device Adapter 0 Virtual Disk Virtual Disk: port 0,box1 Physical Disk: port 0,box2 Physical Disk: port 1,data Physical Disk: port 2,data Physical Disk: port 3,data Physical Disk: port 4,data Physical Devices Physical Disk: port 0,box3 dri Physical Disk: port 1,data dri Physical Disk: port 2,ddata.dri Property Operation ID Operation Name WD Write Cache Mode Write Back(Performance) Read Cache Mode Read Ahead RAID Level RAID S Status Functional Size 5,586.8 GB Member Count 4 Stripe Size 64 K Event Logs(1->20/Total Events:1064) Save Clear Adapter Class Time Save Clear 0 Adapter Event 09/24/2013 14:16 Auto-rebuild has been disabled2.HoverovertheOperationtabandselectMigratefromthemenu.
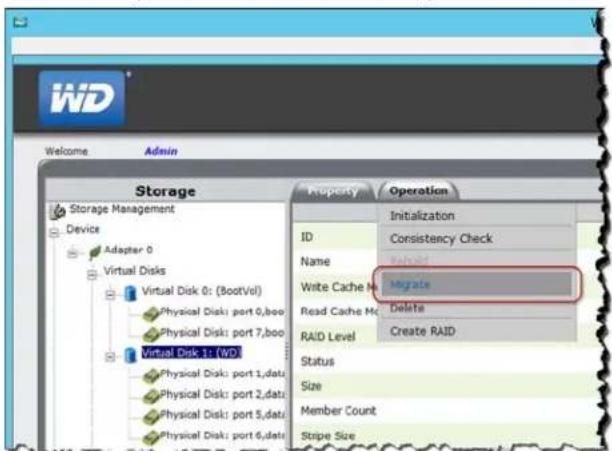
text_image
Storage Storage Management Device Adapter 0 Virtual Disks Virtual Disk 0: (BootVol) Physical Disk: port 0,boo Physical Disk: port 7,boo Virtual Disk 1: (WD) Physical Disk: port 1,data Physical Disk: port 2,data Physical Disk: port 5,data Physical Disk: port 6,data Property Operation Initialization ID Consistency Check Name Write Cache Migrate Write Cache M Delete Read Cache M Delete RAID Level Create RAID Status Size Member Count Stripe Size- On the Migrate VD screen, in the Select Migrate RAID Level field, select the RAID level you'd like to use from the pull-down menu.
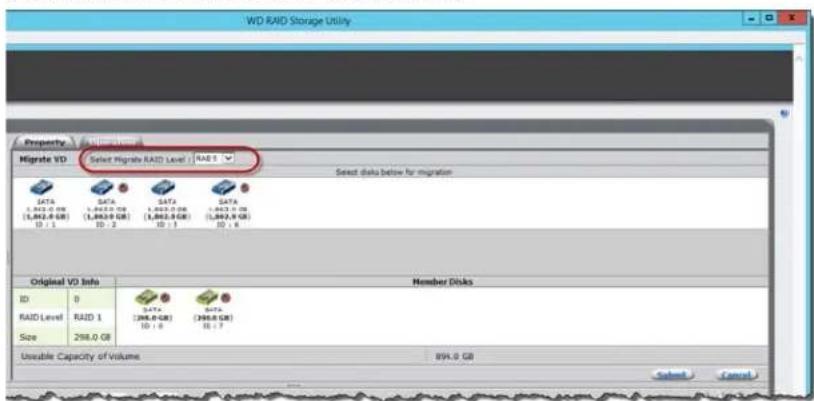
text_image
WD RAID Storage Utility Property Migrate VD Select Migrate RAID Level: RAID Select data below for migration Original VD Info Member Disks ID 0 RAID Level RAID 1 Size 298.0 GB DATA (298.0 GB) DATA (298.0 GB) DATA (298.0 GB) DATA (298.0 GB) Data (298.0 GB) Data (298.0 GB) Data (298.0 GB) Data (298.0 GB) Data (298.0 GB) Data (298.0 GB) Data (298.0 GB) Data (298.0 GB) Data (298.0 GB) Data (298.0 GB) Size Unusable Capacity of Volume 894.0 GB Select Cancel- Selectthevirtualdrive(s)you'dliketomigrate,thenclickSubmit.Migrationbegins.
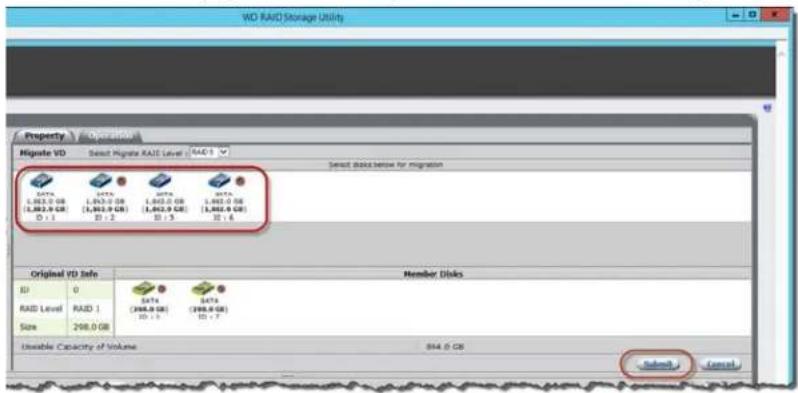
text_image
WD RAID Storage Utility Property Operation Migrate VD Select Migrate RAID Level RAID 1 Select disk below for migration Original VD Info Member Dikes ID 0 DATA DATA DATA RAID Level RAID 1 (1,863.0 GB) (1,863.0 GB) (1,863.0 GB) (1,863.0 GB) (1,863.0 GB) Size 298.0 GB ID > 3 ID > 7 Useable Capacity of Volume: 894.0 GB Submit CancelConsistencyCheck
Usethefollowingstepstoperformaconsistencycheckonyourserverdisks.
- OntheWDRaidStorageUtilityHomescreen, intheStorageManagementpane, selecttheVirtualDiskyou'dliketoperform.
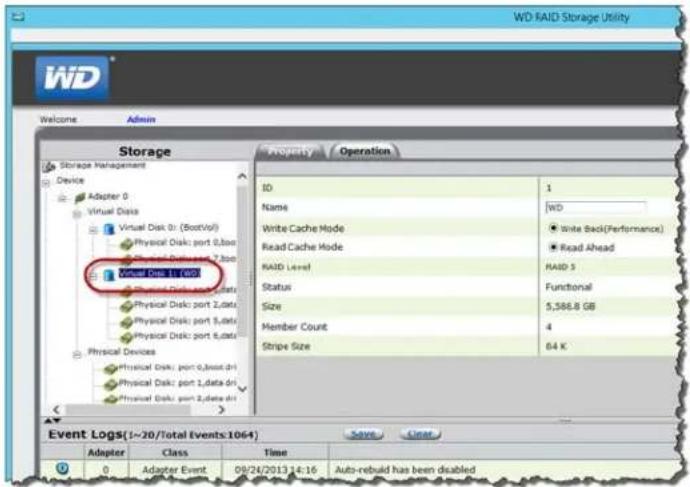
text_image
WD RAID Storage Utility Welcome Admin Storage Storage Management Device Adapter 0 Virtual Disk Virtual Disk: port (BootVit) Physical Disk: port 0,box Read Cache Mode Read Back(Performance) Read Ahead Static Cache 1/2007 Static Disk: port 2,data Physical Disk: port 3,data Physical Disk: port 4,data Physical Devices Physical Disk: port 0,boxd.dt Physical Disk: port 1,data.dt Physical Disk: port 2,data.dt Property Operation ID 1 Name WD Write Cache Mode Read Cache Mode RAID Level Status Functional Size 5,586.8 GB Member Count 4 Stripe Size 64 K Event Logs(1-20/Total Events:1064) Save Clear Adapter Class Time Adaptor Event 09/24/2013 14:16 Auto-rebuild has been disabled2.HoverovertheOperationtabandselectConsistencyCheckfromthemenu.
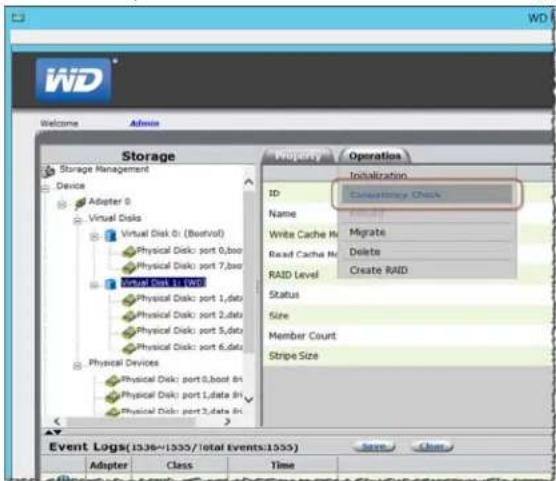
text_image
Storage Device Adapter 0 Virtual Disk Virtual Disk 0: (Barvall) Physical Disk: port 0,box Physical Disk: port 7,box Total Part 1: VDD Physical Disk: port 1,data Physical Disk: port 2,data Physical Disk: port 5,data Physical Disk: port 6,data Physical Devices Physical Disk: port 8,boost 8n Physical Disk: port 1,date 8n Physical Disk: port 2,date 8n Property Operation Initialization ID Cancelled by Check Name Migrate Write Cache H Delete Read Cache H Delete RAID Level Create RAID Status Size Member Count Stripe Size Event Logs(1936~1955/total events:1955) Adapter Class Time- SelectConsistencyCheckfromthepull-downmenu,thenclickStart.
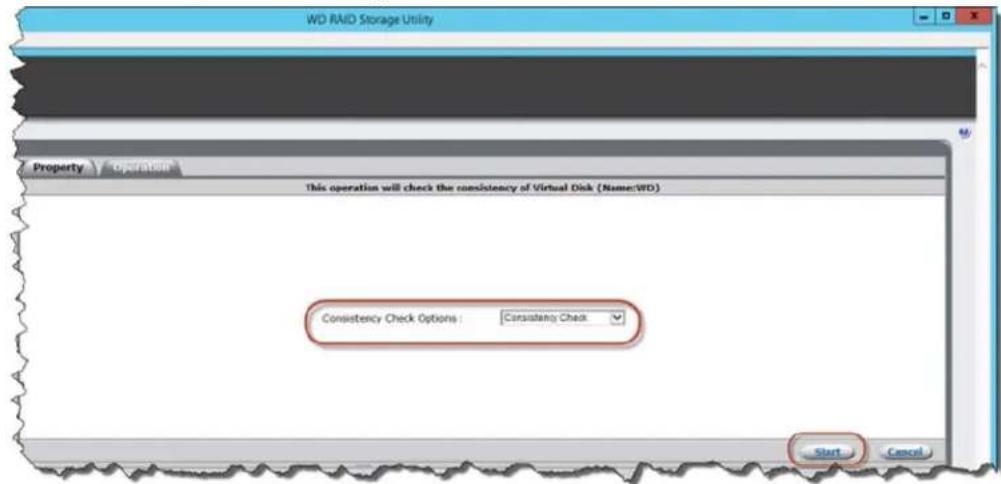
text_image
WD RAID Storage Utility Property Operation This operation will check the consistency of Virtual Disk (Name:WD) Consistency Check Options : Consistency Check Start CancelTheconsistencycheckbegins.
DeletingVirtualDrive
Usethefollowingstepstodeleteyourvirtualdrives.
WARNING! Ensure that you haven not selected your boot drive (Drive0) when deleting virtual drives. When the drive is deleted, all data on the drive is erased.
- OntheWDRaidStorageUtilityHomescreen, intheStorageManagementpane, selecttheVirtualDiskyou'dliketodelete.
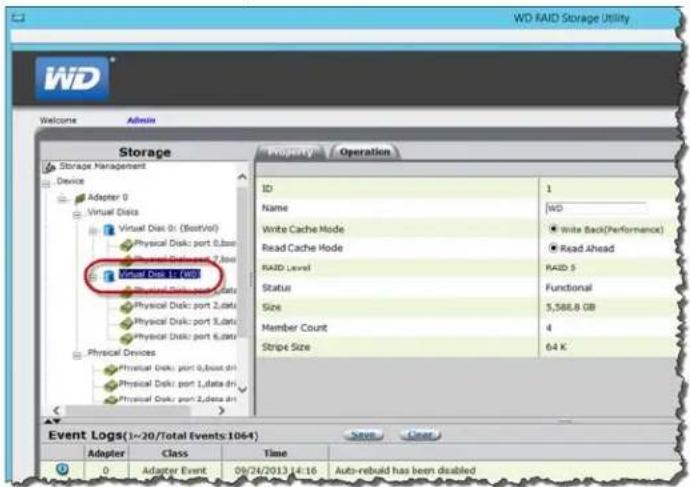
text_image
WD RAID Storage Utility Welcome Admin Storage Storage Management Device Adapter 0 Virtual Data Virtual Disk: port (BootVol) Physical Disk: port 0,base Physical Disk: port 2,data Physical Disk: port 3,data Physical Disk: port 4,data Physical Devices Physical Disk: port 0,base dir Physical Disk: port 1,data dir Physical Disk: port 2,data dir Property Operation ID 1 Name WD Write Cache Mode ● Write Back(Performance) Read Cache Mode ● Read Ahead RAID Level RAID S Status Functional Size 5,568.8 GB Member Count 4 Stripe Size 64 K Event Logs(1-20/Total Events 1064) Adapter Class Time Save Cancel 0 Adapter Event 09/24/2013 14:16 Auto-rebuild has been disabled2.HoverovertheOperationtabandselectDeletefromthemenu.
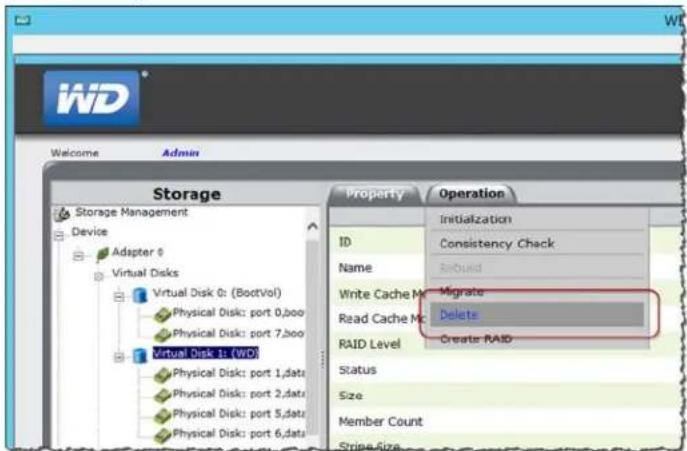
text_image
Storage Storage Management Device Adapter 0 Virtual Disks Virtual Disk 0: (BootVol) Physical Disk: port 0,boo Physical Disk: port 7,boo Virtual Disk 1: (WO) Physical Disk: port 1,data Physical Disk: port 2,data Physical Disk: port 5,data Physical Disk: port 6,data Property Operation Initialization ID Consistency Check Name Build Write Cache Migrate Read Cache Mc Delete RAID Level Create RAID Status Size Member Count Stripe Size- Read the Warning, then click OK.
- Readthemessage, thenclickOK. Your virtualdrive(s) are deleted.
- Readthemessageconcerningpartitioninformation, thenclickOK. Yourvirtualdrive(s) aredeleted.
WDSentinelDS5100/DS6100AdministratorReferenceSheet
Providedbelowisareferencesheetthatallowsyoutokepalloftheusefulinformation associatedwithyourWDSentinelDS5100/DS6100serverinonelocation.Enterthe informationidentifiedbelowandkeepthischecklistinasafelocationforfuturereference.
WDSentinelDS5100/DS6100ServerName:
WDSentinelDS5100/DS6100IPAddress:
- StaticIPAddress:
■ DynamicIPAddress:
WDSentinelDS5100/DS6100ServerPassword:
UserName:
DomainName:
Index
A
accessingDashboard25
accessingLaunchpad Mac54
WindowsPC52
accessingsharedfolders vianetwork58
viaRemoteWebAccess59
accessories7
addingauseraccount27
add-ins
monitoring33
AdministratorReferenceSheet100
Administrator'stasks14
alerticons30
alerts33
monitoring33
automaticbackups61 ,67
automaticallyupdatingWDsoftware 38
B
backingup
usingDashboard64
usingLaunchpad63
WindowsPC60 ,63,64
withTimeMachine64
connectingWindowsPCtosharedfolders
withoutLaunchpad73
ConsistencyCheck97
coolingfan34
CustomerSupport
automaticrequest36
contactsiii
D
Dashboard
accessing25
DCInconnector12
deletingavirtualdrive98
descriptionofWDSentineIDS5100/
DS61003
documentconventions2
drives
findingcompatible36
lock/unlock36
settingupRAID45
settingupStorageSpaces44
settingupyour43
types35 .82
E
enablinganunsupporteddrive82
enablingremotewebaccess40
environmentalcompliance(China)79
ethernetports12
externalusers'tasks14
F
factorydefaults
returningthebootdrivesto70
faileddrive
recovering48
fan
replacing85
FCCClassBinformation78
filesandfolders
recovering67 ,69
G
GNUgeneralpubliclicense80
H
handlingprecautions2
harddrive
managing32
replacing82
Healhtab33
help
wheretofind13
Homepage29
tabs30
taskspanel30 .31
|
ICES/NMB-003compliance78
icon
Add-ins33
alerts30
ComputerandBackups31
ComputersandBackups61
Launchpad52 ,53
Monitor33
ServerFoldersandHardDrives32
Trash57
indicators12
Initialization94
pausing95
stopping95
internalusers'tasks14
K
Kensingtonsecurityslot12
L
Launchpad
accessingonaPC52
backingup63
icon52 ,53
managing55
options55
startingabackup63
uninstallingonaMaccomputer57
uninstallingonWindowsPC57
LEDindications12
DriveLEDs12
EthernetPort12
PowerLED12
M
Mac
accessingLaunchpad54
backingup64
connectingtoWDSentinel23
managingserversettings39
managingtheLaunchpad55
manualupdates
WD38
Microsoftsoftware
updating39
Migration96
Monitoricon33
monitoringadd-ins33
monitoringsystemhealth33
Movingaserverfolder50
N
networkconnectionhealth34
0
officeuses15
onlineproductregistrationiii
operatingsystemrequirements7
P
password
Administrator14
lock/unlock36
passwordandusername15
powersupplies34
productinformation
recording2
productregistrationiii
R
RAID
settingup45
RAIDstorage42
rebootingtheWDSentinelserver41
recoveringafaileddrive48
recoveringdata
PC67
recoveringtheWDSentinelserver70
recovery
bootdrive70
serverimage70
recoverybutton12
referenceresources13
registration,onlineiii
regulatorycompliance78
RemoteWebAccess
accessingcomputersandsharedfolders59
remotewebaccess
enabling40
removingtheservercover87
removingtheunitbackcover87
replacementdrives36
requirements
operatingsystems7
restoringdataandsettings67 ,69
RoHS79
s
safeshutdown40
safetycompliance78
safetyinstructions1
schedulingAutomaticBackups
Dashboard61
PC61
TimeMachine65
schedulingWDsoftwareupdates38
server
settingup25
shuttingdown40
serverfan
replacing85
serverfolders
managing32
moving50
serverrecovery70
serversettings
general39
managing39
media40
service
obtaining79
accessingoverthenetwork58
accessingremotely59
RemoteWebAccess59
sharingdata
USB48
shuttingdownsafely40
shuttingdowntheserver40
softwareupdates
Microsoft39
WD38
specifications8
storage34 ,48
managing42
RAID42
StorageSpaces43
settingup44
systemhealth33
monitoring33
systemtemperature34
T
tabs
Homepage30
UpdatingSoftware37
tasks
Health34
technicalspecifications8
TechnicalSupportcontactslistiii
temperature34
TimeMachine
backingup64
Trashicon57
troubleshooting
cannotaccessWindowsPCsviaRe-
moteAccess74
checklist73
drivenotconnectingtonetwork73
LEDsdonotlightup73
U
UnderwritersLaboratoriesInc.(UL)79
unsupporteddrives
enabling82
updatingMicrosoftsoftware39
updatingWDSoftware38
USB
sharingdata48
storage48
USBstorage48
USBports12
useraccount
adding27
useraccounts15
managing31
userassistance13
userrolesandresponsibilities14
users
external14
internal14
using48
usingTimeMachine64
usingUSBstorage48
V
VGAport12
virtualdrive
deleting98
W
warning
lithiumbattery1 uncleanshutdown40 WDlimitedwarranty79 WDRAIDStorageUtility93 WDSentinelDS5100/DS6100 backview11 components12 connectingtoyournetwork(preferred method)16 frontview10 howitfitsinyouroffice15 packagecontents6 rebooting41 settingup17 shuttingdown40 usinglocallyandremotely15 WDService79 WDsoftware automaticupdates38 manualupdates38 updating37 WindowsPC backingup60 backingupviaDashboard64 backingupviaLaunchpad63 connectingtoWDSentinel21 restoring67
InformationfurnishedbyWDisbelievedtobeaccurateandreliable;however,noresponsibilityisassumedby WDforitsusenorforanyinfringementofpatentsorotherrightsofthirdpartieswhichmayresultfromitsuse. NolicenseisgrantedbyimplicationorotherwiseunderanypatentorpatentrightsofWD.WDreservethe righttochangespecificationsatanytimewithoutnotice.
WesternDigital,WD,andtheWDlogoareregisteredtrademarksofWesternDigitalTechnologies,Inc.inthe U.S.andothercountries;WDSentinelandWDGuardianaretrademarksofWesternDigitalTechnologies,Inc intheU.S.andothercountries.Othermarksmaybementionedhereinthatbelongtoothercompanies.
©2014WesternDigitalTechnologies, Inc. All rights reserved.
WesternDigitalCorporation 3355MichelsonDrive, Suite100 Irvine, California92612U.S.A.
4779-705105-A03April2014