BSNF 9352 OX - Fridge WHIRLPOOL - Free user manual and instructions
Find the device manual for free BSNF 9352 OX WHIRLPOOL in PDF.


User questions about BSNF 9352 OX WHIRLPOOL
0 question about this device. Answer the ones you know or ask your own.
Ask a new question about this device
Download the instructions for your Fridge in PDF format for free! Find your manual BSNF 9352 OX - WHIRLPOOL and take your electronic device back in hand. On this page are published all the documents necessary for the use of your device. BSNF 9352 OX by WHIRLPOOL.
USER MANUAL BSNF 9352 OX WHIRLPOOL
natural_image
Simple line drawing of a refrigerator with a double door and side panel (no text or symbols)User Manual

THANK YOU FOR BUYING A WHIRLPOOL PRODUCT.
In order to receive a more complete assistance,
please register your appliance on www.whirlpool.eu/register
INDEX
HEALTH & SAFETY GUIDE....3
Safety instructions....3
Product Description 5
Accessories* 5
Control panel....6
Shelves 7
Door....7
No-frost refrigerator compartment 7
No-frost freezer compartment....7
Quick ice 7
How to use the appliance....8
First time use 8
Refrigerator compartment and food storage 8
How to store fresh food and beverage 8
Freezer compartment and food storage....9
Removing the freezer drawer container....9
Tips for freezing and storing fresh food 9
Frozen food: shopping tips 9
Storage times for home frozen foods 10
Functional sounds 10
Alarm table....11
Recommendation in case of no use of the appliance 11
Cleaning and maintenance 11
Troubleshooting....12
After-sales service 13
INSTALLATION GUIDE....13
SAFETY INSTRUCTIONS
IMPORTANT TO BE READ AND OBSERVED
Before using the appliance, read these safety instructions. Keep them nearby for future reference. These instructions and the appliance itself provide important safety warnings, to be observed at all times. The manufacturer declines any liability for failure to observe these safety instructions, for inappropriate use of the appliance or incorrect setting of controls.
⚠️ Very young children (0-3 years) should be kept away from the appliance. Young children (3-8 years) should be kept away from the appliance unless continuously supervised. Children from 8 years old and above and persons with reduced physical, sensory or mental capabilities or lack of experience and knowledge can use this appliance only if they are supervised or have been given instructions on safe use and understand the hazards involved. Children must not play with the appliance. Cleaning and user maintenance must not be carried out by children without supervision.
PERMITTED USE
⚠️ CAUTION: The appliance is not intended to be operated by means of an external switching device, such as a timer, or separate remote controlled system. ⚠ This appliance is intended to be used in household and similar applications such as: staff kitchen areas in shops, offices and other working environments; farm houses; by clients in hotels, motels, bed & breakfast and other residential environments.
This appliance is not for professional use. Do not use the appliance outdoors.
The bulb used inside the appliance is specifically designed for domestic appliances and is not suitable for general room lighting within the home (EC Regulation 244/2009).
⚠ The appliance is designed for operation in places where the ambient temperature comes within the following ranges, according to the climatic class given on the rating plate. The appliance may not work properly if it is left for a long time at a temperature outside the specified range. Climatic Class Amb. T. (°C)
SN: From 10 to 32 °C; N: From 16 to 32 °C
ST: From 16 to 38 °C; T: From 16 to 43 °C
This appliance does not contain CFCs. The refrigerant circuit contains R600a (HC). Appliances with Isobutane (R600a): isobutane is a natural gas without environmental impact, but is flammable. Therefore, make sure the refrigerant circuit pipes are not damaged, especially when emptying the refrigerant circuit.
⚠ WARNING: Do not damage the appliance refrigerant circuit pipes.
⚠ WARNING: Keep ventilation openings, in the appliance enclosure or in the built-in structure, clear of obstruction.
⚠ WARNING: Do not use mechanical, electric or chemical means other than those recommended by the Manufacturer to speed up the defrost process.
⚠ WARNING: Do not use or place electrical devices inside the appliance compartments if they are not of the type expressly authorised by the Manufacturer.
⚠ WARNING: Ice makers and/or water dispensers not directly connected to the water supply must be filled with potable water only.
⚠ WARNING: Automatic ice-makers and/or water dispensers must be connected to a water supply that delivers potable water only, with mains water pressure between 0.17 and 0.81 MPa (1.7 and 8.1 bar).
⚠ Do not store explosive substances such as aerosol cans with a flammable propellant in this appliance.
⚠ Do not swallow the contents (non-toxic) of the ice packs (provided with some models). Do not eat ice cubes or ice lollies immediately after taking them out of the freezer since they may cause cold burns.
⚠ For products designed to use an air filter inside an accessible fan cover, the filter must always be in position when the refrigerator is in function.
⚠ Do not store glass containers with liquids in the freezer compartment since they may break.
Do not obstruct the fan (if included) with food items. After placing the food check that the door of the compartments closes properly, especially the freezer door.
⚠️ Damaged gaskets must be replaced as soon as possible.
⚠ Use the refrigerator compartment only for storing fresh food and the freezer compartment only for storing frozen food, freezing fresh food and making ice cubes.
⚠ Avoid storing unwrapped food in direct contact with internal surfaces of the refrigerator or freezer compartments.
Appliances could have special compartments (Fresh Food Compartment, Zero Degree Box, etc.). Unless specified in the specific booklet of product, they can be removed, maintaining equivalent performances.
⚠ C-Pentane is used as blowing agent in the insulation foam and it is a flammable gas.
INSTALLATION
⚠ The appliance must be handled and installed by two or more persons - risk of injury. Use protective gloves to unpack and install - risk of cuts.
⚠️ Installation, including water supply (if any) and
electrical connections, and repairs must be carried out by a qualified technician. Do not repair or replace any part of the appliance unless specifically stated in the user manual. Keep children away from the installation site. After unpacking the appliance, make sure that it has not been damaged during transport. In the event of problems, contact the dealer or your nearest After-sales Service. Once installed, packaging waste (plastic, styrofoam parts etc.) must be stored out of reach of children - risk of suffocation. The appliance must be disconnected from the power supply before any installation operation - risk of electric shock. During installation, make sure the appliance does not damage the power cable - risk of fire or electric shock. Only activate the appliance when the installation has been completed.
⚠️ Be careful not to damage the floors (e.g. parquet) when moving the appliance. Install the appliance on a floor or support strong enough to take its weight and in a place suitable for its size and use. Make sure the appliance is not near a heat source and that the four feet are stable and resting on the floor, adjusting them as required, and check that the appliance is perfectly level using a spirit level. Wait at least two hours before switching the appliance on, to ensure that the refrigerant circuit is fully efficient.
⚠️ To guarantee adequate ventilation, leave a space on both sides and above the appliance. The distance between the rear of the appliance and the wall behind the appliance should be 50 mm, to avoid access to hot surfaces. A reduction of this space will increase the Energy consumption of product.
⚠ WARNING: To avoid a hazard due to instability, positioning or fixing of the appliance must be done in accordance with the manufacturer instructions. It is forbidden to place the refrigerator in such way that the metal hose of gas stove, metal gas or water pipes, or electrical wires are in contact with the refrigerator back wall (condenser coil).
ELECTRICAL WARNINGS
⚠ It must be possible to disconnect the appliance from the power supply by unplugging it if plug is accessible, or by a multi-pole switch installed upstream of the socket in accordance with the wiring rules and the appliance must be earthed in conformity with national electrical safety standards. ⚠ Do not use extension leads, multiple sockets or adapters. The electrical components must not be accessible to the user after installation. Do not use the appliance when you are wet or barefoot. Do not operate this appliance if it has a damaged power cable or plug, if it is not working properly, or if it has been damaged or dropped.
⚠️If the supply cord is damaged, it must be replaced with an identical one by the manufacturer, its service agent or similarly qualified persons in order to avoid a hazard - risk of electric shock.
CLEANING AND MAINTENANCE
⚠ WARNING: Ensure that the appliance is switched off and disconnected from the power supply before performing any maintenance operation; never use steam cleaning equipment - risk of electric shock.
Do not use abrasive or harsh cleaners such as window sprays, scouring cleansers, flammable fluids, cleaning waxes, concentrated detergents, bleaches or cleansers containing petroleum products on plastic parts, interior and door liners or gaskets. Do not use paper towels, scouring pads, or other harsh cleaning tools.
DISPOSAL OF PACKAGING MATERIALS
The packaging material is 100% recyclable and is marked with the recycle symbol 🌐.
The various parts of the packaging must therefore be disposed of responsibly and in full compliance with local authority regulations governing waste disposal.
DISPOSAL OF HOUSEHOLD APPLIANCES
This appliance is manufactured with recyclable or reusable materials. Dispose of it in accordance with local waste disposal regulations. For further information on the treatment, recovery and recycling of household electrical appliances, contact your local authority, the collection service for household waste or the store where you purchased the appliance. This appliance is marked in compliance with European Directive 2012/19/EU, Waste Electrical and Electronic Equipment (WEEE). By ensuring this product is disposed of correctly, you will help prevent negative consequences for the environment and human health.
The symbol 📄 on the product or on the accompanying documentation indicates that it should not be treated as domestic waste but must be taken to an appropriate collection center for the recycling of electrical and electronic equipment.
ENERGY SAVING TIPS
Install the appliance in a dry, well ventilated room far away from any heat source (eg. radiator, cooker, etc.) and in a place not exposed directly to the sun. If required, use an insulating plate.
To guarantee adequate ventilation follow installation instructions. Insufficient ventilation at the back of the product increases energy consumption and decreases cooling efficiency.
Frequent door opening might cause an increase in Energy Consumption. The internal temperature of the appliance and the Energy Consumption may be affected also by the ambient temperature, as well as location of the appliance. Temperature setting should take into consideration these factors.
Reduce door opening to a minimum.
When thawing frozen food, place in the refrigerator. The low temperature of the frozen products cools the food in the refrigerator. Allow warm food and drinks to cool down before placing in the appliance.
Positioning of the shelves in the refrigerator has no impact on the efficient usage of energy. Food should be placed on the shelves in such way to ensure proper air circulation (food should not touch each other and distance between food and rear wall should be kept).
You can increase storage capacity of frozen food by removing baskets and, if present, Stop Frost shelf.
Do not worry about noises coming from the compressor which are described as normal noises in this product's Quick Guide.
PRODUCT DESCRIPTION
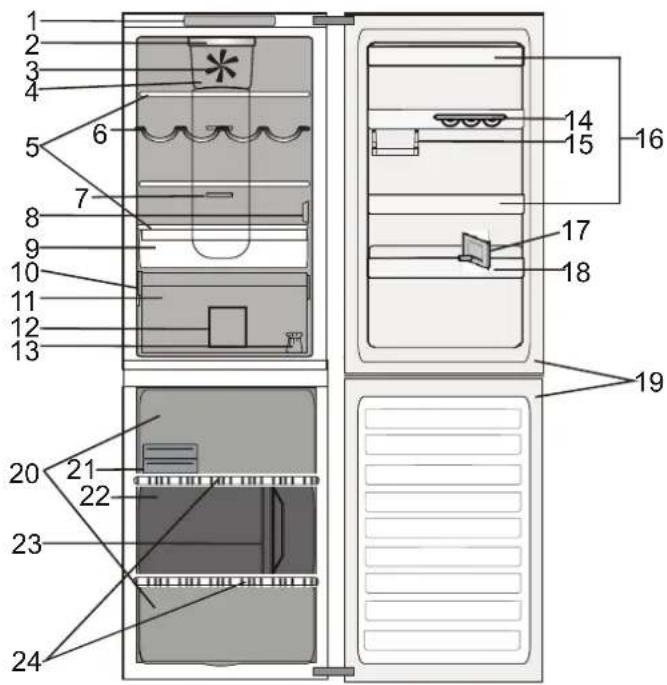
text_image
1 2 3 4 5 6 7 8 9 10 11 12 13 20 21 22 23 24 14 15 16 17 18 19- Control panel
Refrigerator Compartment
-
LED lighting
-
Fan*
-
Fan cover and antibacterial filter area*
-
Shelves
-
Bottle rack*
-
Multi-flow cold air area
-
Sensor cover
-
Cooler compartment (best for meat and fish)
-
Rating plate with commercial name
-
Fruits and vegetables crisper
-
Fridge drawer divider*
-
Door reversibility kit
-
Egg tray*
-
Small items half balcony*
-
Door trays
-
Bottle separator*
-
Bottle balcony
-
Door seal
Freezer Compartment
-
Door seal
-
Freezer drawers
-
Quick Ice / Eutetics
-
Middle drawer: coolest zone best for freezing fresh food
-
Freezer drawer divider
-
Shelves
ACCESSORIES\*
EGG TRAY BOTTLE RACK BOTTLE SEPARATOR
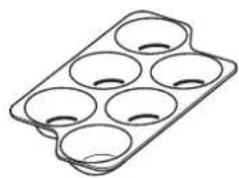
natural_image
Line drawing of a six-cylinder baking mold (no text or symbols)
natural_image
Line drawing of a plastic bottle partially submerged in a wavy liquid container (no text or symbols)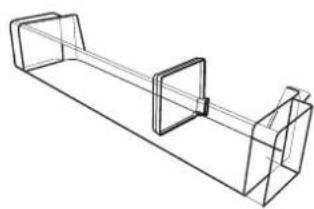
natural_image
Pure technical line drawing of a mechanical bracket or support structure without any text, numbers, or symbolsFREEZER DRAWER DIVIDER
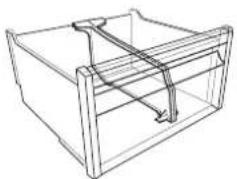
natural_image
Line drawing of a 3D rectangular box with internal structural lines (no text or symbols)FRIDGE DRAWER DIVIDER
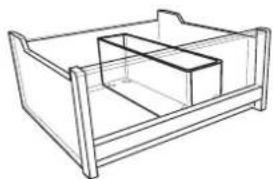
natural_image
Line drawing of a wooden crate with two compartments (no text or symbols)QUICK ICE COMPARTMENT
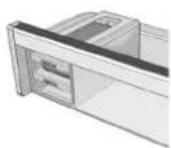
EUTETICS/QUICK ICE TRAYS
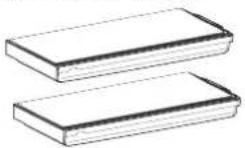
* Available only on certain models
CONTROL PANEL
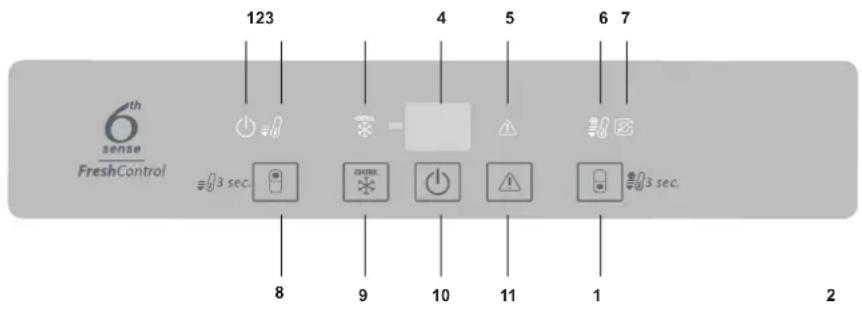
text_image
6th sense FreshControl 123 4 5 6 7 3 sec. 8 9 10 11 1 2- On/stand-by indicator
- Fast cool indicator
- Freeze control indicator
- Fridge/freezer temperature display (°C)
- Stop alarm indicator
- Fast freeze indicator
- Black out alarm indicator
- Fridge temperature button / fast cool button
- Freeze control button
- On/stand-by
- Stop alarm
- Freezer temperature button / fast freeze button
ON/STANDBY
To put the product in Stand-by, press and hold the On/Stand By button for 3 seconds. All the indicators turn off except On/Standby indicator. Press again to reactivate the appliance.

6^TH SENSE
This function automatically works to ensure the optimal conditions to preserve the stored food. The "6 ^th Sense" function is automatically activated when:
- a large amount of food is loaded into the refrigerator
- the refrigerator door is left open for a long time
- a prolonged power failure takes place, causing the internal temperature of the appliance to increase to values that cannot guarantee safe storage of food.
FRIDGE TEMPERATURE
To adjust the Fridge Temperature, press the Fridge °C button. The Fridge Temperature can be adjusted between +2°C and +8°C, as shown by the Fridge Temperature LEDs.
FREEZER TEMPERATURE
To adjust the Freezer Temperature, press the Freezer °C button. The Freezer Temperature can be adjusted between -16°C and -24°C, as shown by the Freezer Temperature LEDs.
FAST COOL
Using Fast Cool function it is possible to increase the cooling capacity in the refrigerator compartment. The use of this function is recommended when placing a very high quantity of food in the refrigerator compartment. Press the Fast Cool button to activate Fast Cool function. When activated, the Fast Cool indicator turns on. The function is automatically disabled after 6 hours, or can be manually disabled by pressing Fast Cool button again.
FAST FREEZE
The use of this function is recommended when placing a very high quantity of food to be frozen in the freezer compartment. 24 hours before freezing fresh food, press the Freezer button to activate the Fast Freeze function. When activated, the Fast Freeze indicator turns on. After 24 hours place the food to be frozen in the middle freezing zone of freezer compartment. The function is automatically disabled after 48 hours, or can be manually disabled by pressing Fast Freeze button.
FREEZE CONTROL
Freeze Control is an advanced technology that reduces temperature fluctuations in the whole freezer compartment to minimum, thanks to an innovative air system, totally independent from the fridge. Freeze burns are reduced up to 60% and food preserves its original quality and color. To activate/deactivate the Freeze Control function simply press the FREEZE CONTROL button. The function works properly in a defined range of temperature: between -22°C and -24°C. When the function is engaged and the current temperature in the freezer is set to the warmer set point than -22°C, the temperature is automatically set to -22°C to match the working range. If the function is engaged and the user modify the freezer temperature out of the working range, the function is automatically switched off. In case of Fast freezing is engaged, the function “Freeze control” is inhibited until the Fast Freezing function switched off.
FAN\*
The Fan improves temperature distribution inside the refrigerator compartment, allowing better preservation of stored food. By default, the fan is switched on. To turn off the fan press the button of fan. Please note that when the fan is switched on it will not continuously work. The fan will start/stop working depending on the temperature and/or humidity level inside the fridge. It is therefore absolutely normal if the fan does not move even if the fan is switched on. If the appliance has the Fan it can be equipped with the antibacterial filter. Remove it from the box placed in the crisper drawer and insert into the fan cover. The replacement procedure is included in the filter box.
FREEZING FRESH FOOD
Place fresh food to be frozen on the shelf in the freezer compartment, avoiding direct contact with food that is already frozen. The quantity of fresh food that can be frozen in 24 hours is written on the rating plate. To freeze fresh food, place the freezer compartment shelf in the bottom position.
LED LIGHT
The light system inside the fridge compartment uses LEDs light, allowing a better lightning as well as very low energy consumption. If the LED light system does not work, please contact the Service to replace it.
Important: The refrigerator compartment light switches on when the refrigerator door is opened. If the door is kept open for more than 8 minutes the light will be automatically switched off.
SHELVES
All shelves, flaps and pull-out baskets are removable.
DOOR
DOOR REVERSIBILITY
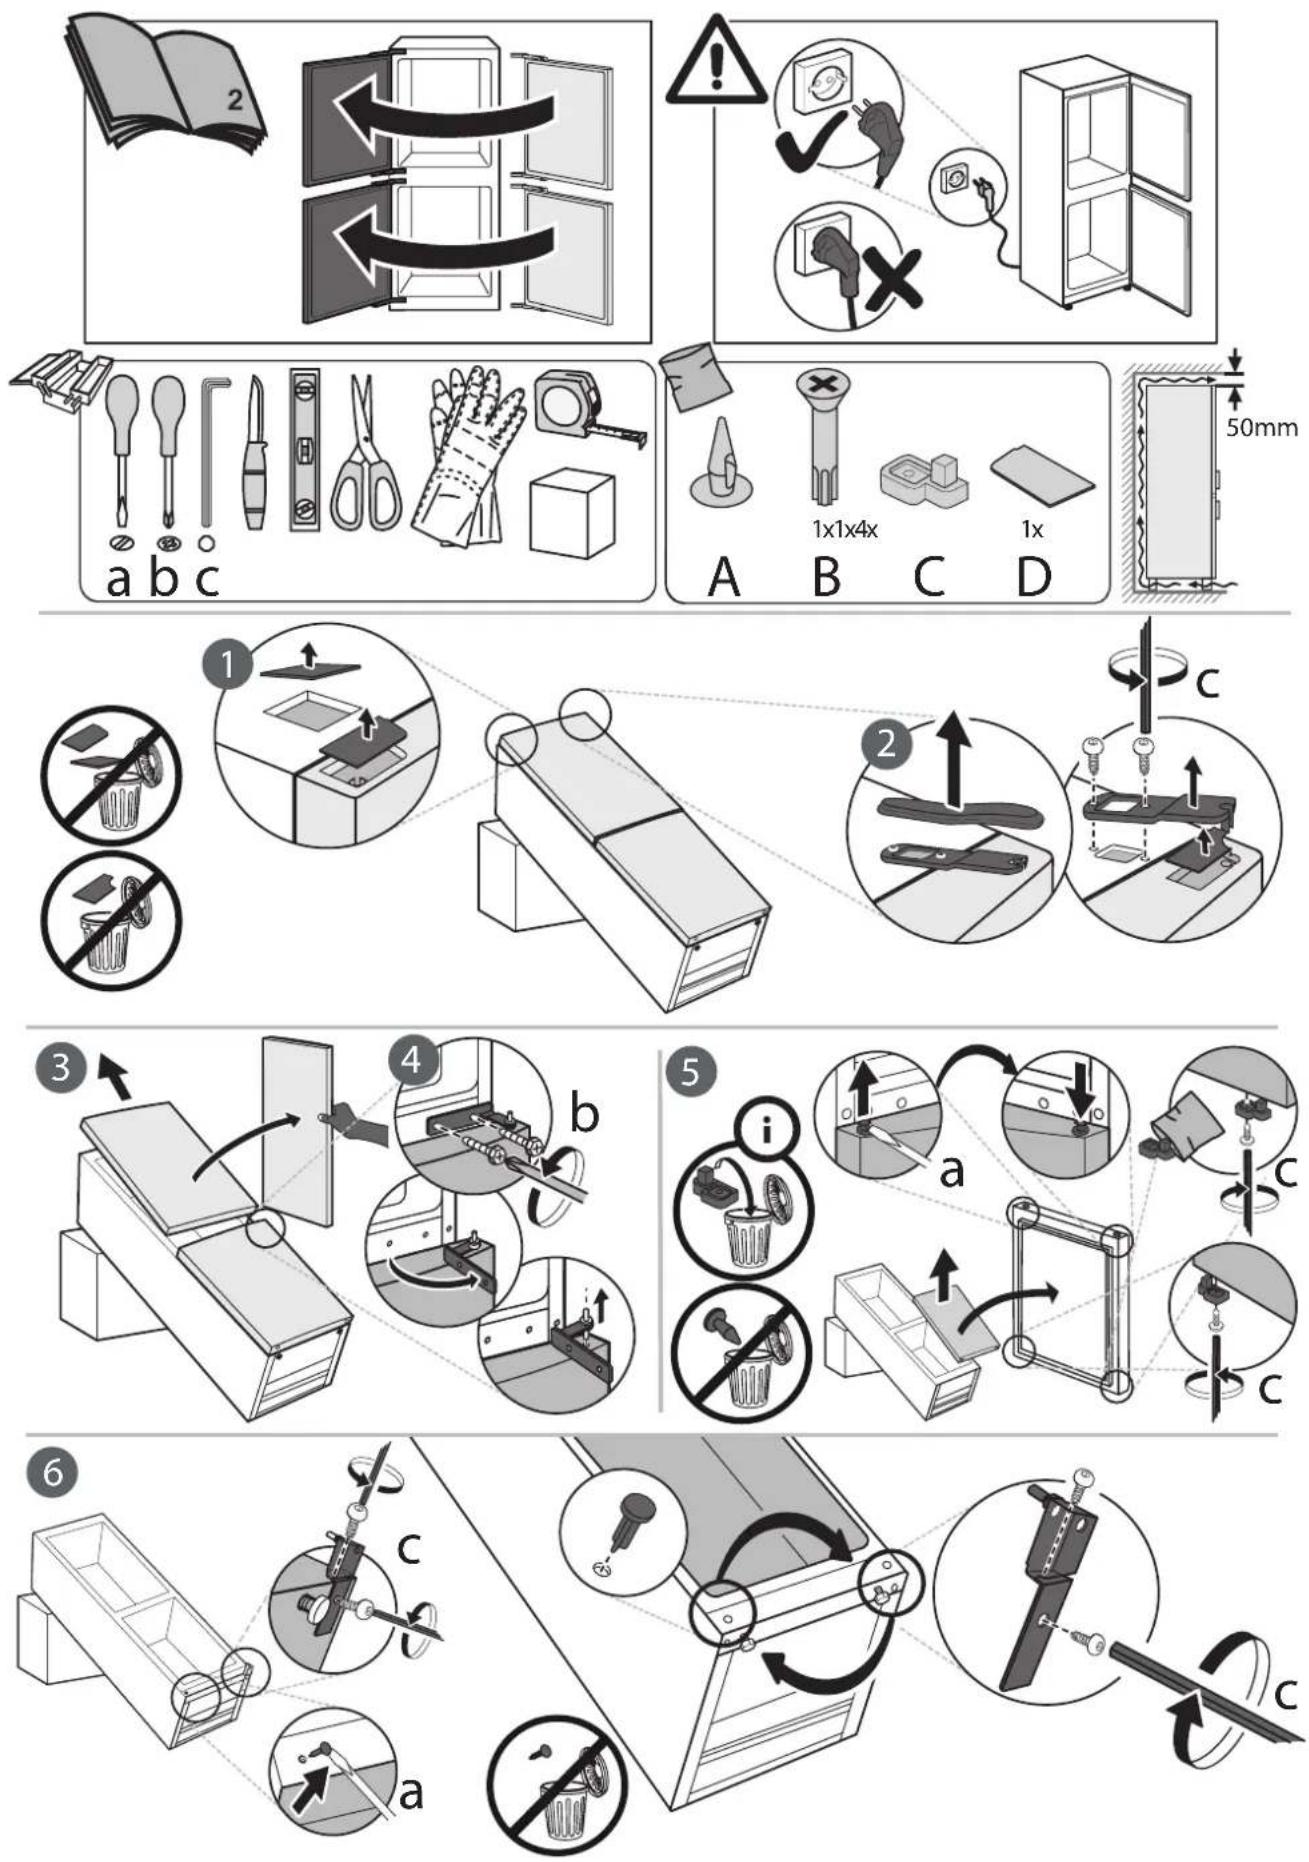
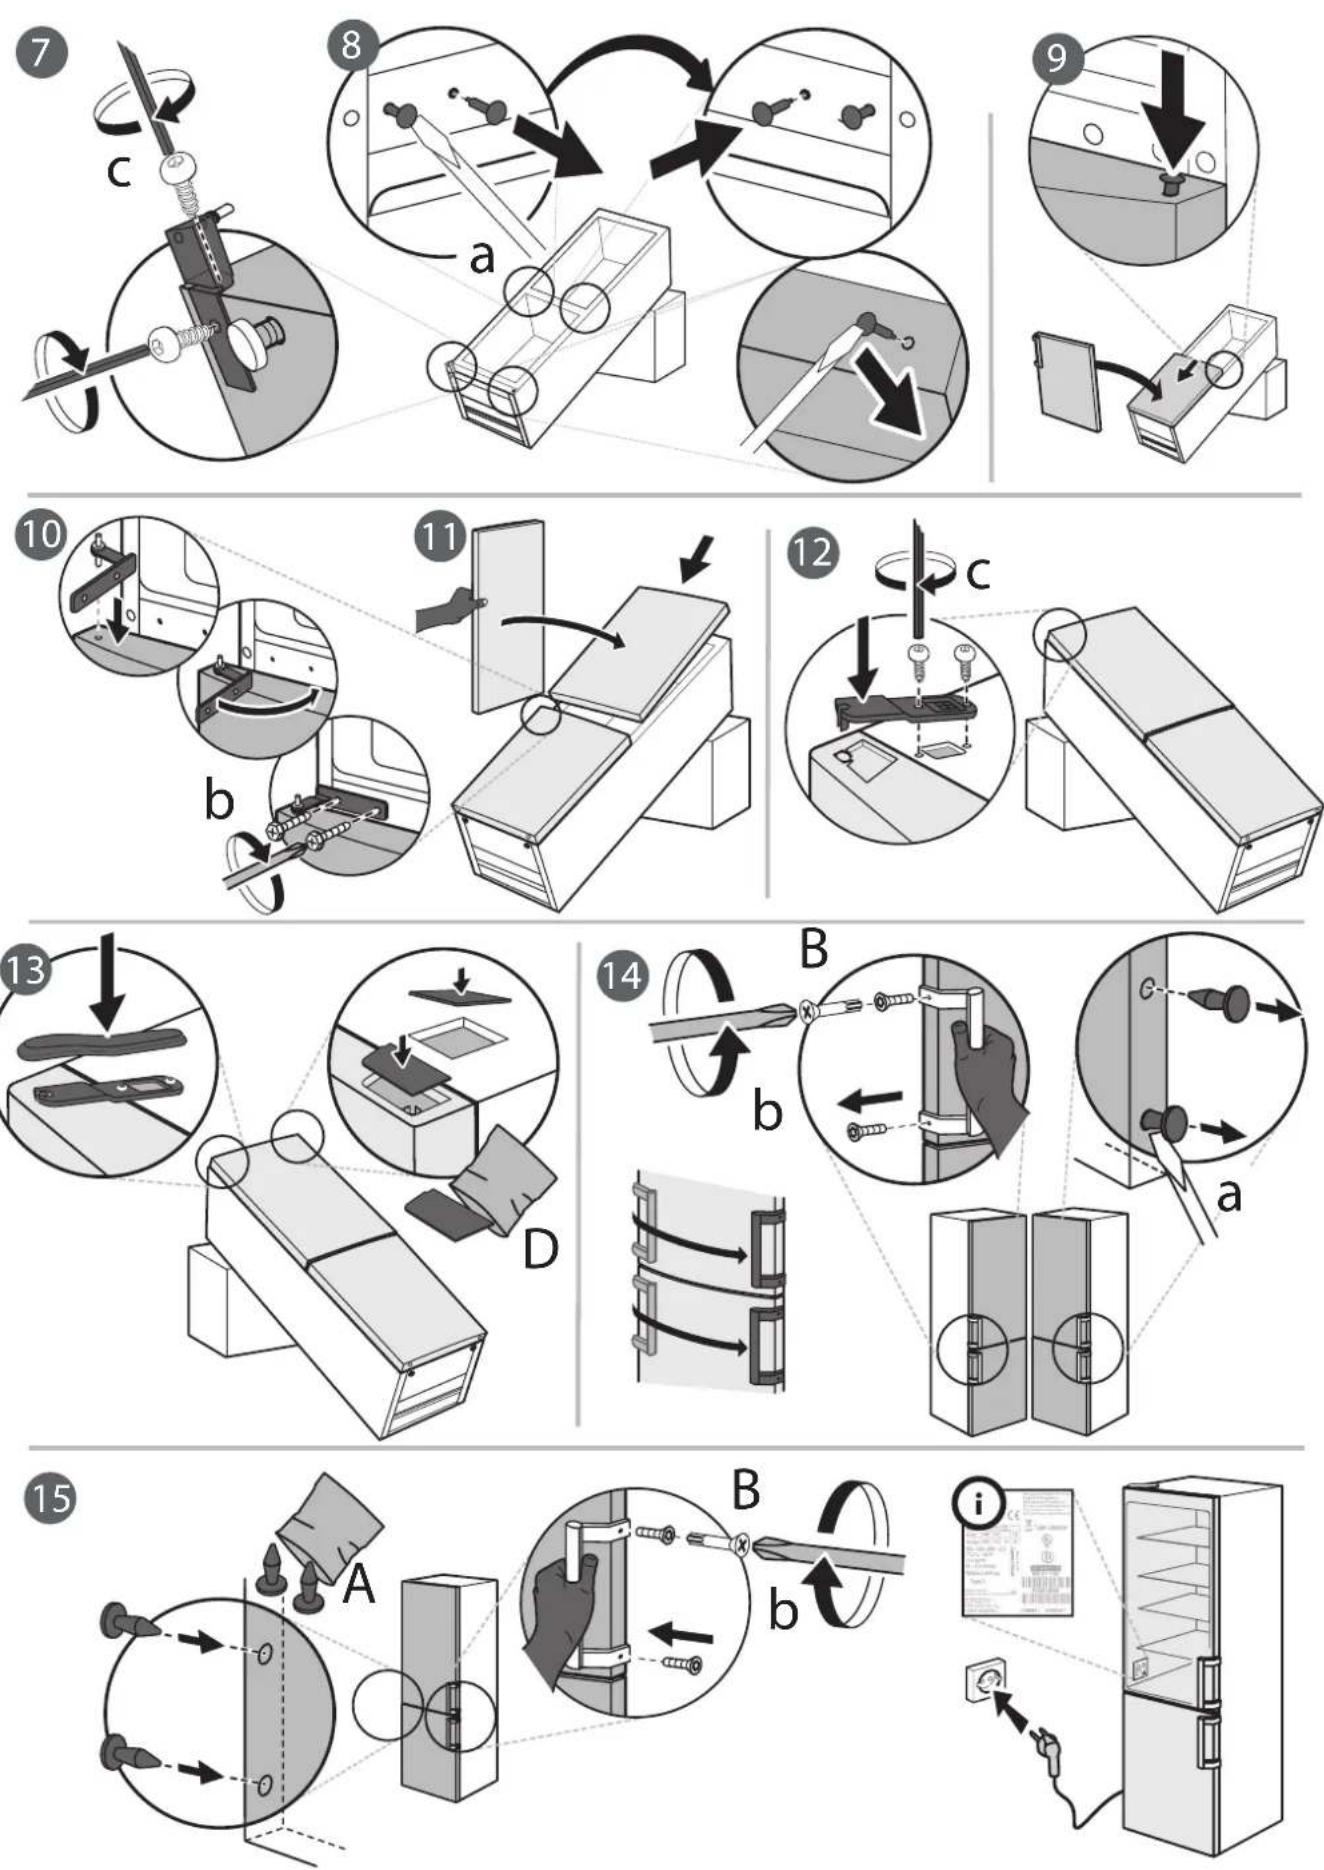
Note: The direction of door opening can be changed. If this operation is performed by After-sales Service it is not covered by the warranty.
Follow instruction in Installation Guide.
NO-FROST REFRIGERATOR COMPARTMENT
Refrigerator compartment defrosting is completely automatic. Droplets of water on the rear wall inside the refrigerator compartment indicate that the automatic defrost phase is in progress.
The defrost water is automatically run into a drain hole and collected in a container, where it evaporates.
NO-FROST FREEZER COMPARTMENT
No Frost freezers provide chilled air circulation around the storage areas, and prevent the formation of ice, thereby completely eliminating the need for defrosting.
Frozen items don't stick to the walls, labeling stays legible and storage space remains neat and clear.
QUICK ICE
HOW TO MAKE ICE CUBES
Put the empty ice cube trays into the freezer 24 hours before using the Quick Ice feature to cool them down. To achieve the best performance of the Quick Ice trays it is recommended to keep them permanently in the freezer and maintain temperature setting at -18°C or colder. Remove a Quick Ice tray by pulling it towards you.
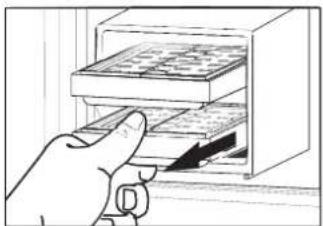
natural_image
Hand inserting a card into a rack inside a storage cabinet (no text or symbols visible)Remove the cover and fill the tray with potable water (maximum level = 2/3 of the overall capacity of the tray).
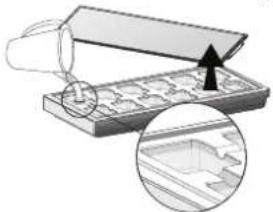
natural_image
Illustration of a mechanical component being inserted into a tray, with an arrow indicating the process (no text or symbols present)Insert the cover back into the tray and insert it back into the dedicated slots in the top freezer drawer.
Take care not to spill water.
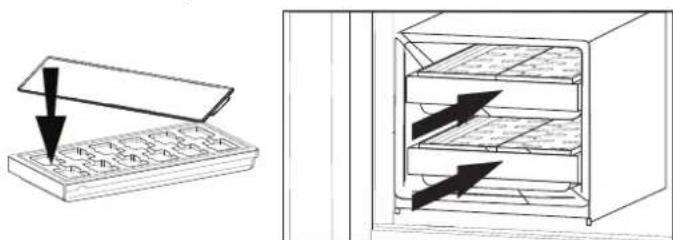
text_image
Diagram showing a device with arrows pointing to internal compartments, likely illustrating a storage or processing process.Wait at least 30 minutes until the ice cubes are formed (this time can be slightly longer if the trays are used immediately after the first use).
HOW TO TAKE ICE CUBES
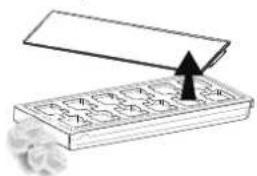
When ice is ready please open the cover and remove cubes.
natural_image
Diagram of a mechanical component with a downward arrow indicating force or direction (no text or symbols)HOW TO USE THE APPLIANCE
FIRST TIME USE
Wait at least two hours, after the installation, before connecting the appliance to the power supply.
Connect the appliance to the power supply it starts the operation automatically. The ideal storage temperatures for the food are preset in the factory.
After turning the appliance on, you must wait for 4-6 hours for the correct storage temperature to be reached for a normally filled appliance. Position the antibacterial antiodour filter in the fan as demonstrated in the filter packaging (if available).
REFRIGERATOR COMPARTMENT AND FOOD STORAGE
The refrigerator compartment allows for the storage of fresh food and drink. The refrigerator compartment defrosts completely automatically. The occasional presence of drops of water on the internal back wall of the compartment is a sign of the automatic defrosting phase. The defrosting water is channelled into a drain and then collected in a container, where it evaporates.
Note: the ambient temperature, how often the doors are opened and the position of the appliance may affect the internal temperatures in the two compartments. Set the temperatures depending on these factors.
In very humid conditions, condensation may form in the refrigerator compartment, especially on the glass shelves.
In this case, it is recommended that you close containers with liquids in (e.g. a pot of stock), wrap up food with a high water content (e.g. vegetables) and turn on the fan, if there is one. All of the drawers, door shelves and shelves can be removed.
AIR VENTILATION
The natural circulation of air in the refrigerator compartment results in zones with different temperatures. It is coldest directly above the fruits and vegetables crisper and at the rear wall. It is warmest at the top front of the compartment. Insufficient ventilation results in an increase in energy consumption and reduction of the refrigerating performance.
HOW TO STORE FRESH FOOD AND BEVERAGE
Foods which give off a large amount ethylene gas (apples, apricots, pears, peaches, avocado, figs, prunes, blueberries, mellons, beans) and those that are sensitive to this gas, such as fruit vegetables and salad, should always be separated or wrapped so as not to reduce the storage life; for example do not store tomatoes together with kiwi fruits or cabbage.
Do not store food too close together to enable sufficient air circulation. Use recyclable plastic, metal, aluminum and glass containers and cling film to wrap foods.
If you have a little quantity of food to store in the refrigerator, we recommend to use the shelves above the crisper for fruits and vegetables since this is the coolest area of the compartment. Always use closed containers for liquids and for food that may give off or be tainted by odor or flavor transfer or cover them. To avoid bottles falling over, you can use the bottle holder (available on selected models).
natural_image
Diagram of a refrigerator interior layout with labeled compartments and fixtures (no text or symbols)Legend
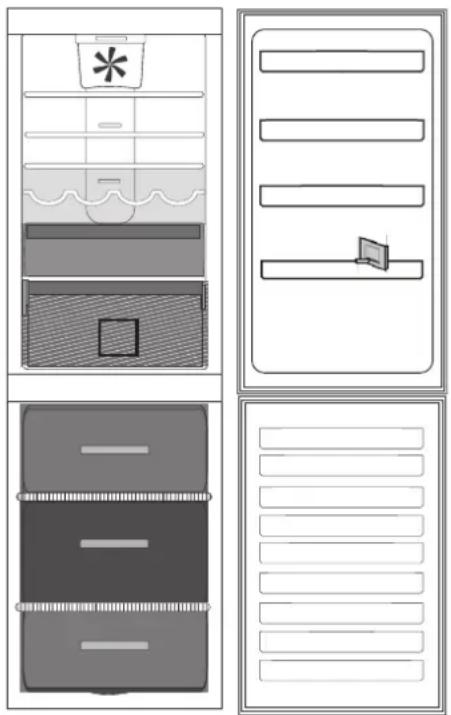
TEMPERATE ZONE Suggested for the storage of tropical fruit, cans, drinks, eggs, sauces, pickles, butter, jam
COOL ZONE Suggested for storage of cheese, milk, daily food, delicatessen, yogurt
COOLEST ZONE Suggested for the storage of cold cuts, desserts
FRUIT & VEGETABLE DRAWER
FREEZER COMPARTMENT AND FOOD STORAGE
The freezer compartment follows for the storage of frozen food (for the period indicated on the packaging) and the freezing of fresh food.
The quantity of fresh food that can be frozen in 24 hours is written on the rating plate.
Arrange the fresh food in the freezing area inside the freezer compartment, leaving enough space around the food packages to allow air to circulate freely. It is advisable that you do not re-freeze food that has partially defrosted. It is important to wrap the food in a way that prevents the ingress of water, humidity or condensation.

natural_image
Diagram of a cabinet with horizontal bars and a side panel, no text or symbols presentTo get more volume, the freezer compartment can be used without the freezer drawers. Make sure that the door is closed properly.
ICE CUBES
Fill 2/3 of the ice tray with water and put it back in the freezer compartment. Do not use sharp or pointed objects to remove the ice under any circumstances.
Legend

FREEZING ZONE DRAWER
(MAX COOL ZONE) Suggested to freeze fresh/cooked food.

FREEZER DRAWER
REMOVING THE FREEZER DRAWER CONTAINER
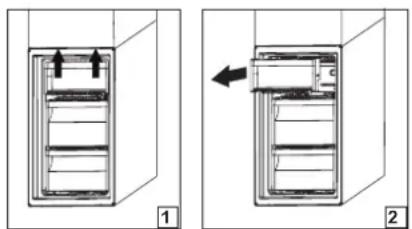
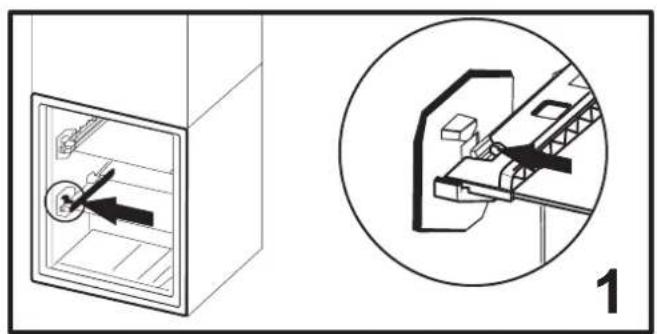
- Open the freezer door.
- Pull the upper container upwards by the right and left corners (1).
- Remove the drawer (2).
• Install the upper container in the reverse order.
natural_image
Two technical diagrams showing a container with internal compartments and directional arrows, labeled 1 and 2 (no text or symbols present)TIPS FOR FREEZING AND STORING FRESH FOOD
- We recommend to label and date all your frozen food. Adding a label will help you to identify foods and to know when they should be used before their quality deteriorates. Do not re-freeze defrosted food.
- Before freezing, wrap and seal fresh food in: aluminium foil, cling film, air and water-tight plastic bags, polythene containers with lids or freezer containers suitable for freezing fresh food.
- Food must be fresh, mature and of prime quality in order to obtain high quality frozen food.
- Fresh vegetables and fruit should preferably be frozen as soon as they are picked to maintain the full original nutritional value, consistency, colour and flavor. Some meat, especially game, should be hung before it is frozen.
• Always leave hot food to cool before placing in the freezer.
- Eat fully or partially defrosted foods immediately. Do not refreeze unless the food is cooked after it has thawed. Once cooked, the thawed food can be refrozen.
- Do not freeze bottles with liquid.
FROZEN FOOD: SHOPPING TIPS
When purchasing frozen food products:
- Ensure that the packaging is not damaged (frozen food in damaged packaging may have deteriorated). If the package is swollen or has damp patches, it may not have been stored under optimal conditions and defrosting may have already begun.
- When shopping, buy frozen foods at the end of your trip and transport them in a thermally insulated cool bag.
- Once at home, place the frozen foods immediately in the freezer.
- If food has defrosted even partially, do not refreeze it. Consume within 24 hours.
- Avoid or reduce temperature variations to the minimum. Respect the best-before date on the package.
• Always observe the storage information on the package.
STORAGE TIMES FOR HOME FROZEN FOODS
Product Storage period
| Butter or margarine 6 months | |
| Cheese 3 months | |
| Fish | 2/3 months |
| Shellfish | 1 month |
| Fruits (except citrus) 8-12 months | |
| Ice cream or sherbet 2/3 months | |
| Meat | |
| Ham- sausage | 2 months |
| Roasts (beef-pork- lamb) | 8/12 months |
| Steaks or chops (beef-lamb-pork) | 4 months |
| Milk, fresh fluid 1-3 months | |
| Poultry (chicken-turkey) 5-7 months | |
| Vegetables 8-12 months |
FUNCTIONAL SOUNDS
Sounds coming from your appliances are normal since it has a number of fans and engines to regulate performances that switch on and off automatically.
SOME OF THE FUNCTIONAL SOUNDS CAN BE REDUCED THROUGH:
- Leveling the appliance and installing it on an even surface.
- Separating and avoiding contact between the appliance and furniture.
- Checking if the internal components are correctly placed.
- Checking if bottles and containers are not in contact with each other.
SOME OF THE FUNCTIONAL SOUNDS YOU MIGHT HEAR
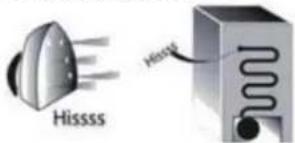
- A hissing sound when switching on the appliance for the first time or after a long pause.
text_image
Hissss Hisss- A gurgling sound when refrigerant fluid enters into the pipes.
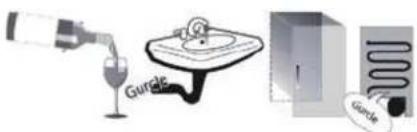
text_image
Gurale Gurale- BRRR sound is from the compressor running.
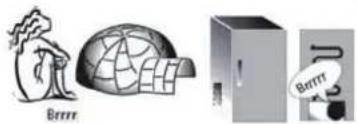
natural_image
Illustration of three objects: a bear, a globe with a net, and a cabinet with a speech bubble containing 'BRITT' (no text or symbols on objects)- Buzzing sound when water valve or fan start working.
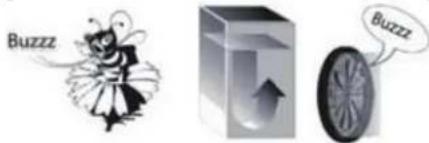
text_image
Buzzz Buzzz- A cracking sound when compressor starts.
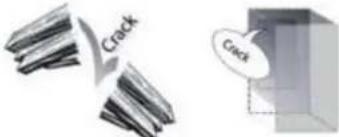
text_image
Crack Crack- The CLICK is from the thermostat which adjusts how often the compressor is running.
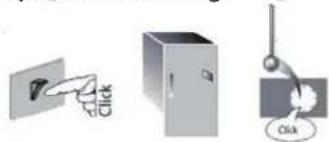
natural_image
Three simple icons: a hand pointing at a wall, a cabinet, and a hanging clock with 'Click' label (no text or symbols on objects)Alarm type Signal Cause Cure
| Door open alarm Door open alarm indicator remains on, the acoustical alarm is activated and the Alarm Indicator blinks. | The Fridge or Freezer door has remained open for more than 2 minutes. | Close the door or press the Stop Alarm to mute the acoustical alarm. |
| Temperature alarm The Temperature display blinks (°C) and the Alarm Indicator remains on. | IThe inside temperature is not adequate | Press the Stop Alarm button; the acoustical alarm stops, the Temperature Display (°C) blinks and the Alarm Indicator remains on until a temperature < -10°C is reached. |
| Antibacterial filter alarm The Antibacterial filter alarm indicator lit on | Finished the validity of Antibacterial filter. | Replace the Antibacterial filter, press the Alarm button to reset it. |
| Long black-out alarm The Black Out Alarm icon remains on, the Alarm indicator blinks. | Prolonged power failure, able to cause the inside temperature to increase to 0°C. | Press the Stop Alarm button; the acoustical alarm stops. |
| Malfunction The letter “F” blinks on the display (°C). | Product malfunction. Contact the After-sales Service. | |
RECOMMENDATION IN CASE OF NO USE OF THE APPLIANCE
IN THE EVENT OF NON-USE OF THE APPLICANCE
Disconnect the appliance from the power supply, empty it, defrost it (if necessary) and clean it.
Keep the doors slightly ajar to let air circulate inside the compartments. By doing this, you avoid the development of mould and bad odours.
IN THE EVENT OF AN INTERRUPTION TO THE POWER SUPPLY
Keep the doors closed so the food stays cold for as long as possible. Do not re-freeze food that has partially defrosted. If there is a prolonged power cut, the black out alarm may also activate (in products with electronics).
CLEANING AND MAINTENANCE
Before any cleaning or maintenance operation, unplug the appliance from the mains or disconnect the electrical power supply.
Never use abrasives. Never clean refrigerator parts with flammable fluids.
Do not use steam cleaners.
The buttons and control panel display must not be cleaned with alcohol or alcohol-derived substances, but with a dry cloth.
- Periodically clean the appliance with a cloth and a solution of lukewarm water and neutral detergent specifically for refrigerator interiors.
- Clean the outside of the appliance and the door seal with a damp cloth and dry with a soft cloth.
- Condenser placed in the rear of the appliance should be cleaned regularly using a vacuum cleaner.
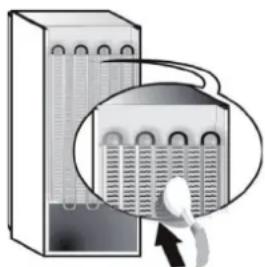
natural_image
Illustration of a server rack with a magnified inset showing internal components (no text or symbols)Important:
- The buttons and control panel display must not be cleaned with alcohol or alcohol-derived substances, but with a dry cloth.
- The refrigeration system pipes are located near the defrost pan and can become hot. Periodically clean them with a vacuum cleaner.
TROUBLESHOOTING
What to do if... Possible reasons Solutions
| The appliance is not working. | There may be an appliance power supply problem. | ·Check if power cable plugged into a live socket with the proper voltage.·Check if the protection devices and fuses of the electrical system in your home |
| There is water in the defrost pan. | This is normal in hot, damp weather. The pan can even be half full. | ·Make sure the appliance is level so that the water does not overflow. |
| The edges of the appliance cabinet, which come in contact with the door seal, are warm to the touch. | This is not a defect. This is normal in hot weather and when the compressor is running. | |
| The light does not work. | The light may need replacing. The appliance may be in On/ Stand-by model. | ·Make sure if the protection devices and fuses of the electrical system in your home work well.·Check if the power cable is plugged into a live socket with the proper voltage·In case the LEDs are broken the user must call the Service for exchange of the same type available only at our After-sales Service Centers or authorized dealers. |
| The motor seems to run too much. | Motor running time depends on different things: number of door openings, amount of food stored, temperature of the room, setting of the temperature controls. | ·Make sure that the appliance controls are correctly set.·Check if there is not a large amount of food been added to the appliance.·Check that the door is not opened too often.·Check that the door close properly. |
| The appliance temperature is too high. | There could be various causes (see “Solutions”). | ·Make sure that the condenser (back the appliance) is free of dust and fluff.·Make sure that the door properly closed.·Make sure that the door seals properly fitted.·On hot days or if the room is warm, the motor naturally runs longer.·If the appliance door has been left open for a while or if large amounts of food have been stored, the motor will run longer in order to cool down the interior of the appliance. |
| The doors do not open and close properly. | There could be various causes (see “Solutions”). | ·Check that food packages are not blocking the door.·Check that the internal parts or automatic ice maker are not out of position.·Check that the door seals are not dirty or sticky.·Ensure the appliance is level. |
AFTER-SALES SERVICE
BEFORE CALLING THE AFTER-SALES SERVICE
-
See if you can solve the problem by yourself with the help of the suggestions given in the TROUBLESHOOTING.
-
Switch the appliance off and back on again to see if the fault persists.
IF AFTER THE ABOVE CHECKS THE FAULT STILL OCCURS, GET IN TOUCH WITH THE NEAREST AFTER-SALES SERVICE
To receive assistance, call the number shown on the warranty booklet or follow the instructions on the website www.whirlpool.eu
When contacting our Client After sales service, always specify:
• a brief description of the fault;
• the type and exact model of the appliance;
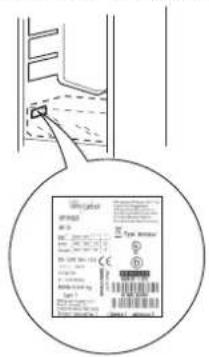
text_image
Technical diagram showing a step-by-step assembly with labeled components and a magnified inset of a device panel.- the service number (number after the word Service on the rating plate). The service number is also indicated on the guarantee booklet;
- your full address;
- your telephone number.
If any repairs are required, please contact an authorised after-sales service (to guarantee that original spare parts will be used and repairs carried out correctly).
flowchart
graph TD
    A["Open Book"] --> B["Cut Down Box"]
    B --> C["Check Down Hand"]
    C --> D["Close Button"]
    D --> E["Adjustment to Cover"]
    E --> F["Close Door"]
    F --> G["50mm Floor"]

    subgraph Section 1
        H["1: Screen with Pin, Clip, Paste, etc."] --> I["2: Screwdriver, pressor, handbag, etc."]
    end

    subgraph Section 2
        J["2: Screwdriver, pressor, handbag, etc."] --> K["3: Screen with Pin, Clip, Paste, etc."]
    end

    subgraph Section 3
        L["4: Screen with Pin, Clip, Paste, etc."] --> M["5: Screwdriver, pressor, handbag, etc."]
    end

    subgraph Section 4
        N["5: Screen with Pin, Clip, Paste, etc."] --> O["6: Screwdriver, pressor, handbag, etc."]
    end

    subgraph Section 5
        P["6: Screen with Pin, Clip, Paste, etc."] --> Q["7: Screwdriver, pressor, handbag, etc."]
    end
natural_image
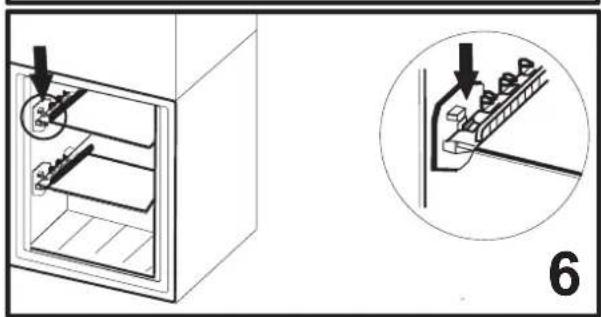
Diagram showing a door lock inside a refrigerator and its corresponding schematic of a mechanical assembly (no text or symbols present)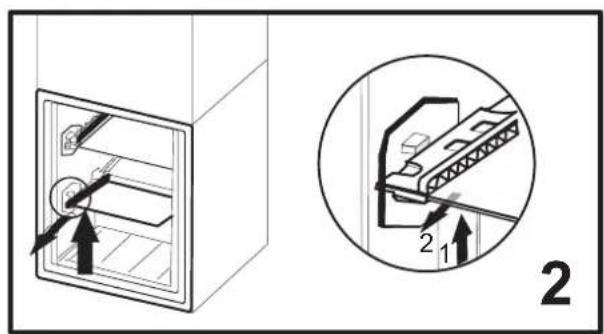
text_image
Technical diagram showing a door panel with directional arrows and a magnified view of the door structure with numbered annotations.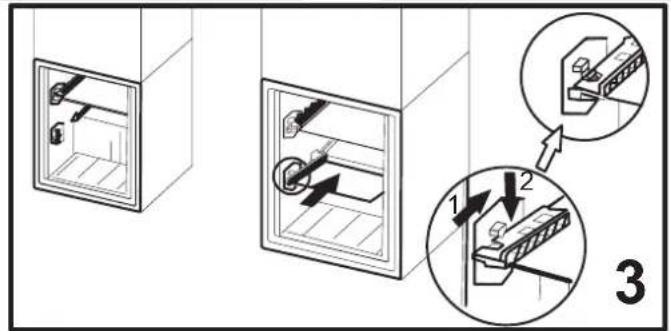
text_image
Technical diagram showing three-step installation of a wall-mounted device with labeled components and directional arrows.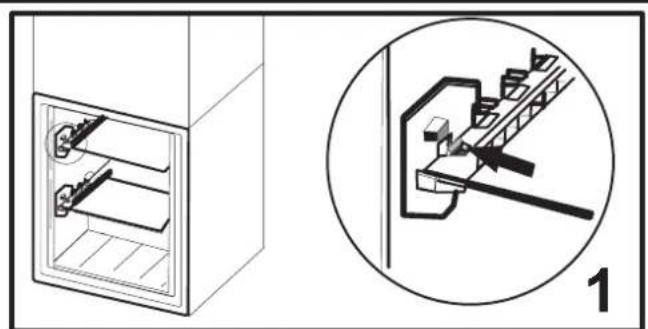
natural_image
Technical diagram showing a cabinet with internal components and a close-up of a mechanical assembly (no text or symbols)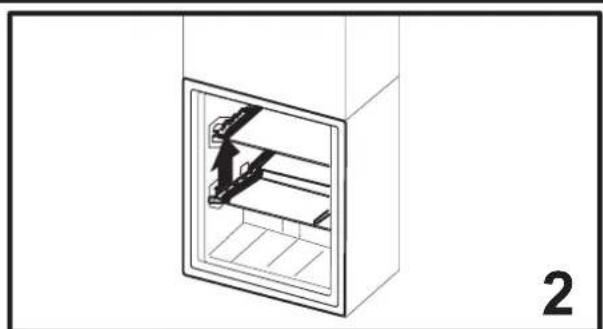
natural_image
Technical line drawing of a cabinet or enclosure with internal components and a labeled section '2' (no text or symbols on the diagram itself)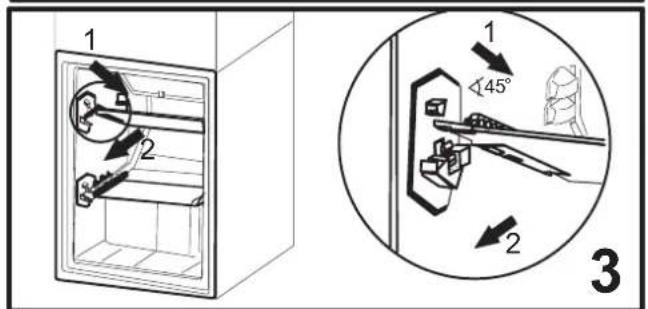
text_image
1 2 1 45° 2 3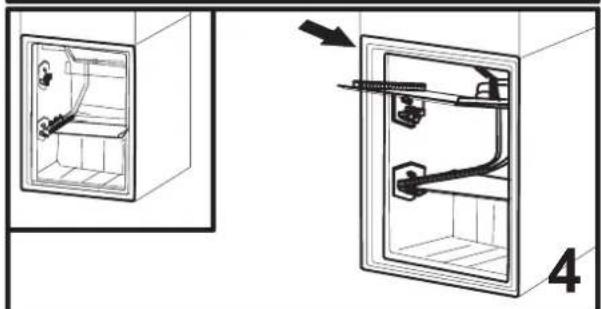
natural_image
Diagram of a refrigerator interior showing internal components and a hand valve mechanism (no text or labels)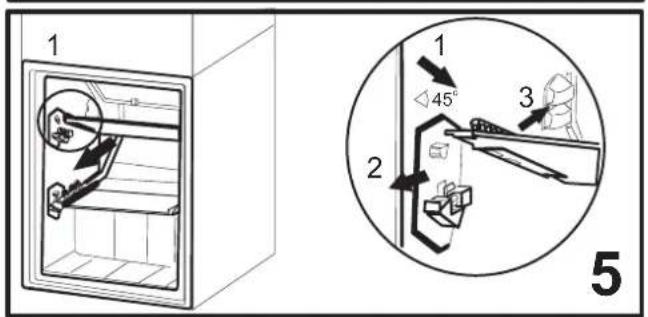
text_image
1 1 45° 3 2 5