
XNB-6000 - Security Camera Wisenet - Free user manual and instructions
Find the device manual for free XNB-6000 Wisenet in PDF.


| Product Type | Indoor/Outdoor Network Camera |
| Image Sensor | 1/2.8" Progressive CMOS |
| Resolution | 1920 x 1080 (2MP) |
| Lens Focal Length | 2.8 - 12 mm (Varifocal) |
| Minimum Illumination | 0.01 Lux (Color), 0 Lux (B/W with IR) |
| Compression | H.265, H.264, MJPEG |
| Dimensions (W x H x D) | 70.0 x 220.0 x 164.0 mm |
| Weight | Approx. 1.1 kg (without bracket) |
| Power Supply | 12 V DC or PoE (IEEE 802.3af) |
| Power Consumption | Max 12 W (with IR) |
| Network Interface | 10/100 Base-TX (RJ-45) |
| IR Distance | Up to 30 m |
| Weatherproof Rating | IP66 |
| Video Streaming | Dual-stream, ONVIF compatible |
| Motion Detection | Yes, with alarm output |
| Cleaning Instructions | Use soft dry cloth; avoid solvents |
| Safety Certifications | CE, UL listed |
| Spare Parts Availability | Mounting bracket, power adapter, lens (optional) |
Frequently Asked Questions - XNB-6000 Wisenet
User questions about XNB-6000 Wisenet
0 question about this device. Answer the ones you know or ask your own.
Ask a new question about this device
Download the instructions for your Security Camera in PDF format for free! Find your manual XNB-6000 - Wisenet and take your electronic device back in hand. On this page are published all the documents necessary for the use of your device. XNB-6000 by Wisenet.
USER MANUAL XNB-6000 Wisenet
©2017 Hanwha TechwinCo., Ltd. All rights reserved.
Trademark
Each of trademarks herein is registered. The name of this product and other trademarks mentioned in this manual are the registered trademark of their respective company.
Restriction
Copyright of this document is reserved. Under no circumstances, this document shall be reproduced, distributed or changed, partially or wholly, without formal authorization.
Disclaimer
Hanwha Tochwin makes the best to verify the integrity and correctness of the contents in this document, but no formal guarantee shall be provided. Use of this document and the subsequent results shall be entirely on the user's own responsibility. Hanwha Tochwin reserves the right to change the contents of this document without prior notice.
❖ Design and specifications are subject to change without prior notice.
The initial administrator ID is "admin" and the password should be set when logging in for the first time.
Please change your password every three months to safely protect personal information and to prevent the damage of the information theft.
Please, take note that it's a user's responsibility for the security and any other problems caused by mismanaging a password.
important Safety inStructionS
- Read these instructions.
- Keep these instructions.
- Heed all warnings.
- Follow all instructions.
- Do not use this apparatus near water.
- Clean the contaminated area on the product surface with a soft, dry cloth or a clamp cloth. (Do not use a detergent or cosmetic products that contain alcohol, solvents or surfactants or oil constituents as they may deform or cause damage to the product.)
- Do not block any ventilation openings, Install in accordance with the manufacturer's instructions.
- Do not install near any heat sources such as radiators, heat registers, stoves, or other apparatus (including amplifiers) that produce heat.
- Do not defeat the safety purpose of the polarized or grounding-type plug. A polarized plug has two blades with one wider than the other. A grounding type plug has two blades and a third grounding prong. The wide blade or the third prong are provided for your safety. If the provided plug does not fit into your outlet, consult an electrician for replacement of the obsolete outlet.
- Protect the power cord from being walked on or pinched particularly at plugs, convenience receptacles, and the point where they exit from the apparatus.
- Only use attachments/ accessories specified by the manufacturer.
- Use only with the cart, stand, tripod, bracket, or table specified by the manufacturer, or sold with the apparatus. When a cart is used, use caution when moving the cart/apparatus combination to avoid injury from tip-over.
- Unplug this apparatus during lighting storms or when unused for long periods of time.
- Refer all servicing to qualified service personnel. Servicing is required when the apparatus has been damaged in any way, such as power-supply cord or plug is damaged, liquid has been spilled or objects have fallen into the apparatus, the apparatus has been exposed to rain or moisture, does not operate normally, or has been dropped.
- This product is intended to be supplied by a Listed Power Supply Unit marked "Class 2" or "LPS" and rated from 24 Vac (50/60 Hz) min.0.64 A or 12 Vdc, min.0.61 A.
- If you use excessive force when installing the product, the camera may be damaged and malfunction. If you forcibly install the product using non-compliant tools, the product may be damaged.
- Do not install the product in a place where chemical substances or oil mist exists or may be generated. As edible oils such as soybean oil may damage or warp the product, do not install the product in the kitchen or near the kitchen table.
This may cause damage to the product. - When installing the product, be careful not to allow the surface of the product to be stained with chemical substance.
Some chemical solvents such as cleaner or adhesives may cause serious damage to the product's surface. - If you install/disassemble the product in a manner that has not been recommended, the production functions/performance may not be guaranteed.
Install the product by referring to "Installation & connection" in the user manual. - Installing or using the product in water can cause serious damage to the product.
warningG
TO REDUCE THE RISK OF FIRE OR ELECTRIC SHOCK, DO NOT EXPOSE THIS PRODUCT TO RAIN OR MOISTURE. DO NOT INSERT ANY METALLIC OBJECT THROUGH THE VENTILATION GRILLS OR OTHER OPENINGS ON THE EQUIPMENT.
Apparatus shall not be exposed to dripping or splashing and that no objects filled with liquids, such as vases, shall be placed on the apparatus.
To prevent injury, this apparatus must be securely attached to the Wall/ceiling in accordance with the installation instructions.
caution
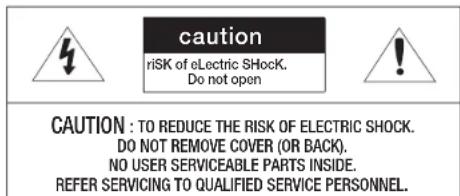
text_image
caution riSK of eElectric SHock. Do not open CAUTION : TO REDUCE THE RISK OF ELECTRIC SHOCK. DO NOT REMOVE COVER (OR BACK). NO USER SERVICEABLE PARTS INSIDE. REFER SERVICING TO QUALIFIED SERVICE PERSONNEL.eXpLanation of GrapHicaL SymBoLS

The lightning flash with arrowhead symbol, within an equilateral triangle, is intended to alert the user to the presence of “dangerous voltage” within the product’s enclosure that may be of sufficient magnitude to constitute a risk of electric shock to persons.

The exclamation point within an equilateral triangle is intended to alert the user to the presence of important operating and maintenance (servicing) instructions in the literature accompanying the product.
overview
Class I construction
An apparatus with CLASS I construction shall be connected to a MAINS socket outlet with a protective earthing connection.
Battery
Batteries(battery pack or batteries installed) shall not be exposed to excessive heat such as sunshine, fire or the like.
Disconnection Device
Disconnect the main plug from the apparatus, if it's defected. And please call a repair man in your location.
When used outside of the U.S., it may be used HAR code with fittings of an approved agency is employed.
CAUTION
Risk of explosion if battery is replaced by an incorrect type.
Dispose of used batteries according to the instructions.
These servicing instructions are for use by qualified service personnel only.
To reduce the risk of electric shock do not perform any servicing other than that contained in the operating instructions unless you are qualified to do so.
The CVBS out terminal of the product is provided for easier installation, and is not
recommended for monitoring purposes.
Please use the input power with just one camera and other devices must not be connected.
The ITE is to be connected only to PoE networks without routing to the outside plant.
Please read the following recommended safety precautions carefully.
- Do not place this apparatus on an uneven surface.
- Do not install on a surface where it is exposed to direct sunlight, near heating equipment or heavy cold area.
- Do not place this apparatus near conductive material.
- Do not attempt to service this apparatus yourself.
• Do not place a glass of water on the product.
- Do not install near any magnetic sources.
- Do not block any ventilation openings.
- Do not place heavy items on the product.
- Please wear protective gloves when installing/removing the camera.
The high temperature of the product surface may cause a burn.
User's Manual is a guidance book for how to use the products.
The meaning of the symbols are shown below.
- Reference: In case of providing information for helping of product's usages
- Notice: If there's any possibility to occur any damages for the goods and human caused by not following the instruction
※ Please read this manual for the safety before using of goods and keep it in the safe place.
contentS
OVERVIEW

INSTALLATION & CONNECTION

NETWORK CONNECTION AND
SETUP

3 Important Safety Instructions
6 Product Features
6 Recommended PC Specifications
6 Recommended Micro SD/SDHC/SDXC
Memory Card Specifications
6 NAS recommended specs
7 What's Included
8 At a Glance
10 Mounting the Lens
11 Inserting/removing a Micro SD memory card
11 Memory Card Information (Not Included)
12 Connecting with other Device
15 Connecting the Camera Directly to Local
Area Networking
15 Connecting the Camera Directly to a DHCP Based DSL/Cable Modem
16 Connecting the Camera Directly to a PPPoE Modem
16 Connecting the Camera to a Broadband Router with the PPPoE/Cable Modem
17 Buttons used in IP Installer
17 Static IP Setup
19 Dynamic IP Setup
19 Port Range Forward (Port Mapping) Setup
20 Connecting to the Camera from a Shared Local PC
20 Connecting to the Camera from a Remote PC via the Internet
WEB VIEWER

21 Connecting to the Camera
22 Password setting
22 Login
22 Plug-in support specifications for each browser
23 Installing WebViewer Plugin
23 Using a Plug-in Free Webviewer
23 Using the Live Screen
26 Playing the recorded video
SETUP SCREEN

28 Setup
28 Basic Setup
32 PTZ setup
34 Video & Audio setup
40 Network Setup
43 Event Setup
45 NAS (Network Attached Storage) guide
48 Configure analysis settings
52 System Setup
54 Open Platform Setup
APPENDIX

55 Specification
57 Product Overview
58 Troubleshooting
59 Open Source Announcement
PRODUCT FEATURES
- Supports 2M pixel resolution videos (XNB-6000)
- Supports 5M pixel resolution videos (XNB-8000)
- Multi-Streaming
This network camera can display videos in different resolutions and qualities simultaneously using different CODECs.
• Web Browser-based Monitoring
Using the Internet web browser to display the image in a local network environment. - Alarm
When an event occurs, video is either sent to the email address registered by the user, sent to the FTP server, saved in a Micro SD card or NAS, or a signal is sent to the alert output terminal.
- Tampering Detection
Detects tempering attempts on video monitoring.
• Defocus detection function
Detects the defocus phenomenon of the camera lens.
- Motion Detection
Detects motion from the camera's video input.
- Audio Detection
Detects sound louder than a certain level specified by user.
- Smart Codec
Adaptively applies codecs for a portion of the camera's field of view to improve the quality of such area specified by user.
• Auto Detection of Disconnected Network
Detects network disconnection before triggering an event.
- Fog detection
Detects fog that is heavier than the detection level.
- Face Detection
Detects faces in the specified area from the camera's video input.
• IVA (Intelligent Video Analysis) function
Detects a motion or situation that meets the configured event rules.
• Sound source classification
Detects a sound source specified by the user.
• ONVIF Compliance
This product supports ONVIF Profile S&G.
For more information, refer to www.onvif.org.
RECOMMENDED PC SPECIFICATIONS
• CPU : Intel(R) Core(TM) i7 3.4 GHz or higher
• RAM : 8G or higher
• Supported OS : Windows 7, 8.1, 10, Mac OS X 10.10, 10.11, 10.12
• Plug-in free web viewer
Supported web browsers : Google Chrome, MS Edge, Mozilla Firefox(Windows 64bit only), Apple Safari 9 (Mac OS X only)
- Plug-In Webviewer
Supported web browsers : MS Explorer 11, Apple Safari 9 (Mac OS X only)
RECOMMENDED MICRO SD/SDHC/SDXC MEMORY CARD SPECIFICATIONS
- Recommended capacity : 16GB to 256GB (MLC type)
- The following types of memory cards from the following manufacturers are recommended for this camera.
- Manufacturer : SanDisk, Transcend
- Product family : High endurance
NAS RECOMMENDED SPECS
- Recommended capacity: 200GB or higher is recommended.
- Simultaneous access: One unit of NAS can accept a maximum of sixteen camera accesses.
- For this camera, you are recommended to use a NAS with the following manufacturer's specs.
Recommended products Available sizes
ONAP NAS A maximum of 16 cameras can access simultaneously.
Synology NAS A maximum of 16 cameras can access simultaneously.

- If you use NAS equipment for purposes other than video saving, the number of accessible cameras may be reduced.
wHat'S incLuDeD
Please check if your camera and accessories are all included in the product package. (As for each sales country, accessories are not the same.)
| Appearance Item Name Quantity Description | |||
 | Camera | 1 | |
 | Instruction book, Installer S/W CD | 1 | |
 | Quick Guide(Optional) | 1 | |
 | Warranty card(Optional) | 1 | |
| [CHBX] | Cable for the testing monitor | 1 | Used to test the camera connection to a portable display device |
 | 6-position Terminal Block | 1 | Used for alarm in/out terminals |
| Options (not Included) | |||
| CSVC Lens Optional Ions to be inserted in a camera | |||
AT A GLANCE
Front Side
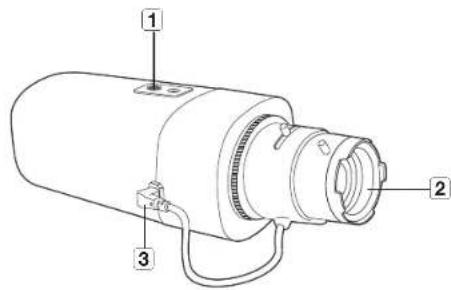
text_image
Technical diagram of a cylindrical device with labeled parts 1, 2, and 3| Item Description | |
| 1Mounting Bracket Screw Hole | Used to fix the camera on a mounting bracket.▪ The screw size: It is the specification for the screws used to fasten the camera to the support.1/4" -20 UNC ≤ 4.5mm ± 0.2mm (ISO Standard), or 0.197" (ASA Standard) [IMAGE] |
| 2Auto Iris Lens (Optional) | Installed on the lens adaptor. |
| 3Auto Iris Lens Connector | Used to supply power and output signal to control the iris of the lens. |

■ Mounting Bracket is not included.
For more information to use mounting bracket, refer to the product's documentation.
Rear Side
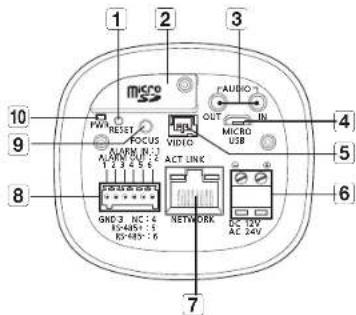
text_image
1 2 3 4 5 6 7 8 9 10 PWR RESET FOCUS VOLUME IN: 3 1 2 3 4 5 6 GNC 3 NC: 4 K-PWR: 1 KS-485: 6 NETWORK AUDIO OUT MPEG USB ACT LINK| Item Description | ||
| 1 Reset Button | The button restores all camera settings to the factory default.Press and hold for about 5 seconds to reboot the system.■ If you reset the camera, the network settings will be adjusted so that DHCP can be enabled. If there is no DHCP server in the network, you must run the IP Installer program to change the basic network settings such as IP address, Subnet mask, Gateway, etc. before you can connect to the network. | |
| 2 Micro SD Memory Card Compartment | Compartment for the Micro SD memory card. | |
| 3 Audio terminal | AUDIO OUT Used to connect to speakers. | |
| AUDIO IN Used to connect to a microphone. | ||
| 4 MICRO USB port | Port to connect the Wi-Fi dongie.You can check the installation video through the applications installed in the smartphone.Refer to "Connect to WIFI dongie" on page 12.■ Wifi dongie and OTG gender are sold separately. | |
| 5 Test Monitor Out | Output port for test monitoring the video output. Use the test monitor cable to connect to a mobile display and check the test video. | |
| 6 Power Port Used to plug the power cable. | ||
| 7 Network Port Used to connect the PoE or Ethernet cable for network connection. | ||
| 8 Alarm I/O Port | ALARM IN Used to connect the alarm input sensor or external day/night sensor. | |
| ALARM OUT Used to connect the alarm output signal. | ||
| GND Used for earth-grounding. | ||
| RS-485+ RS-485 Data line | ||
| RS-485- RS-485 Data line | ||
| 9 Focus Adjustment Button The button adjusts the focus of image automatically. | ||
| 10 Power Indicators | ON: While the power is onOFF: If the power is off | |
RS-485 port only supports direct connection with parvillt driver and external connections of the RS-485 controller is not supported.
MOUNTING THE LENS
Disconnect the power before proceeding.

- The C/CS lens and C-mount adaptor are not included in the product package.
It is recommended that megapool lens are use on this camera to optimise performance.
Mounting the CS lens on a camera
Turn the CS lens clockwise to attach it.
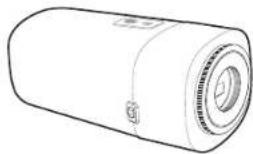
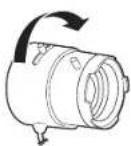
CS Lens
Mounting the C lens on a camera
Turn the C mount adapter clockwise and turn the C lens clockwise.
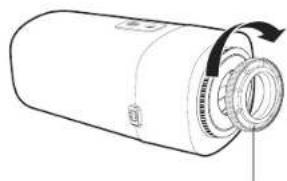
natural_image
Diagram of a cylindrical device with a scroll wheel and directional arrow indicating rotation (no text or symbols)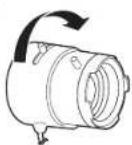
CLens
C Mount Adapter
Connecting the Auto Iris Lens connector
Plug the iris connector of the lens in the camera connecting groove.
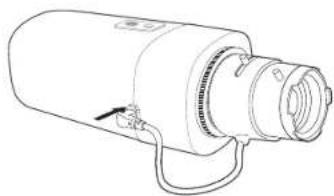
natural_image
Line drawing of a cylindrical device with attached tubing and a threaded port (no text or symbols)Focusing
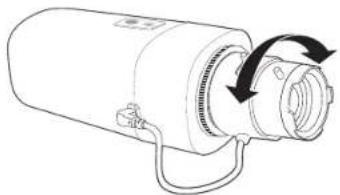
Select a target to film, turn the zoom lever of the lens to adjust the magnification and then focus the lens so that target is clearly displayed.
natural_image
Line drawing of a cylindrical device with a curved arrow indicating rotation or movement (no text or symbols)
- After focusing with the zoom lever of the lens, press the [FOCUS] button on the rear of the camera to adjust the lens even more clearly.
INSERTING/REMOVING A MICRO SD MEMORY CARD

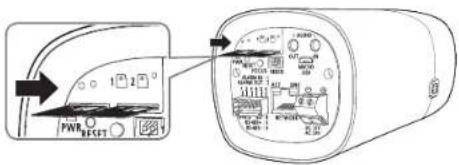
- Disconnect the power cable from the camera before inserting the Micro SD memory card.
- Do not insert the Micro SD memory card while it's upside down by force. Otherwise, it may damage the Micro SD memory card.
Inserting a Micro SD Memory Card
Push the Micro SD memory card in the direction of the arrow shown in the diagram.
text_image
Diagram showing device panel with labeled ports and control buttons, including a zoomed-in view of the main component.Removing a Micro SD Memory Card
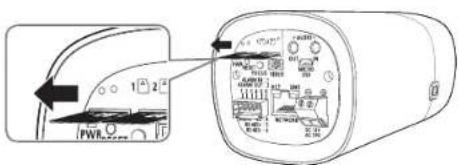
Gently press down on the exposed end of the memory card as shown in the diagram to eject the memory card from the slot.
text_image
Diagram showing device rear panel with labeled ports and internal components, including a close-up view of the front panel.
- Pressing too hard on the Micro SD memory card can cause the card to shoot out uncontrollably from the slot when released.
Before removing your Micro SD memory card, turn off the camera or go to, turn the device off, and press the [Apply] button. (Page 44) - If you turn off the camera or remove the Micro SD memory card that contains data from the product, the data may be lost or damaged.
MEMORY CARD INFORMATION (NOT INCLUDED)
What is a memory card?
The memory card is an external data storage device that has been developed to offer an entirely new way to record and share video, audio, and text data using digital devices.
Selecting a memory card that's suitable for you
Your camera supports Micro SD/SDHC/SDXC memory cards.
You may, however, experience compatibility issues depending on the model and make of the memory card.
The following types of memory cards from the following manufacturers are recommended for this camera.
- Manufacturer : SanDisk, Transcend
- Product family : High endurance
It is recommended to use a 16GB to 256GB (MLC type) memory card for this camera.
Playback performance can be affected depending on the speed of memory card.
Memory Card Components
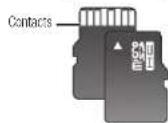
Micro SD/SDHC/SDXC
CONNECTING WITH OTHER DEVICE
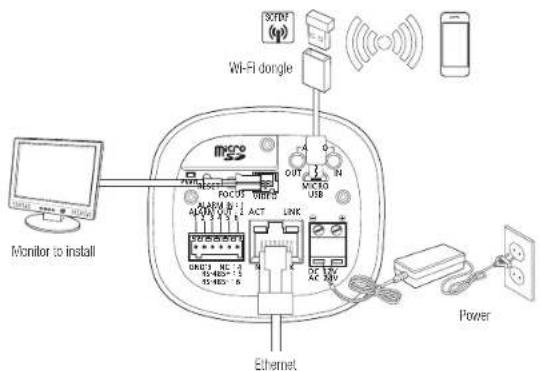
text_image
Monitor to install Wi-Fi dongle Ethernet Power SSTM USB N OUT AC AC AC AC AC AC AC AC AC AC AC AC AC AC AC AC AC AC AC AC AC AC AC AC AC AC AC AC AC AC AC AC AC AC AC AC AC AC AC AC AC AC AC AC AC AC AC AC AC AC A1 100 100 100 100 100 100 100 100 100 100 100 100 100 100 100 100 100 100 100 100 100 100 100 100 100 10The CVBS out terminal of the product is provided for easier installation, and is not recommended for monitoring purposes.
- The Micro USB out terminal of the product is provided for easier installation, and is not recommended for monitoring purposes.
Ethernet Connection
Connect the Ethernet cable to the local network or to the Internet.
Connecting Wi-Fi
Camera Setup
- Connect OTG gender (5-pin) and WiFi dongle to the micro USB terminal.
Smartphone Setup
- Install the Wisenet Installation application.
- Select the camera SSID after turning on the WiFi
- Run the Wisenet Installation application.
- When you log in to the camera, the video will be connected. (Initial password: 4321)
- The video will be played without being logged in during the initial connection.
- The camera angle can be adjusted through the smartphone video.
Recommended dongle manufacturer
| Manufacturer Model | |
| NETIS WF2123 n300 | |
| EDIMAX EW-7811Un | |
| IP Time N100mini | |
| TP-LINK TL-WN523N V1 | |
| ASUS USB-N13 | |
| NETGEAR WNA3100M |
Power Supply
Use the screwdriver to connect each line (+,-) of the power cable to the corresponding power port of the camera.
- When connected to PoE and DC 12V power or PoE and AC 24V power simultaneously, the device uses the external power (AC 24V or DC 12V).
-You can also use a router featuring PoE to supply power to the camera.
-Use PoE that is compliant with the EEE802 3al protocols.
■ Be careful not to reverse the polarity when you connect the power cable.
- AC24V can be connected in non-polar union.
- If you want to connect an external device, you must turn off the external device before proceeding.
- Connect the set and the adapter power line first, and then connect the power cable to the outlet on the wall.
Power Cable Specification for Each Model
In case of DC 12V Input:
| Wire Type (AWG) #20 #18 | ||
| Cable Length (Max.) 17m 27m |
In case of AC 24V Input:
| Wire Type (AWG) #22 #20 | ||
| Cable Length (Max.) 25m 40m |
Network Cable Specification
| Item Contents Remark | ||
| Connector RJ45 | ||
| Ethernet | 10/100Base-T | 10/100 Mbps |
| Cable | UTP Category 5a | |
| Max Distance | 100M | |
| PoE Support | IEEE 802.3af |
Connecting to Audio Input/Output
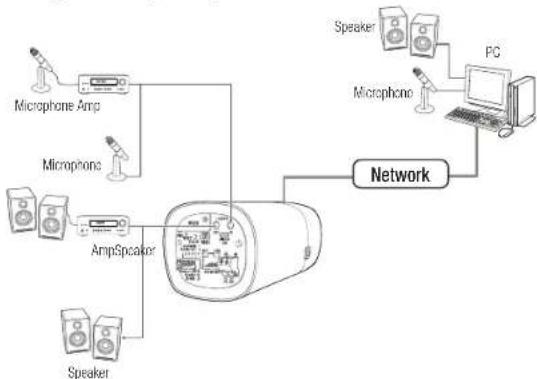
flowchart
graph TD
    A["Speaker"] --> B["Amplifier"]
    C["Microphone"] --> B
    D["Microphone Amp"] --> B
    E["Speaker"] --> B
    B --> F["Network"]
    G["Speaker"] --> H["PC"]
    I["Microphone"] --> H
    J["Speaker"] --> H
    H --> K["PG"]
- Connect the AUDIO IN port of the camera with the microphone or LINE OUT port of the amplifier that the microphone is connected to.
- Connect the AUDIO OUT port of the camera with the speaker or LINE IN port of the amplifier that the speaker is connected to,
- Check the specifications for audio input.
- Audio Codec
- Audio In : Q.711 PCM (Bit Rate: 64Kbps / Sampling Frequency: 8kHz), G.726 ADPCM (Bit Rate: 16Kbps, 24Kbps, 32Kbps, 40Kbps / Sampling Frequency: 8kHz), AAC (Bit Rate: 48Kbps / Sampling Frequency: 16kHz)
Audio Out : G.711 PCM (Bit Rate: 64kbps / Sampling Frequency: 8kHz)
- Full duplex Audio
• Audio in : Mono signal line input (Max.2.4 Vpp)
• Audio out : Mono signal line output (Max.2.4 Vpp)
• Line out impedance : 600Ω
Connecting to the I/O port box
Connect the Alarm I/O signal to the corresponding port of the rear port box.
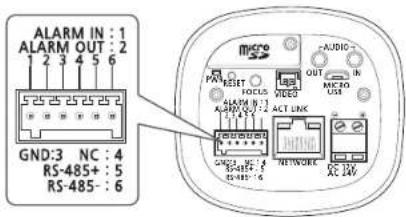
text_image
ALARM IN : 1 ALARM OUT : 2 GND:3 NC : 4 RS-485+ : 5 RS-485- : 6 micro PAN RESET HOCLS VOCLS ALARM IN : 3 ACR : 2 ACT LINK NETWORK AUDIO OUT MICRO USB NC : 10V- ALARM IN: Used to connect the alarm input sensor or external day/night sensor.
• ALARM OUT: Used to connect the alarm output signal.
• GND: Used for earth-grounding.
- RS-485+ : Communication port for RS-485 receiver (+).
- RS-485- : Communication port for RS-485 receiver (-).
Connecting an external RS-485 device
Connect the camera with an external device using the [RS-485 +, -] ports.
You can control the pan/tilt operations of the camera via RS-485 communications.
The GND connection is recommended for RS-485 communications. If you encounter a communication failure, connect the GND pin as appropriate to correct the GND level between camera and external device.
installation & connection
To connect the external sensor
Connect one strand of each signal line (2-strand) of the sensors to the [ALARM IN] port, and connect the other strand to the [GND] port.
Alarm In Wiring Diagram
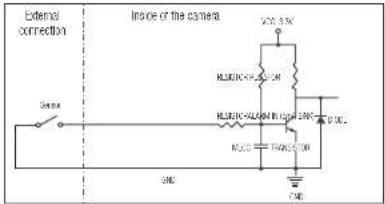
text_image
External connection Inse of the camera VCC 3.5V RLDC10-UL20M RLDC10-UL20M IN RCLC RLDC 100kΩ/100kΩ RCLC CMCTo connect the alarm out
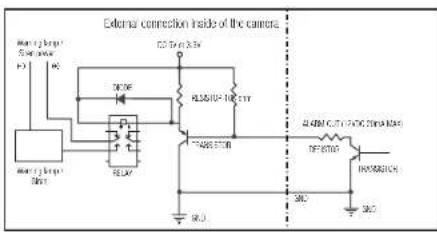
If devices (e.g., flashing light and siren) that exceed the voltage and current specifications are connected by using the open collector method, it may cause malfunction.
Refer to the alarm out connection diagram below when connecting devices that exceed the voltage and current specifications.
Alarm Out Wiring Diagram
text_image
External connection inside of the camera CC 70x3.5V DC10F RL50/10-10 C1Y RL40/10-10 RL20/10-10 RL10/10 RL20/10 RL30/10 RL40/10 RL50/10 RL60/10 RL70/10 RL80/10 RL90/10 RL10/10 RL11/10 RL12/10 RL13/10 RL14/10 RL15/10 RL16/10 RL17/10 RL18/10 RL19/10 RL20/10 RL21/10 RL22/10 RL23/10 RL24/10 RL25/10 RL26/10 RL27/10 RL28/10 RL29/10 RL30/10 RL31/10 RL32/10 RL33/10 RL34/10 RL35/10 RL36/10 RL37/10 RL38/10 RL39/10 RL40/10 RL41/10 RL42/10 RL43/10 RL44/10 RL45/10 RL46/10 RL47/10 RL48/10 RL49/10 RL50/10 RL51/10 RL52/10 RL53/10 RL54/10 RL55/10 RL56/10 RL57/10 RL58/10 RL59/10 RL60/10 RL61/10 RL62/10 RL63/10 RL64/10 RL65/10 RL66/10 RL67/10 RL68/10 RL69/10 RL70/10 RL71/10 RL72/10 RL73/10 RL74/10 RL75/10 RL76/10 RL77/10 RL78/10 RL79/10 RL80/1014 installation & connection
network connection and setup
You can set up the network settings according to your network configurations.
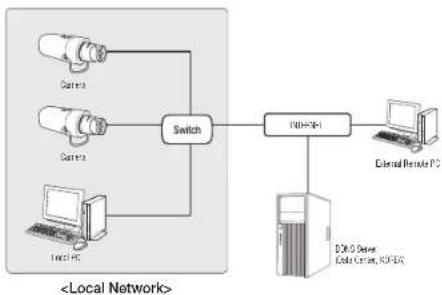
CONNECTING THE CAMERA DIRECTLY TO LOCAL AREA NETWORKING
Connecting to the camera from a local PC in the LAN
- Launch an Internet browser on the local PC.
- Enter the IP address of the camera in the address bar of the browser.
flowchart
graph TD
    A["Camera"] --> B["Switch"]
    C["Camera"] --> B
    D["Local PC"] --> B
    B --> E["External Remote PC"]
    E --> F["DC/OS Server, Local Center, RCPER"]
    F --> G["Local Network"]
A remote PC in an external Internet out of the LAN network may not be able to connect to the camera installed in the intranet if the port-forwarding is not properly set or a firewall is set.
In this case, to resolve the problem, contact your network administrator.
In the IP installer, you can use the initial password, *4321* to set IP Address, Subnet Mask, Gateway, HTTP Port, VAP Port, IP type. After changing the network interface, for better security, access the web viewer and change the password.
- By factory default, the IP address will be assigned from the DHCP server automatically if there is no DHCP server available, the IP address will be set to 192.168.1.100. To change the IP address, use the IP Installer.
For further details on IP Installer use, refer to "Static IP Setup". (Page 17)
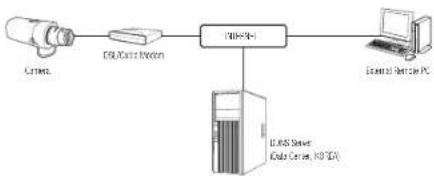
CONNECTING THE CAMERA DIRECTLY TO A DHCP BASED DSL/CABLE MODEM
flowchart
graph LR
    A["Camera"] --> B["DRU/DC drive"]
    B --> C["I/O/MI"]
    C --> D["Control Panel PC"]
    C --> E["I/O/MI Server, Red Series, HD TV"]
- Connect the user PC directly with the network camera.
- Run the IP Installer and change the IP address of the camera so that you can use the web browser on your desktop to connect to the Internet.
- Use the Internet browser to connect to the web viewer.
- Move to [Setup] page.
- Move to [Network] - [DDNS] and configure the DDNS settings.
- Move to [Basic] - [IP & Port], and set the IP type to [DHCP].
- Connect the camera, which was removed from your PC, directly to the modem.
- Restart the camera.
For configuring the DDNS settings, refer to "DDNS". (page 40)
- For registering the DDNS settings, refer to "Registering with DDNS". (page 40)
■ Refer to "IP & Port" for how to setup IP, (page 31)
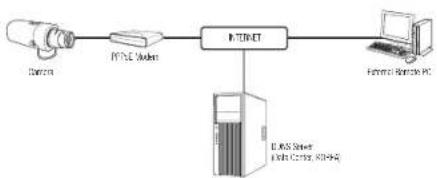
CONNECTING THE CAMERA DIRECTLY TO A PPPoE MODEM
flowchart
graph LR
    A["Host"] --> B["Internet"]
    B --> C["Computer"]
    B --> D["Internet Port"]
    D --> E["Internet Port"]
    style A fill:#f9f,stroke:#333
    style B fill:#ccf,stroke:#333
    style C fill:#cfc,stroke:#333
    style D fill:#fcc,stroke:#333
    style E fill:#ffc,stroke:#333
- Connect the user PC directly with the network camera.
- Run the IP Installer and change the IP address of the camera so that you can use the web browser on your desktop to connect to the Internet.
- Use the Internet browser to connect to the web viewer.
- Move to [Setup] page.
- Move to [Network] - [DDNS] and configure the DDNS settings.
- Move to [Basic] - [IP & Port] Setup Page, set the IP type to [PPPoE], and enter the network service's ID and password.
- Connect the camera, which was removed from your PC, directly to the modem.
- Restart the camera.
For configuring the DDNS settings, refer to "DDNS". (page 40)
- For registering the DDNS settings, refer to "Registering with DDNS", (page 40)
■ Refer to "IP & Port" for how to setup IP. (page 31)
CONNECTING THE CAMERA TO A BROADBAND ROUTER WITH THE PPPoE/CABLE MODEM
This is for a small network environment such as homes, SOHO and ordinary shops.
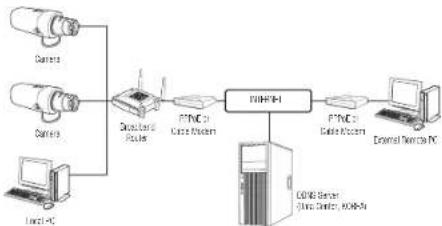
flowchart
graph TD
    A["Camera"] --> B["Wireless Device"]
    C["Camera"] --> B
    D["Link PC"] --> B
    B --> E["PTNC to Case Room"]
    E --> F["BIHP-1"]
    F --> G["PTNC to Case Room"]
    G --> H["External Device PC"]
    I["CCMS Server (Line Center), K0H-1"] --> F
Configuring the network settings of the local PC connected to a Broadband Router
Configuring the network settings of the local PC connected to a Broadband Router, follow the instructions below.
- Select:
→ → → → → → or - Follow the instructions below if you select
ex1) If the address (LAN IP) of the Broadband Router is 192.168.1.1
IP address : 192.168.1.100
Subnet Mask: 255,255,255.0
Default Gateway:192.168.1.1
ex2) If the address (LAN IP) of the Broadband Router is 192.168.0.1
IP address : 192.168.0.100
Subnet Mask: 255.255.255.0
Default Gateway:192.168.0.1
ex3) If the address (LAN IP) of the Broadband Router is 192.168.xxx.1
IP address : 192.168.xxx.100
Subnet Mask: 255.255.255.0
Default Gateway: 192.168.xxx.1
For the address of the Broadband Router, refer to the product's documentation.
- For more information about port forwarding of the broadband router, refer to "Port Range Forward (Port Mapping) Setup" (Page 19)
BUTTONS USED IN IP INSTALLER
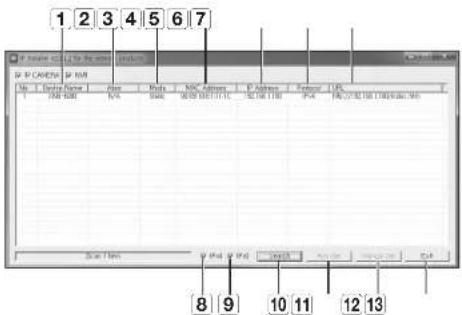
text_image
1 2 3 4 5 6 7 IP: C:\Users\IP: Web\Windows\My Computer\F:\My Documents\F:\My Tools\F:\My Settings\F:\My Tools\F:\My Settings\F:\My Tools\F:\My Settings\F:\My Tools\F:\My Settings\F:\My Tools\F:\My Settings\F:\My Tools\F:\My Settings\F:\My Tools\F:\My Settings\F:\My Tools\F:\My Settings\F:\My Tools\F:\My Settings\F:\My Tools\F:\My Settings\F:\My Tools\F:\My Tools\F:\My Tools\F:\My Tools\F:\My Tools\F:\My Tools\F:\My Tools\F:\My Tools\F:\My Tools\F:\My Tools\F:\My Tools\F:\My Tools\F:\My Tools\F:\My Tools\F:\My Tools\F:\My Tools\F:\My Tools\F:\My Tools\F:\My Tools\F:\My Tools\F:\My Tasks\F:\My Tasks\F:\My Tasks\F:\My Tasks\F:\My Tasks\F:\My Tasks\F:\My Tasks\F:\My Tasks\F:\My Tasks\F:\My Tasks\F:\My Tasks\F:\My Tasks\F:\My Tasks\F:\My Tasks\F:\My Tasks\F:\My Tasks\F:\My Tasks\F:\My Tasks\F:\My Tasks\F:\My Tasks\F:\My Task\F:\My Task\F:\My Task\F:\My Task\F:\My Task\F:\My Task\F:\My Task\F:\My Task\F:\My Task\F:\My Task\F:\My Task\F:\My Task\F:\My Task\F:\My Task\F:\My Task\F:\My Task\F:\My Task\F:\My Task\F:\My Task\F:\My Task\F:\My Work 8 9 10 11 12 13| Item Description | ||
| 1 | Device Name | Model name of the connected camera.Click the column to sort the list by model name.However, search will be stopped if clicked during the search. |
| 2 | Alias This function is not currently implemented. | |
| 3 | Mode | Displays either,orfor the current network connection status. |
| 4 | MAC(Ethermet) Address | Ethernet address for the connected camera.Click the column to sort the list by Ethernet address.However, search will be stopped if clicked during the search. |
| 5 | IP Address | IP address.Click the column to sort the list by IP address.However, search will be stopped if clicked during the search. |
| 6 | Protocol | Network setting for the camera.The factory default is "IPv4".Cameras with the IPv6 setting will be displayed "IPv6". |
| 7 | URL | DDNS URL address enabling access from the external Internet.However, this will be replaced with theof the camera if DDNS registration has failed. |
| 8 | IPv4 Scans for cameras with the IPv4 setting | |
| Item Description | |
| 9 IPv6 | Scans for cameras with the IPv6 setting. Activated in an IPv6 compliant environment only. |
| 10 Search | Scans for cameras that are currently connected to the network. However, this button will be grayed out if neither IPv4 nor IPv6 is checked. |
| 11 Auto Set | The IP Installer automatically configures the network settings. |
| 12 Manual Set | You should configure the network settings manually. |
| 13 Exit | Exits the IP installer program. |
For the IP installer, use only the installer version provided in the installation CD or use the latest one if available. You can download the latest version from the Hanwha Techwn web site.
- If the supporting OS is Windows 8.1, it is recommended that you use the Wisenet Device Manager instead of the IP Wisenet. The Wisenet Device Manager Program can be downloaded by visiting the Hanwha Techwin website (http://www.hanwha-security.com) under the menu
STATIC IP SETUP
Manual Network Setup
Run
At the initial startup, both [Auto Set] and [Manual Set] will be grayed out.
For cameras found with the IPv6 setting, these buttons will be grayed out as the cameras do not support this function.
- Select a camera in the search list. Check the MAC address of the camera on the camera's label. Both the [Auto Set] and [Manual Set] buttons will be activated.
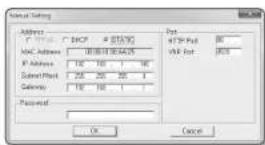
- Click [Manual Set].
The Manual Setting dialog appears.
- In the pane, provide the necessary information.
- MAC (Ethernet) Address: The MAC address imprinted on the camera label is automatically displayed and requires a user setting.
IP related parameters can be set only when DHCP is not checked.
network connection and setup
If not using a Broadband Router
For setting
-
In the
pane, provide necessary information. -
HTTP Port: Used to access the camera using the Internet browser, defaulted to 80.
• VNP Port: Used to control the video signal transfer, defaulted to 4520. -
Enter the password.
Enter the password of "admin" account, which was used to access the camera.
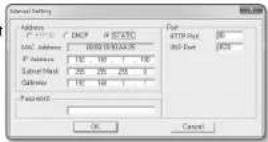
For the security purposes, you are recommended to use a combination of numbers, alphabets uppercase and lowercase and special characters for your password.
- If you want to change the password, refer to "Administrator password change" of the user setup. (page 30)
- Click [OK]
Manual network setup will be completed.
If using a Broadband Router
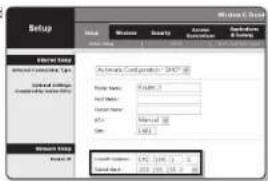
- IP Address : Enter an address falling in the IP range provided by the Broadband Router. ex) 192.168.1.2\~254, 192.168.0.2\~254, 192.168.XXX.2\~254
- Subnet Mask: The
- Gateway: The
- The settings may differ depending on the connected Broadband Router model. For more information, refer to the user manual of the applicable router.
- For more information about port forwarding of the broadband router, refer to "Port Range Forward (Port Mapping) Setup" (Page 19)
text_image
Setup File Name: AutoCAD Format: Normal Format Type: Normal Format Name: Normal Format Name: Normal Format Name: Normal Format Name: Normal Format Name: Normal Format Name: Normal Format Name: Normal Format Name: Normal Format Name: Normal Format Name: Normal Format Name: Normal Format Name: Normal Format Name: Normal Format Name: Normal Format Name: Normal Format Name: Normal Format Name: Normal Format Name: Normal Format Name: Normal Format Name: Normal Format Nam: Format Nam: Format Nam: Format Nam: Format Nam: Format Nam: Format Nam: Format Nam: Format Nam: Format Nam: Format Nam: Format Nam: Format Nam: Format Nam: Format Nam: Format Nam: Format Nam: Format Nam: Format Nam: Format Nam: Format Nam: Format Nam: Format Nam: Format Nam: Format Nam: Format Nam: Format Nam: Format Nam: Format Nam: Format Nam: Format Nam: Format Nam: Format Nam: Format Nam: Metropolitan Metropolitan Metropolitan Metropolitan Metropolitan Metropolitan Metropolitan Metropolitan Metropolitan Metropolitan Metropolitan Metropolitan Metropolitan Metropolitan Metropolitan Metropolitan Metropolitan Metropolitan Metropolitan Metropolitan Metropolitan Metropolitan Metropolitan Metropolitan Metropolitan Metropolitan Metropolitan Metropolitan Metropolitan Metropolitan Metropolitan Metropolitan Metropolitan Metropolitan Metropolitan Metropolitan Metropolitan Metropolitan Metropolitan Metropolitan Metropolitan Metropolitan Metropolitan Metropolitan Metropolitan Metropolitan Metropolitan Metropolitan Metropolitan Metropolitan Metropolitan18_ network connection and setup
If the Broadband Router has more than one camera connected
Configure the IP related settings and the Port related settings distinctly with each other.
ex)
| Category Camera #1 Camera #2 | |||
| IP related settings | IP Address | 192.168.1.100 | 192.168.1.101 |
| Subnet Mask | 255.255.255.0 | 255.255.255.0 | |
| Gateway | 192.168.1.1 | 192.168.1.1 | |
| Port related settings | HTTP Port | 8080 | 8081 |
| VNP Port | 4520 | 4521 | |
If the
ex) http://IP address: HTTP Port http://192.168.1.100:8080
Auto Network Setup
Run
At the initial startup, both [Auto Set] and [Manual Set] will be grayed out.
For cameras found with the IPv6 setting, these buttons will be grayed out as the cameras do not support this function.
-
Select a camera in the search list. Check the MAC address of the camera on the camera's label. Both the [Auto Set] and [Manual Set] buttons will be activated.
-
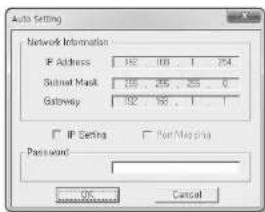
Click [Auto Set]. The Auto Setting dialog appears. The
, , and will be set automatically. -
Enter the password. Enter the password of "admin" account, which was used to access the camera.
- For the security purposes, you are recommended to use a combination of numbers, alphabels uppercase and lowercase and special characters for your password.
- If you want to change the password, refer to "Administrator password change" of the user setup. (page 30)
- Click [OK]. Auto network setup will be completed.

text_image
Auto Setting Network Information IP Address 192 100 1 274 Subnet Mask 235 255 255 0 Gateway 192 198 1 1 IP Setting Password: OK CancelDYNAMIC IP SETUP
Dynamic IP Environment Setup
• Example of the Dynamic IP environment
- If a Broadband Router, with cameras connected, is assigned an IP address by the DHCP server
- If connecting the camera directly to modem using the DHCP protocols
- If IPs are assigned by the internal DHCP server via the LAN
Checking the Dynamic IP
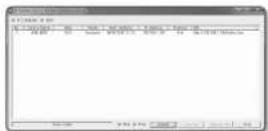
- Run the IP Installer on the user's local computer.
Cameras allocated with
address are shown in the list. - Select a camera from the search result.
- Click the [Manual Set] button and check the camera's
address. If you uncheck , you can change IP to .

PORT RANGE FORWARD (PORT MAPPING) SETUP
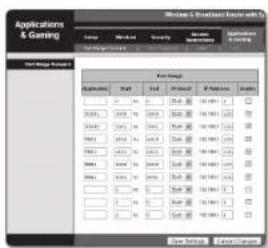
If you have installed a Broadband Router with a camera connected, you must set the port range forwarding on the Broadband Router so that a remote PC can access the camera in it.
Manual Port Range Forwarding
- From the Setup menu of the Broadband Router, select
- . For setting the port range forward for a third-party Broadband Router, refer to the user guide of that Broadband Router. - Select
and for each connected camera to the Broadband Router. The number of each port to be configured to the IP router should be set according to the port number designated in - - on the camera web viewer.
text_image
Applications & Gaming Subs Media Security Data Application Help Menu Help Main Menu Help File Manager Applications Subs Media Security Data Application Help Menu Help Main Menu Help Main Menu Help Main Menu Help Main Menu Help Main Menu Help Main Menu Help Main Menu Help Main Menu Help Main Menu Help Main Menu Help Main Menu Help Main Menu Help Main Menu Help Main Menu Help Main Menu Help Main Menu Help Main Menu Help Main Menu Help Main Menu Help Main Menu Help Main Menu Help Main Menu Help Main Menu Help Main Menu Help Main Menu Help main menu help- When done, click [Save Settings].
Your settings will be saved.

- Above sample instructions are based on the CISCO's Broadband Router.
- The settings may differ depending on the connected Broadband Router model. For more information, refer to the user manual of the applicable router.
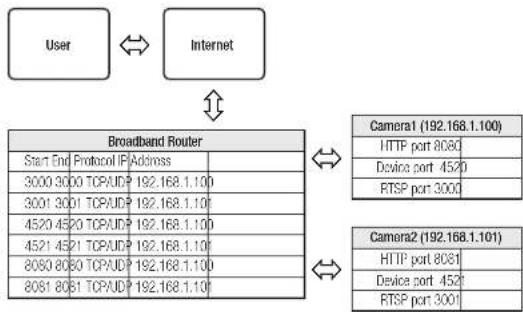
Setting up Port Range Forward for several network cameras
- You can set a rule of Port Forwarding on the Broadband Router device through its configuration web page.
• A user can change each port using the camera setting screen.
When Camera1 and Camera2 are connected to a router :
flowchart
graph TD
    A["User"] <--> B["Internet"]
    B --> C["Broadband Router"]
    C --> D["Camera1 (192.168.1.100)"]
    C --> E["Camera2 (192.168.1.101)"]
    D --> F["HTTP port 8060"]
    D --> G["Device port 4520"]
    D --> H["RTSP port 3000"]
    E --> I["HTTP port 8081"]
    E --> J["Device port 4520"]
    E --> K["RTSP port 3001"]

- Port forwarding can be done without additional router setup if the router supports the UPnP (Universal Plug and Play) function. After connecting the network camera, select the checkbox from the menu
connectinG to tHe camera from a SHARED LocaL pc
- Run the IP Installer. It will scan for connected cameras and display them as a list.
- Double-click a camera to access. The Internet browser starts and connects to the camera.

- Access to the camera can also be gained by typing the camera's IP address in the address bar of the Internet browser.
connectinG to tHe camera from a remote pc via tHe internet
Since using the IP Installer on a remote computer that is not in the Broadband Router's network cluster is not allowed, users can access cameras within a Broadband Router's network by using the camera's DDNS URL.
- Before you can access a camera in the Broadband Router network, you should have set the port range forward for the Broadband Router.
- From the remote PC, launch the Internet browser and type the DDNS URL address of the camera, or the IP address of the Broadband Router in the address bar. ex) http://ddns.hanwha-security.com/ID

For registering the DDNS settings, refer to "Registering with DDNS". (page 40)
CONNECTING TO THE CAMERA
Normally, you would
-
Launch the Internet browser.
-
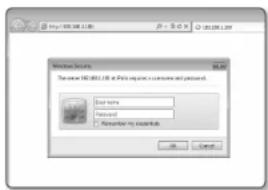
Type the IP address of the camera in the address bar.
ex) * IP address (IPv4): 192.168.1.100 →
http://192.168.1.100
- the Login dialog should appear.
• IP address (IPv6) : 2001:230:abcd: ffff:0000:0000:ffff:1111
→ http://[2001:230:abcd:ffff:0000:0000:ffff:1111] - the Login dialog should appear.
If the HTTP port is other than 80
-
Launch the Internet browser.
-
Type the IP address and HTTP port number of the camera in the address bar.
ex) IP address : 192.168.1.100:HTTP Port number(8080)
→ http://192.168.1.100:8080 - the Login dialog should appear.
text_image
Windows Security The name: ISO-001.1.01 at Paris Engine, is necessary and password. [ ] Our name [ ] Password [ ] Remembering any password.Using URL
-
Launch the Internet browser.
-
Type the DDNS URL of the camera in the address bar.
ex) URL address : http://ddns.hanwha-security.com/ID
- the Login dialog should appear.

■ Network connection is disabled in the LAN only environment.
Connecting via UPnP
-
Run the client or operating system in support of the UPnP protocol.
-
Click the camera name for search.
In the Windows operating system, click the camera name searched from the network menu.
- The login window is displayed.
Connecting via Bonjour
-
Run the client or operating system in support of the Bonjour protocol.
-
Click the camera name for search.
In the Mac operating system, click the camera name searched from the Bonjour tab of Safari.
- The login window is displayed.
To check the DDNS address
If the camera is connected directly to the DHCP cable modem, DSL modem, or PPPoE modem, the IP address of your network will be changed each time you try to connect to the ISP (Internet Service Provider) server.
If this is the case, you will not be informed of the IP address changed by DDNS.
Once you register a dynamic IP-based device with the DDNS server, you can easily check the changed IP when you try to access the device.
To register your device to the
PASSWORD SETTING
When you access the product for the first time, you must register the login password.
When the "Password change" window appears, enter the new password.
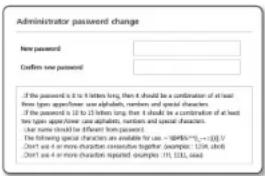
text_image
Administrator password change New password Confirm new password If the password is 8 to 10 letters long, then it should be a combination of at least then types appear/see alphabels, numbers and special characters. If the password is 10 to 12 before long, it should be a combination of at least two types appear/see alphabels, numbers and special characters. Use name should be different from password. The following special characters are available for use: =494%*5.5; =3.5%; Don't use or no more characters respective (examples: [1], [2], etc) Don't use or no more characters repeated (examples: [1], [3], etc)
For a new password with 8 to 9 digits, you must use at least 3 of the following: uppercase/lowercase letters, numbers and special characters. For a password with 10 to 15 digits, you must use at least 2 types of those mentioned.
-Special characters that are allowed.: \~!@4%^^0_-1=[]/.?/
- For higher security, you are not recommended to repeat the same characters or consecutive keyboard inputs for your passwords.
- If you lost your password, you can press the [RESET] button to initialize the product. So, don't lose your password by using a memo pad or memorizing it.
LOGIN
Whenever you access the camera, the login window appears. Enter the User ID and password to access the camera.
- Enter "admin" in the
Input box. The administrator ID, *admin*, is fixed and can not be changed. - Enter the password in the
input field. - Click [OK].
If you have logged in successfully, you will the Live Viewer screen.
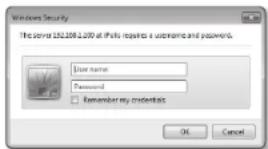
text_image
Windows Security The serial 152.108.1.200 at IPv6 requires a username and password. User name Password Remember my credentials OK Cancel
- When you access the camera web viewer, pay special attention to the security by checking whether the image data is encrypted.

- If you check the "Remember my credentials" option when your input is done, in future you will be logged in automatically without being prompted to enter the login information.
- You will experience the best video quality if the screen size is 100%. Reducing the ratio may cut the image on the borders.
PLUG-IN SUPPORT SPECIFICATIONS FOR EACH BROWSER
The existing plug-in web viewer and a new plug-in free web view is embedded together.
This allows you to use the web viewer in newer browser environments that do not support plug-ins, such as Chrome, EDGE, Firefox (Windows 64-bit only), and Safari. For browsers that allow the installation of plug-ins, such as IE and Safari, installing the plug-in is recommended.
According to the browser environment, the following differences may be observed.
- Chrome, Firefox(Windows 64bit only), EDGE browser : Although they don't support plug-ins, you can use a web viewer as a plug-in free web viewer is embedded.

- As the plug-in free webviewer has lower performance than the plug-in webviewer, it has a limit on the monitoring of high quality profiles and playback of saved videos.
To monitor high quality profiles and play saved videos, use either a plug-in webviewer or SmartViewer.
-Pugin-free webviewer creation conditions: The selected profile exceeds MJPEG Full HD 10fps H.264 (Chrome : full screen resolution supported / Edge, Firefox, Safari : Full HD 30 fps or higher) H.265 FullHD 10fps 2Mbps or higher
-Pugin-free payback conditions: MJPEG/H.264 full screen resolution: H.265 HD or below
■ The plug-in free feature has been optimized for the Chrome browser.
■ Supports Adaptive Streaming
This is the feature that automatically lowers the profile if there is a delay of more than 5 seconds. It was made to prevent issues such as increased latency and no response from the browser when playing the video on a system with lower hardware specifications than recommended.
The video profile is reduced in the following sequence: 1920X1080(20fps) -> 1280X720(20fps) -> 640X480(20fps).
- In the following cases, the detection performance may be impaired or an malfunction may occur.
-Monconous monitoring environment, night or low illumination environment
- Severe camera wobbling and sudden changes in illumination
- IE, Safari browser : You can use a web viewer even if you don't install the existing plug-in web viewer.

■ To monitor/play saved video seamlessly, you are required to install a plug-in.
In the following cases, the detection performance may be impaired or an malfunction may occur.
-Monconous monitoring environment, night or low illumination environment
- Severe camera wobbling and sudden changes in illumination
INSTALLING WebViewer PLUGIN
To access to the plug-in webviewer and play a live video (H.264/H.265) or a recorded video, an installation message will be prompted. At this time you need to install the webviewer plug-in to use the function properly.
- When the monitoring page is accessed for the very first time, the installation page is displayed. Click [Download plugin] to begin installation.
- If the plug-in installation file download status is suspended at 99% in the Internet Explorer browser, retry it after selecting "Release SmartScreen filter" in "Tool → SmartScreen filter".
-
Click [Run] in the message window.
-
Click [Yes] when the notice window saying that all browser windows will be closed.
Steps 4 and 5 will be skipped if no Web Viewer Plug-in is installed.
-
When the old version of the Web Viewer Plug-in is installed, a notice window saying the old version will be deleted is displayed. Click [Yes] when the notice window is displayed.
-
Click [OK]. The old version of Web Viewer Plug-in is deleted.
-
Click [Install] to begin installation of the Web Viewer Plug-in.
-
Click [Finish]. Web Viewer Plug-in installation is completed.
In your internet explorer, if you need to move to the installation screen after installing the webserver plugin, check whether webserver_actweplogin, its control in the "Tool → Additional Function Management" menu is "Activated", it not, and if there is a persisting problem, then select "Tools → Internet Options → General" and delete all the search records. If the problem persists, please register the IP or Domain of your camera in "Tools → Internet Options → Security → Trusted sales".
USING A PLUG-IN FREE WEBVIEWER
Although it is not possible to install plug-ins separately if you access the camera from Google Chrome, Mozilla Firefox, or the MS Edge web browser, you can view and control the camera video without installing plug-ins.
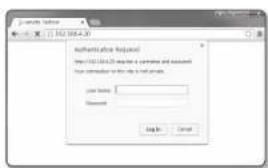
- Enter your username and password to log in.
- When you are logged in, a camera live view screen appears.
text_image
Authenticular after http://localhost http://localhost:10.00000000000000000000000000000000000000000000000000000000000000000000000000000000000000000000000000 User https://localhost/16384567898888888888888888888888888888888888888888888888888888888888888888888888888888888888888888888888888888| Item Description | |
| 1Live Moves to the Live screen | |
| 2Playback | Move to the screen where you can search for the video recording saved in your Micro SD memory card or NAS. |
| 3 Setup Move to the Setup screen. | |
| 4Viewer Screen | Displays the Live video on the screen.■ You can use the mouse wheel to activate the digital zooming in Viewer screen. |
| 5Webviewer plug-in installation | You can install webviewer plug-ins to play live or recorded videos (only available in E and Safari). |
| 6Online help The Online help provides detailed descriptions for each function. |
web viewer
| Item Description | ||
| 7 Profile type | You can select a profile type inunder thesetup menu.■ Click the icon to display the name of the current profile.■ Alterimages can be displayed on the screen under the following conditions if the video is played in the monitoring page:The resolution is changed due to a profile change.-Incoming data is being slowed due to a network delay when the profile is changed.The web browser window size and location is changed. | |
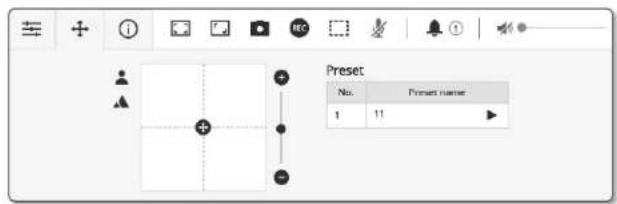
| 8 PTZ | Controls the PAVTILT/ZOOM motion. | |
| Manual focus [ ▲ / ▲Adjusts the focus of the screen to near distance or far distance. | ||
| Zoom In [ ● ] | Drag the bar on the right side of the UI up, or click the [ ● ] button to zoom in the screen.The farther the bar position is from the center, the faster the screen will be zoomed in. | |
| Zoom Out ( ● ) | Drag the bar on the right side of the UI down or click the [ ● ] button to zoom out the screen.The farther the bar position is from the center, the faster the screen will be zoomed out. | |
| Move screen ( ● ) | Moves in the direction where the cursor is located. | |
| Auto tracking ( Ⓞ ) | Click the icon to turn it ON, and the camera will track a moving person or object automatically. | |
| 9 Profile access information | You can read the profile information. | |
| 10 Switch View Mode | Full Screen ( [ ] ) | Double click on the video screen, and the current video will be played in the full screen of the monitor. |
| Fit to screen ( [ ] ) | A view mode in which the size of the camera video automatically fills to the web browser size. | |
| Size of the original file ( [ ] ) | View mode in which the video is played in the actual resolution. | |
| Maintain Aspect Ratio ( [ ] ) | View mode that adjusts the aspect ratio to best fit the resolution. | |
| 11 Capture | Saves the snapshot as an image file in the .png format. | |
| 12 Record | The user can save the video on the PC. | |
| 13 Pixel Counter | Checks the number of pixels in the selected area on the video screen. | |
| Item Description | |
| 14 Microphone control Activates the microphone. | |
| 15 Alarm output Activate the Alarm Out port. | |
| 16 Audio control Activates audio and adjusts the volume. | |

- Some functions may not work on a specific browser or codec.
To capture the snapshot
-
Click [Capture (n) on the scene to capture.
-
When a captured video is saved, a notification message appears. The captured image is saved in the designated folder for each browser.

If the screen is not captured by IE browser in Windows 7 or higher, run the IE Browser with the Admin privilege.
To save
-
Click the [Record ( icon).
-
To end the recording, press [Record (REC)] again.

- You can save the recorded file on the PC in an avi file format. Designate a path and save the video.
To fit the full screen
-
Click the (Full Screen ( )noon.
-
This will fit the Viewer to the full screen.
-
To leave full screen mode, click the [Full Screen (☐)] button again or press the [Esc] key on the keyboard.
To Use Audio
-
Click [Audio ( * )] icon to activate audio communication.
-
Use [●] bar to control the volume.
- If there is no sound from pulling in and cut the audio jack while it is in operation, click the [Audio (◆) icon to enable it again. - To use audio, you need to set
To Use Microphone
Click [Mic ( ) icon to activate the microphone.

■ If you are using IE or the Safari browser, you will need to install plug-in.
To count the number of pixels
- Click the [Pixel count (I)] icon to activate it.
- Drag the mouse on the video to select an area.
- The number of pixels in the selected area is displayed on the screen.
To control PTZ
- Click the PTZ (÷ icon.
- Move the cursor of the Move Screen pad [●] to move the camera direction or adjust the zoom or focus.
text_image
Preset No. Preset name 1 11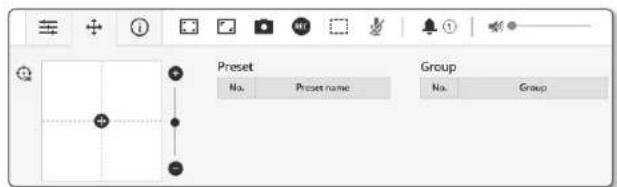
text_image
Preset No. Preset name Group No. GroupTo check the profile status
You can check the profile information.

other
Profile access | Profile | Networkgrid | Data cardiff | AIC (%) | Current user count | |---|---|---|---|---| | NFE1 | 100.44 | 5/2 | 0 | 0 | | NFE2 | 102.68 | 5/39 | 0 | 0 | | NFE3 | 107.68 | 5/39 | 0 | 0 | | NFE4 | 107.68 | 5/3 | 0 | 0 | Current users Profile | Networkgrid | Data cardiff | AIC (%) | Current user count | | NFE1 | 100.44 | 5/2 | 0 | 0 | | NFE2 | 102.68 | 5/39 | 0 | 0 | | NFE3 | 107.68 | 5/39 | 0 | 0 | | NFE4 | 107.68 | 5/3 | 0 | 0 |- Click the [Status ( ⓘ)] icon.
- The profile access information screen is updated whenever the screen is enabled.
• Profile access : Show the information of the newly added profile.
- Profile : Show the information of the newly added codec.
- Bitrate(kbps): Show both the actual bit rate and the set bit rate.
- Framerate(lps) : Show both the actual frame rate and the set frame rate.
ATC(%) : Show the ATC status.
- Concurrent users count : Show the number of concurrent users who access the profile.
- Current users: Shows information on users accessing web viewer and displaying monitoring video.
- Profile : Show the name of the profile accessed by the user.
- Bitrate(kbps) : Show the current bit rate.
- Network connection status: It shows whether the network is working fine.
- IP address : Show the IP address of the current user.
PLAYING THE RECORDED VIDEO

Before you can play the video, you must configure the record settings. For details on record settings, refer to "Storage" (page 44);
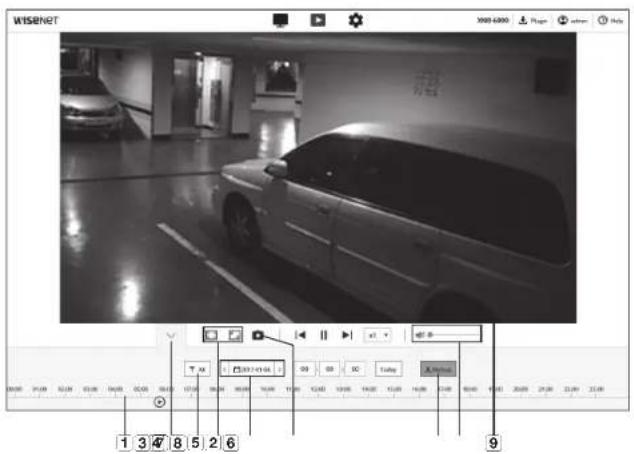
Playback Screen Name and Features
text_image
WISENET X803-6300 page sunknown Help 1 3 4 5 2 6 9| Item Description | ||
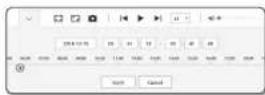
| 1 Time Bar Move the time bar to play the video at a desired time. | ||
| 2 Hide the context menu | The contextual menu screen at the bottom will disappear, and only the menu icon will be displayed. | |
| 3 Search event setting Sel the event type to search within the search period. | ||
| 4 Switch View Mode | Full Screen ( [IMAGE] ) | Double click on the video screen, and the current video will be played in the full screen of the monitor. |
| Fit to screen ( [IMAGE] ) | A view mode in which the size of the camera video automatically fills to the web browser size. | |
| Size of the original file ( [IMAGE] ) | View mode in which the video is played in the actual resolution. | |
| Maintain Aspect Ratio ( [IMAGE] ) | View mode that adjusts the aspect ratio to best fit the resolution. | |
| Item Description | |
| 5 Search range setting | Set the search date and time range for data saved in your Micro SD memory card or NAS. |
| 6 Capture | Saves the current video screen in an image file format (format may vary depending on the browser). |
| 7 Backup | Set the desired date to make a backup copy of video data saved in your Micro SD memory card or NAS.You can set up to 5 minutes for the backup of a saved video. |
| 8 Audio | To listen to a voice signal (if present) in the recorded video, then activate the voice signal icon when you play it. |
| 9 Viewer Screen The recorded video will appear. | |
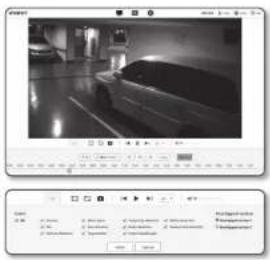
To play the content after searching by event
- On the Playback screen, click the [Show ( )] button.
- If there is a video recorded on the date of search, the applicable video is displayed on the time bar.
- To perform a search by event type, click the [All] button at the top of the time bar and select an event type.
- When done, click [Apply].
Event searched is displayed on the time bar. - Click the [Play (▷)] button.
- To pause the video, click the [Pause (Ⅲ)] button.
text_image
Screenshot of a video editing software interface showing a black-and-white photo of a car at an intersection with toolbars and file list below.To play after searching by time
- Click the []ison.
- On the calendar, set the search date, start time and end time. The event searched is displayed on the time bar.
- Click the [Play (▷)] button. The video at the selected time will be played.
- When a video is played, the recording time of the video currently being played is displayed.
- Search the video forward and backward and adjust the playback speed.
- How to Move Playback Interval Select the [K, D] button to move 1 frame forward/backward.
- How to Control Playback Speed Click the [ ] button and you can select a speed of
either 1x, 2x, 4x and 8x or -1x, -2x, -4x and -8x, and you can set the playback speed as desired.
- Move the position of the [Time Bar (☐)] to play the video at a desired time.
natural_image
Interior view of a dimly lit room with furniture and lighting (no visible text or symbols)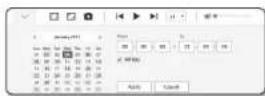
To back up the searched video
- During playback, click [Backup] on the scene to back up. The data in the applicable section will be backed up.
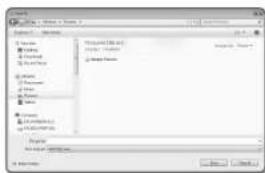
- Click [Apply] button. The Save As window appears.
- Confirm the save path and click [Save] button. The screenshot will be backed up to the specified path.
To play the backup video
The backed up images are saved in an .avi format. Installing the media player that supports the format for the user PC is recommended.

- If playback does not run smoothly due to the user environment, optimizing by installing the latest codec and other methods are required.
To Play an AVI File
(1) Micro SD memory card
- Separate the Micro SD memory card from the camera.
Before separating the Micro SD memory card, set the
-
Insert the Micro SD memory card into the PC.
-
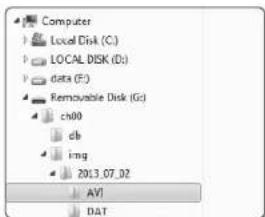
Play the AVI file in the "\ch00\img\YYYY_mm_DD\AVI" directory, using a media player.
A filename starts with the format "001_YYYYMMDD_HHMMSS.avi" and the file number is incremented by one. YYYYMMDD_HHMMSS indicates the start time of data saving.
- "001_YYYYMMDD_HHMMSS.shtml" file is a caption file, and you can view it if it exists in the same directory as its related AVI file.
■ The max recording time per AVI file is 5 minutes. - Once corrupted, the data in the Micro SD memory card cannot be replayed in the Web Viewer's [Playback].
text_image
Computer Local Disk (C:) LOCAL DISK (D:) data (E:) Removable Disk (G:) cn00 db img 2013.07_02 AVI DAT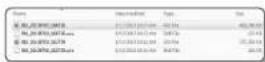
(2) NAS (Network-Attached Storage)
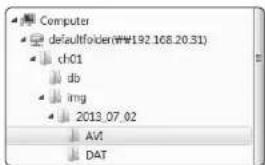
- In Windows browser, use \
\ to access. ex:\192.168.20.31\defaultfolder\ch01\img\2013_07_02\AVI - Go to
→ → Enter 1. - Connected to the NAS. The directory structure is same as the directory structure for a Micro SD memory card.
A filename starts with the format "001_YYYYMMDD_HHMMSS.avi" and the file number is incremented by one. YYYYMMDD_HHMMSS indicates the start time of data saving.
*001_YYYYMMDD_HHMMSS.smi* file is a caption file, and you can view it if it exists in the same directory as its related AVI file.
The max recording time per AVI file is 30 minutes.
■ If you change or damage the saved data on your own, it will not play back or save properly.
text_image
Computer defaultfolder(#192 168.20.31) ch01 db img 2013.07.02 AV DAT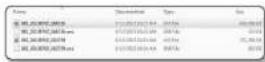
SETUP
You can configure the basic camera information, PTZ, video and audio, network, event, analyze and system settings.
- On the live screen, click the [Setup (★)] button.
- The Setup screen appears.
BASIC SETUP
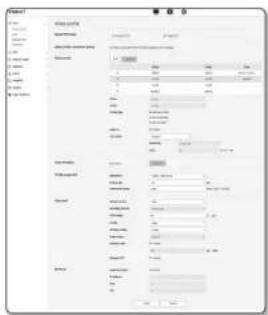
Video profile
- From the Setup menu, select the <Basic(≡) tab.
- Click
- Configure PTZ Mode. PTZ mode can be activated by selecting it while the camera is on the outside.
When connecting to the camera from external NVR, ISV, our SmartViewer, and if the PTZ control command is sent from them, the PTZ mode the administrator already selected will be the one used for operation.
If digital PTZ mode is selected, it will run only in profiles where digital PTZ is selected.
When digital PTZ mode is selected, the resolution and bit rate are limited.
- Set the
- Keep connection when profile setting is changed: Output uses the same settings even when the settings of the active profile are changed.
If not selected, changing a profile used by an existing connection resets such connection.
- Select each profile properties.
For more details, refer to "To Add/Change the Video Profile". (Page 29)
6. Click the input box of each item and enter / select a desired value.
- The context menu may differ depending on the selected codec type.
- Default profile: If no profile is selected when using the Web Viewer, the default video profile is applied.
- E-mail/FTP profile: Video profile to be transferred to the specified email or FTP site.
■ Only the MJPEG codec can be set as the E-mail/FTP profile. - Record profile: This is the profile that is applied to video recording.
• DPTZ Profile : Profile applied when using the PTZ. -
To use PTZ add a DPTZ profile.
-
Select whether or not to input audio in the video.
Select the
text_image
Scanned document with Chinese text fields and a table of contents, likely from a form or report.- According to your situation, set ATC (Auto Transmit Control) mode.
- ATC mode: It adjusts the video properties according to the variance in the network bandwidth, controlling the bit rate. Adjusting the bit rate depends on the ATC mode.
- Control framerate : Reduce the frame rate if the network bandwidth drops down.
- Control compression: Control the compression rate if the network bandwidth drops down. Compression adjustment can cause deterioration of the image quality.
- Event(MD) : Activated when the motion detection (MD) event is set. Frame rate is adjusted when an event occurs.
If no motion is detected in the surrounding area, the minimum amount of frames is output to save the bandwidth use. - If
is set to , the encoding priority according to the ATC mode will be fixed as below:
| Bitrate control / ATC mode Control framerate Control compression Event(MO) | |||
| CBR Compression | Framerate Framerate | ||
- Sensitivity: Affect the transfer rate according to the variance in the network bandwidth. The transfer rate will be adjusted to the fastest if the bandwidth is
, and adjusted to the latest if the bandwidth is . - Limit: If the quality or frame rate is adjusted, the property will be changed to the applied value (%) against the previous setting value (100%). Note that if you reduce the property value too much, you may encounter flickering on the screen. So it is advisable to adjust the value within the threshold.
It is recommended to apply ATC control only for cameras supporting ATC.
- Set the ATC sensitivity to
in a network environment with high variance in the network bandwidth. -
If the network connection is unstable, you may encounter flickering on the screen.
-
Select Able or Disable for the Crop Encoding function.
For more details, refer to "To Use Crop Encoding". (Page 30)
- Crop encoding : It cuts only the selected area out of the full screen and outputs it at the resolution specified in
- When done, click [Apply].
To Add/Change the Video Profile
The profile setup can be added or modified to accommodate various profiles depending on the recording conditions.
- In
- Provide the name and select a codec.
- Specify the conditions under which the codec will be applied.
- Specify the details of the selected codec including resolution and frame rate.
• Resolution : Set the video size of the H.264/H.265 and MJPEG files.
- Framerate: Set the max number of video frames per sec.

- The Sensor mode setup in Camera Setup changes the maximum configurable framerate.
| Sensor 25 fps 30 fps 50 fps 60 fps | |||
| Framorate 1-25 fps 1-30 fps 1-50 fps 1-60 fps |
• Maximum bitrate : Set the max bit rate of video when the bit rate control is set to VBR.
As the bit rate can be adjusted limitedly according to the resolution, frame rate and screen complexity, the actual bit rate can be greater than the maximum bit rate. So you must consider the use conditions when setting the value.
- Target bitrate: Set the target bit rate when the bit rate control is set to CBR.
- Bitrate control: You can select one from constant bit rate and variable bit rate for compression. Fixed bitrate means that the network transmission bitrate is fixed while varying the video quality or frame rate, variable bitrate means that a higher priority is placed on the video quality while varying the bitrate.
After setting the fixed bit rate for bit control, if you select the video quality priority mode, depending on the complexity of the screen, the actual transmitted frame rate may differ from the frame rate setup in order to guarantee the optimal video quality for the given bit rate.
- Encoding priority: You can set the priority of video transmission to frame rate or compression.
- GOV length: It specifies the distance (in terms of number of frames) between two consecutive I-Frames in a video sequence when H.264/H.265 codec was selected. (One I-Frame + 0-Several P-Frames)
• Profile : You can select the H.264/H.265 profiling method.
- Entropy coding: Reduce the possible compression loss due to encoding.
• Smart codec : Specify the use of Smart codec.

- You can use this when the bit rate control value is CBR. Detailed settings are configured in the Smart Codec on the Audio & Video tab. (Page 39)
- Dynamic GOV: When the bit rate control is VBR in H.264/H.265 codec, it makes the GOV length automatically change to the set value of the maximum dynamic GOV.
- Dynamic FPS: Set the FPS value to automatically change the setting of the FPS value to the maximum dynamic value when the bit rate control is VBR between H.264/H.265 codec.
- Multicast(RTSP): Specify the use of the RTSP protocol.
- IP address : Enter an IPv4 address with which you can connect to the IPv4 network.
- Port : Specify the video communication port.
- TTL: You can set the TTL for the RTP packet.

- If you set the Multicast address to 224.0.0.0-224.0.0.255, multicast may not work properly in all environments. In that case, we recommend you change the multicast address.
What is GOV length?
GOV(Group of Video object planes) is a set of video frames for H.264/H.265 compression, indicating a collection of frames from the initial I-Frame to the next I-Frame. GOV consists of 2 kinds of frames. I-Frame and P-Frame.
I-Frame is the basis frame of compression, and contains data for a completed single image. P-Frame contains only the data that has changed from the preceding I-Frame.
For H.264/H.265 codec, you can determine the GOV length.
If you set a recording profile with H.284/H.266 codec, the GOV length will be framerate/2.
What is dynamic GOV?
Dynamic GOV is a function that enables the GOV to automatically change in a range from the set value of the minimum GOV length to the maximum dynamic GOV set value according to the situation of the video. In a video with almost no motion, GOV operates with the dynamic GOV settings, which makes the bit rate of the entire video reduced. The I-frame is output right after a motion is detected and GOV operates with the GOV length settings until the motion disappears.
If you use this function, the GOV of a video operates with the minimum GOV length settings.
setup screen
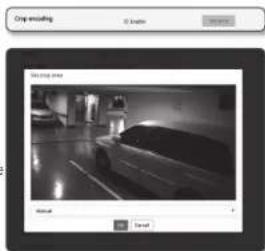
To Use Crop Encoding
- Select
. - Click
.
The Crop Encoding Area Setup window will pop up.
• 16:9 : The aspect ratio shall be set to 16:9 as close as to the user specified area.
The supporting size ranges from 640X360 to 1280X720 and supporting output resolutions are 640X360, 800X448, 1280X720.
- 4:3: The aspect ratio shall be set to 4:3 as close as to the user specified area.
The supporting size ranges from 320X240 to 1280X960 and supporting output resolutions are 320X240, 640X480, 800X600, 1024X768, and 1280X960.
- Manual : It sets up the aspect ratio of the user specified area.
The supporting size ranges from XNB-6000: 320X240 - 1280X1024 / XNB-8000: 320x240 - 1600x1200 and all supporting output resolutions are available except 1920X1080.
text_image
City opening New! New!-
Drag the mouse on the screen to specify the Crop Encoding area at your discretion.
-
If you set output as
, you can specify a desired range. However, if output is only available at a supported resolution, the image will be output at the resolution that is closest to the range that you specified. - The Crop Encoding area setup can change depending on the DIS setup. Reset the Crop Encoding area when the DIS setup is changed.
User
- From the Setup menu, select the <Basic(□tab).
- Click
. - Provide the necessary user information.
- Administrator password change: Change the password for the administrator.
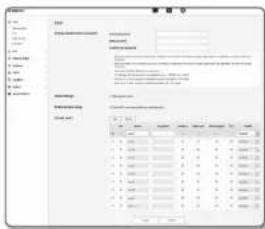
For the security purposes, you are recommended to use a combination of numbers, alphabets uppercase and lowercase and special characters for your password.
- It is recommended to change your password once every three months.
■ The password length and limits are shown as follows.
A combination of at least three types of upper case, lower case, numeric, and special characters: 8 to 9 characters.
-A combination of at least two types of upper case, lower case, numeric, and special characters: 10 to 15 characters. -Should be different from the ID.
-Cannot repeat the same letter, number of special characters more than 4 times.
-Don't use 4 or more characters consecutive together. (examples: 1234, abcd)
-Don't use 4 or more characters repeated. (examples -!!!, 1111, aaaa)
-Special characters that are allowed. : - !@#\$%^*|_- + = [ ] .?
-After the factory setting, the admin and user passwords are initialized. You need to reset the password.
-When you access the camera web page for the first time or access it after the initialization, you will be moved to the admin password setting menu.
-In this menu, you need to login again with the new password before using the camera web page menus.
-If the existing password is not matched, when you change the admin password, you cannot change the password.
-After changing your password, if there is a camera connected to a CMS or NVR client, then you need to re-register it with the newly changed password. If the camera is still connected with the same password, then the account may be locked because a client uses the previous password.
- If you try to login with the registered account, 5 or more consecutive password authentication has failed, and then the account may be locked for thirty seconds.
-
When the password is changed while multiple connections are active from a PC, the browser may malfunction. In that case, reconnect to the server.
-
Guest setup: if you select
, the guest account can access the Web viewer screen but can only view the live Viewer screen. - The ID/password for the guest account is
, which cannot be changed. - Authentication setup: If you select
, you can access RTSP without logging in and view the video.
- Current users: If you select
- The administrator can set the audio input, audio output, alarm output and PTZ control permissions.
- Audio input/Audio output/Alarm output: You can enable/disable Audio input/Audio output/Alarm output in the live mode on the current user account.
- PTZ control : Select
. - Profile: If you select
, you can only see the default profile video; if selecting , you can see the full profile videos.
ONVF functions available to a registered user allowed to use ONVF functions are limited to those of granted with permission.
- When done, click [Apply].
Date & Time
- From the Setup menu, select the
tab. - Click
- Specify the time and date that will be applied to the camera.
- Current system time : Displays the current time settings of your system.
• Timezone : Specify the local time zone based on the GMT
- Daylight saving time: If checked, the time will be set one hour before the local time zone for the specified time period.
This option will be displayed only in areas where DST is applied.
- System time setup : Specify the time and date that will be applied to your system.
- Manual : Sets the current time of the camera manually.
When you select the
- Synchronize with NTP server : Sync with the time of the specified server address.
text_image
Scanned screenshot of a Chinese software interface showing menu options and data fields for user information and statistics.- When done, click [Apply].
- If you select the
IP & Port
- From the Setup menu, select the <Basic ( : tab.
- Click
- Click
. - Set the
.
• IP type : Select an IP connection type.
- Manual : Specify the IP address, Suionet mask,
Gateway, DNS1, and DNS2
- DHCP : Specify the DNS1 and DNS2.
- PPPoE: Specify the DNS1, DNS2, ID and Password.
- If you set it to
• MAC address : Shows the MAC address.
• IP address : Displays the current IP address.
Subnet mask : Displays the
Gateway : Displays the
• DNS1/DNS2 : Displays the DNS(Domain Name Service) server address.
- Set the
.
Set to
The IP addressing system will be defaulted to DHCP. If no DHCP server is found, the previous settings will be restored automatically.
- Once completed with editing, click [Apply] to apply changes and the browser exits. After a while, connect again with the changed IP.
text_image
File Name: Size: Size Size Size Size Size Size Size Size Size Size Size Size Size Size Size Size Size Size Size Size Size Size Size Size Size Size Size Size Size Size Size Size Size Size Size Size Size Size Size Size Size Size Size Size Size Size Size Size Size Size Sizesetup screen
6. Click .
- Type in each item in the Port menu as necessary.
- Neither the port range between 0 and 1023 nor port 3702 is available.
- HTTP: HTTP port used to access the camera via the web browser.
The default is 80(TCP).
- Setting the HTTP port for Safari and Google Chrome browsers to 65535 is not allowed by security policy.
- HTTPS: In this version, the security of the web communication protocol HTTP is strengthened. It can be used when you set HTTPS mode in SSL. The initial value is set to 443(TCP).
- The available setting range is 1024–65535. (For security reasons, in your Safari or Google Chrome browser, you may not use 65535 as your HTTPS port.)
- RTSP: Used to transfer videos in the RTSP mode: the default is 554.
- Timeout: When connecting to RTSP, this function resets the connection if there's no response for a certain time.

- If changed the HTTP port, the browser exits.
Afterwards, address should contain the newly assigned HTTP port trailing the IP. ex) IP address: 192.168.1.100, HTTP port : Assigned 8080 → http://192.168.1.100:8080 (If HTTP port is set to 80, no need to specify the port number)
■ Using RTSP and HTTPS is recommended in order to prevent the image information from being restored.
- When done, click [Apply].
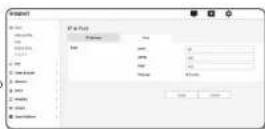
PTZ SETUP
External PTZ
Configure the connection settings to the external pan/tilt receiver so that you can control the PTZ operations via the receiver connected to the RS-485 port of the camera.

In
-
From the Setup menu, select the <PTZ(+) tab.
-
Click
. -
Specify the serial port.
You can set the RS-485 communication mode for pan/tilt-compliant receiver that is connected to the network camera.
- Protocol : From SAMSUNG-T/SAMSUNG-E/PELCO-D/PELCO-P/SUNGJIN/PANASONIC/HONEYWELL/AD/VICON/GE/BOSCH, select the same protocol as that of the receiver.
• Camera ID : Displays the fixed camera ID.
• Baudrate : Transfer rate for RS-485 communications.
• Data bit : Specify the data bit.
- Parity bit: Specify the parity bit.
- Stop bit : Specify the stop bit
- ONVIF Focus move: Set external camera's focus for ONVIF controls.
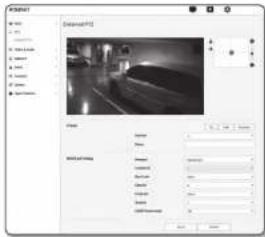
text_image
Audio Audio Video Audio Audio Audio Audio Audio Audio Audio Audio Audio Audio Audio Audio Audio Audio Audio Audio Audio Audio Audio Audio Audio Audio Audio Audio Audio Audio Audio Audio Audio Audio Audio Audio Audio Audio Audio Audio Audio Audio Audio Audio Audio Audio Audio Audio Audio Audio Audio Audio Audio Audio Auction Audio Audio Audio Audio Audio Audio Audio Audio Audio Audio Audio Audio Audio Audio Audio Audio Audio Audio Audio Audio Audio Audio Audio Audio Audio Audio Audio Audio- When done, click [Apply].

- All these operations above mentioned will be enabled only if the network camera is properly connected to the parvilt-compliant receiver. And the serial port for the parvilt operations should be properly specified.

- Check the functions supported by the receiver when it is connected. Some functions may be disabled depending on the receiver or protocol specification. Refer to the following table for more details.
Functions Supported for Each Protocol
| Protocol | P control | P movement speed | T control | T movement speed | Zoom control | Zoom movement speed | Focus control | Focus control speed | Preset save | Preset movement | Remarks |
| SAMSUNG-T | 0 | 0 | 0 | 0 | 0 | ||||||
| SAMSUNG-L | 0 | 0 | 0 | 0 | 0 | ||||||
| PELOC-D | 0 | 0 | 0 | 0 | 0 | ||||||
| PELOC-P | 0 | 0 | 0 | 0 | 0 | ||||||
| SUNGJN | 0 | X | 0 | X | X | X | X | X | 0 | X | PT direction (up, down, left, bottom) |
| Protocol | P control | P movement speed | I control | I movement speed | Zoom control | Zoom movement speed | Focus control | Focus control speed | Preset start | Preset movement | Remarks |
| PANASONIC | 0 | 0 | 0 | 0 | 0 | ||||||
| HONEYWELL | 0 | 0 | 0 | 0 | 0 | 0 | |||||
| AD O O | 0 | 0 | 0 | 0 | 0 | ||||||
| VICO V O | 0 | 0 | 0 | 0 | 0 | ||||||
| GE O O | 0 | 0 | 0 | 0 | 0 | ||||||
| BOSCH O O | 0 | 0 | 0 | 0 | 0 |
- Click the cursor [●] on the screen moving pad to control movement of the screen.
- Move screen: Scroll the cursor in the direction desired.
- Control screen movement rate: The further away the cursor is from the center, the faster it moves on the screen.
- Control zoom movement.
The farther the bar is from the center, the faster the screen expands.
- Zoom Out: Move down the bar in the right of the UL or press the 1 button.
The farther the bar is from the center, the faster the screen reduces in size.
- Adjust the focus.
- Manual focus / ▲: Adjusts the focus of the screen for short distance or long distance.
- The pan/tilt/zoom operations can be controlled only if the camera is connected to a pan/tilt receiver with a proper
To add a preset
- Select the preset number to add.
- Set the name for the preset.
- Press the [Add] button.
To delete a preset
- Select the preset number to delete.
- Press the [Remove] button.
To move a preset
- Select a preset number that you want to move.
- Press the [Go] button.
Digital PTZ
Use this settings page to move the camera view and perform the digital zoom.

- DPTZ jog is output when there is at least 1 profile with the
- From the Setup menu, select the
- Click
.
To add a preset
- Select the preset number to add.
- Set the name for the preset.
- Press the [Add] button.
To delete a preset
- Select the preset number to delete.
- Press the [Remove] button.
To move to a desired preset
- Select a preset number that you want to move.
- Press the [Go] button.
To set a group
The group function enables you to group various presets before calling them in sequence. Six groups can save a total of 128 presets each.
- Select a group setting mode.
- Press the [Add] button.
Entered in the bottom list.
- If you want to delete a preset added, select it and press the [Delete] button.
- Press the [Start] button.
It performs the group operation.
- Press the [Stop] button.
The running group will be stop. - Press the [Remove] button.
Selected group data will be deleted.
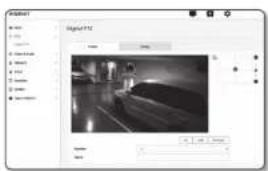
text_image
Visual132 Visual132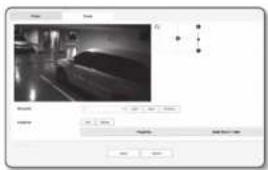
text_image
Screenshot of a software interface showing a grayscale image editing dialog with control buttons and file name input.VIDEO & AUDIO SETUP
Video setup
- From the Setup menu, select the <Video & Audio (王) tab.
- Click
- Select a
- Flip: Turn upside down the image that is captured by the camera.
- Mirror: Flip horizontal the image that is captured by the camera.
- Hallway view: Rotates the video captured by the camera according to the set angle.
You can rotate the video 0, 90 or 270 degrees. -
If you change settings, the browser window will be closed and the camera restarted. Please access again later.
-
Specify whether to use the analog video output function.
To decrease the performance reduction, the usage should only be unlocked after installation.
- Select the video type.
- Specify the privacy zone.
You can set the pattern of the privacy area either to Opaque or Mosaic. - When done, click [Apply].
To set the privacy zone
You can specify a certain area of the camera video to be protected for your privacy.
- Set it to
. - Click [Apply].
- Select 4 vertices on the screen with your mouse to specify the area.
- Enter the name and select the color, and then click [OK].
- If you want to delete a name in the list, select it and click [Delete].
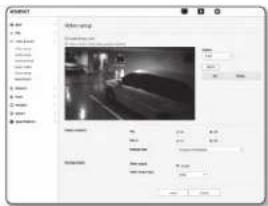
text_image
View File Edit View Insert View Mode: 100% View Angle: 120° View Depth: 5 px View Width: 5 px View Light: 5 px View Light Ratio: 1.00 View Light Speed: 1000 rpm/s View Light Speed: 1000 rpm/s View Light Speed: 1000 rpm/s View Light Speed: 1000 rpm/s View Light Speed: 1000 rpm/s View Light Speed: 1000 rpm/s View Light Speed: 1000 rpm/s View Light Speed: 1000 rpm/s View Light Speed: 1000 rpm/s View Light Time: 0.00-0.01-0.02-0.03-0.04-0.05-0.06-0.07-0.08-0.09-0.10-0.11-0.12-0.13-0.14-0.15-0.16-0.17-0.18-0.19-0.20-0.21-0.22-0.23-0.24-0.25-0.26-0.27-0.28-0.29-0.30-0.31-0.32-0.33-0.34-0.35-0.36-0.37-0.38-0.39-0.40-0.41-0.42-0.43-0.44-0.45-0.46-0.47-0.48-0.49-0.50-0.51-0.52-0.53-0.54-0.55-0.56-0.57-0.58-0.59-0.60-0.61-0.62-0.63-0.64-0.65-0.66-0.67-0.68-0.69-0.70-0.71-0.72-0.73-0.74-0.75-0.76-0.77-0.78-0.79-0.80-0.81-0.82-0.83-0.84-0.85-0.86-0.87-0.88-0.89-0.90-0.91-0.92-0.93-0.94-0.95-0.96-0.97-0.98-0.99-1 View Light View Light View Light View Light View Light View Light View Light View Light View Light View Light View Light View Light View Light View Light View Light View Light View Light View Light View Light View Light View Light View Light View Light View Light View Light View Light View Light View Light View Light View Light View Light View Light View Light View Light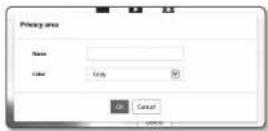
Audio setup
You can configure the I/O settings of the audio source from the camera.
- From the Setup menu, select the
- Click
- Set the audio input value.
• Source : Sets the audio input.
- Internal microphone : Built-in microphone embedded in the camera.
- Line : Connect the cable to the audio device.
- External microphone: Uses an external microphone.
-
Apply power to Ext. Mic.: Select this check box when the external microphone is not powered, and the power will be supplied from the camera to the microphone. You can configure settings when selecting
.
• Codec : Specify the audio codec. -
G.711 : A audio codec standard, it uses 64 Kbps PCM (Pulse Code Modulation) encoding.
ITU standard audio codec that is adequate for digital voice transfer in PSTN network or through a PBX. - C.726 - ITU standard audio codec applying ADPCM (Adaptive Differential Pulse Code Modulation) for variable bit rates of 40/32/24/16 Kbps to 64 Kbps PCM encoding.
- AAC : Acronym of Advanced Audio Coding, which is an international standard designed to be the successor of the MP3 format. You can use audio at a higher sampling rate than when you use the existing G.711 or G.726 codec.
- Sampling rate: Refers to the number of times of sampling when digitalizing an analog soundtrack. The higher this value is, the better the sound quality is.
- Bitrate: Set the bit rate to differentiate compression ratio if using G.726 codec.
• Gain : Specify the audio input amplification.

Sound quality deterioration or howling may occur if the loudness of the sound source or gain value were set excessively.
-
Set the audio output level.
-
Enable: Sets whether to use audio output.
• Gain : Specify the audio output amplification. -
When done, click [Apply].
Camera setup
You can change the camera settings according to the environment where the camera is located.
- From the Setup menu, select the
- Click
. - Configure the settings as necessary of: Image preset mode, Sensor, SSDR, White balance, Back light, Exposure, Day/ Night, Special, OSD
- When done, click [Apply].
- If a certain time (timeout: 240s) is elapsed with your not pressing the [Apply] button after changing the settings, your changes will not be applied.
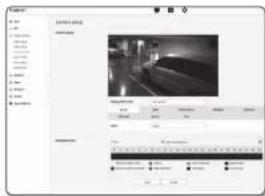
text_image
Screenshot of a video editing software interface showing timeline, preview window, and playback controls with Chinese text labels.If you want to set an image preset
Users can set presets easily.
The selected image preset mode will be in operation during the configured period, but at other times the values configured in the user preset mode are reflected.
-
Select a desired mode from the image presets.
-
Motion & Bright video: This is the factory setting for your camera. Select it for video recording, focusing on reproducibility.
- Motion: Record a moving object clearly. If there are many moving objects, such as on a road or in a crowded place like a museum, select this option.
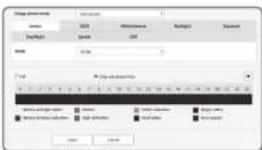
text_image
Image processing Name: 2011 Resolution: 100 Balance: 0.0000 Export: View: View: View: View: View: View: View: View: View: View: View: View: View: View: View: View: View: View: View: View: View: View: View: View: View: View: View: View: View: View: View: View: View: View: View: View: View: View: View: View: View: View: View: View: View: View: View: View: View: View: View:- Noise level can increase in a low illumination environment, and sensitivity can go down.
- Noise reduction: Select this when you need a video with low noise in the low illumination environment.
- Bright video: This makes the dark area in a full video brighter.
Video contracts effects are reduced. - Motion & Noise reduction: Use this when there are many moving objects, such as on a road or in a crowded place like a museum, or when you need a video with low noise in a low illumination environment.
- High definition: Use it when there are many moving objects, such as on a road or in a crowded place like a museum, or when you need to make a dark area in full video brighter.
• Vivid video: Makes the entire video displayed in vivid colors.
The contrast of the video reduces and the color reproducibility becomes low.
- User preset: Select it if you want to display video with settings chosen by you.
- When selecting a mode other than the preset mode, you can't set the shutter speed, AGC, SSDR, SSNR and color.
- Set the camera item for each image preset mode.
- Set the
.
- Off: Your camera will execute a specific image preset operation at all times.
- Only scheduled time: Your camera will execute a specific image preset operation for the time period set by you on each date.
- Click the [ ] button.
- Set the
and - When done, click [Apply].
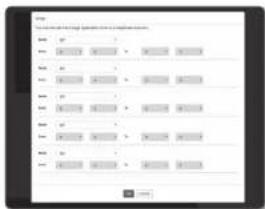
text_image
Data setting: 100% data set to configuration Type: 100% Type: 100% Type: 100% Type: 100% Type: 100% Type: 100% Type: 100% Type: 100% Type: 100% Type: 100% Type: 100% Type: 100% Type: 100% Type: 100% Type: 100% Type: OK CancelInitial setting for each image preset mode
| Image preset | Minimum shutter | Maximum shutter | Prefer shutter | AGC SSDR | SSNR 2D | SSNR 3D COLOR | ||
| Motion & Bright video | Default(1/5) | 1/12000 1/60(1/50) | Default(High) | Default (12) | Default (12) | Default (12) | Default (50) | |
| Motion 1/30 1/7 | 2000 1/200 | Default(High) | Default (12) | 4 | 4 | Default (50) | ||
| Noise reduction | 1/15 | 1/12000 | 1/60(1/50) | Middle | Default (12) | Default (12) | Default (12) | Default (50) |
| Bright video | Default(1/5) | 1/12000 1/60(1/50) | Default(High) | 18 | Default (12) | Default (12) | Default (50) | |
| Motion & Nose reduction | 1/30 | 1/12000 | 1/200 | Middle | Default (12) | 4 | 4 | Default (50) |
| High definition | 1/30 1/7 | 2000 1/200 | Default(High) | 18 | 4 | 4 | Default (50) | |
| Vivid video | Default(1/5) | 1/12000 1/60(1/50) | Default(High) | 18 | Default (12) | Default (12) | 90 | |
| User preset | Manual | Manual | Manual | Manual | Manual | Manual | Manual | Manual |
The preset setup functions as an aid to users to configure setup. If you don't want the preset function, deactivate it before use.
- If you change the image preset, only shutter/AGC/SSDR/SSNR/COLOR are reset to the default value for each model.
■ The "Camera Setting" value does not change between presets.
setup screen
To Set the Sensor
It specifies how many frames the camera CMOS sensor will capture per second.
- Select
. - Select
.
| Gene | GSK | MMP domain | Denmark | Signet |
| Target | gene | SNP | ||
| Name | 7.1% | ? | ||

- Refer to "Video profile" for the framerate setup range of the
To Set SSDR
In a scene where the difference between bright and dark is severe, you can increase the brightness of the dark area alone to regulate the overall brightness.
- Select
. - Set the SSDR use option to
. - Configure the
and settings as necessary.
• Level: Adjust the level of the dynamic range.
• D-Range : Select the amplitude area of the dynamic range.
| Sensor | USB | Memory address | Settings | Parameters |
| Signal | Source | USB | ||
| GND | 8.1 words | |||
| IAND | + | + | + | + |
| SIRAGE | Survey | |||
To Set White Balance
You can correct the image colors based on white under any lighting conditions.
- Select
- Select
.
• ATW : Corrects the colors of the camera video
automatically
- Manual: You can adjust the red and blue gains of the
camera video manually.
- Outdoor: Automatically corrects the video colors of the camera to be optimized to the outdoor environment.
- Indoor: Automatically corrects the video colors of the camera to be optimized to the indoor environment.
- AWC: Corrects the colors of the camera video to be optimized to the current lighting condition and screen mode.
To obtain the optimal condition for the current lighting, put the focus of the camera to a white paper and press the [Set] button. If the lighting environment is changed, you should readjust the settings accordingly.
| Source | OR | Other expense | Benefits | Expense |
| Benefit | Sum of | Total | ||
| Amount | 200 | 2,000 | ||
| Net gain | -1 | 3 | 5,000 | -1,000 |
| Net loss | -1 | 3 | 5,000 | -1,000 |

- In AWC mode, click the [Set] button if you want to keep the white balance level of the current image.

- The white balancing may not work properly in the following conditions:
If this is the case, switch to AWC mode
-If the surrounding condition of the object is out of the temperature correction range
ext Clear sky, sunset
-If the surrounding of the object is dark
-If the focus of the camera directly faces the fluorescent lighting or if the camera is installed in a place of variable illumination, the white balancing operation may be unstable.
To Set BLC
You can specify a desired area on the video manually and set the area to be displayed more clearly.
- Select
. - Set
to . - Set
You can change the level to adjust the brightness of the monitoring area. - Set the
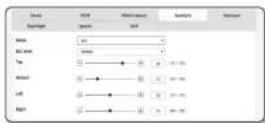

- When setting BLC, a green box is displayed on the screen for 15 seconds.
- To prevent malfunction at the time of BLC setup, the vertical space of the BLC area should be over 40 and below 60 while the horizontal space over 30 and below 60.
HLC (Highlight Compensation) Setup
If a strong light like a streetlamp or vehicle headlight points toward the camera, the area can be set to be cut off to prevent a saturated area on the monitor.
1. Select
-
Set
to -
HLC level: This adjusts the brightness level to cut off the highlighted area.
-
Mask
-
Off: Does not block an area with a brightness that is a certain level or higher.
On: Always blocks an area with a brightness that is a certain level or higher.
- Night only: No blocked area is generated if the surrounding environment becomes dark to a certain level.
- All day: No blocked area is generated if the surrounding environment becomes dark or bright to a certain level.
- Mask color: You can select the color of the blocked area.
Mask tone: You can adjust the brightness of the color in the blocked area.
Dimming: Detects an area on the screen with strong light, and adjusts the brightness and reduces the saturated area.
3. Set the levels to specify the target area.

- When setting HLC, a green box is displayed on the screen for 15 seconds.
- To prevent malfunction at the time of HLC setup, the vertical space of the HLC area should be over 40 and below 60 while the horizontal space over 30 and below 60.

- At night operation, this function will be activated only if the incoming highlight exceeds a certain area in a low contrast environment.
- At night operation, HLC will not function in too a bright or too a dark scene.
■ During daytime operation. HLC will not work in dark condition.
To Set WDR
It displays a sharp image of the objects in a scene where both bright and dark areas exist.
- Select
. - Set
to . - Select each item and set it properly.
- WDR level: Adjusts the intensity of backlight compensation.
- Auto: Detects the surrounding environment and automatically uses backlight compensation.
- Turn off in low light: Does not use automatic backlight compensation when detecting a dark environment.
- Turn off in B/W: Does not use backlight compensation when switching to B/W mode.
It is recommended to use WDR in the indoor environment.
- Noise may exist between the dark area and the bright area. In the WDR mode,
- With WDR mode On or Off, the minimum, maximum and user-preferred shutter value will be reset.
■ If you use the Paperbure lens manually or a shaking preventive shutter, the WDR performance is partially limited. - In WDR mode, noise may occur in the motion area.
To Set Exposure
You can adjust the exposure level of the camera.
- Select
. - Select each item and set it properly.
- Brightness: Adjust the screen brightness.
• Minimum shutter : The limit of the longest exposure time.
- Shutter is the mode to set up the range of the sensor exposure time which will specify the upper and lower limits for the electronic shutter movement
- The framerate may be reduced in the dark condition if Shutter has a lower value than specified in the Sensor mode.
• Maximum shutter: The limit of the shortest exposure time.
- Prefer shutter: Sets an appropriate exposure duration that is preferentially applied within the exposure duration range.
- Anti flicker: It prevents screen flickering incurring from the dissonance between the surrounding lighting and the frequency.
• SSNR
- On: Noise of the video is removed.
- Wise NR: Automatically adjusts the nose reduction level when there is a moving object in the video to increase the identifiability.
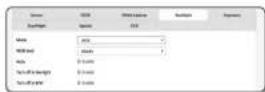
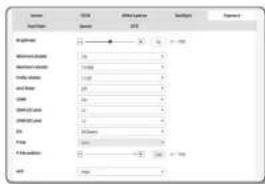
• SSNR 2D Level: Adjusts the 2DNR level.
- 2DNR: This is a method of reducing the noise by using the adjacent pixel information on a single video frame.
If you increase the level, the noise will be reduced but the video may be blurred.
• SSNR 3D Level: Adjusts the 3DNR level.
- 3DNR: This is a method of reducing the noise by using multiple video frames.
If you increase the level, the noise will be reduced but the video may drag.
- Iris: Selects whether to use the camera lens manually or automatically.
- DC(Auto): The aperture is automatically adjusted according to the intensity of light in the surrounding environment.
- P-Iris: This is the depth priority mode. You can close the shutter during the day to get good depths and in the nighttime, you can open the shutter to get more lights.
XNB-6000: Supports M13VP288IR, SLA_M2690PN, SLA_M3180PN, M13VP850IR, M118VP413IRCS, and SL410P.
XNB-8000: Supports M118VP413IRCS and SL410P.
• P-Iris : Set up P-Iris.
- Auto: The iris is automatically adjusted to the amount of the surrounding light.
- Manual: Sets the iris manually to the desired position.
• P-Iris position : Set up the P-Iris position.
• AGC : Select AGC Control mode.
Adjust the gain value of the video (that, in particular, was recorded at a low contrast scene and had a lower brightness level than normal) to control the video brightness.
The image exposure can be saturated depending on the Shutter setup range.
- It may take some time from the point when you enable the WiseKR mode to the point when the effect is actually applied released.
- When the WiseNR mode is enabled, the identifiability of the video will be improved. but the noise may be increased as well.
- In a bright environment with less noise, WiseVR may not be so effective.
- 'With intelligent MR enabled, the motion detection in the video will be performed according to the operation conditions of the motion detection event, as motion detection uses the motion detection function internally. For more information, please refer to "Motion detection" (page 48).
setup screen
To Set Day/Night
- Select
. - Select each item and set it properly.
- Mode : Mode is used to adjust the color of Color or Black and White.
- Color : The video is always output in color.
- B/W : The video is always output in black and white.
- Auto: Normally, it is set to Color but to B&W under low luminance at night.
- If ASC of the
menu is set to . the day/night mode cannot be set to . - External: It controls the color of the video when the alarm input terminal is synchronized with an external device.
- Schedule : Set the time during which the camera is operated in the color mode.
- Dwell Time: It specifies the period for which the selected brightness condition must be maintained to switch the lighting mode from Day to Night or vice versa.
• Duration : It specifies the interval of lighting mode conversion. - Alarm in: The video is set to Color or B/W as the alarm sensor is open or closed.
- If the Day/Night mode is set to External Input, the alarm input function of the Event-Alarm Input page is disabled.
- Simple focus after D/N: The video is automatically focused after the lighting mode changes from Day to Night or vice versa.
- Activation time(Color): It specifies the schedule for color mode operation.
- If it is set, the Color mode is maintained from 00 second of the starting time to 59 second of the ending time.
- When you switch to daylight mode, motion detection mode does not work.
To Setup Special
- Select
. - Select each item and set it properly.
- DIS : Compensates the image automatically when it is seen to shake for stable image output.

Mitigate the degree of image vibration when the camera vibrates due to the external factors such as wind.
- Sharpness: Adjust the overall sharpness of the image. If selecting
- Sharpness level: The higher the level is, the sharper and clearer the outline of the image becomes.
• Gamma : Adjust the contrast of the image. - Contrast: Adjusts the difference between the darkest area and the brightest area in the video.
• Color level : Adjust the strength of video color.
- Defog: Compensate the video in the foggy or cloudy weather.
It is set to
text_image
query name query query test testName testName System System Author Author of the data Author's database 1 query 2 query 3 query 4 query 5 query 6 query 7 query 8 query 9 query 10 query
text_image
Image 名称 大小 分辨率 分辨率 分辨率 Alpha1 color Auto RGB 100 7 Brightness 95 6 Standard Speed 0.25 0.25 0.25 Distance 0.25 0.25 0.25 Normal 0.25 0.25 0.25 Vertical 0.25 0.25 0.25 Depth 0.25 0.25 0.25 Weightedness 0.25 0.25 0.25 Size 100 7 Size value: 100 Size value: 100 Size value: 100
text_image
Image 名称 大小 分辨率 分辨率 分辨率 Alpha1 color Auto RGB 100 7 Brightness 95 6 Standard Speed 0.25 0.25 0.25 Distance 0.25 0.25 0.25 Normal 0.25 0.25 0.25 Dimenial 0.25 0.25 0.25 Balance 0.25 0.25 0.25 Weightedness 0.25 0.25 0.25 Angle 100 7 Angle Rate 0.25 0.25 0.25 ISO 100 7 ISO Level 0.25 0.25 0.25- Off: Disable the fog elimination function.
- Auto: The image is automatically compensated according to the loggy level. Adjust
to be more effective. - Manual: The user manually sets the amount of compensation for each image.
- If the defog mode is set to
- If the manual defog level is high in a thin fog, the image may become too dark.
• Delog level : Control the delog level.
- LDC: To determine whether or not to use the image distortion correction.
• LDC Level: To adjust the level of the distortion correction factor.
To Set OSD
-
Select
. -
Select each item and set it properly.
-
Camera title: It specifies the name of the camera to be displayed on the screen.
Select the - Add : Click the
button and you can add a total of 5 lines, 15 characters per line and a total of 60 characters. -
Preview : Click the
button to check the name of camera that will be displayed on the screen. -
Camera title X, Y: it specifies the position of the camera name on the screen.
- Date & time : Set the time display and date formats on the screen.
- Date & Time X, Y: Specify the position of time display on the screen.
- Weekday overlay: Specify the use of date display date on the screen.
• Size : Sets the size of OSD to small/medium/large.
• Color : Sets the color of the OSD to white/red/blue/green/black/gray. - Transparency: Sets the transparency of DSD to opaque / low / middle / high.
A position-adjustable item (Camera title, Date & Time) may not be displayed normally if it overlaps with another fixed OSD item.
■ Multilingual other than English: Input only in the selected language is available.
Smart codec
Set a desired area of the video incoming from the camera as ROI area and specify the detection sensitivity for the area.
- From the Setup menu, select the
- Click
. - Set the image quality.
The ROI area will be displayed in the specified quality. - Specify an area of interest to monitor manually.
- Select a desired area with the mouse pointer, and drag it as much as you want.
- You can specify up to 5 distinct areas.
- To cancel all the settings for the area, click the [Clear] button.
- When done, click [Apply].
text_image
Smart filter Smart filter name: 1.0000 2.0000 3.0000 4.0000 5.0000 6.0000 7.0000 8.0000 9.0000 10.0000 11.0000 12.0000 13.0000 14.0000 15.0000 16.0000 17.0000 18.0000 19.0000 20.0000 21.0000 22.0000 23.0000 24.0000 25.0000 26.0000 27.0000 28.0000 29.0000 30.0000 31.0000 32.0000 33.0000 34.0000 35.0000 36.0000 37.0000 38.0000 39.0000 40.0000 41.0000 42.0000 43.0000 44.0000 45.0000 46.0000 47.0000 48.0000 49.0000 50.0000 51.0000 52.0000 53.0000 54.0000 55.0000 56.0000 57.0000 58.0000 59.0000 60.0000 61.0000 62.0000 63.0000 64.0000 65.0000 66.0000 67. 68 69 78 79 88 89 98 99 1 1 1 1 1 1 1 1 1 1 1 1 1 1 1 1 1 1 1 1 1 1 1 1 1 1 1 1 1 1 1 1 1 1 1 1 1 1 1 1 1 1 1 1 1 1 1 1 1 1 2 2 2 2 2 2 2 2 2 2 2 2 2 2 2 2 2 2 2 2 2 2 2 2 2 2 2 2 2 2 2 2 2 2 2 2 2 2 2 2 2 2 2 2 2 2 2 2 2 2 3The Smart codec will not be active if it is set to
Focus setup
You can adjust the focus and zoom ratio of video image.
- From the Setup menu, select the
- Click
. - Set the focus according to the following procedures.
1) Reset : Click the [Reset] button to return focus to the default flange back position.
2) Focus (lens adjustment): Adjusts the lens focus (Far←Near) and sharpens the image.
3) Simple focus: Drags the mouse on the screen to designate a position on which to set the auto focus. Press the [ ] button to automatically focus the video.
- Quick Focus mode: Adjusts the focus quickly.
The Simple focus mode may not fit correctly in the following cases:
-Sudden change to the object in Simple focus mode (sudden movement, appearance or disappearance)
-Radical change to the brightness in Simple locus mode
-Image of a low contrast
-If the camera is exposed to a strong light source in the front or surroundings
- In case the focus is inappropriate apart from mentioned above. use [ - , + , + , - , + , - ] button to manually adjust the focus.
- In a situation where Simple focus is hardly applied, try to use the manual focus mode.
WiseStream
This is the feature that optimizes the size of the video data by reducing the bit rate through increasing the compression of the parts where there is no movement after detecting the complexity in the image.
- From the Setup menu, select the
- Click
. -
Select wise stream mode.
-
Off : Wise Stream function will be disabled.
-
Low - High : use the wise stream to select the bit rate reduction level.
-
When done, click [Apply].
In the following cases, the WiseStream function may malfunction.
-Sudden screen switch may cause distortion of the video.
- it is not appropriate to use in an environment with too much movement and motion on the screen.
NETWORK SETUP
DDNS
DDNS is an abbreviation of Dynamic Domain Name Service that converts the IP address of a camera into a general Host Name so that the user can easily remember it.
- You can use the DDNS service only if the internet is connected.
- From the Setup menu, select the
tab. - Click
- Select the
connection type. - Type in the DDNS items according to the selected type.
- Wisenet DDNS : Select this if you use the DDNS server provided by Henwha Techwin,
- Product ID : Enter the product ID that is registered with the Wisenet DDNS service.
- Quick connect: It sets port forwarding automatically when used with a UPnP (Universal Plug and Play) supporting router.
text_image
DATA 0.0000 1.0000 2.0000 3.0000 4.0000 5.0000 6.0000 7.0000 8.0000 9.0000 10.0000 11.0000 12.0000 13.0000 14.0000 15.0000 16.0000 17.0000 18.0000 19.0000 20.0000 21.0000 22.0000 23.0000 24.0000 25.0000 26.0000 27.0000 28.0000 29.0000 30.0000 31.0000 32.0000 33.0000 34.0000 35.0000 36.0000 37.0000 38.0000 39.0000 40.0000 41.0000 42.0000 43.0000 44.0000 45.0000 46.0000 47.0000 48.0000 49.0000 50.0000 51.0000 52.0000 53.0000 54.0000 55.0000 56.0000 57.0000 58.0000 59.0000 60.0000 61.0000 62.0000 63.0000 64. 65 66 67 68 69 75 76 77 78 79 85 86 87 88 89 95 96 97 98 99 125If you want to use the DDNS service without using a hub that supports the UHP function, click Quick connect, then go to the hub menu and activates port forwarding for your hub. For more on how to set port forwarding for your hub, refer to "Port Range Forward (Port Mapping) Setup", page 194
- Public DDNS: Select one of provided public DDNS servers when you use a public DDNS server.
- Service : Select desired public DDNS service server.
- Host name : Enter the name of the host that is registered with the DDNS server.
- User name : Enter the user name for the DDNS service.
-
Password : Enter the password for the DDNS service.
-
When done, click [Apply].
- If selected
Registering with DDNS
To register your product with the Wisenet DDNS
- Visit the Wisenet DDNS web site (http://ddns.hanwha-security.com) and sign in with a registered account.
- From the top menu bar, select
. - Click the [Register Product] tab.
- Enter the product ID.
- Select a
and specify the . - Specify the product location with a description if necessary.
- Click [Product Registration].
The product will be added to the product list that you can check.
text_image
Sign Up Standard Registration or Validation Service Registered Information Signature: Department: Department of the Department of the Department of the Department of the Department of the Department of the Department of the Department of the Department of the Department of the Department of the Department of the Department of the Department of the Department of the Department of the Department of the Department of the Department of the Department of the Department of the Department of the Department of the Department of the Department of the Department of the Department of the Department of the Department of the Department of the Department of the Department of the Department of the Department of the Department OF THE DEPARTMENT OF THE DEPARTMENT OF THE DEPARTMENT OF THE DEPARTMENT OF THE DEPARTMENT OF THE DEPARTMENT OF THE DEPARTMENT OF THE DEPARTMENT OF THE DEPARTMENT OF THE DEPARTMENT OF THE DEPARTMENT OF THE DEPARTMENT OF THE DEPARTMENT OF THE DEPARTMENT OF THE DEPARTMENT OF THE DEPARTMENT OF THE DEPARTMENT OF THE DEPARTMENT OF THE DEPARTMENT OF THE DEPARTMENT OF THE DEPARTMENT OF THE DEPARTMENT OF THE DEPARTMENT OF THE DEPARTMENT OF THE DEPARTMENT OF THE DEPARTNERS OF THE DEPARTNERS OF THE DEPARTNERS OF THE DEPARTNERS OF THE DEPARTNERS OF THE DEPARTNERS OF THE DEPARTNERS OF THE DEPARTNERS OF THE DEPARTNERS OF THE DEPARTNERS OF THE DEPARTNERS OF THE DEPARTNERS OF THE DEPARTNERS OF THE DEPARTNERS OF THE DEPARTNERS OF THE DEPARTNERS OF THE DEPARTNERS OF THE DEARTNERS OF THE DEARTNERS OF THE DEARTNERS OF THE DEARTNERS OF THE DEARTNERS OF THE DEARTNERS OF THE DEARTNERS OF THE DEARTNERS OF THE DEARTNERS OF THE DEARTNERS OF THE DEARTNERS OF THE DEARTNERS OF THE DEARTNERS OF THE DEARTNERS OF THE DEARTNERS OF THE DEARTNERS OF THE DEARTNERS OF THIS
text_image
Register Product C:\Users\Software\Product\Design\Software\Product\Design\Product\Product\Design\Product\Design\Product\Design\Product\Design\Product\Design\Product\Design\Product\Design\Product\Design\Product\Design\Product\Design\Product\Design\Product\Design\Product\Design\Product\Design\Product\Design\Product\Design\Product\Design\Product\Design\Product\Design\Product\Design\Product\Design\Product\Design\Product\Design\Product\Design\Product\Design\Product\Service Copyright: 100% Copyright: 100% Copyright: 100% Copyright: 100% Copyright: 100% Copyright: 100% Copyright: 100% Copyright: 100% Copyright: 100% Copyright: 100% Copyright: 100% Copyright: 100% Copyright: 100% Copyright: 100% Copyright: 100% Copyright: Copyright: Copyright: Copyright: Copyright: Copyright: Copyright: Copyright: Copyright: Copyright: Copyright: Copyright: Copyright: Copyright: Copyright: Copyright: Copyright: Copyright: Copyright: Copyright: Copyright: Copyright: Copyright: Copyright: Copyright: Copyright: Copyright: Copyright: Copyright: Copyright: Copyright: Copyright: Copyright: Copyright: Copyright: Copyright: Copyright: Copyright: Copyright: Copyright: Copyright: Copyright: Copyright: Copyright: Copyright: Copyright: Copyright: Copyright: Copyright: Copyright: Copyright:
text_image
M1005 Name: M1005 Address: M1005 Email: M1005 Website: M1005 Name: M1005 Address: M1005 Email: M1005 Website: M1005To connect to the Wisenet DDNS in camera setup
- From the DDNS setup page, set
to . - Provide the
that you registered product ID with the DDNS site. - Click [Apply]. When the connection is successfully made, you will see the message of <(Success)> on the screen.
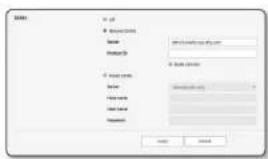
text_image
2001 ID: 03 B: Selected Data Source: Microsoft Microsoft Excel C:\Users\My Documents\My Documents\My Documents\My Documents\My Documents\My Documents\My Documents\My Documents\My Documents\My Documents\My Documents\My Documents\My Documents\My Documents\My Documents\My Documents\My Documents\My Documents\My Documents\My Documents\My Documents\My Documents\My Documents\My Documents\My Documents\My Documents\My Documents\My Documents\My Documents\My Documents\My Documents\My Documents\My Documents\My Documents\nName HelpConfiguring public DDNS in Camera Settings
- Open the DDNS settings page and select
for . - Enter the corresponding site's host name, user name and password.
- Click [Apply] button. If the connection properly establishes, <(Success)> appears.
- When done, click [Apply].

- To use DDNS service properly, both DDNS setup and the router's port forwarding setup are required. For port forwarding setup, refer to "Port Range Forward (Port Mapping) Setup". (page 19)
IP filtering
You can create a list of IPs that you want to grant or deny access to them.
- From the Setup menu, select the
tab. - Click
. - Select
.
- Deny registered IP: If selecting this, access from those IPs that are added to the filtering will be restricted.
- Allow registered IP: If selecting this, access from only those IPs that are added to the filtering will be accepted.
- Click the [Add] button.
The IP list will be created.
- Provide the IP that you want to grant or deny access from.
When you enter an IP address and a Prefix, the list of IP addresses available will appear in the right-side filter range column.
If selected
-
Select an IP to delete from the list. Click the [Delete] button.
-
When done, click [Apply].
HTTPS
You can select a secure connection system or install the public certificate for this purpose.
- From the Setup menu, select the
- Click
- Select a secure connection system.
- To access the camera using HTTPS mode, you have to type the IP address for the camera in the form of "https://
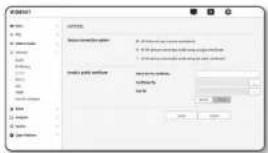
text_image
MODEL1 COMMENTS Model selection system 0.1 (model name: model1) 0.2 (model name: model2) 0.3 (model name: model3) Model and settings Model type: Model1 Model2 Model3 Model4 Model5 Model6 Model7 Model8 Model9 Model10 Model11 Model12 Model13 Model14 Model15 Model16 Model17 Model18 Model19 Model20 Model21 Model22 Model23 Model24 Model25 Model26 Model27 Model28 Model29 Model30 Model31 Model32 Model33 Model34 Model35 Model36 Model37 Model38 Model39 Model40 Model41 Model42 Model43 Model44 Model45 Model46 Model47 Model48 Model49 Model50 Model51 Model52 Model53 Model54 Model55 Model56 Model57 Model58 Model59 Model60 Model61 Model62 Model63 Model64 Model65 Model66 Model67 Model68 Model69 Model70 Model71 Model72 Model73 Model74 Model75 Model76 Model77 Model78 Model79 Model80- Search for the public certificate that you want to install on the camera.
To install the certificate on the camera, you need to provide a certificate name (it can be arbitrarily assigned by the user), certificate file issued from the certification authority and a key file.
- The
- When done, click [Apply].
Installing the certificate
- Enter the certificate name.
- Click the 'Browse ( )' button, select the public certificate file and key file to be installed, and then click the [Install] button.
Deleting the certificate
- Click [Delete] button.
- To delete a public certificate, you should access the network video decoder in the mode of
or .
setup screen
802.1x
When connecting network, you can choose whether using 802.1x protocol, and then install the certification.
- From the Setup menu, select the
tab. - Click <802.1x>.
- Set the
- IEEE 802.1x : Specify the use of the 802.1x protocol.
• EAP type : Select EAP-TLS or LEAP.
• EAPOL version : Select version 1 or 2.
- ID: Enter the client certificate ID in EAP-TLS and the user ID in LEAP.
- Password: Enter the client private key password in EAP-TLS and the user password in LEAP. You do not have to enter the password in EAP-TLS if it uses a key file that is not encrypted.
- If the connected network device does not support the 802.1x protocol, the protocol will not operate properly even if you set it.
LEAP is an authentication method with poor security. Use it only in an environment where EAP-TLS is not available.
- Install/remove the certificate.
The certificate is needed only for EAP-TLS.
- CA certificates: Select a public certificate that contains the public key.
- Client certificate: Select a public certificate that contains the client certificate key.
-
Client private Key: Select a public certificate that contains the client private key.
-
When done, click [Apply].
To install/remove 802.1x related certificates
- Press the [Browse ( - )] button for each item and select a certificate to install.
- If no certificate is installed, you will see "Not Available" appearing next to the selected item.
- Press the [Install] button to start installation with a message of "Installed" next to the item.
- Press the [Delete] button to remove the certificate.
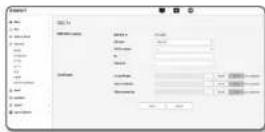
QoS
You can specify the priority to secure a stable transfer rate for a specific IP.
- From the Setup menu, select the
tab. - Click
- Click the [Add] button.
The IP list will be created.
- Enter an IP address to which you will apply QoS.
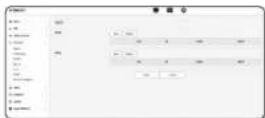

The default prefix for Pv4 is 32; For DSCP, the default is set to 83
Only the IP addresses that are set to
- Select an IP to delete from the list.
Click the [Delete] button. - When done, click [Apply].
SNMP
With the SNMP protocols, the system or network admin can monitor the network devices on a remote site, and configure the environment settings.
- From the Setup menu, select the
tab. - Click
. -
Specify the
. -
Enable SNMP v1 : SNMP version 1 will be active.
- Enable SNMP v2c : SNMP version 2 will be active.
- Read community : Provide the name of the read community where you can access to the SNMP information.
The default name is
Write community : Provide the name of the write community where you can access to the SNMP information. The default name is
- Enable SNMP v3: SNMP version 3 will be active.
-
Password : Specify the default password for SNMP version 3.
-
The default password can be exposed to a hacking thread so it is recommended to change the password after installing the product.
Note that the security and other related issues caused by the unchanged password shall be responsible for the user.
■ Password should be longer than B characters, no more than 16 characters.
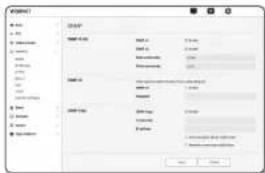
text_image
ADD Add Delete Add/Delete Add/Delete Add/Delete Add/Delete Add/Delete Add/Delete Add/Delete Add/Delete Add/Delete Add/Delete Add/Delete Add/Delete Add/Delete Add/Delete Add/Delete Add/Delete Add/Delete Add/Delete Add/Delete Add/Delete Add/Delete Add/Delete Add/Delete Add/Delete Add/Delete Add / Add / Add / Delete / Delete / Delete / Delete / Delete / Delete / Delete / Delete / Delete / Delete / Delete / Delete / Delete / Delete / Delete / Delete / Delete / Delete / Delete / Delete / Delete / Delete / Delete / Delete / Delete / Delete / Delete / Delete / Delete / Delete / Delete / Delete / Delete / Delete / Delete / Delete / Delete / Delete / Delete / Delete / Delete / Delete / Delete / Delete / Delete / Delete / Delete / Delete / Delete / Delete / OK Cancel- Enable SNMP Trap: SNMP trap is used to send important events and conditions to the Admin. - Community: Enter the trap community name to receive messages.
- IP address: Enter the IP address to which messages will be sent.
- Authentication failure notification: It specifies whether an event shall be generated when the community information is invalid.
- Network connection notification : it specifies whether an event shall be generated when the network disconnection is restored.
- When done, click [Apply].

- SNMP v3 is only able to be set when the secure connection mode is HTTPS. Refer to "HTTPS". (page 41)
- If you don't use SNMP √3, there may be a security issue.
Auto IP configure
You can set the IP available for access and camera searching automatically.
-
From the Setup menu, select the
tab. -
Click
. -
Set the
.
An additional IP address may be assigned to assess the camera from the Link-Local network.
- Auto configure : It specifies Able or Disable for the Link-Local IPv4 address.
• IP address : Display the assigned IP address.
- Subnet mask: Display the subnet mask of the assigned IP.
- Set the
Cameras can be automatically searched in the client and operating system in support of the UPnP protocol.
- UPnP discovery : It specifies Able or Disable for UPnP Discovery.
- Friendly name: Display the camera name.
Friendly name is displayed in the format of WISENET-

- In the Windows operating system which basically supports UPnP, the cameras connected to the network are displayed.
- Set the
.
Cameras can be automatically searched in the client and operating system in support of the Bonjour protocol.
- Friendly name: Display the camera name.
Friendly name is displayed in the format of WISENET

- In the Mac operating system, which support Bonjour by default, the connected cameras are automatically displayed in the Bonjour bookmark of the Safari web browser.
If the Bonjour bookmark is not displayed, check Bookmarks Setup in the "Preference" menu.
- When done, click [Apply].
EVENT SETUP
Event setup
You can easily set the event detection items, and move to the detailed setting.
- From the Setup menu, select the
tab. - Click Event setup>.
- Activate desired items on the Event list.
- When done, click [Apply].

- To configure detailed event settings, click a desired type. You will be redirected to the detailed settings.
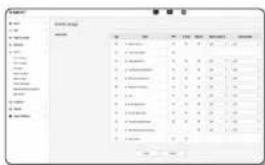
text_image
Scanned document with Chinese text, tables, and a grid of numerical dataFTP / E-mail
You can configure the FTP/E-mail server settings so that you can transfer the images taken with camera to your PC if an event occurs.
- From the Setup menu, select the
tab. - Click
- Select
or and enter / select a desired value.
- FTP configuration
- Server address : Enter the IP address of the FTP server that you transfer the alarm or event images to.
- ID : Enter the user ID with which you will log in to the FTP server.
- Password : Enter the user account password for logging into the FTP server.
- Upload directory: Specify the FTP path where you will transfer the alarm or event images.
- Port: The default port of the FTP server is 21; however, you can use a different port number according to the FTP server settings.
- Passive mode : Select
If you need to connect in passive mode due to the firewall or the FTP server settings.
setup screen
• E-mail configuration
- Server address : Enter the SMTP address of the email server that you transfer the alarm or event images to.
- Authentication : Select whether to use authorization.
- TLS : Specify the use of TLS.
- ID : Enter the user ID for logging into the email server.
- Password : Enter the user account password for logging into the email server.
- Port: The default port of the email server is 25; however, you can use a different port number according to the email server settings.
- Recipient : Enter the address of the email recipient.
- Sender : Enter the address of the email sender. If the sender address is incorrect, the email from the sender may be classified as SPAM by the email server and thus may not be sent.
- Subject : Enter a subject for your email.
- Body : Provide the text for the massage. Attach the alarm or event images to the email that you are preparing.
- When done, click [Apply].
Storage
You can activate recording on your device, set the recording conditions, check the saved data capacity and format the device itself.
- From the Setup menu, select the
tab. - Click
. - Select a device to save data in.

- If your device is properly recording data, it will display "Recording"
- if you see an "Error" message, check the following:
- Check the storage to see if it is connected to the device.
- Check the files in the storage to see if they are damaged.
- Check the storage to see if they are physically damaged.
- If the "Error" message does not disappear after following the instructions. format: the Micro SD card. After formatting, if the error message still remains, replace the Micro SD card.
- if you remove the Micro SD card without changing a button to 'off' position in settings or if you connect a camera to an unstable power source, the Micro SD card may be damaged.
- The number of simultaneously accessible new profiles after the recording mode is activated is 2
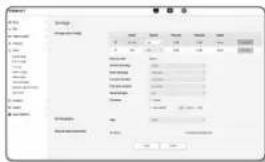
To make recording on the Micro SD memory
- Set the SD card unit to
. - Click the [Apply] button.
- Check the memory card's
and
You can format the Micro SD card by clicking the
■ Some frames may be skipped if the Micro SD memory card operates at the lower speed than recommended
For more details, refer to "Recommended Micro SD/SDHC/SDXC Memory Card Specifications", (Page 6)
- For a Micro SO memory card with a large capacity, the formatting will be slowed down accordingly.
- The data traffic will increase when the camera is set to higher resolution, higher bit rate, and/or higher framerate.
If there is too much data traffic, some frame may be skipped although it is stored in a full frame.
- When a frame skip occurs, images are saved at the rate of min. one image per sec.
-
Specify the storage action.
-
Record profile: The name of profile to be recorded is displayed.
• Normal recording : Make recording at a certain frame rate. - Event recording: Set the recording type for a certain event that occurs.
- Pre event duration: Specify the time point before the occurrence of the alarm; starting from the time point, the images will be transferred. You can specify up to 5 seconds before the occurrence of the alarm.
- Post event duration: Specify the time point after the occurrence of the alarm; to the specified time point, the images will be transferred. You can specify up to 120 seconds after the occurrence of the alarm.
- Record file type: It specifies the file format of the recorded images.
- STW: It is Hanwha Techwin's unique file format.
- AVI: It is the conventional avi format.

■ If the Record file type is changed, the existing data is formatted.
• Overwrite: If the Micro SD memory is full, this will delete old data and store new data in replacement.
- Auto delete : Data for a certain period is deleted, while other data is not deleted.
This can be set within the range of one day to 180 days.
- If the storage period is excited, data is automatically deleted and new data will be recorded. Once deleted, it cannot be recovered.
- Set
.
- Type : Camera supports VFAT and ext4 as an SD card file system, which can be configured by the user. (However, in case of ext4 file system, an additional application is required to recognize the Windows operating system)

■ If the settings are changed, the existing data will be formatted.
- It may take up to 10 minutes to format an SD card in the ext4 file system.
- Specify the
.
• Always: Always save recorded video in the Micro SD memory card.
- If set to Always, the activation time cannot be changed.
- Only scheduled time:Records only on the specified time of the specified day of week.
- When done, click [Apply].
If you want to record in your NAS
- Sel the saving operation and basic recording
- Auto deletion is supported only if your NAS meets the recommended specifications.
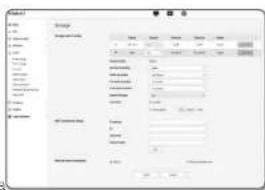
- Enter the information registered in your NAS.
• IP address : Unique IP address assigned to the NAS.
• ID: An ID registered in the NAS.
• Password : Password registered in the NAS.
- Default folder : Designate the NAS user folder to save data in.
- Click the [Test] button to see if you can successfully connect to the NAS.
- if the success message is displayed, it means that you can successfully save data in the NAS.
■ If the fail message is displayed, check the following.
-Confirm that the IP address of the NAS is valid.
-Confirm that the ID/password of the NAS is valid.
- Confirm that you can access the folder designated as the default folder using the ID of the NAS.
- Confirm that the NAS SMB/CIFS items are unchecked.
- Confirm that the NAS IP address and the camera IP address are in the same format.
exj The NAS & camera subnet mask initial value is 255.255.255.0.
If the IP address is 192.168.20.32 then the N/S IP address should be in the range of 192.168.20.1 - 192.168.20.255.
-Check whether you tried to access as another user without formatting the default folder saved or used.
-Confirm that you used recommended NAS equipment.
-
After the settings are completed, set the NAS unit to
. -
Click the [Apply] button.
-
Log in the NAS and check the
and .
You can format the default folder specified in the NAS connection setting by clicking the
- Since data may not be saved after a temporary network interruption when using NAS, it is recommended that you use SD at the same time to prevent loss of recorded images.
The data traffic will increase when the camera is set to higher resolution, higher bit rate, and/or higher framerate.
If there is too much data traffic, some frame may be skipped although it is stored in a full frame.
- When a frame skip occurs, images are saved at the rate of min. one image per sec.
NAS (Network Attached Storage) guide
Since data may not be saved after a temporary network interruption when using NAS, it is recommended that you use SD at the same time to prevent loss of recorded images.
- If the setting allows a Micro SD memory card and the NAS to be simultaneously connected for use, the higher priority for recording goes to the NAS.
If you activate Overwrite to the NAS by setting it to
- If you are saving data in the NAS, you might be unable to save it when you insert a Micro SD memory card used by another camera.
■ NAS recommended specs : Refer to "NAS recommended specs". (Page 6)
- If you change the NAS saving while saving data in the NAS, it will not be reflected in the system immediately.
- If you remove NAS equipment on your own while saving data, or if the network is disconnected, NAS saving operation will be terminated abnormally
- NAS saving allows only one camera to a folder. Logging in with another camera is not allowed, and the images will not be saved.
The following is a description of how to save data using the NAS according to the Synology NAS method, which is one of the recommended products.
- Access the Synology NAS as an admin. In this example, the NAS IP Address is set to [192.168.20.253].
text_image
DiskStation Remember me- If you access it as an admin, the following screen will be displayed. Click the [Control Panel].
text_image
Screenshot of a desktop application interface with icons and text labels, likely from an older software application.- Click the
in the file sharing and privilege menu.
text_image
Screenshot of a software interface showing a grid of icons representing different applications or functions, likely from an older application.setup screen
- Click the [Create] button.
- After entering the shared folder name(ID), click the [OK] button to create a shared folder. In this example, the shared folder name is [testDirectory].
- After entering the shared folder name(ID), click the [OK] button to create a shared folder. In this example, the shared folder name is [testDirectory].
text_image
File or the following fields: Name: (AddDirectory) Description: □ Help this shared folder in "My Network Files" □ Enable recipients □ Load file size in embedded and write □ Help folder and list from years without permissions □ Export the shared folder Contents list: Delete key: □ Make successfully on site:- In Windows, for NAS access, set the privilege for the shared folder as follows. Check the admin's [Read/Write].
- Click on the
in the file sharing and privilege menu.
text_image
Screenshot of a software interface showing a grid of categorized icons and labels, likely representing system status or settings.- After clicking the [Create] button, enter name(ID) and password. In this example, name(ID) is set to [testID] and password is also set to [testID].
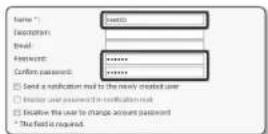
- In Windows, set the privilege for NAS access. For the shared folder created in step 4 called "testDirectory" check [Read/Write].
text_image
Add Options - Add Options Add Options to the following: OK Cancel Help Help Add Options Add Options to the following: OK Cancel Help- Basic setting in the NAS is completed. Connect your camera to the actual NAS. As shown below, enter the NAS connection setting items.
- After entering item 10, check
. - Click the [Apply] button. Finish saving by using the NAS.
Alarm output
- From the Setup menu, select the <Event ( ) tab.
- Click
. - Configure the camera alarm output settings.
- If you change the alarm output type, the alarm out button on the monitoring page and alarm output type displayed on Event Setup page will be changed accordingly.
- Type
- N.O. (Normal Open): Considers "Open circuit" status of the sensor or alarm input device as normal, and triggers alarm event if becomes "Closed circuit" status.
- N.C. (Normal Close): Considers "Closed circuit" status of the sensor or alarm input device as normal, and triggers alarm event if becomes "Open circuit" status.
• Mode : Sets the alarm output method.
- There is difference between operations when clicked alarm output button while disabled.
- Pulse: It is activated during the time period specified by the duration (switching interval) and then becomes inactive automatically.
-
Active/Inactive : It maintains as activated until the user clicks the button again to make it inactive.
Duration: Set the alarm duration that maintains activated if the mode is set to pulse, from 1 to 15 seconds. -
When done, click [Apply].
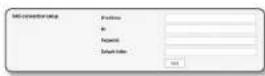
text_image
File Name Edit Edit Mode Edit Date Edit Time Edit Address Edit Address Edit Address Edit Address Edit Address Edit Address Edit Address Edit Address Edit Address Edit Address Edit Address Edit Address Edit Address Edit Address Edit Address Edit Address Edit Address Edit Address Edit Address Edit Address Edit Address Edit Address Edit Address Edit Address Edit Address Edit Address Edit Address Edit Address Edit Address Edit Address Edit Address Edit Address Edit Address Edit AddressAlarm input
You can set the alarm input type, activation time, and operation mode.
- From the Setup menu, select the
tab. - Click
- Set whether or not to
. -
Select the type.
-
N.O. (Normal Open): it is normally open, but if it is closed, an alarm will be triggered.
• N.C. (Normal Close): It is normally closed, but if it is open, an alarm will be triggered. -
Specify the
. -
Always: Always check if an alarm occurs. It activates in operated mode when the alarm occurs.
- If set to
, the activation time cannot be changed.
- Only scheduled time: Check if an alarm occurs at a specified day of the week for a specified time period. It activates in operated mode when the alarm occurs.
- [1mm 30mm 1h]: Sets the time display format on the vertical axis.
- [Reset] : Reset all settings.
-
Specify an operation that will perform if an alarm occurs.
-
FTP : Specify the use of FTP transfer in the alarm input setup.
- Refer to "FTP / E-mail" for more details. (page 43)
- E-mail: Specify the use of email transfer in the alarm input setup.
- Refer to "FTP / E-mail" for more details. (page 43)
- Record: You can set up the alarm to record to a Micro SD card or an NAS when operating.
- Set
to in . (page 44) - Alarm output1: Select whether to set the alarm output if an alarm is incoming, and specify the alarm output time.
- Goto preset: Moves to the specified preset location when setting the alarm input.
-
Only if the camera panel will receiver is installed. Goto preset is available.
-
When done, click [Apply].
text_image
Scanned document with Chinese text fields and a table, likely a form or form interfaceTime schedule
You can configure settings to transmit images at regular intervals at a scheduled operation time regardless of the occurrence of an event.
- From the Setup menu, select the
tab. - Click
- Set whether or not to
. - Specify the
. -
Specify the
. -
Always: Always activates in operated mode at the set interval.
- Only scheduled time : Periodically activates in operated mode at a specified time and date.
The transfer interval setting value must be smaller than the preset activation interval to succeed in image transmission.
- Specify the activation conditions.
- FTP : Specify the use of the FTP transfer if an event occurs.
- Refer to "FTP / E-mail" for more details. (page 43)
- When done, click [Apply].
text_image
TOMATO Name: 100000 File name: 100000 File size: 50000 File type: 100000 File path: 100000 File size: 50000 File path: 100000 File path: 150000 File path: 200000 File path: 250000 File path: 300000 File path: 350000 File path: 400000 File path: 450000 File path: 500000 File path: 550000 File path: 600000 File path: 650000 File path: 700000 File path: 750000 File path: 800000 File path: 850000 File path: 900000 File path: 950000 File path: 100000Network disconnection
When the network is physically disconnected, it is considered as an event to be saved.
- From the Setup menu, select the
tab. - Click
. - Set whether or not to
. - Configure the event motion schedule and event motion conditions.
- For more information about
- When done, click [Apply].
text_image
Network configuration Network name: www.nanlab.com Access status: 0.01-0.02 Access status: 0.01-0.02 Connection type: 0.01-0.02 Connection status: 0.01-0.02 Connection type: 0.01-0.02 Connection status: 0.01-0.02 Connection type: 0.01-0.02 Connection status: 0.01-0.02 Connection type: 0.01-0.02 Connection status: 0.01-0.02 Connection type: Connection status: Connection type: Connection status: Connection type: Connection status: Connection type: Connection status: Connection type: Connection status: Connection type: Connection status: Connection type: Connection status: Connection type: Connection status: Connection type: Connection status: Connection type: Connection status: Connection type: Connection status: Connection type: Connection status: Connection type: Connection status: Connection type: Connection status: Connection type: Connection status: Connection type: Connection status: Connection type: Connection status: Connection type: Intersection Intersection Intersection Intersection Intersection Intersection Intersection Intersection Intersection Intersection Intersection Intersection Intersection Intersection Intersection Intersection Intersection Intersection Intersection Intersection Intersection Intersection Intersection Intersection Intersection Intersection Intersection Intersection Intersection Intersection Intersection Intersection Intersection Intersection Intersection Intersection Intersection Intersection Intersection Intersection Intersection Intersection Intersection Intersection Intersection Intersection Intersection Intersection Intersection Intersection IntersectionApp event
You can set the system to generate signals for the events defined on the application. The event signals provided vary depending on the application function.
- From the Setup menu, select the
- Click
. - Set whether or not to
. - Configure the event motion schedule and event motion conditions.
- For more information about
- When done, click [Apply].
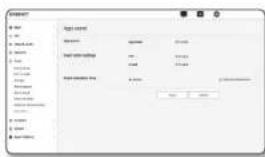
text_image
Screenshot of a software interface showing a list of items with corresponding values and buttons, likely from an older software development or configuration tool.CONFIGURE ANALYSIS SETTINGS
Motion detection
You can configure settings to generate an event signal when a motion is detected.
- From the Setup menu, select the
tab - Click
. - Set whether or not to
. - Set an and
.
You can specify level and sensitivity settings separately for each area.
A single area supports a shape with up to 8 vertexes. Select 4 vertexes on the video using the mouse to create a rectangle, and select each line of the rectangle and add up to 4 more points to create a desired shape.
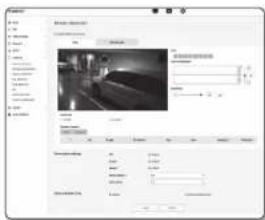
text_image
Screenshot of a video editing software interface showing audio settings and preview panel with Chinese text.-
Configure settings for each item.
-
Level of detection: If the motion is greater than the level configured, a motion detection event is generated.
Even on the chart, if the motion is greater than the boundary of the level configured, the color is displayed differently. - Sensitivity: Sets the sensitivity of motion detection for each area. Decrease the sensitivity in an environment where the background and the object are clearly distinguished, and increase the sensitivity in a dark environment where the background and the object cannot be clearly distinguished.
- Hand over: To use Handover, select
. You can relocate a specific camera to a specific PTZ preset position when a motion is detected in a configured detection area. Specifies a camera for each detection area. -
Receiver camera: The receiving camera can be inter-operated with the detection area.
-
Configure the event motion schedule and event motion conditions.
- For more information about
7. When done, click [Apply].
Detected size of an object may have difference with the actual size according to its shape.
In the following cases, motion detection performance may be impaired or a malfunction may occur.
-The object color or brightness is similar to the background.
-Small activities around the border area of the camera's field of view.
-Multiple movements continue occurring at random due to a scene change, rapid lighting changes or other reasons.
-A fixed object continues moving in the same position.
-Motions of less position changing such as approaching to the camera or fading away from the camera.
-Moving object approaches to the camera too close
-An object hides other objects behind.
Too fast object (for a proper detection, one object should be found overlapping between contiguous frames)
-Reflection / blur / shadow due to a strong light such as direct sunlight, illumination, or headlamp.
In severe snow, rain, wind or in dawn / dusk
Tampering detection
You can set to detect tampering attempts and trigger events, such as sudden change of camera's framing direction, blocked lens and other overall change of scenes from the video.
- From the Setup menu, select the
tab. - Click
. - Set whether or not to
. - The chart represents the degree of tempering. Set the level sensitivity of tempering to detect (range: 1 to 100).
- Set the sensitivity. The higher the set value, the more sensitive the camera reaction (range: 1 to 100).
- Specify the minimum monitoring duration. An event signal is generated if a state higher than the detection level remains for the minimum monitoring duration (unit: seconds)
- Specify whether to exclude dark areas. This function makes it difficult to distinguish darkness due to de-illumination from darkness due to being blocked by an object. Despite this property, if you want to exclude an alarm for sudden changes in screen brightness such as de-illumination, you should enable this function.
- Configure the event motion schedule and event motion conditions.
- For more information about
and , refer to 'Alarm input'. (page 47) - When done, click [Apply].
The detection will be restarted after stabilization for a certain period of time (about 5 seconds). During stabilization, detection is not available.
- If false alarms are frequently generated, you should gradually decrease the sensitivity to minimize false alarms.
- If you use a low sensitivity, alarms may be generated even by very small changes on the screen, but false detection may occur in response to changes in moving objects or brightness.
- In the following cases, the tempering detection function may malfunction.
- Monitoring environment with simple background, right and low light level environment.
- Severe camera vibration or sudden lighting changes
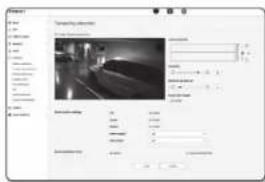
text_image
Tuning (RGB) Color Size Distance Resolution Noise Frequency Noise Ratio Noise Mode Noise Level Noise Range Noise Mode Noise Level Noise Range Noise Mode Noise Level Noise Range Noise Mode Noise Level Noise Range Noise Mode Noise Level Noise Range Noise Mode Noise Level Noise Range Noise Mode Noise Level Noise Range Noise Mode Noise Level Noise Range Noise Mode Noise Level Noise Range Noise Mode Noise Level Noise Range Noise Mode Noise Level Noise Range Noise Mode Noise Level Noise RangeDefocus detection
You can configure settings to generate an alarm signal when a defocus of the camera lens is detected.
- From the Setup menu, select the
tab. - Click
. - Set whether or not to
-
Configure settings for each item.
-
Level of detection: An alarm is generated if the current level is higher than the detection level configured.
- Sensitivity: The higher the intensity is, the higher the level of the chart that is output for the same video.
-
Minimum duration (s) : An alarm is generated if the level state higher than the detection level remains continuously for the minimum monitoring duration configured.
-
Configure the event motion schedule and event motion conditions.
■ Simple Focus : Specifies whether to use the simple defocus function when defocus is detected.
- For more information about
- When done, click [Apply].
- After an alarm for delocus detection is generated, if you want to receive an alarm for delocus detection again, you need to return to a stable state at least once. Examples of returning to a stable state are as follows.
-Use Defocus Detection check box is deselected
-Video identification is available, as simple focus is activated
-If an object in the video moves to a position at which good focus is ensured and thus an identifiable tempering is detected.
In the following cases, the defocus detection performance may be impaired or a malfunction may occur.
-Monoteneus monitoring environment, night or low illumination environment
-Sudden changes in the illumination (e.g. indoor light shutting off)
-Lens blocked by a large object that covers almost all of the screen
-Changes the focus object by changing the camera position.
setup screen
Fog detection
You can configure settings to generate an event signal when fog is detected.
- From the Setup menu, select the
tab. - Click
. - Set whether or not to
. -
Configure settings for each item.
-
Level of detection: An alarm is generated if the current level is higher than the detection level configured.
- Sensitivity: The higher the intensity is, the higher the level of the chart that is output for the same video.
-
Minimum duration (s) : An alarm is generated if the level state higher than the detection level remains continuously for the minimum monitoring duration configured.
-
Configure the event motion schedule and event motion conditions.
-
Defog: Specifies whether to use the fog removal function when fog is detected.
-
For more information about
and , refer to "Alarm Input". (page 47) -
When done, click [Apply].
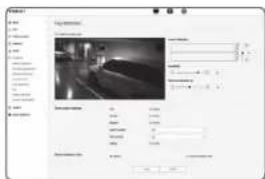
text_image
Screenshot of a software interface showing image editing settings with color channels and preview thumbnailsAfter an alarm for the fog detection is generated, if you want to receive an alarm for fog detection again, you will need to return to a stable state at least once. Video improvement after fog removal is not recognized as a stable state. Examples of returning to a stable state are as follows.
-Use Fog Detection check box is deselected.
-Video is identifiable as fog or smoke disappears.
In the following cases, fog detection performance may be impaired or a malfunction may occur.
-Monotonsus monitoring environment, night or low illumination environment
-Sudden changes in the illumination (e.g. indoor light shutting off)
-Lens blocked by a large object that covers almost all of the screen
-Changes the focus object by changing the camera position.
Face detection
You can configure the settings to generate an event signal in response to the detection of a face in the specified area.
- From the Setup menu, select the
tab. - Click
. - Set whether or not to
. - Set an and
. - Set the sensitivity level.
- The higher the sensitivity, the more detailed and precise face detection is available.
- Configure the event motion schedule and event motion conditions.
For more information aboutand , refer to "Alarm input". (page 47) - When done, click [Apply].
text_image
Screenshot of a software interface showing image editing settings with Chinese labels and preview thumbnailsIVA (Intelligent Video Analysis)
You can configure settings to generate an event signal when a motion or situation meeting the specified event rules is detected.
- From the Setup menu, select the
tab. - Click
- Set whether or not to
. - Configure rules to detect. For more information about settings, refer to "Configure analysis rules", Configurable rules are as follows.
- Crossing: You can detect an object passing in the selected direction on a specified virtual line.
- Intrusion: You can detect the emergence of a moving object within a virtual area.
- Enter: Detects an object entering from the outside to the inside of the virtual area.
- Exit: Detects an object exiting from the inside to the outside of the virtual area.
- Appear(Disappear): Detects a new object appearing inside a virtual area, which is monitored for a specified period of time after its position is fixed, or detects a fixed object that disappears and is not monitored for the monitoring duration.
-
Lottering: Detects an object wandering inside the virtual area for longer than the monitoring duration.
-
Select area(s) that you don't want to include in the analysis, and excluded area(s).
- Set the sensitivity level and a size of interest (if necessary).
For more information about settings, refer to "Common Settings". - Configure the event motion schedule and event motion conditions.
- For more information about
and , refer to "Alarm Input", (page 47) - When done, click [Apply].
text_image
File 10 File 11 File 12 File 13 File 14 File 15 File 16 File 17 File 18 File 19 File 20 File 21 File 22 File 23 File 24 File 25 File 26 File 27 File 28 File 29 File 30 File 31 File 32 File 33 File 34 File 35 File 36 File 37 File 38 File 39 File 40 File 41 File 42 File 43 File 44 File 45 File 46 File 47 File 48 File 49 File 50 File 51 File 52 File 53 File 54 File 55 File 56 File 57 File 58 File 59 File 60 File 61 File 62 File 63 File 64 File 65 File 66 File 67 File 68 File 69 File 70 File 71 File 72 File 73 File 74 File 75 File 76 File 77 File 78 File 79 File 80 File 81 File 82 File 83 File 84 File 85 File 86 File 87 File 88 File 89 File 90 File 91 File 92 File 93 File 94 File 95 File 96 File 97 File 98 File 99 File 100Configure analysis rules
You can configure individual analysis rules as follows.
Crossing
- Select the
tab. - Left-click on the screen to specify the start and end of the line at a desired position to detect.
- Select a direction of interest.
- When done, click [Apply].
- To remove the rules that have been configured, right-click on the line and click the [OK] button in the pop-up window that appears.
- Intrusion, Enter, Exit, Appear(Disappear), Loitering
- Click on the
tab. - Left click on the screen to specify 4 vertexes at desired positions.
- From the virtual area that has been configured, select an analysis category.
- When done, click [Apply].
- To remove the rules that have been configured, right-click on the line and click the [OK] button on the pop-up window that appears.
Common settings
Common settings are settings to increase the detection accuracy and minimize false positives, based on the use environment.
- Sensitivity
- Select the
tab. - You can change the sensitivity of distinguishing the screen background from motions. In a situation in which objects can be clearly distinguished from backgrounds, set this to a low sensitivity level. For the opposite scenario, in which it is hard to distinguish objects, such as in a low illumination situation, set this to a high level.
- When done, click [Apply].
- Size
- Select the
tab. - For each rectangle that represents the minimum size and the maximum size, right-click on the vertex at the bottom-right to move and resize it.
- Motions smaller than the specified minimum size or bigger than the maximum size are not detected. To avoid unintended detections caused by great and small noises, set minimum/maximum motion sizes appropriately in accordance with your environment. Note that the same motions on the same location can be detected differently in terms of their detection size; it is recommended to consider and include the tolerable difference when selling the minimum/maximum detection sizes.
- When done, click [Apply].
Audio detection
You can set to detect sound over the specified level and trigger an event accordingly.
- From the Setup menu, select the
tab. - Click
- Set whether or not to
- Set the audio detection's sound level.
The lower the level, the smaller the sound change is detected.

The audio detection level is designed to normalize the input data to a value between 1 and 100 and detect the signal larger than threshold level. It is unrelated to the decibel (dB) level.
- Configure the event motion schedule and event motion conditions.
- For more information about
and , refer to "Alarm Input". (page 47) - When done, click [Apply].

- Select
- If detected audio level is too low, set the audio input gain to a higher level in
- You can use the audio detection function when the camera is connected with an audio input device.
Sound classification
You can configure settings to generate an event signal in response to the detection of a specified sound source.
- From the Setup menu, select the
tab. - Click
. - Set whether or not to
. - Set the level of audio energy for the sound source to classify. The energy level value for the input audio is updated periodically from right to left, and is drawn on the area. Sound source classification is only applied to audio at a level higher than the specified value.
- Configure settings for each item.
Noise reduction : Specify the
- If the noise in the surrounding environment is too loud, exceeding 55 to 60dB, use the noise reduction function.
If the noise reduction function is used, the sound classification function may be degraded or may malfunction depending on the environment, as the original sound source is reduced. If you use the noise reduction filter in a Quiet environment, the sound source classification function may be impaired.
- Categories: Select a sound source to classify.
Sound source definition
-Scream: Loud sound generated by humans, such as a scream or shout by a male/female adult or children
-Gunshot: Gunshot sound (excluding rapidly-generated, consecutive gunshot sounds)
-Explosion: Sound of sudden explosion that is the result of a destructive action
-Crashing glass: Sound of glass breakage
text_image
File Selection Name: Size: 100 Export: Export name: Export size: 500 Export value: 100 Export rate: 100 Export destination: Export options: OK Cancel Help
text_image
Name/Configuration Name/Configuration Parameters Data type Current data Parameters Parameters Parameters Parameters Parameters Parameters Parameters Parameters Parameters Parameters Parameters Parameters Parameters Parameters Parameters Parameters Parameters Parameters Parameters Parameters Parameters Parameters Parameters Parameters Parameters Parameters Parameters Parameters Parameters Parameters Parameters Parameters Parameters Parameters Parameters Parameters Parameters Parameters Parameters Parameters Parameters Parameters Parameters Parameters Parameters Parameters Parameters Parameters Parameters Parameters Categories: Category 1: Category 1, Category 2, Category 3, Category 4, Category 5, Category 6, Category 7, Category 8, Category 9, Category 10, Category 11, Category 12, Category 13, Category 14, Category 15, Category 16, Category 17, Category 18, Category 19, Category 20, Category 21, Category 22, Category 23, Category 24, Category 25, Category 26, Category 27, Category 28, Category 29, Category 30, Category 31, Category 32, Category 33, Category 34, Category 35, Category 36, Category 37, Category 38, Category 39, Category 40, Category 41, Category 42, Category 43, Category 44, Category 45, Category 46, Category 47, Category 48, Category 49, Category 50, Category 51, Category 52, Category 53, Category 54, Category 55, Category 56, Category 57, Category 58, Category 59, Category 60, Category 61, Category 62, Category 63, Category 64, Category 65, Category 66, Category 67, Category 68, Category 69, Category 70, Category 71, Category 72, Category 73, Category 74, Category 75, Category 76, Category 77, Category 78, Category 79, Category 80, Category 81, Category 82, Category 83, Category 84, Category 85, Category 86, Category 87, Category 88, Category 89, Category 90, Category 91, Category 92, Category 93, Category 94, Category 95, Category 96, Category 97, Category 98, Category 99, Total Optionssetup screen
- Configure the event motion schedule and event motion conditions.
- For more information about
- When done, click [Apply].

In
- In
-Frequency range: 40 to 16,000Hz
-Impedance: 1.5000
-Sensitivity: -40±3 dB (7.1-14.1 mV)
- In the following cases, sound source classification performance may be impaired or malfunction.
-Gunsnot sounds are generated consecutively, such as the sound made by a machine gun rather than a one-shot sound. -Noise is too loud to distinguish from the target sound source.
-2 or more sound sources are input simultaneously.
-Sound source classification is applied in a quiet environment using the noise removal function
-Sound of applause or scream is heard from a close distance (within 1m) from the camera
-A loud sound source that does not belong to any of the sound source categories such as aircraft sound or siren sound is suddenly generated
-The external microphone does not conform to the recommended specifications
SYSTEM SETUP
Product information
- From the Setup menu, select the
tab. - Click
- Check the camera information, or provide details according to your network environment.
• Model : Model name of the product.
- Serial number : Product serial number.
• Device name : Provide a device name that will be displayed on the Live screen.
- Location: Specify the location where the camera is installed.
• Description : Provide detailed information about the camera location.
- Memo: Provide an explanation about the camera for better understanding.
• Language : Select a preferred language for the Web Viewer OSD.
The default language is set to
- When done, click [Apply].
Upgrade / Reboot
- From the Setup menu, select the <System ( ) tab.
- Click
- Select a desired item and set it appropriately.
- Upgrade: Performs upgrading the system. When reconnecting, the web viewer will not run normally if the browser cache is not completely clear.
- Factory default: Initializes all setting information including the camera settings to the factory reset state. (however, logs are not initialized)
- Select the
check box and settings other than network settings and open platform settings will be reset. - The IP addressing system will be defaulted to DHCP if you reset the camera. If no DHCP server is found, the previous settings will be restored automatically.
- Configuration backup & Restore: Backs up the current system settings before performing the restoration process. The system is automatically restarts after backup or restoration.
- Restart: Restarts the system.
To perform the upgrade
- Click |Browse ( ) and specify a file to upgrade.
- Click [Upgrade].
- An "Upgrade" progress bar is prompted to show the upgrading status.
- Once completed upgrading, the browser exits and the camera restarts.

It may take a max of 10 minutes for the upgrade process.
If you forcibly terminate the upgrade process, upgrade will not be completed properly.
- During restarting the system, accessing with web viewer will not be made.
- You can download the latest version from the Hanwha Techwin web site.
To back up the current settings
- Click [Backup].
- A file in a ".bin" file format is saved in "Library" -> "Document" -> "Downloads".
To restore the backup settings
- To restore the backup settings, click [Restore].
- Select a desired backup file.

- If you perform the backup or restoration, the web browser will be closed and the camera will rebocks.
- If you try to recover the config file backed up in other model, some functions may malfunction and you need to change the setting manually.
Log
You can check the system log or event log.
- From the Setup menu, select the
tab. - Click
. -
Select a log type.
-
Access Log: You can check the log information that contains the user's access and the access time.
-
System log: You can check the system logs where any system changes are recorded including the time information.
• Event log : You can check the event logs including the time information. -
From the right log list, select an item to search for.
If you selectin the top left dropdown list, all logs for the applicable log type will be displayed. - If one page can not display all the logs available, use the bottom buttons to move to the previous, next, or the last item.
- Click on the
button to save all the log data for the currently selected mode in the "time stamp value create by camera in modelname-mode-camera.txt file" in the download folder for the browser.

■ Each page displays 15 logs with the latest one displayed at the top.
- Each log contains up to 1,000 records and after 1,000 records are saved, the oldest log is deleted when a new record is generated.
OPEN PLATFORM SETUP
Open Platform
A user can install an application on their camera to execute additional functions.
- From the Setup menu, select the
tab. - Click
. - Click the [Browse ( - )] button to select the ^.cap file from the user folder.
- Click the [Install] button to install your application.
-
The information of the installed application is displayed in the list.
-
Uninstall : Deletes installed or operating applications.
- Go App: You will be redirected to the app page of each application.
- Start : Execute an installed application.
- Stop: Terminates a running application.
- Health: Displays the currently running application's resource occupation rate, thread counts and execution time, etc.
• Priority : Sets the priority of running applications.
If the total resource utilization rate of the camera (including main tasks and applications) exceeds
80%, an ongoing application will be forced to stop. In this case, the priority set by the user is used to determine which application should be stopped first.
- Auto start: When the camera's power supply or main task is running, a certain application for which auto execution has been activated will run automatically.
- Application manager: This displays the resource occupation rate of an application currently running in your camera.
Memory Usage (%): This is the memory utilization rate for each application.
- CPU Usage (%): This is the CPU utilization rate for each application.
- Thread count : This is the number of threads created by each application.
- Duration: This is the total execution time of each application.
- Kill Task: Terminates an application.
- Total Usage: This is the total resource occupation rate of the camera (including main tasks and applications).

- For questions about application use or installation, check the Techwin developer website.
appendix
Specification
| Items | Description | ||
| XNB-6000 XNB-8000 | |||
| Video | Imaging Device 1/2.8" 2M CMOS 1/1.8" BM CMOS | ||
| Total Pixels 1945(H) x 1109(V) | 2.16M 3096(H) x 2094(V) | ||
| Effective Pixels 1945(H) x 109(V) | 2.13M 2616(H) x 1976(V) | ||
| Scanning System Progressive Scan | |||
| Min. Illumination | Color: 0.01 Lux(F1.2, 1/30sec)BW: 0.001 Lux(F1.2, 1/30sec) | Color: 0.07 Lux(F1.2, 1/30sec)BW: 0.007 Lux(F1.2, 1/30sec) | |
| S / N Ratio 50dB | |||
| Video Out | CVBS: 1.0 Vp-p / 750 composite, 720x480(M), 720x570(P), for installation USB: Micro USB type B, 1280x720 for installation | ||
| Lens | Focus Control | Simple Focus / Manual, Remote control via network, Button control (Manual, Simple Focus) | |
| Lens Type Manual, DC Auto Iris | P-iris | ||
| Mount Type CVCS | |||
| Operational | Camera Title | Off / On (Displayed up to 85 characters)- WW: English/Numeric/Special Characters- Common : Multi-line (Max 5), Color (Grey/Green/Rod/Blue/Black/White), Transparency, Auto Scale by Resolution | |
| Day & Night Auto (CR) / Color / BW / External / Schedule | |||
| Backlight Compensation Off / BLC / HLC(Masking/Dimming) / WDR | |||
| Wide Dynamic Range 150dB | 120dB | ||
| Contrast Enhancement | SSDR (Off / On) | ||
| Digital Noise Reduction | SSNRS (2D+3D Noise Filter) (Off / On) | ||
| Digital Image Stabilization | Off / On (Built-in Gyro sensor) | ||
| Defog | AutoInput from log detector/Manual/Off | ||
| Motion Detection | Off/ On(Sea, 8point Polygonal zones), Handover | ||
| Privacy Masking | Off / On (32oa, polygonal zones)- Color : Grey, Green, Red, Blue, Black, White- Mosaic | ||
| Items | Description | ||
| XNB-6000 XNB-8000 | |||
| Operational | Gain Control | Off / Low / Middle / High / Manual | |
| White Balance | ATM / AMC / Manual / Indoor / Outdoor (included Mercury & Sodium) | ||
| Contrast | Level adjustment | ||
| LDC | On/Off (5 levels with Min/Max) | ||
| Electronic Shutter Speed | Minimum / Maximum / Anti flicker (2 ~ 1/12,000sec) | ||
| Digital PTZ | 24X, Digital PTZ(Preset, Group) | ||
| Flip / Mirror | Flip : On/OffMirror : On/OffHallway : 90°/270° | ||
| Video & Audio Analytics | Temporing, Looting, Directional Detection, Do focus Detection, Fog Detection, Virtual Line, Enter/Exit, Appear / Disappear, Audio Detection, Face Detection, Motion Detection, Digital Auto Tracking, Sound Classification | ||
| Alarm I/O | Input 1ea / Output 1ea | ||
| Remote Control Interface | RS-485 | ||
| RS-485 Protocol | Samsung-T/E, Pelco-DrP, Panasonic, Honeywell, AD, Vicon, BE, Bosch, Sunglin | ||
| Alarm Triggers | Alarm Input, Motion Detection, Video & Audio Analytics, Network Disconnect | ||
| Alarm events | File upload via FTP, E-MailNotification via E-MailLocal storage/SD/SDHC/SDXC or NAS recording at Event (Alarm Triggers)External outputDPTZ preset | ||
| Audio In | Selectable (Mic IV/Line IV/Built-in mic)Max output level: 1VrmsSupply voltage: 2.5VDC(4mA), Input Impedance: approx. 2K Ohm | ||
| Audio out | Line cut, Max output level: 1 Vrms | ||
| Pixel Counter | Support | ||
appendix
| Items | Description | ||
| XNB-6000 XNB-8000 | |||
| Network | Ethernet RJ-45 (10/100BASE-T) | ||
| Video Compression Format | H.265/H.264 |MPEG-4 Part 10(AVC): Main/Baseline/High Motion JPEG | ||
| Resolution | 1920x1080 / 1280x1024 / 1280x960 / 1280x720 / 1024x768 / 800x600 / 800x448 / 720x578 / 720x480 / 640x480 / 640x360 / 320x240 | 2560x1920 / 2560x1440 / 1920x1080 / 1600x1200 / 1280x1024 / 1280x960 / 1280x720 / 1024x768 / 800x600 / 800x448 / 720x576 / 720x480 / 640x480 / 640x360 / 320x240 | |
| Max. Framerate | H.265/H.264 : Max. 60fps at all resolutions Motion JPEG : Max. 30fps | H.265/H.264 : Max. 30fps at all resolutions Motion JPEG : Max. 30fps | |
| Smart Codec Manual model(Area-based: 5ea) | |||
| WiseStream II | Support | ||
| Video Quality Adjustment | H.264/H.265 : Target Bitrate Level Control MJPEG : Target Bitrate Level Control | ||
| Bitrate Control Method | H.264/H.265 : CBR or VBR Motion JPEG : VBR | ||
| Streaming Capability Multiple Streaming (Up to 10 Profios) | |||
| Audio Compression Format | G.711 μ-law /G.726 Selectable G.726 (ADPCM) 8KHz, G.711 8KHz G.726 : 16Kcps, 24Kcps, 32Kcps, 40Kcps AAC-LC : 48Kbps at 8/16/32/48KHz | ||
| Audio Communication BI-directional (2-Way) | |||
| IP IPv4, IPv6 | |||
| Protocol | TCP/IP, UDP/IP, RTP(IOP), RTP(TCP), RTCP, RTSP, NTP, HTTP, HTTPS, SSL/TLS, DHCP, PPPoF, FTP, SMTP, ICMP, IGMP, SNMPv1/V2cA(0(MIB-2), ARP, DNS, DONS, QoS, PIM-SM, UPnP, Bonjour | ||
| Items | Description | ||
| XNB-6000 XNB-8000 | |||
| Network | Security | HTTPS(SSL) Login AuthenticationDigest Login AuthenticationIF Address FilteringUser access Log802.1x Authentication (EAP-TLS, EAP-LEAP) | |
| Streaming Method Unicast / Multicast | |||
| Max. User Access 20 users at Unicast Mode | |||
| Edge Storage | SD/SDHC/SDXC 2slot (up to 812 GB)- Continuous recording(1st slot to 2nd slot)- Motion Images recorded in the SD/SDHC/SDXC memory card can be downloaded.NAS(Network Attached Storage)Local PC for Instant Recording | ||
| Application Programming Interface | OMVIF Profile S/GSUNAPI(HTTP API)Open Platform | ||
| Webpage Language | English, Korean, French, German, Spanish, Italian, Chinese, Russian, Japanese, Swedish, Portuguese, Czech, Polish, Turkish, Dutch, Hungarian, Greek | ||
| Web Viewer | Supported OS: Windows 7 / 8.1 / 10, MAC OS X 10.10, 10.11, 10.12Plug-In free web viewerSupported web browsers: Google Chrome 54, MS Edge 38, Mozilla Firefox 49(Window 64bit only), Apple Safari 9 (Mac OS X only)Plug-In web viewerSupported web browsers: MS Explorer 11, Apple Safari 9 (Mac OS X only) | ||
| Central Management Software | SmartViewer, SSM | ||
| Environmental | Operating Temperature / Humidity | -10°C ~ +55°C (14°F ~ +131°F) / Less than 90% RH | |
| Storage Temperature / Humidity | -50°C ~ +60°C (-58°F ~ -140°F) / Less than 90% RH | ||
| Electrical | Input Voltage / Current 24VAC ± 10%, 12VDC ± 10%, PoEIEEE802.3af; | ||
| Power Consumption | Max. 6.5W(12VDC), Max. 7.5W(PoE), Max. 8W(24VAC) | Max. 7.5W(12VDC), Max. 8.5W(PoE), Max. 8.5W(24VAC) | |
| Mechanical | Color / Material Black, Ivory / Plastic | ||
| Dimension (WxDxD) W73.1 x H66.6 x D147.8mm (2.88" x 2.62" x 5.82") | |||
| Weight 420g (0.93b) | |||
proDuct overview
Unit : mm (inch)
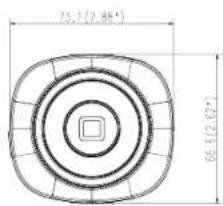
text_image
73.1(2.85°) 66.4(2.02°)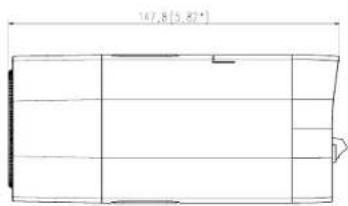
text_image
147,8(5.82°)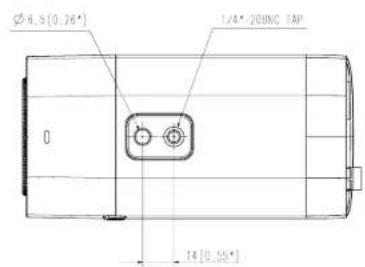
text_image
Ø6.5(0.26°) 1/4" 200NC TAP 0 14 (0.55°)appendix
trouBLeSHootinG
| PROBLEM SOLUTION | |
| When an Windows 10 user accesses the web viewer through Chrome or Firefox, the sound volume of microphone changes periodically. | This is what happens when microphone driver has been set to Realtek driver.Install the High Definition Audio device (Windows Default Driver) or the third party driver as the microphone driver. |
| No video is displayed when accessing the plug-in free webviewer on Safari via HTTPS. | On the authentication popup window prompted when Initially accessing https, click "View Authentication Certificate" and select the "Always trust when connecting to the designated weviewer IP" check box.If the webviewer continues failing to display a video after you select "Next" on the message window below, press the command key + C to exit the Safari browser, access again and follow the procedures stated above. |
| I can't access the camera from a web browser. | Check to make sure that the camera's Network settings are appropriate.Check to make sure that all network cables have been connected properly.If connected using DHCP, verify that the camera is able to acquire dynamic IP addresses without any problem.If the camera is connected to a Broadband Router, verify that port forwarding is properly configured. |
| Viewer got disconnected during monitoring. | Connected Viewers become disconnected upon any change to camera or network configurators.Check all network connections.If the camera is connected over an PPPoE network, it's possible for Viewer to disconnect under poor network conditions. |
| The camera connected to the network Is not detected in the IP installer program. | Turn off the firewall settings on your PC and then search the camera again. |
| Images overlap. | Check whether two or more cameras are set to a single multicast address instead of different addresses. If a single address is used for multiple cameras, the images may overlap. |
| No Image appears. | If the transmission method is set to multicast, check whether there is a router that supports multicast in the LAN the camera is connected to. |
| PROBLEM SOLUTION | |
| ofis set to,but no notification e-mail reaches me even when an analysis event had occurred. | · Verify the settings in the following sequence:A. Checksettings.B. Theshould be set to.C. Check if theoption ofmenu is checked to use. |
| Can I define event rules even when I don't use? | · Yes, it can be. You can set mice for events despite of the intelligent video analysis setting. |
| No signal is found at the Alarm Output port even when an Intelligent video analysis event is generated. | · Check alarm output port settings. |
| Cannot record into the Micro SD memory card. | · Check if the memory card is defective. |
| Micro SD memory card is inserted but the camera does not operate property. | · Check if the memory card is inserted in the proper direction. Operation of memory card that is formatted by other devices is not guaranteed with this camera unit· Format the memory card again in→→menu. |
| Cannot record in the NAS. | · Confirm that the information registered in the NAS is correct. |
| It reports that NAS setting has failed. | · Confirm that the IP address of the NAS is valid.· Confirm that the ID/password of the NAS is valid.· Confirm that you can access the folder designated as the default folder using the ID of the NAS.· Confirm that the NAS SMB/CIFS items are unchecked.· Confirm that the NAS IP address and the camera IP address are in the same format ax) The NAS & camera subnot mask initial value is 255.255.255.0.If the IP address is 192.168.20.32 then the NAS IP address should be in the range of 192.168.20.1-192.168.20.255.· Check whether you tried to access as another user without formatting the default folder saved or used.· Confirm that you used recommended NAS equipment. |
OPEN SOURCE ANNOUNCEMENT
GPL/LGPL software license
The software included in this product contains copyrighted software that is licensed under the GPLA.GPL. You may obtain the complete Corresponding Source code from us for a period of three years after our last shipment of this product by sending email to help.ccl@hanwho.com
If you want to obtain the complete Corresponding Source code in the physical medium such as CD-ROM, the cost of physically performing source distribution might be charged.
GPL SW
Component Name License URL
| Base Kernel | GPL 2.0 | |
| Busycox | GPL 2.0 | https://www.busybox.net/discernoid/snappings |
| Ibrune2-4.3.0 | GPL 2.0 | |
| Iotube3-1.4.21 | GPL 2.0 | http://ftp.norrilla.org/pub/spracles |
| ethno4-4.2 | GPL 2.0 | |
| mcc-1.5.2 | GPL 2.0 | http://m.cuniracted.org/pub/mcc-lits |
| millidag 9.11 | GPL 2.0 | |
| rr. pppce 3.11 | GPL 2.0 | https://www.mersingspingu.in.com/pppcn/ |
| wce_supulcent-2.5 | GPL 2.0 | |
| bash-4.3.30 | GPL 3.0 | |
| zeru-ouni | GPL 2.0 |
LGPL SW
Component Name License URL
| gLibc | LCFL2.0 |
| Inclusis | 1 GHI 5.0 |
| neon 0.78.6 | 1 GHI 2.0 http://www.wccdov.org/hoen/ |
GNU GENERAL PUBLIC LICENSE
Version 2, June 1991
Copyright (C)1989, 1951 Proo Software Foundation, Inc. 51 Franklin Street/Rith Floor, Boston, MA 02 110-1301, USA Everyone's permitted to copy and distribute verbalim copies of this license document, but changing it is not allowed.
Preamble
The lessons for most software are designed to take away your freedom to share and change it. By contrast, the GNU General Public License is intended to guarantee your freedom to share end change free software--to make sure the software is free for all its users. The General Public License applies to most of the free Software Foundation's software and to any other program whose authors commit to using it. Stone other Free Software Foundation software is covered by the GNU Incor Donors Hubie License Instinct. You can apply in your programs, too. When we expand at more software, we are rotating to freedom, not prize. Our General Public License are designed to make sure that you have the freedom to distribute accessories of free software (and charge for this service if you know). You can use the free software or use others of it in more free programs -- but that, you know you can do these things.
To protect your rights, we need to make restrictions that forbid anyone to deny you, these rights or to ask you to surrender the rights. These restrictions translate to certain responsibilities for you if you distribute copies of the software, or if you modify it.
For example, if you distribute clothes of such a program, whether gratie or for a fee, you must give the recipients all the rights that you have.
You must make sure that they, too, receive or can get the source code. And you must show them these terms so they know their rights. We protect your rights with two steps:
(1)Copyright: the software, and (2)offer you the license which gives you legal permission to copy, distribute and/or modify the software. Also, for each author's protection and ours, we want to make certain that everyone understands that there is no warranty for this free software. If the software is modified by someone else and passed on, we want its implications to know that what they have is not the original, so that any problems introduced by others will not reflect on the original authors' regulations.
Finally, any free program is threatened constantly by software patents. We wish to avoid the danger that redistributors of a free program will individually obtain patent licenses. In effect making the program proprietary. To prevent this, we have made it clear that any patent must be licensed for everyone's free use or not licenses at all. The precise terms and conditions or copying, distribution and modification below.
TERMS AND CONDITIONS FOR COPYING, DISTRIBUTION AND MODIFICATION
Version 2, June 1991 Copyright (C) 1986, 1981 Free Software Foundation, Inc. 51 Franklin S
- This License applies to any program or other work which contains a notice placed by the copyright holder saying it may be distributed under the terms of this General Public License.
The "Program", below, refers to any such program or work, and a "work based on the Program" means either the Program or any derivative work under
copyright law: that is to say. A work something the Program or a portion of it, either otherwise or with modification is also translated into another language. Hereafter translation is included without limitation in the term "modification".) Each license is addressed as "you".
Activities other than copying, distribution and modification are not covered by this License; they are outside its scope. The set of running the Program is not resinkred, and the output from the Program is covered only if its contents constitute a work based on the Program independent of having been made by running the Program? Whether that is true depends on what the Program does.
- You may copy and distribute web form copies or the Program's source code as you receive it, in any medium, provided that you conspicuously and
appropriately publish on each copy an appropriate copyright notice and disclaimer of warranty; keep in fact at the notices that refer to this License and to the absence of any warranty; and give any other recipients of the Program a copy of the License along with the Program.
You may charge a fee for the physical act of transferring a copy, and you may at your option offer warranty protection in exchange for a fee.
- You may modify your copy or copies of the Program or any portion of it, thus forming a work based on the Program, and copy and distribute such modifications or work under the terms of Section 1 above, provided that you also meet all of these conditions:
a) You must cause the modified fits to carry prominent notices stating that you changed the fits and the date of any change
b) You must cause any work that you distribute or publish, that in whole or in part contains or is derived from the Program or any part thereof, to be licensed as a whole at no charge to all third parties under the terms of this License.
c) If the modified program normally reads commands interactively when run you must issue it, when started running for such interactive use in the most ordinary way to print or display an announcement including an appropriate copyright notice and a notice that there is no warranty (or else, saying that you provide a warranty) and that users may resellicate the program under these conditions, and selling the user how to view a copy of the license. (Exceptional if the Program itself is Interactive but does not normally print such an announcement, your work based on the Program is not required to print an announcement.)
These requirements apply to the modified work as a whole. If identifiable sections of that work are not derived from the Program, and can be reasonably considered independent and accurate works in themselves, then this License, and its terms do not apply to those sections when you distribute them as accurate works. But when you distribute the same sections as part of a whole which is a work based on the Program, the distribution of the whole must be on the terms of this License, whose permissions for other licenses extend to the entire whole, and thus to each and every part regardless or who wrote it.
Thus, it is not the intent of this section to claim rights or contest your rights to work written entirely by you; rather the intent is to exercise the right to control the distribution of derivative or collective works based on the Program. In addition, there aggregation of another work not based on the Program with the Program (for with a work based on the Program) a volume of a storage or distribution medium does not bring the other work under the scope of this license.
- You may copy and distribute the Program for a work based on it, under Section 2 in object costs or executable term under the terms of Sections 1 and 2 above provided that you also do one of the following:
a) Accompany it with the complete corresponding machine-readable source code, which must be distributed under the terms of Sections 1 and 2 above on a medium customarily used for software Interchange; or,
b) Accompany it with a written offer, said for at least three years, to give any third party, for a charge no more than your cost of physically performing source distribution, a complete machineable copy of the corresponding source code, to be distributed under the terms of Sections 1 and 2 above on a medium customally used for software interchange; or.
c) Accompany I with the Information you received as to the latter to distribute corresponding source code. (This alternative is allowed only for noncommercial data button and only if you received the program in object code or executable form with such an offer, in accord with Subsection b above.) The source code for a work means the preferred form of the work for making modifications to it. For an executable work, complete source code means all the source code for all modules it contains, plus any associated interface definition file, plus the scripts used to control completion and installation of the executable. However, as a special exception, the source code distributed cannot include anything that is normally distributed [in other source or binary form] with no major
components (pomplier, kernel, and so one of the operating system on which the executable runs, unless that component itself accompanies the executable. If distribution of executable or object code is made by offering access to copy from a cegenerated place, then offering equivalent access to copy the source code from the same place counts as distribution of the source code, even though third parties are not compelled to copy the source along with the object code.
- You may not copy, modify, sublicense, or distribute the Program except as expressly provided under the License. Any attempt otherwise to copy, modify, sublicense or distribute the Program is void, and will automatically terminate your rights under this License.
However, parties who have received copies, or rights, from you under this license will not have their licenses terminated so long as such parties remain in full compliance.
- You are not required to accept this License, since you have not signed it. However, nothing else grants you permission to modify or distribute the Program or its derivative works.
These actions are prohibited by law. If you do not accept the License, therefore, by modifying or distributing the Program (or any work based on the Program), you indicate your acceptance of this license to do so, and all its terms and conditions for copying, distilling or modifying the Program or works based on it.
-
Each time you redistribute the Program for any work based on the Program, the recipient automatically receives a license from the original licensor to copy, distribute or modify the Program subject to those forms and conditions. You may not impose any further restrictions on the recipients' exercise of the rights granted herein. You are not responsible for enforcing compliance by third parties to this License.
-
If, as a consequence of a court judgment or allegation of patent infringement or for any other reason (not limited to patent issued), conditions are imposed on you whether by court prior, agreement or otherwise/other contractor the conditions of this License, they do not excuse you from the conditions of this License. If you cannot distribute so as to satisfy simultaneously your obligations under this License and any other pursuant obligations, then as a consequence you may not distribute the Program at all.
For example, if a patent license would not permit royalty-free red attribution of the Program by all those who receive copies directly or indirectly through you, then the only way you could satisfy both it and this License would be to refrain entirely from distribution of the Program.
It may portion of this section is held intact or unenjoyable under any particular circumstance. The balance of the section is intended to apply and the section as a whole is intended to apply in other circumstances. It is not the purpose of this section to instruct you to ignore any parents or other property, rights or conditions, validity of any such claims. This section has the sole purpose of protecting the integrity of the free software distribution system, which is implemented by public license predictions. Many people have made generous contributions to the wide range of software distribution through that system in reliance on consistent application at their system: it is up to the authoritarian orders to decide it no or she is willing to distribute software through any other system and a license cannot impose that choice. This section is intended to make thoroughly clear what is believed to be a consequence of the rest of this issue.
-
If the distribution and/or use of the Program is restricted in certain countries either by patents or by copyrighted interfaces, the original copyright holder who closes the Program under this License may add an explicit geographical distribution limitation excluding those counties, so that distribution is permitted only or among counties no. thus excluded. In such cases, this License incorporates the limitation as it written in the body of this License.
-
The Free Software Foundation may submit revised and/or new versions of the General Public License from time to time. Such new versions will be similar in spirit to the present version, but may offer in detail to address new problems or concerns. Each version is given a distinguishing version number. I the Program specifies a version number of this License which applies to it and "any inter version", you have the option of following the terms and conditions other than that version or of any later version published by the Free Software Foundation. If the Program does not specify a version number of the License, you may choose any version ever published by the Free Software Foundation.
-
If you wish to incorporate parts of the Program into other tree programs whose distribution conditions are different, write to the author to ask for permission. For software which is copyrighted by the Free Software Foundation, write to the Free Software Foundation; we sometimes make exceptions for this. Our decision will be guided by the two goals of preserving the free status of all derivatives of our free software and of promoting the sharing and reuse of software generally.
NO WARRANTY
-
BECAUSE THE PROGRAM IS LICENSED FREE OF CHARGE, THERE IS NO WARRANTY FOR THE PROGRAM, TO THE EXTENT PERMITTED BY APPLICABLE LAW. EXCEPT WHEN OTHERWISE STATED IN WRITING THE COPYRIGHT HOLDERS AND/OR OTHER PARTIES PROVIDE THE PROGRAM BASIS WITHOUT WARRANTY OF ANY KIND. EITHER EXPRESSED OR IMPLIED, INCLUDING, BUT NOT LIMITED TO, THE IMPLIED WARRANTIES OF MERCHANTABILITY AND THINKING A PARTICULAR PURPOSE. THE FIRST WISKS AS TO THE QUALITY AND PERFORMANCE OF THE PROGRAMS WITH YOU SHOULD THE PROGRAMPROME DEFECTIVE, YOU ASSUME THE COST OF ALL NECESSARY SERVIÇOS, REPAIR OR COPIECTION.
-
IN NO EVENT UNLESS REQUIRED BY APPLICABLE LAW OR AGREED TO INVITING WILL ANY COPYRIGHT HOLDER, OR ANY OTHER PARTY WHO MAY MEATY AND/OR DISKILLIIT DAMAGE IS, INCLUDING ANY OF N/AIR, SELLIN, INDIVIDUAL OR CONSUMPTIONAL DAMAGE ASHING OUT OF THE US-OR NATHY TO USE THE PROGRAM (NO USING BUT NOT LIMITED TO CENS OF DATA OR IS A RING PROCESSED INACCUMULATED LOSSES SUSTAINED BY YOU OR THIRD PARTIES OR A FAILURE OF THE PROGRAM TO OPENIVE WITH ANY OTHER PROGRAMS, EVEN IF SUCH HOLDER OR OTHER PARTY HAS BEEN ADVISED OF THE POSSIBILITY OF SUCH DAMAGES.
END OF ITEMS AND CONDITIONS
How to Apply These Terms to Your New Program. If you develop a new program, and you want it to be of the greatest possible use to the public, the best way to achieve this is to make it free software which everyone can distribute and change under these terms. To do so, attach the following rules to the program: it is safest to attach them to the start of each source file to most effectively convey the exclusion of warranty; and each file should have at least the "copyright" line and a pointer to where this full citation is found only in line to give the program's name and an idea of what it does.
Copyright (Gypsy name of author)
This program is free software; you can redistribute it and/or modify it under the terms of the GNU General Public License as published by the Free Software Foundation; either version 2 or the license, or at your option company later version.
This program is distributed in the hope that it will be useful, but WITHOUT ANY WARRANTY; without even the implied warranty of MERCANTABILITY OF HUNES FOR A PARTICULAR PURPOSE. See the GNU General Public License for more details.
You should have received a copy of the GNU General Public License along with this program: If not, with to the Free Software Foundation, Inc., 51 Franklin Street, Fifth Floor, Boston, MA 02-10-1301, USA.
Also add information on how to contact you by electronic and paper mail. If the program is interactive, make it output a short notice like this when it starts in an interactive mode:
Gromovision version 69. Copyright (C) year name of author Gromovision comes with ABSOLUTELY NO WARRANTY; for details type 'show w'. This is free software and you are welcome to redistribute it under certain conditions; type 'show o' for details.
The hypothetical commands 'show w' and 'show c' should show the appropriate parts of the General Public License. Of course, the commands you use may be called something other than 'show w' and 'show c'; they could even be mouse-clicks or menu items-- whatever suits your program.
You should also get your employer (if you work as a programmer) or your school, if any to sign a "copyright disclaimer" for the program if necessary. Here is a sample: after this name:
Yoyodyne, Inc. hereby disclaims all copyright interest in the program "Cronovision" (which makes passes at compliance written by James Hacker, signature of Ty Coon, 1 April 1983 Ty Coon, President of Vice The General Public License does not permit incorporating your program into proprietary programs. If your program is a submarine library, you may consider it more useful to permit linking proprietary applications with the library. If this is I who act good want to do, use the SNUI case General Public Insgred at this license.
GNU GENERAL PUBLIC LICENSE
Version 3, 29 June 2007
Copyright © 2007 Free Software Foundation, Inc. http://ef.org
Everyone is permitted to copy and distribute verbal copies of this license document, but changing it is not allowed.
Presamble
The GNU General Public License is a free, copyell license for software and other kinds of works. The licenses for most software and other practical works are designed to take away your freedom to share and change the works. By contrast, the GNU General Public License is intended to guarantee your freedom to share and change all versions of a program-- to make sure it remains free software for all its users.
We, the Free Software Foundation, use the GNU General Public License for most of our software; it applies also to any other work released this way by its author.
You can apply it to your programs, too. When we speak of free software, we are referring to freedom, not price. Our General Public Licenses are designed to make sure that you have the freedom to distribute copies of free software (and charge for them if you wish), that you receive source code or can get it if you want it, that you can change the software or use prices of it in new free programs, and that you know you can do these things.
It is protected your rights, we need to prevent others from denying you these rights or asking you to surrender the rights. Therefore, you have certain responsibilities if you distribute copies of the software, or if you modify it responsibilities to respect the freedom of others. For example, if you distribute copies of such a program, whether grants or for a fee, you must cass on to the recipients the same feedone that you received. You must make sure that they too, receive any other money. And you may about those less money and they are not able to accept any responsibility that would be able to receive this with two
staps (1) anchor copyright on the software, and (2) offer you think I license giving you legal permission to copy, clear but not modify it. For the developers' and authors' protection, the GFL clearly explains that there is no anomaly for this free software. For both users' and authors' sake, the GFL requires that modified versions be marked as changes, so that their problems will not be attributed exclusively to authors of previous versions. Some devices are designed to deny usmen access to Intel or our modified versions of the software line de mon, although the manufacturer can do so. This is fundamentally incompatible with the aim or protecting users' motion to change the software. The systematic pattern of such abuse occurs in the area of products for individuals to rats, which is precisely where it is most unrecognizable. Therefore, we have designed this version of the GFL to prohibit the productize for those products. If such problems arise substantially in other domains, we stand ready to extend this provision to those domains in future versions of the GFL, as it needed to protect the freedom of usmen.
Finally, every program is threatened constantly by software patents. States should not allow patents to coordinate development and use of software on general purpose computers, but in those that do, we wish to avoid the special anger that patents applied to a free program could make it relatively proprietary. To prevent one, the GPL assures that atens cannot be used to render the program non-free. The precise terms and conditions for copying, distribution and modification follow:
TERMS AND CONDITIONS
0. Definitions.
"This License" refers to version 5 of the GNU General Public License.
Copyright" also means copyright-like laws that apply to other kinds of works, such as semiconductor masks. "The Program" refers to any copyrightable work licenses under this license. Each licencor is addressed as "you". "Licencors" and "recipients" may be individuals or organizations.
To "modify" a work means to copy from or adapt all or part of the work in a fashion requiring copyright permission, other than the making of an exact copy. The resulting work is called a "modified version" of the earlier work on a work "based on" the earlier work.
A "covered work" means either the unmodified Program or a work based on the Program.
To "procogale" a work means to do anything with it that, without permission, would make you directly or secondally liable for infringement under applicable copyright law, except executing it on a computer or modifying a private copy.
Propagation includes copying, distribution (with or without modification), making available to the public, and in some countries other activities as well.
to "acnewy" a work means any sort of propagation that enables other parties or make or receive copies. More interaction with a user through a computer network, with no transistor of a copy is not convoying. An interactive user interface displays "Acropriate Legal Notices" to the extent that it includes a concometer and prominently visible feature that it displays an appropriate copyright notice, and it tells the user that there is no warranty for the work except to the extent that warrants are provided, that contains may convey the work under this License, and how to have a copy of this License. If this Interface presents a list of user commands or options, such as a menu, a prominent item in the list meets this option.
1. Source Code.
The "source code" for a work means the preferred form of the work for making modifications to it. "Object code" means any non-source form of a work.
A "Standards Interlaser" means an interlace that either is an official standard defined by a recognized standards body, or, in the case of interfaces specified for a particular programming language, one that is widely used among developers working in that language.
The "System Libraries" of an executable work include anything, other than the work as a whole, that (as is included in the normal form of packaging a Major Component, but which is not part of that Major Component, and (by) serves only to enable use, or the work with that Major Component, or to implement a Standard Interface for which an implementation is available to the public in source case form. A "Major Component". In this context, means a major essential component kernel, window system, and so only the specific operating system (if any on which the executable work runs, or a computer used to produce the work, or an object, code interpreter used to run it).
The "Corresponding Source" for a work in object code form means all the source code needed to generate, install, and (for an executable work) run the object code and is modify the work, including scripts to control three activities.
However, it does not include the works System Libraries, or general-purpose locks or generally available free programs which are used unmodified in performing these activities but which are not part of the work. For example, Corresponding Source includes interface definition files associated with source files for the work, and the source code for shared libraries and dynamically linked subprograms that the work is specifically designed to require, such as by intimate data communication or control flow between those subprograms and other parts of the work.
The Corresponding Source need not include anything that users can regenerate automatically from other parts of the Corresponding Source. The Corresponding Source for a work in source code form is that same work.
2. Basic Permissions.
All rights granted under this license are granted for the terms of copyright on the Program, and are otherwise provided the stated conditions are met. This license explicitly reflects your unlimited permission to run the unmodified Programs. The output from running a covered work is traversed by this license only if the output, given its content, consults a covered work. This license acknowledges your rights of an use or other equivalent, as provided by copyright law. You may make, run and co-plateate covered works that you do not convert, without conditions so long as your losses either remain in force. You may convey, covered works to owners for the sole purpose of having them made modifications except only for you, or provide you with it ifiticks for running these works, provided that you comply with the terms of this license in considering animalistics for whom you do not control copyright. These thus making or running the animals works for you, but do exclusively on your behalf, under your direction and contact, on terms that prohibit them from making any losses of your copyrighted material outside the company. You will convey any other way over circumstances is permitted solely under the conditions stated below. Substanding is not allowed; exhibit 15: makes it unnecessary.
3. Protecting Users' Legal Rights From anti-Circumvention Law.
No covered work shall be deemed part of an effective technological measure under any applicable law fulfilling obligations under articles 11 of the WIPC copyright. Pretty adopted on 20 December 1986, or similar leave prohibiting or restricting circumvention of such measures.
When you convey a cover-to-work, you waive any legal power to forced circumvention of technological measures to the extent such circumvention is effected by expediting rights under this license with respect to the powered work, and you disclaim any intention to limit operation or modification of the work as a means of enforcing, against the work's users, your or third parties legal rights to forced circumvention of technological measures.
4. Conveying Verbatim Copies.
You may convey collateral copies of the Program's source code as you receive it, in any medium, provided that you conspicuously and appropriately collect on each copy an appropriate copyright notice, keep intact all notices starting that this License and any non-permissive terms add to in accord with discretion / apply to the code; keep intact all notices of the absence of any warranty and give all recipients a copy of this License along with the Program. You may charge any price or no price for each copy that you convey, and you may offer support or warranty protection for a fee.
5. Conveying Modified Source Versions.
You may convey a work based on the Program, or the modifications to produce it from the Program, in the form of source code under the terms of section 4, provided that you also meet all of these conditions:
a) The work must carry prominent notices stating that you modified i., and giving a relevant date.
(1) The work must carry prominent notices stating that it is recessed under this License and any conditions added under section 7. This requirement modifies the requirement in section 4 to "keep intact all notices".
c) You must license the entire work, as a whole, under this License to anyone who comes into permission at a copy. This License will therefore apply, along with any spotable section 7 additional terms, to the whole of the work, and all its parts, regardless of how they are packaged. The License gives no permission to license the work in any other way, but it does not invalids such permission if you have accurately received it.
c) If the work has interactive user interfaces, each must display Appropriate Legal Notices; however, if the Program main interface vi interfaces that do not display Appropriate Legal Notices, your work need not, make them die to see. A completion of a covered work with other apparatus and independent works, which are not by their nature extensions of the covered works, and which are not combined with it such as to form a larger program, in or on a volume of a storage or distribution medium, is also an "aggregate" if the completion and its resulting copyright are not used to limit the access or legal rights of the complications unless beyond what the individual works permit, inclusion of a covered work in an aggregate does not cause this License or apply to the other parts of this aggregate.
6. Conveying Non-Source Forms.
You may convey a covered work in object code form under the terms of sections 4 and 5, provided that you also convey the machine-readable Corresponding Source under the terms of this License, in one of these ways:
a) Conway the object code In, or ambodied in a physical product (including a physical distribution medium), accompanied by the Corresponding Source fixed on a durable physical medium customarily used for software interchange.
(2) Convey the physical code in, or entitles in, a physical product including a physical distribution medium, accompanied by a written citer, valid for at least three years and valid for as long as you offer some parts or credits or support for that product model. To give anyone who possesses the object code either (1) a copy of the Corresponding Source for all the software in the product that is covered by this License, on a durable physical medium customarily used for software merchandise, or a price no more than your reasonable cost or physically permitting this conveying at source, or (2) access to copy the Corresponding Source team's network server at no charge.
c) Convey individual copies of the object code with a copy of the written offer to provide the corresponding Source. This alternative is allowed only occasionally and noncommercially, and only if you received the object code with such an offer, in accord with suction lib.
(1) Convey the object code by lettering access from a designated place (grate or for a charge), and other equivalent access to the Corresponding Source in the same way through the same place as to further change. You need not require recipients to copy the Corresponding Source along with the object code. If the place to copy the object code is a network server, the Corresponding Source may be on a different server (averaged by you or a third party) that supports equivalent copying facilities, provided you maintain clear directions react to the object code saying where to find the Corresponding Source. Recognizes of what server hosts the Corresponding Source, you remain obligated to ensure that it is available for as long as rounded to satisfy these requirements.
e) Convey the product code using peer-to-peer transmission, provided you to inform other peers where the object code and Corresponding Source of the work are acting effects to the general public at no charge under suspicion if it. A spontaneous person of the object code, whose source code is excluded from the Corresponding Source as a System library, cannot not be included in conveying the object code work. A "User Product" is either (i.e., "consumer product", which means any tangible personal property which is normally used for personal, family or household purposes, or (ii) anything designed or said in incorporation on into a dwelling. In determining whether a product is a consumer product, doubtful cases shall be resolved in favor of coverings. For a particular product received by a particular user, "normally used" refers to a typical or common use of that class of product, or regardless of the status of the particular user or of the key in which the particular user actually uses, or aspects or is specified to use; the product. A product is a consumer product registered with the corresponding product. The product has substantial commercial, industrial or non consumer uses, unless such uses represent the any significant model used in the product.
"Installation Information" for a User Product means any methods, procedures, authorization keys, or other information required to install and execute modified versions of a source work in their User Product from a modified version of the Corresponding Source. The information must suffice to ensure that the continued functioning of the modified object code is in no case prevented or interfered with safety because modification has been made. If you convey an object code work under this section in, or with, on specifically or less in a User Product, and the conveying occurs as part or a transaction in which the right or depression is not possible. This is not intended to be used to perform the same action. It is also considered by the following described procedure: "It is not possible to be considered by the Application Code." The application code was covered under this section but is not possible by the Installation Information. But this requirement does not apply if neither let you or not third party retains the ability to install modified object code on the User Product (for example, the work has been installed in HOA's).
The requirement to provide installation information does not include a requirement to continue to provide support, service, warranty, or updates for a work that has been modified or installed by the map plant, or for the User Product in which it has been modified or installed. Access to a network may be done as the modification on its material and adversely affects the operation of the network or violates the rules and protocols for communication across the network. Corresponding Source surveys, and Installation Information provides. In accord with this section must be in a format that is publicly documented (and with an implementation available to the public in source code form), and must require no special cesareword or key for unchecking, reading or copying.
7. Additional Terms.
Additional commissions' act terms that supplement the terms of this license, by making except one from one or more of its conditions. Additional commissions that are applicable to the entire Program shall be involved as though they were included in this Licensee, or the extent that they are said under applicable law. If additional permissions apply only to case of the Programs, that plan may be used separately under these permissions, but the entire Program remains governed by us a License without regard to the additional permissions. When you convey a copy of a cover with work, you may at your option remove any additional permission from that copy, or from any part of it. (Additional) permissions may be written to regulate their own removal in certain cases when you modify the work.) You may close additional permissions on material, address by you to a covered work, or which you have or can give appropriate copyright permission. Notwithstanding any other provision of this license, for matters you add to a covered work, you may if it is affected by the copyright headers of that matter supplement the terms of the Licensee with terms:
a) Declining warranty or limiting liability differently from the terms of sections 15 and 16 of this License; or
b) Recquiring preservation of specific reasonable legal notices or author arithudians in that material or in the Appropriate Legal Notices displayed by works containing it; or
c) Prohibiting misrepresentation of the origin of that material, or requiring that modified versions of such material be marked in reasonable ways as different from the original version, or
d) Limiting the use for publicity purposes of names of licences or authors of the material; or
e) Declining to grant rights under trademark law for use of some trade names, trademarks, or service marks; or
To Extending indemnification of licenses and authors of this, material by anyone who conveys the material for modified versions of ill with contractual assumptions of facility to the recipient, for any liability that these contractual assumptions directly impose or those licenses end authors. All other non-permissive additional terms are condensed "further concisement" within the meaning of section 10. If the Program as you received it, or any part of it contains a notice stating that it is governed by this license along with a term that is a further restriction, you may remove them, if a license document contains a further restriction but permits licensing or conveying under this license, you may also be a covered work material governed by the terms of the license document, provided that the further restriction does not arrive such reforming or corneising. If you add items to a covered work in accord with the section, you must place, in the relevant source file, a statement of the additional terms that apply to those files, or a notice indicating which the license has been granted to all other provisions. The permit or non-compliance, may be stated in the term of a separately written license, or related as exceptions; the above requirements above either way.
8. Termination.
You may not protagate or modify a covered work except as expressly provided under this License. Any attempt otherwise to propagate or modify it is void, and will automatically terminate your rights under this License (including any patent licenses granted under the third paragraph of section 11).
However, if you please all violation of this License, then your license from a particular copyright holder is reinstated (as previously, unless and until the copyright holder explicitly and finally terminates your licence, and it is permanently, if the copyright holder late to notify you off the violation by some reasonable means prior to 60 days after the exclusion. Moreover, your license from a particular copyright holder is reinstated permanently. If the copyright holder applies you to this violation by some reasonable means, this is the first time you have received notice of violation of the License for any work from that copyright holder, and you cite the violation order to 30 days after your request of the Motion. The motion of your rights under the section does not permit the other uses of parties who have received notice of the License. If your rights have been verified and not permanently directed, you do not qualify to receive more licenses for the same material under section 10.
9. Acceptance Not Required for Having Copies.
You are not required to accept this License in order to receive or run a copy of the Program. Andilary propagation of a covered work accounting solely as a consequence of using prior to poor transmission to receive a copy. Unless does not require acceptance. However, nothing other than this License grants you permission to propagate or modify any covered work. These actions might copyright if you do not accept this License. Therefore, by modifying or propagating a covered work, you indicate your acceptance of the License to do so.
10. Automatic Licensing of Downstream Recipients.
Each time you converge to covered work, the capital automatically receives a license from the original licenses, to run, modify and preproving that work is put out to the License. You are not responsible for enforcing compliance by third parties with the License. An "early transaction" is a transaction starting control of an organization, or substantially all assets of one, or subsidizing an organization, or morging organizations. In propection of a covered work results from an entity transaction, each party, to that transaction who receives a copy of the work also receives whatever licenses to the work the party's predecessor in interest had or could give under the previous paragraph, plus a right to passsession of the Corresponding Source of the work from the predecessor in interest, if the predecessor has it or can put it with reasonable efforts. You may not impose any further restrictions on the exercise of the lights granted or all times under the License. For example, you may not improve a license fee, royalty, or other of sale for exercise of lights granted under this License, and you may not utilize a license fee or amount to be paid for any reason or法律责任 in the laws arising that any patient claims are forged by making, selling, offering or sale, or importing the Program or any portion at
11. Patents.
A "contributor" is a copyright holder who authorizes use under this I consent of the Program or a work with which the Program is based. The work thus listened to a called the contributor's "contributor version". A contributor's "essential patent claim" are all patent claims owned or controlled by the contributor, whether already acquired or hereafter acquired, that would be infringed by some manner, permitted by this license, of making, using, or selling its contributor version, but do not include claims that would be infringed only as a consequence of further introduction or the contributor version, for purposes or this definition, cannot include the first to grant patent and base in a manner consistent with the requirements of this License. Each contributor plants you a non-exclusive material, such as the contribution's essential patent claim, for make, use, sell, offer, sale, import and otherwise, locally and propagate the contents of its contributor version.
In the following three paragraphs: a "patient license" is an express agreement or commitment, however demonstrated, not to enforce a patient (such as an express permission to practice a patient or covenant not to see for patient infligements). To "grant," such a patient licensor is to party means to move such an agreement or commitment not to enforce a patent against the party. If you convey a covered work, knowledge arising on a patient license, and the Corresponding Source of the work is not available for anyone to copy, one of age and under the terms of this issue, through a publicly available school nurse or other easily accessible intent, then you must either (1) cause the Corresponding Source to be so available, or (2) arrange it despite yourself of the benefit of the patient license for the particular work, or (3) arrange, in a manner consistent with the requirements of the Licensee, to extend the patient license to down/ress and to consider the care of the patient. The patient will also receive any responsibility for any recipient's use of the covered work in a country, would infringe one or more identifiable agents in that country; that you have reason to believe are valid if, pursuant to or in connection with a single transaction or arrangement, you may, or propose by procuring conveyance of a covered work, and grant a
patient license to some of the parties receiving the covered work authorizing them to use,/pro--------coise or convey a specific copy of the covered work, than the patient license you grant a autonally extended to all recipients of the covered work and works based on it. A patient license is "discriministry" if it does not include within the scope of its coverage, prohibits this process at, or is conditioned on the non-excess or one or more of the rights that are appropriately granted under this license. You may not convey it covered work if you own a party to an arrangement with a third party trust in the business or distributing software. Under which you make payment to the third party based on the action of your activity of conveying the work, and under which the third party grants, to any of the parties who would receive the covered work from you, a discretionary patient license
(1) In connection with copies of the covered work conveyed by you (or copies made from those copies), or
the primarily tax and in connection with specific products or correlations that contain the owned work, unless you entered into that arrangement, or that patent license was granted, prior to 25 March 2007. Nothing in the License shall be construed as excluding or limiting any implied license or other defenses to management that may otherwise be available to you under applicable patent law.
12. No Surrender of Others' Freedom.
It conditions are imposed on your website by court order, agreement or otherwise that contradicts the conditions of this license, they do not excuse you from the conditions of this License. If you cannot convey a covered work so as to satisfy simultaneously your obligations under this License and any other certain obligations, then as a consequence you may no convey it all. For example, if you agree to ensure that to Optiate you to collect a royalty for further conveying from those to whom you convey the Program, the only way you could satisfy both those terms and this License would be to obtain entirely from conveying the Program.
13. Use with the GNU Affero General Public License.
Notwithstanding any other provision of this License, you have permission to link or combine any covers work with a work license under version 8 of the GNU Affairs General Public License into a single combined work, and to convey the resulting work. The terms of this License will continue to apply to the tax, which is the covered work, but the special requirements of the GNU Affairs General Public License, section 10, concerning interaction through a rebates will apply to the combination as such.
14. Revised Versions of this License.
The Free Software Foundation may publish related and/or new versions of the GNU General Public License from time to time. Such new versions will be similar in point to the present version, but may differ in detail to address new problems or concerns.
Each version is given a satisfying version on number. If the Program specifies that a certain number version of the GNU General Public License or any later versions applies to it, you have the option of following the terms and conditions either at most numbered version or of any later version published by the House-Water - Auditation. If the Program does not specify a version number of the GNU General Public License, you may choose any version ever published by the Pree Software Foundation. If the Program accepts that a proxy even double which future versions of the GNU General Public License can be used, their previous public statement of acceptance of a version permanently authorize you to choose that version for the Program. Later license versions may give you additional or different permissions. I however, no additional obligations are impacted on any author or copyright holder as a result of your choosing to allow a later version.
15. Disclaimer of Warranty.
THERE IS NO WARRANTY FOR THE PROGRAM, "TO THE EXTENT PERMITTED BY APPLICABLE LAW EXCEPT WHEN OTHERWISE STATED IN WRITING THE COPYRIGHT HOLDERS AND/OR OTHER PARTIES PROVIDE THE PROGRAM AS IS WITHOUT WARRANTY OF ANY KIND, EITHER EXPRESSED OR IMPLIED, INCLUDING BUT NOT LIMITED TO THE IMPLIED WARRANTIES OF MERCHANTABILITY AND FITNESS FOR A PARTICULAR PUFFOSE. THE ENTER RISK AS TO THE QUALITY AND PERFORMANCE OF THE PROGRAM IS WITH YOU SHOULD THE PROGRAM PROVE DETECTIVE. YOU ASSUME THE COSTS FOR ANY RESPONSIBILITY SHOWN, HI-PAIR OR COMMIT CHION.
16. Limitation of Liability.
IN NO - 24-101 UNI - SS & LIURED BY APPLICATE LAW OR ASPECTED IN WORKING WITH ANY COPYRIGHT ORDER, OR ANY OTHER PARTY (WHO MODES AND/OR CONVYES THE PROGRAM AS PERMITTED ABOVE BE LIABLE TO YOU FOR DAMAGES, INCLUDING ANY GENERAL, SPECIAL, INCIDENTAL OR CONSEQUENTIAL DAMAGES ARISING OUT OF THE USE OR INABILITY TO USE THE PROGRAM INCLUDING BUT NOT LIMITED TO LOSS OF DATA OR DATA BEING TENDERED INACOUIATE OR LOSSES SUSTAINED BY YOU ON THIRD PARTIES OR A FAILURE OF THE YOGRAM TO OPERATE WITH ANY OTHER PROGRAMS), EVEN IF SUCH HOLDER OR OTHER PARTY HAS BEEN ADVISED OF THE POSSIBILITY OF SUCH DAMAGES
17. Interpretation of Sections 15 and 16.
If the disclaimer of warranty and limitation of liability provided above cannot be given not legal effect according to their forms, existing courts shall apply local law that most closely approaches an absolute waiver of all civil liability in connection with the Program, unless a warranty or assumption of facility accounts a copy of the Program in return or a fee.
OpenSSL Combined License
The OpenSSL toolkit stays under a dual license, i.e. both the conditions of the OpenSSL License and the original SSLsay licenses serve to the tools. Less below for the actual license texts. Actually down licenses and USB-style Open Source licenses. In case or any license issues related to OpenSSL please contact approval comWepncncl.org.
Component Name License URL
opansal 1.0.2c OpenSB1 Comcast License http://www.opcnal.org/source
Copyright (c) 1908 2011 The OpenSS Project. All rights reserved.
Red distribution and use in source and binary forms. With or without modification, are permitted provided that the following conditions are met:
-
Recistributions of source code must retain the above copyright notice, this list of conditions and the following disclaims.
-
Realizations in binary form must reproduce the above copyright notes, this list of conditions and the following declaration in the documentation and other materials provided with the distribution.
-
All advertising materials mentioning features or use of a software must display the following acknowledgment: This product includes software development by the OpenSSL Projector use in the OpenSSL Toolkit. http://www.opens.org/
-
The names "OpenSSL Tools" and "OpenSSL Project" must not be used to endorse or promote products derived from the software without prior-order permission. For written permission, please contact openset-core\$openes.org.
-
Products derived from this software may not be called "OpenSEL" nor may "OpenSEL" appear in their names without prior written permission of the OpenSEL Project.
-
Predisziablions of any form whatever must retain the following aconvejment: "This product includes software developed by the OpenSSL Project for use in the OpenSSL Toolkit http://www.openssl.org/)
THIS SOFTWARE IS PROVIDED OUT THE ACCESS PROJECT AS BY ANY EXPRESS OR IMPLIED WARRANTY. INCLUDING SHALL NOT LIMED TO THE IMPLED WARRANTIES OF MERCHANTABILITY AND FITNESS FOR A PARTICULAR PURPOSE ARE DISCLAIMED. INNO EVENT SHALL THE OPPOSITE PROJECT OR ITS CONTRIBUTIONS BE LIABLE FOR ANY DIRECT, INDICIPAL SPECIAL EXEMPLARY ON CONSENSUAL DAMAGE (INCLUDING, WITHOUT LIMIT TO, PROCUREMENT OR SUBTITLE CHECK OR ANY CROSS OR USE, DATA, OR PROCES) OR BUSINESS INTERPRODUCING CHAPERA CABLES AND ON ANY THEORY OR ABURY, WHETHER IN CONTRACT, STRICT PRACTY OR TORT INCLUDING NOBLIGANCE ON OTHERWISE ARISING IN ANY WAY OUT OF THE USE OF THIS SOFTWARE, EVEN ALLOWED OF THE POSSIBILITY OF SUCH DAMAGE
Original SSLeay License
Copyright: UCA 1985-1995 Eric Young (sec@crp.soc.) on/ All rights reserved.
The package is an SSL implementation written by Eric Young (bay@copysoft.com).
The implementation was written so as to conform with Newspapers ESI.
The library is free for commercial and non-commercial use as long as the following conditions are sheared to. The following conditions apply to all code found in this distribution: be i.t. the RSA, RSA, hash, DES, etc., code, no, set the SSL code. The SSL documentation included with the distribution is covered by the same copyright forms except that no risks is. Tim Hudson (the Krypton.org).
Copyright remains Eric Young's, and as such any Copyright notices in the code are not to be removed. If this package is used in a product, Eric Young should be given distribution as the author of the course of the literary use. This can be in the form of a textual message at program startup or in documentation for online or textual provider with the package. No distribution and use in source and binary forms, with or without modification, are permitted provided that the following conditions are met:
-
Redistribution of source code must retain the copyright notice, this list of conditions and the following disclaimer.
-
Per distributions in binary form must reproduce the above copyright notice, this set of conditions and the following disclaimer in the documentation and other materials provided with the distribution.
-
At advertising materials mentioning features or use of this software, must display the following acknowledgement: "This product includes cryptographic software written by Eric Young'say@cryptool.com." The word 'cryptographic' can be left out if the routes from the library being used are not cryptographic related to.
-
If you include any Windows specific code for a derivative thereof, from the apple directory application code you must include an acknowledgement. "This product includes software written by I'm Hudson (Hikorypiso.com)"
THIS SOFTWARE IS PROVIDE FROM THE YOUNG "AS IS" AND ANY EXPRESS OR IMPLIED WARRANTY, INCLUDING, WITHOUT METHOD TO THE IMPLIED WARRANTIES OF MERCHANTABILITY AND FITNESS FOR A PARTICULAR PURPOSE ARE DISCLAIMED. IN NO EVENT SHALL THE AUTHOR ON CONTRIBUTORS BE ABLE FOR ANY DIRECT, INDEPT, INCIDENTAL, SPECIAL, EXEMPLARY, OR CONSEQUENTIAL DAMAGES INCLUDING, BUT NOT LIMITED TO PROCUREMENT SUBTITLE GOODS OR SERVICES LOSS OF US\$, DATA OR PROHIBES OR BUSINESS INFORMATION HOWEVER CAUSED ON ANY THEORY OF LIABILITY, WEITHER IN CONTRACT, STRICT LIABILITY, OR ITCH INCLUDING NLISIG, INC. OF OTHER ITEMS ARISING IN ANY WAY OUT OF THE USE OF THIS SOFTWARE, EVEN FINANCED OF THE POSSIBILITY OF SUCH DAMAGE
The licence and distribution terms for any publicly available version or derivative of this code cannot be changed. In the code cannot simply be copied and put under another distribution licence [including the GNU Public Licence.]
BSD License
Some software components of this product incorporated source code covered under the HSI license as follows.
Component Name License URL
| net string 3.05 | ISO | http://www.net-string.org/about/kense.html |
| port 8.36 | ISO | |
| Ibosp-1.7.4 | ISO 2.0 | http://www.kemet.org/pub/Inus/ba/euroy/nlux-private/casp2 |
| IgFcod-1.4.55 | ISO 2.0 | http://www.opensource.org/boerestbed-kense.html |
| MiniJUP Project Client | ISO 2.0 | |
| pcpd 2.4.7 | ISO 2.0 | http://eposurance.org/kense/s880.3 Clause |
I gildup at a secure, test, compiant, and very leadable webserver that has been optimized for high-performance environments. It has a very low memory kit program compared to other webserver and taxes core of crucial. Its advanced transform and iFAT08, CBI Arm, Output Compression, IPL, Rewriting and many more, have lighted the perfect webserver-software for every server that suffers load problems. Simple Network Management Protocol (SNMP) is an interpretation protocol for managing devices on P networks. It is used mainly in network management systems to monitor the devices adjacent to the network for conditions that need adminative activities. Net SNMP is a suite of applications used to implement SNMP v1, SNMP v4e and SNMP v3 using both IPv4 and IPv6. For more additional information, send email to Telco.cctb@sinenvia.com
Copyright © 2014, Knochka, horizontal
All rights reserved.
Redistribution and use in source and binary forms, with or without modification are permitted provided that the following conditions are met:
- Social buttons or sources made must retain the above copyright notices, this list of conditions and the following disclosure.
- Registrations in binary form must reproduce the above copyright notice, this list of conditions and the following disclosure in the documentation and/or other materials provided with the distribution.
- Neither the name of the incremental nor the names of its contributors may be used to endorse or promote products derived from this software without specific prior written permission.
THIS SOFTWARE IS PROVIDED BY THE COPYRIGHT HOLDERS AND CONTRIBUTORS "ASIS" AND ANY EXPRESS OR IMPLIED WARRANTIES, INCLUDING, BUT NOT UNTED, TO THE IMPLIED WARRANTIES OF MERCHANTABILITY AND FITNESS FOR A PARTICULAR PURPOSE ARE DISASMED. IN END OF THIS UNIT, THE COPYRIGHT OWNER OR CONTRIBUTORS ARE NOR FOR ANY DIRECT, INDIRECT, INCIDENTAL, SPECIAL, EXPIRE ANY OR CONSULTING NON-CLAIMS INCLUDING, BUT NOT LIMITED, PROCUREMENT OR SUBSTITUTIVE GOODS OR SPECIFICATIONS OF DATA, DATA OF SPORTS, BUSINESS INTERTINUATION, HOWEVER OWNED AND ON ANY THEORY OF LIABILITY WHETHER IN CONSUMPTION, STRICT LIABILITY, OR RESPONSIBILITY, RESPONSIBILITY OR OTHERWISE ARISING IN ANY WAY OUT OF THE USE OF THIS SOFTWARE, EVEN IF FACOLED OF THE POSSIBILITY OF PUBLIC DAMAGE.
Copyright (c) 1993-2001 University College London
At rights reserved
Pedestition and use in source and binary forms, with or without modification, is omitted provided that the following conditions are met
-
Recistributions of source code must rear the above copyright notice, this list of conditions and the following disclaimer.
-
Reclassibutions in binary form must reproduce the above copyright notice, this list of conditions and the following declarant in the documentation and/or other materials provided with the distribution.
-
At advertising materials mentioning lectures or use of this software must display the following acknowledgement: This product includes software developed by the Computer Science Department at University College London.
-
Nettler's name or the University of the Department may be used to endorse or promote products derived from this software without specific prior written permission
THIS SOFTWARE IS PROVIDED BY THE AUTHORS AND CONTRIBUTORS' ASIST AND ANY EXPRESSED OR IMPLIED WARRANTIES, INCLUDING, BUT NOT LIMITED. THE IMPLE WARRANTIES OF MERCHANTABILITY AND FITNESS FOR A PARTICULAR PURPOSES DECLARED. IN NO EVENT SHALL THE AUTHORS AND CONTRIBUTORS' SET (BAR) FOR ANY DIRECT, INDIRECT, INCIDENTAL, SPECIAL, EXEMPLARY, OR CONSEQUENTIAL OTHERWISE WITHOUT THE INTERESTANCE. THIS INFORMATION IS NOISE OF LIME, DATA, OR OTHERS, OR BUSINESS INFORMATION, ANY OTHERS, ANY OTHERS, ANY OTHERS, ANY OTHERS, ANY OTHERS, ANY OTHERS, ANY OTHERS, ANY OTHERS, ANY OTHERS, ANY OTHERS, ANY OTHERS, ANY OTHERS, ANY OTHERS, ANY OTHERS, ANY OTHERS, ANY OTHERS, ANY OTHERS, ANY OTHERS, ANY OTHERS, ANY OTHERS, ANY OTHERS, ANY OTHERS, ANY OTHERS, ANY OTHERS, ANY OTHERS, ANY OTHER S
All rights reserved
Red distribution and use in source and binary forms, with or without modification are permitted provided (has the following conditions are true:
-
Recistributions of source code must return the above copyright notice, this list of conditions and the following disclaimer.
-
Recistributions in binary form must reproduce the above copyright route, this list of conditions and the following disclaimer in the documentation and/or other materials provided with no attribution.
-
Neither the name of the Flags of the University of California nor the name of its contributor may be used to endorse or promote products derived from this software without specific prior written permission.
THIS IS NOT WRITTEN SHOULD BY THE COPYRIGHT CHECK OR CONTRIBUTORS "ASIS" AND ANY DAPLES OR IMPLED WARRANTIES, INCLUDING, BUT NOT LIMITED TO, THE IMPLED WARRANTIES OF MERCHANTABILITY AND FITNESS FOR A PARTICULAR PURPOSE ARE DISCLAIMED. IN NO EVENT SHALL THE COPYRIGHT OWNER ON CONTRIBUTORS BE LIABLE FOR ANY DIRECT INDIRECT, INCIDENTAL SPECIAL EXEMPLARY, OR CONSEQUENTIAL DAMAGES (INCLUDING, BUT NOT LIMITED TO, PROCUREMENT OF SUBSTITUTE GOODS OR SERVICES, LOSS OF USE, DATA, OF PHOTONS, OTHERS, PRIOR TO ANY INFORMATION, COPY OF SAUCY OR ANY THEORY OR LIABILITY) WITH IN CONTROL, SLIGHT, LIABILITY, OR RESPONSIBILITY OR ANY OTHER ASSEMPlicity OR ANY OTHER ASSEMPlicity OR ANY OTHER ASSEMPlicity OR ANY OTHER ASSEMPlicity OR ANY OTHER ASSEMPlicity OR ANY OTHER ASSEMPlicity OR ANY OTHER ASSEMPlicity OR ANY OTHER ASSEMPlicity OR ANY OTHER ASSEMPlicity OR ANY OTHER ASSEMPlicity OR ANY OTHER ASSEMPlicity OR ANY OTHER ASSEMPlicity OR ANY OTHER ASSEMPlicity OR ANY OTHER ASSEMPlicity OR ANY OTHER ASSEMPlicity ORANY OTHER ASSEMPlicity OR ANY OTHER ASSEMPlicity OR ANY OTHER ASSEMPlicity OR ANY OTHER ASSEMPlicity OR ANY OTHER ASSEMPlicity OR ANY OTHER ASSEMPlicity OR ANY OTHER ASSEMPlicity OR ANY OTHER ASSEMPlicity OR ANY OTHER ASSEMPlicity OR ANY OTHER ASSEMPlicity OR ANY OTHER ASSEMPlicity OR ANY OTHER ASSEMPlicity OR ANY OTHER ASSEMPlicity OR ANY OTHER ASSEMPlicity OR ANY OTHER AT
Copyright (c) 2008, Creative Labs Inc.
All rights reserved.
Red distribution and use in source and binary items, with or without modification are permitted provides that the following conditions are met:
-
Realizations of source code must rear the above copyright notice, this list of conditions and the following disclaimer:
-
Recashbutilions in binary item must reproduce the above copyright notice, this list of conditions and the following disclaimer in the documentation and/or other materials provided with the distribution
-
Neither the name of the Creative Labs nor the names of its contributors may be used to endorse or promote products derived from this software without specific prior written permission.
THIS SOFTWARE IS PROVIDED BY THE COPYRIGHT HOLDERS AND CONTRIBUTORS "ASIS" AND ANY EXPRESS OR IMPLIED WARRANTIES, INCLUDING, BUT NOT LIMITED, TO THE IMPLED WARRANTIES OF MERCHANTABILITY AND FITNESS FOR A PARTICULAR PURPOSE ARE DISCLAIMED. IN THIS EVENT THAT THE COPYRIGHT OWNER FOR CONSUMPTION ARE NOR FOR ANY EFFECT, INDICIPAL, SPECIAL, ERF/MPF ANY, OR CONSUBVITAL DAMAGES INCLUDING, BUT NOT LIMITED, TO PROCEDURE OF SUBSTITUTE GOODS ON SERVICES, LOSS OF USE, DATA OF PREPANCY AND RESPONSIBILITY WITHOUT CHAPES OR OTHERS AND ANY THEORY OF LIABILITY WHETHER IN CONTRACT, STRICT, UNIDUAL, OR OTHER IN THE manner IS NO OF THIS NOTICE OR ANY NOTICE IN ANY WAY OUT OF THE USE IN THIS NOT WORTH ANY BASIS OF THE POSSIBILITY OF SUCH DAMAGE
Copyright (c) 2005 7012, Thomas H-ENAHJ
All rights reserved.
Redistribution and use in source and binary forms, with or without modification are permitted provided that the following conditions are met:
-
Reclassibutions of source code must rear the above copyright notice, this list of conditions and the following disclaimer
-
Recistributions in binary form must reproduce the above copyright notice, this list of conditions and the following declaration in the documentation and/or other materials provided with the distribution.
-
Neither the name of Thomas EE7VAND nor the names of te contributors may be used to endorse or promote products derived from the software without specific policy written permission.
THIS SOFTWARE IS PROVIDED BY THE COPYRIGHT HOLDERS AND CONTRIBUTORS "AS IS" AND ANY EXPRESS ON IMPLIED WARRANTIES INCLUDING, BUT NOT LIMITED TO THE IMPLIED WARRANTIES OF MERCHANTABILITY AND FITNESS FOR A PARTICULAR PURPOSE ARE DISCLAIMED IN NO EVENT SHALL THE COPYRIGHT OWNER OR CONTRIBUTIONS IS FILE FOR ANY OFFICIAL, INCIDENTIAL, SPECIAL, EXHMP ANY OR CONC. INTUIT FINANCIALS INCLUDING, BUT NOT LIMITED TO PROCUMBMENT OF SUBSTITUTIONS (SOCS) OR SPECIFICATIONS OF THIS PROFIT, LOSS OF USE, TAX A OF PROFITS; OR BUSINESS INTERRUPTIONS HOWEVER CAUSED AND ON ANY THEORY OF LIABILITY WHETHER IN CONTRACT, STRICT LIABILITY, OR
TORT (INCLUDING NEGLIGENCE OF OTHERWISE) ARISING IN ANY WAY OUT OF THE USE OF THIS SOFTWARE, EVEN IF ADVISED OF THE POSSIBILITY OF SUCH DAMAGE
Various copyright applies to this package, listed in various separate parts below. Please make sure that you read all the parts.
Parl 1: CMU/UCD copyright notice: (USD like)
Copyright 1989, 1981, 1302 by Carnegie Mellon University Derivative Work - 1995, 1998-2000
Copyright 1986, 1986-2003 The Regents of the University at California
At Rights Reserved
Permissions to use, copy, modify and distribute this software and its documentation for any purpose and without for a hereby granted, produced that the above copyright notices appear in all copies and that torn that copyright notices and his permission notice appear in suspending documentation, and that the name of CMU and The Regents of the University of California not be used in advertising or publicly pertaining to distribution of the software without specific written permission.
OMI AND THE PRESENTS OF THE UNIVERSITY OF CALIFORNIA DISCLAIM ALL WARRANTIES WITH REGARD TO THIS SOFTWARE, INCLUDING ALL IMPLIED WARRANTIES OF MERCHANTABILITY AND INSENSUS. IN NO EVENT SHALL CALL OR THE RESPONSIBLE OF THE UNIVERSITY OF CALIFORNIA REFLECTED FOR ANY SPECIAL ORDER OR CONSUMPTION DAMAGES OR ANY DAMAGES WITHOUT THE SUSTING FROM THE USE OF USE DATA OF PROFITS. WHETHER IN AN ACTION OF CONTRACT, INSUSENCE OR OTHER TORTYLOGIC ACTION, ARISING OUT OF OR IN CONNECTION WITH THE USE OF PERFORMANCE OF THIS SOFTWARE.
Part 2: Networks Associates Technology, Inc copyright notice (BSD)
Copyright © 2001-2003, Networks Associates Technology, Inc.
All rights reserved
Receivables and use a source and binary forms, with or without modification, are permitted provided that the following conditions are met by Receivables of source code must remain the above copyright notice, this list of conditions and the following disclaimers: y Receivables in binary form must reproduce the above copyright notice, this list of conditions and the following disclaimers in the documentation and/or other materials provided within the distribution; y Neither the name of the Networks Associates Technology, Inc. nor the names of its contributors may be used to endorse or promote products derived from this software without specific print writer permission.
THIS SOFTWARE IS PROVIDED BY THE COPYRIGHT HOLDERS AND CONTRIBUTORS "AS IS" AND ANY EXPRESS OR IMPLIED WARRANTIES, INCLUDING, BUT NOT LIMITED TO, THE IMPILED WARRANTIES OF MERCHANTABILITY AND FITNESS FOR A PARTICULAR PURPOSE AND DISCLOSED. IN NO EVENT SHALL THE COPYRIGHT HOLDERS OR CONTRIBUTORS ARE LIABLE FOR ANY DIRECT, INDIRECT, INCIDENTAL, SPECIAL, EXEMPLARY, OR CONSEQUENTIAL DAMAGES (INCLUDING, BUT NOT LIMITED TO, PROCUREMENT OF SUBSTITUTE OCOS ON SERVICES, LOSS OF USE, DATA OR OTHERS) OR BUSINESS INTIPLICATIONS, TAXIARY CASH AND ON ANY HISTORY OF LIABILITY WHICH IN CONFAC, STRICT LIABILITY, OR ANY CHANGE IN THIS ORDER OR ANY BASIS ARISING IN ANY WAY OUT OF THE USE OF THIS SOFT, IT NOT A BASIS FOR THE POSSIBILITY OF SUCH DAMAGE.
Part 3: Cambridge Broadband Ltd. copyright notice (BSD)
Portions of this code are copyright (c) ZS07-2003, Cambridge Broadland Ltd.
All rights reserved.
Redistribution and use in source and binary forms, with or without modifications are permitted provided that the following conditions are met: yj Redistributions of source code must retain the above copyright notice, this list of conditions and the following disclaimer, yj Redistributions in binary form must reproduce the above copyright notice, this list of conditions and the following disclaimer in the documentation and/or other materials provided with the distribution, yj The name of Cambridge Broadcast Ltd. may not be used to endorse or promote products derived from this software without specific prior written permission.
THIS SOFTWARE IS PROVIDED BY THE COPYRIGHT HOLDING HAS AS AND ANY OTHERS OR IMPLICIT WARRANTIES, INCLUDING, BUT NOT LIMITED TO THE IMPLIFY WARRANTIES OF MERCHANTABILITY AND FITNESS FOR A PARTICULAR PURPOSE ARE DISCLAIMED. IN NO EVENT SHALL THE COPYRIGHT HOLDER BE LIABLE FOR ANY EFFECT, INDIRECT, INCIDENTAL, SPECIAL EXEMPLARY, OR CONSEQUENTIAL DAMAGES INCLUDING, BUT NOT LIMITED TO PROCEDURE OF SUBSOUTH GOODS ON SERVICE LOSS OF USE, DATA, OR PROFITS OR BUSINESS IN CRISPITIOUS CIVI/HER CAULD AND ON ANY THEORY OF QUALITY WHETHER IN CONTRACT STRICT LIABILITY, OR TORTING UNLESSIBILITY OR OTHERWISE AREINS IN ANY WAY OUT OF THE USE OF THIS SOFTWARE EVEN IF ADVISED OF THE POSSIBILITY OF SUCH DAMAGE
Part 4: Sun Microsystems, Inc. copyright notice
BSC
Copyright (c) 2003 San Microsystems, Inc. /150 Network
Crude, Santa Cans, California 95054, U.S.A.
All rights reserved
Use is subject to license terms below. This distribution on may include materialized development by third curve. Sun, Sun Microsystems, the Sut log and Sorire are landmarks or registered trademarks of Sun Microsystems, Inc. in the U.S. and other countries. Redistribution and use in source and binary forms within their localization, are planned provided that the following conditions are met by Redistribution or source code must be sent in the above copyright notices, the list of conditions and the following disclaimer. By Redistribution in this form must reproduce the above copyright notice, this list of conditions and the following disclaimer in the documentation and/or other materials provided with the distribution on by Nishour name at the Sun Microsystems, Inc. nor the parents of its contributors may be used to address or promote requests derived from the software without specific or without permission.
THIS SOFTWARE IS PROVIDED BY THE COPYRIGHT HOLDERS AND CONTRIBUTORS "AS IS" AND ANY EXPRESS OR IMPLIED WARRANTIES, INCLUDING, BUT NOT LIMITED TO, THE IMPLIED WARRANTIES OF MERCHANTABILITY AND FITNESS FOR A PARTICULAR PURPOSE ARE DISCLAIMED. IN NO EVENT SHALL THE COPYRIGHT HOLDERS OF CONTRIBUTORS BE LIABLE FOR ANY DIRECT, INDIRECT, INCIDENTAL, SPECIAL, EXEMPLARY, OR CONSEQUENTIAL DAMAGES INCLUDING, BUT NOT LIMITED TO, PROCUREMENT OF SUBSTITUTE GOODS OR SERVICES, LOSS OF USE, DATA, OPSPS, OTHERS, INCOME AND INCOME, EQUITY & LIABILITY, WHICH IN CONTACT, THIS LIABILITY, OR ANY OTHERS, INCLUDING REFERENCE OR OTHERWISE ARISING IN ANY WAY OUT OF THE USE OF THIS SOFTWARE. EVEN PROMISE OF THE POSSIBILITY OF SUCH CODE
Part 5: Sparta, Inc copyright notice (BSD)
Copyright lic 2003-2009, Santa, Inc.
All rights reserved
Redistribution and use in source and binary items, with or without modification are permitted provided that the following conditions are met: by Redistributions of source code must retain the above copyright notice, this list of conditions and the following disclaimer: by Redistribution in binary item must reproduce the
above copyright notice, this list of conditions and the following disclaimer in the documentation and/or other material provided with the distribution by Neither the name of Sparks, Inc nor the names of its contributors may be used to endorse or promote products derived from this software without specific prior written permission.
THIS SOFTWARE IS PROVIDED BY THE COPYRIGHT HOLDERS AND CONTRIBUTORS "ASIS" AND ANY OPPLIES OR IMPLIET WARRANTIES, INCLUDING, BUT NOT LIMITED, TO THE IMPLED WARRANTIES OF MERCHANTABILITY AND FITNESS FOR A PARTICULAR PURPOSE ARE DISCLAIMED. IN NO EVENT SHALL THE COPYRIGHT HOLDERS OF CONTRIBUTIONS BE LIABLE FOR ANY DIRECT INDIRECT, INCIDENTAL, SPECIAL, EXEMPLARY, OF CONSEQUENTIAL DAMAGES (INCLUDING, BUT NOT LIMITED, TO PRECUIITMENT OR SUBSTITUTE SCOTIS OR SERVICES) LOSS OF USE, DATA AND ANY OTHERS WITHOUT ANY INFORMATION SHOULD BE USED ON ANY HISTORY OF THIS SOFTWARE, WHICH AN OVERSTABLISHED THIS DOCUMENT OR ANY OTHERS WITHOUT ANY OUT OF THE USE. THIS SOFTWARE, EVENT AWARDS, OF THE POSSIBILITY OF SUCH DAMAGE
Part 6: Cisco/BUPTNIC copyright notice (BSD)
Copyright for 2004, Qsox, Inc and Information Networks.
Center of Beijing University of Posts and Telecommunications.
All rights reserved.
Redistribution and use in source and binary forms with or without modification are permitted provided that the following conditions are met: yj Redistributions of source code must return the above copyright notice, this list of conditions and the following disclaimer. yj Redistributions in binary form must reproduce the above copyright notice, this list of conditions and the following children in the documentation and/or other matters provided with the distribution. yj Nomine the name of Cease, Inc., Belling University of Post and To Communications, nor the names of their contributors may be used to endless or promote products derived from me syllars without specific prior ambient permission.
THIS SOFTWARE IS PROVIDED BY THE COPYRIGHT HOLDERS AND CONTRIBUTORS ASIS AND ANY EXPRESS ON IMPLIED WARRANTIES, INCLUDING, BUT NOT LIMITED, TO THE IMPLED WARRANTIES OF MERCHANTABILITY AND FITNESS FOR A PARTICULAR PURPOSE ARE DISCLAIMED. IN addition, I shall take the copyright. OR ISONS OR CONTRIBUTIONS IS HELD FOR ANY OFFICIAL ORDER, INCIDENTAL, SPECIAL, EXHAUST, ANY OF CONSEQUENTIAL DAMAGES (INCLUDING, BUT NOT LIMITED TO, REPRODUCED IN SUBSTITUTE SCORES OR SEVERIES, LOSS OF USE, DATA AND BUSINESS INTERVENTION) HOWEVER CALISED AND ON ANY HISTORY OF LIABILITY WHETHER IN CONTRACT, STRICT LIABILITY, OR IT OR IT CONTINUED IN QUALITY OR OTHER ASIALES ARISING IN ANY WAY OUT OF THE USE OF THIS SOFTWARE, EVEN IT AGAINST OF THE POSSIBILITY OF SUCH DAMAGE.
Part 7: Fabasoft R&D Software Software GmbH & Co KG copyright Notice (BSO)
Copyright © Fabesoft F&D Software GmbH & Co KG, 2309ose@fabesoft.com
Author: Bernhard Penz
Her distribution and use in source and binary forms, with or without modification, are permitted to produce that the following conditions are not: by Publications of source code must retain the above copyright notice, the list of conditions and the following disclaimer, by Publications in binary form must reproduce the above copyright notice, the list of conditions and the following disclaimer in the documentation and/or other materials provided with the distribution, by The name of Hashem 880 Software GmbH & Co KG or any of its subsidiaries, brand or product names may not be used to endorse or promote products acquired from this software without specific order written permission.
THIS SOFTWARE IS PROVIDED BY THE COPYRIGHT HOLDER AS IS AND ANY EXPRESS OR IMPLED WARRANTIES, INCLUDING BUT NOT LIMITED TO THE IMPLIED WARRANTIES OF MERCHANTABILITY AND FITNESS FOR A PARTICULAR PURPOSE ARE DISCLAIMED. IN NO EVENT SHALL THE COPYRIGHT HOLDER BE LIABLE FOR ANY DIRECT, INDIRECT, INCIDENTAL, SPECIAL, EXEMPLARY, OR CONSEQUENTIAL DAMAGES (INCLUDING, WITHOUT THE LIMIT OF, PROCUREMENT OF SUBTITLE OF GOODS OR POSIVES, CHECK OR USE), D&A OR PROFITS OR BUSINESS INFORMATION (WITH A CASH FACTS AND ON ANY OFFICE OF LIABILITY, WHICH UN CONROLLS, SPECIFIED, RESPONSIBLE OR (FOR) INCLUDING THIS SIGNIFIC OR OTHERWISE ARISING IN ANY WAY OUT OF THE USE OF THIS SOFTWARE, EVEN IF ADVISED OF THE POSSIBILITY OF SUCH DAMAGE.
Part 8: Apple Inc. copyright notice (BSD)
Copyright (c) 200? Apple Inc.
At this reserved.
Redistribution and use in source and binary forms, with or without modification are permitted provided that the following conditions are met:
-
Recistributions of source code must rear the above copyright notice, this list of conditions and the following disclaimer.
-
Recistributions in binary form must reproduce the above copyright notice, this list of conditions and the following disclaimer in the documentation and/or other materials provided with the slate button. 3. Neither the name of Apple Inc. ("Apple") nor the name of its contributors may be used to endorse or promote products derived from the software without applicable prior written permission.
THIS SCH (WAL) IS PROMISED BY APPLE AND ITS CONSULTORS AS IS AND ANY EXPRESS OR WHOLE WARRANTIES, INCLUDING, BUT NOT LIMITED TO, THE IMPIED WARRANTIES OF MERCHANTABILITY AND FITNESS FOR A PARTICULAR PURPOSE ARE DISCLAIMED. IN NO EVENT SHALL APPLE OR ITS CONTRIBUTORS BE LIABLE FOR ANY DIRECT INDIRECT, INCIDENTAL, SPECIAL, EXEMPLARY, OR CONSEQUENTIAL DAMAGES INCLUDING, BUT NOT LIMITED TO, PROCUREMENT OF SUBSTITUTE GOODS OR SERVICES, LOSS OF USE, DATA, ON SPORTS, OR BUSINESS INFORMATION HOWEVER CAUSED AND ON ANY THEORY OF LIABILITY WHETHER IN CONTRACT, STRICT LIABILITY, OR ILLIGING USING
NIGHTS NO. OR OTHER RISP, ARISING MANY WAY OUT OF THE USE OF THIS SOFTWARE, FOR IT ASSETS OF THE POSSIBILITY OF SUCH INFORMATION. Part 9: ScienceLogic, LLC copyright notice (BSD)
Copyright (c) 2008, Scientificogr. II G
At rights reserved.
Redistribution and use in sources and binary formats with or without modification are permitted to provide that the following conditions are: by Redistributions of source cards must retain the above copyright notice, this list of conditions and the following disclaimer by Redistributions in binary terms must reproduce the above copyright notice, this list of conditions and the following disclosure in the documentation and/or metadata as provided with the distribution by "Neither name of Science & Logic LLC" nor the names of its contributions may be used to endorse or promote products derived from this software without special features written permission.
THIS SOFTWARE IS PROVIDED BY THE COPYRIGHT HOLDERS AND CONTRIBUTORS ASSISTAN ANY EXPRESS OR IMPERITISH WARRANTIES, INCLUDING BUT NOT LIMITED TO THE IMPERIT WARRANTY OF MERCHANTABILITY AND FITNESS FOR A PARTICULAR PURPOSE ARE DISCUED. AN IN THIS EVENT SHALL THE COPYRIGHT HOLDERS OF CONTRIBUTIONS BE LIABLE FOR ANY DIRECT INFECT, INCIDENTAL, SPECIAL, EXEMPLARY, OR CONCESSIONAL DAMAGES INCLUDING, BUT NOT LIMITED TO PROCUREMENT OF SUBSTITUTE GOODS OR SLAVINGS, LOSS OF USE, DATA AND ANY OTHERS. ANY BUSINESS INSPIRATION, ANSWERS CALIFID, AND ON ANY HISTORY OF LIABILITY PARTNERS IN CONTRACT, STRICT LIBILITY OR TORT, INCLUDING NEGLIGENCE OR OTHERWISE ARISING IN ANY WAY OUT OF THE USE OF THIS SOFTWARE. EVEN IF ADVISED OF THE POSSIBILITY OF SUCH DAMAGE
The MIT License
Some software components of this product incorporate source code covered under the MT license as follows
MIT License 2.0
Acknowledges, adhermers, Juncy U, Thaml, IlexiP, Vissall: Vissall by refries OpenGI. Sampina Park: White Study xerg series, elaphoe 2012.55, ReAMES D./
Copyright (c) 2011, The Daja Foundation
Copyright 2010, ALTHONS tx: http://quenvi.com/sbouli
Dual license Under the MI or GPI Version 2 encers.
- http://www.org/license
- http://dose.query.com/UPWidgel
Copyright Daniel Vollard
Copyright for Alatovis (port@altovis.com)
Copyright Alesey Serin
Copyright Gary Pennington Gary.Pennington@AUCsun.com
Copyright and W. Bond
Copyright William Black everrack@minr.com, Inc.
Copyright (c) 2007-2510 The Khronos Group Inc.
Copyright Alish Kumar Palra
Copyright (c) 2008 Free Software Foundation, Inc.
Permiss on is hereby granted, free of charge, to any person obtaining a copy of this software and associated documentation free the "Software", to deal in the Software without restriction, including without limitation the rights to use, copy, modify, merger, publish, distribution, license, and/or sell accounts of the Software, and to permit persons to whom the Software is furnished to do so, subject to the following conditions:
The above copyright notice and this permission notice shall be induced in all copies or substantial persons of the Software.
THE SOFTWARE IS PROVIDED "AS IS", WITHOUT WARRANTY OF ANY KIND, EXCESS OR IMPLIED, INCLUDING BUT NOT LIMITED TO THE WARRANTIES OF PUBLIC INTACTIBILITY, UNLESS FOR A PARTICULAR PURPOSE AND NONIN RINGEMENT. IN NO EVENT SHALL THE ACTIONS OF COPYRIGHT HOLD-HE IS THIS FOR ANY CLAIM, DAMAGES OR OTHER THATILITY, WHICH IN AN ACTION OF CONTRACT, TORT OR OTHER PANISH, ARISING FROM OUT OF ON CONNECTION WITH THE SOFTWARE OR THE USE OF OTHER DEALINGS IN THE SOFTWARE
Mozilla Public License
Since we, at Hanwha, Icohwin, used the Maxwell Hiclow component without modifying the source case according to the MD/T1A Public License 1.1, we are not obliged to provide the source code of the corresponding component.
- Version 1.
1. Definitions.
1.0.1. "Commercial Use" means distribution or otherwise marking the Covered Code available to a third party.
1.1. Corbinator's means each entity that creates or contributes to the creation of Modifications.
1.2. "Contributor Version" means the combination of the Original Code prior Modifications used by a Contributor, and the Modifications made by that particular Contributor.
1.3. Covered Code ^4 means the Original Code or Modifications of the combination of the Original Code and Modifications. In each case including portions more
1.4. Electronic Distribution Mechanism* means a mechanism generally accepted in the software development community for the electronic transfer of data.
1.5. Executable means Covered Code in any form other than Source Code.
1.5. "Initial Developer" means the individual entity identified as the initial Developer in the Source Code notice required by Exhibit A.
1.7. Larger Work" means a work which combines Covered Code or portions thereof with code not governed by the same of this License.
1.8. "License" means this document
1.8.1. "I schematic" means having the right to grant, to the maximum extent possible, whether at the time of the initial grant or subsequently accrued any and all of the rights conveyed herein.
1.9. Modifications* nears any addition to or deletion from the substance or structure of either the Origin Code or any previous Modifications. When Covered Code is released as a series of this, a Modification In:
A. Any addition to order from the contents of a 1e containing Original Code or previous Modifications.
B. Are new file that contains any part of the Original Code or previous Modifications.
1.10. Original Code ^® means Source Class of computer software code which is described in the Source Class not as required by Exhibit A as Original Class, and which at the time of its release under this license is not already Covered Data governed by this License.
1.10.1. "Parent Claims" means any patent claim(s) now owned or hereafter acquired, including without limitation, method, process and apparatus claims, in any patent. Usensible by grantor.
1.11. Source Code* means the preferred form of the Covered Code for marking modifications to it, including all measures it contains, plus any associated interface definition for files, scripts used to control some files and installation or an Execution, or source code differential comparisons against either the Original Code or another well known, available Covered Code or the Continue's choice. The Source Code can be a compressed or archival form, provided the approximate compression or determining software is widely available for no charges.
1.12. You "or 'Your' in terms of individual or a legal entity exercising rights under, and complying with all of the terms of this License or a future version of this License issued under Section 6.1. For legal entities, 'You' includes any entity which controls is controlled by or is under common control with You. For purpose of this definition, "control" means (the owner director or director, to cause the direction or management of such entity, whether by contract or otherwise, or by ownership of more than their asset (pct) at the outstanding share or convertible ownership or such entity).
2. Source Code License.
2.1. The Initial Developer Grant. The Initial Developer hereby grants You a world visit, psychology, non-exclusive license, subject to third party international property claims:
(a) under Intellectual property rights (either that patent or trademark) Licenable by India Developer to use, reproduce, modify, display, template, sublicense and distribute the Ordina. Open for portions, merely with or without Modifications, and/or as part of a large Work; and
(b) under Polenis Gains ringged by the making, using or selling of Original Code, to make, have made use, practice, sell, and offer for sale, and/or otherwise disperse of the Original Code for portion thereof.
(c) the licenses granted in this Section 2. (e) and (b) are effective on the date initial Developer first distributes Original Code under the terms of this License.
(4) Notwithstanding Section 2.1(b) above, no patent, license is granted; 11 for scope that, you delete from the Original Code, 2 separate from the Original Code, or 3 for infringement caused by: (5) the modification of the Original Code or (6) in the combination of the Original Code with other software or devices.
2.2. Contributor Grant. Subject to third party individual property sources, each Contributor hereby grants you a world wage, royalty-free non-exclusive license.
(a) under infectious property rights (other than patent or trademark) is noticeable by Contributor, to use, reproduce, mostly display, perform, subsistence and distribute the Modifications created by such Contributor (or portions thereof either or an unmodified basis, with other Modifications, as Covered Code and/or as part of a Larger Work, and
by under Patent Claims Intingued by the moving, using, or selling of Modifications made by the Contributor other alone and/or in combination with its Contributor Version for portions of such combinations. To make use, sell, offer for sale, have made, and/or otherwise dispense of: 1) Modifications made by the Contributor (or portions thereof); and 2) the combination of Modifications made by the Contributor with its Contributor Version (or parts of such combinations).
(c) the licenses granted in Sections 2.2(a) and 7.2(b) are effective on the date Contributor first makes Commercial Use of the Covered Code.
(4) Notwithstanding Section 3.2 by above, no patient license is granted. By or any copy, that Contributor has entered from the Contributor version 2, separately from the Contributor Version 3 for infrections caused by: I third part modifications of Contributor version or if the combination of Modifications made by that Contributor with other software (except as part of the Contributor version) or other devices; or by under Patent Claims enthrings by Covered Data in the absence of Modifications made by that Contributor.
3. Distribution Obligations.
3.1. Application of License The Identifications which You create or to which You contribute are governed by the terms of his License, including without limitation Section 2.2. The Source Code version of Covered Code may be distributed only under the terms of this License or a future version of this License released under Section 8.1, and you must include a copy of this License with every copy of the Source Code You distribute. You may not offer or impose any terms on any Source Code version that either or restricts the applicable version of the License or the recipients' rights forbearnder. However, Journey Includes an additional document offering the additional rights description in Section 8.1.
3.2. Availability of Source Code. Any Modification which you create or to whom You contribute must be made available in Source Code form under the terms of this License effer on the same media as an Executory version or via an attached Electronic Distribution Mechanism for anyone to win your material as Executory version, which is made available via Electronic Distribution Mechanism, must remain available for a local book (19) months after the data it hereby assumes available, or has six months after a secondary version of that particular Modification has been made available to such documents. You are responsible for ensuring that the Source Code version remains available even if the Electronic Distribution Mechanism is maintained by a third party.
3.3. Description of Modifications. You must cause all Covered Code to which You contribute to contain a file documenting the changes You make to create that Covered Code are the date of any change. You must include a prominent statement that the Modification is derived, directly or indirectly, from Original Code provides by the Initial Developer and including the name at the Initial Developer in play the Source Code, and play in any notice in an Executive section or related documentation in which You describe the origin or ownership of the Covered Code.
3.4. Intellectual Property Matters
(3) Part Parly Claims, if Contributor has knowledge that a license under a part parly intellectual property rights is required to exercise the rights granted by such Contributor under Sections 2.1 or 2.2, Contributor must include a strict for with the Source Code distribution than "LESA" which satisfies this claim and the party meeting the claim in sufficient detail that is recipient will know whom to contest. If Contributor obtain such knowledge after the Modification is made available as described in Section 3.2, contributor must promptly modify the LESA. In a copies Contributor makes available hereafter and shall take other steps (such as modifying appropriate mailing lists or newgrouped reasonably calculated to inform those who receive the Source Code that new knowledge has been obtained.
(b) Contributor AFIs. If Contributor's Modifications include an application programming interface and Contributor has knowledge of patent licenses which are reasonably necessary to outnumber the AP. Contributor must also include this information in the Legal file.
(c) Representations.
Contributor represents that, except as disclosed pursuant to Section 1.4(a) above. Contributor believes that Contributors's Modulators are Contributors' original creations and/or Contributor has sufficient rights to grant the rights conveyed by the license.
3.3 Required Notice, You must duplicate the notice but which A in each of the source code. It is not possible to put such notice in a particular Source Code for the due to its structure, then You must include such notice in a location (such as a relevant directory) where a user would also know to lose for such a notice. If you desired one or more information you may also your name as a Contributor to the notice described in English. If you are also please be in License in any documentation for this purpose, you should have to do so on behalf of any other person who is responsible for any liability and/or an individual or facility obligations at time or more than some of Covered Code. However, You may do so only on your behalf, and on behalf of the third scope or any Contributor, you must not take about key days that any such warranty support, indoor mail or facility obligation is offered by you alone, and you merely agree to provide this Note Reader and also Commitor for any facility housed by the this Developer or such Contributor as a result of water supply, support, indemnity or
3.6. Utilization of Exclusable Version, You may distribute Covered Code in Executable or only the requirements of Section 3.1. To have been met or not Covered Code, and if you include a notice stating that the Secures Code version of the Covered Code is available under the terms of this License, including a subscription of how and where You have fulfilled the obligations of Section 3.2. The notice must be inconclusively introduced in any notice if an Executable version, related documentation of collateral in which You describe recipients' rights relating to the Covered Code, You may distribute the execution version of Covered Code or membership rights under a license of Your choice, which may contain forms different main license, provided that You use in compliance with the terms of this License and that the License
for the Executable version does not attempt to limit or alter the recipient's rights in the Source Code were on from the right set forth in this License. If you distribute the Exceivable version under a different license, you must make it absolutely clear that any terms which differ from the License are offered by you, and, not by the Initial Developer or any Contributor. You may agree to indemnify the Initial Developer and every Contributor for any liability incurred by the Initial Developer or such Contributor as a result of any such terms your offer.
3.7. Larger Works. You may create a Larger Work by combining Covered Code with other code not governed by the terms of this License and distribute the Larger Work as a single product. In such a case, You must make sure the requirements of this License are fulfilled for the Covered Code.
4. Inability to Comply Due to Statute or Regulation.
If it is impossible for You to comply with any of the terms of this License with respect to some or all of the Covered Code due to statute, optional order, or regulation then. You must be comply with the terms of this License to the maximum extent possible, and to describe the limitations and the code they affect. Such description must be included in this Legal case describes in Boston 3/4 and must be included with all distributions of the Source. Case. Except to the extent prohibited by statute or regulation, such description must be sufficiently obtained for a rectant of ordinary mail to the able to understand it.
5. Application of this License.
This License applies to code to which the Initial Developer has attached the notice in Exhibit A and to related Covered Code.
6. Versions of the License.
6.1. New Versions, Netscape Communications Corporation ("Nelscape") may publish revised and/or new versions of the License from time to time. Each version will be given a distinguishing version number.
6.2. Effect of New Versions. Once Covered Gods has been published under a particular version of the License, You may always continue to use it under the terms of that version. You may also choose to use such Covered Code under the same of any subsequent version of the License published by Netscape. No one other than Netscape has the right to occupy the terms applicable to Covered Gods created under this license.
6.3. Deventive Works: If you create or use a modified version of the License (which you may only be, in order to apply it to the words which is not already Owned Code governed by this License). You must be aware Your license so that the licenses "Model", "MOI" L4H*, "MOH" H*, "Nescaper", "MNI", "NHI" or any consisting of similar prices do not appear in your license (except to note that your license drives from the License and/or otherwise made it clear). Your version of the license contains some which did from the Private Public License and Nescaper Public License. Filing in the name of the Initial Developers, Original Code or Contributor in the notice described in Exhibit A email of their respective or deemed to be modifications of the License!
7. DISCLAIMER OF WARRANTY.
CONTROL CODE IS PROVIDED UP THE LEVEL ON AN AS IS BASIS, WITHOUT WARRANTY OF ANY ONE, OTHER INFORMATION, INCLUDING WITHOUT LIMITATION, WARRANTIES THAT THE COVER CODE IS FREE OF EFFECTS, MERCHANTABILITY, FOR YOUR PARTICULAR PURPOSE OR NON-INFRINGEMENT. THE ENTIRE RICKS AS TO THE QUALITY AND PERFORMANCE OF THE COVER CODE IS WITH YOU SHOULD ANY COVER CODE PHONE ONLY. ANY NAME IS CIOUS YOU NOT THE INTL. IF BELOW OR ANY OTHER REGISTRATION ASSUM. THE COST OF ANY INCOME SHAPY CONCING, HIGH OR CORRECT, THIS DISCUA OF WARRANTY CONSTITUTE AN ESSENTIAL PART OF THE CHECK, NO USE OF ANY COVER CODE IS AUTHORIZED HEREIN OR EXCEPT UNDER THIS DISCUMBER.
8. TERMINATION.
8.1. This License and the rights granted here under will terminate automatically if you fail to comply with some reason and fail to cure such breach within 30 days of becoming aware of the breach. All jurisdictions or the Covered Code which are properly granted shall survive any termination of the License. Proceedings, which, by their nature, must remain in other ways to deliver the termination of this license shall survive.
8.2. If You Initiate, Legger by assigning a patent infringement claim (excluding statutory judgment actions) against Ina Developer or a Contributor (the Ina Developer or Contributor against whom You do such action is referred to as "Participant" judging that:
(1) Using Parleritor's Contribution Vector directly or indirectly intends any parent, then any and all rights granted by such Participant to You under Section 2.3 (also or 2.6) of this notice shall also be 60 days notice from Participant to Marate or unknown. If there is 60 days after receipt of notice, You brother, I disagree, is willing to pay Participant but ultimately agree responsible royalty for You just and future use of Modifications made by such Part, equivalent, or will otherwise. Your disagree claim with respect to the Distribution Version Argentina such Parleritor. It is not 50 days or times, a reasonable royalty and payment arrangement are still made by agreed upon in writing by the parents or the litigation claims is not written, the rights granted by Participant to You under Section 2.1 (also or 2.2) automatically temperate at the expiration of the 60-day period specified above.
(b) any software, hardware, or device, other than such Participants's Contributor Version, directly or indirectly in range any patents, then any rights granted to You by such Participant under Sections 2.1(b) and 2.2(b) are removed effective as of the date You first made, used, sold, distributed or had since, Modifications made by that Parto point.
8.5. If you asset a patent infringement claim against Participant, alleging that such Participant's Contributor Version directly or indirectly infringes any patent where such claim is received (such as by license or settlement, prior to the inference of patent infringement litigation, then the reasonable value of the license granted by such Participant under Section 2.1 or 2.2 shall be taken into account for determining the amount or value of any payment or license.
8.4. In the event or termination under Securities 0.1 or 0.2 above, all end user license agreements (excluding distributors and resellers), which have been validly granted by You or any distribution hereunder prior to termination shall survive termination.
9. LIMITATION OF LIABILITY.
UNDER COUNCUMBAND AND UNDERHOLD: THEORY WITH THE RIGHT (INCLUDING BENCH, CONTRACTOR, OR CHINAIR), SHALL YOU, THE INITIAL DEVELOPER, ANY OTHER CONTRIBUTION, OR ANY CONTRIBUTION OF COVERED CODE OR ANY SUPPLY IN ANY OF SUCH PARTIES BE LIABLE TO ANY PERSON FOR ANY INDIRECT SPECIAL, ADDITIONAL, OR CONSOLIDATED DAMAGES OF ANY CHARACTER INCLUDING WITHOUT LIMITATION, DAMAGES OF ANY INFORMATION. ANY OTHER INFORMATION CONTACTS BY THE PRESENT OF THIS INFORMATION. ANY OTHER INFORMATION IS NOT AVAILABLE. IF SUCH PARTY SHALL HAVE BEEN INFORMED OF THE POSSIBILITY OF SUCH DAMAGES. THIS IMINATION OF LIABILITY SHALL NOT APPLY TO UNABILY. FOR DEATH OF PERSONAL INJURY RESULTING FROM SUCH PARTY'S RESOLUTION TO THE EXTENT APPLICABLE LAW PRIORIBLE SUCH IMPLICATION, SOME OF THE PRESENT OF THIS INFORMATION. ANY OTHER INFORMATION IS NOT AVAILABLE. IF SUCH PARTY SHALL HAVE BEEN INFORMED OF THE POSSIBILITY OF SUCH DAMAGES. THIS IMINATION OF LIABILITY SHALL NOT APPLY TO UNABILY.
the Covered Code is a "commercial item" as that item is defined in 48 C.I.R. 2.101 (Oct. 1986), consisting of commercial computer software and "commercial computer software documentation," as such items are used in 48 C.I.R. 12.212 (Sept. 1985). Constellen, with 48 C.I.R. 13.212 and 49 C.I.R. 227.206-1 through 227.7202-4 June 1985, at U.S. Government End Users acquire Covered Code only those rights set forth herein.
11. MISCELLANEOUS.
The License represents the complete agreement concerning subject matter, and need. Any provision of the License is held to be therefore, such provision shall be reformed only by the extent necessary to make it incorporated. This License shall be governed by California laws provisions expected in the extent applicable law, if any provide otherwise, excluding its content law provisions. With respect to disputes in which either a party is a receptor of, or an entity charged or registered to do business in the United States of America, any other relation relating to the License shall be subject to the extubation of the Federal Courts of the Northern District of California, with venue living in Santa Clara County, California, with the taxing party responsible or taxes, including without limitation, court cases and responsible obligations or tax or expenses. The application or the United States Convention on Contracts for the International State of Arabia is hereby excluded. Any law or regulation which
provides that the language of a context shall be construed against the drifter shall not apply to the Licence.
- RESPONSIBILITY FOR CLAIMS.
As between Initial Developer and the Contributors, each party is responsible for claims and damages arising, directly or indirectly, out of its utilization or rights under this License and You agree to work with Initial Developer and Contributors to distribute such responsibility on an equitable basis. Nothing herein is intended or shall be deemed to constitute any act as a liability.
- MULTIPLE-LICENSED CODE
Initial Developer may designate portions of the Covered Code as Multiple-Licated. Multiple-Licensed means that the Initial Developer permits you to utilize portions of the Covered Code under Your choice of the MPL or the alternative licenses, I any, specified by the Initial Developer in the he described in Exhibit A.
EXHIBIT A - Mozilla Public License.
The contents of this file are subject to the Media Public License Version 1.1 (the "License"); you may not use the De-excess in compliance with the License. You may obtain a copy of the License at http://www.moultia.org/MP/Software distribute under the License is distributed on an "AS IS" basis, WITHOUT WARRANTY OF ANY KIND, either express or implied. See the License for the specific language governing rights and limitations under the License.
The Original Code is
The Initial Developer of the Original Code is
Portione created by
are Copyright 10
Contributora
Alternatively, the contents of the file may be used under the terms of the ____ license (the [____] License), in which case the provisions of [____] License are applicable instead of home above. If you wish to allow use of your version of this file only under the terms of the [____] license are not to allow others to use your version of this file under the MPL. Indicate your decision by contacting the provisions above and repass them with the notice and other provisions required by the [____] License. If you do not delete the provisions above, a recipient may use your view of this file under either the MPL or the [____] license.
[NO.1]: The text of this Exhibit A may differ slightly from the text of the notices in the Source Code file at the Original Code, we should use the text of this Exhibit A rather than the text found in the Original Code Source Code for Your Modifications
The Independent JPEG Group's JPEG Software
The software included in this product contains copyright and software that is licensed under the J-PLS license.
• J-1-15 licen##
Case project. Generating Outline: Osteni, 1 b/pog
This definition contains the sixth public release of the Independent JPLG Group's free JPCG software. You are welcome to redistribute this software and to use it for any purpose, subject to the conditions under LEGAL ISSUES, below.
Several years of this software (particularly those incorporating it into larger programs) should contact L.G. or pag.info@unet.u, not to be added to our electronic mailing list. Making list members are routed of updates and have a chance to participate in technical discussions, etc.
This software is the work of Tom Lane, Phil. Gladstone, Jim Boucher, Lee Crocker, Julian Mingullon, Lue Ortiz, George Phillips, Divide Riceal, Curo Vollooding, Sel's Walcons, and other members of the Independent JPEO Group
L3 is not affiliated with the official LSC J-1G standards committee.
LEGAL ISSUES
In plain English:
-
We don't promise that this software works. But if you find any buys, please et us know!
-
You can use this software for whatever you want. You don't have to pay us.
-
You may not prepare that you wrote this software. If you use it in a program, you must acknowledge somewhere in your documentation that you've used the LOG code.
In legalese:
The authors have NO WARRANTY or reorganisation, either excess or implied, with respect to the software, in quality, accuracy, merchantability, or interest for a particular purpose. This software is priced "AS IS", and you, its user, assume the entire risk as to its quality and accuracy.
This software is copyright © 1991-1996. Thomas G. Lane. All Rights Reserved except, as specified below.
Permission is hereby granted to use, copy, modify, and distribute this software (or portions thereof) for any purpose, without law, subject to these conditions:
(1) If any part of the source code or this so aware is distributed, then this RLACML file must be included, with this copyright and no warranty notice transferred; and any additions, deletions, or changes to the original files must be clearly indicated in accompanying documentation.
(2) If only executable code is distributed, then the accompanying documentation on must state that "the software is based in part on the work of" No Independent /FEO Group".
(5) Permission or use of this software is granted only if the user accepts full responsibility for any undesirable consequences; the authors accept NO. LIABILITY or damages of any kind.
These conditions apply to any software derived from or based on the UIG scale, not just to the unmedited library. If you use our work, you ought to as knowledge is
Permutation is NOT granted for the use of any UGI author's name or company name in advertising or publicly relating to this software or products derived from it. This software may be referred to only as "the independent JPEG Group's software".
We specifically permit and encourage the use of this software as the basis of commercial products, provided that all warranty or liability claims are assumed by the product vendor.
and2000 is included in this distribution by permission of L. Peter Deutean, sole proprietor of a copyright holder, Alautin Enterprises of Merko Park, CA.
analysis is NOT covered by the above copyright and conditions, but instead by the usual distribution terms of the Free Software Foundation: principally, that you must include source code for your distributors. See the file analysis for full details; However, also analyze it is not needed to part of any program generated from the UG ends, this does not limit you more than the foregoing paragraphs do.
The Jone configuration options 'configure' was produced with HMI, Autoion. It is copyright by the first Software I cumulation but is freely discontinue. The same risks for its supporting certificate being given, configuration, information, and information support, information, or copyright by MUL tool are also freely distributed. It appears that the arithmetic coding option of the JPE is specified by patients based on HMI, Autoion, and Mitsubishi. In this arithmetic coding cannot legally be used without obtaining one or more licenses. For this reason, support for arithmetic coding has been removed from the JHMI software (Ghino & Thelmo) coding provides only a marginal gain over the uncalculated Huffman mode, it is unlikely that very many important extensions will support. Using as we are aware, there are no patient restrictions on the remaining code.
the GIF bundle or more only included costs to make and write GIF files. To avoid entanglement with the Unays 1/29 percent, GIF matching support has been removed altogether, and the Sill enter has been simplified to produce "uncompressed GIFs." This technique does not use the L2W algorithm. The resulting GIF files are longer than usual, but, are readable by all standard GIF decoders.
We are required to state that
The Graphics Interchange Format(s) is the Copyright property of Compulsory Incorporated. GHSM is a Service Mark property of Compulsory Incorporated.
T-Kernel License
- This Product uses the Source Code of T-Kernel under T-License granted by the T-Engine Forum(www.t-engine.org)
T-License [License Agreement for Source Code of T-Komol]
established by T-Engine Forum
on January 23, 2001
(1) 2013年6月1日, 2:45
Article 1. Scope of License Agreement
- This License Agreement sets forth copyright and the terms and conditions of use applicable to the source code of T-Kernel distributed by T-Engine Forum and any derivative work created therefrom.
Article 2. Definition
-
"T-Kamel" means a real-time operating system controlled and distributed by T-Engine Forum on behalf of the copyright holder thereof.
-
"Source Code" means a source program, including related comments and documentaries, for the 1-Kerns and the Robert Source Code defines in Article 2.6, which is registered with T-Engine Forum.
-
"Hardware-dependent Part" means the part of the Source Code which depends on hardware and needs to be charged when the Source Code is ported and operated on the target hardware, and is designated and acquired as such part.
-
"Compiler-dependent Part" means the part of the Source Code which depends on controller and needs to be changed when the Source Code is parked and occurred on the target hardware, and is designated and separated as such part.
-
"Heater He" means the part of the Source Code which contains definitions necessary to develop application programs.
-
"T-Engine Hardware" means the hardware which is manufactured in accordance with the T-Engine Hardware specifications of the pT-Engine Hardware specifications issued by T-Engine Forum, and registered with T-Engine Forum.
-
"Similar Hardware to T-Engine Hardware" means any hardware (including software which enables hardware) other than that defined in Article 2.6 above, on which the T-Kernel can be operated.
-
"Ported Source Code" means a source program produced from the Source Code by modifying only its Hardwiredependent Part end/or Compiler-dependent Part to enable it to be operated on the T-Engine Hardware or the Similar Hardware or T-Engine Hardware. The Ported Source Code which is registered with
The Great Earth shall be included in the Source Ocean.
-
"Modified Source Code" means a source program modified from the Source Code for the purpose of improving its performance, increasing or decreasing its function, and the like. The Period Source Code shall not be included in the Modified Source Code.
-
"Binary Code" means an executable code form which is created by correcting programs, which include a or part of the Source Code on the Modified Source Code.
-
"Derivative Work" means the Modified Source Code on the Binary Code.
-
"Embeddias Product" means any product which operates with executable code form of the Source Code, the Modified Source Code or the Binary Code, loaded on its hardware.
-
"End Use" means a consumer who uses the Embedded Product
-
"System Developer means any person who develops the Embedded Product by itself or has a third party develop the same, and provides, whether with or without payment, the End User with the Embedded Product."
-
"Distribution of Modification" means any person who produces the Modified Source Code and, whether with or without payment, distributes the same to any third party
-
"Patch for Modification" means a difference, program, system, or the like in order to create the Modified Source Code from the Source Code or the Binary Code thereof.
-
"Vicarious Execution of Patch Processing" means vicarious execution service to create the Modified Source Code applying the Patch for Modification to the Source Code or the Binary Code thereof.
-
"Source Code User" means a person who uses the Source Code.
-
"Distribution" means any of the following acts:
I. to transmit a work to a large number of specific persons through the Internet communication, broadcasting, and the like;
-
to transmit a work to the general public through the internet communication, broadcasting, and the like automatically in response to a request, from the public; and
-
to distribute a copy of a work in the general public or a large number of specific persons.
Article 3. Copyright
- The copyrights of the Source Code shall be owned by Ken Saikamura.
Article 4. License of Source Code
-
As provided for in this Article, T-Engine Forum shall provide, and grant a license to use, the Source Code less of charge to any person who has taken the necessary procedure for registration as prescribed by T-Engine Forum and agreed to the T-License.
-
The Source Code shall be distributed exclusively by T-Engine Forum. Any person who obtains the Source Code under Article 4.1 above shall not make any no Distribution of the Source Code.
-
In accordance with the license granted under Article 4.1 above, the Source Code User may perform the following acts:
-
to copy and/or modify the Source Code provided by T-Engine Forum hereunder for its own research, development and the like
-
To run the Source Goods provided by I Engine Forum hereunder for its own research, development and the like.
-
To run the Source Code modified in accordance with the provision of Article 4.3 (1) above for its own research, development and the life.
-
to distribute the Binary Code created from the Source Code provided by T-Engine Forum hereunder or from the Source Code modified in accordance with the provision of Article 4.3 (1) above.
-
In accordance with the license granted under Article 4.1 above, the System Developer may perform the following acts:
-
to perform any and all acts set forth in the Article 4.3 above.
-
to develop and manufacture the Embedded Product containing the Binary Code, and, whether with or without payment, provide the End User with the same and make the Binary Code available to the End User on the Embedded Product.
-
The Source Code User and the System Developer shall be obligated to give a notice that the Source Code is used, in such a way as separately specified by I Engine Forum, when they use the Source Code or the Binary Code, or make the Binary Code available for the End User on the Emorated Product.
Article 5. Distribution of Modified Source Code
-
Any of A members of T-Engine Forum may become the Distributor of Modification by cleaning the spromal of T-Engine Forum through the registration procedure as please based by the Forum presented that only the department of the A member which has taken the registration procedure may distribute the Modified Source Code in such a way as provided for in the Article as long as it hence the Anememberships.
-
The Distributor of Modification may create the Modified Source Code based on the Source Code provided by T-Engine Forum and the Patch for Modification to be applied to create such Modified Source Code from the Source Code.
-
The Distributor of Modification shall prior to the distribution, inform T-Engine Forum of and register a name and description of the Modified Source Code in such a way as specified by T-Engine Forum.
-
The Distributor of Modification shall determine the name of the Modified Source Code subject to the rules separately established by I-Engric Forum and publish an appropriate notice as required by the rules on the Patch for Modification and the Modified Source Code.
-
The Distributor of Modification may distribute the Modified Source Code to a third party whether with or without payment, provided that the Distributor of Modification shall take the necessary measures to probit, he third party from making the re-Distribution of the Modified Source Code.
-
Developer with the Patch for Modification. Provided, however, that the Distributor of Modification shall be obligated to confirm that the System Developer is the Source Code User duly licensed under Article 4.1.
-
The Distributor of Modification may perform the Vizarious Execution of Patch Processing for the System Developer.
-
The System Developer shall not distribute the Modified Source Code in further modified form to any third party as a standard-alone software product.
-
The System Developer may under the same obligation as interested in Article 4.5, make the Embedded Product available for the End User through use of the Patch for Modification distributed by the Distributor of Modification or the Derivative Works obtained through the Vicarious Execution of Patch Processing.
Article 6. Distribution and Registration of the Ported Source Code
- The Source Code User and the System Developer may whether with or without change, distribute to any third party only the following parts of the Paved
Source Code on the T-Engine Hardware or the Similar Hardware to T-Engine Hardware:
-
The Hardware dependent Port and/or Compiler dependent Port; provided that the Source Code, Lacer and the System Developer shall Inform T Engine Forum of, and T Engine Forum may publish, a method for distributing said Parley to third parties.
-
The Header File provided that the Header File shall be distributed together with the Binary Code of the Ported Source Code.
-
Any member of T-Engine Forum now request T-Engine Forum to register and distribute, as an original source code for T-Kernel, the Pored Source Code on the T-Engine Hardware or the Similar Hardware to T-Engine Hardware.
-
Any member of T-Engine Forum who requests the distribution mentioned in the preceding paragraph shall access to the following conditions:
-
The member shall confirm that the object hardware is the T-Engine Hardware or the Similar Hardware to T-Engine Hardware.
-
The member shall provide 1 English Forum with a complete set of operational environment for the object hardware and 1 Kernel tree of charge when requesting the distribution.
-
The member shall submit test results of the Ported Source Code to T-Engine Forum when requesting the distribution.
-
In the event that I-Engine Forum accepts the request mentioned in Article 8.2. I-Engine Forum shall register and distribute the Ported Source Code as the Source Codes for Portes. Provided, however, that the Ported Source Code may be installed in the same way as the Modified Source Code until the time of registration hereunder.
-
The provision set forth in Article 3 shall apply to the Period Source Code registered in accordance with this Article.
Article 7. Use for Other Purpose
- Any use of the Source Code, the Modified Source Code or the Ported Source Code other than these stipulated in Articles 4, 5 and 6 shall be subject to the prior approval of I-Engre Forum.
Article 8. Limited Warranty
-
I-Engine Forum and the copyright holder of the Source Code warrant that the Source Code does not infringe third party's copyrights. Provided, however, that I-Engine Forum and the copyright holder of the Source Code makes no warranty as to the Hardware-dependent Part and/or Computer-dependent Part act forth in Article 6.2 in the Ported Source Code by any third party.
-
Neither I Engine Forum nor the copyright holder of the Source Code warrants that the Source Code will it for any particular purpose of the Source Code User.
-
Neither T-Engine Forum nor the copyright holder of the Source Code warrants that the Source Code does not bring any third party's industrial property rights. In no event shall T-Engine Forum and the copyright holder of the Source Code be liable for any dispute which may arise between the Source Code User and a third party in connection with the third party's industrial property rights.
Article 9. Indemnity
- Nelliter: H-Engine Forum nor the copyright holder of the Source Code shall be liable for any damages (including, but not limited to, damages resulting from losses of profit, business interruption, losses of business information or any other preliminary damages arising out of use or impossibility of use of the Source Code, even if T-Engine Forum and the copyright holder have been informed of the possibility of such damages.
Article 10. Breach of Agreement
-
In case that T-Engine Forum considers that this License Agreement is breached or that the population of T-Kernel is obstructed, T-Engine Forum shall take measures to correct such breach or such obstruction, take measures on the ground of copyright infringement, or take any other necessary measures against the breaching person or the obstructing person, regardless of whether or not the said person is a member of T-Engine Forum.
-
In case of breach of this License Agreement by a member of I Engine Forum, I Engine Forum may take appropriate measures against the member; for example, the member is disqualified from membership, depending on what kind of breach has been committed by it.
-
Any legal dispute which may arise in relation to any breach of this License Agreement shall be subject to the exclusive jurisdiction at the Tokyo District Court.
Article 11. Governing Law and Language
-
This License Agreement shall be governed by end interpreted under the laws of Japan.
-
This License Agreement is executed in both Japanese text and English text, provided that the Japanese text shall govern the interpretation and performance of this License Agreement.
Apache License 2.0
Component Name License URL
rDNSResponder_conjour/Apache_License 2.0 http://www.apache.org/licenses/LICENSE-2.0
TERMS AND CONDITIONS FOR USE, REPRODUCTION, AND DISTRIBUTION
- Definitions. "I license" shall mean the terms and conditions for use, reproduction, and distribution as defined by Section 1 (Through 9 or this document). "Licensor" shall mean the copyright owner or entity authorized by the copyright owner that is granting the Licensee.
Legal Entity* shall mean the union of the existing entity and other entities that contract, are controlled by, or are under common control with that entity. For the purpose of this definition, "contract means is the power, effect or indirect, to cause the direction or management of such entity, whether by contract or otherwise, only ownership or any percent (85%) or more or the outstanding shares, only nonqualified ownership or such entity."
Year for "Your" shall mean an individual or legal entity exercising permitted granted by this License. "Source form shall mean the preferred form for making modifications, including but not limited to software sources code, documentation sources, and configuration files."
On part, form shall mean any form resulting from mechanical transformation or translation of a Source form, including but not limited to completed object code, generated documentation, and as well as to other media types.
Work shall mean the work of authorship, whether in Source or Object form, made available under the License, so indicated by a copyright notice that is not due to or attached to the work (an example is provided in the Appendix below).
Derivative Works shall mean any work, whether in Source or Open form, that is based on for derivative for the Work and for which the editorial revisions, citations, elaborations, or other methodors represent, as a wise, an original work or authorship. For the purposes of this license, Derivative Works shall not include works that certain separate from, or merely linked them by namely the interests of the Work and Derivative Works herein.
"Contribution" shall mean any work of a membership, including the original version of the Work and any modifications or selections to their Work or Derivative Works. Interest, that is internationally guaranteed by Lionsor for inclusion in this Work by the copyright owner or by an individual and legal Entity, is guaranteed to support on behalf of the copyright owner. For the purposes of this definition, "submitted" means any form of electronic, webal, or written communication sent to the Licitor or its representatives, including but not limited to communication on electronics and lists, source code social systems, and issue looking systems; are managed by, or on behalf of, the Lionsor for the purpose of discussing and improving the Work, but providing communication that a compliance marker or otherwise has been issued upon the Lionsor to any individual or legal Rights or behalf of whom a Conductor has been received by Lionsor and subsequently imprisoned within the Work."
-
Grant of Copyright License: Subject to the terms and conditions of this License, each Contributor hereby grants to you perpetual executives, non-exclusive charges, hereby too. Excessive copyright license to reproduce, prepare Derivative Works or public display publicly perform, public license, and disclosure the work and such Derivative Works in Source or Object Items.
-
Grant of patent license. Subject to the terms and conditions of this license, each Contributor hereby grants to Your a proposal, endorsement, non-exclusive, no charge, repayment, irreversible patent as amended in this caseofy patent license to make, have means, etc., after to sell, and Imact and otherwise transfer the Work, where such license applies only to those patent claims is licensed by each Contributor that are necessarily infringed by their Contributors' acresor by contribution of their Contribution with the Work to which each Contribution is submitted. If you believe patent litigation against any entity, including a deceased or counterstrain in a lexical, alleging that the Work or a Contribution incorporated within the Work constitutes direct or contributory parent agreement, then any person liesee genetics to your under this license for that Work shall terminate as of the calls such legislation it estee.
-
Collectibution. You must reproduce and distribute copies of the Work or Derivative Works thereof in any medium, with or without modifications, and in Source or Object form, provided that you meet the following conditions:
(a) You must give any other recipients of the Work or Derivative Works a copy of this License; and
(b) You must cause any modified lies, a grey prominent replies stating that You changed the lies; and
(4) You must lead, in the Source form of any Derivative Works that you distribute all copyright, patent, trademark, and attribution notices from the Source form of the Work, excluding those notices that do not portray to any part of the Derivative Works; and
(4) If the Will Works be made a "NOTICE" text file as part, this distribution over any Derivative Works has. You distribute must include a sealed copy of the attribution notices contained in within such NOTICE file, excluding those notices that do not require to apply part of the Derivative Works, in at least one of the following places within a N-TICE text file distributed as part of the Derivative Works within the Source form or documentation, it is provided along with the Derivative Works, or, with a copy generated by the Derivative Works. Due, whenever such third party notices namely appear, the contracts of the NO-TICE are for internal and purposes only and do not modify this notice. You may act your own attribution notices within Derivative Works has you distribute, alongside or an an attachment to the NOTICE text. From the Will Works, provided such electronic attribution notices cannot be considered as modifying the license.
You may add Your own copyright statement to Your modifications and may provide additional or different license terms and contracts for use reproduction, or distribution of Your modifications, or for any such Derivative Works as a whole, provided Your Use, reproduction, and distribution of the Work otherwise complies with the conditions stated in the License
-
Submission of Contributions, Unless You explicitly state otherwise, any Contribution intentionally submitted for inclusion in the Work by You to the Licensor shall be under the terms and conditions of this License, without any additional terms or conditions. Norwithstanding this above, nothing herein shall supersede or readily the terms of any separate license agreement you may have executed with Licensor regarding such Contributions.
-
Trademarks. This License does not grant permission to use the trade names, trademarks, service marks, or product names of the Licenciect, except as required for reasonable and customary use in describing this origin of the Work and reproducing the content of the NOTICE 1a.
-
Disclaimer of Warranty, Unless required by applicable law or agreed to in writing. Does our provides the Work and each Contributor provides to Contributions on an "AS IS" BASE, WITHOUT WARRANTIES OF CONDITIONS OF ANY KIND, either express or implied, including, without limitation, any warranties or conditions of TITLE, NONINFRINGEMENT, MERCHANTABILITY OR FITNESS FOR A PARTICULAR PURPOSE. You are solely responsible for determining the approximate use of using or redistributing the Work and assume any risks associated with Your exercise of permissions under the License.
-
I believe it is easily in no act and under no legal theory, whether in line (including engineering, contract, or otherwise, unless required by applicable law such as deliberate and pursuant to or agreed to or binding any Contributor be liable to you for damages, including any direct, indirect, special, incidental or consequential damages of any character arising as a result of this License or out of the use or inability to use the Work requiring but not limited to damages for loss or goodwill, work, language, computer failure or malfunction, or any and all other commercial damages or losses, even in such Contributor has been adults of the possibility of such damage.
-
Accepting Warranty or Additional Liability, While restructuring the Work or Derivative Works thereof, You may choose to offer and charge a fee for, accordance of support, warranty, indemnity, or other facility obligations and/or rights consistent with this License. However, in accepting such obligations, You may act only on Your own behalf or on Your sole responsibility, not on behalf of any other Contributor, and only if you agree to indemnity, defend, and hold each Contributor unless for any facility incurred by or claims assented against, such Contributor by reason or your accepting any such warranty or additional liability.
END OF TERMS AND CONDITIONS
APPENDIX How to apply the Apache License to your work.
To apply the Apache Universe to your work, attach the following possible direction, with the fields concluded by brackets [1] replaced with your own Identifying Information (Don't include the snippets). The last should be enclosed in the appropriate comment syntax for the file format. We also recommend that a file or class name and description of purpose be introduced on the same "printed page" as the copyright notice for easier identification within third-party archives.
Copyright (YAY) [name of copyright owner]
Licensed under the Apache License. Version 2.3 (the "License"); you may not use this file except in compliance with the License. You may obtain a copy of the License at http://www.apache.org/licenses/LICENSE-2.0
Unless required or applicable law or agreed to in writing, software distributes under the License is distributed on an "AS IS" BASIS, WITHOUT WARRANTIES OR CONDITIONS OF ANY KIND. Other exercise or implicit. See the License for the specific language governing permissions and limitations under the License.
BZip2 License
This program, "bzip2", the associated library "lobzip2", and all documentation, are copyright © 1966-2007 Julian R. Seward. All rights reserved.
Component Name License URL
http://0.6:http://www.czp.org/
Redistribution and use in source and binary forms, with or without modification, are permitted provided that the following conditions are met:
-
Explanations of source code must retain the above copyright notice, this list of conditions and the following disclaims:
-
The origin of the software must not be misrepresented, you must not claim that you wrote the original software. If you use this software in a product, an advertisement in the product, documentation would be exceeded but is not required.
-
Altered source versions must be plainly marked as such, and must not be misrepresented as being the original software.
-
The name of the author may not be used to endorse or promote products derived from the software without specific price written permission. THIS SOFTWARE IS PROVIDED BY THE AUTHOR'S ID & IN ANY EXPRESS OR IMPIED WARRANTIES, INCLUDING, BUT NOT LIMITED TO THE IMPLIED WARRANTIES OF MERCHANTABILITY AND FITNESS FOR A PART CULAR PURPOSE ARE DISCLAIMED. IN NO EVENT SHALL THE AUTHOR IS THAT FOR ANY OTHER IN ANY COOLING, INFORMATION, SPECIAL, NO HOPE, OR CONSENT ON ANY DAMAGE INCLUDING, BUT NO USED TO OTHER ANY OTHER IN ANY OTHERS. THIS INFORMATION IS SUBJECT TO ANY WORKS AND ON ANY THEORY OF LIABILITY, WHETHER IN CONTRACT STRICT LIABILITY, OR TORT INCLUDING NEGLIGENCE OR OTHERWISE ARISING IN ANY WAY OUT OF THE USE OF THIS SOFTWARE, EVEN IF ADVISED OF THE POSSIBILITY OF SUCH DAMAGE.
Julien Sward [scawrd@zp.org
http://bbvp2 version 1.0.5 of 10 December 2023
University of Illinois / NCSA Open Source License
Copyright (c): 1995-2007, The Board of Trustees of the University of Illinois All Rights Reserved.
Component Name License
Icer-2.0.5 University of Illinois / NCSA Open Source
I perd performance test
Mark Gates
May Trumas
Jr Ferguson
,on Dager
Feng Qir
Kevin Gibbs
John Eelabrook
National Laboratory for Applied Network Research
National Center for Supercomputing Applications
University of Illinois at Urbana-Champaign
http://www.nescnplus.com/
Permiton is hereby granted, free of charge, to any person obtaining a copy of this software (per) and associated documentation files (the "Software"), to avail in the Software without restriction, inducing without limitation the rights to use, copy, modify, merger, public, distribute, unsecuse, and/or sell copies of the Software, and to permit persons to whom the Software is furnished to do so, subject to the following conditions:
Redistribution one of sources each must retain the above copyright notice, this list of content one and the following obligations
Redistributors in share form must reproduce the above copyright notice, this list of conditions and the following disclosure in the documentation and/or other materials provided with the distribution.
Neither the names of the University of Illinois, NOSA, nor the name of the contributors may be used to endorse or promote products derived from this software without specific prior written permission. The SOFTWARE is PROVIDED "AS IS", WITHOUT WARRANTY OF ANY KIND, EXPRESS OR IMPLIED, INCLUDING, WITHOUT THE WARRANTY OF MECHANIC AVILITY, HUNI-SS-COR A PART OR A PULSE AND KONNINGMENT IN IN THIS statement. THE CONTRIBUTIONS OF COPYRIGHT ITEMS ARE LIABLY FOR ANY CLAIM, DAMAGE OR OTHER LIABILITY, WHICH IN AN AGREATION OR CONTRACT, TORT OR OTHERWISE, ARISING FROM OUT OF OR IN CONNECTION WITH THE SOFTWARE OR THE USE OR OTHER DEALINGS IN THE SOFTWARE.
PHP 3.01 License
The PHP License, Version 2.01 Copyright (e) 1988 - 2010 The PHP Group, All rights reserved.
Component Name License URL
phc-5.2.17 PHP 8.01 Http://www.phc.net/distributions
He distribution and use in source and binary items, with or without modification is permitted provided that the following conditions are met:
-
Reattributions of source code must retain the above copyright notice, this list of conditions and the following disclaimers.
-
Recistributions in binary form must reproduce the above copyright notice, this list of conditions and the following disclaimer in the documentation and other materials provided with the place button.
-
The name "PHP" must not be used to endorse or promote products derived from this software without prior written permission. For written permission, please contact group@php.net.
-
Products derived from this software may not be called "PHP", nor may "PHP" appear in their name, without prior written permission from groupAphp.net. You may indicate that your software works in conjunction with PHP by saying "Foo for PHP" instead of calling it "PHP Foo" or "phploc".
-
The PHP Group may publish related and/or new versions of the license from time to one each version will be given a distinguishing version number. Once covered code has been published under a particular version of the license, you may always continue to use it under the terms of this version. You may also choose to use such covered code under the terms of any subsequent version of the license published by the PHP Group. No one other than the PHP Group has this right to modify the terms applied to covered code created under the license.
-
Recistributions of any form whatever must retain the following acknowledgment: "This product includes PHP software, freely available from http://www.php.net/soc/arees"
THIS SOFTWARE IS PROMOY THE PUP DEVELOPMENT TRAM AS BY AND ANY ENSERSH OR MIP TO WARINGS, INCLUDING, BUT NOT LIMITED TO THE IMP OF WARANIS OF M O RANUABILITY AND HIM SIX OF A PARTICULAR PURPOSE: ANY DISC. AN INDI- NIV SHALL THE PUP DEVELOPMENT TEAM OF ITS CONTRIBUTORS DE LIABLE FOR ANY DIRECT INDIRECT, INCIDENTAL, SPECIAL EXPLORARY, CONSEQUENTIAL DAMAGES INCLUDING, BUT NOT LIMITED TO PROCUREMENT OF SUBSTITUTE GOODS OR SERVICES, LOSS OF USE, DATA, OR PROFITS; OR BUSINESS INTENTRUATION HOWEVER CAUSED AND ON ANY THEORY OF LIABILITY, WHETHER IN CONTRACT STRICT LIABILITY OF THIS ORDER OR OTHERS ARISING IN ANY WAY OUT OF THE USE OF THIS SOFTWARE, ANY FEATURES OF THE POSSIBILITY OF SUG DRAWING.
The software console of voluntary contributions made by many individuals on behalf of the PHP Group. The PHP Group can be contacted via Email at group@prisonet.
For more information on the FTP Group and the FTP project, please see http://www.php.net. FTP includes the zend engine, freely available a http://www.zend.com.
zlib / libpng License
This software is provided "as-is", without any express or implied warranty. In no event, will the authors be held liable for any damages arising from the use of this software.
Component Name License URL
zib-1.28 zib/1bpg http://zib.net/
Copyright (C) 1985-2010 Jean-coup Gailty and Mark Adler
Permission is granted to anyone to use this software for any purpose, including commercial applications, and to alter it and redistribute it freely subject to the following restrictions.
-
The origin of this software must not be misrepresented; you must not claim that you wrote the original software. If you use this software in a product, an acknowledgment in this product documentation would be appreciated but is not required.
-
Altered source versions must be plainly marked as such, and must not be represented as being the original software.
-
This notice may not be removed or altered from any source distribution.
Jean-louis Gally Mark Adler
joup467 p.org master@alumn.edu/comm.edu
The data format used by the zib library is described by FFOs (Request for Comments, 1957 to 1962 in the file http://www.led.org/for/fe-1963.net/te-forma), rfc18b1.txt pollute format and rfc18b2.net (grip format).
Portions of this software are copyright 1998-2002 The FreeType Project (www.heeltype.org). All rights reserved.

Any changes or modifications in construction of this device which are not expressly approved by the party responsible for compliance could void the user's authority to operate the equipment.
This device complies with part 15 of the FCC Rules. Operation is subject to the following two conditions: (1) This device may not cause harmful interference, and (2) this device must accept any interference received, including interference that may cause undesired operation.
This equipment has been tested and found to comply with the limits for a Class A digital device, pursuant to part 15 of the FCC Rules. These limits are designed to provide reasonable protection against harmful interference when the equipment is operated in a commercial environment. This equipment generates, uses, and can radiate radio frequency energy and, if not installed and used in accordance with the instruction manual, may cause harmful interference to radio communications. Operation of this equipment in a residential area is likely to cause harmful interference in which case the user will be required to correct the interference at his own expense.

Hanwha Techwin cases for the environment at all product manufacturing stages, and is taking measures to provide customers with more environmentally friendly products.
The Eco mark represents Harwha Techwin's devotion to creating environmentally friendly products, and indicates that the product satisfies the EU RoHS Directive.
Correct Disposal of This Product (Waste Electrical & Electronic Equipment)
(Applicable in the European Union and other European countries with separate collection systems)
This marking on the product, accessories or literature indicates that the product and its electronic accessories (e.g. charger, headset, USB cable) should not be disposed of with other household waste at the end of their working life. To prevent possible harm to the environment or human health from uncontrolled waste disposal, please separate these items from other types of waste and recycle them responsibly to promote the sustainable reuse of material resources.
Household users should contact either the retailer where they purchased this product, or their local government office, for details of where and how they can take these items for environmentally safe recycling.
Business users should contact their supplier and check the terms and conditions of the purchase contract. This product and its electronic accessories should not be mixed with other commercial wastes for disposal.

Correct disposal of batteries in this product
(Applicable in the European Union and other European countries with separate battery return systems.)
This marking on the battery, manual or packaging indicates that the batteries in this product should not be disposed of with other household waste at the end of their working life. Where marked, the chemical symbols Hg, Cd or Pb indicate that the battery contains mercury, cadmium or lead above the reference levels in EC Directive 2006/66. If batteries are not properly disposed of, these substances can cause harm to human health or the environment.
To protect natural resources and to promote material reuse, please separate batteries from other types of waste and recycle them through your local, free battery return system.
Head Office
6, Pangyo-ro 319 beon-gil, Bundang-gu, Seongnam-si,
Gyeonggi-do, 463-400 Rep. of KOREA
Tel: +82.70.7147.8753 Fax: +82.31.8018.3740
www.hanwha-security.com
Hanwha Techwin America
500 Frank W. Burr Blvd. Suite 43 Teaneck, NJ 07666
Toll Free +1.877.213.1222 Direct +1.201.325.6920
Fax +1.201.373.0124
www.hanwha-security.com
Hanwha Techwin Europe
Heriot House, Heriot Road, Chertsey, Surrey, KT16 9DT, United Kingdom
Tel +44.1932.57.8100 Fax +44.1932.57.8101
www.hanwha-security.eu

Hanwha
Techwin