
Lancaster 85450 - Uncategorized DA-LITE - Free user manual and instructions
Find the device manual for free Lancaster 85450 DA-LITE in PDF.


User questions about Lancaster 85450 DA-LITE
0 question about this device. Answer the ones you know or ask your own.
Ask a new question about this device
Download the instructions for your Uncategorized in PDF format for free! Find your manual Lancaster 85450 - DA-LITE and take your electronic device back in hand. On this page are published all the documents necessary for the use of your device. Lancaster 85450 by DA-LITE.
USER MANUAL Lancaster 85450 DA-LITE
The Da-Lite Difference.

natural_image
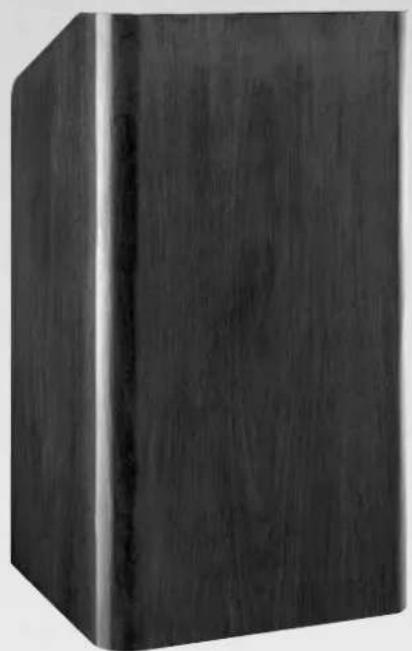
Monochrome image of a reflective globe with grid lines, showing continents and oceans (no text or symbols)Instruction Book for LECTERN
natural_image
Dark rectangular object with textured surface, possibly a book or container (no visible text or symbols)
DA-LITE SCREEN COMPANY, INC.
3100 North Detroit Street
Post Office Box 137
Warsaw, Indiana 46581-0137
Phone: 574-267-8101
800-622-3737
Fax: 574-267-7804
Toll Free Fax: 877-325-4832
www.da-lite.com
e-mail: info@da-lite.com
ALL MODELS
POWER
Connect power supply to 110/120 VAC 3-wire outlet (220/240 VAC models to 220/240 VAC source).
READING LIGHT
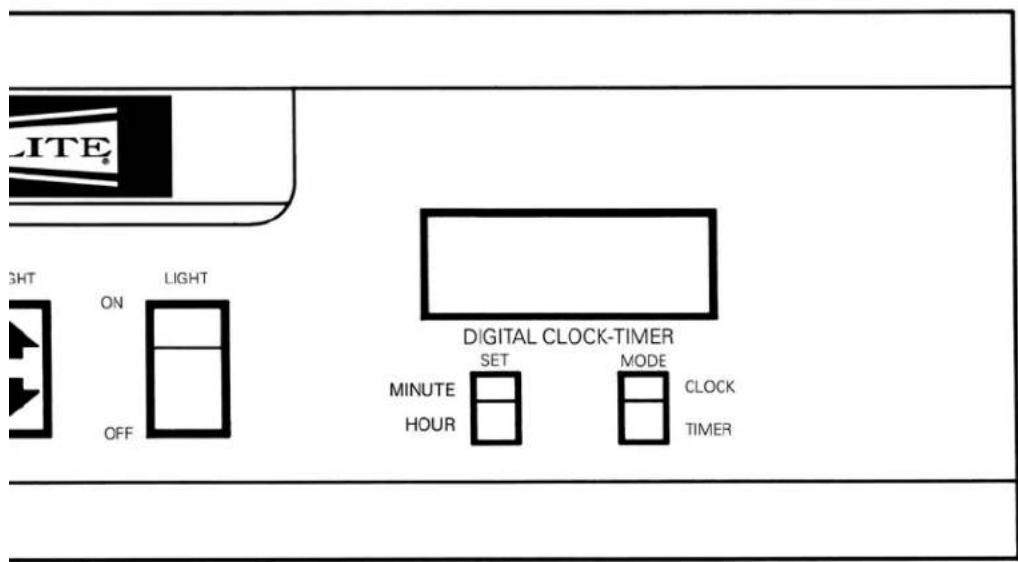
Depress light switch to activate light. ADJUST VISOR AS NECESSARY. Use GE 25T8DC 110v appliance lamp or equivalent when relamping all 110/120 sound and non-sound lecterns; GE 1176 12v for 220v lecterns.
DIGITAL CLOCK/COUNT DOWN TIMER
Select desired mode; adjust time with SET switch. Unit will remain operational as long as the main power supply is on. NOTE: Power interruptions will cause the clock to flash until reset.
OPTIONAL HEIGHT ADJUSTMENT
Models with optional reading surface adjustment are controlled by the switch marked HEIGHT and provide up to 8 - 9 inches of elevation. To raise or lower, depress HEIGHT switch.
SOUND MODELS

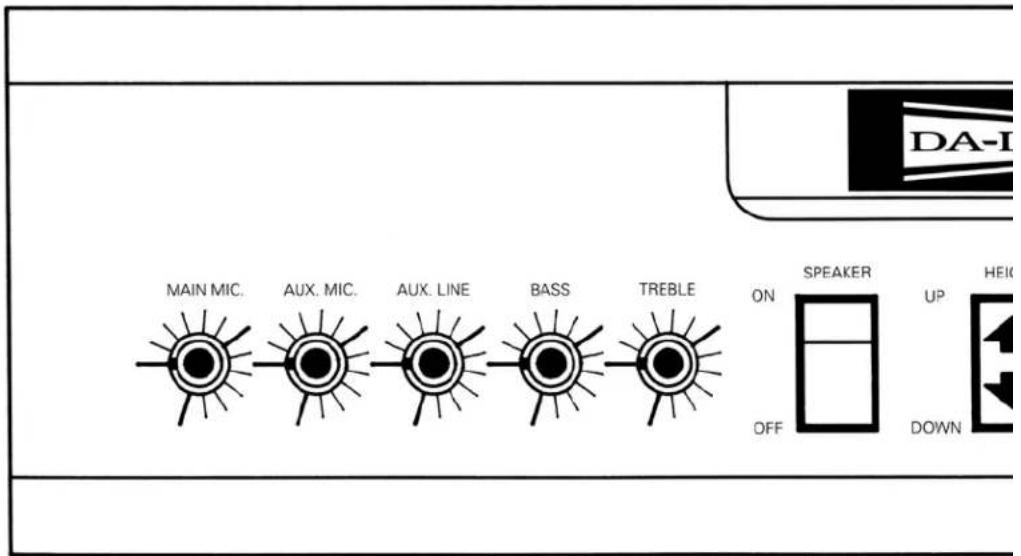
Plug microphone into shock mount on reading surface. Turn main power switch located under reading surface on. Rotate "MAIN MIC", "TREBLE" and "BASS" controls fully counterclockwise to minimum volume position. Turn speaker switch located on dash panel to "on" position. While speaking into the microphone, slowly increase "MAIN MIC" volume by turning knob clockwise. Adjust
until feedback begins, then decrease volume to stable condition or lower to desired volume level. Adjust bass and treble controls to desired tonal quality. Turn SPEAKER SWITCH to "off" position when done using the sound system.
AUXILIARY MICROPHONE (XLR JACK)
The auxiliary mic input is located under the reading surface and is used for a second mic or wireless microphone input. The volume control is located on the dash panel. The aux. mic input is balanced low impedance (600 Ω) and is phantom powered so condenser type microphone can be used.
AUXILIARY LINE INPUT (1/4" PHONE JACK)
The auxiliary input is used for playback of tape player, musical instrument, VCR, or an audio feed from another sound system. The volume control is located on dash panel.
AUXILIARY LINE OUTPUT (1/4" PHONE JACK)
The signal output is a composite of all the inputs and can be fed directly to an audio or video tape recorder. Or, the line output can be fed to another sound system to combine systems for greater output, or it may be fed to the input of a hearing impaired system.
EXTERNAL SPEAKER OUTPUTS (1/4" PHONE JACK)
The external speaker outputs can be used to drive external speakers in lieu of the internal lectern speaker. When a plug is inserted into the external speaker jacks, the internal speaker is disconnected. The powerful (50 watts) is adequate to drive several speakers provided the total load impedance is not less than 2 ohms. The output of the amplifier is self-protecting against overload; however, low impedance loads (below 2 Ω) will cause excessive heating reducing amplifier output.
text_image
MAIN MIC. AUX. MIC. AUX. LINE BASS TREBLE ON OFF SPEAKER UP DOWN HEIK DA-ISTACKING MODELS
To remove lectern top from projector stand base, disconnect power cord and turn the black knob (located under the middle shelf) counter-clockwise until disengaged. Lift off lectern top and place in desired location.
Projector stand base features a 110/120 VAC Duplex receptacle for equipment. Plug line cord into approved 3-wire 110/120 V outlet. To assemble, reverse this procedure.
SERVICE
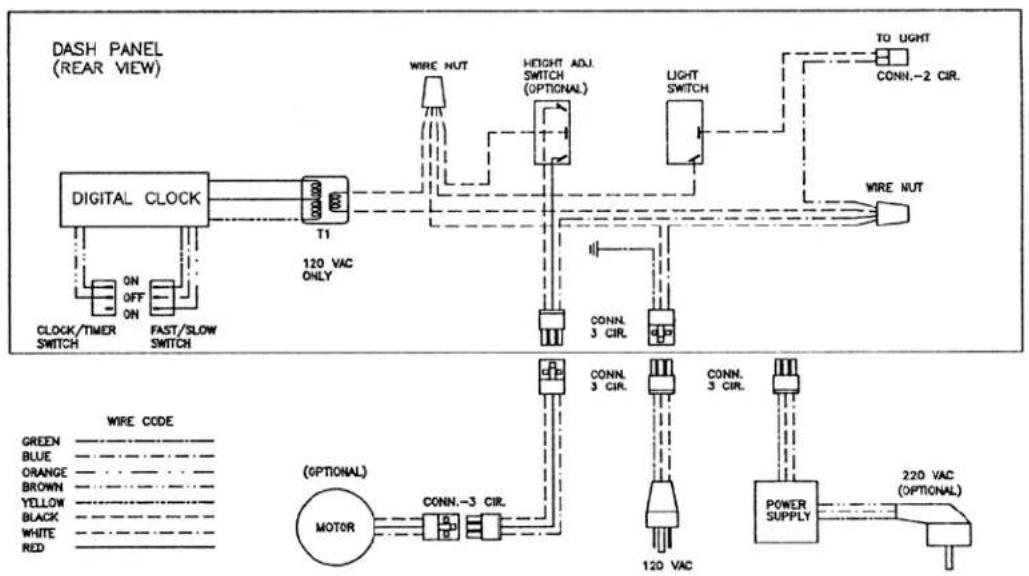
The Da-Lite sound system is modular in design for ease of service. The power supply and amplifier are accessed inside the lectern body. The controls are accessed by removal of dash panel.
If your lectern fails to operate on a known power source, be sure to check the circuit breaker located on the Power Supply for a tripped condition. Reset to restore function. If breaker continues to trip, discontinue use of product until problem can be diagnosed.
text_image
LITE SHT ON LIGHT OFF DIGITAL CLOCK-TIMER MINUTE SET MODE CLOCK HOUR TIMERLECTERN WIRING DIAGRAM - NON-SOUND SYSTEM
flowchart
graph TD
    A["DIGITAL CLOCK"] --> B["T1"]
    B --> C["120 VAC ONLY"]
    C --> D["CONN. 3 CIRL"]
    D --> E["HEIGHT ADJ. SWITCH (OPTIONAL)"]
    E --> F["LIGHT SWITCH"]
    F --> G["TO LIGHT CONN.-2 CIRL"]
    G --> H["WIRE NUT"]
    H --> I["POWER SUPPLY"]
    I --> J["220 VAC (OPTIONAL)"]
    K["CLOCK/TIMER SWITCH"] --> L["ON OFF ON"]
    M["FAST/SLOW SWITCH"] --> N["ON"]
    O["GREEN"] --> P["(OPTIONAL)"]
    Q["BLUE"] --> P
    R["ORANGE"] --> P
    S["BROWN"] --> P
    T["YELLOW"] --> P
    U["BLACK"] --> P
    V["WHITE"] --> P
    W["RED"] --> P
    X["WIRE CODE"] --> Y["(OPTIONAL)"]
    Z["MOTOR"] --> AA["CONN.-3 CIRL"]
    AB["120 VAC"] --> AC["CONN. 3 CIRL"]
    AD["POWER SUPPLY"] --> AE["220 VAC (OPTIONAL)"]
LECTERN WIRING DIAGRAM - SOUND SYSTEM

flowchart
graph TD
    A["Clock"] --> B["Speaker Switch"]
    B --> C["3-Pin Jack"]
    C --> D["Tweeter"]
    D --> E["Woofer"]
    E --> F["Power Switch"]
    G["Masterboard"] --> H["Amplifier Assembly"]
    H --> I["Power Supply"]
    I --> J["AC Out SW."]
    I --> K["Line In"]
    I --> L["Line Out"]
    I --> M["Mic 2"]
    N["Preamer/Mixer Assembly"] --> O["117 Volts AC"]
    P["Dash Panel Circuit Housing"] --> Q["Reading Lamp Switch"]
    Q --> R["Reading Lamp"]
    R --> S["AC Plug"]
    T["External Speakers"] --> U["3-Pin Jack"]
    V["110 - 230 Volts 50 - 60 Hz Fused (10 A) Inlet"] --> W["Power Amp Circuit Housing"]