
Cubase Studio 5 - Software STEINBERG - Free user manual and instructions
Find the device manual for free Cubase Studio 5 STEINBERG in PDF.


User questions about Cubase Studio 5 STEINBERG
0 question about this device. Answer the ones you know or ask your own.
Ask a new question about this device
Download the instructions for your Software in PDF format for free! Find your manual Cubase Studio 5 - STEINBERG and take your electronic device back in hand. On this page are published all the documents necessary for the use of your device. Cubase Studio 5 by STEINBERG.
USER MANUAL Cubase Studio 5 STEINBERG
Thanks to: Georg Bruns
The information in this document is subject to change without notice and does not represent a commitment on the part of Steinberg Media Technologies GmbH. The software described by this document is subject to a License Agreement and may not be copied to other media except as specifically allowed in the License Agreement. No part of this publication may be copied, reproduced or otherwise transmitted or recorded, for any purpose, without prior written permission by Steinberg Media Technologies GmbH.
All product and company names are ^TM or ^ trademarks of their respective owners. Windows XP is a trademark of Microsoft Corporation. Windows Vista is a registered trademark or trademark of Microsoft Corporation in the United States and/or other countries. The Mac logo is a trademark used under license. Macintosh and Power Macintosh are registered trademarks.
Release Date: January 07, 2009
© Steinberg Media Technologies GmbH, 2009.
All rights reserved.
Table of Contents
10 Part I: Getting into the details
11 About this manual
12 Welcome!
13 VST Connections: Setting up input and output busses
14 About this chapter
14 Setting up busses
18 Using the busses
20 Setting up Group and FX channels
20 About monitoring
20 External instruments/effects (Cubase only)
25 The Project window
26 Background
28 Window Overview
34 Operations
56 Options
59 Playback and the Transport panel
60 Background
61 Operations
63 Options and Settings
65 The Virtual Keyboard
66 Recording
67 Background
67 Basic recording methods
69 Audio recording specifics
79 MIDI recording specifics
84 Options and Settings
87 Recovery of audio recordings after system failure
88 Fades, crossfades and envelopes
89 Creating fades
91 The Fade dialogs
92 Creating crossfades
93 The Crossfade dialog
94 Auto Fades and Crossfades
95 Event Envelopes
96 The Arranger track
97 Introduction
97 Setting up the Arranger track
98 Working with arranger events
100 Flattening the Arranger chain
101 Live Mode
102 Arranging your music to video
103 The Transpose functions
104 Introduction
104 Transposing your music
107 Other functions
109 The mixer
110 About this chapter
110 Overview
112 Configuring the mixer
116 The audio-related channel strips
117 The MIDI channel strips
117 The input and output channels
117 Basic mixing procedures
121 Audio-specific procedures
128 MIDI-specific procedures
129 Utilities
132 VST Mixer Diagrams
135 Control Room (Cubase only)
136 Background
137 Control Room operations
137 Configuring the Control Room
140 The Control Room Overview
141 The Control Room Mixer
146 Studios and Studio Sends
149 Direct Monitoring and latency
150 Audio effects
151 About this chapter
151 Overview
152 Insert effects
157 Send effects
161 Using the Side-Chain input
163 Using external effects (Cubase only)
163 Editing effects
164 Effect presets
166 Installing and managing effect plug-ins
169 VST Instruments and Instrument tracks
170 Introduction
170 VST Instrument channels vs. instrument tracks
170 VST Instrument channels
172 Instrument tracks
174 What do I need? Instrument channel or Instrument track?
174 Instrument Freeze
175 VST instruments and processor load
175 Using presets for VSTi configuration
178 About latency
179 External instruments (Cubase only)
180 Surround sound (Cubase only)
181 Background
182 Operations
188 Automation
189 Introduction
189 Enabling and disabling the writing of automation data
190 What can be automated?
191 The Automation panel
191 Automation modes
193 Automation performance utilities
195 The Settings section
196 Hints and further options
196 Automation track operations
199 Working with automation curves
202 MIDI Controller automation
204 Audio processing and functions
205 Background
205 Audio processing
213 Applying plug-ins (Cubase only)
214 The Offline Process History dialog
215 Freeze Edits
216 Detect Silence
217 The Spectrum Analyzer (Cubase only)
218 Statistics (Cubase only)
219 The Sample Editor
220 Background
221 Window overview
224 General Operations
230 Options and settings
231 AudioWarp: Tempo matching audio
234 Working with hitpoints and slices
238 Free Warp
241 Flattening the realtime processing
243 VariAudio (Cubase only)
254 The Audio Part Editor
255 Background
255 Opening the Audio Part Editor
255 Window overview
257 Operations
258 Common methods
259 Options and Settings
260 The Pool
261 Background
261 Window overview
263 Operations
273 The MediaBay
274 Introduction
276 Window overview
276 Browsing for media files
279 Finding files in the Viewer section
283 Previewing files in the Scope section
284 The Tag Editor (Cubase only)
288 Working with Track Presets
289 Introduction
289 Types of track presets
290 Applying track presets
292 Creating a track preset
293 Creating tracks from track presets or VST presets
293 Previewing MIDI, instrument and VST presets independently of tracks
295 Track Quick Controls
296 Introduction
296 Setting up the Quick Controls tab
297 Setting up quick controls on an external remote controller
298 Quick controls and automatable parameters
299 Remote controlling Cubase
300 Introduction
300 Setting Up
301 Operations
302 The Generic Remote device
304 Track Quick Controls
304 Apple Remote (Macintosh only)
305 MIDI realtime parameters and effects
306 Introduction
306 The Inspector – General handling
306 The Inspector sections
310 MIDI effects
313 Managing plug-ins
314 Using MIDI devices
315 Background
315 MIDI devices – general settings and patch handling
320 About Device panels (Cubase only)
323 About Studio Connections (Cubase only)
325 MIDI processing and quantizing
326 Introduction
326 The Quantizing functions
331 Making your settings permanent
332 Dissolve Part
333 Bounce Selection
333 Repeat Loop
333 Other MIDI functions
337 The MIDI editors
338 Introduction
338 Opening a MIDI editor
340 The Key Editor – Overview
342 Key Editor operations
356 The In-Place Editor
358 The Drum Editor - Overview
359 Drum Editor operations
361 Working with drum maps
364 Using drum name lists
365 The List Editor – Overview
365 List Editor operations
368 Working with System Exclusive messages
370 Recording System Exclusive parameter changes
370 Editing System Exclusive messages
372 VST Expression
373 Introduction
374 VST Expression in Cubase
377 Creating and editing Expression Maps
380 The Logical Editor, Transformer and Input Transformer
381 Introduction
381 Opening the Logical Editor
382 Window overview
382 Setting up filter conditions
386 Selecting a function
387 Specifying actions
389 Applying the defined actions
389 Working with presets
389 The Input Transformer
391 The Project Logical Editor
392 Introduction
392 Opening the Project Logical Editor
392 Window overview
393 Setting up filter conditions
397 Specifying actions
399 Selecting a function
399 Applying Macros
399 Applying the defined actions
399 Working with presets
401 Editing tempo and signature
402 Background
402 Tempo and signature display
404 Editing tempo and signature
406 Process Tempo (Cubase only)
406 The Process Bars dialog (Cubase only)
407 The Beat Calculator
408 Merge Tempo From Tapping
408 The Time Warp tool
413 The Project Browser
414 Window Overview
415 Editing tracks
419 Export Audio Mixdown
420 Introduction
420 Mixing down to audio files
422 The available file formats
427 Synchronization
428 Background
428 Synchronization signals
429 Synchronizing the transport vs. synchronizing audio
430 Making basic settings and connections
431 Synchronization settings
436 Machine Control
437 Sync Options
438 Working with VST System Link
438 Preparations
440 Activating VST System Link
443 Application examples
445 Video
446 Background
446 Before you start
448 Operations
451 ReWire
452 Introduction
452 Launching and quitting
453 Activating ReWire channels
453 Using the transport and tempo controls
454 How the ReWire channels are handled in Cubase
454 Routing MIDI via ReWire2
454 Considerations and limitations
455 File handling
456 Working with Projects
459 Importing audio
462 Exporting and importing OMF files (Cubase only)
464 Exporting and importing standard MIDI files
465 Exporting and importing MIDI loops
466 Exporting and importing tracks (Cubase only)
467 Other Import/Export functions
467 Cleanup
468 Customizing
469 Background
469 Workspaces
471 Using the Setup options
472 Customizing track controls
473 About preference presets (Cubase only)
474 Appearance
475 Applying track and event colors
478 Where are the settings stored?
479 Key commands
480 Introduction
480 Setting up key commands
483 Setting up tool modifier keys
484 The default key commands
487 Part II: Score layout and printing
488 How the Score Editor works
489 About this chapter
489 Welcome!
489 How the Score Editor operates
489 MIDI notes vs. score notes
490 Display Quantize
492 Entering notes by hand vs. recording notes
493 The basics
494 About this chapter
494 Preparations
494 Opening the Score Editor
494 The project cursor
494 Playing back and recording
495 Page Mode
495 Changing the Zoom factor
496 The active staff
496 Making page setup settings
496 Designing your work space
498 About the Score Editor context menus
498 About dialogs in the Score Editor
499 Setting key, clef and time signature
503 Transposing instruments
503 Printing from the Score Editor
503 Exporting pages as image files
504 Working order
504 Force update
505 Transcribing MIDI recordings
506 About this chapter
506 About transcription
506 Getting the parts ready
506 Strategies: Preparing parts for score printout
507 Staff settings
507 Situations which require additional techniques
508 Inserting Display Quantize changes
509 Strategies: Adding Display Quantize changes
509 The Explode function
510 Using "Scores Notes To MIDI"
511 Entering and editing notes
512 About this chapter
512 Score settings
513 Note values and positions
514 Adding and editing notes
516 Selecting notes
517 Moving notes
518 Duplicating notes
518 Cut, copy and paste
519 Editing pitches of individual notes
520 Changing the length of notes
521 Splitting a note in two
521 Working with the Display Quantize tool
521 Split (piano) staves
522 Strategies: Multiple staves
522 Inserting and editing clefs, keys or time signatures
523 Deleting notes
524 Staff settings
525 About this chapter
525 Staff settings
525 Making settings
525 Working with staff presets
526 Staff names
526 Key and clef
526 Display Quantize and interpretation Options
529 Display Transpose
529 The Options tab
530 The Polyphonic tab
530 The Tablature tab
531 Polyphonic voicing
532 About this chapter
532 Background: Polyphonic voicing
533 Setting up the voices
535 Strategies: How many voices do I need?
535 Entering notes into voices
535 Checking which voice a note belongs to
536 Moving notes between voices
537 Handling rests
537 Voices and Display Quantize
538 Creating crossed voicings
539 Automatic polyphonic voicing - Merge All Staves
539 Converting voices to tracks – Extract Voices
540 Additional note and rest formatting
541 About this chapter
541 Background: Note stems
541 Setting stem direction
542 Stem length
542 Accidentals and enharmonic shift
543 Changing the note head shape
544 Other note details
545 Coloring notes
545 Copying settings between notes
545 Handling beaming
549 About tied notes
550 Graphic moving of notes
551 Cue notes
552 Grace notes
552 Tuplets
555 Working with symbols
556 About this chapter
556 Background: The different layers
557 The Symbols Inspector
558 Important! – Symbols, staves and voices
559 Adding symbols to the score
565 Selecting symbols
566 Moving and duplicating symbols
569 Changing length, size and shape
570 Deleting symbols
570 Copy and paste
570 Alignment
570 Symbol details
576 Working with chords
577 About this chapter
577 Inserting Chord symbols
579 Global chord settings
580 Working with text
581 About this chapter
581 Adding and editing text symbols
583 Different types of text
587 Text functions
590 Working with layouts
591 About this chapter
591 Background: Layouts
591 Creating a layout
591 Opening a layout
591 Layout operations
592 Using layouts - an example
592 Marker Track to Form
593 Working with MusicXML
594 Introduction
595 Importing and exporting MusicXML files
597 Designing your score: additional techniques
598 About this chapter
598 Layout settings
599 Staff size
599 Hiding/showing objects
600 Coloring notes
600 Multiple rests
601 Editing bar lines
602 Creating upbeats
602 Setting the number of bars across the page
603 Moving bar lines
604 Dragging staves
605 Adding brackets and braces
606 Auto Layout
607 Reset Layout
608 Breaking bar lines
609 Scoring for drums
610 About this chapter
610 Background: Drum maps in the Score Editor
610 Setting up the drum map
612 Setting up a staff for drum scoring
612 Entering and editing notes
612 Using "Single Line Drum Staff"
613 Creating tablature
614 About this chapter
614 Creating tablature automatically
615 Creating tablature manually
615 Tablature number appearance
615 Editing
616 Note head shape
617 The score and MIDI playback
618 About this chapter
618 Scores and the Arranger mode
618 The MIDI Meaning function
619 Dynamic crescendo symbols
620 Tips and Tricks
621 Overview
621 Useful editing techniques
622 Frequently asked questions
624 If you wish you had a faster computer
625 Index
Part I: Getting into the details
1
About this manual
Welcome!
This is the Operation Manual for Steinberg's Cubase. Here you will find detailed information about all the features and functions in the program.
About the program versions
The documentation covers two program versions; Cubase and Cubase Studio, for two different operating systems or "platforms"; Windows and Mac OS X.
Some features described in the documentation are only applicable to the Cubase version. Whenever this is the case this will be clearly indicated in the heading of the related subject.
Similarly, some features and settings are specific to one of the platforms, Windows or Mac OS X. This is clearly stated in the applicable cases. In other words:
If nothing else is said, all descriptions and procedures in the documentation are valid for both Cubase and Cubase Studio, under Windows and Mac OS X. The screenshots are taken from the Windows version of Cubase.
Key command conventions
Many of the default key commands in Cubase use modifier keys, some of which are different depending on the operating system. For example, the default key command for Undo is [Ctrl]-[Z] under Windows and [Command]-[Z] under Mac OS X.
When key commands with modifier keys are described in this manual, they are shown with the Windows modifier key first, in the following way:
[Win modifier key]/[Mac modifier key]-[key]
For example, [Ctrl]/[Command]-[Z] means "press [Ctrl] under Windows or [Command] under Mac OS X, then press [Z]".
Similarly, [Alt]/[Option]-[X] means "press [Alt] under Windows or [Option] under Mac OS X, then press [X]".
Please note that this manual often refers to right-clicking, e.g. to open context menus. If you are using a Mac with a single-button mouse, hold down [Ctrl] and click.
2
VST Connections: Setting up input and output busses
About this chapter
Cubase uses a system of input and output busses to transfer audio between the program and the audio hardware.
- Input busses let you route audio from the inputs on your audio hardware into the program. This means that when you record audio, you will always do this through one or several input busses.
- Output busses let you route audio from the program to the outputs on your audio hardware. When you play back audio, you will always do this through one or several output busses.
As you can see, the input and output busses are vital when you work with Cubase. This is why you find this chapter at the beginning of the Operation Manual – once you understand the bus system and know how to set up the busses properly, it will be easy to go on with recording, playing back, mixing and doing surround work (Cubase only).
Setting up busses
Strategies
In Cubase, you can create any number of busses. A number of surround formats are supported (Cubase only). In Cubase Studio, busses are in mono or stereo.
⇒ The bus configuration is saved with the project – therefore it is a good idea to add and set up the busses you need and save these in a template project (see “Save as Template” on page 457).
When you start working on new projects, you start from this template. That way you get your standard bus configuration without having to make new bus settings for each new project. If you need to work with different bus configurations in different projects, you can either create several different templates or store your configurations as presets (see "Other bus operations" on page 17). The templates can of course also contain other settings that you regularly use – sample rate, record format, a basic track layout, etc.
So, which type of busses do you need? This depends on your audio hardware, your general audio setup (e.g. surround speaker setup) and what kind of projects you work with.
Here's an example:
Let's say you are using audio hardware with eight analog inputs and outputs and digital stereo connections (10 inputs and outputs all in all). Furthermore, you work with a surround setup in 5.1 format (Cubase only). Here's a list of busses you may wish to add:
Input busses
- Most likely you need at least one stereo input bus assigned to an analog input pair. This would let you record stereo material. If you want to be able to record in stereo from other analog input pairs as well, you add stereo input busses for these, too.
- Although you can record mono tracks from one side of a stereo input, it may be a good idea to add a dedicated mono input bus. This could be assigned to an analog input to which you have connected a dedicated microphone pre-amp for example. Again, you can have several different mono busses.
- You probably want a dedicated stereo input bus assigned to the digital stereo input, for digital transfers.
- Cubase only: If you want to transfer surround material directly to a surround track, e.g. from surround-configured location recording equipment, you need an input bus in that surround format – in this example, this would be a 5.1 input bus.
Output busses
- You probably want one or several stereo output busses for monitoring and listening to stereo mixes.
- For digital transfers, you need a stereo bus assigned to the digital stereo output as well.
- Cubase only: You need a surround bus in the format of your speaker configuration (in this example, 5.1) assigned to the correct outputs (which in turn are connected to the correct speakers). You may want additional surround busses if you tend to work in different surround formats.
Different busses can use the same inputs/outputs on the audio hardware! For example, you may want a stereo output bus assigned to the same outputs as the front stereo channels in your surround bus – this makes it easy to listen to stereo mixes without having to reconnect your speakers.
Preparations
Before you set up busses, you should name the inputs and outputs on your audio hardware. For example, if you are using a 5.1 surround speaker setup, you should name the outputs according to which speaker they are connected to (Left, Right, Center and so on).
The reason for this is compatibility – it makes it easier to transfer projects between different computers and setups. For example, if you move your project to another studio, the audio hardware may be of a different model. But if both you and the other studio owner have given your inputs and outputs names according to the surround setup (rather than names based on the audio hardware model), Cubase will automatically find the correct inputs and outputs for your busses and you will be able to play and record without having to change the settings.
Use the Device Setup dialog to assign names to the inputs and outputs of your audio hardware:
- Open the Device Setup dialog from the Devices menu.
- Make sure that the correct driver for your audio hardware is selected on the VST Audio System page, so that the audio card is listed in the Devices list.
- Select your audio card in the list.
The available input and output ports on your audio hardware are listed on the right.
- To rename a port, click its name in the "Show as" column and enter a new name.
- If needed, you can also disable ports by deactivating them in the "Visible" column.
Disabled ports will not show up in the VST Connections window when you are making bus settings. If you attempt to disable a port that is used by a bus, you will be asked whether this is really what you want – note that this will remove the port from the bus!
- Click OK to close the Device Setup dialog.
If you open a project created on another computer and the port names do not match (or the port configuration is not the same – e.g. the project is created on a system with multi-channel i/o and you open it on a stereo in/out system), the Pending Connections dialog will appear.
This allows you to manually re-route ports used in the project to ports available in your system.
Mac OS X only: Retrieving channel names
For some audio cards, you can automatically retrieve the ASIO channel names for the ports of your audio hardware:
- Open the Device Setup dialog via the Devices menu.
- On the VST Audio System page, select your audio card on the "ASIO driver" pop up menu.
- In the Devices list to the left, select your audio card. The available settings are displayed.
- In the settings section to the right, click the Control Panel button.
This opens the control panel for your audio hardware.
- Activate the "Use CoreAudio Channel Names" option.
- When you now open the VST Connections window to set up the busses in your system, you will find that the port names in the Device Port column correspond to the names that are used by the CoreAudio driver.
If you want to use the project later on with an earlier version of Cubase, you will have to re-assign the port connections in the VST Connections window (see below).
Mac OS X only: Port selection and activation
On the settings page for your audio card (opened via the Device Setup dialog, see above), you can specify which input and which output port should be active. This allows you, for example, to use the Microphone input instead of the Line input or even to deactivate the audio card input or output completely, if required.
This function is only available for Built-In Audio, standard USB audio devices and a certain number of other audio cards (e.g. Pinnacle CineWave).
The VST Connections window
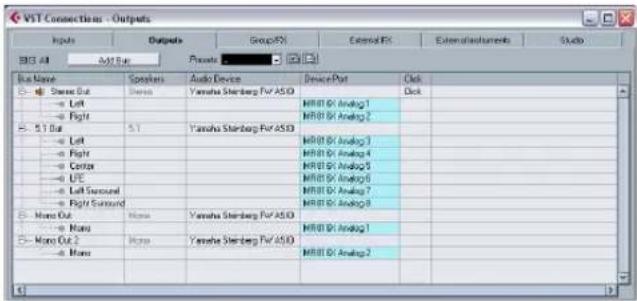
You add and set up busses in the VST Connections window, opened from the Devices menu.
text_image
VST Connections - Outputs Inputs Outputs Group(F) External FX External instruments Studio BIG 44 AVI Bus Private Bus Name Speakers Audio Device Device Port Dock - Stereo Out Stereo Yamaha Steinberg For ASD MRI@ SI Analog1 - Left - Right - 5.1 Bus 5.1 Yamaha Steinberg For ASD MRI@ SI Analog2 - Left - Right - Center - UE - Left Second - Right Second - Mono Out Home Yamaha Steinberg For ASD MRI@ SI Analog3 - Mono Home Yamaha Steinberg For ASD MRI@ SI Analog4 - Mono Out 2 Home Yamaha Steinberg For ASD MRI@ SI Analog5 - Mono Home Yamaha Steinberg For ASD MRI@ SI Analog6 CThis window contains the following tabs:
- The Inputs and Outputs tabs are for viewing input busses or output busses, respectively.
- The Group/FX tab allows you to create Group and FX channels/tracks and to make output assignments for these. See "Setting up Group and FX channels" on page 20.
- The External FX tab (Cubase only) allows you to create effect send/return busses for connecting external effects which can then be selected via the effect pop-up menus from inside the program. See "External instruments/effects (Cubase only)" on page 20 and "Using external effects (Cubase only)" on page 163 for further information.
- The External Instruments tab (Cubase only) allows you to create input/output busses for connecting external instruments. See “External instruments/effects (Cubase only)” on page 20 and the chapter “VST Instruments and Instrument tracks” on page 169 for further information.
- The Studio tab (Cubase only) is where you enable and configure the Control Room. See the chapter "Control Room (Cubase only)" on page 135.
For the time being, we shall focus on how to set up input and output busses.
Depending on which tab you have selected, Inputs or Outputs, the window lists the current input or output busses, with the following columns:
Column Description
Bus Name Lists the busses. You can select busses and rename them by clicking on them in this column.
Speakers Indicates the speaker configuration (mono, stereo, surround formats) of each bus.
Audio Device This shows the currently selected ASIO driver.
Column Description
Device Port When you have "opened" a bus (by clicking its + button in the Bus Name column) this column shows which physical inputs/outputs on your audio hardware are used by the bus.
Click You can route the click to a specific output bus, regardless of the actual Control Room output, or indeed when the Control Room is disabled.
Adding a bus
- Click the Inputs or Outputs tab depending on which you want to add.
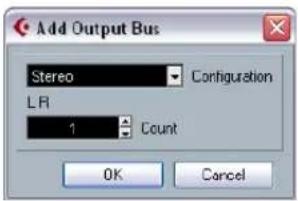
- Click the Add Bus button.
A dialog appears.
text_image
Add Output Bus Stereo Configuration LRI 1 Count OK Cancel- Select the desired (channel) configuration.
The pop-up menu contains Mono and Stereo options as well as several surround formats (Cubase only). To select another surround format, use the "More..." submenu.
-
Alternatively you can right-click in the VST Connections window and add a bus in the desired format directly from the context menu.
The new bus appears with the ports visible. -
Click in the Device Port column to select an input/output port for a channel in the bus.
The pop-up menu that appears lists the ports with the names you have assigned in the Device Setup dialog. Repeat this for all channels in the bus.
Adding a child bus (Cubase only)
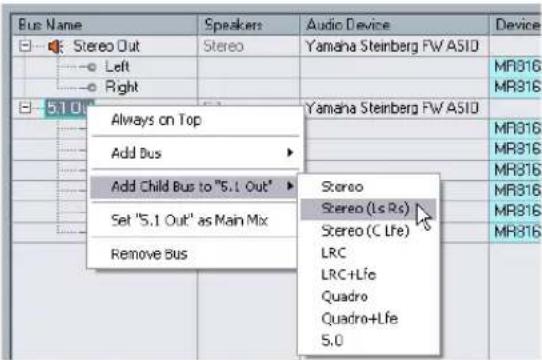
A surround bus is essentially a set of mono channels – 6 channels in the case of the 5.1 format. If you have a mono track in the project, you can route it to a separate speaker channel in the bus (or route it to the parent surround bus and use the SurroundPanner to position it in the surround image). But what if you have a stereo track that you simply want to route to a stereo channel pair within the bus (Left and Right or Left Surround and Right Surround for example)? For this you need to create a child bus.
- Select the surround bus in the list and right-click on it. A pop-up menu appears.
text_image
Bus Name Speaker: Audio Device Device Stereo Out Stereo Yamaha Steinberg FW ASIO Left MR316 Right 5.10 Always on Top Add Bus Add Child Bus to "5.1 Out" Set "5.1 Out" as Main Mix Remove Bus Stereo Stereo (Lc Rs) Stereo (C Lfe) LRC LRC+Life Quadro Quadro+Life 5.02. Select a channel configuration from the "Add Child Bus" submenu.
As you can see, you can create stereo child busses (routed to various speaker channel pairs in the surround bus) or other surround bus formats (with fewer channels than the "parent bus").
The child bus you created will be available for direct routing in the mixer. It is a part of the parent surround bus, which means there will be no separate channel strip for it.
Although child busses are probably most useful in output busses, you can also create child busses within a surround input bus – for example if you want to record a stereo channel pair (e.g. front left-right) in the surround bus to a separate stereo track.
Setting the Main Mix bus (the default output bus)
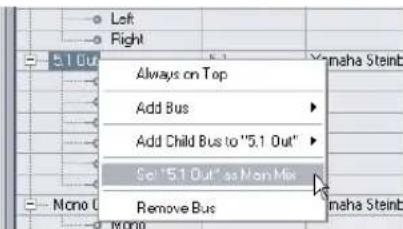
The Main Mix is the output bus that each new channel in the mixer will be assigned to when it is created.
Any of the output busses in the VST Connections window can be the default output bus. By right-clicking on the name of an output bus, you can set this bus as the Main Mix bus.
text_image
Left Right 5.1 Out Always on Top Add Bus Add Child Bus to "5.1 Out" Sel '5.1 Out' as Mon Mix Remove Bus None Yamaha Steinb Yamaha SteinbSetting the default output bus in the VST Connections window.
When creating new audio, group or FX channels in the mixer, they will automatically be routed to the default bus.

The default bus is indicated by an orange colored speaker icon next to its name in the VST Connections window.
Presets
On the Inputs and Outputs tabs, you will find a Presets menu. Here you can find three different types of presets:
- A number of standard bus configurations.
-
Automatically created presets tailored to your specific hardware configuration.
On each startup, Cubase will analyze the physical inputs and outputs provided by your audio hardware and create a number of hardware-dependent presets with the following possible configurations: -
one stereo bus
- various combinations of stereo and mono busses
- a number of mono busses
- Cubase only: one 5.1 bus (if you have 6 or more inputs)
- Cubase only: various combinations of 5.1 and stereo busses (if you have 6 or more inputs)
- Cubase only: various combinations of 5.1 and mono busses (if you have 6 or more inputs)
- You can also save your own setups as presets.
To store the current configuration as a preset, click the Store "+" button and enter a name for the preset. You can then select the stored configuration directly from the Presets pop-up menu at any time. To remove a stored preset, select it and click the "-" button.
Other bus operations
- To change the port assignment for a bus, you proceed as when you added it: Make sure the channels are visible (by clicking the "+" button next to the bus, or by clicking the "+" button at the top of the window) and click in the Device Port column to select ports.
- To remove a bus you do not need, select it in the list, right-click and select "Remove Bus" from the pop-up menu, or press [Backspace].
Using the busses
This section describes briefly how to use the input and output busses you have created. For details refer to the chapters "Recording" on page 66 and "The mixer" on page 109.
Routing
When you play back an audio track (or any other audio-related channel in the mixer – VST Instrument channels, ReWire channels, etc.), you route it to an output bus. In the same way, when you record on an audio track you select from which input bus the audio should be sent.
- You can select input and output busses in the Inspector, using the Input and Output Routing pop-up menus.
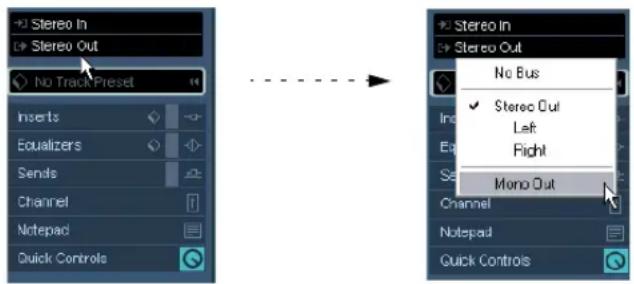
text_image
Stereo In Stereo Out No Track Preset Inserts Equalizers Sends Channel Notepad Quick Controls Stereo In Stereo Out No Bus ✓ Stereo Out Left Right Mono Out Channel Notepad Quick Controls- You can also select busses in the Routing panel at the top of each channel strip in the mixer.
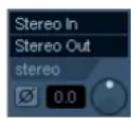
If the Routing panel is not shown, click the Show Routing button in the extended common panel or open the Mixer context menu and select "Show Routing View" from the Window submenu (see "Normal vs. Extended channel strips" on page 112).
For audio-related channel types other than audio track channels (i.e. VST Instrument channels, ReWire channels, Group channels and FX channels), only the Output Routing pop-up menu is available.
- If you press [Shift]-[Alt]/[Option] and select an input or output bus in the Track list or the Mixer Routing View (Cubase only), it will be chosen for all selected channels.
This makes it easy to quickly set several channels to use the same input or output. Similarly, if you press [Shift] and select a bus, the following selected channels will be set to use incrementing busses – the second selected channel will use the second bus, the third will use the third bus and so on.
When selecting an input bus for a track you can only select busses that correspond to the track's channel configuration. Here are the details for input busses:
- Mono tracks can be routed to mono input busses or individual channels within a stereo or surround input bus (Cubase only).
- Mono tracks can be routed to External Inputs configured on the Studio tab of the VST Connections window. These can be mono or individual channels within a stereo or surround bus (Cubase only). They can also be routed to the Talkback input.
- Mono tracks can also be routed to mono output busses, mono group output busses or mono FX channel output busses, provided that these will not lead to feedback.
- Stereo tracks can be routed to mono input busses, stereo input busses or stereo child busses within a surround bus (Cubase only).
- Stereo tracks can be routed to External Inputs that are configured in the Studio tab of the VST Connections window. These can be mono input busses or stereo input busses. They can also be routed to the Talkback input.
- Stereo tracks can also be routed to mono or stereo output busses, mono or stereo group output busses and mono or stereo FX channel output busses, provided that these will not lead to feedback.
- Surround tracks can be routed to surround input busses (Cubase only).
- Surround tracks can be routed to External Inputs that are configured in the Studio tab of the VST Connections window, provided that these have the same input configuration.
- Surround tracks can also be routed to output busses, provided that these have the same input configuration or will not lead to feedback.
For output busses any assignment is possible.
Assignments that will lead to feedback are not available in the pop-up menu. This is also indicated by a one-way symbol.
To disconnect input or output bus assignments, select "No Bus" from the corresponding pop-up menu.
Viewing the busses in the mixer
In the mixer, busses are represented by input and output channels (shown in separate panes to the left and right in the window). You can show or hide these independently by clicking the Hide Input Channels and Hide Output Channels buttons in the common panel:
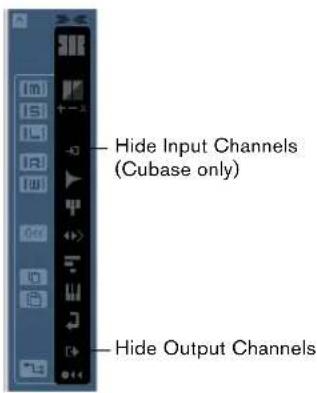
text_image
Hide Input Channels (Cubase only) Hide Output ChannelsIn Cubase Studio, only the output busses are visible in the mixer!
The input busses you have created in the VST Connections window are available for selection on the Input Routing pop-up menus, but you will not be able to make any specific mixer settings for the input busses.
Input channels (Cubase only)
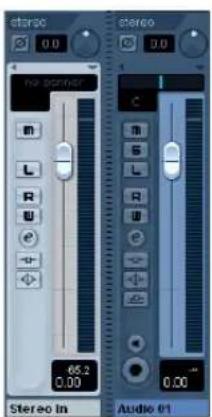
text_image
stereo 0.0 no power 65.2 0.00 Stereo In Audio 01 C B S L R U D B S R U D B S C B S L R U D B S C B S L R U D B S C B S L R U D B S C B S L R U D B S C B S L R U D B S C B S L R U D B sThe input channels are shown to the left in the mixer. As you can see, each input channel resembles a regular mixer channel strip.
Here you can do the following:
- Check and adjust the recording level using the Input Gain knobs and/or the level fader. See "Setting input levels" on page 71.
- Change the phase of the input signal. This is done by clicking the Input Phase button next to the Input Gain control.
- Add effects or EQ to the input bus. See "Recording with effects (Cubase only)" on page 78 for an example of how to add effects to your recording at the input bus stage.
The settings you make in the input channel strip will be a permanent part of the recorded audio file!
Output channels
text_image
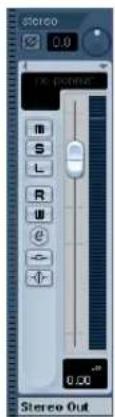
Stereo 0.0 16 frames M S L R U e - - - - - - - - - - - - - - - - - - - - - - - - - - - - - - - - - - - - - - - - - - - - - - - - - - - - - - - - - - - - - - - - - - - - - - - - - - - - - - - - - - - - - - - - - - - - - - - - - - - - - Stereo OutThe output channels are shown to the right in the mixer. Here you can do the following:
- Adjust the output level for the busses with the faders.
- Open the Channel Settings window to add effects or EQ. These will affect the whole bus. Examples of effects you may want to add here include compressors, limiters and dithering. See the chapter "Audio effects" on page 150.
Setting up Group and FX channels
The Group/FX tab in the VST Connections window shows all Group channels and FX channels in your project. You can create new Group or FX channels by clicking the corresponding Add button. This is the same as creating Group channel tracks or FX channel tracks in the Project window (see "Using group channels" on page 127 and the chapter "Audio effects" on page 150).
However, the VST Connections window also allows you to create child busses for Group and FX channels (Cubase only). This is useful e.g. if you have Group or FX channels in surround format and want to route stereo channels to specific channel pairs in these.
To create a child bus for a Group channel or FX channel in surround format, proceed as follows:
- Open the VST Connection window and select the Groups/FX tab.
- Select the Group or FX channel in the list and right-click it.
- Select a channel configuration from the "Add Child Bus" submenu.
The child bus you created will be available for direct routing in the mixer. It is a part of the parent Group or FX channel, which means there will be no separate channel strip for it.
About monitoring
By default, monitoring is done via the Control Room (see the chapter "Control Room (Cubase only)" on page 135). When the Control Room is disabled on the Studio tab of the VST Connections window, the Main Mix bus (see "Setting the Main Mix bus (the default output bus)" on page 17) will be used for monitoring.
In Cubase Studio, the Main Mix bus is always used for monitoring.
Setting the monitoring level
When you are using the Control Room for monitoring, this is set in the Control Room Mixer, see "The Control Room Mixer" on page 141. When you are monitoring via the Main Mix bus, you can adjust the monitoring level in the regular Project Mixer.
External instruments/effects (Cubase only)
Cubase supports the integration of external effect devices and external instruments, e.g. hardware synthesizers, into the sequencer signal flow.
You can use the External Instruments tab and the External FX tab in the VST Connections window to define the necessary send and return ports and access the instruments/effects through the VST Instruments window.
External instruments and effects are indicated by an "x" icon in the list next to their names in the respective pop-up menus.
Requirements
- To use external effects, you need audio hardware with multiple inputs and outputs. To use external instruments, a MIDI interface must be connected to your computer.
An external effect will require at least one input and one output (or input/output pairs for stereo effects) in addition to the input/output ports you use for recording and monitoring.
- As always, audio hardware with low-latency drivers is a good thing to have.
Cubase will compensate for the input/output latency and ensure that the audio processed through external effects is not shifted in time.
Connecting the external effect/instrument
To set up an external effect or instrument, proceed as follows:
-
Connect an unused output pair on your audio hardware to the input pair on your external hardware device. In this example, we assume that the hardware device has stereo inputs and outputs.
-
Connect an unused input pair on your audio hardware to the output pair on your hardware device.

Please note that it is possible to select input/output ports for external effects/instruments that are already used (i.e. that have been selected as inputs/outputs in the VST Connections window). If you select a used port for an external effect/instrument, the existing port assignment will be broken. Note that you will not get a warning message!
Once the external device is connected to the audio hardware of your computer, you have to set up the input/output busses in Cubase.
Setting up external effects
- Open the VST Connections window from the Devices menu.
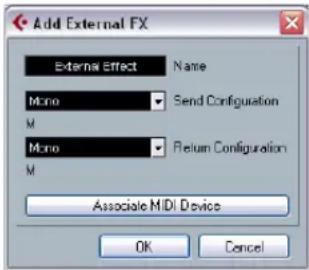
- Open the External FX tab and click "Add External FX".
text_image
Add External FX External Effect Name Mono Send Configuration M Mono Return Configuration M Associate MIDI Device OK Cancel-
In the dialog that appears, enter a name for the external effect and specify the Send and Return configurations. Depending on the type of effect, you can specify mono, stereo or surround configurations.
-
You also need a MIDI device that corresponds with the external effect. You can then click the Associate MIDI Device button to connect the two.
You can use the MIDI Device Manager to create a new MIDI device for the effect. Note that delay compensation will only be applied for the effect when you use MIDI devices. For information about the MIDI Device Manager and user device panels see the chapter "Using MIDI devices" on page 314. - Click OK. This adds a new External FX bus.
-
Click in the Device Port column for the Send Bus "Left" and "Right" ports and select the outputs on your audio hardware.
-
Click in the Device Port column for the Return Bus "Left" and "Right" ports and select the inputs on your audio hardware.
- If you like, make additional settings for the bus. These are found in the columns to the right. Note that you can adjust these while actually using the external effect – which may be easier as you can hear the result. The following options are available:
Setting Description
Delay If your hardware effect device has an inherent delay (latency), you should enter this value here, as it allows Cu-base to compensate for that delay during playback. You can also let the delay value be determined by the program: Right-click in the Delay column for the effect and select "Check User Delay". Note that you do not have to take the latency of the audio hardware into account – this is handled automatically by the program.
Send Gain Allows you to adjust the level of the signal being sent to the external effect.
Return Gain Allows you to adjust the level of the signal coming in from the external effect. Note however that excessive output levels from an external effect device may cause clipping in the audio hardware. The Return Gain setting cannot be used to compensate for this – you have to lower the output level on the effect device instead.
MIDI Device When you click in this column, a pop-up menu opens where you can disconnect the effect from the associated MIDI device, select a MIDI device, create a new device or open the MIDI Device Manager to edit the MIDI device. When Studio Manager 2 is installed, you may also select an OPT editor to access your external effect.
Used Whenever you insert an external effect into an audio track, this column shows a checkmark ("x") to indicate that the effect is being used.
- When you are done, close the VST Connections window.
Note that external device ports are exclusive, see "Connecting the external effect/instrument" on page 20.
How to use the external effect
If you now click an insert effect slot for any channel, you will find the new external FX bus listed on the "External Plug-ins" submenu.
When you select it, the following happens:
- The external FX bus is loaded into the effect slot just like a regular effect plug-in.
- The audio signal from the channel is sent to the outputs on the audio hardware, through your external effect device and back to the program via the inputs on the audio hardware.
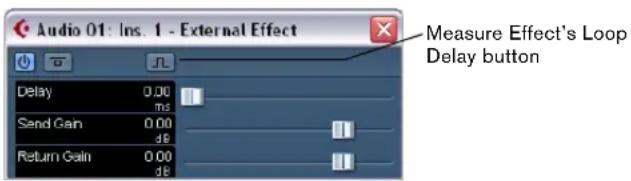
- A parameter window appears, showing the Delay, Send Gain and Return Gain settings for the external FX bus. You can adjust these as necessary while playing back. The parameter window also provides the "Measure Effect's Loop Delay for Delay Compensation" button. This is the same function as the "Check User Delay" option in the VST Connections window. It provides Cubase with a Delay value to be used for delay compensation. When you have defined a MIDI device for the effect, the corresponding Device window will be opened. When Studio Manager 2 is installed, and you have set up a corresponding OPT editor, this OPT editor will be displayed.
text_image
Audio 01: Ins. 1 - External Effect Measure Effect's Loop Delay button Delay 0.00 ms Send Gain 0.00 dB Return Gain 0.00 dBThe default parameter window for an external effect
Like any effect, you can use the external FX bus as an insert effect or as a send effect (an insert effect on an FX channel track). You can deactivate or bypass the external effect with the usual controls.
Setting up external instruments
- Open the VST Connections window from the Devices menu.
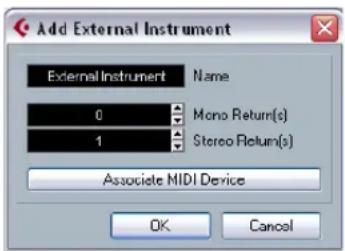
- Open the External Instrument tab and click "Add External Instrument".
text_image
Add External Instrument External Instrument Name 0 Mono Return(s) 1 Stereo Return(s) Associate MIDI Device OK Cancel- In the dialog that appears, enter a name for the external instrument and specify the number of required mono and/or stereo returns.
Depending on the type of instrument, a specific number of mono and/or stereo return channels is required.
- You also need a MIDI device that corresponds with the external instrument. You can then click the Associate MIDI Device button to connect the two.
You can use the MIDI Device Manager to create a new MIDI device. For information about the MIDI Device Manager and user device panels, see the chapter "Using MIDI devices" on page 314.
- Click OK.
This adds a new external instrument bus.
-
Click in the Device Port column for the "Left" and "Right" ports of the Return Bus and select the inputs on your audio hardware to which you connected the external instrument.
-
If you like, make additional settings for the bus.
These are found in the columns to the right. Note that you can adjust these while actually using the external instrument – which may be easier as you can hear the result. The following options are available:
Setting Description
Delay If your hardware device has an inherent delay (latency), you should enter this value here. This allows Cubase to compensate for that delay during playback. Note that you do not have to take the latency of the audio hardware into account – this is handled automatically by the program.
Return Gain Allows you to adjust the level of the signal coming in from the external instrument. Note however that excessive output levels from an external device may cause clipping in the audio hardware. The Return Gain setting cannot be used to compensate for this – you have to lower the output level on the device instead.
MIDI Device When you click in this column, a pop-up menu opens where you can disconnect the instrument from the associated MIDI device, select a MIDI device, create a new device or open the MIDI Device Manager to edit the MIDI device. When Studio Manager 2 is installed, you may also select an OPT editor to access your external instrument.
Used Whenever you insert the external instrument into a VST Instrument slot, this column shows a checkmark ("x") to indicate that the instrument is being used.
- When you are done, close the VST Connections window.
Note that external device ports are exclusive, see "Connecting the external effect/instrument" on page 20.
How to use the external instrument
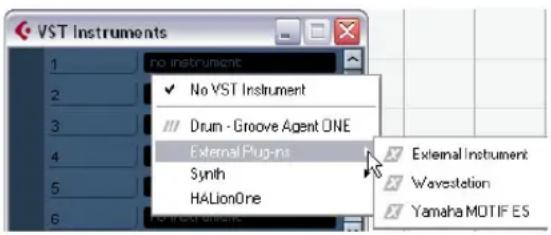
Once you have set up the external instrument in the VST Connections window, you can use it as a VST Instrument. Open the VST Instruments window and click on an empty instrument slot. On the Instrument pop-up menu, your external instrument is listed on the External Plug-ins submenu:
text_image
VST Instruments 1 2 3 4 5 6 no instrument ✓ No VST InstrumentDrum - Groove Agent ONE
External Plug-ins Synth HALionOne External Instrument Wavestation Yamaha MOTIF ESWhen you select the external instrument in the VST Instruments window, the following happens:
- A parameter window for the external device is opened automatically. This may either be the Device window, allowing you to create a generic device panel, an OPT editor window or a default editor. For information about the Device window, the MIDI Device Manager and User device panels, see the chapter "Using MIDI devices" on page 314.

To send MIDI notes to the external instrument, open the Output Routing pop-up menu in the Inspector for the corresponding MIDI track and select the MIDI device to which the external instrument is connected. This ensures use of delay compensation. The instrument will now play any MIDI notes it receives from this track and return them to Cubase through the return channel(s) you have set up.
The external instrument will behave like any other VST Instrument in Cubase.
About the Favorites buttons
In the VST Connections window, both the External FX tab and the External Instruments tab feature a Favorites button.

text_image
puts Group/FX External FX External Instruments FavoritesThe Favorites button on the External FX tab
Favorites are device configurations that you can recall at any time, like a library of external devices that are not constantly connected to your computer. They also allow you to save different configurations for the same device, e.g. a multi-effect board or an effect that provides both a mono and a stereo mode.
To save a device configuration as a favorite, proceed as follows:
- When you have added a new device in the VST Connections window, select it in the Bus Name column and click the Favorites button.
A context menu is displayed showing an option to add the selected effect or instrument to the Favorites.
- You can recall the stored configuration at any time by clicking the Favorites button and selecting the device name from the context menu.
About the "plug-in could not be found" message
When you open a project that uses an external effect/instrument, you may get a "plug-in could not be found" message. This will happen when you remove an external device from the VST Connections window although it is used in a saved project, or when transferring a project to another computer on which the external device is not defined. You may also see this message when opening a project created with an earlier version of Cubase.
In the VST Connections window, the broken connection to the external device is indicated by an icon in the Bus Name column.
To reestablish the broken connection to the external device, simply right-click the entry for the device in the Bus Name column and select "Connect External Effect". The icon is removed, and you can use the external device within your project as before.

Note that busses set up for external effects or external instruments are saved "globally", i.e. for your particular computer setup.
Freezing external effects/instruments
Just as when working with regular VST instruments and effects, you can also choose to freeze external effects and instruments. The general procedure is described in detail in the chapters "Audio effects" on page 150 and "VST Instruments and Instrument tracks" on page 169.

Note that you have to perform Freeze in realtime. Otherwise external effects will not be taken into account.
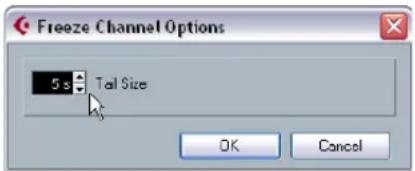
When freezing external instruments or effects, you can adjust the corresponding tail value in the Freeze Channel Options dialog:
text_image
Freeze Channel Options 5 s Tail Size OK Cancel- Use the arrow buttons next to the Tail Size value field to set the desired Tail length, i.e. the range after the part boundary that should also be included for the freeze. You can also click directly in the value field and enter the desired value manually (the maximum value being 60s).
- When the Tail Size is set to 0s (default), the freezing will only take into account the data within the Part boundaries.
The Project window
Background
The Project window is the main window in Cubase. This provides you with an overview of the project, allowing you to navigate and perform large scale editing. Each project has one Project window.
About tracks
The Project window is divided vertically into tracks, with a timeline running horizontally from left to right. The following track types are available:
Track type Description
| Audio For recording and playing back audio events and audioparts. Each audio track has a corresponding audio channel in the mixer.An audio track can have any number of automation tracks for automating mixer channel parameters, effect settings, etc. | |
| Folder Folder tracks function as containers for other tracks,making it easier to organize and manage the track structure. They also allow you to edit several tracks at the same time. See “Folder tracks” on page 53. | |
| FX Channel FX channel tracks are used for adding send effects. Each FX channel can contain up to eight effect processors – by routing effect sends from an audio channel to an FX channel, you send audio from the audio channel to the effect(s) on the FX channel. Each FX channel has a corresponding channel strip in the mixer – in essence an effect return channel. See the chapter “Audio effects” on page 150.All FX channel tracks are automatically placed in a special FX channel folder in the Track list, for easy management.An FX channel can also have any number of automation tracks for automating mixer channel parameters, effect settings, etc. | |
| Group Channel | By routing several audio channels to a Group channel,you can submix them, apply the same effects to them,etc. (see “Using group channels” on page 127).A Group channel track contains no events as such, but displays settings and automation curves for the corresponding Group channel. Each Group channel track has a corresponding channel strip in the mixer. In the Project window, Group channels are organized as tracks in a special Group Tracks folder. |
| Instrument This allows you to create a track for a dedicated instrument, making e.g. VST instrument handling easier and more intuitive. Instrument tracks have a corresponding channel strip in the mixer. Each instrument track can have any number of automation tracks in the Project window. However, Volume and Pan are automated from within the mixer. It is possible to edit Instrument tracks directly in the Project window, using the Edit In-Place function (see “The In-Place Editor” on page 356). For more information on instrument tracks, see the chapter “VST Instruments and Instrument tracks” on page 169. | |
Track type Description
| MIDI For recording and playing back MIDI parts. Each MIDI track has a corresponding MIDI channel strip in the mixer. It is possible to edit MIDI tracks directly in the Project window, using the Edit In-Place function (see “The In-Place Editor” on page 356). A MIDI track can have any number of automation tracks for automating mixer channel parameters, insert and send effect settings etc. | |
| Marker The Marker track displays markers which can be moved and renamed directly in the Project window (see “Markers” on page 54). A project can have only one marker track. | |
| Arranger The Arranger track is used for arranging your project, by marking out sections in the project and determining in which order they should be played back. See the chapter “The Arranger track” on page 96. | |
| Ruler (Cubase only) | Ruler tracks contain additional rulers, displaying the timeline from left to right. You can use any number of ruler tracks, each with a different display format if you wish. See “The ruler” on page 33 for more information about the ruler and the display formats. |
| Signature Time signature events can be added and edited on the signature track, or in the Tempo Track Editor window. A project can have only one signature track. See the chapter “Editing tempo and signature” on page 401 for details. | |
| Tempo You can create tempo changes within a project using the tempo track. A project can have only one tempo track. See the chapter “Editing tempo and signature” on page 401 for details. | |
| Transpose The Transpose track allows you to set global key changes. A project can have only one transpose track. See the chapter “The Transpose functions” on page 103. | |
| Video For playing back video events. A project can have only one video track. | |
About parts and events
The tracks in the Project window contain parts and/or events. Events are the basic building blocks in Cubase. Different event types are handled differently in the Project window:
- Video events and automation events (curve points) are always viewed and rearranged directly in the Project window.
- MIDI events can always be found in MIDI parts, which are containers for one or more MIDI events. MIDI parts are rearranged and manipulated in the Project window. To edit the individual MIDI events in a part, you have to open the part in a MIDI editor (see "The MIDI editors" on page 337).
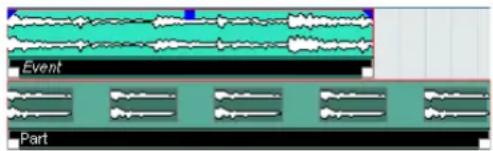
- Audio events can be displayed and edited directly in the Project window, but you can also work with audio parts containing several events. This is useful if you have a number of events which you want to treat as one unit in the project. Audio parts also contain information about the time position in the project.
text_image
Event PartAn audio event and an audio part
Audio handling
When you work with audio files, it is crucial to understand how audio is handled in Cubase:
When you edit or process audio in the Project window, you always work with an audio clip that is automatically created on import or during recording. This audio clip refers to an audio file on the hard disk that itself remains untouched. This means, that audio editing and processing is "non-destructive", in the sense that you can always undo changes or revert to the original versions.
An audio clip does not necessarily refer to just one original audio file! If you apply e.g. some processing to a specific section of an audio clip, this will create a new audio file containing only this section. The processing will then be applied to the new audio file only, leaving the original audio file unchanged. Finally, the audio clip is automatically adjusted, so that it refers both to the original file and to the new, processed file. During playback, the program will switch between the original file and the processed file at the correct positions. You will hear this as a single recording, with processing applied to one section only. This feature makes it possible to undo processing at a later stage, and to apply different processing to different audio clips that refer to the same original file.
An audio event is the object that you place on a time position in Cubase. If you make copies of an audio event and move them to different positions in the project, they will still all refer to the same audio clip. Furthermore, each audio event has an Offset value and a Length value. These determine at which positions in the clip the event will start and end, i.e. which section of the audio clip will be played back by the audio event. For example, if you resize the audio event, you will just change its start and/or end position in the audio clip – the clip itself will not be affected.
An audio region is a section within a clip with a length value, a start time, and a snap point. Audio regions are shown in the pool and are best created and edited in the Sample Editor.
If you want to use one audio file in different contexts, or if you want to create several loops from one audio file, you should convert the corresponding regions of the audio clip to events and bounce them into separate audio files. This is necessary since different events that refer to the same clip access the same clip information.
Window Overview
text_image
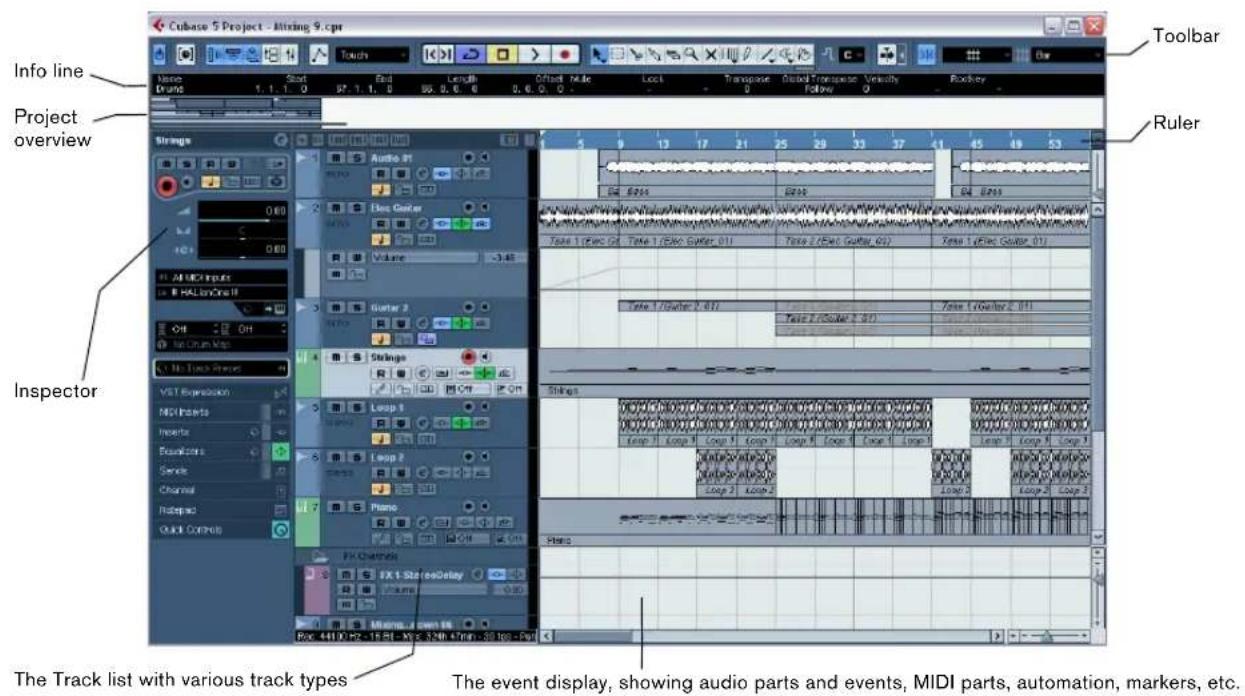
Cubase 5 Project - Mixing 9.cpr Info line Project overview Inspector The Track list with various track types The event display, showing audio parts and events, MIDI parts, automation, markers, etc. Toolbar RulerThe Track list
The Track list displays all the tracks used in a project. It contains name fields and settings for the tracks. Different track types have different controls in the Track list. To see all the controls you may have to resize the track in the Track list (see "Resizing tracks in the Track list" on page 35).
- The Track list area for an audio track:
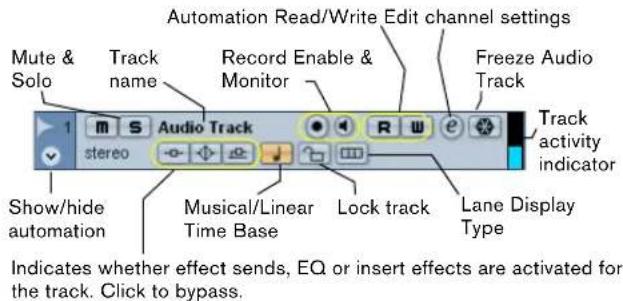
text_image
Mute & Solo Track name Record Enable & Monitor Audio Track Show/hide automation Musical/Linear Time Base Lock track Lane Display Type Track activity indicator Automation Read/Write Edit channel settings Freeze Audio Track- The Track list area for an automation track (opened by clicking the Show/Hide Automation button on a track):

text_image
Automation Read/Write Append automation track Volume -2.52 Mute Lock track Automation parameter (click to select parameter)- The Track list area for a MIDI track:
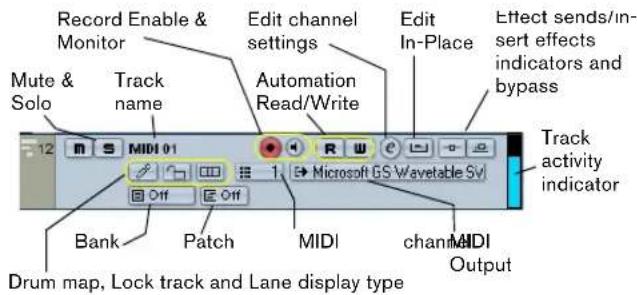
text_image
Record Enable & Monitor Edit channel settings Edit In-Place Effect sends/insert effects indicators and bypass Mute & Solo Track name Automation Read/Write Track activity indicator 12 M S MIDI 01 1 Microsoft GS Wavetable Sv Off Off Bank Patch MIDI channel MIDI Output Drum map, Lock track and Lane display typeThe Inspector
The area to the left of the Track list is called the Inspector. This shows additional controls and parameters for the track you have selected in the Track list. If several tracks are selected (see "Handling tracks" on page 38), the Inspector shows the setting for the first (topmost) selected track.
To hide or show the Inspector, click the Inspector icon in the toolbar.
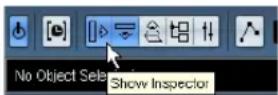
The Inspector icon
- For most track classes, the Inspector is divided into a number of sections, each containing different controls for the track. You can hide or show sections by clicking on their names.
Clicking the name for a hidden section brings it into view and hides the other sections. [Ctrl]/[Command]-clicking the section name allows you to hide or show a section without affecting the other sections. [Alt]/[Option]-clicking a section name shows or hides all sections in the Inspector.
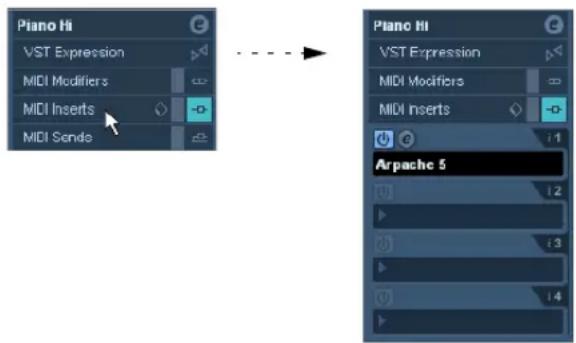
text_image
Piano Hi VST Expression MIDI Modifiers MIDI Inserts MIDI Sends Piano Hi VST Expression MIDI Modifiers MIDI Inserts Arpache 5- You can also use key commands to show different Inspector sections.
These are set up in the Key Commands dialog, see "Setting up key commands" on page 480.
→ Hiding a section does not affect its functionality.
For example, if you have set up a track parameter or activated an effect, your settings will still be active even if you hide the respective Inspector section.
Which sections are available in the Inspector depends on the selected track.
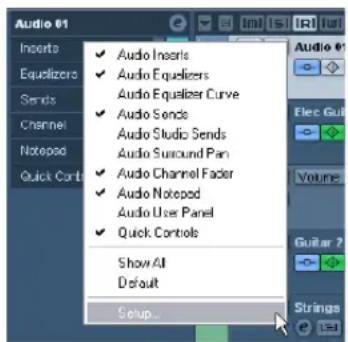
Please note that not all Inspector tabs are shown by default. You can show/hide Inspector sections by right-clicking on an Inspector tab and activating/deactivating the desired option(s).
Make sure you right-click on an inspector tab and not on the empty area below the Inspector, as this will open the Quick context menu instead.
text_image
Audio 61 Inserts Equalizers Sends Channel Notepad Quick Cont ✓ Audio Inerts ✓ Audio Equilizers Audio Equilizer Curve ✓ Audio Sends Audio Studio Sends Audio Surround Pan ✓ Audio Channel Fader ✓ Audio Notepad Audio User Panel ✓ Quick Controls Show All Default Setup... Audio 61 Elec Gul Volume Guitar ? StringsThe Inspector Setup context menu
Inspector sections
The Inspector contains the controls that can be found on the Track list, plus some additional buttons and parameters. In the table below, these additional settings and the different sections are listed. Which sections are available for which track type is described in the following sections.
Parameter Description
| Auto Fades Settings button | Opens a dialog in which you can make separate Auto Fade settings for the audio track. See “Making Auto Fade settings for a separate track” on page 95. |
| Edit Channel settings | Opens the Channel Settings window for the track, allowing you to view and adjust effect and EQ settings, etc. See “Using Channel Settings” on page 122. |
| Volume Use this to adjust the level for the track. Changing this setting will move the track's fader in the mixer window, and vice versa. See “Setting volume in the mixer” on page 117 to learn more about setting levels. | |
| Pan Use this to adjust the panning of the track. As with the Volume setting, this corresponds to the Pan setting in the mixer. | |
| Delay This adjusts the playback timing of the audio track. Positive values delay the playback while negative values cause the track to play earlier. The values are set in milliseconds. | |
| Input Routing This lets you specify which Input bus or MIDI input the track should use (see “Setting up busses” on page 14 for information about Input busses). | |
Parameter Description
| OutputRouting | Here you decide to which output the track should be routed. For audio tracks you select an output bus (see “Setting up busses” on page 14) or Group channel, for MIDI tracks you select a MIDI output and for Instrument tracks, you select the Instrument to which it is routed. |
| Inserts section | Allows you to add insert effects to the track, see the chapters “Audio effects” on page 150 and “MIDI realtime parameters and effects” on page 305. The Edit button at the top of the section opens the control panels for the added insert effects. |
| Equalizers section | Lets you adjust the EQs for the track. You can have up to four bands of EQ for each track, see “Making EQ settings” on page 123. The Edit button at the top of the section opens the Channel Settings window for the track. |
| Equalizer Curve section | Lets you adjust the EQs for the track graphically, by clicking and dragging points in a curve display. |
| Sends section | Allows you to route an audio track to one or several FX channels (up to eight), see the chapter “Audio effects” on page 150. For MIDI tracks, this is where you assign MIDI send effects. The Edit button at the top of the section opens the control panel for the first effect in each FX channel. |
| Studio Sends (Cubase only) | The Studio Sends are used to route cue mixes to Control Room Studios. For a detailed description of Studios and Studio Sends, see the chapter “Control Room (Cubase only)” on page 135. |
| Surround Pan (Cubase only) | When the SurroundPanner is used for a track, this is also available in the Inspector. For further information, see “Using the SurroundPanner” on page 184. |
| Channel section | Shows a duplicate of the corresponding mixer channel strip. The channel overview strip to the left lets you activate and deactivate insert effects, EQs and sends. |
| Notepad section | This is a standard text notepad, allowing you to jot down notes about the track.If you have entered any notes about a track, the icon next to the “Notepad” heading will light up to indicate this.Moving the pointer over the icon will display the Notepad text in a tooltip. |
| User Panel (Cubase only) | Here you can display device panels, e.g. for external MIDI devices, audio track panels or VST insert effect panels. For information on how to create or import MIDI device and user panels, see the separate PDF document “MIDI Devices”. |
| Quick Controls | Here you can configure quick controls, e.g. to use remote devices. See the chapter “Track Quick Controls” on page 295. |
Audio tracks
For audio tracks, all settings and sections listed above are available.
Instrument tracks
As explained in the chapter "VST Instruments and Instrument tracks" on page 169, the Inspector for an Instrument track shows some of the sections you would find for VST Instrument channels and MIDI tracks.
MIDI tracks
When a MIDI track is selected, the Inspector contains a number of additional sections and parameters, affecting the MIDI events in realtime (e.g. on playback). Which sections are available for MIDI tracks is described in the chapter "MIDI realtime parameters and effects" on page 305.
Arranger track
For the Arranger track, the Inspector displays the lists of available Arranger chains and Arranger events. See "The Arranger track" on page 96 for details.
Folder tracks
When a folder track is selected, the Inspector shows the folder and its underlying tracks, much like a folder structure in the Windows Explorer or Mac OS X Finder.
You can click one of the tracks shown under the folder in the Inspector to have the Inspector show the settings for that track. This way, you don't have to "open" a folder track to make settings for tracks within it.
FX channel tracks
When an FX channel track is selected, the following controls and sections are available:
- Edit button
- Volume control
- Pan control
- Output Routing pop-up menu
- Inserts section
- Equalizers section
- Equalizer Curve section
- Sends section
- Studio Sends section (Cubase only)
- Surround Pan section (Cubase only)
- Channel section
- Notepad section
FX channel tracks are automatically placed in a special folder, for easier management. When this folder track is selected, the Inspector shows the folder and the FX channels it contains. You can click one of the FX channels shown in the folder to have the Inspector show the settings for that FX channel – this way you don't have to "open" a folder track to access the settings for the FX channels in it.
Group channel tracks
When a Group channel track is selected, the following controls and sections are available:
- Edit button
- Volume control
- Pan control
- Output Routing pop-up menu
- Inserts section
- Equalizers section
- Equalizer Curve section
- Sends section
- Studio Sends section (Cubase only)
- Surround Pan section (Cubase only)
- Channel section
- Notepad section
Just like FX channel tracks, all Group channel tracks are placed in a separate folder – when this is selected, the Inspector shows the folder and the Group channels it contains. You can click one of the Group channels shown in the folder to have the Inspector show the settings for that Group channel – this way, you don't have to "open" a folder track to access the settings for the Group channels in it.
Marker tracks
When the marker track is selected, the Inspector shows the marker list. For more information, see the section "Markers" on page 54.
Ruler tracks (Cubase only)
For ruler tracks, the Inspector isn't used.
Transpose track
When the transpose track is selected, the following controls and sections are available:
- Mute button
- Keep Transpose in Octave range
- Toggle Timebase button
- Lock button
- Notepad section
The Transpose track controls are described in detail in the chapter "The Transpose functions" on page 103.
Signature track and tempo track
For the signature track and the tempo track, the Inspector displays a list of all time signature events or tempo events. See the chapter "Editing tempo and signature" on page 401 for details.
Video tracks
When a video track is selected, the Inspector contains a lock button for locking the track (see "Locking events" on page 48), a Mute button for interrupting video playback and two settings for how the video thumbnails are shown: Show Frame Numbers and Snap Thumbnails (see "Playing back a video file" on page 447).
Video tracks make use of the Notepad Inspector tab.
The toolbar
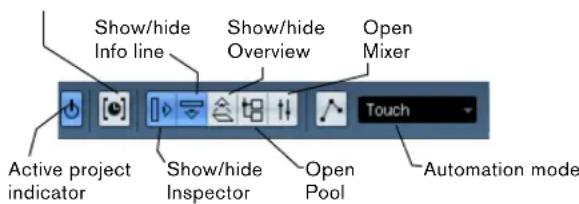
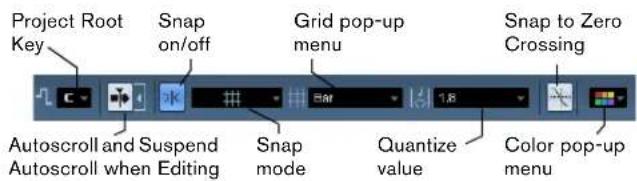
The toolbar contains tools and shortcuts for opening other windows and various project settings and functions:
Constrain delay compensation
text_image
Show/hide Info line Show/hide Overview Open Mixer Touch Active project indicator Show/hide Inspector Open Pool Automation modeProject window tools

text_image
Screenshot of a software toolbar with icons for text, drawing, and editing toolsTransport controls
(Previous/Next Marker, Cycle, Stop, Play, and Record)
text_image
Project Root Key Snap on/off Grid pop-up menu Snap to Zero Crossing Autoscroll and Suspend Autoscroll when Editing Snap mode Quantize value Color pop-up menuIn addition to these, the toolbar can contain a number of other tools and shortcuts, not visible by default. How to set up the toolbar and specify which tools should be displayed or hidden is described in the section "Using the Setup options" on page 471.
The info line
| File | Description | Start | End |
| Bass | Bass | 9.1.1.0 | 25.1.1.0 |
The info line shows information about the currently selected event or part in the Project window. You can edit almost all values on the info line using regular value editing. Length and position values are displayed in the format currently selected for the ruler (see "The ruler" on page 33).
- To hide or show the info line, click the Show Event Info Line button on the toolbar.
The following elements can be selected for display and editing on the info line:
- Audio events
- Audioparts
- MIDI parts
- Video events
- Markers
- Automation curve points
- Transpose events
- Arranger events
When several elements are selected
- If you have several elements selected, the info line will show information about the first item in the selection. The values will be shown in yellow to indicate that several elements are selected.
- If you edit a value on the info line, the value change is applied to all selected elements, relatively to the current values.
If you have two audio events selected and the first is one bar long and the other two bars long, the info line shows the length of the first event (one bar). If you now edit this value to 3 bars in the info line, the other event will be resized by the same amount – and will thus be 4 bars long.
- If you press [Ctrl]/[Command] and edit on the info line, the values will be absolute instead. In our example above, both events would be resized to 3 bars. Note that [Ctrl]/[Command] is the default modifier key for this – you can change this in the Preferences (Editing–Tool Modifiers page, under the Info Line category).
Editing Transpose and Velocity for MIDI parts
When one or several MIDI parts are selected, the info line contains Transpose and Velocity fields.
- Adjusting the Transpose field transposes the selected parts in semitone steps.
Note that this transposition doesn't change the actual notes in the part – it's just a "play parameter", affecting the notes on playback. The transposition you specify for a part on the info line is added to the transposition set for the whole track. For more information on transposing, see the chapter "The Transpose functions" on page 103.
- Adjusting the Velocity field shifts the velocity for the selected parts – the value you specify is added to the velocities of the notes in the parts.
Again, this velocity shift only affects the notes on playback, and again, the value you specify is added to the Vel.Shift. value set for the whole MIDI track in the Inspector.
Getting on-the-fly info with the Arrow tool
If the option "Select Tool: Show Extra Info" is activated in the Preferences (Editing-Tools page), a tooltip will be shown for the Arrow tool, displaying information depending on where you point it. For example, in the Project window event display, the tool will show the current pointer position and the name of the track and event you're pointing at.
The ruler

The ruler at the top of the event display shows the timeline. Initially, the Project window ruler uses the display format specified in the Project Setup dialog (see "The Project Setup dialog" on page 34), as do all other rulers and position displays in the project. However, you can select an independent display format for the ruler by clicking the arrow button to the right of it and selecting an option from the pop-up menu (you can also bring up this pop-up menu by right-clicking anywhere in the ruler).
Option Positions and lengths displayed as
Bars+Beats Bars, beats, sixteenth notes and ticks. By default there are 120 ticks per sixteenth note but you can adjust this with the "MIDI Display Resolution" setting in the Preferences (MIDI page).
Seconds Hours, minutes, seconds and milliseconds.
Timecode This format displays hours, minutes, seconds and frames. The number of frames per second (fps) is set in the Project Setup dialog (see "The Project Setup dialog" on page 34). You can choose between 24, 25, 29.97 and 30fps or 29.97 and 30dfps ("drop frame").
Samples Samples.
User Hours, minutes, seconds and frames, with a user definable number of frames per second. You set the desired number of fps in the Preferences (Transport page).
Time Linear When this is selected, the ruler will be linear relative to time. This means that if there are tempo changes on the tempo track, the distance between the bars will vary in Bars+Beats mode.
Bars+Beats Linear When this is selected, the ruler will be linear relative to the meter position – bars and beats. This means that if there are tempo changes on the tempo track, there still will be the same distance between bars in Bars+Beats mode. If the ruler is set to a time-based mode, the distance between seconds will vary depending on the tempo changes.
- The selection you make here affects the ruler, the info line and tooltip position values (which appear when you drag an event in the Project window).
You can also select independent formats for other rulers and position displays. - To set the display format globally (for all windows), use the primary display format pop-up on the Transport panel, or hold down [Ctrl]/[Command] and select a display format in any ruler.
- If you use the "Timecode" or "User" options and the option "Show Timecode Subframes" is activated in the Preferences (Transport page), the frames will also display subframes.
There are 80 subframes per frame.
Using multiple rulers - ruler tracks (Cubase only)
As described above, the Cubase Project window contains a main ruler at the top of the event display, displaying the timeline from left to right.
If needed, you can have several rulers in the Project window, by adding ruler tracks to the project. Each ruler track contains an additional ruler.
- To add a ruler track, select "Add Track" from the Project menu and from the submenu that appears, select "Ruler". A ruler track showing an additional ruler is added to the Track list.

A ruler track set to the display format "Seconds"
You can add any number of ruler tracks to a project, and position them as needed by dragging them up or down in the Track list. Each of the rulers can show a separate display format:
- To select a display format for a ruler track, click on its name in the Track list and select an option from the pop-up menu.
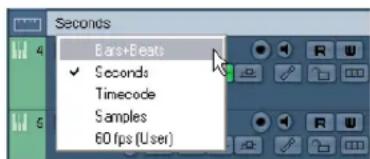
text_image
Seconds Ears+Beats ✓ Seconds Timecode Samples 60 fps (User)Note that ruler tracks are completely independent from the main event display ruler, as well as rulers and position displays in other windows. This means that:
- Each ruler track in a project can have its own display format.
- Ruler tracks are not affected by the display format setting in the Project Setup dialog (see "The Project Setup dialog" on page 34).
- Ruler tracks are not affected if you set the display format globally with the primary time display in the Transport panel.
Ruler tracks are affected by the option "Show Time-code Subframes" in the Preferences (Transport page, see above).
Operations
Creating a new project
You create a new project in the following way:
- Select "New Project" from the File menu.
A dialog appears, listing a number of project templates, including any custom templates you may have created (see "Save as Template" on page 457).
- Select a template (or "Empty") and click OK.
A file dialog appears, allowing you to specify a location for the project folder. This will contain all files related to the project.
- Select an existing folder or create a new one. Then click OK.
A Project window opens. If you selected a template, the new project will be based on this template, and include the corresponding tracks, events and settings.
The Project Setup dialog
General settings for the project are made in the Project Setup dialog. This is opened by selecting "Project Setup..." from the Project menu.
If the "Run Setup on Create New Project" option is activated in the Preferences dialog (General page), the Project Setup dialog will open automatically when you create a new project.
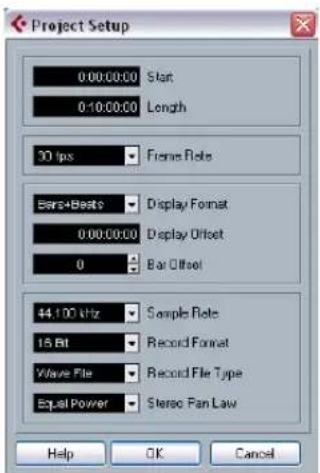
text_image
Project Setup 0:00:00:00 Start 0:10:00:00 Length 30 fps Frame Rate Bar+Beats Display Format 0:00:00:00 Display Offset 0 Bar Offset 44.100 kHz Sample Rate 15 Bit Record Format Wave File Record File Type Equal Power Stereo Fan Law Help OK CancelThe following settings are available in the Project Setup dialog:
Setting Description
Start The start time of the project. Allows you to have the project start at another time than zero. Also used for setting the sync start position when synchronizing Cubase to external devices (see "Setting up Cubase for external sync to timecode" on page 433). When you change this setting you will be asked whether you want to keep the project content at its timecode positions. "Yes" means that all events will stay at their original timecode positions – i.e. they will be moved in relation to the start of the project. "No" means that all events keep their position relative to the project start.
Length The length of the project.
Frame Rate Used when synchronizing Cubase with external equipment. If Cubase is slave, this value is automatically set to the frame rate of the incoming sync signal. If Cubase is the master, this determines the frame rate of the sent sync signal. See "Setting the Frame Rate" on page 430.
Display Format This is the global display format used for all rulers and position displays in the program, except ruler tracks (Cubase only, see "Ruler tracks (Cubase only)" on page 31). However, you can make independent display format selections for the individual rulers and displays if you like. For descriptions of the different display format options, see "The ruler" on page 33.
Display Offset Offsets the time positions displayed in the ruler etc., allowing you to compensate for the Start position setting. Typically, if you synchronize Cubase to an external source starting at a frame other than zero, you set the Start position to this value. However, if you still want the display in Cubase to start at zero, set the Display Offset to the same value.
Bar Offset This works just like "Display Offset" described above, in that it offsets the time positions in the ruler by a number of bars, allowing you to compensate for the Start position setting. The difference is that Bar Offset is only used when the "Bars+Beats" display format is selected (see "The ruler" on page 33).
Sample Rate The sample rate at which Cubase records and plays audio.
Record When you record audio in Cubase, the files that are created will be of this resolution and file type. See "Selecting a recording file format" on page 69.
Stereo Pan Law Decides whether panning should use power compensation or not (see "About the "Stereo Pan Law" setting (audio channels only)" on page 121).
While most Project Setup settings can be changed at any time, you must select a sample rate once and for all when starting with a new project! All audio files must be of this sample rate to play back correctly.
Zoom and view options
Zooming in the Project window is done according to the standard zoom techniques, with the following special notes:
- When you are using the Zoom tool (magnifying glass), the result depends on the option "Zoom Tool Standard Mode: Horizontal Zooming Only" in the Preferences (Editing-Tools page).
If this is activated and you drag a selection rectangle with the Zoom tool, the window will only be zoomed horizontally (track height will not change). If the option is off, the window will be zoomed both horizontally and vertically.
- When using the vertical zoom sliders, the tracks are scaled relatively.
In other words, if you have made any individual track height adjustments (see below), the relative height differences are maintained.
You find the following options are available on the Zoom submenu on the Edit menu:
Option Description
| Zoom In Zooms in one step, centering on the project cursor. | |
| Zoom Out Zooms out one step, centering on the project cursor. | |
| Zoom Full Zooms out so that the whole project is visible. "The whole project" means the timeline from the project start to the length set in the Project Setup dialog (see above). | |
| Zoom to Selection | Zooms in horizontally and vertically so that the current selection fills the screen. |
| Zoom to Selection (Horiz) | Zooms in horizontally so that the current selection fills the screen. |
Zoom to Event This option is available only in the Sample Editor (see "Zooming" on page 224).
Zoom In Vertically Zooms in one step vertically.
Zoom Out Vertically Zooms out one step vertically.
Zoom In Tracks Zooms in on the selected track(s) one step vertically.
Zoom Out Tracks Zooms out the selected track(s) one step vertically.
Zoom Selected Tracks This zooms in vertically on the selected track(s) and minimizes the height of all other tracks.
Undo/Redo Zoom These options allow you to undo/redo the last zoom operation.
- If the option "Zoom while Locating in Time Scale" is activated in the Preferences (Transport page), you can also zoom by clicking in the main ruler and dragging up or down with the mouse button pressed.
Drag up to zoom out; drag down to zoom in.
- You can zoom the contents of parts and events vertically, using the waveform zoom slider in the top right corner of the event display.
This is useful when viewing quiet audio passages.
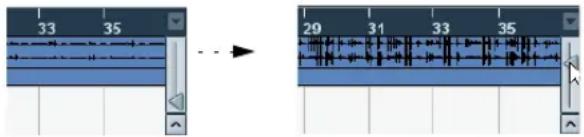
text_image
33 35 → 29 31 33 35To get an approximate reading on the level of the audio events by viewing the waveforms, make sure this slider is all the way down. Otherwise, zoomed waveforms may be mistaken for clipped audio.
- If you activate the option Quick Zoom in the Preferences (Editing page), the contents of parts and events will not be continuously redrawn when you zoom manually.
Instead, the contents are redrawn once you have stopped changing the zoom – activate this if screen redraws are slow on your system.
Resizing tracks in the Track list
- You can change the height of an individual track by clicking on its lower border in the Track list and dragging up or down.
To change the height of all tracks simultaneously, hold down [Ctrl]/[Command] and resize one of the tracks in this way. If "Snap Track Heights" is activated on the Track scale pop-up (see below), the track height will change in fixed increments when you resize it.
This behavior is different when "Enlarge Selected Track" is activated on the Edit menu (see below).
- You can also change the width of the Track list area, by dragging the border between the Track list and the event display.
- By default, the controls shown for tracks in the Track list will adapt to the track size. This means that when resizing a track's height or width the controls will be placed where they best "fit in".
If you prefer to have the controls in fixed positions, you can deactivate the option "Wrap Controls" in the Track Controls settings dialog (see "Customizing track controls" on page 472).
- You can decide for each track type which controls should be shown in the Track list – see "Customizing track controls" on page 472.
- You can use the Track scale pop-up (opened by clicking the arrow button above the vertical zoom control) to set the number of tracks to view in the current Project window.
The track height will be adjusted to show only the number of tracks specified on the pop-up menu. By selecting "Zoom N Tracks" from the pop-up you can manually set the number of tracks to fit in the current Project window.
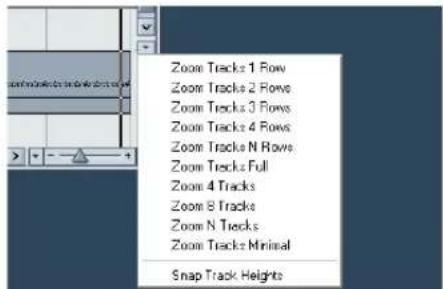
text_image
Zoom Tracks 1 Row Zoom Tracks 2 Rows Zoom Tracks 3 Rows Zoom Tracks 4 Rows Zoom Tracks N Rows Zoom Tracks Full Zoom 4 Tracks Zoom 8 Tracks Zoom N Tracks Zoom Tracks Minimal Snap Track Heights- Tracks can also be divided vertically in lanes – see "Editing in Lane Display mode" on page 50.
The Enlarge Selected Track option
When this option is activated on the Edit menu (or in the Preferences, Editing-Project & Mixer page), the selected track is enlarged automatically. This is useful if you are stepping through the tracks in the Track list, to check or edit the settings. The tracks will revert to the size they had before when they are deselected. You can adjust the size directly in the Track list if the default enlargement factor does not suit you.
While this is the program behavior you will want in most cases, it may be a disadvantage when changing the track height you started out with for one or more tracks (i.e. their "original" height, before "Enlarge Selected Track" was activated). As soon as you try to resize a track, it is selected and automatically enlarged. Instead of turning off "Enlarge Selected Track", resizing the desired track(s) and the activating "Enlarge Selected Track" again, you can resize a track in the Track list without selecting it.
Proceed as follows:
- Move the mouse pointer over the lower border of the (unselected) track you want to resize.
The mouse pointer turns into a divider symbol.
- Hold down [Alt]/[Option] and drag the lower border of the track until it reaches the desired height.
Now, when you select this track, (and "Enlarge Selected Track" is activated), it will be enlarged. It will revert to the changed size, when you select a different track.
Zoom presets and Cycle markers
The pop-up menu to the left of the horizontal zoom control allows you to select, create and organize zoom presets. These are useful if you want to toggle between different zoom settings (e.g. one where the whole project is displayed in the project window and another with a high zoom factor for detailed editing). With this pop-up menu, you can also zoom in on the area between cycle markers in the project.
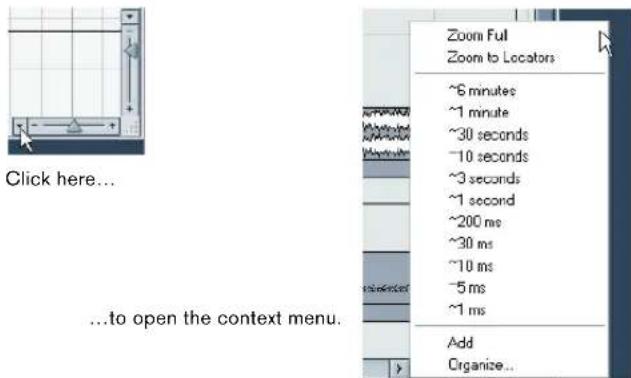
text_image
Zoom Ful Zoom to Locators ~6 minutes ~1 minute ~30 seconds ~10 seconds ~3 seconds ~1 second ~200 ms ~30 ms ~10 ms ~5 ms ~1 ms Add Organize...The upper part of the menu lists the zoom presets:
- To store the current zoom setting as a preset, select Add from the pop-up menu.
A dialog appears, allowing you to type in a name for the preset.
- To select and apply a preset, select it from the pop-up menu.
- The "Zoom Full" preset is always available. Selecting this option zooms out so that the whole project is visible.
"The whole project" means the timeline from the project start to the length set in the Project Setup dialog (see "The Project Setup dialog" on page 34).
- If you want to delete a preset, select "Organize..." from the pop-up menu.
In the dialog that appears, select the preset in the list and click the Delete button. The preset is removed from the list.
- If you want to rename a preset, select "Organize..."
from the pop-up menu.
In the dialog that appears, select the desired preset in the list and click the Rename button. A second dialog opens, allowing you to type in a new name for the preset. Click OK to close the dialogs.

Zoom presets are global for all projects, i.e. they are available in all projects you open or create.
The middle part of the pop-up lists any cycle markers you have added in the project:
- If you select a cycle marker from this menu, the event display is zoomed in to encompass the marker area (see "Markers" on page 54).
- You cannot edit the cycle markers in this pop-up menu. For information on editing markers, see “Editing markers in the Marker window” on page 54.

Only the cycle markers you create in the current project are available on the menu.
The Zoom history
Cubase maintains a history of recent zoom stages, allowing you to undo and redo zoom operations. This way you can zoom in several steps and then easily go back to the zoom stage at which you started.
There are two ways to invoke Undo Zoom and Redo Zoom:
- Use the items on the Zoom submenu on the Edit menu. You can also assign key commands for these.
- Double-click with the Zoom tool (magnifying glass) to Undo Zoom.
Press [Alt]/[Option] and double-click to Redo Zoom.
Adjusting how parts and events are shown
The Preferences on the File menu (the Cubase menu, under Mac OS X) contains several settings for customizing the display in the Project window.
The Event Display page contains common settings for all track types:
Option Description
| Colorize | Determines whether the backgrounds or “contents” |
| Event Back-ground | (waveforms, etc.) of parts and events will be colorized.See “Handling tracks” on page 38. |
| Show Event Names | Determines whether the names of parts and events should be shown in the Project window. |
Option Description
| Transparent Events | When this is activated, events and parts will be transparent, showing the waveforms and MIDI events only. |
| Show Data on Small Track Heights | If this is activated, the contents of events and parts will be shown, even if the height of a track is very small. |
The Event Display—Audio page contains settings for audio events:
Option Description
| InterpolateAudio Images | If the option is deactivated, single sample values are drawn as “steps”. If the option is activated they are interpolated to form “curves”. |
| Wave Image Style | Determines whether audio waveforms should be displayed as solid images, frames or “inverted” images (solid+frame). This selection affects all waveform images in the Project window, Sample Editor and Audio Part Editor.Note that the “Framed” and “Solid and Framed” styles are more demanding for the computer. If the system feels slower in these modes, please switch back to “Solid” wave image style. |
| Show EventVolume CurvesAlways | If this is activated the “volume curves” created with the volume and fade handles are always shown – if not, the curves are only shown for selected events. |
| Fade Handlesalways on top | When this option is activated, the fade handles stay at the top of the event, and vertical help lines indicate the exact end or start points of fades. |
| Thick FadeLines | If this option is activated, the fade lines and volume curves are thicker, increasing their visibility. |
| Show Waveforms | Determines whether audio waveforms should be shown at all. |
| BackgroundColorModulation | When this is activated, the backgrounds of audio waveforms are displayed in a different way, reflecting the waveform dynamics. This is especially useful to get an overview when working with small track heights. |
The Event Display–MIDI page contains settings for MIDI parts:
Option Description
| Default Edit Action | Determines which editor should be opened when you double-click a MIDI part or select it and press [Ctrl]/[Command]-[E]: the Key, List, In-Place, Drum or Score Editor. Note that this setting is overridden for tracks with drum maps if the option “Edit as Drums when Drum Map is assigned” (see below) is activated. |
| Part Data Mode | Determines if and how events in MIDI parts should be shown in the Project window: as score notes, as drum notes or as lines. If “No Data” is selected, events will not be shown at all. Note that this setting is overridden for tracks with drum maps if the option “Edit as Drums when Drum Map is assigned” (see below) is activated. |
Option Description
| ShowControllers | Governs whether non-note events (controllers, etc.) should be shown in MIDI parts in the Project window. |
| Edit as Drums when Drum Map is assigned | If this is activated, parts on MIDI tracks with drum maps assigned will be shown with drum note symbols in the Project window. Also, the parts will automatically open in the Drum Editor when double-clicked (overriding the Default Edit Action setting above). |
| Note Name Style | Determines how MIDI note names (pitches) should be displayed in editors, etc. |
The Event Display–Video page contains settings for video events:
Option Description
| Show Video Thumbnails | When this is activated, thumbnail frames of the video contents are shown on the Video track. |
| Video Cache Size | This determines how much memory is available for video thumbnails. If you have long video clips and/or work with a large zoom factor (so that a lot of frames are shown in the thumbnails), you may have to raise this value. |
Zooming and navigating in the overview line
By clicking the Show Overview button on the toolbar, an extra pane appears under the toolbar; the project overview line.
Show Overview button
In the overview line, events and parts on all tracks are displayed as boxes. You can use the overview line to zoom in or out, and for navigating to other sections of the project. This is done by moving and resizing the track view rectangle in the overview line:
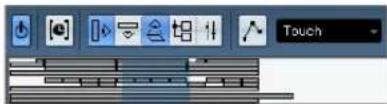
text_image
TouchThe track view rectangle
- The track view rectangle indicates the section of the project currently displayed in the event display.
- You zoom in or out horizontally by resizing the rectangle. Resize it by dragging the edges of the rectangle.
- You can drag the track view rectangle to view other sections of the project.
This can also be done by clicking anywhere in the upper part of the overview – the track view rectangle will be moved to where you clicked. The number of tracks shown will not change.
Handling tracks
To add a track to the project, select "Add Track" from the Project menu and select a track type from the submenu that appears. The new track is added below the currently selected track in the Track list.
- The items on the "Add Track" submenu are also available on the context menu.
This is accessed by right-clicking in the Track list.
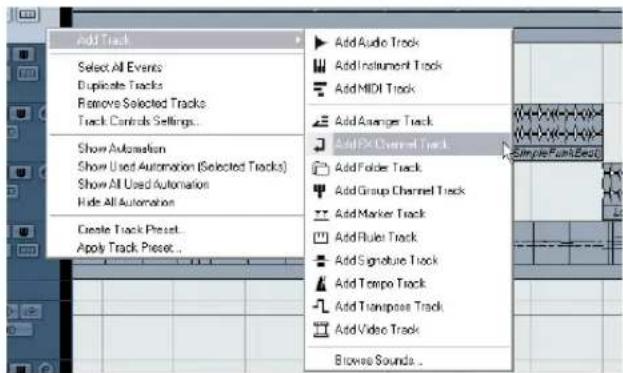
text_image
Add Track Select All Events Duplicate Tracks Remove Selected Tracks Track Controls Settings... Show Automation Show Used Automation (Selected Tracks) Show All Used Automation Hide All Automation Create Track Preset... Apply Track Preset... Add Audio Track Add Instrument Track Add MIDI Track Add Asanger Track Add FX Channel Track Add Folder Track Add Group Channel Track Add Marker Track Add Flue Track Add Signature Track Add Tempo Track Add Transpase Track Add Video Track Browse Sounds...- If you select Audio, MIDI, Group Channel or Instrument from the Add Track submenu, a dialog opens, allowing you to insert several tracks in one go. Just enter the desired number of tracks in the value field.
- For audio and group channel tracks, the channel configuration – mono, stereo or a surround configuration (Cubase only) – can be set in the Configuration pop-up.
- The Browse Sounds option in the Add Track dialog is described in the chapter "Working with Track Presets" on page 288.
- In the Preferences (Editing–Project & Mixer page), you can find the option "Auto Track Color Mode".
This offers you several options for automatically assigning colors to tracks that are added to the project.
Once you have created tracks, you can manipulate and rearrange them in various ways:
- To rename a track, double-click in the name field and type in a new name. If you hold down any modifier key when pressing [Return] to close the name field, all events on the track will get the name you entered.
- To select a track, click on it in the Track list. A selected track is indicated by a light gray color in the Track list.
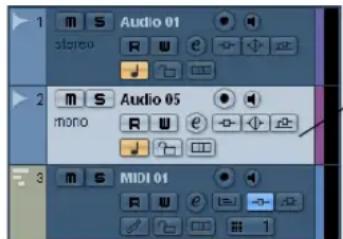
text_image
1 m S Audio 01 stereo R U e → ↓ 2 m S Audio 05 mono R U e → ↓ 3 m S MIDI 01 R U e → ↓ 1This track is selected.
It is possible to select several tracks by pressing [Ctrl]/[Command] and clicking on them. [Shift]-click to select a continuous range of tracks.
- To move a track, click and drag it up or down in the list.
-
To duplicate a track, complete with all contents and channel settings, right-click in the Track list and select "Duplicate tracks" from the context menu, or select "Duplicate tracks" from the Project menu.
The duplicated track will appear below the original track. -
You can select a default color for a track by activating "Show Track Colors" above the Track list and selecting a color from the Color pop-up menu on the toolbar. This color will be used for all events on the track and will also be shown in the Mixer. You can override the default track color for individual events and parts by using the Color tool or the Color Selector pop-up menu. For more information, see "Applying track and event colors" on page 475. The option "Colorize Event Background" in the Preferences dialog (Event Display page) determines whether the backgrounds or waveforms of events will be colorized.
- To remove a track, right-click on it in the Track list and select "Remove Selected Tracks" from the context menu. You can also remove multiple selected tracks, by selecting "Remove Selected Tracks" either from the context menu or from the Project menu. Furthermore, you can remove all tracks not containing any events by selecting "Remove Empty Tracks" from the Project menu.
- To change the track height of an individual track, click on its lower border in the Track list and drag up or down, see "Resizing tracks in the Track list" on page 35.
Note that you can also automatically enlarge the selected track, see "The Enlarge Selected Track option" on page 36.
Disabling audio tracks
Audio tracks can be disabled by selecting "Disable Track" from the Track list context menu. Disabling a track is similar to muting it (see "Muting events" on page 49), since a disabled track will not be played back. However, disabling a track not only "zeroes" the output volume from the track, but actually shuts down all disk activity for it. See "About track disable/enable" on page 63 for more information.
Track folding
On the Project menu you will find the Track Folding submenu, allowing you to quickly show, hide or invert what is displayed in the Project window event display. This enables you for example to divide the project into several parts (by creating several folder tracks for the different project elements) and showing/hiding their contents by selecting a menu function (or using a key command). You can also fold in automation tracks this way. The following options are available:
- Toggle Selected Track
When you select this menu option, the fold state of the selected track is reversed, i.e. if the track was folded in (its elements (subtracks) were hidden), it is now unfolded (all subtracks displayed) and vice versa.
- Fold Tracks
Select this menu option to fold in all open folder tracks in the Project window. Please note that the exact behavior of this function depends on the "Deep Track Folding" setting in the Preferences, see below.
- Unfold Tracks
Select this menu option to unfold all folder tracks in the Project window. Please note that the exact behavior of this function depends on the "Deep Track Folding" setting in the Preferences, see below.
- Flip Fold States
Select this menu option to flip the fold states of the tracks in the Project window. This means that all tracks that were folded in will be unfolded and all unfolded tracks will be folded in, respectively.
⇒ You can assign key commands for these menu options in the Key Commands dialog (Project category).
In the Preferences (Editing–Project & Mixer page), you can find the following option affecting the track folding behavior:
- Deep Track Folding
When this is activated, any folding settings you make in the Track Folding submenu of the Project menu also affect the sub-elements of the tracks, i.e. if you fold in a folder track which contains 10 audio tracks 5 of which have several automation tracks open, all these audio tracks within the folder track will be folded in as well.
Dividing the Track list (Cubase only)
It is possible to divide the Track list into two parts. Both sections will have independent zoom and scroll controls (if needed), but resizing the window vertically will affect the lower section only (if possible). This is useful if you're working with a video track along with multi-track audio for example. This way, you can place the video track in the upper Track list, letting you scroll the audio tracks separately in the lower Track list, referencing them against the video track.
- To divide the Track list, click the "Divide Track List" button in the top right corner of the Track list.
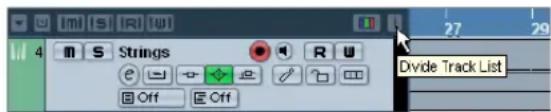
text_image
4 m S Strings R U Off Off 27 29 Divide Track List- To revert to a single Track list, click the button again.
When the Track list is divided into two parts, the following applies:
- If you add tracks from the Add Track submenu of the Project menu, Video tracks, Marker tracks and Arranger tracks will automatically be placed in the upper part of the Track list.
If the Track list already contains tracks of the type Video, Marker or Arranger, these will automatically be moved to the upper part when you divide the Track list. All other types of tracks will be placed in the lower part. - If you add tracks from the context menu invoked by right-clicking in the Track list, tracks will be added to the part of the Track list in which you click.
- You can move any type of track from the lower Track list to the upper and vice versa by right-clicking it in the Track list and selecting "Toggle Track List" from the context menu.
- You can resize the upper part by clicking and dragging the divider between the Track list sections.
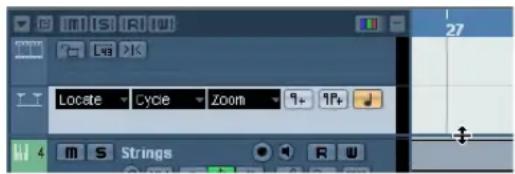
text_image
Lia Locate Cycle Zoom 9+ 1P+ 4 m S StringsSwitching between musical and linear time base
Tracks can be either musical (tempo) or linear (time) based.
- On a track using linear time base, the events will be positioned on specific time positions – changing the playback tempo will not affect the time position of events.
- On a track using musical time base, the positions of events are represented as meter values (bars, beats, 1/16th notes and ticks, with 120 ticks per 1/16th note). If you change the playback tempo, the events will play back at an earlier or later time.
- In the Preferences (Editing page), you can find the option “Default Track Time Type” (Cubase only).
This allows you to specify the default track time type for new tracks (Audio, Group/FX, MIDI and Marker tracks). When you change this setting, all new tracks will use the selected time type. You can choose between "Musical", "Time Linear" and "Follow Transport Main Display". Selecting "Musical" will cause all added tracks to be set to musical time type. When you select "Time Linear", all new tracks will use linear time base. The third option uses the primary time format setting on the Transport panel. When this is set to "Bars+Beats", tracks with musical time base will be added. When this is set to any of the other options (Seconds, Timecode, Samples, etc.), all new tracks will use linear time base.
Whether to use musical or linear time base depends on the type of project and recording situation. You can always change this setting individually for each track, by clicking the musical/linear time base button in the Inspector or Track list. Musical time base is indicated by a note symbol, while linear time base is indicated by a clock symbol.
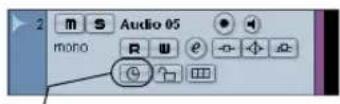
Linear time base selected
Musical time base selected
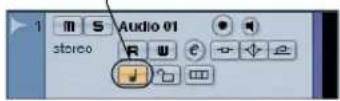

Internally, events on musical time based tracks use the same high precision for positioning (64 bit floating point values) as linear time based events. However, switching between linear and musical time base results in a very small loss of precision (introduced by the mathematical operations used for scaling values in the two different formats). Therefore you should avoid switching repeatedly between the two modes.
For more information about tempo changes, see the chapter "Editing tempo and signature" on page 401.
Adding events to a track
There are a number of ways to add events to a track:
- By recording (see "Basic recording methods" on page 67).
- By dragging files and dropping them on the track at the desired position.
You can create events by dragging and dropping from the following locations:
- The desktop
- The MediaBay and its related windows (see the chapter "The MediaBay" on page 273)
The Pool - A library (a Pool file that is not attached to a project)
- The "Find media" dialog
- The Project window of another open project
- The Audio Part Editor of any open project
- The Sample Editor – press [Ctrl]/[Command] and drag to create an event of the current selection, or click in the left column of the region list and drag to create an event from a region.
text_image
7230While you drag the clip in the Project window, its position will be indicated by a marker line and a numerical position box. See also "Using drag and drop" on page 264.
- By selecting "Audio File..." or "Video File..." from the Import submenu on the File menu.
This opens a file dialog, allowing you to locate the file you wish to import. When you import a file this way, a clip is created for the file and an event that plays the whole clip is inserted on the selected track, at the position of the project cursor.
You can also import MIDI files by using the Import submenu, but this works in a slightly different way (see "Exporting and importing standard MIDI files" on page 464).
- By grabbing audio CD tracks and converting them to audio files (see "Importing audio CD tracks" on page 459).
- By importing only the audio portion of a video file and converting it to an audio file (see "Extracting audio from a video file" on page 450).
- By using Copy and Paste on the Edit menu.
This allows you to copy all kinds of events between projects. You can also copy events within the project, e.g. from the Sample Editor.
- By drawing.
Some types of events (markers and automation events) can be drawn directly into the Project window. For audio and MIDI tracks, you can draw parts (see "Creating parts" on page 42).
Audio file import options
When you are importing audio files there are a number of options concerning how the files should be treated by Cu-base:
- You can choose to copy the file into the audio folder of the project and have the project make reference to the copied file rather than the original file. This helps you keep your project "self-contained".
- You can choose to split stereo and multi-channel files into a number of mono files.
- Furthermore, you may want all files in the project to have the same sample rate and sample size (resolution).
The Preferences dialog (Editing–Audio page) contains a setting that lets you decide which options to use. Select one of the following options on the "On Import Audio Files" pop-up menu:
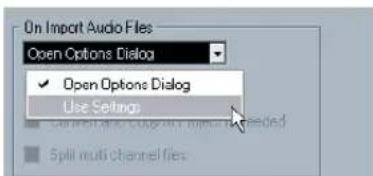
text_image
On Import Audio Files Open Options Dialog ✓ Open Options Dialog Use Settings ■ Edit and Copy into image needed ■ Split multi channel files- Open Options Dialog
An Options dialog appears when you import, allowing you to select whether you want to copy the files to the Audio folder and/or convert them to the project settings. Please note the following:
- When importing a single file of a format other than the project settings, you can specify which properties (sample rate and/or resolution) should be changed.
- When importing multiple files at the same time, you can select to convert the imported files automatically if necessary, i.e. if the sample rate is different than the project's or the resolution is lower than the project setting.
- Use Settings
No Options dialog will appear when you import. Instead, you can choose to make any of the options below the pop-up the standard action(s). Activate any number of the following options to have them performed automatically each time you import audio files:
Option Description
| Copy Files to Working Directory | If files are not already in the project's audio folder they are copied there before being imported. |
| Convert and Copy to Project If Needed | If files are not already in the project's audio folder they are copied there before being imported. Furthermore, if the files have a different sample rate or a lower resolution than the project settings, they are automatically converted. |
| Split multi-channel files | If you import a multi-channel audio file (including two-channel stereo files), it will be split into a number of mono files – one for each channel – which are placed on separate, automatically created mono tracks. |
Creating parts
Parts are containers for MIDI or audio events. If you record MIDI, a MIDI part is automatically created, containing the recorded events. You can also create empty audio or MIDI parts and later add events to them.
There are two ways to do this:
- Draw a part on a MIDI or audio track with the Pencil tool. You can also draw parts by pressing [Alt]/[Option] and using the Arrow tool.
- Double-click with the Arrow tool on a MIDI or audio track, between the left and right locator.
To add events to a MIDI part, you use the tools and functions in a MIDI editor (see "The Key Editor – Overview" on page 340). Adding events to audio parts is done in the Audio Part Editor (see "Window overview" on page 255) by pasting or by using drag and drop.
- You can also gather existing audio events into a part, by using the "Events to Part" function on the Audio menu. This creates an audio part containing all selected audio events on the same track. To remove the part and make the events appear as independent objects on the track again, select the part and use the "Dissolve Part" function on the Audio menu.
Auditioning audio parts and events
Audio parts and events can be auditioned in the Project window with the Play tool:

When auditioning, audio will be routed directly to the Control Room (Cubase only), if the Control Room is activated. When the Control Room is deactivated, the audio will be routed to the default output bus, bypassing the audio channel's settings, effects and EQs. In Cubase Studio, the Main Mix bus is always used for monitoring.
1. Select the Play tool.
Note that the Play tool and the Scrub tool share the same tool button. If the tool icon on the toolbar doesn't show a speaker symbol, first click on the icon to select it, then click again and select "Play" from the pop-up menu.
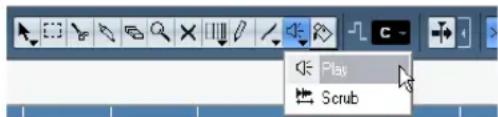
text_image
Play Scrub2. Click where you want playback to start, and keep the mouse button pressed.
Only the track on which you click is played back, starting at the click position.
- Release the mouse button to stop playback.
Scrubbing
The Scrub tool allows you to locate positions in the audio by playing back, forwards or backwards, at any speed:
- Select the Scrub tool.
Note that the Play tool and the Scrub tool share the same tool button. If the tool icon on the toolbar doesn't show a "scrub symbol", first click on the icon to select it, then click again and select "Scrub" from the pop-up menu.
- Click at the desired position and keep the mouse button pressed.
The project cursor is moved to the position at which you click.
- Drag to the left or right.
The project cursor follows the mouse pointer and the audio is played back. The speed and pitch of the playback depend on how fast you move the pointer.
You can adjust the responsiveness of the Scrub function in the Preferences (Transport-Scrub page).
⇒ It is also possible to “scrub” the whole project with the Jog wheel on the Transport panel (Cubase only).
See "Project scrubbing – the Jog Wheel (Cubase only)" on page 63.
- Note that scrubbing can be quite a burden on your system. To avoid playback problems, you will find the "CPU Saving Scrub Mode" option in the Preferences (Transport-Scrub page).
When you activate this option, scrubbing will be less demanding on the processor. This can be very useful when scrubbing in a large project, where the "normal" scrub behavior leads to processing overloads. When "CPU Saving Scrub Mode" is activated, the effects are disabled for scrubbing and the resampling quality is lower.
Editing parts and events
This section describes techniques for editing in the Project window. If not explicitly stated, all descriptions apply to both events and parts, even though we use the term “event” for convenience.
When you are using the tools for editing, you can in many cases get additional functions by pressing modifier keys (e.g. pressing [Alt]/[Option] and dragging with the Arrow tool creates a copy of the dragged event).
On the following pages, the default modifier keys are described – you can customize these in the Preferences (Editing-Tool Modifiers page), see "Setting up tool modifier keys" on page 483.
Selecting events
Selecting events is done using any of the following methods:
- Use the Arrow tool.
The standard selection techniques apply.
- Use the Select submenu on the Edit menu.
The options are:
Option Description
All Selects all events in the Project window.
None Deselects all events.
Invert Inverts the selection – all selected events are dese- lected and all events that were not selected are se- lected instead.
In Loop Selects all events that are partly or wholly between the left and right locator.
From Start to Cursor Selects all events that begin to the left of the project cursor.
From Cursor to End Selects all events that end to the right of the project cursor.
Equal Pitch These are available in the MIDI Editors (see "Selecting notes" on page 346) and the Sample Editor (see "Using the Select menu" on page 227).
Select Controllers in Note Range This is available in the MIDI Editors (see "Selecting controllers within the note range" on page 346).
All on Selected Tracks Selects all events on the selected track.
Select Event This is available in the Sample Editor (see "Window overview" on page 221).
Left/Right Selection Side to Cursor These two functions are only used for range selection editing (see "Creating a selection range" on page 51).
Note that these functions work differently when the Range Selection tool is selected (see "Creating a selection range" on page 51).
- Select all events on a track by right-clicking on it in the Track list and selecting "Select All Events" from the context menu.
- You can also use the arrow keys on the computer keyboard to select the closest event to the left, right, above or below.
If you press [Shift] and use the arrow keys, the current selection will be kept, allowing you to select several events.
- If the option "Auto Select Events under Cursor" is activated in the Preferences (Editing page), all events on the selected track(s) that are "touched" by the project cursor are automatically selected.
This can be helpful when rearranging your project, since it allows you to select whole sections (on all tracks) by selecting all tracks and moving the project cursor.
- It is also possible to select ranges, regardless of the event and track boundaries.
This is done using the Range Selection tool (see "Range editing" on page 51).
- Note that in the Preferences (Editing page), you can find the option "Use Up/Down Navigation Commands for selecting Tracks only".
By default, tracks are selected with the up/down arrow keys on the computer keyboard. However, these are also used for selecting events (see above) which can lead to confusing results in some cases. Since track selection is a most vital operation in both editing and mixing, you have the option to use the navigation controls for track selection only. The following applies:
- When this option is deactivated and no event/part is selected in the Project window, the up/down arrow keys on the computer keyboard are used to step through the tracks in the Track list – just as you would expect this to work.
- When this option is deactivated and an event/part is selected in the Project window, the up/down arrow keys still step through the tracks in the Track list – but on the currently selected track, the first event/part will automatically be selected as well. If this is not the desired behavior, you have to activate "Use Up/Down Navigation Commands for selecting Tracks only".
- When this option is activated, the up/down arrow keys are only used to change the track selection – the current event/part selection in the Project window will not be altered.
- Also in the Preferences (Editing-Tools page), you can find the Cross Hair Cursor options section.
This allows you to display a cross hair cursor when working in the Project window and editors, facilitating navigation and editing, especially when arranging in large projects. You can set up the colors for the line and the mask of the cross hair cursor, and define its width. The cross hair cursor works as follows:
- When the Selection tool (or one of its subtools) is selected, the cross hair cursor appears when you start moving/copying a part/event, or when using the event trim handles.
- When the Pencil tool, the Scissors tool or any other tool that makes use of this function is selected, the cross hair cursor appears as soon as you move the mouse over the event display.
- The cross hair cursor is only available for tools where such a function is of any use. The Mute tool for example does not use a cross hair cursor, as you have to click directly on an event to mute it.
Moving events
To move events in the Project window, use the following methods:
- Click and drag to a new position.
All selected events will be moved, maintaining their relative positions. You can only drag events to tracks of the same type. If Snap is activated, this determines to which positions you can move the events (see "The Snap function" on page 56).
Note also that you can restrict movement to be either horizontal or vertical only, by holding down [Ctrl]/[Command] while dragging.

You will note that there is a slightly delayed response when you move an event by dragging. This helps you avoid accidentally moving events when you click on them in the Project window. You can adjust this delay with the Drag Delay setting in the Preferences (Editing page).
- Select the event and edit the Start position in the info line.
- Use the "Move to" options on the Edit menu.
The following options are available:
Option Description
Cursor Moves the selected event to the project cursor position. If there are several selected events on the same track, the first event will start at the cursor, and the following will be lined up end-to-start after the first one.
Origin Moves the selected events to their original positions, i.e. the positions at which they were originally recorded.
Front/Back This function doesn't actually change the position of the events, but moves the selected events to the front or back, respectively. This is useful if you have overlapping events, and want to see one that is partially obscured. For audio events, this is an extra important feature, since only the visible sections of events will be played back. Moving an obscured audio event to front (or moving the obscuring event to back) will allow you to hear the whole event on playback (see also "Overlapping events" on page 256). Note that it is also possible to use the "To Front" function on the event context menu for this (although this works in a different way, see "Create Events mode (Preferences)" on page 76).
- Use the Nudge buttons in the toolbar.
These move the selected events to the left or right. The amount of movement depends on the selected display format (see "The Project Setup dialog" on page 34) and the value set on the Grid pop-up menu.

text_image
Fade Out Move Right 0.0 3.49 0:00:05 Lock Transpose 0 41 43 45 47
When the Range Selection tool is used, the Nudge buttons move the selection range (see "Moving and duplicating" on page 52).
⇒ The Nudge buttons are not visible in the toolbar by default.
You can decide which items should be visible by right-clicking in the toolbar and activating the corresponding option on the context menu.
See "The setup context menus" on page 471 for more information.
Duplicating events
Events can be duplicated in the following ways:
- Hold down [Alt]/[Option] and drag the event to a new position.
If Snap is activated, this determines to which positions you can copy the events (see "The Snap function" on page 56).

If you hold down [Ctrl]/[Command] as well, movement direction is restricted to either horizontal or vertical. That means if you drag an event vertically it cannot be moved horizontally at the same time.
- Audio and MIDI parts can also be duplicated by pressing [Alt]/[Option]-[Shift] and dragging.
This creates a shared copy of the part. If you edit the contents of a shared copy, all other shared copies of the same part are automatically edited in the same way.

text_image
Audio 01 Audio 01 Audio 01Shared copies are indicated by showing the name in italic text and an icon in the right corner of the part.
Note:
- When you duplicate audio events, the copies are always shared. This means that shared copies of audio events always refer to the same audio clip (see "Audio processing" on page 205).
- You can convert a shared copy to a real copy by selecting "Convert to Real Copy" from the Edit menu. This creates a new version of the clip (that can be edited independently) and adds this to the Pool. Note that no new files are created by this operation – for that you need to use the "Bounce Selection" function from the Audio menu (see "Exporting regions as audio files" on page 269).
- Selecting "Duplicate" from the Edit menu creates a copy of the selected event and places it directly after the original.
If several events are selected, all of these are copied "as one unit", maintaining the relative distance between the events.
- Selecting "Repeat..." from the Edit menu opens a dialog, allowing you to create a number of copies (regular or shared) of the selected event(s).
This works just like the Duplicate function, but you can specify the number of copies.
- You can also perform the Repeat function by dragging: Select the event(s) to repeat, press [Alt]/[Option], click the handle in the lower right corner of the last selected event and drag to the right.
The longer to the right you drag, the more copies are created (as shown by the tooltip).
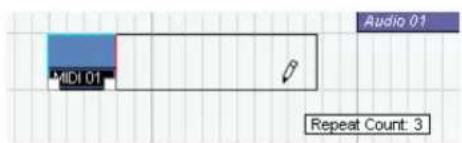
text_image
Audio 01 MIDI 01 Repeat Count: 3- Selecting "Fill Loop" from the Edit menu creates a number of copies starting at the left locator and ending at the right locator.
The last copy is automatically shortened to end at the right locator position.
text_image
2 3 4 5 6 7 Mystic O: Mystic O: Mystic O: Mystic O: Mystic O: MysUsing Cut, Copy and Paste
You can cut or copy selected events, and paste them in again, using the functions on the Edit menu.
- When you paste an audio event, it is inserted on the selected track, positioned so that its snap point is aligned with the cursor position.
If the selected track is of the wrong type, the event will be inserted on its original track. See "The Snap function" on page 56 for information about the snap point.
- If you use the "Paste at Origin" function, the event is pasted at its original position (the position from which you cut or copied it).
Renaming events
By default, audio events show the name of their clip, but you can enter a separate descriptive name for separate events if you like. This is done by selecting the event and typing in a new name in the "Description" field in the info line.
- You can also give all events on a track the same name as the track by changing the track name, holding down a modifier key and pressing [Return]. See "Handling tracks" on page 38.
Splitting events
You can split events in the Project window in the following ways:
- Click with the Scissors tool on the event you want to split.
If Snap is activated, this determines the exact split position (see "The Snap function" on page 56). You can also split events by pressing [Alt]/[Option] and clicking with the Arrow tool.
- Select "Split at Cursor" from the Edit menu.
This splits the selected events at the position of the project cursor. If no events are selected, all events (on all tracks) that are intersected by the project cursor will be split.
- Select "Split Loop" from the Edit menu.
This splits events on all tracks at the left and right locator positions.
If you split a MIDI part so that the split position intersects one or several MIDI notes, the result depends on the option "Split MIDI Events" in the Preferences (Editing-MIDI page).
If the option is activated, the intersected notes will be split (creating new notes at the beginning of the second part). If it is deactivated, the notes will remain in the first part, but "stick out" after the end of the part.
Gluing events together
You can glue events together using the Glue Tube tool. There are three possibilities:
- Clicking on an event with the Glue Tube tool glues it together with the next event on the track. The events do not have to touch one another.
The result is a part containing the two events, with one exception: If you first split an event and then glue the two sections together again (without moving or editing them first), they become a single event again.
- You can select several events on the same track and click on one of them with the Glue Tube tool.
A single part is created.
- When you hold down [Alt]/[Option] while clicking on an event with the Glue Tube tool, this event will be glued together with all following events on this track.
You can change the default key command for this in the Preferences (Editing-Tool Modifiers page).
Resizing events
Resizing events means to move their start or end positions individually. In Cubase, there are three types of resizing:
Resizing type Description
| Normal Sizing | The contents of the event stay fixed, and the start or end point of the event is moved to “reveal” more or less of the contents. |
| Sizing Moves Contents | The contents follow the moved start or end of the event (see the figure below). |
| Sizing Applies Time Stretch | The contents will be time stretched to fit the new event length (see the separate description on “Resizing events using time stretch” on page 47). |
To select one of the resizing modes, select the Arrow tool and then click again on the Arrow tool icon on the toolbar. This opens a pop-up menu from which you can select one of the resizing mode options.
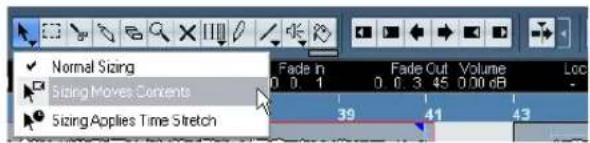
text_image
Normal Sizing Fade In Fade Out Volume Loc Sizing Moves Contents 0.0.1 0.0.3 45 0.00 dB Sizing Applies Time Stretch 39 41 43The icon on the toolbar will change, indicating the selected resizing mode.
The actual resizing is done by clicking and dragging the lower left or right corner of the event. If Snap is activated, the Snap value determines the resulting length (see "The Snap function" on page 56).
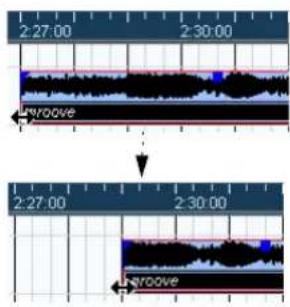
text_image
2:27:00 2:30:00 Groove 2:27:00 2:30:00 GrooveNormal sizing
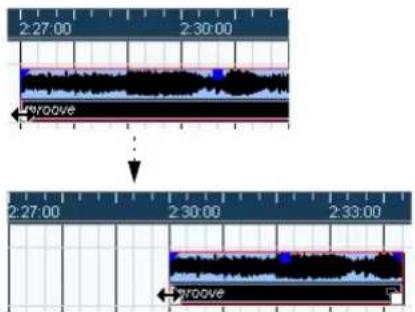
text_image
2:27:00 2:30:00 Groove 2:27:00 2:30:00 2:33:00 GrooveSizing moves contents.
- If several events are selected, all will be resized in the same way.
- You can also resize events with the Scrub tool.
This works just the same as when resizing with the Arrow tool, but the audio under the pointer is played back (scrubbed) while you drag.
- It is also possible to resize events by using the Trim buttons (located in the Nudge palette) on the toolbar.
This will move the start or end position of the selected Event(s) by the amount set on the Grid pop-up menu. The sizing type currently selected applies to this method too, with the exception of "Sizing Applies Time Stretch" which is not possible with this method. You can also use key commands for this (by default, press [Ctrl]/[Command] and use the left and right arrow key).
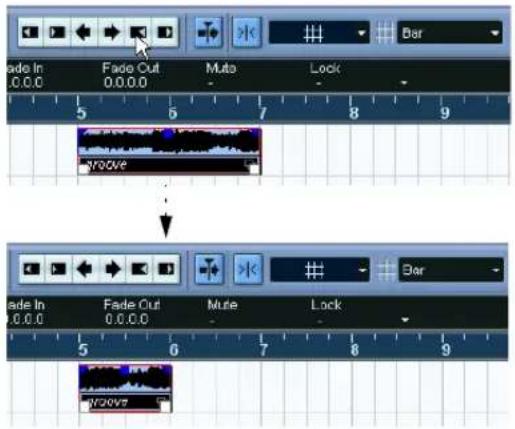
text_image
Made In 0.0.0 Fade Cut 0.0.0.0 Muto - Lock Bar 5 6 7 8 9 yroove Made In 0.0.0 Fade Cut 0.0.0.0 Mute - Lock 5 6 7 8 9 yrooveNote that the Nudge palette is not visible in the toolbar by default. See "The setup context menus" on page 471 for instructions on how to show and hide items in the toolbar.
When resizing events, any automation data will not be taken into account.
Resizing events using time stretch
If you want to resize a part and make its contents "fit" the new size, you should use this option. Proceed as follows:
- Click the Arrow icon on the toolbar and select the "Sizing Applies Time Stretch" option from the pop-up menu.
- Point close to the end point of the part you want to stretch.
- Click and drag left or right.
When you move the mouse, a tooltip shows the current mouse position and length of the part. Note that the snap value applies, as with any part operation.
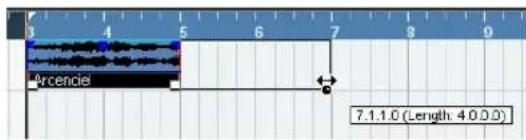
text_image
Arcenoid 7.1.1.0 (Length: 4.0.0.0)- Release the mouse button.
The part is "stretched" or "compressed" to fit the new length.
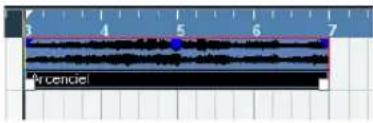
text_image
by cenciel- For MIDI parts, this means that the note events are stretched (moved and resized).
Controller data will be moved.
- For audio parts, this means that the events are moved, and that the referenced audio files are time stretched to fit the new length.
A dialog shows the progress of the time stretch operation.
⇒ You can adjust which algorithm should be used for the time stretch algorithm in the Preferences (Editing–Audio page).
For more information about time stretch, see "Time Stretch" on page 212.
Sliding the contents of an event or part
You can move the contents of an event or part without changing its position in the Project window. By default, this is done by pressing [Alt]/[Option]-[Shift], clicking in the event or part and dragging to the left or right.

When sliding the contents of an audio event, you cannot slide past the start or end of the actual audio clip. If the event plays the whole clip, you cannot slide the audio at all.
Grouping Events
Sometimes it is useful to treat several events as one unit. This can be done by grouping them: Select the events (on the same or different Tracks) and select "Group" from the Edit menu.
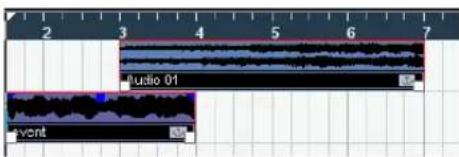
text_image
Audio 01 eventGrouped events are indicated by a group icon in the right corner.
If you edit one of the grouped events in the Project window, all other events in the same group are affected too (if applicable).
Group editing operations include:
- Selecting events.
- Moving and duplicating events.
- Resizing events.
- Adjusting fade-in and fade-out (audio events only, see "Creating fades" on page 89).
- Splitting events (splitting one event will automatically split any other grouped events that are intersected by the split position).
- Locking events.
- Muting events (see below).
- Deleting events.
Locking events
If you want to make sure you don't edit or move an event by accident, you can lock it. Locking can affect one (or any combination) of the following properties:
Lock Options Description
Position If this is locked, the event cannot be moved.
Size If this is locked, the event cannot be resized.
Other If this is locked, all other editing of the event is disabled.
This includes adjusting the fades and event volume, processing, etc.
- To specify which of these properties should be affected by the Lock function, use the "Lock Event Attributes" popup menu in the Preferences (Editing page).
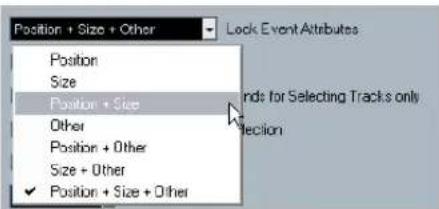
text_image
Position + Size + Other Position Size Position + Size Other Position + Other Size + Other ✓ Position + Size + Other Lock Event Attributes Ends for Selecting Tracks only Selection- To lock events, select them and select "Lock..." from the Edit menu.
The events will be locked according to the options specified in the Preferences.
The padlock symbol indicates that one or more of the lock options are activated for the event.
- You can adjust the lock options for a locked event by selecting it and selecting "Lock..." from the Edit menu again. This opens a dialog in which you can activate or deactivate the desired lock options.
- To unlock an event (turn off all lock options), select it and select "Unlock" from the Edit menu.
- It is also possible to lock a whole track, by clicking the padlock symbol in the Track list or in the Inspector.
This disables all editing of all events on the track.
Muting events
To mute individual events in the Project window, proceed as follows:
- To mute or unmute a single event, click on it with the Mute tool.

- To mute or unmute several events, select them – either by using the standard selection techniques, or by using one of the options on the Select submenu on the Edit menu – and click on one of the selected events with the Mute tool.
All selected events will be muted.
- You can also click in an empty area with the Mute tool and drag a selection rectangle around several events you want to mute or unmute, and then click on one of them with the Mute tool.
- You can mute events by selecting them and selecting "Mute" from the Edit menu.
Similarly, you can unmute the selected events by selecting "Unmute" from the Edit menu.
- You can also change the mute status of selected events on the info line.
Muted events can be edited as usual (with the exception of adjusting fades), but are not played back.
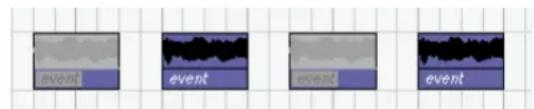
text_image
event event event eventMuted events are "grayed out".
- You can also mute whole tracks by clicking the Mute ("M") button in the Track list, the Inspector or the mixer. Clicking the Solo ("S") button for a track mutes all other tracks. Note that there are two modes for the track solo function:
If the option "Enable Solo on Selected Track" is activated in the Preferences (Editing-Project & Mixer page) and you have soloed a track, selecting
another track in the Track list will automatically solo that track instead – the solo state “moves” with the track selection.
If the option isn't activated, the track you solo stays soloed, regardless of the selection.
Removing events
To remove an event from the Project window, use any of the following methods:
- Click on the event with the Eraser tool.
Note that if you press [Alt]/[Option] while you click, all following events on the same track will be deleted, but not the event you clicked and all events before it. - Select the event(s) and press [Backspace], or select "Delete" from the Edit menu.
Creating new files from events
An audio event plays a section of an audio clip, which in turn refers to one or more audio files on the hard disk. However, in some situations you may want to create a new file that consists only of the section played by the event. This is done with the function "Bounce Selection" on the Audio menu:
- Select one or several audio events.
- Set up fade in, fade out and event volume (on the info line or using the volume handle) as desired.
These settings will be applied to the new file. For details on fades and event volume, see "Creating fades" on page 89. - Select "Bounce Selection" from the Audio menu.
You are asked whether you want to replace the selected event or not.
- If you click "Replace", a new file is created, containing only the audio in the original event. A clip for the new file is added to the Pool, and the original event is replaced by a new event playing the new clip.
- If you click "No", a new file is created and a clip for the new file is added to the Pool.
The original event is not replaced.
You can also apply the Bounce Selection function to an audio part. In that case, the audio from all events in the part will be combined into a single audio file. If you choose "Replace" when asked, the part will be replaced with a single audio event playing a clip of the new file.
Editing in Lane Display mode
When you are recording in Stacked cycle recording mode, each take ends up on a separate lane on the track, see "Recording audio in Stacked mode" on page 77 and "Cycle Record mode: Stacked/Stacked 2 (No Mute)" on page 82. However, you can also select this lane mode manually for individual tracks, and use it when editing in the Project window. This makes it easier to view and handle overlapping events and parts.
Audio tracks
- In the Track list or in the Inspector for the selected track, click the Lane Display Type button and select "Lanes Fixed" from the pop-up menu.
The audio track is divided vertically into two lanes. By default, all audio events end up in the first (top) lane.
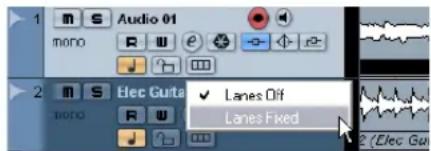
text_image
Audio 01 mono Elec Guta Lanes Off Lanes Fixed 2 Elec Gua- Now you can move events or parts between lanes, either by dragging or by using the "To Front" commands on the Edit menu or the context menu (this will move the event on the lane that has playback priority).
Note that if there are overlapping audio events, the audio on the lowest lane has playback priority – moving events between lanes affects what will be heard!
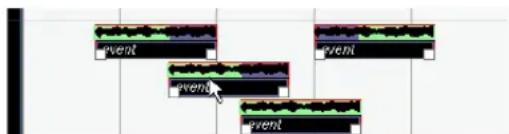
text_image
event event eventIf the vertical zoom factor is sufficiently high, the sections that will be heard on playback are indicated in green.
- Note that there will always be an extra, empty lane at the bottom of the track – moving an event there always will add another lane.
Depending on the number of lanes used, you may want to adjust the vertical zoom for the track – simply drag the track edges in the Track list.
- After rearranging the overlapping events so that you hear what you want, you can select all events and select "Delete Overlaps" from the Advanced submenu on the Audio menu.
This puts all events in the top lane and resizes events so that overlapping sections are removed.
- To turn off Lanes mode, select "Lanes Off" from the Lane Display Type pop-up menu.
If you do this without using the "Delete Overlaps" function, all overlapping sections will be kept. However, the sections that were green will now be the sections visible ("on top") and thus the sections that will be heard.
MIDI tracks
- In the Track list or in the Inspector for the selected track, click the Lane Display Type button and select "Lanes Auto" or "Lanes Fixed".
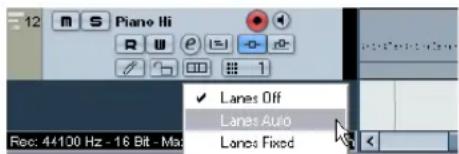
text_image
12 m S Piano Hii ✓ Lanes Off Lanes Auto Rec: 44100 Hz - 16 Bit - Max Lanes Fixed- In Lanes Auto mode, extra lanes will automatically be added where necessary – if two MIDI parts overlap, they will automatically be put on separate lanes.
- In Lanes Fixed mode, you have to move MIDI parts between lanes manually (by dragging them or by using the "Move to Front/Back" commands on the Edit menu or context menu).
In this mode, there will always be an extra, empty lane at the bottom of the track – if you move a part there, another lane will be added and so on.
- You can edit the overlapping parts as usual – by cutting, deleting or muting sections in the Project window or by opening them in a MIDI editor.
In an editor, parts on different lanes will be treated just like parts on different tracks – you can use the part list pop-up menu to select an active part for editing, etc.
Note that there is no playback priority between lanes on a MIDI track – all unmuted parts will be heard during playback. - To merge all overlapping parts into one, make sure the MIDI track is selected, position the left and right locator around the parts and select "Merge MIDI in Loop" from the MIDI menu.
In the dialog that appears, activate the Erase Destination option and click OK. This merges all unmuted MIDI between the locators to a single part. - To turn off Lanes mode, select "Lanes Off" from the Lane Display Type pop-up menu.
Range editing
Editing in the Project window isn't necessarily restricted to handling whole events and parts. You can also work with selection ranges, which are independent from the event/part and track boundaries.
Creating a selection range
To make a selection range, drag with the Range Selection tool.

When the Range Selection tool is selected, the Select submenu on the Edit menu has the following items for making selection ranges:
Option Description
| All | Makes a selection that covers all tracks, from the start of the project to the end (as defined by the Length setting in the Project Setup dialog). |
| None Removes the current selection range. | |
| Invert | Only used for event selection (see "Selecting events" on page 43). |
| In Loop Makes a selection between the left and right locator, on all tracks. | |
| From Start to Cursor | Makes a selection on all tracks, from the start of the project to the project cursor. |
| From Cursor to End | Makes a selection on all tracks, from the project cursor to the end of the project. |
| All on Selected Tracks | Only used for event selection (see "Selecting events" on page 43). |
| Select Event This is available in the Sample Editor (see "Using the Select menu" on page 227). | |
| Left Selection Side to Cursor | Moves the left side of the current selection range to the project cursor position. |
| Right Selection Side to Cursor | Moves the right side of the current selection range to the project cursor position. |
- Double-clicking on an event with the Range Selection tool creates a selection range encompassing the event. If you hold down [Shift] you can double-click several events in a row, and the selection range will expand to encompass them all. Double-clicking a second time on an event opens it for editing in the Sample Editor.
Adjusting the size of the selection range
You can adjust the size of a selection range in the following ways:
- By dragging its edges.
The pointer takes the shape of a double arrow when you move it over an edge of the selection range.
- By holding down [Shift] and clicking.
The closest selection range edge will be moved to the position at which you clicked.
- By adjusting the selection range start or end position on the info line.
- By using the Trim buttons on the toolbar.
The left Trim buttons will move the start of the selection range and the right buttons will move the end. The edges will be moved by the amount specified on the Grid pop-up.
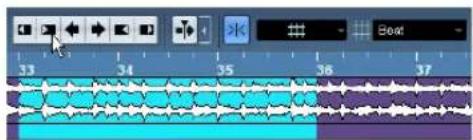
text_image
33 34 35 36 37Clicking this Trim button...
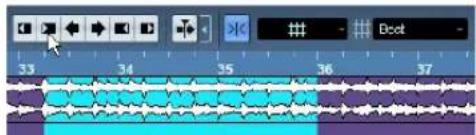
text_image
33 34 35 36 37...will move the start of the selection range to the right by 1 beat.
- By using the Nudge buttons on the toolbar.
These will move the whole selection range to the left or the right. The amount of movement depends on the selected display format (see "The Project Setup dialog" on page 34) and the value specified on the Grid pop-up menu.
Note that the contents of the selection are not moved – using the Nudge buttons is the same as adjusting the start and end of the selection range at the same time, by the same amount.
⇒ The Trim buttons and the Nudge buttons are located in the Nudge palette, which is not visible in the toolbar by default.
See "The setup context menus" on page 471 for instructions on how to show and hide items in the toolbar.
Making selection ranges for several non-contiguous tracks
You can create selection ranges that cover several tracks by pressing [Alt]/[Option]-[Shift]. However, it is also possible to exclude tracks from a selection range:
- Create a selection range from the first to the last desired track.
- Press [Alt]/[Option] and click in the selection range on the tracks you want to exclude from the selection.
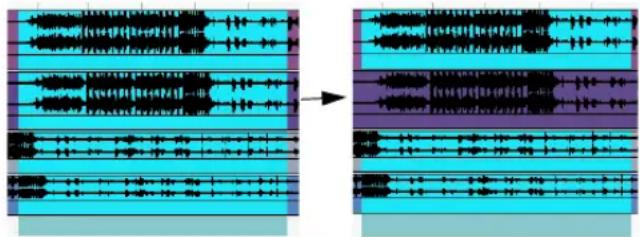
text_image
Audio waveform analysis diagram showing amplitude reduction from left to right with labeled channels and time intervals- In the same manner, you can add a track to the selection range by [Alt]/[Option]-clicking in the selection range area on the track.
Moving and duplicating
- To move a selection range, click and drag it to a new position.
This will move the contents of the selection range to the new position. If the range intersected events or parts, these will be split before moving, so that only the sections within the selection range are affected.
- To duplicate a selection range, hold down [Alt]/[Option] and drag.
You can also use the Duplicate, Repeat and Fill Loop functions, just as when duplicating events (see "Duplicating events" on page 45).
Using Cut, Copy and Paste
When working with selection ranges, you can either use Cut, Copy and Paste on the Edit menu, or use the functions "Cut Time" and "Paste Time" on the Range submenu on the Edit menu. These work differently to their related functions on the Edit menu:
Function Description
Cut Cuts out the data in the selection range and moves it to the clipboard. The selection range is replaced by empty track space in the Project window, meaning that events to the right of the range keep their positions.
Copy Copies the data in the selection range to the clipboard.
Function Description
Paste Pastes the clipboard data at the start position and track of the current selection. Existing events are not moved to make room for the pasted data.
Paste at Origin Pastes the clipboard data back at its original position. Existing events are not moved to make room for the pasted data.
Cut Time Cuts out the selection range and moves it to the clipboard. Events to the right of the removed range are moved to the left to fill out the gap.
Paste Time Pastes the clipboard data at the start position and track of the current selection. Existing events are moved to make room for the pasted data.
Paste Time at Origin Pastes the clipboard data back at its original position. Ex-isting events are moved to make room for the pasted data.
Deleting selection ranges
Again, you can either use "regular" Delete or "Delete Time":
- If you use the Delete function on the Edit menu (or press [Backspace]), the data within the selection range is replaced by empty track space.
Events to the right of the range keep their position.
- If you use "Delete Time" on the Edit menu's Range submenu, the selection range is removed and events to the right are moved to the left to close up the gap.
Other functions
On the Range submenu on the Edit menu, you will find three more range editing functions:
Function Description
Split Splits any events or parts that are intersected by the selection range, at the positions of the selection range edges.
Crop All events or parts that are partially within the selection range are cropped, that is, sections outside the selection range are removed. Events that are fully inside or outside the selection range are not affected.
Insert Silence Inserts empty track space from the start of the selection range. The length of the silence equals the length of the selection range. Events to the right of the selection range start are moved to the right to "make room". Events that are intersected by the selection range start are split, and the right section is moved to the right.
Region operations
Regions are sections within a clip, with various uses. While regions are perhaps best created and edited in the Sample Editor (see "Working with regions" on page 228), the following region functions are available in the Advanced submenu of the Audio menu:
Function Description
| Event or Range as Region | This function is available when one or several audio events or selection ranges are selected. It creates a region in the corresponding clip, with the start and end position of the region determined by the start and end position of the event or selection range within the clip. |
| Events from Regions | This function is available if you have selected an audio event whose clip contains regions within the boundaries of the event. The function will remove the original event and replace it with event(s) positioned and sized according to the Region(s). |
Folder tracks
Moving tracks into a folder is a way to structure and organize tracks in the Project window. By grouping tracks in folder tracks, you can solo and mute them in a quicker and easier way and perform editing on several tracks as one entity. Folder tracks can contain any type of track including other folder tracks.
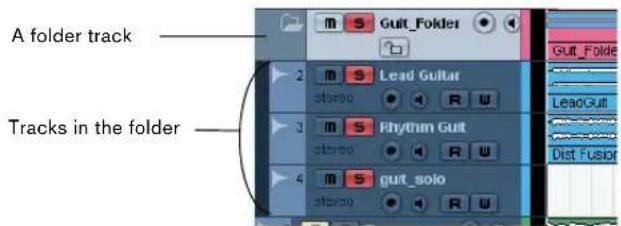
text_image
A folder track Tracks in the folderHandling folder tracks
- Creating a folder track
Select "Add Track" from the Project menu and select "Folder" from the submenu that appears, or right-click in the Track list and select "Add Folder Track" from the context menu to create a folder track.
- Moving tracks into a folder
In the Track list, click on a track that you want to move into a folder and drag it onto a folder track. A green arrow pointing to a folder appears when you drag the track onto the folder track in the list. The track is placed in the folder track, and all parts and events on the track will be represented by a corresponding folder part (see below). You can also create sub-folders by moving one folder track into another. For example, you could have a folder containing all the vocals in a project, and each vocal part could have a folder containing all the takes for easier handling etc.
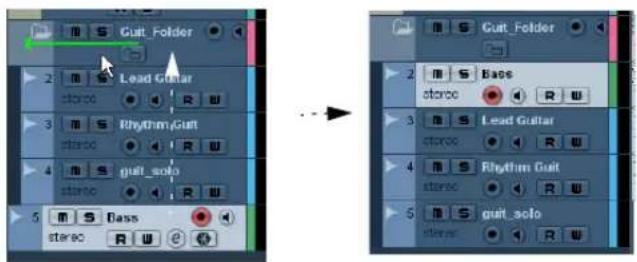
text_image
S Guit_Folder 2 M S Lead Guitar 3 M S Rhythm_Guit 4 M S guit_solo 5 M S Bass stereo R W- Removing tracks from a folder
Drag a track out of the folder and release it in the Track list to remove it from the folder.
- Hiding/showing tracks in a folder
Click on the "Expand/Collapse Folder" button (the folder icon) to hide or show the tracks located in a folder or use the corresponding options in the Track Folding submenu of the Project menu (see "Track folding" on page 39). Hidden tracks are played back as usual.
- Muting and soloing folder tracks
Click the Mute or Solo button on the folder track to mute or solo all tracks in the folder as one unit.
Working with folder parts
A folder part is a graphic representation of events and parts on the tracks in the folder. Folder parts indicate the position and length of the events and parts, as well as on which track they are (their vertical position). If part colors are used, these are also shown in the folder part.
Any Project window editing you perform to a folder part affects all the events and parts it contains. You can select several folder parts if you like – this allows you to handle and edit them together. The editing you can perform includes:
- Moving a folder part. This will move its contained events and parts (possibly resulting in other folder parts, depending on how the parts overlap).
- Using cut, copy and paste.
- Deleting a folder part. This will delete its contained events and parts.
- Splitting a folder part with the Scissors tool.
- Gluing folder parts together with the Glue tube tool. This will only work if the adjacent folder parts contain events or parts on the same track.
- Resizing a folder part resizes the contained events and parts according to the selected resizing method, see "Resizing events" on page 46.
- Muting a folder part. This will mute its contained events and parts.
Tracks inside a folder can be edited as one entity by performing the editing directly on the folder part containing the tracks. You can also edit individual tracks within the folder by showing the contained tracks, selecting parts and opening editors as usual.
Double-clicking a folder part opens the editors for the corresponding track classes present in the folder. The following applies:
- All MIDI parts located on the tracks within the folder are displayed as if they were on the same track, just like when opening the Key Editor with several MIDI parts selected. To be able to easily discern the different tracks in the editor, give each track a different color in the Project window and use the "Part Colors" option in the editor (see "Coloring notes and events" on page 344).
- If the folder contains tracks with audio events and/or audio parts, the Sample and/or Audio Part Editors are opened with each audio event and audio part in a separate window.
Markers
Markers are used to locate certain positions quickly. If you often find yourself jumping to a specific position within a project, you should insert a marker at this position. There are two types of markers:
- Cycle markers allow you to store the start and end positions of a range.
On the Marker track they are shown as two markers bridged by a horizontal line. They are ideal for setting sections of a song, for example "Intro", "Verse", and "Chorus", this enables you to quickly navigate to the song sections, and also to optionally repeat the section (by activating Cycle on the Transport panel). Cycle markers can freely overlap.
- Standard markers store a specific position.
The left and right locators are handled separately – see "The left and right locators" on page 62.
Editing markers in the Marker window
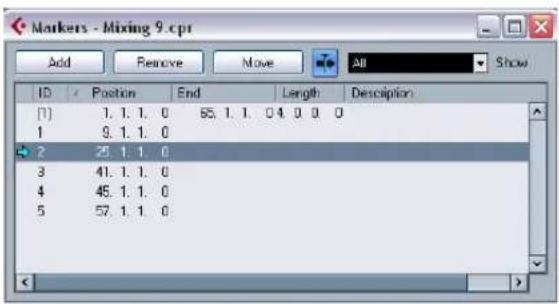
text_image
Markers - Mixing 9.cpr Add Remove Move All Show ID Position End Length Description [1] 1. 1. 1. 0 65. 1. 1. 0 4. 0. 0 0 1 9. 1. 1. 0 2 25. 1. 1. 0 3 41. 1. 1. 0 4 45. 1. 1. 0 5 57. 1. 1. 0The Marker window lists the markers in the order in which they occur in the project. To open the Marker window, select "Markers" from the Project menu, click the "Show" button in the Marker section on the Transport panel or use the key command (by default [Ctrl]/[Command]-[M]).
The Marker window is divided into six columns:
Column Description
Locate (left-most column) If you click in this column the project cursor will be moved to the corresponding marker position. A blue arrow indicates the marker at the project cursor position (or the closest marker before the project cursor).
ID In this column you can edit marker ID numbers. Each time you add a marker, it is automatically and sequentially assigned an ID number, starting from ID 1. IDs for cycle markers are shown in brackets and start from [1]. The nine first markers (1 to 9) can be recalled by using key commands (by default [Shift]-[1] to [9] on the typewriter part of the keyboard).
Position In this column you can view and edit the markers' time positions (or start positions for cycle markers).
End In this column you can view and edit the end positions of cycle markers.
Length In this column you can view and edit the length of cycle markers.
Description Here you can enter names or descriptions for markers.
Click on a column heading to sort the marker list by that column. The Marker columns can also be reordered by dragging and dropping the column headers.
The following actions can be performed in the Marker window:
- Adding markers
Click the Add button or press [Insert] (Windows only) on the computer keyboard to add position markers at the current project cursor position Select "Cycle Markers" from the Show pop-up menu and click the Add button to add a cycle marker between the left and right locator.
- Removing markers
Select a marker and click the Remove button to remove it.
- Moving marker positions
Set the project cursor to the position to which you want to move (or re-program) a marker, select the marker that you want to change in the Marker window and click the Move button. If a cycle marker is selected, the Move operation affects the cycle marker start position, the length of the range is not affected. You can also move markers by editing their position numerically in the Position column.
Editing markers on the Marker track
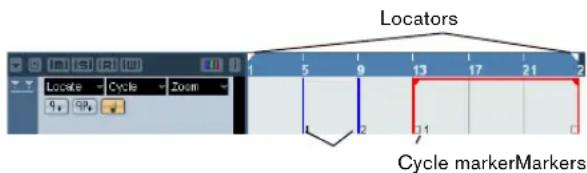
text_image
Locators 1 5 9 13 17 21 2 Locate - Cycle - Zoom 4 40 Cycle markerMarkersThe Marker track is used for viewing and editing markers. Any changes made on the Marker track are reflected in the Marker window and vice versa. Standard position markers are shown as vertical lines with the marker name (if assigned) and number beside it. If you select the Marker track, all markers are shown in the Inspector.
To add the Marker track to the Project, select "Marker" from the Add Track submenu of the Project menu (or right-click in the Track list and select "Add Marker Track"). You can only have one Marker track in a project.
The following editing functions can be performed directly on the Marker track:
- Adding markers
Press the [Insert] key (Win) or the "Add Marker" button in the Track list, to add a position marker at the current cursor position during playback. Click the "Add Cycle Marker" button in the Track list, to add a cycle marker at the left and right locator positions.
Add Marker/Add Cycle Marker buttons
- Selecting markers
Use the standard techniques.
- Drawing markers
Use the Pencil tool (or press [Alt]/[Option] and use the Arrow tool) to draw position markers. Snap is taken into account.
Hold down [Ctrl]/[Command] while using the Pencil or the Arrow tool to draw cycle markers. Snap is taken into account.
- Resizing
Select and drag a cycle marker by the handles that appear at the bottom of the start and end events to resize it. This can also be done numerically on the info line.
- Moving
Click and drag, or edit the positions on the info line to move a marker.
Snap is taken into account if activated.
- Removing
Select a position marker and press [Delete] or use the Erase tool to remove it.
Click with the Eraser tool to delete a cycle marker. If you hold down [Alt]/[Option] when you click, all consecutive markers will also be deleted.
- Naming
Select a marker and enter a name on the info line.
■ Moving the left and right locators
Double-click on a cycle marker or select it from the Cycle pop-up menu in the Track list, to move the left and right locators to encompass the cycle marker.
Use the numeric pad keys [1] and [2] to move the project cursor position to the start or the end of the cycle marker. You can also use key commands for this – see "Editing markers using key commands" on page 55.
- Zooming
Select a cycle marker on the Zoom pop-up menu, to zoom in the event display to encompass the selected range only (see the section "Zoom presets and Cycle markers" on page 36).
You can also do this by pressing [Alt]/[Option] and double-clicking on the cycle marker in the event display.
- Making range selections in the Project window
Double-click with the Range Selection tool between any two markers to create a selection range between the markers, spanning all tracks in the project. This is a quick way to move or copy (hold down [Alt]/[Option]) complete sections of the project (on all tracks).
Editing markers using key commands
You can use key commands for marker operations, see
"Transport category" on page 486.
Editing markers in the Project Browser
If you have a Marker track in the Project window, you can create and edit all marker parameters, including marker IDs, in the Project Browser. For details about editing markers in the Project Browser see “Editing the Marker track” on page 418.
Options
The Snap function
The Snap function helps you to find exact positions when editing in the Project window. It does this by restricting horizontal movement and positioning to certain positions. Operations affected by Snap include moving, copying, drawing, sizing, splitting, range selection, etc.
- You turn Snap on or off by clicking the Snap icon in the toolbar.
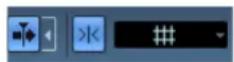
Snap activated.
When you are moving audio events with Snap activated, it isn't necessarily the beginning of the event that is used as Snap position reference. Instead, each audio event has a snap point, which you can set to a relevant position in the audio (such as a downbeat, etc.).
The snap point is preferably set in the Sample Editor since it allows for a higher degree of precision (see “Adjusting the snap point” on page 226). You can however also set the snap point directly in the Project window, in the following way:
- Select an event.
- Place the project cursor at the desired position within the selected audio event.
- Pull down the Audio menu and select "Snap Point To Cursor".
The snap point is set at the cursor position.
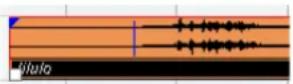
The snap point for an event is displayed as a blue line in the Project window.
Exactly how Snap works depends on which mode is selected on the Snap mode pop-up menu.
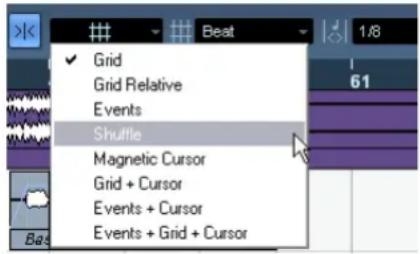
text_image
Beat Grid Grid Relative Events Shuffle Magnetic Cursor Grid + Cursor Events + Cursor Events + Grid + CursorThe following sections describe the different Snap modes:
Grid
In this mode, the Snap positions are set with the Grid Type pop-up menu to the right. The options depend on the display format selected for the ruler. For example, if the ruler is set to show bars and beats, the grid can be set to bars, beats or the quantize value set with the next pop-up menu to the right. If a time or frame-based ruler format is selected, the Grid Type pop-up menu contains time or frame-based grid options, etc.
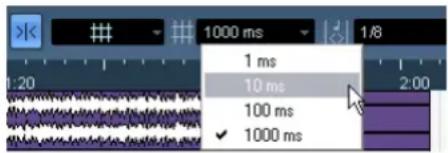
text_image
1000 ms 1 ms 10 ms 100 ms ✓ 1000 msWhen Seconds is selected as ruler format, the Grid Type pop-up menu contains time-based grid options.
Grid Relative
When you move events and parts in this mode they will not be “magnetic” to the grid. Rather, the grid determines the step size for moving the events. This means that a moved event will keep its original position relative to the grid.
For example, if an event starts at the position 3.04.01 (one beat before bar 4), Snap is set to Grid Relative and the Grid Type pop-up menu is set to "Bar", you can move the event in steps of one bar – to the positions 4.04.01, 5.04.01 and so on. The event will keep its relative position to the grid, i.e. stay one beat before the bar lines.
- This only applies when dragging existing events or parts – when you create new events or parts this mode works like the Grid mode.
Events
In this mode, the start and end positions of other events and parts become “magnetic”. This means that if you drag an event to a position near the start or end of another event, it is automatically aligned with the start or end of the other event. For audio events, the position of the snap point is also magnetic (see “Adjusting the snap point” on page 226).
- Note that this includes marker events on the marker track. This allows you to snap events to marker positions, and vice versa.
Shuffle
Shuffle mode is useful when you want to change the order of adjacent events. If you have two adjacent events and drag the first one to the right, past the second event, the two events will change places.
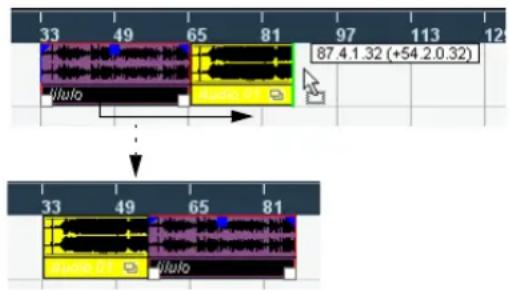
text_image
33 49 65 81 97 113 12 87.4.1.32 (+54 2.0.32) luko luko luko luko 33 49 65 81The same principle works when changing the order of more than two events:
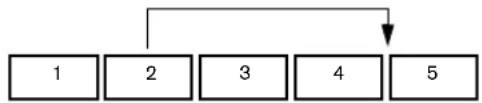
flowchart
graph TD
    A["1"] --> B["2"]
    B --> C["3"]
    C --> D["4"]
    D --> E["5"]
Dragging event 2 past event 4...

...changes the order of events 2, 3 and 4.
Magnetic Cursor
When this mode is selected, the project cursor becomes "magnetic". Dragging an event near the cursor causes the event to be aligned with the cursor position.
Grid + Cursor
This is a combination of the "Grid" and "Magnetic Cursor" modes.
Events + Cursor
This is a combination of the "Events" and "Magnetic Cursor" modes.
Events + Grid + Cursor
This is a combination of the "Events", "Grid" and "Magnetic Cursor" modes.
Snap to Zero Crossing
When this option is activated on the toolbar or in the Preferences (Editing–Audio page), splitting and sizing of audio events is done at zero crossings (positions in the audio where the amplitude is zero). This helps you avoid pops and clicks which might otherwise be caused by sudden amplitude changes.
Autoscroll

"Autoscroll" and "Suspend Autoscroll when Editing" are activated
When the Autoscroll option is activated, the waveform display will scroll during playback, keeping the project cursor visible in the window. You can find the Autoscroll button in the toolbars of the Project window and all editors.
- If the option "Stationary Cursors" is activated in the Preferences (Transport page), the project cursor will be positioned in the middle of the screen (if possible).
Suspending autoscroll
When editing parts or events during playback with Autoscroll enabled, you may suddenly "loose sight" of the edited material as the display follows the project cursor.
If you don't want the Project window display to change when editing during playback, you can activate the "Suspend Autoscroll when Editing" button. You will find this button right next to the Autoscroll button. When this option is enabled, autoscrolling is suspended as soon as you click anywhere in the event display during playback.
Proceed as follows:
- Open a project that contains audio or MIDI parts/events.
- Enable both the "Autoscroll" and the "Suspend Autoscroll when Editing" buttons (both buttons turn blue).
-
Start playback.
-
Edit an audio or MIDI part/event of your project (e.g. click and drag it to a different location on its track). The Autoscroll button will turn orange.
Autoscrolling is now suspended, i.e. when the project cursor moves to the right edge of the Project window, the display will not follow to keep the cursor visible.
As soon as playback stops, or when you click the Autoscroll button again (so it turns blue), Cubase will return to the normal Autoscroll behavior.
4
Playback and the Transport panel
Background
This chapter describes the various methods available for controlling Playback and Transport functions in Cubase.
The Transport panel
Below you can find a brief description of each item on the Transport panel.
The pictures below show the Transport panel with all controls visible (note that the Jog/Shuttle control is available in Cubase only). The Transport panel is divided into the following sections, from left to right.
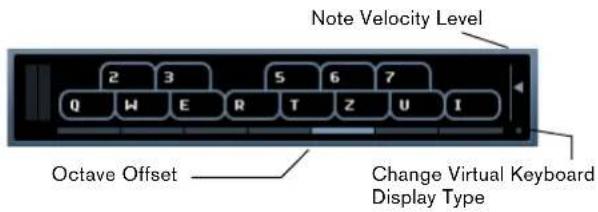
text_image
Note Velocity Level 2 3 5 6 7 Q W E R T Z U I Octave Offset Change Virtual Keyboard Display Type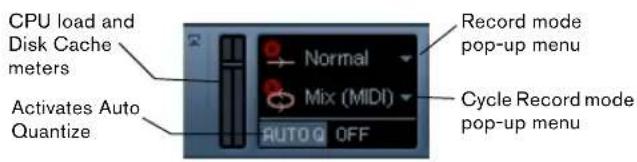
text_image
CPU load and Disk Cache meters Activates Auto Quantize Normal Mix (MIDI) AUTO OFF Record mode pop-up menu Cycle Record mode pop-up menu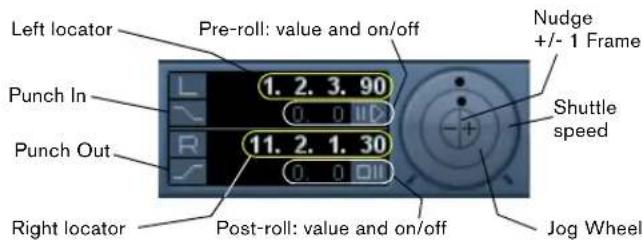
text_image
Left locator Punch In Punch Out Right locator Pre-roll: value and on/off 1. 2. 3. 90 0. 0 HD 11. 2. 1. 30 0. 0 Off Post-roll: value and on/off Nudge +/- 1 Frame Shuttle speed Jog Wheel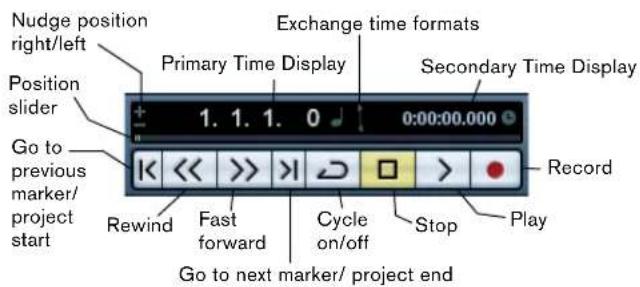
text_image
Nudge position right/left Position slider Go to previous marker/ project start Rewind Fast forward Go to next marker/ project end Exchange time formats Primary Time Display 0:00:00.000 Secondary Time Display Record Cycle on/off Stop Play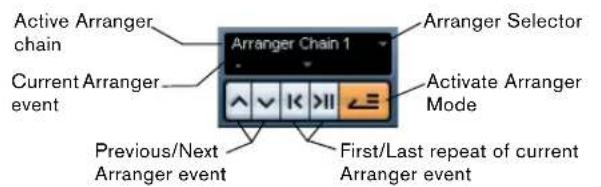
text_image
Active Arranger chain Current Arranger event Arranger Chain 1 Arranger Selector Activate Arranger Mode Previous/Next Arranger event First/Last repeat of current Arranger event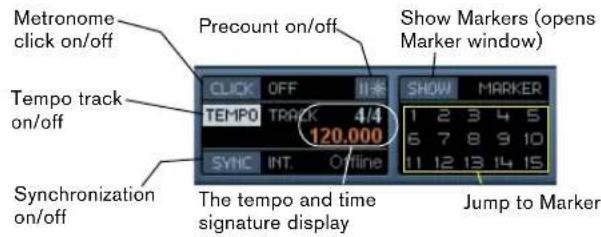
text_image
Metronome click on/off Precount on/off Show Markers (opens Marker window) Tempo track on/off 120.000 SYNC INT. Online SHOW MARKER 1 2 3 4 5 6 7 8 9 10 11 12 13 14 15 Synchronization on/off The tempo and time signature display Jump to Marker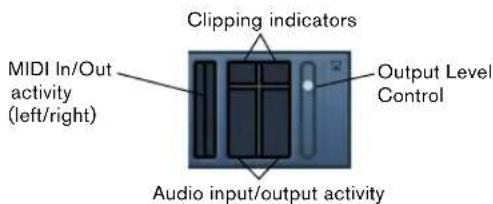
text_image
Clipping indicators MIDI In/Out activity (left/right) Output Level Control Audio input/output activityNote that the Output Activity and Clipping indicator as well as the Output Level Control refer to the Control Room channel (Cubase only), if the Control Room is activated. If the Control Room is disabled, these controls refer to the Main Mix Output bus as defined on the Outputs tab in the VST Connections window. For information on the Control Room, see the chapter "Control Room (Cubase only)" on page 135. In Cubase Studio, the Main Mix bus is always used for monitoring.
- The main Transport functions (Cycle/Stop/Play/Record) can also be shown on the toolbar.
In addition, various play options are available on the Transport menu.
Hiding and showing the Transport Panel
The Transport panel is shown automatically when you launch a new project. To hide or show it, select "Transport Panel" on the Transport menu (or use a key command – by default [F2]).
About Pre-roll and Post-roll
These items are described in the chapter "Recording", see "About Pre-roll and Post-roll" on page 84.
Changing the Transport panel setup
You can customize the appearance of the Transport panel by right-clicking anywhere on the panel and selecting/de-selecting the corresponding options on the context menu.
This is described in detail in the section "The setup context menus" on page 471.
The numeric keypad
In the default Key Command settings, various Transport panel operations are assigned to the numeric keypad on the computer keyboard. The keypads are slightly different on PC and Macintosh computers:
Numeric Key Function
| [Enter] Play |
| [+] Fast Forward |
| [-] Rewind |
| [*] Record |
| [÷] (Win)/[/] (Mac) Cycle On/Off |
| [.] Return to Zero |
| [0] Stop |
| [1] Go to Left Locator |
| [2] Go to Right Locator |
| [3-9] Go to marker 3 to 9 |
Operations
Setting the project cursor position
There are several ways to move the project cursor position:
- By using Fast Forward and Rewind.
- By using the Jog/Shuttle/Nudge control on the Transport panel (Cubase only – see “The Shuttle Speed control (Cubase only)” on page 63).
- By dragging the project cursor in the lower part of the ruler.
-
By clicking in the ruler. Double-clicking in the ruler moves the cursor and starts/stops playback.
-
If the option "Locate when Clicked in Empty Space" is activated in the Preferences (Transport page) you can click anywhere in an empty section of the Project window to move the cursor position.
- By changing the value in any of the position displays.
- By using the position slider above the transport buttons in the Transport panel.
The range of the slider relates to the Length setting in the Project Setup dialog. Hence, moving the slider all the way to the right will take you to the end of the project.
- By using markers (see "Markers" on page 54).
- By using playback options (see "Playback functions" on page 64).
- By using the Arranger function (see "The Arranger track" on page 96).
- By using functions on the Transport menu.
The following functions are available:
| Function Description | |
| Locate Selection/ Locate Selection End | Moves the project cursor to the beginning or end of the current selection. For this to be available, you must have selected one or more events or parts, or made a selection range. |
| Locate Next/ Previous Marker | This moves the project cursor to the closest marker to the right or left (see “Marker tracks” on page 31). |
| Locate Next/ Previous Event | This moves the project cursor forwards or backwards respectively, to the closest beginning or end of any event on the selected track(s). |
If Snap is activated when dragging the project cursor, the Snap value is taken into account. This is helpful for finding exact positions quickly.
⇒ There are also numerous key commands available for moving the project cursor (in the Transport category in the Key Commands dialog).
For example, you can assign key commands to the "Step Bar" and "Step Back Bar" functions, allowing you to move the project cursor in steps of one bar, backwards and forwards.
About the Transport panel display formats

Primary time display (left) and secondary time display (right)
The time unit shown in the ruler can be independent from the time unit shown in the main time display on the Transport panel. This means that you can display timecode in the transport position display and bars and beats in the ruler, for example. In addition, there is a secondary time display to the right of the primary time display which is also independent, giving you three different time units shown at the same time (in the Project window, you can also create additional ruler tracks – see "Using multiple rulers – ruler tracks (Cubase only)" on page 33).
The following rules apply:
- If you change the time format of the primary time display on the Transport panel, the time format of the ruler will be changed as well.
This is the same as changing the display format in the Project Setup. Therefore, to have different display formats in the ruler and the main time display you should change the format in the ruler. - The primary time display format is set on the pop-up menu to the right in the main position display.
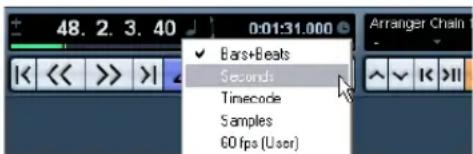
text_image
48. 2. 3. 40 0:01:31.000 Arranger Chain ✓ Bars+Beats Seconds Timecode Samples 60 fps (User)- This setting also determines the time format displayed for the left and right locators on the Transport panel.
- The secondary time display is completely independent, and the display format is set on the pop-up menu to the right in the secondary time display.
- You can swap time formats between the primary and secondary time displays by clicking the double arrow symbol between them.
The left and right locators
The left and right locators are a pair of position markers used for specifying punch-in and punch-out positions during recording, and as boundaries for cycle playback and recording.
When cycle mode is activated on the Transport panel, the area between the left and right locator will be repeated (cycled) on playback.
However, if the right locator is positioned before the left, this will work as a "jump" or "skip mode" – when the project cursor reaches the right locator it will immediately jump to the left locator position and continue playback from there.
There are several ways to set locator positions:
- To set the left locator, press [Ctrl]/[Command] and click at the desired position in the ruler.
Similarly, pressing [Alt]/[Option] and clicking in the ruler sets the right locator. You can also drag the locator "handles" directly in the ruler.

The locators are indicated by the "flags" in the ruler. The area between the locators is highlighted in the ruler and in the Project window (see "Appearance" on page 474). Note that if the right locator is before the left locator, the color of the ruler between the locators will change (from blue to red).
- Click and drag in the upper half of the ruler to "draw" a locator range.
If you click on an existing locator range, you can drag to move it. - Pressing [Ctrl]/[Command] and pressing [1] or [2] on the numeric keypad sets the left or right locator to the project cursor position.
Similarly, you can press [1] or [2] on the numeric keypad (without [Ctrl]/[Command]) to set the project cursor position to the left or right locator position. Note that these are default key commands – you can change these if you like. - By creating cycle markers you can store any number of left and right locator positions, which can be recalled by simply double-clicking on the corresponding marker (see "Editing markers on the Marker track" on page 55).
- The "Locators to Selection" item on the Transport menu (default key command [P]) sets the locators to encompass the current selection.
This is available if you have selected one or several events or made a selection range. - You can also adjust the locators numerically on the Transport panel.
Clicking the L/R buttons in the locator section on the Transport panel will move the project cursor to the respective locator. If you press [Alt]/[Option] and click the L or R button, the corresponding locator will be set to the current project cursor position.
The Shuttle Speed control (Cubase only)
The shuttle speed control (the outer wheel on the Transport panel) allows you to play the project at any playback speed, forwards or backwards. This provides a quick way to locate or "cue" to any position in the project.
- Turn the shuttle speed wheel to the right to start play-back.
The further to the right you move the wheel, the faster the playback speed.
- If you turn the wheel to the left instead, the project will play backwards.
Similarly, the playback speed depends on how far to the left you turn the wheel.
Project scrubbing – the Jog Wheel (Cubase only)
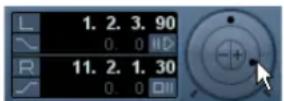
The middle wheel on the Transport panel serves as a jog wheel. By clicking and dragging it to the right or left you will move the playback position manually forwards or backwards – much like scrubbing on a tape deck. This helps you pinpoint exact locations in the project.
- Note that the jog wheel is an “endless rotary encoder” – you can turn it as many times as needed to move to the desired location.
The faster you turn the wheel, the faster the playback speed.
- If you click the jog wheel during playback, playback will automatically stop.
The nudge position buttons (Cubase only)
The + and - buttons in the middle of the Shuttle/Jog section allow you to nudge the project cursor position one frame at a time to the right or left.
Options and Settings
The "Return to Start Position on Stop" preference
This setting is found on the Transport page in the Preferences (found on the File menu under Windows, or on the Cubase menu under Mac OS X).
- If "Return to Start Position on Stop" is activated when you stop playback, the project cursor will automatically return to the position where recording or playback last started.
- If "Return to Start Position on Stop" is deactivated, the project cursor will remain at the position where you stop playback.
Pressing Stop again will return the project cursor to the position where recording or playback last started.
About track disable/enable
For audio tracks, the track context menu contains an item named "Disable Track". This shuts down all disk activity for the track, as opposed to using Mute, which merely turns down the output volume for a track. For example, if you often record "alternative takes" you can easily build up a large number of takes on different tracks. Even though these tracks are muted, they are actually still "playing back" from the hard disk during playback. This puts an unnecessary load on your disk system, so using "Disable Track" is recommended for such situations.
- Select "Disable Track" for tracks that you want to keep in the project for later use but do not want to play back now. The track color changes to indicate that the track is disabled.
- Select "Enable Track" from the track context menu to re-enable disabled tracks.
Playback functions
Apart from the standard transport controls on the Transport panel, you can also find a number of functions on the Transport menu that can be used to control playback. The items have the following functionality:
Option Description
| Post-roll from Selection Start/End | Starts playback from the beginning or end of the currently selected range and stops after the time set in the Post-roll field on the Transport panel. |
| Pre-roll to Selection Start/End | Starts playback from a position before the start or end of the currently selected range and stops at the selection start or end, respectively. The play-back start position is set in the Pre-roll field on the Transport panel. |
| Play from Selection Start/End | Activates playback from the beginning or end of the current selection. |
| Play until Selection Start/End | Activates playback two seconds before the start or end of the current selection and stops at the selection start or end, respectively. |
| Play until Next Marker | This activates playback from the project cursor and stops at the next marker. |
| Play Selection Range | This activates playback from the start of the current selection and stops at the selection end. |
| Loop Selection | This activates playback from the start of the current selection and keeps starting over again when reaching the selection end. |
The functions listed above (except "Play until Next Marker") are only available if you have selected one or more events or made a selection range.
In the Preferences dialog (Editing–Audio page) you will find the option “Treat Muted Audio Events like Deleted”. When you activate this option, any events overlapped by a muted event will become audible.
About Chase
Chase is a function that makes sure your MIDI instruments sound as they should when you locate to a new position and start playback. This is accomplished by the program transmitting a number of MIDI messages to your instruments each time you move to a new position in the project, making sure all MIDI devices are set up correctly with regard to program change, controller messages (such as MIDI Volume), etc.
For example, let's say you have a MIDI track with a program change event inserted at the beginning. This event makes a synth switch to a piano sound.
At the beginning of the first chorus you have another program change event which makes the same synth switch to a string sound.
You now play back the song. It begins with the piano sound and then switches to the string sound. In the middle of the chorus you stop and rewind to some point between the beginning and the second program change. The synth will now still play the string sound although in this section it really should be a piano!
The Chase function takes care of that. If program change events are set to be chased, Cubase will track the music back to the beginning, find the first program change and transmit it to your synth, setting it to the correct sound.
The same thing can apply to other event types as well. The Chase Events settings in the Preferences dialog (MIDI page) determine which event types will be chased when you locate to a new position and start playback.
→ Event types for which the checkbox is activated here will be chased.
- In this section of the Preferences dialog, you will also find the option "Chase not limited to Part Boundaries". When you activate this option, MIDI controllers are also chased outside the part boundaries, i.e. the Chase will be performed on the part touched by the cursor as well as on all the parts to the left of it. Please note that this option should be deactivated for very large projects, as it considerably slows down operations such as positioning and soloing. When you deactivate this option, the MIDI controllers are only chased within the parts under the position cursor.
The Virtual Keyboard
The Virtual Keyboard can be displayed in the Transport panel. It allows you to play and record MIDI notes by using your computer keyboard or mouse. This is useful if you have no external MIDI instrument at hand and you do not want to draw in notes with the Pencil tool. The Virtual Keyboard can perform all functions that can be controlled by external MIDI keyboards, e.g. playing and recording MIDI notes.

When the Virtual Keyboard is displayed, the usual key commands are blocked because they are reserved for the Virtual Keyboard. The only exceptions are: [Ctrl]/[Command]-[S] (Save), Num [*] (Start/Stop Record), [Space] (Start/Stop Playback), Num [1] (Jump to left locator), [Delete] or [Backspace] (Delete), Num [/] (Cycle on/off), [F2] (Show/Hide Transport panel), and [Alt]/[Option]-[K] (Show/Hide Virtual Keyboard).
- You can choose between two different keyboard display modes: computer keyboard and piano roll. To switch between these two modes, click the "Change Virtual Keyboard Display Type" button or use the [Tab] key.
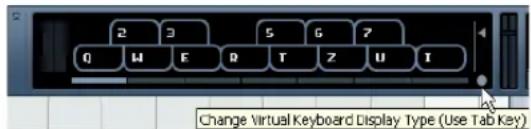
text_image
2 3 5 G 7 Q M E R T Z U T Change Virtual Keyboard Display Type (Use Tab Key)The Virtual Keyboard in computer keyboard display mode

natural_image
Pure graphical element with no text, numbers, or symbolsThe Virtual Keyboard in piano roll display mode
To record MIDI using the Virtual Keyboard, proceed as follows:
- Create or choose a MIDI or an instrument track and activate the "Record Enable" button for it.
- Open the Virtual Keyboard by selecting "Virtual Keyboard" on the Devices menu or by pressing [Alt]/[Option]-[K]. You can also open the Virtual Keyboard by right-clicking on the Transport panel and selecting "Virtual Keyboard" on the context menu.
The Virtual Keyboard is displayed in the Transport panel.
- Activate the Record button and press a key on your computer keyboard to enter a note.
You can also click on the keys of the Virtual Keyboard to enter notes.
- You can also press several keys simultaneously to enter polyphonic parts. The maximum number of notes that can be played at one time varies between the different operating systems and hardware configurations.
- Use the fader "Note velocity level" to the right of the virtual keyboard to adjust the volume.
You can also use the up and down arrow keys for this.
- Enter the desired notes this way.
- When you are done, hit the Stop button and close the Virtual Keyboard.
When the Virtual Keyboard is hidden, all key commands are available again.
Options and settings
- In piano roll mode, you have a wider range of keys at your disposal, allowing you to enter two voices simultaneously, for example bass and lead voice or bass drums and HiHats.
In computer keyboard mode, you can use the two rows of keys that are displayed on the Virtual Keyboard to enter notes. In piano roll mode, you can also use the two rows of keys below these.
- You have seven full octaves at your disposal. Use the "Octave Offset" buttons at the bottom of the virtual keyboard to offset the octave range of the keyboard.
You can also use the left and right arrow keys to switch the keyboard range to a lower or higher octave, respectively.
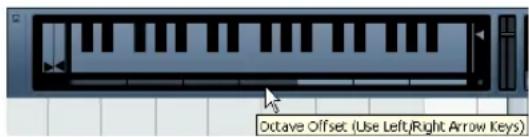
text_image
Octave Offset. (Use Left/Right Arrow Keys)- In piano roll mode, you can use the two sliders to the left of the keyboard to introduce pitchbend (left slider) or modulation (right slider).
You can also click on a key, hold the mouse button pressed until the mouse pointer becomes a crosshair tool and drag upwards/downward to introduce modulation or left/right to create pitchbend.

natural_image
Pure electrical circuit lines without any symbolsRecording
Background
This chapter describes the various recording methods that you can use in Cubase. As it is possible to record both audio and MIDI tracks, both recording methods are covered in this chapter.
Before you start
This chapter assumes that you are reasonably familiar with certain basic recording concepts, and that the following initial preparations have been made:
- You have properly set up, connected and calibrated your audio hardware.
- You have opened a project and set the project setup parameters to your specifications.
Project setup parameters determine the record format, sample rate, project length etc. that affect the audio recordings you make during the course of the project. See "The Project Setup dialog" on page 34.
- If you plan to record MIDI, your MIDI equipment should be set up and connected correctly.
Basic recording methods
This section describes the general methods used for recording. However, there are additional preparations and procedures that are specific to audio and MIDI recording respectively. Make sure to read these sections before you start recording (see "Audio recording specifics" on page 69 and "MIDI recording specifics" on page 79).
Record-enabling tracks
Cubase can record on a single track or on several tracks (audio and/or MIDI) simultaneously. To make a track ready for recording, click the Record Enable button for the track in the Track list, in the Inspector or in the mixer. When activated, the buttons turn red, indicating record ready mode.
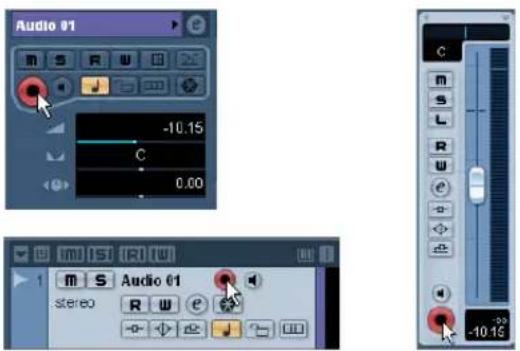
Record Enable in the Inspector, Track list and mixer
If the option "Enable Record on Selected Track" is activated in the Preferences (Editing-Project & Mixer page), tracks are automatically record-enabled when you select them in the Track list.
⇒ You can set up key commands to record-enable all audio tracks simultaneously and to deactivate Record Enable for all audio tracks (Arm/Disarm all Audio Tracks).
You will find these commands in the Key Commands dialog, in the Mixer category (see "Setting up key commands" on page 480).
⇒ The exact number of audio tracks you can record simultaneously depends on your computer CPU and hard disk performance.
In the Preferences (VST page), you can find the option "Warn on Processing Overloads". When this is activated, a warning message will be displayed as soon as the CPU clip indicator (on the Transport panel) lights up during recording.
Manually activating recording
You activate recording by clicking the Record button on the Transport panel or toolbar or by using the corresponding key command (by default [*] on the numeric keypad).
Recording can be activated in Stop mode (from the current cursor position or from the left locator) or during playback:
- If you activate recording in Stop mode, and the option "Start Record at Left Locator" is activated on the Transport menu, recording will start from the left locator. The pre-roll setting or the metronome count-in will be applied (see "About Pre-roll and Post-roll" on page 84).
-
If you activate recording in Stop mode, and "Start Record at Left Locator" is deactivated, recording will start from the current project cursor position.
-
If you activate recording during playback, Cubase will immediately enter Record mode and start recording from the current project cursor position.
This is known as "manual punch in".
Activating recording in Sync mode
If you are synchronizing the Cubase transport to external equipment (Sync is activated on the Transport panel) and you activate recording, the program will go into "record ready" mode (the record button on the Transport panel will light up). In this case, recording will start when a valid timecode signal is received (or when you click the Play button). See the chapter "Synchronization" on page 427 for more information.
Automatically activating recording
Cubase can automatically switch from playback to recording at a given position. This is known as "automatic punch in". A typical use for this would be if you need to replace a section of a recording, and want to listen to what is already recorded, up to the recording start position.
- Set the left locator to the position where you want recording to start.
- Activate the Punch In button on the Transport panel.
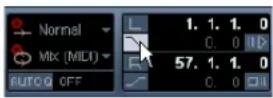
Punch In activated
- Activate playback from some position before the left locator.
When the project cursor reaches the left locator, recording is automatically activated.
Stopping recording
Again, this can be done automatically or manually:
- If you click the Stop button on the Transport panel (or use the corresponding key command, by default [0] on the numeric keypad), recording is deactivated and Cubase goes into Stop mode.
- If you click the Record button (or use the key command for recording, by default [*]), recording is deactivated but playback continues.
This is known as "manual punch out".
- If the Punch Out button is activated on the Transport panel, recording will be deactivated when the project cursor reaches the right locator.
This is known as "automatic punch out". By combining this with automatic punch in, you can set up a specific section to record – again very useful if you want to replace a certain part of a recording. See also "Stop after Automatic Punch Out" on page 84.
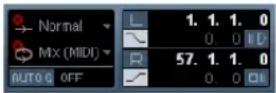
Punch In and Out activated
Cycle recording
Cubase can record and play back in a cycle – a loop. You specify where the cycle starts and ends by setting the left and right locators. When the cycle is active, the selected section is seamlessly repeated until you hit Stop or deactivate cycle mode.
- To activate cycle mode, click the cycle button on the Transport panel.
text_image
55. 3. 1. 0 0:01:49.000 << >> > □ > ●Cycle activated
- To record in cycle mode, you can start recording from the left locator, from before the locators or from within the cycle, in Stop mode or during playback. As soon as the project cursor reaches the right locator, it will jump back to the left locator and continue recording a new lap.
- The results of cycle recording depend on the selected cycle record mode and are different for audio (see "Recording audio in cycle mode" on page 75) and MIDI (see "Recording MIDI in cycle mode" on page 81).
Audio pre-record
This feature allows you to capture up to 1 minute of any incoming audio you play in Stop mode or during playback, "after the fact". This is possible because Cubase can capture audio input in buffer memory, even when not recording.
Proceed as follows:
- Open the Preferences (Record-Audio page).
-
Specify a time (up to 60 seconds) in the "Audio Pre-Record Seconds" field.
This activates the buffering of audio input, making Pre-Record possible. -
Make sure an audio track is record-enabled and receives audio from the signal source.
-
When you have played some audio material you want to capture (either in Stop mode or during playback), click the Record button.
-
After a few seconds stop the recording.
An audio event is created, starting at where the cursor position was when you activated recording. This means that if you were in stop mode, and the cursor was at the beginning of the project, you may have to move the event to the right in the next step. If you were playing along to a project you should leave the event where it is.
- Select the Arrow tool and place the cursor on the bottom left edge of the event so that a double arrow appears, then click and drag to the left.
Now the event is extended and the audio you played before activating record is inserted – this means that if you played along during playback, the captured notes will end up exactly where you played them in relation to the project.
The recording was activated at the start of bar 9. This is indicated by a blue line in the audio event.
Audio recording specifics
Selecting a recording file format
The format for recorded files is set in the Project Setup dialog on the Project menu. There are three settings: sample rate, record format (bit depth) and record file type. While the sample rate is set once and for all when you start working on a new project, the bit depth and file type can be changed at any time.
Record file type
The Record File Type setting determines which type of files will be created when you record:
File type Description
| Wave File Wave files have the extension “.wav” and are a common file format on the PC platform. | |
| Wave 64 File (Cubase only) | Wave 64 is a proprietary format developed by Sonic Foundry Inc. Audio-wise it is identical to the Wave format, but the internal file structure makes much larger file sizes possible. This is useful e.g. for long live recordings in surround format, where the audio files can become huge. |
| Broadcast Wave File | In terms of audio content, the same as regular Wave files, but with embedded text strings for supplying additional information about the file (see below). |
| AIFF File | Audio Interchange File Format, a standard defined by Apple Inc. AIFF files have the extension “.aif” and are used on most computer platforms. Like Broadcast Wave files, AIFF files can contain embedded text strings (see below). |
- If you select Broadcast Wave File or AIFF format, you can specify Author, Description and Reference text strings that will be embedded in the recorded file.
This is done on the Record-Audio-Broadcast Wave page in the Preferences.
Record format (bit depth)
The available options are 16 bit, 24 bit and 32 bit float. Use the following guidelines:
- Normally, select the record format according to the bit depth delivered by your audio hardware.
For example, if your audio hardware has 20 bit A/D converters (inputs), you may want to record at 24 bit resolution to capture the full bit depth. On the other hand, if your hardware has 16 bit inputs, it is pointless to record with a higher bit depth – this will only make the audio files larger, with no difference in audio quality. The exception is if you record with effects – see "Recording with effects (Cubase only)" on page 78.
- The higher the bit depth, the larger the files and the more strain is put on the disk system.
If this is an issue, you may want to lower the record format setting.

For further information on the options in the Project Setup dialog, see "The Project Setup dialog" on page 34.
Setting up the track
Creating a track and selecting the channel configuration
Audio tracks can be configured as mono, stereo or surround tracks (Cubase only). This allows you to record or import a file containing multiple channels and treat it as one entity, with no need to split it up into several mono files etc. The signal path for an audio track maintains its channel configuration all the way from the input bus, via EQ, level and other mixer settings to the output bus.
You specify the channel configuration for a track when you create it:
-
Select "Add Audio Track" from the Track list context menu or the Project menu (or, if an audio track is already selected, double-click in an empty area of the Track list). A dialog appears with a channel configuration pop-up menu.
-
Select the desired format from the pop-up menu. In Cubase Studio, you choose between mono and stereo. In Cubase, the most common formats are listed directly on the pop-up menu, with the remaining surround formats listed on the "More..." submenu. For a list of the available surround formats, see "Output bus configuration" on page 182.
- The Browse item in this dialog allows you to browse your disk(s) for created Track Presets, which can be used as a basis (or template) for tracks.
This is described in detail in the chapter "Working with Track Presets" on page 288.
3. Click OK.
A track appears, set to the specified channel configuration. In the mixer, a corresponding channel strip appears. You cannot change the channel configuration for a track.
Selecting an input bus for a track
Here we assume that you have added and set up the required input busses (see "Setting up busses" on page 14). Before you record, you need to specify from which input bus the track should record. You can do this in the Inspector or in the mixer:
- In the Inspector, you select an input bus on the Input Routing pop-up menu in the top section.
As described in the section "The Inspector" on page 29, the Inspector shows the settings for the selected track. You show or hide the Inspector by clicking the "Show/Hide Inspector" button on the Project window toolbar.
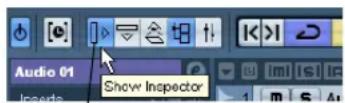
Click here to show/hide the Inspector.
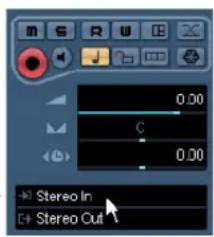
text_image
0.00 C 0.00 Stereo In Stereo CutClick here to select an input bus for the track.
- In the mixer, you select an input bus on the Input Routing pop-up menu at the top of the track's channel strip.
If this pop-up menu is not shown, you need to open the Mixer Routing View by clicking the "Show Routing" button in the extended Mixer common panel or by selecting "Show Routing View" from the Window submenu on the Mixer context menu. See "Configuring the mixer" on page 112 for more information about the mixer.
Click here to show or hide the input and output settings.
Click here to select an input bus for the track.
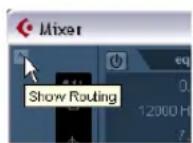
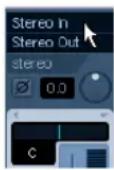
Recording from busses
You can also select an output bus, a group bus or an FX channel bus as an Input for your recording.
Let's assume you want to create a downmix of separate tracks, e.g. bass drum, hihats, snare etc.
Proceed as follows:
- Set up your separate tracks as desired and add a group track.
- For each of the drum tracks, open the Output Routing pop-up menu and select the Group track as output.
- Create a new audio track, open the Input Routing pop-up menu for it and select the Group track as input for this audio track.
- Record enable this audio track and start recording.
Now, the output of the group track will be recorded on the new track and you will get a mix of your separate tracks.
Note that you can also select an FX channel as recording source. In this case, only the output of the FX channel will be recorded.
For more information about the routing possibilities, see "Routing" on page 18.
Selecting a folder for the recorded audio files (Cubase only)
Each Cubase project has a project folder containing (among other things) an "Audio" folder. By default, this is where recorded audio files are stored. However, you can select record folders independently for each audio track if needed.
Proceed as follows:
- To select the same record folder for several audio tracks, select them by pressing [Shift] or [Ctrl]/[Command] and clicking on them in the Track list.
- Right-click in the Track list for one of the tracks to bring up the context menu.
-
Select "Set Record Folder".
-
Use the file dialog that appears to navigate to the desired folder (or create a new folder with the Create button). Tip: if you want to have separate folders for different types of material (speech, ambient sounds, music, etc.), you can create subfolders within the Project's "Audio" folder and assign different tracks to different subfolders. This way, all audio files will still reside within the project folder, which will make managing the Project easier.
- It is possible to have different tracks record to totally different locations, even on different disks. However, if you need to move or archive the project, there is a risk of missing some files. The solution is to use the "Prepare Archive" function in the Pool to gather all external files into the project folder first, see "Prepare Archive" on page 271.
Setting input levels
When recording digital sound, it is important to set the input levels correctly – loud enough to ensure low noise and high audio quality, but not so loud that clipping (digital distortion) occurs.
Clipping typically occurs in the audio hardware when a too loud analog signal is converted to digital in the hardware's A/D converters.
- If you are using Cubase, it is also possible to get clipping when the signal from the input bus is written to a file on your hard disk. This is because in Cubase, you can make settings for the input bus, adding EQ, effects, etc. to the signal as it is being recorded. This may raise the level of the signal, causing clipping in the recorded audio file.
The procedure for checking the signal level coming into the audio hardware is slightly different depending on whether you are using Cubase or Cubase Studio:
Cubase
In Cubase, you check the input level at the input channel.
To check the level of the "unprocessed" signal coming into the audio hardware, you need to switch the level meters to "Meter Input". In this mode, the input channel level meters will show the level of the signal at the input of the bus, before any adjustments such as input gain, EQ, effects, level or pan:
- Right-click in the Mixer window.
The Mixer context menu appears. -
Select the Global Meter Settings submenu and make sure "Meter Input" is activated.
-
Play back the audio and check the level meter for the input channel.
The signal should be as loud as possible without exceeding 0dB (the Clipping indicator for the input bus should not light up).
The Clipping indicator
-
If necessary, adjust the input level in one of the following ways:
-
Adjust the output level of the sound source or external mixer.
- Use the audio hardware's own application program to set the input levels (if possible).
See the documentation for the audio hardware.
- If your audio hardware supports the ASIO Control Panel function, it may be possible to make input level settings.
To open the ASIO control panel, open the Device Setup dialog via the Devices menu and, in the list to the left (below "VST Audio System"), select your audio card. When this is selected, you can open the Control Panel by clicking on the Control Panel button in the settings section to the right.
The next step is to check the level of the audio being written to a file on your hard disk. This is only necessary if you have made any adjustments to the input channel (level settings, EQ, insert effects, etc.).
Also note the following:
- If you record in 32 bit float format, the bit depth will not be reduced – which means there is no risk of clipping at this stage.
Also, this preserves the signal quality perfectly. Therefore, you should consider using 32 bit float format when you are recording with effects (see "Recording with effects (Cubase only)" on page 78). -
If you record in 16 or 24 bit format, the available headroom is lower, which means clipping can occur if the signal is too loud. To avoid this, set the signal level in the following way:
-
Bring up the mixer context menu, open and select Global Meter Settings "Meter Post-Fader".
-
Set up the input channel, by adding EQ and/or effects.
With some effects you may want to adjust the level of the signal going into the effect – use the Input Gain knob for this. Note that you need to press [Shift] or [Alt]/[Option] to adjust the Input Gain.
Adjusting the Input Gain.
- Play back the audio and check the level meter of the input channel.
The signal should be reasonably loud but should not reach 0dB (the Clipping indicator for the input bus should not light up). - If necessary, use the input channel fader to adjust the signal level.
Cubase Studio
In Cubase Studio, the input channels are not shown in the mixer. Instead, you need to check the level at the channel strip for the track on which you are recording:
- Locate the channel strip for the track you're about to record on.
- Activate monitoring for the channel by clicking the speaker button next to the fader.
When monitoring is activated, the meter shows the level of the incoming audio signal.
- Play the audio source that you want to record and check the level meter for the channel.
- Adjust the output level of your audio source so that the meters go reasonably high without reaching 0.0dB.
Check the numerical peak level indicator below the meter in the bus channel strip. To reset the peak level indicator, click on it.
⇒ You must adjust the output level of the audio source – you cannot use the faders in Cubase Studio to adjust the input level!
An alternative way of checking the input levels would be to use the control panel for your audio hardware (if it features input level meters). It may also be possible to adjust the input level in the control panel.
See the documentation of your audio hardware for details.
Monitoring
In this context, "monitoring" means listening to the input signal during recording. There are three fundamentally different ways to do this: via Cubase, externally (by listening to the signal before it reaches Cubase), or by using ASIO Direct Monitoring (which is a combination of both other methods – see below).
Monitoring via Cubase
If you monitor via Cubase, the input signal is mixed in with the audio playback. The advantage of this is that you can adjust the monitoring level and panning in the mixer, and add effects and EQ to the monitor signal just as during playback (using the track's channel strip – not the input bus!).
The disadvantage of monitoring via Cubase is that the monitored signal will be delayed according to the latency value (which depends on your audio hardware and drivers). Therefore, monitoring via Cubase requires an audio hardware configuration with a low latency value. You can check the latency of your hardware in the Device Setup dialog (VST Audio System page).
⇒ If you are using plug-in effects with large inherent delays, the automatic delay compensation function in Cubase will increase the latency.
If this is a problem, you can use the Constrain Delay Compensation function while recording, see "Constrain Delay Compensation" on page 179.
When monitoring via Cubase, you can select one of four Auto Monitoring modes in the Preferences (VST page):
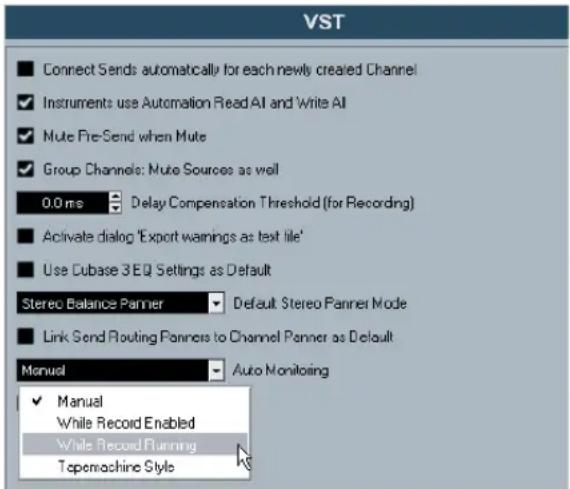
text_image
VST Connect Sends automatically for each newly created Channel Instruments use Automation Read AI and Write AI Mute Pre-Send when Mute Group Channels: Mute Sources as well 0.0 ms Delay Compensation Threshold (for Recording) Activate dialog 'Export warnings as text file' Use Cubase 3 EQ Settings as Default Stereo Balance Banner Default Stereo Panner Mode Link Send Routing Panners to Channel Panner as Default Manual Auto Monitoring Manual While Record Enabled While Record Running Topmachine Style- Manual.
This option allows you to turn input monitoring on or off by clicking the Monitor button in the Inspector, the Track list or in the mixer. - While Record Enabled.
With this option, you will hear the audio source connected to the channel input whenever the track is record enabled.
- While Record Running.
This option switches to input monitoring only during recording.
- Tapemachine Style.
This option emulates standard tapemachine behavior: input monitoring in Stop mode and during recording, but not during playback.
- Cubase only: In the Preferences (VST-Metering page) you can find the option "Map Input Bus Metering to Audio Track (in Direct Monitoring)".
When Direct Monitoring is activated in the Device Setup dialog, this option allows you to map the input bus metering to monitor-enabled audio tracks. This gives you the opportunity to watch the input levels of your audio tracks when working in the Project window.
When Direct Monitoring is activated in the Device Setup dialog, this function works as follows:
- When "Map Input Bus Metering to Audio Track (in Direct Monitoring)" is activated, audio tracks show the metering signal from the input bus they are routed to as soon as the track is record-enabled.
Note that the tracks are mirroring the input bus signal, i.e. you will see the same signal in both places. When using mapped metering, any functions (e.g. trimming) you apply to the audio track are not reflected in its meters.
- When "Map Input Bus Metering to Audio Track (in Direct Monitoring)" is not activated, metering works as usual.
- In Cubase Studio, the audio tracks always show the input bus metering, see "Cubase Studio" on page 72.
External monitoring
External monitoring (listening to the input signal before it goes into Cubase) requires some sort of external mixer for mixing the audio playback with the input signal. This can be a stand-alone physical mixer or a mixer application for your audio hardware, if this has a mode in which the input audio is sent back out again (usually called "Thru", "Direct Thru" or similar).
When using external monitoring, you cannot control the level of the monitor signal from within Cubase or add VST effects or EQ to the monitor signal. The latency value of the audio hardware configuration does not affect the monitor signal in this mode.
If you want to use external monitoring, you need to make sure that monitoring via Cubase is not activated as well. Select the "Manual" monitoring mode in the Preferences (VST page) and do not activate the Monitor buttons.
ASIO Direct Monitoring
If your audio hardware is ASIO 2.0 compatible, it may support ASIO Direct Monitoring (this feature may also be available for audio hardware with Mac OS X drivers). In this mode, the actual monitoring is done in the audio hardware, by sending the input signal back out again. However, monitoring is controlled from Cubase. This means that the audio hardware's direct monitoring feature can be turned on or off automatically by Cubase, just as when using internal monitoring.
- To activate ASIO Direct Monitoring, open the Device Setup dialog on the Devices menu and activate the Direct Monitoring checkbox on the page for your audio hardware. If the checkbox is grayed out, your audio hardware (or its driver) does not support ASIO Direct Monitoring. Consult the audio hardware manufacturer for details.
- When ASIO Direct Monitoring is activated, you can select a monitoring mode in the Preferences (VST page), as when monitoring via Cubase (see "Monitoring via Cubase" on page 73).
- Depending on the audio hardware, it may also be possible to adjust the monitoring level and panning from the mixer (including the Control Room section, but excluding the Talkback and External Return channels) by adjusting the volume faders, the input gain controls and the send levels for Control Room studios.
Consult the documentation of the audio hardware if in doubt.
- VST effects and EQ cannot be applied to the monitor signal in this mode, since the monitor signal does not pass through Cubase.
- Depending on the audio hardware, there may be special restrictions as to which audio outputs can be used for direct monitoring.
For details on the routing of the audio hardware, see its documentation.
The latency value of the audio hardware configuration does not affect the monitor signal when using ASIO Direct Monitoring.
When using Steinberg hardware (MR816 series) in combination with ASIO Direct Monitoring, monitoring will be virtually latency-free.
If you are using RME Audio Hammerfall DSP audio hardware, make sure that the pan law is set to -3dB in the card's preferences.
Recording
Recording is done using any of the general recording methods (see "Basic recording methods" on page 67). When you finish recording, an audio file is created in the Audio folder within the project folder. In the Pool, an audio clip is created for the audio file, and an audio event that plays the whole clip appears on the recording track. Finally, a waveform image is calculated for the audio event. If the recording was very long, this may take a while.
If the option "Create Audio Images During Record" is activated in the Preferences (Record-Audio page), the waveform image will be calculated and displayed during the actual recording process.
This realtime calculation uses some processing power - if your processor is slow or you are working on a CPU-intensive project, you should consider turning this option off.
Undoing recording
If you decide that you do not like what you just recorded, you can delete it by selecting Undo from the Edit menu. The following will happen:
- The event(s) you just created will be removed from the Project window.
- The audio clip(s) in the Pool will be moved to the Trash folder.
- The recorded audio file(s) will not be removed from the hard disk.
However, since their corresponding clips are moved to the Trash folder, you can delete the files by opening the Pool and selecting "Empty Trash" from the Media menu, see "Deleting from the hard disk" on page 264.
Recording overlapping events
The basic rule for audio tracks is that each track can play back a single audio event at a time. This means that if two or more events are overlapping, only one of them will be heard at any given time.
What happens when you record overlapping events (record in an area where there are already events on the track) depends on the Linear Record Mode setting on the Transport panel:
- In "Normal" or "Merge" mode, recording where something has already been recorded creates a new audio event that overlaps the previous one(s).
When you record audio, there is no difference between "Normal" and "Merge" mode – the difference only applies to MIDI recording (see "About overlap and the Record Mode setting" on page 81).
- In "Replace" mode, existing events (or portions of events) that are overlapped by the new recording will be removed. This means that if you record a section in the middle of a longer existing recording, the original event will be cut into two events with a gap for the new event.
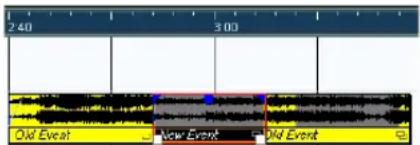
text_image
240 300 Old Event New Event Old EventWhich event will be heard?
If two or more events are overlapping, you will only hear the events (or portions of events) that are actually visible. Overlapped (hidden) events or sections are not played back.
- The functions “Move to Front” and “Move to Back” on the Edit menu (Move submenu, see “Moving events” on page 44) are useful for managing overlapping events, as is the “To Front” function (see below).
Recording audio in cycle mode
If you are recording audio in cycle mode, the result depends on two factors:
- The "Cycle Record Mode" setting on the Transport panel.
- The "Audio Cycle Record Mode" setting in the Preferences (Record–Audio page).
Cycle Record Modes on the Transport panel
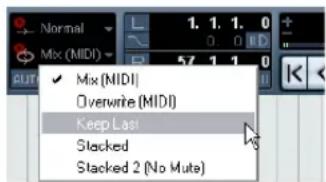
text_image
Normal Mix (MIDI) ✓ Mix (MIDI) Overwrite (MIDI) Keep Last Stacked Stacked 2 (No Muts)There are five different modes on the Transport panel, but the first two modes only apply to MIDI recording. For audio cycle recording, the following applies:
- If “Keep Last” is selected, the last complete “take” (the last completely recorded lap) is kept as an audio event. In reality, all laps you recorded are saved in one audio file divided into regions – one region for each take. You can easily select a previous take for playback – this is done as when recording in “Create Regions” mode (see “Create Regions mode (Preferences)” on page 76).
- If "Stacked" is selected, each take will appear as an event on a separate "lane" on the track.
This is useful when you want to view and edit the different takes and eventually combine them to one recording. In this mode, the Audio Cycle Record Mode preference does not matter. Stacked 2 (No Mute) is the same as Stacked, except that all the takes will be audible. See "Recording audio in Stacked mode" on page 77.
- If any of the other cycle recording modes is selected, the result depends entirely on the "Audio Cycle Record Mode" setting in the Preferences (Record–Audio page).
These options are described below.
Create Events mode (Preferences)
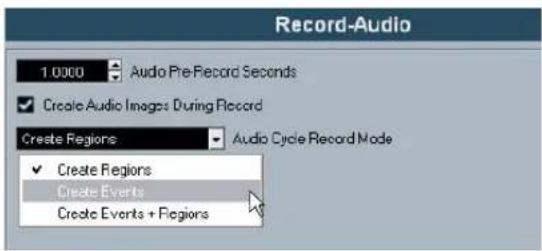
text_image
Record-Audio 1.0000 Audio Pre-Record Seconds ✓ Create Audio Images During Record Create Regions ✓ Create Regions Create Events Create Events + RegionsWhen "Audio Cycle Record Mode" is set to "Create Events" in the Preferences (Record-Audio page), the following will happen when you record audio in cycle mode:
- One continuous audio file is created during the entire recording process.
- For each recorded lap of the cycle, one audio event is created.
The events will have the name of the audio file plus the text "Take *", where "*" indicates the number of the take.
- The last take (the last recorded lap) will be on top (and will thus be the one you hear when you activate playback).
To select another take for playback, proceed a follows:
- Holding [Alt]/[Option], right-click the event and select "To Front" on the context menu.
Whether a right click opens the context menu or the toolbox is determined by the "Popup Toolbox on Right Click" option in the Preferences dialog (Editing-Tools page). Depending on this setting the context menu is opened by right-clicking or by right-clicking holding any modifier key.
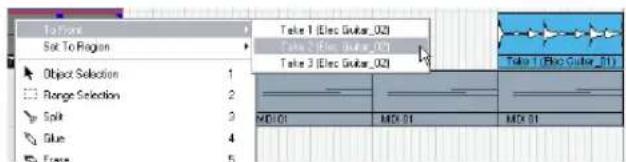
text_image
Top Set To Region Object Selection Range Selection Split Blue Frame Take 1 (Elec Guitar_02) Take 2 (Elec Guitar_01) Take 3 (Elec Guitar_02) Take 1 (Elec Guitar_01) MDI 01 MDI 01 MDI 01The "To Front" submenu, listing all the other (obscured) events.
- Select the desired take.
The corresponding event is brought to front.
This method allows you to quickly combine the best parts of each take, in the following way:
- Use the Scissors tool to split the events in several sections, one for each part of the take.
For example, if you recorded four lines of vocals (in each take), you can split the events so that each line gets a separate event.

text_image
Take 1 (New event) Take 4 (New event) Take 3 (New event) TakeThe events after splitting. Note that since the original take events overlap each other, clicking with the Scissors tool will split all takes at the same position.
- For each section of the take, use the "To Front" function to bring the best take to the front.
This way, you can quickly combine the best sections of each take, using the first vocal line from one take, the second line from another take, and so on.
You can also compile a "perfect" take in the Audio Part Editor, see "Assembling a "perfect take"' on page 258.
Create Regions mode (Preferences)
When Audio Cycle Record Mode is set to "Create Regions" in the Preferences (Record-Audio page), the following will happen when you record audio in cycle mode:
- One continuous audio file is created during the entire recording process.
- The audio event in the Project window shows the name of the audio file plus the text "Take *" (with "*" being the number of the last completed cycle lap).
- If you play back the recorded event, you will only hear what was recorded during the last lap of the cycle recording.
The previous "takes" recorded in the cycle are still available, however.
- The audio clip is divided into regions (called takes), one for each lap of the cycle that was recorded.
If you locate the audio file you just recorded in the Pool, and click on the plus sign beside it, you can see the regions that have been created, one for each lap of the cycle that was completed during recording.
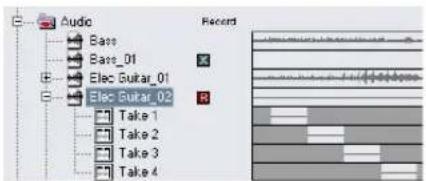
text_image
Audio Bass Bass_01 Elec Guitar_01 Elec Guitar_02 Take 1 Take 2 Take 3 Take 4 Record"Take" regions in the Pool window
To play back the different "takes", proceed as follows:
-
In the Project window, holding [Alt]/[Option], right-click the event that was created during cycle recording. Provided that the "Popup Toolbox on Right Click" option in the Preferences dialog (Editing-Tools page) is activated, this brings up the context menu.
-
Select the "Set To Region" menu item.
A submenu appears with the takes you recorded during cycle record.
- Now you can select any of the takes from the submenu and it will replace the previous take event in the Project window.
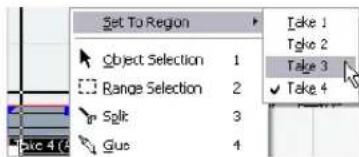
text_image
Set To Region Object Selection 1 Range Selection 2 Split 3 Gus 4 Take 1 Take 2 Take 3 Take 4Use this method to listen through the various takes. Select the best single take, or compile a "perfect" take by cutting out the best bits from each take and putting them together (see "Assembling a "perfect take" on page 258).
Create Events + Regions mode (Preferences)
In this mode, both events and regions are created. If you work with the takes as events in this mode, you can edit the events freely (e.g. splitting them), see "Create Events mode (Preferences)" on page 76. However, in case you want to go back to the original takes, they are still available as regions (on the "Set To Region" submenu, in the Pool or in the Sample Editor).
Recording audio in Stacked mode
When you record audio in cycle mode and the "Stacked" Cycle Record Mode is selected on the Transport panel, the following happens:
- Each complete recorded cycle lap is turned into a separate audio event.
- The track is divided into "lanes", one for each cycle lap.
- The events are stacked above each other, each on a different lane.
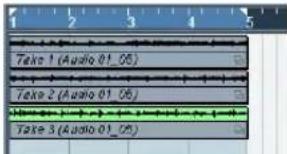
text_image
Take 1 (Audio 01_05) Take 2 (Audio 01_06) Take 3 (Audio 01_07)This makes it easy to create a "perfect take" by combining the best parts from the different cycle laps:
- Zoom in so you can work comfortably with the stacked events.
If you play back the recorded section, only the lowest (last) take will be heard.
-
To audition another take, either mute the lower take(s) with the Mute tool or move the takes between the lanes. This can be done by dragging or by using the functions Move to Front/Back on the context menu or the Edit menu.
-
Edit the takes so that only the parts you want to keep can be heard.
You can cut events with the Scissors tool, resize them, mute them or delete them.
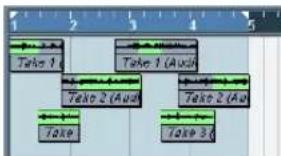
flowchart
graph TD
    A["Take 1"] --> B["Take 2 (Audi)"]
    B --> C["Take 3"]
    style A fill:#f9f,stroke:#333
    style B fill:#ccf,stroke:#333
    style C fill:#cfc,stroke:#333
The sections that will be heard are indicated in green.
- When you are satisfied with the result, select all events on all lanes and select "Delete Overlaps" from the Advanced submenu on the Audio menu.
This puts all events back on a single lane and resizes events so that overlapped sections are removed.
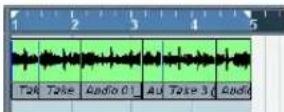
- To turn off the lane display mode for the track, click the Lane Display Type button in the Track list and select "Lanes Off".
If the button is hidden, you can bring it to view in the Track Controls Settings dialog – see "Customizing track controls" on page 472.
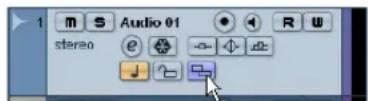
The Lane Display Type button
Recording with effects (Cubase only)
Normally you record the audio signals "dry" and add effects non-destructively during playback as described in the chapter "Audio effects" on page 150. However, Cu-base also allows you to add effects (and/or EQ) directly while recording. This is done by adding insert effects and/or making EQ settings for the input channel in the mixer.
⇒ This will make the effects become part of the audio file itself – you cannot change the effect settings after recording.
About the record format
When you record with effects, you should consider setting the record format (bit depth) to 32 Bit Float. This is done in the Project Setup dialog on the Project menu. Note that this is not required in any way – you can also record with effects in 24 or 16 Bit format.
However, there are two advantages to 32 Bit Float format:
- With 32 Bit Float recording, you do not risk clipping (digital distortion) in the recorded files.
This can of course be avoided with 24 or 16 Bit recording as well, but requires more care with the levels.
- Cubase processes audio internally in 32 Bit Float format – recording in the same format means the audio quality will be kept absolutely pristine.
The reason is that the effect processing in the input channel (as well as any level or EQ settings you make there) is done in 32 Bit Float format. If you record at 16 or 24 Bit, the audio will be converted to this lower resolution when it is written to file – with possible signal degradation as a result.
Note also that it does not matter at which actual resolution your audio hardware works. Even if the signal from the audio hardware is in 16 Bit resolution, the signal will be 32 Bit Float after the effects are added in the input channel.
An example
This example shows how to apply the "SoftClipper" effect while recording. Note that this is only an example. The principle is the same for all effects (or combinations of effects).
- Set up an audio track for recording and select the desired input bus.
For best results, you should also activate monitoring as this allows you to hear and try out your settings before actually recording. See "Monitoring via Cubase" on page 73 for a description of monitoring via Cubase.
- Open the Mixer and make sure the full extended view is shown.
To show the extended mixer view, either click the arrow icon ("Show Extended Mixer") in the Common Panel, select "Show Extended View" from the Window submenu on the Mixer context menu or use a key command (this can be set in the Key Commands dialog, see "Setting up key commands" on page 480).
- Locate the input channel (bus) from which you record. If the input channels are hidden, click on the Show/Hide Input Channels button to the left.
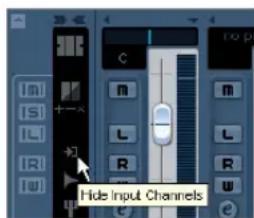
text_image
Hide Input Channels-
Check the input level (of the signal coming into the audio hardware) as described in the section "Setting input levels" on page 71 and adjust the level of the source audio if necessary.
-
Pull down the View Options pop-up menu for the input channel and select "Inserts".

text_image
Empty ✓ Inserts EQs EQs Curve Sends Sends 1-4 Sends 5-8 Panor Meter Overview User Panel Studio Sends ✓ Can HideThe View Options pop-up menu is opened by clicking the arrow button between the fader panel and the extended panel.
Now the extended panel for the input channel shows the insert slots.
- Click on an insert slot and select an effect from the context menu.
As you see, the included effects are sorted into submenus – you will find the SoftClipper effect on the "Distortion" submenu.
The effect is loaded and activated and its control panel is automatically opened.
- Adjust the effect parameters to your liking.
For detailed information on the Effect parameters, see the separate manual "Plug-in Reference". - When the effect is set up as desired, you can check the level of the input channel by setting the Meters to post-fader (see "Setting input levels" on page 71).
Use the input channel fader to adjust the level if needed. - Activate recording.
- When you're finished, you can play back the recorded audio track.
As you can hear, the effect you applied is now a part of the actual audio file. - If you do not want to record more with the same plugin, you should deactivate it by clicking in the insert slot and selecting "No Effect".
MIDI recording specifics
Activating MIDI Thru
Normally, when working with MIDI, you will have MIDI Thru activated in Cubase, and Local Off selected in your MIDI Instrument(s). In this mode, everything you play during recording will be "echoed" back out again on the MIDI output and channel selected for the recording track.
- Make sure the option "MIDI Thru Active" is activated in the Preferences (MIDI page).
- Record enable the track(s) on which you want to record.
Now, incoming MIDI is "echoed" back out again for all record-enabled MIDI tracks.
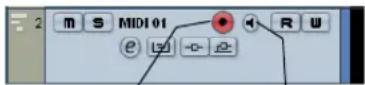
Record Enable button Monitor button
⇒ If you just want to use the Thru function for a MIDI track without recording, activate the monitor button for the track instead.
This is useful e.g. if you want to try out different sounds or play a VST instrument in realtime without recording your playing.
Setting MIDI channel, input and output
Setting the MIDI channel in the instrument
Most MIDI synthesizers can play several sounds at the same time, each on a different MIDI channel. This is the key to playing back several sounds (bass, piano etc.) from the same instrument. Some devices (such as General MIDI compatible sound modules) always receive on all 16 MIDI channels. If you have such an instrument, there is no specific setting you need to make in the instrument. On other instruments, you will have to use the front panel controls to set up a number of "Parts", "Timbres" or similar so that they receive on one MIDI channel each. See the manual that came with your instrument for more information.
Naming MIDI ports in Cubase
MIDI inputs and outputs are often displayed with unnecessarily long and complicated names. However, you can rename your MIDI ports to more descriptive names:
- Open the Device Setup dialog from the Devices menu.
- Select the MIDI Port Setup item in the Device list.
The available MIDI inputs and outputs are listed. Under Windows, which device to choose depends on your system.
- To change the name of a MIDI port, click in the "Show As" column and type in a new name.
After closing the dialog, the new name will appear on the MIDI Input and Output Routing pop-up menus.
Setting the MIDI input in the Inspector
You select MIDI inputs for tracks in the Inspector (the area to the left of the Track list in the Project window):
- If the Inspector is hidden, click the Show Inspector button on the toolbar.
- Select the track(s) by clicking in the Track list.
To select multiple tracks, press [Shift] or [Ctrl]/[Command] and click. The Inspector shows the settings for the first selected track (for details, see "The Inspector" on page 29).
- Click the track name in the Inspector to make sure the topmost section is shown.
text_image
MDI 01 Off Off 0.00- Pull down the Input Routing pop-up menu and select an input.
The available MIDI inputs are shown. The items on the menu depend on the type of MIDI interface you are using, etc.

- If you select the "All MIDI Inputs" option, the track will receive MIDI data from all available MIDI inputs.
- If you hold down [Shift]-[Alt]/[Option] and select a MIDI input, this will be used for all selected MIDI tracks.
Setting the MIDI channel and output
The MIDI channel and output settings determine where the recorded MIDI is routed during playback, but are also relevant for MIDI Thru in Cubase. Channel and output can be selected in the Track list or in the Inspector. The procedure below describes how to make the settings in the Inspector, but it can be done in largely the same manner in the Track list as well.
-
To select the track(s) and show the settings in the Inspector, proceed as when selecting a MIDI input (see above).
-
Pull down the Output Routing pop-up menu and select an output.
The available MIDI outputs are shown. The items on the menu depend on what type of MIDI interface you are using etc.
text_image
AI MIDI Inputs VSL2020 Midi Not Connected VSL2020 Midi SoundMAX WDM MIDI Microsoft GS Waveletable SW Synth- If you hold down [Shift]-[Alt]/[Option] and select a MIDI output, this is selected for all selected MIDI tracks.
- Use the Channel pop-up menu to select a MIDI channel for the track.
text_image
All MDI Inputs Microsoft ...Is SW Synth Off No Drum Ma Ans 1 2 3- If you set the track to MIDI channel "Any", each MIDI event on the track will be sent out on the channel stored in the event itself.
In other words, the MIDI material will be played back on the channel(s) used by the MIDI input device (the MIDI instrument you play during recording).
Selecting a sound
You can select sounds from within Cubase by instructing the program to send Program Change and Bank Select messages to your MIDI device. This is done using the "Patch Selector" and "Bank Selector" fields in the Inspector or Track list.

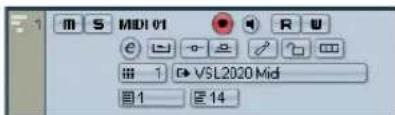
text_image
M S MIDI 01 R U 1 VSL2020 Mid 1 14Program Change messages give access to 128 different program locations. If your MIDI instruments have more than 128 programs, Bank Select messages (set in the "Bank Selector" field) allow you to select different banks, each containing 128 programs.
→ Bank Select messages are recognized differently by different MIDI instruments. The structure and numbering of banks and programs may also vary. Consult the documentation of your MIDI instruments for details.
Note that it is also possible to select sounds by name. For descriptions of how to set this up, see the separate "MIDI Devices" PDF document.
Recording
Recording MIDI is done according to the basic recording methods (see "Basic recording methods" on page 67). When you finish recording, a part containing MIDI events is created in the Project window.
About overlap and the Record Mode setting
MIDI tracks are different from audio tracks when it comes to overlapping parts:
All events in overlapping parts are always played back. If you record several parts at the same locations (or move parts so that they overlap), you will hear the events in all parts on playback, even though some of the parts are obscured in the Project window.
When recording overlapping parts, the result depends on the Linear Record Mode setting on the Transport panel:
- If the record mode is set to "Normal", overdub recording works as with audio tracks, i.e. if you record again where something has already been recorded, you get a new part that overlaps the previous one(s).
- If the record mode is set to "Merge", the overdubbed events are added to the existing part.
- If the record mode is set to "Replace", the new recording replaces any existing events in the area on that track.
About punch in and out on MIDI tracks
Performing and setting up manual and automatic punch in/out recording for MIDI tracks is done in exactly the same way as for audio tracks. There is one thing to note, however:
- Punching in and out on recordings with Pitchbend or controller data (modulation wheel, sustain pedal, volume etc.) may lead to strange effects (apparently hanging notes, constant vibrato etc.).
If this happens, you may need to use the Reset item on the MIDI menu (see "The Reset function" on page 83).
About the Automatic MIDI Record Quantize function
If Auto Quantize is activated on the Transport panel (the "Auto Q" button), the notes you record are automatically quantized according to the current Quantize settings. For more information about quantizing, see "The Quantizing functions" on page 326.
Recording MIDI in cycle mode
When you record MIDI in cycle mode, the result depends on which Cycle Record mode is selected on the Transport panel:
Cycle Record mode: Mix (MIDI)
For each completed lap, everything you record is added to what was previously recorded in the same part. This is useful for building up rhythm patterns, for example. Record a hi-hat part on the first lap, the bass drum part on the second lap etc.
Cycle Record mode: Overwrite (MIDI)
As soon as you play a MIDI note (or send any MIDI message), all MIDI you have recorded on previous laps is overwritten from that point on in the part. An example:
- You start recording in an eight bar cycle.
- The first take was not good enough – you start directly with a new take on the next cycle lap and overwrite the first take.
- After recording the second take you let the recording roll on and listen, without playing anything. You find that the take was good up until bar seven, for example.
- On the next lap, you wait until bar seven and start playing.
This way you will overwrite the last two bars only. - Make sure you stop playing before the next lap begins – otherwise you will overwrite the entire take.
Cycle Record mode: Keep Last
Each completed lap replaces the previously recorded lap. Note the following:
- The cycle lap must be completed – if you deactivate recording or press Stop before the cursor reaches the right locator, the previous take will be kept.
- If you do not play or input any MIDI during a lap, nothing happens (the previous take will be kept).
Cycle Record mode: Stacked/Stacked 2 (No Mute)
In this mode, the following happens:
- Each recorded cycle lap is turned into a separate MIDI part.
- The track is divided into "lanes", one for each cycle lap.
- The parts are stacked above each other, each on a different lane.
- All takes but the last one are muted (Stacked).
- If Stacked 2 is selected, no muting takes place.
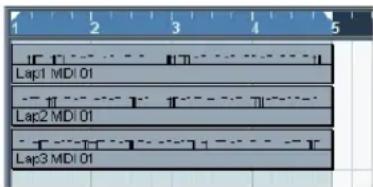
text_image
Lap1 MDI 01 Lap2 MDI 01 Lap3 MDI 01This makes it easy to create a “perfect take” by combining the best parts from the different cycle laps. You can edit the parts in the Project window (by cutting, resizing and deleting) or you can use a MIDI editor as in the following example:
- Unmute the muted takes by clicking the parts with the Mute tool.
- Select all takes (parts) and open them in the Key Editor for example.
-
Use the part list pop-up menu on the toolbar to select which part to edit.
See "Handling several parts" on page 339. -
Remove or edit notes as desired.
-
When you are happy with the result, close the editor.
-
To turn it all into a single MIDI part (containing your "perfect take"), select all parts and select "Merge MIDI in Loop" from the MIDI menu.
-
In the dialog that appears, activate the Erase Destination option and click OK.
The remaining events in the parts are merged together into a single part.
Recording different types of MIDI messages
You can decide exactly which event types should be recorded by using the MIDI filters – see “Filtering MIDI” on page 84.
Notes
When you press and release a key on your synth or other MIDI keyboard, a Note On (key down) and a Note Off (key up) message are sent out. The MIDI note message also contains the information which MIDI channel was used. Normally, this information is overridden by the MIDI channel setting for the track, but if you set the track to MIDI channel "Any", the notes will be played back on their original channels.
Continuous messages
Pitchbend, aftertouch and controllers (like modulation wheel, sustain pedal, volume etc.) are considered as MIDI continuous events (as opposed to the momentary key down and key up messages). If you move the Pitchbend wheel on your synthesizer while recording, this movement is recorded together with the key (Note On and Note Off messages), just as you'd expect. But the continuous messages can also be recorded after the notes have been recorded (or even before). They can also be recorded on their own tracks, separately from the notes to which they belong.
Say, for instance, that you record one or several bass parts on track 2. If you now set another track, like track 55, to the same output and MIDI channel as track 2, you can make a separate recording of just pitchbends for the bass parts on track 55. This means that you activate recording as usual and only move the pitchbend wheel during the take. As long as the two tracks are set to the same output and MIDI channel, it will appear to the MIDI instrument as if the two recordings were made at the same time.
Program Change messages
Normally, when you switch from one program to another on your keyboard (or whatever you use to record), a number corresponding to that program is sent out via MIDI as a Program Change message. These can be recorded on the fly with the music, recorded afterwards on a separate track, or manually entered in the Key or List Editors.
System Exclusive messages
System Exclusive (SysEx) is a special type of MIDI message used to send data that only makes sense to a unit of a certain make and type. SysEx can be used to transmit a list of the numbers that make up the settings of one or more sounds in a synth. For more about viewing and editing SysEx messages, see the chapter "Working with System Exclusive messages" on page 368.
The Reset function
The Reset function on the MIDI menu sends out note-off messages and resets controllers on all MIDI channels. This is sometimes necessary if you experience hanging notes, constant vibrato, etc.
There are two other options to perform a reset:
- Cubase can automatically perform a MIDI reset on stop. You can turn this function on or off in the Preferences (MIDI page).
- Cubase can automatically insert a reset event at the end of a recorded part.
Open the Preferences (MIDI page) and activate the option "Insert Reset Events after Record". The inserted Reset event will reset controller data such as Sustain, Aftertouch, Pitchbend, Modulation, Breath Control, etc. This is useful if a MIDI part is recorded and e.g. the Sustain pedal is still held after stopping recording. Usually, this would cause all following parts to be played with Sustain, as the Pedal Off command was not recorded. This can be prevented by activating "Insert Reset Events after Record".
Retrospective Record
This feature allows you to capture any MIDI notes you play in Stop mode or during playback and turn them into a MIDI part "after the fact". This is possible due to the fact that Cubase can capture MIDI input in buffer memory, even when not recording.
Proceed as follows:
- Enable the Retrospective Record option in the Preferences (Record–MIDI page).
This activates the buffering of MIDI input, making Retrospective Record possible. - Make sure a MIDI track is record-enabled.
- When you have played some MIDI material you want to capture (either in Stop mode or during playback), select Retrospective Record from the Transport menu (or use the key command, by default [Shift]-Num[*]).
The content of the MIDI buffer (i.e. what you just played) is turned into a MIDI part on the record enabled track. The part will appear where the project cursor was when you started playing – this means that if you played along during playback, the captured notes will end up exactly where you played them in relation to the project.
- The Retrospective Record Buffer Size setting in the Preferences (Record–MIDI page) determines how much data can be captured.
MIDI Preferences
There are several other options and settings in the Preferences that affect MIDI recording and playback:
MIDI page
- Length Adjustment
Adjusts the length of notes so that there is always a short time between the end of one note and the start of another (of the same pitch and on the same MIDI channel). The time is set in ticks. By default there are 120 ticks per 1/16 note, but you can adjust this with the MIDI Display Resolution setting on the same page.
Record-MIDI page
- Snap MIDI Parts to Bars
When this is activated, recorded MIDI parts will automatically be lengthened to start and end at whole bar positions. If you are working in a Bars+Beats-based context, this can make editing (moving, duplicating, repeating, etc.) easier.
- Solo Record in MIDI Editors
If this is activated and you open a part for editing in a MIDI editor, its track is automatically record-enabled. Furthermore, Record Enable is deactivated for all other MIDI tracks until you close the editor again.
This makes it easier to record MIDI data when you're editing a part – you will always be sure the recorded data ends up in the edited part and not on any other track.
■ MIDI Record Catch Range in ms
When you record starting at the left locator, this setting helps you make sure the very start of the recording is included. A very annoying scenario is when you have recorded a perfect MIDI take, only to find out that the very first note was not included – because you started playing a little bit too early! If you raise the Record Catch Range, Cubase will catch the events played just before the recording start point, eliminating this problem.
For a description of the other options, click the Help button in the Preferences.
Filtering MIDI
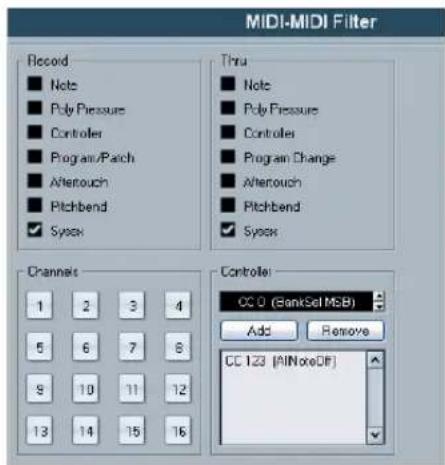
text_image
MIDI-MIDI Filter Record ■ Note ■ Poly Pressure ■ Controller ■ Program/Patch ■ Aftertouch ■ Pitchbend ✓ Sysox Thru ■ Note ■ Poly Pressure ■ Controller ■ Program Change ■ Aftertouch ■ Pitchbend ✓ Sysox Channels 1 2 3 4 5 6 7 8 9 10 11 12 13 14 15 16 Controller: CC 0 (BankSet MCB) Add Remove CC 123 (RINoteDF)The MIDI-MIDI Filter page in the Preferences allows you to prevent certain MIDI messages from being recorded and/or "thruput" (echoed by the MIDI Thru function).
The dialog is divided into four sections:
Section Description
Record Activating any of these options prevents that type of MIDI message from being recorded. It can, however, be thruput, and if already recorded, it will play back normally.
Thru Activating any of these options prevents that type of MIDI message from being thruput. It can, however, be recorded and played back normally.
Channels If you activate a channel button, no MIDI messages on that MIDI channel will be recorded or thruput. Already recorded messages will, however, be played back normally.
Controller Allows you to prevent certain MIDI controller types from being recorded or thruput. To filter out a controller type, select it from the list at the top of the Controller section and click "Add". It will appear on the list below. To remove a controller type from the list (allow it to be recorded and thruput), select it in the lower list and click "Remove".
Options and Settings
Recording-related Transport Preferences
A couple of settings in the Preferences (Transport page) are relevant for recording. Set these according to your preferred method of work:
Deactivate Punch In on Stop
If this is activated, punch in on the Transport panel is automatically deactivated whenever you enter Stop mode.
Stop after Automatic Punch Out
If this is activated, playback will automatically stop after automatic punch out (when the project cursor reaches the right locator and punch out is activated on the Transport panel). If the post-roll value on the Transport panel is set to a value other than zero, playback will continue for the set time before stopping (see below).
About Pre-roll and Post-roll
Pre-roll value field and on/off switch. Post-roll value field and on/off switch.
The pre-roll and post-roll value fields (below the left/right locator fields) on the Transport panel have the following functionality:
- By setting a pre-roll value, you instruct Cubase to "roll back" a short section whenever playback is activated.
This applies whenever you start playback, but is perhaps most relevant when recording from the left locator (punch in activated on the Transport panel) as described below. - By setting a post-roll value, you instruct Cubase to play back a short section after automatic punch out before stopping.
This is only relevant when punch out is activated on the Transport panel and "Stop after Automatic Punch Out" is activated in the Preferences (Transport page).
- To turn pre-roll or post-roll on or off, click the corresponding button on the Transport panel (next to the pre/post-roll value) or use the "Use Pre-roll" and "Use Post-roll" options on the Transport menu.
An example:
- Set the locators to where you want to start and end recording.
- Activate Punch in and Punch out on the Transport panel.
- Activate the option "Stop after Automatic Punch Out" in the Preferences (Transport page).
- Set suitable pre-roll and post-roll times by clicking in the corresponding fields on the Transport panel and typing in time values.
- Activate pre-roll and post-roll by clicking the buttons next to the pre-roll and post-roll times so that they light up.
- Activate recording.
The project cursor "rolls back" by the time specified in the pre-roll field and playback starts. When the cursor reaches the left locator, recording is automatically activated. When the cursor reaches the right locator, recording is deactivated, but playback continues for the time set in the post-roll field before stopping.
Using the metronome
The metronome can output a click that can be used as a timing reference. The two parameters that govern the timing of the metronome are tempo and time signature, as set on the tempo track and signature track, or in the Tempo Track Editor (see "Editing the tempo curve" on page 404).
You can use the metronome for a click during recording and/or playback or for a precount (count-in) that will be heard when you start recording from Stop mode. Click and precount are activated separately:
- To activate the metronome, click the Click button on the Transport panel.
You can also activate the "Metronome On" option on the Transport menu or use the corresponding key command (by default [C]).
- To activate the precount, click the Precount button on the Transport panel.
You can also activate the "Precount On" option on the Transport menu or set up a key command for this.

text_image
Click on/off CLICK ON 1/4 TEMP0 TRACK 4/4 120.000 SYNC INT. Offline Precount on/offMetronome settings
You make settings for the metronome in the Metronome Setup dialog, opened from the Transport menu.
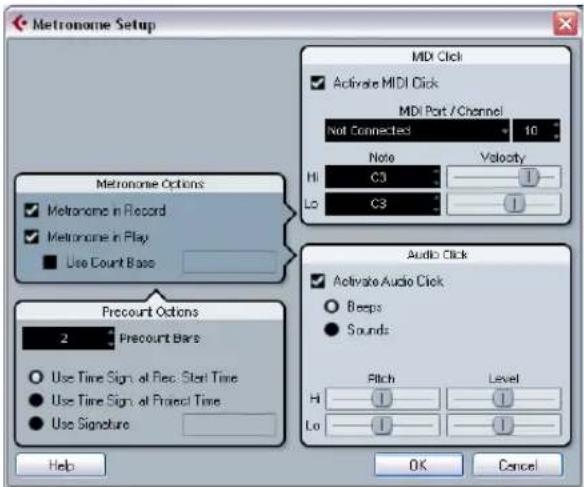
text_image
Metronome Setup Metronome Options ✓ Metronome in Record ✓ Metronome in Play ■ Use Count Base MIDI Click ✓ Activate MIDI Click MDI Port / Channel Not Connected 10 Note Velocity Hi C3 1 Lo C3 1 Audio Click ✓ Activate Audio Click ○ Beeps ● Sounds Fitch Level Hi 1 1 Lo 1 1 Precount Options 2 Precount Bars ○ Use Time Sign at Rec: Start Time ● Use Time Sign at Project Time ● Use Signature Help OK CancelThe metronome can use either an audio click played back via the audio hardware, send MIDI data to a connected device which will play back the click or do both.
The following metronome settings can be made in the dialog:
| Metronome Options | Description |
| Metronome in Record / Play | Allows you to specify whether the metronome should be heard during playback, recording or both (when Click is activated on the Transport panel). |
| Use Count Base | If this option is activated, a field appears to the right where you specify the “rhythm” of the metronome. Normally, the metronome plays one click per beat, but setting this to e.g. “1/8” gives you eighth notes – two clicks per beat. It is also possible to create unusual metronome rhythms such as triplets etc. |
| Precount Options | Description |
| Precount Bars | Sets the number of bars the metronome will count in before it starts recording if precount is activated on the Transport panel. |
| Use Time Signature at Record Start Time | When this is activated, the precount will automatically use the time signature and tempo set at the position where you start recording. |
| Use Time Signature at Project Time | When this is activated, the precount will be in the time signature set on the tempo track. Furthermore, any tempo changes on the tempo track during the precount will be applied. |
| Use Signature This lets you set a time signature for the precount. In this mode, tempo changes on the tempo track will not affect the precount. | |
MIDI Click Description
| Activate MIDI Click | Selects whether or not the metronome will sound via MIDI. |
| MIDI Port/ Channel | This is where you select a MIDI output and channel for the metronome click. Note that you can select a VST Instrument previously set up in the VST Instruments window from this menu, allowing you to use a VST Instrument sound for the Metronome click. |
| Hi Note/ Velocity | Sets the MIDI note number and velocity value for the “high note” (the first beat in a bar). |
| Lo Note/ Velocity | Sets the MIDI note number and velocity for the “low notes” (the other beats). |
Audio Click Description
| Activate | Selects whether or not the metronome will sound via the |
| Audio Click | audio hardware. |
| Beeps When this is selected, the audio clicks will be beeps generated by the program. Adjust the pitch and level of the beeps for the “Hi” (first) beat and “Lo” (other) beats using the sliders below. | |
| Sounds When this is selected, you can click in the “Sound” fields below to load any audio files for use as the “Hi” and “Lo” metronome sounds. The sliders set the level of the click. | |
Lock and Unlock Record
During recording it can happen that you accidentally deactivate the record mode, e.g. by pressing [Space]. In order to prevent this, you can set up a key commands for this in the Key Commands dialog. If you use the Lock Record key command, the Record button will turn gray and the record mode is locked until you use the Unlock Record key command or enter Stop mode.
- If Lock Record is activated and you want to enter Stop mode (by clicking Stop or pressing [Space]), you will see a dialog in which you need to confirm that you want to stop recording. You can also use the Unlock Record key command first and then enter Stop mode as usual.
- By default, no key commands are assigned to these functions. In the Key Commands dialog, you will find the corresponding key command entries in the Transport category (see the chapter "Key commands" on page 479 for more information on how to set up key commands).
These key commands are especially useful when combined with other commands (e.g. with Record/Stop) using the macro functions. That way you will receive powerful macros that can greatly enhance your workflow.
Note that an automatic punch-out at the right locator position that you may have set on the transport panel, will be ignored in Lock Record mode.
Remaining Record Time Display
The Remaining Record Time Display lets you see how much time you have left for recording. The available time depends on the current setup, for example, on the amount of tracks that are record-enabled, your project setup (e.g. the sample rate), and the amount of hard disk space available.
You can show and hide the display by using the Remaining Record Time Display option on the Devices menu.
⇒ The remaining record time is also shown in the status bar below the Track list.
⚠️ If you are storing your tracks on different drives (by using individual record folders), the time display refers to the medium with the least storage space available.
Recovery of audio recordings after system failure
Normally, when a computer crashes, all changes made to your current project since you last saved it will be lost. Usually, there is no quick and easy way to recover your work.
With Cubase, when your system crashes while you are recording (because of a power cut or other mishap), you will find that your recording is still available, from the moment when you started recording to the time when your computer crashed.
When you experience a computer crash during a recording, simply relaunch the system and check the project record folder (by default this is the Audio subfolder inside the project folder). It should contain the audio file you were recording at the time of the crash.

This feature does not constitute an “overall” guarantee by Steinberg. While the program itself was improved in such a way that audio recordings can be recovered after a system failure, it is always possible that a computer crash, power cut, etc. might have damaged another component of the computer, making it impossible to save or recover any of the data.

Please do not try to actively bring about this kind of situation to test this feature. Although the internal program processes have been improved to cope with such situations, Steinberg cannot guarantee that other parts of the computer are not damaged as a consequence.
Fades, crossfades and envelopes
Creating fades
There are two main types of fade-ins and fade-outs in audio events in Cubase: fades created by using the fade handles (see below) and fades created by processing (see "Fades created by processing" on page 90).
Fades created by using the fade handles
Selected audio events have blue handles in the upper left and right corners. These can be dragged to create a fade-in or fade-out respectively.
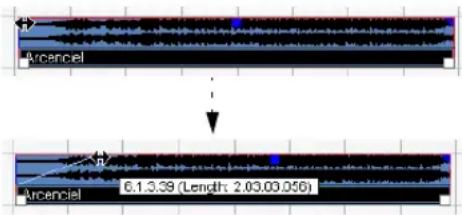
text_image
Arcenel 6.1.3.39 (Length: 2.03.09.056)Creating a fade-in. The fade is automatically reflected in the shape of the event's waveform, giving you a visual feedback of the result when you drag the fade handle.
Fades created with the handles are not applied to the audio clip as such but calculated in realtime during playback. This means that several events referring to the same audio clip can have different fade curves. It also means that having a huge number of fades may demand a lot of processor power.
- If you select multiple events and drag the fade handles on one of them, the same fade will be applied to all selected events.
- A fade can be edited in the Fade dialog, as described on the following pages.
You open the dialog by double-clicking in the area above the fade curve, or by selecting the event and selecting "Open Fade Editor(s)" from the Audio menu (note that this will open two dialogs if the event has both fade-in and fade-out curves).
If you adjust the shape of the fade curve in the Fade dialog, this shape will be maintained when you later adjust the length of a fade.
- You can make the fade longer or shorter at any time, by dragging the handle.
You can actually do this even without selecting the event first, i.e. without visible handles. Just move the mouse pointer along the fade curve until the cursor turns into a bidirectional arrow, then click and drag.
- If the option "Fade Handles always on Top" is activated in the Preferences dialog (Event Display–Audio page), the fade handles stay at the top of the event, and vertical help lines indicate the exact end or start points of fades. This is useful in situations where you want the event volume to be very low, as this option allows you to still see the fade handles.
- If the option "Show Event Volume Curves Always" is activated in the Preferences (Event Display–Audio page), the fade curves will be shown in all events, regardless of whether they are selected or not.
If the option is deactivated, the fade curves are shown in selected events only. - If the option "Thick Fade Lines" is activated in the Preferences dialog (Event Display–Audio page), the fade lines and volume curve are thicker, increasing their visibility.
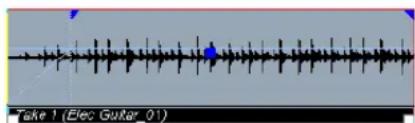
text_image
Take 1 (Elec Guitar_01)Fade handles on top of the event and thicker fade and volume lines allow you to edit and view fades even in situations where event volume is very low.
- When the option “Use Mouse Wheel for Event volume and Fades” is activated in the Preferences dialog (Editing–Audio page), you can use the mouse wheel to move the volume curve up or down. When you hold down [Shift] while moving the mouse wheel, this will change the fade curves. This is useful in situations where the fade handles are not visible (e.g. because of a very high zoom factor). When you position the mouse pointer somewhere in the left half of the event, the fade in end point is moved. When the mouse pointer is in the right half of the event, the fade out start point will move.
⇒ You can set up key commands for changing the event volume curve and any fade curves, if you do not want to use the mouse for this.
You will find these commands in the Key Commands dialog, in the Audio category. See "Key commands" on page 479.
As an alternative to dragging the fade handles, you can use the items "Fade In to Cursor" and "Fade Out to Cursor" on the Audio menu to create fades (Cubase only). Position the project cursor on an audio event where you want a fade in to end or a fade out to begin, and select the appropriate option from the Audio menu. A fade will then be created, ranging from the event's start or end to the position of the cursor.
Creating and adjusting fades with the Range Selection tool

"Handle-type" fades can also be created and adjusted with the Range Selection tool, in the following way:
- Select a section of the audio event with the Range Selection tool.
The result depends on your selection:
- If you select a range from the beginning of the event, a fade-in will be created within the range.
- If you select a range that reaches the end of an event, a fade-out will be created in the range.
-
If you select a range encompassing a middle section of the event, but not reaching neither the start nor the end, both a fade-in and a fade-out will be created outside of the selected range. In other words, the fade-in will cover the area from the beginning of the event to the beginning of the selected range, and the fade-out will cover the area from the end of the selected range to the end of the event.
-
Pull down the Audio menu and select "Adjust Fades to Range".
The fade areas are adjusted according to the selection range.

You can select multiple audio events on separate tracks with the Range Selection tool, and apply the fade to all of them simultaneously.
About the volume handle
A selected audio event also has a blue handle in the top middle. This is the volume handle, and it provides a quick way of changing the volume of an event, directly in the Project window. It is linked directly to the volume setting on the info line, that is, dragging the volume handle also changes the value on the info line.
The volume change is displayed numerically on the info line.
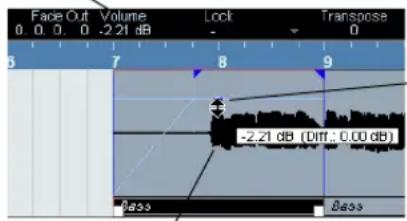
text_image
Face Out Volume Lock Transpose 0. 0. 0. -2.21 dB 0 5 7 8 9 -2.21 dB (Diff: 0.00 dB) Bass BassDrag the Volume handle up or down to change the volume of the event.
The event waveform reflects the volume change.
Removing fades
To remove the fades for an event, select the event and select "Remove Fades" from the Audio menu.
You can also use the Range Selection tool to remove fades and crossfades within the selected range this way.
Fades created by processing
If you have selected an audio event or a section of an audio event (using the Range Selection tool), you can apply a fade-in or fade-out to the selection by using the "Fade In" or "Fade Out" functions on the Process submenu on the Audio menu. These functions open the corresponding Fade dialog, allowing you to specify a fade curve.

Note that the length of the fade area is determined by your selection. In other words, you specify the length of the fade before you enter the Fade dialog.

Also note that you can select multiple events and apply the same processing to all of them simultaneously.
Fades created this way are applied to the audio clip rather than to the event. Please note the following:
- If you later create new events that refer to the same clip, these will have the same fades.
- You can remove or modify the fades at any time using the Offline Process History (see "The Offline Process History dialog" on page 214).
If other events refer to the same audio clip, you will be asked whether you want the processing to be applied to these events or not.
- Continue will apply the processing to all events that refer to the audio clip.
- New Version will create a separate, new version of the audio clip for the selected event.
- You can also activate the option "Do not show this message again". Regardless of whether you then choose "Continue" or "New Version", any further processing will conform to the option you select.
You can change this setting at any time in the Preferences (Editing-Audio page), under "On Processing Shared Clips".
The Fade dialogs
The Fade dialogs appear when you edit an existing fade or use the "Fade In"/"Fade Out" functions on the Process submenu on the Audio menu. The picture below shows the Fade In dialog; the Fade Out dialog has identical settings and features.
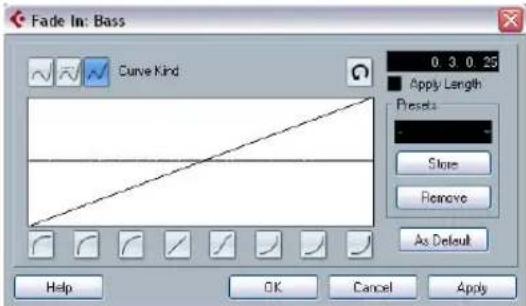
text_image
Fade In: Bass Curve Kind 0 3 0 25 Apply Length Presets: Close Remove As Default Help OK Cancel Apply- If you open the Fade dialog(s) with several events selected, you can adjust the fade curves for all these events at the same time.
This is useful if you want to apply the same type of fade-in to more than one event, etc.
Curve Kind
These buttons determine whether the fade curve should consist of spline curve segments (left button), damped spline segments (middle button) or linear segments (right button).
Fade display
The Fade display shows the shape of the fade curve. The resulting waveform shape is shown in dark gray, with the current waveform shape in light gray.
You can click on the curve to add points, and click and drag existing points to change the shape. To remove a point from the curve, drag it outside the display.
Curve shape buttons
These buttons give you quick access to some common curve shapes.
Restore button

The Restore button (to the right above the fade display) is only available when editing fades made by dragging the fade handles. Click this to cancel any changes you have made since opening the dialog.
As Default button
The "As Default" button is only available when editing fades made by dragging the fade handles. Click this to store the current settings as the default fade. This shape will be used whenever you create new fades.
Fade Length Value
The Fade Length Value is only available when editing fades made by dragging the fade handles. It can be used to enter fade lengths numerically. The format of values displayed here are determined by the Primary Time Display in the Transport Panel.
When you activate the "Apply Length" option, the value entered in the Fade Length value field will be used when clicking "Apply" or "OK". This setting is deactivated by default.
When you set the current Fade as the Default fade, the length value is included as part of the default settings.
Presets
If you have set up a fade in or fade out curve that you may want to apply to other events or clips, you can store it as a preset by clicking the Store button.
- To apply a stored preset, select it from the pop-up menu.
- To rename the selected preset, double-click on the name and type a new one.
- To remove a stored preset, select it from the pop-up menu and click Remove.
⚠️ Stored fade in presets will only appear in the Fade In dialog, and fade out presets will only appear in the Fade Out dialog.
Preview, Apply and Process
The buttons in the bottom row are different depending on whether you are editing a fade made with the fade handles or applying a fade using processing:


The Edit Fade dialog The Process Fade dialog
The Edit Fade dialogs have the following buttons:
Button Function
OK Applies the set fade curve to the event, and closes the dialog.
Cancel Closes the dialog.
Apply Applies the set fade curve to the event, without closing the dialog.
The Process Fade dialogs have the following buttons:
Button Function
Preview Plays back the fade area. Playback will repeat until you click the button again (the button is labeled "Stop" during play-back).
Process Applies the set fade curve to the clip, and closes the dialog.
Cancel Closes the dialog without applying any fade.
Creating crossfades
Overlapping audio material on the same track can be crossfaded, for smooth transitions or special effects. You create a crossfade by selecting two consecutive audio events and selecting the Crossfade command on the Audio menu (or by using the corresponding key command, by default [X]). The result depends on whether the two events overlap or not:
- If the events overlap, a crossfade is created in the overlapping area.
The crossfade will be of the default shape – initially a linear, symmetric crossfade, but you can change this as described below.
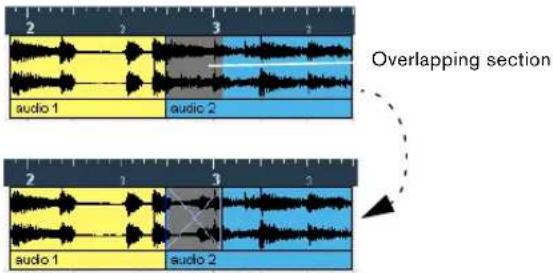
text_image
2 3 aouio 1 aouio 2 2 3 aouio 1 aouio 2 Overlapping section- If the events do not overlap but are directly consecutive (lined up end-to-start, with no gap) it is still possible to crossfade them – provided that their respective audio clips overlap! In this case, the two events are resized so that they overlap, and a crossfade of the default length and shape is applied.
The default crossfade length and shape are set in the Crossfade dialog (see "Default buttons" on page 94).
An example:
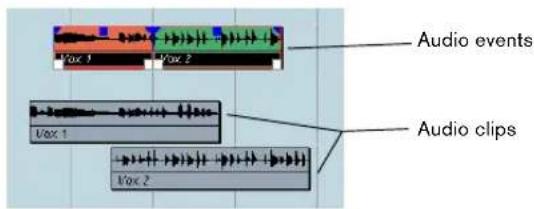
text_image
Audio events Audio clips Vox 1 Vox 2The events themselves do not overlap, but their clips do. Therefore, the events can be resized so that they overlap, which is required for a cross-fade to be created.
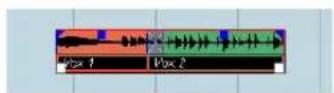
When you select the Crossfade function, the two events are resized so that they overlap, and a default crossfade is created in the overlapping section.
- If the events do not overlap, and cannot be resized enough to overlap, a crossfade cannot be created.
- Cubase only: You can specify the length of the cross-fade using the Range Selection tool: make a selection range covering the desired crossfade area and use the Crossfade command.
The crossfade is applied in the selected range (provided that the events or their clips overlap, as described above). You can also make a selection range after creating the crossfade and use the function "Adjust fades to Range" on the Audio menu.
- Once you have created a crossfade, you can edit it by selecting one or both crossfaded events, and selecting
"Crossfade" from the Audio menu again (or by double-clicking in the crossfade zone).
This opens the Crossfade dialog, see below.
Removing crossfades
To remove a crossfade, proceed as follows:
- Select the events and select "Remove Fades" from the Audio menu.
You can also use the Range Selection tool: drag the Range Selection tool so that the selection encloses all the fades and crossfades you wish to remove, and select "Remove Fades" from the Audio menu.
- You can also remove a crossfade by clicking and dragging it outside the track.
The Crossfade dialog
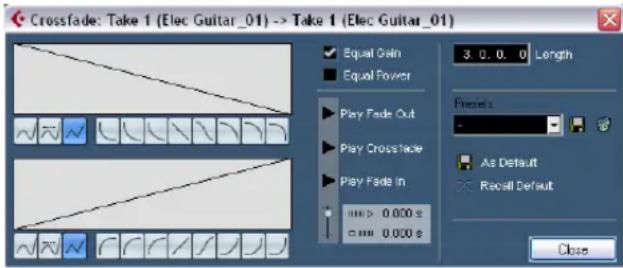
text_image
Crossfade: Take 1 (Elec Guitar_01) -> Take 1 (Elec Guitar_01) Equal Gain Equal Flower Play Fade Out Play Crossfade Play Fade In 3.0.0.0 Length Presets: As Default Recall Default CloseThe Crossfade dialog contains separate, but identical, sections for the fade-in and fade-out curve settings in the crossfade on the left, and common settings on the right.
Fade Displays
Shows the shape of the fade-out and fade-in curve, respectively. You can click on the curve to add points, and click and drag existing points to change the shape. To remove a point from the curve, drag it outside the display.
Curve kind buttons
These buttons determine whether the corresponding fade curve should consist of spline curve segments (left button), damped spline segments (middle button) or linear segments (right button).
Curve shape buttons
These buttons give you quick access to some common curve shapes.
Equal Power and Gain
- If you activate the "Equal Gain" checkbox, the fade curves are adjusted so that the summed fade-in and fade-out amplitudes will be the same all along the crossfade region. This is often suitable for short crossfades.
- If you activate the "Equal Power" checkbox, the fade curves are adjusted, so that the energy (power) of the crossfade will be constant all along the crossfade region.
⚠️ Equal Power curves have only one editable curve point. You cannot use the Curve kind buttons or the presets when this mode is selected.
Play buttons
- The "Play Fade Out" and "Play Fade In" buttons allow you to audition the fade-out or fade-in part only, without the crossfade.
- The "Play Crossfade" button plays back the whole crossfade.
You can also use the Transport panel controls to play back the crossfaded audio events. However, that method will play back all unmuted audio events on other tracks as well.
Pre-roll and Post-roll
When auditioning with the Play buttons, you can choose to activate pre-roll and/or post-roll. Pre-roll lets you start playback before the fade area, and post-roll lets you stop playback after the fade area. This can be useful for auditioning the fade in a context.
- To specify how long the pre-roll and post-roll should be, click in the time fields and enter the desired time (in seconds and milliseconds).
- To activate pre-roll and post-roll, click the respective button. To deactivate it, click the button again.
Length settings
You can adjust the length of the crossfade area numerically in the "Length" field. If possible, the length change will be applied equally to "both sides" of the crossfade (i.e. Cubase tries to "center" the crossfade).

To be able to resize a crossfade this way, it must be possible to resize the corresponding event. For example, if the left crossfaded event already plays its audio clip to the end, its endpoint cannot be moved any further to the right.
Presets
If you have set up a crossfade shape that you may want to apply to other events, you can store it as a preset by clicking the Store button.
- To apply a stored preset, select it from the pop-up menu.
- To rename the selected preset, double-click on the name and type in a new one.
- To remove a stored preset, select it from the pop-up menu and click Remove.
Default buttons
- Clicking the "As Default" button stores all of the current settings as the default crossfade. These settings will then be used whenever you create new crossfades.
- The Crossfade Length setting is included in the Default settings. However, it is only applied if the events to be crossfaded do not overlap, otherwise the crossfade will be in the overlap area (see "Creating crossfades" on page 92).
- Clicking the "Recall Default" button copies the curves and settings of the Default crossfade to the Crossfade dialog.
Auto Fades and Crossfades
Cubase features an Auto Fade function that can be set both globally, i.e. for the entire project, and separately for each audio track. The idea behind the Auto Fade function is to create smoother transitions between events by applying short (1–500ms) fade-ins and fade-outs.

As mentioned earlier, fades are calculated in realtime during playback. This means that the larger the number of audio tracks with Auto Fades activated in a project, the higher the demands on the processor.

Note that auto fades are not indicated by the fade lines!
Making global Auto Fade settings
- To make Auto Fades settings globally for the project, select "Auto Fades Settings..." from the Project menu. This opens the Auto Fades dialog for the project.
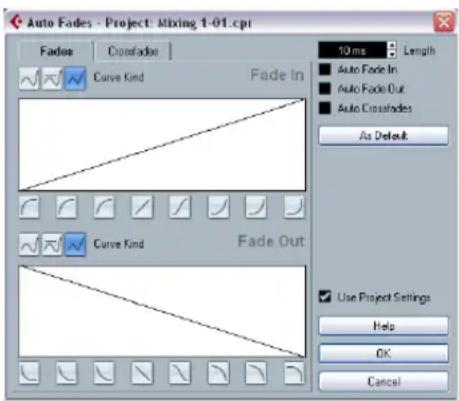
text_image
Auto Fades - Project: Mixing 1-01.cpt Fade Cirrefades Curve Kind Fade In 10 ms Length Auto Fade In Auto Fade Out Auto Classades As Default Curve Kind Fade Out Use Project Settings Help OK Cancel- Use the checkboxes in the upper right corner to activate or deactivate Auto Fade In, Auto Fade Out and Auto Crossfades, respectively.
- Use the Length value field to specify the length of the Auto Fade or Crossfade (1–500ms).
- To adjust the shapes of Auto Fade In and Auto Fade Out, select the "Fades" tab and make settings as in the regular Fade dialogs.
-
To adjust the shape of the Auto Crossfade, select the "Crossfades" tab and make settings as in the regular Crossfade dialog.
-
If you want to use the settings you have made in future projects, click the "As Default" button.
The next time you create a new project, it will use these settings by default. - Click OK to close the dialog.
Making Auto Fade settings for a separate track
By default, all audio tracks will use the settings you have made in the project's Auto Fades dialog. However, since Auto Fades use computing power, a better approach may be to turn Auto Fades off globally and activate them for individual tracks, as needed:
-
Right-click the track in the Track list and select "Auto Fades Settings..." from the context menu (or select the track and click the "Auto Fades Settings" button in the Inspector).
The Auto Fades dialog for the track opens. This is identical to the project's Auto Fades dialog, with the addition of a "Use Project Settings" option. -
Deactivate the "Use Project Settings" option.
Now, any settings you make will be applied to the track only.
- Set up the Auto Fades as desired and close the dialog.
Reverting to project settings
If you want a track to use the global Auto Fade settings, open the Auto Fades dialog for the track and activate the "Use Project Settings" checkbox.
Event Envelopes
An envelope is a volume curve for an audio event. It is similar to the realtime fades, but allows you to create volume changes within the event, not only at the start or end. To create an envelope for an audio event, proceed as follows:
- Zoom in on the event so that you can view its waveform properly.
- Select the Pencil tool.
When you move the Pencil tool over an audio event, a small volume curve symbol is shown next to the tool. - To add an envelope point, click in the event with the Pencil tool.
A blue envelope curve and a curve point appear.
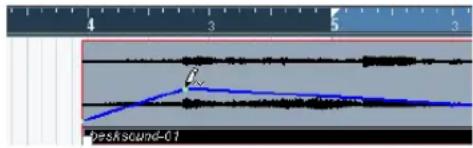
text_image
4 3 5 3 d besksound-01-
Drag the curve point to adjust the envelope shape. The waveform image reflects the volume curve.
-
You can add as many curve points as you like.
- To remove a curve point from the envelope, click on it and drag it outside the event.
- The envelope curve is a part of the audio event – it will follow when you move or copy the event.
After copying an event with an envelope, you can make independent adjustments to the envelopes in the original event and the copy.
⇒ It is also possible to apply an envelope to the audio clip using the Envelope function on the Process submenu on the Audio menu.
See "Envelope" on page 206.
To remove an event envelope curve from a selected event, open the Audio menu and select the Remove Volume Curve option.
7
The Arranger track
Introduction
The Arranger track allows you to work with sections of your project in a non-linear fashion, to simplify arranging to the maximum extent. Instead of moving, copying and pasting events in the Project window to create a linear project, you can define how different sections are to be played back, like a playlist.
For this, you can define arranger events, order them in a list, and add repeats as desired. This offers a different and more pattern-oriented way of working, which complements the usual linear editing methods in the Project window.
You can create several Arranger chains, making it possible to store different versions of a song within the project without sacrificing the original version. When you have created an Arranger chain that you like, you have the option of "flattening" the list, which creates a normal linear project based on the Arranger chain.
You can also use the Arranger track for live performances on the stage, in clubs or at parties.
Setting up the Arranger track
Let's say you have prepared a number of audio files that form the base of a typical pop song, with introduction, verse, chorus and bridge. Now you want to arrange these files.
The first step is to create an Arranger track. On the Arranger track, you define specific sections of the project by creating arranger events. These can be of any length, may overlap and are not bound to the start or end of existing events and parts. Proceed as follows:
- Open the project for which you want to create arranger events.
-
Open the Project menu and select "Arranger" from the Add Track submenu (or right-click in the Track list and select Add Arranger track).
An Arranger track is added. There can be only one Arranger track in a project, but you can set up more than one Arranger chain for this track, see "Managing Arranger chains" on page 99. -
On the Project window toolbar, make sure that Snap is activated, and that the Grid resolution is set to a mode that allows your arranger events to snap to appropriate positions in the project.
Snap to events is activated, i.e. when drawing in the Project window, new events will snap to existing events.
- On the Arranger track, use the Pencil tool to draw an event of the desired length.
An Arranger event is added, called "A" by default. Any following events will be named in alphabetical order.
- You can rename an Arranger event by selecting it and changing its name in the Project window info line or by holding down [Alt]/[Option], double-clicking on the name in the Arranger chain (see below) and entering a new name.
You may want to name your arranger events according to the structure of your project, e.g. Verse, Chorus etc.
- Create as many events as you need for your project.
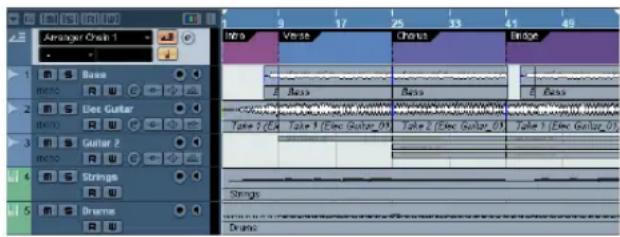
text_image
1 2 3 4 5 6 7 8 9 10 11 12 13 14 15 16 17 18 19 20 21 22 23 24 25 26 27 28 29 30 31 32 33 34 35 36 37 38 39 40 41 42 43 44 45 46 47 48 49 50 51 52 53 54 55 56 57 58 59 60 61 62 63 64 65 66 67 68 69 70 71 72 73 74 75 76 77 78 79 80 81 82 83 84 85 86 87 88 89 90 91 92 93 94 95 96 97 98 99 100In this example, arranger events have been created that correspond to a classic pop song structure. Note how there is no realtime line in the project: the music sequence is determined by the arranger events.
Events can be moved, resized and deleted using the standard techniques. Please note:
- If you want to change the length of an event, select the Arrow tool and click and drag the lower corners of the event in the desired direction.
- If you copy an Arranger event (by [Alt]/[Option]-dragging or by using copy/paste), a new event will be created with the same name as the original.
However, this new event will be totally independent from the original event. - Double-clicking on an arranger event adds it to the current Arranger chain.
Working with arranger events
You now have a number of arranger events that form the basic building blocks for your arrangement. The next step is to arrange these events using the functions of the Arranger Editor.
Creating an Arranger chain
You can set up an Arranger chain in the Arranger Editor or in the Inspector for the Arranger track. The Arranger Editor is opened by clicking the "e" button in the Inspector or in the Track list.
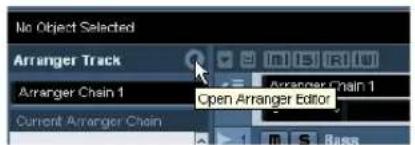
text_image
No Object Selected Arranger Track Arranger Chain 1 Current Arranger Chain Open Arranger Editor m s BassClick the "e" button...
...to open the Arranger Editor.
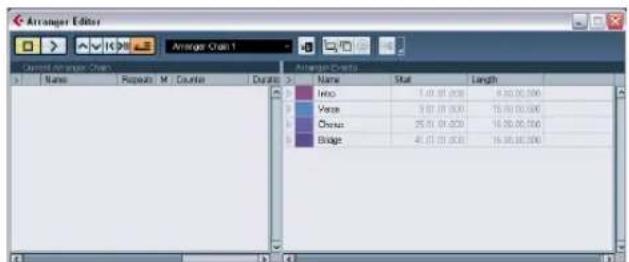
text_image
Arranger Editor Arranger Chain 1 Name Repeats M Counties Duration Name exactly Intro 7.40.00 (200) 9.30.00 (300) Verge 3.67.00 (300) 15.00.00 (300) China 25.00.00 (200) 16.00.00 (300) Bridge 41.01.00 (200) 16.00.00 (300)To the right in the Arranger Editor, the available arranger events are listed, in the order they appear on the time line. To the left you find the actual Arranger chain, which shows in which order the events will be played back, from top to bottom, and how many times they should be repeated.
Initially the Arranger chain will be empty – you set up the Arranger chain by adding events from the right list to the Arranger chain. There are several ways to add events to the Arranger chain.
- Double-clicking on the name of an event in the window section on the right (or in the project window).
When an event is selected in the Arranger chain on the left, this will add the event above the selected event. When no events are selected in the Arranger chain, the event will be added at the end of the list.
- By selecting one or more events in the right list, right-clicking and selecting "Append Selected In Arranger Chain".
This will add the selected events at the end of the list.
- By dragging and dropping arranger events from the right list to the left list.
A blue insertion line shows you where the dragged event will end up.
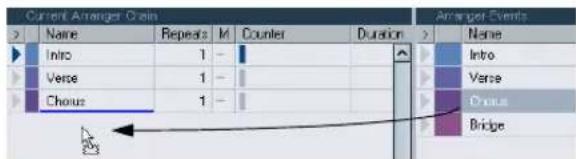
text_image
Current Arranger Chain Name Repeats M Counter Duration Intro 1 - Verse 1 - Chorus 1 - Arranger Events Name Intro Verse Chorus BridgeHere, the Verse event is dragged into the Arranger chain and placed after the first chorus.
- By dragging arranger events from the Project window into the Arranger chain.
If you followed our example, you should now have arranger events arranged in a very basic pop song pattern. However, we have used audio files that are only a few bars long – to turn our pattern into a "song" (or at least into a basic sketch of the song structure), these files must be looped. This is where the Repeats function comes in.
If you want an event to repeat several times, proceed as follows:
- Click in the Repeats field for an event, type in the desired number of repeats and press [Enter].
When playing back the Arranger chain, the Counter column indicates which repeat of this event is currently playing.
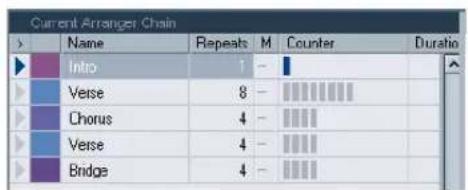
text_image
Current Arranger Chain Name Repeats M Counter Duration Into 1 - Verse 8 - Chorus 4 - Verse 4 - Bridge 4 -- Click in the Mode field for an event and select the desired repeat mode.
Option Button Description
| Normal In this mode, the Arranger chain will be played back just as you set it up. | |
| Repeat forever | In this mode, the current Arranger event will be repeated in a loop until you either click on another event in the Arranger Editor or press play once again. |
| Pause after Repeats | In this mode, the playback of the Arranger chain will be stopped after having played back all repeats of the current Arranger event. |
When you now play back the Arranger chain, you will hear the complete arrangement. Proceed as follows:
- Make sure that Arranger mode is activated.
When Arranger mode is activated, the project will be played back using the Arranger settings.
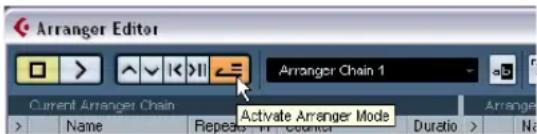
text_image
Arranger Editor Arranger Chain 1 Current Arranger Chain Activate Arranger Mode Name Repeats H. Counter Duratio > Na- Position the Arranger Editor window so that you can see the Arranger track in the Project window, and click in the arrow column for the event at the top of the list so that the arrow becomes blue.
You should see the project cursor jump to the beginning of the first event specified in the Arranger chain.
- Activate playback, either from the Arranger Editor or on the Transport panel.
The events are played back in the specified order.
Editing the Arranger chain
In the Arranger chain on the left, you can do the following:
- Select multiple events by [Ctrl]/[Command]-clicking or [Shift]-clicking as usual.
- Drag events to move them in the list.
- Drag events while holding [Alt]/[Option] to create copies of the selected items.
The insert location for both move and copy operations is indicated by a blue or red line in the list. A blue line indicates that the move or copy is possible; a red line indicates that if the current position were to be used, a move or copy is not allowed.
- Use the Repeats column to specify how many times each event should be repeated.
- Click the arrow to the left of an event in the Arranger chain to move the playback position to the start of that event.
- To remove an event from the list, right-click on it and select "Remove Touched" from the context menu. To remove several events, select them, right-click and select "Remove Selected".
Navigating
To navigate between arranger events, you use the Arranger transport buttons:
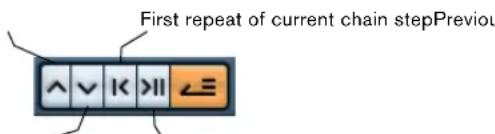
text_image
First repeat of current chain stepPreviousNext chain step Last repeat of current chain step
These controls are available in the Arranger Editor, on the Project window toolbar, and on the Transport panel.
In the Arranger Editor, the event that is currently played back is indicated by an arrow in the leftmost column, and the indicators in the Counter column.
Managing Arranger chains
You can create several Arranger chains. This way, you can create alternative versions for playback. In the Arranger Editor, the toolbar buttons on the right are used for this:
Button Description
| a b | Click this to rename the current Arranger chain. |
| Creates a new, empty Arranger chain. | |
| Creates a duplicate of the current Arranger chain, containing the same events. | |
| Removes the currently selected Arranger chain. Only available if you have created more than one Arranger chain. |
- In the Inspector, these functions are accessed from the Arranger pop-up menu (opened by clicking on the Arranger name field).
The Arranger chains you create will be listed on the Name pop-up menu, found in the Arranger Editor to the left of the buttons, at the top of the Arranger track Inspector, and in the Track list. Please note that to be able to select another Arranger chain from the pop-up menu, the Arranger mode must be activated.
Flattening the Arranger chain
When you have found an Arranger chain that suits your purposes, you can "flatten" it, i.e. convert the list into a linear project. Proceed as follows:
- Click the Flatten button (or select Flatten Chain from the pop-up menu in the Inspector for the Arranger track). The events and parts in the project are reordered, repeated, resized, moved and/or deleted (if these are not within the boundaries of any used Arranger event), so that they correspond exactly to the Arranger chain.

The Flatten button
2. Activate Playback.
The project will now play back exactly as in Arranger mode, but you can view it and work with it as usual.

Flattening the Arranger chain may remove events and parts from the project. Only use the Flatten function when you know you do not want to edit the Arranger track/chain any more. If in doubt, save a copy of the project before flattening the Arranger chain.
Flattening options
Sometimes it might be useful to keep the original Arranger events even after flattening the Arranger track. By using flattening options you can define which chain should be flattened, where it should be stored and how it should be named together with other options.
- Click the Flattening options button.
- In the window that appears, select the desired options.
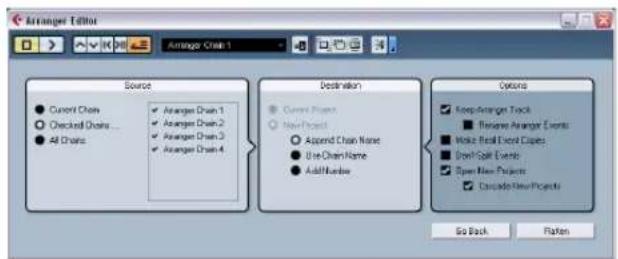
text_image
Arrange Drill 1 Source ● Current Chain ○ Checked Chain ... ● All Chains ✓ Arrange Chain 1 ● Arrange Chain 2 ● Arrange Chain 3 ● Arrange Chain 4 Destination ● Current Project ○ New Project ○ Append Chain Name ● Use Chain Name ● Add Number Options ✓ Keep-Arrange Track ■ Reviewe Arrange Events ■ Make Final Event Clips ■ Draft-Split Events □ Open Run Projects □ Cascade Run Projects Go Back FlattenIn the Source section you can specify which Arranger chain should be flattened. The available options are:
Option Description
| Current Chain | If you activate this option, only the current chain will be flattened. |
| Checked Chains... | If you activate this option, you can select the arranger chains you want to flatten in the list to the left. |
| All Chains If you activate this option, all arranger chains of the current project will be flattened. | |
The Destination section allows you to choose where the result of the flattening should be saved. The available options are:
Option Description
| Current Project | This is only available if you have selected “Current Chain” as Source. If you activate this option, the result of the flattening of the current chain will be saved in the current project. |
| New Project | If you activate this option, you can flatten one or several chains in a new project. In this case it might be useful to use naming options. If you activate “Append Chain Name”, the Chain Names will be appended in brackets to the project name. If you activate “Use Chain Name”, the new projects will have the name of the current Arranger chains. If you activate “Add Number”, the new projects will be named like the old ones and a number will be appended in brackets. |
In the Options section you can make further settings. The available options are:
Option Description
| Keep Arranger Track | If you activate this option, the Arranger Track will be kept when flattening the Arranger chain. Activate "Rename Arranger Events" to append a number to the events, according to their use. If e.g. you use Arranger event "A" two times, the first occurrence will be renamed "A 1" and the second "A 2". |
| Make Real Event Copies | Normally, you will get shared copies when flattening the Arranger track. If you activate this option, real copies will be created instead. |
Option Description
| Don't Split Events | If this option is activated, MIDI notes that start before or are longer than the Arranger event will not be included. Only MIDI notes that begin and end inside the Arranger event boundaries will be taken into account. |
| Open New Projects | If you activate this option, a new project will be created for every flattened Arranger chain. If you activate the option "Cascade New Projects" the opened projects will be cascaded. |
- You can now flatten the Arranger track by clicking the Flatten button.
If you realize that you want to do further arrangements, you can click the "Go Back" button and make your adjustments. Your Flattening settings will be kept.
- Click the "Go Back" button to go back to the Arranger Editor or close the window by clicking its Close button.
Live Mode
If you have set up an Arranger track and play it back, you have also the possibility to influence the playback order "live". Note that the Arranger mode has to be activated to be able to use the Live mode.
-
Add an Arranger track by selecting "Arranger" from the Add Track submenu of the Project menu.
-
Create the desired Arranger events by drawing with the Pencil tool on Arranger track.
-
Set up an Arranger chain in the Inspector for the Arranger track or in the Arranger Editor, activate the Arranger mode and play back your project.
Now you can use your Arranger events listed in the lower section of the Arranger track Inspector to play back your project in Live Mode:
- Switch into Live mode by clicking on the little arrow in the lower list of the Arranger track Inspector to the left of the Arranger event you want to trigger.
The Arranger event will be looped endlessly, until you click on another Arranger event. This might be useful, if you want to loop e.g. a guitar solo with a flexible length.
- You can stop Live mode by clicking the Stop button or go back to "normal" playback in Arranger mode by clicking on any arranger event in the upper list.
In the latter case, playback will be continued from the arranger event where you clicked. The "Select grid" pop-up menu will always be taken into account. When the grid is set to "1 Bar" and you click the Stop button e.g., playback will be stopped after the next bar.
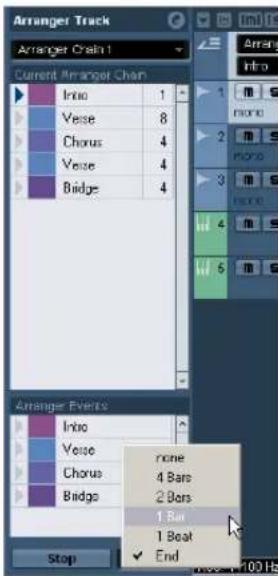
text_image
Arranger Track Arranger Chain 1 Current Arranger Chain Info 1 Vesee 8 Chorus 4 Vesee 4 Bridge 4 Arranger Events Info none 4 Bars 2 Bars 1 Bar 1 Boat ✓ End StopThe active Arranger event will be played back as long as defined before jumping to the next.
Option Description
None Jumps to the next section immediately.
4 bars, When one of these modes is selected, a grid of 4 or 2 bars (depending on the setting) will be placed on the active Arranger event. Whenever the respective grid line is reached, playback will jump to the next Arranger event. An example: Let's say you have an Arranger event which is 8 bars long and the grid is set to 4 bars. When the cursor is anywhere within the first 4 bars of the Arranger event when you hit the next Arranger event, playback will jump to the next event when the end of the fourth bar of the Arranger event is reached. When the cursor is anywhere within the last 4 bars of the Arranger event, playback will jump to the next event at the end of the event. When an event is shorter than 4 (or 2) bars when this mode is selected, playback will jump to the next section at the event end.
1 bar Jumps to the next section at the next bar line.
1 beat Jumps to the next section at the next beat.
End Plays the current section to the end, then jumps to the next section.
Arranging your music to video
The relative time of your Arranger track can be taken as a reference instead of the project time. This is useful, if you want to use the Arranger track to compose music for video and fill e.g. a specific video section with music, by repeating the corresponding number of Arranger events.
If you position your external sync master device to a position that does not match the Project Start time, Cubase will jump automatically to the right position in the Arranger track and will start playback from there, i.e. the correct relative position and not the absolute project time will be found. The reference for the external timecode can be MIDI or any other Timecode that can be interpreted/read by Cubase.
An example:
-
Set up a project with a MIDI track and three MIDI parts. The first should start at position 00:00:00:00 and end at position 00:01:00:00, the second should start at position 00:01:00:00 and end at position 00:02:00:00 and the third should start at position 00:02:00:00 and end at position 00:03:00:00.
-
Activate the Sync button on the Transport panel.
-
Add an Arranger track and create Arranger events that match the MIDI parts.
-
Set up the Arranger chain "A-A-B-B-C-C", activate the Arranger mode and play back your project.
-
Start external Timecode at position 00:00:10:00 (within the range of "A").
In your project, the position 00:00:10:00 will be located and you will hear "A" playing. Nothing special!
Now, let's see what happens if your external sync master device starts at a position that does not match the Project Start time:
- Start at 00:01:10:00 (within the range of what originally was "B").
In your project, the position 00:01:10:00 will be located and you will hear "A" playing, because it plays twice in the Arranger track.
- Start external Timecode at position 00:02:10:00
(within the range of what originally was "C").
In your project, the position 00:02:10:00 will be located and you will hear "B" playing, because it plays "later" in the Arranger track.
⇒ If the Arranger mode is not activated or no Arranger track exists, Cubase will work as usual.
The Transpose functions
Introduction
Cubase offers transpose functions for audio, MIDI and instrument parts and for audio events. These allow you to create variations of your music or change the harmonics of an entire project or separate sections.
Transpose can be applied on three levels:
- On the entire project
By changing the project Root Key in the Project window toolbar, the whole project will be transposed (see "Transposing an entire project with the Root Key" on page 104).
- On sections of the project
By creating Transpose events on the Transpose track, you can set transpose values for separate sections of your project (see "Transposing separate sections of a project using Transpose events" on page 106).
- On individual parts or events
By selecting individual parts or events and changing their transpose value in the info line, you can transpose individual parts or events (see "Transposing individual parts or events using the info line" on page 106).

The transpose functions do not change the actual MIDI notes or the audio, but only affect the playback.
Apart from the transpose features described in this chapter, you can also transpose all MIDI notes on the selected track using the MIDI modifiers (see "Transpose" on page 308), selected notes using the Transpose dialog (see "Transpose" on page 330), and MIDI tracks using MIDI effects (see the separate manual "Plug-in Reference").
Transposing your music
In the following sections we will describe the different possibilities of transposing your music. Note that these can also be combined. However, we recommend you to set the root key first, before recording or changing transpose values on the transpose track.

As a general rule, you should always set the root key first when you work with content with a defined root key.
Transposing an entire project with the Root Key
The root key you specify for a project will be the reference that audio or MIDI events in your project will follow. You can however exclude separate parts or events from being transposed, e.g. drums or percussion (see "The Global Transpose setting" on page 107).
Depending on whether you are using events which already contain root key information or not, the procedures differ slightly.
If the events already contain root key information
Let's say you want to create a project based on loops. Proceed as follows:
-
Open the MediaBay and drag some loops into an empty project, see "Browsing for media files" on page 276. For this example, import audio loops with different root keys.
-
Now, open the Root Key pop-up menu in the Project window toolbar and set the project root key. The entire project will be played back with this root key. Note that by default, the project root key is not specified (“-”).
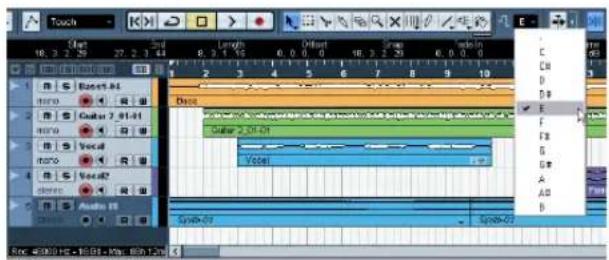
text_image
Touch 16.3.2.29 27.2.3.44 Length 8.3.1.15 Infraft 0.0.0 0 16.3.2.29 Vodin 0.0.0 Bassart 84 Guitar 2.01-01 Vocal Vocal Audio 01 Guitar 2.01-01 Vocal Symb-01 Symb-02 Doc = 16.3.2.29 - 16.3.2.29 - 16.3.2.29
text_image
File1 - Transpunt Track Cpt View FADSLINES B All B All Import Search Project Folder Find Record Folder C:\My projects Media\Audio Media Audio Signal Barr 1 C 85.26 4/4 Hz Fender Blue Voice 1 C 132.03 4/4 Hz Gula 2,041 1 E 130.06 4/4 Hz Synth 7 E 100.06 4/4 Hz Synth 2 E 100.06 4/4 Hz Vocal 1 E 147.58 4/4 HzA loop-based project with different event root keys
The separate loops will be transposed in order to match the project root key. If you e.g. have imported a bass loop in C and the project root key is set to E, the bass loop will be transposed up by 4 semitones.
text_image
Fade Out Volume Lock Transpose 0.0.0 0.00 dB - 4 6 7 8- Now (with the root key set), record audio or MIDI.
The recorded events will get the project root key.
- When you are done and satisfied with the result, you can change the project root key and your events will follow.

If you work with drums or percussion, you should exclude these from being transposed by setting the "Global Transpose" setting on the info line to "Independent" (see "The Global Transpose setting" on page 107).
If the events do not contain root key information
Let's say you have created a project by recording audio and importing some MIDI loops, and you want to match the root key of the whole project to the register of a certain singer.
Proceed as follows:
- In your project, open the Project menu and select "Transpose" from the Add Track submenu (or right-click in the Track list and select "Add Transpose Track") to add the Transpose track.
You can only have one Transpose track in a project.
-
Set the project to the desired root key by selecting the corresponding option from the Root Key pop-up in the Project window toolbar.
-
Right-click in the Track list for the Transpose track and select "Set root key for unassigned events" from the context menu.
This sets the project root key for all parts or events not containing any root key information. This option is only available, if a project root key has been set.
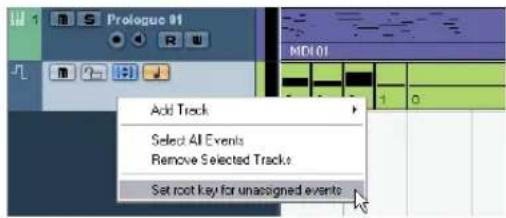
text_image
Add Track Select All Events Remove Selected Tracks Set root key for unassigned events
If you work with drums or percussion, you should exclude these from being transposed by setting the "Global Transpose" setting on the info line to "Independent" (see "The Global Transpose setting" on page 107).
Recording with a project root key
Let's say that you want to record a guitar line for a project that is in D# minor, but your guitar player prefers to play in A minor. In this case, change the project root key to A, so that you can record your guitar. Proceed as follows:
-
Open your project and set the project root key to A. All parts and events will be transposed in order to match the root key.
-
Listen to your project and verify that no drums and percussions have been transposed. If drums have been transposed, select them and set their Global Transpose setting to "Independent".
-
Record your guitar line as desired.
-
When you are done and satisfied with the result, you can change the project root key back to D# minor and your events will follow.

For recorded audio events and MIDI parts, the "Global Transpose" setting on the info line is automatically set to "Follow", i.e. the events or parts will get the project root key.
Changing the Root key of single events or parts
If you want to check if an audio event or part has root key information or if you want to change it, proceed as follows:
- Open the Pool and display the Key column by selecting "Root Key" from the "View/Attributes" pop-up menu in the Pool.
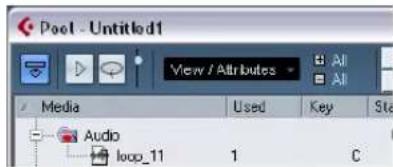
text_image
Pool - Untitled1 View / Attributes Media Used Key Sta Audio loop_11 1 CAn audio event with the root key set to "C"
- Click in the Root Key column for the desired audio event and set the key according to your needs. You can also check and assign Root Keys in the MediaBay.
If you change the root key of an audio part or event, the corresponding audio file will not change. To save the Root Key setting in the audio file, you have to use the "Bounce Selection" function from the Audio menu.
To check or change the root key setting of a MIDI part, proceed as follows:
- Select your MIDI part in the Project window and check the Project window info line.
A MIDI part with the root key set to "D"
- Click on the root key value in the info line to open the corresponding pop-up menu and select the desired root key.

If you change the project root key after setting the event root key, the events will keep their own root key settings, and will be transposed to match the project root key. If you record an audio or a MIDI part and the project root key is specified, this root key is automatically set.
Transposing separate sections of a project using Transpose events
Sometimes you may want to transpose only certain sections of your project, e.g. to create harmonic variations. This can be done by creating transpose events. Transpose events allow you to add a relative transpose offset by specifying transpose values in semitones. You can e.g. brighten up your loops in C major by transposing them by 5 semitones, so that the subdominant on F major is played back, or you can turn your hit more interesting by transposing the last chorus one semitone upwards.
-
In your project, open the Project menu and select Transpose from the Add Track submenu (or right-click in the Track list and select "Add Transpose Track") to add the Transpose track. You can only have one Transpose track in a project.
-
Select the Pencil tool from the toolbar and click in the Transpose track to create a transpose event. A transpose event will be created from the point where you clicked until the end of the project.
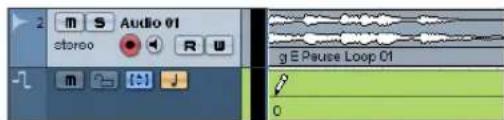
text_image
2 m S Audio 01 storoo R U g E Pause Loop 01 0- To create another transpose event, click with the pencil tool on the first transpose event.
By default, the transpose value of new transpose events is set to 0.
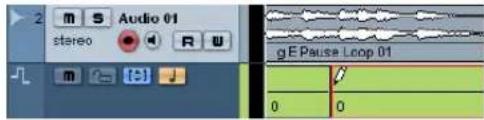
text_image
Audio 01 stereo gE Pause Loop 01 0 0You can add more transpose events by clicking with the pencil tool.
- Click in the transpose value field and enter the transpose value for the transpose event.
You can enter the desired value with the computer keyboard, use the mouse wheel or [Alt]/[Option]-click on the transpose value to open a value fader. You can specify values between -24 and 24 semitones.
- Play back your project.
The parts of your project on the same position as the transpose events will be transposed according to the specified transpose values.
⇒ You can also transpose the whole project using the transpose track. This is useful e.g. if your singer does not reach a certain pitch. In this case you can transpose your whole project by e.g. -2 semitones. Always remember to verify that the "Global Transpose" setting for drums and percussion is set to "Independent" on the info line (see "The Global Transpose setting" on page 107).
You can erase and move transpose events, but you cannot mute, cut or glue them. The option "Locators to Selection" does not apply on transpose events.
Transposing individual parts or events using the info line
You can also transpose individual audio and MIDI parts and events via the Info line (or the Inspector). This transposition will be added to the global transposition (i.e. the root key or the transpose events). Proceed as follows:
-
Select the event that you want to transpose.
-
In the Project window info line, adjust the Transpose value as desired.
A global transpose change will not overwrite individual part or event transpose, but will be added to the transpose value for the part or event. In this case, it might be useful to keep the transposition within the octave range (see "Keep Transpose in Octave Range" on page 108).
Other functions
Indicate Transpositions
When you transpose your music, you may sometimes want to visually compare the original sounds and the transposed music. For MIDI parts, you can check this by opening the Key Editor and clicking the "Indicate Transpositions" button. This will help you see how your MIDI notes will be transposed. If the button is activated, the Key Editor will show the note pitch you will hear, if it is deactivated, the Key Editor shows the original pitch of the notes in your MIDI part. By default, the "Indicate Transpositions" button is deactivated.
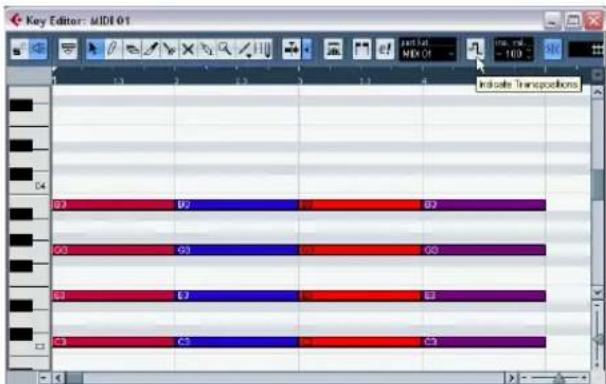
text_image
Key Editor: MIDI 01 Indicate Transpositions 01 02 03 04 03 03 04 03 03 04 03 03 04A MIDI part as originally recorded
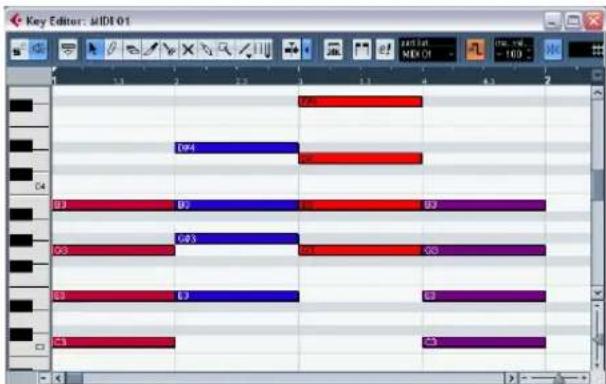
text_image
Key Editor: MIDI 01 D94 D7 D7 D3 D3 D3 D3When you activate "Indicate Transpositions" you will see how your MIDI part will be transposed.
The Global Transpose setting
If you are working with drum and percussion loops or special effects (FX) loops, you will want to exclude these from being transposed. This can be achieved by locking them using the Global Transpose setting. Proceed as follows:
-
Open your project.
-
Select the desired event or part and set the "Global Transpose" setting on the info line to "Independent". A symbol will be displayed in the lower right corner of the selected part or event, indicating that it will not be transposed neither by changing the root key nor by specifying transpose events.
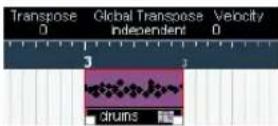
If Global Transpose is set to Independent, the selected part will not be transposed.
- You can now change the project root key.
The "Independent" parts or events will not be affected by the root key changes.
If you import ready-made parts or events that are tagged drums or FX, Global Transpose will be automatically set to Independent.
If you record audio or MIDI, Global Transpose will be set to "Independent", provided that the transpose track exists and you have specified at least one transpose event (even when the transpose value is not defined). In this case, your recording will sound exactly the way you played it. The transpose events will not be taken into account during recording and the recorded event will not get the project root key.
Have a look at the following example:
- Set up a project with the root key in C.
- Add a transpose track and enter transpose events with the values 0, 5, 7 and 0.
- Record some chords with your MIDI keyboard. For our example, record C, F, G and C.
The transpose events are not taken into account and the result of your recording will be C, F, G and C. No root key will be set.
→ Recorded events are "independent" from Global Transpose.
If no transpose track exists or if no transpose event has been added, Global Transpose will be set to Follow.
If Global Transpose is set to Follow, the selected part will follow all global transpositions.
Locking the Transpose track
If you want to prevent your transpose events from being changed by mistake, activate the Lock button on the transpose track. This way, you will not be able to move your transpose events or change their transpose values.
Muting transpose events
Sometimes it might be useful to disable the transpose track, e.g. to hear the original sound of individual tracks. If you activate the mute button on the transpose track, your transpose events will not be taken into account during playback.
Keep Transpose in Octave Range
The "Keep Transpose in Octave Range" button on the transpose track (the button with an up and down arrow in brackets) keeps the transposition in the octave range. This option is activated by default. This way, nothing will be transposed by more than seven semitones. This ensures that your music never sounds unnatural because the pitch was raised too high or too low.
To understand the principle behind this, follow the example below:
- Create a MIDI part, enter a C major chord, open the Key Editor and activate "Indicate Transpositions".
This way you can observe and understand what happens when you change the transposition.
- Add a transpose track and create a transpose event. By default, the transpose value is set to 0.
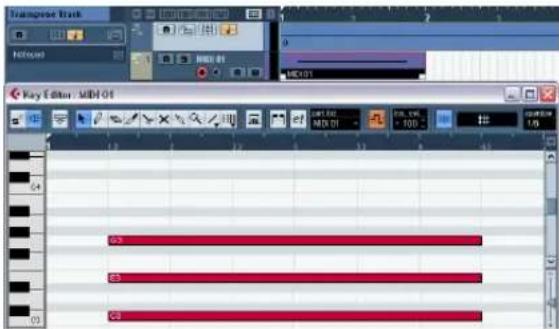
text_image
Transpersion Track Hotspot MIDI 01 Key Editor: MIDI 01 03 03 03- Make sure that the "Keep Transpose in Octave Range" button is activated on the transpose track and change the transpose value of the transpose event to 7. Your chord will be transposed accordingly.
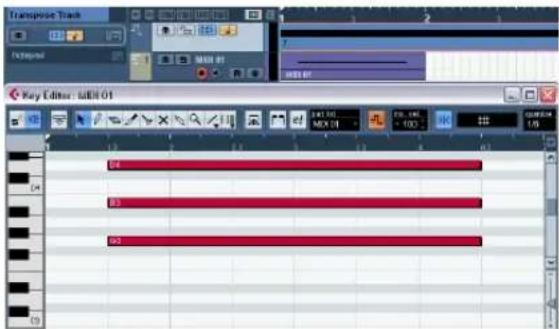
text_image
Transpose Track Integral MEN 01 Key Editor: MME 01 04 03 02If you enter a transpose value of 7, your chord will be transposed by seven semitones upwards. In this example, this would be G3/B3/D4.
- Set the transpose value to 8 semitones.
As "Keep Transpose in Octave Range" is activated, your chord will now be transposed to the nearest interval or pitch.
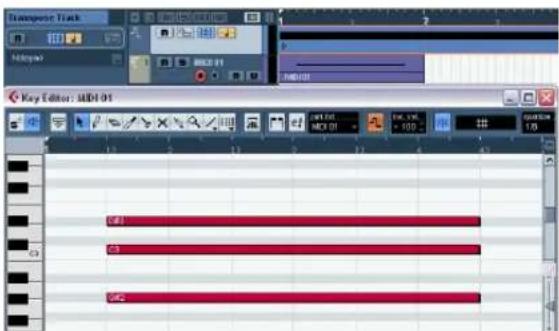
text_image
Track Track Hotkey HOLD HOLD01 HOLD01 Key Editor: MDT-01 C1 C2 C3Your chord has been transposed to the nearest pitch, this results in G#2/C3/D#3.
If you mainly work with audio loops, we recommend activating "Keep Transpose in Octave Range".
The mixer
About this chapter
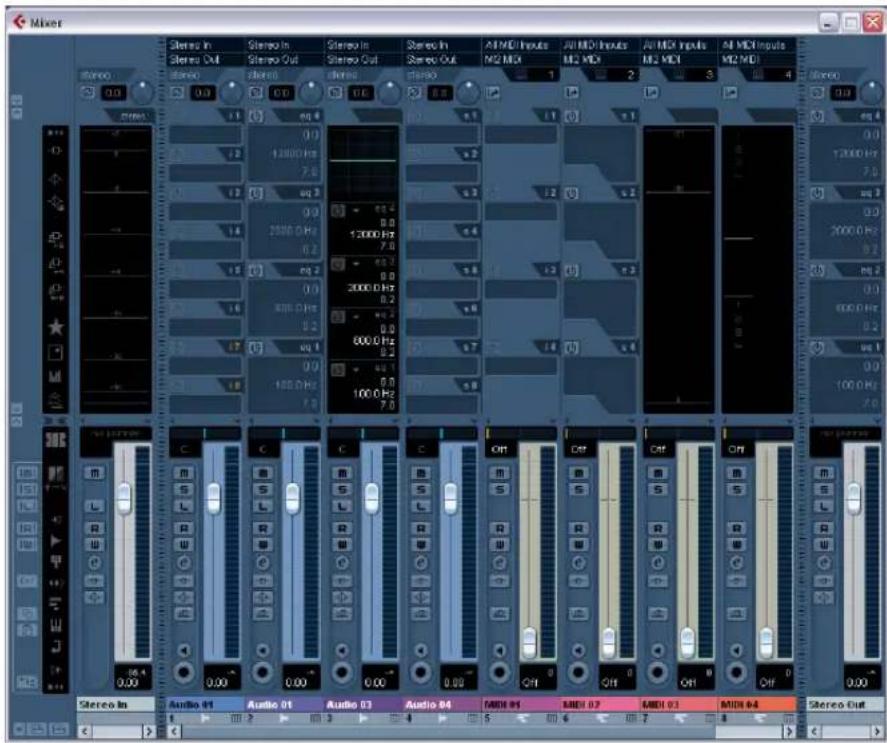
text_image
Mixer Stereo In Stereo Out Stereo In Stereo Out Stereo In Stereo Out AT MDI Inputs AT MDI Inputs AT MDI Inputs AT MDI Inputs Stereo In Audio 01 Audio 01 Audio 03 Audio 04 MIDI 01 MIDI 02 MIDI 03 MIDI 04 Stereo Out Stereo In Stereo Out Stereo In Stereo Out Stereo In Stereo Out Stereo In Stereo Out Stereo In Stereo Out Stereo In Stereo Out Stereo In Stereo Out Stereo In Stereo Out Stereo In Stereo Out Stereo In Stereo Out Stereo In Stereo Out Stereo In Stereo Out Stereo In StereoOutThe picture shows an extended mixer (see "Normal vs. Extended channel strips" on page 112).
This chapter contains detailed information about the elements used when mixing audio and MIDI, and the various ways you can configure the mixer.
Some mixer-related features are not described in this chapter. These are the following:
- Setting up and using audio effects. See the chapter "Audio effects" on page 150.
- Setting up and using MIDI effects. See the chapter "MIDI realtime parameters and effects" on page 305.
- Surround Sound (Cubase only). See the chapter "Surround sound (Cubase only)" on page 180.
- Automation of all mixer parameters. See the chapter "Automation" on page 188.
- How to mix down several audio tracks (complete with automation and effects if you wish) to a single audio file. See the chapter "Export Audio Mixdown" on page 419.
Overview
The mixer offers a common environment for controlling levels, pan, solo/mute status etc. for both audio and MIDI channels.
Opening the mixer
The mixer can be opened in several ways:
- By selecting Mixer from the Devices menu.
- By clicking the Mixer icon on the toolbar.
- By using a key command (by default [F3]).
- By clicking the Mixer button in the Devices panel. You open the Devices panel by selecting Show Panel from the Devices menu.
About the multiple mixer windows
You may have noticed that there are in fact several separate mixer items selectable from the Devices menu (in Cubase Studio there are two mixer items). These are not separate mixers, but rather separate views of the same mixer.
- Each of the mixer windows can be configured to show any combination of channels, channel types, narrow and wide channel strips, etc. (how to do this is described later in this chapter).
You can for example configure one mixer window to show MIDI channel strips, another to show input and output channels or another to show all audio-related channels.
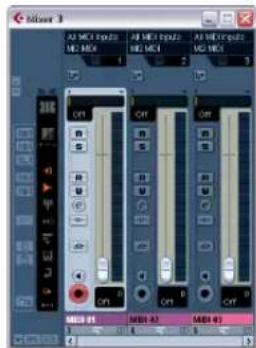
text_image
Alt MEI Input Alt MEI Output Alt MEI Input Alt MEI Output Alt MEI Level Alt MEI Level Alt MEI Level Alt MEI Level Alt MEI Level Alt MEI Level Alt MEI Level Alt MEI Level Alt MEI Level Alt MEI Level Alt MEI Level Alt MEI Level Alt MEI Level Alt MEI Level Alt MEI Level Alt MEI Level Alt MEI Level Alt MEI Level Alt MEI Level Alt MEI Level Alt MEI Levels Alt MEI Levels Alt MEI Levels Alt MEI Levels Alt MEI Levels Alt MEI Levels Alt MEI Levels Alt MEI Levels Alt MEI Levels Alt MEI Levels Alt MEI Levels Alt MEI Levels Alt MEI Levels Alt MEI Levels Alt MEI Levels Alt MEI Levels Alt MEI Levels Alt MEI Levels Alt MEI Levels Alt MEI Levels Alt MEI Level Alt MEI Level Alt MEI Level Alt MEI Level Alt MEI Level Alt MEI Level Alt MEI Level Alt MEI Level Alt MEI Level Alt MEI Level Alt MEI Level Alt MEI Level Alt MEI Level Alt MEI Level Alt MEI Level Alt MEI Level Alt MEI Level Alt MEI Level Alt MEI Level Alt MEILevel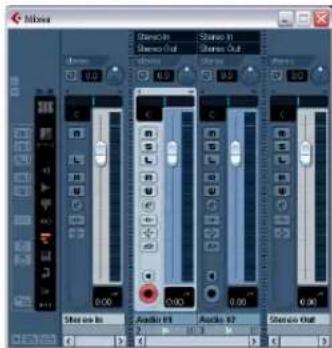
text_image
Mixer Stereo In Stereo Out Stereo In Stereo Out Stereo In Audio 01 Audio 02 Stereo Out- You can also save channel configurations as View sets (see "Channel view sets" on page 115), which are then accessible from all mixer windows.
These features are very convenient when working with large projects. Considering the number of different channel types that can be shown in the mixer, they could even be described as necessary!
The use of multiple mixer windows combined with the ability to recall different mixer configurations enables you to focus on the task at hand and keep window scrolling down to a minimum.
All options for configuring the mixer described in this chapter are identical for all mixer windows.
What channel types can be shown in the mixer?
The following track-based channel types are shown in the mixer:
- Audio
· M I D I - Effect return channels (referred to as FX channels in the Project window)
- Group channels
- Instrument track channels
The order of audio, MIDI, instrument, group and effect return channel strips (from left to right) in the mixer corresponds to the Project window Track list (from the top down). If you reorder tracks of these types in the Track list, this will be mirrored in the mixer.
In addition to the above, the following channel types are also shown in the mixer:
- Activated ReWire channels (see the chapter "ReWire" on page 451).
- VST Instrument channels (see the chapter "VST Instruments and Instrument tracks" on page 169).
ReWire channels cannot be reordered and always appear to the right of other channels in the main mixer pane (see below). VST instrument (VSTi) channels can be reordered in the Track list which will in turn be mirrored in the mixer.
The other track types are not shown in the mixer.
Input and output busses in the mixer
Input and output busses are represented by input and output channels in the mixer. They appear in separate "panes" separated by movable dividers and with their own horizontal scrollbars, see "The input and output channels" on page 117.
In Cubase Studio, only the output channels are shown in the mixer (not input channels).
About multi-channel audio (Cubase only)
Cubase has full support for surround sound. Each audio channel and bus in the mixer can carry up to 6 speaker channels. This means that if you have an audio track configured for 5.1 surround sound, for example, it will have a single channel strip in the mixer, just like mono or stereo tracks, but its level meter will have six meter bars, one for each speaker channel.
Another thing to note is that the look of a channel strip differs slightly depending on how it is routed – mono or stereo tracks routed to a surround output bus will have a surround panner control instead of a regular pan control, for example. For further information on multi-channel audio, see the chapter "Surround sound (Cubase only)" on page 180.
Configuring the mixer
As mentioned earlier, the mixer window can be configured in various ways to suit your needs and to save screen space. Here follows a run through of the various view options (the following descriptions assume that you have an active project containing some tracks).
Normal vs. Extended channel strips
You can show/hide extended channel strips and the input/output routing section at the top of the channel strips. Proceed as follows:
- Open any of the mixer windows.
The leftmost strip is called the common panel and is always shown in the mixer. It contains various global settings and options relating to the mixer. For further information, see "The common panel" on page 113.
- Click on the arrow button on the common panel ("Show Extended Mixer") or right-click in the Mixer to open the Mixer context menu and select "Show Extended View" from the Window submenu.
You can also use a key command for this. See the chapter "Key commands" on page 479.
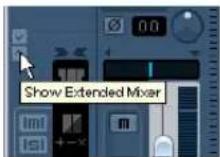
Opening the Extended Mixer via the Mixer Common panel...
...and via the Mixer context menu.
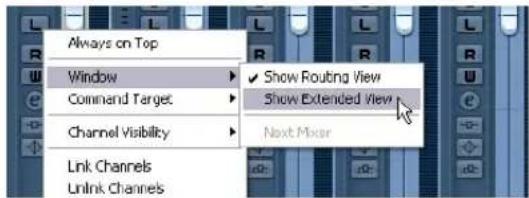
text_image
Always on Top Window Command Target Channel Visibility Link Channels Unlink Channels ✓ Show Routing View Show Extended View Next Mixer- You can show or hide the Routing panel of the channel strips by clicking on the respective arrow button ("Show Routing") or by selecting "Show Routing View" from the Window submenu on the Mixer context menu. The fader panel is always shown.
The fader panel shows the basic controls – faders, pan controls and an associated vertical row of buttons. The extended panel can be set to show EQ, effect sends, insert effects, etc. The Routing section contains input and output routing pop-up menus (where applicable), along with input phase and input gain controls (Cubase only).
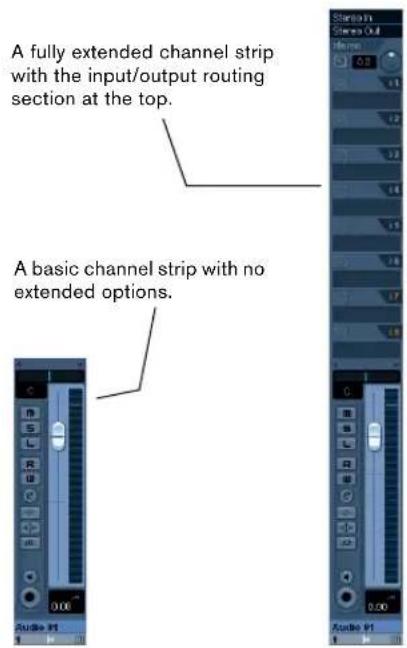
text_image
A fully extended channel strip with the input/output routing section at the top. A basic channel strip with no extended options. Audio P1 0.00 0.00 Audio P1The common panel
The common panel appears to the left in the mixer windows and contains settings for changing the look and behavior of the mixer, as well as global settings for all channels.
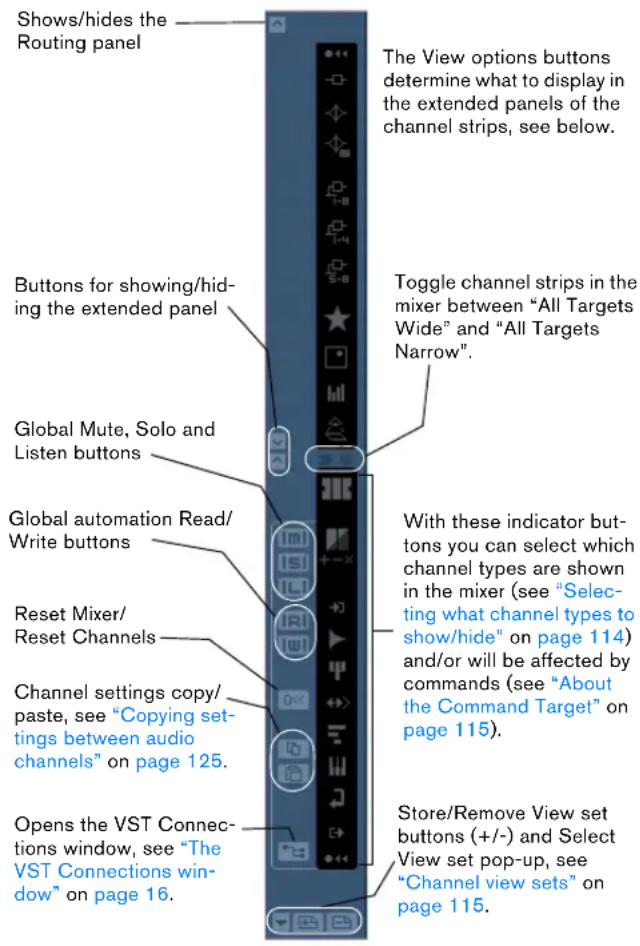
text_image
Shows/hides the Routing panel Buttons for showing/hiding ing the extended panel Global Mute, Solo and Listen buttons Global automation Read/ Write buttons Reset Mixer/ Reset Channels Channel settings copy/paste, see "Copying set- tings between audio channels" on page 125. Opens the VST Connec- tions window, see "The VST Connections win- dow" on page 16. The View options buttons determine what to display in the extended panels of the channel strips, see below. Toggle channel strips in the mixer between "All Targets Wide" and "All Targets Narrow". With these indicator but- tons you can select which channel types are shown in the mixer (see "Select- ing what channel types to show/hide" on page 114) and/or will be affected by commands (see "About the Command Target" on page 115). Store/Remove View set buttons (+/-) and Select View set pop-up, see "Channel view sets" on page 115.Selecting what to display in the extended channel strips
You can select what to display in the extended channel strip either globally from the common panel or individually from each channel strip.
The available options vary depending on the channel type.
- For a description of the options for audio-related channels, see "Options for the extended audio channel strip" on page 121.
- For a description of the options for MIDI channels, see "Selecting what to show in the extended MIDI channel strip" on page 128.
Selecting globally from the common panel
- Open any of the mixer windows.
- Make sure that the extended panel of the mixer is visible.
In the extended area of the common panel, you can see a vertical row of icons. These act as buttons and determine globally what is displayed in the extended panel for all channel strips in the mixer.
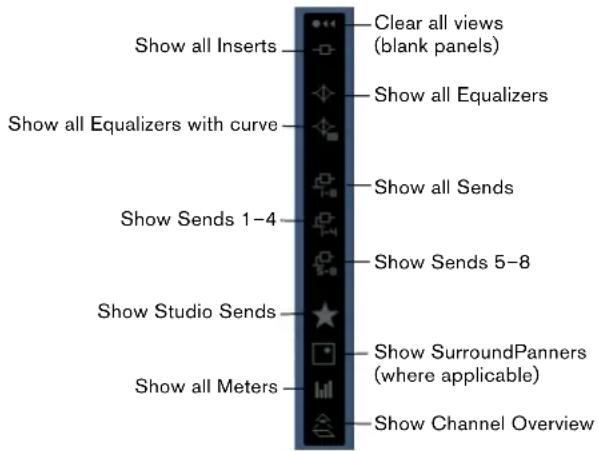
text_image
Show all Inserts Show all Equalizers with curve Show Sends 1-4 Show Studio Sends Show all Meters Clear all views (blank panels) Show all Equalizers Show all Sends Show Sends 5-8 Show SurroundPanners (where applicable) Show Channel Overview- Click on the "Show all Inserts" button (second icon from the top).
Now all channel strips in the mixer will show Insert effect slots in the extended panel.
- As mentioned above, what can be set globally depends on the type of channel.
Channel types that do not support a selected global option will be unaffected. - If you press [Alt]/[Option] and click one of the global view buttons, the input (Cubase only) and output channels will be affected as well.
Selecting for individual channels
Each channel strip in the mixer features a View options pop-up menu, which is used for two things:
- To determine what is shown in the extended panel for individual channels in the mixer.
- To set the "Can Hide" status for individual channels in the mixer, see below.
The View options pop-up is opened by clicking the down arrow located just above the fader panel of a channel strip.
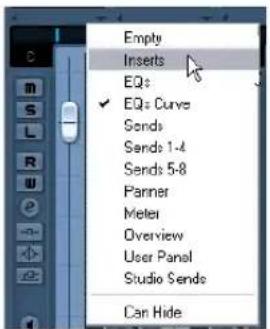
text_image
Empty Inserts EQs ✓ EQs Curve Sends Sends 1-4 Sends 5-8 Partner Meter Overview User Panel Studio Sends Can Hide- To select what to display in the extended panel from the View options pop-up menu, you must first open the extended mixer.
Selecting what channel types to show/hide
You can specify what channel types to show or hide in the mixer. In the lower part of the common panel you find a vertical strip with different indicator buttons. Each indicator represents a channel type to show or hide in the mixer:
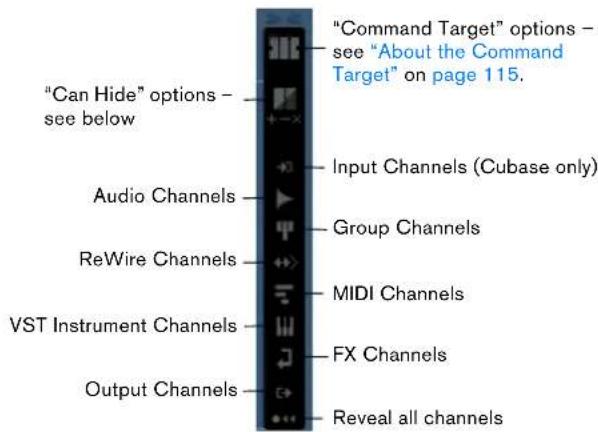
text_image
"Command Target" options - see "About the Command Target" on page 115. "Can Hide" options - see below Input Channels (Cubase only) Audio Channels Group Channels ReWire Channels MIDI Channels VST Instrument Channels FX Channels Output Channels Reveal all channels- To hide or show a channel type, click the corresponding indicator.
If an indicator is dark, the corresponding channel type will be shown in the mixer. If it is orange, the corresponding channel type will be hidden.
Showing/hiding individual channels (the "Can Hide" setting)
You can also show/hide individual channels of any type in the mixer. For this, you can assign channels a "Can Hide" status, which allows you to hide these channels collectively. Proceed as follows:
- Pull down the View options pop-up menu for the channel you want to hide and activate the "Can Hide" option or [Alt]/[Option]-click in the top middle section of the channel strip.
The "/" icon is shown if "Can Hide" is activated for a channel strip.
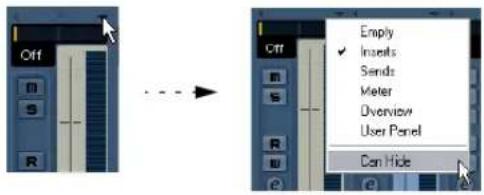
text_image
Off N S R Off M S R Can Hide Empty Inserts Sends Meter Overview User Panel-
Repeat this for all channels you want to hide.
-
Click the button "Hide Channels set to 'Can Hide'" on the common panel.
This hides all channels set to "Can Hide". To show them again, click the button again or click the "Reveal All Channels" button at the bottom of the common panel.
Below the "Hide Channels set to 'Can Hide'" button, there are three additional buttons.
These have the following functionality:
Option Description
| Set Target Channels to 'Can Hide' | This activates "Can Hide" for all Channels you specified as "Command Targets", see below. |
| Remove 'Can Hide' from Target Channels | This deactivates "Can Hide" for all Channels you specified as "Command Targets", see below. |
| Remove 'Can Hide' from All Channels | This deactivates "Can Hide" for all Channels in the Mixer. |
About the Command Target
Command targets let you specify which channels should be affected by the "commands" (basically all the functions that can be assigned key commands) when working with the Mixer, e.g. what to display in the extended mixer, the width setting of the channel strips, etc. You can set command targets using the Mixer common panel or the context menu.
The Command Target Controls on the common panel
The following options are available:
- All Channels – Select this if you want your commands to affect all channels.
- Selected Only – Select this if you want your commands to affect the selected channels only.
- Exclude Inputs (Cubase only) – Select this if you do not want your commands to affect the input channels.
- Exclude Outputs – Select this if you do not want your commands to affect the output channels.
Channel view sets
Channel view sets are saved configurations of the mixer windows, allowing you to quickly switch between different layouts for the mixer. Proceed as follows:
- Set up the mixer the way you wish to store it as a view set.
The following settings will be stored:
- Settings for individual channel strips (e.g. narrow or wide mode and whether the channel strip is (or can be) hidden or not).
- The hide/show status for channel types.
- The mixer's display status (fader panel, extended panel, routing panel).
-
Settings for what is shown in the extended view of the mixer.
-
Click the "Store View Set" button (the plus sign) at the bottom of the (non-extended) common panel.
-
A dialog appears, allowing you to enter a name for the view set.
-
Click OK to store the current mixer view set.
- You can now return to this stored configuration at any time, by clicking the "Select Channel View Set" button (the down arrow to the left of the "Store View Set" button) and selecting it from the pop-up menu.
- To remove a stored channel view set, select it and click the "Remove View Set" button (the minus sign).

Some remote control devices (such as Steinberg's Houston) feature this function, which means that you can use the remote device to switch between the channel view sets.
Setting the width of channel strips
Each channel strip can be set to either "Wide" or "Narrow" mode by using the Channel Narrow/Wide button on the left above the fader strip.
The Channel Narrow/Wide button
- Narrow channel strips contain a narrow fader, miniature buttons, and the View options pop-up. If you have selected to show parameters in the extended section, only the channel overview or the Meter can be shown in narrow mode. (The parameters will be shown again when you return to wide mode.)
text_image
C M S L R U 0.00 0.00 Audio 01 Audio 0 1 2Wide and narrow channel strips
- When selecting "All targets narrow" or "All targets wide" on the common panel, all channel strips selected as command targets (see "About the Command Target" on page 115) are affected.
The audio-related channel strips
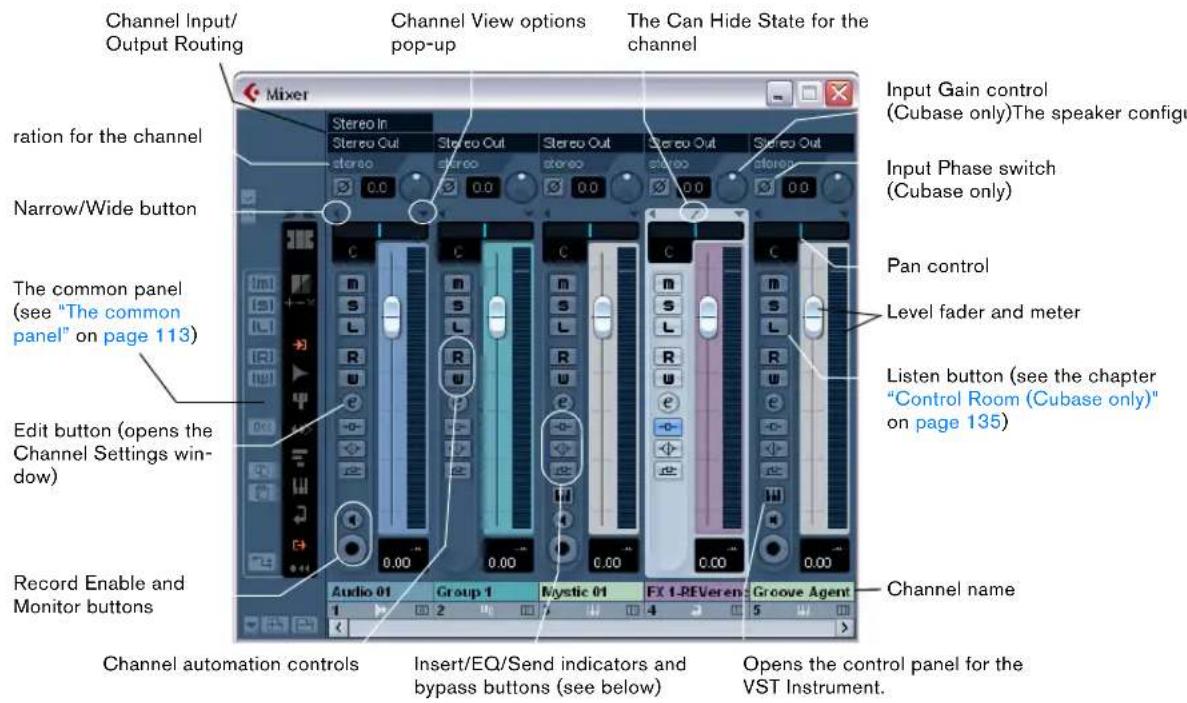
text_image
Channel Input/Output Routing Channel View options pop-up The Can Hide State for the channel Mixer Input Gain control (Cubase only) The speaker config Ratio for the channel Narrow/Wide button The common panel (see "The common panel" on page 113) Edit button (opens the Channel Settings window) Record Enable and Monitor buttons Audio 01 Group 1 Mystic 01 FX 1-REVeren Groove Agent Channel name Channel automation controls Insert/EQ/Send indicators and bypass buttons (see below) Opens the control panel for the VST Instrument.The mixer in normal mode (faders and Routing View visible), showing (from left to right): the common panel, a stereo audio channel, a group channel, an instrument channel, an FX channel and a VST Instrument channel strip.
All audio-related channel types (audio, instrument track, input/output channels, group, effect return, VST Instrument and ReWire) basically have the same channel strip layout, with the following differences:
- Only audio track channels have an Input Routing pop-up menu.
- Only audio and instrument track channels have a Monitor and Record Enable button.
- Input/output channels do not have sends.
- Instrument track and VST Instrument channels have an additional button for opening the instrument's control panel.
- Input channels (Cubase only) and output channels have clipping indicators.
About the Insert/EQ/Send indicators and bypass buttons

The three indicator buttons in each audio channel strip have the following functionality:
- If an Insert or Send effect or an EQ module is activated for a channel, the corresponding button is lit.
The effect indicators will be blue, the EQ indicator will be green.
- If you click these buttons when lit, the corresponding EQ or effects section will be bypassed.
Bypass is indicated by yellow buttons. Clicking the button again deactivates bypass.
The MIDI channel strips

text_image
This opens the control panel for a connected VST Instrument. Input Transformer button Channel Narrow/Wide button Mute and Solo Channel automation controls Insert/Send indicators and Bypass buttons Monitor and Record Enable buttons All MIDI Inputs MIDI input pop-up MIDI output pop-up 1 MIDI channel pop-up Can Hide State Pan control Level (velocity) meter Edit button Level fader (MIDI volume) Off MIDI 01The MIDI channel strips allow you to control volume and pan in your MIDI instrument (provided that they are set up to receive the corresponding MIDI messages). The settings here are also available in the Inspector for MIDI tracks.
The input and output channels
The busses you set up in the VST Connections window are represented by input and output channels in the mixer. These are shown in separate "panes" (to the left and right of the regular channel strips, respectively), with their own dividers and horizontal scrollbars. The i/o channel strips are very similar to other audio channels and are identical for input and output channels (except that input channels do not have Solo buttons).
⇒ If you are using Cubase Studio, only output channels are shown in the mixer.
The input channels (busses) you have set up in the VST Connections window are available for selection on the Input Routing pop-up menus but you cannot view them or make settings for them in the mixer.
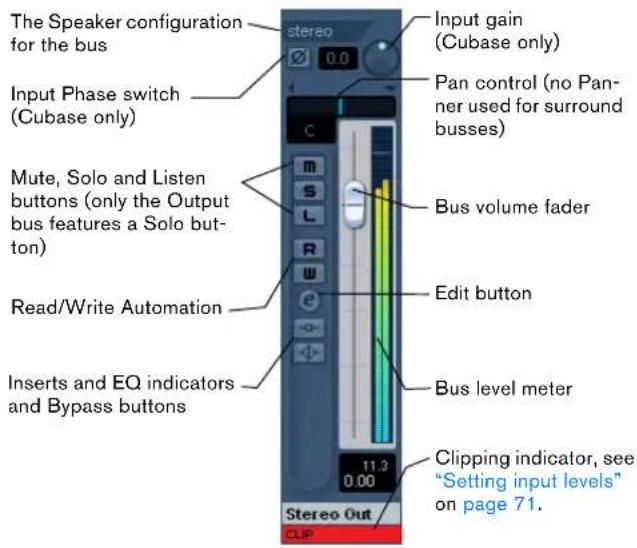
text_image
The Speaker configuration for the bus Input Phase switch (Cubase only) Mute, Solo and Listen buttons (only the Output bus features a Solo but- ton) Read/Write Automation Inserts and EQ indicators and Bypass buttons Input gain (Cubase only) Pan control (no Pan- ner used for surround busses) Bus volume fader Edit button Bus level meter 11.3 0.00 CLIP Stereo Out Clipping indicator, see "Setting input levels" on page 71.- For information on how to set up input and output busses, see the chapter "VST Connections: Setting up input and output busses" on page 13.
- How to route audio channels to busses is described in the section "Routing audio channels to busses" on page 127.
- If the Control Room is disabled (see the chapter "Control Room (Cubase only)" on page 135), the Main Mix (the default output) bus is used for monitoring. For information about Monitoring, see "About monitoring" on page 20. In Cubase Studio, the Main Mix bus is always used for monitoring.
Basic mixing procedures
Setting volume in the mixer
In the mixer, each channel strip has a volume fader.
- For audio channels, the faders control the volume of the channels before they are routed (directly or via a group) channel to an output bus.
Each channel can in turn handle up to 6 speaker channels – see the chapter "Surround sound in Cubase" on page 181. -
An output channel fader determines the master output level of all audio channels routed to that output bus.
-
MIDI channels handle fader volume changes in the mixer by sending out MIDI volume messages to the connected instrument(s). Connected instruments must be set to respond to MIDI messages (such as MIDI volume in this case) for this to function properly.
- The fader settings are displayed numerically below the faders, in dB for audio channels and in the MIDI volume 0 to 127 value range for MIDI channels. You can click in the fader value fields and enter a volume setting by typing
- To make fine volume adjustments, hold down [Shift] when you move the faders.
- If you hold down [Ctrl]/[Command] and click on a fader, it will be reset to its default value, i.e. 0.0dB for audio channels, or MIDI volume 100 for MIDI channels. This reset to default values works for most mixer parameters.
You can use the faders to set up a volume balance between the audio and MIDI channels and perform a manual mix by moving the faders and other controls while playing back. By using the Write function (see “Enabling and disabling the writing of automation data” on page 189), you can automate the levels and most mixer actions.

It is also possible to create volume envelopes for separate events in the Project window or Audio Part Editor (see "Event Envelopes" on page 95) or to make static volume settings for an event on the info line or with the volume handle (see "About the volume handle" on page 90).
About the level meters for audio channels
When playing back audio in Cubase, the level meters in the mixer show the level of each audio channel.
- Directly below the level meter is a small level readout – this shows the highest registered level in the signal. Click this to reset the peak levels.
- Peak levels can also be shown as static horizontal lines in the meter, see “Changing the meter characteristics” on page 126.
If the peak level of the audio goes above 0dB, the numerical level indicator will show a positive value (i.e. a value above 0dB).
⇒ Cubase uses 32 bit floating point processing internally, so there is virtually limitless headroom – signals can go way beyond 0dB without clipping. Having higher levels than 0dB for individual audio channels is therefore not a problem in itself. The audio quality will not be degraded by this. However, when many high level signals are mixed in an output bus, this may require that you lower the output channel level a lot (see below). Therefore it is good practice to keep the maximum levels for individual audio channels roughly around 0dB.

When Direct Monitoring is used and the option "Map input bus metering to Audio track (in Direct Monitoring)" is activated in the Preferences (VST-Metering page), the level meters in the mixer will show the level of the input bus instead.
About the level meters for input and output channels
For the input and output channels, things are different. I/O channels have clipping indicators (input channels are only shown in Cubase).
- When you are recording, clipping can occur when the analog signal is converted to digital in the audio hardware. With Cubase, it is also possible to get clipping in the signal being recorded to disk (when 16 or 24 bit record format is used and you have adjusted the mixer settings for the input channel). For more information, see "Setting input levels" on page 71.
- In the output busses, the floating point audio is converted to the resolution of the audio hardware. In the integer audio domain, the maximum level is 0dB – higher levels will cause the clipping indicator for each bus to light up. If the clipping indicators light up for a bus, this indicates actual clipping – digital distortion which should always be avoided.

If the clipping indicator lights up for an output channel, reset the indicator by clicking on it, and lower the level until the indicator does not light up.
Adjusting Input Gain (Cubase only)
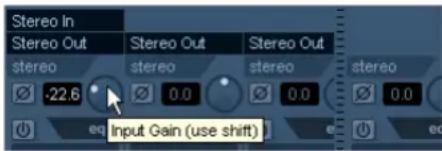
text_image
Stereo In Stereo Out Stereo Out Stereo Out stereo stereo stereo stereo -22.6 0.0 0.0 0.0 Input Gain (use shift)Each audio channel and input/output channel features an Input Gain control. This controls the gain for the incoming signal, before EQ and effects.
The Input Gain is not meant to be used as a volume control in the mixer, as it is not suited for continuous level adjustments during playback. It can, however, be used to cut or boost the gain in various circumstances:
- To change the level of a signal before the effects section. The level going into certain effects can change the way the signal is affected. A compressor, for example, can be "driven" harder by raising the Input Gain.
- To boost the level of poorly recorded signals.
To change the Input Gain, you need to press [Shift] and adjust the control (to avoid accidental gain changes). If you press [Alt]/[Option], you can adjust the Input Gain with a fader. Alternatively, you can also enter the desired number in the value field.
Input Phase switch (Cubase only)
Each audio channel and input/output channel has an Input Phase switch, to the left of the Input Gain control. When activated, the phase polarity is inverted for the signal. Use this to correct for balanced lines and mics that are wired backwards, or mics that are “out of phase” due to their positioning.
- Phase polarity is important when mixing together two similar signals.
If the signals are "out of phase" with respect to one another, there will be some cancellation in the resulting audio, producing a hollow sound with less low frequency content.
Level meters for MIDI channels
The level meters for MIDI channels do not show actual volume levels. Instead, they indicate the velocity values of the notes played back on MIDI tracks.
MIDI tracks set to the same MIDI channel and output
If you have several MIDI tracks set to the same MIDI channel (and routed to the same MIDI output), making volume and pan settings for one of these MIDI tracks/mixer channels will also affect all other mixer channels set to the same MIDI channel/output combination.
Using Solo and Mute

The Mute and Solo buttons
You can use the Mute and Solo buttons to silence one or several channels. The following applies:
- The Mute button silences the selected channel.
Clicking the Mute button again unmutes the channel. Several channels can be muted simultaneously. A muted channel is indicated by a lit Mute button and also by the lit Global Mute indicator on the common panel.

A muted channel in the mixer.

A lit Global Mute indicator on the common panel shows that one or more channels are muted.
- Clicking the Solo button for a channel mutes all other channels.
A soloed channel is indicated by a lit Solo button, and also by the lit Global Solo indicator on the common panel. Click the Solo button again to turn off Solo. - Several channels can be soloed at the same time. However, if you press [Ctrl]/[Command] and click the Solo button for a channel, any other soloed channels will automatically be un-soloed (i.e. this Solo mode is exclusive).
- [Alt]/[Option]-clicking a Solo button activates "Solo Defeat" for that channel.
In this mode the channel will not be muted if you solo another channel. To turn off Solo Defeat, [Alt]/[Option]-click the Solo button again.
[Alt]/[Option]-click a Solo button...

...to activate Solo Defeat for that channel.
- You can un-mute or un-solo all channels by clicking the Mute or Solo indicator on the common panel.
Listen Mode (Cubase only)


The Listen button for a channel strip and the global Listen button on the Common panel
Clicking the Listen button for a channel routes that channel to the Control Room without interrupting the normal signal flow. The following applies:
- When the channel is set to after-fader (also referred to as post-fader), the signal being routed to the Control Room channel will come after the fader and pan controls of the Listen-enabled channel.
- When the Control Room channel is set to pre-fader, the signal will be routed from just before the fader.
Control Room channel set to after-fader (AFL)...
...and to pre-fader (PFL).
A Listen-enabled channel is indicated by a lit Listen button, and also by the lit Global Listen button on the common panel. Click the Listen button again to turn off Listen mode. You can also turn off Listen mode for all Listen-enabled tracks at the same time by clicking the Listen button on the common panel.
For more information about the Listen functionality, see the chapter "Control Room (Cubase only)" on page 135.
Setting pan in the mixer
The pan control
The pan controls in the mixer are used to position a channel between the left and right side of the stereo spectrum. By default for stereo audio channels, pan controls the balance between the left and right channels. You can change this in the Preferences. By selecting one of the other pan modes (see below), you can set pan independently for the left and right channel.
- To make fine pan adjustments, hold down [Shift] when you move the pan control.
- To select the (default) center pan position, hold down [Ctrl]/[Command] and click on the pan control.
- For MIDI channels, the pan control sends out MIDI pan messages.
The result depends on how your MIDI instrument is set to respond to pan – check your documentation for details.
⇒ The SurroundPanner is described in the section "Using the SurroundPanner" on page 184.
Panning Bypass
You can bypass the panning for all track types except MIDI tracks. To do this, keep [Shift] and [Alt]/[Option] pressed and click on the pan setting for the respective channel in the mixer (on the fader panel or in the extended mixer view). The Panning Bypass state is reflected in all the different pan setting sections, e.g. if you bypass a channel in the mixer, this is automatically reflected in the Inspector for the respective track.
When panning is bypassed for a channel, the following happens:
- Mono channels will be panned center.
- Stereo channels will be panned left and right.
- Surround channels will be panned center.
⇒ To deactivate Panning Bypass, simply press [Shift]-[Alt]/[Option] and click again.
About the three pan modes (Cubase only)
If you right-click in the pan control field for a (stereo) audio channel, you can select one of three pan modes:
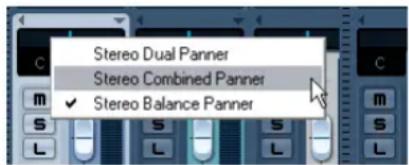
text_image
Stereo Dual Panner Stereo Combined Panner ✓ Stereo Balance Panner- Stereo Balance Panner controls the balance between the left and right channels.
This is the default mode.
- If Stereo Dual Panner is selected, there will be two pan controls with the upper controlling pan for the left channel, and the lower controlling pan for the right channel.
This allows you set pan independently for the left and right channels. Note that it is possible to reverse the left and right channels, i.e. the left channel can be panned to the right and vice versa. You can also "sum" two channels by setting them to the same pan position (i.e. mono) – note that this will increase the volume of the signal.

- If Stereo Combined Panner is selected, the left and right pan positions are shown as two lines with a blue/gray area between them. If you reverse the left and right channels, the area between the pan controls will be red instead of blue/gray.
In this mode, the left and right pan controls are linked, and can be moved left and right like a single pan control (keeping their relative distance).
- Stereo Combined mode also allows you set pan independently for the left and right channels. This is done by holding down [Alt]/[Option] and dragging the corresponding pan control.
When moving combined pan controls so that the left or right pan control reaches its maximum pan value, it naturally cannot go any further. If you continue to move further in the same direction, only the other pan control will move, thus altering the set relative pan range until both channels are panned fully to one side. If you move the pan controls in the opposite direction without releasing the mouse, the previously set pan range will be restored.
⇒ The pan settings made with the Dual Panner are reflected in the Combined Panner and vice versa.
⇒ You can specify the default pan mode for inserted audio tracks in the Preferences (VST page).
About the "Stereo Pan Law" setting (audio channels only)
In the Project Setup dialog there is a pop-up menu named "Stereo Pan Law", on which you can select one of several pan modes. This is related to the fact that without power compensation, the power of the sum of the left and right side will be higher (louder) if a channel is panned center than if it is panned left or right.
To remedy this, the Stereo Pan Law setting allows you to attenuate signals panned center, by -6, -4.5 or -3dB (default). Selecting the 0dB option effectively turns off constant-power panning. Experiment with the modes to see which fits best in a given situation. You can also select "Equal Power" on this pop-up menu, which means that the power of the signal will remain the same regardless of the pan setting.
Audio-specific procedures
This section describes the options and basic procedures regarding audio channels in the mixer.
Options for the extended audio channel strip
When using the extended channel strip view options, the upper panel can be set to show different views for each audio channel strip. You can select what to display in the extended panel individually for each channel or globally for all channels (see "Selecting what to display in the extended channel strips" on page 113).
The following views are possible:
- The 8 insert effect slots.
The inserts can also be found in the Inspector and the Channel Settings window, see "Using Channel Settings" on page 122. - The 8 sends, with pop-ups and send level value sliders. The sends can also be found in the Inspector and the Channel Settings window, see "Using Channel Settings" on page 122.
-
You also have the option of displaying four sends at a time (the Sends 1–4 and 5–8 menu items).
These modes offer the additional benefit of displaying send levels as dB values.
⇒ There are no sends for Input/Output channels. -
The EQ section, either with value sliders ("EQs") or as numerical settings with a curve display ("EQs curve"). These two views have exactly the same controls but different graphic layouts. The EQ section is also available in the Channel Settings window. For EQ parameter descriptions, see "Making EQ settings" on page 123.
- The SurroundPanner section (where applicable). If the channel is routed to a surround bus you can view a compact version of the SurroundPanner in the extended panel – double-click to open the full SurroundPanner panel.
- The "Meter" option shows large level meters in the extended panel. These operate exactly like the regular meters.
- Cubase only: The User Panel option displays Device panels for the audio track, including panels for inserted VST effects, see "Audio tracks" on page 30. You can access User panels by clicking on the tab at the top of the User Panel display in the extended mixer. For information on Device Panels, see the separate PDF document "MIDI Devices".
- Selecting the "Empty" option will display a blank panel in the extended strip.
- You can also select the "Overview" option – this shows a graphic overview of which insert effect slots, EQ modules and effects sends are activated for the channel. You can click the indicators to turn the corresponding slot/EQ module/ send on or off.
If you have selected a parameter for the extended channel strip and then switch to "narrow" mode, only the channel overview and the Meter can be shown in the extended channel strip. When you switch back to "wide" mode, the parameter settings are displayed again.
Using Channel Settings
For each audio channel strip in the mixer and in the Inspector and Track list for each audio track, there is an Edit button ("e").
Clicking this opens the VST Audio Channel Settings window. By default, this window contains:
- A section with eight insert effect slots (see "Audio effects" on page 150).
- Four EQ modules and an associated EQ curve display (see "Making EQ settings" on page 123).
- A section with eight sends (see "Audio effects" on page 150).
- A duplicate of the mixer channel strip (without the extended panel but with the input and output settings panel).
You can customize the Channel Settings window, by showing/hiding the different panels and/or by changing their order:
- To specify which panels should be shown/hidden, right-click in the Channel settings window, and activate/deactivate the respective options on the Customize View submenu on the context menu.
- To change the order of the panels, select "Setup..." on the Customize View pop-up menu and use the "Move up" and "Move Down" buttons.
For further information, see the chapter "Customizing" on page 468.
Every channel has its own channel settings window (although you can view each in the same window if you like – see below).
Click the Edit button to open the Channel Settings window.
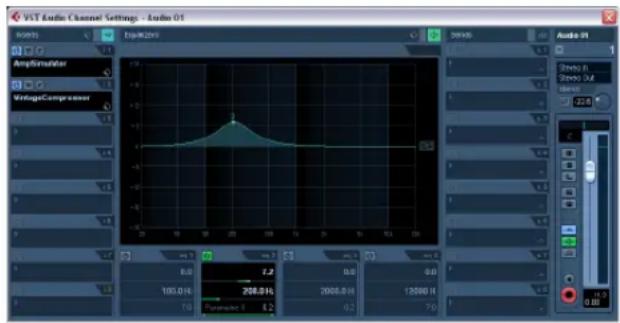
text_image
VST Audio Channel Settings - Audio 01 Audio01 Audio01 AmplSimulator VoltageCompressor 0.0 7.2 0.0 0.0 103.014 208.014 2008.014 12560 H 7.0 Parametro 3 6.2 0.2 7.0 10.2 0.00The Channel Settings window is used for the following operations:
- Apply equalization, see "Making EQ settings" on page 123.
- Apply send effects, see "Audio effects" on page 150.
- Apply insert effects, see "Audio effects" on page 150.
- Copy channel settings and apply them to another channel, see "Copying settings between audio channels" on page 125.
All channel settings are applied to both sides of a stereo channel.
Changing channels in the Channel Settings window
You can view any channel's settings from a single window.
If the option "Sync Project and Mixer Selection" is activated in the Preferences (Editing–Project & Mixer page), this can be done "automatically":
- Open the Channel Settings window for a track and position it so that you can see both the Project window and the Channel Settings window.
Selecting a track in the Project window automatically selects the corresponding channel in the mixer (and vice versa). If a Channel Settings window is open, this will immediately switch to show the settings for the selected channel. This allows you to have a single Channel Settings window open in a convenient position on the screen, and use it for all your EQ and channel effect settings.
You can also select a channel manually (thereby changing what is shown in the open Channel Settings window). Proceed as follows:
- Open the Channel Settings window for any channel.
- Open the Choose Edit Channel pop-up menu by clicking the arrow button to the left of the channel number at the top of the Fader view.
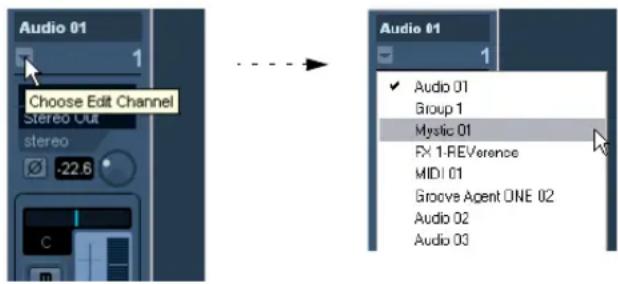
text_image
Audio 01 Choose Edit Channel Stereo Out stereo -22.6 C Audio 01 ✓ Audio 01 Group 1 Mystic 01 RX 1-REVerence MIDI 01 Groove Agent ONE 02 Audio 02 Audio 03-
Select a channel from the pop-up to show the settings for that channel in the open Channel Settings window.
-
Alternatively, you can select a channel in the mixer by clicking its channel strip (make sure not to click on a control as this will change the respective parameter setting instead).
This selects the channel, and the Channel Settings window is updated. - To open several Channel Settings windows at the same time, press [Alt]/[Option] and click the Edit buttons for the respective channels.
Making EQ settings
Each audio channel in Cubase has a built-in parametric equalizer with up to four bands. There are several ways to view and adjust the EQs:
- By selecting one of the EQ display modes ("EQs" or "EQs Curve") for the extended channel strip in the mixer.
These modes contain the same settings but present them in different ways:
In "EQs" mode, the top value slider controls the gain, the middle controls frequency and the lower sets the filter type and the Q parameter for each EQ band.
In "EQs Curve" mode, EQ settings are shown as a curve. Parameters are set by clicking on the value and adjusting with the fader that appears.
- By selecting the "Equalizers" or "Equalizer Curve" tab in the Inspector.
The “Equalizers” section is similar to the “EQs” mode in the extended mixer or the “Equalizers” section in the Channel Settings window, while the “Equalizer Curve” section shows a display in which you can “draw” an EQ curve. Setting EQ in the Inspector is only possible for track-based audio channels.
Note that by default, only the Equalizers tab is shown. To display the Equalizer Curve tab, right-click on an Inspector tab (not in the empty area below the Inspector) and activate the "Equalizer Curve" option.
- By using the Channel Settings window. This offers both parameter sliders and a clickable curve display (the Equalizer + Curve pane) and also lets you store and recall EQ presets.
Below we describe how to set up EQ in the Channel Settings window, but the parameters are the same in the mixer and Inspector (apart from the presets and reset function, which are not available in the mixer).
The Equalizers + Curve pane in the Channel Settings window consists of four EQ modules with parameter sliders, an EQ curve display and some additional functions at the top.
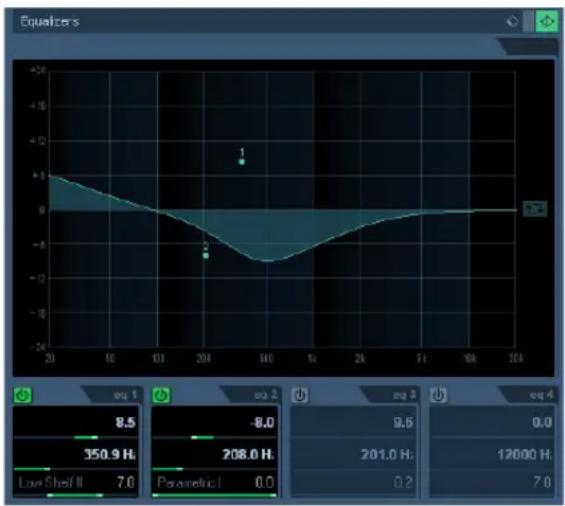
line
| Parameter | Value | | --------------- | ----- | | Low Shelf II | 7.0 | | High | -8.0 | | Peak | 1 | | Parameters | 0.0 | | High | 9.6 | | Low | 208.0 H | | High | 12000 H | | Parameters | 0.2 | | High | 7.0 |Using the parameter controls
- Activate an EQ module by clicking its on/off button. Although the modules have different default frequency values and different Q names, they all have the same frequency range (20Hz to 20kHz). The only difference between the modules is that you can specify different filter types for each individual module (see below).
- Set the amount of cut or boost with the gain control – the upper slider.
The range is ± 24dB.
- Set the desired frequency with the frequency slider. This is the center frequency of the frequency range (20Hz to 20kHz) to be cut or boosted.
- Click on the lower slider (to the left) to open the filter type pop-up menu and select the desired filter type. The "eq1" and "eq4" bands can act as parametric, shelving or high/low-pass filters, while "eq2" and "eq3" will always be parametric filters.
- Set the Q value with the lower slider (to the right). This determines the width of the affected frequency range. Higher values give narrower frequency ranges.
- If needed, you can activate and make settings for up to four modules.
- Note that you can edit the values numerically as well, by clicking in a value field and entering the desired gain, frequency or Q value.
Using the curve display
When you activate EQ modules and make settings, you will see that your settings are automatically reflected in the curve display above. You can also make settings directly in the curve (or combine the two methods any way you like):
- To activate an EQ module, click in the curve display. This adds a curve point and one of the modules below are activated.
-
Make EQ settings by dragging the curve point in the display.
This allows you to adjust gain (drag up or down) and frequency (drag left or right). -
To set the Q parameter, press [Shift] and drag the curve point up or down.
You will see the EQ curve become wider or narrower as you drag.
- You can also restrict the editing by pressing [Ctrl]/[Command] (sets gain only) or [Alt]/[Option] (sets frequency only) while you drag the curve point.
- To activate another EQ module, click somewhere else in the display and proceed as above.
- To turn off an EQ module, double-click its curve point or drag it outside the display.
- To mirror ("inverse") the eq curve on the x axis, click the button to the right of the curve display.
The Inverse Equalizers button
EQ bypass
Whenever one or several EQ modules are activated for a channel, the EQ button will light up in green in the mixer channel strip, Inspector (Equalizer and Channel sections), Track list and Channel Settings window (top right corner of the EQ section).
You can also bypass all EQ modules. This is useful, as it allows you to compare the sound with and without EQ. Proceed as follows:
- In the mixer, the Track list and in the Channel section in the Inspector, click the EQs state button so that it turns yellow.
To deactivate EQ Bypass, click the button again, so that it turns green again.
- In the Inspector (Equalizers tab) and in the Channel Settings window, click the Bypass button (next to the EQ button) so that it turns yellow. Click again to deactivate EQ Bypass mode.
EQ bypass in the mixer, the Channel Settings window and the Inspector
EQ reset
On the Presets pop-up menu in the Channel Settings window and in the Inspector, you will find the Reset command. Select this to turn off all EQ modules and reset all EQ parameters to their default values.
Using EQ presets
Some useful basic presets are included with the program. You can use them as they are, or as a starting point for further “tweaking”.
- To call up a preset, pull down the presets pop-up menu in the Channel Settings window or in the Inspector and select one of the available presets.
- To store the current EQ settings as a preset, select "Store Preset" on the presets pop-up menu and enter the desired name for the preset in the dialog that appears.
- To rename the selected preset, select "Rename Preset" on the pop-up menu and enter a new name.
- To delete the selected preset, select "Remove Preset" on the pop-up menu.
→ You can also apply EQ (and Inserts) settings from Track presets, see "Applying Inserts and EQ settings from track presets" on page 291.
EQ in the channel overview
If the "Channel" section is selected in the Inspector or the "Overview" view mode is selected in the extended mixer, you will get an overview of which EQ modules, insert effects and effect sends are activated for the channel.
By clicking the respective indicator (1 to 4), you can turn the corresponding EQ module on or off.
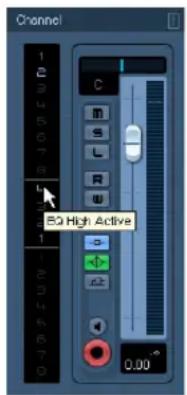
text_image
Channel 80 High Active 0.00The channel overview in the Inspector
The option "Use Cubase 3 EQ settings as default"
In the Preferences (VST page) you will find the option "Use Cubase 3 EQ settings as default". When you activate this option, the EQ settings from Cubase 3 will be used by default. This means that when you create a new track, the four EQ modules will be set to the EQ band types as follows:
This EQ module... ...will be set to
EQ1 Low Shelf 1
EQ2 Parametric 1
EQ3 Parametric 1
EQ4 High Pass 1
Copying settings between audio channels
It is possible to copy all channel settings for an audio channel and paste them to one or several other channels. This applies to all audio-based channel types. For example, you can copy EQ settings from an audio track and apply these to a group or VST Instrument channel, if you want them to have the same sound.
Proceed as follows:
- In the mixer, select the channel you want to copy settings from.
- Click the "Copy First Selected Channel's Settings" button on the common panel.
text_image
Copy First Selected Channel's Settings Stereo In Audio 01 Audio 02- Select the channel(s) you want to copy the settings to and click the "Paste Settings to Selected Channels" button (below the "Copy First Selected Channel Settings" button).
The settings are applied to the selected channel(s).
You can copy channel settings between different types of channels, but only those channels will be used for which corresponding settings are available in the target channel:
- For example, since input/output channels do not have send effects, copying from them will leave the Sends settings in the target channel unaffected.
- Also, in case of Surround Sound (Cubase only), for example, any Insert effects routed to surround speaker channels will be muted, when the settings are pasted to a mono or stereo channel.
Initialize Channel and Reset Mixer
The Initialize Channel button can be found in the lower part of the Control Strip section in the Channel Settings window (if this section is not shown in the Channel Settings window, open the context menu and select "Control Strip" on the Customize View submenu). Initialize Channel resets the selected channel to the default settings.
Similarly, the mixer common panel holds a Reset Mixer/Reset Channels button – when you click this, you will be asked whether you want to reset all channels or just the selected channels.
The default settings are:
- All EQ, Insert and Send effect settings are deactivated and reset.
- Solo/Mute is deactivated.
- The fader is set to 0dB.
- Pan is set to center position.
Changing the meter characteristics
In the Mixer context menu, opened by right-clicking anywhere on the mixer panel, there is a submenu named "Global Meter Settings". Here you can make settings for the preferred meter characteristics, with the following options:
- If "Hold Peaks" is activated, the highest registered levels are "held" and are shown as static horizontal lines in the meter.
Note that you can turn this on or off by clicking in any audio level meter in the mixer.
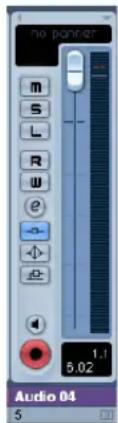
text_image
no panther m S L R W e - - - - - - - - - - - - - - - - - - - - - - - - - - - - - - - - - - - - - - - - - - - - - - - - - - - - - - - - - - - - - - - - - - - - - - - - - - - - - - - - - - - - - - - - - - - - - - - - - - - - + 5.02 1.1 Audio 04 5Hold Peaks is activated. The highest registered level is displayed in the meter.
- If "Hold Forever" is activated, the peak levels will be shown until meters are reset (by clicking the numerical peak display below the meter).
If "Hold Forever" is off, you can specify for how long the peak levels will be held with the parameter "Meters' Peak Hold Time" in the Preferences (VST-Metering page). The peak hold time can be between 500 and 30000ms. - If "Meter Input" is activated, meters will show input levels for all audio channels and input/output channels.
Note that the input meters are post input gain (Cubase only). - If "Meter Post-Fader" is activated, meters will show post-fader levels.
This is the default setting for channels in the mixer. - In Cubase, there is also a “Meter Post-Panner” mode. This is similar to “Meter Post-Fader”, but the meters will reflect pan settings as well.
- If "Fast Release" is activated, the meters respond very quickly to level peaks. If "Fast Release" is deactivated, the meters respond more like standard meters.
You can set the time it takes for the meters to "fall back" in the Preferences (VST-Metering page).
Using group channels
You can route the outputs from multiple audio channels to a group. This enables you to control the channel levels using one fader, apply the same effects and equalization to all of them etc. To create a group channel, proceed as follows:
- Select Add Track from the Project menu and select "Group Channel" from the submenu that appears.
- Select the desired channel configuration and click OK. A group channel track is added to the Track list and a corresponding group channel strip is added to the mixer. By default the first group channel strip is labeled "Group 1", but you can rename it just like any channel in the mixer.
- Pull down the Output Routing pop-up for a channel you want to route to the group channel, and select the group channel.
The output of the audio channel is now redirected to the selected group.
- Do the same for the other channels you wish to route to the group.

You can select a group channel as an Input for an audio track, e.g. to record a downmix of separate track outputs routed to a group (see "Recording from busses" on page 71).
Settings for group channels
The group channel strips are (almost) identical to audio channel strips in the mixer. The descriptions of the mixer features earlier in this chapter apply to group channels as well. Some things to note:
- You can route the output of a group to an audio channel (see "Recording from busses" on page 71), to an output bus or to another group.
You cannot route a group to itself. Routing is done with the Output Routing pop-up menu in the Inspector (select the subtrack for the Group in the Track list) or in the Routing section at the top of each channel strip. - There are no Input Routing pop-ups, Monitor buttons or Record Enable buttons for group channels.
This is because inputs are never connected directly to a group. - Solo functionality is automatically linked for channels routed to a group and the group channel itself.
This means that if you solo a group channel, all channels routed to the group are automatically soloed as well. Similarly, soloing a channel routed to a group will automatically solo the group channel.
- Mute functionality depends on the setting "Group Channels: Mute Sources as well" in the Preferences (VST page). By default, when you mute a group channel no audio will pass through the group. However, other channels that are routed directly to that group channel will remain unmuted. If any of those channels have aux sends routed to other group channels, FX channels or output busses, those will still be heard.
If the option "Group Channels: Mute Sources as well" is activated in the Preferences (VST page), muting a group channel will cause all other channels directly routed to it to be muted as well. Pressing mute again will unmute the group channel and all other channels directly routed to it. Channels that were muted prior to the group channel being muted will not remember their mute status and will be unmuted when the group channel is unmuted.
The option "Group Channels: Mute Sources as well" does not affect how mute automation is written. Writing mute automation on a group channel only affects the group channel and not channels routed to it. When writing the automation, you will see the other channels being muted when this option is activated. However, upon playback, only the group channel will respond to the automation.
One application of group channels is to use them as "effect racks" – see the chapter "Audio effects" on page 150.
About output busses
Cubase uses a system of input and output busses which are set up using the VST Connections dialog. This is described in the chapter "VST Connections: Setting up input and output busses" on page 13.
Output busses let you route audio from the program to the outputs on your audio hardware.
Routing audio channels to busses
To route the output of an audio channel to one of the active busses, proceed as follows:
- Open the mixer.
- Make sure the routing panel is visible – see "Normal vs. Extended channel strips" on page 112.
- Pull down the Output Routing pop-up menu at the top of the channel strip and select one of the busses.
This pop-up menu contains the output busses configured in the VST Connections window, as well as available group channels (provided that the busses and groups are compatible with the speaker configuration for the channel – see "Routing" on page 18).
You can also make routing settings in the Inspector.
For details on routing surround channels (Cubase only), see "Surround in the mixer" on page 182.
Viewing the output busses in the mixer
Output busses are shown as output channels in a separate pane to the right in the mixer. You show or hide this pane by clicking the Hide Output Channels button in the mixer's common panel.
Each output channel resembles a regular audio channel strip. Here you can do the following:
- Adjust master levels for all configured output busses using the level faders.
- Adjust input gain and input phase of the output busses (Cubase only).
- Add effects or EQ to the output channels (see the chapter "Audio effects" on page 150).
MIDI-specific procedures
This section describes basic procedures for MIDI channels in the mixer.
Selecting what to show in the extended MIDI channel strip
When using the extended channel strip view options (see "Normal vs. Extended channel strips" on page 112), the upper panel can be set to show different views for each MIDI channel strip. You select what to display for each channel by using the View options pop-up menu at the top of each channel strip. The following views are possible:
- The MIDI insert effects.
MIDI inserts can also be found in the Inspector and the Channel Settings window for MIDI channels. How to use MIDI insert effects is described in the chapter "MIDI realtime parameters and effects" on page 305.
■ The MIDI send effects.
The sends can also be found in the Inspector and the Channel Settings window for MIDI channels. How to use MIDI send effects is described in the chapter "MIDI realtime parameters and effects" on page 305. -
The "Meter" option shows large level (velocity) meters in the extended panel.
-
You can also select the "Overview" option – this shows a graphic overview of which insert effect slots and effect sends are activated for the channel.
You can click the indicators to turn the corresponding slot/send on or off.
- Cubase only: The "User Panel" option allows you to import MIDI device panels – this is described in the separate PDF document "MIDI Devices".
- Selecting "Empty" will display a blank panel in the extended strip.
- By selecting from the View options pop-up on the common panel, you can set the view for all channels in the mixer.
Selecting EQ or SurroundPanners (which apply to audio channels only) will not change the view for MIDI channels. Selecting inserts or send effects from the common panel will change the view for all channel types.
Using Channel Settings
For each MIDI channel strip in the mixer (and MIDI track in the Track list or the Inspector), there is an Edit ("e") button.
Clicking this opens the MIDI Channel Settings window. By default, this window contains a duplicate of the mixer channel strip, a section with four MIDI inserts and a section with four MIDI send effects.
You can customize the Channel Settings window, by showing/hiding the different panels and/or by changing their order:
- To specify, which panels should be shown/hidden, right-click in the Channel settings window, and activate/deactivate the respective options on the Customize View submenu on the context menu.
- To change the order of the panels, select "Setup" on the Customize View pop-up menu and use the "Move up" and "Move Down" buttons in the dialog that opens.
Every MIDI channel has its own channel settings window.
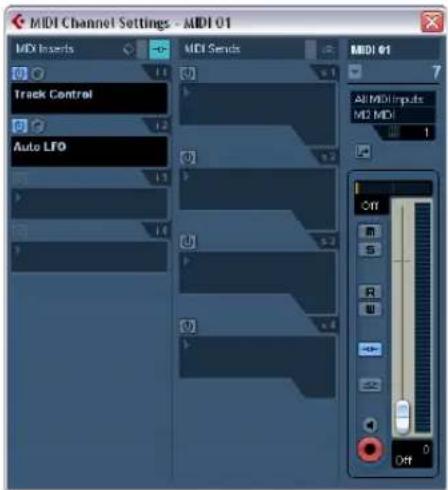
text_image
MIDI Channel Settings - MIDI 01 MIDI Inserts Track Control Auto LFO MIDI Sends All MIDI Inputs M2 MIDI Off OffThe MIDI Channel Settings window
Utilities
Link/Unlink channels
This function is used to "link" selected channels in the mixer so that any change applied to one channel will be mirrored by all channels in that group. You can link as many channels as you like, and you can also create as many groups of linked channels as you like. To link channels in the mixer, proceed as follows:
- Press [Ctrl]/[Command] and click on all the channels you want to link.
[Shift]-clicking allows you to select a continuous range of channels.
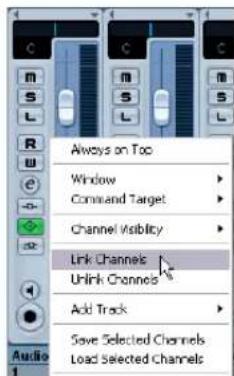
text_image
Always on Too Window Command Target Channel Visibility Link Channels Unlink Channels Add Track Save Selected Channels Load Selected Channels-
Right-click somewhere on the gray mixer panel. The Mixer context menu appears.
-
Select "Link Channels" from the context menu.
- To unlink channels, select one of the linked channels and select "Unlink Channels" from the Mixer context menu. The channels are unlinked. Note that you do not have to select all the channels that are linked, only one of them.
⇒ It is not possible to remove individual channels from Link status.
To make individual settings to a linked channel, press [Alt]/[Option] when changing the setting.
What will be linked?
The following rules apply for linked channels:
- Only level, mute, solo, select, monitor and record enable will be linked between channels. Effect/EQ/pan/input and output routing settings are not linked.
- Any individual channel settings you have made before linking will remain until you alter the same setting for any of the linked channels.
For example, if you link three channels, and one of them was muted at the time you applied the Link Channel function, this channel will remain muted after linking. However, if you mute another channel all linked channels will be muted. Thus, the individual setting for one channel is lost as soon as you change the same parameter setting for any of the linked channels.
- Fader levels will be "ganged". The relative level offset between channels will be kept if you move a linked channel fader.
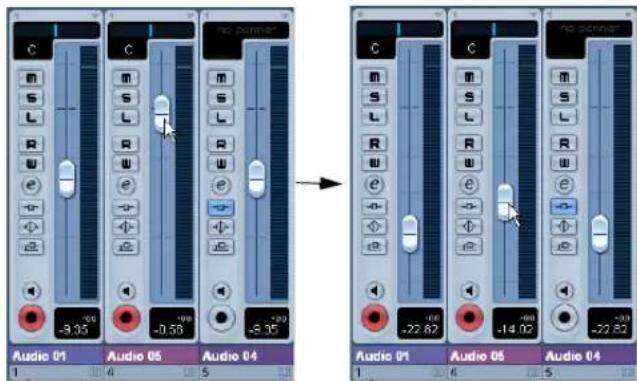
text_image
C m S L R e -9.35 -0.50 -0.50 -8.35 Audio 01 Audio 05 Audio 04 → C m S L R e -22.82 -14.02 -22.82 Audio 01 Audio 05 Audio 04The three channels shown are linked. Pulling down one fader changes the levels for all three channels, but keeps the relative level mix.
- By pressing [Alt]/[Option], you can make individual settings and changes for channels that are linked.
Linked channels have individual automation tracks. These are completely independent, and are not affected by the Link function.
The Window submenu
The Mixer context menu, opened by right-clicking anywhere on the Mixer window background, provides the Window submenu. Its options are handy for quickly switching to another open mixer window, showing/hiding the different mixer panes etc. It contains the following options:
- Show Routing View
Allows you to show/hide the topmost section of the mixer which contains the input/output routing settings.
■ Show Extended View
Allows you to show/hide the middle section of the mixer, where you can display different settings for the channels (EQs, Send effects, etc.).
- Next Mixer
This displays the next mixer window (if you have several mixer windows open).
Saving mixer settings
It is possible to save complete mixer settings for all or all selected audio-related channels in the mixer. These can later be loaded into any project. Channel settings are saved as mixer settings files. These have the file extension ".vmx".
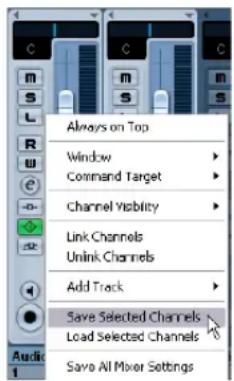
text_image
Always on Top Window Command Target Channel Visibility Link Channels Unlink Channels Add Track Save Selected Channels Load Selected Channels Save All Mixer SettingsRight-clicking somewhere in the mixer panel or in the Channel Settings window brings up the context menu where the following Save options can be found:
- "Save Selected Channels" will save all channel settings for the selected channels.
Input/output routings are not saved.
- "Save All Mixer Settings" saves all channel settings for all channels.
When you select any of the above options, a standard file dialog opens where you can select a name and storage location on your disk for the file.
Saving mixer settings does not apply to MIDI channels in the mixer – only audio-related channels (group, audio, instrument, effect return, VSTi and Re-Wire) are saved with this function!
Loading mixer settings
Loading Selected Channels
To load mixer settings saved for selected channels, proceed as follows:
- Select the same number of channels in the new project to match the number of channels you saved settings for in the previous project.
For example, if you saved settings for six channels, select six channels in the mixer.
- Mixer settings will be applied in the same order as they were in the mixer.
Thus, if you save settings from channels 4, 6 and 8 and apply these settings to channels 1, 2 and 3, the settings saved for channel 4 would be applied to channel 1, the settings saved for channel 6 to channel 2 and so on.
- Right-click the mixer panel to open the context menu, and select "Load Selected Channels".
A standard file dialog appears, where you can locate the saved file.
- Select the file and click "Open".
The channel settings are applied to the selected channels.
Loading mixer settings does not apply to MIDI channels in the mixer – only audio-related channels (group, audio, instrument, effect return, VSTi and ReWire) are saved and can be loaded with this function!
If you choose to apply mixer settings to fewer channels than you saved, the order of the saved channels in the mixer applies – i.e. the saved channels that are "left over" and not applied will be the channels with the highest channel numbers (or furthest to the right in the mixer).
Loading All Mixer Settings
Selecting "Load All Mixer Settings" from the context menu allows you to open a saved mixer settings file, and have the stored settings applied to all channels for which there is information included in the file. All channels, output settings, VST Instruments, sends and "master" effects will be affected.
Please note that if the saved mixer settings were for 24 channels, for example, and the mixer you apply it to currently contains 16 channels, only the settings for channels 1 to 16 will be applied – this function will not automatically add channels.
About the VST Performance window
The VST Performance window is opened from the Devices menu. The window shows two meter displays: The ASIO meter, which indicates CPU load, and the Disk meter, which shows the hard disk transfer rate. It is recommended that you check this from time to time, or keep it always open. Even if you have been able to activate a number of audio channels in the project without getting any warning, you may run into performance problems when adding EQ or effects.
- The ASIO meter (at the top) shows the ASIO time usage, i.e. the time required to complete the current processing tasks. The more tracks, effects, EQ etc. you use in your project, the longer processing will take, and the longer the ASIO meter will show activity.
If the red Overload indicator lights up, you need to decrease the number of EQ modules, active effects and/or audio channels playing back simultaneously.
- The lower bar graph shows the hard disk transfer load. If the red overload indicator lights up, the hard disk is not supplying data fast enough to the computer. You may need to reduce the number of tracks playing back by using the Disable Track function (see "About track disable/enable" on page 63). If this does not help, you need a faster hard disk. Note that the overload indicator may occasionally blink, e.g. when you locate during playback. This does not indicate a problem, but happens because the program needs a moment for all channels to load data for the new playback position.
⇒ The ASIO and Disk load meters can also be shown on the Transport panel (as "Performance") and on the Project window toolbar (as "Performance Meter").
There they are shown as two miniature vertical meters (by default at the left side of the panel/toolbar).
VST Mixer Diagrams

Note that the AFL/PFL Listen Bus architecture is available only in Cubase.
Input Objects
Input Channel External Input Channel (Cubase only) Talkback Channel (Cubase only)
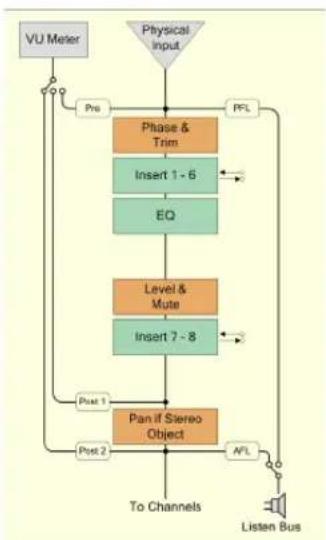
flowchart
graph TD
    A["VU Meter"] --> B["Phase & Trim"]
    B --> C["Insert 1 - 6"]
    C --> D["EQ"]
    D --> E["Level & Mute"]
    E --> F["Insert 7 - 8"]
    F --> G["Pan if Stereo Object"]
    G --> H["To Channels"]
    G --> I["AFL"]
    I --> J["Listen Bus"]
    J --> K["PFL"]
    K --> B
    L["Physical Input"] --> B
    M["Pre"] --> B
    N["Post 1"] --> G
    O["Post 2"] --> G
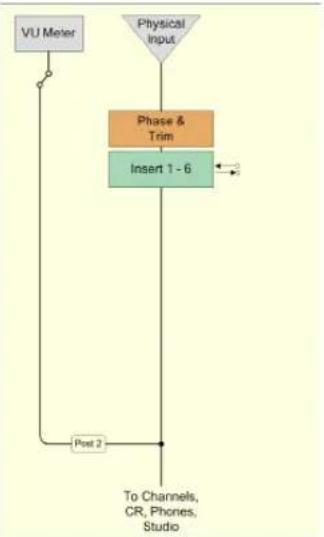
flowchart
graph TD
    A["VU Meter"] --> B["Phase & Trim"]
    B --> C["Insert 1 - 6"]
    C --> D["Physical Input"]
    D --> E["Post 2"]
    E --> F["To Channels, CR, Phones, Studio"]

flowchart
graph TD
    A["VU Meter"] --> B["Trim"]
    B --> C["Insert 1 - 6"]
    C --> D["Level & Mute"]
    D --> E["Insert 7 - 8"]
    E --> F["Post 2"]
    F --> A
    G["Physical Input"] --> B
    G --> D
    H["To Channels & Studio"] --> E
Channel Objects
Audio Channel
ReWire Channel
VSTi Channel
External Instrument (Cubase only)
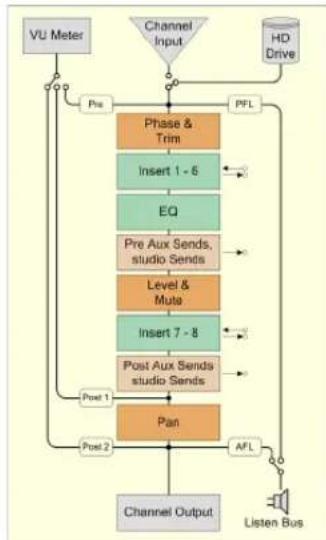
flowchart
graph TD
    A["VU Meter"] --> B["Phase & Trim"]
    B --> C["Insert 1 - 6"]
    C --> D["EQ"]
    D --> E["Pre Aux Sends, studio Sends"]
    E --> F["Level & Mute"]
    F --> G["Insert 7 - 8"]
    G --> H["Post Aux Sends studio Sends"]
    H --> I["Pan"]
    I --> J["Channel Output"]
    K["HD Drive"] --> L["PFL"]
    L --> B
    M["Post 1"] --> N["Post 2"]
    O["Post 2"] --> P["AFL"]
    P --> I
    Q["Listen Bus"] --> R["AFL"]
    R --> I
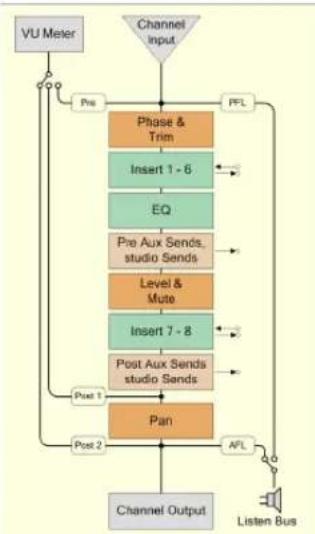
flowchart
graph TD
    A["VU Meter"] --> B["Phase & Trim"]
    B --> C["Insert 1 - 6"]
    C --> D["EQ"]
    D --> E["Pre Aux Sends, studio Sends"]
    E --> F["Level & Mute"]
    F --> G["Insert 7 - 8"]
    G --> H["Post Aux Sends studio Sends"]
    H --> I["Pan"]
    I --> J["Post 2"]
    J --> K["Channel Output"]
    L["Channel Input"] --> M["PFL"]
    M --> N["AFL"]
    N --> O["Listen Bus"]
    O --> P["Post 1"]
    P --> Q["Post 2"]
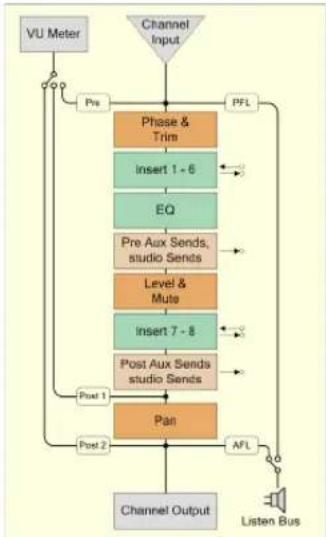
flowchart
graph TD
    A["VU Meter"] --> B["Phase & Trim"]
    B --> C["Insert 1 - 6"]
    C --> D["EQ"]
    D --> E["Pre Aux Sends, studio Sends"]
    E --> F["Level & Mute"]
    F --> G["Insert 7 - 8"]
    G --> H["Post Aux Sends studio Sends"]
    H --> I["Pan"]
    I --> J["AFL"]
    J --> K["Listen Bus"]
    K --> L["Channel Output"]
    L --> M["Post 2"]
    M --> N["Post 1"]
    N --> O["Prel"]
    O --> P["Prel"]
    P --> Q["Prel"]
    Q --> R["Prel"]
    R --> S["Prel"]
    S --> T["Prel"]
    T --> U["Prel"]
    U --> V["Prel"]
    V --> W["Prel"]
    W --> X["Prel"]
    X --> Y["Prel"]
    Y --> Z["Prel"]
    Z --> AA["Prel"]
    AA --> AB["Prel"]
    AB --> AC["Prel"]
    AC --> AD["Prel"]
    AD --> AE["Prel"]
    AE --> AF["Prel"]
    AF --> AG["Prel"]
    AG --> AH["Prel"]
    AH --> AI["Prel"]
    AI --> AJ["Prel"]
    AJ --> AK["Prel"]
    AK --> AL["Prel"]
    AL --> AM["Prel"]
    AM --> AN["Prel"]
    AN --> AO["Prel"]
    AO --> AP["Prel"]
    AP --> AQ["Prel"]
    AQ --> AR["Prel"]
    AR --> AS["Prel"]
    AS --> AT["Prel"]
    AT --> AU["Prel"]
    AU --> AV["Prel"]
    AV --> AW["Prel"]
    AW --> AX["Prel"]
    AX --> AY["Prel"]
    AY --> AZ["Prel"]
    AZ --> BA["Prel"]
    BA --> BB["Prel"]
    BB --> BC["Prel"]
    BC --> BD["Prel"]
    BD --> BE["Prel"]
    BE --> BF["Prel"]
    BF --> BG["Prel"]
    BG --> BH["Prel"]
    BH --> BI["Prel"]
    BI --> BJ["Prel"]
    BJ --> BK["Prel"]
    BK --> BL["Prel"]
    BL --> BM["Prel"]
    BM --> BN["Prel"]
    BN --> BO["Prel"]
    BO --> BP["Prel"]
    BP --> BQ["Prel"]
    BQ --> BR["Prel"]
    BR --> BS["Prel"]
    BS --> BT["Prel"]
    BT --> BU["Prel"]
    BU --> BV["Prel"]
    BV --> BW["Prel"]
    BW --> BX["Prel"]
    BX --> BY["Prel"]
    BY --> BZ["Prel"]
    BZ --> CA["Prel"]
    CA --> CB["Prel"]
    CB --> CC["Prel"]
    CC --> CD["Prel"]
    CD --> CE["Prel"]
    CE --> CF["Prel"]
    CF --> CG["Prel"]
    CG --> CH["Prel"]
    CH --> CI["Prel"]
    CI --> CJ["Prel"]
    CJ --> CK["Prel"]
    CK --> CR["Prel"]
    CR --> CS["Prel"]
    CS --> CT["Prel"]
    CT --> CU["Prol"]
    CU --> CV["Prol"]
    CV --> CW["Prol"]
    CW --> CX["Prol"]
    CX --> CY["Prol"]
    CY --> CZ["Prol"]
    CZ --> DA["Prol"]
    DA --> DB["Prol"]
    DB --> DC["Prol"]
    DC --> DD["Prol"]
    DD --> DE["Prol"]
    DE --> DF["Prol"]
    DF --> DG["Prol"]
    DG --> DH["Prol"]
    DH --> DI["Prol"]
    DI --> DJ["Prol"]
    DJ --> DK["Prol"]
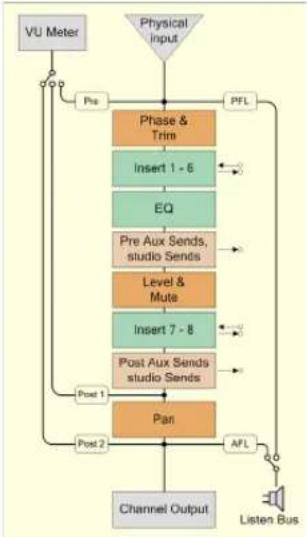
flowchart
graph TD
    A["Physical Input"] --> B["Phase & Trim"]
    B --> C["Insert 1 - 6"]
    C --> D["EQ"]
    D --> E["Pre Aux Sends, studio Sends"]
    E --> F["Level & Mute"]
    F --> G["Insert 7 - 8"]
    G --> H["Post Aux Sends studio Sends"]
    H --> I["Pan"]
    I --> J["Channel Output"]
    J --> K["AFL"]
    K --> L["Listen Bus"]
    L --> M["PFL"]
    M --> N["Phase & Trim"]
    N --> O["Insert 1 - 6"]
    O --> P["EQ"]
    P --> Q["Pre Aux Sends, studio Sends"]
    Q --> R["Level & Mute"]
    R --> S["Insert 7 - 8"]
    S --> T["Post Aux Sends studio Sends"]
    T --> U["Pan"]
    U --> V["AFL"]
    V --> W["Listen Bus"]
    W --> X["PFL"]
    X --> Y["Phase & Trim"]
    Y --> Z["Insert 1 - 6"]
    Z --> AA["EQ"]
    AA --> AB["Pre Aux Sends, studio Sends"]
    AB --> AC["Level & Mute"]
    AC --> AD["Insert 7 - 8"]
    AD --> AE["Post Aux Sends studio Sends"]
    AE --> AF["Pan"]
    AF --> AG["AFL"]
    AG --> AH["Listen Bus"]
    AH --> AI["PFL"]
    AI --> AJ["Phase & Trim"]
    AJ --> AK["Insert 1 - 6"]
    AK --> AL["EQ"]
    AL --> AM["Pre Aux Sends, studio Sends"]
    AM --> AN["Level & Mute"]
    AN --> AO["Insert 7 - 8"]
    AO --> AP["Post Aux Sends studio Sends"]
    AP --> AQ["Pan"]
    AQ --> AR["AFL"]
    AR --> AS["Listen Bus"]
    AS --> AT["PFL"]
    AT --> AU["Phase & Trim"]
    AU --> AV["Insert 1 - 6"]
    AV --> AW["EQ"]
    AW --> AX["Pre Aux Sends, studio Sends"]
    AX --> AY["Level & Mute"]
    AY --> AZ["Insert 7 - 8"]
    AZ --> BA["Post Aux Sends studio Sends"]
    BA --> BB["Pan"]
    BB --> BC["AFL"]
    BC --> BD["Listen Bus"]
    BD --> BE["PFL"]
    BE --> BF["Phase & Trim"]
Summing Objects
Group Channel
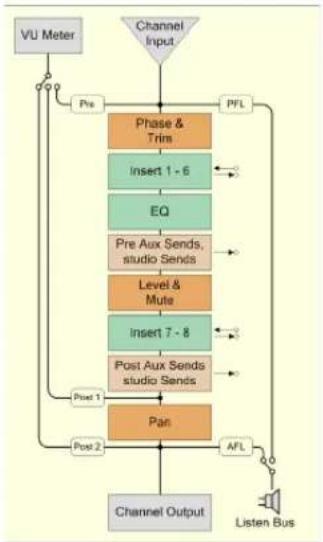
flowchart
graph TD
    A["VU Meter"] --> B["Phase & Trim"]
    B --> C["Insert 1 - 6"]
    C --> D["EQ"]
    D --> E["Pre Aux Sends, studio Sends"]
    E --> F["Level & Mute"]
    F --> G["Insert 7 - 8"]
    G --> H["Post Aux Sends studio Sends"]
    H --> I["Pan"]
    I --> J["AFL"]
    J --> K["Listen Bus"]
    K --> L["Channel Output"]
    L --> M["Post 2"]
    M --> N["Post 1"]
    N --> O["Prel"]
    O --> P["PFL"]
    P --> Q["Channel Input"]
FX Channel
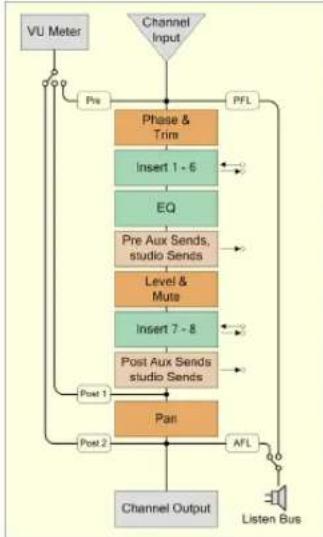
flowchart
graph TD
    A["VU Meter"] --> B["Phase & Trim"]
    B --> C["Insert 1 - 6"]
    C --> D["EQ"]
    D --> E["Pre Aux Sends, studio Sends"]
    E --> F["Level & Muts"]
    F --> G["Insert 7 - 8"]
    G --> H["Post Aux Sends studio Sends"]
    H --> I["Pan"]
    I --> J["AFL"]
    J --> K["Listen Bus"]
    K --> L["Channel Output"]
    L --> M["Post 2"]
    M --> N["Post 1"]
    N --> O["Prel"]
    O --> P["PFL"]
    P --> Q["Channel Input"]
Output Bus
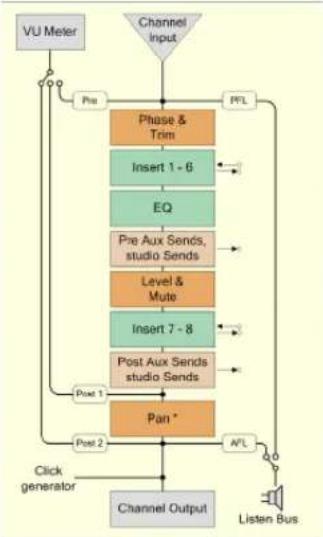
flowchart
graph TD
    A["VU Meter"] --> B["Phase & Term"]
    B --> C["Insert 1 - 6"]
    C --> D["EQ"]
    D --> E["Pre Aux Sends, studio Sends"]
    E --> F["Level & Mute"]
    F --> G["Insert 7 - 8"]
    G --> H["Post Aux Sends studio Sends"]
    H --> I["Pan *"]
    I --> J["Post 2"]
    J --> K["Channel Output"]
    K --> L["Listen Bus"]
    L --> M["AFL"]
    M --> N["PFL"]
    N --> O["Pus"]
    O --> P["Phase & Term"]
    P --> Q["Insert 1 - 6"]
    Q --> R["EQ"]
    R --> S["Pre Aux Sends, studio Sends"]
    S --> T["Level & Mute"]
    T --> U["Insert 7 - 8"]
    U --> V["Post Aux Sends studio Sends"]
    V --> W["Pan *"]
    W --> X["Pus"]
    X --> Y["Phase & Term"]
    Y --> Z["EQ"]
    Z --> AA["Pre Aux Sends, studio Sends"]
    AA --> AB["Level & Mute"]
    AB --> AC["Insert 7 - 8"]
    AC --> AD["Post Aux Sends studio Sends"]
    AD --> AE["Pan *"]
    AE --> AF["Pus"]
    AF --> AG["Phase & Term"]
    AG --> AH["EQ"]
    AH --> AI["Pre Aux Sends, studio Sends"]
    AI --> AJ["Level & Mute"]
    AJ --> AK["Insert 7 - 8"]
    AK --> AL["Post Aux Sends studio Sends"]
    AL --> AM["Pan *"]
    AM --> AN["Pus"]
    AN --> AO["Phase & Term"]
    AO --> AP["EQ"]
    AP --> AQ["Pre Aux Sends, studio Sends"]
    AQ --> AR["Level & Mute"]
    AR --> AS["Insert 7 - 8"]
    AS --> AT["Post Aux Sends studio Sends"]
    AT --> AU["Pan *"]
    AU --> AV["Pus"]
    AV --> AW["Phase & Term"]
    AW --> AX["EQ"]
    AX --> AY["Pre Aux Sends, studio Sends"]
    AY --> AZ["Level & Mute"]
    AZ --> BA["Insert 7 - 8"]
    BA --> BB["Post Aux Sends studio Sends"]
    BB --> BC["Pan *"]
    BC --> BD["Pus"]
    BD --> BE["Phase & Term"]
    BE --> BF["EQ"]
    BF --> BG["Pre Aux Sends, studio Sends"]
    BG --> BH["Level & Mute"]
    BH --> BI["Insert 7 - 8"]
    BI --> BJ["Post Aux Sends studio Sends"]
    BJ --> BK["Pan *"]
    BK --> BL["Pus"]
    BL --> BM["Phase & Term"]
    BM --> BN["EQ"]
    BN --> BO["Pre Aux Sends, studio Sends"]
    BO --> BP["Level & Mute"]
    BP --> BQ["Insert 7 - 8"]
    BQ --> BR["Post Aux Sends studio Sends"]
    BR --> BS["Pan *"]
Main Mix Bus
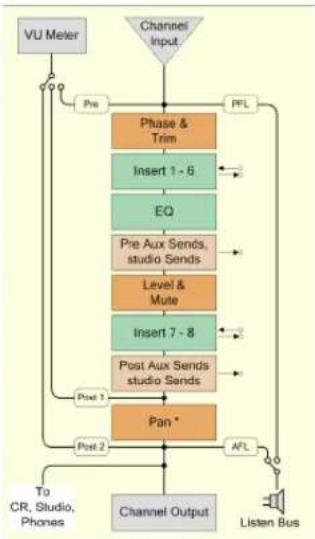
flowchart
graph TD
    A["VU Meter"] --> B["Phase & Trim"]
    B --> C["Insert 1 - 6"]
    C --> D["EQ"]
    D --> E["Pre Aux Sends, studio Sends"]
    E --> F["Level & Mute"]
    F --> G["Insert 7 - 8"]
    G --> H["Post Aux Sends studio Sends"]
    H --> I["Pan *"]
    I --> J["Post 2"]
    J --> K["To CR, Studio, Phones"]
    K --> L["Channel Output"]
    L --> M["AFL"]
    M --> N["Listen Bus"]
    N --> O["PFL"]
    O --> P["Pre"]
    P --> Q["Phase & Trim"]
Control Room Objects (Cubase only)
Control Room Channel
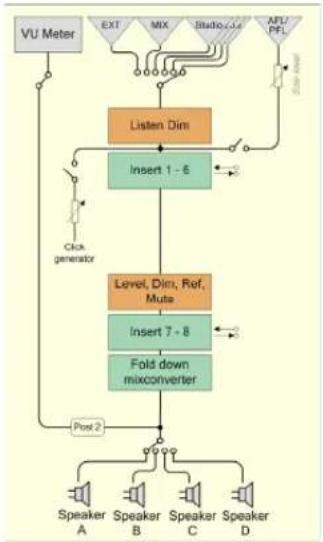
flowchart
graph TD
    A["VU Meter"] --> B["Listen Dim"]
    B --> C["Insert 1 - 6"]
    C --> D["Level, Dim, Ref, Mute"]
    D --> E["Insert 7 - 8"]
    E --> F["Fold down mixconverter"]
    F --> G["Post 2"]
    G --> H["Speaker A"]
    G --> I["Speaker B"]
    G --> J["Speaker C"]
    G --> K["Speaker D"]
    L["EXT"] --> B
    M["MIX"] --> B
    N["Studio C4s"] --> B
    O["AFL PFL"] --> B
    P["Click generator"] --> B
Phones Channel
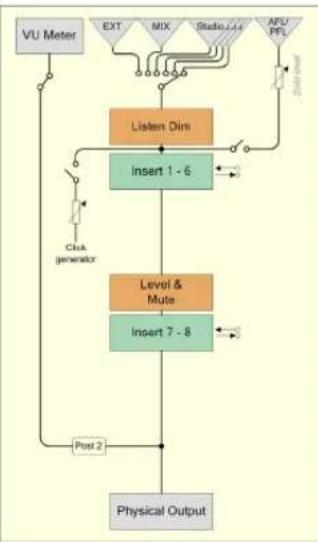
flowchart
graph TD
    A["VU Meter"] --> B["Listen Dim"]
    B --> C["Insert 1 - 6"]
    C --> D["Level & Mute"]
    D --> E["Insert 7 - 8"]
    E --> F["Physical Output"]
    G["EXT"] --> B
    H["MIX"] --> B
    I["Studio C/C"] --> B
    J["AFU P/L"] --> B
    K["Clock generator"] --> B
    L["Post 2"] --> D
    M["200 MHz"] --> B
Studio Channel
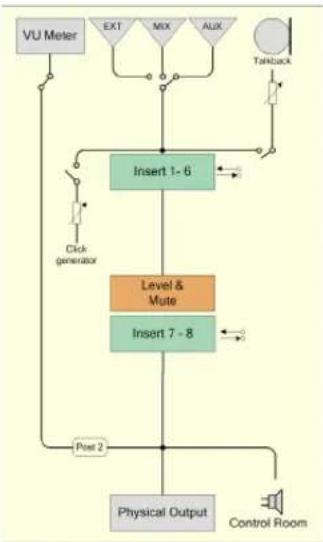
flowchart
graph TD
    A["VU Meter"] --> B["Insert 1-6"]
    B --> C["Level & Mute"]
    C --> D["Insert 7-8"]
    D --> E["Physical Output"]
    E --> F["Control Room"]
    G["Click generator"] --> B
    H["Tankback"] --> B
    I["Post 2"] --> E
    J["EXT"] --> B
    K["MIX"] --> B
    L["AUX"] --> B
Monitor
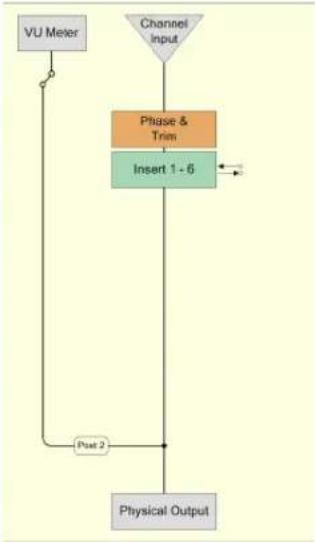
flowchart
graph TD
    A["VU Meter"] --> B["Phase & Trim"]
    B --> C["Insert 1 - 6"]
    C --> D["Physical Output"]
    E["Channel Input"] --> B
    F["Post 2"] --> B
Overall (Cubase only)
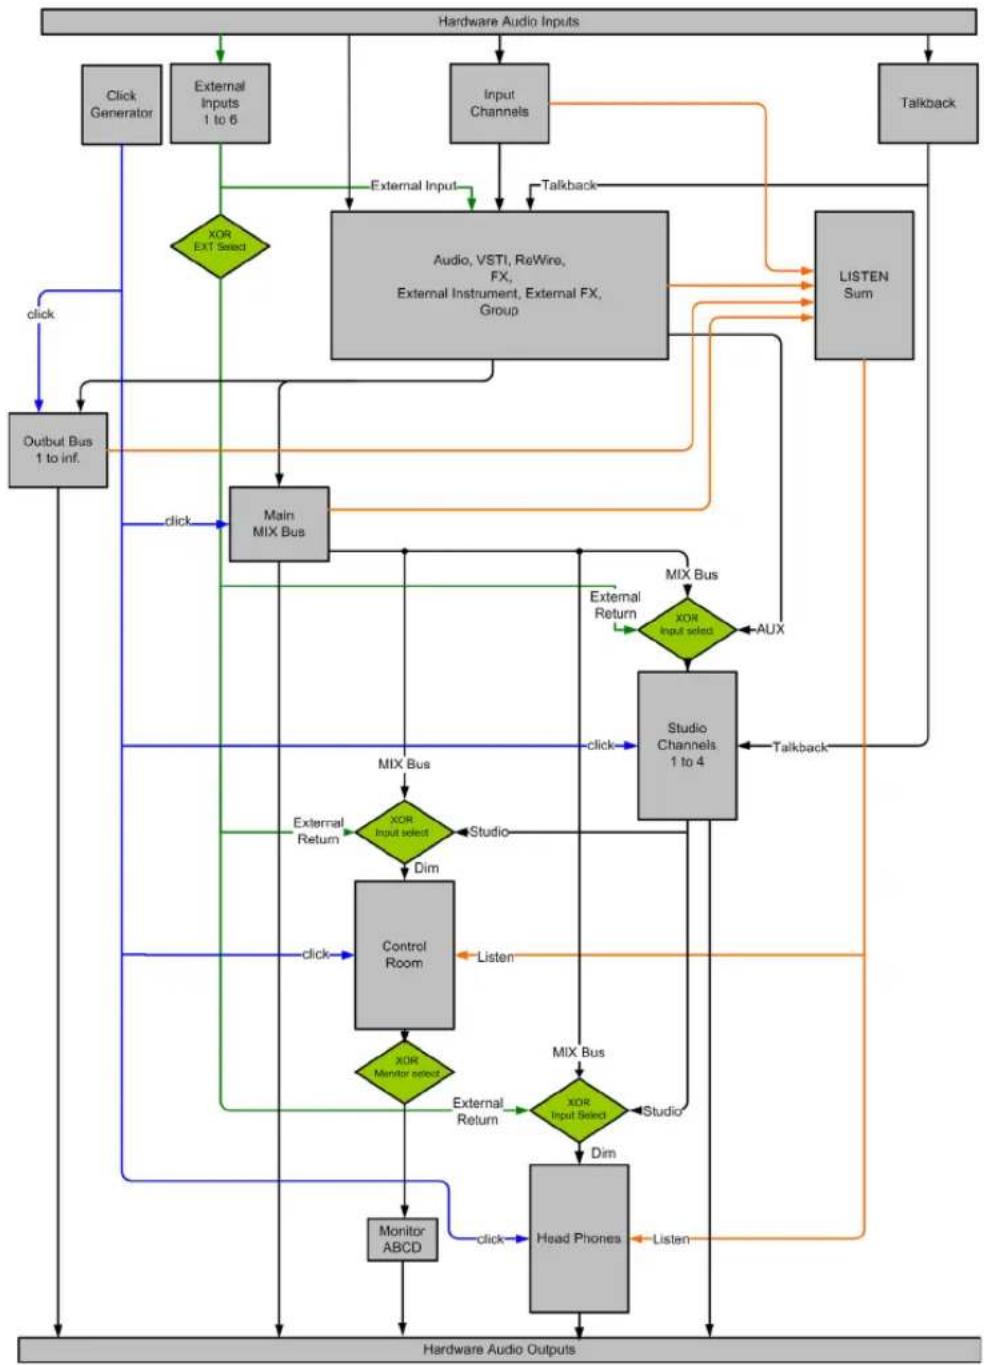
flowchart
graph TD
    A["Hardware Audio Inputs"] --> B["Input Channels"]
    B --> C["Audio, VSTI, ReWire, FX, External Instrument, External FX, Group"]
    C --> D["LISTEN Sum"]
    D --> E["Talkback"]
    E --> F["External Inputs 1 to 6"]
    F --> G{XOR EXT Select}
    G -->|click| H["Outbul Bus 1 to inf."]
    G -->|external return| I["Main MIX Bus"]
    I --> J["MIX Bus"]
    J --> K{XOR Input Select}
    K -->|click| L["Control Room"]
    K -->|external return| M["External Return"]
    K -->|listen| N["Mirror ABCD"]
    K -->|External Return| O["External Return"]
    O --> P["Head Phones"]
    P --> Q["Dim"]
    Q --> R["MIX Bus"]
    R --> S{XOR Input Select}
    S -->|click| T["External Return"]
    S -->|external return| U["External Return"]
    S -->|listen| V["External Return"]
    V --> W["External Return"]
    W --> X["MIX Bus"]
    X --> Y["Studio Channels 1 to 4"]
    Y --> Z["AUX"]
    Z --> AA["MIX Bus"]
    AA --> AB["External Return"]
    AB --> AC["External Return"]
    AC --> AD["MIX Bus"]
    AD --> AE["Textual Lines"]
    AE --> AF["Output Bus 1 to inf."]
    AF --> AG["Hardware Audio Outputs"]
Control Room (Cubase only)
Background
Large console Monitoring sections
In traditional analog studios, the audio console maintained control over every audio signal in the studio, including the control room monitors, headphone systems, external 2-track tape machines and communications such as the talkback system.
The console itself provided a means of creating multiple cue mixes for performers in the studio. Using available aux sends, the engineer could create multiple cue mixes for the various performers, each one having a unique mix tailored for that person or group of performers.
With the advent of the DAW, many of the functions of the console started being performed inside the audio software, allowing for more flexibility and instant recall of any setting. In many studios, the console sat idle except for adjusting the playback level of the speakers, switching to monitor external devices and routing signals to headphones and other cue mix playback systems.
Smaller hardware units have been made to replace the monitoring section using a simple volume knob with speaker and input switches. Some even include a talkback system and headphone amplifiers.
Surround sound
With more and more surround recording and mixing being performed in the DAW environment, the needs of the monitoring section have become magnified. Surround speaker setups must be able to work with smaller, stereo speakers and even mono speaker systems. Switching back and forth between them can become quite complicated. Also, the ability to perform downmixes of multi-channel audio is needed on a regular basis for many audio professionals.
Virtual Control room – The concept
The concept behind creating the Control Room features in Cubase was to divide the studio environment into the performing area (studio) and the engineer/producer area (control room) common to traditional studios. Previously, an analog console or some method of speaker control and monitor routing was necessary to provide this functionality to the DAW environment.
With its Control Room Mixer and Control Room Overview features, Cubase provides all the functionality of the analog console's monitoring section, along with many more features, in a virtual, VST-based audio environment where flexibility and instant recall are expected.
Control Room features
The following features are available for the Control Room Mixer:
- Support for up to four sets of monitors with various speaker configurations from mono up to 6.0 Music or Cine speaker systems.
- Dedicated Headphone output.
- Support for up to four discrete cue mix outputs called "Studios".
- Dedicated Talkback channel with flexible routing and automatic record defeat.
- Support for up to six external inputs with configurations up to 6.0 surround.
- Click track routing and level control to all Control Room outputs.
- Flexible Listen Bus options with the Listen Dim setting that allows Listen-enabled tracks to be heard in context with the whole mix.
- Listen Bus Enabling on both Control Room and Headphone outputs.
- User-definable downmix settings using the MixConvert plug-in for all speaker configurations.
- Individual speaker soloing for all speaker configurations.
- Multiple inserts on each Control Room channel for metering and surround de-coding among other possibilities.
- Monitor Dim function with adjustable level.
- User-defined Calibrated Monitor level for post-production mixing in a calibrated environment.
- Adjustable Input Gain and Input Phase on all external inputs and Speaker outputs.
- Full-sized meters on every Control Room channel.
- Support for up to four aux sends (Studio Sends) for creation of discrete cue mixes for performers. Each Studio output has its own cue mix.
- The ability to disable the Control Room Section when working with an external monitoring solution or console.
Control Room operations
In traditional analog studios, the control room section of the console contained the most used set of controls in the whole studio. Often, the studio monitor level had all the markings rubbed off from so much use.
The need to constantly be able to switch monitoring sources, adjust the volume of monitors and route various cue mixes and other sources to headphone systems is the norm in most sessions. Meeting the needs of several performers in the studio plus a producer and the engineer becomes a constant task that requires flexibility and ease of operation. Communication between everyone must be flawlessly clear without intruding on the creativity of performers.
With all this in mind, the Cubase Control Room Mixer is designed to fill those needs with a simple yet highly flexible solution. The virtual mixing environment of VST is the ideal solution to the varied needs of a control room matrix. With a virtual mixer, a high degree of customization and precise settings are possible with the ability to completely recall these settings at any time.
Configuring the Control Room
The Control Room features are configured in several locations within Cubase.
- The VST Connections window has a tab labelled "Studio" in which the hardware inputs and output are defined for the Control Room channels.
- On the Devices menu you will find the Control Room Overview that gives you a visual overview of the Control Room channels and signal flow.
- On the Devices menu you will find the Control Room Mixer which allows operation of the Control Room features.
- In the Preferences dialog (VST-Control Room page) you will find some general Control Room settings.
VST Connections – Studio tab
The Studio tab of the VST Connections window is where you configure the inputs and outputs for the Control Room Mixer. For more information, see the chapter "VST Connections: Setting up input and output busses" on page 13. By default, one stereo Monitor channel is created after installing Cubase.
Control Room channels
There are five types of channels that you can create, each defining either an input or output of the Control Room Mixer. As more channels are created, the Control Room Mixer expands to display controls for each channel.
- Monitors
Each Monitor channel is a set of outputs that are connected to monitor speakers in the Control Room. Each Monitor can be configured for a mono, stereo or up to 6.0 surround speaker configuration. Up to four Monitors can be created, each with a different speaker configuration.
- Phones
The Phones channel is used by the engineer in the control room for checking cue mixes and as another option for listening to the mix or external inputs on a pair of headphones. It is not intended for cue mixes that performers use while recording. Only one stereo Headphone channel is available.
- Studios
Studio channels are intended for sending cue mixes to performers in the studio during recording. They have talkback and click functions and can monitor the main mix, external inputs or a dedicated cue mix. Up to four Studios can be created allowing four discrete cue mixes for performers.
- External inputs
External inputs are for monitoring external devices such as CD players, multi-channel recorders or any other audio source. Up to six external inputs can be created with various configurations from mono up to 6.0 surround.
- Talkback
The Talkback is a mono input used for a communications system between the control room and performers in the studio. Only one mono Talkback channel is available.
Control Room channels cannot share hardware inputs or outputs with external FX or external instruments, as defined in the VST Connections window (see "Connecting the external effect/instrument" on page 20). As you create connections for each channel, only those device ports that have not been used for external FX or instruments will be available.
A great deal of confusion can result if outputs and Monitor channels share the same device ports. As a starting point, set all the outputs to "Not Assigned" while the Control Room is set up.
The Control Room Mixer is designed to display information and controls only for the channels you have defined in the VST Connections dialog. For example, if you have not defined any Studio channels, they will not appear in the Control Room Mixer. The Control Room Overview displays all the possible channels but only highlights the ones that have been defined. To see all available controls in the Control Room Mixer, start by creating the maximum amount of channels on the Studio tab of the VST Connections window.
Creating a Control Room channel
To create a new channel, open the Studio tab of the VST Connections window and click on the Add Channel button. A pop-up menu lists all available channel types along with how many of each type are available. Select the type of channel you wish to create. For most channel types a dialog opens, allowing you to choose the configuration of the channel (stereo, 5.1, etc.).
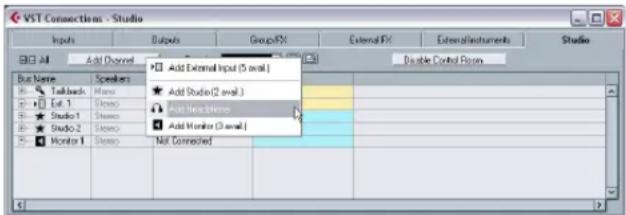
text_image
VST Connections - Studio Inputs Outputs Group FX External FX External instruments Studio Add Channel Add External Input (5 avail) Disable Control Power Bus Name Speakers Tailback: None Add Studio(2 avail.) Exit 1 Stereo Boost Noise Studio 1 Stereo Add Monitor (3 avail) Studio 2 Stereo Add Monitor (3 avail) Monitor 1 Stereo Not ConnectedThe Studio tab of the VST Connections window showing several Control Room channels
After clicking OK, the new channel will appear in the VST Connections window. For each audio path an audio device must be selected. You can assign device ports to channels in the same fashion as assigning any VST connection.
Note that the port assignments for all Control Room channels except Monitor channels are exclusive, meaning that you cannot assign the same device port to an input or output and a Control Room channel at the same time.
⚠️ Monitor channels, however, can share device ports with each other as well as inputs and outputs. This can be helpful if you use the same speakers as a stereo pair and also as the left and right channels of a surround speaker configuration. Switching between monitors that share device ports will be seamless, providing any downmix of multi-channel audio to stereo if needed. Only one monitor set can be active at a time.
Monitors
Create a Monitor channel for every set of speakers in your studio. A typical post-production studio could have one set of 5.1 surround speakers, another stereo set of speakers and even a single, mono speaker for checking balances for mono broadcast. The Control Room Mixer will allow you to switch speakers easily. Each set of Monitors can have its own custom downmix settings, input gain and input phase adjustments.
Phones
Create a Phones channel if you intend to listen to headphones in the control room. The Phones channel is not intended for use by performers in the studio. It is designed for the engineer to quickly listen to any source in the studio, including the four cue mixes, as a reference.
⚠️ The Phones channel is stereo only.
Studios
Create a Studio channel for each cue mix you wish to create for performers in the studio. For example, if you have two available headphone amplifiers for performers to use, create two Studio channels, one for each headphone mix. There are four available Studio channels.
⚠️ Studio channels can either be mono or stereo.
External inputs
Create external input channels for every playback device you wish to be able to monitor in the Control Room. There are six available external inputs with channel configurations from mono up to 6.0 surround. Use external inputs to quickly listen to CD players, master recorders, or other workstations.

If you select external inputs as input source of an audio channel, you can record them. In this case, you will not need to assign the device ports to the input channel (see "Routing" on page 18).
Talkback
Create a Talkback channel if you have a microphone in the control room available for communication with performers in the studio. The Talkback channel can be routed to each Studio channel with variable levels in order to optimize communications between the control room and performers. It is mono only.
Additionally, the Talkback is available as a possible input source for audio tracks. You can record from the Talkback just like any other input.

Inserts are available on the Talkback and all other Control Room channels. A compressor/limiter can be inserted on the Talkback channel to ensure that erratic levels do not bother performers and clear communication with everyone is possible.
Disabling the Control Room
Once you have created all the channels for your studio configuration, the Control Room functions are available for use. If you need to use Cubase without the Control Room functions, you can simply press the Disable Control Room button on the Studio tab of the VST Connections window. Any channels you have created are saved and when you enable the Control Room again, that configuration is reloaded.
You can also create presets for the Control Room configuration in the same manner as for inputs and outputs, see "Other bus operations" on page 17.
Outputs - Main Mix
For the Control Room to function correctly, the Main Mix on the Outputs tab must be assigned to the set of outputs that actually contains your final mix signal. If you only have one output bus, it will be the Main Mix by default.
If you have more than one output bus defined, you can choose another bus as Main Mix by right-clicking on the name of the output and selecting "Set 'Out' as Main Mix". The Main Mix is marked by a small speaker icon to the left of its name.
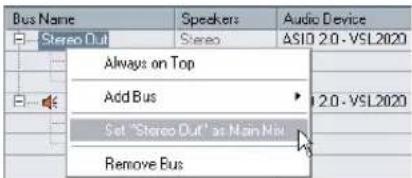
text_image
Bus Name Stereo Out Speakers Stereo Audio Device ASIO 2.0 - VSL2020 Always on Top Add Bus Set "Stereo Out" as Main Menu Remove BusSelecting an output bus as Main Mix in the VST Connections window.
Outputs other than the Main Mix are not routed through the Control Room Mixer. They can, however, share the device ports of Monitor channels in the Control Room.
Output click enabling
There may be a situation when you want the click to be routed always to a specific output bus, regardless of the actual Control Room settings, or indeed when the Control Room is disabled. In these cases, enable the click on specific outputs using the Click column on the Outputs tab in the VST Connections window.
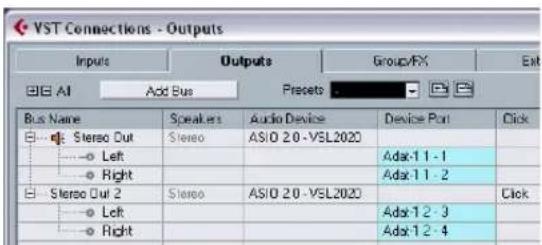
text_image
VST Connections - Outputs Inputs Outputs Group/FX Exit Add Bus Presets Bus Name Speakers Audio Device Device Port Click Stereo Out Stereo ASIO 2.0 - VSL2020 Left Adx-1 1 - 1 Right Adx-1 1 - 2 Stereo Out 2 Stereo ASIO 2.0 - VSL2020 Left Adx-1 2 - 3 Right Adx-1 2 - 4The Output tab showing the Main Mix and a second stereo output that is click enabled.

The click will only be heard in outputs that are assigned to device ports. Be aware that the click can also be routed to device ports using the Control Room features.

Sharing audio device ports between outputs and Control Room channels can cause confusing behavior and possible overload of those ports without any indication from Cubase. It is advisable to disconnect all outputs from all device ports when first configuring the Control Room.

Be aware that some audio interfaces allow very flexible routing within the hardware itself. Certain routing configurations could cause overloads and possible damage to speaker equipment. Consult the hardware documentation for further information.
The Control Room Overview
You can access the Control Room Overview from the Devices menu. The Control Room Overview is designed to display the current configuration of the Control Room. The window shows all possible channels, with active channels highlighted once they have been created in the VST Connections window. Channels that are grayed out have not been defined in the VST Connections window.
The Control Room Overview allows you to see the signal flow through the Control Room Mixer. All the routing functions of the Control Room Mixer are duplicated in the Overview.
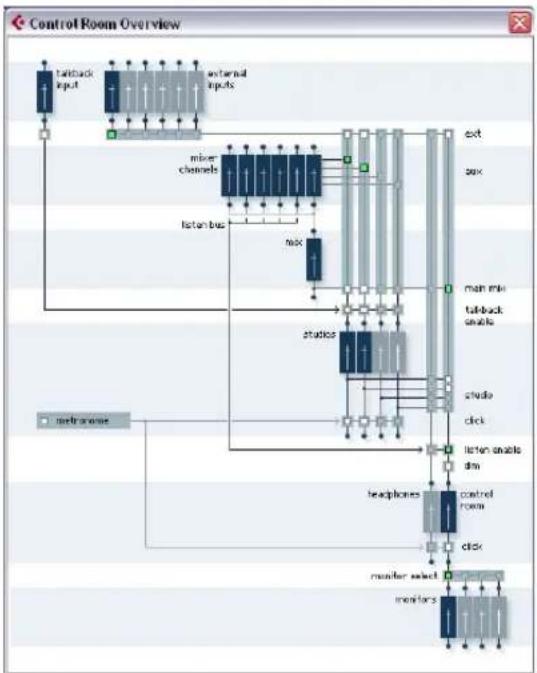
flowchart
graph TD
    A["Input"] --> B["transceiver"]
    C["External Inputs"] --> D["mixer channels"]
    D --> E["listan bus"]
    E --> F["nick"]
    F --> G["station"]
    G --> H["ctd"]
    H --> I["main mix"]
    I --> J["talkback shinks"]
    J --> K["ctd"]
    K --> L["click"]
    L --> M["latten shinks"]
    M --> N["dim"]
    N --> O["teaplores"]
    O --> P["control room"]
    P --> Q["click"]
    Q --> R["monitor select"]
    R --> S["monitors"]
Open the Control Room Mixer and the Control Room Overview windows side by side. As you operate the controls in the Mixer you will see the various pale green squares light up in the Overview, indicating changes in signal flow. You can also click the squares in the Overview and watch the controls in the Mixer reflect the changes in signal flow.
The Control Room Mixer
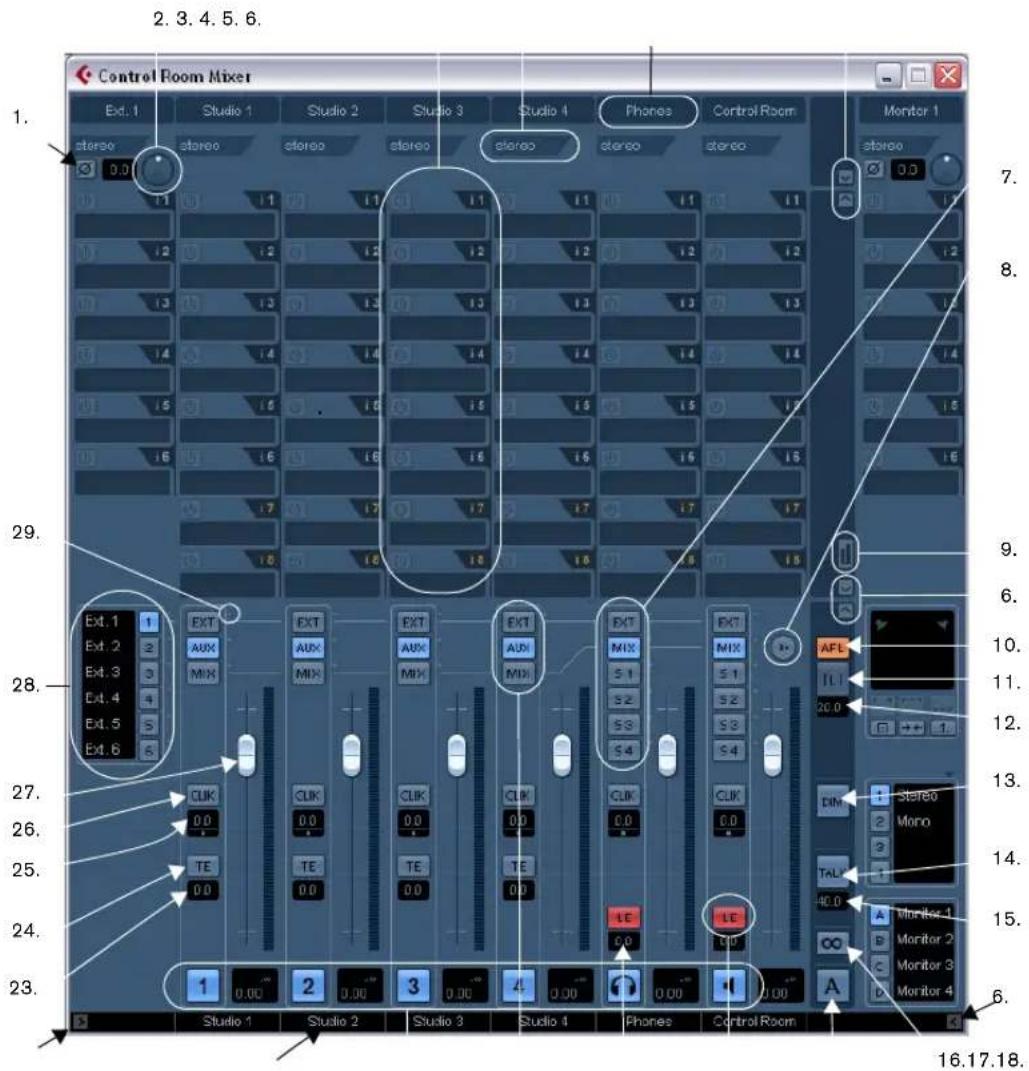
text_image
2.3.4.5.6. Control Room Mixer Ext.1 Studio 1 Studio 2 Studio 3 Studio 4 Phones Control Room Monitor 1 stereo stereo stereo stereo stereo stereo 1. 11 11 11 11 11 11 11 11 12 12 12 12 12 12 13 13 13 13 13 13 14 14 14 14 14 15 15 15 15 15 16 16 16 16 16 16 17 17 17 17 18 18 18 18 29. Ext.1 1 Ext.2 2 Ext.3 3 Ext.4 4 Ext.5 5 Ext.6 6 EXT AUX MIX EXT AUX MIX EXT AUX MIX EXT MIX S1 S2 S3 S4 EVT MIX S1 S2 S3 S4 EVT MIX S1 S2 S3 S4 EVT MIX S1 S2 S3 S4 AFL JLII 20.0 CLK STereo Mono 20.0 TE 0.0 0.0 0.0 0.0 0.0 0.0 0.0 0.0 0.0 0.0 0.0 0.0 0.0 0.0 0.0 0.0 0.0 0.0 0.0 0.0 0.0 0.0 0.0 0.0 0.0 0.29. 27. 26. 25. 24. 23. Studio 1 Studio 2 Studio 3 Studio 4 Phones Control Room A Monitor 4 Monitor 3 Monitor 2 Monitor 1 Monitor 1 Studio 2 Studio 3 Studio 4 Studio 5 Studio 6 Studio 7 Monitor 8 Monitor 9 Monitor 10 Monitor 11 Monitor 12 Monitor 13 Monitor 14 Monitor 15 Monitor 16.17.18.The Control Room Mixer is where you access all the features of the Control Room. The Control Room Mixer can be resized to accommodate more channels and to display more controls.
It has a variety of controls, some that are similar to the Project Mixer and some that are unique to Control Room operations. The following diagrams show every control, followed by a brief description of what each control does.
1. Input Phase
Each external input and Monitor speaker output has an Input Phase reversal switch. When lit, all audio paths within the channel have their phase reversed.
2. Input Gain
Each external input, Monitor speaker output and the Talkback input has an Input Gain control. When an external input or Monitor becomes active, the Gain settings are recalled.
3. Channel inserts
Each channel in the Control Room Mixer has inserts available. While most channels have six pre-fader and two post-fader inserts, the external inputs and Monitors only have six pre-fader inserts.
4. Channel configuration
This displays the current configuration of audio paths in the channel, e.g. Stereo, or 5.1.
5. Channel labels
This displays the name of the channel as defined in the VST Connections window.
6. Expansion controls
There are several arrow buttons that open and close various panels of the Control Room Mixer. By default, all extended panels are hidden.
7. Control Room and Headphone input selectors
These buttons allow the selection of various input sources for the Control Room and Headphone channels. The choices are External Input, Main Mix, or any one of the four Studio channels.
8. Use Reference Level
When you click this button, the Control Room Level is set to the reference level set in the Preferences, e.g. a level for calibrated mixing environments such as film dubbing stages. Press [Alt]/[Option] and click on this button to set the Preferences reference level setting to the current Control Room level.
9. Show Meters/Inserts button
This allows you to switch between the display of Meters and Inserts for the extended Mixer view.
10. Listen Bus AFL/PFL
This button determines whether the source signals sent to the Listen bus are pre-fader (PFL) or post-fader (AFL).
11. Listen Activate/Deactivate All Listen
When lit, this indicates that one or more channels in the Project Mixer are Listen enabled. Clicking this button deactivates Listen for all channels.
12. Listen DIM Level
This gain control adjusts the volume of the Main Mix when channels have been put in Listen mode. This allows you to keep Listen enabled channels in context with the Main Mix. If the Listen DIM is set to minus infinity, Listen enabled channels will be heard by themselves. Any other setting leaves the Main Mix at a lower level.
13. DIM Signal
This turns the Control Room level down by a preset amount (the default setting is -30dB). This allows a quick reduction in monitor volume without disturbing the current monitor level. Clicking on the DIM button again returns the monitor level to the previous setting.
14. Activate Talkback
Click the TALK button to turn on the Talkback system, allowing communication between the control room and performers in the studio. There are two modes of operation: momentary mode used by clicking and holding the Talk button, and latch mode where clicking once turns the Talkback on until you click it again to turn it off.
15. Talkback DIM Level
When the Talkback is enabled, this control allows you to determine how much the output of all the channels in the Control Room Mixer is reduced. This prevents unwanted feedback. If the Talkback DIM level is set to 0dB, no change will occur in the Control Room channels.
16. Cycle Downmix Preset Selection
The Control Room allows four different Speaker downmix settings for auditioning with various speaker configurations. Clicking this button cycles through the four downmix presets. Various icons appear to show which preset is active.
17. Cycle Monitor Selection
Pressing this button changes the Monitor selection to the next available set. As Monitors are changed, so are the downmix presets, Monitor inserts, Input Gain and Input Phase controls associated with that Monitor set.
18. Listen Enable for Output
This turns on Listen bus functions for either the Control Room or Headphone output. If this is not enabled, the Listen bus will not be routed to that channel.
19. Listen Level for Output
This level adjustment determines how loud Listen bus signals are when routed to the Control Room or Headphone output. Clicking on the number pops up a fader control for adjustment.
20. Studio input selectors
For Studio Channels, the input choices are External Input, Aux (from Studio Sends) or Main Mix.
21. Activate channel buttons
These buttons turn each channel's output on or off. When lit, the channel is on.
22. Channel labels
These labels reflect the names created in the VST Connections window.
23. Talkback amount to Studio
This pop-up fader controls the amount of Talkback signal fed to the output of each Studio.
24. Talkback Enable to Studio
In order for Talkback signals to be routed to a Studio, this button must be lit. Clicking on it turns it on or off. When Talkback Enable is deactivated, the Talkback DIM setting has no effect on this output.
25. Metronome Level and Pan
The Level and Pan controls determine how the Metronome will be heard in each channel. These controls are independent for each channel.
26. Activate Metronome Click
This determines whether click signals are sent to each channel. When lit, click signals will be heard in that output.
27. Channel Level control
This is the main volume for each Control Room output. These faders do not affect recording input levels or the Main Mix level for exporting mixdowns.
28. External input switching
There are six available external inputs. These buttons determine which external input is currently being used. The names for each external input are displayed here as they were created in the VST Connections window.
29. Signal Presence Indicators
In the Preferences dialog, there is an option to display these Signal Presence Indicators as a substitute for the full size meters.
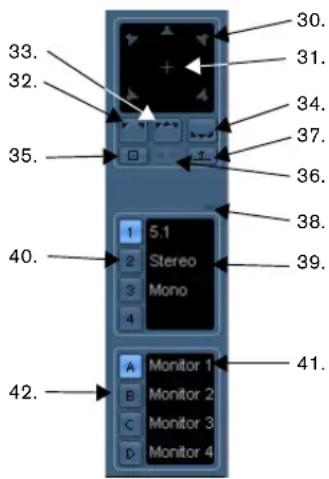
text_image
33. 32. 35. 40. 1 5.1 Stereo Mono 3 4 A Monitor 1 B Monitor 2 C Monitor 3 D Monitor 4 30. 31. 34. 37. 36. 38. 39. 41. 42.The Monitor controls in the Control Room Mixer
30. Individual speaker Solos
Each speaker icon is a solo button for that channel. [Shift]-clicking a speaker will solo all the speakers in that row (front or rear). [Ctrl]/[Command]-clicking on a speaker that is already soloed will mute that speaker and solo all other channels.
31. LFE Solo
The plus icon solos the LFE channel.
32. Solo Front Channels
This button solos all front speakers.
33. Solo Left and Right Channels
This button solos the left and right channels.
34. Solo Rear Channels
This solos all rear channels.
35. Cancel Speaker Solo
This button defeats all speaker solos, resetting them to normal playback.
36. Listen to Solo Channels on Center Monitor
When this button is enabled, all speakers that are soloed will be heard in the center channel if there is one in the configuration. If not (as with stereo) the soloed channel will be heard equally in both left and right speakers.
37. Listen to Rear Channels on Front Monitors
This button solos the rear channels and routes them to the front speakers.
38. Open MixConvert Settings
Clicking on this tab opens the MixConvert plug-in used to downmix multi-channel signals for monitoring.
39. Downmix labels
This area displays the names of the four downmix presets. You can click on a name to change it. A “?” appears when there is no preset defined for that downmix.
40. Downmix Preset Selection
With these buttons you can select the downmix preset for the current Monitor.
41. Monitor labels
This area displays the names of the four possible Monitors. The names are created in the VST Connections window when you define a Monitor channel.
42. Monitor selection
With these buttons you can select the current Monitor set. Each Monitor has its own settings including downmix preset, solo enables, inserts, input gain and input phase. These settings are automatically recalled when a Monitor is selected.
Configuring the Control Room Mixer
In order to display more controls in the Control Room Mixer, the small arrows at the lower left and right corners can be clicked to open or close the extended speaker controls on the right ("Right Strip") and the External Input and Talkback controls on the left ("Left Strip").
The arrow in the upper right corner of the Control Room Mixer extends the Mixer vertically to display meters and inserts ("extended view"). A second arrow appears above the inserts and meter display. Extending the Mixer using this arrow exposes the Input Gain and Input Phase controls, the channel configuration and the name of each channel ("routing view").
The different Control Room Mixer panels are handled in the same way as the Project Mixer panels, see "Configuring the mixer" on page 112.

You can also use the Window submenu on the Control Room Mixer context menu to show/hide the different panels, just as in the Project Mixer.
Control Room inserts and meters
In the extended view of the Control Room Mixer the meters are visible. They function the same way as the ones in the Project Mixer.
When you click on the Show Meters/Inserts button to the right of the meters/inserts display, the view changes to show inserts instead of meters. Alternatively, these can also be displayed by deactivating the Show Meters option on the Window submenu of the Control Room Mixer context menu.
Each Control Room channel has a set of inserts configured as six pre-fader and two post-fader inserts. External inputs and Monitor channels only have the six pre-fader inserts.
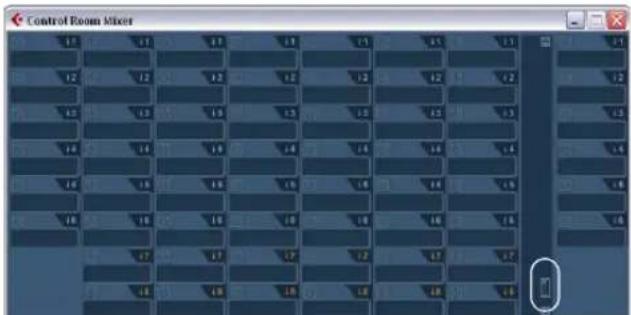
text_image
Control Room Mixer 12 17 18 19 21 24 27 12 12 13 14 15 16 17 13 13 14 15 16 17 14 14 15 16 17 15 15 16 17 18 19 16 16 17 18 19 17 17 18 19 20 Control Room MixerThe extended view with the Show Inserts/Meters button highlighted
If you do not wish to see full sized meters but still want some indication of signal activity, activate the option "Signal Presence Indicators" in the Preferences (VST-Control Room page). They will be displayed next to the input selection buttons and indicates signal presence for all inputs.
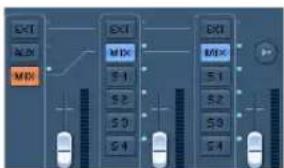
text_image
EXIT NEW MIX EXIT MIX 51 52 53 54 OUT MIX 51 52 53 54Control Room Mixer channels with active Signal Presence indicators
Inserts for external inputs
Each external input has its own set of six inserts. By clicking the button next to the name of an external input at the left of the Mixer window the inserts associated with that channel are displayed in the extended view.
Inserts for the Talkback channel
The Talkback channel has a separate set of eight inserts. In order to view and adjust them, the Talkback must be enabled via the TALK button located in the bottom right section of the Control Room Mixer. Click once on the TALK button to activate the Talkback system. The inserts for external inputs are now replaced with the Talkback inserts. Once the Talkback is disabled, the view reverts to external input inserts.

You can easily identify the inserts for the Talkback since they have six pre-fader and two post-fader inserts while the external inputs only have six pre-fader inserts. If the Control Room Mixer is fully expanded, the name displayed at the very top of the Mixer will reflect which channel is currently in the extended view.
Monitor Inserts
Each Monitor channel has a set of six inserts. These inserts are all post Control Room fader level and are most useful for surround decoding or brickwall limiting to protect sensitive monitor speakers.
Each set of monitors has its own Input Phase and Input Gain settings available in the top section of the extended Control Room Mixer. In addition, there are speaker solo icons along with various soloing modes and speaker routing options in the Speaker Solo panel.
The Speaker Solo panel
Use the speaker solos to test your multi-channel speaker system and ensure that the proper channels are routed to each speaker.
Just below the configuration display, all settings for automatic downmixing of multi-channel sources are shown.
There are four downmix presets. Some will automatically be configured for the sets of monitors you have defined. Each preset is adjustable with the MixConvert plug-in, which you access by clicking the small arrow icon above the Downmix Presets section.
Click here to open the MixConvert control panel.
The Downmix Presets section

Automatic configuration of the downmix settings follows a logical path. For example, if you have defined one set of 5.1 monitors and another set of stereo monitors, Cubase will create a 5.1 to stereo downmix preset and another downmix to mono. You can modify all the settings for each downmix preset using the MixConvert plug-in.
The Main Mix and the Control Room channel
The channel configuration of the "Main Mix" (the default output) determines what the channel configuration of the Control Room channel will be. Switching between a project that has a stereo Main Mix to a project that has a 5.1 Main Mix will cause the Control Room channel in the Control Room Mixer to change from a stereo to a 5.1 configuration.
The Main Mix configuration also determines the layout of the Speaker Solo panel. If the Main Mix is stereo, there will only be a left and right speaker in the solo panel.
Any external input that has more channels than the Main Mix will not be heard correctly when routed to the Control Room channel. Only the channels available will be heard.
If a 5.1 external input is routed to a stereo Control Room channel, only the left and right channels will be heard even if a 5.1 Monitor is selected. Only two channels can be routed through a stereo Control Room channel. You could use an instance of MixConvert on the external input's inserts to downmix the material to stereo in order to hear it.
Suggested settings
With all the versatility that the Control Room provides there are also opportunities for confusion when first setting up the Control Room. The following list contains suggestions that could help to quickly set up the Control Room to get started for recording and mixing.
- If you do not have a master recording device and only use the Export Mixdown function to create finished mix files, set your Main Mix output to "Not Assigned". This eliminates many confusing errors and unpredictable behavior since outputs and Control Room Monitors can share hardware outputs. The Main Mix is automatically routed to the Control Room channel and will not be affected.
- Create one stereo Monitor to familiarize yourself with the Control Room level controls, DIM settings, the Listen Bus and other monitoring features. Once you have become acquainted with some of these functions, create additional Monitors for every set of speakers you intend to use.
- Use the inserts on Monitor channels for surround decoding and bass management plug-ins among other things.
- Use the inserts on the Control Room channel for metering and spectral analysis plug-ins. All solos including the Listen Bus will come through the Control Room channel allowing analysis of individual sounds.
- A brickwall limiter in the last insert of the Control Room channel can prevent accidental overloads and damage to speaker systems.
- Use the inserts for the Talkback channel to control the dynamics of the talkback microphone. This will help protect performers' hearing and ensure that everyone can be heard over the talkback microphone.
- Use the Gain settings on the external inputs to level balance CD players and other sources to the Main Mix level for A/B comparisons.
- Use the Gain settings on each Monitor to level balance all your monitor systems. Switching between sets of speakers will result in the same playback volume.
- Use the calibrated Control Room level for film or DVD mixing. Set this level to the proper speaker volume as determined by the mixing standard you choose to follow.
Control Room preferences
There are several preferences for the Control Room Mixer. These are found in the Preferences dialog (VST-Control Room page).
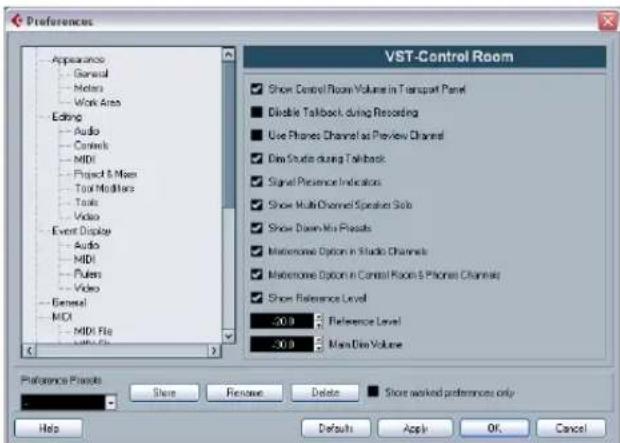
text_image
Preferences Appearance General Notes Work Area Editing Audio Controls MIDI Project & Mass Tool Modifiers Tools Video Event Display Audio MIDI Pusters Video General MIDI MIDI File VST-Control Room Show Control Room Volume in Transport Panel Disable Tailback during Recording Use Phones Channel as Preview Channel Drive Studio during Tailback Signal Preference Indicators Show Multi Channel Speaker Sub Show Drive-Mix Plastics Makeframe Option in Studio Channels Makeframe Option in Control Room & Phones Channels Show Reference Level 30.0 Reference Level 30.0 Main Dim Volume Preference Pixels Store Remove Delete Show worked preferences only Help Default Apply OK CancelThe Control Room Preferences
Most of these preferences deal with what options are visible in the Control Room Mixer. This allows you to customize the layout of the Mixer and only have the controls visible that you use the most.
The other preferences have the following functionality:
- Show Control Room Volume in Transport Panel
This option makes the small fader at the right-hand side of the Transport Panel control the Control Room level. When this option is not activated (or the Control Room is disabled), that fader controls the level of the Main Mix bus.
■ Disable Talkback during Recording
When activated, this option will turn off the Talkback channel when the transport enters record mode. It is advisable to set the Talkback DIM to 0dB when using this feature so as not to radically change the mix level when punching in and out of record mode.
- Use Phones Channel as Preview Channel
When activated, the Headphone output will be used for Preview options such as import preview, scrubbing, offline process preview and certain Sample Editor operations. Note that when using the Headphones output for preview, the Control Room channel will no longer output preview audio.
- Dim Studio during Talkback
When this option is enabled, the cue mix heard in a Studio will be dimmed (by the amount set in the Talkback Dim Level field (below the TALK button) for as long as the Talkback channel is used. When disabled, the cue mix level remains the same during Talkback.
■ Reference Level
This setting determines the Control Room level used when the Reference Level button is activated.
- Main Dim Volume
This is the amount of gain reduction applied to the Control Room channel when the DIM button is activated.
Studios and Studio Sends
Studio Sends are displayed in the Cubase Project Mixer and the Inspector. Each Studio Send is intended for the creation of a discrete cue mix for performers to listen to during recording. Studio Sends are essentially stereo aux sends that are routed to Studio outputs in the Control Room Mixer. There are up to four Studios and Studio Sends available.
Configuring Studio Sends
Studio Sends only become active when a Studio channel has been created in the VST Connections window. Otherwise they remain grayed out. For every Studio defined in the VST Connections, every channel in the Project Mixer has an additional aux send with level, pan and pre/post-fader selection. This aux send is used to create a mix for a performer to listen to while recording.
- In the Project Mixer, the Studio Sends are accessed by choosing the Studio Sends option from the View options pop-up menu in each channel or by clicking the star icon ("Show Studio Sends") on the common panel of the extended Project Mixer.
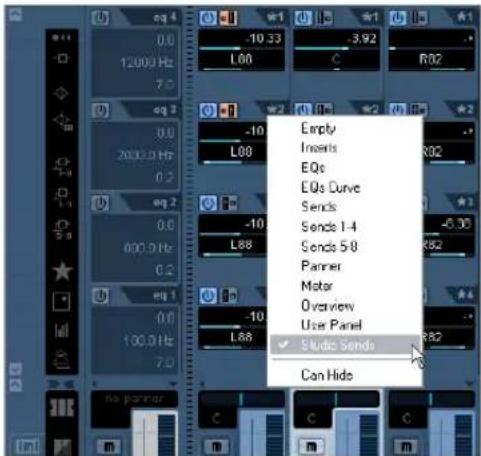
text_image
0.0 12000 Hz 7.0 -10 33 L60 -3.92 C R02 -10 L88 Eq 2 0.0 2000.0 Hz 0.2 -10 L88 Eq 1 0.0 600.0 Hz 0.2 -10 L68 Eq 1 0.0 100.0 Hz 7.0 no partner Empty Inserts EQs EQs Curve Sends Sends 1-4 Sends 5-8 Panner Motor Overview User Panel Studio Sends Can HideThe Studio Sends view in the Project Mixer
- In the Inspector, a Studio Sends tab can be found. This displays all Studio Sends for the selected track.
Please note that not all Inspector sections are available by default. To show/hide a section, right-click on an Inspector section and select/deselect the corresponding option on the context menu.
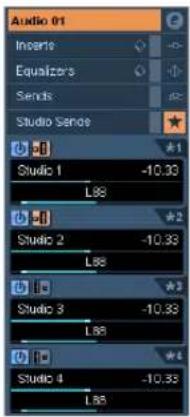
text_image
Audio 01 Insertio Equalizers Sends Studio Sense Studio 1 L88 Studio 2 L88 Studio 3 L88 Studio 4 L88 *1 *2 *3 *4The Studio Sends tab in the Inspector
Each Studio can have a unique name in order to help identify what it is being used for. For example, the four Studios could be named:
- Vocalist Mix
• Guitarist Mix - Bassist Mix
- Drummer's Mix
The name of each Studio is displayed in the Control Room Mixer. To hear the Studio Sends mix in the Studio output, the input selector for each Studio must be set to "Aux".
A Studio channel in the Control Room Mixer with its input set to Aux.
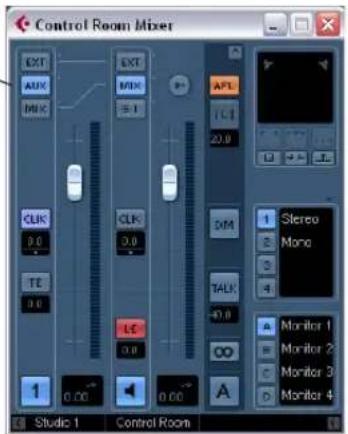
text_image
Control Room Mixer EXT AUX DHX EXT MIX 5.1 AFL 1.1 20.0 CLK 0.0 CLK 0.0 DM Stereo Mono TE 0.0 TALK +3.0 Monitor 1 Monitor 2 Monitor 3 Monitor 4 LC 0.0 0.00 Studio 1 Control RoomSetting up a Studio cue mix
The Studio Sends are very flexible. There are several ways to create a cue mix for each Studio in a very fast and efficient manner. Simple "more me" mixes and more complex discrete mixes are easily accommodated by the Studio Sends.
Using fader and pan settings from the Project Mixer
You can create a cue mix from the fader and pan levels already used in the Project Mixer and then alter them to meet the needs of an individual performer. You can do this with any single channel or group of channels at any time. To copy fader and pan information from the main mix, proceed as follows:
- In the Project Mixer, select all the channels that you wish to copy settings from.
The following operations affect only selected channels.
- In the Control Room Mixer, right-click anywhere in a Studio Channel's mixer strip to open the context menu that has the Studio's name as a submenu.
This submenu contains all the Studio Send functions for that Studio. If you open the context menu outside of a Studio mixer strip, the submenu will be for All Studios.
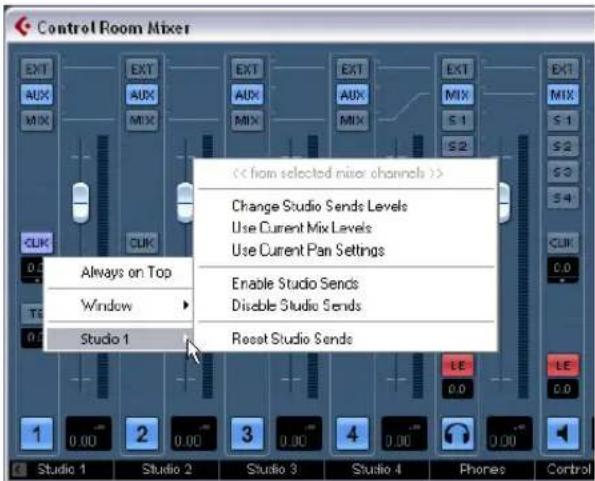
text_image
Control Room Mixer << from selected mixer channels >> Change Studio Sends Levels Use Current Mix Levels Use Current Pan Settings Enable Studio Sends Disable Studio Sends Reset Studio Sends Always on Top Window Studio 1 Studio 1 Studio 2 Studio 3 Studio 4 Phones ControlThe Control Room Mixer's context menu
-
Choose the "Use Current Mix Levels" option to copy the fader levels on the selected tracks to the Studio Sends. This option sets all Studio Send levels for the selected tracks to the same level as the main channel fader. It also changes the Studio Send status to pre-fader so that changes in the main mix do not affect the Studio Sends.
-
Choose the "Use Current Pan Settings" option to copy pan information from the main mix to the Studio Sends on selected tracks.
Studio Sends are either mono or stereo. If the Send is mono, the pan setting will still be copied. However, the output of the Studio Send will be a sum of the left and right channels.
- Choose the "Enable Studio Sends" option to activate the Sends on selected channels.
By default, Studio Sends are not enabled even when level and pan information is copied to them. You must enable them in order to hear the Studio cue mix.
By copying the level and pan information from the main mix to the Studio Sends, a rough balance can be created in a matter of moments. Next, you may alter the level and pan settings on any channel's Studio Sends to change the mix to meet the performer's needs. This may require increasing the volume of the performer herself. This is often referred to as a "more me" mix.
Adjusting the overall Studio Send level
Levels in the main mix are often optimized for the loudest signal level possible without clipping. However, when you are creating a "more me" mix, you may find that there is not enough headroom available in the Studio Send to turn up channels without clipping becoming a possibility.
Fortunately, the Studio Sends have an option to adjust multiple send levels at the same time, allowing you to keep the blend intact while lowering the overall volume to make room for "more me" signals.
Once you have created a Studio Send mix, proceed as follows to adjust their relative levels.
- Select all the channels you wish to modify.
Only selected channels are affected by the context menu commands.
- Right-click anywhere in the Studio mixer strip on the Control Room Mixer to open the context menu for that Studio.
You may also use the context menu outside of the Studio strip to adjust all four Studio Sends on the selected channels at the same time.
- Choose the "Change Studio Sends Level" option from the Studio submenu.
This will bring up a gain window with a checkbox that reads "Relative Mode". Make sure this is activated if you want to adjust already existing levels.
- Either use the up and down arrow buttons or click on the numeric readout to open a pop-up fader and adjust the gain as necessary.
The level of all selected Studio Sends will be adjusted by the amount shown here. For example, if the amount reads -3dB, then each Studio Send level is reduced by 3dB.
- Click OK to change the level.
It is possible to view these changes as they occur if you have the Project Mixer open and the extended view set to show the Studio Sends.
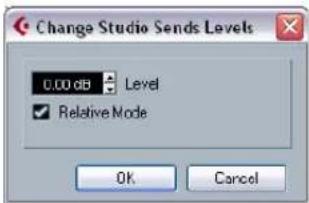
text_image
Change Studio Sends Levels 0.00 dB Level ✓ Relative Mode OK Cancel⚠️ If you deactivate the "Relative Mode" option, all Studio Sends will be set to the same absolute level. While the dialog window is still open, you may check the "Relative Mode" box again and reload the previous relative levels. Only when you click OK, will the level settings be made permanent. Choosing Cancel returns all Send levels to their previous settings.
Using Studio Sends from outputs
Each output also has Studio Sends. Studio Sends from the Main Mix output can be used to route the main mix instantly to the Studio output.
Any level changes made to the main mix are reflected in the signal sent by the Studio Send. Setting the level lower than 0dB can leave headroom for "more me" signals in the Studio channel output.
Post-Fader Studio Sends
It is also possible to use the Studio Sends as post-fader aux sends. This is another way for the cue mix to follow changes made to the Main Mix. The Reset function is very helpful in this regard.
To reset the Studio Sends to the post-fader default level of -6dB, proceed as follows:
-
Select all the channels you wish to reset. Studio Send commands only work on selected channels.
-
In the Studio Channel mixer strip right-click to open the context menu. In the Studio submenu, select the "Reset Studio Sends" command.
If you open the context menu in other areas of the Control Room Mixer besides the Studio mixer strips, the context menu commands will affect all Studios at the same time.
- Selecting the "Reset Studio Sends" option changes the Send level of all selected channels to -6dB and sets the signal source to post-fader.
The -6dB level is designed to allow for headroom for "more me" signals in the Studio outputs.
Once all Studio Sends have been set to -6dB, post-fader, any changes to the main mix will also change the Studio mix. For “more me” channels, simply turn up the level on that channel or even set the signal to pre-fader for absolute control.
Studio Send cue mix summary
Using various combinations of the above techniques should allow you to create complex discrete cue mixes for performers in very little time. Modifications to these mixes can occur in the Project Mixer or the Inspector, giving you the most accessibility for quick changes.
To familiarize yourself with how the Studio Sends work, open the extended Project Mixer and set the view to the Studio Sends. Follow the above examples and watch how the Studio Sends react to various commands. This should help you get a feel for how they function and increase the workflow productivity of recording sessions.
Direct Monitoring and latency
The Control Room and Studio Sends functions use the internal processing power of the host computer system for all routing and processing, which means they are subject to the computer's latency.
When recording with several performers at once, a system capable of running at very low ASIO buffer settings will be necessary to take full advantage of all the Studio Send features.
Studio Sends are not capable of controlling the Direct Monitoring features of various audio hardware interfaces. This means that unless the internal latency of the system is very low (128 samples or less), monitoring of record-enabled tracks through the Studio Sends will have some delay that could affect performers during recording.
In the situation where internal latency is too much for record monitoring, it is advisable to use the Studio Sends for monitoring of tracks that have already been recorded and use normal Direct Monitoring for tracks currently being recorded.
Audio effects
About this chapter
Cubase comes with a number of effect plug-ins included. This chapter contains general details about how to assign, use and organize effect plug-ins. The effects and their parameters are described in the separate manual "Plug-in Reference".
This chapter describes audio effects, i.e. effects that are used to process audio, group, VST Instrument and ReWire channels.
Overview
There are three ways to use audio effects in Cubase:
- As insert effects.
An insert effect is inserted into the signal chain of an audio channel, which means that the whole channel signal passes through the effect. This makes inserts suitable for effects for which you do not need to mix dry and wet sound, e.g. distortion, filters or other effects that change the tonal or dynamic characteristics of the sound. You can have up to eight different insert effects per channel (and the same is true for input (Cubase only) and output busses – for recording with effects and "master effects", respectively).
- As send effects.
Each audio channel has eight sends, each of which can be freely routed to an effect (or to a chain of effects). Send effects are practical for two reasons: you can control the balance between the dry (direct) and wet (processed) sound individually for each channel using the sends, and several different audio channels can use the same send effect. In Cu-base, send effects are handled by means of FX channel tracks.
- By using offline processing (Cubase only).
You can apply effects directly to individual audio events – this is described in the chapter "Audio processing and functions" on page 204.
About VST 3
The new VST 3 plug-in standard offers many improvements over the previous VST 2 standard, yet retains full backwards compatibility, i.e. you will still be able to use your previous VST effects and presets.
In the program, effects compatible with previous VST versions will be easily recognized:
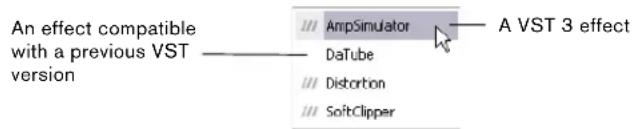
text_image
An effect compatible with a previous VST version AmpSimulator DaTube Distortion SoftClipper A VST 3 effectCubase is able to run plug-ins originally developed for different platforms: you can use a 32-bit plug-in under Windows Vista 64 bit, and you can use plug-ins developed for Mac PPC on Mac Intel systems.
As the use of 32-bit plug-ins on 64-bit computers affects the computer performance, these will be marked by an icon in the plug-in menus.
Please note that this functionality is provided to allow you to load older projects including their original plug-ins on current computers. However, the plug-ins will require higher CPU performance when compared to their native platform. Therefore, it is recommended to use 64 bit versions or Intel Mac (Universal Binary) versions of such plug-ins or instruments once available.
VST Preset management
From a user perspective, the main difference between VST 2 and VST 3 is in the effect preset management. The ".fxp/.fxb" files used in VST 2 have been replaced by VST 3 Presets (extension ".vstpreset"). Using the preset management features, you can assign various attributes to your effect presets to help you quickly find the right patch. You can also preview effect presets before you load them. A large number of presets for effects are included with the program. If you have any previous VST plug-ins installed on your computer, you can still use them, and you can also convert their programs to VST 3 presets. See "Effect presets" on page 164 for details.
Smart plug-in processing
Another feature of the VST3 standard is “smart” plug-in processing. Previously, any loaded plug-in was processing continuously, regardless of whether a signal was present or not. In VST3, processing by a plug-in can be disengaged if there is no signal present. This can greatly reduce the CPU load, thus allowing for more effects to be used.
This is achieved by activating the option "Suspend VST3 plug-in processing when no audio signals are received" in the Preferences dialog (VST-Plug-ins page).
When this is activated, VST 3 plug-ins will not consume CPU power on silent passages, i.e. when no audio data runs through them.
Be aware, however, that this can lead to a situation where you added more plug-ins on "transport stop" than the system can handle on playback. Therefore, you should always find the passage with the largest number of events playing simultaneously to make sure that your system offers the required performance.
→ Activating this option can increase your system performance a lot in certain projects, but it also makes it more unpredictable whether the project can play back fine on any timecode position of the project.
About side-chain inputs
Several VST3 effects feature side-chain inputs. This means that the operation of the effect can be controlled via external signals routed to the side-chain input. The effect processing is still applied to the main audio signal. See "Using the Side-Chain input" on page 161.
About plug-in delay compensation
A plug-in effect may have some inherent delay or latency. This means that it takes a brief time for the plug-in to process the audio fed into it – as a result, the output audio will be slightly delayed. This especially applies to dynamics processors featuring "look-ahead" functionality.
Cubase provides full plug-in delay compensation throughout the entire audio path. All plug-in delays are compensated for, maintaining the sync and timing of all audio channels.
Normally, you do not have to make any settings for this. However, VST3 dynamics plug-ins with look-ahead functionality have a "Live" button, allowing you to disengage the look-ahead to minimize latency, if they are to be used during realtime recording (see the separate manual "Plug-in Reference").
You can also constrain the delay compensation, which is useful to avoid latency when recording audio or playing a VST Instrument in real time. See “Constrain Delay Compensation” on page 179.
About tempo sync
Plug-ins can receive timing and tempo information from the host application (in this case, Cubase). Typically, this is used to synchronize certain plug-in parameters (such as modulation rates or delay times) to the project tempo.
- This information is automatically provided to any VST plug-in (2.0 or later) that “requests it”. You do not have to make any special settings for this.
- You set up tempo sync by specifying a base note value. You can use straight, triplet or dotted note values (1/1 to 1/32).
Please refer to the separate manual "Plug-in Reference" for details about the included effects.
Insert effects
Background
As the name implies, insert effects are inserted into the audio signal path – this means that the audio channel data will be routed through the effect. You can add up to eight different insert effects independently for each audio channel (audio track, group channel track, FX channel track, VST Instrument channel or ReWire channel) or bus. The signal passes through the effects in series from the top downwards, with the signal path shown below:
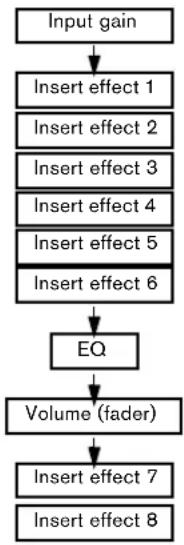
flowchart
graph TD
    A["Input gain"] --> B["Insert effect 1"]
    B --> C["Insert effect 2"]
    C --> D["Insert effect 3"]
    D --> E["Insert effect 4"]
    E --> F["Insert effect 5"]
    F --> G["Insert effect 6"]
    G --> H["EQ"]
    H --> I["Volume (fader)"]
    I --> J["Insert effect 7"]
    J --> K["Insert effect 8"]
As you can see, the last two insert slots (for any channel) are post-EQ and post-fader. Post-fader slots are best suited for insert effects where you do not want the level to be changed after the effect, such as dithering (see
"Dithering" on page 155) and maximizers – both typically used as insert effects for output busses.
→ Applying several effects on several channels may be too much for your CPU to handle!
If you want to use the same effect with the same settings on several channels, it may be more efficient to set up a group channel and to apply your effect only once, as a single insert for this group. You can use the VST Performance window to keep an eye on the CPU load.
Routing an audio channel or bus through insert effects
Insert effect settings are available in the mixer (in extended mode), the Channel Settings window and the Inspector.
The examples below show the Channel Settings window, but the procedures are the same for all the inserts sections:
- Bring up the Channel Settings window.
By default, the inserts are located to the far left.
- Pull down the effect type pop-up for one of the insert slots, and select an effect.
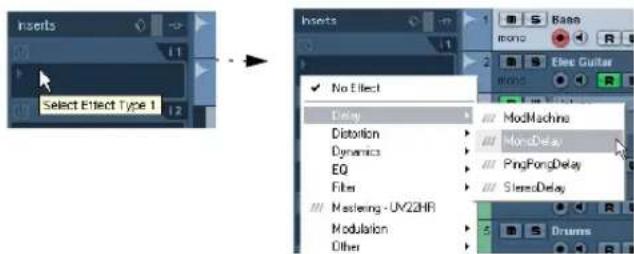
text_image
Inserts Select Effect Type 1 No Effect Delay Distortion Dynamics EQ Fiber Mastering - UV22HR Modulation Other ModMachine MondDelay PingFongDelay SlurredDelay DrumsThe effect is loaded and automatically activated and its control panel opens. You can open or close the control panel for an effect by clicking the "e" button for the insert slot.
- If the effect has a dry/wet Mix parameter, you can use this to adjust the balance between the dry signal and the effect signal.
See "Editing effects" on page 163 for details about editing effects.
- To remove an effect, pull down the effect type pop-up menu and select "No Effect".
You should do this for all effects that you do not intend to use, to reduce the CPU load.
- You can add up to 8 insert effects per channel this way.
- You can reorder the effects by clicking in the area above the name field and dragging the effect onto another slot.
- You can copy an effect into another effect slot (for the same channel or between channels) by holding down [Ctrl]/[Command] and dragging it onto another effect slot.
Deactivating vs. bypassing
If you want to listen to the track without having it processed by a particular effect, but do not want to remove this effect completely from the insert slot, you can either deactivate or bypass it:
Deactivating means to terminate all processing, whereas bypassing means to play back only the unprocessed original signal – a bypassed effect is still processing in the background. Bypassing allows for crackle-free comparison of the original ("dry") and the processed ("wet") signal.
- To deactivate an effect, click the blue button on the left above the insert slot.
- To bypass an effect, click its Bypass button (the middle button above the insert slot).
When an effect is bypassed, this button is yellow.
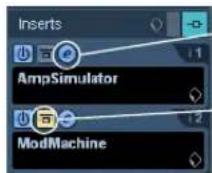
This effect is activated, and its control panel is open.
This insert effect is bypassed.
- To bypass all inserts for a track, click the global bypass button.
This button can be found at the top of the Inserts section in the Inspector or the Channel Settings window. It lights up in yellow to indicate that the inserts of this track are bypassed. In the Track list and the channel strip in the mixer, the Inserts State button will also light up in yellow.

text_image
Inserts 1 Bass mono R Bass AmpSimulator Click to Bypass Inserte (reset inserts with 'ALT' + click) radio Take 1 / Eled TakeInsert effects in the channel overview
If the "Channel" section is selected in the Inspector or the "Channel Overview" view mode is selected in the extended mixer, you will get an overview of which insert effects, EQ modules and effect sends are activated for the channel.
You can activate or deactivate individual insert effect slots by clicking the corresponding number (in the top part of the overview).
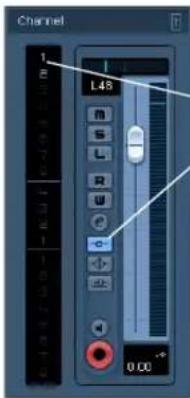
text_image
Channel 1 2 3 4 5 6 7 8 9 10 11 12 13 14 15 16 17 18 19 20 21 22 23 24 25 26 27 28 29 30 31 32 33 34 35 36 37 38 39 40 41 42 43 44 45 46 47 48 49 50 51 52 53 54 55 56 57 58 59 60 61 62 63 64 65 66 67 68 69 70 71 72 73 74 75 76 77 78 79 80 81 82 83 84 85 86 87 88 89 90 91 92 93 94 95 96 97 98 99 100The blue color of inserts 1 and 2 and the blue Inserts State button in the channel strip indicate that this track has active inserts.
The channel overview in the Inspector
Using mono or stereo effects with a surround channel (Cubase only)
Whether your effect supports mono, stereo or multi-channel processing depends entirely on the effect plug-in.
Normally, when you apply a mono or stereo insert effect to a surround (multi-channel) track, the first speaker channels of the track (often L and/or R) are routed through the effect's available channels, and the other channels of the track are left unprocessed.
However, you may want to apply the effect to other speaker channels. This is done in the Channel Settings window:
-
Right-click somewhere in the Channel Settings window (except the EQ display) to open the Channel Settings context menu.
-
Select "Customize View" from the menu, and select "Insert Routing" from the submenu.
The Insert Routing section appears to the left of the EQ display. It contains a row of small signal diagrams.
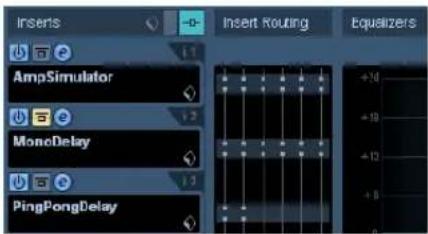
text_image
Inserts AmpSimulator MonoDelay PingPongDelay Insert Routing Equalizers +14 +19 +12 +6- Double-click on the small signal diagram for the effect to open the Routing Editor window.
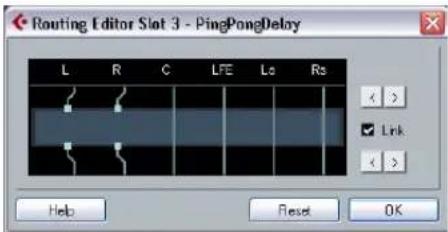
text_image
Routing Editor Slot 3 - PingPongDelay L R C LFE Lo Rs < > ✓ Link < > Help Reset OKThe Routing Editor window
The columns in the diagram represent the channels in the current configuration, with signals passing from top to bottom. The gray field in the middle represents the actual effect plug-in.
- The squares above the effect represent inputs to the effect plug-in.
- The squares below the effect represent outputs from the effect plug-in.
- A line that passes through the effect (with no square input/output indicators) represent a bypass connection – the audio on that speaker channel passes the effect without being processed.
- A "broken" line indicates a broken connection – the audio on that speaker channel will not pass on to the output at all.
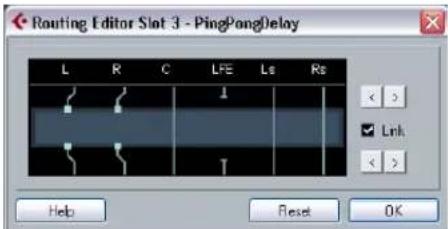
text_image
Routing Editor Slot 3 - PingPangDelay L R C LFE Ls Rs < > Link < > Help Reset OKHere, the effect will process the L and R channels. The Ls, Rs and C channels are not processed, while the Lfe connection is broken.
Operations
You can move connections to the effect inputs and outputs sideways to route the audio to/from inputs/outputs other than the standard configuration. To do this, click the arrow buttons to the right.
- The upper two arrows move the input connections, and the lower two arrows move the output connections. If the "Link" checkbox is activated, the input and output connections will be moved at the same time. This is the mode to use when you simply want to process other channels than the default, without any cross-connections.
- If you move inputs or outputs independently of each other, this means you create a "cross-connection".
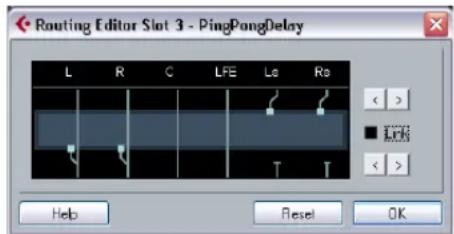
text_image
Routing Editor Slot 3 - PingPongDelay L R C LFE Ls Re < > < > Help Reset OKThe audio on the Ls-Rs channels is processed in the plug-in and output on the L-R channels. Since the L-R channels are bypassed, this means the final L-R output will contain both the original L-R signals and the processed Ls-Rs signals.
- If a channel is bypassed (a straight line is shown through the plug-in) you can click the line to break the connection.
Click again to replace the broken connection with a bypass. - Clicking Reset takes you back to the original standard connection.
→ Changes you make in this window are audible immediately.
Adding insert effects to busses
All input (Cubase only) and output busses have eight insert slots, just like regular audio channels. The procedures for adding insert effects are the same.
- Adding insert effects to an input bus (Cubase only) allows you to record with effects.
The effects will become a permanent part of the recorded audio file (see the chapter "Recording" on page 66).
- Insert effects added to an output bus will affect all audio routed to that bus, like a "master insert effect".
Typically you would add compressors, limiters, EQ or other plug-ins to tailor the dynamics and sound of the final mix. Dithering is a special case, as described below.
Please note that the input/output busses only appear as tracks in the Track list, when their automation W(rite) buttons have been activated once. Therefore you can only use the Inspector section to make Inserts settings for the busses if you have activated Write automation for the respective bus beforehand.
However, you can always make Inserts settings in the Channel Settings window and the extended mixer.
Dithering
Dithering is a method for controlling the noise produced by quantization errors in digital recordings. The theory behind this is that during low level passages, only a few bits are used to represent the signal, which leads to quantization errors and hence distortion.
For example, when “truncating bits”, as a result of moving from 24 to 16 bit resolution, quantization errors are added to an otherwise immaculate recording. By adding a special kind of noise at an extremely low level, the effect of these errors is minimized. The added noise could be perceived as a very low-level hiss under exacting listening conditions. However, this is hardly noticeable and much preferred to the distortion that otherwise occurs.
When should I use dithering?
- Consider dithering when you mix down to a lower resolution, either in realtime (during playback) or with the Export Audio Mixdown function.
A typical example is when you mix down a project to a 16-bit stereo audio file for audio CD burning.
What is a "lower resolution" then? Well, Cubase uses 32-bit float resolution internally, which means that all integer resolutions (16 bit, 24 bit, etc.) are lower. The negative effects of truncation (no dithering) are most noticeable when mixing down to 8 bit, 16 bit and 20 bit format; whether to dither when mixing down to 24 bits is a matter of taste.
Applying dithering
- Open the VST Output Channel Settings window by clicking the "e" button for the Output channel in the mixer. You can also display the Inserts section in the extended mixer pane.
- Open the Inserts pop-up menu for slot 7 or 8.
The two last Insert effect slots (for all channels) are post-fader, which is crucial for a dithering plug-in. The reason is that any master gain change applied after dithering would bring the signal back to the internal 32 bit float domain, rendering the dithering settings useless.
- Select the included UV22HR dithering plug-in from the pop-up menu.
The included dithering plug-ins and their parameters are described in the separate manual "Plug-in Reference". If you have installed another dithering plug-in that you prefer, you can of course select this instead.
- Make sure the dithering plug-in is set to dither to the correct resolution.
This would be the resolution of your audio hardware (on playback) or the desired resolution for the mixdown file you want to create (as set in the Export Audio Mixdown dialog, see the chapter "Export Audio Mixdown" on page 419). - Use the other parameters in the control panel to set up the dithering to your liking.
Using group channels for insert effects
Like all other channels, group channels can have up to eight insert effects. This is useful if you have several audio tracks that you want to process through the same effect (e.g. different vocal tracks that all should be processed by the same compressor).
Another special use for group channels and effects is the following:
If you have a mono audio track and want to process this through a stereo insert effect (e.g. a stereo chorus or an auto panner device), you cannot just insert the effect as usual. This is because the audio track is in mono – the output of the insert effect will be in mono as well, and the stereo information from the effect will be lost.
One solution would be to route a send from the mono track to a stereo FX channel track, set the send to pre-fader mode and lower the fader completely for the mono audio track. However, this makes mixing the track cumbersome, since you cannot use the fader.
Here's another solution:
- Create a group channel track in stereo and route it to the desired output bus.
- Add the desired effect to the group channel as an insert effect.
- Route the mono audio track to the group channel.
Now the signal from the mono audio track is sent directly to the group, where it passes through the insert effect, in stereo.
Freezing (rendering) insert effects for a track
Effect plug-ins can sometimes require a lot of processor power. If you are using a large number of insert effects for a track, you may reach a point where the computer cannot play back the track properly (the CPU overload indicator in the VST Performance window lights up, you get crackling sounds, etc.).
To remedy this, you can freeze the track, by clicking the Freeze button in the Inspector.
- The Freeze Channel Options dialog is opened, allowing you to set a "Tail" time in seconds.
This adds time at the end of the rendered file to allow reverb and delay tails to fully fade out. - The program now renders the output of the track, including all pre-fader insert effects, to an audio file. This file is placed in the "Freeze" folder within the Project folder (Windows). On the Mac, the Freeze folder is stored under "User/Documents".
- The frozen audio track is locked for editing in the Project window.
The frozen insert effects cannot be edited or removed and you cannot add new insert effects for the track (except post-fader effects).
- On playback, the rendered audio file is played back. You can still adjust the level and panning in the Mixer, make EQ settings and adjust the effect sends. In the Mixer, the channel strip for a frozen track is indicated by a "snow flake" symbol on the volume fader handle.
After freezing the Inserts for a track, you hear the track play back as before but the insert effects do not have to be calculated in real time, easing the load on the computer processor. Typically, you would freeze a track when it is finished and you do not need to edit it anymore.
- You can only freeze audio tracks this way, not group channel tracks or FX channel tracks.
- The last two insert effects will not be frozen. This is because these are post-fader insert slots.
- You can also freeze VST instruments and their insert effects – see the chapter "VST Instruments and Instrument tracks" on page 169.
Unfreezing
If you need to edit the events on a frozen track or make settings for the insert effects, you can unfreeze the track:
- Click the Freeze button in the Inspector for the track. You will be asked whether you really want to unfreeze the channel and if you wish to keep or delete the freeze files.
- Click "Unfreeze" or "Keep Freeze files".
This reactivates the frozen insert effects. Clicking "Keep Freeze Files" will unfreeze the channel but not delete the freeze files. After editing, you can freeze the track again.
Send effects
Background
As their name implies, send effects are outside of an audio channel's signal path, i.e. the audio data to be processed must be sent to the effect (as opposed to insert effects, which are inserted into the channel's signal path).
To this end, Cubase provides FX channel tracks. When you have created such a track, it is added to the Track list and can be selected as a routing target in the Send slots of audio channels.
- When selecting an FX channel track in one of the send slots of an audio channel, the audio is sent to the FX channel and through any insert effects set up for it.
Each audio channel has eight sends, which can be routed to different FX channels, and thus different FX channel insert effect configurations. You control the amount of signal sent to the FX channel by adjusting the effect send level.
- If you have added several effects to the FX channel, the signal passes through the effects in series, from the top (the first slot) downward.
This allows for "custom" send effect configurations – e.g. a chorus followed by a reverb followed by an EQ and so on. - The FX channel track has its own channel strip in the mixer, the effect return channel.
Here you can adjust the effect return level and balance, add EQ and route the effect return to any output bus. - Each FX channel track can have any number of automation tracks, for automating various effect parameters.
See the chapter "Automation" on page 188 for more information.
Setting up send effects
Adding an FX channel track
- Pull down the Project menu and select "FX Channel" from the "Add Track" submenu.
A dialog appears.
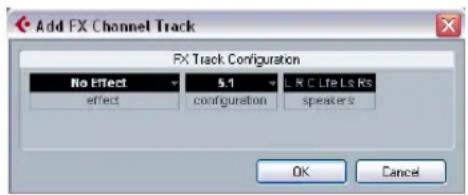
text_image
Add FX Channel Track FX Track Configuration No Effect 5.1 LRC Life Ls Rs effect configuration speakers OK Cancel- Select a channel configuration for the FX channel track.
Normally, stereo is a good choice since most effect plug-ins have stereo outputs.
- Select an effect for the FX channel track.
This is not strictly necessary at this point – you can leave the plug-in pop-up menu set to "No Effect" and add effects to the FX channel later if you like.
- Click OK.
An FX channel track is added to the Track list, and the selected effect, if any, is loaded into the first insert effect slot for the FX channel (in that case, the lit Inserts tab for the FX channel track in the Inspector indicates that an effect has been assigned and automatically activated).
- All FX channel tracks you create will appear in a dedicated "folder" track in the Track list.
This makes it easy to manage and keep track of all your FX channel tracks, and also allows you to save screen space by folding in the FX Channel folder.
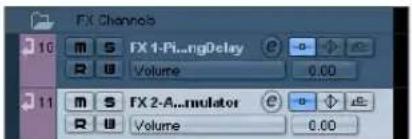
text_image
FX Channels 10 m S FX 1-Pi...ngDelay e Volume 0.00 11 m S FX 2-A...mulator e Volume 0.00FX channel tracks are automatically named "FX 1", "FX 2" etc., but you can rename them if you wish. Just double-click the name of an FX channel track in either the Track list or the Inspector and type in a new name.
Adding and setting up effects
As mentioned above, you can add a single insert effect when you create the FX channel track. To add and set up effects after the FX channel track is created, you can either use the Inspector for the track (click the Inserts tab) or the VST FX Channel Settings window:
- Click the Edit ("e") button for the FX channel track (in the Track list, mixer or Inspector).
The FX Channel Settings window appears, similar to a regular Channel Settings window.
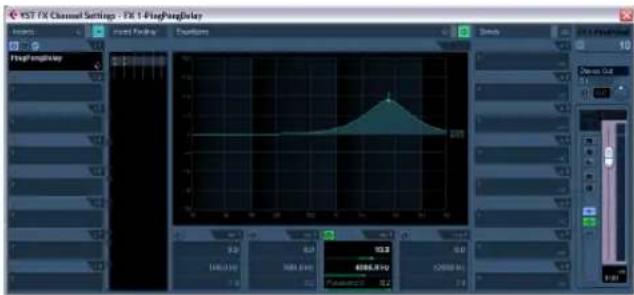
text_image
XST FX Channel Settings - FX 1 -PlayFangDelay Signal Play FangDelay Frequency 0.0 146.00 108.00 13.5 0.0 0.0 0.0 0.0 0.0 0.0 0.0 0.0 0.0 0.0 0.0 0.0 0.0 0.0 0.0 0.0 0.0 0.0 0.0 0.0 0.0 0.0 0.0 0.0 0.0 0.2On the left in the window you can find the Inserts section with eight effect slots.
- Make sure the FX channel is routed to the correct output bus.
This is done with the Output Routing pop-up menu at the top of the fader section (also available in the mixer and Inspector).
- To add an insert effect in an empty slot (or to replace the current effect in a slot), click in the slot and select an effect from the pop-up menu.
This works just like when selecting insert effects for a regular audio channel.
- When you add an effect, its control panel will automatically appear. When you set up send effects, you would normally set the wet/dry Mix control to all "wet".
This is because you control the balance between the wet and the dry signal with the effect sends. For more information, see "Editing effects" on page 163.
- You can add up to eight effects for an FX channel.
The signal will pass through all the effects in series. It is not possible to adjust the send and return levels separately for the effects – this is done for the FX channel as a whole. If what you want is several separate send effects (where you can control the send and return levels independently), you should instead add more FX channel tracks – one for each effect.
- You can reorder the effects by clicking in the area above the name field and dragging the effect onto another slot.
- You can copy an effect into another effect slot (for the same channel or between channels) by holding down [Ctrl]/[Command] and dragging it onto another effect slot.
- To remove an insert effect from a slot, click in the slot and select "No Effect" from the pop-up menu.
You should do this for all effects that you do not intend to use, to reduce the CPU load.
- You can bypass individual effects (or all effects) by clicking the corresponding Bypass button(s) for the FX channel track.
See "Routing an audio channel or bus through insert effects" on page 153.
- You can also adjust level, pan and EQ for the effect return in the FX Channel Settings window.
This can also be done in the mixer or in the Inspector.
→ Remember that the more effect units you use, the higher the CPU load.
Making settings for the sends
The next step is to set up a send for an audio channel and route it to the FX channel. This can be done in the mixer (in the extended panel), in the Channel Settings window or in the Inspector for the audio track. The example below shows the Channel Settings window, but the procedure is similar for all the sections:
- Click the "e" button for an audio channel to bring up its Channel Settings window.
By default, the send section is located to the left of the channel strip. Each of the eight sends has the following controls:
- An On/Off button for activating/deactivating the effect
- A send level slider
- A pre/post-fader switch
- An "e" (edit) button
Note that the last three items are not shown until the send is activated and an effect has been loaded.
- Pull down the Routing pop-up menu for a send by clicking in the empty slot, and select the desired routing destination.
text_image
Sends ✓ No Bus FX 1-PingPongDelay FX 2-AmpSimulator Outputs- If the first item on this menu ("No Bus") is selected, the send is not routed anywhere.
- Items called "FX 1", "FX 2" etc. correspond to existing FX tracks. If you renamed an FX track (see "Adding an FX channel track" on page 157), that name will appear on this menu instead of the default.
- The menu also allows for routing a send directly to output buses, separate output bus channels or Group channels.
-
Select an FX channel track from the pop-up menu. Now the send is routed to the FX channel.
-
Click the power button for the effect send so that it lights up in blue.
This activates the send.
- Click and drag the send level slider to a moderate value.
The send level determines how much of the signal from the audio channel is routed to the FX channel via the send.
Setting the Send level.
- In the mixer, you can use the level fader for the FX channel to set the effect return level.
By adjusting the return level, you control the amount of the signal sent from the FX channel to the output bus.
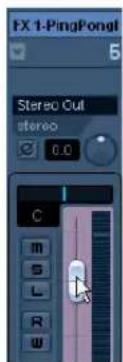
text_image
FX 1-PingPongl Stereo Cut stereo 0.0 CSetting the effect return level.
- If you want the signal to be sent to the FX channel before the audio channel's volume fader in the mixer, click on the Pre-Fader button for the send so that it lights up.
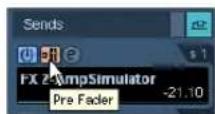
A send set to pre-fader mode.
Normally you want the effect send to be proportional to the channel volume (post-fader send). The picture below shows where the sends are "tapped" from the signal in pre and post-fader mode.

flowchart
graph TD
    A["Input gain"] --> B["Insert effects 1-6"]
    B --> C["EQ"]
    C --> D["Volume (fader)"]
    D --> E["Insert effects 7-8"]
    E --> F["Post-fader sends"]
    C --> G["Pre-fader sends"]
You can choose whether a send in pre-fader mode should be affected by the channel's Mute button or not. This is done with the option "Mute Pre-Send when Mute" in the Preferences dialog (VST page).
- When one or several sends are activated for a channel, the Send Effects buttons light up in blue.
⇒ Cubase only: The FX channels themselves have sends, too.
Bypassing the sends
- In the mixer, you can click on the lit (blue) Sends State button for a channel to bypass (disable) all its sends. When the sends are bypassed, the button is yellow. Click the button again to enable the sends.
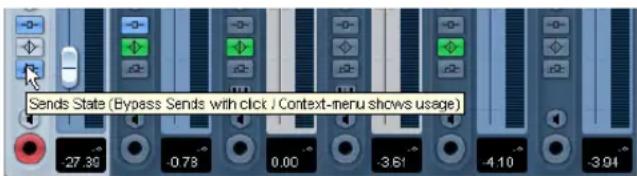
text_image
Sends State (Bypass Sends with click / Context-menu shows usage)Click this button to bypass the sends.
- In the Inspector and the Channel Settings window, click the button to the left of the Sends button (so that it lights up yellow) to bypass the sends.
- You can also bypass individual sends in the channel overview.
See "Insert effects in the channel overview" on page 154.
- You can also bypass the send effects by clicking the "Bypass Inserts" button for the FX channel.
This bypasses the actual effects which may be used by several different channels. Bypassing a send affects that send and that channel only. If you bypass the insert effects, the original sound will be passed through. This may lead to unwanted side effects (higher volume). To deactivate all effects, use the mute button in the FX channel.
Setting pan for the sends (Cubase only)
By default, the sends for an audio channel follow any pan settings – stereo or surround – you make for the channel itself. This means that if an audio channel is panned to the right, the signal from its effect sends will be panned the same way, making the stereo imaging as clear and true as possible.
However, you may want to have different pan settings for the sends. There are several uses for this:
- If you route a send from a mono channel to a stereo FX channel track, you can position the send signal at center pan in the stereo FX channel (or anywhere you like).
- If you route a send from a stereo channel to a mono FX channel track, the pan control works as a crossfader, determining the balance between the stereo sides when the stereo send signal is mixed to mono.
- If you route a send from a mono or stereo channel to a FX channel track in surround format, you can use the surround panner to position the send signal in the surround image.
You set up send panning in the following way:
- Open the Channel Settings window for the audio channel.
-
Right-click somewhere in the Channel settings window (not the EQ display), to open the context menu and open the "Customize View" submenu.
-
From the submenu, select "Send Routing" and "Control Strip".
In the Send Routing section of the Channel Settings window, each send is shown as a small routing diagram showing a pre/post selector to the right and a pan fader (where applicable). In the Control Strip section, you can activate the option "Link Send Routing Panners to Channel Panner as Default". When this is activated, the send panners follow the pan for the channel. This item is also available in the Preferences dialog (VST page).
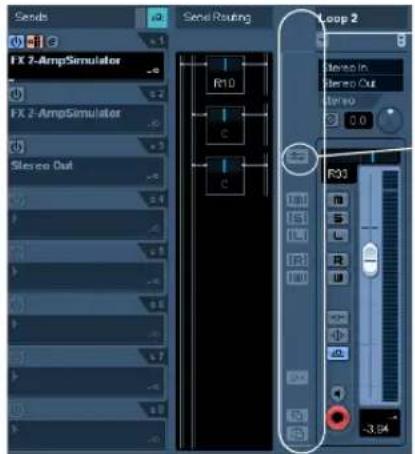
text_image
Sends FX 2-AmpSimulator FX 2-AmpSimulator Slope Out Slope Routing C C Loop 2 Slope In Slope Out R10 R33 -3.94The Control Strip section
Link Send Routing Panners to Channel Panner
The Sends, Send Routing and Control Strip sections in the Channel Settings window.
- Click and drag the pan control for the desired send(s) in the display.
You can reset the pan control to the center position by [Ctrl]/[Command]-clicking on the pan control.
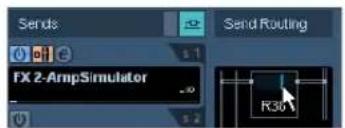
text_image
Sends FX 2-AmpSimulator Send Routing R36- If the FX channel is configured in a surround format, the pan control will be a miniature surround panner, similar to the one found in the mixer.
You can click and drag the "ball" in the miniature panner display to position the send in the surround field, or double-click in the display to bring up the surround panner. See the chapter "Surround sound (Cubase only)" on page 180.
If both the send (the audio channel) and the FX channel are in mono, the pan control is not available.
FX channels and the Solo Defeat function
When mixing, you might sometimes want to solo specific audio channels, and listen only to these while other channels are muted. However, this will mute all FX channels as well. If the soloed audio channels have sends routed to FX channels, this means you will not hear the send effects for the channels.
To remedy this, you can use the Solo Defeat function for the FX channel:
-
[Alt]/[Option]-click the Solo button for the FX channel. This activates the Solo Defeat function for the FX channel. In this mode, the FX channel will not be muted if you solo another channel in the mixer.
-
You can now solo any of the audio channels without having the effect return (the FX channel) muted.
- To turn off the Solo Defeat function for the FX channel, [Alt]/[Option]-click the Solo button for the FX channel again.
Using the Side-Chain input
Many VST 3.0 effects feature a side-chain input. Side-chaining allows you, for example, to lower the music volume when someone is speaking ("ducking") or to use compression (e.g. on a bass sound) when the drums are hit, thereby "harmonizing" the intensity of the two instruments. Another possibility is to use the side-chain signal as a source for modulation.
The effect types which feature side-chain functionality are Delay, Dynamics, Modulation and Filter.
For detailed descriptions of the plug-ins that feature side-chaining, see the separate manual "Plug-in Reference".
⇒ Certain combinations of tracks and side-chain inputs may lead to feedback loops and added latency. If this is the case, the side-chain options will not be available.
Creating a Ducking delay
The delay repeats can be silenced by side-chain signals exceeding a certain threshold.
You can use this feature to create a so-called "ducking delay" for your vocals. Let's say you want to add a delay effect that is audible only when no signal is present on the vocal track. For this, you need to set up a delay effect which is deactivated every time the vocals start again.
Proceed as follows:
- Select the vocal track.
- On the Project menu, select "Duplicate Tracks".
Now you can use the vocal events on the second track to silence the delay effect. - Open the Insert tab for the first Vocal track in the Inspector and select "PingPongDelay" from the Effects pop-up menu.
The control panel for the effect opens.
- On the control panel for the effect, make the desired effect settings and activate the Side-Chain button.
Try out the effect settings to find out which settings will work best with your project. For detailed descriptions of the parameters, see the separate manual "Plug-in Reference".
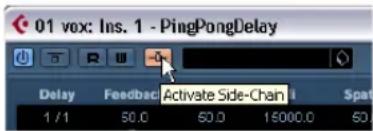
text_image
01 vox: Ins. 1 - PingPongDelay Delay Feedback Activate Side-Chain Spat 1 / 1 50.0 50.0 15000.0 50- In the Track list, select the second vocal track.
- Pull down the Output Routing pop-up menu and on the Side-Chain submenu, select the PingPongDelay effect you set up for the vocal track.
This way, the signals from the second (duplicate) track are routed to the effect (and do not end up in the mix).
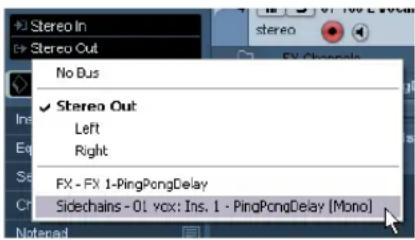
text_image
Stereo In Stereo Cut No Bus ✓ Stereo Out Left Right FX - FX 1-PingPongDelay Sidechains - 0.1 vcx: Ins. 1 - PingPongDelay [Mono]Now every time the signals on the vocal track exceed the threshold, the delay will be deactivated. Since the threshold for the delay effect is fixed, you may have to adjust the volume of track 2, in this example, to ensure that vocal parts of low or middle volume will also silence the delay effect.
Triggering a compressor using side-chain signals
Compression, expansion or gating can be triggered by side-chain signals exceeding a specified threshold.
You may run into a situation where you want to lower the volume of one instrument every time another instrument is played. You could e.g. want to lower the volume of the bass guitar during the bass drum hits. This can be achieved by applying compression to the bass guitar signal every time the drum signals are present on the respective track.
Proceed as follows:
- Select the bass guitar track.
- Open the Inserts tab in the Inspector, click in an insert slot to open the effect selection pop-up menu and, on the Dynamics submenu, select "Compressor".
The effect is loaded into the effect slot and the effect control panel opens. - Make the desired effect settings (you will most likely have to adjust them later to get the right compression level) and activate the Side-Chain button.
- Select the bass drum track.
- Open the Sends Inspector section, click in a send slot and from the Side-Chain submenu, select the Compressor effect you created for the bass guitar track. Adjust the Send level.
This way, the bass drum signal triggers the compressor on the bass guitar track.
When you now play back the project, the bass guitar will be compressed whenever the signals on the bass drum track exceed the threshold.
Side-chain and Modulation
Side-chain signals bypass the built-in LFO modulation and instead apply modulation according to the envelope of the side-chain signal. Since each channel will be analyzed and modulated separately, this allows for creating astonishing spatial stereo or surround modulation effects. Feel free to experiment with the functions to see what they have to offer!
About drag&drop
When you drag effects from one insert slot to another (on the same channel or between different channels), the following applies:
- When you move an effect within a channel (e.g. from slot 4 to slot 6), the side-chain connections will be kept.
- When you drag and drop an effect between two channels, the side-chain connections will not be kept.
- When copying an effect into another effect slot (for the same or a different channel), the side-chain connections will not be copied, i.e. they will be lost.
Using external effects (Cubase only)
Although this program comes with a top selection of VST effect plug-ins, and although there is a huge range of additional plug-ins available on the market, you may still have some hardware effect units that you want to use – valve compressors, reverb units, vintage tape echo machines, etc. By setting up external FX busses you can make your outboard equipment part of the Cubase virtual studio!
An external FX bus is a combination of outputs (sends) and inputs (returns) on your audio hardware, along with a few additional settings. All external FX busses you have created will appear on the effect pop-up menus and can be selected like the internal effect plug-ins. The difference is that if you select an external effect as an insert effect for an audio track, the audio will be sent to the corresponding audio output, processed in your hardware effect (provided that you have connected it properly) and returned via the specified audio input.
Creating and handling of external effects is described in detail in the chapter "VST Connections: Setting up input and output busses" on page 13.
Editing effects
All inserts and sends have an Edit ("e") button. Clicking this opens the control panel for the effect, in which you can make parameter settings.
The contents, design and layout of the control panel depends on the selected effect. However, all effect control panels have an On/Off button, a Bypass button, Read/Write automation buttons (for automating effect parameter changes, see the chapter "Automation" on page 188), a preset pop-up menu and a Preset Management pop-up menu for saving and loading effect presets. Some plug-ins also feature a side-chain button, see "Using the Side-Chain input" on page 161.
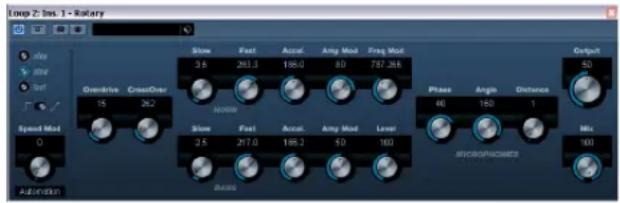
text_image
Loop 2: Ins. 1 - Rotary % Ave Show Set Speed Mod 0 Automation Overdrive CrossOver 15 26.2 Show Past Accal. Amy Mod Freq Mod 3.5 281.3 196.0 8.0 787.268 AVGOW 2.5 217.0 Accal. Amy Mod Level 5.0 100 Output 5.0 60 Angle Distance 1 MIS MICROGRAPHICS 100The Rotary effect control panel
- Please note that all effects can be edited using a simplified control panel (horizontal sliders only, no graphics). This panel is opened by pressing [Ctrl]/[Command]+[Alt]/[Option]+[Shift] and clicking on the Edit button for the effect send or slot.
Effect control panels may have any combination of knobs, sliders, buttons and graphic curves.
⇒ The included effects and their parameters are described in detail in the separate manual "Plug-in Reference".
- If you edit the parameters for an effect, these settings are saved automatically with the project.
- You can also save the current settings as a preset, see below.
- Effects parameters can be automated – see the chapter "Automation" on page 188.
Effect presets
Effect preset management in Cubase is very versatile. In the MediaBay – or with certain limits in the Save Preset dialog – you can assign attributes to presets which allow you to organize and browse them according to various criteria. Cubase comes with a huge array of categorized track and VST presets that you can use straight out of the box. You can also preview effect presets before loading them which considerably speeds up the process of finding the right effect preset.
Effect presets can be divided into the following main categories:
- VST presets for a plug-in.
These are stored parameter settings for a specific effect. - Inserts presets that contain insert effect combinations.
These can contain the whole insert effects rack, complete with settings for each effect, see "Saving insert effect combinations" on page 166.
Selecting effect presets
Most VST effect plug-ins come with a number of useful presets for instant selection.
To select an effect preset in the Presets browser, proceed as follows:
- Load an effect, either as a channel insert or into an FX channel.
The control panel for the effect is displayed. - Click in the preset field at the top of the control panel. This opens the Presets browser.
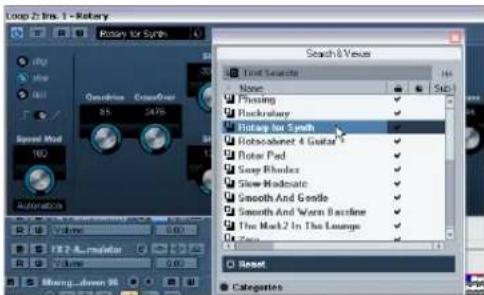
text_image
Loop 2 Brs. 1 - Rotary Rotary for Synth Speed Mod 100 Automatics Text Search None Phasing Rockclarity Rotary for Synth Rotoscabinet & Guitar Rotor Pad Screw Rhulce Slow Moldcoat Smooth And Gentle Smooth And Worm Baseline The Mack2 In The Loungs Reset Categories- You can also open the Presets browser from the Inspector (Inserts tab) or the Channel Settings window.
-
Select the desired preset in the list.
-
Activate playback to audition the selected preset. Simply step through the presets until you found the right sound. It may be helpful to set up cycle playback of a section to make comparisons between different preset settings easier.
- Double-click on the desired preset (or click outside the Presets browser) to apply the preset.
- To return to the preset that was selected when you opened the Presets browser, click the Reset button.
- You can also open the Presets browser by clicking the button to the right of the preset field an selecting "Load Preset" from the Preset Management pop-up menu.
- The preset handling for VST 2 plug-ins is slightly different, see "About earlier VST effect presets" on page 165.
The Browser sections
The Presets browser contains the following sections:
- The "Search & Viewer" section (displayed by default) lists the available presets for the selected effect.
- The Filter section (displayed when you click the Categories button) shows the available preset attributes for the selected effect.
If no attributes have been specified for the effect presets, the columns will be empty. If attributes have been assigned to a preset for this effect, you can click on the attribute in the respective column (Category, Style etc.), to filter out all presets that do not match the selected attribute(s).
- If you also activate the "Show Location" button, the Browser & Filter section is displayed, allowing you to specify the Presets folder that should be searched for preset files.
Saving effect presets
You can save your edited effect settings as presets for further use (e.g. in other projects):
- Open the Preset Management pop-up menu.
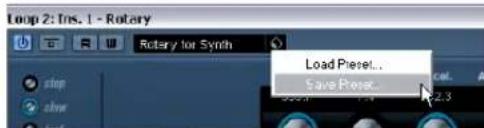
text_image
Loop 2: Ins. 1 - Rotary Rotary for Synth Load Preset... Save Preset...- Select "Save Preset..." from the pop-up menu.
This opens a dialog where you can save the current settings as a preset.
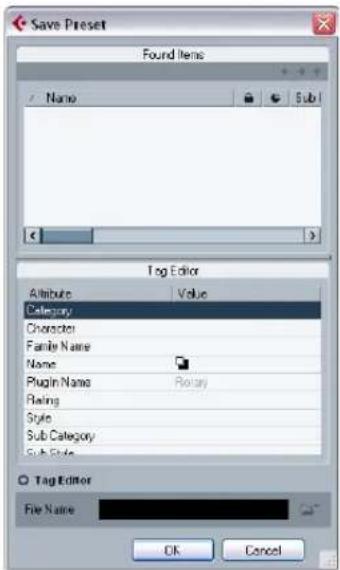
text_image
Save Preset Found Items Name Sub Tag Editor Attribute Value Category Character Family Name Name Plugin Name Retray Rating Style Sub Category Sub Style Tag Editor File Name OK Cancel- In the File name field in the lower part of the Save Preset dialog, enter a name for the new preset.
- If you wish to assign attributes to the preset, click the Tag Editor button.
Click in the Value column to select an appropriate "tag" for one or several of the available categories in the Attributes column. For further information on preset handling and the Tag Editor, see the chapter "The MediaBay" on page 273.
- Click OK to store the preset and exit the dialog.
User-defined presets are saved in the following location:
- Win: \Documents and Settings\
- Mac: /Users/
You cannot change the default folder, but you can add further subfolders inside the individual effect preset folders.
About earlier VST effect presets
As stated previously, you can use any VST 2.x plug-ins in Cubase. For a description of how to add VST plug-ins, see "Installing and managing effect plug-ins" on page 166.
When you add a VST 2 plug-in, any previously stored presets for it will be in the old FX program/bank format (.fxp/.fxb). You can import such files, but the preset handling will be slightly different. You will not be able to use the new features like the Tag Editor until you have converted the old ".fxp/.fxb" presets to VST 3 presets. If you save new presets for the included VST 2 plug-ins, these will automatically be saved in the new ".vstpreset" format.

All VST 2 presets can be converted to VST 3 presets.
Importing and converting FXB/FXP files
To import .fxp/.fxb files, proceed as follows:
- Load any VST 2 effect you may have installed, and open the Preset Management pop-up menu.
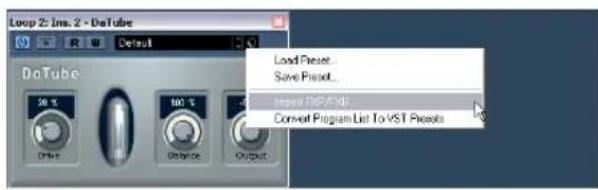
text_image
Loop 2: Ins. 2 - DaTube Load Preset... Save Preset... Import (IF/AT) Convert Program List To VST Presets-
Select "Import FXB/FXP..." from the pop-up. This menu item is only available for VST 2 plug-ins.
-
In the file dialog that opens, locate the .fxp file and click Open.
If you load a bank (.fxb), it will replace the current set of all effect programs. If you load a single program, it will replace the currently selected effect program only. Note that such files exist only if you created your own .fxp/.fxb presets with a previous version of Cubase (or any other VST 2 application).
- After importing, you can convert the current program list to VST presets by selecting "Convert Program List to VST Presets" from the Preset Management pop-up.
After converting, the presets will be available in the Presets browser, and you can use the Tag Editor to add attributes and audition the presets. The new converted presets will be stored in the VST3 Preset folder.
Saving insert effect combinations
You can save the complete insert effect rack for a channel together with all parameter settings as an inserts preset. Inserts presets can be applied to audio, instruments, FX channel or group tracks.
This works as follows:
- Select the desired track in the Track list and open the Inserts Inspector section.
- Load a combination of insert effects and adjust the parameters (or select effect presets) for each effect.
- At the top of the Inserts tab, click the VST Sound button to open the Preset Management pop-up menu for the inserts and select "Store Preset".
This can also be done from the Channel Settings window using the VST Sound button at the top of the Inserts section.
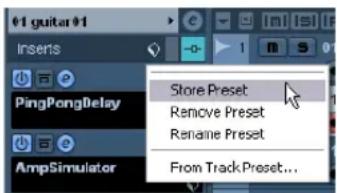
text_image
01 guitar 01 Inserts PingPongDelay AmpSimulator Store Preset Remove Preset Rename Preset From Track Preset...- Type in a name for the preset in the dialog that appears.
- Select the track (audio/group/instrument/fx channel) you wish to apply the new preset to, and open the Preset Management pop-up menu.
As you can see, the new preset is available at the top of the pop-up menu.
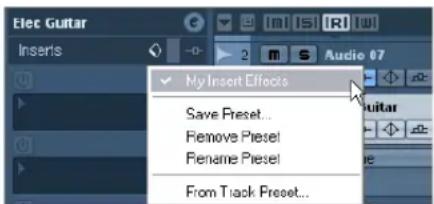
text_image
Elec Guitar Inserts My Insert Effects Save Preset... Remove Preset Rename Preset From Track Preset...- Select the preset you created from the pop-up menu.
The effects are loaded into the Insert slots of the new track, and the control panels for all effects are opened.
- Note that when loading insert combination presets, any plug-ins that were previously loaded for the track will be removed, regardless of whether these slots are used in the preset.
In other words, saving an inserts preset means saving the states of all insert slots.
- You can use the Preset Management pop-up to save your settings as preset, or to rename or remove the current preset.
Extracting insert effect settings from track presets
You can extract the effects used in a track preset and load them into your inserts "rack":
- Select "From Track Preset..." on the Preset Management pop-up menu to open a dialog where all track presets are shown.
- Select an item in the list to load the effects used in the track preset.
Track presets are described in the chapter "Working with Track Presets" on page 288.
Installing and managing effect plug-ins
Cubase supports two plug-in formats; the VST 2 format (with the file name extensions ".dll" on the PC and ".VST" on the Mac) and the VST 3 format (extension ".vst3" on both platforms). The formats are handled differently when it comes to installation and organizing.
Installing additional VST plug-ins
Installing VST 3 plug-ins under Mac OS X
To install a VST 3.x plug-in under Mac OS X, quit Cubase and drag the plug-in file into one of the following folders:
- /Library/Audio/Plug-Ins/VST3/
This is only possible if you are the system administrator. Plug-ins installed in this folder will be available to all users, for all programs that support them. - /Users/
/Library/Audio/Plug-Ins/VST3/
"" is the name you use to log on to the computer (the easiest way to open this folder is to go to your "Home" folder and use the path /Library/Audio/Plug-Ins/VST/ from there). Plug-ins installed in this folder are only available to you.
When you launch Cubase again, the new effects will appear on the effect pop-up menus. In the VST 3 protocol, the effect category, sub-folder structure etc. are built-in and cannot be changed. The effect(s) will simply show up in the assigned category folder(s) on the Effect pop-up menu.
Installing VST 2.x plug-ins under Mac OS X
To install a VST 2.x plug-in under Mac OS X, quit Cubase and drag the plug-in file to one of the following folders:
- /Library/Audio/Plug-Ins/VST/
This is only possible if you are the system administrator. Plug-ins installed in this folder will be available to all users, for all programs that support them.
-
"
When you launch Cubase again, the new effects will appear on the effect pop-up menus.
If an effect plug-in comes with its own installation application, you should use this.
As a general rule, always read the documentation or readme files before installing new plug-ins.
Installing VST 3 plug-ins under Windows
Under Windows, VST 3 plug-ins are installed by dragging the files (with the extension ".vst3") into the vst3 folder in the Cubase application folder. When you launch Cubase again, the new effects will appear on the Effect pop-up menus. In the VST 3 protocol, the effect category, subfolder structure etc. are built-in and cannot be changed. The installed new effect(s) will simply show up in the assigned category folder(s) on the effect pop-up menu.
Installing VST 2 plug-ins under Windows
Under Windows, VST 2.x plug-ins are installed by dragging the files (with the extension ".dll") into the Vstplugins folder in the Cubase application folder, or into the Shared VST Plug-in folder – see below. When you launch Cubase again, the new effects will appear on the effect pop-up menus.
If an effect plug-in comes with its own installation application, you should use this.
As a general rule, always read the documentation before installing new plug-ins.
Organizing VST 2 plug-ins
If you have a large number of VST 2 plug-ins, having them all on a single pop-up menu in the program may become unmanageable. For this reason, the VST 2 plug-ins installed with Cubase are placed in appropriate subfolders according to the effect type.
- Under Windows, you can organize VST plug-ins by moving, adding or renaming subfolders within the Vstplugins folder.
When you launch the program and pull down an effects pop-up menu, the subfolders will be represented by hierarchical submenus, each listing the plug-ins in the corresponding subfolder.
- Under Mac OS X, you cannot change the hierarchic arrangement of the "built-in" VST plug-ins.
However, you can arrange any additional plug-ins you have installed (in the /Library/Audio/Plug-Ins/VST/folders, see above) by placing them in sub-folders. In the program, the subfolders will be represented by hierarchical submenus, each listing the plug-ins in the corresponding subfolder.
About the effects from previous Cubase versions
The Legacy folder on the program DVD contains effects from previous versions of Cubase.
The main reason for installing these earlier plug-ins is backwards compatibility, allowing you to import old Cubase projects and get the correct effect settings.
The Plug-in Information window
On the Devices menu, you will find an item called "Plug-in Information". Selecting this opens a dialog listing all the available VST compatible plug-ins in your system (including VST Instruments), along with all MIDI plug-ins.
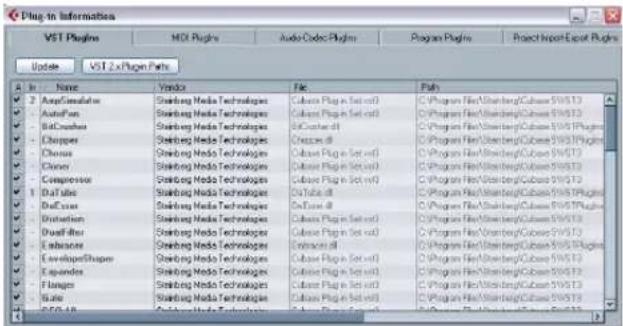
text_image
Plug-in Information VST Plugins Add Programs Update VST 2 x Plug Pins A B C D E F G H I J K L M N O P Q R S T U W X Y Z A B C D E F G H I J K L M N O P Q R S T U W X Y Z A B C D E F G H I J K L M N O P Q R S T U W X Y O P Q R S T U W X Y O P Q R S T U W X Y O P Q R S T U W X Y O P Q R S T U W X Y O P Q R S T U W X O P Q R S T U W X O PManaging and selecting VST plug-ins
To display all available VST plug-ins, open the "VST PlugIns" tab.
- To enable a plug-in (make it available for selection), put a check mark in the left column.
Only the enabled plug-ins will appear on the effect menus.
- The Instances column indicates how many instances of the plug-in are currently used in Cubase.
Clicking in this column for a plug-in which is already in use produces a pop-up showing exactly where each use occurs.
A plug-in may be in use even if it is not enabled in the left column.
You might for example have opened a project containing effects that are currently disabled on the menu. The left column only determines whether or not the plug-in will be visible on the effect menus.
- All columns can be resized by dragging the divider in the column header.
The other columns show the following information about each plug-in:
Column Description
Name The name of the plug-in.
Vendor The manufacturer of the plug-in.
File This shows the complete name of the plug-in (with extension).
Category This indicates the category of each plug-in (such as VST Instruments, Surround Effects, etc.).
Version Shows the version of the plug-in.
SDK Shows with which version of the VST protocol a plug-in is compatible.
Latency This shows the delay (in samples) that will be introduced if the effect is used as an Insert. This is automatically compensated for by Cubase.
Side-Chain Inputs Shows the number of side-chain inputs for a plug-in.
I/O This column shows the number of inputs and outputs for each plug-in.
Path The path and name of the folder in which the plug-in file is located.
Update button
Clicking this button will make Cubase re-scan the designated VST folders for updated plug-in information.
VST 2.x Plug-in Paths button
This opens a dialog where you can see the current paths to where VST 2.x plug-ins are located. You can add/remove folder locations by using the corresponding buttons. If you click "Add", a file dialog is opened, where you can select a folder location.
About the "shared" plug-ins folder (Windows and VST 2.x only)
You can designate a "shared" VST 2.x plug-ins folder. This will allow VST 2.x plug-ins to be used by other programs that support this standard.
You designate a shared folder by selecting a folder in the list and clicking the "Set As Shared Folder" button in the VST 2.x Plug-in Paths dialog.
Exporting plug-in information files
You can also save plug-in information as an .xml file, e.g. for archiving purposes or troubleshooting. The Export function is available for VST, MIDI and Audio Codec plug-ins. Proceed as follows:
-
Right-click on the desired tab in the Plug-in Information window to open the context menu and select "Export". A file dialog opens.
-
In the dialog, specify a name and location for the Plugin Information export file and click OK to export the file.
- The Plug-in Information file contains information on the currently installed/available plug-ins, their version, vendor, etc.
- The .xml file can then be opened in any editor application supporting the xml format.
VST Instruments and Instrument tracks
Introduction
VST Instruments are software synthesizers (or other sound sources) that are contained within Cubase. They are played internally via MIDI. You can add effects or EQ to VST Instruments, just as with audio tracks.
Some VST Instruments are included with Cubase, others can be purchased separately from Steinberg and other manufacturers.
→ This chapter describes the general procedures for setting up and using VST Instruments.
⇒ Depending on the VST version the instrument is compatible with, an icon may be displayed in front of the instrument name, see "About VST 3" on page 151.
The included VST Instruments and their parameters are described in the separate PDF document "Plug-in Reference".
VST Instrument channels vs. instrument tracks
Cubase allows you to make use of VST Instruments in two different ways:
- By activating instruments in the VST Instruments window. This creates a VST Instrument channel, which can be played by one (or several) MIDI track(s) routed to it.
- By creating instrument tracks. Instrument tracks are a combination of a VST Instrument, an instrument channel and a MIDI track. You play and record MIDI note data directly for this track.
Both methods have their advantages, and should be selected according to what best suits your needs. The following sections describe the two approaches.
VST Instrument channels
You can access a VST Instrument from within Cubase by creating a VST Instrument channel and associating this channel with a MIDI track. Proceed as follows:
- On the Devices menu, select "VST Instruments". The VST Instruments window opens.
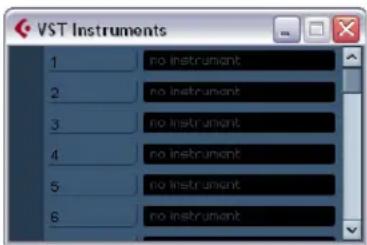
text_image
VST Instruments 1 no instrument 2 no instrument 3 no instrument 4 no instrument 5 no instrument 6 no instrument- Click in one of the empty slots to open the instrument pop-up menu and select the desired instrument.
- You will be asked if you want to create an associated MIDI track connected to the VST Instrument. Do so. The instrument is loaded and activated, and its control panel is opened. A MIDI track with the name of the instrument is added to the Track list. The output of this track is routed to the instrument.
In the Preferences dialog (VST-Plug-ins page), you can specify what should happen when loading a VST instrument in an instrument slot. Open the pop-up menu "Create MIDI track when loading VSTi" and select one of the available options:
- When you select "Always", a corresponding MIDI track will always be created.
- When you select "Do not", no track will be created and only the instrument will be loaded.
- Select "Always ask to" if you want to decide whether a MIDI track should be created whenever you load an instrument.
You can also use modifiers to specify what should happen when you load a VST instrument (overriding the Preference setting):
- When you hold down [Ctrl]/[Command] while selecting a VST Instrument for an instrument slot, a corresponding MIDI track with the name of the instrument is automatically created.
- When you hold down [Alt]/[Option] while selecting a VST Instrument for an instrument slot, no MIDI track will be created for the instrument.
- If you do not want the plug-in control panels to open every time you load a plug-in, open the Preferences dialog (VST-Plug-ins page) and deactivate "Open Effect Editor After Loading it".
You can open a plug-in panel at any time by clicking the "e" button of the corresponding plug-in slot.
- If you now look in the Project window Track list, you will find that a dedicated folder for the chosen instrument has been added, within a "VST Instruments" folder (where all your VST Instrument channels will be listed).
The separate folder for the added VST Instrument contains two or more automation tracks: one for automating the plug-in parameters and one for each mixer channel used by the VST Instrument. For example, if you add a VST Instrument with four separate outputs (four separate mixer channels), the folder will contain five automation tracks. To keep the screen less cluttered, you may want to close the folder for the VST Instrument until you need to view or edit any of the automation tracks. For more about automation, see the chapter "Automation" on page 188.
- When you select the MIDI track routed to the VST instrument, you will see that the Inspector contains a separate section for the instrument.
This section contains the audio channel settings for the VST Instrument (inserts, EQs, Sends and fader settings). The tab has two buttons for opening the Channel Settings window (for the VST Instrument channel) and the Edit Instrument button which opens the control panel for the VST Instrument.
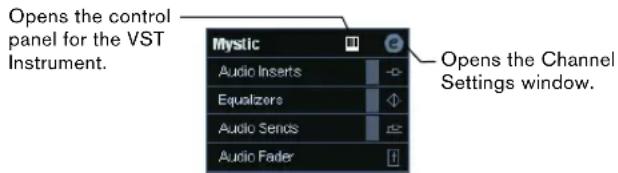
text_image
Opens the control panel for the VST Instrument. Mystic Audio Inserts Equalizers Audio Sends Audio Fader Opens the Channel Settings window.- Depending on the selected VST Instrument, you may also need to select a MIDI channel for the track.
For example, a multitimbral VST Instrument can play back different sounds on different MIDI channels – check the documentation for the VST Instrument for MIDI implementation details.
-
Make sure the option "MIDI Thru Active" is activated in the Preferences dialog (MIDI page).
-
Activate the Monitor button for the MIDI track (in the Track list, Inspector or mixer).
When this is activated (or when the track is record enabled), incoming MIDI is passed on to the selected MIDI output (in this case the VST Instrument), see the chapter "Recording" on page 66.
- Open the mixer.
You will find one or more channel strips for the audio outputs of the VST Instrument. VST Instrument channel strips have the same features and functionality as group channel strips, with the addition of an Edit button at the bottom of the strip for opening the VST Instrument control panel. You will also find Output Routing pop-up menus at the top of the channel strips, for routing the VST Instrument channels e.g. to output channels or groups. Routing is described in detail in the chapter "VST Connections: Setting up input and output busses" on page 13.
- Play the VST Instrument from your MIDI keyboard.
You can use the mixer settings to adjust the sound, add EQ or effects, etc., just as with regular audio channels. Of course, you can also record or manually create MIDI parts that play back sounds from the VST Instrument.
You can have up to 64 (32 in Cubase Studio) VST Instruments activated at the same time, either different instruments or several instances of the same instrument. However, software instruments can consume a lot of CPU power – keep an eye on the VST Performance window to avoid running out of processor power. See also “Instrument Freeze” on page 174.
- VST Instrument channels give you full access to multi-timbral instruments.
You can have several MIDI tracks routed to the VST Instrument, each playing a different part.
- Similarly, you can route channels to any available output provided by the VST Instrument.
The VST Instruments window
When a VST Instrument is loaded, six controls are displayed for this slot in the VST Instruments window.
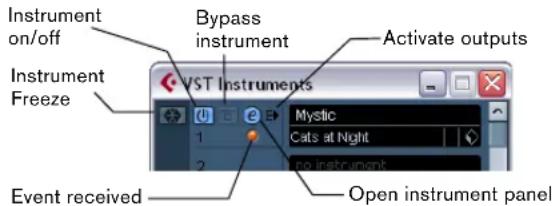
text_image
Instrument on/off Instrument Freeze Bypass instrument Activate outputs VST Instruments Mystic Cats at Night no instrument Event received Open instrument panel- The button on the far left is used for the Freeze function, see "Instrument Freeze" on page 174.
- The second button is used to activate or deactivate the VST Instrument.
When an instrument is selected from the instrument pop-up menu, it is activated automatically, i.e. the on/off control lights up in blue.
For some instruments you may also bypass the instrument by clicking the Bypass button to the right of the on/off button.
- Click the Edit ("e") button to open the control panel for the VST Instrument.
- Below the Edit button is a small LED that will light up when MIDI data is received by the instrument.
- The rightmost button allows you to activate the desired output for the instrument.
This is useful when you are using VST Instruments that have a large number of audio busses, which may be confusing. Click one of the entries in the pop-up list to activate/deactivate output busses for this instrument.
Instrument tracks
An instrument track is a combination of a VST Instrument, a MIDI track, and a VST Instrument channel, in other words: it is a track coupled with a sound – it allows you to think in terms of sounds rather than in terms of track and instrument settings.
Adding Instrument tracks
To open and use an Instrument track, proceed as follows:
- Open the Project menu and select Instrument from the Add Track submenu.
You can also right-click in the Track list and select "Add Instrument Track" on the context menu.
- The Add Instrument Track dialog is opened.
You can select an instrument for the track from the pop-up (but you can also leave this until later if you wish). Specify the number of instrument tracks you wish to create in the "count" field. If you click the "Browse Presets" button, the dialog expands to show the Presets browser, where you can browse for sounds.
- Click OK to add the Instrument track.
When you select an Instrument in the Add Track dialog, the new track will get the name of the instrument. When no instrument is selected, the track is named "Instrument track".
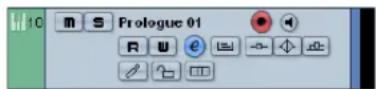
An instrument track in the Track list
Properties
- Each Instrument track has a corresponding channel strip in the mixer.
-
In the Inspector, you can select a VST Instrument from the Instrument pop-up menu.
When you select an instrument from this pop-up, its control panel will open automatically. -
You can also exchange the “sound” of an instrument track (i.e. the VST Instrument and its settings) by extracting these data from another instrument track or a VST preset, see “Extracting sound from an instrument track or VST preset” on page 292.
- On the Input Routing pop-up menu, you can select a MIDI input.
Instrument tracks have only one MIDI input.
- To open the control panel for the VST Instrument, click the "Edit Instrument" button in the Inspector.
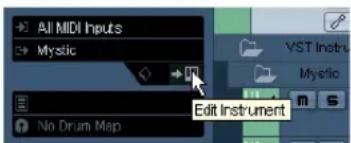
text_image
All MIDI Inputs Mystic Edit Instrument- As with MIDI tracks, you can perform the usual MIDI editing procedures on the instrument track, like duplicate, split repeat or lock the track, use the In-Place Editor, drag and drop the MIDI parts of an instrument track etc. For more information, see the chapter “MIDI realtime parameters and effects” on page 305.
- As with the MIDI track inspector and track controls, you can adjust track delay, choose MIDI input, work with VST Instrument panels, choose drum maps etc. For more information, see the chapter “MIDI realtime parameters and effects” on page 305.
- Instrument tracks have all options that VST Instrument channels have, i.e. Inserts, Sends, EQ, etc.
⇒ VST Instruments used in Instrument tracks do not appear in the VST Instruments window.
For an overview of all used VST Instruments, open the Plug-in Information window via the Devices menu. For further information, see the section "The Plug-in Information window" on page 167.
Restrictions
- Instrument tracks have no MIDI Sends.
- MIDI volume and pan cannot be controlled (there is no "MIDI fader" tab in the Inspector); instead, the VST Instrument volume and pan are used (via the "Channel" tab in the Inspector). This applies also to the respective automation parameters.
Due to there being only one volume and pan control for the instrument track, the Mute button will mute the complete track including the VST Instrument. (As opposed to a MIDI track with an assigned VST Instrument, for which muting the MIDI track still allows you to monitor and record the VST Instrument.)
- Instrument tracks always have one stereo output channel only. This means that VST Instruments that do not provide a stereo output as their first output channel cannot be used with instrument tracks, and must be loaded via the VST Instruments window.
- Due to the limitation to one output channel, instrument tracks play only the first voice of a multi-timbral VST Instrument. If you want to use all voices, you have to load the instrument via the VST Instruments window and set up a MIDI channel to play it.
Import and export options
Importing MIDI loops
You can import "MIDI loops" (file extension "*.midiloop") in Cubase. These files contain MIDI Part information (MIDI notes, controllers, etc.) as well as all the settings that are saved in Instrument track presets (see "About track presets and VST presets" on page 175). This way, you can easily reuse instrument patterns you really like in other projects or applications for example.
Proceed as follows:
-
Open the MediaBay window via the Media menu.
-
In the Filter section, activate the "Show MIDI Loops" button.
This is not necessary, but will help you locate your MIDI loops more quickly.
- In the Viewer section, select the desired MIDI loop and drag it in an empty section in the Project window.
An Instrument track is created and the Instrument part is inserted at the position where you dragged the file. The Inspector will reflect all settings saved in the MIDI loop, e.g. the VST instrument that was used, applied Insert effects, Track parameters, etc.
You can also drag MIDI loops onto existing Instrument or MIDI tracks. However, this will only import the part information.
This means this part will only contain the MIDI data (notes, controllers) saved in the MIDI loop, but no inspector settings or instrument parameters.
Exporting MIDI loops
Exporting MIDI loops is a great way of saving a MIDI part together with its instrument and e.g. effect settings. This allows you to easily reproduce patterns you once created without having to search for the correct sound, style or effect.
Proceed as follows:
- Select the desired Instrument part.
-
On the File menu-Export submenu, select "MIDI Loop...".
A file dialog opens. -
Enter the desired name for the MIDI loop in the Name field in the lower section of the dialog.
- If you want to save attributes for the MIDI loop, click the Tag Editor button.
This lets you specify e.g. a category and a sub category for your MIDI loop.
- Click OK to close the dialog and save the MIDI loop.
MIDI Loop files are saved in the following folder:
- Windows: \Documents and Settings\
- Mac: /Users/
This default folder cannot be changed, you can however create subfolders within this folder to organize your MIDI loops. Simply click the "Create New Folder" button in the Save MIDI Loop dialog.
Exporting instrument tracks as MIDI file
You can also export instrument tracks as standard MIDI files, see "Exporting MIDI files" on page 464.
Please note:
- As there is no MIDI patch information in an instrument track, this information is missing in the resulting MIDI file.
- If you activate "Export Inspector Volume/Pan", volume and pan information of the VST Instrument will be converted and written into the MIDI file as controller data.
What do I need? Instrument channel or Instrument track?
- If you need a particular sound without knowing which VST Instrument to use, create an instrument track and use the preview features to find the sound you want.
- Do likewise if the Instrument track restrictions described above do not matter.
- If you are planning to create an instrument track preset, complete with inserts and EQ settings, you have to use an instrument track.
- If you need to use multitimbral parts and/or multiple outputs, set up a VST Instrument channel.
Instrument Freeze
Like all plug-ins, VST Instruments may require a lot of processor power. If you are using a moderately powerful computer or if you are using a large number of VST Instruments, you may come to a point where your computer cannot handle all VST Instruments playing back in realtime (the CPU overload indicator in the VST Performance window lights up, you get crackling sounds, etc.).
Enter the Instrument Freeze function! This is how it works:
- When you freeze a VST Instrument, the program renders an audio file of the instrument output (taking into account all unmuted MIDI parts routed to that VST Instrument). This file is placed in the "Freeze" folder within the Project folder.
-
All MIDI tracks routed to the VST Instrument, or the instrument track associated with the VST Instrument, are muted and locked (the controls for these tracks will appear "grayed-out" in the Track list and Inspector).
-
When you start playback, the rendered audio file is played back from an “invisible” audio track, routed to the VST Instrument’s mixer channel. Thus, any effects, EQ or mixing automation will still be applied.
- You can also freeze the mixer channel of the VST Instrument. This freezes any pre-fader insert effects for the channels, just as when freezing audio tracks (see "Freezing (rendering) insert effects for a track" on page 156).
The result of the Freeze is that you get exactly the same sound as before, but the computer processor does not have to calculate the sound of the VST Instrument in real-time.
Performing the freeze
The instrument freeze function is available in the VST Instruments window, and in the Track list and the Inspector for instrument tracks.
- Set up the project so that the VST Instrument plays back the way you want it to. This includes editing the MIDI tracks routed to the VST Instrument, or editing the instrument track, and making parameter settings for the VST Instrument itself. If you have automated parameter changes for the VST Instrument, make sure the Read (R) button is activated.
- Open the VST Instruments window from the Devices menu, or, if you are using an instrument track, select the track and open the top Inspector tab.
- Click the Freeze button for the VST Instrument (the button to the left of the VST Instrument slot), or the Freeze button in the Inspector for the instrument track.
The Freeze button in the VST Instruments window...
...and in the Inspector.
The Freeze Instrument Options dialog appears with the following options for the Freeze operation:
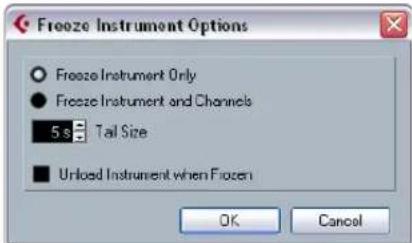
text_image
Freeze Instrument Options ● Freeze Instrument Only ● Freeze Instrument and Channels 5 s Tail Size ■ Unload Instrument when Frozen OK Cancel- Select "Freeze Instrument Only" if you do not want to freeze any insert effects for the VST Instrument channels. If you are using insert effects on the VST Instrument channel(s) and want to be able to edit, replace or remove these after freezing the VST Instrument, you should select this option.
- Select "Freeze Instrument and Channels" if you want to freeze all pre-fader insert effects for the VST Instrument channels.
If your VST Instrument channels are set up with the desired insert effects and you do not need to edit these, select this option.
- You can set a Tail Size time to let sounds complete their normal release cycle.
Otherwise, the sound might be cut off at the very end of the freeze file. - When you activate "Unload Instrument when Frozen", the frozen VST Instrument will be removed.
This is useful if you are freezing an instrument that uses a lot of RAM, e.g. for pre-loading samples. By unloading the instrument, the RAM becomes available for other plug-ins, etc.
4. Click OK.
A progress dialog is shown while the program renders the VST Instrument audio to a file on your hard disk.
The Freeze button lights up. If you check the Project window at this point, you will find that the relevant MIDI/instrument tracks have grayed out controls in the Track list and Inspector. Furthermore, the MIDI parts are locked and cannot be moved.
5. Play back the project.
You will hear exactly the same sound as before freezing the VST Instrument – but the CPU load will be considerably less!
- If you selected "Freeze Instrument and Channels", any insert effects used by the VST Instrument are also frozen (except for the post-fader inserts – Cubase only). However, you can always adjust level, pan, sends and EQ for frozen VST Instruments.
Unfreezing
If you need to make adjustments (either to the MIDI tracks, to the VST Instrument parameters or to the VST Instrument channels if these were frozen) you need to unfreeze the VST Instrument:
- Click the Freeze button for the VST Instrument again (either in the VST Instruments window or in the Inspector). You will be asked to confirm this operation.
- Click "Unfreeze".
The tracks and VST Instrument are restored and the rendered "freeze file" is deleted.
VST instruments and processor load
If you are working with VST 3 instruments, another way to relieve processor load is the option "Suspend VST3 plug-in processing when no audio signals are received" in the Preferences dialog (VST-Plug-ins page). This is described in the section "Smart plug-in processing" on page 151.
Using presets for VSTi configuration
About track presets and VST presets
Track presets and VST presets allow you to quickly set up tracks or instruments with all the settings required for the sound you want. Cubase provides various types of presets for various purposes. Two of these are of relevance for VST Instruments:
- Track presets for instrument tracks store the parameter settings of a VST Instrument together with all track/channel settings (applied audio and MIDI insert effects, etc.). Instrument track presets can only be applied to instrument tracks, not to instrument channels activated in the VST Instruments window.
- VST presets store all panel settings for a plug-in (VST Instruments and VST effects), but no track/channel settings. Note that you can create instrument tracks from VST 3 presets, i.e. selecting a VST 3 preset will create an instrument track with all settings stored in the VST preset plus an "empty" track.
As described in the chapter "Audio effects" on page 150, there are two types of VST presets that can be used: the VST 2 standard ".fxb/.fxp" files and the VST 3 preset standard with the extension ".vstpreset". Some of the included VST Instruments use the VST 2 preset standard, and others use the VST 3 standard.
All VST 2 instruments can import ".fxb/.fxp" files and also convert them to the VST 3 standard. Once converted, you can use all VST 3 features. See "About earlier VST Instrument presets" on page 178.
For further information on Track presets and VST presets, see the chapter "Working with Track Presets" on page 288.
Browsing for sounds
One important and often time-consuming aspect of music creation is the search for the right sounds. You might spend a huge amount of time trying out the presets for a particular instrument only to find out later that the preset for another instrument contains the sound you were looking for.
This is why Cubase features extensive browsing possibilities, allowing you to preview all available presets without having to load them first!
In addition, you can filter your search by specifying category, style, etc.
For example, if you are looking for a bass sound, simply select the Bass category and you can browse and preview all bass sounds for all instruments. If you know you want a synth bass sound, select Synth Bass as sub-category and all synth bass sounds will be shown, etc.
You can also browse and preview track presets for instrument tracks, i.e. instrument sounds plus all track settings and all channel insert effect settings for this track.
These features combined speed up the process of finding the right sound immensely.
- When creating your own presets, it is always a good idea to set up attributes for them, as it allows you to fully use the browsing features for your files, too.
This is described in detail in the chapter "The MediaBay" on page 273.
There are two ways of browsing for sounds:
■ Using the Presets browser.
This will apply preset settings to an existing track.
- Using the Browse Sounds dialog.
Use this dialog if you have not set up a track yet.
Using the Presets browser
- Create an instrument track and select it in the Track list. You do not have to assign an instrument to the track, but make sure to specify a MIDI input.
- Make sure that the track settings are shown in the Inspector.
- Click in the Track Preset field in the Inspector (the text field currently reads "No Track Preset").
Click here...
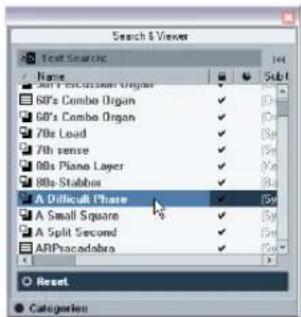
text_image
Search & Viewer Text Search Name Sub1 60's Combo Organ ✓ 70s Load ✓ 80's Piana Layer ✓ 80s Stabbs ✓ A Difficult Shape ✓ A Small Square ✓ A Split Second ✓ ARPracadsora ✓ Reset Categories...to open the Presets browser.
-
The Presets browser is opened. It contains three sections (Browser, Search & Viewer and Filter). By default, only the Search & Viewer section is shown. Note that it may take a moment before all available sounds appear in the Viewer.
-
The Viewer section to the right displays all track presets for instrument tracks and all VST 3 presets.
Track presets for audio tracks, MIDI tracks or "multi" track setups are not displayed. The preset icon to the left of the file name indicates the type of preset. - Select a preset in the list.
- Play a few notes on your MIDI keyboard to hear the preset sound. You can switch between presets and hear the sound when you play. You can also play back/loop a MIDI part on a track. Each time you select a preset, all associated track and/or instrument settings are automatically loaded.
-
Use the Filter section to search for specific attributes if you wish.
You can click on the attributes in the respective column (Category, Style etc.), to filter out all presets that do not match the selected attribute(s). -
Double-click the desired preset to select it and close the dialog.
Using the "Browse Sounds" dialog
- Open the Project menu—Add Track submenu and select "Browse Sounds...".
The Browse Sounds dialog is opened. It contains the same sections as the Apply Track Presets dialog (Browser, Viewer and Filter).
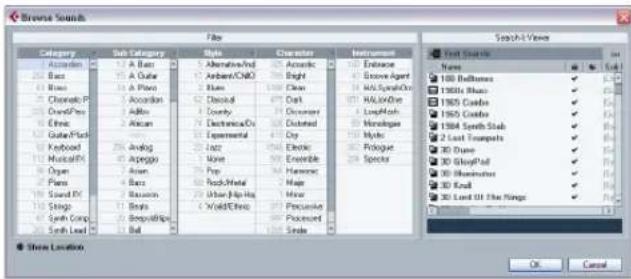
text_image
Browse Sounds File Category Sub Category Style Character Instrument Additions 12 A Base 1 Alternative/Red 10 Accratic 10 Enhance Bass 15 A Duler 1 Ambient/CNO 10 Bright 10 Secure Agent Bass 16 A Floor 1 Floor 100 Ctrn 100 Multi-Spectra Chronic P 18 Accordion 1 Decidual 90 Dot 90 RLOO Cord/Pers 2 Addio 1 Country 10 Dimension 10 LongFlash Ethic 2 African 1 Electronics/Ox 1 Disturbed 10 Monologue Guitar/Flick 2 Baby 1 Experimental 40% Cydr 10 Mycle Keyboard 29 Analog 2 Jazz 50 Electric 10 Pologue Music/Rix 30 Aspegg None 50 Ensemble 10 Splice Open 31 Asian 75 Pro 30 Harmonic 10 Shopee Pans 32 Bass 7 Rock/Metal 30 Map 10 Shopee Board/DVD 33 Samsung 70 Other/Hip/His 30 Hine Stings 34 Beats 74 World/Ethnic 35 Precuneus 10 Shopee Synth Comp 35 Bypass/Rip/Rig/Ump(Ump/Ump) Synth Lead 36 Ball 37 Stride Search Views Text Source: Name 100 BellBoxes 1960s Shares 1965 Cards 1965 Cards 1968 Synth Subb 2 Last Transports 30 Drone 30 Shopee/Red 30 Shopee/Red 30 Shopee/Red 30 Shopee/Red 30 Shopee/Red 30 Shopee/Red 30 Shopee/Red Show/View Show Location OK CancelThe Viewer section of the Browse Sounds dialog displays all preset sounds for all track types and all VST Instruments. To preview the presets, you have play MIDI notes on your MIDI keyboard because at this stage there is no track connected.
- When you have found the right sound, click OK to close the dialog.
An instrument track is created with all track and/or instrument settings that were saved in the preset.
Selecting VST Instrument presets
The previous sections focussed on selecting presets for the creation of new instrument tracks, or for changing the setup of an existing track. However, you can also use presets to change the settings of a VST Instrument.

Note that the following refers to the selection of VST 3 presets (.vstpreset). If you want to apply .fxp/.fxb presets to your VST 2 instruments in this way, see "About earlier VST Instrument presets" on page 178.
To select a VST Instrument preset, proceed as follows:
-
Load a VST Instrument (either in the VST Instruments window or via an instrument track).
-
If you use the VST Instruments window, select a MIDI track routed to the instrument. If you use an instrument track, select this.
-
If necessary, click on the track name at the top of the Inspector to open the basic track settings.
-
Click in the Programs field in the Inspector. The Presets browser is opened.
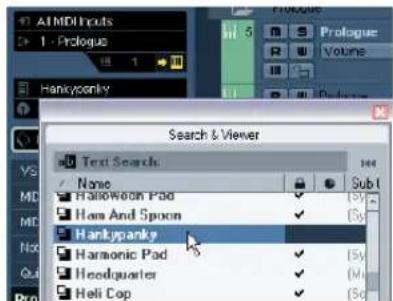
text_image
ATMDI Inputs 1 - Prologue Hankypanky Search & Viewer Text Searches None Halloween Pad Ham And Spoon Hankypanky Harmonic Pad Headquarter Heli Cop-
Step through the presets during playback to find the sound you are looking for.
-
Double-click the desired preset to load it and close the Presets browser.
- You can also open the Presets browser by clicking in the preset name field in the control panel of a VST Instrument or by clicking the button next to the Preset name in the control panel and selecting "Load Preset..." from the pop-up menu.
- Selecting another preset in the Presets browser will load it directly, replacing the previous preset.
- When the Presets browser is open, you can still use Project window key commands, allowing you to start/stop playback or locate to different positions in the project.
- Clicking the Reset button below the Viewer will reload the last loaded preset.
Saving VST Instrument presets
You can save your settings as presets for further use (e.g. in other projects):
- In the VST Instrument panel, click the button to the right of the preset name and select "Save Preset..." from the pop-up menu.
This opens a dialog where you can save the current settings as a preset.
Presets are saved into a default folder named VST3 Presets. Within this folder, there is a folder called "Steinberg Media Technologies" where the included presets are arranged in subfolders named after each instrument.
You cannot change the default folder, but you can add further subfolders inside the instrument's preset folder.
- Under Windows, the default preset folder is in the following location: Boot drive\Documents and Settings\
\Application data\VST3 Presets. -
Under Mac OS, the default preset folder is in the following location: /Users/
/Library/Audio/Presets/ / . -
Enter a name for the new preset in the File name field in the lower part of the dialog.
- If you wish to assign attributes to the preset, click the Tag Editor button.
Click in the Value column to select an appropriate "tag" for one or several of the available categories in the Attributes column. Tagging is described in detail in the chapter "The MediaBay" on page 273.
- Click OK to store the preset and exit the dialog.
Extracting sounds from Track Presets
You can extract a sound from a Track preset (disregarding any track/channel settings) and save it as a VST preset. Proceed as follows:
-
Click the button "Extract sound from Track Preset" below the Output Routing pop-up menu in the Inspector. This opens a dialog where all Track Presets are shown.
-
Select an instrument track preset or VST preset by double-clicking it.
The VST Instrument and the settings (but no inserts, EQs or modifiers) of the existing track are overwritten using the data of the track preset. The previous VST Instrument for this instrument track is removed and the new VST Instrument with its settings is set up for the instrument track.
Track Presets are described in detail in the chapter "Working with Track Presets" on page 288.
About earlier VST Instrument presets
You can use any VST 2.x Instrument plug-ins in Cubase. Installing VST Instrument plug-ins works the same way as for audio effects – see "Installing additional VST plug-ins" on page 166.
When you install a VST 2 instrument, any previously stored presets for it will be of the old FX program/bank (.fxp/.fxb) standard. You can import such files, but the preset handling will be slightly different. You will not be able to use the new features like the Preview function or the Tag Editor until you have converted the old ".fxp/.fxb" presets to VST 3 presets. If you save new presets for a VST 2 plug-in these will automatically be saved in the new ".vstpreset" format in the default location.
Importing and converting FXB/FXP files
To import .fxp/.fxb files, proceed as follows:
- Load any VST 2 instrument you may have installed, and click on the VST Sound button to open the Preset Management pop-up menu.
-
Select "Import FXB/FXP" from the pop-up menu. This menu item is only available for VST 2 instrument plug-ins.
-
In the file dialog that opens, locate the .fxp file and click "Open".
If you load a bank (.fxb), it will replace the current set of all effect programs. If you load a single program, it will replace the currently selected effect program only. Note that such files exist only if you created your own .fxp/fxb presets with a previous program version (or any other VST 2 application).
- After importing, you can convert the current program list to VST presets by selecting “Convert Program List to VST Presets” from the Preset Management pop-up.
When the presets are converted, they will be available in the Presets browser, and you can use the Tag Editor to add attributes and audition the presets. The presets will be stored in the VST3 Preset folder.
About latency
Depending on your audio hardware and its ASIO driver, the latency (the time it takes for the instrument to produce a sound when you press a key on your MIDI controller) may simply be too high to allow comfortable realtime VST Instrument playback from a keyboard.
If this is the case, a workaround is to play and record your parts with another MIDI sound source selected, and then switch to the VST Instrument for playback.
→ You can check the latency for your audio hardware in the Device Setup dialog (VST Audio System page).
The input and output latency values are shown below the ASIO Driver pop-up menu. For live VST Instrument playing, these values should ideally be a few milliseconds (although the limit for “comfortable” live playing is a matter of personal taste).
Constrain Delay Compensation
Cubase features full delay compensation throughout the entire audio path. This means that any delay inherent in the VST plug-ins you use will automatically be compensated for during playback, so that all channels are kept in perfect sync (see "About plug-in delay compensation" on page 152).
However, when you play a VST Instrument in realtime or record live audio (with monitoring through Cubase activated), this delay compensation may sometimes result in added latency. To avoid this, you can activate the Constrain Delay Compensation button on the Project window toolbar. This function tries to minimize the latency effects of the delay compensation, while maintaining the sound of the mix as far as possible.
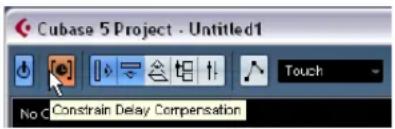
text_image
Cubase 5 Project - Untitled1 Touch No Constrain Delay Compensation- In the Preferences dialog (VST page) you will find a setting called Delay Compensation Threshold. Only plug-ins with a delay higher than this setting will be affected by the Constrain Delay Compensation function.
- VST plug-ins (with higher delay than the threshold value) which are activated for VST Instrument channels, audio track channels that are record enabled, group channels and output channels will be turned off when you activate Constrain Delay Compensation.
- VST plug-ins activated for FX channels are not turned off but their delay is disregarded by the program (delay compensation is turned off).
After recording or using a VST Instrument with Constrain Delay Compensation, you should turn off the function to restore full delay compensation.
External instruments (Cubase only)
An external instrument bus is an input (return) to your audio hardware, along with a MIDI connection via Cubase and few additional settings. External instrument busses are created in the VST Connections window. All external instrument busses you have created will appear on the VST Instrument pop-up menus and can be selected in the same way as any VST Instrument plug-in. If you select an external instrument, you play it via MIDI as usual (you have to create a MIDI device to play it) and the sound (synth audio output) will come in to the VST environment where you can apply processing etc. For more information on external instruments, see "Setting up external instruments" on page 22.
Surround sound (Cubase only)
Background
What is Surround sound?
Surround is a common name for various techniques for positioning audio in reference to the listener. Whereas regular stereo is limited to left/right positioning, within a relatively narrow field, surround sound opens possibilities of positioning an audio source anywhere around the listener.
Surround sound comes in many flavors, from the ill-fated Quadraphonic format for vinyl discs launched in the 70's, to today's more successful incarnations.
The differences between the formats are in two areas:
- The number and configuration of speakers.
This varies from two speakers up to 6.
- The intended final coding format.
This depends on the media the audio will be "stored" on: film, broadcast video or DVD, for example.
Surround sound is a large topic, there are entire books and regular publications devoted to the subject. This chapter will not provide an in-depth introduction to surround sound as such. Instead it will concentrate on the specific implementation in Cubase.
Surround sound in Cubase
Cubase has integrated surround sound features with support for several formats. This support goes all the way through the audio path – all audio channels and busses can handle multiple speaker channel configurations (up to 6 channels). A channel in the mixer can either carry complete surround mixes, or an individual speaker channel which is part of a surround setup.
- Audio channels can be routed freely to surround channels.
- The SurroundPanner function in the mixer allows you to graphically position channels in the surround field. This plugins is described in detail in the section "Using the SurroundPanner" on page 184.
- Cubase is ready for surround specific plug-ins, that is plug-ins with multi-channel support specifically designed for surround sound mixing tasks (the included "Mix6to2" plug-in is an example of this). Due to their multi-channel support, plug-ins conforming to the VST 3 standard will work well in a surround configuration, even if the are note specifically designed for surround. The plug-ins that are included with Cubase are described in the separate pdf document "Plug-in Reference".
- You configure Cubase for surround by defining input and output busses in the desired surround format, and specifying which audio inputs and outputs should be used for the different channels in the busses. This is done in the VST Connections window.
Encoding
The result of a surround mix in Cubase is either the multi-channel audio sent from the surround output bus to your surround speaker setup, or (if you use the Export audio feature) audio file(s) on your hard disk. Exported surround mixes can either be split (one mono file per speaker channel) or interleaved (a single file containing all the surround channels).
Getting from this step to the final product (surround sound on DVD, etc.) requires special software and possibly hardware. This equipment will encode the signal into the desired format, possibly compress the audio and store it on the final media.
Exactly what type of software and/or hardware you need depends on what kind of format you are mixing for and is not dependent on Cubase in any way.
The VST Connections window
In this window you can add input and output busses.
There is a complete selection of common surround configurations available, as well as standard mono or stereo busses.
The Bus Name column contains the currently configured busses as they will appear in the Input and Output Routing pop-ups in the mixer.
Click here to add a bus.
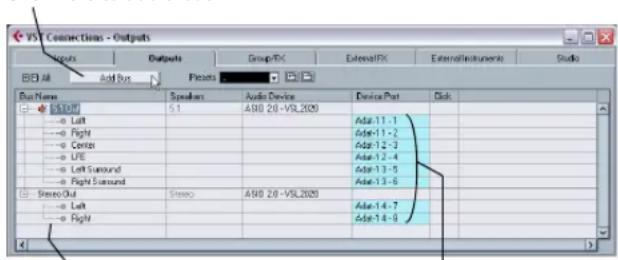
text_image
PS Connections - Outputs Reports Outputs Group/FX External/FX ExternalInstrument Studio Add Bus Presets Bus Name Speakers Audio Device Device Part Click 5.1 A98 2.0 - VSL 2020 ---- Left ---- Right ---- Center ---- LFE ---- Left Surround ---- Right Surround Stereo Out Stereo A98 2.0 - VSL 2020 ---- Left ---- Right Add: 11 - 1 Add: 11 - 2 Add: 12 - 3 Add: 12 - 4 Add: 13 - 5 Add: 13 - 6 Add: 14 - 7 Add: 14 - 8The currently configured busses
The outputs selected for the channels of the bus
VST Connections showing the Outputs page. The "5.1 Out" bus is unfolded, displaying the individual speaker channels, with their physical output ports displayed in the Device Port column to the right.
Surround in the mixer
Surround sound is supported throughout every stage of the signal path in the Cubase mixer, from input to output bus. Each bus or audio channel can carry up to 6 surround speaker channels.
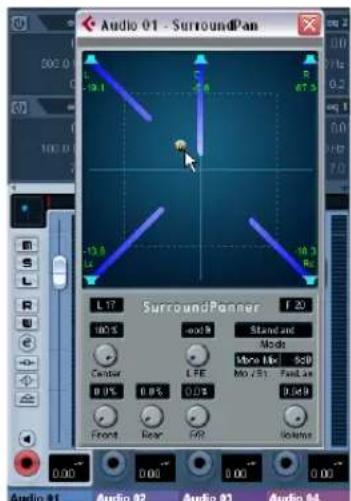
text_image
Audio 01 - SurroundPan L17 SurroundPanner F20 100% -400% Central LFE Standard Mode More Mix 850 0.0% 0.0% 0.0% 0.0% 0.0% Front Rear /F20 Solution Audio 01 Audio 02 Audio 03 Audio 04Here, the SurroundPanner is used for positioning the sound "dynamically" in the surround field.
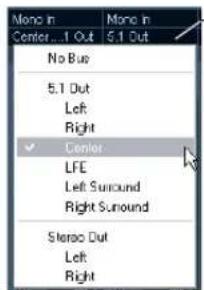
text_image
Mono in Center... 1 Out 5.1 Out No Bus 5.1 Out Left Right ✓ Center LFE Left Surround Right Surround Stereo Out Left Right- Using the Output Routing pop-up menu, audio channels can be routed directly to surround channels.
In the output channel section of the mixer you can control the master levels for configured busses. The level meter for a bus (or channel in the mixer) that carries multiple surround channels will show multiple level bars, one for each speaker channel in the surround configuration.
Operations
Setting up the surround configuration
Output bus configuration
Before you can start working with surround sound, you have to configure a surround output bus, through which all the speaker channels of the chosen surround format are routed. How to add and set up busses is described in detail in the section "Setting up busses" on page 14. Here is a brief run through:
- Open the VST Connections window from the Devices menu.
- Click on the "Outputs" tab.
- Click the "Add Bus" button and select one of the preset formats from the Configuration pop-up (see below). The new bus appears with the ports visible.
- By clicking in the Device Port column you can now route the speaker channels to the desired outputs of your audio hardware.
- If you like, rename the output bus by clicking its name and typing in a new one.
This name will appear in the mixer and on routing pop-ups.
The following surround configurations are included:
Format Description
LRCS LRCS refers to Left Right Center Surround, where the surround speaker is center-rear positioned. This is the original surround format that first appeared as Dolby Stereo in cinema and later as the home cinema format Dolby ProLogic.
5.0 This is the same as 5.1 (see below) but without the LFE channel. The LFE channel is optional in 5.1 and if you do not plan to use it, you might find this option more convenient.
5.1 This format is one of the most popular in cinema and DVD.
In its various cinema and DVD encoding implementations (established by different manufacturers) it is referred to as Dolby Digital, AC-3, DTS and MPEG 2 Multi-channel. 5.1 has one center speaker (mainly used for speech) and four surround speakers (for music and sound effects). Additionally a sub-channel (LFE – Low Frequency Effects) with lower bandwidth is used for special low frequency effects.
LRC Same as LRCS, but without the surround speaker channel.
LRS Left-Right-Surround, with the surround speaker positioned at center-rear.
LRC+Lfe Same as LRC but with an Lfe sub-channel added.
LRS+Lfe Same as LRS but with an Lfe sub-channel added.
Format Description
Quadro The original Quadraphonic format for music, with one speaker in each corner. This format was intended for vinyl record players.
LRCS+Lfe Same as LRCS but with an Lfe sub-channel added.
Quadro+Lfe Same as Quadro but with an Lfe sub-channel added.
6.0 Cine A Left-Right-Center front speaker arrangement with 3 (Left-Right-Center) surround channels.
6.0 Music This uses 2 (Left/Right) front channels with Left and Right surround channels and Left and Right Side channels.
Child busses
Essentially a child bus is a bus within a (wider) bus. Typically you may want stereo child busses within your surround bus – this allows you to route stereo tracks directly to a stereo speaker pair within the surround bus. You may also want to add child busses in other surround formats (with fewer channels than the "parent bus").
Once you have created a surround bus, you can add one or several child busses to it by right-clicking the bus and selecting "Add Child Bus", see "Adding a child bus (Cubase only)" on page 16.
Input bus configuration
To work with surround sound in Cubase, it is often not necessary to configure a surround format input bus. You can record audio files via standard inputs, and easily route the resulting audio channels to surround outputs at any stage. You can also directly import multi-channel files of specific surround format onto audio tracks of the same format.
You should add a surround input bus in the following circumstances:
- You have existing audio material in a specific surround format, and you wish to transfer this material into Cubase as a single, multi-channel file.
- You wish to record a surround setup "live".
In both cases, you can add and configure an input bus of the format you wish to use in the VST Connections dialog so that each input on your audio hardware is routed to the corresponding speaker channel.
To add an input bus, use the same general method as described for output busses (see "Output bus configuration" on page 182), but select the "Inputs" tab instead.
Routing channels directly to surround channels
If you want to place an audio source in one separate speaker channel only, you can route it directly to that speaker channel. This is useful for pre-mixed material or multi-channel recordings that do not require panning.
- Open the mixer and locate the channel you wish to route.
- From the Output Routing pop-up menu, select the corresponding surround speaker channel.
- If a stereo audio channel is routed directly to a speaker channel, the left/right channels will be mixed to mono.
The pan control for the audio channel governs the balance between the left and right channel in the resulting mono mix. Center pan will produce a mix of equal proportion.
Routing channels using child busses
Child busses provide a way to route stereo (or multi-channel) audio channels to specific speaker channels in a surround configuration.
The most obvious application of a child bus is when you wish to add a stereo channel to two specific left/right surround speaker channels.
If you have added a child bus within a surround bus (see "Adding a child bus (Cubase only)" on page 16), it appears as a submenu item within the surround bus on the Output Routing pop-up menu. Select this to route a stereo audio channel directly to that stereo speaker pair in the surround bus.
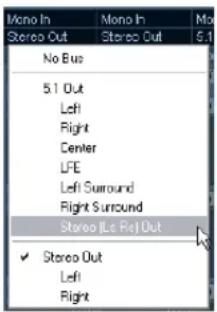
text_image
Mono In Stereo Out Mono In Stereo Out 5.1 No Bus 5.1 Out Left Right Center LFE Left Surround Right Surround Stereo (Le Re) Out ✓ Stereo Out Left RightUsing the SurroundPanner
Cubase has a special feature for graphically positioning a sound source in a surround field. This is actually a special plug-in which distributes the audio from the channel in various proportions to the surround channels.
- Open the mixer and locate the channel you wish to position.
This could be a mono or stereo channel.
- From the Output Routing pop-up menu, select the "whole surround bus" option (not a specific speaker channel).
A miniature image of the surround plug-in interface appears above the fader in the channel strip.
The channel strip showing a miniature surround field.
- You can click and drag directly in the miniature image to move the sound in the surround field.
The horizontal red strip to the right controls the subbass (LFE) level (if available in the selected surround format).
- You can also view a slightly larger version of this control by selecting "Panner" on the View options pop-up menu for the extended mixer panel.
This mode offers click and drag-panning as well as numerical values for left/right balance, front/rear balance and LFE amount – enter the desired number or use the mouse wheel to adjust them.
- The SurroundPanner can also be displayed in the Inspector for all audio channel track types. To display the Surround Pan tab in the Inspector, make sure the corresponding option is enabled in the Inspector context menu.
- For total control over surround panning, double-click on the miniature image to open the full SurroundPanner interface in a separate window.
The SurroundPanner controls
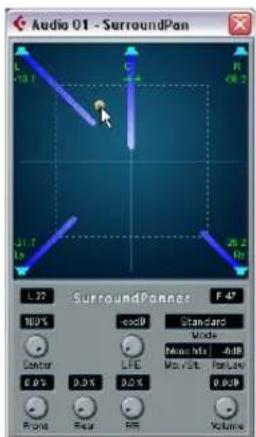
text_image
Audio 01 - SurroundPan L22 SurroundPaner F47 100% Control 0.0% Rise Rea RIF Standard Mode Mina Mts Vol VSt. Fan Low Volume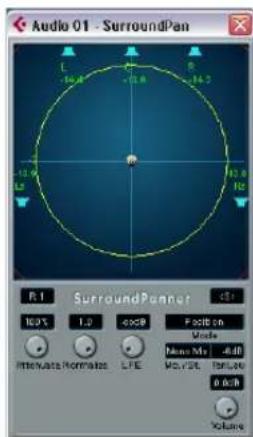
text_image
Audio 01 - SurroundPan R:1 SurroundPaner 160% 1.0 -0.059 Position Mode Micro Mio -4dB Mio, DIO -1dB 0.0 dB Volume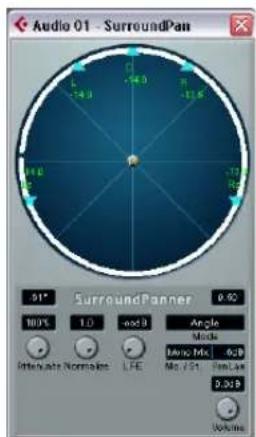
text_image
Audio 01 - SurroundPan 91° SurroundPanner 100% 1.0 -0.03 Angle Mode Laser Mix -628 No / St Fem/Lux 0.009 VolumeThe SurroundPanner plug-in interface in Standard, Position and Angle mode
The SurroundPanner plug-in allows you to position your audio in the surround field. It consists of an image of the speaker arrangement, as defined by the output bus selected on the Output Routing pop-up menu, with the sound source indicated as a gray ball.
Mode - Standard/Position/Angle
The Standard Mode/Position Mode/Angle Mode switch allows you to work in three modes:
- In both Standard and Position mode, the speakers in the front are aligned, as they would normally be in a cinema-type situation. This means that the front speakers are at a varying distance from the center. Standard mode (default) is the best mode for moving sources between speakers without level attenuation.
- Angle Mode is the traditional surround sound mixing definition. Note that here the speakers are defined as being at equal distance from the center. This is not really a true representation of for example a cinema, but has still proven to work well in many situations.
Speakers
The speakers in the panel represent the chosen surround configuration.
You can turn speakers on and off by clicking them with [Alt]/[Option] pressed. When a speaker is turned off, no audio will be routed to that surround channel.
Positioning and levels

The text below assumes that the Mono/Stereo pop-up is set to "Mono Mix". For information on the other modes, see below.
A sound source is positioned either by clicking or by dragging the gray "ball" around in the panel (or by using key commands, see below). By dragging during playback you can record automation, see "Enabling and disabling the writing of automation data" on page 189.
- In Standard Mode, the signal levels from the individual speakers are indicated by colored lines from the speakers to the center of the display.
Exactly how levels are handled may require some explanation:
- When you move a source around, a number will indicate the loudness in each speaker.
This is a value in dB (decibel) and is relative to the nominal level of the source. In other words, 0.0 (dB) represents full level.
- If you position the source far enough away from a speaker, its level will drop to zero (indicated by a negative infinity symbol).
- In Standard Mode, the signal levels from the individual speakers are indicated by colored lines from the speakers to the center of the display.
- In Position Mode, the concentric circles will help you determine the level of the signal at a certain position. The yellow circle represents -3dB below nominal level, the red circle is at -6dB and the blue is located at -12dB. These are affected by attenuation, see below.
- In Angle Mode, a white arc helps you determine the perceived "range" of a source (white and blue for stereo tracks). The sound will be at its loudest in the middle of the arc and will have dropped in level towards the ends.
- You can use modifier keys to restrict movement in various ways:
In Standard and Position Mode:
Key Movement restriction
[Ctrl]/[Command] Vertically only
[Ctrl]/[Command]- Horizontally only [Shift]
[Alt]/[Option] Diagonally (up left, down right)
[Ctrl]/[Command]- Diagonally (up right, down left)
[Alt]/[Option]
[Shift] Mouse movements are scaled to allow very fine movements
In Angle Mode:
Key Movement restriction
[Shift] From center to perimeter only
[Ctrl]/[Command] Along the perimeter only (at current distance from center)
There is also a special set of key commands for working in the SurroundPanner window.

For a complete list of the available key commands, click on the SurroundPanner logo and then click again!
The LFE encoder (all modes)
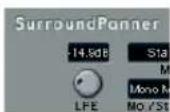
If the selected surround setup includes an LFE channel, a separate LFE level encoder is available in the Surround-Panner window. Use this to set the signal amount sent to the LFE channel. You can also set this using the small red strip to the right of the SurroundPanner in the mixer channel strip, or by typing in a number in the LFE value field in the larger SurroundPanner that can be shown in the extended channel strip.
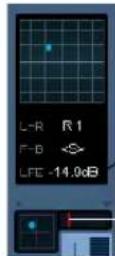
√ Click here and type in a LFE level value...
...or drag this control to set the LFE level.
The SurroundPanner in the channel strip (bottom) and in the extended panel of the mixer channel strip ("Panner" selected on the View options pop-up menu).
Mono/Stereo pop-up (All Modes)
If you have a mono channel, the Mono/Stereo pop-up is set to Mono Mix by default. The panner will then behave as described above.
If you have a stereo channel, you have the option of using one of the three Mirror modes. Two gray balls will then appear, one for each channel (L/R). This will allow you to move the two channels symmetrically, by dragging one of them. The three modes allow you to select which axis should be used for mirroring.
- The default mode for stereo channels is the Y-Mirror mode.
- If you run a stereo signal through the panner in Mono Mix mode, the two channels will be mixed together before entering the plug-in.
- If you run a mono signal through the plug-in in one of the stereo modes, the signal will be split before entering the plug-in.
Additional parameters (Standard mode)
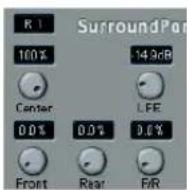
- Center Level.
This determines how center source signals should be reproduced by the front speakers. With a value of 100%, the center speaker will provide the center source. With a value of 0%, the center source will be provided by the ghost image created by the left and right speakers. Other values will produce a mix between these two methods.
- Divergence Controls.
The three divergence controls determine the attenuation curves used when positioning sound sources, for X-axis front, X-axis back and Y-axis (front/rear), respectively. If all three Divergence values are 0% (default), positioning a sound source on a speaker will set all other speakers to zero level (-×) (except for the center speaker which depends on the center level). With higher values, the other speakers will receive a percentage of the sound source.
Additional parameters (Position and Angle mode)
- Attenuate.
Attenuate can be used to amplify or weaken the source. Exactly what effect this has on the level in each speaker can be determined by the level readouts, the concentric circle (Position mode) and the arc (Angle mode).
- Normalize.
Normalize is a function for controlling the overall loudness from all speakers. When this is set to 1.0 (full normalization), the level from all speakers together is always exactly 0dB. The individual levels will then be boosted or attenuated accordingly.
⚠️ Please note that this is not a dynamic feature, like compression or limiting. It is instead just a tool for scaling the nominal output levels from the surround channels.
Automation
All parameters in the SurroundPanner plug-in can be automated, just as with any other plug-in. See "Enabling and disabling the writing of automation data" on page 189.
Exporting a Surround mix
When you have set up a surround mix, you can export it with the Export Audio Mixdown function. This function exports a single selected output bus – this means that all channels that you want to be part of the mix must be routed to the surround output bus.
You have the following export options when doing surround work:
- Export to "split" format, resulting in one mono audio file for each surround channel.
- Export to interleaved format, resulting in a single multi-channel audio file (e.g. a 5.1 file, containing all six surround channels).
- Under Windows you can also export a 5.1 surround mix to a file in Windows Media Audio Pro format.
This is an encoding format tailored for 5.1 surround – see "Windows Media Audio Pro files (Windows only)" on page 425.
For more about exporting to files, see the chapter "Export Audio Mixdown" on page 419.
Using effects in surround configurations
Cubase introduces a special surround format for VST plug-ins, that is plug-ins that can process more than two channels. Mix6to2 is an example of such a plug-in.
Applying a surround-aware plug-in
This is not different from applying a regular plug-in. The only difference is that the plug-in panel may have controls for more than two channels.
Using a stereo plug-in in a surround configuration
Normally, when you apply a stereo insert effect to a surround configuration, the first two speaker channels (often L and R) are routed through the plug-in and other channels are left unprocessed.
However, you may want to use the plug-in on other speaker channels. This is described in the chapter "Audio effects" on page 150.
Automation
Introduction
In essence, automation means finding and recording, for each and every moment of your project, the right values for a particular mixer parameter. When you create your final mix, you will not have to worry about having to adjust this particular parameter control yourself – Cubase will do it for you.
Cubase provides very powerful and yet intuitive automation of virtually every mixer and effect parameter.
The following sections provide detailed descriptions of the Cubase automation features.
Enabling and disabling the writing of automation data
Tracks and mixer channels in Cubase can be "automation enabled" by activating their automation Write (W) buttons.
The following track types feature Write (W) and Read (R) buttons in the mixer, in the Track list and in the Channel Settings window: Audio, MIDI, Instrument, FX Channel and Group Channel tracks. Furthermore, the control panels for all plug-in effects and VST Instruments also feature Write and Read buttons.
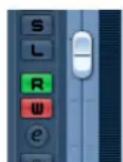
The Write and Read buttons for a channel in the mixer and for an automation track in the Track list
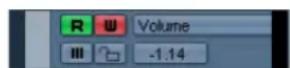
- If you activate Write for a channel, virtually all mixer parameters you adjust during playback for that specific channel will be recorded as automation events.
- If Read is activated for a channel, all your recorded mixer actions for that channel will be performed during playback, just like you performed them in Write mode.
- The W and R buttons for a track in the Track list are mirrors of the W and R buttons in the corresponding channel strip in the mixer.
Note that the Read button is automatically enabled when you enable the Write button. This allows Cubase to read existing automation data at any time.
You can separately deactivate Write, if you want to only read existing data. There is no status Write on/Read off.
There are also global Read and Write indicator buttons ("All Automation to Read/Write Status") in the common panel of the mixer and at the top of the Track list:
The "All Automation to Read/Write Status" buttons in the mixer, and in the Track list
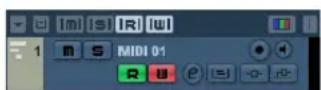
These buttons light up as soon as there is a single enabled Read or Write button on any channel/track within your project.
- When "All Automation to Read/Write Status" is disabled and you click on one of these buttons, all Read/Write buttons on all tracks/channels are enabled. When "All Automation to Read/Write Status" is enabled, this means that at least one of the Read/Write buttons on one of the channels of your project is enabled.
- When "All Automation to Read/Write Status" is enabled and you click on one of these buttons, any enabled Read/Write buttons on the tracks/channels of your project are disabled.
⇒ You will also find global Read/Write buttons on the Automation panel. See the section "The Read/Write buttons in the Mode section" on page 193.
Creating automation data
Within a Cubase project, the changes in a parameter value over time are reflected as curves on so-called automation tracks. The curves are drawn in realtime while you write the automation data. Most of the tracks in your project have automation tracks, one for each automated parameter.
Automation tracks are hidden by default. For information on automation track handling, see the sections "Automation track operations" on page 196 and "Working with automation curves" on page 199.
There are two approaches you can use to create automation curves:
- "Offline", by manually drawing the curves on automation tracks in the Project window.
See "Editing automation events" on page 200.
text_image
1 S Elec Guitar mono R W Take 1 (Elec) Talk R W Volume -3.46- "Online", by enabling the Read button and adjusting parameters in the mixer or channel settings window while rolling through the project in realtime. The value settings are recorded and displayed as a curve on the automation track. In the following sections, this online writing of automation data is also referred to as an "automation pass".
The methods are not different in terms of how the automation data is applied. They only differ in the way the automation events are created – manually drawing them or recording them during automation passes. Any applied automation data will be reflected in both the mixer (a fader will move for example) and in a corresponding automation track curve.
There are no hard and fast rules regarding which method you should use. For example, you can create your automation data online without ever even opening an automation track. Or you can stick to drawing automation curves offline. Every method has its advantages, but of course it is up to you to decide what to use and when.
- Editing curves on automation tracks offers a graphical overview in relation to the track contents and the time position.
This makes it easy to quickly change parameter values at specific points, without having to activate playback. For example, this method gives you a good overview if you have a voice-over or a dialog on one track and a music bed on another track, the level of which needs to be lowered by a specific amount every time the dialog occurs.
- By using write automation in the mixer you do not have to manually select parameters from the Add Parameter list. You can work much like you would using a "real" physical mixer. Every action you perform is automatically recorded on automation tracks which you can later open for viewing and editing.
The automation tracks themselves indicate the writing of automation data:
- While writing automation data, the color of the automation track in the Track list changes to red.
text_image
Audio 01 stereo R u e R u P volume- The delta indicator in the automation track shows the relative amount by which the new parameter setting deviates from any previously automated value. This is an additional visual aid when writing new automation data.
The delta indicator
What can be automated?
You can automate virtually every parameter in the Cubase mixer.
- To find out which parameters can be automated for a particular track, click in the Parameter display of the automation track to open a pop-up menu. Select "More..." to open the Add Parameter dialog.
This dialog lists all automatable parameters for a particular track type. It is described in detail in the section "Assigning a parameter to an automation track" on page 197.
The following actions CANNOT be automated, even though they are features of the Cubase mixer:
- Changing the input phase (Cubase only)
- Changing of routing settings
- Inserting a plug-in
- Moving of plug-ins to different insert slots
- Copying insert settings
- Changing the stereo panner mode
- Changing Control Room settings (Cubase only)
The Automation panel
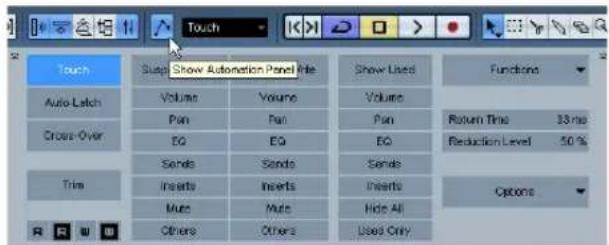
text_image
Touch Auto-Latch Cross-Over Trim R U W Snap Show Automation Panel File Volume Pan EQ Sands Inserts Mute Others Volume Pan EQ Sands Inserts Mute Others Show Used Volume Pan EQ Sands Inserts Mute Others Used Only Functions Return Time 33 ms Reduction Level 50 % OptionsThe Automation panel is a floating window, similar to the Mixer and Transport panel. You can leave it open while you work – the Project window will always have the focus.
To open the Automation panel, open the Project menu and select the Automation Panel option or click the Automation Panel button on the Project window toolbar.
The Automation panel gives you access to all automation options in Cubase. By default, all sections are displayed.
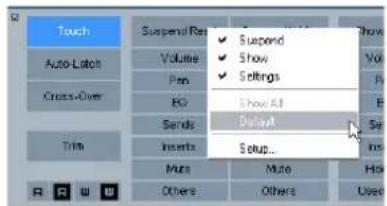
text_image
Touch Auto-Latch Cross-Over Title Suspend Run Volume Pen EC Sends Inserts Mute Others Suspend Show Settings Show AI DipuaA Setup... Mute Others Hold UseYou can change the panel configuration using the Setup dialog, see "Using the Setup options" on page 471. The following sections will explain all modes and options.
Automation modes
Cubase provides three different punch-out modes for automation, available on the Automation Mode pop-up menu on the main toolbar and in the Mode section on the Automation panel.
Selecting the automation mode in the Automation panel and the Cubase toolbar.
The three modes available are Touch, Auto-Latch and Cross-Over. In all three modes, automation data will be written as soon as a parameter control is touched in play mode. They differ in the way the writing of automation data is ended, i.e. in their "punch-out" behavior. Which mode to use depends on what is required in your particular working situation.
Note that you can change the automation mode at any time, i.e. in play or stop mode or during an automation pass. You can also assign key commands to the automation modes so you can quickly change between them. See "Automation key commands" on page 196.
General punch-out conditions
The current automation pass will always punch-out as soon as one of the following conditions is met, independent of which automation mode is selected:
- If you Disable Write
- If you Stop playback
- If you activate Fast Forward/Rewind
- If the project cursor reaches the right locator in Cycle mode.
- If you click in the ruler to move the project cursor (note that this function is user-definable – it can be controlled via the Automation panel, see "Allow Continue Writing after Transport Jump" on page 196).
Touch
Typically, you would use Touch mode in situations where you want to make a change lasting only a few seconds to an already set up parameter.
As the name implies, Touch will write automation data only for as long as you actually touch a parameter control – punch-out occurs as soon as you release the control.
After punch-out, the control will return to the previously set value. The Return Time setting (see "Return Time" on page 195) determines how long it takes for the parameter to reach the previously set value.
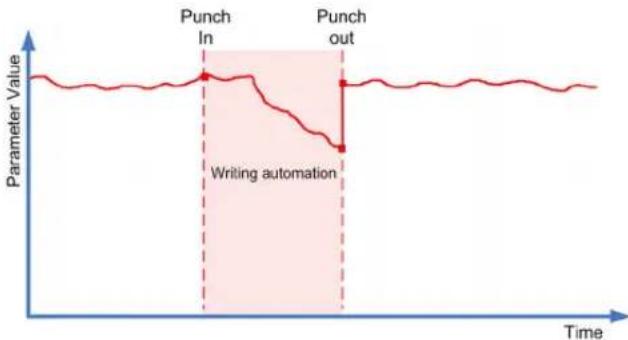
line
| Point Label | Description | | ----------------- | ----------------------- | | Punch In | Peak of curve | | Punch out | Lower peak of curve | | Writing automation| Shaded region (shaded area) |Automation mode: Touch
Auto-Latch
In Auto-Latch mode, there is no specific punch-out condition other than those valid in all modes, see above.
Auto-Latch is probably the automation mode you will use the most, in all situations where you want to keep a value over a longer period of time – for example when making EQ settings for a particular scene.
Once your pass has started, the writing of automation data continues for as long as playback lasts or Write is enabled. The last value setting will be kept until you stop writing.
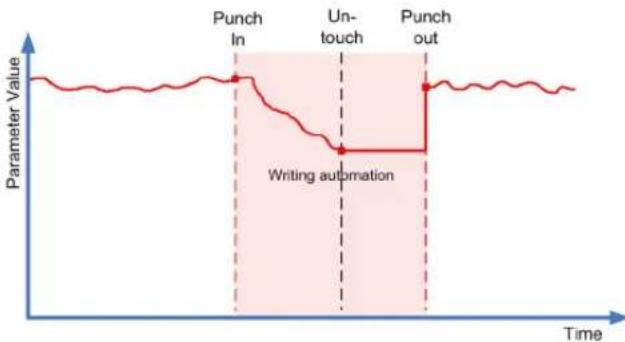
line
| Time Phase | Parameter Value | | -------------- | --------------- | | Punch In | 1.0 | | Un-touch | 0.5 | | Punch Out | 1.0 |Automation mode: Auto-Latch
⇒ The automation mode for On/Off switches is always Auto-Latch (even if another mode is selected globally or for the track).
Cross-Over
Think of the Cross-Over mode as a kind of "manual return time" option (see "Return Time" on page 195). The Cross-Over mode can be used in situations where you are not happy with an already existing automation curve or with the automatically applied return settings. Cross-Over mode allows you to perform a "manual return" to ensure smooth transitions between new and existing automation settings.
For Cross-Over, the punch-out condition is crossing over an already existing automation curve after touching the parameter for a second time.
Look at the figure below: Like in Auto-Latch mode, once the automation pass begins with the first touching of the parameter control, automation data is written for as long as playback lasts.
When you have found the correct value setting, you can release the fader – the automation pass continues, with the value setting remaining the same.
Now, re-touch the fader and move it towards the original value. As soon as you cross the original curve, punch-out occurs automatically.
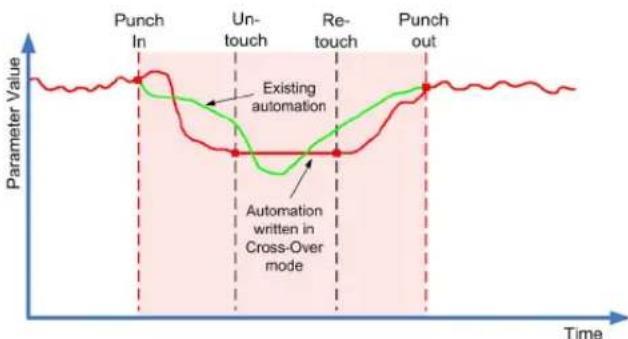
line
| Time Point | Existing Automation | Automation Written in Cross-Over Mode | | -------------- | ------------------- | ------------------------------------- | | Punch In | High | High | | Un-touch | Low | Low | | Re-touch | Low | Low | | Punch out | High | High |Automation mode: Cross-Over
Trim
This is described in the section "Trim" on page 193.

When selecting Trim as the automation mode for a track, the punch-out behavior will always be as in Auto-Latch.
The Read/Write buttons in the Mode section
At the bottom of the Mode section, you find two Read and two Write buttons. These are used to globally enable or disable the Read and Write buttons on all tracks.
The All Automation to Read/Write buttons in the Mode section
- Click "All Automation to Write" to enable all Write buttons (and, at the same time, all Read buttons) on all tracks/channels of your project.
Clicking "All Automation Write off" will disable all Write buttons. The Read buttons will remain enabled.
- Click "All Automation to Read" to enable all Read buttons on all tracks/channels of your project.
Clicking "All Automation Read off" will disable all Read buttons.
Automation performance utilities
The automation modes described above become far more effective when used in combination with the Cubase automation performance utilities. These are a number of options and functions tailored to specific situations, allowing you to write automation data quickly and efficiently. You will find these utilities on the Automation panel.
Trim
Trim is available from the Automation panel only. Trim is a way of manipulating an already written automation curve, rather than an automation mode.
→ Trim works for channel volume and aux send level adjustments.
When enabling Trim, a channel volume fader is positioned in the exact middle position, and will not move with any existing volume automation curve.
You can use Trim either in Stop mode or in Play mode.
- In Stop mode, moving the fader with Trim activated will move the existing automation curve between the left and right locators up or down.
- In Play mode, as the project cursor moves along the timeline, your Trim moves will adjust the existing breakpoints on the automation curve.
Note that the exact result of your trim moves in Play mode will only be visible after punch-out.
Note that Trim is not merely a matter of rewriting the automation curve using the fader movements you perform. Instead, the settings from the existing curve and the settings calculated from your fader movements are used to re-calculate the automation curve as soon as you punch-out.
The Suspend options
| Suspend Read | Suspend Write |
| Volume | Volume |
| Pan | Pan |
| EQ | EQ |
| Sends | Sends |
| Inserts | Inserts |
| Muls | Muls |
| Others | Others |
The parameters or parameter groups selected here are excluded from the reading or writing of automation data – giving you full manual control of these parameters.
Note that the Others options refer to all parameters not covered by any of the options Volume, Pan, Mute, EQ, Sends or Inserts.
Suspending Write
Imagine the following situation: To help you concentrate while working on a particular track, you mute several other tracks. However, because automation Write is active on these tracks, this mute state is also automated during the next automation pass – a classic situation in mixing.
To avoid inadvertently excluding whole tracks from your mix in this way, you can exclude Mute from all automation writing. Simply click Mute below the Suspend Write button in the Suspend section on the Automation panel.
- To suspend the writing of automation data for all parameters/parameter groups, click the Suspend Write button at the top of the section.
When any of the options below the Suspend Write button are enabled, clicking Suspend Write will disable these buttons.
- When an automation pass is in progress for a particular parameter and you write-suspend this parameter, it will punch-out of the automation pass.
Suspending Read
Imagine you have already automated several tracks. While working on the current track, you want one of the other tracks to be louder, to better identify a particular position in your audio material. By suspending Read for the volume parameter, you regain full manual control and can set the volume to the required level.
- To suspend the reading of automation data for all parameters/parameter groups, click the Suspend Read button at the top of the section.
When any of the options below the Suspend Read button are enabled, clicking Suspend Read will disable these buttons.
The Show options
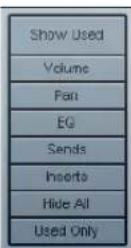
The Show options on the Automation panel always affect all tracks. Clicking on these buttons opens the automation tracks for the corresponding parameters, e.g. volume or pan. This makes it easy to look at your EQ settings on several tracks, for example.
- When you click either Volume, Pan, EQ, Sends or Inserts, this will open the corresponding automation track(s) for all tracks.
The automation tracks will be opened even if no automation data was recorded on these tracks. - For parameter groups (i.e. Pan, EQ, Sends and Inserts) you can step through the individual parameter sets by repeatedly clicking the respective button.
- When the Used Only button is enabled, clicking one of the options will show you only the automation tracks for which automation data has already been written.
"Empty" automation tracks will not be displayed.
- When you click Show Used, only automation tracks that contain automation data will be displayed.
- Hide All will hide all open automation tracks.
The Settings section
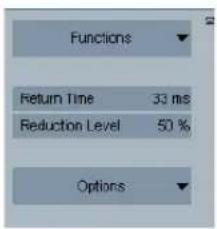
text_image
Functions Return Time 33 ms Reduction Level 50 % OptionsIn the Settings section of the Automation panel you will find a number of global options and commands.
The Functions pop-up menu
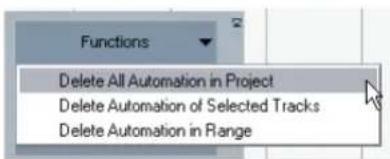
text_image
Functions Delete All Automation in Project Delete Automation of Selected Tracks Delete Automation in RangeAt the top of the Settings section, you will find the Functions pop-up menu, which contains a number of global commands affecting automation.
→ You can always undo these actions!
Delete All Automation in Project
This global command will remove all automation data from your project. Use this option with great caution, otherwise you may lose your work.
Delete Automation of Selected Tracks
When you select this command, all automation data for the selected track(s) will be removed. Make sure you have selected the right track(s) before using this option.
Delete Automation in Range
This command will delete, on all tracks, all automation data between the left and right locator. Be sure that this is what you want to do before proceeding!
Global options
Return Time
The Return Time setting determines how fast the automated parameter returns to any previously automated value when you release the mouse button.
The default setting is 33ms. Make sure that the return time is set to a value higher than 0, to prevent sudden jumps in your parameter settings (which may lead to crackles).
Reduction Level
The automation reduction function automatically reduces the number of automation events. During an automation pass (or when drawing automation with the Pencil tool), these are added as a continuous stream of densely packed break-points. This is necessary because the program cannot "guess" what you will be doing next.
However, when punching out, the reduction function will remove all break-points that are not needed. The automation curve will contain only the break-points necessary to reproduce your actions.
For example, all break-points that lie between two other points, but do not deviate from the curve, will be automatically removed by reduction.
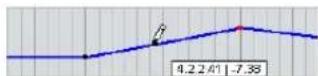
If you try to add a break-point that does not deviate from the existing curve between two existing points...
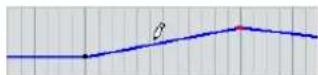
...it will be removed when the mouse is released. If you move the selected break-point by any amount so that the resulting curve is not a straight line, a new event will be added.
- If you are unhappy with the default setting (a reduction of roughly 50% ), you can change it, but normally the default setting works well.
The higher the number of automation events, the higher the CPU load. If performance is an issue in your workflow, you should consider raising the reduction level, to remove more events.
The Options pop-up menu
Show Data on Tracks
When this option is activated, audio waveforms or MIDI events will be displayed not only on the audio or MIDI tracks, but also on the corresponding automation tracks.
Note that this depends on two options in the Preferences dialog: The events will be displayed only when the option "Show waveforms" (Event Display–Audio) is enabled and when "Part Data Mode" (Event Display–MIDI) is set to an option other than "No data".
Allow Continue Writing after Transport Jump
Normally, when you are writing automation data and locate to another position in the project during this process, the writing will be stopped until the mouse button is released or until the Transport Stop command is received. This is to make sure that you do not inadvertently overwrite existing automation (e.g. if the Cycle is active or if you are using the Arranger functions). However, when you activate "Allow Continue Writing after Transport Jump", the recording of automation will not be blocked, allowing for example for multiple automation passes in Cycle mode.
Hints and further options
Automation key commands
In the Key Commands dialog (opened from the File menu in Cubase), in the Commands section on the left, you will find an Automation category which lists all automation commands to which you can assign key commands.
How to assign key commands is described in detail in the chapter "Key commands" on page 479.
About linking and automation
- Cubase allows you to link, in the mixer window, various parameters between different channels (see “Link/Unlink channels” on page 129).
When automating the settings of a channel that is linked to another channel in the mixer, the parameters of the linked channel will NOT be automated.
- Cubase only: Also, in the channel settings window, you can link a send's panorama settings to the panorama settings displayed in the channel strip (by enabling the option "Link Send Routing Panners to Channel Panner as Default" in the Preferences–VST page).
For linked panners of sends and channels, automating one panner will automate the linked panner as well.
About automation undo
Every automation write operation you perform creates its own event in the undo history, so you can undo or redo any of your automation moves at any time.
Automation track operations
About automation tracks
Audio tracks, group channel tracks and FX channel tracks all have automation tracks. These allow you to view and edit the automation of all mixer settings for the track, including settings for the track's insert effects. There is one automation track for each parameter, and automation tracks can be shown or hidden in any combination.
Similarly, MIDI tracks have automation tracks for mixer settings, track parameters and (if used) for send and insert effect settings.
VST Instruments have special automation tracks that appear in the Project window when you load a VST Instrument via the VST Instruments window. There is one automation track for the plug-in parameters, and one track for each mixer channel used by the instrument. These tracks have automation subtracks, giving you access to all parameters and mixer settings.
Instrument tracks, as a combination of a MIDI track and a VST Instrument, have automation tracks that provide automation parameters for the VST Instrument itself, for the VST Instrument channel and the respective MIDI automation parameters.
Finally, for ReWire channels and input (Cubase only)/output channels, automation tracks are automatically added as soon as you activate automation (with the Write button) in the corresponding mixer channel strip or in the Channel Settings window or globally ("All Automation to Write Status") in the Mixer common panel or above the track list. These tracks also have automation tracks for all parameters.
Opening automation tracks
Every track has a number of automation tracks, each showing one automation parameter.
For audio, Instrument, group channel, MIDI and FX channel tracks, there are two ways you can open an automation track for the channel:
- By right-clicking the track in the Track list and selecting "Show Automation" from the context menu.
- By clicking along the left edge of the track in the Track list. (Also, when you position the mouse pointer over the lower left corner of the track, a corresponding arrow icon ("Show/Hide Automation") appears.)
An automation track opens in the Track list. By default, the volume parameter is assigned to the first automation track.

text_image
Click here to open an automation track.- If you position the mouse pointer over the lower left corner of an automation track, a "+" sign ("Append Automation Track") will appear. If you click this, another automation track opens, by default showing the next parameter in the Add Parameter list (see below).
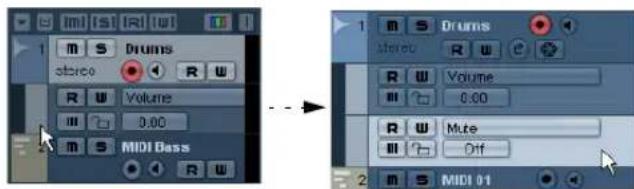
text_image
1 m S Drums storeo R U R U Volume 0.00 m S MIDI Bass 2 m S MIDI 01Assigning a parameter to an automation track
Default parameters are already assigned to automation tracks when you open them, according to their order in the Add Parameter list (see below).
To select which parameter an open automation track should display, proceed as follows:
- If none exists, open an automation track using one of the methods described above.
- Click in the parameter display for the automation track. A pop-up list is shown, containing some of the automation parameters plus the item "More..." at the bottom of the list. The contents of the list depend on the track type.
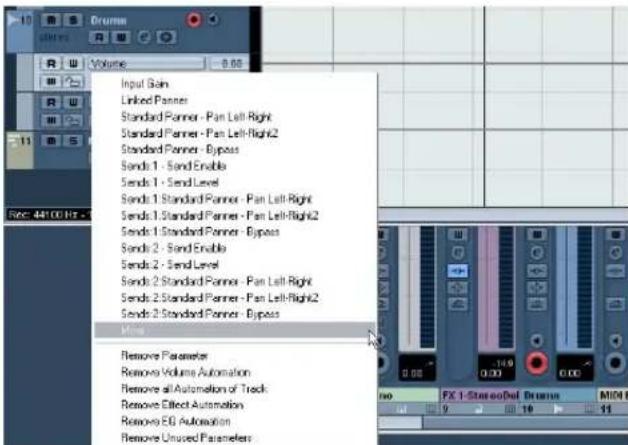
text_image
Input Gain Linked Banner Standard Banner - Pan Left-Right Standard Banner - Pan Left-Right2 Standard Banner - Bypass Sends 1 - Send Enable Sends 1 - Send Level Sends 1 Standard Banner - Pan Left-Right Sends 1 Standard Banner - Pan Left-Right2 Sends 1 Standard Banner - Bypass Sends 2 - Send Enable Sends 2 - Send Level Sends 2 Standard Banner - Pan Left-Right Sends 2 Standard Banner - Pan Left-Right2 Sends 2 Standard Banner - Bypass Remove Parameter Remove Volume Automation Remove all Automation of Track Remove Effect Automation Remove EG Automation Remove Unused Parameters- If the parameter you wish to automate is on the pop-up menu, you can select it directly.
The parameter will then replace the current parameter in the automation track. - If you wish to add a parameter not available on the pop-up menu or want to view all parameters that can be automated, go on to the next step.
3. Select "More...".
The Add Parameter dialog appears. This dialog shows a list with all parameters that can be automated for the selected channel (sorted into different categories), including the parameters for any assigned insert effects. To view the parameters in each category, click the "+" sign for the category folder.
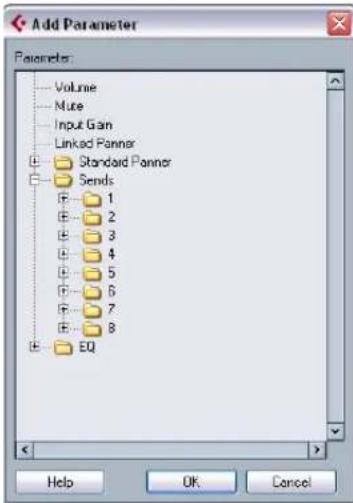
text_image
Add Parameter Parameters: Volume Mute Input Gan Linked Panner Standard Panner Sends 1 2 3 4 5 6 7 8 EQ Help OK CancelThe Add Parameter dialog for an audio track
- Select a parameter from the list and click OK.
The parameter will then replace the current parameter in the automation track.
Note that the "replacing" of the parameter displayed in the automation track is completely non-destructive. If the automation track contained any automation data for the parameter you just replaced, this data will still be there, although it will not be visible after you replaced the parameter. If you click in the parameter display you can switch back to the replaced parameter. On the pop-up menu, all automated parameters are indicated by an asterisk (*) after the parameter name.
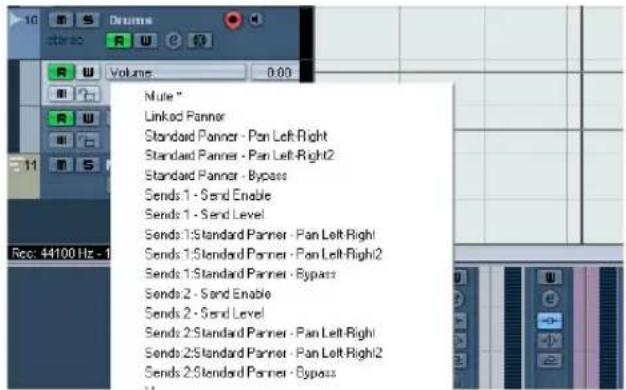
text_image
10 R S Draums stereo R U Volume 0.00 11 Rule " Linked Panner Standard Panner - Pan Left-Right Standard Panner - Pan Left-Right2 Standard Panner - Bypass Sends 1 - Send Enable Sends 1 - Send Level Sends 1:Standard Panner - Pan Left-Right Sends 1:Standard Panner - Pan Left-Right2 Sends 1:Standard Panner - Bypass Sends 2 - Send Enable Sends 2 - Send Level Sends 2:Standard Panner - Pan Left-Right Sends 2:Standard Panner - Pan Left-Right2 Sends 2:Standard Panner - Bypass Rec: 44100 Hz - 1The Mute parameter is automated.
You can click the "Append Automation Track" button (the "+" sign) for the automation track several times to open additional automation tracks. Repeat the above procedure to assign a parameter to each automation track.
Note that tempo changes cannot be automated on automation tracks. This is done using the tempo recording function in the Tempo Track Editor, see "Recording tempo changes" on page 405.
Removing automation tracks
To remove automation tracks, proceed as follows:
- To remove an automation track, click the parameter name and select "Remove Parameter" from the pop-up menu. Note that this will also delete any automation events on the automation track, and the automation track will be closed.
- To remove all currently unused automation tracks from a track in the Track list, select "Remove Unused Parameters" from any of its automation track parameter name pop-ups. All automation tracks that do not contain automation events will be closed for the selected track.
- Use the Delete options in the Functions pop-up menu of the Automation panel, see "The Functions pop-up menu" on page 195.
Using these commands will also lead to the removal of automation tracks.
Showing/hiding automation tracks
- To hide a single automation track, position the pointer over the top left border of the automation track in the Track list and click the "Hide Automation Track" button (the minus sign).
- To hide all automation tracks for a track, right-click the track for which you wish to hide the automation tracks, and select "Hide Automation" from the context menu.
- To hide all automation tracks for all tracks in the Track list, right-click any track and select "Hide All Automation" from the context menu.
This option is also available on the Track Folding submenu of the Project menu.
- On the Automation panel, you can hide or show automation tracks using the options in the Show section.
See "The Show options" on page 194.
Showing only used automation tracks
If a lot of automation tracks are used, it may be impractical to have them all open in the Track list. If you want to view only the automation tracks that are used (i.e. those that actually contain automation events) and hide all empty automation tracks, do one of the following:
- Right-click any track in the Track list and select the option "Show All Used Automation" from the pop-up menu. This will close all automation tracks not containing any automation events, while leaving used automation tracks open for all tracks. This option is also available in the Track Folding submenu of the Project menu.
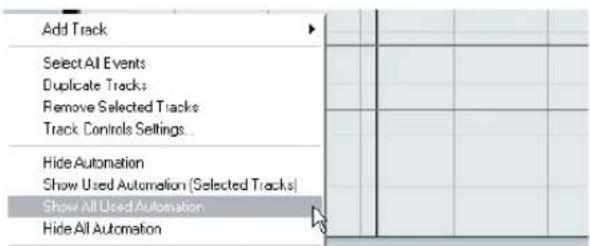
text_image
Add Track Select All Events Duplicate Tracks Remove Selected Tracks Track Controls Settings... Hide Automation Show Used Automation (Selected Tracks) Show All Used Automation Hide All Automation- Right-click a specific track and select the option "Show Used Automation (Selected Track)" from the context menu. This will close all automation tracks for the selected track not containing any automation events, while leaving used automation tracks open.
Muting automation tracks
text_image
R W Volume 0.00 Mute AutomationYou can mute individual automation tracks by clicking their Mute buttons in the Track list. Unlike the Read (R) button, which will activate or deactivate Read mode for all automation tracks of a track, the Mute button allows you to turn off automation for a single parameter.
The "Automation follows Events" setting
If you activate "Automation follows Events" on the Edit menu (or in the Preferences-Editing page), automation events will automatically follow when you move an event or part on the track.
This makes it easy to set up automation related to a specific event or part, rather than to a specific position in the project. For example, you can automate the panning of a sound effect event (having the sound pan from left to right, etc.) – if you need to move the event, the automation will automatically follow! The rules are:
- All automation events for the track between the start and end of the event or part will be moved.
If there are automation events in the new position (to which you move the part or event), these will be overwritten.
- If you copy an event or part, the automation events will be duplicated as well.
Recording plug-in automation
Every parameter for every assigned effect or VST Instrument can be automated in much the same manner as described above.
The following example assumes that you have assigned an insert effect to an FX channel track (see the chapter "Audio effects" on page 150), and describes how to record automation for the effect:
- Select the FX channel track in the Track list and open its Inserts section in the Inspector.
-
Open the control panel for the effect by clicking the Edit button ("e") above the insert effect slot in the Inspector.
-
Click the Write button in the control panel to enable Write mode.
The Read button is enabled as well. All effects and VST Instruments have Write/Read buttons on their control panels. These work exactly like the corresponding buttons in the mixer or in the Track list.
- Start playback and adjust some effect parameters in the control panel.
When you are finished, stop playback and return to the position where you started playback.
- Disable Write.
The Read button remains enabled.
- Start playback and watch the control panel.
All actions you performed during the previous playback will be reproduced exactly.
Dragging and dropping of insert plug-ins
You can drag an insert plug-in from one insert slot to another, either on the same channel or on a different channel.
- When dragging a plug-in to a different insert slot on the same channel, any existing automation data will move with the plug-in.
- When dragging a plug-in to a different insert slot on a different channel, any existing automation data will not be transferred to the new channel.
Working with automation curves
About automation curves
There are two kinds of automation curves, "ramp" and "jump":
- Jump curves are created for any parameter that only has on/off values, like a Mute button, for example.
- Ramp curves are created for any parameter that generates continuous multiple values, such as fader or encoder movements, etc.
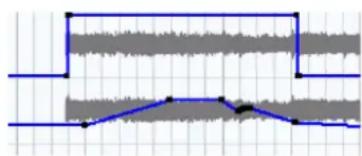
natural_image
Pure waveform diagram with no text, numbers, or symbolsExamples of jump and ramp automation curves
About the static value line
When you open an automation track for a parameter for the first time, it does not contain any automation events (unless you have previously adjusted that parameter with write automation activated), and this is reflected in the event display as a straight horizontal black line, the "static value" line. This line represents the current parameter setting.
- If you have manually added any automation events or used write automation for the corresponding parameter, and then disable the reading of automation data, the automation curve will be grayed-out in the automation track event display and the static value will be used instead. As soon as Read mode is enabled, the automation curve will become available.
Editing automation events
Drawing automation events
By using write automation in the mixer, you generate automation events by moving parameter encoders and faders in the mixer. You can also add them manually by drawing automation curves on an automation track. Proceed as follows:
- Open an automation track for the track you want to make settings for.
The static value line is shown in the event display for the automation track and the Volume parameter is selected.
- Select the Pencil tool.
You can also use the various modes of the Line tool for drawing curves, see below.
- Click on the static value line. An automation event is added, read automation mode is automatically activated, and the static value line changes to a blue automation curve.
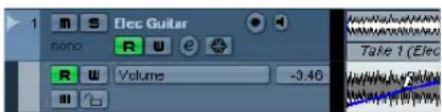
text_image
Elec Guitar mono R W e Volume -3.46 Take 1 (Elec- If you click and hold, you can draw a curve by adding a multitude of single automation events.
Note that the track color in the Track list changes to red to indicate that automation data is being written.
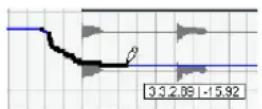
- When you release the mouse button, the number of automation events is reduced to a few events, but the basic shape of the curve still remains the same.
This “thinning out” of events is governed by the Reduction Level setting in the Settings section of the Automation panel, see “Reduction Level” on page 195.
- If you now activate playback, the volume will change with the automation curve.
In the mixer, the corresponding fader moves accordingly.
- Simply redo the operation if you are not happy with the result.
If you draw over existing events, a new curve is created.
- If the automation track is in Read mode already, you can also add automation events by clicking with the Arrow tool.
If you are trying to add a break-point between two existing points and the new point does not deviate from the existing curve, it will be removed by reduction as soon as you release the mouse button (see "Reduction Level" on page 195).
Using the various modes of the Line tool to draw automation curves
The Line tool can be very useful for drawing automation events. The various modes are accessed by selecting the Line tool on the toolbar, clicking on it a second time and selecting from the pop-up menu that appears.
- Clicking and dragging with the Line tool in Line mode shows a line in the automation track and creates automation events aligned with this line.
This is a quick way to create linear fades, etc.

flowchart
graph TD
    A["Start"] --> B{Condition}
    B -->|Yes| C["Process 1"]
    B -->|No| D["Process 2"]
    C --> E["End"]
    D --> F["End"]
- The Line tool in Parabola mode works in the same way, but aligns the automation events with a parabolic curve instead, resulting in more “natural” curves and fades. Note that the result depends on the direction from which you draw the parabolic curve.

- The Sine, Triangle and Square Line tool modes create automation events aligned with continuous curves. If snap is activated and set to Grid, the period of the curve (the length of one curve "cycle") is determined by the grid setting. If you press [Shift] and drag, you can set the period length manually, in multiples of the grid value.

Selecting automation events
- To select a single automation break-point, click on it with the Arrow tool. The break-point turns red, and you can drag it in any horizontal or vertical direction between two points.
- To select multiple break-points, you can either [Shift]-click or drag a selection rectangle with the Arrow tool. All break-points inside the selection rectangle will be selected.

text_image
Diagram showing a waveform editing process with labeled steps and color-coded segmentsDrawing a selection rectangle around break-points to select them.
- To select all automation events on an automation track, right-click the automation track in the Track list and choose "Select All Events" from the context menu.

text_image
Add Track Select All Events Remove Selected TracksRemoving automation events
There are several ways to remove break-points:
- By selecting points and pressing [Backspace] or [Delete] or selecting Delete from the Edit menu, or by clicking on a break-point with the Eraser tool.
This will remove the break-points. The curve is redrawn to connect the break-points immediately to the left and right of the removed points.
- By selecting a range (with the Range Selection tool), and pressing [Backspace] or [Delete] or selecting Delete from the Edit menu.
- By clicking in the parameter display on an automation track and selecting "Remove Parameter" from the pop-up. This will remove all automation events from the automation track, and the automation track will be closed.
Editing automation events
Automation events can be edited much like other events. You can use cut, copy and paste, you can group and nudge events, etc.
Editing automation events in the Project Browser
You can also edit automation events in the Project Browser. Proceed as follows:
- Open the Project Browser by selecting it from the Project menu. The Browser window opens. The window is divided into two sections, the Structure list to the left and the event display to the right.
- Click on the “+” sign for a track in the structure list. Automated tracks have two subitems: Track Data and Automation. The Automation item corresponds to the automation track in the Project window, and contains the track's automation events.
- Click on the "+" sign for the Automation item. All automated parameters for the track are shown in the structure list.
- Clicking on a parameter in the structure list brings up the automation events in the event display.
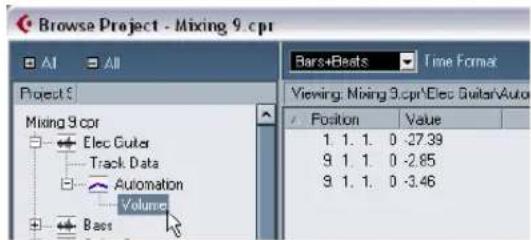
text_image
Browse Project - Mixing 9.cpr Project 5 Barts+Beats Time Format Viewing: Mixing 3.cpr\Elec Guitar\Auto Position Value 1. 1. 1. 0 -27.39 9. 1. 1. 0 -2.85 9. 1. 1. 0 -3.46 Mixing 9.cpr Elec Guter Track Data Automation Volume BassThe following parameters are available for all automation tracks:
Parameter Description
Position The position of the automation event.
Value The value of the automation event.
MIDI Controller automation
Merging automation data
When working with Cubase, it is possible to record automation data for MIDI controller data in two places: as MIDI part data and as data on an automation track.
If you have such "conflicting" automation data, you can specify separately for every parameter how these will be combined during playback. This is done by selecting an Automation Merge mode in the Track list for the automation track.
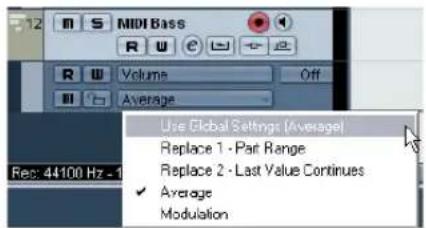
text_image
MIDI Bass Volume Off Average Rec: 44100 Hz - 1 Use Global Settings (Average) Replace 1 - Pair Range Replace 2 - Last Value Continues ✓ Average ModulationThe options on the Automation Merge Mode pop-up menu
The following options are available:
Option Description
| Use Global Settings | When this is selected, the automation track uses the "global" Automation Merge mode specified in the MIDI Controller Automation Setup dialog, see below. |
| Replace 1 - Part Range | When this is selected, the part data has playback priority over the automation track data, i.e. at the left and right part borders, the automation mode switches abruptly from part to track automation, and vice versa. |
| Replace 2 - Last Value Continues | Similar to the above, but part automation only begins when the first controller event within the part is reached. At the end of the part, the last controller value will be kept until an automation breakpoint is reached on the automation track. |
| Average When this is selected, the average values between part and track automation will be used. | |
| Modulation In this mode, the automation track curve modulates the existing part automation, with higher curve points emphasizing the automation values and lower curve points reducing the automation values even further. | |
⇒ This pop-up menu is only available for controllers that can be recorded both for a part and a track. When the pop-up menu is not available in the Track list, the current parameter will not cause any playback conflicts.
For a full list of all the parameters with potential automation data conflicts, open the MIDI Controller Automation Setup dialog, see below.
⇒ The settings you make for a controller are applied to all MIDI tracks that use this controller.
MIDI Controller Automation Setup settings
In the MIDI Controller Automation Setup dialog, you can specify how existing MIDI automation should be handled on playback and where new automation data should be recorded, in a MIDI part or as track automation.
Proceed as follows:
- On the MIDI menu, select "MIDI Controller Automation Setup".
A dialog opens.
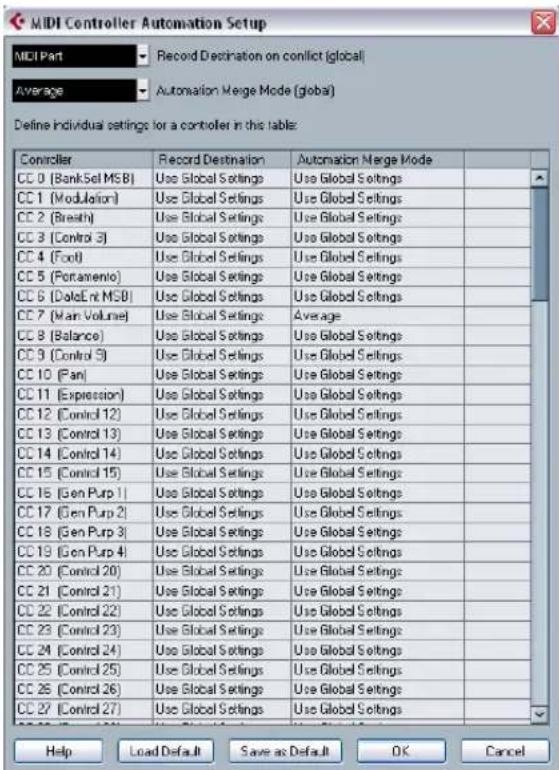
text_image
MIDI Controller Automation Setup MIDI Part Record Destination on conflict (global) Average Automation Merge Mode (global) Define individual settings for a controller in this table: Controller Record Destination Automation Merge Mode CC 0 (BankSet MSB) Use Global Settings Use Global Settings CC 1 (Modulation) Use Global Settings Use Global Settings CC 2 (Breath) Use Global Settings Use Global Settings CC 3 (Control 3) Use Global Settings Use Global Settings CC 4 (Foot) Use Global Settings Use Global Settings CC 5 (Portamento) Use Global Settings Use Global Settings CC 6 (DolcEnt MSB) Use Global Settings Use Global Settings CC 7 (Main Volume) Use Global Settings Average CC 8 (Balance) Use Global Settings Use Global Settings CC 9 (Control 9) Use Global Settings Use Global Settings CC 10 (Fan) Use Global Settings Use Global Settings CC 11 (Expression) Use Global Settings Use Global Settings CC 12 (Control 12) Use Global Settings Use Global Settings CC 13 (Control 13) Use Global Settings Use Global Settings CC 14 (Control 14) Use Global Settings Use Global Settings CC 15 (Control 15) Use Global Settings Use Global Settings CC 16 (Gen Purp 1) Use Global Settings Use Global Settings CC 17 (Gen Purp 2) Use Global Settings Use Global Settings CC 18 (Gen Purp 3) Use Global Settings Use Global Settings CC 19 (Gen Purp 4) Use Global Settings Use Global Settings CC 20 (Control 20) Use Global Settings Use Global Settings CC 21 (Control 21) Use Global Settings Use Global Settings CC 22 (Control 22) Use Global Settings Use Global Settings CC 23 (Control 23) Use Global Settings Use Global Settings CC 24 (Control 24) Use Global Settings Use Global Settings CC 25 (Control 25) Use Global Settings Use Global Settings CC 26 (Control 26) Use Global Settings Use Global Settings CC 27 (Control 27) Use Global Settings Help Load Default Save as Default OK Cancel- On the "Record Destination on conflict (global)" pop-up menu, specify the record destination for MIDI controller data.
This determines which destination will be used if there is a "conflict", i.e if MIDI controller data is received by Cubase and both the Record and the Automation Write buttons are enabled.
The following options are available:
Option Description
MIDI Part Select this when you want to record MIDI part automation.
Automation Track Select this to record the controller data on an automation track in the Project window.
-
On the "Automation Merge mode (global)" pop-up menu, specify the global Automation Merge Mode, i.e. the mode that will be used for all automation tracks with the setting "Use Global Settings", see above. By default, this is set to "Average".
-
In the table in the lower section of the dialog, you can specify the Record destination and the Automation Merge mode separately for all the available MIDI controllers. This gives you full control over the MIDI automation (destination as well as Merge mode) in your project.
- Click in the Record Destination column for a MIDI controller to open the pop-up menu where you can choose where you want recorded data of this particular MIDI Controller to end up.
- Click in the Automation Merge Mode column for a MIDI controller to specify what will happen with data for this specific controller on playback.
- All settings you make in this dialog are saved with the project.
- When you create a new project, the default settings will be used. To save the current settings as default settings, click the "Save as Default" button. To return to the default settings, click the "Load Default" button.
Audio processing and functions
Background
Audio processing in Cubase can be called "non-destructive", in the sense that you can always undo changes or revert to the original versions. This is possible because processing affects audio clips rather than the actual audio files, and because audio clips can refer to more than one audio file. This is how it works:
- If you process an event or a selection range, a new audio file is created in the Edits folder, within your project folder.
This new file contains the processed audio, while the original file is unaffected.
- The processed section of the audio clip (the section corresponding to the event or selection range) then refers to the new, processed audio file.
The other sections of the clip will still refer to the original file.
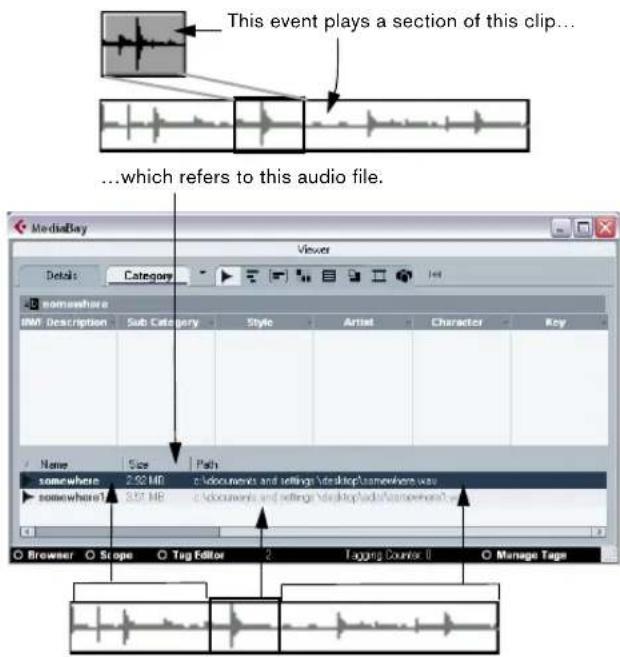
text_image
This event plays a section of this clip... ...which refers to this audio file. MediaBay Viewer Details Category sowemore IMF Description Sub Category Style Artist Character Key Name Size Path somewhere 2.92 MB c:\documents and settings\desktop\sowemore.way somewhere 3.57 MB c:\documents and settings\desktop\downarrow\sowemore.way Browser Scope Tag Editor 2 Tagging Counter 0 Manage TageAfter processing the event, the clip will refer both to the original file and a new file, containing the processed section only.
- Since all edits are available as separate files, it is possible to undo any processing, at any point and in any order! This is done in the Offline Process History dialog, see "The Offline Process History dialog" on page 214.
- Furthermore, the original, unprocessed audio file can still be used by other clips in the project, by other projects or by other applications.
Audio processing
Basically, you apply processing by making a selection and selecting a function from the Process submenu on the Audio menu. Processing is applied according to the following rules:
- When events are selected in the Project window or the Audio Part Editor, the processing will be applied to these events only.
Processing will only affect the clip sections that are referenced by the events. - When an audio clip is selected in the Pool, the processing will be applied to the whole clip.
- When you have made a selection range, the processing will be applied to this range only.
Other sections of the clip are not affected.
If you attempt to process an event that is a shared copy (i.e. the event refers to a clip that is used by other events in the project), you are asked whether you want to create a new version of the clip or not.
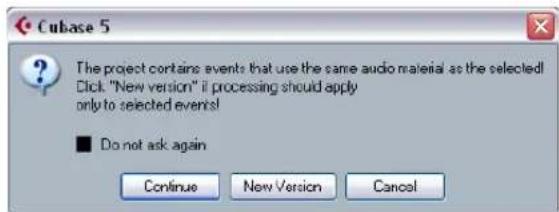
text_image
Cubase 5 The project contains events that use the same audio material as the selected! Click "New version" if processing should apply only to selected events! ■ Do not ask again Continue New Version CancelSelect "New Version" if you want the processing to affect the selected event only. Select "Continue" if you want the processing to affect all shared copies.
⇒ If you activate "Do not show this message again", any further processing you do will conform to the selected method ("Continue" or "New Version").
You can change this setting at any time by using the "On Processing Shared Clips" pop-up in the Preferences (Editing–Audio page). Also, "Create New Version" will now be displayed as an option in the dialog for the processing function.
Common settings and features
If there are any settings for the selected Audio processing function, these will appear when you select the function from the Process submenu. While most settings are specific for the function, some features and settings work in the same way for several functions:
The "More..." button
If the dialog has a lot of settings, some options may be hidden when the dialog appears. To reveal these, click the "More..." button.

To hide the settings, click the button again (now labeled "Less...").
The Preview, Process and Cancel buttons
These buttons have the following functionality:
Button Description
Preview Allows you to listen to the result of the processing with the current settings. Playback will continue repeatedly until you click the button again (the button is labeled "Stop" during Preview playback). You can make adjustments during Preview playback, but the changes are not applied until the start of the next "lap". Some changes may automatically restart the Preview playback from the beginning.
Process Performs the processing and closes the dialog.
Cancel Closes the dialog without processing.
Pre/Post-Crossfade
Some processing functions allow you to gradually mix the effect in or out. This is done with the Pre/Post-Crossfade parameters. If you activate Pre-Crossfade and specify a value of e.g. 1000ms, the processing will be applied gradually from the start of selection, reaching full effect 1000ms after the start. Similarly, if you activate Post-Crossfade, the processing will gradually be removed, starting at the specified interval before the end of the selection.

The sum of the Pre- and Post-Crossfade times cannot be larger than the length of the selection.
Envelope
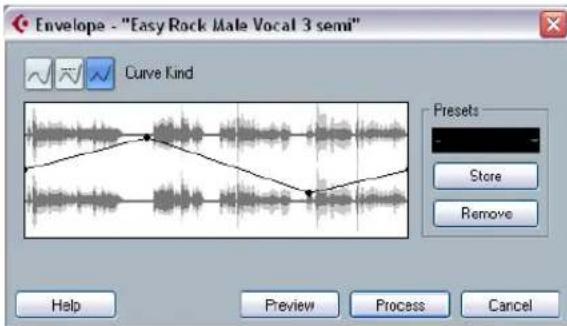
text_image
Envelope - "Easy Rock Male Vocal 3 semi" Curve Kind Presets Store Remove Help Preview Process CancelThe Envelope function allows you to apply a volume envelope to the selected audio. The dialog contains the following settings:
Curve Kind buttons
These determine whether the envelope curve should consist of spline curve segments (left button), damped spline segments (middle button) or linear segments (right button).
Envelope display
Shows the shape of the envelope curve. The resulting waveform shape is shown in dark gray, with the current waveform shape in light gray. You can click on the curve to add points, and click and drag existing points to change the shape. To remove a point from the curve, drag it outside the display.
Presets
If you have set up an envelope curve that you may want to apply to other events or clips, you can store it as a preset by clicking the Store button.
- To apply a stored preset, select it from the pop-up menu.
- To rename the selected preset, double-click on the name and enter a new one in the dialog that appears.
- To remove a stored preset, select it from the pop-up menu and click Remove.
Fade In and Fade Out
For a description of these functions, see the chapter "Fades, crossfades and envelopes" on page 88.
Gain
text_image
Gain - "Easy Rock Male Vocal 3 semi" 0.00 dB Gain No Clip Detected (100.0%) Help More... Preview Process CancelAllows you to change the gain (level) of the selected audio. The dialog contains the following settings:
Gain
This is where you set the desired gain, between -50 and +20dB. The setting is also indicated below the Gain display as a percentage.
Clipping detection text
If you use the Preview function before applying the processing, the text below the slider indicates whether the current settings result in clipping (audio levels above 0dB). If that is the case, lower the Gain value and use the Preview function again.
- If you want to increase the level of the audio as much as possible without causing clipping, you should use the Normalize function instead (see "Normalize" on page 208).
Pre- and Post-Crossfade
See "Pre/Post-Crossfade" on page 206.
Merge Clipboard
text_image
Merge Clipboard - "Bashing Drummer" Orig. Sources mix (%) Copy 50 50 Help More... Preview Process CancelThis function mixes the audio from the clipboard into the audio selected for processing, starting at the beginning of the selection.

For this function to be available, you need to have cut or copied a range of audio in the Sample Editor first.
The dialog contains the following settings:
Sources mix
Allows you to specify a mix ratio between the original (the audio selected for processing) and the copy (the audio on the clipboard).
Pre- and Post-Crossfade
See "Pre/Post-Crossfade" on page 206.
Noise Gate
text_image
Noise Gate - "Bashing Drummer" -20.00 dB Threshold 5 ms Attack Time 100 ms Min. Opening Time 30 ms Release Time Linked Channels Help More... Preview Process CancelScans the audio for sections weaker than a specified threshold level and replaces them with silence. The dialog contains the following settings:
Threshold
The level below which you want audio to be silenced. Levels below this value will close the gate.
Attack Time
The time it takes for the gate to open fully after the audio level has exceeded the threshold level.
Min. Opening Time
This is the shortest time the gate will remain open. If you find that the gate opens and closes too often when processing material that varies rapidly in level, you should try raising this value.
Release Time
The time it takes for the gate to close fully after the audio level has dropped below the threshold level.
Linked Channels
This is available for stereo audio only. When it is activated, the Noise Gate is opened for both channels as soon as one or both channels exceed the Threshold level. When Linked Channels is deactivated, the Noise Gate works independently for the left and right channel.
Dry/Wet mix
Allows you to specify a mix ratio between "dry" and processed sound.
Pre- and Post-Crossfade
See "Pre/Post-Crossfade" on page 206.
Normalize
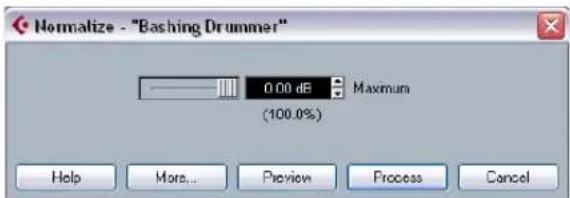
text_image
Normalize - "Bashing Drummer" 0.00 dB Maximum (100.0%) Help More... Preview Process CancelThe Normalize function allows you to specify the desired maximum level of the audio. It then analyzes the selected audio and finds the current maximum level. Finally it subtracts the current maximum level from the specified level and raises the gain of the audio by the resulting amount (if the specified maximum level is lower than the current maximum, the gain will be lowered instead). A common use for Normalizing is to raise the level of audio that was recorded at too low an input level. The dialog contains the following settings:
Maximum
The desired maximum level for the audio, between -50 and 0dB. The setting is also indicated below the Gain display as a percentage.
Pre- and Post-Crossfade
See "Pre/Post-Crossfade" on page 206.
Phase Reverse
Reverses the phase of the selected audio, turning the waveform "upside down".
The dialog contains the following settings:
Phase Reverse on
When processing stereo audio, this pop-up menu allows you to specify which channel(s) should be phase-reversed.
Pre- and Post-Crossfade
See "Pre/Post-Crossfade" on page 206.
Pitch Shift
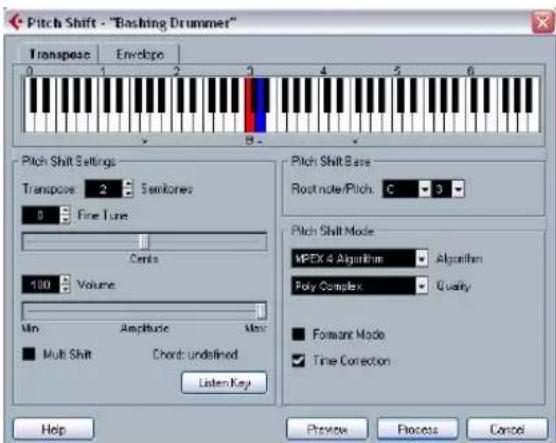
text_image
Pitch Shift - "Bashing Drummer" Transpose Envelope 0 1 2 3 4 5 6 Pitch Shift Settings Transpose 2 Semikones 0 Fine Tone Cents 100 Volume Min Amplitude Miss: ■ Multi Shift Chord: undefined Listen Key Pitch Shift Base Root note/Pitch C 3 Pitch Shift Mode MPEX 4 Algorithm Algorithm Poly Complex Quality ■ Formant Mode ✓ Time Correction Help Preview Process CancelThis function allows you to change the pitch of the audio with or without affecting its length. You can also create "harmonies" by specifying several pitches or apply pitch shift based on a user specified envelope curve.
When the Transpose tab is selected, the dialog contains the following parameters:
Keyboard display
This is a graphic overview of the transposition setting. Here, you can specify the transpose interval in semitones.
- The root note is indicated in red.
This has nothing to do with the actual key or pitch of the original audio, it just provides a way to display transpose intervals. You can change the root note by using the settings in the Pitch Shift Base section, or by pressing [Alt]/[Option] and clicking in the keyboard display.
- To specify a transpose interval, click on one of the keys. The key is indicated in blue, and the program plays test tones in the base pitch and transpose pitch to give you an audible confirmation.
- If "Multi Shift" is activated (see below), you can click on several keys to create "chords". Clicking on a blue (activated) key removes it.
Pitch Shift settings
The "Semitones" and "Fine tune" settings allow you to specify the amount of pitch shift. You can transpose the audio ±16 semitones, and fine tune it by ±200 cents (hundredths of semitones).
Volume/Amplitude
Allows you to lower the volume of the pitch-shifted sound.
Multi Shift
When this is activated, you can add several transpose values, creating multi-part harmonies. This is done by adding intervals in the keyboard display (see above). Note that you cannot use the Preview function in Multi Shift mode.
- If the intervals you add make up a standard chord, this chord is displayed to the right.
Note, however, that to include the base pitch (the original, untransposed sound) in the processed result, you need to click the base key in the keyboard display as well, so that it is displayed in blue.
Listen Key/Chord button
Clicking this button plays a test tone pitched according to the activated interval key on the keyboard display. If "Multi Shift" is activated, this button is called "Listen Chord" and plays all activated intervals as a chord.
Pitch Shift Base
This allows you to set the root note (the red key in the keyboard display). It has nothing to do with the actual pitch, but is an aid for setting up intervals and chords.
Pitch Shift Mode
This is where you can make settings for the MPEX 4 algorithm. You can choose between 7 quality settings:
Option Description
Preview This mode should only be used for preview.
Mix Fast This mode is a very fast mode for preview. This works best with composite music signals mono or stereo material.
Option Description
Solo Fast Use this mode for single instruments (monophonic material) and voice.
Solo Musical Same as above but higher quality.
Poly Fast Use this for processing monophonic and polyphonic material. This is the fastest setting that gives still very good results. You can use this for drum loops, mixes, chords.
Poly Musical Use this for processing monophonic and polyphonic material. This is the recommended MPEX default quality setting. You can use this for drum loops, mixes, chords.
Poly Complex This high quality setting is quite processor intense and should be used only when processing difficult material or for stretch factors above 1.3.
Formant Mode
If you are processing vocal material, you should activate this option in order to preserve the vocal characteristics of the pitch-shifted audio and to avoid a a "chipmunk voice" effect.
Time Correction
When this is activated, the pitch shift process will not affect the length of the audio. When this is deactivated, raising the pitch will shorten the audio section and vice versa, much like changing the playback speed on a tape recorder.
Using envelope based Pitch Shift
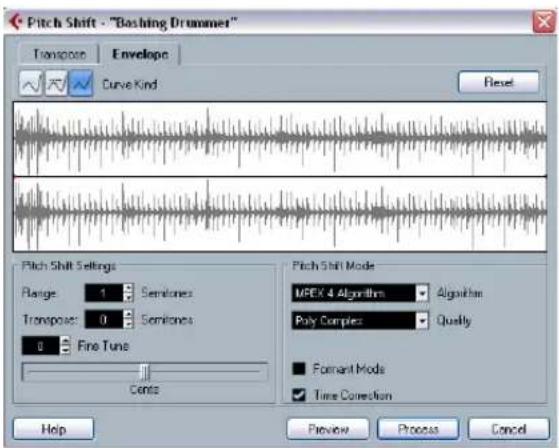
text_image
Pitch Shift - "Bashing Drummer" Transport Envelope Curve Kind Reset Pitch Shift Settings Range 1 Semitones Transpose 0 Semitones Fine Tune Counts Pitch Shift Mode MPEX 4 Algorithms Algorithm Poly Complex Quality Forment Mode Time Correction Help Review Process CancelWhen the "Envelope" tab is selected, you can specify an envelope curve on which the pitch shift should be based. This allows you to create pitchbend effects, pitch-shift different sections of the audio by different amounts, etc.
Envelope display
Shows the shape of the envelope curve over the waveform image of the audio selected for processing. Envelope curve points above the center line indicate positive pitch shift, while curve points below the center line indicate negative pitch shift. Initially, the envelope curve will be a horizontal, centered line, indicating zero pitch shift.
- You can click on the curve to add points, and click and drag existing points to change the shape. To remove a point from the curve, drag it outside the display.
Curve Kind
These buttons determine whether the envelope curve should consist of spline curve segments (left button), damped spline segments (middle button) or linear segments (right button).
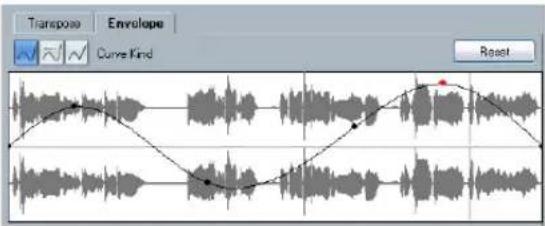
text_image
Transpose Envelope Curv Kind ResetSpline curve segment envelope
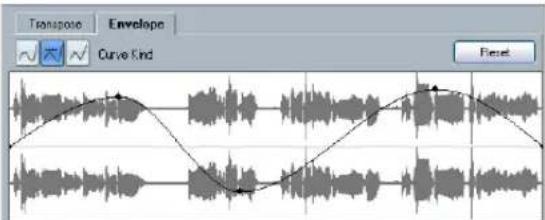
text_image
Transpose Envelope Curve Kind ResetThe same envelope with damped spline segments selected.
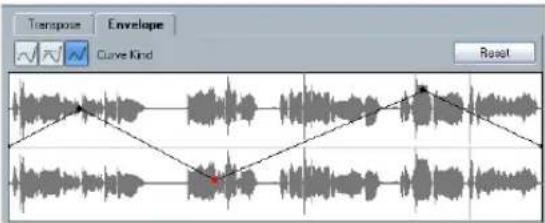
text_image
Transpose Envelope Curve Kind ResetThe same envelope with linear segments selected.
Range
This parameter determines the vertical pitch range of the envelope. If set to "4", moving a curve point to the top of the display corresponds to pitch shifting by +4 semitones. The maximum range is +/-16 semitones.
Transpose and Fine Tune
These parameters allow you to adjust the value of a curve point numerically:
- Click on a curve point to select it.
The selected point is shown in red. - Adjust the Transpose and Fine Tune parameters to change the pitch of the curve point in semitones and cents, respectively.
Pitch Shift Mode
These are the same parameters as on the Transpose tab, see "Pitch Shift Mode" on page 209.
Example
Let's say that you wish to create a pitchbend effect, so that the pitch is raised linearly by exactly 2 semitones in a specific part of the selected audio.
- Remove all curve points by clicking the Reset button.
- Select a linear curve by clicking the Curve Kind button to the right.
- Make sure the Range parameter is set to 2 semitones or higher.
- Create a point where you want the pitchbend to start by clicking on the envelope line.
Since this is the starting point for the pitchbend, you want its pitch to be zero (the envelope line should still be straight). If necessary, use the Fine Tune parameter to set the curve point to 0 cents, because this point governs the start point, where you want the pitch transition to begin. - Create a new curve point at the horizontal position where you want the pitchbend to reach the full value.
This curve point determines the rise time of the pitchbend effect, i.e. the further away from the starting point the new point is positioned, the longer it will take for the pitchbend to reach the full value, and vice versa. -
With the second point still selected, use the Transpose and Fine Tune parameters to set the pitch to exactly 2 semitones.
-
Create a new curve point to set the duration of the pitchbend, i.e. the time the pitch should remain transposed by 2 semitones.
- Finally, create a point where you want the pitchbend to end.
You do not have to create a new point if you are at the end of the audio file, since there is always an end point at the right side of the waveform display. - If necessary, make additional settings in the Pitch Shift Mode section, see "Pitch Shift Mode" on page 209.
- Click Process.
The pitchbend is applied according to the specified settings.
Remove DC Offset
This function will remove any DC offset in the audio selection. A DC offset is when there is too large a DC (direct current) component in the signal, sometimes visible as the signal not being visually centered around the "zero level axis". DC offsets do not affect what you actually hear, but they affect zero crossing detection and certain processing, and it is recommended that you remove them.

It is recommended that this function is applied to complete audio clips, since the DC offset (if any) is normally present throughout the entire recording.
There are no parameters for this function. Note that you can check for DC Offset in an audio clip using the Statistics function (see "Statistics (Cubase only)" on page 218).
Resample
text_image
Resample - "Easy Rock Malo Vocal 3 semi" File Rate: 44100.00 44100.0 New Rate 0.000 % Difference Help Preview Process CancelThe Resample function can be used for changing the length, tempo and pitch of an event.
The original sample rate of the event is listed in the dialog. Resample the event to a higher or lower sample rate by either specifying a sample rate or by specifying the difference (as a percentage value) between the original sample rate and the desired new one.
- Resampling to a higher sample rate will make the event longer and cause the audio to play back at a slower speed with a lower pitch.
- Resampling to a lower sample rate will make the event shorter and cause the audio to play back at a faster speed with a higher pitch.
- You can audition the result of the resampling by entering the desired value and clicking "Preview".
The event will then be played back as it will sound after the resampling.
- When you are satisfied with the preview result, click "Process" to close the dialog and apply the processing.
Reverse
Reverses the audio selection, as when playing a tape backwards. There are no parameters for this function.
Silence
Replaces the selection with silence. There are no parameters for this function.
Stereo Flip
text_image
Stereo Flip - "Easy Rock Male Vocal 3 semi" Flip Left-Right Mode Help More... Preview Process CancelThis function works with stereo audio selections only. It allows you to manipulate the left and right channel in various ways.
The dialog contains the following parameters:
Mode
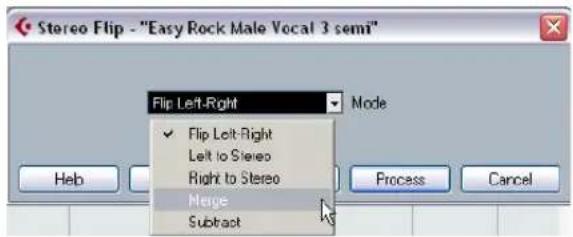
text_image
Stereo Flip - "Easy Rock Male Vocal 3 semi" Flip Left-Right ✓ Flip Left-Right Left to Stereo Right to Stereo Merge Subtract Node Help Process CancelThis pop-up menu determines what the function does:
Option Description
Flip Left-Right Swaps the left and right channel.
Left to Stereo Copies the left channel sound to the right channel.
Right to Stereo Copies the right channel sound to the left channel.
Merge Merges both channels on each side for mono sound.
Subtract Subtracts the left channel information from the right and vice versa. This is typically used as a "Karaoke effect", for removing centered mono material from a stereo signal.
Time Stretch
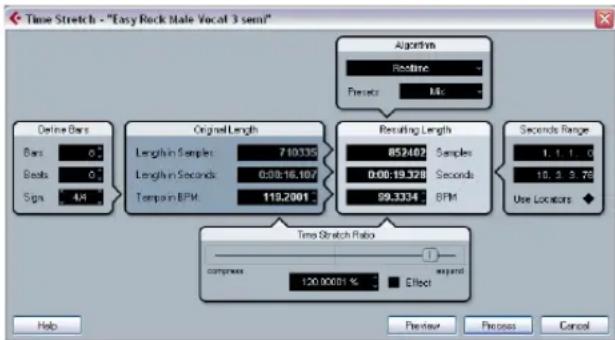
text_image
Time Stretch - "Easy Rock Male Vocal 3 semi" Algorithm Baseline Presets: Mix Define Bars Bars: 0 Beats: 0 Sign: 4.4 Original Length Length in Samples: 710335 Length in Seconds: 0.08:16.107 Temp in BPM: 119.2001 Resulting Length 852469 Samples 0.00:19.328 Seconds 99.3334 BPM Seconds Range: 1.1.1.0 16.3.3.78 Use Locations Time Stretch Ratio compress 120.00001 % effect Help Preview Process CancelThis function allows you to change the length and "tempo" of the selected audio without affecting the pitch. The dialog contains the following parameters:
Define Bars section
In this section, you set the length of the selected audio and the time signature:
Option Description
Bars If you use the tempo setting (see below), you can specify the length of the selected audio here, in bars.
Beats If you use the tempo setting, you can specify the length of the selected audio here, in beats.
Sign. If you use the tempo setting, you can specify the time signature here.
Original Length section
This section contains information and settings regarding the audio selected for processing:
Option Description
Length in Samples The length of the selected audio, in samples.
Option Description
Length in Seconds The length of the selected audio, in seconds.
Tempo in BPM If you are processing music, and know the actual tempo of the audio, you can enter it here as beats per minute. This makes it possible to time-stretch the audio to another tempo, without having to compute the actual time stretch amount.
Resulting Length section
These settings are used if you want to stretch the audio to fit within a specific time span or tempo. The values will change automatically if you adjust the Time Stretch Ratio (see below).
Option Description
Samples The desired length in samples.
Seconds The desired length in seconds.
BPM The desired tempo (beats per minute). For this to work, you have to know the actual tempo of the audio, and specify this (along with time signature and length in bars) in the Original Length section to the left.
Seconds Range section
These settings allow you to set the desired range for the time stretch.
Option Description
Range Allows you to specify the desired length as a range between two time positions.
Use Locators Clicking the diamond-shaped button below the Range fields sets the Range values to the left and right Locator positions, respectively.
Time Stretch Ratio section
The Time Stretch Ratio determines the amount of time stretch as a percentage of the original length. If you use the settings in the Resulting Length section to specify the amount of time stretch, this value will change automatically. The possible range depends on the "Effect" option:
- If the "Effect" checkbox is deactivated, the range is 75–125%.
This is the preferred mode if you want to preserve the character of the sound.
- If the "Effect" checkbox is activated, you can specify values between 10 and 1000% (Realtime), or 50 and 200% (MPEX 4).
This mode is mainly useful for special effects, etc.
Algorithm section
Allows you to select a time stretch algorithm: MPEX 4 and Realtime mode.
- MPEX 4 mode
This mode is based on Prosoniq's proprietary MPEX (Minimum Perceived Loss Time Compression/Expansion) algorithm. This algorithm (which is also used in Prosoniq's TimeFactory™ application) uses an artificial neural network for time series prediction in the scale space domain to achieve high end time and pitch scaling. This gives the best possible audio quality result. You can choose between 7 quality settings, see "Pitch Shift Mode" on page 209.
- Realtime mode
This is the algorithm used for the realtime time stretching features in Cu-base. Although this algorithm is optimized for time stretching in realtime, you can use it for offline processing as well. The Presets pop-up contains the same presets as found in the Algorithm pop-up in the Sample Editor, see "Selecting an algorithm for realtime playback" on page 234.
Applying plug-ins (Cubase only)
You can add plug-in effects in realtime during playback (see the chapter "Audio effects" on page 150). However, sometimes it is useful to "permanently" apply effects to one or several selected events. In Cubase, this is done in the following way:
- Make a selection in the Project window, the Pool or an editor.
Effects are applied according to the same rules as Processing (see "Common settings and features" on page 206).
-
Select "Plug-ins" from the Audio menu.
-
Select the desired effect from the submenu.
The Process Plug-in dialog appears.
About stereo and mono
If you are applying an effect to mono audio material, only the left side of the effect's stereo output will be applied.
The process plug-in dialog
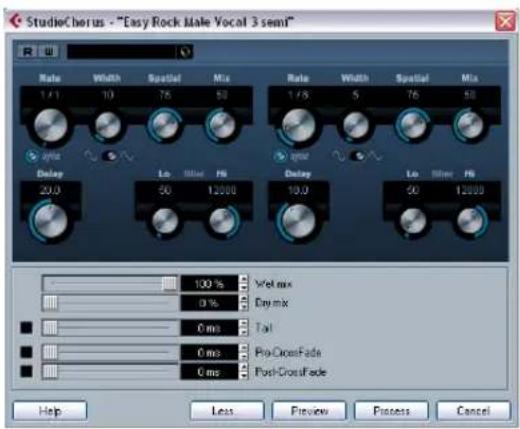
text_image
StudioChorus - "Easy Rock Make Vocal 3 sem" Rate Width Spatial Mix Rate Width Spatial Mix 1/1 10 75 50 1/8 5 76 50 Delay Lo Filter FB Delay Lo Filter FB 20.0 50 12000 10.0 50 12000 100% Wet mix 0% Dry mix 0 ms Tail 0 ms ProCrossFade 0 ms PostCrossFade Help Less Preview Process CancelThe process plug-in dialog for the StudioChorus effect.
The upper section of the process plug-in dialog contains the effect parameters of the selected plug-in. For details on the parameters of the included plug-ins, see the separate PDF document "Plug-in Reference".
The lower section of the dialog contains settings for the actual processing. These are common to all plug-ins.
- If the lower section is hidden, click the "More..." button to display it.
Clicking the button again (now labeled "Less...") will hide the lower section.
The following settings and functions are available in the common, lower section of the dialog:
Wet mix/Dry mix
These two sliders allow you to specify the balance between wet (processed) and dry (original) signal in the resulting clip.
Normally the two sliders are "reverse-ganged", so that raising the Wet mix slider lowers the Dry mix slider by the same amount. However, if you press [Alt]/[Option] and drag a slider, you can move it independently. This allows you to set e.g. 80% dry and 80% wet signal. Be careful to avoid distortion.
Tail
This parameter is useful if you are applying an effect that adds material after the end of original audio (such as re-verb and delay effects). When the checkbox is activated, you can specify a tail length using the slider. The tail time is included when playing back with the Preview function, allowing you to find the appropriate tail length.
Pre/Post-Crossfade
These settings allow you to gradually mix the effect in or out. If you activate Pre-Crossfade and specify a value of e.g. 1000ms, the effect will be applied gradually from the start of selection, reaching full effect 1000ms after the start. Similarly, if you activate Post-Crossfade, the processing will gradually be removed starting at the specified interval before the end of the selection.

The sum of the Pre- and Post-Crossfade times cannot be larger than the length of the selection.
Preview button
Allows you to listen to the result of the processing with the current settings. Playback will continue repeatedly until you click the button again (the button is labeled "Stop" during Preview playback). You can change the effect settings during Preview playback if needed.
Process button
Applies the effect and closes the dialog.
Cancel button
Closes the dialog without applying the effect.
The Offline Process History dialog
If you want to remove or modify some or all processing from a clip, this can be done in the Offline Process History dialog. Processing that can be modified in the Offline Process History dialog includes the functions on the Process menu, any applied plug-in effects (Cubase only), and Sample Editor operations such as Cut, Paste, Delete and drawing with the Pencil tool.
Due to the clip-file relationship (see "Background" on page 205), it is even possible to modify or remove some processing "in the middle" of the Process History, while keeping later processing! This feature depends on the type of processing performed (see "Restrictions" on page 215).
Proceed as follows:
- Select the clip in the Pool or one of its events in the Project window.
You can see which clips have been processed by checking the Status column in the Pool – the waveform symbol indicates that processing or effects have been applied to the clip (see "About the Status column symbols" on page 262).
- Select "Offline Process History..." from the Audio menu.
The Offline Process History dialog appears.
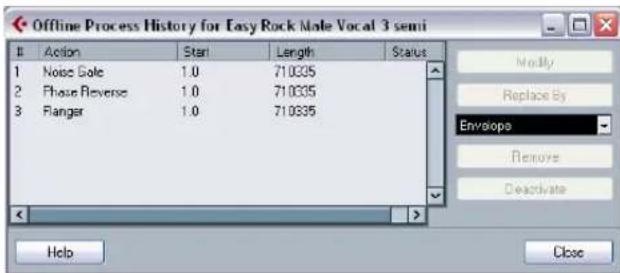
text_image
Offline Process History for Easy Rock Male Vocal 3 semi Action Start Length Status 1 Noise Gate 1.0 71.0335 2 Phase Reverse 1.0 71.0335 3 Flanger 1.0 71.0335 Modify Replace By Envelops Remove Deactivate Help CloseThe left part of the dialog contains a list of all processing you have added to the clip, with the most recent operations at the bottom of the list. The "Start" and "Length" columns indicate which section of the clip was affected by each operation. The "Status" column indicates if the operation can be modified or undone.
- Locate the operation you want to edit and select it by clicking on it in the list.
- To modify the settings of the selected processing, click the "Modify" button.
This opens the dialog for the processing function or applied effect, allowing you to change the settings. This works just as when you applied the processing or effect the first time.
- To replace the selected operation with another processing function or effect, select the desired function from the pop-up menu and click the "Replace By" button.
If the selected function has settings, a dialog will appear as usual. The original operation will then be removed and the new processing will be inserted in the Offline Process History.
- To remove the selected operation, click the "Remove" button.
The processing is removed from the clip.
- To undo the selected operation and remove the processing from the clip click the "Deactivate" button.
The processing is removed from the clip, but the operation remains in the list. To redo the operation and apply the processing again, click the button, now renamed to "Activate", again.
- Click "Close" to close the dialog.
Restrictions
- If there are no settings for the processing function, you cannot modify it.
- If you have applied processing that changes the length of the clip (such as Cut, Insert or Time Stretch), you can only remove this if it is the most recent processing in the Offline Process History (at the bottom of the list in the dialog). If an operation cannot be removed or modified, this is indicated by an icon in the "Status" column. Also, the corresponding buttons will be grayed out.
Freeze Edits
The Freeze Edits function on the Audio menu allows you to make all processing and applied effects permanent for a clip:
- Select the clip in the Pool or one of its events in the Project window.
- Select "Freeze Edits..." from the Audio menu.
- If there is only one edit version of the clip (no other clips refer to the same audio file), the following dialog will appear:
text_image
Cubase 5 Replace original or create new file? Replace New File CancelIf you select "Replace", all edits will be applied to the original audio file (the one listed in the clip's Path column in the Pool). If you select "New File", the Freeze Edits operation will create a new file in the Audio folder within the project folder (leaving the original audio file unaffected).
- If the selected clip (or the clip played by the selected event) has several edit versions (i.e. there are other clips referring to the same audio file), the following alert will appear:
text_image
Cubase 5 The project contains events that use the same audio material as the selected! Click "New version" if processing should apply only to selected events! ■ Do not ask again Continue New Version CancelAs you can see, you do not have the option to Replace the original audio file in this case. This is because that audio file is used by other clips. Select "New File" to have a new file created in the Audio folder within the project folder.
After a Freeze Edits, the clip refers to a new, single audio file. If you open the Offline Process History dialog for the clip, the list will be empty.
Detect Silence
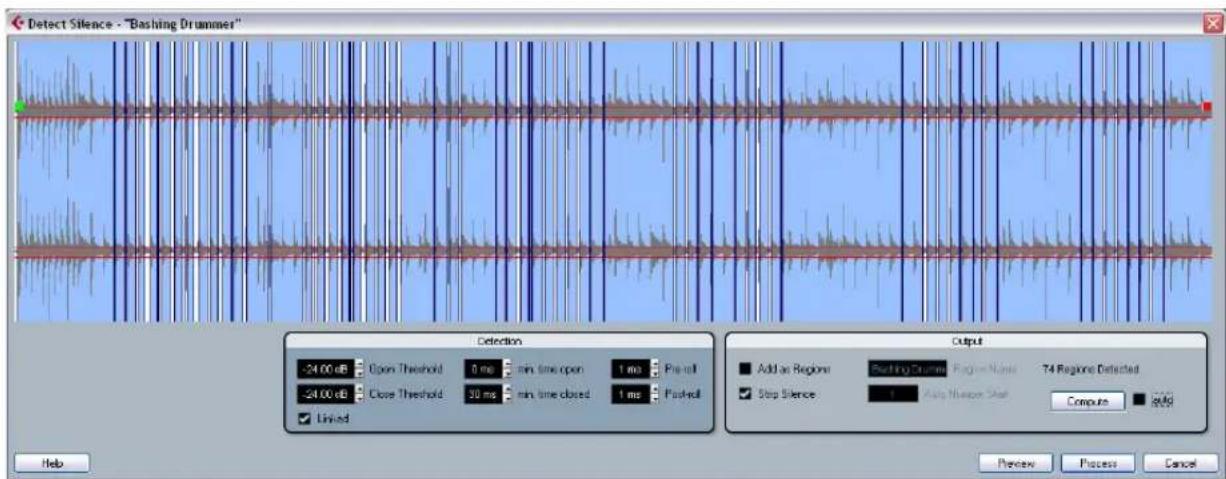
text_image
Detect Silence - "Bashing Drummer" Detection 24.00 dB Open Threshold 0 ms min time open 1 ms Pre-till 24.00 dB Close Threshold 30 ms min time closed 1 ms Post-till ✓ Linked Output Add on Regions Bashing Drummer Programs Name T4 Regions Detected ✓ Stop Silence 1 Main Window Start Compute auto Preview Process CancelThe Detect Silence function on the Advanced submenu of the Audio menu searches for silent sections in an event and either splits the event, removing the silent parts from the project, or creates regions corresponding to the non-silent sections. Proceed as follows:
- Select the event in the Project window or the Audio Part Editor.
You can select several events if you like, in which case you will be allowed to make separate settings for each selected event. - Select "Detect Silence" from the Advanced submenu of the Audio menu.
The Detect Silence dialog appears. - Adjust the settings in the Detection section to the left. They have the following functionality:
Setting Description
| Open Threshold | When the audio level exceeds this value, the function will "open", i.e. let the sound through.Set this low enough to open when a sound starts, but high enough to remove unwanted noise during "silent" sections. |
| Close Threshold | When the audio level drops below this value, the function will "close". This value cannot be higher than the Open Threshold value.Set this high enough to remove unwanted noise during "silent" sections. |
| Linked If this checkbox is ticked, Open and Close Threshold will be set to the same value. | |
Setting Description
| min. time open | Determines the minimum time that the function will remain "open" after the audio level has exceeded the Open Threshold value.If the audio contains repeated short sounds, and you find that this results in too many short "open" sections, try raising this value. |
| min. time closed | Determines the minimum time that the function will remain "closed" after the audio level has dropped below the Close Threshold value.Usually you would want to set this to a low value, to avoid removing sounds. |
| Pre-Roll Allows you to have the function "open" slightly before the audio level exceeds the Open Threshold value. In other words, the start of each "open" section is moved to the left according to the time you set here.This is useful to avoid removing the attack of sounds. | |
| Post-Roll Allows you to have the function "close" slightly after the audio level drops below the Close Threshold value.This is useful to avoid removing the natural decay of sounds. | |
- Click the "Compute" button.
The audio event is analyzed, and the waveform display is redrawn to indicate which sections will be considered "silent", according to your settings. Above the Compute Button the number of detected regions is displayed.
- If you activate the "auto" checkbox next to the Compute button, the audio event will be analyzed (and the display will be updated) automatically every time you change the settings in the Detection section of the dialog.
Please note that you should not activate this option when you are working with very long files, as this process might take some time.
- You can use the Preview function to listen to the result. The event is played back repeatedly in its entire length, but with the "closed" sections silenced.
-
Repeat steps 3 and 4 until you are satisfied with the result.
-
Now activate the "Add as Regions" or the "Strip Silence" checkbox, or both.
"Add as Regions" will create regions according to the non-silent sections. "Strip Silence" will split the event at the start and end of each non-silent section, and remove the silent sections in between.
-
If you activate "Add as Regions", you can specify a name for the Regions in the Region Name field. In addition to the name, the regions will be numbered, starting with the number specified in the Auto Number Start field.
-
Click "Process".
The event is split and/or regions are added.

text_image
Fou Fama B F F F F F F F F F F F F F F F F F F F F F F F F F F F F F F F F F F F F F F F F F F F F F F F F F F M M M M M M M M M M M M M M M M M M M M M M M M M M MThe result of the "Strip Silence" option.
- If you selected more than one event in step 1 above, you can activate the "process all" checkbox to apply the same settings to all selected events. If you do not activate this, the dialog will appear again, allowing you to make separate settings for each event.
The Spectrum Analyzer (Cubase only)
This function analyzes the selected audio, computes the average "spectrum" (level distribution over the frequency range) and displays this as a two-dimensional graph, with frequency on the x-axis and level on the y-axis.
- Make an audio selection (a clip, an event or a range selection).
- Select "Spectrum Analyzer" from the Audio menu. A dialog with settings for the analysis appears.
text_image
Spectrum Analyzer - "Bashing Drummer" 4096 Size in Samples 512 Size of Overlap Hamming Window used Normalized Values Mono left From Stereo Help Process CancelThe default values give good results in most situations, but you can adjust the settings if you like:
Option Description
Size in Samples The function divides the audio into "analysis blocks", the size of which is set here. The larger this value, the higher the frequency resolution of the resulting spectrum.
Size of Overlap The overlap between each analysis block.
Window used Allows you to select which window type should be used for the FFT (Fast Fourier Transform, the mathematical method used for computing the spectrum).
Normalized Values When this is activated, the resulting level values are scaled, so that the highest level is displayed as "1" (0dB).
From Stereo When analyzing stereo material, there is a pop-up menu with the following options: Mono mix – the stereo signal is mixed to mono before analyzing. Mono left/right – the left or right channel signal is used for analysis. Stereo – both channels are analyzed (two separate spectrums will be displayed).
- Click the "Process" button.
The spectrum is computed and displayed as a graph.
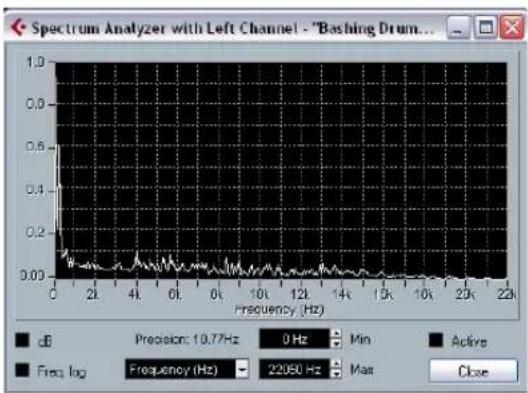
line
| Frequency (Hz) | Value | | -------------- | --------- | | 0 | 1.0 | | 2k | 0.0 | | 4k | 0.0 | | 6k | 0.0 | | 8k | 0.0 | | 10k | 0.0 | | 12k | 0.0 | | 14k | 0.0 | | 16k | 0.0 | | 18k | 0.0 | | 20k | 0.0 | | 22k | 0.0 |- You can adjust the display with the settings in the display window:
Setting Description
| dB When this is activated, the vertical axis shows dB values.When it is deactivated, values between 0 and 1 are shown. | |
| Freq. log When this is activated, frequencies (on the horizontal axis) are displayed on a logarithmic scale. When it is deactivated, the frequency axis is linear. | |
| Precision Indicates the frequency resolution of the graph. This value cannot be changed here, but is governed by the Size in Samples setting in the previous dialog. | |
| Frequency/ Note | Allows you to select whether you want the frequencies to be displayed in Hertz or with note names. |
| Min. Sets the lowest frequency shown in the graph. | |
| Max. Sets the highest frequency shown in the graph. By adjusting the Min and Max values, you can take a closer look at a smaller frequency range. | |
| Active When this is activated, the next Spectrum Analysis will appear in the same window. When deactivated, new Spectrum Analysis results will appear in separate windows. | |
- If you move the mouse pointer over the graph, a cross-hair cursor follows the graph curve and the display in the upper right corner shows the frequency/note and level at the current position.
To compare the level between two frequencies, move the pointer to one of the frequencies, right-click once and move the pointer to the second frequency. The delta value (the difference in level between the current position and the right-click position) is displayed in the upper right corner (labeled "D").
- If you analyze stereo audio and selected the "Stereo" option in the first dialog, the graphs for the left and right channel are superimposed in the display, with the left channel graph in white and the right channel graph in yellow. The display in the upper right corner shows the values for the left channel – to see the right channel values, hold down [Shift]. An "L" or "R" is displayed to indicate which channel values are shown.
- You can leave the window open or close it by clicking the "Close" button.
If you leave it open and the "Active" checkbox is ticked, the result of the next Spectrum Analysis will be displayed in the same window.
Statistics (Cubase only)
| Statistics - "Bashing Drummer" | ||
| Channel | Left | Right |
| Min. Sample Value: | -1.000 | -1.000 |
| -0.00 dB | -0.00 dB | |
| Max. Sample Value: | 0.794 | 0.897 |
| -2.01 dB | -0.95 dB | |
| Peak Amplitude: | -0.00 dB | -0.00 dB |
| DC Difset | -1.12 % | -0.20 % |
| -67.36 dB | -83.00 dB | |
| Estimated Resolution: | 16 Bit | 16 Bit |
| Estimated Pitch: | 5550.1Hz/F7 | 3885.7Hz/B6 |
| SampleRate: | 44.100 kHz | 44.100 kHz |
| Min. RMS Power: | -72.29 dB | -67.32 dB |
| Max. RMS Power: | -15.88 dB | -15.35 dB |
| Average: | -24.64 dB | -24.68 dB |
The Statistics function on the Audio menu analyzes the selected audio (events, clips or range selections) and displays a window with the following information:
Item Description
| Min. Sample Value | The lowest sample value in the selection, as a value between -1 and 1 and in dB. |
| Max. Sample Value | The highest sample value in the selection, as a value between -1 and 1 and in dB. |
| Peak Amplitude | The largest sample value (in absolute numbers) in the selection, in dB. |
| DC Offset | The amount of DC Offset (see "Remove DC Offset" on page 211) in the selection, as a percentage and in dB. |
| Estimated Resolution | Even though an audio file is in 16 or 24 bits, it may have been converted from a lower resolution. The Estimated Resolution value makes an educated guess about the actual audio resolution, by computing the smallest level difference between two samples. |
| Estimated Pitch | The estimated pitch of the audio selection. |
| Sample Rate | The sample rate of the audio selection. |
| Min. RMS Power | The lowest loudness (RMS) measured in the selection. |
| Max. RMS Power | The highest loudness (RMS) measured in the selection. |
| Average | The average loudness over the whole selection. |
The Sample Editor
Background
The Sample Editor allows you to view and manipulate audio by cutting and pasting, removing or drawing audio data, processing or applying effects (see "Audio processing and functions" on page 204). This editing can be called "non-destructive": The actual file (if created or imported from outside the project) will remain untouched and using the Offline Process History you can undo modifications or revert to the original settings at any time (see "The Offline Process History dialog" on page 214).
The Sample Editor also contains most of the AudioWarp related functions, i.e. the realtime time stretching and pitch shifting functions in Cubase. These can be used to match the tempo of any audio loop to the project tempo (see "AudioWarp: Tempo matching audio" on page 231).
The VariAudio features allow you to edit monophonic vocal recordings in pitch and time, as easily as editing MIDI in the Key Editor. In these realtime pitch modifications the transitions will be kept so that the sound will remain natural. The pitch detection and correction is “non-destructive”, i.e. you can always undo modifications or revert to the original versions. See “VariAudio (Cubase only)” on page 243.
Another special feature of the Sample Editor is hitpoint detection. Hitpoints allow you to create "slices", which are useful, for example, if you want to change the tempo without affecting the pitch (see "Working with hitpoints and slices" on page 234).
Opening the Sample Editor
You open the Sample Editor by double-clicking an audio event in the Project window or the Audio Part Editor, or by double-clicking an audio clip in the Pool. You can have more than one Sample Editor window open at the same time.
- Note that double-clicking an audio part in the Project window will open the Audio Part Editor, even if the part only contains a single audio event.
This is described in a separate chapter, see "The Audio Part Editor" on page 254.
Window overview
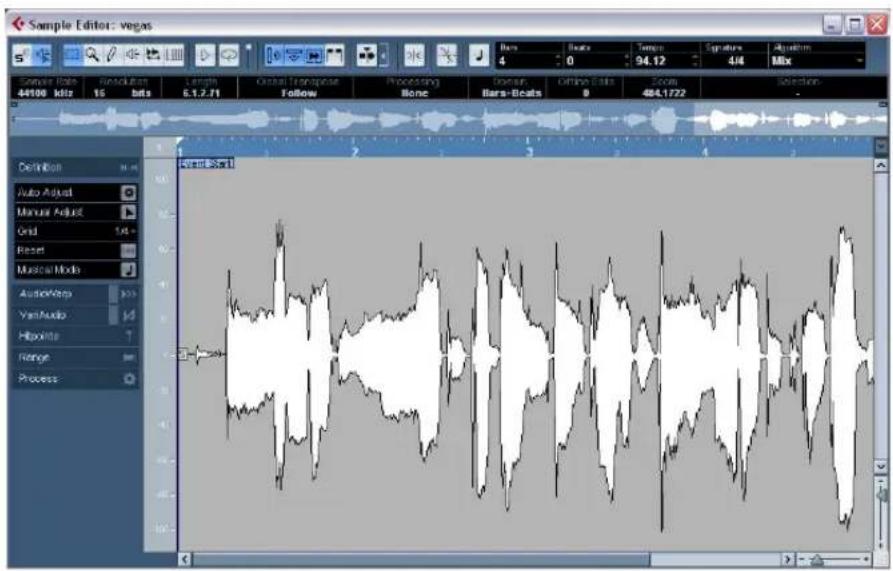
text_image
Sample Editor: vegas Audio Rate 44100 MHz Resolution 16 bits Length 6.1,2.71 Actual Transporter Follow Processing Bone Glosses Bars-Beats Offline Edits Zoom 484.1722 Selection Definition Auto Adjust Manual Adjust Grid Reset Musical Mode AudioWorks VanAudio Hipkins Range Process Event StartThe Elements menu
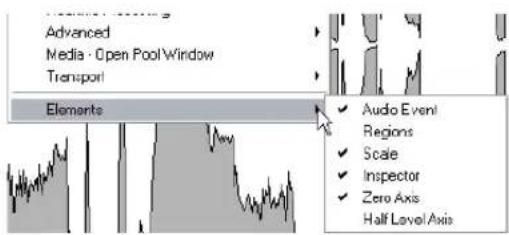
text_image
Advanced Media · Open Pool Window Transport Elements Audio Event Regions Scale Inspector Zero Axis Half Level AxisIf you hold [Alt]/[Option] and right-click in the Sample Editor to bring up the context menu, you will find a submenu called "Elements". By activating or deactivating options on this submenu, you specify what is shown in the editor window. Some of these options are also available as icons on the toolbar.
Provided that the "Popup Toolbox on Right Click" option in the Preferences dialog (Editing-Tools page) is activated, a right-click holding a modifier key brings up the context menu.
The toolbar
The toolbar contains the following tools:
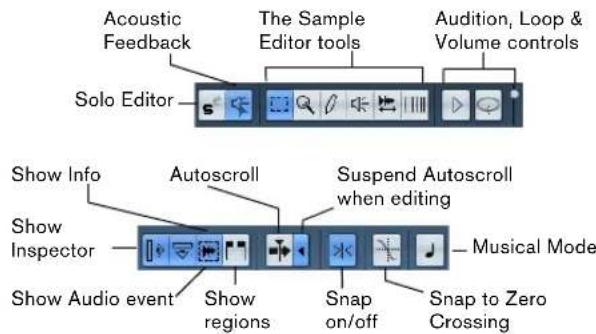
text_image
Acoustic Feedback The Sample Editor tools Audition, Loop & Volume controls Solo Editor Show Info Autoscroll Suspend Autoscroll when editing Show Inspector Show Audio event Show regions Snap on/off Snap to Zero Crossing Musical ModeTo the right of the tools the estimated length of your audio file is displayed in bars and beats (PPQ) together with the estimated tempo and the time signature. If you want to use Musical mode, you should always verify if the length in bars corresponds to the audio file you imported. If necessary, listen to your audio and enter the correct bar length. The Algorithm pop-up allows you to select an algorithm for the realtime time stretching (see "Selecting an algorithm for the flattening (Cubase only)" on page 241).

- You can customize the toolbar by right-clicking it and using the context menu to hide or show items.
- Selecting Setup from the context menu allows you to rearrange sections on the toolbar, store toolbar presets, etc. See "Using the Setup options" on page 471.
The info line
If you activate the Show Info button on the toolbar, the info line will show information about the edited audio clip:
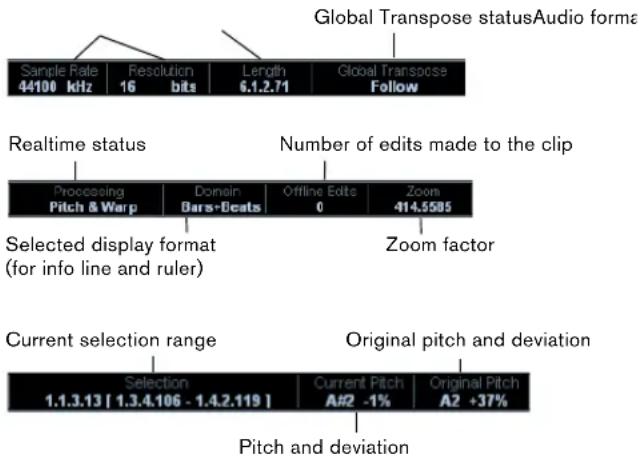
text_image
Global Transpose statusAudio forma Sample Rate 44100 kHz Resolution 16 bits Length 6.1.2.71 Global Transpose Follow Realtime status Number of edits made to the clip Processing Pitch & Warp Domain Bars+Beats Offline Edits 0 Zoom -414.5585 Selected display format (for info line and ruler) Zoom factor Current selection range Original pitch and deviation Selection Current Pitch A#2 -1% Original Pitch A2 +37% Pitch and deviationInitially, length and position values are displayed in the format specified in the Project Setup dialog. The info line can be customized, see "The Setup dialogs" on page 471.
The Sample Editor Inspector
To the left in the Sample Editor, you will find the Sample Editor Inspector. It contains all the tools and functions for working in the Sample Editor.
For more information on the handling of the various Inspector tabs, see the section "The Inspector" on page 29.
The Definition tab
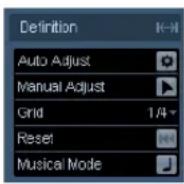
The Definition tab will help you to adjust the audio grid and define the musical context of your audio. This is useful, if you have an audio loop or audio file that you want to match to the project tempo, see "AudioWarp: Tempo matching audio" on page 231.
The AudioWarp tab
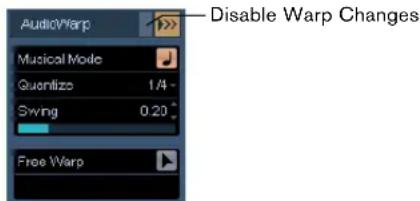
text_image
AudioWarp Musical Mode Quantize 1.4 - Swing 0.20 - Free Warp Disable Warp ChangesThe AudioWarp tab lets you perform timing settings for your audio. This includes setting a quantize resolution for the audio, applying swing and manually changing the rhythm of the audio by dragging beats to time positions in the grid (see "Free Warp" on page 238).
If you activate the Disable Warp Changes button (see above), any warp modifications you have made will be disabled, allowing you to compare the modified with the original sound of your audio. However, the display will not change. The timestretch implemented by the Musical mode will not be disabled by this. Disable Warp Changes is deactivated when you close the Sample Editor and will not be recalled on reopening it.
The VariAudio tab (Cubase only)
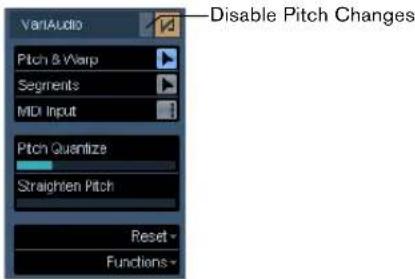
text_image
Disable Pitch Changes VanAudio Pitch & Warp Segments MDI Input Pitch Quantize Straighten Pitch Reset FunctionsOn this tab you can edit single notes of your audio file and change their pitch and/or timing, in a way that is similar to the editing of MIDI notes (see "Understanding the waveform display in VariAudio" on page 243). Furthermore, you can extract MIDI from your audio (see "Functions – Extract MIDI..." on page 252).

If you activate the Disable Pitch Changes button (see above), any pitch modifications you have made will be disabled, allowing you to compare the modified with the original sound of your audio. However, the display will not change. Disable Pitch Changes is deactivated when you close the Sample Editor and will not be recalled on reopening it.
The Hitpoints tab
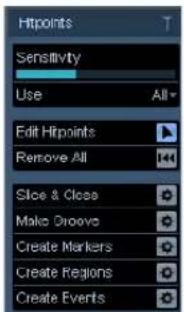
text_image
Hitpoints Sensitivity Use All Edit Hitpoints Remove All Slice & Close Make Droove Create Markers Create Regions Create EventsOn this tab, the transients or hitpoints of the audio can be marked and edited (see "Working with hitpoints and slices" on page 234). Hitpoints allow you to slice your audio, and to create groove quantize maps from your audio. You can also create markers, regions and events using hitpoints.
The Range tab
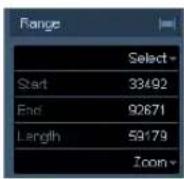
On this tab you will find functions for working with ranges and selections (see "Making selections" on page 227).
The Process tab
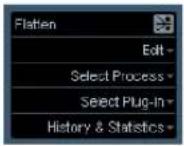
This tab regroups the most important audio editing commands from the Audio and Edit menus. For further information on the Select Process and Select Plug-in pop-up menus, see the chapter "Audio processing and functions" on page 204.
The thumbnail display
Event Start Event End Selection range

natural_image
Cross-sectional diagram of a mechanical or fluid system with no visible text, numbers, or symbolsSnap Point
Blue rectangle
The thumbnail display provides an overview of the whole clip. The section currently shown in the main waveform display of the Sample Editor is indicated by a blue rectangle in the thumbnail, while the current selection range is shown in light blue. If the "Show Audio Event" button is activated in the toolbar, event start/end and snap point will also be shown in the thumbnail display.
- You can move the blue rectangle in the thumbnail to view other sections of the clip.
Click in the lower half of the rectangle and drag to the left or right to move it. - You can resize the blue rectangle (by dragging its left or right edge) to zoom in or out, horizontally.
- You can define a new viewing area by clicking in the upper half of the overview and dragging a rectangle.
The ruler
The Sample Editor ruler is located between the thumbnail and the waveform displays. The ruler is explained in detail in the section "The ruler" on page 33.
The waveform display and the level scale
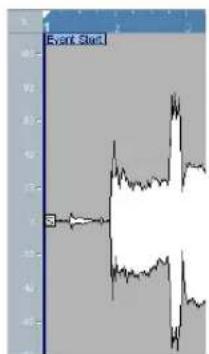
text_image
Event Step1The waveform display shows the waveform image of the edited audio clip according to the wave image style set in the Preferences (Event Display–Audio page), see "Adjusting how parts and events are shown" on page 37. To the left of the waveform display a level scale can be shown, indicating the amplitude of the audio.
- When the level scale is shown, you can select whether the level should be shown as a percentage or in dB. This is done by right-clicking the level scale and selecting an option from the context menu. This also allows you to hide the level scale.
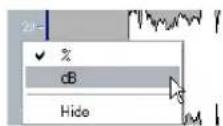
- To display the level scale after hiding it, right-click to bring up the context menu and activate Level Scale on the Elements submenu.
- This submenu also allows you to select whether you want the zero axis and/or the half level axis indicated in the waveform display.
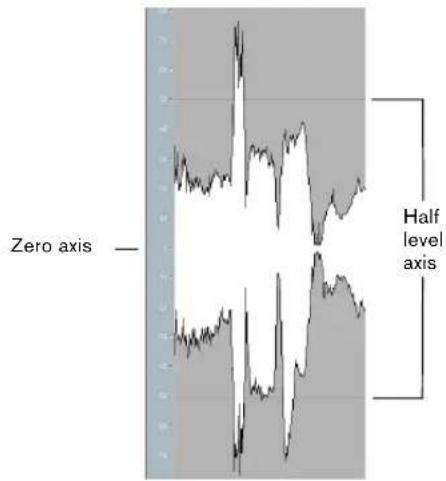
line
| X Position | Y Value | | ---------- | ------- | | Zero axis | — | | Half level axis | — |General Operations
Zooming
Zooming in the Sample Editor is done according to the standard zoom procedures, with the following special notes:
- The vertical zoom slider changes the vertical scale relative to the height of the editor window, in a way similar to the waveform zooming in the Project window (see "Zoom and view options" on page 35).
The vertical zoom will also be affected if the Preference "Zoom Tool Standard Mode" (Editing-Tools page) is deactivated and you drag a rectangle with the Zoom tool.
- The following options relevant to the Sample Editor are available on the Zoom submenu (on the Edit menu and the context menu):
Option Description
Zoom In Zooms in one step, centering on the position cursor.
Zoom Out Zooms out one step, centering on the position cursor.
Zoom Full Zooms out so that the whole clip is visible in the editor.
Zoom to Selection Zooms in so that the current selection fills the editor display.
Zoom to Selection (Horiz.) Zooms in horizontally so that the current selection fills the editor display.
Option Description
| Zoom to Event Zooms in so that the editor shows the section of the clip corresponding to the edited audio event. This is not available if you opened the Sample Editor from the Pool (in which case the whole clip is opened for editing, not an event). | |
| Zoom In/Out Vertical | This is the same as using the vertical zoom slider (see above). |
- On the VariAudio tab (see "VariAudio (Cubase only)" on page 243) you can also zoom by holding down [Alt]/[Option] while drawing a selection rectangle around the segments that you want to be zoomed on. You can zoom out by holding down [Alt]/[Option] and clicking in an empty area of the waveform.
- You can also zoom by resizing the rectangle in the thumbnail display.
See "The thumbnail display" on page 223.
- The current zoom setting is shown in the info line, as a "samples per screen pixel" value.
- Note that you can zoom in horizontally to a scale of less than one sample per pixel!
This is required for drawing with the Pencil tool (see "Drawing in the Sample Editor" on page 230).
- If you have zoomed in to one sample per pixel or less, the appearance of the samples depends on the option "Interpolate Audio Images" in the Preferences (Event Display–Audio page).
If the option is deactivated, single sample values are drawn as "steps". If the option is activated, they are interpolated to a "curve" form.
Auditioning
While you can use the regular play commands to play back audio when the Sample Editor is open, it is often useful to listen to the edited material only.
⇒ Cubase only: When auditioning, audio will be routed to the Control Room (if the Control Room is activated) or to the Main Mix (the default output bus). In Cubase Studio, the Main Mix bus is always used for all auditioning. For information about routing, see the chapter "VST Connections: Setting up input and output busses" on page 13.
You can adjust the auditioning level with the miniature level fader on the toolbar.
Using key commands
If you activate the "Playback Toggle triggers Local Preview" option in the Preferences (Transport page), you can start/stop auditioning by pressing [Space]. This is the same as clicking the Audition icon on the toolbar.
Using the Audition icon
Clicking the Audition icon on the toolbar plays back the edited audio, according to the following rules:
- If you have made a selection, this selection will be played back.
- If there is no selection, but the option "Show Event" is activated (see "Show audio event" on page 230), the section of the clip corresponding to the event will be played back.
- If there is no selection, and "Show Event" is deactivated, playback will start at the cursor position (if the cursor is outside the display, the whole clip will be played back).
- If the Audition Loop icon is activated, playback will continue repeatedly until you deactivate the Audition Loop icon. Otherwise, the section will be played back once.
Note that there is a separate Play button for auditioning regions. See “Auditioning regions” on page 229.
Using the Speaker tool
If you click somewhere in the waveform display with the Speaker ("Play") tool and keep the mouse button pressed, the clip will be played back from the position at which you clicked. Playback will continue until you release the mouse button.
Using Acoustic Feedback
See "Listening to your modifications" on page 252.
Scrubbing
The Scrub tool allows you to locate positions in the audio by playing back, forwards or backwards, at any speed:
-
Select the Scrub tool.
-
Click in the waveform display and keep the mouse button pressed.
The project cursor is moved to the position at which you click.
- Drag to the left or right.
The project cursor follows the mouse pointer and the audio is played back. The speed and pitch of the playback depends on how fast you move the pointer.
- You can adjust the response of the Scrub tool with the Scrub Response (Speed) setting in the Preferences (Transport–Scrub page).
You will also find a separate Scrub Volume setting on this page.
Adjusting the snap point
The snap point is a marker within an audio event (or clip, see below). This is used as a reference position when you are moving events with snap activated, so that the snap point is "magnetic" to whatever snap positions you have selected.
By default, the snap point is set at the beginning of the audio event, but often it is useful to move the snap point to a "relevant" position in the event, such as a downbeat, etc.
-
Activate the "Show Audio Event" option on the toolbar, so that the event is displayed in the editor.
-
Scroll so that the event is visible, and locate the "S" flag in the event.
If you haven't adjusted this previously, it will be located at the beginning of the event.
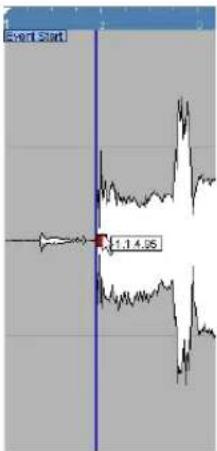
line
| Event Start | Value | | ----------- | ----- | | 1.14.35 | 1.1 |- Click on the "S" flag and drag it to the desired position. When you drag the snap point, a tooltip shows its current position (in the format selected on the Sample Editor ruler).
- Cubase only: If the Scrub tool is selected when you move the snap point, you will hear the audio while dragging (just like when scrubbing).
This makes it easier to find the correct position.
You can also adjust the snap point by setting the project cursor:
-
Place the cursor at the desired position (intersecting the event). You may want to do this by scrubbing, to spot the right position exactly.
-
Holding [Alt]/[Option], right-click to open the context menu and select "Snap Point To Cursor" from the Audio submenu.
Provided that the "Popup Toolbox on Right Click" option in the Preferences dialog (Editing-Tools page) is activated, a right-click holding a modifier key brings up the context menu.
The snap point will be set to the position of the cursor. This method can also be used in the Project window and the Audio Part Editor.
When you set the grid start in the Definition tab, the snap point will be moved to the grid start (see "Manually adjusting grid and tempo" on page 232).
- It is also possible to define a snap point for a clip (for which there is no event yet).
To open a clip in the Sample Editor, double-click it in the Pool. After having set the snap point using the procedure described above, you can insert the clip into the project from the Pool or the Sample Editor, taking the snap point position into account.

Events and clips can have different snap points. If you open a clip from the pool you can edit the clip snap point. If you open a clip from within the project window, you can edit the event snap point. The clip snap serves as a template for the event snap point and does not affect snapping.
Making selections
To select an audio section in the Sample Editor, you click and drag with the Range Selection tool.
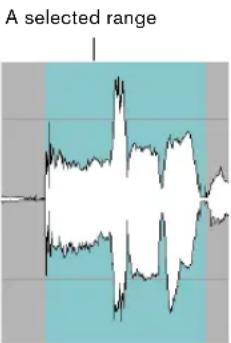
text_image
A selected range- If Snap to Zero Crossing is activated on the toolbar, the start and end of the selection will always be at zero crossings (see "Snap" on page 230).
- You can resize the selection by dragging its left and right edge or by [Shift]-clicking.
- The current selection is indicated in the corresponding fields in the Range tab of the Sample Editor Inspector. You can fine-tune the selection by changing these values numerically. Note that the values are relative to the start of the clip, rather than to the project timeline.
Using the Select menu
In the Select menu in the Range tab and in the Select submenu of the Edit menu you can find the following options:
Function Description
Select All Selects the whole clip.
Select None Selects no audio (the selection length is set to "0").
Function Description
| Select in Loop Selects all audio between the left and right locator. | |
| Select Event Selects the audio that is included in the edited event only. This is not available if you opened the Sample Editor from the Pool (in which case the whole clip is opened for editing, not an event). | |
| Locators to Selection (Range tab only) | Sets the locators to encompass the current selection. This is available if you have selected one or several events or made a selection range. |
| Locate Selection (Range tab only) | Moves the project cursor to the beginning or end of the current selection. For this to be available, you must have selected one or more events or parts, or made a selection range. |
| Loop Selection (Range tab only) | This activates playback from the start of the current selection and keeps starting over again when reaching the selection end. |
| From Start to Cursor (Edit menu only) | Selects all audio between the clip start and the project cursor. |
| From Cursor to End (Edit menu only) | Selects all audio between the project cursor and the end of the clip. For this to work, the project cursor must be within the clip boundaries. |
| Edit Pitch This function requires that one or several notes are already selected. The Edit Pitch options select all notes of this part that have the same pitch as the currently selected note/s (in any octave or in the current octave). | |
| Left Selection Side to Cursor (Edit menu only) | Moves the left side of the current selection range to the project cursor position. For this to work, the cursor must be within the clip boundaries. |
| Right Selection Side to Cursor (Edit menu only) | Moves the right side of the current selection range to the project cursor position (or the end of the clip, if the cursor is to the right of the clip). |
Editing selection ranges
Selections in the Sample Editor can be processed in several ways. Please note the following:
- If you attempt to edit an event that is a shared copy (i.e. the event refers to a clip that is used by other events in the project), you are asked whether you want to create a new version of the clip.
Select "New Version" if you want the editing to affect the selected event only. Select "Continue" if you want the editing to affect all shared copies. Note: If you activate the option "Do not show this message again" in the dialog, any further editing you do will conform to the selected method ("Continue" or "New Version"). You can change this setting at any time with the "On Processing Shared Clips" pop-up menu in the Preferences (Editing–Audio page).
- Any changes to the clip will appear in the Offline Process History, making it possible to undo them at a later point (see "The Offline Process History dialog" on page 214).
Cut, Copy and Paste
The Cut, Copy and Paste commands (on the Edit menu in the Process tab of the Sample Editor Inspector or in the main Edit menu) work according to the following rules:
- Selecting Copy copies the selection to the clipboard.
- Selecting Cut removes the selection from the clip and moves it to the clipboard.
The section to the right of the selection is moved to the left to fill the gap.
- Selecting Paste copies the data on the clipboard into the clip.
If there is a selection in the editor, this will be replaced by the pasted data. If there is no selection, the pasted data will be inserted starting at the selection line. The section to the right of the line will be moved to make room for the pasted material.
natural_image
Abstract black-and-white line drawing with no text or symbolsThe pasted data will be inserted at the selection line.
Delete
Selecting Delete (on the Edit menu in the Process tab of the Sample Editor Inspector or in the main Edit menu or by pressing [Backspace]) removes the selection from the clip. The section to the right of the selection is moved to the left to fill out the gap.
Insert Silence
Selecting "Insert Silence" (on the Edit menu in the Process tab of the Sample Editor Inspector or in the Range sub-menu of the main Edit menu) will insert a silent section with the same length as the current selection, at the selection start.
- The selection will not be replaced, but moved to the right to make room.
If you want to replace the selection, use the "Silence" function instead (see "Silence" on page 211).
Processing
The Processing features (on the Select Process menu in the Process tab of the Sample Editor Inspector or in the Process submenu on the Audio menu) can be applied to selections in the Sample Editor, as can the effects (on the Select Plug-in menu in the Process tab of the Sample Editor Inspector or in the Plug-ins submenu on the Audio menu). See the chapter "Audio processing and functions" on page 204.
Creating a new event from the selection using drag&drop
You can create a new event that plays only the selected range, using the following method:
- Make a selection range.
- Press [Ctrl]/[Command] and drag the selection range to the desired audio track in the Project window.
Creating a new clip or audio file from the selection
You can extract a selection from an event and either create a new clip or a new audio file, in the following way:
- Make a selection range.
- Holding [Alt]/[Option], right-click to open the context menu and select "Bounce Selection" from the Audio submenu.
Provided that the "Popup Toolbox on Right Click" option in the Preferences dialog (Editing-Tools page) is activated, a right-click holding a modifier key brings up the context menu.
A new clip is created and added to the Pool, and another Sample Editor window will open with the new clip. The new clip will refer to the same audio file as the original clip, but will only contain the audio corresponding to the selection range.
Working with regions
Regions are sections within a clip. One of the main uses for regions is Cycle recording, in which the different “takes” are stored as regions (see “Recording audio in cycle mode” on page 75). You can also use this feature for marking important sections in the audio clip. Regions can be dragged into the Project window from the Sample Editor or the Pool to create new audio events. From the Pool, you can also export a region to disk as a new audio file.
Regions are best created, edited and managed in the Sample Editor.
Creating a region
- Select the range that you want to convert into a region.
- Click the "Show Regions" button on the toolbar, or activate the "Regions" option on the Elements submenu of the context menu.
The regions list is displayed to the right in the Sample Editor window.
- Click the Add Region button above the Regions list (or select "Event or Range as Region" from the Advanced submenu of the Audio menu).
A region is created, corresponding to the selected range.
- To name the region, double-click on it in the list and enter a new name.
Regions can be renamed at any time, using this procedure.
- When a region is selected in the Regions list, it is instantly displayed and selected in the Sample Editor.
Creating regions from Hitpoints
If your audio event contains calculated hitpoints, you can choose to automatically create regions from hitpoints. This can be useful to isolate recorded sounds. For further information on hitpoints, see "Working with hitpoints and slices" on page 234.
Editing regions
The region selected in the list is displayed in gray in the waveform display and thumbnail.
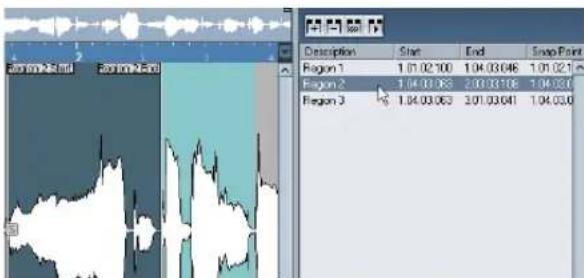
There are two ways to edit the start and end position of a region:
- Click and drag its start and end handles in the waveform display (with any tool). When you move the pointer over the handles, it will automatically change to an arrow pointer to indicate that you can drag the handles.
- Edit the Start and End positions numerically in the Regions list.
The positions are shown in the display format selected for the ruler and info line, but are relative to the start of the audio clip, rather than the project timeline.
Auditioning regions
You can listen to a region by selecting it in the list and clicking the Play Region button (above the list). The region will play back once or repeatedly, depending on whether the Loop icon on the toolbar is activated or not.
Making selections from regions
If you select a region in the list and click the Select Region button above, the corresponding section of the audio clip is selected (as if you had selected it with the Range Selection tool). This is useful if you want to apply processing to the region only.
- Note that you can also double-click a region in the Pool to have its audio clip opened in the Sample Editor with the area of the region automatically selected.
Creating new events from regions
You can create new audio events from regions, using drag&drop:
- Click in the region's leftmost column in the list and keep the mouse button pressed.
- Drag the region to the desired position in the project and release the mouse button.
A new event is created.
- You can also use the function "Events from Regions" from the Advanced submenu of the Audio menu for this (see "Region operations" on page 53).
Removing regions
To remove a region from a clip, select it in the list and click the Remove Region button above the list.
Exporting regions as audio files
If you create a region in the Sample Editor, the region can be exported to disk as a new audio file. This is done from the Pool, see "Exporting regions as audio files" on page 269.
Drawing in the Sample Editor
It is possible to edit the audio clip at sample level by drawing with the Pencil tool. This can be useful if you need to manually edit out a spike or click, etc.
-
Zoom in to a zoom value lower than 1. This means that there is more than one screen pixel per sample.
-
Select the Pencil tool.
-
Click and draw at the desired position in the waveform display. When you release the mouse button, the edited section is automatically selected.

Any modifications created by drawing will appear in the Offline Process History, making it possible to undo them at a later stage (see "The Offline Process History dialog" on page 214).
Options and settings
Show audio event

This is only available if you opened the Sample Editor by double-clicking an audio event in the Project window or the Audio Part Editor and not, if you opened the audio event from within the Pool.
When the Show Audio Event button is activated on the toolbar (or the option "Audio Event" is activated on the Elements submenu of the context menu), the section corresponding to the edited event is highlighted in the waveform display and Thumbnail. The sections of the audio clip not belonging to the event are shown with a dark gray background.
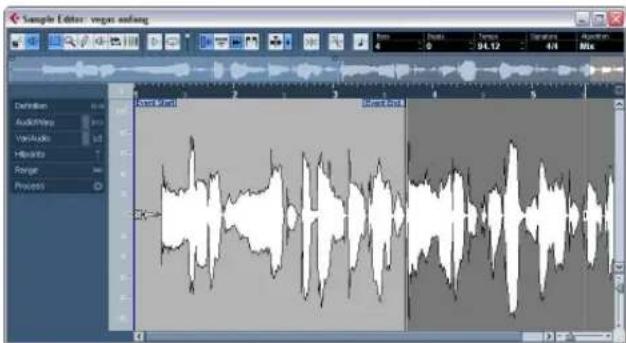
text_image
Sample Editor: vrgas audio Definition Audio/Video V歌曲 Histogram Ranger Project Gross Genre Gross Genre 0.0 0.0 24.12 4.6- In this mode, you can adjust the start and end of the event in the clip by dragging the event handles in the waveform display. When you move the pointer over the event handles (no matter what tool may be selected), it takes on the shape of an arrow, to indicate that you can click and drag.
Snap

Snap activated.
The Snap function helps you to find exact positions when editing in the Sample Editor. It does this by restricting horizontal movement and positioning to certain grid positions. You turn Snap on or off by clicking the Snap button in the Sample Editor toolbar. This setting affects:
- Range operations
- VariAudio modifications
- AudioWarp modifications
This setting affects only the Sample Editor, and is independent of the Snap setting in the Project window toolbar or other editors.
Snap to Zero Crossing

Snap to Zero Crossing activated.
This setting is linked to the Snap to Zero Crossing setting in the Project window, see the section "Snap to Zero Crossing" on page 57.
If hitpoints have been calculated, these will also be taken into account when snapping to zero crossings.
Autoscroll

Autoscroll and Suspend Autoscroll when Editing activated.
When this option is activated in the Sample Editor toolbar, the waveform display will scroll during playback, keeping the project cursor visible in the editor.
This setting is independent of the Autoscroll setting in the Project window toolbar or other editors. You can find more information on this function in the section
"Autoscroll" on page 57.
AudioWarp: Tempo matching audio
AudioWarp is the generic name for the realtime time stretching and pitch shifting functions in Cubase. The main AudioWarp features are tempo-matching audio loops to the project tempo and matching up an audio clip with fluctuating tempo to a fixed tempo.
If you want to tempo-match an audio loop to the project tempo, you will normally work with loops with straight beats. In this case you will only need to activate the Musical mode on the toolbar.
The Musical mode is one of the key AudioWarp features. It allows you to lock audio clips to the project tempo by using realtime time stretching. This is very useful if you want to use loops in your project and do not want to worry too much about timing.
When Musical mode is activated, audio events will adapt to any tempo changes in Cubase, just like MIDI events. However, using this function should not be confused with quantizing: the timing, i.e. the rhythmic feeling will be maintained.

You can activate Musical mode in the AudioWarp tab, in the Definition tab and in the toolbar.
It is also possible to activate/deactivate Musical mode from within the Pool by clicking the corresponding checkbox in the Musical mode column.
When you have correctly set a tempo or length for an audio clip, this information is saved with the project. This allows you to import files into the project with Musical mode already activated. The tempo (if set) is also saved when exporting files.
Cubase supports ACID® loops. These loops are standard audio files but with embedded tempo/length information. When ACID® files are imported into Cubase, Musical mode is automatically activated and the loops will adapt to the tempo set in the project.
Proceed as follows to tempo match an audio loop to the project tempo:
- Import your loop into the project and double-click it to open it in the Sample Editor.
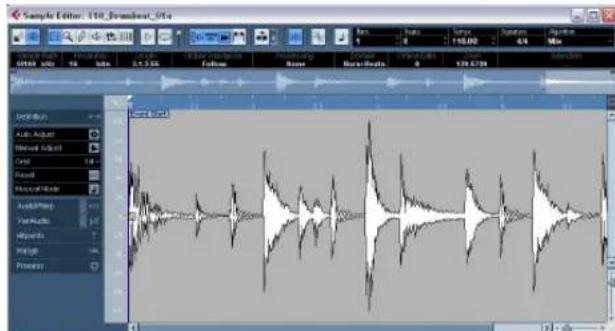
text_image
Sample Editor: 110_Fransact_01a Audio Auto Adjust Maxial Adjust Cast Rout Honey/Whit AudioPlay Var/Rock Watts Music Proces- Activate the Musical mode in the toolbar. Your loop will automatically be adapted to the project tempo.
As you can see, it is very easy to adapt audio loops to the project tempo. If you want to use an audio file with unknown tempo instead, or if the beat of your loop is not straight, further adjustments could be necessary. These are described in the following section.
Manually adjusting grid and tempo
If you want to manually adjust the grid and tempo of your audio file, because you have a very special loop and the automatic functions did not lead to satisfying results, proceed as follows:
- Open the Definition tab in the Sample Editor Inspector and activate the Manual Adjust tool.
- Select a suitable resolution value from the Grid pop-up menu.
With the Manual Adjust tool you can manipulate the time grid for the audio file. If you select the Manual Adjust tool and move the mouse in the Sample Editor, the pointer turns to a flag. Depending on the position, the tool can have the following functions:
Function Description
| Set Grid Start (green) | This tool is shown at the clip start. When it is displayed, you can click and drag it with the mouse to the first down-beat in order to set the grid start at this position. |
| Stretch Bars (red) | This tool is shown at beat positions when you hold down [Ctrl]/[Command]. When it is displayed, you can click and drag it with the mouse to beat positions in order to set the start of the next bar. All grid positions will be stretched. |
| Stretch Previous - Move Next (pink) | This tool is shown at bar positions. When it is displayed, you can click and drag it with the mouse to bar positions in order to set the start of the next bar. The tempo of the last bar will be changed, i.e. the beat/grid positions of the last bar will be stretched, while all following grid positions will be moved. |
| Adjust Beat Position - Single (blue) | This tool is shown at beat positions. When it is displayed, you can click and drag it with the mouse to adjust single beat positions. The previous and next beat will be locked. Edited or locked beats are displayed in red. |

You can change the modifiers for this in the "Define Audio Grid" category in the Preferences dialog (Editing-Tool Modifiers page).
- Move the mouse pointer to the beginning of the audio file until the pointer changes to a green flag (Set Grid Start).
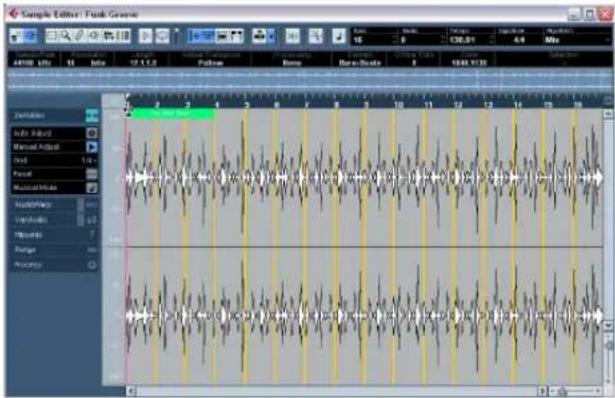
text_image
Sample Editor: Push Green 44100 MHz 11 Bits 17.4.1.0 Follow Home Base-Scale 8 1943.12.35 Animation Auto Adjust Manual Adjust Tool 1.6 Focal Musical Realms Audio/Temp Variableo Hypofo Sanga Processo 1.6 1.6 1.6 1.6 1.6 1.6 1.6 1.6 1.6 1.6 1.6 1.6 1.6 1.6 1.6 1.6 1.6 1.6 1.6 1.6 1.6 1.6 1.6 1.6 1.6 1.5 1.5 1.5 1.5 1.5 1.5 1.5 1.5 1.5 1.5 1.5 1.5 1.5 1.5 1.5 1.5 1.5 1.5 1.5 1.5 1.5 1.5 1.5 1.5 1.5 1.4 1.4 1.4 1.4 1.4 1.4 1.4 1.4 1.4 1.4 1.4 1.4 1.4 1.4 1.4 1.4 1.4 1.4 1.4 1.4 1.4 1.4 1.4 1.4 1.4 1.3 1.3 1.3 1.3 1.3 1.3 1.3 1.3 1.3 1.3 1.3 1.3 1.3 1.3 1.3 1.3 1.3 1.3 1.3 1.3 1.3 1.3 1.3 1.3 1.3 1.2 1.2 1.2 1.2 1.2 1.2 1.2 1.2 1.2 1.2 1.2 1.2 1.2 1.2 1.2 1.2 1.2 1.2 1.2 1.2- Click and drag the green flag to the right until it matches the first downbeat in the sample and release the mouse button.
Now the ruler grid is offset so that it starts on the first downbeat in the sample.
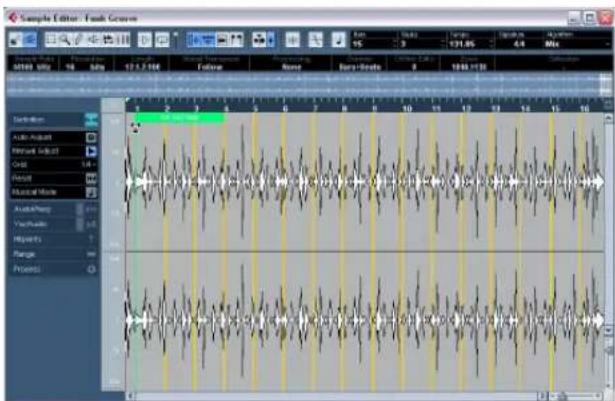
text_image
Sample Editor: Fresh Genes 01/09/02 16 500 12.3.2.100 Follow None Copy-Strike 1 1888.10.31 Timeline Audio Adjust Audio Select Crist Fossil Musical Mode AudioTemp Yachualo Hypothesis Merge Process- Make sure that the length in bars shown in the toolbar corresponds to your settings.
- Audition the file to determine where the next downbeat occurs, i.e. the first beat of the second bar in the sample.
-
Place the mouse pointer at the start of the second bar in the waveform display.
-
Hold down [Ctrl]/[Command], click and drag the red flag (Stretch Bars) to the left or right until the second bar in the ruler is aligned with the position of the second downbeat of the sample, and release the mouse button. The start of the next bar is set, and all grid positions will be stretched.
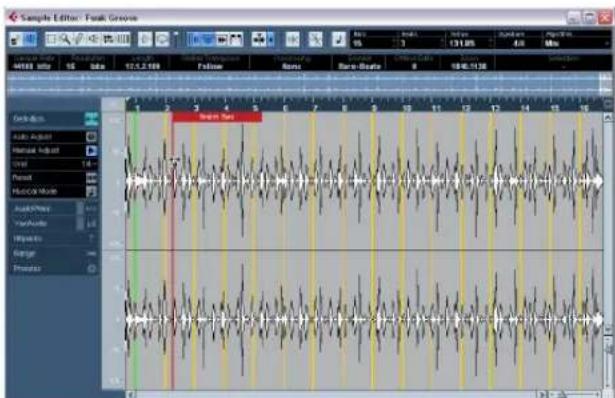
text_image
Sample Editor: Frank Greene 44583 mHz 16 Sbps 12.5.198 Follow None Star-Beats 0 104.1136 Audio Player Audio Player Audio Player Audio Player Audio Player Audio Player Audio Player Audio Player Audio Player Audio Player Audio Player Audio Player Audio Player Audio Player Audio Player Audio Player Audio Player Audio Player Audio Player Audio Player Audio Player Audio Player Audio Player Audio Player Audio Player Audio Player Audio Player Audio Player Audio Player Audio Player Audio Player Audio Player Audio Player Audio Player- Check the other beats and use the pink flag (Stretch Previous - Move Next) if necessary.
This flag is shown at bar positions. When you drag it with the mouse, the start of the next bar is set, and the tempo of the last bar will be changed.
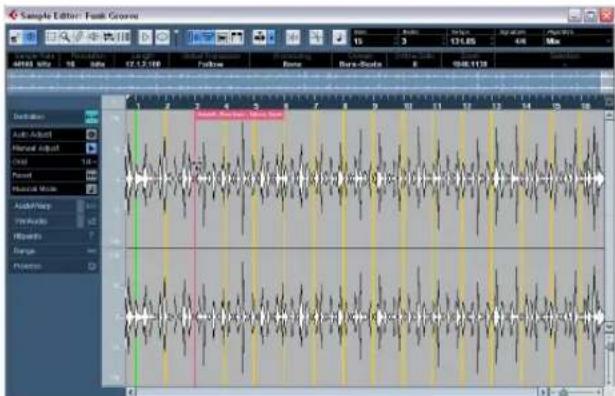
text_image
Sample Editor: Tusk Grcm 49/03/01 16 Sits 12.12.100 Follow Bone Base-Stock 8 04.11.13 Definition Auto Adjust Manual Adjust Tool 1.4 Noise Natural Noise Audio/Sharp TranAudio Hypo onto Range Polarize- Now have a look at the single beats in between the bars, and, if necessary, use the blue flag (Adjust Beat Position - Single) to adjust them.
Drag the flag until the single beat position is aligned with the waveform, and release the mouse button.
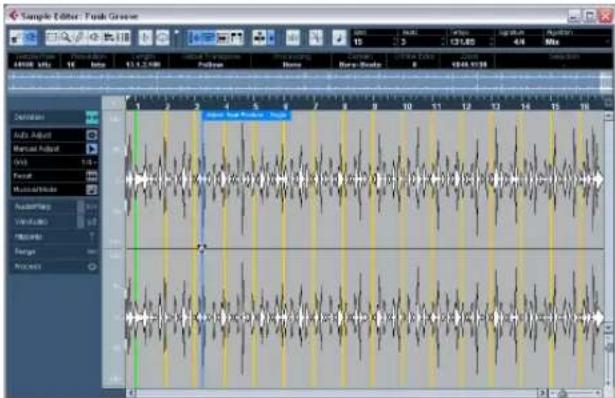
text_image
Sample Editor: Push Greener 4000 MHz 16 fps 13.5.2.00 Follow Home New-Beats 8 10:45:17:00 Derivatives Auto Adjust Manual Adjust VSS 5.4 Focal Musical/Video Audio/Temp Variable Music Range Process- Activate Musical Mode and start playback.
If you find that the beat sounds too straight, you can select a resolution for the audio by adjusting the Quantize value on the AudioWarp tab. When you select the "Bar" option, the audio will be synced to tempo without quantizing. The Swing fader lets you offset every second position in the grid creating a swing or shuffle feel.
Note that the Quantize pop-up will be only be available if the Musical Mode is activated on the toolbar.
The loop will automatically adjust to the project tempo, and follow any further tempo changes you make! In the Project window, the audio event will have a note symbol and a double arrow in the lower right corner. The note symbol indicates Musical mode and the arrow indicates that the file is stretched.

text_image
Audio 05 stereo Funk GrooveSelecting an algorithm for realtime playback
In the Algorithm pop-up in the toolbar you can select the algorithm to be applied on realtime playback.
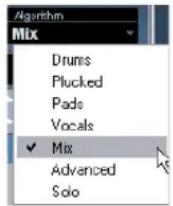
In this pop-up you can find various options that govern the audio quality of the realtime time stretching. There are pre-sets for common types of audio material and an Advanced option which allows you to manually set warp parameters:
Option Description
Drums This mode is best for percussive sounds, because it will not change the timing of your audio. Using this option for pitched audio will lead to noticeable artifacts. In this case, you can try the Mix mode.
Plucked This should be used for audio with transients and a relatively stable spectral sound character (e.g. plucked instruments).
Pads Use this mode for pitched audio with slower rhythm and a stable spectral sound character. This will minimize sound artifacts, but the rhythmic accuracy will not be preserved.
Vocals This mode was optimized for slower signals with transients and a prominent tonal character (e.g. vocals).
Mix This mode will preserve the rhythm and minimize the artifacts for pitched material which does not meet the above criteria (i.e. with a less homogenous sound character). This will be selected by default for audio that is not categorized.
Advanced This allows for a manual tweaking of the time stretching parameters. By default, the settings that are shown when you open the dialog are those of the last used preset (except if the Solo mode was selected, see below). The Advanced settings are described in more detail below this table.
Solo This mode will preserve the formants of the audio. It should only be used for monophonic material (solo woodwind/brass instruments or solo vocals, monophonic synths or string instruments that do not play harmonies).
If you select the Advanced menu item, a dialog opens where you can manually adjust the three parameters that govern the sound quality of the time stretching:
Parameter Description
Grain size The realtime time stretching algorithm splits the audio into small pieces called "grains". This parameter determines the size of the grains. For material with many transients you should use low Grain size values for best results.
Overlap Overlap is the percentage of the whole grain that will overlap with other grains. Use higher values for material with a stable sound character.
Variance Variance is also a percentage of the whole length of the grains and sets a variation in positioning so that the overlapping area will sound smooth. A Variance setting of 0 will produce a sound akin to time stretching used in early samplers, whereas higher settings will produce more (rhythmic) "smearing" effects but less audio artifacts.
Working with hitpoints and slices
Hitpoint detection is a special feature of the Sample Editor. It detects attack transients in an audio file and then adds a type of marker, i.e. a "hitpoint", at each transient. These hitpoints allow you to create "slices", where each slice ideally represents each individual sound or "beat" in a loop (drum or other rhythmic loops work best with this feature). When you have successfully sliced the audio file, you can do a number of useful things with it:
- Change the tempo without affecting the pitch.
- Extract the timing (a groove map) from a drum loop. This can then be applied to quantize other events.
- Replace individual sounds in a drum loop.
- Edit the actual playing in the drum loop without affecting the basic feel.
- Extract sounds from loops.
You can further edit these slices in the Audio Part Editor. For example you can:
- Remove or mute slices.
- Change the loop by reordering, replacing or quantizing slices.
- Apply processing or effects to individual slices.
- Create new files from individual slices using the "Bounce Selection" function on the Audio menu.
- Realtime transpose and stretch slices.
- Edit slice envelopes.
⇒ The term “loop” is used throughout this section. Loop in this context usually means an audio file with a musical time base, i.e. the length of the loop represents a certain number of bars and/or beats at a certain tempo. Playing the loop back at the right tempo in a cycle set to the correct length will produce a continuous loop without gaps.
When a selection range is defined, hitpoints will only be detected within this range.
⚠️ Hitpoints will only be displayed in the waveform if the Hitpoints tab is open.
Using hitpoints
The main functionality of using hitpoints to slice up a loop is to make a loop fit the tempo of a song, or alternatively to create a situation that allows the song tempo to be changed while retaining the timing of a rhythmic audio loop, just like when using MIDI files.
Which audio files can be used?
Here are some guidelines as to what type of audio files are suited for slicing using hitpoints:
- Each individual sound in the loop should have noticeable attack.
Slow attacks, legato playing, etc. may not produce the desired result. - Poorly recorded audio might be difficult to slice correctly. In these cases, try to normalize the files or to remove DC Offset.
- There may be problems with sounds drowned in smearing effects, like short delays.
Calculating hitpoints and slicing a loop
Before proceeding, find a suitable loop using the criteria above. Proceed as follows:
-
Open the event or clip for editing in the Sample Editor. You can do this by double-clicking an event on an audio track in the Project window or a clip in the Pool. In this example, we assume you work with an event on a track.
-
Open the Hitpoints tab in the Sample Editor Inspector and select an option from the Use pop-up.
The Use pop-up menu on the Hitpoints tab affects which hitpoints are shown and is a useful tool for removing unwanted hitpoints.
It contains the following options:
Option Description
All All hitpoints are shown (taking the Sensitivity slider into account).
1/4, 1/8, Only hitpoints that are close to the selected note value positions within the loop are shown (e.g. close to exact sixteenth note positions). Again, the Sensitivity slider is taken into account.
Metric Bias This is like the "All" mode, but all hitpoints that are close to even meter divisions (1/4, 1/8, 1/16, etc.) get a "sensitivity boost" – they are visible at lower sensitivity slider settings. This is useful if you are working with dense or cluttered material with a lot of hitpoints, but you know that the material is based on a strict meter. By selecting Metric Bias it will be easier to find the hitpoints close to the meter position (although most other hitpoints are also available, at higher sensitivity settings).
- Move the sensitivity slider to the right to add hitpoints or to the left to remove unwanted hitpoints until one individual sound is played between each hitpoint.
If your main reason for slicing the loop is to change the tempo, you generally need as many slices as you can get, but never more than one per individual "hit" in the loop. If you want to create a groove, you should try to get approximately one slice per eighth note, sixteenth note or whatever the loop requires (see "Creating groove quantize maps" on page 237).
In the next step, the loop will be adapted to the project tempo set in Cubase. - Verify the Tempo and Bars values in the toolbar.
- On the Hitpoints tab, click on the Slice & Close button or select "Create Audio Slices from Hitpoints" from the Hitpoints submenu on the Audio menu to create audio slices from the hitpoints.
The following happens:
■ The Sample Editor closes.
- The audio event is “sliced” so that the sections between the hitpoints become separate events, all referring to the same original file.
- The audio event is replaced by an audio part, containing the slices (double-click the part to view the slices in the Audio Part Editor). If you edited a clip from the Pool, you need to drag it to an audio track to get a part with the slices.

When you create slices, all events containing the edited clip will also be replaced.
- The loop is automatically adapted to the project tempo. This takes the loop length you specified into account: e.g., if the loop was one bar long, the part is resized to fit exactly one bar in the Cubase tempo, and the slices are moved accordingly, keeping their relative positions within the part.
- In the Pool, the sliced clip is shown with a different icon. Dragging the sliced clip from the Pool to an audio track will create an audio part with the slices adapted to the project tempo, just as above.

Only when the audio tempo has been defined and the audio grid matches the project tempo, your slices will be straight (quantized).
- Activate cycle playback on the Transport panel.
The loop should now play back seamlessly at the tempo set in the project!
- Make sure the "Musical time base" button in the Track list or Inspector (the button should show a note symbol – see "Switching between musical and linear time base" on page 40) is activated. This way the loop will follow any further tempo changes.
- If the project tempo is lower than the original tempo of the loop, there may be audible gaps between each slice event in the part.
This can be remedied by using the Close Gaps function on the Advanced submenu of the Audio menu, see "Close Gaps" on page 238. You should also consider activating auto fades for the corresponding audio track – fade-outs set to about 10ms will help eliminate any clicks between the slices when you play back the part. See "Fades, crossfades and envelopes" on page 88.
- If the project tempo is higher than the loop's original tempo, you may want to activate auto crossfades for the track.
You can use the Close Gaps functions in this case as well, see "Close Gaps" on page 238.
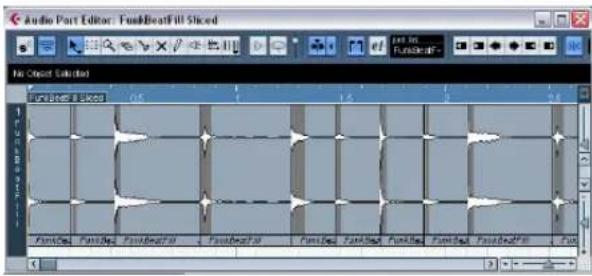
text_image
Audio Part Editor: FunbfBeatFill Sliced File Edit FunbfBeat Fill 0.5 1.4 2 34 FunbfBeat Fill FunbfBeat Fill FunbfBeat Fill FunbfBeat Fill FunbfBeat Fill FunbfBeat Fill FunbfBeat Fill FunbfBeat Fill FunbfBeat Fill FunbfBeat Fill FunbfBeat Fill FunbfBeat Fill FunbfBeat Fill FunbfBeat Fill FunbfBeat Fill FunbfBeat Fill FunbfBeat Fill FunbfBeat Fill FunbfBeat Fill FunbfBeat Fill FunbfBeat Full FunbfBeat Full FunbfBeat Full FunbfBeat Full FunbfBeat Full FunbfBeat Full FunbfBeat Full FunbfBeat Full FunbfBeat Full FunbfBeat Full FunbfBeat Full FunbfBeat Full FunbfBeat Full FunbfBeat Full FunbfBeat Full FunbfBeat Full FunbfBeat Full FunbfBeat Full FunbfBeat Full FunbfBeat Full FunbfBeat FullyThe slices in the Audio Part Editor. Here, the project tempo was higher than the loop's original tempo – the slice events overlap slightly.
Setting hitpoints manually
If you cannot get the desired result by adjusting the sensitivity, try to set and edit hitpoints manually.
-
Zoom in on the waveform at the point where you wish to add a hitpoint.
-
Select the Edit Hitpoints tool to audition the area and make sure that the start of the sound is in view.
- Activate Snap to Zero Crossing on the Sample Editor toolbar.
By finding zero crossings in the waveform (positions where the amplitude is close to zero), manually added slices won't introduce any clicks or pops. All hitpoints calculated by the program are automatically placed at zero crossings.

"Snap to Zero Crossing" may alter the timing. In some cases it might be better to deactivate it, especially if you just want to generate a groove quantize map. However, if you create slices afterwards, auto fades will be necessary.
- Press [Alt]/[Option] so that the mouse pointer changes to a pencil tool and click just before the start of the sound. A new hitpoint appears. Manually added hitpoints are locked by default.
- If you notice that a hitpoint was either placed too far away from the start of the sound or too far into the sound, you can move it by clicking on the hitpoint handle and dragging it to the new position.
- Audition the slices by pointing and clicking in any slice area.
The pointer changes to a speaker icon and the corresponding slice will be played back from the beginning to the end.
- If you hear a single sound split into two slice you can disable an individual slice by pressing [Alt]/[Option] (the pointer turns into a cross) and clicking on the corresponding hitpoint handle.
The hitpoint handle gets smaller and its line disappears to indicate that it is disabled. To reactivate a disabled hitpoint, [Alt]/[Option]-click on the hitpoint handle again.
- If you hear "double hits" (e.g. a snare hit being followed by a hi-hat hit within the same slice) you can add further hit-points manually, or you can raise the sensitivity slider until the hitpoint appears, lock this hitpoint by pointing on the handle until it becomes green and click on it.
Locked hitpoints are displayed in a darker color. After locking the hitpoint you can drag the sensitivity slider to the original setting and the locked hitpoint will remain shown. You can unlock a locked hitpoint by clicking on its handle.
- If you want to delete a hitpoint, simply drag it out of the Sample Editor window.
Hitpoints that you have created manually can also be deleted by clicking their handle.
Match-quantizing audio
Hitpoints can have individual Q-points. These are mainly used for audio quantizing. Their function is to define the point to which the quantizing will apply. Sometimes a slice might have a slow attack, and a peak further into the slice which you wish to use as the Q-point. When you apply quantize, the Q-point will define where the warp tab will be added. This also defines the point which will be stretched to a grid position when quantizing.
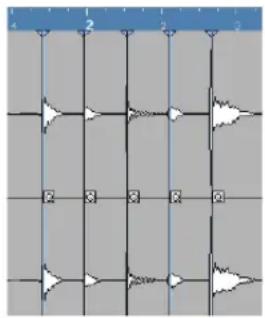
flowchart
graph TD
    A["Input 1"] --> B["Channel 1"]
    B --> C["Channel 2"]
    C --> D["Channel 3"]
    D --> E["Channel 4"]
    E --> F["Output 1"]
    style A fill:#f9f,stroke:#333
    style F fill:#f9f,stroke:#333

Sounds with a slow attack have their rhythmic center at some point before the peak.
- To activate Q-points, open the Preferences (Editing-Audio page) and activate the option "Hitpoints have Q-Points".
Next time you use the Calculate Hitpoints function, the hitpoints will have Q-points.
- To offset the position of a Q-point in relation to the hit-point, simply click on the "Q" icon and drag it to the right to the desired position.
Creating groove quantize maps
You can generate groove quantize maps based on the hitpoints you have created in the Sample Editor. Groove quantizing is not meant for correcting errors, but for creating rhythmic feels. This is done by comparing your recorded music with a "groove" (a timing grid generated from the file) and moving the appropriate notes so that their timing matches the one of the groove. In other words, you can extract the timing from an audio loop and use it for quantizing MIDI parts (or other audio loops, after slicing them).
Proceed as follows:
-
Check the audio tempo and define the audio grid as described above.
-
Create and edit hitpoints as described above. You don't have to create slices – just set up the hitpoints.
- You should try to get approximately one slice per eighth note, sixteenth note or whatever the loop requires when setting hitpoints for extracting a groove.
It can be helpful to use one of the note value-based options on the "Use" pop-up menu when you're setting up the hitpoints (see "Calculating hit-points and slicing a loop" on page 235).
-
When you have finished setting the hitpoints, click on the Make Groove button in the Hitpoints tab of the Sample Editor Inspector or select "Create Groove Quantize from Hitpoints" from the Hitpoints submenu on the Audio menu. The groove is extracted.
-
If you now pull down the Quantize Type pop-up menu in the Project window you will find an additional item at the bottom of the list, with the same name as the file from which you extracted the groove.
This groove can now be selected as a base for quantizing, just like any other quantize value. See "The Quantizing functions" on page 326.
- If you want to save this groove, open the Quantize Setup dialog and store it as a preset.
→ You can also create grooves from a MIDI part by selecting the part and dragging it on the grid display in the middle of the Quantize Setup dialog or by selecting "Part to Groove" from the Advanced Quantize submenu on the MIDI menu.
Other hitpoint functions
On the Hitpoints tab of the Sample Editor Inspector and on the various submenus of the Audio menu, you will also find the following functions:
Create Markers
If an audio event contains calculated hitpoints, you can click on the Create Markers button in the Hitpoints tab to add a marker for each hitpoint (see "Marker tracks" on page 31). This can be useful to snap to hitpoints, e.g. for locating hitpoints and for using the Time Warp tool (see "The Time Warp tool" on page 408).
Create Regions
If your audio event contains calculated hitpoints, you can click the Create Regions button on the Hitpoints tab to automatically create regions from hitpoints. This can be useful to isolate recorded sounds, in order to upload them, e.g. to HALion either as velocity or keyzones.
When you make a selection, regions will only be calculated from the hitpoints that are contained in the selection.
Create Events
When you wish to create separate events according to the hitpoints for a file, you can click on the Create Events button in the Hitpoints tab. This means that you do not have to make the same considerations as when slicing for tempo changes. You can use any method you like to set hitpoints.
- The slices created will appear in the Project window as separate events.
Close Gaps
This function from the Advanced submenu on the Audio menu is useful if you sliced a loop for tempo changes. Lowering the tempo below the loop's original tempo will create gaps between the slices. The lower the tempo is in relation to the original tempo, the wider the gaps will be. Close Gaps can be used to remedy this.
Proceed as follows:
- Set the desired tempo.
- Select the part in the Project window.
-
Select "Close Gaps" from the Advanced submenu on the Audio menu.
Time stretch is applied on each slice to close the gaps. Depending on the length of the part and the algorithm set in the Preferences (Editing–Audio page), this can take a little while. -
The waveform is redrawn and the gaps are closed!
-
Note that this feature creates new clips in the Pool, one for each slice.
- Close Gaps can also be used when the project tempo is higher than the original loop tempo.
This will use the time stretch function to compress the slices to fit. - If you decide to change the tempo again after using the Close Gaps function, you should undo the Close Gaps operation or start over again, using the original unstretched file.
- You can also use this function on individual events (in the Audio Part Editor or Project window).
The events don't have to be slices – you can use Close Gaps simply to stretch an audio event to the start position of the next event.
Free Warp
The Free Warp tool allows you to create Warp tabs. Warp tabs are a kind of marker or anchor that can be attached to musically relevant time positions in an audio event, for example the first beat of every bar. Warp tabs can be dragged to the corresponding time positions in the project, and the audio will be stretched accordingly.
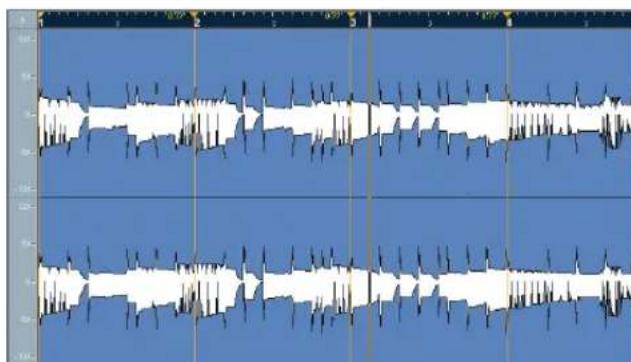
text_image
Audio waveform display showing multiple tracks with varying amplitude and frequency patterns across 10 channelsA typical application of warp tabs is to use them to synchronize audio to video.

If the AudioWarp tab is open, warp tabs will be displayed in the waveform and if the VariAudio tab is open, they will be displayed in the ruler.
You can also use warp tabs for further tweaking after having activated Musical mode.

When you deactivate the Musical mode, select another Quantize value or move the Swing slider, all your warp modifications will be lost.
Using the Free warp tool
Warp tabs are created using the Free Warp tool on the AudioWarp tab of the Sample Editor, but can also be created from hitpoints (see "Creating warp tabs from hit-points" on page 241). In this example, we will show how a file with slightly varying tempo can be locked to a steady tempo by using warp tabs.
- Open the audio file you wish to process in the Sample Editor.
- Activate the "Snap to Zero Crossing" button on the Sample Editor toolbar.
When you activate this button, warp tabs will snap to zero crossings and hitpoints (if shown).
- Determine the length of the file.
- On the Definition tab, click the Auto Adjust button so that the audio event is stretched to the project tempo.
- On the AudioWarp tab, select the Free Warp tool.
For aligning the tempo, you should use Bars and Beats as ruler resolution. When you place the mouse pointer in the waveform display, it changes to a clock with arrows on either side, and a vertical line in the middle which represents the pointer. When you move the pointer in the waveform window, it shows the position in bars, beats and ticks as well as in seconds.
- Line up the audio file so that the first beat of the first bar (in the audio event) starts on the first beat of a bar in the project.
- If the audio file doesn't start on a downbeat, you can use the Event Start handle in the Sample Editor and adjust the position in the Project window so that the first downbeat in the sample is aligned with the first beat of a bar in the grid.
Now the musical first downbeat should be aligned with the first beat of a bar in the project.
The next step is to see where the first warp tab needs to be added. It may be useful to hear the metronome click to determine when the tempo of the audio clip drifts from the project tempo. To hear the metronome, activate the Click button on the Transport panel and play back using the transport controls.
- Play back the audio file, either by auditioning in the Sample Editor or from the Transport panel, and determine where the first beat of a bar in the audio event does not match the corresponding ruler position in the project. If you find it difficult to pinpoint an exact position in the audio event, you can switch to the Scrub tool and/or zoom in the view. Switch back to the Free Warp tool when you have found the position.
- In our example, the first beat of the third bar in the audio event is slightly offset from the corresponding grid position and thus needs to be moved back a bit.
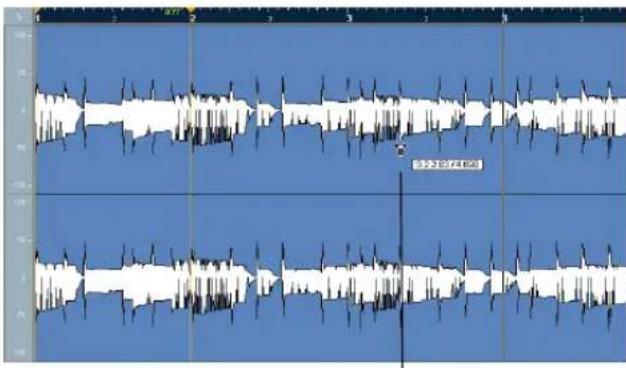
text_image
1 2 3 4 5 6 7 8 9 10 11 12 13 14 15 16 17 18 19 20 21 22 23 24 25 26 27 28 29 30 31 32 33 34 35 36 37 38 39 40 41 42 43 44 45 46 47 48 49 50 51 52 53 54 55 56 57 58 59 60 61 62 63 64 65 66 67 68 69 70 71 72 73 74 75 76 77 78 79 80 81 82 83 84 85 86 87 88 89 90 91 92 93 94 95 96 97 98 99 100The third downbeat in the audio event
- Place the pointer at the position of the first beat of the third bar in the audio event and click and hold.
When you click, a warp tab is added. If the position where you clicked was off, you can adjust it by dragging the tab in the ruler.
- With the mouse button still pressed, drag the warp tab so that the position lines up with the first beat of the bar in the ruler.
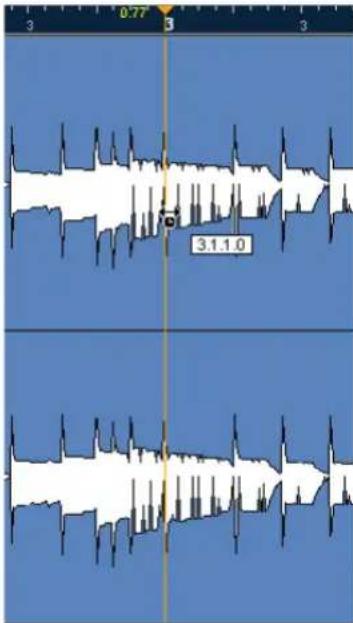
text_image
0.77 3 3 3.1.1.0- Release the mouse button.
Now the first beat in the audio event is perfectly aligned with the corresponding position in the project!
text_image
3.1.1.0 / 4000 (on warp tab)- You can also first add warp tabs at the relevant musical positions and change their positions later, see "Editing warp tabs" on page 240.
Next to the warp tab handle in the ruler, a number is shown. This number indicates the warp factor, i.e. the amount of stretch. Warp factor numbers higher than 1.0 indicate that the audio region preceding the warp tab is expanded and will play back slower. Warp factor numbers lower than 1.0 indicate that the audio region preceding the warp tab is compressed and will play back faster.
Note that this ratio is limited to a range between 0.1 and 10. This factor is updated when you change the project tempo with Musical mode enabled or use the Time Warp tool.
- Continue to use the same method to align the first beat in each bar to the corresponding ruler position. You only have to add warp tabs where the downbeat in the audio file drifts from the ruler position and/or if you want to lock a warp tab so that it is not moved when editing other points.
When you are done, the previously varying tempo of the audio event will be metronome-steady and will adapt to any tempo in Cubase.
This example illustrates the general methods of using warp tabs and the Free Warp tool. But you can of course use warp tabs for other operations than aligning down-beats to grid positions. With the Free Warp tool, you can literally stretch any region within a sample to any position!
Editing warp tabs
Moving the destination of existing warp tabs
To move a destination position of a warp tab (and thus stretch the audio), select the Free Warp tool and position the pointer on the Warp line in the waveform so that the line in the middle of the pointer becomes blue. Then click and drag to move the position of the warp tab.
text_image
0.75 1.2.2.35 / 0.661 (on warp tab)Moving the insert position of existing warp tabs
If you simply wish to change the insert position of a warp tab in the audio, click and drag the warp tab header in the ruler. However, this will change the warping.
Bypassing warp tabs
You can disable all warp modifications by activating the Disable Warp Changes button in the AudioWarp tab or by setting up and using the "Bypass Warping" key command in the Key Commands dialog, Sample Editor category (see "Key commands" on page 479).
Deleting warp tabs
You can configure a tool modifier for deleting warp tabs in the Preferences dialog (Editing-Tool Modifiers-Audio-Warp tool). To delete a warp tab, hold down the tool modifier so that the pointer becomes an eraser and click on the warp tab.
Resetting warp modifications
To reset all warp changes, click the Reset button on the AudioWarp tab.
Creating warp tabs from hitpoints
You can also create warp tabs from hitpoints selecting "Create Warp Tabs from Hitpoints" on the Realtime Processing submenu of the Audio menu.
For descriptions of how hitpoints are created and edited please see "Using hitpoints" on page 235.
Flattening the realtime processing
You can "flatten" the realtime processing at any time. This can be done to serve two purposes; to reduce the CPU load and to optimize the sound quality of the processing. The flatten function takes the following into account:
- Warp modifications (see "Free Warp" on page 238 and "Warping segments" on page 250), even when Bypass is activated. After the flattening, your Warp tabs will be lost. However, you can undo this function as usual.
- VariAudio pitch modifications (see “Changing the pitch” on page 247), even when Bypass is activated. In this case, the Realtime algorithm (Solo preset) will be used. After the flattening, your VariAudio data will be lost. However, you can undo this operation.
- Event transpose (see "Transposing individual parts or events using the info line" on page 106).
- Select the audio event(s) you wish to process and select "Flatten" from the Realtime Processing submenu of the Audio menu.
You should also use this function before applying any offline processing. When the flatten processing is applied, a copy of the original file is automatically created in the Pool so that the original audio clip remains intact.
Selecting an algorithm for the flattening (Cubase only)
In the Pool, you can select an algorithm for several selected clips at a time.
⚠️ If you are working with VariAudio pitch shifting, the Realtime algorithm (Solo preset) will be used automatically.
When you flatten the realtime processing, you can use the MPEX 4 algorithm to process the audio, which may produce better sound quality than the realtime processing. This is also the only way to achieve polyphonic formant conserving pitch shifting, apart from offline processing.
Proceed as follows:
- Select the audio event(s) you wish to process.
- Select "Flatten" from the Realtime Processing sub-menu of the Audio menu or use the corresponding button in the Process tab.
If you did not perform any pitch modifications a dialog appears where you can select an algorithm for the processing. You can either select the MPEX 4 algorithm, which will produce the highest sound quality, or the Realtime algorithm which is much quicker but will not improve the audio quality of the processing (although it will reduce the CPU load).
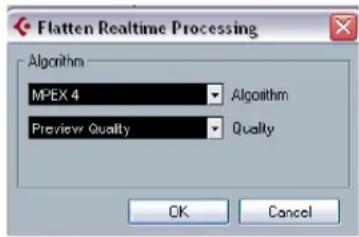
text_image
Flatten Realtime Processing Algorithm MPEX 4 Preview Quality Algoithm Quality OK CancelThis dialog will not be opened when the time stretching factor is outside the range of 0.5 and 2 or when you introduced VariAudio pitch modifications. In these cases the Realtime algorithm will be used.
The MPEX4 algorithm allows you to select one of seven different quality settings:
Option Description
Preview This mode should only be used for preview.
Mix Fast This mode is a very fast mode for preview. This works best with composite music signals (mono or stereo material).
Solo Fast Use this mode for single instruments (monophonic material) and voice.
Solo Musical Same as above but higher quality.
Poly Fast Use this for processing monophonic and polyphonic material. This is the fastest setting that gives still very good results. You can use this for drum loops, mixes, chords.
Poly Musical Use this for processing monophonic and polyphonic material. This is the recommended MPEX default quality setting. You can use this for drum loops, mixes, chords.
Poly Complex This high quality setting is quite processor intense and should be used only when processing difficult material or for stretch factors above 1.3.
- If the audio has been transposed, the dialog also contains the option "Formant Correction". Activate this if you want to e.g. avoid a "chipmunk voice" effect.
- Select an algorithm and click OK.
After the processing, any loop that was previously stretched in realtime or had been pitch shifted will play back exactly the same, but Musical mode will be deactivated and the realtime pitch shifting will be set to 0.
The audio clip is now like any standard audio clip before applying realtime processing, i.e. it will not follow tempo changes. The flattening processing function is best used when you have determined the tempo or key of a project, but you can of course always adapt the audio to a new key or tempo. In this case, it is better to revert back to the original audio clip rather than to process the already processed file again.
Unstretching audio files
By selecting "Unstretch Audio" from the Realtime Processing submenu of the Audio menu, all realtime time stretching (by sizing or by warp tabs) is removed.
Note that realtime transpose (in the info line) and Musical mode will not be removed by this.
Whether the "Unstretch Audio" menu item is available depends on whether the time stretching was applied at the event or clip level:
- If you sized an audio event in the Project window using "Sizing Applies Time Stretch" (see "Resizing events using time stretch" on page 47), you can undo the time stretching by selecting the event in the Project window and then applying "Unstretch Audio".
This will remove all time stretching and warp tabs.
- When you have entered a tempo and/or length in the toolbar, this information is saved for the source clip and all events that use it.
These changes will not be undone using "Unstretch Audio".
VariAudio (Cubase only)
→ Before you continue, make sure you read the tutorial in the Getting Started manual.
With the AudioWarp features, editing audio in the time domain has become significantly easier. However, editing pitch was limited to having just one single numeric "transpose" value per event or part.
With cutting-edge technology Cubase finally turns the dreams of musicians and producers into reality: editing vocal lines in the Sample Editor has become just as seamless and quick as if editing MIDI notes in the renowned Key Editor. This is the new VariAudio feature that offers completely integrated vocal editing and pitch alteration of individual notes in monophonic vocal recordings and can solve intonation and timing problems with only a few mouse clicks.
And how does it work? First, the vocal line is analyzed and split into segments shown as graphic representation of the notes sung. After the detection process is complete, the recognized notes can be modified entirely “non-destructive” so that any modifications to the audio material can be undone or reverted to the state of the original file.
VariAudio was developed and optimized specifically to be used with monophonic vocal recordings. Though the detection and stretching of notes of other monophonic audio recordings, such as those of a saxophone, may work well, the quality of the end result depends greatly on the generic condition and structure of the recording's texture. The following sections explain the exciting functionality of VariAudio in which we only refer to monophonic vocal material.
VariAudio allows you to change your audio on the vertical axis (see "Changing the pitch" on page 247) and on the horizontal axis (see "Warping segments" on page 250).
If you load projects with VariAudio files in Cubase Studio, the original files will be played back and your VariAudio modifications will be ignored. If you want to hear your modifications in Cubase Studio, you will have to bounce the audio files that have been edited with the Cubase VariAudio features.
Understanding the waveform display in VariAudio
When you open monophonic vocal recordings in the Sample Editor and click the Segments or the Pitch & Warp mode on the VariAudio tab, your audio will be analyzed and segmented to display the tonal portions, i.e. the notes sung or played. This process is called segmentation. The segmentation allows you to easily associate the audio with your lyrics and to introduce pitch and timing changes.
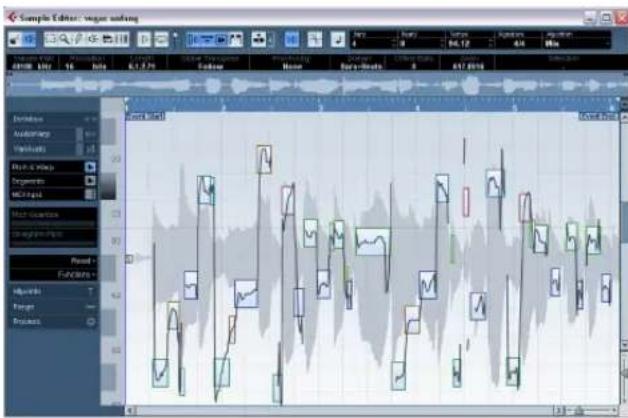
text_image
Sample Editor: Vogor working 4/10/2016 Audio Audioing Vocabulary View & View Segments Mega Market Market Options Market Options Residual Functions Hybridics Foreign BusinessIn between the different segments you may find gaps where non-tonal portions have been detected:
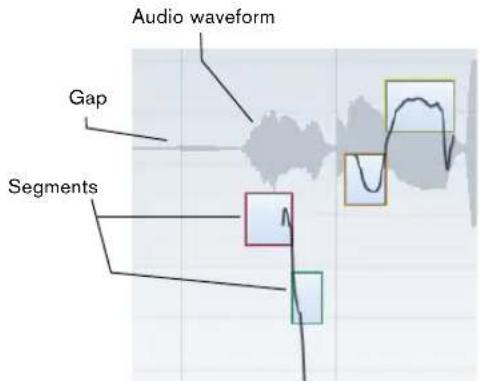
text_image
Audio waveform Gap SegmentsIn this example, at the beginning of the waveform, you can see a gap where no segment is shown. Such gaps can be caused by non-tonal portions of the audio, e.g. breath sounds.
→ Please note that the audio waveform displayed on the VariAudio tab is always shown as mono, even if you opened a stereo or multi-channel file.
The vertical position of a segment indicates its average pitch. If Pitch & Warp mode is activated and you move the mouse pointer over a segment, a piano roll will be displayed, showing the found pitches.
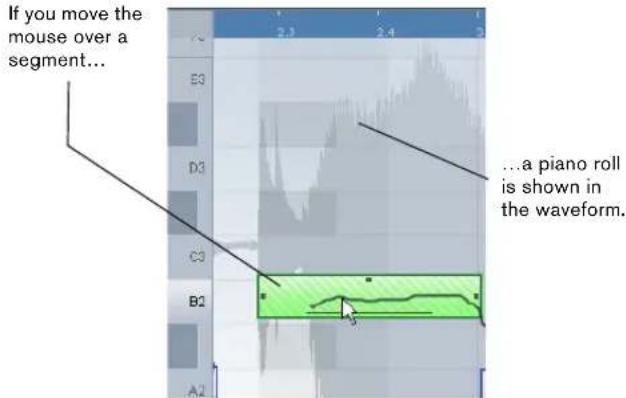
text_image
If you move the mouse over a segment... E3 D3 C3 B2 A2 2.3 2.4 3 ...a piano roll is shown in the waveform.Furthermore, if you move the mouse pointer over a segment and the zoom factor is high enough, the average pitch – note name and fine tuning in cent steps (100ths of a semitone) – is shown on top of the segment.
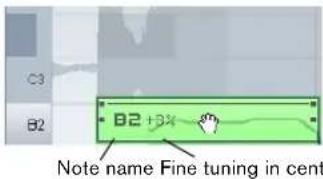
text_image
C3 B2 B2 +3% Note name Fine tuning in centNote pitches represent the perceived fundamental frequency of a sound. The note A4 is perceived to be of the same pitch as a sine wave of 440 Hz. The notation of pitches is a logarithmic frequency scale. The table below shows the relation between pitch (note name) and frequency in Hz:
| C4 C#4/ | D4 Eb4/ | E4 F4 F#4/ | Gb4 |
| Db4 | D#4 | ||
| 261.63 277.18 293.66 311.13 329.63 349.23 369.99 | |||
| G4 Ab4/ | A4 Bb4/ | B4 C5 | |
| G#4 | A#4 | ||
| 392.00 415.30 440.00 466.16 493.88 523.25 | |||
The average pitch of a segment is calculated from its micro pitch curve. Micro-pitch curves represent the progression of the pitch for the tonal portion of the audio.
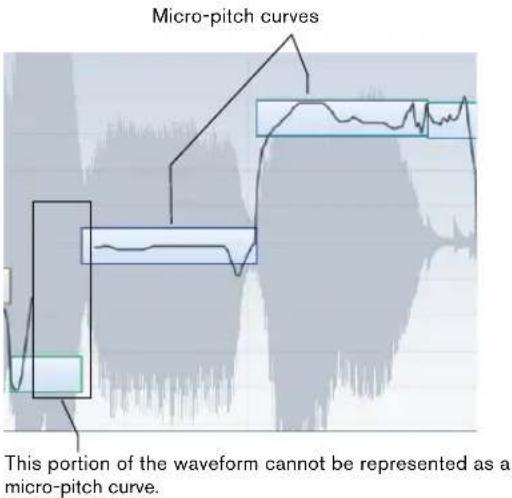
text_image
Micro-pitch curves This portion of the waveform cannot be represented as a micro-pitch curve.The horizontal position of a segment indicates the time position and the length.
You can navigate through the segments by using the left/right arrow keys on your computer keyboard.
You can zoom in on the segments that you want to edit by holding down [Alt]/[Option] while drawing a selection rectangle. To zoom out, i.e. to move one step back in the zoom history, hold down [Alt]/[Option] and click in an empty area of the waveform. If you hold down [Alt]/[Option] and double click in an empty area, the display will be zoomed out to show all segments.
Applying editing, offline processes and VariAudio
The following offline processes and edits that affect the length of the audio file, may lead to the re-analysis of the audio material:
- Options on the Select Process menu in the Process tab of the Sample Editor Inspector or in the Process submenu on the Audio menu that can be applied to selections
- Effect processing using the options on the Select Plug-in menu in the Process tab of the Sample Editor Inspector or in the Plug-ins submenu on the Audio menu (see the chapter "Audio processing and functions" on page 204)
- Cut, paste and delete (see "Editing selection ranges" on page 227) or drawing notes (see "Drawing in the Sample Editor" on page 230)
This in turn may render any already existing VariAudio data invalid, and such data may be discarded automatically.

Therefore, you should always apply offline processing or edits before using the VariAudio features.
If you apply editing that affects the audio itself (like reverse, cut, etc.) to a file containing VariAudio data, the following warning message will be displayed:
text_image
Cubase 5 This operation will invalidate the VanAudio data. ■ Do not display this warning again Proceed Cancel- When you click Proceed, your edits will be applied, and you will lose your VariAudio data.
Click Cancel to return to your audio file without applying any changes.
If you apply offline processing to a file containing VariAudio data, the following warning message will be displayed:
text_image
Cubase 5 This operation may invalidate the VarAudio data. When proceeding you may choose to keep the data anyway. ■ Do not display this warning again Proceed Proceed and Keep Cancel- When you click Proceed, your edits will be applied, and you will lose your VariAudio data.
- When you click Proceed and Keep, your edits will be applied. Any VariAudio data in the audio file will be kept. Offline processes that may not affect existing VarioAudio data are Envelope, Fade In/Out, Normalize or Silence.
- Click Cancel to return to your audio file without applying any changes.
- When you activate the option "Do not display this warning again" in one of these warning dialogs before proceeding, Cubase will no longer display these messages, and always proceed with the option you last selected. You can reactivate these warning messages by activating the options "Inhibit warning when changing the Sample Data" or "Inhibit warning when applying Offline Processes" option in the Preferences (VariAudio page).
Segments mode

Please note that due to the data gained during this process the audio and thus the size of your project can increase.
If you activate Segments mode in the VariAudio tab, your audio file will be analyzed and split into separate segments.

Please note that the analysis of audio files longer than 3 minutes might take some time. A dialog with a progress bar is displayed while the audio file is analyzed. You can click the Abort button to abort the operation.
When you want to change the pitch of audio that includes non-tonal portions, e.g. consonants or effect sounds like reverberation, you may have to edit the segmentation in order to include the non-tonal portions in the segments. Otherwise, pitch modifications will only affect the tonal portions and not the non-tonal portions.
Editing the segmentation includes changing the start and end position of a segment, cutting or gluing segments, and moving or deleting them. Just select the section of the file that you want to change, activate Segments mode, and edit the segmentation for the desired section. If you are not satisfied with your changes, you can go back to the original segmentation (see "Reset" on page 252).

Editing the segmentation always leads to a recalculation of the segment's pitch. Therefore, it is recommended that you edit segmentation before changing pitch.
In Segments mode, the segments are shown with a hatched background. You can switch to "Pitch & Warp" mode (see "Pitch & Warp mode" on page 247) by pressing the [Tab] key.
The following paragraphs list the corrections that can be performed when Segments mode is activated.
Changing the note start or end point
If you find that a note starts or ends too early or too late, e.g. when the reverb of a note or a consonant is not included in the segment, proceed as follows:
- Activate Segments mode on the VariAudio tab.
- To change the length of a segment, move the mouse pointer over the start/end of the segment.
The mouse pointer becomes a double arrow.
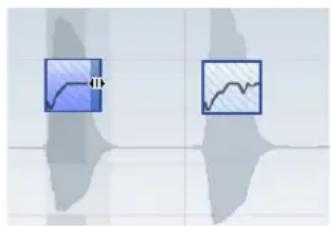
natural_image
Two abstract line graphs with shaded regions, no text or symbols present- Click and drag the segment start/end to the left or right. The segment length will be changed accordingly. As the average pitch (see above) is recalculated, the segment may jump upwards or downwards. Snap will not be taken into account.

When the resulting segment pitch cannot be calculated because of an increase in non-tonal data, the segment will be deleted.
Note that you can drag the segment start/end only until it reaches the start/end of the next segment. Segments cannot overlap each other.
Cutting a segment
If you notice that a segment includes more than one note, proceed as follows:
- Activate Segments mode on the VariAudio tab.
- Move the mouse pointer over the lower border of the segment that you would like to cut.
The mouse pointer becomes a scissor.
- Click at the desired position to cut the segment. The segment will be cut accordingly and Snap is taken into account.

When the resulting segment pitch cannot be calculated because of an increase in non-tonal data, the segment will be deleted.
Note that there is a minimum size for a segment. Very short segments cannot be cut.
Gluing a segment

We recommend to correct the segmentation before pitching. If you glue together segments after changing the pitch (this includes manual pitch modifications, Pitch Quantize and Straighten Pitch), your modifications will be reset and the original pitch will be heard.
If you notice that a single note is spread over two segments, proceed as follows:
- Activate Segments mode in the VariAudio tab.
- Hold down [Alt]/[Option] and move the mouse pointer over the segment that you want to glue to the next. The mouse pointer becomes a glue tube.
- Click to glue the active segment to the next segment.
If several segments are selected, they will all be glued together. Snap will not be taken into account.

When the resulting segment pitch cannot be calculated because of an increase in non-tonal data, the segment will be deleted.
Moving a segment horizontally
After cutting a segment, it may be necessary to move segments horizontally, e.g. if you notice that a note is at the wrong position.
Proceed as follows:
- Activate Segments mode on the VariAudio tab.
- To move a segment, move the mouse pointer over the upper border of the segment.
The mouse pointer becomes a double arrow.
- Click and drag the whole segment to the left or right.
The segment will be moved accordingly. If several segments are selected, they will be moved together. Snap will not be taken into account.

When the resulting segment pitch cannot be calculated because of an increase in non-tonal data, the segment will be deleted.
Note that you can only drag the segment start/end until it reaches the start/end of the next segment. Segments cannot overlap each other.
Deleting segments
Sometimes it might be useful to delete segments. This is true for situations where you want the original audio to be played back, e.g. for non-tonal portions or consonants.
You can delete segments by selecting them and pressing [Backspace].
Saving the segmentation
The corrected segmentation is saved with the project, no additional saving is required.
Pitch & Warp mode
If you activate Pitch & Warp mode in the VariAudio tab, you can change the pitch and the timing of your audio.

Before changing the pitch or timing of your segments, make sure that the segments you want to change are corrected (see “Applying editing, offline processes and VariAudio” on page 245).
You can edit the pitch and timing of audio segments for corrective purposes but also creatively by experimenting freely with note pitches in order to change the melody with or without preserving a natural sound, or by changing the timing of the audio (see "Pitch & Warp mode" on page 247).
In Pitch & Warp mode, the segments are shown with a plain background. You can toggle between "Pitch & Warp mode" and "Segments" mode by pressing the [Tab] key.
There are some restrictions concerning the highest and lowest possible note pitch. You cannot choose note pitches above C5 and below E0.
The following paragraphs list the modifications that can be performed when Pitch & Warp mode is activated.
Changing the pitch

Before changing the pitch, you should have corrected the segmentation. If you glue together segments after changing the pitch, your modifications will be reset and the original pitch will be heard.
If you want to edit the pitch of a segment, proceed as follows:
-
Activate Pitch & Warp mode on the VariAudio tab.
-
Move the mouse pointer over the segment.
The mouse pointer becomes a hand symbol to indicate that you can change the pitch of the segment. If the zoom factor is high enough, a tooltip indicates the found note pitch and the deviation of the segment from this pitch in percent.
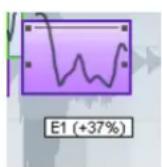

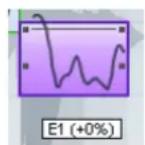
You can set up the way in which a note will snap to a certain pitch in the Preferences dialog (Editing-Tool Modifiers page):
- If you use "Absolute Pitch Snapping" (by default no modifier) the segment will be pitched to the next semitone.
- If you use "Relative Pitch Snapping" (by default [Ctrl]/[Command]) the segment snaps in relation to its current deviation in cents. That means that if the segment has a pitch of C3 and a deviation of 22% and you move it up by one semitone, it will be pitched to C#3 while keeping the deviation of 22% .
-
If you use "No Pitch Snapping" (by default [Shift]) you can edit the pitch freely.
-
Drag the segment up or down to the desired pitch and release the mouse. However, be careful: The more the pitch deviates from the original pitch, the less likely it is that your audio will sound natural.
If the Solo algorithm is not turned on already, a warning appears informing you that Cubase has selected it automatically. (You can disable this warning message in the Preferences-VariAudio page.) The segment will be pitched accordingly. While dragging, the original micro-pitch curve of the segment is shown in orange. If several segments are selected, they will be pitched together.
You can also use the up/down arrow keys on your computer keyboard to edit the note pitches.
Proceed as follows:
- Use the up/down arrow keys to change the pitch in semitone steps.
- Hold down [Shift] while using the up/down arrow keys to change the pitch in cent steps.

If you pitch-shift audio events with the Transpose options (see "The Transpose functions" on page 103) the transposition will be added to the pitch modifications that you introduced in Pitch & Warp mode, even if this is not reflected in the segmentation display.
Pitch Quantize
You can also quantize the audio pitch upwards or downwards to iteratively reduce the deviation from the nearest semitone position.
Proceed as follows:
- Select the segments you want to quantize.
- Move the Pitch Quantize slider to the right. The selected segments are quantized iteratively.
You can set up a key command for Pitch Quantize in the Sample Editor category of the Key Commands dialog (see "Key commands" on page 479). When using the key command, the segments will be directly quantized to the next semitone position.
Tilting the micro-pitch curve
Sometimes changing the pitch of the whole note segment is not enough. In these cases you will have to modify how the pitch changes inside the segment. This is indicated by the micro pitch curve (see “Understanding the waveform display in VariAudio” on page 243).

The micro-pitch curve displays the progression of the pitch for the tonal portion of the segment. For non-tonal portions of the audio, micro-pitch curves cannot be shown.
Proceed as follows:
- Activate Pitch & Warp mode on the VariAudio tab.
- To change the micro-pitch of a segment, move the mouse pointer over the top left/right corner of the segment. The mouse pointer becomes an up/down arrow.
- Drag upwards/downwards with the mouse to change the micro-pitch curve.
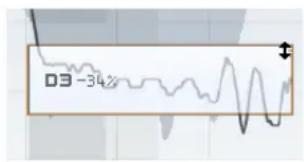
text_image
D3 -34%If the pitch falls at the end of the segment...
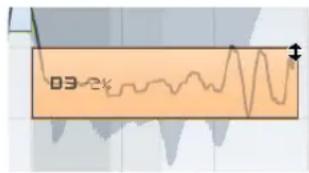
line
| Time Point | Value (%) | | :--- | :--- | | 1 | 0.32 | | 2 | 0.45 | | 3 | 0.68 | | 4 | 0.92 | | 5 | 1.15 | | 6 | 1.38 | | 7 | 1.61 | | 8 | 1.84 | | 9 | 2.07 | | 10 | 2.30 | | 11 | 2.53 | | 12 | 2.76 | | 13 | 2.99 | | 14 | 3.22 | | 15 | 3.45 | | 16 | 3.68 | | 17 | 3.91 | | 18 | 4.14 | | 19 | 4.37 | | 20 | 4.60 | | 21 | 4.83 | | 22 | 5.06 | | 23 | 5.29 | | 24 | 5.52 | | 25 | 5.75 | | 26 | 5.98 | | 27 | 6.21 | | 28 | 6.44 | | 29 | 6.67 | | 30 | 6.90 | | 31 | 7.13 | | 32 | 7.36 | | 33 | 7.59 | | 34 | 7.82 | | 35 | 8.05 | | 36 | 8.28 | | 37 | 8.51 | | 38 | 8.74 | | 39 | 8.97 | | 40 | 9.20 | | 41 | 9.43 | | 42 | 9.66 | | 43 | 9.89 | | 44 | 10.12 | | 45 | 10.35 | | 46 | 10.58 | | 47 | 10.81 | | 48 | 11.04 | | 49 | 11.27 | | 50 | 11.50 | | 51 | 11.73 | | 52 | 11.96 | | 53 | 12.19 | | 54 | 12.42 | | 55 | 12.65 | | 56 | 12.88 | | 57 | 13.11 | | 58 | 13.34 | | 59 | 13.57 | | 60 | 13.80 | | 61 | 14.03 | | 62 | 14.26 | | 63 | 14.49 | | 64 | 14.72 | | 65 | 14.95 | | 66 | 15.18 | | 67 | 15.41 | | 68 | 15.64 | | 69 | 15.87 | | 70 | 16.10 | | 71 | 16.33 | | 72 | 16.56 | | 73 | 16.79 | | 74 | 17.02 | | 75 | 17.25 | | 76 | 17.48 | | 77 | 17.71 | | 78 | 17.94 | | 79 | 18.17 | | 80 | 18.40 | | 81 | 18.63 | | 82 | 18.86 | | 83 | 19.09 | | 84 | 19.32 | | 85 | 19.55 | | 86 | 19.78 | | 87 | 20.01 | | 88 | 20.24 | | 89 | 20.47 | | 90 | 20.70 | | 91 | 20.93 | | 92 | 21.16 | | 93 | 21.39 | | 94 | 21.62 | | 95 | 21.85 | | 96 | 22.08 | | 97 | 22.31 | | 98 | 22.54 | | 99 | 22.77 | | Note: The data is in a format format (e.g., 'Year' or 'Month') and is not explicitly provided in the image....activate Pitch & Warp mode, point at the top right corner and drag upwards.
If you want to change the pitch modulation only for the segment start or end, you can set an "anchor point" to specify which part of the pitch should be affected:
- Move the mouse pointer over the top border of the segment.
The mouse pointer becomes an I-beam symbol. - Click at the position where you want to set an anchor. A vertical line appears at the position where you clicked. A segment can only have one anchor.
- Move the mouse pointer over the top left/right corner of the segment and drag upwards or downwards to tilt the micro-pitch curve.
The modulation curve will only be changed from the segment border to the anchor.
Move the mouse over the top border and click to set an anchor...
text_image
03 -21%...if you only want to compensate for the descending pitch at the end of the segment.
- If you press [Alt]/[Option] while dragging up/down, the tilt anchor is used as an axis around which the micro-pitch curve can be rotated.
text_image
EB=93%If you set a tilt anchor...

text_image
E3-483.2%...and press [Alt]/[Option], the mouse pointer becomes a diagonal arrow to indicate that you can rotate the micro pitch curve.
natural_image
Abstract line drawing with a purple gradient background and irregular black lines (no text or symbols)- Repeat the steps above to set anchors and tilt the micro-pitch curve until you are satisfied with the result.
- If you want to remove a tilt anchor from a segment, hold down [Alt]/[Option], position the mouse cursor at the top border of the segment until it turns to a glue tube, and click. The tilt anchor will be deleted.
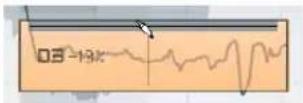
Straighten Pitch
If you want to compensate for the rise and fall of notes, i.e. the deviation of the micro-pitch curve from the representative pitch, you can use the Straighten Pitch slider. This correction comes in handy when a note is played flat (pitch rises) or sharp (the pitch falls) at the end. Proceed as follows:
- Select the segments whose pitch you want to straighten.
- Move the Straighten Pitch slider to the right. The pitch of the selected segments will be straightened. If no segment was selected, all pitches are straightened.

text_image
Straighten Pitch ResetThis micro-pitch looks a bit off. By moving the Straighten Pitch slider to the right...
...the micro-pitch curve is straightened.
MIDI Input
You can also change the pitch on the fly by selecting the segment you want to change and pressing a key on your MIDI keyboard or using the Virtual Keyboard (see "The Virtual Keyboard" on page 65).
Proceed as follows:
- After having corrected the segmentation, select the segment for which you would like to change the pitch.
- Activate Pitch & Warp mode and click the MIDI Input button.
- Press a key on your MIDI keyboard or use the Virtual Keyboard to change the pitch of the segment.
The pitch of the segment changes according to the note you played.
The MIDI Input function has two modes. You can switch between these by [Alt]/[Option]-clicking on the MIDI Input button:
- In Still Mode you can select individual segments by clicking on them and change their pitch by pressing a MIDI key. You can also select several segments and press a MIDI key, to change the pitch of several segments simultaneously. The pitch of the first selected segment is changed to the pitch of the MIDI note you played. The pitches of the other selected segment are changed by the same amount.
Still Mode is activated for MIDI Input.
- In Step Mode you can step through the segments by selecting the first segment that you would like to change and pressing a MIDI key. The next segment will automatically be selected afterwards. This allows you to work in a more creative way and to develop e.g. completely new melody lines via MIDI.
Step Mode is activated for MIDI Input.
- When you are done, deactivate the MIDI Input button.
MIDI controller data like PitchBend or Modulation will be ignored.
Warping segments
⚠️ Any correction of the segmentation must be applied before warping segments.
Time correction, i.e. warping at segment level, is useful if you want to align a musical accent to a certain position, or change or quantize the timing of single segments in monophonic vocal recordings. When warping audio segments, warp tabs will be created. These are shown on the VariAudio and the AudioWarp tabs of the Sample Editor Inspector. (For information on warping complete audio files, see "Free Warp" on page 238.)
If you want to warp a segment, proceed as follows:
-
Activate Pitch & Warp mode on the VariAudio tab.
-
To change the timing of a segment, move the mouse pointer over the start/end of the segment.
The mouse pointer becomes a double arrow and the warp tabs are displayed in the ruler.
- Drag the start/end of the segment to the desired position.
If the Snap button is activated, the segment border will snap to the grid. When you drag the segment border, warp tabs appear not only at the border but also at the adjacent segment borders to indicate which portions of the audio are stretched/affected.
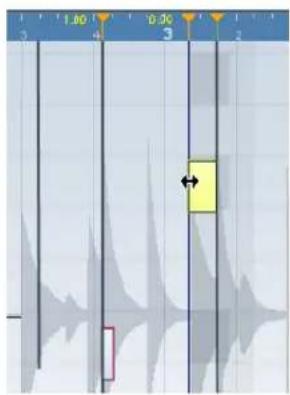
text_image
1.00 0.90 3 2 4 3 2 1 0 -1 -2 -3 -4 -5 -6 -7 -8 -9 -10 -11 -12 -13 -14 -15 -16 -17 -18 -19 -20 -21 -22 -23 -24 -25 -26 -27 -28 -29 -30 -31 -32 -33 -34 -35 -36 -37 -38 -39 -40 -41 -42 -43 -44 -45 -46 -47 -48 -49 -50 -51 -52 -53 -54 -55 -56 -57 -58 -59 -60 -61 -62 -63 -64 -65 -66 -67 -68 -69 -70 -71 -72 -73 -74 -75 -76 -77 -78 -79 -80 -81 -82 -83 -84 -85 -86 -87 -88 -89 -90 -91 -92 -93 -94 -95 -96 -97 -98 -99 -100→ Warping a segment will also change the timing of the adjacent segments.
⇒ Timing modifications introduced this way will not adapt to the project tempo. If this is what you want, you should use the Musical mode (see "AudioWarp: Tempo matching audio" on page 231).
- You can change the insert position of a warp tab in the audio by clicking and dragging the warp tab header in the ruler. This will change the warping (see "Editing Warp tabs" on page 251).
- Hold down [Shift] (by default) to delete warp tabs or configure another tool modifier in the Preferences dialog (Editing-Tool Modifiers-AudioWarp tool). To delete a warp tab, hold down the tool modifier so that the pointer becomes an eraser and click on the warp tab.
- If you are not satisfied with your changes, you can revert the timing of the selected segments by choosing the "Warp Changes" option from the Reset pop-up menu (see "Reset" on page 252).
Editing Warp tabs
In some cases the beginning of the waveform does not correspond to the beginning of a segment, e.g. when the audio starts with non-tonal portions like breath sounds (see "Understanding the waveform display in VariAudio" on page 243). If you want to pitch your audio, this is exactly what you want. But when it comes to warping, any changes you wish to make must affect the waveform as a whole.
You can of course change the segmentation to achieve this, but if you want to pitch your audio afterwards, this would affect also any non-tonal portions of the audio. If this is not what you want, proceed as follows:
- Activate Pitch & Warp mode and activate the Snap button.
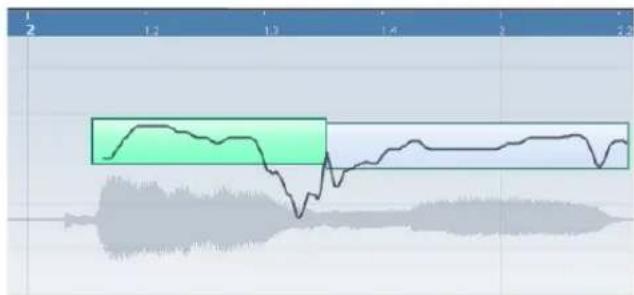
line
| Time | Value | |------|-------| | 0 | 0 | | 1 | 1 | | 2 | 1 | | 3 | 0 | | 4 | -1 | | 5 | -2 | | 6 | -1 | | 7 | 0 | | 8 | 1 | | 9 | 1 | | 10 | 0 | | 11 | -1 | | 12 | -2 | | 13 | -1 | | 14 | 0 | | 15 | 1 | | 16 | 1 | | 17 | 0 | | 18 | -1 | | 19 | -2 | | 20 | -1 | | 21 | 0 | | 22 | 1 | | 23 | 1 | | 24 | 0 | | 25 | -1 | | 26 | -2 | | 27 | -1 | | 28 | 0 | | 29 | 1 | | 30 | 1 | | 31 | 0 | | 32 | -1 | | 33 | -2 | | 34 | -1 | | 35 | 0 | | 36 | 1 | | 37 | 1 | | 38 | 0 | | 39 | -1 | | 40 | -2 | | 41 | -1 | | 42 | 0 | | 43 | 1 | | 44 | 1 | | 45 | 0 | | 46 | -1 | | 47 | -2 | | 48 | -1 | | 49 | 0 | | 50 | 1 | | 51 | 1 | | 52 | 0 | | 53 | -1 | | 54 | -2 | | 55 | -1 | | 56 | 0 | | 57 | 1 | | 58 | 1 | | 59 | 0 | | 60 | -1 | | 61 | -2 | | 62 | -1 | | 63 | 0 | | 64 | 1 | | 65 | 1 | | 66 | 0 | | 67 | -1 | | 68 | -2 | | 69 | -1 | | 70 | 0 | | 71 | 1 | | 72 | 1 | | 73 | 0 | | 74 | -1 | | 75 | -2 | | 76 | -1 | | 77 | 0 | | 78 | 1 | | 79 | 1 | | 80 | 0 | | 81 | -1 | | 82 | -2 | | 83 | -1 | | 84 | 0 | | 85 | 1 | | 86 | 1 | | 87 | 0 | | 88 | -1 | | 89 | -2 | | 90 | -1 | | 91 | 0 | | 92 | 1 | | 93 | 1 | | 94 | 0 | | 95 | -1 | | 96 | -2 | | 97 | -1 | | 98 | 0 | | 99 | 1 | | Note: The actual values may vary due to the random nature of the data generation. The provided values are just an example. I have left blank text in the code. There is no actual text present in the code.In this example the beginning of the first segment does not correspond to the beginning of the waveform.
- Move the mouse pointer over the start of the segment so that it becomes a double arrow and drag the segment start to the beginning of the bar.
The segment border will snap to the grid at the exact bar position.
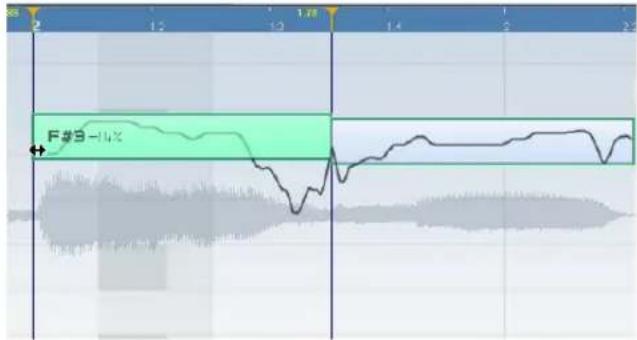
text_image
F#3-14%Now the beginning of the segment matches the beginning of the bar, but we want the beginning of the waveform to match the beginning of the bar:
- Point at the warp handle displayed in the ruler until it turns to a double arrow and drag it to the beginning of the waveform.
The background is displayed in orange to indicate which part of the waveform is affected by the change.
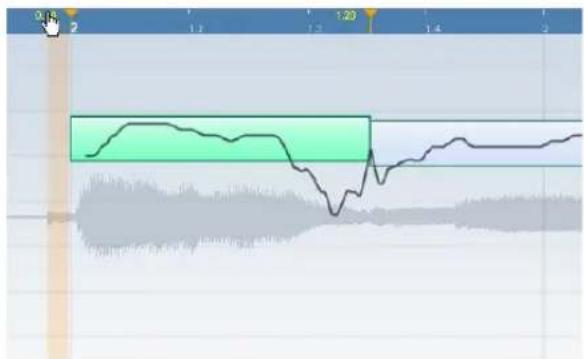
text_image
Audio waveform interface showing a green channel with a highlighted segment and gray background noiseNow the beginning of the waveform matches the desired bar position.
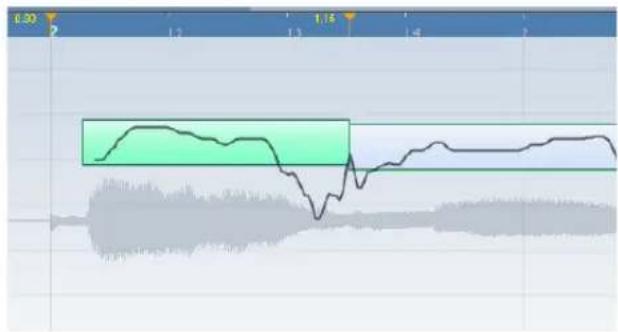
line
| Time | Value | |------|-------| | 2.30 | 0 | | 1.2 | 1.3 | | 1.14 | 1.14 |Editing warp tabs can also be useful, if you change the length of a segment that you have already warped. In this case, editing warp tabs can help you synchronize your audio again.
Reset
This pop-up menu at the bottom of the VariAudio tab allows you to reset the modifications you performed in Pitch & Warp mode (pitch modifications, time modifications or both). It also lets you reset the changes you made in Segments mode by reanalyzing the audio and returning to the original segmentation. The following options are available:
Function Description
| Pitch Changes If you select this option, pitch changes including micro-pitch modifications with the tilt micro-pitch tool will be reset either for the selected segments (if available) or for the whole file. | |
| Warp Changes | If you select this option, warp changes will be reset. |
| Pitch + Warp Changes | If you select this option, pitch, micro-pitch and warp changes will be reset either for the selected segments (if available) or for the whole file. |
| Reanalyze Audio | If you select this option, the audio will be reanalyzed and all your segmentation changes will be reset. |
→ You can set up key commands for the reset and the re-analyze function in the Sample Editor category of the Key commands dialog (see "Key commands" on page 479).
Listening to your modifications
You can listen to the results of your modifications using the following methods:
- By activating Acoustic Feedback on the toolbar.
The segments will be played back when you adjust the pitch or while nudging, navigating and selecting segments. This way you can easily audition your modifications while editing. - By using the Play tool on the toolbar.
- By using the Audition and the Audition Loop tool on the toolbar.
- By using cycle playback in the Project window.
If you want to compare the original to the modified audio (i.e. hear the audio without pitch or warp modifications), you have the following possibilities:
- You can disable your pitch modifications by activating the Disable Pitch Changes button in the VariAudio tab or by setting up and using the "VariAudio: Disable Pitching" key command in the Key Commands dialog, Sample Editor category (see "Key commands" on page 479).
- You can disable your warp modifications by activating the Disable Warp Changes button in the AudioWarp tab or by setting up and using the "Disable Warping" key command in the Key Commands dialog, Sample Editor category (see "Key commands" on page 479).
Functions - Extract MIDI...
If you want to create an identical second voice with a MIDI Instrument, or print out the notes from within the Score Editor, you can extract a MIDI part. You can later export the MIDI part as a MIDI file (see "Exporting and importing standard MIDI files" on page 464).
Before extracting MIDI from your audio you should correct the segmentation, otherwise, you will have to correct segmentation errors later in the MIDI part. Transition changes, tilting the micro-pitch curve, pitch quantize and pitch corrections will be taken into account.
The result depends on the quality and the characteristics of your audio.
Proceed as follows:
- Open the Sample Editor by double-clicking your audio file in the Project window or the Pool.
- Open the VariAudio tab.
-
Open the Functions pop-up menu and select "Extract MIDI...".
The "Extract MIDI" dialog opens. -
Select an Extraction mode in the corresponding popup menu to include or exclude pitchbend events.
Pitchbend events are MIDI controller data that are saved in a MIDI file and that create pitch transitions between MIDI notes. The following options are available:
Function Description
| Just Notes and no Pitchbend Data | If you select this option, only notes will be included in the MIDI part. |
| Notes and Static Pitch-bend Data | If you select this option, a pitchbend event will be created for every segment. Select a Pitchbend value from 1 to 24 in the Pitchbend Range field. When you are working with an external MIDI Controller, it might be necessary to set it to the same value. |
| Notes and Continuous Pitchbend Data | If you select this option, pitchbend events that correspond to the micro-pitch curve will be created. Select a Pitch-bend value from 1 to 24 in the Pitchbend Range field. The setting should correspond to the same value on your MIDI controller or the VST Instrument being controlled. Note that although the graphic representation of the pitchbend curve is smoothed, all pitchbend data are included. |
5. Open the Destination pop-up menu and select an option to decide where the MIDI part should be placed.
The following options are available:
Function Description
| First Selected Track | If you select this option, the MIDI part will be placed on the first selected MIDI or Instrument track. Note that any MIDI parts from previous extractions that are on this track will be deleted. |
| New MIDI Track | If you select this option, a new MIDI track will be created for the MIDI part. |
| Project Clip-board | If you select this option, the MIDI part is copied to the clipboard so that you can insert it at the desired position on a MIDI or Instrument track in the Project window. |
⇒ If you opened the Sample Editor from the Pool and the audio file does not form part of your project, the MIDI part will be inserted at the Project start position.
- Click OK.
A MIDI part is created.
If your audio event references only a section of the audio clip, only this range will be extracted.
You can also use a key command to extract your audio as MIDI. In this case no dialog will be opened and the settings that were used for the previous extraction will be used instead. For further information on how to set up key commands, please refer to the chapter "Key commands" on page 479.
The Audio Part Editor
Background
The Audio Part Editor allows you to view and edit the events inside audio parts. Essentially, this is the same type of editing that you do in the Project window, which means that this chapter contains a lot of references to the chapter "The Project window" on page 25.
Audio parts are created in the Project window in one of the following ways:
- By selecting one or several audio events on the same track, and selecting "Events to Part" from the Audio menu.
- By gluing together two or more audio events on the same track with the Glue Tube tool.
- By drawing an empty part with the Pencil tool.
- By double-clicking between the left and right locator on an audio track.
With the last two methods, an empty part is created. You can then add events to the part by pasting, or by using drag and drop from the Pool.
Opening the Audio Part Editor
You open the Audio Part Editor by selecting one or more audio part(s) in the Project window and double-clicking on any one of them (or using the Edit-Open key command, by default [Ctrl]/[Command]-[E]). The Audio Part Editor can display several parts at once, and you can also have more than one Audio Part Editor open at the same time.
⇒ Double-clicking on an audio event in the Project window will open the Sample Editor (see "Opening the Sample Editor" on page 220).
Window overview
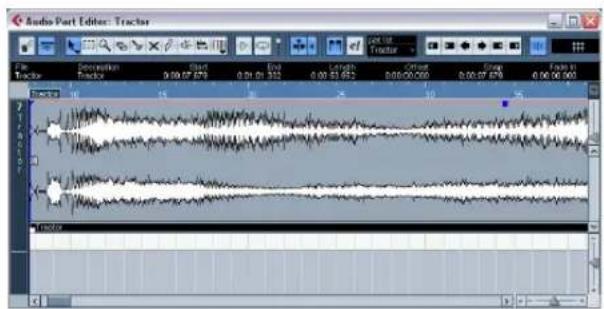
text_image
Audio Part Editor: Tractor Tractor Decimation Tractor Close 0.00.07.879 End 0.00.01.352 Length 0.00.01.662 Offset 0.00.00.060 Spread 0.00.07.879 Face in 0.00.06.060The toolbar
The tools, settings and icons on the toolbar have the same functionality as in the Project window, with the following differences:
- A Solo button (see "Auditioning" on page 257).
- Separate tools for auditioning (Speaker) and scrubbing (see "Scrubbing" on page 257).
- No Line, Glue Tube or Color tools.
- Play and Loop icons and an Audition Volume control (see "Auditioning" on page 257).
- Independent Track Loop settings (see "The independent track loop function" on page 257).
- Part List controls for handling several parts: activating parts for editing, restricting editing to active parts only and showing part borders (see "Handling several parts" on page 258).
→ You can customize the toolbar by hiding or reordering its items.
See "Using the Setup options" on page 471.
The ruler and info line
These have the same functionality and appearance as their counterparts in the Project window.
- You can select a separate display format for the Audio Part Editor ruler by clicking on the arrow button on the right and selecting an option from the pop-up menu.
For a list of the available formats, see "The ruler" on page 33.
About lanes
If you make the editor window larger, this will reveal additional space below the edited events. This is because an audio part is divided vertically in lanes.
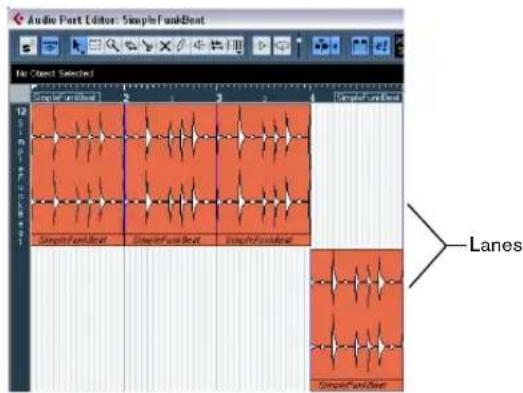
text_image
Audio Port Editor: SimpleFontEffect No Direct Selected SimpleFontEffect SimpleFontEffect SimpleFontEffect Lanes SimpleFontEffectLanes can make it easier to work with several audio events in a part:
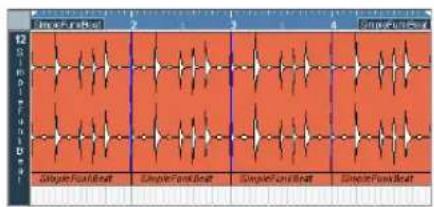
text_image
Glycerus Focal-Blatt Slycerus Focal-Blatt Sputum Focal-Blatt Sputum Focal-Blatt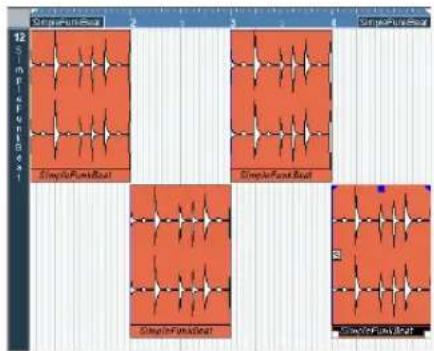
text_image
SimpleFunBeat SimpleFunBeat SimpleFunBeat SimpleFunBeat SimpleFunBeatIn the upper figure it is unnecessarily hard to discern, select and edit the separate events. In the lower figure, some of the events have been moved to another lower lane, making selection and editing much easier.
- To move an event to another lane without accidentally moving it horizontally, press [Ctrl]/[Command] and drag it up or down.
This is the default modifier key for this – you can adjust this in the Preferences if you like.
Overlapping events
Only one event per track can be played back at the same time! This means that if you have overlapping events (on the same lane or different lanes) these will cut each other off, according to the following rules:
- For events on the same lane, the ones that are on top (visible) will be played.
To move overlapping events to the front or back, use the Move to Front and Move to Back functions on the Edit menu.
- For events on different lanes, the event on the lowest lane gets playback priority.
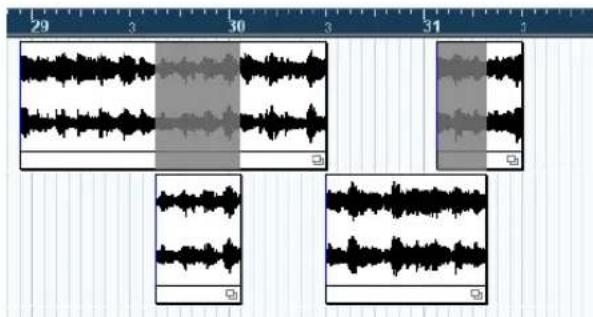
text_image
Audio waveform display showing multiple tracks with varying amplitude and frame rate, labeled with time markers 29–31 and 0–1.The overlapping sections of the upper event will not be played since the event on the lower lane has playback priority!
Imagine the following situation: You have two overlapping audio events, with the top event audible during playback. What happens when you mute the audible event?
- By default, you will not hear the overlapped event when muting an event that has playback priority over another event.
This default behavior ensures that you do not suddenly hear audio events that previously were not part of your mix.
- In the Preferences dialog (Editing–Audio page) you will find the option “Treat Muted Audio Events like Deleted”. When you activate this option, any events overlapped by a muted event will become audible.
Operations

Zooming, selecting and editing in the Audio Part Editor are done just as in the Project window (see "Operations" on page 34).
- Note that if a part is a shared copy (i.e. you have previously copied the part by [Alt]/[Option]-[Shift] and dragging), any editing you perform will affect all shared copies of this part.
To indicate that it is a shared copy, its name is displayed in italics and a symbol is displayed in the lower right corner of the part in the Project window.
Auditioning
There are three ways to listen to the events in the Audio Part Editor:
By using the Speaker tool
If you click somewhere in the editor's event display with the Speaker tool and keep the mouse button pressed, the part will be played back from the position where you clicked. Playback will continue until you release the mouse button.
By using the Audition icon
The Audition and Audition Loop icons.
Clicking the Audition icon on the toolbar plays back the edited audio, according to the following rules:
- If you have selected events in the part, only the section between the first and last selected event will be played back.
- If you have made a range selection, only this section will be played back.
- If there is no selection, the whole part will be played back. If the project cursor is within the part, playback starts from the current cursor position. If the cursor is outside the part, playback starts from the beginning of the part.
- If the Audition Loop icon is activated, playback will continue until you deactivate the Audition icon. Otherwise, the section will be played back once.
- When auditioning with the Speaker tool or Audition icon, audio will be routed directly to the Control Room (Cubase only) or to the Main Mix (the default output bus) if the Control Room is disabled. In Cubase Studio, the Main Mix bus is always used for auditioning.
By using regular playback
You can of course use the regular playback controls while in the Audio Part Editor. Furthermore, if you activate the Solo Editor button on the toolbar, only the events in the edited part will be played back.
The independent track loop function
The independent track loop is a sort of "mini-cycle", affecting only the edited part. When the loop is activated, the events in the parts that are within the loop will be repeated continuously and completely independent – other events (on other tracks) are played back as usual. The only "interaction" between the loop and the "regular playback" is that the loop starts every time the cycle starts over again.
To set up the independent track loop, proceed as follows:
- Turn on the loop by clicking the Independent Track Loop button on the toolbar.
If it is not visible, right-click the toolbar and add the Independent Track Loop Settings section – see "Using the Setup options" on page 471.

When the loop is activated, the cycle is not shown in the editor's ruler. Now you need to specify the length of the loop:
- [Ctrl]/[Command]-click in the ruler to set the start and [Alt]/[Option]-click to set the end of the loop.
You can also edit the loop start and end positions numerically in the fields next to the Loop button.
The loop is indicated in purple in the ruler.
⇒ The events will be looped as long as the Loop button is activated and the Audio Part Editor window is open.
Scrubbing
In the Audio Part Editor, the Scrub tool has a separate icon on the toolbar. Apart from that, scrubbing works exactly as in the Project window (see "Scrubbing" on page 43).
Handling several parts
When you open the Audio Part Editor with several parts selected – all on the same track or on different tracks – they might not all "fit" in the editor window, which can make it hard to get an overview of the different parts when editing.
Therefore, the toolbar features a few functions to make working with multiple parts easier and more comprehensive:
- The Part List menu lists all parts that were selected when you opened the editor, and lets you select which part should be active for editing.
When you select a part from the list, it is automatically made active and centered in the display.
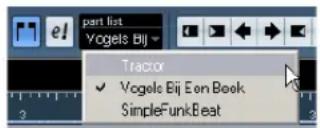
text_image
part list Vogels Bij Tractor ✓ Vogels Bij Een Book SimpleFunkBeatNote that it is also possible to activate a part by clicking on it with the Arrow tool.
- The button "Edit Active Part Only" lets you restrict editing operations to the active part only.
If you for example select "All" from the Select submenu on the Edit menu with this option activated, all events in the active part will be selected but not the events in other parts.
"Edit Active Part Only" activated on the toolbar.
- You can zoom in on an active part so that it fills the screen by selecting "Zoom to Event" from the Zoom submenu on the Edit menu.
- The button "Show Part Borders" can be used if you want to see clearly defined borders for the active part. When this is activated, all parts except the active one are grayed out, making the borders easily discernible. There are also two "markers" in the ruler with the name of the active part, marking its beginning and end. These can be moved freely to change the part borders.
"Show Part Borders" activated on the toolbar.
- It is possible to cycle between parts, making them active using key commands.
In the Key Commands dialog – Edit category, there are two functions: "Activate Next Part" and "Activate Previous Part". If you assign key commands to these, you can use them to cycle between parts. See "Setting up key commands" on page 480 for instructions on how to set up key commands.
Common methods
Assembling a "perfect take"
When you record audio in Cycle mode, either an event or a region (or both) is created for each recorded lap (see "Recording audio in cycle mode" on page 75). These events and regions are named "Take X", where "X" is the number of the take. You can create a perfect take by putting together sections of the different takes in the Audio Part Editor.
⇒ The procedure below will not work if you recorded with "Keep Last" mode selected on the Transport panel. In that case, only the last take will be kept on the track (although the previous takes will be available as regions in the Pool).
First, you have to create an audio part from the takes. This procedure is slightly different depending on whether you choose to create events or regions.
Creating an audio part from events
- In the Project window, use the Object Selection tool to draw a rectangle around the recorded events.
This is necessary, since clicking on the event may just select the event on top (the last take). If in doubt, check the info line – the info text should be yellow. - Pull down the Audio menu and select "Events to Part". The events are converted to an audio part.
- Note that the events cycle record mode also makes it easy to combine different takes in the Project window – see “Create Events mode (Preferences)” on page 76.
Creating an audio part from regions
- In the Project window, select the event you recorded in Cycle mode. After recording, this will play the last take.
- Pull down the Audio menu and select "Events to Part". You are asked whether you want to "Create part using regions".
- Click "Regions". The regions are converted to an audio part.
Assembling a take
- Double-click the part to open the Audio Part Editor. Now, the different takes will be placed on different lanes, with the last take at the bottom.
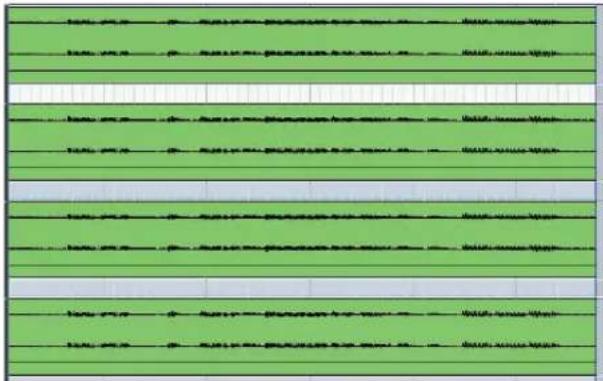
text_image
Green background with horizontal lines of handwritten or printed text, possibly a form or checklist-
Use the tools to cut out pieces of the takes and assemble the final result. This can include splitting with the Scissors tool, resizing events with the Arrow tool or deleting with the Eraser tool.
-
Remember that the events on the lowest lane have play-back priority. Use the Audition icon to audition the result.
- Close the Audio Part Editor. You have now assembled a "perfect take"!
Options and Settings
The following options and settings are available in the Audio Part Editor:
- Snap
You can specify an independent Snap mode (and snap value for the Grid mode) in the editor. The functionality is exactly the same as in the Project window.
- Autoscroll
When Autoscroll is activated on the toolbar, the window will scroll during playback, keeping the project cursor visible in the editor. This setting can be activated or deactivated individually for each window.
- Snap to Zero Crossing
When this option is activated, all audio edits are done at zero crossings (positions in the audio where the amplitude is zero). This helps you avoid pops and clicks which might otherwise be caused by sudden amplitude changes.
The Pool
Background
Every time you record on an audio track, a file is created on your hard disk. A reference to this file – a clip – is also added to the Pool. Two general rules apply to the Pool:
- All audio and video clips that belong to a project are listed in the Pool.
- There is a separate Pool for every project.
The way the Pool displays folders and their contents is similar to the way the Mac OS X Finder and the Windows Explorer display folders and lists of files.
In the Pool you can, among other things, perform the following operations:
Operations that affect files on disk
- Importing clips (audio files can automatically be copied and/or converted)
- Converting file formats.
- Renaming clips (this will also rename the referenced files on disk) and regions
- Deleting clips
▪ Preparing file archives for backup - Minimizing files
Operations that only affect clips
- Copying clips
- Auditioning clips
- Organizing clips
- Applying audio processing to clips
- Saving or importing complete Pool files
Opening the Pool
You can open the Pool in any of the following ways:
- By clicking the Open Pool button on the Project window toolbar.
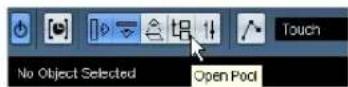
- By selecting "Pool" on the Project menu or "Open Pool Window" on the Media menu.
- By using a key command (by default [Ctrl]/[Command]-[P] – note that using this key command a second time will close the Pool again).
The content of the Pool is divided into three main folders:
■ The Audio folder
This contains all audio clips and regions currently in the project.
■ The Video folder
This contains all video clips currently in the project.
- The Trash folder
Unused clips can be moved into the Trash folder for later permanent removal from the hard disk.
These folders cannot be renamed or deleted from the Pool, but any number of subfolders can be added (see "Organizing clips and folders" on page 270).
Window overview
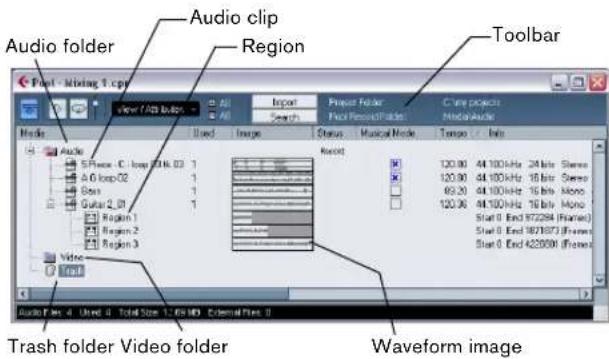
text_image
Audio folder Audio clip Region Toolbar File - Mixing 1.cps View 1/40 boles Import Search Request Folder Request Projects Media Audio Audio Audio S.France C. Impo 216.03 A.O imp.02 Goss Guitar 2.01 Region 1 Region 2 Region 3 Video Trash folder Video folder Waveform imageToolbar overview
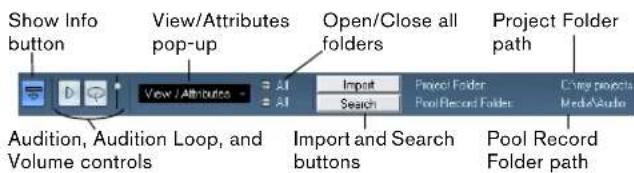
text_image
Show Info button View/Attributes pop-up Open/Close all folders Project Folder path View / Attitudes - 3 All 3 All Import Search Project Folder Pool Record Folder Crowy projects MediaAudio Audition, Audition Loop, and Volume controls Import and Search buttons Pool Record Folder pathThe info line
Click the "Show Info" button on the toolbar to show or hide the info line at the bottom of the Pool window. It shows the following information:
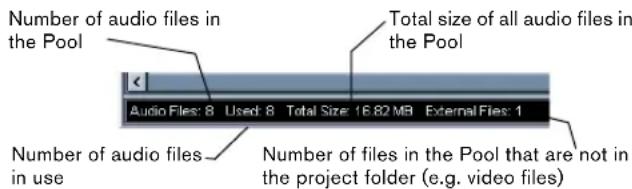
text_image
Number of audio files in the Pool Total size of all audio files in the Pool Audio Files: 8 Used: 8 Total Size: 16.82 MB External Files: 1 Number of audio files in use Number of files in the Pool that are not in the project folder (e.g. video files)How clips and regions are displayed in the Pool
- Audio clips are represented by a waveform icon followed by the clip name.

Guitars2
- Audio regions are represented by a region icon followed by the region name.

Region 1
- Video clips are represented by a camera icon followed by the clip name.

Video
The Pool window columns
Various information about the clips and regions can be viewed in the Pool window columns. The columns contain the following information:
Column Description
| Media This column contains the Audio, Video and Trash folders. If the folders are opened, the clip or region names are shown and can be edited. This column is always shown. |
| Used This column displays the number of times a clip is used in the project. If there is no entry in this column, the corresponding clip is not used. |
| Status This column displays various icons that relate to the current Pool and clip status. See “About the Status column symbols” on page 262 for a description of the icons. |
| Musical Mode The checkbox in this column allows you to activate or deactivate Musical Mode. If the Tempo column (see below) displays “???”, you have to enter the correct tempo before you can activate Musical Mode. |
Column Description
Tempo This shows the tempo of audio files, if available. If no tempo has been specified, the column displays "???".
Sign. This is the time signature, e.g. "4/4".
Key This is the root key, if one was specified for the file.
Info This column shows the following information for audio clips: The sample rate, bit resolution, number of channels and the length in seconds. For regions, it displays start and end times in frames, and for video clips the frame rate, number of frames, and length in seconds.
Type This column shows the file format of the clip.
Date This column shows the date and time when the audio file was last changed.
Origin Time This column shows the original start position where a clip was recorded in the project. As this value can be used as a basis for the option "Insert into Project" in the Media or context menu (and other functions), you can change it if the Origin Time value is independent (i.e. not for regions). This can either be done by editing the value in the column, or by selecting the corresponding clip in the Pool, moving the project cursor to the new desired position and selecting "Update Origin" from the Audio menu.
Image This column displays waveform images of audio clips or regions.
Path This column shows the path to the location of a clip on the hard disk.
Reel Name If you have imported an OMF file (see "Exporting and importing OMF files (Cubase only)" on page 462), it may include this attribute, which is then shown in this column. The Reel Name describes the "physical" reel or tape from which the media was originally captured.
About the Status column symbols
The Status column can display various symbols that relate to the clips status. The following symbols can be shown:
| Symbol | Description |
| Record | This indicates the current Pool Record folder (see “Changing the Pool Record folder” on page 269). |
| This symbol is shown if a clip has been processed. | |
| ? | The question mark indicates that a clip is referenced in the project but missing from the Pool (see “About missing files” on page 266). |
| This indicates that the clip file is external, i.e. located outside the current Audio folder for the project. | |
| This indicates that the clip has been recorded in the currently open version of the project. This is useful for finding recently recorded clips quickly. |
Sorting the Pool contents
You can sort the clips in the Pool by name, date etc. This is done by clicking on the corresponding column heading. Clicking again on the same heading switches between ascending and descending sort order.
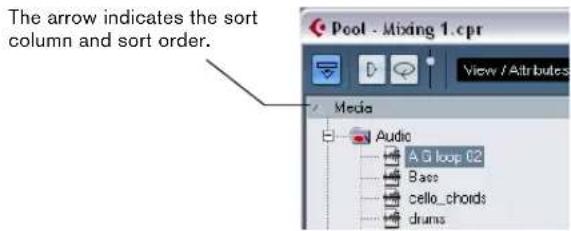
text_image
The arrow indicates the sort column and sort order. Pool - Mixing 1.cpr View / Attributes Media Audio A G loop 02 Base cello_chords drumsCustomizing the view
- You can specify which of the columns are shown or hidden by opening the View/Attributes pop-up menu on the toolbar and selecting/deselecting items.
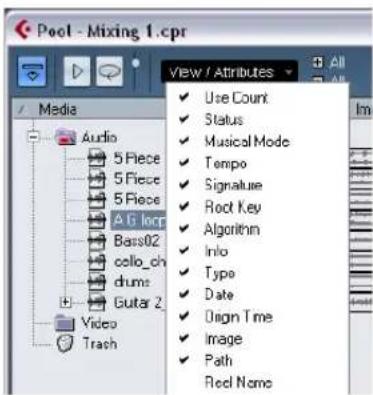
text_image
Pool - Mixing 1.cpr View / Attributes Media Audio 5 Piece 5 Piece 5 Piece A to locp Bass02 cello_ch drums Guitar 2 Video Trash Use Count Status Musical Mode Tempo Signature Root Key Algorithm Info Type Date Dragn Time Image Path Real Name- You can rearrange the order of the columns by clicking on a column heading and dragging the column to the left or right.
The mouse pointer changes to a hand when you place it on the column heading.
- The width of a column can also be adjusted by placing the pointer between two column headers and dragging left or right.
The pointer changes to a divider when you place it between two column headers.
Operations
⇒ Most of the Pool-related main menu functions are also available on the Pool context menu (opened by right-clicking in the Pool window).
Renaming clips or regions in the Pool
To rename a clip or a region in the Pool, select it and click on the existing name, type in a new name and press [Return].
⇒ This will also rename the referenced files on disk!
Renaming a clip in the Pool is much preferred to renaming it outside Cubase (for example on the computer desktop). This way, Cubase already "knows" about the change, and will not lose track of the clip the next time you open the project. See "About missing files" on page 266 for details about lost files.
Duplicating clips in the Pool
To duplicate a clip, proceed as follows:
-
Select the clip you wish to copy.
-
Select "New Version" on the Media menu.
A new version of the clip appears in the same Pool folder, with the same name but with a "version number" after it, to indicate that the new clip is a duplicate. The first copy made of a clip will get the version number "2" and so on. Regions within a clip are copied too, but keep their name.
! Duplicating a clip does not create a new file on disk, but a new edit version of the clip (referring to the same audio file).
Inserting clips into a project
To insert a clip into a project, you can either use the Insert commands on the Media menu or use drag and drop.
Using menu commands
Proceed as follows:
-
Select the clip(s) you want to insert into the project.
-
Pull down the Media menu and select an "Insert into Project" option.
"At Cursor" will insert the clip(s) at the current project cursor position.
"At Origin" will insert the clip(s) at their Origin Time position(s).
- Note that the clip will be positioned so that its snap point is aligned with the selected insert position.
You can also open the Sample Editor for a clip by double-clicking it, and perform the insert operation from there. This way you can set the snap point before inserting a clip.
- The clip is inserted on the selected track or on a new audio track.
If several tracks are selected, the clip will be inserted on the first selected track.
Using drag and drop
When using drag and drop to insert clips into the Project window, please note the following:
- Snap is taken into account if activated.
- While you drag the clip in the Project window, its position is indicated by a marker line and a numerical position box.
Note that these indicate the position of the snap point in the clip. For example, if you drop the clip at the position 10.00, this will be where the snap point ends up. See "Adjusting the snap point" on page 226 for information on how to set the snap point.
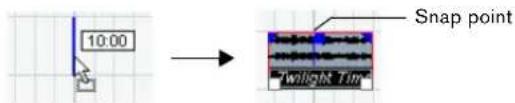
text_image
10:00 Snap point Twilight Tim- If you position the clip in an empty area in the event display (i.e. below existing tracks), a new track is created for the inserted event.
Deleting clips
Removing clips from the Pool
To remove a clip from the Pool without deleting it from the hard disk, proceed as follows:
- Select the clip(s) and select "Delete" from the Edit menu (or press [Backspace] or [Delete]).
A prompt asks whether you want to move the clip to the Trash or remove it from the Pool.
- If you try to delete a clip that is used by one or more events, the program will ask you whether to remove these events from the project.
text_image
Cubase 5 The selection is used in the project! Do you want to remove all occurrences from the project? Remove CancelIf you cancel, neither the clip nor the associated events are deleted.
- In the window that appears, select "Remove from Pool".
The clip is no longer associated with the project, but still exists on the hard disk and can be used in other projects, etc. This operation can be undone.
Deleting from the hard disk
To delete a file permanently from the hard disk, it must first be moved to the Trash folder:
- Follow the instructions for deleting clips above, but click the Trash button instead of the Remove from Pool button.
Alternatively, you can drag and drop clips into the Trash folder.
- On the Media menu, select "Empty Trash".
A warning message is displayed.
- Click "Erase" to delete the file on the hard disk permanently.
This operation cannot be undone!
Before you permanently delete audio files from the hard disk, make sure that they are not used by another project!
To retrieve a clip or region from the Trash folder, drag it back into an Audio or Video folder.
Removing unused clips
This function finds all clips in the Pool that are not used in the project. You can then decide whether to move them to the Trash folder (from where they can be permanently deleted) or to remove them from the Pool:
- Select "Remove Unused Media" on the Media or context menu.
A message appears asking you whether you want to move the file to the Trash or to remove it from the Pool.
- Make your selection.
Removing regions
To remove a region from the Pool, select it and select "Delete" from the Edit menu (or press [Backspace] or [Delete]).
⇒ For regions there is no alert if the region is used in the project!
Locating events and clips
Locating events via clips in the Pool
If you want to find out which events in the project refer to a particular clip in the Pool, proceed as follows:
- Select one or more clips in the Pool.
- Select "Select in Project" on the Media menu.
All events that refer to the selected clip(s) are now selected in the Project window.
Locating clips via events in the Project window
If you want to find the clips events in the Project window, proceed as follows:
- Select one or more events in the Project window.
- Pull down the Audio menu and select "Find Selected in Pool".
The corresponding clip(s) are located and highlighted in the Pool.
Searching for audio files
The search functions can help you locate audio files in the Pool, on your hard disk or on other media. This works much like the regular file search, but with a couple of extra features:
- Click the Search button in the toolbar.
A search pane appears at the bottom of the window, displaying the search functions.
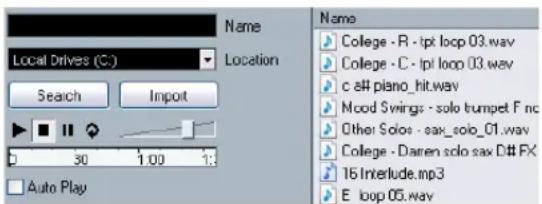
text_image
Local Drives (C:) Search Import Auto Play Name Location 30 1:00 1: Name College - R - tpt loop 03.wav College - C - tpl loop 03.wav c ## piano_hit.wav Mood Swings - solo trumpet F nc Other Solos - sax_solo_01.wav College - Damen solo sax D## FX 16 Interlude.mp3 E loop 05.wavThe search pane in the Pool
By default, the search parameters available in the search pane are "Name" and "Location". For using other filter criteria, see "Extended Search functionality" on page 265.
-
Specify the name of the file(s) to search for in the Name field.
You can use partial names or wildcards (*). Note that only audio files of the supported formats will be found. -
Use the Location pop-up menu to specify where to search.
The pop-up menu will list all your local drives and removable media.
- If you want to limit the search to certain folders, choose "Select Search Path" and select the desired folder in the dialog that appears.
The search will include the selected folder and all subfolders. Note also that folders you have recently selected using the "Select Search Path" function will appear on the pop-up menu, allowing you to quickly select them again.
- Click the Search button.
The search is started and the Search button is labeled Stop – click this to cancel the search if needed.
When the search is finished, the files found are listed to the right.
- To audition a file, select it in the list and use the play-back controls to the left (Play, Stop, Pause and Loop). If Auto Play is activated, selected files will automatically be played back.
- To import a file into the Pool, double-click on it in the list or select it and click the Import button.
- To close the search pane, click the Search button in the toolbar again.
Extended Search functionality
Apart from the search criterion Name, additional search filters are available. The Extended Search options allows for a very detailed search, helping you to master even the largest sound database.
To use them, proceed as follows:
-
Click the Search button on the toolbar. The Search pane is displayed in the lower part of the Pool window.
-
Move the mouse pointer over the "Name" text to the right of the name field and click on the arrow that appears.
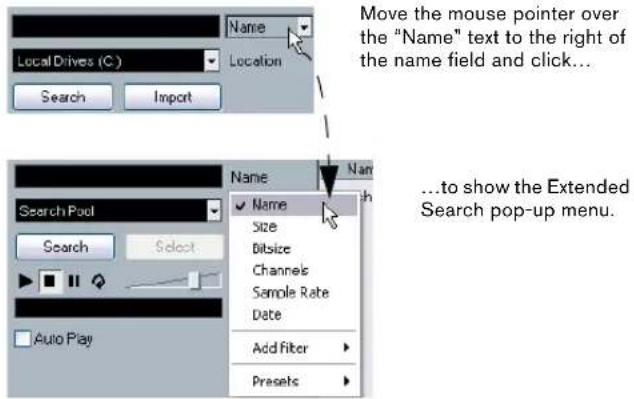
text_image
Move the mouse pointer over the "Name" text to the right of the name field and click... Search Import Search Pool Search Select Auto Play Name Name Size Bitsize Channels Sample Rate Date Add filter Presets ...to show the Extended Search pop-up menu.- The Extended Search pop-up menu opens.
It contains six options determining which search criterion is displayed above the Location field (Name, Size, Bitsize, Channels, Sample Rate or Date), as well as the Add Filter and Presets submenus.
The search criteria have the following parameters:
- Name: partial names or wildcards (*)
- Size: Less than, More than, Equal, Between (two values), in seconds, minutes, hours and bytes
- Bitsize (resolution): 8, 16, 32, 64
- Channels: Mono, Stereo and from 3 to 16
- Sample Rate: various values, choose "Other" for free setting
-
Date: various search ranges
-
Select one of the search criteria in the pop-up menu to change the search option above the Location pop-up menu.
- If you want to display more search options, select the desired element from the "Add filter" submenu.
This allows you, for example, to add the Size or the Sample Rate parameters to the already displayed Name and Location parameters.
text_image
Add filter Presets Name Size Bitsize Channels Sample Rate Date- You can save presets of your search filter settings. To do this, click Save Preset on the Presets submenu and enter a name for the preset.
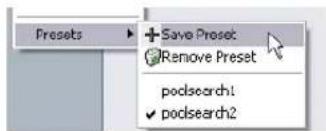
text_image
Presets +Save Preset Remove Preset poclsearch1 ✓poclsearch2Existing presets can be found at the bottom of the list. To remove a preset, click on the preset to activate it, then select Remove Preset.
The Find Media window
Alternatively to the search pane in the Pool, you can open a stand-alone Find Media window by selecting the "Search Media..." option from the Media or context menu (also available from the Project window). This offers the same functionality as the search pane.
- To insert a clip or region directly into the project from the Find Media window, select it in the list and choose one of the "Insert into Project" options from the Media menu. The options are described in the section "Inserting clips into a project" on page 263.
About missing files
When you open a project, the Resolve Missing Files dialog (see below) may open, warning you that one or more files are "missing". If you click Close, the project will open anyway, without the missing files. In the Pool, you can check which files are considered missing. This is indicated by a question mark in the Status column.
A file is considered missing under one of the following conditions:
- The file has been moved or renamed outside the program since the last time you worked with the project, and you ignored the Resolve Missing Files dialog when you opened the project for the current session.
- You have moved or renamed the file outside the program during the current session.
- You have moved or renamed the folder in which the missing files are located.
Locate missing files
- Select "Find Missing Files" from the Media or context menu.
The Resolve Missing Files dialog opens.
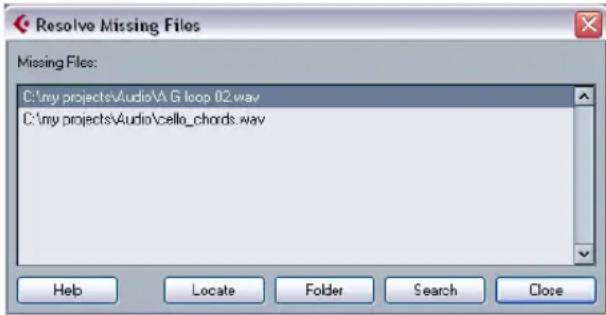
text_image
Resolve Missing Files Missing Files: C:\my projects\Audio\A G loop 02.wav C:\my projects\Audio\cello_chords.wav Help Locate Folder Search Close-
Decide if you want the program to try to find the file for you (Search), if you want to do it yourself (Locate) or if you want to specify in which directory the program should search for the file (Folder).
-
If you select Locate, a file dialog opens, allowing you to locate the file manually. Select the file and click "Open".
- If you select Folder, a dialog opens to let you specify the directory in which the missing file can be found. This might be the preferred method if you have renamed or moved the folder containing the missing file, but the file still has the same name. Once you select the correct folder, the program finds the file and you can close the dialog.
- If you select Search, a dialog opens to let you specify which folder or disk should be scanned by the program. Click the Search Folder button, select a directory or a disk and click the Start button. If found, select the file from the list and click "Accept". Afterwards Cubase tries to map all other missing files automatically.
Reconstructing missing edit files
If a missing file cannot be found (e.g. if you have accidentally deleted it from the hard disk), it will normally be indicated with a question mark in the Status column in the Pool. However, if the missing file is an edit file (a file created when you process audio, stored in the Edits folder within the project folder), it may be possible for the program to reconstruct it by recreating the editing to the original audio file.
Proceed as follows:
- Open the Pool and locate the clip(s) for which files are missing.
- Check the Status column – if it says "Reconstructible", the file can be reconstructed by Cubase.
- Select the reconstructible clips and select "Reconstruct" from the Media menu.
The editing is performed and the edit files are recreated.
Removing missing files from the Pool
If the Pool contains audio files that cannot be found or reconstructed, you may want to remove these. For this, select "Remove Missing Files" from the Media or context menu. This will remove all missing files from the Pool as well as the corresponding events from the Project window.
Auditioning clips in the Pool
There are three ways to audition clips in the Pool:
- By using key commands. If you activate the "Playback Toggle triggers Local Preview" option in the Preferences (Transport page), you can use [Space] to audition. This is the same as clicking the Audition icon on the toolbar.
- By selecting a clip and activating the Audition button. The whole clip will play back, unless you stop playback by clicking the Audition button again.
- By clicking somewhere in the waveform image for a clip. The clip will play from the position in the waveform you click until the end of the clip, unless you stop playback by clicking the Audition button, or by clicking anywhere else in the Pool window.
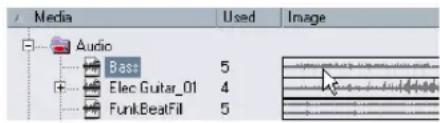
text_image
Media Audio Bass 5 Elec Guitar_01 4 FunkBeatFill 5Click in the waveform image to audition a clip.
The audio is routed directly to the Control Room, if activated (Cubase only). When the Control Room is deactivated, the audio is routed to the Main Mix (the default output) bus, bypassing the audio channel's settings, effects and EQs. In Cubase Studio, the Main Mix bus is always used for auditioning.
⇒ You can adjust the auditioning level with the miniature level fader on the toolbar. This does not affect the regular playback level.
If you have activated the Audition Loop button before you audition, the following will happen:
- When you click the Audition button to audition a clip, the clip is repeated indefinitely until you stop playback by clicking the Audition or Audition Loop button again.
- When you click in the waveform image to audition, the section from the point you clicked to the end of the clip is repeated indefinitely until you stop playback.
Opening clips in the Sample Editor
The Sample Editor allows you to perform detailed editing on the clip (see "The Sample Editor" on page 219). You can open clips in the Sample Editor directly from the Pool in the following ways:
- If you double-click a clip waveform icon or a clip name in the Media column, the clip opens in the Sample Editor.
- If you double-click a region in the Pool, its clip opens in the Sample Editor with the region selected.
One practical use for this is to set a snap point for a clip (see "Adjusting the snap point" on page 226). When you later insert the clip from the Pool into the project, you can have it be properly aligned according to the set snap point.
About the Import Medium dialog
The Import Medium dialog lets you import files directly into the Pool. It is opened from the Media or context menu or using the Import button in the Pool window.
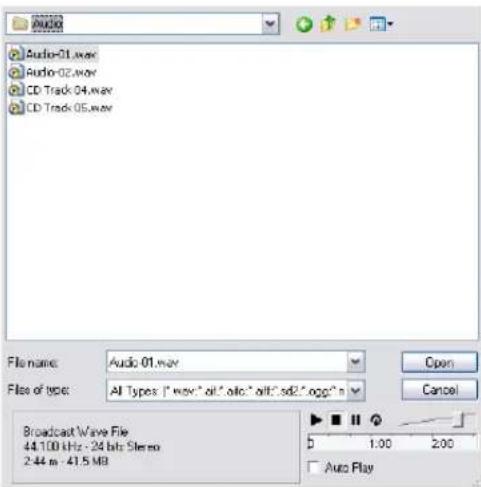
text_image
Audio Audio-01.wav Audio-02.wav CD Track 04.wav CD Track 05.wav File name: Audio 01.wav File of type: All Types: "wav" alt, alt, alt, sd2, ogg" Broadcast Wave File 44.100 kHz - 24 bits Stereo 2.44 m - 41.5 MB Open Cancel Auto PlayThis is a standard file dialog, where you can navigate to other folders, audition files, etc. The following audio file formats can be imported:
- Wave (Normal or Broadcast, see "Broadcast Wave files" on page 424)
- AIFF and AIFC (Compressed AIFF)
- REX or REX 2 (see "Importing ReCycle files" on page 461)
- Dolby Digital AC3 file (ac3 – if you have the Steinberg Dolby Digital Encoder installed in your system) – Cubase only
- DTS file (dts – if you have the Steinberg DTS Encoder installed in your system) – Cubase only
- SD2 (Sound Designer II)
- MPEG Layer 2 and Layer 3 (mp2 and mp3 files – see "Importing compressed audio files" on page 461)
- Ogg Vorbis (ogg files – see "Importing compressed audio files" on page 461)
- Windows Media Audio (Windows – see "Importing compressed audio files" on page 461)
- Wave 64 (w64 files – Cubase only)
They may have the following characteristics:
- Stereo or mono
- Any sample rate (although files with another sample rate than the one used in the project will play back at the wrong speed and pitch – see below).
- 8, 16, 24 bit or 32 bit float resolution
The following videos formats can also be imported:
- AVI (Audio Video Interleaved)
- MOV and QT (QuickTime)
- WMV (Windows only)
- DV (MacOSXonly)
- MPEG 1 and 2 video files
⚠ For video files to be played back correctly, the right codecs have to be installed.
⇒ It is also possible to use the commands on the Import submenu on the File menu to import audio or video files into the Pool.
When you select a file in the Import Medium dialog and click Open, the Import Options dialog opens:
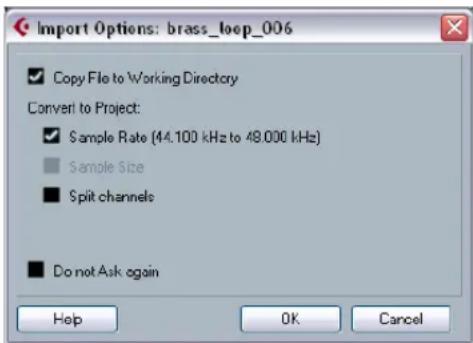
text_image
Import Options: brass_loep_006 ✓ Copy File to Working Directory Convert to Project: ✓ Sample Rate (44.100 kHz to 48.000 kHz) ■ Sample Size ■ Split channels ■ Do not Ask again Help OK CancelIt contains the following options:
- Copy File to Working Directory
Activate this if you want a copy of the file to be made in the Audio folder of the project, and have the clip refer to this copy. If the option is off, the clip will refer to the original file in the original location (and will thus be marked as "external" in the Pool – see "About the Status column symbols" on page 262).
- Convert to Project section
Here you can choose to convert the sample rate (if the sample rate is different than the one set for the project) or the sample size, i.e. resolution (if the sample size is lower than the record format used in the project).
The options are only available if necessary. Note that if you are importing several audio files at once, the Import Options dialog will instead contain a "Convert and Copy to Project if needed" checkbox. When this is activated, the imported files will be converted only if the sample rate is different or the sample size is lower than the project's.
- Split channels/Split multi-channel files
If this is activated, stereo and multi-channel files are split into a corresponding number of mono files – one for each channel – and these will be imported into the Pool. Note that if you use this option, the imported files will always be copied to the Audio folder of the project, as described above.
- Do not Ask again
If this is activated, files will always be imported according to the settings you have made, without this dialog appearing. This can be reset in the Preferences (Editing–Audio page).
You can always convert files later by using the Convert Files (see "Convert Files" on page 272) or Conform Files (see "Conform Files" on page 272) options.
About the Import Audio CD dialog
You can import tracks (or sections of tracks) from an audio CD directly into the Pool by using the "Import Audio CD..." function on the Media menu. This opens a dialog in which you can specify which tracks should be copied from the CD, converted to audio files and added to the Pool.
For details about the Import from Audio CD dialog, see "Importing audio CD tracks" on page 459.
Exporting regions as audio files
If you have created regions within an audio clip (see "Working with regions" on page 228), these can be exported as separate audio files. To create a new audio file from a region, proceed as follows:
- In the Pool, select the region you wish to export.
- On the Audio menu, select "Bounce Selection". A browser dialog opens.
- Select the folder in which you want the new file to be created.
A new audio file is created in the specified folder. The file will have the name of the region and will automatically be added to the Pool.
If you have two clips that refer to the same audio file (different "versions" of clips, e.g. created with the "Convert to Real Copy" function), you can use the Bounce Selection function to create a new, separate file for the copied clip. Select the clip, select Bounce Selection and enter a location and name for the new file.
Changing the Pool Record folder
text_image
View / Attributes Media Used Status Audio Recond Video TrashThe Pool Record folder
All audio clips that you record in the project will end up in the Pool Record folder. The Pool Record folder is indicated by the text "Record" in the Status column and by a red dot on the folder itself. By default, this is the main Audio folder. You can, however, at any time create a new Audio subfolder and designate this as your Pool Record folder.
To do this, proceed as follows:
- Select the Audio folder or any audio clip. You cannot designate the Video folder (or any of its subfolders) as the Pool Record folder.
- Select "Create Folder" on the Media or context menu. A new empty subfolder named "New Folder" appears in the Pool.
- Select the new folder and rename it as desired.
- Select "Set Pool Record Folder" on the Media or context menu, or click in the Status column of the new folder. The new folder now becomes the Pool Record folder, and any audio recorded in the project will be saved in this folder.
Organizing clips and folders
If you accumulate a large number of clips in the Pool, it may sometimes be difficult to quickly find specific items. In such cases, organizing clips in new subfolders with suitable names that reflect the content can be a solution. For example, you could put all sound effects in one folder, all lead vocals in another, etc. Proceed as follows:
- Select the type of folder, audio or video, for which you want to create a subfolder.
You cannot put audio clips in a video folder and vice versa. - Select "Create Folder" on the Media or context menu. A new empty subfolder named "New Folder" appears in the Pool.
- Rename the folder as desired.
- Drag and drop the clips you wish to move to the new folder.
- Repeat steps 1–4 as necessary.
Applying processing to clips in the Pool
You can apply audio processing to clips from within the Pool in the same way as to events in the Project window. Simply select the clip(s) and choose a processing method from the Audio menu. To find out more about audio processing, see the chapter "Audio processing and functions" on page 204.
Undoing processing
If you have applied processing to a clip, in the Project window, the Sample Editor, or in the Pool, this is indicated by the red and gray waveform symbol in the Status column. This processing can always be undone using the Offline Process History, see "The Offline Process History dialog" on page 214.
Freeze Edits
You can use the Freeze Edits function to create a new file with processing applied or to replace the original with a processed version, see "Freeze Edits" on page 215.
Minimize File
The option "Minimize File" on the Media or context menu allows you to shrink the audio files according to the size of the audio clips referenced in a project. The files produced using this option only contain the audio file portions actually used in the project. This can significantly reduce the size of the project, if large portions of the audio files are unused. Therefore, the option is useful for archiving purposes after you have completed a project.
⇒ This operation will permanently alter the selected audio files in the Pool. This cannot be undone!
If this is not what you want, you can use the option "Back up Project" on the File menu instead, see "Back up Project" on page 458. This function also has the option of minimizing files, but copies all files into a new folder, leaving the original project untouched.
Proceed as follows:
- Select the file(s) you wish to minimize.
-
Select "Minimize File" on the Media menu.
An alert appears, informing you that the entire Edit History will be cleared. Click Minimize to proceed or Cancel to stop the process. -
After the minimizing is finished, another alert appears, because the file references in the stored project have become invalid.
Click Save Now to save the updated project or click Later to proceed with the unsaved project.
Only the audio portions actually used in the project remain in the corresponding audio file(s) in the Pool Record folder.
Prepare Archive
The option "Prepare Archive" on the Media menu is useful if you want to archive a project. It verifies that every clip referenced in the project is located in the same folder, and takes actions if that is not the case:
- Any files that are located outside the current project folder will be copied into it.
Please note that audio files residing within the project folder will not be copied to the audio folder. You will therefore have to copy them there manually before backing up the audio folder or save them separately during backup, see below.
- If any processing has been applied, you will be asked whether you want to Freeze Edits.
If you do this, you do not have to archive the Edits folder. Everything belonging to the project will be contained in the project file and the Audio folder.
Once you have performed a Prepare Archive, you can copy the project file, the Audio folder and any other audio material you saved in the project folder to a different location, e.g. a backup disk.
It is not necessary to archive the Images folder, since these Images can be recreated by Cubase. You may also find a file with the extension ".csh" in the project folder.
This contains image information for edited clips and other data that can be recreated, so it can safely be deleted.

Video clips are always referenced and not stored in the project folder.
Importing and exporting Pool files (Cubase only)
You can import or export a Pool as a separate file (file extension ".npl"), by using the "Import Pool" and "Export Pool" options on the Media or context menu.
When you import a Pool file, the file references in it are "added" to the current Pool.
Since the audio and video files are only referenced but not saved in the Pool file, the Pool import is only useful if you have access to all referenced files (which preferably should have the same file paths as when the Pool was saved).
You can also save and open libraries. These are standalone Pool files that are not associated with a project.
Working with libraries (Cubase only)
You can use libraries to store sound effects, loops, video clips, etc., and transfer media from a library into a project by using drag and drop. The following library functions are available on the File menu:
New Library
Creates a new library. Just as when creating new projects, you will be asked to specify a project folder for the new library (in which media files will be stored). The library will show up as a separate Pool window in Cubase.
Open Library
Opens a file dialog for opening a saved library file.
Save Library
Opens a file dialog for saving the library file (file extension ".npl").
Convert Files
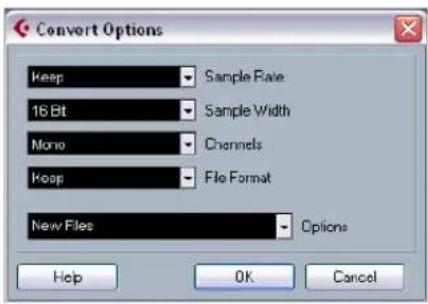
text_image
Convert Options Keep Sample Raise 16 Bit Sample Width Mono Channels Keep File Format New Files Options Help OK CancelSelecting the option "Convert Files" on the Media or context menu opens the Convert Options dialog which operates on selected files. Use the pop-up menus to specify which audio file attributes you want to keep and which you want to convert. The available settings are:
- Sample Rate
Keep as is, or convert to a sample rate between 8.000 and 96.000 kHz.
- Sample Width
Keep the sample width (resolution) as is, or convert to 16 Bit, 24 Bit or 32 Bit Float.
- Channels
Keep as is, or convert the file to Mono or Stereo Interleaved.
- File Format
Keep as is, or convert to Wave, AIFF, Wave 64 or Broadcast Wave format.
Options
When you convert a file, you can use the Options pop-up to set one of the following options regarding what to do with the new file:
Option Description
| New Files Creates a copy of the file in the audio folder and converts this new file according to the chosen attributes. The new file is added to the Pool, but all clip references will still point to the original, unconverted file. | |
| Replace Files Converts the original file without changing clip refer-ences. The references are however saved with the next save action. | |
| New + Replace in Pool | Creates a new copy with the chosen attributes, replaces the original file with the new one in the Pool and redirects the current clip references from the original file to the new file. This is the option to select if you want your audio clips to refer to the converted file, but still want to keep the original file on disk (e.g. if the file is used in other projects). |
Conform Files
By using this command, you will change all selected files that have different file attributes than what is specified for the project, to conform to this standard.
Proceed as follows:
-
Select the clips in the Pool.
-
Select "Conform Files" on the Media menu.
A dialog opens allowing you to choose between keeping or replacing the original unconverted files in the Pool.
The following applies:
- Clip/event references in the pool are always redirected to the conformed files.
- If any "keep" option is selected, original files remain in the Project's Audio folder and new files are created.
- If you select the "Replace" option, files in the Pool and in the Project's Audio folder are replaced.
Extract Audio from Video File
This Media menu item allows you to extract the audio from a video file on disk. It automatically generates a new audio clip that will appear in the Pool Record folder. The resulting clip will have the following properties:
- It will get the same file format and sample rate/width as in the current project.
- It will get the same name as the video file.
→ This function is not available for .mpeg video files.
The MediaBay
Introduction
One of the biggest challenges in typical computer-based music production environments is how to manage the ever-growing number of plug-ins, instruments, presets, etc. from multiple sources. With VST Sound, Cubase offers a comprehensive system to organize sounds and sound-related files, with the powerful MediaBay at its core.
What is VST Sound?
With version 4.5, Steinberg introduced VST Sound, a new version of the Media Management System that is directly integrated into VST3 and that has now replaced the SoundFrame concept. VST Sound allows direct integration into the MediaBay to third party manufacturers of plug-ins and instruments, and encompasses all formats and file types previously supported by SoundFrame such as audio loops, VSTi presets, video, MIDI files and track presets.
VST Sound in Cubase links the following features:
The MediaBay
The MediaBay is a universal Media Management System providing different views that allow you to find and tag media files, quickly import media files into projects and more.
- VST Sound Loops
In Cubase, you can add meta data for category, style, character and other information to audio and MIDI loops, thus converting them into VST Sound loops that can easily be managed with the MediaBay.
- VST3 Presets
Cubase makes use of VST presets as an additional way to apply sounds to instrument tracks and effects to audio tracks (see "Previewing MIDI, instrument and VST presets independently of tracks" on page 293).
Plug-in parameters can be saved as VST presets, and you can also generate VST presets (i.e. sounds) from VST2 Instruments.
- Track presets
Track presets are a combination of track settings, effects and mixer settings that can be applied to new tracks of various types. So right from the start, you can set up your tracks for a specific sound (see the chapter "Working with Track Presets" on page 288).
- VST Instruments
The VST Instruments included with Cubase are the best way to experience VST Sound out of the box. They provide more than 1000 sounds that can be searched, sorted and previewed conveniently (see the chapter "VST Instruments and Instrument tracks" on page 169.
The VST Sound features can easily be recognized by the VST Sound symbol.

The VST Sound symbol
What is the MediaBay?
Modern music production involves having to deal with a multitude of media files, such as audio, MIDI and video files.
Cubase features a powerful media file management database that allows you to control all your media files from within your sequencer program, similar to what you can do in the Windows Explorer or Mac OS Finder. This may involve several different tasks:
- You can browse the folders of your file system to view folders and files.
- You can define searches to find specific files and filter the search results.
- You can organize your files in a folder structure.
- You can use the tagging features to assign your files to specific categories, and use these categories as the basis for your searches.
Which file formats are supported?
The following media file formats are supported by the Media Management System:
- Audio: .wav, .w64, .aiff, .aifc, .rex, .rx2, .mp3, .mp2, .ogg, .sd2, .wma (Windows only)
■ MIDI: .mid and .midiloop - Video: .avi, .mov, .qt, .mpg, .mpeg, .wmv (Windows only)
- Track Presets: .trackpreset
These are templates for audio tracks, MIDI tracks and instrument tracks. Track Presets are described in detail in the chapter "Working with Track Presets" on page 288.
■ VST Presets: .vstpreset
VST presets are files containing all parameter settings for a particular VST plug-in. VST preset files are described in detail in the section "Previewing MIDI, instrument and VST presets independently of tracks" on page 293.
- Pattern banks: .patternbank Pattern banks contain drum patterns created with the MIDI plug-in “Beat Designer”, see “Previewing pattern banks” on page 284.
- Project files (from Cubase, Nuendo, Sequel): .cpr, .npr, .steinberg-project
When the option "Show file extensions" is activated in the Preferences dialog (MediaBay page), file name extensions (e.g. .wav or .cpr) will be displayed in the MediaBay.
Accessing the Media Management System
The Media Management System in Cubase can be accessed via three different preconfigured views: the MediaBay, the Loop Browser and the Sound Browser.
To access these, pull down the Media menu and select "Open MediaBay", "Open Loop Browser" or "Open Sound Browser" (or use the respective key commands).
Which of these views to use depends entirely on your working environment, and you may find that you want to change the default setup to better meet your requirements.
- By default, the MediaBay is configured to show all window sections and display all file types. If you want to work on media files of various types, if you have to move files to different locations using the Browser section, or if you want to perform other general file management tasks, the MediaBay is probably the best view configuration.
- The Loop Browser is configured to show audio files and MIDI loops. Use this if your focus is on working with loops.
- The Sound Browser is focussed on track preset and VST preset files. Use this if you want to work with the available presets.
Whenever you read about the "MediaBay" in this manual, please remember the following:
The MediaBay is only one of the three preconfigured views of the Media Management System. Since all controls are visible in the MediaBay window per default, we will refer to this view throughout this manual when describing functions. However, the editing methods performed in the MediaBay can also be applied in the Loop Browser and the Sound Browser.
Key commands
Many of the MediaBay functions can be performed using key commands. These can be found in the Key commands dialog (Media category). For details on setting up and using key commands, see the chapter "Key commands" on page 479.
Navigation
You can use the [Tab] key on your computer keyboard to move the focus between the different sections of the MediaBay window. Use the arrow keys to navigate to different folders, files or tags.
Note that the field that has the focus in the Filter section of the Viewer is shown in light blue.
Window overview
The Viewer section, see "Finding files in the Viewer section" on page 279.
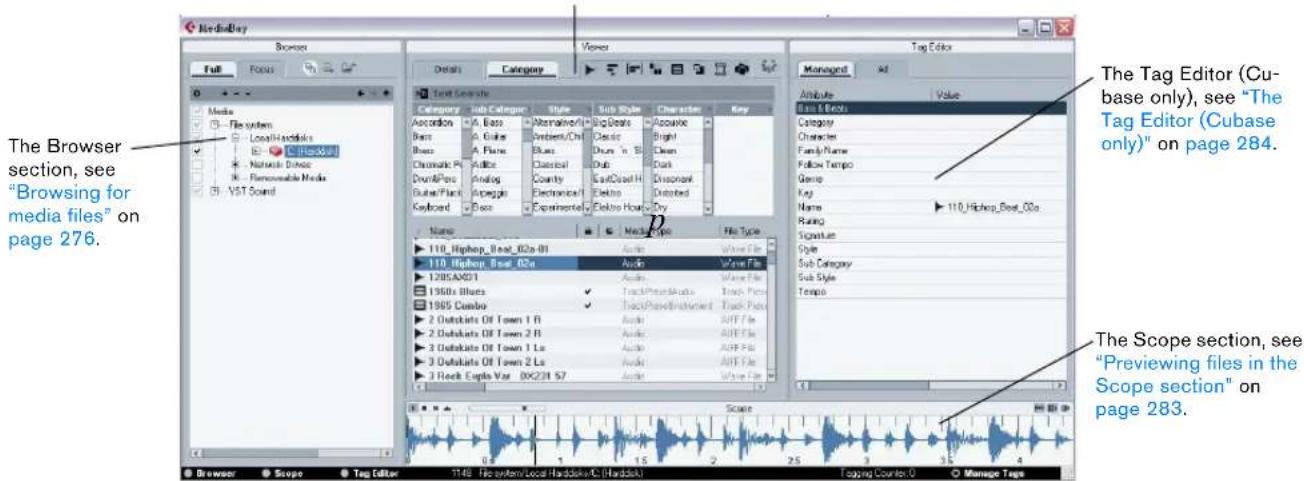
text_image
The Browser section, see "Browsing for media files" on page 276. The Scope section, see "Previewing files in the Scope section" on page 283.The info line
The info line is located at the bottom of the window.

The info line shows the number of files displayed in the Viewer section and the path to the folder selected in the Browser section in which these files were found.
MediaBay sections
You can use the buttons below the Browser section to show/hide the respective sections in the MediaBay window. The Viewer section cannot be hidden.
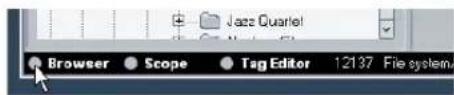
text_image
Jazz Quartel Browser Scope Tag Editor 12137 File systemClick this button to hide the Browser section.
- You can change the size of the individual sections by dragging the divider line between two sections.
- When saving a Cubase project, the current status of the MediaBay is also saved.
This means that if the MediaBay was open when you saved a project, it will be opened again the next time you open this particular project. The last MediaBay window configuration will also be restored.
Browsing for media files
To the left in the default MediaBay window you will find the Browser section.
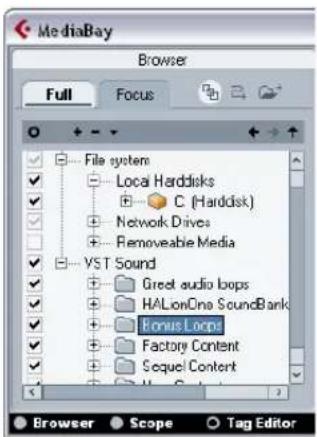
text_image
MediaBay Browser Full Focus File system Local Harddisks C (Harddisk) Network Drives Removable Media YST Sound Greet audio loops HALionOne SoundBank Browus Loops Factory Content Sequel Content Browser Scope Tag EditorThe Browser section of the MediaBay window
Note that the Browser section can only show folders; any media files contained in a selected folder are displayed in the Viewer section to the right.
This also depends on the "Deep Results" setting, see "Filtering the Viewer display" on page 280.
The VST Sound node
The VST Sound node in the Browser section
The Browser section provides a shortcut to user content and factory content files, including the preset folders. You can find this node at the top of the Browser folder hierarchy, at the same level as the File System node.
- The folders below the VST Sound node represent the folders in which content files and newly created track presets, VST presets, etc. are stored by default. To find out the "true" location of such a file, right-click it in the Viewer section and select "Open in Explorer" (Win)/"Reveal in Finder" (Mac). This will open an Explorer/Finder window in which the corresponding file is highlighted.
Scanning operations
When you open the MediaBay, the Loop Browser or the Sound Browser for the first time, a scan for media files needs to be performed. Specify which folders or directories should be included in the scan by activating the checkboxes to the left of the folder name. Depending on the amount of media files on your computer, the scan may take a while. The scan result is saved in the MediaBay database.
- To include a folder, activate its checkbox.
These folders will be scanned for files.
- You can restrict the search to individual subfolders. This will be reflected in the checkbox icon for the folder the subfolder resides in. The checkmark and the box in front of a folder will turn gray if only some of the subfolders are selected.
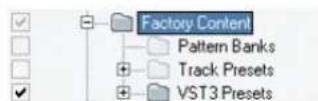
Only the VST3 Presets subfolder of the Factory Content folder will be scanned for files.
The scanning status for the individual folders in the Browser section is indicated by the color of the icons:
- A red icon means that this folder is currently being scanned.
-
A light grey icon means this folder has been scanned.
-
Orange folder icons are displayed when a scanning process was interrupted.
- Yellow icons are displayed for folders that have not been scanned.
- If "Stop scanning folders when closing MediaBay" is activated in the Preferences dialog (MediaBay page), Cubase will scan for media files only when the MediaBay window is open. When this is deactivated, the folders will be scanned in background, even when the MediaBay window is closed. Even if scanning in background is activated, Cubase will not scan folders while playing back or recording.
Scanning indicator
At the top right in the Viewer section you will find an indicator which shows whether the MediaBay is currently searching for files.

text_image
Viewer When this indicator is shown, a media search is in progress.Note that this indicator is only shown when scanning in the foreground (i.e. when you selected a folder to be scanned). It is not displayed for any background scanning operations.
Deep Results
When you activate the "Deep Results" button, the Viewer shows the files contained in the selected folder and in any subfolders (without showing these subfolders). When this button is deactivated, the Viewer shows all folders and files contained in the selected folder.

The Deep Results button
Rescan on Select
When you activate this button, selecting a folder in the Browser section will cause this folder to be rescanned. This ensures that the MediaBay will always display the current content of a folder.
The "Rescan on Select" button

When a folder contains a large number of media files, the scanning process may take some time – you may want to deactivate "Rescan on Select", if you know that you have not made any changes to the content of your media folders since they were last scanned.
When "Rescan on Select" is deactivated, you can always right-click in the Browser section and select "Rescan" from the context menu to force a rescan of the currently selected folder.
Refresh
In addition to the Rescan option, the context menu for the selected node or folder in the Browser section (e.g. VST Sound) also contains a Refresh option. This refreshes the display for this location without having to rescan the corresponding media files.
Use the Refresh option when you have modified tag values and want to update the Filter section so that the corresponding files are listed with the modified tag values.
This is also useful if you have mapped a new network drive and want this to appear as a node in the Browser section. Simply select the Refresh option for the parent node (i.e. Network Drives) and the new drive will appear in the list (ready to be scanned for media files).
Folder operations
The Browser section shows the folder structure of your computer's file system in a way very similar to the Windows Explorer or the Mac OS Finder:
- Click on a folder name in the Browser display to select the corresponding folder.
- Double-click on a folder icon in the Browser display to open the corresponding folder.
- You can switch the Browser display between the Full view and the Focus view.
If you select a folder and switch to the Focus tab only this folder and its subfolders are shown. When you switch back to the Full view, the entire file system node can be accessed again.
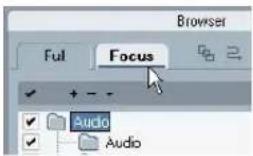
text_image
Browser Ful Focus Audio AudioThe Focus view for the Audio folder
- You can hide all folders that not being scanned for files by clicking the "Show MediaBay Managed Items Only" button.
This will keep the list less cluttered.
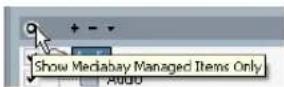
- Use the folder navigation buttons to navigate to folders. Click "Previous Browse Location" or "Next Browse Location" to select the previous or next folder in a sequence of previously selected folders. Clicking the "Browse Containing Folder" button will select the parent folder of the previously selected folder.

text_image
The "Create new folder" button The folder navigation buttons- You can create a new folder inside the folder by clicking the "Create New Folder" button (the folder icon). A dialog is opened in which you can enter a name for the new folder.
- To delete a folder, right-click the folder icon and select "Delete from Disk" from the context menu.
A warning message is displayed, asking you to confirm that you really want to move this folder to the operating system's trash folder.
- To rename a folder, select it in the list, click on its name and enter a new name.
- You can drag & drop a folder to another location. You will be asked if you wish to copy or move the folder to the new location.
Browse Selection Presets
If you constantly find yourself returning to specific folders during your work, you can save these browse locations as presets so that selecting such a preset will take you to the folder instantly. Proceed as follows:
- Select the desired folder in the folder display.
- Click the Add Browse Location Preset button (the "+" icon).
A naming dialog for the new preset is displayed. - Accept the default name (the complete folder path) or enter a new name for the preset.
- Click OK.
The new preset is added to the Select Browse Location Presets pop-up menu (which can be opened by clicking on the down arrow).
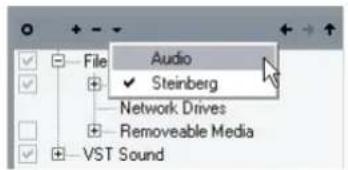
text_image
Audio Steinberg Network Drives Removable Media VST SoundWhen you now open the Select Browse Location Presets pop-up menu and select the new preset, the respective preset folder will be selected in the Browser display.
- To remove a preset from the pop-up menu, select it and click the "Remove Browse Location Preset" button (the "-" icon).
- When the Browser section is hidden from view, the Select Browse Location Presets pop-up menu is shown in the Viewer section.
This way you do not always have to open the Browser in order to switch the browse location.
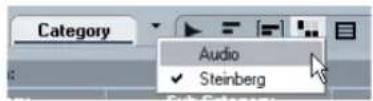
The Select Browse Location Presets pop-up menu in the Viewer
Finding files in the Viewer section
The Viewer section consists of two panes: the Filter section at the top and below it, the Viewer display. In the Filter section, you can set up filters and define searches for specific files. The Viewer display lists any files contained in the folder selected in the Browser, and tags of these files. How to set up the tag display in the Viewer is described in the section "Managing the tag lists" on page 284.
⇒ Cubase only: Note that it is only possible to edit tags in the Viewer if "Allow Editing in Viewer" is activated in the Preferences dialog (MediaBay page).
When this is deactivated, editing is only possible in the Tag Editor (see "Editing tags in the Tag Editor" on page 285).
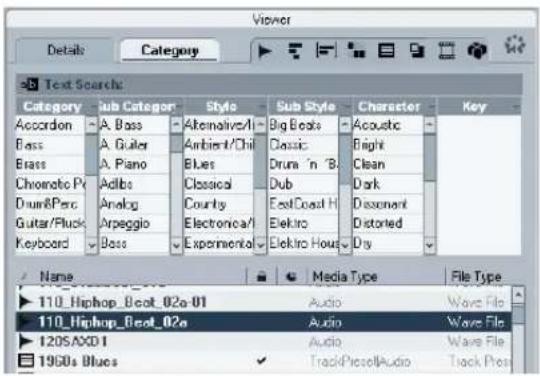
text_image
Viewer Details Category Sub Category Style Sub Style Character Key Accordion A. Bass Alternatives/1 Big Beats Acoustic Bass A. Guitar Ambient/Chil Classic Bright Brass A. Piano Blues Drums in 'B' Clean Chromatic PV Adbits Classical Dub Dark Dram/Perc Analog Country East Coast H Dissanteil Guitar/Pluck Arpeggio Electronica/ Elektro Distorted Keyboard Bass Experimental Elektro Hours Dry Name Media Type File Type 110_Hiphop_Beat_02e-01 Audio Wave File 110_Hiphop_Beat_02e Audio Wave File 120SAXD1 Audio Wave File 1950s Blues Track/PiecellAudio Track PresThe Viewer section
Depending on your settings, the number of files displayed in the Viewer can be huge (the info line at the bottom of the window shows the number of files found with the current filter settings). Therefore, the MediaBay provides a number of ways to display only specific files and to perform very refined file searches.
⇒ The default number of files displayed in the Viewer section can be set by specifying a new value for "Maximum Number of Results in Viewer" in the Preferences dialog (MediaBay page).
Filtering the Viewer display
The MediaBay provides a number of filter buttons that can be used to limit the number of files displayed in the Viewer section. These buttons are situated at the top of the Viewer section and can be used to show all supported file types or any combination of file types.
For example, when you activate the audio and the MIDI file filter buttons, only audio and MIDI files are displayed. When none (or all) of these buttons are activated, files of all supported types will be displayed.

The filter buttons. The display is filtered to show only audio files.
Defining searches for specific files
The filter buttons let you find files according to the folder(s) they might be located in, or according to their file type. However, you can also perform very detailed searches for files that meet certain criteria.
- Cubase only: The Details search mode allows you to perform a search for a specific file tag value. You define which tag to search for, e.g. "Name", and specify the corresponding value, e.g. "myfilename.wav".
- In Category search mode, the Filter section will display all values found for a specific tag. Selecting one of these values will result in a list of files all showing this particular tag value.
For example, you could look for sample rates and pick 44.1 kHz to give you a list of all files with that particular sample rate. But Category search mode becomes really interesting when making extensive use of tagging – see "Performing a Category search" on page 281 and "Tagging media files" on page 286.
- Once a search operation is completed, the very first entry in the Viewer display is selected. When you now press [Tab] once, this selected entry will get the focus and you can use the Up and Down arrow keys to browse the list of files.
Performing a Details search (Cubase only)
You can also perform a search for a particular file name in the file system.
Proceed as follows:
- Select the root folder of your hard disk in the Browser section.
- Select the Details search mode by clicking on the Details tab at the top of the Filter section.
- By default, the tag selection pop-up menu to the left is set to "Any Attribute", and the condition pop-up menu in the middle is set to "contains".
Leave these as they are.
- Enter part of the name of the file that you wish to find in the text field to the right.
Note how a new search is performed every time you enter another letter. Detail searches are not case sensitive.
Tag selection pop-up menu
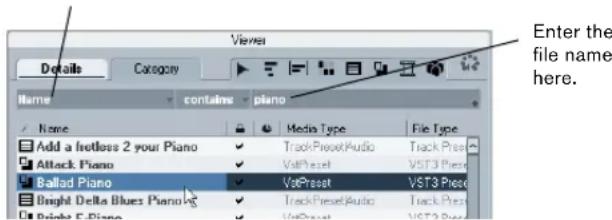
text_image
Enter the file name here. Details Category Name contains piano Add a forestless 2 your Piano Attack Piano Ballad Piano Bright Delta Blues Planning Track Preset Audio Track Pres Vst3 Preset Vst3 Preset Track Preset Audio Track Pres Vst3 Preset Track Preset Audio Track PresA Details search for files whose names contain "piano"
- The tag selection pop-up menu shows an alphabetical list of file tags you can choose from. At the top of the pop-up menu, the MediaBay maintains a smaller list of the last 5 tags selected during previous searches.
Note that you can select more than one tag. This will create an OR condition: the files found will match either one or the other tag. Click OK to set the tag(s) to search for. How to configure the tag list is described in the section "Managing the tag lists" on page 284. - To reset all search fields to their default settings, click the Reset Filter button in the top right corner of the Filter section.
This will also reset the tag list settings.

The Reset Filter button in the Filter section
- The condition pop-up menu contains the following options:
Option Description
contains The search result must contain the text or number specified in the text field to the right.
omits The search result must not contain the text or number specified in the text field to the right.
equals The search result must match the text or number specified in the text field to the right, including any file extension. Note, however, that detail searches for text are not case sensitive.
= The search result must be higher than, or equal to, the number specified in the field to the right.
<= The search result must be lower than, or equal to, the number specified in the field to the right.
is empty You can use this option to find files for which certain tags have not been specified yet.
range When "range" is selected, you can specify a lower and an upper limit for the search result in the fields to the right.
- Note that for all conditions except "range", you can enter more than one string in the text field (separate different search strings with a space).
These strings form an AND condition, i.e. the files found will match all strings entered in the field.
- To open a new filter line, move the mouse pointer to the right end of the text field and click the "+" button.
This way, you can add up to five filter lines in which you can define further search conditions. Note that two or more filter lines form an AND condition, i.e. the files searched for must match the conditions defined in all filter lines. Click the “-” button for a filter line to remove it.
Performing a Category search
The MediaBay allows you not only to view and edit some of the standard file attributes found in all computer files, but it also provides preconfigured tags, or "categories", that you can use to organize your media files.
The advantages of such categorization become obvious when having to find one specific file, e.g. a certain guitar sound, among a large number of media files from various contexts, without knowing the name of that file.

In Cubase Studio, the Category search is the only search mode available.
When you select the Category search mode, the Filter section will show the tag columns, each with its own list of tag values. If the columns are wide enough, a number displayed before a filter name indicates how many files match this criteria.
| Category | Sub Category | Style | Sub Style | Character |
| 1 Chromatic F | 1 A. Bass | 27 Alternative/ | 23 Alternative | 67 Acoustic |
| 3 Drum/Ferc | 1128 A. Guitar | 49 Ambient/Ch | 25 Avantipardo | 62 Bright |
| 1 Ethnic | 1 A. Piero | 6 Blues | 8 Big Trees | Clean |
| 1128 Guitar/Pluc | 1 Accordion | 25 Classical | 25 Classic | 1 Dark |
| Keyboard | 1 Adbits | 67 County | 25 College Floor | 9 Dissement |
| Musical PC | 1 African | 1 Electronica | 1 Drum n/Bas | 4 Distorted |
Category search mode. These tag values were found in the currently selected folder.
By clicking on individual tag values in the tag columns, you define the search filter: only the files that match the selected tag values will be shown in the Viewer display. Select more tag values from other columns to further refine your search.
Only files matching these tag values are displayed in the Viewer.
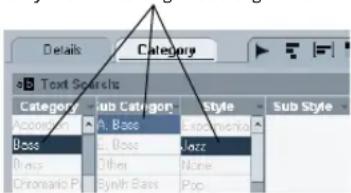
text_image
Details Category a Text Search Category Sub Category Style Sub Style Accounting A. Base Superwork Boss L. Base Jazz Brass Others None Chronic P Synth Bass PopThe "Category" and "Sub Category" tags are directly linked to each other: for each Category value, there are certain Sub Category values available. Changing the Category value in the first tag column will give you different values in the Sub Category column! The same applies to the Style and Sub Style tag values.
Each tag column displays only the tag values found in the folder selected in the Browser section of the MediaBay! This means that selecting another folder in the Browser may lead to the display of different Category search settings.
- Selected tag values in the same tag column form an OR condition.
This means that files must be tagged according to either one or the other value to be displayed in the Viewer section.
For the "Style" tag, the files found either have the "Blues" OR the "Jazz" tag value.
- Tag values in different columns form an AND condition. This means that files must be tagged according to all these values to be shown in the Viewer display.

The files found belong to the "E. Guitar" Sub Category AND show "Blues" for the Style tag.
Categorization by tagging makes it easy to organize your media files. How to assign tag values to your files is described in the section "The Tag Editor (Cubase only)" on page 284 and in the section "Tagging media files" on page 286.
⇒ Cubase only: Note that you can use existing tags or use the user tag feature (see "Defining user tags" on page 286) to create your own categories.
Category searches are used not only in the MediaBay, but throughout Cubase in various VST Sound-related contexts (see "What is VST Sound?" on page 274).
Further options for Category searches
- The text field at the top serves as an additional name filter: you can enter a file name or part of a file name here. This corresponds to a "Name: contains" Details search, which means that the name of the file must contain the text you enter here. See also "Performing a Details search (Cubase only)" on page 280.
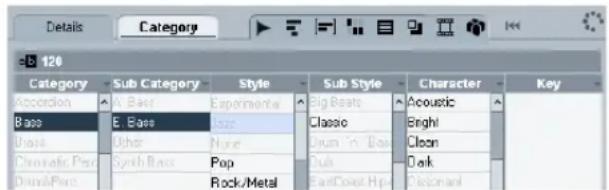
text_image
Details Category Sub Category Style Sub Style Character Key Accordion A Back Experimental Big Beats Acoustic Bags E Base Jags Classic Bright Blacks Other None Drum in Base Clean Chromatic Pads Synth Base Pop Dusk Dark Dural/Pins Rock/Metal East Coast Hip ResonantIn addition to the filter defined by the tag columns, the file name must contain "120".
- You can change which tag type is displayed in each column by clicking on the column title and selecting another tag from the tag list pop-up menu.
How to configure the tag list is described in the section "Managing the tag lists" on page 284.
- To select a tag value, simply click on it. To deselect it, click the value again.
Note that you can select more than one value in each tag column.
- Click the Reset Filter button at the top right of the Filter section to clear all settings in the tag columns.
This will also reset the tag list settings.
Performing a context menu search
You can use the "Search for" options on the context menus of the Viewer tabs and the Tag Editor to automatically show only those files that correspond with a certain tag value of the currently selected file.
Right-click the file with the desired tag value to open the context menu and select it from the "Search for..." submenu. This way you can easily find all the files that have a value in common, e.g. if you want to view all files that belong to a certain family.
When you used the context menu search functions, the "Reset Filter" button in the Filter section will be replaced by the "Go Back" button. Clicking this button will return you to the previous view, rather than resetting all search options.
Additional Viewer operations
- You can move/copy a file from the Viewer section to another location by clicking and dragging it to another folder in the Browser section.
You will be asked if you wish to copy or move the file to the new location.
- To insert a file into the project, right-click the file and select one of the "Insert into project" options from the context menu.
This will import this file into your current project, either at the start of the project or at the current cursor position.
- To delete a file, right-click it in the Viewer and select "Delete" from the context menu.
A warning message is displayed, asking you to confirm that you really want to move this file to the operating system's trash folder.
- Cubase only: When the option "Allow Editing in Viewer" is activated in the Preferences dialog (MediaBay page), you can also edit tags in the Viewer.
Otherwise this is possible only in the Tag Editor.
Previewing files in the Scope section
Below the Viewer you will find the Scope section. It allows you to play back files selected in the Viewer section.
The elements visible in this section and their functions depend on the type of media file selected in the Viewer.

The Scope section does not play back video files or project files. Also, it is not possible to preview audio track presets in the MediaBay (see below).
Previewing audio files
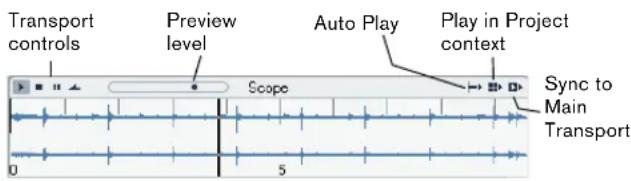
text_image
Transport controls Preview level Auto Play Play in Project context Sync to Main Transport 0 5The Scope section for an audio file
- To preview an audio file, simply click the Play button.
- When Auto Play is activated, selecting a file in the Viewer will automatically start playback.
- When "Play in Project context" is activated, the file will be played back together with the current project, starting at the current project cursor position.
Note that activating "Play in Project context" may apply realtime time-stretching to your audio file. When you import an audio file into your project, the setting for "Play in Project context" determines whether Musical mode is activated automatically for this file.
- When "Sync to Main Transport" is activated, the Play and Stop functions from the Transport panel also control Play and Stop in the Scope section. To use this, the "Play in Project context" option also has to be activated.
This option is very useful for previewing audio loops. To use it to its full extent, set the left locator on the beginning of a bar, then start playing back the project using the Transport panel. The loops that you now select in the Viewer section will start together with the project in perfect sync. Play and Stop of the scope transport can still be used on its own if needed.
Previewing MIDI files
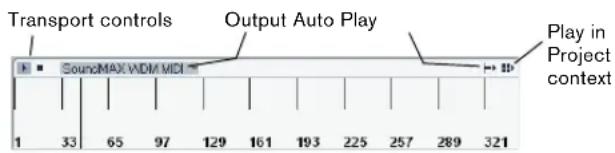
text_image
Transport controls Output Auto Play Play in Project context 1 33 65 97 129 161 193 225 257 289 321The Scope section for a MIDI file
- To preview a MIDI file (.mid), you first have to select an output device in the Output pop-up.
- Auto Play and "Play in Project context" work as for audio files, see above.
Previewing MIDI loops
- To preview a MIDI loop file, click the Play button.
- Auto Play works as for audio files, see above. MIDI Loops are always played in the project context.
Previewing track and instrument presets
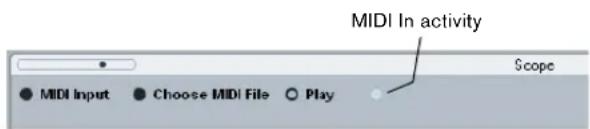
text_image
MIDI In activity Scope MIDI Input Choose MIDI File PlayThe Scope section for a MIDI track preset
Track presets for MIDI or instrument tracks and VST plugin presets require MIDI notes for previewing. There are two ways these notes can be sent to the track preset:
- Click the "MIDI Input" button and play MIDI notes on a MIDI keyboard connected to your system.
- Clicking "Choose MIDI File" will open a file dialog where you can navigate to a MIDI file. When you now click "Play", the notes received from the MIDI file will be played with the settings of the track preset applied.
- You can also set the preview level.
Track presets for audio tracks cannot be previewed in the MediaBay. You can do this in the Presets browser (for further information, see "Applying track or VST presets in the Inspector or the context menu of the track" on page 291).
Previewing pattern banks
Pattern banks containing drum patterns can be created with the MIDI plug-in "Beat Designer". Detailed information on the Beat Designer and its functions can be found in the chapter "MIDI effects" in the separate PDF document "Plug-in Reference". One pattern bank contains 4 subbanks which in turn contain 12 patterns each. In the Scope section for a pattern bank file, a keyboard-style display allows you to select a subbank (click on a number at the top) and a pattern (click on a key).

text_image
controls 1 2 3 4 Scope Auto PlayTransThe Scope section for a pattern bank
- To preview a pattern, select the pattern bank in the Viewer section. In the Scope section, choose the desired subbank and pattern. Then click the Play button.
Note that it is possible that a subbank may also contain empty patterns. Patterns that contain data are indicated by a circle in the upper part of the key in the keyboard display. Selecting an empty pattern will have no effect. - When Auto Play is activated, selecting a file in the Viewer will automatically start playback.
When you have found the pattern bank you want to use in your project, double-click on it in the Viewer section to create a new MIDI track in the Project window which contains one instance of the Beat Designer using this pattern bank.
The Tag Editor (Cubase only)
When a file is selected in the Viewer section, the Tag Editor shows a two-column list of tags and tag values for this file.
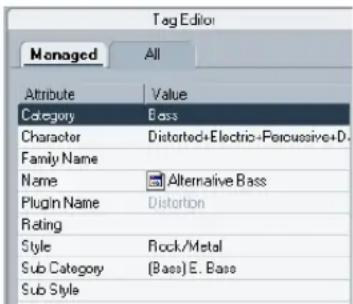
text_image
Tag Editor Managed All Attribute Value Category Bass Character Distorted+Electric+Pericussive+D. Family Name Name Alternative Bass Plugin Name Distortion Rating Style Rock/Metal Sub Category (Bass) E. Bass Sub StyleTags (or "attributes") for media files are sets of metadata providing additional information on the file. The different types of media files have different tags: for example, for .wav audio files you will find standard tags like name, length, size, sample rate, etc., while for .mp3 files, additional tags such as "Artist" or "Genre" are available.
The Media Management System provides further tags, such as "Category" or "Character".
You have access not only to the standard tags and the preconfigured tags provided by Cubase, but you can also define your own tags and add these to your files (Cubase only).
In Cubase Studio, tags can be edited only in the Viewer.
Managing the tag lists
Lists of tags and tag values are used in various places in the MediaBay window. You can configure these lists and define certain tag properties in the Manage Tags dialog.
Proceed as follows:
- Open the Manage Tags dialog by clicking on the Manage Tags button in the lower right corner of the MediaBay window.
- Click one of the filter buttons at the top of the Manage Tags dialog to select the file type for which you want to configure the tag lists.
The Manage Tags dialog shows a list of all tags available for the media files supported by the MediaBay, and three columns of checkboxes, one for the Filter section, one for the Viewer and one for the Tag Editor.
- To display a certain tag in the Filter section, the Viewer display or the Tag Editor, activate the corresponding checkbox for this tag:
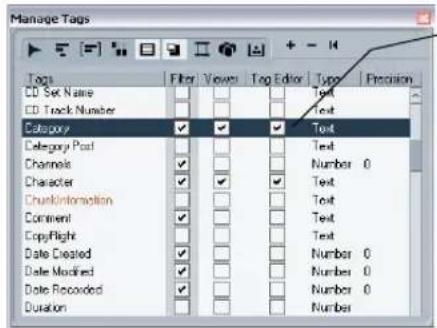
text_image
Manage Tags Tags Filter Views Tag Editor Type Friceline CD Set Name Text CD Track Number Category ✓ ✓ ✓ Text Category Post Text Channels ✓ ✓ ✓ Number 0 Character ✓ ✓ ✓ Text ChunkInformation ✓ ✓ ✓ Text Comment ✓ ✓ ✓ Text CopyFlight ✓ ✓ ✓ Text Date Created ✓ ✓ ✓ Number 0 Date Modified ✓ ✓ ✓ Number 0 Date Recorded ✓ ✓ ✓ Number 0 DurationThe "Category" tag is selected for display in the Filter tag lists, the Viewer and in the Tag Editor.
- Close the Manage Tags dialog by clicking its close button.
Your settings will be applied.
- The Type column shows whether the value for a tag is a number, text or a Yes/No-type switch. The Precision column shows the number of decimals displayed after a point for number tags.
- Click and drag in the tag display to select several tags (click somewhere outside the selected area to deselect). This way, you can activate/deactivate all selected checkboxes in one go.
- To return to the default tag display settings for the Filter, Viewer and Tag Editor sections, click the "Reset to Default" button (above the tag display) in the Manage Tags dialog.
Displaying tags in the Tag Editor
You can switch the tag display in the Tag Editor:
- Click on "Managed" to show only the tags activated for display in the Manage Tags dialog. Use this view to limit the tag display to those tags that are of interest to you
- Click on "All" to show all tags for the file selected in the Viewer for which values are available. Use this display if you wish to see all tags, including standard file attributes such as Name, Size or Date Modified.
Displaying tags in the Viewer
Most of the time, tags displayed in the MediaBay are sorted alphabetically. Only in the Viewer can you change the tag display order:
- Move the mouse pointer to a column heading, click and drag that heading to another position in the display.
Editing tags in the Tag Editor
You can use the Tag Editor to edit tag values of the various media files. Tag values can be chosen from pop-up lists, entered as text or numbers or set to Yes or No.
In Cubase Studio, tags can be edited only in the Viewer.
Note that changing a tag value in the Tag Editor may permanently change the corresponding file.
When it comes to editing, you will notice that there are different types of tags:
- "Display only" tags cannot be edited. Their values are displayed in a lighter color.
In this case, the file format probably does not permit changing this value, or changing a particular value makes no sense (e.g. you cannot change the file size in the MediaBay, because you have no way of adding or removing media information).
- When clicking in the Value column for most attributes, a pop-up menu opens from which you can choose a value. For some of the pop-up menus there is a "more..." button to open a window with even more tag values.
These tag selection windows also feature a Text Search button that you can use to find specific values more quickly.
- Many tag values can also be edited by double-clicking in the Value column of the Tag Editor.
Simply enter/change the text or number setting in the field displayed for a value.
- Some of the tags ("Category" and "Sub Category" as well as "Style" and "Sub Style") are directly linked to each other. The "Category" pop-up for example allows you to set a category, and the "Sub Category" pop-up contains the corresponding sub categories sorted according to the categories.
By picking a sub category belonging to a different category, the Category tag will be changed as well (the same is true for Style and Sub Style).
- Clicking in the Value column for the "Character" tag opens the Edit Character dialog.
Click a radio button on the left or the right side and then click OK to define values for the Character tag.
- By clicking in the Value column for the Rating tag and dragging to the left or right, you can rate the file on a scale from 1 to 5.
For example, use this to indicate the file's sound quality or its suitability for a certain purpose.
- To remove the attribute value from the selected files, right-click in the Value column for the desired attribute and select "Remove Tag" from the context menu.
Defining user tags
You can define your own tags and save these in the MediaBay database and the corresponding media files. You can use such user tags for example to define your own filter categories, further refining the categorization of your media files.
To define a user tag, proceed as follows:
- Open the Manage Tags dialog by clicking the Manage Tags button in the lower right corner of the MediaBay window.
- Click on the Add User Tag button.
The Add User Tag dialog opens.
- Enter a name for the new tag and define its type. Tags can be of the types "Text", "Number" or "Yes/No" switch.
- For tags of the type "Number", you can also specify how many decimals should be displayed after a decimal point. Enter the corresponding value in the Precision field.
- Click OK.
The new tag is added to the list of available tags and can be displayed in the Tag Editor and the Viewer.
- To remove a user tag from the MediaBay views and database, select it in the tag list and click the Remove User Tag button.
The tag will be removed from the Managed Tags lists in which it was previously displayed.
- Cubase recognizes all user tags that are included in media files. If you load content from another user, for example, who has assigned his own user tags to the files, these tags will also be shown in the Tag Editor on the All tab.
Because of this, it can happen that user tags that you removed using the Remove User Tag button will still appear on the All tab in the Tag Editor.
Tagging media files
The search functions, especially the Category search mode, become a truly powerful media management tool when making extensive use of tagging.
Media files are usually organized in complex folder structures to provide a logical way of guiding the user to the desired files, with the folder and/or file names indicating the instrument, style, tempo, etc.
To find a particular sound or loop in such a folder structure can be very time consuming – tagging is the answer! To assign a number of meaningful tags, e.g. to a library of loop files, proceed as follows:
- Copy the loop files to your hard disk. Tagging means editing the files, so you need them on your system.
- Open the MediaBay and browse to where the new loops are located.
- Navigate to a folder containing loops. For example, you might have a folder containing Metal style drum loops, at 120bpm.
- In the Viewer, select all files contained in this folder. Make sure that the Deep Results button is deactivated, so that only files contained in this folder are displayed.
- Assign tags that reflect the information indicated by the folder structure. In the above example, you would put "Metal" as a value for the Style tag, and "Drums" for the Instrument tag. The Tag Editor also allows you to display a "Tempo" tag, for which you could specify a value of "120".
You can now use the Category search mode to quickly find all Metal style drum loops at 120bpm, without the need to navigate through a large number of folders and subfolders.
Tagging multiple files simultaneously
There is no limit as to how many files can be tagged at the same time, but you need to be aware that the tagging of thousands of files in one go may take quite a while. This operation is executed in background, so that you can continue with your work as usual. By looking at the Tagging Counter in the MediaBay info line you can see how many files still have to be updated.
Tagging Counter: 280
The Tagging Counter shows the number of files that still need to be updated.
- The display will be updated immediately in the different MediaBay sections, even if the values have not been written to the corresponding media files yet.
- If you close Cubase before the Tagging Counter has gone down to zero, a dialog with a progress bar is displayed, indicating how long the updating process will take. You can choose to abort this process if you need to close the application immediately.
In this case only the files that were updated before you clicked "Abort" will have the new tag value.
Tagging write-protected files
Media files may be write-protected due to a number of reasons: They may belong to content that was provided by someone else who write-protected the files, you may have write-protected them yourself in order not to overwrite them accidentally, or they could be generally unwritable because the file format does not allow write operations by the MediaBay.
In the MediaBay, the write protection status of files is shown as an attribute in the Tag Editor and in the Write Protection column in the Viewer display.

The Write Protection column in the Viewer display
- Regardless of the write protection status, you can always change the attribute values of a file in the MediaBay. If the corresponding file is write-protected, however, these changes will not be written to disk and occur in the MediaBay only.
- If you have set new attribute values for a file that is write-protected, this will be reflected in the Pending Tags column.
Note that if you rescan the MediaBay content and a media file on your hard disk has changed since the last scan, all pending tags for this file will be lost. - If a file has pending tags, and you want to write the corresponding attributes to the file, you need to remove the write protection first, and then select the "Write Tags to File" command from the context menu.
You can change the write-protection status of your media files, provided that the file type allows write operations and you have the necessary operation system permissions:
- To set or remove the write protection attribute for a file, simply select the file in the Viewer display and select "Set/Remove Write Protection" from the context menu.
If the Write Protection and/or the Pending Tags column are not visible, you may have to enable the corresponding attributes for the file type in question using the Manage Tags window, see "Managing the tag lists" on page 284.
If you use other programs than Cubase to change the write-protection status of a file, this will not be reflected in the MediaBay until you rescan the files! Be aware, however, that this might lead to further changes in the MediaBay content.
Working with Track Presets
Introduction
Track presets are templates from audio, MIDI or instrument tracks that can be applied to newly created or existing tracks of the same type. They contain sound and channel settings, thus allowing you to quickly browse, preview, select and change sounds, or reuse channel settings across projects.
Track Presets are organized in the Sound Browser (a view of the MediaBay, see "The MediaBay" on page 273) where you can categorize them with tags.
Types of track presets
There are four kinds of track presets (audio, instrument, MIDI and Multi) and two kinds of VST presets (VST Instrument presets and VST effect plug-in presets). These are described in the following sections.
Note that volume, pan, input gain and input phase will be restored only when creating a new track from a track preset.
Audio track presets
Track presets for audio tracks include all settings that "define" the sound. You can use the factory presets as a starting point for your own editing and save the audio settings that you optimized for an artist you often work with as a preset for future recordings.
The following data will be saved in audio track presets:
- Insert FX settings (including VST effect presets)
- EQ settings
- Volume + Pan
- Input Gain + Phase
Instrument track presets
Instrument track presets offer both MIDI and audio features and are best choice when handling sounds of simple, mono-timbral VST Instruments. Use instrument track presets for auditioning your tracks, inspiration, or saving your preferred sound settings. You can directly extract sounds from instrument track presets for use in instrument tracks.
The following data will be saved in instrument track presets:
- Audio Insert FX
- Audio EQ
- Audio Volume + Pan
■ Audio Input Gain + Phase - MIDI Insert FX
- MIDI Track Parameters
- Input Transformer
- VST Instrument
- Staff settings
- Color settings
- Drum map settings
MIDI track presets
MIDI tracks should be used for multi-timbral VST Instruments and external instruments. When creating MIDI track presets you can either include the currently set channel, or the currently set patch. See “Creating a track preset” on page 292 for details.
- To ensure that saved MIDI track presets for external instruments will work again with the same instrument later, you should install the instrument as MIDI device, because in this case the MIDI interface and the connecting ports are irrelevant. (For this to work, the MIDI device has to have exactly the same name as in the original setup.) For more information about this, see the separate pdf document “MIDI Devices”.
The following data will be saved in MIDI track presets:
- MIDI Modifiers (Transpose, etc.)
- MIDI Inserts (FX)
- Output + Channel or Program Change
- Input Transformer
- Volume + Pan
- Staff settings
- Color settings
- Drum map settings
Multi track presets
You can use multi track presets e.g. when recording setups that require several microphones (a drum set or a choir, where you record always under the same conditions) and have to edit the resulting tracks in a similar way, or for layered tracks, where you use several tracks to generate a certain sound instead of manipulating only one track.
If you select more than one track when creating a track preset, the settings of all selected tracks will be saved as one multi track preset. Since you can apply a multi track preset only if the target tracks are of the same type, number and sequence as the tracks in the track preset, multi track presets are useful when you have a recurring situation with very similar tracks and settings.
VST (Instrument) presets
VST Instrument presets (extension .vstpreset) are VST presets that behave like instrument track presets in the context of the Project window and contain a VST Instrument and its settings but no modifiers, MIDI inserts, inserts or EQ settings. You can directly extract sounds from VST presets for use in instrument tracks.
The following data is saved in VST Instrument presets:
• VST Instrument
- VST Instrument settings
VST effect plug-ins are available in VST3 and VST2 format. Presets for these effects are also saved as VST presets. These that can be part of audio track presets (see "Audio track presets" on page 289).
In this manual, "VST presets" stands for VST3 Instrument presets, unless stated otherwise.
Pattern Banks
Pattern Banks are Presets created for the Beat Designer MIDI effect. They behave much like track presets. For detailed information, see "Previewing pattern banks" on page 284 and the chapter "MIDI effects" in the separate PDF document "Plug-in Reference".
Applying track presets
When you apply a track preset, all saved settings are applied, see "Types of track presets" on page 289. Track presets can be applied to tracks of their own type only, i.e. audio track presets to audio tracks, etc. The only exception are instrument tracks: for these VST presets are also available. Note that applying VST presets to instrument tracks leads to removal of modifiers, MIDI inserts, inserts or EQs, since these settings are not stored in VST presets, see "Previewing MIDI, instrument and VST presets independently of tracks" on page 293.
Once a track preset is applied, you cannot undo the changes! It is not possible to remove an applied preset from a track and return to the previous state. If you are not satisfied with the track settings, you can either edit the settings manually or apply another preset.
Applying track or VST presets via drag and drop
- Open the Sound Browser from the Media menu. The general handling of the Sound Browser is the same as for the MediaBay, see "The MediaBay" on page 273.
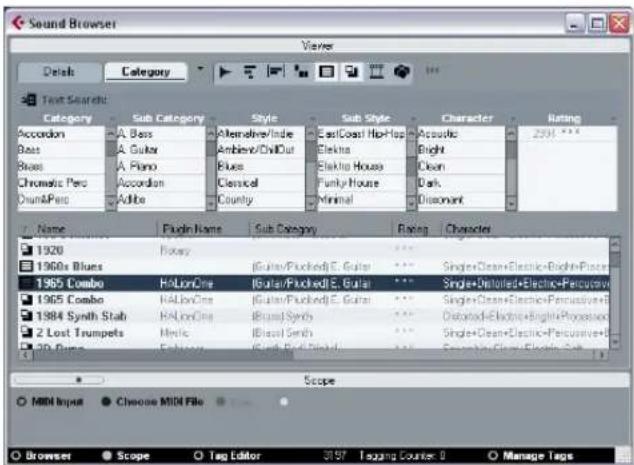
text_image
Sound Browser Details Category Sub Category Style Sub Style Character Rating Accordion A. Bass Alternative/Indie EastCoast Hip-Hop Acoustic 2591 *** Bass A. Guitar Ambience/DivIOut Elektra Bright Blues A Piano Elias Elektra House Clean Chromatic Perc Accordion Classical Funky House Dark Churn&Perc County Minimal Discomant Adobe Adobe Name Plugin Name Sub Category Rating Character 1920 Rotary 1960s Blues (Guitar/Plucked) E. Guitar *** Single+Clean+Electric+Bright+Piece 1965 Combo H/LonOne (Guitar/Plucked) E. Guitar *** Single+Diluted+Electric+Pericouvert+ 1965 Combo H/LonOne (Guitar/Plucked) E. Guitar *** Single+Clean+Electric+Pericouvert+ 1984 Synth Stab H/LonOne (Broad Synth) *** Dooltooth+Electric+Bright+Piece 2 Lost Trumpets M dynamic (Broad Smith) *** Single+Clean+Electric+Pericouvert+ 30 Pums Ech钢琴 (Band By C Band) *** Energy+Clean+Electric-Sub Scope ○ MIDI Input ● Choose MIDI File ▼ ▼ ▼ ▼ ▼ ▼ ▼ ▼ ▼ ▼ ▼ ▼ ▼ ▼ ▼ ▼ ▼ ▼ ▼ ▼ ▼ ▼ ▼ ▼ ▼ ▼ ▼ ▼ ▼ ▼ ▼ ▼ ▼ ▼ ▼ ▼ ▼ ▼ ▼ ▼ ▼ ▼ ▼ ▼ ▼ ▼ ▼ ▼ ▼ ▼ ▲ ○ Browser ● Scope ○ Tag Editor 2057 Tagging Counter 3 ○ Manage TagsThe Sound Browser
-
Select a MIDI or instrument track preset, or a VST preset.
-
Preview the preset using the preview functions in the Scope section (for further information, see "Previewing files in the Scope section" on page 283).
-
Drag and drop it onto a track of the same type.
→ You can also drag and drop track presets from the Windows Explorer or the Mac OS Finder, but in this case, no preview for track presets is possible.
Applying track or VST presets in the Inspector or the context menu of the track
- Select a track in the Project window.
- Click the VST Sound button in the Inspector or right-click the track to open the context menu and select "Apply Track Preset".
The Presets browser opens. Here, the files are presented in list form.
- Select a track or VST preset from the list.
If needed, activate the Categories option in order to show a customizable filter section that is similar to the one in the MediaBay, see "Performing a Category search" on page 281.
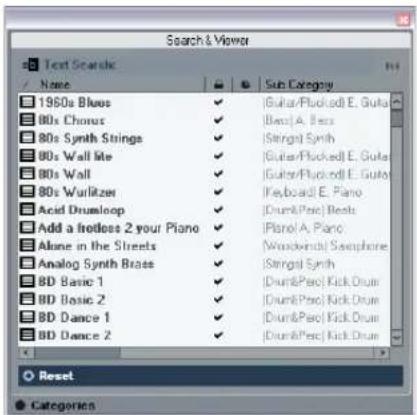
text_image
Search & Viewer Text Searchic Name Sub Category 1950s Blues (Guitar/Flucked) E. Guitar 80s Chorus (Best) A. Bass 80s Synth Strings (String) Synth 80s Wall Note (Guitar/Flucked) E. Guitar 80s Wall (Guitar/Flucked) E. Guitar 80s Wurlitzer (Keyboard) E. Piano Acid Drumloop (Drum/Psic) Beats Add a freetless 2 your Piano (Plane) A. Piano Alone in the Streets (Woodwind) Saxophone Analog Synth Brass (String) Synth BD Basic 1 (Drum&Pec) Kick Drain BD Basic 2 (Drum&Pec) Kick Drain BD Dance 1 (Drum&Pec) Kick Drain BD Dance 2 (Drum&Pec) Kick Drain Reset Categories- Hit the Play button on the Transport panel to preview the selected audio, MIDI, instrument track or VSTpreset. All settings from the track preset will be applied in realtime to the selected track. If you set up your target track to a cycle and play back in loop, previewing will be very comfortable. Note that you cannot preview multi track presets.
- Click outside the browser to apply the selected preset or click the Reset button below the list to return to the unchanged track.
Applying a multi track preset
- Select several tracks in your project.
The selected tracks have to be of the same type, number and sequence as the tracks in the track preset. - Right-click the track to open the context menu and select "Apply Track Preset".
The Presets browser opens. Only multi track presets corresponding to the selection of tracks in the project will be shown.
- Select a multi track preset from the list.
- Click outside the browser to apply the selected preset or click the Reset button below the list to return to the unchanged track.
Reloading track or VST presets
To revert to the default settings of the applied preset, click the "Reload Track Preset" button.
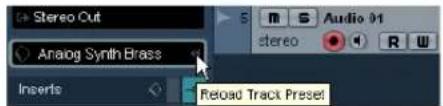
text_image
Stereo Cut Analog Synth Brass Inserts Reload Track PresetApplying Inserts and EQ settings from track presets
Instead of handling complete track presets, it is also possible to apply Insert or Equalizer settings from track presets:
- Select the desired track, open the Inspector or the Channel Settings window and click the VST Sound button on the Inserts or Equalizers tab/section. The presets pop-up menu is opened.
- Select "From Track Preset..." in the pop-up menu. The Presets browser opens, showing all available track presets that contain Inserts or EQ settings.
- Select the track preset with the desired Inserts or EQs and click outside the browser.
For information on the general handling of Inserts presets, see "Effect presets" on page 164. The general handling of EQ presets is described in the section "Using EQ presets" on page 125.
Extracting sound from an instrument track or VST preset
For instrument tracks, you can extract the "sound" of an instrument track preset or VST preset, that means the VST Instrument and its settings.
Proceed as follows:
- Select the instrument track to which you want to apply a sound.
- Click the VST Sound button below the Output Routing field in the Inspector.
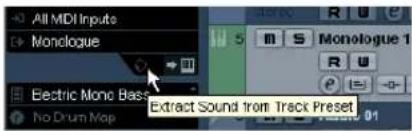
text_image
All MDI Inputs Monologue Electric Mono Bass No Drum Map Extract Sound from Track PresetThe Presets browser opens, showing a list of all available presets.
- Select an instrument track preset or VST preset by double-clicking on it.
The VST instrument and its settings (but no inserts, EQs and modifiers) of the existing track are overwritten with the data of the track preset. The previous VST instrument for this instrument track is removed and the new VST instrument with its settings is set up for the instrument track.
⇒ The VST instrument of an instrument track does not show up in the VST Instrument window but only in the Plug-In Information window, see the section “The Plug-in Information window” on page 167.
Creating a track preset
A track preset is created from an existing audio, MIDI or instrument track – or several of these tracks. Proceed as follows:
- Select one or more tracks in the Project window. If several tracks are selected, all of them are stored in one combined multi track preset, see "Multi track presets" on page 290.
- Right-click one of the selected tracks in the Track list to open the context menu and select "Create Track Preset". The Save Track Preset dialog opens. The buttons on top work like the corresponding ones in the MediaBay, see "Folder operations" on page 278.
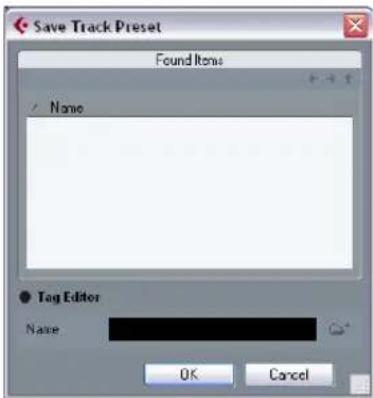
text_image
Save Track Preset Found Items Name Tag Editor Name OK Cancel- Enter a file name in the "File Name" field.
The track preset file name extension .trackpreset is assigned automatically.
- If you selected a MIDI track, you can include either the MIDI channel or the MIDI patch in your track preset.
Choose "MIDI channel" from the Include pop-up menu when working with a completely pre-configured multi-timbral external instrument (for example, a Sampler) in order to call up the correct channel.
Choose "MIDI Patch" when working with a multi-timbral external instrument (e.g. a MIDI Expander), with all sounds available on all channels, but changing sounds (patches).
If you want to use a MIDI track preset for a pre-configured VST Instrument setup, load the VST Instrument(s) in the VST Instruments window, select a VST Instrument patch, save the track preset and do not change the patch afterwards. To ensure this, use a template project with the VSTi setup included and save the sounds (track presets) of this template project in specific subfolders, as they only work within this setup.
-
Open the "Tag Editor" by clicking on the corresponding option and edit the tags. For more information about the Tag Editor, see "The Tag Editor (Cubase only)" on page 284.
-
Click OK to create the track preset.
Track presets are saved in the "Track Presets" folder in default subfolders named according to their track type (audio, MIDI, instrument and multi). For further information, see "Where are the settings stored?" on page 478.
You cannot change the default folders, but you can add further subfolders, e.g. "drums" and "choir".
All presets are available under the (virtual) VST Sound node, see "The VST Sound node" on page 277.
Creating tracks from track presets or VST presets
Using drag and drop
- Open the Sound Browser from the Media menu.
- Select a track or VST preset from the list of all presets.
- Hit the Play button on the Transport panel to preview the selected VSTpreset.
All settings will be applied in realtime to the selected track. If you set up your target track to a cycle and play back in loop, previewing will be very comfortable. Note that you cannot preview multi track presets. - Drag and drop the preset onto the Track list in the Project window.
One or more (in case of multi track presets) tracks will be created. If you drag and drop a VST instrument preset, this will result in an instrument track.
→ You can also drag and drop from the Windows Explorer or the Mac OS Finder, but in this case, no preview for MIDI and instrument track presets is possible.
Using the Browse Sounds dialog
- Right-click the Track list to open the context menu and, on the Add Track submenu, select "Browse Sounds...". The Browse Sounds dialog with all available presets opens.
- Select a track or VST preset from the list of all presets. At this point you can preview selected MIDI and instrument track presets as well as VST presets, see "Previewing MIDI, instrument and VST presets independently of tracks" on page 293. If you want to list a certain track preset type only, open the respective folder in the Browser section.
- Click OK to create one or more (in case of multi track presets) tracks.
Using the Add Track function
- Right-click the Track list to open the context menu and select the desired option on the context menu.
- If you want to create more than one track of the same type, enter the number in the Count field.
- Click "Browse Presets" to open the Browse Presets section of the "Add Track" dialog with the Category search and a list of all available presets. For details, see "Performing a Category search" on page 281.
The view is filtered to show only the corresponding track presets.
- If you want to see the contents of presets subfolders within the VST Sound node, click the "Show Location" option to open the Browser section (see "Browsing for media files" on page 276).
- Select a track or VST preset.
- Hit the Play button on the Transport panel to preview the selected preset.
- Click OK to create the track.
Notice that the new track will not be named after the track preset.
⇒ This method is not available for multi track presets.
Previewing MIDI, instrument and VST presets independently of tracks
There are two possibilities for previewing MIDI, instrument track presets and VST presets in the Sound Browser or in dialogs with the Browse Presets section open:
Via standard MIDI input
- Open the "Browse Sounds" dialog and select a MIDI, an instrument track or a VST preset.
The preview buttons appear on the lower right. (In the Sound Browser, the preview buttons appear in the Scope section.)
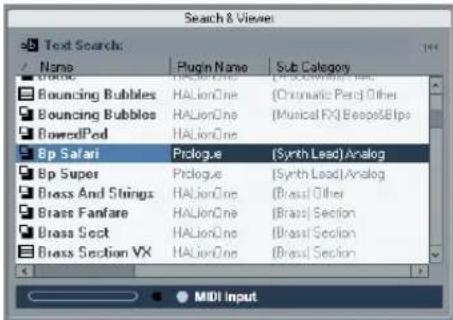
text_image
Search & View Text Search: Name Plugin Name Sub Category Bouncing Bubbles HALionOne (Chromatic Perc) Other Bouncing Bubbles HALionOne (Musical FX) BeepotBips BowedPod HALionOne Bp Safari Prologue (Synth Lead) Analog Bp Super Prologue (Synth Lead) Analog Brass And Strings HALionOne (Brasst Other Brass Fanfare HALionOne (Brasst Section Brass Sect HALionOne (Brasst Section Brass Section VX HALionOne (Brasst Section MIDI InputTrack-independent preview, for example a VST preset in the "Browse Sounds" dialog
- Make sure the "In 'All MIDI Inputs'" option is activated for your MIDI input device (default setting).
Only MIDI data incoming via "All MIDI Inputs" is used for preview. - Click the MIDI Input button.
- Play some MIDI notes via your MIDI input device, for example a keyboard.
The Activity meter on the far right mirrors the MIDI in activity.
Using a MIDI file
- Open the "Browse Sounds" dialog and select a MIDI or instrument track preset or a VST preset. The preview buttons appear on the lower right. (In the Sound Browser, the preview buttons appear in the Scope section.)
- Click the Choose MIDI File button, select a MIDI file (.mid) in the file dialog that appears and click OK.
- Click the MIDI Input button and activate "Play" (the Play button is now available). The chosen MIDI file will be played back with the track or VST preset.
The MIDI file selection is not saved when closing the dialogs or the Sound Browser. Therefore, you have to select a new file the next time you want to preview a preset using a MIDI file.
Track Quick Controls
Introduction
Cubase can give you instant access to up to eight parameters of each audio, MIDI or instrument track. This is done with the aid of the so-called quick controls, set up on the Quick Controls Inspector tab for these tracks.
The Quick Controls tab can be used as a kind of track control center, an area in which your most important parameters are assembled in one place. This saves you from having to click your way through the various windows and sections pertaining to your track.
Also, Cubase allows you to assign these quick controls very quickly to an external remote control device. This gives you manual control of your most important track parameters.
Setting up the Quick Controls tab
Assigning parameters to quick controls
The Quick Controls tab shows eight slots, one for each quick control. To start with, these slots are empty. Proceed as follows to assign track parameters to the quick control slots:
- On the Quick Controls tab, click on the first quick control slot.
A context menu is opened. It lists all parameters currently accessible for this particular track.
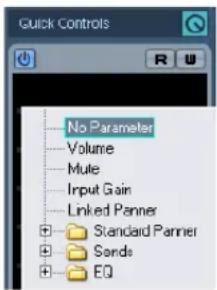
text_image
Quick Controls No Parameter Volume Mute Input Gain Linked Penner Standard Penner Sands EQ- Double-click the parameter that you want to assign to the first quick control slot.
The parameter name and its value are displayed in the slot. You can change the value by dragging the slider.
The track's main volume parameter is assigned to quick control 1.
- Repeat these steps for each quick control slot until all eight slots are associated with track parameters.
You can now control the 8 functions most important to you via one single Inspector section.
Editing the quick control slots
- To rename a quick control, double-click on the name in the slot to select it, enter a new name and press [Enter].
- To replace a parameter assignment with a different parameter, click on the corresponding quick control slot and double-click on a different parameter in the browser pop-up menu list.
The parameter assignment in this slot is changed.
- To remove a parameter from a slot, double-click the parameter name to select it and press the [Delete] or [Backspace] key. Confirm this operation by pressing [Enter] or click in the corresponding slot and select "No parameter" from the browser pop-up menu.
The parameter assignment is removed, and the quick control slot is empty.
Options and settings
- Quick control assignments are saved with the current project.
- Since quick control settings are part of the track setup, you can save them as track presets, allowing you to re-use your settings across different projects.
Track presets are described in the chapter "Working with Track Presets" on page 288.
- You can automate all parameter settings on the Quick Controls tab using the Read/Write Enable buttons (R and W) at the top right.
The automation features of Cubase are described in detail in the chapter "Automation" on page 188.
Setting up quick controls on an external remote controller
Quick controls become really powerful when used in combination with a remote controller.
Setting up the connection between the slots on the Quick Controls Inspector tab and a remote control device is easy. Proceed as follows:
- In Cubase, open the Device Setup dialog from the Devices menu.
- In the Devices list on the left, select the Quick Controls option.
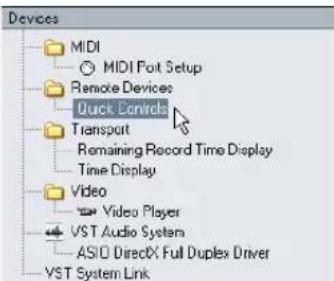
text_image
Devices MIDI MIDI Folt Setup Remote Devices Quick Controls Transport Remaining Record Time Display Time Display Video Video Player VST Audio System ASIO DirectX Full Duplex Driver VST System LinkThis will open the Quick Controls section on the right of the dialog:
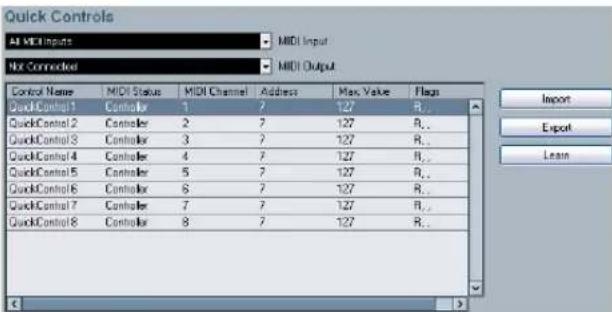
text_image
Quick Controls All MIDI Inputs MIDI Input NX Connected MIDI Output Control Name MIDI Status MIDI Channel Address Max Value Flags QuickControl1 Controller 1 ? 7 127 R... QuickControl2 Controller 2 ? 7 127 R... QuickControl3 Controller 3 ? 7 127 R... QuickControl4 Controller 4 ? 7 127 R... QuickControl5 Controller 5 ? 7 127 R... QuickControl6 Controller 6 ? 7 127 R... QuickControl7 Controller 7 ? 7 127 R... QuickControl8 Controller 8 ? 7 127 R...- With your remote control device connected to Cubase via MIDI, select the corresponding MIDI port on your computer in the MIDI Input pop-up (or select "All MIDI Inputs"). If your remote controller has its own MIDI input and supports MIDI feedback, you can connect your computer to the device input. Then, select the corresponding MIDI port in the MIDI Output pop-up.
- Click "Apply" to apply your settings.
-
Select "QuickControl1" in the "Control Name" column.
-
Move the control (knob, fader or other) on your remote control device that you want to use for the first quick control.
- In the Device Setup dialog, click the Learn button.
text_image
Flags R.. R.. R.. R.. Import Export Learn- Repeat the last 3 steps for the other quick controls.
You have now associated the slots on the Quick Control tab with control elements on your external remote controller. Moving a control element will automatically change the value of the parameter assigned to the corresponding quick control.
- The remote controller setup for quick controls is saved globally, i.e. independent of any projects.
If you have various remote controllers, you can store and load several quick control setups using the Export and Import buttons.
Quick controls and automatable parameters
The quick controls feature has one special extension: you can use quick controls not only to access certain parameters of the current track, but also to control all automatable parameters. This makes it possible to use the Quick Controls tab of a dedicated track as a kind of "mini mixer", controlling parameters on other tracks. However, you should use this function with caution, as you might accidentally modify parameters on other tracks.
Proceed as follows:
- Create a new, empty audio track and open its Quick Controls tab.
This track has no events or parts.
- Hold down the [Ctrl]/[Command] key and click on the slot for quick control 1.
The parameter selection context menu is opened, but it lists not the parameters of the current track, but all automatable parameters.
- Open the VST Mixer folder.
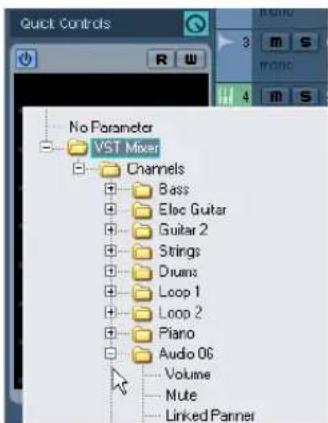
text_image
Quick Controls No Parameter VST Mixer Channels Bass Elac Guitar Guitar 2 Strings Drums Loop 1 Loop 2 Piano Audio 06 Volume Nute Linked BannerThe pop-up lists all channels available in the mixer of your current project.
- Now assign a parameter of one particular channel to quick control 1, and another parameter of another channel to quick control 2.
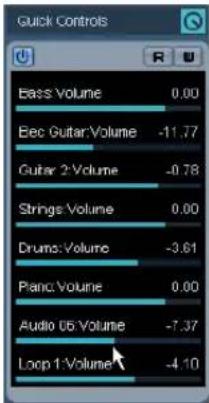
text_image
Quick Controls Bass Volume 0.00 Bec Guitar:Volume -11.77 Guitar 2:Volume -0.78 Strings Volume 0.00 Drums:Volume -3.61 Piano Volume 0.00 Audio 05:Volume -7.37 Loop 1:Volume -4.10Here, quick controls 1–8 have been set up to control the main volume of eight audio tracks.
The Quick Controls tab has become a "secondary" mixer, dedicated to quick-controlling parameters on other tracks.
Quick controls that are assigned that way cannot work when saved as track presets.
22
Remote controlling Cubase
Introduction
It is possible to control Cubase via MIDI. A large number of MIDI control devices is supported. This chapter describes how to set up Cubase for remote control. The supported devices are described in the separate pdf document "Remote Control Devices".
- There is also a Generic Remote Device option, allowing you to use any MIDI controller to remote control Cubase. How to set this up is described in the section "The Generic Remote device" on page 302.
Setting Up
Connecting the remote device
Connect the MIDI Out on the remote unit to a MIDI In on your MIDI interface. Depending on the remote unit model, you may also need to connect a MIDI Out on the interface to a MIDI In on the remote unit (this is necessary if the remote unit features "feedback devices" such as indicators, motorized faders, etc.).
If you will be recording MIDI tracks, you do not want any MIDI data from the remote unit to accidentally be recorded as well. To avoid this, you should also make the following setting:
- Open the Device Setup dialog from the Devices menu.
- Select "MIDI Port Setup" in the list to the left.
- Check the table to the right and locate the MIDI input to which you have connected the MIDI remote unit.
- Deactivate the checkbox in the "In 'All MIDI Inputs'" column for that input, so that the State column reads "Inactive".
- Click OK to close the Device Setup dialog.
Now you have removed the remote unit input from the "All MIDI Inputs" group. This means that you can record MIDI tracks with the "All MIDI Inputs" port selected without risking to record the data from the remote unit at the same time.
Selecting a remote device
- Pull down the Devices menu and select Device Setup. A dialog window opens with a list of device categories and devices shown in the left part of the window.
- If you cannot find the remote device you are looking for, click on the plus sign in the top left corner and select the device from the pop-up menu.
The selected device is added to the Devices list.
- Note that it is possible to select more than one remote device of the same type.
If you have more than one remote device of the same type, these will be numbered in the Devices list. For example, to be able to use a Mackie Control Extender, you must install a second Mackie control device.
- Now select your MIDI control device model from the Devices list.
Depending on the selected device, either a list of programmable function commands or a blank panel is shown in the right half of the dialog window.
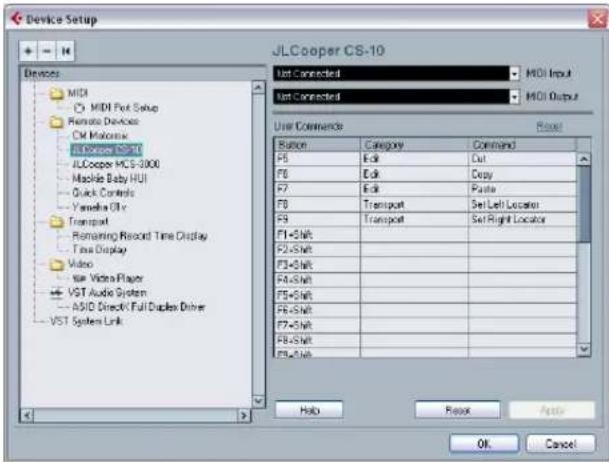
text_image
Device Setup JLCooper CS-10 List Connected MIDI Input List Connected MIDI Output User Commands Button Category Command F5 Edit Cut F6 Edit Copy F7 Edit Paste F8 Transport Set Left Locator F9 Transport Set Right Locator F1=Shift F2=Shift F3=Shift F4=Shift F5=Shift F6=Shift F7=Shift F8=Shift F9=Shift Help Reset Finish OK CancelA JL Cooper CS-10 selected as remote control device.
-
Select the correct MIDI input from the pop-up menu. If necessary, select the correct MIDI output from the pop-up menu.
-
Click OK to close the dialog.
You can now use the MIDI control device to move faders and knobs, activate Mute and Solo, etc. The exact parameter configuration depends on which external MIDI control device you are using.
- In the Project window (Track list) and the mixer (bottom of channel strips) you will now see white stripes indicating which channels are currently linked to the remote control device.
Audio 01 can be remote controlled, while Audio 02 is not linked to the remote control device.

Sometimes communication between Cubase and a remote device is interrupted or the handshaking protocol fails to create a connection. To re-establish communication with any device in the Devices list, select it and click the Reset button in the Device Setup dialog. Also, the "Send Reset Message to all Devices" button at the top of the dialog will reset every device in the Devices list.
Operations
Global options for remote controllers
In the Device Setup dialog, on the page for your remote device, some (or all) of the following global functions may be available (depending on your remote device):
Option Description
| Reset This allows you to revert to the factory default settings for the remote device. | |
| Bank If your remote device contains several banks, you can select the bank you want to use on this pop-up menu.The bank you select here will be the one used by default when Cubase is launched. | |
| Smart Switch Delay | Some of the Cubase functions (e.g. Solo and Mute) support the so called “smart switch” behavior: In addition to regular activation/deactivation of a function by clicking a button, you can also activate the function for as long as the button is pressed. Upon releasing the mouse button, the function is deactivated.This pop-up menu allows you to specify how long a button must be pressed before it goes into “smart switch” mode. When “Off” is selected, the “smart switch” function is deactivated in Cubase. |
Writing automation using remote controls
Automating the mixer in Touch mode using a remote control device is done in the same way as when you operate on-screen controls in Write mode. However, when it comes to replacing existing automation data, there is one important difference:
- If you activate Write mode and move a control on the remote control device, all data for the corresponding parameter is replaced from the position where you moved the control, up until the position where playback is stopped! In other words, as soon as you move a control in Write mode, it remains "active" until you stop playback. The reason for this is explained below.
As a consequence, an additional precaution must be taken:
- Make sure you move only the controller you want to replace!
In order to replace existing automation data for a control in Touch mode, the computer needs to know how long the user actually "grabbed" or used the control. When doing this "on screen", the program simply detects when the mouse button is pressed and released. When you are using an external remote control device, however, there is no mouse button involved, and Cubase cannot tell whether you "grab and hold" a fader, or simply move it and release it. Instead, you have to indicate that you have "released" the control by stopping playback.

The above does not apply to the Mackie Control or any other remote control device with touch sensitive controls. These devices will stop writing as they have touch sensitive faders, which means that they stop writing as soon as you release the fader.

This is only relevant when you are using a remote control device in Touch mode and Write mode is activated in the mixer.
Assigning remote key commands
For some of the supported remote devices, you can assign any Cubase function (to which a key command can be assigned) to generic buttons, wheels or other controls. As of this writing, these devices are:
- JL Cooper MCS 3000
- JL Cooper CS-10
• T a s c a m U S - 4 2 8 - Yamaha 01x
- Yamaha DM 2000v2
- Yamaha DM 1000v2
- Radical SAC - 2 k
- Steinberg Houston
Proceed as follows:
-
Open the Device Setup dialog and select one of the remote devices that support this feature.
On the right side of the window you will find a three column table. This is where you assign commands. -
Use the "Button" column to locate a remote device control or button to which you wish to assign a Cubase function.
-
Click in the "Category" column for the control, and select one of the Cubase function categories from the popup menu.
-
Click in the "Command" column, and select the desired Cubase function from the pop-up menu.
The available items on the pop-up menu depend on the selected category.
- Click "Apply" when you are done.
The selected function is now assigned to the button or control on the remote device.
A note about remote controlling MIDI tracks
While most remote control devices will be able to control both MIDI and audio channels in Cubase, the parameter setup may be different. For example, audio-specific controls (such as EQ) will be disregarded when controlling MIDI channels.
Accessing user panel parameters via remote control devices (Cubase only)
Cubase allows you to control external MIDI devices through user device panels. When you have assigned project parameters to a device panel to be displayed in the Mixer (i.e. when creating the panel, you must select the Channel Strip Size option in the Add Panel dialog), you can access these parameters through some of the remote control devices supported by Cubase.
This feature is supported for the following devices:
- Steinberg Houston
- Mackie Control
- Mackie HUI
- Yamaha DM 2000
- CM Motormix
· S A C 2 K
These remote control devices provide an extra display page in the Inserts section for the selected channel.
This page is called User and is displayed as the 9th insert page for audio channels and as the 5th insert page for MIDI channels. It allows you to control the parameters assigned to your user device panel from your remote control device.
The Generic Remote device
If you have a generic MIDI controller, you can use this for remote control of Cubase by setting up the Generic Remote device:
- Open the Device Setup dialog on the Devices menu. If the Generic Remote device is not on the Devices list, you need to add it.
- Click the "+" sign in the top left corner and select the "Generic Remote" device from the pop-up menu.
- When the Generic Remote device is added in the Device Setup dialog, you can open the corresponding window by selecting "Generic Remote" from the Devices menu.
The Generic Remote window
3. Select the Generic Remote device in the Devices list to the left.
The settings for the Generic Remote device are displayed, allowing you to specify which control on your device should control which parameter in Cubase.
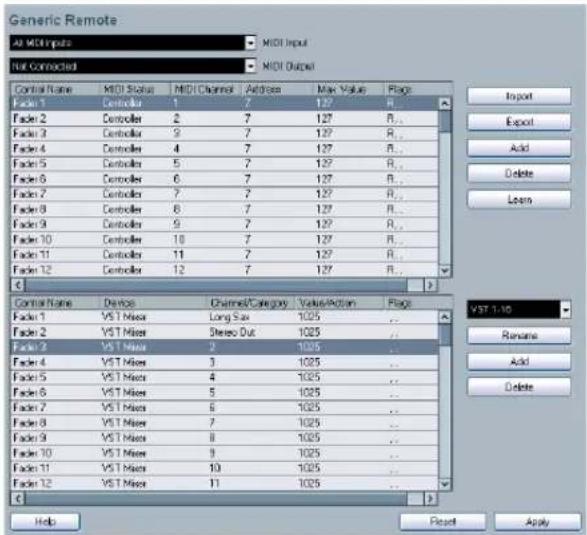
text_image
Generic Remote At MIDI Input MIDI Input Not Connected Control Name MIDI Status MIDI Channel Address Max Value Flags Fader 1 Controller 1 7 127 R... Fader 2 Controller 2 7 127 R... Fader 3 Controller 9 7 127 R... Fader 4 Controller 4 7 127 R... Fader 5 Controller 5 7 127 R... Fader 6 Controller 6 7 127 R... Fader 7 Controller 7 7 127 R... Fader 8 Controller 8 7 127 R... Fader 9 Controller 9 7 127 R... Fader 10 Controller 10 7 127 R... Fader 11 Controller 11 7 127 R... Fader 12 Controller 12 7 127 R... C Control Name Device Channel/Category Value/Action Flags Fader 1 VST Mises Long Size 1025 ... Fader 2 VST Mises Stereo Out 1025 ... Fader 3 VST Mises 2 1025 ... Fader 4 VST Mises 3 1025 ... Fader 5 VST Mises 4 1025 ... Fader 6 VST Mises 5 1025 ... Fader 7 VST Mises 6 1025 ... Fader 8 VST Mises 7 1025 ... Fader 9 VST Mises 8 1025 ... Fader 10 VST Mises 9 1025 ... Fader 11 VST Mises 10 1025 ... Fader 12 VST Mises 11 1025 ... C Import Export Add Delete Learn VST-1-10 Rename Add Delete Help Reset Apply-
Use the MIDI Input and Output pop-up menus to select the MIDI port(s) to which your remote device is connected.
-
Use the pop-up menu to the right to select a bank. Banks are combinations of a certain number of channels, and are used because most MIDI devices can control only a limited number of channels at a time (often 8 or 16). For example, if your MIDI control device has 16 volume faders, and you are using 32 mixer channels in Cubase, you would need two banks of 16 channels each. When the first bank is selected you control channel 1 to 16; when the second Bank is selected you control channel 17 to 32. Since you can control Transport functions as well, you may need several banks.
-
Set up the table at the top according to the controls on your MIDI control device.
The columns have the following functionality:
Column Description
Control Name Double-clicking this field allows you to enter a descriptive name for the control (typically a name written on the console). This name is automatically reflected in the Control Name column in the lower table.
Column Description
MIDI Status Clicking in this column pulls down a pop-up menu, allowing you to specify the type of MIDI message sent by the control. The options are Controller, Program Change, Note On, Note Off, Aftertouch and Polyphonic Pressure. Also available are Continuous Control NRPN and RPN, a way to extend the available control messages. The "Ctrl JLCooper" option is a special version of a Continuous Controller where the 3rd byte of a MIDI message is used as address instead of the 2nd byte (a method supported by various JL-Cooper remote devices).
MIDI Channel Clicking in this column opens a pop-up menu, allowing you to select the MIDI channel on which the controller is transmitted.
Address The Continuous Controller number, the pitch of a note or the address of a NRPN/RPN Continuous Controller.
Max. Value The maximum value the control will transmit. This value is used by the program to "scale" the value range of the MIDI controller to the value range of the program parameter.
Flags Clicking in this column pulls down a pop-up menu, allowing you to activate or deactivate three flags: Receive – activate this if the MIDI message should be processed on reception. Transmit – activate this if a MIDI message should be transmitted when the corresponding value in the program changes. Relative – activate this if the control is an "endless" rotary encoder, which reports the number of turns instead of an absolute value.
- If you find that the table at the top holds too many or too few controls, you can add or remove controls with the Add and Delete buttons to the right of the table.
- If you are uncertain of which MIDI message a certain controller sends, you can use the Learn function.
Select the control in the upper table (by clicking in the Control Name column), move the corresponding control on your MIDI device and click the Learn button to the right of the table. The MIDI Status, MIDI Channel and Address values are automatically set to those of the moved control.
- Use the table at the bottom to specify which Cubase parameters you want to control.
Each row in the table is associated to the controller in the corresponding row in the first table (as indicated by the Control Name column). The other columns have the following functionality:
Column Description
Device Clicking in this column pulls down a pop-up menu, used for determining which device in Cubase should be controlled. The special option "Command" allows you to perform certain command actions by remote control. One example of this is the selection of remote banks.
Column Description
| Channel/Category | This is where you select the channel to be controlled or, if the "Command" Device option is selected, the Command category. |
| Value/Action Clicking in this column pulls down a pop-up menu, allowing you to select the parameter of the channel to be controlled (typically, if the "VST Mixer" Device option is selected you can choose between volume, pan, send levels, EQ, etc.).If the "Command" Device option is selected, this is where you specify the "Action" of the category. |
| Flags Clicking in this column pulls down a pop-up menu, allowing you to activate or deactivate three flags:Push Button – When activated, the parameter is only changed if the received MIDI message shows a value unequal to 0.Toggle – When activated, the parameter value is switched between minimum and maximum value each time a MIDI message is received. The combination of Push Button and Toggle is useful for remote controls which do not latch the state of a button. One example is controlling mute status with a device on which pressing the Mute button turns it on, and releasing the Mute button turns it off. If Push Button and Toggle are activated, the Mute status will change between on and off whenever the button is pressed on the console.Not Automated – When activated, the parameter will not be automated. |
8. If necessary, make settings for another bank.
Note that you only need to make settings in the bottom table for this bank. The table at the top is already set up according to the MIDI remote device.
- If necessary, you can add banks by clicking the Add button below the Bank pop-up.
Clicking the Rename button allows you to assign a new name to the currently selected bank, and you can remove an unneeded bank by selecting it and clicking the Delete button.
- When you are finished, close the Device Setup window. Now, you can control the specified Cubase parameters from the MIDI remote device. To select another bank, use the pop-up menu in the Remote Status window (or use a control on the MIDI remote device, if you have assigned one for this).
Importing and exporting remote setups
The Export button in the top right corner of the Generic Remote Setup window allows you to export the current setup, including the Control configuration (the table at the top) and all banks. The setup is saved as a file (with the file extension ".xml"). Clicking the Import button allows you to import saved remote setup files.
- The last imported or exported remote setup will automatically be loaded when the program starts or the Generic Remote control is added in the Device Setup dialog.
Track Quick Controls
If you have an external remote control device, you can set it up to control up to eight parameters of each audio track, MIDI track or instrument track, using the Track Quick Controls feature in Cubase. How to set up your device and how to assign parameters to it is described in the chapter "Track Quick Controls" on page 295.
Apple Remote (Macintosh only)
Many Apple computers come with an Apple Remote Control, a small hand-held device akin to TV remote controls. It allows you to remotely control certain features in Cubase.
- Open the Device Setup dialog and select Apple Remote Control from the Add Device pop-up.
- In the list on the right, the Apple Remote's buttons are listed. For each button you can open a pop-up menu from which you can select a Cubase parameter.
The parameter you select will be assigned to the corresponding button on the Apple Remote.
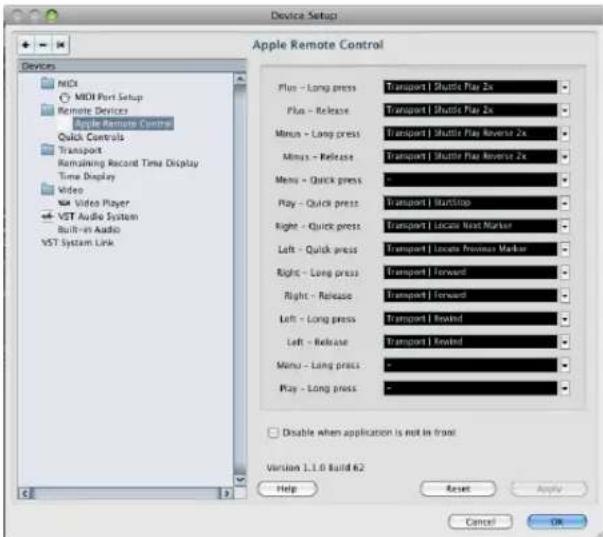
text_image
Device Setup Apple Remote Control Devices MIDI MIDI Port Setup Remote Devices Apple Remote Control Quick Controls Transport Remaining Record Time Display Time Display Video Video Player VST Audio System Built-in Audio VST System Link Play - Long press Transport | Shuttle Play 2x Play - Release Transport | Shuttle Play 2x Minus - Long press Transport | Shuttle Play Reverse 2x Minus - Release Transport | Shuttle Play Reverse 2x Menu - Quick press - Play - Quick press Transport | Startstop Right - Quick press Transport | Locals Next Marker Left - Quick press Transport | Locals Previous Marker Right - Long press Transport | Forward Right - Release Transport | Forward Left - Long press Transport | Forward Left - Release Transport | Forward Menu - Long press - Play - Long press - Disable when application is not in front Version 1.1.0 Build 62 Help Reset Apply Cancel OKBy default, the Apple Remote always controls the application that currently has the focus on your Macintosh computer (provided that this application supports the Apple Remote).
- When the option "Disable when application is not in front" is not selected, the Apple Remote will control Cu-base even if it does not have the focus.
MIDI realtime parameters and effects
Introduction
For each MIDI track, you can set up a number of track parameters, or modifiers, and MIDI effects. These affect how the MIDI data is played back, "transforming" MIDI events in realtime before they are sent to the MIDI outputs.
On the following pages, the available parameters and effects are described. Keep in mind:
- The actual MIDI events will not be affected – the changes happen “on the fly”.
- Since the modifier settings do not change the actual MIDI data on the track, they will not be reflected in the MIDI editors. To convert the track settings into “real” MIDI events, use the Freeze MIDI Modifiers function or the Merge MIDI in Loop function (see “Making your settings permanent” on page 331).
The Inspector – General handling
The MIDI modifiers and effects are set up in the Inspector (although some settings are available in the mixer as well). Here's a brief rundown on how to handle the Inspector:
- To show or hide the Inspector, click the Inspector icon on the Project window toolbar.
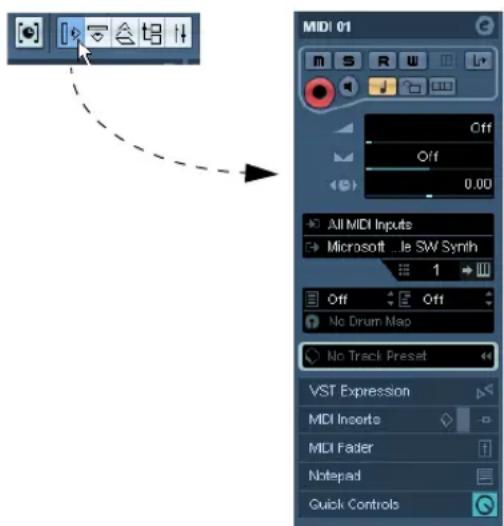
text_image
MIDI 01 Off 0.00 All MIDI Inputs Microsoft - le SW Synth 1 Off Off No Drum Map No Track Preset VST Expression MDI Inserte MDI Fader Notepad Quick ControlsThe Inspector for a MIDI track
- For a MIDI track, up to nine sections (eight in Cubase Studio) are available. Which of these sections are displayed in the Inspector is determined in the setup context menu or the Setup dialog of the Inspector.
For information about setting up the Inspector, see "Using the Setup options" on page 471.
- You can fold or unfold the sections individually by clicking on the section name.
Clicking the name for a hidden section brings it to view and hides the other sections. [Ctrl]/[Command]-clicking the tab allows you to hide or show a section without affecting other sections. [Alt]/[Option]-clicking a tab shows or hides all sections in the Inspector.
⇒ Folding or hiding (via the Setup dialog) a section does not affect the functionality but merely hides the section from view.
This means your settings will still be active even if you fold or hide the Inspector settings.
The Inspector sections
Apart from the basic track settings in the topmost Inspector section (see below), the Inspector for a MIDI track also contains the following sections: VST Expression, MIDI Modifiers, MIDI Inserts, MIDI Sends, MIDI Fader, Notepad, User Panel, Quick Controls and one for a connected VST Instrument. With the exception of the MIDI Inserts and Sends sections (see "MIDI effects" on page 310) these are described below.
Basic track settings
These are settings that either affect the basic functionality for the track (mute, solo, enable record, etc.) or send out additional MIDI data to the connected devices (program change, volume, etc.). The section contains all settings in the Track list (see "The Track list" on page 28), with a few additional parameters:
Parameter Description
| Track name field | Click once to show/hide the topmost Inspector section.Double-click to rename the track. |
| Edit button This opens the Channel Settings window for the track (a window showing a channel strip with volume fader and other controls, along with effect settings – see “Using Channel Settings” on page 122). | |
| Mute/Solo buttons | Mutes or solos the MIDI track. |
Parameter Description
| Read/Write buttons | Used for automating the track settings – see “Enabling and disabling the writing of automation data” on page 189. |
| Open Device Panels button | Cubase only: If the MIDI track is routed to a device with a panel, clicking this button opens the respective panel. For more information, see the separate PDF document “MIDI Devices”. |
| Input transformer button | Opens the Input Transformer dialog, allowing you to transform incoming MIDI events in realtime, see “The Input Transformer” on page 389. |
| Record enable button | Activate this to make the track ready for recording. |
| Monitor button | When this is activated (and the option “MIDI Thru Active” is activated in the Preferences–MIDI page), incoming MIDI will be routed to the selected MIDI output. |
| Toggle Time-base button | Switches between musical (tempo related) and linear (time related) time base for the track. See “Switching between musical and linear time base” on page 40. |
| Lock button | Activate this to disable all editing of all events on the track. |
| Lane Display Type button | Allows you to divide the tracks in lanes. For more about lanes, see “Recording audio in Stacked mode” on page 77. |
| Volume Use this | to adjust the level for the track. Changing this setting will move the track’s fader in the mixer window, and vice versa. See “Setting volume in the mixer” on page 117 for more about setting levels. |
| Pan Use this to adjust the panning of the track. | |
| Delay This adjusts the playback timing of the MIDI track. Positive values delay the playback while negative values cause the track to play earlier. The values are set in milliseconds. | |
| In/Out/Chn pop-ups | This is where you select MIDI input, MIDI output and MIDI channel for the track. |
| Edit Instrument button | If the MIDI track is routed to a VST instrument, clicking this button opens the control panel for the VST instrument. |
| Bank and Patch Selector pop-up | Allows you to select a sound, see below. (If no bank is available, only the Patch selector is shown.) |
| Map pop-up | Allows you to select a drum map for the track – see “Managing drum maps” on page 363. |
| Apply Track Preset button | Allows you to apply a track preset, see “Applying track presets” on page 290. |
Note that the functionality of the Bank and Patch selector settings (used for selecting sounds in the connected MIDI instrument) depends on the instrument to which the MIDI output is routed, and how you have set it up in the MIDI Device Manager.
The MIDI Device Manager allows you to specify which MIDI instruments and other devices are connected to the various MIDI outputs, thus making it possible to select patches by name. See the chapter "Using MIDI devices" on page 314 for details about the MIDI Device Manager.
Many of the basic track settings are duplicated in "mixer channel strip form" in the MIDI Fader section of the Inspector (see below).
VST Expression section
This section is used when working with the VST Expression features, see the chapter "VST Expression" on page 372.
MIDI Modifiers
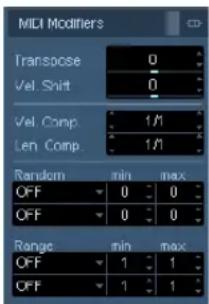
text_image
MIDI Modifiers Transpose 0 Vel. Shift 0 Vel. Comp. 1/1 Len Comp. 1/1 Random min max OFF 0 0 OFF 0 0 Range min max OFF 1 1 OFF 1 1The settings on this tab will affect the MIDI events on the track in realtime during playback. They will also be in effect if you play "live" with the track selected and record enabled (provided that "MIDI Thru Active" is activated on the Preferences–MIDI page). This makes it possible to e.g. transpose or adjust the velocity of your live playing.
⇒ If you want to compare the result of your modifier settings with the "unprocessed" MIDI, you can use the Bypass button in the MIDI Modifiers section.
When this is activated, the MIDI Modifiers settings will be temporarily disabled. A bypassed section is indicated by a yellow Bypass button.
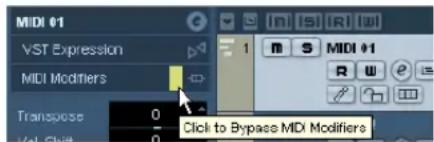
text_image
MIDI 01 VST Expression MIDI Modifiers Transpose 0 0 Click to Bypass MDI ModifiersTranspose
This allows you to transpose all notes on the track in semitones. The available range is -127 to +127 semitones, but remember that the total range of MIDI note numbers is 0 to 127. Furthermore, not all instruments can play back notes over the whole range. Therefore, extreme transpositions can give rather strange and unwanted results.
- You can also transpose individual MIDI parts using the Transpose field in the info line.
The transposition in the info line (for the individual part) is added to the transpose value you have set up for the whole track in the Inspector.
This setting is also affected by the global Transpose settings. For detailed information, see the chapter "The Transpose functions" on page 103.
Velocity Shift
This setting lets you change the dynamics of all notes on the track. The value in this field is added to the velocity of each note message that is sent out (use negative values to lower the velocities). The range is -127 to +127 with 0 representing no change in velocity.
Note that the effect of changing the velocity depends on the sound and instrument.
You can also adjust the velocity of events in individual MIDI parts using the Velocity field in the info line.
The velocity shift in the info line (for the individual part) is added to the velocity shift you have set up for the whole track in the Inspector.
Velocity Compression
This function multiplies the velocity values with the factor you specify. This factor is set using a numerator (left value) and a denominator (right value), resulting in a fractional number (1/2, 3/4, 3/2 etc.). For example, if you set the factor to 3/4, the velocities will be three quarters of their original values. This will also affect the difference in velocity between the notes, thus compressing or expanding the velocity scale. Typically, you would combine this setting with the Velocity Shift parameter.
An example:
Let's say you have three notes with the velocity values 60, 90 and 120, and wish to "even out" the velocity differences somewhat. If you set the Velocity Compression value to 1/2 , the notes will play back with the velocities 30, 45 and 60. By adding 60 in the Velocity Shift field, the notes will play back with the velocities 90, 105 and 120, meaning you have compressed the velocity range.
In a similar way, you can use Velocity Compression values greater than 1/1 together with negative values in the Velocity Shift field, to expand the velocity range.

Remember that the maximum velocity is always 127 no matter how much you try to expand.
Length Compression
This value adjusts the lengths of all notes on the track. As with Velocity Compression, the value is set with a numerator and denominator. For example, the value 2/1 means that all note lengths will be doubled, while 1/4 means all note lengths will be a quarter of the actual lengths.
Random
The Random settings let you introduce random variations to various properties of MIDI notes. Anything from very subtle variations to dramatic changes can be applied. There are two separate “random generators”, set up in the following way:
- Pull down the Random pop-up menu and select which note property should be randomized.
The options are position, pitch, velocity and length.
Keep in mind that depending on the content of the track, certain parameter changes might not be immediately noticeable or have any effect at all (as would be the case if applying random length to a percussion track playing "one-shot" samples for example).
To best audition the random changes, choose a track with clearly defined rhythm and note content (as opposed to a string pad).
2. Set the desired range of random deviation by entering values in the two number fields.
The two values govern the limits of the randomization, so that the values will vary between the left value and the right value (you cannot set the left value higher than the right value). The maximum random range for each property is listed in the table below:
Property Range
Position -500 to +500 ticks
Pitch -120 to +120 semitones
Velocity -120 to +120
Length -500 to +500 ticks
⇒ You can make independent settings for the two random generators.
- To deactivate the Random function, pull down the Random pop-up menu(s) and select "OFF".
Range
The Range function lets you specify a note (pitch) or velocity range and either force all notes to fit within this range, or exclude all notes outside this range from playback. As with the Random function, there are two separate Range settings. Set them up as follows:
- Pull down the Range pop-up menu and select one of the following four modes:
Mode Description
Vel. Limit This function affects all velocity values outside the specified range. Velocity values below the Min setting (the lower limit of the range) are set to the Min value, and velocity values above the Max setting are set to the Max value. Notes with velocity values within the set range are not affected. Use this if you want to force all velocity values to fit within a certain range.
Vel. Filter Velocity Filter works by excluding all notes with velocity values outside the specified range. Notes with velocity values below the Min setting or above the Max setting will not be played back. Use this to "isolate" notes with certain velocity values.
Mode Description
| Note Limit This function allows you to specify a pitch range, andforces all notes to fit within this range. Notes outside thespecified range are transposed up or down in octavesteps until they fit within the range.Note: If the range is too “narrow”, so that some notescannot be fit within the range by octave-transposing,these notes will get a pitch in the middle of the range. Forexample, if you have a note with a pitch of F3, and therange is C4-E4, that note will be transposed to D4. | |
| Note Filter | Note Filter works by excluding all notes with pitches out-side the specified range. Notes lower than the Min setting or higher than the Max setting will not be played back. Use this to “isolate” notes with certain pitches. |
2. Use the two fields to the right to set the minimum and maximum values.
These values will be shown as numbers (0–127) for the velocity modes and as note numbers (C-2 to G8) for the pitch modes.
Note that you can make independent settings for the two Range functions.
- To deactivate the Range function, pull down the Range pop-up menu(s) and select "OFF".
MIDI Fader section
This contains a single channel strip, allowing you to set volume, pan, mute/solo and other parameters for the track, and a panel view of the active sends/inserts. This is a "mirror" of the track's channel strip in the Cubase mixer – see "The MIDI channel strips" on page 117.
Notepad section
This is a standard notepad, allowing you to enter notes and comments about the track. Each track has its own notepad in the Inspector.
VST Instrument section
If the MIDI track is routed to a VST Instrument, a new subpanel will appear at the bottom of the Inspector, labeled with the name of the VST instrument. Clicking this section shows a duplicate of the Inspector settings for the VST Instrument channel. This makes it easy to adjust the channel settings for the VST Instrument while you are editing the MIDI track.
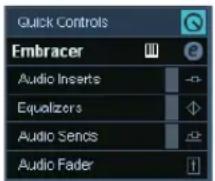
text_image
Quick Controls Embracer Audio Inserts Equalizers Audio Sends Audio Fader- If the VST Instrument has multiple outputs (and thus several mixer channels), there will be a setting called
"Output" at the top of the VST Instrument section.
New sub-panels will also be added in the following cases:
- When a MIDI track is routed to an external instrument or effect that has an associated MIDI Device. In this case, the new subpanel will get the name of the device.
- When a MIDI track is routed to an effect plug-in that also receives audio data, i.e. that is used as an insert effect for an audio track (e.g. MIDI Gate), a sub-panel for this audio track appears in the MIDI track inspector.
- If a MIDI track is routed to a plug-in assigned to a FX Channel track, a corresponding FX sub-panel is added to the Inspector.
For an easy way to combine MIDI and VST instruments, check out instrument tracks (see "VST Instruments and Instrument tracks" on page 169).
User Panel section (Cubase only)
This allows you to display MIDI device panels, which are control panels for external hardware. This is described in the separate PDF document "MIDI Devices".
Quick Controls section
This allows you to configure quick controls, e.g. to use remote devices. See the chapter "Track Quick Controls" on page 295.
MIDI effects
Cubase comes with a number of MIDI effect plug-ins, capable of transforming the MIDI output from a track in various ways.
Just like the MIDI modifiers, MIDI effects are applied in realtime to the MIDI data played back from the track (or to MIDI you play live "thru" the track).
What are MIDI effects?
Although a MIDI effect can be similar to an audio effect, it is important to remember that you're not processing the sound resulting from MIDI playback, but the MIDI data (the "instructions" for how the music should be played back).
A MIDI effect will change properties of the MIDI events (e.g. change the pitch of notes) and/or generate new MIDI events (for example, a MIDI delay may add new MIDI notes, “echoing” the original notes).
⇒ The included MIDI effect plug-ins are described in the separate manual "Plug-in Reference".
Insert and send effects
As with audio effects, there are two ways to route the MIDI events on a track to an effect:
If you add an insert effect, the MIDI events will be sent to the effect, which will process the data and pass it on to the track's MIDI output (or to another insert effect).
In other words, the MIDI events will be routed "through" the insert effect.
If you use a send effect, the MIDI events will be sent both to the track's MIDI output and to the effect.
That is, you will get both the unprocessed MIDI events and the output of the MIDI effect. Note that the effect can send its processed MIDI data to any MIDI output – not necessarily to the one used by the track.
There are separate sections in the Inspector for MIDI inserts and MIDI sends.
MIDI Inserts section
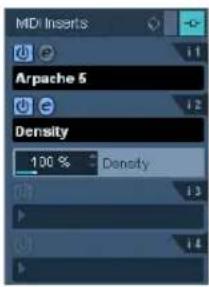
text_image
MDI Inserts Arpache 5 Density 100 % DensityThis allows you to add up to four MIDI insert effects. The section contains the following items:
Item Description
| PresetManagementbutton | Click this to open the track presets pop-up menu and select an insert preset or apply an insert from a track preset, see "Previewing MIDI, instrument and VST presets independently of tracks" on page 293. |
| Bypass button | Click this to temporarily disable all insert effects for the track (useful for comparing with the unprocessed MIDI, etc.). |
| Inserts section tab | This is in blue if an insert effect is activated. |
| Effect selec-tion pop-up menu (x 4) | Selecting an effect from this pop-up menu automatically activates it and brings up its control panel (which can be a separate window or a number of settings below the insert slot in the Inspector).To remove an insert effect completely, select "No Effect". |
| On button (x 4) | Allows you to turn the selected effect on or off. |
| Edit button (x4) | Click this to bring up the control panel for the selected effect. Depending on the effect, this may appear in a separate window or below the insert slot in the Inspector. Clicking the button again hides the control panel. |
⇒ Effects that display their controls in the Inspector can be opened in a separate control panel window by pressing [Alt]/[Option] and clicking the Edit button.
MIDI Sends section
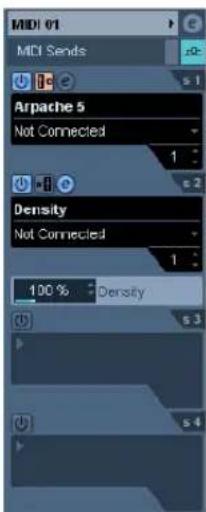
text_image
MIDI 01 MIDI Sends s 1 Arpache 5 Not Connected 1 Density Not Connected 1 100 % Density s 3 s 4This allows you to add up to four MIDI send effects. Unlike audio send effects, you can select and activate send effects individually for each track. The section contains the following items:
Item Description
| Bypass button Click this to temporarily disable all send effects for the track (useful for comparing with the unprocessed MIDI, etc.). | |
| Sends section tab | This is in blue if any send effect is activated. |
| Effect selection pop-up menu (x 4) | Selecting an effect from this pop-up menu automatically activates it and brings up its control panel (which can be a separate window or a number of settings below the send slot in the Inspector).To remove a send effect completely, select "No Effect". |
| On button (x 4) Allows you to turn the selected effect on or off. | |
| Pre/Post button (x4) | If this is activated, the MIDI signals will be sent to the send effects before the MIDI modifiers and insert effects. |
| Edit button (x4) | Click this to bring up the control panel for the selected effect. Depending on the effect, this may appear in a separate window or below the sends slot in the Inspector. Clicking the button again hides the control panel. |
| Output pop-up menu (x4) | This determines to which MIDI output the effect should send the processed MIDI events. |
| Channel setting (x4) | This determines on which MIDI channel the effect should send the processed MIDI events. |
⇒ Effects that display their controls in the Inspector can be opened in a separate control panel window by pressing [Alt]/[Option] and clicking the Edit button.
About presets
Several of the MIDI plug-ins come with a number of pre-sets for instant use.
MIDI In and Out activity indicators
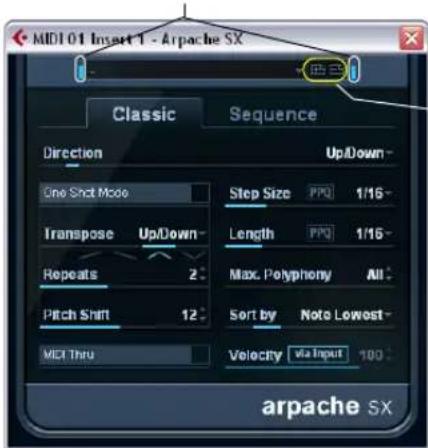
text_image
MIDI 01 Insert 1 - Apache SX Classic Sequence Direction Up/Down One Shot Mode Step Size PPG 1/16- Transpose Up/Down Length PPG 1/16- Repeats 2 Max. Polyphony All Pitch Shift 12 Sort by Note Lowest MDI Thru Velocity via Input 100 arpache SXSave and Remove Preset buttons
- To load a preset, select it from the Presets pop-up menu.
- To store your current settings as a preset, click on the plus (+) button ("Save Preset...") to the right of the Presets menu.
You will be asked to specify a name for the preset. The saved preset will then be available for selection from the pop-up menu for all instances of that MIDI plug-in, in all projects. - To remove a preset, select it, click on the minus (-) button ("Remove Preset").
At the left and right borders of the Presets pop-up menu you will also find MIDI In and Out activity indicators.
Whenever the plug-in receives or transmits MIDI data, the left or the right indicator will light up, respectively.
Applying a MIDI insert effect – an example
Here is a step-by-step example of how to add a MIDI insert effect to a MIDI track:
- Select the MIDI track and open the Inspector.
- Open the MIDI Inserts tab in the Inspector.
- Alternatively you could use the mixer: bring up the extended mixer panel and select "Inserts" on the view options pop-up menu for the track's channel strip.
- Click in one of the insert slots to open the MIDI effect pop-up menu.
- Select the desired MIDI effect from the pop-up menu. The effect is automatically activated (the power button for the insert slot lights up) and its control panel appears, either in a separate window or in the MIDI Inserts section below the slot (depending on the effect).
Now all MIDI from the track will be routed through the effect.
-
Use the control panel to make settings for the effect. All included MIDI effects are described in the separate manual "Plug-in Reference".
-
You can bypass the insert effect by clicking its power button (above the insert slot).
- To bypass all insert effects for the MIDI track, use the bypass button in the MIDI Inserts section in the Inspector, in the mixer channel strip or in the Track list.
- To remove an insert effect, click in its slot and select "No Effect".
Managing plug-ins
Selecting Plug-in Information from the Devices menu opens a window in which all loaded plug-ins, audio and MIDI, are listed.
- To view the MIDI effect plug-ins, click the MIDI Plug-ins tab.
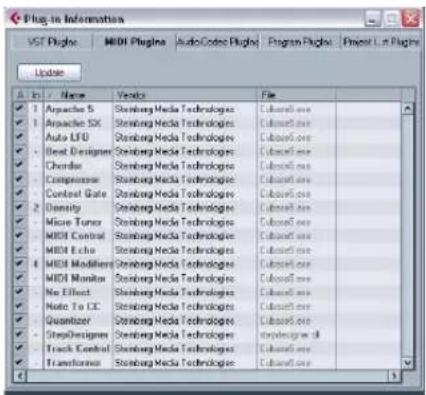
text_image
Plug-in Information VST Plugins MIDI Plugins AutoCodes Plugins Program Plugins Project Lnt Plugins Update A / B / C / D / E / F / G / H / I / J / K / L / M / N / O 1 Apache 5 1 Apache 6K Auto LFD Best Designers Chordor Comparator Context Gate Density Micro Tuner MIDI Control MIDI Echo MIDI Modifiers MIDI Monitor No Effect Note To CC Quantizer StepDesigners Track Control Transformer Vendor C:\Users\None C:\Users\None C:\Users\None C:\Users\None C:\Users\None C:\Users\None C:\Users\None C:\Users\None C:\Users\None C:\Users\None C:\Users\None C:\Users\None C:\Users\None C:\Users\None C:\Users\None C:\Users\None- The leftmost column allows you to deactivate plug-ins. This is useful if you have plug-ins installed that you do not want to use in Cubase. Only plug-ins that are activated (ticked checkbox) will appear on the MIDI effect pop-up menus. Note that plug-ins that are currently in use cannot be deactivated.
- The second column shows how many instances of each plug-in are currently used in the project.
- The remaining columns show various information about each plug-in and cannot be edited.
Using MIDI devices
Background
The MIDI Device Manager allows you to specify and set up your MIDI devices, making global control and patch selection easy.
But the MIDI Device Manager also features powerful editing functions that can be used to create MIDI device panels (Cubase only). MIDI device panels are internal representations of external MIDI hardware, complete with graphics. The MIDI device panel editor provides all the tools you need to create device maps where every parameter of an external device (and even an internal device like a VST instrument) can be controlled and automated from inside Cubase.
For descriptions of how to create device maps and the powerful device panel editing features, see "About Device panels (Cubase only)" on page 320. For additional information on how to create panels for VST instruments, see the separate pdf document "MIDI Devices".
MIDI devices – general settings and patch handling
On the following pages, we will describe how to install and set up preset MIDI devices, and how to select patches by name from within Cubase. For a description on how to create a MIDI device from scratch, please refer to the separate pdf document "MIDI Devices".
About Program Change and Bank Select
To instruct a MIDI instrument to select a certain patch (sound), you send a MIDI Program Change message to the instrument. Program Change messages can be recorded or entered in a MIDI part like other events, but you can also enter a value in the Program Selector field in the Inspector for a MIDI track. This way, you can quickly set each MIDI track to play a different sound.
With Program Change messages, you are able to select between 128 different patches in your MIDI device. However, many MIDI instruments contain a larger number of patch locations. To make these available from within Cubase, you need to use Bank Select messages, a system in which the programs in a MIDI instrument are divided into banks, each bank containing 128 programs. If your instruments support MIDI Bank Select, you can use the Bank Selector field in the Inspector to select a bank, and then the Program Selector field to select a program in this bank.
Unfortunately, different instrument manufacturers use different schemes for how Bank Select messages should be constructed, which can lead to some confusion and make it hard to select the correct sound. Also, selecting patches by numbers this way seems unnecessarily cumbersome, when most instruments use names for their patches nowadays.
To help with this, you can use the MIDI Device Manager to specify which MIDI instruments you have connected by selecting from a vast list of existing devices or by specifying the details yourself. Once you have specified which MIDI devices you are using, you can select to which particular device each MIDI track should be routed. It is then possible to select patches by name in the Track list or Inspector.
Opening the MIDI Device Manager
Select MIDI Device Manager from the Devices menu to bring up the following window:
Cubase:
List of connected MIDI devices. The first time you open the MIDI Device Manager, this list will be empty.
Use these buttons to install/remove devices.
This button opens the selected device.
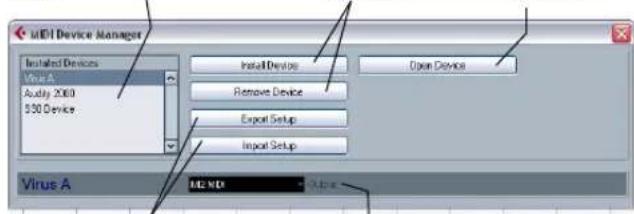
text_image
iMIDI Device Manager Installed Devices Virus A Auday 2010 530 Device Install Devluy Remove Devluy Export Setup Import Setup Open Devluy Virus A H2 MIO OutputUse these buttons to import/export XML Device setups.
Here you specify to which MIDI output the selected device is connected.
Cubase Studio:
List of connected MIDI devices. The first time you open the MIDI Device Manager, this list will be empty. Use these buttons to install/remove devices.
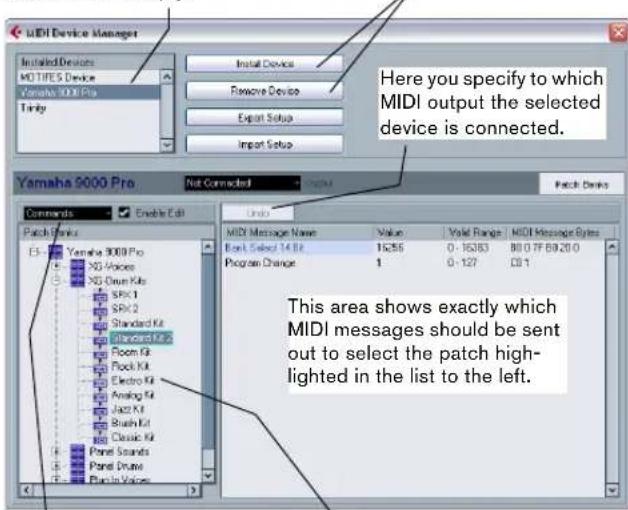
text_image
MIDI Device Manager Installed Devices MOTIFES Device Yamaha 9000 Pro Tinity Install Device Remove Device Export Setup Import Setup Here you specify to which MIDI output the selected device is connected. Yamaha 9000 Pro Not Connected Patch Drinks Comments Enable Edit Patch Drinks E5-Yamaha 9000 Pro XD-Vaccles XD-Drum Kit SPK1 SPK2 Standard Kit Standard Kit 2 Room Kit Rock Kit Electro Kit Analog Kit Jazz Kit Brush Kit Classic Kit Panel Sounds Panel Drums Panel Units Under MIDI Message Name Value Valid Range MIDI Message Bytes Bank Select 14 Bit 1356 0:16383 80.0 FF 8920.0 Program Change 1 0:127 031 This area shows exactly which MIDI messages should be sent out to select the patch highlighted in the list to the left.This pop-up menu lets you edit the selected device (provided that "Enable Edit" is ticked).
Here, the patch structure for the selected device is shown.
When you open the MIDI Device Manager for the first time, it will be empty (because you have not installed any devices yet). On the following pages we describe how to add a pre-configured MIDI device to the list, how to edit the settings and how to define a device from scratch.
Note that there is an important difference between installing a preset MIDI device ("Install Device") and importing a MIDI device setup ("Import Setup"):
- The presets do not include any device mapping of parameters and controls and no graphic panels.
They are simply patch name scripts. When you install a preset MIDI device, it is added to the Installed Devices list. For more information about patch name scripts, see the separate pdf document "MIDI Devices".
- A device setup can include device mapping, panels and/or patch information.
Device setups are also added to the list of installed devices when imported. For more information about setups and device panels, see "About Device panels (Cubase only)" on page 320.
Defining a new MIDI device
If your MIDI device is not included in the list of pre-configured devices (and is not a "plain" GM or XG device), you need to define it manually to make it possible to select patches by name. This is handled slightly differently for Cubase and Cubase Studio.
Cubase:
- In the MIDI Device Manager, click the Install Device button. The Add MIDI Device dialog appears.
- Select "Define New..." and click OK. The "Create New MIDI Device" dialog appears. For a description of the options in this dialog, see the separate PDF document "MIDI Devices".
- In the Identical Channels list, activate the MIDI channels you would like the device to use.
This means that the device will receive Program Change over any MIDI channel. For a description of Identical and Individual Channels, see the separate PDF document "MIDI Devices".
- Enter a name for the device at the top of the dialog, and click OK.
The device appears in the Installed Devices list, and the device node structure for the device is automatically shown in a new window.
- Select Patch Banks from the pop-up at the top of the window.
As you can see, the list is currently empty.
- Make sure the Enable Edit checkbox is activated.
Now you can use the functions on the Commands pop-up menu on the left to organize the patch structure of the new device.
Cubase Studio:
- In the MIDI Device Manager, click the Install Device button.
The Add MIDI Device dialog appears. - Select "Define New..." and click OK. A dialog appears.
- Enter the name of the device and the MIDI channels you would like the device to use and click OK. The device appears in the Installed Devices list.
- Select the device in the list. As you can see, it currently contains only an Empty Bank item.
- Make sure the Enable Edit checkbox is activated. Now you can use the functions on the Commands pop-up menu on the left to organize the patch structure of the new device.
Installing a preset MIDI device
To install a preset MIDI device, proceed as follows:
- Click the Install Device button.
A dialog appears listing all pre-configured MIDI devices. For now we assume that your MIDI device is included in this list. - Locate and select the device in the list and click OK.
- If your MIDI device is not included in the list but is compatible with the GM (General MIDI) or XG standards, you can select the generic GM or XG Device options at the top of the list.
When you select one of these options, a name dialog will appear. Enter a name for the instrument and click OK.
The device now appears in the Installed Devices list to the left. - Make sure that the new device is selected in the list and open the Output pop-up menu.
- Select the MIDI output that the device is connected to.
- If you are using Cubase, click the Open Device button. A separate window opens for the selected device, showing a node structure in the left half of the window. At the top of this structure is the device itself, and below it the MIDI channels used by the device. For more information about the Device window, see the separate pdf document "MIDI Devices".
- Select Patch Banks from the pop-up at the top of the window.
The Patch Banks list in the left half of the window shows the patch structure of the device. This could simply be a list of patches, but it is usually one or several layers of banks or groups containing the patches (much like a folder structure on a hard disk for example).
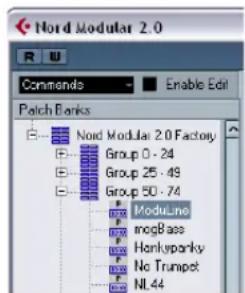
text_image
Nord Modular 2.0 Commands Enable Edit Patch Banks Nord Modular 2.0 Factory Group 0 - 24 Group 25 - 49 Group 50 - 74 ModuLine mcqBass Honkyparky No Trumpet NL44- You can rename a device in the Installed Devices list by double-clicking and typing – this is useful if you have several devices of the same model, and want to separate them by name instead of by number.
- To remove a device from the Installed Devices list, select it and click Remove Device.
Note that if there already exists a panel for the device (Cubase only), opening the device might open this panel first. In this case, click on the Edit ("e") button to open the Device window.
About Patch Banks
Depending on the selected device, you may find that the Patch Banks list is divided in two or more main banks. Typically, these are called Patches, Performances, Drums, etc. The reason for having several patch banks is that different "types" of patches are handled differently in the instruments. For example, while "patches" typically are "regular" programs that you play one at the time, "performances" may be combinations of programs, which could e.g. be split across the keyboard, layered or used for multi-timbral playback.
For devices with several banks, you will find an additional item labeled "Bank Assignment" in the pop-up at the top of the window. Selecting this opens a window in which you can specify for each MIDI channel which bank it should use.
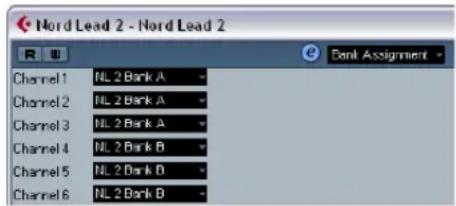
text_image
Nord Lead 2 - Nord Lead 2 R U Bank Assignment Channel1 NL 2 Bank A Channel2 NL 2 Bank A Channel3 NL 2 Bank A Channel4 NL 2 Bank B Channel5 NL 2 Bank D Channel6 NL 2 Bank BThe selection here will affect which bank is displayed when you select programs by name for the device in the Track list or Inspector. For example, many instruments use MIDI channel 10 as an exclusive drum channel, in which case you would want to select the "Drums" (or "Rhythm Set", "Percussion", etc.) bank for channel 10 in this list. This would then let you choose between different drum kits in the Track list or Inspector.
Limitations
There is no easy way to import a patch name script into an existing MIDI device. For a complex workaround based on XML editing, see the separate pdf document "MIDI Devices".
Selecting a patch for an installed device
If you return to the Project window at this point, you will find that the installed device has been added to the MIDI Output menus (in the Track list and the Inspector). Now you can select patches by name, in the following way:
- Pull down the Output menu (in the Track list or Inspector) for the track you want to associate the installed device with, and select the device.
This directs the track to the MIDI output specified for the device in the MIDI Device Manager. The Bank and Program Selector fields in the Track list and Inspector are replaced by a single Program Selector field that currently reads "Off".
- Click the Program Selector field to display a pop-up menu, hierarchically listing all the patches in the device. The list is similar to the one displayed in the MIDI Device Manager. You can scroll the list up and down (if required), click the plus/minus signs to show or hide subgroups, etc.
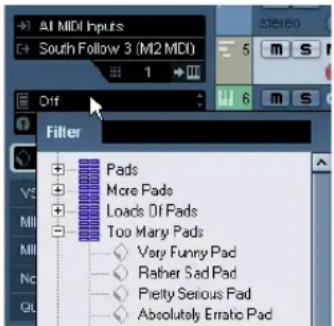
text_image
AI MIDI Inputs South Follow 3 (M2 MIDI) Diff Filter Pads More Pads Loads Of Pads Too Many Pads Very Funny Pad Rather Sad Pad Pretty Serious Pad Absolutely Erratic PadYou can also use a filter function here. For this, enter the search term in the Filter field, e.g. "drum", and press [Return] to display all sounds with "drum" in the name.
- Click a patch in the list to select it.
This sends the appropriate MIDI message to the device. You can also scroll the program selection up or down, as with any value.
Renaming patches in a device
The pre-configured devices list is based on the factory-preset patches, i.e. the patches included in the device when you first bought it. If you have replaced some of the factory presets with your own patches, you need to modify the device so that the patch name list matches the actual device:
- In the MIDI Device Manager, select the device in the Installed Devices list.
- If you are using Cubase, click Open Device.
Make sure that Patch Banks is selected on the pop-up at the top of the window.
- Activate the Enable Edit checkbox.
When this is turned off (default), you cannot edit the pre-configured devices.
- Use the Patch Banks display to locate and select the patch you want to rename.
In many instruments, the user-editable patches are located in a separate group or bank.
-
Click on the selected patch in the Patch Banks list to edit its name.
-
Type in the new name and click OK.
-
Rename the desired patches in this way, and finish by deactivating Enable Edit again (to avoid modifying the device by accident).
⇒ You can also make more radical changes to the patch structure in a device (adding or deleting patches, groups or banks), see below.
For example, this is useful if you expand your MIDI device by adding extra storage media such as RAM cards.
Patch Structure
Patches are structured as follows:
- Banks are the main categories of sounds – typically patches, performances and drums, as described above.
- Each bank can contain any number of groups, represented by folders in the list.
- The individual patches, performances or drum kits are represented by presets in the list.
The Commands pop-up menu contains the following items:
Create Bank
Creates a new bank at the highest hierarchical level of the Patch Banks list. You can rename this by clicking on it and typing a new name.
New Folder
Creates a new subfolder in the selected bank or folder. This could correspond to a group of patches in the MIDI device, or just be a way for you to categorize sounds, etc. When you select this item, a name dialog appears, allowing you to name the folder. You can also rename the folder afterwards by clicking it and typing in the list.
New Preset
This adds a new preset in the selected bank or folder.
You can rename the preset by clicking it and typing a new name.
When the preset is selected, the corresponding MIDI events (Program Change, Bank Select, etc.) are shown in the event display to the right. The default setting for a new preset is Program Change 0 – to change this, proceed as follows:

For details on which MIDI events are used for selecting patches in the MIDI device, consult its documentation.
- To change which Program Change value should be sent out to select the patch, adjust the number in the Value column for the Program Change event.
- To add another MIDI event (e.g. Bank Select) click directly below the last event in the list and select a new event from the pop-up menu.
After adding a new event, you need to set its value in the Value column, as with Program Change. - To replace an event, click on it and select another event from the pop-up menu.
For example, a MIDI device may require that a Bank Select message is sent first, followed by a Program Change message, in which case you would need to replace the default Program Change message with a Bank Select message and add a new Program Change after that. - To remove an event, select it and press [Delete] or [Backspace].

Different devices use different schemes for Bank Select. When you insert a Bank Select event, you should check the device's documentation to find out whether to choose "CC: BankSelect MSB", "Bank Select 14 Bit", "Bank Select 14 Bit MSB-LSB Swapped" or some other option.
Add Multiple Presets
This opens a dialog, allowing you to set up a range of pre-sets to be added to the selected bank or folder.
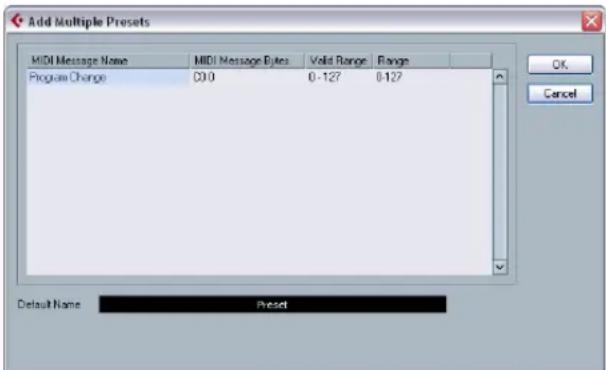
text_image
Add Multiple Presets MIDI Message Name MIDI Message Bytes Valid Range Range Program Change D0.0 0-127 0-127 OK Cancel Default Name PresetProceed as follows:
- Add the event types required for selecting a patch in the MIDI device.
This is done just as when editing the settings for a single event: clicking in the event display brings up a pop-up menu from which you can select an event type. - Use the Range column to set up either a fixed value or a range of values for each event type in the list.
This requires some explanation:
If you specify a single value in the Range column (e.g. 3, 15 or 127), all added presets will have an event of this type set to the same value. If you instead specify a value range (a start value and an end value, separated by a dash, e.g. 0–63), the first added preset will have an event set to the start value, the next value will be incrementally raised by one and so on, up to and including the end value.
⇒ The number of added presets depends on the Range setting.
| MIDI Message Name | MIDI Message Bytes | Valid Range | Range |
| Program Change | C0 0 | 0 - 127 | 0-7 |
| CC: BankSelect LSB | B0 20 0 | 0 - 127 | 2 |
This will generate eight presets, each with a Bank Select event set to 2, but with different Program Change events (ranging from 0 to 7).
- Specify a Default Name below the event display.
The added events will get this name, followed by a number. You can re-name presets manually in the Patch Banks list later.
- Click OK.
A number of new presets have now been added to the selected bank or folder, according to your settings.
Other editing functions
- You can move presets between banks and folders by dragging them to the Patch Banks list.
- You can remove a bank, folder or preset by selecting it in the Patch Banks list and pressing [Backspace].
- If you specify more than one bank, a Bank Assignment item is added to the pop-up menu at the top of the window. Use this to assign banks to the different MIDI channels (see "About Patch Banks" on page 317).
About Device panels (Cubase only)
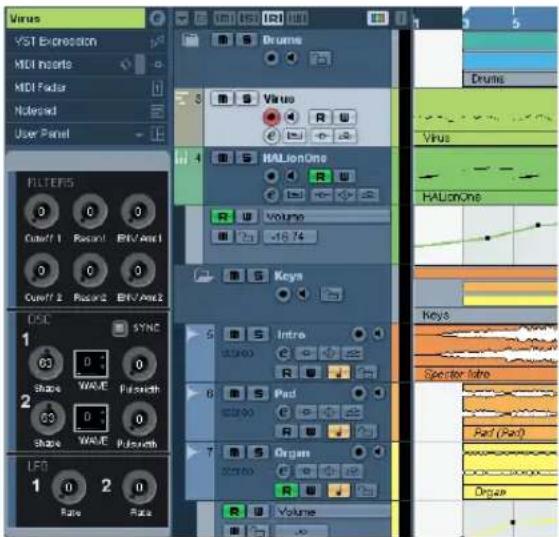
text_image
Virus VIST Expression MIDI Inerted MIDI Factor Notesed User Panel 0 0 0 Cutoff 1 Racer 2 BIV/Amo 3 Cutoff 2 Racer 2 BIV/Amo 2 0 0 0 0 0 0 OSC SYNE 1 0 0 Shape WAVE Pulsooth 2 0 0 Shape WAVE Pulsooth LF0 1 0 2 0 Rate Rate Drums Virus HALionOne R U U Volgn -18.74 S Keys 5 S Intro 6 S Past 7 S Organ 8 S R R Volume 9 S Drums Virus HALionOne Keys Speaker Info Past (Past) OrganOn the following pages we will describe how to use MIDI Device panels and the powerful MIDI device panel editing features of the MIDI Device Manager.
We recommend that you first configure the patch banks, then export the device setup before editing the panels. This way, most of your settings will be saved in case of panel configuration problems.
The panels are saved in XML format. For more information, see the separate pdf document "MIDI Devices".
Basic concept
The panel editing features in the MIDI Device Manager can be seen as a separate application or entity within Cubase. It allows you to build device maps complete with control panels, including all parameters controllable from within Cubase. Building more complex device maps requires that you are familiar with SysEx programming (see the separate pdf document "MIDI Devices"). But you can also create simpler panels by assigning MIDI Control Change messages to control objects, which does not require any programming skills.
Although these powerful editing features are there if you need them, you do not have to use them to use MIDI devices.
Device panels in the program
In this section we will take a look at a pre-configured MIDI device panel to illustrate how it can be used in Cubase. Several device setups complete with panels are included with the program. These are located in the "Device Maps" folder inside the application folder.
Opening a device setup
Proceed as follows to open a MIDI device setup:
- Open the MIDI Device Manager from the Devices menu.
- Click the "Import Setup" button.
A file dialog opens. -
Select a device setup file for import by navigating to the Device Maps folder (see above).
The Device setup files are saved in XML format, for more information see the separate pdf document "MIDI Devices". -
Click Open. The Import MIDI Devices dialog appears where you can select one or several devices for import. A device setup file can contain one or several MIDI devices.
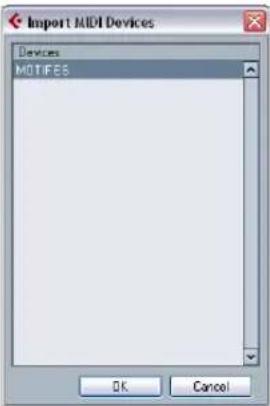
text_image
Import MIDI Devices Devices MOTIFES OK Cancel- Select a device and click OK.
The device is added to the list of installed devices in the MIDI Device Manager.
- Select the correct MIDI output from the Output pop-up menu, select the device in the list and click the Open Device button.
The device control panel opens in a separate window. The Edit ("e") button at the top opens the Edit Panel window, see the separate pdf document "MIDI Devices".
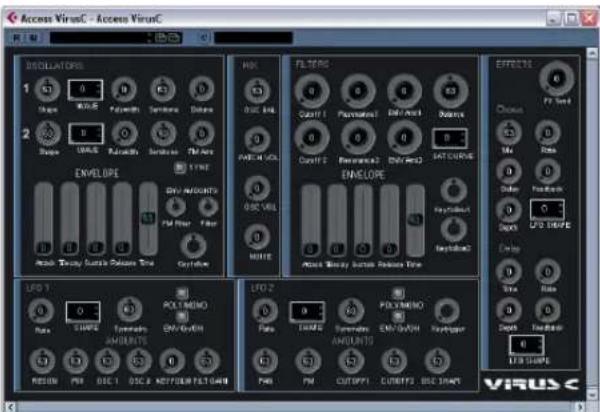
text_image
Access VirusC - Access VirusC 1 2 DISCOLATORS 1 Stage MOS-S Feymouth Sanskara Daiya 3 Stage UWAS Feymouth Sanskara FM Arz ENVELOPE Open Open Filter 0.50 VLS 0.50 VLS NONE ENVELOPE Open Open Effectors Close Mix Rms Dain Feedback 0 Dain DIP STRAPCE Done True Done DIP STRAPCE VIRUSCA device control panel representing an Access Virus synth.
-
Close the Device panel and return to the Project window.
-
Select the device from the "Output Routing" pop-up menu for a MIDI track.
Note that for some devices, you may have to set the MIDI channel to "Any".
Now the Device panel can be opened by clicking the Open Device Panels button in the Inspector or in the channel strip for the corresponding track in the Mixer.
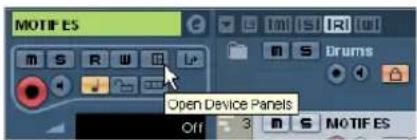
text_image
MOTIF ES m S R W Lp Drums Open Device Panels Off 3 m S MOTIF ESNote that [Ctrl]/[Command]-clicking the Open Device Panels button allows you to open a subpanel via the panel browser pop-up menu.
Showing panels in the Inspector
- In the Inspector, open the User Panel tab and click on the arrow on the right.
A "Panels" folder is shown with the selected device in a node structure below it. If you open all the folders, you can select any individual panel from the device that "fits" into the User Panel space.
text_image
Contagious Pad User Panel Panels Access VirusC Access VirusC.OxalNFI Access VirusC.INSPECT Mining Virus Sub Oscillator Oscillator Oscillator2 Effect- Select a panel by double-clicking it in the list. The panel opens in the Inspector.
text_image
Notepad User Panel FILTERS Cutoff 1 Reson1 ENV Art1 Cutoff 2 Reson2 ENV Art2 OSC SYNCIf you cannot see any panels in the "Panels" folder, although you have successfully set up a MIDI device with several panels, make sure you selected the correct channel from the Channel pop-up menu, preferably "Any" to see all device panels. Also make sure that the panels fit into the space, otherwise they will not be available in the "Panels" folder.
Showing panels in the Mixer
- Open the Mixer and make sure the extended channel view is shown.
- Open the View options pop-up for the MIDI channel connected to the device and select "User Panel".
text_image
Empty Inserts Sends Meter Overview ✓ User Panel Can Hide- Click the arrow next to the label "user" at the top of the extended section of the channel strip.
The Panels folder is displayed like in the Inspector, but with different available panels. Just like in the Inspector, the panel has to "fit" into the available space to be selectable.
- Double-click to select a panel.
The panel is now shown in the extended section of the channel strip.

text_image
Stereo In Audio/MDI Units Audio... MDI Stereo Out 1 0.0 0.0 12000 Hz 7.0 0.0 3000 Hz 0.2 0.0 600 Hz 0.2 0.0 100 Hz 7.0 Chorus Ms Rate Delay Feedlock Depth Shape DELAY Time Rate Depth Feedlock 0 Shape FX Band OffAutomating device parameters
Automation works just like for normal audio and MIDI tracks:
- Open the device control panel by clicking the Open Device Panels button in the Inspector.
- Activate Write automation on the device panel. You can automate the device by either moving knobs and sliders on the control panel or by drawing curves on the automation track for a selected parameter.
text_image
Access VirusC - Access VirusC R U Write Automation 05000000000000000000000000000000000000000000000000000000000000000000000000000000 1 63 0 63 Shape WAVE Putwidth Sencil- If you now go back to the Project window, there will be a MIDI Device Automation track in the Track list.
If the track is hidden, select "Show Used Automation" on the Track Folding submenu of the Project menu.
If you click in the name field, all parameters in the device are shown and can be selected for automation.
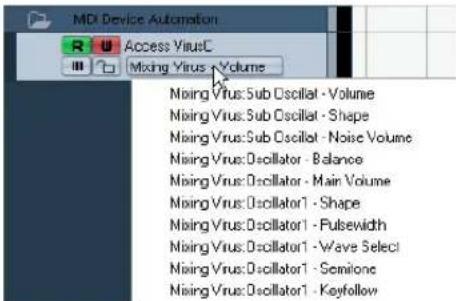
text_image
MDI Device Automation R U Access VirusC Mixing Virus - Volume Mixing Virus: Sub Oscillator - Volume Mixing Virus: Sub Oscillator - Shape Mixing Virus: Sub Oscillator - Noise Volume Mixing Virus: Oscillator - Balance Mixing Virus: Oscillator - Main Volume Mixing Virus: Oscillator1 - Shape Mixing Virus: Oscillator1 - Pulsewidth Mixing Virus: Oscillator1 - Wave Select Mixing Virus: Oscillator1 - Semitone Mixing Virus: Oscillator1 - Keyfollow- To open another automation track for the next parameter on the pop-up menu, click the + button ("Append automation track") at the bottom left of the automation track.
⇒ If you wrote automation but your MIDI device is not yet connected, the panel will not display any parameter changes when playing back the track with the Read button activated.
About Studio Connections (Cubase only)
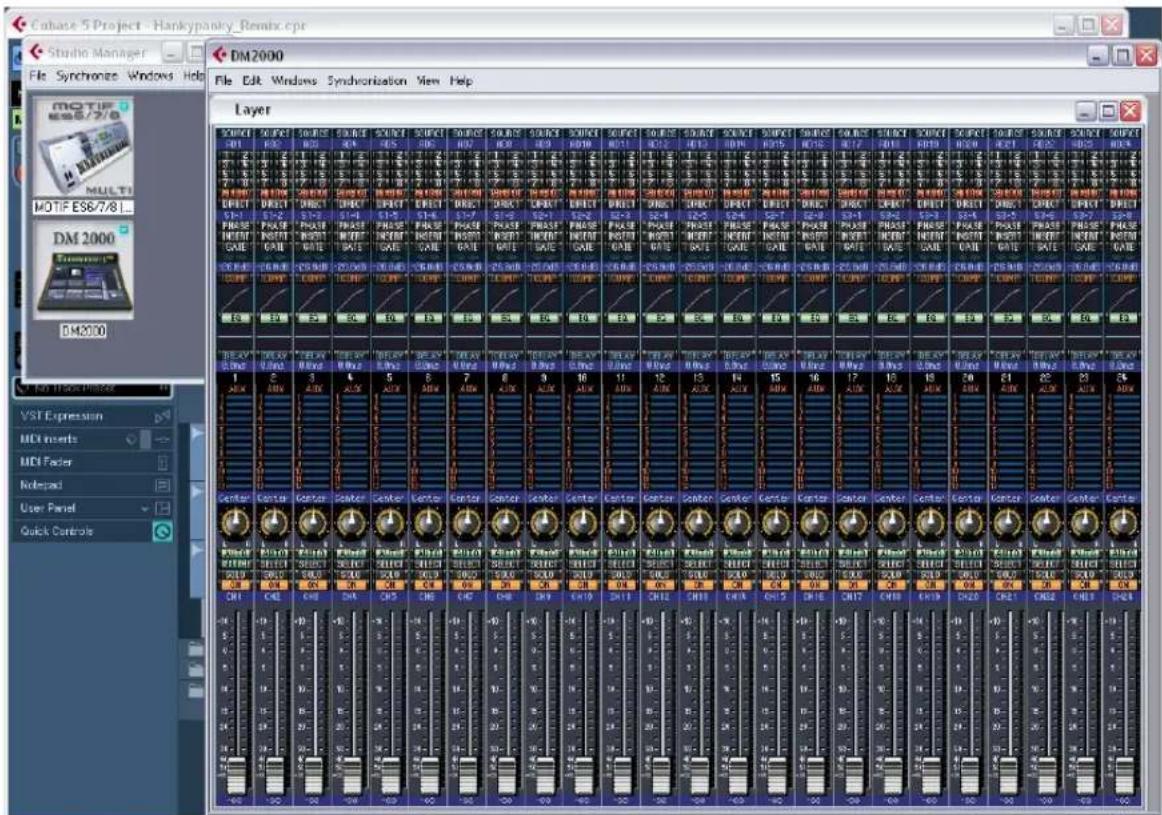
text_image
Cubase 5 Project - Hankypanky_Remix.cpr Studio Manager File Synchronze Windows Help File Edit Windows Synchronization View Help DM2000 Multi MOTIF ES6/7/8 DM 2000 DM2000 Layer SUPPORT 100 MHz 1 MHz 3 MHz 5 MHz 7 MHz 9 MHz 11 MHz 13 MHz 15 MHz 17 MHz 19 MHz 21 MHz 23 MHz 25 MHz 27 MHz 30 MHz 32 MHz 34 MHz 36 MHz 38 MHz 40 MHz 42 MHz 44 MHz 46 MHz 48 MHz 50 MHz 52 MHz 54 MHz 56 MHz 58 MHz 60 MHz 62 MHz 64 MHz 66 MHz 68 MHz 70 MHz 72 MHz 74 MHz 76 MHz 78 MHz 80 MHz 82 MHz 84 MHz 86 MHz 88 MHz 90 MHz 92 MHz 94 MHz 96 MHz 98 MHz 100 MHz 102 MHz 104 MHz 106 MHz 108 MHz 110 MHz 112 MHz 114 MHz 116 MHz 118 MHz 120 MHz 122 MHz 124 MHz 126 MHz 128 MHz 130 MHz 132 MHz 134 MHz 136 MHz 138 MHz 140 MHz 142 MHz 144 MHz 146 MHz 148 MHz 150 MHz 152 MHz 154 MHz 156 MHz 158 MHz 160 MHz 162 MHz 164 MHz 166 MHz 168 MHz 170 MHz 172 MHz 174 MHz 176 MHz 178 MHz 180 MHz 182 MHz 184 MHz 186 MHz 188 MHz 190 MHz 192 MHz 194 MHz 196 MHz 198 MHz 200 MHz 202 MHz 204 MHz 206 MHz 208 MHz 210 MHz 212 MHz 214 MHz 216 MHz 218 MHz 220 MHz 222 MHz 224 MHzStudio Connections is the name of an initiative led by Steinberg and Yamaha. The initiative intends to create industry standards for totally integrated system environments using software and hardware products.
First implementation stage of the Studio Connections open standard is the integration and support of Yamaha's Studio Manager 2 (SM2) and Total Recall for compatible hardware devices.
For further information about Studio Connections, please visit the website http://www.studioconnections.org.
If you have an SM2 component installed, there is an additional menu item on the Devices menu.
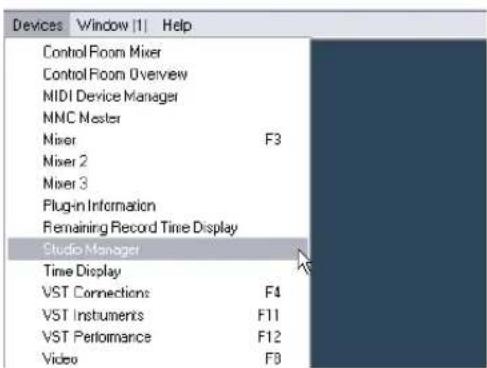
text_image
Devices | Window [1] | Help Control Room Mixer Control Room Overview MIDI Device Manager MMC Master Mixer F3 Mixer 2 Mixer 3 Plugin Information Remaining Record Time Display Studio Manager Time Display VST Connections F4 VST Instruments F11 VST Performance F12 Video F8Total Recall
Total Recall means that you can save and recall all settings of your hardware and software products by opening one integrated file in a DAW such as Cubase or Nuendo. Also you will have instant and organized access to hardware editors.
When you load a project or switch to another active project that contains SM2 data, the Total Recall Synchronization dialog appears:
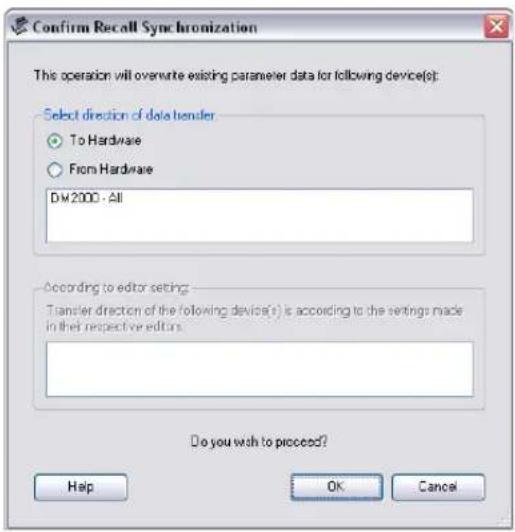
text_image
Confirm Recall Synchronization This operation will overwrite existing parameter data for following device(s): Select direction of data sender To Hardware From Hardware DM2000 - All According to editor setting Transfer direction of the following device(s) is according to the settings made in their respective editors. Do you wish to proceed? Help OK CancelThis dialog can also be opened any time from the Studio Manager's Synchronize menu. Click OK for the Dump to start.
Virtual MIDI Devices
If you have a new OPT component (e.g. the DM2000) which uses a new special interface, you can access these components as virtual MIDI Devices in the MIDI track's output routing (if the output of the OPT is configured).
When a MIDI track is routed to such a device, the "Open Device Panels" button becomes available.
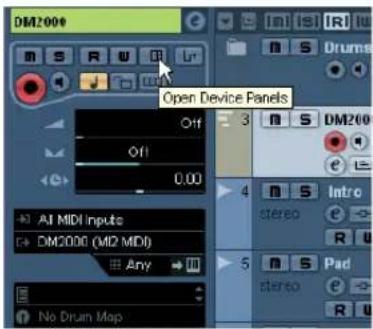
text_image
DM2000 Open Device Panels Off 3 DM200 Off 0.00 AI MIDI Inputs DM2000 (M2 MIDI) Any 4 Stereo Intro 5 Pad No Drain MapClick the Open Device Panels button...
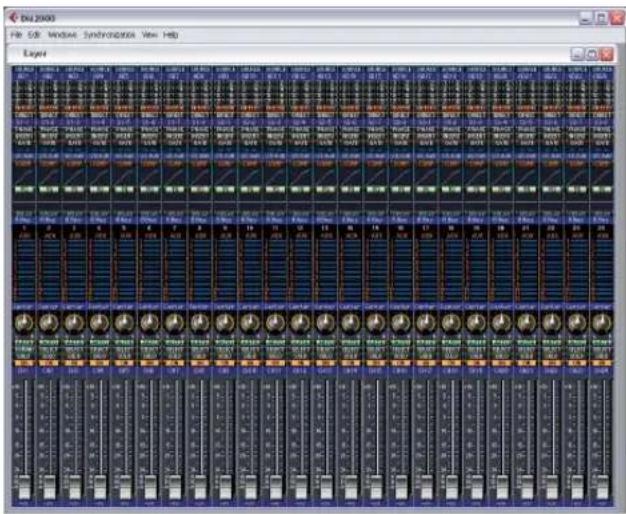
text_image
File Edit Window Syndromation View Help Layers...to open the editor window for the device.
Please also refer to the separate documentation for the Studio Manager 2 and the OPT components.
MIDI processing and quantizing
Introduction
This chapter describes the various MIDI processing functions available on the MIDI menu. They offer various ways to edit MIDI notes and other events, either in the Project window or from within a MIDI editor.
MIDI functions vs. MIDI modifiers
In some cases, the result of a MIDI function can also be obtained by using MIDI modifiers and effects (see "MIDI realtime parameters and effects" on page 305). For example, the operations "Transpose" and "Quantize" are available both as MIDI modifiers and as MIDI functions.
The main difference is that MIDI modifiers and effects do not affect the actual MIDI events on the track in any way, while MIDI functions change the events “permanently” (although recent changes can be undone).
Use the following guidelines to decide which path to choose for operations that are available both as modifiers or effects and as functions:
- If you want to adjust a few parts or events only, use MIDI functions. The MIDI modifiers and effects affect the output of the whole track (although they can be made permanent in a specific area with the Merge MIDI in Loop function).
- If you want to experiment with different settings, use MIDI modifiers and effects.
- MIDI modifiers and effects settings are not reflected in the MIDI editors, since the actual MIDI events are not affected. This can be potentially confusing; if you have transposed notes using modifiers for example, the MIDI editors will still show the notes with their original pitch (but they will play back at their transposed pitch). Therefore, MIDI functions are a better solution if you want to see the effects of your editing in the MIDI editors.
What is affected by the MIDI functions?
Which events are affected when you use a MIDI function depends on the function, the active window and the current selection:
- Some MIDI functions only apply to MIDI events of a certain type.
For example, quantization only affects notes, while the Delete Controllers function only applies to MIDI controller events.
- In the Project window, the MIDI functions apply to all selected parts, affecting all events (of the relevant types) in them.
- In the MIDI editors, the MIDI functions apply to all selected events. If no events are selected, all events in the edited part(s) will be affected.
The Quantizing functions
What is quantizing?
Quantizing in its fundamental form is a function that automatically moves recorded notes, positioning them on exact note values:
For example, if you record a series of eighth notes, some of them may end up slightly beside the exact eighth note positions.

text_image
8 2 3 4 9Quantizing the notes with the quantize grid set to eighth notes will move the "misplaced" notes to exact positions.

text_image
8 2 3 4 9However, quantizing is not only a method of correcting errors, it can also be used creatively in various ways. For example, the "quantize grid" does not have to consist of perfectly straight notes, some notes can automatically be excluded from quantizing, etc.
When quantizing MIDI, only MIDI notes are affected (no other event types).
However, you can choose to move the controllers together with their respective notes by activating the "Move Controller" option in the Quantize Setup dialog, see "The Move Controller setting" on page 328.
Setting up quantize on the toolbar
At its most basic, setting up quantizing consists of selecting a note value from the Quantize pop-up menu on the toolbar (in the Project window or a MIDI editor).
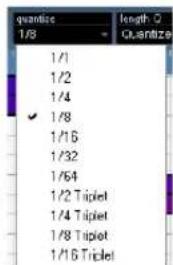
text_image
quantize 1/8 length 0 Quantize 1/1 1/2 1/4 ✓ 1/8 1/16 1/32 1/64 1/2 Triplet 1/4 Triplet 1/8 Triplet 1/16 TripletThis allows you to quantize to exact note values (straight, triplet or dotted notes) only.
Setting up quantize in the Quantize Setup dialog
If you want more options than those available on the pop-up menu, select "Quantize Setup..." from the MIDI menu (or "Setup..." from the Quantize pop-up menu) to open the Quantize Setup dialog.
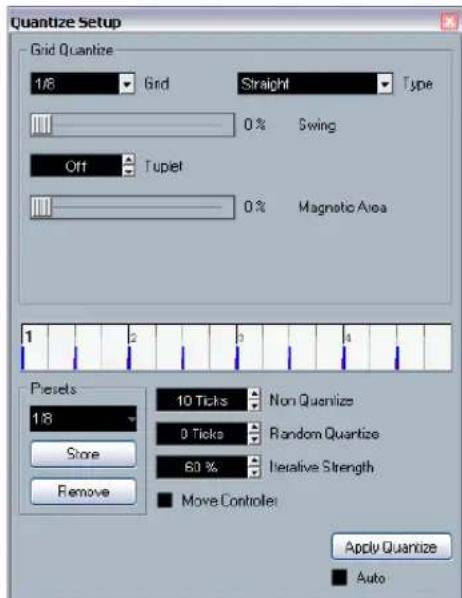
text_image
Quantize Setup Grid Quantize 1/8 Grid Straight Type 0% Swing Off Tupet 0% Magnetic Axoa 1 2 3 4 Preset 10 Ticks Non Quantize 1/8 0 Ticks Random Quantize Store 60 % Iterative Strength Remove Move Controls Apply Quantize Auto⇒ Any settings you make in the dialog are immediately reflected in the Quantize pop-up menus. However, if you want your settings permanently available on the Quantize pop-up menus, you have to use the presets functions (see "Presets" on page 328).
The grid display in the middle of the dialog shows one bar (four beats), with blue lines indicating the quantize grid (the positions that notes will be moved to). Value changes in the grid, presets and quantize options will be graphically reflected here, see below.
The Quantize Setup dialog contains the following settings:
The Grid and Type pop-ups
These are used to determine the basic note value for the quantizing grid. In other words, these have the same functionality as the Quantize pop-up menu on the toolbar.
Swing
The Swing slider is only available when a straight note value is selected for the grid and Tuplet is off (see below). It lets you offset every second position in the grid, creating a swing or shuffle feel. When you adjust the Swing slider, the result is shown in the grid display.
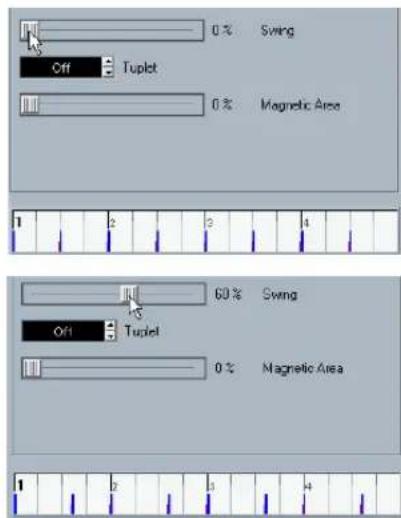
text_image
0% Swing Off Tuplet 0% Magnetic Area 1 2 3 4 60% Swing Off Tuplet 0% Magnetic Area 1 2 3 4A straight eighth note grid compared with a grid with 60% swing.
Tuplet
Allows you to create more rhythmically complex grids by dividing the grid into smaller steps.
Magnetic Area
This allows you to specify that only notes within a certain distance from the grid lines should be affected by quantizing.
- When the slider is set to 0%, the Magnetic Area function is deactivated, i.e. all notes are affected by quantizing. If you move the slider gradually to the right, you will note how the magnetic areas are shown around the blue lines in the grid display.
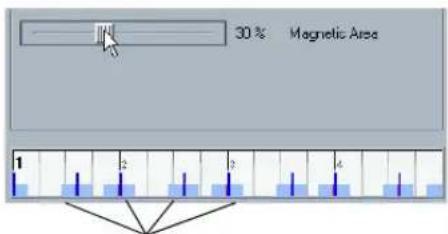
text_image
30 % Magnetic Area 1 2 3 4Only notes within the indicated zones will be affected by quantizing.
Presets
The controls in the lower left corner of the dialog allow you to store the current settings as a preset, which will then be available on the Quantize menus on the toolbars. The usual preset procedures apply:
- To store the settings as a preset, click the Store button.
- To load a stored preset into the dialog, simply select it from the pop-up menu.
This is useful if you want to modify an existing preset.
- To rename the selected preset, double-click on the name and type in a new one.
- To remove a stored preset, select it from the pop-up menu and click Remove.
- You can also create presets by extracting existing grooves from a MIDI part.
Just select the desired MIDI part and drag it on the grid display in the middle of the Quantize Setup dialog or open the Advanced submenu on the MIDI menu and select "Part to Groove" (see "Part to Groove" on page 330).
Apply and Auto
These functions allow you to apply quantizing directly from the dialog, see below.

If you do not want to apply the quantizing you have set up in the dialog, close the window by clicking its close button.
This setting affects the result of the quantizing. It allows you to set a "distance" in ticks (120ths of sixteenth notes).
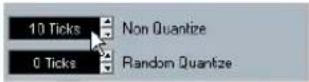
Events that already are within the specified distance from the quantize grid will not be quantized. This allows you to keep slight variations when you quantize, but still correct notes that are too far from the grid.
The Random Quantize setting
This setting affects the result of the quantizing. It allows you to set a "distance" in ticks (120ths of sixteenth notes).
Events will be quantized to random positions within the specified "distance" from the quantize grid, thus creating a more "loose" quantizing. Much like the Non Quantize setting, this allows for slight variations, while at the same time keeping notes from ending up too far from the grid.
The Iterative Strength setting
Here you specify how much the notes should be moved towards the grid when using the Iterative Quantize function, see below.

The Move Controller setting
When this is activated, controllers related to notes (pitch-bend, etc.) are automatically moved with the notes when these are quantized.
Applying quantize
There are several ways to apply the quantize:
- The standard method is to select "Over Quantize" from the MIDI menu (or using a key command, by default [Q]). This quantizes the selected MIDI parts or notes according to the current Quantize pop-up menu setting.
- You can also apply quantizing directly from the Quantize Setup dialog, by clicking the "Apply Quantize" button.
- If you activate the "Auto" checkbox in the Quantize Setup dialog, any change you make in the dialog is immediately applied to the selected MIDI parts or notes.
A great way of using this feature is to set up a playback loop, and adjust the settings in the dialog until you get the desired result.

When you apply quantize, the result is based on the original position of the notes. Therefore, you can freely try out different quantize settings with no risk of "destroying" anything. See also "Undo Quantize" on page 329.
The Auto Quantize function
If you activate the Auto Q button on the Transport panel, all MIDI recordings you make are automatically quantized according to the settings you have made in the Quantize Setup dialog.
Iterative Quantize
Another way to apply "loose" quantization is to use the Iterative Quantize function on the MIDI menu. It works like this:
Instead of moving a note to the closest quantize grid position, Iterative Quantize moves it only part of the way. You specify how much the notes should be moved towards the grid with the "Iterative Strength" setting in the Quantize Setup dialog.
Iterative Quantize also differs from "regular" quantization in that the operation is not based on the notes' original positions but on their current, quantized position. This makes it possible to repeatedly use Iterative Quantize, gradually moving the notes closer to the quantize grid until you've found the desired timing.
Advanced Quantize functions
Quantize Lengths

This function is only available from within the MIDI editors.
This function (on the Advanced Quantize submenu on the MIDI menu) will quantize the length of the notes, without changing their start positions. At its most basic level, this function will set the length of the notes to the Length Quantize value on the MIDI editor toolbar. However, if you have selected the "Quantize Link" option on the Length Quantize pop-up menu, the function will resize the note according to the quantize grid, taking the Swing, Tuplet and Magnetic Area settings into account.
An example:
- Length Quantize set to "Quantize Link".
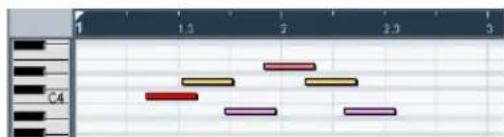
text_image
1 1.3 2 2.3 5 C4- Some 16th notes.
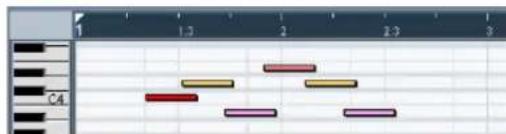
text_image
1 1.3 2 2.3 3 C4- Here, the quantize value has been set to straight 16th notes with Swing at 100%.
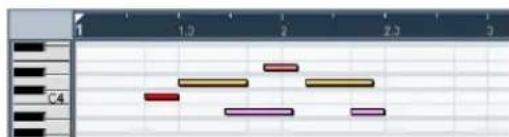
text_image
1 1.2 2 2.3 3 C4- Selecting Quantize Lengths will adjust the note lengths according to the grid. If you compare the result to the first figure above, you will find that notes that started within the odd sixteenth note "zones" show the longer grid length, and notes in the even zones have the shorter length.
Quantize Ends
The Quantize Ends function on the Advanced Quantize submenu will only affect the end positions of notes. Apart from that, it works just like regular quantizing, taking the Quantize pop-up menu setting into account.
Undo Quantize
As mentioned above, the original position of each quantized note is stored. Therefore, you can make the selected MIDI notes revert to their original, unquantized state at any time by selecting Undo Quantize from the Advanced Quantize submenu. This is independent from the regular Undo History.
Freeze Quantize
There may be situations when you want to make the quantized positions "permanent". For example, you may want to quantize notes a second time, having the results based on the current quantized positions rather than the original positions. To make this possible, select the notes in question and select "Freeze Quantize" from the Advanced Quantize submenu. This makes the quantized positions permanent.

After you have performed a Freeze Quantize for a note, you cannot undo its quantization.
Part to Groove
With this function, you can extract the groove from a selected MIDI part and turn it into a Quantize preset.
You can also extract grooves from audio, using e.g. hit-points (see "Creating groove quantize maps" on page 237), or audio parts, ReCycle (.rex) parts or drum parts that have been processed with the Detect Silence function. Since audio contains no velocity information, velocity will remain unchanged after applying a Groove that you extracted from audio.
In both cases, the resulting groove appears on the Quantize menus and you apply it as you would any Quantize preset. You can also view and edit the resulting quantize settings in the Quantize Setup dialog.
Transpose
The Transpose item on the MIDI menu opens a dialog with settings for transposing the selected notes:
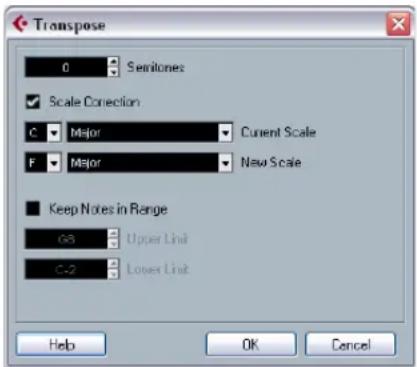
text_image
Transpose 0 Semitones Scale Correction C Major Current Scale F Major New Scale Keep Notes in Range G8 Upper Link C-2 Lower Link Help OK Cancel→ You can also use the Transpose track for transposing, see “The Transpose functions” on page 103.
Semitones
This is where you set the amount of transposition.
Scale Correction
Scale Correction transposes the selected notes by forcing them to the closest note of the selected scale type. This can be used for creating interesting key and tonal changes, either by itself or in conjunction with the other settings in the Transpose dialog.
- To activate Scale Correction, click the checkbox.
- Select a root note and scale type for the current scale from the upper pop-up menus.
- Select a root note and scale type for the new scale from the lower pop-up menus.
Make sure to select the correct root note if you want to keep the result in the same key as the original notes, or select an entirely different key if you want to experiment.
Keep Notes in Range
When this is activated, transposed notes will remain within the Upper and Lower Limit values.
- If a note ends up outside the limits after transposition, it will be shifted to another octave, keeping the correct transposed pitch if possible.
If this is not possible (if you have set a very narrow range between the Upper and Lower Limit), the note will be transposed "as far as possible", i.e. to the Upper or Lower Limit note. If you set the Upper and Lower Limits to the same value, all notes will be transposed to this pitch!
OK and Cancel
Clicking OK performs the transposition. Clicking Cancel closes the dialog without transposing.
Making your settings permanent
The settings described in the chapter "MIDI realtime parameters and effects" on page 305 do not change the MIDI events themselves, but work like a "filter", affecting the music on playback. Therefore, you may want to make them permanent, i.e. convert them to "real" MIDI events, for example to transpose a track and then edit the transposed notes in a MIDI editor. For this, you can use two commands from the MIDI menu:
- "Freeze MIDI Modifiers" – This applies all filter settings permanently to the respective track. With this function, the settings are "added" to the events on the track, and all modifiers will be set to zero.
- "Merge MIDI in Loop" – This merges all selected tracks (or parts) to create a new track. The settings are applied during the merge and will still be displayed later in the respective menus.
These two functions are described in the following sections.
Freeze MIDI Modifiers
The "Freeze MIDI Modifiers" function affects the following settings for MIDI tracks:
- Several settings on the main tab of the Inspector (program and bank selection and the Delay parameter).
- The settings on the MIDI Modifiers tab (i.e. Transpose, Velocity Shift, Velocity Compression and Length Compression).
- The settings on the MIDI Inserts tab (if, e.g., you are using an arpeggiator and want to convert the added notes to real events).
The following settings for MIDI parts are taken into account as well:
- The Transpose and Velocity settings for parts displayed on the info line – the Volume setting is not taken into account.
To use the "Freeze MIDI Modifiers" function, proceed as follows:
- Select the desired MIDI track.
- Pull down the MIDI menu and select "Freeze MIDI Modifiers".
The Inspector settings will be converted to MIDI events and inserted at the beginning of the part(s). All notes of the part(s) will be modified accordingly and the Inspector settings will be reset.
Merge MIDI in Loop
The “Merge MIDI in Loop” function combines all MIDI events on all unmuted tracks, applies MIDI modifiers and effects and generates a new MIDI part, containing all the events as you would hear them play back. Proceed as follows:
- Make sure only the desired MIDI track(s) are unmuted. If you only want to include events from a single track in the merge operation, you may want to solo the track.
- Set up the left and right locators to encompass the area you want to merge.
Only events starting within this area will be included. - Select the track on which you want the new part to be created.
This can be a new track or an existing track. Data in the cycle area on the track can be kept or overwritten (see below). - Select "Merge MIDI in Loop" from the MIDI menu.
A dialog appears with the following options:
Option Description
| Include Inserts If this is activated, any MIDI insert effects currently activated for the track(s) will be applied. | |
| Include Sends If this is activated, any MIDI send effects currently activated for the track(s) will be applied. | |
| Erase Destination | If this is activated, all MIDI data between the left and right locator on the destination track will be deleted. |
| Include Chase If this is activated, events placed outside the selected part but relating to it will be included in the processing, e.g. a Program Change right before the left locator. For more about chase events, see “About Chase” on page 64. | |
5. Click OK.
A new part is created between the locators on the destination track, containing the processed MIDI events.
Applying effects to a single part
Normally, the MIDI modifiers and effects affect a whole MIDI track. This may not always be what you want – you may want to apply some MIDI effects to a single part for example (without having to create a separate track for that part only). The Merge MIDI in Loop function can help:
- Set up your MIDI modifiers and MIDI effects the way you want them for the part.
This will of course affect the whole track, but focus on the part for now.
- Set the locators to encompass the part.
Simply select the part and choose Locators to Selection from the Transport menu (or use the corresponding key command, by default [P]).
-
Make sure the track holding the part is selected in the Track list.
-
Select Merge MIDI in Loop.
-
In the dialog that appears, activate the desired effect options, make sure that Erase Destination is activated and click OK.
Now a new part is created on the same track, containing the processed events. The original part is deleted.
- Turn off or reset all MIDI modifiers and effects, so that the track plays back as usual.
Dissolve Part
The Dissolve Part function on the MIDI menu has two separate uses:
- When you work with MIDI parts (on MIDI channel "Any") containing events on different MIDI channels. Dissolve Part separates the events according to MIDI channel.
- When you want to separate MIDI events according to pitch.
A typical example would be drum and percussion tracks, where each pitch usually corresponds to a separate drum sound.
When dissolving a part into either separate channels or separate pitches, you can automatically remove the silent (empty) areas of the resulting parts by activating the "Optimized Display" checkbox in the Dissolve Part dialog. This option is not available when "Dissolve to Sublanes" is activated, see "Dissolving to sublanes" on page 333.
Dissolving parts into separate channels
Setting a track to MIDI channel "Any" will cause each MIDI event to play back on its original MIDI channel, rather than a channel set for the whole track. There are two main situations when "Any" channel tracks are useful:
- When you record several MIDI channels at the same time.
You may for example have a MIDI keyboard with several keyboard zones, where each zone sends MIDI on a separate channel. Recording on an "Any" channel track allows you to play back the recording with different sounds for each zone (since the different MIDI notes play back on separate MIDI channels).
- When you have imported a MIDI file of Type 0.
MIDI files of Type 0 contain only one track, with notes on up to 16 different MIDI channels. If you were to set this track to a specific MIDI channel, all notes in the MIDI file would be played back with the same sound; setting the track to "Any" will cause the imported file to play back as intended.
The Dissolve Part function scans MIDI parts for events on different MIDI channels and distributes the events into new parts on new tracks, one for each MIDI channel found. This allows you to work with each musical part individually. Proceed as follows:
-
Select the parts containing MIDI data on different channels.
-
Select "Dissolve Part" from the MIDI menu.
-
In the dialog that appears, select the "Separate Channels" option.
Now, for each MIDI channel used in the selected parts, a new MIDI track is created and set to the corresponding MIDI channel. Each event is then copied into the part on the track with the corresponding MIDI channel. Finally, the original parts are muted.
An example:

text_image
This part contains events on MIDI channels 1, 2 and 3.Selecting "Dissolve Part" creates new parts on new tracks, set to channels 1, 2 and 3. Each new part contains only the events on the respective MIDI channel.
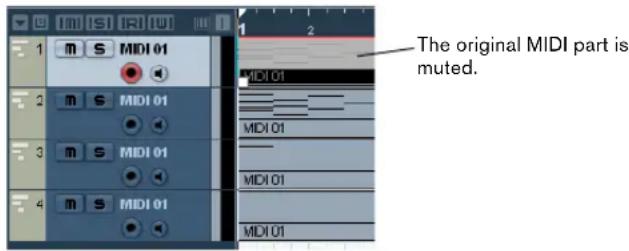
text_image
The original MIDI part is muted.Dissolving parts into separate pitches
The Dissolve Part function can also scan MIDI parts for events of different pitches, and distribute the events into new parts on new tracks, one for each pitch. This is useful when the different pitches are not used in a melodic context, but rather for separating different sounds (e.g. MIDI drum tracks or sampler sound FX tracks). By dissolving such parts, you can work with each sound individually, on a separate track.
Proceed as follows:
- Select the parts containing MIDI data.
- Select "Dissolve Part" from the MIDI menu.
- In the dialog that appears, select the "Separate Pitches" option.
A new MIDI track is created for each used pitch in the selected parts. The events are then copied into the parts on the track for the corresponding pitch. Finally, the original parts are muted.
Dissolving to sublanes
In the lower right section of the Dissolve Part dialog, you will find the option "Dissolve to Sublanes". When this is activated, the part will not be dissolved onto different tracks but onto different sublanes of the original track, allowing for a better management of MIDI material that "belongs together".
This is useful when working with drums for example, as it allows you to split up a part into different drum sounds and edit these independently. When you have made the desired modifications, you can reassemble all your drums into one part using the Bounce Selection command, see below.
This option is especially handy when working with instrument parts on instrument tracks. "Normal" dissolving would lead to a number of different tracks each routed to a separate instance of the connected VST instrument. When dissolving parts to sublanes, the parts will still reside on the same track, with all parts using the same VST instrument instance.
Bounce Selection
With this function, you can combine MIDI parts on several lanes to a single MIDI part. This can be used to reassemble a drum part that you dissolved onto several lanes for editing, see above. Simply select the MIDI parts on the different lanes that you want to combine and select "Bounce Selection" on the MIDI menu.
During the bounce process, any muted parts will be removed. If transpose and velocity values were specified for the parts, these are taken into account as well.
Repeat Loop
With this function, the events inside the independent track loops will be repeated until the end of the part, i.e. the notes that were previously only played repeatedly are now actual notes on the MIDI track. Events to the right of the independent track loop (within the same part) will be replaced by this function. For more information about independent track loops, see "The independent track loop" on page 343.
Other MIDI functions
The following items can be found on the Functions sub-menu of the MIDI menu:
Legato
Extends each selected note so that it reaches the next note.
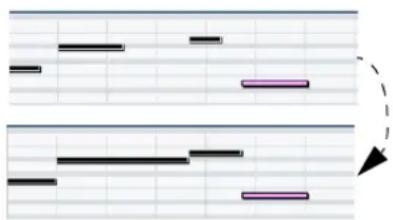
flowchart
graph TD
    A["Input Block 1"] --> B["Process Step 1"]
    B --> C["Output Block 2"]
    C --> D["Feedback Loop"]
    D --> E["Output Block 3"]
You can specify a gap or overlap for this function with the "Legato Overlap" setting in the Preferences (Editing–MIDI page).
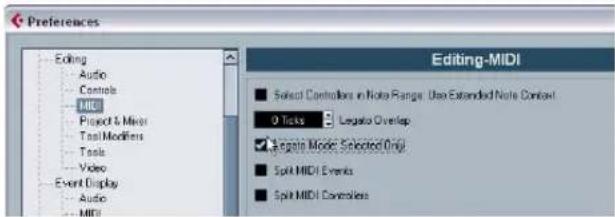
text_image
Preferences Editing Audio Controls MIDI Project & Mirer Tool Modifiers Tools Video Event Display Audio MIDI Editing-MIDI Select Controllers in Note Range: Use Extended Note Context! 0 Tasks Legato Overlap Regate Mode Selected Only Split MIDI Events Split MIDI ControlsWhen using Legato with this setting, each note will be extended to end 5 ticks before the next note.
When you activate "Legato Mode: Selected Only", the length of the note will be adjusted so that it reaches the next selected note, allowing you e.g. to only apply Legato to your bass line (when playing on a keyboard).
Fixed Lengths

This function is only available from within the MIDI editors.
This function resizes all selected notes to the length set with the Length Quantize pop-up menu on the MIDI editor toolbar.
Delete Doubles
This function removes double notes, i.e. notes of the same pitch on the exact same position from the selected MIDI parts. Double notes can occur when recording in Cycle mode, after Quantizing, etc.
Delete Controllers
This function removes all MIDI controllers from the selected MIDI parts.
Delete Continuous Controllers
This function removes all "continuous" MIDI controller events from the selected MIDI parts. Therefore, "on/off" events such as sustain pedal events are not removed.
Delete Notes
Allows you to delete very short or weak notes. This is useful for automatically removing unwanted "ghost notes" after recording. Selecting "Delete Notes..." opens a dialog in which you set up the criteria for the function.
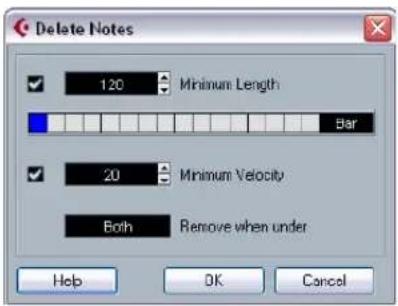
text_image
Delete Notes ✓ 120 Minimum Length Bar ✓ 20 Minimum Velocity Both Remove when under Help OK CancelThe parameters have the following functionality:
Minimum Length
When the Minimum Length checkbox is activated, the note length is taken into account, allowing you to remove short notes. You can either specify the minimum length (for notes to be kept) in the value field or by dragging the blue line in the graphical length display below.
- The graphical length display can correspond to 1/4 bar, one bar, two bars or four bars. You change this setting by clicking in the field to the right of the display

In this case, the whole length display corresponds to two bars, and the Minimum Length is set to 32nd notes (60 ticks).
Minimum Velocity
When the Minimum Velocity checkbox is activated, the velocity of notes is taken into account, allowing you to remove weak notes. You specify the minimum velocity (for notes to be kept) in the value display.
Remove when under
This setting is only available when both Minimum Length and Minimum Velocity is activated. By clicking in this field, you select whether both the length and the velocity criteria must be met for notes to be deleted, or whether one of the criteria will suffice.
OK and Cancel
Clicking OK performs the automatic delete according to the rules set up. Clicking Cancel closes the dialog without deleting notes.
Restrict Polyphony
Selecting this item opens a dialog in which you can specify how many “voices” should be used (for the selected notes or parts). Restricting the polyphony this way is useful when you have an instrument with limited polyphony and want to make sure all notes will be played. The effect is achieved by shortening notes as required, so that they end before the next note starts.
Pedals to Note Length
This function scans for Sustain pedal on/off events, lengthens the affected notes to match the Sustain pedal off position, and then removes the Sustain Controller on/off events.
Delete Overlaps (mono)
This function allows you to make sure that no notes of the same pitch overlap (i.e. that one starts before the other ends). Overlapping notes of the same pitch can confuse some MIDI instruments (a new Note On is transmitted before the Note Off is transmitted). This command can then be used to automatically solve the problem.
Delete Overlaps (poly)
This function shortens notes when required, so that no note begins before another ends. This happens regardless of which pitch the notes have.
Velocity
This function opens a dialog that allows you to manipulate the velocity of notes in various ways.
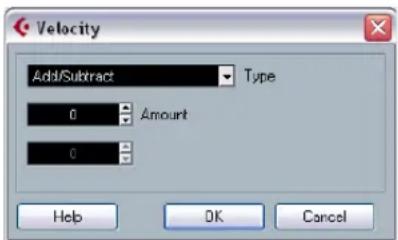
text_image
Velocity Add/Subtract Type 0 Amount 0 Help OK CancelThe following types of velocity processing are available:
Add/Subtract
This simply adds a fixed number to the existing velocity values. You set the value (positive or negative) with the Amount parameter.
Compress/Expand
Compresses or expands the “dynamic range” of MIDI notes by scaling the velocity values according to the Ratio setting (0–300%). The principle behind this is that multiplying different velocity values with a factor higher than 1 (over 100%) will also make the differences between velocity values greater, while using a factor lower than 1 (under 100%) will make the differences smaller. In short:
- To compress ("even out" velocity differences), use ratio values below 100%.
After compression, you would probably want to add a velocity amount (with the Add/Subtract function) to maintain the average velocity level.
- To expand (create greater difference in velocity), use ratio values above 100%.
Before you expand, you may want to adjust the velocity with the Add/Subtract function, so that the average velocity is somewhere in the middle of the range. If the average velocity is high (near 127) or low (near 0), expansion will not work properly, simply because velocity values can only be between 0 and 127!
Limit
This function allows you to make sure that no velocity values fall outside a given range (the Lower and Upper values). Any velocity values outside this range are raised/ lowered to exactly the Lower/Upper values.
Fixed Velocity
This function sets the velocity of all selected notes to the Insert Velocity value on the toolbar in the MIDI editors.
Thin Out Data
Thins out MIDI data. Use this to ease the load on your external MIDI devices if you have recorded very dense controller curves etc.
You can also manually thin out the controller data by using the quantize function in the Key Editor.
Extract MIDI Automation
This is an extremely useful function as it allows you to quickly and easily convert the continuous controllers of your recorded MIDI parts into MIDI track automation data, making them available for editing in the Project window. Proceed as follows:
- Select the desired MIDI part containing the continuous controller data.
- Select "Extract MIDI Automation". (This command is also available on the Key Editor context menu.) The controller data will automatically be removed from the controller lane in the editor.
- In the Project window, open the automation track(s) for the respective MIDI track. You will find that an automation track has been created for each of the continuous controllers in the part.
This function can only be used for continuous controllers. Data such as Aftertouch, Pitchbend or SysEx cannot be converted to MIDI track automation data.
Remember that to be able to hear the automation data, you have to activate the Read button for the respective automation track(s).
MIDI controller automation is also affected by the Automation Merge Mode, see "MIDI Controller automation" on page 202.
Reverse
This function inverts the order of the selected events (or of all events in the selected parts), causing the MIDI music to play backwards. Note that the effect is different from reversing an audio recording. With MIDI, the individual notes will still play as usual in the MIDI instrument – it is only the order of playback that is changed.
Merge Tempo from Tapping
This function allows you to create a complete tempo track based on your tapping, see the section “Merge Tempo From Tapping” on page 408.
The MIDI editors
Introduction
There are several ways to edit MIDI in Cubase. You can use the tools and functions in the Project window for large-scale editing, or the functions on the MIDI menu to process MIDI parts in various ways (see "What is affected by the MIDI functions?" on page 326). For hands-on graphical editing of the contents of MIDI parts, you use the MIDI editors:
- The Key Editor is the default MIDI editor, presenting notes graphically in an intuitive piano roll-style grid. The Key Editor also allows for detailed editing of non-note events such as MIDI controllers. For more information, see “The Key Editor – Overview” on page 340.
- The Score Editor shows MIDI notes as a musical score and comes with advanced tools and functions for notation, layout and printing.
The Score Editor is described in detail in "Part II: Score layout and printing" on page 487.
- The Drum Editor is similar to the Key Editor, but takes advantage of the fact that with drum parts, each key corresponds to a separate drum sound.
This is the editor to use when you're editing drum or percussion parts. For more information, see "The Drum Editor – Overview" on page 358.
- The List Editor shows all events in the selected MIDI parts as a list, allowing you to view and edit their properties numerically. It also allows you to edit SysEx messages. For more information, see "The List Editor – Overview" on page 365 and "Working with System Exclusive messages" on page 368.
- The Edit In-Place function allows you to edit MIDI parts directly in the Project window.
This is similar to working in the Key Editor, but makes it easier to edit MIDI in context with other track types. See "The In-Place Editor" on page 356.
- You can also edit MIDI in the Project Browser.
Like the List Editor, the Project browser shows the events in a list and allows you to perform numerical editing. However, you will probably find the List Editor better suited for MIDI editing, since it has various dedicated features and functions for this. The Project Browser is described in the chapter "The Project Browser" on page 413.
→ You can define each of the editors mentioned above as your default MIDI editor, see below.
This chapter describes how to use all editors except the Score Editor (which is described in detail in "Part II: Score layout and printing" on page 487).
Please note that features that are identical in these editors (especially in the Key and Drum Editors) will be described in the Key Editor section. The sections about the Drum Editor (see "The Drum Editor – Overview" on page 358), the In-Place Editor (see "The In-Place Editor" on page 356) and the List Editor (see "The List Editor – Overview" on page 365) describe the specific features of these editors only.
Opening a MIDI editor
There are two ways to open a MIDI editor:
- Select one or several parts (or a MIDI track, with no parts selected), pull down the MIDI menu and select Open Key Editor, Open Score Editor, Open Drum Editor, Open List Editor or Open In-Place Editor (or use the corresponding key command).
The selected parts (or all parts on the track, if no part was selected) will open in the chosen editor.
- Double-click a part to open it in the default editor. Which editor opens depends on the Default Edit Action setting in the Preferences (Event Display-MIDI page).
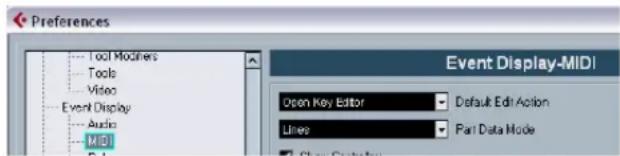
text_image
Preferences Tool Modifiers Tools Video Event Display Audio MID Event Display-MIDI Open Key Editor Default Edit Action Lines Part Data ModeIf the option “Edit as Drums when Drum Map is assigned” is activated and a drum map is selected for the edited track (see “Selecting a drum map for a track” on page 363), the Drum Editor will open. This way you can double-click to open the Key Editor (or the Score Editor, List or In-Place Editor, depending on your preferences) but drum tracks will automatically open in the Drum Editor.
If the part you open for editing is a shared copy, any editing you perform will affect all shared copies of this part. Shared copies are created by pressing [Alt]/[Option]-[Shift] and dragging, or by using the Repeat function with the "Shared copies" option activated. In the Project window, shared copies are indicated by the part name in italics and an icon in the bottom right corner of the part.
Handling several parts
When you open a MIDI editor with several parts (or a MIDI track containing several parts) selected, you might find it somewhat hard to get an overview of the different parts when editing.
For such cases the editor toolbar features a few functions to make working with multiple parts easier and more comprehensive:
- The Part List menu lists all parts that were selected when you opened the editor (or all parts on the track, if no parts were selected), and lets you select which part should be active for editing.
When you select a part from the list, it is automatically made active and centered in the note display.
Note that it is also possible to activate a part by selecting an event within this part with the Arrow tool.
- The button "Edit Active Part Only" lets you restrict editing operations to the active part only.
For example, if you select "All" from the Select submenu on the Edit menu with this option activated, only events in the active part will be selected.
Similarly, if you select notes by dragging with the Arrow tool (making a selection rectangle), only the notes in the active part will be selected.
"Edit Active Part Only" is activated on the toolbar.
- You can zoom in on the active part so that it fills the screen by selecting "Zoom to Event" from the Zoom submenu on the Edit menu.
- The button "Show Part Borders" can be used if you want to see clearly defined borders for the active part. When this is activated, all parts except the active one are grayed out, making the borders easily discernible. In the Key Editor, there are also two "markers" in the ruler with the name of the active part, marking its beginning and end. These can be moved freely to change the size of the part.
"Show Part Borders" is activated on the toolbar.
- It is possible to cycle between parts (making them active) using key commands.
In the Key Commands dialog – Edit category, you will find two functions for this: "Activate Next Part" and "Activate Previous Part". If you assign key commands to these, you can use them to cycle between parts in the editors. For further information, see "Setting up key commands" on page 480.
The Key Editor – Overview
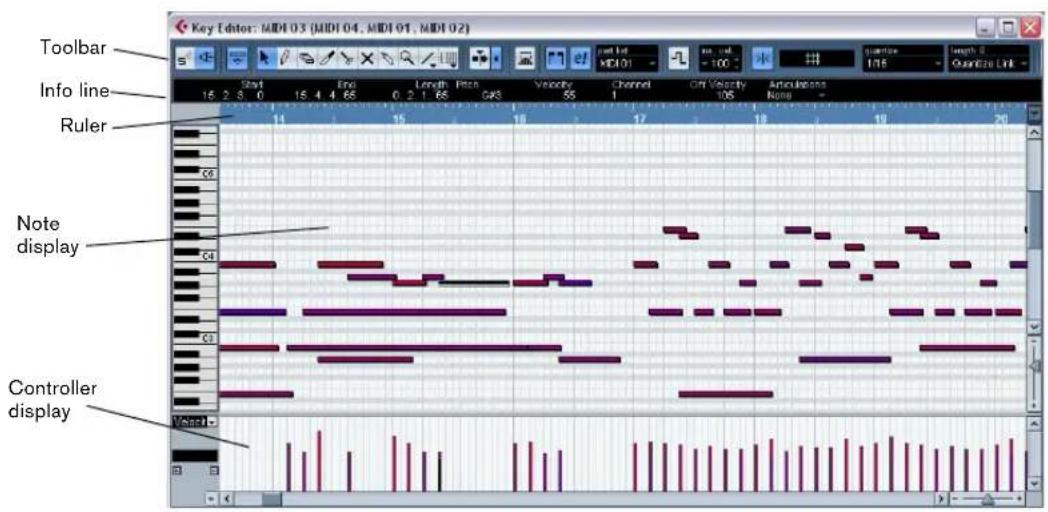
text_image
Toolbar Info line Ruler Note display Controller display VesetThe toolbar
As in other windows, the toolbar contains tools and various settings. You can specify which toolbar items should be shown and store/recall different toolbar configurations – see "Using the Setup options" on page 471.
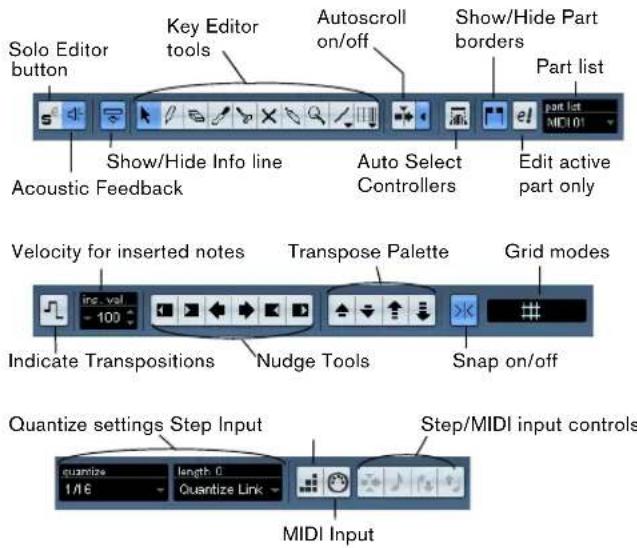
text_image
Solo Editor button Key Editor tools Autoscroll on/off Show/Hide Part borders Part list Show/Hide Info line Auto Select Controllers Edit active part only Acoustic Feedback Velocity for inserted notes Transpose Palette Grid modes ind. val 100 Indicate Transpositions Nudge Tools Snap on/off Quantize settings Step Input Step/MIDI input controls quantize 1/16 length: 0 Quantize Link MIDI Input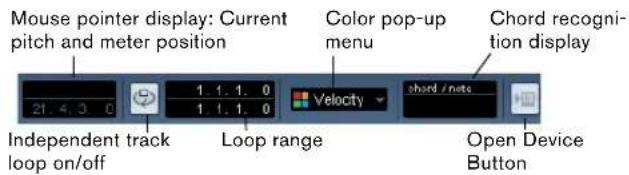
text_image
Mouse pointer display: Current pitch and meter position Color pop-up menu Chord recogni- tion display 21.4.3.0 1.1.1.0 1.1.1.0 Velocity chord / note Independent track loop on/off Loop range Open Device ButtonThe info line

The info line shows information about selected MIDI notes. You can edit all values on the info line using regular value editing (see "Editing on the info line" on page 348 for details). Length and position values are displayed in the format currently selected for the ruler (see below).
- To hide or show the info line, click the icon in the toolbar.
The ruler
The ruler shows the timeline, by default in the display format selected on the Transport panel. You can select a separate format for a MIDI editor ruler on the Ruler pop-up menu, opened by clicking the arrow button to the right of it. For a list of the available formats, see "The ruler" on page 33.
At the bottom of the pop-up menu, there are two additional items:
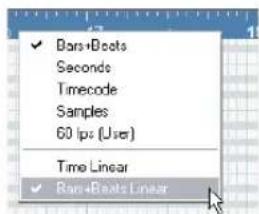
text_image
✓ Bars+Boots Seconds Timecode Samples 60 fps (User) Time Linear ✓ Bars+Boats Linear- If "Time Linear" is selected, the ruler, note display and controller display will be linear in relation to time. This means that if the ruler shows bars and beats, the distance between the bar lines will vary depending on the tempo.
- If "Bars+Beats Linear" is selected, the ruler, note display and controller display will be linear in relation to tempo. This means that if the ruler shows bars and beats, the distance between beats will be constant.
In most cases, you would probably set the display format to "Bars+Beats" in "Bars+Beats Linear" mode when editing MIDI.
The note display
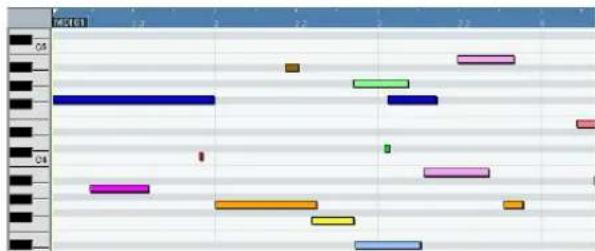
bar
| Category | Value | | -------- | ----- | | C8 | 2.0 | | B8 | 2.0 | | B9 | 2.0 | | C8 | 2.0 | | B8 | 2.0 | | B9 | 2.0 | | C8 | 2.0 | | B8 | 2.0 | | B9 | 2.0 | | C8 | 2.0 | | B8 | 2.0 | | B9 | 2.0 |The note display is the main area in the Key Editor. It contains a grid in which MIDI notes are shown as boxes. The width of a box corresponds to the note length, and the vertical position of a box corresponds to the note number (pitch), with higher notes higher up in the grid. The piano keyboard to the left serves as a guide for finding the right note number.
For a description on how to display colors in the note display, see "Coloring notes and events" on page 344.
The chord recognition function
Cubase features a handy chord recognition function that helps you identify chords in the Key Editor note display. To find out which chord is formed by simultaneously played notes, place the project cursor over the notes. All MIDI notes currently "touched" by the project cursor are analyzed and the chord recognition display in the toolbar shows you which chord the notes form.
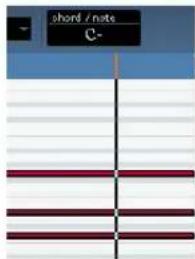
text_image
chord / note C-In the picture above, the project cursor touches the notes C, Eb and G. As shown in the chord recognition display, this results in a C minor chord.
The controller display
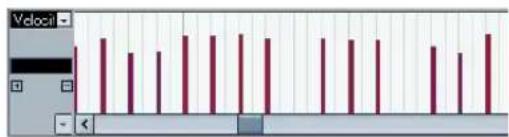
text_image
Volocil -The area at the bottom of the Key Editor window is the controller display. This consists of one or several controller lanes, each showing one of the following properties or event types:
- Velocity values of the notes.
- Pitchbend events.
- Aftertouch events.
- Poly Pressure events.
- Program Change events.
- SysEx events.
- Articulations (see the chapter "VST Expression" on page 372).
- Any type of continuous controller event (see "Editing continuous controllers on the controller lane" on page 355).
To change the size of the controller display, drag the divider between the controller display and the note display. This will make the controller display larger and the note display smaller, or vice versa.
Velocity values are shown as vertical bars in the controller display, with higher bars corresponding to higher velocity values:
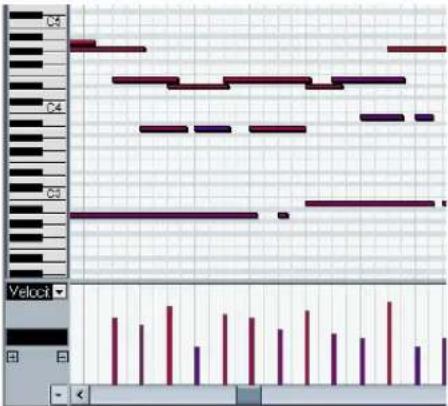
text_image
C5 C4 C3 VelocityEach velocity bar corresponds to a note in the note display.
Events other than velocity values are shown as blocks, the heights of which correspond to the values of the events. The beginning of an event is marked by a curve point. To select an event, click on the curve point, so that it turns red.
Unlike notes, events in the controller display have no length. The value of an event in the display is "valid" until the start of the next event:
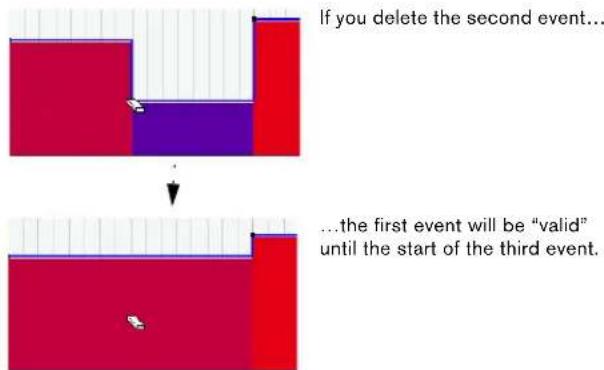
text_image
If you delete the second event... ...the first event will be "valid" until the start of the third event.For a description of editing in the controller display, see "Editing in the controller display" on page 351.
Key Editor operations
Zooming
Zooming in the Key Editor is done according to the standard zoom procedures, using the zoom sliders, the Zoom tool or the Zoom submenu on the Edit menu.
- When you drag a rectangle with the Zoom tool, the result depends on the option "Zoom Tool Standard Mode: Horizontal Zooming Only" in the Preferences (Editing-Tools page).
If this is activated, the window will only be zoomed horizontally; if not, the window will be zoomed both horizontally and vertically.
Using the Trim tool
The Trim tool allows you to change the length of note events by cutting off the end or the beginning of notes. It is available in the Key Editor and in the List Editor.
Using the Trim tool means moving the note-on or the note-off event for one or several notes to a position defined with the mouse. Proceed as follows:
- Select the Trim tool in the toolbar. The mouse pointer changes to a knife symbol.
-
Locate the notes that you wish to edit.
-
To edit a single note, click on it with the Trim tool. The range between the mouse cursor and the end of the note will be removed.
You can use the mouse position display in the toolbar to find the exact position for the trim operation.
- To edit several notes, click and drag with the mouse across the notes.
A line is displayed. The notes will be trimmed along this line.
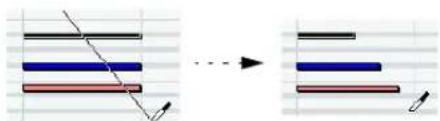
text_image
Diagram illustrating a process with labeled components and directional arrows, showing transformation from layered structure to final state.Trimming the end of three note events.
- By default, the Trim tool will cut off the end of notes. To trim the beginning of the note(s), press [Alt]/[Option] while dragging.
- If you press [Ctrl]/[Command] while dragging, you will get a vertical trim line, allowing you to set the same start or end time for all edited notes.
You can change the Trim tool key commands in the Preferences (Editing-Tool Modifiers page).
Note that when you trim the beginning of a note in the List Editor, the note may move to a different position in the list (since other events may now begin before the edited event).
Note that the trimmed note ends or starts do not snap to the grid.
Playing back
You can play back your music as usual when working in a MIDI editor. There are several features designed to make editing easier during playback:
Solo button

If you activate the Solo button, only the edited MIDI parts will be heard during regular playback.
Autoscroll
As described in the section "Autoscroll" on page 57, the Autoscroll function makes the window "follow" the project cursor during playback, so that the current play position is visible at all times. However, when you are working in a MIDI editor, you may want to deactivate Autoscroll – this way, the events you are working with will stay visible.
The Autoscroll buttons in each MIDI editor are independent of the Project window Autoscroll setting, which means that Autoscroll can be activated in the Project window and deactivated in the MIDI editor you are working in.
The independent track loop
The independent track loop is a sort of “mini-cycle”, affecting only the MIDI part being edited. When the loop is activated, the MIDI events within the loop will be repeated continuously and completely independent – other events (on other tracks) will be played back as usual. The only “interaction” between the loop and the “regular playback” is that every time the cycle starts over again, so does the loop.
To set up the independent track loop, proceed as follows:
- Activate the loop by clicking on the Loop button on the toolbar.
If it is not visible, right-click the toolbar and add the Independent Track Loop Settings section – see "Using the Setup options" on page 471.
When the loop is activated, the cycle is not shown in the ruler.
-
Now you need to specify the length of the loop. You have the following possibilities:
-
[Ctrl]/[Command]-click and [Alt]/[Option]-click in the ruler to set the start and end of the loop, respectively.
- Edit the loop start and end positions numerically in the fields next to the Loop button.
- Click and drag in the upper part of the ruler to move the locators to the desired positions.
The independent track loop is indicated in purple in the ruler.
⇒ The MIDI events will be looped as long as the Loop button is activated and the MIDI editor window is open.
To turn the loop into actual MIDI notes, use the Repeat Loop function on the MIDI menu, see "Repeat Loop" on page 333.
Acoustic Feedback
If the speaker icon on the toolbar is activated, individual notes will automatically be played back (auditioned) when you move or transpose them, or when you create new notes by drawing. This makes it easier to hear what you're doing.
In the Preferences dialog (MIDI page), you can specify whether the Acoustic Feedback function should also include any MIDI sends or inserts used for the track. Activate the option "Audition through MIDI Inserts/Sends" if you want the layering of MIDI instruments (by MIDI sends) to be active within the MIDI editors as well. This way, the acoustic feedback of the editors sends the MIDI data not only to the output selected for the track, but additionally through any MIDI inserts and MIDI sends assigned to it. Note, however, that this also means that the MIDI events will be sent through any MIDI plug-ins assigned to this track.
Snap
Snap is activated on the toolbar.
The Snap function helps you find exact positions when editing in a MIDI editor. It does this by restricting horizontal movement and positioning to certain positions. Operations affected by snap include moving, duplicating, drawing, sizing, etc.
- How Snap works depends on the Snap mode pop-up menu next to the Snap button.
See "The Snap function" on page 56.
- When the "Bars+Beats" display format is selected in the ruler, the snap grid is set by the quantize value on the toolbar.
This makes it possible to snap not only to straight note values but also to swing grids set up in the Quantize Setup dialog (see "The Quantizing functions" on page 326).
When any of the other display formats is selected in the ruler, positioning is restricted to the displayed grid, i.e. you can snap in finer increments by zooming in, and in coarser increments by zooming out the display.
Coloring notes and events
By using the Colors pop-up menu on the toolbar, you can select a color scheme for the events in the editor. The following options are available:
Option Description
| Velocity | The notes get different colors depending on their velocity values. |
| Pitch The notes get different colors depending on their pitch. | |
| Channel The notes get different colors depending on their MIDI channel value. | |
| Part The notes get the same color as their respective part in the Project window. Use this option when you are working with two or more tracks in an editor, to make it easier to see which notes belong to which track. | |
| GridMatch The notes get different colors depending on their time position. This mode makes it easy to see e.g. if the notes in a chord start at the exact same beat. | |
When any of the options (apart from "Part") is selected, you can select "Setup" from the Colors pop-up menu. This opens a dialog in which you can specify which colors should be associated with which velocities, pitches or channels, respectively.
Creating and editing notes
To draw in new notes in the Key Editor, you use the Pencil tool or the Line tool.
Drawing notes with the Pencil tool
With the Pencil tool, you insert single notes by clicking at the desired time (horizontal) and pitch position (vertical).
- When you move the pointer in the note display, its bar position is indicated in the toolbar, and its pitch is indicated both in the toolbar and on the piano keyboard to the left. This makes it easy to find the right note and insert position.
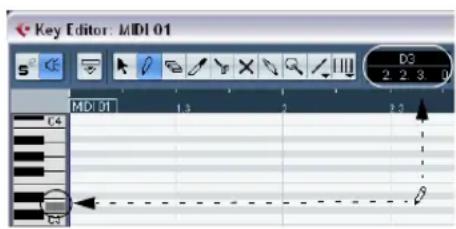
text_image
Key Editor: MIDI 01 D3 2 2 3 D MDI 01 1.5 2.2 C4 C5- If Snap is activated, this determines the start position of the created note.
- If you click once, the created note will have the length set on the Length Quantize pop-up menu on the toolbar. You can create a longer note by clicking and dragging. The length of the created note will be a multiple of the Length Quantize value.
Drawing notes with the Line tool
The Line tool can be used for creating series of contiguous notes. To do so, click and drag to draw a line and then release the mouse button.
→ The Line tool has several different modes.
To select one of the modes, click on the Line tool icon on the toolbar when the tool is already selected. This opens a pop-up menu from which you can select one of the Line tool modes.
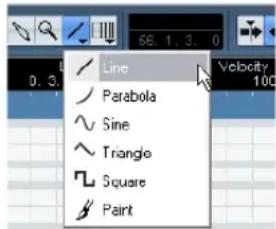
text_image
Line Parabola Sine Triangle Square PaintThe tool icon will change appearance according to the selected mode.
Mode Description
| Line This is the default mode for the Line tool. When this mode is selected, you click and drag to create a straight line, in any angle. When you release the mouse button a series of notes will be created, aligned with the line. If Snap is activated, the notes will be spaced and sized according to the Quantize value. | |
| Parabola, Sine, Triangle, Square | These modes insert events along different curve shapes. While they can be used for creating notes, they're probably best suited for controller editing (see "Adding and editing events in the controller display" on page 353). |
| Paint Allows you to insert multiple notes by dragging with the mouse button pressed. If Snap is activated, the notes will be positioned and sized according to the Quantize and Length Quantize values. If you press [Ctrl]/[Command] while painting, movement will be restricted to horizontal only (i.e. the painted notes will have the same pitch). | |
Setting velocity values
When you draw notes in the Key Editor, the notes will get the velocity value set in the insert velocity field on the toolbar.
You can use one of four different methods for determining the velocity:
- When a tool modifier is assigned for the Select tool-Edit Velocity action (in the Editing-Tool Modifiers page of the Preferences dialog), you can select one or more notes, press the modifier (by default [Ctrl]/[Command]-[Shift]) and click on one of the selected notes to change the velocity.
The cursor changes into a speaker and, next to the note, a field with the velocity value appears – the Note Velocity slider. Move the mouse pointer up or down to change the value. Value changes will be applied to all selected notes, as you can see in the controller lane.
- Selecting a predefined velocity value from the insert velocity pop-up menu.
The menu contains five different predefined velocity values. The "Setup..." item opens a dialog that allows you to specify which five velocity values should be available on the pop-up menu. (This dialog can also be opened by selecting "Insert Velocities..." from the MIDI menu.)
text_image
100 90 70 50 120 Setup...- Manually entering the desired velocity value by clicking in the insert velocity field and typing in the desired value.
- Using a key command.
You can assign a key command to each of the five available velocity values in the Key Commands dialog (MIDI category – the items Insert Velocity 1–5). This allows for quick switching between different velocity values when entering notes. See "Setting up key commands" on page 480 for instructions on how to set up key commands.
Selecting notes
Selecting notes is done using any of the following methods:
- Use the Arrow tool.
The standard selection techniques apply, like selecting by clicking on the note or using a selection rectangle. Note that when you press [Shift] and click on notes or draw a selection rectangle, these notes will be added to the overall selection. When you press [Ctrl]/[Command] and click on notes or draw a selection rectangle, these notes will be removed from the overall selection (standard Windows behavior).
- Use the Select submenu on the Edit menu or context menu.
The Select menu options are:
Option Description
All Selects all notes in the edited part.
None Deselects all events.
Invert Inverts the selection – all selected events are deselected and all notes that were not selected are selected instead.
In Loop Selects all notes that are partially or completely inside the boundaries of the left and right locators (only visible if locators are set).
| From Start to Cursor | Selects all notes that begin to the left of the project cursor. |
| From Cursor to End | Selects all notes that end to the right of the project cursor. |
| Equal Pitch – all Octaves | This function requires that a single note is selected. It selects all notes of this part that have the same pitch (in any octave) as the currently selected note. |
| Equal Pitch – same Octave | As above, but selects notes of the exact same pitch only (same octave). |
| Select Controllers in Note Range | Selects the MIDI controller data within range of the selected notes, see below. |
- You can also use the left and right arrow keys on the computer keyboard to step from one note to another. If you press [Shift] and use the arrow keys, the current selection will be kept, allowing you to select several notes.
- To select all notes of a certain pitch, press [Ctrl]/[Command] and click on the desired key in the keyboard display to the left.
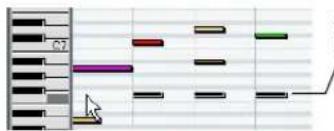
text_image
Cropped image showing a musical score with visible keyboard, time, and key markingsAll notes of the corresponding pitch are selected.
You can also press [Shift] and double-click on a note to select all the following notes of the same pitch – or use the Equal Pitch functions on the Select submenu.
- If the option "Auto Select Events under Cursor" is activated in the Preferences (Editing page), all notes "touched" by the project cursor are automatically selected.
Toggle selections
If you want to toggle the selected elements within a selection rectangle, press [Ctrl]/[Command] and enclose the same elements within a new selection rectangle. Once you release the mouse button, the previous selection is deselected and vice versa.
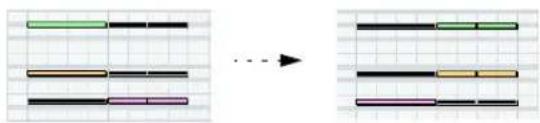
Selecting controllers within the note range
You can select the controllers within the range of the selected notes. The following applies:
- When the Auto Select Controllers button is activated on the toolbar, the controllers will always be selected when the respective notes are selected.
- When you select "Select Controllers in Note Range" on the Select submenu of the Edit menu, the controllers within the note range (i.e. between the first/leftmost and last/right-most note) will be selected.
Please note that for this to work, only two notes have to be selected. All controllers within this range will be selected.
- A note range lasts until the start of the next note or the end of the part.
- Selected controllers for notes are moved when the corresponding notes are moved.
Moving and transposing notes
To move notes in the editor, use any of the following methods:
- Click and drag to a new position.
All selected notes will be moved, maintaining their relative positions. If Snap is activated, this determines to which positions you can move the notes, see "Snap" on page 344.

Note also that you can restrict movement to horizontal or vertical only by holding down [Ctrl]/[Command] while dragging.
- Use the up and down arrow keys on the computer keyboard.
This method allows you to transpose the selected notes, without risking to move them horizontally. You can also use the Transpose function (see "Transpose" on page 330) for this. Note that pressing [Shift] and using the up and down arrow keys will transpose notes in steps of one octave.
Transpose is also affected by the global transpose setting, see "The Transpose functions" on page 103.
- Use the Move to Cursor function on the Edit menu. This moves the selected notes to the project cursor position.
- Select a note and adjust its position or pitch on the info line.
See "Editing on the info line" on page 348.
- Use the Move buttons in the Nudge palette on the toolbar.
This moves the selected note(s) by the amount set on the Quantize pop-up menu.
By default, the Nudge palette is not shown on the toolbar – see "Using the Setup options" on page 471 for more information.
Note that when you move selected notes to a different position, any selected controllers for these notes will move accordingly.
See also "Moving and copying events" on page 354.
You can also adjust the position of notes by quantizing (see "The Quantizing functions" on page 326).
Duplicating and repeating notes
Notes are duplicated much in the same way as events in the Project window:
- Hold down [Alt]/[Option] and drag the note(s) to a new position.
If Snap is activated, this determines to which positions you can copy notes (see "Snap" on page 344).
- Selecting Duplicate from the Edit menu creates a copy of the selected note and places it directly after the original. If several notes are selected, all of these are copied "as one unit", maintaining the relative distance between the notes.
- Selecting "Repeat..." from the Edit menu opens a dialog, allowing you to create a number of copies of the selected note(s).
This works like the Duplicate function, but you can specify the number of copies.
- You can also perform the Repeat function by dragging: Select the note(s) to repeat, press [Alt]/[Option], click the right edge of the last selected note and drag to the right. The longer to the right you drag, the more copies are created (as indicated by the tooltip).
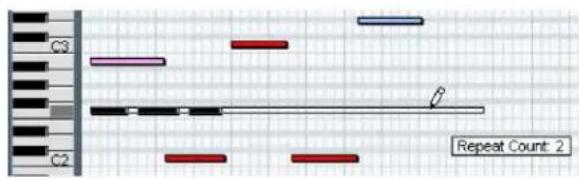
text_image
C3 C2 Repeat Count: 2Using cut and paste
You can use the Cut, Copy and Paste options on the Edit menu to move or copy material within a part or between different parts. When you paste copied notes, you can either use the regular Paste function or the function "Paste Time" from the Range submenu of the Edit menu.
- "Paste" inserts the copied notes at the project cursor position without affecting existing notes.
- "Paste Time" inserts at the project cursor position, but moves (and if necessary, splits) existing notes to make room for the pasted notes.
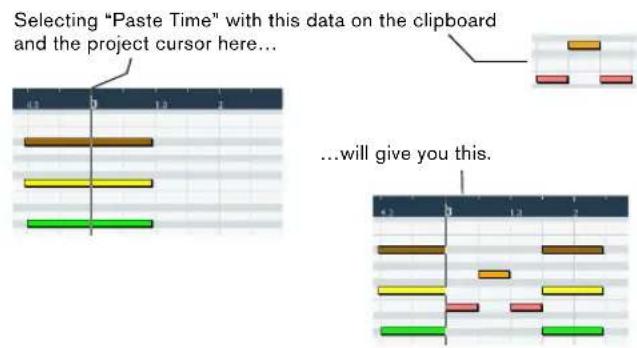
text_image
Selecting "Paste Time" with this data on the clipboard and the project cursor here... ...will give you this.Resizing notes
To resize a note, use one of the following methods:
- Position the arrow tool at the start or end of the note, so that the pointer takes on the shape of a small double arrow. Click and drag to the left or right to resize the note. This method allows you to resize the note from either direction.
- Click with the Pencil tool within the note box and drag to the left or the right (to make the note shorter or longer, respectively).
With both these methods, the resulting length will be a multiple of the Length Quantize value on the toolbar.
- Use the Trim Start/End buttons on the Nudge palette on the toolbar.
This resizes the selected note(s) by moving their start or end positions, in steps according to the Length Quantize value on the toolbar. By default, the Nudge palette is not shown on the toolbar – see "Using the Setup options" on page 471 for more information.
- Select the note and adjust its length on the info line. See "Editing on the info line" on page 348 for details on info line editing.
- Use the Trim tool, see "Using the Trim tool" on page 342.
Splitting notes
There are three ways to split notes:
- Clicking on a note with the Scissors tool splits the note at the position you pointed (taking the Snap setting into account if activated).
If several notes are selected, they are all split at the same position.
- If you select "Split at Cursor", from the Edit menu all notes that are intersected by the project cursor are split at the cursor position.
- If you select "Split Loop", from the Edit menu all notes that are intersected by the left or right locator are split at the locator positions.
Gluing notes
Clicking on a note with the Glue Tube tool will "glue it together" with the next note of the same pitch. The result will be one long note spanning from the start of the first note to the end of the second note and with the properties (velocity, etc.) of the first note.
Muting notes
Individual notes can be muted in the Key Editor, as opposed to muting an entire MIDI part in the Project window. This allows you to exclude notes from playback, but keep the option to bring them back again at any time. To mute a note, use one of the following methods:
- Click on it with the Mute tool.
- Drag a rectangle with the Mute tool, enclosing all notes you want to mute.
- Select the note(s) and choose Mute from the Edit menu. The default key command for this is [Shift]-[M].
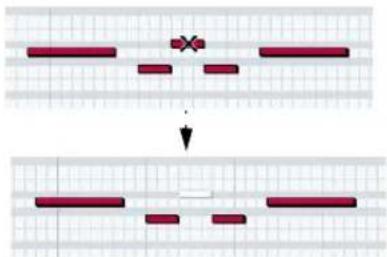
flowchart
graph TD
    A["Input"] --> B{Decision}
    B -->|Yes| C["Process Step"]
    B -->|No| D["Feedback Loop"]
    C --> E["Output"]
Muted notes are "dimmed" in the note display.
To unmute a note, either click it or enclose it with the Mute tool, or select it and choose Unmute from the Edit menu. The default key command for this is [Shift]-[U].
Deleting notes
To delete notes, either click on them with the Eraser tool or select them and press [Backspace].
Editing on the info line
The info line shows the values and properties of the selected event(s). If a single event is selected, its values are displayed on the info line. If several events are selected, the info line shows the values of the first of these events in yellow.
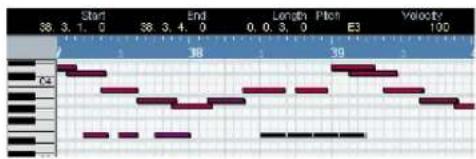
text_image
Start End Length Pitch Velocity 38 3.1.0 38 3.4.0 0.0.3.0 E3 100 18 39 02 03 04 05 06 07 08 09 10 11 12 13 14 15 16 17 18 19 20 21 22 23 24 25 26 27 28 29 30 31 32 33 34 35 36 37 38Several events are selected.
You can edit the values on the info line using regular value editing. This allows you to move, resize, transpose or change velocity of events in a very precise manner. It is also possible to click the Pitch or Velocity field in the info line and play a note on your MIDI keyboard – the pitch or velocity will be adjusted according to the note you played.
If you have several events selected and change a value, all selected events will be changed by the set amount.
⇒ If you have several events selected, hold down [Ctrl]/[Command] and change a value, the change will be absolute.
In other words, the value setting will be the same for all selected events.
How the Key Editor handles drum maps
When a drum map is assigned to a MIDI or instrument track (see "Working with drum maps" on page 361), the Key Editor will display the drum sound names as defined by the drum map.
In Cubase, the name of the drum sound is displayed in the following locations:
In the info line, in the Pitch field. In the Mouse Note Value field.
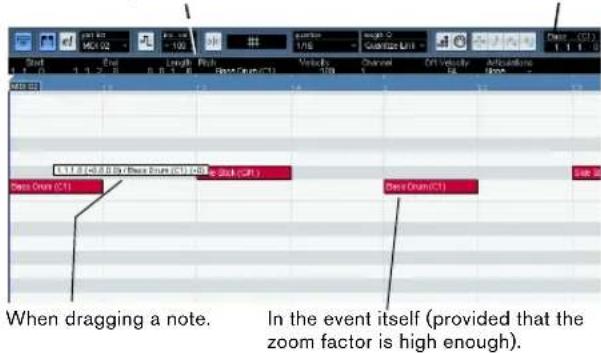
text_image
Start 1.0 End 1.1.2.3 Length B: 0.5 Finish Event Group (C1) Voltage J/m Channel T Off Velocity Omega Reset (C1) 1.1.2.3 1.1.2.3 1.1.2.3 1.1.2.3 1.1.2.3 1.1.2.3 1.1.2.3 1.1.2.3 1.1.2.3 1.1.2.3 1.1.2.3 1.1.2.3 1.1.2.3 1.1 1.1 1.1 1.1 1.1 1.1 1.1 1.1 1.1 1.1 1.1 1.1 1.1 1.1 1.1 1.1 1.1 1.1 1.1 1.1 1.1 1.1 1.1 1.1 1.1 1.2 1.2 1.2 1.2 1.2 1.2 1.2 1.2 1.2 1.2 1.2 1.2 1.2 1.2 1.2 1.2 1.2 1.2 1.2 1.2 1.2 1.2 1.2 1.2 1.2 1.3 1.3 1.3 1.3 1.3 1.3 1.3 1.3 1.3 1.3 1.3 1.3 1.3 1.3 1.3 1.3 1.3 1.3 1.3 1.3 1.3 1.3 1.3 1.3 1.3 1.4 1.4 1.4 1.4 1.4 1.4 1.4 1.4 1.4 1.4 1.4 1.4 1.4 1.4 1.4 1.4 1.4 1.4 1.4 1.4 1.4 1.4 1.4 1.4 1.4 1.5 1.5 1.5 1.5 1.5 1.5 1.5 1.5 1.5 1.5 1.5 1.5 1.5 1.5 1.5 1.5 1.5 1.5 1.5 1.5 1.5 1.5 1.5 1.5 1.5 1.6 1.6 1.6 1.6 1.6 1.6 1.6 1.6 1.6 1.6 1.6 1.6 1.6 1.6 1.6 1.6 1.6 1. When dragging a note. In the event itself (provided that the zoom factor is high enough).This allows you to use the Key Editor for drum editing, e.g. when editing drum note lengths (which may be necessary for some external instruments) or when editing several parts, to identify drum events.
How the Key Editor handles Expression maps
When an expression map is assigned to a MIDI track (see the chapter "VST Expression" on page 372), the Key Editor will display the musical articulations defined for that map, in the following locations:
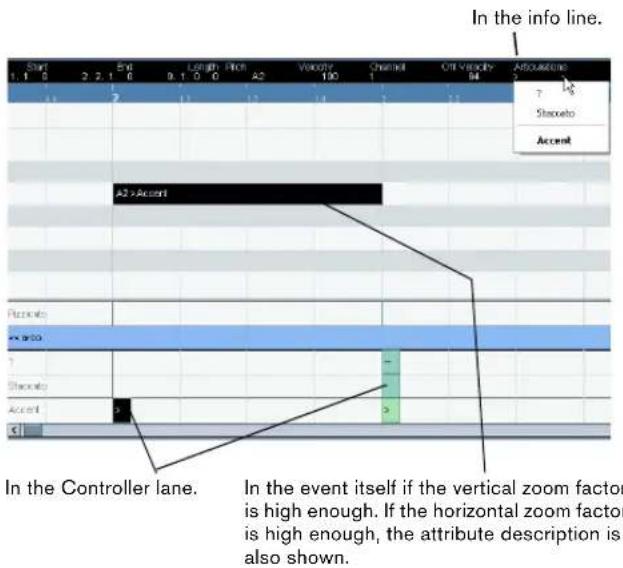
text_image
In the info line. Start 1.1 0 2.2.1 6 Length Pitch A2 Velocity 100 Channel Off Velocity 94 Attenuation 7 Steneto Accent A2 > Accent In the Controller lane. In the event itself if the vertical zoom factor is high enough. If the horizontal zoom factor is high enough, the attribute description is also shown.For more information, see the chapter "VST Expression" on page 372.
Editing notes via MIDI
You can change the properties of notes via MIDI. For example, this can be a fast way to get the right velocity value, since you will hear the result even as you edit:
- Select the note you want to edit.
- Click on the MIDI Input button on the toolbar.
Click this button to enable editing via MIDI.
- Use the note buttons on the toolbar to decide which properties should be changed by the MIDI input.
You can enable editing of pitch, note-on and/or note-off velocity.
With this setting, the edited notes will get the pitch and velocity values of the notes input via MIDI, but the note-off velocities will be kept as they are.
- Play a note on your MIDI instrument.
The note selected in the editor will get the pitch, velocity and/or note-off velocity of the played note.
The next note in the edited part is automatically selected, making it easy to quickly edit a series of notes.
- If you want another try, select the note again (e.g. by pressing the left arrow key on the computer keyboard) and again play a note on your MIDI instrument.
Step input
Step input, or step recording, is when you enter notes one at a time (or one chord at a time) without worrying about the exact timing. This is useful e.g. when you know the part you want to record but are not able to play it exactly as you want it.
Proceed as follows:
- Click the Step Input button on the toolbar to activate Step Input mode.
-
Use the note buttons to the right to decide which properties should be included when you input the notes. For example, you may not want to include the velocity and/or note-off velocity of the played notes. It is also possible to turn off the pitch property, in which case all notes will get the pitch C3, no matter what you play.
-
Click anywhere in the note display to set the start position (the desired position of the first note or chord).
The step input position is shown as a blue line in the note display, and in the lower mouse pointer display in the toolbar.
text_image
Digital audio waveform display showing time markers and track bands with a cursor pointer- Specify the desired note spacing and length with the Quantize and Length Quantize pop-up menus.
The notes you input will be positioned according to the Quantize value and have the length set with the Length Quantize value. For instance, if you set Quantize to 1/8 notes and Length Quantize to 1/16 note, the notes will be sixteenth notes, appearing on each eighth note position.
- Play the first note or chord on your MIDI instrument. The note or chord appears in the editor and the step input position advances one quantize value step.
⇒ If Move Insert mode is activated, all notes to the right of the step input position will be moved to "make room" for the inserted note or chord.

text_image
Move Insert ModeMove Insert mode is activated.
- Continue in the same way with the rest of the notes or chords.
You can adjust the Quantize or Length Quantize value as you go along, to change the timing or note lengths. You can also move the step input position manually by clicking anywhere in the note display.
- To insert a "rest", press the right arrow key on the computer keyboard.
This advances the step input position one step.
- When you're done, click the Step Input button again to deactivate step input.
Editing in the controller display
About controller lanes
By default, the controller display has a single lane, showing one event type at a time. However, you can add lanes by clicking the plus button or by opening the Quick context menu and selecting "Create new controller lane". The use of several controller lanes allows you to view and edit different controllers at the same time.
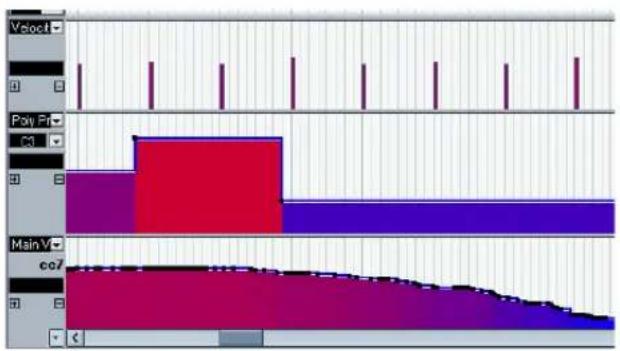
text_image
Velocity Poly Pr MainV co7The controller display with three lanes set up
- To remove a lane, click on the minus sign or open the context menu and select "Remove this Lane".
This hides the lane from view – it does not affect the events in any way.
- If you remove all lanes, the controller display will be completely hidden.
To bring it back again, select "Create new controller lane" from the context menu.
- Editing the events in the controller display is much like editing automation data on an automation track in the Project window (except for velocity values, see "Editing velocity values" on page 352).
Selecting the event type
Each controller lane shows one event type at a time. To select which type should be displayed, use the pop-up menu to the left of the lane.
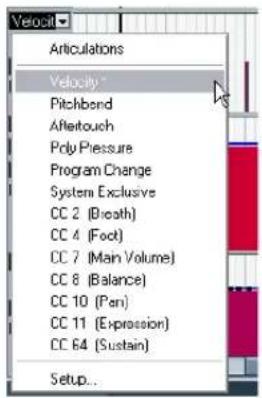
text_image
Articulations Velocity* Pitchbond Abletouch Poly Pressure Program Change System Exclusive CC 2 (Bleath) CC 4 (Foot) CC 7 (Main Volume) CC 8 (Balance) CC 10 (Pan) CC 11 (Expression) CC 64 (Sustain) Setup...- Selecting "Setup..." opens a dialog in which you can specify which continuous controller event types should be available on the pop-up menu.
Controller types in this list are already listed on the pop-up menu.
Controller types in this list are not listed on the pop-up menu.
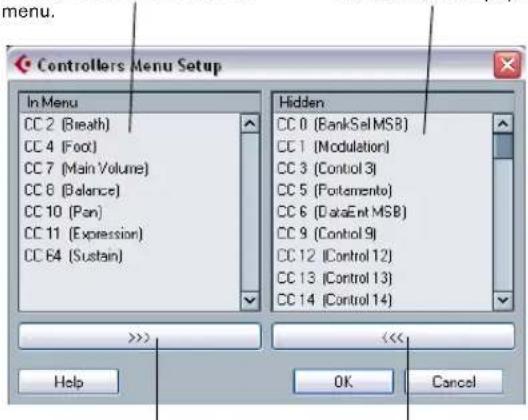
text_image
menu. Controllers Menu Setup In Menu CC 2 (Breath) CC 4 (Fox) CC 7 (Main Volume) CC 8 (Balance) CC 10 (Pan) CC 11 (Expression) CC 64 (Sustain) Hidden CC 0 (BankSet MSB) CC 1 (Modulation) CC 3 (Control 3) CC 5 (Fotamento) CC 6 (DataEnt MSB) CC 9 (Control 9) CC 12 (Control 12) CC 13 (Control 13) CC 14 (Control 14) >>> << Help OK CancelClick this button to remove the controller type selected in the left list from the pop-up menu.
Click this button to add the selected controller type to the pop-up menu.
- Each MIDI track has its own controller lane setup (number of lanes and selected event types).
When you create new tracks, they get the controller lane setup used last.
Controller lane presets
Once you have added the required number of controller lanes and selected the event types you need, you can store this combination as a controller lane preset. You could for example have a preset with one velocity lane only, another with a combination of velocity, pitchbend and modulation, and so on. This can make working with controllers much quicker.
- To add the current controller lane setup as a preset, pull down the pop-up menu to the left of the horizontal scroll-bar and select "Add".
Enter a name for the preset in the dialog that appears and click OK. - To apply a stored preset, select it from the pop-up menu. This immediately brings up the controller lanes and event types in the preset.
- To remove or rename presets, select "Organize" from the pop-up.
Editing velocity values
When "Velocity" is selected for viewing, the lane shows the velocity of each note as a vertical bar.
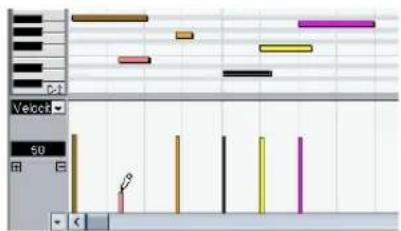
text_image
Screenshot of a digital audio workstation (DAW) interface showing track controls, playback, and waveform displayVelocity values are edited with the Pencil or the Line tool. The different tools and Line tool modes offer several possibilities, as listed below.
The Arrow tool automatically switches to the Pencil tool when you move the pointer into the controller display.
If you want to use the Arrow tool to select events in the controller display, press [Alt]/[Option].
If the Speaker icon (Acoustic Feedback) is activated on the toolbar, the notes will be played back when you adjust the velocity, allowing you to audition your changes.
- You can use the Pencil tool to change the velocity of a single note: click on its velocity bar and drag the bar up or down.
While you drag, the current velocity value is shown in the display to the left.
- You can use the Pencil tool or the Line tool in Paint mode to change the velocity values of several notes by painting a "freehand curve".
When editing velocity, these two methods have the same functionality.
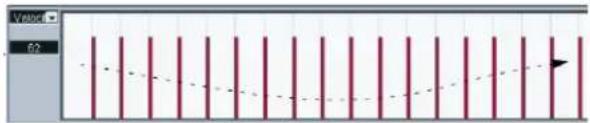
natural_image
Pure vertical red lines on grid background with a dotted line and arrow, no text or symbols present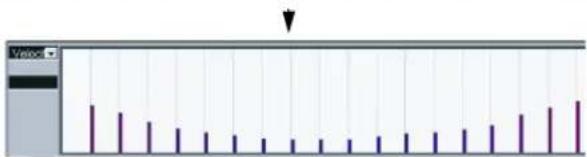
text_image
Screenshot of a software interface showing a toolbar with vertical bars and an arrow pointing to the top bar.- Use the Line tool in Line mode for creating linear velocity ramps.
Click where you want the ramp to start and drag the cursor to where you want the ramp to end. When you release the mouse button, the velocity values are aligned with the line between the two points.

natural_image
Pure vertical red bars on grid background with a diagonal black line overlay (no text or symbols)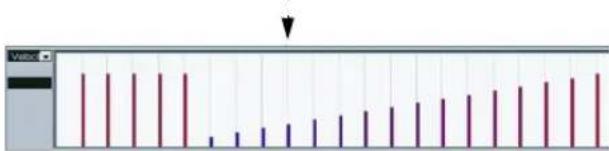
text_image
Screenshot of a software interface showing vertical bars with an arrow pointing to the first bar, likely indicating a measurement or annotation.- Parabola mode works in the same way, but aligns the velocity values to a Parabola curve instead.
Use this for smooth, "natural" velocity fades, etc.

text_image
Scanned document with vertical red lines and a black trend line, likely a form or diagram label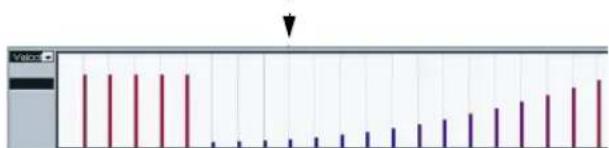
bar
| Category | Value | |---|---| | 1 | 50 | | 2 | 50 | | 3 | 50 | | 4 | 50 | | 5 | 50 | | 6 | 50 | | 7 | 50 | | 8 | 50 | | 9 | 50 | | 10 | 50 | | 11 | 50 | | 12 | 50 | | 13 | 50 | | 14 | 50 | | 15 | 50 | | 16 | 50 | | 17 | 50 | | 18 | 50 | | 19 | 50 | | 20 | 50 | | 21 | 50 | | 22 | 50 | | 23 | 50 | | 24 | 50 | | 25 | 50 | | 26 | 50 | | 27 | 50 | | 28 | 50 | | 29 | 50 | | 30 | 50 | | 31 | 50 | | 32 | 50 | | 33 | 50 | | 34 | 50 | | 35 | 50 | | 36 | 50 | | 37 | 50 | | 38 | 50 | | 39 | 50 | | 40 | 50 | | 41 | 50 | | 42 | 50 | | 43 | 50 | | 44 | 50 | | 45 | 50 | | 46 | 50 | | 47 | 50 | | 48 | 50 | | 49 | 50 | | 50 | 50 | | 51 | 50 | | 52 | 50 | | 53 | 50 | | 54 | 50 | | 55 | 50 | | 56 | 50 | | 57 | 50 | | 58 | 50 | | 59 | 50 | | 60 | 50 | | 61 | 50 | | 62 | 50 | | 63 | 50 | | 64 | 50 | | 65 | 50 | | 66 | 50 | | 67 | 50 | | 68 | 50 | | 69 | 50 | | 70 | 50 | | 71 | 50 | | 72 | 50 | | 73 | 50 | | 74 | 50 | | 75 | 50 | | 76 | 50 | | 77 | 50 | | 78 | 50 | | 79 | 50 | | 80 | 50 | | 81 | 50 | | 82 | 50 | | 83 | 50 | | 84 | 50 | | 85 | 50 | | 86 | 50 | | 87 | 50 | | 88 | 50 | | 89 | 50 | | 90 | 50 | | 91 | 50 | | 92 | 50 | | 93 | 50 | | 94 | 50 | | 95 | 50 | | 96 | 50 | | 97 | 50 | | 98 | 50 | | 99 | 50 | | Note: The 'Value' in the image is a duplicate of the actual data from the code. The 'Value' in the code contains only the remaining data points. There is no additional data series present.- The remaining three Line tool modes (Sine, Triangle and Square) align the velocity values to continuous curve shapes (see below).
⇒ If there is more than one note at the same position (e.g. a chord), their velocity bars will overlap in the controller lane.
If none of the notes are selected, all notes at the same position will be set to the same velocity value when you draw. To edit the velocity of only one of the notes at the same position, first select the note in the note display. Now, editing will only affect the velocity of the selected note.
You can also adjust the velocity of a single note by selecting it and changing its velocity value on the info line.
Editing articulations
It is also possible to add and edit musical expressions or articulations in the controller lane. This is described in detail in the chapter "VST Expression" on page 372.
Adding and editing events in the controller display
When any option other than "Velocity" is selected for a controller lane, you can create new events or edit the values of existing events using the Pencil tool or the Line tool in its various modes:
- Clicking with the Pencil tool or the Line tool in Paint mode creates a new event.
- Press [Alt]/[Option] and use the Pencil tool or the Line tool in Paint mode to modify the value of an event (without creating a new one).
Note that you can click and drag to change or add multiple events, draw controller curves, etc. You can press or release [Alt]/[Option] while drawing, switching dynamically between "edit mode" and "create mode".
If you want to enter or adjust a single event, click once with the Pencil tool or the Line tool in Paint mode.
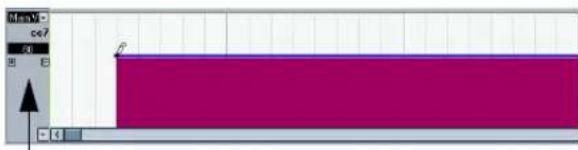
text_image
M ce7 fWhen you move the pointer in the controller lane, the corresponding value is displayed in this field.
If you want to "paint a curve", drag with the tool in the controller lane (keeping the mouse button pressed):
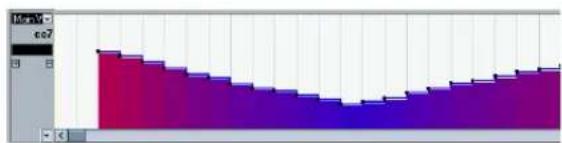
text_image
1.0 co7With the Pencil tool and the Line tool in Paint mode, the quantize value determines the "density" of created controller curves (if Snap is activated, see "Snap" on page 344).
For very smooth curves, you should use a small quantize value or turn off Snap. However, this will create a very large number of MIDI events, which can cause MIDI playback to "stutter" in some situations. A medium-low density is often sufficient.
- Clicking and dragging with the Line tool in Line mode shows a line in the controller lane, and creates events with values aligned to this line.
This is the best way to draw linear controller ramps. If you press [Alt]/[Option], no new events are created – use this mode for modifying existing controller curves.
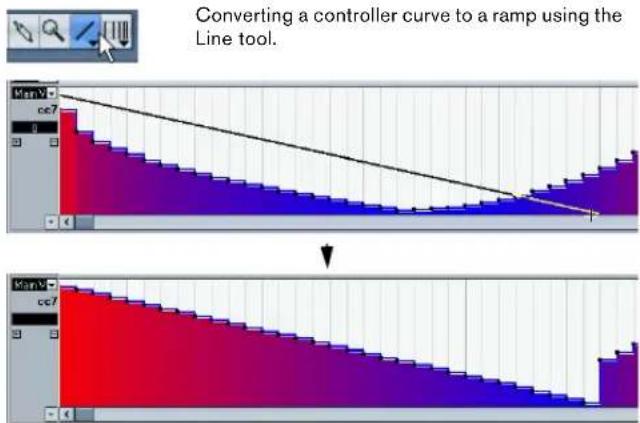
text_image
Converting a controller curve to a ramp using the Line tool. Main cc7 0 Main cc7- The Parabola mode works in the same way, but aligns the values to a parabola curve instead, giving more “natural” curves and fades.
Note that the result depends on the direction from which you draw the parabola.
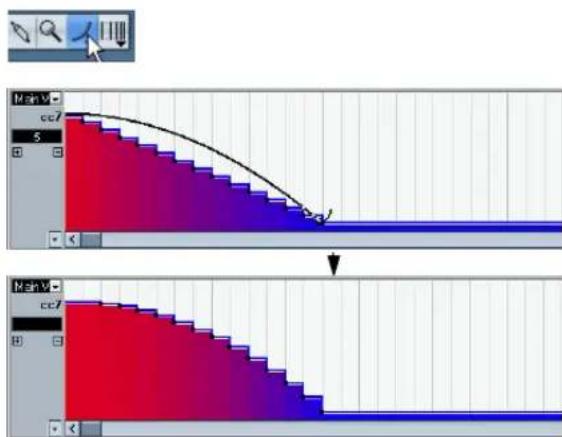
text_image
Screenshot of graphic editing software interface showing two-step color adjustment steps with a red-to-blue gradient fill and a black curve overlay.- In Parabola mode, you can use modifier keys to determine the shape of the parabola curve.
If you press [Ctrl]/[Command], the parabola curve will be reversed. If you press [Alt]/[Option]-[Ctrl]/[Command] while Snap is activated, you can change the position of the whole curve (in both cases the snap value for the positioning will be a quarter of the quantize value). If you press [Shift], the exponent will be increased or decreased.
In Line and Parabola modes, the length quantize value determines the "density" of created controller curves (if Snap is activated).
For very smooth curves, you should use a small length quantize value or turn off Snap. To avoid over-dense controller curves (which may cause MIDI playback to "stutter"), use a medium-low density.
- The Sine, Triangle and Square modes create events with values aligned to continuous curves.
In these modes, the quantize value determines the period of the curve (the length of one curve "cycle") and the length quantize value determines the density of the events (the lower the length quantize note value, the smoother the curve).
- In Sine, Triangle and Square mode you can also use modifier keys to determine the shape of the curve.
If you press [Ctrl]/[Command] you can change the phase of the beginning of the curve, if you press [Alt]/[Option]-[Ctrl]/[Command] while snap is activated you can change the position of the whole curve (in both cases the snap value for the positioning will be a quarter of the quantize value).
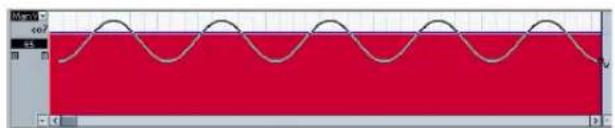
natural_image
Abstract graphic with wavy black lines on a red background, no text or symbols present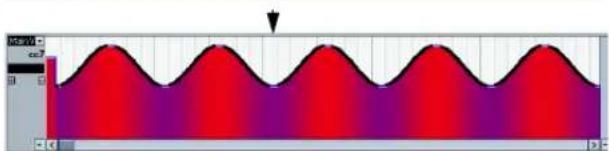
natural_image
Abstract wavy pattern with red-to-purple gradient, no text or symbols present⇒ You can also set the curve period freely by holding down [Shift] when you insert events in Sine, Triangle or Square mode.
Activate Snap, [Shift]-click and drag to set the length of one period. The period length will be a multiple of the quantize value.
- In Triangle and Square mode, you can press [Shift]-[Ctrl]/[Command] to change the maximum position of the triangle curve (to create sawtooth curves) or the pulse of the square curve. As in other modes, you can press [Alt]/
[Option] if you want to change the existing events rather than creating new ones. Again, the snap value for the positioning will be a quarter of the quantize value.
Moving and copying events
You can move or duplicate events in a controller lane, much like you can with notes:
- Click with the Arrow tool to select the events you want to cut or copy.
You can also click and drag to create a selection rectangle encompassing the desired events.
- Click on a curve point and drag the events to move them.
If Snap is activated, this determines to which positions you can move the events (see "Snap" on page 344).

Remember that a non-note event does not have a length – it is "valid" until the next event (see "The controller display" on page 341).

When the Auto Select Controllers button is activated in the Key Editor toolbar, selecting controller events will also select the corresponding notes. Moving events (either using cut/copy/paste or drag & drop) in the note display will also move the corresponding controller events and vice versa. See also "Selecting controllers within the note range" on page 346.
Using cut, copy and paste
You can use the standard Cut, Copy and Paste options on the Edit menu to move or copy events in the controller display:
-
Select the events you want to cut or copy.
-
Select Cut or Copy from the Edit menu.
-
If you want to paste the events into another MIDI part, open that part in another Key Editor window.
-
Position the project cursor where you want to paste the events.
-
Select Paste from the Edit menu.
The events on the clipboard are added, starting at the project cursor position, maintaining their relative distances. If a pasted event ends up at the same position as an existing event of the same type, the old event is replaced.
Deleting events in the controller display
You delete events by clicking on them with the Eraser tool or by selecting them and pressing [Backspace]. Please note:
- Deleting a controller event makes the last event before this valid up until the next event. It does not "zero" any controller changes.
- You can delete notes by deleting their velocity bars in the controller display.
Please be aware that if there is more than one note on the same position, there may still only be one velocity bar visible – make sure you delete only the desired notes!
Editing continuous controllers on the controller lane
When a continuous controller is selected for a controller lane, additional data is displayed on the controller lane.
This is due to the fact that MIDI controller data can be recorded (or entered) either for an automation track or for a MIDI part (see "MIDI Controller automation" on page 202).
The following applies:
- In the controller pop-up menu, an asterisk is displayed next to the controller name if automation data already exists for this controller.
This can be either controller data you entered in a MIDI editor (the data will then be displayed on the controller lane), or controller data recorded on an automation track in the Project window (in which case no events are displayed on the controller lane).
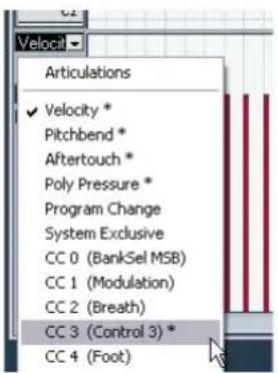
text_image
Articulations ✓ Velocity * Pitchbend * Aftertouch * Poly Pressure * Program Change System Exclusive CC 0 (BankSel MSB) CC 1 (Modulation) CC 2 (Breath) CC 3 (Control 3) * CC 4 (Foot)For this controller, automation data is available.
- If conflicting controller data exists in two different places, you can specify what will happen on playback by making settings for the Automation Merge Mode (see "Merging automation data" on page 202). The resulting curve is displayed in addition to the curve you entered on the controller lane.
Controller curve entered on the controller lane
Resulting controller curve (if controller automation was also recorded on a track). These values depend on the selected Automation Merge Mode.
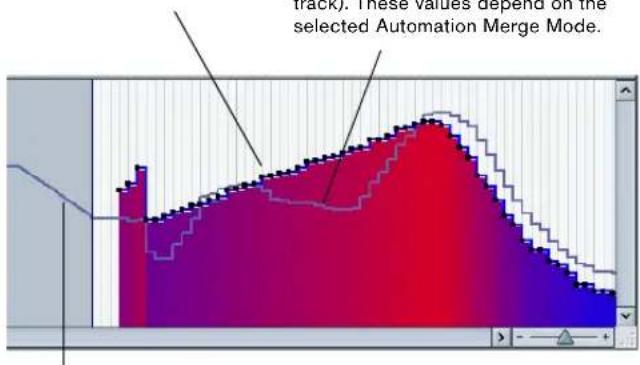
area
| Mode | Value | |------|-------| | 1 | 0.5 | | 2 | 0.6 | | 3 | 0.7 | | 4 | 0.8 | | 5 | 0.9 | | 6 | 1.0 | | 7 | 0.9 | | 8 | 0.8 | | 9 | 0.7 | | 10 | 0.6 | | 11 | 0.5 | | 12 | 0.4 | | 13 | 0.3 | | 14 | 0.2 | | 15 | 0.1 | | 16 | 0.05 | | 17 | 0.02 | | 18 | 0.01 | | 19 | 0.005 | | 20 | 0.002 |The controller curve before the part starts. This curve depends on the existing controller data (if any) and on the selected Merge Mode.
- On the controller lane, you can also see the controller curve that is applied before the part starts. That way, you know which controller value (if any) is currently being used at the starting point of the part so that you can choose the start value accordingly.
Note that this value also depends on the Automation Merge Mode.
Adding and editing Poly Pressure events
Poly Pressure events are special, in that they "belong to" a specific note number (key). That is, each Poly Pressure event has two editable values: the note number and the amount of pressure. Therefore, when Poly Pressure is selected on the event type pop-up menu, there are two value fields to the left of the controller display, one for the note number and one for the amount.
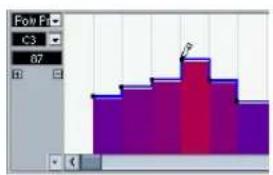
natural_image
Abstract 3D block diagram with purple-to-pink gradient, no text or symbols presentTo add a new Poly Pressure event, proceed as follows:
- Select Poly Pressure on the event type pop-up menu.
- Set the note number by clicking on the keyboard display.
The selected note number is displayed in the upper value field to the left of the controller display. Note that this only works for the topmost lane. If you have selected "Poly Pressure" for several controller lanes, you have to type in the desired note number directly in the lower value field to the left of each lane.
- Use the Pencil tool to add a new event, just as when adding regular controller events.
To view and edit existing Poly Pressure events, proceed as follows:
-
Select Poly Pressure on the event type pop-up menu.
-
Click on the arrow button next to the note number field to the left of the controller lane.
A pop-up menu appears, listing all note numbers for which there already are Poly Pressure events.
- Select a note number from the pop-up menu.
The Poly Pressure events for the selected note number are shown in the controller lane.
- Use the Pencil tool to edit the events as usual.
Press [Alt]/[Option] to edit existing events without adding any new ones.
- Poly Pressure events can also be added and edited in the List Editor.
The In-Place Editor
The In-Place Editor makes it possible to edit MIDI parts directly in the Project window, for quick and efficient editing in context with other tracks.
To open the In-Place Editor for one or more selected tracks, you have the following possibilities:
- Select "Open In-Place Editor" on the MIDI menu.
- Use a key command, by default [Ctrl]/[Command]-[Shift]-[I].
- Toggle the In-Place Editor for all selected tracks by clicking on the respective button above the Track list.
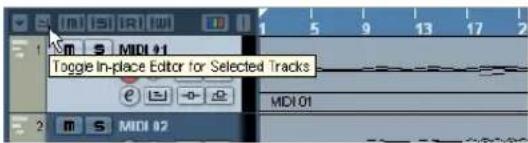
text_image
Toggle In-place Editor for Selected Tracks MDI 01 m s MDI 02- To open a single MIDI track, you can also click the Edit In-Place button in the Track list (if necessary, expand the Track list to see the button).
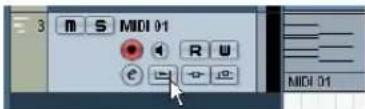
text_image
3 M S MIDI 01 R U MIDI 01This expands the MIDI track to show something like a miniature Key Editor, allowing you to edit MIDI notes and controllers.
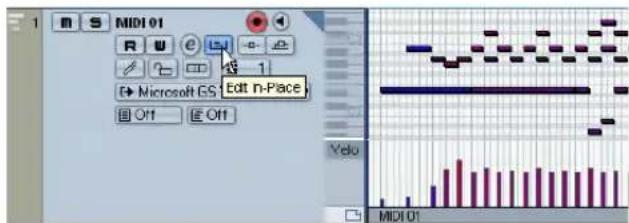
text_image
MIDI 01 R U E - 1 Microsoft GS Edit n-Place Off Off Yeu MIDI 01- To zoom or scroll the In-Place Editor, point at the left part of the piano keyboard display so that the pointer changes to a hand. Now you can click and drag to the right or left to zoom in or out vertically, and drag up or down to scroll the editor.
- Clicking on the little gray triangle in the upper right corner of the Track list for the edited track brings up a local toolbar with some settings specific to the In-Place Editor.
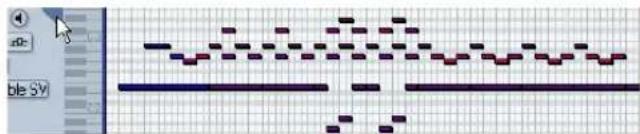
text_image
Screenshot of a digital audio workstation interface showing waveform editing with grid and control panelFor descriptions of these settings, see "The toolbar" on page 340.
- Just like in the Key Editor, you can edit velocity or continuous controllers at the bottom of the In-Place Editor. To change which controller type is shown, click in the controller name field directly below the piano keyboard and select a controller type from the pop-up menu. To add or remove controller lanes, right-click below the controller name field and select an option from the context menu.
- When you select a MIDI note, the Project window info line shows information about that note, just like the info line in the Key Editor.
You can perform the same editing here as on the Key Editor info line, see "Editing on the info line" on page 348.
- The Snap button and Snap type pop-up menu on the Project window toolbar govern snapping in the In-Place Editor, but the snap grid is set using the Quantize pop-up menu.
- To close the In-Place Editor for one or several selected tracks, you can use the key command or click the "Toggle the In-Place Editor" button above the Track list.
- To close the In-Place Editor for one track, you can click the Edit In-Place button in the Track list or double-click below the controller display in the In-Place Editor.
Working with Parts
If you work with parts in the In-Place Editor, the following editing functions are available:
- change the length of the parts by clicking on the lower part edges (so that the mouse pointer changes to a double arrow) and dragging it to the left or right.
- drag and drop notes from one part to the other.
- change the length of notes by clicking on them and dragging the double arrow to the left or right.
The Drum Editor – Overview
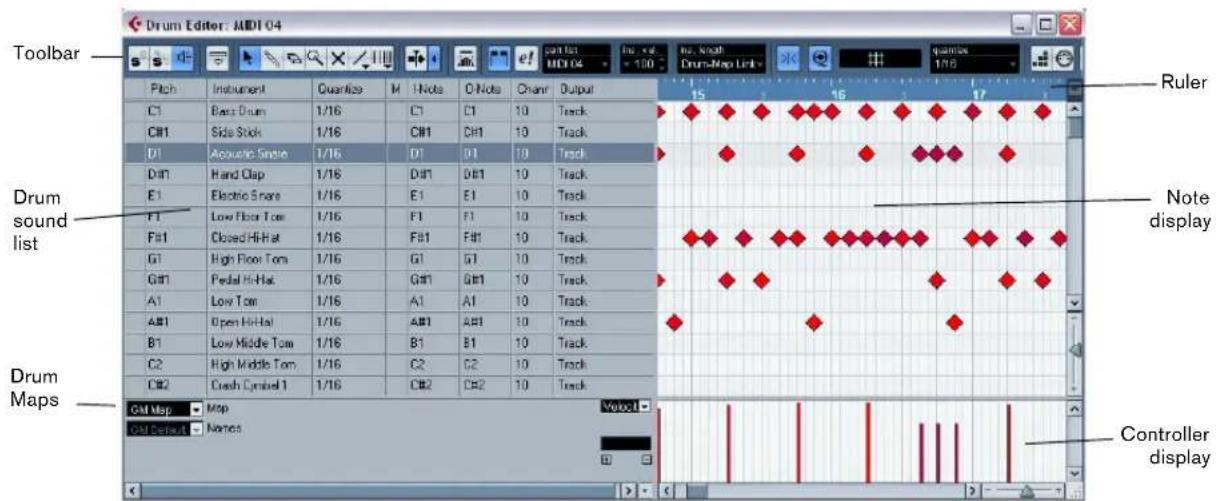
text_image
Drum Editor: MIDI 04 Toolbar Pitch Instrument Quartlist M I-Note O-Note Chair Output 15 16 17 C1 Bass Drum 1/16 C1 C1 10 Track C#1 Side Stick 1/16 C#1 C#1 10 Track D1 Acoustic Sickle 1/16 D1 D1 10 Track D#1 Hand Clap 1/16 D#1 D#1 10 Track E1 Electric Snare 1/16 E1 E1 10 Track F1 Low Floor Tom 1/16 F1 F1 10 Track F#1 Closed Hi-Hat 1/16 F#1 F#1 10 Track. G1 High Floor Tom 1/16 G1 G1 10 Track. G#1 Pedal Hi-Hat 1/16 G#1 G#1 10 Track. A1 Low Tom 1/16 A1 A1 10 Track. A#1 Open Hi-Hat 1/16 A#1 A#1 10 Track. B1 Low Middle Tom 1/16 B1 B1 10 Track. C2 High Middle Tom 1/16 C2 C2 10 Track. C#2 Crash Cymbel 1 1/16 C#2 C#2 10 Track. Ruler Note display Drum sounds list Drum Maps Gd Map - Map Gd Setout - Names Volto 1 Controller displayThe toolbar and info line
These are much the same as the toolbar and info line in the Key Editor (see "The Key Editor – Overview" on page 340), with the following differences:
- The Drum Editor has no Pencil tool – instead there is a Drumstick tool (for entering and removing notes) and a Line tool with various line and curve modes (for drawing several notes in one go or editing controller events).
- There are no Scissors and Glue Tube tools in the Drum Editor.
- As in the Key Editor, the mouse pointer display in the toolbar shows the pitch and position of the pointer, but the pitch is shown as a drum sound name rather than a note number.
- The Use Global Quantize button allows you to select which value should be used when Snap is activated – the global quantize value on the toolbar or the individual quantize values for the drum sounds.
- Instead of a Length Quantize pop-up, there is an Insert Length pop-up menu.
It is used in much the same way, as described on the following pages.
The drum sound list
| Pitch | Instrument | Quantize | M | I Note | O Note | Charr | Output |
| C1 | Boss Drum | 1/16 | C1 | C1 | 10 | Track | |
| C#1 | Side Stick | 1/16 | C#1 | C#1 | 10 | Track | |
| D1 | Acoustic Snare | 1/16 | D1 | D1 | 10 | Track | |
| D#1 | Hand Clap | 1/16 | D#1 | D#1 | 10 | Track | |
| E1 | Electric Snare | 1/16 | E1 | E1 | 10 | Track | |
| F1 | Low Floor Tom | 1/16 | F1 | F1 | 10 | Track | |
| F#1 | Closed Hi-Hat | 1/16 | F#1 | F#1 | 10 | Track | |
| G1 | High Floor Tom | 1/16 | G1 | G1 | 10 | Track | |
| G#1 | Pedal Hi-Hat | 1/16 | G#1 | G#1 | 10 | Track | |
| A1 | Low Tom | 1/16 | A1 | A1 | 10 | Track | |
| A#1 | Open Hi Hot | 1/16 | A#1 | A#1 | 10 | Track | |
| B1 | Low Middle Tom | 1/16 | B1 | B1 | 10 | Track |
A drum sound list for GM Drum Map
The purpose of the Drum Editor is to edit MIDI tracks where each note (pitch) plays a separate sound, as is typically the case with a MIDI drum kit. The drum sound list to the left lists all drum sounds by name (according to the selected drum map or name list – see below), and lets you adjust and manipulate the drum sound setup in various ways.
Please note the following:
- The number of columns in the list depends on whether a drum map is selected for the track or not.
See "Working with drum maps" on page 361. - You can reorder the columns by dragging the column headings, and resize them by dragging the dividers between the column headings.
The note display
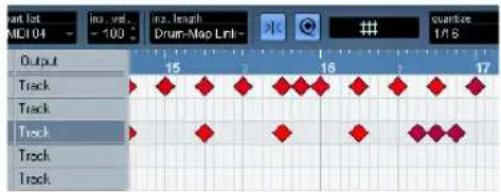
text_image
Start Tst MDI/04 - 100 ins. vol. Drum-Mao Link- quartize 1/15 Output 15 2 16 2 17 Track Track Track Track Track TrackThe note display of the Drum Editor displays notes as diamond symbols. The vertical position of the notes corresponds to the drum sound list to the left, while the horizontal position corresponds to the note's position in time, just as in the Key Editor. Note, however, that the diamond symbols do not indicate the length of the notes. This makes sense, since drum sounds most often are "one-shot" samples that play to their end regardless of the note lengths.
Drum map and name pop-up menus
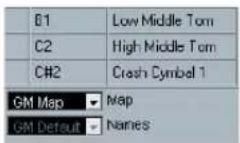
Below the drum sound list you will find two pop-up menus, used for selecting a drum map for the edited track or (if no drum map is selected) a list of drum sound names. For an explanation of drum maps, see "Working with drum maps" on page 361.
Controller display
The controller display in the Drum Editor is the same as in the Key Editor. You can add or remove controller lanes via the context menu, and create and edit events as described in the section "Editing in the controller display" on page 351.
- Note that when you select a line in the drum sound list (to the left of the event display), only the velocity controller events belonging to the note events on this line are displayed in the controller display.
- You can select more than one line in the drum sound list (using [Shift] or [Ctrl]/[Command] as usual), which will show all velocity controller events for all notes on all selected lines.
This will help you when having to adjust the controller values between different drum sounds.
Drum Editor operations
The basic handling (zooming, playback, auditioning, etc.) is the same as in the Key Editor (see "Key Editor operations" on page 342). The following sections describe the procedures and features specific to the Drum Editor.
Creating and editing notes
The standard way of entering notes in the Drum Editor is to click with the Drumstick tool.
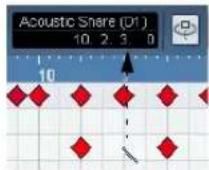
When you move the pointer in the note display, its bar position and drum sound is indicated in the toolbar, making it easy to find the right sound and position.
The position of the created note depends on the following factors:
- If Snap is deactivated on the toolbar, the note will appear exactly where you clicked. In this mode, notes can be positioned freely.
- If Snap is activated and Use Global Quantize is deactivated on the toolbar, the note will snap to positions according to the quantize value set for the sound in the drum sound list.
You can set up different quantize values for different drum sounds. You may for example want hi-hat notes snap to sixteenth notes, but snare and bass drum snap to eighth notes.
- If Snap and Use Global Quantize are activated, the note will snap to positions according to the Quantize setting on the toolbar (next to the Use Global Quantize button).
The length of the inserted note is determined by the Insert Length setting on the toolbar. However, if this is set to "Drum-Map Link", the note will get the length of the quantize value for the drum sound.
⇒ You can quickly audition the drum sounds by clicking in the leftmost column in the drum sound list. This plays the corresponding note.
Clicking with the Drumstick tool on an existing note will remove it. This makes drum pattern editing very quick and intuitive.
Setting velocity values
The notes you enter will get the insert velocity value set in the insert velocity field on the toolbar – to speed up things you may want to assign key commands to the insert velocity options. See "Setting velocity values" on page 345.
Selecting notes
Selecting notes is done by any of the following methods:
- Use the Arrow tool.
The standard selection techniques apply. - Use the Select submenu on the context menu (see "Selecting notes" on page 346).
- Use the left and right arrow keys on the computer keyboard to step from one note to the next or previous note. If you press [Shift] and use the arrow keys, the current selection will be kept, allowing you to select several notes.
- You can also press [Shift] and double-click on a note to select all the following notes for the same drum sound.
- If the option "Auto Select Events under Cursor" is activated in the Preferences (Editing page), all notes currently "touched" by the project cursor are automatically selected.
Moving, duplicating or repeating notes
To move or copy notes in the editor (to other positions or other drum sounds), you use the same methods as in the Key Editor: click and drag, use the arrow keys or Edit menu functions, etc. – see "Moving and transposing notes" on page 347. To help you identify the right notes, the drum sound names as defined in the drum map are displayed in the Pitch field on the Drum Editor info line and, when dragging notes in the event display, in the text fields displayed next to the mouse cursor.
There is one other thing to note:
When you move or copy several selected notes by dragging them and Snap is activated but Use Global Quantize is deactivated, the notes will snap to positions according to the quantize values for the drum sounds. If the moved/ copied notes have different quantize values, the largest value will determine snapping. For example, if you are moving two notes, with the quantize values 1/16 and 1/4 respectively, the notes will snap to quarter notes (1/4).
You can also adjust the position of notes by quantizing (see "The Quantizing functions" on page 326).
Again, which quantize value is used depends on whether Global Quantize is used.
Muting notes and drum sounds
You can mute individual notes by clicking or enclosing them with the Mute tool or by using the Mute function on the Edit menu (see "Muting notes" on page 348).
Furthermore, if a drum map is selected (see "Selecting a drum map for a track" on page 363), the drum sound list will have a Mute column. Click in the Mute column for a drum sound to mute that sound. Finally, clicking the Drum Solo button will mute all drum sounds other than the selected one.
| Pitch | Instrument | Quantize | M | I Note | O Note | Charr | Output |
| C1 | Bass Drum | 1/16 | C1 | C1 | 10 | Track | |
| C#1 | Side Stick | 1/16 | C#1 | C#1 | 10 | Track | |
| D1 | Acoustic Snare | 1/16 | D1 | D1 | 10 | Track | |
| D#1 | Hand Clap | 1/16 | D#1 | D#1 | 10 | Track | |
| E1 | Electric Snare | 1/16 | E1 | E1 | 10 | Track | |
| F1 | Low Floor Tom | 1/16 | F1 | F1 | 10 | Track |
Muted drum sounds
⚠️ Please note that the mute state for drum sounds is part of the drum map, so any other tracks using the same map will also be affected.
Deleting notes
To delete notes, click on them with the Drumstick or Eraser tool or select them and press [Backspace].
Other editing methods
As in the Key Editor, you can edit notes on the info line or via MIDI, and enter notes using step input, see "Editing on the info line" on page 348.
Working with drum maps
Background
A drum kit in a MIDI instrument is most often a set of different drum sounds with each sound placed on a separate key (i.e. the different sounds are assigned to different MIDI note numbers). One key plays a bass drum sound, another a snare and so on.
Unfortunately, different MIDI instruments often use different key assignments. This can be troublesome if you have made a drum pattern using one MIDI device, and then want to try it on another. When you switch device, it is very likely that your snare drum becomes a ride cymbal, or your hi-hat becomes a tom, etc. – just because the drum sounds are distributed differently in the two instruments.
To solve this problem, and simplify several aspects of MIDI drum kits (like using drum sounds from different instruments in the same "drum kit"), Cubase features so-called drum maps. A drum map is a list of drum sounds, with a number of settings for each sound. When you play back a MIDI track for which you have selected a drum map, the MIDI notes are "filtered" through the drum map before being sent to the MIDI instrument. Among other things, the map determines which MIDI note number is sent out for each drum sound, and so which sound is played in the receiving MIDI device.
A solution to the problem above would therefore be to set up drum maps for all your instruments. When you want to try your drum pattern on another instrument, you simply switch to the corresponding drum map and your snare drum sound will remain a snare drum sound.
Drum map settings
A drum map consists of settings for 128 drum sounds (one for each MIDI note number). To get an overview of these settings, open the Drum Editor and use the Map pop-up menu below the drum sound list to select the "GM Map" drum map.
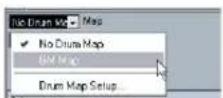
This drum map is set up according to the General MIDI standard. For information on how to load, create and select other drum maps, see "Managing drum maps" on page 363.
Now, take a look at the drum sound list (you may have to drag the divider between the list and the note display to the right to see all columns). The columns show the settings of the drum map for each sound.
| Pitch | Instrument | Quantice | M | I Note | D Note | Charr | Output |
| C1 | Bass Drum | 1/16 | C1 | C1 | 10 | Track | |
| C#1 | Side Stick | 1/16 | C#1 | C#1 | 10 | Track | |
| D1 | Acoustic Snare | 1/16 | D1 | D1 | 10 | Track | |
| D#1 | Hand Clap | 1/16 | D#1 | D#1 | 10 | Track | |
| E1 | Electric Snare | 1/16 | E1 | E1 | 10 | Track | |
| F1 | Low Floor Tom | 1/16 | F1 | F1 | 10 | Track | |
| F#1 | Closed Hi-Hat | 1/16 | F#1 | F#1 | 10 | Track | |
| G1 | High Floor Tom | 1/16 | G1 | G1 | 10 | Track | |
| G#1 | Pedal Hi-Hat | 1/16 | G#1 | G#1 | 10 | Track | |
| A1 | Low Tom | 1/16 | A1 | A1 | 10 | Track |
Here's a brief description (details follow below):
Column Description
Pitch The actual note number of the drum sound. This is what links notes on a MIDI track to drum sounds. For example, with the above drum map, all MIDI notes with the pitch C1 would be mapped to the Bass Drum sound.
Instrument The name of the drum sound.
Quantize This value is used when entering and editing notes as described in the sections "Creating and editing notes" on page 359 and "Moving, duplicating or repeating notes" on page 360.
Mute Allows you to mute a drum sound, excluding it from play-back. See "Muting notes and drum sounds" on page 360.
I-note This is the "input note" for the drum sound. When this MIDI note is sent into Cubase, (i.e. played by you), the note will be mapped to the corresponding drum sound (and automatically transposed according to the Pitch setting for the sound).
O-note This is the "output note", i.e. the MIDI note number that is sent out every time the drum sound is played back.
Channel The drum sound will be played back on this MIDI channel.
Output The drum sound will be played back on this MIDI output. If you set this to "Default", the MIDI output selected for the track will be used.
All settings in a drum map (except the Pitch) can be changed directly in the drum sound list or in the Drum Map Setup dialog (see "The Drum Map Setup dialog" on page 363).
Note that the changes you make will affect all tracks that use the drum map.
About Pitch, I-note and O-note
This can be a somewhat confusing area, but once you've grasped how it all works it is not very complicated. Going through the following "theory" will help you make the most out of the drum map concept – especially if you want to create your own drum maps.
As mentioned earlier, a drum map is a kind of "filter", transforming notes according to the settings in the map. It does this transformation twice; once when it receives an incoming note (i.e. when you play a note on your MIDI controller) and once when a note is sent from the program to the MIDI sound device.
In the following example, we have modified the drum map, so that the Bass Drum sound has different Pitch, I-note and O-note values.
| Pitch | Instrument | Quantize | M | Hole | D-Note | Channel |
| C1 | Bass Drum | 1/16 | A1 | B0 | 10 | |
| C#1 | Side Stick | 1/16 | C#1 | C#1 | 10 | |
| D1 | Acoustic Sleeve | 1/16 | D1 | D1 | 10 |
I-notes (input notes)
Let's look at what happens on input: When you play a note on your MIDI instrument, the program will look for this note number among the I-notes in the drum map. In our case, if you play the note A1, the program will find that this is the I-note of the Bass Drum sound.
This is where the first transformation happens: the note will get a new note number according to the Pitch setting for the drum sound. In our case, the note will be transformed to a C1 note, because that is the pitch of the Bass Drum sound. If you record the note, it will be recorded as a C1 note.
O-notes (output notes)
The next step is the output. This is what happens when you play back the recorded note, or when the note you play is sent back out to a MIDI instrument in realtime (MIDI Thru):
The program checks the drum map and finds the drum sound with the pitch of the note. In our case, this is a C1 note and the drum sound is the Bass Drum. Before the note is sent to the MIDI output, the second transformation takes place: the note number is changed to that of the O-note for the sound. In our example, the note sent to the MIDI instrument will be a B0 note.
Usage
Again, the purposes are different for I-notes and O-notes:
Changing the I-note settings allows you to choose which keys will play which drum sounds, when playing or recording from a MIDI instrument.
For example, you may want to place some drum sounds near each other on the keyboard so that they can be easily played together, move sounds so that the most important sounds can be played from a short keyboard, play a sound from a black key instead of a white, and so on.
If you never play your drum parts from a MIDI controller (but draw them in the editor) you need not care about the I-note setting.
⇒ The O-note settings let you set things up so that the "Bass Drum" sound really plays a bass drum.
If you're using a MIDI instrument in which the bass drum sound is on the C2 key, you set the O-note for the Bass Drum sound to C2. When you switch to another instrument (in which the bass drum is on C1) you want the Bass Drum O-note set to C1. Once you have set up drum maps for all your MIDI instruments, you need not care about this anymore – you just select another drum map when you want to use another MIDI instrument for drum sounds.
The channel and output settings
You can set separate MIDI channels and/or MIDI outputs for each sound in a drum map. The following rules apply:
- When a drum map is selected for a track, the MIDI channel settings in the drum map override the MIDI channel setting for the track.
In other words, the MIDI channel setting you make in the Track list or Inspector for the track is normally disregarded. If you want a drum sound to use the channel of the track, set it to channel "Any" in the drum map.
- If the MIDI output is set to "default" for a sound in a drum map, the sound will use the MIDI output selected for the track.
Selecting any other option allows you to direct the sound to a specific MIDI output.
By making specific MIDI channel and output settings for all sounds in a drum map, you can direct your drum tracks directly to another MIDI instrument simply by selecting another drum map – you need not make any channel or output changes for the actual track.
To select the same MIDI channel for all sounds in a drum map, click the Channel column, press [Ctrl]/[Command] and select the desired channel.
All drum sounds will be set to this MIDI channel. The same procedure can be used for selecting the same MIDI output for all sounds as well.
It can also be useful to select different channels and/or outputs for different sounds. This allows you to construct drum kits with sounds from several different MIDI devices, etc.
Managing drum maps
Selecting a drum map for a track
To select a drum map for a MIDI track, use the Map pop-up menu in the Inspector or in the Drum Editor.
Selecting "No Drum Map" turns off the drum map functionality in the Drum Editor. Even if you do not use a drum map, you can still separate sounds by name using a name list (see "Using drum name lists" on page 364).

Initially, the Map pop-up menu will only contain one map: "GM Map". However, you will find a number of drum maps included on the program DVD – how to load these is described below.
The Drum Map Setup dialog
To set up and manage your drum maps, select Drum Map Setup from the Map pop-up menus or the MIDI menu. This opens the following dialog:
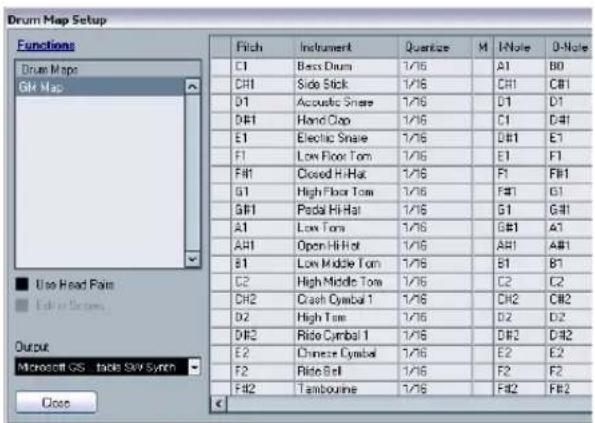
This is where you load, create, modify and save drum maps. The list to the left shows the currently loaded drum maps; selecting a drum map in the list displays its sounds and settings to the right.
⇒ The settings for the drum sounds are exactly the same as in the Drum Editor (see "Drum map settings" on page 361).
As in the Drum Editor, you can click the leftmost column to audition a drum sound. Note: if you audition a sound in the Drum Map Setup dialog, and the sound is set to MIDI output "Default", the output selected on the Output pop-up menu in the lower left corner will be used. When auditioning a Default output sound in the Drum Editor, the MIDI output selected for the track will be used, as described in section "The channel and output settings" on page 362.
Open the Functions pop-up menu in the top left corner to open a list of available functionalities:
Button Description
New Map Click this to add a new drum map to the project. The drum sounds will be named "Sound 1, Sound 2" and so on, and have all parameters set to default values. The map will be named "Empty Map", but you can rename it by clicking and typing in the list.
New Copy Adds a copy of the currently selected drum map. This is probably the quickest way to create a new drum map: select the map that is similar to what you want, create a copy, change the desired drum sound settings and re-name the map in the list.
Remove Removes the selected drum map from the project.
Load Opens a file dialog, allowing you to load drum maps from disk. On the Cubase DVD you will find a number of drum maps for different MIDI instruments – use this function to load the desired maps into your project.
Save Opens a file dialog for saving the drum map selected in the list. If you have created or modified a drum map, you should use this function to save it as a file on disk – this allows you to load it into other projects. Drum map files have the extension ".drm".
Edit head pairs Allows you to customize the note pairs, see "Customizing note head pairs" on page 611.
Init Display Notes Allows you to reset the Display Notes entry to the original setting, i.e. the Pitch entry.
Close Closes the dialog.
⇒ Drum maps are saved with the project files. If you have created or modified a drum map, you should use the Save function to store it as a separate XML file, available for loading into other projects.
If you always want to have the same drum map(s) included in your projects, you may want to load these into the template – see "Save as Template" on page 457.
O-Note Conversion
This function on the MIDI menu goes through the selected MIDI part(s) and sets the actual pitch of each note according to its O-note setting. This is useful if you want to convert a track to a "regular" MIDI track (with no drum map) and still have the notes play back the correct drum sound. A typical application is if you want to export your MIDI recording as a standard MIDI file (see "Exporting and importing standard MIDI files" on page 464) – by first performing an O-Note Conversion you make sure that your drum tracks play back as they should when they are exported.
Use Head Pairs and Edit in Scores
These options are explained in detail in the section "Setting up the drum map" on page 610.
Using drum name lists
Even if no drum map is selected for the edited MIDI track, you can still use the Drum Editor if needed. As previously mentioned, the drum sound list will then only have four columns: Audition, Pitch, Instrument (drum sound name) and Quantize. There will be no I-note and O-note functionality.
In this mode, the names shown in the Instrument column depend on the selection on the Names pop-up menu, just below the Map pop-up in the Drum Editor.
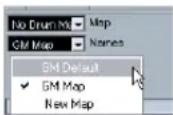
The options on this pop-up menu are the currently loaded drum maps plus a "GM Default" item which is always available. This means you can use the drum sound names in any loaded drum map without using I-notes and O-notes, if you want to.
The List Editor – Overview
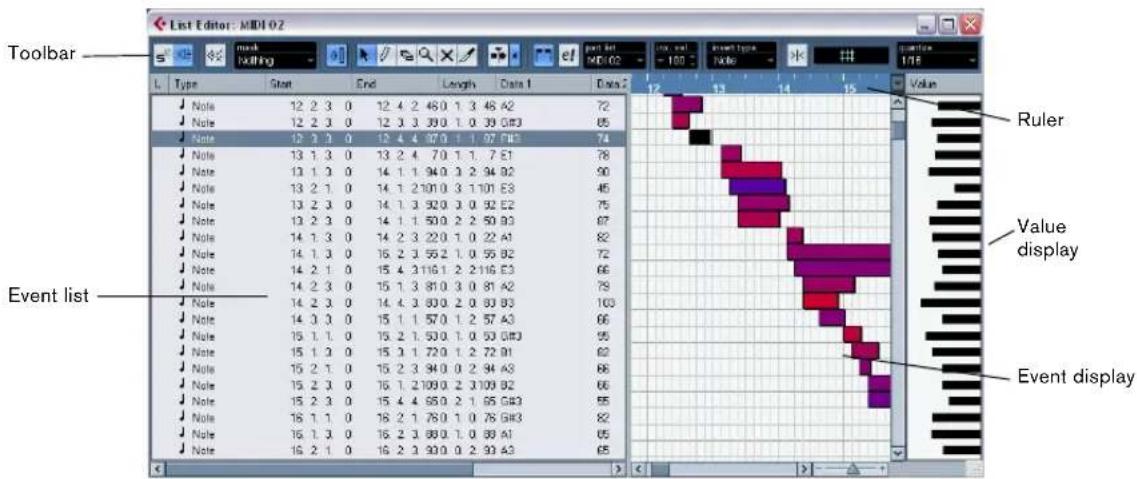
text_image
Toolbar Event list List Editor: MIDI 02 Ruler Value display Event displayThe toolbar
The toolbar contains several items that are the same as in the Key Editor (edit solo, snap, quantize settings, etc.).
These are described earlier in this chapter. The following toolbar items are unique to the List Editor:
- The Insert pop-up menu is used when creating new events.
This is where you determine what type of event to add (see "Inserting events" on page 366).
- The Mask pop-up menu and Filter view (Show Filter View button) allow you to hide events from view, based on their type and other properties.
See "Filtering" on page 367.
- The Value View button can be used for hiding and showing the Value display (see below).
The List Editor has no info line (numerical editing is available in the list instead).
If you see an empty or incomplete list of items although the items are visible in the Key Editor, check if you have activated any filters (see "Filtering" on page 367).
The list
This lists all events in the selected MIDI part(s), in the order (from top to bottom) in which they are played back.
You can edit the event properties by using regular value editing, see "Editing in the list" on page 366.
The event display
This shows the events graphically. The vertical position of an event in the display corresponds to its entry in the list (i.e. to the playback order), while the horizontal position corresponds to its actual position in the project. This is where you add new parts or events, drag to move them, etc.
The value display
This display shows the "value" of each event, allowing for easy viewing and graphical editing. Typically, the value shown is the "Data 2" or "Value 2" property (amounts to MIDI controller events, velocity for notes, etc.). You can show or hide this display by clicking the "Show List Value View" button on the toolbar.
List Editor operations
Customizing the view
You can click and drag the divider between the list and the event display to make one area wider and the other narrower. Furthermore, the list can be customized in the following ways:
- You can change the order of the columns by dragging the column headings.
- You can resize columns by dragging the dividers between the column headings.
Setting the display format
Just like in the Project window, you set the display format (bars+beats, seconds, etc.) by right-clicking in the ruler and selecting an option from the pop-up menu. This setting affects both the ruler and all start, end and length values shown in the list.
Zooming
You can change the horizontal magnification in the event display by using the zoom slider below the display or the Zoom tool (the magnification glass).
Inserting events
To add a new event to the edited part, proceed as follows:
- Use the Insert pop-up menu on the toolbar to select the event type.
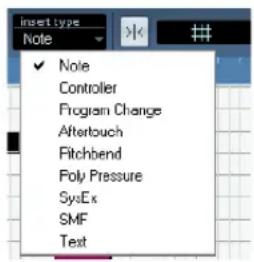
text_image
Insert type Note ✓ Note Controller Program Change Aftertouch Fitchbend Poly Pressure SysEx SMF Text- Select the Pencil tool and click in the event display at the desired position (relative to the ruler).
If you are creating note events, you can click and drag to set the length of the note.
The new event appears in the list and in the display. Its properties will be set to default values, but can be adjusted in the list.
- Notes will get the insert velocity value set in the insert velocity field on the toolbar. See "Setting velocity values" on page 345.
Editing in the list
The list allows you to perform detailed numerical editing of the events properties. The columns have the following functionality:
Column Description
L An arrow in this column indicates the event that starts closest before the project cursor position. If you click in this column for an event, the project cursor is moved to the start of that event. Double-clicking moves the cursor position and starts/stops playback – useful for auditioning when editing in the list.
Type The event type. This cannot be changed.
Start The start position of the event, shown in the format selected for the ruler. Changing this is the same as moving the event. Note that moving the event past any other event in the list will re-sort the list (the list always shows the events in the order they are played back).
End This is only used for note events, allowing you to view and edit the end position of a note (thereby resizing it).
Length This is only used for note events. It shows the length of the note - changing this resizes the note and automatically changes the End value as well.
Data 1 This is the "data 1" or "value 1" property of the event. The content of this depends on the event type – for notes, this is the pitch, for example. Where applicable, the values are shown in the most relevant form. For instance, the Data 1 value for notes is shown as a note number in the format selected in the Preferences (Event Display–MIDI page). See also the table in the section "Editing in the value display" on page 368.
Data 2 This is the "data 2" or "value 2" property of the event. The content of this depends on the event type – for notes, this is the note-on velocity value, for example. See the table in the section "Editing in the value display" on page 368.
Data 3 This is the "data 3" or "value 3" property of the event. This value is only used for note events, where it corresponds with the note-off velocity.
Channel The MIDI channel of the event. Note that this setting is normally overridden by the channel setting for the track. To make a MIDI event play back on "its own" channel, set its track to channel "Any" in the Project window.
Comment This column is used for some event types only, providing an additional comment about the event.
- You can edit several events at once. If several events are selected and you edit a value for one event, the other selected events' values will be changed as well.
Normally, any initial value differences between the events will be maintained – i.e. the values will change by the same amount. If you press [Ctrl]/[Command] when you edit, however, all events will get the same value.
⇒ For SysEx (system exclusive) events, you can only edit the position (Start) in the list.
However, when you click the Comment column, the MIDI SysEx Editor opens, in which you can perform detailed editing of system exclusive events (see "Working with System Exclusive messages" on page 368).
Editing in the event display
The event display allows you to edit the events graphically using the tools on the toolbar. You can edit single events as well as several selected events simultaneously.
- To move an event, click and drag it to a new position. Note that moving the event past any other event in the display will re-sort the list (the list always shows the events in the order they are played back). As a result, the vertical position of the event in the display will change as well.
- To make a copy of an event, press [Alt]/[Option] and drag it to a new position.
- To resize a note, select it and drag its end point with the Arrow tool as in the Project window.
This only works with notes.
- To mute or unmute an event, click on it with the Mute tool.
You can mute or unmute several events in one go by enclosing them in a selection rectangle with the Mute tool. - You can select a color scheme for the events with the Colors pop-up menu on the toolbar.
This affects how all MIDI events are shown in the List, Key and Drum Editors – see “Coloring notes and events” on page 344. - To delete an event, select it and press [Backspace] or [Delete], or click on it with the Eraser tool in the event display.
Filtering
Clicking the "Show Filter View" button on the toolbar opens an additional filter bar that allows you to hide specific event types from view. For example, it may be hard to find note events if the part contains a lot of controllers. By hiding these, the list becomes more manageable.
- To hide an event type, activate its checkbox on the filter view.
- To see one event type only (hide all other event types), press [Ctrl]/[Command] and click its checkbox. If you [Ctrl]/[Command]-click again, all checkboxes are cleared (all events will be visible).
⇒ The event types remain hidden even if you close the filter view.
To make sure you see all events, open the filter view and check that all checkboxes are deactivated.
⇒ The filter view does not remove, mute or change the events in any way.
Masking
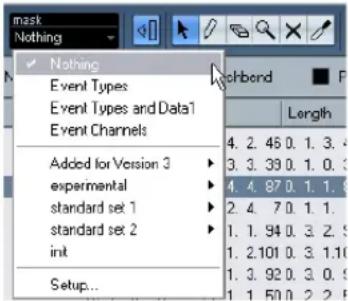
text_image
mask Nothing ✓ Nothing Event Types Event Types and Data1 Event Channels Added for Version 3 experimental standard set 1 standard set 2 int Setup... chbond Length 4. 2. 45 0. 1. 3. 4 3. 3. 39 0. 1. 0. 3 4. 4. 87 0. 1. 1. 8 2. 4. 7 0. 1. 1. 1. 1. 94 0. 3. 2. 5 1. 2.101 0. 3. 1.10 1. 3. 92 0. 3. 0. 5 1. 1. 50 0. 2. 2. 5The Mask function is similar to the filter view but allows you to hide events based on other criteria as well. Proceed as follows:
- Select an event (or several events) of the type you want to view.
- Pull down the Mask pop-up menu on the toolbar and select one of the options.
The results are as follows:
Option Description
Event Types Only events with the type of the selected event will be shown. This does the same as the filter view but is quicker if you only want to view a single event type.
Event Types and Data 1 Only events of the same type and with the same "Data 1" value will be shown. For example, if a note event is selected, only notes with the same pitch will be shown. If a controller event is selected, only controllers of the same type will be shown.
Event Channels Only events with the same MIDI channel value as the selected event will be shown.
In addition to the above options, the menu also gives you access to the presets available in the Logical Editor (see "The Logical Editor, Transformer and Input Transformer" on page 380). Furthermore, the "Setup..." item on the Mask pop-up menu gives you direct access to the Logical Editor. In that editor you can create very complex masking settings.
When you apply any of the Logical presets or use the Logical Editor to create masking settings yourself, only the events that meet the criteria specified will be visible.
- To deactivate the Mask function, select "Nothing" from the Mask pop-up menu.
The most typical usage of the Mask function is to view a certain type of controller only (e.g. Modulation, Breath Control, etc.). Since these are all the same event types (controller), this would not be possible using the filter view. With the “Event Types and Data 1” option on the Mask pop-up menu, it is!
Editing in the value display
The value display to the right of the event display is a tool for quick viewing and editing of multiple values, e.g. velocities or controller amounts. The values are shown as horizontal bars, with the bar length corresponding to the value.
text_image
Value 1 2 3 4 5 6 7 8 9 10 11 12 13 14 15 16 17 18 19 20 21 22 23 24 25 26 27 28 29 30 31 32 33 34 35 36 37 38 39 40 41 42 43 44 45 46 47 48 49 50 51 52 53 54 55 56 57 58 59 60 61 62 63 64 65 66 67 68 69 70 71 72 73 74 75 76 77 78 79 80 81 82 83 84 85 86 87 88 89 90 91 92 93 94 95 96 97 98 99 100A velocity ramp in the value display
You edit the values by clicking and dragging. Note that the pointer automatically takes on the shape of the Pencil tool when you move it into the value display – you do not have to select the Pencil tool for this.
Exactly which value is shown for an event depends on the event type. The following table shows what is displayed and edited in the Data columns and the value display:
Event type Data 1 Data 2 Value display
| Note Pitch | (note number) | Note-on velocity | Velocity |
| Controller Controller type Controller | amount | Controller amount | |
| Program Change | Program number | Not used Program number | |
| Aftertouch Aftertouch amount | Not used Aftertouch amount | ||
Pitchbend Bend amount Not used Bend amount
SysEx Not used Not used Not used
Articulations Not used Not used Not used
- For note events there will also be a value in the Data 3 column, which is used for note-off velocity.
- The value display can be hidden from view by clicking the "Show List Value View" button on the toolbar, so that it is not lit.

text_image
mask Nothing Note Controller Show List Value View Program ChangeWorking with System Exclusive messages
SysEx (System Exclusive) messages are model-specific messages for setting various parameters of a MIDI device. This makes it possible to address device parameters that would not be available via normal MIDI syntax.
Every major MIDI manufacturer has its own SysEx identity code. SysEx messages are typically used for transmitting patch data, i.e. the numbers that make up the settings of one or more sounds in a MIDI instrument.
Cubase allows you to record and manipulate SysEx data in various ways. The following sections point to various features that help you manage and create SysEx data.
To learn about the possibilities of the MIDI Device Manager for controlling your device, see the chapter "Using MIDI devices" on page 314.
Bulk dumps
Recording a bulk dump in Cubase
In any programmable device, the settings are stored as numbers in computer memory. Change those numbers, and you will change the settings.
Normally, MIDI devices allow you to dump (transmit) all or some settings in the device's memory in the form of MIDI SysEx messages. A dump is therefore (among other things) a way of making backup copies of the settings of your instrument: sending such a dump back to the MIDI device will restore the settings.
If your instrument allows the dumping of a few or all of its settings via MIDI by activating some function on the front panel, this dump will probably be recordable in Cubase.
- Open the Preferences dialog from the File menu (on the Mac, this is located on the Cubase menu) and select the MIDI-MIDI Filter page.
This allows you to govern which MIDI event types should be recorded and/or thru-put.
- Make sure that recording of SysEx data is not filtered, by deactivating the SysEx checkbox in the Record section. The SysEx checkbox in the Thru section can be left as it is (by default activated).
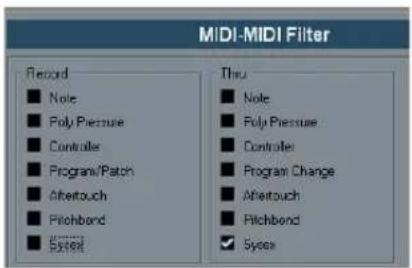
text_image
MIDI-MIDI Filter Record ■ Note ■ Poly Pressure ■ Controls ■ Program/Patch ■ Abitouch ■ Pitchbond ■ System Thru ■ Note ■ Poly Pressure ■ Controls ■ Program Change ■ Abitouch ■ Pitchbond ✓ SystemThis way, SysEx messages will be recorded but not echoed back out to the instrument (which might lead to unpredictable results).
-
Activate recording on a MIDI track and initiate the dump from the front panel of the instrument.
-
When done recording, select the new part and open the List Editor from the MIDI menu.
This allows you to check that the SysEx dump was recorded – there should be one or several SysEx events in the part/event list.
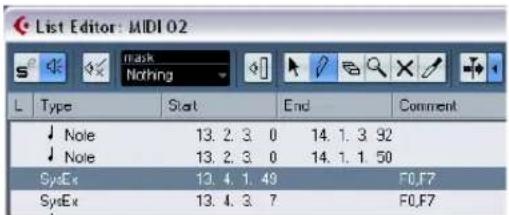
text_image
List Editor: MIDI 02 mask Nothing L Type Stat End Comment ↓ Note 13. 2. 3. 0 14. 1. 3. 92 ↓ Note 13. 2. 3. 0 14. 1. 1. 50 SysEx 13. 4. 1. 49 F0,F7 SysEx 13. 4. 3. 7 F0,F7If your MIDI instrument does not offer a way to initiate a dump "by itself", you have to send a Dump Request message from Cubase to start the dump. In that case, use the MIDI SysEx Editor (see "Editing System Exclusive messages" on page 370) to insert the specific Dump Request message (see the instrument's documentation) at the beginning of a MIDI track. When you activate recording, the Dump Request message will be played back (sent to the instrument), the dump will start and be recorded as above.
Transmitting a bulk dump back to a device
- Make sure the MIDI track with the System Exclusive data is routed to the device.
You may want to check your device's documentation to find details about which MIDI channel should be used, etc. - Solo the track.
This might not be necessary, but it is a good safety measure. - Make sure the device is set up to receive SysEx messages (often, receiving SysEx is turned off by default).
- If necessary, put the device in "Standby to Receive System Exclusive" mode.
- Play back the data.
Some advice
- Do not transmit more data than you need. If all you want is a single program, do not send them all, it will only make it harder to find the one you want. Usually, you can specify exactly what you want to send.
-
If you want the sequencer to dump the pertinent sounds to your instrument each time you load a project, put the SysEx data in a silent "count-in" before the project itself starts.
-
If the dump is very short (for instance, a single sound) you can put it in the middle of the project to re-program a device on the fly. However, you can achieve the same effect by using Program Change. This is definitely preferable, since less MIDI data is sent and recorded. Some devices may be set up to dump the settings for a sound as soon as you select it on the front panel.
- If you create parts with useful "SysEx dumps", you can put these on a special muted track. When you want to use one of them, drag it to an empty unmuted track and play it back from there.
- Do not transmit several SysEx dumps to several instruments at the same time.
- Make a note of the current device ID setting of the instrument. If you change this, the instrument may refuse to load the dump later.
Recording System Exclusive parameter changes
Often you can use SysEx to remotely change individual settings in a device, e.g. open a filter, select a waveform, change the decay of the reverb etc. Many devices are also capable of transmitting changes made on the front panel as SysEx messages. These can be recorded in Cubase, and thus incorporated into a regular MIDI recording.
Here's how it works: let's say you open up a filter while playing some notes. In that case, you will record both the notes and the SysEx messages generated when you opened of the filter. When you play it back, the sound changes exactly like it did when you recorded it.
- Open the Preferences dialog from the File menu, select the MIDI-MIDI Filter page and make sure that SysEx is recorded, i.e. the Sysex checkbox in the Record section is deactivated.
- Make sure the instrument is actually set to transmit changes of front panel controls as SysEx messages.
- Record normally.
When you're done, you can check that the events were recorded properly in the List Editor.
Editing System Exclusive messages
While SysEx events are shown in the List Editor/Project Browser, their entire content is not (only the beginning of the message is displayed in the Comment column for the event). Also, you cannot edit the event (other than moving it) as you can with other event types in the List Editor.
Instead, you have to use the MIDI SysEx Editor for this.
- To open the MIDI SysEx Editor for an event, click in the Comments column for the event in the List Editor/Project Browser.
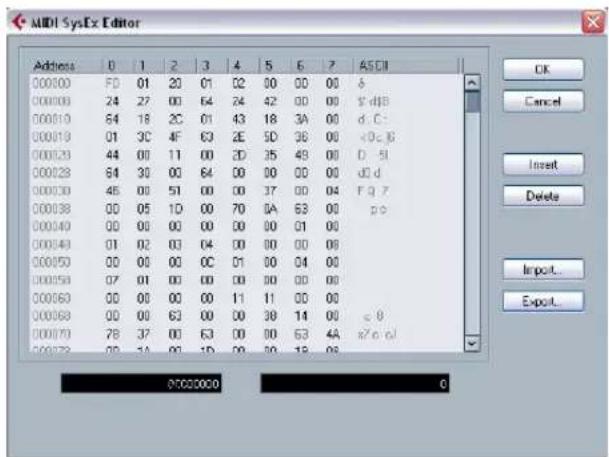
text_image
MIDI SysEx Editor Address 0 1 2 3 4 5 6 7 ASCII 000100 F0 01 20 01 02 00 00 00 & 000108 24 27 00 64 24 42 00 00 $ dB 000110 64 18 2C 01 43 18 3A 00 d.C: 000119 01 3C 4F 63 2E 5D 36 00 x0c.B 000123 44 00 11 00 2D 35 49 00 D.SI 000128 64 30 00 64 00 00 00 00 d.D 000133 45 00 51 00 00 37 00 04 F.G.F 000138 00 05 1D 00 70 BA 63 00 p.c 000143 00 00 00 00 00 01 00 000149 01 02 03 04 00 00 00 08 000153 00 00 00 OC 01 00 04 00 000159 07 01 00 00 00 00 00 00 000163 00 00 00 00 11 11 11 11 28 37 63 63 63 63 63 63 28 37 63 63 63 63 63 63 OK Cancel Insert Delete Import... Eport... 878222222222222222222222222222222222222222222222222222222222222222222 878222222222222222222222222222222 8782222222222222The display shows the entire message on one or several lines. SysEx messages always begin with F0 and end with F7 with a number of arbitrary bytes in between. If the message contains more bytes than fit on one line, it continues on the next. The Address indication to the left helps you find out on which position in the message a certain value resides.
You can edit all values except for the first (F0) and last one (F7).
Selecting and viewing values
To select a value, either click on it or use the cursor keys. The selected byte is displayed in various formats:
- In the main display, values are shown in hexadecimal format.
- To the right of this, values are shown in ASCII format.
- At the bottom of the dialog, the selected value is shown in binary and decimal formats.
Editing a value
The selected value can be edited directly in the main display or in the decimal and binary displays. Just click on it and type in the desired value as usual.
Adding and deleting bytes
Using the Insert and Delete buttons or their corresponding computer keyboard keys, you can add and delete bytes from the message. Inserted data will appear before the selection.
To delete the complete SysEx message, select it in the List Editor and press [Delete] or [Backspace].
Importing and exporting data
The Import and Export buttons allow you to get SysEx data from disk and to export the edited data to a file. The file has to be in "MIDI SysEx" (.SYX) binary format. Only the first dump in a .SYX file will be loaded.
This format should not be confused with MIDI files, which have the extension .MID.
27
VST Expression
Introduction
About articulations
Musical articulations, or expressions, define how certain notes "sound", i.e. how they should be sung or performed on a given instrument. They allow you to specify that a string instrument is bowed (not plucked), a trumpet muted (not played open), and so on. Articulations also define the relative volume of notes (to play some notes louder or softer than the others) or changes in pitch (create a tremolo).
Articulations can be divided into "Directions" and "Attributes".
- Directions are valid for all notes from the insert position on, until another direction is scored. This means, they are applied not to single notes, but to a continuous range of notes, or even an entire piece of music.
An example for a direction is pizzicato, which means that the string instrument should be plucked.
- Attributes belong to single notes. They are only applied to the notes for which they are scored.
Examples for this are accents, where a note should be played with an emphasis, and staccato, where notes are played shorter.
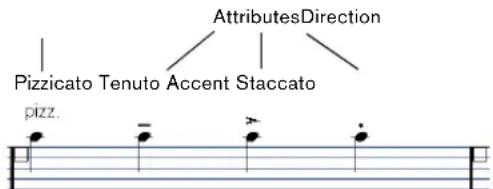
text_image
AttributesDirection Pizzicato Tenuto Accent Staccato pizz.Musical expressions in the Score Editor
Articulations and MIDI
When working with MIDI, i.e. when you are entering notes via a MIDI keyboard, editing notes in the MIDI editors or using VST Instruments, these articulations need to be realized as different sounds. This can be achieved using the following command and data types, which are used to trigger the necessary sound changes:
Option Description
| Program Change | Via Program Change messages, you can instruct a connected VST instrument to switch from one program to another. Depending on the instrument, this can be used to play a different articulation. |
| MIDI channel | Multi-timbral instruments, such as Steinberg's HALion, feature so-called programs, usually representing different articulations. These can be accessed via MIDI channel messages. |
Option Description
| Key switches | Some software samplers, like Steinberg's HALion Symphonic Orchestra, make use of “key switches”, meaning that certain keys are not used to trigger sounds, but to switch between articulations, for example. |
| MIDI editing | Articulations like staccatos or accents can be created by modifying the actual MIDI data, e.g. by changing length or velocity. |
Expression Maps
When working on a project, you might want to audition a composition including articulations and other notation expressions. In Cubase, this can be achieved using the VST Expression functionality. This feature makes use of so-called "Expression Maps", which can be selected via a separate pop-up menu in the Inspector for MIDI or instrument tracks. Within these maps, the sound mapping and characteristics for all your musical expressions can be specified, using the methods described in the above table.
In detail, this works as follows:
When you select an Expression Map for a MIDI or instrument track, the articulations (sounds) defined in the map are automatically applied during playback. Cubase recognizes the expressions scored for the MIDI part and then searches the sound slots in the Expression Map for a sound that matches the defined criteria.
When a matching sound slot is found, the current note is either modified (e.g. reduced in length or played louder), or the MIDI channel, program change or key switch information is sent to the connected instrument (the instrument selected on the Output Routing pop-up menu for the track), so that a different sound will be played. When no sound slot is found that matches the articulations used in the part, the “closest match” will be used, see “Groups” on page 378.
When you enter articulations in a MIDI part, you need to set up an Expression Map in a way that the right sounds in the connected VST or MIDI instrument are triggered (see "Creating and editing Expression Maps" on page 377).
Expression Maps also allow you to link your articulations with remote keys on a MIDI input device and map these to sounds that can be played by a MIDI device or VST instrument. This way, you can enter notes and articulations using a remote MIDI device and have these automatically be recorded and played back correctly by Cubase.
Expression Maps are, for example, useful in the following situations:
- When you want to enter musical articulations directly in one of the MIDI editors, especially the Score Editor, without having to record MIDI data first.
- When you want to play/record music in realtime and control articulation changes while playing.
- When you open and edit projects from other users. By using Expression Maps, you can map the articulation information to a different instrument set or content library quickly and easily.
VST Expression in Cubase
The VST Expression functionalities can be found in different locations in Cubase. To be able to use these functions, an Expression Map or a track preset containing such a map has to be loaded.
An example
To get a quick impression of the VST Expression function in Cubase, take a look at an example project:
- Open the project "VST Expression Demo", which you find on the program DVD in the Additional Content folder (Demo Projects subfolder).
This project contains 5 instrument tracks, each of which is assigned to a HALionOne instance that uses an Expression Map suited for the respective sound. The track presets used in this project are installed with the program and make use of the HALionOne Expression Set.
- Now look at the track list. The track "Nylon Guitar" is selected.
The events on this track are shown in the Score Editor. In the Inspector, the VST Expression tab is displayed, showing the Expression Map for the guitar.
- Start playback.
In the Score Editor, you can see several articulation symbols. Whenever such a symbol is reached during playback, the Expression Map switches to another sound slot.
- Double-click on one of the Nylon Guitar parts.
The Key Editor opens. Here, the articulations that are shown as articulation events on the Articulation lane (not as symbols as in the Score Editor). For further information, see “Articulations in the Key, Drum, and In-Place Editors” on page 375.
- On the MIDI menu, select "VST Expression Setup...". The VST Expression Setup window opens. This shows the details of the Expression Map and can be used to create or edit Expression Maps, see "Creating and editing Expression Maps" on page 377.
- In the Expression Maps section to the left, select the Map "Nylon Guitar". In the Sound Slots list in the middle section of the window, the different articulations are shown, together with the symbols that are used. If you select the slots in the list, you can see that they all have different key switches that are sent to the connected instrument (HALionOne in this example). Using this key switches the instrument is instructed it to switch to another set of samples, to play back a different articulation.
The four other tracks in the project also use a HALionOne program and a separate Expression Map. For these too, the articulations are triggered by key switches sent to the VST instrument.
Loading Expression Maps
Expression Maps can either be part of track or VST presets, or be saved separately. Depending on this, the way to make them available in Cubase is slightly different.
Loading Expression Maps that are part of presets
Cubase comes with a set of predefined Expression Maps which are part of the default presets. They are loaded automatically with the presets. Track presets are described in detail in the chapter "Working with Track Presets" on page 288.
The following applies:
- Included with Cubase are several track presets which are pre-configured for use with VST Expression. They contain sounds that make use of key switches and have different articulations. To indicate that these presets can be used in this context, they have the suffix "VX". The same sounds that are used in these track presets are also available as part of VST3 presets for HALionOne (with the same name). This allows you to use them more flexibly with your Expression Maps in your projects.
- Track presets for HALion Symphonic Orchestra can also be used with VST Expression. The presets are installed automatically with Cubase. However, for them to be available, you have to separately install the VST instrument. These Track Presets begin with "HSO" and end with "VX".
Expression Maps that were saved separately
It is also possible to define your own Expression Maps, see “Creating and editing Expression Maps” on page 377. To load these, proceed as follows:
- In the Inspector for the selected track, select the VST Expression section, open the Expression Map pop-up and choose "VST Expression Setup...".
If the VST Expression tab is not shown in the Inspector, right-click on another Inspector tab and select "VST Expression" from the context menu. - In the VST Expression Setup dialog, click the Load button in the Expression Maps section on the left. A file dialog appears.
- Locate and select an Expression Map and click Open. The Expression Map is added to the Maps list.
- Repeat the steps for all the maps you want to make available, and close the dialog.
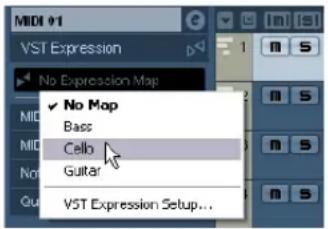
text_image
VST Expression No Expression Map ✓ No Map Bass Cellb Guitar VST Expression Setup...All maps loaded are available on the Expression Map pop-up menu in the Inspector.
Articulations in the Project window
In the Inspector for MIDI and instrument tracks, a VST Expression section is available. This indicates whether an Expression Map is used for a track. It also shows the sound slots that are active for playback and for realtime input.
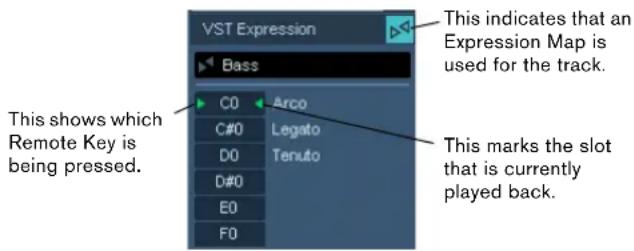
text_image
VST Expression Bass This indicates that an Expression Map is used for the track. This shows which Remote Key is being pressed. C0 Arco C#0 Legato D0 Tenuto D#0 E0 F0 This marks the slot that is currently played back.The possibility to monitor the active slots is especially useful when recording articulations with an external device, such as a MIDI keyboard. This way, you can see whether the correct sound slot, i.e. the right articulation, is used.
Articulations in the Score Editor
In the Score Editor, articulations can be inserted like other symbols. There is a special tab in the Symbols Inspector, containing all articulation symbols of the current Expression Map.
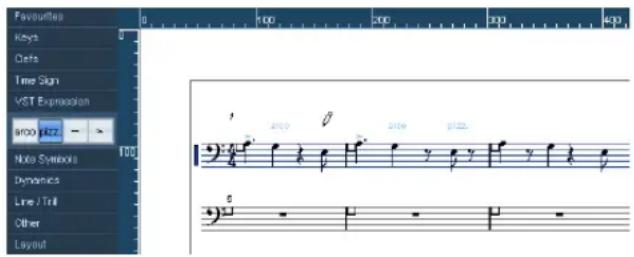
text_image
Favourites Keys Data Time Sign VST Expression work Jazz - Note Symbols Dynamics Line / Trill Other Layout- To insert a symbol, click on it in the Articulations tab, and click at the desired position in the note display.
- To delete an articulation symbol from the score, select it and press [Delete] or [Backspace].
You can also click on it with the Eraser tool.
In the Preferences dialog (Score-Colors for Additional Meanings page), you can specify a color for VST Expression symbols. This way, you can easily distinguish them from other Score symbols.
Articulation editing in the Score is the same as regular symbol editing, see the chapter "Working with symbols" on page 555.
Note that in the Score Editor, it is possible to insert symbols for a single note that in fact cannot be combined in a musically meaningful way. So when entering articulations, make sure that they do not collide with other articulations.
Articulations in the Key, Drum, and In-Place Editors
If an Expression Map is used for a MIDI or instrument track, its articulations are shown in the note events in the Key Editor display, provided that the vertical zoom factor is high enough. If the horizontal zoom factor is high enough, the attribute description (the text in the Description column, see "Editing Articulations" on page 378) is also shown.
You can insert and edit musical expressions in the Key, Drum, and In-Place Editors using the controller lane. This is much like regular controller lane editing (see "Editing in the controller display" on page 351).
To display the available articulations (i.e. all articulations set up in the selected Expression Map), open the pop-up menu to the left of the lane and select "Articulations".
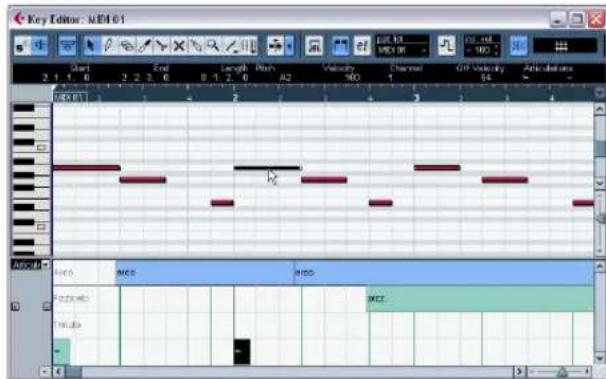
text_image
Key Editor: MEDI 01 Start End Length Pitch Volatility Channel Stop Volatility Acceleration 2 1 0 2 3 6 8 1 2 6 A2 100 1 4 3 1 4 5 6 7 8 9 MEDI MCD MBD FECTIONS mula MZZ"Articulations" selected for the Controller lane in the Key Editor.
- When "Articulations" is selected for a controller lane, the note beginnings are displayed as thin vertical lines in the controller display.
- All articulations that are specified for the selected Expression Map are available on the controller lane. They appear on different rows one above the other. The order in which they are listed is the same as in the Expression Map. The different groups (1 to 4) are also reflected here, see “Groups” on page 378. They are separated by black lines. Articulations belonging to the same group are shown in the same color.
- Directions are displayed as bars in the controller lane. They begin at the insertion point of a direction and end at the insertion point of the next articulation from the same group (or at the end of the part if no more directions follow). Attributes are inserted at the note beginning.
You can assign a maximum of one attribute per group to each note.
Editing on the controller lane
- To insert new directions on the controller lane, select the Pencil tool and click at the desired position in the respective row, i.e. where you want the direction to start. Note that you will have to click at the exact position of the first note you want to apply this articulation to or to the left of it. Instead of selecting the Pencil tool, you can also hold down [Alt]/[Option] and click at the desired position.
- To insert new attributes on the controller lane, select the Pencil tool and click at the respective note line in the corresponding row of the controller lane.
Instead of selecting the Pencil tool, you can also hold down a modifier key (by default [Alt]/[Option]) and click at the desired position.
- To remove a direction, click on it with the Eraser tool or select it and press [Delete] or [Backspace].
- To remove an attribute, click on it with the Pencil tool. Note that you cannot select attributes in the controller lane without automatically selecting the corresponding note, too. Therefore, you cannot delete an attribute by selecting it and pressing [Delete] or [Backspace] without deleting the note as well.
If several notes are selected, you can use the Pencil tool to insert or delete attributes for all of them in one go.
Editing on the info line
When a MIDI note is selected in the note display, the info line contains the option "Articulations". This displays the note attributes (symbols) specified for the selected note. Click in this section to open the Articulations pop-up menu. The following applies:
- All note attributes available in the Expression Map are shown on the pop-up menu, sorted by group (see "Groups" on page 378).
- To add an attribute to a note, simply select it on the pop-up menu. Attributes that are active for a note are indicated on the menu.
If you click on an active attribute again on the menu, it will be deleted.
- If you select another attribute from the same group for a note, the attribute will replace the previous attribute.
Articulations in the List Editor
In the List Editor, the Articulations can be viewed and edited in the Comment column. The options are the same as on the Key Editor info line, see above.
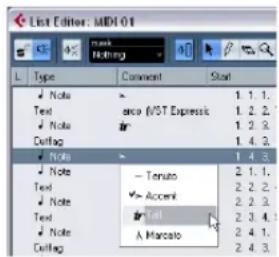
text_image
List Editor: MIDI-01 L Type Comment Start ✓ Note 1 1. 1. Text arcia /VIST Expressk 1 2. 2. ✓ Note in 1 2. 3. Curlag 1 4. 3. ✓ Note 1 4. 3 ✓ Note - Tenato 2 1. 1. Text ✓ Acceni 2 2. 2. ✓ Note in Call 2 3. 4. ✓ Note A Marcato 2 4. 1. Curlag 2 4. 3.Directions can be shown either as Text or as Graphic Symbols (like in the Score Editor). Either way, they are followed by the text "VST Expression" in brackets, so as to be easily recognizable and distinguishable from ordinary Score symbols.
Creating and editing Expression Maps
Creating an Expression Map
Proceed as follows:
- In the Inspector for a MIDI or instrument track, open the VST Expression section, open the Expression Map pop-up menu and select "VST Expression Setup..." (or select "VST Expression Setup..." on the MIDI menu).
A window opens, allowing you to load and create Expression Maps.
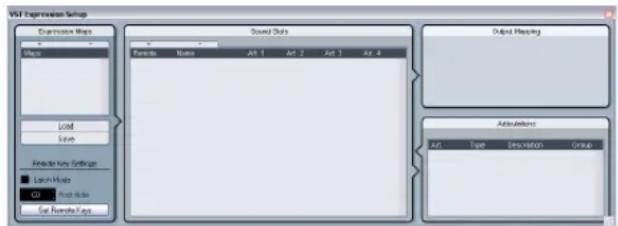
text_image
VST Expression Setup Extrusive Maps Maps Load Save Create Entry Settings Launch Mode CD Press Mode Get Remote Maps Sound Sets Forward Names Art 1 Art 2 Art 3 Art 4 Output Mapping Adjustments Art Type Designation GroupThe VST Expression Setup window
- To create a new map from scratch, click the plus button at the top of the Maps list in the Expression Map section of the dialog.
A new map named "Untitled" is shown in the Expression Maps section.
- Click on the map name and enter a meaningful name (e.g. "Cello" to set up an Expression Map for a cello).
Adding sound slots
Now, you create the "sound slots", one for each articulation you want to add. Proceed as follows:
- In the Sound Slot section to the right of the Maps list, a sound slot is added automatically when a new map is created.
This is the default slot that will be used. You can specify an articulation for it or leave it empty, depending on you preferred default setting.
- Click in the first Articulation column (Art. 1) for the sound slot and select an articulation from the menu.
A new entry is added in the Articulations section in the lower right corner of the window.
- When adding articulations, the name of the sound slot is automatically set to the articulation. To change the name, click in the name field and enter a new name.
The names of the sound slots are displayed in the Inspector for the track, see "Articulations in the Project window" on page 375.
- To create a complex articulation, made of several different single articulations, click in the other Articulation columns (Art. 2-4) for the sound slot and add the corresponding articulations.
For each new articulation, an additional entry will be added in the Articulations section.
- Apart from creating combined articulations, the Articulation columns also allow you to prioritize articulations, by sorting them into different groups.
When the program is looking for sounds and no exact match is found, the group setting will define the "closest match", i.e. the sound which matches most criteria when searching from left to right will be used. For example, if two sounds are found which have the same articulation in group 1, the sound that also matches group 2 will be preferred and so on. For more information on groups, see below.
- If you cannot find the articulation you want to add on the pop-up menu, you can define your own articulations by selecting "Add Custom Articulation".
This adds a default articulation which you can define in the Articulations section, see below.
- When you have made the desired settings, click the plus button again to add another sound slot.
Add as many sound slots as you need.
- In the Remote column, you can specify the key on your external device that triggers this sound slot.
For more information, see "Remote Key Settings" on page 379.
Output Mapping
When you have added the desired sound slots, you can map these to certain "sound characters" or "expressions" of an instrument, e.g. a bowed violin or a pizzicato violin, a plain trumpet, a muted trumpet or a trumpet playing staccato. The available sounds depend on the instrument that is selected for the MIDI or instrument track. You can also create expressions by editing the incoming MIDI data, for example by changing the note length or velocity. This is done in the Output Mapping section.
The following parameters are available:
Parameter Description
| 1st/2nd Key Switch | If you have an instrument that uses key switches (e.g. Steinberg's HALion Symphonic Orchestra), you can enter up to two key switches in these fields. This allows you, for example, to switch between a bowed and a pizzicato violin. |
| Program Here you can specify a Program Change number, to switch to another program containing a different articulation on a connected instrument. | |
| Channel Here you can specify the MIDI channel that should be used. When using with HALion Symphonic Orchestra for example, this allows you to switch to a different program. | |
| Length Here you can specify the note length. This way, you can create staccato or tenuto sounds. | |
| Velocity Here you can specify the desired velocity. This allows you to create accents, for example. | |
| Min. Velocity If you are using an instrument that has different velocity ranges on the same key, you can specify a minimum velocity here, to make sure that the sample mapped to a particular range is used. | |
| Transpose This allows you to specify a transpose value. This can be used to select different articulations in some sample libraries, in which different articulations are located on different octaves, for example. | |
Editing Articulations
In the Articulations section, the Articulations you added for the sound slots are displayed. The following settings can be made here:
Option Description
| Art. Clicking in this column opens a context menu, where you can choose whether you want to insert a symbol or a text string. If you select Symbol, the dialog with the available symbols opens. If you select Text, you can directly enter the desired text. |
| Type In this column you specify whether you want to add an "Attribute" (which only influences a single note, e.g. an accent) or a "Direction" (which is valid from the insertion position until it is replaced by another articulation, e.g. arco and pizzicato). |
| Description Here, you can enter a descriptive text. For example, this could be the name of the symbol (e.g. Accent) or the long name of a direction (e.g. pizz and pizzicato). |
| Group This column allows you to specify the Group, or importance of the symbol, see below. |
Groups
You can sort the different articulations you define for an Expression Map into one to four groups. Groups can be used to combine directions and attributes in more complex musical expressions by choosing articulations from the different groups, for example to play a note arco AND staccato AND with an accent.
The groups themselves are exclusive. This means articulations residing within the same group cannot be used together. Since some of the articulations cannot be combined, a violin for example cannot be played Arco (bowed) and pizzicato (plucked) at the same time, these articulations should be placed in the same group.
Furthermore, the groups represent the musical importance, with group 1 having the highest priority (expressions in group 1 are more important than those in group 2, 3 and 4). This setting is required when the Expression Map does not find an exact match for your data and tries to identify the closest possible sound. Let's say you have added a staccato symbol and an accent to a note in an editor. In the Expression Map, you have specified that staccato is in group 2 and the accent is in group 3. The connected instrument, however, does not have a sample that corresponds to these settings. In this case, the program will look for a staccato sound, disregarding the accent.
Remote Key Settings
The Remote Keys specify which key on an external device will be used to play a certain sound slot, i.e. these keys will then be used to insert articulations instead of notes.
The active Remote Keys (if any) are reflected in the Inspector for the track, see "Articulations in the Project window" on page 375.
If you do not plan to record or trigger articulations via a MIDI input device, you do not need to specify remote keys.
Latch Mode
This setting determines whether the Remote Key function reacts to note-off messages.
- When Latch Mode is deactivated, the key you press on your MIDI input device is valid for as long as the key is held, i.e. the sound slot will play until the key is released. On release, the default (first) sound slot is played again.
- When Latch Mode is activated, the key you press is valid until the next key is pressed.

Note that Latch Mode can only be generally activated/deactivated in Cubase, not for single Expression Maps.
Root Note
Here, you can specify the first key on your external device that you want to use as a remote key. This is useful, since it allows you to automatically adjust existing remote key assignments to suit your needs, for example when you are using a MIDI keyboard with a very wide or very narrow key range.
Set Remote Keys
Remote keys can be specified manually for each slot in the Sound Slots section of the window. However, you can also automatically assign a range of keys on your external device to the sound slots in the Expression Map. Proceed as follows:
- Click the Set Remote Keys button. A dialog opens.
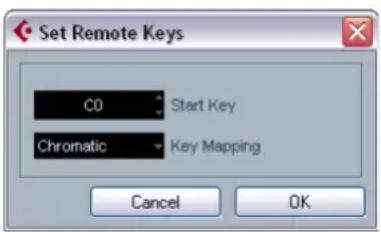
text_image
Set Remote Keys C0 Start Key Chromatic Key Mapping Cancel OK-
Use the Start Key field to specify the first key on the MIDI input device you want to trigger a sound slot.
-
On the Key Mapping pop-up menu, you can specify with which keys on your device you want to trigger the sound slots.
You can choose whether you want to use all keys on the keyboard as remote keys, or whether only the white or black keys are used.
- Click OK to close the dialog.
Saving your settings
When you have made the desired settings, you need to save the Expression Map. To do so, click the Save button in the Expression Maps section of the window, specify a file name and a location for the Expression Map and click Save.
The Logical Editor, Transformer and Input Transformer
Introduction
Most of the time you will perform your MIDI editing graphically in one of the MIDI editors. But there are times when you want more of a "search and replace" function on MIDI data, and that's where the Logical Editor comes in.
The principle of the Logical Editor is this:
- You set up filter conditions to find certain elements. This could be elements of a certain type, with certain attributes or values or on certain positions, in any combination. You can combine any number of filter conditions and make composite conditions using AND/OR operators.
- You select the basic function to be performed. The options include Transform (changing properties of the found elements), Delete (removing the elements), Insert (adding new elements based on the found positions of other elements) and more.
- You set up a list of actions, which specify exactly what should be done.
This is not necessary for all functions. For example, the Delete function does not require any additional action specifications – it simply removes all found elements. The Transform function on the other hand requires that you specify which properties should be changed and in which way (transpose notes by a certain amount, adjust velocity values, etc.).
By combining filter conditions, functions and the specific actions, you can perform very powerful processing.
To master the Logical Editor, you need some knowledge about how MIDI messages are structured. However, the Logical Editor also comes with a rich selection of presets, allowing you to access its processing powers without delving into its more complicated aspects, see "Working with presets" on page 389.

Studying the included presets is an excellent way to learn the workings of the Logical Editor! Many of them can also be used as starting points when you set up your own editing operations using the Logical Editor.
About the Transformer MIDI effect
The Transformer effect is a realtime version of the Logical Editor, allowing you to apply editing to the events played back from a track "on the fly". The Transformer contains virtually the same settings and functions as the Logical Editor – where there are differences between the two, this is clearly stated on the following pages.
For details on how to open the Transformer (and other MIDI effects), see “MIDI realtime parameters and effects” on page 305.
About the Input Transformer
This too is very similar to the Logical Editor. Just like the Transformer effect, the Input Transformer works in real-time. However, the Input Transformer filters out and transforms MIDI data as it is recorded. In other words, the settings you make in the Input Transformer will affect the actual MIDI events you record.
The Input Transformer is described in the section “The Input Transformer” on page 389. However, we recommend that you make yourself familiar with the Logical Editor first, since they share many features and principles.
About the Project Logical Editor
There is also a “Project Logical Editor” available via the Edit menu. This is described in the chapter “The Project Logical Editor” on page 391.
Opening the Logical Editor
- Select the desired parts or events.
What will be affected by the operation depends on the current selection:
- In the Project window, edits using the Logical Editor are applied to all selected parts, affecting all events (of the relevant types) in them.
- In the MIDI editors, edits using the Logical Editor are applied to all selected events. If no events are selected, all events in the edited part(s) will be affected.
You can change the selection while the Logical Editor window is open.
- Select "Logical Editor..." from the MIDI menu.
Window overview
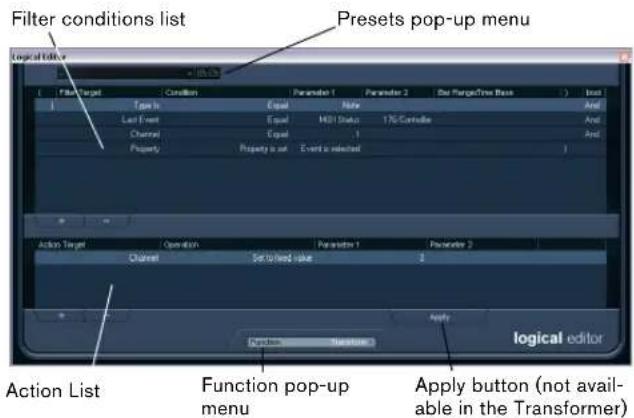
text_image
Filter conditions list Presets pop-up menu Logical Editor Type In Last Event Channel Property Action Target Channel Set to fixed value Function pop-up menu Apply button (not available in the Transformer) Action List function pop-up menu Apply logical editorSetting up filter conditions
General procedure
The upper list is where you set up the filter conditions, determining which elements to find. The list can contain one or several conditions, each on a separate line.
- To add a new condition, click the Add button (+) below the list.
A new line is added at the bottom of the list. If there are many lines, you may need to use the scrollbar to the right to view them. - To remove a condition, select it and click the Delete button (-) below the list.
If you have already defined filter conditions and/or applied a preset, but want to start again from scratch, you can initialize the settings by selecting the Init option from the Presets pop-up menu.
You set up a filter condition line by clicking in the columns and selecting options from the pop-up menus that appear. Here is a brief description of the columns:
Column Description
Left bracket This is used for "bracketing" several lines together when creating conditions with multiple lines and the boolean operators And/Or. See "Combining multiple condition lines" on page 385.
Filter Target Here you select which property to look for when finding elements. Your choice here affects the available options in the other columns as well, see below!
Column Description
Condition This determines how the Logical Editor should compare the property in the Filter Target column to the values in the Parameter columns (see below). The available options depend on the Filter Target setting.
Parameter 1 Here you set which value the element properties should be compared to (depending on the Filter Target). For example, if the Filter Target is "Position" and Condition is "Equal", the Logical Editor will look for all elements starting at the position you specify in the Parameter 1 column.
Parameter 2 This column is only used if you have selected one of the "Range" options in the Condition column. This allows you to find all elements with values inside (or outside) the range between Parameter 1 and Parameter 2.
Bar Range/Time Base (Logical Editor only) This column is only used if the Filter Target is set to "Position". If one of the "Bar Range" options is selected in the Condition column, you use the Bar Range/Time Base column to specify "zones" within each bar (allowing you to find e.g. all elements on or around the first beat of every bar). If any of the other Condition options is selected, you can use the Bar Range/Time Base column to specify the time base (PPQ, Seconds, etc.). See "Searching for elements at certain positions (Logical Editor only)" on page 383.
Right bracket This is used for "bracketing" several lines together. See "Combining multiple condition lines" on page 385.
bool This allows you to insert the boolean operators And/Or, when creating conditions with multiple lines. See "Combining multiple condition lines" on page 385.
- You can also set up filter conditions by dragging MIDI events directly into the upper list.
If the list contains no entries, a MIDI event dragged into this section will form conditions including the state and type of the event. If it contains entries, the dragged event will initialize the matching parameters. For example, if a length condition is used, the length will be set according to the length of the event.
Conditions
Depending on the Filter Target setting, the following options can be selected in the Condition column:
Condition Elements will be found if their Filter Target property...
| Equal ...has the exact same value as set up in the Parameter 1 column. | |
| Unequal ...has any value other than the one set up in the Parameter 1 column. | |
| Bigger ...has a value higher than the one set up in the Parameter 1 column. | |
| Bigger or Equal | ...has a value that is the same as or higher than the one set up in the Parameter 1 column. |
| Less ...has a value lower than the one set up in the Parameter 1 column. | |
| Less or Equal ...has a value that is the same as or lower than the one set up in the Parameter 1 column. | |
| Inside Range ...has a value that is between the values set up in the Parameter 1 and Parameter 2 columns. Note that Parameter 1 should be the lower value and Parameter 2 the higher. | |
| Outside Range | ...has a value that is not between the values set up in the Parameter 1 and Parameter 2 columns. |
| Inside Bar Range (Logical Editor only) | ...is within the “zone” set up in the Bar Range/Time Base column (Position only), in each bar within the current selection. |
| Outside Bar Range (Logical Editor only) | ...is outside the “zone” set up in the Bar Range/Time Base column (Position only), in each bar within the current selection. |
| Before Cursor (Logical Editor only) | ...is before the song cursor position (Position only). |
| Beyond Cursor (Logical Editor only) | ...is after the song cursor position (Position only). |
| Inside Track Loop (Logical Editor only) | ...is inside the set track loop (Position only). |
| Inside Cycle (Logical Editor only) | ...is inside the set cycle (Position only). |
| Exactly matching Cycle (Logical Editor only) | ...exactly matches the set cycle (Position only). |
| Note is equal to | ...is the note specified in the Parameter 1 column, regardless of octave (Pitch only). Lets you find e.g. all C notes, in all octaves. |
⇒ The Conditions for the “Property” filter target are different, see “Searching for properties” on page 385.
Below, the different Filter Targets (and their corresponding Condition and Parameter options) are described in more detail.
Searching for elements at certain positions (Logical Editor only)
Selecting "Position" in the Filter Target column lets you find elements starting at certain positions, either relative to the start of the song or within each bar.
- If you select any condition other than the Range or Bar Range options, you set up a specific position (in PPO, seconds, samples, or frames) in the Parameter 1 column. Use the Bar Range/Time Base column to specify the time base.
| Filter Target | Condition | Parameter 1 | Parameter 2 | Bar Range/Time Base |
| Position | Equal | 1.01.01.000 | PPD | |
Here, the Logical Editor will find all elements at 1.1.1. in the project.
- If you select Inside Range or Outside Range in the Condition column, you set the start position of the range in the Parameter 1 column and the end position in the Parameter 2 column. You can also change the time base using the Bar Range/Time Base column.
The Logical Editor will then find all elements inside or outside this position range.
- If you select one of the Bar Range options in the Condition column, the Bar Range/Time Base column will show a graphic bar display. You specify the range within the bar by clicking and dragging in the bar display (the specified Bar Range is indicated in blue).
The Logical Editor will then find all elements starting inside or outside this Bar Range, in all bars (within the current selection).
| Filter Target | Condition | Parameter 1 | Parameter 2 | Eor Range/Time Base |
| Position | Inside Bar Range | 436 | 504 |
Here, the Logical Editor will find elements starting around the second beat in each bar.
Searching for notes of certain lengths (Logical Editor only)
Only note events have lengths (actually, a note is made up of separate note-on and note-off events but in Cubase it is considered as a single event with a length). Therefore, the "Length" Filter Target is only valid if you're specifically searching for notes – there has to be another condition line with the Filter Target "Type", Condition "Equal" and Parameter 1 set to "Note". See "Combining multiple condition lines" on page 385 for more about using multiple filter conditions.
Searching for Value 1 or Value 2
A MIDI event is composed of several values. What is displayed for Value 1 and 2 depends on the type of event:
Event type Value 1 Value 2
| Notes The Note Number/Pitch. | The velocity of the note. |
| PolyPressure The key that waspressed. | The amount of pressure forthe key. |
| Controller The type of Controller,displayed as a number. | The amount of ControlChange. |
| Program Change The Program Changenumber. | Not used. |
| Aftertouch The amount of pres-sure. | Not used. |
| Pitchbend The “fine tune” of thebend. Not always used. | The coarse amount of bend. |
→ System Exclusive events are not included in the table above, since they do not use value 1 and 2.
Since value 1 and 2 have different meanings for different events, searching for e.g. value 2 = 64 would both find notes with the velocity 64 and controllers with the amount 64, etc. If this is not what you want, you can add an additional filter condition line with the Filter Target "Type", specifying which type of events to find (see below).

This is particularly useful when searching for note pitch or velocity values, as described below.
The general procedures when searching for value 1 or 2 are:
- If you select any Condition other than the Range options, you set up a specific value in the Parameter 1 column.

Here, the Logical Editor will find all events with a value 2 less than 80.
- If you select Inside Range or Outside Range in the Condition column, the range consists of the values between Parameter 1 and Parameter 2.
Note that Parameter 1 should have the lower value.
Searching for note pitch or velocity
If you add another condition line with the Filter Target "Type", Condition "Equal" and Parameter 1 set to "Note", the Logical Editor will "know" you are searching for pitch or velocity. This has the following benefits:
- The Filter Targets Value 1 and Value 2 will be displayed as "Pitch" and "Velocity" respectively, making it easier to grasp the function of the filter condition.
- Pitch values in the Parameter columns will be displayed as note names (C3, D#4, etc.). When entering pitch values you can either type a note name or a MIDI note number (0–127).
- When Value 1 (pitch) is selected as Filter Target, an additional option appears in the Condition column: "Note is equal to". When this is selected, you specify a note name in the Parameter 1 column but without any octave number (C, C#, D, D#, etc.). The Logical Editor can then find all notes of a certain key, in all octaves.
See "Combining multiple condition lines" on page 385 for more info on working with multiple filter condition lines.
Searching for controllers
There is similar extended functionality when searching for controllers: If you've added an additional "Type = Controller" condition line, the Logical Editor will "know" you are searching for controllers. The Parameter 1 column will then show the names of the MIDI controllers (Modulation, Volume, etc.) when Value 1 is selected as Filter Target.
Searching for MIDI channels
Each MIDI event contains a MIDI channel setting (1–16). Normally, these settings are not used, since the MIDI event plays back on the MIDI channel set for its track. However, you can come across MIDI parts with events set to different channels, for example in the following scenarios:
- If you have recorded MIDI from an instrument sending on several different channels (e.g. a master keyboard with different key zones).
- If you have imported a MIDI file of type 0 (with a single track, containing MIDI events with different channel settings).
Searching for MIDI channel values is straightforward; you select a Condition and enter a MIDI channel (1–16) in the Parameter 1 column (and, if you've selected one of the Range Conditions, a higher channel in the Parameter 2 column, creating a value range).
Searching for element types
Selecting Type as the Filter Target allows you to find elements of a certain type only.
- The Condition column contains only three options: Equal, Unequal and All Types.
- Clicking the Parameter 1 column displays a pop-up menu, listing the available types (Note, Poly Pressure, Controller, etc.).
The Logical Editor will find all elements matching or not matching the selected type (depending on the Condition).

As mentioned above, selecting Type = Note or Type = Controller adds some additional functionality to the Logical Editor. You should make it a habit to add a Type condition when applicable.
Searching for properties
On the Filter Target pop-up menu, you will find an option called Property. This allows you to search for properties that are not part of the MIDI standard but rather Cubase-specific settings.
When the Property option is selected, the Condition column has two options: "Property is set" and "Property is not set". Which property to look for is selected in the Parameter 1 column. The options are "muted", "selected" and "empty". Two examples:

Here, the Logical Editor will find all muted events.
| Filter Target | Condition | Parameter 1 | Parameter 2 | Bar Range/Time Base | |
| Property | Property is set | Event is selected | |||
| Property | Property is set | Event is muted | |||
Here, the Logical Editor will find all events that are selected and muted.
Searching for event contexts
On the Filter Target pop-up menu, you will find an option called "Last Event". This can be used to perform context-dependent searches (especially useful in the Input Transformer).
"Last Event" indicates the state of an event which has already passed the Input Transformer/Logical Editor. The condition has to be combined with Parameter 1 and Parameter 2.
Below, you will find a few examples on how the Last Event filter target can be used.
Here, the action will only be performed when the sustain pedal is down:
Filter Target Condition Parameter 1 Parameter 2
Last Event Equal MIDI Status 176/Controller
Last Event Equal Value 1 64
Last Event Bigger Value 2 64
In this example, the action will be performed when the note C1 is pressed (the "Note is playing" condition is only available in the Input Transformer and in the Transformer effect):
Filter Target Condition Parameter 1 Parameter 2
Type is Equal Note
Last Event Equal Note is playing 36/C1
In this example, the action will be performed after playing the C1 note:
Filter Target Condition Parameter 1 Parameter 2
Last Event Equal Value 1 36/C1
Combining multiple condition lines
As described above, you can add condition lines by clicking the Add button (+) below the list. The result of combining condition lines depends on the boolean And/Or operators and the brackets.
The bool column
By clicking in the "bool" column to the right in the list, you can select a boolean operator: "And" or "Or". A boolean operator combines two condition lines and determines the result in the following way:
- If two condition lines are combined with a boolean And, both conditions must be fulfilled for an element to be found.
| Filter Target | Condition | Parameter 1 | Parameter 2 | Bit Range/Time Base | ) | bool |
| Type In | Equal | Note | And | |||
| Position | Equal | 3.01.01.000 | PPQ ) |
The Logical Editor will only find elements that are notes and start at the beginning of the third bar.
- If two condition lines are combined with a boolean Or, one of the conditions (or both) must be fulfilled for an element to be found.
| Filter Target | Condition | Parameter 1 | Parameter 2 | Bar Range/Time Base | 1 | bool |
| Typoia | Equal | Note | Or | |||
| Position | Equal | 3.01 01.000 | PPQ | ) |
The Logical Editor will find all events that are notes (regardless of their position) and all events starting at the beginning of the third bar (regardless of their type).
When you add a new condition line, the boolean setting defaults to And. Therefore, if all you want to do is set up two or more conditions that all must be met for an element to be found, you do not have to think about the boolean column – just add the required lines and make the usual filter settings.
Using brackets
The bracket (parenthesis) columns let you enclose two or more condition lines, dividing the conditional expression into smaller units. This is only relevant when you have three or more condition lines and want to use the boolean Or operator. This is how it works:
- Without brackets, the conditional expressions are evaluated according to their order in the list.
| Filter Target | Condition | Parameter 1 | Parameter 2 | Bit Range/Time Base | J) | bool |
| Type Is | Equal | Note | And | |||
| Pitch | Equal | C3 | Or | |||
| Channel | Equal | 1 |
In this case the Logical Editor will find all MIDI notes with the pitch C3, as well as all events (regardless of their type) set to MIDI channel 1.
Maybe you wanted to find all notes that either had the pitch C3 or the MIDI channel 1 (but no non-note events)? Then you need to add some brackets:
| Filter Target | Condition | Parameter 1 | Parameter 2 | Bar Range/Time Base | ) | Input |
| Type to | Equal | Note | And | |||
| ( | Pitch | Equal | C3 | Gr | ||
| Channel | Equal | 1 | ) | |||
- Expressions within brackets are evaluated first. If there are several layers of brackets, these are evaluated "from the inside out", starting with the innermost brackets.
You add brackets by clicking in the bracket columns and selecting an option. Up to triple brackets can be selected.
Selecting a function
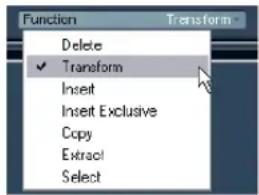
text_image
Function Delete ✓ Transform Insert Insert Exclusive Copy Extract SelectThe pop-up menu at the bottom of the Logical Editor is where you select the function – the basic type of editing to be performed.
Below, the available options are listed. Note that some options are not available in the Transformer effect.
Delete
Deletes all elements found by the Logical Editor. In the case of the Transformer, this function will remove (or "mute") all found elements from the "output stream" – the actual elements on the track are not affected.
Transform
Changes one or several aspects of the found elements. You set up exactly what should be changed in the action list, see "Specifying actions" on page 387.
Insert
This will create new elements and insert these into the part(s) (Logical Editor) or the output stream (Transformer). The new elements will be based on the elements found by the Logical Editor's filter conditions, but with any changes you have set up in the action list applied.
Another way of expressing this is that the Insert function copies the found elements, transforms them according to the action list and inserts the transformed copies among the existing elements.
Insert Exclusive
This will transform the found elements according to the action list. Then, all elements that were not found (that did not meet the filter conditions) are deleted (Logical Editor) or removed from the output stream (Transformer).
Copy (Logical Editor only)
This will copy all found elements, transform them according to the action list and paste them into a new part on a new MIDI track. The original events are not affected.
Extract (Logical Editor only)
This works like Copy, but will cut the found events instead. Or in other words, Extract will transform all found events and move them to a new part on a new MIDI track.
Select (Logical Editor only)
This will simply select all found events, highlighting them for further work in the regular MIDI editors.
Specifying actions

The lower list in the Logical Editor window is the action list. This is where you specify any changes that should be made to the found events (relevant for all function types except Delete and Select).
The handling of the action list is similar to the filter condition list, but without the brackets and booleans. You simply add lines by clicking the Add button (+) below the list, and fill out the columns as required. To remove a superfluous action line, select it and click the Delete button (-).
Action Target
This is where you select the property that should be changed in the events:
Option Description
| Position (Logical Editor only) | Adjusting this value will move the events. |
| Length (Logical Editor only) | Lets you resize the events (notes only). |
| Value 1 This adjusts value 1 in the events. As described in the section "Searching for Value 1 or Value 2" on page 384, what is displayed for value 1 depends on the event type. For notes, value 1 is the pitch. |
| Value 2 This adjusts value 2 in the events. As described in the section "Searching for Value 1 or Value 2" on page 384, what is displayed for value 2 depends on the event type. For notes, value 2 is the velocity value. |
Option Description
Channel Allows you to change the MIDI channel setting. See "Searching for MIDI channels" on page 384.
Type Allows you to change the event type, e.g. transform after-touch events to modulation events.
Value 3 This adjusts value 3 in the events, which is used for handling of Note-off velocity when searching for properties. See “Searching for properties” on page 385.
⇒ The Position and Length parameters are interpreted via the time base setting in the Bar Range/Time Base column, with the exception of the Random setting, which uses the time base of the affected events.
Operation
This setting determines what to do with the Action Target. The options on this pop-up menu are different depending on the selected Action Target. Below, all available operations are listed:
Add
Adds the value specified in the Parameter 1 column to the Action Target.
Subtract
Subtracts the value specified in the Parameter 1 column from the Action Target.
Multiply by
Multiplies the Action Target value with the value specified in the Parameter 1 column.
Divide by
Divides the Action Target value by the value specified in the Parameter 1 column.
Round by
This “rounds” the Action Target value using the value specified in the Parameter 1 column. In other words, the Action Target value is changed to the closest value that can be divided by the Parameter 1 value.
For example, if the Action Target value is 17 and Parameter 1 is 5, the result of rounding will be 15 (the closest value that can be divided by 5). Another word for this type of operation would be "quantizing", and it is actually possible to use it for this, by setting the Action Target to "Position" and specifying a quantize value with Parameter 1 (in ticks, with 480 ticks per quarter note).
Set Random Values between
This will set the Action Target value to a random value within the range specified with Parameter 1 and 2.
Set Relative Random Values between
This will add a random value to the current Action Target value. The added random value will be within the range specified with Parameter 1 and 2. Note that these can be set to negative values.
For example, if you set Parameter 1 to -20 and Parameter 2 to +20, the original Action Target value will get a random variation, never exceeding ±20 .
Set to fixed value
This sets the Action Target to the value specified in the Parameter 1 column.
Add Length (Logical Editor only)
This is only available when Action Target is set to Position. Furthermore, it is only valid if the found events are notes (and thus have a length). When Add Length is selected, the length of each note event will be added to the Position value. This can be used for creating new events (using the Insert function) positioned relative to the end positions of the original notes.
Transpose to Scale
This is only available when Action Target is set to Value 1, and when the filter conditions are specifically set up to find notes (a "Type = Note" filter condition line has been added). When "Transpose to Scale" is selected, you can specify a musical scale using the Parameter 1 and 2 columns. Parameter 1 is the key (C, C#, D, etc.) while Parameter 2 is the type of scale (major, melodic or harmonic minor, etc.).
Each note will be transposed to the closest note in the selected scale.
Use Value 2
This is only available when Action Target is set to Value 1. If this option is selected, the Value 2 setting in each event will be copied to the Value 1 setting.
For example, this would be useful if you are transforming all Modulation controllers to Aftertouch events (since controllers use Value 2 for their amount, while Aftertouch uses Value 1 – see “Searching for Value 1 or Value 2” on page 384).
Use Value 1
This is only available when Action Target is set to Value 2. If this option is selected, the Value 1 setting in each event will be copied to the Value 2 setting.
Mirror
This is only available when Action Target is set to Value 1 or Value 2. When this option is selected, the values will be "mirrored" around the value set in the Parameter 1 column.
In the case of notes, this will invert the scale, with the key set in the Parameter 1 column as "center point".
Linear Change in Loop Range (Logical Editor only)
This will affect events within the loop range (between the left and right locators) only. It will create a linear "ramp" of values (replacing the original values) starting at the value in the Parameter 1 column and ending at the Parameter 2 value.
This can be used for creating linear controller sweeps, velocity ramps, etc.
Relative Change in Loop Range (Logical Editor only)
As with the previous option, this will create a ramp of values, affecting events in the loop range only (i.e. between the locators). However, here the changes are “relative”, meaning that values will be added to the existing values.
In other words, you set up a value ramp starting at Parameter 1 and ending at Parameter 2 (note that the Parameter values can be negative). The resulting value ramp is then added to the existing values for the events within the loop range.
For example, if you apply this to note velocities with Parameter 1 set to 0 and Parameter 2 set to -100, you create a velocity fade-out, keeping the original velocity relations:
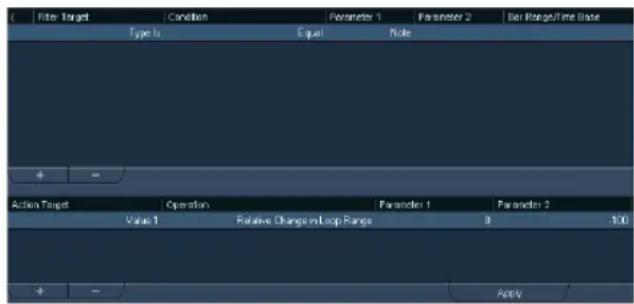
text_image
Filter Target Condition Parameter 1 Parameter 2 Bar Range/Time Base Type 1 Equal Note Action Target Operation Parameter 1 Parameter 2 Value 1 Relative Change in Loop Range 0 100 ApplyApplying the defined actions
Once you have set up filter conditions, selected a function and set the required actions (or loaded a preset), you apply the actions defined with the Logical Editor by clicking the Apply button.

In the Logical Editor, processing is not performed until you click the Apply button. When using the Transformer MIDI effect, there is no Apply button – the current settings are automatically applied in real-time during playback or live playing.
Logical Editor operations can be undone just like any other editing.
Working with presets
The Presets pop-up menu at the top of the window allows you to load, store and manage Logical Editor presets.
- To load a preset, select it from the Presets pop-up menu. If available, an explanatory text appears to the right of the menu. When setting up your own presets, you can click in this area and enter a description.
- You can also select Logical Presets directly from the MIDI menu.
This allows you to apply a preset to the selected MIDI part, without having to open the Logical Editor.
- It is also possible to select and apply Logical Presets from within the List Editor (from the Mask menu).
Storing your own settings as a preset
If you have made Logical Editor settings that you want to use again, you can store them as a preset:
- Click on the Store Preset button on the right of the Preset menu.
A dialog for specifying a name for the new preset is displayed.
- Enter a name for the preset and click OK. The preset is stored.
⇒ To remove a preset, load it and click on the Remove Preset button.
Organizing and sharing presets
The Logical Editor presets are stored within the application folder in the Presets\Logical Edit subfolder (see also "Where are the settings stored?" on page 478). While these files cannot be edited "manually", you can reorganize them (e.g. putting them in subfolders) like any files.
This also makes it easy to share presets with other Cu-base users, by transferring the individual preset files.
⇒ The list of presets is read each time the Logical Editor is opened.
The Input Transformer
This function allows you to filter out and change MIDI data coming to a MIDI track before it is recorded. The Input Transformer is very similar to the Transformer MIDI effect, but contains four independent "modules", for which you can set up different filtering and actions. You can activate any or all of these four modules.
Here are some of the things the Input Transformer allows you to do:
- Set up split keyboard combinations for recording left and right hands separately.
- Turn a controller like a foot pedal into MIDI notes (for playing bass drum the right way).
- Filter out one specific type of MIDI data on one MIDI channel only.
- Turn aftertouch into any controller (and vice versa).
- Invert velocity or pitch.
Again: four of these things can be done at the same time.
Opening the Input Transformer
To open the Input Transformer for a MIDI track, select the track and click the Input Transformer button in the Inspector to open the pop-up menu:
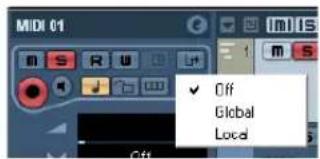
text_image
MIDI 01 Off Global Local- Select Global to make Input Transformer settings that affect all MIDI inputs (and thereby all MIDI tracks).
- Select Local to make Input Transformer settings for this track only.
In both cases, the button lights up and the Input Transformer opens.
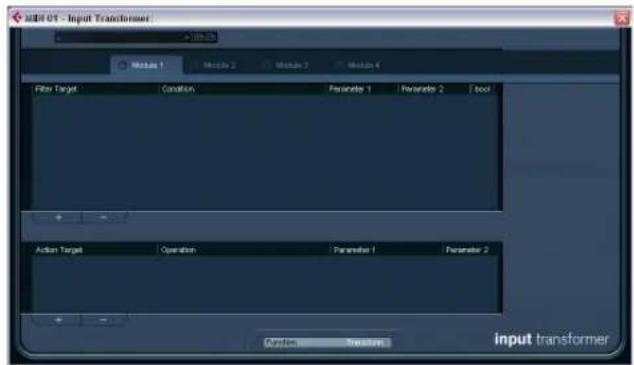
text_image
m08-01 - Input Transformer Module 1 Module 2 Module 3 Module 4 Filter Target Condition Parameter 1 Parameter 2 Tool Action Target Operation Parameter 1 Parameter 2 Function Transformer input transformerHandling the four modules
The Input Transformer is really four separate transformers, or modules.
- You select which module to view and make settings for by clicking the corresponding Module tab.

Module 1 selected for viewing and editing.
- The On/Off buttons next to the Module names determine which module(s) are active.
Here, Module 1 is inactive and Module 2 is active.
The Function pop-up menu
The Function pop-up menu contains two options: Filter and Transform.
- In Filter mode, only the filter conditions (the upper list) are taken into account. All events matching the conditions set up will be filtered out (excluded from the recording).
- In Transform mode, events matching the filter conditions will be transformed according to the settings in the action list (the lower list).
Setting up filtering and actions
This is done just like in the Logical Editor. Here is a brief rundown:
- Click the Add button (+) to add lines to the filter condition list or action list.
To remove a line, click it to select it and click the Delete button (-) below the lists. - Clicking the columns in the filter condition list opens pop-up menus allowing you to specify the conditions to match.
- Clicking the columns in the action list opens pop-up menus allowing you to specify what should be done to the found events (when Transform mode is selected).
For detailed descriptions of the filter conditions and action columns, see "General procedure" on page 382.
- The Input Transformer has no Apply button – the settings are active as soon as you activate the On/Off button of a module.
The settings made in the active modules will affect all MIDI data you record on the track.
⇒ Closing the Input Transformer window does not turn it off – you need to deactivate the On/Off buttons of all modules for this!
A lit Input Transformer button in the Inspector indicates that one or more modules are active.
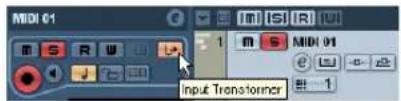
text_image
MIDI 01 m S R W 1 m S MIDI 01 Input TransformerThe Project Logical Editor
Introduction
On the Edit menu you will find the function "Project Logical Editor...". This opens a Project Logical Editor for the entire project. It works similar to the Logical Editor on the MIDI menu, see the chapter "The Logical Editor, Transformer and Input Transformer" on page 380. The most important difference is that the Logical Editor for MIDI works at the event level, whereas the Project Logical Editor works at the project level and is therefore a very powerful tool for "search and replace" functions in your entire project.
⇒ The MIDI events in the MIDI parts will not be affected by the Project Logical Editor operations. If you want to change MIDI notes or controller data, you have to use the Logical Editor.
With the Project Logical Editor, you can combine filter conditions with actions to create complex procedures, e.g. for special track type operations on tracks that are named identically. You can use its functions to delete all muted MIDI parts or to toggle the open state of all folder tracks in your project, etc.
Included with the Project Logical Editor are a number of presets that give you an impression of the great possibilities that this feature offers, see "Working with presets" on page 399. Many of them can also be used as starting points when you set up your own editing operations.
The principle for the Project Logical Editor is this:
- You set up filter conditions to find certain elements. This could be elements of a certain type, with certain attributes or values or on certain positions, in any combination. You can combine any number of filter conditions and make composite conditions using AND/OR operators.
- You select the basic function to be performed. The options are Transform (changing properties of the found elements), Delete (removing the elements) and Select (selecting the found elements).
- You set up a list of actions, which specify exactly what should be done.
This is not necessary for all functions. For example, the Delete function does not require any additional action specifications – it simply removes all found elements.
- In the Macro pop-up menu you can choose an additional macro that will be executed after the actions you defined. Use this to extend the possibilities offered by combining the filter conditions and actions specified in the Project Logical Editor even further.
By combining filter conditions, functions, the specific actions, and additional macros, you can perform very powerful processing.
The Project Logical Editor allows all kinds of settings that may not always make sense. Experiment a bit before applying your edits to important projects. You can undo the operations by using the Undo command on the Edit menu.
Opening the Project Logical Editor
- Open the desired project.
All elements in the project will be affected, you do not have to make any selection. - Select "Project Logical Editor..." from the Edit menu.
Window overview
Presets pop-up menu List of filter conditions
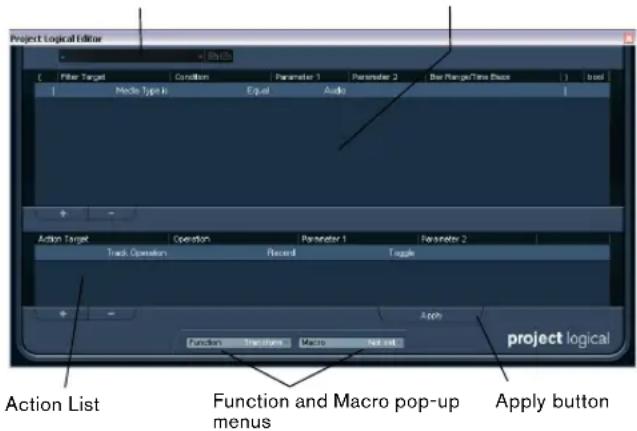
text_image
Project Logical Editor Filter Target Condition Parameter 1 Parameter 2 Bar Range/Time Base load Mode Type II Equal Audio Action Target Operation Parameter 1 Parameter 2 Track Operations Record Toggle Function Track Share Macro Not set Action List Function and Macro pop-up menus Apply button project logicalTo understand the Project Logical Editor, it might be a good idea to start by exploring the included presets. These are found on the Presets pop-up menu at the top of the window. For information on how to create and handle your own presets, see "Working with presets" on page 399.
Setting up filter conditions
General procedure
The upper list is where you set up the filter conditions, determining which elements to find. The list contains one or several conditions, each on a separate line.
| Filter Target | Condition | Parameter 1 | Parameter 2 | Bar Range/Time Base |
| Media Type in | Equal | MIDI | ||
| Container Type in | Equal | Track |
- To add a new condition, click the Add button (+) below the list.
The new line is added at the bottom of the list. If there are many lines, you may need to use the scrollbar to the right to view them.
- To remove a condition, select it and click the Delete button (-) below the list.
If you have already defined filter conditions and/or applied a preset, but want to start again from scratch, you can initialize the settings by selecting the Init option from the Presets pop-up menu.
You set up a filter condition line by clicking in the columns and selecting options from the pop-up menus that appear. Here is a brief description of the columns:
Column Description
| Left bracket This is used for “bracketing” several lines together when creating conditions with multiple lines and the boolean operators And/Or. See “Combining multiple condition lines” on page 396. |
| Filter Target Here you select which property to look for when finding elements. Your choice here affects the available options in the other columns as well, see below! |
| Condition This determines how the Project Logical Editor should compare the property in the Filter Target column to the values in the Parameter columns (see below). The available options depend on the Filter Target setting. |
| Parameter 1 Here you set which value the element properties should be compared to (depending on the Filter Target). For example, if the Filter Target is “Position” and Condition is “Equal”, the Project Logical Editor will look for all elements starting at the position you specify in the Parameter 1 column. |
| Parameter 2 This column is only used if you have selected one of the “Range” options in the Condition column. Typically, this allows you to find all elements with values inside (or outside) the range between Parameter 1 and Parameter 2. |
Column Description
| Bar Range/Time Base | This column is only used if the Filter Target is set to "Position". If one of the "Bar Range" options is selected in the Condition column, you use the Bar Range/Time Base column to specify "zones" within each bar (allowing you to find e.g. all elements on or around the first beat of every bar). If any of the other Condition options is selected, you can use the Bar Range/Time Base column to specify the time base (PPQ, Seconds, etc.). See "Searching for elements at certain positions" on page 395. |
| Right bracket This is used for "bracketing" several lines together. See "Combining multiple condition lines" on page 396. |
| bool | This allows you to insert the boolean operators And/Or, when creating conditions with multiple lines. See "Combining multiple condition lines" on page 396. |
Below, the different Filter Targets (and their corresponding Condition and Parameter options) are described in more detail.
Searching for Media types
- Select "Media Type" in the Filter Target pop-up menu. This allows you to find elements of certain types of media only.
- Open the pop-up menu in the Parameter 1 column and select the desired option. When the Filter Target is set to Media Type, the pop-up menu lists the available media types. The following table lists what will be found:
Media Type Description
| Audio If no container type is specified, this finds audio events, audio parts and audio tracks. |
| MIDI If no container type is specified, this finds MIDI parts and MIDI tracks. |
| Automation If no container type is specified, this finds automation events and automation tracks. |
| Marker | If no container type is specified, this finds marker events and marker tracks. |
| Transpose | If no container type is specified, this finds transpose events and transpose tracks. |
| Arranger | If no container type is specified, this finds Arranger events and Arranger tracks. |
| Tempo | If no container type is specified, this finds tempo events and tempo tracks. |
| Signature | If no container type is specified, this finds signature events and signature tracks. |
- Open the pop-up menu in the Condition column and select the desired condition.
For media types, the following options are available:
Condition Description
Equal This finds the Media Type set up in the Parameter 1 column.
All Types This finds all Media Types.
For example, if you have set up the Project Logical Editor like this...
| Filter Target | Condition | Parameter 1 | Parameter 2 | Box Range/Time Base |
| Media Type is | Equal | Marker |
...it will find all Marker events and tracks in the project.
Searching for Container types
-
Select Container Type in the Filter Target pop-up menu. This allows you to find parts, events or tracks.
-
Open the pop-up menu in the Parameter 1 column and select the desired option.
When the Filter Target is set to Container Type, the pop-up menu lists the available container types. The following table lists what will be found:
Container Type Description
Folder Track This finds all folder tracks, included FX Channel and Group Channel folders.
Track This finds all track types.
Part This finds audio, MIDI and Instrument parts. Folder parts will not be found.
Event This finds automation points, markers, as well as audio, arranger, transpose, tempo and time signature events.
- Open the pop-up menu in the Condition column and select the desired condition.
For container types, the following options are available:
Condition Description
Equal This finds the Container Type set up in the Parameter 1 column.
All Types This finds all Container Types.
For example, if you have set up the Project Logical Editor like this...
| Filter Target | Condition | Parameter 1 | Parameter 2 | Bar Range/Time Base |
| Container Types | Equal | FolderTrack |
...it will find all Folder tracks in the project.
Combining Media Type and Container Type
The combination of the filter targets Media Type and Container Type represents a versatile tool for logical operations:
| Filter Target | Condition | Parameter 1 | Parameter 2 | Bar Range/Time Base | 1 | bool |
| Media Type is | Equal | MIDI | And | |||
| Container Type is | Equal | Part | 1 |
Here, the Project Logical Editor will find all MIDI and instrument parts in the project.
| Filter Target | Condition | Parameter 1 | Parameter 2 | Bar Range/Time (s) | Book |
| Media Type is | Equal | Automation | And | ||
| Container Type is | Equal | Track | And | ||
| Name | Contains | val | I |
Here, the Project Logical Editor will find all automation tracks (not events) in the project whose name contains vol.
| Filter Target | Condition | Parameter 1 | Parameter 2 | Bit Range/Time Base | bool |
| Media Type is | Equal | MIDI | And | ||
| Container Type is | Equal | Part | And | ||
| Property | Not set | Event emulated |
Here, the Project Logical Editor will find all MIDI and instrument parts (not tracks) in the project that are muted.
| Filter Target | Condition | Parameter 1 | Parameter 2 | Bar Ranges/Time Base | Total | |
| III | Media Type is | Equal | MIDI | And | ||
| Container Type is | Equal | Part | ) | Or | ||
| ( | Media Type is | Equal | Audio | And | ||
| Container Type is | Equal | Event | )] | And | ||
| Property | Property is set | Event is mutated | ) | |||
Here, the Project Logical Editor will find all MIDI and instrument parts (not tracks) or all audio events (not parts or tracks) in the project that are muted.
Searching for Names
- Select Name on the Filter Target pop-up menu.
- Enter the desired name, or a part of a name in the Parameter 1 column.
- Open the pop-up menu in the Condition column and select the desired condition.
For names, the following options are available:
Condition Description
Equal This is the exact same text string as set up in the Parameter 1 column.
Contains This contains the text specified in the Parameter 1 column.
For example, if you have set up the Project Logical Editor like this...
| Filter Target | Condition | Parameter 1 | Parameter 2 | Bar Range/Time Base | J | bool |
| Container Type is | Equal | Track | And | |||
| Name | Contains | voc | I |
...it will find all tracks in the project whose name contains "voc".
To take maximum advantage of this feature, we recommend using a standard nomenclature in your projects (Drums, Perc, Voc, etc.).
Searching for elements at certain positions
- Select "Position" in the Filter Target pop-up menu. This allows you to find elements starting at certain positions, either relative to the start of the project or within each bar.
- Open the pop-up menu in the Condition column and select the desired condition. For positions, the following options are available:
Condition An element will be found if it...
| Equal ...has the exact same value as set up in the Parameter 1 column. | |
| Unequal ...has any value other than the one set up in the Parameter 1 column. | |
| Bigger ...has a value higher than the one set up in the Parameter 1 column. | |
| Bigger or Equal | ...has a value that is the same as or higher than the one set up in the Parameter 1 column. |
| Less ...has a value lower than the one set up in the Parameter 1 column. | |
| Less or Equal ...has a value that is the same as or lower than the one set up in the Parameter 1 column. | |
| Inside Range ...has a value that is between the values set up in the Parameter 1 and Parameter 2 columns. Note that Parameter 1 should be the lower value and Parameter 2 the higher. | |
| Outside Range ...has a value that is not between the values set up in the Parameter 1 and Parameter 2 columns. | |
| Inside Bar Range | ...is within the “zone” set up in the Bar Range/Time Base column, in each bar within the current selection. |
| Outside Bar Range | ...is outside the “zone” set up in the Bar Range/Time Base column, in each bar within the current selection. |
| Before Cursor ...is before the song Project position. | |
| Beyond Cursor ...is after the song Project position. | |
| Inside Track Loop | ...is inside the set track loop (see “The independent track loop function” on page 257). |
Condition An element will be found if it...
Inside Cycle ...is inside the set cycle.
Exactly matching ...exactly matches the set cycle.
- If you select any condition other than the Range, Bar Range, Cursor, Loop or Cycle options, you set up a specific position (in PPQ, seconds, samples, or frames) in the Parameter 1 column. Use the Bar Range/Time Base column to specify the time base. Note that the position for Bar Range is measured in ticks related to the start of the bar.

Here, the Project Logical Editor will find all elements at the PPQ position 5.1.1. in the project.
- If you select Inside Range or Outside Range in the Condition column, you set the start position of the range in the Parameter 1 column and the end position in the Parameter 2 column. You can also change the time base using the Bar Range/Time Base column.
The Project Logical Editor will then find all elements inside or outside this position range.
- If you select one of the Bar Range options in the Condition column, the Bar Range/Time Base column will show a graphic bar display. You specify the range within the bar by clicking and dragging in the bar display (the specified Bar Range is indicated in blue).
The Project Logical Editor will then find all elements starting inside or outside this Bar Range, in all bars (within the current selection).

Here, the Project Logical Editor will find elements starting around the second beat in each bar.
Searching for elements of certain lengths
- Select Length in the Filter Target pop-up menu. This allows you to find elements of a certain length only. The Length parameter is interpreted via the time base setting in the Bar Range/Time Base column, i.e. in PPO, seconds, samples, or frames.
- Open the pop-up menu in the Condition column and select the desired condition.
For lengths, the following options are available:
Condition An element will be found, if it...
Equal ...has the exact same value as set up in the Parameter 1 column.
Unequal ...has any value other than the one set up in the Parameter 1 column.
Bigger ...has a value higher than the one set up in the Parameter 1 column.
Bigger or ...has a value that is the same as or higher than the one Equal set up in the Parameter 1 column.
Less ...has a value lower than the one set up in the Parameter 1 column.
Less or Equal ...has a value that is the same as or lower than the one set up in the Parameter 1 column.
Inside Range ...has a value that is between the values set up in the Parameter 1 and Parameter 2 columns. Note that Parameter 1 should be the lower value and Parameter 2 the higher.
Outside Range ...has a value that is not between the values set up in the Parameter 1 and Parameter 2 columns.
If you select any condition other than the Range options, you set up a specific position in the Parameter 1 column.
| Filter Target | Condition | Parameter 1 | Parameter 2 | Box Range/Time Base | ) | bool |
| Container Type a | Equal | Part | Or | |||
| Container Type b | Equal | Event | And | |||
| Media Type a | Equal | Audio | And | |||
| Length | Less | 0200 | Samples | | |||
Here, the Project Logical Editor will find all audio parts and events in the project with a length smaller than 200 samples.
Searching for properties
-
Select "Property" on the Filter Target pop-up menu.
-
Open the pop-up menu in the Condition column and select the desired condition.
When the Property option is selected, the Condition column has two options: "Property is set", and "Property is not set".
- Open the pop-up menu in the Parameter 1 column and select the desired option.
This sets which property will be searched. The options are "Event is muted", "Event is selected", and "Event is Empty".
Note that “event” in this context refers to all the Project window elements that can be modified, e.g. MIDI parts, audio events and parts, or transpose, arranger, and automation events.
Three examples:
| Filter Target | Condition | Parameter 1 | Parameter 2 | Bit Range/Time Base | 1) | bod |
| Media Type a | Equal | MDI | And | |||
| Container Type a | Equal | Pall | And | |||
| Property | Property is set | Events mixed |
Here, the Project Logical Editor will find all muted MIDI and instrument parts.
| Filter Target | Conviton | Parameter 1 | Parameter 2 | bar Range/Time Base | ) | bool |
| Property | Property is set | Event is selected | And | |||
| Property | Property is not set | Event isヌured | ||||
Here, the Project Logical Editor will find all elements that are selected but not muted.
| Filter Target | Condition | Parameter 1 | Parameter 2 | Bar Range/Time Base | ) | bool |
| Media Type is | Equal | Audio | And | |||
| Container Type is | Equal | Part | And | |||
| Property | Property is set | Event is selected | And | |||
| Property | Property is set | Event is empty |
Here, the Project Logical Editor will find all selected audio parts that are empty.
Combining multiple condition lines
As described above, you can add condition lines by clicking the Add button (+) below the list. The result of combining condition lines depends on the boolean And/Or operators and the brackets.
The bool column
By clicking in the "bool" column to the right in the list, you can select a boolean operator: "And" or "Or". A boolean operator combines two condition lines and determines the result in the following way:
- If two condition lines are combined with a boolean And, both conditions must be fulfilled for an element to be found.
| Filter Target | Condition | Parameter 1 | Parameter 2 | Bar Range/Time Base | 3 | box |
| Media Type is | Equal | MIDI | Avd | |||
| Container Type is | Equal | Track |
The Project Logical Editor will only find MIDI tracks.
- If two condition lines are combined with a boolean Or, one of the conditions (or both) must be fulfilled for an element to be found.
| Filter Target | Condition | Parameter 1 | Parameter 2 | Bar Range/Time Base | j | bool |
| Container Type is | Equal | Part | 0i | |||
| Container Type is | Equal | Event | And | |||
| Position | Exactly Matching Cycle | PPQ | ||||
The Project Logical Editor will find all parts or events that match exactly the cycle.

When you add a new condition line, the boolean setting defaults to And. Therefore, if all you want to do is set up two or more conditions that all must be met for an element to be found, you do not have to think about the boolean column – just add the required lines and make the usual filter settings.
Using brackets
The bracket (parenthesis) columns let you enclose two or more condition lines, dividing the conditional expression into smaller units. This is only relevant when you have three or more condition lines and want to use the boolean Or operator.
You add brackets by clicking in the bracket columns and selecting an option. Up to triple brackets can be selected.
- Without brackets, the conditional expressions are evaluated according to their order in the list.
| Filter Target | Condition | Parameter 1 | Parameter 2 | Bar Range/Time Base | Tool |
| Media Type is | Equal | Audio | And | ||
| Name | Contains | pero | Dir | ||
| Name | Contains | drums |
Here, the Project Logical Editor will find all audio parts and events whose name contains perc as well as other parts and events (e.g. MIDI parts) whose name contains drums.
Maybe you want to find all audio parts and events that either had the name perc or the name drums (but no other parts or events named drums)? Then you need to add some brackets:
| Filter Target | Condition | Parameter 1 | Parameter 2 | Color Range/Time Base | 1 | bool |
| Media Type is | Equal | Audio | And | |||
| Name | Contains | perc | Ch | |||
| Name | Contains | drums | ] |
Here, all audio parts or events will be found whose name contains perc or drums.
⇒ Expressions within brackets are evaluated first. If there are several layers of brackets, these are evaluated “from the inside out”, starting with the innermost brackets.
Specifying actions
| Action Target | Operation | Parameter 1 | Parameter 2 |
| Track Operation | Record | Toggle |
The lower list in the Project Logical Editor window is the action list. This is where you specify any changes that should be made to the found elements, relevant for the function type Transform.
You can perform two different kinds of actions: track-based actions (such as Track Operation, Name) and event-based actions (such as Position, Length, Name). There are also actions that only take effect on automation data (Trim).
The handling of the action list is similar to the filter condition list, but without the brackets and booleans. You simply add lines by clicking the Add button (+), and fill out the columns as required. To remove a superfluous action line, select it and click the Delete button (-).
Action Target
This is where you select the property that should be changed. The Operations determine what to do with the Action Target. Below, all available operations are listed:
Position
Adjusting this value will move the elements. This parameter is interpreted via the time base setting in the Bar Range/Time Base column, with the exception of the Random setting, which uses the time base of the affected events:
Operation Description
Add Adds the value specified in the Parameter 1 column to the Position.
Subtract Subtracts the value specified in the Parameter 1 column from the Position.
Multiply by Multiplies the Position value with the value specified in the Parameter 1 column.
Divide by Divides the Position value by the value specified in the Parameter 1 column.
Round by This "rounds" the Position value using the value specified in the Parameter 1 column. In other words, the Position value is changed to the closest value that can be divided by the Parameter 1 value. For example, if the Position value is 17 and Parameter 1 is 5, the result of rounding will be 15 (the closest value that can be divided by 5). Another word for this type of operation would be "quantizing", and it is actually possible to use it for this, by specifying a quantize value with Parameter 1 (in ticks, with 480 ticks per quarter note).
Operation Description
| Set Relative Random Values between | This will add a random value to the current Position value. The added random value will be within the range specified with Parameter 1 and 2. Note that these can be set to negative values.For example, if you set Parameter 1 to -20 and Parameter 2 to +20, the original Position value will get a random variation, never exceeding ± 20 . |
| Set to fixed value | This sets the Position to the value specified in the Parameter 1 column. |
Length
Lets you resize the elements. This parameter is interpreted via the time base setting in the Bar Range/Time Base column, with the exception of the Random setting, which uses the time base of the affected events:
Operation Description
| Add Adds the value specified in the Parameter 1 column to the Length. | |
| Subtract Subtracts the value specified in the Parameter 1 column from the Length. | |
| Multiply by Multiplies the Length value with the value specified in the Parameter 1 column. | |
| Divide by Divides the Length value by the value specified in the Parameter 1 column. | |
| Round by This “rounds” the Length value using the value specified in the Parameter 1 column. In other words, the Length value is changed to the closest value that can be divided by the Parameter 1 value. | |
| Set to fixed value | This sets the Length to the value specified in the Parameter 1 column. |
| Set Random Values between | This will add a random value to the current length. The added random value will be within the range specified with Parameter 1 and 2. |
Track Operation
This lets you change the track status.
Operation Description
| Folder Opens, closes or toggles folders. | |
| Record Enables, disables or toggles the record enable status. | |
| Monitor Enables, disables or toggles the monitor status. | |
| Solo Enables, disables or toggles the solo status. | |
| Mute Enables, disables or toggles the mute status. | |
| Read | Enables, disables or toggles the read enable status. |
| Write | Enables, disables or toggles the write enable status. |
| EQ Bypass Enables, disables or toggles the EQ bypass status. | |
| Inserts Bypass | Enables, disables or toggles the inserts bypass status. |
Operation Description
| Sends Bypass Enables, disables or toggles the sends bypass status. | |
| Lanes Active | Enables, disables or toggles the lanes active status. |
Name
This lets you rename the found elements.
Operation Description
| Replace Replaces names with the text specified in the Parameter 1 column. | |
| Append | Names will be appended with the string specified in the Parameter 1 column. |
| Prepend | The name will be prepended with the string specified in the Parameter 1 column. |
| Generate Name | The name will be replaced by the text specified in the Parameter 1 column, followed by the number set with Parameter 2. The number will be increased by 1 for every found element. |
| Replace Search String | You can specify a search string under Parameter 1 that should be replaced by the text specified in the Parameter 2 column. |
Trim
This Action Target is used for automation only and lets you trim the found elements.
Operation Description
| Multiply by | Multiplies the Trim value with the value specified in the Parameter 1 column. |
| Divide by | Divides the Trim value by the value specified in the Parameter 1 column. |
Set Color
This lets you set the color for an element. For this Action Target the only Operation available is "Set to fixed value". To use this, insert the name of a track color in the Parameter 1 column, e.g. "Color 7" to use dark green as track color.
Selecting a function
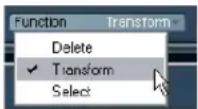
The left pop-up menu at the bottom of the Project Logical Editor is where you select the function – the basic type of editing to be performed.
The available options are:
Delete
Deletes all elements found by the Project Logical Editor.
When you delete automation tracks and undo this operation by selecting Undo from the Edit menu, the automation tracks will be restored, but the tracks will be closed.
Transform
Changes one or several aspects of the found elements. You set up exactly what should be changed in the action list, see below.
Select
This will simply select all found elements, highlighting them for further work in the Project window.
Applying Macros
In the Macro pop-up menu you can select a macro that will be executed automatically after completing the actions defined using the Filter and Action lists. This is useful if you would like to extend the already powerful Project Logical Editor features even further.
To use this, you set up the macro that you need in the Key Commands dialog (see "Setting up key commands" on page 480) and then select it in the Project Logical Editor from the Macro pop-up menu.
For example, you could use the filter conditions to select all tracks that contain automation data for a certain automation parameter (such as "volume") and use the macro "Select all on Track + Delete" to remove the automation events from these tracks (without deleting the tracks themselves).
Applying the defined actions
Once you have set up filter conditions, selected a function and set the required actions (or loaded a preset), you apply the actions defined with the Project Logical Editor by clicking the Apply button.
Project Logical Editor operations can be undone just like any other editing.
Working with presets
The Presets section in the bottom right section of the window allows you to load, store and manage Project Logical Editor presets. A preset contains all settings in the window, which means you can simply load a preset, edit the settings (if necessary) and click Apply.
- To load a preset, select it from the Presets pop-up menu. If available, an explanatory text appears to the right of the menu. When setting up your own presets, you can click in this area to enter a description.
- You can also open the Edit menu and select Presets directly from the "Process Project Logical Editor" submenu. This allows you to apply a preset directly, without having to open the Project Logical Editor.
Storing your own settings as a preset
If you have made Project Logical Editor settings that you want to use again, you can store them as a preset:
- Click the Store Preset button to the right of the Presets pop-up menu.
A dialog for specifying a name for the new preset is displayed.
- Enter a name for the preset and click OK.
The preset is stored.
⇒ To remove a preset, load it and click the Remove Preset button.
Organizing and sharing presets
The Project Logical Editor presets are stored within the application folder in the Presets\Logical Edit Project subfolder (see also "Where are the settings stored?" on page 478). While these files cannot be edited manually, you can reorganize them (e.g. putting them in subfolders) like any files.
This also makes it easy to share presets with other Cu-base users, by transferring the individual preset files.
⇒ The list of presets is read each time the Project Logical Editor is opened.
Setting up key commands for your presets
If you have stored Project Logical Editor presets, you can set up key commands for them:
- Pull down the File menu and select "Key Commands...". The Key Commands dialog appears.
- Use the list in the Commands column to navigate to the category "Process Project Logical Editor" and click the plus-sign to display the items in the folder.
- In the list, select the item to which you wish to assign a key command, click in the "Type in Key" field and enter a new key command.
- Click the Assign button above the field.
The new key command appears in the Keys List. - Click OK to exit the dialog.
For more information on Key Commands, see the chapter "Key commands" on page 479.
Editing tempo and signature
Background
Whenever you create a new project, Cubase will automatically set the tempo and time signature for this project. The tempo and signature settings can be displayed in two ways: either on dedicated tracks in the Project window, or in the Tempo Track Editor.
Tempo modes
Before we go into detail about tempo and signature settings, you should understand the different tempo modes.
For each track in Cubase that can make use of this function, you can specify whether it should be time-based or tempo-based (see "Switching between musical and linear time base" on page 40). For tempo-based tracks, the tempo can either be fixed throughout the entire project (this is called "fixed tempo mode") or follow the tempo track (this is called "tempo track mode"), which may contain tempo changes.
- To switch between fixed tempo mode and tempo track mode, use the Tempo button on the Transport panel:
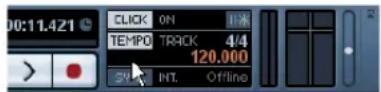
When the Tempo button is lit (and the text "Track" is shown), the tempo follows the tempo track; when it is deactivated (and the text "Fixed" is shown), a fixed tempo is used (see "Setting the fixed tempo" on page 405). You can also switch the tempo mode with the Activate Tempo Track button on the Tempo Track Editor toolbar.
In tempo track mode, the tempo cannot be changed on the Transport panel, i.e. the tempo information here is for display purposes only.
Signature events are always active, regardless of whether fixed tempo mode or tempo track mode is selected.
A note about tempo-based audio tracks
For tempo-based tracks, the start position of audio events on the timeline depends on the current tempo setting. However, it is important to realize that the actual audio (“within” the events) will play back as recorded, regardless of any tempo changes you make. Therefore, it is good practice to make the proper tempo and time signature settings before you start recording tempo-based audio.
To make an already recorded audio track follow the tempo changes, you can use the Sample Editor, see the chapter "The Sample Editor" on page 219.
How well this works depends on the character of the audio recordings, since the hitpoint detection feature works best with fairly rhythmical material.
To adapt the tempo track to time-based material, you can use the Time Warp tool, see "The Time Warp tool" on page 408.
This allows you to adjust the tempo track so that tempo-based material (e.g. positions in music) coincides with time-based material (e.g. positions in narration, video, etc.).
Tempo and signature display
You can view the current tempo and signature settings of your project in a number of ways:
- On the Transport panel.
See above, and the section "The Transport panel" on page 60.
- By displaying the tempo track and the signature track in the Project window.
Open the Project menu, select Add Track and the Signature and/or Tempo options.
- In the Tempo Track Editor.
Open the Project menu and select Tempo Track Editor, or [Ctrl]/[Command]-click the Tempo button on the Transport panel.
About the tempo and signature tracks
The tempo track and the signature track allow you to view and edit tempo and signature data in the project context.
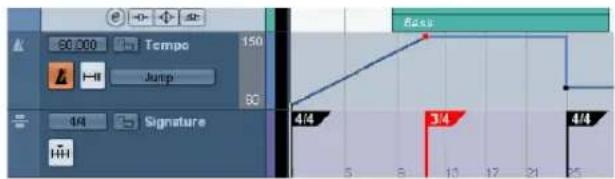
text_image
50.000 Tempo 150 Jump 60 Signature 4/4 8/4 3/4 4/4- The Inspectors for these tracks show the positions and values of individual tempo curve points or signature events.
- The signature track's background always shows bars. This is independent of the ruler display format setting.
- In the Track list for the tempo track, on the far right, you can specify the display range by clicking on the numbers at the top or bottom and dragging up or down.
Note that this does not change the tempo setting, but changes the display scale of the tempo track.
- You can lock the tempo track and the signature track to prevent unintentional editing.
Simply click the lock symbols in the Track list to lock/unlock the tracks.
About the Tempo Track Editor
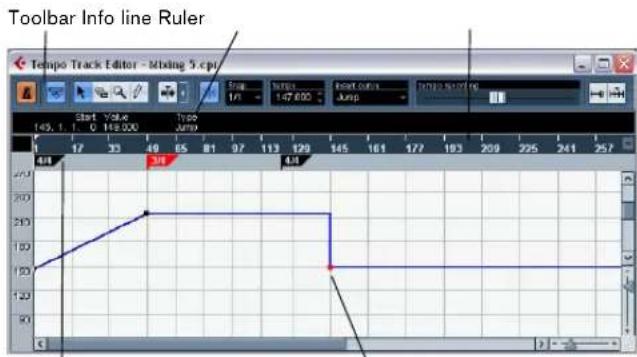
text_image
Toolbar Info line Ruler Tempo Track Editor - Mixing 5 cpi Start Value Type Jump 1/4 Time 147.000 Jump 145.1 0 118.000 Jump 4:4 33 49 65 81 97 113 129 145 161 177 193 209 225 241 257 210 120 120 120Time Signature area Tempo curve display
If you do not want to display two extra tracks in the Project window, you can also open the Tempo Track Editor to view and edit tempo and signature information.
The Tempo Track Editor has a toolbar, info line and ruler just like other editors in Cubase, plus an area for the display of time signature events and a tempo curve display.
The toolbar
The toolbar contains various tools and settings:
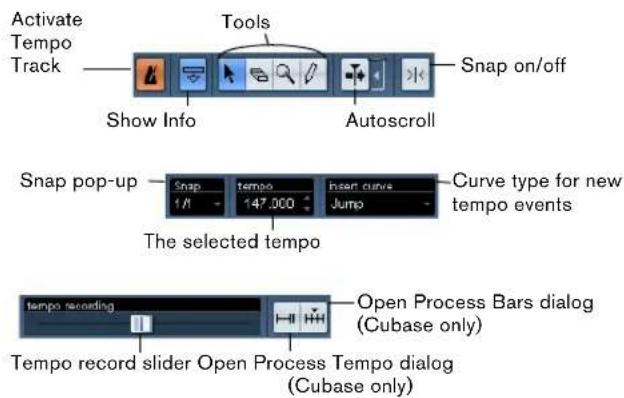
text_image
Activate Tempo Track Tools Snap on/off Show Info Autoscroll Snap pop-up 1/1 tempo 147.000 Insert curve Jump Curve type for new tempo events The selected tempo tempo recording Open Process Bars dialog (Cubase only) Tempo record slider Open Process Tempo dialog (Cubase only)- The tools for Object Selection, Erase, Zoom and Draw are used in the same way as in other editors. The Snap and Autoscroll functions also work exactly like in the Project window.
Note that in the Tempo Track Editor, the Snap function affects tempo events only. Time signature events always snap to the beginning of bars. - The info line in the Tempo Track Editor allows you to change settings for selected time signature events, and the type and tempo of selected tempo curve points.
- The ruler in the Tempo Track Editor shows the timeline, and is similar to the ruler in the Project window. See the section "The ruler" on page 33 for details.
- The area below the ruler shows time signature events.
- The main display shows the tempo curve (or, if fixed tempo mode is selected, the fixed tempo – see "Setting the fixed tempo" on page 405). To the left of the display you will find a tempo scale to help you quickly locate the desired tempo.
Note that the vertical "grid lines" in the tempo curve display correspond to the display format selected for the ruler.
Editing tempo and signature
You can use the options of either the Tempo Track Editor or the tempo and signature tracks to edit tempo and signature settings. The descriptions given below are valid in both cases. The only exception is the tempo recording slider (see below) which is available only in the Tempo Track Editor.
Editing the tempo curve

This section assumes that you are working in tempo track mode, i.e. the Tempo button must be activated on the Transport panel.
Adding tempo curve points
- Use the "Insert curve" pop-up menu (in the toolbar of the Tempo Track Editor) or the "Type of New Tempo points" pop-up menu in the Track list for the tempo track to select whether you want the tempo to change gradually from the previous curve point to the new one ("Ramp") or change instantly to the new value ("Jump").
You can also set this to Automatic. In this case, the types of existing tempo curve points will be used when inserting new points at the same position.
-
Select the Pencil tool.
-
Click and drag in the tempo curve display to draw a tempo curve.
When you click, the tempo display in the toolbar shows the tempo value. If Snap is activated on the toolbar, this determines at which time positions you can insert tempo curve points, see "The Snap function" on page 56.
Insert curve set to "Ramp" Insert curve set to "Jump"
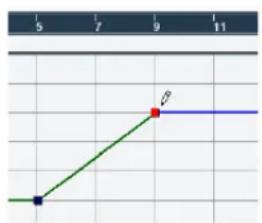
text_image
5 7 9 11 β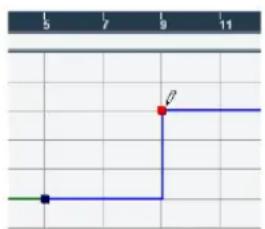
text_image
5 7 9 11 θ- You can also click on the tempo curve with the Arrow tool.
This adds a single point with each click.
Tempo values can also be automatically inserted by the Beat Calculator, see "The Beat Calculator" on page 407.
Selecting tempo curve points
Curve points can be selected as follows:
- Using the Arrow tool.
The standard selection techniques apply.
- Using the Select submenu on the Edit menu.
The options are:
Option Description
All Selects all curve points on the tempo track.
None Deselects all curve points.
In Loop Selects all curve points between the left and right locator.
From Start to Cursor
Selects all points to the left of the project cursor.
From Cursor to End
Selects all points to the right of the project cursor.
- You can also use the left and right arrow keys on the computer keyboard to go from one curve point to the next. If you press [Shift] and use the arrow keys, you can select several points at the same time.
Editing tempo curve points
Curve points can be edited in the following ways:
- By clicking and dragging horizontally and/or vertically with the Arrow tool.
If several points are selected, all of them are moved. If Snap is activated on the toolbar, this determines to which time positions you can move curve points, see "The Snap function" on page 56.
- By adjusting the tempo value. You can do this in the tempo display on the Tempo Track Editor toolbar, in the Inspector or on the info line.
Note that selecting several points and changing the tempo value in the info line leads to a relative adjustment of the tempo values.

Dragging tempo curve points with a time-based display format (any other format than "Bars+Beats") may lead to confusing results. This is because moving a point will change the relationship between tempo and time. Let's say you move a tempo point to the right and drop it at a certain time position. When you release the mouse button, the mapping between tempo and time will be adjusted (since you have changed the tempo curve). As a result, the moved point will appear at another position. For this reason, we recommend using the Bars+Beats display format when editing tempo curves.
Adjusting the curve type
You can change the curve type of a tempo curve segment at any time, using the following method:
- With the Arrow tool, select all curve points within the segment you want to edit.
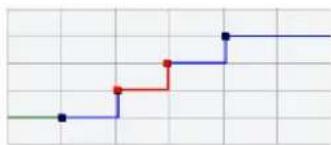
flowchart
graph TD
    A["Start"] --> B["Step 1"]
    B --> C["Step 2"]
    C --> D["Step 3"]
    D --> E["End"]
- In the info line, click below the word "Type" to switch the curve type between "Jump" and "Ramp". The curve sections between the selected points are adjusted.
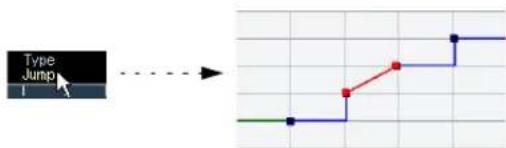
flowchart
graph LR
    A["Type Jump"] --> B
    B --> C
    C --> D
    D --> E
    E --> F
    F --> G
Removing tempo curve points
To remove a curve point, either click on it with the Erase tool or select it and press [Backspace]. The first tempo curve point cannot be removed.
Recording tempo changes
The Tempo Recording slider on the toolbar of the Tempo Track Editor allows you to record tempo changes "on the fly": simply start playback and use the slider to raise or lower the tempo at the desired positions. This is useful for creating natural sounding ritardandos, etc.
Setting the fixed tempo
When the tempo track is deactivated, the tempo track curve is grayed out (but still visible). Since the tempo is fixed throughout the whole project, there are no tempo curve points. Instead, the fixed tempo is displayed as a horizontal black line in the tempo curve display.
text_image
1 2 3 4 5 6To set the tempo in fixed mode:
- Adjust the value numerically in the tempo display on the Tempo Track Editor toolbar or in the Track list.
- On the Transport panel, click on the tempo value to select it, enter a new value and press [Enter].
Adding and editing time signature events
- To add a time signature event, click in the time signature area/track with the Pencil tool.
This adds a default 4/4 time signature event at the closest bar position. Remember: When the Arrow tool is selected, pressing [Alt]/[Option] will give you the Pencil tool.
- To edit the value of a time signature event, select it and adjust the value on the info line, or double-click the event and enter a new value.
Note that there are two controls for the signature display; the left one adjusts the numerator and the right one adjusts the denominator.
- You can move a time signature event by clicking and dragging it with the Arrow tool.
Note that you can [Shift]-click to select multiple events. Also note that time signature events can only be positioned at the start of bars. This is also true if Snap is deactivated.
- To remove a time signature, either click on it with the Eraser tool or select it and press [Backspace] or [Delete]. The first time signature event cannot be removed.
Exporting and importing tempo tracks
You can export the current tempo track for use in other projects by selecting "Tempo Track" from the "Export" submenu on the File menu. This allows you to save the tempo track information (including time signature events) as a special xml file (file extension ".smt").
To import a tempo track, select "Tempo Track" from the Import submenu on the File menu. Note that this replaces all tempo track data in the current project (although the operation can be undone if needed).
Process Tempo (Cubase only)
Process Tempo allows you to define a specific length or end time for a set range, and the tempo track will automatically set a tempo that will fit the range in the specified time.
Proceed as follows:
- Specify a region or range that you wish to process by setting the left and right locators, either in the Tempo Track Editor or in the Project window.
- Click on the Process Tempo button (either in the Tempo Track Editor or on the tempo track).
The Process Tempo dialog appears.
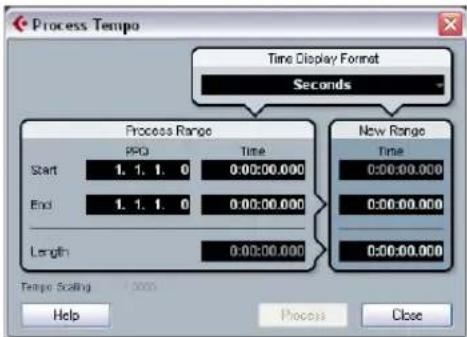
text_image
Process Tempo Time Display Format Seconds Process Range Start 1. 1. 1. 0 0:00:00.000 End 1. 1. 1. 0 0:00:00.000 Length 0:00:00.000 New Range Time 0:00:00.000 0:00:00.000 0:00:00.000 Tempo Scaling 1.000 Help Process Close- In the Process Range fields, the specified range is shown, in Bars and Beats (PPQ) and in a time format, which can be selected from the Time Display Format pop-up menu.
The range defined in step 1 will already be set, but you can edit the range by adjusting the values in the Process Range fields if you wish.
Now you can either specify a new range length or a new range end time. What to choose depends on whether the range should have a specific length or whether it should end at a specific time position.
- Enter the desired End or Length in the corresponding fields of the New Range section.
You can select a time format for the new range in the Time Display Format pop-up.
- Click Process.
Now the tempo track is automatically adjusted, and the range will have the specified duration.
The Process Bars dialog (Cubase only)
The Process Bars dialog (opened from the Tempo Track Editor or the signature track) uses the global "Insert Silence" and "Delete Time" functions from the Range submenu on the Edit menu. However, the necessary ranges (or parameters) are calculated using a musical "bars+beats-based" environment. The function also ensures that the time signatures stay "in sync" after these operations. This allows for a much more intuitive approach when inserting, deleting or replacing "time" while working with a project set to the Bars+Beats time type.
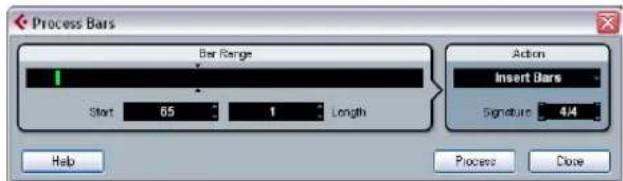
text_image
Process Bars Bar Range Start 65 1 Length Action Insert Bars Signature 4.4 Help Process CloseThe Process Bars dialog
The dialog contains the following elements:
Option Description
| Bar Range The Bar Range display gives you a graphical overview of the position of the bar range within the project as well as its length. Click on the right edge of the green indicator and drag it to the right to enlarge the range. You can also use the Start and Length value fields (see below).The arrow pair in this section marks the length of the current project. The area to the right marks the bar range that can be added (500 bars max.). | |
| Bar Range – Start | This is where you specify the start position for the bar range. Click on the arrows to raise/lower the value or click directly in the value field to enter the value manually. |
| Bar Range – Length | This is where you specify the length of the bar range. Click on the arrows to raise/lower the value or click directly in the value field to enter the value manually. |
| Action – Insert Bars | When you select this action, clicking the Process button will insert the specified number of empty bars with the set time signature at the start position specified above. |
| Action – Delete Bars | When you select this action, clicking the Process button will delete the specified number of bars, beginning at the start position specified above. |
Option Description
| Action – Reinterpret Bars | When you select this action, clicking the Process button will reinterpret the bar range to fit the specified time signature. This is very special in the sense that both bars+beats positions of the notes and the tempo are being changed to fit the new time signature, but the play-back of the notes will stay just the same.If you want to reinterpret e.g. a bar with the time signature 3/4 so that it gets the time signature 4/4, quarter notes will become half note triplets. If you reinterpret a bar with the time signature 4/4 to attain 3/4, you will get quadruplets. |
| Action – Replace Bars | When you select this action, clicking the Process button will cause the time signature of the specified bar range to be replaced by the one you specify in this dialog. |
| Action – Signature | This lets you specify the time signature for the action you select on the Action pop-up menu (except for the Delete Bars action). |
| Process | Click on this button to apply your changes to the specified bar range. |
| Close | Clicking this button without clicking on “Process” first will close the dialog without applying your settings. |
The Beat Calculator
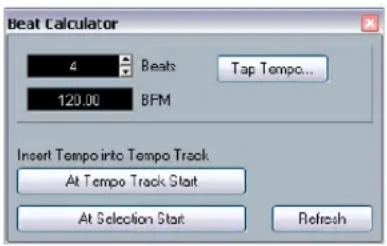
text_image
Beat Calculator 4 Beats Tap Tempo... 120.00 BFM Insert Tempo into Tempo Track. At Tempo Track Start At Selection Start RefreshThe Beat Calculator is a tool for calculating the tempo of freely recorded audio or MIDI material. It also allows you to set the tempo by tapping.
Calculating the tempo of a recording
-
In the Project window, make a selection that covers an exact number of beats of the recording.
-
Select "Beat Calculator..." from the Project menu. The Beat Calculator window appears.
-
In the Beats field, enter the number of beats that the selection encompasses.
The corresponding tempo is calculated and displayed in the BPM field.
- If you need to adjust the selection, you can go back to the Project window, leaving the Beat Calculator open. To re-calculate the tempo after adjusting the selection, click Refresh.
- You can also insert the calculated tempo into the tempo track by clicking one of the buttons in the lower left corner of the Beat Calculator window.
Clicking "At Tempo Track Start" will adjust the first tempo curve point, while "At Selection Start" will add a new tempo curve point at the selection's start position, using the "Jump" curve type (see "Adding tempo curve points" on page 404).
⚠️ If fixed tempo mode is selected when you insert the calculated tempo, the fixed tempo will be adjusted, regardless of which button you click.
Using Tap Tempo
The Tap Tempo function allows you to specify a tempo by tapping:
-
Open the Beat Calculator.
-
If you want to tap the tempo to some recorded material, activate playback.
-
Click the Tap Tempo button.
The Tap Tempo window appears.
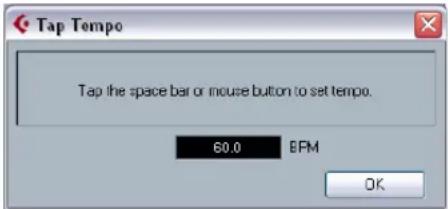
text_image
Tap Tempo Tap the space bar or mouse button to set tempo. 60.0 EPM OK-
Tap the tempo on the Spacebar of the computer keyboard or with the mouse button. The tempo display will update the calculated tempo between each tap
-
When you stop tapping, the program calculates the average timing of the taps and displays it.
-
Click OK to close the Tap Tempo dialog. The tapped tempo is now shown in the Beat Calculator's BPM display. You can insert it into the tempo track as described above.
Merge Tempo From Tapping
This function allows you to create a complete tempo track based on your tapping. Typically, you would use this if you have an audio file with no tempo mapping and want to be able to add other material afterwards, etc.
- Create an empty time-based MIDI track and, while playing back your audio material, tap the new tempo on your MIDI keyboard and record the created notes onto the new MIDI track.
Note that you must create note events – pedal events cannot be used for this function. - Play back the audio and check that the timing of the MIDI notes corresponds to that of the audio.
If necessary, edit the MIDI notes in an editor. - Select the MIDI part (or the individual notes in an editor) that you want to use for the calculation.
- Select "Merge Tempo From Tapping" from the Functions submenu on the MIDI menu.
A dialog opens.
- In the dialog, specify what type of note (1/2, 1/4, etc.) you tapped during the recording.
If you activate the "Begin at Bar Start" option, the first note will automatically start at the beginning of a bar when calculating the new tempo curve.
- Click OK.
The project's tempo is adjusted to the tapped notes. - Open the Project menu and select "Tempo Track" to check that the new tempo information is reflected in the tempo curve.
Another way of creating a tempo map for freely recorded audio would be to use the Time Warp tool, see below.
[Non-Text]
The Time Warp tool
The Time Warp tool lets you adjust the tempo track so that "musical time-based" material (positions related to the tempo) matches "linear time-based" material (positions in time). Some typical applications:
- When you have recorded music (audio or MIDI) without tempo reference or metronome click, the Time Warp tool can be used for creating a tempo map that fits the recording (allowing you to rearrange or add other material).
- When you are creating music for a movie and want to match certain positions in the video with certain positions in the music.
The Time Warp tool makes use of the fact that tracks can be based on time positions (linear time base) or positions related to tempo (musical time base), see "Switching between musical and linear time base" on page 40 for a description of these modes.
Basic procedure
You use the Time Warp tool to drag a musical position (a position in bars+beats format) to a certain position in time. This can be done in the Project window or in an editor, as described below. Here is the general procedure:
- Make sure tempo track mode is active.
You cannot use the Time Warp tool in fixed tempo mode. - Select the Time Warp tool.
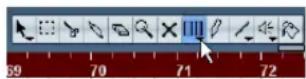
Bars+Beats format is automatically selected for the ruler in the active window, and the ruler is shown in brown.
- Click in the window at a musical position and drag it so that it matches a position in the material you are editing – e.g. the start of an event, a certain "hit" within an audio event, a frame in a video clip, etc.
When you click with the Time Warp tool, it snaps to the grid in the window.
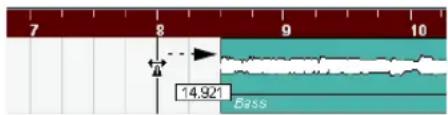
text_image
7 8 9 10 14.92' BassDragging the start of the bar to the start of the audio event.
While you are dragging, the track(s) you are editing are temporarily switched to linear time base. This means that the contents of the tracks remain at the same time positions regardless of the tempo (there is an exception to this in the Project window, see below).
- When you release the mouse button, the musical position you clicked on matches the time position you dragged it to.
This is because the Time Warp tool changed the last tempo event on the tempo track (and/or added new ones, depending on window and usage), thereby scaling the tempo track to fit.
Rules
- When you use the Time Warp tool, the tempo value of the last tempo event (before the click position) is adjusted.
- If later tempo events exist, a new tempo event will be created at the click position. This way, the later tempo event(s) will not be moved.
- If you press [Shift] and use the Time Warp tool, a new tempo event is created at the click position. [Shift] is the default modifier for this – you can adjust this in the Preferences (Editing–Tool Modifiers page).
- If you use the Time Warp tool in an editor, a tempo event will be created at the start of the edited part or event. Only the currently edited track will be affected – but note that events to the right of the edited events or parts (on the edited track) will be affected as well.
- If you have made a selection range and use the Time Warp tool within that range, the tempo changes will be confined to that range.
This means tempo events will be inserted at the start and end of the selection range, if needed – useful if you need to adjust the tempo within a certain area but want all material outside that range to stay in place.
- When you click with the Time Warp tool, it snaps to the tempo grid in the window.
- When you drag the tempo grid to a new position, it can be magnetic to events in the window.
In the Project window, this requires that Snap is activated and "Events" is selected on the Snap Type pop-up menu – the grid will then snap to the start and end of events or parts, and to markers. In the Sample Editor, this requires that Snap is activated – the grid will then snap to hitpoints (if any). In the MIDI editors, this requires that Snap is activated – the grid will then snap to the start and end of notes.
- The function will create tempo values up to 300bpm.
Viewing and adjusting tempo events
When you select the Time Warp tool, the ruler of the active window is shown in brown. Existing tempo events are shown in the ruler as "flags" with the tempo values displayed.

text_image
91 1 5 9 110 13 140 17 21 25This helps you see what's going on, but you can also use this for editing the tempo track:
- If you press the create/erase modifier key (by default [Shift]) and click on a tempo event in the ruler, it is deleted.
- You can click on a tempo event in the ruler and drag to move it.
This automatically edits the tempo value in the event so that elements to the right keep their positions.
- If you press [Alt]/[Option] and move (or delete) a tempo event in the ruler, the tempo value is not adjusted – this means elements to the right will be moved.
This is the default modifier key for this – you can adjust it in the Preferences (Editing-Tool Modifiers page).
Using the Time Warp tool in the Project window
In the Project window, there are two modes for the Time Warp tool:
- In the default mode, all tracks are temporarily switched to linear time base when you use the tool. This means that all tracks will keep their absolute time positions when you adjust the tempo track.
- In the “musical events follow” mode, no tracks are switched to linear time base. This means that all tracks that are not set to linear time base will follow the changes you make to the tempo track.
You select the Time Warp mode by selecting the tool, clicking on the tool icon and selecting an option from the pop-up menu.
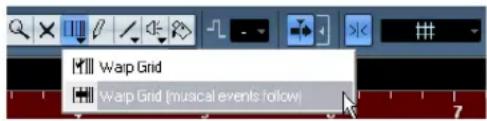
text_image
Warp Grid Warp Grid [musical events follow]Matching a musical score to video
Here's an example of how to use the Time Warp tool in "musical events follow" mode. Let's say you are creating the music for a film. You have a video track, an audio track with a commentary and some audio and/or MIDI tracks with your music. Now you want to match the position of a musical cue to a position in a video film. The musical cue is located in bar 33. There are no tempo changes in the project (yet).
- Make sure tempo track mode is selected on the Transport panel.
- Now you need to locate the position in the video. If you do not need very high precision, you can simply locate it looking at the thumbnails on the video track – otherwise you can pinpoint the exact position and add a marker to the Marker track (that you can snap to later on).
You can also make a note of the exact position and add an extra ruler track set to show the time code (Cubase only).
- Make sure the correct tracks are set to linear time base or musical time base, respectively.
In our example, we want the video track and the audio track with a commentary voice-over to be linear time-based (as well as the marker track, if you are using one). All other tracks should be set to musical time base. You change this by clicking the time base button in the Track list or Inspector.
Musical time base selected. Linear time base selected.
- Set up the Grid Type pop-up menu as desired.
When you click with the Time Warp tool, it snaps to the selected grid. In this case, you will find the musical cue at the start of bar 33, so we can set the grid to "Bar".
- Note that this affects the snapping to the ruler (tempo grid) when you click! In addition, the tool can be "magnetic" to events in the Project window when you drag – for this, you need to activate Snap and select "Events" on the Snap Type pop-up menu.
In our example, this would be useful if you created a marker at the desired position in the video – when you drag the grid (see below), it will snap to the marker.
-
Select the Time Warp tool and select the "musical events follow" mode.
-
Click in the event display at the start of bar 33 and drag to the desired position in the video.
As mentioned above, this can mean dragging to a position indicated by the thumbnails on the video track, to a marker on the Marker track or to a time position on an additional ruler track (Cubase only).
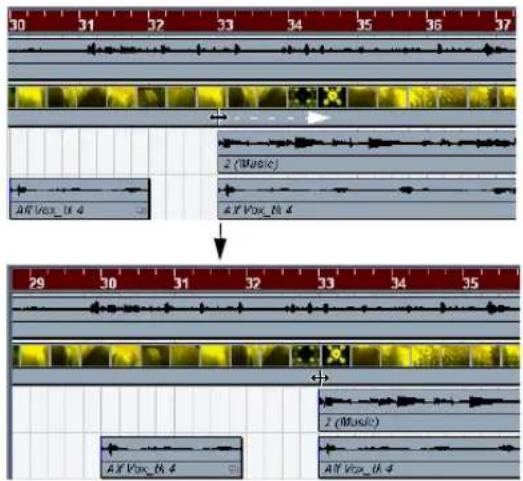
text_image
30 31 32 33 34 35 36 37 2 (Music) AIF Vox_th 4 AIF Vox_th 4 29 30 31 32 33 34 35 AIF Vox_th 4 AIF Vox_th 4 AIF Vox_th 4When you drag, the ruler is scaled – and the music tracks will follow.
- Release the mouse button.
If you look in the ruler at the beginning of the project, you will see that the first (and only) tempo event has been adjusted.
- Try playing back.
The musical cue should now happen at the correct position in the video.
Let's say you need to match another cue to another position later on in the video. If you simply repeat this procedure, you will find that the first cue gets out of sync – since you are still changing the first (and only) tempo event on the tempo track!
You need to create a "lock point" – a tempo event at the first cue position:
- Press [Shift] and click with the Time Warp tool in the event display at the cue position. In our case this is bar 33.
text_image
0 31 32 33 34 35 2 (Music)As you can see, a tempo event (with the same value as the first one) is added at that position.
- Now match the second musical cue to the correct video position by dragging the musical position to the desired time position as before.
The new tempo event is edited – the first tempo event is unaffected and the original cue is still matched.
- If you know you are going to match several cues this way, you should make it a habit to press [Shift] each time you use the Time Warp tool to match positions.
This adds a new tempo event – that way, you do not have to add tempo events afterwards as described above.
About snapping
If Snap is activated in the Project window and "Events" is selected on the Snap Type pop-up menu, the Time Warp tool will be magnetic to events when you drag the tempo grid. This makes it easier to snap a tempo position to a marker, the start or end of an audio event, etc.
Using the Time Warp tool in an audio editor
Using the Time Warp tool in the Sample Editor or Audio Part Editor is different from using it in the Project window, in the following ways:
- When you use the Time Warp tool, a tempo event is automatically inserted at the beginning of the edited event or part – this tempo event will be adjusted when you warp the tempo grid with the tool. This means that material before the edited events will not be affected.
- Only the default mode for the Time Warp tool is available. So when you use the tool, the edited track is temporarily switched to linear time base.
Making a tempo map for a "free" recording
The following example shows how to use the Time Warp tool in the Sample Editor to create a tempo map matching freely recorded music. Let's say you have recorded a drummer, playing without a metronome – this typically means the tempo varies ever so slightly. To be able to add more material and easily rearrange the recorded audio, you want the tempo in Cubase to match the recorded drum track:
- If necessary, move the recorded event. Move it so that the first downbeat ("one") happens at the start of the bar – zoom in if needed.
- Open the drum recording in the Sample Editor and make sure Hitpoint mode is not selected. The Time Warp tool cannot be used in Hitpoint mode. However, if you have calculated hitpoints already, these will be visible when the Time Warp tool is selected (see below).
- Set the zoom so that you can see the individual drum hits clearly.
To achieve this type of "visual" beat matching, it is important to have a fairly clean recording, such as the drum track in this example.
- Select the Time Warp tool.
You have already matched the first downbeat with the start of a bar. However, if the recording starts before the first downbeat (with a fill, some silence, etc.), you want to "lock" the first downbeat so that it stays in position:
- Press [Shift] and click in the event at the position of the first downbeat (the start of the bar).
When you press [Shift], the pointer turns into a pencil. Clicking adds a tempo event at the first downbeat – when you later adjust the tempo with the Time Warp tool, the first downbeat will stay in place. Note that if the event starts exactly on the first downbeat (no audio before the "one"), you do not need to do this. This is because a tempo event is automatically added at the start of the edited event. - Now, locate the start of the next bar in the ruler.
- Click at that position in the event display and drag to the downbeat of the second bar in the recording. When you click, the pointer will snap to the ruler grid.
By dragging the grid, you changed the tempo value in the tempo event at the first downbeat. If the drummer held a fairly consistent tempo, the following bars should now match pretty well too. - Check the following bars and locate the first position where the audio drifts from the tempo.
Now, if you simply adjusted that beat in the tempo grid to match the beat in the recording, the tempo event at the first downbeat would be changed – this would ruin the match in the previous bars! We need to lock these by inserting a new tempo event.
- Locate the last beat that is in sync.
This would be the beat just before the position where the audio and tempo drift apart.
- Press [Shift] and click at that position to insert a tempo event there.
This locks this matched position. The material to the left will not be affected when you make adjustments further along.
-
Now match the tempo grid to the next (unmatched) beat by clicking and dragging with the Time Warp tool. The tempo event you inserted in step 10 will be adjusted.
-
Work your way through the recording this way – when you find that the recording drifts from the tempo, repeat steps 9 to 11 above.
Now the tempo track follows the recording and you can add more material, rearrange the recording etc.
Matching to hitpoints
If you have calculated hitpoints for the audio event you are editing, these will be shown when the Time Warp tool is selected.
- The number of hitpoints shown depends on the Hitpoint Sensitivity slider setting you've made in Hitpoint mode.
- If you activate the Snap to Zero Crossing button on the toolbar, the Time Warp tool will snap to hitpoints when you drag the tempo grid.
- You can use the Create Markers from Hitpoints function (on the Hitpoints submenu of the Audio menu) to create markers at the hitpoint positions. This can be useful when using the Time Warp tool in the Project window, as the tool will be magnetic to markers (if Snap to Events is activated on the toolbar).
Using the Time Warp tool in a MIDI editor
This is very similar to using the tool in an audio editor:
- When you use the Time Warp tool, a tempo event is automatically inserted at the beginning of the edited part – this tempo event will be adjusted when you warp the tempo grid with the tool. Material before the edited part will not be affected.
- Only the default mode for the Time Warp tool is available. So when you use the tool, the edited MIDI track is temporarily switched to linear time base.
- The rulers in the MIDI editors can be set to "Time Linear" or "Bars+Beats Linear" mode (see "The ruler" on page 340) – the Time Warp tool requires Time Linear mode. If necessary, the ruler mode will be switched when you select the Time Warp tool.
- If Snap is activated on the toolbar in the MIDI editor, the tool will snap to the start and end of MIDI notes when you drag the tempo grid.
Typically, you would use the Time Warp tool in a MIDI editor to match the Cubase tempo to freely recorded MIDI material (much like the audio example above).
The Project Browser
Window Overview
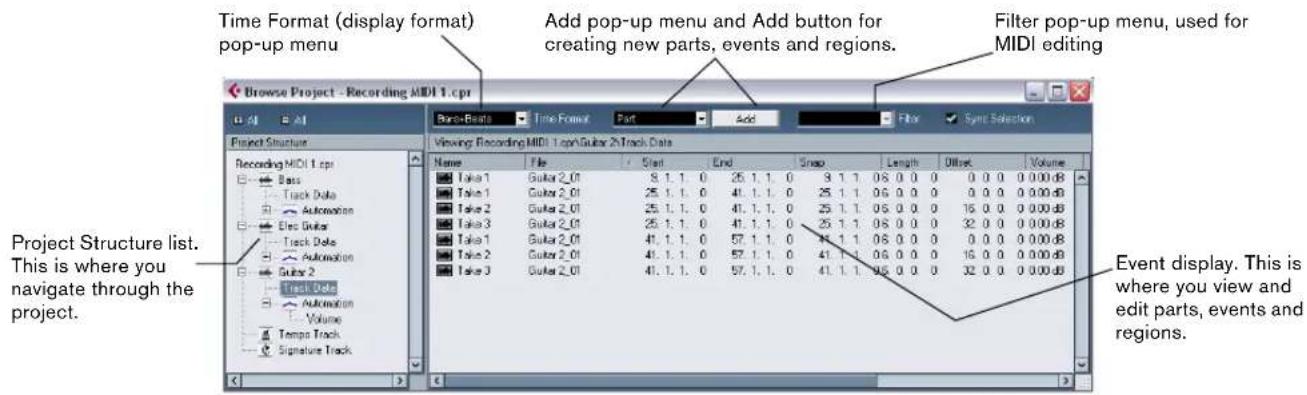
text_image
Time Format (display format) pop-up menu Add pop-up menu and Add button for creating new parts, events and regions. Filter pop-up menu, used for MIDI editing Project Structure Recording MIDI 1.cpr Bore+Beats Time Format Port Add Filter Sync Selection Viewing Recording MIDI 1.cpr/Guitar 2Track Data Project Structure list. This is where you navigate through the project. Event display. This is where you view and edit parts, events and regions.The Project Browser window provides a list based representation of the project. This allows you to view and edit all events on all tracks by using regular value editing in a list.
Opening the Project Browser
You open the Project Browser by selecting "Browser" from the Project menu. The Browser window can be open while you are working in other windows; any changes made in the Project window or an editor are immediately reflected in the Project Browser and vice versa.
Navigating in the Browser
You use the Project Browser much like you use the Windows Explorer and Mac OS X Finder for browsing folders on your hard disk:
- Click on an item in the Project Structure list to select it for viewing.
The contents of the item are shown in the event display.
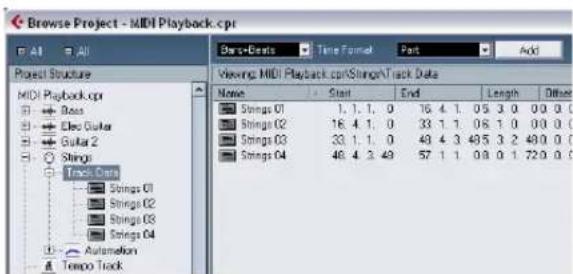
text_image
Browse Project - MIDI Playback.cpr All All Project Structure MIDI Playback.cpr → Bass → Clue Guta → Guta 2 → Strings Track Data → Strings O1 → Strings O2 → Strings O3 → Strings O4 → Automation → Tempo Track Bars-Beats Time Format Past Add Viewing MIDI Playback.cpr/Strings/Track Data Name Start End Length Different Strings O1 1, 1, 1, 0 16 4. 1. 0.5 3. 0 0.0 0.0 Strings O2 16. 4. 1. 0 33. 1. 1. 0.6 1. 0 0.0 0.0 Strings O3 33. 1. 1. 0 49. 4. 3. 49.5 3. 2 49.0 0.0 Strings O4 48. 4. 3. 49 57. 1. 1. 0.8 0. 1 72.0 0.0In this figure, the parts on a MIDI track are displayed.
- Items with hierarchical substructures can be folded out by clicking the plus symbols or the "closed folder" symbols in the Project Structure list.
When the substructure of an item is revealed, a minus symbol or an "open folder" symbol is shown instead – click this to hide the substructure.
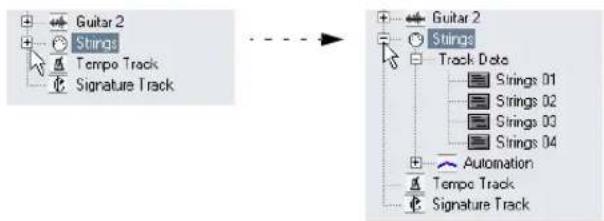
flowchart
graph TD
    A["Guitar 2"] --> B["Strings"]
    B --> C["Tempo Track"]
    B --> D["Signature Track"]
    E["Guitar 2"] --> F["Strings"]
    F --> G["Track Data"]
    G --> H["Strings 01"]
    G --> I["Strings 02"]
    G --> J["Strings 03"]
    G --> K["Strings 04"]
    L["Automation"] --> M["Tempo Track"]
    M --> N["Signature Track"]
- To reveal or hide all substructures in the Project Structure list, use the buttons “(+) All” and “(-) All” above the list.
- The actual editing is done in the event display, using regular value editing techniques.
There is one exception: You can rename items in the Project Structure list by clicking on their names and typing.
Customizing the view
You can drag the divider between the Project Structure list and the event display to make one of them wider and the other narrower. Furthermore, the event display can be customized in the following ways:
- You can change the order of the columns by dragging the column headings to the left or right.
- You can resize columns by dragging the dividers between the column headings.
- To select a display format for all position and length values, use the Time Format pop-up menu.
- You can sort events in the display by columns, by clicking the column heading.
For example, if you want to sort events by their start positions, click that column heading. An arrow appears in the column heading, indicating that events are sorted by that column. The direction of the arrow indicates whether the events are sorted in ascending or descending order. To change the direction, click the column heading again.
Importing files via the MediaBay
You can also import audio, video and MIDI files into the Project Browser via the MediaBay using drag and drop.
→ You can only import into existing tracks. This means, for example, that a video track has to exist in the Project window prior to importing a video file in the Project Browser.
For more information about the MediaBay, see "The MediaBay" on page 273.
About the Sync Selection option
If the "Sync Selection" checkbox is activated (on the Project Browser toolbar), selecting an event in the Project window automatically selects it in the Project Browser, and vice versa. This makes it easy to locate events in the two windows.
Editing tracks
Editing audio tracks
Audio tracks can have two "subitems": Track Data and Automation.
- The Automation item corresponds to the Automation track in the Project window, and contains the track's automation events (see "Editing Automation tracks" on page 417).
- The Track Data item corresponds to the actual audio track in the Project window. It contains audio events and/or audio parts, which in turn can contain audio events.
Note that if you have not performed any automation or opened an automation track, the Browser will only contain the audio data.
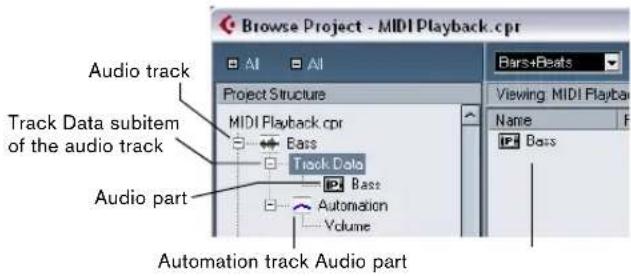
text_image
Browse Project - MIDI Playback.cpr Audio track Track Data subitem of the audio track Audio part Project Structure MIDI Playback.cpr Bass Track Data Bass Automation Volume Automation track Audio part Bars+Beats Viewing MIDI Playback Name BassThe following parameters are available for the different items:
The list columns for audio events
Parameter Description
Name Allows you to change the name of the event. Double-clicking on the waveform image beside it opens the event in the Sample Editor.
File The name of the audio file referenced by the event's audio clip.
Start The start position of the event. If the event belongs to an audio part, you cannot move it outside the part.
End The end position of the event.
Snap The absolute position of the event's snap point. Note that adjusting this value will not change the position of the snap point within the event – instead it is another way of moving the event!
Length The length of the event.
Offset This determines "where in the audio clip" the event starts. Adjusting this value is the same as sliding the contents of the event in the Project window (see "Sliding the contents of an event or part" on page 48). You can only specify positive Offset values, since the event cannot start before the start of the clip. Likewise, it cannot end after the end of the clip. If the event already plays the whole clip, the Offset cannot be adjusted at all.
Volume The volume of the event, as set with the Volume handle or on the info line in the Project Window.
Fade In The length of the fade-in and fade-out areas respectively. Fade Out If you use these settings to add a fade (where there previously was none), a linear fade will be created. If you adjust the length of an existing fade, the previous fade shape will be maintained.
Mute Click in this column to mute or unmute the event.
Image Displays a waveform image of the event inside a gray box corresponding to the clip. The image is scaled according to the width of the column.
The list columns for audio parts
Parameter Description
Name The name of the part. Double-clicking on the part symbol beside it opens the part in the Audio Part Editor.
Start The start position of the part. Editing this value is the same as moving the part in the Project window.
End The end position of the part. Editing this value is the same as resizing the part in the Project window.
Length The length of the part. Editing this value is the same as resizing the part in the Project window.
Offset This adjusts the start position of the events within the part. Adjusting this value is the same as sliding the contents of the part in the Project window (see "Sliding the contents of an event or part" on page 48). Setting a positive Offset value is the same as sliding the contents to the left, while a negative Offset corresponds to sliding the contents to the right.
Mute Click in this column to mute or unmute the part.
Creating audio parts
When the "Audio" item of an audio track is selected in the Project Structure list, you can create empty audio parts on the track by clicking the Add button on the toolbar. This will insert a part between the left and right locator.
Editing MIDI tracks
Just like audio tracks, MIDI tracks can have two "sub-items": Track Data and Automation.
- The Track Data item corresponds to the actual MIDI track in the Project window and can contain MIDI parts (which in turn can contain MIDI events).
- The Automation item corresponds to the automation track in the Project window, and contains the track's automation events (see "Editing Automation tracks" on page 417).
Note that if you have not performed any automation or opened an automation track, the Browser will only contain the MIDI data.
When editing the Track Data, the following parameters are available:
The list columns for MIDI events
Parameter Description
Type The type of MIDI event. This cannot be changed.
Start The position of the event. Editing this value is the same as moving the event.
Parameter Description
End This is only used for note events, allowing you to view and edit the end position of a note (thereby resizing it).
Length This is only used for note events. It shows the length of the note - changing this resizes the note and automatically changes the End value as well.
Data 1 The property of this value depends on the type of MIDI event: For notes, this is the note number (pitch). This is displayed and edited as a note name and an octave number, with the values ranging between C-2 and G8. For Controller events, this is the type of Controller, displayed in words. Note that you can edit this by entering a number – the corresponding Controller type is automatically displayed. For Pitchbend events, this is the fine adjustment of the bend amount. For Poly Pressure events, this is the note number (pitch). For other event types, this is the value of the event.
Data 2 The property of this value depends on the type of MIDI event: For notes, this is the note-on velocity. For Controller events, this is the value of the event. For Pitchbend events, this is the coarse bend amount. For Poly Pressure events, this is the amount of pressure. For other event types, this is not used.
Channel The event's MIDI Channel. See "Notes" on page 82.
Comment This column is used for some event types only, providing an additional comment about the event.
The list columns for MIDI parts
Parameter Description
Name The name of the part.
Start The start position of the part. Editing this value is the same as moving the part.
End The end position of the part. Changing this is the same as resizing the part (and will automatically affect the Length value as well).
Length The length of the part. Changing this resizes the part and automatically changes the End value.
Offset This adjusts the start position of the events within the part. Adjusting this value is the same as sliding the contents of the part in the Project window (see "Sliding the contents of an event or part" on page 48). Setting a positive Offset value is the same as sliding the contents to the left, while a negative Offset corresponds to sliding the contents to the right.
Mute Click in this column to mute or unmute the part.
⇒ For SysEx (system exclusive) events, you can only edit the position (Start) in the list.
However, clicking the Comment column opens the SysEx Editor, in which you can perform detailed editing of system exclusive events. For a description of this, see "Working with System Exclusive messages" on page 368.
Filtering MIDI events
When you are editing MIDI in the Project Browser, the large number of different MIDI events displayed can make it hard to find the events you want to edit. The Filter pop-up menu allows you to select a single event type for display.
text_image
Note Controller Program Change Poly Pressure Altertouch Pitchbend SysExWhen this option is selected, only Controller events will be shown in the event display. To show all event types, select the top item ("---") from the menu.
Creating MIDI parts
When a MIDI track is selected in the Project Structure list, you can create empty MIDI parts on the track by clicking the Add button. This will insert a part between the left and right locator.
Creating MIDI events
You can use the Project Browser to create new MIDI events:
- Select a MIDI part in the Project Structure list.
- Move the project cursor to the desired position for the new event.
- Use the Add pop-up above the event display to select which type of MIDI event to add.
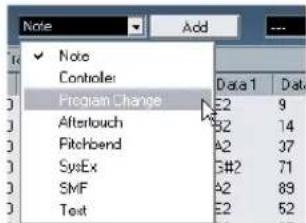
text_image
Note Add ✓ Note Controller: Program Change Aftertouch Pitchbend SysEx SMF Text Data 1 Data E2 9 B2 14 A2 37 G#2 71 A2 89 E2 524. Click the Add button.
An event of the selected type is added to the part, at the project cursor position. If the cursor is outside the selected part, the event is added at the beginning of the part.
Editing Automation tracks
All kinds of Cubase automation (the automation tracks for MIDI, instrument, audio, group and FX channel tracks or the individual automation tracks for VST Instruments, ReWire channels or Input (Cubase only)/Output busses) are handled in the same way in the Project Browser. Each Automation item in the Project Structure list will have a number of sub-entries, one for each automated parameter. Selecting one of these parameters in the Project Structure list shows its automation events in the list:
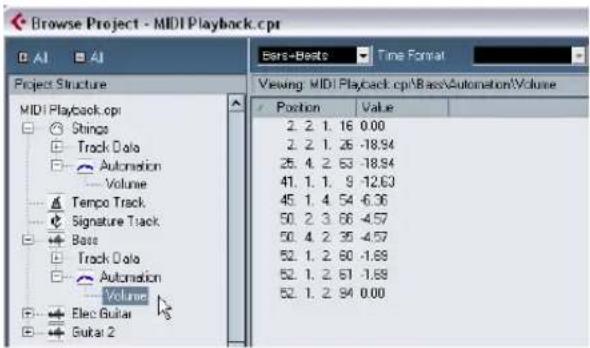
text_image
Browse Project - MIDI Playback.cpr Project Structure MIDI Playback.cpr Strings Track Data Automation Volume Tempo Track Signature Track Bass Track Data Automation Volume Elec Guitar Guital 2 Viewing: MIDI Playback.cp\Bass\Automation\Volume Position Value 2. 2. 1. 16 0.00 2. 2. 1. 26 -18.94 25. 4. 2. 53 -18.94 41. 1. 1. 9 -12.63 45. 1. 4. 54 -6.36 50. 2. 3. 66 -4.57 50. 4. 2. 39 -4.57 52. 1. 2. 60 -1.68 52. 1. 2. 61 -1.68 52. 1. 2. 94 0.00You can use the two columns in the list to edit the position of the events and their values.
Editing the Video track
When the Video track is selected in the Project Structure list, the event display lists the video events on the track, with the following parameters:
Column Description
Name The name of the video clip that the event refers to.
Start The start position of the event. Editing this value is the same as moving the event.
End The end position of the event. Editing this value is the same as resizing the event, and will automatically change the Length value as well.
Length The length of the event. Editing this value is the same as resizing the event, and will automatically change the End value as well.
Offset This determines "where in the video clip" the event starts. Note that the event cannot start before the start of the clip, or end after the end of the clip. Thus, if the event already plays the whole video clip, the Offset cannot be adjusted at all.
Editing the Marker track
Marker events have the following parameters:
Column Description
| Name The name of the marker. This can be edited for all markers except the left and right locator. | |
| Start | The position of “regular” markers or the start position of cycle markers. |
| End The end positions of cycle markers. Editing this value is the same as resizing the cycle marker, and will automatically change the Length value as well. | |
| Length The length of cycle markers. Editing this value is the same as resizing the marker, and will automatically change the End value as well. | |
| ID The number of the marker. For regular (non-cycle) markers, this corresponds to the key commands used for navigating to the markers. For example, if a marker has ID 3, pressing [Shift]-[3] on the computer keyboard will move the song position to that marker. By editing these values, you can assign the most important markers to key commands.Note that you cannot edit the “L” and “R” marker IDs (left and right locator) or assign IDs 1 and 2 to markers (since these are reserved for the locators). | |
When the Marker track is selected, you can insert markers by selecting "Marker" or "Cycle Marker" from the Add pop-up menu and clicking the Add button. Regular markers will be added at the current project cursor position while cycle markers will be added between the current left and right locator positions.
Editing the tempo track
When the tempo track is selected in the Project Structure list, the event display shows the events on the tempo track, with the following parameters:
Parameter Description
| Position The position of the tempo event. You cannot move the first event on the tempo track. |
| Tempo The tempo value of the event. |
| Type This indicates whether the tempo should jump to the value of the event (“Jump” type) or whether it should change gradually from the previous tempo event, creating a ramp (“Ramp” type). See “Editing the tempo curve” on page 404. |
You can add new tempo events by clicking the Add button. This creates a jump-type event with the value 120 bpm at the project cursor position. Make sure that there is no other tempo event at the current cursor position.
Editing time signatures
When "Signature track" is selected in the Project Structure list, the event display shows the time signature events in the project:
Parameter Description
| Position The position of the event. Note that you cannot move the first time signature event. |
| Signature The value (time signature) of the event. |
You can add new time signature events by clicking the Add button. This creates a 4/4 event, at the beginning of the bar closest to the project cursor position. Make sure that there is no other time signature event at the current cursor position.
Deleting events
The procedure for deleting events is the same for all different track types:
- Click on an event (or a part) in the Event display to select it.
- Select Delete from the Edit menu or press [Delete] or [Backspace].
Note that you cannot delete the first Tempo event or the first Time Signature event.
Export Audio Mixdown
Introduction
The Export Audio Mixdown function in Cubase allows you to mix down audio from the program to files on your hard disk, in a number of formats. In the Channel Selection section, you can choose which channels (or busses) to export. By activating the "Channel Batch Export" option you can choose to mix down several channels at once. For each channel, an individual file will be created.
The following channel types are available:
- Output channels
For example, if you have set up a stereo mix with tracks routed to a stereo output bus, mixing down that output bus would give you a mixdown file containing the whole mix. Similarly, you can mix down a complete surround bus, either to a single multi-channel file or to one file per surround channel (by activating the Split Channels option).
■ Audio track channels (Cubase only)
This will mix down the channels for the tracks, complete with insert effects, EQ, etc. This can be useful for turning a number of events into a single file, or to convert tracks with insert effects into audio files (that are less CPU-intensive). Simply export the track and re-import the file into the project.
- Any kind of audio-related mixer channel (Cubase only)
This includes VST Instrument channels, instrument tracks, effect return channels (FX Channel tracks), Group channels and ReWire channels. There are many uses for this – for example, you can mix down an effect return track or turn individual ReWire channels into audio files.
Please note the following:
- The Export Audio Mixdown function mixes down the area between the left and right locators.
- When you mix down, you get what you hear – mutes, mixer settings and insert effects are taken into account. Note though that you will only include the sound of the channels you select for mixdown.
- MIDI tracks are not included in the mixdown!
To make a complete mixdown containing both MIDI and audio, you first need to record all your MIDI music onto audio tracks (by connecting the outputs of your MIDI instruments to your audio inputs and recording, as with any other sound source).
- Cubase only: You can also export selected tracks – this is a different function that does not create an audio mix-down.
Rather, this is a way to transfer complete tracks (including clips and events) from one project to another. See "Exporting and importing tracks (Cubase only)" on page 466.
Mixing down to audio files
- Set up the left and right locators to encompass the section you want to mix down.
-
Set up your tracks, so that they play back the way you want.
This includes muting unwanted tracks or parts, making manual mixer settings and/or activating the R (Read) automation buttons for some or all mixer channels. -
Pull down the File menu and select "Audio Mixdown..." from the Export submenu.
The Export Audio Mixdown dialog appears.
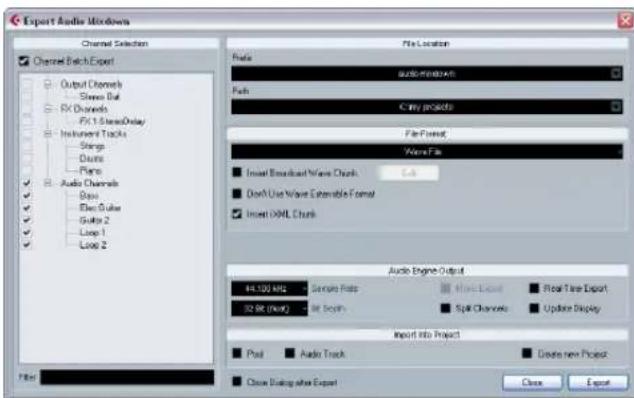
text_image
Export Audio Windows Channel Selection Output Channels Shares Bat RX Channels FX1.5 StereoDelay Instrument Tracks Steps Pairs Audio Channels Bags Elect Pulse Guitar 2 Loop 1 Loop 2 File Location Falls audiowindows Falls Cany projects File Format: Wave Files ■ Insert Broadcast Wave Chunks: 0.4 ■ Don't Use Wave Externable Format ■ Insert XML Chunks Audio Engine Output 84.120 MHz - Sample Rate 32 Hz (MHz) - or Beginn ■ Real Time Export ■ Split Channels ■ Update Display Import into Project ■ Post ■ Audio Track ■ Create new Project ■ Close During after Export Close ExportThe available settings and options differ depending on the selected file format (see "The available file formats" on page 422).
- In the Channel Selection section to the left, select the channel(s) you want to mix down. The list contains all output and audio-related channels available in the project (see "About the Channel Selection section" on page 421).
Activate the Channel Batch Export option if you want to mixdown several channels at once.
- In the File Location section at the top you can specify a name (or prefix in case of channel batch exports) and path for the mixdown files.
To the right of the File Name/Prefix and the Path fields you will find two pop-up menus with a number of options:
Naming Options pop-up menu:
- Select "Set to Project Name" to use the project name for the export file.
- Activate the "Auto Update Name" option (so that a checkmark is displayed before it) to add a number to the specified file name every time you click the Export button.
Path Options pop-up menu:
- Select "Choose..." to open a dialog in which you can browse for a path and enter a file name.
The file name will automatically be shown in the File Name/Prefix field.
- Select an entry from the Recent Paths section to reuse a path specified for a previous export.
This section is only shown after an export has been completed. With the "Clear Recent Paths" option you can delete all entries from the Recent Paths section.
- Activate the option "Use Project Audio Folder" to save the mixdown file in the project's Audio folder.
-
Choose an entry from the File Format pop-up menu.
-
Activate the Split Channels option if you want to export all sub-channels of a multi-channel bus as mono files, or activate "Mono Export" if you want to export a channel as a single mono file.
→ "Mono Export" is not available if "Channel Batch Export" is activated.
-
Make additional settings for the file to be created. This includes selecting sample rate, bit depth, etc. The available options depend on the selected file format – see "The available file formats" on page 422.
-
If you want to automatically import the resulting audio files back into Cubase, activate any of the checkboxes in the "Import into project" section.
If you activate the Pool checkbox, a clip referring to the file will appear in the Pool. Activating the Audio Track checkbox as well will create an audio event that plays the clip, and place it on a new audio track, starting at the left locator. If you activate the Create New Project option, a new project is created that contains one audio track for each of the exported channels. Note that if this is activated, the Pool and Audio Track options will be disabled.
⇒ The Create New Project option is only available if you have selected an uncompressed file format and the Use Project Audio Folder option is deactivated.
- If you activate Realtime Export, the export will happen in realtime, i.e. the process will take the same time as regular playback.
Some VST plug-ins, external instruments and effects require this in order to have enough time to update correctly during the mixdown – consult the plug-in manufacturers if uncertain.
- Cubase only: When Realtime Export is activated, the exported audio will be played back via the Control Room. The Audition Volume fader allows you to adjust the Control Room volume. Note that if the Control Room is deactivated and for channel batch exports, there will be no Audition Volume fader in the dialog.
- Depending on the CPU and disk speed of your computer, it may not be possible to export all channels simultaneously if Realtime Export is activated. If an error occurs during the realtime export, the program will automatically stop the process, reduce the number of channels and start again. Afterwards the next batch of files is exported. This is repeated as often as needed to export all selected channels.
Due to this splitting of the export process in "runs", the realtime export might take longer than the actual playback would.
- If you activate Update Display, the meters will be updated during the export process.
This allows you to check for clipping, for example.
- Click Export.
A dialog with a progress bar is displayed while the audio file or files are being created. If you change your mind during the file creation, you can click the Abort button to cancel the operation.
- If the option "Close dialog after export" is activated, the dialog will be closed.
- If you have activated any of the "Import into project" options, the file or files will be imported back into the same or a new project.
When playing back the re-imported file in the same Cubase project, remember to mute the original tracks so that you really hear the correct file.
About the Channel Selection section
The Channel Selection section shows all output and audio-related channels available in the project. These channels are organized in a hierarchical structure that allows you to easily identify and select the channels you want to export. The different channel types are listed below each other, with channels of the same type being grouped in a node (e.g. Instrument Tracks).
- You can activate/deactivate channels by clicking on the checkboxes in front of the channel names.
- If Channel Batch Export is activated, you can also activate/deactivate all channels of the same type by clicking on the checkbox in front of the channel type entry.
- If Channel Batch Export is activated, you can select/de-select several channels in one go using the [Shift] and/or [Ctrl]/[Command] modifiers and then clicking on any of the checkboxes for the highlighted channels.
Note that this toggles the activation status of a channel, i.e. all selected channels that were previously activated will be deactivated and vice-versa.
- If your project contains a large number of channels, it might get difficult to find the desired channels in the Channel Selection section. To remedy this, and to simplify the process of selecting several channels, you can filter the display. Simply type in the desired text (e.g. "voc" to show all tracks containing vocals) in the Filter field below the tree view.
About the Import Options dialog
If you activate any of the options in the Import into project section, the Import Options dialog will open for each exported channel when the export is complete. For a detailed description of the options in this dialog see "About the Import Medium dialog" on page 268.
File naming conventions
The exported files on the hard disk are being named according to the following convention:
This could, for example, result in the following file names:
"mixdown - 3 - Audio - Elec Guitar.wav" or "surround mix - Output - 5.1 Out 03 (LFE).aiff" for a surround channel.
The available file formats
The following pages describe the different export file formats, as well as their options and settings.
- AIFF files (see "AIFF files" on page 422).
- AIFC files (see "AIFC files" on page 423).
- Wave files (see "Wave files" on page 424).
- Wave 64 files (Cubase only, see "Wave 64 files (Cubase only)" on page 424).
- Broadcast Wave files (see "Broadcast Wave files" on page 424).
-
MP3 files (Cubase only, see "MPEG 1 Layer 3 files (Cubase only)" on page 424).
-
Ogg Vorbis files (see "Ogg Vorbis files" on page 424).
- Windows Media Audio Pro files (Windows only, see "Windows Media Audio Pro files (Windows only)" on page 425).
⇒ Most of the settings described below for AIFF files are available for all file types. Where this is not the case, you will find additional information in the corresponding section.
MP3 Export (Cubase Studio only)
This version of Cubase provides a function for exporting your audio mixdown as mp3 files. This function is limited to 20 trial encodings or a trial period of 30 days from the installation date (whichever ends first). After this period, the function will be disabled until you purchase the mp3 encoder for Cubase.
- When the mp3 format is selected, and you click the Export button, a window opens showing you how many trial encodings you have left. You can upgrade to an unlimited mp3 export function by clicking the "Go to Online Shop" button in the dialog.
This will take you to Steinberg's online shop where you can purchase the upgrade. Note that a working internet connection is required.
AIFF files
AIFF stands for Audio Interchange File Format, a standard defined by Apple Inc. AIFF files have the extension ".aif" and are used on most computer platforms.
For AIFF files the following options are available:
Option Description
| File Name In this field you can enter a name for the mixdown file. | |
| Naming options pop-up menu | This allows you to define how your project should be named. If you select “Set to Project Name” the project name will be used for the export file. If you activate the “Auto Update Name” option a number will be added to the specified file name every time you click the Export button. |
| Path Here you can specify a path where you want the mix-down to be saved. | |
| Path options pop-up menu | This allows you to specify where the file should be saved. If you select “Choose...” a file dialog will open and the file name will automatically be shown in the File Name/Prefix field. If you already have exported a file, the Recent Paths section will be shown where you can choose to reuse a previous path. If you activate "Use Project Audio Folder", the mixdown file will be saved in the project’s Audio folder. |
Option Description
| Insert Broadcast Wave Chunk | This allows you to include information about the date and time of creation, a timecode position (allowing you to insert exported audio at the correct position in other projects, etc.) along with author, description and reference text strings in the exported file.Some applications may not be able to handle files with embedded info – if you get problems using the file in another application, deactivate the option and re-export. |
| Edit button By clicking this button the “Broadcast Wave Chunk” dialog opens where you can enter additional information that will be embedded in the exported files. Note that in the Preferences (Record–Audio–Broadcast Wave page) you can enter default text strings for author, description and reference that will automatically be displayed in the “Broadcast Wave Chunk” dialog. | |
| Don’t Use Wave Extensible Format (Wave files only) | The Wave Extensible format contains additional metadata, such as the speaker configuration. It is an extension to the normal Wave format that some applications may not be able to handle.If you get problems using the Wave file in another application, activate this option and re-export. |
| Insert iXML chunk | This allows you to include additional project-based or sound metadata (e.g. scene and take information) in the exported file.Some applications may not be able to handle files with embedded info – if you get problems using the file in another application, deactivate the option and re-export. |
| Sample Rate (only uncompressed file formats) | This setting determines the frequency range of the exported audio – the lower the sample rate, the lower the highest audible frequency in the audio. In most cases, you should select the sample rate set for the project, since a lower sample rate will degrade the audio quality (mainly reducing the high frequency content) and a higher sample rate will only increase the file size, without adding to audio quality. Also consider the future usage of the file – if you e.g. plan to import the file into another application, you should select a sample rate supported by that application.If you are making a mixdown for CD burning, you should select 44.100 kHz, since this is the sample rate used on audio CDs. |
| Bit Depth (only uncompressed file formats) | Allows you to select 8, 16, 24 bit or 32 bit (float) files. If the file is an “intermediate mixdown” that you plan to re-import and continue working on in Cubase, we recommend that you select the 32 bit (float) option.32 bit (float) is a very high resolution (the same resolution as used internally for audio processing in Cubase), and the audio files will be twice the size of 16 bit files. If you are making a mixdown for CD burning, you should use the 16 bit option, as CD audio is always 16 bit.In this case, we recommend that you activate the UV-22HR dithering plug-in (see the separate PDF document “Plug-in Reference” for details). This reduces the effects of quantization noise and artifacts from being introduced when converting the audio down to 16 bit.8 bit resolution should only be used if required, since it will result in limited audio quality. 8 bit audio may be suitable in some multimedia applications, etc. |
Option Description
| Realtime Export If you activate this option, the export will happen in real-time, i.e. the process will generally take the same time as regular playback. Some VST plug-ins, external instruments and effects require this in order to have enough time to update correctly during the mixdown – consult the plug-in documentation.Cubase only: When Realtime Export is activated, the exported audio will be played back via the Control Room. | |
| Update Display If you activate this option, the meters will be updated during the export process. This allows you to check for clipping, for example. | |
| Mono Export (only for single-channel export) | If you activate this option, the exported audio is mixed down to mono. |
| Split Channels Activate this option if you want to export all sub-channels of a multi-channel output bus as mono files. | |
| Pool Activate this option if you want to import the resulting audio file automatically back into the Pool. A clip referring to the file will appear in the Pool.If this option is activated, the Import Options dialog appears on export. For a description of the available settings, see “About the Import Medium dialog” on page 268. | |
| Audio Track If you activate this option, an audio event that plays the clip will be created and placed on a new audio track, starting at the left locator.Furthermore, the Import Options dialog appears on export. For a description of the available settings, see “About the Import Medium dialog” on page 268. | |
| Create New Project (uncompressed file formats only) | Activate this option if you want to automatically create a new project that contains one audio track for each exported channel. The tracks will have the corresponding mixdown file as audio event. The track names will be identical with the export channel names.Note that the new project will be the active project. |
| Close dialog after export | If this option is activated, the dialog will be closed after the export, otherwise it will be left open. |
| Audition Volume fader (only for single-channel export) | Cubase only: During a Realtime Export, this fader is displayed in the progress dialog after you clicked the Export button. It allows you to adjust the Control Room volume. Note that this fader is only available if the Control Room is activated. |
AIFC files
AIFC stands for Audio Interchange File Format Compressed, a standard defined by Apple Inc. These files support compression ratios as high as 6:1 and contain tags in the header. AIFC files have the extension ".aifc" and are used on most computer platforms.
AIFC files support the same options as AIFF files.
Wave files
Wave files have the extension ".wav" and are the most common file format on the PC platform.
Wave files support the same options as AIFF files.
Wave 64 files (Cubase only)
Wave 64 is a proprietary format developed by Sonic Foundry Inc. In terms of audio quality, Wave 64 files are identical to standard wave files, but in the file headers Wave 64 files use 64-bit values for addressing where wave files use 32-bit values. The consequence of this is that Wave 64 files can be considerably larger than standard Wave files. Wave 64 is therefore a good file format choice for really long recordings (file sizes over 2GB), e.g. live surround recordings. Wave 64 files have the extension ".w64".
Wave 64 files support the same options as AIFF files.
Broadcast Wave files
Concerning audio, Broadcast Wave files are the same as regular Wave or Wave 64 files, but without compression. To create a Broadcast Wave file, select either Wave or Wave 64 as the file format and activate the Insert Broadcast Wave Chunk option. Click Edit if you wish to edit the chunk information, otherwise the defaults as specified in the Preferences (Record—Audio—Broadcast Wave page) will be used. Broadcast Wave files have the extension ".wav".
Broadcast Wave files support the same options as AIFF files.
MPEG 1 Layer 3 files (Cubase only)
MPEG 1 Layer 3 files have the extension “.mp3”. By use of advanced audio compression algorithms, mp3 files can be made very small, yet maintaining good audio quality.
Apart from the Sample Rate and Bit Depth options, MPEG 1 Layer 3 files support the same settings as AIFF files in the sections File Location, Audio Engine Output and Import into project. The File Format settings are different, though.
For MPEG 1 Layer 3 files the following options are available in the File Format section:
Option Description
| Bit Rate fader By moving this fader, you can select a bit rate for the mp3 file. As a rule, the higher the bit rate, the better the audio quality and the larger the file. For stereo audio, 128kBit/s is often considered to result in “good” audio quality. | |
| Sample Rate pop-up | On this pop-up menu you can select a Sample Rate for the mp3 file. |
| High Quality Mode option | When this is activated, the encoder will use a different resampling mode, which can give better results depending on your settings. In this mode, you cannot specify the Sample Rate, but only the Bit Rate for the mp3 file. |
| Insert ID3 Tag option | This allows you to include ID3 Tag information in the exported file. |
| Edit ID3 Tag button | When you click this, the ID3 Tag dialog opens, in which you can enter information about the file. This additional information will be embedded as text strings in the file, and can be displayed by most mp3 playback applications. |
Ogg Vorbis files
Ogg Vorbis is an open source, patent-free audio encoding and streaming technology, offering compressed audio files (extension ".ogg") of small size, but with comparatively high audio quality.
Apart from the Sample Rate and Bit Depth options, Ogg Vorbis files support the same settings as AIFF files in the sections File Location, Audio Engine Output and Import into project.
In the File Format section you will find only one setting: the Quality fader. The Ogg Vorbis encoder uses variable bit rate encoding, and the Quality setting determines between which limits the bit rate will vary. Generally speaking, the higher the Quality setting, the higher the sound quality but also the larger the files.
Other file formats
Steinberg also offers optional Dolby Digital (AC3) and DTS encoders for export directly to AC3 or DTS format (Cubase only). Please go to www.steinberg.net for more information.
Windows Media Audio Pro files (Windows only)
This is a continuation of the Windows Media Audio format developed by Microsoft Inc. Due to the advanced audio codecs and lossless compression used, WMA Pro files can be decreased in size with no loss of audio quality. Furthermore, WMA Pro features the possibility of mixing down to 5.1 surround sound. The files have the extension “.wma”.
When you select "Windows Media Audio File" as the file format, you can click the "Codec Settings..." button to open the "Windows Media Audio File Settings" window.
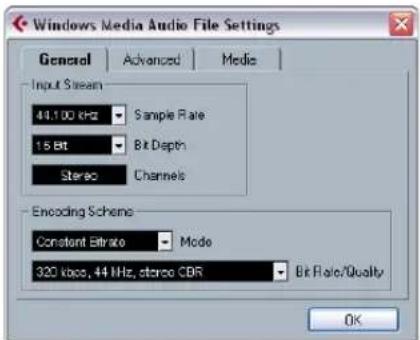
text_image
Windows Media Audio File Settings General Advanced Media Input Stream 44.100 kHz Sample Rate 15 Bit Bit Depth Stereo Channels Encoding Scheme Constant Ebitrate Mode 320 kbps, 44 kHz, stereo CBR Bit Rate/Quality OKWindows Media Audio File Settings
Note that the configuration options may vary, depending on the chosen output channel(s).
General tab
In the Input Stream section, you set the sample rate (44.1, 48 or 96kHz) and the bit resolution (16bit or 24bit) of the encoded file. These should be set to match the sample rate and bit resolution of the source material. If no value matches that of your source material, use the closest available value that is higher than the actual value. For example, if you're using 20bit source material, set the bit resolution to 24bit rather than 16bit.
⇒ The setting in the Channels field depends on the chosen output and cannot be changed manually.
The settings in the Encoding Scheme section are used for defining the desired output from the encoder, e.g. whether it should be a stereo file or a 5.1 surround file. Make settings appropriate for the intended use of the file. If the file will be downloaded or streamed on the Internet, you might not want too high bit rates, for example. See below for descriptions of the options.
■ Mode
The WMA Pro encoder can use either a constant bit rate or a variable bit rate for encoding to 5.1 surround, or it can use lossless encoding for encoding to stereo. The options on this menu are as follows:
Mode Description
Constant Bitrate This will encode to a 5.1 surround file with a constant bit rate (set in the Bit Rate/Channels menu, see below). Constant bit rate is preferably used if you want to limit the size of the final file. The size of a file encoded with a constant bit rate is always the bit rate times the duration of the file.
Variable Bitrate Encodes to a 5.1 surround file with a variable bit rate, according to a quality scale (the desired quality is set in the Bit Rate/Quality menu, see below). When you encode with variable bit rates, the bit rate fluctuates depending on the character and intricacy of the material being encoded. The more complex passages in the source material, the higher the bit rate – and the larger the final file.
Lossless Encodes to a stereo file with lossless compression.
- Bit Rate/Quality
This menu allows you to set the desired bit rate. The available bit rate settings vary depending on the selected mode and/or output channels (see above). If the Variable Bitrate mode is used, the menu allows you to select from various levels of quality, with 10 being the lowest and 100 the highest. Generally, the higher the bitrate or quality you select, the larger the final file will be. The menu also shows the channel format (5.1 or stereo).
Advanced tab
- Dynamic Range Control
These controls allow you to define the dynamic range of the encoded file. The dynamic range is the difference in dB between the average loudness and the peak audio level (the loudest sounds) of the audio. These settings affect how the audio is reproduced if the file is played on a Windows XP computer with a player from the Windows Media series, and the "Quiet Mode" feature of the player is activated to control the dynamic range.
The dynamic range is automatically calculated during the encoding process, but you can specify it manually as well.
To manually specify the dynamic range, first put a checkmark in the box to the left by clicking in it, and then enter the desired dB values in the Peak and Average fields. You can enter any value between 0 and -90dB. Note, however, that it is usually not recommended to change the Average value, since this affects the overall volume level of the audio and therefore can have a negative effect on the audio quality.
The Quiet Mode in a Windows Media player can be set to one of three settings. Below, these settings are listed together with an explanation of how the Dynamic Range settings affect them:
- Off: If Quiet Mode is off, the dynamic range settings that were automatically calculated during the encoding will be used.
- Little Difference: If this is selected and you have not manually changed the dynamic range settings, the peak level will be limited to 6dB above the average level during playback. If you have manually specified the dynamic range, the peak level will be limited to the mean value between the peak and average values you specified.
- Medium Difference: If this is selected and you have not manually changed the dynamic range settings, the peak level will be limited to 12dB above the average level. If you have changed the dynamic range, the peak level will be limited to the peak value you specified.
■ Surround Reduction Coefficients
Here you can specify which amount of volume reduction, if any, should be applied to the different channels in a surround encoding. These settings affect how the audio is reproduced on a system incapable of playing back the file in surround, in which case the surround channels of the file will be combined into two channels and played back in stereo instead.
The default values should produce satisfactory results, but you can change the values manually if you wish. You can enter any value between 0 and -144dB for the surround channels, the center channel, the left and right channels and the LFE channel, respectively.
Media tab
In these fields you can enter a number of text strings with information about the file – title, author, copyright information and a description of its contents. This information will then be embedded in the file header and can be displayed by some Windows Media Audio playback applications.
For more information about surround sound and encoding, see the chapter "Surround sound (Cubase only)" on page 180.
Synchronization
Background
What is synchronization?
Synchronization is said to exist when you make two pieces of equipment agree on time or tempo and position info.
You can establish synchronization between Cubase and a number of other types of devices, including tape recorders and video decks, but also MIDI devices that "play back", such as other sequencers, drum machines, "workstation sequencers", etc.
When you set up a synchronization system, you must decide which unit is the master. All other devices are then slaved to this unit, which means they will adjust their playback speed to the master's.

For a description of the VST System Link feature (with which you can synchronize separate computers running Cubase or Nuendo for example), see "Working with VST System Link" on page 438.
Cubase as slave
When a synchronization signal is coming in to Cubase, from another device, this device is the master and Cubase is the slave. Cubase will adjust its playback to the other device.
Cubase as master
When you set up Cubase to transmit synchronization information to other devices, Cubase is the master and the other devices are the slaves; they will adjust their playback to Cubase.
Cubase - both master and slave
Cubase is a very capable synchronization device. It can operate as both master and slave at the same time. For example, Cubase might be slaved to a tape recorder transmitting timecode, while at the same time transmitting MIDI Clock to a drum machine, acting as a master for that.
Synchronization signals
Basically there are three types of synchronization signals for audio: timecode, MIDI clock and word clock.
Timecode (SMPTE, EBU, MTC, VITC, etc.)
Timecode appears in a number of guises. No matter which "format" it has, it always supplies a "clock on the wall" type of synchronization, that is, a synchronization related to hours, minutes, seconds and two smaller units called "frames" and "subframes".
- LTC (SMPTE, EBU) is the audio version of timecode. This means that it can be recorded on the audio track of an audio or video recorder.
- VITC is the video format timecode, stored in the actual video image.
- MTC is the MIDI version of timecode, transmitted via MIDI cables.
- ADAT sync (Alesis) is only used with the ASIO Positioning Protocol, see "About the ASIO Positioning Protocol (APP)" on page 434.
For the ASIO Positioning Protocol, other high precision timecode formats may also be supported.
Format recommendations for timecode – without ASIO Positioning Protocol
- When using synchronizer to synchronize your system to external timecode, the most common timecode format is MTC. Contrary to some reports you might have heard, MTC delivers good precision for external sync. This is due to the fact that the operating system can “time stamp” incoming MIDI messages, which increases precision.
Format recommendations for timecode – with ASIO Positioning Protocol
- LTC and VITC are the formats with the highest precision and are recommended when available.
- MTC is the next best option and probably the most common choice, since few audio hardware solutions have built-in LTC or VITC readers. However, LTC and VITC offer even higher precision when available.
MIDI Clock
MIDI Clock is a tempo-based type of synchronization signals, i.e. it is related to the number of "beats per minute". MIDI Clock signals are suitable for synchronizing two devices that agree on tempo, such as Cubase and a drum machine.

MIDI Clock is not suitable as a master sync source for an application like Cubase. Therefore Cubase will transmit MIDI Clock signals to other devices, but it will not receive MIDI Clock.
Word Clock
Word clock is basically a replacement for the sample rate clock (e.g. in an audio card). Word clock hence runs at the same rate as the sample rate in the audio, 44.1kHz, 48kHz, etc.
Word clock does not contain any position information, it is only a "simple" signal for clocking the audio at its sample rate.
Word clock comes in many formats, analog on coaxial cable, digital as part of an S/PDIF, AES/EBU or ADAT audio signal, etc.
Synchronizing the transport vs. synchronizing audio
How timing is handled in a non-synchronized system
Let's first look at the situation where Cubase is not synchronized to any external source:
Any digital playback system has an internal clock that ultimately affects the playback speed and stability, and PC audio hardware is no exception. This clock is extremely stable.
When Cubase is playing back with no external synchronization, all playback is internally synchronized to the internal digital audio clock.
Synchronizing Cubase's playback
Let's assume now that we use external timecode synchronization with Cubase. For example, we might synchronize playback to a tape recorder.
Timecode coming from an analog tape recorder will always vary slightly in speed. Different timecode generators and different tape recorders will also supply timecode with slight differences in speed. In addition, the shuttling of tape mechanisms due to overdubs and re-recordings can cause the physical tape to wear and stretch, which affects the speed of the timecode.
If you use a synchronizer that generates word clock and set up Cubase to sync to incoming timecode, it will vary its overall playback speed to compensate for such fluctuations in the speed of the timecode – that's the whole purpose of synchronization.
What happens with the digital audio?
The fact that Cubase's playback is synchronized to the timecode does not affect the playback of the digital audio. It still relies on the perfectly stable, built-in clock in the audio hardware.
As might be expected, problems will appear when the perfectly stable digital audio gets related to the slightly varying speed of a system synchronized to timecode.
The playback timing of each event will not be in total accordance with the tape or the MIDI playback, since the playback speed of the audio is determined by the digital audio hardware's built-in clock.
Resolving to word clock
The solution to this problem is to use one external clock for all components in the system. One master clock is used to derive whatever type of clock signal each component in the system needs. For example, something called a house clock can be used to generate sample rate clocks for the digital audio hardware and timecode for Cubase. This ensures that all components in the system use the same reference source for their timing.
Synchronizing digital audio to external clocks running at sample rate is often called "resolving" or "synchronizing to word clock".
If you aim to perform synchronization to external signals, we strongly recommend that you obtain proper synchronization equipment. This encompasses:
- An audio card that can be slaved to external word clock.
- A synchronizer that can read timecode (and possibly house clock) and generate the required sync signals from that, such as the Steinberg TimeLock Pro.
or...
- An audio system with complete built-in synchronization possibilities, preferably supporting the ASIO Positioning Protocol (see "About the ASIO Positioning Protocol (APP)" on page 434).
Using timecode without word clock
Of course, it is possible to set up a synchronization system where you lock Cubase to timecode without using word clock. However, please note that the timing of audio vs. MIDI cannot be guaranteed and that fluctuations in speed in the incoming timecode will not affect the playback of audio events. This means that synchronizing to timecode may work in the following situations:
- When the timecode was originally generated by the audio card itself.
- When the source providing the timecode is extremely stable (such as a digital video system, a digital tape recorder or another computer).
- When you remain synchronized to that same stable source throughout the entire process, both while recording and playing back audio.
Making basic settings and connections
Setting the Frame Rate
The frame rate is the number of frames per second in a film or on a video tape. However, the frame rate used varies with the type of media (film or video), which country the video tape has been produced in, and other circumstances.
In the Project Setup dialog are two settings for frame rates:
- The Frame Rate pop-up is automatically adjusted to the frame rate of the incoming timecode.
There is an exception to this when you are synchronizing Cubase to MIDI Timecode: If you have selected 29.97fps or 30dfps as Frame Rate in Cubase, this selection will be kept, since these frame rates are not included in the MTC format.
The following frame rates are available:
Frame Rate Description
24 fps The traditional frame rate of 35mm film.
25 fps The frame rate used for all video and audio in Europe (EBU).
29.97 fps Straight 29.97 frames per second.
29.97 dfps "Drop frame" code running at 29.97 frames per second, most often used in the United States of America for work with color video.
30 fps Straight 30 frames per second. This is often used in the United States for audio only work.
30 dfps Very rarely used.
- The Display Format pop-up contains a number of formats that function as the "master" setting for the display format used in the various rulers and position displays. The item "60 fps (user)" on this menu represents a user-definable frame rate. To make editing with frame accuracy correspond to the actual frame rate in an external sync source, you need to set this frame rate to the same value as on the Frame Rate pop-up menu.
Proceed as follows:
- Open the Preferences dialog (accessed from the File menu under Windows or the Cubase menu on the Mac) and select the Transport page.
- Enter the desired frame rate under "User Definable Framerate".
Either type in the desired value directly or use the arrow buttons to increase/decrease the value. You can enter any value between 2 and 200.

- When you're done, click OK to close the dialog and save the settings.
The Frame Rate you specified will now be used in the Display Format pop-up.
Making connections
The following connections are required for external sync via a synchronizer, including resolving of the audio card. For details on audio card and synchronizer settings and connections, see the manuals for these devices.
- Route the master clock signal (LTC, VITC, etc.) to an input on the synchronizer.
- Connect the word clock output on the synchronizer to a word clock input on the audio card.
- Connect the MIDI Timecode (MTC) output on the synchronizer to the corresponding input on the computer.
- Set up the synchronizer and make sure the frame rate settings are in accordance with the master clock.
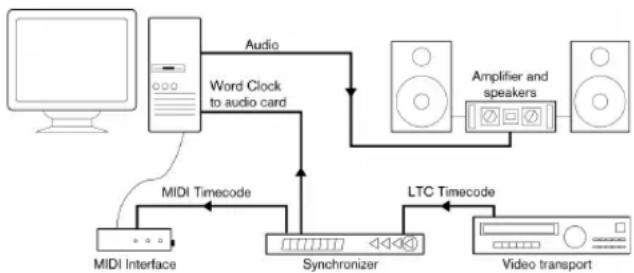
flowchart
graph TD
    A["MIDI Interface"] -->|MIDI Timecode| B["Synchronizer"]
    B --> C["Audio"]
    C --> D["Word Clock to audio card"]
    D --> E["Amplifier and speakers"]
    E --> F["Video transport"]
    B --> G["LTC Timecode"]
A typical synchronization setup
Synchronization settings
In the following sections you will find a description of how to set up your system for the different timecode sources:
Internal Timecode
In this mode, Cubase is the master. When working with MMC (see "Machine Control" on page 436), the external device gives the start and stop signals, but is synchronized by Cubase.
Use the "MIDI Timecode Destinations" and "MIDI Clock Destinations" sections to specify which devices should be slaved to Cubase.
Synchronizing other Equipment to Cubase
You may have other MIDI devices that you want to syn- chronize to Cubase. There are two types of synchronization signals that Cubase can transmit: MIDI Clock and MIDI Timecode.
Transmitting MIDI Clock
If you transmit MIDI Clock to a device supporting this type of synchronization signal, the other device will follow Cubase's tempo. The tempo setting in the other device is of no relevance. Instead, it plays at the same tempo as Cubase. If the device also reacts to Song Position Pointers (which Cubase transmits) it will follow when you wind, rewind and locate using the Cubase Transport panel.
MIDI Clock transport commands include "Start", "Stop" and "Continue". However, some MIDI equipment (e.g. some drum machines) do not recognize the "Continue" command. If this is the case with your equipment, activate the option "Always Send Start Message" in the Project Synchronization Setup dialog (MIDI Clock Destinations). When this is activated, only the Start command is used.
- Activate "MIDI Clock Follows Project Position" if you want the other device to follow when you loop, jump and locate during playback. When this is activated, the sent MIDI Clock signals will follow the sequencer time and tempo position at all times.
⚠️ Please note that some external devices may not react smoothly to these repositioning messages. Especially when working with some older devices, it may take some time for them to synchronize accurately to the project time.
Send MIDI Clock in Stop Mode
When the option "Send MIDI Clock in Stop Mode" in the Project Synchronization Setup dialog (MIDI Clock Destinations section) is activated, Cubase will send MIDI Clock signals to the selected MIDI Clock destinations even when Cubase is in Stop mode.
This is, for example, useful if you are working with a keyboard that has a built-in arpeggiator, the tempo of which you are controlling via MIDI Clock messages. This way, the arpeggiator will keep the right tempo even when Cubase is in Stop mode. You may also be able to use this feature with some external drum machines, as it allows you to play the drum patterns in the current sequencer tempo even when Cubase is stopped.
- When this option is deactivated, Cubase will send MIDI Clock signals to the selected MIDI Clock destinations only during playback.
In this mode, you will not be able to use the above-mentioned arpeggia-
tor of your keyboard in Stop mode.
→ Keep in mind that the MIDI Clock information always refers to the tempo at the current project position.
Transmitting MIDI Timecode
If you transmit MIDI Timecode to a device supporting this type of synchronization signal, the device will synchronize time-wise to Cubase, that is, the time displays on Cubase's Transport panel and on the other device will agree. When you wind and locate Cubase and then activate playback, the other device will follow from the same position (if it has this capability and is set up for it!).
⇒ If you want to be able to loop, jump and locate during playback in Cubase and have the other device follow, activate MIDI Timecode Follows Project Time.
When this is activated, the sent MIDI Timecode will follow the sequencer time position at all times.
Setting Up
- Connect the desired MIDI Outputs from Cubase to the device(s) that you plan to synchronize.
- Open the Project Synchronization Setup dialog from the Transport menu.
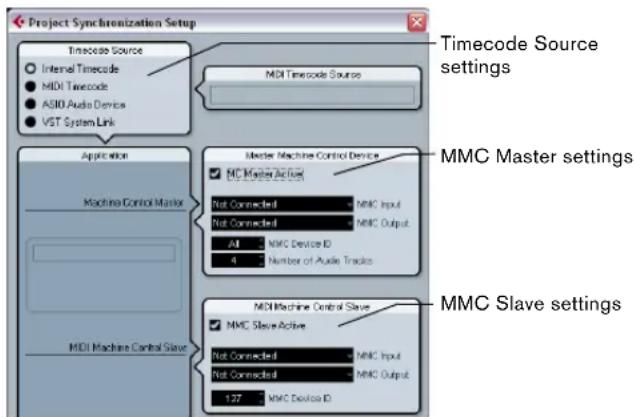
text_image
Project Synchronization Setup Timecode Source Internal Timecode MIDI Timecode ASIO Audio Device VST System Link MDI Timecode Source Application Machine Control Master Master Machine Control Device MC Master Active Not Connected MNC Input Not Connected MNC Output A4 MNC Device ID 4 Number of Audio Tracks MDI Machine Central Slave MNC Slave Active Not Connected MNC Input Not Connected MNC Output 127 MNC Device ID MMC Master settings MMC Slave settings- Activate the sync outputs by using the corresponding checkboxes.
You can output any combination of MIDI Timecode and MIDI Clock to any combination of outputs (however, you probably do not want to send MTC and MIDI Clock to the same output).
Some MIDI interfaces will automatically send MIDI Clock to all MIDI outputs, regardless of the MIDI Clock Port selection in Cubase. If this is the case, you should only select one MIDI Clock port (consult the documentation of the MIDI Interface if in doubt).
4. Set the other device(s) to their "external synchronization" mode (or some other mode with a similar name) and activate playback on them if necessary.
5. Activate playback in Cubase, and the other device(s) will follow.
MIDI Timecode
In this mode, Cubase is the slave and the timecode is sent by the MIDI Timecode Source specified in the corresponding section.
Setting up Cubase for external sync to timecode
- In the Project Synchronization dialog, set Timecode Source to MIDI Timecode.
- Use the pop-up menu in the MIDI Timecode Source section to select an input for the timecode.
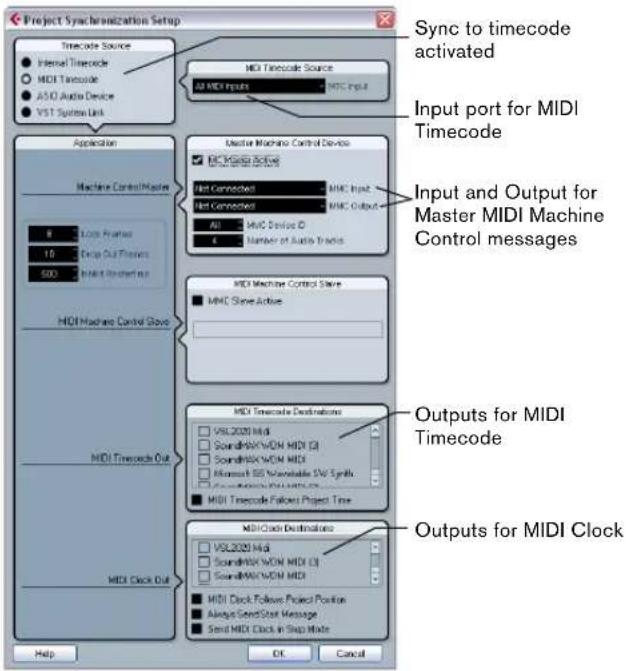
text_image
Project Syncynchronization Setup Sync to timecode activated Input port for MIDI Timecode Input and Output for Master MIDI Machine Control messages MIDI Timecode Source MIDI Input MIDI Timecode MIDI Timecode Active MIDI Machine Control Device MIDI Machine Control Store MIDI Machine Control Store MIDI Machine Control Store MIDI Timecode Destination VSL2020 Mid SoundMAX WON MIDI (D) SoundMAX WON MIDI Microsoft 80 Wireless Disk Synth MIDI Timecode Fakout Project Time MIDI Clock Destination VSL2020 Mid SoundMAX WON MIDI (D) SoundMAX WON MIDI MIDI Clock Follows Project Position Always Send Start Message Send MIDI Clock in Step Mode Help OK Cancel- Close the Project Synchronization Setup dialog and open the Project Setup dialog from the Project menu.
- Use the Start value to set which frame on the external device (e.g. a video tape) should correspond to the beginning of the project.
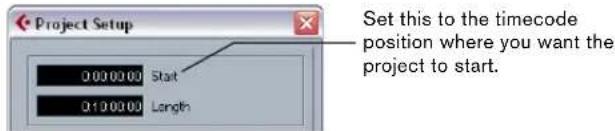
text_image
Project Setup 0000000 Start 0100000 Length Set this to the timecode position where you want the project to start.- You can also set this with the function "Set Timecode at Cursor" on the Project menu.
This is useful if you know that a certain position in your project coincides with a certain timecode position in the external device. Move the project cursor to that position, select "Set Timecode at Cursor" and specify the corresponding timecode position in the dialog that appears – the Start value is adjusted accordingly.
- In the dialog that appears, you are asked if you want to keep the project content at its timecode positions. Select "No".
This will make all events and parts keep their positions relative to the project start.
- Close the Project Setup dialog.
- On the Transport panel, activate the Sync button (or select Use External Sync from the Transport menu).
- Start the tape (or video, or other master device) that contains the timecode. Cubase starts playing when it receives timecode with a position "higher" than or equal to the project Start frame.
You can wind the device that sends the timecode to any position and start from there.

When the master device with the timecode is stopped, you can use the Cubase transport controls as you normally do.
You should also take a look at the Sync Options, see "Sync Options" on page 437.
The Sync indicator
On the Transport panel you can check the status of incoming timecode by observing the sync indicator. It switches between "Offline" (not waiting for sync), "Idle" (ready for sync but no signal is coming in), and "Lock xx" (where xx indicates the frame rate of the incoming signal).
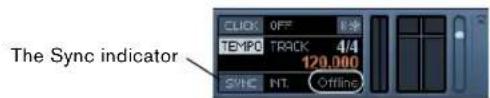
text_image
The Sync indicator CLOCK OFF TEMPQ TRACK 4/4 120.000 SYNC INT OfflineASIO Audio Device
This option is only available if your hardware is compatible with the ASIO Positioning Protocol.
In this mode, Cubase is the slave and the synchronization signal can be received from another device connected to a digital interface of the audio hardware.
About the ASIO Positioning Protocol (APP)
The ASIO Positioning Protocol requires audio hardware with specific ASIO drivers.
The ASIO Positioning Protocol is a technology that expands on the type of sync described above and makes sample-accurate positioning possible.
When transferring audio digitally between devices, it is important that synchronization using word clock and timecode is completely correlated. If not, the audio will not be recorded at the exact intended (sample-accurate) position, which can cause various types of problems, such as inaccurately positioned audio material, clicks and pops, etc.
A typical situation is when transferring material from a digital multi-track tape recorder to Cubase (for editing) and then back again. If you do not have sample-accurate synchronization set up, you cannot be sure that the material will appear in its exact original position, when transferred back to the tape recorder.
In order to take advantage of the ASIO Positioning Protocol, your audio hardware must be suitably equipped and the functionality must be included in the ASIO driver for the hardware.
An example of a system for doing sample-accurate transfers would be transferring audio tracks from an Alesis ADAT to Cubase. Here the ADAT will be the sync master (though it does not necessarily have to be). It provides both the digital audio (with an inherent word clock) and position information (timecode) via its ADAT sync protocol. The master clock is generated by the ADAT itself.
Hardware and software requirements for APP
- Your computer audio hardware (in the example above, this would be an ADAT card in your computer) must support all the functionality required for the ASIO Positioning Protocol. That is, it must be able to read the digital audio and the corresponding position information from the external device.
- There must be an ASIO 2.0 driver for the audio hardware.
- For resolving to external timecode, the audio hardware must have an integrated timecode reader/generator.
- For information about which audio hardware models currently support APP, see the Steinberg web site (www.steinberg.net).
The ASIO Positioning Protocol exploits the specific advantage of having an audio card that has an integrated timecode reader. With such a card and the ASIO Positioning Protocol, you can achieve constant sample-accurate synchronization between the audio source and Cubase.
Setting up the audio card for external synchronization
- Open the Device Setup dialog from the Devices menu and, on the VST Audio System page, select the name of your audio interface.
- Click the Control Panel button to open the card's proprietary setup dialog.
If this card is accessed via a special ASIO driver (as opposed to DirectX or the Generic Low Latency ASIO Driver), this dialog is provided by the card, not by Cubase. Hence the settings vary with the card brand and model. - Adjust the settings as recommended by the card manufacturer, then close the dialog.
The dialog may also contain various diagnostic tools that allow you to verify for example whether word clock is arriving correctly. - From the Clock Source pop-up, select the input to which you routed the word clock signal.
This pop-up menu may not be used if you selected an input in the Control Panel dialog instead.
You can now set up the synchronization:
- Open the Project Synchronization Setup dialog and set the Timecode Source to "ASIO Audio Device".
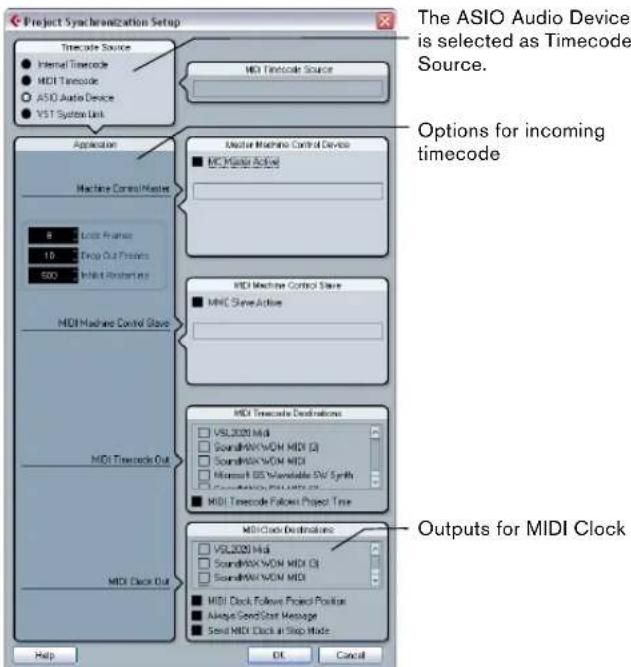
text_image
Project Synchronization Setup Timecode Source Internal Timecode HDI Timecode ASIO Audio Device VST System Link MDI Timecode Source Application Machine Control Master 8 Clock frames 10 Drop Out Frames 500 HMI Ristrants MDI Machine Control Slave Master Machine Control Device MCI Master Active HDI Machine Control Slave MHC Slave Active MDI Machine Control Slave HDI Machine Control Slave MDI Machine Control Slave MDI Tinscale Destinations VSL2020 HDI SoundMAX VON MDI (3) SoundMAX VON MDI Microsoft DS Wireless DiS Synth SoundMAX VON MDI (3) MDI Tinscale Tablock Project Time MDI Clock Destination VSL2020 HDI SoundMAX VON MDI (3) SoundMAX VON MDI HDI Clock Follow Project Position Always Send Star Message Send MDI Clock in Stop Mode Help OK Cancel The ASIO Audio Device is selected as Timecode Source. Options for incoming timecode Outputs for MIDI Clock- Make the necessary settings in the dialog.
For information on the different sections, click the Help button in the dialog. - Close the Project Synchronization Setup dialog.
- Open the Project Setup dialog from the Project menu and use the Start value to set which frame on the external device (e.g. a video tape) should correspond to the beginning of the project.
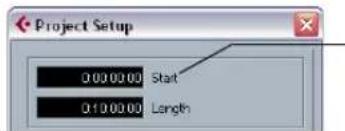
text_image
Project Setup 0:00:00:00 Start 0:10:00:00 LengthSet this to the timecode position where you want the project to start.
- You can also set this with the function "Set Timecode at Cursor" on the Project menu.
This is useful if you know that a certain position in your project coincides with a certain timecode position in the external device. Move the project cursor to that position, select "Set Timecode at Cursor" and specify the corresponding timecode position in the dialog that appears – the Start value is adjusted accordingly.
- A message appears, asking you whether you want to keep the project content at its timecode positions. Select "No".
This will make all events and parts keep their positions relative to the project start. - Close the Project Setup dialog.
- On the Transport panel, activate the Sync button (or select "Use External Sync" from the Transport menu).
- Start the tape (or video, or other master device) that contains the timecode. Cubase starts playing when it receives timecode with a position "higher" than or equal to the project Start frame.
You can wind the device that sends the timecode to any position and start from there.

When the master device is stopped, you can use the Cubase transport controls as you normally do, when it is not synchronized.
You should also take a look at the Sync Options, see "Sync Options" on page 437.
The Sync indicator
On the Transport panel you can check the status of incoming timecode by observing the sync indicator. It switches between "Offline" (not waiting for sync), "Idle" (ready for sync but no signal is coming in), and "Lock xx" (where xx indicates the frame rate of the incoming signal).
VST System Link

For a description of the VST System Link feature (with which you can synchronize separate computers running Cubase or Nuendo for example) see "Working with VST System Link" on page 438.
Machine Control
Cubase can control external tape transports and similar devices via MIDI Machine Control. This allows you to operate an external tape transport from Cubase's Transport panel. That is, Cubase can make the tape recorder locate to a certain position, start, stop, rewind, etc.
About sync and machine control
Controlling tape transports is a two-way process:
- Cubase sends out machine control commands to the tape recorder, asking it to locate to a certain position and activate playback, etc.
- The tape recorder locates to the requested position, starts and delivers timecode back to Cubase, to which Cubase is synchronized.
Even though it appears as if Cubase is controlling the tape recorder completely, it is important to remember that in this setup, Cubase is still being synchronized to the external tape transport, not vice versa.
Also note that the two processes of sync and machine control are completely separated, in terms of protocols used. You can for example synchronize to MTC while sending out transport commands via MMC.
MIDI Machine Control (MMC)
This is a standard MIDI protocol for controlling tape transports. There are a number of tape recorders and hard disk recording systems on the market that support this protocol. Cubase allows you to control the transport of an external MMC device and arm tracks for recording (Cubase only).
Machine Control commands can be sent using MIDI Machine Control (MMC):
- Set up and test basic timecode synchronization, as described earlier in this chapter.
-
Connect a MIDI Out on your MIDI interface to a MIDI In on the tape recorder (or similar device).
If you have not already done so (when setting up for MIDI Timecode), also connect a MIDI cable from the MIDI Output on the tape recorder to a MIDI In on the computer. -
Make sure you have timecode recorded on the tape recorder, and that it is set up to use MMC.
-
Open the Project Synchronization Setup dialog via the Transport menu in Cubase.
- In the Master Machine Control Device section, activate the "MC Master Active" checkbox.
- Select the correct MMC Inputs and Outputs from the respective pop-up menus.
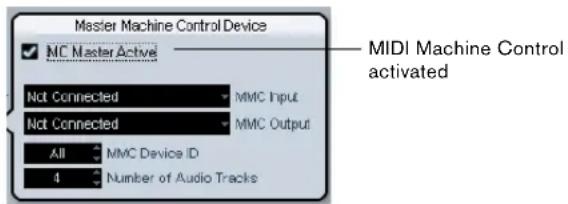
text_image
Master Machine Control Device MC Master Active Not Connected MMC Input Not Connected MMC Output All MMC Device ID 4 Number of Audio Tracks MIDI Machine Control activated- Make sure that the MMC Device ID corresponds to the ID of the controlled device.
If more that one machine is connected or if you do not know the Device ID, this can be set to "All", the "Broadcast" device ID. - Set the "Number of Audio Tracks" setting to the number of tracks on the external tape recorder (Cubase only).
- Open the Preferences dialog from the File menu (on the Mac, this is located on the Cubase menu), select the MIDI Filter section and make sure Sysex is activated in the Thru section.
This is necessary since MMC uses two-way communication (the tape recorder "replies" to the MMC messages it receives from Cubase). By filtering out Sysex Thru, you ensure that these MMC System Exclusive replies are not echoed back to the tape recorder.
- Close the Preferences and open the Project Setup dialog from the Project menu.
- As when synchronizing without using transport control, use the Start value to specify which frame on the tape should correspond to the beginning of the project.
- Close the Project Setup dialog.
How to proceed from here depends on whether you are using Cubase or Cubase Studio:
Cubase:
- Pull down the Devices menu and select MMC Master. The MIDI Machine Control master transport panel appears.
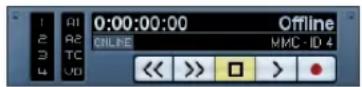
It is now possible to control the external tape recorder independently or together with Cubase:
- If you activate the Online button on the MMC Master panel you can use the transport buttons on the panel to control the transport of the device.
- You can also use the buttons to the left on the MMC Master panel to arm tape tracks for recording.
The number of record arm buttons depends on the "Number of Audio Tracks" setting in the Master Machine Control Device section of the Project Synchronization Setup dialog.
- The "A1, A2, TC, VD" items refer to additional tracks usually found on video tape recorders.
Refer to the manual of your VTR device to see if these tracks are supported. - If you activate the Sync button on the Transport panel, the MMC Master transport buttons (or the buttons on the main Transport panel) will control the external tape recorder and Cubase in sync.
- On the Transport panel, activate the Sync button.
- Try to Stop, Fast Forward and Rewind from Cubase and activate Play from different positions in the project. The tape transport should follow.
- To turn off the synchronization between the tape recorder and Cubase, simply deactivate Sync on the Transport panel.
Cubase Studio:
- On the Transport panel, activate the Sync button.
- Try to Stop, Fast Forward and Rewind from Cubase Studio and activate Play from different positions in the project.
The tape transport should follow.
- Turn off the synchronization between the tape recorder and Cubase Studio, simply deactivate Sync on the Transport panel.
Cubase as MMC slave (Cubase only)
This is set up in the MIDI Machine Control Slave section. Simply specify the MIDI ports and the MMC Device ID.
Some mixers support the MMC-Master protocol for controlling external devices, including Tascam DM-24, Yamaha DM2000 and SSL. This means that Cubase can be used as a "recorder", where track arming and transport commands can be sent from the master device. In addition, some digital audio workstations (DAWs) can only operate in MMC-Master mode.
Sync Options
The following Sync options are available in the Project Synchronization Setup dialog:
Lock Frames
Using this field you can set how many frames of “correct” timecode Cubase should receive before attempting to “lock” (synchronize) to incoming timecode. If you have an external tape transport with a very short start-up time, you could try lowering this number to make lock-up even faster than it already is.
Drop Out Frames
On an analog tape with timecode, dropouts may occur. If a drop-out is very long, Cubase may (temporarily) stop. In the Drop Out Frames field you can set how long a drop-out (in frames) should be tolerated until Cubase decides that the tape is not good enough to synchronize to. If you have a very stable timecode source, you may lower this number to make Cubase stop more swiftly after the tape recorder has been stopped.
Inhibit Restart
Some synchronizers will still transmit MIDI Time Code for a short period after an external tape machine has been stopped. These extra frames of timecode can sometimes cause Cubase to restart suddenly. Inhibit Restart allows you to control the amount of time in milliseconds that Cubase will wait to restart (ignoring incoming MTC) once it has stopped.
Working with VST System Link
VST System Link is a network system for digital audio that allows you to have several computers working together in one large system. Unlike conventional networks it does not require Ethernet cards, hubs, or CAT-5 cables; instead it uses the kind of digital audio hardware and cables you probably already possess in your studio.
VST System Link has been designed to be simple to set up and operate, yet give enormous flexibility and performance gains in use. It is capable of linking computers in a "ring" network (the System Link signal is passed from one machine to the next, and eventually returns to the first machine). VST System Link can send its networking signal over any type of digital audio cable, including S/PDIF, ADAT, TDIF, or AES, as long as each computer in the system is equipped with a suitable ASIO compatible audio interface.
Linking up two or more computers gives you vast possibilities:
- Dedicate one computer to running VST instruments while recording audio tracks on another.
- If you need lots of audio tracks, you may simply add tracks on another computer.
- You could have one computer serve as a "virtual effect rack", running CPU-intensive send effect plug-ins only.
Since you can use VST System Link to connect different VST System Link applications on different platforms, you can take advantage of effect plug-ins and VST instruments that are specific to certain programs or platforms.
Preparations
Requirements
The following equipment is required for VST System Link operation:
■ Two or more computers.
These can be of the same type or use different operating systems – it does not matter. For example, you can link an Intel-based PC to an Apple Macintosh without problems.
- Each computer must have audio hardware with specific ASIO drivers, installed and working.
- The audio hardware must have digital inputs and outputs.
Of course, to be able to connect the computers, the digital connections must be compatible (i.e. the same digital formats and connection types must be available). - At least one digital audio cable for each computer in the network.
- A VST System Link host application installed on each computer.
Any VST System Link applications can connect to each other.
Additionally, we recommend that you use a KVM switch-box.
Using a KVM switchbox
If you want to set up a multi-computer network, or even a small network in a limited space, it is a good idea to invest in a KVM (Keyboard, Video, Mouse) switchbox. With one of these you can use the same keyboard, monitor, and mouse to control each computer in the system, and switch between computers very rapidly. KVM switchboxes are not too expensive, and very easy to set up and operate. If you decide not to go this route, the network will function just the same, but you may end up doing a lot of jumping from one machine to the other while setting up!
Making connections
Below, we assume that you are connecting two computers. Should you have more than two computers, it is still best to start with two and add the others one by one once the system is working – this makes troubleshooting easier if you run into problems. For two computers, you will need two digital audio cables, one in each direction:
- Use the first digital audio cable to connect digital output of computer 1 with the digital input of computer 2.
- Use the other cable to connect the digital output of computer 2 with the digital input of computer 1.
- If a card has more than one set of inputs and outputs, choose whichever one that suits you – for simplicity usually the first set is best.
Synchronization
Before you proceed, you need to make sure that the clock signals on your ASIO cards are synchronized correctly. This is essential when cabling any kind of digital audio system, not just VST System Link.

All digital audio cables by definition always carry a clock signal as well as audio signals, so you do not have to use a special Word Clock input and output for this (although you may find that you get a slightly more stable audio system if you do, especially when using multiple computers).
The Clock Mode or Sync Mode is set up in the ASIO control panel of the audio hardware. In Cubase, you proceed as follows:
- Pull down the Devices menu and open the Device Setup dialog.
-
On the VST Audio System page, select your audio interface from the "ASIO Driver" pop-up menu.
The name of the audio interface now appears as a subentry to the VST Audio System entry in the Devices list. -
Select your audio interface in the Devices list to the left.
-
Click the Control Panel button.
The ASIO control panel appears.
- Open the ASIO control panel on the other computer as well.
If you are using another VST System Link host application on that computer, check its documentation for details on how to open the ASIO control panel.
- Now, you need to make sure that one audio card is set to be the Clock Master, and all the other cards are set to listen for the clock signal coming from the Clock Master, i.e. they must be Clock Slaves.
The naming and procedure for this differs depending on the audio hardware – consult its documentation if required. If you are using Steinberg Nuendo ASIO hardware, all cards default to the "AutoSync" setting – in this case you must set one of the cards (and only one) to "Master" in the Clock Mode section of the control panel.
- Typically, the ASIO control panel for an audio card contains some indication of whether the card receives a proper sync signal or not, and the sample rate of that signal.
This is a good indication that you have connected the cards and set up clock sync properly. Check your audio hardware's documentation for details.

It is very important that one and only one card is the clock master, otherwise the network cannot function correctly. Once you have set this up, all the other cards in the network will take their clock signal from this card automatically.
The only exception to this procedure is if you are using an external clock – which could be from a digital mixing desk or special Word Clock synchronizer for example. If so, you must leave all your ASIO cards in Clock Slave or AutoSync mode, and make sure that each of them is listening for the signal coming from the synchronizer, usually passed through your ADAT cables or Word Clock connectors in a daisy chain fashion.
VST System Link and latency
The general definition of latency is the amount of time it takes any system to respond to whatever messages are sent to it. For example, if your system's latency is high and you play VST instruments in realtime, you will get a noticeable delay between when you press a key and when you hear the sound of the VST instrument. Nowadays, most ASIO-compatible audio cards are capable of operating with very low latencies. Also, all VST applications are designed to compensate for latency during playback, making the playback timing tight.
However, the latency time of a VST System Link network is the total latency of all the ASIO cards in the system added together. Therefore it is extra important to minimize the latency times for each computer in the network.
⇒ The latency does not affect the synchronization – it is always perfectly in time. But it can affect the time it takes to send and receive MIDI and audio signals, or make the system seem sluggish.
To adjust the latency of a system, you adjust the size of the buffers in the ASIO control panel – the lower the buffer size, the lower the latency. It is best to keep to fairly low latencies (buffer sizes) if your system can handle it – about 12ms or less is usually a good idea.
Setting up your software
Now it is time to set up your programs. The procedures below describe how to set things up in Cubase. If you are using another program on the other computer, please refer to its documentation.
Setting the sample rate
The projects in both programs must be set to use the same sample rate. Select "Project Setup..." from the Project menu and make sure the sample rate is the same in both systems.
Streaming digital audio between applications
- Create input and output busses in both applications and route these to the digital inputs and outputs.
The number and configuration of the busses depends on your audio hardware and on your needs. If you have a system with eight digital i/o channels (such as an ADAT connection), you could create several stereo or mono busses or a surround bus together with a stereo bus, or any combination you need. The important thing is that you should have the same configuration in both applications – if you have four stereo output busses on computer 1, you want four stereo input busses on computer 2, etc.
- Set things up so that computer 1 plays back some audio.
You could for example import an audio file and play it back in Cycle mode.
-
In the Inspector or Mixer, make sure the playing audio channel is routed to one of the digital output busses you set up.
-
In computer 2, open the Mixer and locate the corresponding digital input bus.
The audio being played back should now "appear" in the program running on computer 2. You should see the input bus level meters moving.
- Reverse this procedure so that computer 2 plays back and computer 1 "listens".
Now you have verified that the digital connection works as it should.
From this point on in this chapter, we refer to the busses connected to the digital inputs and outputs as "VST System Link busses".
Settings for the audio hardware
When you send VST System Link data between computers, it is important that the digital information is not changed in any way between the programs. Therefore, you should open the control panel (or additional application) for your audio hardware and make sure that the following conditions are met:
- If there are additional "format settings" for the digital ports that you use for VST System Link data, make sure these are turned off.
For example, if you are using an S/PDIF connection for VST System Link, make sure that "Professional format", Emphasis and Dithering are turned off. - If your audio hardware has a mixer application allowing you to adjust the levels of digital inputs and outputs, make sure that this mixer is disabled or that the levels for the VST System Link channels are set to ± 0 dB.
- Similarly, make sure no other forms of DSP (pan, effects, etc.) are applied to the VST System Link signal.
Notes for Hammerfall DSP users
If you are using RME Audio Hammerfall DSP audio hardware, the Totalmix function allows for extremely complex signal routing and mixing in the audio hardware. This can in some situations lead to "signal loops" in which case the VST System Link will not work. If you want to make absolutely sure this will not cause any problems, select the default or "plain" preset for the Totalmix function.
Activating VST System Link
Before you proceed, you need to make sure that VST System Link is set as Timecode Source in the Synchronization dialog and that the desired Sync options are activated, see "Sync Options" on page 437.
After setting up the inputs and outputs, you now need to define which input/output should carry the actual VST System Link information.
The System Link networking signal is carried on only one bit of one channel. This means that if you have an ADAT based system which normally carries eight channels of 24-bit audio, once you activate VST System Link you will have seven channels of 24-bit audio and one channel of
23-bit audio (the least significant bit of this last channel will be used for networking). In practice this makes no discernible difference to the audio quality, since you will still have around 138dB headroom on this channel.
To set things up, open the VST System Link panel:
- Open the Device Setup dialog on the Devices menu.
- Select VST System Link in the Devices list to the left.
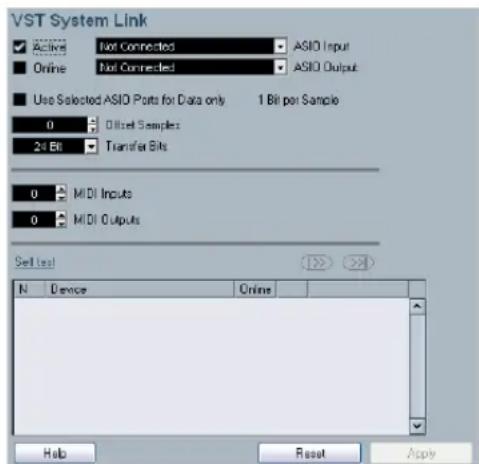
text_image
VST System Link Active Not Connected ASIO Input Online Not Connected ASIO Output Use Selected ASIO Ports for Data only 1 Bit per Sample 0 Offset Samples 24 Bit Transfer Bits 0 MIDI Inputs 0 MIDI Outputs Set Test N Device Online Help Reset Apply- Use the ASIO Input and ASIO Output pop-up menus to define which channel should be the networking channel (and thus become a 23-bit audio channel, in our example). Quite often you will be able to leave these pop-ups the way they are.
- Click the Active checkbox at the top of the panel.
- Repeat the steps above for every computer on the network.
As the computers are made active, you should see the small Sending and Receiving indicators flashing on each active computer, and the name of each computer should appear in the list at the bottom of the pane. Each computer is assigned a random number – do not worry about this, it is just so the network knows internally which one is which.
- You can double-click on the name in bold (which is the name of the computer you are currently working on) and set it to whatever other name you wish.
This name will appear in the System Link window of every computer on the network.
⇒ If you do not see the name of each computer appearing once you have made it active, you may have to check your settings.
Go through the procedure above again and make sure that all ASIO cards are listening to the digital clock signals correctly, and that each computer has the correct inputs and outputs assigned to the System Link network.
Putting the network online
After each computer's name you will see whether it is online or not. When a computer is online, it will receive transport and timecode signals, and its sequencer application can be started and stopped by remote control. If it is off-line, it can only be started from its own keyboard – it is effectively an independent machine, although it is still on the network.
Note that any computer can control any and all of the others – VST System Link is a peer-to-peer network and there is no absolute “master” computer.
However, most users do like to think of one machine as the master (in a one person/two computer network, this would be the machine you actually sit behind most of the time).
For now, let's put all computers online:
- Activate the Online checkbox in the VST System Link panel for all computers.
- Check that the system is working by pressing Play on one computer – all computers should start almost instantly and play perfectly in time, with sample-accurate precision.
- The Offset setting allows you to adjust whether one machine will play back slightly ahead or behind the rest.
This is normally not needed, but occasionally with some hardware you may find that the lock is a few samples out. In that case you can adjust the lock with the Offset value. For now, leave it set to 0 – it will most likely be what you want.
- The Transfer Bits setting allows you to specify whether you want to transfer 24 or 16 bits. This allows you to use older audio cards which do not support transfer of 24 bits.
VST System Link sends and understands all transport commands, so you can play, stop, fast forward, rewind, etc. the entire network from one computer without a problem – try it! If you jump to a locator point on one machine, all other machines will also instantly jump to that locator point. You can even scrub on one computer and have the video and audio on another computer actually scrub right along with you.

Make sure that all computers have their tempos set to the same value, otherwise your synchronization will be seriously skewed.
Using MIDI
As well as supplying transport and sync control, VST System Link also supplies up to 16 MIDI ports, each with 16 channels. You set this up as follows:
- Use the MIDI Inputs and Outputs value boxes to specify the number of MIDI ports you need.
The default value is 0 MIDI In and 0 MIDI Out ports. - Create a MIDI track in the Project window and open the Inspector (top section).
- If you now pull down the Input or Output Routing pop-up menu, you will find the specified System Link ports added to the list of MIDI Inputs and Outputs.
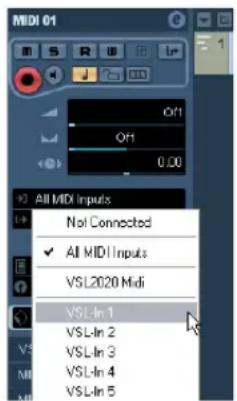
text_image
MIDI 01 Off 0.00 All MIDI Inputs Not Connected ✓ All MIDI Inputs VSL2020 Midi VSL-In 1 VSL-In 2 VSL-In 3 VSL-In 4 VSL-In 5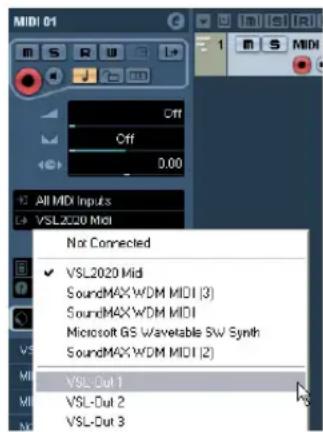
text_image
MIDI 01 Off Off 0.00 All MIDI Inputs VSL2020 MIDI Not Connected VSL2020 Mid SoundMAX WDM MIDI (3) SoundMAX WDM MIDI Microsoft GS Wavetable SW Synth SoundMAX WDM MIDI (2) VSL-Out 1 VSL-Out 2 VSL-Out 3This allows you to route MIDI tracks to VST instruments running on another computer, as described in the application examples (see "Using one computer for VST instruments" on page 443).
The "Use Selected ASIO Ports for Data only" setting
If you are sending huge amounts of MIDI data at once, there is a small possibility that you might run out of bandwidth on your VST System Link network. This will manifest itself by notes “choking” or timing becoming erratic.
If this happens, you can devote more bandwidth to MIDI by activating "Use Selected ASIO Ports for Data only" in the VST System Link Setup panel. When this is activated, the VST System Link information will be sent on the entire channel instead of just one bit, more than enough for all the MIDI you could ever hope to use. The downside is that you can no longer use this ASIO channel for audio transfer (do not connect it to a speaker!), thus leaving you only 7 channels of audio in our ADAT cable example. Depending on how you work this might be a reasonable compromise.
Hearing the network audio
If you are using an external mixing desk, hearing your audio really is not an issue – just plug the outputs of each computer into the desired channels on the external mixing desk, press Play on one of the computers, and you're good to go.
However, many people prefer to mix internally inside the computer and just use a desk for monitoring (or maybe not use any external mixer at all). In this case you will need to select one computer to be your "main mix computer" and send the audio from your other computers into this.
In the following example, we assume you are using two computers, with computer 1 as your main mix computer and computer 2 running two additional stereo audio tracks, an FX channel track with a reverb plug-in and a VST instrument plug-in with stereo outputs.
- First you want to set things up so that you can listen to the audio playback from computer 1.
In other words, you need an unused set of outputs, e.g. an analog stereo output, connected to your monitoring equipment. - Go to computer 2 and route each of the two audio tracks to a separate output bus.
These should be busses connected to the digital outputs – let's call them Bus 1 and 2. - Route the FX channel track to another VST System Link bus (Bus 3).
-
Route the VST instrument channel to yet another bus (Bus 4).
-
Go back to computer 1 and check the corresponding four VST System Link input busses.
If you start playback on computer 2, the audio should "appear" on the input busses on computer 1. However, to mix these audio sources you need actual mixer channels.
-
Add four new stereo audio tracks on computer 1 and route these to the output bus you use for listening, e.g. to the analog stereo outputs.
-
For each of the audio tracks, select one of the four input busses.
Now, each computer 2 bus is routed to a separate audio channel on computer 1.
- Activate monitoring for the four tracks.
If you now start playback, the audio from computer 2 will be sent "live" to the new tracks on computer 1, allowing you to hear them together with any tracks you play back on computer 1.
For more information about Monitoring, see "About monitoring" on page 20.
Adding more tracks
What if you have more audio tracks than you have VST System Link busses (physical outputs)? Then you just use the computer 2 mixer as a submixer: Route several audio channels to the same output bus and adjust the output bus level if needed.
Note also that if your audio cards have multiple sets of input and output connections you can link up multiple ADAT cables and send audio via any of the busses on any of the cables.
Internal mixing and latency
One problem with mixing inside the computer is the latency issue we mentioned earlier. The VST engine always compensates for record latencies, but if you are monitoring through computer 1 you will hear a processing delay while you listen to signals coming from your other computers (not on your recording!). If your audio card in computer 1 supports ASIO Direct Monitoring you should definitely turn this on – you can find the setting in the VST Audio System Device Setup panel (see "ASIO Direct Monitoring" on page 74). Most modern ASIO cards support this function. If yours does not you may want to change the Offset value in the VST System Link Setup panel to compensate for any latency issues.
Setting up a larger network
This is not much more difficult than a two computer network. The main thing to remember is that VST System Link is a daisy chain system. In other words, the output of computer 1 goes to the input of computer 2, the output of computer 2 goes to the input of computer 3, and so on around the chain. The output of the last computer in the chain must always go back into the input of computer 1, to complete the ring.
Once you have done this, the transmission of all the transport, sync, and MIDI information to the whole network is handled pretty much automatically. However, where you may run into confusion in a large network is in the transmission of audio signals back to a central mix computer.
If you have lots of hardware inputs and outputs on your ASIO cards you do not have to send audio via the chain at all, but can transmit it directly to the master mix computer via one or more of its other hardware Inputs. For example, if you have a Nuendo Digiset interface or 9652 card on computer 1 you could use ADAT cable 1 for networking, ADAT cable 2 as a direct audio input from computer 2, and ADAT cable 3 as a direct audio input from computer 3.
You can also transmit audio via the ring system if you do not have enough hardware I/Os for direct audio transmission. For example, in a four computer scenario you could send audio from computer 2 into a channel in the mixer in computer 3, and from there to a channel in the mixer in computer 4, and from there back to the master mixer in computer 1. This can certainly be tricky to set up, so generally it is recommended that if you want to set up a complex network, you should make sure to use ASIO cards with at least three separate digital I/Os.
Application examples
Using one computer for VST instruments
In this example, one computer will be used as main record and playback machine, and another computer as a virtual synth rack.
- Record a MIDI track into computer 1.
- Once you have finished recording, route the MIDI output of that track to System Link MIDI port 1.
-
Now go to computer 2, open up the VST Instrument rack and assign an instrument to the first slot in the rack.
-
Route the VST Instrument channel to the desired output bus.
If you are using computer 1 as your main mixing computer, this would be one of the VST System Link output busses, connected to computer 1.
-
Create a new MIDI track in the Project window of computer 2, and assign the MIDI output of the track to the VST Instrument you created.
-
Assign the MIDI input of the track to be VST System Link port 1.
Now, the MIDI track on computer 1 is routed to the MIDI track on computer 2, which in turn is routed to the VST Instrument.
- Now activate monitoring for the MIDI track on computer 2, so that it will listen and respond to any MIDI commands coming in.
In Cubase, you would click the Monitor button in the Track list or Inspector.
- Start Playback on computer 1.
It will now send the MIDI information on the track to the VST Instrument loaded on computer 2.
Even with a slow computer you should be able to stack a whole bunch of extra VST Instruments this way, expanding your sound palette considerably. Do not forget that VST System Link MIDI is also sample-accurate, and thus has much tighter timing than any hardware MIDI interface ever invented!
Creating a virtual effect rack
The effect sends for an audio channel in Cubase can either be routed to an FX channel track or to any activated Group or output bus. This allows you to use a separate computer as a "virtual effect rack", by setting things up in the following way:
- Go to computer 2 (the machine you will use as effect rack) and add a new stereo audio track.
You cannot use an FX channel track in this case, since the track must have an audio input.
-
Add the desired effect as an insert effect for the track. Let's say you add a high-quality reverb plug-in.
-
In the Inspector, select one of the VST System Link busses as input for the audio track.
You want to use a separate System Link bus, which will only be used for this purpose.
-
Route the channel to the desired output bus. If you are using computer 1 as your main mixing computer, this would be one of the VST System Link output busses, connected to computer 1.
-
Activate monitoring for the track.
-
Now, go back to computer 1 and select a track to which you want to add some reverb.
-
Bring up the effect sends for the track, in the Inspector or the mixer.
-
Open the Send Routing pop-up menu for one of the sends, and select the VST System Link bus assigned to the reverb in step 3.
-
Use the Send slider to adjust the amount of effect as usual.
The signal will be sent to the track on computer 2 and processed through its insert effect, without using any processor power on computer 1.
You can repeat the steps above to add more effects to the "virtual effect rack". The number of effects available this way is only limited by the number of ports used in the VST System Link connection (and of course by the performance of computer 2, but given that it will not have to handle any recording or playback, you should be able to use quite a lot of effects).
Getting extra audio tracks
All computers on a VST System Link network are locked with sample-accuracy. Therefore, if you find that the hard drive on one computer is not fast enough to run as many audio tracks as you need, you can record new tracks on one of the other computers instead. This would create a "virtual RAID system", with several disks all operating together. All tracks will remain locked together just as tightly as if they were all running on the same machine. This means that you effectively have an unlimited track count! Need another 100 tracks? Just add another computer.
Video
Background
Cubase plays back video films in a number of formats.
Under Windows, video playback can be done using one of three playback engines: Video for Windows, DirectShow or QuickTime 7.1. This ensures compatibility with as wide a range of video files as possible. The following file formats are supported: AVI, Windows Media Video (Cubase only: you can also import files in Windows Media Video Pro format), QuickTime and MPEG.
Under Mac OS X, QuickTime is always used as playback engine. QuickTime supports the following video file formats: AVI, MPEG, QuickTime and DV.
There are two ways to play back video:
- Without any special hardware.
See "Playing back video without any hardware" on page 447. - Using video hardware that, for example, connects to an external monitor.
See "Playing back video file using video hardware" on page 448.
Before you start
When working on a project involving a video file, there are several points to bear in mind:
Have you selected the right playback engine? (Windows only)
The playback engine is used not only for playback of the video file, but also to provide file information in the Pool and in the Import Video dialog. Therefore, to make sure that you have chosen the right playback engine for a particular type of video file, check the file information displayed in the Import Video dialog or the Pool prior to trying to import or playing back the file.
When this information reads "0x0 pixel", "0.000 s" and "0 Frames", the video file is either corrupt, or the format is not supported by the codecs available to the selected video playback engine. You will either have to change the video playback engine, or install the required codec.
Trying to import or play back a file not supported by the selected video playback engine leads to unpredictable results – if no information on the number of frames, the length and the pixel resolution is available in the Import Video dialog, the Pool or the MediaBay, you cannot import/play this file properly with this particular video playback engine.
You can change the video playback engine in the Device Setup dialog. After having done so, make sure to remove any previously imported video file from the Pool first, and re-import it.
About the QuickTime video playback engine
In Cubase for Windows, you select a playback engine in the Device Setup-Video Player page:
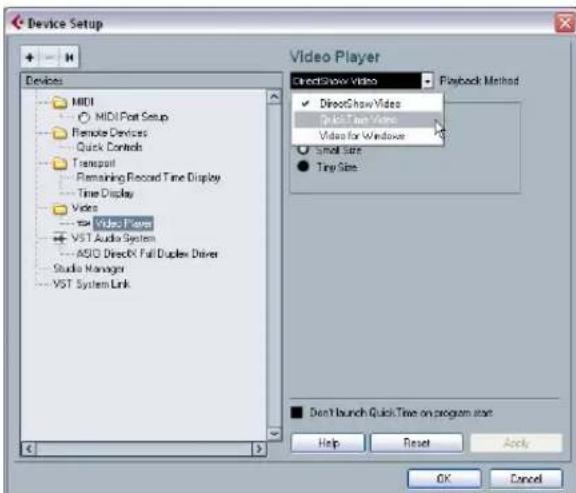
text_image
Device Setup + - H Devices MIDI MIDI Port Setup Remote Devices Quick Controls Transport Remaining Record Time Display Time Display Video Video Player VST Audio System ASIO DirectX Full Duples Driver Studio Manager VST System Link Video Player DirectShow Video Playback Method DirectShow Video Quick Time Video Video for Windows Small Size Tiny Size Don't launch Quick Time on program start Help Reset Apply OK Cancel- Generally, you can expect most Windows hardware to work with DirectShow.
On a Windows system, the DirectShow and Video for Windows players are provided by the operating system, so you do not have to install any additional software. - Under Windows, QuickTime 7.1 must be installed on your computer for QuickTime playback to be available.
There is a freeware version (a QuickTime installer is included on the Cubase DVD if required, or you can download it from www.quicktime.com) and a "pro" version, which offers additional video cutting options. The engine is the same in both versions, so for mere playback in Cubase there is no need to purchase the "pro" version.
- Under Mac OS X, only the QuickTime playback engine is available, supporting the formats AVI, MPEG, Quick-Time and DV. If your system has a FireWire port, there is also a FireWire option – see below.

QuickTime as a video playback engine is available only if you have QuickTime 7.1 (or higher) installed on your computer. If you do not have QuickTime, or if a version lower than 7.1 is installed, this option will not be available in Cubase.
Video quality in QuickTime
When you are using QuickTime as your video playback engine, you can select "High Quality" from the Video window context-menu, or "Use high-quality video settings when available" in the Device Setup dialog, Video Player page, in the Video Properties section for QuickTime).
- When your QuickTime video was recorded with the corresponding quality settings, selecting the "Use high-quality video settings when available" or the "High Quality" option will make the video display sharper and smoother. Note that this will also lead to increased processor load.
Video playback preferences
In the Preferences (Event Display–Video page), there are two options for video playback:
- Show Video Thumbnails.
When this is activated, thumbnail frames of the video contents are shown in the track.
- Video Cache Size.
This determines how much memory is available for video thumbnails. If you have long video clips and/or work with a large zoom factor (so that a lot of frames are shown in the thumbnails), you may have to raise this value.
Playing back a video file
Video files are displayed as events/clips on the video track, with thumbnails representing the frames in the film (if the option Show Video Thumbnails is activated in the Preferences, Event Display–Video page).

text_image
Studio SessionA video event on a video track
In the Track list and Inspector, you will find the following controls for video tracks:
Button Description
| Lock When this is activated, the video event will be locked, see “Locking events” on page 48. | |
| Show Frame Numbers | When this is activated, each thumbnail is shown with the corresponding video frame number. |
| Snap Thumbnails | When this is activated, the individual thumbnail images will be positioned exactly at their respective start time position. Also, no more than one thumbnail per frame will be shown, even if you zoom in a lot. |
| Mute Video When this is activated, video playback will be stopped, but playback of any other events in the project will continue (to decrease the processor load). You may have to use the Track Controls Settings dialog to make this button visible in the Track list. | |
To view the video on the computer screen (as opposed to on an external monitor, see below), proceed as follows:
- If you're running Mac OS X, open the Device Setup dialog from the Devices menu, click "Video Player" in the list and make sure "Onscreen Window" is selected in the Video Output section of the dialog.
- Under Windows, either pull down the Devices menu and select Video, or use a key command – by default [F8], or double-click the video clip.
A video window appears. In Stop mode, this displays the video frame at the project cursor position.
The video will be played back together with any other events in the Project window as usual.
Playing back video without any hardware
- For the DirectShow video player, open the Device Setup dialog from the Devices menu, click Video Player in the Devices list and use the buttons in the Video Properties section to select a size or right-click in the video window to switch to full screen. Right-click again to exit full screen.
- For the QuickTime player (Windows and Mac), you can drag the borders, just like resizing other windows. You can also right-click in the video window to open the Video window context menu and select one of the Size options. There is also a Full Screen Mode available in the menu. Right-click again or press the [Esc] key on your computer keyboard to exit full screen mode.
Playing back video on your computer screen puts a limit on the size of the video window as well as the image quality.
Playing back video file using video hardware
Under Windows, multi-head graphics cards that support overlay functionality can be used to display the video picture on an external TV or computer monitor in full screen mode. The manufacturers nVIDIA and Matrox have working (and tested) solutions available. Check the card's documentation for information on how it handles video output and how to set it up for multi-monitor display.
For Apple computers equipped with a FireWire port, you can easily connect external video hardware via this, as OS X has built-in video support for the most common formats (NTSC/PAL/DVCPRO). FireWire is capable of high data-transfer speed and is the most common standard for communicating with video-related peripheral equipment. To play back a video file via hardware connected to the FireWire port, select "FireWire" in the Outputs pop-up of the Device Setup-Video Player dialog. When FireWire is selected as output, a number of format options appear on the Format pop-up, allowing you to select between various video formats and resolutions.
Operations
Importing a video file
Video files are imported in the same manner as audio files.
- By using the File menu (Import–Video File).
- By using drag and drop from the Windows Explorer/Mac OS Finder, the Pool or the MediaBay.
This requires that a video track has been added to the Project and that you drop the video file onto this track.
- By importing the file to the Pool first and then dragging it into the Project window (see the chapter "The Pool" on page 260 for details).
Please note the following:
- You can only have one video track in each project. The Video track is added like other tracks in the Project window by using the Add Track submenu on the Project menu. If a project does not contain a video track when you import a video file via File-Import-Video file, this is added automatically.
- All video files on the track must be of the same size and compression format.
- The Import dialog has an option for extracting the audio from a video file (see "Extracting audio from a video file" on page 450) and for generating a thumbnail cache file for the video file, see below.
Video import preferences
In the Preferences dialog (Editing–Video page), there are two options that affect the import of video files:
- Extract Audio on Import Video File
When this is activated, the audio will automatically be extracted and imported into the project when you import a video file. This way, the audio will also be included when you insert a video e.g. by using drag and drop. When you import video files by using the File menu, you can activate this option separately for each imported video file on the Import dialog.
- Generate Thumbnail Cache on Import Video File
When this is activated, a thumbnail cache file will be created automatically when you import a video file. This is handy, as a cache file will also be created when you import a video file using drag and drop. When you import video files by using the File menu, you can activate this option separately for each imported video file on the Import dialog, see below.
Advantage of thumbnail cache files
To display video thumbnails in the Project window, the option "Show Video Thumbnails" has to be activated in the Preferences dialog (Event Display–Video page).
When working with video in Cubase, video files are displayed as events/clips on the video track with thumbnails representing the frames in the film. These are calculated in realtime, i.e. they have to be redrawn during scrolling or moving. As this consumes quite a lot of processor power, reaction sometimes may be sluggish. To remedy this, you can generate a thumbnail cache file.
The cache file is used in situations where the processor load is very high and the correct redrawing or realtime calculation might use system resources necessary for editing or processing. When the cache file is used and you zoom in on the thumbnails, you will see that they are in a lower resolution, i.e. the pictures are not as clean as when they are calculated. When the processes that rely heavily on the computer CPU are finished, the frames will be automatically recalculated, i.e. the program automatically switches between realtime calculation of the pictures and using the cache file.
The generated thumbnail cache file will be stored in the same folder as the video file and will get the name of the file with the suffix ".videocache".
Generating thumbnail cache files during video import
A thumbnail cache file will be created automatically before the file is inserted in the Project window, if:
- the option "Generate Thumbnail Cache" in the Import Video dialog is activated, when you click "Open".
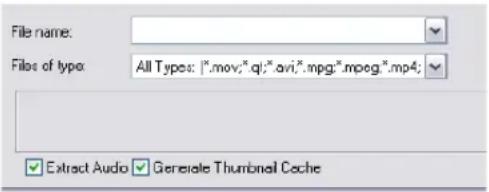
text_image
File name: Files of type: All Types: |*.mov;*.ql;*.avi;*.mpg;*.mpeg;*.mp4; Extract Audio Generatea Thumbnail Cache- you activated "Generate Thumbnail Cache on Import Video File" in the Preferences (Editing–Video page).
A window will be displayed, showing you the progress and the estimated time for the process.
bar
| Category | Value | | ------------------ | ----- | | RockyTX.mov | 34 % | | Estimated Time Remaining: 8sec | 0 sec |The thumbnail cache file is being created.
After the cache file is created, the window will be closed and the video clip is inserted as usual. When you now start video playback and perform processor consuming operations, the thumbnail file is used to display the video frames in the Project window. When enough processor power is available, the "real" calculated thumbnail frames are displayed again.
Generating thumbnail cache files from within the Pool
When you have video files without thumbnail cache files (e.g. if you did not create a thumbnail cache file during import or if you are working with an older project), you always have the possibility to generate the thumbnail cache file at a later stage. This is done from within the Pool.
Proceed as follows:
- Open the Pool window and locate the video file you want to create a thumbnail cache file for.
- Right-click the file to open the context menu and select "Generate Thumbnail Cache", or select "Generate Thumbnail Cache" from the Media menu.
Just as when creating the file during import, the status window opens (see above).
After the file is created, the window will be closed and the thumbnail cache file is used when necessary, i.e. under high load.

Please note that the cache file will not be automatically updated if a video file is edited. Whenever you change a video file (e.g. in a video editing application), you need to create a new thumbnail cache file manually, as described above. (To refresh the "real" thumbnails of an edited video file, resize the video track so that they are calculated again.)
Editing a video file
Video clips are played back by events just as audio clips are. You can use all the basic editing operations on video events, just as with audio events. The following operations are not possible on the video track:
- Drawing, Gluing, and Scrubbing.
Note that when you activate the Mute button for a video track, the video playback will be stopped, but playback of any other Project events will continue. See below. - The video track has no editor and does not make use of parts.
- Cubase allows you to cut, copy, paste and trim video events, i.e. your video track may contain more than one video event. However, when using the DirectShow video player (Windows only), you may find that only the first event on the video track is played back correctly. In such a case make sure that the video track contains no more than one video event.
- Under Windows, you may find that you are unable to edit a video file copied from a CD. This is because files copied from CD are write protected by default. Right-click the file, and deactivate the "Read-Only" option in the File Properties dialog.
- When you have a video file in a format not supported by Cubase, use an external application to convert the file to a format that Cubase can import.
Extracting audio from a video file
If a video file contains audio, it can be extracted. Regardless of the audio format in the actual file, the resulting audio file will always be in the format (Sample Rate and Record Format) that is specified for the Project in the Project Setup dialog.
There are several ways to extract audio from a video file:
- By activating "Extract Audio" in the Import Video dialog. This will add the audio on the active or on a new audio track. The new track and the clip will get the name of the video file. The new audio event will start at the same time as the video event, so that they are in sync with each other.
- By activating "Extract Audio on Import Video File" in the Preferences (Editing–Video page).
This will automatically extract the corresponding audio from a video file during import. This is also true if you import files using drag and drop.
- By using "Import Audio from Video File" from the File-Import submenu.
This will add the audio to the currently active or a new audio track. However, in this case no video clip is created, only an audio event (starting at the project cursor position).
- By using "Extract Audio from Video File" from the Media menu.
When a video file is selected in the pool, the audio is extracted and added to the Pool as a clip. When no video file is selected, the "Import audio tracks from video" dialog is opened, in which you can select a video file from which the audio data is to be extracted and imported into the project.
→ Please note audio extraction is not possible for Quick-Time video files containing compressed audio.
Replacing the audio in a video file
Cubase has a special function for replacing the audio in a video file:
- Pull down the File menu and select "Replace Audio in Video File...".
- In the file dialog that appears, locate and select the video file on your hard disk and click Open. A new file dialog appears.
- Locate and select the audio file that you want to insert into the video file and click Open.
The audio is added to the video file, replacing its current audio track (if any).
- By combining the functions Extract Audio, Export Audio Mixdown and Replace Audio in Video File, you can create a completely new audio track for a video file.
ReWire
Introduction
ReWire and ReWire2 are special protocols for streaming audio between two computer applications. Developed by Propellerhead Software and Steinberg, ReWire provides the following possibilities and features:
- Realtime streaming of up to 64 separate audio channels (256 with ReWire2), at full bandwidth, from the "synthesizer application" into the "mixer application". In this case, the "mixer application" is of course Cubase. An example of a "synthesizer application" is Propellerhead Software's Reason.
- Automatic, sample accurate synchronization between the audio in the two programs.
- The possibility to have the two programs share one audio card and take advantage of multiple outputs on that card.
- Linked transport controls that allow you to play, rewind, etc., either from Cubase or from the synthesizer application (provided it has some kind of transport functionality).
- Automatic audio mixing functions of separate channels as required. In the case of Reason, for example, this allows you to have separate mixer channels for the different devices.
- Additionally, ReWire2 offers the possibility to route MIDI tracks in Cubase to the other application, for full MIDI control.
For each ReWire2 compatible device, a number of extra MIDI outputs will be made available in Cubase. In the case of Reason, this allows you to route different MIDI tracks in Cubase to different devices in Reason, with Cubase serving as the main MIDI sequencer.
- The overall load on your system is much reduced, compared to when using the programs together in the conventional way.
Launching and quitting
When using ReWire, the order in which you launch and quit the two programs is very important:
Launching for normal use with ReWire
- First launch Cubase.
- Enable one or several ReWire channels in the ReWire Device dialog for the other application.
This is described in detail in the section "Activating ReWire channels" on page 453. - Launch the other application.
It may take slightly longer for the application to start when you are using ReWire.
Quitting a ReWire session
When you are finished, you also need to quit the applications in a special order:
- First quit the synthesizer application.
- Then quit Cubase.
Launching both programs without using ReWire
We cannot think of any scenario, in which you would need to run Cubase and the synthesizer application simultaneously on the same computer, without using ReWire, but you can:
- First launch the synthesizer application.
- Then launch Cubase.
⇒ Please note that the two programs now compete for system resources such as audio cards, just as when running either with other, non-ReWire audio applications.
Activating ReWire channels
ReWire supports streaming of up to 64 separate audio channels, while ReWire2 supports 256 channels. The exact number of available ReWire channels depends on the synthesizer application. Using the ReWire Device panels in Cubase, you can specify which of the available channels you want to use:
- Pull down the Devices menu and select the menu item with the name of the ReWire application. All recognized ReWire compatible applications will be available on the menu.
The ReWire panel appears. This consists of a number of rows, one for each available ReWire channel.
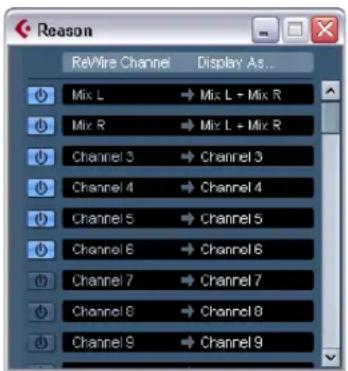
text_image
Reason ReWire Channel Display As... Mix L → Mix L + Mix R Mix R → Mix L + Mix R Channel 3 → Channel 3 Channel 4 → Channel 4 Channel 5 → Channel 5 Channel 6 → Channel 6 Channel 7 → Channel 7 Channel 8 → Channel 8 Channel 9 → Channel 9The ReWire panel for Reason
- Click on the power buttons to the left to activate/deactivate the desired channels.
The buttons light up to indicate activated channels. Please note that the more ReWire channels you activate, the more processing power is required.
- For information about exactly what signal is carried on each channel, see the documentation of the synthesizer application.
- If desired, double-click on the labels in the right column, and type in another name.
These labels will be used in the Cubase mixer to identify the ReWire channels.
Using the transport and tempo controls
This is only relevant if the synthesizer application has some sort of built-in sequencer or similar.
Basic transport controls
When you run ReWire, the transports in the two programs are completely linked. It does not matter in which program you play, stop, fast forward or rewind. However, recording (if applicable) is still completely separate in the two applications.
Loop settings
If there is a loop or cycle facility in the synthesizer application, that loop will be completely linked to the cycle in Cu-base. This means that you can move the start and end point for the loop or turn the loop on or off in either program, and this will be reflected in the other.
Tempo settings
As far as tempo goes, Cubase is always the master. This means that both programs will run in the tempo set in Cubase.
However, if you are not using the tempo track in Cubase, you can adjust the tempo in either program, and this will immediately be reflected in the other.
⚠️ If you are using the tempo track in Cubase (i.e. the Tempo button is activated on the Transport panel), you should not adjust the tempo in the synthesizer application, since a tempo request from ReWire will automatically deactivate the tempo track in Cubase!
How the ReWire channels are handled in Cubase
When you activate ReWire channels in the ReWire Device panels, they will become available as channel strips in the mixer. The ReWire channel strips have the following properties:
- ReWire channels appear to the right of the other audio and MIDI channel strips in the mixer.
- ReWire channels may be any combination of mono and stereo, depending on the synthesizer application.
- ReWire channels have the same functionality as regular audio channels.
This means you can set volume and pan, add EQ, insert effects and sends and route the channel outputs to groups or busses (done in the Inspector – or in the mixer, Cubase only). However, ReWire channels have no monitor buttons.
- All ReWire channel settings can be automated using the Read/Write buttons.
When you write automation, channel automation tracks will automatically appear in the Project window. This allows you to view and edit the automation graphically, just as with VST Instrument channels, etc.
- You can mix down the audio from ReWire channels to a file on your hard disk with the Export Audio Mixdown function (see "Mixing down to audio files" on page 420).
You can export the output bus to which you have routed the ReWire channels. Cubase only: you can also export individual ReWire channels directly – “rendering” each ReWire channel to a separate audio file.
Routing MIDI via ReWire2

This feature is only available with ReWire2-compatible applications.
When using Cubase with a ReWire2-compatible application, additional MIDI outputs will automatically appear on the MIDI Output pop-up menus for MIDI tracks. This allows you to play the synthesizer application via MIDI from Cubase, using it as one or several separate MIDI sound sources.
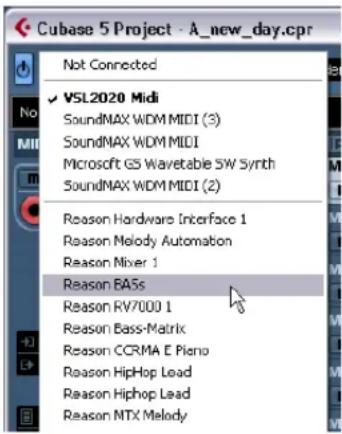
text_image
Cubase 5 Project - A_new_day.cpr Not Connected ✓ VSL2020 Midi SoundMAX WDM MIDI (3) SoundMAX WDM MIDI Microsoft GS Wavetable SW Synth SoundMAX WDM MIDI (2) Reason Hardware Interface 1 Reason Melody Automabon Reason Mixer 1 Reason BA5s Reason RV7000 1 Reason Bass-Matrix Reason CCRA E Piano Reason HipHop Lead Reason HipHop Lead Reason NTX MelodyThe MIDI outputs for a Reason song. Here, each output goes directly to a device in the Reason rack.
- The number and configuration of MIDI outputs depends on the synthesizer application.
Considerations and limitations
Sample rates
Synthesizer applications may be limited to audio playback in certain sample rates. If Cubase is set to a sample rate other than those, the synthesizer application will play back at the wrong pitch. Consult the documentation of the synthesizer application for details.
ASIO drivers
ReWire works well with ASIO drivers. By using the Cu-base bus system you can route sounds from the synthesizer application to various outputs on an ASIO compatible audio card.
File handling
Working with Projects
New Project
The New Project command on the File menu allows you to create a new project, either as an empty project or based on a template:
- Select New Project from the File menu.
The templates list is displayed. When you install Cubase, templates for various purposes are included, but you can also create your own (see "Save as Template" on page 457).
- Select a template from the list or select "Empty".
A file dialog opens, allowing you to specify a folder for the new project.
- Select an existing project folder or create a new folder and click OK.
A new, untitled project is created.
Open
The Open command on the File menu is used for opening saved project files. Project files created with Cubase (file extension ".cpr"), Nuendo (file extension ".npr") and Sequel (extension ".steinberg-project") can be opened. Note that program-specific settings which cannot be applied in Cubase will be ignored.
- Select "Open..." from the File menu.
A file dialog opens, allowing you to select a project.
- Click Open.
The project opens in the Project window.
- Several projects can be open at the same time.
This is extremely useful if you want to copy parts or entire sections from one project to another.
- If a project is already opened, opening another project brings up a warning.
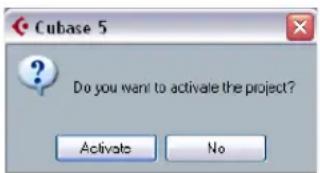
text_image
Cubase 5 Do you want to activate the project? Activate No- Click "No" to open the other project inactive.
This significantly reduces load times, especially for large projects.
- Click Activate to open and activate the new project.
The active project is indicated by the blue Activate Project button in the upper left corner of the Project window. To activate a different project, simply click its Activate Project button.
text_image
Cubase 5 Project - Mixing 9 Cubase 5 Project - Even No Active Selected Activate ProjectAn active project
- You can also open project files by selecting an entry from the "Recent Projects" submenu on the File menu. This submenu lists the projects you have recently worked with, with the most recent one at the top of the list.
- You can also set Cubase to automatically open a project when you launch the program (see "Startup Options" on page 458).
- You can drag projects from the MediaBay into the Cu-base application window (not into an existing Project window) to open them.
About the "Pending Connections" dialogs
If you open a Cubase project created on a different system (other audio hardware), the program tries to find matching audio inputs and outputs for the i/o busses (this is one of the reasons why you should use descriptive, generic names for your input and output ports – see "Preparations" on page 15).
If the program cannot resolve all audio/MIDI inputs and outputs used in the project, a Pending Connections dialog will open. This allows you to manually re-route any ports specified in the project to ports available in your system.
Close
The Close command on the File menu closes the active window. If a Project window is active, selecting this closes the corresponding project.
- If the project contains unsaved changes, you are asked whether you want to save it before closing.
If you select "Don't Save" and have recorded or created new audio files since saving, you get the choice to delete or keep these.
Save and Save As
The commands Save and Save As allow you to save the active project as a project file (file extension ".cpr"). The Save command stores the project under its current name and location, while Save As allows you to rename and/or relocate the file. If a project has not been saved yet or if it has not been changed since it was last saved, only Save As is available.

Generally, we recommend that you save project files in their project folders, to keep the projects as manageable as possible.
A word about file extensions
Under Windows, file types are indicated by three letter file name extensions (such as *.cpr for Cubase project files).
Under Mac OS X, it is not necessary to use file name extensions, since the file types are stored internally in the files. However, if you want your Cubase projects to be compatible with both platforms, you should make sure the option "Use File Extension in File Dialog" is activated in the Preferences (General page). When this is activated, the proper file name extension is automatically added when you save a file.
Save New Version
This function is only available as a key command, by default [Ctrl]/[Command]-[Alt]/[Option]-[S]. When you use this function, an identical, new project file is being created and activated.
The new file will get the same name as the original project, but with an incremental number attached. For example, if your project is called "My Project", you will get new versions called "My Project-01", "My Project-02", and so on.
Save New Version is useful if you are experimenting with edits and arrangements and want to be able to go back to a previous version at any time. The newest versions are always listed on the Recent Projects submenu on the File menu for instant access.
Save as Template
This function allows you to save the current project as a template. When you create a new project, the available templates are listed, allowing you to base the new project on a template.
Proceed as follows:
- Set up a project.
- Select "Save As Template..." from the File menu and save the project template under the desired name.
- Templates can contain clips and events just like regular projects. If this is not what you want, make sure to remove all clips from the Pool before you save the project as a template.
Templates are always stored in the Templates folder.
On a Windows system, it is located at \Documents and Settings\
Setting up a default template
If you always want the same default project to open when you launch Cubase, you can save a default template. Proceed as follows:
- Set up a project.
- Select "Save As Template..." from the File menu and save the project template with the name "default".
- Open the Preferences dialog and select the General page.
- Open the "On Startup" pop-up and select "Open 'Default' Template".
The next time you launch Cubase, the default template will automatically be opened. For details on the other Startup options, see "Startup Options" on page 458.
Back up Project
This function is very useful if you want to move or backup your project.
- Select "Back up Project..." from the File menu.
A file dialog opens in which you can choose an existing empty folder or create a new folder to save the project.
- Click OK.
The "Back up Project Options" dialog opens.
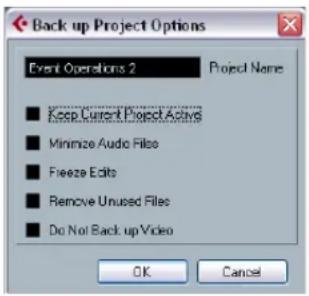
text_image
Back up Project Options Event Operations 2 Project Name ■ Keep Current Project Active ■ Minimize Audio Files ■ Freeze Edits ■ Remove Unused Files ■ Do Not Back up Video OK CancelThis dialog contains the following options
Option Description
| Project Name Enter a project name if you want to change it from the default (the current name of the project). | |
| Keep Current Project Active | When this option is activated, the current project will still be the active project after clicking OK. If you wish to switch to the new backup project instead, you need to deactivate this option. |
| Minimize Audio Files | If this is activated, only the audio file portions that are actually used in the project will be included. This can significantly reduce the size of the project folder (if you are using small sections of large files), but it also means you cannot use other portions of the audio files if you continue working with the project in its new folder. |
| Freeze Edits This will perform a Freeze Edits operation, making all processing and applied effects permanent to each clip in the Pool, see “Freeze Edits” on page 215. | |
| Remove Unused Files | When this is activated, only files in the Pool that are actually used in the project will be stored in the new folder. |
| Do Not Back up Video | When this is activated, any video clips on the video track or in the pool of the current project will not be included in the backup project. |
-
Make the desired settings.
-
Click OK.
A copy of the project is saved in the new folder. The original project is not affected.
Auto Save
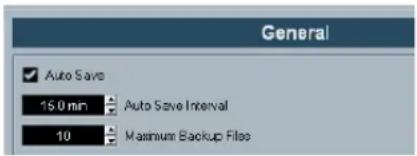
text_image
General ✓ Auto Save 15.0 min Auto Save Interval 10 Maximum Backup FilesIf you activate the Auto Save option in the Preferences (General page), Cubase will automatically save backup copies of all open projects with unsaved changes.
These backup copies are named "
- Use the "Auto Save Interval" setting to specify the time intervals in which a backup copy will be created.
- Use the "Maximum Backup Files" option to specify how many backup files will be created with the Auto Save function.
When the maximum number of backup files is reached, the existing files will be overwritten (starting with the oldest file).
With this option only the project files themselves will be backed up. If you want to include the files from the Pool and save your project in a different location, you need to use the "Back up Project" function.
Startup Options
The "On Startup" pop-up menu in the Preferences (General page) allows you to specify what should happen each time you launch Cubase.
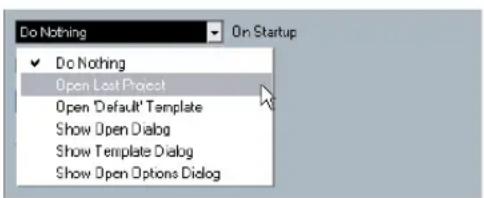
text_image
Do Nothing On Startup ✓ Do Nothing Open Lost Project Open 'Default' Template Show Open Dialog Show Template Dialog Show Open Options DialogThe following options are available:
Option Description
Do Nothing Cubase launches without opening a project.
Open Last Project The last saved project is opened on launch.
Option Description
| Open 'Default' Template | The default template is opened, see "Setting up a default template" on page 457. |
| Show Open Dialog | The Open dialog opens on launch, allowing you to manually locate and open the desired project. |
| Show Template Dialog | The Template dialog opens on launch, allowing you to create a new project from one of the templates. |
| Show Open Options Dialog | The Open Document Options dialog opens on launch, see below. It allows you to make a different choice each time you launch Cubase. |
Cubase Open Document Options dialog
This dialog will open in two cases:
- If you launch Cubase with the option "Show Open Options Dialog" selected on the "On Startup" pop-up menu in the Preferences (General page).
- If you hold down [Ctrl]/[Command] while launching Cubase.
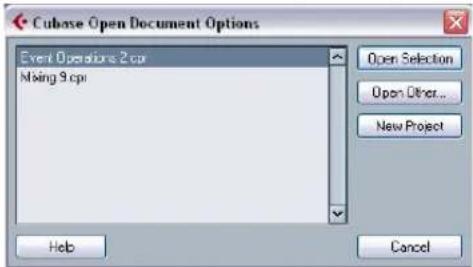
text_image
Cubase Open Document Options Event Operations 2 cpi Mixing 9 cpi Open Selection Open Other... New Project Help CancelThe Open Document Options Dialog
The dialog lists your recently used projects.
- To open a project, select it and click the "Open Selection" button.
- To open another project not listed here, click the "Open Other..." button.
A file dialog opens that allows you to look for the desired file on your disk. - To create a new project, click the "New Project" button.
Revert
If you select "Revert" from the File menu, you will be asked whether you really want to revert to the last saved version of the project. If you click "Revert", all changes you have made since saving will be discarded.
If you have recorded or created new audio files since saving, you will be asked whether you want to delete or keep these.
Importing audio
In Cubase audio can be imported in a variety of different formats. For example, you can import tracks from audio CDs, or import audio files saved in different formats (compressed and uncompressed).
For information on audio file import preferences, please see "Audio file import options" on page 41. For information on how to import audio files into the Pool and import options, see "About the Import Medium dialog" on page 268.
Importing audio CD tracks
You can import audio from audio CDs into Cubase projects in two ways:
- To import the CD tracks directly into project tracks, choose the "Audio CD..." option from the Import submenu on the File menu.
The imported audio CD track(s) are inserted on the selected audio track(s) at the project cursor position.
- To import the CD tracks into the Pool, select "Import Audio CD..." from the Media menu.
This might be the preferred method if you want to import several CD tracks in one go.
Selecting one of the Import Audio CD menu items brings up the following dialog:
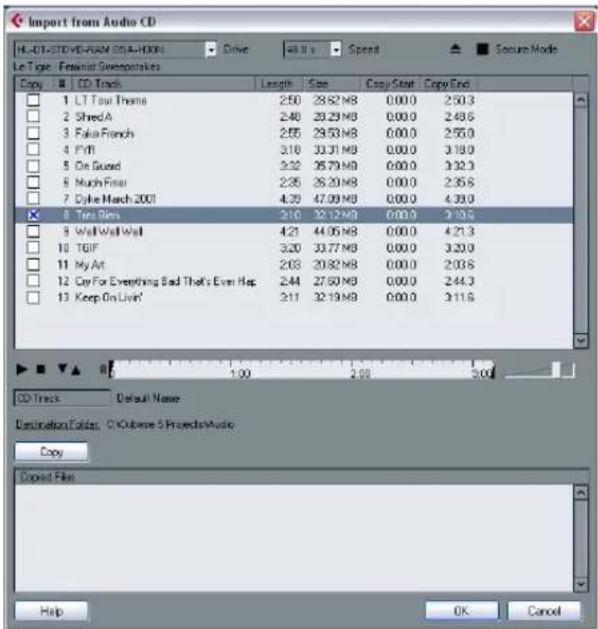
text_image
Import from Audio CD HIL-01-STD-VI-RAM 05-A-HOOI Drive 48.1% Speed Secure Mode Le Tige - Fensial Snoopstakes Copy CD Track Length Size Copy Start Copy End 1 LT Tour Phone 250 28.62 MB 0.00.0 250.3 2 Shed A 248 29.29 MB 0.00.0 248.6 3 Fake Friends 255 29.53 MB 0.00.0 255.0 4 FYB 318 33.31 MB 0.00.0 318.0 5 On Guard 332 35.79 MB 0.00.0 332.3 6 Much Finish 235 26.20 MB 0.00.0 235.6 7 Dyke March 2001 439 47.99 MB 0.00.0 439.9 8 Tee Bies 310 32.12 MB 0.00.0 310.6 9 Wall Wall Wall 421 44.05 MB 0.00.0 421.3 10 TGIF 320 33.77 MB 0.00.0 320.9 11 My Art 243 26.82 MB 0.00.0 243.6 12 Cap For Everything Bad That's Even Hap: 244 27.60 MB 0.00.0 244.3 13 Keep On Live' 311 32.19 MB 0.00.0 311.6 CD Track Default Name Destination Ends: C:\Outverse S Projects\Music Copy Copid File Help OK CancelTo import one or more tracks, proceed as follows:
- If you have more than one CD drive, select the correct one from the Drives pop-up menu at the top left. On opening the CD, the program tries to retrieve the track names from CDDB (a CD database). If no connection to CDDB can be established or the CD track names are not found, you can manually change the generic track name in the Default Name field.
- Windows only: Activate the "Secure Mode" option if you want to use a Secure Read mode.
Use this if you encounter problems when trying to import an audio CD. Error checking and correction will be done during the process. Note that this mode will take more time.
- In the Windows version, select the data transfer speed from the Speed pop-up menu.
While you normally want to use the fastest possible speed, you may have to select a slower speed for flawless audio extraction. - Activate the Copy checkbox for every audio file you want to import.
You can also select a copy section for every file, see below.
- Click on the Copy button to create a local copy of the audio file(s) or section(s).
The copied files are listed at the bottom of the dialog. By default, imported audio CD tracks will be stored as Wave files (Windows) or AIFF files (Mac) in the Audio folder of the current project. To change the folder, click Destination Folder and select a different folder from the dialog. During copying, the Copy button is labeled "Stop"; click it to stop the process.
- Click OK to import the copied audio files into the project, or click Cancel to stop the import and discard the copied files.
- If you import more than one audio file into project tracks, a dialog opens in which you have to choose whether to insert the tracks on one track or on different ones.
The new track(s) are displayed in the Project window. New audio clips are created and added to the Pool.
The columns in the "Import from Audio CD" dialog have the following functionality:
Column Description
Copy Activate the checkbox in this column for the track you want to copy/import. To activate more than one checkbox, click and drag over the checkboxes (or press [Ctrl]/[Command] or [Shift] and click).
# This is the track number.
Column Description
| CD Track as shown | When you import an audio CD track, the file is named according to this column. The names are pulled automatically from CDDB, if possible. You can rename a track by clicking in the CD Track column and typing a new name. You can also apply a generic name to all audio CD tracks, if no name was available in CDDB. |
Length The length of the audio CD track in minutes and seconds.
Size The file size of the audio CD track in MB.
Copy Start You can copy a section of a track if you like. This indicates the start of the section to be copied in the track. By default, this is set to the start of the track (0.000) but you can adjust this on the copy selection ruler (see below).
Copy End Indicates the end of the section to be copied in the track. By default, this is set to the end of the track but you can adjust this on the copy selection ruler (see below).
By default, complete tracks are selected.
- If you want to copy and import a section of an audio CD track only, select the track in the list and specify the start and end of the selection to be copied by dragging the handles in the copy selection ruler.
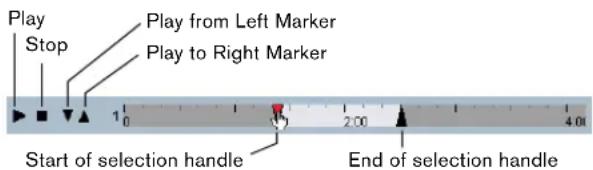
text_image
Play Stop Play from Left Marker Play to Right Marker Start of selection handle End of selection handleNote that you can import sections of several audio CD tracks by selecting them in turn and adjusting the selection. The start and end settings for each track are displayed in the list.
- You can audition the selected audio CD track by clicking the Play button.
The track will be played back from selection start to selection end (or until you click the Stop button).
- The Play from left Marker (down arrow) and Play to Right Marker (up arrow) buttons allow you to audition the start and end of the selection only.
The down arrow button will play a short snippet beginning at the start of the selection, while the up arrow button will play a snippet starting just before the end of the selection.
- To open the CD drive, click on the Eject button at the top of the dialog.
Importing Audio from Video files
While you can automatically extract the audio when importing a video file (see "Extracting audio from a video file" on page 450), it is also possible to import the audio from a video file without importing the video itself:
- Pull down the File menu, open the Import submenu and select "Audio from Video File...".
- In the file dialog that opens, locate and select the video file and click Open.
The audio in the selected video file is extracted and converted to a Wave file in the project's Audio folder.
- A new audio clip is created and added to the Pool. In the Project window, an event referencing the audio file is inserted on the selected track at the project cursor position. If no track was selected, a new track is created.
This works just like importing regular audio files.
For importing video files, see "Importing a video file" on page 448.
Importing ReCycle files
ReCycle by Propellerhead Software is a program designed especially for working with sampled loops. By "slicing" a loop and making separate samples of each beat, ReCycle makes it possible to match the tempo of a loop and edit the loop as if it was built of individual sounds. Cubase can import two file types created by ReCycle:
- REX files (export file format of the first versions of ReCycle, extension ".rex").
- REX 2 files (file format of ReCycle 2.0 and later, extension ".rx2").
For this to work, the REX Shared Library needs to be installed on your system. If this is not the case, you will find the corresponding installer on the installation DVD (in the "Additional Content\Installer Data" folder).
Proceed as follows:
- Select an audio track and move the project cursor to where you want the imported file to start.
You probably want to import REX files to tempo based audio tracks, since this will allow you to change the tempo later on (having the imported REX file automatically adjust).
- Select "Audio File..." from the Import submenu on the File menu.
- On the file type pop-up menu in the file dialog, select REX File or REX 2 File.
- Locate and select the file you want to import, and click Open.
The file is imported and automatically adjusted to the current Cubase tempo.
Unlike a regular audio file, the imported REX file will consist of several events, one for each "slice" in the loop. The events will automatically be placed in an audio part on the selected track and positioned so that the original internal timing of the loop is preserved.
- If you now open the part in the Audio Part Editor, you can edit each slice separately by muting, moving and resizing events, adding effects and processing, etc.
You can also adjust the tempo and have the REX file automatically follow (provided that its track is tempo based).
You can achieve similar results by using Cubase's own loop slicing features, see "Working with hitpoints and slices" on page 234.
Importing compressed audio files
Cubase can import (and export, see "Mixing down to audio files" on page 420) several common audio compression formats. The procedure is the same as when importing any non-compressed audio file, with one important thing to note:
- When you import a compressed audio file, Cubase creates a copy of the file and converts this to Wave format (Windows) or AIFF format (Mac OS X) before importing it. The original compressed file will not be used in the project. The imported file is placed in the designated project Audio folder.
The resulting Wave/AIFF file will be several times larger than the original compressed file.
The following file types are supported:
MPEG audio files
MPEG, which stands for Moving Picture Experts Group, is the name of a family of standards used for encoding audio-visual information (e.g. movies, video, music) in a digital compressed format.
Cubase can read two types of audio MPEG files: MPEG Layer 2 (*.mp2) and MPEG Layer 3 (*.mp3). Currently, mp3 is the most common of these formats, while the mp2 format is mostly used in broadcast applications.
Ogg Vorbis files
Ogg Vorbis is an open and patent-free format that offers very small audio files maintaining comparatively high audio quality. Ogg Vorbis files have the extension “.ogg”.
Windows Media Audio files (Windows only)
Windows Media Audio is an audio format developed by Microsoft, Inc. Due to advanced audio compression algorithms, Windows Media Audio files can be made very small, maintaining good audio quality. The files have the extension “.wma”.
For exporting Audio, see the chapter "Export Audio Mixdown" on page 419.
Exporting and importing OMF files (Cubase only)
Open Media Framework Interchange (OMFI) is a platform independent file format intended for the transfer of digital media between different applications. Cubase can import and export OMF files (file extension ".omf"), allowing you to use Cubase in conjunction with other audio and video applications.
Exporting OMF files
You can only export stereo files in OMF format.
- Pull down the File menu, open the Export submenu and select "OMF...".
The Export Options dialog opens.
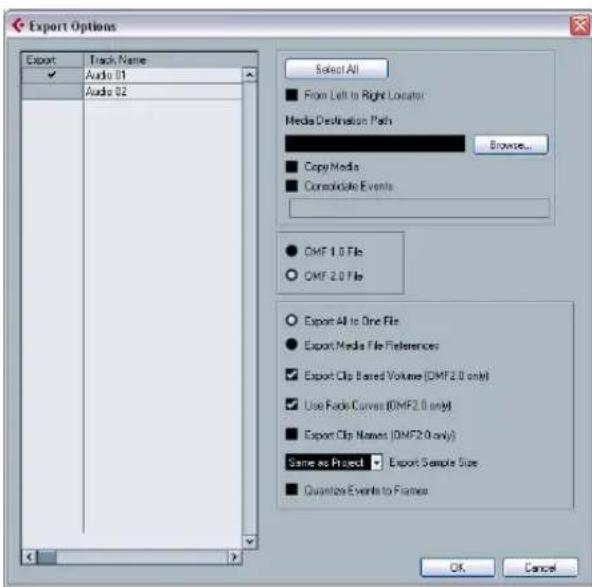
text_image
Export Options Export Track Name Audio 01 Audio 02 Select All From Left to Right Locator Media Destination Path Browse... Copy Media Consolidate Events OMF 1.0 File OMF 2.0 File Export All to One File Export Media File Preferences Export Clip Based Volume (OMF2.0 only) Use Radio Curves (OMF2.0 only) Export Clip Names (OMF2.0 only) Same as Project Export Sample Size Quantize Events to Frames OK CancelThe Export Options dialog for OMF files
- Use the Track list to the left to select the tracks that should be included in the exported file.
To select all tracks, click the "Select All" button. Normally, the whole project is included – to export the range between the locators only, activate "From Left to Right Locator".
- When referencing media files (see below), you can set the referenced output path by entering it in the "Media Destination Path" field or by clicking on "Browser..." and choosing it in the file dialog that appears.
All file references will be set to this path. You can create references to media destinations that do not exist on the system you are currently working with, making it easy to prepare files for use in projects on another system or in a network environment.
- If you want to create copies of all the media files, choose the "Copy Media" option.
By default, the copied audio files are placed in a sub-directory in the export destination folder. To specify a different location for the copied files, use the "Media Destination Path" field.
- If you want to copy only the portions of audio files that are used in the project, select "Consolidate Events".
You can also define handle lengths in milliseconds to include audio outside each event boundary for later fine tuning. If you do not have any handles when consolidating audio files, you will not be able to adjust fades or edit points when the project is imported in another application.
- Select "1.0 File" or "2.0 File", depending on which OMF version is supported by the application in which you plan to import the file.
- Select whether you want to include all audio data in the OMF file ("Export All to One File") or use references only ("Export Media File References").
If you choose "Export All to One File", the OMF file will be totally "self-contained", but possibly very large. If you choose "Export Media File References", the file will be small, but the referenced audio files must be available for the receiving application.
-
If you selected the "2.0 File" option above, you can choose whether to include the volume settings and fades for the events (as set up with the event volume and fade handles) as well as the clip names – to include these in the OMF file, activate "Export Clip Based Volume", "Use Fade Curves" and/or "Export Clip Names".
-
Specify a sample size (resolution) for the exported files (or use the current project settings).
-
If you activate "Quantize Events to Frames", the event positions in the exported file will be moved to exact frames.
-
Click OK, and specify a name and location in the file dialog that opens.
The exported OMF file will contain (or reference) all audio files that are played in the project (including fade and edit files). It will not include unused audio files referenced in the Pool, or any MIDI data. Video files are not included.
Importing OMF files
-
Pull down the File menu, open the Import submenu and select "OMF...".
-
In the file dialog that opens, locate the OMF file and click Open.
- If there is already an open project, a dialog opens in which you can select whether a new project should be created for the file. If you select "No", the OMF file will be imported into the current project.
-
If you choose to create a new project, a file dialog opens in which you can select the project folder. Select an existing project folder or create a new one.
-
The Import Options dialog opens, allowing you to choose a track for the import.
- Activating the "Import all media files" option allows you to import media that is not referenced by events.
- Activating the "Import Clip Gain as Automation" option imports volume automation and envelopes of the Volume Automation Track of each track.
- "Import at Timecode Position" will insert the elements contained in the OMF file at their original timecode positions.
This is useful when you want to position every imported element at its exact timecode position, i.e. as it was saved in the OMF file. This way, the elements will end up at their correct time positions even when Cubase uses a different frame rate than the OMF file. This is usually required in a picture-related context.
- "Import at Absolute Time" will insert the elements contained in the OMF file starting at the timecode position saved in the file and keeping the relative distances between the elements.
This is required when the relative positioning of the elements inside the OMF file needs to be maintained after importing it into the Cubase timeline (even if Cubase is set to a different frame rate than the OMF file). This is usually required in music contexts, where the timing between objects has highest priority.
- If the OMF file contains video event information, you are asked whether you want to create Markers at the start position of the video events.
This allows you to manually import the video files, using the Markers as position references.
A new, untitled project is created (or tracks are added to the existing project), containing the audio events of the imported OMF file.
Exporting and importing standard MIDI files
Cubase can import and export Standard MIDI Files, which makes it possible to transfer MIDI material to and from virtually any MIDI application on any platform. When you import and export MIDI files, you can also specify whether certain settings associated with the tracks should be included in the files (automation tracks, volume and pan settings, etc.).
Exporting MIDI files
To export your MIDI tracks as a standard MIDI file, pull down the File menu and select "MIDI File..." from the Export submenu. A regular file dialog opens, allowing you to specify a location and name for the file.
When you have specified a location and a name for the file, click "Save". The Export Options dialog opens, allowing you to specify a number of options for the file – what should be included in the file, its type and its resolution (see below for a description of the options).
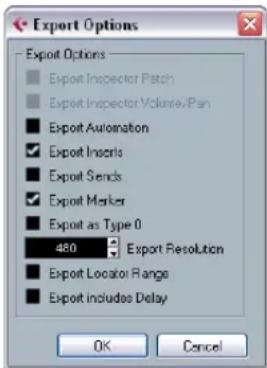
text_image
Export Options Export Options Export Inspector Patch Export Inspector Volume/Pan Export Automation Export Inseris Export Sends Export Marker Export as Type 0 480 Export Resolution Export Locator Range Export includes Delay OK CancelThe Export Options dialog
You will also find these settings in the Preferences (MIDI-MIDI File page). If you set these up in the Preferences, you only need to click OK in the Export Options dialog to proceed.
The dialog contains the following options:
| Option Description | |
| Export Inspector Patch | If this is activated, the MIDI patch settings in the Inspector – Bank Select and Program Select (used for selecting sounds in the connected MIDI instrument) are included as MIDI Bank Select and Program Change events in the MIDI file. |
| Export Inspector Volume/Pan | If this is activated, Volume and Pan settings made in the Inspector are included as MIDI Volume and Pan events in the MIDI file. |
| Export Automation | If this is activated, the automation data (as heard during playback) are converted to MIDI controller events and included in the MIDI file, see the chapter “Automation” on page 188. This also includes automation recorded with the MIDI Control plug-in (see the separate PDF document “Plug-in Reference”).Note that if a continuous controller (e.g. CC7) has been recorded but the Read button is deactivated for the automation track (i.e. the automation is effectively switched off for this parameter), only the part data for this controller will be exported.If this option is deactivated and the Automation Read button is activated, no Continuous Controllers are exported. If the Read button is deactivated, the Controller data of the MIDI part are exported (these will now be handled like “regular” part data).In most cases, you would probably activate this option. |
| Export Inserts | If this is activated and you are using any MIDI plug-ins as insert effects, the modifications to the original MIDI notes that occur as a result of the effect(s) will be included in the MIDI file. A MIDI delay, for example, will produce a number of repeats to a MIDI note by actually adding additional, “echoing” notes at rhythmic intervals – these notes will be included in the MIDI file if the option is activated. |
| Export Sends | If this is activated and you are using any MIDI plug-ins as send effects, the modifications to the original MIDI notes that occur as a result of the effect(s) will be included in the MIDI file. |
| Export Marker | If this is activated, any markers you have added (see “Markers” on page 54) will be included in the MIDI file as standard MIDI file marker events. |
| Export as Type 0 | If this is activated, the MIDI file will be of type 0 (all data on a single track, but on different MIDI channels). If you do not activate this option, the MIDI file will be of Type 1 (data on separate tracks). Which type to choose depends on what you want to do with the MIDI file (in which application or sequencer it should be used, etc.). |
| Export Resolution | You can specify a MIDI resolution between 24 and 960 for the MIDI file. The resolution is the number of pulses, or ticks, per quarter note (PPQ) and determines the precision with which you will be able to view and edit the MIDI data. The higher the resolution, the higher the precision. The resolution should be chosen depending on the application or sequencer with which the MIDI file will be used though, since certain applications and sequencers may not be able to handle certain resolutions. |
Option Description
| Export Locator Range | If this is activated, only the range between the locators will be exported. |
| Export includes Delay | If this is activated, the delay of the MIDI track will be included in the MIDI file. For more information about the Delay option, see “Basic track settings” on page 306. |
⇒ The MIDI file will include the tempo information of the project (i.e. it will include the tempo and time signature events of the Tempo Track Editor or, if the Tempo Track is deactivated on the Transport panel, the current tempo and time signature).
Inspector settings other than those specified in the Export options are not included in the MIDI file! To include these, you need to convert the settings to "real" MIDI events and properties by using the Merge MIDI in Loop function for each track, see "Merge MIDI in Loop" on page 331.
Importing MIDI files
To import a MIDI file from disk, proceed as follows:
- Select "MIDI File..." from the Import submenu on the File menu.
- If there is already an open project, a dialog opens in which you can select whether a new project should be created for the file. If you select "No", the MIDI file will be imported into the current project.
- Locate and select the MIDI file in the file dialog that opens and click Open.
- If you choose to create a new project, select the project folder. Select an existing project folder or create a new one.
The MIDI file is imported. The result depends on the contents of the MIDI file and the Import Options settings in the Preferences dialog (MIDI–MIDI File page). The Import Options are as follows:
Option Description
| Extract First Patch | If this is activated, the first Program Change and Bank Select events for each track are converted to Inspector settings for the track. |
| Extract First Volume/Pan | If this is activated, the first MIDI Volume and Pan events for each track are converted to Inspector settings for the track. |
| Import Controller as Automation Tracks | If this is activated, MIDI controller events in the MIDI file will be converted to automation data for the MIDI tracks. If this is deactivated, controller data for the MIDI Parts will be imported. |
Option Description
| Import to Left Locator | If this is activated, the imported MIDI file will be placed so that it starts at the position of the left locator – otherwise it will start at the beginning of the project. Note that if you choose to have a new project created automatically, the MIDI file will always start at the beginning of the project. |
| Import Marker If this is activated, Standard MIDI File Markers in the file will be imported and converted to Cubase markers. | |
| Import dropped File as single Part | If this is activated and you drag and drop a MIDI file into the project, the whole file will be placed on a single track. |
| Ignore Master-track Events on Merge | If this is activated and you import a MIDI file into the current project, tempo track data in the MIDI file are ignored. The imported MIDI file will play according to the current tempo track in the project.If this option is deactivated, the Tempo Track Editor will be adjusted according to the tempo information in the MIDI file. |
| Auto Dissolve Format 0 | If this is activated and you import a MIDI file of type 0 into the project, the file will automatically be “dissolved”: For each embedded MIDI channel in the file, a separate track will be inserted in the Project window.If this is deactivated, only one MIDI track will be created. This track will be set to MIDI Channel “Any”, allowing all MIDI events to play back on their original channels. You can also use the “Dissolve Part” function on the MIDI menu to distribute the events onto different tracks with different MIDI Channels at a later stage. |
| Import to In-strument tracks | If this is activated and you drag a MIDI file into the project, an Instrument track will be created instead of a MIDI track. Furthermore, the program will load the corresponding track preset for the instrument track (based on the program change events included in the MIDI file). |
- It is also possible to import a MIDI file from disk by dragging and dropping it from the Windows Explorer or the Mac OS Finder into the Project window. The Import Options apply as well.
Exporting and importing MIDI loops
Cubase allows you to import MIDI loops (file extension ".midiloop") and to save instrument parts as MIDI loops. MIDI loops are handy, as they contain not only MIDI notes and controllers, but also the associated VST instrument and instrument track preset settings.
How to import and export MIDI loops is described in detail in the chapter "VST Instruments and Instrument tracks" on page 169.
Exporting and importing tracks (Cubase only)
You can export Cubase tracks (Audio, FX, Group, Instrument, MIDI and Video) as track archives for import into other Cubase (or Nuendo) projects. All the information associated with the tracks will be exported (mixer channel settings, automation tracks, parts and events, etc.). If you select the option "Copy" (see below), a separate "media" folder will be created, containing copies of all referenced audio files.
→ Project-specific settings (such as tempo) are not part of the exported track archives.
For creating track presets from tracks, see "Working with Track Presets" on page 288.
Exporting tracks as track archives
-
Select the tracks you wish to export.
-
Pull down the File menu, open the Export submenu and choose "Selected Tracks...".
-
You are prompted to choose between two options:
- Click Copy to include copies of the media files in the export.
A file dialog opens in which you can choose an existing empty folder or create a new folder for saving the track archive (as *.xml file) and its media subfolder, which will contain any associated audio or video files.
- Click Reference to include merely a reference to the files in the export.
A file dialog opens in which you can choose an existing folder for saving the track archive (as single *.xml file).
- Click OK to save the track archive.
Importing tracks from a track archive
The Import Track Archive function lets you import tracks exported from another Cubase (or Nuendo) project.
Note that the sample rates of the active project and the track archive have to match. If necessary, you have to convert the sample rate, see below.
-
Pull down the File menu, open the Import submenu and select "Track Archive...".
-
In the file dialog that opens, select the XML file and click Open.
The Import Options dialog opens.
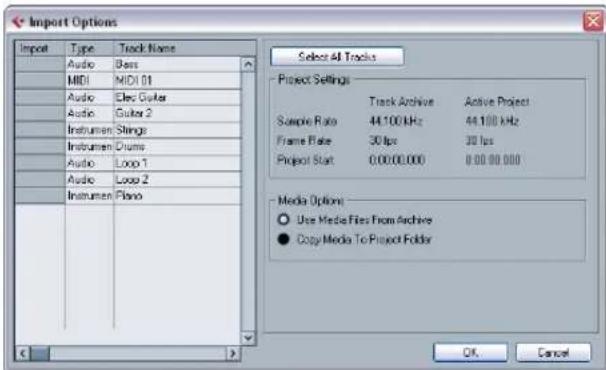
text_image
Import Options Input Type Track Name Audio Bars MIDI MIDI 01 Audio Elec Guitar Audio Guitar 2 Instrument Strings Instrument Drums Audio Loop 1 Audio Loop 2 Instrument Piano Select All Tracks Project Settings Track Archive Active Project Sample Rate 44.100 kHz 44.100 kHz Frame Rate 30 fps 30 fps Project Start 0.00.00.000 0.00.00.000 Media Options Use Media Files From Archive Copy Media To Project Folder OK CancelIn the Project Settings area, you can see a comparison between the settings of the track archive and the active project.
- Click in the Import column on the left to select the desired track(s) or click "Select all Tracks".
A checkmark is shown for all selected tracks.
- Choose which media files to use:
- Select "Use Media Files From Archive" if you want to import the track without copying the media files into your project folder.
- Select "Copy Media To Project Folder" if you want to import the media files into your project folder. For the option "Perform Sample Rate Conversion", see below.
- Click OK.
The tracks are imported, complete with all contents and settings.
Sample rate conversion on track archive import
A track archive may contain media files with a sample rate that is different from the sample rate of your currently active project. You can see the sample rate difference in the Project Settings area.
- To convert the sample rate of a track archive to the sample rate used in the active project on import, select the option "Copy Media To Project Folder" and then "Perform Sample Rate Conversion".
⇒ Unconverted files with another sample rate than the one used in the project will play back at the wrong speed and pitch.
Other Import/Export functions
- For exporting scores, see "Exporting" on page 504.
- For exporting and importing tempo tracks, see "Exporting and importing tempo tracks" on page 405.
Cleanup
The Cleanup function on the File menu helps you to save hard disk space by locating and – if you like – deleting unused audio files in the project folders on your disk.
-
Select "Cleanup..." from the File menu.
If there are any open projects, an alert shows. Clicking "Close" closes all open projects and brings up the dialog "Cleanup Cubase Project Folders". -
To restrict the Cleanup function to a certain folder, click the "Search Folder" button and select the folder.
The default setting is that the Cleanup function is applied to all folders on all hard disks. You should only select a specific folder if you are certain it does not contain audio files used in other projects (outside the folder), see below. You can reset the function to search all folders by opening the "Search Folder" dialog again and clicking "Cancel".
- Click the Start button.
Cubase will now scan the selected folder (or all hard disks) for Cubase project folders and check for audio and image files (in the Audio, Edits and Images subfolders) that are not used by any project. The found files are listed in the dialog.
- When the scan is complete, you can select files by clicking in the list.
Use [Ctrl]/[Command]-click to select several files, and [Shift]-click to select a range of files. You can also click the Select All button to select all files in the list.
In the following situations, the Cleanup function will list files that are not unused:
- If you have moved or renamed files or folders (without updating the project files to use the new paths), there is no way for Cubase to know that these files are used in a project.
- If you perform the Cleanup function on a folder in which there are audio files belonging to other projects (outside the folder), these files will be considered "unused".
- Also, make sure you do not delete any files used in other applications, or files that you generally want to keep!
However, you can always safely delete image files since these can be reconstructed by the program, if necessary.
- Delete any files you do not want to keep by selecting them and clicking Delete.
- Close the dialog by clicking the Close button.
Customizing
Background
The user can customize the appearance and functionality of Cubase in various ways.
User configurable items described in this chapter are:
- Workspaces
By storing different window combinations as workspaces, you can quickly switch between different working modes – see "Workspaces" on page 469.
- Setup dialogs
Several parts of the user interface (toolbars, Transport panel, Inspector, info lines and Channel Settings windows) provide a Setup dialog, where you can configure which items of the respective window area or panel are to be shown or hidden and where they should be located – see "Using the Setup options" on page 471.
- Track list
The controls shown in the Track list can be set for each track type – see "Customizing track controls" on page 472.
- Preference presets (Cubase only)
You can save and recall preference settings as preference presets – see "About preference presets (Cubase only)" on page 473.
- Appearance
The general look of the program can be adjusted – see "Appearance" on page 474.
- Track and event colors
You can adjust which colors should be used – see "Applying track and event colors" on page 475.
This chapter also contains a section describing where your preferences and settings are stored (see "Where are the settings stored?" on page 478), to help you transfer your customized settings to another computer.
Workspaces
A configuration of Cubase windows is called a "workspace". A workspace stores the size, position and content of all windows, allowing you to quickly switch between different working modes via the menu or by using key commands. For example, you may want as large a Project window as possible when you are editing, whereas you may want the Mixer and effect windows open during mixdown. Workspaces are listed and managed on the Workspaces submenu on the Windows menu.
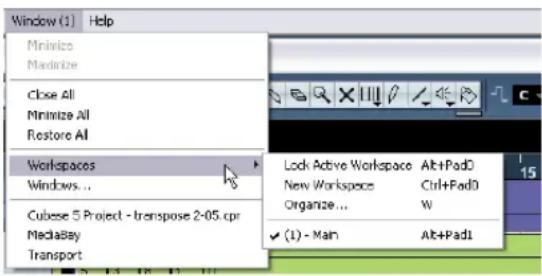
text_image
Window (1) Help Minimize Maximize Close All Minimize All Restore All Workspaces Windows... Cubes 5 Project - transpose 2-05 cpr MediaBay Transport Lock Active Workspace Alt+PadD New Workspace Ctrl+PadD Organize... W ✓ (1) - Main Alt+Pad1Editing the active workspace
There is always one workspace active, even if you have not saved any. To make changes to the active workspace, you simply set up the windows as desired – including opening, closing, moving and sizing windows, and adjusting zoom and track height. The changes are automatically stored for the active workspace.
- To keep a workspace from being accidentally changed, select "Lock Active Workspace" from the Workspaces submenu.
A locked workspace will keep its original window settings. You may change the current window layout on the screen, but the next time you select the workspace again, the originally stored layout is recalled.
Creating a new workspace
- Pull down the Window menu and open the Workspaces submenu.
- Select "New Workspace".
- In the dialog that opens, enter a name for the workspace.
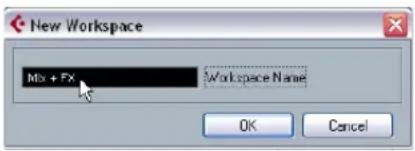
text_image
New Workspace Mix + FX Workspace Name OK Cancel4. Click OK.
The workspace is stored and will appear on the submenu. It is now the active workspace.
5. Set up the windows you want to include in the new workspace.
This may include opening, moving and sizing windows, and adjusting zoom and track height.
Activating a workspace
- Pull down the Window menu and open the Workspaces submenu.
- Select a workspace from the list on the submenu.
The windows are closed, opened, moved and/or resized according to the stored workspace. - You can also activate up to nine workspaces using key commands.
This is set up under the Workspaces category in the Key Commands dialog.
Organizing workspaces and presets
If you select "Organize..." from the Workspaces submenu, the Organize Workspaces dialog opens:
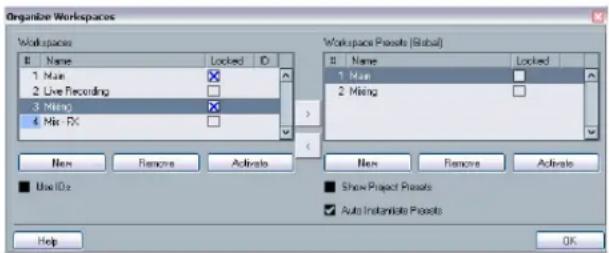
text_image
Organise Workspaces Workspaces Name Locked 1 Main 2 Live Recording 3 Ming 4 Min - Rx New Remove Activate Use IDs Workspace Panels (Global) Name Locked 1 Main 2 Ming New Remove Activate Show Project Panels Auto Instantiate Panels Help OKThe list to the left shows the workspaces in the active project, while the list to the right shows the workspace presets. While workspaces are stored with each project, workspace presets can be stored globally, allowing you to set up a number of workspaces for use in any project. Workspace presets store the position and size of the main windows only – project-specific windows are not included.
- In the Workspaces list to the left, you can rename workspaces (by double-clicking and typing) and lock or unlock them.
- The arrow buttons between the two lists allow you to copy the selected workspace to a workspace preset, or vice versa.
- The buttons below each list let you add, remove or activate workspaces or presets.
You can also activate a workspace or a preset by double-clicking in its number column.
- Normally, when you use key commands to activate workspaces, they relate to the order in the workspace list, e.g. the key command for "Workspace 1" selects the first workspace on the list and so on. However, if you activate the Use IDs checkbox, you can enter a number (1–9) in the ID column for each workspace.
This number will be used as reference when you are using key commands, so that the key command for "Workspace 1" recalls the workspace with ID 1.
- Workspace presets are not only saved globally, but also included in the project. If you open a project on a different system, by default the global presets stored on this system are shown in the list to the right. To see the presets included in your project, activate the Show Project Presets checkbox.
- Activate the Auto Instantiate Presets checkbox to convert all global workspace presets automatically into workspaces when you create a new project or open a project.
- To close the dialog, click the OK button.
Note that you can continue working in other windows with the Organize Workspaces dialog open.
Using the Setup options
You can customize the appearance of the following elements:
- Transport panel
- Info line
- Channel Settings window
- Toolbars
- Inspector
The setup context menus
If you right-click the Transport panel, the toolbars, the info lines, or the Inspector, the respective setup context menu opens. For Channel Settings windows, these options are found in the dialog's context menu, on the Customize View submenu. Here, you can activate/deactivate elements as desired.
The following general options are available on the setup context menus:
- "Show All" makes all items visible.
- "Default" resets the interface to the default setting.
- "Setup..." opens the Setup dialog (see below).
If presets are available, they can be selected on the lower half of the menu.
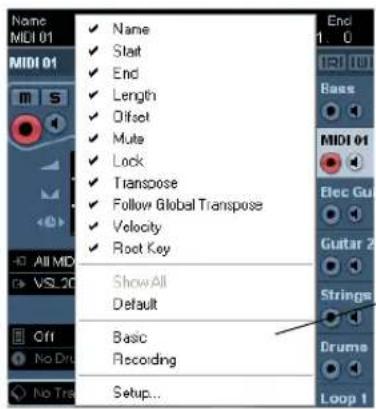
text_image
Name MIDI 01 MIDI 01 ✓ Name ✓ Start ✓ End ✓ Length ✓ Offset ✓ Mute ✓ Lock ✓ Transpose ✓ Follow Global Transpose ✓ Velocity ✓ Root Key Show All Default Basic Recording Setup...This section shows Setup presets, if available.
The info line setup context menu
The Setup dialogs
If you select "Setup..." from the setup context menus, the Setup dialog opens. This allows you to specify which elements should be visible/hidden and to set the order of the elements. You can also save and recall setup presets in this dialog.
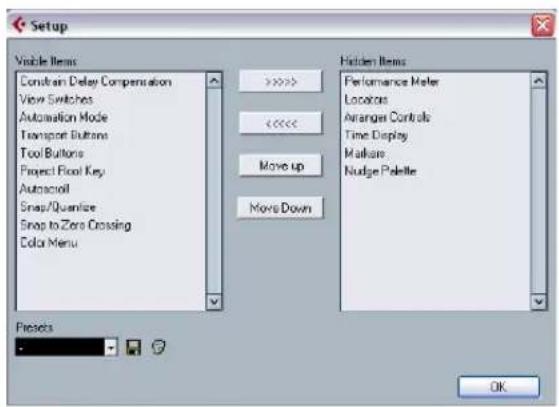
text_image
Setup Visible Items Constrain Delay Compensation View Switches Automation Mode Transport Buttons Tool Buttons Project Float Key Autocroll Snap/Quantize Snap to Zero Crossing Color Menu >>>> <<< Move up Move Down Hidden Items Performance Meter Locators Arranger Controls Time Display Mallware Nudge Palette Presets OKThe dialog is divided into two sections. The left section displays the currently visible items and the right section displays the currently hidden items.
- You can change the current show/hide status by selecting items in one section and then use the arrow buttons in the middle of the dialog to move them to the other section. Changes are applied directly.
- By selecting items in the "Visible Items" list and using the Move Up and Move Down buttons, you can reorder the items list.
Changes are applied directly. To undo all changes and revert to the standard layout, select "Default" on the setup context menu.
- If you click the Save button (disk icon) in the Presets section, a dialog opens, allowing you to name the current configuration and save it as a preset.
- To remove a preset, select it on the presets pop-up menu and click the trash icon.
- Saved configurations are available for selection from the Presets pop-up in the Setup dialog or directly from the setup context menu.
Customizing track controls
For each track type you can configure which track controls should be shown in the Track list. You can also specify the order of controls and group controls so that they are always shown adjacent to each other. This is done using the Track Controls Settings dialog.
Opening the Track Controls Settings dialog
There are two ways to open the dialog:
- Right-click a track in the Track list and select "Track Controls Settings..." from the context menu.
- Click the arrow in the top left corner of the Track list and select "Track Controls Settings...".
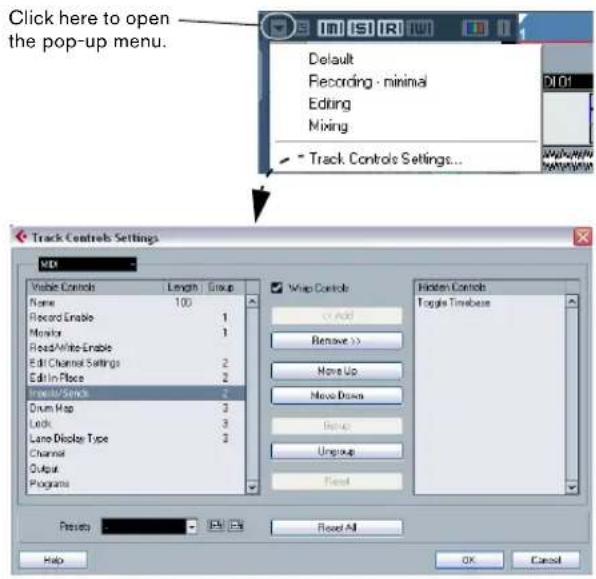
text_image
Click here to open the pop-up menu. Default Recording - minimal Editing Mixing Track Controls Settings... Track Controls Settings WD Visible Controls Length Group Name 100 Record Enable 1 Move 1 Read/Write-Enable 2 Edit Channel Settings 2 Edit In-Place 2 Create/Send 2 Drum Map 3 Link 3 Lane Display Type 3 Channel 3 Output 3 Programs 3 Wrap Controls View Up Remove >> Move Down UpUp Ungroup Reset Hidden Controls Toggle Timbase Presets... Reset All Help OK CancelSetting the track type
The settings made in the Track Controls Settings dialog apply to the selected track type, which is shown in the menu display in the top left corner of the dialog.
- To change the track type, click the arrow to the right in the menu display and select a track type from the pop-up menu that opens.
All settings made in the dialog will apply to all tracks (current and subsequent) of the selected type.
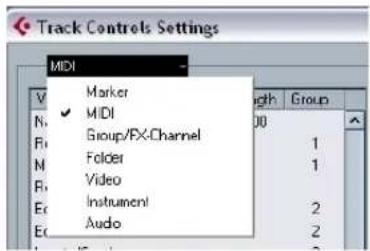
text_image
Track Controls Settings MDI Marker ✓ MIDI Group/FX-Channel Folder Video Instrument AudioThe Track Type pop-up in the Track Controls Settings dialog
Always make sure that you have selected the desired track type when editing the track controls!
Removing, adding and moving track controls
The dialog is divided into two sections. The left section displays controls currently visible on the Track list, and the right section displays the controls currently hidden.
- You can hide controls from the Track list by selecting them in the list to the left and clicking the Remove button. To show hidden elements, select them in the list to the right and click the Add button.
Click OK to apply the changes.
⇒ All controls can be removed except the Mute and Solo buttons.
- By selecting controls in the "Visible Controls" list and using the Move Up and Move Down buttons, you can change the order of the list.
Click OK to apply the changes.
Grouping track controls
If you resize the Track list, the position of the controls will change dynamically to accommodate as many controls as possible in the available space (given that Wrap Controls is activated – see below). By grouping several track controls you ensure that they are always be positioned side by side in the Track list. To group controls, proceed as follows:
-
Make sure you have selected the correct track type.
-
In the "Visible Controls" section, select at least two controls.
You can only group controls that are adjacent to each other in the list. To group controls that are currently not adjacent in the list, use the Move Up/Down buttons first.
3. Click Group.
A number is displayed in the Group column for the grouped controls. The first group created has the number 1, the second 2, and so on.
4. Click OK.
The controls are now grouped.
- You can ungroup commands by using the Ungroup button. Please note that this will remove the selected element and the elements below it in the list from this group. To remove an entire group, select the first (topmost) element belonging to this group and click the Ungroup button.
About Wrap Controls
This is activated by default. Wrap Controls allows the controls to be dynamically repositioned when resizing the Track list. That is, as many controls as possible will be displayed depending on the current size of the Track list.
If you deactivate Wrap Controls, the positions of the controls are fixed, regardless of the size of the Track list. In this mode, you may have to resize the tracks vertically (by dragging the dividers between them) to display all the controls.
About the Length column
The Length column in the Visible Controls list allows you to set the maximum length for certain text fields, e.g. Name. To change the setting, click on the number in the Length column and type in a new value.
Resetting Track list settings
You have two possibilities to reset the settings:
- Click Reset to restore all default track controls settings for the selected track type.
- Click Reset All to restore all default track controls settings for all track types.
Saving presets
You can save track controls settings as presets for later recall:
- Click on the Save button (the plus sign) to the right of the Presets pop-up menu.
A dialog opens, asking you to type in a name for the preset.
- Click OK to save the settings as a preset.
Saved presets are available for selection from the Presets pop-up menu and from the pop-up menu in the top left corner of the Track list.
- To remove a preset, select it in the Track Controls Settings dialog and click the Delete button (the minus sign).
⇒ Cubase comes with a number of Track Control Settings presets available.
About preference presets (Cubase only)
In the Preferences dialog it is possible to save complete or partial preference settings as presets. This lets you recall settings quickly and easily.
Saving a preference preset
When you have made your preferences settings, proceed as follows to save all settings as a preset:
- Make sure that the "Store marked preferences only" option is not activated. This is because this option is used for saving partial settings (see below), as opposed to complete settings.
- Click the Store button in the lower left section of the Preferences dialog.
A dialog opens, allowing you to type in a name for the pre-set.
- Click OK to save the preset.
Your saved settings are now available from the Preference Presets pop-up menu.
Loading a preference preset
To load a saved preference preset, simply select a preset from the Preference Presets pop-up menu. The preset is applied immediately.
Saving partial preferences settings
It is also possible to save partial preferences settings. This is useful when you have made settings that only relate to a certain project or situation, for example. When you apply a saved partial preference preset, you only change the saved settings. All other preferences will be left unchanged.
When you have made your specific preferences settings, proceed as follows to save the partial settings as a preset:
- Activate "Store marked preferences only". A new "Store" column is added to the Preferences list.
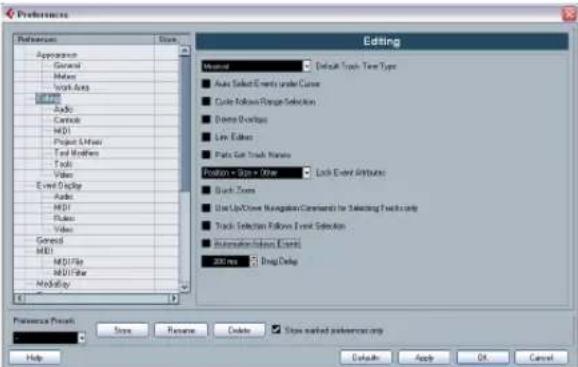
text_image
Preferences Preferences Appearance General Notes Work Area Audio Controls HDI Project Software Tool Widths Tools Video Event Display Audio HDI Plots Video General HDI MDI File MDI Filter Modulator Edit Editing Material Default Topic Type Auto Select Event under Cause Carle Retouch Range Selection Dance Overpass Line Eilers Data Set Track Names Position = Size × Other Lock Event Airfores Shock Zones Load Up/Down Navigation Constraints for Selecting Tools only Track Selection Followed Event Selection Information Event Event 200 fps Drag Delay Preference Focus Store Rename Delete Show marked preferences only Help Default Apply OK Cancel- Click in the Store column of the Preferences items you wish to save.
Note that if you activate a Preferences page that contains subpages, these will also be activated. If this is not what you want, simply deactivated the subpages.
- Click the Store button in the lower left section of the Preferences dialog.
A dialog opens, asking you to type in a name for the preset. It is a good idea to choose a descriptive name for a partial preference preset, preferably relating to the saved settings (for example "Editing-Controls").
- Click OK to save.
Your saved settings are now available from the Preference Presets pop-up menu.
Appearance
In the Preferences dialog, you will find a page called Appearance. This page differs for Cubase and Cubase Studio.
Cubase Studio
For Cubase Studio, you will find the following settings:
■ Basic Appearance Scheme
- By selecting an option from this pop-up menu you can adjust the general look of the program. After selecting an Appearance Scheme and clicking Apply or OK, you need to restart the program for the changes to take effect.
- Brightness/Intensity sliders
These sliders allow you to fine-tune the brightness and contrast in various areas in the program. Changes take effect when you click Apply or OK.
Cubase
For Cubase, it contains three subpages with the following settings:
General
The controls on the General page affect the appearance of the windows that surround the controls and workspaces in Cubase.
- Saturation determines how rich the background colors are, from gray to blue.
- Brightness lightens or darkens the background.
- Button Brightness can be used to separately lighten or darken the buttons.
Meters
The coloring of meters in Cubase can be controlled in sophisticated ways. Multiple colors can help to visually indicate what levels are being reached, e.g. in a channel of the VST Mixer. To do this, the meter on the Appearances-Meters page has color handles that allow you to define what color the meter will have at a given signal level.
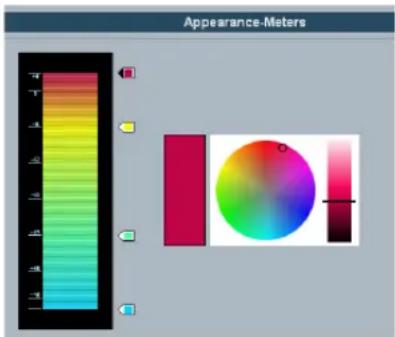
text_image
Appearance-Meters T S J K L M H C B D E F G H I J K L M N O P Q R S T U V W X Y ZThe Appearances-Meters page in the Preferences dialog
- The default setting has four color handles. Each color handle has a unique color that gradually shifts as the meter moves toward the next color handle.
You can click on any color handle and move its position on the meter scale. If you hold down [Shift] while moving the handle with the mouse, it will move ten times slower for more precise positioning. You may also nudge the color handle's position with the Arrow Up/Down keys. Holding [Shift] while nudging will move the color handle ten times faster.
- You can add color handles by [Alt]/[Option]-clicking anywhere along the side of the meter scale. To remove a color handle, [Ctrl]/[Command]-click the handle.
By adding more color handles to the meter scale, you can define colors for more specific signal levels. Try adding two color handles very close to one another. You can make the meter color change more rapidly at a specific signal level this way.
- To change the color of a handle, select the handle by either clicking on it or by jumping to it with the [Tab] key (hold down [Shift] and press the [Tab] key to jump backwards). Then use the hue and brightness controls on the right side to alter the handle's color.
The currently selected color handle is indicated by a black triangle on its left side.
Work Area
The work areas in Cubase are those places where the actual data are displayed such as the project window event display. In these areas, there are items such as vertical and horizontal grid lines that can be altered in intensity by the controls found on this page.
Applying track and event colors
You can use color scheming for easier overview of tracks and events in the Project window. Applying colors is divided into two areas; track and event colors.
- A track color is shown and can be edited in the Inspector, the Track list, and the corresponding channel in the Mixer. It is furthermore displayed in all parts and events for the track in the event display.
Track colors can be switched on and off globally.
- Event colors are shown for parts and events in the event display and are independent from the track colors.
⇒ An applied event color "overrides" the track color, if both are used.
The color palette can be customized, see "The Event Colors dialog" on page 477.
Track colors
Applying track colors manually
To activate track colors, proceed as follows:
- Click the Show/Hide Track Colors button at the top of the Track list.
This brings up the Track Color Selector in the Inspector, the Track list and in the Mixer.
- To bring up the color palette, click the Track Color Selector.
Click the arrow in the track name title bar or...
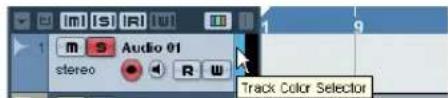
text_image
m s Audio 01 stereo R W Track Color Selector...click the color strip in the Track list.
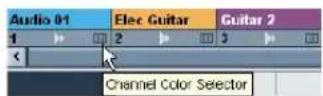
In the Mixer, click the Channel Color Selector below the channel name.
3. Select a color from the color bar.
The track color is now applied to the Inspector title palette and the Track list as well as the channel strips in the Mixer and any parts and events on the selected track.
Applying track colors automatically
In the Preferences (Editing-Project & Mixer page), you can find the option "Auto Track Color Mode".
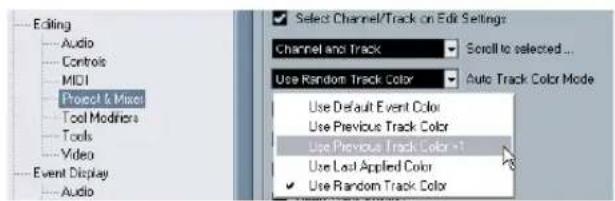
text_image
Editing Audio Controls MIDI Project & Mix Tool Modifiers Tools Video Event Display Audio Select Channel/Track on Edit Settings Channel and Track Scroll to selected... Use Random Track Color Auto Track Color Mode Use Default Event Color Use Previous Track Color Use Previous Track Color -1 Use Last Applied Color Use Random Track ColorThis offers you several options for automatically assigning colors to tracks that are added to the project.
Option Effect
| Use Default Event Color | The default color (gray) is assigned. |
| Use Previous Track Color | Uses the color of the track above the new one (i.e. the track that is selected when you add a new track). |
| Use Previous Track Color +1 | Uses the color next to the color of the track above the new one (+1 refers to the color number in the palette). |
| Use Last Applied Color | The last manually assigned color is used. |
| Use Random Track Color | Track colors are assigned randomly. |
Coloring parts and events
There are two ways to color parts and events in the Project window:
Using the color selector
- Select the desired parts or events.
- Choose a color from the Color Selector in the toolbar.
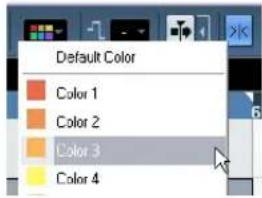
text_image
Default Color Color 1 Color 2 Color 3 Color 4Using the Color tool
- On the toolbar, select the Color tool.

- Click the small strip below it to bring up the color palette.
- Select a color.
- Click on a part/event to assign the color.
The color is applied to all selected parts/events and overrides the track color (if used).
- If you press [Ctrl]/[Command] and click on a part/event with the Color tool, the color palette is displayed and you can choose the desired color for an event.
- If you press [Alt]/[Option], the Color tool cursor becomes a pipette, which can be used to select a color by clicking on a part/event.
Customizing the event background
On the Event Display page in the Preferences dialog, you can find the option "Colorize Event Background".
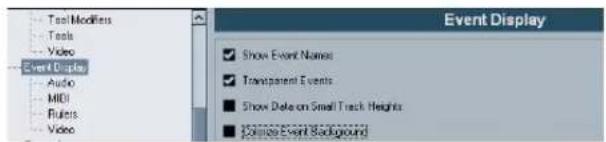
text_image
Event Display Show Event Names Transparent Events Show Delete on Small Track Heights Balance Event BackgroundThis option affects the display of events in the Project window.
- When this is activated, the events and parts in the event display will have the selected background color.
- When this is deactivated, the event "content", e.g. MIDI events and audio waveforms, are displayed in the selected color and the event background is gray.
The Event Colors dialog
You can open the Event Colors dialog in two ways:
- Double-click the small strip below the Color tool.
- Open the Color pop-up menu on the toolbar and select "Select Colors...".
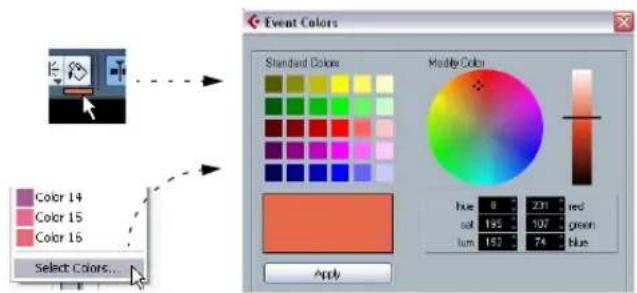
text_image
Event Colors Standard Colors Modify Color Blue: 8 231 red Red: 195 107 green Lum: 152 74 blue ApplyIn the Event Colors dialog, you can fully customize the color palette, apart from the default color (gray).
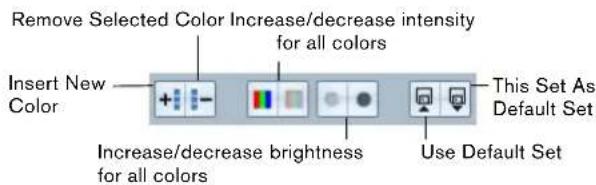
text_image
Remove Selected Color Increase/decrease intensity for all colors Insert New Color This Set As Default Set Increase/decrease brightness for all colors Use Default SetTo add new colors to the color palette, proceed as follows:
- Click the Insert New Color button in the Event Colors section to add a new color. A new color icon and color name are added to the Event Colors section.
- Click the color field next to the name field to activate the new color for editing.
-
In the Standard Colors section, select the standard color. You can modify the selected color as follows:
-
Drag the cursor to another point in the color circle.
- Move the handle in the color meter.
- Enter the values for red, green and blue and hue, saturation and luminosity manually.
- Click the Apply button in the Standard Colors section. The color setting is applied to the selected color field in the Event Colors section.
You can edit every existing event color in the same way.
- To delete an event color item, select it and click the "Remove Selected Color" button in the Event Colors section.
- To increase or decrease the intensity and the brightness of all colors, use the corresponding buttons in the Event Colors section.
- To save the current set as default, click the button "This Set As Default Set" in the Event Colors section. You can then click the button "Use Default Set" to the right to apply the default set.
- To return to the standard setting of the palette in Cu-base, click Reset.
Where are the settings stored?
As you have seen, there are a large number of ways in which you can customize Cubase. While some of the settings you make are stored with each project, others are stored in separate preference files.
If you need to transfer your projects to another computer (e.g. in another studio), you can bring all your settings along by copying the desired preference files and installing them on the other computer.
It is a good idea to make a backup copy of your preference files once you have set things up the way you want! This way, if another Cubase user wants to use his or her personal settings when working on your computer, you can restore your own preferences afterwards.
- Under Windows, preference files are stored in the folder "\Documents and Settings\
If you run the 64 bit version of Cubase, this folder is called "Cubase 64bit". On the Start menu, you will find a shortcut to this folder for easy access.
- Under Mac OS X, preference files are stored in the folder "/Library/Preferences/Cubase 5/" under your home directory.
The full path would be: "/Users/
⇒ The RAMpresets.xml file, which contains various presets settings (see below), is saved when exiting the program.
→ Program functions (e.g. crossfade) or configurations (e.g. panels) not used in the project will not be stored.
Below, the preferences that are not saved in the default preferences folder (see above) are listed:
Setting Stored in
| Mixer (or channel) settings | saved in the last active folder as *.vmx file (VST Mixer settings) |
| Color setup saved with the project | |
| Mixer view preset | saved with the project |
| Workspaces saved with the project | |
| Crossfade presets | Application folder\Presets\RAMPresets.xml |
| Device setup files | Application folder\Device Maps (as *.xml file) |
Setting Stored in
| Drum maps Application folder\DrumMaps (as *.drm file) | |
| EQ presets Application folder\Presets\VstEqPresets.pxml | |
| Track presets(user-defined,for all programs) | Win:\Documents and Settings\<user name>\Application Data\Steinberg\Track PresetsMac:/Users/<user name>/Library/Application Support/Steinberg/Track Presets/(in the subfolders \Audio, \Instrument, \Midi, \Multi) as *.trackpreset file |
| VST3 presets(user-defined,for all programs) | Win:\Common files\VST3 Presets\<company>\Mac:/Users/<user name>/Library/Audio/Presets/<company>/<plug-in name>as *.vstpreset file |
| VST3 presets(public, for allprograms) | Win:\Documents and Settings\VST3 Presets\<company>\Mac:/Library/Audio/Presets/<company>/<plug-in name>as *.vstpreset file |
Key commands
Introduction
Most of the main menus in Cubase have key command shortcuts for certain items on the menus. In addition, there are numerous other Cubase functions that can be performed via key commands. These are all default settings. If you want, you can customize existing key commands to your liking, and also add commands for menu items and functions that have no key command assigned.

You can also assign tool modifier keys, i.e. keys that change the behavior of various tools when pressed. This is done in the Preferences dialog – see "Setting up tool modifier keys" on page 483.
How are key commands settings saved?
Every time you edit or add any key command assignment, this is stored as a global Cubase preference – not as part of a project. Hence, if you edit or add a key command assignment, any subsequent projects that you create or open will use these modified settings. However, the default settings can be restored at any time by clicking the Reset All button in the Key Commands dialog.
In addition, you can save key commands settings as a "key commands file", which is stored separately and can be imported into any project. This way you can quickly and easily recall customized settings, when moving projects between different computers, for example. The settings are saved in an .xml file on the hard disk.
How to save key commands settings is described in the section "About key commands presets" on page 482.
Setting up key commands
The following is a description of how you set up key commands and save them as presets for easy access. Key commands settings are accessed and edited in the Key Commands dialog.
Adding or modifying a key command
In the Key Commands dialog you will find all main menu items and a large number of other functions, arranged in a hierarchical way similar to the Windows Explorer and Mac OS Finder. The function categories are represented by a number of folders, each containing various menu items and functions. When you open a category folder by clicking the plus sign beside it, the items and functions it contains are displayed with the currently assigned key commands.
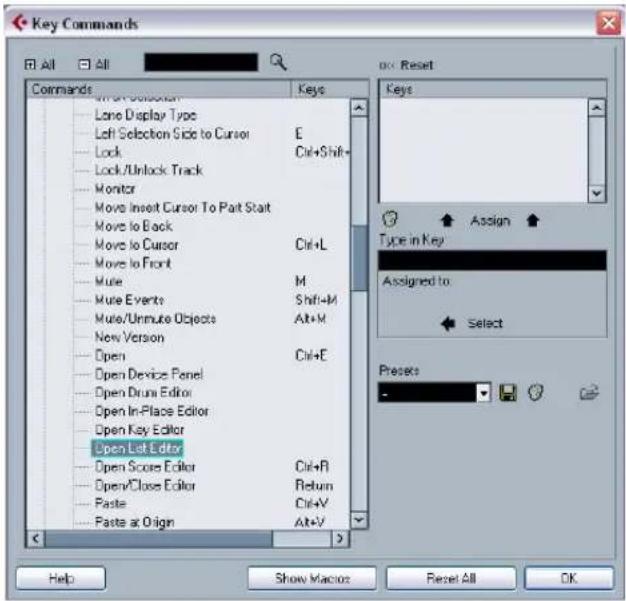
text_image
Key Commands All All Commands Lone Display Type Left Selection Side to Cursor Lock Lock/Unlock Track Monitor Move Insert Cursor To Part Start Move to Back Move to Cursor Move to Front Mute Mute Events Mute/Unmute Objects New Version Open Open Device Panel Open Drum Editor Open In-Place Editor Open Key Editor Open List Editor Open Score Editor Open/Close Editor Paste Paste at Origin E Ctrl+Shift+ Ctrl+L M Shift+M Alt+M Ctrl+E Ctrl+R Ctrl+V Alt+V OK Reset Keys Type in Key Assigned to Select Presets Help Show Macioz Reset All OKTo add a key command, proceed as follows:
-
Pull down the File menu and select "Key Commands...". The Key Commands dialog appears.
-
In the Commands list on the left, choose a category.
-
Click the plus sign to open the category folder and display the items it contains.
Note that you can also click the "global" plus and minus signs in the top left corner to open and close all category folders at once.
- In the list, select the item to which you want to assign a key command.
Already assigned key commands are shown in the Keys column as well as in the Keys section in the top right corner.
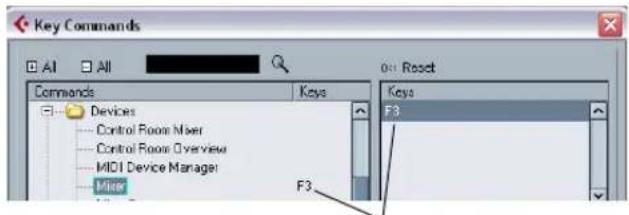
text_image
Key Commands All All Commands Devices Control Room User Control Room Overview MIDI Device Manager Mixer 0:1 Reset Keys F3 F3Key commands are displayed here.
- Alternatively, you can use the search function in the dialog to find the desired item.
For a description of how to use the search function, see below.
- When you have found and selected the desired item, click in the "Type in Key" field and enter a new key command.
You can choose any single key or a combination of one or several modifier keys ([Alt]/[Option], [Ctrl]/[Command], [Shift]) plus any key. Just press the keys you want to use.
- If the key command you entered is already assigned to another item or function, this is displayed below the "Type in Key" field.
You can either ignore this and proceed to assign the key command to the new function instead, or you can select another key command.

text_image
Type in Key F3 Assigned to: Device - Mixer Select- Click the Assign button above the field.
The new key command appears in the Keys List.

If the key command you enter is already assigned to another function, you will get a warning message asking if you really want to reassign the command to the new function.
- Click OK to exit the dialog.
⇒ You can set up several different key commands for the same function. Adding a key command to a function that already has another key command will not replace the key command previously defined for the function. If you wish to remove a key command, see below.
Searching for key commands
If you want to know which key command is assigned to a certain function in the program, you can use the Search function in the Key Commands dialog:
- Click in the search text field at the top left of the dialog and type in the function for which you want to know the key command.
This is a standard word search function, so you should type the command as it is spelled in the program. Partial words can be used; to search for all quantize related commands, type "Quantize", "Quant", etc.
- Click the Search button (the magnifying glass icon). The search is conducted and the first matching command is selected and displayed in the Commands list below. The Keys column and the Keys list show the assigned key commands, if any.
- To search for more commands containing the word(s) you entered, click the Search button again.
- When you are done, click OK to close the dialog.
Removing a key command
To remove a key command, proceed as follows:
- Use the list of categories and commands to select the item or function for which you wish to remove a key command.
The key command is shown in the Keys column and the Keys list. - Select the key command in the Keys list and click the Delete button (the trash icon).
You are asked whether you really want to remove the key command. - Click Remove to remove the selected key command.
- Click OK to close the dialog.
Setting up macros
A macro is a combination of several functions or commands to be performed in one go. For example, you could select all events on the selected audio track, remove DC offset, normalize the events and duplicate them, all with a single command.
Macros are set up in the Key Commands dialog as follows:
- Click the Show Macros button.
The macro settings are shown in the lower part of the dialog. To hide these from view, click the button (now renamed Hide Macros) again. - Click New Macro.
A new, unnamed macro appears in the Macros list. Name it by typing the desired name. You can rename a macro at any time by selecting it in the list and typing in a new name. - Make sure the macro is selected, and use the categories and commands in the upper half of the dialog to select the first command you want to include in the macro.
- Click Add Command.
The selected command appears in the list of commands in the Macros section.
- Repeat the procedure to add more commands to the macro.
Note that commands are added after the currently selected command in the list. This allows you to insert commands "in the middle" of an existing macro.
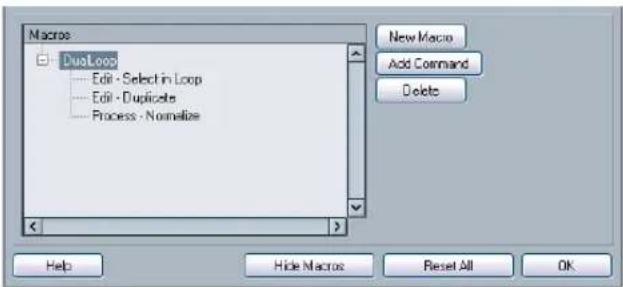
text_image
Macroe DualLoop Edit - Select in Loop Edit - Duplicates Process - Normalize New Macro Add Command Delete Help Hide Macros Reset All OKA macro with three commands
- To remove a command from the macro, select it in the Macros list and click Delete.
- Similarly, to remove an entire macro, select it in the Macros list and click Delete.
After you have closed the Key Commands dialog, all macros you have created appear at the bottom of the Edit menu in the Macros submenu, available for instant selection.
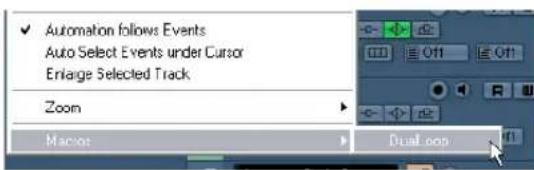
text_image
Automation follows Events Auto Select Events under Cursor Enlarge Selected Track Zoom Macro: Dual-loopYou can also assign key commands to macros. All macros you have created appear in the upper section of the Key Commands dialog under the Macros category – just select a macro and assign a key command as with any other function.
About key commands presets
As mentioned above, any changes made to the key commands (and macros) are automatically stored as a Cubase preference. However, it is also possible to store key commands settings separately. This way, you can store any number of different key command settings as presets for instant recall.
Saving key commands presets
Proceed as follows:
- Set up the key commands and macros to your liking. When setting up key commands, remember to click "Assign" to make the changes.
- Click the Save button next to the Presets pop-up menu.
A dialog appears, allowing you to type in a name for the preset.
- Click OK to save the preset.
Your saved key commands settings are now available on the Presets pop-up menu.
Loading key command presets
To load a key command preset, simply select it from the Presets pop-up menu.
Note that this operation may replace existing key commands!
The key command settings you load will replace the current key command settings for the same functions (if any). If you have macros of the same name as those stored in the preset you load, these will be replaced too. If you want to be able to revert to your current settings again, make sure to save them first, as described above!
Loading earlier key commands settings
If you have saved key commands settings with an earlier program version, it is possible to use them in Cubase 5, by using the "Import Key Command File" function, which lets you load and apply saved key commands or macros:
- Open the Key Commands dialog.
- Click the "Import Key Command File" button to the right of the Presets pop-up menu.
A standard file dialog opens.
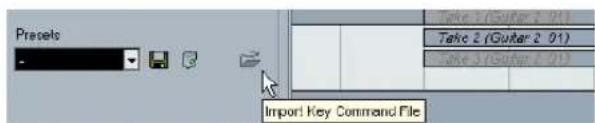
text_image
Presets Take 1 (Guitar 2.01) Take 2 (Guitar 2.01) Take 3 (Guitar 2.01) Import Key Command File- In the file dialog, use the "Files of type" pop-up menu to specify if you want to import a key commands file (".key") or a macro commands file (extension ".mac").
When you have imported an older file, you might want to save it as a preset (see above) to be able to access it from the Presets pop-up menu in the future.
- Navigate to the file you want to import and click "Open".
The file is imported.
- Click OK to exit the Key Commands dialog and apply the imported settings.
The settings in the loaded key commands or macros file now replace the current settings.
About the "Reset" and "Reset All" functions
These two buttons in the Key Commands dialog will both restore the default settings. The following rules apply:
- "Reset" will restore the default key command setting for the function selected in the Commands list.
- "Reset All" will restore the default key commands for all commands.

Note that the "Reset All" operation will cause any changes made to the default key commands to be lost! If you want to be able to revert to these settings again, make sure to save them first!
Setting up tool modifier keys
A tool modifier key is a key you can press to get an alternate function when using a tool. For example, clicking and dragging an event with the Arrow tool normally moves it – holding down a modifier key (by default [Alt]/[Option]) will copy it instead.
The default assignments for tool modifier keys can be found in the Preferences (Editing-Tool Modifiers page). Here, you can also edit them:
- Open the Preferences dialog and select the Editing-Tool Modifiers page.
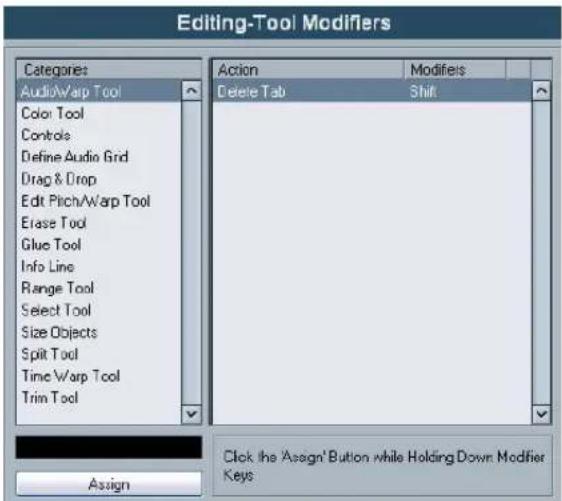
text_image
Editing-Tool Modifiers Categories Audio/Warp Tool Color Tool Controls Define Audio Grid Drag & Drop Edit Pitch/Warp Tool Erase Tool Glue Tool Info Line Range Tool Select Tool Size Objects Split Tool Time Warp Tool Trim Tool Action Modifiers Delete Tab Shift Assign Click the Assign' Button while Holding Down Modifier Keys- Select an option in the Categories list, and locate the action for which you want to edit the modifier key.
For example, the "Copy" action mentioned above resides in the category "Drag & Drop".
-
Select the action in the Action list.
-
Hold down the desired modifier key(s) and click the Assign button.
The current modifier keys for the action are replaced. If the modifier keys you pressed are already assigned to another tool, you will be asked whether you want to overwrite them. If you do, this will leave the other tool without any modifier keys assigned.
- When you're done, click OK to apply the changes and close the dialog.
The default key commands
Below, the default key commands are listed according to category.

When the Virtual Keyboard is displayed, the usual key commands are blocked because they are reserved for the Virtual Keyboard. The only exceptions are: [Ctrl]/[Command]-[S] (Save), Num [*] (Start/Stop Record), [Space] (Start/Stop Playback), Num [1] (Jump to left locator), [Delete] or [Backspace] (Delete), Num [/] (Cycle on/off), [F2] (Show/Hide Transport panel), and [Alt]/[Option]-[K] (Show/Hide Virtual Keyboard).
- As described in the section "Key command conventions" on page 12, modifier keys are written as: [Win modifier key]/[Mac modifier key]. For example, "[Ctrl]/[Command]-[N]" in the list below means "press [Ctrl] under Windows or [Command] under Mac OS X, then press [N]".
Audio category
Option Key command
Adjust Fades to Range [A]
Auto Grid [Shift]-[Q]
Crossfade [X]
Find Selected in Pool [Ctrl]/[Command]-[F]
Automation category
Option Key command
Toggle Read Enable All Tracks [Alt]/[Option]-[R]
Toggle Write Enable All Tracks [Alt]/[Option]-[W]
Devices category
Option Key command
Mixer [F3]
Virtual Keyboard [Alt]/[Option]-[K]
Video [F8]
VST Connections [F4]
VST Instruments [F11]
VST Performance [F12]
Edit category
Option Key command
| Autoscroll [F] | |
| Copy | [Ctrl]/[Command]-[C] |
| Cut | [Ctrl]/[Command]-[X] |
| Cut Time | [Ctrl]/[Command]-[Shift]-[X] |
| Delete | [Delete] or [Backspace] |
| Delete Time | [Shift]-[Backspace] |
| Duplicate | [Ctrl]/[Command]-[D] |
| Edit In-place | [Ctrl]/[Command]-[Shift]-[I] |
| Group | [Ctrl]/[Command]-[G] |
| Insert Silence | [Ctrl]/[Command]-[Shift]-[E] |
| Left Selection Side to Cursor | [E] |
| Lock | [Ctrl]/[Command]-[Shift]-[L] |
| Move to Cursor | [Ctrl]/[Command]-[L] |
| Mute | [M] |
| Mute Events | [Shift]-[M] |
| Mute/Unmute Objects | [Alt]/[Option]-[M] |
| Open Default Editor | [Ctrl]/[Command]-[E] |
| Open Score Editor | [Ctrl]/[Command]-[R] |
| Open/Close Editor | [Return] |
| Paste | [Ctrl]/[Command]-[V] |
| Paste at Origin | [Alt]/[Option]-[V] |
| Paste Time | [Ctrl]/[Command]-[Shift]-[V] |
| Record Enable | [R] |
| Redo | [Ctrl]/[Command]-[Shift]-[Z] |
| Repeat | [Ctrl]/[Command]-[K] |
| Right Selection Side to Cursor [D] | |
| Select All | [Ctrl]/[Command]-[A] |
| Select None | [Ctrl]/[Command]-[Shift]-[A] |
| Snap On/Off | [J] |
| Solo | [S] |
| Split At Cursor | [Alt]/[Option]-[X] |
| Split Range | [Shift]-[X] |
| Undo | [Ctrl]/[Command]-[Z] |
| Ungroup | [Ctrl]/[Command]-[U] |
| Unlock | [Ctrl]/[Command]-[Shift]-[U] |
| Unmute Events | [Shift]-[U] |
Editors category
Option Key command
Show/Hide Info view [Ctrl]/[Command]-[I]
Show/Hide Inspector [Alt]/[Option]-[I]
Show/Hide Overview [Alt]/[Option]-[O]
File category
Option Key command
Close [Ctrl]/[Command]-[W]
New [Ctrl]/[Command]-[N]
Open [Ctrl]/[Command]-[O]
Quit [Ctrl]/[Command]-[Q]
Save [Ctrl]/[Command]-[S]
Save As [Ctrl]/[Command]-[Shift]-[S]
Save New Version [Ctrl]/[Command]-[Alt]/[Option]-[S]
Media category
Option Key command
Open Loop Browser [F6]
Open MediaBay [F5]
Add Down: [Shift]-[Down Arrow]
Expand/Undo selection in the Project window to the bottom/ Move selected event in the Key Editor down 1 octave
Add Left: [Shift]-[Left Arrow]
Expand/Undo selection in the Project window/Key Editor to the left
Add Right: [Shift]-[Right Arrow] Expand/Undo selection in the Project window/Key Editor to the right
Add Up: [Shift]-[Up Arrow] Expand/Undo selection in the Project window to the top/Move selected event in the Key Editor up one octave
Option Key command
| Down: | [Down Arrow] |
| Select next in the Project window/Move selected event in the KeyEditor one semitone down | |
| Left: | [Left Arrow] |
| Select next in the Project window/Key Editor | |
| Right: | [Right Arrow] |
| Select next in the Project window/Key Editor | |
| Up: | [Up Arrow] |
| Select next in the Project window/Move selected event in the KeyEditor one semitone up | |
| Bottom | [End] |
| Select bottom track in the Track list | |
| Top: | [Home] |
| Select top track in the Track list | |
| Toggle Selection | [Ctrl]/[Comma |
Nudge category
Option Key command
| End Left | [Alt]/[Option]-[Shift]-[Left Arrow] |
| End Right | [Alt]/[Option]-[Shift]-[Right Arrow] |
| Left | [Ctrl]/[Command]-[Left Arrow] |
| Right | [Ctrl]/[Command]-[Right Arrow] |
| Start Left | [Alt]/[Option]-[Left Arrow] |
| Start Right | [Alt]/[Option]-[Right Arrow] |
Project category
Option Key command
| Open Browser | [Ctrl]/[Command]-[B] |
| Open Markers | [Ctrl]/[Command]-[M] |
| Open/Close Pool | [Ctrl]/[Command]-[P] |
| Open Tempo Track Editor | [Ctrl]/[Command]-[T] |
| Setup | [Shift]-[S] |
| Show/Hide Track Colors | [Shift]-[C] |
Tool category
Option Key command
Delete tool [5]
Draw tool [8]
Drumstick tool [0]
Glue tool [4]
Mute tool [7]
Next Tool [F10]
Play tool [9]
Previous Tool [F9]
Range tool [2]
Select tool [1]
Split tool [3]
Zoom tool [6]
Transport category
Option Key command
Auto Punch In [I]
Auto Punch Out [O]
Cycle Num [/]
Exchange time formats [.]
Fast Forward [Shift]-Num [+]
Fast Rewind [Shift]-Num [-]
Forward Num [-]
Input Left Locator [Shift]-[L]
Input Position [Shift]-[P]
Input Right Locator [Shift]-[R]
Input Tempo [Shift]-[T]
Insert Marker [Insert] (Win)
Locate Next Event [N]
Locate Next Marker [Shift]-[N]
Locate Previous Event [B]
Locate Previous Marker [Shift]-[B]
Locate Selection [L]
Locators to Selection [P]
Loop Selection [Shift]-[G]
Metronome On [C]
Nudge Cursor right [Ctrl]/[Command]-Num [-]
Nudge Cursor left [Ctrl]/[Command]-Num [+]
Panel (Transport panel) [F2]
Option Key command
| Play Selection Range | [Alt]/[Option]-[Space] |
| Recall Cycle Marker 1 to 9 | [Shift]-Num [1] to Num [9] |
Record Num [*]
Retrospective Record [Shift]-Num [*]
Return to Zero Num [.] or Num [,]
Rewind Num [-]
Set Left Locator [Ctrl]/[Command]-Num [1]
Set Marker 1 [Ctrl]/[Command]-[1]
Set Marker 2 [Ctrl]/[Command]-[2]
Set Marker 3 to 9 [Ctrl]/[Command]-Num [3] to [9] or [Ctrl]/[Command]- [3] to [9]
Set Right Locator [Ctrl]/[Command]-Num [2]
Play [Enter]
Start/Stop [Space]
Stop Num [0]
To Left Locator Num [1]
To Marker 1 [Shift]-[1]
To Marker 2 [Shift]-[2]
To Marker 3 to 9 Num [3] to [9] or [Shift]-[3] to [9]
To Right Locator Num [2]
Use External Sync [T]
Workspace category
Option Key command
Lock/Unlock Active Workspace [Alt]/[Option]-Num [0]
New [Ctrl]/[Command]-Num [0]
Organize [W]
Workspace 1-9 [Alt]/[Option]-Num [1-9]
Zoom category
Option Key command
| Zoom Full | [Shift]-[F] |
| Zoom In | [H] |
| Zoom In Tracks | [Alt]/[Option]-[Down Arrow] |
| Zoom Out | [G] |
| Zoom Out Tracks | [Alt]/[Option]-[Up Arrow] or [Ctrl]/[Command]-[Up Arrow] |
| Zoom to Event | [Shift]-[E] |
| Zoom to Selection | [Alt]/[Option]-[S] |
| Zoom Tracks Exclusive | [Z] or [Ctrl]/[Command]-[Down Arrow] |
Part II: Score layout and printing
How the Score Editor works
About this chapter
In this chapter you will learn:
- How the Score Editor and MIDI data relate.
- What Display Quantize is and how it works.
Welcome!
Welcome to scoring in Cubase! The Score Editor has been created to allow you to get any possible piece of music displayed as a score, complete with all the necessary symbols and formatting. It allows you to extract parts out of a full orchestra score, to add lyrics and comments, create lead sheets, score for drums, create tablature, etc. In other words: just about any type of notation you could ever desire!
There are a few basic principles to how the Score Editor works, which you have to understand to make full use of it.
How the Score Editor operates
The Score Editor does the following:
- Reads the MIDI notes in the MIDI parts.
- Looks at the settings you have made.
- Decides how the MIDI notes should be displayed according to the settings.
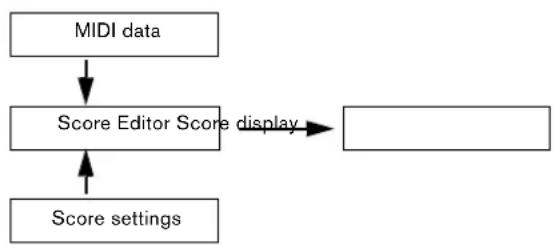
flowchart
graph TD
    A["MIDI data"] --> B["Score Editor Score display"]
    B --> C["Score settings"]
The Score Editor takes MIDI data and settings as input and produces a score as output.
The Score Editor does all this in realtime. If you change some of the MIDI data (for example by moving or shortening a note) this is immediately reflected in the score. If you change some of the settings (for example the time signature or key signature) this is also immediately apparent.
You should not think of the Score Editor as a drawing program, but rather as an "interpreter" of MIDI data.
MIDI notes vs. score notes
MIDI tracks in Cubase hold MIDI notes and other MIDI data. As you may know, a MIDI note in Cubase is only defined by its position, length, pitch and velocity. This is not nearly enough information to decide how the note should be displayed in a score. The program needs to know more: What type of instrument are we talking about, Drums? Piano? What key is the piece in? What is the basic rhythm? How should the notes be grouped under beams? You provide this information by making settings and working with the tools available in the Score Editor.
An example of the MIDI/score relationship
When Cubase stores a MIDI note's position, it makes the measurement in an absolute value, called ticks. There are 480 ticks to a quarter note. Have a look at the example below.

A quarter note at the end of a 4/4 measure
The note is on the fourth beat of the measure. Now, let's say you change the time signature to 3/4. This shortens the length of a "measure" to only three quarter notes - 1440 ticks. Suddenly our quarter note is in the next measure:

The same note in 3/4
Why? Since you are not changing the MIDI data in the track/part (that would ruin your recording!) by changing the time signature, the note is still at the same absolute position. It is just that now each “measure” is shorter, which effectively moves the note in the score.
What we are trying to get across here is that the Score Editor is an “interpreter” of the MIDI data. It follows rules that you set up by making settings in dialogs, on menus, etc. And this interpretation is “dynamic”, or in other words, it is constantly updated whenever the data (the MIDI notes) or the rules (the score settings) change.
Display Quantize
Let's say you used the Project window to record a figure with some staccato eighth notes. When you open the Score Editor, these notes are displayed like this:

This does not look anything like what you intended. Let's start with the timing – obviously, you were off at a couple of places (the third, fourth and last note all seem to be a 32nd note late). You can solve this by quantizing the figure, but this would make the passage sound too "stiff", and not fit in the musical context. To resolve this problem the Score Editor employs something called "Display Quantize".
Display Quantize is a setting which is used to tell the program two things:
- How precise the Score Editor should be when displaying the note positions.
- The smallest note values (lengths) you want displayed in the score.
In the example above, the Display Quantize value seems to be set to 32nd notes (or a smaller note value).
Let's say we change the Display Quantize value to sixteenth notes in the example:

With Display Quantize set to sixteenth notes
OK, now the timing looks right, but the notes still do not look like what you intended. Maybe you can understand that from a computer's point of view, you did play sixteenth notes, which is why there are a lot of pauses. But that's not how you meant it. You still want the track to play back short notes, because it is a staccato part, but you want something else "displayed". Try setting the Display Quantize value to eighth notes instead:
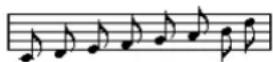
With Display Quantize set to eighth notes
Now we have eighth notes, as we wanted. All we have to do now is to add staccato articulation which can be done with one simple mouse click using the Pencil tool (see the chapter "Working with symbols" on page 555) or using musical articulations (see the chapter "VST Expression" on page 372).
How did this work? By setting the Display Quantize value to eighth notes, you give the program two instructions that would sound something like this in English: "Display all notes as if they were on exact eighth note positions, regardless of their actual positions" and "Don't display any notes smaller than eighth notes, regardless of how short they are". Please note that we used the word "display", which leads us to one of the most important messages of this chapter:
Setting a Display Quantize value does not alter the MIDI notes of your recording in any way, as regular quantizing does. It only affects how the notes are displayed in the Score Editor (and nowhere else)!
Choose your Display Quantize values with care
As explained above, the Display Quantize value for notes puts a restriction on the "smallest" note value that can be displayed. Let's see what happens if we set it to quarter notes:
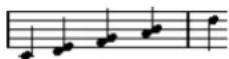
With Display Quantize set to quarter notes
Oops, this doesn't look too good. Well of course it doesn't! We have now instructed the program that the "smallest" note that occurs in the piece is a quarter note. We have explicitly told it that there are no eighth notes, no sixteenths, etc. So when the program draws the score on screen (and on paper) it quantizes the display of all our eighth notes to quarter note positions, which makes it look like above. But again, please note that when you hit Play, the passage will still play as it originally did. The Display Quantize setting only affects the score image of the recording. One last important note:
Even if you manually enter notes in the score using perfect note values, it is very important that you have your Display Quantize settings right! These values are not just used for MIDI recordings! If you for example set the Display Quantize value for notes to quarter notes and start clicking in eighth notes, you will get eighth notes in the track (as MIDI data), but still only quarter notes in the display!
Using Rests as Display Quantize setting
Above we used Display Quantize for notes. There is a similar Display Quantize setting called "Rests" which is used to set the smallest rest to be displayed. Often, this setting is very effective:
Let's start with the following note example:

As you see, the first note appears one sixteenth note late. If we change the Display Quantize value for notes to eighth notes, the score will be displayed like this:

With Display Quantize: Notes set to eighth notes
Unfortunately, this moves the first note to the same position as the second, since sixteenth note positions are not allowed. We can solve this by inserting extra Display Quantize values within the bar with the Display Quantize tool (see "Inserting Display Quantize changes" on page 508), but there is a much easier way: Change the Display Quantize value for notes back to sixteenths, but set the value for rests to eighth notes! This tells the program not to display any rests smaller than eighth notes, except when necessary. The result looks like this:

With Display Quantize: Notes set to sixteenth notes, but Rests set to eighth notes.
How did this work? Well, you instructed the program not to display any rests smaller than eighth notes, except when “necessary”. Since the first note appeared on the second sixteenth note position, it was necessary to put a sixteenth rest at the beginning of the figure. All other rests, however, can be hidden by displaying the notes as eighth notes, and were therefore not “necessary”.
This leads us to the following general guidelines:
Set the Notes value according to the "smallest note position" you want to be shown in the score.
For example, if you have notes on odd sixteenth note positions, the Notes value should be set to sixteenth notes.
Set the Rests value according to the smallest note value (length) you want to be displayed for a single note, positioned on a beat.
Common Display Quantize settings would be to have Notes set to 16 (sixteenth notes) and Rests set to 4 (quarter notes).
Handling exceptions
Unfortunately, the guidelines above will not work perfectly in every situation. You may for example have a mix of straight notes and tuplets of different types, or you may wish to display equally long notes with different note values depending on the context. There are several methods you can try:
Automatic Display Quantize
If your score contains both straight notes and triplets, you can use Auto Quantize. When this is activated, Cubase tries to "understand" whether the notes should be display quantized to straight notes or triplets. See "If your music contains mixed straight notes and triplets" on page 527.
Using the Display Quantize tool
With the "Q" tool, you can insert new Display Quantize values anywhere in the score. Inserted Display Quantize values affect the staff from the insertion point onwards. See "Inserting Display Quantize changes" on page 508.
Permanent alteration of MIDI data
As a last resort, you can resize, quantize or move the actual note events. However, this would result in the music not playing back like it originally did. Often it is possible to get the score to look the way you want without altering any MIDI data.
Summary
This closes our discussion on the basic concept of display quantizing. There are a number of other special situations which require more advanced techniques, which you will find out about in the next chapters. You will also read about other settings which work along the same lines as Display Quantize. These are called “interpretation options”.
Entering notes by hand vs. recording notes
Sometimes you will enter and edit notes by hand (or rather using the mouse and/or the computer keyboard) and at other times you will record them from a MIDI keyboard. Most of the time, you will do a combination of both. In the chapter “Transcribing MIDI recordings” on page 505 you will find out how to make a recorded score as legible as possible without making any permanent changes to the MIDI data. The chapter “Entering and editing notes” on page 511 shows you how to enter and edit notes using the mouse. In real life, even if you have recorded the piece perfectly, you will often have to do some permanent editing to your recording before printing.

You will have to read both chapters in order to understand how to produce legible scores!
2
The basics
About this chapter
In this chapter you will learn:
- How to open the Score Editor.
- How to switch between Page Mode and Edit Mode.
- How to set up the page size and margins.
- How to hide and show the Symbols Inspector, the toolbar and the extended toolbar.
- How to set up the ruler.
- How to set a zoom factor.
- How to make initial settings for key, clef and time signature.
- How to transpose instruments.
- How to print and export your score.
Preparations
- In the Project Window, create a MIDI track for each instrument.
You can prepare a piano (split) staff from a single track, i.e. there is no need to create one track for the bass clef and one for the treble clef. - Name each track after the instrument.
This name can later be used in the score if you like. - Record into the tracks or create empty parts on all tracks.
You can make very long parts that cover the entire project, or you can start out with shorter parts to begin with. If you choose the latter option, you can always go back later and add new parts or copy existing parts.
Opening the Score Editor
Editing one or several parts
To open one or several parts in the Score Editor, select the parts (on the same or on different tracks) and select "Open Score Editor" from the MIDI menu or "Open Selection" from the Scores menu. The default key command for this is [Ctrl]/[Command]-[R].
- You can also select the Score Editor as your default editor, allowing you to open it by double-clicking parts. This is done with the Default Edit Action pop-up menu in the Preferences dialog (Event Display–MIDI page).
Editing whole tracks
When preparing a score for printing, you probably want to open whole MIDI tracks in the Score Editor. To do this, select the track(s) in the Track list and make sure no parts are selected – then open the Score Editor as described above.
Editing parts on different tracks
If you have selected parts on two or more tracks (or several entire tracks – no parts) and open the Score Editor, you will get one staff for each track (although you can split a staff in two, e.g. when scoring for piano). Think of the Project window as an overview of your entire score and the tracks as representing one instrument each.
Editing predefined combinations of tracks
In the section "Layout operations" on page 591, you will find out how to open the Score Editor for a certain combination of tracks that you edited before.
Displaying single voices or the complete score
When the option "Double-click on staff flips between full score/part" is activated in the Preferences dialog (Scores-Editing page), double-clicking on the blue rectangle to the left of a staff will switch between display of either the whole score or the current voice.
The project cursor
The project cursor appears as a vertical line across the staff. When you open the Score Editor, the view is automatically scrolled so that the project cursor is visible in the window. This means you do not always see the beginning of the edited part when you first open the Score Editor.
- Hold down [Alt]/[Option] and [Shift] and click anywhere in the score to move the project cursor there. This is handy when the project cursor is not visible. This is not possible if Keyboard Input mode is activated, see "Entering notes using the computer keyboard" on page 514.
Playing back and recording
You can play back and record MIDI in the Score Editor using the standard transport commands, just like in the other MIDI editors. See the chapter "The MIDI editors" on page 337.
Page Mode
When you are preparing a score for printout, you should set the Score Editor to Page Mode. This is done by selecting Page Mode from the Scores menu. When Page Mode is activated, a checkmark will appear next to this menu option.
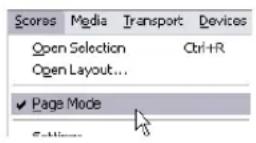
Page Mode is activated.
In Page mode, the window switches to display one page at a time, as it will appear on printout.
Page Mode vs. Edit Mode
When Page Mode is not activated, the Score Editor is in Edit Mode. All you can do in Edit Mode, you can also do in Page Mode. But Page Mode offers lots of additional features which are directly related to how the score is displayed and printed.

This section of the manual assumes you are in Page Mode. It will be mentioned explicitly if something in this text specifically relates to Edit Mode.
Using the scroll bars in Page Mode
In Page Mode, the scroll bars are used to scroll the image of the page inside the window.
Moving between pages in Page Mode
If your score takes up more than one page, you use the page number indicator in the lower right corner to move to another page in your score. The number can be adjusted using the standard editing techniques.
text_image
Screenshot of a software toolbar with dropdowns, sliders, and a numeric input field labeled '1'The Page Number indicator – adjust it to move to another page.
Also, if Autoscroll is activated on the toolbar, the score display will follow the project cursor position. This way you can scroll the score by using fast forward or rewind.
Editing individual parts in Page Mode
When you view a single part in Page Mode, the bars before and after the part will normally be shown as empty measures in the Score Editor. This is to preserve the layout of the track, i.e. the spacing between staves and bar lines, number of bars per staff, etc.
If you want to view and print a single part, without any surrounding empty bars, activate the option "Unlock Layout when editing single parts" in the Preferences dialog (Scores-Editing page). Note, however, that if you adjust the layout when editing the part in this mode, this will erase the layout for the whole track!
Changing the Zoom factor
There are two ways to change the zoom in Page Mode: by setting a zoom factor on the zoom pop-up menu or by using the Zoom tool (magnifying glass).
Using the zoom pop-up menu
Above the vertical scrollbar to the right you will find a pop-up allowing you to set the zoom factor.
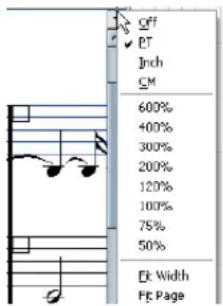
text_image
Off PT Inch CM 600% 400% 300% 200% 120% 100% 75% 50% E: Width F: PageThe zoom pop-up
By zooming in you will be able to make detailed adjustments to symbols, etc. By zooming out you will get a better overview.
- If you select "Fit Page", the zoom factor is adjusted according to the window size so that the whole page becomes visible.
- If you select "Fit Width", the zoom factor is adjusted according to the window width so that the full width of the page becomes visible.
⇒ This pop-up menu can also be opened by right-clicking in the ruler.
Using the Zoom tool
The Zoom tool in the Score Editor works much like in the Project window:
- Click once with the Zoom tool to zoom in one step.
- Hold down [Alt]/[Option] and click once with the Zoom tool to zoom out one step.
- Drag a rectangle with the Zoom tool to set a custom zoom factor.
The section encompassed by the rectangle is zoomed to fill the window.
- Hold down a modifier key and right-click with the Zoom tool to open the Zoom context menu, and select the desired Zoom setting.
Using the Mouse wheel
You can also zoom by holding down [Ctrl]/[Command] and moving the mouse wheel. The mouse position will be kept (if possible) when zooming in or out.
The active staff
One thing to note when you are working with multiple staves is the "active" staff. Only one staff at a time can be active, and it is indicated by a blue rectangle to the left of the clef symbol.
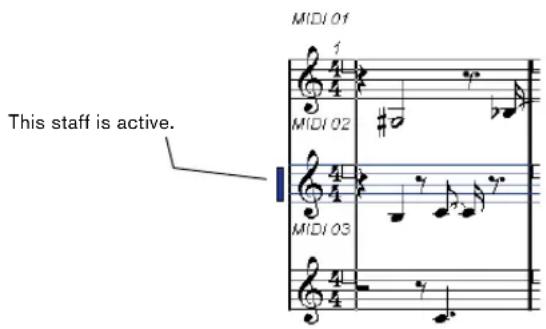
text_image
MIDI 01 1 4 MIDI 02 #0 4 4 MIDI 03 This staff is active.To make a staff active, click anywhere on it. By default, you can also use the up and down arrow keys on the computer keyboard to step between staves.
Making page setup settings
Before preparing the score for printout, you have to make some page settings for your project. This does not have to be the first thing you do, but it is a good working habit, because it will also affect the on-screen display of the score.
-
On the File menu, select Page Setup.
The Page Setup dialog appears. This is the regular operation system Page Setup dialog, described in detail in your system's documentation. The only things that Cubase adds to this are the margin settings. -
Select the preferred printer, paper size, orientation, etc.
-
If you need to, change the margins by setting the left, right, top and bottom settings.
- To make the settings permanent, save the project. If you want new projects to always start with certain page setup settings, you can create project templates with these, see "Setting up a default template" on page 457.
Designing your work space
Some of the areas in the Score Editor can be hidden. Exactly which areas to show/hide depends on what kind of project you are working on, how big a monitor you have, and so on.

text_image
Scores: MIDI 01, 1.01.01.000 - 5.01.0 Info line Extended toolbar Inspector No Object Selected Insert 1 L J J J J J J Bar Handles Hidden Notes Hide Favourites 0 Keys Display filter bar RulerThese areas can be hidden or displayed.
- You can configure the toolbar, the info line and the Inspector in their own setup dialogs. Here you can specify exactly which buttons, which properties for a particular object, or which symbol tabs you wish to see.
The handling is the same for the different Setup dialogs. For a detailed description of the Inspector Setup dialog, see "The Symbols Inspector Setup dialog" on page 557.
The info line
The info line displays information about the selected note. It can be hidden/displayed by clicking the "Show Info" button on the toolbar, or by using a key command, by default [Ctrl]/[Command]-[I].
The extended toolbar
The extended toolbar can be displayed/hidden by clicking the "Show Tool Strip" button on the main toolbar.
The display filter bar
This area contains checkboxes determining which indicators, handles and other non-printed elements should be shown in the score. You can show/hide the filter bar by clicking the "Show Filter View" button on the toolbar.
The ruler
In the Score Editor there are no meter/time position rulers as in the other editors. Instead, there are horizontal and vertical "graphic rulers" in Page Mode. These help you to position symbols and graphical objects in the score.
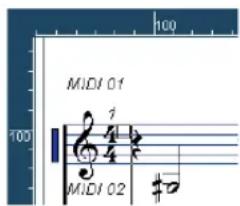
text_image
MIDI 01 100 100 MIDI 02 #D- To specify which units to show on the rulers, open the Zoom pop-up menu and select one of the options.
You can choose between points, inches and centimeters.
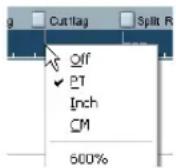
- To hide the rulers, select "Off" from the pop-up menu.
The Symbols Inspector
The symbol buttons, which are used to add symbols to the score, can be found in the Inspector to the left of the score display.
- To display the Inspector, click the Show Symbols button on the toolbar.
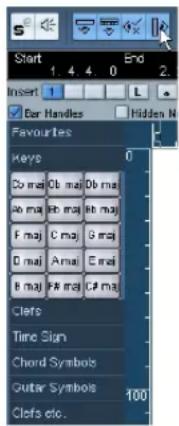
text_image
Start 1 4 0 End Insert 1 L Bar Handles Hidden N Favourites Keys Cb maj Cb maj ab maj Fb maj F maj C maj G maj C maj Amaj E maj B maj F# maj C# maj Clets Time Sign Chord Symbols Guitar Symbols Clets etc.- You can open Symbols Inspector tabs as free-floating palettes by right-clicking on one of the buttons and selecting "Open as Palette" from the context menu.
You can move symbol palettes around on the screen by clicking and dragging their title bars.
Right-clicking on a symbol palette brings up a pop-up menu.
- Select "Toggle" to switch between a vertical or horizontal view of the palette.
- Select one of the symbol palettes on the pop-up menu to bring up that palette (and replace the current palette).
- Hold down [Ctrl]/[Command] and select a palette from the pop-up menu to open the selected palette in a new window (without closing the existing one).
- Click the close button to close a symbol palette.
How to work with symbols is explained in detail in the chapter "Working with symbols" on page 555.
The Position Info window
To help you further when positioning objects in the score, Page Mode has a special Position Info window, in which you can view and adjust object positions numerically, in the unit selected for the ruler. To display the Position Info window, click in the ruler.
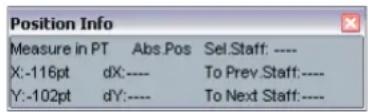
text_image
Position Info Measure in PT Abs.Pos Sel.Staff: ---- X:-116pt dX:---- To Prev.Staff:---- Y:-102pt dY:---- To Next Staff:----Showing and hiding "invisible" elements
Some of the elements in the score will not be printed, but rather serve as indicators for layout changes, handles, etc. These elements can be hidden or shown in any combination by using the display filter bar.
- If the filter bar is not shown, click the Show Filter View button on the toolbar.
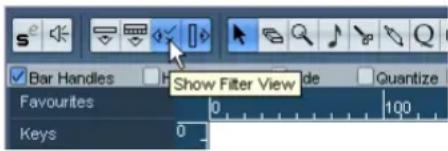
text_image
Bar Handles Show Filter View de Quantize Favourites 0 100 Keys 0The checkboxes on the filter bar determine whether an element should be visible (checkbox ticked) or not. The following options are available:
Option Description
Bar Handles Displays the bar handles, used for copying bars (see "Moving and duplicating with the bar handles" on page 568).
Hidden Notes Displays any notes you might have hidden (see "Hiding/ showing objects" on page 599).
Hide Displays markers in the score for each hidden element (notes excepted, see "Hiding/showing objects" on page 599).
Quantize Displays markers in the score where you have made Display Quantize "exceptions" (see "Inserting Display Quantize changes" on page 508).
Layout tool Displays markers in the score where you have made adjustments with the Layout tool (see "Graphic moving of notes" on page 550).
Grouping Displays markers in the score where you have made beam groupings (see "Grouping" on page 545).
Cutflag Displays markers in the score where you have inserted cutflag events (see "The Cut Notes tool" on page 550).
Option Description
Split Rests Displays markers in the score wherever you have split multiple rests (see "Splitting multi-rests" on page 601).
Stems/Beams Displays markers in the score where you have made any stem or beam adjustments (see "Setting stem direction" on page 541 and "Manual adjustment of beams" on page 549).
About the Score Editor context menus
Many functions and settings of the Score Editor can be accessed via context menus, opened by right-clicking on certain elements of the score. If you choose a note, for example, the note context menu is opened, listing note-related functions.
- If you hold [Alt]/[Option] and right-click on an empty area of the score, the context menu opens. It lists all available tools (allowing you to quickly switch between tools) and it contains many functions of the main menus.
Provided that the "Popup Toolbox on Right Click" option in the Preferences dialog (Editing-Tools page) is activated, a right-click holding a modifier key brings up the context menu.
About dialogs in the Score Editor
There are two types of dialogs available in the Score Editor:
- Non-modal dialogs can remain open while you continue working in the score.
In a non-modal dialog, you click the Apply button to apply the settings in the dialog to the selected objects in the score. This means you can select different elements in the score and change their settings, without having to close the dialog in between.
The dialog is closed by clicking the standard close button in the window title bar. The Score Settings dialog is an example for a non-modal dialog.
- Regular dialogs have an OK button instead of an Apply button.
Clicking OK applies the settings you have made and closes the dialog. You cannot continue working in the score (or select other objects) until you close the dialog.
If the option "Apply closes Property Windows" is activated in the Preferences dialog (Scores-Editing page), clicking the Apply button in a non-modal dialog closes the dialog.
In other words, this makes a non-modal dialog work a bit more like a regular dialog.
Setting key, clef and time signature
When preparing to enter notes into a score, you will probably want to start out by setting the desired key, clef and time signature for the staff. The text below assumes you are working on one track only. If you have multiple staves, you either make this setting independently for each staff or for all staves at once. See "Staff settings" on page 507.
Normally, all these symbols appear at the beginning of each staff. However, you can control this by using the Real Book option (see "Real Book" on page 598) and by hiding objects (see "Hiding/showing objects" on page 599).
When entering or editing keys, there is one important thing to note:

On the Score Settings–Project page, on the Notation Style subpage (Keys category) you will find the option "Key Changes for the entire Project" (activated by default). When this option is activated, all changes made to the key will always affect every staff in the project, i.e. it is not possible to define different keys for different staves.
Using the Symbols Inspector to set the initial key, clef and time signature
- Click the Show Symbols button in the Score Editor toolbar to open the Symbols Inspector.
- Select the Keys tab and click on the symbol for the key that you wish to use.
The Pencil tool is now selected.
- Click anywhere in the first bar of the staff to set the key for the track.
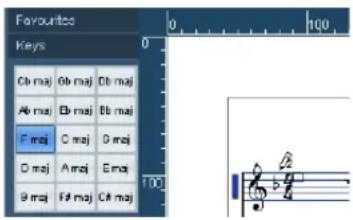
text_image
Favourites Keys 0 100 Cb maj 0b maj 0b maj Ab maj 0b maj 0b maj F maj C maj D maj D maj A maj E maj 9 maj F# maj C# maj- Open the Clefs tab of the Inspector and click on the symbol for the clef that you wish to use in your score.
-
Click anywhere in the first bar of the staff to set the clef for this track.
-
Open the Time Signatures tab of the Inspector and click on the symbol for the time signature value that you wish to use.
If you cannot find the desired time signature, you can use the Edit Time Signature dialog (see below).
The settings you have made so far are valid for the entire track. If you wish to further edit these settings, or if you need different settings for different bars of your track, proceed as described in the next section.
Editing the time signature
- Double-click on the time signature symbol at the beginning of the staff.
A dialog opens.
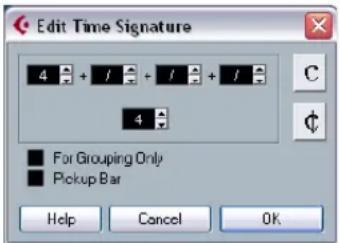
text_image
Edit Time Signature 4 + / + / + / 4 For Grouping Only Pickup Bar Help Cancel OKThe Edit Time Signature dialog with a 4/4 signature
- If the project is in 4/4 or 2/2, you can select common time/cut time directly by clicking one of the two symbols on the right.
This will set the time signature to 4/4 or 2/2, respectively and will also insert a common/cut time symbol on the staff. - If the project is in any other time, set the numerator and denominator above and below the line, respectively.
The numerator can consist of several numbers for composite time signatures. However, if the project is in a simple time signature you only need to fill in the first number above the line. The more advanced options are described below. - The "Pickup Bar" option is described in the section "By using the Pickup Bar feature" on page 602.
- Click OK or press [Return].
All tracks share the time signature! In other words, when you set the time signature, you do this for all tracks in the project.
If you need to enter half a bar somewhere (for example) you have to make a time signature change (e.g. from 4/4 to 2/4 and back again). See "Inserting and editing clefs, keys or time signatures" on page 522 to find out how to enter time signature changes.
Composite time signatures and the For Grouping Only option
For composite signatures, the numerator can be made up of up to four groups. For example, "4+4+3+/ " on the upper line and 8 on the lower means the time signature is 11/8.
The reason for dividing the numerator into several numbers is to get beaming and tied notes displayed correctly automatically. This does not affect the metronome or anything else, only beams and ties. For more information on beaming, see "Handling beaming" on page 545.
If "For Grouping Only" is not activated, the numerator will show all the numbers entered. If it is activated, it will show the sum of the numbers entered, as for "simple" time signatures.
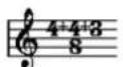
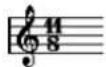
"For Grouping Only" off and on
Note that Cubase tries to preserve the denominator when you insert a composite signature with "For Grouping Only" activated. This means that if you have a 4/4 time signature, and change it to a composite value (3+3+2 eighths for example), the time signature will still be displayed as 4/4 instead of 8/8.
Setting the time signature on the Transport panel
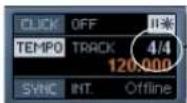
-The time signature on the Transport panel
You can also set the time signature directly on the Transport panel. Please note that you cannot create composite time signatures from the Transport panel.
Setting the time signature using the signature track/Tempo Track Editor
You can also add, edit and delete time signatures using the signature track or the Tempo Track Editor (see the chapter "Editing tempo and signature" on page 401).
Please note:
- The score always shows the time signature events set in the signature track/Tempo Track Editor, regardless of whether or not the Tempo button is activated. Likewise, any time signatures you create in the Score Editor are shown in the signature track/Tempo Track Editor.
- You cannot create composite time signatures using the signature track/Tempo Track Editor.
Editing the clef
On the clef context menu
When you right-click on a clef symbol, a context menu with a list of all available clefs is opened. This menu also contains the following options:
■ Display Clef Changes as Small Symbols
If you activate this option and insert a clef change in the score, the clef will be displayed with a smaller symbol.
- Warnings for new Clefs at Line Breaks
If you activate this option and insert a new clef at a line break, the Clef change symbol will be inserted in the last bar before the staff break.
When this is deactivated, the symbol will be inserted in the first bar of the next staff line.
- Hide
If you select this function, the clef will be hidden.
■ Properties
If you select this function, the Edit Clef dialog is opened.
In the Edit clef dialog
- Double-click on the current clef.
A dialog appears.
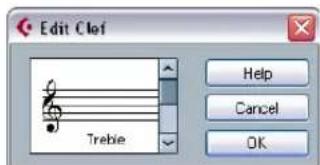
text_image
Edit Clof Trebie Help Cancel OKDouble-clicking on a clef brings up the Edit Clef dialog.
- Use the scroll bar to select a clef.
This does not work if Auto Clef is activated on the Score Settings–Staff page, see below.
- Repeat the steps above for all staves in the system.
On the Score Settings-Staff page
- Click on a staff to make it the active staff.
- On the Scores menu, select "Settings..." to open the Score Settings dialog. Select the Staff page at the top to open Main tab, showing the current settings for the active staff.
You can also double-click to the left of a staff to make it active and bring up the Score Settings dialog in one go (if this does not work, the option "Double-click on staff flips between full score/part" in the Preferences dialog (Scores-Editing page) may be activated – see "Displaying single voices or the complete score" on page 494).
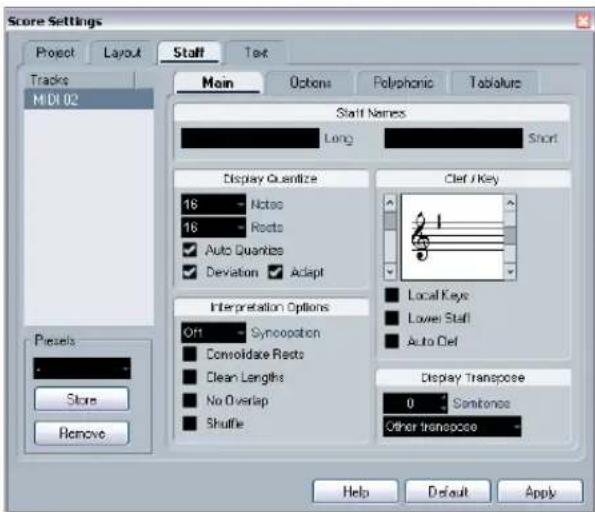
text_image
Score Settings Project Layout Staff Text Tracks MDI 02 Main Options Polyphonic Tablature Staff Names Long Short Display Quantize 16 Notes 16 Roots ✓ Auto Quantize ✓ Deviation ✓ Adapt Clerf / Key Local Keys Lower Staf Auto Cief Interpretation Options Off Syncocotion Consolidate Roots Clean Lengths No Overlap Shuffle Display Transpose 0 Sentences Other transpose Presets Store Remove Help Default Apply- In the Clef/Key section, use the scroll bar on the left to select one of the available clefs.
You will find out how to insert clef changes in the section "Inserting and editing clefs, keys or time signatures" on page 522.
- Click Apply.
→ You can select another staff in the score and make settings for it without having to close the Score Settings dialog first.
In a split system
If you have a split system (see "Split (piano) staves" on page 521 and "Strategies: How many voices do I need?" on page 535) you can of course set different clefs for the upper and lower staff.
- Open the Score Settings-Staff page.
-
Select a clef for the upper staff.
-
Activate the "Lower Staff" checkbox.
- Set a clef for the lower staff.
Using Auto Clef
Auto Clef activated on the Score Settings-Staff page.
On the Score Settings-Staff page you will also find the option Auto Clef. If this is activated, the program will automatically select a treble clef or a bass clef for the staff, depending on the range of the notes in the part.
Editing the key
On the Score Settings—Project page, on the Notation Style subpage (Keys category) you will find the option "Key Changes for the entire Project". When this option is activated, all changes made to the key will always affect every staff in the project, so that it is not possible to define different keys for different staves (other than the relative display transpositions for transposing instruments as set up in their respective Staff Settings).
Also from the Staff settings dialog, any staff (e.g. a drum staff) can be set to not show key signatures.
Therefore, when you want to edit the key, decide if you want the key change to apply to the entire project, or if you want to use different keys on different staves:
- If the key set at the beginning of the track is to be used on all staves, and if any subsequent key changes are also valid for all staves, then leave the option "Key Changes for the entire Project" activated.
- If you want to use different keys on different staves, make sure that the option "Key Changes for the entire Project" is deactivated.
On the key context menu
When you right-click on a key symbol, a context menu with a list of all available keys is opened. This menu also contains the following options:
■ Key changes for the entire Project
If this option is activated, all changes made to the key will always affect the entire project, so that it is not possible to define different keys for different staves.
- Hide
If you select this, the key will be hidden.
- Properties
If you select this, the Edit Key dialog is opened.
In the Edit Key dialog
If the current key is anything but C major/A minor (no accidentals), you can set the key directly in the score:
- Double-click on the accidentals at the beginning of a staff.
The "Edit Key" dialog opens.
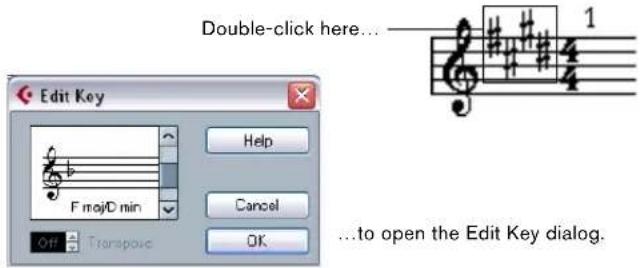
text_image
Double-click here... Edit Key Help Cancel OK ...to open the Edit Key dialog.- Use the scroll bar to select a key and click OK.
- You can also enter a Display Transpose value, see "Transposing instruments" on page 503.
On the Score Settings-Staff page
- Make the desired staff active, open the Score Settings dialog and select the Staff page.
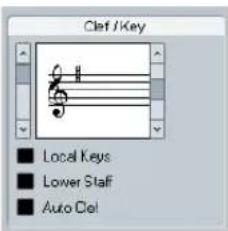
text_image
Clift / Key ■ Local Keys ■ Lower Staff ■ Auto ClalThe Clef/Key section on the Score Settings—Staff page
-
Use the right scroll bar in the Clef/Key section to select the desired key.
-
Click Apply.
- You can select other staves in the score and make settings for these, without having to close the Score Settings dialog.
Setting the key for a split system
If you have a split system with two staves (see "Split (piano) staves" on page 521 and "Strategies: How many voices do I need?" on page 535) you can set different keys for the upper and lower staff.
-
Click in the system to make one of its staves the active staff.
-
Open the Score Settings-Staff page.
-
Set a key for the upper staff.
This will automatically set the lower staff to the same key.
- If you need to set a different key for the lower staff, activate the "Lower Staff" checkbox and set a key for this.
The Lower Staff checkbox
Setting a local key
You can also set a different key for the selected staff only. This is useful for instruments like oboe and english horn that change display transpose and therefore also the key.
-
Make the desired staff active, open the Score Settings dialog and select the Staff page.
-
Activate the option "Local Keys" on the Main subpage in the Clef/Key section.
⇒ This option is only available if "Key changes for entire Project" is activated on the Score Settings–Project page, Notation style subpage (Keys category).
-
Use the scroll bar to the right to set the desired key.
-
Click Apply to set the selected key for the staff.
Transposing instruments
Scores for some instruments, for example a lot of brass instruments, are written transposed. Therefore, the Score Editor provides a Display Transpose function. With this function notes are transposed in the score without affecting the way they are played back. This allows you to record and play back a multi-staff arrangement, and still score each instrument according to its own transposition.
Setting Display Transpose
- Make the desired staff active, open the Score Settings dialog and select the Staff page.
- Select your instrument from the transpose pop-up menu at the bottom or adjust the value directly in the Semitones field.
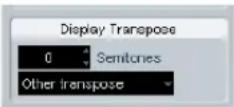
The Display Transpose section on the Score Settings-Staff page.
- Click Apply.

Display Transpose does not affect MIDI playback!
For some instruments, you may wish to set the different keys in the notation. In this case, activate the "Local Keys" option, see above.
Display Transpose in the Edit Key dialog
If you want to change the Display Transpose setting in the middle of the score, you can do this by inserting a key change (see "Inserting and editing clefs, keys or time signatures" on page 522). In the Edit Key dialog (which is opened by double-clicking a key symbol) you will find a Transpose field, in which you can enter a transposition value in semitones. This is useful if you are for example writing a saxophone part and want the player to switch from alto to tenor saxophone.
Note that you enter an absolute Display Transpose value that is used from this point on.
In other words, this setting is not relative to any Display Transpose settings you made on the Score Settings–Staff page.
Disabling Display Transpose
You can also disable Display Transpose by clicking on the "Disable Display Transpose" button on the Score Editor toolbar. This can be useful, if you work with transposing instruments and want to show the scored key and not the concert key.

Printing from the Score Editor
When you have made all necessary changes to the score display and are satisfied with the result, you can go ahead and print your score, e.g. to hand out note sheets.
Proceed as follows:
- On the Scores menu, activate "Page Mode". Printing is only possible from within Page Mode.
- Select Page Setup from the File menu and make sure all your printer settings are correct. Close the dialog.

If you change your setting for paper size, scale and margins now, the score may change its look.
- Select Print from the File menu.
- A standard Print dialog appears. Fill out the options as desired.
- Click Print.
Exporting pages as image files
You can export a section of a page or a complete page in various file formats. This allows you to import your scores into desktop publishing and drawing applications.
Selecting a section of a page for exporting
If you only want to export a part of a certain page, proceed as follows:
- Make sure you are in Page Mode.
- Select the Export tool ("Select Export Range").
The pointer turns into a crosshair. -
Drag over the section of the score you want to include. The area is indicated by a black rectangle.
-
You can adjust the size of the rectangle by clicking and dragging its handles with the Object Selection tool.
- You can move the rectangle to another position in the score by clicking and dragging.
To export the selected range, you have two possibilities:
- Double-click inside the rectangle while it is selected.
This opens the Export Scores dialog, where you can make settings for the file to be created (see below).
- Use the Export Scores function, see below.
Exporting
To export the score, proceed as follows:
- Make sure you are in Page Mode.
- Select the page you want to export.
-
Pull down the File menu, open the Export submenu and select "Export Scores...".
The Export Scores dialog appears. -
Select a picture format.
-
Specify a resolution for the file.
This determines the accuracy with which the image will be created. 300 dpi, for example, is the resolution many laser printers use for printing. If the image file will only be displayed on screen in other programs, select 72 or 96 (depending on screen resolution) and it will have the same size as it had in Cubase.
- Specify name and location for the file and click Save.
The page of the score is exported and saved as a file. It can now be imported into any program supporting the selected file format.
Working order
When you prepare a score we suggest you do things in the following order, since this will minimize the time needed if you make a mistake somewhere and need to redo a step.
- Preferably work on copies of recorded tracks.
If the parts are fairly complex you might have to change them permanently after which they will not play back as they originally did.
- If memory is short, break the score up into segments.
You might for example use the Split Loop function (on the main Edit menu) to split the parts across all tracks.
- Arrange the tracks in the Project window in the order you want them displayed in the score.
You cannot rearrange the order of systems in the Score Editor. However, you can go back and change the order in the Project window at any time.
- When opening the Score Editor, begin with the adjustments described above.
You should always begin by setting page margins, etc.
- If you have recorded music into tracks already, try adjusting the graphic display of the score much as possible without permanently editing the notes.
Use the Score Settings, Display Quantize, Grouping, etc.
- If the tracks are empty, make basic staff settings, enter the notes and then make detailed adjustments, add Display Quantize, etc.
- If needed, use polyphonic voicing to resolve overlapping notes, create piano systems, handle crossing voices, etc.
- When all this is done, decide if you need to perform “destructive” editing.
You might for example have to permanently alter the length or position of some of the recorded notes.
- Hide unwanted objects and add note-dependent and note-related symbols.
This includes accents, dynamic symbols, crescendo, slurs, lyrics, "graphic rests" etc.
- Work through the score and adjust the number of bars across the page.
- Adjust the vertical spacing between staves and grand staves.
The last two steps can be performed automatically by the program using the Auto Layout features.
- Add layout symbols like endings, page text, etc.
- Print or export the score.
- Go back and create alternative layouts, e.g. to extract voices.
Force update
If for some reason the screen is not redrawn properly (as a result of the computer's recalculation of the appearance of the page), you can select "Force Update" from the Functions submenu on the Scores menu or click the Update button on the toolbar. This forces a redraw of the whole page.

The Force Update button
Transcribing MIDI recordings
About this chapter
In this chapter you will learn:
- How to prepare your parts for score printouts.
- How to use the Display Quantize tool to handle "exceptions" in the score.
- How to resolve parts that contain mixed notes and triplets.
About transcription
This chapter assumes you have a MIDI recording that you want to transform into a printable score. However, if the parts are fairly complicated, you will probably need to perform some manual editing of the notes. Hence you will need to read the chapter "Entering and editing notes" on page 511, too!

Before starting, make sure you understand the basic principles behind the score notes/MIDI notes relationship and also what Display Quantize is, as described in the chapter "How the Score Editor works" on page 488.
Getting the parts ready
- Record the music.
You must definitely play in time with the click. - Play back to check that the music was recorded as intended.
If not, you might need to re-record or perform some editing. - Decide how much permanent alteration to the recording you can accept to make the score look good.
If the answer is "none", you should prepare your score from a copy of the track. See the section below. - Select all parts (on all tracks) that you wish to work on.
- Open the Score Editor.
- Activate Page Mode.
Strategies: Preparing parts for score printout
Below follow a few tips that you might want to refer to when preparing a score for printout:
- If a part is complex, you may have to do some “manual” editing of notes, like moving them or changing their lengths (see the chapter “Entering and editing notes” on page 511). This means that the recording will not play back exactly as it originally did. If this is a problem, we suggest you work on a copy of the recording. Use the Duplicate Track function on the Project menu to create a version of the track for scoring. Rename the track and mute the original track while you are preparing the score. You could of course also work on a copy of the entire project file.
- For reasons described in the previous chapter, quantizing the track might be a good idea. This will reduce the amount of detailed adjustments needed in the Score Editor.
- If you need to quantize, always play back your tracks afterwards to make sure timing was not disrupted due to inappropriate quantize settings. You might have to quantize some sections with one value and others with another.
- If the project contains many repetitions, it might be quicker to record just one instance of each to start with. If you then finish the score work on each section, you can assemble the entire project by working with parts in the Project window. This might save you some time since the detailed adjustments to each section have to be performed only once.
- A similar approach can also be used when you create sections where several instruments play the same rhythm (a horn section, for example): Record the first instrument and make adjustments so that it looks like it should in the Score Editor. Then copy the part to the other tracks, and change the pitches of the notes using MIDI input. Finally, go through the copied parts and make fine adjustments, change display transpose settings, etc. This can be a very fast way to create polyphonic parts with complicated rhythms.
- There also may be situations when the quickest way to record a part for several instruments is simply to record it in one go, by playing the chords on your MIDI instrument. If you later want to split the recording into separate tracks or polyphonic voices, you can use the Explode function, see “The Explode function” on page 509.
Staff settings
The first thing to do after opening the Score Editor is to make initial staff settings. This is done on the Score Settings-Staff page. There are three ways to open the Score Settings dialog:
- Make the staff active, pull down the Scores menu and select "Settings...".
- Double-click on the blue rectangle to the left of the staff. Please note that when the option "Double-click on staff flips between full score/part" is activated in the Preferences dialog (Scores-Editing page), double-clicking will instead switch between display of either the whole score or the current voice. If your score shows more than one track, double-clicking will display this track and hide all others. If your score shows only one track, double-clicking will either show the layout, that contains most of the tracks or, if no multi-track layout exists, all tracks.
- Make the staff active and click the "i" button on the extended toolbar.
For this to work, make sure no notes or symbols are selected – otherwise, clicking the "i" button may open a dialog with settings for the selected object instead.
Click the Staff button to open the Score Settings—Staff page. The Staff page shows the current settings for the staff on four tabs. For detailed information on the Staff Settings page, see the chapter "Staff settings" on page 524.
Situations which require additional techniques
The notes may not always appear in the score as you expect them to, initially. This is because there are a number of situations which require special techniques and settings. Below you can find a list of some of these and where to find more information about handling them:
- Notes at the same position are considered to be part of a chord. To get independent voicing (e.g. notes with different stem directions), such as for vocal material, you need to use the polyphonic voicing feature, see the chapter "Polyphonic voicing" on page 531.

Without and with polyphonic voicing
- If two notes beginning at the same position have different lengths, the longer one will be displayed as a number of tied notes. To avoid this, you will either have to use the No Overlap feature (see "No Overlap" on page 528) or polyphonic voicing (see "Polyphonic voicing" on page 531).
- One note will often be displayed as two notes with a tie. Please note that this is merely the way the program displays this note; only a single note is “stored”.

text_image
4 3 2 ←→ 4This single note in the Key Editor is displayed as two tied notes in the Score Editor.
- Normally the program adds ties where necessary (if a note stretches over a beat), but not always. For a “modern” notation of syncopated notes (less ties), you will need to use the Syncopation feature, see “Syncopation” on page 527.

The same note, without and with syncopation
- If you find that you want a long note to be displayed as two or more tied notes, you can achieve this with the Cut Notes tool. See “The Cut Notes tool” on page 550.
- If two notes on the same position are too close to each other or if you want their order in the part reversed, you can do this without affecting playback. See “Graphic moving of notes” on page 550.
- If a note has the wrong accidental, this can be changed. See “Accidentals and enharmonic shift” on page 542.
- Stem direction and length are automatic, but you can change them manually if you wish. See "Background: Note stems" on page 541.
- If you need a split staff (e.g. when you are scoring for piano), there are special techniques for this – see “Split (piano) staves” on page 521 and “Polyphonic voicing” on page 531.
If you run into trouble
Below you can find a few simple troubleshooting steps that will help you pinpoint other common problems:
- The note I recorded is displayed with the wrong length. For example, I recorded a sixteenth and got a quarter note. You probably have the wrong Display Quantize value set. Open the Score Settings–Staff page. If Auto Quantize is activated, deactivate it, unless you have mixed triplets and regular notes. Also check the Notes and Rests Display Quantize values. If the settings are too "coarse", change them to a smaller note value. If you for example need the program to display an eighth note rest, Rests Display Quantize must be set to "8" or a smaller value (please refer to the chapter "How the Score Editor works" on page 488). If No Overlap is activated, you might want to turn it off.
- There is a pause after a note that I don't want. You probably added a note with the wrong note value. Either lengthen the note (physically or graphically – see “Changing the length of notes” on page 520) or delete the one you have (see “Deleting notes” on page 523) and add a new one with the correct note value. If this problem occurs a lot in your score, try selecting a larger Rests Display Quantize value (see “Using Rests as Display Quantize setting” on page 491).
- There is no pause after the note although there should be one.
Either the note is too long (use Clean Lengths or change the current note's length), or Rests Display Quantize is set to too high a value. Open the Score Settings–Staff page and lower it.
- The note has an accidental when it shouldn't, or it doesn't when it should.
Maybe the note is simply of the wrong pitch? Click on it (using the Object Selection tool) and look at the info line (if this is not shown, see "The info line" on page 497). Move it to the correct pitch (see "Editing pitches of individual notes" on page 519). If this is not the reason, maybe you have the wrong key set? And finally, you can also use enharmonic shifting (see "Accidentals and enharmonic shift" on page 542). - Notes are not grouped under beams the way I want it. Normally the program groups eighth notes, sixteenths etc. under beams. This can be deactivated. There is also detailed control of which notes are grouped under a beam. This is described in the section "Handling beaming" on page 545.
Inserting Display Quantize changes
Some situations may require different staff settings on different sections of the track. The staff settings are valid for the entire track, but you can insert changes wherever you like:
- Select the Display Quantize tool from the toolbar or context menu.
The Display Quantize tool on the toolbar
- The Display Quantize dialog opens.
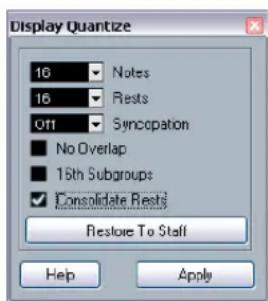
text_image
Display Quantize 16 Notes 16 Rests Off Syncopation No Overlap 15th Subgroups Consolidate Rests Restore To Staff Help Apply- Activate the flags you need and set the quantize values as desired.
For details, see "Display Quantize and interpretation Options" on page 526. Additional hints below. - If you want to restore the settings to the ones used on the Score Settings—Staff page, click the Restore To Staff button.
- Move the mouse over the staff where you want to insert a new Display Quantize value.
Use the mouse position box to find the exact location. The vertical position is of no relevance as long as you click somewhere in the staff.
- Click the mouse button to insert a Display Quantize event.
The new quantize settings are now inserted into the staff at the position where you clicked. The settings are valid until a new change is inserted.
- If you are using polyphonic voices (see "Polyphonic voicing" on page 531), you can insert a Display Quantize event for all voices by pressing [Alt]/[Option] and clicking with the tool.
If the option "Display Quantize Tool affects all Voices" is activated on the Score Settings–Project page (Notation Style subpage, in the Miscellaneous category), Display Quantize events will always be inserted for all voices.
Viewing and editing Display Quantize changes
If you activate the "Quantize" checkbox on the display filter bar (see "Showing and hiding "invisible" elements" on page 498), a marker will be shown under the staff for each Display Quantize setting you have entered with the tool.
This allows you to edit your settings in the following ways:
- To edit a Display Quantize change event, double-click on its marker.
This opens the Display Quantize dialog again – adjust the settings and click Apply. - If the Display Quantize dialog is already open, you can select any Display Quantize change event, adjust its settings in the dialog and click Apply.
- To remove a Display Quantize change, either click its marker to select it and press [Backspace] or [Delete], or click on it with the Erase tool.
Strategies: Adding Display Quantize changes
Very often, the score will be fine except for a few bars somewhere. To remedy the problem, insert two Display Quantize changes with the tool (one at the beginning of the section, one after it to restore to the current staff settings).
If you have mixed triplets and straight notes, it can be tempting to insert many Display Quantize changes. Before you do so, try the Auto Quantize options and their additional settings. See "If your music contains mixed straight notes and triplets" on page 527.
The Explode function
This function allows you to "split" the notes on a staff into separate tracks. It is also possible to use this function to convert a polyphonic staff into polyphonic voices – this is described in the section "Automatically – the Explode function" on page 536.
You may want to create a copy of the original track first, since this will be changed by the operation.
- Pull down the Scores menu, open the Functions submenu and select "Explode...".
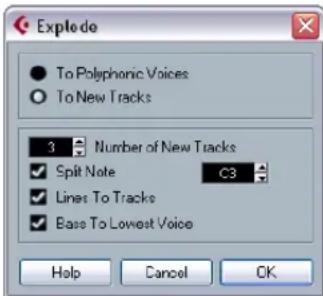
text_image
Explode To Polyphonic Voices To New Tracks 3 Number of New Tracks Split Note C3 Lines To Tracks Base To Lowest Voice Help Cancel OKThe Explode dialog, set to create tracks.
- Make sure "To New tracks" is selected at the top of the dialog.
- Enter the desired number of new tracks.
Note that this is the number of new tracks to be created! For example, if you have a three-part polyphonic section and want to split this into three separate tracks, you must specify 2 new tracks, since the original track will hold one of the parts. - Use the options in the bottom section to set up the criteria for the split.
Choose from the following options:
Option Description
| Split Note Use this to move all notes below a certain pitch to another track. When this is selected, it is pointless to specify more than 1 new track. | |
| Lines To tracks Use this when you want all musical “lines” to be put on one track each. The notes with the highest pitch will remain on the original track, the notes with the second highest pitch will be put on the first new track, and so on. | |
| Bass To Lowest Voice | When this is activated, the lowest notes will always end up on the lowest track. |
5. Click OK.
A number of new tracks are now added to the score and the Project window.
Using "Scores Notes To MIDI"
For very complicated scores, there may be situations where you have tweaked the parameters for Display Quantize and Interpretation as best you can, and you still cannot get the score exactly as you want it. Perhaps one setting works fine in one section of the track and another is needed for another section.
In such a case, "Scores Notes To MIDI" will help you out. It changes the lengths and position of some or all the MIDI notes in the edited parts so that they have exactly the values currently shown on screen.
- For safety, go back to the Project window and make a copy of the track.
- Open the part(s) again in the Score Editor.
If you only want some sections of your score to be "converted", make sure to only open those parts.
- Make sure the notes you want to affect are not hidden (see "Hiding/showing objects" on page 599).
- Select "Scores Notes To MIDI" from the Functions submenu on the Scores menu.
The notes are now "converted".
- Make whatever adjustments are needed to make the score read as intended.
Now that the notes have the exact lengths and positions that were previously only displayed, you can probably deactivate many of the options on the Score Settings–Staff page and delete Display Quantize settings, etc.
If you find the operation did not give you the result you were after, you can undo your settings or go back to the original track, make a copy of that, and start over.
Entering and editing notes
About this chapter
In this chapter you will learn:
- How to make various settings for how notes are displayed.
- How to enter notes.
- How to use tools and settings to make the score as legible as possible.
- How to set up a split (piano) staff.
- How to work with multiple staves.
Score settings
Before you start entering notes, you need to make some initial staff settings in addition to those described in the chapter "The basics" on page 493. To understand why and how these settings and the note data in the score interact, please read the chapter "How the Score Editor works" on page 488.
There are three ways to open the Score Settings dialog:
- Make the staff active, pull down the Scores menu and select "Settings...".
- Double-click on the blue rectangle to the left of the staff. Please note that when the option "Double-click on staff flips between full score/part" is activated in the Preferences dialog (Scores-Editing page), double-clicking will instead switch between display of either the whole score or the current voice. If your score shows more than one track, double-clicking will display this track and hide all others. If your score shows only one track, double-clicking will either show the layout that contains most of the tracks or, if no multi-track layout exists, all tracks.
- Make the staff active and click the "i" button on the extended toolbar.
For this to work, make sure no notes or symbols are selected – otherwise, clicking the "i" button may open a dialog with settings for the selected object instead.
The Score Settings dialog shows the current settings for the active staff. For detailed information on the Staff Settings dialog, see the chapter “Staff settings” on page 524.
Applying settings and selecting other staves
To make settings for another staff, simply make it active in the score (by clicking anywhere in the staff or by using the up/down arrow keys on the computer keyboard).
Always click Apply before making another staff active
- otherwise your settings will be lost!
Staff presets
When you want to reuse settings made for one track in other tracks, you will save some time by creating a staff preset (see "Working with staff presets" on page 525).
There are a number of staff presets available, set up to suit various instruments, etc.
The presets are accessed via the Presets pop-up menu on the Score Settings—Staff page, or from the Staff context menu, opened by right-clicking on the blue rectangle to the left of the staff. Use them as they are, or as starting points for your own settings.
Suggested initial settings
When you start out entering notes, your staff settings should make your score display the notes as entered. We suggest the following:
| Option Description | |
| Display Quantize: Notes 64 | |
| Display Quantize: Rests 64 | |
| Auto Quantize Activated | |
| Syncopation Off | |
| Consolidate Rests Off | |
| Clean Lengths Off | |
| No Overlap Off | |
| Shuffle Off | |
| Key As required | |
| Clef As required | |
| Auto Clef | Activate this if you want the program to select a treble or bass clef automatically. |
| Display Transpose 0 | |
| Options tab settings | As is |
| Polyphonic tab settings | Staff Mode: Single (for split staves, see "Split (piano) staves" on page 521) |
| Tablature tab settings | Tablature Mode deactivated |
⇒ It is very important that you understand how the Display Quantize values for notes and rests interact with the score. If you select too large a notes/rests value, the notes you “click in” may not appear as intended.
Please read "How the Score Editor works" on page 488. If you have mixed triplets and straight notes, see "Display Quantize and interpretation Options" on page 526.
Note values and positions
Two of the most important settings for entering notes (and the ones you will change most often) are the length of the note (the note value) and the minimum spacing between notes (the Quantize value).
Selecting a note value for input
You can choose the length for entering notes as follows:
- By clicking the note symbols on the extended toolbar. You can select any note value from 1/1 to 1/64 and activate/deactivate the dotted and triplet options by clicking the two buttons to the right.


The selected note value is displayed in the Length Quantize field on the toolbar and also reflected by the cursor shape of the Insert Note tool.
- By selecting an option from the Length Quantize pop-up menu on the toolbar.
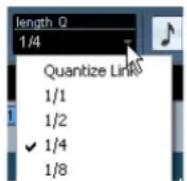
- By assigning key commands to the different length values.
This is done in the Key Commands dialog on the File menu, in the category "Set Insert Length".
About unusual note values
Not all note values can be selected directly, for example double dotted notes. Such notes are created by changing the length of the note after you have entered it (see "Changing the length of notes" on page 520), by gluing notes together (see "Lengthening a note by gluing two notes together" on page 520) or by using the Display Length feature.
Selecting a Quantize value
When you move the mouse pointer over the score, you will see that the position box on the toolbar tracks your movement and shows the current position in bars, beats, sixteenth notes and ticks.
Positioning on screen is controlled by the current Quantize value. If you set this to 1/8, for example, you can only insert and move notes to eighth note positions, at quarter notes, at half bars or at bar positions. It is a good strategy to set the Quantize value to the smallest note value in the project. This does not stop you from inputting notes at "coarser" positions. However, if you set the Quantize value to too small a note value, it is easier to make mistakes.
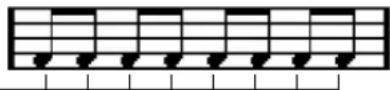
With the Quantize value set to 1/8, you can only input notes at eighth note positions.
The Quantize value is set on the toolbar in the Quantize pop-up menu:
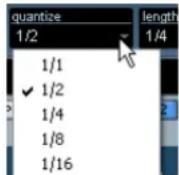
- You can also assign key commands to the different Quantize values.
This is done in the Key Commands dialog on the File menu, under the category "MIDI Quantize".
- Just like in the other MIDI editors, you can use the Quantize Setup dialog to create other Quantize values, irregular grids, etc.
However, this is not often used when inputting score notes.
The "mouse position box"
While you will most often use the graphical position in the actual score to determine where the notes go, there are instances when you will want to verify the position numerically using the mouse position box:
The upper field shows the pitch according to the vertical position of the pointer in a staff. The lower field shows the "musical position" in bars, beats, sixteenth notes and ticks:
- The relation between beats and bars depends on the time signature: In 4/4 there are 4 beats to a bar. In 8/8 there are eight, in 6/8 there are six, etc.
- The third number is the sixteenth note within the beat. Again, the time signature determines the number of sixteenth notes to each beat. In a quarter note based time signature (4/4, 2/4, etc.) there are four sixteenth notes to each beat, in an eighth note based time signature (3/8, 4/8, etc.), there are two sixteenth notes, etc.
- The last value is in ticks, with 480 ticks per quarter note (and thus 120 ticks per sixteenth note).
The figures below show some note positions and their corresponding position values:
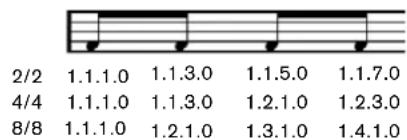
text_image
2/2 1.1.1.0 1.1.3.0 1.1.5.0 1.1.7.0 4/4 1.1.1.0 1.1.3.0 1.2.1.0 1.2.3.0 8/8 1.1.1.0 1.2.1.0 1.3.1.0 1.4.1.0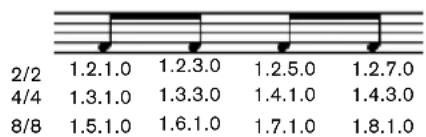
text_image
2/2 1.2.1.0 1.2.3.0 1.2.5.0 1.2.7.0 4/4 1.3.1.0 1.3.3.0 1.4.1.0 1.4.3.0 8/8 1.5.1.0 1.6.1.0 1.7.1.0 1.8.1.0Eighth note positions
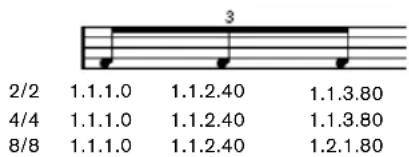
Eighth note triplet positions
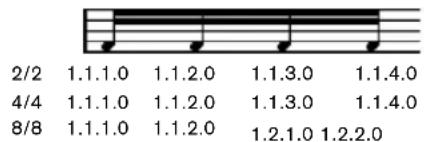
text_image
2/2 1.1.1.0 1.1.2.0 1.1.3.0 1.1.4.0 4/4 1.1.1.0 1.1.2.0 1.1.3.0 1.1.4.0 8/8 1.1.1.0 1.1.2.0 1.2.1.0 1.2.2.0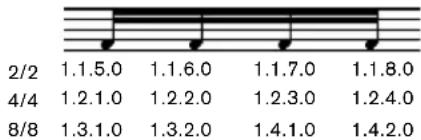
text_image
2/2 1.1.5.0 1.1.6.0 1.1.7.0 1.1.8.0 4/4 1.2.1.0 1.2.2.0 1.2.3.0 1.2.4.0 8/8 1.3.1.0 1.3.2.0 1.4.1.0 1.4.2.0Sixteenth note positions
Adding and editing notes
Entering notes using the computer keyboard
A quick and easy way to enter notes, without having to decide on the pitch, position and note value first is using the computer keyboard. To enter a note, proceed as follows:
- On the toolbar, activate the "Keyboard Input" button. Now you can enter notes using the computer keyboard.
The "Keyboard Input" button
2. Hold down [Alt]/[Option].
A note with the note value specified in the extended toolbar appears. By default, the insert position is the first position of the bar and the pitch is C3. You can however change this using the computer keyboard.
- You can change the pitch of the note by using the up and down arrow keys.
To transpose the note in octave steps, use the Page Up/Page Down keys.
- To change the insert position of the note, use the right and left arrow keys.
Note that for position changes, the Quantize value is taken into account.
- To change the length of the note, hold down [Shift] and use the right and left arrow keys.
This changes the note value step by step, passing from one Quantize value to the next.
3. To insert the note, press [Return].
The note with the specified pitch and note value is inserted at the selected position and the insert position for the next note changes according to the Quantize value. If you press [Shift]-[Return], the insert position does not change, allowing you to enter chords.
Entering notes with the mouse
To add a note to the score, proceed as follows:
- Make the staff active.
Notes are always inserted on the active staff. See "The active staff" on page 496 for details. - Select the desired note value.
See "Selecting a note value for input" on page 513. - If you select the note value by clicking on a symbol on the extended toolbar, the Insert Note tool is automatically selected – otherwise select the Insert Note tool from the toolbar or context menu.
- Select a Quantize value.
The Quantize value determines the spacing between notes. If you set Quantize to 1/1 you will only be able to add notes at downbeats. If you set Quantize to 1/8 you will be able to add notes at eighth note positions, etc.
-
Click in the staff and keep the mouse button pressed. The Insert Note tool changes into a note symbol (showing the note exactly as it would be inserted in the score).
-
Move the mouse horizontally to find the correct position.
-
Move the mouse vertically to find the correct pitch.
Accidentals are shown beside the note to indicate the current pitch.
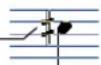
If the option "Show Note Info by the Mouse" is activated in the Preferences dialog (Scores-Editing page), the position and pitch of the note will also be shown in a "tooltip" next to the pointer while you're dragging.
If you find that screen redraws are too sluggish, you may want to deactivate this option.
- Release the mouse button.
The note appears in the score.

If you activate the option "Animate Note Cursor" in the Preferences dialog (Scores-Editing page), you do not need to keep the mouse button pressed to see the note as it would be inserted in the score.
Adding more notes
- If you want the next note to have a different length value, select the corresponding note symbol.
-
If you need finer positioning, or if the current value is too fine, change the Quantize value.
-
Move the mouse to the desired position, and click.
Notes input at the same position are automatically interpreted as chords, see below.
About the interpretation
The notes may not always appear in the score as you initially expect them to. This is because there are a number of situations that require special techniques and settings. Below you can find a list of some of these and where to find more information about handling them:
- Notes at the same position are considered parts of a chord. To get independent voicing (for example notes with different stem directions), such as for vocal material, you need to use polyphonic voicing – see “Polyphonic voicing” on page 531.
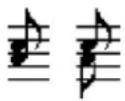
Without and with polyphonic voicing
- If two notes beginning at the same position have different lengths, the longer will be displayed as a number of tied notes. To avoid this, you will either have to use the "No Overlap" feature (see "No Overlap" on page 528) or polyphonic voicing (see "Polyphonic voicing" on page 531).
- One note will often be displayed as two notes with a tie. This is only how the program displays the note, there is still only a single note “stored”.
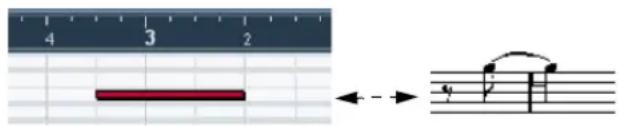
text_image
4 3 2 ←→This single note in the Key Editor is displayed as two tied notes in the Score Editor.
- Generally the program adds ties where necessary (if a note stretches over a beat), but not always. For more “modern” notation of syncopated notes (less ties), you need to use the syncopation feature, see “Syncopation” on page 527.

The same note, without and with Syncopation
- If you want a long note to be displayed as two (or more) tied notes, you can use the Cut Notes tool for this.
-
If a note has the wrong accidental, this can be changed. See "Accidentals and enharmonic shift" on page 542.
-
If two notes on the same position are too close to each other or if you want their “graphical order” in the score reversed, you can do this without affecting playback. See “Graphic moving of notes” on page 550.
- Stem direction and length is normally automatic, but you can set it yourself. See "Background: Note stems" on page 541.
- If you are scoring for piano and therefore (or for other reasons) need a split staff, there are special techniques for this, see "Split (piano) staves" on page 521 and "Polyphonic voicing" on page 531.
Selecting notes
In the operations described in the rest of this chapter, you will often work on selected notes. The text below describes how to select notes:
By clicking
To select a note, click on the note head with the Object Selection tool. The note head turns red to indicate that it is selected.
- To select more notes, hold down [Shift] and click on them.

text_image
Selected notes- To deselect notes, hold down [Shift] and click on them again.
- If you hold down [Shift] and double-click on a note, this note and all the following notes in the same staff are selected.
Using a selection rectangle
- Click in an empty area in the score with the Object Selection tool and keep the mouse button pressed.
- Drag the mouse pointer to create a selection rectangle. You can drag to select notes on several voices or staves if you wish.
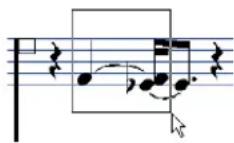
- Release the mouse button.
All notes with note heads inside the rectangle are selected.
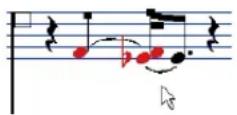
If you want to deselect one or more of the notes, hold down [Shift] and click on them.
Using the keyboard
By default, you can step through (and select) the notes in the staff using the left and right arrow keys. If you press [Shift], you can select a series of notes as you step through them.
- If you are working with polyphonic voices, you will step through the notes on the current track, i.e. in a split system, you will step through the staves.
- If you want to use other keys for selecting notes, you can customize the settings in the Key Commands dialog (in the Navigate category).
Selecting tied notes
Longer notes are often displayed in the score as one note with a tie. If you intend to select the entire note (e.g. for deleting), you should select the first note, not the tied note.
There is a setting for this in the Preferences dialog (Scores-Editing page): If you activate "Tied notes selected as Single Units", the whole note will be selected, even if you click on one of the tied notes.
Deselecting everything
To deselect everything, simply click in an empty area of the score with the Object Selection tool.
Moving notes
In the following, you will find descriptions of the various methods to move notes, as well as related features.
Moving by dragging
Proceed as follows:
- Set the Quantize value.
The Quantize value will restrict your movement in time. You cannot place notes on positions smaller than the Quantize value (see "Selecting a Quantize value" on page 513). - Select the note(s) you want to move.
You can select notes across several staves if you wish. - Click one of the selected notes and drag it to a new position.
The horizontal movement of the note is "magnetically attracted" to the current Quantize value. The mouse position box on the toolbar shows what the new position and pitch for the dragged note will be.
If the option "Show Note Info by the Mouse" is activated in the Preferences dialog (Scores-Editing page), the position and pitch of the note will also be shown in a "tooltip" next to the pointer while you're dragging.
If you find that screen redraws are too sluggish, you may want to deactivate this option.
- Release the mouse button.
The notes appear at their new position.
- If you press [Ctrl]/[Command] and drag, movement is restricted to vertical or horizontal (depending on the direction in which you drag).
- If you move notes vertically and the option "Keep moved notes within key" is activated in the Preferences dialog (Scores–Editing page), the notes will be transposed within the current key only.
Moving by using key commands
Instead of dragging the note with the mouse, you can assign key commands for this:
- The corresponding commands can be found in the Nudge category in the Key Commands dialog. They are listed as "Left", "Right", "Top" and "Bottom".
- When moving notes to the left or right using key commands, the notes will be moved in steps according to the Quantize value.
The keys assigned for up/down nudging will transpose notes in semitone steps.
Moving across staves – the Lock button
If you are editing several tracks, you may want to move notes from one staff to another. Proceed as follows:
- Make the desired Quantize settings and select the notes.
Make sure to only select notes on the same staff. - Make sure the "L" (Lock) button on the extended toolbar is deactivated.
The "L" (Lock) button is deactivated.
When this button is activated, you cannot move notes and other objects from one staff to another, which is handy if you need to transpose a note very high or low, for example.
3. Click on one of the notes and drag them to the new system.
The active staff rectangle indicates on which staff the dragged note(s) will appear.
The Snap mode
The notes you move (or copy), will snap to positions defined by the note length and Quantize values. Using the Snap Type pop-up menu on the Score Editor toolbar you can set the Snap mode used when moving or copying notes:
- When using the "Grid" mode, notes you move (or copy) always snap to exact grid positions.
- When using the "Grid Relative" mode, a note with a certain position relative to a grid line always maintains that relative position to the grid when moved (or copied).
Acoustic Feedback
Acoustic Feedback is activated.
To hear the pitch of the note while moving, activate the speaker icon (Acoustic Feedback) on the toolbar.
About the lock layers
When you are moving and editing notes in the score, you might accidentally move other objects nearby. To avoid this, assign different types of objects to different "lock layers" (up to three) and instruct Cubase to "lock" one or two of these layers, making them unmovable.
There are two ways to set up which type of object should belong to which lock layer:
- Open the Preferences dialog from the File menu and select the Scores–Event Layer page.
This page lets you adjust the layer setting for each object type.
- Right-click one of the layer buttons (1-2-3) on the extended toolbar to bring up a pop-up menu, showing which object types are associated with that layer.
A checkmark for an object type means it belongs to that layer. If no checkmark is shown, you can select the object type on the menu to move it to that layer.
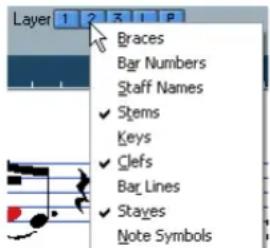
text_image
Layer 1 2 3 4 P Braces Bar Numbers Staff Names Stems Keys Clefs Bar Lines Stayes Note SymbolsTo lock a layer, click on its Lock Layer button, so that it is not blue. You can only select or move objects whose Layer button is activated. For more detailed information, see "Using the lock layers" on page 565.
There are also "L" and "P" layer buttons, for the layout and project layer.
Clicking these buttons allows you to lock the layout and project layers (see "Background: The different layers" on page 556).
Duplicating notes
To duplicate notes in the score, proceed as follows:
- Set the Quantize value and select the desired notes. You can duplicate any block of notes, even on several systems at the same time. The Snap mode applies, see "The Snap mode" on page 517.
- Press [Alt]/[Option] and drag the duplicate notes to their new position.
- If you want to restrict movements to one direction, press [Ctrl]/[Command].
This works just as for moving, as described above.
- If you want to restrict the pitch to inside the current key only, make sure the option "Keep moved notes within key" is activated in the Preferences dialog (Scores–Editing page).
- Release the mouse button to insert the notes.
- [Alt]/[Option] is the default modifier key for copying/duplicating. If you like, you can change this in the Preferences dialog (Editing–Tool Modifiers page).
The entry for this is found in the Drag & Drop category ("Copy").
⇒ You can also move or copy whole bars by dragging the bar handles, see "Moving and duplicating with the bar handles" on page 568.
Cut, copy and paste
- To cut notes, select them and choose Cut from the Edit menu (or use a key command, by default [Ctrl]/[Command]-[X]).
The notes are now removed from the score and put on the clipboard.
- To copy notes, select them and choose Copy from the Edit menu (or use a key command, by default [Ctrl]/[Command]-[C]).
A copy of the notes is made, and put on the clipboard. The original notes remain where they were.
The clipboard can only hold one set of notes. If you cut or copy and then cut or copy again, the notes copied to the clipboard first are lost.
Notes that you have put on the clipboard by cutting or copying can be inserted into the score again as follows:
- Activate the desired staff.
- Move the project cursor to the position where you want the first note to appear.
This is done by holding down [Alt]/[Option] and [Shift] and clicking at the desired position in the score.
- Select Paste from the Edit menu (or use a key command, by default [Ctrl]/[Command]-[V]).
The notes are pasted in, beginning at the project cursor. If the cut or copied notes come from different staves, they will also be inserted on different staves. Otherwise, the notes are inserted on the active staff. They keep the pitch and relative positions they had when you cut or copied them.
Editing pitches of individual notes
By dragging
The simplest way to edit the pitch of a note is to drag it up or down. Remember to hold down [Ctrl]/[Command] to avoid moving the note sideways as well.
- If the option "Keep moved notes within key" is activated in the Preferences dialog (Scores-Editing page), notes are transposed within the current key only.
- To avoid accidentally moving the note into another staff, activate the Lock button (see "Moving across staves – the Lock button" on page 517).
- When you drag the mouse up and down before releasing the button, accidentals are shown beside the note to indicate the current pitch.
This helps you verify the vertical position for the note.
Using the Transpose palette
The Transpose palette on the toolbar contains buttons for transposing the selected notes up or down in steps of one semitone or one octave.
- To show the Transpose palette, right-click the toolbar and activate "Transpose Palette" on the context menu.
Using key commands
Instead of transposing the note with the mouse, you can assign key commands for this.
- The commands for which you can assign key commands are found in the Nudge category in the Key Commands dialog.
The commands are listed as "Top" (transpose one semitone up) and "Bottom" (transpose one semitone down).
Using the info line
You can use the info line to change the pitches (and other properties) of one or several notes numerically, see "The info line" on page 32.
- If you have several notes selected and change the pitch on the info line, the changes are relative.
That is, all selected notes are transposed by an equal amount.
- If you have several notes selected, hold down [Ctrl]/[Command] and change the pitch on the info line, the changes are absolute.
That is, all selected notes are set to the same pitch.
Via MIDI
Proceed as follows:
- On the toolbar, activate the MIDI Input button and the Record Pitch button to the right.
If you also want to change the note-on and/or note-off velocity of the notes via MIDI, this can be done by also activating the corresponding velocity buttons, as described in the chapter "The MIDI editors" on page 337
To edit notes via MIDI (pitches only), set up the buttons like this.
2. Select the first note you want to edit.
3. Press a key on your MIDI keyboard.
The note takes on the pitch of the key you pressed. The program then selects the next note.
4. To change the pitch of the next selected note, simply press the desired key.
In this manner you can change the pitches of as many notes as you wish, by simply pressing the relevant keys. You can also use key commands (by default the left and right arrow key) to pass from one note to the other. For example, if you make a mistake, you can step back to the previous note by pressing the left arrow key.
Changing the length of notes
When it comes to note lengths, the Score Editor is special in that it does not necessarily display the notes with their actual length. Depending on the situation, you may want to change the "physical length" of the notes or the "display length".
Changing the "physical" length
This will change the actual length of the notes. The change will be audible when you play back the music.

Remember that the appearance of notes and rests in the score is determined by the Display Quantize settings on the Score Settings-Staff page. Depending on the Notes and Rests values, notes may be displayed as if they were longer than they really are (see "Display Quantize" on page 490).
By using the Insert Note tool
Proceed as follows:
- Select the note symbol with the desired note value on the extended toolbar.
- Hold down [Alt]/[Option] and click on the note(s) you wish to set to this length.

text_image
Musical notation showing a treble clef with a note and a downward arrow indicating motion or direction.By using the extended toolbar
Using the extended toolbar is another quick way to set a number of notes to the same length:
- Select the notes you want to change.
- Hold down [Ctrl]/[Command] and click on one of the note icons on the extended toolbar. All the selected notes now get the note value on which you clicked.
By using the info line
You can also edit length values numerically on the info line. The same rules apply as when changing the pitch of notes (see "Using the info line" on page 519).
Lengthening a note by gluing two notes together
You can create unusual note length values by gluing notes of the same pitch together.
- Insert the notes you want to glue together (if they do not already exist).
- Select the Glue tool from the toolbar or context menu.
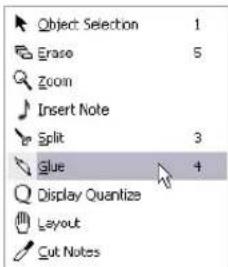
text_image
Object Selection Erase Zoom Insert Note Split glue Display Quantize Layout Cut NotesThe Glue tool on the context menu
- Click on the first note.
This note will now be tied to the first following note with the same pitch.

Make sure you have Display Quantize values for notes and rests that allow you to display notes of the created note value.
- If you want to glue more notes, click again.
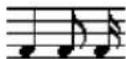
By gluing together a quarter note, an eighth note and a sixteenth note...
...you get a double dotted quarter note.
Changing the display length
If you want to change the displayed length of notes without affecting how they play back, the first thing to try is to adjust Display Quantize, either for the whole staff or for a separate section, using the Display Quantize tool (see "Inserting Display Quantize changes" on page 508).
But you can also make display length adjustments to individual notes in the Set Note Info dialog:
-
Double-click on the note. The Set Note Info dialog opens.
-
Locate the "Length" setting.
By default, this is set to "Auto", which means that the note is displayed according to its actual length (and the Display Quantize settings).
-
Double-click in the value field and enter a new length value (displayed in bars, beats, sixteenth notes and ticks). To set the display length to "Auto" again, scroll the value down to zero.
-
Click Apply and close the dialog.
The note is now displayed according to its display length setting. However, the Display Quantize settings still apply!
Splitting a note in two
If you have two notes strung together by a tie, and click on the "tied" note head with the Split tool, the note is divided into two, with the length of the "main" and the tied note, respectively.
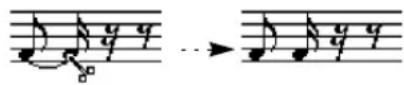
Before and after splitting a tied note
Working with the Display Quantize tool
There are instances when you will want different staff settings for different sections of the track. The settings on the Score Settings–Staff page are valid for the entire track, but by using the Display Quantize tool you are able to insert changes and exceptions wherever you like. This is described in detail in the section "Inserting Display Quantize changes" on page 508.
Split (piano) staves
Setting up the split staff
Proceed as follows:
- Make a staff active.
- Open the Score Settings–Staff page for the staff and select the Polyphonic tab.
-
From the Staff Mode pop-up menu, select Split.
-
Set the Splitpoint value to a suitable note.
All notes below this note value will be put on the lower clef, all above will be put on the upper clef.
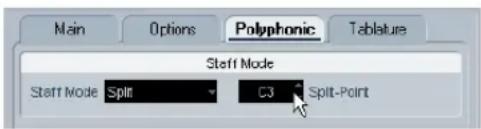
text_image
Main Options Polyphonic Tablature Steff Mode Start Mode Split C3 Split-PointSplit mode selected.
- If the default piano clef settings for the upper and lower staff are not what you want, you can adjust these settings now (or you can make key and clef adjustments directly in the score, see “Setting key, clef and time signature” on page 499).
- Make whatever additional staff settings you need. These will apply to both the upper and lower staves of the split system.
- Click Apply.
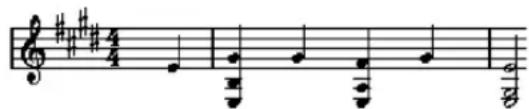
text_image
#μ#4 4/4 #μ #1/4 #1/4Before and after setting a split at C3
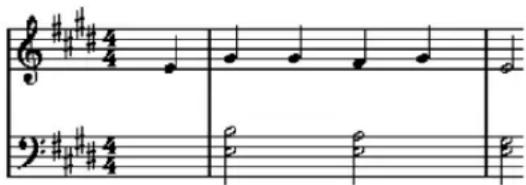
text_image
Musical score snippet with treble and bass clefs, showing notes and articulation marksChanging the splitpoint
Proceed as follows:
- Open the Score Settings–Staff page for the system you are working on.
- Select the Polyphonic tab.
- Change the Splitpoint value.
- Click Apply.
Now, some notes that were previously on the lower staff will be on the upper, or vice versa.
Strategies: Multiple staves
As described above, when you have parts on several tracks selected in the Project window, these will be put on one staff each, when you open the Score Editor. This allows you to work on several staves in parallel.
Working with several staves is not much different from working with one. Below follow some guidelines that apply specifically to working with multiple staves.
Score settings—Staff page
- The settings on the Score Settings–Staff page are local to each staff. You can have the Score Settings dialog open and select each staff in turn to make settings – just remember to click Apply before selecting another staff, otherwise your changes will be lost.
- If several staves share settings, you will save some time by using staff presets. Set up the staff settings for the first staff, and save them as a preset. This preset can then be applied to any of the other staves, one at a time. See "Working with staff presets" on page 525 for details.
Selecting notes
- You can select notes from one or several staves at the same time, using any of the selection methods, see "Selecting notes" on page 516.
Adding notes
This is done just as on a single system, see “Adding and editing notes” on page 514. Please note the following:
- When you enter a note, use the mouse position box (on the toolbar) to determine the pitch. Whether it ends up on the upper or lower staff has nothing to do with where you aim with the mouse. The Splitpoint setting always decides if a note goes on the upper or lower staff. If you change the splitpoint, this will affect existing notes, see below.
- Sometimes a fixed splitpoint is not good enough. You might want to put two notes with the same pitch on different staves in different parts of the score. To achieve this you need to use polyphonic voicing, see “Polyphonic voicing” on page 531.
- You can add notes to any staff by clicking on it with the Insert Note tool. The active staff rectangle will move to the staff where you input the note.
- If you need to enter a note with a very high or low pitch, which makes it wind up on the wrong staff when you click, first enter a note with the wrong pitch, and then edit its pitch as described in the section "Editing pitches of individual notes" on page 519.
Inserting and editing clefs, keys or time signatures
It is possible to insert a change of key, clef, or time signature anywhere in the score.
Inserting a symbol on one staff
Proceed as follows:
- Open the "Clefs etc." tab in the Inspector.
This contains clef, key and time signature symbols.
text_image
Time Sign VST Expression Clefs etc. Note Symbols Dynamics Line / Trill OtherThe "Clefs etc." tab in the Inspector
- Select the symbol you wish to insert.
When you move the mouse over the score display, the pointer takes on the form of a pencil (see also "About the Pencil tool" on page 559). - Move the mouse over the staff where you want to insert a new symbol.
Use the mouse position box to find the exact location. The vertical position is of no relevance as long as you click somewhere in the staff. Time signature changes can only be inserted at the beginning of a bar. - Click the mouse button to insert the symbol.
Inserting a symbol at position 1.1.1.0 is the same as changing the staff settings which are stored in the track. Inserting anywhere else adds the change to the part.
Inserting a symbol on all staves
If you hold down [Alt]/[Option] when you insert a symbol with the Pencil tool, it will be inserted at this position on all staves currently being edited in the Score Editor.
- Time signature changes are always inserted on all tracks in the score.
Or rather, they are inserted on the signature track, which affects all tracks.
- For key changes, Display Transpose is taken into account.
This allows you to set all staves to a new key and the staves set to Display Transpose will still show the correct key after the key change.
If some of the staves are bracketed (straight brackets only, as set up on the Score Settings-Layout page, see "Adding brackets and braces" on page 605), inserting a symbol for one of these staves will insert it for all other staves within the bracket.
Staves outside the bracket will not be affected.
Editing keys, clefs and time signatures
If you double-click on a symbol, a dialog appears allowing you to change the settings for it.
If you hold down [Alt]/[Option] when double-clicking, all symbols at the same position are changed accordingly. With key signatures, the Display Transpose value is taken into account as described above.
- On the Score Settings–Project page (Notation sub-page), you will find several options for how key, clef and time signature changes should be displayed.
You can also adjust the automatic spacing between these symbols in the Spacings subpage. See the dialog help for details.
Moving clefs
Clefs inserted into the score have an effect on how notes are displayed. If you for example insert a bass clef in the middle of a treble staff, the staff switches to show bass pitches. Therefore it is very important where you insert the clef.
If you want to move the clef graphically, without disturbing the relation between the clef and the notes, proceed as follows:
- Select the Layout tool.
Note that this tool is available in Page Mode only.
The Layout tool on the context menu
- Click on the clef and drag it to the desired position. Now the clef is moved, but the score is still interpreted as if it remained in its original position.
When you insert a clef change in the score, you can decide whether this should have the same size as the first (default) clef symbol or whether it should be displayed with a smaller symbol. Simply right-click the symbol and activate or deactivate "Display Clef Changes as small Symbols".
When "Warnings for new Clefs at Line Breaks" is activated on the Clef context menu and you inserted a clef change at a line break in the score, the Clef change symbol will be inserted in the last bar before the staff break. When this is deactivated, the symbol will be inserted in the first bar of the next staff line.
Deleting notes
Notes can be deleted as follows:
Using the Erase tool
Proceed as follows:
- Select the Erase tool from the toolbar or context menu.
The Erase tool on the context menu
- One at a time, click on the note(s) you want to erase, or enclose them in a selection rectangle, and click on any of the notes.
Using the Delete menu option or the keyboard
Proceed as follows:
- Select the notes you want to delete.
- Select Delete from the Edit menu, or press [Delete] or [Backspace] on the computer keyboard.
Staff settings
About this chapter
In this chapter you will learn:
- How to make staff settings.
- How to work with staff presets.
Staff settings
Below follows a run-through of all staff settings, more detailed information about the ones already described and references to other places in the manual for some options.
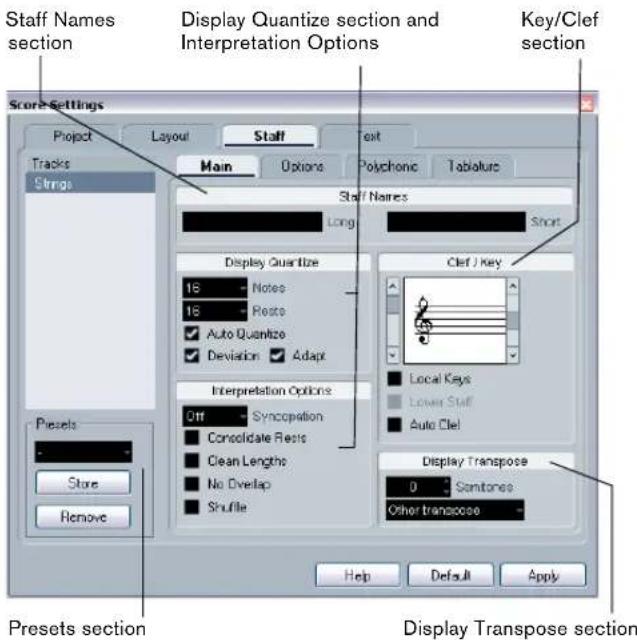
text_image
Staff Names section Display Quantize section and Interpretation Options Key/Clef section Score Settings Project Layout Staff Text Tracks Main Options Polychonic Tablature Strings Staff Names Long Short Display Quantize 16 Notes 16 Rests Auto Quantize Deviation Adapt Clef J Key Interpretation Options Off Synccipation Consolidate Rests Clean Lengths No Dwellap Shuffle Local Keys Lower Staff Auto Clel Display Transpose 0 Semitones Other Transpose Presets Store Remove Help Default Apply Presets section Display Transpose sectionThe Staff page has four tabs – here, the Main tab is selected.
Making settings
- Open the Score Settings-Staff page.
- With the dialog open, make the desired staff active. Click anywhere in a staff to make it active, or use the up and down arrow keys to step from staff to staff.
- Select the desired tab and make all necessary settings. The settings for regular staves are found on the Main and Options tab, the Polyphonic tab contains settings for split systems and polyphonic voices while the Tablature tab lets you set up tablature scores.
- When you have made the desired settings, click Apply.
If the option "Apply closes Property Windows" is activated in the Preferences dialog (Scores-Editing page), clicking Apply will also close the dialog.
- To make settings for another staff, simply make it active in the score (by clicking anywhere in the staff or by using the up/down arrow keys on the computer keyboard). However, please note that you need to click Apply before making another staff active – otherwise your settings will be lost!.
⚠️ Staff settings can be saved in the track presets. For more information, see the chapter "Working with Track Presets" on page 288.
Working with staff presets
You will spend some time making staff settings for your scores. Staff presets allow you to reuse those settings whenever you work with a staff similar to one you have worked on before. A staff preset contains all the settings on the Score Settings–Staff page, except for the key.
- To store the current settings (including the settings on the Options tab, see below) click the Store button in the Presets section of the Staff page.
Enter a name for the preset in the name dialog that appears, and click OK. The preset will now be available on the Presets pop-up menu (in all projects).
- There are a number of staff presets available, set up to suit various instruments, etc. The presets are accessed from the Presets pop-up menu on the Score Settings—Staff page, or from the staff context menu, opened by right-clicking on the blue rectangle to the left of a staff. Use them as they are, or as starting points for your own settings. Note that this loads the settings in the preset into the dialog – to apply these to a staff you must click the Apply button as usual. You can also apply staff presets directly in the score – see below.
- To remove a preset, select it from the pop-up menu and click the Remove button.
Applying a preset directly in the score
If you right-click on the blue rectangle to the left of a staff, a context menu will appear, listing all available presets. Select one to apply it to the staff.
How staff presets are stored
The staff presets are stored as individual files in the Presets–Staff Presets folder within the Cubase program folder. The presets are available for selection in any project you create or edit.
Staff names

These fields allow you to specify a "long" and a "short" name for the staff. The long name is shown for the very first system for this staff in the score (at the start of the project), while the short name is shown for the remaining systems.
- Whether the names should be shown at all is set on the Score Settings–Layout page (see “Staff names” on page 588).
- If you only want the "long name" to be shown (i.e. if you do not want a name shown for each system in the score), simply delete the short name.
- If the option "Show Long Staff Names on new Pages" is activated in the "Staff Names" section of the Score Settings—Project page, the long name will be shown at the beginning of each new page.
- You can also specify two separate subnames by double-clicking the staff name and entering them in the upper and lower text entry fields in the dialog that appears. Note that this will only be displayed correctly, if you are in Page Mode and if "Show Track Names to Left of staff" is activated on the Notation Style subpage (Staff Names category) of the Score Settings–Project page.
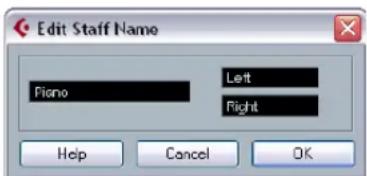
text_image
Edit Staff Name Fiano Left Right Help Cancel OKThe Edit Staff Name dialog
Key and clef
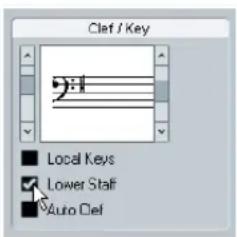
text_image
Clift / Key ■ Local Keys ■ Lower Staff ■ Auto DelThe basic key and clef settings are described in detail in the section "Setting key, clef and time signature" on page 499. There is also a Lower Staff checkbox which is only used in conjunction with split (piano) staves and polyphonic voicing (see "In a split system" on page 501).
- If you want to set a different key symbol, e.g. when scoring for french horn, activate the "Local Keys" option.
Display Quantize and interpretation Options
These two sections of the dialog contain a number of settings used to determine how the notes should be interpreted. While these settings are more critical to making MIDI recorded music appear as legible as possible it is still important to have them set correctly when entering notes using the mouse. Below you will find descriptions of the settings – for further details, see “Strategies: Adding Display Quantize changes” on page 509.
There are “fixed” Display Quantize values plus an “Auto” option which should only be used when your music contains mixed straight notes and triplets. For background information about Display Quantize, see “Display Quantize” on page 490.
Display Quantize values
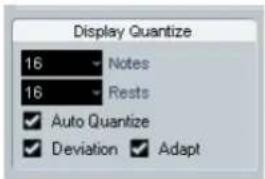
text_image
Display Quantize 16 Notes 16 Rests ✓ Auto Quantize ✓ Deviation ✓ AdaptNotes and Rests
- Generally, the Notes value should be set to a value equal to, or smaller than, the "smallest note position" you want to be shown in the score.
- The Rests value should be set to a value equal to, or smaller than, the smallest note value (length) you want to be displayed for a single note, positioned on a beat.
- If the score contains only triplets, or mostly triplets, select one of the Triplet options.
Auto Quantize
- If the project contains no triplets or only triplets, deactivate this option.
- If the project contains mixed triplets and straight notes, activate this option (see below).
Deviation and Adapt
- When Deviation is activated, triplets/straight notes will be detected even if they are not exactly "on the beat". However, if you know your triplets/straight notes are perfectly recorded (quantized or entered by hand), deactivate this option.
- When Adapt is activated, the program "guesses" that when one triplet is found, there are probably more triplets surrounding it. Activate this option if not all of your triplets are detected.
If your music only contains "straight" notes or triplets
1. Specify a Notes value.
For example, if you have notes on odd sixteenth note positions, the Notes value should be set to 16 (sixteenth notes). The "T" values on the pop-up are for triplets.
2. Specify a Rests value.
For example, if you want a single short note on a beat (quarter note position) to be displayed as a quarter note, set the Rests value to 4 (quarter notes).
- Deactivate the Auto Quantize option.
- Set all the Interpretation Options.
These are described in detail below. -
Examine the score.
See "Inserting Display Quantize changes" on page 508. -
If necessary, use the Display Quantize tool to insert "exceptions" to the staff settings.
If your music contains mixed straight notes and triplets
- Examine the score and decide if it mainly contains triplets or mainly "straight" notes.
- Set the Notes value accordingly.
If the score is mainly triplets, select the smallest triplet note position used in the score. If it is mainly straight notes, select the smallest "ordinary" note position. - Set the Rests value as described above.
- Activate the Auto Quantize option.
- Activate the Deviation ("Dev.") and Adapt flags if you need them.
Interpretation Options
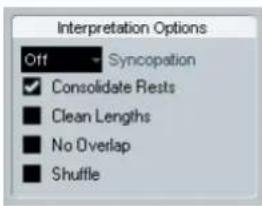
text_image
Interpretation Options Off Syncopation ✓ Consolidate Rests ■ Clean Lengths ■ No Overlap ■ ShuffleSyncopation
Activate Syncopation when the program adds more ties to notes crossing beats and bar lines than you prefer. The following options are available:
Option Description
Relax When Syncopation is "relaxed", the program will apply syncopation in a number of common cases.
Full Syncopation is on.
Off Syncopation is off, with no exceptions.
For a "modern" notation of syncopated notes, activate Syncopation.
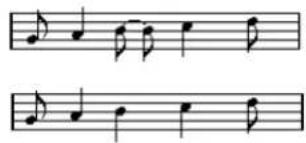
text_image
Musical notation with two identical measures: first notes equal to 4/4 time, second notes equal to 4/4 time.Without and with Syncopation
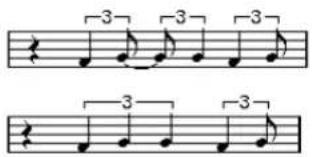
text_image
-3-3-3 -3-3-3Again, without and with Syncopation
Note that you can insert "exceptions" to the Syncopation setting on the Score Settings-Staff page, by using the Display Quantize tool. You can also create tied notes in various combinations by using the Cut Notes tool.
Consolidate Rests
Activate this when you want small consecutive rests joined into one (an eight note rest and a sixteenth note rest joined to a dotted eighth note rest for example).
Consolidate Rests deactivated and activated
Clean Lengths
When this option is activated, the program interprets the length of your notes differently. A note's length (in the display only) might be extended to the beginning of the next note or to the next Rests "position" for Display Quantize. An example:
- If a note is too short, you may get a rest just after it.
- When Clean Lengths is activated, the rest will disappear.
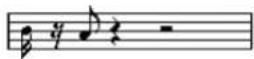
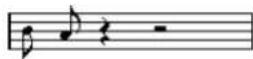
A slightly short eighth note without and with "Clean Lengths".
If using Clean Lengths does not help in a particular situation, you will have to manually resize the offending note(s) or use the Display Quantize tool (see "Inserting Display Quantize changes" on page 508).
No Overlap
When notes starting at the same position have different lengths, the program tends to add more ties than you may want. This can be avoided by using No Overlap.
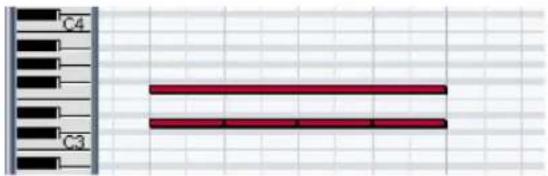
text_image
C4 C3This recording in the Key Editor...

...will be displayed like this when No Overlap is deactivated...
...and like this when No Overlap is activated.
You can insert "exceptions" to the No Overlap setting on the Score Settings—Staff page, by using the Display Quantize tool.

Please note that there may be situations when neither of these alternatives is ideal. If you run into such a situation, it can probably be resolved by using polyphonic voices, see "Polyphonic voicing" on page 531.
Shuffle
In jazz it is very common to score a shuffled beat as straight notes, simply to make it more legible.
When the Shuffle flag is activated, the program searches for eighth note or sixteenth note pairs where the second note is played late (with a "swing feel" or as the third note in a triplet). Such pairs are displayed as regular eighth or sixteenth notes instead of triplet-based figures.
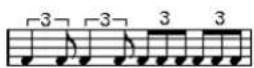
Without and with Shuffle
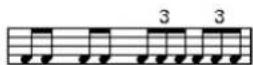
Display Transpose
This is used when preparing parts for instruments that are not scored at the actual concert key. For example, if you want the note C3 to be played by an alto sax, you have to score it as an A3 – nine semitones up. Luckily, the Display Transpose setting takes care of this for you:
- Use the pop-up menu to select the instrument for which you're scoring.
- If the pop-up menu does not list your instrument, you can set the desired transposition with the Semitones value field.
⇒ The Display Transpose setting does not affect play-back or the actual pitch of the notes – it only changes how they are displayed and printed.
You can also insert Display Transpose changes anywhere in the score, by inserting a key change symbol and using the Transpose setting in the Edit Key/Clef dialog (see "Display Transpose in the Edit Key dialog" on page 503).
- On the Score Settings–Project page ("Chord Symbols" subpage), deactivate the option "Use Display Transpose" if you do not want the chord symbols to be affected by the Display Transpose setting (see "Chord Symbols" on page 579).
- You can disable Display Transpose by clicking on the button "Disable Display Transpose" in the toolbar of the Score Editor.
For more information, see "Transposing instruments" on page 503.
The Options tab
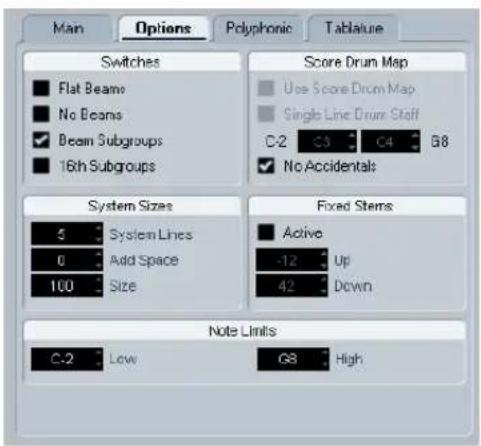
text_image
Main Options Polyphonic Tablaize Switches Flat Beams No Beams Beam Subgroups 16th Subgroups Score Drum Map Use Score Drum Map Single Line Drum Staff C-2 C3 C4 G8 No Accidentals System Sizes 5 System Lines 0 Add Space 100 Size Fixed Stems Active -12 Up 42 Down Note Limits C-2 Low G8 HighClicking the Options tab in the dialog brings up another page with additional settings. Below follows a brief description of these, with references to more detailed explanations.
Switches
Option Description
Flat Beams Activate this when you want the beams over notes to be flat (as opposed to slanted). See "Beam appearance and slant settings" on page 548.
No Beams Activate this when you do not want any beaming at all on the staff (for example for vocal scoring). See "Turning beaming on/off" on page 545.
Beam Subgroups Use this when you want sixteenth notes displayed under a beam to be divided into groups of four notes. See "Handling beam groups" on page 548.
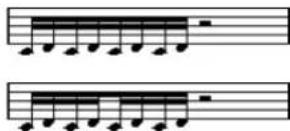
16th Subgroups Use this when you want even smaller subgroups of sixteenth notes. This setting has no effect if Beam Subgroups is deactivated.
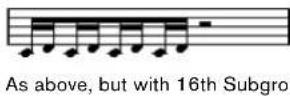
System Sizes
This section allows you to set the number of system lines and to control spacing between the lines:
Option Description
System Lines The number of lines in a system. For regular scoring, this should be set to 5.
Add Space Allows you to increase or decrease the space between the lines in a system.
Size Allows you to set a size for the systems, as a percentage (with 100% being the default value). In effect, this setting scales the score vertically.
Score Drum Map
These settings are described in the chapter "Scoring for drums" on page 609.
Fixed Stems
Activate this if you want all note stems to end at the same vertical position. This feature is perhaps most often used when scoring for drums (see “Setting up a staff for drum scoring” on page 612).

text_image
Musical notation staff with treble and bass clefs, showing notes and rests in 4/4 time signatureA drum pattern with Fixed Stem length activated
The Up and Down parameters determine which position (relative to the top of the staff) should be used for up and down stems, respectively. The graphical display helps you get your settings right.
Note Limits
Use the Low and High fields to specify a note range. In the active staff, any notes outside this range will be displayed in a different color. When writing a score for a specific instrument, this makes it easy to find notes that are outside of this instrument's note range.
If the option "Hide Notes beyond Limits" is activated in the Preferences dialog (Scores-Editing page), any notes outside the Note Limits range will be hidden.
The Polyphonic tab
This is where you activate and set up split (piano) systems or polyphonic voices (several independent score lines in the same staves). These settings are described in the chapter "Polyphonic voicing" on page 531.
The Tablature tab
This tab contains settings for creating tablature scores. The settings are described in the chapter "Creating tablature" on page 613.
Polyphonic voicing
About this chapter
In this chapter you will learn:
- How to decide when to use polyphonic voicing.
- How to set up voices.
- How to automatically convert your score to polyphonic voicing.
- How to enter and move notes into voices.
Background: Polyphonic voicing
Polyphonic voicing allows you to resolve a number of situations impossible to score properly otherwise:
- Notes starting at the same position, but with different lengths. Without polyphonic voicing you get unnecessary amounts of ties.
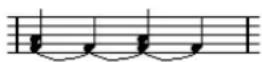
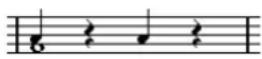
Without and with polyphonic voicing
- Vocal scoring and similar. Without polyphonic voicing, all notes starting at the same position are considered parts of a chord. With polyphonic voicing you can give each voice a stem direction, you can have individual rest handling for each voice etc.
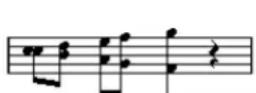
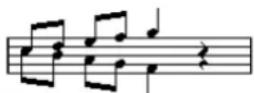
Without and with polyphonic voicing
- Complicated piano systems. Without polyphonic voicing, you have to resort to a fixed split note setting to decide which notes go on which clef. With polyphonic voicing, the splitpoint can be "floating". The program can even automatically put a bass line on the lower clef for you.
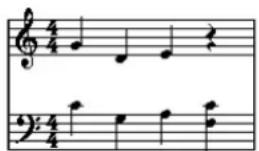
text_image
Musical notation with treble and bass clefs, showing notes and rests in 4/4 time signature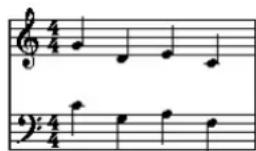
text_image
Musical notation snippet showing treble and bass clefs with notes and rests in 4/4 time signatureWith a split system and with polyphonic voicing
How voices are created
Cubase allows for up to eight voices. The first thing you do is to set them up. This includes "telling" the program which voices belong to the upper clef and which belong to the lower, how you want rests displayed for each voice, etc.
The second thing you do is to move or enter notes into the voices. If you have a recording done already, the program can do much of this work for you, automatically. You might then want to fine tune by moving one or more notes into another voice, or you might want to add notes to a certain voice. See “Adding and editing notes” on page 514.

Each voice is polyphonic. In other words, one voice can contain chords.
Overlapping notes
Throughout this chapter you will encounter the term “overlapping notes”. Two notes are considered overlapping when they are on the same staff and:
- They start at the same position, but have different note values (for example whole note and a quarter note both at the beginning of a bar), or...
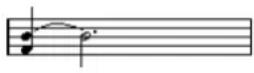
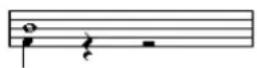
Notes starting at the same position, without and with polyphonic voices.
- One note starts before another has ended. For example a half note at the beginning of a bar and an eighth note at the second beat.
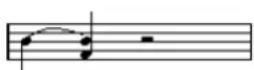
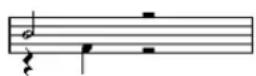
A note that starts before another has ended, without and with polyphonic voices.
Voices and MIDI channels
Internally the program organizes the notes into voices by changing their MIDI channel values. Normally you set it up so that notes with MIDI channel 3 belong to voice 3 etc. Most of the time the link between MIDI channels and voices will be totally transparent to you as a user. Sometimes you can take advantage of this relationship, as described later in this chapter.
There are also a few important things to note:
When you make a note part of a voice, you are in fact changing its MIDI channel value. However, when you change the voice's MIDI channel values in the setup dialog, this does not affect the notes' MIDI channel setting. This can lead to serious confusion, since the relationship between the notes and the voices is affected. It might even make notes disappear (the program will warn if this happens).
In other words, do not change the MIDI channels on the Polyphonic tab on the Score Settings-Staff page after you have put your notes into voices, unless you are absolutely sure of what you are doing.
When you open a part that contains notes on different MIDI channels, these notes are in fact already assigned to voices (since notes are assigned to voices using their MIDI channel setting). While this fact can be put to good use, it can also create confusion, and even disappearing notes, as described above.
Setting up the voices
To set up your score for polyphonic voicing, proceed as follows:
-
Open the Score Settings—Staff page for the staff.
-
Select the Polyphonic tab.
-
Pull down the Staff Mode pop-up and select Polyphonic.
This makes the voice list in the lower part of the dialog available. It consists of eight rows, one for each voice. They are numbered and therefore we refer to them as voices 1 to 8.
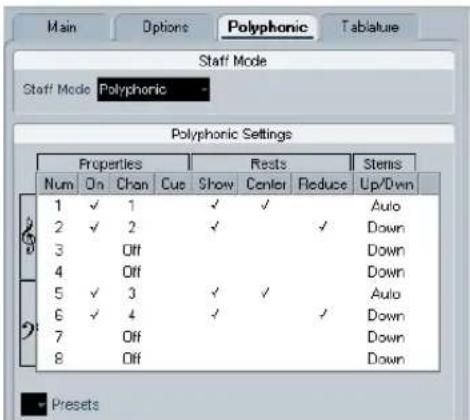
text_image
Main Options Polyphonic Tablature Staff Mode Polyphonic Polyphonic Settings Properties Rests Stems Num On Chan Cue Show Center Reduce Up/Down 1 ✓ 1 ✓ ✓ Auto 2 ✓ 2 ✓ ✓ Down 3 Off 4 Off 5 ✓ 3 ✓ ✓ Down 6 ✓ 4 ✓ ✓ Down 7 Off 8 Off PresetsDo not confuse the voice numbers with the MIDI channel setting for each voice.
- To activate a voice, click in its "On" column, so that a checkmark appears.
There are four voices on each staff, for a total of eight. If you activate one "upper" voice and one "lower" voice, you will get a split (piano) staff.
- If you have particular reasons to use specific MIDI channels, change the "Chan" settings for the voices.
The program automatically sets each voice to a different MIDI channel. If you do not have good reasons to make changes, leave the settings as they are.
⚠️ If two voices are set to the same MIDI channel, the lower will be treated as if it were turned off.
- Click in the "Rests-Show" column to decide for which voices you want rests displayed.
A checkmark indicates that rests will be shown for a voice. Often you will only want rests to be shown for one voice per staff, see below.
- If you have activated "Rests-Show" for a voice, but do not want rests to be shown in empty bars, click in the "Rests-Reduce" column for that voice.
This is especially useful for cue voices, see "Cue notes" on page 551.
- Click in the "Rests-Center" column to determine at which vertical positions rests should be shown (for voices with "Rests-Show" activated).
When this option is activated for a voice, the rest will be put in the vertical center of the staff, when it is not, the rest will get a vertical position based on the pitch of the notes.
- Decide on a stem direction for each voice, by selecting from the pop-up in the Stems column.
If you select Auto, the program will make decisions about which stems go in which direction (just as when not using polyphonic voices). You can always force stem direction for individual notes by using the Flip Stem function, see "Flipping the stem of one or several notes" on page 541.

There is a special stem feature for voice 1: If you set this to Auto, the stem direction will depend on the pitch of the note as usual – except if there are voice 2 notes in the bar, because then the voice 1 stems will automatically be set to Up!
-
If you want the notes in a voice to be smaller than regular notes, put a checkmark in the Cue column for the voice.
-
Click Apply.
The staff is changed to polyphonic voicing, and the program distributes the existing notes into voices according to their MIDI channel values.
- At this point you may want to use the Explode function to automatically move notes into the proper voices. See "Automatically – the Explode function" on page 536.
If the "Some Notes Do Not Belong To Voices..." dialog appears
When you click Apply, a warning may appear saying "Some notes do not belong to any voice and may be hidden. Correct these notes?".
This warning appears when the staff contains notes with MIDI channel settings which do not match any of the active voices.
If you click the "Correct" button, these notes will be moved to active voices. If you click "Ignore", nothing will be changed, and some notes will be hidden. However, they are not lost, they appear in all other editors and can be made to appear again in the Score Editor if you change the channel settings for the notes or voices, activate more voices, etc.
About the polyphonic presets
The Presets pop-up menu on the Polyphonic tab (below the list of voices) contains three very useful setups. Instead of making settings by hand, you can select one of the presets, saving some time. The presets are:
Variable Split
This sets up the dialog for two voices, one on each staff, each with auto stem direction. This is a good starting point for a piano staff when the fixed split option does not suffice.
Optimize two voices
In this preset, only voices 1 and 2 are activated, and set up like this:
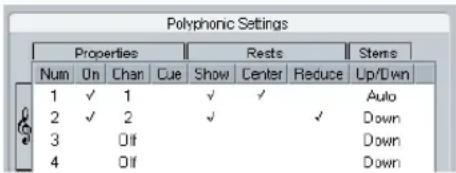
text_image
Polyphonic Settings Properties Stems Num On Chan Cue Show Center Reduce Up/Down 1 ✓ 1 ✓ ✓ Auto 2 ✓ 2 ✓ ✓ Down 3 Off Down 4 Off DownThis way the first voice behaves as in single staff mode, but if there are notes in the second voice, the stems of the first one are set to Up.
Optimize four voices
This is like “Optimize Two Voices”, but with two staves. Voices 5 and 6 are activated as well, with the same settings as voices 1 and 2. This is the recommended way to write piano music.
Strategies: How many voices do I need?
Well, it depends...
- If you are scoring for vocals, you simply need one voice for each voice, so to speak.
- Often you will use voices for resolving the problem of overlapping notes (see "Overlapping notes" on page 532), for example when scoring for piano. In this case, you will need two voices each time two notes overlap. If three notes overlap, you will need three voices. In other words you will need to check for the "worst case" (largest number of overlapping notes at a certain position) and activate that many. If you do not know how many notes you need when starting out to prepare a score, do not worry, you can add more voices later.
- Voices 1 and 2 on the upper staff and 5 and 6 on the lower are special. These handle “collisions” (notes with small intervals, accidentals that otherwise would come too close, etc.) automatically which the other voices do not. Always use these voices first!
An example: in the situation below, three voices are required. The lowest note overlaps both the "melody" and the chords, so it cannot share a voice with the chords. The chords overlap the melody, so they cannot share a voice either.
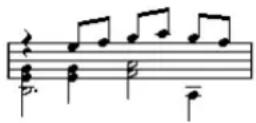
Entering notes into voices
When you add new notes, you need to decide which voice they go into:
- Make sure the extended toolbar is visible.
- Select the Object Selection tool.
- If you have a split system, check the voice Insert buttons.
These are displayed after the text "Insert" on the left side on the extended toolbar. Only the voices that are activated on the Polyphonic tab are shown. If the upper staff is active, the voice Insert buttons are numbered
1, 2, etc., otherwise they are numbered 5, 6, etc.
Insert 1 2 3
Here, three voices are available on the upper staff.
- If you need to switch the voice icons to the right "clef", click somewhere in the system you want to insert notes in.
- Select one of the voices by clicking on the corresponding button.
Any notes you enter from now on will be inserted into that voice.
Insert 1 2 3
Voice 3 activated for insertion.
- Insert the notes as usual, see "Adding and editing notes" on page 514.
- To switch to another voice, click the corresponding button.
- To insert notes into a voice on the other clef, click on that clef and then select a voice using the buttons.
Symbols and voices
Later in this manual you will learn about symbols that can be added to the score. Many of these symbols must also be put into a particular voice. See "Important! – Symbols, staves and voices" on page 558.
Checking which voice a note belongs to
When you select one single note, the corresponding voice button on the extended toolbar is selected. This allows you to quickly find out which voice a certain note is in (after you have used the Move To Voice function, for example).
- When you step through the notes using the arrow keys, you will only step through the notes in one voice at a time. This can be used as a quick way to check which notes belong to the same voice as some other note.
Moving notes between voices
Manually
To manually move notes to another voice, proceed as follows:
- Select the note(s) you want to move to a particular voice.
- Right-click on one of the notes and select "Move to Voice" from the context menu.
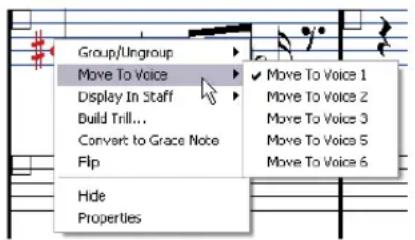
text_image
Group/Ungroup Move To Voice Display In Staff Build Trill... Convert to Grace Note Flip Hide Properties ✓ Move To Voice 1 Move To Voice 2 Move To Voice 3 Move To Voice 5 Move To Voice 6Move to Voice and the submenu it invokes.
- On the submenu, select the voice to which you want to move the notes.
Only the activated voices are available on the menu.
- You can also press [Ctrl]/[Command] and click a voice Insert button on the extended toolbar to move the selected notes to the corresponding voice.
You can also assign key commands for this in the Score Functions category of the Key Commands dialog on the File menu.
Automatically – the Explode function
The Explode function distributes notes, either onto new tracks (see "The Explode function" on page 509) or into polyphonic voices:
- Pull down the Scores menu and select "Explode..." from the Functions submenu.
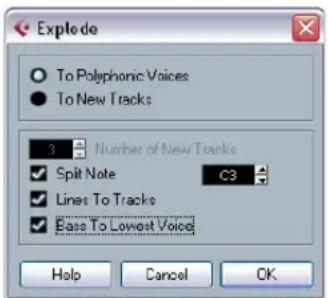
text_image
Explode To Polyphonic Voices To New Tracks 3 Number of New Tracks Split Note C3 Lines To Tracks Ease To Lowest Voice Help Cancel OKThe Explode dialog, set to create polyphonic voices.
- Make sure "To Polyphonic Voices" is selected at the top of the dialog.
- Use the options in the lower half of the dialog to set up the criteria for the split.
Choose from the following options:
Option Description
Split Note Use this to move all notes below a certain pitch to another voice.
Lines To Tracks Use this when you want all musical "lines" to be put in one voice each. The notes with the highest pitch will go to the first voice, the notes with the second highest pitch will go to the second, and so on.
Bass To Lowest Voice When this is activated, the lowest notes will always end up in the lowest voice.
4. Click OK.
The notes are distributed to different voices.
Alternative ways of handling voices
Below we suggest further “advanced” ways of putting notes into voices. This is based on the relation between voices and MIDI channels, so please make sure you understand how this connection works.
- You can use the Logical Editor (see the chapter “The Logical Editor, Transformer and Input Transformer” on page 380) to put notes into voices, based on other more complex criteria, like for example their pitch and length. This is done by setting up the Logical Editor so that the notes that meet the criteria get their MIDI channel changed to that of their voice.
- When you enter notes using step input you can change the MIDI channel on your input device and directly enter notes into separate voices.
- You can play back each voice on a different MIDI channel, simply by setting the track to Any. This can be used as a convenient way of “proof-hearing” each voice separately.
- You can use the Input Transformer to assign a certain key range to a MIDI channel, and thereby automatically put notes into voices when recording.
- For brass and vocals, you might record each voice on its own track, and use the "Merge All Staves" function to automatically copy each recording to a separate voice on a new track (see "Automatic polyphonic voicing – Merge All Staves" on page 539).
- When you have assigned parts to voices, you can use the Extract Voices function to create one track out of each voice (see "Converting voices to tracks – Extract Voices" on page 539).
Handling rests
With polyphonic voices, you often get more rest symbols than desired.
- If a voice does not need any rests at all, you can deactivate rests separately for this voice on the Polyphonic tab on the Score Settings—Staff page.
- If you only need rests from one voice on a staff, activate Rests–Center for that voice (this is done in the same dialog). If two or more voices have rests, deactivate Rests–Center. The program then automatically makes sure the rests do not “collide” in the score, by adjusting their vertical position.
- To avoid having several rests displayed in empty bars, you can activate the Rests–Reduce option for all voices (that have rests) except one. This option causes the program to hide rests in empty bars.
- You can use the Hide feature (see "Hiding/showing objects" on page 599) to totally remove individual superfluous rests from the score.
- You can use the Object Selection tool to manually move rests up/down or sideways to adjust the "picture".
- If needed you can add "rest symbols" (rests that do not affect the playback data in any way) by using the symbols.
Voices and Display Quantize
When you insert Display Quantize changes (see "Inserting Display Quantize changes" on page 508), you can either apply the settings to all voices (by [Alt]/[Option]-clicking with the tool) or to the current voice only.

If "Display Quantize tool affects all Voices" is activated on the "Notation Style" subpage (Miscellaneous category) of the Score Settings-Project page, the Display Quantize settings will always affect all voices (even if you do not press [Alt]/[Option] and click).
Making Display Quantize settings for one single voice allows you to do two things:
- Make each voice have its own Display Quantize settings by inserting a Display Quantize event for each voice, at the beginning of the staff. This will then be valid for the entire staff, until another Display Quantize event is inserted.
- Insert Display Quantize "exceptions" anywhere in the score, independently for each voice.
Proceed as follows:
- Make sure the option "Display Quantize tool affects all Voices" is deactivated.
- Select the voice for which you wish to insert a Display Quantize event.
This is done by clicking at the corresponding voice button on the extended toolbar as described above, or by selecting a note that belongs to this voice.
- Select the Display Quantize tool.

text_image
Split 3 Glue 4 DisplayQuantize Layout Cut Notes Select Export Range- Click at the position you want to insert the event. The Display Quantize dialog appears.
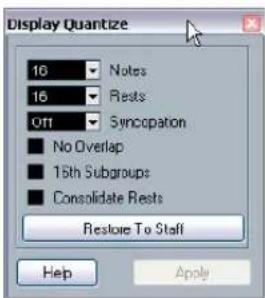
text_image
Display Quantize 10 Notes 16 Rests OTT Syncopation No Overlap 15th Subgroups Consolidate Rests Restore To Staff Help Apply- Fill out the dialog as described in the section "Display Quantize and interpretation Options" on page 526.
- Click Apply.
Creating crossed voicings
Often, for example in vocal scoring, you will have crossed voicings on one system. You can of course move notes manually into voices to get the stem direction and other note properties right, but there is a quicker way. Let's explain how to do this by example. Without using polyphonic voicing, you have entered this:
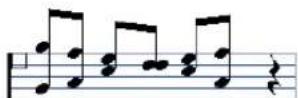
- Open the Score Settings-Staff page and select the Polyphonic tab.
- From the Staff Mode pop-up menu, select Polyphonic.
- Activate voice 1 and 2 only, and make settings for them as in the picture below.
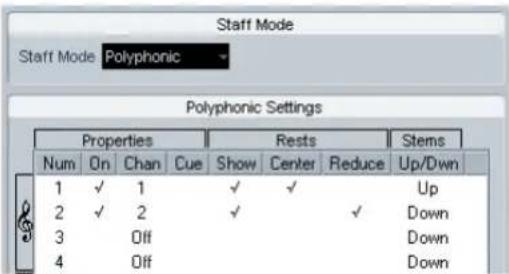
text_image
Staff Mode Staff Mode Polyphonic Polyphonic Settings Properties Rests Stems Num On Chan Cue Show Center Reduce Up/Down 1 ✓ 1 ✓ ✓ Up 2 ✓ 2 ✓ ✓ Down 3 Off 4 Off Down4. Click Apply.
The staff is in Polyphonic staff mode, but all notes are still in the same voice.
-
Pull down the Scores menu and select "Explode" from the Functions submenu.
-
In the dialog that appears, select the "To Polyphonic Voices" option and activate "Lines To Tracks". Leave the other options off.
7. Click OK.
The notes have now been split in two "lines", each in a separate voice. However, from the middle of the bar, notes that are in voice 1 should be in voice 2 and vice versa.
- Select the two notes that should be moved from voice 1 to voice 2.
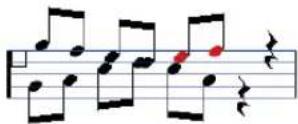
Two notes in voice 1 selected.
9. Move the notes to voice 2.
The quickest way to do this is to press [Ctrl]/[Command] and click the voice Insert [2] button on the extended toolbar.
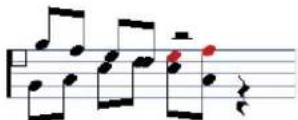
Two notes moved to the right voice.
- Select the two notes that should be moved to voice 1 and move them, too.
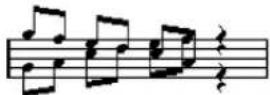
All notes in the right voices.
The voicing is now correct, as you can tell from the stem directions. However, there is still some work to do on the notes graphical positions (see "Graphic moving of notes" on page 550) and the display of stems and beams for some of the notes (see "Manual adjustment of beams" on page 549). When you have made those adjustments, the score may look like this:
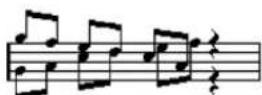
After making graphical adjustments.
Automatic polyphonic voicing – Merge All Staves
If you have already created some tracks which look and play back as they should, and you want to combine these into one track with polyphonic voices, there is a special function on the Scores menu for this:
- Open the tracks (up to four) in the Score Editor.
- Pull down the Scores menu and select "Merge All Staves" from the Functions submenu.
Now a new track is created and shown in the score. The track will have polyphonic voices activated, and the four original tracks will be assigned to one voice each (voices 1, 2, 5 and 6 will be used).
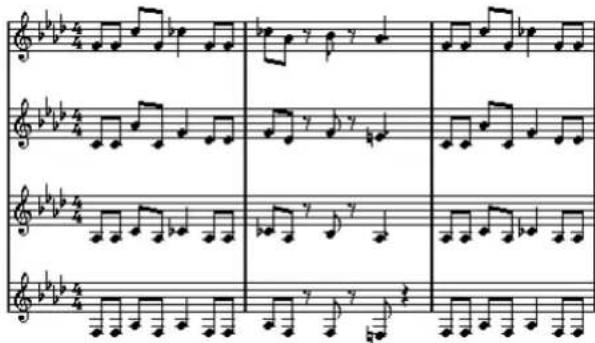
text_image
Sheet music with treble and bass clefs, showing multiple staves with notes and rests in standard Western notationBefore...
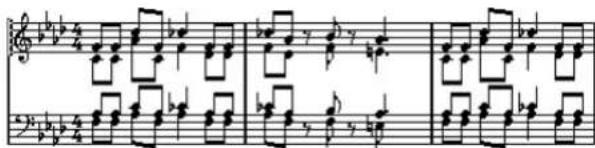
text_image
Musical score snippet with treble and bass clefs, showing notes, rests, and articulation marks...and after merging the staves
Furthermore, all non-linked symbols that belong to the staff that will become the first polyphonic voice in the merged staff will be copied. They will have the same positions as the original symbols.

When you later play back the music, you need to mute the four original tracks, or you will get double notes.
Converting voices to tracks – Extract Voices
This function does the opposite of "Merge All Staves" – it extracts polyphonic voices from an existing track and creates new tracks, one for each voice. Proceed as follows:
- Open a track containing 2 to 8 polyphonic voices in the Score Editor.
- Pull down the Scores menu and select "Extract Voices" from the Functions submenu.
A number of new tracks is created and added to the display of the Score Editor. Each track will contain the music from one polyphonic voice. If there were non-linked symbols in the original track, each new track will get a copy of these symbols.
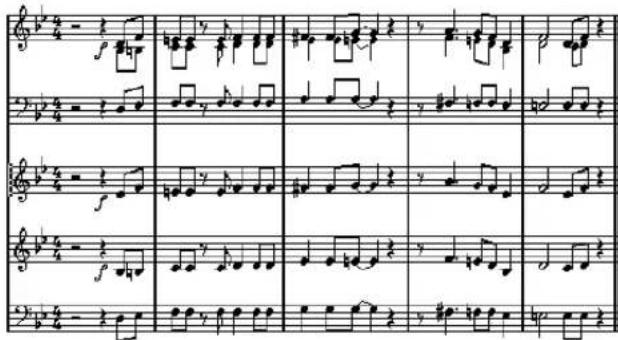
text_image
Sheet music with multiple staves and clefs, showing musical notation and dynamic markings
When you later play back the music, you need to mute the original track (the one with polyphonic voices), or you will get double notes.
7
Additional note and rest formatting
About this chapter
In this chapter you will learn:
- How to control stem direction.
- How to control beaming, and create cross-staff beaming.
- How to make detailed adjustments to note appearance.
- How to perform "graphic moving" of notes.
- How to create grace notes.
- How to create tuplets.
Background: Note stems
The direction of stems is governed by five things:
- How notes are grouped under beams.
- Any manual manipulation of beams.
- The Flip Stems function.
- How the note information is set for each note.
- How the Polyphonic tab on the Score Settings–Staff page is set up (if you use polyphonic voices).
The order of this list corresponds to the priority of the settings, i.e. on conflict, the grouping under beams has the highest priority and the settings made on the Polyphonic tab the lowest.
⚠️ If you have edited the stem length of a note and then flip it, the stem will be reset to default length.
If you have activated the "Fixed Stems" option on the Score Settings-Staff page (Options tab, see "Fixed Stems" on page 530), a lot of the automatic stem length settings are ignored. However, you can still edit the stem length and direction of individual notes.
Setting stem direction
In polyphonic voices
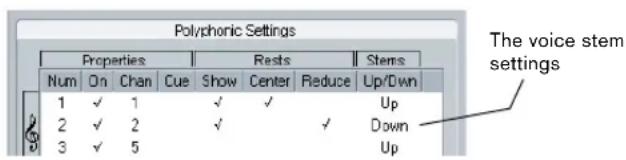
text_image
Polyphoric Settings Properties Rests Stems Num On Chan Cue Show Center Reduce Up/Down 1 ✓ 1 ✓ ✓ Up 2 ✓ 2 ✓ ✓ Down 3 ✓ 5 UpOn the Score Settings–Staff page (Polyphonic tab), the stem direction can be set separately for each voice.
Using Flip Stems
Flipping the stem of one or several notes
- Select the notes.
- Click the Flip icon on the extended toolbar.
All the stems in the selection are now flipped. Those that pointed up now point down and vice versa.
- You can also assign a key command for this. In the Key Commands dialog on the File menu, the command is called "Flip" and is found in the Score Functions category.
- You can also right-click a note or a selection of notes and select the Flip option from the context menu.
Flipping the stems of notes grouped under a beam
- Select any note in the group.
- Invoke Flip as described above. The entire group is now flipped.

text_image
Musical notation showing two staves with notes and rests, including a melodic phrase in the first sheet.Before and after the flip. No matter which note you select, the entire group is flipped.
This will not work if you have adjusted the slanting of the beam by dragging. If you have, you must first reset the beam as described in the section "Stem length" on page 542.
Independent stem direction under a beam
If you need stems attached to the same beam to go in different directions, this is achieved by dragging the beam's start and end points, as described in the section "Manual adjustment of beams" on page 549. This feature is available in Page Mode only.
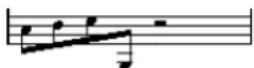
Independent stem direction under a beam
Stem direction in the Set Note Info dialog
The Set Note Info dialog can be opened by double-clicking on a note head. In its lower left corner you will find a pop-up for setting stem direction.
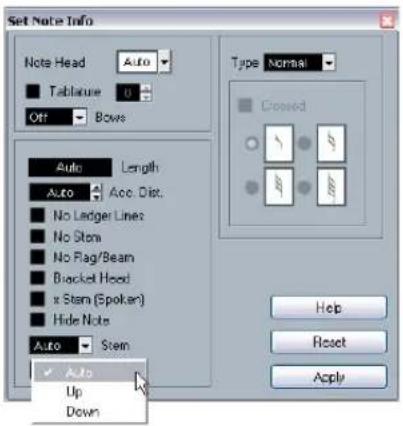
text_image
Set Note Info Note Head Tablehead Off Bows Auto Length Auto Acc. Dist. No Ledger Lines No Stem No Flag/Beam Bracket Hood x Stem (Spoken) Hide Note Auto Stem ✓ Auto Up Down Type Normal Closed Help Reset ApplyThe Set Note Info dialog with the Stem pop-up
- Setting this pop-up to Up or Down is the same as using Flip Stems, see "Using Flip Stems" on page 541.
- Setting this pop-up to Auto makes the program set the stem direction automatically.
Stem length
Adjusting stem length (Page Mode)
- Click on the end of the stem so that a handle appears.

The stem handle selected.
- If you want to change the lengths of several stems at the same time, hold down [Shift] and select these stems as well.
- Drag the stem handle (on one of the selected stems) up or down.
All selected stems will be lengthened or shortened by the same amount.
Resetting stem length and beam slants
- Make sure the display filter bar is visible (if not, click the Show Filter View button in the toolbar).
- Make sure the "Stems/Beams" checkbox is activated on the filter bar.
Now, below the notes where stems have been changed or beam slant adjusted manually, the word "Stem" will appear.
- Click on the "Stem" text to select it.
- Press [Backspace] or [Delete] to remove it.
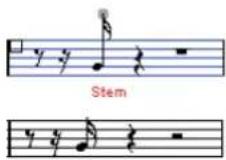
Before and after deleting the "Stem" item.
Accidentals and enharmonic shift
Making global settings
On the Score Settings—Project page (Accidentals subpage), you will find a number of options for how accidents are displayed in the score. Once set, these are valid for all tracks in the project. Proceed as follows:
- Open the Score Settings—Project page and select the Accidentals subpage from the list displayed on the left.
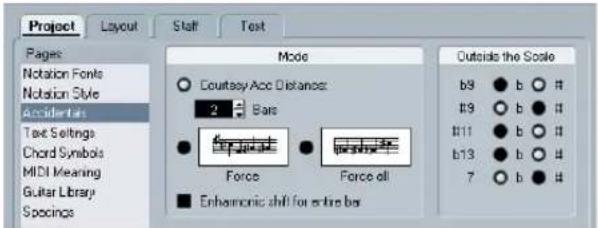
text_image
Project Layout Staff Text Pages Notation Fonts Notation Style Accidents Text Settings Chord Symbols MIDI Meaning Guitar Library Specifications Mode Courtesy Acc Distance: 2 Bars Force Force ell ■ Enharmonic shift for entire bar Outside the Scale b9 b # b3 b b # b11 b b # b13 b b # 7 b b #The Accidentals subpage on the Score Settings—Project page
Now, you can use one of the following possibilities:
- Activate the option "Courtesy Acc Distance" and enter a value in the bars field.
This determines after how many measures courtesy accidentals should be shown. If you set this to "0", notes outside the scale get accidentals and no courtesy accidentals are shown.
- Activate one of the following options by clicking on the graphics:
Option Description
Force Notes outside the scale get accidentals and accidentals are repeated even within the same bar.
Force all Every single note in the score gets an accidental.
- With the radio buttons to the right, you can decide how five of the most common intervals outside the scale should be displayed, as sharps or as flats.

When you activate the option "Accidentals for Each Note" in the Notation Style subpage of the Score Settings—Project page (in the "H.W. Henze Style" category), all notes will be displayed with accidentals (even tied notes).
Enharmonic shift
If one or several notes are not displayed with the accidents you wish, you can perform an Enharmonic Shift on them.
-
Select the notes to be shifted.
-
Click the desired option on the extended toolbar.
Option Description

Use these buttons when you want regular Enharmonic Shifting (select one option).

Use this button when you want to deactivate Enharmonic Shifting for the notes.

Use this button when you want to hide the accidental completely.

Use this button when you want to create a "help accidental" for the selected notes only.
- If the enharmonic shift should be repeated in the whole bar, activate the option "Enharmonic shift for entire bar" in the Score Settings—Project page, Accidentals subpage.
Changing the note head shape
- Select the notes for which you wish to change the note head shape.
Make sure not to select the stems, only the note heads.
- Open the Set Note Info dialog.
To do so, double-click one of the notes, click the "i" button on the extended toolbar, or right-click on a note head and select "Properties" from the context menu.
- Pull down the "Note Head" pop-up menu in the top left corner of the dialog.
The pop-up menu contains all the available head shapes and an "Auto" option, which selects the normal default shape for the note.
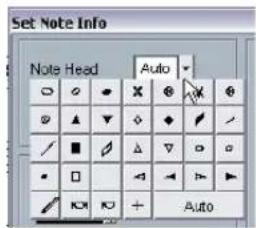
text_image
Set Note Info Note Head Auto AutoThe Note Head menu
-
Select one of the note heads.
-
Click Apply.
The settings are applied to the selected notes.
- If you like, select other notes and make settings for them.
When you are done, close the dialog by clicking its Close button.
Other note details
Each note has a number of settings in the Set Note Info dialog.
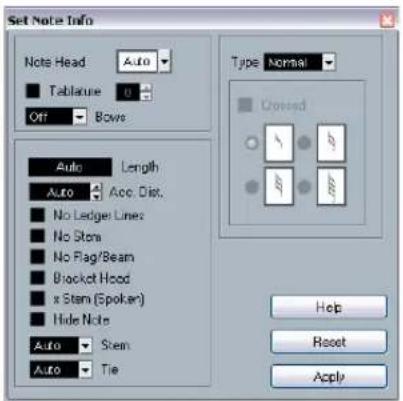
text_image
Set Note Info Note Head Auto Tablature 0 Off Bowe Auto Length Auto Acc Dist. No Ledger Lines No Stom No Flag/Beam Bracket Hood x Stem (Spoker) Hide Note Auto Stem Auto Tie Type Normal Crossed Help Reset ApplyThe Set Note Info dialog contains the following settings:
Option Description
| Note Head Used for selecting custom note head shapes (see “Changing the note head shape” on page 543). | |
| Tablature on/off and number | Used for creating or editing tablature (see “Creating tabla-ture” on page 613). This feature can be used for individual notes or together with the automatic tablature function. |
| Bows pop-up menu | Used for adding bow up/bow down articulation. When selecting “Off”, bow symbols will not be displayed for the selected notes. |

Bow up and down
Display Length This allows you to change the displayed length of notes, without affecting playback. Note that the display quantize settings still apply (see "Display Quantize values" on page 527). To reset this value to "Auto" (so that notes are displayed according to their actual length), scroll the value down to zero.
Accidental Distance Use this to specify how far from the note, horizontally, you want the accidental. The higher the number the greater the distance.
No Ledger Lines Turns off ledger lines for notes with high or low pitches.

With and without ledger lines
No Stem Hides the note stem completely
No Flag/Beam Activate this to hide the flags or beams of the selected notes.
Option Description
Bracket Head When this is activated, notes will be displayed with brackets:
Bracket Head on and off
X Stem (Spoken) When this option is activated for a note, it is displayed with an x across its stem. This is normally used to indicate spoken words.
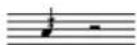
Hide Note Activating this checkbox will hide the selected notes.
Stem pop-up menu Determines the stem direction, see "Using Flip Stems" on page 541.
Tie pop-up menu Determines the direction of ties. When this is set to "Auto", the program will choose a tie direction depending on the stem direction of the tied notes.
Type pop-up menu Determines the note type. There are four options: - Normal. This is how notes usually are displayed. - Grace. When this is selected, notes will be displayed as grace notes. This is described in detail on "Grace notes" on page 552. - Cue. When this is selected, notes will be displayed as cue notes (smaller notes, often used as "guide notes" or optional lines). See "Cue notes" on page 551.
- Graphic. These are special notes, useful for example for guitar notation (pull-offs) and trills (as "help notes", indicating which notes to trill between). In both these cases the "No Stems" option could be useful. Graphic notes are not included in the "automated cutting" (see "The Cut Notes tool" on page 550). They are positioned after the notes they "belong to" (as opposed to grace notes).
Crossed Activate this option, when you want the stem to be crossed by a slanted line (to indicate that the note is a grace note).
Grace note options These options are available when Grace is selected on the Type pop-up menu. See "Grace notes" on page 552.
Coloring notes
You can assign colors to notes using the color pop-up menu on the toolbar.
- Simply select the notes for which you wish to use colors, click the Color Scheme Selector field to the right in the toolbar and pick a color from the pop-up menu.
Only the note heads will be colored. Note that the color will only be visible once the notes have been deselected.
- On the far right in the Score Editor toolbar you will find the Hide Colors button.
If you assigned colors to some or all of the notes in your score, this button allows you to switch between display of colored or uncolored notes. This may help you to find selected notes among other colored notes.
If the Preferences dialog (Scores–Colors for Additional meanings page) you can specify different colors for elements in the score in order to indicate that they are “special” in any way. You can for example choose a color for a “Moved Graphic” or a “Moved Slur”. These objects will be colored accordingly when they are moved from their default positions (see “Moving note symbols” on page 568).
- Open the Preferences dialog (Scores-Use Colors for Additional meanings).
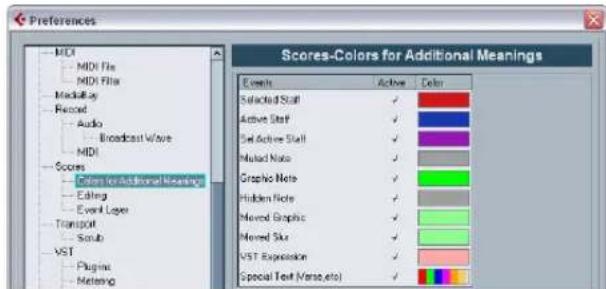
text_image
Preferences MDI MDI File MDI Filter MediaPlay Record Audio Broadcast Wave MDI Scores Colors for Additional Meanings Editing Event Layer Transport Scrub VST Plugins Metering Scores-Colors for Additional Meanings Events Active Color Selected Staff ✓ Active Staff ✓ Select Active Staff ✓ Match Note ✓ Graphic Note ✓ Hidden Note ✓ Moved Graphic ✓ Moved Skin ✓ VST Expression ✓ Special Text (Verse,etc) ✓ ✓-
Click in the Active column to activate this function for the respective element.
-
Click in the color field to the right to specify the desired color.
The colors will be included when you print the score. When color-printing a score, you will get the colors you selected for the notes. When you are using a black-and-white printer, the notes will appear in black (notes that have not been assigned a color) and different shades of grey (depending on how bright/dark a color was used for the note).
Copying settings between notes
If you have made various settings in the Set Note Info dialog for a note, and want to use these settings for other notes as well, there is an easy way to do this:
- Set up the first note as desired. This includes the settings in the Set Note Info dialog, but also any note-related symbols (such as accents, staccato, articulation, etc. – see "Adding note symbols" on page 559).
- In the score, select the note and select "Copy" from the Edit menu.
- Select the notes to which you want to copy the attributes.
- Right-click the notes to which you want to copy the attributes, and select "Paste Note Attributes" from the context menu.
The selected notes will now get the attributes of the first, copied note, but their pitches and note values will remain unchanged.
Handling beaming
Turning beaming on/off
Beaming is enabled/disabled independently for each staff.
- Click the Options tab.
- To turn off beaming, activate No Beams and click Apply.
Even if beaming is deactivated for the staff, you can put some notes under beams, as described below.
Grouping
When beaming is on, the program automatically groups notes under beams. However, there are a number of ways to determine how notes are grouped.
Using the Edit Time Signature dialog
The time signature for the score naturally affects grouping. But you can control this yourself by creating a composite time signature used only for grouping:
- Open the Edit Time Signature dialog by double-clicking the time signature symbol for the staff.
-
Set up the numerator with the grouping you desire. If you for example want eighth notes in two groups of three and one group of two, enter 3+3+2.
-
Set the denominator, if necessary.
-
Activate "For Grouping Only".
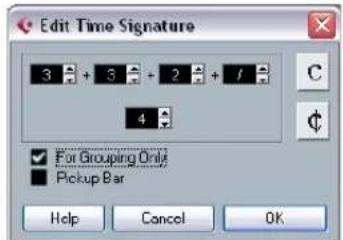
text_image
Edit Time Signature 3 + 3 + 2 + 1 4 ✓ For Grouping Only Pickup Bar Help Cancel OKThe time signature dialog with "For Grouping Only" activated
- Click OK.

Note that the "For Grouping Only" setting only affects the way the numerator is divided. Any changes you make to the "sum" of the numerator number or the denominator will result in a change of actual time signature in the project. If you need a grouping which cannot be entered in the current time signature, you will have to group notes manually, see below.
Regular grouping of a number of eighth notes or smaller ("Beam")
If the grouping the program assigns is not the one you want, you can put any selection of eighth notes or smaller under a beam:
- Select at least two notes, where you want the beam to begin and end.
All notes between these two notes will be grouped under a beam.
- Click the Group Notes icon on the extended toolbar or right-click on one of the notes to be grouped and select "Beam" from the "Group/Ungroup" submenu of the context menu.

The Group Notes icon

text_image
Musical notation showing two staves with notes, rests, and red dots indicating pitch or rhythm.Before and after grouping.
- Double-clicking on the "Grouping" text opens the Grouping dialog, allowing you to adjust the "note value" for the symbols.
Grouping quarter notes or larger under a beam ("Brillenbass")
It is also possible to use the grouping feature for notes that are not displayed with beams (quarter notes, half notes, etc.). The result are so called "Brillenbass" symbols, commonly used for indicating repeated accompaniment patterns, etc.
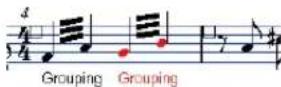
- Double-clicking on the "Grouping" text opens the Grouping dialog, allowing you to adjust the "note value" for the symbols.
Grouping notes using Repeats
To show Repeats for the grouped notes, proceed as follows:
-
Show the display filter bar in the Score Editor (by clicking the "Show Filter View" button on the toolbar) and make sure the "Grouping" checkbox is activated. Now, you will see the text "Grouping" below all groups you have created.
-
Select the desired notes.
-
Right-click on one of the notes and from the Group/Ungroup submenu, select "Repeat...".
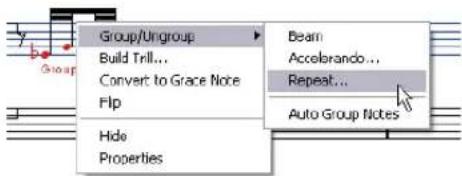
text_image
Group/Ungroup Build Trill... Convert to Grace Note Flip Hide Properties Beam Accelerando... Repeat... Auto Group Notes- In the dialog that appears, use the radio buttons to select the desired note value for the repeats.
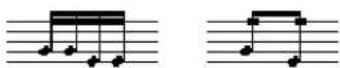
In this example, the "Repeat" feature is used to display two pairs of sixteenth notes as two eighth notes with "repeat bars". Note that the second and fourth sixteenth note have only been hidden – playback is not affected!
- Click OK to close the dialog.
- Double-clicking on the "Grouping" text opens the Grouping dialog, allowing you to adjust the "note value" for the symbols.
Creating an accelerando/ritardando
To create an accelerando/ritardando, proceed as follows:
- Select the notes as described above and select "Accelerando" from the Group/Ungroup submenu. A dialog appears.
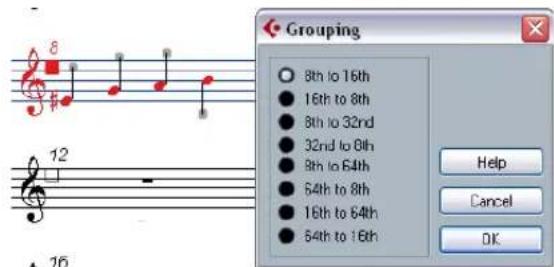
text_image
Grouping 8th to 16th 16th to 8th 8th to 32nd 32nd to 8th 8th to 64th 64th to 8th 16th to 64th 64th to 16th Help Cancel OK- Use the radio buttons to select the desired combination (i.e. define whether you want an accelerando or a ritardando and specify the desired note values) and click OK to close the dialog.
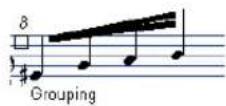
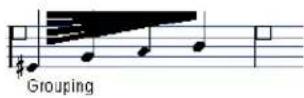
Example for accelerando (left) and ritardando (right)
- Double-clicking on the "Grouping" text opens the Grouping dialog, allowing you to select another combination.
The Grouping dialog
As described above, the Grouping dialog can also be opened by double-clicking an existing grouping text in the score.
- Which Grouping dialog appears depends on the grouping option you used for the notes (Beam, Repeats or Accelerando, see above).
Removing groups
If you have created a group as described above, and wish to remove it, proceed as follows:
-
Make sure the "Grouping" checkbox is activated in the display filter bar.
-
Select a group by clicking on its "Grouping" text.
-
Press [Backspace] or [Delete].
The grouping is removed.

text_image
Grouping- If you need to remove all groups from the score, hold down [Shift] and double-click on the first "Grouping" text. This selects all "Grouping" symbols, so you can delete them all at once by pressing [Backspace] or [Delete].
Removing a note from a group
There is no dedicated "ungroup" command, simply because it is not needed. A group can consist of one note if you wish. In other words...
- To remove one note at the end of a group, select it and proceed with grouping as above.
- If you select notes in the middle of a beam and then group, three groups are created.

Before and after grouping
Automatic grouping
The program can also go through the selected notes and automatically create grouping for you, where it is deemed suitable. Proceed as follows:
- Select the notes you want checked for auto-grouping. Typically, you would select all notes on the track by using the Select All command on the Edit menu.
- Right-click on one of the notes and select "Auto Group Notes" from the context menu. In 4/4 you will for example get two groups of eighth notes per bar, in 3/4 you will get one group per bar, etc.

Before and after using auto grouping in 4/4
Cross-staff beaming
To create a beam that extends from one staff to another, proceed as follows:
- Set up a split or polyphonic voicing system or open the Score Editor with more than one track.
- Set up a beam of notes (using the group command) and adjust their pitches so that they are correct even though some of the notes are on the wrong staff. Use the info line to edit the pitches if they are very low or high.
- Select the notes that should appear on the other staff.
- Select "Display in Staff" from the context menu for a selected note and select a staff from the submenu.
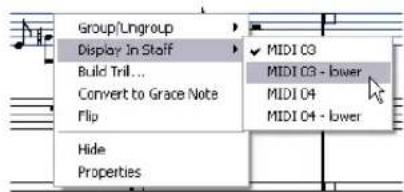
text_image
Group/Lngroup Display In Staff Build Trill... Convert to Grace Note Flip Hide Properties MIDI 03 MIDI 03 - lower MIDI 04 MIDI 04 - lowerThe notes are "graphically" moved to the selected system, but keep their actual pitch.

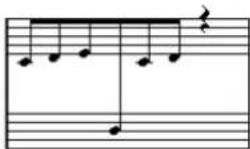
Before and after moving a note to the lower staff
- If needed, adjust the beam appearance (see "Manual adjustment of beams" on page 549).
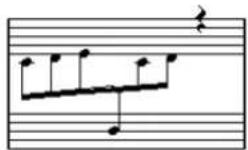
Cross-staff beaming with the beam in the middle
This does not move the affected notes to another track, but merely displays them as if they belonged to the other staff.
Handling beam groups
There are two settings for groups under a beam, Beam Subgroups and 16th Subgroups, both found on the Options tab on the Score Settings-Staff page. If "Beam Subgroups" is activated, the program displays subgroups after four sixteenth notes under a beam. If you also activate "16th Subgroups", subgroups appear after only two sixteenths.
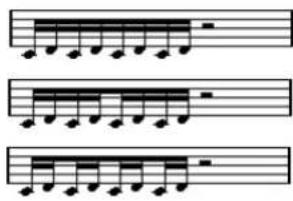
text_image
Musical notation showing three staves with treble and bass clefs, each marked with a quarter note and rhythmic groupings.Beam Subgroups off
Beam Subgroups on
On with 16th Subgroups activated
Beam appearance and slant settings
Global settings
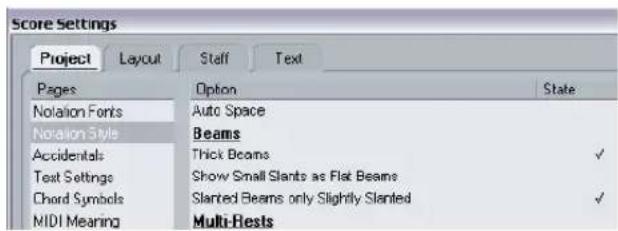
text_image
Score Settings Project Layout Staff Text Pages Option State Notation Fonts Auto Space Notation Style Beams Accidentals Thick Beams ✓ Text Settings Show Small Slants as Flat Beams Chord Symbols Slanted Beams only Slightly Slanted ✓ MIDI Meaning Multi-ResitsOn the Score Settings-Project page (Notation Style subpage), you will find the following three options for beam appearance in the Beams category:
- Thick Beams.
Activate this if you want beams to be displayed as thick lines.
- Show Small Slants as Flat Beams.
When this is activated, beams that would be only slightly slanted will be displayed flat.
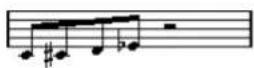
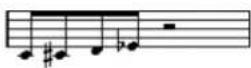
Without and with "Show Small Slants as Flat Beams"
- Slanted Beams only Slightly Slanted.
Activate this if you only want a slightly slanted beam even though there might be a significant pitch difference between the notes under the beam.

text_image
Musical notation showing two staves with notes and rests on a treble clefWithout and with "Slanted Beams only Slightly Slanted"

These settings are global for all staves.
Staff settings
On the Options tab of the Score Settings-Staff page, you will find a couple of settings for beams as well.
Option Description
Flat Beams Activate this when you do not want any slant at all, no matter the pitch difference of the notes under the beams.
No Beams Activate this when you do not want any beams at all.
Manual adjustment of beams
For very detailed control you can manually adjust the beam slant:
-
Group and flip notes and adjust the settings described above until the beams are as close as possible to how you want them.
-
Click on the corner made up by the beam and the stem.
A handle appears on the corner of beam and stem.
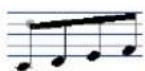
A beam handle
- Drag the handle up or down.
The slant of the beam changes.
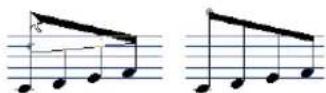
Dragging a handle and the effect it has.
→ You can adjust the distance between notes and their beam without changing the beam slant. Select both handles of a beam (by pressing the [Shift] key while selecting the second handle) and drag one of the handles up or down.
Mixed staff direction
By dragging the beam handles you can put the beam between the note heads:
Putting the beam between the notes.
About tied notes
Sometimes, notes will be displayed as two or more notes tied together. Generally, there are three different occasions when this will happen:
- When a note is of an "uneven" length that cannot be displayed without tying together two or more notes of different note values.
- When a note crosses a bar line.
- When a note crosses a "group line" within a bar.
The last case requires some explanation: Cubase uses a "cutting mechanism" that automatically creates tied notes depending on the length and position of the notes. For example, a quarter note is cut in two and tied if it crosses a half note beat, and an eighth note is cut in two and tied if it crosses a quarter note beat:

text_image
Musical notation staff with treble and bass clefs, showing notes and rests in a melody lineThis quarter note is cut. This eighth note is cut.
However, this is not always what you want. There are three ways to affect the cutting mechanism:
Syncopation
When the Syncopation option is activated on the Main tab of the Score Settings–Staff page, Cubase will be less prone to cut and tie notes. For example, the second quarter note in the figure above would not have been cut if syncopation had been activated.
The Syncopation setting affects the whole track, but you can also make syncopation settings for separate sections in the score, by inserting display quantize events (see "Inserting Display Quantize changes" on page 508).
Time signature changes
By inserting time signature changes, you can change the way notes are cut. This is done in the same way as when you specify how beamed notes should be grouped – see "Grouping" on page 545.
With a regular 4/4 time signature.
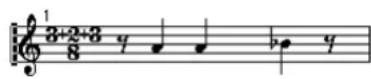
With a composite time signature (3+2+3 eighth notes).
The Cut Notes tool
By using the Cut Notes tool, you can disable the automatic cutting mechanism in a bar, and insert manual cuts at any given position in the score.
Proceed as follows:
- Select the Cut Notes tool.
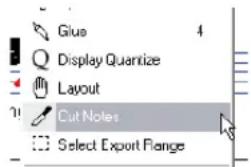
text_image
Gius Display Quantize Layout Cut Notes Select Export Range- Set the Quantize pop-up menu to an appropriate value. As usual, this determines where you will be able to click.
- When you are using polyphonic voices, select the voice you want to make settings for.
- Click in the bar containing the notes you want to cut manually, at the position you want them cut.
This inserts a cutflag event in the bar at the position you clicked. If you hold down [Alt]/[Option], a cutflag event is inserted for all voices in a polyphonic staff.
A half note, placed at 2.1.3. This is by default cut at 2.3.1 (the middle of the bar). When you click at the position 2.2.1, a cutflag event is inserted.

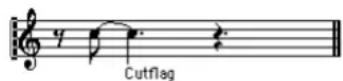
As a result, the regular cutting mechanism is disabled and the note is cut at the position you clicked instead.
The following rules apply to cutflag events:
- If a bar contains a cutflag event, the automatic cutting mechanism is disabled within that bar.
- All notes or rests that start before and end after a cutflag event will be cut at the position of the event.
- To display cutflag events, make sure that "Cutflag" is activated on the filter bar.
- To remove a cutflag event, either click again with the Cut Notes tool at the same position, or select it and press [Backspace] or [Delete].
Other options for tied notes
Tie direction
As described in the section "Tie pop-up menu" on page 544, you can set the direction of the tie manually in the Set Note Info dialog.
Flat ties
If you prefer ties to be displayed as flat lines, rather than regular "curved" ties, activate the option "Flat Ties" in the "H.W. Henze Style" category on the Score Settings–Project page (Notation Style subpage).
Graphic moving of notes
There might be instances where the “graphical” order of the notes is not the one you want. In this case, you can move notes without affecting the score or playback in any way. This can be done with the Layout tool or using you computer keyboard.
By using the Layout tool
- Select the Layout tool in the Score Editor toolbar.
- Click again on the tool button to open the Mode pop-up menu and select the desired option.
The following modes are available
Mode Description
| Move Single Object | In this mode, only the object you move with the Layout tool will be affected (moved). Use this if you want to “correct” the position of one single note in the score, for example. |
| Move Notes and Context | In this mode, other score objects will be moved accordingly when you move a note with the Layout tool. Use this mode if you want to correct the display of all score objects within a bar rather than modifying single note positions. |
- Click on the note and drag it to the desired position. Note that movement is restricted to horizontally only.
⇒ You can also automatically select all notes making up a chord, by holding down [Alt]/[Option] and clicking on one of the notes with the Layout tool.
By using the computer keyboard
You can assign key commands for moving objects graphically. In the Key Commands dialog on the File menu, the commands are found under the Nudge category and called Graphical Left, Right, Bottom and Top (only the Graphical Left and Right commands apply to notes).
After assigning key commands, you select the notes you want to move and press the assigned keys to adjust their graphical position.
Cue notes
You can create cue notes by using voices or by converting individual notes into cue notes.
Setting a voice to display cue notes
- Open the Score Settings–Staff page and select the Polyphonic tab. This is described in the section "Setting up the voices" on page 533.
- Click in the "Cue" column for the voice, so that a checkmark appears.
- Decide how to handle rests for the voice. You might for example leave "Rests–Show" activated and activate "Reduce". If you do, you will get rests in this voice, but not as many as otherwise. Empty bars, for example, will not have any rests at all.
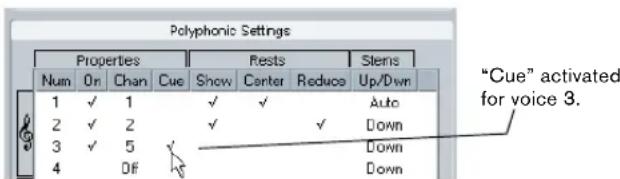
text_image
Polyphonic Settings Properties Num On Chan Cue Show Center Reduce Stens Up/Down 1 ✓ 1 ✓ ✓ Auto 2 ✓ 2 ✓ ✓ Down 3 ✓ 5 4 Off Down "Cue" activated for voice 3.-
Close the dialog.
-
Move the notes into the cue voice.
Polyphonic voicing is described in detail on "Polyphonic voicing" on page 531.
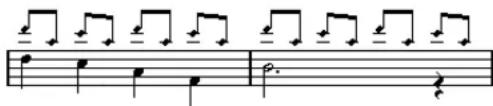
text_image
Musical notation with treble and bass clefs, showing notes and rests in a melody lineAn example of a cue note voice
A quick example
Let's say you have a flute part and want some cue notes for it.
- Switch on polyphonic voices and activate voice 1 and voice 2.
- Set voice 2 to "Auto" stem direction and centered rests.
- Set up voice 1 to be a cue voice, with hidden rests and stems pointing up.
- Insert the cue notes into voice 1.
Turning individual notes into cue notes
- Select one or several notes.
- Double-click one of the notes.
The Set Note Info dialog appears. You can also click the "i" button on the extended toolbar, or right-click on a note head and select "Properties" from the context menu to open this dialog. - Select Cue from the Type pop-up.

text_image
Set Note Info Note Head Auto Type CueNote type set to Cue
- Click Apply.
The settings are applied to the selected notes.
- When you are done, close the dialog by clicking its close button.
Grace notes
You can turn any note into a grace note. Grace notes are considered to be notes without lengths. This means that once a note is turned into a grace note it does not affect the rest of the score display in any way.

Before and after converting to grace notes. Note that after the conversion, the grace notes no longer "interfere" with the interpretation of the other notes.

Grace notes are always positioned just before the next note on the staff. If there is no note after a grace note on the staff, the grace note will be hidden!
Creating grace notes manually
- Locate the note for which you want a grace note.
- Insert one or more new notes just before it.
The note value and exact position of the note is not important. However, the pitch of course is.
From here on there are two ways to go:
- Select the notes and open the Set Note Info dialog, either by double-clicking on one of the note heads or by clicking the "i" icon on the extended toolbar. In the dialog, select the Grace note type.
- Right-click on one of the notes and select "Convert to Grace Note" from the context menu. This turns the note into a grace note without opening any dialog.
Grace notes and beaming
- If two grace notes are at exactly the same position (the same tick), they will be put onto the same stem, as a chord.
- If multiple grace notes in front of the same note are put on different positions (even if they are only one tick apart), they will be grouped under a beam.
- Please note that it is possible to have beamed grace notes overlapping a beam of regular notes, as in the example below:
Grace notes in the middle of a group of regular notes
Editing a grace note
- Select one or several grace notes and open the Set Note Info dialog.
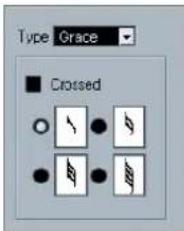
text_image
Type Grace ■ CrossedThe grace note settings in the Set Note Info dialog
- Select a note value for the stem.
- Activate Crossed, if you wish.
When this is activated, the stem will be crossed by a slanted line, to further indicate that the note is a grace note. - Click Apply.
The settings are applied to the selected notes. - When you are done, close the dialog by clicking its close button.
Converting grace notes to normal notes
- Select the notes you want to convert.
If you want to make sure that all notes in the score are normal notes, you can select all notes (using the Select All command on the Edit menu). - Double-click on one of the selected grace notes. The Set Note Info dialog appears.
- Select "Normal" from the "Type" pop-up.
- Click Apply.
Tuplets
The regular Display Quantize values do not apply to any other divisions than triplets. To create quintuplets, septuplets etc., follow the instructions below.
There are two methods for creating tuples:
- With permanent alteration to the MIDI data. This is the "drawing" mode to use when you want to build the tuplet from scratch. It does not put any demand on the notes' positions before the tuplet is created.
- As display quantize. This is the method you use when the tuple is recorded and plays back as you want it, but is not displayed correctly.
Actually, in the first case, you make permanent alterations and set display quantize settings, all in one go. In the second case you only make display quantize settings.
With permanent change to MIDI data
- Insert as many notes as the tuplet consists of.
This would typically be 5, 7 or 9. If the tuplet contains rests, simply leave space for those, but make sure the current Display Quantize value allows them to be shown.
Five sixteenth notes, about to be converted to a quintuplet.
-
Select all the notes that make up the tuplet.
-
Select "Build N-Tuplet..." from the Scores menu. The Tuplets dialog appears.
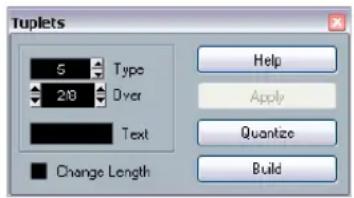
text_image
Tuplets 5 Type 2/8 Over Text Change Length Help Apply Quantize Build- Set the type of tuplet in the Type field.
“5” means a quintuplet, “7” means a septuplet, etc.
-
Set the length of the entire tuplet using the "Over" field.
-
Activate Change Length, if you need it.
If you do, the program will alter the length of all notes so that they are exactly the note value the tuplet indicates. If you do not, the lengths of the existing notes will not be affected in any way.
- If you want any other text than the standard above the tuplet, enter it into the "Text" field.
The standard text is simply the number in the type field. If the tuplet is put under a beam (see "Tuplet display options" on page 554) the text is put just above it. If there is no beam, the text is found in the middle of a bracket.
- Click Build.
The tuplet appears. The notes have now been moved to the tuplet positions and their length might have changed.
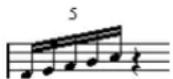
- If needed, edit the lengths and pitches of the notes in the tuplet.
You can also make various settings for the appearance of the tuplet – see below.
Without permanent change to MIDI data
- Select the notes in the tuplet group.
In this case, the notes play back correctly but are not displayed as a tuple (yet).
-
Select "Build N-Tuplet..." from the Scores menu to bring up the Tuplets dialog.
-
Make settings in the dialog, as described above.
-
Click Quantize.
Now the tuplet is displayed correctly. You can make additional settings for how the tuplet should appear, as described below.
- If necessary, adjust the notes.

Lengths and positions in a tuplet group are probably best edited using the info line.
Editing tuplet settings
- Double-click on the text above the Tuplet group to bring up the Tuplets dialog.

Double-click here.
-
Adjust the Text setting.
-
Click Apply.
The changes are applied to the tuplet, without affecting the tuplet type or length.
Grouping
If the Tuplet is a quarter note long or shorter, the notes will be automatically grouped under a beam. If it is longer you have to perform the grouping manually. See "Grouping" on page 545 for details.
Tuplet display options
On the Score Settings—Project page, Notation Style subpage ("Tuplets" category), you find the following settings for tuplets:
Option Description
| Tuplet Brackets | There are three possible settings for this option:– None: Tuplets never have brackets.– Always: Tuplets always have brackets.– ...by the head: Brackets are shown only when the tuples are displayed on the "head side". |
| Display Tuplet values by the Beams | When this is activated, tuplets will be displayed on the "beam side" of the notes instead of on the note head side. |
| Suppress Recurring Tuplets | When this is activated, and you have several tuplets of the same type in the same bar, only the first of these is displayed as a tuplet. |
| Show Tuplet Brackets as “Slurs” | When this is activated, the tuplet brackets will be “slur-like” (rounded). |
Working with symbols
About this chapter
In this chapter you will learn:
- What the different types of symbols are.
- How to insert and edit symbols.
- Details about special symbols.
Background: The different layers
A score page is always made up of three layers – the note layer, the layout layer and the project layer. When you add symbols, these will be inserted into one of these layers, depending on the type of symbol. The symbols that have a relation to notes – accents, dynamic markings, slurs, lyrics etc. – will be put in the note layer. Other symbols – such as repeats, rehearsal marks, some types of text, etc. – can be put either in the layout layer (which is individual for each layout) or in the project layer (common for all layouts).
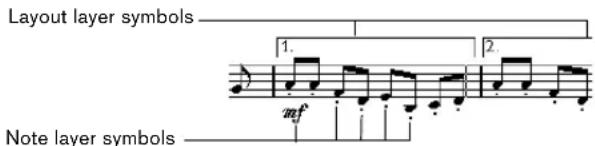
text_image
Layout layer symbols Note layer symbolsNote layer symbols
Let's look at the note layer symbols first. These come in three flavors:
- Note symbols. These are each tied to a single note. Examples of note symbols are accents and lyrics. When you move the note, the symbol moves with it. The same is true if you cut the note and then paste; the symbol is cut and pasted together with the note.
- Note-dependent symbols. Only a few symbols belong to this category, for example the arpeggio lines. In one way, these behave just like grace notes (see "Grace notes" on page 552). They always precede a note or chord. If there is no note "after them" on a staff, they will disappear.
- All other note layer symbols (tempo, dynamics, chords etc.). Their position is related to the bar. (Whichever way you edit the notes, these symbols remain unaffected.) However, their positions are fixed within a measure. If you for example change the spacing of the bars across the page (see “Setting the number of bars across the page” on page 602), this will affect the symbols positions.
Layout layer symbols
Now let's examine the layout layer symbols. The layout layer is not stored individually for each track, as the other symbols are. Instead it is common to a "set of tracks". Let's illustrate this with an example:
You have four tracks that make up a string quartet. You edit them all at the same time and add symbols to the score, both note layer symbols and layout layer symbols.
Now you close the Score Editor and open only one of the tracks for editing. All your note layer symbols are there just as you left them, but the layout layer symbols have disappeared! Don't worry, close the editor again, and open all four tracks for editing and the symbols are back.
This is due to the fact that the layout layer symbols are part of a "bigger entity" called "layout". And a layout is something that is stored not per track, but for a group of tracks. Each time you open the same combination of tracks for editing, you get the same layout.
For a detailed description of the layout layer, see the chapter "Working with layouts" on page 590.
Project layer symbols
Project layer symbols are layout symbols that are present in all layouts. The project layer holds the symbols found in the Project tab, plus bar line types and bar number offsets.
Using project layer symbols in conjunction with the Arranger mode, you can have playback in the program follow the score – repeats, da Capos and endings will be played back properly allowing you to hear your compositions as they would be played back by live players.
Why three layers?
There are several reasons for this division into layers:
- Many of the symbols that are in the layout layer can be stretched to span over several staves, or for other reasons make more sense to think of as belonging to a certain group of tracks.
- The layout layer is only one part of the bigger concept of layouts. Layouts allow you to easily extract parts from a full score and perform automatic formatting. This is described in the chapter "Working with layouts" on page 590.
- Typically, you want to display some symbols – repeat bar lines, endings, score titles etc. – for all layouts in a score. To achieve this, insert them on the project layer.
Which symbols are part of which layer is described in the section "The available symbols" on page 558 and onwards.
The Symbols Inspector
To display the Symbols Inspector, click the Show Symbols button on the toolbar.
Customizing the Symbols Inspector
You can customize the appearance of the Symbols Inspector by showing/hiding tabs and by specifying their order in the Inspector.
Showing/Hiding Symbols Inspector tabs
If you right-click on any tab in the Inspector, a context menu will appear. On this menu, you can directly check (show) or uncheck (hide) elements of the Inspector as desired.
You can also select different preset configurations from the lower half of the menu. To display all Symbols Inspector tabs, select "Show All".
The Symbols Inspector Setup dialog
If you right-click on any closed tab in the Symbols Inspector and select "Setup..." from the context menu, a dialog appears. In this dialog you can configure where the separate tabs should be placed in the Inspector and save/recall different configurations of the Inspector.
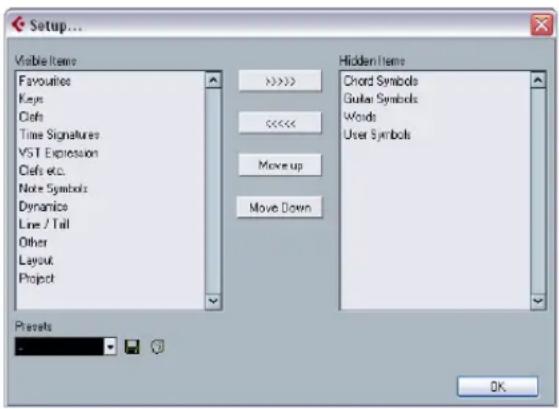
text_image
Setup... Visible Items Favourite Keys Cleft Time Signatures VST Expression Cleft etc. Note Symbols Dynamics Line / Tail Other Layout Project Hidden Items Chord Symbols Guitar Symbols Words User Symbols Move up Move Down Presets OKThe Setup dialog for the Symbols Inspector
The dialog is divided into two columns. The left column displays the currently visible tabs in the Inspector, and the right column displays the currently hidden tabs.
- You can change the current show/hide status by selecting items in one column and using the arrow buttons in the middle of the dialog to move them to the other column. The changes are reflected directly in the editor.
- You can change the order of the (visible) tabs in the Symbols Inspector with the "Move Up" and "Move Down" buttons.
The changes are reflected directly in the Score Editor. To revert back to the default Inspector settings, right-click on one of the tabs and select "Default" from the context menu.
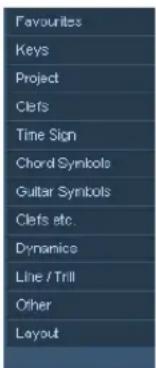
text_image
Favourites Keys Project Clets Time Sign Chord Symbols Guitar Symbols Clets etc. Dynamics Line / Trill Other LayoutA "customized" Inspector
- If you click the Save button (disk icon) in the Presets section, you can name the current configuration and save it as a preset.
- To remove a preset, select it and click the trash icon.
- Saved configurations are available for selection from the Presets pop-up in the dialog, or directly from the Inspector context menu.
Working with symbol palettes
You can open any of the Symbols Inspector sections as separate symbol palettes.
Opening tabs as palettes
- Right-click on one of the symbols of the desired tab in the Inspector.
Note that you have to right-click on a symbol. Right-clicking on a tab header will open another context menu instead, see above.
- Select "Open as Palette" from the context menu.
The selected tab will be shown as palette.
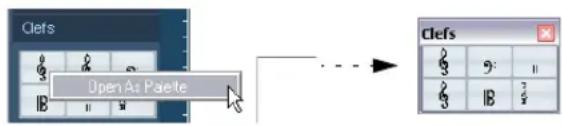
flowchart
graph LR
    A["Open As Palette"] --> B["Clefs"]
Moving and handling palettes
Palettes are handled as any window, which means that you can:
- Move a palette to another position by dragging its title bar.
- Close a palette by clicking its close button.
In addition, you can select whether the palette should be shown horizontally or vertically, by right-clicking and selecting "Toggle" from the context menu.
The available symbols
The following symbols palettes/tabs are available:
- F a v o u r i t e s
- K e y s
- C l e f s
- Time Sign
- Chord Symbols
- Guitar Symbols
- VST Expression. This is described in the chapter "VST Expression" on page 372.
- C l e f e t c.
- Note Symbols
- Dynamics
- Line/Trill. Note that the arpeggios, hand indication and strum symbols are all “note-dependent”!
- Other
- Layout. All these symbols are drawn in their own "layer".
- Project. These symbols will be present in all layouts.
- Words. This is described in the section "The Words tab" on page 587.
- User Symbols. This is described in the section "User Symbols" on page 574.
When you place the mouse pointer on a symbol, a tooltip shows you information about the function. Further details about many of the symbols can be found in the section "Symbol details" on page 570.
Setting up the Favourites tab
In the Symbols Inspector, you will find a tab called Favourites. Cubase allows you to fill this tab with a selection of symbols from other tabs. This way, you have instant access to the symbols you use most often:
- Open the Favourites tab.
If it is the first time you are using this tab, it will be empty. - Open the tab from which you want to copy a symbol.
⇒ Not all symbols can be placed on the Favourites tab.
- Right-click on the symbol you want to add to the Favourites tab and select "Add to Favourites" on the context menu.
You can also add a symbol to the Favourites tab by [Alt]/[Option]-clicking on it.
- Repeat this procedures for other symbols you want to add to the Favourites tab.
- To remove a symbol from the Favourites tab, select "Remove from Favourites" from the context menu or hold down [Alt]/[Option] and click on it.
Important! – Symbols, staves and voices
Most symbols belong to a staff when inserted. Only note symbols, slurs and ties are an exception. They belong to notes and therefore to voices.
It is extremely important that the correct staff is active when you insert a symbol (if you are editing multiple staves).
If you for example insert a symbol while the wrong staff is active, the symbol might later "disappear" because you edit another configuration of tracks (the track you actually inserted the symbol on might not be opened for editing).
The same is true for note symbols and their relation to voices. Make sure the correct voice is active when inserting symbols or they might wind up at the wrong position, fermatas may be turned upside down etc.
Layout symbols work slightly differently. Instead of belonging to a certain staff or voice, they belong to a layout.
Since different track combinations use different layouts, this means that if you insert a layout symbol in the score when you are editing two tracks (for example a trumpet
and a saxophone part), it will not be there when you view each track by itself in the Score Editor. If you want the same symbols to appear in other layouts as well, you can copy the form of one layout to another. If you want a symbol to appear in all layouts, use the Project tab.
Adding symbols to the score
Making space and handling margins
- If you find there is not enough space between staves to add symbols (like for example text), see "Dragging staves" on page 604 for info on how to separate the staves.
- If you find the score looks crammed after adding symbols, check out the section "Auto Layout" on page 606.

Symbols you add outside the margins will not be printed!
About the Pencil tool
Unlike in the other MIDI editors, there is no Pencil tool among the tools on the Score Editor toolbar. Instead, the Pencil tool is “automatically” selected when you insert symbols. The following applies:
- Normally, the Pencil tool is automatically selected when you click on a symbol in the Inspector. However, if the option “Double-click Symbol to get Pencil tool” is activated in the Preferences dialog (Scores–Editing page), you need to double-click the symbol to get the Pencil tool.
- On the same page of the Preferences dialog, you will find an option called "Display Arrow tool after Inserting Symbol". When this is activated, the Object Selection ("Arrow") tool is automatically selected after you have inserted a symbol.
If you want to insert a lot of symbols with the Pencil tool, you may want to deactivate this option.
Adding note symbols
Adding a symbol to one note
- Open the Note Symbols tab in the Inspector.
-
Click (or double-click) on the desired symbol in the tab. As mentioned above, the "Double-click Symbol to get Pencil tool" preference determines whether you need to double-click. In either case, the Pencil tool is selected.
-
Either click on the note or above or below it.
If you click on the note, the symbol is put in at a predefined distance from the note. If you instead click "above or below" the note, you decide for a vertical position yourself. In either case, the symbol is aligned horizontally with the note. It can later be moved up/down.
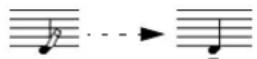
Clicking on a note inserts the note symbol (in this case a tenuto) at a predefined distance from the note head.
There are three options in the Accents category of the Score Settings dialog (Project page–Notation Style sub-page) that affect the vertical positioning of note symbols:
- Accents above Stems
When this is activated, accent note symbols are displayed at the stem side of notes instead of the note head.
- Accents above Staves
When this is activated, accent note symbols are displayed above the staff, regardless of the stem direction of the notes. This setting overrides the "Accents above Stems" option.
- Center Note-Linked Symbols on Stems
When this is activated, accents are centered on stems and not on note heads.
Adding a symbol to several notes using the Pencil tool
You might for example want to add a staccato symbol to all notes within a few measures. Proceed as follows:
- Open the Note Symbols tab in the Inspector.
- Select the notes to which you want to apply the symbol.
- Click on the desired symbol in the Inspector.
- Click on one of the notes.
The symbol is added to each selected note, at a predefined distance. The symbols can be moved later.
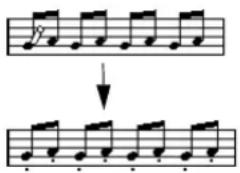
text_image
Musical notation showing a sequence of notes with rhythmic patterns before and after a transformationAdding a symbol without tying it to a note
Note-dependent symbols can be entered freely, too. This allows you to add a fermata to a rest symbol for example.
- Make sure the correct staff is active.
- Click the symbol so that the Pencil tool is selected, as described above.
- Hold down [Ctrl]/[Command] and click where you want to add the symbol.
Adding other symbols
- Open the desired symbol tab in the Inspector.
- Click on the symbol you want to add.
- Click once or click and drag somewhere in the score. The symbol appears. For many symbols with a length, you can drag to set the length of the symbol directly. The symbol appears with its handles selected (if it uses handles) so that you can change its size directly if you wish. This is all described in detail in the section "Changing length, size and shape" on page 569.
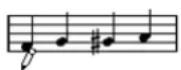
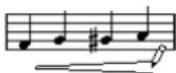
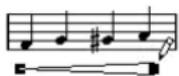
Press the mouse button – drag – and release!
- You can change the size of most of the note symbols and dynamics in a score by right-click on the corresponding object and selecting the desired option from the Size submenu on the context menu.
About note-dependent symbols
Note-dependent symbols like arpeggios and strum directions must be put in front of a note or they will belong to the following note instead (if there is no following note, the symbols will not be inserted at all).
Adding text
There are special methods for working with text, described in their own chapter, "Working with text" on page 580.
Adding slurs and ties
Slurs can be drawn in manually or inserted automatically for a group of notes. Ties are usually added by the program but can also be drawn in as "graphic" symbols.
There are two types of slurs - "regular" slurs and Bezier slurs (with which you have full control over thickness, curve shape, etc.).
Slurs, ties and the Display Quantize value
Since a slur or tie "musically" always spans from one note (or chord) to another, the beginning and end of a slur/tie in Cubase is always related to two notes in the score.
When you draw in a tie or slur, the program uses the Quantize value to find the closest two notes to "attach" the symbol to. In other words, if you want to add the slur/tie to a note at a sixteenth note position, make sure Quantize is set to 1/16th notes or smaller (this is only true for manual drawing in of slurs and ties).
Please note that this does not necessarily mean that the symbol has to start or end exactly above/below two notes. Instead, what it means is that when you use the Layout tool to move the note graphically to adjust the look of the bar, the slur/tie moves with it (see "Graphic moving of notes" on page 550). The same is true if you adjust the width of the measure – the slur/tie is adjusted accordingly.
If you want the end points of the slurs to snap to exact note positions, activate the option "Snap Slurs when dragging" on the context menu or in the Preferences dialog (Scores-Editing page).
Drawing the slur/tie
- Set the Quantize value depending on the positions of the two notes that the slur/tie should span.
For example, if one of them is at a quarter note position and the other at an eighth note position, set Quantize to 1/8 note or a smaller note value. - Click on the correct slur/tie in the Symbols Inspector, so that the Pencil tool is selected.
- Position the mouse close to the first note and drag to a position close to the second note.
The end points of the slur/tie will snap to their default positions – holding down [Ctrl]/[Command] allows you to move the end points freely.
There are two special functions for inserting a slur or tie that automatically spans from one note to another.
Adding a slur/tie between two notes
- Select two notes.
- Click the correct slur/tie symbol in the Inspector, so that the Pencil tool is selected.
- Hold down [Ctrl]/[Command] and [Shift] and click on one of the two notes.
The slur/tie is added between the two selected notes.
Inserting a slur over a selection of notes
- Select a span of notes.
- Pull down the Scores menu and select "Insert Slur".
A slur is created, starting at the first selected note and ending at the last.
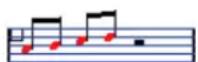
The Bezier slur
The Bezier slur is a special slur symbol, found on the Dynamics symbol tab. Unlike the regular slur, this symbol is made up of a bezier curve, allowing you to create more advanced curve shapes.
To add a Bezier slur, click on the symbol in the Inspector so that the Pencil tool is selected, and click or drag in the score. Clicking creates a Bezier slur of the default length and shape, while dragging creates a straight line.
You will find that the default Bezier slur has four curve points - one at each end and two along the curve.
- To move the slur, click on it (but not on a curve point) and drag.
- To resize the slur, click and drag the end points.
- To change the shape of the slur, click on one of the middle curve points and drag in any direction.
Right-clicking on a curve point brings up a context menu with the following options:
Option Description
| Add Points/Reduce Points | Adds another pair of curve points to the Bezier slur. This allows you to create very complex slur shapes. After adding points, there will be an additional menu item "Reduce Points" – selecting it removes the additional curve points. |
Add Thickness Makes the Bezier slur thicker.
| Reduce Thickness | Makes the Bezier slur thinner. |
| Hide | This hides the slur symbol, see “Hiding/showing objects” on page 599. |
Creating trills
If you have recorded or entered a trill, Cubase can help you display this properly:
- Select the notes that make up the trill.
- Right-click on one of the notes and select "Build Trill..." from the context menu.
- Select an option from the dialog that appears.
The radio buttons determine how the trill should look. Activate the "Help Note" option if you want an extra note to indicate between which notes the trill should be played. - Click OK.
Now the following happens:
- All notes except the first one (and possibly the second) are hidden.
- The first note automatically gets a display length matching the length of the whole trill.
- If you choose to include a help note, the second note is converted to a "Graphic" note, with brackets but without stem. Otherwise, the second note is hidden, too.
- The trill symbols you selected in the dialog are inserted.
Inserting symbols across staves
If you hold down [Alt]/[Option] while adding a symbol to one staff in a grand staff, this symbol will be put in at corresponding positions on all staves. This allows you for example to insert rehearsal marks, repeats, etc. for all instruments at the same time.
Adding a keyboard symbol
The "Other" tab contains a piano keyboard symbol, useful for example in educational scores. The symbol has the following properties:
- To insert the keyboard symbol, select it from the Inspector, click with the Pencil tool at the desired position and drag a box to specify the approximate size of the keyboard.
- After you have inserted the keyboard symbol, you can drag its edges to resize it vertically or horizontally.
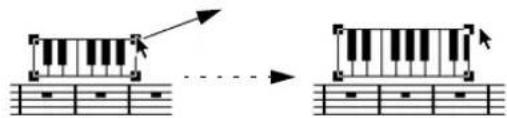
text_image
Diagram illustrating the transformation of a piano keyboard into a separate keyboard, with directional arrows indicating movement.- If you right-click on an inserted keyboard symbol and select "Properties" from the context menu, a dialog opens allowing you to specify further properties for the symbol. You can also double-click on an inserted keyboard symbol to open this dialog.
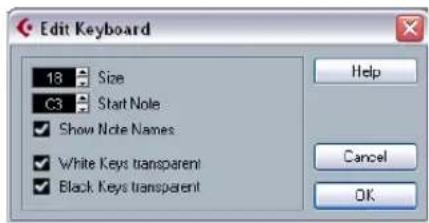
text_image
Edit Keyboard 18 Size C3 Start Note Show Note Names White Keys transparent Black Keys transparent Help Cancel OKOption Description
Size Governs the width of the keys.
Start Note This is the leftmost note in the keyboard symbol.
| Show Note Names | When this is activated, each C key is displayed with note name and octave (C1, C2, etc.). |
| White/Black Keys transparent | Activate these if you want the white and/or black keys to be transparent. |
Adding guitar chord symbols
A fretboard symbol of a guitar chord can be inserted anywhere in the score.
Guitar symbols are found on the "Guitar Symbols" tab and the "Other" tab in the Symbols Inspector.
- The Guitar Symbols tab contains all Guitar symbols of the current guitar library, see "Using the guitar library" on page 563. If the symbol you want to insert is among these, select it and insert it as you would any other symbol, see above.
To insert a guitar symbol not present in the guitar library, proceed as follows:
-
Open the "Other" tab.
-
Click on the guitar chord symbol, so that the Pencil tool is selected.
- Click in the score, at the position where you want the symbol to appear.
The Guitar Symbol dialog appears.
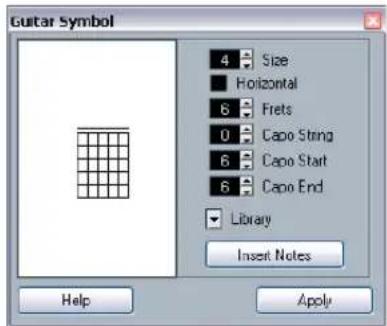
text_image
Guitar Symbol 4 Size Horizontal 6 Frets 0 Capo String 6 Capo Start 6 Capo End Library Insert Notes Help Apply- To put a black dot on any fret and string, click on it. To remove it, click again.
- To add a symbol just above the string, outside the fretboard, click there.
Consecutive clicks allow you to select between a ring (open string), a cross (do not play this string) and no symbol.
- To add a capodaster number, click to the left of the symbol.
Consecutive clicks allow you to step through the possibilities.
- You can also add a capodaster symbol (a line over the strings), by setting the "Capo String" parameter to a value higher than 0.
By adjusting the Capo End and Start values, you can create capodaster symbols that span fewer strings.
- Use the "Size" value field to adjust the size of the chord symbol.
- If you want the symbol to be horizontal, activate the "Horizontal" checkbox.
- To display more or fewer frets than the default six, change the "Frets" value.
4. Click Apply.
The guitar symbol appears in the score.
- Clicking the Insert Notes button will insert the actual notes in the chord into the score.
You can also right-click on a guitar symbol and select "Insert Notes" from the context menu.
You can edit the symbol at any time by double-clicking it, changing the settings in the dialog and clicking Apply. Note that you can also access the symbols you have defined in the guitar library by right-clicking a guitar symbol – see below.
If you select "Make Chord Symbol" from the context menu, the corresponding chord symbol will be displayed above the guitar symbol. This function is very useful when writing lead sheets, for example.
Using the guitar library
The above method is fine if you only want to add a few chord symbols to your score. If you need a lot of chord symbols, or if you are using chord symbols in a lot of different scores, you can gather all your chord symbols in a "guitar library" instead. This way you do not have to recreate the same chord symbol over and over again.
Defining chord symbols
- Double-click on one of the symbols in the Guitar Symbols tab in the Inspector to open the guitar library. Alternatively, you can open the Score Settings—Project page and select the "Guitar Library" subpage.
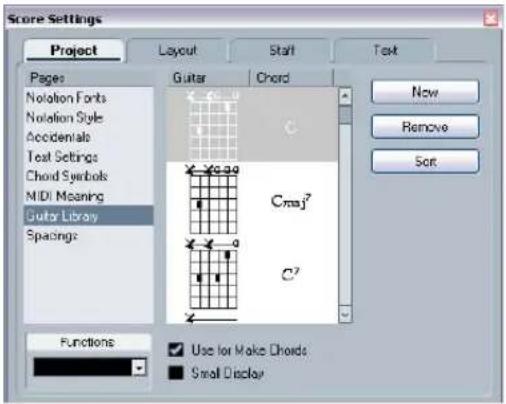
text_image
Score Settings Project Layout Stall Text Pages Notation Fonts Notation Style Accidentials Text Settings Chord Symbols MIDI Meaning Guitar Library Spacing: Functions Use for Make Chords Small Display New Remove Sort- To add a guitar chord symbol to the library, click the New button.
A chord symbol appears in the list to the left.
- To edit the chord symbol, double-click it in the list. This opens the Guitar Symbol dialog, as when editing a chord symbol in the score.
- The symbol you create will also be "interpreted" and its name will be displayed to the right of the fretboard symbol. This can also be edited by double-clicking if you like.
- To sort the available symbols in the library according to their root notes, click the Sort button.
- To remove a symbol from the library, select it in the list and click Remove.
- To save the current library as a separate file, select "Save..." from the Functions pop-up menu.
A file dialog appears, allowing you to specify a name and location for the file.
- To load a guitar library file, select "Load current Pane..." from the Functions pop-up menu.
In the file dialog that appears, locate and open the desired guitar library file.
⚠️ Loading a guitar library file replaces the current library!
There are also two additional checkboxes in the Guitar Library dialog:
Option Description
| Use for Make Chords | When this is activated, and you use the "Make Chord Symbol" function (see "Using Make Chord Symbols" on page 578), the program will insert guitar symbols as well as regular chords (if any fitting guitar symbols can be found). If there are several guitar symbols for a certain chord in the Guitar Library, the first one will be used. |
| Small Display If this is activated, the chord symbols in the list will be displayed in the size they will have in the score. If it is deactivated, the symbols will be displayed in a larger size, for easier editing. |
Inserting symbols from the library
Apart from the "Use for Make Chords" option above, there are two ways to insert symbols from the guitar library into the score:
- Use the Functions pop-up menu on the Guitar Library subpage of the Score settings—Project page when creating or editing guitar symbols.
- Right-click on a guitar symbol in the score and select a chord symbol from the Presets submenu on the context menu.
Adding an image file
You can insert image files as symbols into the Score. This allows you to import logos, copyright symbols, images of finger positions, etc.
Proceed as follows:
- In the Symbols Inspector, open the Other, the Layout or the Project tab. Image files can be inserted on all three layers, see "Background: The different layers" on page 556.
text_image
Block Text Page Text Jxxx J=J D.C. Fine D.S. Fine D.C. Coda D.S. Coda Fine 1. 2. IMG Image File
- Click on the Image File button to select the Pencil tool. Click in the score at the position where you want to insert the file.
A file dialog opens.
- Locate and select the image file you want to insert.
The lower section of the Import dialog contains the following settings:
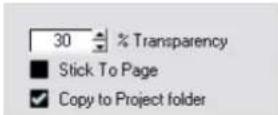
- To copy the referenced file into the Project folder, activate the "Copy to Project folder" option.
This is recommended as it will make it easier to manage all files used in a project. - If you modify your score, by adding staves for example, the position of an inserted image file will change. If this is not what you want, activate "Stick to Page" to keep it at a fixed position in your staff.
- The Transparency parameter allows you to set the desired transparency of the image.
- Click Open to insert the file.
The image file is inserted. Its size depends on the printer resolution. However, you can scale the image by dragging its handles. To restore the printer resolution, right-click on the image to open the context menu and select "Snap to Printer Resolution".
You can modify the settings you made on import by right-clicking on the image and selecting "Properties" on the context menu, to open the Image Properties dialog.
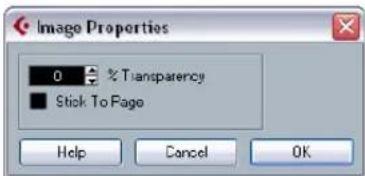
text_image
Image Properties 0 % Transparency Stick To Page Help Cancel OKUsing layout symbols
Symbols inserted from the Layout tab belong to the layout layer. When you are editing a layout containing several tracks, you can have inserted layout symbols automatically copied to any combination of tracks in the layout. You decide which staves should display layout symbols by ticking their "L" column in the Score Settings-Layout page (opened by selecting "Settings..." on the Scores menu).
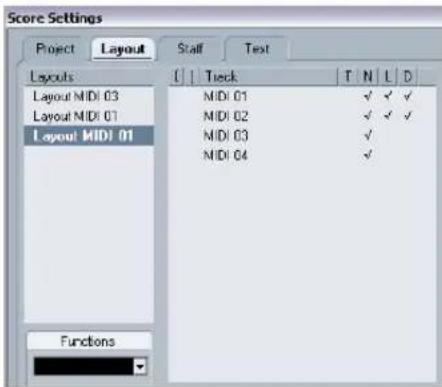
text_image
Score Settings Project Layout Staff Text Layouts T1 T2ck T N L D Layout MIDI 03 MIDI 01 ✓ ✓ ✓ Layout MIDI 01 MIDI 02 ✓ ✓ ✓ Layout MIDI 01 MIDI 03 ✓ MIDI 04 ✓ FunctionsHere, layout symbols will be displayed for the first two tracks.
- Any editing you perform to layout symbols is automatically duplicated in the other tracks.
- The display of layout symbols for different tracks can be deactivated at any time.
- Layout symbols can be copied between layouts, by using the Get Form function on the Functions pop-up menu on the Score Settings–Layout page.
One example of how to use layout symbols:
Let's say you are editing a full orchestra score, and want rehearsal marks inserted for more than one staff (typically, above each instrument group – brass, strings, percussion, etc.). Now all you need to do is insert the rehearsal marks from the Layout tab for one of the tracks. To do so, open the Score Settings–Layout page, tick the "L" column for the desired tracks/staves and click Apply.
Using Project symbols
Project symbols are part of the project layer and will therefore appear in all layouts. The project layer also contains changes to bar lines (e.g. repeats and double bar lines) and bar number offsets. Typically you use Project symbols when you know you want these shown for all combinations of tracks.
→ You can also use Project symbols in combination with the Arranger mode to have the program play back according to the score, e.g. repeats, Da Capos and endings. See "Scores and the Arranger mode" on page 618.
Selecting symbols
Almost all symbols can be selected by clicking on them. For symbols that have a length or size, one or more handles appear.
A selected crescendo
An exception to this are the slurs and ties which can be selected by clicking on the end points or by drawing a selection rectangle.
Using the lock layers
Sometimes it can be very hard to click on a symbol or other object in the score without accidentally selecting other symbols nearby. To remedy this, you can assign different types of objects to different "lock layers" (up to three) and instruct Cubase to "lock" one or two of these layers, making them "unmovable". Furthermore, you can lock the layout and project layers separately if needed.
Proceed as follows:
Setting up the lock layers
- Open the Preferences dialog, and select the Scores-Event Layers page.
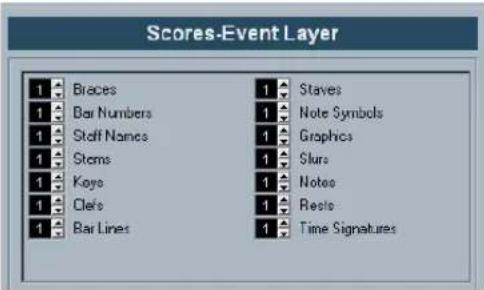
text_image
Scores-Event Layer 1 Brace 1 Staves 1 Bar Numbers 1 Note Symbols 1 Staff Names 1 Graphics 1 Stoms 1 Slurs 1 Keys 1 Notes 1 Clefs 1 Reels 1 Bar Lines 1 Time Signatures- Assign each event type to a layer (1, 2 or 3).
It is a good idea to specify different layers for event types that might conflict "graphically". For example, you might want to assign bar numbers and note symbols to different layers, if you find that you accidentally move bar numbers when editing note symbols and vice versa.
- Click OK to close the dialog.
- Alternatively, you can right-click on one of the Layer buttons (1-2-3) on the extended toolbar to bring up a pop-up menu, showing which object types are associated with that layer.
A checkmark for an object type means it belongs to that layer. If no checkmark is shown, you can select the object type from the pop-up menu to move it to that layer.
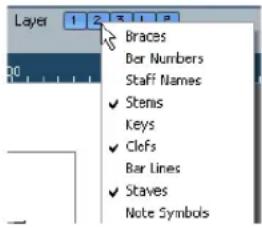
text_image
Layer 1 2 R I P Braces Ber Numbers Staff Names ✓ Stems Keys ✓ Clefs Bar Lines ✓ Staves Note SymbolsLocking a layer
To "lock" a layer, click on its lock layer button.
In this figure, layer 2 is locked. Event types assigned to layer 2 cannot be selected, moved or deleted.
Visual indication of the layers
Objects belonging to locked event layers will be "greyed out" in the score. This makes it very easy to find out which object belongs to which layer – perhaps especially useful for the layout and project layers. For example, to quickly spot all objects in the layout layer, lock all other layers by clicking their buttons. Now, only layout layer objects will be shown normally; all other objects will be greyed out.
Moving and duplicating symbols
There are four ways to move and duplicate symbols:
- By dragging them with the mouse (see below).
- By using the computer keyboard (moving only – see "Moving by using the computer keyboard" on page 567).
- By using the bar handles (see “Moving and duplicating with the bar handles” on page 568).
- By using the Paste Note Attributes function (duplicating note symbols only – see “Copying settings between notes” on page 545).
Moving and duplicating by using the mouse
This is done much as with other objects in Cubase. The following rules apply:
- Note symbols and note-dependent symbols move with the notes/chords they belong to. In other words, if you move the note/chord, the symbols move with it/them.
- Note symbols (like accents and lyrics) can only be moved vertically. Other symbols (like braces and brackets) can only be moved horizontally.
- All other symbols without handles can be moved freely. If you hold down [Ctrl]/[Command], movement is restricted to one direction only.
- If the symbol has one or more handles when it is selected, do not drag it by the handles, or you will change its shape instead of moving it.
- Slurs and ties are an exception, as they can only be moved by first dragging one handle and then the other. However, if you use the Layout tool (see "Graphic moving of notes" on page 550) to move the notes they belong to, or if you change the measure width, they will be adjusted automatically.
- Duplicating is done by moving with [Alt]/[Option] pressed, as always in Cubase. Slurs, ties and bar lines cannot be duplicated with this method.
There are two features to help you position symbols (and other score objects) correctly: the rulers and the Position Info window.
The rulers
Unlike other editors, the Score Editor does not have a meter/time position-based ruler. Instead, its rulers are "graphical", i.e. they indicate the actual x-y position of objects (with "zero" at the upper left corner).
- The current pointer position is indicated by thin lines in the rulers.
- To hide the rulers, pull down the pop-up menu above the scroll bar to the right and select "Off".
This pop-up menu can also be shown by right-clicking in the ruler.
- To display the ruler again, pull down the same pop-up menu and select one of the units (inches, centimeters or points).
This setting will also affect the units used in the Position Info window (see below).
The Position Info window
If you need to fine-tune the graphical positions of symbols and other objects, you should use the Position Info window. This makes positioning easier in two ways:
- You get a numerical indication of the exact position of the mouse pointer (and any object you are dragging).
- You can move objects or staves by typing in position values.
You display the Position Info window by clicking in the ruler.
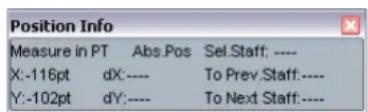
text_image
Position Info Measure in PT Abs.Pos Sel.Staff: ---- X:-116pt dX:---- To Prev.Staff:---- Y:-102pt dY:---- To Next Staff:----The window contains the following settings and values:
Option Description
Measure in Inch/cm/mm/pt Click this label to change units for the Position Info window. This choice will also affect the units used in the rulers.
Abs/Rel. Pos Click this label to select whether X-Y position values should be “absolute” (referring to the upper left corner of the current page) or “relative” (referring to the upper left corner of the active staff).
Option Description
X, Y When a single object is selected, these values show the horizontal and vertical position of this object. When no objects or several objects are selected, these values show the current horizontal and vertical position of the pointer. When a single object is selected, you can click on these values and type in a new position for the object.
dX, dY When you are moving an object, these values indicate the horizontal and vertical distance you have moved it. You can click and type in values to move the object(s) by the specified distances.
Sel. Staff If "Abs. Pos" is selected (see above), this value shows the distance from the top of the score page to the top of the active staff. You can click and type in a value to move the active staff. If "Rel. Pos" is selected, this value will always be 0, since vertical positions are related to the top of the active staff!
To Prev Staff The distance between the active staff and the staff above it. Clicking and typing in a value will move the active staff.
To Next Staff The distance between the active staff and the staff below it. Clicking and typing in a value will move the staves below the active staff.
Dragging symbols across staves
If you drag a symbol across the staves, you will note how the "active staff" indicator to the left follows the mouse pointer. Use this as an indication, to make sure that symbols end up in the correct staff.
- If you are editing several tracks at the same time, and want to make sure that a symbol is not accidentally moved to another track when you drag it vertically, click on the "L" button on the extended toolbar.
When this is activated, you cannot move symbols across staves by dragging.
Moving by using the computer keyboard
You can assign key commands for moving symbols, notes or rests graphically in the Key Commands dialog on the File menu. The commands are found under the "Nudge" category and are called "Graphical Left", "Graphical Right", "Graphical Top" and "Graphical Bottom".
Selecting an object and using one of these commands is the same as dragging them with the Layout tool, but this method offers higher precision.
Moving and duplicating with the bar handles
This function allows you to move or copy the contents of a whole bar to one or several other bars. You can select which elements in the bar should be included in the operation. Proceed as follows:
- Bring up the display filter bar by clicking the "Show Filter View" button on the toolbar.
- On the filter bar, make sure the "Bar Handles" option is activated.
Now, each bar in the score is shown with a handle in the upper left corner.
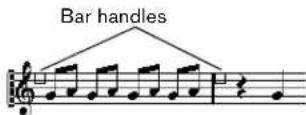
- Double-click on the handle of the bar from which you want to copy or move symbols.
The Bar Copy dialog appears.
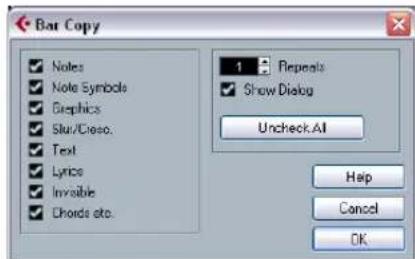
text_image
Bar Copy Notes Note Symbol Graphics Slur/Classo. Text Lyrics Invisible Chords etc. 1 Repeats Show Dialog Uncheck All Help Cancel OK-
Make sure that only the symbol types you want to move/copy are checked.
-
If you have several subsequent bars to which you want to copy symbols, set the "Repeats" value to this number of bars.
If you only want to copy symbols from one bar to another, make sure "Repeats" is set to 1. This option is only available for copying, not for moving.
-
If you want this dialog to appear every time you perform the move/copy operation (see below), activate "Show Dialog".
-
Click OK to close the dialog.
-
To copy the specified event types to another bar, hold down [Alt]/[Option], click on the bar handle of the first bar and drag it to the "target" bar.
To move the event types instead of copying them, drag the bar handle without holding down [Alt]/[Option].
- If you activated "Show Dialog" in step 6 above, the Bar Copy dialog appears, allowing you to confirm your settings. Click OK to close the dialog and perform the operation.
Now, the following happens:
- If you activated "Note Symbols" in step 4 above, the note symbols are copied from the "source" bar and pasted onto notes at the same positions in the "target" bar. If there is a note symbol for a certain note in the "source" bar, but no note at the corresponding position in the "target" bar, the symbol will be ignored.
The actual positions of notes are used as a basis for this operation – not the displayed positions.
If you copy the note symbols from the first bar to the second bar...
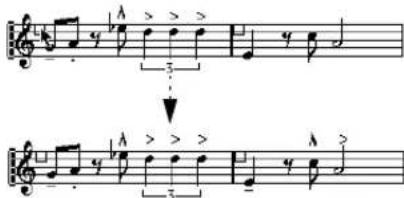
text_image
Musical score snippet showing two staves with notes and rests, including a visual instruction to press the right key....only symbols that find corresponding note positions in the second bar will be copied.
- If you activated other types of symbols in step 4 above, these will simply be moved to the same graphical position in the "target" bar.
- If you set "Repeats" to a number larger than 1 in step 5 above, the same symbols will be pasted into that number of bars (starting from the one you drag the bar handle to).
- If you do not hold down [Alt]/[Option] when dragging the bar handle, the symbols (and other event types specified in the dialog) are removed from the "source" bar.
If there already are symbols (or other objects) of the specified types in the "target" bars, these will be removed.
Moving note symbols
Note symbols, slurs and ties all have "default positions". This determines the vertical distance between the note head(s) and the symbol.
- You can manually adjust the vertical positions of individual symbols, but if you move or transpose their notes, the symbols are automatically reset to their default positions. This also ensures that note symbols and slurs are positioned sensibly when you change the Display Transpose settings.
- To reset the vertical positions of note symbols and slurs in a score, right-click on the corresponding object and select "Default position" from the context menu.
Changing length, size and shape
You can change the shape of any symbol that has a length. Proceed as follows:
Changing the length of a symbol
1. Select the symbol.
The handles appear.

Symbols with a length have two handles when selected.
2. Drag one of the handles.
You may be restricted to vertically or horizontally only, depending on the type of symbol.

In the Preferences dialog (Scores-Editing page), there is a preference called "Keep Crescendo Symbols Horizontal". When this is activated, crescendo and diminuendo symbols will never be slanted.
Resizing note symbols and dynamics
- Right-click on a dynamic or note symbol.
- Select the desired option from the Size submenu. The size of the symbol will change accordingly.
ppp
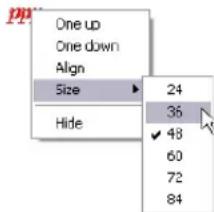
text_image
One up One down Align Size 24 36 Hide ✓ 48 60 72 84ppp
PPP
Changing the symbol size.
Altering the shape and direction of slurs and ties
This section describes how to alter the "regular" slur and tie symbols. How to add and edit Bezier slur symbols is described in the section "The Bezier slur" on page 561.
There are two types of slurs and ties in the Symbols Inspector. The up/down variation of each actually represent the same symbol but with different initial direction. You can perform the following editing to slurs and ties:
- By dragging the middle handle up/down you can change the shape of the curve.

Dragging the middle handle of a slur changes its shape.
- By selecting a slur or a tie and clicking the "Flip" symbol on the extended toolbar or by selecting "Flip Position" in the context menu, you can change the direction and positioning of the slur or tie.
Actually, there are three "modes" for a slur or tie. You step through these three modes by clicking the button.
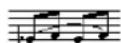
- By dragging the end points of a slur or tie, you can change its shape without affecting its "relation" to the notes it belongs to.
In other words, the end point of the slur/tie will then keep its relative distance to that note when the note is moved with the Layout tool or when the measure width is adjusted. - By holding down [Ctrl]/[Command] and dragging the end points of a slur or tie, it can be detached from the notes it belonged to.
To restore the default shape of a symbol, right-click on it and select "Default position" from the context menu. See "Moving note symbols" on page 568. - To change the default shape and spacing of slurs and ties, open the Score Settings–Project page and edit the settings “Slur’s Start & End Distance from Note Head” and “Slur’s Middle Distance from Note Head” in the Spacings subpage.
These settings will be used for all new slurs and ties you create, as well as for all existing slurs for which you have not manually changed the shape.
Deleting symbols
This is done as with all other objects in Cubase, either with the Erase tool or by selecting it and pressing [Delete] or [Backspace].
Copy and paste
All symbols except those in the Layout and Project tabs can be copied and pasted just as any other object in Cubase. The following applies:
- Symbols that were tied to notes (e.g. accents) will become "free-floating" objects when pasted.
That is, they are not tied to any note any more. If this is not what you want, consider copying with the bar handles, as described in the section "Moving and duplicating with the bar handles" on page 568.
Alignment
Symbols can be aligned as in drawing programs. Proceed as follows:
- Select all objects you want to align.
- On the Scores menu, Align Elements submenu, select the desired option.
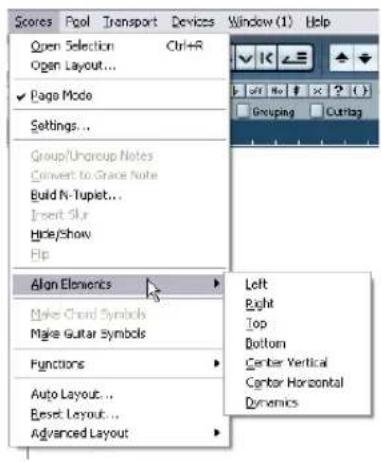
text_image
Scores Open Selection Ctrl+R Open Layout... ✓ Page Mode Settings... Group/Ungroup Notes Convert to Grace Note Build N-Tuplet... Insert Skr Hide/Show Flip Alon Elements Make Chord Symbols Make Guitar Symbols Functions Auto Layout... Reset Layout... Advanced Layout Left Right Top Bottom Center Vertical Center Horizontal DynamicsOption Result
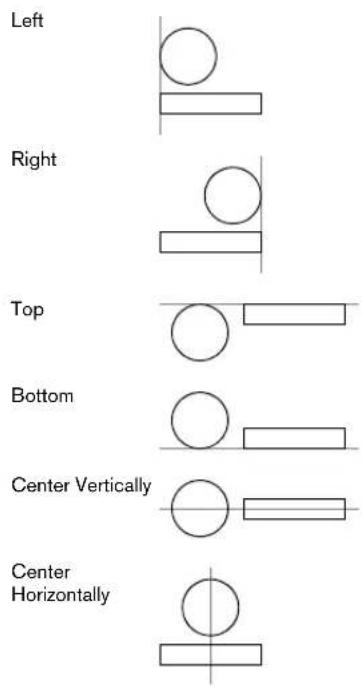
text_image
Left Right Top Bottom Center Vertically Center Horizontally
Note symbols like staccato and accents can only be aligned horizontally.
The "Dynamics" option is a special function for aligning dynamic symbols, as described in the section "Aligning dynamics" on page 572.
Symbol details
This section further describes some of the symbol tabs.
The "Clefs etc." tab
Clefs
You can insert a clef symbol anywhere in the score. This will have an effect on the notes, just as the first clef on the staff has. And just as with the first clef, the type is selected from a dialog that appears as soon as you click. See "Inserting and editing clefs, keys or time signatures" on page 522 and "Setting key, clef and time signature" on page 499.
When you double-click on an existing clef, the same dialog appears allowing you to change the type.
When you right-click on a clef, you can change the type from the context menu.
Time signatures
You can insert a time signature symbol at the beginning of any bar. Inserting a new time signature will insert a change into the signature track, see "Inserting and editing clefs, keys or time signatures" on page 522.
When you click with the Pencil tool, a dialog appears allowing you to specify the time signature. When you double-click on an existing time signature symbol, the same dialog appears allowing you to change the type. This dialog is described in detail in the section "Editing the time signature" on page 499. When you right-click on a time signature, you can change the type on the context menu.
- You can select a font and size for time signatures in the "Text Settings" subpage of the Score Settings dialog (Project page).
The default font for this is the included "Steinberg Notation" font.
Keys
Inserting a key change is similar to inserting a new clef (see above). For further information, see "Editing the key" on page 501.
- In the dialog that appears when you insert a key change, you can also insert Display Transpose changes.
The "Dynamics" tab
There are dynamic symbols ranging from ffff to pppp, plus "special" dynamic symbols such as sforzando, fortepiano, etc.
- By selecting a dynamic symbol and clicking the "+" and "-" buttons on the extended toolbar, you can quickly edit dynamics in the score.
Use this feature to step between pppp, pp, p, mp, mf, f, ff, fff and ffff.
- You can also right-click on a symbol and select "One up" or "One down" on the context menu.
As above, these commands can be used to step between pppp, pp, p, mp, mf, f, ff, fff and ffff.
- To change the size of a dynamic symbol, right-click on it and in the context menu, select an option from the Size submenu.
- In the Line/Trill tab you will find a line symbol which allows you to create the following type of change in dynamics:

Crescendo and diminuendo (decrescendo)
In the Dynamics tab, there are three kinds of crescendo symbols: regular crescendo, regular diminuendo and a "double" crescendo (diminuendo–crescendo).
- To insert a crescendo (<) or diminuendo (>) , select the corresponding symbol from the tab and drag from left to right.
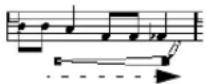
- If you draw a crescendo symbol from right to left, the result will be a diminuendo symbol, and vice versa.
- To insert a crescendo-diminuendo (<>) symbol, select the double crescendo symbol from the tab and drag from left to right.
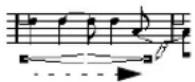
- To insert a diminuendo-crescendo ( > < ) symbol, select the double crescendo symbol from the tab and drag from right to left.
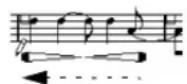
- When you have inserted a crescendo or diminuendo symbol, you can move it and resize it by dragging its handles.
- The "dynamic crescendo/diminuendo" symbol (p < f) is special in that it actually affects the velocity of the notes as they are played back.
This is described in the section "Dynamic crescendo symbols" on page 619.
- If the option "Keep Crescendo Symbols 'Horizontal'" is activated in the Preferences dialog (Scores–Editing page), crescendo/diminuendo symbols will never be slanted when you draw them, but stay horizontal. Also, this option prevents you from accidentally dragging an endpoint up or down when moving the symbol.
- It is also possible to "flip" crescendo symbols, by selecting the option in the context menu or by clicking the Flip button on the extended toolbar.
Aligning dynamics
There is a special command for aligning dynamic symbols (including crescendos) horizontally. Unlike the regular align function (see "Alignment" on page 570), aligning dynamics takes the "baseline" of the dynamic letters into account, aligning them as text rather than as graphic symbols.
- Select the dynamic symbols you want to align, e.g. pp and a crescendo.
- Right-click on a selected symbol and select the "Align" function on the context menu. This aligns all selected dynamics (except slurs and beziers) horizontally.
You can also align the dynamic objects by pulling down the Scores menu and selecting "Dynamics" from the Align Elements submenu.
The "Line/Trill" tab
Octave symbols

The octave symbols (8va and 15va) act as a "local display transpose" (see "Transposing instruments" on page 503)
– they shift the display of the score one/two octaves down.
- By dragging the end of the dotted line, you can specify exactly which notes should be affected by the octave symbol.
Only notes beneath the dotted line are display transposed.
- You can also right-click on the octave symbol and select the "Extend (+)" or "Reduce (-)" command to extend it to the next chord or to reduce it.
Tuplet group symbols

These are "graphical" tuplet group symbols, as opposed to the "real" tuplets.
- After inserting a tuplet group symbol, you can double-click on its number and enter any number from 2 to 32.
- You can specify globally how tuplets should be displayed in the "Notation Style" subpage of the Score Settings–Project page.
You can also select a font and size for the tuplet numbers in the Text Settings subpage. - You can also right-click on the tuplet group symbol and select the "Extend (+)" or "Reduce (-)" command to extend it to the next chord or to reduce it.
Vertical symbols
The vertical symbols in the Line/Trill tab are “note-dependent”. This means that they must be inserted in front of a note. For more information see “Note layer symbols” on page 556 and the text about grace notes (which behave similarly) in the section “Grace notes” on page 552.
The "Other" tab
Lyrics and text symbols are described in the chapter "Working with text" on page 580. Chord symbols are described in the section "Inserting Chord symbols" on page 577.
Pedal down and up symbols

When you insert a Pedal down or up symbol, you will also insert an actual MIDI event (damper pedal, control change 64) at that position. Similarly, inserting or recording a damper pedal event in another editor will display a pedal down/up symbol in the score.
- If the option "Hide Pedal Markers" is activated in the Miscellaneous category of "Notation Style" subpage of the Score Settings–Project page, all pedal markers are hidden.
Use this if you have recorded a lot of damper pedal messages, but do not want these to show in the score (for example if you are writing for an instrument other than piano).
A pedal down/up symbol combination can be displayed as "Two Symbols", "Ped." + Bracket" or as "Bracket only". Just right-click on the pedal symbol and choose an option from the context menu. You can also set this on the Score Settings-Project page, on the Notation Style subpage (Miscellaneous).
Repeats

Repeat signs (one and two bars) have a special feature: if you hold down [Shift]-[Ctrl]/[Command] when entering them, notes in the bars they relate to are automatically hidden (for more info on hiding symbols, see "Hiding/showing objects" on page 599).
Box (rectangle) symbol

This is a "generic" box symbol, which may be useful for different purposes. If you double-click on a box, a dialog opens in which you can specify whether the box should be transparent or not, and whether the border should be visible. This dialog can also be opened by selecting "Properties" from the context menu.
The box symbol is available in the "Other" and "Layout" tabs.
The keyboard symbol
This is described in the section "Adding a keyboard symbol" on page 562.
Additional symbols
If you click on the "Select Symbol" button and then into the score, the "Select Symbol" dialog opens. Here you can choose note heads, accidentals and rests that work only as drawing elements, i.e. they do not insert any note data into the track. They do not affect MIDI playback! You can set the desired symbol font size directly in the Font Size field.
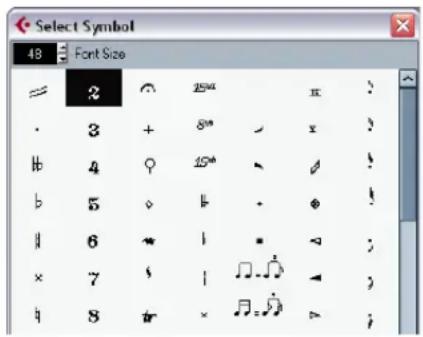
text_image
Select Symbol 48 Font Size 2 25" x ? 3 + 8" x ? 4 10" 5 11 " φ ! 6 * 1 * △ ; 7 1 ♩ △ ;The "Layout" tab
Rehearsal marks
These come in two flavors, as numbers and as letters.
When you place the first of these in the score, it will be labelled 1 or A (depending which you choose in the tab), the second will then automatically be labelled 2 or B, the next 3 or C etc. If you delete one, the labelling of the others will be shifted so that they always make up a complete series of numbers/letters.
- You can select a font and size for rehearsal marks in the "Text Settings" subpage of the Score Settings–Project page. This dialog also allows you to add a box or an oval around the rehearsal mark.
- Rehearsal marks can be added automatically, at the start position of each Marker in the project. This is done using the "Marker track to Form" function.
The "D.C.", "D.S." and "Fine" symbols provide a quick way to insert some common play directions into the score. The symbols are text symbols – you can adjust which font should be used in the "Text Settings" subpage of the Score Settings–Project page, see "Settings for other fixed text elements" on page 589.
- To have these symbols actually affect playback, insert them from the Project tab and use the Arranger mode. See "Scores and the Arranger mode" on page 618.
Endings

There are two types of endings, closed ("1") and open ("2"). Both can be stretched to any length or height by dragging the handles. You can also double-click or right-click on the existing number and enter any text you like.
Endings are available both in the Layout tab (for the layout layer), the Project tab (for the project layer) and the Line/Trill tab (for the note layer). Which one to choose depends on the score; while it is handy to insert endings once and for all as Project symbols, this will not allow you to make individual adjustments for the different parts.
- You can right-click on an ending symbol and select the "Extend (+)" or "Reduce (-)" command to extend it to the next chord or to reduce it.
Tempo

text_image
Text Page Text A J=xx J=J D.C. Fine → Text Page Text A J=xx J=J D.C. Fine J=120This always shows the current tempo according to the tempo track. In other words, to make this symbol display a certain tempo, insert the value into the tempo track.
Normally this symbol shows the number of beats (quarter notes) per minute, but if you double-click or right-click on it, a menu appears that allows you to select any note value. The number then changes accordingly.
Tempo change as note symbol

This symbol allows you to specify a tempo change as a change from one note value to another. The example above would mean "lower the tempo by a third".
To change the note value for either symbol, double-click or right-click on it and select the desired note value from the context menu.
User Symbols
The User Symbols tab lets you create your own graphic symbols and use these in the score.
Creating a user symbol
Initially, the User Symbols tab is empty. To create symbols you use the User Symbols editor:
- Double-click on the empty symbol field in the tab. The User Symbols editor opens. You can also right-click on an empty symbol field and select "Edit..." to open the same dialog.

text_image
User Symbols New Blank 0.45 New Book 10x100 Features Function +-
Pull down the Functions pop-up menu and select the desired zoom factor from the View submenu. Often you want to work at a reasonably high zoom factor when drawing and editing symbols.
-
Use the tools and functions to draw a symbol. The available tools are listed in the table below.
When you are finished, you can close the editor and insert the symbol into the score, or you can create more symbols:
-
Select "New Symbol" from the Functions pop-up menu. An empty symbol field appears in the section to the left of the drawing area – this section corresponds to the actual User Symbols tab, showing all symbols you have created.
-
Click the new empty symbol field to the left to make sure it is selected. The drawing area is cleared.
-
Continue creating new symbols this way.
- You can edit existing symbols at any time by selecting them to the left and using the tools and functions. Any changes you make are automatically stored in the User Symbols tab for the project. You can also export symbols, for use in other projects, see below.
- To insert a user symbol into the score, click it in the tab to select the Pencil tool and then click at the desired position in the score.
The User Symbols editor – tools and functions
The toolbar contains the following tools and settings, from left to right:
Tool Description
| Arrow Use this to select objects – press [Shift] to select more than one. Click and drag to move objects – press [Ctrl]/ [Command] to drag vertically or horizontally only or press [Alt]/[Option] to copy.To delete an object, select it and press [Backspace] or [Delete]. | |
| Line Draws a straight line. | |
| Rectangle | Creates a rectangle. You can fill this with the Fill button if needed. |
| Polygon Creates a polygon – click where each corner of the poly-gon should be and close the figure by clicking outside the drawing area. | |
| Circle Creates a circle. You can fill this with the Fill button if needed. | |
| Ellipse Creates an ellipse. You can fill this with the Fill button if needed. | |
| Arc Creates an arc. | |
| Text Allows you to insert text objects. Clicking with this tool in the drawing area opens a dialog where you enter the text, specify font, style, etc. You can double-click on a text ob-ject you have inserted to change its text or settings. | |
| Symbol Clicking with this tool brings up a dialog where you can select any of the existing score symbols and incorporate this (at the desired font size) into your own symbol. | |
| Frame Color When this is selected, the Color pop-up menu selects the color for the object frame. | |
| Fill Color When this is selected, the Color pop-up menu selects the fill color for objects (if Fill is selected) | |
| Fill Click this if you want the object to be filled – you can then select a Fill Color for it from the Color pop-up menu. | |
| No Fill Click this if you do not want the object to be filled. | |
| Color pop-up | Selects Frame or Fill Color for objects. The "Select Col-ors..." menu item brings up a standard color dialog. |
| Line Width | Allows you to change the line width used for the selected object. |
The Note Linked pop-up lets you create symbols linked to note positions. This affects the whole symbol, not a selected graphic object.
| Menu item | Description |
| Not Linked | The symbol will not be linked to notes. |
| Linked/Left | The symbol will be linked to a note, appearing to the left of the note. |
| Linked/Center | The symbol will be linked and centered to a note. |
| Linked/Behind | The symbol will be linked to a note, appearing to the right of the note. |
The Functions pop-up menu contains the following items (some of these can also be accessed on the context menu for the User Symbols tab):
| Menu item | Description |
| New Symbol | Adds a new empty symbol to the tab (and to the symbol list to the left in the editor). |
| Delete Symbol | Deletes the current symbol from the tab. |
| Export User Symbols... | Allows you to save the current tab as a separate file on disk. |
| Import User Symbols... | Loads settings for a complete tab from disk. Note that this replaces the current settings. |
| Export/Import Symbol... | Lets you save or load individual symbols to/from disk. Importing a symbol replaces the current symbol in the tab. |
| Delete | Deletes the selected object(s). |
| Select All Selects all objects in the current symbol. | |
| Transform - Scale Symbol | Lets you scale (resize) the selected object by specifying a percentage. |
| Transform - Mirror horizontal/vertical | Mirrors the selected object along the horizontal or vertical axis. |
| Transform - Flip ± 90 | Rotates the selected object by + or - 90 degrees. |
| Draw - Group | Groups the selected objects so that they are treated as one. |
| Draw - Ungroup | Ungroups the selected group. |
| Draw - Bring To Front/Send To Back | These items let you arrange the objects by moving them to the front or the back. |
| Align | Aligns the selected objects to each other. |
| View | Sets the zoom factor for the drawing area. |
Working with chords
About this chapter
In this chapter you will learn:
- How to enter chord symbols manually and automatically using the "Make Chord Symbols" feature.
- Which settings can be made for chord symbols.
Inserting Chord symbols
Manually
- On the Chord Symbols tab, you will find a set of predefined chord symbols, see "Using presets" on page 578. If the symbol you want to add is among these, simply select it and click in the score to insert the chord symbol.
To specify and enter any other chord symbol, proceed as follows:
- Open the "Other" tab and select the chord symbol button.
- Click in the score at the position where you want to insert the chord symbol.
The Edit Chord Symbol dialog opens.
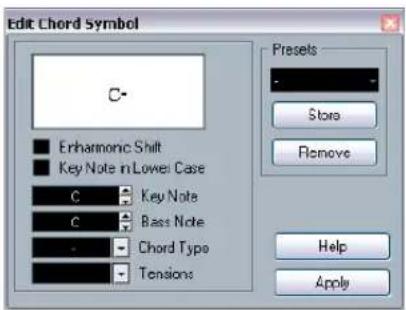
text_image
Edit Chord Symbol C- ■ Erharmonic Shift ■ Key Note in Lower Case C Key Note C Bass Note - Chord Type Tensions Presets Store Remove Help ApplyThe Edit Chord Symbol dialog
- Enter the key (root) note in the Key Note field.
You can either type in a chord letter or step through the chord letters using the up/down arrows to the right.
- Specify a chord type in the "Chord Type" field.
You can either enter it directly (for example, by typing a "7") or select an option from the pop-up menu (click the arrow button to open it).
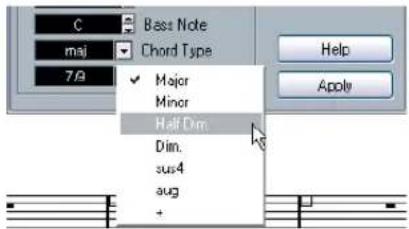
text_image
C Bass Note maj Chord Type 7/8 Major Minor Half Dim Dim. sus4 aug + Help Apply- If you wish, specify a tension in the "Tension" field.
Again, this can be done by typing or by using the pop-up menu. However, there are some special display options which you can only get by typing (see the table below). You might also want to add some text here (such as "no third", etc.). You can also select the basic tensions from the pop-up menu, and then add special options by typing.
Character Description Example Result
() The tensions will
be enclosed in brackets.
/ The tensions will
be separated by a slash sign.
| The tensions will
be placed above one another.

You can also combine several options. This is a combination of two options, along with a space to put the "9" above the "5". Note that only one "(“ sign is needed when the "|” option is used.

- If you want to have a special bass note (e.g. a C major with a D bass note), set the Bass Note pop-up menu to this note (this cannot be the same as the key note).
The program will "remember" the relation between key and bass note, so that if you change the key note, the bass note will follow. - If you want the key note to be displayed in lower case, activate the "Key Note in Lower Case" checkbox.
- If needed, activate the "Enharmonic Shift" option.
- Click Apply.
The chord symbol appears in the score.
- To open the Edit Chord Symbol dialog for an existing chord, double-click on the symbol.
You can also right-click on the symbol and select "Properties" on the context menu to open the dialog.
Using presets
As with many other functions in Cubase, you can create chord symbol presets for instant use. Each preset contains all settings in the dialog – i.e. the preset list is a "library" of chords. You will find the presets in the Chord Symbols tab in the Inspector and in the corresponding context menu. The preset handling is the usual:
- Click Store to store the current settings as a preset. A dialog will appear, allowing you to enter a name for the preset.
- To load a stored preset, select it from the Presets popup menu or select it from the Presets submenu of the context menu.
Note that this only loads the settings into the dialog – you need to click. Apply to apply the settings to a selected chord symbol.
- To remove a preset, select it on the pop-up menu and click Remove.
Using Make Chord Symbols
If you already have recorded the chords for a project, Cubase can analyze them and create chord symbols:
- Open the recording in the Score Editor. If you want the chords to be inserted on another track, you can create an empty part on that track and open it along with the recording.
- If you like, make settings for how the chords should be displayed on the Score Settings—Project page, on the Chord Symbols and the Notation Fonts subpages. You can change all these settings after you inserted the chords as well.
- Select the notes for which you want chord symbols to be created. If chord symbols should be created for all chords on the track, use the Select All function on the Edit menu.
- Use the arrow keys to make the desired staff active. This should be the staff on which you want the chord symbols to end up.
- Select "Make Chord Symbols" from the Scores menu. The chords appear. They can be moved, duplicated and deleted as any other symbol. You can also double-click on a chord symbol to edit it in the Edit Chord Symbol dialog (in the same way as when creating chords manually – see above).
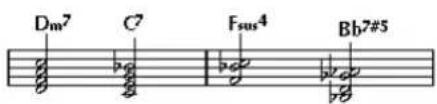
text_image
Dm7 C7 Fsus4 Bb7#5A staff after using Make Chord Symbols.
- Instead of using the "Make Chord Symbols" menu item, you can click on the Make Chord Symbols button on the extended toolbar.

text_image
Functions i J# J# H X#Y C7 UPD - + Layer 1 2 3 L P 0 400 500 600 Make Chord Symbols- If the option "Use for Make Chords" is activated in the Guitar Library subpage of the Score Settings—Project page (see "Adding guitar chord symbols" on page 562), guitar chord symbols will be added as well (if the guitar library contains any guitar symbols that match the chords).
About the analysis
- The MIDI chords are expected to be played in their most basic inversion. If not, an extra bass note is added. For example, the notes CEG are interpreted as C major, but GCE is interpreted as C major with a G bass note. If you do not want any interpretation of the inversion (i.e. no added bass notes) hold down [Ctrl]/[Command] while selecting Make Chord Symbols.
- All selected notes on all staves are taken into consideration. Whenever there is any change on any staff, the notes are reinterpreted and a new chord symbol is added. This means you should probably avoid having the melody track in the Score Editor when you use Make Chord Symbols, or you will get a lot more chords than you expect, possibly with strange tensions.
- In addition to the above, the Quantize value is used. At the most, there will be a new chord at each quantize position.
- There must be at least three notes at a certain position for the program to interpret it as a chord. Also some combinations of notes simply do not make any sense to the program and will not produce any chords.
- The analysis method is not perfect since the same set of notes can be interpreted differently depending on context. Some editing may be required. If you record the track solely to create chords automatically, play the chord as simple as possible, in the correct inversion, without added octaves, etc.
Global chord settings
On the Score Settings–Project page (Chord Symbols and Notation Fonts subpages), there are several global settings that affect how chords are displayed. These settings affect all chords in the project.
Chord Symbols
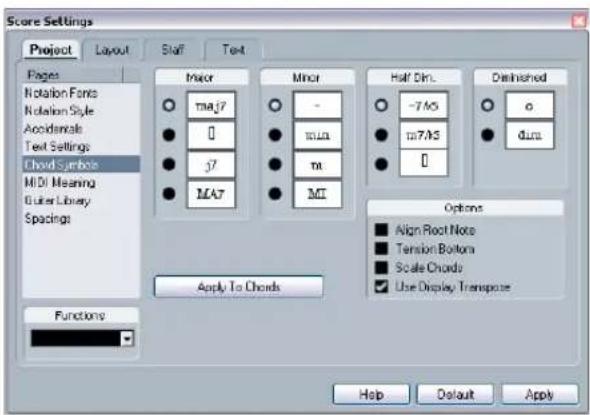
text_image
Score Settings Project Layout Staff Text Pages Notation Fonts Notation Style Accidematic Text Settings Chord Symbols MIDI Meaning Outer Library Spacings Major Minor Half Dim. Disinished ○ mA j7 ○ - ○ -7A5 ○ o ● 0 ○ MA ● 0 ● j7 ● MA ● MI Options ■ Align Root Note ■ Tension Bottom ■ Scale Chords ✓ Use Display Transporte Apply To Chords Functions Help Default ApplyUse the four sections of radio buttons to specify how the four most common chord types should be displayed:
- If you want the root (key) note to be aligned with the bass note, so that they are both displayed at the same vertical position, activate "Align Root Note".
- If you want the tensions to be displayed at the same vertical position as the root note (rather than a bit above the root note), activate "Tension Bottom".
- Activate "Scale Chords" to scale a staff (using the Size setting on the Options tab on the Score Settings–Staff page), and want the chords to be scaled accordingly.
- Activate "Use Display Transpose" if you want the chord symbols to be affected by the Display Transpose setting on the Score Settings–Staff page.
- To apply the settings to your score, click "Apply to Chords".
Notation Fonts
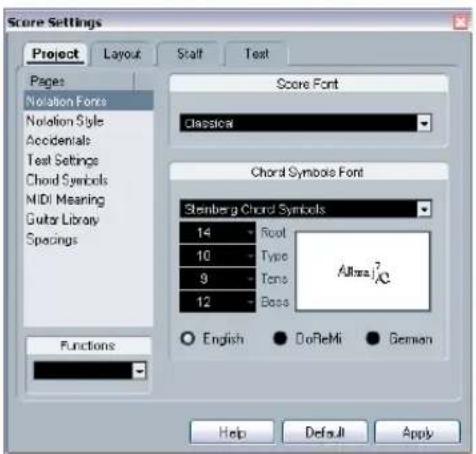
text_image
Score Settings Project Layout Staff Text Pages Notation Fonts Notation Style Accidentals Test Settings Chord Symbols MIDI Meaning Guitar Library Specifications Functions Score Font Classical Chord Symbols Font Stenberg Chord Symbols 14 Root 10 Type 9 Tons 12 Boss Alfara ? English DoReMi German Help Default Apply- Use the Score Font pop-up to select a font for the display of note heads, clefs etc.
Available are Legacy, Classical and Jazz.
- Use the Chord Symbols Font pop-up to select a font for the chords.
Cubase comes with its own font for this (Steinberg Chord Symbols), but you can also pick any other available font from the pop-up menu.
- Use the four size value fields to select sizes for the four different chord "elements".
You can type in values or use the pop-up menus. Normally, you would want the "Root" size to be the largest and the "Tension" size the smallest.
- Use the radio buttons at the bottom to select a chord display mode.
This affects how the key and bass notes are displayed:
Option Description
English Regular notation.
DoReMi "Do-Re-Mi-..." are used instead of "C-D-E-..."
German As English notation, but "B" is displayed as "H", and "Bb" or "A#" are displayed as "B".
Working with text
About this chapter
In this chapter you will learn:
- Which different types of text are available.
- How to enter and edit text.
- How to set font, size and style.
- How to enter lyrics.
Adding and editing text symbols
This section describes the general procedure for adding and editing text symbols. As described in the section "Different types of text" on page 583, there are several different types of text symbols, but the basic procedures are the same (except for block text symbols, see "Block Text" on page 585, and page text symbols, see "Page text" on page 585).
Inserting a text symbol
-
If you wish, select a font, size and style for the text (or select a text attribute), as described in the section "Selecting font, size and style for the text" on page 582.
You can also change these settings after you inserted the text. -
Open the desired symbol tab in the Inspector.
The different text symbols are found on the Other, Layout and Project symbol tabs.
-
Click on the text symbol in the tab to select the Pencil tool.
-
Make sure the correct staff is active, and click in the score at the position where you want the text to appear. If you are adding lyrics, you should click above or below a note (lyrics are centered around each note and positioned vertically to where you clicked). See "Lyrics" on page 583.
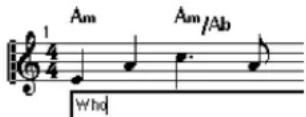
- Enter the text in the text box that appears.
You can use [Backspace] to delete letters, and move the cursor with the arrow keys.
- When you are done, press [Return].
The text appears. You can move, duplicate or delete it as with any symbol.
About the melisma lines
When you add a text symbol, you will find a handle at the right edge of the text. By dragging this handle to the right, you can extend a "melisma line" from the text. This has several uses:
- If you are adding lyrics and want to indicate that a syllable should be sung over several notes:
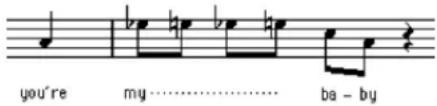
text_image
you're my be - by- If the text is an advice about articulation or playing style, and you want it to apply to a certain musical phrase only:

text_image
Grow1 3- If the text is an advice about articulation or playing style, and you want it to apply from that point on in the score:
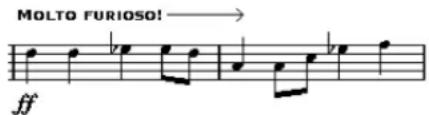
text_image
MOLTO FURIOSO! ffOn the Score Settings—Project page, Text Settings subpage, you will find two settings that determine the appearance of the melisma lines:
- The Melisma Style pop-up is where you specify whether the line should be solid or dotted.
- The Melisma End pop-up allows you to choose whether the end of the line should be plain, have an arrow, or form a "bracket" up or down.
Making space
- If you find there is not enough space between staves, e.g. to add lyrics, please see "Dragging staves" on page 604 for info on how to separate the staves.
- If you find the score looks crammed after adding text, see "Auto Layout" on page 606.
Editing the text
If you made a mistake when typing or for some other reason wish to change text, double-click on a text block with the Object Selection tool, edit the text and press [Return] to close it.
- It is also possible to replace all occurrences of a certain word in the score, without having to edit the texts manually, see "Find and replace" on page 587.
Selecting font, size and style for the text
- Select the text you want to make settings for. If nothing is selected, the settings you make will be the "default settings". The next time you insert text, these settings will be used.
- Open the Score Settings-Text page.
- Select a font from the Font pop-up menu.
How many and which fonts appear depends on what typefaces you have installed on your computer.
For regular text you should probably avoid the "Steinberg" fonts. These are the fonts Cubase uses for all scoring symbols, etc. - Select a text size from the Size pop-up menu (or enter one manually in the text field).
- You can also add one or several font options using the checkboxes and pop-up menus. Most of the options are common text style variations such as bold, italic, underline, etc. But there are also a few special style options:
Option Description
| Frame Allows you to put the text in a rectangular ("Box") or oval frame. | |
| Melisma options | These determine the appearance of the "melisma line", see "About the melisma lines" on page 581. |
| Positioning Allows you to select which side of the text block (left or right) should be used for calculating its position. This has an effect in situations where that text block is moved automatically (as a result of an Auto Layout function, when you move bar lines manually, etc.). If, for example, the text block appears just in front of a note (to the left of it), it will appear in a more sensible position after the adjustment, if the "Right" option is selected. | |
| Alignment: Left/Center/Right | Allows you to specify the alignment of the text. These options are only valid for texts with more than one line. |
- Click Apply to apply the settings to the selected text. Note that you can select other text blocks while the dialog remains open – the dialog will be updated to reflect the settings of the currently selected text.
- When you are done, close the Score Settings dialog.
Text attribute sets
A text attribute set can be seen as a "preset" containing all font, size and style settings. By creating text attribute sets for the settings you use most often, you can save a lot of time.
Creating a text attribute set
- Open the Score Settings–Project page and select the Text Settings subpage.
- Open the Attribute Sets tab.
- Pull down the Set pop-up menu and select the "Empty" set.
- Select a font, specify a size and add style options using the checkboxes. The options are the same as when you make text settings on the Score Settings-Text page (see above).
- Click in the Set field and enter a name for the new text attribute set.
- Click Store to store the new text attribute set.
Using text attribute sets
To apply the settings in the text attribute set to one or several text blocks, select them, select the set from the Set pop-up menu on the Score Settings-Text page and click Apply. You can also apply a text attribute set to a text block directly in the score by right-clicking it and selecting the set from the context menu.
- If you select a text attribute set on the Text page when no text is selected in the score, the settings will be used the next time you insert some text.
⇒ After you've selected a set for a text block, there will be a "link" between the text and the attribute set. Any changes to the attribute set will affect all texts that use it (see below). You can still edit any text settings manually (on the Project–Text Settings subpage) but then the "link" to the attribute set will be removed.
Editing text attribute sets
If you edit the settings in a text attribute set, all texts using this particular set will be affected. This is very practical, since it allows you to use the same number of “generic” sets for all your projects (for titles, comments, lyrics, etc.), and simply change the fonts, sizes, etc. for a different project if necessary. This will also make it easier to move projects between computers (which may not have the same fonts installed).
- Select the Attribute Sets tab on the Text Settings subpage of the Score Settings–Project page.
- Select the attribute set you want to edit from the Set pop-up menu.
- Change the settings as desired.
This includes the name of the set. - Click Apply.
Different types of text
Regular text
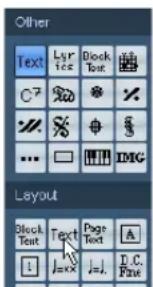
text_image
Other Text Lyrics Block Text C7 X200 # # ... IMG Layout Block Text Text Page Text A J=XX J=J. D.C. FineThe regular Text option is selected.
This type of text is inserted by selecting Text in the Other or the Layout symbol tabs.
The text is tied to the bar and staff position. If you move the bar or the entire staff, it moves with it.
Pasting text
You can paste text (e.g. from another program) into a text symbol in the score. To do this, select the text symbol and right-click it. Then, select "Text from Clipboard" from the context menu. This option is also available on the Functions submenu of the Scores menu.
Similarly, you can copy selected text by using the "Text to Clipboard" option from the context menu.
Lyrics
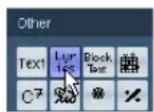
The Lyrics option is selected.
This type of text is inserted by selecting Lyrics on the Other symbol tab.
When you insert lyrics, you should click below or above the note the syllable belongs to. The text will then appear horizontally centered around the note and vertically positioned to where you clicked. You can later move it up or down, as with any symbol.
Lyrics are tied to the note position. If you move the note, the text moves with it. The spacing between notes is also adjusted to make the lyrics fit.
Inserting lyrics for a number of notes
- With lyrics selected, click below or above the first note with the Pencil tool.
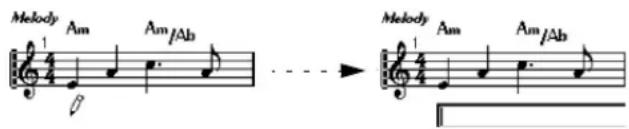
text_image
Melody Am Am/Ab → Melody Am Am/Ab-
A text input field is opened. Enter the text (the word or syllable) for that note.
-
Hit [Tab].
The program moves on to the next note.
-
Input text for this note and hit [Tab] again.
-
Proceed until the last note and then press [Return] or click outside the text box.
When you insert lyrics this way, the positions of the notes will automatically be adjusted so that no lyric "block" overlaps another. If this is not what you want, you can activate the option "Don't Sync Lyrics" in the Lyrics category on the Score Settings—Project page (Notation Style sub-page). If this is activated, the note positions will not be affected, which may be preferable.
- When entering words with several syllables you normally separate the syllables with a dash (-). By default, the dash signs are automatically centered between the syllables – if this is not what you want, activate the option “Don’t Center Hyphens” in the Lyrics category on the Score Settings–Project page (Notation Style subpage).
Lyrics and measure widths
When you first enter lyrics, the result may look crammed, since the words take up more space than the notes (the lyrics are also selected just after entering the last word, which will make them look a bit odd when overlapping). To remedy this, use the auto layout function to automatically adjust the measure widths (see "Auto Layout" on page 606).
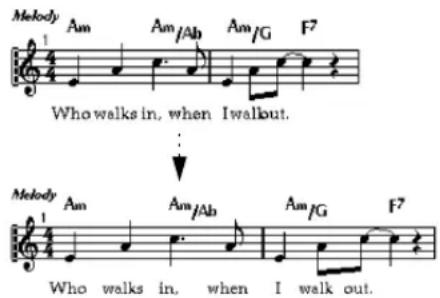
text_image
Melody Am Am/Ab Am/G F7 Who walks in, when I walkout. Melody Am Am/Ab Am/G F7 Who walks in, when I walk out.Before and after using the auto layout function.
Adding a second verse
To insert a second line of lyrics, proceed as follows:
- Enter the new lyrics above or below the existing verse.
- Select all the words that should be in the new verse.
- Right-click the selected words to open the context menu.
- Select the appropriate verse from the Move To Verse submenu (Verse 1–6).
This assigns the selected lyrics to the selected verse.
To indicate that the words belong to another verse, they are automatically displayed in another color. However, all verses will print in black as usual.
- To select all words in one verse only, press [Shift] and double-click on the first word in that verse.
This selects all following words in the verse.
Inserting lyrics into voices
Each voice can have its own lyrics. If you have a vocal arrangement with several voices, you can add lyrics to them, one by one.
- Click on the Lyrics symbol in the Other symbol tab, so that the Pencil tool is selected.
- Make sure that the correct voice is selected (on the extended toolbar). See "Entering notes into voices" on page 535.
- Click on the first note in the selected voice.
- Enter the lyrics for this voice, using the [Tab] key to move from note to note, as described above.
- Start over, by activating the next voice, clicking on the first note in that voice and proceeding as with the first voice.
- If needed, adjust the position of the lyrics for each voice (see below).
Moving lyrics
If you want to move the lyrics up or down, for example to make room for a second verse, proceed as follows:
- Hold down [Shift] and double-click on the first word in the lyrics.
All lyric "blocks" are selected.
- Drag one of the lyric blocks up or down.
All selected lyric blocks are moved accordingly.
Adding lyrics from the clipboard
If you want to prepare your lyrics in another program, you can import them into Cubase the following way:
- Create the lyrics in another program.
Separate words with space as usual, syllables within words with dash signs (-). - Copy the text.
- In Cubase, select the first note to which the lyrics should be added.
- Pull down the Scores menu and select "Lyrics from Clipboard" from the Functions submenu.
The lyrics are added, starting at the selected note.
Layout text
The text symbols in the Layout symbol tab are part of the layout layer, and can thus be hidden or shown for different tracks in the layout, by activating the "L" column on the Score Settings—Layout page. The text will appear in all staves for which you have activated the "L" column. This means it is tied to the bar and staff position. If you move the bar or the entire staff, it moves with it.
Block Text
Block Text allows you to import text from a file on disk or from the clipboard. Proceed as follows:
- Click on the Block Text symbol on the desired tab to bring up the Pencil tool.
You can choose between project layer block text (from the Project tab – useful for text that should appear on all pages, e.g. the score title), layout layer block text (from the Layout tab – if you want to print a title only for a particular track layout, e.g. for a particular instrument), or block text used for individual parts (from the Other tab – this text will only appear in the score for a particular part).
- Click in the score where you want to insert the text.
A regular file dialog appears.
-
Select a file (text or rtf) to import.
-
Click Open.
The text in the file is inserted into the score.
- Right-clicking on inserted Block Text brings up a pop-up menu with the following options:
Menu item Description
| Import Text... Imports text from a text file or rtf file. The imported text will replace any text currently inserted at the position of the Block Text. |
Update Text Reloads the text from the file.
| Text From Clipboard | Pastes the text from the clipboard into the Block Text. |
| Text To Clipboard | Copies the Block Text to the clipboard. |
| Hide Hides the inserted block text. To make the text visible again, activate the Hide checkbox in the display filter bar, right-click on the text "Hidden" which is displayed for the hidden text and select "Show" on the context menu. |
| Properties Brings up the RTF Settings dialog. You can also open this by double-clicking the Block Text. |
The RTF Settings dialog
Selecting "Properties" from the context menu (or double-clicking the Block Text) brings up a dialog with settings for the Block Text. These are:
Setting Description
Font Lets you select the font to use for the Block Text. If "No Change" is selected, the font in the original file (if applicable) is used.
Size The text size, as a percentage.
Draw Frame When this is activated, a frame is shown around the Block Text.
Word wrap When this is activated, line breaks are used to fit the text in the Block Text symbol.
Replace mode In this mode, the Block Text box will be opaque, covering what's under it.
Trans mode In this mode, the Block Text box will be transparent.
Page text
The page text symbols are found on the Layout and Project tabs. They work the same way, but Project Page Text is part of the project layout, and will therefore appear in all layouts.
The position of page text is not tied to a note, bar or staff position. In other words, it does not matter if you move other objects on the page, the page text stays where you inserted it. Typically, it is used for score titles, page numbers, copyright information and other text elements that you want displayed with all parts (on all pages if you like).
Proceed as follows to enter Page text:
- Open the Layout or the Project tab of the Symbols Inspector.
- Click on the Page Text symbol to bring up the Pencil tool.
- Click in the score.
It does not matter where you click – the positioning is specified in the dialog that appears. -
Enter the text you want displayed in the field at the top of the dialog.
You can use special characters to add "variables" such as page numbers – see below. -
Adjust the settings for how the text should be positioned:
Option Description
| Show on all pages | When this is activated, the text will be shown on all pages. The "Except First" checkbox allows you to exclude the very first page. |
| Show on first page | When this is selected, the text will only be shown on the first page. |
| Line This determines how the text should be aligned. For example, if you place several texts on "Top/Left", you can sort them by entering the desired number of lines. | |
| Toggle Position | When the Left or Right position option is selected to the right, activating this checkbox will make the text alternate between left and right alignment on even/odd pages. |
| Position buttons | Determines where on the page you want the text, vertically (Top/Bottom) and horizontally (Left, Center, Right). |
- Select a text attribute set for the text, or make manual settings for font, size and style.
7. Click OK.
The text is inserted. You can adjust the positioning manually by dragging the text block.
Inserting variables
When you enter the text, you can also insert special characters or "place holders" for different attributes. When the text is displayed, these characters will be replaced by their actual values (e.g. page numbers). The following variables are available:
Text to enter Text that will be displayed
%p The current page number.
%| (lower case L) The long staff name.
%s The short staff name.
%or The name of the project.
For example, if you enter the text “%l, %r, Page %p”, these variables might be shown as “1st Violin, Quartet No.2, Page 12” in the score.
Using the Score Settings (Text page)
In the Score Settings (Text page), you can find a number of text-related settings. The symbol buttons correspond to the symbols found on the Other, Layout, and Project tabs of the Symbols Inspector, see "Symbol details" on page 570. You can use the Layer pop-up menu to switch between the display of the corresponding layers.
- Select the layer you wish to use from the Layer pop-up menu.
The text symbols available for this layer will be displayed to the left of the pop-up menu.
- You can use the text symbols in the same way as you would use symbols from the Inspector or a symbol palette. When you select a text symbol and move the mouse pointer over the score, the pointer will change to a pencil, and you can enter text at the position you click on.
The Notepad tab and the Selection tab
Below the text symbols and the Layer pop-up, you can find two tabs with large text entry fields.
- Use the Notepad tab to enter longer text passages.
When you are happy with the text in terms of wording and length, select all or part of the text, and select a note in the score. Now, the Insert Lyrics button below the Notepad tab becomes available.
When you click Insert Lyrics, the selected text will be entered into the score, starting from the note you selected.
- When you select text in the score and open the Selection tab, the selected words are shown in the text field. You can now change the wording of the text, and use the text format options to the left to change the appearance of the selected text. When you are done, click Apply to apply your changes to the selected text in the score.
Text functions
The Words tab
If you have certain words that you use a lot, you can "store" these as dedicated symbols on the Words tab. This will save time, since you do not have to type the same word over and over again.
Storing a word
- Open the Words symbol tab.
This tab is hidden by default. See "Showing/Hiding Symbols Inspector tabs" on page 557 for information on how to display hidden Inspector tabs.
- Double-click on an "empty" symbol.
The Custom Text Editor dialog appears.
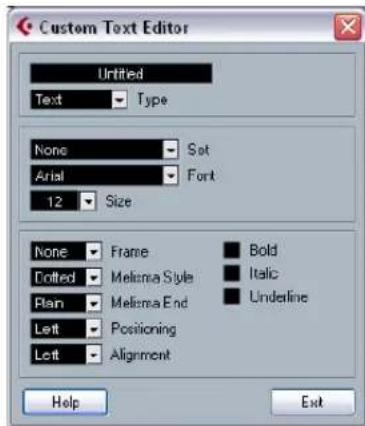
text_image
Custom Text Editor Untitled Text Type None Sat Arial Font 12 Size None Frame Bold Dotted Melissa Style Italic Plain Melissa End Underline Left Positioning Left Alignment Help Exit-
Type in the desired word(s) in the text field at the top of the dialog.
-
Specify the text type (regular text or lyrics) with the Type pop-up.
-
Make settings for font, size and style.
You can also use a text attribute set if you like.
- Click Exit to close the dialog.
The words you entered appear in the selected symbol field on the Words tab.
- Right-clicking one of the fields opens a context menu with a number of options:
- Select "Edit..." to open the Custom Text Editor dialog.
- Select "New" to add a new empty symbol to the Words tab.
- Select "Remove" to delete any unwanted symbols from the Words tab.
- Select "Open As Palette" to open the Words symbol palette.
Inserting a word
You insert words from the Words tab as you would insert any regular symbol, by selecting the appropriate word and clicking in the score. However, you can edit the word after inserting it, just as with text inserted by typing.
Find and replace
This function allows you to replace all occurrences of a certain word or group of words, with another word or group of words. The replacement is done once and for all, for all text symbol types, regardless of font, size and style settings. Proceed as follows:
- Pull down the Scores menu and select "Find and Replace" from the Functions submenu. A dialog appears.
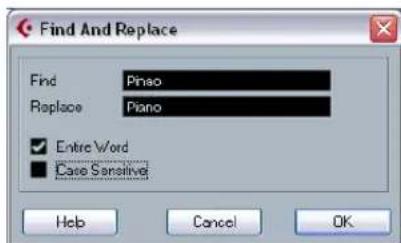
text_image
Find And Replace Find Piano Replace Piano ✓ Entire Word ■ Case Sensitive Help Cancel OK- Enter the words to replace in the Find value field.
- If you want all instances of the words to be replaced, regardless of upper/lower case, deactivate the "Case Sensitive" option.
- If you do not want to replace the words if they are a part of another word, activate the "Entire Word" option. For example, if you want to replace the word "string" but not the word "stringendo", you should activate "Entire Word".
- Enter the words that should be used as replacement in the "Replace" field.
- Click OK.
Now all occurrences of the "Find" words will be replaced with the "Replace" words.
Staff names
You can make settings for staff names in several places:
- On the Score Settings–Layout page, you specify whether the staff names should be shown at all, and whether to use the names of the actual edited tracks in the score. In a multi-track layout, you can choose for which tracks the staff names should be shown, by clicking in the "N" column for each track.
- You specify a long and short staff name on the Score Settings–Staff page (Main tab).
These will be used if you do not use the "From Tracks" option on the Score Settings–Layout page. The long name will be displayed for the first system only, and the short name for the following systems. If you want a name at the top of the page only, leave the "Short" name field empty.

If the option "Show Long Staff Names on new Pages" is activated on the Notation Style subpage (Staff Names category) of the Score Settings—Project page, the long name will be displayed for the first system on every page.
To select a font for staff names, proceed as follows:
- Open the Score Settings—Project page and select the Text Settings subpage.
- Select the Project Text tab.
- Use the "Font for" pop-up menu to select "Staff Names".
- Select font, size and styles for the staff names (or use a text attribute set).
- Click Apply and close the Score Settings dialog.
Additional staff name settings
- If you activate the option "Show Track Names to Left of staff" on the Notation Style subpage (Staff Names category) of the Score Settings–Project page, the staff names will be shown to the left of the staves, instead of above them.
- You can define separate subnames for the upper and the lower staff in a polyphonic or split system, see “Staff names” on page 526.
- You can fine-tune the vertical and horizontal position of staff names with some of the options on the Spacing subpage of the Score Settings–Project page.
Bar Numbers
Bar Number settings can be made in several places as well:
General settings
- Open the Notation Style subpage of the Score Settings—Project page.
- Scroll down the list to the "Bar Numbers" category.
- Use the "Show every" setting to specify how often bar numbers should be shown.
The options are "First Bar" (bar numbers shown for the first bar on each staff), "Off" (no bar numbers shown) and any number. Click in the Status column and use the mouse wheel to select the desired option. - If you like, activate the "Show Range with Multi-Rests" option.
When this is activated, and you have a multi-rest, the bar number at the beginning of the multi-rest will show a range, indicating the length of the multi-rest. - If you want the bar numbers to be displayed below the bar lines, activate the "Below Bar Lines" option.
- Click Apply and close the Score Settings dialog.
Text settings
As with many of the other fixed text elements, you can select a font, size and style for bar numbers on the Text Settings subpage of the Score Settings—Project page.
Spacing
On the Spacings subpage of the Score Settings—Project page you will find four settings that relate to bar numbers:
Option Description
| First Bar Number – Horizontal Offset | Sets the horizontal distance between the bar number and the bar line for the first bar on each staff. |
| First Bar Number – Vertical Offset | Sets the vertical distance between the bar number and the bar line for the first bar on each staff. |
| Other Bar Numbers – Horizontal Offset | Sets the horizontal distance between the bar number and the bar line for all other bars. |
| Other Bar Numbers – Vertical Offset | Sets the vertical distance between the bar number and the bar line for all other bars. |
Offsetting bar numbers
If you double-click on a bar number, a dialog appears, allowing you to skip a number of bars in the otherwise continuous bar numbering.
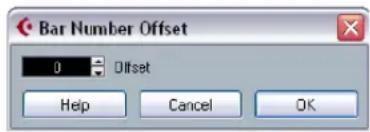
text_image
Bar Number Offset 0 Offset Help Cancel OKThis is used for example when a section repeats. Say, you have a repeat of bar 7 and 8, and want the first bar after the repeat to have the number 11, not 9. To achieve this, you double-click on the "9" and insert an offset of "2".
It is also useful if the score starts with an upbeat, and you want the first "real" bar to be numbered 1. In that case you would specify an offset of "-1" for the second bar, and make sure the bar number for the upbeat bar is hidden.
- Bar number offsets belong to the Project layer and are shown for all tracks and layouts.
Settings for other fixed text elements
You can make text settings for virtually all text and numbers that appear in the score. Proceed as follows:
- Open the Text Settings subpage of the Score Settings—Project page.
- Select the Project Text tab.
- Use the "Font For" pop-up menu to select a text type to make settings for.
- Use the options in the dialog to change the settings.
- Click Apply to apply the settings to all elements of the selected type.
To close the dialog, click the close button at the top right of the dialog window.
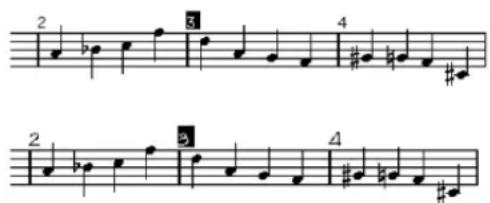
text_image
2 3 4 2 3 4Bar Numbers before and after changing their text settings.
- You can also define text attribute sets on the Text Settings subpage, as a means to quickly change text.
Note that you can select a defined attribute set from the context menu opened when right-clicking on a text element (see "Text attribute sets" on page 582).
Working with layouts
About this chapter
In this chapter you will learn:
- What layouts are and what they contain.
- How to create layouts.
- How to use layouts for opening combinations of tracks.
- How to apply, load, save and delete layouts.
- How to import and export layouts.
- An example of how layouts can be used.
Background: Layouts
Layouts can be viewed as "presets" containing settings for the layout layer: staff spacing, bar lines, layout symbols etc.
When to use layouts
- You will need to format the score differently when you print the entire score and when you extract parts for single instruments (or groups of instruments). Layouts allow you to keep different sets of "looks" for the same track or set of tracks. You might for example have one layout for each single instrument and one for the entire score.
- By selecting another layout on the Score Settings–Layout page, you can switch to another combination of tracks without having to leave the Score Editor.
What makes up a layout?
A layout contains the following items and properties:
- The inserted Layout symbols (see "The available symbols" on page 558).
- All settings on the Layout page of the Score Settings dialog.
- The vertical spacing of the staves.
- Bar line spacing.
- Broken bar lines.
Note that Project symbols (see "The available symbols" on page 558), bar line types and bar number offsets are part of the Project layer, and will appear in all layouts.
How layouts are stored
Layouts are created automatically when you edit a single track or a combination of tracks. They are an integral part of the specific track combination, which means you do not have to store them separately.
Creating a layout
Layouts are created automatically when you open a new combination of tracks for editing.
Each track may have been edited before, individually or together with other tracks, it doesn't matter. What matters is that you open precisely these tracks. For example, to create a layout for a string quartet, select parts on the corresponding tracks and press [Ctrl]/[Command]-[R].

The order of the tracks does not matter – you can re-order them in the Project window without removing the layout. However, the spacing of the staves in the layout is related to the order of the tracks.
Opening a layout
The "Open Layout" command on the Scores menu opens a dialog listing all available layouts for the Project.
- Select the desired layout in the list and click OK to open the tracks contained in the layout in the Score Editor.
This is a quick way for opening several tracks in the Score Editor directly from the Project window.
Layout operations
The Score Settings dialog contains a Layout page, where you can make settings for the different layouts. To the left of the dialog, all existing layouts in the project are listed (this is the same list as in the Open Layout dialog, see above). The layout currently used is highlighted in the list.
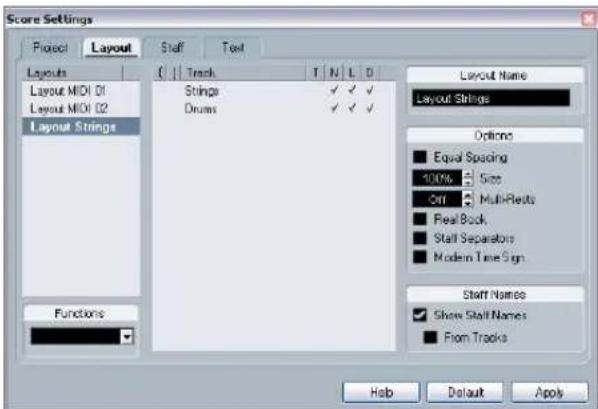
text_image
Score Settings Project Layout Staff Text Layout Layout MIDI 01 Strings ✓ ✓ ✓ Layout MIDI 02 Drums ✓ ✓ ✓ Layout Strings Functions Layout Name Layout Strings Options Equal Spacing 100% Size On MultiReuts Real Back Staff Separators Modern Time Sign Start Names Show Staff Names From Tracks Help Default ApplyThe Score Settings-Layout page
Here you can perform a number of operations:
Opening the tracks in a layout
To select another combination of tracks for editing, select the corresponding layout in the list.
- You can keep the dialog open while you are editing, and use this function for selecting which tracks to edit.
Importing layout symbols
By selecting another layout and selecting "Get Form" from the Functions pop-up menu below the list, you import all Layout symbols (inserted from the Layout section in the Symbols Inspector) from the selected layout into the current layout.
Managing layouts
- To rename a layout, select it in the list and enter the desired name in the Name field to the right in the dialog. Initially, a layout gets the name of one of the edited tracks – it may be a good idea to give each layout a more informative name.
- To remove a layout you no longer need, select it in the list and select "Remove" in the Functions pop-up menu.
- To remove all layouts for which there no longer are track combinations, select "Clean Up" from the Functions pop-up menu.
Importing and exporting layouts
By selecting a layout and selecting "Export..." or "Import..." from the Functions pop-up menu below the list, you can export or import a Layout. Note that all Staff settings will be taken into account, when exporting or importing a layout.
Working with Display Transpose
You can specify for each staff in a layout whether it should use Display Transpose. Just click in the D column in the Score Settings-Layout page to activate or deactivate the option. Note that this setting affects this layout only.

text_image
Track Piano T N L D Layout Name Layout Piano Use Display Transpose for this staffUsing layouts – an example
The following text outlines the basic steps for extracting a musical part from a full score.
- Prepare the entire score, including all formatting. This might include inserting Project layer Block Text for the Score title, setting the bar line type, etc.
- Open the Score Settings-Layout page and enter the desired name in the Name field (for example "Full Score").
- Close the Score Editor.
- Open a single track, for example a woodwind part. The Project layer settings will automatically appear in the new single track layout.
- Prepare a layout for the woodwind part. You might for example move bar lines, add endings, activate multiple rests, etc.
- You can also import all layout symbols from the "Full Score" layout, by opening the Score Settings–Layout page, selecting the "Full Score" layout in the list to the left and selecting "Get Form" from the Functions pop-up menu (see "Importing layout symbols" on page 592).
Be careful not to change any of the properties which are not part of the layout or you will modify the "Full Score", too.
- Enter the desired name for the new layout in the Name field on the Score Settings–Layout page and click "Apply".
Marker Track to Form
If you have created markers in the Project window which denote the start of each new "section" in your music (verse, bridge, chorus, etc.), you can automatically transfer these markers into the current layout:
- Pull down the Scores menu and open the Advanced Layout submenu.
- Select "Marker Track to Form".
Now, rehearsal marks and double bar lines are inserted in the score, at the position of each marker. - If you want the names of the markers shown as well, open the Advanced Layout submenu again and select "Display Markers".
Working with MusicXML
Introduction
MusicXML is a music notation format developed by Recordare LLC in 2000 based primarily on two academic music formats. It allows the representation of scores in the current symbolic representation of western music notation, used since the 17th century. With Cubase you can now import and export MusicXML files created with version 1.1. This makes it possible to share and exchange sheet music with people who are using score writing programs such as Finale and Sibelius.
As MusicXML is supported to various degrees by different programs, you will always have to do manual adjustments.
What is MusicXML used for?
The MusicXML file format can be used for the following purposes:
- Representation and printing of sheet music
- Exchange of sheet music between various score writing programs
- Electronic distribution of musical scores
- Storage and archiving of scores in an electronic format
Notational representation vs. musical performance
MusicXML is a music notation file format, that means it deals especially with the layout of music notation and the correct graphical representation, i.e. how a piece of music should look.
However, MusicXML music data also contains elements that define how a piece of music should sound. These are used e.g. when creating a MIDI file from MusicXML. This means that MusicXML has things in common with MIDI.
MIDI is a music interchange format for performance applications like Cubase or other sequencers. The MIDI file format is designed for playback, i.e. the main focus of the MIDI file format lies in the performance, not in the notation.
Is MusicXML better than MIDI?
Advantages of MusicXML
MIDI tracks hold MIDI notes and other MIDI data. A MIDI note in Cubase is only defined by its position, length, pitch and velocity. This is not enough to decide how the note should be displayed in a score. For a correct representation, Cubase also needs the following information:
- Stem direction, beaming.
- Expression marks (staccato, accent, ties and slurs).
- Information about the instrument in the score.
■ Key and basic rhythm of the piece. - Grouping of notes, etc.
MusicXML can store a great part of this information. However, you will have to adjust the scores with the tools available in the Score Editor.
Advantages of MIDI
Although MusicXML has obvious advantages in the representation of musical scores, there are also restrictions in sound. This is due to the fact that MusicXML as a music notation format has a graphical background and is designed for exchanging representation, not sound.
When playing back MusicXML files in Cubase, the following parameters, among others, will not be considered:
- On and Off velocities
- Dynamics
- Controller data
- S y s E x
- Standard MIDI file meta events
- Audio
- All Cubase-specific data like automation, MIDI effects, Input Transformer, etc.
Importing and exporting MusicXML files
Cubase can import and export MusicXML files, which makes it possible to transfer musical scores to and from applications that support this file format. However, there are some restrictions concerning the parameters supported by Cubase:
Export Import
Notes
| Pitch Yes Yes |
| Length Yes Yes |
| Staves Yes Up to two per part |
| Voices Yes Up to four per staff |
| Accidentals Yes Yes |
| Ties Yes No |
| Dots Yes No |
| Stem Yes Yes |
| Beams Yes No |
| Grace Notes Yes Yes |
| Rests Yes Yes |
Layout
| Page Size Yes No | ||
| Page margins | Yes | Yes |
| Page scaling Yes Yes | ||
| Page breaks | Yes No | |
| System breaks | Yes Yes | |
| Distance betweenstaves and systems | Yes Yes | |
| Left/right Inset | Yes No | |
| Distance betweenmeasures | Yes No | |
| Hidden staves | Yes Yes | |
| x and y positions ofsymbols | Yes Yes | |
Symbols
| Keys | Yes Yes | |
| Clefs Yes Yes | ||
| Time Signature | Yes Yes | |
| Dynamics | Yes Yes | |
| Ornaments | Yes / incomplete | Yes / incomplete |
| Articulations | Yes / incomplete | Yes / incomplete |
| Export Import | ||
| Technicals | Yes / incomplete | Yes / incomplete |
| Lyrics | Yes Yes | |
| Chord Symbols | Yes Yes | |
| Damper Pedal | Yes Yes | |
| Dynamics | Yes Yes | |
| Rehearsals | Yes Yes | |
| Text Yes | Yes | |
| Layout Text | Yes N.A. | |
| Global Text | Yes "Credits" | |
| Dashes | Yes Yes | |
| Endings | Yes Yes | |
| Octave Shift | Yes Yes | |
| Bar line types | Yes Yes | |
| Slurs Yes Yes | ||
| Hammer-on/pull-off | No | No |
| Formatting | ||
| Display Transpose | Yes Yes | |
| Drum notation | Yes Yes | |
| Short / long staff names | Yes Yes | |
| Program changes | Yes N.A. | |
| Music font | Yes (if Jazz font) | Yes |
| Tablature (including String tunings) | Yes Yes | |
Importing MusicXML files
- Pull down the File menu and open the Import submenu.
- On the submenu, select "MusicXML...".
- In the file dialog that opens, locate and select the MusicXML file and click "Open".
- Another file dialog opens in which you can select the project folder for the new project.
Select an existing project folder or create a new one by clicking "Create" and entering a name in the dialog. - A new project is created with the name of the MusicXML file.
Exporting MusicXML files
- Set up the score the way you want it in the Score Editor of Cubase.
- Open the File menu and open the Export submenu.
- On the submenu, select "MusicXML...". Note that this option is only available when the Score Editor is open.
- A file dialog opens in which you can choose an existing empty folder or create a new folder for saving the MusicXML file (as *.xml file).
Designing your score: additional techniques
About this chapter
In this chapter you will learn:
- How to change the staff size.
- How to create multi-rests.
- How to add and edit bar lines.
- How to create upbeats.
- How to set measure spacing and the number of bars across the page.
- How to control staff and grand staff spacing.
- How to use the Auto Layout dialog.
- How to use the Reset Layout function.
- How to break bar lines.

Before you start designing the score page layout, you should open the Page Setup dialog on the File menu, and make settings for paper size, print scale and margins!
Layout settings
text_image
Score Settings Project Layout Staff Text Layouts Layout MIDI 01 Layout MIDI 02 Layout Strings Functions Track T N L D Strings ✓ ✓ ✓ Drums ✓ ✓ ✓ Layout Name Layout Strings Options Equal Spacing 100% Size On Multi-Posts Real Back Staff Separatory Modern Time Sign Staff Names Show Staff Names From Tracks Help Default ApplyThe Score Settings-Layout page contains a number of settings that affect the display of the current layout.
The Track list
The Track list lists the tracks included in the layout and allows you to make the following settings:
Option Description
Brackets These two columns allow you to add braces or brackets, encompassing any number of staves in the layout. See "Adding brackets and braces" on page 605.
Option Description
T This is relevant if the Modern Time Sign. option is activated to the right. In that case, you use this column to specify for which tracks the time signature should be shown - see below.
N This option lets you specify for each staff in a layout whether the staff name should be shown.
L If this is activated, any layout symbols will be shown; otherwise they will be hidden. This allows you to e.g. have rehearsal marks shown for the top staff only in a multi-staff layout.
D This option lets you specify for each staff in a layout whether it should use Display Transpose.
Equal Spacing
- Activate this option when you want a note to take up space according to its note value. When Equal Spacing is activated, two sixteenth notes will take up as much space as one eighth note, for example.
Size
Changes the size of all staves. See "Staff size" on page 599.
Multi-Rests
Whenever more than one-bar rests occur, the program can replace these with a multi-rest symbol. This parameter allows you to set how many empty bars should be "allowed" before Cubase will collect them into a multi-rest. "Off" means "never". See "Multiple rests" on page 600 for more information on multi-rests.
Real Book
When this option is activated, clef symbols are not set out at the beginning of each staff, only on the first staff on each page.
Staff Separators
When this option is activated, separator symbols are inserted at the beginning of each grand staff.
A staff separator between two systems
Modern Time Signature
When this is activated, time signatures are shown above the staves rather than in them. You can set the size of the modern time signature in the Time Sign section on the Score Settings–Project page (Notation Style subpage). When modern time signature is selected, you use the "T" column in the Track list in the Layout page to specify for which tracks time signatures should be displayed.
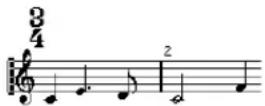
- If you prefer to display the score in a more modern way, check out the other options on the Notation Style subpage. For descriptions of the options use the Help button in the dialog.
Staff size
For one staff
You can set the staff size as a percentage value of the normal size.
- Open the Score Settings–Staff page for the staff you want to edit.
- Select the Options tab.
-
Adjust the Size parameter in the System Sizes section. The values range from 25% up to 250% of the normal size.
-
Click Apply.
For all tracks in a layout
- Open the Score Settings-Layout page.
- Change the Size parameter.
The values range from 25% up to 250% of the normal size. - Click Apply.
All staves will now get the desired size. Staves that have individual size settings (see above) will still be proportionally smaller/larger.
This setting is part of the layout and can be used when printing a full score slightly smaller than the parts for each instrument, for example.
Hiding/showing objects
Any object on a page can be hidden, including notes, rests, symbols, clefs, bar lines, even entire staves.
This can be useful in the following situations:
Printing scales
If you want to create scale examples, enter the notes and hide time signatures, bar lines and other unwanted objects.

text_image
Musical notation staff with notes and eighth notes indicating pitch and rhythmA scale created with hidden bar lines, time signatures, etc.
Graphic notation
By hiding bar lines, you can produce graphic notation.
Hiding notes meant for playback only
If you have recorded your music, you may have added glissandos, falls, etc. that sound fine but result in a lot of unnecessary notes. You probably want to hide those notes and insert the suitable symbols instead.
Hiding
To hide items, proceed as follows:
- Select all the items you want to hide.
- Select "Hide/Show" from the Score menu or click on the "H" (Hide) button on the extended toolbar.
Notes can also be hidden by selecting them, clicking the "i" button on the extended toolbar and ticking the Hide Note checkbox in the Set Note Info dialog (see "Other note details" on page 544).
If the Hide option in the display filter bar is activated, hidden objects are shown in grey so that they are still visible and you can select them.
Hiding in the current layout only
If you want the hiding to be "local" to the current layout, hold down [Ctrl]/[Command] when selecting "Hide/Show" as described above.

This is not possible when hiding notes, only other symbols.
⇒ You can also move hidden objects to the layout by right-clicking the "Hide" marker and selecting "Move to Layout".
Viewing hidden objects
The display filter bar (shown by clicking the "Show Filter View" button on the toolbar) contains two options related to hidden objects:
- If you activate the "Hidden Notes" option, all hidden notes in the score are shown.
Deactivating "Hidden Notes" will hide the notes again. - If you activate the "Hide" option, all hidden objects (except notes) will be indicated by a "Hide" text marker.
Showing one object
- Make sure "Hide" is activated on the display filter bar.
- Click on the "Hide" text marker below the object you want to display again.
The text is selected. - Press [Backspace] or [Delete].
The object appears. Undo is available if you change your mind.
Showing all objects
If you select "Hide/Show" from the Scores menu again, all hidden objects are displayed.
- You can also use the Reset Layout function to permanently display hidden notes and objects, as described in the section "Reset Layout" on page 607.
Showing a hidden note
While all hidden notes can be made visible by ticking the Hidden Notes checkbox on the display filter bar, you may want to make some of them "permanently" visible again:
- Activate the Hidden Notes checkbox on the display filter bar.
- Select the notes that you want to "un-hide". In the Preferences dialog (Scores–Use Colors for Additional Meanings) you can set the color for hidden notes.
- Double-click one of the notes.
- Deactivate the Hide Note option in the Set Note Info dialog and click Apply.
Coloring notes
You can use the color pop-up menu on the toolbar to colorize selected notes, e.g. for educational purposes. This is described in detail in the section "Coloring notes" on page 545.
Multiple rests
Multiple consecutive rests can be automatically displayed as multi-rests. Proceed as follows:
- Open the Score Settings-Layout page.
-
Set the Multi-Rests option to the number of empty bars that should be "allowed" before Cubase will display them as a multi-rest.
For example, a value of 2 means that three or more consecutive empty bars will be displayed as a multi-rest. If you set this to "Off", multi-rests will not be used. -
Click Apply and close the dialog.
The multi-rests now appear in the score.
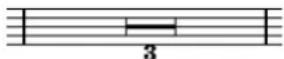
A multi-rest over three bars
Splitting multi-rests
To divide one long multiple rest into several shorter ones, proceed as follows:
- Double-click on the multi-rest symbol.
The Split Multi-Rest dialog appears:
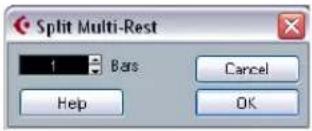
text_image
Split Multi-Rest 1 Bars Help Cancel OK-
In the dialog, enter the bar number where you want the first split.
-
Click OK.
If you need more splits, double-click on any multi-rest symbol and proceed as above.

The program automatically splits multi-rests at time signature changes, double bar lines, repeat signs and rehearsal marks.
Multi-rest appearance
The Score Settings—Project page contains several subpages, on which you can make settings for multi-rests:
- The subpage "Notation Style" contains the following settings concerning multi-rests:
Option Description
| Multi-Rests – Church Style | When this is activated, multi-rests are shown in “church style” (vertical bars), rather than with the regular, horizontal symbols. |
| Multi-Rests – Numbers above Symbol | When this is activated, the numbers are shown above the multi-rest symbol, instead of below it. |
| Multi-Rests – Snap Rests moved with the Layout tool | When this is activated, rests will automatically snap to “intelligent” positions in the score (i.e. positions used in regular notation) when moved with the layout tool. If this is deactivated, rests can be positioned freely. |
| Bar numbers – Show Range with Multi-Rests | When this is activated, and bar numbers are displayed, the bar numbers of a multi-rest will be shown as a range. |
- On the Spacings subpage of the dialog, you can adjust the height and width of multi-rest symbols.
- On the Text Settings subpage, you can select a font for the multi-rest numbers (select "Multi-Rests" in the "Font For" pop-up menu and make the desired settings).
Editing bar lines
Editing existing bar lines
For each bar line, you can choose whether you want a regular, single bar line, a double bar line, a repeat sign, etc.
- Double-click on the bar line for which you want to edit the settings.
A dialog appears with a number of bar line types.
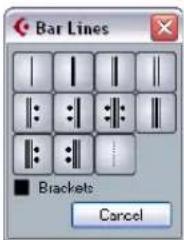
text_image
Bar Lines Brackets Cancel- If you wish the bar line to be shown with "brackets", activate the Brackets checkbox.
This is only relevant for repeat signs.

- Click on the desired bar line type.
The dialog closes and the bar line type is changed.
- If you do not want to display bar lines at the beginning of the parts, open the Score Settings-Project page, on the Notation Style subpage (Bar Lines category) and activate the option "Hide First Bar line in Parts".
⇒ The bar line types are part of the Project layer – any changes you make will be reflected in all layouts.
Creating upbeats
By using the Pickup Bar feature
With this method, the upbeat actually contains exactly the number of beats displayed. That is, if you have an upbeat of one beat, your project starts with one bar in 1/4 time.
- Change the time signature of the first bar to the length of the upbeat.
- Insert a time signature of the correct kind (the time signature used throughout the project) in the second bar.
To insert a time signature, select it in the "Time Sign" section in the Symbols Inspector and click in the Score with the Pencil tool. - Enter the notes in the upbeat into the first bar.
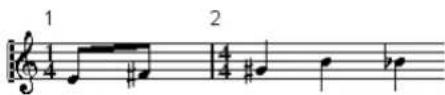
text_image
1 2The first bar before making any adjustments
-
Double-click the time signature for the upbeat bar. The Edit Time Signature dialog appears.
-
Activate the option "Pickup Bar" and click OK.
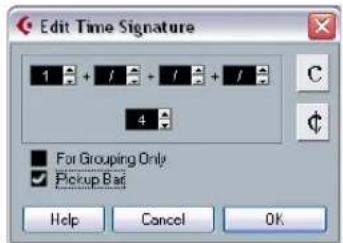
text_image
Edit Time Signature 1 + / + / + / 4 For Grouping Only Pickup Bar Help Cancel OKNow, the time signature of the first bar takes on the look of the second bar's signature, while the time signature in the second bar is hidden:
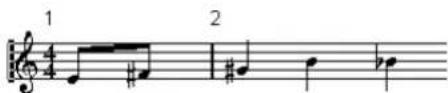
text_image
1 2-
If you use bar numbers, double-click on the first bar number and enter an offset of -1.
-
Adjust the display of bar numbers and hide the "0" in the first measure.
By hiding rests
With this method, the first bar will actually have the same time signature as the following bars – it will only look like an upbeat bar:
- Enter the notes in the upbeat into the first bar.
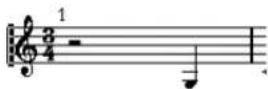
The first bar before making any adjustments
-
Hide the rests that precede the notes.
-
Drag the bar line between measure one and two to adjust the width of the bar.
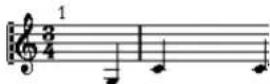
After hiding the rest and dragging the bar line
-
If you like, move the notes in the upbeat measure, using the Layout tool.
-
If you use bar numbers, adjust them as described in the previous example.
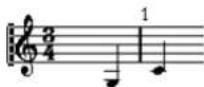
The final upbeat
Setting the number of bars across the page
Automatically
- When you open a new combination of tracks for editing, the number of bars across the page is determined by the setting "Default Number of Bars per Staff" in the Preferences dialog (Scores–Editing page).
- In the Auto Layout dialog (see "Auto Layout" on page 606), you can set the maximum number of bars across the staff.
Manually
In Page Mode, you have full control over the number of bars appearing across the page, by using the Number of Bars dialog or the tools.
If you want to use the "Max. number of Bars" option in the Auto Layout dialog (see "Auto Layout" on page 606), you should do this before you adjust the number of bars manually.
Using the Number of Bars dialog
- Make a staff active in the system where you want to make changes.
This means that if everything looks fine until for example the fifth system, activate one of the staves in this system.
- Pull down the Scores menu and select "Number Of Bars" from the Advanced Layout submenu.
The Number of Bars dialog is displayed.
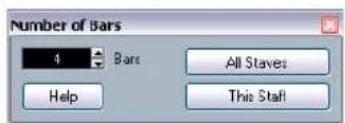
text_image
Number of Bars 1 Bars All Staves Help This Staff- Set the desired number of bars across the page.
- To change the number of bars for the active staff only, click "This Staff".
- To change the number of bars for the active staff and all following staves, click "All Staves".
In other words, to set all systems on all pages to the same number of bars, make the very first staff active and use the All Staves option.
Using the tools
- To make a bar "fall down" on a new staff, use the Split tool to click on its bar line.
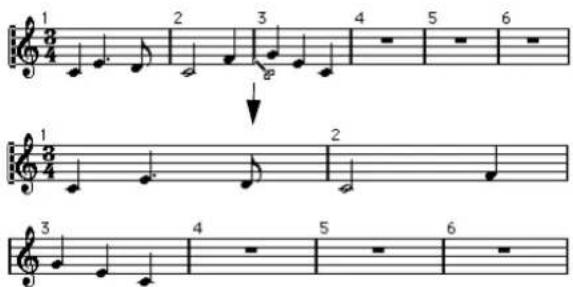
text_image
1 2 3 4 5 6 ↓ 1 2 3 4 5 6Before and after moving the third bar one staff down
- To bring the bar back up to the previous staff, use the Glue tool to click on the last bar line on the upper of the two staves.
This will in fact move all measures in the lower staff up to the upper.
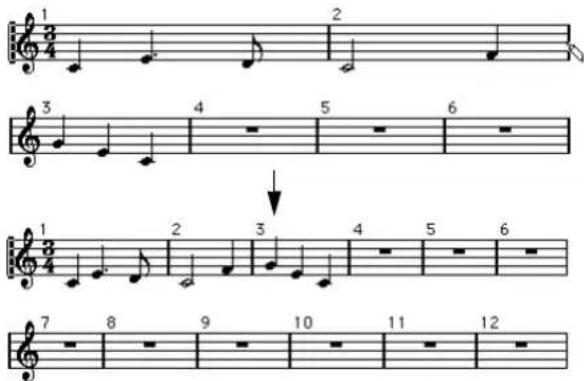
text_image
1 2 3 4 5 6 1 2 3 4 5 6 7 8 9 10 11 12Moving bar lines
The following operations can be made using the regular Object Selection tool or the Layout tool.
Moving a bar line
If you drag a bar line to the left or right, the surrounding bars are adjusted proportionally.
Moving bar lines on all staves
If you hold down [Alt]/[Option] when dragging a bar line, all bar lines below the one you drag will be moved accordingly.
Moving a single bar line separately
If you hold down [Ctrl]/[Command] while dragging a bar line, the widths of the surrounding bars are not affected.
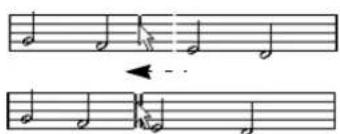
text_image
Musical notation showing two staves with notes and a directional arrow indicating movement or change.Making an indent on one line
- To create an indent, simply drag the first or last bar line on a staff.
The sizes of all measures are adjusted proportionally.
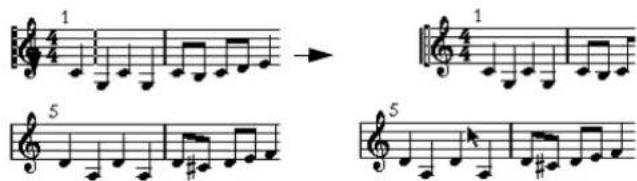
text_image
1 5 → 1 5 5Before and after dragging the first bar line on the first staff
Making indents on several lines
If you hold down [Alt]/[Option] and drag the first or last bar line in a system, all following systems will get the same indent. If you want all lines on all pages to be modified in the same way, hold down [Alt]/[Option] and drag the appropriate bar line on the first system of the score.
The last bar line in the score
Cubase attempts to move the last bar line and space the bars on the last line in a sensible way. But you can change this manually by dragging the last bar line, if you like. To change the type of the last bar line, double-click it and select the desired type.
Resetting bar spacing
To reset the bar spacing to standard values for several lines, proceed as follows:
- Locate the first line for which you want to reset the bar spacing, and make one staff in that system active.
- Select "Number of Bars" from the Advanced Layout submenu on the Scores menu.
- Specify the number of bars that you already have on the line.
- Click on "This Staff".
Clicking "All Staves" will reset the lines of all staves in the score, see "Using the Number of Bars dialog" on page 603.
- Close the dialog.
The bar spacing is reset for the currently selected staff and all following staves.
Dragging staves
For the following operations, you can use the Object Selection tool or the Layout tool.
Dragging staves can only be done in Page Mode.
Adding space between two grand staves
- Locate the first staff in the lower of the two systems you wish to spread apart.
- Click just to the left of the first bar line and keep the mouse button pressed.
The entire staff is selected.
- Drag downwards until you have reached the desired distance between the staves and release the mouse button.
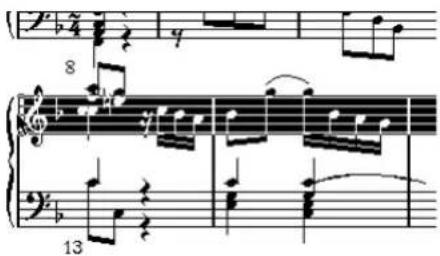
text_image
Musical score snippet with treble and bass clefs, showing notes, rests, and articulation marksBefore...

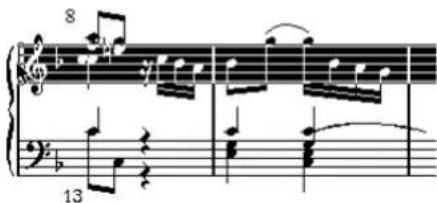
text_image
Musical score snippet showing treble and bass clefs with notes, rests, and articulation marks...and after dragging the upper system
Setting the same distance between all grand staves
- Hold down [Alt]/[Option] and drag the first staff of the second system, until you have reached the desired distance between this and the first system.
- Release the mouse button.
The distances between all the systems will be adjusted accordingly.
This operation affects the system you drag and all following systems.
Setting the distance between staves within a grand staff
- Locate the lower staff in the grand staff you wish to spread apart.
- Click just to the left of its first bar line and keep the mouse button pressed.
The entire staff gets selected.
- Drag downwards or upwards and release the mouse button.
The new distance is set for the two staves.
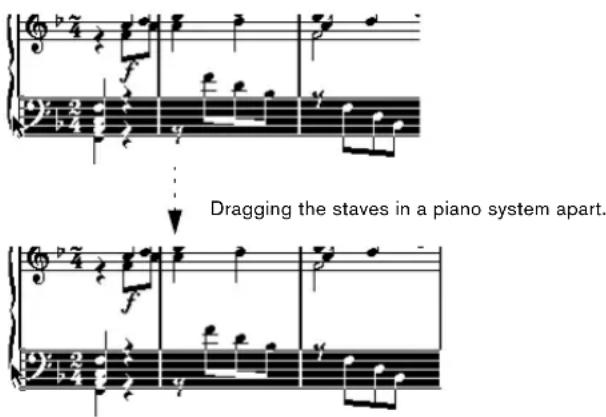
text_image
Dragging the staves in a piano system apart.Setting the same distance between staves in several systems
- Hold down [Alt]/[Option] and drag the desired staff as described above.
- Release the mouse button.
The corresponding staves in all following systems are moved accordingly.
Moving one staff only
You may wish to move one staff without affecting any other staff in any way:
- Hold down [Ctrl]/[Command].
- Drag any staff as described above.
Moving staves between pages
By using the "Move to Next/Previous Page" commands on the Staff context menu, you can quickly edit the page breaks.
Moving staves to the next page
- Locate and activate the staff you want to move to the top of the next page.
This can be any staff except the first staff on the page. - Right-click on the blue rectangle to the left of the staff, and select "Move to Next Page" from the context menu. The active staff (and any following staves on the page) are moved to the next page.
Moving staves to the previous page
- Make the staff at the top of the page the active staff. If any other staff is active, the option "Move to Previous Page" cannot be used. Also, the function will not work for the first staff on the first page.
- Right-click on the blue rectangle to the left of the staff, and select "Move to Previous Page" from the context menu. The active staff, and as many of the following staves as there are room for, are moved to the previous page. If the previous page is already "full", nothing will happen.
Adding brackets and braces
Brackets and braces are added on the Score Settings-Layout page. The settings you make are specific for the current layout, i.e. you can have different brackets or braces set up for different track configurations.
- Open the Score Settings-Layout page.
In the Track list, you will find columns for braces ( { } and brackets ( [ ). - Click in one of the columns and drag downwards in the list to encompass the desired staves.
The column indicates graphically which staves will be encompassed by the brace or bracket.
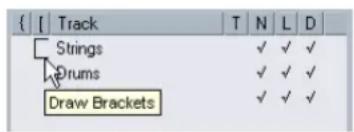
text_image
Track Strings Drums Draw Brackets T N L D ✓ ✓ ✓ ✓ ✓ ✓ ✓ ✓ ✓Click at the first staff for which you want a bracket or brace...
...and drag downwards in the list to enclose the desired staves.
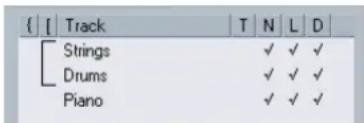
text_image
{ | Track | T N L D | Strings ✓ ✓ ✓ Drums ✓ ✓ ✓ Piano ✓ ✓ ✓3. Close the dialog.
The score is displayed with brackets or braces according to the settings you made.
- You can edit brackets and braces in the dialog by dragging the ends of the indicator in the list.
- To remove a bracket or brace, click on its indicator in the list.
⇒ You can automatically get broken bar lines based on the brackets you have added – see "Breaking bar lines" on page 608.
If the option "Show Braces in Edit Mode" is activated in the Preferences dialog (Scores-Editing page), brackets and braces are shown in Edit Mode as well.
Auto Layout
This item on the Scores menu brings up a dialog with several options. Activating one of these makes the program "go through" the score and make adjustments to measure widths, staff distances, etc. Exactly which parts and properties of the score are affected depends on which option you activate/deactivate.
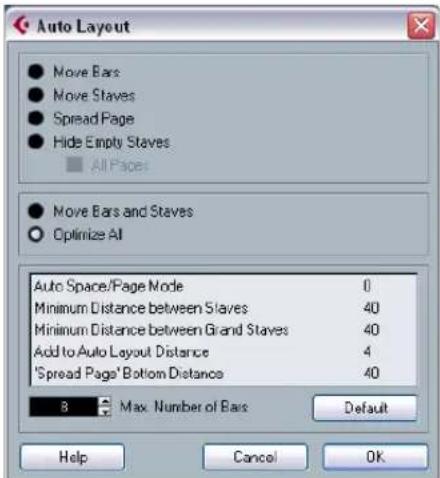
text_image
Auto Layout Move Bars Move Staves Spread Page Hide Empty Staves All Pages Move Bars and Staves Optimize All Auto Space/Page Mode 0 Minimum Distance between Slaves 40 Minimum Distance between Grand Staves 40 Add to Auto Layout Distance 4 'Spread Page' Bottom Distance 40 8 Max. Number of Bars Default Help Cancel OK
The automatic layout adjustments are done just as if you yourself had made them manually. This means that if there is something you do not like, you can always change it manually, as described above.
→ You can also open the Auto Layout dialog by clicking the Auto Layout button on the extended toolbar.

Move bars
This option looks at the currently active grand staff, and attempts to adjust the measure widths, so that all notes and symbols get as much room as possible. The number of bars on the staff is not affected.
- You can perform this function for several staves in one go, by dragging a selection rectangle over their left edges, and then selecting Move Bars.
Move Staves
This changes the measure width (as with Move Bars) but also the vertical staff distance, of the active staff and all following staves.
Spread Page
This corrects the vertical layout of the staves on the current page, so that they "fit onto the page". In other words, this removes white space at the bottom of the page.
Hide Empty Staves
This hides all empty staves, from the active staff to the end of the score. Note that polyphonic/split staves are in this case treated as one entity, if the clef in the upper system differs from that in the lower system. That is, a piano staff is considered “empty” only if there are no notes on either staff.
- If you have activated the "Hidden" option on the Filter Bar, hidden staves are indicated by a marker with the text "Hide:Name" (where "Name" is the staff name). To display hidden staves, delete their "Hide" markers.
- If you activate the option "Auto Layout: Don't hide first staff" in the Preferences dialog (Scores-Editing page), staves in the very first grand staff will not be hidden, even if they are empty.
This is useful for example if you are creating an orchestra score, and want to show the complete "layout" of the orchestra on the first page of the score, without hiding anything.
All Pages
Activate this if you want to apply the options above to all pages. Please note that this setting will be applied to the active staff and onwards. If you want all pages in the score to be affected, you have to make the very first staff (the first staff on the first page) the active staff.
Move Bars and Staves
This is a combination of "Move Bars", "Move Staves", and "All Pages", plus automatic calculation of the number of bars across the page – the function tries to optimize the number of bars across the page for each staff (with the maximum number of bars as set in the dialog).
Optimize All
All of the above in one fell swoop. This procedure might take some time but usually yields great results.
Other functions
In the lower part of the dialog, the following options are available:
Setting Description
| Auto Space/ Page Mode | The higher the value, the more space is allowed for each element in the score (and thus, the fewer the bars across the page). |
| Minimum Distance between Staves | When you use an Auto Layout function that moves staves (changes the vertical staff distance), this setting determines the minimum distance between the staves. |
| Minimum Distance between Grand Staves | This sets the minimum distance between Grand Staves in the same way. |
| Add to Auto Layout Distance | This number is added to the distance between staves that will be added when you use any of the Auto Layout functions. The higher the number, the larger the distance between staves. |
| 'Spread Page' Bottom Distance | This will be added to the white space that appears on the bottom of a page when using the Spread Page functions. |
| Max. Number of Bars | This allows you to specify the maximum number of bars per staff when using the "Bars and Staves" or "Optimize All" functions. |
⇒ The functions "Move Bars" and "Move All Bars" ("Move Bars" + "All Pages") can also be accessed via the Staff context menu (opened by right-clicking on the blue rectangle to the left of the active staff).
Reset Layout
This function allows you to delete invisible layout elements, which in effect restores the score to default settings.
- Select "Reset Layout..." from the Scores menu. The Reset Layout dialog appears.
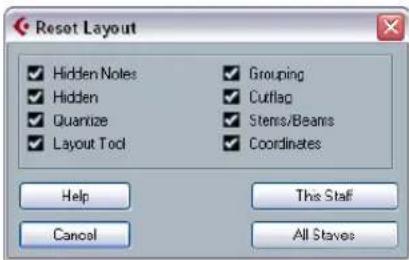
text_image
Reset Layout Hidden Notes Hidden Quantize Layout Tool Grouping Cutflag Stems/Beans Coordinates Help Cancel This Staff All StavesThe following options are available:
Option Description
Hidden Notes Makes all hidden notes permanently visible again.
Hidden Makes all other hidden objects permanently visible again.
Quantize Deletes all Display Quantize elements.
Layout tool Resets all positions of notes, clefs, slurs and ties altered using the Layout tool.
Grouping Resets the grouping under beams to standard values.
Cutflag Deletes all cutflag events.
Stems/Beams Resets the length of all stems and reset the slant of beams that have been manually adjusted.
Coordinates Removes all manual spacing of note symbols and slurs.
-
Activate the items you want to delete or reset to standard settings.
-
Click on "This Staff" to clean up the active staff only, or on "All Staves" to clean up all staves in the score.
Breaking bar lines
Sometimes you may not want a bar line to stretch all the way across a grand staff. If this is the case, you have the possibility to "break it".
Manually
Breaking bar lines in one grand staff
- Select the Erase tool.
- Click on a bar line connecting the two staves.
All bar lines between these two staves (except the first and last) are broken. To break the first or last bar line in a grand staff, you need to click directly on these.
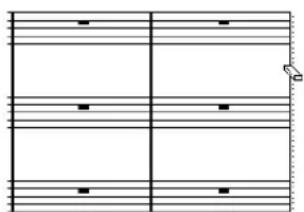
natural_image
Pure musical notation grid lines without any text, numbers, or symbols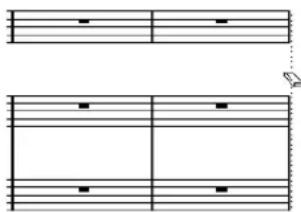
text_image
Two musical notation sheet music with slurs and a small musical note, likely for a melody or rhythm exercise.Before and after splitting the bar lines between two staves.
Breaking bar lines in several grand staves
If you hold down [Alt]/[Option] and click on a bar line as described above, the corresponding bar lines are broken in all following grand staves.
Re-connecting broken bar lines
If you have broken the bar lines, you can use the Glue tool to connect them again.
- Select the Glue tool.
- Click on one of the bar lines in the staff above the broken bar lines.
All bar lines between these staves in this grand staff are connected.
- To re-connect bar lines in several grand staves, hold down [Alt]/[Option] and click with the Glue tool.
The bar lines between the corresponding staves are connected in all following grand staves.
Automatically
If you have added brackets for some staves on the Score Settings-Layout page (see "Adding brackets and braces" on page 605), you can have bar lines broken between each bracketed "section", giving a clearer indication of which staves belong together:
- Open the Score Settings dialog from the Score menu and, on the Project page, select the "Notation Style" subpage.
- In the Bar Lines section, locate and activate the option "Break Bar Lines with Brackets".
- The option Break Last Brackets determines whether the breaking of bar lines should also apply to the bar line at the end of each row.
Scoring for drums
About this chapter
In this chapter you will learn:
- How to set up the drum map.
- How to set up a staff for drum notes.
- How to enter and edit drum notes.
- How to use a single line drum staff.
Background: Drum maps in the Score Editor
When scoring for drums, you can assign a unique note head to each pitch. There is even the possibility to set up different note heads for different note values!
However, to be able to fully use this function, you need to understand a bit about drum maps, and the use of these in the Score Editor.
About drum maps
Cubase handles drum editing by means of drum maps (see the chapter "The MIDI editors" on page 337). In the Score Editor, the drum map displays different note heads for different pitches.
You access the drum map by selecting "Drum Map Setup" from the MIDI menu.
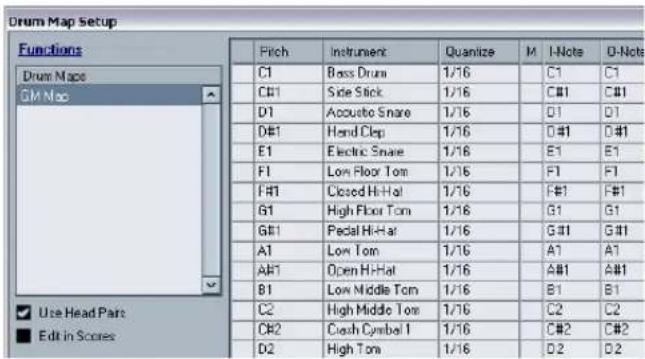
text_image
Drum Map Setup Functions Drum Maps GM Map ✓ Use Head Pairs ■ Edit in Scores Pitch Instrument Quantize M I-Note O-Note C1 Bass Drum 1/16 C1 C1 C#1 Side Stick 1/16 C#1 C#1 D1 Acoustic Snare 1/16 D1 D1 D#1 Hend Clip 1/16 0#1 0#1 E1 Electric Snare 1/16 E1 E1 F1.Low Floor Tom 1/16 F1 F1 F#1 Closed Hi-Hat 1/16 F#1 F#1 G1 High Floor Tom 1/16 G1 G1 G#1 Pedal Hi-Hat 1/16 G#1 G#1 A1.Low Tom 1/16 A1 A1 A#1 Open Hi-Hat 1/16 A#1 A#1 B1.Low Middle Tom 1/16 B1 B1 C2 High Middle Tom 1/16 C2 C2 C#2 Cash Symbol I 1/16 C#2 C#2 D2 High Tom 1/16 D2 D2The Drum Map Setup dialog
Pitch vs. Display Note
In the Drum Map Setup dialog you will find a column Pitch and a column Display Note.
- The Pitch corresponds to the I-note for the drum sound and cannot be edited here.
- The Display Note value is used to set where the note should be displayed vertically. It can be thought of as a Display Transpose setting that is unique for each note. This only affects how the note is displayed, not how it is recorded etc.
Use Score Drum Map on/off
For the drum map settings to be used in the score, you need to activate "Use Score Drum Map" in the Score Settings-Staff page (Options tab).
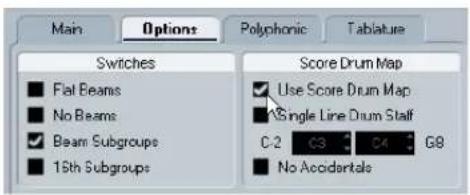
text_image
Main Options Polyphonic Tablature Switches Flat Beams No Beams Beam Subgroups 15th Subgroups Score Drum Map Use Score Drum Map Single Line Drum Staff C2 C3 C4 G8 No AccidentalsSetting up the drum map
Basic settings
- Open the Score Editor for the drums track.
This should be a MIDI track to which you have assigned a drum map. - On the Score Settings-Staff page (Options tab), activate the option "Use Score Drum Map".
- On the MIDI menu, select "Drum Map Setup".
The Drum Map Setup dialog appears. - Make settings for the sounds/MIDI notes you need.
The dialog contains the following options:
Option Description
Pitch This corresponds to the I-note of the sound in the drum map, and cannot be edited here.
Instrument The name of the drum sound in the map.
Display Note The display pitch, i.e. the pitch at which the note will be shown in the score. For example, you typically want all three hi-hat sounds to be shown on the same system line in the score (but with different symbols). Therefore, you set these to the same display pitch.
Option Description
Head Symbol Clicking in this column opens a window in which you can select a note head symbol for the sound. If "Use Head Pairs" is activated in the dialog, you can select a note head pair instead.
Voice This allows you to make all notes with this pitch belong to a certain voice, so that they get e.g. a common rest handling and stem direction.

Please note that many different drum maps can be created for a project. Which one you get depends on which drum map is assigned to the edited track. These drum maps are totally independent of one another, i.e. each pitch can have different settings in different drum maps.
Initializing the display pitches
If you select "Init Display Notes" from the Functions popup menu in the top left corner of the Drum Map Setup dialog, all display pitch values are reset, so that actual pitch and display pitch are the same for each sound/note.
Using note head pairs
Not only can you have different drum sounds displayed with different note heads, you can also display different note heads for different note values:
- Activate the "Use Head pairs" checkbox.
The "Head Symbol" column now shows two head symbols for each drum sound.
All head symbols are arranged in pairs - by default an "empty" head and a "filled" head. Just as with regular notes, the "empty" note heads are used with half notes and larger note values, and the "filled" heads are used with quarter notes and smaller note values.
- To select a head pair for a drum sound/note, click in the Head symbol column to open the pop-up menu and choose the new head pair.
Customizing note head pairs
If you do not like the default pairs of note heads, you can edit these:
- Select Edit Head pairs from the Functions pop-up menu.
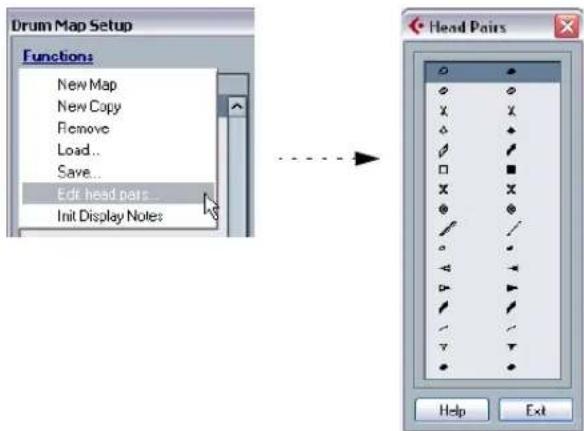
text_image
Drum Map Setup Functions New Map New Copy Remove Load... Save... Edit head pairs... Init Display Notes Head Pairs Help Exit-
To change a symbol in a pair, click on it and select a new symbol from the pop-up menu.
-
When you're done, click Exit to close the dialog.
Editing the drum map in the score
If you activate the checkbox "Edit in Scores" in the Drum Map Setup dialog, you can change the settings for the score drum map directly in the score:
- Transposing a note will change the display pitch of its drum sound – the actual note will not be transposed.
- Double-clicking a note allows you to make note head settings for that drum sound.
- Using the "Move to Voice" function will change the voice assignment of the drum sound.
⇒ This requires that you leave the Drum Map Setup dialog open – closing the dialog will automatically deactivate this option, allowing you to perform normal editing.
Setting up a staff for drum scoring
- Open the Score Settings–Staff page and select the Options tab.
- Make sure "Use Score Drum Map" is activated.
- If you want a single line drum staff, activate the corresponding option (see "Using "Single Line Drum Staff" on page 612).
- If you want flat beams, activate the corresponding option (see "Handling beaming" on page 545).
- If you want all stems to end at the same position, activate Fixed Stems and set a length for up/down stems.
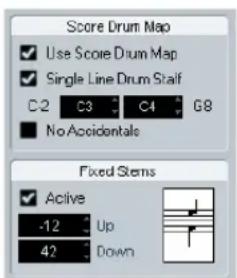
text_image
Score Drum Map ✓ Use Score Drum Map ✓ Single Line Drum Stalf C2 C3 C4 G8 ■ No Accidentals Fixed Stems ✓ Active -12 Up 42 DownAn example of drum staff settings
- You may also want to use polyphonic voices to handle rest and stem separately.
However, you can still activate the "Fixed Stems" option if you like. See the chapter "Polyphonic voicing" on page 531 for more information about polyphonic voices.
Entering and editing notes
This is like entering notes on a normal note system. However, please note:
- Notes are edited using their display pitch when the drum map is used. This means that when you move a note vertically, you move it to another display pitch. What actual pitch it gets depends on which pitch uses the display pitch you now “dropped it on”.
If the drum map contains two notes with the same pitch (for example Open and Closed HiHat), you can get the second note by holding [Ctrl]/[Command].
Using "Single Line Drum Staff"
When this option is activated on the Options tab on the Score Settings–Staff page, there is only one line in the system. Furthermore, notes can only appear below the line, on the line and above the line.
To decide which notes go where, proceed as follows:
- Open the Score Settings–Staff page and select the Options tab.
- Activate "Use Score Drum Map" and "Single Line Drum Staff".
- Set up the two pitch values to decide which pitches go on the line.
Notes below this range automatically wind up below the line and notes above wind up above the line.

When you enter and edit the pitch of notes on a single line drum staff, the best way is to drag the note up or down while watching the mouse position box on the toolbar.
Creating tablature
About this chapter
In this chapter you will learn:
- How to create tablature, automatically and manually.
- How to control the appearance of the tablature notes.
- How to edit tablature.
Cubase is able to produce score in tablature format. This can be done automatically, by "converting" recorded MIDI information. You can also create a tablature staff from scratch and enter the notes "by hand".

Even though we use the term "converting" in this chapter, please note that tablature is a mode. You can switch between regular notation and tablature at any time.
Creating tablature automatically
This assumes you have a regular score on screen already. We also suggest you perform basic editing like quantizing to make the score as legible as possible as regular notes before converting into tablature.
-
Make sure the notes in the score are inside the range of the instrument.
Notes with a pitch lower than the open tuning of the lowest string cannot be converted. -
Open the Score Settings–Staff page and select the Tablature tab.
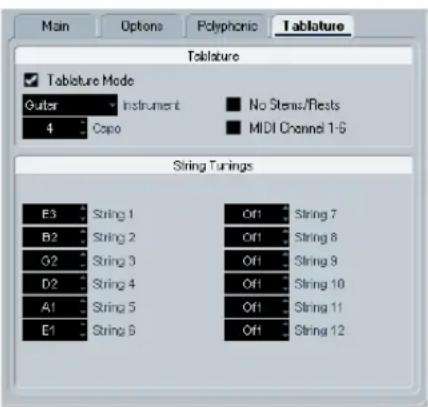
text_image
Main Options Polyphonic Tablature Tablature Mode Outer Instrument No Stens/Rests 4 Capo MIDI Channel 1-5 String Turings E3 String 1 B2 String 2 G2 String 3 D2 String 4 A1 String 5 E1 String 6 Off String 7 Off String 8 Off String 9 Off String 10 Off String 11 Off String 12-
Activate "Tablature Mode".
-
Select one of the predefined instruments from the pop-up menu.
- If you are not using one of the predefined instruments, set the open tuning of each string using the value fields. You can create tablature for up to 12 strings. To disable a string, set it to Off, the lowest value.
-
If you want to use a capodaster, e.g. on the forth fret, enter the corresponding value in the Capo field. The tablature changes accordingly.
-
Make the desired settings for "No Stems/Rests" and "MIDI Channel 1-6".
No Stems/Rests will give you a score where the notes have no stems and where all the rests are hidden. The "MIDI Channel 1–6" feature is described below.
- Click Apply.
The tablature appears. You will get as many note lines as you have activated strings. All the notes will now have a fret number instead of their regular note heads.
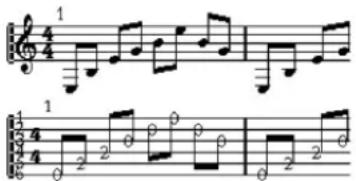
text_image
Musical notation with treble and bass clefs, showing notes, rests, and articulation marksBefore and after activating tablature mode.
- Edit the score, if needed.
You can make Display Quantize settings, add symbols, etc. as usual. However, editing the actual notes is a bit different from regular note editing. See below.
Using "MIDI Channel 1-6"
This feature will make notes automatically appear on the correct string according to their MIDI channel value.
Normally, the program automatically decides on which string to display a note, by looking at the pitch and then putting the note at the lowest possible string. You can then either manually move a note to the correct string, or use the "MIDI Channel 1-6" option to let the program move the notes automatically.
-
Many guitar synthesizers are able to transmit each string on a different MIDI channel. If you have such an instrument, set it up so that the high E string transmits on MIDI channel 1, the B string transmits on MIDI channel 2, etc.
This feature can be used for MIDI string instruments with up to six strings. -
Record the project. Quantize and edit it as desired.
-
Make sure the option "MIDI Channel 1-6" is activated and convert the notes into tablature, as described above.
- The notes will automatically be placed on the right strings.
For example if you played a "B" on the low E-string, it will appear as a "7" on that string, not as a "2" on the A-string.
Creating tablature manually
To set up an empty system for inputting tablature, proceed as follows:
- Change the clef to the tablature symbol.
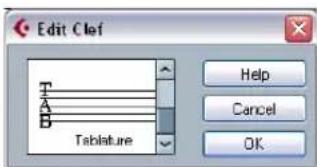
text_image
Edit Clef Tablature Help Cancel OKThe tablature clef
- Open the Score Settings—Staff page and select the Options tab.
- Set the "System Lines" to as many strings as the instrument you are scoring for has.
- Raise the Add Space value to 1 or 2.
You will need a little extra space between note lines to make room for the numbered note heads.
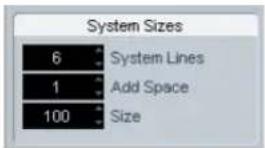
text_image
System Sizes 6 System Lines 1 Add Space 100 SizeSuggested system line settings for guitar tablature
- On the Tablature tab, activate "Tablature Mode".
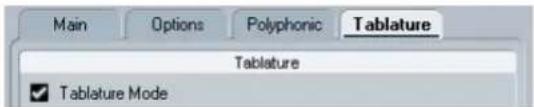
text_image
Main Options Polyphonic Tablature Tablature ✓ Tablature ModeTablature Mode activated.
- Set up whatever other parameters you need in the dialog, and click Apply.
-
Select the Insert Note tool and move the pointer over the score.
-
Press the mouse button and drag up and down until the note appears on the desired string with the correct fret number (you can also verify the pitch on the toolbar, as usual).
When you drag up and down, the program automatically selects the lowest possible string. If you want a fret number higher than 4 on a guitar tablature, for example, you have to use "Move To String", see below.
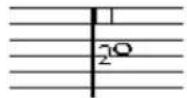
Setting the correct pitch. Use the mouse position box on the toolbar as an additional guide.
9. Release the mouse button.
The note is displayed.
Tablature number appearance
On the Score Settings-Project page (Text Settings subpage), you will find text settings for the tablature numbers. Select "Tablature" in the "Font For" pop-up menu and select the desired font, size and style for the number note heads.
Editing
Tablature can be edited like any other score. You can move notes, handle beaming, stem direction, etc.
Moving notes to another string
If you want for example a "C" to appear as a "8" on the low E-string rather than a "3" on the A-string on a guitar, proceed as follows:
- Select one note or a number of notes that you want to move to a new string.
- Right-click on one of the selected notes and, from the "Move to String" submenu, select the desired string.
The Fret number is automatically adjusted according to the tuning of the instrument (as set up on the Tablature tab on the Score Settings-Staff page).
Moving notes
Moving notes in pitch in a tablature score is working the same way as entering notes manually, see above.
Editing on the info line
You can change the pitch of notes on the info line as usual. The string and fret number will be updated automatically in the score.
Note head shape
If you only want to enter a fret number for your notes (Tab-lature mode off), you can use the Set Note Info dialog on regular notes.
- Double-click on the head of a note.
The Set Note Info dialog appears. - Activate the Tablature option and set a fret number in the value field to the right.
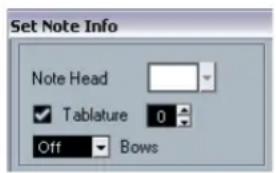
text_image
Set Note Info Note Head ✓ Tablature 0 Off BowsThe tablature settings in the Set Note Info dialog
- Click Apply.
The score and MIDI playback
About this chapter
In this chapter you will learn:
- How to use the Arranger mode to have the playback follow the structure of the score.
- How to use the MIDI Meaning function.
- How to use crescendo/diminuendo symbols with integrated dynamics.
→ You can also play back articulations in the Score using the VST Expression functionality. This is described in detail in the chapter "VST Expression" on page 372.
Scores and the Arranger mode
Repeats (bar lines) will appear in all layouts, as will Project symbols like Segnos, Codas, Da Capo, endings, etc. To have the playback in Cubase follow these directions, proceed as follows:
-
Add the desired repeats and Project symbols to the score.
-
Right-click the toolbar in the Score Editor and make sure "Arranger" is ticked.
This adds the Arranger buttons to the toolbar.
- Click the "Activate Arranger Mode" button on the toolbar and start playback.
Playback will follow the repeats and Project symbols in the score – sections within repeat symbols will be repeated, the playback position will jump to the beginning when encountering a Da Capo symbol, and so on.
The MIDI Meaning function
The MIDI Meaning function interprets some dynamic symbols, affecting the velocity of notes during playback.
⇒ This is done in realtime during playback – the actual notes are not affected!
Proceed as follows:
- On the Score Settings—Project page, open the MIDI Meaning subpage.
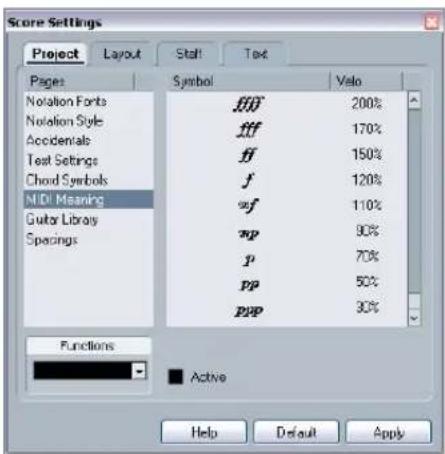
text_image
Score Settings Project Layout Stall Text Pages Symbol Velo Notation Fonts ffff 200% Notation Style fff 170% Accidentals ff 150% Text Settings f 120% Chord Symbols f 110% HIDI Meaning wf 90% Guitar Library xp 70% Sperings p p 50% Functions p pP 30% Active Help Default ApplyAs you can see, the dialog lists the dynamic symbols to the left. To the right is a column, allowing you to specify in which way each symbol should affect the velocity of the notes as they are played back.
- Set up the dynamic symbols.
If you set the fortissimo symbol (ff) to mean Velocity=150% and insert a fortissimo symbol in the score, all notes will be played back with 1.5 times their actual velocity, from that point in the score until the next dynamic symbol.
-
To activate MIDI Meaning, click the Active checkbox.
-
Click Apply and close the dialog.
Now, note symbols and dynamics will affect the notes on playback.
For dynamic changes to take effect, the MIDI sound source must respond to velocity.
Also, note that the maximum note velocity is always 127. If all notes were recorded or entered with maximum velocity, Velocity settings over 100% will not have any effect.
Dynamic crescendo symbols
In the Symbols Inspector – Dynamics tab, you will find a special crescendo symbol:

This allows you to enter a crescendo or diminuendo in the score and have the note velocity adjusted accordingly during playback. The same rules apply as for MIDI Meaning:
- The actual notes are not affected – the settings affect play-back only.
- For the crescendo/diminuendo to be heard, the MIDI sound source must respond to velocity.
- The maximum note velocity is always 127. If the notes are recorded or entered with high velocity values, you may not hear any difference between e.g. forte and fortissimo.
Proceed as follows:
- Select the dynamic crescendo symbol and make sure the Pencil tool is selected (see "Adding symbols to the score" on page 559).
- Click where you want the crescendo or diminuendo to start, drag to its end position and release the mouse button. By default this inserts a crescendo from piano (p) to forte (f).
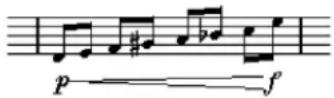
- To adjust the dynamics at either end of the crescendo, right-click to bring up a palette from which to select the desired dynamic symbol.
If you select a dynamic symbol at the start that is "louder" than the one at the end, the crescendo symbol is automatically changed to a diminuendo symbol.
- In the palette for the start symbol you will find three additional options: "cresc", "dim" and "None" (no symbol is shown).
If any of these is selected, the crescendo or diminuendo will start from the “current dynamic”, i.e. with the level according to the previous dynamics symbol in the staff.
- On the Score Settings—Project page, select the MIDI Meaning subpage and make sure the Active checkbox is ticked.
The dynamic crescendo/diminuendo makes use of the MIDI Meaning function and uses the velocity scaling you have set up for the dynamics symbols in this dialog.
- Start playback.
You should now hear the crescendo or diminuendo affect the note velocities.
Tips and Tricks
Overview
This chapter provides useful information about editing techniques and answers to a number of questions that might arise when you use the Score Editor. For more information about the functions referred to, please use the index and check the previous chapters.
Useful editing techniques
Use this section to find out more about some editing techniques that will help you to use the score functions more efficiently.
Moving a note without transposing it
If you hold down [Ctrl]/[Command] while moving a note (or several notes), only horizontal movements are possible, so that you do not have to worry about the notes being transposed. You can also set up a key command for this. This is done in the Key Commands dialog (Nudge category).
Moving and spacing several staves
If you have a number of staves that you want displayed with an equal distance (for example, all strings of a grand staff in a full orchestra score), this can be done using the Position Info window:
- Open the Preferences (Scores-Editing page) and deactivate the option "Global staff Spacing with [Alt Gr]/[Option]-[Command]".
- In the score, select the staves you want to set to an equal distance.
- Open the Position Info window by clicking on the ruler.
- Use the To Previous Staff or To Next Staff settings to specify the desired distance between the staves. All selected staves are spaced according to your settings.
- If you do this when the option “Global staff Spacing with [Alt Gr]/[Option]-[Command]” is activated, all staves in the score are affected.
Polyphonic voicing
If you are working on a full score with more than one instrument in one staff (2 flutes, 2 trumpets, etc.), you should use polyphonic voices. And even if both instruments play the same notes, you should insert notes for both instruments (you can mute the notes of the second voice, if playback is an issue). If you do this, it will be much easier to extract single parts later by using the "Extract Voices" command.
Using the bar handles
Double-clicking a bar handle opens the Bar Copy dialog. This function is great for copying accents, but you can also use it for copying drum phrases, etc. For more information, see "Moving and duplicating with the bar handles" on page 568.
- If you hold down [Shift] and double-click on a bar handle, this and the next bar are selected.
This is handy when copying phrases of two or more bars in one go.
Copying a section with "invisibles"
If you want to copy and paste a section which contains hidden elements, adjusted beams and stems, etc., there are two ways to proceed:
- Use the filter bar to make indicators appear in the score. Then select these indicators together with the notes before you copy.
This ensures the notes are copied with their formatting, etc.
- Double-click the bar handle of one of the bars, and make sure all relevant event types are activated in the dialog. Then select the bars you want to copy by clicking their bar handles, and copy them by [Alt]/[Option]-dragging the bar handles.
For more information, see "Moving and duplicating with the bar handles" on page 568.
Using "Scores Notes To MIDI"
This function converts the score data, as displayed, into MIDI data. Let's say for example that you have set up the score so that it is displayed to 99% the way you want it to be. Yet, that last 1% forces you to deactivate some of the Staff Settings (like Clean Lengths, No Overlap or Auto Quantize), which makes other parts of the score illegible. In this case, try using the function "Scores Notes To MIDI". Note that you should work on a copy of the track! For more information, see "Using "Scores Notes To MIDI" on page 510.
Optimizing rests
If you have a number of consecutive empty bars, you can replace them with one multiple rest. See "Multiple rests" on page 600.
Zero system lines
Having no system lines at all might seem like a stupid idea to start with. But this option allows you to create chord sheets really quickly, see “Using Make Chord Symbols” on page 578.
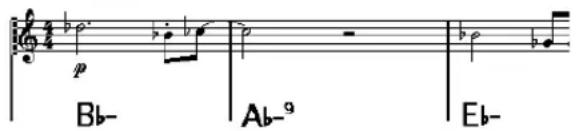
text_image
Bb- Ab-9 Eb-A lead sheet created by specifying "0" system lines
Examples and scales
If you are creating scale examples and similar, you can use the Real Book option and manually hide all symbols at the beginning of the first staff to make the score appear like separate unconnected "lines".
Remember you can also hide the bar lines.

An example scale without bar lines
Controlling the order and appearance of grace notes
Normally, grace notes are beamed. Their order under the beam is controlled by their order in the track. It is enough to put a grace note one tick before the next grace note to make them appear in the desired order under the beam.
Initially the grace notes are put in with a 32nd note beam. By double-clicking the note and changing the "flag" type in the Set Note Info dialog, you can change this.
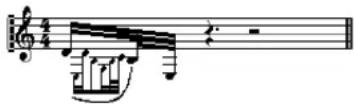
Complex grace notes
Speeding up inserting key changes
If you have a grand staff with many instruments, inserting key changes one by one can take a lot of time.
In this case, activate "Key changes for the entire Project" on the Key context menu or on the Score Settings–Project page (Notation Style subpage, Keys category). This way, all changes made to the key will always affect the entire project.
Speeding up inserting staccato and accents
Symbols linked to notes can also be put in for a number of notes at the same time, even on different staves. See "Adding a symbol to several notes using the Pencil tool" on page 559.
Setting the distance between staves in a piano score
Drag the first bass staff on the first page. This will copy the spacing to all staves. Please note that this can only be done in Page Mode.
Frequently asked questions
In this section, you will find some answers to questions concerning adding and editing of notes as well as the handling of symbols and layouts.
I enter a note with one value and it is shown as a note with another value.
Set the Rests value for Display Quantize to a smaller note value. Try deactivating Auto Quantize, especially if you do not have any triplets or triplets only.
Notes are not displayed at the correct positions.
Try changing the Notes value for Display Quantize.
There are a number of short rests after my notes.
Your Rests value for Display Quantize might be set to too small a note value. Raise it. Also check the "Clean Lengths" setting.
When I change the length of a note, nothing happens.
This is because the Display Quantize value puts a restriction on what note values can be displayed. Check that Display Quantize is set to the smallest note value you have in your project.
I have adjusted Display Quantize and the other staff settings best I can. The notes are still shown with the wrong values.
You might need to use one of these three features: inserting Display Quantize events, using polyphonic voicing, or applying "Scores Notes To MIDI".
I change the Display Quantize settings on the Score Settings-Staff page (Main subpage) and nothing happens.
Did you remember to click Apply? Maybe you have already inserted Display Quantize events in the score? These override the staff settings.
Suddenly many Display Quantize events appear in the score.
This is not a malfunction. If you had Auto Quantize on and start inserting Display Quantize events, the auto quantizing is automatically transformed into Display Quantize events.
One long note is shown as many tied notes.
Do other notes occur at the same positions but with different lengths? Then you need to use polyphonic voicing. Are the note(s) syncopated? Then you should try the syncopation feature.
Even though I've tried the above, notes are not tied as I want them.
The way notes are tied in Cubase follows basic notation rules. You may need to make exceptions to these rules, by using the Cut Notes tool.
I have an unnecessarily large amount of rests.
Especially with polyphonic voicing, superfluous rests may be created. Try deactivating rests for one or more voices. You might also leave the rests activated on the Score Settings–Staff page (Polyphonic tab) and then hide the rests you do not need, one by one.
When using polyphonic voices, a number of rests are drawn on top of each other.
As above, you should try hiding rests on the Score Settings—Staff page (Polyphonic tab), center rests and possibly manually moving or hiding rests.
In polyphonic voices, notes that are on the same musical position are not displayed exactly vertically above each other.
This is not a malfunction. Cubase has built-in automatic algorithms for making the score as legible as possible. Sometimes this will include adjustments of the "graphic" position of notes, especially with small intervals like seconds. You can always move the notes using the Layout tool.
When using polyphonic voices, notes with small intervals "collide".
As described above, Cubase tries to avoid this, but only for voices 1 and 2 in the upper staff and voices 5 and 6 in the lower. For other voices, please use the Layout tool to manually move the notes.
When I select a note, nothing is shown on the info line.
The note is probably tied to another note. This means that the second note does not really exist, it is just a graphic indication that the main note is long. Try selecting the main note instead.
Symbols from the Layout Symbols tab are sometimes invisible when I open the score.
This is not a malfunction. Those symbols are part of a layout. If you open the score with another layout, for example because you open another combination of tracks, you will see another layout which might not contain any Symbols at all. See the chapter "Working with layouts" on page 590.
I can't select an object on the screen, or I can't select an object without selecting another object.
Drag a selection rectangle around the objects. Then hold down [Shift] and deselect all the objects you do not want included, by clicking on them. You should also check out the lock layer function.
Symbols have disappeared.
Are they layout symbols? Then maybe they belong to another layout than the one you are editing now.
If that is not the reason, maybe you have inserted the symbol into the wrong staff, see “Important! – Symbols, staves and voices” on page 558.
A symbol doesn't move with its staff. Auto Layout produces far too wide spacing.
Maybe you have inserted the symbol into the wrong staff. Please observe the warning in the section "Important! – Symbols, staves and voices" on page 558.
A note symbol appears too far from the note I wanted it inserted on.
Do you have activated the correct voice? Note symbols are inserted into voices, just like notes.
If you wish you had a faster computer
Here are some tips for those who find some operations slower than they would like:
- Work on a smaller section of the score at a time. Break the project up into parts and work on those parts individually until the final layout stage.
- Switch on multi-rests as late as possible.
- When working in Edit Mode, set Default Bars Across The Staff to a small value, for example 2.
- In Edit Mode, resize the window so that only one grand staff at a time is visible.
- Consider upgrading your computer hardware.
Index
A
Accelerando 547
Accents
Above Staves 559
Above Stems 559
Accidentals
About 542
Distance From Note 544
ACID® loops 231
Acoustic Feedback 344
Score Editor 518
Activate Next/Previous Part 339
Activate project button 456
Active Part 339
Active Staff 496
Adapt (Display Quantize) 527
Add Bus 16
Add Space 530
Add Track 38
Adding Notes 514
Adjust Fades to Range 90
Advanced Quantize 329
Aftertouch
Deleting 355
Editing 353
Recording 82
AIFF files 422
Align
Dynamics 572
Symbols 570
Text 582
Alt/Option key 12
Always Send Start Message 431
Angle Mode 185
Any (MIDI channel settings) 80
Apogee UV22 HR 156
Appearance 474
General 474
Meters 475
Apple Remote 304
Apply closes Property Windows 498
Applying effects 213
Archiving 271
Arranger mode 618
Arranger track
Adding 97
Creating a chain 98
Flattening 100
Renaming events 97
Articulations
Auditioning 373
Editing on the controller lane 376
ASIO 2.0 74
ASIO Direct Monitoring 74
ASIO meter 131
ASIO Positioning Protocol
About 434
Setting up 433
Attenuate (SurroundPanner) 186
Audio channels
Copying settings 125
Linking 129
Making settings 122
Mixing down to file 420
Saving settings 130
Audio clips
About 205
Creating new versions 263
Definition 27
Deleting 264
Locating events 265
Managing in Pool 263
Opening in the Sample Editor 268
Audio effects
About 151
Applying 213
Automating 199
Editing 163
External 163
For output busses (Master inserts) 155
Freezing 156
In surround configurations 187
Inserts 152
Organizing in subfolders 167
Post-fader inserts 152
Pre/Post-fader sends 159
Recording with 78
Saving 164
Selecting Presets 164, 177
Sends 159
Tempo sync 152
Using VST System Link 444
Audio events
Definition 27
Editing in Browser 415
Editing in Sample Editor 220
Fade handles 89
Making selections 227
Slicing 236
Volume handles 90
Audio files
Converting 272
Deleting permanently 264
Exporting 420
Format for recording 69
Formats 268
Import options 41
Importing into Pool 268
Importing into Project window 41
Locating missing 267
Reconstructing missing 267
Removing missing 267
Audio parts
About 26
Creating by gluing events 46
Creating from events 42
Drawing 42
Editing in Audio Part Editor 255
Editing in Project Browser 415
Sliding contents 48
Audio Warp
Unstretch Audio 242
Audition icon
Sample Editor 225
Audition Loop icon
Sample Editor 225
Auditioning
Audio Part Editor 257
MIDI editors 344
Pool 267
Project window 42
Sample Editor 225
Auto Clef 501
Auto Fades 94
Auto Group Notes 547
Auto Layout
About 606
Hide Empty Staves 606
Move Bars 606
Move Bars and Staves 607
Move Staves 606
Optimize All 607
Spread Page 606
Auto Monitoring modes 73
Auto Quantize 81, 527
Auto Save 458
Auto Select Events under Cursor
MIDI editors 346
Project window 44
Automatic MIDI Record Quantize 81
Automation
Auto-Latch mode 192
Cross-Over mode 192
Delta indicator 190
Editing in Project Browser 417
MIDI Controller 202
Opening automation subtracks 197
Return Time 195
Showing and hiding 197
Tempo 198, 405
Touch mode 192
Trim 193
Automation events
About 199
Drawing 200
Editing 200
Editing in the Project Browser 201
Removing 201
Selecting 201
Automation follows Events (Option) 199
Automation Merge Modes (MIDI) 202
Automation pass 190
Automation subtracks
Assigning parameters to 197
Hiding and showing 198
Muting 199
Autoscroll 57, 343, 495
B
Back up Project 458
Backup (.bak) files 458
Bank Assignments 317
Bank Select 315
Bar Handles 568, 621
Bar Lines
Breaking 608
Indent 604
Moving 603
Selecting Type 601
Bar Numbers
Offsetting 589
Settings 588
Spacing 588
Bars
Moving to Next/Prev. Staff 603
Number Across Page 602
Resetting Spacing 604
Bars+Beats Linear
MIDI editors 341
Basic Appearance Scheme (Cubase Studio) 474
Bass To Lowest Voice
Explode Function 509, 536
Batch export
Audio channels 420
Beam Subgroups 529
Beams 546
Appearance 548
Group Settings 548
Grouping 545
Manual Adjustment 549
On/Off 545
Slant 548
Stem Direction 541
Beat Calculator 407
Bezier slurs 561
Block Text 585
Bounce (Export Audio) 420
Bounce Selection 333
Pool 269
Project window 49
Sample Editor 228
Bow Up/Down 544
Braces 605
Bracket Head 544
Brackets 605
Brightness 474, 475
Brillenbass 546
Broadcast Wave files
Exporting 424
Recording 69
Build N-Tuplet 553
Build Trill 561
Buses
Add child bus 16
Busses
About 14
Adding 16
Mixing down to file 420
Routing to and from 18
Viewing in the mixer 19
Bypass
AudioWarp 252
Effect sends 160
Inserts 153
Bypass Warping
Sample Editor 241
C
Center Note-Linked Symbols on Stems 559
Channel (MIDI)
Setting 80
Channel Overview
EQ 125
Insert effects 154
Channel Settings
Audio tracks 122
Copying 125
MIDI tracks 128
Channel Settings windows
Customizing 471
Channel view sets 115
Channels (MIDI) 79
Chase events 64
Child Busses 16
Chord Recognition 341
Chord Symbols
Global Settings 579
Inserting Automatically 578
Inserting Manually 577
Clean Lengths 528
Cleanup 459, 467
Clefs
Editing 523
Inserting 522
Moving 523
Setting Initial 499
Click 85
Clips, see "Audio clips"
Close Gaps
Sample Editor 238
Close project 456
Color pop-up menu 545, 600
MIDI editors 344
Project window 39
Color tool 39
Coloring notes 545, 600
Colorize Event Background 37
Computer keyboard display Virtual Keyboard 65
Configuring Studio Sends 146
Configuring the Control Room Mixer 143
Conform Files 272
Consolidate Rests 528
Constrain Delay Compensation 179
Context menus 498
Control Room
About 136
Channels 137
Configuring 137
Creating a Channel 138
Features 136
Mixer 141
Operations 137
Overview 140
Preferences 146
Settings 145
Controller display
About 341
Adding and removing lanes 351
Controller lane presets 352
Editing events 353
Editing velocity 352
Selecting event type 351
Controllers
Deleting 355
Editing 353
Recording 82
Convert Files 272
Convert to MIDI
Notes and Continuous Pitchbend Data 253
Notes and Static Pitchbend Data 253
Convert to Real Copy 45
Converting MIDI to CC track automation 336
Copy 518, 570
Count-in 85
Cpr files 456
Create Audio Images During Record 74
Create events
Sample Editor 238
Create events (Cycle Rec Mode) 76
Create Groove Quantize 237
Create MIDI track when loading VSTi 170
Create new controller lane 351
Create Regions (Cycle Rec Mode) 76
Create slices 236
Crescendo
Affecting MIDI playback 619
Drawing 571
Flipping 572
Keeping Horizontal 572
Crop 52
Crossed Voicings 538
Crossfades
Creating 92
Editing in dialog 93
Presets 94
Removing 93
Cross-Staff Beaming 548
Csh files 271
Ctrl/Command key 12
Cue Notes 551
Cursor, see "Project cursor"
Custom Palette 558
Cut 518
Cut Notes Tool 550
Cut Time 52
Cutflag Events 550
Cycle
About 62
Record modes 81
Recording 68
Recording audio 75
Recording MIDI 81
Cycle markers
About 54
Adding in Marker window 55
Drawing 55
Making selections with 55
Navigating to 55
D
D.C. (Da Capo) 574
Deactivate Punch In on Stop 84
Default MIDI editor 338
Default Number of Bars per Staff 602
Default Output Bus 17
Default template 457
Default Track Time Type 40
Delay compensation
About 152
Constraining 179
Delete
Audio files from disk 264
Events in Project window 49
MIDI controllers 334, 355
MIDI drum notes 360
MIDI notes 348
Notes 523
Symbols 570
Delete Continuous Controllers 334
Delete Controllers 334
Delete Doubles 334
Delete Notes 334
Delete Overlaps
Audio 50, 77
Mono (MIDI) 335
Poly (MIDI) 335
Delete Time 52
Detect Silence 216
Dev(Display Quantize) 527
Device Panels
About 320
Inspector 30
Mixer 122
Device Ports
Selecting for busses 16
Setting up 15
Dialogs 498
Diminuendo
Affecting MIDI playback 619
Drawing 571
Keeping Horizontal 572
Disable sends 160
Disable Track 63
Disk meter 131
Display Arrow Tool after Inserting Symbol 559
Display filter bar 497, 498
Display format 33
Display Length 520, 544
Display Markers 592
Display Quantize
About 490
Auto 527
In Polyphonic Voices 537
Inserting changes 508
Rests 491
Tool 491, 508
Display Transpose 503, 529
Display transpose
Disable 503
Dissolve Part
Audio 42
MIDI 332
Dithering 155
Dividing the Track list 40
Don't Center Hyphens 584
Don't Sync Lyrics 583
Double-click Symbol to get Pencil Tool 559
Drag Delay 44
Drag&drop Inserts
Automation 199
Side-Chain 163
Draw
Hitpoints 236
In Sample Editor 230
Markers 55
MIDI controllers 353
MIDI notes 344
Parts 42
Drop Out Frames 437
Drum Editor
Creating and editing notes 359
Muting drum sounds 360
Selecting drum maps 363
Drum maps
About 361
Making settings 361
MIDI channel and output 362
Selecting 363
Setup dialog 363
Drum name lists 364
Drum Notes
About 610
Adding and Editing 612
Head Pairs 611
Setting Up The Staff 612
Single Line 612
Drum Sound Solo 360
Drumstick tool 359
Duplicate
Events and parts 45
MIDI notes 347
Notes 518
Symbols 566
Using Bar Handles 568
Duplicate tracks 39
Dynamics symbols
Adding 571
Affecting MIDI playback 618
E
Edit Active Part Only 339
Edit as Drums when Drum Map is assigned 338
Edit button
Audio channel strips 122
Audio track Inspector 29
MIDI channel strips 128
MIDI track Inspector 306
Edit Drum Map in Scores 611
Edit In-Place 356
Edit Mode 495
Edit Pitch/Time (VariAudio)
Changing the pitch 247
Description 247
Tilting the micro pitch curve 248
Edit Segment (VariAudio)
Changing note start/end point 246
Cutting segments 246
Deleting segments 247
Gluing segments 246
Moving segments horizontally 247
Saving the segmentation 247
Edit warp
Sample Editor 239
Editing via MIDI 349
Edits folder 205
Elements
Sample Editor 221
Enable Record on Selected Track 67
Enable Solo on Selected Track 49
Enable Track 63
Ending Symbols 574
Enharmonic Shift
Manual 543
Enlarge Selected Track 36
Envelope
Process 206
Realtime 95
EQ
Bypassing 124
Presets 125
Setting 123
Equal Pitch (Selection) 346
Erase Tool 49, 523, 608
Event as Region 53
Event Envelopes 95
Event Lock Layers 565
Events
Audio 27
Color 39
Duplicating 45
Grouping 48
Locking 48
Moving 44
Muting 49
Overlapping in audio part 256
Overlapping in Project window 44
Removing 49
Renaming 46
Renaming all on track 39
Resizing 46
Resizing with time stretch 47
Selecting 43
Sliding contents 48
Splitting 46
Events (Snap mode) 57
Events from Regions 53
Events to Part 42
Explode 509, 536
Export
OMF 462
Export Audio Mixdown 420
Export MIDI files 464
Export Options (MIDI files) 464
Export selected tracks 466
Export Tempo track 405
Exporting the Score as Image Files 503
Expression Maps
Creating 377
Loading 374
External Effects 163
External effects
About 20
Favorites 23
Freezing 24
Missing plug-ins 23
Setting up 21
External Inputs (Control Room
Channel) 137, 139, 144
External instruments
About 20
Favorites 23
Freezing 24
Missing plug-ins 23
Setting up 22
Extract Audio from Video 461
Extract MIDI (VariAudio) 252
Just Notes and no Pitchbend Data 253
Extract MIDI Automation 336
Extract Voices 539
F
Fade handles 89
Fade In/Out functions 90
Faders 117
Fades
Auto Fades 94
Creating 89
Editing in dialog 91
Presets 91
Processing 90
Removing 90
Fill Loop 45
Filter (MIDI) 84
Filter (Project Browser) 417
Filter bar 367, 497, 498
Find and Replace 587
Find missing files 267
Find Selected in Pool 265
FireWire 448
Fit Page/Width 495
Fixed Lengths 334
Fixed Stem Length 530
Fixed tempo 402
Fixed Velocity 335
Flat Beams 529
Flat Ties 550
Flip
Crescendo 572
Slurs and Ties 569
Stems 541
Folder parts 53
Folder tracks
Moving tracks into 53
Muting and soloing 53
Fonts 582, 589
For Grouping Only 500, 546
Force Update 504
Frame rates 430
Free Warp 238
Freeze Edits 215
Freeze Quantize 330
Freeze Tracks 156
Freeze VST Instruments 174
FX channel tracks
About 157
Adding effects for 158
Mixing down to file 420
Routing sends to 159
Setting up 157
Soloing 161
G
Gain 207
Generic Remote Device 302
Get Form 592
Global (Input Transformer) 390
Global Staff Spacing 621
Global Text 585
Glue Tool 520, 603
MIDI editors 348
Project window 46
Grace Notes
Converting to Normal 552
Creating Manually 552
Order of 622
Settings 552
Graphic Note Type 544
Grid (Snap mode) 56
Grid Relative (Snap mode) 56
Groove Quantize
From audio 237
Group 48
Group channel tracks
About 26
Routing audio to 127
Using effects 156
Group Notes Icon 546
Grouping
Automatic 547
Removing 547
Repeats 546
Grouping notes 545
Accelerando 547
Beam 546
Brillenbass 546
Repeats 546
Ritardando 547
Guitar Chord Symbols 562
Guitar Library 563
H
Hide Empty Staves
About 606
All Pages 607
Hide First Bar Line in Parts 601
Hide Notes beyond Limits 530
Hide Pedal Markers 573
Hiding Objects 599
Hitpoints
About 234
Editing manually 236
Use pop-up menu 235
Horizontal Zooming Only 35
|
Image file
Inserting in the Score Editor 564
Import
Audio CD 269
Audio files 41
Audio from Video file 461
Medium in Pool 268
MIDI files 464
MPEG files 462
Ogg Vorbis files 462
OMF 462
REX 461
Tempo track 405
Track Archive 466
Video files 41
WMA files 462
Indent 604
Independent track loop
Audio Part Editor 257
MIDI editors 343
Indicate Transpositions 107
Info line
Changing the Note length 520
Customizing 471
Drum Editor 358
Key Editor 340
Pool 262
Project window 32
Sample Editor 222
Score Editor 497
Inhibit Restart 437
Initialize Channel 126
I-Note 362
Input busses
About 14
Adding 16
Routing to channels 18
Viewing in the mixer 19
Input channels 117
Input Gain
About 119
Setting record level 72
Input levels 71
Input Phase switch 119
Input selection
Multiple audio channels 18
Multiple MIDI channels 80
Input Transformer 389
Input/Output routing panel (Mixer) 112
Inputs (Audio) 15
Inputs (MIDI) 79
Insert buttons 535
Insert effect combinations
Saving 166
Insert effects (Audio) 152
Insert into Project 266
Insert pop-up menu 366
Insert Silence
Project window 52
Sample Editor 228
Insert Slur 561
Insert Velocity (MIDI Editors) 345
Inserts
Bypassing vs. deactivating 153
Inserts drag&drop
Automation 199
Side-Chain 163
Inspector
Audio tracks 30
Customizing 471
Folder tracks 30
General controls 29
Handling 29
MIDI tracks 306
Sub-panels 310
Transpose track 31
Instrument Freeze 174
Intensity (Appearance) 474, 475
Interpolate Audio Images 225
Interpretation Options 526, 527
Iterative Quantize 329
J
Jog wheel 63
K
Keep Crescendi Horizontal 572
Keep Last
Audio cycle recording 75
MIDI cycle recording 81
Keep Moved Notes within Key 517
Key
Editing 523
Inserting Changes 522
Setting Initial 499
Key Changes for the entire
Project 501
Key commands
About 480
Conventions 12
Default 484
Importing 482
Loading 482
Modifying 480
Removing 481
Resetting 483
Searching for 481
Keyboard Input button 514
Keyboard Symbol 562
L
L Button 517
Lanes
Audio Part Editor 256
Stacked Audio Recording 77
Stacked MIDI Recording 82
Latency
Monitoring 73
VST System Link 439
Layout Layer 556
Symbols 556
Layout Page (Score Settings dialog) 598
Layout Settings
About 598
Equal Spacing 598
Modern Time Signature 599
Multi-Rests 598
Real Book 598
Size 598
Staff Separators 598
Layout tool 523, 550, 560
Move Notes and Context 550
Move Single Object 550
Layouts
About 591
Creating 591
Export 592
Opening 591
Opening Tracks In 592
Operations 592
Selecting 592
Ledger lines 544
Left locator 62
Legato 333
Length Adjustment 83
Length Compression 308
Length of Notes 520
Length Quantize 345
Level faders 117
Level meters
Input 71
Post-Fader mode 72
Settings 126
LFE amount (Surround) 186
Libraries 271
Line mode
Automation 200
MIDI controllers 353
MIDI velocity 352
Linear Record Mode
Audio 75
MIDI 81
Linear time base 40
Lines To Tracks
Explode Function 509, 536
List Editor
Adding events 366
Editing in the list 366
Editing in the value display 368
Filtering events 367
Masking events 367
Local (Input Transformer) 390
Local Keys 502
Locate when clicked in empty space 61
Locators 62
Lock 48
Lock button 517
Lock Event Attributes 48
Lock Frames 437
Lock Layers 565
Lock Record
Unlock Record 86
Logical Editor
About 381
Actions 387
Filter conditions 382
Functions 386
Opening 381
Presets 389
Loop
Audio Part Editor 257
MIDI editors 343
Lyrics
About 583
In Voices 584
Inserting Manually 583
Verse 584
Lyrics from Clipboard 584
M
M button 49
Mac OS X
Port activation 15
Port selection 15
Retrieving channel names 15
Machine control
Setting up 436
Macros 481
Magnetic Area 328
Magnetic Cursor (Snap mode) 57
Magnifying Glass tool 35
Main Mix Bus 17
Make Chord Symbols 578
Map Input Bus Metering to Audio Track (in Direct Monitoring) 73
Marker Track to Form 592
Markers
About 31
Adding in Marker window 55
Drawing on Marker track 55
Editing in Project Browser 418
Editing on Marker track 55
ID numbers 54
Key commands for 55
Marker track 55
Marker window 54
Moving 55
Removing 55
Snapping to 57
Mask function 367
Media files 274
Write protection in MediaBay 287
MediaBay
Browse Selection Presets 279
Browser 276
Context menu search 282
Detail search 280
Filter buttons 280
Media files 274
Scanning operations 277
Scope 283
Search 281
Supported files 274
Tag Editor 284
Tags 284
User tags 286
Viewer 279
VST Sound node 277
Write Protection 287
Melisma Lines 581
Merge All Staves 539
Merge Clipboard 207
Merge MIDI in Loop 331
Merge Record Mode
Audio 75
MIDI 81
Merge Tempo from Tapping 336, 408
Meters
Characteristics 126
Coloring of 475
Input level 71
Peak Hold Time 126
Post-Fader mode 72
Settings 126
Metric Bias 235
Metronome
Activating 85
Precount 85
Settings 85
MIDI
Functions 326
MIDI channel
"Any" 80
In drum maps 362
Selecting for tracks 80
Send effects 311
MIDI Channel Settings 80, 128
MIDI Clock
About 429
Always Send "Start" 431
Transmitting 431
MIDI Clock Follows Project
Position 431
MIDI Controller Automation
Setup 202
MIDI Device Manager 315
MIDI devices
Defining new for patch selection 316
Editing patches 318
Installing 317
Selecting patches 318
MIDI effects
About 310
Deactivating 313
Inserts 311
Presets 312
Sends 311
MIDI files 464
MIDI Filter 84
MIDI input (Editing via) 349
MIDI Input button 349, 519
MIDI Input Transformer 389
MIDI inputs
Renaming 79
Selecting for tracks 79
MIDI Meaning 618
MIDI Modifiers 307, 326
MIDI notes
Deleting 348
Drawing 344
Editing velocity 352
Moving 347
Muting 348
Muting in Drum Editor 360
Quantizing 326
Resizing 348
Selecting 346
Splitting and gluing 348
Transpose (Function) 330
Transposing (in editor) 347
MIDI outputs
In drum maps 362
Renaming 79
Selecting for tracks 80
Send effects 311
MIDI parts
About 26
Drawing 42
Editing 338
Editing in Project Browser 416
Sliding contents 48
MIDI Record Catch Range 83
MIDI reset 83
MIDI Thru 79
MIDI Timecode Follows Project
Time 432
MIDI tracks
Channel Settings window 128
MIDI Modifiers 307
Settings 306
Minimize Files 270
Mix (Cycle Record mode) 81
Mixer
Common panel 113
Exclusive Solo 119
Extended channel strips 112
Group channels 127
Hiding channel types 114
Input and output busses 117
Input/Output settings 112
Link/Unlink channels 129
Loading settings 130
Multiple mixer windows 111
Pan 120
Saving settings 130
Solo and Mute 119
View options 113
Volume 117
Mixing down to audio file 420
MMC
Setting up 436
Modern Time Signature 599
Modifier keys 12, 483
Modulation
Virtual Keyboard 65
Monitor button
Audio tracks 73
MIDI tracks 79
Monitoring modes 73
Monitors (Control Room
Channel) 137, 138, 144
Mouse Position Box 513
Move Bars
About 606
All Pages 607
Move Bars and Staves 607
Move Controller (Quantize setting) 328
Move Hitpoints 236
Move Notes and Context 550
Move Single Object 550
Move Staves
About 606
All Pages 607
Move to Back/Front 44
Move to Cursor 44
Move to Next/Prev. Page 495, 605
Move to Origin 44
Moving
Between Voices 536
Notes 517
Objects graphically using the computer keyboard 551
Staves 604
Symbols 566
Using Bar Handles 568
Using key commands 517
MP3 files
Exporting 424
Importing 462
MPEG files
Audio 462
MPEX
Pitch Shift 209
Time Stretch 213
Multi-channel export 420
Multi-Rests
Creating 600
Option 598
Settings 601
Splitting 601
Musical mode
Activating in Pool 231
Sample Editor 231
Musical time base 40
MusicXML
About 594
Exporting 596
Importing 595
Mute
Events in Project window 49
MIDI notes 348
Mixer 119
Pre-Send 160
Tool 49
Tracks 49
N
New Project 34
No Beams 529
No Flag/Beam 544
No Overlap 528
No Stems 544
Noise Gate 207
Non-modal dialogs 498
Normal Record Mode
Audio 75
MIDI 81
Normal Sizing 46
Normalize
Audio effect 208
SurroundPanner 186
Note Layer 556
Note Layer Symbols 556
About 556
Adding 559
Note symbols
Adding 559
Affecting MIDI playback 618
Size 569
Note Values 513
Note Velocity
Slider 345
Note-dependent Symbols 556
Notes
Adding 514
Assigning colors 545
Deleting 523
Display Length 520
Duplicating 518
Editing Via MIDI 519
Graphic 544
Graphic moving 550
Grouping 545
Head Shape 543
Info Dialog 542
Ledger lines 544
Length 520
Moving 517
Note Values 513
Selecting 516
Splitting 521
Notes, see also "MIDI notes"
Npl files
Libraries 271
Pool files 271
Nudge buttons
MIDI editors 347
Project window 45
Nudge key commands 567
Nudge position buttons 63
Nudging notes 517
Number of Bars dialog 603
Numeric keypad 61
O
Octave Offset
Virtual Keyboard 65
Octave Symbols 572
Offline Process History 214
Offset Bar Numbers 589
Ogg Vorbis files
Exporting 424
Importing 462
OMF files 462
On Import Audio Files 41
On Processing Shared Clips 205
On Startup setting 458
Online (VST System Link) 441
O-Note 362
O-Note Conversion 364
Open 456
Open Document Options dialog 459
Open Layout 591
Optimize All 607
Optimize Two/Four Voices 534
Option/Alt key 12
Output busses
About 14
Adding 16
Mixing down to file 420
Routing channels to 18
Surround configurations 182
Viewing in the mixer 19
Output channels 117
Output selection
Multiple audio channels 18
Multiple MIDI channels 80
Outputs (Audio) 15
Outputs (MIDI) 79
Over Quantize 328
Overlapping events
Audio Part Editor 256
Project window 44
Overview 38
Overwrite (Cycle Record mode) 81
P
Padlock symbol 48
Page
Selecting 495
Page Mode 495
Page number indicator 495
Page Numbers 585
Page Setup 496
Page Text 585
Pan Law 121
Pan modes 120
Parabola mode
Automation 201
MIDI controllers 353
MIDI velocity 352
Part Data mode 37
Parts, see "Audio parts" or "MIDI parts"
Paste 518, 570
Paste at Origin 46
Paste Note Attributes 545
Paste Time
MIDI editing 347
Selection ranges 52
Patch Banks 317
Patch Editor (Surround) 187
Pattern Banks
Previewing in MediaBay 284
Peak Hold Time 126
Pedal Symbols 572
Pedals to Note Length 335
Pencil tool 42, 559
Pending Connections 456
Phase Reverse 208
Phones (Control Room
Channel) 137, 138
Piano roll display
Virtual Keyboard 65
Piano Staff
Fixed Splitpoint 521
Variable Splitpoint 534
Pickup Bar (Option) 602
Pitch Quantize (VariAudio) 248
Pitch Shift 208
Pitchbend
Deleting 355
Editing 353
Recording 82
Virtual Keyboard 65
Play tool
Project window 42
Plug-in delay compensation 152
Plug-in Information window
MIDI plug-ins 313
VST plug-ins 167
Plug-ins
Applying 213
Automating 199
Getting info 167
In surround configurations 187
Installing VST 2.x 166
Organizing 167
Poly Pressure events 355
Polyphonic Presets 534
Polyphonic Voicing 531
About 532
Automatic 539
Display Quantize 537
Entering Notes 535
Identifying Voices for Notes 535
Moving Notes To Voices 536
Presets 534
Rest Handling 537
Setting Up 533
Stem Direction 541
Polyphony (Restricting) 335
Pool
About 261
Audition icon 267
Auditioning 267
Convert Files 272
Duplicating clips 263
Handling audio clips 263
Import Medium 268
Importing Pool files 271
Locate missing files 267
Record folder 269
Search Filters 266
Search Functionality 265
Status column icons 262
Popup Toolbox on Right Click 76
Position cursor 494
Position Info Window 567
Position Mode 185
Post-roll 84
Pre/Post-CrossFade 206
Precount 85
Pre-fader sends 159
Preferences
Popup Toolbox on Right Click 76
Presets 473
Transferring 478
Prepare Archive 271
Pre-roll 84
Previewing
Track presets 290
track presets 291
Prg field 318
Printing
From the Score Editor 503
Making Settings 496
Process Bars 406
Process Tempo 406
Processing
About 205
Plug-ins 213
Settings and functions 206
Undoing 214
Program Change 315
Project
Activating 456
Creating 34
Opening 456
Saving 457
Saving templates 457
Template 457
Project Browser 414
Project cursor 494
Autoscroll 57
Moving 61
Selecting events with 44
Snapping to 57
Project Layer 556
Symbols 556
Project Logical Editor
About 392
Actions 397
Filter conditions 393
Functions 399
Macros 399
Opening 392
Overview 392
Presets 399
Project overview line 38
Project scrubbing 63
Project Setup dialog 34
Projects
Backup 458
Punch In
Automatic 68
Manual 67
Punch Out 68
Q
Q tool 508
Q-points 237
Quantize
About 326
Applying 328
Automatic during recording 81
Creating grooves from audio 237
Ends 329
Lengths 329
Selecting a value 513
Setting on toolbar 327
Setup dialog 327
Tool 491
Undo 329
Quick Zoom 35
R
Random (MIDI Modifier) 308
Random Quantize setting 328
Range (MIDI Modifier) 309
Range Selection tool 51
Realtime Export 421
Realtime mode (time stretch) 213
Reconstruct 267
Record Catch Range 83
Record enable 67
Record file type 69
Record folder 71
Record format 69
Record mode
Lock 86
Unlock 86
Record Mode (Linear)
Audio 75
MIDI 81
Recording from busses 71
Recording in MIDI editors 83
Recording tempo changes 405
Recovering recordings 87
ReCycle files 461
Redo Zoom 37
Regions
Creating 229
Creating from events 53
Creating with Detect Silence 217
Editing 229
Exporting as audio files 269
Removing 230
Rehearsal Marks 573
Relative snapping 56
Remaining Record Time Display 86
Remote control
Accessing user panels 302
Key commands 302
Setting up 300
Writing automation 301
Remove DC Offset 211
Remove Empty Tracks 39
Remove missing files 267
Remove Parameter 201
Removing crossfades 93
Removing fades 90
Repeat
Events and parts 45
Loop 333
MIDI notes 347
Repeats 546
Repeats Symbols 573
Replace Audio in Video File 450
Replace Record Mode
Audio 75
MIDI 81
Reset 83
Reset Layout 607
Reset Mixer 126
Reset pop-up (VariAudio) 252
Resolution (Recording) 69
Resolving 429
Restrict Polyphony 335
Rests
Creating Multi-Rests 600
In Polyphonic Voices 533, 537
Retrospective Record 83
Return To Start Position on Stop 63
Reverse 211
Reverse (MIDI function) 336
Revert 459
ReWire
About 452
Activating 453
Channels 454
Routing MIDI 454
REX files 461
Right locator 62
Ritardando 547
Root key 105
Routing
Audio to and from busses 18
Effect sends 159
Effect sends (Panning) 160
Ruler 497, 567
About 33
Adding additional time scales 33
Ruler tracks 33
S
S button 49
Sample Editor
Audio clip information 222
AudioWarp tab 222
Audition 225
Definition tab 222
Elements menu 221
Free Warp 238
Hitpoints tab 223
Info line 222
Inspector 222
MIDI Input 249
Process tab 223
Range tab 223
Toolbar 221
VariAudio tab 223
Zooming 224
Sample rate 34
Sample size 69
Save 457
Save New Version 457
Scissors tool
MIDI editors 348
Project window 46
Score Editor 521
Score Drum Map
About 610
Display Pitch 610
Initializing 611
Setting Up 610
Score Editor 498
Adding an image file 564
Box symbol 573
Score Settings
About 512
Switching Staves 512
Values For Note Input 512
Score Title 585
Score Toolbar
Showing and Hiding 497
Scores Notes To MIDI 510
Scrolling 495
Scrubbing
Events in Project window 43
Events in Sample Editor 226
Project 63
Resizing events by 47
While setting snap point 226
Search Functionality in Pool 265
Search key commands 481
Select Tool
Show Extra Info 32
Selecting
Events in Project window 43
Layouts 592
MIDI notes 346
Mixer channels 123
Notes 516
Symbols 565
Send effects (Audio) 157
Set Note Info dialog 544
Set Pool Record Folder 269
Set Record Folder 71
Set root key for unassigned events 105
Set Timecode at Cursor 433, 435
Shared copy 45
Show All Used Automation 198
Show Braces in Edit mode 606
Show Controllers 38
Show Data on Small Track Heights 37
Show Event Names 37
Show Event Volume Curves Always 89
Show Filter View 367, 497
Show Long Staff Names on new Pages 526, 588
Show Note Info by the Mouse 515, 517
Show Part Borders 339
Show Track Colors 39
Show Video Thumbnails 447
Showing Objects 600
Shuffle 528
Shuffle (Snap mode) 57
Shuttle speed 63
Side-Chain
Drag&drop 163
Using 161
Signal levels 71
Silence 211
Sine mode
Automation 201
MIDI editing 354
Single Line Drum Staff 612
Size (System) 530
Sizing Applies Time Stretch 47
Sizing Moves Contents 46
Slices
Creating 236
Slurs
Adding 560
Bezier slurs 561
Shape and Direction 569
Snap
MIDI editors 344
Project window 56
Sample Editor 230
Snap MIDI Parts to Bars 83
Snap mode 517
Snap point
Setting for clips in Pool 268
Setting in Project window 56
Setting in Sample Editor 226
Snap Slurs when dragging 560
Snap to Zero Crossing
Audio Part Editor 259
Preference setting 57
Sample Editor 230
Snap Track Heights 35
Solo
Audio Part Editor 257
Folder tracks 53
MIDI editors 343
Mixer 119
On Selected Track 49
Tracks 49
Solo Defeat 119, 161
Solo Record in MIDI Editors 83
Speaker icon
MIDI editors 344
Score Editor 518
Speaker tool
Audio Part Editor 257
Project window 42
Speakers (SurroundPanner) 185
Spectacle Bass 546
Spectrum Analyzer 217
Split
Events 46
Range 52
Split at Cursor
MIDI editors 348
Project window 46
Split Loop
MIDI editors 348
Project window 46
Split MIDI Events 46
Split Note
Explode Function 509, 536
Piano Staff 521
Split Staff
Setting up 521
Split Tool 603
Spread Page
About 606
All Pages 607
Square mode
Automation 201
MIDI editing 354
Stacked Cycle Recording
Audio 77
MIDI 82
Staff Mode
Split 521
Staff Names
Displaying 588
Long and Short 588
Staff Options 529
Staff Presets 525
Staff Settings
About 507
Switching Staves 525
Staff Size 599
Standard Mode 185
Start Record at Left Locator 67
Startup options 458
Static Value Line (Automation) 200
Stationary cursors 57
Statistics 218
Staves
Moving 604
Stem Direction
About 541
In Polyphonic Voices 541
Manual Flip 541
Set Note Info dialog 544
Stems Hidden 544
Stems Length 542
Step Bar (Key command) 61
Step Input 350
Stereo Flip 211
Stereo Pan Law 121
Stereo pan modes 120
Stop after Automatic Punch Out 84
Straighten Pitch (VariAudio) 249
Strip Silence 217
Studio Connections 323
Studio Cue Mix 147
Studio Manager 323
Studios (Control Room
Channel) 137, 138
Surround
About 181
Applying plug-ins 187
Exporting to file 187
Positioning sounds 184
Routing to surround channels 183
Setting up 182
SurroundPanner 184
Suspend Autoscroll 57
Suspend VST3 plug-in processing
when no audio signals are
received (VST3) 151, 175
Swing 327
Symbol Palettes
About 497
Available Symbols 558
Customizing 558
Displaying 557
Moving and Handling 558
Symbols
Adding 560
Adding to Notes 559
Aligning 570
Creating 574
Deleting 570
Duplicating 566
Guitar Chords 562
In Palettes 558
Length 569
Moving 566
Moving with Keyboard 567
Note Layer Symbols 556
Note-dependent 556
Relation to Staves and Voices 558
Resizing 569
Selecting 565
Symbols Inspector
Customizing 557
Sync indicator 433, 435
Sync Project and Mixer
Selection 123
Sync Selection 415
Synchronization
About 428
Audio card settings 434
Connections for 431
Formats 428
Frame rates 430
Indicator (Transport panel) 433, 435
Machine control 436
Options 437
Project Synchronization Setup dialog 431
Recording in Sync mode 68
Send MIDI Clock in Stop Mode 432
Syncing equipment 431
To timecode 433
System Exclusive
About 368
Bulk Dumps 369
Editing 370
Recording parameter changes 370
System Lines 530
System Sizes (Staff Settings) 530
T
Tablature
Automatic Creation 614
Capo 614
Clef 615
Editing 615
Manual Creation 615
MIDI Channels 614
Number Note Head 615
Talkback (Control Room
Channel) 137, 139, 144
Tap Tempo 407
Templates 457
Tempo
About 402
Calculating 407
Editing 404
Editing in Project Browser 418
Importing and exporting 405
Setting in Fixed mode 405
Tapping 407
Tempo based tracks 40
Tempo Change Symbol 574
Tempo recording 198, 405
Tempo Symbols 574
Text
Adding 581
Aligning 582
Block Text 585
Editing 582
Font, Size and Style 582
Importing from file 585
Lyrics 583
Melisma Lines 581
Page Text 585
Regular 583
Replacing Words 587
Text Attribute Sets
About 582
Creating 582
Using 582
Thin Out Data 335
Ties
About 515, 549
Adding As Symbols 560
Direction 544
Dynamics 569
Flat 550
Shape and Direction 569
Splitting 521
Using the Cut Notes Tool 550
Time based tracks 40
Time display 62
Time format 33
Time Linear
MIDI editors 341
Time Scales 33
Time Signature
About 402
Composite 500
Editing 405, 523
For Grouping only 500
Inserting 522
Modern 599
Setting Initial 499
Signature track/Tempo TrackEditor 500
Time Stretch 212
Time Warp tool 408
Timecode
About 428
Frame rates 430
Synchronizing to 433
Toggle Track List 40
Tool modifier keys 483
Toolbar
Audio Part Editor 255
Customizing 471
Drum Editor 358
Key Editor 340
List Editor 365
Pool 261
Project window 31
Sample Editor 221
Score Editor 496
Toolbox
On right click 76
Track Archive
Importing 466
Track Controls Settings 472
Track list
About 28
Customizing 472
Dividing 40
Track presets
Extracting sound from 178
Previewing 290, 291
Removing 290
Track Quick Controls 304
About 296
Assigning parameters 296
Controlling the mixer 298
Remote Control setup 297
Removing 296
Renaming 296
Replacing 296
Track types 26
Tracks
Adding 38
Audio channel configuration 70
Changing the height 35
Color 39
Disabling/Enabling 63
Freezing 156
Importing/Exporting 466
Locking 49
Musical/Linear time base 40
Removing 39
Renaming 39
Selecting 39
Transcription 506
Transferring
Projects and settings 478
Tracks between projects 466
Transformer (MIDI effect) 381
Transparent events 37
Transport menu
Functions 60
Playback options 64
Transport panel
Customizing 471
Display format 62
Hiding and showing 60
Key commands 61
Overview 60
Transpose
Info line 32
MIDI function 330
MIDI Modifier 308
Transpose track
About 104
Transposing 519
Transposing instruments 503
Triangle mode
Automation 201
MIDI editing 354
Trills 561
Trim buttons 47
Trim tool 342
Tuplet
Quantize Setup 327
Tuplets 552
Display Options 554
Group Symbols 572
U
Undo
Processing 214
Quantize 329
Recording 74
Zoom 37
Ungroup 48
Unlock 48
Unlock Layout when editing single parts 495
Unstretch Audio 242
Upbeats 602
Upd button 504
Update Display 423
Update Origin 262
Use colors for additional meanings 545
Use Cubase 3 EQ settings as default 125
Use File Extension in File Dialog 457
Use Selected ASIO Ports for Data only 442
User Panels 30, 122
Audio Tracks 122
User Symbols 574
UV22 HR 156
V
Variable Split 534
VariAudio
About 243
Bypass 252
Changing the pitch 247
Editing Pitch/Time 247
Editing segments 245
Extract MIDI 252
Features 243
Listening to your edits 252
Pitch Quantize 248
Reset 252
Straighten Pitch 249
Velocity
Editing 352
Editing via MIDI 350
Info line 32
MIDI function 335
Virtual Keyboard 65
Velocity Compression 308
Velocity Shift
MIDI Modifier 308
Verses (Lyrics) 584
Video
Extracting audio from 450
Generating thumbnail cache files 449
Import preferences 448
Importing files 448
Playing back 447
Playing back via FireWire 448
Preparations (Windows) 446
Replacing audio 450
Setting up 446
Video Cache Size 447
Video track
Editing in Project Browser 417
Showing thumbnails 447
Virtual Keyboard
About 65
Computer keyboard display 65
Description 65
Modulation 65
Note velocity level 65
Octave Offset 65
Piano roll display 65
Pitchbend 65
Voice Insert buttons 535
Voices
About 532
Converting to Tracks 539
Display Quantize 537
Entering Notes Into 535
Identifying for Notes 535
Moving Notes To 536
Rest Handling 537
Setting Up 533
Stem Direction 541
Volume (Info line) 118
Volume curve 95
Volume handle 90
VST 3
Suspend VST3 plug-in processing when no audio signals are received 151, 175
VST Channel Settings 122
VST Connections 16
Presets 17
VST Expression
About 373
Drum Editor 375
In-Place Editor 375
Key Editor 375
List Editor 377
Score Editor 375
VST Instrument channel
Setting up 170
VST Instruments
Activating 171
Browsing for sounds 176
Channels 171
Freezing 174
Presets for instruments 175
Saving Presets 177
Using VST System Link 443
VST Performance window 131
VST plug-ins
Getting info 167
Installing 166
VST Ports 15
VST presets
Removing 290
VST System Link
About 435
Activating 440
Connections 438
Latency 439
MIDI 442
Putting computers online 441
Requirements 438
Setting up sync 439
Settings 440
Z
Zero Crossings 57
Zoom 495
About 35
History 37
Mouse wheel 496
Pop-up menu 495
Presets 36
Sample Editor 224
Tool 496
Track height 35
Waveforms 35
Zoom N Tracks 36
Zoom Tool Standard Mode 35
Zoom while Locating in Time
Scale 35
W
Warp tabs
Creating from hitpoints 241
Wave files 424
Wave Image Style 37
Wave64 files 424
Waveform zooming 35
Window layouts 469
Windows Media Audio files
Exporting 425
Importing 425, 462
Surround format (Pro) 425
WMA files
Importing 462
WMA Pro files 425
Word Clock
About 429
Selecting for sync 434
Setting up 431
Words Palette 587
Workspaces 469
Wrap Controls (Track list) 35
X
X Stem (Spoken) 544