Sprinta Plus - Pool Robot Kreepy Krauly - Free user manual and instructions
Find the device manual for free Sprinta Plus Kreepy Krauly in PDF.


User questions about Sprinta Plus Kreepy Krauly
0 question about this device. Answer the ones you know or ask your own.
Ask a new question about this device
Download the instructions for your Pool Robot in PDF format for free! Find your manual Sprinta Plus - Kreepy Krauly and take your electronic device back in hand. On this page are published all the documents necessary for the use of your device. Sprinta Plus by Kreepy Krauly.
USER MANUAL Sprinta Plus Kreepy Krauly
text_image
KREEPY® KRAULY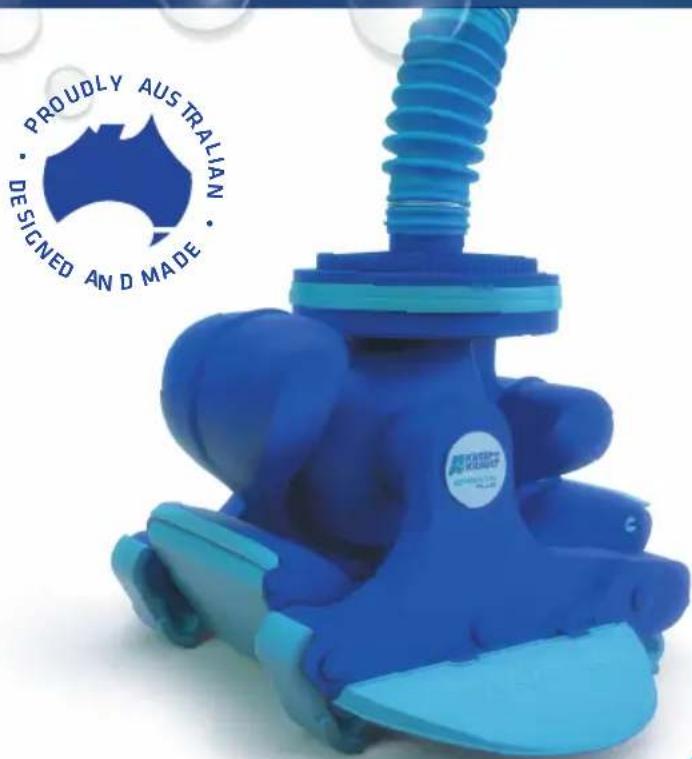
text_image
PROUDLY AUSTRALIAN DESIGNED AND MADESPRINTA PLUS
OWNER'S MANUAL
Congratulations
Your new Sprinta Plus is designed to give you years of reliable performance. Assembly is simple and we'll walk you through it, step-by-step.
This booklet should answer all your questions. However if you need a little extra help, feel free to call our Customer Service Department, Mon-Fri 9-5 in your local area, or go to the website for up-to-date information.
1800 777 255
www.kreepykrauly.com.au
natural_image
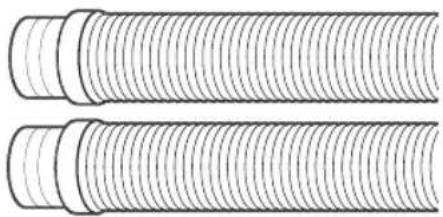
Two parallel cylindrical mechanical components with threaded ends, shown in side profile (no text or symbols)Components checklist
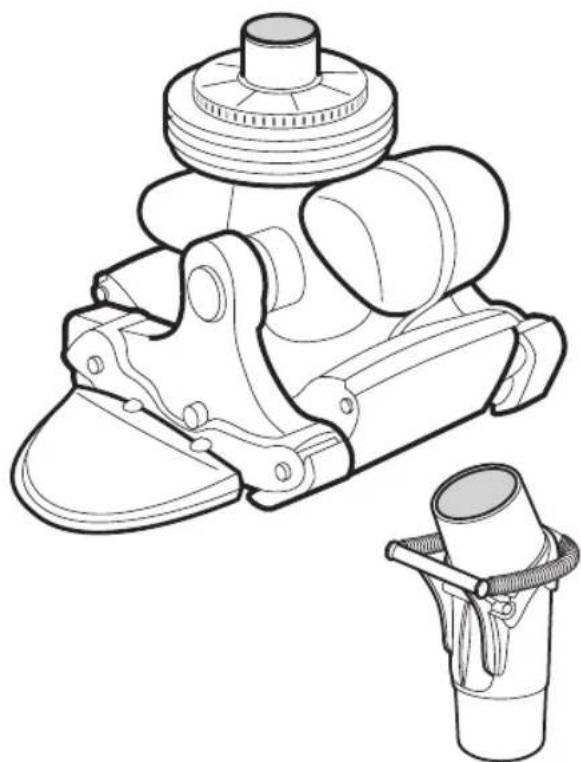
You will find all the pictured components inside this box.
natural_image
Technical line drawing of a mechanical device with a cylindrical component and a separate cylindrical component (no text or symbols)Sprinta Plus
Smart-Skim
natural_image
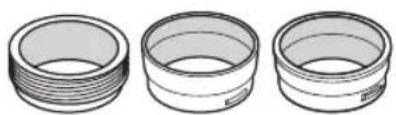
Three identical cylindrical mechanical components with different internal structures, shown from different angles (no text or symbols)Smart-Skim adaptors
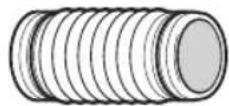
Flexi-connector

natural_image
Illustration of a coiled pipe with flanged ends and a central shaft (no text or symbols)x1
x9
Male-to-male hose length

natural_image
Pure line drawing of a cylindrical pipe or tube with no text, numbers, or symbolsMale-to-female hose lengths
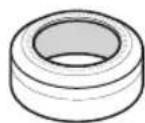
x3
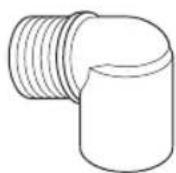
Hose weights
90 degree connector (optional)
STEP 1
Prepare your pool
If your pool is clean, balanced and algae-free, you're ready to get started.
a. First, clean the skimmer and pump basket.
b. Check the water level.
c. Brush down the sides of your pool.
d. Next, make sure the return jets are facing downwards.
e. Then, backwash or clean your cartridge filter.
f. Now turn off the pump.
TIP: Before installing your Sprinta Plus, check the following:
Vinyl-lined pool – Check for signs of deterioration or damage to the liner. Remediate before installation.
Tiled pool - Check and repair any loose tiles.
STEP 2
Assemble the connectors
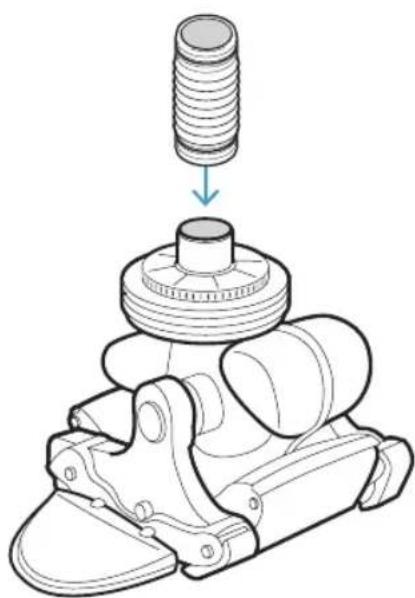
- Attach the Flexi-connector
(the incredibly bendy small hose) to the top opening of your Sprinta Plus.
natural_image
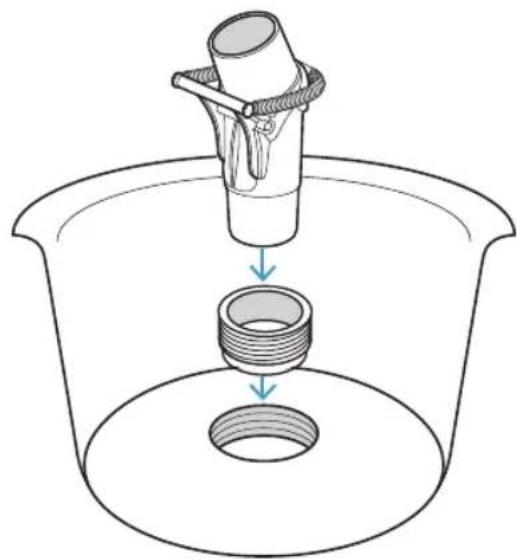
Mechanical assembly diagram showing a mechanical component with a threaded shaft and housing (no text or symbols)- Now, insert the Smart-Skim (the part with the spring on it) into an adaptor fitting, then attach it to the bottom of the skimmer basket.
natural_image
Diagram of a mechanical component being inserted into a container, showing fluid flow direction (no text or symbols)TIP: Depending on the Vacuum Plate your pool uses, you may have to use a different skim adaptor - we've included three for you to choose from. You know you're using the right one when there is a tight fit. See our website if you need help.
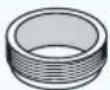
used with most vacuum plates
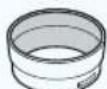
used with Polyplastics 190 & 210 standard
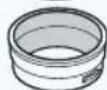
used with Polyplastics SK10 (rectangular)
NOTE: To remove, ensure the pump is off and grasp from the bottom of the Smart-Skim, pulling up. (Note: Not from the hose or spring).
STEP 3
Build the Ultra Flex hose
- Start with the male-male hose and twist on a female-male length. Keep going until the hose is long enough to reach from your skimmer box to the far corner of your pool. Now add one extra length – this will optimise the coverage of your Sprinta Plus.

natural_image
Diagram of two cylindrical pipes with internal threading, one with a blue arrow indicating direction (no text or symbols)male male female
TIP: Wetting the hose ends in your pool will make them easier to connect to each other.
- Attach your 3 hose weights. Position the first weight at 2m from the first male end, then every 1.5m after that.
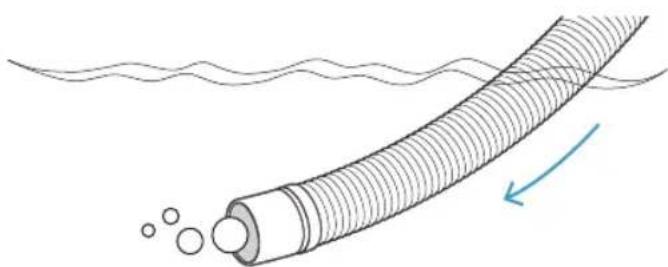
- Submerge the assembled hose in your pool. To expel all the air push downwards feeding the hose into the pool.
natural_image
Diagram of a curved pipe with bubbles and fluid, showing flow direction (no text or symbols)TIP: When removing or storing hose sections, store flat to ensure extended life of the hose.
Connect the hose to Sprinta Plus
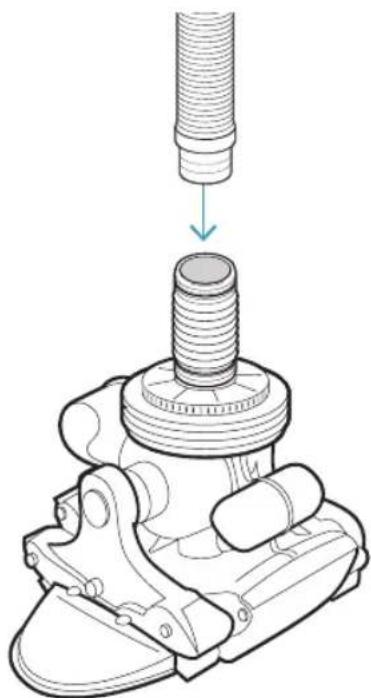
- Submerge the Sprinta Plus in your pool to expel all air
(rotation to help remove trapped air).
Then connect the submerged and air-free male-male hose end to the Flexi-connector on your Sprinta Plus.
natural_image
Mechanical assembly diagram showing a threaded component being inserted into a housing (no text or symbols present)- Connect the other end
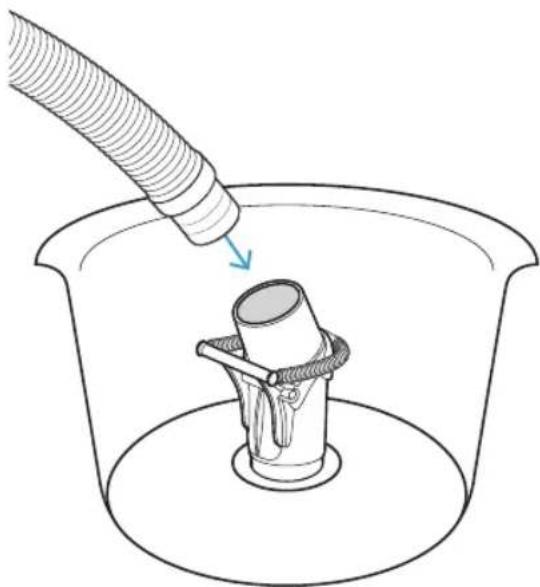
of the hose to the Smart-Skim ensuring the end of the hose is submerged and free of air.
natural_image
Diagram of a pipe being inserted into a container with a central component (no text or symbols)• If the angle of the Smart-Skim
is insufficient and makes connecting the hose difficult, use the 90 degree connector between the end of the hose and the Smart-Skim valve.
STEP 5
Let's get cleaning
- Your Sprinta Plus is good to go – simply turn the pump on. There's no need to make any manual adjustment to the vacuum pressure; any excess vacuum will be used by the Smart-Skim to provide surface skimming.
- All you need to do from here on in is remember to empty the skimmer basket regularly. Too easy!
TIP: Please be suction aware when working on your pool. Before undertaking any maintenance or troubleshooting, ensure your pump is off before handling your Sprinta Plus system.
Troubleshooting
If your Sprinta Plus isn't moving
- Check if the pump or filter basket needs cleaning, or if your filter needs backwashing or cleaning.
- Check there are no leaks in the hose. If there are, replace any damaged sections.
- Check the main drain and all suction lines are closed. The only one that should be open is the suction line that is attached to your Sprinta Plus.
- Check that your pool is balanced. Alkaline pools and algae can make the machine slip.
- Check that the Smart-Skim is opening and closing, and that the spring is still attached.
- Your pool pump and filter system may be too small to effectively run your Sprinta Plus. Ask your pool professional to advise.
- There may be air in your Sprinta Plus. Turn the pump off and rotate your Sprinta Plus while holding it underwater.
- There may be a blockage in your Sprinta Plus. Turn off the pump and remove the steering system. Check for obstructions, then replace the steering system (see instructions on pages 9-10).
Sprinta Plus is moving in a repetitive pattern
- Check that the hose is not coiled or kinked.
To uncoil the hose:
- Simply rotate a few of the 1m hose length connectors 180 degrees until it is straight again.
- In hot weather (above 28°C), remove the cleaner and hose from the pool and lay the hose only flat for a day. The heat will make the hose relax and uncoil. Just remember to turn the pump off first before removing your hose from the pool.
- In cooler weather, remove the hose from the pool. Prop both ends of the hose around 20cm off the ground. Pour a bucket of warm water (50-60°) into the hose until it spills out of the other end. Carefully roll the hose side to side to ensure even warming. After 5 minutes, fill the hose with cold water – either with a bucket, or by placing the hose end onto the pool outlet. The hose will now be relaxed and ready to reinstall.
- Check that the return line water flow is directed downwards or sideways. Redirect it as necessary with a return line diverter. If that still doesn't work, you may need to purchase an Eyeball Diverter from your local Kreepy Krauly retailer.
- Check that the hose weights are fitted as described on page 4.
- Remove the steering system to check for obstructions in the turbine and that the steering system freely rotates clockwise and anticlockwise (see instructions on pages 9-10).
NOTE: For more detailed troubleshooting advice please contact your helpful local dealer, or check our online resources for hints, tips and other information at www.kreepykrauly.com.au
Removing the Steering System
text_image
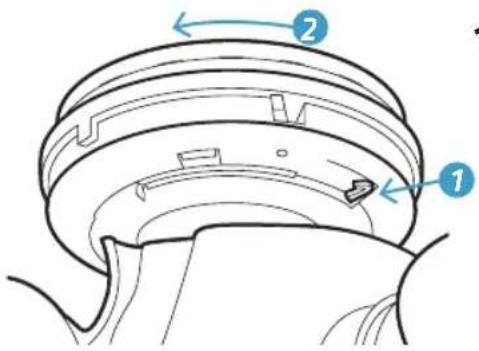
Technical diagram of a mechanical component with numbered parts and directional arrows indicating motion or assembly.- Press in the two tabs located on opposite sides on the under-side of the steering unit. Turn anticlockwise and lift off.
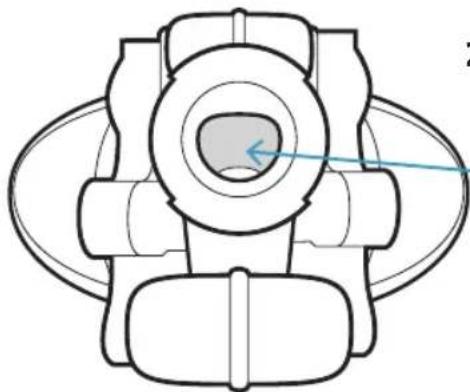
natural_image
Technical line drawing of a mechanical component with no visible text or symbols- You should now have three separate components as shown. Clear any obstruction in the turbine.
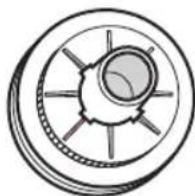
steering system
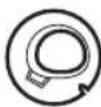
flow washer (white)
NOTE: Don't misplace
Re-fitting the Steering System
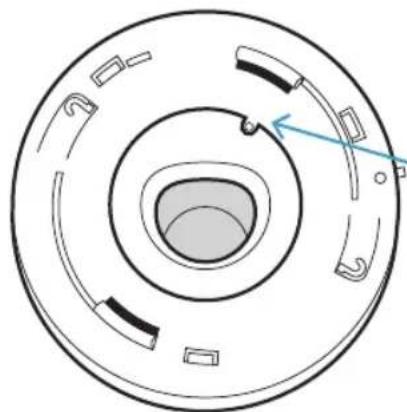
natural_image
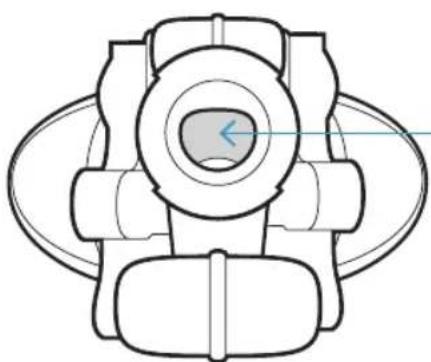
Diagram of a circular mechanical component with internal channels and a blue arrow indicating direction (no text or symbols)- Re-fit the flow washer to the underside of the steering system (there is a cut-out to assist in locating the correct position).
natural_image
Top-down schematic of a mechanical component with no visible text or symbols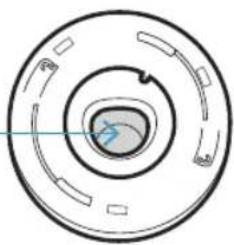
natural_image
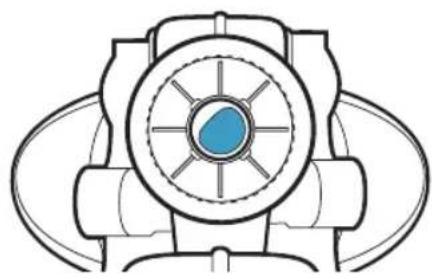
Circular diagram with concentric rings and internal segments, no text or symbols present- Align the inlets.
natural_image
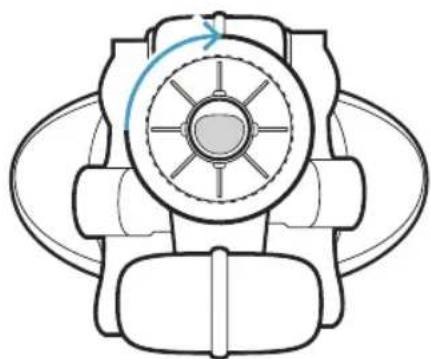
Pure mechanical component diagram without any text, numbers, or symbols- Turn over the steering unit (with flow washer inserted) and place on top of the Sprinta Plus. The inlets will initially be misaligned.
natural_image
Technical diagram of a mechanical component with no visible text or symbolsRotate the steering unit clockwise until the steering unit locks into place. The inlets will now be aligned and the flow washer won't be visible.
What should I expect from my Sprinta Plus?
How it moves
The powerful turbine harnesses the pool's suction to oscillate your Sprinta Plus' legs, propelling it in a forward motion. Its minimal contact with the pool surface contributes to its fast speed and efficient cleaning. The light-weight and compact design allows it to move all over your pool floor and walls, navigating itself into the tightest of corners and moving freely around any obstacles, making it ‘unstickable’.
How it Steers
The Intelligent Steering Module navigates the Sprinta Plus in a looping pattern that alternates in direction, ensuring efficient cleaning. Its ‘unstickable’ reputation is due to its steering system as it will automatically turn and release itself immediately, or after a short delay, depending on your pool shape. In combination with the Ultra Flex hose, this ensures your cleaner is not restricted or directed by the hose.
How it Cleans
Sprinta Plus cleans your pool daily with your normal filter cycle by gently Vortex Vacuuming your pool surface. Leaves are picked up by the large front and side scoops and pulled through the straight-through turbine to the skimmer box. The Vortex Vacuum aids in the pick up of heavier debris such as sand and grit, that can be left by other cleaners. The Smart-Skim uses the excess vacuum to draw water into your skimmer box to help reduce floating debris.
The Ultra Flex Hose
The unique Ultra Flex hose rests just below the water surface due to its natural buoyancy and hose weights. The Ultra Flex design means the hose can flex and bend easily so that it doesn't restrict the movement of your Sprinta Plus. This increases coverage in your pool.
Looking after your Sprinta Plus
- Clean out the skimmer basket regularly.
- To safely remove the Smart-Skim from the skimmer box, take the hose off first, then grip the Smart-Skim at the base and gently pull upwards.
- Manually open and close the Smart-Skim occasionally to flush away accumulated dirt and debris.
- Monitor your Sprinta Plus feet occasionally for wear and tear.
Beware of the pool blanket effect
Pool blankets prevent chlorine evaporating. If you're using one, carefully monitor your chlorine or salt water setting to avoid over chlorinating your pool, which can harm your Sprinta Plus and void your warranty. If you have any questions please call our Customer Service department on 1800 777 255 or talk to your pool shop pro.
Your Warranty
Your Sprinta Plus is engineered to last. This is reflected in the 2-year Full System Warranty and 10-year Flow Turbine Warranty.
Protecting Your Warranty
All Kreepy Krauly pool cleaning systems are made in Australia to withstand harsh Australian conditions. They are manufactured from top quality materials that are UV, salt and chemical resistant. Being an Australian company, we offer local after sales service, maintenance and parts. For any troubleshooting with your Sprinta Plus, simply contact your local pool shop for assistance. You will extend the life of your Sprinta Plus by using genuine Sprinta Plus parts and chlorinating your pool correctly. The use of non-genuine parts and over-chlorinating your pool may void your warranty, impair your Sprinta Plus' performance or result in colour fade.
Activating Your Sprinta Plus Warranty
To activate your 2-year Full System Warranty and 10-year Flow Turbine Warranty, please fill in your Sprinta Plus' serial number and return the self-addressed warranty registration card to us as soon as possible. Alternatively, you can activate your 2-year Full System Warranty and 10-year Flow Turbine Warranty online at www.kreepykrauly.com.au/warranty.
Record Serial Number Here:
TIP: Your Serial Number can be found on the packaging or on a waterproof sticker on the underside of your Sprinta Plus.
NOTE: For full warranty conditions, please refer to your warranty card or go online to www.kreepykrauly.com.au/warranty
Further Information
This booklet should have answered all your questions. However if you need a little extra help or up-to-date information, go to www.kreepykrauly.com.au, or call our Customer Service Department on 1800 777 255, Monday to Friday 9am-5pm in your local area. Alternatively, contact your local pool shop professional.

KREEPY KRAULY®
www.kreepykrauly.com.au
We reserve the right to revise, change, or modify Sprinta Plus without incurring any obligations to make like changes on Sprintas previously sold. This publication remains the sole copyright of ITC Manufacturing Pty. Ltd