
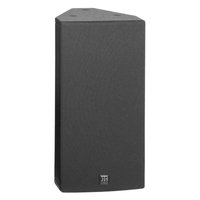
Premium PR:O 15 XD - Loudspeaker HK AUDIO - Free user manual and instructions
Find the device manual for free Premium PR:O 15 XD HK AUDIO in PDF.


| Product Type | Active 2-way PA Loudspeaker |
| Woofer | 15" (385 mm) neodymium |
| Tweeter | 1.4" (36 mm) neodymium compression driver |
| Amplifier Power | 1200 W RMS Class D |
| Frequency Response | 49 Hz – 20 kHz (-10 dB) |
| Maximum SPL | 133 dB peak |
| DSP Presets | 12 presets (Music, Live, Speech, etc.) |
| Connectivity | 2x XLR/TRS combo inputs, 1x XLR Mix Out, USB Audio |
| Bluetooth | Built-in, for audio streaming and control via app |
| Dimensions (W x H x D) | 441 x 680 x 401 mm (17.4 x 26.8 x 15.8 in) |
| Weight | 21.3 kg (47.0 lbs) |
| Power Supply | 100-240 V AC, 50/60 Hz |
| Power Consumption | 160 W (1/8 power) |
| Enclosure Material | 15 mm plywood with polyurea coating |
| Grille | Powder-coated steel with acoustic foam |
| Mounting | Pole mount (35 mm), 6x M10 rigging points |
| Handles | 2 integrated side handles |
| Cooling | Convection, fanless |
| Maintenance | Wipe with dry cloth; keep vents clean |
| Safety | Do not expose to rain or moisture; ensure proper ventilation |
| Repairability | Spare parts available via HK Audio service centers |
Frequently Asked Questions - Premium PR:O 15 XD HK AUDIO
User questions about Premium PR:O 15 XD HK AUDIO
0 question about this device. Answer the ones you know or ask your own.
Ask a new question about this device
Download the instructions for your Loudspeaker in PDF format for free! Find your manual Premium PR:O 15 XD - HK AUDIO and take your electronic device back in hand. On this page are published all the documents necessary for the use of your device. Premium PR:O 15 XD by HK AUDIO.
USER MANUAL Premium PR:O 15 XD HK AUDIO
PREMIUM PR:0
PR:0 10 XD • PR:0 12 D • PR:0 12 XD • PR:0 15 D • PR:0 15 XD
PR:0 18 SUB A • PR:0 210 SUB A
Manual 1.0
Important Safety Instructions! Read before connecting!
This product has been built by the manufacturer in accordance with IEC 60065 and left the factory in safe working order. To maintain this condition and ensure non-risk operation, the user must follow the advice and warning comments found in the operating instructions. If this product shall be used in vehicles, ships or aircraft or at altitudes exceeding 2000 m above sea level, take care of the relevant safety regulations which may exceed the IEC 60065 requirements.
WARNING: To prevent the risk of fire and shock hazard, do not expose this appliance to moisture or rain. Do not open case – no user serviceable parts inside. Refer service to qualified service personnel.

This symbol, wherever it appears, alerts you to the of uninsulated dangerous voltage inside the enclosure – that may be sufficient to constitute a risk of shock.

This symbol, wherever it appears, alerts you to the use of externally accessible hazardous voltage. External wiring is used to any terminal marked with this symbol must be a trade cable" complying with the manufacturers' conditions, or must be a wiring installed by instructed only.

This symbol, wherever it appears, alerts you to important and maintenance instructions in the accompanying. Read the manual.

This symbol, wherever it appears, tells you: Take care! Hot to prevent burns you must not touch.
- Read these instructions.
- Keep these instructions.
- Follow all warnings and instructions marked on the product and in this manual.
- Do not use this product near water. Do not place the product near water, baths, wash basins, kitchen sinks, wet areas, swimming pools or damp rooms.
- Do not place objects containing liquid on the product – vases, glasses, bottles etc.
- Clean only with dry cloth.
- Do not remove any covers or sections of the housing.
- The set operating voltage of the product must match the local mains supply voltage. If you are not sure of the type of power available consult your dealer or local power company.
- Before connecting the device, please ensure that the mains supply you are using is equipped with adequate protection against short circuiting and grounding faults when the device is plugged in.
- To reduce the risk of electrical shock, the grounding of this product must be maintained. Use only the power supply cord provided with this product, and maintain the function of the center (grounding) pin of the mains connection at any time. Make sure the mains outlet used provides a proper protective ground connection.
- Do not defeat the safety purpose of the polarized or grounding-type plug. A polarized plug has two blades with one wider than the other. A grounding type plug has two blades and a third grounding prong. The wide blade or the third prong are provided for your safety. If the provided plug does not fit into your outlet, consult an electrician for replacement of the obolete outlet.
- Protect the power cord from being walked on or pinched particularly at plugs, convenience receptacles, and the point where they exit from the device! Power supply cords should always be handled carefully. Periodically check cords for cuts or sign of stress, especially at the plug and the point where the cord exits the device.
- Never use a damaged power cord.
- Unplug this product during lightning storms or when unused for long periods of time.
- This product can be fully disconnected from mains only by pulling the mains plug at the unit or the wall socket. The product must be placed in such a way at any time, that disconnecting from mains is easily possible.
- Fuses: Replace with IEC127 (5x20mm) type and rated fuse for best performance only! It is prohibited to use "patched fuses" or to short the fuse-holder. Replacing any kind of fuses must only be carried out by qualified service personal.
- Refer all servicing to qualified service personnel. Servicing is required when the unit has been damaged in any way, such as: - When the power cord or plug is damaged or frayed.
- If liquid has been spilled or objects have fallen into the product.
- If the product has been exposed to rain or moisture.
- If the product does not operate normally when the operating instructions are followed.
- If the product has been dropped or the cabinet has been damaged.
- Do not connect external speakers to this product with an impedance lower than the rated impedance given on the product or in this manual. Use only cables with sufficient cross section according to the local safety regulations.
- Keep away from direct sunlight.
- Do not install near heat sources such as radiators, heat registers, stoves or other devices that produce heat.
- Do not block any ventilation openings. Install in accordance with manufacturer's instructions. This product must not be placed in a built-in installation such as a rack unless proper ventilation is provided.
- Always allow a cold device to warm up to ambient temperature, when being moved into a room. Condensation can form inside it and damage the product, when being used without warming up.
- Do not place naked flame sources, such as lighted candles on the product.
- The device must be positioned at least 20 cm/8" away from walls.
- Use only with the cart, stand, tripod, bracket or table specified by the manufacturer or sold with the product. When a cart is used, use caution when moving the cart/product combination to avoid injury from tip-over.
- Use only accessories recommended by the manufacturer, this applies for all kind of accessories, for example protective covers, transport bags, stands, wall or ceiling mounting equipment. In case of attaching any kind of accessories to the product, always follow the instructions for use, provided by the manufacturer. Never use fixing points on the product other than specified by the manufacturer.
- This appliance is NOT suitable to be used by any person or persons (including children) with limited physical, sensorical or mental ability, or by persons with insufficient experience and/or knowledge to operate such an appliance. Children under 4 years of age must be kept away from this appliance at all times.
- Never push objects of any kind into this product through cabinet slots as they may touch dangerous voltage points or short out parts that could result in risk of fire or electric shock.
- This product is capable of delivering sound pressure levels in excess of 90 dB, which may cause permanent hearing damage! Exposure to extremely high noise levels may cause a permanent hearing loss. Wear hearing protection if continuously exposed to such high levels.
- The manufacturer only guarantees the safety, reliability and efficiency of this product if:
- Assembly, extension, re-adjustment, modifications or repairs are carried out by the manufacturer or by persons authorized to do so.
- The electrical installation of the relevant area complies with the requirements of IEC (ANSI) specifications.
- The unit is used in accordance with the operating instructions.
- This product is optimized for use with music and speech signals. Using this product with sine wave, square wave or other kind of measuring signals at higher level may lead to severe damage of the product.
General Notes on Safety for Loudspeaker Systems

Mounting systems may only be used for those loudspeaker systems authorized by the manufacturer and only with the mounting accessories specified by the manufacturer in the installation instructions. Read and heed the manufacturer's installation instructions. The indicated load-bearing capacity cannot be guaranteed and the manufacturer will not be liable for damages in the event of improper installation or the use of unauthorized mounting accessories.
The system's load-bearing capacity cannot be guaranteed and the manufacturer will not be liable for damages in the event that loudspeakers, mounting accessories, and connecting and attaching components are modified in any way.
Components affecting safety may only be repaired by the manufacturer or authorized agents, otherwise the operating permit will be voided.

Installation may be performed qualified personnel only, and by a pick-points with sufficient load-carrying capacity and reliance with local building regulations. Use only the mounting wire specified by the manufacturer in the installation of oions (screws, anchors, etc.). Take all the precautions necessary to ensure bolted connections and other threaded locking will not loosen.

Fixed and portable installations (in this case, speakers and using accessories) must be secured by two independent safeties. The extent them from falling. Safeties must be able to catch or parts that are loose or may become loose. Ensure with the given national regulations when using fixing, attaching, and rigging devices. Factor potential dynamic (work) into the equation when determining the proper size of bearing capacity of safeties.

Be sure to observe speaker stands' maximum load-bearing. Note that for reasons of design and construction, most stands are approved to bear centric loads only; that is, the 's' mass has to be precisely centered and balanced. Ensure stands are set up stably and securely. Take appropriate measures to secure speaker stands, for example when:
- the floor or ground surface does not provide a stable, secure base.
- they are extended to heights that impede stability.
- high wind pressure may be expected.
- there is the risk that they may be knocked over by people. Special measures may become necessary as precautions against unsafe audience behavior. Do not set up speaker stands in evacuation routes and emergency exits. Ensure corridors are wide enough and put proper barriers and markings in place when setting speaker stands up in passageways. Mounting and dismounting are especially hazardous tasks. Use aids suitable for this purpose. Observe the given national regulations when doing so.

Wear proper protection (in particular, a helmet, gloves, and shoes) and use only suitable means of ascent (ladders, s, etc.) during installation. Compliance with this ment is the sole responsibility of the company performing allation.

WARNING!
After installation, inspect the system comprised of the mounting fixtures and loudspeakers to ensure it is properly secured.
The operator of loudspeaker systems (fixed or portable) must regularly inspect or task a third party to regularly inspect all system components in accordance with the given country's regulations and have possible defects repaired immediately.
We also strongly recommend maintaining a logbook or the like to document all inspections.
When installing speakers for longer lasting or permanent outdoor operation, be sure to take into account the stability and load-bearing capacity of platforms and surfaces; loads and forces exerted by wind, snow, and ice; as well as thermal influences. Also be sure to provide sufficient safety margins for the rigging points used for flown systems. Observe the given national regulations when doing so.
- Ask the manufacturer if your product is allowed for outdoor usage!

Professional loudspeaker systems can produce harmful levels. Even prolonged exposure to seemingly harmless starting at about 95 dBA SPL) can cause permanent hearing! Therefore we recommend that everyone who is exposed to some levels produced by loudspeaker systems wears a normal hearing protection (earplugs or earmuffs).
Manufacturer: Stamer Musikanlagen GmbH, Magdeburger Str. 8, 66606 St. Wendel, Germany
PREMIUM PR:0
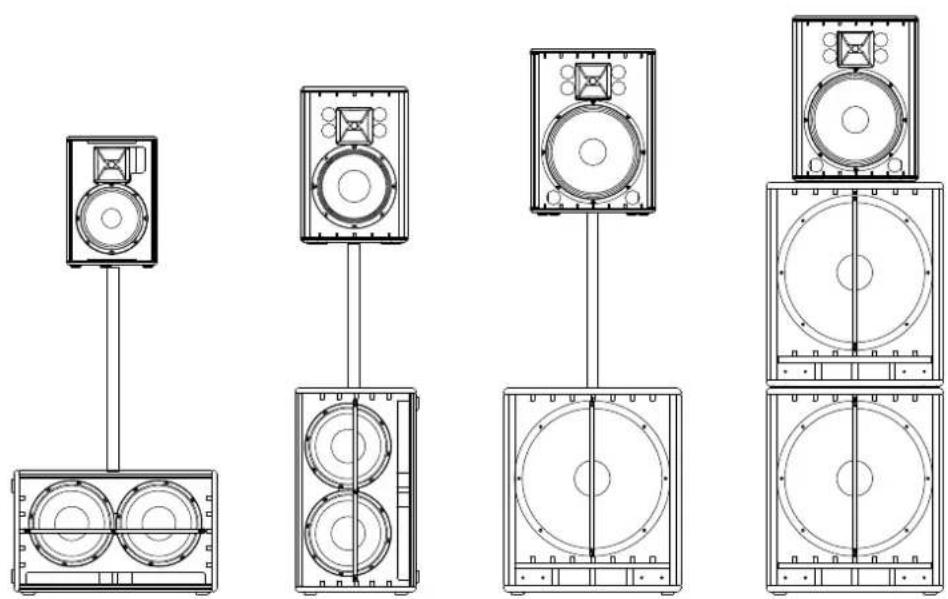
Welcome to the HK Audio family!
Thank you for choosing a brand-name product made by our company. Rest assured, we engineered and built it with the greatest care so it will serve you well for many tomorrows to come.
Even if your experience with sound systems runs deep, some things about this product are sure to be new to you. This is why we ask that you do not set this manual aside without reading it first. Be sure to keep it in a safe place for later reference.
Here's wishing you the best sound at every occasion!
Your HK Audio team
Warranty
Register each powered PREMIUM PR:0 speaker separately to extend your warranty to five years free of charge! Use the convenient online registration option at www.hkaudio.com.
If you are unable to register online, please fill out the enclosed warranty card, ensuring all information is legible and complete, and mail or fax it to us.
The registration is only valid if the warranty registration card is filled out and returned to HK AUDIO or the device is registered via Internet within 30 days of the date of purchase.
We are also interested in learning where and by whom our devices are used. This information will help us design future products. Your data are of course protected by German privacy laws.
Thank you!
HK AUDIO
Technischer Service
Postfach 1509
66959 St. Wendel, Germany
Fax: +49 6851 905 100
1 PREMIUM PR:O Self-powered Cabinets
PR:0 10 XD • PR:0 12 D • PR:0 12 XD • PR:0 15 D • PR:0 15 XD
1.1 Control Features
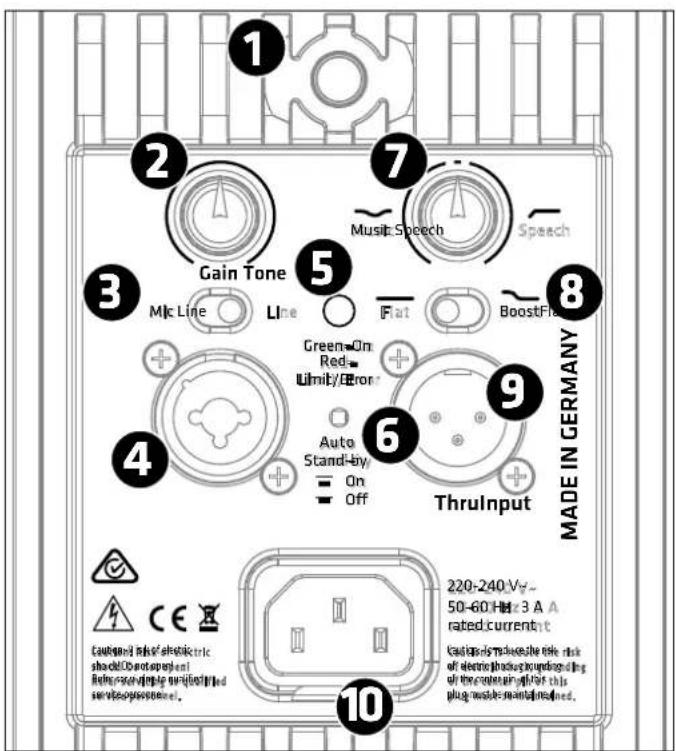
1 Power
This is the PREMIUM PR:0 powered cabinet's on/off button. The Limiter/Status LED lights up green to indicate the cab is powered up.
② Gain
Use this knob to adjust the input gain to match the incoming signal's level.
Adjusting volume levels with the Gain knob:
The +4 dBu (center-notched) position is the factory default setting. It is tuned to achieve the right balance of levels between the mid/ high unit and subwoofer. If necessary, turn the Gain knob to adjust the balance of levels between the mid/ high unit and subwoofer(s) to suit the incoming line signals.
3 Mic/Line Selector
When connecting a microphone, you can optimize the input's gain level by setting this switch to Mic. This setting provides a 30 dB boost.
When connecting a line-level source such as a mixer, audio playback device, or electronic musical instrument, set this switch to Line.
4 Input
Route the incoming audio signal into this electronically balanced, combination XLR/ 6.3 mm (1/4") input (pin 1 = ground, 2 = +, 3 = -).
5 Limiter/Status LED
This dual-color LED serves as a status indicator for the PREMIUM PR:0 powered cabinet (green = power on, red = limit/error). The LED briefly flashes red to tell you the limiter is responding to signal peaks.
Caution! If the Status LED stays red during operation, the cabinet is being overloaded. Turn down the signal level! If you are not routing a signal in and the Status LED stays red, the system has detected a fault.
6 Auto Standby
PREMIUM PR:0 mid/ high units have a power-saving function that can be activated and deactivated. The power amp switches to standby mode when the button is set to On and the unit does not receive a signal for about four hours (consumption <0.5 watts). To power the PREMIUM PR:0 cabinet back up again, simply set its Power button to Off for five seconds and then back to On. Mid/ high units will remain up and running if you disable Auto Standby by setting this button to Off.
7 Tone
The Tone knob adjusts the frequency response to suit the given application. Setting the knob to the center position defeats the filter.

Turning the Tone knob counterclockwise towards Music attenuates by up to -6 dB a broad midrange band with a center frequency of 2500 Hz, thereby taking the edge off the sound. The overall volume is not affected.
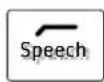
Turning the Tone knob clockwise towards Speech activates a 80-to-200 Hz low-cut filter, which enhances clarity for speech applications and reduces subsonic noise.
The X models (PR: 0 10 XD, PR: 0 12 XD, PR: 0 15 XD) are also tuned to minimize feedback and distortion at high volume levels.
8 Flat/Boost Selector
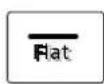
Setting this switch to Flat conjures the optimum linear frequency response for live performances and for operation in combination with subwoofers.
Setting this switch to Boost pumps up the bass. This boosts a broad band of bass frequencies in the kick-drum range between 70 Hz and 80 Hz and extends the low-end response.
9 Thru
This passive parallel output routes the signal routed into the front-end Input back out again (pin 1 = ground, 2 = +, 3 = -).
10 Mains
Use the factory-included power cord to connect this socket to a wall outlet.
1.2 Connecting Cords
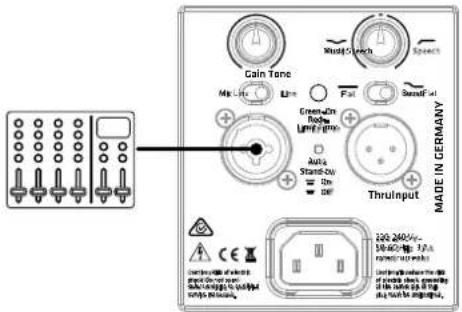
- When operating the PREMIUM PR:O speaker cabinet as a standalone unit or monitor without an added subwoofer, use a balanced cord equipped with XLR connectors or 6.3 mm (1/4") jack plugs to route the signal from the mixer (via a monitor out, line out, or a similar output) or microphone to the Input.
- When operating the cabinet in combination with PREMIUM PR:O series powered subwoofers, use a cord equipped with XLR connectors to connect the subwoofer's Line Out Mid/High to the cabinet's Input.
- Plug a cord equipped with XLR connectors into the Thru port to route the input signal out again.
Go to page 18-21 for illustrations of cable connections.
1.3 Operating the Cabinet
- Ensure the PREMIUM PR:0 cabinet is switched off.
Caution! Always make sure the local mains voltage matches the voltage specified on the PREMIUM PR:0 unit. You may destroy powered cabinet's electronic components if you connect it to the wrong mains voltage.
- When patching in line signals, ensure all other connected components are switched on before powering up. The connected mixer as well as all signal sources connected to it-keyboards, instrument amps, effects and the like—should be switched on first. Always switch on the PREMIUM PR:0 last, after you power up all connected devices, and switch it off first; that is, before you switch off all connected devices.
- When you flip on the Power switch, the fan will start up briefly for a system check and switch off after around five seconds. After that, the cabinet's circuitry controls the fan. It kicks in only at very high volume levels and is regulated according to the temperature. The Status LED lights up red during the system check. It will turn green if there is no error and the system is getting mains power.
- The Gain knob's default setting is the 12 o'clock position (+4 dBu / center-notched). This is the preferred level if you have connected a mixer to the PREMIUM PR:O cabinet. If you plug a CD player or keyboard straight into the cabinet, you may have to turn this knob to adjust the gain to match it to the device's signal level.
Caution! Turn the Gain knob counterclockwise all the way down to the far left when switching the input sensitivity from Line to Mic.
- If you hear distortion or clipping occurs, first check the signal sources and, if possible, reduce the output signal level there.
1.4 Aiming the Cabinet
DuoTilt™ 3/7
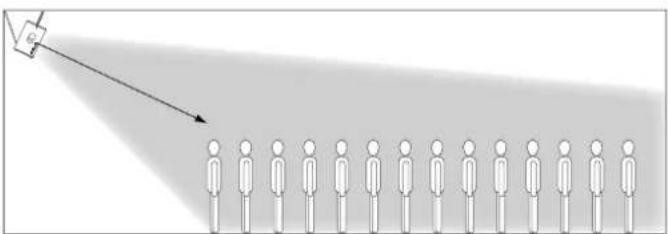
The HK Audio DuoTilt 3/7 pole mount lets you align PREMIUM PR.O cabinets vertically on a speaker stand or mounting pole to prevent or reduce troublesome ceiling reflections. The front aperture of the HK Audio DuoTilt provides a 7° angle, the rear aperture a 3° angle of tilt.
Rule of thumb: We recommend that you opt for the 7° angle if the audience close by and you place cabinets at an elevated position—for example, on stands on the stage—or if the audience is seated. This way the sound and particularly the high frequencies are distributed more uniformly right on up to the front face of the speakers.
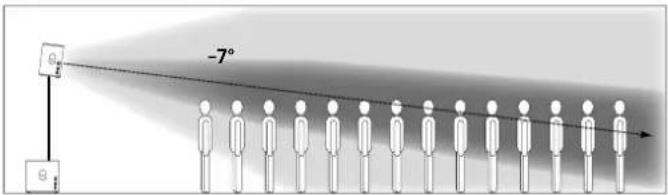
If you wish to address more listeners at a greater distance from the speakers, opt for the 3° angle on the HK Audio DuoTilt 3/7.
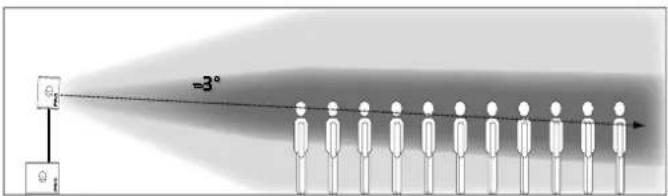
In both situations, you can vary the speakers' reach by adjusting their height. They throw sound over a greater distance as their elevation increases.
Rigging Points
Every PREMIUM PR:0 model comes with three countersunk M8 rigging points. They lets you fly the speaker on steel cables or chains at inclinations from 0° up to 45°. When flying the cabinet, for example, from a truss, use the rear rigging point to determine the degree of inclination.
We recommend using our secure AP-8 suspension points to rig the speaker to the mounting hardware.
2 PREMIUM PR:O Self-powered Subwoofer
PR:0 18 Sub A • PR:0 210 Sub A
2.1 Control Features
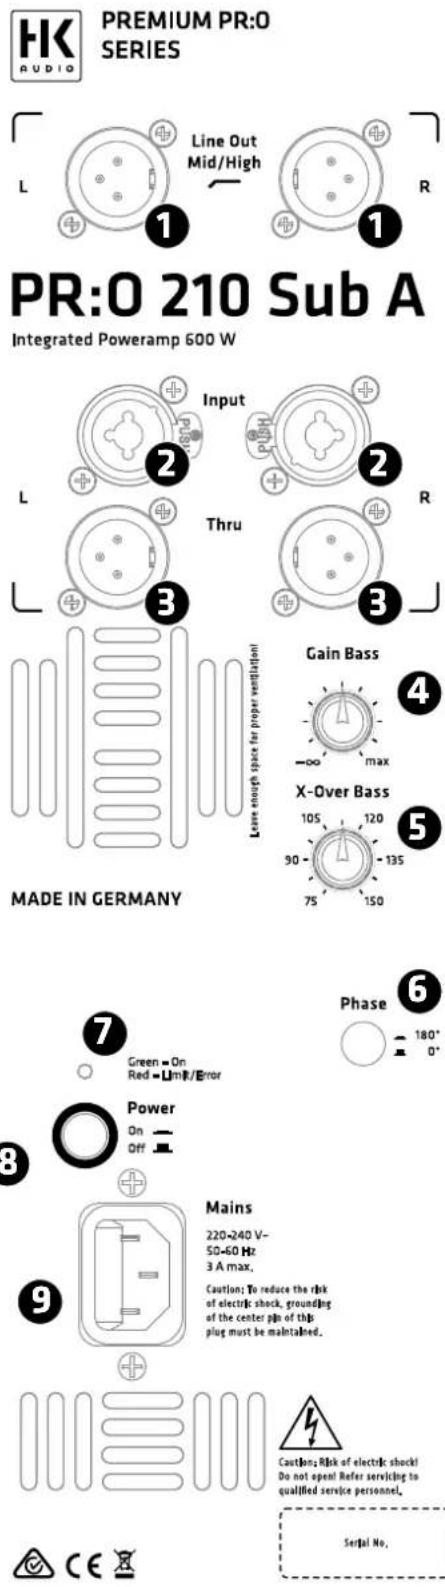
① Line Out Mid/High L/R
Two electronically balanced XLR outputs for connecting PREMIUM PR:0 mid/ high units (pin 1 = ground, 2 = +, 3 = -).
② Input L/R
These two electronically balanced XLR / 1/4" combi inputs accept signals from mixing consoles (pin 1= ground, 2= +, 3= -).
3 Thru L/R
These two parallel outputs patch incoming line signals through, for example, to other PREMIUM PR:O active speakers or monitors (pin 1= ground, 2= +, 3=-).
4 Gain Bass
This knob adjusts the input level (center position = 0 dBV). The 12 o'clock position is the ideal starting point when operating the subwoofer in combination with a PREMIUM PR:O active cabinet. Then you can simply twist the knob to the left or right to cut and boost bass frequencies. If you connect a PREMIUM PR:O satellite, first set the Gain knob to the center detent and then adjust the level to suit the given sound reinforcement situation.
5 X-Over Bass
The active crossover can serve to vary the top cutoff frequency of the subwoofer with a range of 75 to 150 Hz. The best cutoff frequency for the given application depends on the surroundings and satellite, so you will have to experiment.
Note: If you set the cutoff to a frequency higher than 100 Hz, the subwoofer will render mostly the lower frequencies of signals generated by bass guitars, kick drums, and low-end keyboard sounds. If you set the cutoff to a frequency higher than 100 Hz, the subwoofer will also render the lower frequencies of voices and other sound sources.
6 Phase
The Phase switch changes the subwoofer's phase position to match it to the connected satellite's phase position (0° - 180°). Set the switch to 0° when operating the PR:O 18 Sub A in combination with a PREMIUM PR:O active cabinet. The PR:O 210 Sub A's phase has to be reversed 180° to ensure it is in phase with PREMIUM PR:O mid-/high-range units. You may have to invert the phase for combinations with other enclosures. If you are unsure, simply try the 180° setting. If the bass response changes and the signal sounds weak and washed out, the phase setting is incorrect.
7 Limiter/Status LED
This dual-color LED serves as a status indicator for the PREMIUM PR:O powered cabinet (green = power on, red = limit/error). The LED briefly flashes red to tell you the limiter is responding to signal peaks.
Caution! If the Status LED stays red during operation, the cabinet is being overloaded. Turn down the signal level! If you are not routing a signal in and the Status LED stays red, the system has detected a fault.

Power
This is the PREMIUM PR:0 powered cabinet's on/off button. The signal LED lights up green to indicate the cab is powered up.
9 Mains Input
Use the factory-included power cord to connect this socket to a wall outlet. Note: All PREMIUM PR:0 self-powered subwoofers are equipped with V-Lock mains sockets. If you use a VOLEX locking mains cord or another optionally available brand with the same design, you can fix the mains cord in place to prevent accidental disconnection..
2.2 Setting Up and Connecting the Cabinet
Use a balanced cord equipped with XLR connectors or 6.3 mm (1/4") jack plugs to route the signal from the mixer (via a monitor out, line out, or a similar output) to the Input. Then connect the active satellites to the XLR outputs labeled Line Out Mid/High. Use the two Thru ports to feed the fullrange signal to other enclosures. Make sure the XLR connectors' terminals are configured as follows: 1= ground, 2= +, 3= -.
2.3 Operating Speakers
- First make sure the powered cabinet is off. Caution! Connect the cabinet to the mains supply only after you are certain the local mains voltage matches the voltage specified on the rear panel. If you connect the system to the wrong mains voltage, you may destroy the electronic components of the PREMIUM PR:0 active cabinet.
- Back the Gain knobs all the way off, turning them counterclockwise as far as they will go.
Ensure you first switch on all other connected components, for example, a connected mixing console as well as all signal sources patched into it, such as keyboards, instrument amps, effects and so forth. Always connect PREMIUM PR:O active cabinets to Line Out Mid/High, and always switch them on last; that is, after you switch on all other connected components. When you powering down, first turn the Gain knobs to the far left and switch active cabinets off first, before switching off any connected devices.
After you power the system up by engaging the Power switch, a system check prompts the fan to briefly kick on and back off again in about five seconds. The fan is temperature-controlled, actuating only at very high volumes and temperatures requiring cooling.
- The Limiter/Status LED lights up green when the cabinet receives mains power.
Set the Gain knob to the center or 12 o'clock position (= 0 dBV). This is the preferred level if you have connected a mixer to the PREMIUM PR:O active cabinet. You can boost the input level 6 dB by turning up the Gain knob. For the best audio results, ensure the Limiter/Status LED does not light up continuously red.
2.4 Settings
Adjusting volume with the Gain knob
Twist this knob to adjust the line signal levels.
If you hear distortion or saturated signals, first check the signal sources and, if possible, reduce the output signal level there. If you cannot adjust the level of the signal routed to the PREMIUM PR:0 active cabinet at the source, match it to the power amps by backing off the Gain knob to lower the input level.
3 Tips and Tricks
1 Do not expose electronic circuitry to moisture! Protect cabinets against rain when you set them up outdoors. Keep soft drinks, beer, and any other liquids away from the electronic components to prevent short circuits.
2 PREMIUM PR:O active enclosures provide optimum sound to you, so be sure to provide optimum input signals to them! Noise such as humming is generally caused by defective cables, the wrong type of cords, or unbalanced signals routed into the mixing console. Check all signal and mains cables.
3 Prevent distortion! Not only is it unpleasant to your audience's ears, it also endangers your equipment. Make sure all components that are connected directly and indirectly to PREMIUM PR:0 active cabinets have sufficient power ratings, and that they don't distort because they're running at their respective limits. Ensure all sources deliver clean audio signals.
4 Avoid ground loops! Annoying humming can arise even within audio systems with balanced circuits, for example, when the mixing console's mains cord isn't connected and grounded to the same mains circuit as PREMIUM PR:0 active enclosures. Using two different ground circuits can create a ground loop. To prevent this problem, always connect PREMIUM PR:0 active enclosures and the mixing console to the same electrical circuit; that is, the same phase!
CAUTION: Never tape over the plug's ground terminal - this endangers lives!
4 Troubleshooting
The Limiter/Status LED does not light up when the power switched on.
- Check if the power cord is plugged into the Mains input.
- Check if the mains power supply is providing current.
The Limiter/Status LED lights up red, flashing intermittently.
- The Limiter has actuated; lower the input level if necessary.
The Limiter/Status LED lights up red continuously, but no sound is issuing from the cabinet.
- The enclosure's protective circuit has tripped. Please contact your dealer.
The rendered music sounds distorted.
- Check your mixing console's LED meters. They should not be constantly in the red. If necessary, back off the volume at the mixer.
- If the LED displays on your mixer are in the green, back off the PREMIUM PR:0 active cabinet's Gain knob.
- Observe the Limiter/Staus LED on the PREMIUM PR:0 active enclosure's control panel. These may light up red, but only intermittently. The red light may not illuminate continuously. If it does, turn down the Gain knob.
5 Applications
Go to page 18-21 for illustrations of cable connections.
6 Technical Specifications
| Model | PR:0 10 XD | PR:0 12 D | |
| Max SPL | 122 dB half space* | 124 dB half space* | |
| Max SPL peak | 131 dB half space* | 132 dB half space* | |
| Max SPL calculated | 133 dB half space | 133 dB half space | |
| Frequency response +/- 3 dB | 81 Hz - 16 kHz | 72 Hz - 16 kHz | |
| Frequency response -10 dB | 69 Hz - 18 kHz | 62 Hz - 18 kHz | |
| Output power | 1200 W | 1200 W | |
| Amp type | Class D - biamped | Class D - biamped | |
| Active protective circuits | Peak and RMS Sound Limiter (separate for HF and LMF) | Peak and RMS Sound Limiter (separate for HF and LMF) | |
| Bass woofer | |||
| Low/Mid speaker | 1x 10" | 1x 12" | |
| HF driver | 1" | 1" | |
| Horn directivity | 90° x 55° CD horn | 90° x 55° CD horn | |
| Active x-over frequency | 2.5 kHz FIR X-Over with 48 dB/oct. | 2.5 kHz FIR X-Over with 48 dB/oct. | |
| Audio ports | 1x XLR-1/4"-Combo In, bal., 1x XLR-Through | 1x XLR-1/4"-Combo In, bal., 1x XLR-Through | |
| Equalizer | Tone knob (Music / Speech) Bass Boost | Tone knob (Music / Speech) Bass Boost | |
| Angles up | 35° | ||
| Pole mount | DuoTilt 3/7 | DuoTilt 3/7 | |
| Suspension points | 3x M8 | 3x M8 | |
| Grips | 1, integrated | 2, integrated | |
| Casters | |||
| Housing | MDF | MDF | |
| Front grille | 2 mm metal grille backed with black acoustic foam | 2 mm metal grille backed with black acoustic foam | |
| Finish | Acrylic enamel, black | Acrylic enamel, black | |
| Optional accessories | Protective cover, Satellite Add-on | Protective cover, Satellite Add-on | |
| Dimensions (WxHxD) | 38 x 49 x 29 cm | 39 x 57 x 36 cm | |
| Weight | 13.2 kg / 29.1 lbs. | 18.7 kg / 41.2 lbs. |
*@10% THD
| PR:0 210 SUB A | |||||
| 124 dB half space* | 125 dB half space* | 125 dB half space* | 125 dB half space* | 123 dB half space* | |
| 132 dB half space* | 130 dB half space* | 130 dB half space* | 127 dB half space* | 126 dB half space* | |
| 133 dB half space | 133 dB half space | 133 dB half space | 127 dB half space | 126 dB half space | |
| 80 Hz - 16 kHz | 60 Hz - 16 kHz | 61 Hz - 16 kHz | 48 Hz - X-over | 60 Hz - 150 Hz | |
| 69 Hz - 18 kHz | 54 Hz - 18 kHz | 57 Hz - 18 kHz | 38 Hz - X-over | 40 Hz - 150 Hz | |
| 1200 W | 1200 W | 1200 W | 600 W | 600 W | |
| Class D - biamped | Class D - biamped | Class D - biamped | Class D | Class D | |
| Peak and RMS Sound Limiter (separate for HF and LMF) | Peak and RMS Sound Limiter (separate for HF and LMF) | Peak and RMS Sound Limiter (separate for HF and LMF) | Subsonic Filter, Peak Limiter | Subsonic Filter, Peak Limiter | |
| 1x 18" | 2x 10" | ||||
| 1x 12" | 1x 15" | 1x 15" | |||
| 1" | 1" | 1" | |||
| 90° x 55° CD horn | 90° x 55° CD horn | 90° x 55° CD horn | |||
| 2.5 kHz FIR X-Over with 48 dB/oct. | 2.5 kHz FIR X-Over with 48 dB/oct. | 2.5 kHz FIR X-Over with 48 dB/oct. | 75 Hz - 150 Hz, switchable | 75 Hz - 150 Hz, switchable | |
| 1x XLR-1/4"-Combo In, bal., 1x XLR-Through | 1x XLR-1/4"-Combo In, bal., 1x XLR-Through | 1x XLR-1/4"-Combo In, bal., 1x XLR-Through | 2x XLR-1/4"-Combo In, 2x XLR L/R Out Mid/ High,2x XLR Through balanced | 2x XLR-1/4"-Combo In, 2x XLR L/R Out Mid/ High,2x XLR Through balanced | |
| Tone knob (Music / Speech) Bass Boost | Tone knob (Music / Speech) Bass Boost | Tone knob (Music / Speech) Bass Boost | |||
| 33° | 42° | ||||
| DuoTilt 3/7 | DuoTilt 3/7 | DuoTilt 3/7 | 1x M20 | 2x M20 | |
| 3x M8 | 3x M8 | 3x M8 | |||
| 2, integrated | 2, integrated | 2, integrated | 2, integrated | 2, integrated | |
| optional 100 mm | |||||
| MDF | MDF | MDF | MDF | MDF | |
| 2 mm metal grille backed with black acoustic foam | 2 mm metal grille backed with black acoustic foam | 2 mm metal grille backed with black acoustic foam | 2 mm metal grille backed with black acoustic foam | 2 mm metal grille backed with black acoustic foam | |
| Acrylic enamel, black | Acrylic enamel, black | Acrylic enamel, black | Acrylic enamel, black | Acrylic enamel, black | |
| Protective cover, Satellite Add-on | Protective cover, Satellite Add-on | Protective cover, Satellite Add-on | Protective cover, Satellite Add-on | Protective cover, Satellite Add-on | |
| 40 x 59 x 31 cm | 47 x 62 x 42 cm | 47 x 62 x 45 cm | 53 x 61 x 64 cm | 36 x 61 x 53 cm | |
| 16.3 kg / 35.9 lbs. | 23.7 kg / 52.3 lbs. | 22.6 kg / 49.8 lbs. | 39.8 kg / 87.8 lbs. | 27.2 kg / 60 lbs. | |
1 Power
① Line Out Mid/High L/R
Application Samples
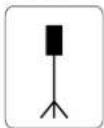
Mono Fullrange/Monitor System
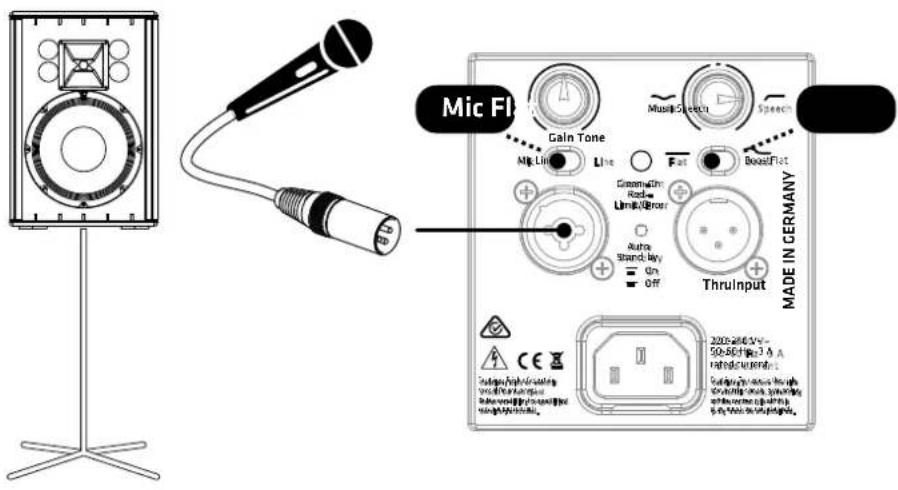
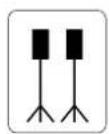
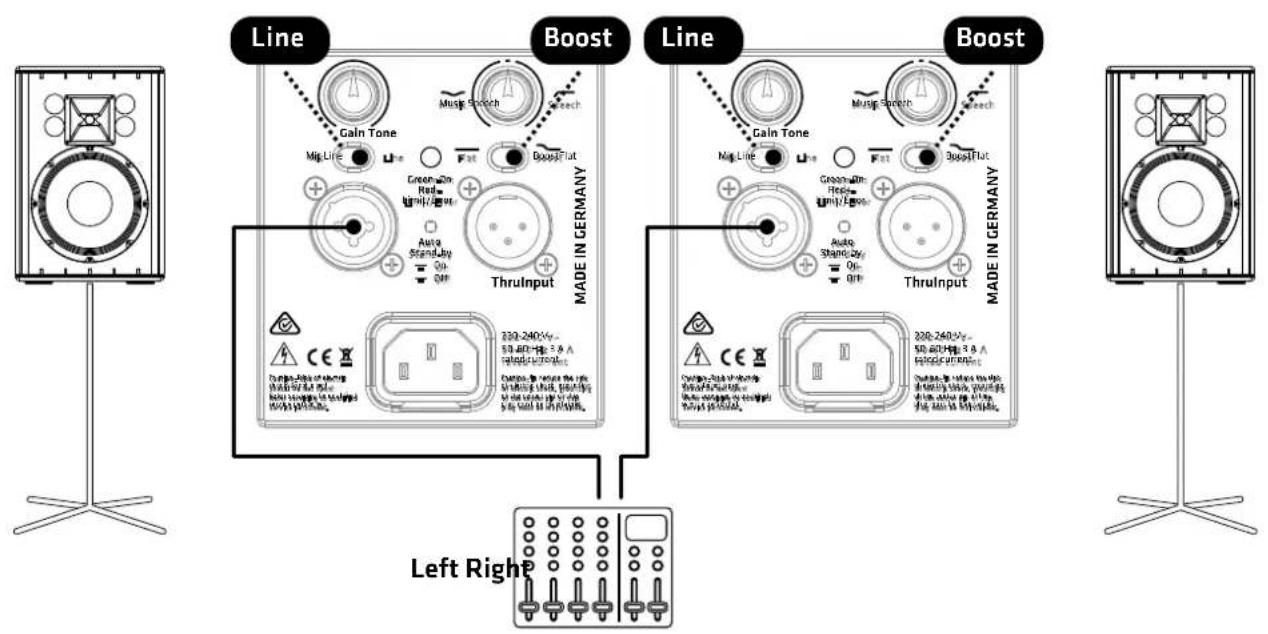
Stereo Fullrange System
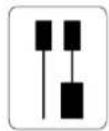
2.1 System
![graph TD subgraph Left A["Line Fl"] --> B["Gain Tone"] B --> C["Mic Line"] C --> D["Lone"] D --> E["Fat"] E --> F["Boost-Flat"] F --> G["Green/Red Red Light/High"] G --> H["Auto Stroke-By On Off"] H --> I["Thru Input"] I --> J["230-240V/- SD-60F/8.5 A rating current"] J --> K["Configuration to remov…](/content/2026/05/819342/images/9045307ab382401ea732477c4d2ba7f7867c01059289fe5ae7e92ca48cfe6038.jpg)
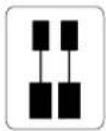
Halfstack System + Monitoring
![graph TD A["Line Flute Flat"] --> B["Left"] A --> C["Right"] D["Line Flute Flat"] --> E["Left Right"] D --> F["Monitor Out 1"] D --> G["Monitor Out 2"] H["Line Flute Flat"] --> I["Left"] H --> J["Right"] K["Line Flute Flat"] --> L["Left Right"] K --> M["Monitor Out 1"] N["Line Flute Flat"] --> O["Le…](/content/2026/05/819342/images/1478baa9c5ab0bdfa6876587e1a68332b21e82301ded945f4acccd6ba881bcd6.jpg)
Fullstack System
![graph TD A["Line Flume Flat"] --> B["Left"] A --> C["Right"] B --> D["PREMIUM PR:O SERIES"] C --> E["PREMIUM PR:O SERIES"] D --> F["L"] D --> G["Line Out Mid/High"] D --> H["R"] E --> I["L"] E --> J["Input"] E --> K["Thru"] E --> L["R"] M["Line Flume Flat"] --> N["Cain Tone"] M --> O["Crew/Soft Redo…](/content/2026/05/819342/images/cca464e3f4212e194b2d6a24ecf472bf52b8ad5c68a386b7d67e456120c4284d.jpg)
PREMIUM PR:0

HK Audio® • Postfach 1509 • 66595 St. Wendel • Germany • info@hkaudio.com • www.hkaudio.com
International Inquiries: fax +49-68 51-905 215 • international@hkaudio.com

- PREMIUM PR:0
- IMPORTANT SAFETY INSTRUCTIONS! READ BEFORE CONNECTING
- GENERAL NOTES ON SAFETY FOR LOUDSPEAKER SYSTEMS
- WARNING
- WELCOME TO THE HK AUDIO FAMILY
- YOUR HK AUDIO TEAM
- WARRANTY
- HK AUDIO
- 1 PREMIUM PR:O SELF-POWERED CABINETS
- 1 POWER
- ② GAIN
- ADJUSTING VOLUME LEVELS WITH THE GAIN KNOB
- 3 MIC/LINE SELECTOR
- 4 INPUT
- 5 LIMITER/STATUS LED
- 6 AUTO STANDBY
- 7 TONE
- 8 FLAT/BOOST SELECTOR
- 9 THRU
- 10 MAINS
- 1.2 CONNECTING CORDS
- GO TO PAGE 18-21 FOR ILLUSTRATIONS OF CABLE CONNECTIONS
- 1.3 OPERATING THE CABINET
- 1.4 AIMING THE CABINET
- DUOTILT™ 3/7
- RIGGING POINTS
- 2 PREMIUM PR:O SELF-POWERED SUBWOOFER
- ① LINE OUT MID/HIGH L/R
- ② INPUT L/R
- 3 THRU L/R
- 4 GAIN BASS
- 5 X-OVER BASS
- 6 PHASE
- 7 LIMITER/STATUS LED
- POWER
- 9 MAINS INPUT
- 2.2 SETTING UP AND CONNECTING THE CABINET
- 2.3 OPERATING SPEAKERS
- 2.4 SETTINGS
- ADJUSTING VOLUME WITH THE GAIN KNOB
- 3 TIPS AND TRICKS
- 4 TROUBLESHOOTING
- 5 APPLICATIONS
Brand : HK AUDIO
Model : Premium PR:O 15 XD
Category : Loudspeaker