ICW6-MB - Pregnant Beale - Free user manual and instructions
Find the device manual for free ICW6-MB Beale in PDF.


User questions about ICW6-MB Beale
0 question about this device. Answer the ones you know or ask your own.
Ask a new question about this device
Download the instructions for your Pregnant in PDF format for free! Find your manual ICW6-MB - Beale and take your electronic device back in hand. On this page are published all the documents necessary for the use of your device. ICW6-MB by Beale.
USER MANUAL ICW6-MB Beale
ICW4-MB, ICW6-MB Shallow Depth In Wall/In Ceiling Speakers
Installation Guide
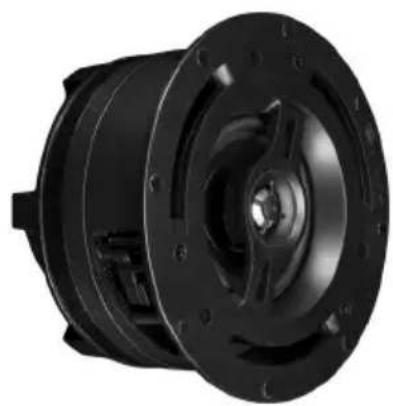
natural_image
Close-up of a black mechanical component with flanged ends and central hub (no visible text or symbols)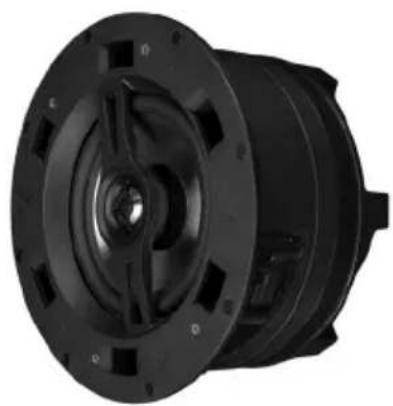
natural_image
Close-up of a black industrial fan or motor component with mounting flanges and central hub (no visible text or symbols)
text_image
BEALE STREET AUDIO INC.Introduction
Congratulations and thank you for purchasing Beale Street Audio In Ceiling speakers and subwoofers with Sonic Vortex®.
Our patented Sonic Vortex Technology is based on Ported Transmission Line design and incorporates a compact, integrated enclosure. Most In Ceiling speakers do not utilize a back box, even fewer have an enclosure, and only a Sonic Vortex speaker has an Integrated Transmission Line Ported Enclosure. Without something behind the speaker driver the music not only plays into the room, but also bleeds into adjoining rooms such as the attic or an occupied room. The bleed negatively affects performance, and sound consistency.
The Sonic Vortex enclosure directs all of the sound from the speaker driver into the room it is intend to be in, so you get to enjoy your speakers without disturbing the rest of the house. Great bass response, stereo image, and big sound that you can't get with any other in ceiling speaker.
Beale Street Audio speakers and subwoofers install with ease using the 'dog' mounting system and magnetic bezelless grilles for fast, clean installations.
Please follow the instructions in this manual to assure proper installation and to achieve the full performance and satisfaction you would expect from Beale Street Audio.
Speaker Placement
Even though the Beale Street Audio BXCW401 and BXCW651 have a shallow depth of less than 4" (101.6mm) when installing in wall/in ceiling speakers, (or in wall/in ceiling anything for that matter) it is always a good idea to find out what is in the wall/ceiling before cutting holes. Be aware of the location of plumbing, electrical and structural elements that may affect speaker placement.
Stereo
It is also a good idea to locate stereo speakers so they are centered to the main listening position in which the user/s will normally be located. Whenever possible, try to position the left and right speakers at the same distance from each other as they are from the main listening position.
Subwoofer
Subwoofers are omni-directional so placement of in wall/in ceiling subs is somewhat less critical, but placement can be affected (good and bad) by corners and walls, so try to find a location that will be somewhat unaffected by placement.
Angled
If using the ‘Angled In’ speakers, be sure to position them so the speakers are facing into the room and directed toward the main listening position.
Surround
Locate surround speakers according to the recommendations in the surround processor's owner's manual.
Installation
SPEAKER WIRE
Pull one run of 16AWG stranded speaker wire from the amplifier location to each speaker location. If in pre-wire, while the walls are open and it's easy, pull extra wire to any location that may be desirable to add speakers at a later date. Leave extra length of wire on each end to allow making connections and installing/removing speakers.
Use the chart below to determine the proper gauge of wire, based upon wire length from the amp to the speakers. If using volume controls, include the total length from the amp to the volume control and then to the speakers.
| SPEAKER WIRE GAUGE TABLE | |
| SPEAKER WIRE LENGTH SPEAKER WIRE GAUGE | |
| 150' (46m) 16AWG | |
| 400' (122m) 14AWG | |
NEW CONSTRUCTION
Beale Street Audio speaker installation can be simplified by using a Beale Street Audio new construction EZBracket, (sold separately; visit www.getbeale.com for additional information). This is installed prior to drywall installation and allows for precise speaker placement and simplifies the final installation of the speaker.
EXISTING CONSTRUCTION
Speaker wire must be run from the equipment or volume control location to each potential speaker location.
- Choose a location for each speaker that is free of obstructions created by joists, HVAC duct-work, electrical wire runs, plumbing or anything else that might not allow for the depth of the speaker or create interference or noise.
Installation
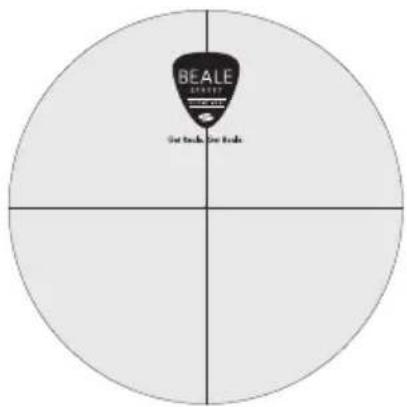
- Once you have determined your locations, use a pencil to mark the hole to cut out for the speaker using the supplied template. Don't forget to allow for the size of the speaker bezel if you are installing the speaker near a sidewall or other item that could become an obstacle.
NOTE: Round grille and square grille finish both use the same drywall cutout.
text_image
BEALE Get Back for Break- If you are unsure of potential obstacles, carefully cut your holes using an angle to the inside of the cutout area. This will allow you to "plug" the hole easily if needed. If the area is clear and is a good location for the speaker, go ahead and cut the edges of the opening at 90 degrees to accommodate the speaker diameter.
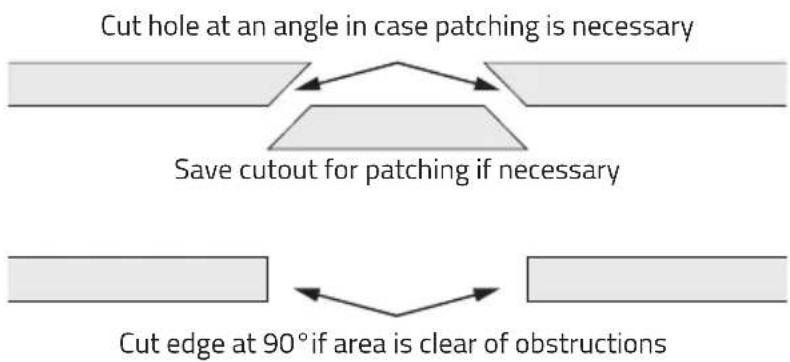
flowchart
graph TD
    A["Cut hole at an angle in case patching is necessary"] --> B["Save cutout for patching if necessary"]
    B --> C["Cut edge at 90° if area is clear of obstructions"]
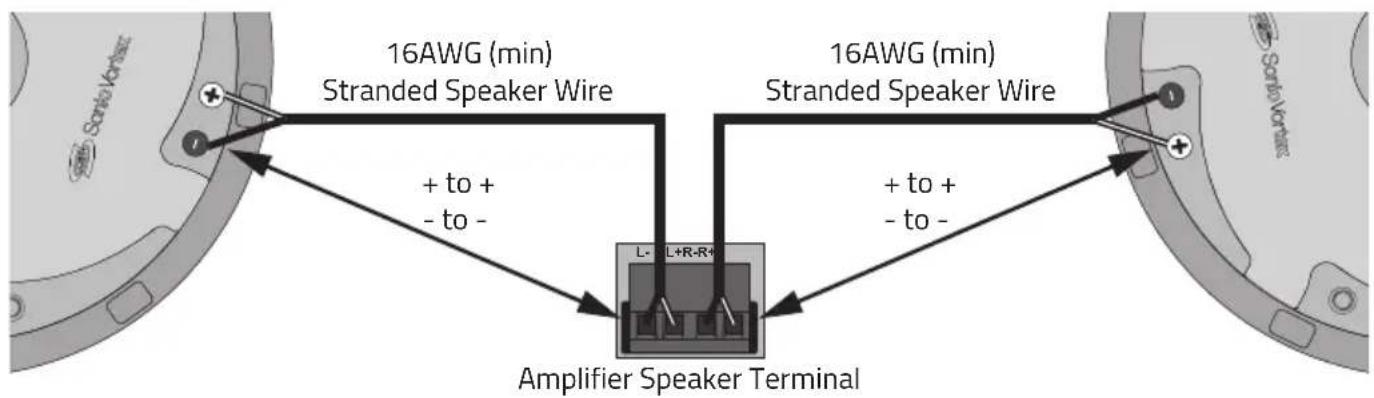
- Strip the insulation on each conductor approximately 1/2" (12.7mm) and insert to the speaker terminals. Ensure that there are no stray strands of wire protruding from the connectors that can cause shorts. Observe proper polarity (+ to + and – to – for each speaker and at the amplifier) and that surround channels are properly positioned and connected, if used.
Installation
text_image
16AWG (min) Stranded Speaker Wire + to + - to - 16AWG (min) Stranded Speaker Wire + to + - to - L-L+R-R+ Amplifier Speaker TerminalRound Grille
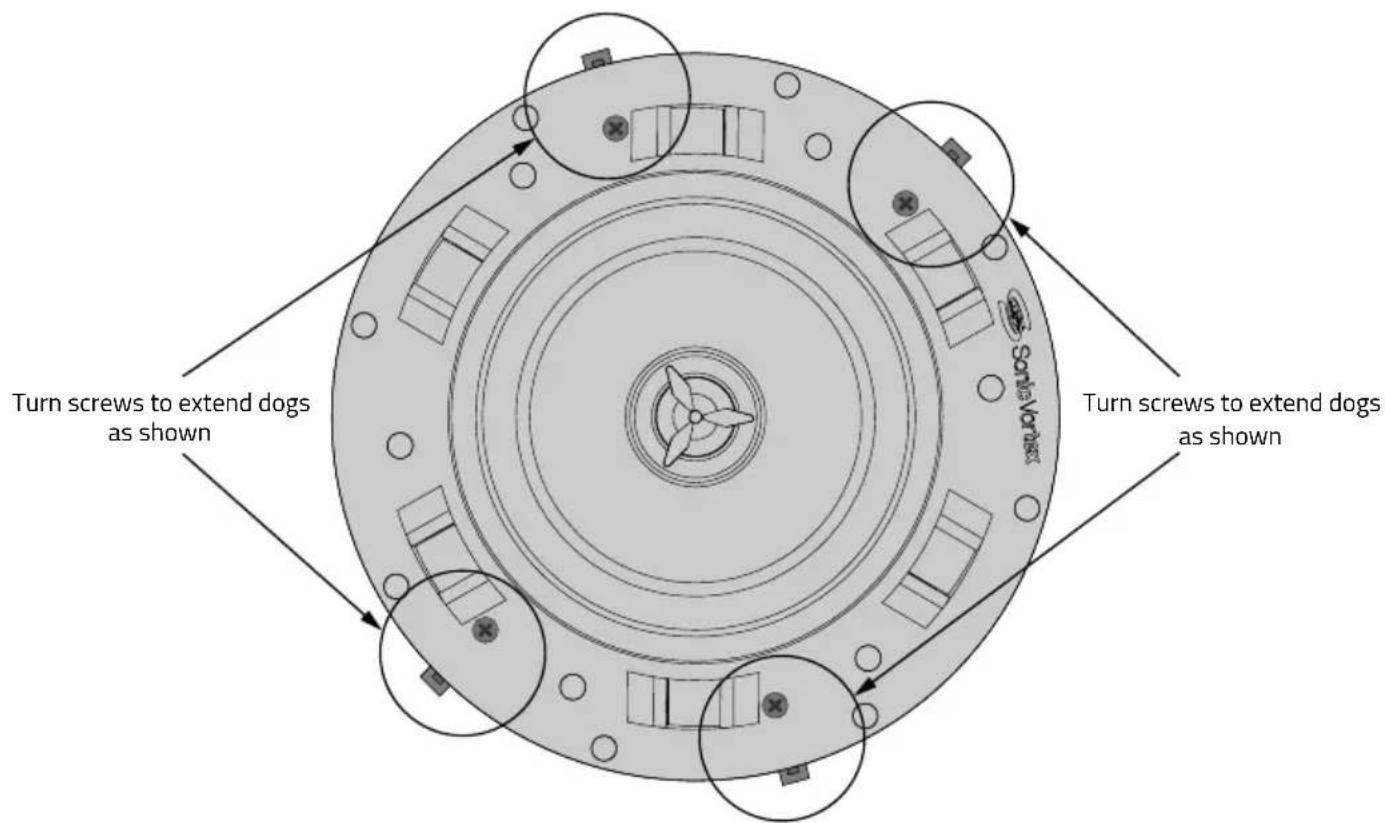
- With the ‘dogs’ flush to the side of the speaker, insert the speaker into the ceiling and tighten each of the four screws for the speakers’ dogs, enough to clamp the speaker to the drywall. Do not overtighten.
text_image
Turn screws to extend dogs as shown Turn screws to extend dogs as shown Santa Vorhagg■ Attach the round grille to speaker. The grille attaches with magnets so it will just snap into place.
Installation
Square Grille
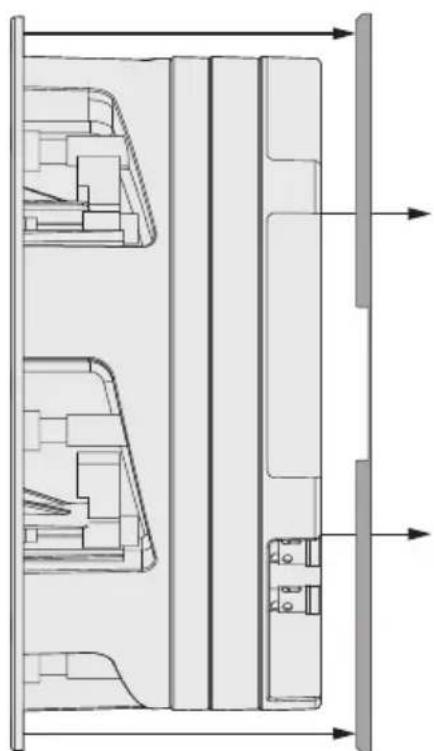
- With the ‘dogs’ flush to the side of the speaker, insert the speaker into the square bezel as shown.
natural_image
Technical line drawing of a mechanical assembly with internal components and directional arrows (no text or symbols)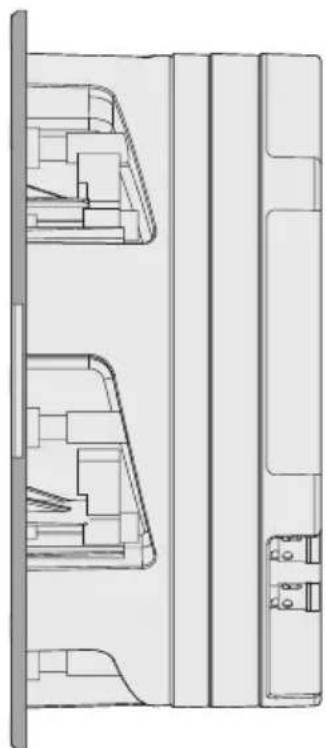
natural_image
Technical line drawing of a mechanical assembly with internal components (no text or symbols)- Slide the Speaker into the Square Bezel 2. Assembled Speaker and Square Bezel
natural_image
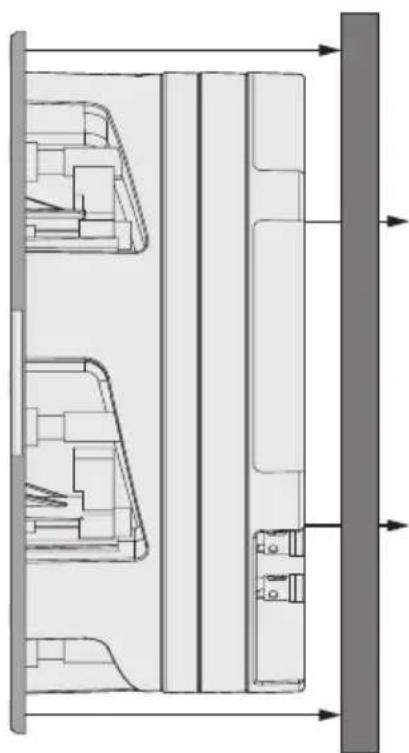
Technical diagram of a mechanical assembly with internal components and directional arrows (no text or labels)- Slide the Speaker/Square Bezel into the Drywall Cutout
natural_image
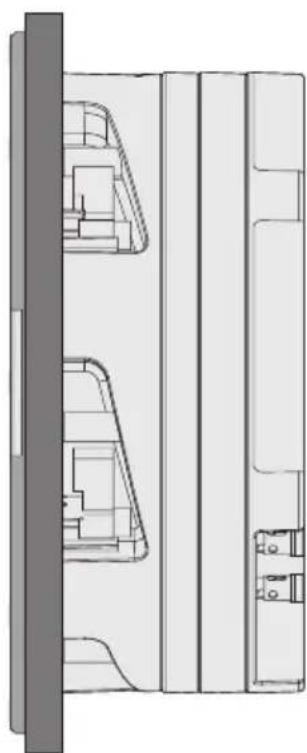
Technical line drawing of a mechanical assembly with internal components (no text or symbols)- Installed Speaker and Square Bezel
Installation
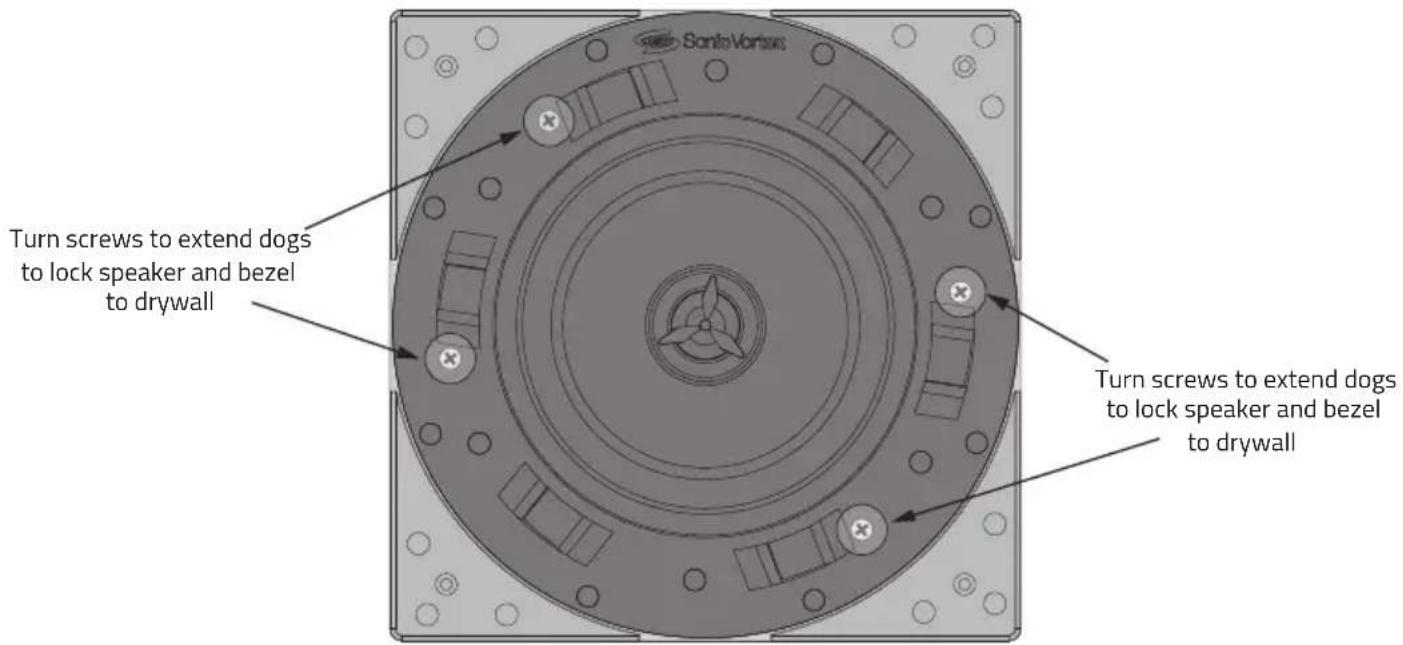
- With the speaker/bezel assembly installed in the wall, using a level, square the bezel to the wall and then turn the 'dog screws' to secure the speaker and bezel to the drywall.
text_image
Santis Vortex Turn screws to extend dogs to lock speaker and bezel to drywall Turn screws to extend dogs to lock speaker and bezel to drywall- Attach square grille to bezel. The grille attaches with magnets so it will just snap into place.
Adapting the Square Grille to an installed Round Speaker
- You can adapt the square bezel/grille to an installed round speaker by cutting one of the thin sides of the bezel, loosening the dogs on the installed speaker just enough to create a space between the speaker and drywall and then slipping the bezel around the speaker. Square the bezel to the wall and then tighten the 'dog screws' to secure the speaker and bezel to the drywall. Install the square grille.
PAINTING
The grille may be painted, but go as light as possible to not to clog the fine holes with paint. Only paint grilles when they have been removed from the speakers and be sure to remove the cloth on the backside of the grille before painting. If the cloth is not removed for painting, it will absorb the paint and clog the grille, significantly affecting the sound...and not in a good way. (We have taken great effort to eliminate any 'color' from the sound of our speakers, so let's try to keep it that way...OK?)
Troubleshooting
Beale Street Audio speakers are designed to function trouble-free. Most problems that occur are due to simple issues. If you have trouble, please check the list of simple fixes below.
| SPEAKER TROUBLESHOOTING | |
| PROBLEM SOLUTION | |
| NO SOUND Verify that there is audio | from the source selected. Select another source if necessary. |
| Ensure that the amplifier is turned on and connected properly. | |
| Check any connections at other devices, such as a volume control. Temporarily bypass the control if needed. | |
| Check wire connections at each speaker not producing sound for good contact to bare wire, not wire insulation. | |
Specifications
4" IN WALL/IN CEILING
ICW4-MB 4" In Wall / In Ceiling 2-way
- Shallow Depth – Under 4 Inches
■ 4" Injected Polypropylene Woofer
■ 3/4" Aluminum Dome Tweeter
■ Butyl Rubber Surround - Pivoting Tweeter
■ Sonic Vortex Ported Transmission Line Enclosure
■ Speaker Weight: 3.9lbs (1.75kg) - Cutout: "6.4" (162mm)
■ Diameter: 7.4" (186mm)
■ Depth: 3.8" (97mm)
■ Installed Frequency Response: 80Hz to 20KHz
■ Power Handling: 5-80W
■ Impedance: 8Ω
■ Sensitivity: 89db - Grille: Magnetic Bezelless; White - Paintable
- Connector Type: Gold Spring Push Terminal
■ EZBracket Size: J
6.5" IN WALL/IN CEILING
ICW6-MB 6.5" In Wall / In Ceiling 2-way
- Shallow Depth – Under 4 Inches
■ 6.5" Injected Polypropylene Woofer
■ 1" Aluminum Dome Tweeter - Butyl Rubber Surround
- Pivoting Tweeter
■ Sonic Vortex Ported Transmission Line Enclosure
■ Speaker Weight: 5lbs (2.28kg) - Cutout: 8.4" (214mm)
■ Diameter 9.4" (239mm)
■ Depth 3.9" (98mm)
■ Installed Frequency Response: 68Hz to 22KHz
■ Power Handling: 5-120W
■ Impedance: 8Ω
■ Sensitivity: 90db - Grille: Magnetic Bezelless; White - Paintable
- Connector Type: Gold Spring Push Terminal
■ EZBracket Size: F
Notes
Limited Warranty
All in-wall, in-ceiling, outdoor speakers, volume controls, and freestanding loudspeakers have a Lifetime Limited Warranty. This warranty includes lifetime parts and repair on components. Powered subwoofers and Beale Street Audio/Beale Street Audio amplifiers have a two (2) year limited warranty. This warranty includes two (2) year parts and repair labor on components. Beale Street Audio/Beale Street Audio obligation under this warranty is limited to repairing or replacing any component found defective in material or workmanship under normal conditions of use. This warranty shall not apply to products which have been abused, modified, disassembled, or repaired by anyone other than Beale Street Audio/Beale Street Audio or one of its appointed service centers. Products to be repaired under this warranty must be returned to the factory or designated service center with all transportation and insurance charges pre-paid.
IMPORTANT: This warranty is ONLY valid if the product is purchased through a Certified Beale Street Audio/Beale Street Audio Dealer. Proof of purchase may be required.
Note: It is the policy of Beale Street Audio/Beale Street Audio to continuously incorporate improvements into our products. All specifications, warranty terms, and prices are subject to change without notice.