Turbo Lite Plus 240 - Tent Black Wolf - Free user manual and instructions
Find the device manual for free Turbo Lite Plus 240 Black Wolf in PDF.


User questions about Turbo Lite Plus 240 Black Wolf
0 question about this device. Answer the ones you know or ask your own.
Ask a new question about this device
Download the instructions for your Tent in PDF format for free! Find your manual Turbo Lite Plus 240 - Black Wolf and take your electronic device back in hand. On this page are published all the documents necessary for the use of your device. Turbo Lite Plus 240 by Black Wolf.
USER MANUAL Turbo Lite Plus 240 Black Wolf
natural_image
Exterior view of a portable camping tent with black covers and vertical supports (no text or symbols visible)Congratulations on choosing a BlackWolf Turbo tent, please read through this instruction booklet thoroughly before using your new tent.
BEFORE YOUR FIRST CAMPING TRIP
We strongly recommend you pitch your tent before you take it away for the first time to familiarise yourself with the process and to double check that all the components are included.
We recommend you weather your tent by hosing it thoroughly, the stitching in the bound seams will swell and this will help seal the stitching holes. Please note and fully understand that no tent can be guaranteed 100% waterproof. Whilst the fabric your tent is made from is waterproof in certain weather conditions such as strong wind and driven rain can cause some leakage through seams and zippers.
USING YOUR TENT
Always peg out all guy ropes at all times. In cool weather or high humidity condensation can form inside your tent. This is not coming through the fabric but is water vapour that is inside the tent (created when you breathe and perspire and also from evaporation off wet items inside your tent). The best way to minimise condensation is to maximise ventilation by opening gusseted windows, vents and doors to allow air to flow through.
AFTER USE CARE
Where possible clean and dry your tent before packing it away, if the weather is bad and you have to pack your tent wet it is important to get it out and thoroughly dry it as soon as possible. NEVER store your tent wet, mildew can form on the fabric, pegs and other components can corrode. After coastal camping trips it is a good idea to rinse your gear in fresh water.
Store your tent in a dry, well ventilated place.
COMPONENT LIST
1 x Turbo Lite Plus tent with frame attached
1 x Turbo Lite Plus fly
11 x Guy ropes (already attached to your tent and packed in fin pockets)
6 x Loose guy ropes for windows
3 x Awning poles & 1 x Awning ridge pole
1 x U-pole (2 x 2 segments, 2 curved poles)
28 x steel pegs in peg bag
1 x Turbo tent bag
TURBO LITE PLUS TENT PITCHING INSTRUCTIONS
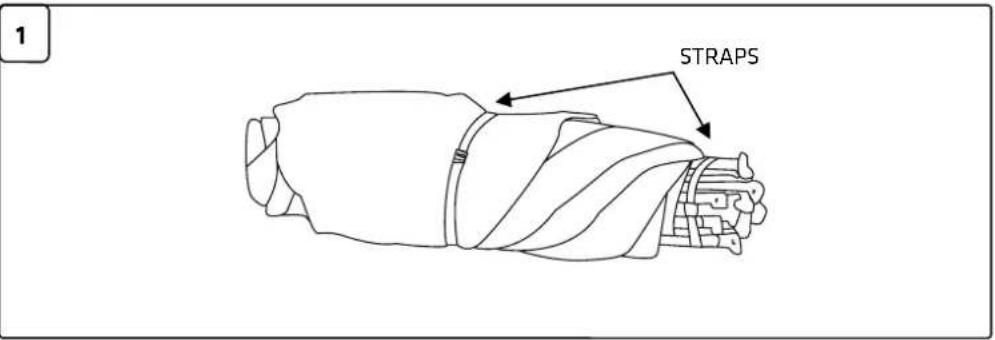
- Choose a flat site, clear away any sharp sticks or stones that may damage your tent floor. Remove your tent from the carry bag and unclip the strap around the tent (put the strap back in the bag for packing up the tent). Then unclip the strap around the top of the frame that holds the pole bundle together.
- Unroll the tent, pull the corners into position so the floor is taught and peg the corners and the peg out d-rings at the feet of the Turbo frame.
- Straighten the legs, the lower knuckles will lock into place
- Un-zip the door and step inside the tent, push the centre hub up from underneath, it will "pop" into position.
- Take the two, two section poles and unfold. Thread the two curved sections through the pole sleeve on the top of the rear room from each side and join them to each other within the pole sleeve. Attach a two section pole to one end with the other end on the ground towards the Turbo frame of the tent, then do the same on the other side. The pole ends should sit just next to the tent floor, pull them back to increase tension on the back room until the walls and roof are taught, the inner is pitched.
text_image
1 STRAPS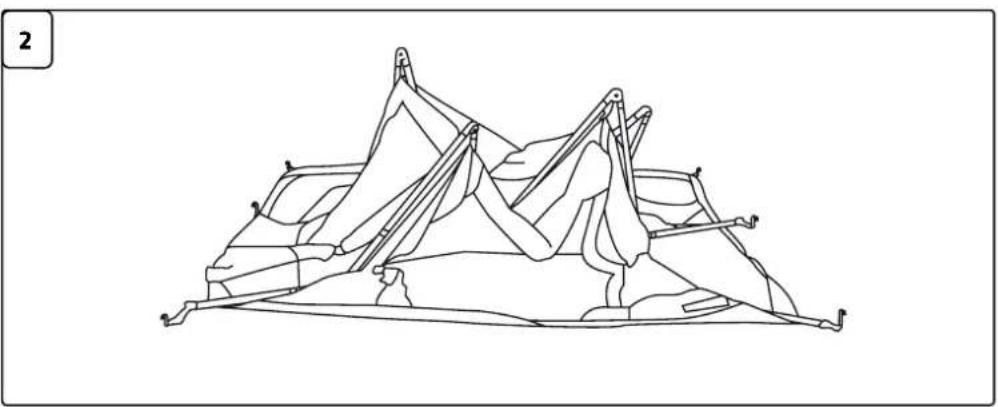
natural_image
Line drawing of a mountain climbing structure with support poles (no text or symbols)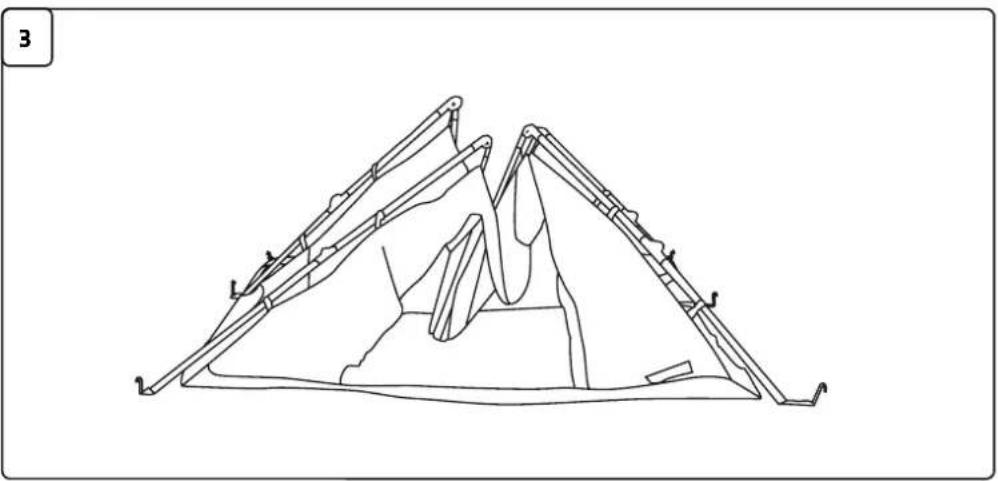
natural_image
Line drawing of a mechanical structure resembling a tower or pyramid, with no visible text or symbols.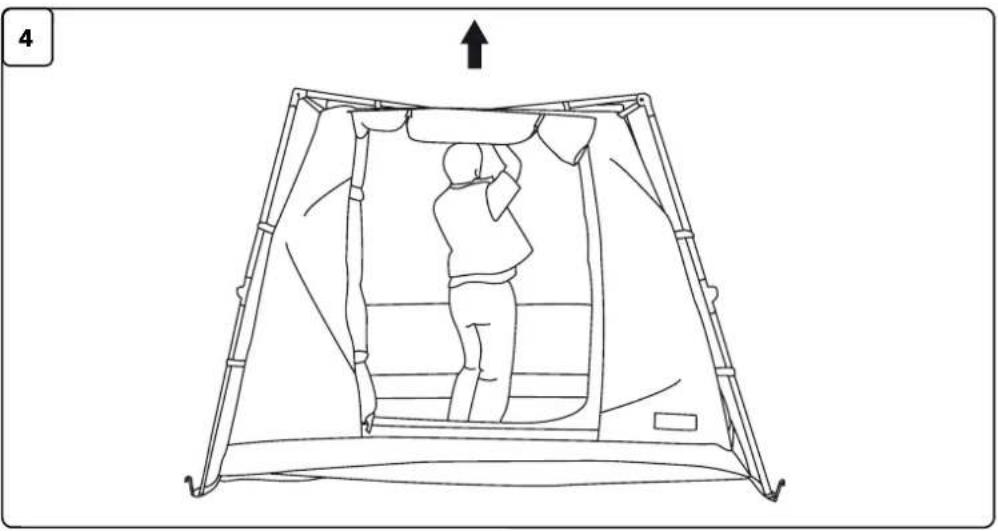
natural_image
Line drawing of a person inside a tent-like structure with an upward arrow, no text or symbols present-
Un-fold the fly and lay it over the tent, the awning is at the front over the door. Clip the fly in place at the feet of the Turbo frame and peg out the rear of the fly using the elastic loops attached to the fly. Secure the Velcro loops on the inside of the fly to the frame. Extend the awning roof pole and place the curved spigot into the hole at the front of the hub.
-
Extend the 3 part awning pole to approximately the height of the centre hub and thread the spigot through the hole in the awning roof pole and the centre front of the awning. Extend the roof pole until the fly fabric is taught then tighten the black collar to set the length.
-
Extend the 2 part awning poles to approximately the height of the upper knuckles and thread the spigots through the corner eyelets. Unravel the guy ropes stored in the zippered fin pockets and peg out at approximately 45 degrees to the tent. The centre awning guy rope should be pegged directly in front of the tent
Short guy ropes are supplied for pegging out the gussetted window flaps for ventilation.
text_image
Diagram of a camping tent with warning symbol and warning triangle, indicating hazard or caution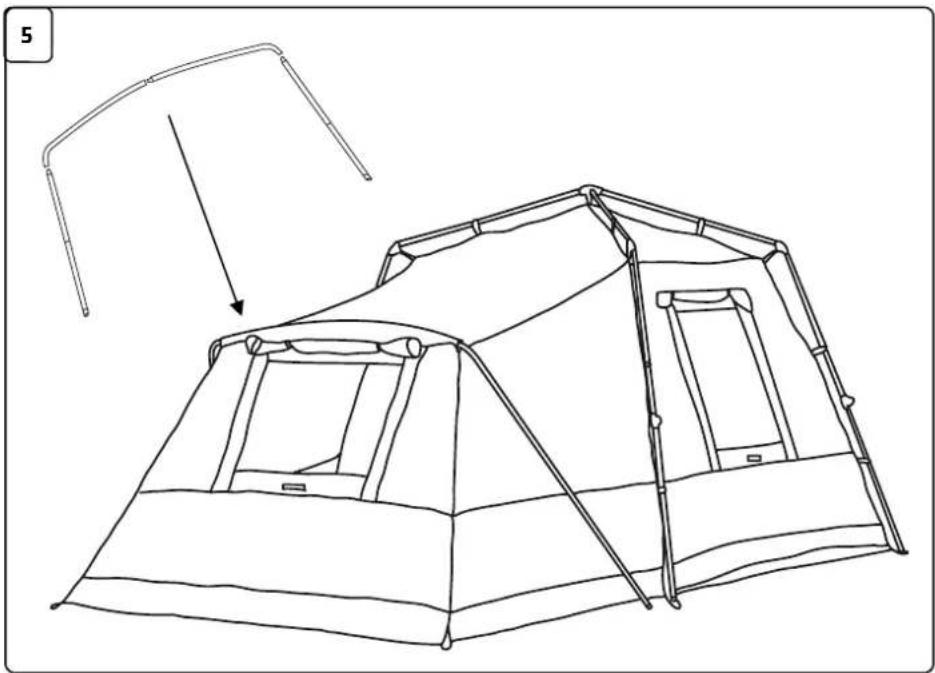
natural_image
Line drawing of a camping tent with a ladder and canopy, showing structural details (no text or symbols)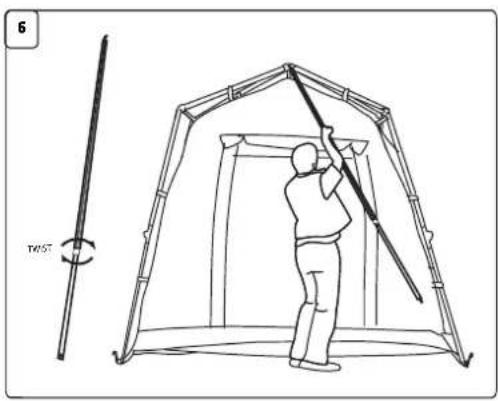
natural_image
Line drawing of a person climbing a bamboo structure with a hand tool, alongside a separate diagram showing a twist angle (no text or symbols)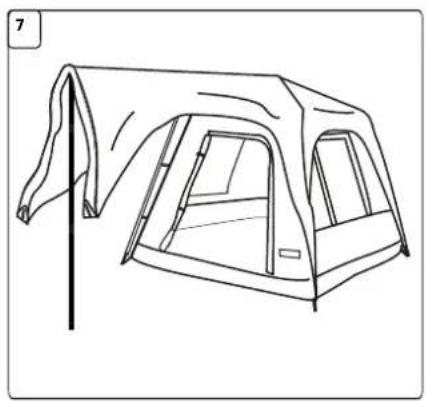
natural_image
Line drawing of a camping tent with a vertical pole and canopy (no text or symbols)
natural_image
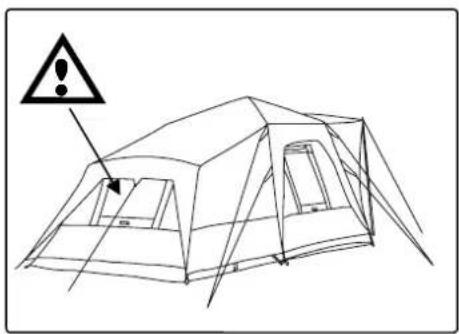
Line drawing of a camping tent structure with no text or symbolsNOTE: IT IS ESSENTIAL THAT THE GUY ROPE FOR THE REAR ROOM IS KEPT TAUGHT TO STOP WATER POOLING ON THE ROOF. BREAKAGE CAUSED BY NOT KEEPING THIS GUY ROPE TIGHT WILL NOT BE COVERED BY WARRANTY.
TURBO LITE PLUS TENT PACKING INSTRUCTIONS
-
Unpeg the guy ropes, roll them up and return to zippered pockets in guy rope fins. Unpeg awning guy ropes and roll up. Twist the awning poles to release and push top section into bottom section for packing. Unclip and remove the fly, allow to dry, if wet, before packing. (Your tent can be packed up wet but should be taken out and dried as soon as possible) Fold the fly to fit into the bag and put aside. Clean and dry all pegs before putting them back into their bag.
-
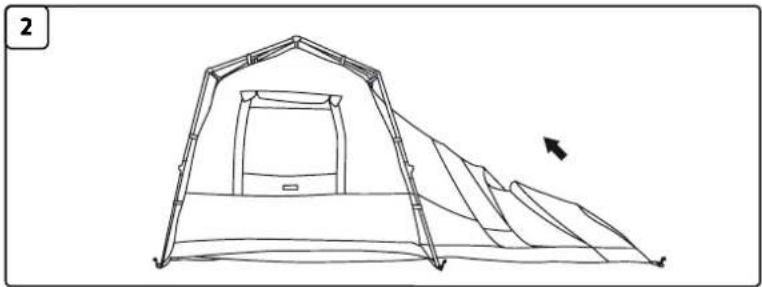
Unpeg the rear room and fold the corners up and clip into the buckles near the upper knuckles.
-
Go inside the tent, grab the handle in the centre of the roof and pull down, hold your other hand up to 'catch' one of the roof poles as the frame 'pops' down.
-
Lower the centre of the tent to the ground and step back outside the tent.
-
Press the button on the lower knuckles to release allowing the legs to fold.
-
Unpeg the tent corners and fold the corner up towards the centre of the tent, thread the webbing loop over the folded knuckle to hold the leg in the folded position.
-
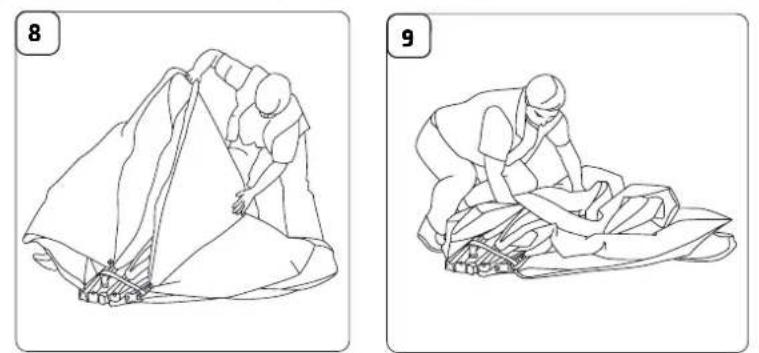
Wrap the webbing strap around the pole bundle to hold it together.
-
Organise the floor folds into neat triangles, spend some time getting these neat and flat because it makes rolling the tent much easier.
-
Fold all the triangle floor panels to one side of the pole bundle and roll the tent around the poles. Secure the rolled tent with the strap.
-
The awning poles and pegs should go into the bag first followed by the tent then the fly on top.
natural_image
Line drawing of a tent structure with a sloped roof and triangular base, no text or symbols present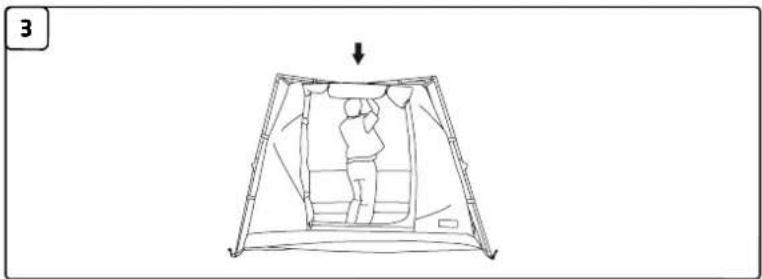
natural_image
Line drawing of a person inside a tent-like structure with stairs, no text or symbols present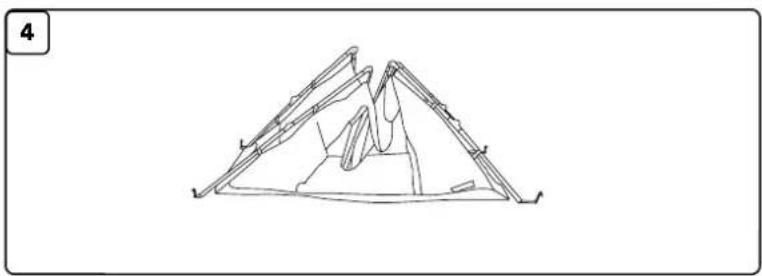
natural_image
Line drawing of a triangular structure with internal components, no text or symbols present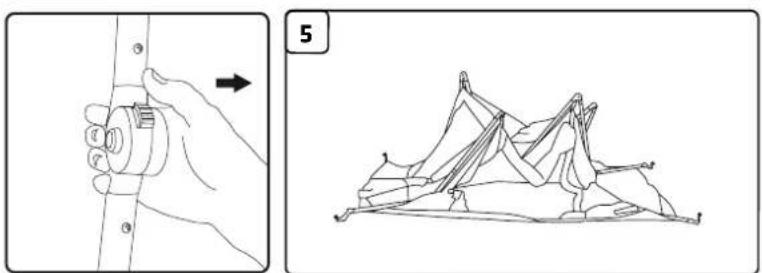
natural_image
Illustration showing a hand holding a camera and a 3D topographic sketch of mountain peaks (no text or symbols)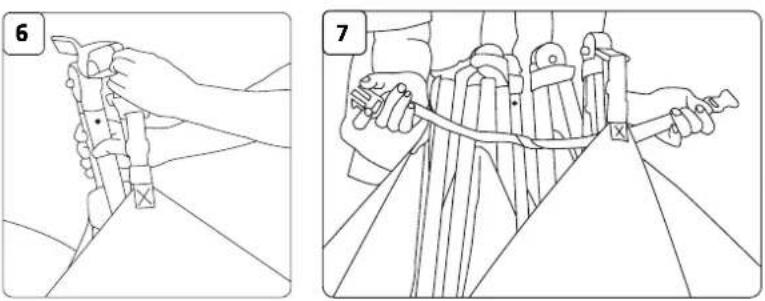
natural_image
Two-step line drawings showing hand positioning and cable installation (no text or symbols)