
IDS-3121W - Monitor Advantech - Free user manual and instructions
Find the device manual for free IDS-3121W Advantech in PDF.


| Product Type | Industrial Open Frame Monitor |
| Display Size | 21.5" |
| Resolution | 1920 x 1080 (Full HD) |
| Brightness | 250 cd/m² |
| Contrast Ratio | 3000:1 |
| Viewing Angle | 178° / 178° (H/V) |
| Response Time | 25 ms |
| Backlight Life | 30,000 hours |
| Touchscreen Type | 5-wire resistive |
| Touch Surface Hardness | 3H |
| Touch Durability | 10 million touches |
| Touch Transparency | 80 ± 3% |
| Operating Temperature | 0 ~ 45 °C |
| Storage Temperature | -20 ~ 60 °C |
| Humidity | 90% @ 40 °C, non-condensing |
| Power Input | 12 VDC ±5% (barrel connector 5.5 x 2.5 mm) |
| Power Consumption | 16.95 W |
| I/O Ports | 1x VGA, 1x DVI-D, 1x USB (touch), 1x HDMI (optional), 1x 12 VDC jack |
| Mounting Options | Rear mount, VESA 75 x 75 mm, 100 x 100 mm |
| Warranty | 2 years |
| Cleaning Instructions | Use a damp cloth. Do not use liquid or spray detergents. |
| Certifications | CE, FCC Class A |
Frequently Asked Questions - IDS-3121W Advantech
User questions about IDS-3121W Advantech
0 question about this device. Answer the ones you know or ask your own.
Ask a new question about this device
Download the instructions for your Monitor in PDF format for free! Find your manual IDS-3121W - Advantech and take your electronic device back in hand. On this page are published all the documents necessary for the use of your device. IDS-3121W by Advantech.
USER MANUAL IDS-3121W Advantech
natural_image
Illustration of four electronic circuit boards with white outlines on a purple background (no text or symbols)IDS-3121W Series
21.5" Industrial Open Frame Monitor
Copyright
The documentation and the software included with this product are copyrighted 2017 by Advantech Co., Ltd. All rights are reserved. Advantech Co., Ltd. reserves the right to improve the products described in this manual at any time without notice. No part of this manual may be reproduced, copied, translated, or transmitted in any form, or by any means, without the prior written permission of Advantech Co., Ltd. The information provided in this manual is intended to be accurate and reliable. However, Advantech Co., Ltd. assumes no responsibility for its use, nor for any infringements of the rights of third parties that may result from its use.
Acknowledgements
Intel and Pentium are trademarks of Intel Corporation.
Microsoft Windows and MS-DOS are registered trademarks of Microsoft Corp.
All other product names or trademarks are properties of their respective owners.
Product Warranty (2 years)
Advantech warrants the original purchaser that all of its products will be free from defects in materials and workmanship for two years from the date of purchase.
This warranty does not apply to any products that have been repaired or altered by persons other than repair personnel authorized by Advantech, or products that have been subject to misuse, abuse, accident, or improper installation. Under the terms of this warranty, Advantech assumes no liability for the consequence of such events.
Because of Advantech's high quality-control standards and rigorous testing, most customers never need to use our repair service. If an Advantech product is defective, it will be repaired or replaced free of charge during the warranty period. For out-of-warranty repairs, customers will be billed according to the cost of the replacement materials, service time, and freight. Please consult your dealer for more details.
If you suspect that your product is defective, follow the steps outlined below.
- Collect all the information about the problem encountered. (For example, CPU speed, Advantech products used, other hardware and software used, etc.) Note anything abnormal and list any onscreen messages displayed when the problem occurs.
- Call your dealer and describe the problem. Please have your manual, product, and all relevant information readily available.
- If your product is diagnosed as defective, obtain a return merchandise authorization (RMA) number from your dealer. This allows us to process your return more quickly.
- Carefully pack the defective product, a completed Repair and Replacement Order Card, and a proof of purchase date (such as a photocopy of your sales receipt) in a shippable container. Products returned without a proof of purchase date are not eligible for warranty service.
- Write the RMA number clearly on the outside of the package and ship it prepaid to your dealer.
Part Number: 2006S31211 Edition 2
Printed in Taiwan March 2017
Declaration of Conformity
CE
This product has passed the CE test for environmental specifications. Test conditions for passing included the equipment being operated within an industrial enclosure. In order to protect the product from damage due to electrostatic discharge (ESD) or electromagnetic interference (EMI) leakage, we strongly recommend the use of CE-compliant industrial enclosure products.
FCC Class A
This equipment has been tested and found to comply with the limits for a Class A digital device, pursuant to part 15 of the FCC Rules. These limits are designed to provide reasonable protection against harmful interference when the equipment is operated in a commercial environment. This equipment generates, uses, and can radiate radio frequency energy and, if not installed and used in accordance with the instruction manual, may cause harmful interference to radio communications. Operation of this equipment in a residential area is likely to cause harmful interference. In such cases, users are required to correct the interference at their own expense.
Technical Support and Assistance
- Visit the Advantech website at http://support.advantech.com to obtain the latest product information.
- Contact your distributor, sales representative, or Advantech's customer service center for technical support or additional assistance. Please have the following information ready before calling:
– Product name and serial number
– Description of your peripheral attachments
– Description of your software (operating system, version, application software, etc.)
– Comprehensive description of the problem
– The exact wording of any error messages
Warnings, Cautions, and Notes
Warning!Warnings indicate conditions that if not observed can result in personal injury!

Caution! Cautions are included to prevent hardware damage or data losses.

New batteries are at risk of exploding if incorrectly installed. Do not attempt to recharge, force open, or heat the battery. Replace the battery only with the same or equivalent type recommended by the manufacturer. Discard used batteries according to the manufacturer's instructions.
Note! Notes provide additional optional information.

Document Feedback
To assist us in improving this manual, we welcome all comments and constructive criticism. Please send all feedback in writing to support@advantech.com
Safety Instructions
- Read these safety instructions carefully.
- Retain this user manual for future reference.
- Disconnect this equipment from all AC outlets before cleaning. Use a damp cloth to clean the equipment. Do not use liquid or spray detergents.
-
For plugable equipment, the power outlet socket should be located near the equipment and easily accessible.
-
Protect the equipment from humidity.
-
Place this equipment on a reliable surface during installation. Dropping or letting the equipment fall may cause damage.
-
The openings of the enclosure are for air convection. Prevent the equipment from overheating. Do not cover the openings.
-
Ensure that the voltage is correct before connecting the equipment to a power outlet.
-
Position the power cord away from high-traffic areas. Do not place anything over the power cord.
-
All cautions and warnings on the equipment should be noted.
-
If idle for a long duration, disconnect the equipment from the power source to avoid damage from transient overvoltage.
-
Never pour liquid into an opening. This may cause fire or electrical shock.
-
Never open the equipment. For safety reasons, the equipment should only be opened by qualified service personnel.
-
If one of the following occurs, have the equipment checked by service personnel:
■ The power cord or plug is damaged.
■ Liquid has penetrated into the equipment.
■ The equipment has been exposed to moisture.
The equipment is malfunctioning or does not function according to the user manual.
■ The equipment has been dropped or damaged.
■ The equipment shows obvious signs of breakage.
-
Do not store this equipment in an environment where the temperature fluctuates below -20 °C (-4 °F) or above 60 °C (140 °F) because this could damage the equipment. The equipment should be stored in a controlled environment.
-
The sound pressure level at the operator's position does not exceed 70 dB (A) in accordance with IEC 704-1:1982.
DISCLAIMER: These instructions are provided according to IEC 704-1. Advantech disclaims all responsibility for the accuracy of any statements contained herein.
Caution!
Information regarding the adapter output rating (12 VDC, 5 A/18 W min) is provided in the user manual to assist with adaptor selection if a power adapter is not shipped with the unit.

Contents
Chapter 1 Overview......1
1.1 Introduction 2
1.2 Features 2
1.3 Applications.... 2
1.4 Product Photos.... 2
1.5 Naming Rule 3
Chapter 2 System Setup....5
2.1 Specifications 6
2.2 Rear Mount Assembly....7
2.3 Packing List....7
Chapter 3 Touchscreen....9
3.1 OSD Functions.... 10
3.2 OSD Menu Details 10
3.2.1 Luminance 10
3.2.2 Image Setup.... 12
3.2.3 Color Temperature....13
3.2.4 OSD Setup.... 14
3.2.5 Extra.... 16
3.3 Touch Drivers.... 19
Appendix A Troubleshooting 21
A.1 Introduction 22
A.2 Troubleshooting 22
Chapter 1
Overview
Introduction
Features
Applications
Product Photos
Naming Rule
1.1 Introduction
Advantech's IDS-3121W series is an innovative industrial-grade open frame monitor, designed for quick and easy integration with Advantech's embedded box computers, such as the ARK series products.
1.2 Features
21.5" Full HD panel with LED backlight, offering 20 \~ 30% power savings
■ 0 \~ 45 °C operating temperature
■ Reliable 5-wire touch sensor
All new mechanical design with an integrated bracket for easy installation
■ Supports diverse mount options, including rear or VESA mounting (75 x 75 mm, 100 x 100 mm)
1.3 Applications
Application scenarios - Self-service applications
Gaming/casino
■ Kiosk/POI machine
- Ticketing machine
ATM
1.4 Product Photos
Front View
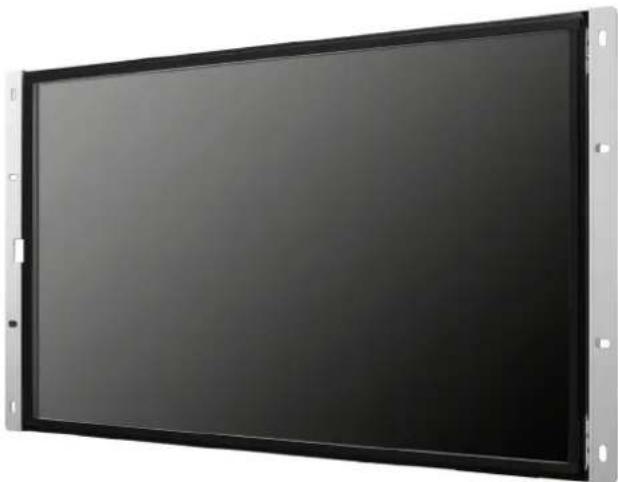
natural_image
Front view of a black rectangular electronic device with metallic frame and mounting brackets (no visible text or symbols)1.5 Naming Rule
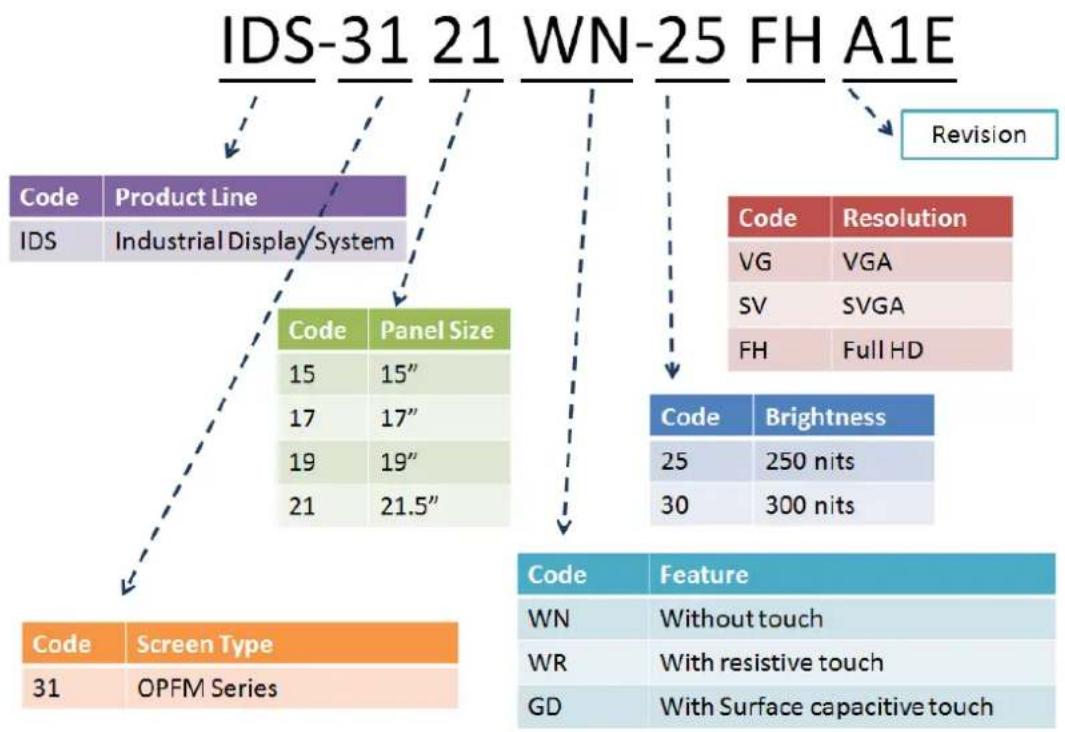
flowchart
graph TD
    A["IDS-31"] --> B["Code"]
    A --> C["Product Line"]
    A --> D["Industrial Display System"]
    E["21"] --> F["Code"]
    E --> G["Panel Size"]
    E --> H["15"]
    E --> I["17"]
    E --> J["19"]
    E --> K["21"]
    E --> L["15""]
    E --> M["17""]
    E --> N["19""]
    E --> O["21.5""]
    P["WN-25"] --> Q["Revision"]
    R["FH"] --> Q
    S["A1E"] --> Q
    T["Code"] --> U["Resolution"]
    U --> V["VG"]
    U --> W["VGA"]
    U --> X["SV"]
    U --> Y["SVGA"]
    U --> Z["FH"]
    U --> AA["Full HD"]
    AB["Code"] --> AC["Brightness"]
    AC --> AD["25"]
    AC --> AE["250 nits"]
    AC --> AF["30"]
    AC --> AG["300 nits"]
    AH["Code"] --> AI["Feature"]
    AI --> AJ["WN"]
    AI --> AK["WR"]
    AI --> AL["GD"]
    AJ --> AM["Without touch"]
    AK --> AN["With resistive touch"]
    AL --> AO["With Surface capacitive touch"]
Chapter 2
System Setup
Specifications
Dimensions
Rear Mount Assembly
Cable Clamp
Packing List
2.1 Specifications
Note! The IDS-3121W series offers the following features.

Unless otherwise indicated, all the specifications listed below are subject to change without prior notification.
| Model IDS-3121W | |||
| Display | Size | 21.5" | LED panel |
| Resolution 1920 x 1080 (Full HD) | |||
| Viewing Angle 178°/178° (H/V) | |||
| Brightness | 250 (cd/m2) | ||
| Color Support 16.7 M colors | |||
| Contrast Ratio 3000:1 | |||
| Response Time 25 [msec] | |||
| Backlight Life 30,000 hrs | |||
| Touch | Touchscreen Type | 5-wire resistive | |
| Surface Hardness | 3H | ||
| Durability | 10 million touches | ||
| Transparency | 80 ± 3% | ||
| Environment | Operating Temperature | 0 ~ 45 °C | |
| Storage Temperature | -20 ~ 60 °C | ||
| Humidity | 90% @ 40 °C, non-condensing | ||
| System | I/O | 1 x VGA, 1 x DVI-D, 1 x 12 VDC jack, 1 x USB, 1 x HDMI (optional)(USB port is reserved for enabling touch operation) | |
| OSD | Keys: Power On/Off, Menu/Enter, Left/Up, Right/Down, Exit/Auto, SourceMenu Functions: Brightness, Contrast, Screen Settings, Color Temperature, OSD Language, Reset, Auto Adjust | ||
| Power Input | 12VDC ± 5% with barrel connector (5.5 x 2.5 mm) | ||
| Power Consumption | 16.95 W | ||
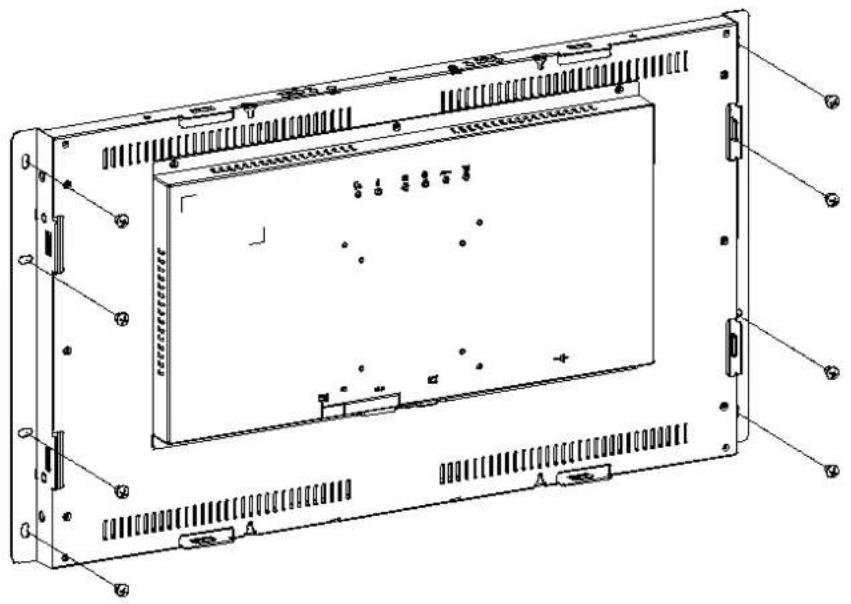
2.2 Rear Mount Assembly
Attach the mount plate to the rear of the IDS-3121W panel using the M5 screws provided. See the image below for reference.
natural_image
Technical line drawing of a computer monitor chassis with visible ports and connectors (no text or labels)Note! To protect the electrical circuits, cover the edge of the touchscreen with insulation tape (e.g., Kapton), taking care not to cover the active display area.
2.3 Packing List
■ 1 x VGA cable 15P (M), 1.8 meter
■ 1 x USB-A(M)/USB-A (M), 1.8 meter
1 x Cable clamp
■ 1 x Cable clamp screw
■ 1 x 60 W 12 V DC power adapter (upon request)
■ 1 x Power cord (upon request)
■ 1 x DVI cable, 2.0 meter (upon request)
■ 1 x RS-232 9P/9P, M/F cable, 1.8 meter (upon request)
Note! The accessory cables listed above may differ according to SKU.

Chapter 3
Touchscreen
OSD Functions
■ Touch Drivers
3.1 OSD Functions
IDS-3121W is equipped with 1920 x 1080 display resolution and the following OSD features:
| Buttons | Description |
| Power Turn the monitor power ON or OFF | |
| Menu | Activate the OSD menu |
| Select | |
| Auto/Exit | Automatically adjust the clock, phase |
| H-position and V-position | |
| Value Up/Down | Move the selector to the previous option |
| Reduce the value of the selected option | |
| LED Function | |
| DPMS ON Green | |
| DPMS STANDBY Orange | |
| DPMS OFF Red | |
3.2 OSD Menu Details
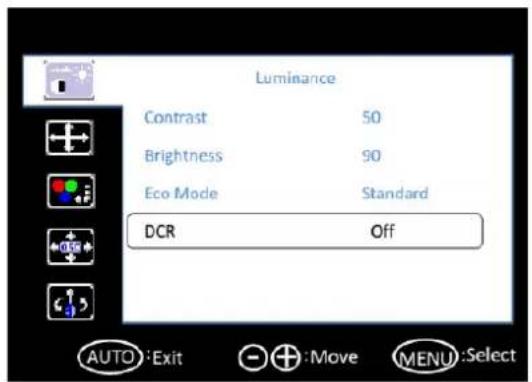
3.2.1 Luminance
Contrast
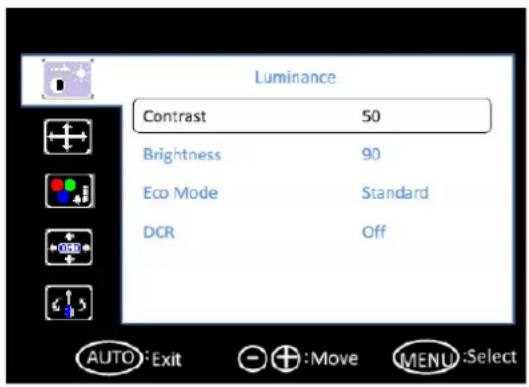
text_image
Luminance Contrast 50 Brightness 90 Eco Mode Standard DCR Off AUTO:Exit + :Move MENU:Select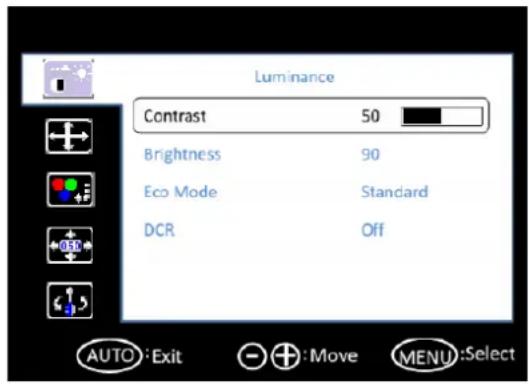
text_image
Luminance Contrast 50 Brightness 90 Eco Mode Standard DCR Off AUTO: Exit +: Move MENU: SelectBrightness

text_image
Luminance Contrast 50 Brightness 90 Eco Mode Standard DCR Off AUTO : Exit + : Move MENU : Select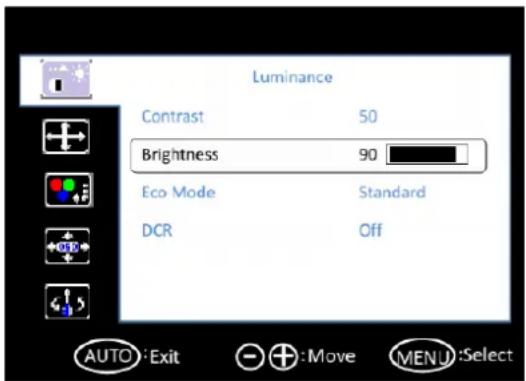
text_image
Luminance Contrast 50 Brightness 90 Eco Mode Standard DCR Off AUTO:Exit +:Move MENU:SelectEco Mode
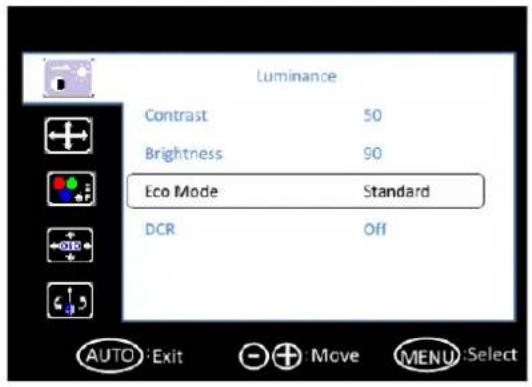
text_image
Luminance Contrast 50 Brightness 90 Eco Mode Standard DCR Off AUTO:Exit Move MENU:Select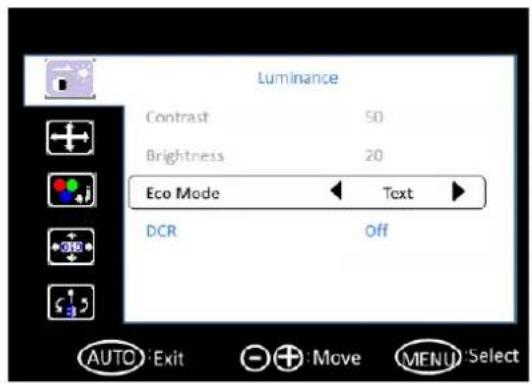
text_image
Luminance Contrast 50 Brightness 20 Eco Mode Text DCR Off AUTO Exit Move MENU Select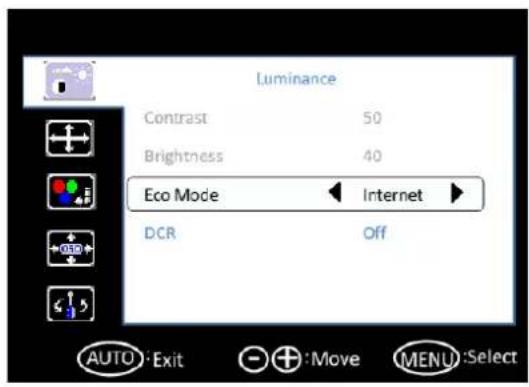
text_image
Luminance Contrast 50 Brightness 40 Eco Mode Internet DCR Off AUTO: Exit +: Move MENU: Select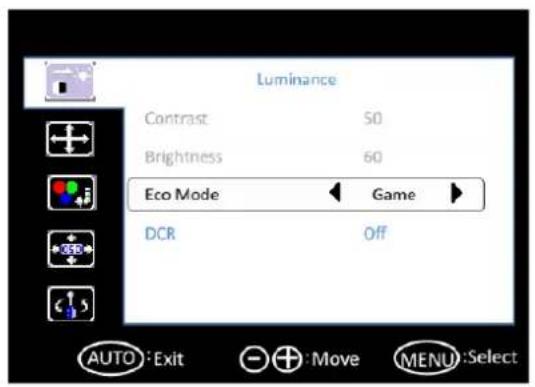
text_image
Luminance Contrast S0 Brightness 60 Eco Mode Game DCR Off AUTO :Exit Move MENU :Select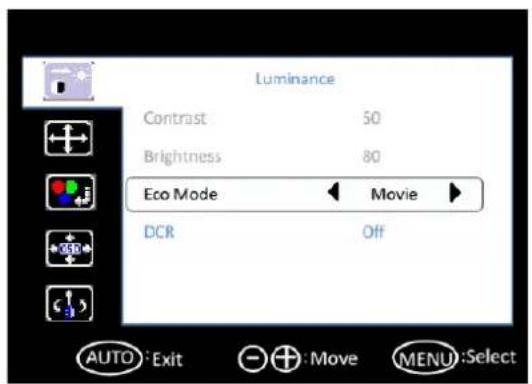
text_image
Luminance Contrast 50 Brightness 80 Eco Mode Movie DCR Off AUTO: Exit Move MENU: Select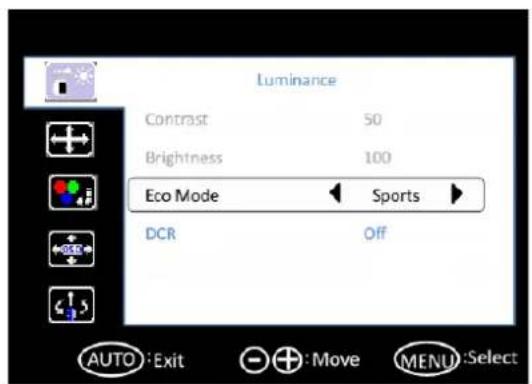
text_image
Luminance Contrast 50 Brightness 100 Eco Mode Sports DCR Off AUTO: Exit +: Move MENU: SelectDCR
text_image
Luminance Contrast 50 Brightness 90 Eco Mode Standard DCR Off AUTO:Exit +:Move MENU:Select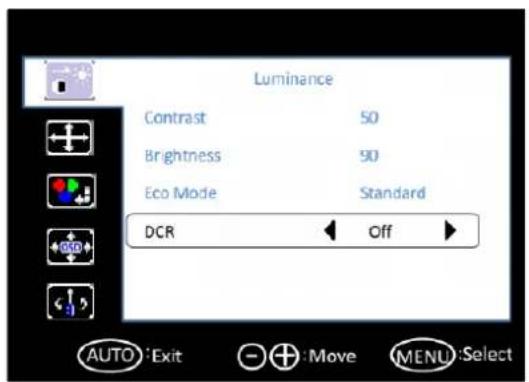
text_image
Luminance Contrast 50 Brightness 90 Eco Mode Standard DCR Off AUTO Exit Move MENU Select3.2.2 Image Setup
Clock
text_image
Image Setup Clock 50 Phase 14 H.Position 50 V.Position 50 Image Ratio Wide AUTO: Exit Move MENU: Select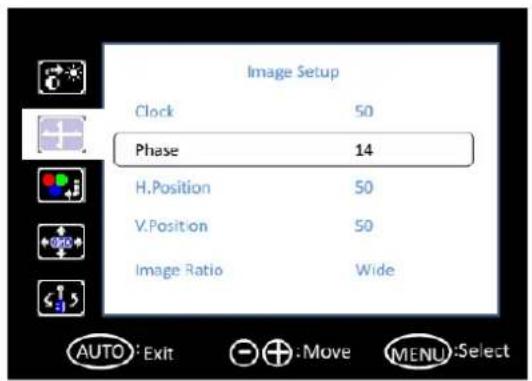
text_image
Image Setup Clock 50 Phase 14 H.Position 50 V.Position 50 Image Ratio Wide AUTO: Exit + : Move MENU: SelectPhase
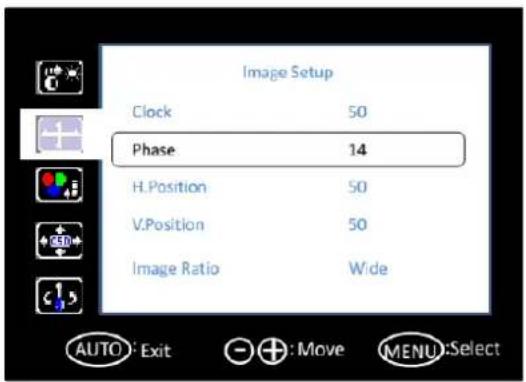
text_image
Image Setup Clock 50 Phase 14 H. Position 50 V. Position 50 Image Ratio Wide AUTO: Exit + : Move MENU:Select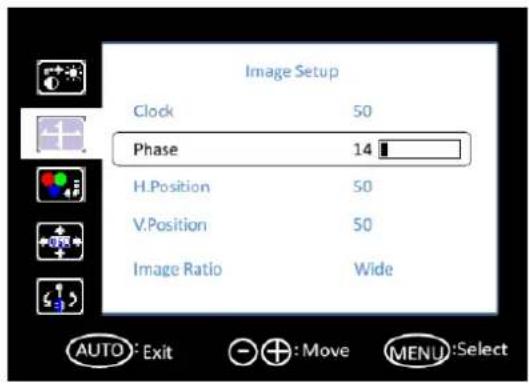
text_image
Image Setup Clock 50 Phase 14 H.Position 50 V.Position 50 Image Ratio Wide AUTO: Exit + : Move MENU:SelectH. Position
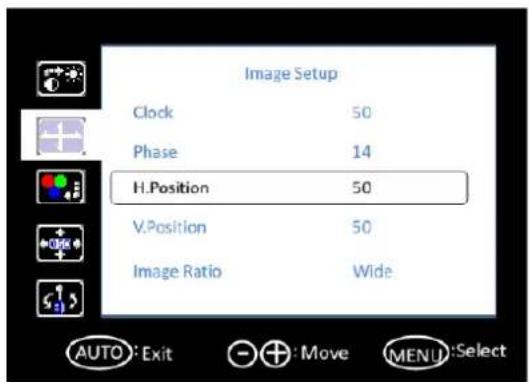
text_image
Image Setup Clock 50 Phase 14 H.Position 50 V.Position 50 Image Ratio Wide AUTO: Exit + : Move MENU:Select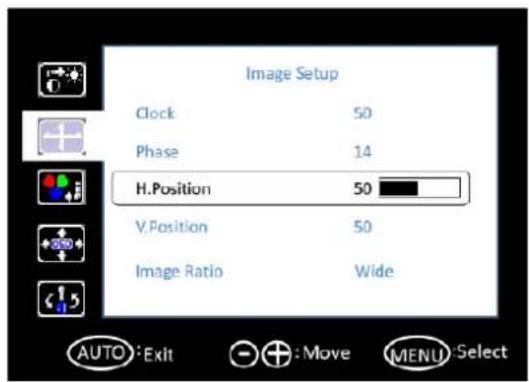
text_image
Image Setup Clock 50 Phase 14 H.Position 50 V.Position 50 Image Ratio Wide AUTO:Exit + :Move MENU:SelectV. Position
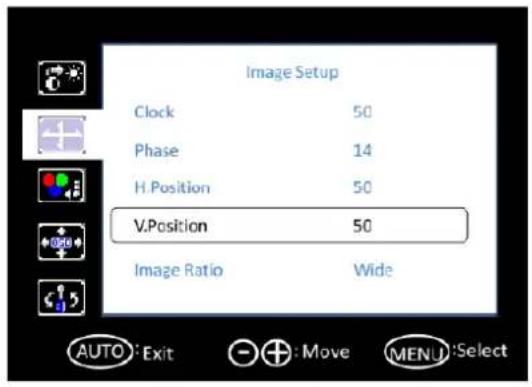
text_image
Image Setup Clock 50 Phase 14 H. Position 50 V.Position 50 Image Ratio Wide AUTO: Exit Move MENU: Select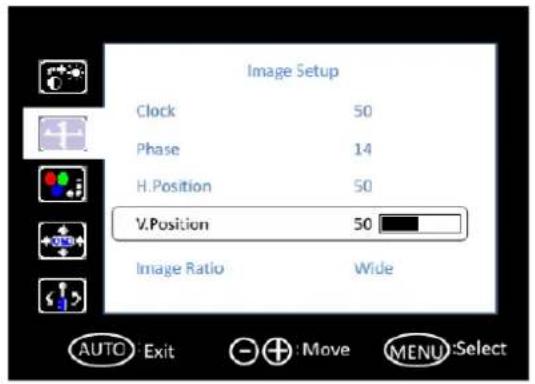
text_image
Image Setup Clock 50 Phase 14 H. Position 50 V.Position 50 Image Ratio Wide AUTO Exit +Move MENU:SelectImage Ratio
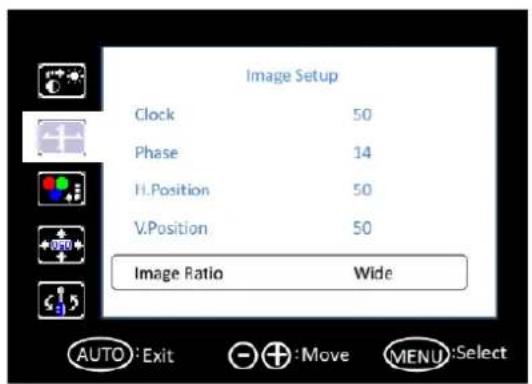
text_image
Image Setup Clock 50 Phase 14 H.Position 50 V.Position 50 Image Ratio Wide AUTO:Exit + :Move MENU:Select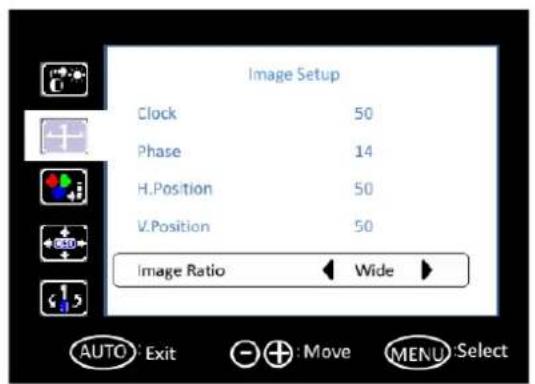
text_image
Image Setup Clock 50 Phase 14 H.Position 50 V.Position 50 Image Ratio Wide AUTO Exit Move MENU Select
text_image
Image Setup Clock 50 Phase 14 H.Position 50 V.Position 50 Image Ratio 4:3 AUTO: Exit + : Move MENU: Select3.2.3 Color Temperature
Color Temperature
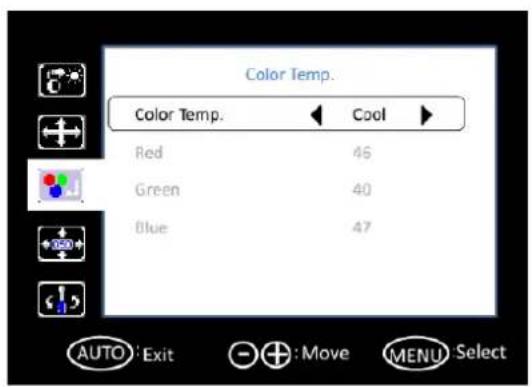
text_image
Color Temp. Color Temp. Cool Red 46 Green 40 Blue 47 AUTO: Exit + : Move MENU: Select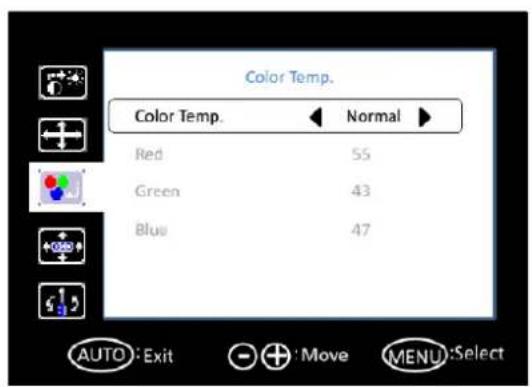
text_image
Color Temp. Color Temp. ← Normal ► Red 55 Green 43 Blue 47 AUTO: Exit Move MENU: Select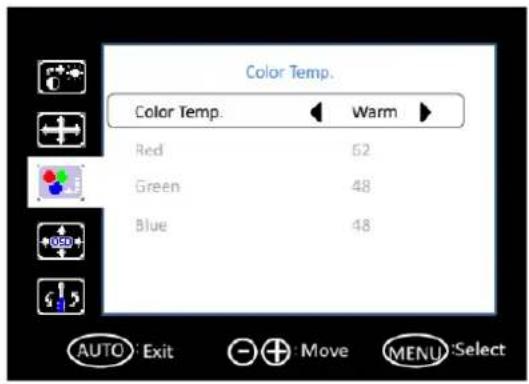
text_image
Color Temp. Color Temp. ◄ Warm ► Red 52 Green 48 Blue 48 AUTO Exit + Move MENU Select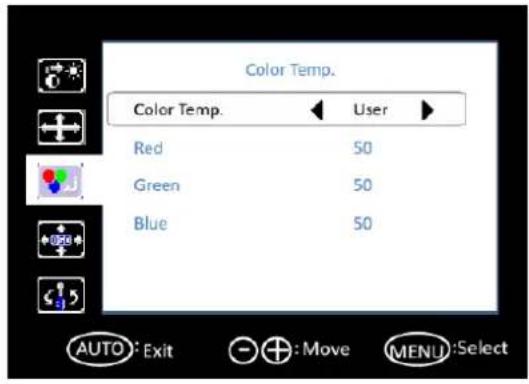
text_image
Color Temp. Color Temp. User Red 50 Green 50 Blue 50 AUTO: Exit +: Move MENU: Select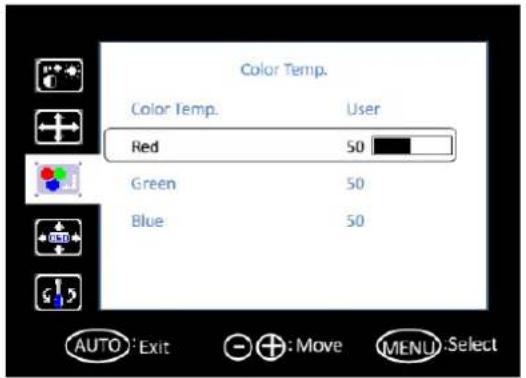
text_image
Color Temp. Color Temp. User Red 50 Green 50 Blue 50 AUTO: Exit Move MENU: Select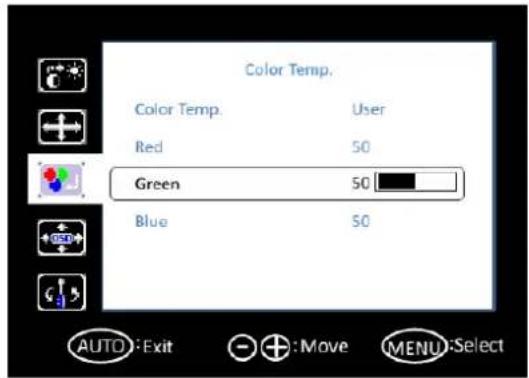
text_image
Color Temp. Color Temp. User Red 50 Green 50 Blue 50 AUTO:Exit + :Move MENU:Select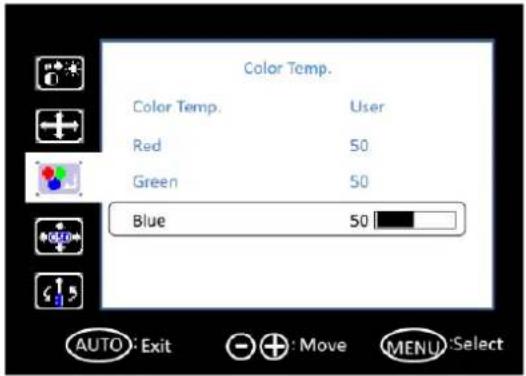
text_image
Color Temp. Color Temp. User Red 50 Green 50 Blue 50 AUTO: Exit +: Move MENU: Select3.2.4 OSD Setup
H. Position
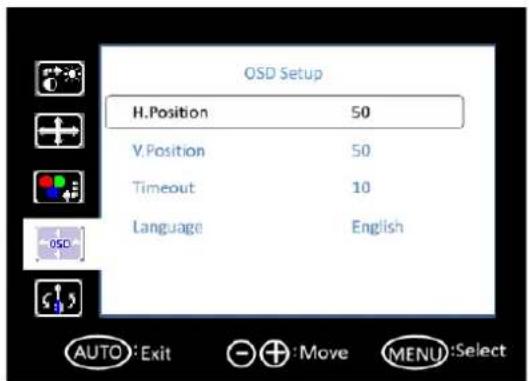
text_image
OSD Setup H.Position 50 V.Position 50 Timeout 10 Language English AUTO: Exit + : Move MENU: Select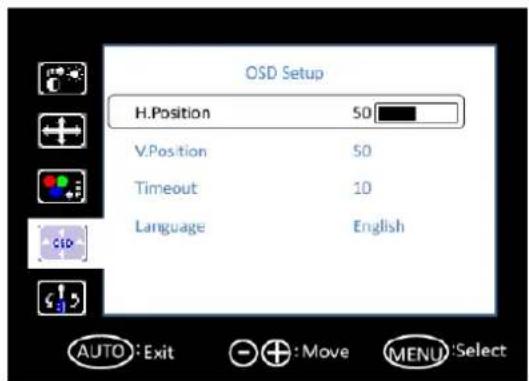
text_image
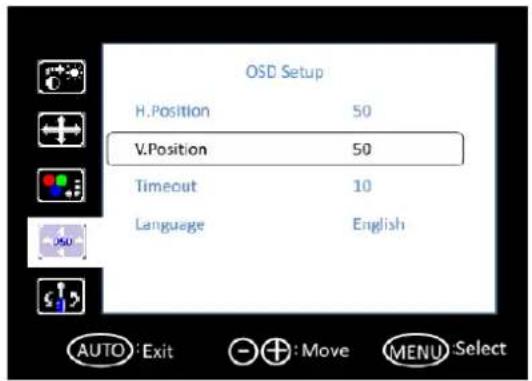
OSD Setup H.Position 50 V.Position 50 Timeout 10 Language English AUTO: Exit Move MENU: SelectV. Position
text_image
OSD Setup H.Position 50 V.Position 50 Timeout 10 Language English AUTO :Exit + :Move MENU :Select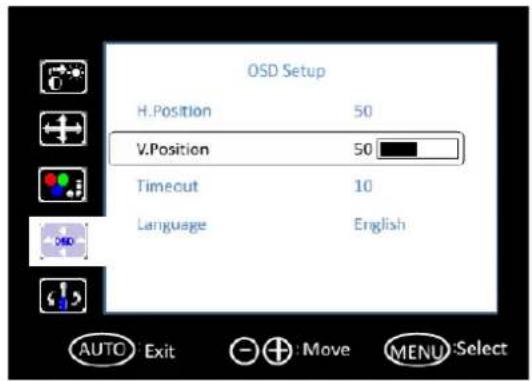
text_image
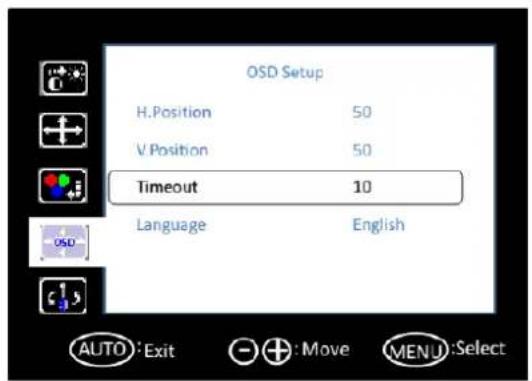
OSD Setup H.Position 50 V.Position 50 Timeout 10 Language English AUTO Exit + :Move MENU SelectTimeout
text_image
OSD Setup H.Position 50 V.Position 50 Timeout 10 Language English AUTO: Exit +: Move MENU: Select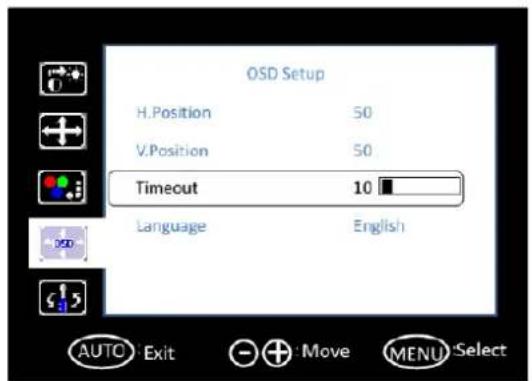
text_image
OSD Setup H.Position 50 V.Position 50 Timeout 10 Language English AUTO Exit Move MENU SelectLanguage

text_image
Color Temp. Color Temp. User Red 50 Green 50 Blue 50 AUTO: Exit + : Move MENU: Select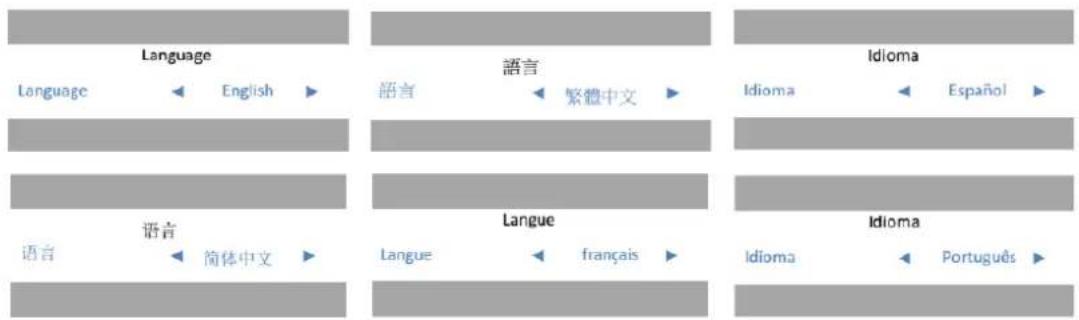
text_image
Language Language ← English → 语言 → 語言 → 繁體中文 → Idioma Idioma ← Español → 语言 → 简体中文 → Langue ← français → Idioma ← Português →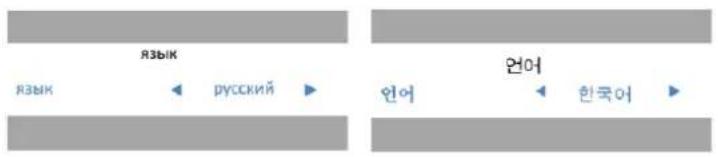
| Luminance | Contrast | 0100 | Adjust contrast 50 | |
| Brightness | 0100 | Adjust brightness (backlight) 90 | ||
| ECO Mode | StandardSportMovieGameInternetText | Standard | ||
| DCR | OnOff | Set dynamic contrast ratio Off | ||
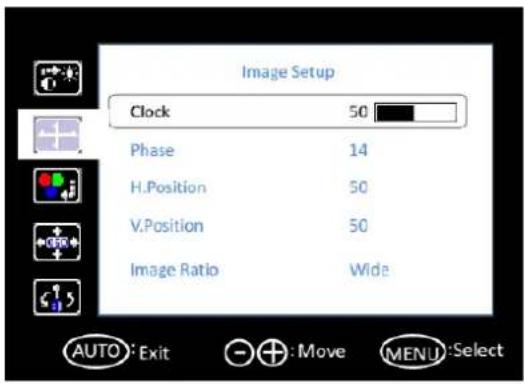
| Image setup | Clock | 0100 | Adjust clock latency of output capture window | Depends on the input resolution |
| Phase | 0100 | Adjust clock phase of output capture window | Depends on the input resolution | |
| H. Position | 0100 | Adjust horizontal position of output capture window | 50 | |
| V. Position | 0100 | Adjust vertical position of output capture window | 50 | |
| Image Ratio | Wide | Adjust aspect ratio to full screen | Wide | |
| 4:3 | Adjust aspect ratio to 4:3 screen | |||
| Color Temperature | Color Temp. | Warm --> | Adjust color temperature to warm | User |
| Normal --> | Adjust color temperature to normal | |||
| Cool --> | Adjust color temperature to cool | |||
| User --> | Adjust color temperature to user defined | |||
| OSD Setup | H. Position | 0100 | Adjust OSD horizontal position 50 | |
| V. Position | 0100 | Adjust OSD vertical position | 50 | |
| Timeout | 5100 | Set OSD timeout counter | 10 | |
| Language | EnglishSpanishFrenchPortugueseRussian简体中文繁體中文Korean | Set OSD display language English | ||
| Extra | Input Select | D-Sub | Set input source | Depends on the input sourceHDMI |
| DVI | ||||
| DDC/CI | On | Set DDC/CI function on/off On | ||
| Off | ||||
| Reset | Yes | Set user setting reset On | ||
| No | ||||
| Information | Resolution | Display current source information | Depends on the input source | |
| H. Frequency | ||||
| V. Frequency | ||||
3.3 Touch Drivers
The touchscreen driver is available online at the Advantech website. Use the following link to access the driver: http://support.advantech.com/support/default.aspx
Appendix A
Troubleshooting
A.1 Introduction
If the monitor is malfunctioning or does not operate according to the user manual, refer to the following instructions before calling the Advantech service center.
If unable to correct the faults using the instructions provided below, please contact your distributor or the Advantech service center.
A.2 Troubleshooting
The image is displayed incorrectly/the full screen image does not appear
■ Ensure that the screen resolution on the motherboard is correct.
The screen image is not centered
- Adjust the horizontal and vertical position of the OSD or select the "Auto" option for automatic adjustment.
Out of range
If an “Out of Range” message appears onscreen, this indicates that the display output signal is not compatible with the LCD display (for example, the output resolution exceeds the LCD display resolution).
■ Adjust the BIOS settings to match the correct resolution.
No signal
The display is powered on but is not receiving or displaying output signals from the computer. Check all power switches, power cables, and VGA signal cables and ensure that both ends of all cables are properly connected.
Going to sleep
If the system goes to sleep, either the display has been set to power-saving mode or is experiencing a sudden signal disconnection problem. Check the BIOS system settings and/or Windows configuration. Then check both ends of the power cable connected to the computer.
ADVANTECH
Enabling an Intelligent Planet
www.advantech.com
Please verify specifications before quoting. This guide is intended for reference purposes only.
All product specifications are subject to change without notice.
No part of this publication may be reproduced in any form or by any means, such as electronically, by photocopying, recording, or otherwise, without prior written permission from the publisher.
All brand and product names are trademarks or registered trademarks of their respective companies.
© Advantech Co., Ltd. 2017