
Clip Voice - Mp3 player SANDISK - Free user manual and instructions
Find the device manual for free Clip Voice SANDISK in PDF.


| Product Type | Wearable MP3 Player & Voice Recorder |
| Storage Capacity | 16 GB (up to 4,000 songs or 100 hours of voice recordings) |
| Battery Life | Up to 20 hours music playback, 15 hours voice recording |
| Charging Time | Up to 3 hours |
| Display Type | Monochrome LCD |
| Weight | Approximately 30 g (1 oz) |
| Dimensions (approx.) | 3.5 x 1.5 x 0.5 in (89 x 38 x 13 mm) |
| Audio Formats Supported | MP3, WMA, Audible (AA/AAX) |
| Microphone | Built-in on earphones |
| Connectivity | USB 2.0 (charging and data transfer) |
| Water Resistance | Water resistant (not submersible) |
| Safety Features | Hearing safety warnings, battery safety instructions |
| Cleaning Instructions | Clean with a soft, lint-free cloth |
| Included Accessories | Earphones with microphone, USB 2.0 cable, Quick Start Guide |
| Repairability | Battery non-replaceable; no user-serviceable parts |
| Power Source | Internal rechargeable lithium-ion polymer battery |
| Operating System Requirements | Windows XP SP2, Mac OS X 10.3, Linux (mass storage class) |
| Playback Controls | Physical buttons (Power/Select, Play/Pause, Volume, Navigation) |
| Maximum Recording Time per File | 8 hours |
| Equalizer Presets | Multiple genres (e.g., Rock, Pop, Jazz, etc.) |
| Language Support | Multiple languages (selectable in settings) |
| Firmware Update | Via USB from SanDisk support website |
Frequently Asked Questions - Clip Voice SANDISK
User questions about Clip Voice SANDISK
0 question about this device. Answer the ones you know or ask your own.
Ask a new question about this device
Download the instructions for your Mp3 player in PDF format for free! Find your manual Clip Voice - SANDISK and take your electronic device back in hand. On this page are published all the documents necessary for the use of your device. Clip Voice by SANDISK.
USER MANUAL Clip Voice SANDISK
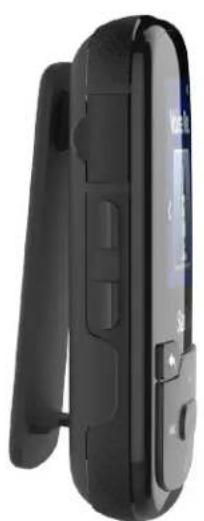
Wearable MP3 Player & Voice Recorder
User Manual
natural_image
Close-up of a black handheld electronic device with a screen and control buttons (no visible text or symbols)

2016

STOP!
IMPORTANT INFORMATION
YOU MUST READ THIS BEFORE
USING THE MP3 PLAYER
- To prevent possible hearing damage, do not listen to high volume levels for long periods.
- Fully understand user manual before use.
- Ensure your player is at low volume levels or power off when not in use.
For more information on safety, go to:
www.sandisk.com/support/clipvoice
CHAPTER 1 .... 5
Safety Tips and Cleaning Instructions....5
Audio Player Safety Instructions 5
CHAPTER 2....7
SanDisk Clip Voice Overview 7
Features 7
Minimum System Requirements....7
Package Contents 7
Clip Voice MP3 Player & Voice Recorder: At-A-Glance 8
Playback Screen....8
Main Menu Options: Six Core Functions....10
Product Capacities....11
Battery....11
Charging....11
Firmware 12
Earphones 12
CHAPTER 3 ...... 13
Basic Operation.... 13
Power/Select Button....13
Power On....13
Power Off....13
Locking the device 13
Unlocking the device ....13
With the device in locked mode, press and hold the Back button for approximately 3 seconds....13
Reset 13
Connecting Player to a Windows or Mac Computer....14
Chapter 4 .... 15
Voice Recording 15
Initiating Voice Recording 15
Playing Saved Voice Recordings ....15
Chapter 5 ...... 16
Music 16
Loading Music....16
Drag and Drop (Windows)....16
Drag and Drop (Mac)....17
Playing Music 17
Options Menu 18
Add Song to GoList 18
Remove Song from GoList....18
Repeat 19
Delete Song 19
Track Info....19
Creating Playlists ....20
Chapter 6 26
Books 26
Loading Audiobooks and Podcasts 26
Drag and Drop (Windows)....26
Drag and Drop (Mac)....26
Playing Audiobooks and Podcasts 27
Chapter 7 28
Sport 28
Stopwatch 28
Recording Laps....29
Chapter 8 30
Settings 30
System Settings ....30
Backlight 30
Brightness 31
Power Saver....31
Sleep 31
Customize....31
Menu Looping....31
Equalizer 31
Replay Gain 32
Language....32
Volume....32
Info 32
Format 32
Restore 33
Music Options....33
Repeat 33
Chapter 10 ...... 34
Learn More, Service, and Warranty Information....34
Getting Technical Support....34
THIRD PARTY INTELLECTUAL PROPERTY NOTICE....34
MANUFACTURER'S LIMITED WARRANTY 35
FCC REGULATION 35
CHAPTER 1
This chapter describes the safety tips and cleaning instructions for the SanDisk Clip Voice Wearable MP3 player & voice recorder.
Safety Tips and Cleaning Instructions
Read the safety instructions carefully before using the player.
- Review this entire manual to ensure proper usage.
- Keep this User Manual for future reference.
- Do not use headphones/earphones while driving, cycling, or operating any motorized vehicle. This may create a traffic hazard and may be illegal in some areas. It can also be dangerous to play your music with headphones/earphones at high volume while walking, or engaged in other activities. You should exercise extreme caution and discontinue use in potentially hazardous situations.
- Avoid using headphones/earphones at high volume. Hearing experts advise against continuous loud and extended music play. Keep the volume at a moderate level, so that you are better able to hear outside sound and are considerate of the people around you.
- The player is water resistant but is not designed to be submerged. Keep the player away from sinks, bathtubs, and other sources were the player could be submerged. Submerging the player can cause electrical shocks.
-
Follow these tips to keep the player working well for a long time:
-
Clean the player with a soft lint-free cloth.
- Do not allow children to use the player unsupervised.
- Never force any connector into the ports of the player or your computer. Make sure your connectors are the identical shape and size before you connect.
- Do not disassemble, crush, short-circuit, or incinerate the internal rechargeable battery as it may cause fire, injury, burns, or other hazards.
Audio Player Safety Instructions
- Your MP3 player is equipped with a variety of features. To help you maximize your listening pleasure, SanDisk would like to advise you that it is important to use the headphones with your MP3 player at a safe hearing level.
- Exposure or repeated exposure for an extended period of time to music and other sounds that are too loud can cause damage to your hearing resulting in temporary or even permanent "noise induced hearing loss".
- Symptoms of hearing loss increase gradually with prolonged exposure at high levels of loudness.
- Initially, you may not even be aware of the loss unless detected with a hearing test.
-
Your hearing may adapt to higher volumes of sound. In order to prevent any harmful impact to your hearing, you must control the sound emanating from your headphones and set the MP3 player's volume to a low setting where you can hear it clearly and comfortably.
-
Studies, including one from NIDCD indicate that sounds of less than 80 decibels, even after long exposure, are unlikely to cause a hearing loss.
- Listen to your MP3 player at such a level that you can still hear conversation
• and other people in your environment without shouting when you attempt to converse. - It can also be dangerous to play your music with headphones/earphones at high volume while walking or engaged in other activities. You should exercise extreme caution and discontinue use in potentially hazardous situations.
- Do not use headphones or earphones while driving, cycling, or operating any motorized vehicle. This may create a traffic hazard and may be illegal in some areas.
Hearing Levels
• To help you understand what may be considered a safe hearing level, the
• following examples are included for your reference:
Examples of Typical Sounds Levels Approx. Sound Level in Decibels (dB)\*
• Refrigerator humming 40
• Normal conversation 60
- City traffic 80
• Motorcycles/lawnmowers 90**
• Rock concerts 110-120**
- Firearms 120-140**
* dB - A decibel (dB) is a unit of relative measurement of the strength sound wave. In decibels (dB), a measured signal level doubles with every additional 3dB.
** These sound decibel levels are considered harmful under extended exposure. The above information is courtesy of the National Institute of Deafness and Other Communication Disorders (NIDCD): www.nidcd.nih.gov/health/hearing/noise.asp
CAUTION:
RISK OF EXPLOSION IF BATTERY IS REPLACED BY AN INCORRECT TYPE. DISPOSE OF USED BATTERIES ACCORDING TO THE INSTRUCTIONS

Correct Disposal of this product. This marking indicated that this product should not be disposed with other household wastes throughout the EU. To prevent possible harm to the environment or human health from uncontrolled waste disposal, recycle it responsibly to promote the sustainable reuse of material resources. To return your used device, please use the return and collections systems or contact the retailer where the product was purchased. They can take this product for environmental safe recycling.

Battery
This product contains Lithium-ion polymer battery. The battery should be replaced only by SanDisk and its authorized service providers. SanDisk and its authorized service providers will ensure the spent battery is recycled properly, since batteries should always be recycled or disposed separately from household waste.
CHAPTER 2
This chapter describes the features and functionality of the SanDisk Clip Voice Wearable MP3 player and voice recorder.
SanDisk Clip Voice Overview
Congratulations on your purchase of a SanDisk Clip Voice!
The SanDisk® Clip Voice MP3 player is a voice recorder that doubles as an MP3 player. With 16GB* capacity, it holds up to 4,000 songs ^2 or 100 hours of voice recordings ^1 . It also delivers up to 20 hours of continuous music or voice playback on a single charge ^3 and it is light and durable so you can take it wherever you go. Whether you're looking to record a lecture or service, play your favorite music, or both, the SanDisk Clip Voice MP3 player is your go-to device.
Features
• Earphones with built-in microphone for voice recording
- Holds up to 4,000 MP3s ^2 or 100 hours of voice recordings ^1
- Up to 20 hours of continuous music and voice playback on a single charge ^3
- Compatible with a range of audio formats ^4
• Enhanced sound quality with deep bass
• Light and durable to go wherever you go
Minimum System Requirements
- Windows® XP SP2 or Mac OS X 10.3 and Linux
• USB 2.0 port (for hi-speed transfers and charging)
Package Contents
The Clip Voice Player is shipped with the following components:
• SanDisk Clip Voice player
• Earphones with built-in microphone
- USB 2.0 Cable
- Quick Start Guide
Clip Voice MP3 Player & Voice Recorder: At-A-Glance

Playback Screen

| 1 | Play/Pause | Displays the music or recording playback status. |
| 2 | Battery Indicator | Displays the battery status. |
| 3 | Album Art | Displays the picture of the Album Art of currently playing content. |
| 4 | Artist name/ song name | Displays the artist name and the song name |
| 5 | Song progress | Displays the progress of the current track |
| 6 | Song no./ all songs | Displays the current track song No./ total No. of song in current location |
Main Menu Options: Six Core Functions

Music – Browse and listen to artists, albums and playlists.
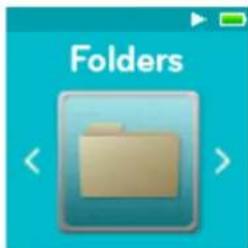
Folders – Browse and listen to content saved in individual folders.

Books – Browse and listen to audiobooks DRM.

Sport – Functioning time saves logs and displays log details.

Settings – View or customize the SanDisk player features.
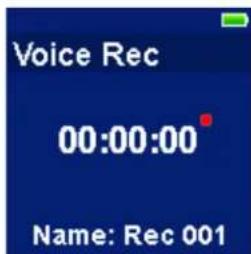
Voice Record – Record hours of lectures or the longest sermon.
Product Capacities
| SanDisk Clip Voice | 16GB |
| Number of songs** (3.5 min) | Up to 4,000 |
Notes:
* 1GB=1,000,000,000 bytes. Actual user storage less.
**Approximations: results will vary based on file size, compression, bit rate, content, host device, pre-loaded files and other factors. See www.SanDisk.com
Battery
The player comes with an internal rechargeable battery that can last up to 20 hours* during typical use. Battery life for voice recording is 15 hours
To use the player for the very first time, you should fully charge the battery. You can charge your SanDisk player through the USB port of your computer, a car adapter (not included), or AC adapter (not included).
*Based on continuous playback at 128 Kbps MP3. Actual life and performance may vary depending upon usage and settings. Battery not replaceable.
Charging
Before using the player, fully charge the device. To charge the battery, follow these steps:
- Connect player to computer (computer must be on).
- A "Charging" icon will appear on the device while it is charging (shown below). Full charge takes up to three hours. When fully charged, battery indicator will be solid green and "Charged" message will appear.

natural_image
Line drawing of a music player with a USB cable and playback controls (no text or symbols)- To stop charging, unplug device.
Quick Tips: The battery CANNOT be overcharged.
- If your computer does not recognize the player, verify that you are using Windows® XP SP2 or Mac OS X 10.3 and Linux (mass storage class only), restart the player, and try again.
NOTE: When battery level reaches 20% device will notify: "Battery running low", at 5% battery will turn off.
Firmware
SanDisk occasionally releases firmware updates, which may include new features and performance enhancements. SanDisk highly recommends updating the MP3 player to the latest firmware. It is highly recommended to update the firmware after the first battery charge.
For the latest firmware information and instructions to update your player, go to http://www.sandisk.com/support/clipvoice.
Earphones
The Clip Voice includes earphones with built-in microphone for voice recording.
CHAPTER 3
This chapter describes basic user operation instructions for the SanDisk Clip Voice.
Basic Operation
Power/Select Button
The Power button is located in the center of the player. It can be used to turn the player on or off, and also to select player options.
Power On
Press and hold the Power button for three seconds to turn on the player. The last played function screen from the Main Menu will appear after the device has been powered on.
Power Off
Press and hold the Power button for three seconds to turn off the player.
Locking the device
Press and hold the Back button for approximately 3 seconds.
Unlocking the device
With the device in locked mode, press and hold the Back button for approximately 3 seconds.
Reset
If the player freezes for any reason, power off the player and then restart it again. After you perform the reset, any adjustments made during the last operation will be lost. Your saved content (e.g. Music Files, Audiobooks, etc.) will not be deleted from the player.
Connecting Player to a Windows or Mac Computer
To connect the player to a Windows computer, follow these steps:
- Connect the large end of the USB cable into an available USB port on the computer.
- Connect the smaller end of the USB cable into the player's dock connector.
- The display screen will show "Charging" (shown below).
- The player will appear in My Computer as "Clip Voice."
Disconnecting the Player from a Windows Computer
Simply disconnect the USB cable from the player after you have finished charging, transferring, or upgrading firmware.
CAUTION: Do not disconnect the player while it is transferring data. Disconnecting the player from the computer during data transfer may damage the device.
Disconnecting the Player from a Mac Computer
Eject the removable disk by dragging the icon to the Trash and then disconnect the USB cable from the computer after you have finished charging, transferring, or upgrading firmware.
CAUTION: Do not disconnect the player while it is transferring data. Disconnecting the player from the computer during data transfer may damage the device.
Chapter 4
This chapter describes how to use your SanDisk Clip Voice for voice recording.
Voice Recording
The SanDisk Clip Voice is ready to record hours of lectures or the longest sermon.
• Maximum recording time is 8 hours
• Voice recording will automatically stop at 8 hours
Initiating Voice Recording
- Use the navigation pad to the Recordings menu
- Press middle key to access the Recordings' sub-menu
- Select Start voice recordings
- Press the back key to stop the recording and click Yes to save the recording
Playing Saved Voice Recordings
- Use the navigation pad to the Recordings menu
- Press middle key to access the Recording' sub-menu
- Click Recordings Library to access the list of saved recordings
- Select the desired recording
Quick Tips: When recording, please make sure to plug in the earphones (included) to the player. The microphone for voice recordings is embedded on the earphones.
Chapter 5
This chapter describes how to load music files from your computer to the SanDisk Clip Voice and play music on the device.
Music

The SanDisk Clip Voice is able to store thousands of songs in various formats and provides multiple listening options that can be customized to suit your individual needs.
Loading Music
You can transfer music from your computer to the player using the drag-and-drop method.
Drag and Drop (Windows)
To drag-and-drop music to the player from a Windows computer, follow these steps:
- Connect the player to your computer using the USB cable.
- Select Open device to view files using Windows Explorer on initial connection or by going to My Computer.
- Double-click on the Clip Voice icon.
- Double-click on the Music folder.
- Drag and drop music files from your computer to the player's Music folder.
Drag and Drop (Mac)
To drag-and-drop music to the player from a Mac computer, follow these steps:
- Connect the player to your computer using the USB cable.
- Double-click on the removable disk icon named Clip Voice that appears on your desktop.
- Double-click on the Music folder.
-
Drag and drop music files from your computer to the player's Music folder.
-
Visit the following link for step-by-step instructions: http://kb.sandisk.com/app/answers/detail/a_id/1141/kw/1141
Quick Tips: Remember to eject the removable disk using the Windows or Mac eject before disconnecting the player.
Playing Music
To play music, follow these steps:
- Select Music from the Main Menu.
- Select from the music content groupings: Shuffle List, Artists, Albums, Songs, sh, and Playlists.
- Shuffle plays all content saved on the device in random order.
- Artists shuffles artists or selects the artist's name to show their songs.
- Albums shuffles songs from all albums or enables scrolling to find desired Albums. Once selected, the album songs will be listed.
- Songs provides a list to select a song title, which are shown in alphabetical order.
- Playlists lists all song titles of content for playlist or GoList groups that have been created.
Quick Tips: Under artists, songs, playlists, and albums pressing "Shuffle List" will shuffle all songs in music library, not just the songs under specific selected category of artists, songs, playlists, or albums. In order to shuffle a single album, select one specific album title and press select, then select Shuffle List.
-
Highlight and select the desired track or file to play from the music content groupings.
-
Press the Forward button to skip to the next song or press-and-hold to fast forward.
-
Press the Previous button once to go back to the beginning of the current song or press Previous button twice to go back to the previous song. Press-and-hold the Previous button to rewind.
-
If the display screen does not show current song, then press the Back button to return to main menu.
-
The following options are available during music playback by pressing the Options button to access the Options menu.
-
Add Song to GoList
- Remove Song from GoList
- Repeat
- Shuffle
- Music EQ
- Delete Song
- Track Info
Options Menu
When listening to music, the player offers seven options for personalizing your listening experience (Add Song to GoList, Remove Song from GoList, Repeat, Shuffle, Music EQ, Delete Song, Track Info).
To select music options, follow these steps:
- Press the Options button while playing a song. The Options Menu will be displayed.
- Customize the player with the following options.
Add Song to GoList
The GoList is an on-the-go optional playlist that enables you to quickly and easily add and remove songs to one of three available GoLists. ne holds up to 100 songs.
This option is only available when the current song isn't already added to the GoList
- Select Add Song to GoList, then select desired GoList.
- Press the Back button to return to the playback screen.
Remove Song from GoList
This option is only available when the current song is already added to the GoList.
- Select Remove Song from GoList.
- Press the Back button to return to the playback screen.
Quick Tips: Clearing the music GoList does not delete songs from the device. It merely clears the content from the playlist that was saved locally to the device.
Repeat
This option repeats the song.
- Select Repeat.
-
Press Select to toggle and choose a repeat mode:
-
Off: No repeat of tracks
• Song: Repeat the current track
• All: Repeat all selected tracks at the current menu location -
Press the Back button to return to the playback screen.
Shuffle
This option plays songs in random order.
- Select Shuffle.
- Press the Select button to toggle between Shuffle On and Shuffle Off (to play songs in random order, set Shuffle to ON).
- Press the Back button to return to the playback screen.
Music EQ
This option enhances the sound quality of certain music types to better match the genre being played.
- Select Music EQ.
- Press the Up or Down button to scroll through the music types and select a desired option that best matches the music being played.
Delete Song
This option deletes a song from the player.
- Select Delete Song.
- Select Yes to confirm.
Track Info
This option displays information about the music being played.
- Select Track Info.
- Press the Up or Down button to scroll through the track information.
- Press the Back button to return to the playback screen.
Creating Playlists
How do I create a playlist on the Clip Voice player?
The Clip Voice player only supports M3U playlists and they must be stored in the same directory as the files in the playlist. The process below gives instructions for creating an M3U playlist using Windows Media Player for the use on the player.
Step 1 - Move all the files you want in the play list into a folder on the computer

Step 2 - Drag the folder into Windows Media Player
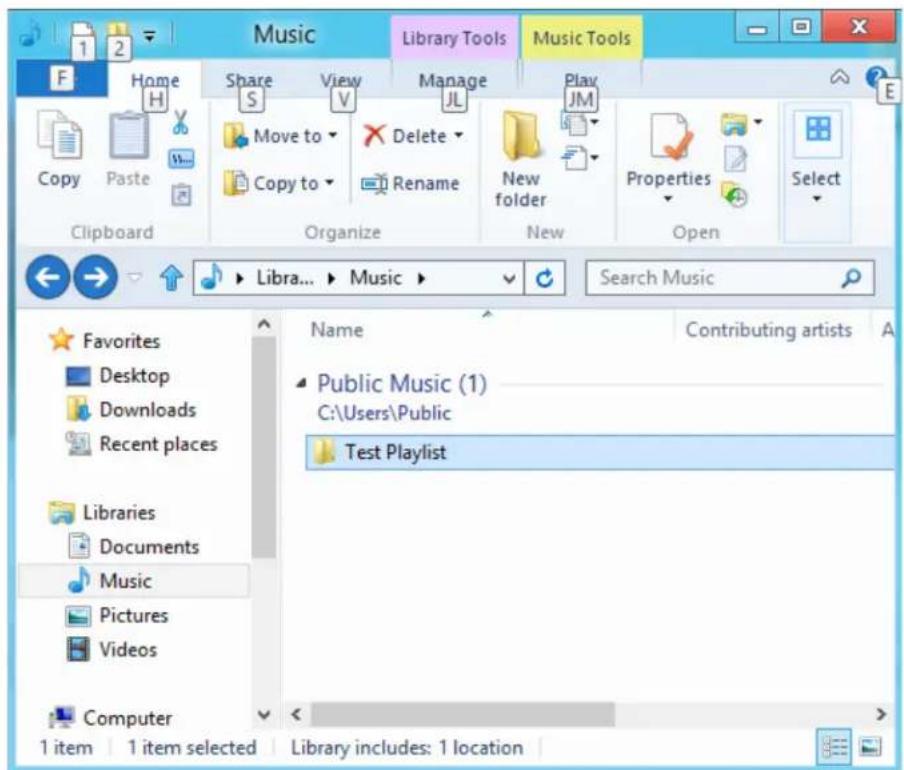

Step 3 - Click the drop down menu and select "Save list as"

Step 4 - Brows to the same directory where the files you want in the playlist are saved, choose M3U playlist as the file type, name the playlist and click save

You should now see the M3U playlist saved alongside the songs you want in the play list

Step 5 - Drag the entire folder containing the songs and the M3U playlist to the Music folder of the Clip Voice

The Playlist will now be available under the Playlist option in the Music menu.
Adding album art to a track using Windows Media Player
Windows Media Player will typically import any media files left in the documents folder and any continuing sub folders. If the files are not importing or they are stored in a separate location then they must be manually added to the library.
METHOD 1 - Manually add Album art using Windows Media Player 12
- Run Windows Media Player.
- Click on the Music tab.

- Drag the picture you want to add to the Album Art icon.
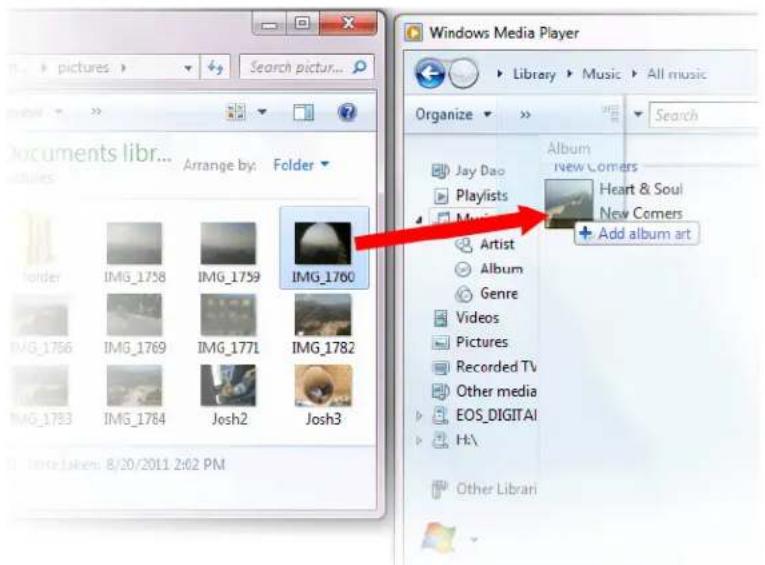
The picture will be added as the album art.

METHOD 2 - Manually add album art using Windows Media Player 11
- Run WMP.
- Click Library on the top bar.
- Select and right-click the file(s) you wish to update and select Advanced Tag Editor.
- Click the Picture tab, then click Add.
- Navigate to the image you wish to use for album art then click Open.
- Click Apply then OK.
METHOD 3 - Let WMP find the Album Info (WMP 10 and 11)
- Run Windows Media Player.
- Click Library on the top bar (Left Bar for WMP10).
- Select and right-click the file(s) you wish to update.
- Select Find Album Info.
Quick Tips:
The SanDisk Clip Voice album art maximum supported resolution is 480 x 480 with a maximum file size of 450kb
Chapter 6
This chapter describes how to load and play audiobooks and podcasts on the SanDisk Clip Voice.
Books

The SanDisk Clip Voice is able to store multiple audiobooks and podcasts. An audiobook is a recorded book in .mp3 format and a podcast is a recorded broadcast in .mp3 format.
Loading Audiobooks and Podcasts
You can transfer music from your computer to the player using the drag-and-drop method.
Drag and Drop (Windows)
To drag-and-drop music to the player from a Windows computer, follow these steps:
- Connect the player to your computer using the USB cable.
- Select Open device to view files using Windows Explorer on initial connection or by going to My Computer.
- Double-click on the Clip Voice icon.
- Double-click on the Audiobooks folder.
- Drag and drop audiobook files from your computer to the player's Audiobooks folder.
Quick Tips: Remember to eject the removable disk before disconnecting the player.
Drag and Drop (Mac)
To drag-and-drop music to the player from a Mac computer, follow these steps:
- Connect the player to your computer using the USB cable.
- Double-click on the Clip Voice icon that appears on your desktop.
- Double-click on the Audiobooks folder.
- Drag and drop audiobook files from your computer to the player's Audiobooks folder.
- Visit the following link for step-by-step instructions: http://kb.sandisk.com/app/answers/detail/a_id/1141/kw/1141
Quick Tips: Remember to eject the removable disk before disconnecting the player.
Playing Audiobooks and Podcasts
Audiobooks
To play audiobooks, follow these steps:
- Select Books from the Main Menu.
- Select Audiobooks, then select Audiobooks. Audiobooks are listed in A-Z order.
- Select desired audiobook.
- Select desired Chapters. After Chapter is selected, audiobook will play and audiobook name/chapter will be displayed.
- The following options are available during playback by pressing the Options button:
- Chapter Skip: Select between off or on whether you want the book to keep its place when you skip between chapters.
- Delete Audiobook: Select between yes or no to delete audiobook from the player. Deleting audiobook from player will not permanently delete the content from your computer.
Quick Tips: to ensure files sort correctly, file should not exceed 16 characters long or use ID3 tags. Also, to make sure your book shows under Audiobooks, place your book under the Audiobook folder.
Podcasts
To play podcasts, follow these steps:
- Select Books from the Main Menu.
- Select Podcasts. Podcasts are listed in A-Z order.
-
Select desired Episodes, which are listed in newest to oldest order. After Episode is selected, podcast will play and podcast name/episode will be displayed.
-
The following options are available during playback by pressing the Options button:
- Delete Podcast: Select between yes or no to delete podcast from the player. Deleting podcast from the player will not permanently delete the content from your computer.
Chapter 7
This chapter describes how to use the SanDisk Clip Voice sport mode.
Sport
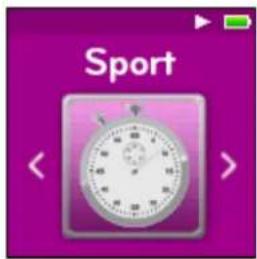
The SanDisk Clip Voice has a built-in timer function that records time in hours, minutes, seconds, and hundredths of a second. The timer function also allows you to record and save Laps.
Stopwatch
To start stop watch, follow these steps:
- Select Sport from the Main Menu.
- Select Stopwatch.
- To start timer, press the Play button once. To Pause stopwatch, press the Play button once.
Quick Tips: After time is started and stopped, time can be resumed by either pressing Play button again, or by pressing the Back button to access the Timer Menu where Resume will be highlighted. Resume will remain an option until a new timer is created.
Recording Laps
To record laps, follow these steps:
- After starting the timer, press the Select button to record a Lap.
Quick Tips: A Lap will save and record time between Laps. Lap 1 will save and record time from the beginning, then Lap 2 will save and record the amount of time that has lapsed between the previous Lap and the current time. Therefore, Laps will add up to the total time if it is utilized during live timing by the user.
- After desired laps are recorded, press the Back button and select Current Log to view the logs. The current log information is automatically saved when a new log is created by pressing Stopwatch. To view recorded log information, press Saved Logs. (This option shows the Lap time of each lap, the average lap time, and the total amount of time.)
Quick Tips: A Log is the set of laps that are recorded and stored in one session.
- To delete logs, select Delete Logs from the Sport Menu. Highlight the log that you want to delete and press the Select button. The log will be permanently deleted from the player.
Chapter 8
This chapter describes how to customize the SanDisk Clip Voice settings.
Settings

The SanDisk Clip Voice has multiple settings that allow you to customize the device to match your own personal listening preferences.
System Settings
To select system setting options, follow these steps:
- Select Settings from the Main Menu.
- Select System Settings.
-
Customize the player with the following options:
-
Backlight
- Brightness
- Power Saver
- Sleep
- Customize
- Menu Looping
- Equalizer
- Replay Gain
- Language
• Volume - Info
- Format
- Restore
Backlight
This option selects the time that the player will trigger the backlight timer program to automatically turn off the backlight. You can press any button to re-activate the backlight.
- Select Backlight.
- Press the Previous or Forward buttons to select desired backlight timer (15 seconds to 90 seconds).
Brightness
This option adjusts the display brightness for better viewing in different lighting environments.
- Select Brightness.
- Press the Previous or Forward buttons to set the contrast level (20% to 100%).
- Press the Select button to confirm choice.
Power Saver
This option turns the player off automatically when it has been idle for a defined period of time.
- Select Power Saver.
- Press the Previous or Forward buttons to select desired time (None to 120 minutes) before power off. The player will not enter the power saver mode if it is set to None.
- Press the Select button to confirm choice.
Sleep
This option turns the player off automatically after a defined period of playback time.
- Select Sleep.
- Press the Previous or Forward buttons to select desired playback time before power off (None to 120 minutes). The player will not enter the sleep mode if it is set to None.
- Press the Select button to confirm choice.
Customize
This option removes player home features from the Main Menu.
- Select Customize.
- Select the name of the feature you want removed.
- Press the Select button to toggle between On or Off.
- Press the Back button to return to previous menu.
Menu Looping
This option enables continuous menu scrolling, or looping, without stopping at the end and beginning of a menu.
- Select Menu Looping.
- Press the Select button to toggle between On or Off.
Equalizer
This option enhances the sound quality of certain music types to better match the genre being played.
- Select Equalizer.
- Press the Up or Down buttons to scroll through the music types.
- Press the Select button to choose the desired option that best matches the music being played.
Replay Gain
This option provides a method for keeping the perceived volume level constant during playback of content. Typically, music albums are mixed and targeted to differing average levels. During playback in shuffle mode there can be wide differences in the track volume, causing the user to make frequent corrections to the volume level.
Quick Tips: European users be aware of the Europeans limits of volume within the laws and regulations of the European Union.
- Select Replay Gain.
- Select Mode and press the Select button to choose between Songs, Albums, or Off.
- Select Pre-Gain and press the Select button to choose how many decibels (dB) you want to adjust the overall Playback Volume level upward to compensate for the "average" level of your library's track adjustment.
Quick Tips: For more information, please visit: http://kb.sandisk.com/app/answers/detail/a_id/430
Language
This option selects different languages for the player's display screen.
- Select Language.
- Press the Up or Down buttons to scroll through languages.
- Press the Select button to choose desired language.
Volume
This option adjust the volume.
- Select Volume.
- Select Normal or High.
- Press the Select button to choose the desired option.
Info
This option displays player information, such as firmware version, available/free memory, number of contents loaded in the player, and the battery status.
- Select Info.
- Press the Up or Down buttons to scroll through information.
Format
CAUTION: This option will delete all the files stored on the player. Ensure that you back up all the media files on the player before formatting the device. All media files will have to re-transferred the device after you have formatted it.
- Select Format.
- Select Internal Memory
- Choose desired option by selecting Yes or No.
- Press the Select button to confirm, or press the Back button to return to the previous menu.
Restore
This option restores the player to the original factory settings it had when the device was first purchased.
CAUTION: This option will delete all customized settings from the player.
- Select Restore.
- Choose desired option by selecting Yes or No.
- Press the Select button to confirm, or press the Back button to return to the previous menu.
Music Options
To select music options, follow these steps:
- Select Settings from the Main Menu.
- Select Music Options.
- Customize the player with the following options:
- Shuffle
- Repeat
Shuffle
This option plays songs in random order.
- Select Shuffle.
- Press the Select button to toggle between Shuffle On and Shuffle Off (to play songs in random order, set Shuffle to ON).
Quick Tips: While on shuffle mode, Forward and Backwards will randomly select a song.
Repeat
This option repeats the song.
- Select Repeat.
- Press Select to toggle and choose a repeat mode:
• Off: No repeat of tracks
• Song: Repeat the current track
• All: Repeat all selected tracks at the current menu location
Quick Tips: If music is currently playing, the Options Menu can be accessed by pressing the Options button when the playback screen is open. Music options include: Add Song To GoList, Remove Song From GoList, Repeat, Shuffle, Music EQ, Delete Song, and Track Info. Please refer to Chapter 4 for more details.
Chapter 10
This chapter describes how to get service and support for the SanDisk Clip Voice Wearable MP3 player & Voice Recorder.
Learn More, Service, and Warranty Information
Getting Technical Support
Before you contact Technical Support, we encourage you to read the Tips and Troubleshooting section to see if your question is covered there.
If you have questions about the use or features of your SanDisk player as well as other SanDisk products, please visit our Knowledgebase at kb.sandisk.com or www.sandisk.com/support.
THIRD PARTY INTELLECTUAL PROPERTY NOTICE
This product is protected by certain intellectual property rights of Microsoft Corporation. Use or distribution of such technology outside of this product is prohibited without a license from Microsoft or an authorized Microsoft subsidiary. Content providers are using the digital rights management technology for Windows Media contained in this device ("WM-DRM") to protect the integrity of their content ("Secure Content") so that their intellectual property, including copyright, in such content is not misappropriated. This device uses WM-DRM software to play Secure Content ("WM-DRM Software"). If the security of the WM-DRM Software in this device has been compromised, owners of Secure Content ("Secure Content Owners") may request that Microsoft revoke the WM-DRM Software's rights to acquire new licenses to copy, display and/or play Secure Content. Revocation does not alter the WM-DRM Software's ability to play unprotected content. A list of revoked WM-DRM Software is sent to your device whenever you download a license for Secure Content from the Internet or from a PC. Microsoft, may, in conjunction with such license, also download revocation lists onto your device on behalf of Secure Content Owners.
THIS PRODUCT IS LICENSED UNDER THE MPEG-4 VISUAL PATENT PORTFOLIO LICENSE FOR THE PERSONAL AND NON-COMMERCIAL USE OF A CONSUMER FOR (i) ENCODING VIDEO IN COMPLIANCE WITH THE MPEG-4 VISUAL STANDARD ("MPEG-4 VIDEO") AND/OR (ii) DECODING MPEG-4 VIDEO THAT WAS ENCODED BY A CONSUMER ENGAGED IN A PERSONAL AND NON COMMERCIAL ACTIVITY AND/OR WAS OBTAINED FROM A VIDEO PROVIDER LICENSED BY MPEG LA TO PROVIDE MPEG-4 VIDEO. NO LICENSE IS GRANTED
OR SHALL BE IMPLIED FOR ANY OTHER USE. ADDITIONAL INFORMATION INCLUDING THAT RELATING TO PROMOTIONAL, INTERNAL AND COMMERCIAL USES AND LICENSING MAY BE OBTAINED FROM MPEGLA, LLC.
SEE HTTP://WWW.MPEGLA.COM.
MPEG Layer-3 audio coding technology licensed from Fraunhofer IIS and Thompson.
MANUFACTURER'S LIMITED WARRANTY
For Technical Support over the Internet, visit: www.sandisk.com/wug
FCC REGULATION
FCC Compliance Statement
The statements should be displayed in the user manual: changes or modifications not expressly approved by the party responsible for compliance could void the user's authority to operate the equipment.
15.105(b) This equipment has been tested and found to comply with the limits for a Class B digital device, pursuant to Part 15 of the FCC Rules. These limits are designed to provide reasonable protection against harmful interference in a residential installation. This equipment generates, uses and can radiate radio frequency energy and, if not installed and used in accordance with the instructions, may cause harmful interference to radio communications. However, there is no guarantee that interference will not occur in a particular installation. If this equipment does cause harmful interference to radio or television reception, which can be determined by turning the equipment off and on, the user is encouraged to try to correct the interference by one or more of the following measures: - Reorient or relocate the receiving antenna. -- Increase the separation between the equipment and receiver. -- Connect the equipment into an outlet on a circuit different from that to which the receiver is connected. -- Consult the dealer or an experienced radio/TV technician for help.
15.21 You are cautioned that changes or modifications not expressly approved by the part responsible for compliance could void the user's authority to operate the equipment.
15.19 This device complies with Part 15 of the FCC Rules.
Operation is subject to the following two conditions:
1) this device may not cause harmful interference and
2) this device must accept any interference received, including interference that may cause undesired operation of the device.
FCC RF Radiation Exposure Statement:
This equipment complies with FCC radiation exposure limits set forth for an uncontrolled environment. End users must follow the specific operating instructions for satisfying RF exposure compliance. This transmitter must not be co-located or operating in conjunction with any other antenna or transmitter.
Please note that changes or modifications not expressly approved by the party responsible for compliance could void the user's authority to operate the equipment.
NOTE: This equipment has been tested and found to comply with the limits for a Class B digital device, pursuant to Part 15 of the FCC Rules. These limits are designed to provide reasonable protection against harmful interference in a residential installation. This equipment generates, uses and can radiate radio frequency energy and, if not installed and used in accordance with the instructions, may cause harmful interference to radio communications. However, there is no guarantee that interference will not occur in a particular installation. If this equipment does cause harmful interference to radio or television reception, which can be determined by turning the equipment off and on, the user is encouraged to try to correct the interference by one or more of the following measures: -Reorient or relocate the receiving antenna. -Increase the separation between the equipment and receiver. -Connect the equipment into an outlet on a circuit different from that to which the receiver is connected. -Consult the dealer or an experienced radio/TV technician for help.
This device complies with Part 15 of the FCC Rules. Operation is subject to the following two conditions: (1) this device may not cause harmful interference, and (2) this device must accept any interference received, including interference that may cause undesired operation.
For more information regarding the FCC compliance, go to: http://kb.sandisk.com/app/answers/detail/a_id/19838
Western Digital Technologies, Inc. is the seller of record and licensee in the Americas of SanDisk ^® products.
SanDisk is a trademark of Western Digital Corporation or its affiliates, registered in the U.S. and other countries. All other trademarks are the property of their respective owners.
©2016 Western Digital Corporation or its affiliates. All rights reserved. Made in China.
- User Manual
- STOP!
- IMPORTANT INFORMATION
- YOU MUST READ THIS BEFORE
- USING THE MP3 PLAYER
- CHAPTER 1 .... 5
- CHAPTER 2....7
- CHAPTER 3 ...... 13
- Chapter 4 .... 15
- Chapter 5 ...... 16
- Chapter 6 26
- Books 26
- Chapter 7 28
- Sport 28
- Chapter 8 30
- Settings 30
- Chapter 10 ...... 34
- CHAPTER 1
- Safety Tips and Cleaning Instructions
- Audio Player Safety Instructions
- Hearing Levels
- Examples of Typical Sounds Levels Approx. Sound Level in Decibels (dB)\*
- CAUTION:
- RISK OF EXPLOSION IF BATTERY IS REPLACED BY AN INCORRECT TYPE. DISPOSE OF USED BATTERIES ACCORDING TO THE INSTRUCTIONS
- Battery
- CHAPTER 2
- SanDisk Clip Voice Overview
- Features
- Minimum System Requirements
- Package Contents
- Playback Screen
- Main Menu Options: Six Core Functions
- Product Capacities
- Notes:
- Charging
- Firmware
- Earphones
- CHAPTER 3
- Basic Operation
- Power/Select Button
- Power On
- Power Off
- Locking the device
- Unlocking the device
- Reset
- Connecting Player to a Windows or Mac Computer
- Disconnecting the Player from a Windows Computer
- Disconnecting the Player from a Mac Computer
- Chapter 4
- Voice Recording
- Initiating Voice Recording
- Playing Saved Voice Recordings
- Chapter 5
- Music
- Loading Music
- Drag and Drop (Windows)
- Drag and Drop (Mac)
- Playing Music
- Options Menu
- Add Song to GoList
- Remove Song from GoList
- Repeat
- Shuffle
- Music EQ
- Delete Song
- Track Info
- Creating Playlists
- Adding album art to a track using Windows Media Player
- METHOD 1 - Manually add Album art using Windows Media Player 12
- METHOD 2 - Manually add album art using Windows Media Player 11
- METHOD 3 - Let WMP find the Album Info (WMP 10 and 11)
- Chapter 6
- Books
- Loading Audiobooks and Podcasts
- Playing Audiobooks and Podcasts
- Audiobooks
- Podcasts
- Chapter 7
- Sport
- Stopwatch
- Recording Laps
- Chapter 8
- Settings
- System Settings
- Backlight
- Brightness
- Power Saver
- Sleep
- Customize
- Menu Looping
- Equalizer
- Replay Gain
- Language
- Volume
- Info
- Format
- Restore
- Music Options
- Chapter 10
- Learn More, Service, and Warranty Information
- Getting Technical Support
- THIRD PARTY INTELLECTUAL PROPERTY NOTICE
- MANUFACTURER'S LIMITED WARRANTY
- FCC REGULATION
Brand : SANDISK
Model : Clip Voice
Category : Mp3 player