
Value AL1916As - Screen ACER - Free user manual and instructions
Find the device manual for free Value AL1916As ACER in PDF.


User questions about Value AL1916As ACER
0 question about this device. Answer the ones you know or ask your own.
Ask a new question about this device
Download the instructions for your Screen in PDF format for free! Find your manual Value AL1916As - ACER and take your electronic device back in hand. On this page are published all the documents necessary for the use of your device. Value AL1916As by ACER.
USER MANUAL Value AL1916As ACER
Package contents ....3
Installation instructions....4
Assembling the Monitor....4
Detaching the Monitor ....4
Adjusting the Viewing Angle....4
Connecting the Devices....5
Switching the Power 5
Adjusting display settings....6
External Controls ....6
OSD options....7
OSD Menu 7
Troubleshooting 9
General specifications....10
Precautions

● The monitor may be damaged if placed too near a source of heat. Be aware of the location of radiators, cookers, open fires etc.
- Do not cover the slots and openings on the back or top of the cabinet as the monitor requires ventilation. The monitor should be located in a well-ventilated room to prevent the possibility of overheating.
- Do not allow sharp objects such as knives, pens, or pencils near the screen. If such objects touch the screen, the LCD panel will be permanently scratched.
- When cleaning this monitor, disconnect it from the electric socket to avoid any danger of electrocution. A soft, lint-free cloth should be used to clean the outside of the monitor. A cloth very slightly moistened with a mild detergent solution will clean stubborn stains. Keep liquids away from the display screen, including sprays. Do not spray liquid directly - it is best to lightly spray on to a cloth and wipe. If liquid gets inside the monitor it can cause electrical shock and/or damage to the unit.
- If you encounter a problem, please check the "Troubleshooting" section first. If this does not resolve the problem do not attempt to repair the monitor by yourself; opening or removing covers can lead to injury or death through electrocution among other hazards. Please contact a qualified engineer if you find the troubleshooting section does not help.
Recycling Information
We, the Acer Incorporated. care very much about our environment protection strategy and firmly believe that it helps us have healthier earth via appropriate treatment and recycling of industrial technology devices at the end-of-life.
These devices contain recyclable materials, which can be re-decomposed and re-integrated into brand-new marvels. On the contrary, other material can be classified to hazardous and poisoned substances. We strongly encourage you to contact the provided information to recycle this product.
United State : http://www.ciwmb.ca.gov/electronics/act2003/Recovery/Approved/
Asia : http://recycle.epa.gov.tw/public/public4_2.htm
Europe : EL-Kretsen: http://www.el-kretsen.se/EL-retur: http://www.elretur.no/SWICO: http://swico.one.webbuild.ch/
SPECIAL NOTES ON LCD MONITORS
The following symptoms are normal with LCD monitor and do not indicate a problem.
NOTES
- Due to the nature of the fluorescent light, the screen may flicker during initial use. Turn off the Power Switch and then turn it on again to make sure the flicker disappears.
- You may find slightly uneven brightness on the screen depending on the desktop pattern you use.
- The LCD screen has effective pixels of 99.99% or more. It may include blemishes of 0.01% or less such as a missing pixel or a pixel lit all of the time.
- Due to the nature of the LCD screen, an afterimage of the previous screen may remain after switching the image, when the same image is displayed for hours. In this case, the screen is recovered slowly by changing the image or turning off the Power Switch for hours.
Package contents
LCD Monitor
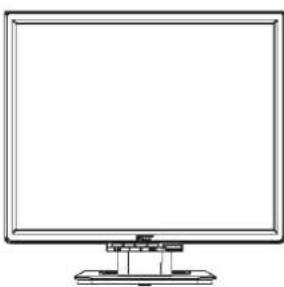
natural_image
Line drawing of a flat-screen computer monitor with stand (no text or symbols)User Manual (CD)

text_image
ACET CD/DVD/Flash LCD Monitor © 2018 Microsoft www.acct.com http://www.acct.com/ www.acct.com www.acct.comPower Cord
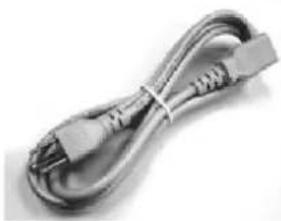
natural_image
Coiled black electrical power plug with terminal connector (no text or symbols visible)Quick Start Guide
text_image
Audio LCD Monitor Quick Start Guide OKTVGA Cable
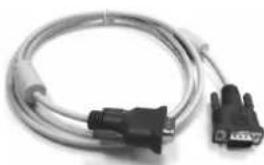
natural_image
Coiled black and silver electrical connector with two connectors (no visible text or symbols)Installation instructions
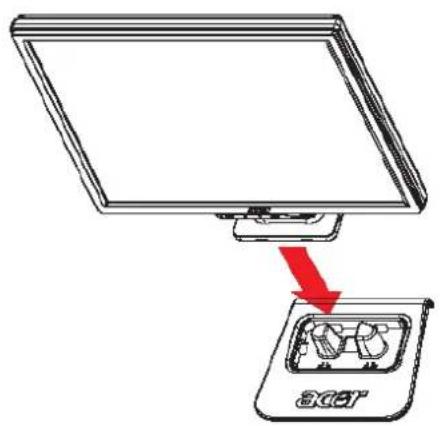
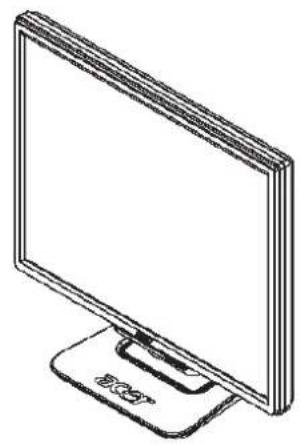
Assembling the Monitor
text_image
305°- Position the monitor on top of the stand.
natural_image
Line drawing of a flat-screen computer monitor with a base (no text or symbols)- Connect the stand into the neck of the monitor along the track.
Detaching the Monitor
If you need to repackage the monitor, please separate the monitor and base, and restore them to the carton. To detach the monitor:
- Unplug the AC power cord to make sure the power is off.
- Pull the 4 hooks on bottom side of the base and hold.
- Separate the monitor and base and put them into carton.

Important
First, find a clean, flat surface to place the monitor after removing it from the stand. Place a clean dry cloth under the monitor to protect it further. Pull the monitor slightly up and away from the stand.
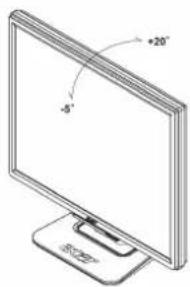
Adjusting the Viewing Angle
The viewing angle of the monitor ranges from -5^20^ .
text_image
Technical diagram of a computer monitor with angular annotations including -5° and +20°Connecting the Devices

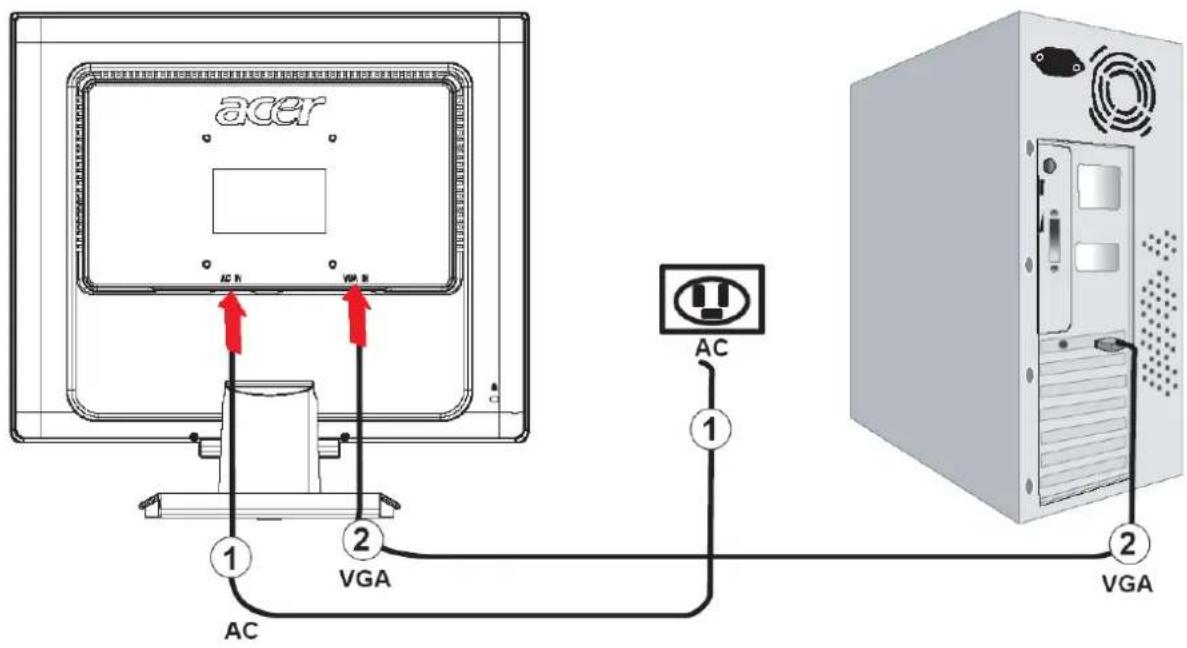
Caution: Make sure that the computer and the monitor are both disconnected from the power supply.
text_image
acer AC B VGA B 1 2 VGA AC 1 2 VGA| 1 | Power Code Attach the monitor to the power cord which should then be inserted into a properly grounded electric socket. |
| 2 | VGA Cable Connect the signal cable to the VGA input socket of the monitor, and connect the signal cable to the VGA output socket of the graphics card on the computer. Then tighten the thumbscrews on the connector. |

WARNING: The D-Sub 15 pin plug of the VGA cable is trapezoid in shape. Make sure the shape of the plug matches the shape of the socket it is inserted into, and that none of the pins are bent or otherwise damaged.
Switching the Power
First, switch the power on to the monitor, then switch the power on to the computer. When you see the LED on the power button go green, this indicates the computer is ready for use. Allow about 10 seconds for the video signal to appear. If you do not see the green light on the power button or a video signal, check the connections.
Adjusting display settings
text_image
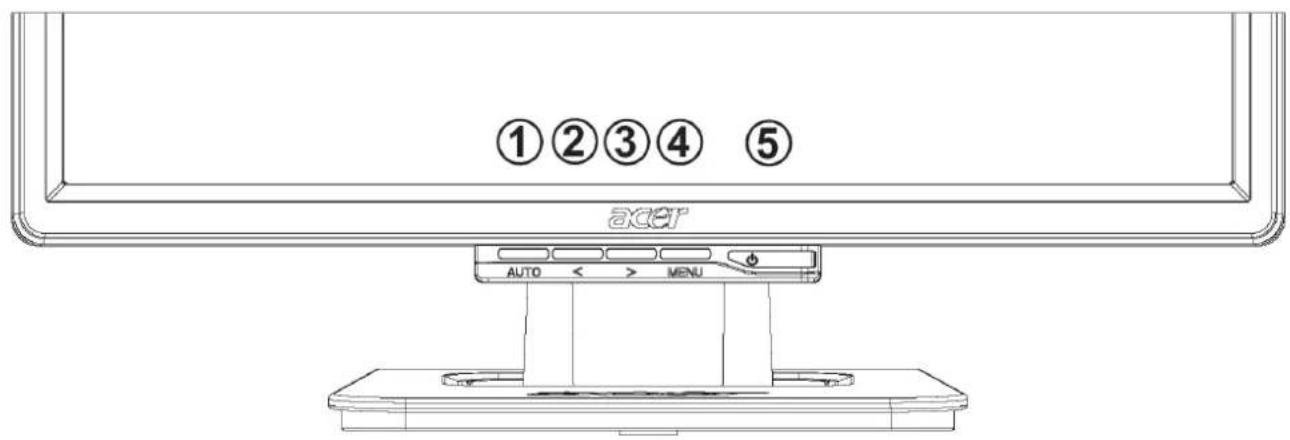
①②③④⑤ ACER AUTO < > MENUExternal Controls
| 1 | AUTO | AUTO | If OSD is active, press to exit a selection in OSD. If OSD is inactive, press and the monitor will automatically optimize the position, focus and clock of your display. |
| 2 | < | MINUS | If OSD is active, press to select or adjust OSD options. |
| 3 | > | PLUS | If OSD is active, press to select or adjust OSD options. |
| 4 | MENU | OSD Function | Press to view OSD. Press again to enter a selection in OSD. |
| 5 | [W226] | POWER | Power on/off Green: power on Orange: in sleep mode |
OSD options
Please refer to "External Controls" on Page 6.
To adjust the OSD settings:
- Press the MENU button to open the OSD menu. Press again to enter a selection of 10 functions on OSD.
- Use the buttons marked < or >, to highlight a control, then adjust the control to the desired level.
- When you have finished making all selections, press the AUTO button to exit the OSD.
OSD Menu
text_image
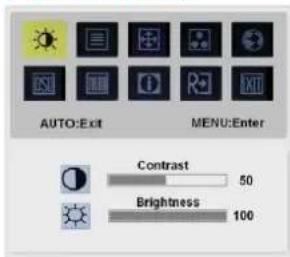
AUTO:Exit MENU:Enter Contrast 50 Brightness 100
Contrast:
This adjusts dark and light shades of color relative to each other to achieve a comfortable contrast.
Brightness:
This adjusts the brightness of the picture on the screen.
text_image
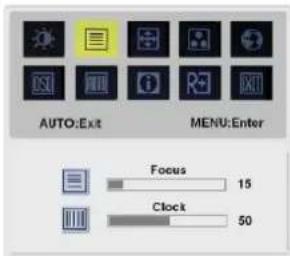
AUTO:Exit MENU:Enter Focus 15 Clock 50
Focus:
This removes any horizontal distortion and makes the picture clear and sharp.
Clock:
If there are any vertical stripes seen on the background of the screen this renders them less noticeable by minimizing their size. It also changes the size of the horizontal screen.
text_image
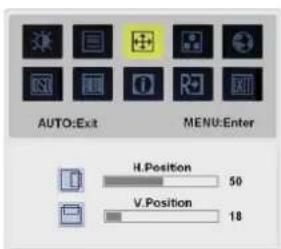
AUTO:Exit MENU:Enter H.Position 50 V Amid Position 18
H-Position:
This adjusts the horizontal.
V-Position:
This adjusts the vertical.
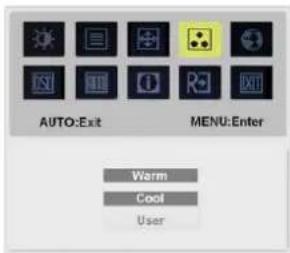
text_image
AUTO:Exit MENU:Enter Warm Cool User
COLOR:
There are three ways of adjusting color:
Warm (Reddish white)
Cool (Bluish white)
User defined:
You can adjust the colors red, green and blue to the intensity you desire.
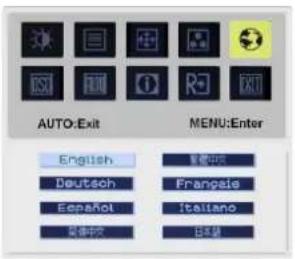
text_image
AUTO:Exit MENU:Enter English Deutsch Español English中文 English中文 Française Italiano 日本語
LANGUAGE:
Select the OSD menu language from
English, German, Spanish, Russian, Traditional Chinese, French, Italian, and Japanese.
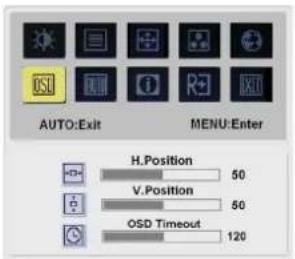
text_image
AUTO:Exit MENU:Enter H.Position 50 V.Position 50 OSD Timeout 120
OSD SETTING:
This changes the position of the OSD window on the screen and staying time.
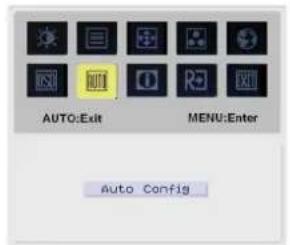
text_image
AUTO:Exit MENU:Enter Auto Config
Auto Config:
System runs auto-configuration.
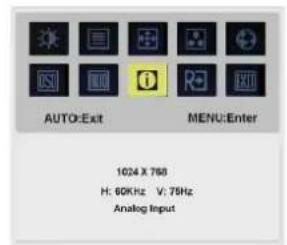
text_image
AUTO:Exit MENU:Enter 1024 X 768 H: 60KHz V: 79Hz Analog Input
INFORMATION:
This shows brief information on the screen.
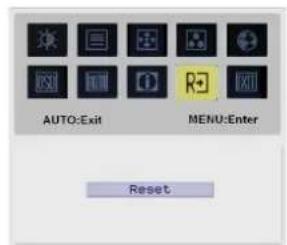
text_image
AUTO:Exit MENU:Enter Reset
Reset:
Recall to default settings.
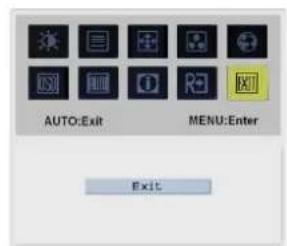
text_image
AUTO:Exit MENU:Enter Exit
Exit:
Exit from OSD.
Troubleshooting
| Problems Possible Solutions | |
| Power LED is not ON | Check to see if the power switch is in the ON position.Ensure that the Power Cord is connected. |
| No Picture | Check to see if the power switch is in the ON position.Ensure that the Power Cord is connected.Ensure the video cable is securely connected to the back of the monitor and the computer.Move the mouse or press any key on the keyboard to bring the monitor out of "active off" mode. |
| Picture shows inappropriate colors | See "Color Adjustment" to adjust RGB color or to select color temperature. |
| Picture bounces or a wave pattern is present in the picture | Move or switch off electrical devices that may be causing interference.Inspect the monitor's video cable and ensure that none of the pins are bent. |
| Image is not sized or centered properly | Press select/auto key and the monitor will automatically optimize the position of your display.See "Position adjustment". |

Caution: Do not attempt to service the monitor yourself or open the computer yourself. Please refer all servicing to qualified service personnel if the problems cannot be solved in "Troubleshooting" section.
General specifications
Item Specification
LCD Panel
| Display 19-inch Flat panel active-matrix TFT LCD | |
| Max resolution SXGA 1280×1024 pixels | |
| Pixel Pitch 0.294 mm | |
| Color | 16.2M |
| Brightness 270 cd/m2 (Typical) | |
| Contrast Ratio 550:1 (Typical) | |
| Response Time 8 ms (Typical) | |
| View Angle of Horizontal 140° | |
| View Angle of Vertical 135° | |
| External Controls | |
| Power Button | ON/ OFF |
| Control Buttons | Auto, <, >, MENU |
| OSD Function | |
| Contrast /Brightness | Contrast / Brightness |
| Focus/Clock | Focus/Clock |
| Position | Position |
| Color | Color |
| Language | Language |
| OSD setting | OSD Setting |
| Auto config | Auto config |
| Information | Information |
| Reset | Reset |
| Exit | Exit |
| Video Interface | |
| Video | Analog 0.7V |
| Sync | TTL (+/-) |
| Plug & Play | DDC2B |
| Power | |
| Power Source | 100~240V AC, 50/60 Hz |
| Power consumption during normal operation | < 40W |
| Power consumption during active off operation | < 1W |
| Dimension and Weight | |
| Dimension (W×H×D) | 411.6 X 407.9 X 182 mm (with stand) |
| Weight (Net/ Gross) | 4.7 Kg/ 6.3 Kg |
Lamp Disposal

LAMP(S) INSIDE THIS PRODUCT CONTAIN MERCURY AND MUST BE RECYCLED OR DISPOSED OF ACCORDING TO LOCAL, STATE OR FEDERAL LAWS. FOR MORE INFORMATION, CONTACT THE ELECTRONIC INDUSTRIES ALLIANCE AT WWW.EIAE.ORG. FOR LAMP SPECIFIC DISPOSAL INFORMATION CHECK WWW.LAMPRECYCLE.ORG.