
PSC 1610v - Printer HP - Free user manual and instructions
Find the device manual for free PSC 1610v HP in PDF.


| Product type | All-in-One printer (print, copy, scan) |
| Dimensions | 438 x 283 x 171 mm (17.2 x 11.1 x 6.7 in) |
| Weight | 5.5 kg (12.2 lb) |
| Power supply | AC 90-240 V, 47-63 Hz, 40 W max |
| Print resolution | Up to 4800 x 1200 optimized dpi (color), 1200 x 1200 dpi (black) |
| Copy speed | Up to 23 ppm black, 18 ppm color (Fast mode) |
| Scan resolution | Optical: 1200 x 4800 dpi; Enhanced: 19200 dpi |
| Supported paper sizes | Letter, A4, Legal, 4x6 in, 5x7 in, envelopes, Hagaki, panoramic |
| Memory card slots | CompactFlash, SmartMedia, Memory Stick, SD/MMC, xD-Picture Card |
| Connectivity | USB 2.0, optional HP JetDirect 175x for network |
| Control panel | 2-line LCD with navigation buttons |
| Print cartridges | Tri-color and black; optional photo print cartridge for 6-ink system |
| Photo features | Borderless printing, proof sheet, PictBridge, DPOF support |
| Copy features | Up to 99 copies, zoom 25% to 400%, poster, iron-on transfer |
| Scan features | Scan to application, memory card, or email via HP Instant Share |
| Duty cycle | 500 pages average, 5000 pages maximum per month |
| Environmental | ENERGY STAR qualified, inkjet cartridge recycling program |
| Maintenance | Self-test report, print cartridge alignment, glass and lid cleaning |
| Safety | FCC Class B, CE marking, regulatory model SDGOB-0401-01 |
Frequently Asked Questions - PSC 1610v HP
User questions about PSC 1610v HP
0 question about this device. Answer the ones you know or ask your own.
Ask a new question about this device
Download the instructions for your Printer in PDF format for free! Find your manual PSC 1610v - HP and take your electronic device back in hand. On this page are published all the documents necessary for the use of your device. PSC 1610v by HP.
USER MANUAL PSC 1610v HP
HP PSC 1600 All-in-One series User Guide

text_image
you +hp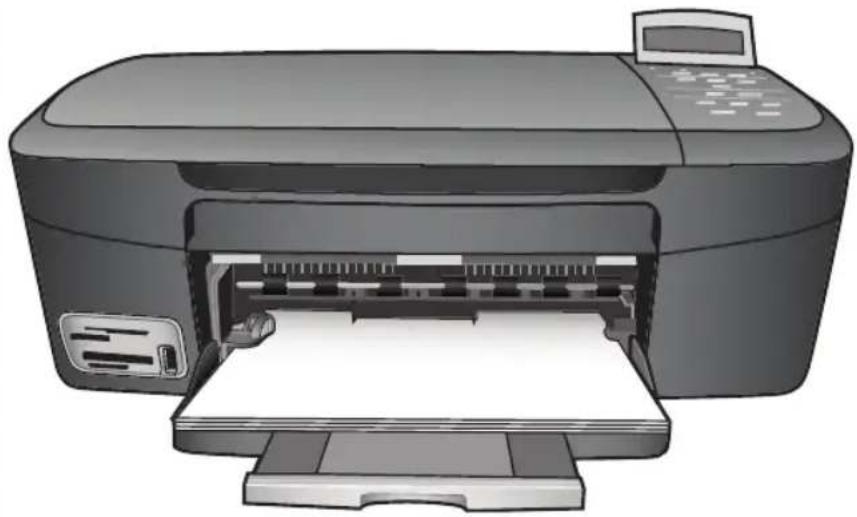
natural_image
Illustration of a HP printer with paper output and control panel (no text or symbols visible)HP PSC 1600 All-in-One series
User Guide
© Copyright 2004 Hewlett-Packard Development Company, L.P.
The information contained herein is subject to change without notice.
Reproduction, adaptation or translation without prior written permission is prohibited, except as allowed under copyright laws.

Adobe and the Acrobat logo are either registered trademarks or trademarks of Adobe Systems Incorporated in the United States and/or other countries.
Windows®, Windows NT®, Windows Me®, Windows XP®, and Windows 2000® are U.S. registered trademarks of Microsoft Corporation.
Intel® and Pentium® are registered trademarks of Intel Corporation.
SD ^™ Card is a trademark of the SD Card Association.
Energy Star® and Energy Star logo® are US registered marks of the United States Environmental Protection Agency.
Publication number: Q5584-90245
First edition: November 2004
Notice
The only warranties for HP products and services are set forth in the express warranty statements accompanying such products and services. Nothing herein should be construed as constituting an additional warranty. HP shall not be liable for technical or editorial errors or omissions contained herein.
The Hewlett-Packard Company shall not be liable for incidental or consequential damages in connection with, or arising out of the furnishing, performance, or use of this document and the program material which it describes.
Note: Regulatory information can be found in Technical information.

It is not lawful in many places to make copies of the following items. When in doubt, check with a legal representative first.
• Governmental paper or documents:
- Passports
- Immigration papers
- Selective service papers
– Identification badges, cards, or insignias
• Governmental stamps:
Postage stamps Food stamps
- Checks or drafts drawn on Governmental agencies
• Paper currency, traveler's checks, or money orders
• Certificates of deposit
• Copyrighted works
Safety information

Warning To prevent fire or shock hazard, do not expose this product to rain or any type of moisture.
Always follow basic safety precautions when using this product to reduce risk of injury from fire or electric shock.

Warning Potential shock hazard.
-
Read and understand all instructions in the Setup Guide.
-
Use only a grounded electrical outlet when connecting the device to a power source. If you do not know whether the outlet is grounded, check with a qualified electrician.
-
Observe all warnings and instructions marked on the product.
-
Unplug this product from wall outlets before cleaning.
-
Do not install or use this product near water or when you are wet.
-
Install the product securely on a stable surface.
-
Install the product in a protected location where no one can step on or trip over the power cord, and where the power cord will not be damaged.
-
If the product does not operate normally, see the onscreen Troubleshooting help.
-
No operator-serviceable parts inside. Refer servicing to qualified service personnel.
-
Use in a well-ventilated area.

Warning This equipment will be inoperable when main power fails.
Contents
1 HP All-in-One overview....5
The HP All-in-One at a glance....5
Control panel overview....6
Menu overview....7
Use the HP Image Zone to do more with your HP All-in-One....9
2 Find more information.... 15
3 Connection information....17
Supported connection types....17
Connect using a USB cable....18
Use Windows printer sharing....18
Use printer sharing (Macintosh OS X)....18
Set up the HP JetDirect 175x....19
Use Webscan....20
4 Load originals and load paper....21
Load an original....21
Choose papers for printing and copying....22
Load paper....23
Avoid paper jams....28
5 Work with photos....29
Transfer photos....29
Edit photos....30
Share photos....31
Print photos....32
6 Use a memory card or PictBridge camera....35
The memory card slots and camera port....35
Transfer photos to your computer....37
Print photos from a proof sheet....37
Set photo print options....40
Print photos directly from a memory card....42
Print photos from a PictBridge-compatible digital camera....43
Print the current photo....44
Print a DPOF file....44
7 Use the copy features....47
Set the copy paper size....47
Set the copy paper type....48
Increase copy speed or quality....49
Make multiple copies of the same original....50
Copy a two-page black-and-white document....50
Make a 10 x 15 cm (4 x 6 inch) borderless copy of a photo....51
Copy a 10 x 15 cm (4 x 6 inch) photo onto a full-size page....51
Copy a photo several times on one page....53
Resize an original using custom settings....53
Resize an original to fit onto letter or A4 paper....54
Copy a faded original....54
Copy a document that has been faxed several times....55
Enhance light areas of your copy....55
Make a poster....56
Prepare a color iron-on transfer....57
Change default copy settings....57
Stop copying....57
8 Use the scan features.... 59
Scan to an application....59
Send a scan to a memory card....60
Stop scanning....60
9 Print from your computer....61
Print from a software application....61
Change the print settings....62
Stop a print job....63
10 Use HP Instant Share....65
Overview....65
Get started....66
Send images using your HP All-in-One....66
Send images using your computer....67
11 Order supplies....73
Order paper, transparency film, or other media....73
Order print cartridges....73
Order other supplies....74
12 Maintain your HP All-in-One....75
Clean the HP All-in-One....75
Check the estimated ink levels....76
Print a self-test report....76
Work with print cartridges....77
Change the device settings....87
13 Troubleshooting information....89
Before you call HP Support....89
View the Readme file....90
Setup troubleshooting....90
Operational troubleshooting....101
Device update....104
14 Get HP support....107
Get support and other information from the Internet....107
Warranty support....107
HP customer support....108
Access your serial number and service ID....108
Call in North America during warranty....108
Call elsewhere in the world....109
Call in Australia under warranty and post-warranty....111
Call HP Korea customer support....111
Call HP Japan support....112
Prepare your HP All-in-One for shipment....112
15 Hewlett-Packard LIMITED WARRANTY STATEMENT....115
Duration of limited warranty....115
Extent of limited warranty....115
Limitation of warranty.... 116
Limitation of liability....116
Contents
Local law....116
Limited warranty information for EU countries/regions....116
16 Technical information....119
System requirements....119
Paper specifications....119
Print specifications....121
Copy specifications....121
Memory card specifications....122
Scan specifications....122
Physical specifications....122
Power specifications....122
Environmental specifications....123
Additional specifications....123
Environmental product stewardship program....123
Regulatory notices....124
Declaration of conformity (European Economic Area)....126
Declaration of conformity....126
Index....127
1 HP All-in-One overview
Many HP All-in-One functions can be accessed directly, without turning on your computer. Tasks such as making a copy or printing photos from a memory card can be accomplished quickly and easily from your HP All-in-One.
This chapter describes the HP All-in-One hardware features, control panel functions, and how to access the HP Image Zone software.

Tip You can do more with your HP All-in-One by using the HP Image Zone software installed on your computer. The software provides enhanced copy, scan, and photo functionality. For more information, see the onscreen HP Image Zone Help and Use the HP Image Zone to do more with your HP All-in-One.
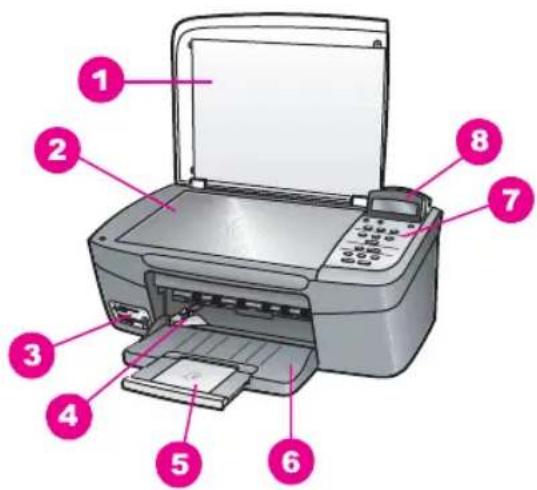
The HP All-in-One at a glance
text_image
Diagram of a printer with numbered parts labeled for identification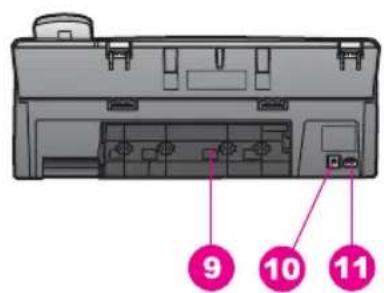
text_image
9 10 11Label Description
1 Lid
2 Glass
3 Memory card slots and camera port
4 Paper-width guide
5 Paper tray extender
6 Paper tray
7 Control panel
8 Control panel display
9 Rear clean-out door
(continued)
Label Description
10 Rear USB port
11 Power connection
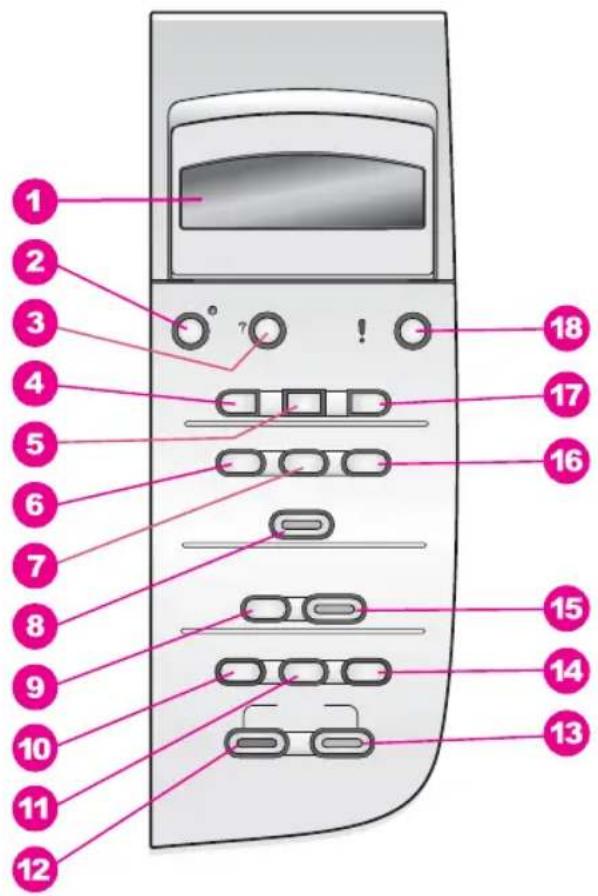
Control panel overview
text_image
1 2 3 4 5 6 7 8 9 10 11 12 13 14 15 16 17 18Label Name and Description
1 Control panel display: View menus, photo filenames, and messages. The control panel display can be pulled up and angled for better viewing.
2 On: Turn the HP All-in-One on or off. When the HP All-in-One is off, a minimal amount of power is still supplied to the device. To completely disconnect the power supply to the HP All-in-One, turn the device off, and then unplug the power cord.
3 Setup: Access the menu system for reports, maintenance, and help.
4 Left arrow: Decrease values, or go back when viewing file names on the control panel display.
5 OK: Select a menu, setting, or value displayed on the control panel display.
(continued)
Label Name and Description
| 6 | Photo Menu: Select photos to print, copy photos, change the image size, change paper size and type, change layout, or adjust your photos. |
| 7 | Select Photos: Select photos to print from a memory card. |
| 8 | Print Photos: Print selected photos from a memory card. |
| 9 | Scan To: Select a scan destination. |
| 10 | Copy Menu: Select copy options, such as number of copies, paper size, and paper type. |
| 11 | Reduce/Enlarge: Reduce or enlarge an original to the specific size of the paper loaded in the paper tray. |
| 12 | Start Copy Black: Start a black copy job. |
| 13 | Start Copy Color: Start a color copy job. |
| 14 No. of Copies: Specify the desired number of copies. | |
| 15 | Start Scan: Start a scan job and send it to the destination you selected using the Scan To button. |
| 16 | Proof Sheet: Print a proof sheet when a memory card has been inserted in a memory card slot. A proof sheet shows thumbnail views of all the photos on the memory card. You can select photos on the proof sheet, then print those photos by scanning the proof sheet. |
| 17 | Right arrow: Increase values, or go forward when viewing file names on the control panel display. |
| 18 | Cancel: Stop a job, exit a menu, or exit settings. |
Menu overview
The following tables provide a quick reference to top-level menus that appear on the HP All-in-One control panel display.
Copy Menu
Copy Paper Size
Paper Type
Copy Quality
Lighter/Darker
Enhancements
Color Intensity
Set New Defaults
Scan To menu
HP Image Zone
Microsoft Word
Adobe Photoshop
HP Instant Share
The Scan To menu lists scan destinations, including applications installed on your computer. Therefore, your Scan To menu might list scan destinations different than the destinations shown here.
Photo Menu
Select Photos
Number of Copies
Image Size
Paper Size
Paper Type
Layout Style
Smart Focus
Digital Flash
Set New Defaults
Proof Sheet Menu
Scan
Setup Menu
-
Help Menu
-
Print Report
-
Tools
-
Preferences
The Help Menu selection on the Setup Menu provides quick access to key help topics. Most of the information is presented on a connected computer screen.
Use the HP Image Zone to do more with your HP All-in-One
The HP Image Zone software is installed on your computer when you set up your HP All-in-One. For further information, see the Setup Guide that came with your device.
Access to the HP Image Zone software differs by operating system (OS):
- If you have a PC and are running Windows, the HP Image Zone software entry point is the HP Director window.
- If you have a Macintosh and are running OS 10.1.5 or later, the HP Image Zone software entry point is the HP Image Zone window.
- If you have a Macintosh and are running OS 9.2.6 or earlier, the HP Image Zone software entry point is the HP Director window.
The entry point gets you started with the HP Image Zone software and services.
You can quickly and easily expand the functionality of your HP All-in-One by using the HP Image Zone software. Look for boxes like this throughout the guide that provide topic-specific tips and helpful information for your projects.
Access the HP Image Zone software (Windows)
Open the HP Director from the desktop icon, system tray icon, or the Start menu. The HP Image Zone software features appear in the HP Director.
To open the HP Director
-
Do one of the following:
-
On the Windows desktop, double-click the HP Director icon.
- In the system tray at the far right of the Windows taskbar, double-click the Hewlett-Packard Digital Imaging Monitor icon.
-
On the taskbar, click Start, point to Programs or All Programs, select HP, and then click Director.
-
In the Select Device box, click to see a list of installed devices.
-
Select the HP All-in-One.

Note The icons in the HP Director graphic below might appear differently on your computer. The HP Director is customized to display icons associated with the device that is selected. If the selected device is not equipped with a particular feature or function, then the icon for that feature or function does not display in the HP Director.

Tip If the HP Director on your computer does not contain any icons, an error might have occurred during the software installation. To correct this, uninstall the software using one of the methods in Uninstall and reinstall the software.
| Button | Name and Purpose |
 | Scan Picture: Scans a photo, picture, or drawing and displays it in the HP Image Zone. |
Chapter 1
(continued)
| Button Name and Purpose | |
 | Scan Document: Scans a document that contains text or both text and graphics, and displays it in your selected program. |
 | Make Copies: Displays the Copy dialog box for the selected device, from which you can make a printed copy of your image or document. You can select the copy quality, number of copies, color, and size. |
 | HP Image Zone: Displays the HP Image Zone, where you can:View and edit imagesPrint photos in multiple sizesMake and print a photo album, postcard, or flyerMake a multimedia CDShare images through e-mail or a website |
 | Transfer Images: Displays the HP Image Transfer software, which allows you to transfer images from the HP All-in-One, and save them on your computer. |
 | Document viewer: Import, find, edit, view, process, print, and send documents. |

Note For information on additional features and menu items such as Software Update, Creative Ideas, and HP Shopping, see the onscreen HP Image Zone Help.
Menus and list items are also available to help you select the device you want to use, check its status, adjust a variety of software settings, and access the onscreen help. The following table explains these items.
| Feature | Purpose |
| Help | Use this feature to access the HP Image Zone Help, which provides software help and troubleshooting information for your HP All-in-One. |
| Select Device | Use this feature to select the device you want to use from a list of installed devices. |
| Settings | Use this feature to view or change various settings for your HP All-in-One, such as print, scan, or copy. |
| Status Use this | feature to display the current status of your HP All-in-One. |
Access the HP Image Zone software (Macintosh OS 10.1.5 or later)

Note Macintosh OS 10.0.0 - 10.1.4 are not supported.
When you install the HP Image Zone software, the HP Image Zone icon is placed in the Dock.
You can access the HP Image Zone software in one of two ways:
• Through the HP Image Zone window
• Through the HP Image Zone Dock menu
Use the HP Image Zone window
The HP Image Zone window has two main elements:
• The display area for the Products/Services tabs
- The Products tab gives you access to many of the features of your HP imaging products, such as an installed products pop-up menu and a list of tasks available for the current product. The list might include tasks such as copy, scan, or transfer images. Clicking on a task opens an application to assist you with that task.
- The Services tab gives you access to digital imaging applications that can help you view, edit, manage, and share you images.
• The Search HP Image Zone Help text box
The Search HP Image Zone Help text box lets you search the HP Image Zone Help for keywords or phrases.
To open the HP Image Zone window
→ Click the HP Image Zone icon in the Dock.
The HP Image Zone window appears.
The HP Image Zone window displays only the HP Image Zone features that are appropriate for the selected device.

Note The icons in the table below might appear differently on your computer. The HP Image Zone window is customized to display feature icons associated with the device that is selected. If the selected device is not equipped with a particular feature or function, then that feature or function does not display in the HP Image Zone window.
| Products | |
| Icon Feature and Purpose | |
| Unload Images: Use this feature to transfer images from a memory card to your computer. | |
| Scan Picture: Use this feature to scan an image and display it in the HP Gallery. | |
| Scan to OCR: Use this feature to scan text and display it in the selected destination text editing software program.Note Availability of this feature varies by country/region. | |
Chapter 1
(continued)
Products
| Icon Feature and Purpose | |
 | Make Copies: Use this feature to make a copy in black and white or color. |
Services
| Icon Feature and Purpose | |
 | HP Image Edit: Use this feature to edit images. (10.2 and later)Use this feature to view and edit images. (10.1.5 only) |
 | HP Gallery: Use this feature to view images. (10.2 and later) |
 | HP Image Print: Use this feature to print images from an album using one of several templates available. |
 | HP Instant Share: Use this feature to open the HP Instant Share software client application. (10.2 and later only) |
 | HP Email Portal: Use this feature to easily send photos through e-mail. |
In addition to the feature icons, several menu and list items allow you to select the device you want to use, check its status, adjust a variety of software settings, and access the onscreen help. The following table explains these items.
| Feature | Purpose |
| Select Device | Use this feature to select the device you want to use from a list of installed devices. |
| Settings | Use this feature to view or change various settings for your HP All-in-One, such as print, scan, or copy. |
| Search HP Image Zone Help | Use this feature to search the HP Image Zone Help, which provides software help and troubleshooting information for your HP All-in-One. |
Use the HP Image Zone Dock menu
The HP Image Zone Dock menu provides a shortcut to HP Image Zone services. The Dock menu automatically contains all of the applications available in the HP Image Zone window Services tab list. You can also set HP Image Zone preferences to add other items to the menu, such as tasks from the Products tab list or HP Image Zone Help. For more information, see the HP Image Zone Help.
To display the HP Image Zone Dock menu
→ Press and hold the mouse on the HP Image Zone Dock icon.
Access the HP Image Zone software (Macintosh OS 9.2.6 or earlier)
The HP Director is the entry point to the HP Image Zone software. Depending on the capabilities of your HP All-in-One, the HP Director lets you initiate device functions such as scanning, copying, or unloading images from a digital camera or memory card. You can also use the HP Director to open the HP Gallery to view, modify, and manage the images on your computer.
To open the HP Director
-
You can access the HP Image Zone software in one of two ways:
-
Double-click the HP Director alias on the desktop.
- Double-click the HP Director alias in the Applications:Hewlett-Packard:HP Photo and Imaging Software folder.

Note If you install several HP devices of different kinds (for example, an HP All-in-One, a camera, and an HP scanner), an HP Director icon for each kind of device is displayed on the desktop. However, if you install two of the same kind of device (for example, you might have a laptop that you connect to two different HP All-in-One devices -- one at work and one at home) only one HP Director icon is displayed on the desktop.
- The HP Director window appears.
The HP Director displays only the task buttons that pertain to the selected device.

Note The icons in the table below might appear differently on your computer. The HP Director menu is customized to display feature icons associated with the device that is selected. If the selected device is not equipped with a particular feature or function, then the icon for that feature or function does not display.
| Device Tasks | |
| Icon Purpose | |
| Unload Images: Use this feature to transfer images from a memory card to your computer. | |
Chapter 1
(continued)
Device Tasks
| Icon Purpose | |
 | Scan Picture: Use this feature to scan an image and display it in the HP Gallery. |
 | Scan Document: Use this feature to scan text and display it in the selected destination text editing software program.Note Availability of this feature varies by country/region. |
 | Make Copies: Use this feature to make a copy in black and white or color. |
Manage and Share
| Icon Purpose | |
 | HP Gallery: Use this feature to display the HP Gallery to view and edit images. |
In addition to the HP Gallery feature, several menu items without icons allow you to select other applications on your computer, change feature settings on your HP All-in-One, and access the onscreen help. The following table explains these items.
Manage and Share
| Feature Purpose | |
| More Applications | Use this feature to select other applications on your computer. |
| HP on the Web | Use this feature to select an HP website. |
| HP Help | Use this feature to select a source for help with your HP All-in-One. |
| Settings | Use this feature to view or change various settings for your HP All-in-One, such as print, scan, or copy. |
2 Find more information
A variety of resources, both printed and onscreen, provide information about setting up and using your HP All-in-One.
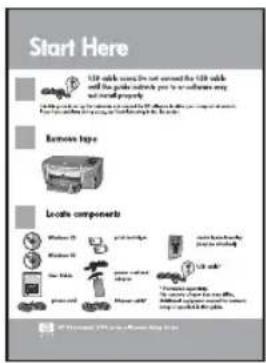 | Setup GuideThe Setup Guide provides instructions for setting up your HP All-in-One and installing software. Make sure you follow the steps in order.If you have problems during setup, see Troubleshooting in the last section of the Setup Guide, Troubleshooting information, or visit www.hp.com/support. |
 | User GuideThe User Guide contains information on how to use your HP All-in-One, including troubleshooting tips and step-by-step instructions. |
 | HP Image Zone TourThe HP Image Zontour is a fun, interactive way to get a brief overview of the software included with your HP All-in-One. You'll learn how HP Image Zonecan help you edit, organize, and print your photos. |
 | HP DirectorThe HP Directorprovides easy access to the software applications, default settings, status, and onscreen Help for your HP device. To start the HP Director, double-click the HP Directoricon from your desktop. |
 | HP Image Zone HelpThe HP Image Zone Helpprovides detailed information on using the software for your HP All-in-One.The Get step-by-step instructionstopic provides information on using the HP Image Zonesoftware with HP devices.The Explore what you can dotopic provides more information about the practical and creative things you |
| can do with the HP Image Zone software and your HP devices.If you need further assistance or want to check for HP software updates, see the Troubleshooting and support topic. | |
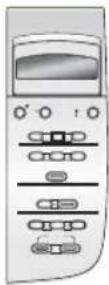 | Onscreen help from your deviceOnscreen help is available from your device and contains additional information on select topics. You can access the Onscreen help from the control panel.Press Setup on the control panel.The Help menu appears on the control panel display.Press OK.Press◄or►to scroll through the available help options.Press OK to view the selected topic on your computer screen. |
| Readme | The Readme file contains the most recent information which might not be found in other publications.Install the software to access the Readme file. |
| www.hp.com/support If you have Internet access, you can get help and support from the HP website. This website offers technical support, drivers, supplies, and ordering information. | |
3 Connection information
Your HP All-in-One comes equipped with a USB port so you can connect directly to a computer using a USB cable. It also has networking capability which can be accessed by using an external print server (HP JetDirect 175x). The HP JetDirect can be purchased as an accessory for your HP All-in-One and lets you easily and inexpensively share your device through an existing Ethernet network.
Supported connection types
| Description Recommended | number of connected computers for best performance | Supported software features | Setup instructions |
| USB connection One computer connected to an HP All-in-One using a USB cable.The USB port is located on the rear of the device. | All features are supported. | Follow the Setup Guide for detailed instructions. | |
| Windows printer sharing | Five.The host computer must be turned on at all times, or the other computers will not be able to print to the HP All-in-One. | All features resident on the host computer are supported. Only print is supported from the other computers. | For setup instructions, see Use Windows printer sharing. |
| Printer sharing (Macintosh) | Five.The host computer must be turned on at all times, or the other computers will not be able to print to the HP All-in-One. | All features resident on the host computer are supported. Only print is supported from the other computers. | For setup instructions, see Use printer sharing (Macintosh OS X). |
| Network connection through the HP JetDirect 175x (J6035C)Availability of the HP JetDirect product | Five network-connected computers. | Only print and Webscan are supported. For more information on | For setup instructions, see Set up the HP JetDirect 175x. |
Chapter 3
(continued)
| Description Recommended | number of connected computers for best performance | Supported software features | Setup instructions |
| varies by country/region. | Webscan, see Use Webscan.Copy and printing are supported from the control panel of your HP All-in-One. |
Connect using a USB cable
Detailed instructions for connecting a computer to your HP All-in-One using a USB cable are included in the Setup Guide that came with your device.
Use Windows printer sharing
If your computer is on a network, and another computer on the network is connected to the HP All-in-One by using a USB cable, you can use that device as your printer using Windows printer sharing. The computer connected directly to the HP All-in-One acts as the host for the printer and has full feature functionality. Your computer, which is referred to as a client, has access only to the print features. All other functions must be performed on the host computer.
To enable Windows printer sharing
→ Refer to the user guide that came with your computer or the Windows onscreen Help.
Use printer sharing (Macintosh OS X)
If your computer is on a network, and another computer on the network is connected to the HP All-in-One by using a USB cable, you can use that device as your printer using printer sharing. The computer connected directly to the HP All-in-One acts as the host for the printer and has full feature functionality. Your computer, which is referred to as a client, has access only to the print features. All other functions must be performed on the host computer.
To enable printer sharing
-
On the host computer, select System Preferences in the Dock. The System Preferences window appears.
-
Select Sharing.
-
From the Services tab, click Printer Sharing.
Set up the HP JetDirect 175x
Your HP All-in-One can be shared by up to five computers on a local area network (LAN) by using the HP JetDirect 175x as a print server for all computers on the network. Simply connect your HP JetDirect to your HP All-in-One and router or hub, and then run the HP JetDirect installation CD. The required printer drivers (INF file) are located on the installation CD for your HP All-in-One.

Note Using the HP JetDirect 175x, you can print and send a scan using Webscan from your computer. You can also make copies and print from the control panel of your HP All-in-One.
To network connect your HP All-in-One using the HP JetDirect 175x (Windows)
-
Do one of the following:
-
If you are setting up the HP All-in-One and HP JetDirect 175x for the first time, use the Setup Guide for your HP All-in-One and follow the hardware setup instructions.
-
If your HP All-in-One has been connected to a computer with a USB cable and you now want to connect it to a network using an HP JetDirect 175x, uninstall the HP Image Zone software from your computer. For more information, see Uninstall and reinstall the software.
-
Follow the HP JetDirect 175x setup instructions to connect the print server to a LAN.
- Connect the HP JetDirect to the USB port on the rear of your HP All-in-One.
- Insert the HP JetDirect installation CD.
You will use this CD to locate the HP JetDirect on the network.
- Select Install to run the HP JetDirect installer.
- When prompted, insert the HP All-in-One installation CD.

Note If you are performing an initial installation of your HP All-in-One and HP JetDirect 175x, do not run the HP All-in-One setup wizard. Just install the drivers following the instructions below.
- Follow the steps appropriate for your operating system:
If you are using Windows XP or 2000:
→ Browse to the root directory of the CD and select the printer driver file, hpoprn08.inf.
If you are using Windows 98 or ME:
a. Browse the CD for the "Drivers" folder and find the correct language subfolder. For example, for English speaking customers, navigate to the \enu\drivers\win9x_me directory, where enu is the English language directory and win9x_me is for Windows ME. The printer driver file is hpoupdrx.inf.
b. If prompted, repeat for each of the files required.
- Complete the installation following the screens on your computer.

Note If at some later time you want to connect to your computer using a USB cable, disconnect the HP JetDirect from your HP All-in-One, uninstall the
HP printer driver from your computer, and follow the instructions provided in the Setup Guide that came with your HP All-in-One.
To network connect your HP All-in-One using the HP JetDirect 175x (Macintosh)
- Follow the HP JetDirect 175x setup instructions to connect the print server to a LAN.
- Connect the HP JetDirect to the USB port on the rear of your HP All-in-One.
-
Do one of the following:
-
If you are setting up your HP All-in-One for the first time, make sure you insert the HP All-in-One installation CD into the CD-ROM drive on your computer and run the HP All-in-One setup wizard.
The network support software for your computer is installed at this time. When the installation is finished, the HP All-in-One Setup Assistant appears on your computer. -
From the Disk Drive, open the HP All-in-One Setup Assistant from the following location: Applications:Hewlett-Packard:HP Photo & Imaging Software:HP AiO Software The HP All-in-One Setup Assistant appears on your computer.
-
Follow the onscreen prompts and provide the information requested.

Note Make sure you click TCP/IP Network on the connection screen.
Use Webscan
Webscan lets you perform a basic scan through the HP JetDirect 175x using just a Web browser. It also lets you perform the scan from your HP All-in-One without the device software installed on your computer. Just enter the IP address of the HP JetDirect in a Web browser and access the HP JetDirect embedded Web server and Webscan.
The user interface for Webscan is unique to using the HP JetDirect and does not support scan-to destinations like the HP Image Zone scanning software. The e-mail functionality of Webscan is limited, so it is recommended you use the HP Image Zone scanning software if you are not connected using the HP JetDirect.
To use Webscan
- Briefly press and release the test button on the rear of the HP JetDirect 175x.
The HP JetDirect network configuration page prints on the HP All-in-One. -
Enter the IP address of the HP JetDirect (obtained from the network configuration page) in a Web browser on your computer.
The HP JetDirect Web server opens in the browser window. -
Select Scan.
-
Follow the onscreen instructions.
4 Load originals and load paper
This chapter provides instructions for loading originals on the glass to copy, scan, or fax; choosing the best paper type for your job; loading paper in the paper tray; and avoiding paper jams.
Load an original
You can copy or scan up to letter- or A4-size originals by loading them on the glass, as described here. You should also follow these instructions when loading a proof sheet on the glass for photo printing.

Note Many of the special features will not work correctly if the glass and lid backing are not clean. For more information, see Clean the HP All-in-One.
To load an original on the glass
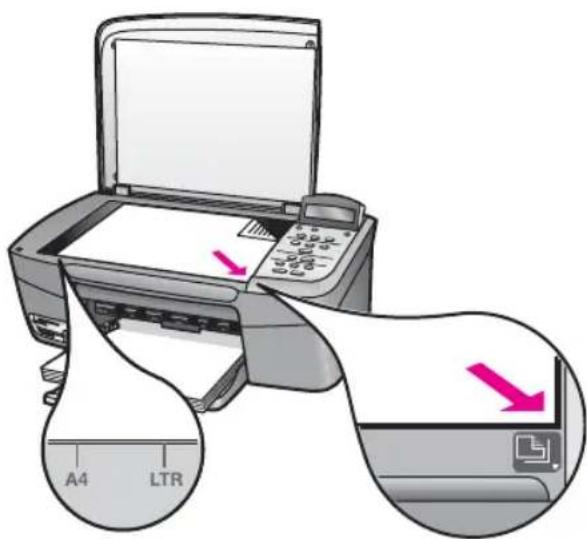
- Lift the lid and place your original face down on the right front corner of the glass. If you are loading a proof sheet, make sure the top of the proof sheet is lined up against the right edge of the glass.

Tip For more help on loading an original, refer to the guides along the front and right edges of the glass.
text_image
A4 LTR- Close the lid.

Tip You can copy or scan oversized originals by completely removing the lid from your HP All-in-One. To remove the lid, lift the lid to the open position, grasp the sides of the lid, and then pull the lid upward. Your HP All-in-One functions normally with the lid removed. Replace the lid by inserting the hinges back into the appropriate slots.
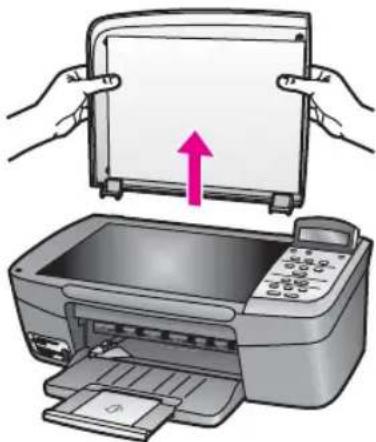
natural_image
Illustration of hands holding a flatboard next to a printer with an upward arrow (no text or symbols)Choose papers for printing and copying
You can use many types and sizes of paper in your HP All-in-One. Review the following recommendations to get the best printing and copying quality. Whenever you change paper types or sizes, remember to change those settings.
Recommended papers
If you want the best print quality, HP recommends using HP papers that are specifically designed for the type of project you are printing. If you are printing photos, for example, load glossy or matte photo paper in the paper tray. If you are printing a brochure or presentation, use a type of paper specifically designed for that purpose.
For more information about HP papers, see the onscreen HP Image Zone Help, or see the HP website:
www.hp.com/support/inkjet_media

Note At this time, this portion of the site is available in English only.
Papers to avoid
Using paper that is too thin, paper that has a slick texture, or paper that stretches easily can cause paper jams. Using paper that has a heavy texture or does not accept ink can cause printed images to smear, bleed, or not fill in completely.
We do not recommend printing to the following papers:
- Paper with cutouts or perforations (unless specifically designed for use with HP inkjet devices).
- Highly textured stock, such as linen. It might not print evenly, and the ink can bleed into these papers.
- Extremely smooth, shiny, or coated papers not specifically designed for your HP All-in-One. They can jam the HP All-in-One or repel the ink.
-
Multi-part forms (such as duplicate and triplicate forms). They can wrinkle or get stuck, and the ink is more likely to smear.
-
Envelopes with clasps or windows. They can get stuck in the rollers and cause paper jams).
- Banner paper.
Depending on your country/region, some of these papers might not be available.
We do not recommend copying to the following papers:
- Any size paper other than letter, A4, 10 x 15 cm (4 x 6 inch), 13 x 18 cm (5 x 7 inch), Hagaki (Japan only), or L (Japan only). Depending on your country/region, some of these papers might not be available to you.
- Panoramic papers.
- Paper with cutouts or perforations (unless specifically designed for use with HP inkjet devices).
- Envelopes.
- Banner paper.
- Transparency film (other than HP Premium Inkjet Transparency Film or HP Premium Plus Inkjet Transparency Film).
- Multiple-part forms or label stock.
Load paper
This section describes the procedure for loading different types and sizes of paper into your HP All-in-One for your copies or printouts.

Caution To help prevent rips, wrinkles, and curled or bent edges, store all paper flat in a resealable bag. If the paper is not stored properly, extreme changes in temperature and humidity might result in curled paper that does not work well in the HP All-in-One.
Load full-size paper
You can load many types of letter, A4, or legal paper into the paper tray of your HP All-in-One.
To load full-size paper
- Open the paper tray door.
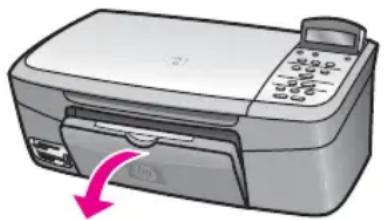
natural_image
Illustration of a printer with a pink arrow indicating compression or disassembly (no text or symbols present)- Pull the paper tray extender toward you, as far as it will go. Flip the paper catch at the end of the paper tray extender to open the extender the rest of the way.

Warning Legal paper might get caught on the paper tray extender if it is fully extended when you print onto legal paper. To avoid a paper jam when using legal-size paper, do not flip open the paper tray extender.
- Squeeze and hold the tab on the top of the paper-width guide, then slide the paper-width guide to its outermost position.
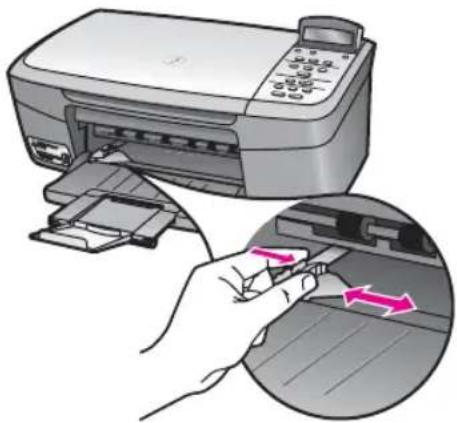
natural_image
Illustration of a printer being inserted into a slot, showing the process with arrows indicating movement (no text or symbols present)-
Tap a stack of paper on a flat surface to align the edges, and then check the paper for the following:
-
Make sure it is free of rips, dust, wrinkles, and curled or bent edges.
-
Make sure all the paper in the stack is the same size and type.
-
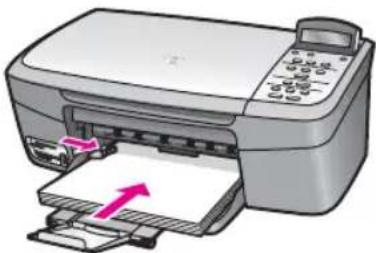
Insert the stack of paper into the paper tray with the short edge forward and the print side down. Slide the stack of paper forward until it stops.

Tip If you are using letterhead, insert the top of the page first with the print side down. For more help on loading full-size paper and letterhead, refer to the diagram engraved in the base of the paper tray.
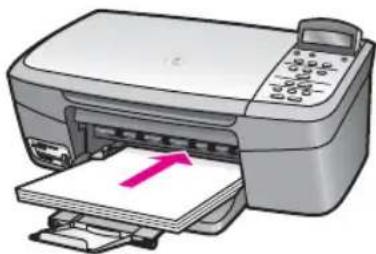
natural_image
Illustration of a printer with paper being inserted, showing paper sheet and printer control panel (no text or symbols)- Squeeze and hold the tab on the top of the paper-width guide, then slide the paper-width guide inward until it stops at the edge of the paper.
Do not overload the paper tray; make sure the stack of paper fits within the paper tray and is no higher than the top of the paper-width guide.
natural_image
Illustration of a printer with paper being inserted, showing paper movement arrows (no text or symbols)Load 10 x 15 cm (4 x 6 inch) photo paper
You can load 10 x 15 cm (4 x 6 inch) photo paper into the paper tray of your HP All-in-One. For best results, use 10 x 15 cm (4 x 6 inch) HP Premium Photo Paper or HP Premium Plus Photo Paper. For more information, see Recommended papers.
For best results, set the paper type and paper size before copying or printing. For information on changing paper settings, see the onscreen HP Image Zone Help.

Tip To help prevent rips, wrinkles, and curled or bent edges, store all paper flat in a resealable bag. If the paper is not stored properly, extreme changes in temperature and humidity might result in curled paper that does not work well in the HP All-in-One.
To load 10 x 15 cm (4 x 6 inch) photo paper
- Remove all paper from the paper tray.
-
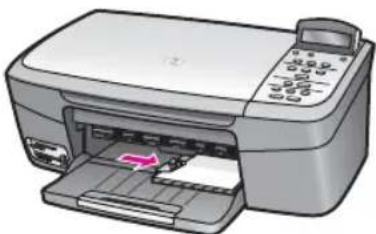
Insert the stack of photo paper into the far right side of the paper tray with the short edge forward and the glossy side down. Slide the stack of photo paper forward until it stops. If the photo paper you are using has perforated tabs, load the photo paper so that the tabs are closest to you.
-
Squeeze and hold the tab on the top of the paper-width guide, then slide the paper-width guide inward against the stack of photo paper until it stops. Do not overload the paper tray; make sure the stack of photo paper fits within the paper tray and is no higher than the top of the paper-width guide.
natural_image
Illustration of a printer with paper inside, showing paper being inserted (no text or symbols visible)Load postcards or Hagaki cards
You can load postcards or Hagaki cards into the paper tray of your HP All-in-One.
For the best results, set the paper type and size before printing or copying. For more information, see the onscreen HP Image Zone Help.
To load postcards or Hagaki cards
- Remove all paper from the paper tray.
Chapter 4
-
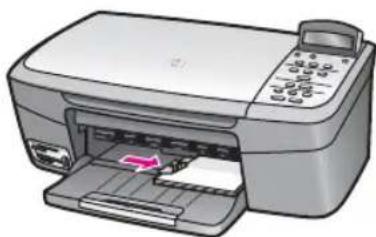
Insert the stack of cards into the far right side of the paper tray with the short edge forward and the print side down. Slide the stack of cards forward until it stops.
-
Squeeze and hold the tab on the top of the paper-width guide, then slide the paper-width guide inward against the stack of cards until it stops. Do not overload the paper tray; make sure the stack of cards fits within the paper tray and is no higher than the top of the paper-width guide.
natural_image
Illustration of a printer with paper inside, showing paper being inserted (no text or symbols visible)Load envelopes
You can load one or more envelopes into the paper tray of your HP All-in-One. Do not use shiny or embossed envelopes or envelopes that have clasps or windows.

Note For specific details on how to format text for printing on envelopes, consult the help files in your word processing software. For best results, consider using a label for the return address on envelopes.
To load envelopes
-
Remove all paper from the paper tray.
-
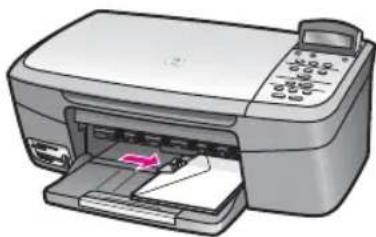
Insert one or more envelopes into the far right side of the paper tray with the envelope flaps up and to the left. Slide the stack of envelopes forward until it stops.

Tip For more help on loading envelopes, refer to the diagram engraved in the base of the paper tray.
- Squeeze and hold the tab on the top of the paper-width guide, then slide the paper-width guide inward against the stack of envelopes until it stops. Do not overload the paper tray; make sure the stack of envelopes fits within the paper tray and is no higher than the top of the paper-width guide.
natural_image
Illustration of a generic printer with paper feed and control panel (no text or symbols)Load other types of paper
The following table provides guidelines for loading certain types of paper. For best results, adjust the paper settings each time you change paper sizes or paper types. For information on changing paper settings, see the onscreen HP Image Zone Help.

Note Not all paper sizes and paper types are available with all the functions on the HP All-in-One. Some paper sizes and paper types can only be used if you are starting a print job from the Print dialog box in a software application. They are not available for copying or printing photos from a memory card or digital camera. Papers that are only available for printing from a software application are indicated as such.
| Paper | Tips |
| HP papers | HP Premium Paper: Locate the gray arrow on the nonprinting side of the paper, and then slide the paper into the paper tray with the arrow side facing up.HP Premium Inkjet Transparency Film: Insert the film so that the white transparency strip (with arrows and the HP logo) is on top and is going into the paper tray first. For printing from a software application only.Note The HP All-in-One cannot automatically detect transparency film. For best results, set the paper type to transparency film before printing or copying onto transparency film.HP Iron-On Transfers: Flatten the transfer sheet completely before using it; do not load curled sheets. (To prevent curling, keep transfer sheets sealed in the original package until you are ready to use them.) Locate the blue stripe on the nonprinting side of the transfer paper and then manually feed one sheet at a time into the paper tray with the blue stripe facing up. For printing from a software application only.HP Greeting Cards, HP Photo Greeting Cards, or HP Textured Greeting Cards: Insert a small stack of HP greeting card paper into the paper tray with the print side down; slide the stack of cards forward until it stops. For printing from a software application only. |
| Labels | Always use letter or A4 label sheets designed for use with HP inkjet devices (such as Avery inkjet labels), and make sure that the labels are no more than two years old. Labels on older sheets might peel off when the HP All-in-One, causing paper jams. For printing from a software application only.Fan the stack of labels to make sure none of the pages are sticking together.Place a stack of label sheets on top of full-size plain paper in the paper tray, label side down. Do not insert labels one sheet at a time. |
Avoid paper jams
To help avoid paper jams, follow these guidelines:
- Prevent curled or wrinkled paper by storing all unused paper flat in a resealable bag.
- Remove printed papers from the paper tray frequently.
- Ensure that paper loaded in the paper tray lies flat and the edges are not bent or torn.
- Do not combine different paper types and paper sizes in the paper tray; the entire stack of paper in the paper tray must be the same size and type.
- Adjust the paper-width guide in the paper tray to fit snugly against all paper. Make sure the paper guide does not bend the paper in the paper tray.
- Do not force paper too far forward in the paper tray.
- Use paper types that are recommended for your HP All-in-One. For more information, see Choose papers for printing and copying.
For more information about clearing paper jams, see Paper troubleshooting.
5 Work with photos
Your HP All-in-One allows you to transfer, edit, share, and print photos in several different ways. This chapter contains a brief overview of the wide range of options for performing each of these tasks, depending on your preferences and computer setup. More detailed information for each task is available in other chapters within this guide, or in the onscreen HP Image Zone Help that came with your software.
Transfer photos
You have several different options for transferring photos. You can transfer photos to your computer or to a memory card. For more information, see the section below specific to your operating system.
Transfer photos using a Windows computer
The graphics below show methods for transferring photos to your Windows computer or a memory card.
You can transfer a photo from a memory card inserted into your HP All-in-One to your Windows computer.
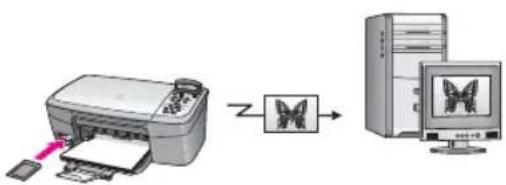
flowchart
graph LR
    A["Printer Printing"] --> B["Image Processing"]
    B --> C["Computer Monitor"]
You can transfer a photo from your HP digital camera to your Windows computer.
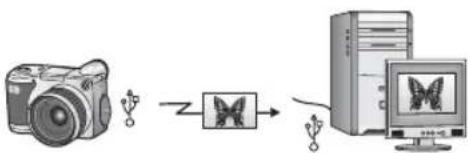
flowchart
graph LR
    A["Camera"] --> B["Butter Icon"]
    B --> C["Server"]
    C --> D["Computer Icon"]
You can transfer a photo by scanning a photo directly onto a memory card inserted into your HP All-in-One.
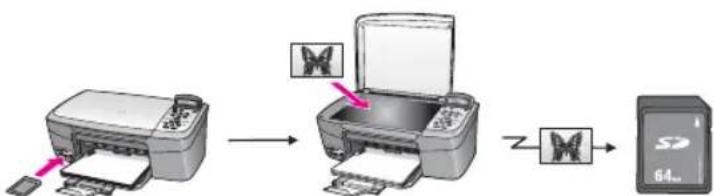
flowchart
graph LR
    A["Printer"] --> B["Printer with butterfly icon"]
    B --> C["Printer with M icon"]
    C --> D["Printer with S464 logo"]
Chapter 5
Transfer photos using a Macintosh
The graphics below show methods for transferring photos to your Macintosh or a memory card. For more information, see the list below the graphic.
You can transfer a photo from a memory card inserted into your HP All-in-One to your Macintosh.
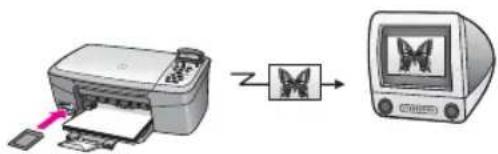
text_image
Diagram showing printer printing process with butterfly symbol and computer monitor displaying butterfly imageYou can transfer a photo from your HP digital camera to your Macintosh.
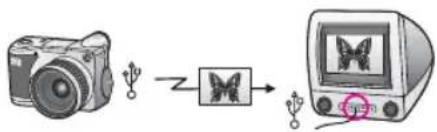
text_image
Diagram showing a camera connected to a butterfly icon and a computer monitor displaying butterfly images, with a small ear symbol indicating the image.You can transfer a photo by scanning a photo directly onto a memory card inserted into your HP All-in-One.

flowchart
graph LR
    A["Printer"] --> B["Photo of butterfly image"]
    B --> C["Transfer to M"]
    C --> D["Storage card with 64mm mark"]
Edit photos
You have several different options for editing photos. For more information, see the section below specific to your operating system.
Edit photos using a Windows computer
The graphics below show methods for editing photos using a Windows computer. You can edit a photo on your Windows computer using the HP Image Zone software.
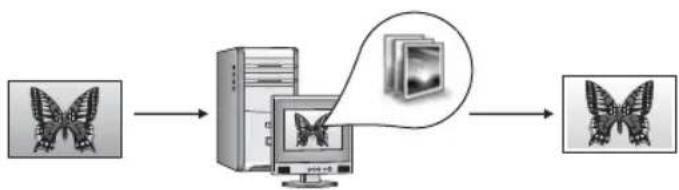
flowchart
graph LR
    A["Computer Image"] --> B["Computer"]
    B --> C["Computer Image with Image Bubble"]
    C --> D["Computer Image with Image Bubble"]
You can edit a photo using the control panel on your HP All-in-One.
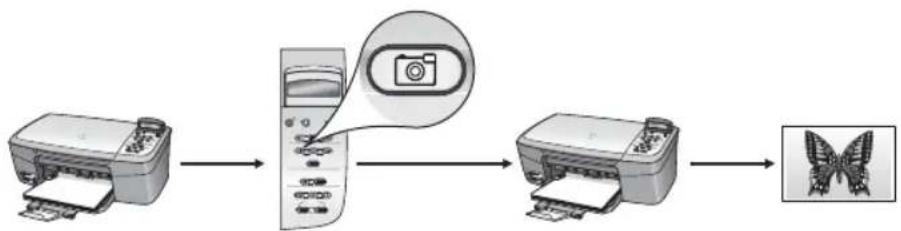
flowchart
graph LR
    A["Printer"] --> B["Printer with Camera Icon"]
    B --> C["Printer"]
    C --> D["Butter Image"]
Edit photos using a Macintosh
The graphics below show methods for editing photos using a Macintosh.
You can edit a photo on your Macintosh using the HP Image Zone software.
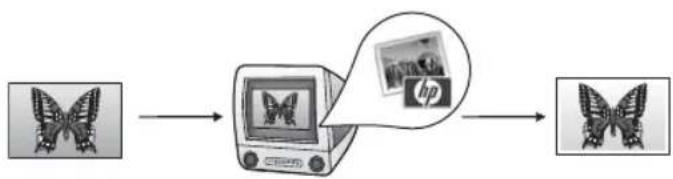
flowchart
graph LR
    A["Butter Image"] --> B["Computer Monitor"]
    B --> C["Product Image"]
You can edit a photo on your Macintosh using the iPhoto software.
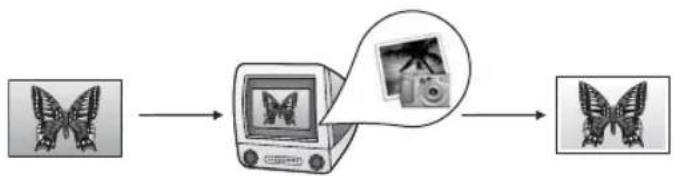
flowchart
graph LR
    A["Computer monitor image"] --> B["Computer screen image"]
    B --> C["Output image"]
You can edit a photo using the control panel on your HP All-in-One.
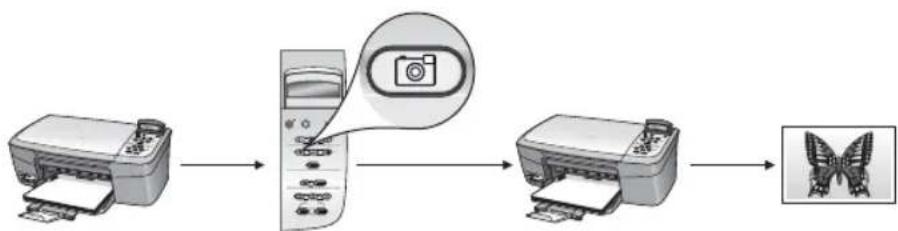
flowchart
graph LR
    A["Printer"] --> B["Printer with Camera Icon"]
    B --> C["Printer"]
    C --> D["Butter Image"]
Share photos
You have several different options for sharing photos with friends and family. For more information, see the section below specific to your operating system.
Share photos using a Windows computer
The graphic below shows a method for sharing photos using a Windows computer.
You can share photos from your USB-connected HP All-in-One using the HP Instant Share server. Transfer photos from your USB-connected HP All-in-One to your computer, where you use the HP Image Zone software to send the photos through the HP Instant Share server as an e-mail to your friends or family.
Chapter 5

flowchart
graph LR
    A["Printer"] -->|Data Transfer| B["Server"]
    B --> C["Monitor"]
    C --> D["Global Globe"]
    D --> E["Laptop"]
    style A fill:#f9f,stroke:#333
    style B fill:#ccf,stroke:#333
    style C fill:#cfc,stroke:#333
    style D fill:#fcc,stroke:#333
    style E fill:#ffc,stroke:#333
Share photos using a Macintosh
The graphic below shows a method for sharing photos using a Macintosh.
You can share photos from your USB-connected HP All-in-One using the HP Instant Share server. Transfer photos from your USB-connected HP All-in-One to your computer, where you use the HP Image Zone software to send the photos through the HP Instant Share server as an e-mail to your friends or family.

flowchart
graph LR
    A["Printer"] --> B["Monitor"]
    B --> C["Global"]
    C --> D["Laptop"]
    style A fill:#f9f,stroke:#333
    style B fill:#ccf,stroke:#333
    style C fill:#cfc,stroke:#333
    style D fill:#fcc,stroke:#333
Print photos
You have several different options for printing photos. For more information, see the section below specific to your operating system.
Print photos using a Windows computer
The graphics below show methods for printing photos using a Windows computer. You can print photos from your HP digital camera using PictBridge.
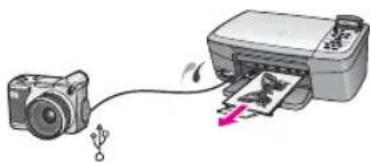
natural_image
Diagram showing a camera connected to a printer with a paper airplane being inserted (no text or symbols present)You can print photos from your camera using a software application (such as HP Image Zone) on your computer.
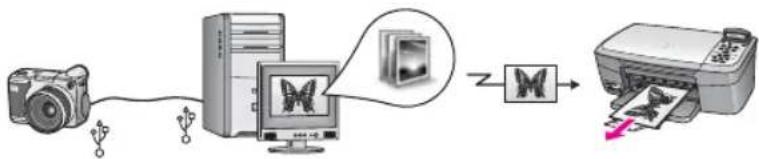
flowchart
graph LR
    A["Camera"] --> B["Computer"]
    B --> C["Printer"]
    C --> D["Printer"]
    style A fill:#f9f,stroke:#333
    style B fill:#ccf,stroke:#333
    style C fill:#cfc,stroke:#333
    style D fill:#fcc,stroke:#333
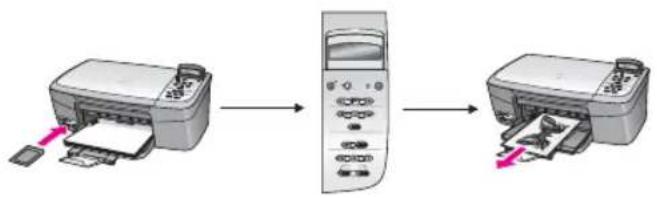
You can print photos from a memory card using the control panel on the HP All-in-One.
flowchart
graph LR
    A["Printer Printer"] --> B["Scan"]
    B --> C["Printer Printer"]
You can print photos from a memory card by transferring photos to your Windows computer and printing them using the HP Image Zone software.

flowchart
graph LR
    A["Printer"] -->|Z| B["Computer"]
    B --> C["Image Processing"]
    C --> D["Printer"]
Print photos using a Macintosh
The graphics below show methods for printing photos using a Macintosh. You can print photos from your HP digital camera using PictBridge.
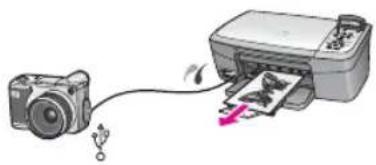
natural_image
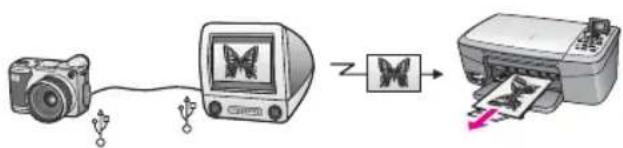
Illustration of a camera connected to a printer with a pink arrow indicating print (no text or symbols present)You can print photos from your camera using a software application (such as HP Image Zone) on your computer.
flowchart
graph LR
    A["Camera"] --> B["Printer"]
    B --> C["Printer"]
    style A fill:#f9f,stroke:#333
    style B fill:#ccf,stroke:#333
    style C fill:#cfc,stroke:#333
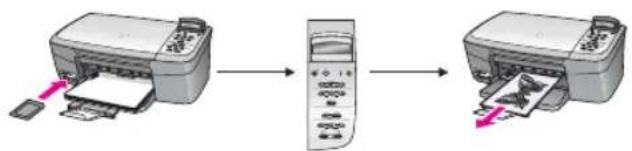
You can print photos from a memory card using the control panel on the HP All-in-One.
flowchart
graph LR
    A["Printer Printer"] --> B["Scan"]
    B --> C["Printer Printer"]
Chapter 5
You can print photos from a memory card by transferring photos to your Macintosh and printing them using the HP Image Zone or iPhoto software.

flowchart
graph LR
    A["Printer"] --> B["Printer"]
    B --> C["Image Processing"]
    C --> D["Printer"]
    style A fill:#f9f,stroke:#333
    style B fill:#ccf,stroke:#333
    style C fill:#cfc,stroke:#333
    style D fill:#fcc,stroke:#333
6 Use a memory card or PictBridge camera
The HP All-in-One can access the memory cards used in most digital cameras so you can print, store, and manage your photos. You can insert the memory card into the HP All-in-One, or connect your camera directly, letting the HP All-in-One read the contents of the memory card while it is still in the camera.
This chapter contains information on using memory cards or a PictBridge camera with your HP All-in-One. Read this chapter for information on transferring photos to your computer, setting photo print options, printing photos, and editing photos.
The memory card slots and camera port
If your digital camera uses a memory card to store photos, you can insert the memory card in your HP All-in-One to print or save your photos. You can also connect a digital camera that supports PictBridge to the HP All-in-One through the camera port and print directly from the camera.

Tip You can print a proof sheet, which might be several pages long and shows thumbnail views of photos stored on the memory card, to print photos from the memory card, even if your HP All-in-One is not connected to a computer.
Your HP All-in-One can read the following memory cards: CompactFlash (I, II), Memory Sticks, MultiMediaCard (MMC), Secure Digital, SmartMedia, and xD-Picture Card.
The following illustration shows the corresponding memory card slot for each supported memory card.
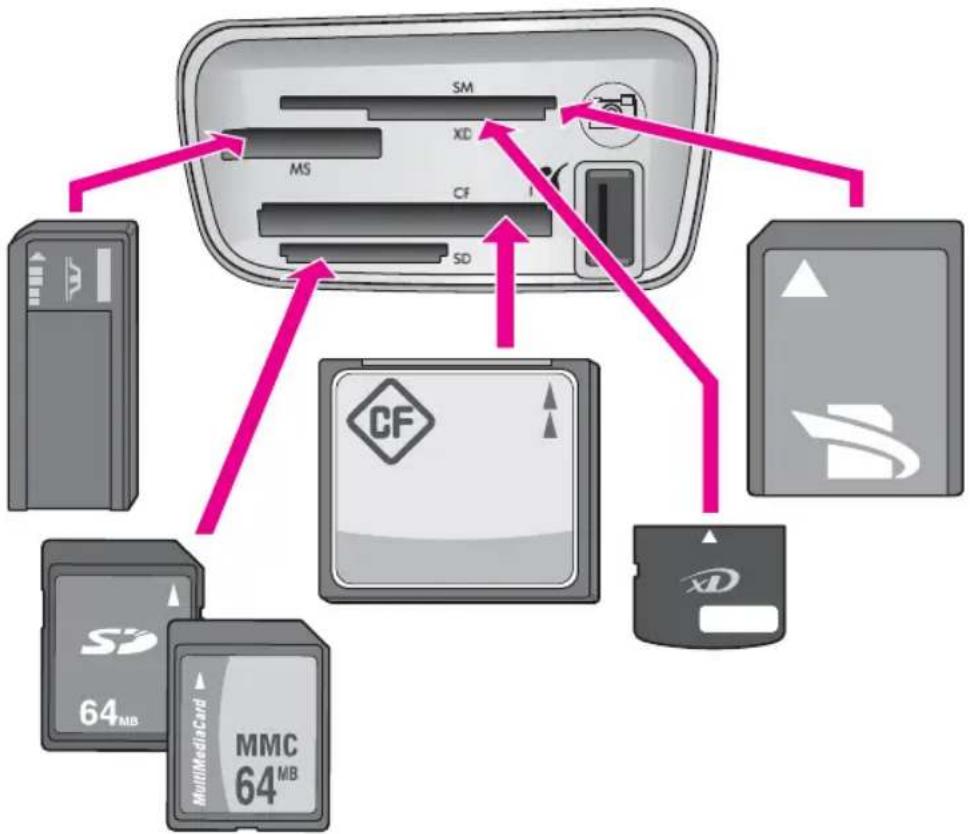
text_image
SM XD MS CF SD 64MB MMC 64MB MultiMediaCard CFThe slots are configured as follows (from top to bottom):
• SmartMedia, xD-Picture Card (fits in bottom right of the slot)
- Memory Stick, Magic Gate Memory Stick, Memory Stick Duo (with user-supplied adapter), Memory Stick Pro
- CompactFlash (I, II)
- Secure Digital, MultiMediaCard (MMC)
- Camera port (to the right of the memory card slots): compatible with any USB-equipped digital camera that supports PictBridge. Look for the PictBridge icon ( ).

Note The camera port only supports USB-equipped digital cameras that support PictBridge. It does not support other types of USB devices. If you attach a USB device that is not a compatible digital camera to the camera port, an error message appears on the control panel display. If you have an older HP camera that does not support PictBridge, try using the USB cable that came with the camera. Plug it into the USB port on the back of the HP All-in-One and not into the camera port near the memory card slots.

Tip By default, Windows XP will format a memory card of 8 MB or less and 64 MB or more with the FAT32 format. Digital cameras and other devices use the FAT (FAT16 or FAT12) format and cannot operate with a FAT32 formatted card. Either format your memory card in your camera or select FAT format to format your memory card in a Windows XP computer.
Transfer photos to your computer
After you take photos with your digital camera, you can print them immediately or save them directly to your computer. To save them to your computer, you need to remove the memory card from the camera and insert it in the appropriate memory card slot on the HP All-in-One.

Note You can only use one memory card at a time in your HP All-in-One.
To use a memory card
- Insert the memory card into the appropriate slot on your HP All-in-One.
When the memory card is inserted correctly, the status light next to the memory card slots begins to blink. Reading card... appears on the control panel display. The status light next to the memory card slots blinks green when the card is being accessed.
If you insert a memory card incorrectly, the status light next to the memory card slots blinks amber and the control panel display shows an error message such as Card is in backwards or Card is not fully inserted.

Caution Never attempt to remove a memory card while it is being accessed. Doing so can damage files on the card. You can safely remove a card only when the status light next to the slots is not blinking.
-
If there are photo files on the memory card that have never been transferred before, a dialog box on your computer asks whether you want to save the photo files to your computer.
-
Click the option to save.
This saves all the new photos from the memory card to your computer.
For Windows: by default, photo files are saved in month and year folders from when you extracted the files from your camera. The folders are created in a C:\Documents and Settings\username\My Documents\My Pictures folder in Windows XP and Windows 2000.
For Macintosh: by default, files are saved to the computer at Hard Drive:Documents:HP All-in-One Data:Photos (OS 9) or Hard Drive:Users:User Name:Pictures:HP Photos (OS X).
When the HP All-in-One finishes reading the memory card, the status light next to the memory card slots stops blinking and stays lit. The name of the first file on the memory card appears on the control panel display.
To navigate through the files on the memory card, press ◀ or ▶ to move backward or forward through the files, one file at a time. Press and hold ◀ or ▶ to move rapidly backward or forward through the files.
Print photos from a proof sheet
A proof sheet is a simple and convenient way to select photos and make prints directly from a memory card without the need for a computer. A proof sheet, which might be several pages long, shows thumbnail views of photos stored on the memory card. The file name, index number, and date appear under each thumbnail. Proof sheets are also a quick way to create a printed catalog of your photos. In order to print
photos using a proof sheet, you need to print the proof sheet, complete it, and then scan it.
Printing photos from a proof sheet is done in three steps: printing a proof sheet, completing the proof sheet, and scanning the proof sheet. This section contains detailed information on all three steps.
Leave your memory card in the slot until after you have completed all three steps (printed, completed, and scanned your proof sheet) and your photos have printed. If you remove the memory card or insert a different memory card, the photos you select will not print.
Print a proof sheet
The first step in using a proof sheet is to print it from the HP All-in-One.
- Insert the memory card into the appropriate slot on your HP All-in-One.

Note Leave the memory card in the slot until after you have printed, completed, and scanned your proof sheet and your photos have printed. If you remove the memory card or insert a different memory card, the photos you select will not print.
- Press Proof Sheet, and then press OK.
This displays the Proof Sheet menu and then selects Print.

Note Depending on how many photos are on the memory card, the time it takes to print a proof sheet can vary greatly.
- If there are more than 20 photos on the card, the Select Photos menu appears. Press ▶ to scroll to the option you want to select, and then press OK.
-All
- Last 20
- Custom Range
- If you choose Custom Range, you must enter the photo index numbers for the first and last photos you want to print. When the First Photo prompt displays, press ▶ until the number for the first photo in the range displays, and then press OK.

Note If you enter the wrong number, press Cancel to cancel the process and then start over.
- When the Last Photo prompt displays, press ▶ until the number for the last photo in the range displays, and then press OK.
Complete the proof sheet
After you have printed a proof sheet, you can use it to select the photos you want to print.

Note You might want to use a photo print cartridge for superior print quality. With the tri-color and photo print cartridges installed, you have a six-ink system. For more information, see Use a photo print cartridge.
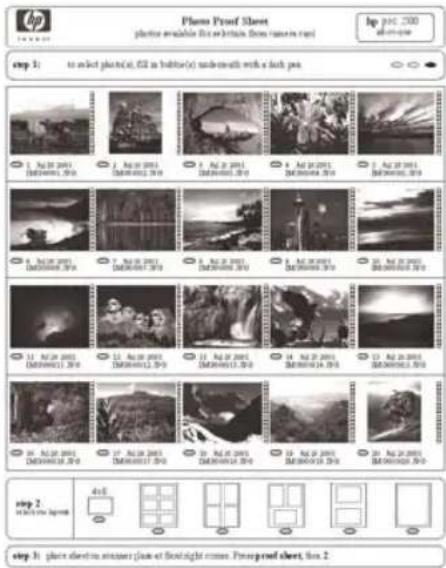
text_image
Photo PDF Sheet photo available for a lecture. Photo name is part bp port, 200 step 1: to select photo(s), all in bottle(s) underneath with a dark pen 1. May 2003 [EMEREOV] 2010 2. May 2003 [EMEREOV] 2010 3. May 2003 [EMEREOV] 2010 4. May 2003 [EMEREOV] 2010 5. May 2003 [EMEREOV] 2010 6. May 2003 [EMEREOV] 2010 7. May 2003 [EMEREOV] 2010 8. May 2003 [EMEREOV] 2010 9. May 2003 [EMEREOV] 2010 10. May 2003 [EMEREOV] 2010 11. May 2003 [EMEREOV] 2010 12. May 2003 [EMEREOV] 2010 13. May 2003 [EMEREOV] 2010 14. May 2003 [EMEREOV] 2010 15. May 2003 [EMEREOV] 2010 16. May 2003 [EMEREOV] 2010 17. May 2003 [EMEREOV] 2010 18. May 2003 [EMEREOV] 2010 19. May 2003 [EMEREOV] 2010 20. May 2003 [EMEREOV] 2010 step 2: 4x6 step 3: photo sheet in starney (face of frontight scene). Photo PDF sheet, Box 2To complete a proof sheet
- Select the photos to print by using a dark pen or pencil to fill in the circles located under the thumbnail images on the proof sheet.
- Select one layout style by filling in a circle in step 2 of the proof sheet.

text_image
4x6
Note If you need more control over print settings than the proof sheet provides, you can print photos directly from the control panel. For more information, see Print photos directly from a memory card.
Scan a proof sheet
The final step in using a proof sheet is to scan the completed sheet to begin printing your photos.

Tip Make sure the glass of the HP All-in-One is completely clean or the proof sheet might not scan properly. For more information, see Clean the glass.
- Load the proof sheet face down on the right front corner of the glass. Make sure the sides of the proof sheet touch the right and front edges. Close the lid.
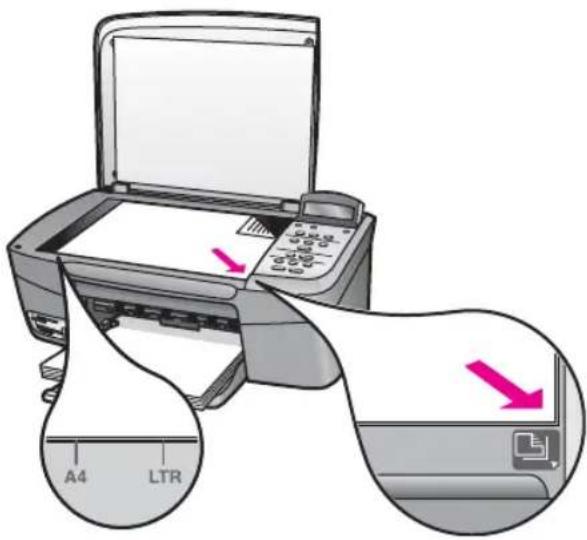
text_image
A4 LTR- Load photo paper in the paper tray. Make sure the same memory card you used to print the proof sheet is still in the slot when you scan that proof sheet.
- Press Proof Sheet, and then press ▶ to select Scan.
- Press OK.
The HP All-in-One scans the proof sheet and prints the selected photos.
Set photo print options
From the control panel, you can control how your HP All-in-One prints photos, including paper type and size, layout, and more.
This section contains information on the following topics: setting photo print options, changing print options, and setting new photo print option defaults.

Tip You can also use the HP Image Zone software when printing photos. For more information, see the HP Image Zone Help.
Use the Photo menu to set photo print options
The Photo menu gives you access to a variety of settings that affect the way photos print, including number of copies, paper types, and more. The default measurements and sizes vary according to country/region.
- Insert a memory card into the appropriate slot on your HP All-in-One.
- Press Photo Menu.
The Photo menu appears.
- Press Photo Menu repeatedly until the setting you want to change appears on the control panel display:
| Setting | Description |
| Select Photos | Lets you select the photos you want to print. All selects all photos on the memory card, and Custom allows you to manually select each photo you want to print. |
| Setting Description | |
| Number of Copies Lets you set the number of copies to be printed. | |
| Image Size Lets you set the size at which you want the imageprinted. Most choices are self-explanatory, but tworequire some explanation: Fill Entire Page and Fit toPage.-Fill Entire Page scales the image to cover all ofthe output paper without any white border area.Some cropping might occur.-Fit to Page scales the image to cover as much ofthe page as possible while keeping the originalaspect ratio without cropping. The image iscentered on the page and is surrounded by awhite border. | |
| Paper Size Lets you select the paper size for the current print job.TheAutomaticsetting defaults to a large (letter or A4)and small 10 x 15 cm (4 x 6 inch) paper size thatvaries by country/region. WhenPaper Size and PaperTypeare both set toAutomatic, the HP All-in-Oneselects the best print options for the current print job.The otherPaper Sizesettings let you override theautomatic settings. | |
| Paper Type Lets you select the paper type for the current print job.TheAutomaticsetting lets the HP All-in-One detectand set the paper type automatically. WhenPaperSize and Paper Typeare both set toAutomatic, theHP All-in-One selects the best options for the currentprint job. The otherPaper Typesettings let youoverride the automatic settings. | |
| Layout Style Lets you select one of two layout styles for the currentprint job.ThePaper Saverlayout fits as many photos on thepaper as possible, rotating and cropping photos ifnecessary.TheAlbum layouts keep the orientation of the originalphotos.Albumrefers to the orientation of the page,not the photos themselves. Some cropping might occur. | |
| Smart Focus Lets you enable or disable automatic digitalsharpening of photos.Smart Focusaffects onlyprinted photos. It does not change the actual image fileon the memory card.Smart Focusis enabled bydefault. | |
| Digital Flash | Lets you make dark photos appear lighter.DigitalFlashaffects only printed photos. It does not change |
| the actual image file on the memory card. Digital Flash is turned off by default. | |
| Set New Defaults Lets | you save the current photo print options settings as the new defaults. |
Change print options
You change each of the Print Options menu settings in the same general way.
- Press Photo Menu repeatedly to see all the options.
The currently selected option is highlighted, and its default setting (if any) appears in the second line of the control panel display.
- Make the change to the setting, and then press OK.
For information on setting default photo print options, see Set new photo print options defaults.
Set new photo print options defaults
You can change the photo print options defaults from the control panel.
- Press Photo Menu until the option you want to change appears.
- Make changes to any options as needed. When you have finished changing an option, press OK.
- Press Photo Menu until Set New Defaults appears on the control panel display.
- Press ▶ to select Yes, and then press OK.
All the current settings become the new defaults.
Print photos directly from a memory card
You can insert a memory card in your HP All-in-One and use the control panel to print photos. For information on printing photos on your HP All-in-One from a PictBridge-compatible camera, see Print photos from a PictBridge-compatible digital camera.
This section contains information on the following topics: printing individual photos, creating borderless photos, and deselecting photos.

Note Before printing photos, you should select options for photo enhancement and set the paper type. For more information, see Set photo print options. You might also want to use the photo print cartridge for superior print quality. For more information, see Use a photo print cartridge.
You can do more than print your photos if you use the HP Image Zone software. This software lets you use photos for iron-on transfers, posters, banners, stickers, and other creative projects. For more information, see the onscreen HP Image Zone Help file that came with your software.
Print individual photos
You can print photos directly from the control panel without using a proof sheet.
- Insert the memory card into the appropriate slot on your HP All-in-One. The status light next to the memory card slots lights up.
-
Load photo paper in the paper tray. Make sure you load the correct size of paper for the photo size you want to print.
-
Press ◀ or ▶ to move backward or forward through the file names on the memory card. When the file name of the photo you want to print appears on the control panel display, press Select Photos. A check mark appears next to the selected file name.
-
Press Photo Menu to display the Photo menu, and then modify the photo print options as desired. The print option settings revert back to the default settings after the print job is completed.
-
Press Print Photos to print the selected photos.
Create borderless prints
An exceptional feature of your HP All-in-One is its ability to turn photos on a memory card into professional, borderless prints.
-
Insert the memory card into the appropriate slot on your HP All-in-One. The status light next to the memory card slots lights up.
-
Use ◀ or ▶ to move backward or forward through the file names on the memory card. When the file name of the photo you want to print appears on the control panel display, press Select Photos. A check mark appears next to the selected file name.
-
Load 10 x 15 cm (4 x 6 inch) photo paper in the paper tray.

Tip If the photo paper you are using has perforated tabs, load the photo paper so that the tabs are closest to you.
- Press Print Photos to print the selected photos as borderless prints.
Deselect photos
You can deselect photos from the control panel.
→ Do one of the following:
- Press Select Photos to deselect the currently selected file on the display.
- Press Cancel to deselect all files and return to the idle screen.
- Press Select Photos to deselect the currently selected file on the display. - Press Cancel to deselect all files and return to the idle screen.
Print photos from a PictBridge-compatible digital camera
The HP All-in-One supports the PictBridge standard, which lets you connect any PictBridge-compatible camera to the camera port and print JPEG photos contained on the memory card in the camera.

Note Your HP All-in-One only supports JPEG file formats when printing from the PictBridge port. For more information about changing the file format on
your PictBridge-compatible digital camera, see the documentation that came with your camera.
- Make sure the HP All-in-One is turned on and that the initialization process is finished.
- Connect your PictBridge-compatible digital camera to the camera port on the front of your HP All-in-One using the USB cable supplied with your camera.
- Turn on your camera and make sure it is in PictBridge mode.

Note When the camera is connected correctly, the status light next to the memory card slots is illuminated. The status light blinks green when printing from the camera.
For more information about printing from a PictBridge-compatible digital camera, see the documentation that came with your camera.
If the camera is not PictBridge-compliant or is not in PictBridge mode, the status light blinks amber and an error message appears on your computer monitor (if you have the HP All-in-One software installed). Disconnect the camera, correct the problem on the camera and reconnect. For more information about PictBridge camera port troubleshooting, see the
Troubleshooting Help that came with your HP Image Zone software.
After you successfully connect your PictBridge-compliant camera to the HP All-in-One, you can print your photos. Make sure the size of the paper loaded in the HP All-in-One matches the setting on your camera. If the paper size setting on your camera is set to the default, the HP All-in-One uses the paper that is currently loaded in the paper tray. Refer to the user guide that came with your camera for detailed information on printing from the camera.

Tip If your digital camera is an HP model that does not support PictBridge, you can still print directly to the HP All-in-One. Connect the camera to the USB port on the back of the HP All-in-One instead of to the camera port. This works with HP digital cameras only.
Print the current photo
You can use the Print Photos button to print the file currently displayed on the control panel display.
- Insert the memory card into the appropriate slot on your HP All-in-One.
- Navigate to the photo file name you want to print.
- Press Print Photos to print the photo using the current settings.
Print a DPOF file
The Digital Print Order Format (DPOF) is an industry-standard file that can be created by some digital cameras. When you select photos with your camera, the camera creates a DPOF file that identifies which photos have been tagged for printing. Your
HP All-in-One can read the DPOF file from the memory card so you do not have to reselect the photos to print.

Note Not all digital cameras allow you to tag your photos for printing. See your digital camera documentation to see if it supports DPOF. Your HP All-in-One supports DPOF file format 1.1.
When you print camera-selected photos, the HP All-in-One print settings do not apply; the settings in the DPOF file for photo layout and number of copies override those of your HP All-in-One.
The DPOF file is stored by the digital camera on a memory card and specifies the following information:
- Which photos to print
• The quantity of each photo to print - Rotation applied to a photo
- Cropping applied to a photo
- Index printing (thumbnails of selected photos)
To print camera-selected photos
- Insert the memory card into the appropriate slot on your HP All-in-One. If there are DPOF-tagged photos, the Print DPOF? prompt appears on the control panel display.
- Do one of the following:
- Press OK to print all DPOF-tagged photos on the memory card. This selects Yes and prints the photos using the DPOF settings.
- Press ▶ and then press OK. This selects NO and bypasses DPOF printing.
7 Use the copy features
The HP All-in-One allows you to produce high-quality color and black-and-white copies on a variety of paper types, including transparencies. You can enlarge or reduce the size of an original to fit a specific paper size, adjust the darkness and color intensity of the copy, and use special features to make high-quality copies of photos, including 10 x 15 cm (4 x 6 inch) borderless copies.
This chapter provides instructions for increasing copy speed, enhancing copy quality, setting the number of copies to print, guidelines for choosing the best paper type and size for your job, making posters, and making iron-on transfers.

Tip For the best copy performance on standard copy projects, set the paper size to Letter or A4, the paper type to Plain Paper, and the copy quality to Fast.
- For information on setting the paper size, see Set the copy paper size.
- For information on setting the paper type, see Set the copy paper type.
- For information on setting the copy quality, see Increase copy speed or quality.
You can learn how to perform photo copy projects, such as making borderless copies of photos, enlarging and reducing the copies of photos to suit your preference, making multiple copies of photos on a page, and making quality enhancements to copies of faded photos.
Make a 10 x 15 cm (4 x 6 inch) borderless copy of a photo.
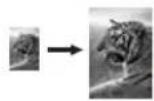
Copy a 10 x 15 cm (4 x 6 inch) photo onto a full-size page.
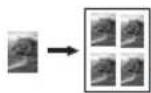
Copy a photo several times on one page.
Enhance light areas of your copy.
Set the copy paper size
You can set the paper size on your HP All-in-One. The paper size you select should match what is loaded in your paper tray. The default paper size setting for copying is Automatic, which causes the HP All-in-One to detect the size of paper in the paper tray.
- Make sure you have paper loaded in the paper tray.
- Load your original face down on the right front corner of the glass.
- Press Copy Menu until Copy Paper Size appears.
- Press ▶ until the appropriate paper size appears.
- Press OK to choose the displayed paper size.
- Press Start Copy Black or Start Copy Color.
| Paper type Suggested paper size settings | |
| Copier, multi-purpose, or plain papers | Letter or A4 |
| Inkjet papers | Letter or A4 |
| Iron-on transfers | Letter or A4 |
| Letterhead Letter or A4 | |
| Photo papers | 10 x 15 cm or 10 x 15 cm Borderless13 x 18 cm or 13 x 18 cm Borderless4 x 6 inches or 4 x 6 Borderless5 x 7 inches or 5 x 7 BorderlessLetter or Letter BorderlessA4 or A4 BorderlessL-size or L-size Borderless (Japan only) |
| Hagaki cards | Hagaki or Hagaki Borderless (Japan only) |
| Transparency films | Letter or A4 |
Set the copy paper type
You can set the paper type on your HP All-in-One. The default paper type setting for copying is Automatic, which causes the HP All-in-One to detect the type of paper in the paper tray.
If you copy onto special papers, or if you experience poor print quality by using the Automatic setting, you can set the paper type manually from the Copy Menu.

Note The HP All-in-One cannot automatically detect transparency film. For best results, set the paper type to Transparency before copying onto transparency film.
- Make sure you have paper loaded in the paper tray.
- Load your original face down on the right front corner of the glass.
- Press Copy Menu until Copy Paper Type appears.
- Press ▶ until the appropriate paper type appears, and then press OK.
- Press Start Copy Black or Start Copy Color.
Refer to the following table to determine which paper type setting to choose based on the paper loaded in the paper tray.
| Paper type | Control panel setting |
| Copier paper or letterhead Plain Paper | |
| HP Bright White Paper Plain Paper | |
| HP Premium Plus Photo Paper, Glossy Premium Photo | |
| Paper type Control panel setting | |
| HP Premium Plus Photo Paper, Matte Premium Photo | |
| HP Premium Plus 4 x 6 inch Photo Paper Premium Photo | |
| HP Photo Paper Photo Paper | |
| HP Everyday Photo Paper Everyday Photo | |
| HP Everyday Photo Paper, Semi Gloss Everyday Matte | |
| Other photo paper Other Photo | |
| HP Iron-On Transfer (for color fabrics) Iron-On | |
| HP Iron-On Transfer (for light or white fabrics) Iron-On Mirrored | |
| HP Premium Paper Premium Inkjet | |
| Other inkjet paper Premium Inkjet | |
| HP Professional Brochure & Flyer Paper (Glossy) Brochure Glossy | |
| HP Professional Brochure & Flyer Paper (Matte) Brochure Matte | |
| HP Premium or Premium Plus Inkjet Transparency Film | Transparency |
| Other transparency film Transparency | |
| Plain Hagaki (Japan only) Plain Paper | |
| Glossy Hagaki (Japan only) | Premium Photo |
| L (Japan only) | Premium Photo |
Increase copy speed or quality
The HP All-in-One provides three options that affect copy speed and quality.
- Normal delivers high-quality output and is the recommended setting for most of your copying. Normal copies faster than Best.
- Best produces the highest quality for all paper and eliminates the banding (striping) effect that sometimes occurs in solid areas. Best copies more slowly than the other quality settings.
- Fast copies faster than the Normal setting. The text is comparable to the quality of the Normal setting, but the graphics might be lower quality. The Fast setting uses less ink and extends the life of your print cartridges.
To change the copy quality from the control panel
- Make sure you have paper loaded in the paper tray.
- Load your original face down on the right front corner of the glass.
- Press Copy Menu until Copy Quality appears.
-
Press ▶ until the appropriate quality setting appears, and then press OK.
-
Press Start Copy Black or Start Copy Color.
Make multiple copies of the same original
You can set the number of copies from the control panel or from the HP Image Zone software.
- Make sure you have paper loaded in the paper tray.
-
Load your original face down on the right front corner of the glass.
-
Press No. of Copies.
-
Press ◀ or ▶ to enter the number of copies, up to the maximum, and then press OK.
(The maximum number of copies varies by model.)

Tip If you hold down either of the arrow buttons, the number of copies changes by increments of 5 to make it easier to set a large number of copies.
- Press Start Copy Black or Start Copy Color.
In this example, the HP All-in-One makes six copies of the original 10 x 15 cm (4 x 6 inch) photo.
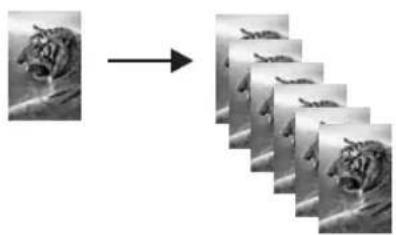
text_image
Image showing a sequence of grayscale images with Chinese characters, likely illustrating a transformation or classification process.Copy a two-page black-and-white document
You can use the HP All-in-One to copy a single- or multiple-page document in color or black and white. In this example, the HP All-in-One is used to copy a two-page black-and-white original.
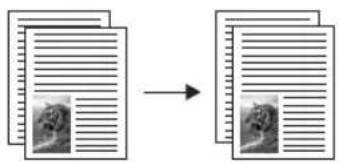
text_image
Diagram showing a document being converted to a blank image, with two small images below the image.- Make sure you have paper loaded in the paper tray.
- Load the first page of your original face down on the right front corner of the glass.
- Press Start Copy Black.
- Remove the first page from the glass and load the second page.
- Press Start Copy Black.
Make a 10 x 15 cm (4 x 6 inch) borderless copy of a photo
You can use the Fill Entire Page setting to create a borderless copy of a photo. In order to achieve a borderless print without changing the proportions of the original, the HP All-in-One might crop some of the image around the margins. In most cases, this cropping will not be noticeable.
For the best quality when copying a photo, load photo paper in the paper tray and change your copy settings for the correct paper type and photo enhancement. You might also want to use the photo print cartridge for superior print quality. With the tri-color and photo print cartridges installed, you have a six-ink system. For more information, see Use a photo print cartridge.
To copy a photo from the control panel
- Load 10 x 15 cm (4 x 6 inch) photo paper in the paper tray.

Note In order to make a borderless copy, you must have photo paper (or other specialty paper) loaded. If the HP All-in-One detects plain paper in the paper tray, it will not make a borderless copy. Instead, your copy will have borders.
- Load your original photo face down on the right front corner of the glass.
Position the photo on the glass so the long edge of the photo is along the front edge of the glass.
- Press Reduce/Enlarge.
The Reduce/Enlarge menu appears.
-
Press ▶ until Fill Entire Page appears, and then press OK.
-
Press Start Copy Color.
The HP All-in-One makes a 10 x 15 cm (4 x 6 inch) borderless copy of your original photo, as shown below.


Tip If the output is not borderless, then set the paper size to the appropriate Borderless menu selection, set the paper type to Photo Paper, set the Photo enhancement, and then try again.
- For more information on how to set the paper size, see Set the copy paper size.
- For information on how to set the paper type, see Set the copy paper type.
- For information on how to set the Photo enhancement, see Enhance light areas of your copy.
Copy a 10 x 15 cm (4 x 6 inch) photo onto a full-size page
You can use the Fill Entire Page setting to enlarge or reduce your original to fill the printable area of the paper size loaded in the paper tray. In this example, Fill Entire
Chapter 7
Page is used to enlarge a 10 x 15 cm (4 x 6 inch) photo to create a full-size borderless copy. When copying a photo, you might want to use the photo print cartridge for superior print quality. With the tri-color and photo print cartridges installed, you have a six-ink system. For more information, see Use a photo print cartridge.

Note In order to achieve a borderless print without changing the proportions of the original, the HP All-in-One might crop some of the image around the margins. In most cases, this cropping will not be noticeable.
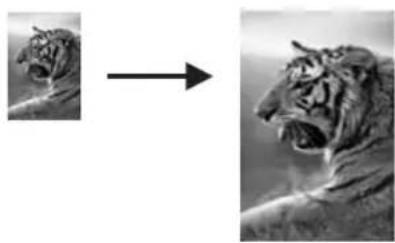
natural_image
Two black-and-white images showing a tiger's head in profile, with an arrow pointing to the side (no text or symbols)To copy a photo onto a full-size page from the control panel

Note This feature will not work correctly if the glass and lid backing are not clean. For more information, see Clean the HP All-in-One.
- Load letter or A4 photo paper in the paper tray.

Note In order to make a borderless copy, you must have photo paper (or other specialty paper) loaded. If the HP All-in-One detects plain paper in the paper tray, it will not make a borderless copy. Instead, your copy will have borders.
- Load your original photo face down on the right front corner of the glass.
Position the photo on the glass so the long edge of the photo is along the front edge of the glass. - Press Reduce/Enlarge.
- Press ▶ until Fill Entire Page appears, and then press OK.
- Press Start Copy Color.

Tip If the output is not borderless, set the paper size to Letter Borderless or A4 Borderless, set the paper type to Photo Paper, set the Photo enhancement, and then try again.
- For more information on how to set the paper size, see Set the copy paper size.
- For information on how to set the paper type, see Set the copy paper type.
- For information on how to set the Photo enhancement, see Enhance light areas of your copy.
Copy a photo several times on one page
You can print multiple copies of an original on one page by selecting an image size from the Reduce/Enlarge menu.
After you select one of the available sizes, you might be prompted whether you want to print multiple copies of the photo to fill the paper you have loaded in the paper tray.
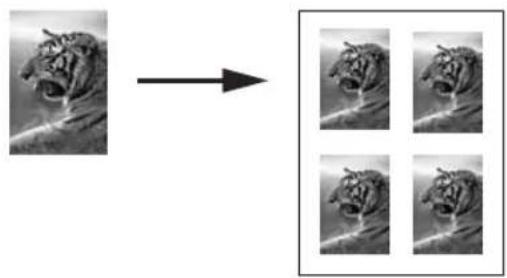
natural_image
Black-and-white image showing a bird jumping over water, with four separate square frames of the same bird (no text or symbols)To copy a photo several times on one page from the control panel
- Make sure you have paper loaded in the paper tray.

Tip For the best quality when copying a photo, load photo paper in the paper tray.
- Load your original photo face down on the right front corner of the glass.
Position the photo on the glass so the long edge of the photo is along the front edge of the glass.
- Press Reduce/Enlarge.
- Press ▶ until Image Size appears, and then press OK.
- Press ▶ to highlight the size in which you want to copy the photo, and then press OK.
Depending on the image size you select, the Many on Page? prompt might appear to determine whether you want to print multiple copies of the photo to fill the paper in the paper tray, or just one copy.
Some larger sizes do not prompt you for a number of images. In this case, only one image is copied to the page.
- If the Many on Page? prompt appears, press ▶ to select Yes or No, and then press OK.
- Press Start Copy Color.
Resize an original using custom settings
You can use your own custom settings to reduce or enlarge a copy of an original.
- Make sure you have paper loaded in the paper tray.
- Load your original face down on the right front corner of the glass.
- Press Reduce/Enlarge.
- Press ▶ until Custom 100% appears, and then press OK.
- Press the ◀ or ▶ to change the reduce/enlarge percentage, and then press OK.

Tip If you hold down either of the arrow buttons, the reduce/enlarge percentage changes by increments of 5.
- Press Start Copy Black or Start Copy Color.
Resize an original to fit onto letter or A4 paper
If the image or text on your original fills the entire sheet with no margins, use the Fit to Page feature to reduce your original and prevent unwanted cropping of the text or images at the edges of the sheet.
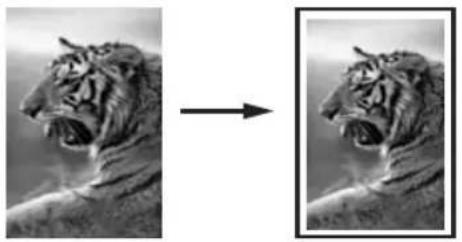
natural_image
Two black-and-white images showing a tiger's head in profile, before and after transformation (no text or symbols)
Tip You can also use Fit to Page to enlarge a small photo to fit within the printable area of a full-size page. In order to do this without changing the proportions of the original or cropping the edges, the HP All-in-One might leave an uneven amount of white space around the edges of the paper.
To resize a document from the control panel
- Make sure you have paper loaded in the paper tray.
- Load your original face down on the right front corner of the glass.
- Press Copy Menu until Copy Paper Size appears.
- Press ▶ until Letter or A4 appears, as appropriate, and then press OK.
- Press Reduce/Enlarge.
- Press ▶ until Fit to Page appears, and then press OK.
- Press Start Copy Black or Start Copy Color.
Copy a faded original
You can use the Lighter/Darker option to adjust the lightness and darkness of the copies you make. You can also adjust the color intensity to make colors on your copy more vivid or more subtle.
- Make sure you have paper loaded in the paper tray.
- Load your original face down on the right front corner of the glass.
- Press Copy Menu until Lighter/Darker appears.
- Press ▶ to darken the copy, and then press OK.

Note You can also press to lighten the copy.
- Press Copy Menu until Color Intensity appears.
- Press ▶ to make the image more vivid, and then press OK.

Note You can also press to make the image more pale.
7. Press Start Copy Black or Start Copy Color.
Copy a document that has been faxed several times
You can use the Enhancements feature to adjust the quality of text documents by sharpening edges of black text or adjust photographs by enhancing light colors that might otherwise appear white.
The Mixed enhancement is the default option. Use the Mixed enhancement to sharpen edges of most originals.
To copy a blurred document from the control panel
- Make sure you have paper loaded in the paper tray.
- Load your original face down on the right front corner of the glass.
- Press Copy Menu until Enhancements appears.
- Press ▶ until Text appears, and then press OK.
- Press Start Copy Black or Start Copy Color.

Tip If any of the following occur, turn off Text enhancement by selecting Photo or None:
- Stray dots of color surround some text on your copies
• Large, black typefaces look splotchy (not smooth) - Thin, colored objects or lines contain black sections
- Horizontal grainy or white bands appear in light- to medium-gray areas
Enhance light areas of your copy
You can use Photo enhancements to enhance light colors that might otherwise appear white. You can also use Photo enhancements to eliminate or reduce any of the following that might occur when copying with Text enhancements:
- Stray dots of color surround some text on your copies
• Large, black typefaces look splotchy (not smooth) - Thin, colored objects or lines contain black sections
- Horizontal grainy or white bands appear in light- to medium-gray areas
To copy an overexposed photo from the control panel
- Make sure you have paper loaded in the paper tray.

Tip For the best quality when copying a photo, load photo paper in the paper tray.
-
Load your original photo face down on the right front corner of the glass. Position the photo on the glass so the long edge of the photo is along the front edge of the glass.
-
Press Copy Menu until Enhancements appears.
- Press ▶ until Photo appears, and then press OK.
- Press Start Copy Color.
It is easy to set Enhancement settings for photos and other documents you copy by using the HP Image Zone software that came with your HP All-in-One. With one click of your mouse button, you can set a photo to copy with Photo enhancements, a text document to copy with Text enhancements, or a document that contains both images and text to copy with both Photo and Text enhancements turned on. For more information, see the onscreen HP Image Zone Help.
Make a poster
You can use the Poster feature to create an enlarged copy of your original in sections and assemble them into a poster.
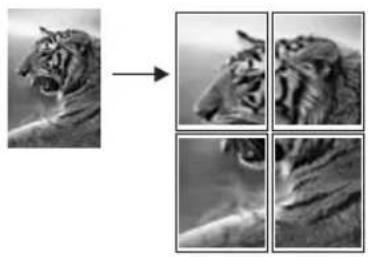
natural_image
Black-and-white photo sequence showing a tiger's head in profile, with four views of the tiger's face (no text or symbols)- Make sure you have paper loaded in the paper tray.

Tip If you are copying a photo into a poster, use full-size photo paper to achieve the highest quality copy.
- Load your original face down on the right front corner of the glass.
If you are copying a photo, position the photo on the glass so the long edge of the photo is along the front edge of the glass.
-
Press Reduce/Enlarge.
-
Press ▶ until Poster appears, and then press OK.
The default poster size is two pages wide.
- Press ▶ to change the poster width.
- Press Start Copy Black or Start Copy Color.
After you select the poster width, the HP All-in-One adjusts the length automatically to maintain the proportions of the original.

Tip If the original cannot be enlarged to the selected poster size because it exceeds the maximum zoom percentage, an error message appears that tells you to try a smaller width. Select a smaller poster size and make the copy again.
- After the poster has printed, trim the edges of the sheets and tape the sheets together.
You can be even more creative with your photos by using the HP Image Zone software that came with your HP All-in-One. For more information, see the onscreen HP Image Zone Help.
Prepare a color iron-on transfer
You can copy an image or text onto an iron-on transfer, then iron it onto a T-shirt, pillow cover, place mat, or other piece of fabric.

Tip Practice applying a T-shirt transfer on an old garment first.
- Load the iron-on transfer paper in the paper tray.
-
Load your original face down on the right front corner of the glass.
If you are copying a photo, position the photo on the glass so the long edge of the photo is along the front edge of the glass. -
Press Copy Menu until Copy Paper Type appears.
-
Press ▶ until Iron-On or Iron-On Mirrored appears, and then press OK.
-
Select Iron-On as the paper type if you are using HP Iron-On Transfers for color fabrics. If you are using HP Iron-On Transfers for color fabrics the image does not need to be reversed to appear properly on the fabric.
-
Select Iron-On Mirrored if you are using HP Iron-On Transfers for light or white fabrics. The HP All-in-One automatically copies a mirror image of your original so that it will appear properly when you iron it onto light or white fabric.
-
Press Start Copy Black or Start Copy Color.
Change default copy settings
- Make sure you have paper loaded in the paper tray.
- Load your original face down on the right front corner of the glass.
- Make any needed changes to the settings in the Copy Menu.
- Press Copy Menu until Set New Defaults appears.
- Press ▶ until Yes appears.
- Press OK to accept the settings as the new default settings.
- Press Start Copy Black or Start Copy Color.
The settings you specify here are only saved on the HP All-in-One. They do not adjust the settings in the software. You can save your most frequently used settings by using the HP Image Zone software that came with your HP All-in-One. For more information, see the onscreen HP Image Zone Help.
Stop copying
→ To stop copying, press Cancel on the control panel.
Chapter 7
8 Use the scan features
Scanning is the process of converting text and pictures into an electronic format for your computer. You can scan just about anything: photos, magazine articles, and text documents, as long as you are careful not to scratch the glass on your HP All-in-One. Scanning to a memory card makes your scanned images even more portable.
You can use the scanning features of your HP All-in-One to do the following:
- Scan text from an article into your word processor and quote it in a report.
- Print business cards and brochures by scanning a logo and using it in your publishing software.
- Send photos to friends and relatives by scanning your favorite prints and including them in e-mail messages.
- Create a photographic inventory of your house or office, or archive treasured photos in an electronic scrapbook.

Note Scanning text (also known as optical character recognition or OCR) lets you bring the content of magazine articles, books, and other printed matter into your favorite word processor (and many other programs) as fully editable text. Learning to do OCR right is important if you want to obtain the best results. Do not expect scanned text documents to be perfect the first time you use your OCR software. Using OCR software is an art that takes time and practice to master. For more information about scanning documents, especially documents containing both text and graphics, see the documentation that came with your OCR software.
To use the scan features, your HP All-in-One and computer must be connected and turned on. The HP All-in-One software must also be installed and running on your computer prior to scanning. To verify that the HP All-in-One software is running on a Windows computer, look for the HP All-in-One icon in the system tray at the lower right side of the screen, near the time. On a Macintosh, the HP All-in-One software is always running.

Note Closing the Hewlett-Packard Digital Imaging Monitor icon in the Windows system tray can cause your HP All-in-One to lose some of its scan functionality and result in the No Connection error message. If this happens, you can restore full functionality by restarting your computer or by starting the HP Image Zone software.
For information about how to scan from the computer, and how to adjust, resize, rotate, crop, and sharpen your scans, see the onscreen HP Image Zone Help that came with your software.
This chapter contains information on sending a scan to and from different destinations, and adjusting the preview image.
Scan to an application
You can scan originals placed on the glass directly from the control panel.
-
Load the original face down on the right front corner of the glass.
-
In the Scan area, press Scan To.
The Scan To menu appears. The Scan To menu lists destinations, including applications, for anything you scan. The default destination is the one you selected the last time you used this menu.
The Scan To menu can be configured. You can designate which applications and other destinations appear on the Scan To menu by using the HP Image Zone software on your computer.
- To select an application to receive the scan, press ▶ until the destination you want appears on the control panel display, and then press Start Scan.
A preview image of the scan appears in the HP Scan window on the computer, where you can edit it.
For more information about editing a preview image, see the onscreen HP Image Zone Help that came with your software.
- Make any edits to the preview image in the HP Scan window. When you have finished, click Accept.
For more information on editing a scan in the HP Scan window, see the onscreen HP Image Zone Help.
The HP All-in-One sends the scan to the selected application. For example, if you chose the HP Image Zone, it automatically opens and displays the image.
The HP Image Zone has many tools that you can use to edit your scanned image. You can improve the overall image quality by adjusting the brightness, sharpness, color tone, or saturation. You can also crop, straighten, rotate, or resize the image. When the scanned image looks just the way you want it, you can open it in another application, send it through e-mail, save it to a file, or print it. For more information about using the HP Image Zone, see the HP Gallery section in the onscreen HP Image Zone Help.
Send a scan to a memory card
You can send the scanned image as a JPEG image to the memory card that is currently inserted in one of the memory card slots on the HP All-in-One. This enables you to use the memory card features to generate borderless prints and album pages from the scanned image. It also enables you to access the scanned image from other devices that support the memory card.
- Load the original face down on the right front corner of the glass.
- In the Scan area, press Scan To.
A Scan To menu appears, listing various options or destinations. The default destination is whichever one you selected the last time you used this menu.
- Press Scan To until Memory Card appears on the control panel display.
- Press Start Scan.
The HP All-in-One scans the image and saves the file to the memory card in the JPEG format.
Stop scanning
→ To stop scanning, press Cancel on the control panel, or in the HP Image Zone software, click Cancel.
9 Print from your computer
The HP All-in-One can be used with any software application that allows printing. The instructions vary slightly depending on whether you are printing from a Windows PC or a Macintosh. Make sure you follow the instructions for your operating system in this chapter.
In addition to the printing capabilities described in this chapter, you can print special print jobs such as borderless prints and newsletters; print images directly from a memory card or from a digital camera that supports PictBridge; and use scanned images in printing projects in the HP Image Zone.
- For more information on printing from a memory card or digital camera, see Use a memory card or PictBridge camera.
- For more information on performing special print jobs or printing images in the HP Image Zone, see the onscreen HP Image Zone Help.
Print from a software application
Most print settings are automatically handled by the software application you are printing from or by HP ColorSmart technology. You need to change the settings manually only when you change print quality, print on specific types of paper or transparency film, or use special features.
To print from the software application you used to create your document (Windows users)
- Make sure you have paper loaded in the paper tray.
- On the File menu in your software application, click Print.
- Select the HP All-in-One as the printer.
- If you need to change settings, click the button that opens the Properties dialog box.
Depending on your software application, this button might be called Properties, Options, Printer Setup, Printer, or Preferences. - Select the appropriate options for your print job by using the features available in the Paper/Quality, Finishing, Effects, Basics, and Color tabs.

Tip You can easily select the appropriate options for your print job by choosing one of the predefined print tasks on the Printing Shortcuts tab. Click a print task in the What do you want to do? list. The default settings for that print task are set and summarized on the Printing Shortcuts tab. If necessary, you can adjust the settings here, or you can make your changes on the other tabs in the Properties dialog box.
- Click OK to close the Properties dialog box.
- Click Print or OK to begin printing.
To print from the software application you used to create your document (Macintosh users)
- Make sure you have paper loaded in the paper tray.
Chapter 9
-
Select the HP All-in-One in the Chooser (OS 9), Print Center (OS 10.2 or earlier), or Printer Setup Utility (OS 10.3 or later) before you begin printing.
-
From the File menu in your software application, choose Page Setup. The Page Setup dialog box appears, allowing you to specify the paper size, orientation, and scaling.
-
Specify the page attributes:
- Choose the paper size.
- Select the orientation.
- Enter the scaling percentage.

Note For OS 9, the Page Setup dialog box also includes options to print a mirrored (or reversed) version of the image, and to adjust the page margins for two-sided printing.
-
Click OK.
-
From the File menu in your software application, choose Print. The Print dialog box appears. If you are using OS 9, the General panel opens. If you are using OS X, the Copies & Pages panel opens.
-
Change the print settings for each option in the pop-up menu, as appropriate for your project.
-
Click Print to begin printing.
Change the print settings
You can customize the print settings of the HP All-in-One to handle nearly any print task.
Windows users
Before you change print settings, you should decide if you want to change the settings for the current print job only, or if you want to make the settings the defaults for all future print jobs. How you display print settings depends on whether or not you want to apply the change to all future print jobs or just to the current print job.
To change the print settings for all future jobs
-
In the HP Director, click Settings, point to Print Settings, and then click Printer Settings.
-
Make changes to the print settings, and click OK.
To change the print settings for the current job
-
On the File menu in your software application, click Print.
-
Make sure the HP All-in-One is the selected printer.
-
Click the button that opens the Properties dialog box. Depending on your software application, this button might be called Properties, Options, Printer Setup, Printer, or Preferences.
-
Make changes to the print settings, and click OK.
-
Click Print or OK in the Print dialog box to print the job.
Macintosh users
Use the Page Setup and Print dialog boxes to change the settings for your print job. Which dialog box you use depends on which setting you want to change.
To change the paper size, orientation, or scaling percentage
- Select the HP All-in-One in the Chooser (OS 9), Print Center (OS 10.2 or earlier), or Printer Setup Utility (OS 10.3 or later) before you begin printing.
- From the File menu in your software application, choose Page Setup.
- Make changes to the paper size, orientation, and scaling percentage settings, and click OK.
To change all other print settings
- Select the HP All-in-One in the Chooser (OS 9), Print Center (OS 10.2 or earlier), or Printer Setup Utility (OS 10.3 or later) before you begin printing.
- From the File menu in your software application, choose Print.
- Make changes to the print settings, and click Print to print the job.
Stop a print job
Although you can stop a print job from either the HP All-in-One or the computer, we recommend you stop it from the HP All-in-One for best results.
To stop a print job from the HP All-in-One
→ Press Cancel on the control panel. Look for the Print Cancelled message on the control panel display. If the message does not appear, press Cancel again.
Chapter 9
10 Use HP Instant Share
HP Instant Share makes it easy to share photos with family and friends. Using the HP Image Zone software installed on your computer, you can select one or more photos to share, select a destination for your photos, and then send the photos on their way. You can even upload your photos to an online photo album or an online photo finishing service. Availability of services varies by country/region.
With HP Instant Share E-mail, family and friends always get photos they can view -- no more large downloads or images that are too big to open. An e-mail message with thumbnail images of your photos is sent with a link to a secure Web page where family and friends can easily view, share, print, and save the photos.
Overview
If your HP All-in-One is USB-connected, you can share photos with friends and relatives using your device and the HP Image Zone software installed on your computer. A USB-connected device is an HP All-in-One that is connected to a computer with a USB cable. The HP All-in-One relies on the computer for access to the Internet.
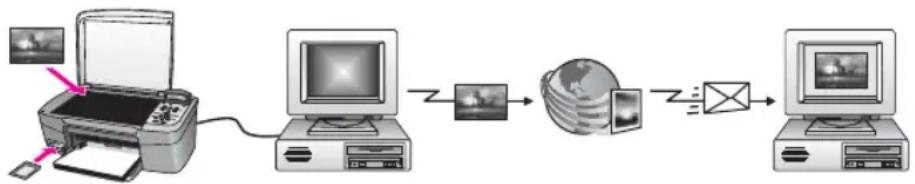
flowchart
graph LR
    A["Printer"] --> B["Computer"]
    B --> C["Global"]
    C --> D["Email Exchange"]
    D --> E["Computer"]
Use HP Instant Share to send images from your HP All-in-One to a destination of your choice. The destination, for example, can be an e-mail address, an online photo album, or an online photo finishing service. Availability of services varies by country/region.

Note You can also send images to a friend or relative's network-connected HP All-in-One or photo printer. To send to a device, you must have an HP Passport user ID and password. The receiving device must be set up and registered with HP Instant Share. You will also need to obtain the name the recipient assigned to the receiving device. Further instructions are provided in step 6 in Send images using your HP All-in-One.
Get started
You must have the following to use HP Instant Share with your HP All-in-One:
- An HP All-in-One connected to a computer with a USB cable.
- Internet access through the computer to which the HP All-in-One is connected.
- HP Image Zone software installed on your computer. Macintosh users will find that the HP Instant Share client application software is also installed.
Once you have set up your HP All-in-One and installed the HP Image Zone software, you are ready to start sharing photos using HP Instant Share. For more information on setting up your HP All-in-One, see the Setup Guide that came with your device.
Send images using your HP All-in-One
Images can be photos or scanned documents. Either can be shared with friends and relatives using your HP All-in-One and HP Instant Share. Simply transfer photos to your computer from a memory card or scan an image, select one or more images to share, and send your images to the destination of your choice.
Send photos from a memory card
Photos from a memory card are transferred to your computer using HP photo transfer software. Once the photos are transferred, use the HP Image Zone software to share your photos using HP Instant Share.
- For more information on transferring photos from a memory card, see Transfer photos to your computer.
- For more information on using the HP Image Zone software to share your photos, see Send images using your computer.
Send a scanned image
You can share a scanned image by pressing Scan To on the control panel. To use Scan To, place an image face down on the glass, select a destination to which you want to send the image, and start the scan.

Note For more information on scanning an image, see Use the scan features.
To send a scanned image from your HP All-in-One
- Load your original face down on the right front corner of the glass.
- Press Scan To on the control panel of your HP All-in-One.
The Scan To menu appears on the control panel display. - Use the ◀ and ▶ arrows to highlight HP Instant Share.
- Press OK or Start Scan to select the destination.
The image is scanned and uploaded to your computer.
For Windows users, the HP Image Zone software opens on your computer. The HP Instant Share tab appears. A thumbnail of the scanned image appears in the Selection Tray.
For Macintosh users, the HP Instant Share client application software opens on your computer. A thumbnail of the scanned image appears in the HP Instant Share window.

Note If you are using a Macintosh OS earlier than X v10.2 (including OS 9 v9.1.5), your photos are uploaded to the HP Gallery on your Macintosh. Click E-mail. Send the scanned image as an e-mail attachment by following the prompts on your computer screen.
- Follow the steps appropriate for your operating system:
If you are using a Windows-based computer:
a. From either the Control or Work areas of the HP Instant Share tab, click the link or icon of the service you want to use to send your scanned image.

Note If you click See All Services, you can choose from among all of the services available in your country/region, for example: HP Instant Share E-mail and Create Online Albums. Follow the onscreen instructions.
The Go Online screen appears in the Work area.
b. Click Next and follow the onscreen instructions.
If you are using a Macintosh:
a. Make sure the scanned image you want to share displays in the HP Instant Share window.
Use the - button to remove photos, or the + button to add photos to the window.
b. Click Continue and follow the onscreen instructions.
c. From the HP Instant Share services list, select the service you want to use to send your scanned image.
d. Follow the onscreen instructions.
-
From the HP Instant Share E-mail service, you can:
-
Send an e-mail message with thumbnail images of your photos which can be viewed, printed, and saved over the Web.
- Open and maintain an e-mail address book. Click Address Book, register with HP Instant Share, and create an HP Passport account.
- Send your e-mail message to multiple addresses. Click the related link.
- Send a collection of images to a friend or relative's network-connected device. Enter the name assigned to the device by the recipient in the E-mail address text box followed by @send.hp.com. You will be prompted to sign in to HP Instant Share with your HP Passport userid and password.

Note If you have not previously set up HP Instant Share, click I need an HP Passport account on the Sign in with HP Passport screen. Obtain an HP Passport user ID and password.
Send images using your computer
In addition to using your HP All-in-One to send images through HP Instant Share, you can use the HP Image Zone software installed on your computer to send images. The
HP Image Zone software lets you select and edit one or more images, and then access HP Instant Share to select a service (for example, HP Instant Share E-mail) and send your images. At a minimum, you can share images through the following:
• HP Instant Share E-mail (send to an e-mail address)
• HP Instant Share E-mail (send to a device)
- Online Albums
• Online photo finishing (availability varies by country/region)
Send images using the HP Image Zone software (Windows)
You can use the HP Image Zone software to share images with friends and relatives. Simply open the HP Image Zone, select the images you want to share, and forward the images using the HP Instant Share E-mail service.
- Double-click the HP Image Zone icon on your desktop.
The HP Image Zone window opens on your computer. The My Images tab appears in the window. - Select one or more images from the folder(s) in which they are stored.
For more information, see the onscreen HP Image Zone Help.

Note Use the HP Image Zone image editing tools to edit your images and achieve the results you want. For more information, see the onscreen HP Image Zone Help.
- Click the HP Instant Share tab.
The HP Instant Share tab appears in the HP Image Zone window.
- From either the Control or Work areas of the HP Instant Share tab, click the link or icon of the service you want to use to send your scanned image.

Note If you click See All Services, you can choose from among all of the services available in your country/region, for example: HP Instant Share E-mail and Create Online Albums. Follow the onscreen instructions.
The Go Online screen appears in the Work area of the HP Instant Share tab.
-
Click Next and follow the onscreen instructions.
-
From the HP Instant Share E-mail service, you can:
-
Send an e-mail message with thumbnail images of your photos which can be viewed, printed, and saved over the Web.
- Open and maintain an e-mail address book. Click Address Book, register with HP Instant Share, and create an HP Passport account.
- Send your e-mail message to multiple addresses. Click the related link.
- Send a collection of images to a friend or relative's network-connected device. Enter the name assigned to the device by the recipient in the E-mail address text box followed by @send.hp.com. You will be prompted to sign in to HP Instant Share with your HP Passport userid and password.

Note If you have not previously set up HP Instant Share, click I need an HP Passport account on the Sign in with HP Passport screen.
Obtain an HP Passport user ID and password.
Send images using the HP Instant Share client application software (Macintosh OS X v10.2 and later)

Note Macintosh OS X v10.2.1 and v10.2.2 are not supported.
You can use the HP Instant Share client application to share images with friends and relatives. Simply open the HP Instant Share window, select the images you want to share, and forward the images using the HP Instant Share E-mail service.

Note For more information on using the HP Instant Share client application software, see the onscreen HP Image Zone Help.
To use the HP Instant Share client application
- Select the HP Image Zone icon from the Dock.
The HP Image Zone opens on your desktop.
- In the HP Image Zone, click the Services button at the top of the window. A list of applications appears in the lower part of the HP Image Zone.
- Choose HP Instant Share from the list of applications. The HP Instant Share client application software opens on your computer.
- Use the + button to add an image to the window, or the - button to remove an image.

Note For more information on using the HP Instant Share client application software, see the onscreen HP Image Zone Help.
- Make sure the images you want to share display in the HP Instant Share window.
- Click Continue and follow the onscreen instructions.
- From the HP Instant Share services list, select the service you want to use to send your scanned image.
- Follow the onscreen instructions.
-
From the HP Instant Share E-mail service, you can:
-
Send an e-mail message with thumbnail images of your photos which can be viewed, printed, and saved over the Web.
- Open and maintain an e-mail address book. Click Address Book, register with HP Instant Share, and create an HP Passport account.
- Send your e-mail message to multiple addresses. Click the related link.
- Send a collection of images to a friend or relative's network-connected device. Enter the name assigned to the device by the recipient in the E-mail address text box followed by @send.hp.com. You will be prompted to sign in to HP Instant Share with your HP Passport userid and password.

Note If you have not previously set up HP Instant Share, click I need an HP Passport account on the Sign in with HP Passport screen. Obtain an HP Passport user ID and password.
Share images using the HP Image Zone (Macintosh OS X earlier than v10.2)

Note Macintosh OS X v10.0 and v10.0.4 are not supported.
You can share images with anyone who has an e-mail account. Simply start the HP Image Zone and open the HP Gallery. Then create a new e-mail message using an e-mail application installed on your computer.

Note For more information, see the HP Gallery section in the onscreen HP Image Zone Help.
To use the e-mail option within the HP Image Zone
- Select the HP Image Zone icon from the Dock.
The HP Image Zone opens on your desktop. - In the HP Image Zone, click the Services button at the top of the window.
A list of applications appears in the lower part of the HP Image Zone. - Choose HP Gallery from the list of applications.
The HP Gallery opens on your computer. - Select one or more images to share.
For more information, see the onscreen HP Image Zone Help. - Click E-mail.
The e-mail program on your Macintosh opens.
Send the images as an e-mail attachment by following the prompts on your computer screen.
Share images using the HP Director (Macintosh OS 9)

Note Macintosh OS 9 v9.1.5 and later and v9.2.6 and later are supported.
You can share images with anyone who has an e-mail account. Simply start the HP Director and open the HP Gallery. Then create a new e-mail message using an e-mail application installed on your computer.

Note For more information, see the HP Gallery section in the onscreen HP Image Zone Help.
To use the e-mail option within the HP Director
- Double-click the HP Director shortcut on your desktop.
The HP Director menu opens on your desktop.
- Double-click HP Gallery.
The HP Gallery opens on your desktop.
3.
Select one or more images to share.
For more information, see the onscreen HP Image Zone Help.
4. Click E-mail.
The e-mail program on your Macintosh opens.
Send the images as an e-mail attachment by following the prompts on your computer screen.
11 Order supplies
You can order recommended types of HP paper and print cartridges online from the HP website.
Order paper, transparency film, or other media
To order media such as HP Premium Paper, HP Premium Plus Photo Paper, HP Premium Inkjet Transparency Film, or HP Iron-On Transfers, go to www.hp.com. If prompted, choose your country/region, follow the prompts to select your product, and then click one of the shopping links on the page.
Order print cartridges
Print cartridge reorder numbers vary by country/region. If the reorder numbers listed in this guide do not match the numbers on the print cartridges currently installed in your HP All-in-One, order new print cartridges with the same numbers as those you currently have installed. Your HP All-in-One supports the following print cartridges.
| Print cartridges | HP reorder number |
| HP black inkjet print cartridge #94 16 ml black print cartridge | |
| HP tri-color inkjet print cartridge #97 16 ml color print cartridge | #95 11 ml color print cartridge |
| HP photo inkjet print cartridge #99 15 ml color photo print cartridge |
You can also find out the reorder numbers for all the print cartridges your device supports by doing the following:
- For Windows users: In the HP Director, click Settings, point to Print Settings and then click Printer Toolbox. Click the Estimated Ink Levels tab, and then click Print Cartridge Ordering Information.
- For Mac users: In the HP Director (OS 9) or HP Image Zone (OS X), choose Settings, and then choose Maintain Printer.
If prompted, select your HP All-in-One, and then click Utilities. From the pop-up menu, choose Supplies.
Additionally, you can contact a local HP reseller or go to www.hp.com/support to confirm the correct print cartridge reorder numbers for your country/region.
To order print cartridges for your HP All-in-One, go to www.hp.com. If prompted, choose your country/region, follow the prompts to select your product, and then click one of the shopping links on the page.
Order other supplies
To order other supplies, such as HP All-in-One software, a copy of the printed User Guide, a Setup Guide, or other customer-replaceable parts, call the appropriate number below:
• In the U.S. or Canada, dial 1-800-474-6836 (1-800-HP invent).
• In Europe, dial +49 180 5 290220 (Germany) or +44 870 606 9081 (U.K.).
To order HP All-in-One software in other countries/regions, call the phone number for your country/region. The numbers listed below are current as of the publication date of this guide. For a list of current ordering numbers, go to www.hp.com. If prompted, choose your country/region, and then click Contact HP for information on calling for technical support.
| Country/region | Number for ordering |
| Asia Pacific (except for Japan) 65 272 5300 | |
| Australia 1300 721 147 | |
| Europe +49 180 5 290220 (Germany) | +44 870 606 9081 (U.K.) |
| New Zealand 0800 441 147 | |
| South Africa +27 (0)11 8061030 | |
| U.S. and Canada 1-800-HP-INVENT (1-800-474-6836) |
12 Maintain your HP All-in-One
The HP All-in-One requires little maintenance. Sometimes you might want to clean the glass and lid backing to remove surface dust and ensure that your copies and scans remain clear. You will also need to replace, align, or clean your print cartridges occasionally. This chapter provides instructions for keeping your HP All-in-One in top working condition. Perform these simple maintenance procedures as necessary.
Clean the HP All-in-One
Fingerprints, smudges, hair, and other debris on the glass or lid backing slow down performance and affect the accuracy of special features such as Fit to Page. To ensure that your copies and scans remain clear, you might need to clean the glass and lid backing. You might also want to dust the exterior of the HP All-in-One.
Clean the glass
Dirty glass from fingerprints, smudges, hair, and dust slows down performance and affects the accuracy of features such as Fit to Page.
- Turn off the HP All-in-One, unplug the power cord, and raise the lid.
- Clean the glass with a soft cloth or sponge slightly moistened with a nonabrasive glass cleaner.

Warning Do not use abrasives, acetone, benzene, or carbon tetrachloride on the glass; they can damage it. Do not place or spray liquid directly on the glass; the liquid might seep under the glass and damage the device.
- Dry the glass with a chamois or cellulose sponge to prevent spotting.
Clean the lid backing
Minor debris can accumulate on the white document backing located underneath the lid of the HP All-in-One.
- Turn off the HP All-in-One, unplug the power cord, and raise the lid.
- Clean the white document backing with a soft cloth or sponge slightly moistened with a mild soap and warm water.
- Wash the backing gently to loosen debris. Do not scrub the backing.
- Dry the backing with a chamois or soft cloth.

Warning Do not use paper-based wipes, as these might scratch the backing.
- If further cleaning is needed, repeat the previous steps using isopropyl (rubbing) alcohol, and wipe the backing thoroughly with a damp cloth to remove any residual alcohol.

Warning Be careful not to spill alcohol on the glass or painted parts of the HP All-in-One, as this might damage the device.
Clean the exterior
Use a soft cloth or slightly moistened sponge to wipe dust, smudges, and stains off the case. The interior of the HP All-in-One does not require cleaning. Keep fluids away from the control panel and the interior of the HP All-in-One.

Warning To avoid damage to painted parts of the HP All-in-One, do not use alcohol or alcohol-based cleaning products on the control panel, lid, or other painted parts of the device.
Check the estimated ink levels
You can easily check the ink supply level to determine how soon you might need to replace a print cartridge. The ink supply level shows an estimate of the amount of ink remaining in the print cartridges.

Tip You can also print a self-test report to see if your print cartridges might need to be replaced. For more information, see Print a self-test report.
To check the ink levels from the HP Director (Windows)
- In the HP Director, click Settings, point to Print Settings, and then click Printer Toolbox.

Note You can also open the Printer Toolbox from the Print Properties dialog box. In the Print Properties dialog box, click the Services tab, and then click Service this device.
- Click the Estimated Ink Level tab.
The estimated ink levels for the print cartridges appear.
To check the ink levels from the HP Image Zone software (Macintosh)
- In the HP Director (OS 9) or HP Image Zone (OS X), choose Settings, and then choose Maintain Printer.
- If the Select Printer dialog box appears, select your HP All-in-One, and then click Utilities.
- From the pop-up menu, choose Ink Level.
The estimated ink levels for the print cartridges appear.
Print a self-test report
If you are experiencing problems with printing, print a self-test report before you replace the print cartridges. This report provides useful information on several aspects of your device, including your print cartridges.
- Load letter, A4, or legal unused plain white paper into the paper tray.
- Press Setup until Print Report appears, and then press OK.
Self-Test Report appears. - Press OK.
- The HP All-in-One prints a self-test report, which might indicate the source of the printing problem. A sample of the ink test area of the report is shown below.

bar
| Color | Test Pattern | | :--- | :--- | | Cyan | Black Cartridge | | Magenta | Black Cartridge | | Yellow | Yellow | | Violet | Black | | Green | Green | | Red | Red |- Make sure the test patterns are even and show a complete grid.
If more than a few lines in a pattern are broken, this might indicate a problem with the nozzles. You might need to clean the print cartridges. For more information, see Clean the print cartridges.
- Make sure the lines of color extend across the page.
If the black line is missing, faded, streaked, or shows lines, this might indicate a problem with the black or photo print cartridge in the right slot.
If any of the remaining three lines are missing, faded, streaked, or show lines, this might indicate a problem with the tri-color print cartridge in the left slot.
- Make sure the color blocks have even consistency and are representative of the colors listed below.
You should see cyan, magenta, yellow, violet, green, and red color blocks. If color blocks are missing, or if a block of color is muddy or does not match the label indicated below the block, this might indicate that the tri-color print cartridge is out of ink. You might need to replace the print cartridge. For more information on replacing print cartridges, see Replace the print cartridges.
- Check the color blocks and lines of color for streaking or white lines.
Streaks might indicate clogged nozzles or dirty contacts. You might need to clean the print cartridges. For more information on cleaning the print cartridges, see Clean the print cartridges. Do not clean with alcohol.

Note For examples of test patterns, lines of color, and color blocks from normal and malfunctioning print cartridges, see the onscreen HP Image Zone Help that came with your software.
Work with print cartridges
To ensure the best print quality from your HP All-in-One, you will need to perform some simple maintenance procedures. This section provides guidelines for handling the print cartridges and instructions for replacing, aligning, and cleaning the print cartridges.
Handle the print cartridges
Before you replace or clean a print cartridge, you should know the part names and how to handle the print cartridges.
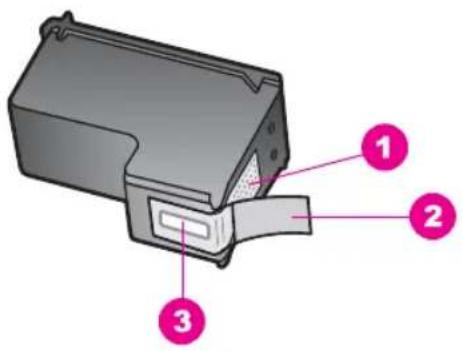
text_image
Diagram of a device component with numbered parts labeled 1, 2, and 31 Copper-colored contacts
2 Plastic tape with pink pull tab (must be removed before installing)
3 Ink nozzles under tape
Hold the print cartridges by their black plastic sides, with the label on top. Do not touch the copper-colored contacts or the ink nozzles.
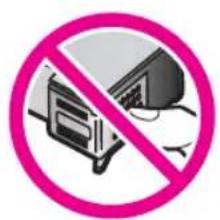
text_image
Prohibition sign with crossed-out devices and a diagonal line, indicating no use or prohibition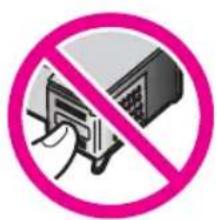
text_image
Prohibition sign with Chinese text and icon of a hand cleaning a device, enclosed in a pink circle.
Warning Be careful not to drop the print cartridges. This can damage them, making them unusable.
Replace the print cartridges
When the ink level for the print cartridge is low, a message appears on the control panel display.

Note You can also check the estimated amount of ink remaining in your cartridges by using the HP Image Zone software that came with your HP All-in-One. For information, see Check the estimated ink levels.
When you receive a low-ink warning message on the control panel display, make sure you have a replacement print cartridge available. You should also replace the print cartridges when you see faded text or if you experience print quality issues related to the print cartridges.

Tip You can also use these instructions to replace the black print cartridge with a photo print cartridge for printing high-quality color photos.
To find out the reorder number for all the print cartridges that your HP All-in-One supports, see Order print cartridges. To order print cartridges for your HP All-in-One, go to www.hp.com. If prompted, choose your country/region, follow the prompts to select your product, and then click one of the shopping links on the page.
To replace the print cartridges
- Make sure the HP All-in-One is on.

Warning If the HP All-in-One is off when you lift the print-carriage access door to access the print cartridges, the HP All-in-One will not release the cartridges for changing. You might damage the HP All-in-One if the print cartridges are not docked safely on the right side when you try to remove them.
- Open the print-carriage access door by lifting from the front center of the device, until the door locks into place.
The print carriage moves to the far right side of the HP All-in-One.
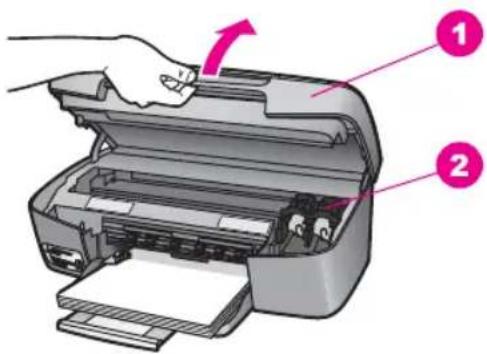
text_image
Diagram of a printer with labeled parts, showing hand operating the paper and printer's internal structure.1 Print-carriage access door
2 Print carriage
- Wait until the print carriage is idle and silent, and then lightly press down on a print cartridge to release it.
If you are replacing the tri-color print cartridge, remove the print cartridge from the slot on the left.
If you are replacing the black or photo print cartridge, remove the print cartridge from the slot on the right.
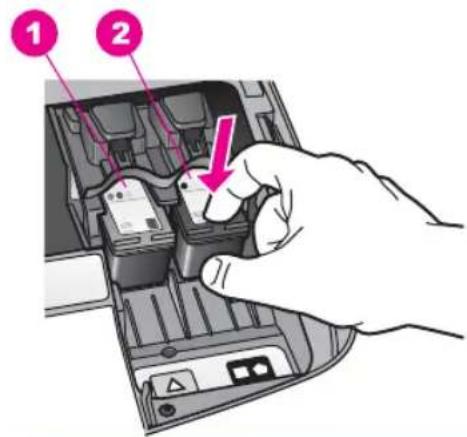
text_image
Diagram showing a hand inserting a device into a computer with labeled parts 1 and 2, highlighting a pink arrow indicating the insertion.1 Print cartridge slot for the tri-color print cartridge
2 Print cartridge slot for the black and photo print cartridges
- Pull the print cartridge toward you out of its slot.
- If you are removing the black print cartridge in order to install the photo print cartridge, store the black print cartridge in the print cartridge protector. For more information, see Use the print cartridge protector.
If you are removing the print cartridge because it is low or out of ink, recycle the print cartridge. The HP Inkjet Supplies Recycling Program is available in many countries/regions, and lets you recycle used print cartridges free of charge. For more information, go to the following website:
www.hp.com/hpinfo/globalcitizenship/environment/recycle/inkjet.html
- Remove the new print cartridge from its packaging and, being careful to touch only the black plastic, gently remove the plastic tape by using the pink pull tab.
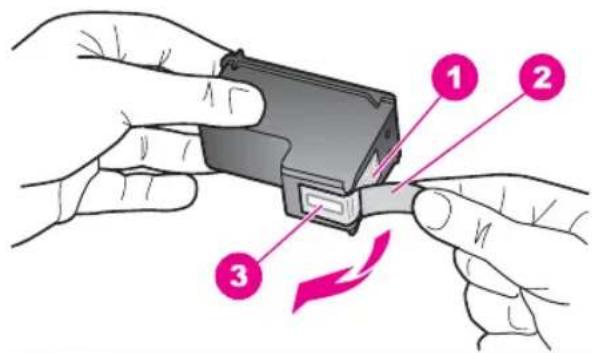
text_image
Diagram showing three labeled steps of a device being inserted into a component, with arrows indicating the process.1 Copper-colored contacts
2 Plastic tape with pink pull tab (must be removed before installing)
3 Ink nozzles under tape
Caution Do not touch the copper-colored contacts or ink nozzles. Touching these parts can result in clogs, ink failure, and bad electrical connections.
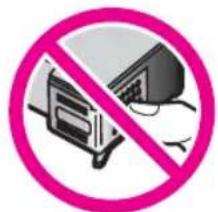
text_image
Prohibition sign with crossed-out devices and a diagonal line, indicating no use or prohibition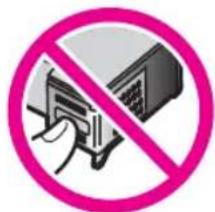
text_image
Prohibition sign with Chinese text and crossed-out icons, indicating no use or prohibition of devices.- Slide the new print cartridge forward into the empty slot. Push the print cartridge forward until it clicks into place.
If the print cartridge you are installing has a white triangle on its label, slide the print cartridge into the slot on the left. The label for the slot is green with a solid white triangle.
If the print cartridge you are installing has a white square or a white pentagon on its label, slide the print cartridge into the slot on the right. The label for the slot is black with a solid white square and a solid white pentagon.
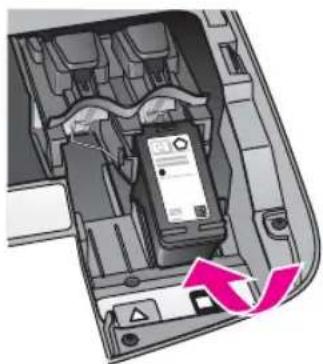
natural_image
Interior view of a device showing internal components and a highlighted component with an arrow (no text or symbols visible)- Close the print-carriage access door.
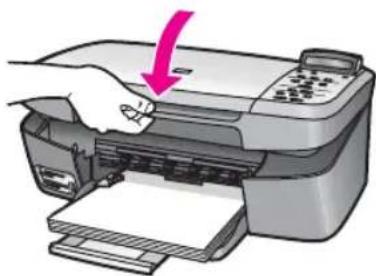
natural_image
Illustration of a hand printing a printer with a pink arrow indicating the process (no text or symbols present)Use a photo print cartridge
You can optimize the quality of the color photos you print and copy with your HP All-in-One by purchasing a photo print cartridge. Remove the black print cartridge and insert the photo print cartridge in its place. With the tri-color print cartridge and photo print
cartridge installed, you have a six-ink system, which provides enhanced quality color photos.
When you want to print regular text documents, swap the black print cartridge back in. Use a print cartridge protector to keep your print cartridge secure when it is not being used.
- For more information on purchasing a photo print cartridge, see Order print cartridges.
- For more information on replacing print cartridges, see Replace the print cartridges.
- For more information on using the print cartridge protector, see Use the print cartridge protector.
Use the print cartridge protector
In some countries/regions, when you purchase a photo print cartridge, you might also receive a print cartridge protector. In other countries/regions, a print cartridge protector comes in the box with your HP All-in-One. If neither your print cartridge nor your HP All-in-One came with a print cartridge protector, you can order one from HP Support. Go to www.hp.com/support.
The print cartridge protector is designed to keep a print cartridge secure and prevent it from drying out when it is not being used. Whenever you remove a print cartridge from the HP All-in-One with the intention of using it again later, store it in the print cartridge protector. For example, store the black print cartridge in a print cartridge protector if you are removing it so you can print high-quality photos with the photo and tri-color print cartridges.
To insert a print cartridge into the print cartridge protector
- Slide the print cartridge into the print cartridge protector at a slight angle and snap it securely into place.
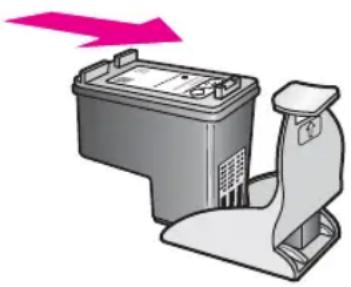
natural_image
Illustration of a battery with a pink arrow indicating direction (no text or symbols)- Store the print cartridge protector in the print cartridge storage area of the HP All-in-One for safe keeping. Open the print-carriage access door and place the print cartridge protector in the device, as shown below.
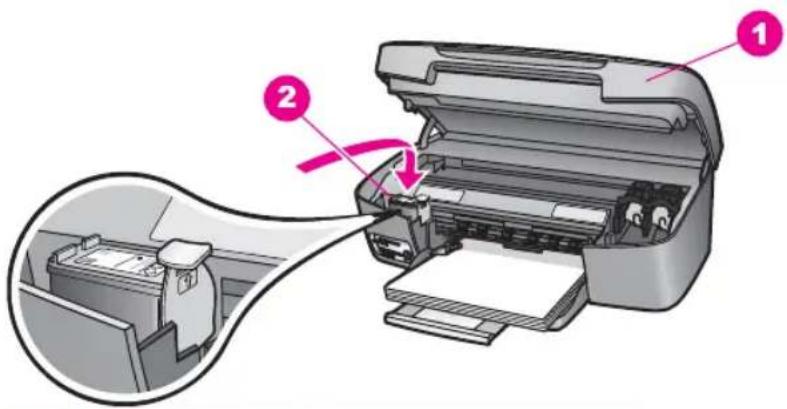
text_image
Diagram showing printer operation with labeled parts and a magnified view of the printer's internal structure.1 Print-carriage access door
2 Print cartridge storage area of the HP All-in-One
- Close the print-carriage access door.
To remove the print cartridge from the print cartridge protector
→ Press down and back on the top of the print cartridge protector to release the print cartridge, then slide the print cartridge out of the print cartridge protector.
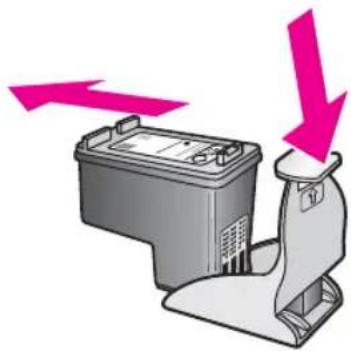
natural_image
Illustration of a battery and switch with two pink arrows pointing downward (no text or symbols)Align the print cartridges
The HP All-in-One prompts you to align cartridges every time you install or replace a print cartridge. You can also align the print cartridges at any time from the control panel or by using the HP Image Zone software on your computer. Aligning the print cartridges ensures high-quality output.

Note If you remove and reinstall the same print cartridge, the HP All-in-One will not prompt you to align the print cartridges. The HP All-in-One remembers the alignment values for that print cartridge, so you do not need to realign the print cartridges.
To align the print cartridges from the control panel when prompted
- Make sure you have letter or A4 unused plain white paper loaded in the paper tray, and then press OK.
The HP All-in-One prints a print cartridge alignment sheet and aligns the print cartridges. Recycle or discard the page.

Note If you have colored paper loaded in the paper tray when you align the print cartridges, the alignment will fail. Load unused plain white paper into the paper tray, and then try the alignment again.
If the alignment fails again, you might have a defective sensor or print cartridge. Contact HP Support. Go to: www.hp.com/support. If prompted, choose your country/region, and then click Contact HP for information on calling for technical support.
2. Press OK.
To align the cartridges from the control panel at any other time
- Load letter or A4 unused plain white paper into the paper tray.
- Press Setup until Tools appears, and then press OK.
- Press ▶ until Align Print Cartridge appears, and then press OK.
The HP All-in-One prints a print cartridge alignment sheet and aligns the print cartridges. Recycle or discard the page.
4. Press OK.
For information on aligning the print cartridges by using the HP Image Zone software that came with your HP All-in-One, see the onscreen HP Image Zone Help that came with your software.
Clean the print cartridges
Use this feature when the self-test report shows streaking or white lines through any of the lines of color. Do not clean print cartridges unnecessarily, as this wastes ink and shortens the life of the print cartridges.
To clean the print cartridges from the control panel
- Load letter or A4 unused plain white paper into the paper tray.
- Press Setup until Tools appears, and then press OK.
Clean Print Cartridge appears.
The HP All-in-One prints a page that you can recycle or discard. If copy or print quality still seem poor after you clean the print cartridges, try cleaning the print cartridge contacts before replacing the affected print cartridge. For information on cleaning the print cartridge contacts, see Clean the print
3. Press OK.
cartridge contacts. For information on replacing the print cartridges, see Replace the print cartridges.
For information on cleaning the print cartridges by using the HP Image Zone software that came with your HP All-in-One, see the onscreen HP Image Zone Help that came with your software.
Clean the print cartridge contacts
Clean the print cartridge contacts only if you get repeated messages on the control panel display prompting you to check a print cartridge after you already have cleaned or aligned the print cartridges.
Before cleaning the print cartridge contacts, remove the print cartridge and verify that nothing is covering the print cartridge contacts, then reinstall the print cartridge. If you continue to get messages to check the print cartridges, clean the print cartridge contacts.
Make sure you have the following materials available:
- Dry foam rubber swabs, lint-free cloth, or any soft material that will not come apart or leave fibers.

Tip Coffee filters are lint-free and work well for cleaning print cartridges.
- Distilled, filtered, or bottled water (tap water might contain contaminants that can damage the print cartridges).

Warning Do not use platen cleaners or alcohol to clean the print cartridge contacts. These can damage the print cartridge or the HP All-in-One.
To clean the print cartridge contacts
- Turn on the HP All-in-One and open the print-carriage access door. The print carriage moves to the far right side of the HP All-in-One.
- Wait until the print carriage is idle and silent, and then unplug the power cord from the back of the HP All-in-One.
- Lightly press down on the print cartridge to release it, and then pull it toward you out of the slot.

Note Do not remove both print cartridges at the same time. Remove and clean each print cartridge one at a time. Do not leave a print cartridge outside the HP All-in-One for more than 30 minutes.
- Inspect the print cartridge contacts for ink and debris buildup.
- Dip a clean foam rubber swab or lint-free cloth into distilled water, and squeeze any excess water from it.
- Hold the print cartridge by its sides.
- Clean only the copper-colored contacts. For information on cleaning the ink nozzle area, see Clean the area around the ink nozzles.
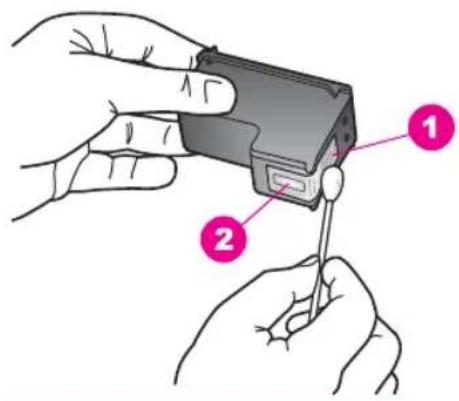
text_image
Illustration showing two hands holding a device with labeled parts 1 and 2, likely illustrating a manual or mechanical operation.1 Copper-colored contacts
2 Ink nozzles (do not clean)
- Allow the print cartridge to dry for approximately ten minutes.
- Slide the print cartridge back into the slot. Push the print cartridge forward until it clicks into place.
- Repeat if necessary for the other print cartridge.
- Gently close the print-carriage access door and plug the power cord into the back of the HP All-in-One.
Clean the area around the ink nozzles
If the HP All-in-One is used in a dusty environment, a small amount of debris might accumulate inside the device. This debris can include dust, hair, carpet, or clothing fibers. When debris gets on the print cartridges, it can cause ink streaks and smudges on printed pages. Ink streaking can be corrected by cleaning around the ink nozzles as described here.

Note Clean the area around the ink nozzles only if you continue to see streaks and smudges on your printed pages after you have already cleaned the print cartridges by using the control panel or the HP Image Zone software. For more information, see Clean the print cartridges.
Make sure you have the following materials available:
- Dry foam rubber swabs, lint-free cloth, or any soft material that will not come apart or leave fibers.

Tip Coffee filters are lint-free and work well for cleaning print cartridges.
- Distilled, filtered, or bottled water (tap water might contain contaminants that can damage the print cartridges).

Warning Do not touch the copper-colored contacts or ink nozzles. Touching these parts can result in clogs, ink failure, and bad electrical connections.
To clean the area around the ink nozzles
- Turn on the HP All-in-One and open the print-carriage access door. The print carriage moves to the far right side of the HP All-in-One.
- Wait until the print carriage is idle and silent, and then unplug the power cord from the back of the HP All-in-One.
- Lightly press down on the print cartridge to release it, and then pull it toward you out of the slot.

Note Do not remove both print cartridges at the same time. Remove and clean each print cartridge one at a time. Do not leave a print cartridge outside the HP All-in-One for more than 30 minutes.
- Place the print cartridge on a piece of paper with the ink nozzles facing up.
- Lightly moisten a clean foam rubber swab with distilled water.
- Clean the face and edges around the ink nozzle area with the swab, as shown below.
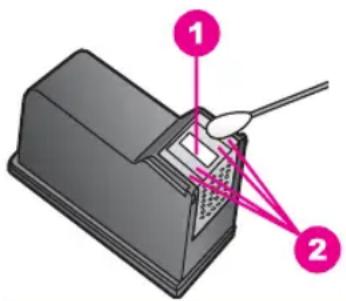
text_image
Diagram of a device with labeled parts, showing a tool interacting with a component and numbered annotations.1 Nozzle plate (do not clean)
2 Face and edges around the ink nozzle area

Warning Do not clean the nozzle plate.
- Allow the ink nozzle area to dry for approximately ten minutes.
- Slide the print cartridge back into the slot. Push the print cartridge forward until it clicks into place.
- Repeat if necessary for the other print cartridge.
- Gently close the print-carriage access door and plug the power cord into the back of the HP All-in-One.
Change the device settings
You can change the scroll speed and prompt delay time settings on your HP All-in-One so that it behaves according to your preference. You can also restore the device settings to what they were when you purchased your device. This will erase any new defaults you have set.
Set the scroll speed
The Scroll Speed option lets you control the rate that text messages scroll in the control panel display. For example, if the message is "Load paper, then press OK.",
it will not completely fit in the control panel display and will need to scroll. This is so that you can read the entire message. You can choose the rate at which it will scroll: Normal, Fast, or Slow. The default is Normal.
- Press Setup until Preferences appears, and then press OK.
- Press ▶ until Set Scroll Speed appears, and then press OK.
- Press ▶ to select a scroll speed, then press OK.
Set the prompt delay time
The Prompt Delay Time option allows you to control the amount of time that passes before a message prompts you to take further action. For example, if you press Copy Menu and the prompt delay time passes without you pressing another button, the message "Press Copy Menu for more options." appears in the control panel display. You can choose Fast, Normal, Slow, or Off. If you select Off, hints will not appear on the control panel display but other messages, such as low ink warnings and error messages, will still appear.
- Press Setup until Preferences appears, and then press OK.
- Press ▶ until Set Prompt Delay Time appears, and then press OK.
- Press ▶ to select a delay time, then press OK.
Restore the factory defaults
You can restore the current settings to what they were when you purchased your HP All-in-One.

Note Restoring the factory defaults will not affect any changes you made to scan settings and the language and country/region settings.
You can perform this process from the control panel only.
- Press Setup until Tools appears, and then press OK.
- Press ▶ until Restore Factory Defaults appears, and then press OK. The factory default settings are restored.
13 Troubleshooting information
This chapter contains troubleshooting information for the HP All-in-One. Specific information is provided for installation and configuration issues, and some operational topics. For more troubleshooting information, see the onscreen HP Image Zone Help that came with your software.
Many issues are caused when the HP All-in-One is connected to the computer using a USB cable before the HP All-in-One software is installed on the computer. If you connect the HP All-in-One to your computer before the software installation screen prompts you to do so, you must follow these steps to fix the installation:
- Disconnect the USB cable from the computer.
- Uninstall the software (if you have already installed it).
- Restart your computer.
- Turn off the HP All-in-One, wait one minute, then restart it.
- Reinstall the HP All-in-One software. Do not connect the USB cable to the computer until prompted by the software installation screen.
For information about uninstalling and reinstalling the software, see Uninstall and reinstall the software.
This section contains the following topics:
- Setup troubleshooting: Contains information on hardware setup, software installation, and HP Instant Share setup troubleshooting information.
- Operational troubleshooting: Contains information on issues that might occur during normal tasks when using the HP All-in-One features.
- Device update: Based on advice from HP customer support or a message on the control panel display, you might access the HP support website to retrieve an upgrade for your device. This section contains information about updating your device.
Before you call HP Support
If you have a problem, follow these steps:
-
Check the documentation that came with the HP All-in-One.
-
Setup Guide: The Setup Guide explains how to set up the HP All-in-One.
-
User Guide: The User Guide is the book you are reading. This book describes the basic features of the HP All-in-One, explains how to use the HP All-in-One without connecting it to a computer, and contains setup and operational troubleshooting information.
-
HP Image Zone Help: The onscreen HP Image Zone Help describes how to use the HP All-in-One with a computer and contains additional troubleshooting information not covered in the User Guide.
-
Readme file: The Readme file contains information on possible installation problems. For more information, see View the Readme file.
-
If you are unable to solve the problem using the information in the documentation, visit www.hp.com/support to do the following:
– Access online support pages
- Send HP an e-mail message for answers to your questions
- Connect with an HP technician by using online chat
– Check for software updates
Support options and availability vary by product, country/region, and language.
-
Contact your local point of purchase. If the HP All-in-One has a hardware failure, you will be asked to bring the HP All-in-One to where you purchased it. Service is free during the HP All-in-One limited warranty period. After the warranty period, you will be quoted a service charge.
-
If you are unable to solve the problem using the onscreen Help or HP websites, call HP Support using the number for your country/region. For more information, see Get HP support.
View the Readme file
You might want to refer to the Readme file for more information on possible installation problems and for system requirements.
- In Windows, you can access the Readme file from the Windows taskbar by clicking Start, pointing to Programs or All Programs, pointing to Hewlett-Packard, pointing to HP PSC 1600 All-in-One series, and then clicking View the Readme File.
- In Macintosh OS 9 or OS X, you can access the Readme file by double-clicking the icon located in the top-level folder of the HP All-in-One software CD-ROM.
Setup troubleshooting
This section includes installation and configuration troubleshooting tips for some of the most common issues associated with software installation and hardware setup.
Hardware setup troubleshooting
Use this section to solve any problems you might encounter while setting up the HP All-in-One hardware.
My HP All-in-One does not turn on
Solution Try the following:
- Make sure the power cable is firmly connected to both the HP All-in-One and the power adaptor, as shown below.
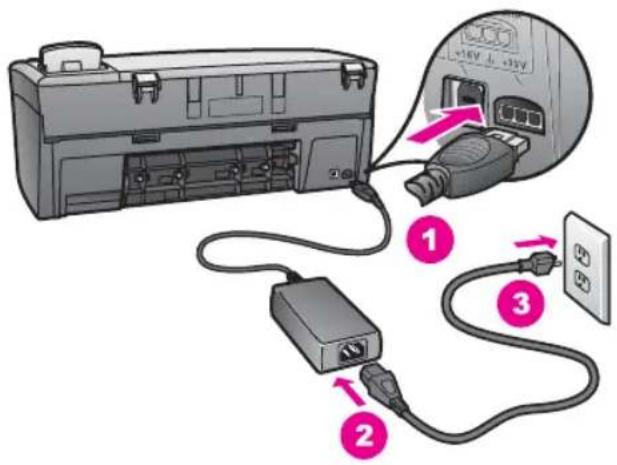
text_image
Diagram showing cable connection to a device with labeled components and power supply connections- Plug the power cable into a grounded power outlet, surge protector, or power strip. If you are using a power strip, make sure the power strip is on.
- Test the power outlet to make sure it is working. Plug in an appliance that you know works, and see if the appliance has power. If not, then there might be a problem with the power outlet.
- If you plugged the HP All-in-One into a switched outlet, make sure the switch is on.
- When you press the On button, wait a few seconds for the HP All-in-One to turn on.
My USB cable is not connected
Solution You must first install the software that came with your HP All-in-One before connecting the USB cable. During installation, do not plug in the USB cable until prompted by the onscreen instructions. Connecting the USB cable before prompted can cause errors.
Connecting your computer to your HP All-in-One with a USB cable is straightforward. Simply plug one end of the USB cable into the back of your computer and the other into the back of the HP All-in-One. You can connect to any USB port on the back of your computer.

Note Do not plug the USB cable into the USB port on your keyboard.
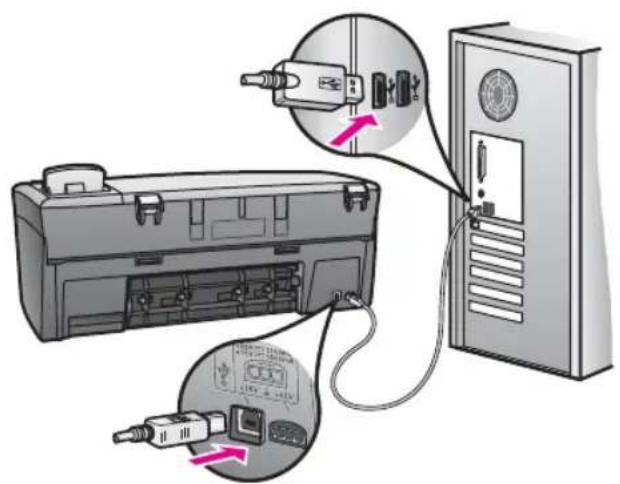
text_image
Diagram showing connection between a printer case and a server unit, with labeled components and directional arrows indicating connection points.I received a message on the control panel display to attach the control panel overlay
Solution This might mean the control panel overlay is not attached, or it is attached incorrectly. Make sure to align the overlay over the buttons on the top of the HP All-in-One and snap it firmly into place.
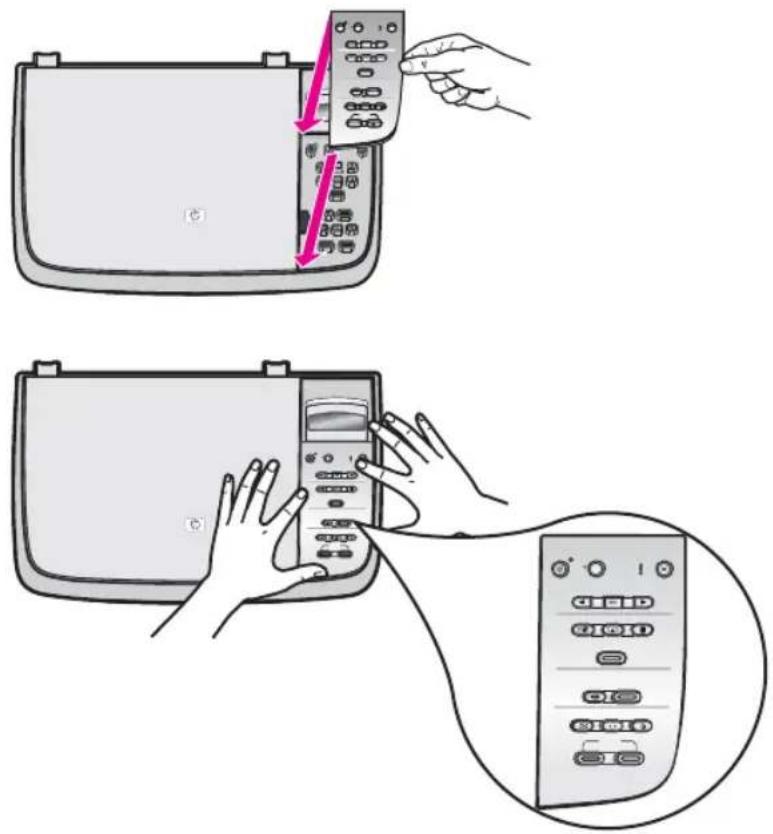
text_image
Illustration showing a hand inserting a remote control panel into a device, with a magnified view of the device's internal components.The control panel display shows the wrong language
Solution Usually, you set the language and country/region when you first set up the HP All-in-One. However, you can change these settings at any time by using the following procedure:
- Press Setup until Preferences appears, and then press OK.
- Press ▶ until Set Language & Country/Region appears, and then press OK. You are prompted with a list of languages. You can scroll through the list of languages by pressing ◀ or ▶
- Press OK on the appropriate language.
- When prompted, press OK to select Yes or Cancel to select No. You are prompted with a list of countries/regions for the selected language.
- Press ▶ to select the appropriate country/region, and then press OK.
- When prompted, press ▶ to select Yes or No, and then press OK.
You can confirm the language and country/region by printing a Self-Test Report, as follows:
- Press Setup until Print Report appears, and then press OK.
- Press ▶ until Self-Test Report appears, and then press OK.
The wrong measurements are showing in menus on the control panel display
Solution You might have selected the incorrect country/region when setting up your HP All-in-One. The country/region you select determines the paper sizes shown on the control panel display.
To change the country/region, you must first set the default language again. Usually, you set the language and country/region when you first set up the HP All-in-One. However, you can change these settings at any time by using the following procedure:
- Press Setup until Preferences appears, and then press OK.
- Press ▶ until Set Language & Country/Region appears, and then press OK. You are prompted with a list of languages. You can scroll through the list of languages by pressing ◀ or ▶
- Press OK on the appropriate language.
- When prompted, press OK to select Yes or Cancel to select No. You are prompted with all the countries/regions for the selected language.
- Press ▶ to select the appropriate country/region, and then press OK.
- When prompted, press▶ to select Yes or No, and then press OK.
Print a Self-Test Report to confirm the language and country/region:
- Press Setup until Print Report appears, and then press OK.
- Press ▶ until Self-Test Report appears, and then press OK.
I received a message on the control panel display to align the print cartridges
Cause The HP All-in-One prompts you to align cartridges every time you install a new print cartridge.

Note If you remove and reinstall the same print cartridge, the HP All-in-One will not prompt you to align the print cartridges. The HP All-in-One remembers the alignment values for that print cartridge, so you do not need to realign the print cartridges.
Solution Align the print cartridges.
-
Make sure you have letter or A4 unused plain white paper loaded in the paper tray, and then press OK. The HP All-in-One prints a print cartridge alignment sheet and aligns the print cartridges. Recycle or discard the page.
-
Press OK.
For more information on aligning the print cartridges, see Align the print cartridges.
I received a message on the control panel display that the print cartridge alignment failed
Cause The incorrect type of paper is loaded in the paper tray.
Solution If you have colored paper loaded in the paper tray when you align the print cartridges, the alignment fails. Load unused plain white letter or A4 paper into the paper tray, and then try the alignment again. For more information, see Align the print cartridges.
If the alignment fails again, you might have a defective sensor or print cartridge. Contact HP Support. Go to www.hp.com/support. If prompted, choose your country/region, and then click Contact HP for information on calling for technical support.
Cause Protective tape is covering the print cartridges.
Solution Check each print cartridge. If the plastic tape is still covering the ink nozzles, gently remove the plastic tape by using the pink pull tab. Do not touch the ink nozzles or the copper-colored contacts.
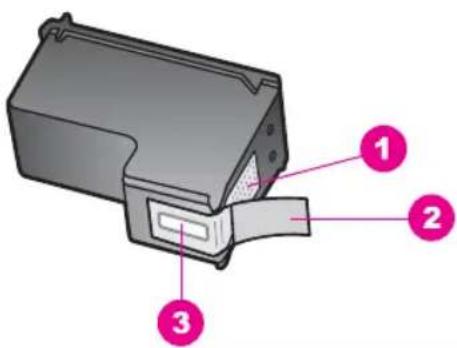
text_image
Diagram of a device component with numbered parts labeled 1, 2, and 31 Copper-colored contacts
2 Plastic tape with pink pull tab (must be removed before installing)
3 Ink nozzles under tape
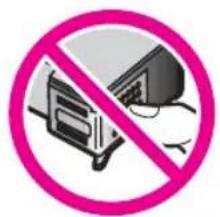
text_image
Prohibition sign with crossed-out devices and a hand holding a monitor, indicating no use or prohibition.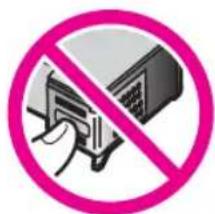
text_image
Prohibition sign with Chinese text and icons, featuring a hand holding a device against a pink circleReinsert the print cartridges and verify that they are fully inserted and locked in place, and then try the alignment again. For more information, see Align the print cartridges.
Cause The contacts on the print cartridge are not touching the contacts in the print carriage.
Solution Remove and then reinsert the print cartridges. Verify that they are fully inserted and locked in place, and then try the alignment again. For more information, see Align the print cartridges.
Cause You are not using HP print cartridges or you are using print cartridges that have been refilled.
Solution The alignment process might fail if you are not using HP print cartridges. It might also fail if you are using refilled print cartridges. Replace the print cartridges with genuine HP print cartridges that have not been refilled, and then try the alignment again. For more information on replacing the print cartridges, see Replace the print cartridges. For more information on aligning the print cartridges, see Align the print cartridges.
Cause The print cartridge or sensor is defective.
Solution Contact HP Support. Go to www.hp.com/support. If prompted, choose your country/region, and then click Contact HP for information on calling for technical support.
The HP All-in-One does not print
Solution If your HP All-in-One and computer are not communicating with each other, try the following:
- Look at the control panel display on the HP All-in-One. If the control panel display is blank and the light next to the On button is not lit, the HP All-in-One is turned off. Make sure the power cable is firmly connected to the HP All-in-One and plugged into a power outlet. Press the On button to turn on the HP All-in-One.
- Check the USB cable. If you are using an older cable, it might not be working properly. Try connecting it to another product to see if the USB cable works. If you experience problems, the USB cable might need to be replaced. Also verify that the cable does not exceed 3 meters (9.8 feet) in length.
- Make sure your computer is USB ready. Some operating systems, such as Windows 95 and Windows NT, do not support USB connections. Check the documentation that came with your operating system for more information.
- Check the connection from your HP All-in-One to your computer. Verify that the USB cable is securely plugged into the USB port on the back of your HP All-in-One. Make sure the other end of the USB cable is plugged into a USB port on your computer. After the cable is connected properly, turn your HP All-in-One off and then on again.
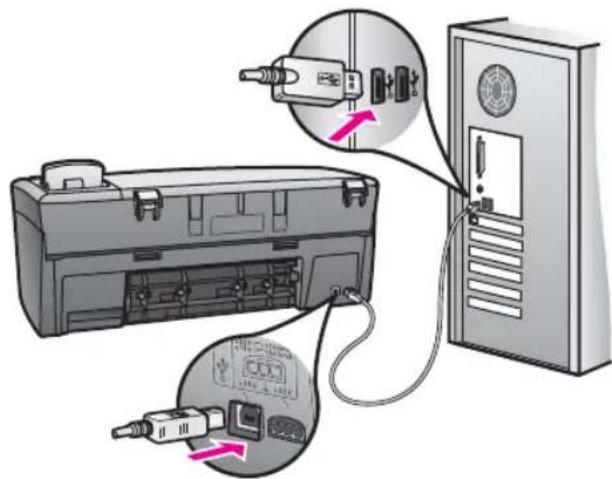
text_image
Diagram showing connection between a device with labeled ports and cable, including a zoomed-in cable and connector.- If you are using a Macintosh: Check the Apple System Profiler (OS 9) or the System Profiler (OS X) to verify your USB connection. If the HP All-in-One shows up in the USB window, then the USB connection between your computer and HP All-in-One is working. If it is working, there might be a problem with the software. Try to run the HP All-in-One Setup Assistant to see if it can detect the HP All-in-One. (You can access the HP All-in-One Setup Assistant through the HP Image Zone software.)
- Check other printers or scanners. You might need to disconnect older products from your computer.
- Try connecting the USB cable to another USB port on your computer. After you check the connections, try restarting your computer. Turn your HP All-in-One off and then on again.
- After you check the connections, try restarting your computer. Turn your HP All-in-One off and then on again.
For more information on setting up your HP All-in-One and connecting it to your computer, see the Setup Guide that came with your HP All-in-One.
I received a message on the control panel display about a paper jam or a blocked carriage
Cause There might be some packing material inside the HP All-in-One or a paper jam.
Solution Lift open the print-carriage access door to expose the print cartridges and remove any packing material, tape, or other foreign objects. Turn off the
HP All-in-One, wait one minute, and then press the On button to turn the HP All-in-One back on.
For more information about clearing paper jams, see Paper has jammed the HP All-in-One.
Software installation troubleshooting
If you encounter a software problem during installation, see the topics below for a possible solution. If you encounter a hardware problem during installation, see Hardware setup troubleshooting.
During a normal installation of the HP All-in-One software, the following things occur:
• The HP All-in-One CD-ROM runs automatically
• The software installs
- Files are copied to your hard drive
- You are requested to plug in the HP All-in-One
- You are requested to restart your computer
• The registration process runs
- A green OK and check mark appear on an installation wizard screen
If any of these things did not occur, there might be a problem with the installation. To check the installation on a PC, verify the following:
- Start the HP Director and check to make sure the following icons appear: Scan Picture and Scan Document. For information on starting HP Director, see the onscreen HP Image Zone Help that came with your software. If the icons do not appear immediately, you might need to wait a few minutes for the HP All-in-One to connect to your computer. Otherwise, see Some of the icons are missing in the HP Director.
- Open the Printers dialog box and check to see that the HP All-in-One is listed.
- Look in the system tray at the far right of the Windows taskbar for an HP All-in-One icon. This indicates that the HP All-in-One is ready.
When I insert the CD-ROM into my computer's CD-ROM drive, nothing happens
Solution Do the following:
- From the Windows Start menu, click Run.
- In the Run dialog box, enter d:\setup.exe (if your CD-ROM drive is not assigned to drive letter D, enter the appropriate drive letter), and then click OK.
The minimum system checks screen appears
Solution Your system does not meet the minimum requirements to install the software. Click Details to see what the specific problem is, and then correct the problem before attempting to install the software.
A red X appears on the USB connect prompt
Solution Normally, a green check appears indicating that the plug and play is successful. A red X indicates that the plug and play failed.
Do the following:
-
Verify that the control panel overlay is firmly attached, and then unplug the HP All-in-One and then plug it in again.
-
Verify that the USB and power cables are plugged in.
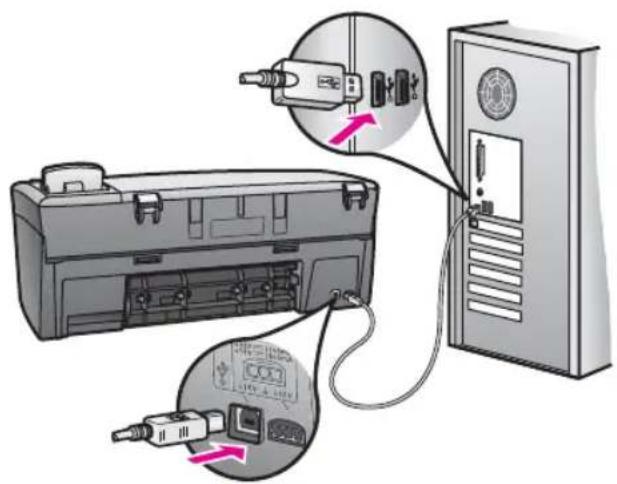
text_image
Diagram showing cable connection between a computer tower and a printer case, with labeled components and directional arrows indicating cable routing.-
Verify that the USB cable is set up properly as follows:
-
Unplug the USB cable and plug it in again.
- Do not attach the USB cable to a keyboard or non-powered hub.
- Verify that the USB cable is 3 meters or less in length.
-
If you have several USB devices attached to your computer, you might want to unplug the other devices during the installation.
-
Continue with the installation and restart the computer when prompted. Then open HP Director and check for the essential icons (Scan Picture and Scan Document).
-
If the essential icons do not appear, remove the software and then reinstall it. For more information, see Uninstall and reinstall the software.
I received a message that an unknown error has occurred
Solution Try to continue with the installation. If that doesn't work, stop and then restart the installation, and follow the directions on the screen. If an error occurs, you might need to uninstall and then reinstall the software. For information, see Uninstall and reinstall the software.
Some of the icons are missing in the HP Director
If the essential icons (Scan Picture and Scan Document) do not appear, your installation might not be complete.
Solution If your installation is incomplete, you might need to uninstall and then reinstall the software. Do not simply delete the HP All-in-One program files from your hard drive. Make sure to remove them properly using the uninstall utility provided in the HP All-in-One program group. For more information, see Uninstall and reinstall the software.
The registration screen does not appear
Solution In Windows, you can access the registration screen from the Windows taskbar by clicking Start, pointing to Programs or All Programs (XP), Hewlett-Packard, HP PSC 1600 All-in-One series, and then clicking Sign up now.
The Digital Imaging Monitor does not appear in the system tray
Solution If the Digital Imaging Monitor does not appear in the system tray located in the far right of the Windows taskbar, start the HP Director to check whether or not essential icons (Scan Picture and Scan Document) are there. For more information, see the Use the HP Director section of the HP Image Zone Help that came with your software.
The system tray normally appears at the bottom of the Windows desktop.
Uninstall and reinstall the software
If your installation is incomplete, or if you connected the USB cable to the computer before prompted by the software installation screen, you might need to uninstall and then reinstall the software. Do not simply delete the HP All-in-One program files from your hard drive. Make sure to remove them properly using the uninstall utility provided in the HP All-in-One program group.
A reinstall can take from 20 to 40 minutes for both Windows and Macintosh computers. There are three methods to uninstall the software on a Windows computer.
To uninstall from a Windows computer, method 1
- Disconnect your HP All-in-One from your computer. Do not connect the HP All-in-One to your computer until after you have reinstalled the software.
- On the Windows taskbar, click Start, Start Programs or All Programs (XP), Hewlett-Packard, HP PSC 1600 All-in-One series, uninstall software.
- Follow the onscreen instructions.
- If you are asked whether you would like to remove shared files, click No. Other programs that use these files might not work properly if the files are deleted.
- Restart your computer.

Note It is important that you disconnect your HP All-in-One before restarting your computer. Do not connect the HP All-in-One to your computer until after you have reinstalled the software.
- To reinstall the software, insert the HP All-in-One CD-ROM into your computer's CD-ROM drive, and follow the onscreen instructions and the instructions provided in the Setup Guide that came with your HP All-in-One.
- After the software is installed, connect the HP All-in-One to your computer.
- Press the On button to turn the HP All-in-One on.
After connecting and turning on your HP All-in-One, you might have to wait several minutes for all of the Plug and Play events to complete.
- Follow the onscreen instructions.
When the software installation is complete, the Digital Imaging Monitor icon appears in the Windows system tray located in the far right of the Windows taskbar.
To verify that the software is properly installed, double-click the HP Director icon on the desktop. If the HP Director shows the essential icons (Scan Picture and Scan Document), the software has been properly installed.
To uninstall from a Windows computer, method 2

Note Use this method if Uninstall Software is not available in the Windows Start menu.
- On the Windows taskbar, click Start, Settings, Control Panel.
- Double-click Add/Remove Programs.
- Select HP All-in-One & Officejet & OfficeJet 4.0, and then click Change/Remove. Follow the onscreen instructions.
- Disconnect your HP All-in-One from your computer.
- Restart your computer.

Note It is important that you disconnect your HP All-in-One before restarting your computer. Do not connect the HP All-in-One to your computer until after you have reinstalled the software.
- Launch setup.
- Follow the onscreen instructions and the instructions provided in the Setup Guide that came with your HP All-in-One.
To uninstall from a Windows computer, method 3

Note This is an alternate method if Uninstall Software is not available in the Windows Start menu.
- Run the HP PSC 1600 All-in-One series software Setup program.
- Select Uninstall and follow the onscreen directions.
- Disconnect your HP All-in-One from your computer.
- Restart your computer.

Note It is important that you disconnect your HP All-in-One before restarting your computer. Do not connect the HP All-in-One to your computer until after you have reinstalled the software.
- Run the HP PSC 1600 All-in-One series software Setup program again.
-
Launch Reinstall.
-
Follow the onscreen instructions and the instructions provided in the Setup Guide that came with your HP All-in-One.
To uninstall from a Macintosh computer
- Disconnect the HP All-in-One from your Macintosh.
- Double-click the Applications: HP All-in-One Software folder.
-
Double-click HP Uninstaller.
Follow the onscreen instructions. -
After the software is uninstalled, disconnect your HP All-in-One, and then restart your computer.

Note It is important that you disconnect your HP All-in-One before restarting your computer. Do not connect the HP All-in-One to your computer until after you have reinstalled the software.
- To reinstall the software, insert the HP All-in-One CD-ROM into your computer's CD-ROM drive.
- Double-click the CD-ROM icon on the desktop, and then double-click HP All-in-One installer.
- Follow the onscreen instructions and the instructions provided in the Setup Guide that came with your HP All-in-One.
Operational troubleshooting
The HP PSC 1600 All-in-One series troubleshooting section in the HP Image Zone Help contains troubleshooting tips for some of the most common issues associated with your HP All-in-One.
To access the troubleshooting information from a Windows computer, go to the HP Director, click Help, and then choose Troubleshooting and Support.
Troubleshooting is also available through the Help button that appears on some error messages.
To access troubleshooting information from Macintosh OS X, click the HP Image Zone icon in the Dock, select Help from the menu bar, choose HP Image Zone Help from the Help menu, and then choose 1600 series Troubleshooting in the Help Viewer.
If you have Internet access, you can get help from the HP website at www.hp.com/support.
The website also provides answers to frequently asked questions.
Paper troubleshooting
To help avoid paper jams, only use paper types that are recommended for your HP All-in-One. For a list of recommended papers, see the onscreen HP Image Zone Help, or go to www.hp.com/support.
Do not load curled or wrinkled paper, or paper with bent or torn edges, into the paper tray. For more information, see Avoid paper jams.
If paper does become jammed in your device, follow these instructions to clear the paper jam.
Paper has jammed the HP All-in-One
Solution
- Press in the tab on the left side of the rear clean-out door to release the door. Remove the door by pulling it away from the HP All-in-One.

natural_image
Illustration of a printer's internal structure with a hand inserting a cable into the case (no text or symbols visible)Caution Trying to clear a paper jam from the front of the HP All-in-One can damage the print mechanism. Always access and clear paper jams through the rear clean-out door.
- Gently pull the paper out of the rollers.
Warning If the paper tears when you are removing it from the rollers, check the rollers and wheels for torn pieces of paper that might be remaining inside the device. If you do not remove all the pieces of paper from the HP All-in-One, more paper jams are likely to occur.
-
Replace the rear clean-out door. Gently push the door forward until it snaps into place.
-
Press OK to continue the current job.
Print cartridge troubleshooting
If you are experiencing problems with printing, you might have a problem with one of the print cartridges. Try the following:
- Remove the print cartridge on the right side to make sure the plastic tape has been removed. If it is still covering the ink nozzles, gently remove the plastic tape by using the pink pull tab. Do not touch the ink nozzles or the copper-colored contacts.
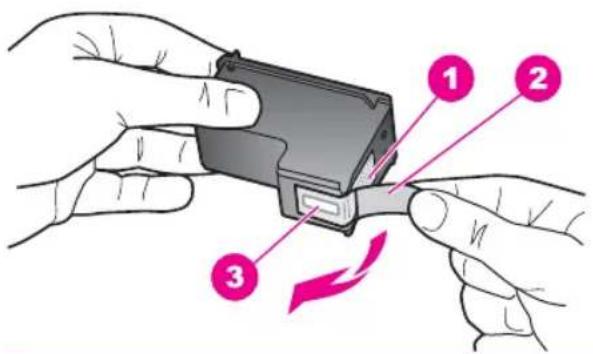
text_image
Diagram showing three labeled parts of a device being inserted into a cable, with arrows indicating direction.1 Copper-colored contacts
2 Plastic tape with pink pull tab (must be removed before installing)
3 Ink nozzles under tape
- Reinsert the print cartridge.
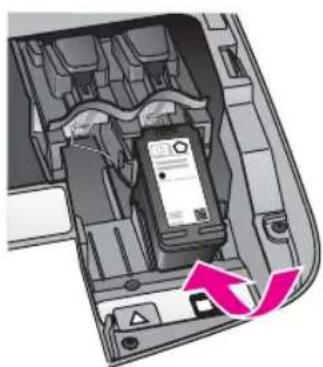
natural_image
Interior view of a device showing internal components and a highlighted device (no text or symbols visible)-
Repeat steps 1 and 2 for the print cartridge on the left side.
-
If the problem persists, print a self-test report to determine if there is a problem with the print cartridges.
This report provides useful information about your print cartridges, including status information. For more information, see Print a self-test report.
- If the self-test report shows a problem, clean the print cartridges.
For more information, see Clean the print cartridges.
-
If the problem persists, clean the copper-colored contacts of the print cartridges. For more information, see Clean the print cartridge contacts.
-
If you are still experiencing problems with printing, determine which print cartridge is experiencing the problem and replace it.
Print troubleshooting
My document did not print
Solution If you have multiple printers installed, make sure you select the HP PSC 1600 All-in-One series in your software application for the print job.

Note You can set the HP All-in-One as the default printer to ensure that the printer is automatically selected when you print from your software
applications. For information, see the onscreen Troubleshooting Help that came with your HP Image Zone software.
Solution Check the status of your HP All-in-One to make sure it does not have an error, such as a paper jam or out of paper message. Try the following:
- Check the HP All-in-One control panel display to see if there are any error messages.
- Windows users: Check the status of the HP All-in-One from your computer. In the HP Director, click Status.
Resolve any errors found. For information on error messages, see the onscreen Troubleshooting Help that came with your HP Image Zone software.
Memory card troubleshooting
The following troubleshooting tip relates only to Macintosh users of iPhoto.
You have video clips on a memory card, but they do not appear in iPhoto after you import the memory card's contents
Solution iPhoto handles still photos only. To manage both video clips and still images, use Unload Images from the HP Director instead.
Device update
If directed by HP customer support or prompted by a message on your computer, update your HP All-in-One. Several update methods are available; each involves downloading a file to your computer to start the Device Update Wizard.
Device update (Windows)
Use one of the following to retrieve an update for your device:
- If directed by HP customer support, use your Web browser to download an update for your HP All-in-One from www.hp.com/support. The file will be a self-extracting executable with the extension .exe. When you double-click the .exe file, the Device Update Wizard opens on your computer.
- Use the Software Update utility, provided with the HP Image Zone software, to automatically search the HP support website for device updates at predetermined intervals. For more information on the Software Update utility, see the onscreen HP Image Zone Help.

Note After the Software Update utility is installed on your computer, it searches for device updates. If you do not have the latest version of the Software Update utility at the time of install, a dialog appears on your computer prompting you to upgrade. Accept the upgrade. Once the upgrade is finished, restart the Software Update utility to locate updates for your HP All-in-One.
To use device update
- Do one of the following:
- Double-click the update .exe file you downloaded from www.hp.com/support.
- When prompted, accept the device update found by the Software Update utility.
The Device Update Wizard opens on your computer.
- At the Welcome screen, click Next.
The Select a Device screen appears.
- Select your HP All-in-One from the list, and then click Next.
The Important Information screen appears.
-
Make sure your computer and device meet the requirements listed.
-
If you meet the requirements, click Update.
A progress bar or other such designator appears on the device display.
- Do not disconnect, shut down, or otherwise disturb your device while the update is occurring.

Note If you disrupt the update, or an error message indicates the update failed, call HP support for assistance.
After your HP All-in-One restarts, the Update Complete screen appears on your computer and a test page prints from your device.
- Your device is updated. It is now safe to use your HP All-in-One.
Device update (Macintosh)
If directed by HP customer support or prompted by an error message, use the device update installer to apply updates to your HP All-in-One as follows:
-
Use your Web browser to download an update for your HP All-in-One from www.hp.com/support.
-
Double-click the downloaded file.
The installer opens on your computer.
-
Follow the onscreen prompts to install the update to your HP All-in-One.
-
Restart the HP All-in-One to complete the process.
14 Get HP support
Hewlett-Packard provides Internet and phone support for your HP All-in-One.
This chapter provides information on how to get support from the Internet, contact HP customer support, access your serial number and service ID, call in North America during warranty, call HP Japan customer support, call HP Korea customer support, call elsewhere in the world, call Australia post-warranty, and prepare your HP All-in-One for shipment.
If you are unable to find the answer you need in the printed or onscreen documentation supplied with your product, you can contact one of the HP support services listed in the following pages. Some support services are available only in the U.S. and Canada, while others are available in many countries/regions worldwide. If a support service number is not listed for your country/region, contact your nearest authorized HP dealer for help.
Get support and other information from the Internet
If you have Internet access, you can get help from www.hp.com/support. This website offers technical support, drivers, supplies, and ordering information.
Warranty support
To obtain HP repair service, you must first contact an HP service office or an HP Customer Support Center for basic troubleshooting. See HP customer support for steps to take before calling Customer Support.

Note This information does not apply to customers in Japan. For information on service options in Japan, see HP Quick Exchange Service (Japan).
Warranty upgrades
Depending on your country/region, HP might offer, for an additional fee, a warranty upgrade option that extends or enhances your standard product warranty. Available options might include priority phone support, return service, or next business day exchange. Typically, service coverage begins on product purchase date and must be purchased within a limited time of product purchase.
For more information:
• In the U.S., dial 1-866-234-1377 to speak to an HP advisor.
- Outside the U.S., please call your local HP Customer Support office. See Call elsewhere in the world for a list of international Customer Support numbers.
- Go to the HP website:
www.hp.com/support
If prompted, choose your country/region, and then find warranty information.
Returning your HP All-in-One for service
Before returning your HP All-in-One for service, you must call HP Customer Support. See HP customer support for steps to take before calling Customer Support.

Note This information does not apply to customers in Japan. For information on service options in Japan, see HP Quick Exchange Service (Japan).
HP customer support
Software programs from other companies might be included with your HP All-in-One. If you experience problems with any of those programs, you will receive the best technical assistance by calling the experts at that company.
If you need to contact HP Customer Support, do the following before you call.
- Make sure that:
a. Your HP All-in-One is plugged in and turned on.
b. The specified print cartridges are installed correctly.
c. The recommended paper is properly loaded in the paper tray.
- Reset your HP All-in-One:
a. Turn off the HP All-in-One by pressing the On button.
b. Unplug the power cord from the back of the HP All-in-One.
c. Plug the power cord back into the HP All-in-One.
d. Turn on the HP All-in-One by pressing the On button.
- For more information, go to www.hp.com/support.
This website offers technical support, drivers, supplies, and ordering information.
- If you are still experiencing problems and need to speak with an HP Customer Support Representative, do the following:
a. Have the specific name of your HP All-in-One, as it appears on the control panel, available.
b. Print a self-test report. For information on printing a self-test report, see Print a self-test report.
c. Make a color copy to have available as a sample printout.
d. Be prepared to describe your problem in detail.
e. Have your serial number and service ID ready. For information on how to access your serial number and service ID, see Access your serial number and service ID.
- Call HP Customer Support. Be near your HP All-in-One when you call.
Access your serial number and service ID
You can access important information by using the Information Menu of your HP All-in-One.

Note If your HP All-in-One is not turning on, you can view the serial number by looking at the sticker above the rear cleanout door. The serial number is the 10-character code in the upper left corner of the sticker.
To access your serial number and service ID
- Press and hold OK. While holding OK, press Copy Menu. This displays the Information Menu.
- Press ▶ until Model Number appears, and then press OK. This displays the service ID. Write down the complete service ID.
- Press Cancel, and then press ▶ until Serial Number appears.
- Press OK.
This displays the serial number. Write down the complete serial number. - Press Cancel to exit the Information Menu.
Call in North America during warranty
Call 1-800-474-6836 (1-800-HP invent). US phone support is available in both English and Spanish languages 24 hours a day, 7 days a week (days and hours of support may change
without notice). This service is free during the warranty period. A fee may apply outside the warranty period.
Call elsewhere in the world
The numbers listed below are current as of the publication date of this guide. For a list of current international HP Support Service numbers, go to www.hp.com/support and choose your own country/region or language.
You can call the HP support center in the following countries/regions. If your country/region is not listed, contact your local dealer or nearest HP Sales and Support Office to find out how to obtain services.
Support service is free during the warranty period; however, your standard long-distance phone charges will apply. In some cases, a flat fee per single incident will also apply.

Note Per call and per minute rates quoted in this section are approximate.
For phone support in Europe, please check for the details and conditions of phone support in your country/region by going to www.hp.com/support.
Alternatively, you can ask your dealer or call HP at the phone number provided in this guide.
As part of our constant efforts to improve our phone support service, we advise you to check our website on a regular basis for new information regarding service features and delivery.
| Country/Region | HP technical support Country/Region HP technical support | ||
| Algeria^1 | +213 61 56 45 43 Luxembourg (French) 900 40 006 | ||
| Argentina (54)11-4778-8380,0-810-555-5520 | Luxembourg (German) 900 40 007 | ||
| Australia during warranty | 1300 721 147 Malaysia 1-800-805405 | ||
| Australia once warrantyhas ended (per-callcharge) | 1902 910 910 Mexico 01-800-472-6684 | ||
| Austria +43 1 86332 1000 | Mexico (Mexico City) (55) 5258-9922 | ||
| Bahrain 800 171 Middle East | (international) | +971 4 366 2020 | |
| Bangladesh | fax to: +65-6275-6707 | Morocco^1 | +212 22 404747 |
| Belgium (Dutch) | +32 070 300 005 | Netherlands (0.10 Euro/min.) | 0900 2020 165 |
| Belgium (French) | +32 070 300 004 | New Zealand | 0800 441 147 |
| Bolivia | 800-100247 | Nigeria | +234 1 3204 999 |
| Brazil (DemaisLocalidades) | 0800 157751 | Norway^2 | +47 815 62 070 |
| Brazil (Grande SãoPaulo) | (11) 3747 7799 | Oman | +971 4 366 2020 |
| Brunei | fax to: +65-6275-6707 | Pakistan | fax to: +65-6275-6707 |
| Country/Region | HP technical support | Country/Region | HP technical support |
| Cambodia fax to: +65-6275-6707 Palestine +971 4 366 2020 | |||
| Canada during warranty (905) 206 4663 Panama 001-800-711-2884 | |||
| Canada once warranty has ended (per-call charge) | 1-877-621-4722 Peru 0-800-10111 | ||
| Caribbean & Central America | 1-800-711-2884 Philippines 632-867-3551 | ||
| Chile 800-360-999 Poland | +48 22 5666 000 | ||
| China 021-38814518, | 8008103888 | Portugal +351 808 201 492 | |
| Colombia | 01-800-51-474-6836(01-800-51-HP invent) | Puerto Rico | 1-877-232-0589 |
| Costa Rica | 0-800-011-4114,1-800-711-2884 | Qatar | +971 4 366 2020 |
| Czech Republic | +420 261307310 | Romania | +40 (21) 315 4442 |
| Denmark | +45 70 202 845 | Russian Federation,Moscow | +7 095 7973520 |
| Dominican Republic | 1-800-711-2884 | Russian Federation, St.Petersburg | +7 812 3467997 |
| Ecuador (Andinatel) | 999119+1-800-7112884 | Saudi Arabia | 800 897 1444 |
| Ecuador (Pacifitel) | 1-800-225528+1-800-7112884 | Singapore | 65 - 62725300 |
| Egypt | +20 2 532 5222 | Slovakia | +421 2 50222444 |
| English International | +44 (0) 207 512 5202 | South Africa (RSA) | 086 0001030 |
| Finland | +358 (0) 203 66 767 | South Africa, OutsideRepublic | +27 11 2589301 |
| France (0.34 Euro/min.) | +33 (0)892 69 60 22 | Spain | +34 902 010 059 |
| Germany (0.12 Euro/min.) | +49 (0) 180 5652 180 | Sri Lanka | fax to: +65-6275-6707 |
| Greece (Cyprus to Athens toll free) | 800 9 2649 | Sweden | +46 (0)77 120 4765 |
| Greece, inside country/region | 801 11 22 55 47 | Switzerland ^3 | +41 0848 672 672 |
| Greece, international | +30 210 6073603 | Syria | +971 4 366 2020 |
| Guatemala | 1800-999-5105 | Taiwan | +886 (2) 8722-8000,0800 010 055 |
| Hong Kong SAR | +(852) 2802 4098 | Thailand | 0-2353-9000 |
| Hungary +36 1 382 1111 Trinidad & Tobago 1-800-711-2884 | |||
| India 91-80-8526900 | Tunisia ^1 | +216 71 89 12 22 | |
| India (toll free) | 1600-4477 37 | Turkey | +90 216 579 71 71 |
| Indonesia 62-21-350-3408 Ukraine, Kiev +7 (380 44) 4903520 | |||
| Ireland | +353 1890 923 902 | United Arab Emirates | +971 4 366 2020 |
| Israel | +972 (0) 9 830 4848 | United Kingdom | +44 (0) 870 010 4320 |
| Italy | +39 848 800 871 | United States | 1-800-474-6836 (1-800-HP invent) |
| Jamaica | 1-800-711-2884 | Venezuela | 0-800-474-6836 (0-800-HP invent) |
| Japan | +81-3-3335-9800 | Venezuela (Caracas) | (502) 207-8488 |
| Jordan | +971 4 366 2020 | Vietnam | 84-8-823-4530 |
| Korea | +82 1588 3003 | W. Africa | +351 213 17 63 80 |
| Kuwait | +971 4 366 2020 | Yemen | +971 4 366 2020 |
| Lebanon | +971 4 366 2020 | ||
1 This Call Center supports French-speaking customers from the following countries: Morocco, Tunisia, and Algeria.
2 Setup price per call: 0.55 Norway kroner (0.08 Euro); customer price per minute: 0.39 Norway kroner (0.05 Euro).
3 This Call Center supports German-, French-, and Italian-speaking customers in Switzerland (0.08 CHF/min. during peak hours, 0.04 CHF/min. during off-peak hours).
Call in Australia under warranty and post-warranty
If your product is under warranty, call 1300 721 147.
If your product is not under warranty, call 1902 910 910. A per-incident, out-of-warranty support fee will be charged to your phone bill.
Call HP Korea customer support
HP 한국 고객 지원 문의
Call HP Japan support
カスタマー・ケア・センター
TEL:0570-000-511 (ナビダイヤル)
HP Quick Exchange Service (Japan)
Prepare your HP All-in-One for shipment
If after contacting HP Customer Support or returning to the point of purchase, you are requested to send your HP All-in-One in for service, please follow the steps below to avoid further damage to the HP product.

Note This information does not apply to customers in Japan. For information on service options in Japan, see HP Quick Exchange Service (Japan).
- Turn on the HP All-in-One. If your HP All-in-One will not turn on, skip this step and go to step 2.
-
Open the print-carriage access door.
-
Wait until the print carriage is idle and silent, and then remove the print cartridges from their slots. For information on removing the print cartridges, see Replace the print cartridges.

Note If your HP All-in-One does not turn on, you can unplug the power cord and then manually slide the print carriage to the far right to remove the print cartridges. When finished, manually move the print carriage to the home position (on the left side), then proceed to step 6.
- Close the print-carriage access door and wait a few minutes for the print carriage to move back to its home position (on the left side).

Note Make sure the scanner has returned to its parked position before turning off the HP All-in-One.
-
Press the On button to turn off the HP All-in-One, and then unplug the power cord.
-
Place the print cartridges in print cartridge protectors or an airtight plastic container so they will not dry out, and put them aside. Do not send them with the HP All-in-One unless the HP customer support call agent instructs you to.
-
Disconnect the power cord from the HP All-in-One.

Note Do not return the power cord and power supply with the HP All-in-One. The replacement HP All-in-One will not be shipped with these items. Store the power cord and power supply in a safe place until the replacement HP All-in-One arrives.
- Remove the control panel overlay as follows:
a. Make sure the control panel display is lying flat against the HP All-in-One.
b. Raise the lid.
c. Place your thumb along the groove on the left side of the control panel overlay. Gently remove the control panel overlay from the device as shown below.
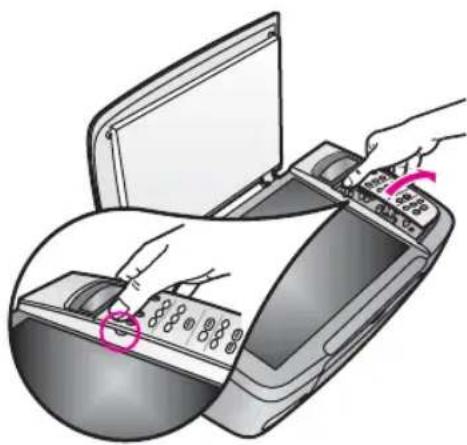
natural_image
Illustration of a hand inserting a device into a computer (no text or symbols visible)- Retain the control panel overlay. Do not return the control panel overlay with the HP All-in-One.

Note The replacement HP All-in-One might not come with a control panel overlay. Store your control panel overlay in a safe place, and when the replacement HP All-in-One arrives, reattach your control panel overlay. You must attach your control panel overlay to use the control panel functions on the replacement HP All-in-One.

Tip See the Setup Guide that came with your HP All-in-One for instructions on how to attach your control panel overlay.
- If available, pack the HP All-in-One for shipment by using the original packing materials or the packaging materials that came with your exchange device.
natural_image
Diagram of a printer inside a paper holder, showing internal components and a pink arrow indicating orientation (no text or symbols present)If you do not have the original packaging materials, please use other adequate packaging materials. Shipping damage caused by improper packaging and/or improper transportation is not covered under the warranty.
-
Place the return shipping label on the outside of the box.
-
Include the following items in the box:
-
A complete description of symptoms for service personnel (samples of print quality problems are helpful).
– A copy of the sales slip or other proof of purchase to establish the warranty coverage period. - Your name, address, and a phone number where you can be reached during the day.
15 Hewlett-Packard LIMITED WARRANTY STATEMENT
Duration of limited warranty
| HP product Duration of limited warranty | |
| Software 90 Days | |
| Printer 1 Year | |
| Print cartridges Until the HP ink is depleted or the “end of warranty” date printed on the cartridge has been reached, whichever occurs first. This warranty does not cover HP ink products that have been refilled, remanufactured, refurbished, misused, or tampered with. | |
| Accessories 90 days | |
Extent of limited warranty
Hewlett-Packard (HP) warrants to the end-user customer that the HP products specified above will be free from defects in materials and workmanship for the duration specified above, which duration begins on the date of purchase by the customer.
For software products, HP's limited warranty applies only to a failure to execute programming instructions. HP does not warrant that the operation of any product will be uninterrupted or error free.
HP's limited warranty covers only those defects that arise as a result of normal use of the product, and does not cover any other problems, including those that arise as a result of: a. Improper maintenance or modification; b. Software, media, parts, or supplies not provided or supported by HP; c. Operation outside the product's specifications; d. Unauthorized modification or misuse.
For HP printer products, the use of a non-HP ink cartridge or a refilled ink cartridge does not affect either the warranty to the customer or any HP support contract with the customer.
However, if printer failure or damage is attributable to the use of a non-HP or refilled ink cartridge, HP will charge its standard time and materials charges to service the printer for the particular failure or damage.
If HP receives, during the applicable warranty period, notice of a defect in any product which is covered by HP's warranty, HP shall either repair or replace the product, at HP's option.
If HP is unable to repair or replace, as applicable, a defective product which is covered by HP's warranty, HP shall, within a reasonable time after being notified of the defect, refund the purchase price for the product.
HP shall have no obligation to repair, replace, or refund until the customer returns the defective product to HP.
Any replacement product may be either new or like-new, provided that it has functionality at least equal to that of the product being replaced.
HP products may contain remanufactured parts, components, or materials equivalent to new in performance.
HP's Limited Warranty Statement is valid in any country/region where the covered HP product is distributed by HP. Contracts for additional warranty services, such as on-site service, may be available from any authorized HP service facility in countries where the product is distributed by HP or by an authorized importer.
Limitation of warranty
TO THE EXTENT ALLOWED BY LOCAL LAW, NEITHER HP NOR ITS THIRD PARTY SUPPLIERS MAKES ANY OTHER WARRANTY OR CONDITION OF ANY KIND, WHETHER EXPRESS OR IMPLIED WARRANTIES OR CONDITIONS OF MERCHANTABILITY, SATISFACTORY QUALITY, AND FITNESS FOR A PARTICULAR PURPOSE.
Limitation of liability
To the extent allowed by local law, the remedies provided in this Warranty Statement are the customer's sole and exclusive remedies.
TO THE EXTENT ALLOWED BY LOCAL LAW, EXCEPT FOR THE OBLIGATIONS SPECIFICALLY SET FORTH IN THIS WARRANTY STATEMENT, IN NO EVENT SHALL HP OR ITS THIRD PARTY SUPPLIERS BE LIABLE FOR DIRECT, INDIRECT, SPECIAL, INCIDENTAL, OR CONSEQUENTIAL DAMAGES, WHETHER BASED ON CONTRACT, TORT, OR ANY OTHER LEGAL THEORY AND WHETHER ADVISED OF THE POSSIBILITY OF SUCH DAMAGES.
Local law
This Warranty Statement gives the customer specific legal rights. The customer may also have other rights which vary from state to state in the United States, from province to province in Canada, and from country to country elsewhere in the world.
To the extent that this Warranty Statement is inconsistent with local law, this Warranty Statement shall be deemed modified to be consistent with such local law. Under such local law, certain disclaimers and limitations of this Warranty Statement may not apply to the customer. For example, some states in the United States, as well as some governments outside the United States (including provinces in Canada), may:
Preclude the disclaimers and limitations in this Warranty Statement from limiting the statutory rights of a consumer (e.g., the United Kingdom);
Otherwise restrict the ability of a manufacturer to enforce such disclaimers or limitations; or Grant the customer additional warranty rights, specify the duration of implied warranties which the manufacturer cannot disclaim, or allow limitations on the duration of implied warranties.
THE TERMS IN THIS WARRANTY STATEMENT, EXCEPT TO THE EXTENT LAWFULLY PERMITTED, DO NOT EXCLUDE, RESTRICT, OR MODIFY, AND ARE IN ADDITION TO, THE MANDATORY STATUTORY RIGHTS APPLICABLE TO THE SALE OF THE HP PRODUCTS TO SUCH CUSTOMERS.
Limited warranty information for EU countries/regions
Listed below are the names and addresses of the HP entities which grant HP's Limited Warranty (manufacturer's warranty) in your country.
You may also have statutory legal rights against the seller on the basis of the purchase agreement in addition to the manufacturer's warranty, which are not restricted by this manufacturer's warranty.
| Belgique/Luxembourg | Ireland | Danmark |
| Hewlett-Packard Belgium BVBA/SPRL | Hewlett-Packard Ireland Ltd.30 Herbert Street | Hewlett-Packard A/SKongevejen 25 |
| Luchtschipstraat 1 | IRL-Dublin 2 | DK-3460 Birkeroed |
| Rue de l'aeronef | ||
| B-1140 Bruxelles | ||
| NederlandHewlett-Packard Nederland BVStartbaan 161187 XR Amstelveen NL | FranceHewlett-Packard France1 Avenue du CanadaZone d'Activite de CourtaboeufF-91947 Les Ulis Cedex | PortugalHewlett-Packard Portugal -Sistemas deInformática e de Medida S.A.Edificio D. Sancho IQuinta da FontePorto Salvo2780-730 Paco de ArcosP-Oeiras |
| DeutschlandHewlett-Packard GmbHHerrenberger Straße 110-140D-71034 Böblingen | ÖsterreichHewlett-Packard Ges.m.b.H.Lieblgasse 1A-1222 Wien | EspañaHewlett-Packard Española S.L.C/ Vicente Aleixandre 1Parque Empresarial Madrid - Las Rozas28230 Las RozasE-Madrid |
| SuomiHewlett-Packard OyPiispankalliontie 17FIN-02200 Espoo | GreeceHewlett-Packard Hellas E.I.E.Voriou Epirou 76151 25 MaroussiAthens | SverigeHewlett-Packard Sverige ABSkalholtsgatan 9S-164 97 Kista |
| ItaliaHewlett-Packard Italiana S.p.AVia G. Di Vittorio 920063 Cernusco sul NaviglioI-Milano | United KingdomHewlett-Packard LtdCain RoadBracknellGB-Berks RG12 1HN | PolskaHewlett-Packard Polska Sp. z o.o.ul. Szturmowa 2A02-678 WarszawaWpisana do rejstruprzedsiebiorcow w SadzieRejonowym dla m.st. Warszawy,XX Wydział Gospodarczy pod numerem KRS 0000016370 |
| HungaryHewlett-Packard Magyarország Kft.1117 BudapestNeumann J. u. 1. | LietuvaUAB “Hewlett-Packard”Šeimyniškių g. 21B09200 Vilnius | LatviaHewlett-Packard SIAPalasta iela 7Riga, LV-1050 |
| Slovenská republikaHewlett-Packard Slovakia, s.r.o.Miletičova 23826 00 Bratislava | Česka republikaHEWLETT-PACKARD s.r.o.Vyskočilova 1/1410140 21 Praha 4 | EstoniaHP Oy Eesti FilialAestonia pst. 1EE-10143 Tallinntel +372 6 813 820fax +372 6 813 822 |
| SloveniaHewlett-Packard d.o.o.Tivolska cesta 481000 Ljubliana | Cyprus/KibrisHewlett-Packard Hellas E.I.E.Voriou Epirou 76151 25 MaroussiAthens, Greece | MaltaHewlett-Packard Europe B.V.Amsterdam, Meyrin Branch150, Route de Nant d'Avril1217 Meyrin, GenevaSwitzerland |
16 Technical information
The technical specifications and international regulatory information for your HP All-in-One are provided in this section.
This chapter contains the following information:
• Windows and Macintosh system requirements
• Paper, print, copy, memory card, and scan specifications
• Physical, power, and environmental specifications
• Regulatory notices
• Declaration of Conformity
System requirements
Software system requirements are located in the Readme file. For information on viewing the Readme file, see View the Readme file.
Paper specifications
This section contains information about paper-tray capacities, paper sizes, and print margin specifications.
Paper-tray capacities
| Type | Paper weight | Input tray* | Output tray** |
| Plain paper 60 to 90 gsm (16 to 24 lb.) | 100 (20 lb. paper) 50 (20 lb. paper) | ||
| Legal paper 75 to 90 gsm (20 to 24 lb.) | 100 (20 lb. paper) 50 (20 lb. paper) | ||
| Cards 200 gsm index max | (110 lb.) | 20 10 | |
| Envelopes 75 to 90 gsm (20 to 24 lb.) | 10 10 | ||
| Transparency film N/A 30 15 or fewer | |||
| Labels N/A 20 10 | |||
| 102 x 152 mm (4 x 6 inch) Photo Paper | 236 gsm (145 lb.) 30 15 | ||
| 216 x 279 mm (8.5 x 11 inch) Photo Paper | N/A 20 10 | ||
* Maximum capacity.
** Output tray capacity is affected by the type of paper and the amount of ink you are using. HP recommends emptying the output tray frequently.
Paper sizes
| Type Size | |
| Paper Letter: 216 x 279 mm (8.5 x 1 inches)A4: 210 x 297 mmA5: 148 x 210 mmExecutive: 184 x 267 mm (7.25 x 10.5 inches)Legal: 216 x 356 mm (8.5 x 14 inches)B5: 176 x 250 mm | |
| Envelopes U.S. #10: 105 x 241 mm (4.125 x 9.5 inches)U.S. #9: 99 x 226 mm (3.9 x 8.9 inches)A2: 111 x 146 mm (4.4 x 5.8 inches)DL: 110 x 220 mm (4.3 x 8.7 inches)C6: 114 x 162 mm (4.5 x 6.4 inches) | |
| Transparency film Letter: 216 x 279 mm (8.5 x 11 inches)A4: 210 x 297 mm | |
| Photo paper 102 x 152 mm (4 x 6 inches)127 x 178 mm (5 x 7 inches)Letter: 216 x 280 mm (8.5 x 11 inches)A4: 210 x 297 mm102 x 305 mm (4 x 12 inch) panoramic127 x 305 mm (5 x 12 inch) panoramic | |
| Cards 76 x 127 mm (3 x 5 inches)Index card: 101 x 152 mm (4 x 6 inches)127 x 178 mm (5 x 7 inches)A6: 105 x 149 mmHagaki card: 100 x 148 mm (3.94 x 5.83 inches) | |
| Labels Letter: 216 x 279 mm (8.5 x 11 inches)A4: 210 x 297 mm | |
| Custom 76 x 127 mm up to 216 x 356 mm (3 x 5 inches up to 8.5 x 14 inches) | |
Print margin specifications
| Top (leading edge) Bottom (trailing edge)* | ||
| Paper or transparency film | ||
| U.S. (Letter, Legal, Executive) | 1.8 mm (0.07 inches) 6.7 mm (0.3 inches) | |
| ISO (A4, A5) and JIS (B5) 1.8 mm (0.07 inches) 6.7 mm (0.3 inches) | ||
| Envelopes | ||
(continued)
Top (leading edge) Bottom (trailing edge)*
3.2 mm (0.13 inches) 6.7 mm (0.3 inches)
Cards
1.8 mm (0.07 inches) 6.7 mm (0.3 inches)
* This margin is not compatible with the HP All-in-One; however, the total writing area is compatible. The writing area is offset from center by 5.4 mm (0.21 inches), which causes asymmetric top and bottom margins.
Print specifications
- 1200 x 1200 dpi black
- 1200 x 1200 dpi color with HP PhotoREt III
- Method: drop-on-demand thermal inkjet
- Language: HP PCL Level 3, PCL3 GUI or PCL 10
- Print speeds vary according to the complexity of the document
- Duty cycle per month: 500 printed pages (average), 5000 printed pages (maximum)
- Panorama-size printing
Mode
Resolution (dpi) Speed\*\* (ppm)
Best Black 1200 x 1200 2
Color 1200 x 1200 up to 4800 dpi optimized* 0.5
Normal Black 600 x 600 7
Color 600 x 600 4
Fast Black 300 x 300 23
Color 300 x 300 18
* Up to 4800 x 1200 optimized dpi color printing on premium photo papers, 1200 x 1200 input dpi.
** Maximum, varies by model and paper type.
Copy specifications
• Digital image processing
- Up to 99 copies from original (varies by model)
• Digital zoom from 25 to 400% (varies by model)
• Fit to page, Poster, Many on page
- Up to 23 copies per minute black; 18 copies per minute color (varies by model)
- Copy speeds vary according to the complexity of the document
| Mode | Speed (ppm) | Print resolution (dpi) | Scan resolution (dpi)* | |
| Best | Black | up to 0.8 | 1200 x 1200 | 1200 x 2400 |
| Color | up to 0.8 | 1200 x 1200** | 1200 x 2400 | |
| Normal | Black | up to 7 | 600 x 600 | 1200 x 2400 |
Appendix 16
(continued)
| Mode | Speed (ppm) | Print resolution (dpi) | Scan resolution (dpi)* | |
| Color up to 4 | 600 x 600 1200 | x 2400 | ||
| Fast | Black | up to 23 | 300 x 300 | 600 x 1200 |
| Color | up to 18 | 300 x 300 | 600 x 1200 |
* Maximum at 400% scaling.
** Up to 4800 x 1200 optimized dpi color printing on premium photo papers, 1200 x 1200 input dpi.
Memory card specifications
• Maximum recommended number of files on a memory card: 1,000
• Maximum recommended individual file size: 12 megapixel maximum, 8 MB maximum
• Maximum recommended memory card size: 1 GB (solid state only)

Note Approaching any of the recommended maximums on a memory card might cause the performance of the HP All-in-One to be slower than expected.
Supported memory card types
- CompactFlash
- SmartMedia
- Memory Stick
• Memory Stick Duo - Memory Stick Pro
- Magic Gate Memory Stick
- Secure Digital
• MultiMediaCard (MMC) - xD-Picture Card
Scan specifications
• Image editor included
- Integrated OCR software automatically converts scanned text to editable text
- Scan speeds vary according to the complexity of the document
• Twain-compliant interface
- Resolution: up to 1200 x 4800 dpi optical; 19200 dpi enhanced (software)
• Color: 48-bit color, 8-bit grayscale (256 levels of gray)
• Maximum scan size from glass: 216 x 297 mm (8.5 x 11.7 inches)
Physical specifications
• Height: 171 mm (6.7 inches) (control panel display in the down position)
• Width: 438 mm (17.2 inches)
• Depth: 283 mm (11.1 inches)
• Weight: 5.5 kg (12.2 pounds)
Power specifications
• Power consumption: 40 W maximum
- Input voltage: AC 90 to 240 V \~ 1 A 47–63 Hz, grounded
• Output voltage: DC 32 Vdc==940 mA, 16 Vdc==625 mA
Environmental specifications
- Recommended operating temperature range: 15^ to 32^ (59° to 90° F)
- Allowable operating temperature range: 15^ to 35^ (59° to 95° F)
• Humidity: 15% to 85% RH non-condensing
• Non-operating (Storage) temperature range: -40^ to 60^ C ( -40^ to 140^ F)

Note In the presence of high electromagnetic fields it is possible the output from the HP All-in-One might be slightly distorted.
HP recommends using a USB cable less than or equal to 3 m (10 feet) in length to minimize injected noise due to potential high electromagnetic fields.
Additional specifications
Memory: 8 MB ROM, 32 MB DRAM
If you have Internet access, you can get acoustic information from the HP website. Go to: www.hp.com/support.
Environmental product stewardship program
This section provides information on protecting the environment; ozone production; energy consumption; paper use; plastics; material safety data sheets; and recycling programs.
Protecting the environment
Hewlett-Packard is committed to providing quality products in an environmentally sound manner. This product has been designed with several attributes to minimize impacts on our environment.
For more information, visit HP's Commitment to the Environment website at:
www.hp.com/hpinfo/globalcitizenship/environment/index.html
Ozone production
This product generates no appreciable ozone gas (O3).
Energy consumption
Energy usage drops significantly while in ENERGY STAR® mode, which saves natural resources, and saves money without affecting the high performance of this product. This product qualifies for ENERGY STAR, which is a voluntary program established to encourage the development of energy-efficient office products.

text_image
energyENERGY STAR is a U.S. registered service mark of the U.S. EPA. As an ENERGY STAR partner, HP has determined that this product meets ENERGY STAR guidelines for energy efficiency.
For more information on ENERGY STAR guidelines, go to the following website:
www.energystar.gov
Paper use
This product is suited for the use of recycled paper according to DIN 19309.
Plastics
Plastic parts over 25 grams are marked according to international standards that enhance the ability to identify plastics for recycling purposes at the end of the product's life.
Material safety data sheets
Material safety data sheets (MSDS) can be obtained from the HP website at:
www.hp.com/go/msds
Customers without Internet access should contact their local HP Customer Care Center.
Recycling program
HP offers an increasing number of product return and recycling programs in many countries/regions, and has partnerships with some of the largest electronic recycling centers throughout the world. HP also conserves resources by refurbishing and reselling some of its most popular products.
This HP product contains the following materials that might require special handling at end-of-life:
• Mercury in the fluorescent lamp in the scanner (< 2 mg)
- Lead in the solder
HP inkjet supplies recycling program
HP is committed to protecting the environment. The HP Inkjet Supplies Recycling Program is available in many countries/regions, and lets you recycle used print cartridges free of charge. For more information, go to the following website:
www.hp.com/hpinfo/globalcitizenship/environment/recycle/inkjet.html
Regulatory notices
The HP All-in-One meets product requirements from regulatory agencies in your country/region.
This section provides information on the regulatory model identification number for your HP All-in-One; an FCC statement; and separate notices to users in Australia, Japan, and Korea.
Regulatory model identification number
For regulatory identification purposes, your product is assigned a Regulatory Model Number. The Regulatory Model Number for your product is SDGOB-0401-01. This regulatory number should not be confused with the marketing name (HP PSC 1600 All-in-One series) or product number.
FCC statement
The United States Federal Communications Commission (in 47 CFR 15.105) has specified that the following notice be brought to the attention of users of this product.
Declaration of Conformity: This equipment has been tested and found to comply with the limits for a Class B digital device, pursuant to part 15 of the FCC Rules. Operation is subject to the following two conditions: (1) this device may not cause harmful interference, and (2) this device must accept any interference received, including interference that may cause undesired operation. Class B limits are designed to provide reasonable protection against harmful interference in a residential installation. This equipment generates, uses, and can radiate radio frequency energy, and, if not installed and used in accordance with the instructions, may cause harmful interference to radio communications. However, there is no guarantee that interference will not occur in a particular installation. If this equipment does cause harmful interference to
radio or television reception, which can be determined by turning the equipment off and on, the user is encouraged to try to correct the interference by one or more of the following measures:
• Reorient the receiving antenna.
- Increase the separation between the equipment and the receiver.
- Connect the equipment into an outlet on a circuit different from that to which the receiver is connected.
- Consult the dealer or an experienced radio/TV technician for help.
For more information, contact the Product Regulations Manager, Hewlett-Packard Company, San Diego, (858) 655-4100.
The user may find the following booklet prepared by the Federal Communications Commission helpful: How to Identify and Resolve Radio-TV Interference Problems. This booklet is available from the U.S. Government Printing Office, Washington DC, 20402. Stock No. 004-000-00345-4.

Caution Pursuant to Part 15.21 of the FCC Rules, any changes or modifications to this equipment not expressly approved by the Hewlett-Packard Company may cause harmful interference and void the FCC authorization to operate this equipment.
This digital apparatus does not exceed the Class B limits for radio noise emissions from the digital apparatus set out in the Radio Interference Regulations of the Canadian Department of Communications.
Notice to users in Australia

This equipment complies with Australian EMC requirements.
Notice to users in Japan (VCCI-2)
Notice to users in Korea
사용자 안내문(B급 기기)
Declaration of conformity (European Economic Area)
The Declaration of Conformity in this document complies with ISO/IEC Guide 22 and EN 45014. It identifies the product, manufacturer's name and address, and applicable specifications recognized in the European community.
Declaration of conformity

DECLARATION OF CONFORMITY
according to ISO/IEC Guide 22 and EN 45014
Manufacturer's Name:
Hewlett-Packard Company
Manufacturer's Address: 16399 West Bernardo Drive
San Diego CA 92127, USA
Regulatory Model Number: SDGOB-0401-01
Declares, that the product:
Product Name: HP PSC 1600 All-in-One series
Power Adapters HP part#: 0950-4491, 0957-2144, 0950-4466
RoIIS Compliant Adapters: 0957-2146, 0957-2152, 0957-2153, 0957-2151
Conforms to the following Product Specifications:
Safety: IEC 60950; 1999 3
^rd edition
EN 60950: 1999
IEC 60825-1 Edition 1.2: 2001 / EN 60825-1+A11+A2+A1: 2002 Class 1(Laser/Led)
UL 60950: 1999
CAN/CSA-22.2 No. 60950-1-03
NOM 019-SFCI-1993, AS/NZS 60950: 2000, GB4943: 2001 NOM 019-SFCI-1993, AS/NZS 60950: 2000, GB4943: 2001
EMC: CISPREM0997CISPR582209198ENI5602:1998 Class B
CISPR 24:1997 / ENISPR249987 / EN 55024:1998
IEC 61000-3-2: 2000 / EN 61000-3-2: 2000
IEC 61000-3-3/A1: 2001 / EN 61000-3-3/ A1: 2001
CONS 3448819988, WCC0-22
FCC Part 15-Class B/CEB-003-Class B/ICES-003, Issue 2
GB9254: 1998
Supplementary Information:
The product herewith complies with the requirements of the Low Voltage Directive 73/23/EC, the EMC Directive 89/336/EC and carries the CE-marking accordingly.
1) The product was tested in a typical configuration.
05 Nov 2004
Date

Muthya S. Guha, Hardware Test & Regs MGR.
European Contact for regulatory topics only: Hewlett Packard GmbH, HQ-TRE, Herrenberger Strasse 140,
D-71034 Böblingen Germany. (FAX +49-7031-14-3143
Index
Symbols/Numerics
10 x 15 cm photo paper load 25
4 x 6 inch photo paper load 25
A
A4 paper
load 23
align print cartridges 83
B
best copy quality 49
borderless copies
10 x 15 cm (4 x 6 inch)
photo 51
fill entire page 51
borderless photos
print from memory card 43
C
cancel
copy 57
print job 63
scan 60
cancel button 7
cartridges. See print cartridges
clean
exterior 76
glass 75
lid backing 75
print cartridge contacts 85
print cartridge ink nozzle
area 86
print cartridges 84
color
copies 55
intensity 54
CompactFlash memory card 35
connection types supported
networked 19
printer sharing 18
USB 18
control panel
overview 6
prompt delay time 88
scroll speed 87
control panel display
change language 93
change measurements 93
copy
black-and-white
documents 50
cancel 57
color intensity 54
copy specifications 121
default settings 57
enhance light areas 55
enlarge into poster 56
iron-on transfer 57
menu 7
paper size 47
paper types,
recommended 48
photos onto letter or A4
paper 51
photos, enhance 55
quality 49
several on one page 53
speed 49
text, enhance 55
customer support
Australia 111
contact 108
HP Quick Exchange
Service (Japan) 112
Japan 112
Korea 111
North America 108
outside U.S. 109
serial number 108
service ID 108
website 107
D
darken
copies 54
declaration of conformity
European Economic Area
126
United States 126
defaults
restore 88
device update
Macintosh 105
overview 104
Windows 104
digital camera
PictBridge 43
Document viewer
HP Director (Windows) 10
DPOF file 44
E
envelopes
load 26
Environmental product
stewardship program 123
environmental specifications
123
F
factory defaults, restore 88
fast copy quality 49
FCC statement 124
fill entire page 51
fit to page 54
G
glass
clean 75
load original 21
greeting cards
load 27
H
Hagaki cards
load 25
HP All-in-One
overview 5
prepare to ship 112
HP Director
HP Instant Share 70
missing icons 98
start 9
HP email portal
HP Image Zone (OS X) 12
HP Gallery
HP Director (OS 9) 14
HP Image Zone (OS X) 12
HP help
HP Director (OS 9) 14
HP Image Edit
HP Image Zone (OS X) 12
HP Image Print
HP Image Zone (OS X) 12
HP Image Zone
HP Director (Windows) 10
HP Instant Share 68, 69, 70
Macintosh 69, 70
Macintosh (OS 9) 13
Macintosh (OS X) 10
overview 9
Windows 9, 68
HP Instant Share
about 65
e-mail photos from 67
HP Image Zone 67
HP Image Zone (OS X) 12
send images 66
send images from 67
send photos from a
memory card (USB) 66
send scanned images 66
send to a device 66, 67
setup (USB) 66
HP JetDirect 17, 19
HP on the Web
HP Director (OS 9) 14
HP Support
before you call 89
|
ink cartridges. See print
cartridges
ink levels, check 76
inkjet supplies recycling 124
Instant Share. See HP Instant Share
iron-on transfers
copy 57
load 27
J
jams, paper 28, 102
L
labels
load 27
left arrow 6
legal paper
load 23
letter paper
load 23
lid backing, clean 75
lighten
copies 54
load
10 x 15 cm photo paper 25
4 x 6 inch photo paper 25
A4 paper 23
envelopes 26
full-size paper 23
greeting cards 27
Hagaki cards 25
iron-on transfers 27
labels 27
legal paper 23
letter paper 23
original 21
postcards 25
transparencies 27
M
maintenance
align print cartridges 83
check ink levels 76
clean exterior 76
clean glass 75
clean lid backing 75
clean print cartridges 84,
85, 86
prompt delay time 88
replace print cartridges 78
restore factory defaults 88
self-test report 76
set scroll speed 87
make copies
HP Director (OS 9) 14
HP Director (Windows) 10
HP Image Zone (OS X) 12
media. See paper
memory card specifications
122
memory cards
insert a card 37
overview 35
print DPOF file 44
print photos 42
proof sheet 37
save files to computer 37
send photos 66
Memory Stick memory card 35
more applications
HP Director (OS 9) 14
MultiMediaCard (MMC)
memory card 35
N
normal copy quality 49
O
OK button 6
on button 6
order
paper 73
print cartridges 73
Setup Guide 74
software 74
User Guide 74
P
paper
incompatible types 22
jams 28, 102
load 23
order 73
paper sizes 120
recommended copy types 48
recommended types 22
paper specifications 119
paper-tray capacities 119
phone numbers, customer
support 108
photo
menu 8
menu button 7
photo paper
load 25
photos
borderless 43
deselect 43
enhance copies 55
HP Image Zone 67
photo print cartridge 81
print from DPOF file 44
Quick Print 44
send from a memory card 66
send scanned images 66
physical specifications 122
PictBridge 43
postcards
load 25
Index
posters
copy 56
power specifications 122
cancel job 63
from computer 61
from software application 61
photos from DPOF file 44
photos from memory card 42
print options 62
print specifications 121
proof sheet 37
Quick Print 44
self-test report 76
print cartridge
recycling 124
print cartridge protector 82
print cartridges
align 83
check ink levels 76
clean 84
clean contacts 85
clean ink nozzle area 86
handle 78
order 73
part names 78
photo print cartridge 81
replace 78
store 82
troubleshoot 102
print margin specifications 120
printer sharing
Macintosh 18
Windows 18
prompt delay time 88
proof sheet
fill in 38
menu 8
print 37
scan 39
Q
quality
copy 49
Quick Print 44
R
recycling
device 124
supplies 124
reduce/enlarge copies
fit several on one page 53
poster 56
resize to fit letter or A4 54
regulatory notices
declaration of conformity 126
declaration of conformity
(European Economic
Area) 126
FCC statement 124
notice to users in Canada 125
notice to users in Japan 125
notice to users in Korea 125
regulatory model
identification number 124
replace print cartridges 78
reports, self-test 76
restore factory settings 88
return your HP All-in-One 112
right arrow 7
S
save
photos to computer 37
scan
button 7
from control panel 59
HP Instant Share 66
proof sheet 39
scan specifications 122
stop 60
to memory card 60
scan document
HP Director (OS 9) 14
HP Director (Windows) 10
scan glass
clean 75
load original 21
scan picture
HP Director (OS 9) 14
HP Director (Windows) 9
HP Image Zone (OS X) 11
scan to menu
Windows 8
scan to OCR
HP Image Zone (OS X) 11
scroll speed 87
Secure Digital memory card 35
self-test report 76
send to a device
HP Image Zone
(Macintosh) 69
HP Image Zone
(Windows) 68
scanned images 66
serial number 108
service 107
see also customer support
service ID 108
Settings
HP Director (OS 9) 14
settings
print options 62
setup
button 6
menu 8
SmartMedia memory card 35
software application, print
from 61
software update.. See device
update
specifications
10 x 15 cm photo paper 119
envelopes 119
labels 119
legal paper 119
letter paper 119
photo paper 119
print 121
transparencies 119
speed
control panel scroll 87
copy 49
start black 7
start color 7
stop
copy 57
print job 63
scan 60
support
before you call 89
resources 89
system requirements 119
T
technical information
copy specifications 121
environmental
specifications 123
memory card
specifications 122
paper sizes 120
paper specifications 119
paper-tray capacities 119
physical specifications 122
power specifications 122
print margin
specifications 120
print specifications 121
scan specifications 122
system requirements 119
weight 122
telephone numbers, customer
support 108
text
enhance on copies 55
transfer images
HP Director (Windows) 10
transparencies
load 27
troubleshoot
contact HP Support 89
hardware installation 90
incorrect measurements 93
installation overview 90
memory card 104
operational 101
overview 89
software installation 97
support resources 89
troubleshoot:
jams, paper 28
U
unload images
HP Director (OS 9) 13
HP Image Zone (OS X) 11
USB cable installation 91
W
warranty
statement 115
upgrades 107
Webscan 20
X
xD memory card 35
© 2004 Hewlett-Packard Development Company, L.P.
Electronic Edition
www.hp.com