
AL1913b - Screen ACER - Free user manual and instructions
Find the device manual for free AL1913b ACER in PDF.


User questions about AL1913b ACER
0 question about this device. Answer the ones you know or ask your own.
Ask a new question about this device
Download the instructions for your Screen in PDF format for free! Find your manual AL1913b - ACER and take your electronic device back in hand. On this page are published all the documents necessary for the use of your device. AL1913b by ACER.
USER MANUAL AL1913b ACER
Installation Safety 1
Cleaning Safety 1
SPECIAL NOTES ON LCD MONITORS 1
Components and Accessories 2
Usage 2
Installation Guide 2
Adjustment of Display 3
Operation 4
Adjustment of Screen 5
Attachment 6
Plug and Play 6
Power Saver 6
Troubleshooting 6
Technical Specifications 7
Display Mode 8
Safety Rules
Note: To ensure your safety and prolong the life of the product, read the following safety rules carefully when you use the product for the first time.
Electrical Safety
DO NOT touch the inside of the display. Only authorized and qualified technicians are allowed to open the LCD display case.
Only hold the plug, not the power cable, when you connect the plug to the receptacle. Make sure that your hands are dry without moisture.
- Don't expose your LCD display in the rain, water, or the environment with high temperature or humidity, such as kitchens, surroundings of a swimming pool, any place near flower vases, etc.)
If your LCD display operates abnormally, especially if there is smoke, noise or smell, remove the plug immediately and contact our authorized dealer or service center.
- Don't touch your LCD display with your fingers or any hard objects to avoid scratching or leaving any oil sludge on the surface of the display
Install your LCD display at the place where the risk of dust contamination is low. Take moisture-proof and ventilation measures to protect your LCD display.
- Don't install your LCD display near any heat source, such as kitchen tables, ovens, or fire sources, or in the sun.
Install your LCD at the place where children will not touch it to avoid electric shock, or dropping. Secure your LCD firmly or explain the safety rules to children, if required.
When installing your LCD display or adjusting its angle, attention shall be paid to the loading capability and leveling of the display.
- Don't spray or pour cleanser or water onto your LCD display or its case directly.
When cleaning your LCD display, make sure that no liquid permeates into the inside of the LCD display or any accessory.
Moisten a clean and soft lint-free cloth with water, ammonia-free water, or glass cleanser without alcohol, wrench it dry and wipe the surface of your LCD display gently. It is recommended to use a silk cloth that is exclusively used to clean the display.
Installation Safety
Cleaning Safety
SPECIAL NOTES ON LCD MONITORS
The following symptoms are normal with LCD monitor and do not indicate a problem.
NOTES
- Due to the nature of the fluorescent light, the screen may flicker during initial use. Turn off the Power Switch and then turn it on again to make sure the flicker disappears.
● You may find slightly uneven brightness on the screen depending on the desktop pattern you use. - The LCD screen has effective pixels of 99.99% or more. It may include blemishes of 0.01% or less such as a missing pixel or a pixel lit all of the time.
- Due to the nature of the LCD screen, an afterimage of the previous screen may remain after switching the image, when the same image is displayed for hours. In this case, the screen is recovered slowly by changing the image or turning off the Power Switch for hours.
Components and Accessories
LCD Display (with speakers)
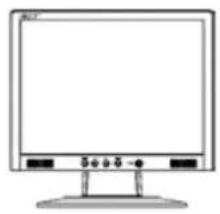
natural_image
Line drawing of a flat-screen computer monitor with no text or symbols on the screen or standPower Cable
LCD Display (without speakers)
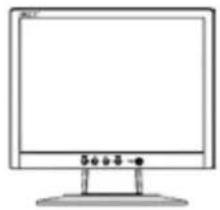
natural_image
Line drawing of a flat-screen computer monitor with control buttons (no text or symbols)Audio Cable (with speakers)
Signal Cable
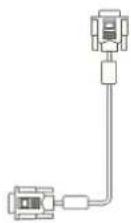
Adaptor
Quick Start Guide
text_image
AL1913W LCD Monitor Quick Start GuideUser's Manual (CD-ROM)
(Potrans: UP060B1190
or APD: DA-60F19)
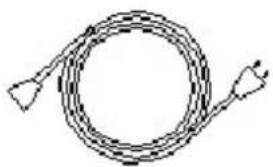
natural_image
Simple line drawing of a coiled cable with two connectors (no text or symbols)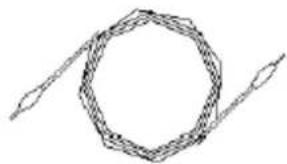
natural_image
Abstract geometric line drawing with a hexagonal shape and two diagonal lines (no text or symbols)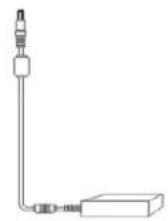
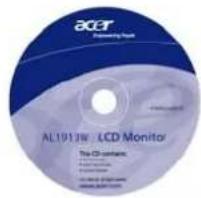
text_image
ACER Programming Book AL1912W, LCD Monitor The CD contains: - 100% AC/DC - 100% 3D/DC - 50% AC/DC - 50% 3D/DCUsage
Installation Guide
Note: Read the [Safety Rules] section carefully before starting the installation
Attention
Before installing your LCD display, consider the following with reference to the space where the display is to be installed:
To minimize the reflection of the display, protect your eyes and ensure premium quality, don't install your LCD display near windows or with backlight. Keep the display away from your eyes at least by 30 cm.
The upper edge of the display should be a little higher than your sight.
Adjust the front and back dip angles of the display based on your visual angle so that you can view the display comfortably.
Quick Installation
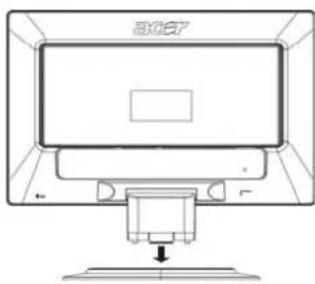
Complete the following steps for quick installation: (See the figure)
Assemble the seat of the display
● Take the seat out of the box and place it on a flat table.
- Take your LCD display out of the carton and assemble the display and seat along the rail. You will hear a click sound when the display and seat are engaged correctly.
natural_image
Line drawing of a computer monitor with a base and top view, no text or symbols presentConnection to PC
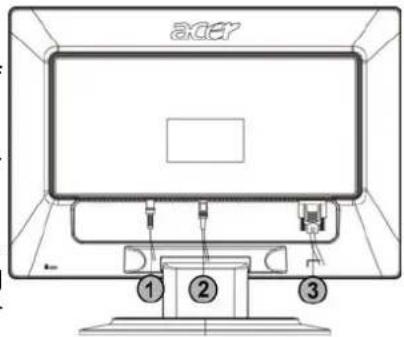
● Make sure that the power supply of your PC is turned off and the power plug is removed.
- Connect and fasten both ends of the signal cable to your PC host and LCD display respectively.
- If your LCD display has built-in speakers, connect the audio cable attached to the display from the sound card output of your PC to the audio input on the back of your LCD display.
- Connect the attached power cable to your LCD display.
● Plug the power cable to the receptacle.
● Turn on the power supplies of your PC and LCD display.
text_image
ACER ① ② ③① Transformer DC end
② Audio Cable
③ Signal Cable
Adjustment of Display
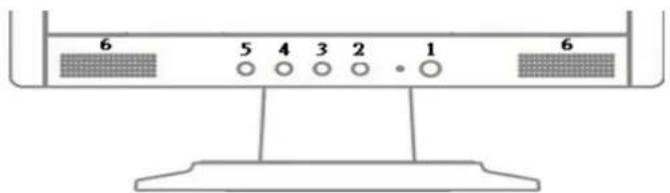
Key Definition
text_image
6 5 4 3 2 1 6| 1 | Power Source | Power On/OffGreen indication: Power is on and normalOrange indication: Sleep status in the energy-saving modeColorless indication: Power off | |
| 2 | MENU OSD Manu Press this | button to enter OSD. Press it again to exit OSD. | |
| 3 | > Plus | Press this button for selection or adjustment when OSD is shown.Press this button and click < and > to adjust volume when OSD is not shown (for the model with speakers only) | |
| 4 | < Minus | ||
| 5 | AUTO | Automatic Adjustment | Press this button to exit the manual when OSD is shown.Press this button for the display to optimize the position, phase and clock pulse automatically when OSD is not shown. |
| 6 | Speaker (For the model with speakers) | ||
Operation
Your LCD display has been adjusted to its optimal status before shipment. (See Page 8).
Your can also adjust the image in accordance with the following illustrations and steps.
Steps:
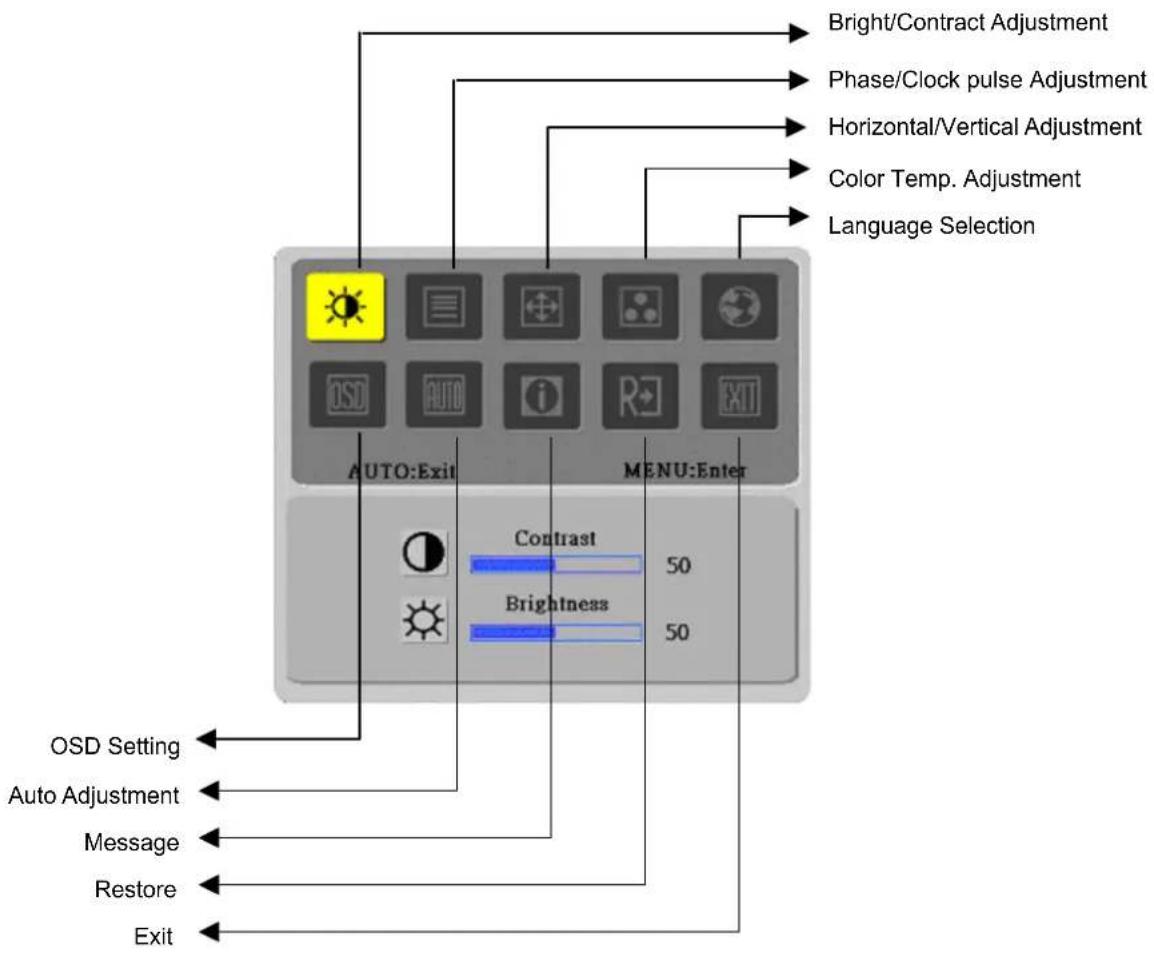
- Click MENU to display the OSD window as shown in the following figure.
- Click < or > to select the function to be adjusted as shown in the following figure.
- Click the MENU button to select the function to be adjusted.
- Click < or > to change current settings.
- To exit OSD, select "EXIT" to close the OSD window and save changes. To change other settings, repeat steps 2-4.
flowchart
graph TD
    A["ISO Setting"] --> B["Auto Adjustment"]
    B --> C["Message"]
    C --> D["Restore"]
    D --> E["Exit"]
    F["Contrast 50"] --> G["Brightness 50"]
    H["Phase/Clock pulse Adjustment"] --> I["Bright/Contract Adjustment"]
    J["Horizontal/Vertical Adjustment"] --> K["Color Temp. Adjustment"]
    L["Language Selection"] --> M["Chromosome Entry"]
    N["AUTO:Exit"] --> O["MENU:Enter"]
    P["ISO"] --> Q["Lightning Icon"]
    R["Auto"] --> S["Lightning Icon"]
    T["Image"] --> U["Lightning Icon"]
    V["Image"] --> W["Lightning Icon"]
Adjustment of Screen
Function Definition
| Primary Directory Symbol | Secondary Directory Symbol | Secondary Directory Items | Description |
 | [SWY] | Contrast djust the contrast between the foreground and background of an image on the screen | |
| [2WH4] | Brightness | djust the background brightness of the screen | |
 |  | Phase djust the focus of the image (for analog input adjustment only) | |
| [W850] | Clock Pulse | djust the clock pulse of the image (for input adjustment only) | |
 | [778H] | Horizontal | ove the image left and right on the screen (for input adjustment only) |
| [0KHX] | Vertical ove the image up and down on the screen (for input adjustment only) | ||
 |  | Warm Color Temp. | Set up the color temp. to be warm white color |
| N/A | Cold Color Temp. | Set up the color temp. to be cold white color | |
 | User Definition/Red | Adjust red/green/blue gain | |
| [XXXH] | User Definition/Green | ||
 | User Definition/Blue | ||
 |  | English | Select the language you want |
N/A | ### | ||
N/A | Deutsch | ||
| [KHSX] | Français | ||
| [A2KS] | Español | ||
 | Italiano | ||
 | 简体中文 | ||
 |  | Horizontal | ove OSD left and right |
| [7040] | Vertical ove OSD up and down | ||
 | OSD Time Display | Adjust OSD time display settings | |
 |  | Auto Adjustment | Set up horizontal, vertical, sequence and focus automatically (for analog input only) |
 | [028K] | Message isplay | Resolution, H/V frequency and the input port used for current input timing function. |
 |  | Restore | estore to factory settings |
 | N/A | Exo | lose the OSD window and save changes. |
Attachment
Plug and Play
The product provides the latest VESA plug and play function to prevent complicated and time-consuming installation procedures. The plug and play function allows your computer system to identify the LCD display easily and set up the functions of the LCD display automatically.
The LCD display transfers the Extended Display Identification Data (EDID) to your computer system via the Display Data Channel (DDC), so that your computer can use the self-setting function of the LCD display.
Power Saver
The LCD display has a built-in Power Control System (Power Saver).
When the LCD display is not operated during a certain time, the Power Control System will brings the LCD display into low voltage status automatically to save power. Move the mouse slightly or press any key to return to the normal operation.
The Power Saver function can only be operated by the display card of the computer system. You can set up this function from your computer.
The LCD display is compatible with EPAENERGY STAR NÜTEK when used with VESA DPMS.
To save power and extend the life of the product, turn off the LCD display power supply when it is not used or when remaining idle for a long time.
Troubleshooting
Power LED does not light
◆ Check that the power switch is turned on.
Make sure that the power cable is connected.
◆ Check that the power switch is turned on.
Make that the power cable is connected.
◆ Ensure that the signal cable is inserted in the receptacle appropriately.
The Power Saver may turn off the display automatically during the operation. Make sure that the display is restored when you press any key from the keyboard.
Icon off
Color Default
Refer to "Color Temperature Adjustment" to adjust RGB color or select color temperatures.
◆ Remove the electronic equipment in the vicinity that may cause EMI interference.
Check the signal cable of the display and ensure that no pin is bent.
Image Offset or wrong Size
Press the auto adjustment button to optimize the screen automatically.
◆ Set up the reference position.
Technical Specifications
| LCD Panel(Back Light Source) | Panel Dimension | Diagonal 481.4mm (19 inch) LCD display |
| Max. Resolution | 1,440 x 900/WXGA+ | |
| Max. Pixel Up to 16.2M true color | ||
| Pixel Span | Horizontal 0.284mm x Vertical 0.284mm | |
| Brightness | 350 cd/m2 | |
| Contrast | 500 : 1 | |
| LC Response Time | 20 ms | |
| Visual Angle | Horizontal 170° / Vertical 170° | |
| Effective Display | Horizontal 408.24mm x Vertical 255.15mm | |
| Input Signal | Signal Mode | Simulated video frequency: 0.7 Vpp, 75Ω(separate SYNC and composite SYNC) |
| SYNC Frequency | Horizontal 30kHz~82kHz x Vertical 56Hz ~76 Hz | |
| Max. Pixel Clock | 135MHz | |
| Input Terminal | Image | D-Sub 15 PIN (VESA) |
| Audio | Phone Jack, d=3.5mm (Optional) | |
| Power Transformer | AC100~240Volts, 50/60Hz | |
| Power Consumption | 60W / Standby 3W | |
| Environmental Conditions | Temperature | 5°C ~ 35°C (operation)/ -20°C ~ 55°C (storage) |
| Humidity | 20% ~ 80% (operation)/ 20% ~ 85% (storage) | |
| Actual Dimension (W x D x H) | 462 mm x 180mm x 385mm | |
| Net Weight | 4.0 kg | |
| Safety Standard | TCO99;UL/CUL;TÜV-GS;CE/LVD;TÜV-ERGO;CB;CCC;FCC-B;VCCI-B;CE/EMC;C-Tick; BSMI; ISO 13406-2;EPA; PCT;NOM | |
Lamp Disposal

LAMP(S) INSIDE THIS PRODUCT CONTAIN MERCURY AND MUST BE RECYCLED OR DISPOSED OF ACCORDING TO LOCAL, STATE OR FEDERAL LAWS. FOR MORE INFORMATION, CONTACT THE ELECTRONIC INDUSTRIES ALLIANCE AT WWW.EIAE.ORG. FOR LAMP SPECIFIC DISPOSAL INFORMATION CHECK WWW.LAMPRECYCLE.ORG.

This device complies with Part 15 of the FCC rules. Operation is subject to the following two conditions: (1) this device may not cause harmful interference, and (2) this device must accept any interference received, including interference that may cause undesired operation.
This Class B digital apparatus meets all requirements of the Canadian Interference- Causing Equipment Regulations.
If the signal of your PC system is the same as one of the following reference signal modes, the screen will be adjusted automatically. If not, the screen will not display or only the LED lights will display. For more information about the adjustment mode, refer to the instructions of your display card.
| Display Mode | Hor. Frequency (kHz) | Vert. Frequency (Hz) | Pixel Frequency (MHz) | SYNC Polarity (H/V) | |
| VESA | VGA | 640x480.469 | 59.940 | 25.175 | -/- |
| 37.861 | 72.809 | 31.500 | -/- | ||
| 37.500 | 75.000 | 31.500 | -/- | ||
| SVGA | 800x6006 | 56.250 | 36.000 | +/+ | |
| 37.879 | 60.317 | 40.000 | +/+ | ||
| 48.077 | 72.188 | 50.000 | +/+ | ||
| 46.875 | 75.000 | 49.500 | +/+ | ||
| XGA | 1024x7683 | 60.004 | 65.000 | -/- | |
| 56.476 | 70.069 | 75.000 | -/- | ||
| 60.023 | 75.029 | 78.750 | +/+ | ||
| SXGA 1152x864 | 67.500 | 75.000 | 108.000 | +/+ | |
| SXGA 1280x1024 | 63.981 | 60.020 | 108.000 | +/+ | |
| 79.976 | 75.025 | 135.000 | +/+ | ||
| WXGA 1280x768 | 47.776 | 59.870 | 79.500 | -/+ | |
| WXGA 1440x900 | 55.935 | 55.887 | 106.5 | -/+ | |
| VGA TEXT 720 x 400 | 31.469 | 70.087 | 28.322 | -/+ | |
| Macintosh | 640x480 | 35.000 | 66.667 | 30.240 | -/- |
| 832 x 624 | 49.725 | 74.500 | 57.283 | -/- | |
| 1024 x 768 | 60.150 | 74.720 | 80.000 | -/- | |