SFPA9305SPX - Oven SMEG - Free user manual and instructions
Find the device manual for free SFPA9305SPX SMEG in PDF.


User questions about SFPA9305SPX SMEG
0 question about this device. Answer the ones you know or ask your own.
Ask a new question about this device
Download the instructions for your Oven in PDF format for free! Find your manual SFPA9305SPX - SMEG and take your electronic device back in hand. On this page are published all the documents necessary for the use of your device. SFPA9305SPX by SMEG.
USER MANUAL SFPA9305SPX SMEG
1.1 General safety instructions 4
1.2 Appliance purpose 8
1.3 Manufacturer's liability 8
1.4 This user manual 9
1.5 Identification plate 9
1.6 Disposal 9
1.7 How to read the user manual 10
1.8 To save energy 10
2 Description 11
2.1 General description 11
2.2 Control panel 11
2.3 Other parts 12
2.4 Accessories 13
2.5 Advantages of steam assisted cooking 14
3 Use 15
3.1 Using the accessories 16
3.2 Using the oven 17
3.3 Cooking advice 42
3.4 Quick Mode 44
3.5 Smart Cooking 45
3.6 History 48
3.7 My recipes 57
3.8 Other functions 62
3.9 Settings 68
4 Cleaning and maintenance 74
4.1 Cleaning the surfaces 74
4.2 Cleaning the door 74
4.3 Cleaning the oven cavity 77
4.4 Cleaning the water circuit 84
4.5 Extraordinary maintenance 90
5 Installation 93
5.1 Electrical connection 93
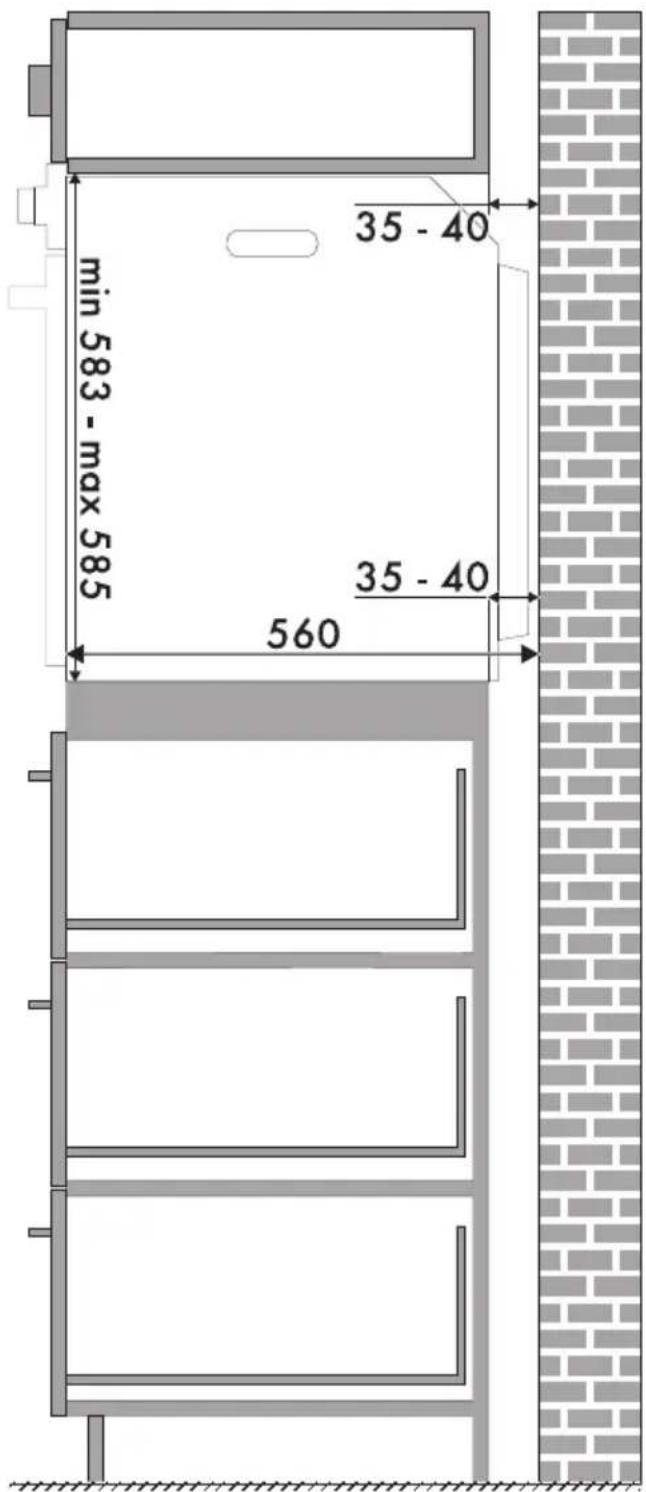
5.2 Instructions for the installer 94
5.3 Positioning 95
TRANSLATION OF THE ORIGINAL INSTRUCTIONS
We advise you to read this manual carefully, which contains all the instructions for maintaining the appliance's aesthetic and functional qualities.
For further information on the product: www.smeg.com
1 Instructions
1.1 General safety instructions

RISK OF INJURY
- During use the appliance becomes hot. Care should be taken to avoid touching heating elements inside the oven.
- WARNING - Accessible parts will become hot when in use. Young children should be kept away.
- Never touch the heating elements during use.
- Protect your hands by wearing oven gloves when moving food inside the oven.
- Never try to put out a fire or flames with water: Turn off the appliance and smother the flames with a fire blanket or other appropriate cover.
-
The appliance is not intended for use by persons (including children) with reduced physical, sensory or mental capabilities, or lack of experience and knowledge, unless they have been given supervised or instruction concerning use of the appliance by a responsible person for their safety.
-
WARNING: Ensure the appliance is switched off before replacing the lamp to avoid the possibility of electric shock.
- Young children should be supervised to ensure that they do not play with the appliance.
- Keep children under the age of eight at a safe distance unless they are constantly supervised.
- Keep children under the age of 8 away from the appliance when it is in use.
- Cleaning and maintenance must not be carried out by unsupervised children.
- The cooking process must always be monitored. A short cooking process must be continuously monitored.
- Never leave the appliance unattended during cooking operations where fats or oils could be released, as these could then heat up and catch fire. Be very careful.
-
(on some models only) During the pyrolytic cleaning function, please note that outside surfaces may become hotter than usual. Please ensure children are kept away.
-
(on some models only) Excess spillage must be removed before starting the pyrolytic cleaning cycle.
- Do not pour water directly onto very hot trays.
- Keep the oven door closed during cooking.
- If you need to move food or at the end of cooking, open the door 5 cm for a few seconds, let the steam come out, then open it fully.
- Pyrolytic cycle (on some models only): remove all accessories from inside the oven.
- Do not insert pointed metal objects (cutlery or utensils) into the slots in the appliance.
- Switch off the appliance immediately after use.
• DO NOT USE OR STORE FLAMMABLE MATERIALS NEAR THE APPLIANCE.
• DO NOT USE AEROSOLS IN THE VICINITY OF THIS APPLIANCE WHILST IT IS IN USE.
• DO NOT MODIFY THIS APPLIANCE.
• Installation and servicing should be carried out by qualified personnel in accordance with current standards.
- Do not try to repair the appliance yourself or without the assistance of a qualified technician.
- Do not pull the cable to unplug the appliance.

RISK OF DAMAGING THE APPLIANCE
- Do not use abrasive or corrosive detergents (e.g. scouring powders, stain removers and metallic sponges) on glass parts. Use wooden or plastic utensils.
- Do not use rough or abrasive materials or sharp metal scrapers.
- Do not sit on the appliance.
• DO NOT FOR ANY REASON USE THE APPLIANCE AS A SPACE HEATER.
Instructions
- Do not use harsh abrasive cleaners or sharp metal scrapers to clean the oven glass door since they can scratch the surface, which may result in shattering of the glass.
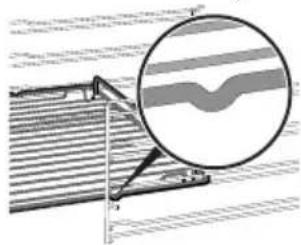
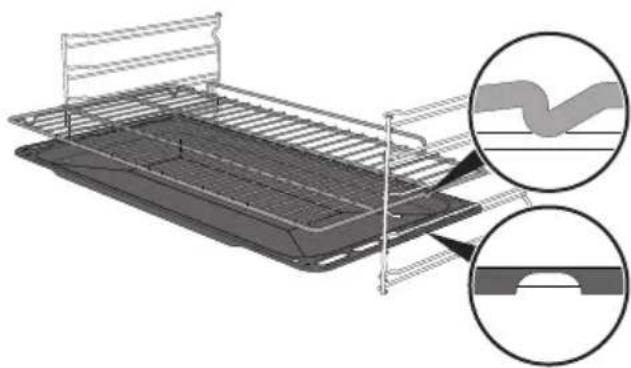
- Racks and trays should be inserted as far as they will go into the side guides. The mechanical safety locks that prevent them from being removed must face downwards and towards the back of the oven cavity.
natural_image
Technical diagram showing a mechanical setup with a magnified circular detail of layered material (no text or symbols)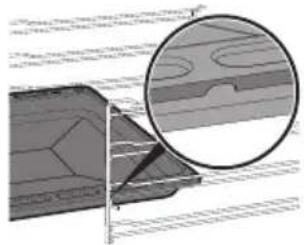
natural_image
Technical diagram showing layered structure with a magnified inset (no text or symbols)- Do not use a steam cleaner to clean this appliance.
- Do not spray any spray products near the appliance.
- Fire hazard: never leave objects in the oven cavity.
-
Do not use plastic cookware or containers when cooking food.
-
(on some models only) Before starting the pyrolytic cycle, remove any food residues or large spills from previous cooking operations from the inside of the oven.
- Do not obstruct ventilation openings and heat dispersal slots.
- Do not put sealed tins or containers in the oven.
- Remove all trays and racks which are not required during cooking.
- Do not cover the bottom of the oven cavity with aluminium or tin foil sheets.
- Do not place pans or trays directly on the bottom of the oven cavity.
- If you wish to use greaseproof paper, place it so that it will not interfere with the hot air circulation inside the oven.
Instructions
- Do not use the open door to rest pans or trays on the internal glass pane.
- Never use the oven door to lever the appliance into place when fitting.
- Avoid exerting too much pressure on the oven door when open.
- Do not use the handle to lift or move the appliance.
Installation and maintenance
• THIS APPLIANCE MUST NOT BE INSTALLED IN BOATS OR CARAVANS.
• The appliance must not be installed on a pedestal.
- Position the appliance into the cabinet cut-out with the help of a second person.
- This oven must not be installed behind a decorative door in order to avoid overheating.
• Installation and servicing should be carried out by qualified personnel in accordance with current standards.
• Have the electrical connection performed by authorised technical personnel.
- The appliance must be connected to earth in compliance with electrical system safety standards.
- Use cables withstanding a temperature of at least 90 °C.
- The tightening torque of the screws of the terminal supply wires must be 1.5 - 2 Nm.
- If the power cable becomes damaged, contact technical support immediately to arrange for it to be replaced in order to avoid possible hazards.
- If the electrical supply is restricted, means of all-pole disconnection must be accessible and incorporated in the fixed wiring in accordance with the wiring rules.
• Always use any necessary/required personal protective equipment (PPE) before performing any work on the appliance (installation, maintenance, positioning or movement).
- Before performing any work on the appliance, switch off the power supply.
- This appliance can be used up to a maximum altitude of 2,000 feet above sea level.
For this appliance
- Ensure that the appliance is switched off before replacing the bulb.
- Do not rest any weight or sit on the open door of the appliance.
• Take care that no objects are stuck in the doors. - Do not install / use the appliance outdoors.
- Only use the temperature probe provided or recommended by the manufacturer.
1.2 Appliance purpose
This appliance is intended for cooking food in the home environment. Every other use is considered improper. It must also not be used:
- In kitchen areas provided for employees in shops, offices and other work environments
- On farms/farm accommodation
- By guests in hotels, motels and other types of residential environments
• In bed and breakfast accommodation.
1.3 Manufacturer's liability
The manufacturer declines all liability for damage to persons or property caused by:
- Use of the appliance other than that specified
- Failure to comply with the instructions in the user manual
- Tampering with any part of the appliance
- The use of non-original spare parts.
1.4 This user manual
- This user manual is an integral part of the appliance and must therefore be kept in its entirety and within the user's reach for the whole working life of the appliance.
- Read this user manual carefully before using the appliance.
- The explanations in this manual include images, which describe all that regularly appears on the display. However, it should be kept in mind that the appliance may be equipped with an updated version of the system, and as such, all that appears on the display may differ from those in the manual.
1.5 Identification plate
The identification plate bears the technical data, serial number and brand name of the appliance. Do not remove the identification plate for any reason.
1.6 Disposal
This appliance conforms to the WEEE European directive (2012/19/EU) and must be disposed of separately from other waste at the end of its service life.
The appliance does not contain substances in quantities sufficient to be considered hazardous to health and the environment, in accordance with current European directives.
To dispose of the appliance:
- Cut the power cable and remove it.

Power voltage Danger of electrocution
- Disconnect the mains power supply.
- Unplug the appliance.
- Deliver the appliance to the appropriate recycling centre for electrical and electronic equipment waste, or return it to the retailer when purchasing an equivalent product, on a one for one basis.
Our appliances are packaged in non-polluting and recyclable materials.
- Deliver the packing materials to the appropriate recycling centre.

Plastic packaging Danger of suffocation
- Do not leave the packaging or any part of it unattended.
- Do not let children play with the plastic bags.
1.7 How to read the user manual
This user manual uses the following reading conventions:

Instructions
General information on this user manual, on safety and final disposal.

Description
Description of the appliance and its accessories.

Use
Information on the use of the appliance and its accessories, cooking advice.

Cleaning and maintenance
Information for proper cleaning and maintenance of the appliance.

Installation
Information for the qualified technician: Installation, operation and inspection.

Safety instructions

Information / Advice
1.8 To save energy

- Only preheat the appliance if the recipe requires you to do so.
- Unless otherwise indicated on the package, defrost frozen foods before placing them in the oven.
- When cooking several types of food it is recommended to cook the foods one after the other to make the best use of the already hot oven.
- Use dark metal moulds: They help to absorb the heat better.
- Remove all trays and racks which are not required during cooking.
- Stop cooking a few minutes before the time normally used. Cooking will continue for the remaining minutes with the heat which has accumulated inside the oven.
- Reduce any opening of the door to a minimum to avoid heat dispersal.
- Keep the inside of the oven clean at all times.
2 Description
2.1 General description
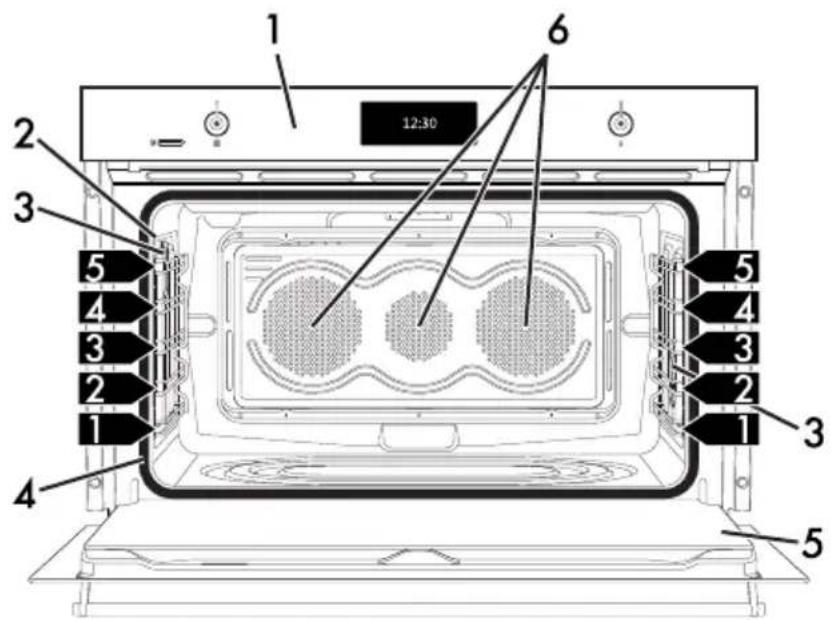
Z
text_image
1 2 3 4 5 6 12:30 1 2 3 4 5 1 2 3 4 51 Control panel
2 Temperature probe socket
3 Oven light
4 Seal
5 Door
6 Fan
7 Rack/tray support frames
1,2,3... Frame shelf
2.2 Control panel

text_image
1 2 3 4 12:30 P B8 i1 Remote control indicator light (on some models only)
When lit, it indicates that the appliance can be controlled remotely via a smartphone or tablet (see the "Built-in oven connectivity" user manual).
2 Function Knob
In Quick Mode, this knob allows you to select the cooking function.
3 Display The touchscreen display allows you to
interact with the appliance. Touch the icons
to access the various functions. All the operating parameters will be shown on the display.
4 Temperature Knob
In Quick Mode, this knob allows you to select the cooking temperature.
SmegConnect (on some models only)
The appliance is equipped with
SmegConnect technology that allows the user to control the appliance via an App on their smartphone or tablet.
For further information, please refer to the booklet provided and / or visit the website
www.smeg.com
2.3 Other parts
Shelves
The appliance features shelves to position trays and racks at different heights. The position of the shelf is indicated from the bottom upwards (see "General description").
Oven lighting
The appliance's interior lighting comes on:
- When the door is opened.
- Touch the light symbol when the oven is in operation to manually activate or deactivate the oven light, apart from when
text_image
the VAPOR CLEAN (multifunction models) and PYROLYTIC (polytic models) functions are in use.
In order to save energy, the light turns off after about one minute from the start of cooking or whenever the door is opened (this function can be disabled via the secondary menu).
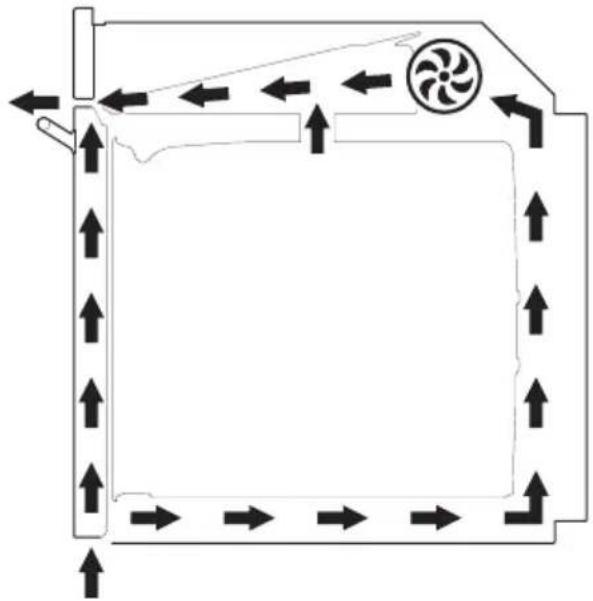
Cooling fan
natural_image
Diagram of airflow or ventilation system around a rectangular chamber with directional arrows and a fan-shaped component (no text or labels)The fan cools the oven and comes into operation during cooking.
The fan causes a steady outflow of air from above the door which may continue for a brief period of time even after the appliance has been turned off.
2.4 Accessories
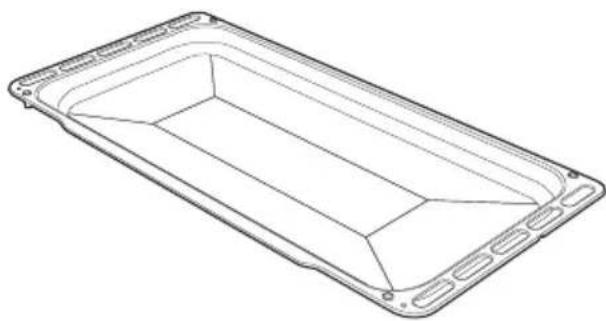
Deep tray
natural_image
Line drawing of a rectangular plastic tray or container with internal compartments and mounting holes (no text or symbols)Useful for collecting fat from foods placed on the rack above and for cooking pies, pizzas and baked desserts.
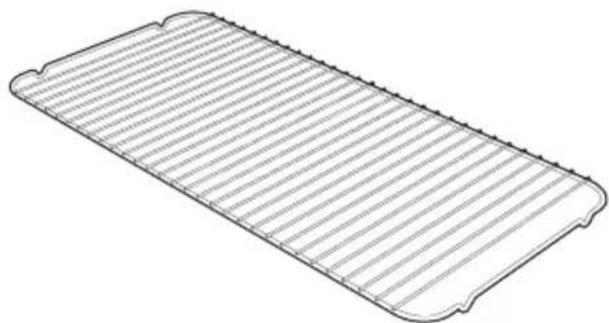
Tray rack
natural_image
Line drawing of a rectangular plate with horizontal grooves and a flared edge (no text or symbols)To be placed over the top of the tray; for cooking foods which may drip.
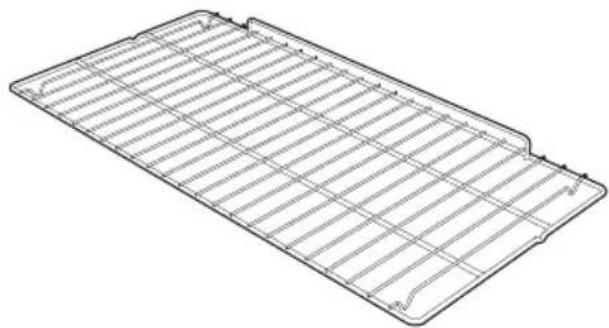
Rack
natural_image
Line drawing of a rectangular metal grate or rack structure with grid lines (no text or symbols)Useful for supporting containers with food during cooking.
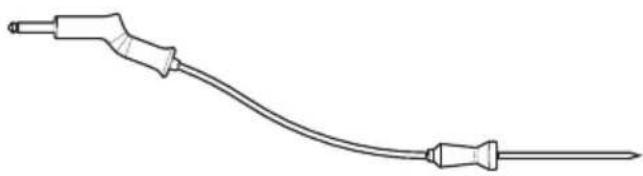
Temperature probe (on some models only)
natural_image
Line drawing of a medical or laboratory probe with two probes and a curved tube (no text or symbols)With the temperature probe, you can cook according to the temperature measured at the centre the food.
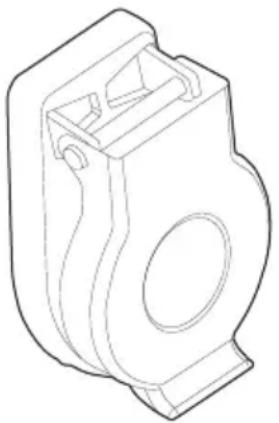
Protective cover (on some models only)
natural_image
Technical line drawing of a mechanical component (no text or symbols)Used to cover and protect the temperature probe socket when the temperature probe is not in use.

Some models are not provided with all accessories.

The oven accessories intended to come into contact with food are made of materials that comply with the provisions of current legislation.

Original supplied and optional accessories can be requested to Authorised Assistance Centres. Use only original accessories supplied by the manufacturer.
2.5 Advantages of steam assisted cooking
The steam assisted cooking system cooks all types of food much more gently and quickly, and is best for preparations such as:
- Braising and stewing
- Cooking sauces
- Cooking au gratin
- Roasting
- Slow cooking
- Regeneration
- Multi mode cooking
Variations in temperature and humidity level allow the desired gastronomic result to be achieved.
The addition of steam enables less fat to be used, for healthier, more natural cooking. It also minimises the loss of food weight and volume during cooking.
Steam assisted cooking is particularly suitable for meat: in addition to making it very tender, it also maintains the shine, and makes it more succulent.
Also recommended for leavened dough and bread products. Indeed, moisture enables the dough to grow and develop during cooking, before the outer crust forms. This results in a lighter and more easily digestible dough, which can be recognised by the larger pockets of air in the dough.
3 Use
Instructions

High temperature inside the oven during use Danger of burns
- Keep the oven door closed during cooking.
- Protect your hands by wearing oven gloves when moving food inside the oven.
- Do not touch the heating elements inside the oven.
- Do not pour water directly onto very hot trays.
- Do not allow children to approach the oven when it is in operation.

Improper use Risk of damage to enamelled surfaces
- Do not cover the bottom of the oven cavity with aluminium or tin foil sheets.
- If you wish to use greaseproof paper, place it so that it will not interfere with the hot air circulation inside the oven.
- Do not place pans or trays directly on the bottom of the oven cavity.
- Do not pour water directly onto very hot trays.

High temperature inside the oven during use
Danger of fire or explosion
- Do not spray any spray products near the appliance.
- Do not use or leave flammable materials near the appliance.
- Do not use plastic cookware or containers when cooking food.
- Do not put sealed tins or containers in the oven.
- Do not leave the appliance unattended during cooking operations where fats or oils could be released.
- Remove all trays and racks which are not required during cooking.
Preliminary operations
- Remove any protective film from the outside or inside of the appliance, including accessories.
- Remove any labels (apart from the technical data plate) from the accessories and from the oven cavity.
- Remove all the accessories from the appliance and wash them (see "4 Cleaning and maintenance").
- Heat the empty oven at the maximum temperature to burn off any residues left by the manufacturing process.
3.1 Using the accessories
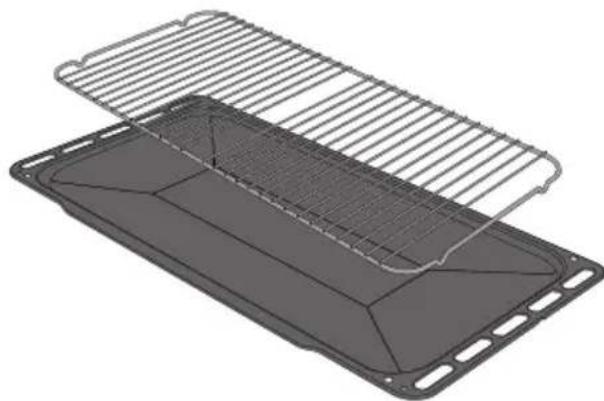
Tray rack
The tray rack has to be inserted into the tray. In this way fat can be collected separately from the food which is being cooked.
natural_image
3D rendering of a rectangular tray with a meshed upper panel and a lower plate, showing internal structure (no text or symbols)Racks and trays
Racks and trays have to be inserted into the side guides until they come to a complete stop.
The mechanical safety locks that prevent the rack from being removed accidentally must face downwards and towards the back of the oven cavity.
natural_image
Technical illustration of a metal tray with internal structure and two magnified views showing internal details (no text or symbols)
Gently insert racks and trays into the oven until they come to a stop.

Clean the trays before using them for the first time to remove any residues left by the manufacturing process.
3.2 Using the oven
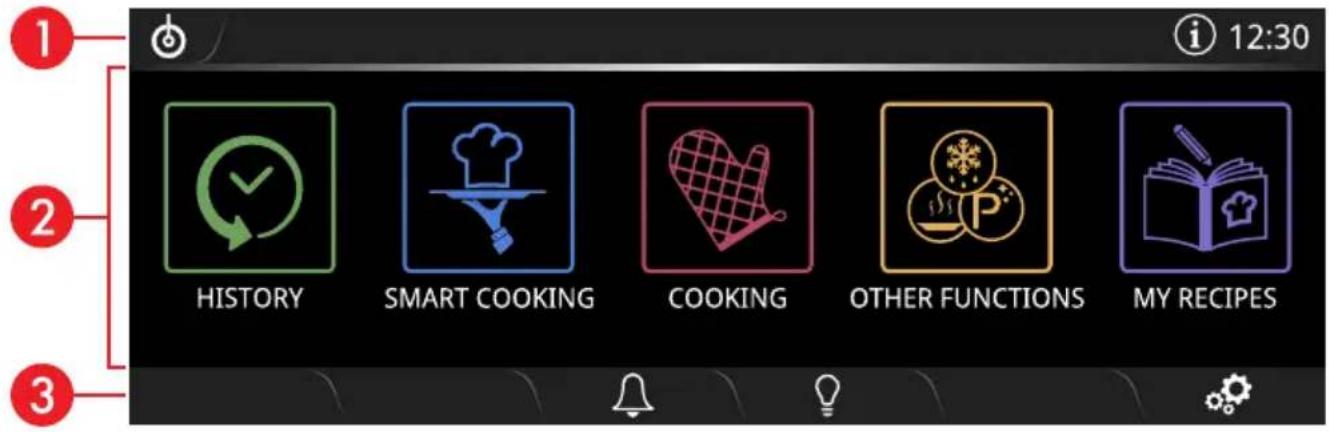
Display
The parameters and values for the currently selected function will be indicated on the display. To use it, simply touch the "virtual" buttons and/or scroll through the values shown.
text_image
1 2 3 HISTORY SMART COOKING COOKING OTHER FUNCTIONS MY RECIPES(the main menu display is shown in the figure)
1 Information area
Information regarding the menus and submenus of the functions in progress in the main area are indicated in this area.
The following are also present in this area:
- QUICK MODE
ton: touch this
button to access
the Quick Mode menu.
• HOME
ton: touch this button to
return to the main menu.
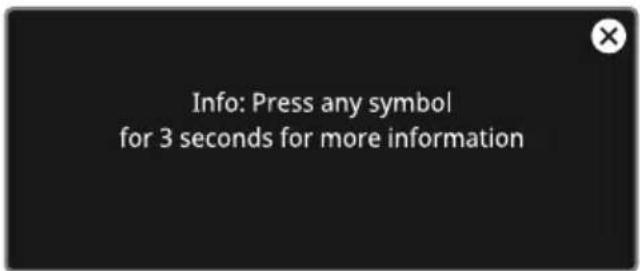
• INFORMATION
ton: touch this
button to display the following screen


text_image
Info: Press any symbol for 3 seconds for more information• The current time display.
According to the page that is displayed, the following buttons may also be present:
2 Main area
The various functions of the appliance can be set in this area. Touch the buttons and values to set the required function.
3 Lower area
There are various shortcut function buttons in this area, which vary according to the functions set in the main area.

HISTORY

MY RECIPES

TIMER

LIGHT

SETTINGS

BACK

CONFIRM

START

REPLAY

STOP

SAVE

DELETE

DOOR LOCK

RAPID PRE-HEATING

PROBE (if fitted)

Press and hold the HOME

button for a few seconds to stop cooking immediately at any time and return to the main menu.
To be able to start any cooking function, the current time must be set.
- Touch the flashing

access the SET THE TIME submenu.
- Scroll up and down through the hours and minutes to set the current time.
Connectivity (on some models only)
Connectivity requirements:
- Smartphone or tablet running iOS version 10.x or later or Android version 5.1 or later.
- Wi-Fi network (2.4 GHz band, WPA2 protected setup) active and available in the place where the appliance is installed.
- Internet connection.
- Name and password of the home Wi-Fi network or WPS mode (Wi-Fi Protected Setup) available.
For further information, please refer to the "Built-in oven connectivity manual".
First use

The following instructions are also valid in the case of a prolonged power failure.
To switch on the appliance:
- Connect the appliance to the mains power supply.
The manufacturer's logo will appear for a few
seconds on the display


After the appliance is switched on, you will need to wait a few seconds before you can use it.
Then the current time display will appear
with the time field

- Touch the CONFIRM button (at the right in the lower area) to set the current time.

The current time can also be set or modified by touching the time indicated on the display for at least 3 seconds.
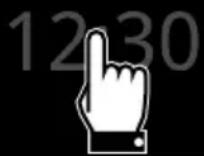
On first use, the appliance language is set to "English" by default. It is recommended that you set the required language at this point.
- Touch the SETTINGS button (at the right in the lower area) 3
- In the Language option (on the left), scroll through the available languages (on the right) to select the required language.
- Touch the CONFIRM button (at the right in the lower area) to set the required language.
Deactivating the display

When the "show the time" mode is set to Off, if the time display is shown, the display will switch off automatically after 2 minutes.
Reactivating the display
To reactivate the display when it is off:
- Turn one of the two knobs. The display turns on after a few seconds. The display shows the main menu when it is switched on again.

Put the knobs back to their starting position.
Selecting a steam assisted cooking function

The steam assisted cooking functions are ideal for preparing moist cakes, bread and for tender roast meats.
- Touch the time indicated on the display.

text_image
1230- Touch the COOKING the "main menu".
n on
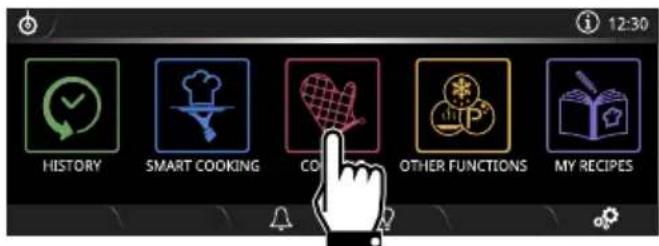
text_image
12:30 HISTORY SMART COOKING CORP OTHER FUNCTIONS MY RECIPES- Select the required steam assisted function (for example "FAN ASSISTED +
STEAM.
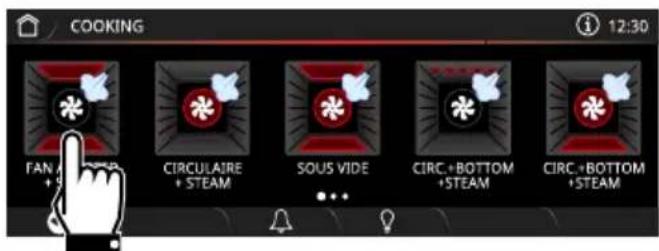
text_image
COOKING 12:30 FAN CIRCULAIRE + STEAM SOUS VIDE CIRC.+BOTTOM +STEAM CIRC.+BOTTOM +STEAM- Touch the TEMPERATURE button or the relative value.
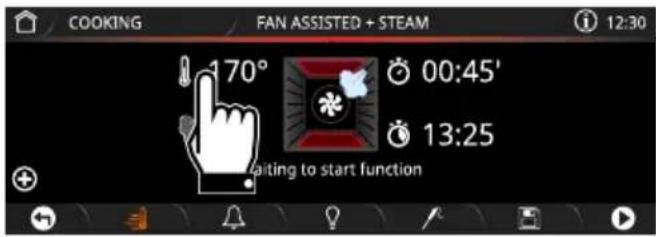
text_image
COOKING FAN ASSISTED + STEAM 12:30 170° 00:45' 13:25 Waiting to start function- Scroll through the values and select the required cooking temperature (for example "200°C").
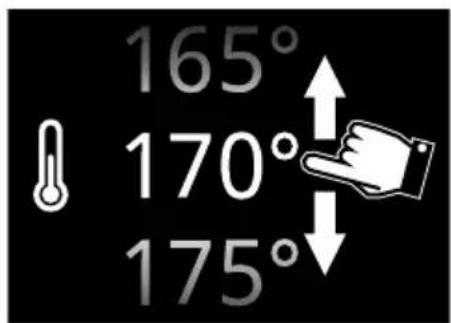
text_image
165° 170° 175°-
Touch the CONFIRM button (at the lower right 1 to confirm the new cooking temperature that has been selected.
-
Touch the COOKING DURATION button or the relative value).

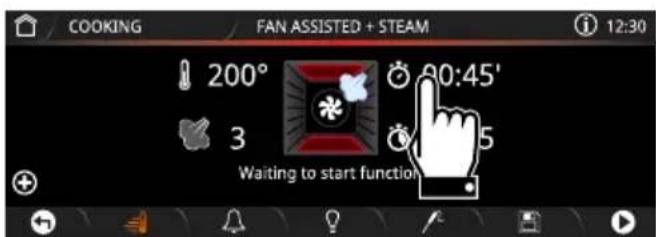
text_image
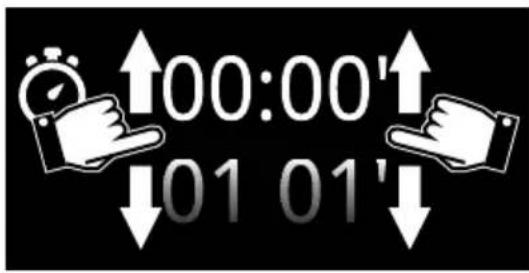
COOKING FAN ASSISTED + STEAM 12:30 200° 80:45' 3 5 Waiting to start function- Scroll through the values and select the required duration (for example "35 minutes").
text_image
00:00' 01 01'- Touch the CONFIRM button to confirm the selected cooking duration.
The hours and minutes can be selected separately.
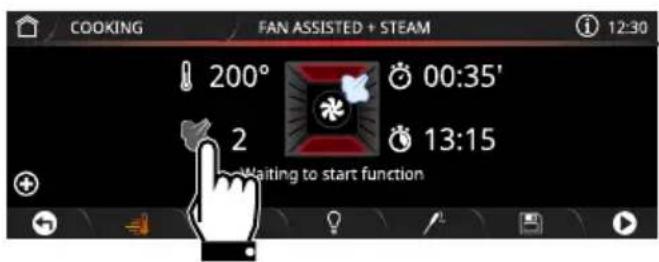
- Touch the STEAM LEVEL button or the relative value.
text_image
COOKING FAN ASSISTED + STEAM 12:30 200° 00:35' 2 13:15 Waiting to start function- Scroll through the values and select the required steam level (for example "1").

The level of steam that can be selected depends on the set cooking time:
Level 1: always available Level 2: 30 minutes and upwards Level 3: 45 minutes and upwards
General information regarding the steam level
Level 1: comparable to cooking with a lid, it is suitable for preparing pizzas, large sausages, whole pork fillets, chicken breasts, fish steaks, quiches, stewed vegetables, bread...
Level 2: recommended for roast chicken, turkey breast, pork loin, medium size fish, roasted potatoes, low temperature cooking of large lean roasts, pasteurisation, egg pasta...
Level 3: comparable to cooking with a lid and with the addition of wine. It is recommended for braised meats, stews, shoulder roasts, large fish, casseroles, stewed potatoes, fish and vegetables stews.....
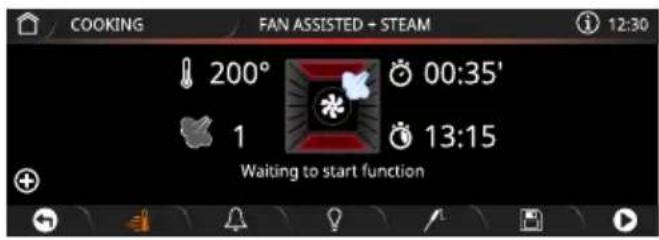
- Touch the CONFIRM √ button.
The expected end of cooking time appears under the duration (in the example "13:15").
text_image
COOKING FAN ASSISTED - STEAM 12:30 200° 00:35' 1 13:15 Waiting to start function
The minutes required for pre-heating are already included in the end-of-cooking time.
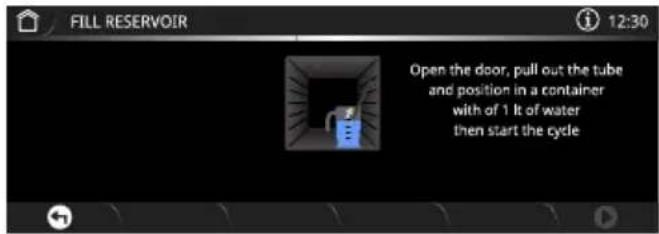
- Touch the START button to reservoir filling procedure.
text_image
FILL RESERVOIR Open the door, pull out the tube and position in a container with of 1 lt of water then start the cycleFilling the reservoir

Use cold tap water which is not too hard, softened water or still mineral water.

Do not use distilled water, tap water with a high chloride content (> 40 mg/l), or other liquids.
- Fill a jug with sufficient water for the cooking duration.
- Open the oven door.
- Rest the jug on the open door.

PLEASE NOTE: overall weight of the jug containing the water must be less than 5 kg.
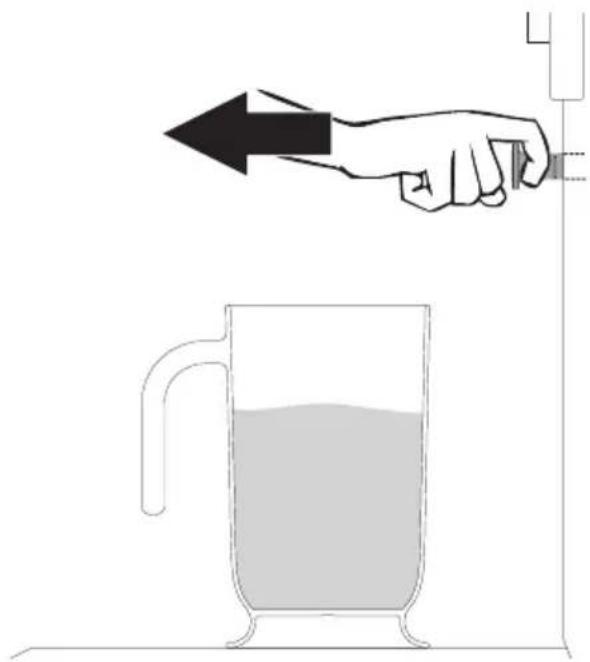
- Remove the tube from its seat.
natural_image
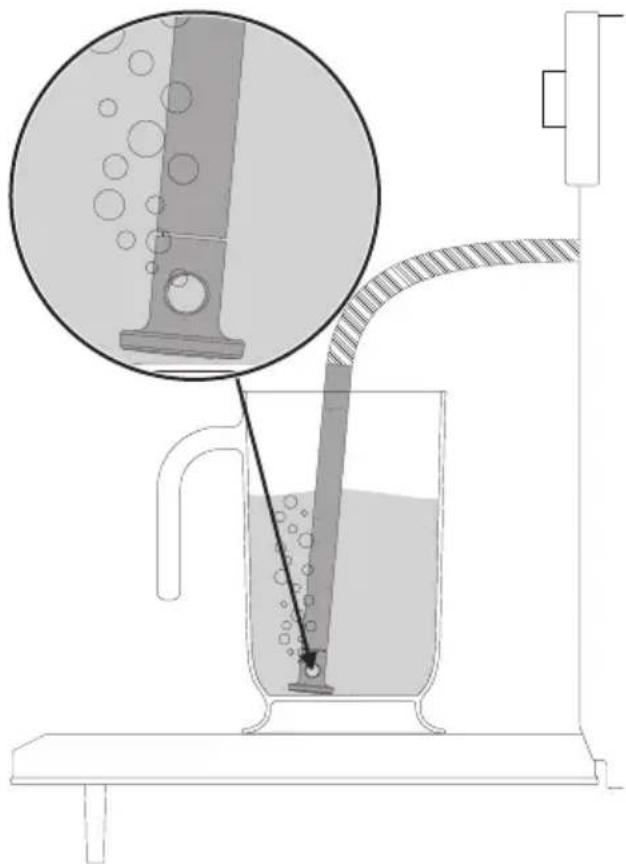
Simple line drawing of a hand holding a downward arrow above a mug filled with liquid, with no text or symbols present.- Place the end at the bottom of the jug.
natural_image
Diagram of a laboratory filtration setup with a beaker, tube, and magnified inset showing liquid droplets (no text or labels)- Press the START

button
to
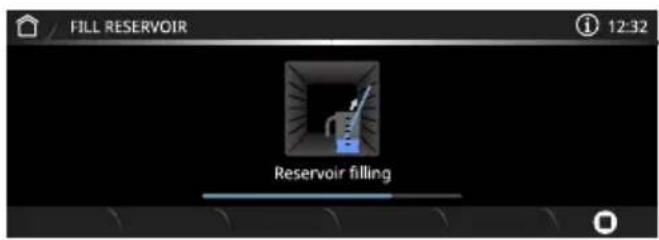
the reservoir with water.
text_image
FILL RESERVOIR Reservoir filling
The appliance will automatically draw the quantity of water necessary for cooking on the basis of the set duration.

In the event that the water runs out, the appliance will automatically stop the cooking process, a buzzer will sound and the display will show a request to fill the reservoir with water.
- When finished, shake the tube in order to remove any remaining water.
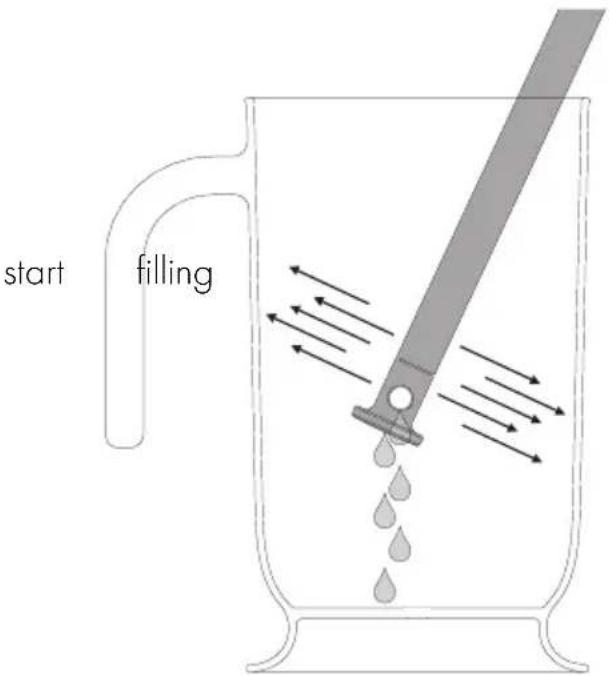
text_image
start filling- Place the tube back into its seat and remove the jug.
9. Close the door.

When the door is closed, a system will automatically draw in any residual water in the tube to avoid drips. A bubbling noise may be heard; this is completely normal.
- Touch the CONFIRM button to confirm that you have finished filling the reservoir.
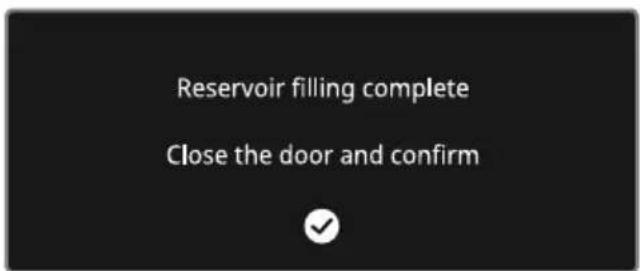
text_image
Reservoir filling complete Close the door and confirmThe appliance starts the function using the parameters set.

Each time the door is opened, the function in progress will stop and then automatically restart when the door is closed again.
Pre-heating
Combination cooking is always preceded by the pre-heating stage that allows the oven to heat up to the set cooking temperature.
This stage is indicated by a progressive increase in the temperature level reached.

text_image
Rapid pre-heating
Unless otherwise indicated in the recipe, it is not recommended to place food in the oven during the preheating stage.

To disable pre-heating, touch the relative button
After pre-heating, a buzzer will sound and a message will appear on the display to indicate that the food can be put in the oven.
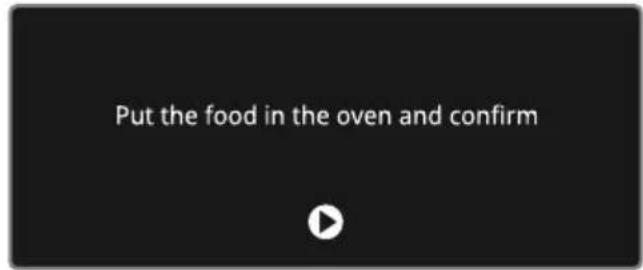
text_image
Put the food in the oven and confirm- Open the door.
- Place the food inside the oven.
- Close the door.
- Touch the START button to start cooking.
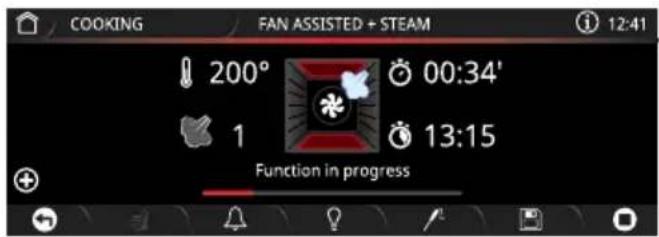
text_image
COOKING FAN ASSISTED + STEAM 12:41 200° 00:34' 1 13:15 Function in progress
If you want to change the type of function during the preheating or cooking phase, you will only be able to select a traditional cooking function.
End of combination cooking
At the end of cooking, Function ended appears on the display and a buzzer sounds briefly, which can be deactivated by touching any point of the display or by opening the door.

text_image
Function endedRemoving the residual water
At the end of steaming, the water can be emptied from the reservoir.

We recommend emptying the reservoir each time you finish using the appliance to avoid scale build-up.
- Touch the HOME

ton to exit from
the function: the appliance prompts you to drain the water from the reservoir.
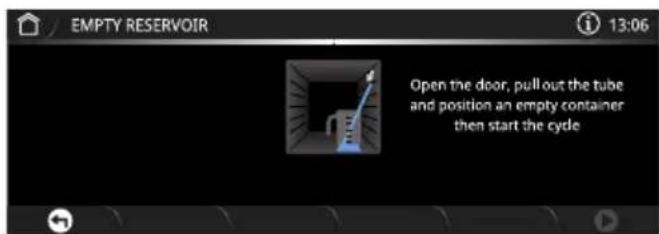
text_image
EMPTY RESERVOIR Open the door, pull out the tube and position an empty container then start the cyde- Stand to the side of the appliance and open the door ajar for a few seconds to allow excess steam to escape.
- Fully open the door when safe to do so and cautiously remove the food from the oven.
-
Rest a jug on the open door.
-
Extract the tube from its seat and insert the end of it into the jug.
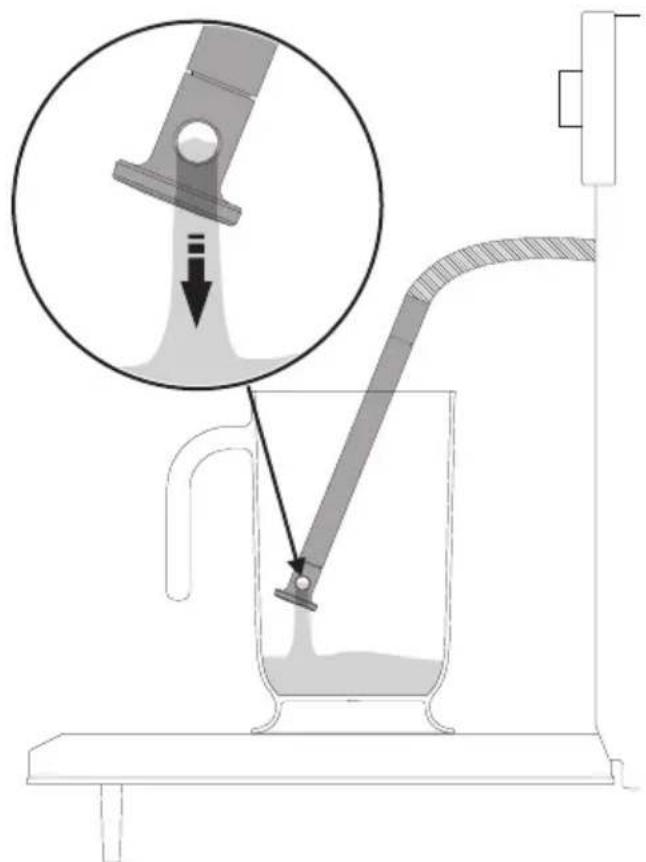
text_image
Diagram illustrating a laboratory filtration setup with labeled components and a magnified inset showing fluid flow direction.- Press the START button to start draining off the water into the jug.
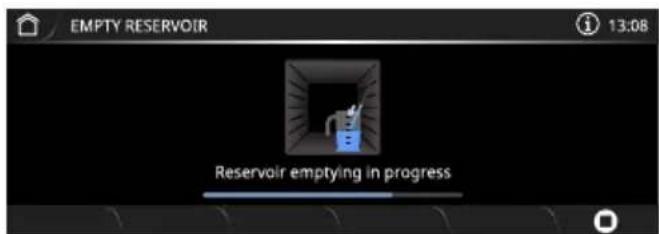
text_image
EMPTY RESERVOIR Reservoir emptying in progress
It is only possible to drain the water when the door is open. Always make sure that you have removed the tube from its seat and inserted its end into the jug (or container) before pressing the START button to start the emptying cycle.
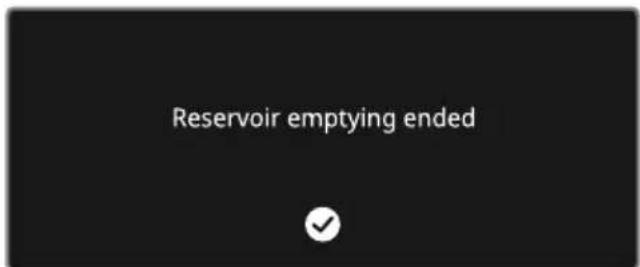
When complete, the display will indicate that the residual water removal process is complete.
text_image
Reservoir emptying ended- Touch the CONFIRM

button.
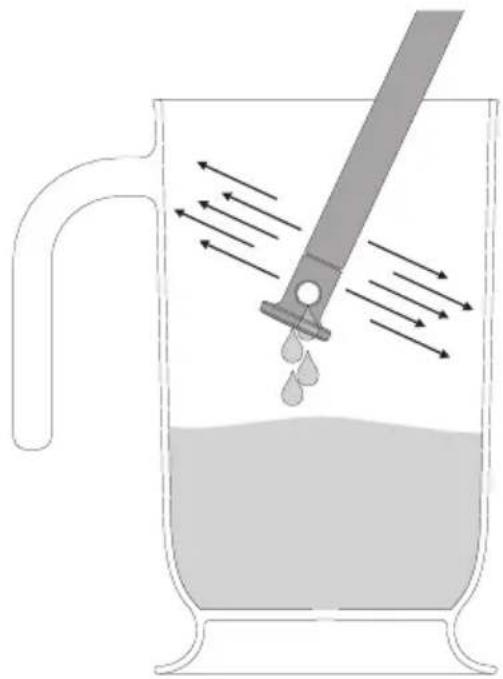
- Shake the tube in order to remove any remaining water.
natural_image
Diagram of a droplet being poured into a beaker with a pipette, showing fluid flow direction (no text or labels)- Place the tube back into its seat and remove the jug.
- Using a sponge, remove the condensation from the base and walls of the oven cavity and from the door glass.

Take care: the water may be very hot.
Steam assisted cooking functions
FAN ASSISTED + STEAM
Intense heat is increased by injections of steam that speed up cooking, but allow the food to remain soft and moist. Ideal for biscuits, cakes and cooking on more than one level.
CIRCULAIRE + STEAM
Intense heat is increased by injections of steam that speed up cooking, but allow the food to remain soft and moist. Ideal for biscuits, cakes and cooking on more than one level
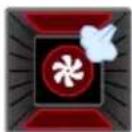
TURBO STEAM
Allows rapid cooking on multiple levels without mixing aromas. Ideal for large volumes of food or intense cooking. The injection of steam speeds up cooking without drying out the food.
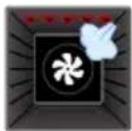
FAN GRILL + STEAM
The intense heat from the grill is distributed by the fan along with injections of steam. This creates optimal conditions for grilling even thick slices of meat without drying them out.
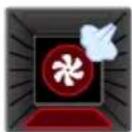
CIRCULAIRE + BOTTOM + STEAM
Intense heat is created by injections of steam that speed up cooking, but allow the food to remain soft and moist. Ideal for pies.
Selecting a traditional cooking function
- Touch the time indicated on the display.

text_image
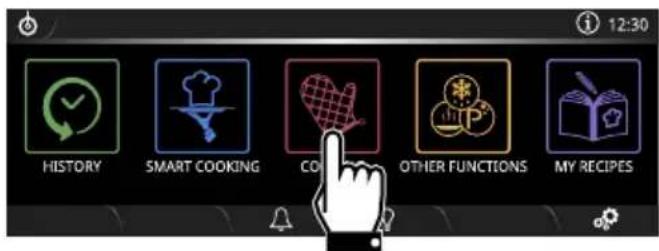
1230- Touch the COOKING on the "main menu".

text_image
12:30 HISTORY SMART COOKING CORP OTHER FUNCTIONS MY RECIPES- Scroll through the display from right to left to access the traditional functions menu.
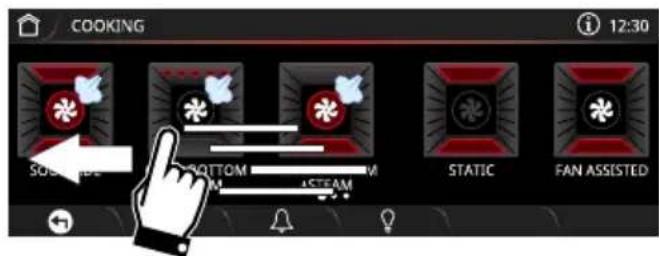
text_image
COOKING 12:30 SOUYAGE BOTTOM M +STEAM STATIC FAN ASSESTED- Select the required function (for example
"FAN ASSISTED"
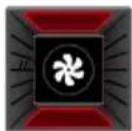
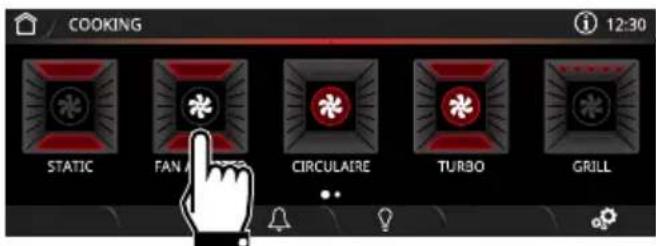
text_image
COOKING STATIC FAN CIRCULAIRE TURBO GRILL 12:30- Touch the START ▶ k right ) to start pre-heating.

Each time the door is opened, the function in progress will stop and then automatically restart when the door is closed again.
Pre-heating
Cooking is preceded by the pre-heating stage that allows the oven to heat up to the set cooking temperature.
This stage is indicated by a progressive increase in the temperature level reached.

text_image
Rapid pre-heating
Unless otherwise indicated in the recipe, it is not recommended to place food in the oven during the preheating stage.

To disable pre-heating, touch the
relative button

After pre-heating, a buzzer will sound and a message will appear on the display to indicate that the food can be put in the oven.
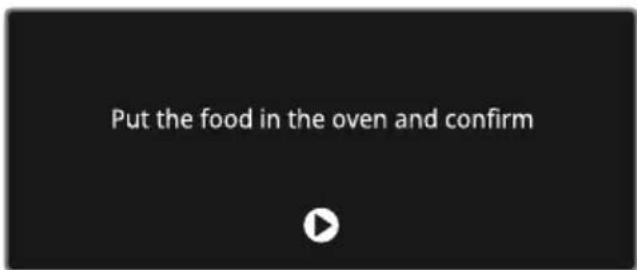
text_image
Put the food in the oven and confirm- Open the door.
- Place the food inside the oven.
- Close the door.
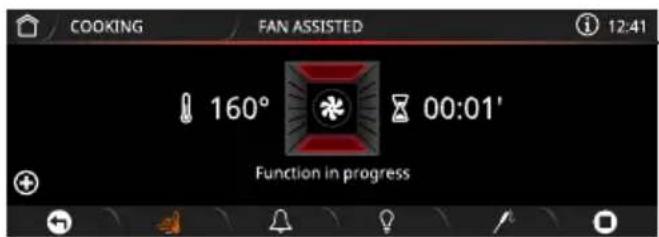
- Touch the START button to start cooking.
text_image
COOKING FAN ASSISTED 12:41 160° 00:01' Function in progress
Once cooking has started, it is possible to set timed cooking:
- Touch the TIME Button and follow the instructions in the "Timed cooking" section.
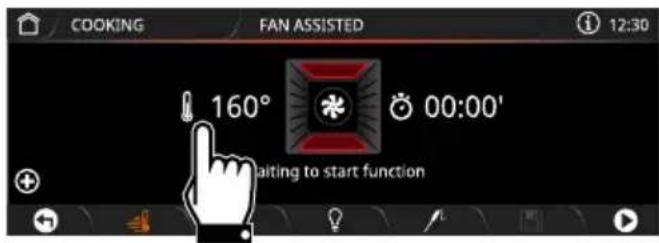
Modifying the cooking temperature

The temperature can be modified at any time during cooking.
- Touch the TEMPERATURE button or the relative value.
text_image
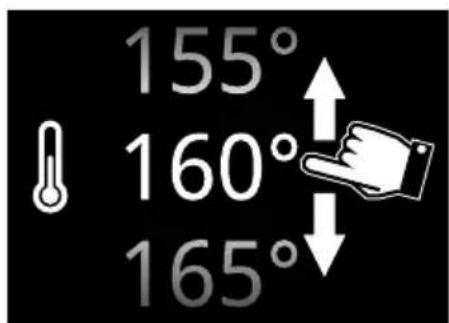
COOKING FAN ASSISTED 12:30 160° 00:00' Waiting to start function- Scroll through the values and select the required cooking temperature (for example "180°C").
text_image
155° 160° 165°- Touch the CONFIRM button (at the
lower right ) to confirm the new cooking temperature that has been selected.
Timed cooking

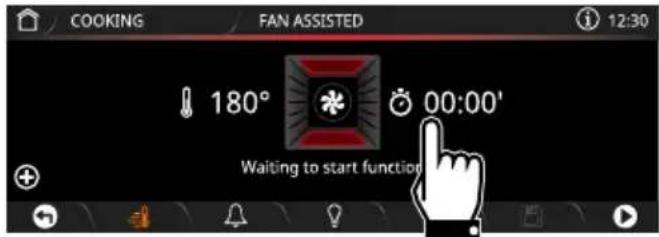
Timed cooking is the function which allows a cooking operation to be started and then ended after a specific length of time set by the user.
- Touch the COOKING DURATION button or the relative value).

text_image
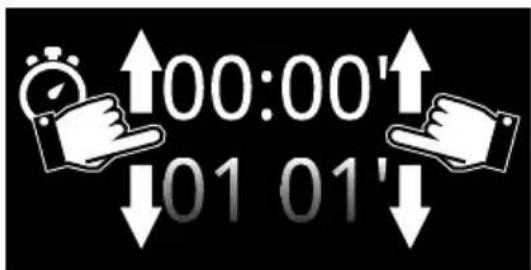
COOKING FAN ASSISTED 12:30 180° 00:00' Waiting to start function- Scroll through the values and select the required duration (for example "1 hour").
text_image
00:00' 01 01'- Touch the CONFIRM button to confirm the selected cooking duration.

The hours and minutes can be selected separately.
The duration of the timed cooking can be from a minimum of 1 minute to a maximum of 13 hours.
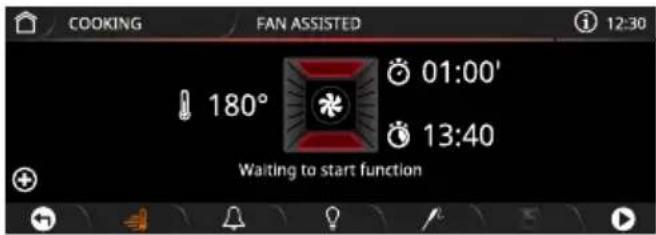
The expected end of cooking time appears under the duration (in the example "13:40").
text_image
COOKING FAN ASSISTED 12:30 180° 01:00' 13:40 Waiting to start function
The minutes required for pre-heating are already included in the end-of-cooking time.
The countdown starts after the pre-heating has ended or if you wish to avoid pre-heating (touch
the relative button

- Touch the START cooking.

button
to
start
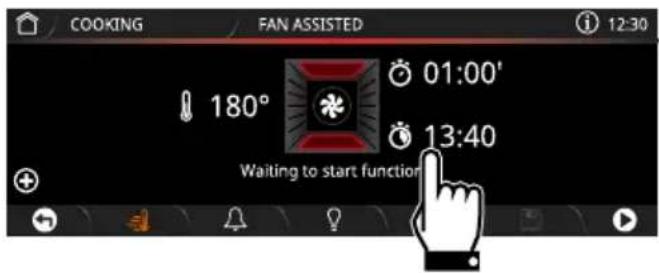
Delay cooking

Delay cooking is the function which allows a cooking operation to be stopped at an established time depending on the time set by the user, after which the oven will switch off automatically.
- After setting timed cooking, touch the
DELAY COOKING

tton or the
relative value.
text_image
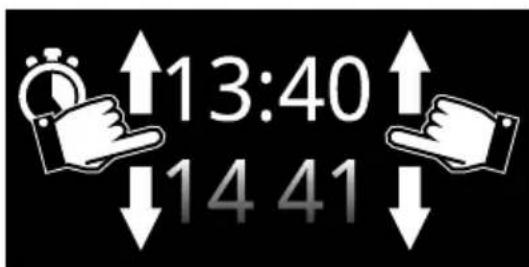
COOKING FAN ASSISTED 12:30 180° 01:00' 13:40 Waiting to start function- Scroll through the values and select the required end-of-cooking time (e.g. "20:00").
text_image
↑13:40 ↓14 41
The hours and minutes can be selected separately.
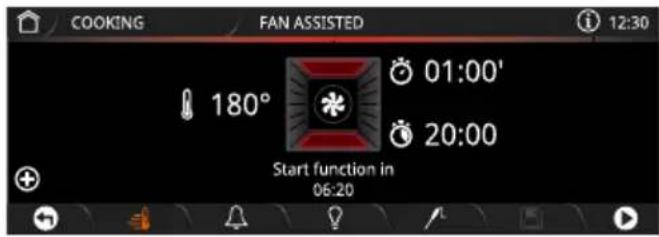
- Touch the CONFIRM button to confirm the selected end of cooking time.
text_image
COOKING FAN ASSISTED 12:30 180° 01:00' 20:00 Start function in 06:20End of cooking
At the end of cooking, Function ended appears on the display and a buzzer sounds briefly, which can be deactivated by touching any point of the display or by opening the door.

text_image
Function ended- Touch the HOME the function.

on to exit from
Multistep Cooking

Multistep cooking means that you can start cooking using a certain function, continue to cook and then end cooking using different functions set by the user.
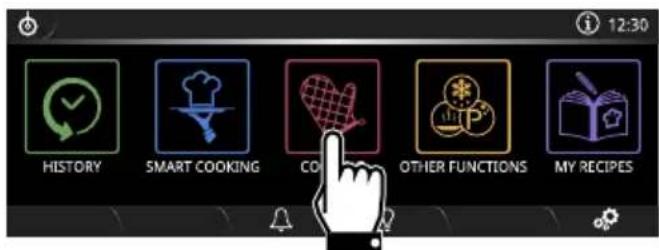
1. Touch the COOKING

the "main menu".
text_image
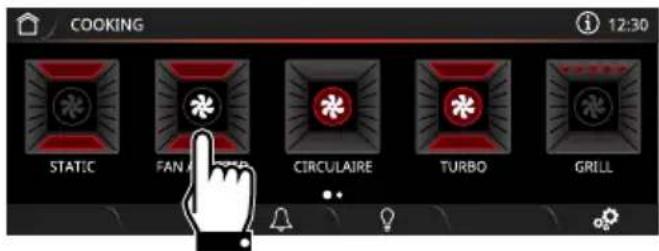
12:30 HISTORY SMART COOKING CORP OTHER FUNCTIONS MY RECIPES2. Select the required function (for example
"FAN ASSISTED"
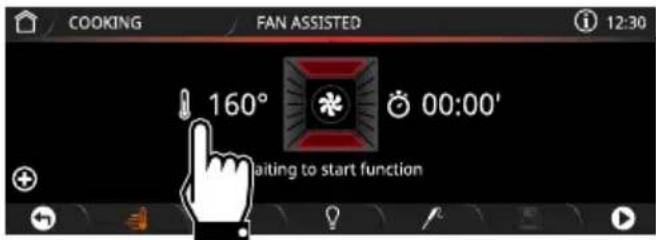
text_image
COOKING i 12:30 STATIC FAN A CHAMP CIRCULAIRE TURBO GRILL- Touch the TEMPERATURE button or the relative value.
text_image
COOKING FAN ASSISTED 12:30 160° 00:00' Waiting to start function- Scroll through the values and select the required cooking temperature (for example "180°C").
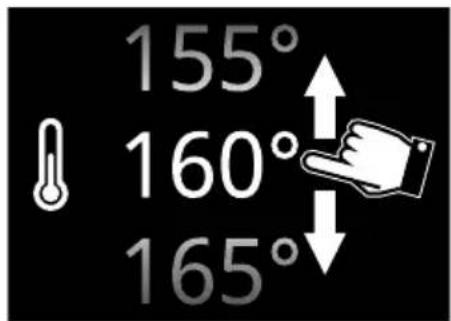
text_image
155° 160° 165°-
Touch the CONFIRM button to confirm the new cooking temperature that has been selected.
-
Touch the COOKING DURATION button or the relative value.

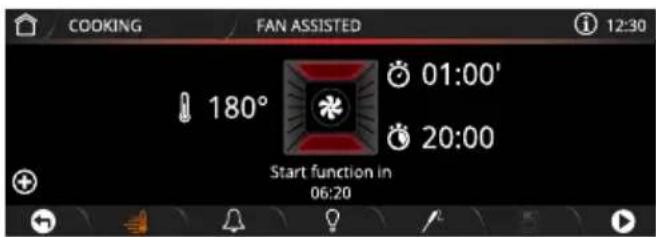
text_image
COOKING FAN ASSISTED 12:30 180° 01:00' 20:00 Start function in 06:20- Scroll through the values and select the required duration (for example "1 hour").

text_image
00:00' 01 01'- Touch the CONFIRM button to confirm the selected cooking duration.

The minutes required for pre-heating are already included in the end-of-cooking time.
-
Touch the MULTISTEP COOKING button (at the bottom left in the main area 2).
-
Select the required function for the second step (for example
"CIRCULAIRE
-
Touch the TEMPERATURE button or the relative value.
-
Scroll through the values and select the required cooking temperature (for example "200°C").
-
Touch the CONFIRM button to confirm the new cooking temperature that has been selected.
-
Touch the COOKING DURATION button or the relative value.


-
Scroll through the values and select the required duration (for example "20 minutes").
-
Touch the CONFIRM button to confirm the selected cooking duration.
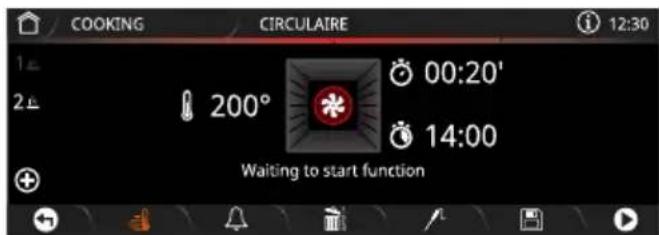
text_image
COOKING CIRCULAIRE 12:30 1 2 200° 00:20' 14:00 Waiting to start function- Touch the MULTISTEP COOKING button (at the bottom left in the main area 2).

- Select the required function for the second
step (for example "GRILL
-
Touch the TEMPERATURE button or the relative value.
-
Scroll through the values and select the required cooking temperature (for example "250°C").
-
Touch the CONFIRM button to confirm the new cooking temperature that has been selected.
-
Touch the COOKING DURATION button or the relative value.

-
Scroll through the values and select the required duration (for example "5 minutes").
-
Touch the CONFIRM button to confirm the selected cooking duration.
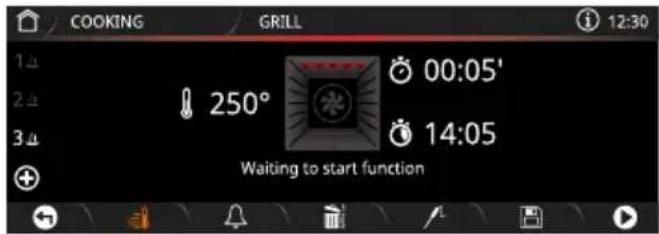
text_image
COOKING GRILL 12:30 1 2 3 250° 00:05' 14:05 Waiting to start function
A maximum of 3 steps can be set in total.

It is not possible to add a further step unless a cooking duration or a probe temperature (if present) has been set.

It is not possible to start cooking unless a cooking duration or a probe temperature (if present) has been set for all the steps.

It is not possible to set a total duration of more than 13 hours.
To view and modify the settings for each step:
- Touch the STEP buttons
To delete a step:
- Touch the button of the STEP


-
Touch the DELETE 123 button.
-
Touch the CONFIRM button to delete the selected step (or the CANCEL button to cancel the selected "delete step" option).
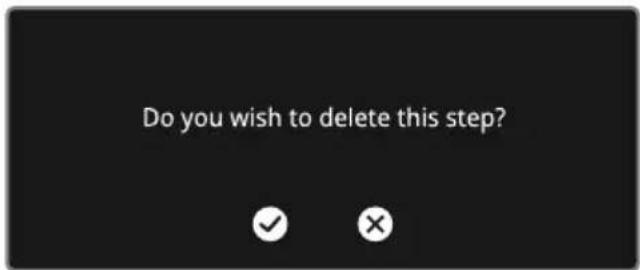
text_image
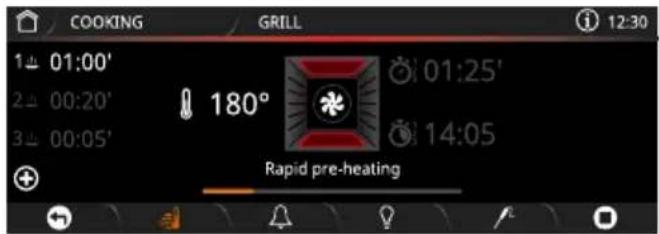
Do you wish to delete this step?- When all the settings have been made, touch the START button to start the Multistep cooking.
text_image
COOKING GRILL 12:30 01:00' 00:20' 00:05' 180° 01:25' 14:05 Rapid pre-heating- The display shows the duration of the step next to each STEP button.

The temperature and duration of the step in progress can be modified during cooking.
At the end of cooking, Function ended appears on the display and a buzzer sounds briefly, which can be deactivated by touching any point of the display or by opening the door.

text_image
Function ended- Touch the HOME button to exit from the function.
Traditional cooking functions
STATIC
Traditional cooking, ideal for preparing a single dish. For example cooking roast meats, fatty meats, bread, pies.
FAN ASSISTED
Intense and uniform cooking. Ideal for biscuits, cakes and cooking on more than one level.
CIRCULAIRE
The heat is distributed quickly and uniformly. Suitable for all dishes, ideal for cooking on multiple levels without mixing smells or flavours.
TURBO
Allows rapid cooking on multiple levels without mixing aromas. Ideal for large volumes of food or intense cooking.
GRILL
Produces excellent grilling and gratinating results. When used at the end of cooking, gives a uniform browning to dishes.
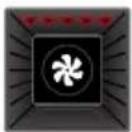
FAN WITH GRILL
Allows optimal grilling, even for thick slices of meat. Perfect for larger cuts of meat.
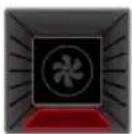
BOTTOM
The heat comes from the bottom of the cavity. Perfect for cakes, pies, tarts and pizzas.
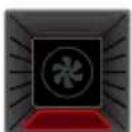
CIRCULAIRE + BOTTOM
Allows you to quickly finish cooking food that is already cooked on the surface but not internally. Ideal for quiches, suitable for all kinds of dishes.
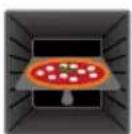
PIZZA
Function designed for cooking pizza.

ECO
Low energy cooking: this function is particularly suitable for cooking on a single shelf with low energy consumption.
It is recommended for all types of food except those that may produce a large amount of moisture (e.g. vegetables).
To obtain maximum energy savings and reduce cooking times, it is recommended not to preheat the oven before placing food in it.

When using the ECO function, avoid opening the door during cooking.

Cooking times are longer with the ECO function.
The ECO function is a delicate cooking function and is recommended for cooking that does not require temperatures higher than 200°C. It is recommended that you select a different function for cooking at higher temperatures.
Using the temperature probe (on some models only)

High temperature of the temperature probe Danger of burns
- Do not touch the rod or the tip of the temperature probe after use.
- Wear oven gloves when handling the temperature probe.

Improper use Risk of damage to the appliance
- Only use the temperature probe provided or recommended by the manufacturer.
• Take care not to scratch or damage enamelled or chrome-plated surfaces with the tip or the plug of the temperature probe. - Do not insert the temperature probe into openings and slots on the appliance.
- When the temperature probe is not in use, make sure that the protective metal cap is properly closed.

Improper use Risk of damage to temperature probe
- Do not pull the cable to remove the temperature probe from the socket or from the food.
• Make sure that the temperature probe or its cable do not get caught in the door.
• Make sure that the temperature probe or its cable do not come into contact with heating elements inside the oven. - No part of the temperature probe should be allowed to come into contact with the walls of the oven cavity, the heating elements, the racks or the trays when they are still hot.
- The probe should not be kept inside the appliance.
- Do not use the temperature probe during the pyrolytic cycle.
Temperature probe
With the temperature probe, roasts, pork loin and various cuts and sizes of meat can be cooked to perfection, even if contained in plastic oven bags (suitable for cooking) or wrapped in aluminium foil.
The temperature probe, indeed, allows foods to be cooked to perfection because it accurately monitors the core temperature of the food, which is measured by a sensor located in the tip of the probe.
Positioning the probe
- Place the food on a tray.
- Insert the tip of the probe into the food before placing it in the oven cavity.
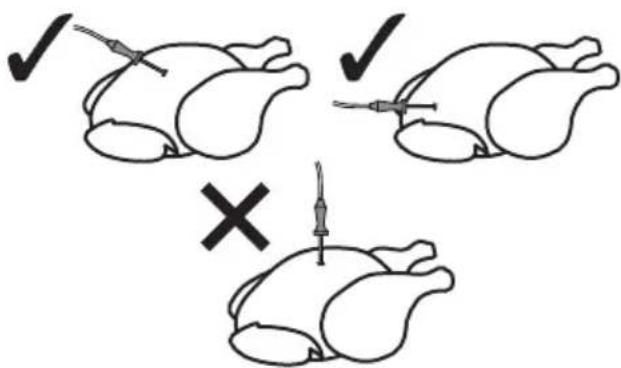
- For best results, make sure that the temperature probe is placed transversely in the thickest part of the food and for least 3/4 of its length. Make sure that it does not touch the tray underneath and that it does not protrude from the food.
text_image
Diagram showing three identical illustrations of a chicken with checkmarks and a cross, likely indicating a medical or surgical procedure.
In order for the probe to measure the core temperature of the food precisely, its tip must not be in contact with bones or fat.

If the probe does not read the temperature of the food correctly, 2 error messages will appear on the display (to acknowledge), after which, the appliance will automatically carry out timed cooking.
Setting cooking parameters when using the temperature probe
- Select a cooking function.
- Touch the TEMPERATURE button or the relative value.
-
Scroll through the values and select the required cooking temperature.
-
Touch the CONFIRM √ button.
-
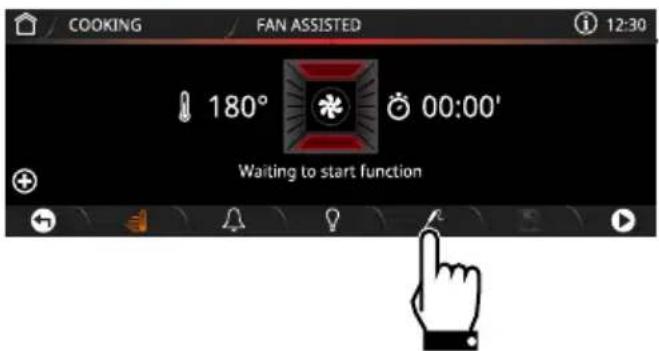
Touch the PROBE button in the lower
area 3.
text_image
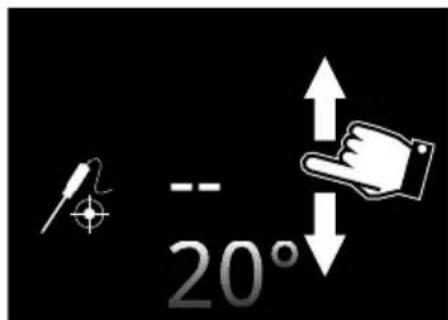
COOKING FAN ASSISTED 12:30 180° 00:00' Waiting to start function- Scroll through the Target temperature values and select the required temperature (for example "80°C").
text_image
-- 20°
The temperature that can be selected ranges from a minimum of 20^ C to a maximum of 90^ C.

It the temperature of the oven is set too low, the appliance automatically sets the minimum temperature necessary in order to reach the selected Target temperature.

For best results, it is recommended to set a cooking temperature higher than the target temperature.
- Touch the CONFIRM button to confirm the selected probe temperature.
A message appears on the display to remind you to connect the probe to the socket and to place it in the food.
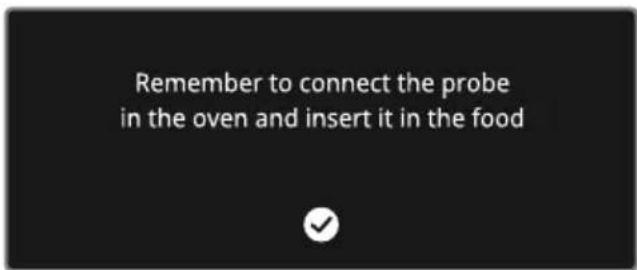
text_image
Remember to connect the probe in the oven and insert it in the food- Touch the CONFIRM √ button.
If using pre-heating:
- Touch the START button to start pre-heating.
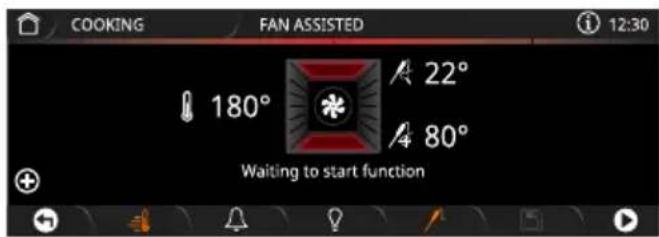
text_image
COOKING FAN ASSISTED 12:30 180° 22° 80° Waiting to start functionAfter pre-heating, a buzzer will sound and a message will appear on the display to indicate that the food can be put in the oven.
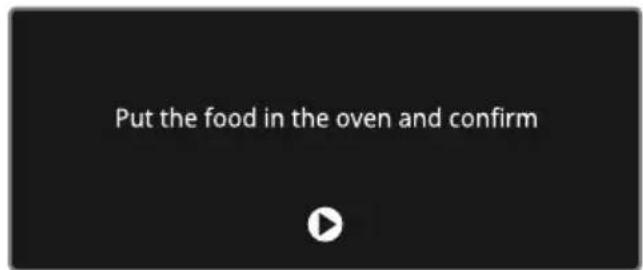
text_image
Put the food in the oven and confirm- Insert the tip of the temperature probe into the food to be cooked.

For best results, make sure that the metal part of the temperature probe is inserted almost completely into the food at a right angle, but make sure that it does not touch the tray underneath.

Improper use Danger of burns
- Wear oven gloves.
- Open the oven door.
- Insert the tray on which the food has been placed into the appropriate guides.
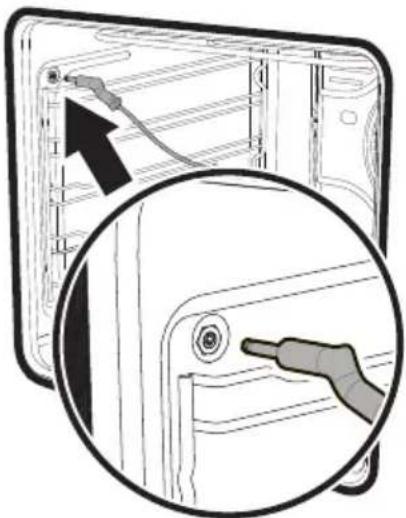
- Insert the plug of the temperature probe into the socket at the side, using the probe to open the protective cover.
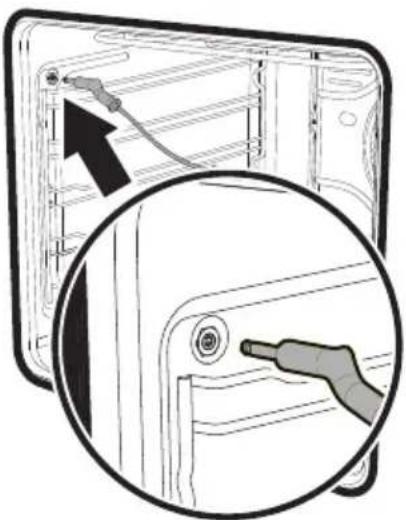
natural_image
Diagram showing a computer monitor with cable and a magnified view of the internal components (no text or symbols)- Close the door.
- Touch the START button to start cooking using the temperature probe.
Without pre-heating
- Touch the PRE-HEATING disable pre-heating.

ton to
- Open the oven door.
- Insert the tray on which the food has been placed into the appropriate guides.
- Insert the plug of the temperature probe into the socket at the side, using the probe to open the protective cover.
natural_image
Diagram showing a computer monitor with a cable inserted into the case, and a magnified view of the device's handle (no text or symbols present)- Close the door.
- Touch the START button to start cooking using the temperature probe.
Cooking using the temperature probe
Function in progress
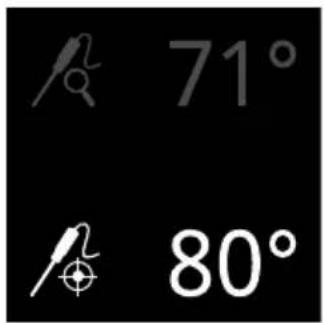
Cooking ends when the Current temperature reaches the Target temperature set by the user.
text_image
71° 80°The heating elements are switched off and the appliance emits a series of beeps.

Improper use Risk of injury
- Wear oven gloves.
- Open the door.
- Remove the probe from the food and unplug it from the socket.
- Remove the food from the oven.
- Make sure that the protective cover is properly closed.
Minute minder timer

This function only activates the buzzer, without stopping the function in progress.

The Timer can be set from a minimum of 1 minute to a maximum of 12 hours and 59 minutes.
- Touch the TIMER Button (in the lower area) to access the Timer menu.

text_image
TIMER MENU 00:00' 00:00' 00:00'Up to 3 minute minder Timers can be set.
- Touch the button of the TIMER


- it you intend to use.
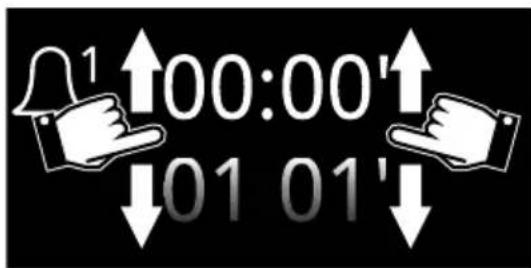
- Scroll through the values and select the required duration.
text_image
1 00:00' 01 01'- Touch the CONFIRM button to confirm the selected duration.

The DELETE

button
the lower area that can be used to delete a timer if one has been selected.
-
Repeat the procedure for the other Timers that you intend to use.
-
When finished, touch the CONFIRM button again to confirm the selected timers.


To cancel the operation, touch the
RETURN

button.
In the following display, the lit TIMER

button, indicates that one or more minute minder timers have been activated:
- Wait for the buzzer to indicate that the time has finished.

The counter must be set to zero in order to remove the minute minder timer.

The display cannot be switched off using the ON/OFF button when a
timer is active.


It is not possible to set delay cooking when the temperature probe is used.
3.3 Cooking advice
General advice
• Use a fan assisted function to achieve consistent cooking at several levels.
- It is not possible to shorten cooking times by increasing the temperature (the food could be overcooked on the outside and undercooked on the inside).
- To prevent condensation from forming on the glass, hot food should not be left inside the oven for too long after cooking.
Advice for cooking meat
- Cooking times vary according to the thickness and quality of the food and to consumer taste.
- Use a meat thermometer when roasting meat, or simply press on the roast with a spoon. If it is hard, it is ready; if not, it needs to be cooked for a few more minutes.
- For meat and potatoes, it is recommended to turn and / or mix the food from time to time in order to obtain a uniform browning on all sides.
- For slow cooking, brown the meat in a pan for a few minutes on all sides before cooking in the oven.
Advice for cooking with the Grill and the Fan with grill
- Meat can be grilled even when it is put into the cold oven or into the preheated oven if you wish to change the effect of the cooking.
- With the Fan with grill function, we recommend that you preheat the oven before grilling.
• We recommend placing the food at the centre of the rack.
Advice for cooking desserts/pastries and biscuits
- Use dark metal moulds: They help to absorb the heat better.
- The temperature and the cooking time depend on the quality and consistency of the dough.
- To check whether the dessert is cooked right through: At the end of the cooking time, put a toothpick into the highest point of the dessert. If the dough does not stick to the toothpick, the dessert is cooked.
- If the dessert collapses when it comes out of the oven, on the next occasion reduce the set temperature by about 10^ C, selecting a longer cooking time if necessary.
Advice for defrosting and proving
- Place frozen foods without their packaging in a lidless container on the first shelf of the oven.
- Avoid overlapping the food.
- To defrost meat, use the rack placed on the second level and a tray on the first level. In this way, the liquid from the defrosting food drains away from the food.
- The most delicate parts can be covered with aluminium foil.
- For successful proving, a container of water should be placed in the bottom of the oven.
Advice on using the probe (if fitted)
- The probe can also be used during normal timed cooking:
-
Insert the probe into the food you are cooking, and connect it to its socket.
-
Press the PROBE button: you can now see the temperature of the food in the Current temperature field.
- In mixed multistep cooking, we recommend inserting the probe at the start of cooking, even in steps which do not require its use.
3.4 Quick Mode
This mode allows you to set a traditional cooking function and its temperature quickly using the knobs.
It is also possible to quickly set the probe cooking function.

The pre-heating function cannot be disabled when Quick Mode is being used.

Cooking can be interrupted at any time by turning the temperature knob to 0.
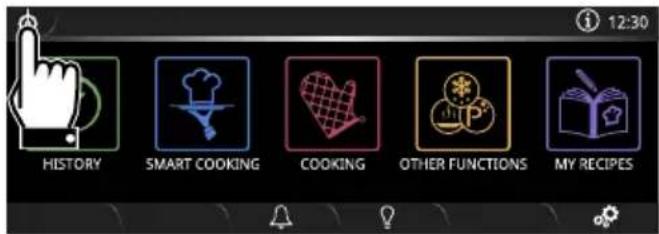
- Touch the QUICK MODE button in the "main menu" (in the information area at the top left).
text_image
12:30 HISTORY SMART COOKING COOKING OTHER FUNCTIONS MY RECIPESIt is now possible to use the knobs to operate the appliance.
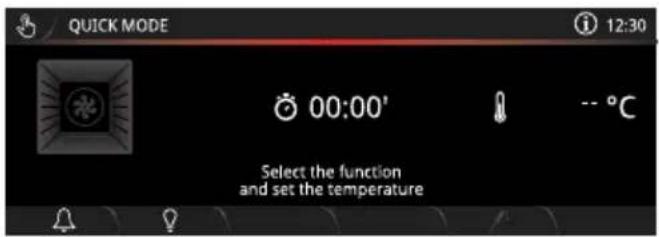
text_image
QUICK MODE 00:00' -- °C Select the function and set the temperature- Turn the Function Knob to select the
required function (e.g. "TURBO
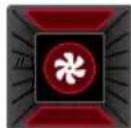
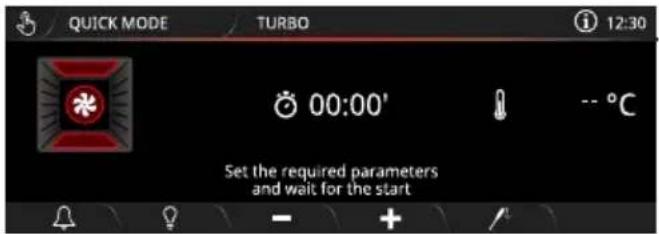
text_image
QUICK MODE TURBO 12:30 00:00' -- °C Set the required parameters and wait for the start
You can select all the traditional functions apart from the
PIZZA

and

ECO
functions.
Traditional cooking
- Turn the Temperature Knob into set the cooking temperature (e.g. "250°C").
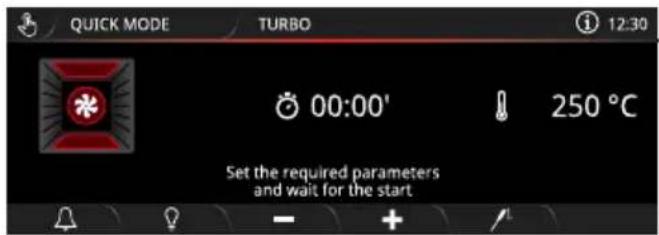
text_image
QUICK MODE TURBO 12:30 00:00' 250 °C Set the required parameters and wait for the startThe oven cavity starts to preheat a few seconds after the last setting was made.

text_image
Rapid pre-heating- Use the Decrease and Increase buttons (in the lower area) to set the cooking duration.

If the Decrease and
Increase buttons are not used, the display will show the cooking time that has elapsed.
3.5 Smart Cooking
This mode allows you to select a previously stored program for cooking food. The appliance automatically calculates the optimum cooking parameters based on the weight selected.
- Touch the time indicated on the display.

text_image
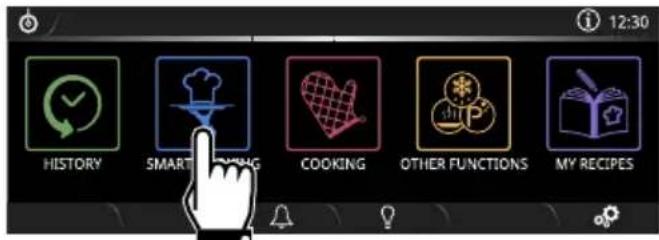
1230- Touch the SMART COOKING

button on the "main menu".
text_image
12:30 HISTORY SMARTROOMING COOKING OTHER FUNCTIONS MY RECIPESStarting a preset recipe
- Select the type of dish required from the SMART COOKING menu (for example
"VEGETABLES

- Select the sub-category of dish to cook (for example "MIXED GRILLED
VEGETABLES
- Scroll through the values to set the weight of the food to be cooked (for example "0.7 kg").

text_image
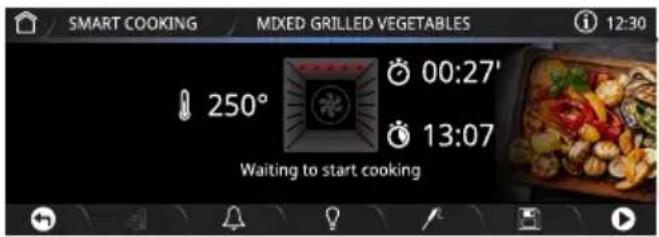
0.4 0.5 Kg 0.6- Touch the CONFIRM button to confirm the settings.
text_image
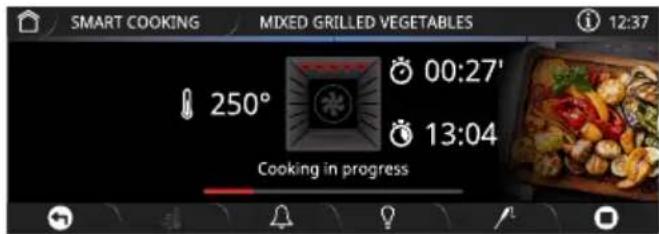
SMART COOKING MIXED GRILLED VEGETABLES 12:30 250° 00:27' 13:07 Waiting to start cooking
It is now possible to save the settings as a personal recipe (see section "3.7 My recipes")
- Touch the START Button to start SMART COOKING.
Cooking will start with the settings specified in the program.

The cooking temperature and duration can be changed at any time, even after cooking has started.
Pre-heating
Cooking is preceded by the pre-heating stage that allows the oven to heat up to the set cooking temperature.
This stage is indicated by a progressive increase in the temperature level reached.

text_image
Rapid pre-heating
The pre-heating function cannot be disabled when Smart Cooking programs are being used.
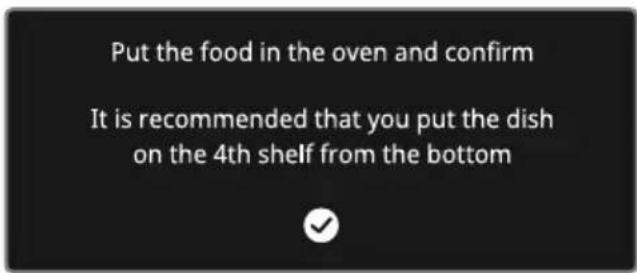
After pre-heating, a buzzer will sound and a message will appear on the display to indicate that the food can be put in the oven. The shelf on which the food should be placed in order to obtain best results is also indicated.
text_image
Put the food in the oven and confirm It is recommended that you put the dish on the 4th shelf from the bottom-
Open the door.
-
Place the food inside the oven.
-
Close the door.
-
Touch the CONFIRM button to start cooking.
text_image
SMART COOKING MIXED GRILLED VEGETABLES 12:37 250° 00:27' 13:04 Cooking in progressEnd of cooking
At the end of cooking, End of cooking appears on the display and a buzzer sounds briefly, which can be deactivated by touching any point of the display or by opening the door.

text_image
End of cooking- Touch the HOME button to exit from the function.
3.6 History
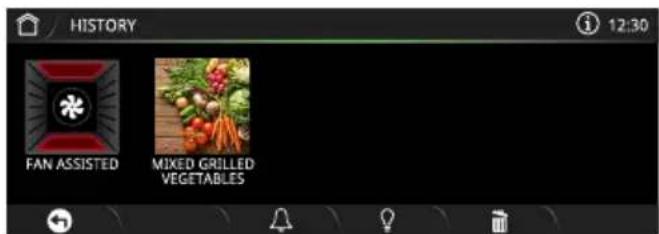
This menu is particularly useful for viewing and reusing the last programs or personal recipes that were used.
- Touch the time indicated on the display.

text_image
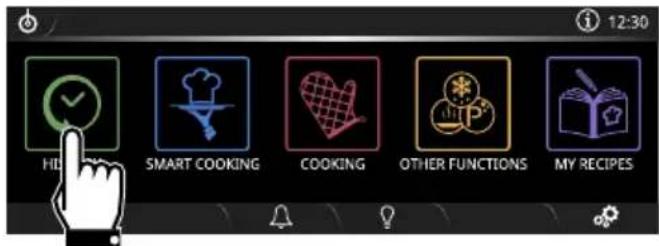
1230- Touch the HISTORY "main menu".

text_image
12:30 Hi SMART COOKING COOKING OTHER FUNCTIONS MY RECIPES- Select the function you wish to reuse and proceed with cooking as described in the previous sections.
text_image
HISTORY 12:30 FAN ASSISTED MIXED GRILLED VEGETABLESDeleting the history
If you wish to delete the history:
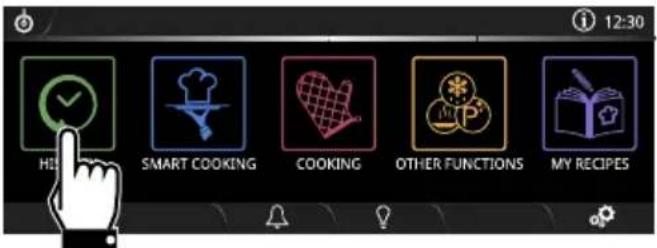
- Touch the HISTORY on the "main menu".
text_image
12:30 HIS SMART COOKING COOKING OTHER FUNCTIONS MY RECIPES-
Touch the DELETE button to delete the history.
-
Touch the CONFIRM button to confirm that you wish to delete the history (or the CANCEL button to cancel the operation.
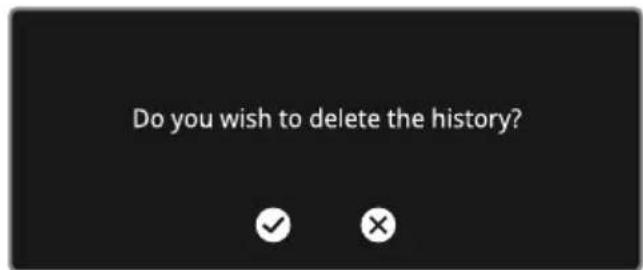
text_image
Do you wish to delete the history?Predefined programs table

= Target temperature (see "Temperature probe")
L1 - L2 - L3 = Steam level 1 - 2 - 3
MEAT
| Subcategory Function Shelf | Weight (Kg) | Temp. (°C) | Time (minutes) | ||||
| ROAST BEEF (RARE) | [CIRCULAIRE] | 2 | 2 | 200 |  | --- | |
| ROAST BEEF (MEDIUM) |  | 2 | 2 | 200 |  | --- | |
| CIRCULAIRE | |||||||
| ROAST BEEF (WELL DONE) | [CIRCULAIRE] | 2 | 2 | 200 |  | --- | |
| ROAST PORK | [CIRCULAIRE + STEAM - L2] | 2 1.5 | 190 |  | --- | ||
| LAMB (MEDIUM) |  + MULTISTEP - L3 + MULTISTEP - L3 |  | 2 1.9 | 180 |  | --- | |
| 190 |  | ||||||
| 200 |  | ||||||
| LAMB (WELL DONE) |  + MULTISTEP - L3 + MULTISTEP - L3 |  | 2 1.9 | 180 |  | --- | |
| 190 |  | ||||||
| 200 |  | ||||||
| ROAST VEAL |  | 2 2.7 | 170 |  | --- | ||
| MULTISTEP - L3 | 180 |  | |||||
| Subcategory Function Shelf | Weight (Kg) | Temp. (°C) | Time (minutes) | ||
| PORK SPARE RIBS (whole piece) |  MULTISTEP - L2 MULTISTEP - L2 | 2 1.0 | 180 30 | ||
| 200 20 | |||||
| 210 10 | |||||
| PORK CHOPS (about 4) |  MULTISTEP MULTISTEP | 2 0.2 | 180 8 | ||
| 240 10 | |||||
| PORK SAUSAGES (about 10-12) |  WITH GRILL WITH GRILL | FAN | 4 0.8 280 12 | ||
| BACON (about 6 rashers 5 mm thick) |  WITH GRILL WITH GRILL | FAN | 4 0.5 280 | 5+4^(1) | |
| ROAST TURKEY |  ASSISTED + STEAM - L3 ASSISTED + STEAM - L3 | FAN | 2 2.1 | 180 (79) | --- |
| ROAST CHICKEN |  MULTISTEP - L1 MULTISTEP - L1 | 2 1.5 | 180 | ||
| 210 (85) | --- | ||||
| ROAST DUCK |  CIRCULAIRE + STEAM - L3 CIRCULAIRE + STEAM - L3 | 2 1.6 | 190 (85) | --- | |
| ROAST RABBIT (jointed) |  CIRCULAIRE + STEAM - L3 CIRCULAIRE + STEAM - L3 | 2 1.0 190 85 | |||
(1) When grilling, it is recommended to cook foods on both sides, making reference to the times given in the table. The greater time always refers to the first side to be cooked, starting with raw foodstuffs.
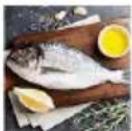
FISH
Z
| Subcategory Function Shelf | Weight (Kg) | Temp. (°C) | Time (minutes) | ||
| WHOLE FISH (FRESH) |  CIRCULAIRE + STEAM - L1 CIRCULAIRE + STEAM - L1 | 20.3 190 23 | |||
| WHOLE FISH (FROZEN) |  CIRCULAIRE + STEAM - L1 CIRCULAIRE + STEAM - L1 | 20.4 200 33 | |||
| SEA BASS |  CIRCULAIRE + STEAM - L1 CIRCULAIRE + STEAM - L1 | 20.5 190 22 | |||
| SALMON |  CIRCULAIRE + STEAM - L1 CIRCULAIRE + STEAM - L1 | 20.2 180 12 | |||
| MONKFISH |  FAN ASSISTED + STEAM - L1 FAN ASSISTED + STEAM - L1 | 21.1 | 220 ( /5) | --- | |
| SNAPPER |  CIRCULAIRE + STEAM - L1 CIRCULAIRE + STEAM - L1 | 206 190 25 | |||
| TURBOT |  FAN ASSISTED FAN ASSISTED | 21.5 | 180 ( /5) | --- | |
VEGETABLES

| Subcategory Function Shelf | Weight (Kg) | Temp. (°C) | Time (minutes) | |
| MIXED GRILLED VEGETABLES |  | 5 0.6 250 | 9+8(1) | |
| GRILL | ||||
| ROASTED VEGETABLES |  | 2 1.2 200 29 | ||
| FAN ASSISTED + STEAM - L1 | ||||
| ROAST POTATOES | 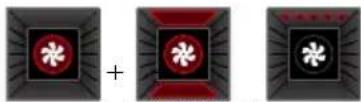 | 2 1.3 | 190 20 | |
| MULTISTEP | 220 10 | |||
| 280 6 | ||||
| CHIPS (FROZEN) |  | 2 0.7 220 27 | ||
| FAN ASSISTED | ||||
| GRATINATED POTATOES | 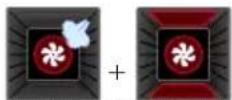 | 2 0.8 | 200 20 | |
| MULTISTEP - L1 | 210 20 | |||
(1) When grilling, it is recommended to cook foods on both sides, making reference to the times given in the table. The greater time always refers to the first side to be cooked, starting with raw foodstuffs.
DESSERTS

Z
| Subcategory Function Shelf | Weight (Kg) | Temp. (°C) | Time (minutes) | ||
| CHOCOLATE CAKE |  CIRCULAIRE + STEAM - L1 CIRCULAIRE + STEAM - L1 | 2 1.0 160 50 | |||
| BISCUITS (20 - 22 pieces 25-27g each) |  FAN ASSISTED + STEAM - L1 FAN ASSISTED + STEAM - L1 | 3 0.5 170 13 | |||
| BUNDT CAKE |  FAN ASSISTED + STEAM - L1 FAN ASSISTED + STEAM - L1 | 2 1.0 160 50 | |||
| MUFFINS (about 50g for each baking cup) |  STATIC STATIC | 3 0.7 170 19 | |||
| PROFITEROLES (medium-large) |  CIRCULAIRE CIRCULAIRE | 2 0.4 180 35 | |||
| MERINGUES |  TURBO TURBO | 2 0.2 120 75 | |||
| SPONGE CAKE |  TURBO TURBO | 2 0.5 150 55 | |||
| STRUDEL |  FAN ASSISTED + STEAM - L1 FAN ASSISTED + STEAM - L1 | 2 0.7 190 25 | |||
| TART |  STATIC STATIC | 2 1.0 170 30 | |||
| BRIOCHE BREAD | 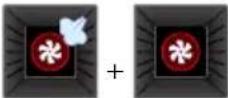 MULTISTEP - L1 MULTISTEP - L1 | 20.1 | 180 5 | ||
| 180 10 | |||||
| CROISSANTS | [CW23] CIRCULAIRE | 20.8 160 32 | |||
For desserts such as biscuits, muffins, meringues, profiteroles etc. the weight indicated corresponds to the total weight of the dough used. Cooking times vary according to the size and thickness of the dessert.
BREAD / PIZZA

| Subcategory Function Shelf | Weight (Kg) | Temp. (°C) | Time (minutes) | ||
| LEAVENED BREAD (LOAF) |  MULTISTEP - L1 MULTISTEP - L1 | 20.2 | 220 6 | ||
| 200 7 | |||||
| 180 5 | |||||
| FOCACCIA | 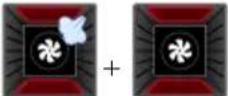 MULTISTEP - L1 MULTISTEP - L1 | 20.9 | 200 8 | ||
| 180 12 | |||||
| PAN-BAKED PIZZA |  PIZZA PIZZA | 10.5 280 8 | |||
| STONE-BAKED PIZZA (FRESH) |  PIZZA PIZZA | 1(2) | 0.5 280 6 | ||
| STONE-BAKED PIZZA (FROZEN) |  PIZZA PIZZA | 1(2) | 0.3 250 6 | ||
(2) (Models without Pizza stone) The stone must be placed on the bottom of the oven. Frozen pizza cooked on the stone does not require different cooking times depending on weight.
PASTA/RICE
Z
| Subcategory Function Shelf | Weight (Kg) | Temp. (°C) | Time (minutes) | ||
| PASTA BAKE | 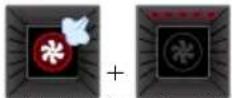 MULTISTEP - L1 MULTISTEP - L1 | 2 1.5 | 190 20 | ||
| 280 7 | |||||
| LASAGNE |  FAN ASSISTED + STEAM - L3 FAN ASSISTED + STEAM - L3 | 1 5.0 | 200 ( [IMAGE] 8 | 5 -- ) | |
| PAELLA |  FAN ASSISTED + STEAM - L1 FAN ASSISTED + STEAM - L1 | 2 0.3 200 20 | |||
| QUICHE | 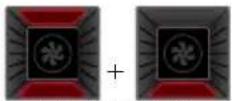 MULTISTEP MULTISTEP | 1 1.0 | 200 26 | ||
| 210 4 | |||||
SLOW COOKING
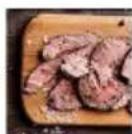
| Subcategory Function Shelf | Weight (Kg) | Temp. (°C) | Time (minutes) | ||
| VEAL |  MULTISTEP MULTISTEP | 2 2.9 | 90 (69) | ||
| 110 (65) | --- | ||||
| 120 (70) | |||||
| BEEF (RARE) |  CIRCULAIRE CIRCULAIRE | 2 2.5 | 90 (55) | --- | |
| BEEF (WELL DONE) |  MULTISTEP MULTISTEP | 2 2.5 | 90 (60) | 0 | ) |
| 110 (70) | 0 | ) | |||
| PORK CHOPS |  MULTISTEP MULTISTEP | 2 1.8 | 90 (65) | ||
| 110 (70) | --- | ||||
| 130 (75) | |||||
| LAMB |  MULTISTEP MULTISTEP | 2 2.7 | 90 (69) | ||
| 110 (70) | --- | ||||
| 130 (75) | |||||

The cooking times in the tables refer to the dish indicated in the recipe and are a guide only; they may vary depending on personal taste.
3.7 My recipes
This menu allows you to enter a personal program with the parameters you wish to use. On first use, the appliance will only offer you to add a new recipe. After storing your recipes, these will then be available in the relative menu.
- Touch the time indicated on the display.

text_image
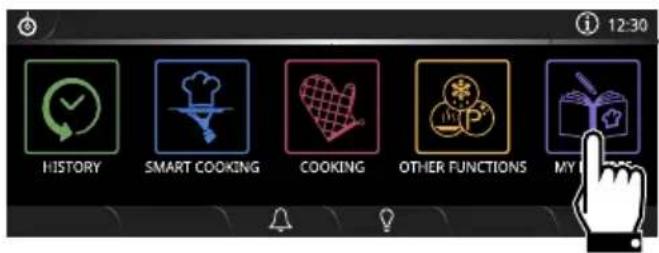
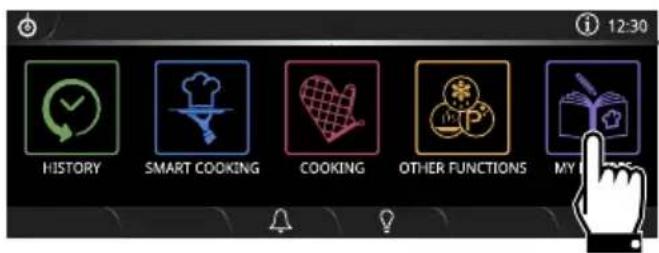
1230- Touch the MY RECIPES on the "main menu".
text_image
12:30 HISTORY SMART COOKING COOKING OTHER FUNCTIONS MY WORKS
Up to 64 personal recipes can be stored.

It is not possible to memorise more than 29 recipes that belong to the same category.
Adding a recipe
- Select the type of dish required from the MY RECIPES menu (for example
"DESSERTS/PASTRIES
- Touch the NEW RECIPE
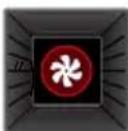
- Select the required function (for example
"CIRCULAIRE
-
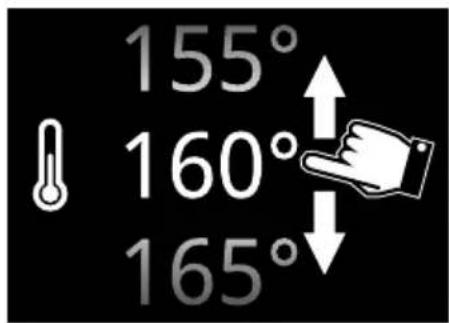
Touch the TEMPERATURE button or the relative value.
-
Scroll through the values and select the required cooking temperature (for example "170°C").
text_image
155° 160° 165°-
Touch the CONFIRM button to confirm the new cooking temperature that has been selected.
-
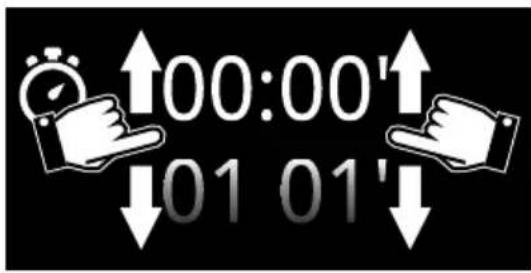
Touch the COOKING DURATION button or the relative value.

- Scroll through the values and select the required duration (for example "55 minutes").
text_image
00:00' 01 01'- Touch the CONFIRM button to confirm the selected cooking duration.
text_image
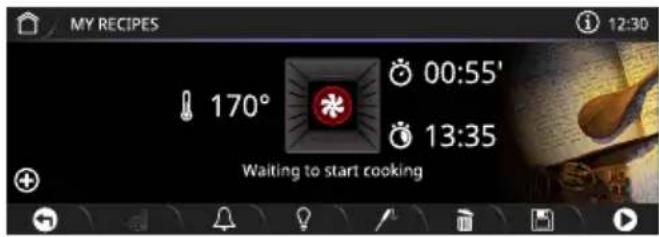
MY RECIPES 12:30 170° 00:55' 13:35 Waiting to start cooking
The minutes required for pre-heating are already included in the end-of-cooking time.

It is now also possible to add Multistep (see "Multistep Cooking") cooking and delay cooking (see "Delay cooking").
Saving a recipe
- Touch the SAVE button.
- Scroll through the values of the SHELF option (for example 2).
- Scroll through the values to set the weight of the food to be cooked (for example "0 kg").
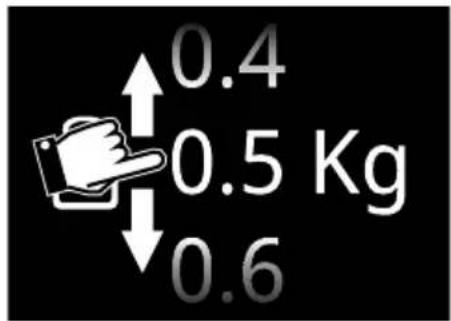
text_image
0.4 0.5 Kg 0.6- Touch the CONFIRM button to confirm the settings.
At this point, a name for the recipe must be entered.
- Use the alphanumeric keypad to enter the name of the recipe to be saved (for example RISOTTO).
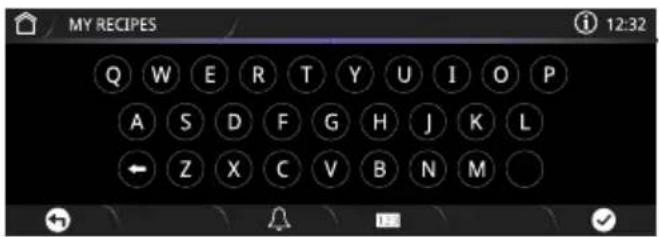
text_image
MY RECIPES Q W E R T Y U I O P A S D F G H J K L ← Z X C V B N M ○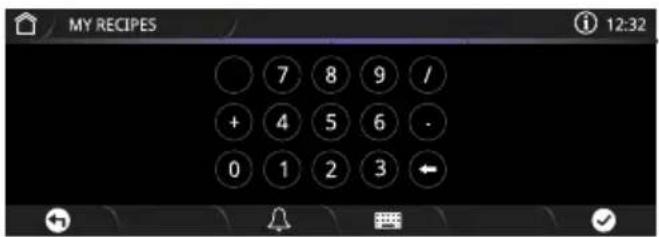
text_image
MY RECIPES 7 8 9 / + 4 5 6 -. 0 1 2 3 ←
Use the 123 buttons to switch from the alphabetic keypad to the numerical keypad and vice versa.

The recipe name can contain a maximum 12 characters, including spaces.

The name must contain at least one character in order to store the recipe.

The character deletes the previous letter.
- Touch the CONFIRM button to store the program.
text_image
Recipe savedStarting a personal recipe
- Touch the time indicated on the display.

text_image
1230- Touch the MY RECIPES turn on the "main menu".
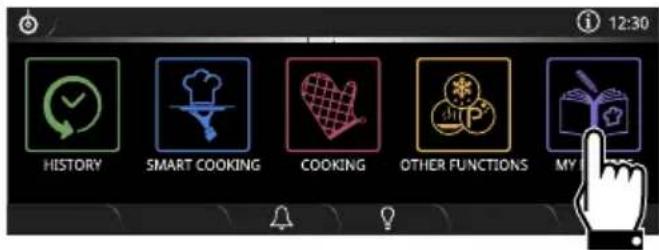
text_image
12:30 HISTORY SMART COOKING COOKING OTHER FUNCTIONS MY- Select the type of dish required from the MY RECIPES menu (for example
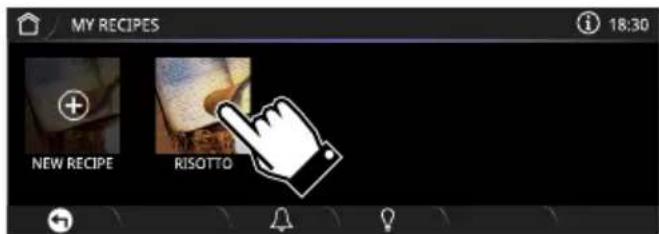
"DESSERTS/PASTRIES
- Select the recipe that was saved previously (for example RISOTTO).
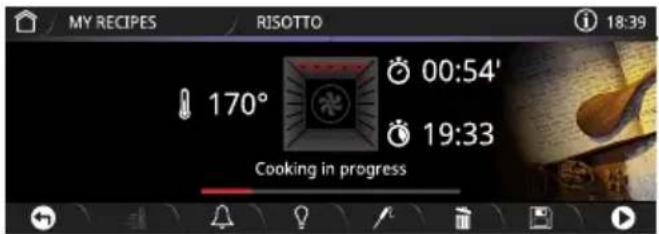
- Touch the START button to start cooking.
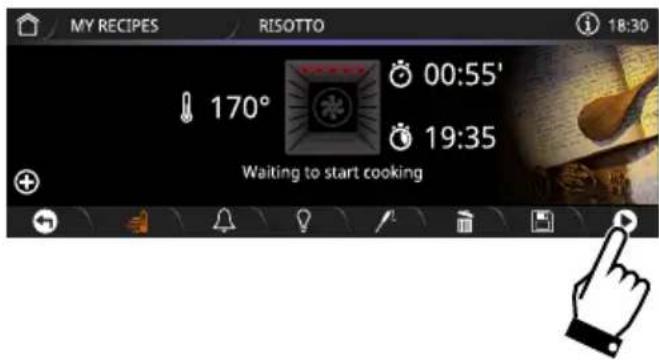
text_image
MY RECIPES RISOTTO 18:30 170° 00:55' 19:35 Waiting to start cookingPre-heating
Cooking is preceded by the pre-heating stage that allows the oven to heat up to the set cooking temperature.
This stage is indicated by a progressive increase in the temperature level reached.

text_image
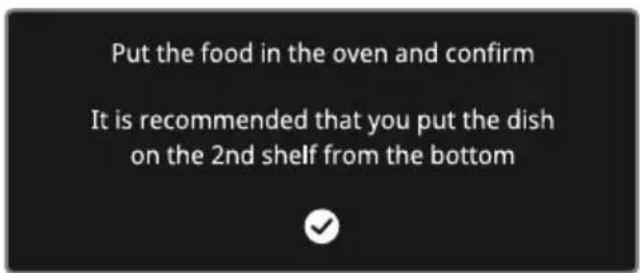
Rapid pre-heatingAfter pre-heating, a buzzer will sound and a message will appear on the display to indicate that the food can be put in the oven. The shelf on which the food should be placed in order to obtain best results is also indicated.
text_image
Put the food in the oven and confirm It is recommended that you put the dish on the 2nd shelf from the bottom-
Open the door.
-
Place the food inside the oven.
-
Close the door.
-
Touch the CONFIRM cooking.

button to
text_image
MY RECIPES RISOTTO 18:39 170° 00:54' 19:33 Cooking in progressEnd of cooking
At the end of cooking, End of cooking appears on the display and a buzzer sounds briefly, which can be deactivated by touching any point of the display or by opening the door.

text_image
End of cooking- Touch the HOME from the function.

ton to exit
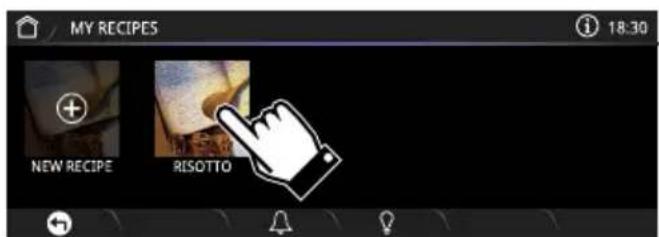
Deleting a recipe
- Touch the time indicated on the display.

text_image
1230- Touch the MY RECIPES on the "main menu".
text_image
12:30 HISTORY SMART COOKING COOKING OTHER FUNCTIONS MY LXXX- Select the type of dish required from the MY RECIPES menu (for example
"DESSERTS/PASTRIES
- Select the recipe that was saved previously (for example RISOTTO).
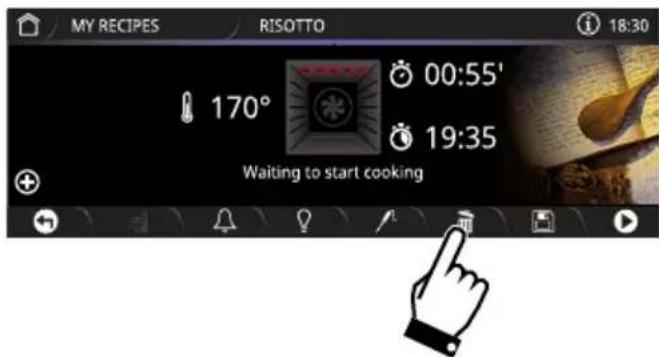
- Touch the DELETE button to delete the recipe.
text_image
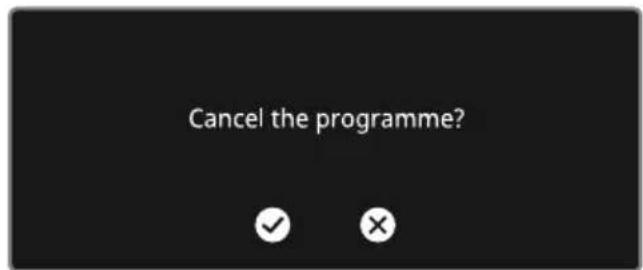
MY RECIPES RISOTTO 18:30 170° 00:55' 19:35 Waiting to start cooking- Touch the CONFIRM button to confirm that you wish to delete the selected recipe (or the CANCEL button to cancel the operation).
text_image
Cancel the programme?3.8 Other functions
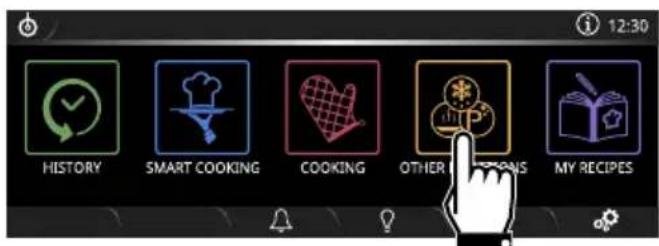
The special functions menu includes several functions such as defrosting, proving or cleaning...
- Touch the time indicated on the display.

text_image
12302. Touch the OTHER FUNCTIONS

button on the "main menu".
text_image
12:30 HISTORY SMART COOKING COOKING OTHER COTIONS MY RECIPES
Certain functions are not available on all models.
Functions list
DEFROST BY WEIGHT
Automatic defrosting function Choose the dish, the oven calculates the time necessary for proper defrosting.
DEFROST BY TIME
Manual defrosting function. Select the length of time required for defrosting, when the set time has elapsed, the function will stop.
PROVING
Specific function to help dough to rise more quickly.
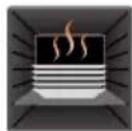
PLATE WARMING
Function that heats and keeps plates warm. Position a baking tray on the lowest shelf and put the plates on it to warm.
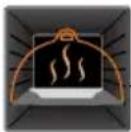
KEEP WARM
This function allows you to keep pre-cooked foods warm.
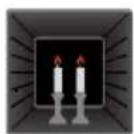
SABBATH
Function that allows you to cook food whilst respecting the provisions of the Jewish day of rest.
VAPOR CLEAN (on some models only)
Steam cleaning function. Remove all accessories, pour 40 cl of water into the hollow on the bottom and spray a solution of water and washing up liquid on the walls of the oven.

PYROLYTIC (on some models only)
Automatic cleaning function. The oven reaches 500^ C, destroying all the dirt inside it. When the function is in progress, the oven door cannot be opened.

The more complex special functions are illustrated below. For the
VAPOR CLEAN

PYROLYTIC
"4 Cleaning and maintenance".
Defrost by weight

If the internal temperature is greater than the one required, the function will be stopped immediately and "Internal temperature unsafe, please wait until the oven is cool" will appear on the display. Allow the appliance to cool down before activating the function.
-
After weighing the food, place it in the appliance.
-
Select DEFROST BY WEIGHT
-
Select the type of food to defrost from the categories MEAT - FISH - BREAD - DESSERTS/PASTRIES
-
Scroll through the values to set the weight of the food to be defrosted.
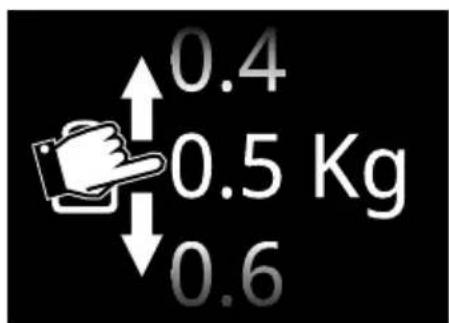
text_image
0.4 0.5 Kg 0.6-
Touch the CONFIRM button to confirm the settings.
-
Touch the START button to start the defrost by weight function.
When finished, a buzzer sounds briefly, which can be deactivated by touching any point of the display or by opening the door.
Pre-set parameters:
| Type | Weight (Kg) | Time |
 | 0.5 01h 45m | |
| MEAT | ||
 | 0.4 00h 40m | |
| FISH | ||
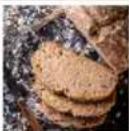 | 0.3 00h 20m | |
| BREAD | ||
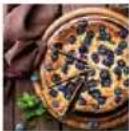 | 1.0 00h 45m | |
| DESSERTS |
*Defrosting times may vary according to the shape and size of the food to be defrosted.

It is not possible to change the default temperature (30°C) for the Defrost by weight function.
Defrost by time
If the internal temperature is greater than the one required, the function will be stopped immediately and "Internal temperature unsafe, please wait until the oven is cool" will appear on the display. Allow the appliance to cool down before activating the function.
-
Place the food inside the appliance.
-
Select DEFROST BY TIME
- Touch the COOKING DURATION button or the relative value.

- Scroll through the values and select the required duration.
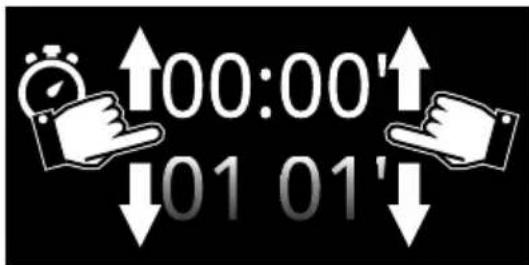
text_image
00:00' 01 01'-
Touch the CONFIRM button to confirm the settings.
-
Touch the START button to start the Defrost by time function.
When finished, a buzzer sounds briefly, which can be deactivated by touching any point of the display or by opening the door.
- Touch the HOME button to exit from the function.

The duration of the Defrost by time function can be from a minimum of 1 minute to a maximum of 12 hours and 59 minutes.

It is not possible to change the default temperature (30°C) for the Defrost by time function.
Proving

If the internal temperature is greater than the one required, the function will be stopped immediately and "Internal temperature unsafe, please wait until the oven is cool" will appear on the display. Allow the appliance to cool down before activating the function.

For successful proving, a container of water should be placed in the bottom of the oven.
- Position the dough to prove on the second level.
- Select PROVING
- Touch the COOKING DURATION button or the relative value.
- Scroll through the values and select the required duration.

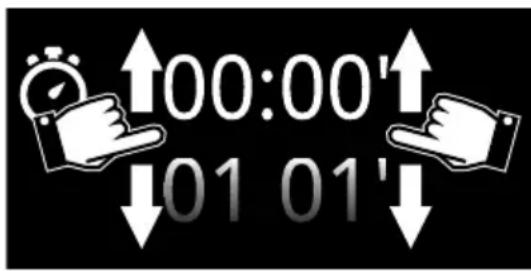
text_image
00:00' 01 01'-
Touch the TEMPERATURE button or the relative value.
-
Scroll through the values and select the required cooking temperature (from 25^ C to 40^ C).
- Touch the CONFIRM button to confirm the settings.
- Touch the START button to start the Proving cycle.
When finished, a buzzer sounds briefly, which can be deactivated by touching any point of the display or by opening the door.

The duration of the Proving function can be from a minimum of 1 minute to a maximum of 12 hours and 59 minutes.
Plate warming
- Position the tray on the first shelf and place the plates to be warmed at the centre of it.
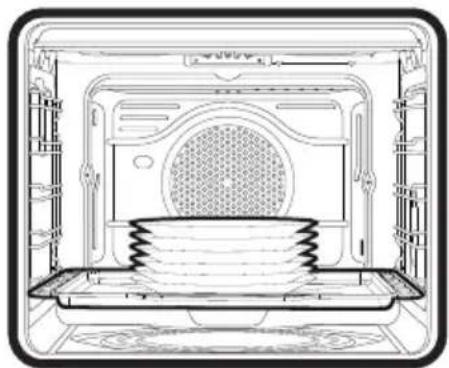
natural_image
Technical line drawing of an oven interior showing internal components and a coiled spring (no text or symbols)
Do not stack plates too high. Stack plates a maximum of 5/6 high.
- Select PLATE WARMING
- Touch the START button to start the Plate warming function.

Unless otherwise set, the Plate warming function has a maximum duration of 12 hours and 59 minutes.
The following can be set while the function is in operation:
• the temperature (from 40°C to 80°C);
• the duration of the function

- a delayed function only if a duration different from the default one is set).
When finished, a buzzer sounds briefly, which can be deactivated by touching any point of the display or by opening the door.
Keep warm
- Select KEEP WARM
- Touch the TEMPERATURE button or the relative value.
- Scroll through the values and select the required cooking temperature (from 60^ C to 100^ C).
- Touch the START button to start the Keep warm function.
When finished, a buzzer sounds briefly, which can be deactivated by touching any point of the display or by opening the door.
Sabbath

This function results in the appliance operating in a particular way:
• Cooking can proceed indefinitely, it is not possible to set any cooking duration.
• No preheating will be performed.
- The cooking temperature that can be selected ranges from 60°C to 100°C.
- Oven light disabled, any operation such as opening the door or manual activation will not activate the light.
- The internal fan remains turned off.
- Buzzers disabled.
- Select SABBATH
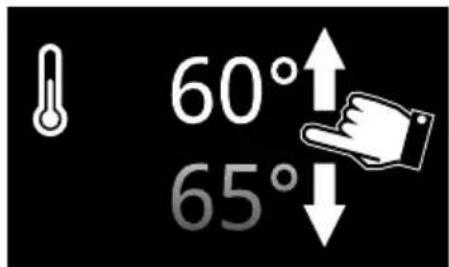
- Touch the TEMPERATURE button or the relative value.
- Scroll through the values and select the required cooking temperature (from 60^ C to 100^ C).
text_image
60°↑ 65°↓- Touch the CONFIRM button to confirm the selected temperature.
- Touch the START Button to start the Sabbath function.
To stop the function:
- Touch the HOME Button for approximately 3 seconds (the display reverts to the main menu).
or
- Touch the ON/OFF 📊 on for approximately 3 seconds (the display reverts to the screen of the function).
3.9 Settings
The product configuration can be set using this menu.
- Touch the SETTINGS button on the main menu display (at the bottom right).
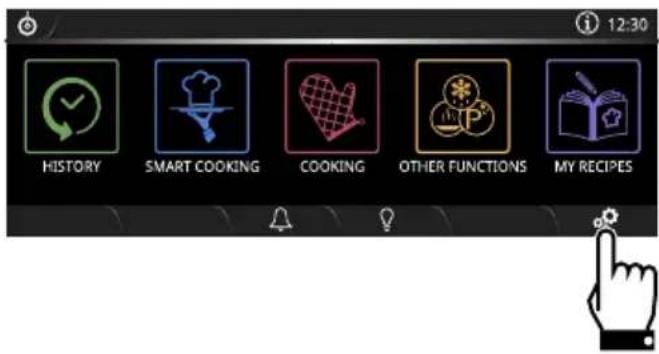
text_image
12:30 HISTORY SMART COOKING COOKING OTHER FUNCTIONS MY RECIPES
In the event of a temporary power cut, all personal settings will remain stored.

For the Connectivity 📤, Remote Control 📌 and SmegConnect 📄, referring to the "Built-in oven Connectivity" user manual (only for SmegConnect models).

Language

Allows you to select the language of the display.
- Select language.
- Scroll through the available languages to select the required language.
- Touch the CONFIRM button to confirm the selected language.

Controls lock

Allows the appliance to automatically lock the controls after one minute of normal operation without any intervention from the user.
- Select controls lock.
- Select Yes.
- Touch the CONFIRM button to activate the Controls lock mode.

During normal operation, it is indicated by the -1 indicator light turning on in the information area 1.
To temporarily disable the lock during cooking:
- Touch one of the values that you wish to modify.
A message appears on the display that indicates how to temporarily disable the Controls lock mode.
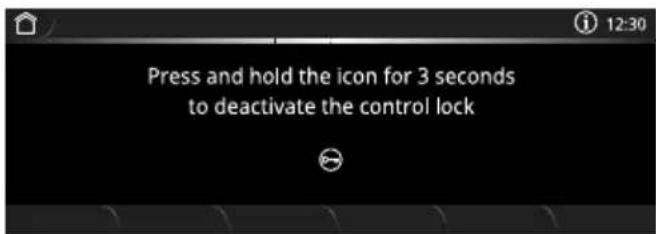
text_image
Press and hold the icon for 3 seconds to deactivate the control lock- Touch the 📷 on for 3 seconds

Showroom (for exhibitors only)

This mode deactivates all the appliance's heating elements, while keeping the control panel active.
- Select Showroom.
- Select On.
- Touch the CONFIRM button to activate the Showroom mode.

During normal operation, it is indicated by the indicator light turning on in the information area 1.

To use the appliance normally, set this mode to Off.

Sound

Whenever one of the display symbols is pressed, the appliance beeps. This setting disables these sounds.
- Select Sound.
- Select Off.
- Touch the CONFIRM button to disable the sound associated with the touching of the symbols on the display.

Keep warm

This mode allows the appliance to keep cooked food warm (at low temperatures) after cooking finishes with a cooking cycle for which a duration has been set (if this is not manually interrupted), without altering the taste and smell obtained during cooking.
- Select Keep warm.
- Select On.
- Touch the CONFIRM button to activate the Keep warm mode.

The keep warm function will be activated 5 minutes after cooking has finished; this is indicated by a series of beeps (see cooking or function ended).

The temperature of the keep warm function is set to 80^ C.

Eco light

For greater energy savings, the lights inside the oven cavity are automatically deactivated approximately one minute after the start of cooking or after the door is opened.
- Select 2p light.
- Select On.
- Touch the CONFIRM button to activate the Eco light mode.

To stop the appliance from automatically deactivating the light after approximately one minute, set this mode to Off.

If this mode is set to Off, the lights are deactivated approximately 15 minutes after the door is opened.

Manual on/off control is always available. Press the symbol, when available, to manually activate the oven light or the symbol to deactivate it.

The Eco light function is factory set to On.
Digital clock

Displays the current time in digital format.
- Select 12:00 Digital clock.
- Select On.
Touch the CONFIRM button to activate the Digital clock mode.

text_image
12:30
In the event of a temporary power cut, the digital version will remain selected.

Water hardness

This mode allows you to set the water hardness value in order to optimise the descaling process.

The appliance is factory set for water of medium hardness (3).
- Select Water hardness.
- Scroll through the hardness levels and select the one required (from 1 to 5).
- Touch the CONFIRM button to confirm.

If your mains water supply is too hard, we recommend using a water softener.

Request information on the hardness of your water from your local water board.
Depending on the water hardness that has been set, after the steam function has been used for a certain number of hours, the display will prompt you to carry out the descaling procedure (see "Descaling").
According to the use of the appliance, the approximate number of hours is as follows:
| Hardness level | °dH °dF Hours | |
| 10 - 1 | 10 - 20 35 - 40 | |
| 2 12 - | 17 21 - 30 25 - 30 | |
| 3 18 - | 24 31 - 42 15 - 20 | |
| 4 25 - | 30 43 - 53 12 - 15 | |
| 5 31 - | 50 54 - 90 8 - 10 |

Demo Mode (for showrooms only)

The same as Showroom, when this mode is activated, after a certain period of inactivity, a demonstration of the various screens that illustrate the potential of the appliance is shown on the display.
- Select DEMO mode Demo Mode.
- Select On.
- Touch the CONFIRM button to activate Demo Mode.

To use the appliance normally, set this mode to Off.

Time display

Enables/disables the clock display when the oven is switched off.
- Select Show the time.
- Select On.
- Touch the CONFIRM button to activate the time display.

The Show the time function is factory set to Off.

If the Show the time function is set to On, when the appliance is in standby it displays the current time at low brightness.
12:30

When the Show the time function is set to On, the appliance consumes more energy than in stand-by mode.

Only for SmegConnect models: If the Show the time function is set to Off the connectivity switches off automatically when the clock goes into stand-by.

Clock format

Activates/deactivates the clock display in the 12 or 24 hour format.
- Select 1224 Clock format.
- Select 12h or 24h.
- Touch the CONFIRM button to activate the required clock format.

The Clock format function is factory set to 24h.

Temperature Format
Allows you to set the temperature scale to degrees Celsius (°C) or degrees Fahrenheit (°F).
- Select °C/°F Temperature format.
- Select °C or °F.
- Touch the CONFIRM button to activate the required temperature format.

The Temperature format function is factory set to °C.

Display brightness

This allows the display brightness level to be selected.
- Select 📂 Display brightness.
- Select from the options High - Medium - Low.
- Touch the CONFIRM button to confirm the selection.

The Display brightness function is factory set to High.

Restore settings

This restores all settings to the original factory settings.
- Select Restore settings.
- Touch the CONFIRM button to confirm the selection.
4 Cleaning and maintenance
Instructions

Improper use Risk of damage to surfaces
- Do not use steam jets to clean the appliance.
- Do not use cleaning products containing chlorine, ammonia or bleach on parts made of steel or that have metallic surface finishes (e.g. anodizing, nickel- or chromium-plating).
- Do not use abrasive or corrosive detergents (e.g. scouring powders, stain removers and metallic sponges) on glass parts.
- Do not use rough or abrasive materials or sharp metal scrapers.
4.1 Cleaning the surfaces
To keep the surfaces in good condition, they should be cleaned regularly after use. Let them cool first.
Ordinary daily cleaning
Always and only use specific products that do not contain abrasives or chlorine-based acids.
Pour the product onto a damp cloth and wipe the surface, rinse thoroughly and dry with a soft cloth or a microfibre cloth.
Food stains or residues
Do not use steel sponges and sharp scrapers as they will damage the surface.
Use normal, non-abrasive products and a wooden or plastic tool, if necessary. Rinse thoroughly and dry with a soft cloth or a microfibre cloth.
Do not allow residues of sugary foods (such as jam) to set inside the oven. If left to set for too long, they might damage the enamel lining of the oven.
4.2 Cleaning the door
Removing the door
For easier cleaning it is recommended to remove the door and place it on a tea towel.
To remove the door proceed as follows:
- Open the door completely and insert two pins into the holes on the hinges indicated in the figure.
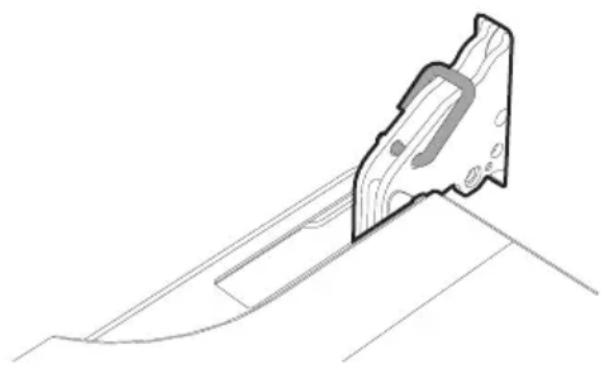
natural_image
Technical line drawing of a mechanical component or bracket (no text or symbols)Cleaning and maintenance
- Grasp the door on both sides with both hands, lift it so that it forms an angle of around 30^ and remove it.
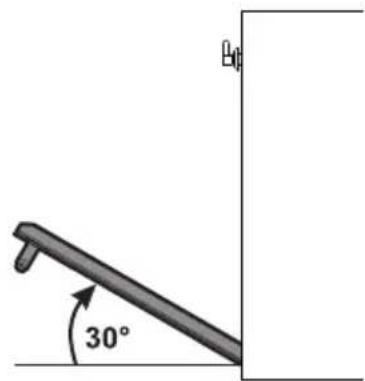
text_image
30°- To reassemble the door, put the hinges in the relevant slots in the oven, making sure that grooved sections A are resting completely in the slots. Lower the door and once it is in place remove the pins from the holes in the hinges.
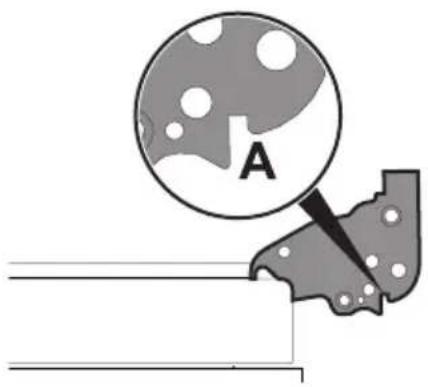
text_image
ACleaning the door glazing
The glass in the door should always be kept thoroughly clean. Use absorbent kitchen roll. In case of stubborn dirt, wash with a damp sponge and an ordinary detergent.

We recommend the use of cleaning products distributed by the manufacturer.
Removing the internal glass panes
For easier cleaning the internal glass panes of the door can be removed.
- Remove the door of the appliance or lock it in position using the special pins.
- Remove the internal glass pane by pulling the rear part gently upwards, following the movement indicated by the arrows.
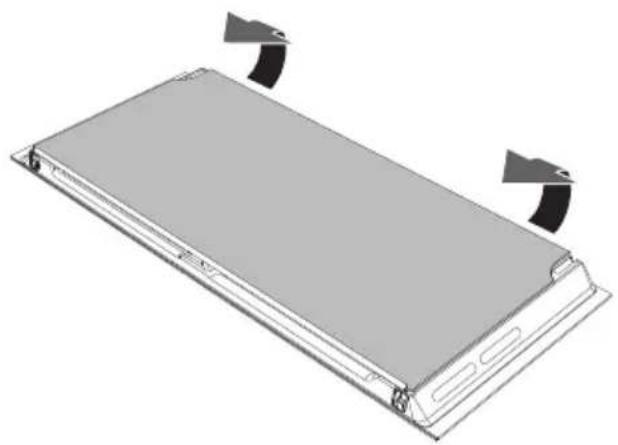
natural_image
3D rendering of a rectangular electronic device with two curved arrows pointing to its top surface (no text or symbols visible)
Cleaning and maintenance
- Then remove the internal glass pane from the front profile.
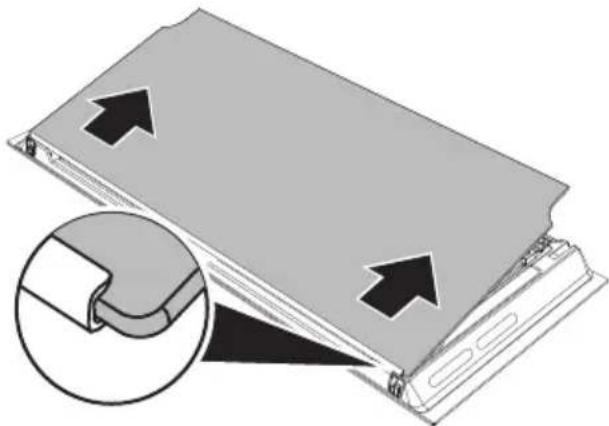
natural_image
Diagram showing a device being folded into a plastic sheet, with an inset close-up highlighting the structural detail (no text or symbols present)- Remove the intermediate glass unit by lifting it upwards.
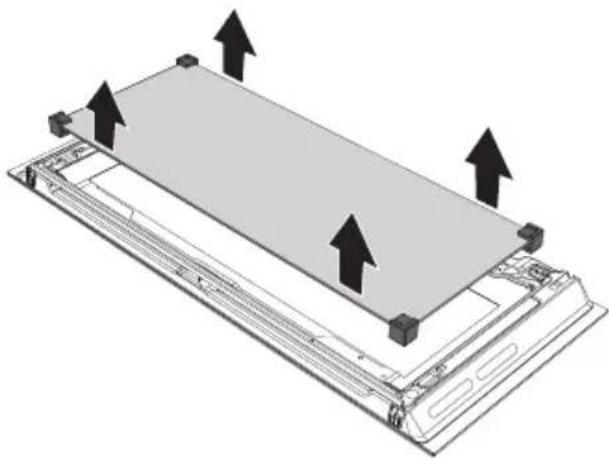
natural_image
3D diagram of a rectangular electronic device with arrows indicating upward motion or force, no text or symbols present.- Clean the external glass pane and the panes removed previously. Use absorbent kitchen roll. In case of stubborn dirt, wash with a damp sponge and neutral detergent.
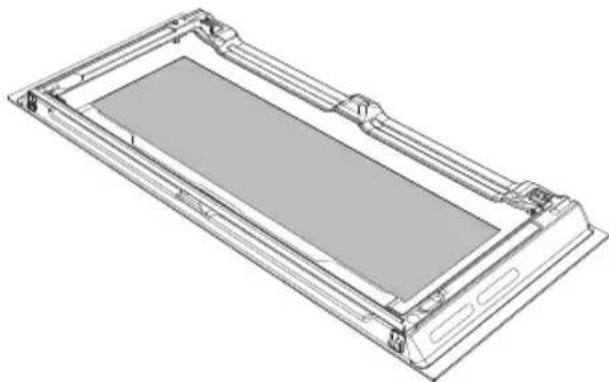
natural_image
Technical line drawing of a rectangular electronic device with internal components (no text or symbols)-
Reposition the intermediate glass unit.
-
Reposition the internal glass pane. Insert the front part into the front profile (1). Then lower the rear part and insert the pins into their housings on the door by applying slight pressure (2).
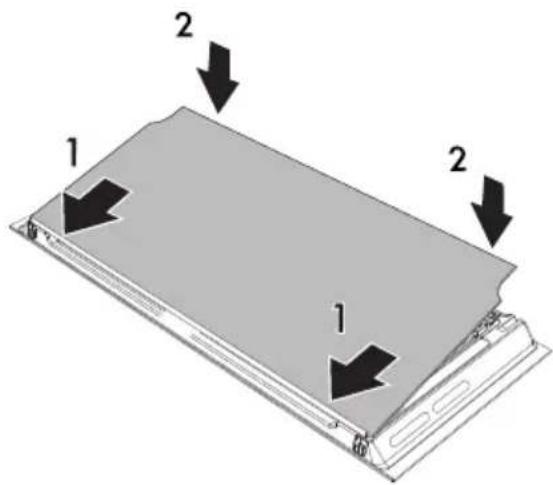
text_image
1 2 2 14.3 Cleaning the oven cavity
In order to keep your oven in the best possible condition, clean it regularly after letting it cool down.
Avoid letting food residue dry inside the oven cavity, as this could damage the enamel.
Take out all removable parts before cleaning.
For easier cleaning, we recommend removing:
- The door
• The rack/tray support frames - The oven seal.

In the event you are using specific cleaning products, we recommend running the oven at maximum temperature for 15-20 minutes in order to eliminate any residue.
Drying
Cooking food generates moisture inside the appliance. This is a normal phenomenon and does not affect the appliance's operation in any way.
Each time you finish cooking:
- Let the appliance cool down.
- Remove any dirt from inside the appliance.
- Dry the interior of the appliance with a soft cloth.
- Leave the door open until the inside of the appliance has dried completely.
Cleaning the probe
After use, the temperature probe should be cleaned after it has cooled down. Clean the tip of the temperature probe (metal part) with water, neutral dish soap and a soft sponge. Clean the rest with a soft damp cloth.
Do not wash it in a dishwasher as it could damage the electrical components of the plug.
Dry thoroughly after cleaning.
Cleaning and maintenance
Removing rack/tray support frames
Removing the rack/tray support frames enables the sides to be cleaned more easily.
To remove the rack/tray support frames:
- Pull the frame towards the inside of the oven to unhook it from its groove A, then slide it out of the seats B at the back.
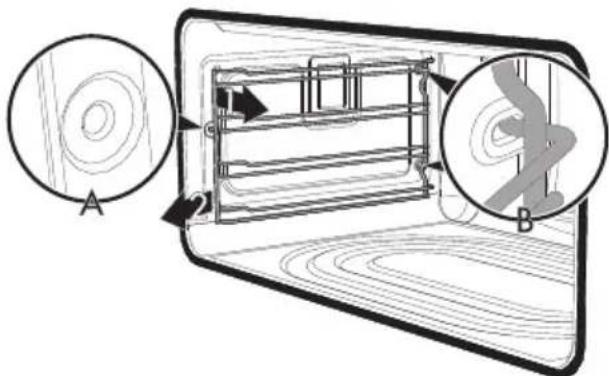
text_image
Diagram illustrating a mechanical or electrical component with labeled parts A and B, showing internal structure and directional arrows.- When cleaning is complete, repeat the above procedures to put the rack/tray support frames back in.
Cleaning the roof of the oven (not on pyrolytic models)

High temperature inside the oven during use Danger of burns
- The following operations must be performed only with the oven switched off and completely cool.
The oven cavity is fitted with a tilting heating element which facilitates cleaning the top part (roof) of the oven.
- Free the upper heating element by gently lifting it and rotating its retainers by 90 degrees.
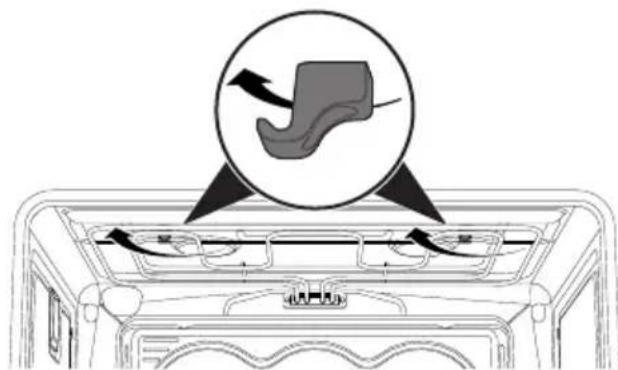
text_image
Diagram illustrating a door handle mechanism with labeled parts and directional arrows, including a magnified view of the handle.- Gently lower the heating element until it stops.
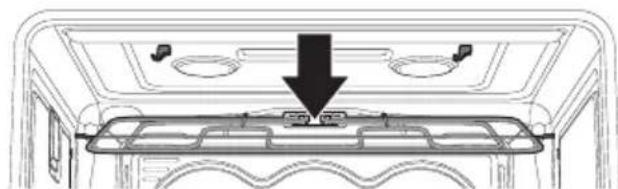
natural_image
Diagram of a car interior showing a roof structure with a downward arrow indicating a component (no text or symbols present)
Improper use Risk of damage to the appliance
- Do not excessively flex the element during cleaning.
- When you have finished cleaning, place the heating element back in position and turn the retainers to lock it in place again.
Cleaning and maintenance
Vapor Clean (on some models only)

Vapor Clean is an assisted cleaning procedure which facilitates the removal of dirt. Thanks to this process, it is possible to clean the inside of the oven very easily. The dirt residues are softened by the heat and water vapour for easier removal afterwards.

Improper use Risk of damage to surfaces
- Remove any food residues or large spills from previous cooking operations from the inside of the oven.
- Carry out assisted oven cleaning operations only when the oven is cold.
Preliminary operations
Before starting the Vapor Clean cycle:
-
Completely remove all accessories from inside the oven.
-
Pour approx. 40 cc of water onto the floor of the oven. Make sure it does not overflow out of the cavity.
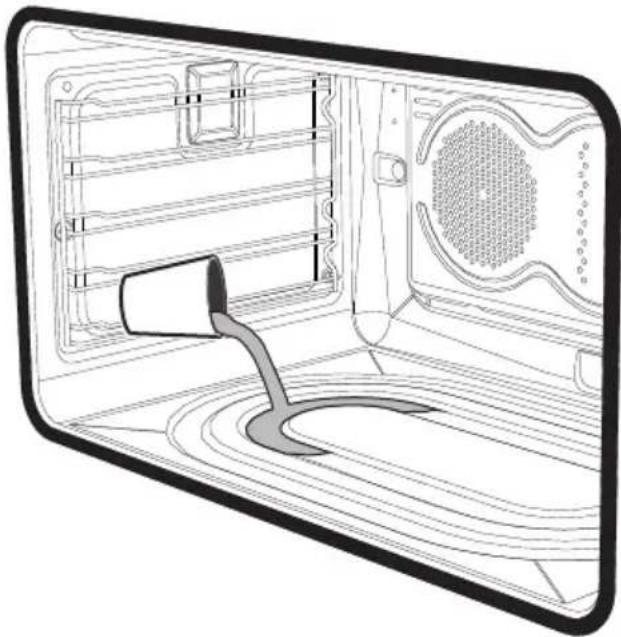
natural_image
Interior view of a microwave oven with a handle and ventilation grilles (no text or symbols visible)- Spray a water and washing up liquid solution inside the oven using a spray nozzle. Direct the spray towards the side walls, upwards, downwards and towards the deflector.
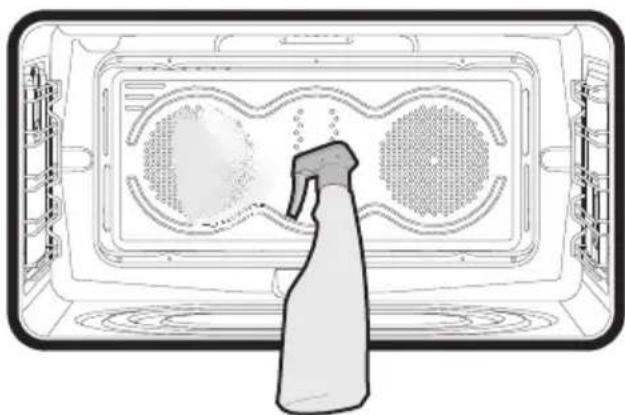
natural_image
Top-down line drawing of a kitchen appliance with a spray bottle inserted, showing front and side views (no text or symbols)
We recommend spraying approx. 20 times at the most.
- Close the door.
Vapor Clean cycle setting

If the internal temperature is greater than the one required, the function will be stopped immediately and "Internal temperature unsafe, please wait until the oven is cool" will appear on the display. Allow the appliance to cool down before activating the function.
5. Touch the OTHER FUNCTIONS
button on the "main menu".

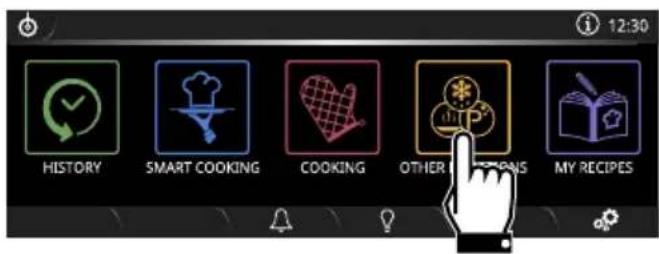
text_image
12:30 HISTORY SMART COOKING COOKING OTHER PROCES MY RECIPES- Scroll the menu to the left and select the
VAPOR CLEAN

function.
- The cleaning cycle screen will appear on the display.
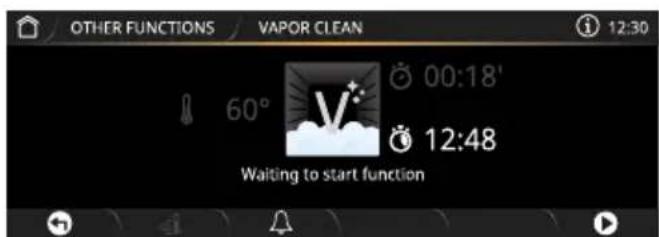
text_image
OTHER FUNCTIONS VAPOR CLEAN 12:30 60° 00:18' 12:48 Waiting to start function
The duration and temperature parameters cannot be changed by the user.

The DELAY COOKING

button can be used to set a function delayed end time.
- Touch the START button to start the Vapor Clean cycle.
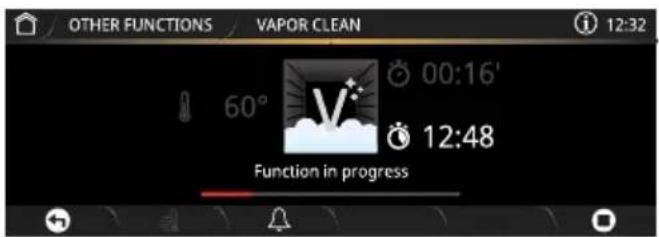
text_image
OTHER FUNCTIONS VAPOR CLEAN 12:32 60° 00:16' 12:48 Function in progress
If the temperature inside the oven is too high, a warning buzzer and message on the display will instruct you to wait for it to cool.
End of the Vapor Clean cycle
At the end of the Vapor Clean function, Function ended appears on the display and a buzzer sounds briefly, which can be deactivated by touching any point of the display or by opening the door.

text_image
Function endedCleaning and maintenance
- Touch the HOME the function.

ton to exit from
- Open the door and wipe away the less stubborn dirt with a microfibre cloth.
- Use a non-scratch sponge with brass filaments on hard to remove deposits.
- In case of grease residues use specific oven cleaning products.
- Remove the residual water inside the oven.
For improved hygiene and to avoid food being affected by any unpleasant odours, we recommend that the oven is dried using a fan-assisted function at 160^ C for approximately 10 minutes.

We recommend wearing rubber gloves for these operations.

We recommend removing the door in order to make the manual cleaning of the parts that are difficult to reach easier.
Pyrolytic: automatic oven cavity cleaning (on some models only)

Pyrolytic cleaning is an automatic, high-temperature cleaning procedure that causes dirt to dissolve. Thanks to this process, it is possible to clean the inside of the oven very easily.

Improper use Risk of injury
- When this function is in use, the surfaces could reach temperatures that are higher than usual.
- Keep children at a safe distance.

Improper use Risk of damage to surfaces
- Switch off the burners or electric hot plates of the hob installed above the oven.
Preliminary operations
Before starting the pyrolytic cycle:
- Clean the internal glass pane following the usual cleaning instructions.
- Remove any food residues or large spills from previous cooking operations from the inside of the oven.
- Completely remove all accessories from inside the oven.

Cleaning and maintenance
- For very stubborn encrustations spray an oven cleaning product onto the glass (read the warnings on the product); leave for 60 minutes, then rinse and dry the glass using kitchen roll or a microfibre cloth.
- Remove the temperature probe (if present).
- Remove the rack/tray support frames.
- Close the door.
Pyrolytic function setting
1. Touch the OTHER FUNCTIONS

button on the "main menu".
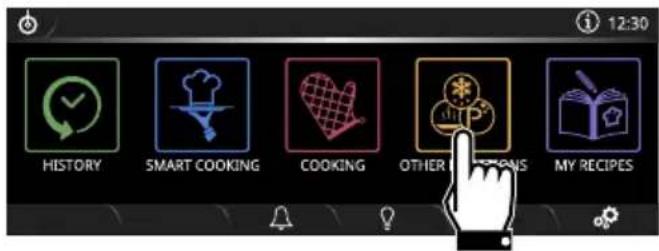
text_image
12:30 HISTORY SMART COOKING COOKING OTHER CUCUMULS MY RECIPES2. Scroll through the menu towards the left
and select the PYROLYTIC function.

3. Select the most appropriate setting for the automatic cleaning of the oven cavity.
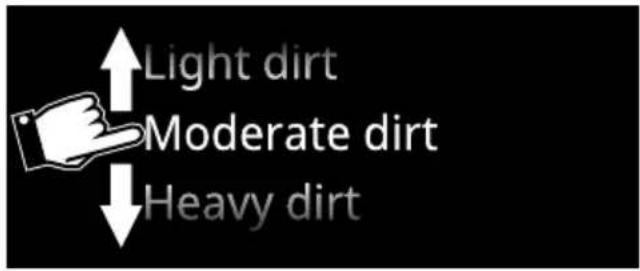
text_image
Light dirt Moderate dirt Heavy dirt
Recommended pyrolytic cycle duration:
- Light dirt = 02:00.
• Moderately dirty = 02:30. - Heavy dirt = 03:00.
4. Touch the CONFIRM button to confirm the setting.
The appliance is ready to start the automatic cleaning cycle.
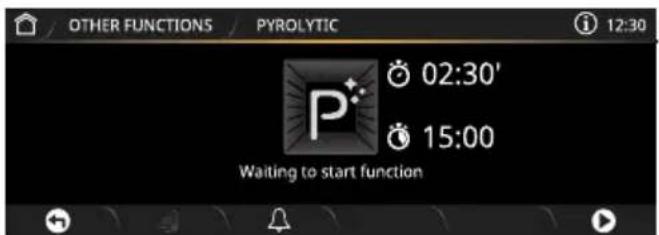
text_image
OTHER FUNCTIONS PYROLYTIC 12:30 02:30' 15:00 Waiting to start function
The DELAY COOKING

button can be used to set a function delayed end time.
Cleaning and maintenance
- Touch the START button to start the pyrolytic cycle.

It is not possible to start the pyrolytic cycle if the temperature probe is plugged in.
The appliance will emit an error signal each time the START button is pressed.
Two minutes after the pyrolytic cycle has started, the door is locked (the symbol appears on the display) by a device that prevents the door from being opened.
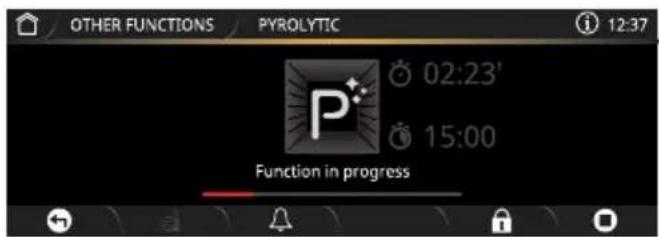
text_image
OTHER FUNCTIONS PYROLYTIC 02:23' 15:00 Function in progress
It is not possible to select any function once the door lock device has been activated. It remains possible, however, to switch off the appliance using the specific controls.
End of the Pyrolytic cleaning cycle
At the end of the pyrolytic cycle, a buzzer sounds briefly, which can be deactivated by touching any point of the display.
The door remains locked until the temperature inside the oven returns to a safe level.
A message will appear on the display to indicate that the oven cavity cooling procedure is in progress.
12:30
- Wait for the oven to cool down and collect the residue deposited inside it using a damp microfibre cloth.

During the first pyrolytic cycle, unpleasant odours may occur due to the normal evaporation of oily manufacturing substances. This is an absolutely normal phenomenon which disappears after the first pyrolytic cycle.

During the pyrolytic cycle the fans produce a more intense level of noise due to a greater rotation speed. This is an absolutely normal operation, intended to provide more effective heat dispersal. At the end of the pyrolytic cycle, the fans will continue to operate for long enough to avoid overheating the walls of adjacent units and the front of the oven.

If the pyrolytic cycle gives unsatisfactory results at minimum duration, it is recommended to set a longer time for successive cleaning cycles.
Cleaning and maintenance
4.4 Cleaning the water circuit
Descaling

The presence of scale due to lack of descaling can compromise correct operation of the appliance in the long term.
The following message will appear on the display from time to time to indicate that you should carry out the boiler descaling procedure:
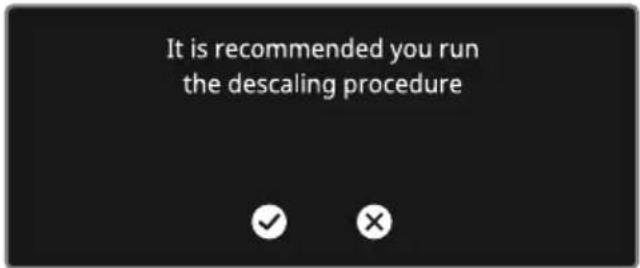
text_image
It is recommended you run the descaling procedure- Touch the CONFIRM button to accept the request to carry out the descaling function.

text_image
OTHER FUNCTIONS DESCALING Open the door, take out the tube, position the descaling solution and start the cycle 01:00'- Fill a jug with a descaling solution (e.g. dilute citric acid).

It is recommended to mix 100 g of citric acid in 250 ml of water.
Note: Do not use lactic acid.
-
Open the door completely.
-
Open the oven door.
-
Rest the jug on the open door.

PLEASE NOTE: the overall weight of the jug containing the descaler solution must be less than 5 kg.
- Remove the tube from its seat.
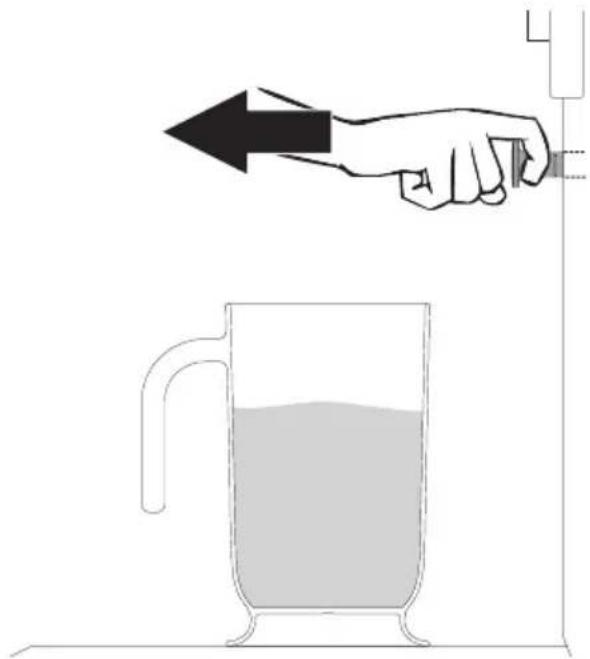
natural_image
Simple line drawing of a hand holding a bottle with liquid, above a mug (no text or symbols)Cleaning and maintenance
- Place the end at the bottom of the jug.
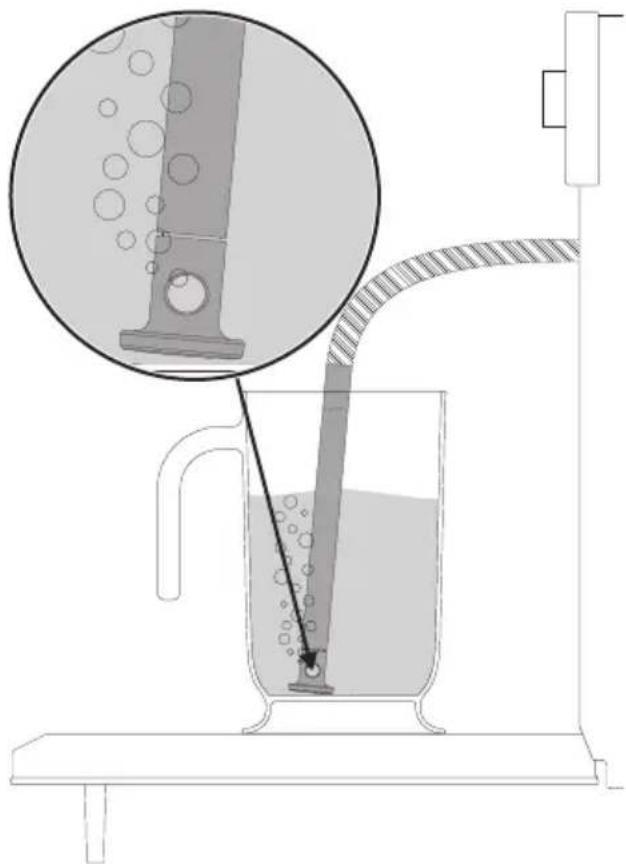
natural_image
Diagram of a laboratory filtration setup with a beaker, tube, and magnified inset showing liquid droplets (no text or labels)- Touch the START button to start filling the reservoir with the descaler solution.
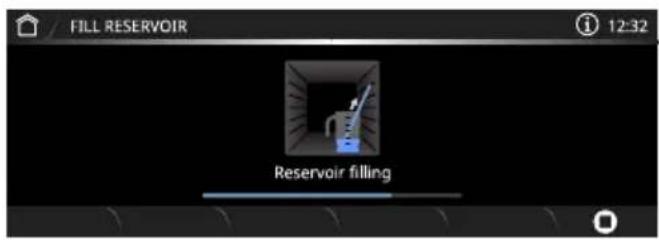
text_image
FILL RESERVOIR Reservoir fillingThe display will show the time left until the end of the descaling cycle.
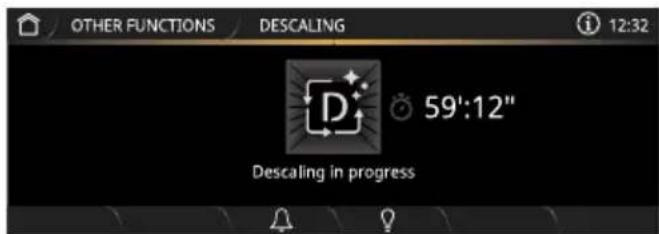
text_image
OTHER FUNCTIONS DESCALING 12:32 59':12" Descaling in progressWhen the process has finished, a buzzer will sound and the display will show the descaling solution draining screen.
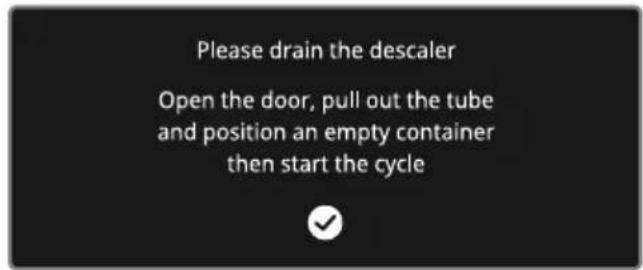
text_image
Please drain the descaler Open the door, pull out the tube and position an empty container then start the cycle- Open the oven door.
- Place a jug on the open door.
- Extract the tube from its seat and insert the end of it into the jug.
Cleaning and maintenance
- Touch the START button to start draining the solution into the jug.
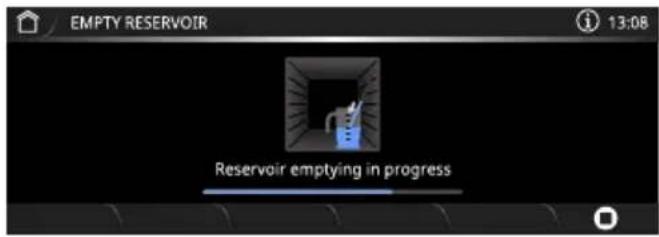
text_image
EMPTY RESERVOIR Reservoir emptying in progress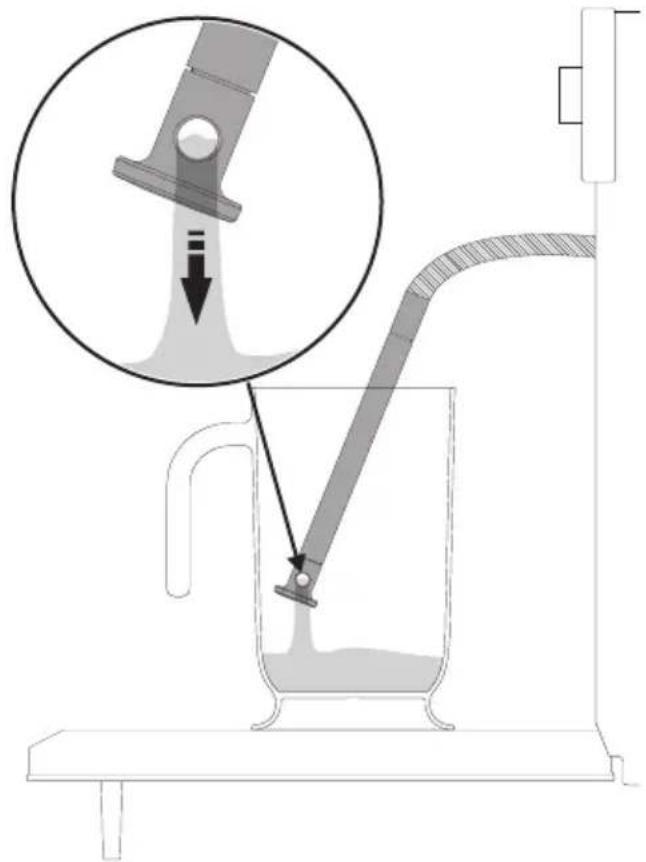
text_image
Diagram illustrating a mechanical or fluid system with a pipe being inserted into a container, showing a magnified inset of the component.When finished, the display indicates the end of the descaling procedure and the start of the rinsing process.
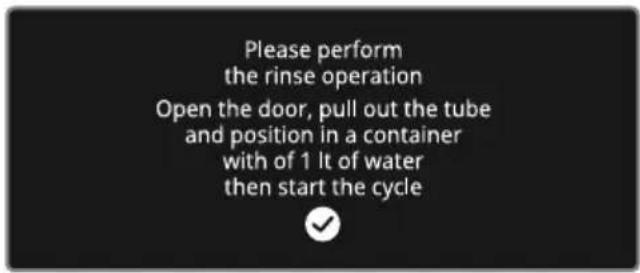
text_image
Please perform the rinse operation Open the door, pull out the tube and position in a container with of 1 lt of water then start the cycle- Shake the tube to remove any remaining solution.
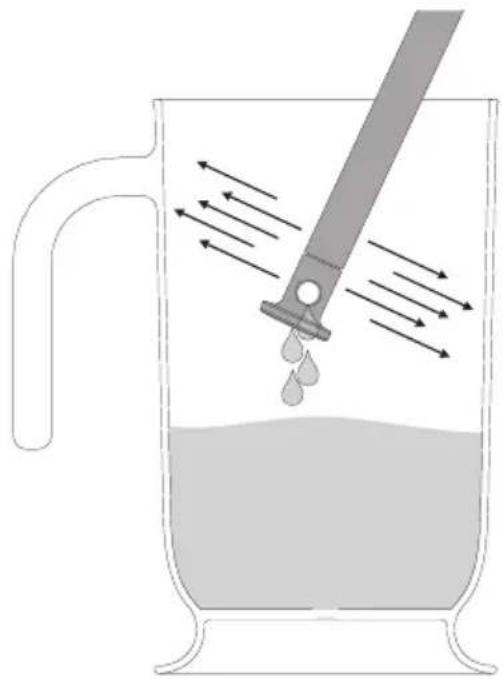
natural_image
Diagram of a droplet being poured into a beaker with a pipette, showing fluid flow direction (no text or labels)-
Prepare a jug containing water to continue with the rinsing procedure.
-
Touch the CONFIRM button to start the rinsing procedure (see section "Cleaning the reservoir (Rinse)".
Cleaning and maintenance
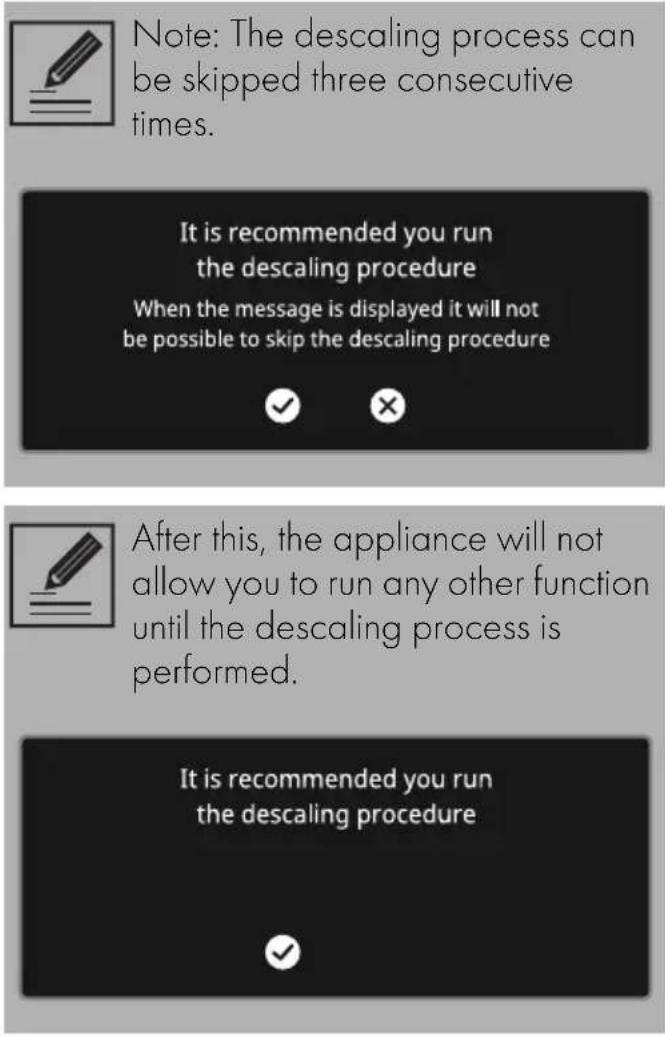
Note: The descaling process can be skipped three consecutive times.
After this, the appliance will not allow you to run any other function until the descaling process is performed.
Manual descaling
When you wish to perform descaling in advance, you can run the function manually:
- Touch the OTHER FUNCTIONS
button on the "main menu".

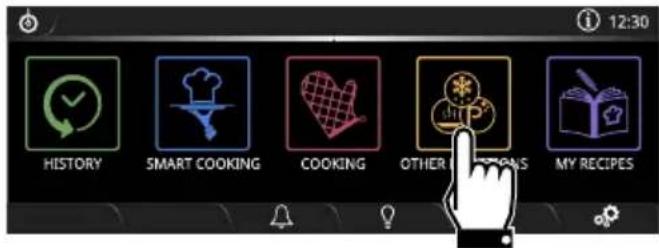
text_image
12:30 HISTORY SMART COOKING COOKING OTHER SCIENCES MY RECIPES- Scroll through the menu towards the left
and select the DESCALING

function.
- The descaling screen will appear on the display.
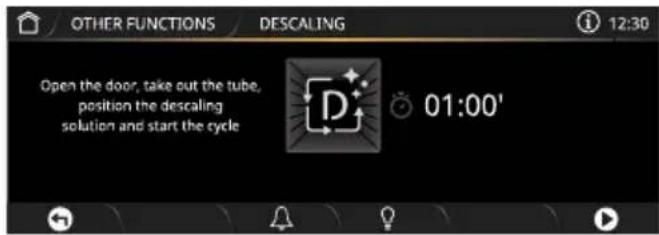
text_image
OTHER FUNCTIONS DESCALING 12:30 Open the door, take out the tube, position the descaling solution and start the cycle 01:00'- Carry out the procedure described in the "Descaling" chapter, starting from point 2.
Cleaning and maintenance
Cleaning the reservoir (Rinse)

To guarantee optimum performance of your appliance, we recommend cleaning the reservoir every 2-3 months.

The rinsing procedure consists of two phases, each involving 5 steps.
- Touch the OTHER FUNCTIONS button on the "main menu".

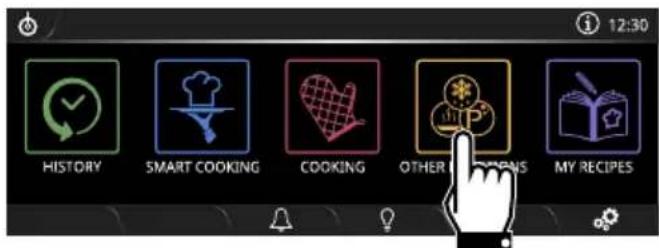
text_image
12:30 HISTORY SMART COOKING COOKING OTHER CUCUMS MY RECIPES- Scroll through the menu to the left and
select the CLEAN RESERVOIR function.

- The clean reservoir screen appears on the display.
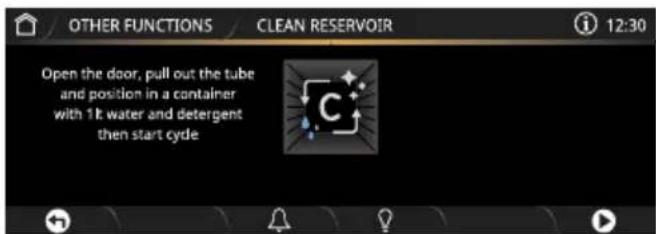
text_image
OTHER FUNCTIONS / CLEAN RESERVOIR 12:30 Open the door, pull out the tube and position in a container with 1 lb water and detergent then start cycle-
Fill the jug with a litre of clean water.
-
Open the oven door.
-
Rest the jug on the open door.

PLEASE NOTE: overall weight of the jug containing the water must be less than 5 kg.
- Remove the tube from its seat.
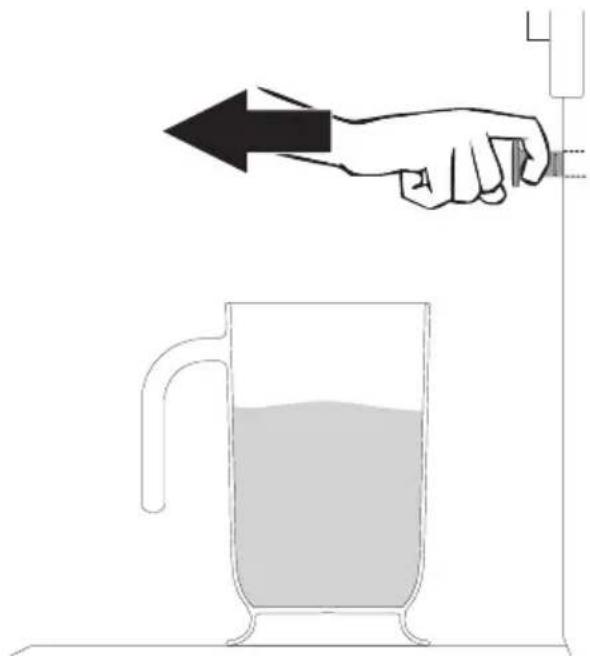
natural_image
Simple line drawing of a hand holding a bottle above a glass filled with liquid, with no text or symbols present.Cleaning and maintenance
- Place the end at the bottom of the jug.
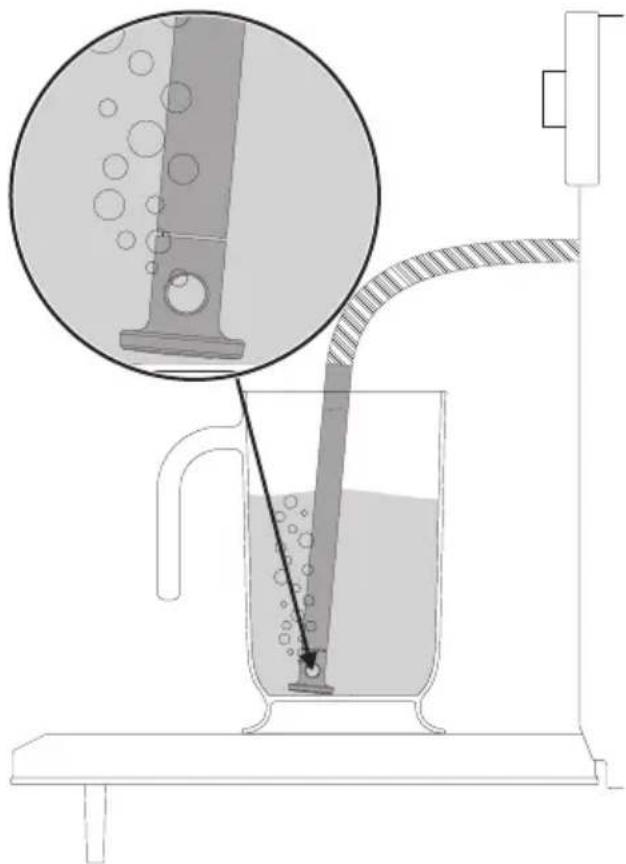
natural_image
Diagram of a laboratory filtration setup with a beaker, tube, and beaker submerged in liquid, showing bubbles and a magnified inset (no text or labels)- Press the START ▶ button to the reservoir with water.
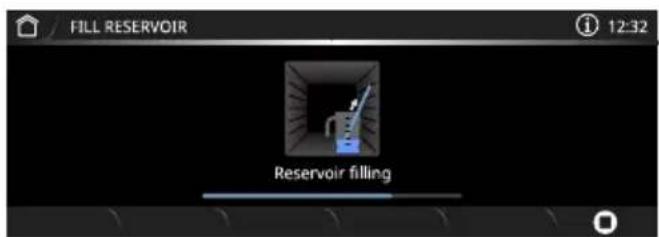
text_image
FILL RESERVOIR Reservoir filling 12:32- When finished, prepare an empty jug.
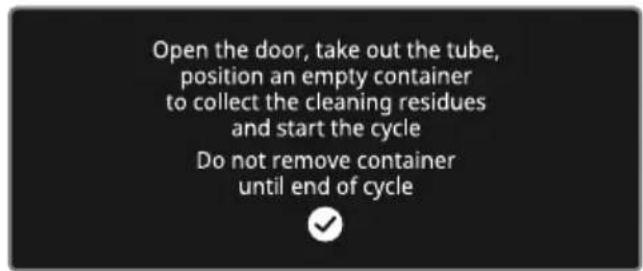
text_image
Open the door, take out the tube, position an empty container to collect the cleaning residues and start the cycle Do not remove container until end of cycle- Place the empty jug on the open door and place the end of the tube into the jug.
- Touch the CONFIRM button to start the water circuit rinse cycle.
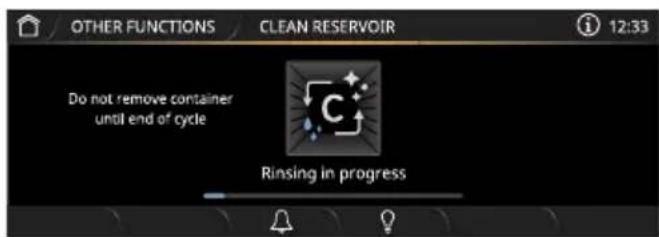
text_image
OTHER FUNCTIONS CLEAN RESERVOIR Do not remove container until end of cycle Rinsing in progressDo not remove the jug until the filling cycle has ended.
Cleaning and maintenance
When finished, a message appears on the display to indicate that the rinsing cycle has finished.
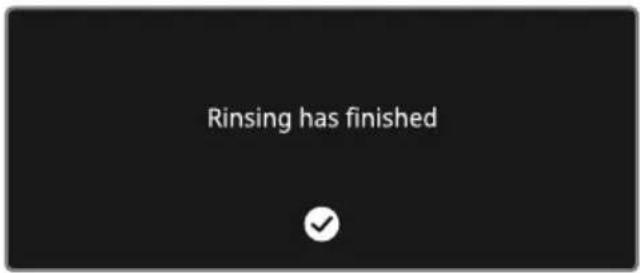
text_image
Rinsing has finished- Touch the CONFIRM from the function.

button
- Shake the tube in order to remove any remaining water.

natural_image
Diagram of a droplet being poured into a beaker with a pipette, showing fluid flow direction (no text or labels)-
Place the tube back into its seat and remove the jug.
-
Close the door.
4.5 Extraordinary maintenance
Removing and installing the door seal (not on pyrolytic models)
To remove the seal:
- Unhook the clips located in the 4 corners and in the centre, then pull the seal outwards.
to
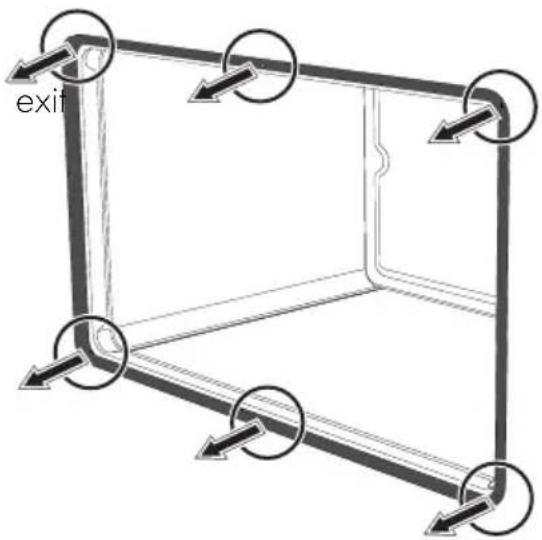
text_image
exitTo refit the seal:
- Hook the clips located in the 4 corners and in the centre onto the seal.
Seal maintenance tips
The seal should be soft and elastic.
• To keep the seal clean, use a non-abrasive sponge and wash with lukewarm water.
Cleaning and maintenance
Replacing the internal light bulb

Live parts
Danger of electrocution
- Unplug the appliance.
-
Use protective gloves.
-
Completely remove all accessories from inside the oven.
- Remove the rack/tray support frames.
- Use a tool (e.g. a spoon) to remove the bulb cover.

Pay attention not to scratch the oven cavity enamel.
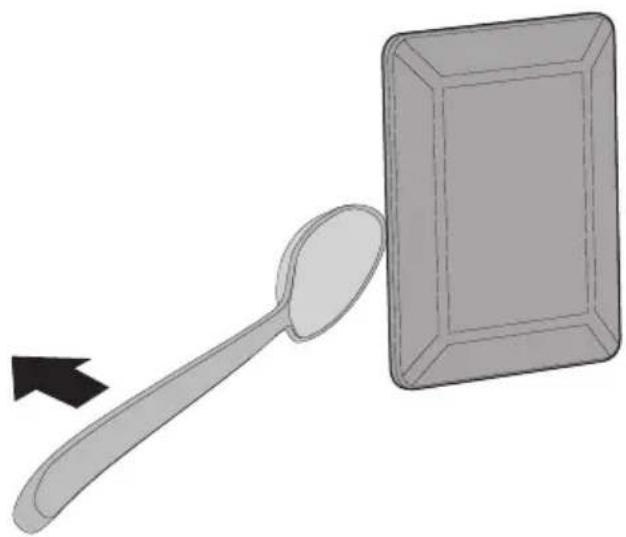
natural_image
Illustration of a spoon interacting with a rectangular plate (no text or symbols)- Slide out and remove the light bulb.
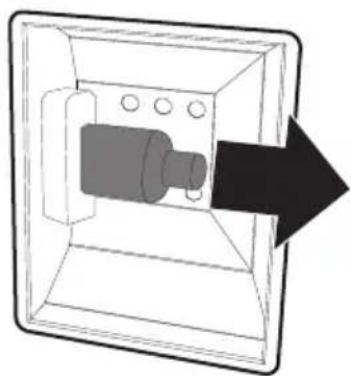
natural_image
Diagram of a mechanical component inside a transparent housing, with an arrow pointing to it (no text or symbols present)
Do not touch the halogen light bulb directly with your fingers, but wrap it in insulating material.
- Replace the light bulb with one of the same type (40W).
- Refit the cover. Make sure that the shaped internal part of the glass (A) is facing the door.
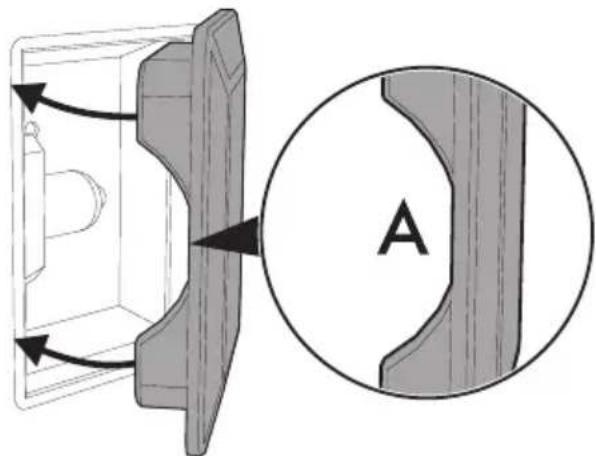
natural_image
Diagram showing a mechanical component with directional arrows and a magnified cross-section labeled A (no text or symbols present)- Press the cover completely down so that it attaches perfectly to the bulb support.
What to do if...
The display is completely off:
- Check the mains power supply.
- Check that any circuit breakers upline of the appliance supply line are in the "ON" position.
The appliance does not heat up:
- Check whether "Showroom (for exhibitors only)" or "Demo Mode (for showrooms only)" mode has been set (for further details see section "Settings").
The controls do not respond:
- Check whether "Controls lock" mode has been set (for further details see section "Settings").
After the (pyrolytic) automatic cleaning cycle it is not possible to select a function:
- Verify whether the door lock has deactivated. If it has not, the oven has a safety device that does not allow functions to be selected while the door lock is active. This is because the temperature inside the oven is still too high to permit any type of cooking.
Error 4 appears on the display:
- The door lock has not properly attached to the door. This might be because the door was accidentally opened during the door lock activation. Switch the oven off and on again, waiting a few minutes before selecting a new cleaning cycle.
If the door is opened during a fan assisted function, the fan stops:
- This is not a fault. It is a normal operation of the appliance, useful when cooking foods in order to avoid excessive heat escaping. When the door is closed, the oven will return to normal operation.

If the problem has not been resolved or in the case of other types of fault, contact your local technical support centre.

If there are other error messages, they will be indicated by Error XX: Note down the error message, function and set temperature and contact your local technical support centre.
Connectivity alarm (on some models only)
For further information, please refer to the Connectivity Manual.
5 Installation
5.1 Electrical connection

Power voltage Danger of electrocution
• Have the electrical connection performed by authorised technical personnel.
- The appliance must be connected to earth in compliance with electrical system safety standards.
- Disconnect the mains power supply.
General information
Check the grid characteristics against the data indicated on the plate.
The identification plate bearing the technical data, serial number and brand name is visibly positioned on the appliance.
Do not remove this plate for any reason.
Perform the ground connection using a wire that is 20 mm longer than the other wires.
The appliance can work in the following modes:
- 220-240 V 2\~
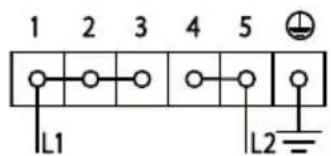
text_image
1 2 3 4 5 L1 L23 x 2.5 mm ^4 three-core cable.
- 220-240 V 3\~
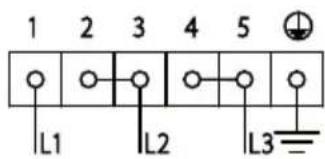
text_image
1 2 3 4 5 L1 L2 L34 x 1.5 mm² four-core cable.
- 220-240 V 1N\~
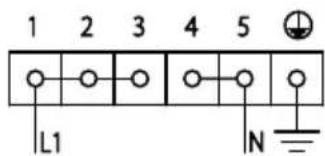
text_image
1 2 3 4 5 L1 N3 x 2.5 mm ^4 three-core cable.
- 380-415 V 2N\~
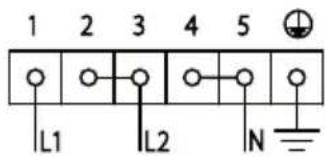
text_image
1 2 3 4 5 L1 L2 N4 x 1.5 mm ^2 four-core cable.

The values indicated refer to the cross-section of the internal conductor.

The aforementioned power cables are sized taking into account the coincidence factor (in compliance with standard EN 60335-2-6).
Fixed connection
Fit the power line with an all-pole circuit breaker in compliance with installation regulations.
The circuit breaker should be located near the appliance and in an easily reachable position.
Connection with plug and socket
Make sure that the plug and socket are of the same type.
Avoid using adapters and shunts as these could cause overheating and a risk of burns.
5.2 Instructions for the installer
- The plug must be accessible after installation. Do not bend or trap the power cable.
- The appliance must be installed according to the installation diagrams.
- If the appliance does not work correctly after having carried out all the checks, contact your local Authorised Service Centre.
- Once the appliance has been installed, please explain to the user how to use it correctly.
Cable replacement

Power voltage Danger of electrocution
- Disconnect the mains power supply.
- Unscrew the 4 screws on the rear casing.
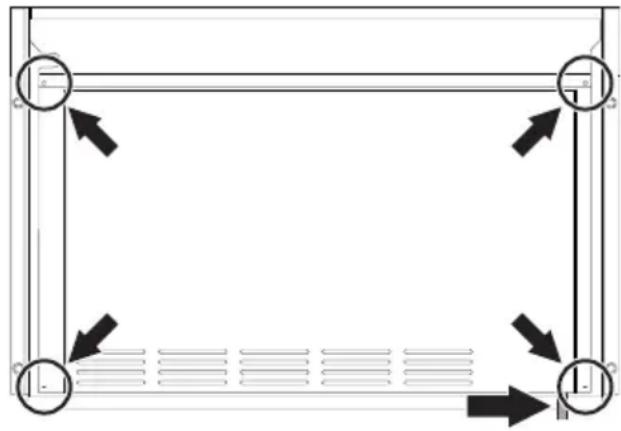
natural_image
Pure electrical circuit lines without any symbolsPosition of the screws and the power cable (rear view)
- Lift the rear casing slightly and remove it to gain access to the terminal board.
- Replace the cable.
- Make sure that the cables (for the oven or any hob) follow the best route in order to avoid any contact with the appliance.
5.3 Positioning

Heavy appliance Crushing hazard
- Position the appliance into the cabinet cut-out with the help of a second person.

Pressure on the open door Risk of damage to the appliance
- Never use the oven door to lever the appliance into place when fitting.
- Avoid exerting too much pressure on the oven door when open.

Heat production during appliance operation Risk of fire
- Check that the carcase material is heat resistant.
- Check that the carcase has the required openings.
- Do not install the appliance in a recess which can be closed with a door, or in a cupboard.
Fastening bushings
-
Mount the appliance into the recess.
-
Open the door completely.
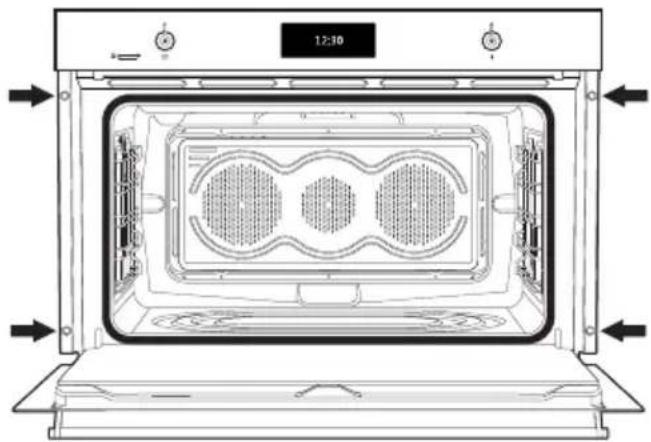
natural_image
Technical line drawing of an oven with ventilation grilles and control panel (no text or symbols)position of covers (front view)
3 Remove the bushing covers on the front of the oven.
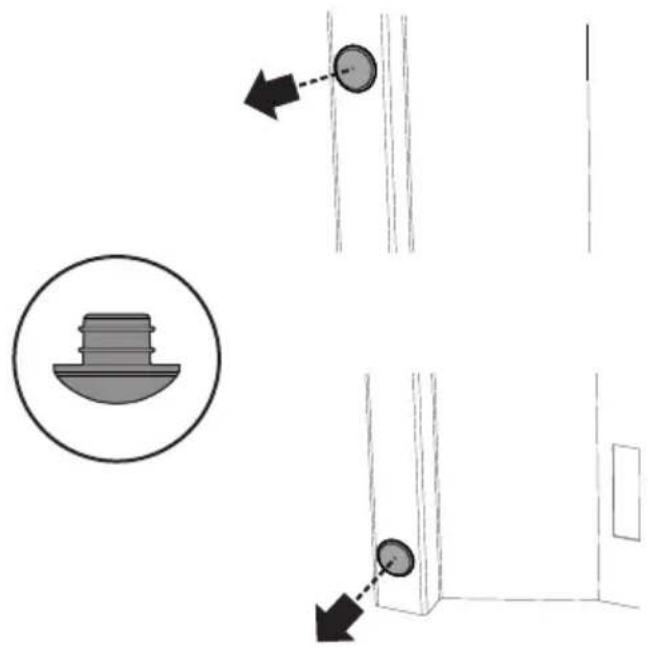
text_image
Diagram showing mechanical components with labeled parts and directional arrows, including a circular component and two hanging weights.4 Secure the appliance to the carcase using the screws.
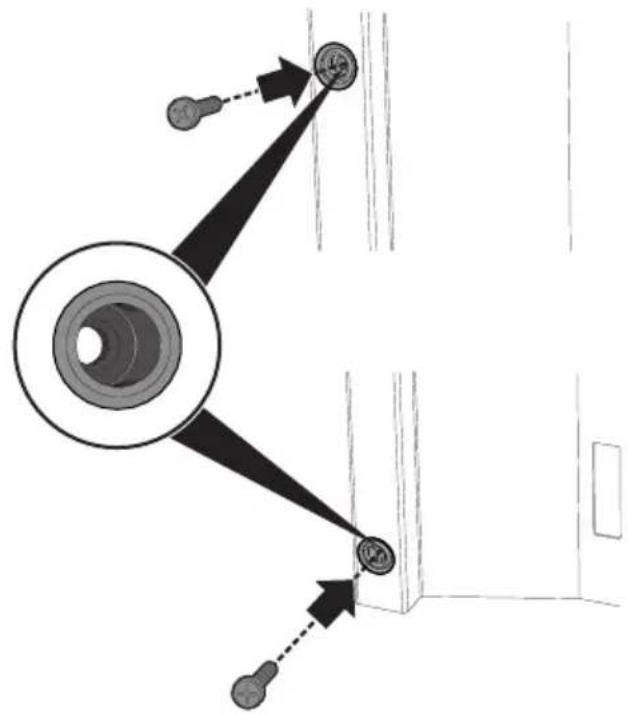
natural_image
Diagram of a mechanical or electrical component with two circular components and directional arrows indicating motion (no text or symbols)5 Cover the bushings with the previously removed covers.
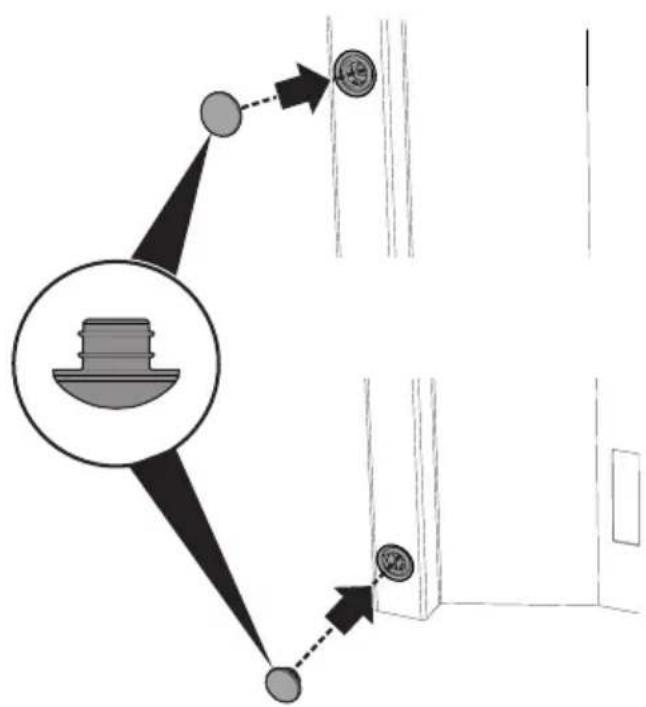
flowchart
graph TD
    A["Container"] --> B["Output 1"]
    A --> C["Output 2"]
Front panel seal
When installing under a worktop, the seal provided must be glued to the back of the front panel to prevent water or other liquids leaking in from the worktop above.
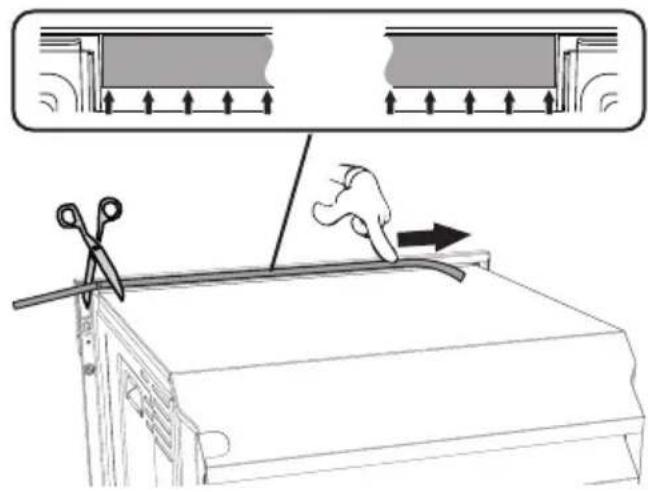
text_image
Diagram illustrating a sewing process with scissors cutting fabric, showing structural change and directional arrows.Install a wooden bar underneath the worktop.
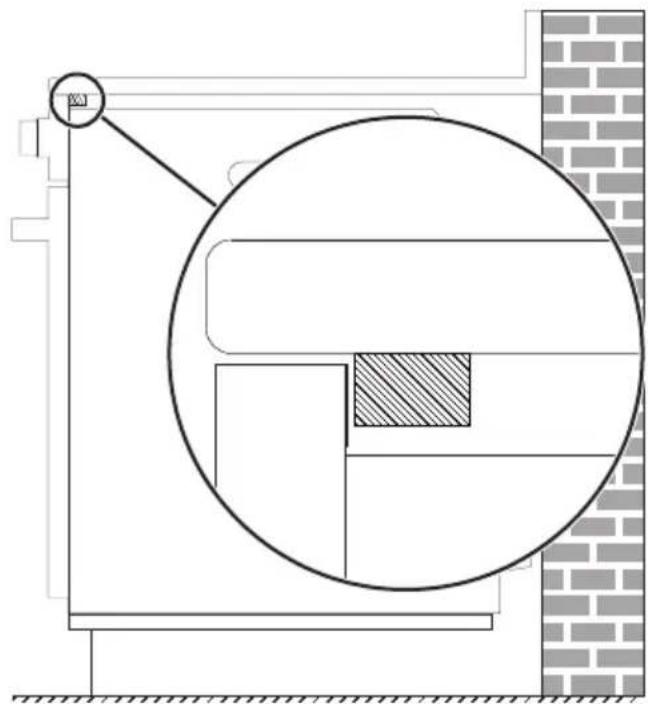
natural_image
Architectural cross-section diagram showing a circular structure with a shaded section, adjacent to a brick wall (no text or symbols)Appliance overall dimensions (mm)
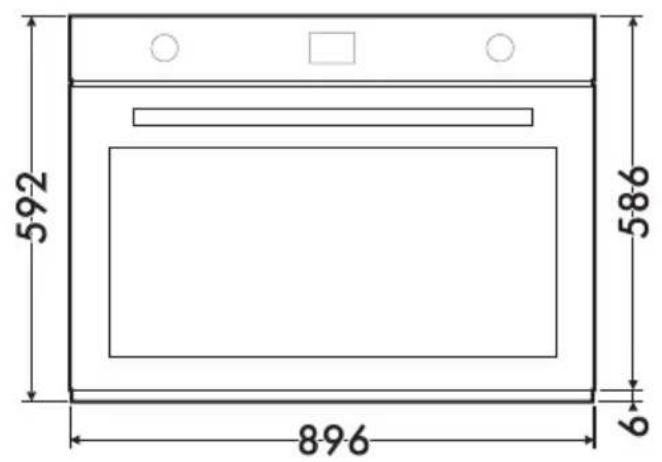
text_image
592 896 586 6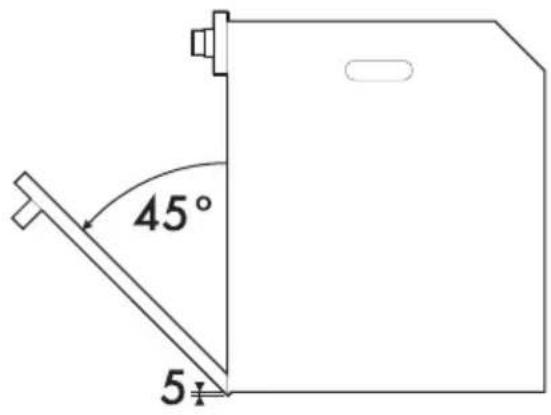
text_image
45° 5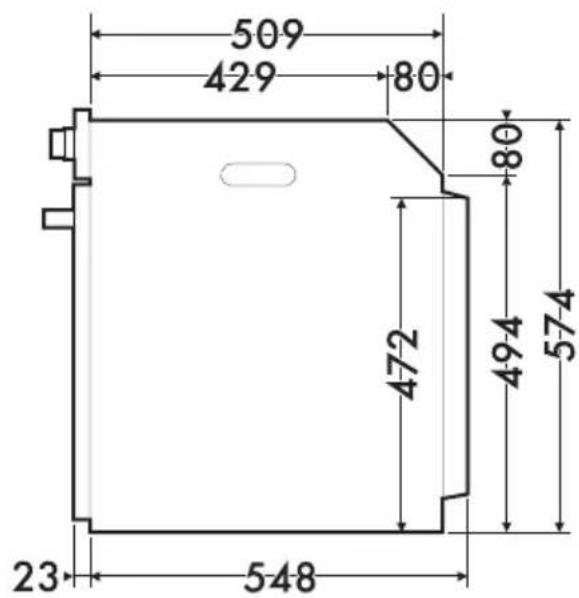
text_image
509 429 80 80 472 494 574 23 548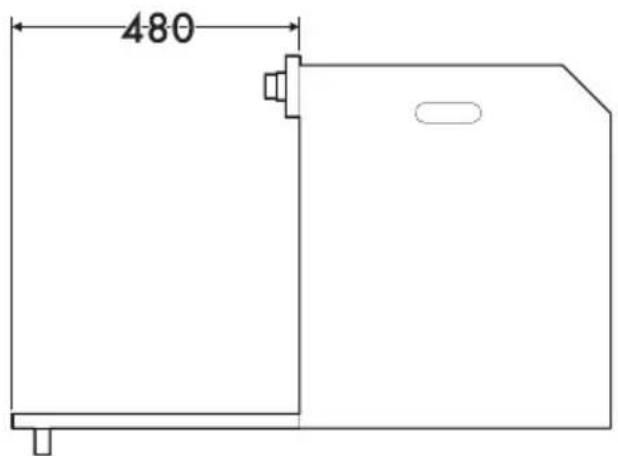
text_image
480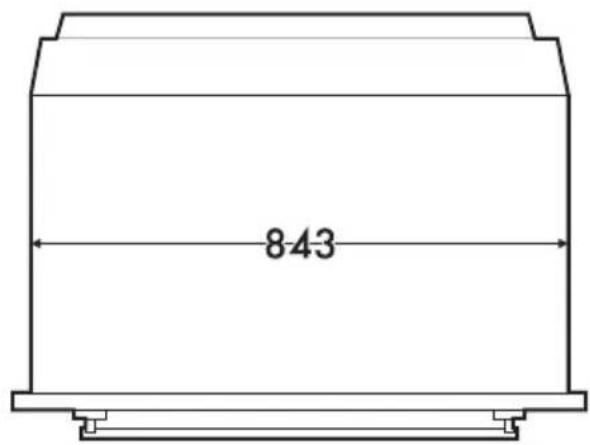
text_image
8-43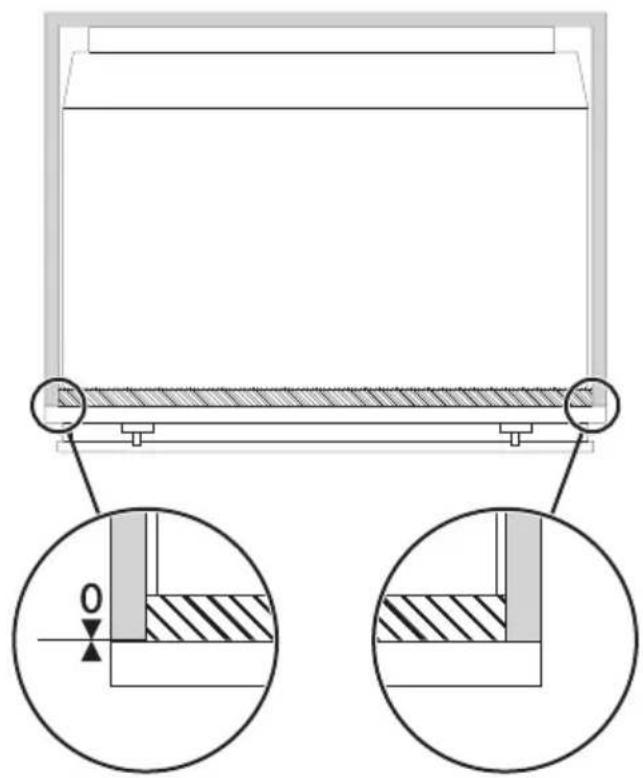
natural_image
Technical diagram showing a mechanical assembly with two circular insets highlighting cross-sections of a component (no text or symbols present)Mounting under worktops (mm)
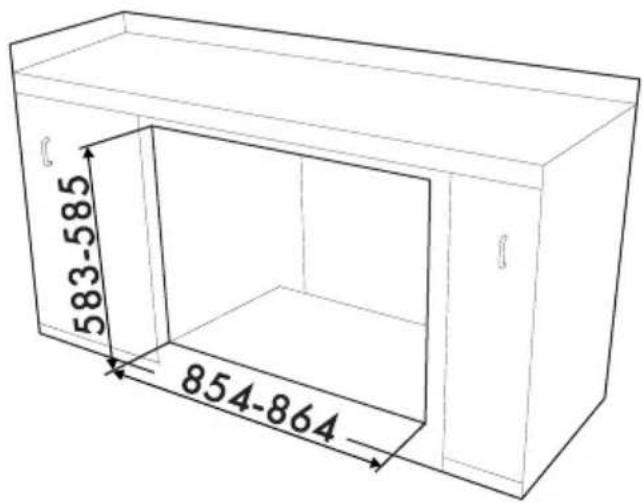
text_image
583-585 854-864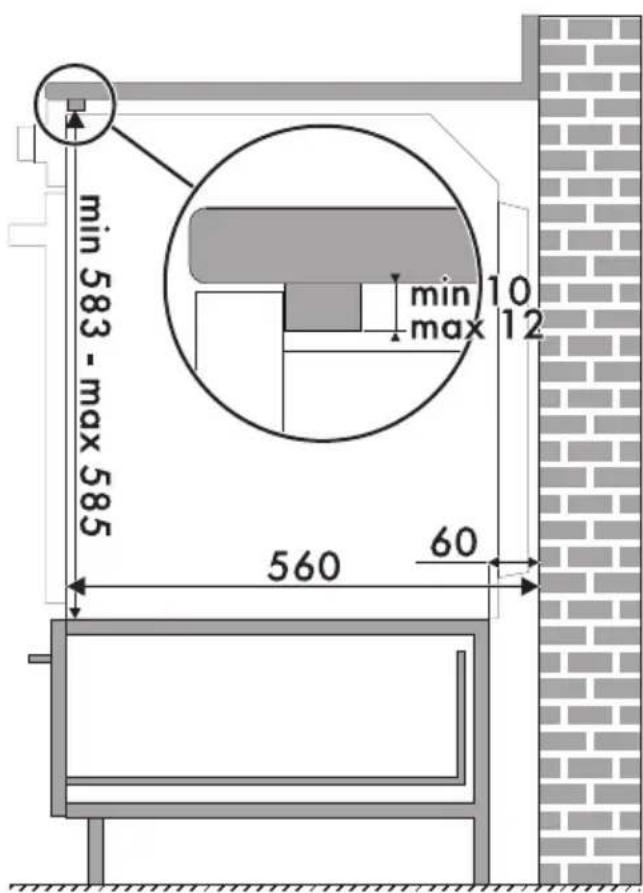
text_image
min 583 - max 585 560 60 min 10 max 12
Make sure that the carcase rear/bottom section has an opening of approx. 60 mm.
Mounting under worktops
Whenever a hob is installed above the oven, a wooden separator should be installed at a minimum distance of 10 mm from the top of the oven to prevent overheating when both appliances are used at the same time. It must only be possible to remove the separator by using suitable tools.
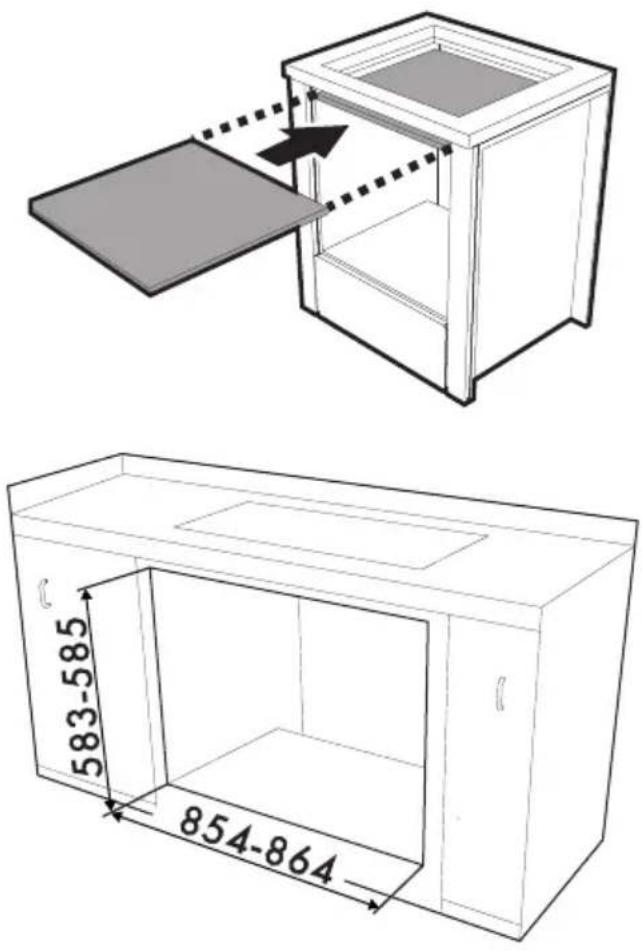
text_image
583-585 854-864Mounting into a column (mm)
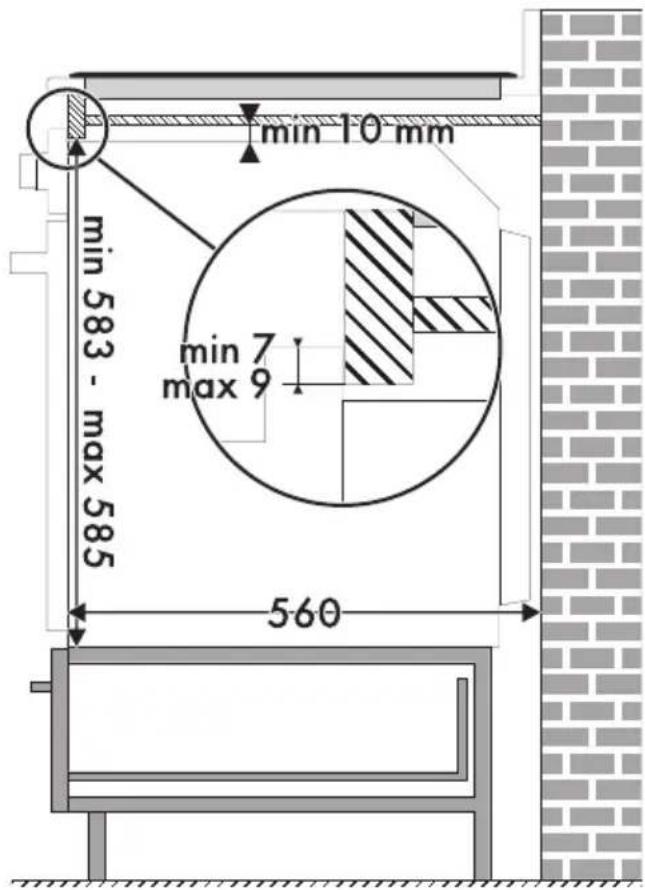
text_image
min 10 mm min 583 - max 585 min 7 max 9 560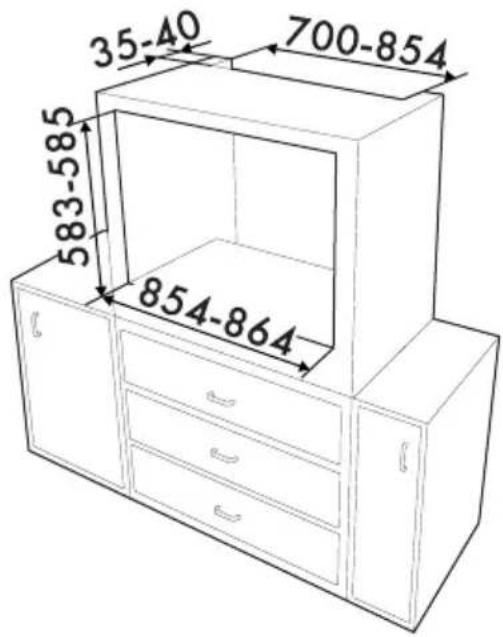
text_image
35-40 700-854 583-585 854-864
Make sure that the carcase top/rear section has an opening approx. 35-40 mm deep.

When using a wooden separator, a wooden bar has to be installed under the worktop in order to use the seal that is glued to the back of the front panel to prevent water or other liquids leaking in.