
Mini NB250 - Laptop TOSHIBA - Free user manual and instructions
Find the device manual for free Mini NB250 TOSHIBA in PDF.


User questions about Mini NB250 TOSHIBA
0 question about this device. Answer the ones you know or ask your own.
Ask a new question about this device
Download the instructions for your Laptop in PDF format for free! Find your manual Mini NB250 - TOSHIBA and take your electronic device back in hand. On this page are published all the documents necessary for the use of your device. Mini NB250 by TOSHIBA.
USER MANUAL Mini NB250 TOSHIBA
Leading Innovation >>>
NB250 Series User's Guide
If you need assistance:
Toshiba's Support Web site pcsupport.toshiba.com
Toshiba Customer Support Center
Calling within the United States (800) 457-7777
Calling from outside the United States (949) 859-4273
For more information, see “If Something Goes Wrong” on page 137 in this guide.
▲WARNING
Handling the cord on this product will expose you to lead, a chemical known to the State of California to cause birth defects or other reproductive harm. Wash hands after handling.
Model: NB250 Series
Recordable and/or ReWritable Drive(s) and Associated Software Warranty
The computer system you purchased may include Recordable and/or ReWritable optical disc drive(s) and associated software, among the most advanced data storage technologies available. As with any new technology, you must read and follow all set-up and usage instructions in the applicable user guides and/or manuals enclosed or provided electronically. If you fail to do so, this product may not function properly and you may lose data or suffer other damage. TOSHIBA AMERICA INFORMATION SYSTEMS, INC. ("TOSHIBA"), ITS AFFILIATES AND SUPPLIERS DO NOT WARRANT THAT OPERATION OF THE PRODUCT WILL BE UNINTERRUPTED OR ERROR FREE. YOU AGREE THAT TOSHIBA, ITS AFFILIATES AND SUPPLIERS SHALL HAVE NO RESPONSIBILITY FOR DAMAGE TO OR LOSS OF ANY BUSINESS, PROFITS, PROGRAMS, DATA, NETWORK SYSTEMS OR REMOVABLE STORAGE MEDIA ARISING OUT OF OR RESULTING FROM THE USE OF THE PRODUCT, EVEN IF ADVISED OF THE POSSIBILITY THEREOF.
Protection of Stored Data
For your important data, please make periodic back-up copies of all the data stored on the hard disk or other storage devices as a precaution against possible failures, alteration, or loss of the data. IF YOUR DATA IS ALTERED OR LOST DUE TO ANY TROUBLE, FAILURE OR MALFUNCTION OF THE HARD DISK DRIVE OR OTHER STORAGE DEVICES AND THE DATA CANNOT BE RECOVERED, TOSHIBA SHALL NOT BE LIABLE FOR ANY DAMAGE OR LOSS OF DATA, OR ANY OTHER DAMAGE RESULTING THEREFROM. WHEN COPYING OR TRANSFERRING YOUR DATA, PLEASE BE SURE TO CONFIRM WHETHER THE DATA HAS BEEN SUCCESSFULLY COPIED OR TRANSFERRED. TOSHIBA DISCLAIMS ANY LIABILITY FOR THE FAILURE TO COPY OR TRANSFER THE DATA CORRECTLY.
Critical Applications
The computer you have purchased is not designed for any “critical applications.” “Critical applications” means life support systems, medical applications, connections to implanted medical devices, commercial transportation, nuclear facilities or systems or any other applications where product failure could lead to injury to persons or loss of life or catastrophic property damage.
ACCORDINGLY, TOSHIBA, ITS AFFILIATES AND SUPPLIERS DISCLAIM ANY AND ALL LIABILITY ARISING OUT OF THE USE OF THE COMPUTER PRODUCTS IN ANY CRITICAL APPLICATIONS. IF YOU USE THE COMPUTER PRODUCTS IN A CRITICAL APPLICATION, YOU, AND NOT TOSHIBA, ASSUME FULL RESPONSIBILITY FOR SUCH USE.
FCC Notice “Declaration of Conformity Information”
This equipment has been tested and found to comply with the limits for a Class B digital device, pursuant to Part 15 of the FCC rules. These limits are designed to provide reasonable protection against harmful interference in a residential installation.
This equipment generates, uses and can radiate radio frequency energy and, if not installed and used in accordance with the instructions, it may cause harmful interference to radio communications. However, there is no guarantee that interference will not occur in a particular installation. If this equipment does cause harmful interference to radio or television reception, which can be determined by turning the equipment off and on, the user is encouraged to try to correct the interference by one or more of the following measures:
◆ Reorient or relocate the receiving antenna.
Increase the separation between the equipment and receiver.
Connect the equipment to an outlet on a circuit different from that to which the receiver is connected.
Consult the dealer or an experienced radio/TV technician for help.
NOTE
Only Peripherals complying with the FCC Class B limits may be attached to this equipment. Operation with noncompliant peripherals or peripherals not recommended by Toshiba is likely to result in interference to radio and TV reception. Shielded cables must be used between the external devices and the computer's ports. Changes or modifications made to this equipment not expressly approved by Toshiba or parties authorized by Toshiba could void the user's authority to operate the equipment.
This device complies with Part 15 of the FCC Rules. Operation is subject to the following two conditions:
This device may not cause harmful interference.
This device must accept any interference received, including interference that may cause undesired operation.
Contact either:
Toshiba's Support Web site at pcsupport.toshiba.com.
Or call the Toshiba Customer Support Center:
Within the United States at (800) 457-7777
Outside the United States at (949) 859-4273
Industry Canada Requirement
This Class B digital apparatus complies with Canadian ICES-003.
Wireless Interoperability
The TOSHIBA Wireless LAN Mini PCI Card products are designed to be interoperable with any wireless LAN product that is based on Direct Sequence Spread Spectrum (DSSS) radio technology, and is compliant to:
The IEEE 802.11 Standard on Wireless LANs (Revision A/B/G), as defined and approved by the Institute of Electrical and Electronics Engineers.
The Wireless Fidelity (Wi-Fi ^® ) certification as defined by the Wi-Fi Alliance. The “Wi-Fi CERTIFIED” logo is a certification mark of the Wi-Fi Alliance.
CAUTION
Bluetooth® and Wireless LAN devices operate within the same radio frequency range and may interfere with one another. If you use Bluetooth and Wireless LAN devices simultaneously, you may occasionally experience a less than optimal network performance or even lose your network connection.
If you should experience any such problem, immediately turn off your Bluetooth or Wireless LAN device.
Please contact Toshiba computer product support on Web site http://www.toshiba-europe.com/computers/tnt/bluetooth.htm in Europe or pcsupport.toshiba.com in the United States for more information.
Wireless LAN and Your Health
Wireless LAN products, like other radio devices, emit radio frequency electromagnetic energy. The level of energy emitted by Wireless LAN devices however is far much less than the electromagnetic energy emitted by wireless devices like for example mobile phones.
Because Wireless LAN products operate within the guidelines found in radio frequency safety standards and recommendations, TOSHIBA believes Wireless LAN is safe for use by consumers. These standards and recommendations reflect the consensus of the scientific community and result from deliberations of panels and committees of scientists who continually review and interpret the extensive research literature.
In some situations or environments, the use of Wireless LAN may be restricted by the proprietor of the building or responsible representatives of the organization. These situations may for example include:
Using the Wireless LAN equipment on board airplanes, or
In any other environment where the risk of interference to other devices or services is perceived or identified as harmful.
If you are uncertain of the policy that applies on the use of wireless devices in a specific organization or environment (e.g. airports), you are encouraged to ask for authorization to use the Wireless LAN device prior to turning on the equipment.
CAUTION
Exposure to Radio Frequency Radiation
The radiated output power of the TOSHIBA Wireless LAN Mini PCI Card is far below the FCC radio frequency exposure limits. Nevertheless, the TOSHIBA Wireless LAN Mini PCI Card shall be used in such a manner that the potential for human contact during normal operation is minimized. The antenna(s) used for this transmitter must not be co-located or operating in conjunction with any other antenna or transmitter.
Regulatory Information
The TOSHIBA Wireless LAN Mini PCI Card must be installed and used in strict accordance with the manufacturer's instructions as described in the user documentation that comes with the product. This device complies with the following radio frequency and safety standards.
Canada – Industry Canada (IC)
This device complies with RSS 210 of Industry Canada.
CAUTION
The installer of this radio equipment must ensure that the antenna is located or pointed such that it does not emit RF field in excess of Health Canada limits for the general population; consult Safety Code 6, obtainable from Health Canada's Web site www.hc-sc.gc.ca/rpb. The RF device shall not be co-located with any other transmitter that has not been tested with this device.
Operation is subject to the following two conditions: (1) this device may not cause interference, and (2) this device must accept any interference, including interference that may cause undesired operation of this device.
The term “IC” before the equipment certification number only signifies that the Industry Canada technical specifications were met.
To prevent radio interference to the licensed service, this device is intended to be operated indoors and away from windows to provide maximum shielding. Equipment (or its transmit antenna) that is installed outdoors is subject to licensing.
EU Declaration of Conformity
TOSHIBA declares that this product conforms to the following Standards:

text_image
C€Supplementary Information:
*The product complies with the requirements of the Low Voltage Directive 73/23/EEC, the EMC Directive 89/336/EEC and/or the R&TTE Directive 1999/5/EC.
This product is carrying the CE-Mark in accordance with the related European Directives. The party responsible for CE-Marking is TOSHIBA Europe GmbH, Hammfelddamm 8, 41460 Neuss, Germany.
The European Union WEEE (Waste from Electrical and Electronic Equipment) Directive Information
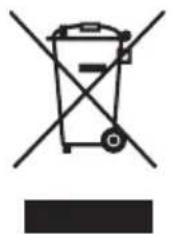
The European Union WEEE (Waste from Electrical and Electronic Equipment) Directive is intended to protect the quality of the environment and human health through the responsible use of natural resources and the adoption of waste management strategies that focus on recycling and reuse. This Directive requires producers of electrical and electronic products put on the market in European Union (EU) member countries after August 2005 to mark such products with a crossed-out wheeled bin with a black bar symbol. If the product's battery or accumulator contains more than the specified values of lead (Pb), mercury (Hg), and/or cadmium (Cd) defined in the Battery Directive (2006/66/EC), then the chemical symbols for lead (Pb), mercury (Hg) and/or cadmium (Cd) will appear below the crossed out wheeled bin symbol on the battery.
natural_image
Symbol of a trash bin crossed with no text or labels, accompanied by a black rectangle below (no readable text or symbols)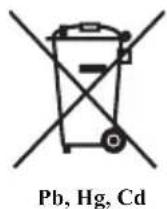
In the European Union, these symbols indicate that when the last end user wishes to discard this product, it must be sent to appropriate facilities for recovery and recycling. This Directive applies to EU member countries only and does not apply to end users in other countries such as the United States.
Although the initial emphasis is in Europe, Toshiba is already working with design engineers, suppliers, and other partners to determine appropriate worldwide product life cycle planning and end-of-life strategies for our products. Please contact your local government for applicable laws and regulations governing the disposal of this product. For information on how to trade-in or recycle your product, visit www.reuse.toshiba.com.
VCCI Class B Information
| Article 14 Unless | approved, for any model accredited low power radio frequency electric machinery, any company, trader or user shall not change the frequency, increase the power or change the features and functions of the original design. |
| Article 17 Any use of low power radio frequency electric machinery shall not affect aviation safety and interfere with legal communications. In the event interference is caused, the use of such electric machinery shall be immediately discontinued. Operation of such products can be resumed only when they are modified and can no longer cause interference. | |
The legal communications mentioned in the above item refer to radio communications operated in accordance with telecommunication laws and regulations.
Low power radio frequency electric machinery shall resist against interference from legal communications or from industrial, scientific and medical radio emission electric machinery.
Using this Equipment in Japan
In Japan, the frequency bandwidth of 2,400 MHz to 2,483.5 MHz for second generation low-power data communication systems such as this equipment overlaps that of mobile object identification systems (premises radio station and specified low-power radio station).
1. Sticker
Please put the following sticker on devices incorporating this product.
The frequency bandwidth of this equipment may operate within the same range as industrial devices, scientific devices, medical devices, microwave ovens, licensed radio stations and non-licensed specified low-power radio stations for mobile object identification systems (RFID) used in factory product lines (Other Radio Stations).
- Before using this equipment, ensure that it does not interfere with any of the equipment listed above.
- If this equipment causes RF interference to other radio stations, promptly change the frequency being used, change the location of use, or turn off the source of emissions.
- Contact TOSHIBA Direct PC if you have problems with interference caused by this product to Other Radio Stations.
2. Indication
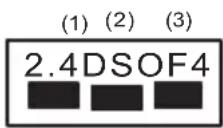
The indication shown below appears on this equipment.
(4)
1 2.4: This equipment uses a frequency of 2.4 GHz.
2 DS: This equipment uses DS-SS modulation.
OF: This equipment uses OFDM modulation.
3 The interference range of this equipment is less than 40m.
4 This equipment uses a frequency bandwidth from 2,400 MHz to 2,483.5 MHz.
It is possible to avoid the band of mobile object identification systems.
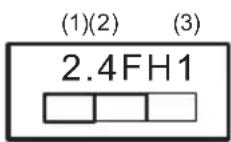
The indication shown below appears on this equipment.
(4)
1 2.4: This equipment uses a frequency of 2.4 GHz.
2 FH: This equipment uses FH-SS modulation.
3 The interference range of this equipment is less than 10m.
4 This equipment uses a frequency bandwidth from 2,400 MHz to 2,483.5 MHz.
- TOSHIBA Direct PC
Monday – Friday: 10:00 – 17:00
Toll Free Tel: 0120-15-1048
Direct Dial: 03-3457-4850
Fax: 03-3457-4868
Device Authorization
This device obtains the Technical Regulation Conformity Certification and the Technical Conditions Compliance Approval, and it belongs to the device class of radio equipment of low-power data communication system radio station stipulated in the Radio Law and the Telecommunications Business Law of Japan.
The name of the radio equipment: refer to the equipment label provided on the computer
Approved by both the JAPAN APPROVALS INSTITUTE FOR TELECOMMUNICATIONS EQUIPMENT and the TELECOM ENGINEERING CENTER
The following restrictions apply:
Do not disassemble or modify the device.
Do not install the embedded wireless module into other device.
◆ 5.17 GHz to 5.23 GHz for indoor use only.
Radio Approvals for Wireless Devices
NOTE
The following information is dependent on what type of wireless device is in your computer. Not all devices are available on all models.
Approved Countries/Regions for the Atheros® Wireless Wi-Fi® Link AR5B95 Series
This equipment is approved to the radio standard by the countries/regions in the following table.
CAUTION
Do not use this equipment except in the countries/regions in the following table.
| Albania Argentina CNC: | 693 GI/20073655 GI/2007 | Australia |
| Austria Azerbaijan Bahrain | ||
| Bangladesh Belgium Bolivia | ||
| Bosnia Brazil Brunei | ||
| Bulgaria Cambodia Canada | ||
| Chile China Colombia | ||
| Croatia Cyprus Czech Republic | ||
| Denmark | Dominican Republic | Ecuador |
| Egypt | El Salvador Estonia | |
| Finland France Germany | ||
| Ghana Greece Guatemala | ||
| Herzegovina Honduras Hong Kong | ||
| Hungary Iceland India | ||
| Indonesia Iraq Ireland | ||
| Italy Jamaica Japan | ||
| Jordan Kazakhstan Kenya | ||
| Kuwait Kyrgyzstan Latvia | ||
| Lebanon Lesotho Liechtenstein | ||
| Lithuania | Luxembourg | Macedonia |
| Malaysia | Malta | Mexico |
| Monaco | Montenegro | Mozambique |
| Nambia | Nepal | Netherlands |
| New Zealand | Nicaragua | Nigeria |
| Norway | Oman | Pakistan |
| Panama | Papua New Guinea | Paraguay |
| Peru Philippines Poland | ||
| Portugal | Puerto Rico | Qatar |
| Romania | Russia Saudi Arabia | |
| Senegal | Serbia | Singapore |
| Slovak Republic | Slovenia | South Africa |
| South Korea | Spain | Sri Lanka |
| Sweden | Switzerland | Taiwan |
| Thailand Turkey UAE (United Arab Emirates) | ||
| Ukraine United Kingdom | Uruguay | |
| USA | Venezuela | Vietnam |
| Yemen Zimbabwe | ||
Europe - Restrictions for use of 2.4 GHz Frequencies in European Community Countries
| België/ Belgique: | For private usage outside buildings across public grounds over less than 300m no special registration with IBPT/BIPT is required. Registration to IBPT/BIPT is required for private usage outside buildings across public grounds over more than 300m. For registration and license please contact IBPT/BIPT. |
| Voor privé-gebruik buiten gebouw over publieke groud over afstand kleiner dan 300m geen registratie bij BIPT/IBPT nodig; voor gebruik over afstand groter dan 300m is wel registratie bij BIPT/IBPT nodig. Voor registratie of licentie kunt u contact opnemen met BIPT.Dans le cas d'une utilisation privée, à l'extérieur d'un bâtiment, au-dessus d'un espace public, aucun enregistrement n'est nécessaire pour une distance de moins de 300m. Pour une distance supérieure à 300m un enregistrement auprès de l'IBPT est requise. Pour les enregistrements et licences, veuillez contacter l'IBPT. | |
| Deutschland: License | se required for outdoor installations. Check with reseller for procedure to follow. |
| Anmeldung im Outdoor-Bereich notwendig, aber nicht genehmigungspflichtig. Bitte mit Händler die Vorgehensweise abstimmen. | |
| France: Restricted | frequency band: only channels 1 to 7 (2400 MHz and 2454 MHz respectively) may be used outdoors in France. Please contact A.R.T. (http://www.art-telecom.fr) for applicable procedures to follow. |
| Bande de fréquence restreinte: seuls les canaux 1-7 (2400 et 2454 MHz respectivement) doivent être utilisés endroits extérieur en France. Vous pouvez contacter l'Autorité de Régulation des Télécommunications (http://www.art-telecom.fr) pour la procédure à suivre. | |
| Italia: | License required for indoor use. Use with outdoor installations not allowed. |
| È necessaria la concessione ministeriale anche per l'uso interno. Verificare con i rivenditori la procedura da seguire. | |
| Nederland: License | se required for outdoor installations. Check with reseller for procedure to follow. |
| Licentie verplicht voor gebruik met buitenantennes. Neem contact op met verkoper voor juiste procedure. |
Bluetooth® Wireless Technology Interoperability
Bluetooth ^® Cards from TOSHIBA are designed to be interoperable with any product with Bluetooth wireless technology that is based on Frequency Hopping Spread Spectrum (FHSS) radio technology, and is compliant to:
Bluetooth Specification as defined and approved by The Bluetooth Special Interest Group.
◆ Logo certification with Bluetooth wireless technology as defined by The Bluetooth Special Interest Group.
CAUTION
Bluetooth wireless technology is a new innovative technology, and TOSHIBA has not confirmed compatibility of its Bluetooth products with all computers and/or equipment using Bluetooth wireless technology other than TOSHIBA portable computers.
Always use Bluetooth cards from TOSHIBA in order to enable wireless networks over two or more (up to a total of seven) TOSHIBA portable computers using these cards. Please contact TOSHIBA computer product support on Web site http://www.toshiba-europe.com/computers/tnt/bluetooth.htm in Europe or pcsupport.toshiba.com in the United States for more information.
When you use Bluetooth cards from TOSHIBA close to 2.4 GHz Wireless LAN devices, Bluetooth transmissions might slow down or cause errors. If you detect certain interference while you use Bluetooth cards from TOSHIBA, always change the frequency, move your computer to the area outside of the interference range of 2.4 GHz Wireless LAN devices (40 meters/43.74 yards or more) or stop transmitting from your computer. Please contact TOSHIBA computer product support on Web site http://www.toshiba-europe.com/computers/tnt/bluetooth.htm in Europe or pcsupport.toshiba.com in the United States for more information.
Bluetooth and Wireless LAN devices operate within the same radio frequency range and may interfere with one another. If you use Bluetooth and Wireless LAN devices simultaneously, you may occasionally experience a less than optimal network performance or even lose your network connection. If you should experience any such problem, immediately turn off either one of your Bluetooth or Wireless LAN. Please contact Toshiba computer product support on Web site http://www.toshiba-europe.com/computers/tnt/bluetooth.htm in Europe or pcsupport.toshiba.com in the United States for more information.
Approved Countries/Regions for use (Bluetooth® wireless technology)
Bluetooth ^® Card from Toshiba equipment is approved to the radio standard by the countries/regions in the following table.
CAUTION
Do not use this equipment except in the countries/regions in the following table.
| Argentina Australia Austria | ||
| Belgium Bulgaria Canada | ||
| Chile China Cyprus | ||
| Czech Republic Denmark Egypt | ||
| Estonia Finland France | ||
| Germany Greece Hong Kong | ||
| Hungary Iceland Ireland | ||
| Italy Japan Jordan | ||
| Korea Kuwait Latvia | ||
| Lebanon Liechtenstein | Lithuania | |
| Luxembourg Malta Netherlands | ||
| New Zealand Norway | Oman | |
| Peru Philippines | Poland | |
| Portugal | Singapore | Slovakia |
| Slovenia | Spain Sweden | |
| Switzerland | Thailand UK | |
| Uruguay USA | Venezuela |
Bluetooth® Wireless Technology and Your Health
The products with Bluetooth ^® wireless technology, like other radio devices, emit radio frequency electromagnetic energy. The level of energy emitted by devices with Bluetooth wireless technology however is much less than the electromagnetic energy emitted by wireless devices such as mobile phones.
Because products with Bluetooth wireless technology operate within the guidelines found in radio frequency safety standards and recommendations, TOSHIBA believes Bluetooth wireless technology is safe for use by consumers. These standards and recommendations reflect the consensus of the scientific community and result from deliberations of panels and committees of scientists who continually review and interpret the extensive research literature.
In some situations or environments, the use of Bluetooth wireless technology may be restricted by the proprietor of the building or responsible representatives of the organization. These situations may for example include:
Using the equipment with Bluetooth wireless technology on board airplanes, or In any other environment where the risk of interference to other devices or services is perceived or identified as harmful.
If you are uncertain of the policy that applies on the use of wireless devices in a specific organization or environment (e.g. airports), you are encouraged to ask for authorization to use the device with Bluetooth wireless technology prior to turning on the equipment.
CAUTION
Exposure to Radio Frequency Radiation
The radiated output power of the Bluetooth Card from TOSHIBA is far below the FCC radio frequency exposure limits. Nevertheless, the Bluetooth Card from TOSHIBA shall be used in such a manner that the potential for human contact during normal operation is minimized.
Regulatory statements
This product complies with any mandatory product specification in any country/region where the product is sold. In addition, the product complies with the following:
European Union (EU) and EFTA
This equipment complies with the R&TTE directive 1999/5/EC and has been provided with the CE mark accordingly.
Canada — Industry Canada (IC)
This device complies with RSS 210 of Industry Canada.
Taiwan
| Article 14 Unless | approved, for any model accredited low power radio frequency electric machinery, any company, trader or user shall not change the frequency, increase the power or change the features and functions of the original design. |
| Article 17 Any use of low power radio frequency electric machinery shall not affect aviation safety and interfere with legal communications. In the event interference is caused, the use of such electric machinery shall be immediately discontinued. Operation of such products can be resumed only when they are modified and can no longer cause interference. | |
The legal communications mentioned in the above item refer to radio communications operated in accordance with telecommunication laws and regulations.
Low power radio frequency electric machinery shall resist against interference from legal communications or from industrial, scientific and medical radio emission electric machinery.
Copyright
This guide is copyrighted by Toshiba America Information Systems, Inc. with all rights reserved. Under the copyright laws, this guide cannot be reproduced in any form without the prior written permission of Toshiba. No patent liability is assumed, however, with respect to the use of the information contained herein.
©2010 by Toshiba America Information Systems, Inc. All rights reserved.
Export Administration Regulation
This document contains technical data that may be controlled under the U.S. Export Administration Regulations, and may be subject to the approval of the U.S. Department of Commerce prior to export. Any export, directly or indirectly, in contravention of the U.S. Export Administration Regulations is prohibited.
Notice
The information contained in this manual, including but not limited to any product specifications, is subject to change without notice.
TOSHIBA CORPORATION AND TOSHIBA AMERICA INFORMATION SYSTEMS, INC. (TOSHIBA) PROVIDES NO WARRANTY WITH REGARD TO THIS MANUAL OR ANY OTHER INFORMATION CONTAINED HEREIN AND HEREBY EXPRESSLY DISCLAIMS ANY IMPLIED WARRANTIES OF MERCHANTABILITY OR FITNESS FOR ANY PARTICULAR PURPOSE WITH REGARD TO ANY OF THE FOREGOING. TOSHIBA ASSUMES NO LIABILITY FOR ANY DAMAGES INCURRED DIRECTLY OR INDIRECTLY FROM ANY TECHNICAL OR TYPOGRAPHICAL ERRORS OR OMISSIONS CONTAINED HEREIN OR FOR DISCREPANCIES BETWEEN THE PRODUCT AND THE MANUAL. IN NO EVENT SHALL TOSHIBA BE LIABLE FOR ANY INCIDENTAL, CONSEQUENTIAL, SPECIAL, OR EXEMPLARY DAMAGES, WHETHER BASED ON TORT, CONTRACT OR OTHERWISE, ARISING OUT OF OR IN CONNECTION WITH THIS MANUAL OR ANY OTHER INFORMATION CONTAINED HEREIN OR THE USE THEREOF.
Trademarks
Adobe and Photoshop are either registered trademarks or trademarks of Adobe Systems Incorporated in the United States and/or other countries.
Atheros is a registered trademark of Atheros Communications, Inc.
Bluetooth word mark and logos are owned by the Bluetooth SIG, Inc. and any use of such marks by Toshiba is under license. Other trademarks and trade names are those of their respective owners.
Intel, Intel Core, Celeron, Centrino and Pentium are trademarks or registered trademarks of Intel Corporation or its subsidiaries in the United States and other countries.
Microsoft, Outlook, Windows, and Windows Media are either registered trademarks or trademarks of Microsoft Corporation in the United States and/or other countries.
MultiMediaCard and MMC are registered trademarks of MultiMediaCard Association.
Secure Digital and SD are trademarks of SD Card Association.
TouchPad is a trademark of Synaptics, Inc.
Wi-Fi is a registered trademark of the Wi-Fi Alliance.
All other brand and product names are trademarks or registered trademarks of their respective companies.
Computer Disposal Information
As part of Toshiba's commitment to preserving the environment, Toshiba supports various trade-in and recycling programs. For details, please visit www.laptops.toshiba.com/green.
Contents
Introduction...... 24
This guide ......26
Safety icons 27
Other icons used....27
Your computer's features and specifications ....28
Other documentation ....28
Service options ......28
Chapter 1: Getting Started....29
Getting comfortable with your computer .....29
Keeping yourself comfortable ....30
Precautions....30
Important information on your computer's cooling fan ....32
Setting up your computer ....32
Connecting to a power source ....33
Charging the main battery....35
Using the computer for the first time....36
Opening the display panel......36
Turning on the power 37
Setting up your software....38
Registering your computer with Toshiba ....38
Adding optional external devices....38
Adding memory (optional)....39
Installing a memory module ....39
Removing a memory module....45
Checking total memory 47
Recovering the Internal Storage Drive ....47
Recovering to out-of-box state (recommended recovery method)......49
Recovering to a custom size partition......51
Recovering without changing the internal storage drive partitions ....54
Creating recovery DVDs/media ....56
Restoring from recovery DVDs/media ....59
Erasing the Internal Storage Drive ....61
Checking the internal storage drive operating status....62
Installing drivers and applications....63
Using the TouchPad™....63
Adjusting TouchPad™ settings 66
Disabling or enabling the TouchPad™ ......67
Using external display devices ....67
Connecting an external monitor or projector 67
Directing the display output when you turn on the computer 68
Adjusting the quality of the external display.....69
Using an external keyboard....69
Using a mouse....69
Connecting a printer 69
Setting up a printer 70
Turning off the computer ....71
Options for turning off the computer .....71
Using the Shut down command....73
Using and configuring Hibernation mode .....76
Using and configuring Sleep mode .....78
Closing the display panel 81
Customizing your computer's settings....81
Caring for your computer....81
Cleaning the computer....81
Moving the computer....82
Using a computer lock ....82
Chapter 2: Learning the Basics....83
Computing tips 83
Using the keyboard 84
Character keys 85
Making your keyboard emulate a full-size keyboard 85
Ctrl, Fn, and Alt keys 85
Function keys....85
Special Windows ^® keys 86
Overlay keys 86
Starting a program....87
Starting a program from the Start menu......88
Starting a program from Windows® Explorer ....88
Starting a program using the Search programs and files field ....89
Saving your work....90
Printing your work 91
Backing up your work 92
Restoring your work 93
Toshiba's online resources 93
Chapter 3: Mobile Computing.... 94
Toshiba's energy-saver design....94
Running the computer on battery power .....94
Battery Notice 95
Power management 96
Using additional batteries ....96
Charging batteries....96
Charging the main battery....97
Charging the RTC battery....97
Monitoring main battery power....98
Determining remaining battery power.....100
What to do when the main battery runs low....100
Setting battery notifications ....101
Conserving battery power 101
Power Plans....102
Using a hot key to set the Power Plan....103
Changing the main battery 104
Removing the battery from the computer .....104
Inserting a charged battery ....106
Taking care of your battery 107
Safety precautions ....107
Maintaining your battery 108
Disposing of used batteries ....109
Traveling tips 110
Chapter 4: Exploring Your Computer's Features.... 111
Exploring the desktop 111
Finding your way around the desktop .....112
Setting up for communications....114
Connecting your computer to a network.....115
Exploring audio features ....115
Recording sounds....115
Using external speakers or headphones......116
Using the Web Camera 117
Using the Memory card reader....117
Inserting memory media....118
Removing memory media....118
Chapter 5: Utilities....120
TOSHIBA Assist 121
Secure....122
Protect & Fix 123
Optimize....124
TOSHIBA Recovery Media Creator ....125
TOSHIBA Application Installer....125
Setting passwords ....126
Using an instant password....126
Using a supervisor password....127
Using a user password ....128
Deleting a user password....129
TOSHIBA PC Diagnostic Tool Utility....130
Mouse Utility ....131
TOSHIBA Hardware Setup....132
TOSHIBA Zooming Utility....134
TOSHIBA Accessibility ....135
TOSHIBA Service Station ....136
Chapter 6: If Something Goes Wrong....137
Problems that are easy to fix ....137
Problems when you turn on the computer......138
The Windows ^® operating system is not working....140
Using Startup options to fix problems .....141
Internet problems ....142
The Windows ^® operating system can help you ....142
Fixing a problem with Device Manager .....143
Checking device properties ....143
Memory problems ....144
Power and the batteries 144
Keyboard problems....146
Display problems 146
Disk or storage drive problems....148
Error-checking 148
Sound system problems 149
Printer problems....150
Wireless networking problems....151
Develop good computing habits ....152
Data and system configuration backup in the Windows ^® operating system.....153
If you need further assistance....157
Before you contact Toshiba ....157
Contacting Toshiba 157
Other Toshiba Internet Web sites....158
Toshiba's worldwide offices....159
Appendix A: Hot Keys/TOSHIBA Cards 161
Hot Key Cards 161
Using the Hot Key Cards ....162
Application Cards....163
Using the Application Cards......163
Card Case....164
Hot key functions....165
Volume Mute 165
Lock (Instant security)....166
Power plan 167
Sleep mode....168
Hibernation mode 169
Output (Display switch) 170
Display brightness ....171
Disabling or enabling wireless devices......172
Disabling or enabling the TouchPad™ .....173
Zoom(Display resolution)....174
Keyboard hot key functions 175
Appendix B: Power Cord/Cable Connectors.... 176
Glossary....177
Index....191
Introduction
Welcome to the world of portable, multimedia computing. With your Toshiba computer, your entertainment can accompany you wherever you go. Using the installed wireless technology, you can check email, enjoy streaming music or video, make calls with VOIP (Voice Over IP), or stay up-to-date with your favorite Web pages.

Your computer model may be ENERGY STAR ^® qualified. If the model you purchased is qualified, it is labeled with the ENERGY STAR ^® logo on the computer and the following information applies.
Toshiba is a partner in the Environmental Protection Agency's (EPA) ENERGY STAR® Program and has designed this computer to meet the latest ENERGY STAR® guidelines for energy efficiency. Your computer ships with the power management options preset to a configuration that will provide the most stable operating environment and optimum system performance for both AC power and battery modes.
To conserve energy, your computer is set to enter the low-power Sleep mode which shuts down the system and display within 15 minutes of inactivity in AC power mode. We recommend that you leave this and other energy saving features active, so that your computer will operate at its maximum energy efficiency. You can wake the computer from Sleep mode by pressing the power button. See the “Mobile Computing” section of the Toshiba User’s Guide for more information on using power management settings to conserve computer energy.
According to the EPA, a computer meeting the new ENERGY STAR ^® specifications will use between 30% and 60% less energy depending on how it is used. If all U.S. households and businesses replaced old computers with new ENERGY STAR ^® qualified models, we would save more than \$2 billion in energy costs each year and avoid greenhouse gas emissions equivalent to nearly 3 million cars.
If every computer purchased by businesses this year met the new ENERGY STAR ^® requirements, businesses would save more than 1.6 billion over the lifetime of those models. That is equivalent to lighting 840 million square feet of U.S. commercial building space each year.
During 2008, Americans, with the help of ENERGY STAR ^® , saved about 19 billion dollars on their utility bills and avoided greenhouse gas emissions equivalent to those from 29 million vehicles.
Visit http://www.energystar.gov or http://www.energystar.gov/powermanagement for more information regarding the ENERGY STAR® Program.
NOTE
This computer is compatible with European Union Directive 2002/95/EC, Restriction of the use of certain Hazardous Substances in electrical and electronic equipment (RoHS), which restricts use of lead, cadmium, mercury, hexavalent chromium, PBB, and PBDE. Toshiba requires its computer component suppliers to meet RoHS requirements and verifies its suppliers' commitment to meeting RoHS requirements by conducting component sampling inspections during the product design approval process.
NOTE
Certain Microsoft® software product(s) included with this computer may use technological measures for copy protection. IN SUCH EVENT, YOU WILL NOT BE ABLE TO USE THE PRODUCT IF YOU DO NOT FULLY COMPLY WITH THE PRODUCT ACTIVATION PROCEDURES. Product activation procedures and Microsoft's privacy policy will be detailed during initial launch of the product, or upon certain reinstallations of the software product(s) or reconfigurations of the computer, and may be completed by Internet or telephone (toll charges may apply).
Some software may differ from its retail version (if available), and may not include user manuals or all program functionality.
NOTE
The product specifications and configuration information are designed for a product Series. Your particular model may not have all the features and specifications listed or illustrated. For more detailed information about the features and specifications on your particular model, please visit Toshiba's Web site at pcsupport.toshiba.com. While Toshiba has made every effort at the time of publication to ensure the accuracy of the information provided herein, product specifications, configurations, prices, system/component/options availability are all subject to change without notice. For the most up-to-date product information about your computer, or to stay current with the various computer software or hardware options, visit Toshiba's Web site at pcsupport.toshiba.com.
This guide
This guide introduces the computer's features as well as some basic procedures needed to perform tasks in Windows ^® 7. You can:
Read the entire guide from beginning to end.
◆ Skim through and stop when a topic interests you.
Use the table of contents and the index to find specific information.
Safety icons
This manual contains safety instructions that must be observed to avoid potential hazards that could result in personal injuries, damage to your equipment, or loss of data. These safety cautions have been classified according to the seriousness of the risk, and icons highlight these instructions as follows:
| △DANGER | Indicates an imminently hazardous situation which, if not avoided, will result in death or serious injury. |
| △WARNING | Indicates a potentially hazardous situation which, if not avoided, could result in death or serious injury. |
| △CAUTION | Indicates a potentially hazardous situation which, if not avoided, may result in minor or moderate injury. |
| CAUTION | Indicates a potentially hazardous situation which, if not avoided, may result in property damage. |
| NOTE | Provides important information. |
Other icons used
Additional icons highlight other helpful or educational information:

TECHNICAL NOTE: This icon indicates technical information about the computer.

HINT: This icon indicates helpful hints and tips.

DEFINITION: This icon indicates the definition of a term used in the text.
Your computer's features and specifications
Certain computer chassis are designed to accommodate all possible configurations for an entire product Series. Your select model may not have all the features and specifications corresponding to all of the icons or switches shown on the computer chassis, unless you have selected all those features.
This information applies to all the features and icons described in this guide.
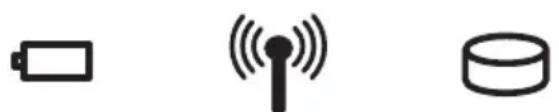
Below are examples of some of the many possible icons used on your computer:
natural_image
Three simple icons: battery, wireless signal source, and database (no text or symbols)(Sample Illustration) System icons
Other documentation
Your computer comes with the following documentation:
An electronic version of the user's guide (this document)
A Quick Start Card
It may also contain guides for other programs that may come with your system.
For accessory information, visit Toshiba's Web site at accessories.toshiba.com.
Service options
Toshiba offers a full line of optional service programs to complement its standard limited warranty. Toshiba's standard limited warranty, extended warranty, and service upgrade terms and conditions are available at warranty.toshiba.com.
To stay current on the most recent software and hardware options for your computer, and for other product information, be sure to regularly check the Toshiba Web site at pcsupport.toshiba.com.
If you have a problem or need to contact Toshiba, see “If Something Goes Wrong” on page 137.
Chapter 1
Getting Started
This chapter provides tips for using your computer effectively, summarizes how to connect components, and explains what to do the first time you use your computer.
The “Instruction Manual for Safety and Comfort,” that is shipped with your computer, contains important safety information. Please read the safety instructions carefully and make sure you fully understand the instructions before you attempt to use your computer in order to avoid potential hazards that could cause bodily injury, property damage, or damage the computer.
Getting comfortable with your computer
Place the computer on a hard flat surface that is large enough for the computer and any other items you are using, such as a printer. Leave enough space around the computer and other equipment to provide adequate ventilation. Otherwise, they may overheat. Read the “Provide adequate ventilation” section in the “Instruction Manual for Safety and Comfort” that is shipped with your computer.
To keep your computer in prime operating condition, protect your work area from:
◆ Dust, moisture, and direct sunlight.
◆ Equipment that generates a strong electromagnetic field, such as stereo speakers (other than speakers that are connected to the computer) or speakerphones.
◆ Rapid changes in temperature or humidity and sources of temperature change such as air conditioner vents or heaters.
Extreme heat, cold, or humidity.
◆ Liquids and corrosive chemicals.
Keeping yourself comfortable
The Toshiba Instruction Manual for Safety and Comfort, included with your computer, contains helpful information for setting up your work environment and tips for working comfortably throughout the day.
Precautions
Your computer is designed to provide optimum safety and ease of use, and to withstand the rigors of travel. You should observe certain precautions to further reduce the risk of personal injury or damage to the computer.
Avoid prolonged physical contact with the underside or surface of the computer.
▲WARNING
Never allow any liquids to spill into any part of your computer, and never expose the computer to rain, water, seawater or moisture. Exposure to liquid or moisture can cause electric shock or fire, resulting in damage or serious injury. If any of these eventualities should accidentally occur, immediately:
- Turn off the computer.
- Disconnect the AC adaptor from the power plug socket and computer.
- Remove the battery pack.
Failure to follow these instructions could result in serious injury or permanent damage to the computer.
Do not turn on the power again until you have taken the computer to an authorized service center.
▲ CAUTION
Avoid prolonged physical contact with the underside or surface of the computer.
◆ Computer base and palm rest can become hot! Avoid prolonged contact to prevent heat injury to skin.
Read the “Avoid extended contact between computer base/palm rest and skin” section in the “Instruction Manual for Safety and Comfort” that is shipped with your computer.
CAUTION
Never place a heavy object on the computer and be careful not to drop a heavy object onto the computer. It could damage the computer or cause system failure.
- Never turn off the computer if a drive light indicates a drive is active.
Turning off the computer while it is reading from or writing to a disk/disc or flash media may damage the disk/disc or flash media, the drive, or both. - Keep the computer and disks away from objects that generate strong magnetic fields, such as large stereo speakers.
Information on some disks is stored magnetically. Placing a magnet too close to a disk can erase important files.
CAUTION
Handle discs carefully. Avoid touching the surface of the disc. Grasp it by its center hole and edge. If you handle the disc incorrectly, you could damage the disc and possibly lose data.
◆ Scan all new files for viruses.
This precaution is especially important for files you receive via email or download from the Internet. Occasionally, even new programs you buy from a supplier may contain a computer virus. You need a special program to check for viruses.
Important information on your computer's cooling fan
Your computer may have a CPU cooling fan that cools the CPU by drawing outside air into the computer.
▲WARNING
Always make sure your computer and AC adaptor have adequate ventilation and are protected from overheating when the power is turned on or when an AC adaptor is connected to a power outlet (even if your computer is in Sleep mode). In this condition, observe the following:
- Never cover your computer or AC adaptor with any object.
Never place your computer or AC adaptor near a heat source, such as an electric blanket or heater.
✿ Never cover or block the air vents including those located at the base of the computer.
Always operate your computer on a hard flat surface. Using your computer on a carpet or other soft material can block the vents located at the base of the computer.
Overheating your computer or AC adaptor could cause system failure, computer or AC adaptor damage or a fire, possibly resulting in serious injury.
Read the “Provide adequate ventilation” section in the “Instruction Manual for Safety and Comfort” that is shipped with your computer.
NOTE
The cooling fan location will vary depending on the computer.
Setting up your computer

TECHNICAL NOTE: You must complete all setup steps up to and including "Setting up your software" on page 38 before adding external or internal components to your computer. These components include, but are not limited to, a mouse, keyboard, printer, and memory.
Your computer contains a rechargeable main battery that needs to be charged before you can use it.
To use external power or to charge the battery you must attach the AC adaptor. See “Connecting to a power source” on page 33.
NOTE
Please handle your computer carefully to avoid scratching or damaging the surface.
Connecting to a power source
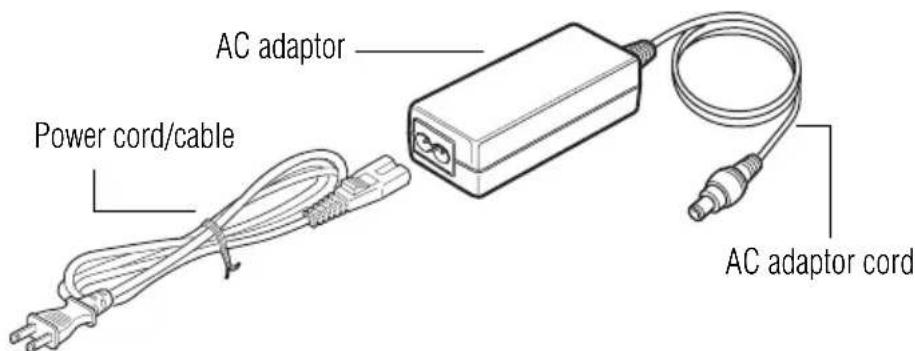
Your computer requires power to operate. Use the power cord/cable and AC adaptor to connect the computer to a live electrical outlet, or to charge the computer's battery.
▲WARNING
Never pull on a power cord/cable to remove a plug from a socket. Always grasp the plug directly. Failure to follow this instruction may damage the cord/cable, and/or result in a fire or electric shock, possibly resulting in serious injury.
▲WARNING
Always confirm that the power plug (and extension cable plug if used) has been fully inserted into the socket, to ensure a secure electrical connection. Failure to do so may result in a fire or electric shock, possibly resulting in serious injury.
Be careful if you use a multiple connector. An overload on one socket could cause a fire or electric shock, possibly resulting in serious injury.
▲WARNING
Always use the TOSHIBA AC adaptor that was provided with your computer and the TOSHIBA Battery Charger (that may have been provided with your computer), or use AC adaptors and battery chargers specified by TOSHIBA to avoid any risk of fire or other damage to the computer. Use of an incompatible AC adaptor or Battery Charger could cause fire or damage to the computer possibly resulting in serious injury. TOSHIBA assumes no liability for any damage caused by use of an incompatible adaptor or charger.
text_image
AC adaptor Power cord/cable AC adaptor cord(Sample Illustration) Power cord/cable and AC adaptor
To connect AC power to the computer:
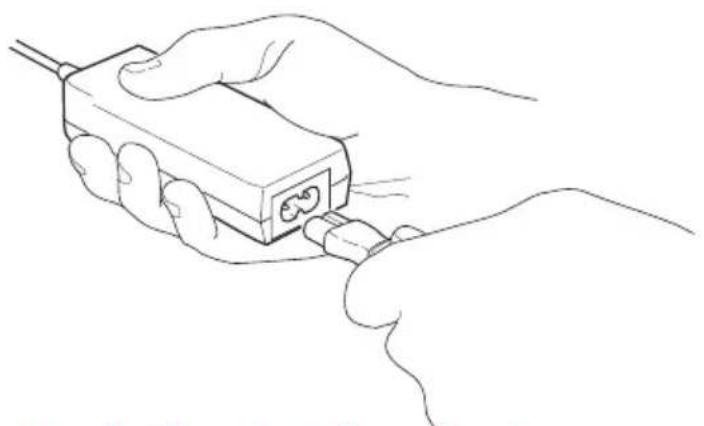
1 Connect the power cord/cable to the AC adaptor.
natural_image
Line drawing of a hand holding an electronic device with a plug inserted (no text or symbols)(Sample Illustration) Connecting the power cord/cable to the AC adaptor
▲WARNING
Handling the cord on this product will expose you to lead, a chemical known to the State of California to cause birth defects or other reproductive harm. Wash hands after handling.

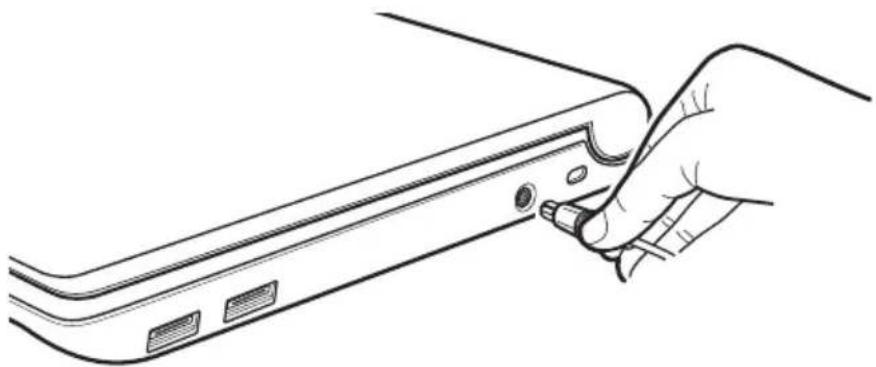
2 Plug the AC adaptor cord into the DC-IN on the side of the computer.
natural_image
Line drawing of a hand inserting a component into a device panel (no text or symbols)(Sample Illustration) Connecting the AC adaptor cord to the computer
3 Connect the power cord/cable to a live electrical outlet.
The AC power light on the indicator panel glows green.

▲WARNING
Never attempt to connect or disconnect a power plug with wet hands. Failure to follow this instruction could result in an electric shock, possibly resulting in serious injury.
The computer's main battery light gives you an indication of the main battery's current charge:
Glows amber while the main battery is being charged (AC adaptor connected)
Glows green when the main battery is fully charged
Is unlit when the main battery has discharged, the battery is not charging, or the AC adaptor is not plugged into the computer or AC outlet
◆ Flashes amber when the main battery charge is low and it is time to recharge the main battery or plug in the AC adaptor
NOTE
If the AC power light flashes amber during charging, either the main battery is malfunctioning, or it is not receiving correct input from the AC power supply.
Disconnect the AC power cord/cable and remove the main battery pack. See “Changing the main battery” on page 104 for information on replacing the main battery.
Charging the main battery
Before using the battery to power the computer, you must charge the battery.
To charge the battery, leave the computer plugged into an AC power source with the computer turned off until the battery light glows green. After that, the battery will be completely charged and ready to power the computer.
CAUTION
Once the battery is charged for the first time, avoid leaving the computer plugged in and turned off for more than a few hours at a time. Continuing to charge a fully charged battery can damage the battery.

TECHNICAL NOTE: The recharging of the battery cannot occur when your computer is using all of the power provided by the AC adaptor to run applications, features, and devices. Your computer's Power Options utility can be used to select a power level setting that reduces the power required for system operation and will allow the battery to recharge.
NOTE
Battery life and charge time may vary depending on the applications, power management settings, and features used.
Using the computer for the first time
The computer is now ready for you to turn it on and begin using it.
Opening the display panel
1 Facing the front of the computer, locate the center of the display panel.
2 Gently raise the panel.
3 Adjust the display to a comfortable viewing angle.
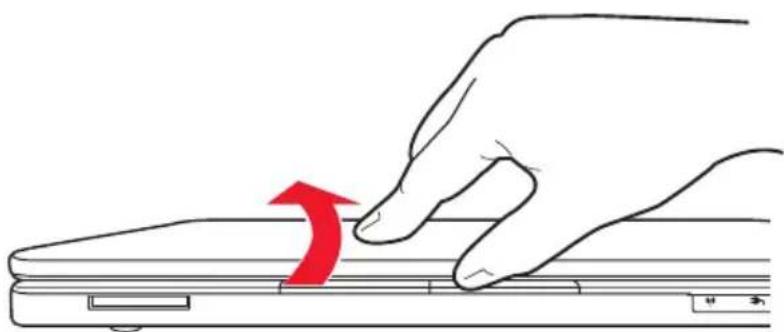
natural_image
Hand pressing a button on a laptop keyboard, with a red arrow indicating the press direction (no text or symbols present)(Sample Illustration) Opening the display panel
NOTE
When opening or closing the display panel, place one hand on the palm rest to hold the computer in place and use the other hand to slowly open or close the display panel.
CAUTION
To avoid damaging the display panel, do not force it beyond the point where it moves easily and never lift the computer by the display panel.
Do not press or push on the display panel and be careful to remove any pens or other objects from the keyboard area before closing the display panel.
Small bright dots may appear on your screen display when you turn on your computer. Your display contains an extremely large number of thin-film transistors (TFT) and is manufactured using high-precision technology. Any small bright dots that may appear on your display are an intrinsic characteristic of the TFT manufacturing technology. Over a period of time, and depending on the usage of the computer, the brightness of the screen will deteriorate. This is also an intrinsic characteristic of the screen technology. When the computer is operated on battery power, the screen will dim and you may not be able to increase the brightness of the screen while on battery power.
Turning on the power
To turn on the computer:
1 Make sure any external devices (such as the AC adaptor, if you plan to use AC power rather than battery power) are properly connected and ready.
2 Press the power button in until the ON/OFF light on the system indicator panel glows green.
NOTE
The power button is disabled when the display panel is closed.
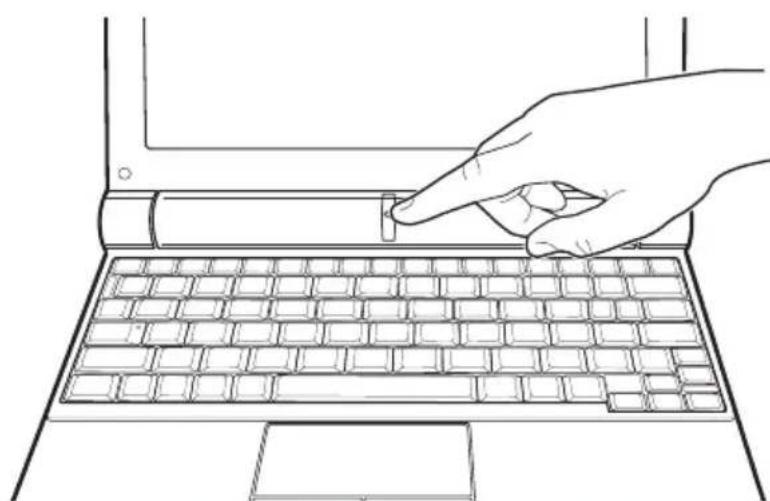
natural_image
Line drawing of a hand pressing a key on a laptop keyboard (no text or symbols)(Sample Illustration) Turning on the power
The preinstalled operating system will load automatically.
CAUTION
When you turn on the computer for the first time, do not turn off the power again until the operating system has loaded completely.
Setting up your software
| CAUTION | When you turn on the computer for the first time, do not turn off the power again until the operating system has loaded completely. |
| NOTE | The names of windows displayed, and the order in which windows appear, may vary according to your software setup choices. |
The first time you turn on your computer, the Setup Wizard guides you through steps to set up your software. Follow the on-screen instructions.
Registering your computer with Toshiba
Product registration is strongly recommended, and allows Toshiba to send you periodic updates, announcements, and special offers applicable to your product. Product registration can be completed by either visiting the Toshiba Web site at http://www.register.toshiba.com, or by clicking Start, All Programs, My Toshiba, and then Toshiba Registration. Failure to complete Product Registration will not diminish Customer rights under the Toshiba standard limited Warranty.
NOTE
To register online, you must be connected to the Internet.
Adding optional external devices
NOTE
Before adding external devices or memory, Toshiba recommends setting up your software. See “Setting up your software” on page 38.
After starting your computer for the first time you may want to:
Add more memory (see “Adding memory (optional)” on page 39)
Connect a mouse (see “Using a mouse” on page 69)
Connect an external keyboard (see “Using an external keyboard” on page 69)
Connect an external monitor (see “Using external display devices” on page 67)
Connect a local printer (see “Connecting a printer” on page 69)
◆ Connect an optional external optical disc drive
Adding memory (optional)

HINT: To purchase additional memory modules, see the accessories information packaged with your system or visit accessories.toshiba.com.
Your computer comes with enough memory to run most of today's popular applications. You may want to increase the computer's memory if you use complex software or process large amounts of data.
NOTE
Before adding external devices or memory, Toshiba recommends setting up your software. See “Setting up your software” on page 38.
Installing a memory module
A memory module can be installed in the memory module slot on the base of the computer. You will need a small Phillips screwdriver for this procedure.
▲ CAUTION
If the computer has been running recently, the memory module(s) may be hot. The surrounding area may also be hot. Allow the module(s) to cool to room temperature before replacing it. Avoid touching the cover, the module(s), and the surrounding area before they have cooled. Failure to follow these directions could result in minor bodily injury.
CAUTION
To avoid damaging the computer's screws, use a small Phillips screwdriver that is in good condition.
CAUTION
Installing a memory module with the computer's power on may damage the computer, the module, or both.
CAUTION
Before you install or remove a memory module, turn off the computer using the Start menu. If you install or remove a memory module while the computer is in Sleep or Hibernation mode, data will be lost.
If the computer is on, begin at step 1; otherwise, skip to step 3.
1 Click Start.
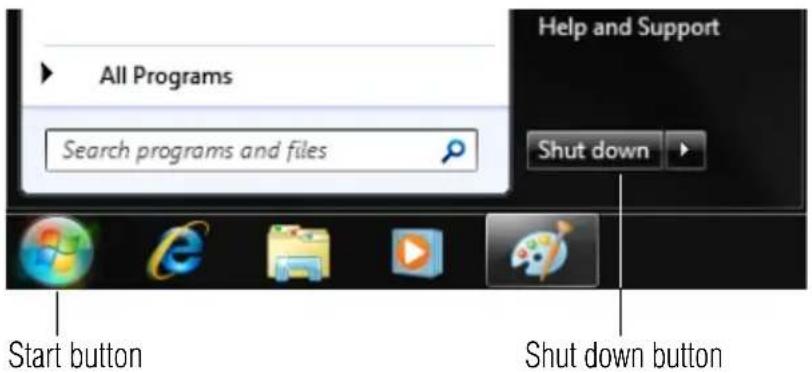
text_image
All Programs Search programs and files Help and Support Shut down Start button Shut down button(Sample Image) Shut down button
2 Click the Shut down button in the lower-right corner of the Start menu.
The computer closes all open programs, shuts down the operating system, and then turns off.
3 Unplug and remove any cables connected to the computer, including the AC adaptor.
4 Place a soft cloth on the work surface to prevent scratching the top cover of the computer, and then place the computer upside down on the cloth.
5 Remove the main battery. For information on removing the main battery, see “Removing the battery from the computer” on page 104.
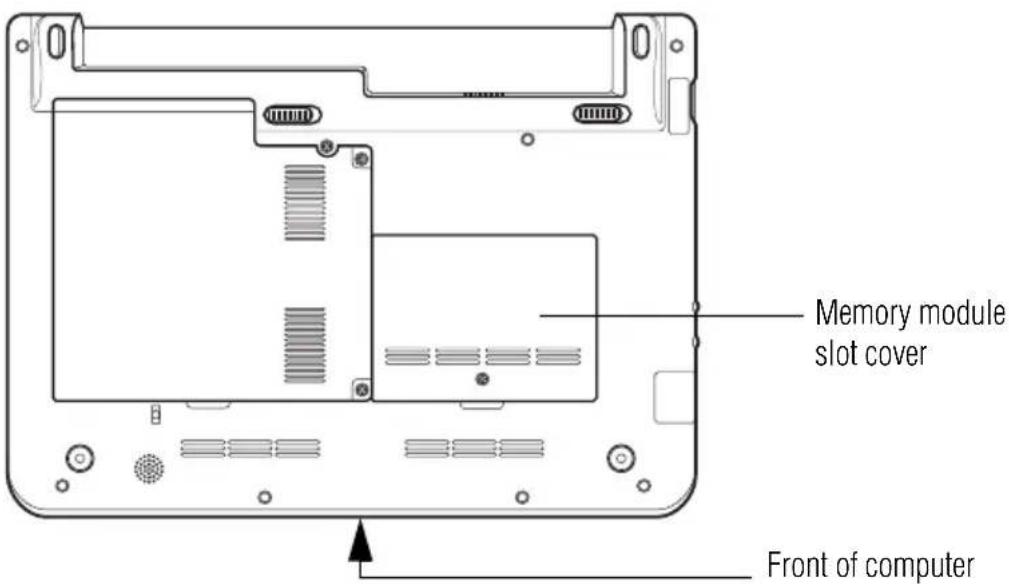
text_image
Memory module slot cover Front of computer(Sample Illustration) Locating the memory module slot cover
6 Using a small Phillips screwdriver, loosen the captive screw that secures the memory module slot cover.
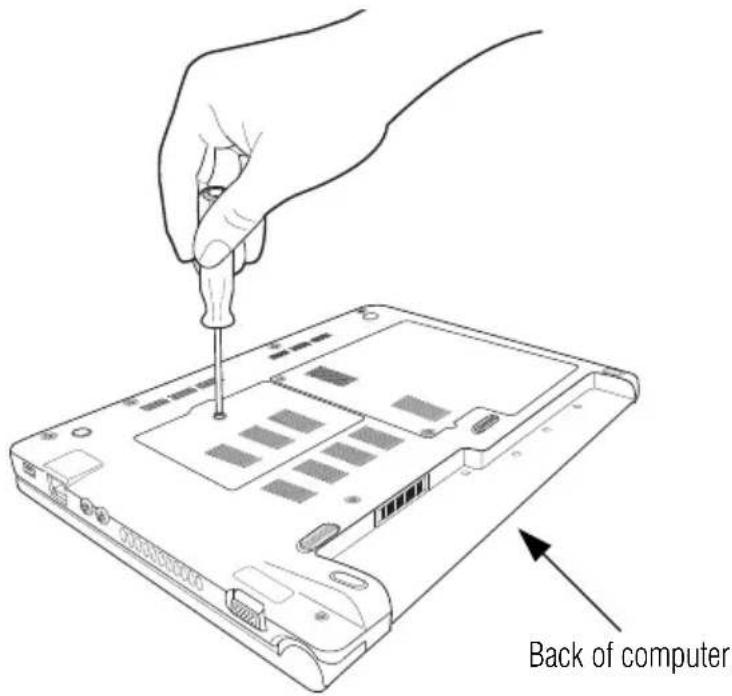
text_image
Back of computer(Sample Illustration) Removing the memory module slot cover
7 Remove the memory module slot cover.
8 Place the screw and the cover in a safe place so that you can retrieve them later.
CAUTION
Static electricity can damage the memory module. Before you handle the module, touch a grounded metal surface to discharge any static electricity you may have built up.
CAUTION
Avoid touching the connector on the memory module or on the computer. Grease or dust on the connector may cause memory access problems.
9 If replacing an existing memory module, remove this memory module by performing steps 2-3 of “Removing a memory module” on page 45.
10 Carefully remove the new memory module from its antistatic packaging, without touching its connector.
11 Locate the empty memory module slot on the underside of the computer.
12 Pick up the memory module by its sides, avoiding any contact with its connector. Position the module toward the socket, aligning the connector's notch with the matching key in the socket.
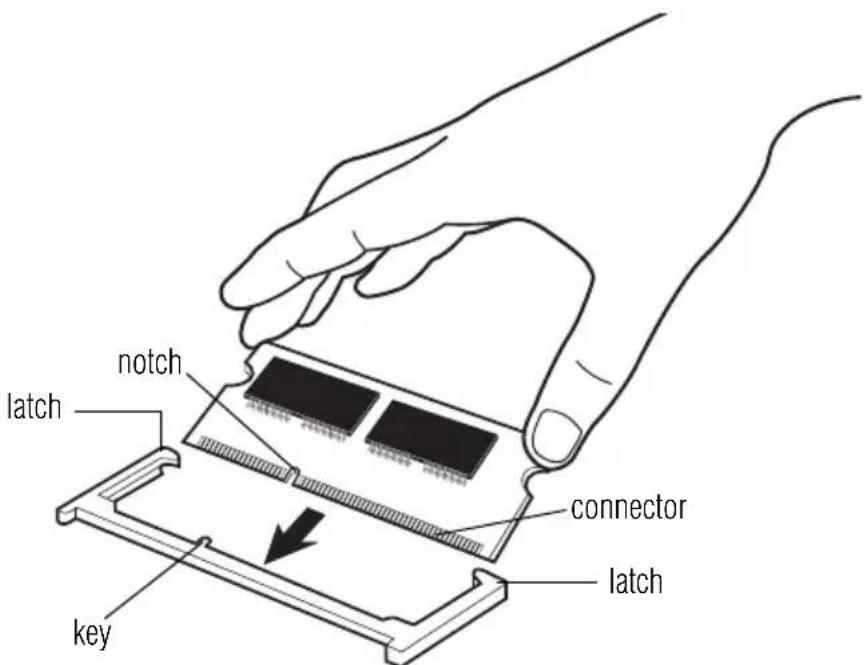
text_image
latch notch connector latch key(Sample Illustration) Aligning the memory module with the socket
13 Firmly press the memory module into the memory slot's socket at approximately a 30-degree angle (to the horizontal surface of the computer).
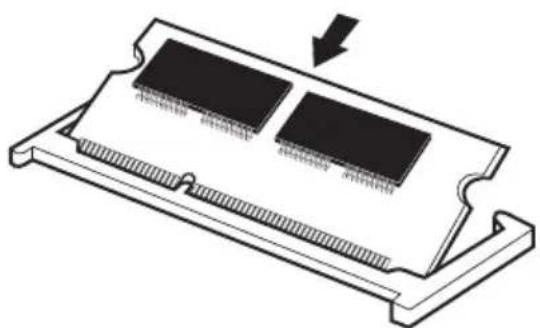
natural_image
Diagram of a computer RAM module with two integrated circuits and an arrow indicating compression (no text or symbols present)(Sample Illustration) Inserting the memory module into the socket
14 Once the module's connector is fully inserted into the socket, press downward on the top edge of the module to seat the module into the latches at the sides of the socket. These latches should "snap" into place securely with the corresponding cutouts in the side of the module. If the latches and cutouts do not line up correctly, repeat steps 13-14.
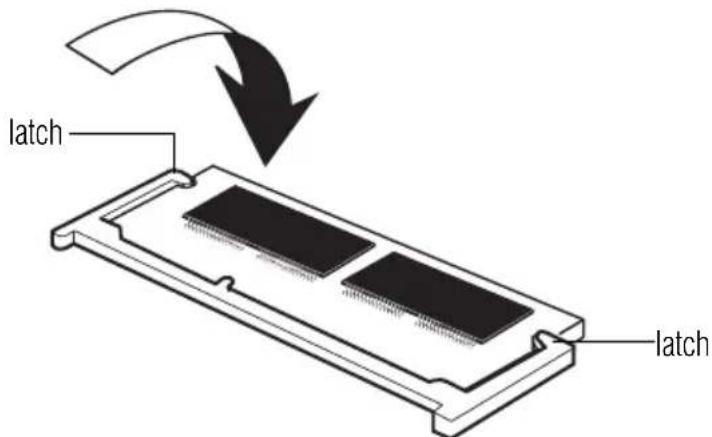
text_image
latch latch(Sample Illustration) Pressing down on the memory module
Do not force the memory module into position. The memory module should be completely inserted into the socket and level when secured in place.
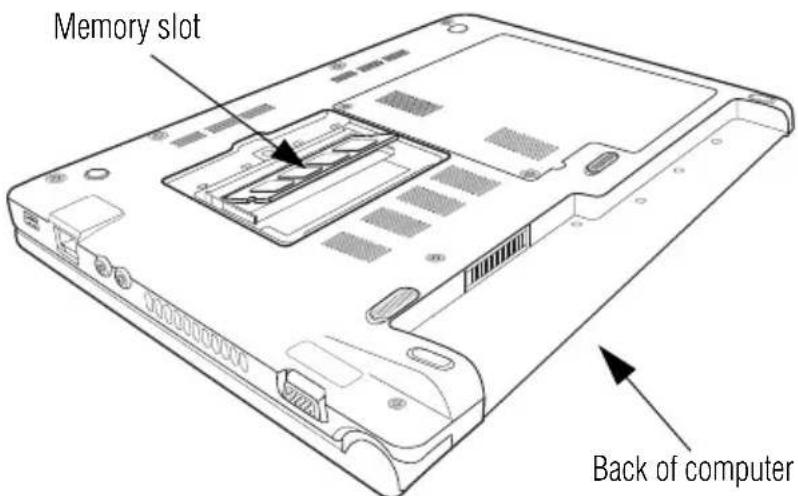
text_image
Memory slot Back of computer(Sample Illustration) Inserting the memory module into the slot
15 Replace the memory module slot cover and secure it using the screw.
16 Re-insert the main battery. For more information on inserting the main battery, see “Inserting a charged battery” on page 106.
17 Turn the computer right side up. Make sure to remove the soft cloth from the work surface before restarting the computer.
▲WARNING
Always make sure your computer and AC adaptor have adequate ventilation and are protected from overheating when the power is turned on or when an AC adaptor is connected to a power outlet (even if your computer is in Sleep mode). In this condition, observe the following:
◆ Never cover your computer or AC adaptor with any object.
Never place your computer or AC adaptor near a heat source, such as an electric blanket or heater.
✿ Never cover or block the air vents including those located at the base of the computer.
Always operate your computer on a hard flat surface. Using your computer on a carpet or other soft material can block the vents located at the base of the computer.
Overheating your computer or AC adaptor could cause system failure, computer or AC adaptor damage or a fire, possibly resulting in serious injury.
18 Reconnect the cables.
19 Restart the computer.

TECHNICAL NOTE: You must have at least one memory module installed for the computer to work.
You can now continue setting up the computer. When the operating system has loaded, you can verify that the computer has recognized the additional memory module.
If you are adding extra memory after setting up the computer, verify that the computer has recognized it correctly as described in “Checking total memory” on page 47.
Removing a memory module
If you need to remove a memory module:
1 Complete steps 1–8 in “Installing a memory module” on page 39 to shut down the computer and open the memory module slot cover.
CAUTION
Do not try to remove a memory module with the computer turned on. You can damage the computer and the memory module.
Do not remove the memory module while the computer is in Sleep or Hibernation mode. The computer could hang up the next time you turn it on and data in memory will be lost. In either of the above cases, the Sleep configuration will not be saved.
NOTE
The following screen may appear when you turn on the power:
Windows Error Recovery
Windows did not shut down successfully. If this was due to the system not responding, or if the system was shut down to protect data, you might be able to recover by choosing one of the Safe Mode configurations from the menu below:
(use the arrow keys to highlight your choice)
Safe Mode
Safe Mode with Networking
Safe Mode with Command Prompt
Start Windows Normally
If "Start Windows® Normally" is highlighted, then press Enter.
If one of the Safe Mode options is highlighted, it is best to press Enter to go into Safe Mode, then shut down and restart the system, at which time Windows ^® should boot back up normally.
When Safe Mode is suggested, this could be a sign that you may need to scan your internal storage drive for errors or defragment the drive. If so, consult Windows® Help and Support.
2 Pull the latches away from the memory module.
The memory module pops up slightly.
3 Gently lift the memory module to a 30-degree angle and slide it out of the slot.
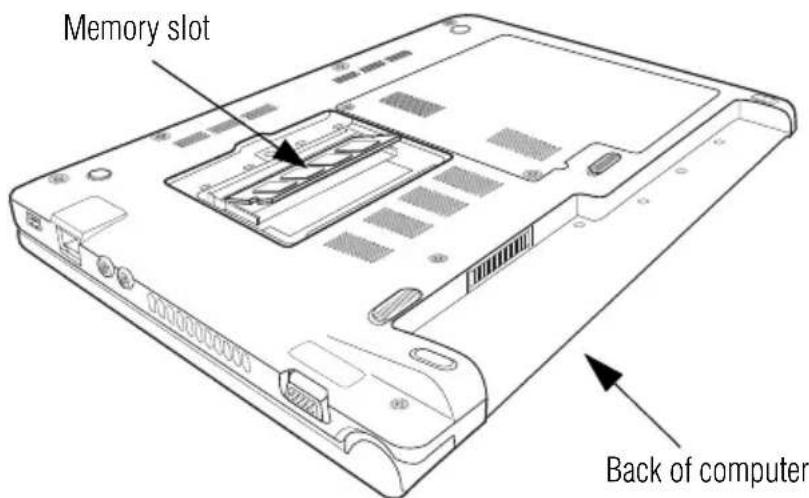
text_image
Memory slot Back of computer(Sample Illustration) Removing the memory module
4 Replace the memory module slot cover and secure it using the screw.
5 Re-insert the main battery. For more information on inserting the main battery, see “Inserting a charged battery” on page 106.
6 Turn the computer right side up. Make sure to remove the soft cloth from the work surface before restarting the computer.
▲WARNING
Always make sure your computer and AC adaptor have adequate ventilation and are protected from overheating when the power is turned on or when an AC adaptor is connected to a power outlet (even if your computer is in Sleep mode). In this condition, observe the following:
◆ Never cover your computer or AC adaptor with any object.
Never place your computer or AC adaptor near a heat source, such as an electric blanket or heater.
✿ Never cover or block the air vents including those located at the base of the computer.
Always operate your computer on a hard flat surface. Using your computer on a carpet or other soft material can block the vents located at the base of the computer.
Overheating your computer or AC adaptor could cause system failure, computer or AC adaptor damage or a fire, possibly resulting in serious injury.
7 Reconnect the cables.
8 Restart the computer.

TECHNICAL NOTE: You must have at least one memory module installed for the computer to work.
Checking total memory
When you add or remove a memory module, you can check that the computer has recognized the change. To do this:
- Click Start, Control Panel, System and Security, and then System.
The System window appears. Installed memory (RAM) is displayed below the System heading.
If the computer does not recognize the memory configuration, turn off the computer and remove the memory module slot cover (complete steps 1-8 in “Installing a memory module” on page 39), and then check that the module is inserted completely into the socket and lined up squarely with the socket latches.
NOTE
From time to time, Windows ^® will display a pop-up that says, “Do you want to allow the following program to make changes to this computer?” This is a security feature to prevent programs or people from doing things on your computer without your permission. If you were trying to perform the action, click Continue; otherwise, click Cancel. If unsure, cancel and try again.
Recovering the Internal Storage Drive
NOTE
To purchase an optional external writable optical disc drive or a USB Flash drive, visit the Toshiba Web site at accessories.toshiba.com.
Your computer includes recovery utilities to allow you to recover your internal storage drive if necessary.
The following internal storage drive recovery options are available:
| Recovery option Description | |
| Recover to out-of-box state | This option restores the original factory image to your internal storage drive, returning your computer to its out-of-box state. (Recommended recovery method)See “Recovering to out-of-box state (recommended recovery method)” on page 49. |
| Recover to a custom size partition | This option allows you to specify a custom size for the C: partition and then restores your C: drive to its out-of-box state. Note: With this option, any changes you made to the C: drive and any other drive partitions you may have created are deleted.See “Recovering to a custom size partition” on page 51. |
| Recover without changing the internal storage drive partitions | This option recovers just your C: drive, leaving any other partitions you may have created (for example, a D: drive) intact.See “Recovering without changing the internal storage drive partitions” on page 54. |
A recovery image of your computer is stored on the internal storage drive, and the image can be restored by running the recovery utilities directly from your internal storage drive as described in the sections below. However, it is strongly recommended that you create recovery DVDs/media. If the recovery files on your internal storage drive become corrupted or are deleted, you can restore your system from your recovery DVDs/media. Also, if your original internal storage drive fails, you can restore your system to a new internal storage drive from your recovery DVDs/media. It is strongly recommended that you create recovery DVDs/media before using your system for the first time. See “Creating recovery DVDs/media” on page 56 and “Restoring from recovery DVDs/media” on page 59.
| NOTE | During the internal storage drive recovery process it is strongly recommended that your computer be connected to an external power source via the AC adaptor.The Toshiba Recovery Wizard also provides the option of erasing your internal storage drive, without restoring the information on the drive. See “Erasing the Internal Storage Drive” on page 61 for more information.When you restore your system, only the operating system files, applications, and drivers originally shipped with the computer are restored. Any files that you created are not restored during this process. Be sure to separately save the files you have created to external media using Windows® Backup or another backup program. For more information, see “Backing up your work” on page 92. |
Recovering to out-of-box state (recommended recovery method)
| CAUTION | Recovering an internal storage drive to its out-of-box state deletes all partitions on the drive and all information stored in those partitions. Be sure to save your work to external media before executing the recovery. For more information, see “Backing up your work” on page 92. |
| NOTE | During the recovery process it is strongly recommended that your computer be connected to an external power source via the AC adaptor. |
You can recover the original factory image (returning the computer to its out-of-box state) using the utilities stored on your computer's internal storage drive or using recovery DVDs/media, if you have created such media. To recover using the first method, follow the procedure below. To recover using the second method, see “Restoring from recovery DVDs/media” on page 59.
To recover the original factory image using the utilities on your computer's internal storage drive:
1 Make sure the computer is turned off.
2 Press and hold the 0 (zero) key on your keyboard while powering on the computer.
3 A warning screen appears, stating that when the recovery is executed all data will be deleted and rewritten. Click Yes to continue.
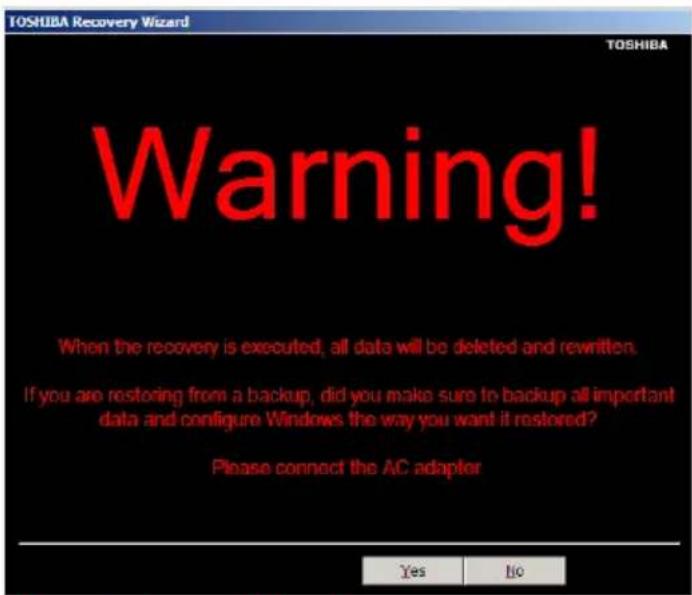
text_image
TOSHIBA Recovery Wizard TOSHIBA Warning! When the recovery is executed, all data will be deleted and rewritten. If you are restoring from a backup, did you make sure to backup all important data and configure Windows the way you want it restored? Please connect the AC adaptor Yes No(Sample Image) Warning screen
4 When the Toshiba Recovery Wizard opens and the Selecting a process screen displays, select Recovery of Factory Default Software and then click Next.
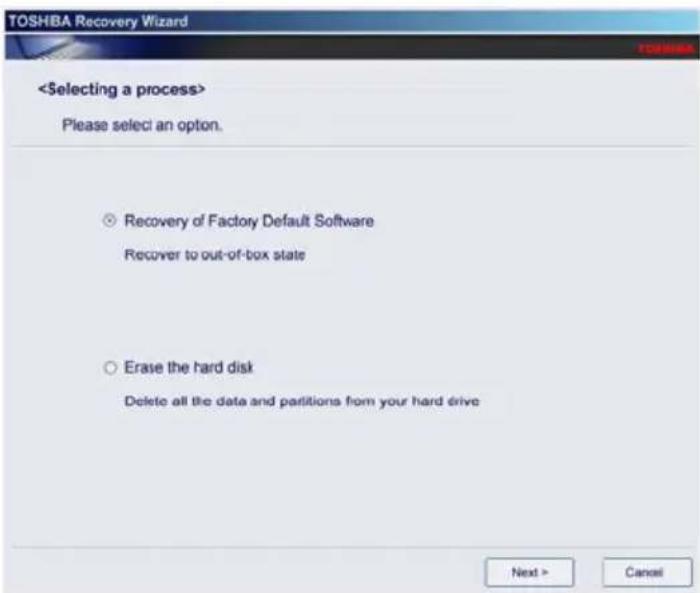
text_image
TOSHBA Recovery Wizard(Sample Image) Selecting a Process screen
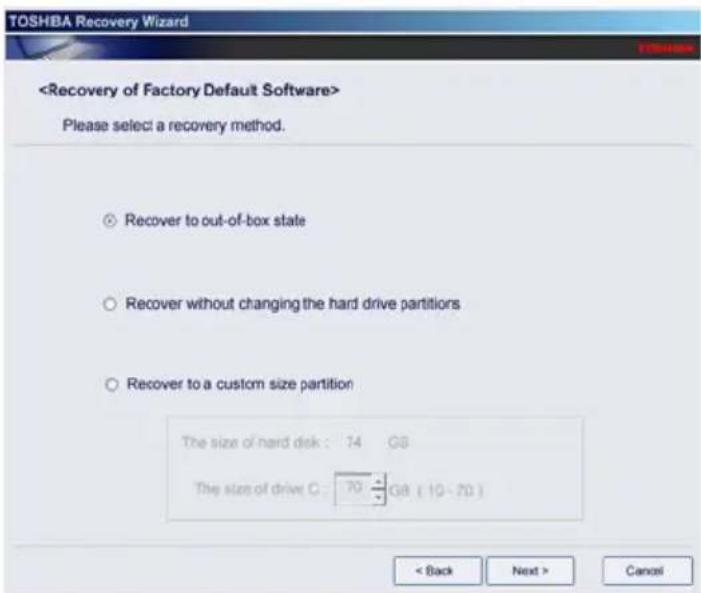
5 The Recovery of Factory Default Software screen appears. Select Recover to out-of-box state.
text_image
(Sample Image) Recovery of Factory Default Software screen
6 Click Next.
A confirmation message displays reminding you that all data will be lost during the recovery process. Be sure to save your work to external media before proceeding (see “Backing up your work” on page 92).
7 Click Next to begin the recovery.
When the process is complete, a message displays indicating that the internal storage drive has been recovered.
8 Press any key on the keyboard to restart the computer.
Recovering to a custom size partition
| CAUTION | Recovering to a custom size partition deletes all partitions on the drive and all information stored in those partitions. Be sure to save your work to external media before executing the recovery. For more information, see “Backing up your work” on page 92. |
| NOTE | During the recovery process it is strongly recommended that your computer be connected to an external power source via the AC adaptor. |
The “Recover to a custom size partition” option restores your C: drive to its out-of-box state, and allows you to specify the size for the C: partition. You can resize and recover the C: drive using the utilities stored on your computer’s internal storage drive or using recovery DVDs/media, if you have created such media. To recover using the first method, follow the procedure below. To recover using the second method, see “Restoring from recovery DVDs/media” on page 59.
To resize and recover the C: drive using the utilities on your computer's internal storage drive:
1 Make sure the computer is turned off.
2 Press and hold the 0 (zero) key on your keyboard while powering on the computer.
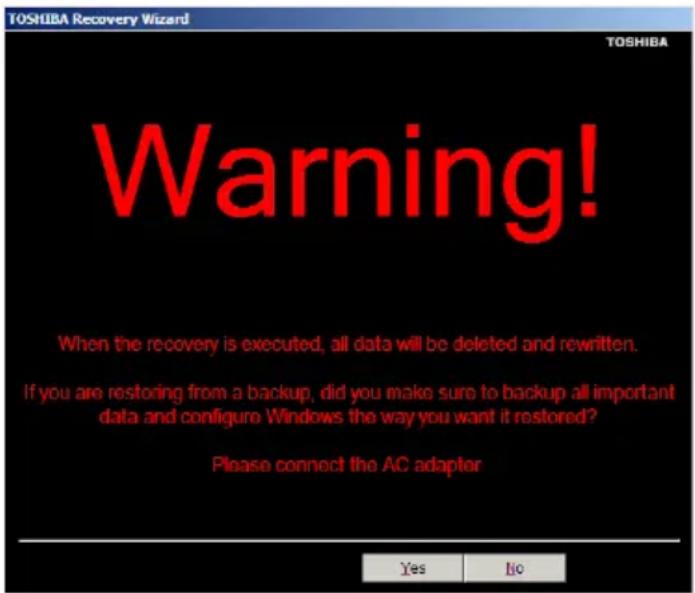
3 A warning screen appears, stating that when the recovery is executed all data will be deleted and rewritten. Click Yes to continue.
text_image
TOSHIBA Recovery Wizard TOSHIBA Warning! When the recovery is executed, all data will be deleted and rewritten. If you are restoring from a backup, did you make sure to backup all important data and configure Windows the way you want it restored? Please connect the AC adapter Yes No(Sample Image) Warning screen
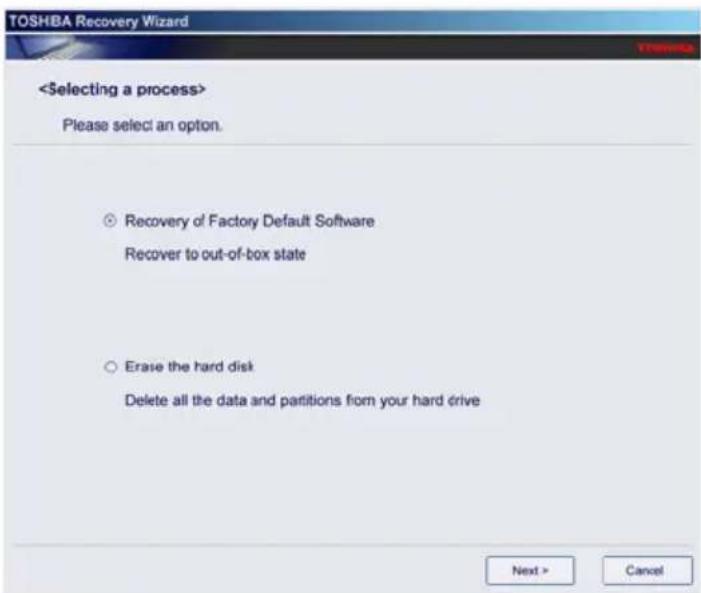
4 When the Toshiba Recovery Wizard opens and the Selecting a process screen displays, select Recovery of Factory Default Software and then click Next.
text_image
TOSHBA Recovery Wizard <$Selecting a process> Please select an option. Recovery of Factory Default Software Recover to out-of-box state Erase the hard disk Delete all the data and partitions from your hard drive Next > Cancel(Sample Image) Selecting a Process screen
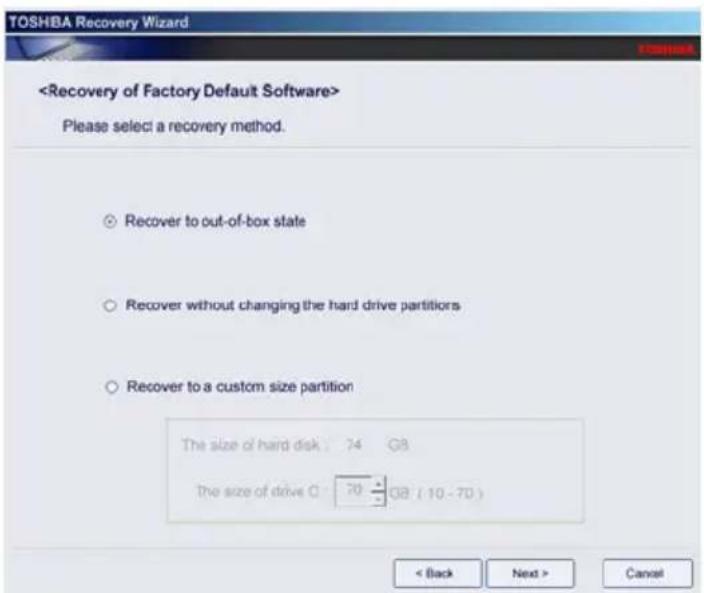
5 The Recovery of Factory Default Software screen appears. Select Recover to a custom size partition.
text_image
(Sample Image) Recovery of Factory Default Software screen
6 Use the on-screen arrow buttons in The size of drive C: field to set the partition size.
7 Click Next.
A confirmation message displays reminding you that all data will be lost during the recovery process. Be sure to save your work to external media before proceeding (see “Backing up your work” on page 92).
8 Click Next to begin the recovery.
When the process is complete, a message displays indicating that the C: drive has been recovered.
9 Press any key on the keyboard to restart the computer.
Recovering without changing the internal storage drive partitions
CAUTION
Recovering without changing the internal storage drive partitions deletes all information stored on the C: drive. Be sure to save your work to external media before executing the recovery (see “Backing up your work” on page 92). If you have created other partitions (for example, a D: drive), those partitions will remain intact and any information on them will not be affected.
NOTE
During the internal storage drive recovery process it is strongly recommended that your computer be connected to an external power source via the AC adaptor.
You can recover the C: drive without affecting other partitions by either using the utilities stored on your computer's internal storage drive or by using recovery DVDs/media, if you have created such media. To recover using the first method, follow the procedure below. To recover using the second method, see “Restoring from recovery DVDs/media” on page 59.
To recover using the utilities on your computer's internal storage drive:
1 Make sure the computer is turned off.
2 Press and hold the 0 (zero) key on your keyboard while powering on the computer.
3 A warning screen appears stating that when the recovery is executed all data will be deleted and rewritten. Click Yes to continue.
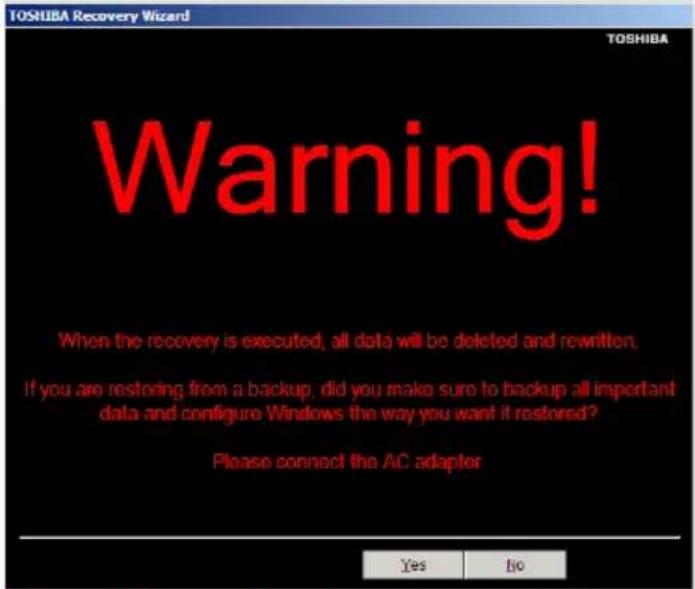
text_image
TOSHIBA Recovery Wizard TOSHIBA Warning! When the recovery is executed, all data will be deleted and rewritten. If you are restoring from a backup, did you make sure to backup all important data and configure Windows the way you want it restored? Please connect the AC adaptor Yes No(Sample Image) Warning screen
4 When the Toshiba Recovery Wizard opens and the Selecting a process screen displays, select Recovery of Factory Default Software and then click Next.

text_image
TOSHEA Recovery Wizard <$Selecting a process> Please select an option. Recovery of Factory Default Software Recover to out-of-box state Erase the hard disk Delete all the data and partitions from your hard drive Next > Cancel(Sample Image) Selecting a Process screen
5 The Recovery of Factory Default Software screen appears. Select Recover without changing the hard drive partitions.
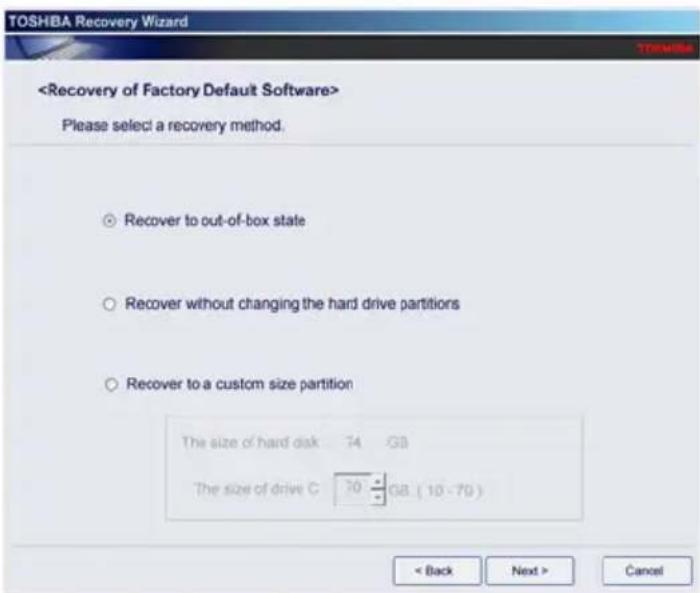
text_image
(Sample Image) Recovery of Factory Default Software screen
6 Click Next.
A confirmation message displays reminding you that all data on the C: drive will be lost during the recovery process. Be sure to save your work to external media before proceeding (see "Backing up your work" on page 92).
7 Click Next to begin the recovery.
When the process is complete, a message displays, indicating that the C: drive has been recovered.
8 Press any key on the keyboard to restart the computer.
Creating recovery DVDs/media
NOTE
To purchase an optional external writable optical disc drive for creating recovery DVDs, please visit the Toshiba Web site at accessories.toshiba.com.
It is strongly recommended that you create recovery DVDs/media. If the recovery files on your internal storage drive become corrupted or are deleted, you can restore your system from your recovery DVDs/media. Also, if your original internal storage drive fails, you can restore your system to a new internal storage drive from your recovery DVDs/media.
NOTE
When you create recovery DVDs/media, only the operating system files, applications, and drivers originally shipped with the computer are backed up to the external media and can be restored from this media. Any files that you created are not backed up on the recovery DVDs/media. You will need to separately back up the files you created; for more information, see "Backing up your work" on page 92.
When you create recovery DVDs/media, the system will prompt you to insert several blank DVDs or connect one or more USB flash drives of a certain minimum capacity to your computer. The amount of space required for storing the recovery files varies by computer model. Follow the procedure below to determine how much space you will need for storing your system's recovery files.
If you want to copy the recovery files to DVDs, you will need an optical disc drive with the capability to write information to discs.
To create recovery DVDs/media:
1 Click Start, All Programs, My Toshiba, and then Recovery Media Creator.
The TOSHIBA Recovery Media Creator dialog box displays.
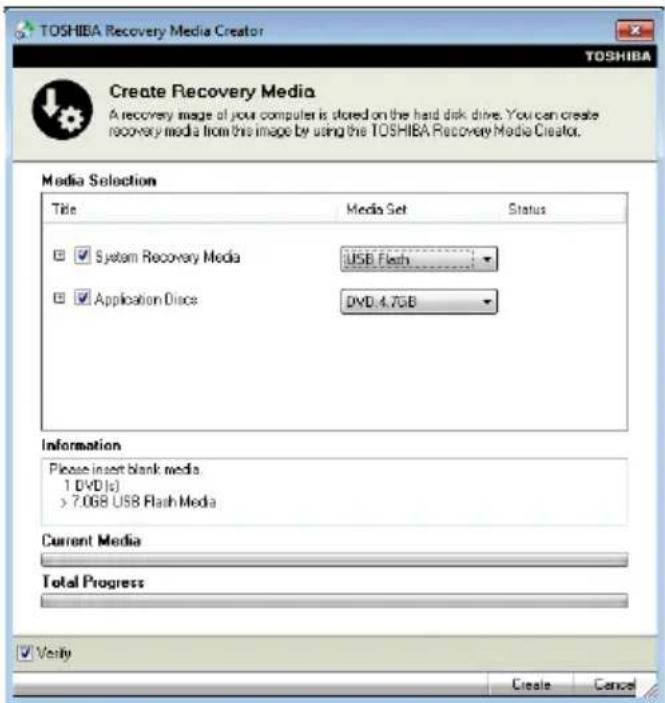
text_image
TOSHIBA Recovery Media Creator TOSHIBA Create Recovery Media A recovery image at your computer is stored on the hard disk drive. You can create recovery media from this image by using the TOSHIBA Recovery Media Creator. Media Selection Title Media Set Status System Recovery Media USB Flash Application Discs DVD 4.7GB Information Please insert blank media. 1 DVD(s) > 7.068 USB Flash Media Current Media Total Progress Verify Create Cancel(Sample Image) TOSHIBA Recovery Media Creator dialog box
2 Select DVD or USB Flash from the drop-down lists next to "System Recovery Media" and "Application Discs," depending on the type of external media you want to use.
NOTE
You cannot store your system's applications on the same drive or disc/disc set where the rest of the system recovery files are stored. For example, you will need to store the applications on one USB flash drive and the system recovery files on another USB flash drive. Or, store the applications on DVD and the system recovery files on a USB flash drive, or vice versa.
3 Check the Information area of the dialog box to determine the number of DVDs you will need and/or the minimum amount of storage space required for copying your system's recovery files to USB flash drive(s).
4 Do one of the following:
If you are copying files to DVD, connect an optional external writable optical disc drive to your computer and insert a blank DVD into the drive.
If you are copying files to a USB flash drive, connect a USB flash drive of the required minimum capacity (as specified in the TOSHIBA Recovery Media Creator utility) to your computer.
CAUTION
All information stored on your DVDs or USB flash drive(s) will be erased during the process of creating the recovery DVDs/media. Be sure to save the information stored on your external media to another storage device before executing this procedure, or use blank media.
5 Click the Create button in the TOSHIBA Recovery Media Creator utility dialog box.
6 Follow the on-screen prompts to complete the copy process.
NOTE
If you are copying the recovery files to DVDs, be sure to label each DVD in the set sequentially (for example, "1 of 3," "2 of 3," etc.), so that you will know in which order to insert the discs during recovery.
For information on using the Recovery media you have created with the preceding steps, see “Restoring from recovery DVDs/media” on page 59.
Restoring from recovery DVDs/media
CAUTION
The recovery process deletes information stored on the internal storage drive. Be sure to save your work to external media before executing the recovery (see “Backing up your work” on page 92).
NOTE
During the internal storage drive recovery process it is strongly recommended that your computer be connected to an external power source via the AC adaptor.
If you have created recovery DVDs/media for your system, you can restore your system from such media, if necessary. For example, if your original internal storage drive fails, you can restore your system to a new internal storage drive from your recovery DVDs/media. For instructions on creating recovery DVDs/media, see “Creating recovery DVDs/media” on page 56.
With recovery media, you can:
◆ Recover to out-of-box state (recommended recovery method)
◆ Recover to a custom size partition
◆ Recover without changing the internal storage drive partitions
For more information on these options, see “Recovering the Internal Storage Drive” on page 47.
NOTE
When you restore your system, only the operating system files, applications, and drivers originally shipped with the computer are restored. Any files that you created are not restored during this process. Be sure to separately save the files you have created to external media using Windows ^® Backup or another backup program. For more information, see “Backing up your work” on page 92.
To recover your internal storage drive from recovery DVDs/media:
1 Shut down and turn off your computer.
2 Do one of the following:
If your recovery files are on DVDs, insert the first recovery DVD into your optional external writable optical disc drive. Consult the documentation that came with your optical disc drive to learn how to load the DVD while the computer is powered off.
If your recovery files are on a USB flash drive, connect the USB flash drive to your computer.
3 Turn on your computer. When the initial screen displays, press F12.
The boot menu displays.
4 Using the arrow keys, select the DVD option or the USB Flash option, depending on which type of media you are using, and then press Enter.
5 A warning screen appears, stating that when the recovery is executed all data on your internal storage drive will be deleted and rewritten. Click Yes to continue.
6 When the Toshiba Recovery Wizard opens and the Selecting a Process screen displays, select Recovery of Factory Default Software and then click Next.
7 Select one of the following options:
✿ Recover to out-of-box state (recommended recovery method)—If you want to recover the original factory image
✿ Recover without changing the hard drive partitions—If you want to recover the C: partition only, leaving other partitions you have created intact
Recover to a custom size partition—If you want to recover the C: drive to its out-of-box state and specify a custom size for the C: drive. Note: This option deletes all other partitions from the drive.
8 Follow the on-screen instructions to complete the recovery process.
When the process is complete, a message displays indicating that the drive has been recovered.
9 Press any key on the keyboard to restart the computer.
Erasing the Internal Storage Drive
CAUTION
Erasing the internal storage drive will delete all data on the drive, including the partitions. Be sure to create recovery DVDs/media and back up your data to external media before erasing the internal storage drive.
NOTE
If you want to restore the internal storage drive, use one of the recovery options instead of erasing the drive. For more information, see “Recovering the Internal Storage Drive” on page 47.
To delete all data and partitions from the internal storage drive:
1 Access the Toshiba Recovery Wizard on your internal storage drive or on your recovery DVDs/media.
To access the Recovery Wizard on your internal storage drive: Press and hold the 0 (zero) key while powering on the computer. Read the Warning screen that displays and then click Yes to continue.
To access the Recovery Wizard on your recovery DVDs/media: Turn off your computer. Insert the first recovery DVD into your optional external writable optical disc drive or connect the USB flash drive containing your recovery files to your computer, and then power on the computer. When the initial screen displays, press F12. Using the arrow keys, select the DVD or USB Flash option on the boot menu, depending on which type of media you are using, and then press Enter. Select Toshiba Recovery Wizard, and then click Next.
2 Select Erase the hard disk and then click Next.
3 Choose one of the following options on the Erase the hard disk screen:
Delete all data and partitions from the hard disk—This option deletes all of the data on the internal storage drive without overwriting the drive.
Delete all partitions and overwrite all sectors on the hard disk—This option deletes all data and then overwrites the entire internal storage drive for security purposes. This process may take several hours, depending on the size of your internal storage drive.
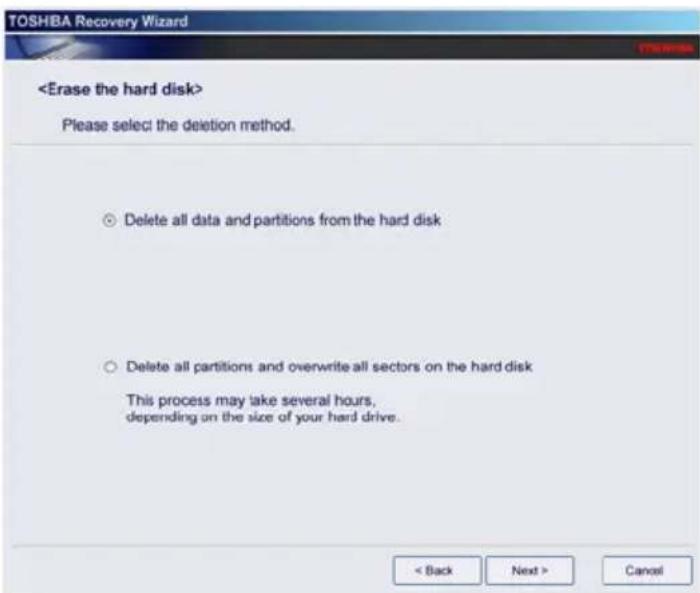
text_image
TOSHBA Recovery Wizard(Sample Image) Erase the hard disk screen
4 Click Next.
A confirmation message displays reminding you that all data on the internal storage drive will be lost. Be sure you have saved your work to external media (see “Backing up your work” on page 92) and created recovery DVDs/media (see “Creating recovery DVDs/media” on page 56) before proceeding.
5 Click Next to begin erasing the internal storage drive.
When the process is complete, a message displays, indicating that the internal storage drive has been erased.
6 Press any key on the keyboard to restart the computer.
Checking the internal storage drive operating status
After restoring your internal storage drive, you can check its status as follows:
1 Click Start.
2 Right-click Computer.
3 Select Manage.
4 Click Disk Management.
5 Highlight the internal storage drive in the Volume list to display its status in the lower portion of the screen.
Installing drivers and applications
The Toshiba Application Installer allows you to reinstall the drivers and applications that were originally bundled with your computer.
To reinstall drivers and applications:
1 Click Start, All Programs, My Toshiba, and then TOSHIBA Application Installer.
2 Click Next.
3 Click the item you want to install.
4 Click Install.
5 Follow the on-screen prompts to complete the installation process.
Using the TouchPad™
NOTE
Some of the TouchPad operations described in this section are only supported in certain applications.
You can use the TouchPad™ (the small, touch-sensitive area in front of the keyboard) and the adjacent control buttons to:
◆ Move the pointer on the screen
Select an item on the screen
◆ Open or activate an item on the screen
◆ Scroll through a document or information
◆ Zoom in for a close-up view
◆ Zoom out to see more information at once
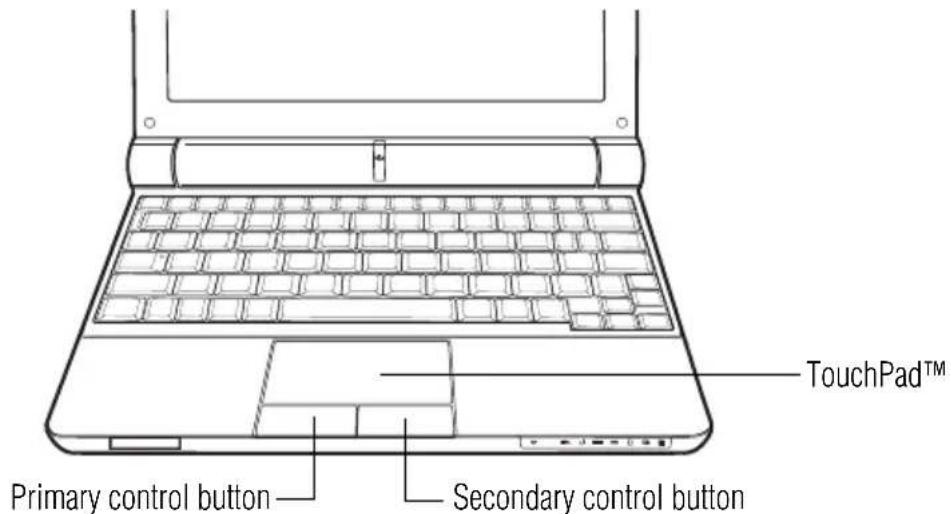
text_image
TouchPad™ Primary control button Secondary control button(Sample Illustration) The TouchPad and associated control buttons
Refer to the table below for specific instructions on performing each operation.
NOTE
The pointer is the icon (usually an arrow) that moves on the screen when you slide your finger across the TouchPad or move a mouse connected to your computer.
| To: | Do the following: | |
| Move the on-screen pointer | Slide your finger across the TouchPad in the direction you want to move the pointer.To move the pointer a longer distance, slide your finger several times across the TouchPad in the preferred direction. | 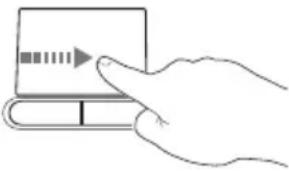 (Sample Illustration)Pointer moves to the right (Sample Illustration)Pointer moves to the right |
| Select an item | 1 Move the pointer to the item you want to select.2 Do one of the following:❖ Tap the TouchPad onceOR❖ Press and release the primary (left-hand) control button | 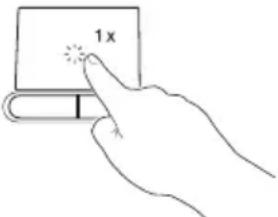 (Sample Illustration)Tap once to select (Sample Illustration)Tap once to select |
| Open or activate an item | 1 Move the pointer to the item you want to open/activate.2 Do one of the following:❖ Tap the TouchPad twice in rapid successionOR❖ Press and release the primary control button twice in rapid succession | 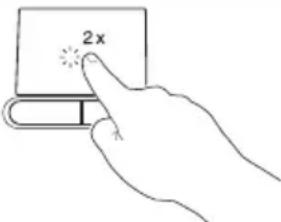 (Sample Illustration)Tap twice to open (Sample Illustration)Tap twice to open |
| Right-click an item | 1 Move the pointer to the item you want to right-click.2 Press and release the secondary control button.This feature varies by program. Check your program documentation for specific instructions on right-clicking. | 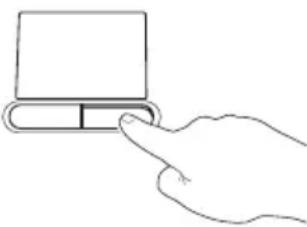 (Sample Illustration)Click the secondary (right-hand) control button (Sample Illustration)Click the secondary (right-hand) control button |
Example:
| To: | Do | the | following: |
| Scroll vertically | Slide your finger along the right edge of the TouchPad in the direction you want to scroll. Repeat to scroll a longer distance. | 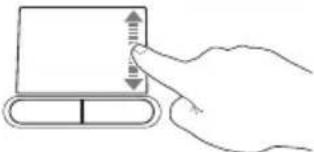 (Sample Illustration)Vertical scrolling active area (Sample Illustration)Vertical scrolling active area | |
| Scroll horizontally | Slide your finger along the bottom edge of the TouchPad in the direction you want to scroll. Repeat to scroll a longer distance. | 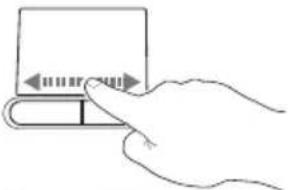 (Sample Illustration)Horizontal scrollingactive area (Sample Illustration)Horizontal scrollingactive area | |
| Scroll continuously(Circular scrolling) | 1 Begin scrolling vertically or horizontally by sliding your finger along the right or bottom edge of the TouchPad as described above.2 Without lifting your finger from the TouchPad, start moving your finger in a circular motion on the TouchPad.3 To scroll in the opposite direction, reverse the direction of the circular motion.4 To stop scrolling, lift your finger off of the TouchPad. | 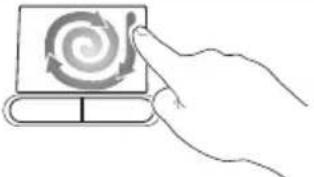 (Sample Illustration)Circular scrolling(vertically) (Sample Illustration)Circular scrolling(vertically)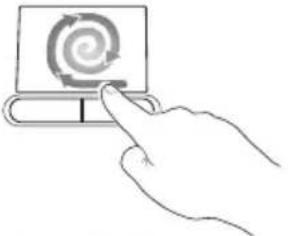 (Sample Illustration)Circular scrolling(horizontally) (Sample Illustration)Circular scrolling(horizontally) | |
| Zoom in/out To zoom in: | |||
| Place two fingers close together on the TouchPad and then slide them apart. | 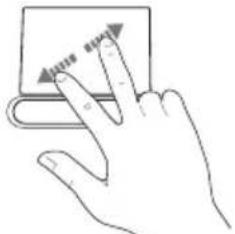 | ||
| To zoom out: | |||
| Place two fingers slightly apart on the TouchPad and then slide them together. | (Sample Illustration) Zooming in | ||
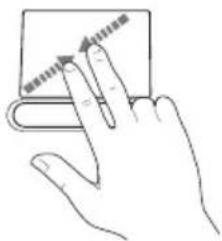 | |||
| (Sample Illustration) Zooming out | |||
Adjusting TouchPad™ settings
While you are typing, the on-screen pointer may seem to move or jump around "by itself" to random locations on the screen. The on-screen pointer may also seem to automatically select text, click buttons, and activate other user interface elements. For help with these problems, try one or more of the following:
Try adjusting your typing technique to avoid accidental contact with the TouchPad™. You may be inadvertently brushing the TouchPad with the heel of your hand as you type. Also, accidental light touches or taps on the TouchPad may select an item or text on the screen, and potentially the item or text may be replaced by the next character you type.
- Temporarily disable the TouchPad, so that it does not respond to touch or button presses while you type. See “Disabling or enabling the TouchPad™” on page 67.
◆ Disable the tapping feature. If you disable tapping only, you can still use the TouchPad's control buttons and move the pointer by sliding your finger on the TouchPad.
Adjust the sensitivity of the TouchPad, so that it is less responsive to accidental light taps and lighter finger pressure.
Example:
NOTE
TouchPad setting options vary by computer model. The TouchPad settings are accessible through the Mouse Properties option of the Windows Control Panel. For more information, please visit www.support.toshiba.com, and enter the phrase “Mouse pointer jumps around as you type” into the Search field.
Disabling or enabling the TouchPad™
The TouchPad ^TM is enabled by default. To enable/disable the TouchPad, press Fn + F9. For more information, see “Disabling or enabling the TouchPad ^TM ” on page 173.
NOTE
Alternately, you can disable only the tapping feature. If you disable tapping only, you can still use the TouchPad's control buttons and move the pointer by sliding your finger on the TouchPad. To disable tapping only, use the Mouse Properties option in the Windows® Control Panel.
Using external display devices
Your computer comes with a built-in display, but you can also connect an external display device via the RGB (monitor) port.
Connecting an external monitor or projector
You can easily attach an external monitor or projector to your computer if you need a larger screen. To do this:
1 Read the directions that came with the monitor to see if you first need to install new software.
2 Connect the monitor's video cable to the RGB (monitor) port on the side of the computer.
3 Connect the device's power cable to a live electrical outlet.
4 Turn on the external device.

Your computer will automatically detect the external display device.
NOTE
In the future you can change the display settings by pressing Fn + F5, or by configuring the display properties settings.
Directing the display output when you turn on the computer
Once you have connected an external display device, you can choose to use the internal display only, the external device only, or both simultaneously.
NOTE
Some modes are only available with the appropriate device attached and turned on.
The quickest way to change the display output settings is to use the display hot key (Fn + F5):
1 Press Fn and F5 simultaneously.
2 While holding down Fn, press F5 repeatedly until the setting you want takes effect. Briefly pause each time you press the F5 key to allow time for the display to change.
This hot key cycles through the settings in the following order (the last two options are available if an external monitor is connected):
Built-in display only
Built-in display and external monitor simultaneously
◆ External monitor only
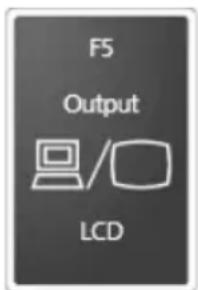
text_image
F5 Output LCD

(Sample Image) Display options window
3 Release the Fn key.
Adjusting the quality of the external display
To obtain the best picture quality from your monitor (or other video display device), you may need to adjust the video settings. See the video device documentation for additional configuration steps.
Using an external keyboard
If you prefer to use an external keyboard, you can attach one to your computer. The computer's USB ports support most USB-compatible keyboards.
Using a mouse
You may want to use a mouse instead of the computer's built-in TouchPad™. You can use a USB-compatible mouse.
Connecting a printer
NOTE
Your printer documentation may require you to install the printer software before physically connecting the printer to your computer. If you do not install the software as instructed by the printer manufacturer, the printer may not function correctly.
Read the documentation that came with your printer. Follow the manufacturer's instructions when connecting a printer.
You can connect a USB-compatible printer to your computer through the USB ports. To determine if the printer is USB-compatible, check its documentation.
To make the connection, you need a suitable USB cable which may come with your printer. If a USB cable was not included with your printer, you can purchase one from a computer or electronics store.
If your printer supports Plug and Play, your computer may automatically recognize the printer; the printer is then ready for use. Refer to your printer documentation for further instructions.

TECHNICAL NOTE: To determine if your printer supports Plug and Play, check its documentation.
If your printer does not support Plug and Play, you can set up the printer as described in "Setting up a printer" on page 70.
To connect a printer to your computer:

1 Connect the printer cable to the printer and then connect the other end to one of the computer's USB ports.
2 Plug the printer's power cable into a live AC outlet.
Setting up a printer
NOTE
Some printers require a specific installation process. Refer to your printer installation guide for instructions before completing the following procedure.
If your printer does not support Plug and Play, follow these steps to set it up for the first time. You only need to set up the printer once.
1 Click Start, Control Panel, Hardware and Sound, and then under Devices and Printers, click Add a printer.
The Add Printer Wizard appears.
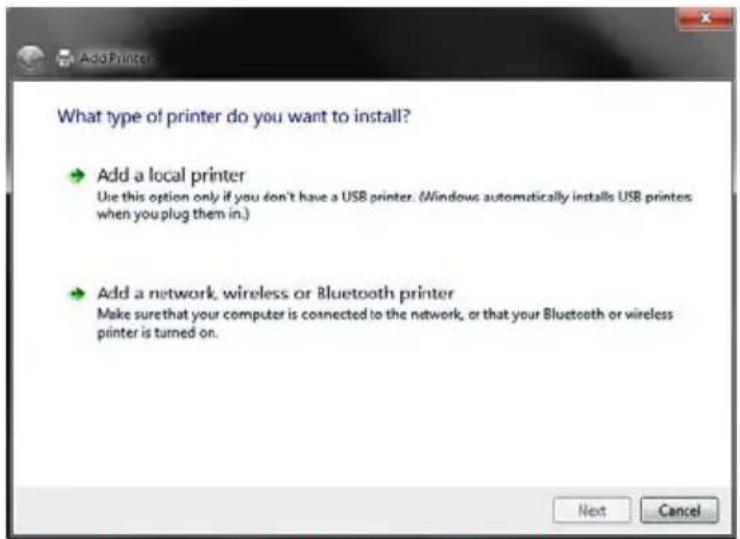
text_image
What type of printer do you want to install? Add a local printer Use this option only if you don't have a USB printer. (Windows automatically installs USB printers when you plug them in.) Add a network, wireless or Bluetooth printer Make sure that your computer is connected to the network, or that your Bluetooth or wireless printer is turned on. Next Cancel(Sample Image) Add Printer Wizard
2 Follow the on-screen instructions to set up your printer.
Turning off the computer
CAUTION
Pressing the power button before shutting down the Windows® operating system could cause you to lose your work. Make sure the system indicator panel's storage drive light and the drive in-use light are off. If you turn off the power while a disk/disc is being accessed, you may lose data or damage the disk/disc and/or drive.
It is a good idea to turn off your computer when you are not using it for a while.
If you are using the computer for the first time, leave the computer plugged into a power source (even though the computer is off) to fully charge the main battery.
Options for turning off the computer
Depending on the operating system installed, you have more than one option available for turning off the computer: Shut down, Hibernate, and Sleep. Each option has its advantages.
Use the Shut down or Hibernate command if you will not be using the computer for several days or if you must turn off your computer.
You must turn off your computer in order to upgrade your computer's internal hardware (such as memory).

TECHNICAL NOTE: Before using the Shut down option to turn off your computer, save your files and make sure all disk/disc activity lights are off.
If you change your mind and decide to continue working after all, wait a few seconds before turning the computer on again.
Use the Sleep command to save your work, system settings, and current state of the desktop to memory, so that when you turn on the computer again, you will quickly and automatically return to where you left off.
Hibernation mode
Hibernation mode shuts the computer down completely, but it first saves the current state of the computer to the internal storage drive. Since Hibernation mode does not require power to maintain the saved information, system settings are retained indefinitely.
Factors to consider when choosing Hibernation:
While in Hibernation mode, the computer uses no main battery power.
Because the state of the system is stored to the internal storage drive, no data is lost if the main battery discharges.
- Restarting from Hibernation takes less time and consumes less main battery power than restarting after turning off the computer using the Shut down command.
- Restarting from Hibernation takes a little more time and consumes more main battery power than restarting from Sleep.
When starting up again, the computer returns to the state in which you left it, including all open programs and files you were using.
For information on how to use and configure Hibernation mode see “Using and configuring Hibernation mode” on page 76.
Sleep mode
The Sleep command places the computer into a power-saving mode. Sleep saves the current state of the computer to memory so that, when you restart the computer, you can continue working from where you left off.
NOTE
After your computer sleeps for an extended period of time, the Windows® operating system may save any open documents and programs to your internal storage drive, and then shuts down the computer.
Factors to consider when choosing Sleep:
While in Sleep mode, the computer uses some main battery power.
Because the state of the system is stored in memory, you will lose data if the main battery discharges completely while the computer is in Sleep mode.
- Restarting from Sleep takes less time and consumes less main battery power than restarting after turning off the computer using the Hibernation or Shut down commands.
When starting up again, the computer returns to the mode in which you left it, including all open programs and files you were using.
If the battery charge becomes critically low, the computer will try to enter Hibernation mode.
CAUTION
If you power down using the Sleep command and the main battery discharges fully, your unsaved information will be lost. Be sure to save your work first.
For information on using Sleep, see “Using and configuring Sleep mode” on page 78.
Using the Shut down command
The Shut down command completely shuts down the computer without saving your work or the current state of the computer. This command closes all open programs, shuts down the operating system, and then turns off your computer.
To turn off your computer using the Shut down command:
1 Click Start.
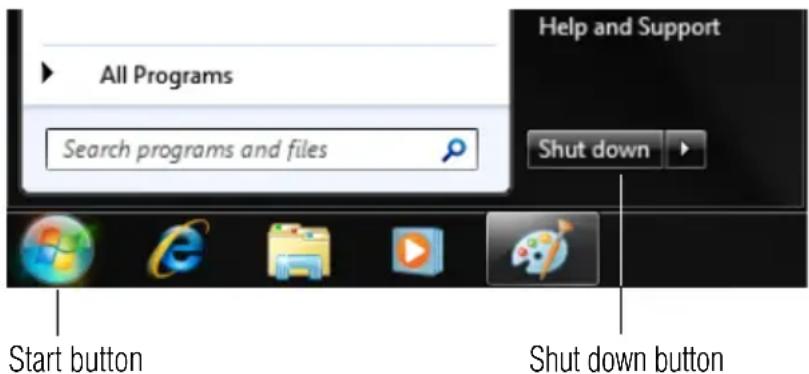
text_image
All Programs Search programs and files Help and Support Shut down Start button Shut down button(Sample Image) Shut down button
2 Click the Shut down button in the lower-right corner of the Start menu.
The computer closes all open programs, shuts down the operating system, and then turns off.
Turning off the computer more quickly
You can also turn off the computer by pressing the power button.
To use this method, you first need to activate it using the Power Options feature. By default, pressing your computer's power button puts the computer into Sleep mode.

1 Click Start, Control Panel, System and Security, and then Power Options.
The Power Options window appears.
2 Click Change plan settings under the power plan to be customized.
The Edit Plan Settings window appears.
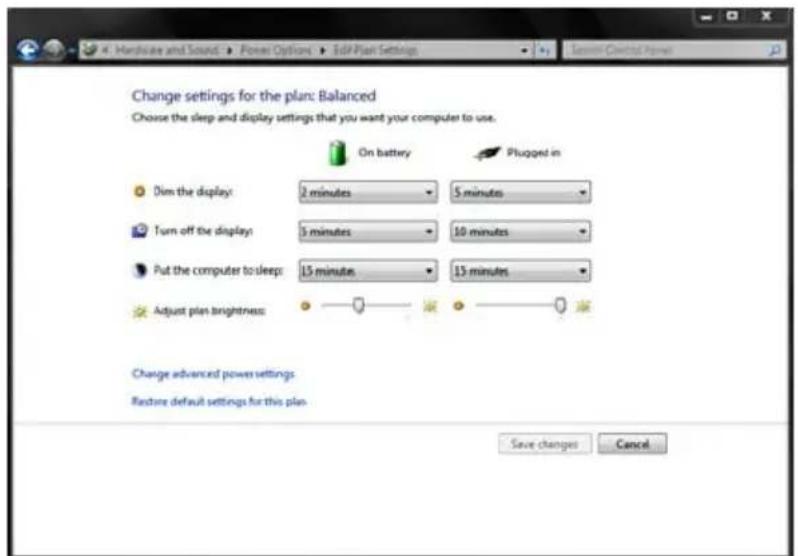
text_image
Change settings for the plan: Balanced Choose the sleep and display settings that you want your computer to use. On battery Plug-in Dim the display: 2 minutes 5 minutes Turn off the display: 3 minutes 10 minutes Put the computer to sleep: 15 minutes 15 minutes Adjust plan brightness: Change advanced power settings Restore default settings for this plan. Save changes Cancel(Sample Image) Edit Plan Settings screen
3 Click Change advanced power settings.
The Advanced settings tab of the Power Options window appears.
4 Double-click Power buttons and lid to display the actions that you can configure.
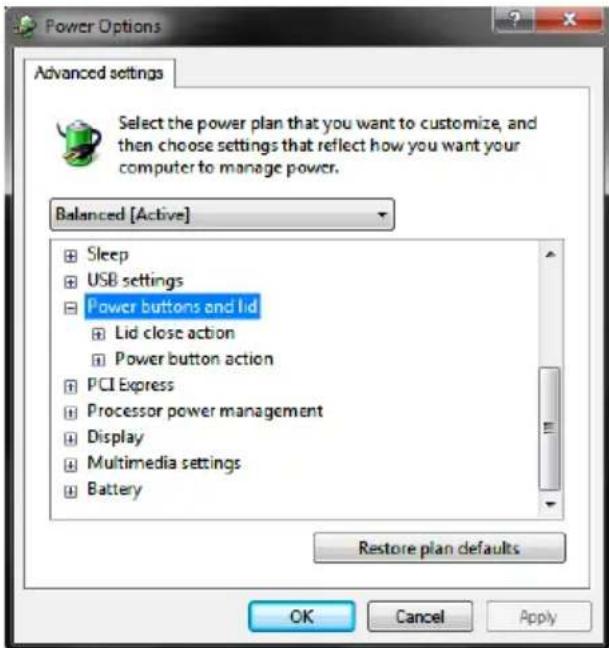
text_image
Power Options Advanced settings Select the power plan that you want to customize, and then choose settings that reflect how you want your computer to manage power. Balanced [Active] Sleep USB settings Power buttons and lid Lid close action Power button action PCI Express Processor power management Display Multimedia settings Battery Restore plan defaults OK Cancel Apply(Sample Image) Advanced settings tab of Power Options screen
5 Select the options you want from the drop-down lists.
NOTE
These options can be set separately for how they operate while the computer is running on battery power or while connected to AC power.
Lid close action
Set this option to Shut down if you want the computer to shut down when you close the display panel.
Power button action
Set this option to Shut down if you want the computer to shut down when you press the power button.
6 Click Apply.
7 Click OK.
Once the computer is configured, you can turn it off by either pressing the power button or closing the display panel, depending on the options set.
Restarting your computer
To start the computer up again, press the power button until the ON/OFF light glows green.
If you turn off the computer by closing the display panel, you can start it again by opening the display panel.
Using and configuring Hibernation mode
To turn off the computer using the Hibernation command:
1 Click Start, and then click the arrow next to the Shut down button in the lower-right corner of the Start menu.
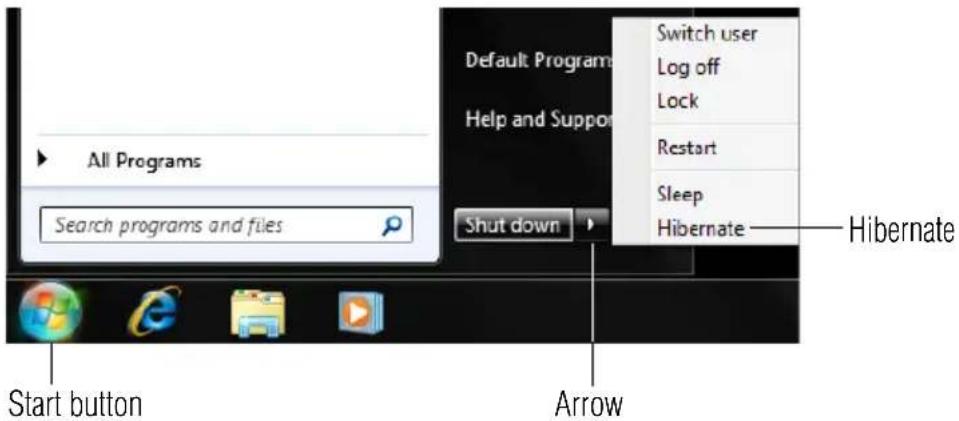
text_image
All Programs Search programs and files Shut down Arrow Start button Switch user Log off Lock Restart Sleep Hibernate Hibernate(Sample Image) Shut down menu
2 Click Hibernate in the pop-up menu.
The computer saves the state of all open programs and files, turns off the display, and then turns off.
Configuring Hibernation mode options
You can place the computer into Hibernation mode by either pressing the power button or closing the display panel. You can also specify an amount of time after which the computer automatically goes into Hibernation mode.
To use any of these methods, you first need to enable them using the Power Options feature.

1 Click Start, Control Panel, System and Security, and then Power Options.
The Power Options window appears.
2 Click Change plan settings under the power plan to be customized.
The Edit Plan Settings window appears.
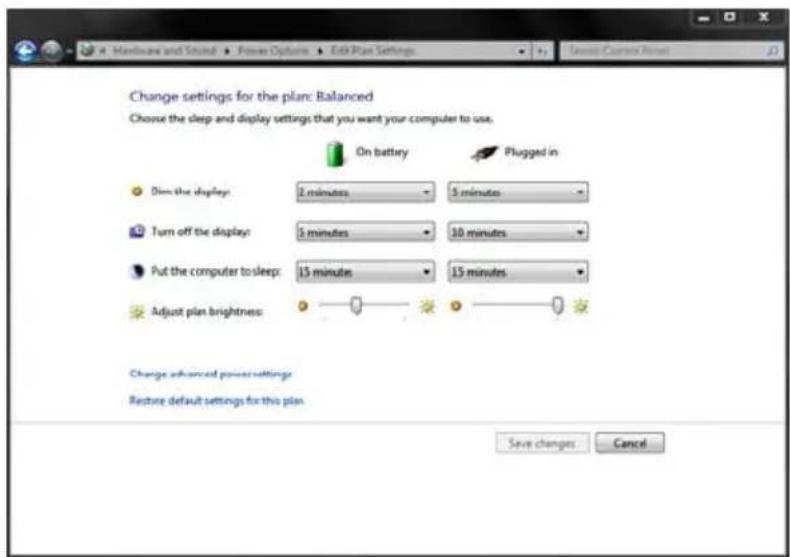
text_image
Change settings for the plan: Balanced Choose the sleep and display settings that you want your computer to use. On battery Plugged in Dim the display: 2 minutes 3 minutes Turn off the display: 5 minutes 30 minutes Put the computer to sleep: 15 minutes 15 minutes Adjust plan brightness: Change advanced power settings Restore default settings for this plan Save changes Cancel(Sample Image) Edit Plan Settings screen
3 Click Change advanced power settings.
The Advanced settings tab of the Power Options window appears.
4 Double-click Power buttons and lid to display the actions that you can configure.
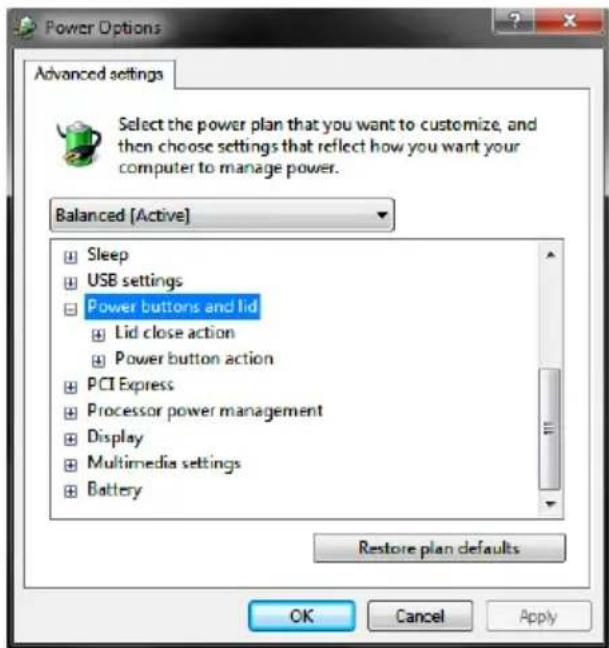
text_image
Power Options Advanced settings Select the power plan that you want to customize, and then choose settings that reflect how you want your computer to manage power. Balanced [Active] Sleep USB settings Power buttons and lid Lid close action Power button action PCI Express Processor power management Display Multimedia settings Battery Restore plan defaults OK Cancel Apply(Sample Image) Advanced settings tab of Power Options screen
5 Select Hibernate for the options you want.
NOTE
These options can be set separately for how they operate while the computer is running on battery power or while connected to AC power.
Lid close action
Set this option to Hibernate if you want the computer to go into Hibernation mode when you close the display panel.
Power button action
Set this option to Hibernate if you want the computer to go into Hibernation mode when you press the power button.
6 Click Apply.
7 Click OK.
Once the computer is configured, you can place it into Hibernation mode by either pressing the power button or closing the display panel, depending on the Hibernation options set.
Starting again from Hibernation mode
To start up the computer from Hibernation mode, press the power button until the ON/OFF light glows green. The computer returns to the screen(s) you were using.
If you put the computer in Hibernation mode by closing the display panel, you can start it again by opening the display panel.
Using and configuring Sleep mode
To turn off the computer using the Sleep command:
1 Click Start, and then click the arrow next to the Shut down button in the lower-right corner of the Start menu.
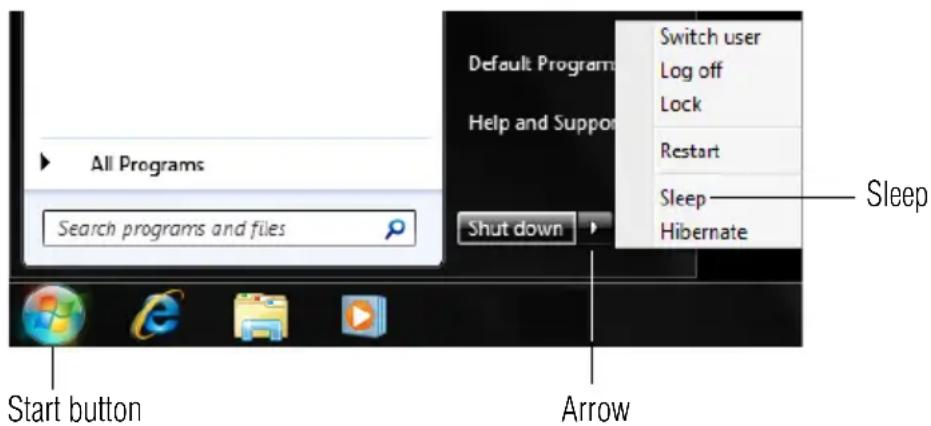
text_image
All Programs Search programs and files Shut down Switch user Log off Lock Restart Sleep Hibernate Start button Arrow Sleep(Sample Image) Shut down menu
2 Click Sleep in the pop-up menu.
The computer saves the status of all open programs and files to the memory, turns off the display, and enters into a low-power mode. The ON/OFF light blinks amber indicating the computer is in Sleep mode.
Configuring Sleep mode options
You can place the computer into Sleep mode by either pressing the power button or closing the display panel. You can also specify an amount of time after which the computer automatically goes into Sleep mode.
To use any of these methods, you first need to enable them using the Power Options feature.

1 Click Start, Control Panel, System and Security, and then Power Options.
The Power Options window appears.
2 Click Change plan settings under the power plan to be customized.
The Edit Plan Settings window appears.
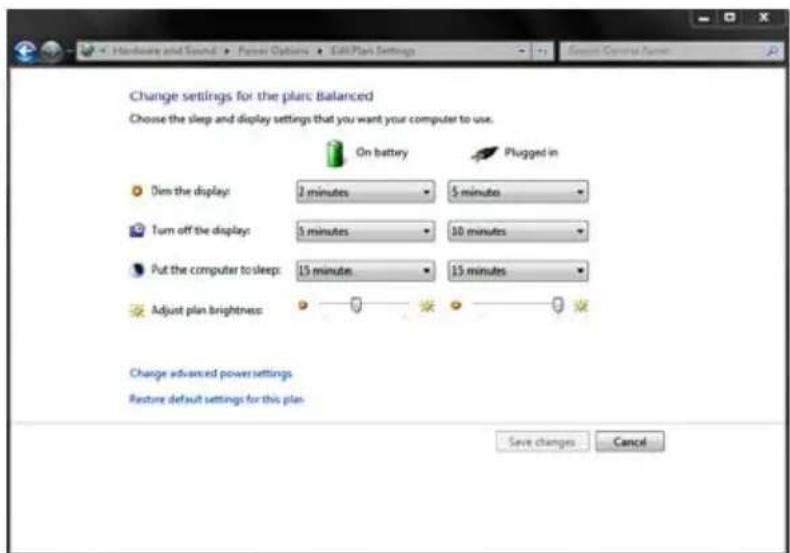
text_image
Change settings for the plan: Balanced Choose the sleep and display settings that you want your computer to use. On battery Plugged in Dim the display: 2 minutes 5 minutes Turn off the display: 3 minutes 30 minutes Put the computer to sleep: 15 minutes 15 minutes Adjust plan brightness Change advanced power settings Restore default settings for this plan. Save changes Cancel(Sample Image) Edit Plan Settings screen
3 To change the amount of time after which the computer enters Sleep mode:
Under Put the computer to sleep, select the desired amount of time in both the On battery and Plugged in categories.
To disable the computer from automatically entering Sleep mode, select Never.
4 Click Change advanced power settings.
The Advanced settings tab of the Power Options window appears.
5 Double-click Power buttons and lid to display the actions that you can configure.

text_image
Power Options Advanced settings Select the power plan that you want to customize, and then choose settings that reflect how you wont your computer to manage power. Balanced [Active] Sleep USB settings Power buttons and lid Lid close action Power button action PCI Express Processor power management Display Multimedia settings Battery Restore plan defaults OK Cancel Apply(Sample Image) Advanced settings tab of Power Options screen
6 Select Sleep for the options you want.
NOTE
These options can be set separately for how they operate while the computer is running on battery power or while connected to AC power.
Lid close action
Set this option to Sleep if you want the computer to go into Sleep mode when you close the display panel.
Power button action
Set this option to Sleep if you want the computer to go into Sleep mode when you press the power button.
7 Click Apply.
8 Click OK.
Once the computer is configured, you can place it into Sleep mode by either pressing the power button or closing the display panel, depending on the Sleep options set.
Starting again from Sleep mode
To start up the computer from Sleep mode, press the power button until the ON/OFF light glows green. The computer returns to the screen(s) you were using.
If you place the computer in Sleep mode by closing the display panel, you can start it again by opening the display panel.
Closing the display panel
After you have turned off the computer, close the display panel to keep dust and dirt out of the computer.
Customizing your computer's settings
There are several ways in which you can customize your computer to suit your particular requirements. Refer to your operating system documentation or Help and Support for details.
You may also wish to customize your power usage settings. For more information, see “Power Plans” on page 102. There are additional custom settings you can choose. See “Utilities” on page 120.
Caring for your computer
This section gives tips on cleaning and moving your computer. For information about taking care of your computer's battery, see "Taking care of your battery" on page 107.
NOTE
Please handle your computer carefully to avoid scratching or damaging the surface.
Cleaning the computer
CAUTION
Keep liquids, including cleaning fluid, out of the computer's keyboard, speaker, and other openings. Never spray cleaner directly onto the computer and/or display. Never use harsh or caustic chemical products to clean the computer.
To keep your computer clean, gently wipe the display panel and exterior case with a lightly dampened cloth.
Moving the computer
Before moving your computer, even across the room, make sure all drive activity has ended (the internal storage drive and optical disc drive indicator lights stop glowing) and all external peripheral cables are disconnected.
CAUTION
Do not pick up the computer by its display panel or by the back. Doing so could damage the system.
Using a computer lock
You may want to secure your computer to a heavy object such as your desk. The easiest way to do this is to purchase an optional computer lock cable. For more information on purchasing a cable lock, visit accessories.toshiba.com.
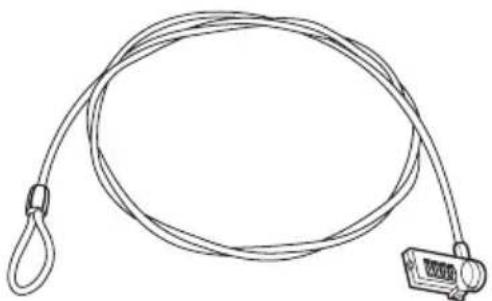
natural_image
Line drawing of a cable with a hanging hook and connector (no text or symbols)(Sample Illustration) Computer lock cable
To secure the computer:
1 Wrap the cable through or around some part of a heavy object.
Make sure there is no way for a potential thief to slip the cable off the object.
2 Pass the locking end through the loop.
3 Insert the cable's locking end into the security lock slot on your computer, then engage the locking device.
The computer is now securely locked.
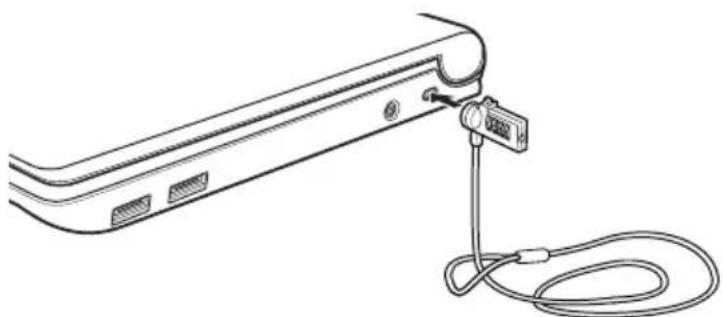
natural_image
Line drawing of a device with a cable and connector attached to a panel (no text or symbols)(Sample Illustration) Attaching security lock cable
Chapter 2
Learning the Basics
This chapter gives some computing tips and provides important information about basic features.
Computing tips
◆ Save your work frequently.
Your work stays in the computer's temporary memory until you save it to the internal storage drive. If the network you are using goes down and you must restart your computer to reconnect, or your battery runs out of charge while you are working, you will lose all work since you last saved.
See “Saving your work” on page 90 for further information.

HINT: Some programs have an automatic save feature that can be activated. This feature saves your file to the internal storage drive at preset intervals. See your software documentation for details.
◆ Back up your files to external media on a regular basis. Label the backup copies clearly and store them in a safe place.
It is easy to put off backing up because it takes time. However, if your internal storage drive suddenly fails, you will lose all the data on it unless you have a separate backup copy. For more information, see “Data and system configuration backup in the Windows® operating system” on page 153.
Use Error-checking and Disk Defragmenter regularly to check and optimize disk space and improve performance.
Scan all new files for viruses.
This precaution is especially important for files you receive via external media, email, or download from the Internet.
Take frequent breaks to avoid repetitive-motion injuries and eyestrain.
Do not turn off the computer if a drive indicator light indicates a drive is active.
Turning off the computer while it is reading from or writing to a disk may damage the disk, the drive, or both.
NOTE
The Windows® operating system records information, such as your desktop setup, during its shutdown procedure. If you do not let the Windows® operating system shut down normally, details such as new icon positions may be lost.
Using the keyboard
Your computer's keyboard contains character keys, control keys, function keys, and special Windows ^ keys, providing all the functionality of a full-size keyboard.
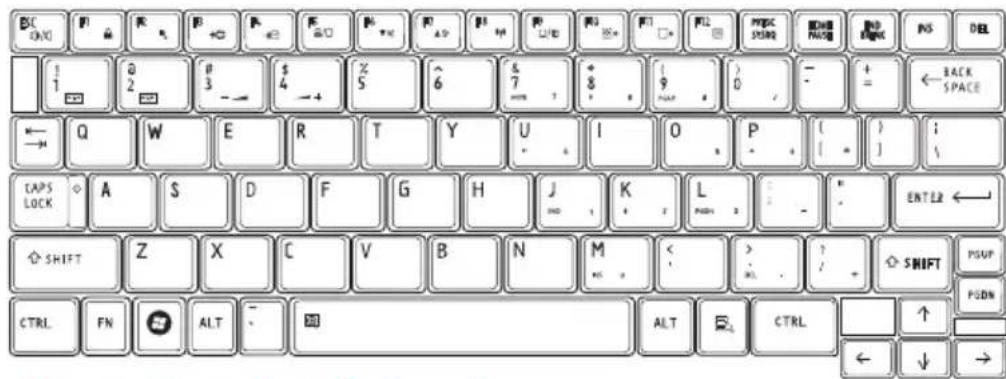
text_image
BC ON/O 1 2 3 4 5 6 7 8 9 0 + - BACK SPACE Q W E R T Y U I O P ( ) : \ CAPS LOCK A S D F G H J K L : - ENTER ← SHIFT Z X C V B N M < > SHIFT PSUP PUDN CTRL FN ALT ① ALT CTRL ↑ ← ↓ →(Sample Illustration) Keyboard
Character keys
Typing with the character keys is very much like typing on a typewriter, except that:
The space bar creates a space character instead of just passing over an area of the page.
The lowercase letter l (el) and the number 1 are not interchangeable.
The uppercase letter O and the number 0 are not interchangeable.
Making your keyboard emulate a full-size keyboard
Although your computer's keyboard layout is compatible with a standard full-size keyboard, it includes fewer keys.
A standard full-size keyboard includes two Enter, Ctrl, and Alt keys; editing keys; cursor positioning keys; and a numeric keypad.
Your computer's keyboard includes only one Enter key. Most of the time, this does not matter. However, some programs assign separate functions to the regular and numeric pad Enter keys on the full-sized keyboard. Using the Fn key, you can simulate the separate key, as follows: Press Fn and Enter simultaneously to simulate the Enter key on the numeric pad of the enhanced keyboard. Pressing the Fn key simultaneously in combination with one of the specially marked keys allows you to emulate a full-size keyboard.
Ctrl, Fn, and Alt keys
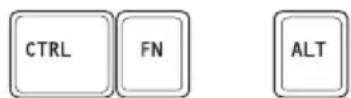
(Sample Illustration) Ctrl, Fn, and Alt keys
The Ctrl, Fn, and Alt keys do different things depending on the program you are using. For more information, see your program documentation.
Function keys
The function keys (not to be confused with the Fn key) are the 12 keys at the top of the keyboard.

text_image
F1 F2 F3 → F4 → F5 □□ F6 ▼ F7 ▲* F8 □/0 F9 □/0 F10 □◇ F11 □◇ F12(Sample Illustration) Function keys
F1 through F12 are called function keys because they execute programmed functions when pressed. Used in combination with the Fn key, function keys marked with icons execute specific functions on the computer. For example, Fn + F9 turns the TouchPad™ ON/OFF. For more information, see “Hot key functions” on page 165.
Special Windows® keys
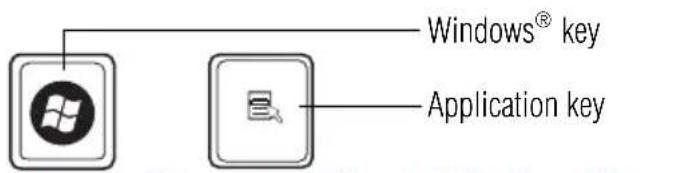
text_image
Windows® key Application key(Sample Illustration) Special Windows ^® keys
Your computer's keyboard has one key and one button that have special functions in Windows®:
Windows ^® key—Opens the Start menu
Application key—Has a similar function as the secondary mouse button
Overlay keys
The keys with gray numbers and symbols on the front of them form the numeric and cursor overlay. This overlay lets you enter numeric data or control the cursor as you would using the 10-key keypad on a desktop computer's keyboard.
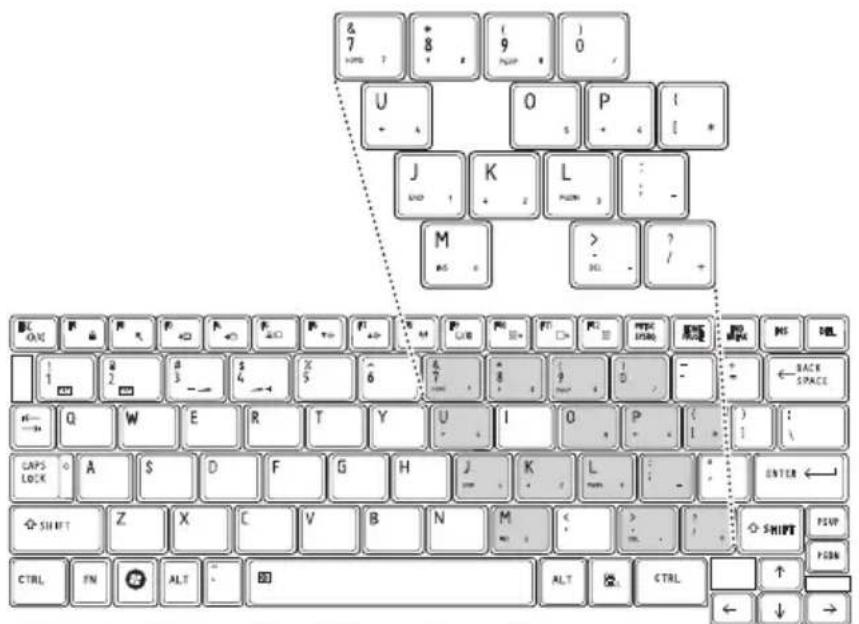
text_image
& 7 HAPP ? + 8 9 0 U - + O P ( I J K L : M > > > / + BC GAV F F F F F F F F F F F F F F F F F F F F F F F F F F F F F F F F F F F F F F F F F F F F F F F F F F 1 2 3 4 5 6 7 8 9 10 11 12 13 14 15 16 17 18 19 20 21 22 23 24 25 26 27 28 29 30 31 32 33 34 35 36 37 38 39 40 41 42 43 44 45 46 47 48 49 50 51 52 53 54 55 56 57 58 59 60 61 62 63 64 65 66 67 68 69 70 71 72 73 74 75 76 77 78 79 80 81 82 83 84 85 86 87 88 89 90 91 92 93 94 95 96 97 98 99 100(Sample Illustration) Numeric and cursor control overlay
Using the overlay to type numeric data
The keys with the numbers on their right front are the numeric overlay keys.

To turn the numeric overlay on, pressFn and F11 simultaneously. The numeric overlay light on the system indicator panel glows when the numeric overlay is on.
To disable the numeric overlay, hold down the Fn key and press F11 again. The numeric overlay light on the system indicator panel goes out.
Using the overlay for cursor control
The keys with the gray arrows and symbols on their left front are the cursor control overlay keys.

To turn the cursor control overlay on, press Fn and F10 simultaneously. The cursor control overlay light on the system indicator panel glows when the cursor control overlay is on.
To disable the cursor control overlay, hold down the Fn key and press F10 again. The cursor control overlay light on the system indicator panel goes out.
Starting a program
The easiest way to start a program is to double-click the name of the file that contains the information you want to work on. To find the file, use the Start menu or Windows ^® Explorer.
If you prefer to open the program first, you have four options. You can:
Double-click the icon for the program on your desktop
Use the Start menu
Use Windows ^® Explorer to locate the program file
Use the Search programs and files field in the Start menu
The next three sections explain how to start a program from the Start menu, Windows ^® Explorer, and the Search programs and files field.
Starting a program from the Start menu
When you install a program, the operating system usually puts an icon in the All Programs menu. To start a program that has an icon in the All Programs menu, follow these steps, which use the Windows® WordPad program as an example:
1 Click Start, and then All Programs.
The Windows ^® operating system displays the All Programs menu, which lists programs and program groups. If your program is listed, go to step 3, otherwise, continue with step 2.
NOTE
If you pause with your mouse on All Programs, it will open it up. You may need to scroll up or down to see the complete list.
2 Click the program group, in this example, Accessories.
The Accessories menu is displayed.
3 Click the program, in this example, WordPad.
WordPad opens.

To close the program, click the Close button in the upper-right corner of the program's window.
Starting a program from Windows® Explorer
If a program is not listed in the All Programs menu, you can start it from Windows® Explorer. Windows® Explorer gives you a view of your computer's contents as a hierarchy or "tree." You can easily see the contents of each drive and folder on your computer. To use this method, you should know the file name and location of the program's executable file (this file ends with .exe).
This example opens WordPad using Windows ^® Explorer.
NOTE
If you pause with your mouse on All Programs, it will open it up. You may need to scroll up or down to see the complete list.

1 Click the Windows Explorer icon on the taskbar.
2 In the left part of the window, double-click Computer to expand the window.
3 In the left part of the window, click the line that ends in “(C:)”.
4 In the right part of the window, double-click the folder containing the program, in this case Program Files.
Windows ^® Explorer shows the contents of the Program Files folder on the right side of the window.
5 In the right part of the window, double-click Windows NT.
6 In the right part of the window, double-click Accessories.
Windows ^® Explorer shows the contents of the Accessories folder on the right side of the window.
7 In the right part of the window, double-click wordpad.
The operating system opens WordPad.

To close the program, click the Close button in the upper-right corner of the program's window.
Starting a program using the Search programs and files field
This example uses the Start menu's Search programs and files field to start WordPad:
1 Click Start to display the Start menu.
The Search programs and files field appears at the bottom of the Start menu.
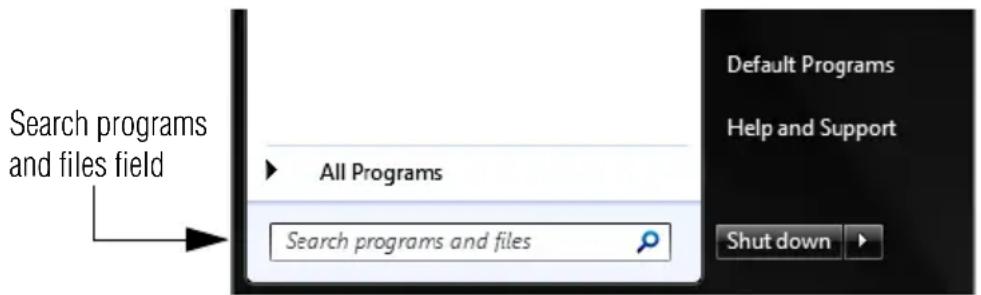
text_image
Search programs and files field All Programs Search programs and files Default Programs Help and Support Shut down(Sample Image) Search programs and files field in Start menu
2 Start typing the program's name (wordpad) in the Search programs and files field.
As you type, all matching files and programs are displayed in a separate window.
3 In the search results window, click WordPad under Programs.
Saving your work
Before you turn off the computer using the Shut down command, save your work on the internal storage drive, external media, flash media, or optical disc. This is one of the most important rules of computing.
When you turn off the computer using the Sleep or Hibernate commands, your work should be there when you resume.
Many programs offer a feature that saves documents at regular intervals. Check your program's documentation to see if it has an automatic save feature.
Saving files
[Non-Text]
1 Click on the arrow in the upper-left corner of your
Windows ^® -based application to display the drop-down menu, and then click Save.
If you are working with a document that already has a file name, this is all you need to do. If you created a new document, your program displays a Save As dialog box.
Use this dialog box to specify where to store the document and to give it a file name.
![TOSHIBA Mini NB250 - [Non-Text] - 1](/content/2026/05/818253/images/3ead96c066b820d84039c1207a200e3482db6c2da56ea6fcc554fec33157525a.jpg)
text_image
Save As Libraries - Documents Search Documents Organize - New folder Favorites Desktop Downloads Recent Places Libraries Documents Music Pictures Videos Computer S3A6884D004 Documents library Includes: 2 locations Name * Date modified Type Fax 5/6/2009 4:51 PM File folder Scanned Documents 5/6/2009 4:50 PM File folder File name: Document Save as type: Rich Text Format (RTF) Save in this format by default Save Cancel Hide Folders(Sample Image) Save As dialog box
2 Choose the drive and folder where you want your file to be stored.
3 Type a file name, then click Save.
File names
The Windows ^® operating system supports long file names that can contain up to 260 characters and can include spaces. Some applications do not support long file names and require file names limited to no more than eight characters.
You may use all the letters, numbers, and other characters on the keyboard, except for these characters: \ / ? : * " > < |. File names are not case-sensitive.
Using a file extension
Most programs assign an extension to the file name that identifies the file as being created in the program with a particular format. For example, Microsoft® Word saves files with a .doc/.docx extension. Any file name with an extension of “.doc/.docx” is assumed to be a Microsoft® Word file. Creating your own extension is usually unwise, since the program is unlikely to recognize a strange extension and may refuse to handle your file correctly.

TECHNICAL NOTE: By default, the Windows ^® operating system does not show file extensions. For information on showing or hiding file extensions, see your Windows ^® online Help.
Printing your work
Ensure the operating system is set up for your printer as described in “Setting up a printer” on page 70.

HINT: You only need to set up the printer the first time you connect it. If you use more than one printer or are changing printers, you will need to set up the Windows ^® operating system to run with the additional printer(s).
To print a file:
1 If your printer is not on, turn it on now.

2 Click on the arrow in the upper-left corner of your
Windows ^® -based application to display the drop-down menu, and then click Print.
The program displays a Print dialog box.
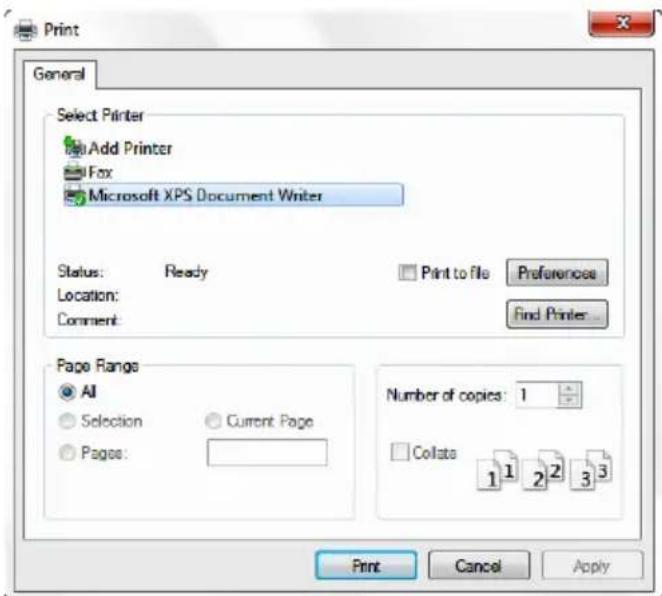
text_image
Print General Select Printer Add Printer Fox Microsoft XPS Document Writer Status: Ready Location: Comment: Print to file Preferences Find Printer... Page Range All Selection Current Page Pages: Number of copies: 1 Collate 1 1 2 2 3 3 Print Cancel Apply(Sample Image) Print dialog box
3 Specify the print parameters. For example, the range of pages and number of copies to print.
4 Click Print.
Backing up your work
Back up all the files you create in case something happens to your computer. You can back up your files to different types of media such as CDs, DVDs, external storage media, or to a network, if available.
To back up several files at one time, use the Microsoft® Windows® Backup program preinstalled on the computer's internal storage drive. Also see “Backing up your data or your entire computer with the Windows® operating system” on page 155.

HINT: Backing up all the files on your internal storage drive may take a considerable amount of time and multiple CDs/DVDs. You may prefer to use a high-capacity backup system, such as an external hard drive.
Restoring your work
To restore information from your backup media to your internal storage drive, use the Restore option in the Windows® Backup and Restore program. Look in the online Help or your operating system documentation for information on restoring files.
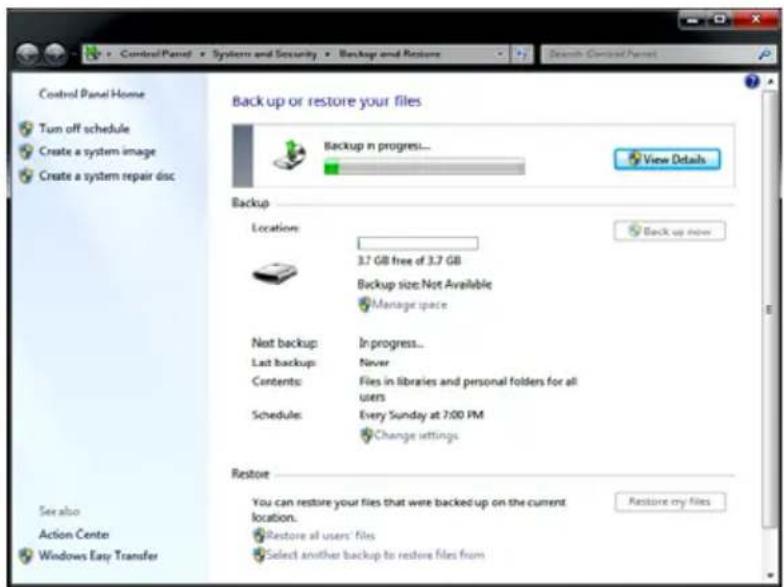
text_image
Control Panel Home Turn off schedule Create a system image Create a system repair disc Back up or restore your files Backup in progress... View Details Backup Location: 3.7 GB free of 3.7 GB Backup size: Not Available Manage space Not backup: In progress... Last backup: Never Contents: Files in libraries and personal folders for all users Schedule: Every Sunday at 7:00 PM Change settings Restore You can restore your files that were backed up on the current location. Restore all users' files Select another backup to restore files from Restore my files See also Action Center Windows Easy Transfer(Sample Image) Backup and Restore screen

TECHNICAL NOTE: When restoring files, the backup program prompts you if you try to overwrite a file that already exists on the internal storage drive. Make sure the backup version is the one you want before overwriting the existing file.
Toshiba's online resources
Toshiba maintains a number of online sites to which you can connect. These sites provide information about Toshiba products, give help with technical questions and keep you up to date with future upgrades. For more information, see “Contacting Toshiba” on page 157.
Chapter 3
Mobile Computing
This chapter covers all aspects of using your computer while traveling.
Toshiba's energy-saver design
Your computer enters a low-power suspension mode when it is not being used, thereby conserving energy and saving money in the process. It has a number of other features that enhance its energy efficiency.
Many of these energy-saving features have been preset by Toshiba. We recommend you leave these features active, allowing your computer to operate at its maximum energy efficiency, so that you can use it for longer periods while traveling.
Running the computer on battery power
The computer contains a removable Lithium-Ion (Li-Ion) battery that provides power when you are away from an AC outlet. You can recharge it many times.
Battery Notice
Battery life rating is for comparison purposes only, and does not indicate the battery life that will be obtained by any individual user. Actual battery life may vary considerably from specifications depending on product model, configuration, applications, power management settings and features utilized, as well as the natural performance variations produced by the design of individual components. The battery life rating is only achieved on the select models and configurations tested by Toshiba under the specific test settings at the time of publication and is not an estimate of a system's battery life under any conditions other than the specific test settings.
Recharge time varies depending on usage. Battery may not charge while the computer is consuming full power. After a period of time, the battery will lose its ability to perform at maximum capacity and will need to be replaced. This is normal for all batteries. To purchase a new battery pack, see the accessories information included with your computer or visit the Toshiba Web site at accessories.toshiba.com. Use only batteries designed to work with your Toshiba computer.
To ensure that the battery maintains its maximum capacity, operate the computer on battery power at least once a month. The Lithium-Ion battery has no memory effect so it is not necessary to let the battery fully discharge each time. However, for better accuracy of the battery meter, it is helpful to fully discharge the battery periodically. Please see “Maintaining your battery” on page 108 for procedures. If the computer is continuously operated on AC power, either through an AC adaptor or a port replicator (if applicable to your system), for an extended period (more than a month), the battery may fail to retain a charge. This may shorten the life of the battery, and may cause the battery meter to be inaccurate.
NOTE
For optimum optical media performance, it is recommended that you play DVDs while running the computer on AC power. For more information about Windows ^® power plans, see “Power Plans” on page 102.
The computer also has an internal real-time-clock (RTC) battery.
The RTC battery powers the RTC memory that stores your system configuration settings and the current time and date information. It maintains this information for up to a month while the computer is turned off.

TECHNICAL NOTE: Depending on your system, the RTC battery may only charge while the computer is turned on.
Power management
Your computer ships with the power management options preset to a configuration that will provide the most stable operating environment and optimum system performance for both AC power and battery modes.
CAUTION
Changes to these settings may result in system performance or stability issues. Users who are not completely familiar with the power management component of the system should use the preset configuration. For assistance with setup changes, contact Toshiba's Customer Support Center.
Using additional batteries
If you travel and need to use your computer for many hours without an AC power source, you may purchase a battery module for use in the computer, or carry additional charged battery packs with you.
For more information on batteries and accessories, see accessories.toshiba.com.
Charging batteries
The battery needs to be charged before you can use it to power the computer.
CAUTION
Never leave batteries in the battery charger for more than a week at a time. Doing so may reduce the potential charge of the battery.
Always use the battery charger specified by Toshiba. You can order a Toshiba battery charger from Toshiba's Web site at accessories.toshiba.com.
NOTE
Battery charge time may vary depending on the applications, power management settings, and features used.
Charging the main battery
To charge the main battery while it is in your computer, plug the computer into a live electrical outlet. The battery charges whether the computer is on or off.

TECHNICAL NOTE: The recharging of the battery cannot occur when your computer is using all of the power provided by the AC adaptor to run applications, features, and devices. Your computer's Power Options utility can be used to select a power level setting that reduces the power required for system operation and will allow the battery to recharge.
The battery may not start charging immediately under the following conditions:
◆ The battery is extremely hot or cold.
To ensure that the battery charges to its full capacity, wait until it reaches room temperature (50 to 80 degrees Fahrenheit, 10 to 26 degrees Celsius).
The battery is almost completely discharged.
Leave the power connected and the battery should begin charging after a few minutes.

HINT: Once the battery is fully charged, we recommend that you operate your computer on battery power until the battery discharges completely. Doing this extends battery life and helps ensure accurate monitoring of battery capacity.
Charging the RTC battery
Your computer has an internal real-time clock (RTC) battery. The RTC battery powers the System Time Clock and BIOS memory used to store your computer's configuration settings. When fully charged, it maintains this information for up to a month when the computer is powered off.
The RTC battery may have become completely discharged while your computer was shipped, resulting in a CMOS error message during startup. The error message may vary by computer model.
NOTE
Depending on your system, the RTC battery may only charge while the computer is turned on.
To recharge the RTC battery, plug the computer into a live electrical outlet and leave the computer powered on for 24 hours.
NOTE
It is seldom necessary to charge the RTC battery because it charges while the computer is on. If the RTC battery is low, the real-time clock and calendar may display the incorrect time and date or stop working.
When Hibernation mode is enabled and the RTC battery is completely discharged, a warning prompts you to reset the real-time clock.
The computer can be used while the RTC battery is being charged, although the charging status of the RTC battery cannot be monitored.
Monitoring main battery power

The computer's main battery light gives you an indication of the main battery's current charge.
Glows amber while the main battery is being charged (AC adaptor connected)
Glows green when the main battery is fully charged
Is unlit when the battery has discharged, the battery is not charging, or the AC adaptor is not plugged into the computer or AC outlet
NOTE
Battery life and charge time may vary, depending upon power management settings, applications and features used.
◆ Flashes amber when the main battery charge is low and it is time to recharge the main battery or plug in the AC adaptor
NOTE
If the AC power light flashes amber during charging, either a battery pack is malfunctioning, or it is not receiving correct input from the AC power supply.
Disconnect the AC power cord/cable and remove the battery pack. See “Changing the main battery” on page 104 for information on replacing the main battery.

HINT: Be careful not to confuse the battery light (☐) with the ON/OFF light (☐)
When the ON/OFF light flashes amber, it indicates that the system is suspended (using the Windows ^® operating system Sleep command).
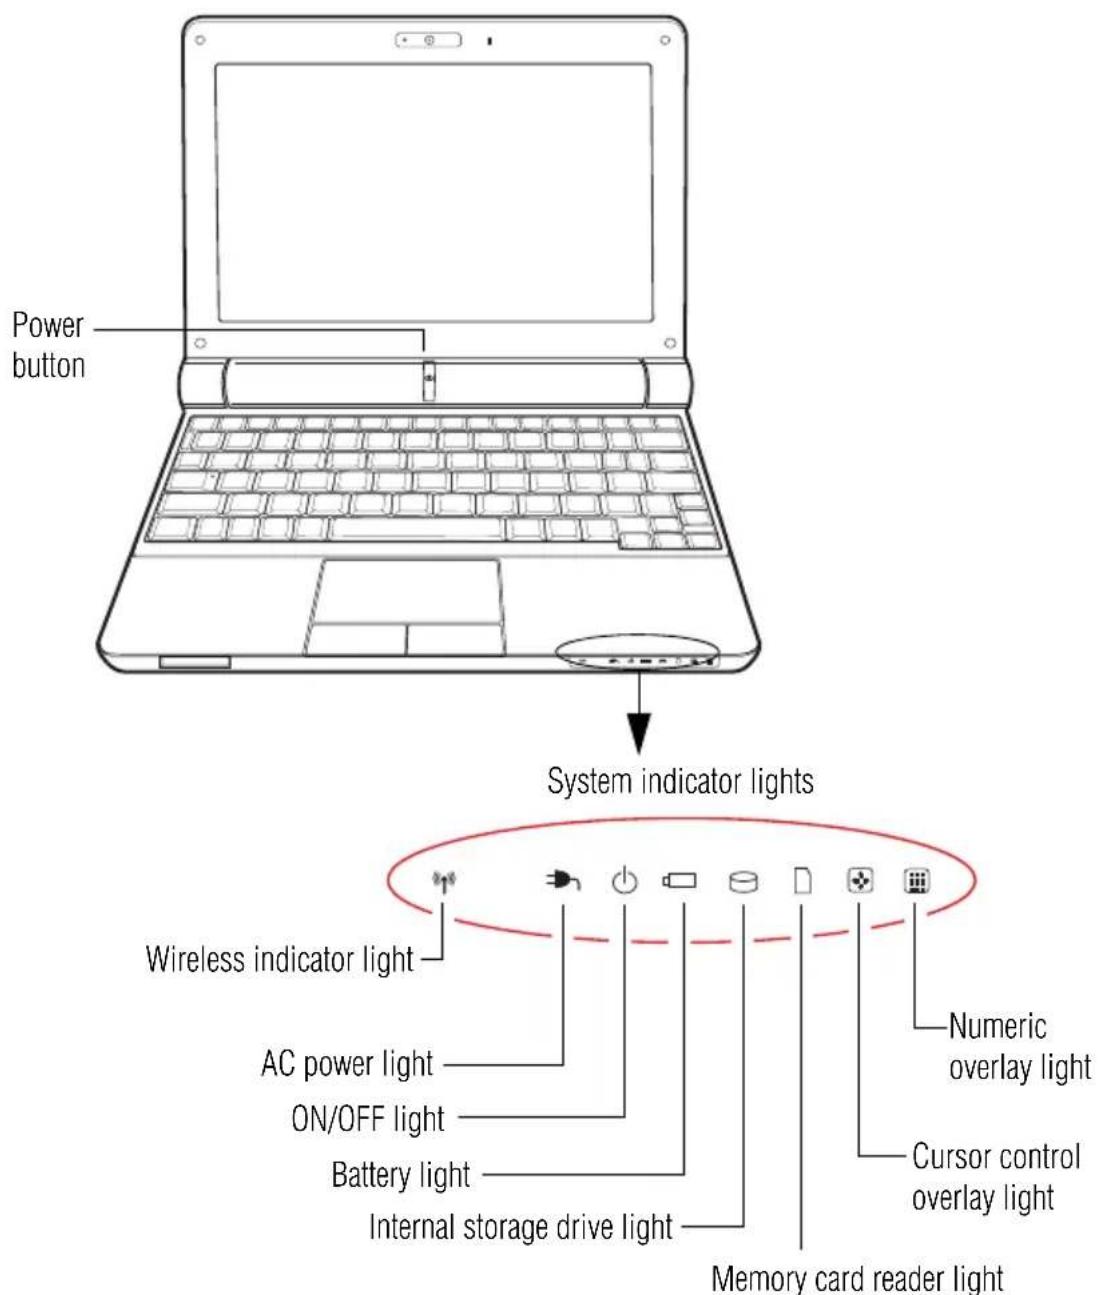
text_image
Power button System indicator lights Wireless indicator light AC power light ON/OFF light Battery light Internal storage drive light Numeric overlay light Cursor control overlay light Memory card reader light(Sample Illustration) Power and battery light locations
Determining remaining battery power
NOTE
Wait a few moments after turning on the computer before trying to monitor the remaining battery power. The computer needs this time to check the battery's remaining capacity and perform its calculations.

Move the pointer over the power icon in the notification area, see “Finding your way around the desktop” on page 112 for more information on the notification area. A pop-up message displays the remaining battery power as a percentage.
With repeated discharges and recharges, the battery's capacity gradually decreases. A frequently used older battery does not power the computer for as long as a new battery, even when both are fully charged.

TECHNICAL NOTE: The computer drains the battery faster at low temperatures. Check your remaining charge frequently if you are working in temperatures below 50 degrees Fahrenheit.
The computer calculates the remaining battery charge based on your current rate of power use and other factors such as the age of the battery.
What to do when the main battery runs low
When the main battery runs low you can:
Plug the computer into an external power source and recharge the main battery
Place the computer into Hibernation mode and replace the main battery with a charged spare (not included with your computer)
◆ Save your work and turn off the computer
If you do not manage to do any of these things before the main battery completely runs out of power, the computer automatically enters Hibernation mode and turns itself off. Hibernation mode keeps track of where you were, so that when you turn on the power again, you can continue where you left off.
If you have Hibernation mode enabled (the default), the computer copies the details of your open programs and files to the internal storage drive before shutting down. For more information on using Hibernation, see “Hibernation mode” on page 72.
Setting battery notifications
You can set two notifications. Each notification can be set to alert you when a specified percentage of remaining battery power has been reached. You can also set the computer to enter Sleep mode or Hibernation mode or to completely power down when the notification goes off.
To change the default notification settings:
1 Click Start, Control Panel, System and Security, and then Power Options.
The Power Options window appears.
2 Click Change plan settings under the power plan to be customized.
The Edit Plan Settings window appears.
3 Click Change advanced power settings.
The Advanced settings tab of the Power Options window appears.
4 Double-click Battery to display the battery options.
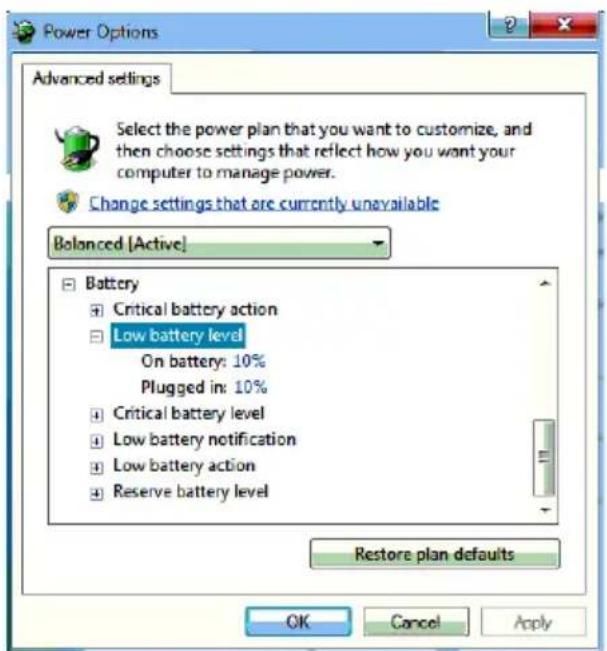
text_image
Power Options Advanced settings Select the power plan that you want to customize, and then choose settings that reflect how you want your computer to manage power. Change settings that are currently unavailable Balanced [Active] Battery Critical battery action Low battery level On battery: 10% Plugged in: 10% Critical battery level Low battery notification Low battery action Reserve battery level Restore plan defaults OK Cancel Apply(Sample Image) Advanced settings tab of Power Options screen
5 Configure the alarm settings to suit your needs.
Conserving battery power
How long a fully charged battery pack lasts when you are using the computer depends on a number of factors, such as:
How the computer is configured
How much you use the internal storage drive or other optional devices
Where you are using the computer, since operating time decreases at low temperatures
There are various ways in which you can conserve power and extend the operating time of your battery:
◆ Enable Sleep or Hibernation, which saves power when you turn off the computer and turn it back on again
Use the Windows ^® power-saving option plans
These power-saving options control the way in which the computer is configured. By using them, you can increase the length of time you can use the computer before you need to recharge the battery.
Microsoft ^® has combined these options into preset Power Plans. Using one of these power plans lets you choose between maximum power savings and peak system performance. You may also set individual power-saving options to suit your own needs.
The following sections describe how to choose a Power Plan and discuss each power-saving option.
Power Plans
You can choose a predefined Power Plan or select your own combination of power options. To do this:
1 Click Start, Control Panel, System and Security, and then Power Options.
The Windows ^® Power Options window appears.
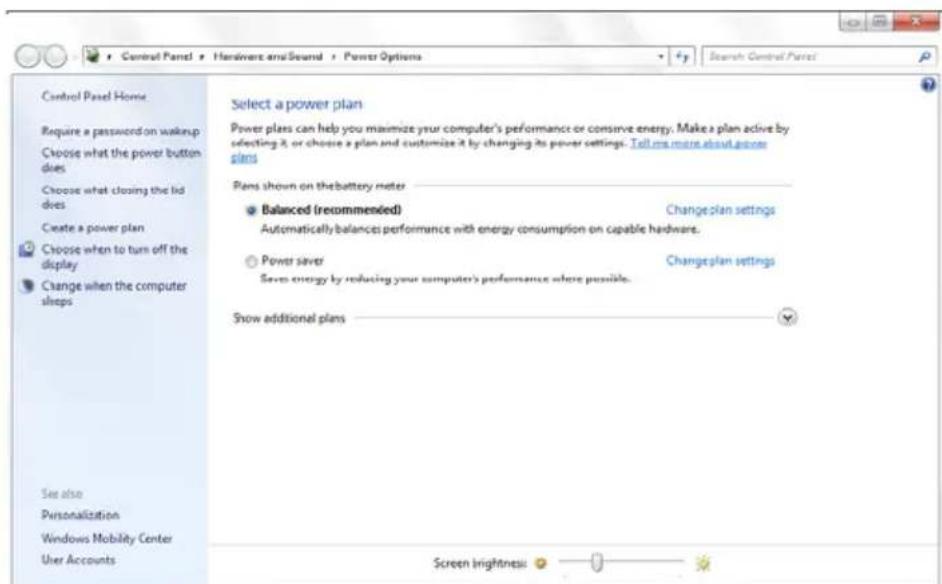
text_image
Control Panel Home Require a password on wakeup Choose what the power button does Choose what closing the lid does Create a power plan Choose when to turn off the display Change when the computer sleeps See also Personalization Windows Mobility Center User Accounts Select a power plan Power plans can help you maximize your computer's performance or conserve energy. Make a plan active by selecting it, or choose a plan and customize it by changing its power settings. Tell me more about power plans Plans shown on the battery meter Balanced (recommended) Change plan settings Automatically balances performance with energy consumption on capable hardware. Power saver Change plan settings Seven energy by reducing your computer's performance where possible. Show additional plans Screen brightness: 0(Sample Image) Windows® Power Options window
2 Select an appropriate plan for your work environment or create your own custom plan.
3 Click Create a power plan in the left pane to set up a new plan.
NOTE
To edit a plan or to edit advanced settings, continue to the following steps.
4 Click Change plan settings to choose the plan you want to edit.
This screen allows you to change basic settings.
5 Click Change advanced power settings to access settings for battery notification levels, internal storage drive power save time, etc.
You can click on the plus signs to expand each item and to see what settings are available for each item.
6 Click OK to save the plan changes you have performed.
By default the two power plans Balanced and Power Saver are satisfactory for most people and do not need to be edited. The Power Saver plan is the best used for maximum battery time. The Balanced plan is a compromise between battery time and performance.
Using a hot key to set the Power Plan
You may use a hot key to set the Power Plan.
To set the Power Plan:
1 Press Fn and F2 simultaneously to display the Power Plan hot key card.
text_image
F2 Power Plan Balanced
(Sample Image) Power Plan hot key card
2 While continuing to press Fn, press F2 until you select the desired Power Plan.
The Power Plan options are: Balanced and Power Saver.
3 Release the Fn key.
The hot key card disappears. You are now in the selected mode.
Changing the main battery
When your main battery has run out of power, you have two options: plug in the AC adaptor or install a charged main battery.
▲WARNING
Never short circuit the battery pack by either accidentally or intentionally bringing the battery terminals in contact with another conductive object. This could cause serious injury or fire, and could also damage the battery pack and computer.
Never expose a battery pack to abnormal shock, vibration or pressure. The battery pack's internal protective device could fail, causing it to overheat or ignite, resulting in caustic liquid leakage, or explosion or fire, possibly resulting in death or serious injury.

TECHNICAL NOTE: To avoid losing any data, save your files and then either completely shut down your computer or put it into Hibernation mode before changing the main battery.
Removing the battery from the computer
To remove the battery:
1 Save your work.
2 Turn off the computer or place it in Hibernation mode according to the instructions in “Using and configuring Hibernation mode” on page 76.
3 Unplug and remove any cables connected to the computer, including the AC adaptor.
4 Close the display panel and turn the computer upside down.
5 Slide the battery release lock to the unlocked position.
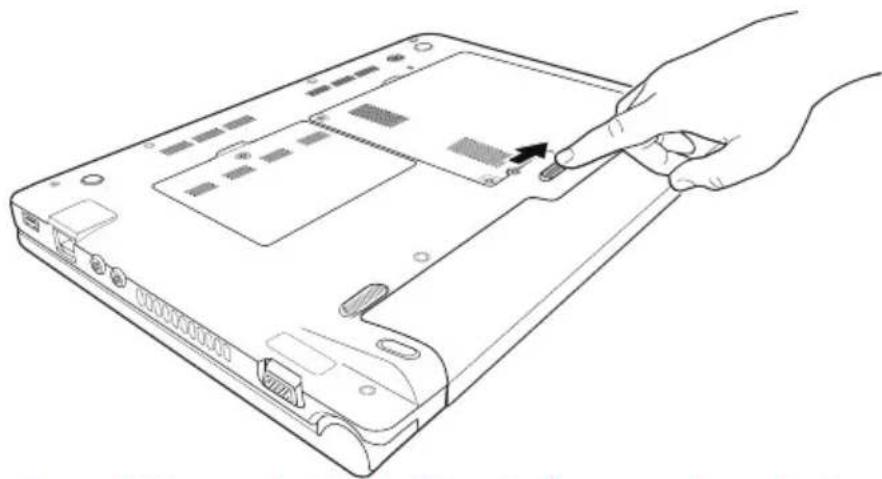
natural_image
Line drawing of a hand inserting a component into a laptop keyboard (no text or symbols)(Sample Illustration) Unlocking the battery release lock
6 Slide the battery release latch to release the battery.
7 Pull the discharged battery out of the computer.
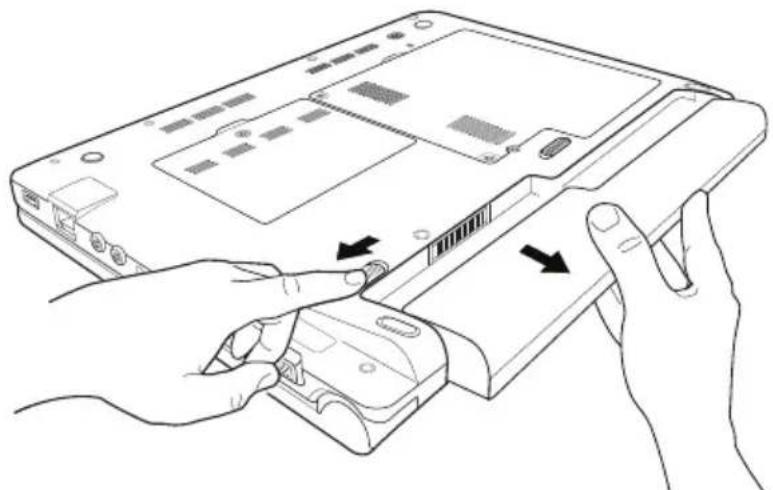
natural_image
Line drawing of hands holding a device with arrows indicating process (no text or symbols)(Sample Illustration) Removing the battery
▲WARNING
If the battery is leaking or its case is cracked, put on protective gloves to handle it, and discard it immediately. Always dispose of used battery packs in compliance with all applicable laws and regulations. Put insulating tape, such as cellophane tape, on the electrode during transportation to avoid a possible short circuit, fire or electric shock. Failure to do so could possibly result in serious injury.
Inserting a charged battery
To insert a battery:
1 Wipe the terminals of the charged battery with a clean cloth to ensure a good connection.
2 Insert the charged battery into the slot until the latch clicks.
The battery pack has been designed so that you cannot install it with reverse polarity.
CAUTION
If the battery does not slide into the slot easily, move the battery release lock to the unlocked position and try again. Do not force the battery into position.
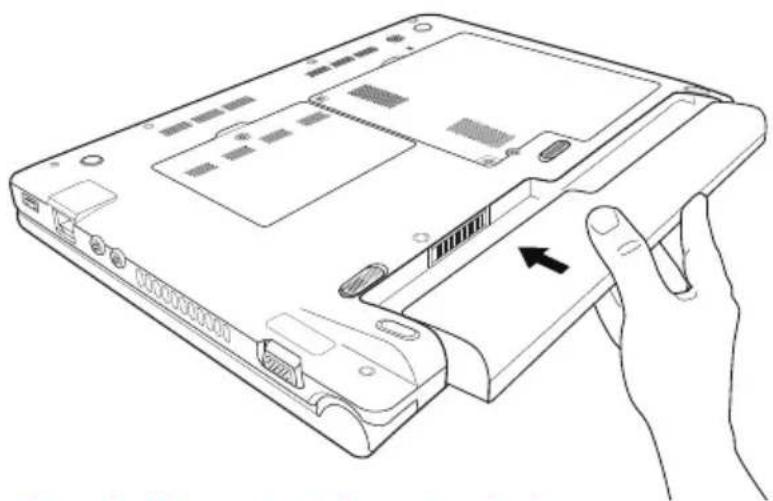
natural_image
Line drawing of a laptop with an open rear panel and a hand holding the side panel (no text or symbols)(Sample Illustration) Inserting the battery
3 Slide the battery release lock to the locked position.
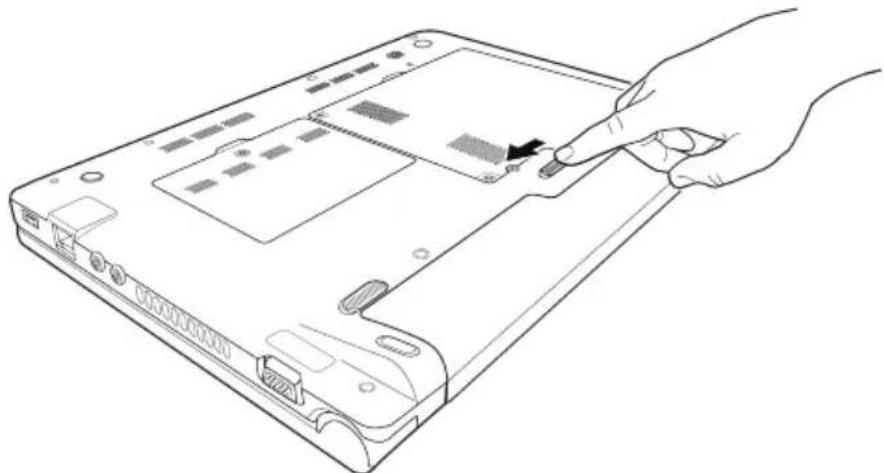
natural_image
Line drawing of a hand inserting a component into a laptop keyboard (no text or symbols)(Sample Illustration) Locking the battery release lock
4 Turn the computer right side up.
5 Reconnect any cables that were removed in step 3 of "Removing the battery from the computer" on page 104.
6 Restart the computer.
Taking care of your battery
The following sections offer tips on how to take care of your battery and prolong its life.
Safety precautions
If the battery pack produces an odor, overheats or changes color or shape while it is being used or charged, turn off the computer's power immediately and disconnect the power cord/cable from the power socket. Carefully remove the battery pack from the computer.
Do not try to disassemble a battery pack.
Do not overcharge or reverse charge a battery. Overcharging will shorten its life, and reverse charging could damage it.
Avoid touching the metal terminals of the battery with another metal object. Short-circuiting the battery can cause it to overheat and may cause damage to the battery or the computer.
Do not incinerate a spent battery, as this could cause it to explode and release caustic liquid.
If a battery is leaking or damaged, replace it immediately. Use protective gloves when handling a damaged battery.
To replace the main battery, use an identical battery that you can purchase through the Toshiba Web site at accessories.toshiba.com.
A reverse polarity condition should be avoided with all batteries. The main battery is designed so that it cannot be installed in reverse polarity.
◆ Charge the battery only in the computer or in a battery charger designated as an approved option.
When you install the battery pack, you should hear a click when it is seated properly.
Do not expose the battery pack to fire. The battery pack could explode.
Maintaining your battery
Fully discharging your battery pack will allow better accuracy of the battery meter.
To fully discharge your battery pack:
Periodically, disconnect the computer from a power source and operate it on battery power until the battery pack fully discharges. Before doing so, follow the steps below:
1 Turn off the computer's power.
2 Disconnect the AC adaptor and turn on the computer's power. If it does not turn on, go to step 4.
3 Operate the computer on battery power for five minutes. If the battery pack has at least five minutes of operating time, continue operating until the battery pack is fully discharged. If the battery light flashes or there is some other warning to indicate a low battery, go to step 4.
4 Connect the AC adaptor to the computer and the power cord/cable to a power outlet. The DC-IN or AC power-light should glow green, and the battery light should glow amber to indicate that the battery pack is being charged. If the DC-IN or AC power-light indicator does not glow, power is not being supplied. Check the connections for the AC adaptor and power cord/cable.
5 Charge the battery pack until the battery light glows green.
If you have extra battery packs, rotate their use.
If you will not be using the system for an extended period, more than one month, remove the battery pack.
If you are not going to use the computer for more than eight hours, disconnect the AC adaptor.
Store spare battery packs in a cool dry place out of direct sunlight.
Disposing of used batteries
The life of a battery pack depends on usage. When the battery pack needs replacing, the main battery light flashes amber shortly after you have fully recharged the battery.
You must discard a battery if it becomes damaged.
▲WARNING
Never attempt to dispose of a battery pack by burning or by throwing it into a fire, and never allow exposure to a heating apparatus (e.g., microwave oven). Heat can cause a battery pack to explode and/or release caustic liquid, both which may possibly cause serious injury.
Always dispose of used battery packs in compliance with all applicable laws and regulations. Put insulating tape, such as cellophane tape, on the electrode during transportation to avoid a possible short circuit, fire or electric shock. Failure to do so could possibly result in serious injury.
▲WARNING
Always use the battery pack supplied as an accessory or an equivalent battery pack specified in the User's Manual. Other battery packs have different voltage and terminal polarities. Use of non-conforming battery packs could generate smoke or cause fire or rupture, possibly resulting in serious injury.
After repeated use, the batteries will finally lose their ability to hold a charge and you will need to replace them. Under certain applicable laws and regulations, it may be illegal to dispose of old batteries by placing them in the trash.
Please be kind to our shared environment. Check with your local government authority for details regarding where to recycle old batteries or how to dispose of them properly. If you cannot find the information you need elsewhere, call Toshiba at: (800) 457-7777.
In addition, Toshiba's recycling initiatives include recycling programs, events and consumer promotions. For details, please visit www.laptops.toshiba.com/green.
Toshiba is dedicated to preserving the environment by sponsoring Call2Recycle™, a program of the Rechargeable Battery Recycling Corporation. For more information and for drop-off locations, visit www.rbrc.org or call 1-800-822-8837.
Notice regarding CR coin cell batteries, applicable to California, U.S.A. only:
Perchlorate Material - special handling may apply.
See http://www.dtsc.ca.gov/hazardouswaste/perchlorate/
Traveling tips
The environmental precautions listed in “Getting comfortable with your computer” on page 29, also apply while traveling.
✿ Never leave your computer on a sunny ledge or in a place where it could get wet or covered in dust.
Always travel with the computer in a carrying case. Toshiba offers a choice of carrying cases for the computer. They all provide plenty of extra space for manuals, power cords, and compact discs. Contact your authorized Toshiba representative for more information or visit Toshiba's Web site at accessories.toshiba.com.

TECHNICAL NOTE: When traveling by air, you may be required to pass your computer through airport security equipment. The X-ray equipment will not harm your computer.
NOTE
Before using your computer aboard an aircraft, make sure the Wireless antenna is OFF if your computer has wireless LAN capability.
NOTE
To enable or disable wireless communication, use the Hot Key Fn + F8. For more information see “Hot Keys/TOSHIBA Cards” on page 161.
Chapter 4
Exploring Your Computer's Features
In this chapter, you will explore some of the special features of your computer.
Exploring the desktop
The desktop is the launching pad for everything you can do in the Windows ^® operating system. You can use its features to start programs, find documents, set up system components, and perform most other computing tasks.

HINT: The illustrated examples in this guide may appear slightly different from the screens displayed by your system. The differences are not significant and do not indicate any change in the functionality of your system.
Finding your way around the desktop
Your computer's desktop includes several standard features: icons, Start button, taskbar, notification area, and background pattern.
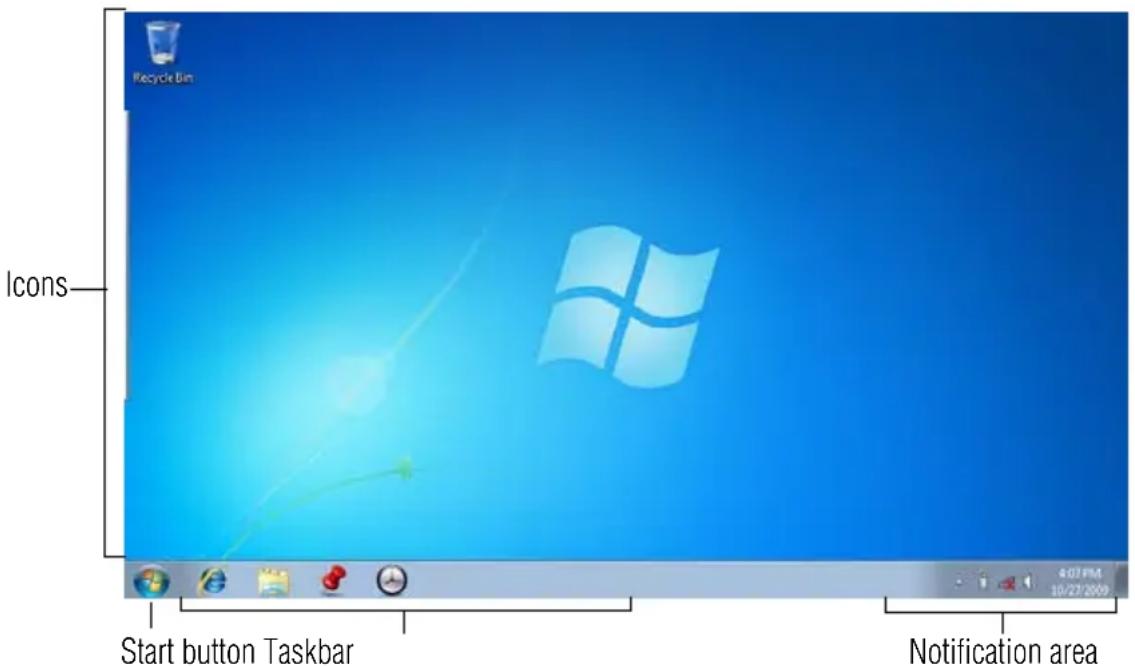
text_image
Recycle Bin Icons Start button Taskbar Notification area(Sample Image) Windows ^® operating system desktop
Icons
An icon represents a folder, file, or program that can be quickly activated by double-clicking the icon.
You can create a new desktop icon for any folder, file, or program by dragging the element's icon from its location in a window to the desktop area.
You may see various icons displayed on your system desktop, for example:

Recycle Bin—Holds files you have deleted. You may be able to retrieve these files until you empty the Recycle Bin.

- TECHNICAL NOTE: If you delete a large number of files or very large files from the internal storage drive, there may be insufficient space available in the Recycle Bin to hold these files. In this case, Windows® will prompt you to either permanently delete the file(s) or cancel the deletion.
If you delete a file (of any size) from an external media or flash media, it does not go into the Recycle Bin. The file is permanently deleted. - Permanently deleted files cannot be recovered from the Recycle Bin. For more information on the Recycle Bin, see Windows® online Help.
NOTE
If you place the pointer over an icon, a popup description of the file contents appears.
Your desktop may contain other icons depending on your configuration. See Windows ^® online Help for more specific information on each icon and how to use it.
Start button

You use the Start button to:
◆ Start programs
Open documents
Adjust system settings
Find files
Access Windows ^® Help and Support
◆ Suspend system activity and shut down the computer
NOTE
Whenever a procedure in this User's Guide instructs you to click Start, it means that you should click the Start button.
Taskbar
Each time you open a program, a button associated with that program appears on the taskbar. With some programs, a button appears on the taskbar for each document or window you open. You can use these buttons to quickly switch between the programs or windows.
To make a program or window the currently active one, click the associated taskbar button.
Notification area
The notification area displays icons of tasks or programs that run continuously in the background and displays notifications. To learn more about each task, position the pointer over the icon for a few moments and a short description of the task appears.
Typical tasks in the notification area are Current time, Power usage mode, network connectivity status, and speaker volume.
To activate a specific task, click the appropriate notification area icon.
Setting up for communications
To connect to the Internet, or use an online service, you need:
A browser or communications program
An Internet Service Provider (ISP) or online service if you plan to use the Internet
A way to connect to the ISP (for example Wi-Fi ^ /LAN, etc.)
Using Wireless LAN connectivity
NOTE
Wireless connectivity and some features may require you to purchase additional software, external hardware or services. Availability of public wireless LAN access points may be limited.
Your system comes with a LAN module. This is a technology that expands wireless communication beyond networking equipment, and can connect many different kinds of electronic devices without the need for cables.
For information on how to set up a wireless connection, refer to your wireless networking device documentation or your network administrator.
To turn your wireless communication ON/OFF, press Fn + F8.
NOTE
To enable or disable wireless communication, use the Hot Key Fn + F8. For more information see “Hot Keys/TOSHIBA Cards” on page 161.
NOTE
When the Wireless antenna is ON, the wireless indicator light will be lit.
For help with common Wi-Fi ^® networking problems, see “Wireless networking problems” on page 151.
Connecting your computer to a network
You can connect your computer to a network to increase its capabilities and functionality using one of its communication ports.
Accessing a network
To access a network, connect an Ethernet cable to the Network port (RJ45) on your computer. For specific information about connecting to the network, consult your network administrator. Many hotels, airports, and offices offer Wi-Fi ^® access. If your computer has Wi-Fi ^® , ask them for help when connecting to their Wi-Fi ^® network.
Exploring audio features
You can use your computer to record sounds using the computer's internal microphone or an optional external microphone. You can listen to sound files or audio CDs using the built-in speakers, headphones, or external speakers.
Recording sounds
You may record sounds using the computer's internal microphone or by connecting an optional external microphone.
Using a microphone

1 If you want to use an external microphone, connect it to the computer.
2 Click Start, All Programs, Accessories, and then Sound Recorder.
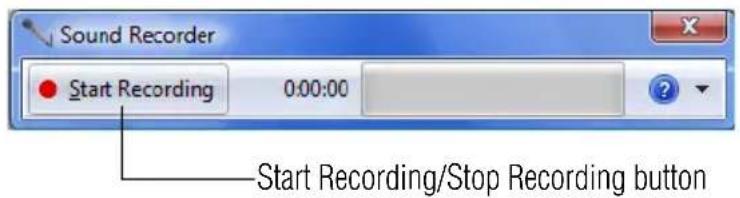
text_image
Sound Recorder Start Recording 0:00:00 Start Recording/Stop Recording button(Sample Image) Sound Recorder screen
3 Click the Start Recording button.
4 Speak normally into the microphone.
NOTE
For better sound quality, you may need to speak closer to the internal microphone.
5 When you have finished recording, click the Stop Recording button.
The Save As dialog box appears.
6 To save the file, type a file name, and then click Save.
Using external speakers or headphones
Your computer is equipped with a full stereo sound system with internal speakers. Instead of using the internal speakers, you can connect headphones or a pair of external stereo speakers.
▲ CAUTION
Before putting on headphones to listen, turn the volume down. Do not set the volume too high when using headphones. Continuous exposure to loud sound can harm your hearing.

TECHNICAL NOTE: When using amplified speakers, use speakers that require an external power source. Other types of speakers will be inadequate to produce sound from the computer.

To play back sound files through external speakers or headphones:
1 Locate the headphone jack on the computer.
2 Using any necessary adapters, plug the cable from the headphones or external speakers into the headphone jack.
The headphone jack requires a 16-ohm stereo mini connector.
To adjust the volume:
For external speakers, use the volume controls on each speaker.
For headphones, use the computer's volume control.

Using the Web Camera
Your computer may come with a built-in Web Camera. With this Web Camera you can do the following:
Take pictures and record videos with your computer
◆ Chat with others and have them see you while using instant messaging (IM) programs
Have video conference calls
NOTE
To email, instant message or video conference, you must be connected to the Internet.
Depending on your computer model, the process of sending email, taking pictures or recording video messages may vary.
The Web Camera software, by default, should already be running. The Web Camera indicator light glows when the Web Camera is active. For more information on the software, click Start, All Programs, TOSHIBA, Utilities, and then Web Camera Application Help.
Using the Memory card reader
The Memory card reader supports the use of Secure Digital ^TM (SD ^TM ) and MMC ^® (MultiMediaCard ^® ) media. These media can be used with a variety of digital products: digital music players, cellular phones, PDAs, digital cameras, digital video camcorders, etc.
CAUTION
To use a micro or mini SD™ Card, an SD™ adapter is required.
The Memory card reader may also support other types of media.
NOTE
Do not use the Copy Disk function for this type of media. To copy data from one media to another, use the drag-and-drop feature of the Windows ^® operating system.
Inserting memory media
The following instructions apply to all types of supported media devices.
1 Turn the media so that the contacts (metal areas) are face down.
2 Push the media into the adapter until it locks in place.
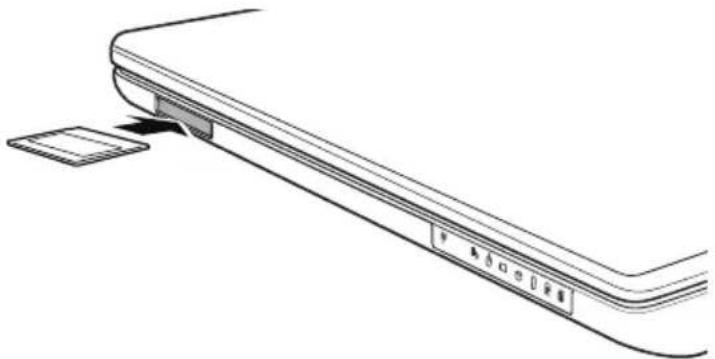
natural_image
Line drawing of a device's rear panel with a clip inserted, showing no text or symbols(Sample Illustration) Inserting memory media
CAUTION
When inserting memory media, do not touch the metal contacts. You could expose the storage area to static electricity, which can destroy data.
Removing memory media

1 Prepare the card for removal by clicking on the Show hidden icons button (▲), if necessary, in the notification area and then selecting the Safely Remove Hardware and Eject Media icon.
If the system is unable to prepare the media for safe removal, a message will tell you to try again later. If the media can be removed now, the system displays Safe to Remove Hardware.
If the computer has a spring-loaded adapter slot, see step 2; otherwise, skip to step 3.
2 Gently press the card inward to release it.
The card pops out slightly.
3 Grasp the card and pull it straight out.
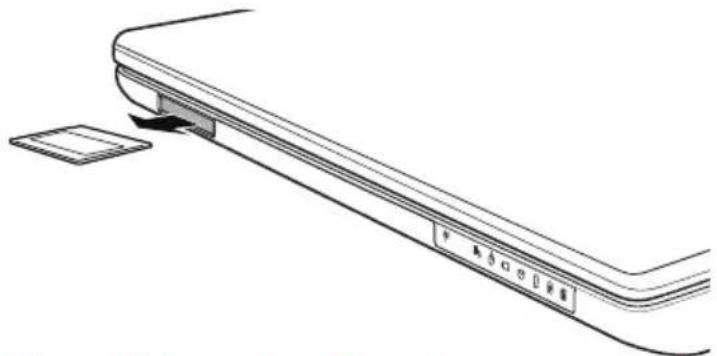
text_image
Diagram showing a device with labeled buttons and an arrow indicating a process or operation, likely from a software interface.(Sample Illustration) Removing memory media
CAUTION
Do not remove memory media while data is being written or read. Even when the Windows® message “copying...” disappears, writing to the media might still be in progress and your data could be destroyed. Wait for the indicator light to go out.
Chapter 5
Utilities
Your computer includes several utilities designed to help you to reconfigure your system to best meet your individual needs.
Together, these allow you to ascertain certain system details, set additional options, or change default options. These utilities are described in this chapter.
NOTE
The utilities described in this chapter, and the icons shown in the sample images are applicable only if the related utility is available on your system.
TOSHIBA Assist
TOSHIBA Recovery Media Creator
TOSHIBA Application Installer
Supervisor password
User password
TOSHIBA PC Diagnostic Tool Utility
Mouse Utility
TOSHIBA Hardware Setup
TOSHIBA Zooming Utility
TOSHIBA Accessibility
TOSHIBA Service Station
TOSHIBA Assist
The TOSHIBA Assist provides quick access to computer functions and allows you to customize a range of computer settings.
To access TOSHIBA Assist, click Start, All Programs, TOSHIBA, Utilities, and then TOSHIBA Assist.
The TOSHIBA Assist window appears.
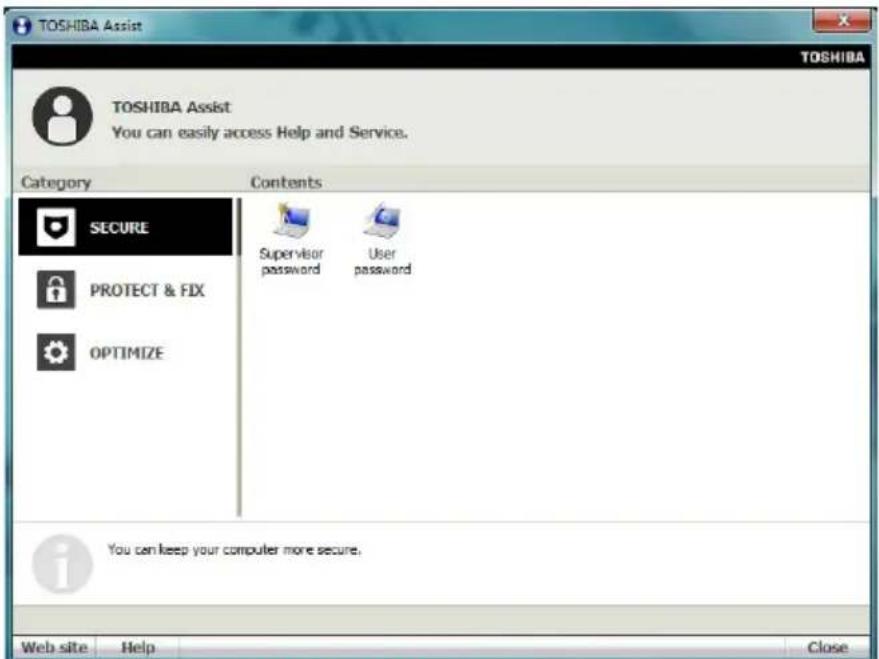
text_image
TOSHIBA Assist TOSHIBA Assist You can easily access Help and Service. Category Contents SECURE Supervisor User protect & fix password password password OPTIMIZE You can keep your computer more secure. Web site Help Close(Sample Image) TOSHIBA Assist window
The TOSHIBA Assist offers four categories of options:
Secure
Protect & Fix
Optimize
Secure
The features available in this category are:
Supervisor password
User password
text_image
TOSHIBA Assist TOSHIBA Assist You can easily access Help and Service. Category Contents SECURE PROTECT & FDX OPTIMIZE Supervisor password User password You can keep your computer more secure. Web site Help Close(Sample Image) TOSHIBA Assist window - Secure tab
Protect & Fix
The feature available in this category is:
TOSHIBA PC Diagnostic Tool Utility
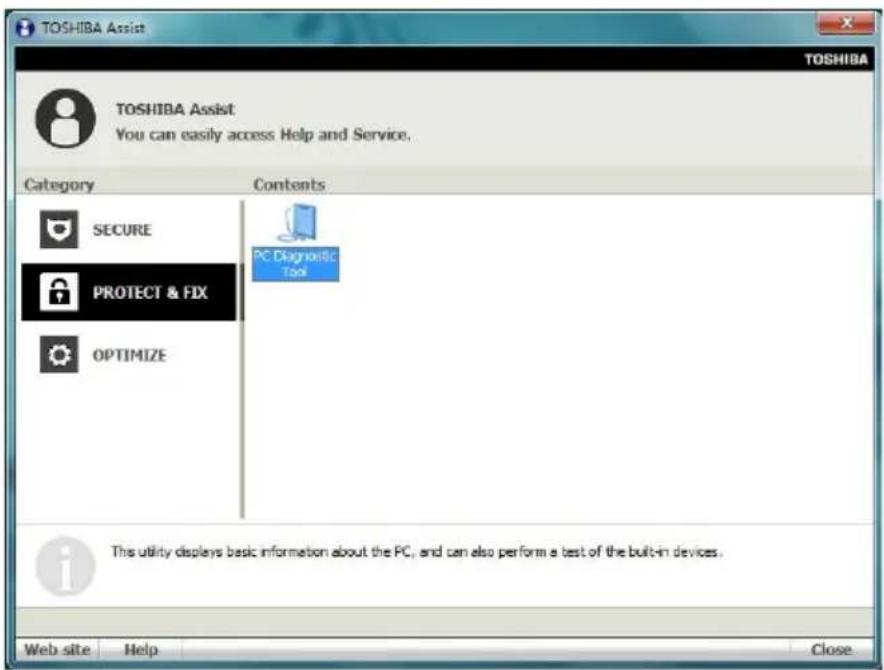
text_image
TOSHIBA Assist TOSHIBA Assist You can easily access Help and Service. Category Contents SECURE PC Diagnosis Tool PROTECT & FIX OPTIMIZE This utility displays basic information about the PC, and can also perform a best of the built-in devices. Web site Help Close(Sample Image) TOSHIBA Assist window - Protect & Fix tab
Optimize
The features available in this category are:
Mouse Utility
TOSHIBA Hardware Setup (Hardware Settings)
TOSHIBA Zooming Utility
TOSHIBA Accessibility
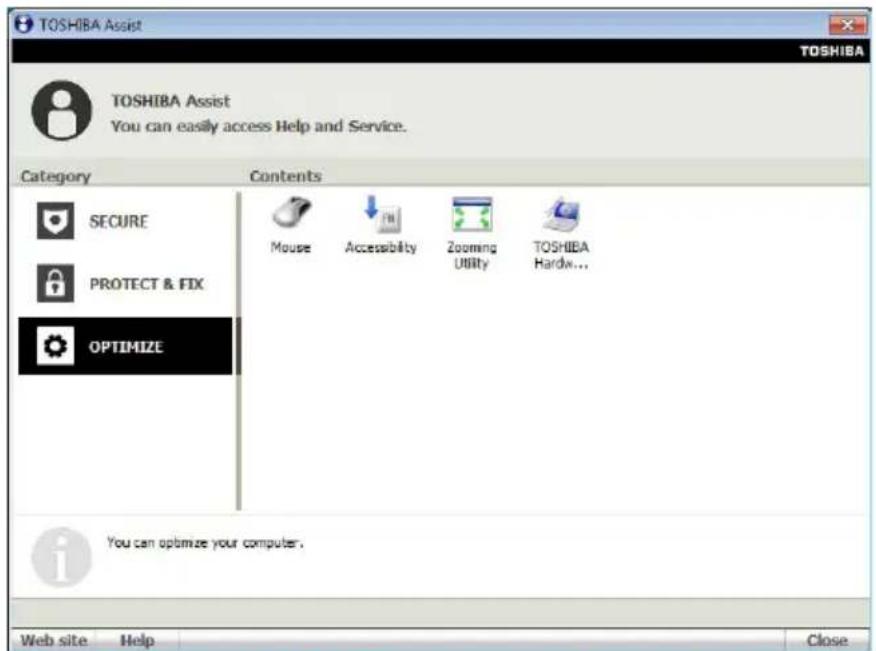
text_image
TOSHIBA Assist TOSHIBA Assist You can easily access Help and Service. Category Contents SECURE Mouse Accessibility Zooming Utility TOSHIBA Hardw... PROTECT & FIX OPTIMIZE You can optimize your computer. Web site Help Close(Sample Image) TOSHIBA Assist window - Optimize tab
TOSHIBA Recovery Media Creator
The TOSHIBA Recovery Media Creator utility enables you to create recovery DVDs/media that can be used to return your system to its out-of-box state, if necessary. For detailed information on using the utility to create recovery DVDs/media, see “Creating recovery DVDs/media” on page 56.
TOSHIBA Application Installer
The TOSHIBA Application Installer allows you to reinstall the drivers and applications that were originally bundled with your computer.
To reinstall drivers and applications:
1 Click Start, All Programs, My Toshiba, and then TOSHIBA Application Installer.
2 Click Next.
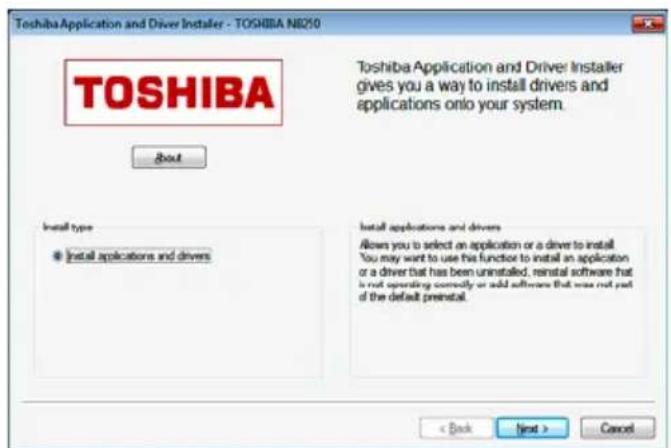
text_image
Toshiba Application and Driver Installer - TOSHIBA NB250 TOSHIBA Toshiba Application and Driver Installer gives you a way to install drivers and applications onto your system. About Install type • Install applications and drivers Install applications and drivers Allows you to select an application or a driver to install "You may want to use the function to install an application or a driver that has been uninstalled, reinstall software that is not operating correctly or add software that was not part of the default preinstal. < Back Next > Cancel(Sample Image) TOSHIBA Application Installer screen
3 Click the item you want to install.
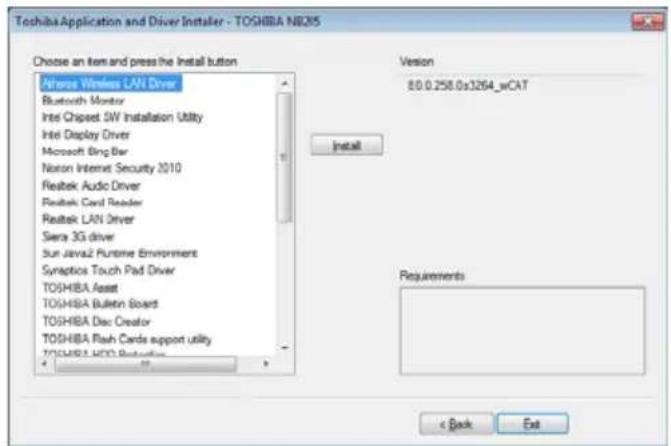
text_image
Toshiba Application and Driver Installer - TOSHIBIA NB215 Choose an item and press the Install button Atrium Wireless LAN Driver Bluetooth Monitor Intel Chipset SW Installation Utility Intel Display Driver Microsoft Bing Bar Nikon Internet Security 2010 Realtek Audio Driver Realtek Card Reader Realtek LAN Driver Sierra 3G driver Sun Java2 Purume Environment Synaptics Touch Pad Driver TOSHIBIA Asset TOSHIBIA Bulletin Board TOSHIBIA Disc Creator TOSHIBIA Flash Cards support utility TOSHIBIA HDD Protection Version 8.0.0.258.0x3264_wCAT Install Requirements < Back Exit(Sample Image) TOSHIBA Application Installer selection screen
4 Click Install, then follow the on-screen prompts to complete the installation process.
Setting passwords
Setting a password lets you walk away from your computer while providing additional protection for your files. When you set a password, you must enter the password before you can work on your computer again.
TOSHIBA supports several types of passwords on your computer:
An instant password—Secures your open programs and files when leaving the computer temporarily.
NOTE
You need to have created a password for your Windows ^® account to use an instant password.
A power-on password—Prevents unauthorized users from starting the computer.
A supervisor password—Prohibits unauthorized users from accessing certain functions such as TOSHIBA Hardware Setup. This is useful if more than one person uses the computer.
When setting up passwords, keep the following in mind:
The user password can be set up under the supervisor password.
The supervisor password must be set before the user password, or the user password must be deleted and then re-entered after the supervisor password is set.
Using an instant password
An instant password secures your system with a single keystroke. Use this feature when you leave your desk for a few minutes and do not want to turn off the computer.
To use an instant password, press Fn + F1.
To unlock your system, press any key or touch the pointing device and the Windows ^® Logon screen will appear. Select your user name and enter your password, if any.
Using a supervisor password
A supervisor password prevents other users from changing hardware configuration options.
Setting a supervisor password
CAUTION
If you choose to set a supervisor or user password, TOSHIBA strongly recommends that you save your password in a location where you can later access it should you not remember it.
TOSHIBA is not responsible for any losses that may occur to you, your organization or others as a result of the inability to access your computer.
To set a supervisor password:
1 Click Start, All Programs, TOSHIBA, Utilities, and then TOSHIBA Assist.
The TOSHIBA Assist window appears.
2 On the left side, click the Secure tab.
3 Click the Supervisor Password icon.
The Supervisor Password tab of the TOSHIBA Password Utility window appears.

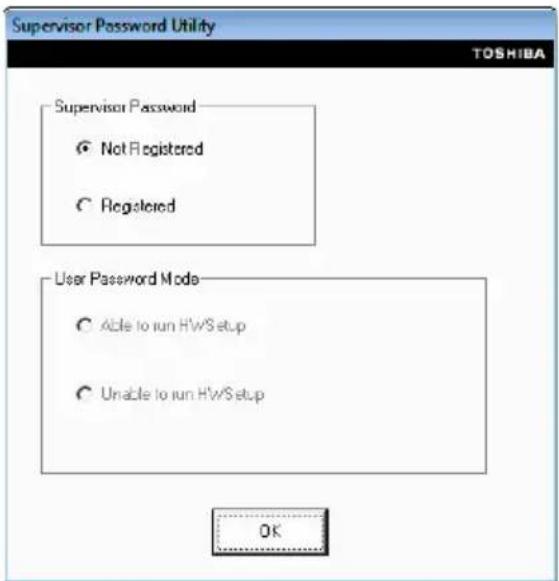
text_image
Supervisor Password Utility TOSHIBA Supervisor Password ● Not Registered ○ Regulated User Password Mode ○ Able to run HW/Setup ○ Unable to run HW/Setup OK(Sample Image) Supervisor Password tab
4 Click Registered.
5 Enter your password, and then enter it again to verify.
6 Click OK.
The supervisor password utility dialog box appears.
7 Select Able to run HWSetup or Unable to run HWSetup and then Click OK.
8 Restart the system to complete the process.
Deleting a supervisor password
To delete a supervisor password:
1 Click Start, All Programs, TOSHIBA, Utilities, and then TOSHIBA Assist.
The TOSHIBA Assist window appears.
2 On the left side, click the Secure tab.
3 Click the Supervisor Password icon.
The Supervisor Password tab of the TOSHIBA Password Utility window appears.
4 Click Not Registered.
A pop-up screen appears asking for a password.
5 Enter the password, then click OK.
6 Click OK to exit.
7 Restart the system to complete the process.
Using a user password
A user password provides power-on password protection.
Setting a user password
CAUTION
If you choose to set a supervisor or user password, TOSHIBA strongly recommends that you save your password in a location where you can later access it should you not remember it.
TOSHIBA is not responsible for any losses that may occur to you, your organization or others as a result of the inability to access your computer.

To register a password for the power-on password functions:
1 Click Start, All Programs, TOSHIBA, Utilities, and then TOSHIBA Assist.
The TOSHIBA Assist window appears.
2 On the left side, click the Secure tab.
3 Click the User Password icon.
4 Click Registered.
5 Enter your password, and then enter it again to verify.
6 Click OK.
7 Click OK to exit.
Deleting a user password
To cancel the power-on password function:
1 Click Start, All Programs, TOSHIBA, Utilities, and then TOSHIBA Assist.
The TOSHIBA Assist window appears.
2 On the left side, click the Secure tab.
3 Click the User Password icon.
4 Click Not Registered.
5 Follow the on-screen instructions to remove the user password.
TOSHIBA PC Diagnostic Tool Utility
This utility can help diagnose problems with devices in your computer. Refer to the online Help documentation within the application for additional help.
NOTE
The TOSHIBA PC Diagnostic Tool utility may show tests for features you do not have. This is normal and does not indicate a problem.
To use the TOSHIBA PC Diagnostic Tool utility:

1 Click Start, All Programs, TOSHIBA, Utilities, and then PC Diagnostic Tool, or click the PC Diagnostic Tool icon in the Protect & Fix tab of TOSHIBA Assist.
The TOSHIBA PC Diagnostic Tool window appears.
2 Click the Diagnostic Tool tab.
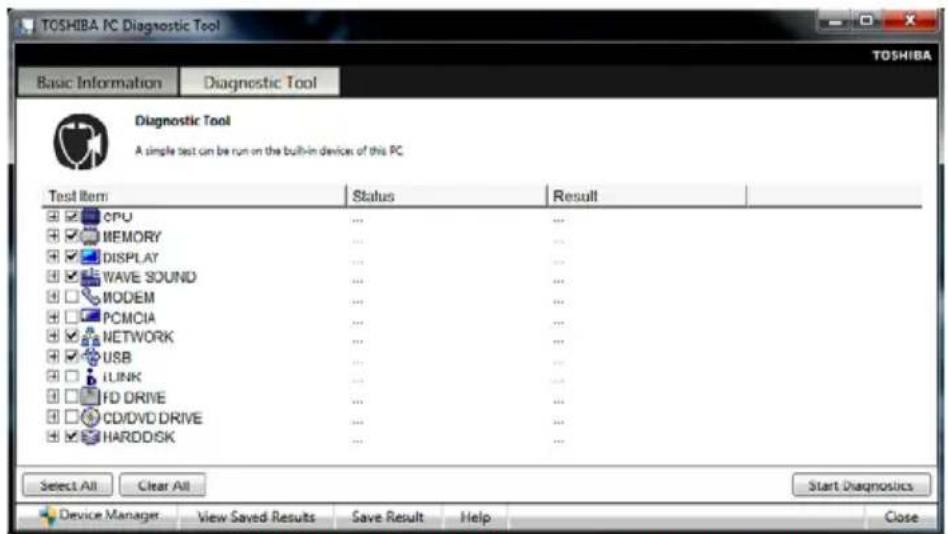
text_image
TOSHIBA PC Diagnostic Tool Basic Information Diagnostic Tool Diagnostic Tool A simple test can be run on the built-in devices of this PC Test Item Status Result CPU ... ... MEMORY ... ... DISPLAY ... ... WAVE SOUND ... ... MODEM ... ... PCMCIA ... ... NETWORK ... ... USB ... ... LINK ... ... FD DRIVE ... ... CD/DVD DRIVE ... ... HARDDISK ... ... Select All Clear All Start Diagnostics Device Manager View Saved Results Save Result Help Close(Sample Image) TOSHIBA PC Diagnostic Tool window
3 Select the devices that you would like to test by clicking the check box that appears to the left of the device.
NOTE
Click the + (plus) and - (minus) symbols to expand and collapse the categories.
4 Click Start Diagnostics when you are ready to begin the tests.
Mouse Utility
The Mouse utility allows you to change your pointing device or mouse settings.
To access the Mouse utility:

1 Click Start, Control Panel, Hardware and Sound, and then under Devices and Printers, click Mouse, or click the Mouse icon in the Optimize tab of TOSHIBA Assist.
The Mouse Properties screen appears.
The settings you can change are divided into these categories:
Buttons
Pointers
Pointer Options
Hardware
You may see additional categories depending on your particular pointing device.
2 Adjust the settings as desired, then click OK.
TOSHIBA Hardware Setup
TOSHIBA Hardware Setup is the TOSHIBA configuration management tool available through the Windows® operating system. To access it:

Click Start, All Programs, TOSHIBA, Utilities, and then HWSetup, or click the TOSHIBA Hardware Settings icon in the Optimize tab of TOSHIBA Assist.
The TOSHIBA HWSetup screen appears.
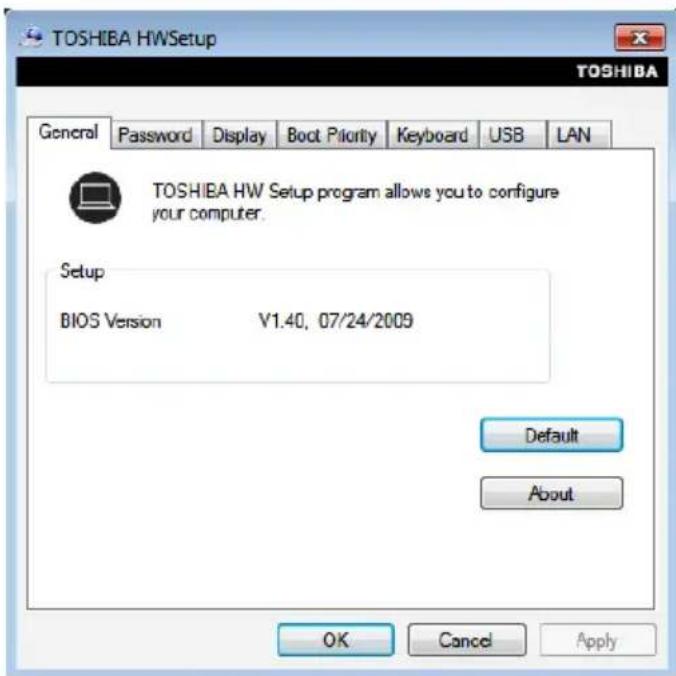
text_image
TOSHIBA HWSetup TOSHIBA General Password Display Boot Priority Keyboard USB LAN TOSHIBA HW Setup program allows you to configure your computer. Setup BIOS Version V1.40, 07/24/2009 Default About OK Cancel Apply(Sample Image) TOSHIBA HWSetup screen - General tab options
The TOSHIBA HWSetup screen may have the following tabs:
- Boot Priority—Allows you to change the sequence in which your computer searches the drives for the operating system
You can also manually choose the Boot Priority by pressing the power button to power on the computer, then quickly pressing the F12 key.
Select the boot device by pressing the arrow keys, then pressing the Enter key.
NOTE
Since the system is a quick-booting system, you must press the keys immediately after pressing the power button.
◆ Display—Allows you to change various default settings for the built-in display
NOTE
When the computer restarts, it remembers the last configuration. If data does not appear on the display you are using after starting in Sleep mode, press Fn + F5. For more information, see “Directing the display output when you turn on the computer” on page 68.
- General—Allows you to view the current BIOS version or change certain settings back to their default values
◆ Keyboard—Allows you to access the wake-on keyboard function - LAN—Allows you to set networking functions
◆ Password—Allows you to set a user password
USB—Allows you to enable or disable USB Legacy Emulation
TOSHIBA Zooming Utility
This utility allows you to select which applications will work with the zoom in/out hot keys (see “Zoom (Display resolution)” on page 174). You may select all applications or any subset of the following:
Microsoft ^® Internet Explorer ^®
Microsoft ^® Office
Windows Media ^® Player
Adobe ^® Acrobat ^® Reader ^®
- Icons on the desktop
To access the TOSHIBA Zooming Utility:
1 Click Start, All Programs, TOSHIBA, Utilities, and then Zooming Utility.
The TOSHIBA Zooming Utility Properties screen appears.
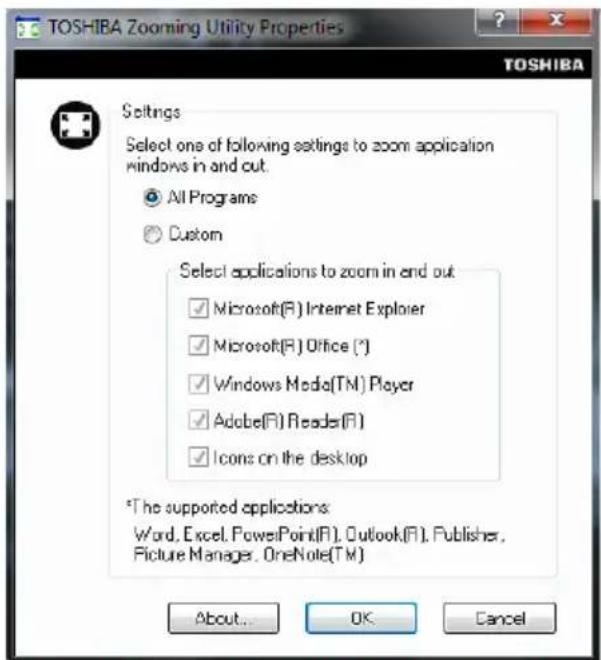
text_image
TOSHIBA Zooming Utility Properties Settings Select one of following settings to zoom application windows in and out. All Programs Custom Select applications to zoom in end out. Microsoft(R) Internet Explorer Microsoft(R) Office (*) Windows Media(TM) Player Adobe(R) Reader(R) Icons on the desktop *The supported applications: Word, Excel, PowerPoint(R), Outlook(R), Publisher, Picture Manager, OneNote(TM) About... OK Cancel(Sample Image) TOSHIBA Zooming Utility Properties screen
2 Select the desired option(s).
3 Click OK.
The zoom in and zoom out hot keys will now work with the applications you selected.
To zoom in, hold down the Fn key and press 2; to zoom out, hold down the Fn key and press 1.
TOSHIBA Accessibility
The TOSHIBA Accessibility utility allows you to use the Fn key to create a hot key combination with one of the function keys without pressing the two keys simultaneously as is usually required. Using Accessibility lets you make the Fn key a sticky key, meaning you can press it once, release it, and then press a function key to activate the hot key function.

text_image
TOSHIBA Accessibility Setting for Fn-StickyKey Use Fn-StickyKey if you want to create Fn key combinations by pressing one key at a time. Use Fn-StickyKey(U) Options Press the Fn key twice to lock(P) Make a sound when Fn key is pressed(M) Show Fn-StickyKey status on screen(S) Automatic reset Un-stick the Fn key if the keyboard is idle for(I) 1 - minutes(N) Make a sound when Fn-StickyKey auto-sets(R) OK Cancel Apply(A)(Sample Image) TOSHIBA Accessibility window
To use TOSHIBA Accessibility:

1 Click Start, All Programs, TOSHIBA, Utilities, and then Accessibility, or click the Accessibility icon in the Optimize tab of TOSHIBA Assist.
The TOSHIBA Accessibility window appears.
2 Check the Use Fn-StickyKey box.
3 Put a check mark next to the desired option.
4 Click OK.
TOSHIBA Service Station
The TOSHIBA Service Station helps you keep your new computer running at its best by notifying you when updated software, firmware, documentation or other information is available for your computer. The TOSHIBA Service Station will alert you when updates are available, and you can then choose to install the updates if you wish.
Chapter 6
If Something Goes Wrong
Some problems you may encounter when using your computer are relatively easy to identify and solve. Others may require help from your network administrator or the manufacturer of the software program.
This chapter aims to help you solve many problems by yourself. It covers the problems you are most likely to encounter.
If all else fails, contact Toshiba. You will find information on Toshiba's support services at the end of this chapter.
Problems that are easy to fix
Your program stops responding.
If you are working with a program that suddenly freezes all operations, chances are the program has stopped responding. You can exit the failed program without shutting down the operating system or closing other programs.
To close a program that has stopped responding:
1 Press Ctrl, Alt, and Del simultaneously (once), then click Start Task Manager.
The Windows ^® Task Manager window appears.
2 Click the Applications tab.
If a program has stopped responding, the words “not responding” appear beside its name in the list.
3 Select the program you want to close, then click End Task.
Closing the failed program should allow you to continue working. If it does not, continue with the next step.
4 Close the remaining programs one by one by selecting the program name, then End Task.
Closing all programs should allow you to continue working. If it does not, power off your computer and then restart it.
Problems when you turn on the computer
These problems may occur when you turn on the power.
The computer will not start.
Make sure you attached the AC adaptor and power cord/cable properly or installed a charged battery.
Press and hold the power button for at least 10 seconds.
If you are using the AC adaptor, check that the wall outlet is working by plugging in another device, such as a lamp.
Verify that the computer is on by looking at the ON/OFF indicator. If the indicator is glowing, the computer is on. Also, try turning the computer off and then on.
If you are using an AC adaptor, verify that the computer is receiving power from the external power source by looking at the AC power light. If the indicator is glowing, the computer is connected to a live external power source.
The computer starts but when you press a key nothing happens.
Verify that the active program accepts text input. Try clicking your mouse on an area where you can type text and try typing again.
Your computer may be in Sleep mode and have a software or resource conflict. When this happens turning the power on returns you to the problem instead of restarting the system. To clear the condition, press Ctrl, Alt, and Del simultaneously. Then shut down the computer via software, or follow the steps if your program stops responding (see “Problems that are easy to fix” on page 137).
The computer displays the WARNING RESUME FAILURE/Windows Error Recovery – Windows did not shut down successfully message.
To continue, select Start Windows normally. This can happen if the computer was put into Sleep mode and the battery has discharged. If you performed a shutdown before this message was displayed, a program or driver may have prevented Windows ^® from shutting down.
Data stored in the computer's memory has been lost. Data stored in the computer's internal storage drive may not be affected.
Always save your data even when you are using Sleep mode. If your battery fully discharges, information that has not been saved will be lost. Your computer can be configured to warn you when the battery is running low see “What to do when the main battery runs low” on page 100.
If you are running on battery power, it is recommended that you do not leave the computer in Sleep mode for long periods of time.
To charge the battery, leave the computer plugged into a live wall outlet for several hours. For more information see “Charging batteries” on page 96.
The AC power light is blinking.
If the AC power light is blinking, try the following steps:
1 Cut off power to the computer by disconnecting the AC adaptor and removing the battery. The error condition will be interrupted, and the AC power light will stop flashing.
2 Put the battery back into the computer. Do not connect the AC adaptor. Try turning the computer on again.
If the computer starts normally, the AC adaptor may be defective and will need to be replaced.
If the AC power light starts flashing, remove the battery, and continue with the steps below.
3 Connect the AC adaptor to the computer. Leave the battery out of the computer. Try turning the computer on again.
If the computer starts normally, the battery may need charging, may be depleted, or may be defective. Turn the computer on, insert the battery, and then leave the computer running for several hours, which will deliver a slow, steady “trickle-charge” to the battery. Once the battery has been trickle-charged, it may begin working correctly again.
If the trickle-charging does not prove effective, visit the Toshiba Web site at pcsupport.toshiba.com and see the Support Bulletin Step-Charging the computer's battery (click the Ask Iris® link and search for the support bulletin by name).
4 Connect the AC adaptor to a different power outlet, preferably in a different room. If the computer starts normally, there may be a problem with the AC outlet itself, or the voltage level available from it.
5 Verify that the AC adaptor is the correct unit for your computer model. The computer may not be able to start from an AC adaptor that is rated for less current (amperage) than the computer requires, even if the rated voltage is correct, and the plug fits correctly in the DC-IN socket. The labels on the bottom of the computer and the AC adaptor show the specifications for voltage ("V") and current ("A") for each device. The voltage level must match exactly. The amperage rating of the AC adaptor must be equal to or greater than that required by the computer.
The battery light is blinking when the computer is on.
If the battery light is blinking when the computer is on, this indicates a power mismatch. Do the following:
1 Check the OUTPUT specifications on the AC adaptor (for example, DC 19V - 3.95A)
2 Check the INPUT specifications on the bottom of the computer.
The output specifications of the AC adaptor must match the input specifications of the computer.
3 If the specifications do not match, locate and use the AC adaptor that shipped with your computer. If the specifications do match, contact Toshiba. See “Contacting Toshiba” on page 157.
The Windows ^® operating system is not working
Once you are familiar with the desktop and used to the way the operating system responds to your work routine, you can easily detect if the operating system is not working correctly. For example:
The operating system fails to start after the initial startup appears.
The operating system takes a long time to start.
The operating system responds differently from the normal routine.
◆ The screen does not look right.
Unless a hardware device has failed, problems usually occur when you change the system in some way such as installing a new program or adding a device.
If you experience any of these problems, use the options in the Startup menu to fix the problem.
Using Startup options to fix problems
If the operating system fails to start properly, you may have to change your system's configuration or verify the startup procedure to fix the problem. To do this, use the options in the Startup menu.
To open the Startup menu:
1 Restart your computer.
2 Press F8 when your computer starts and before Windows ^® starts loading.
The Windows ^® Advanced Boot Options menu displays these options:
Repair Your Computer
Safe Mode
◆ Safe Mode with Networking
◆ Safe Mode with Command Prompt
◆ Enable Boot Logging
◆ Enable low-resolution video (640 x 480)
Last Known Good Configuration (advanced)
◆ Directory Services Restore Mode
◆ Debugging Mode
◆ Disable automatic restart on system failure
◆ Disable Driver Signature Enforcement
◆ Start Windows ^® Normally
When you highlight each option using the arrow keys, Windows ^® displays information about each option at the bottom after Description.
See your Windows ^® documentation for further explanation.
NOTE
If your computer is connected to a network, the Startup menu may display different versions of Safe mode.
Internet problems
My Internet connection is very slow.
Many factors contribute to the speed with which you can surf the Internet. They include: network speed, network conditions, time of day (when everyone else is surfing, your access can be slow) and popularity of the sites you are trying to access. If accessing a particular site is very slow, try later.
My browser cannot find the URL address I typed in.
Make sure you separated the domain names of the address with the forward slash (/). Check the spelling of each name and the syntax of the address carefully. A single incorrect letter or missed character will make it impossible for your browser to locate the site.
My browser cannot find a site I bookmarked.
The World Wide Web is constantly changing. A site you bookmarked yesterday may not be available today or its server may be down for temporary repair. Try again later.
The Windows® operating system can help you
If the operating system has started properly but you still have a problem using your computer, the online Help can assist you in troubleshooting the problem.
To access the Windows ^® operating system Help and Support:
1 Click Start, then click Help and Support, or press F1.
The Help and Support window appears.
2 Then do one or both of the following:
In the Search programs and files field, type in the topic for which you need help and follow the on-screen instructions.
◆ Click one of the options listed in the window and then follow the on-screen instructions.
You can connect to Support Online by clicking the Ask button and then clicking Microsoft Customer Support or by going to Toshiba support at pcsupport.toshiba.com.
Fixing a problem with Device Manager
Device Manager provides a way to check and change the configuration of a device.
CAUTION
Changing the default settings using Device Manager can cause other conflicts that make one or more devices unusable. Device Manager is a configuration tool for advanced users who understand configuration parameters and the ramifications of changing them.
Checking device properties
Device Manager provides a way to view the properties of a device. Properties include the name of the manufacturer, the type of device, the drivers installed, and the system resources assigned to the device.
To check a device's properties:
1 Click Start, Control Panel, System and Security, and then under System, click Device Manager.
2 To view the device(s) installed, double-click the device type.
3 To view the properties, double-click the device.
The operating system displays the device Properties dialog box, which provides an array of tabs. They may include:
The General tab, which provides basic information about the device.
The Resources tab, which lists resources assigned to the device. This tab does not appear if the device is not using resources.
The Driver tab, which displays the drivers being used by the device. This tab also provides options for updating the driver or rolling back the driver in case the new version is causing a problem.
The tabs that appear in the dialog box vary from one device to another.
For more information about Device Manager, refer to Windows ^® online Help.
Memory problems
Incorrectly connected or faulty memory modules may cause errors that seem to be hardware or even software related. It is worthwhile checking for these first:
1 Click Start, and then click the Shut down button in the lower-right corner of the Start menu.
The computer shuts down completely.
2 Remove the memory module, following the instructions in "Removing a memory module" on page 45.
3 Reinstall the memory module, following the instructions in "Installing a memory module" on page 39, and making sure the module is seated properly.
4 Check for the error again.
5 If the error recurs, remove the memory module entirely and check for the error again.
If removing the memory module eliminates the error, the memory module may be faulty. If the error recurs without the memory module installed, the error is not caused by the memory module.

TECHNICAL NOTE: You must have at least one memory module installed for the computer to work.
Power and the batteries
Your computer receives its power through the AC adaptor and power cord/cable or from the system batteries (battery, optional secondary battery, and real-time clock (RTC) battery). Power problems are interrelated. For example, a faulty AC adaptor or power cord/cable will neither power the computer nor recharge the batteries.
Here are some typical problems and how to solve them:
The AC power light does not come on when you plug in the AC adaptor and power cord/cable.
Make sure the AC adaptor and power cord/cable are firmly plugged into both the wall outlet and the computer.
If the AC power light still does not come on, check that the wall outlet is working properly by plugging in a lamp or other appliance.
The AC adaptor and power cord/cable work correctly, but the battery will not charge.
The battery does not charge while the computer is consuming full power. Try turning off the computer.
The battery may not be inserted correctly in the computer. Turn off the computer, remove the battery, clean the contacts with a soft dry cloth (if necessary) and replace the battery. See “Removing the battery from the computer” on page 104.
The battery may be too hot or too cold to charge properly. If you think this is the probable cause, let the battery reach room temperature and try again.
If the battery has completely discharged, it will not begin charging immediately. Leave the AC adaptor and power cord/cable connected, wait 20 minutes and see if the battery is charging.
If the battery light is glowing after 20 minutes, let the computer continue charging the battery for at least another 20 minutes before you turn on the computer.
If the battery light does not glow after 20 minutes, the battery may have reached the end of its useful life. Try replacing it.
The battery appears not to power the computer for as long as it usually does.
If you frequently repeat shallow charge and discharge, the battery meter may become inaccurate. Let the battery discharge completely, then try charging it again.
Check the power options via your Power Plans (see “Power Plans” on page 102). Have you added a device, such as a memory module, that takes its power from the battery? Is your software using the internal storage drive more? Is the display power set to turn off automatically? Was the battery fully charged to begin with? All these conditions affect how long the charge lasts.
After a period of time, the battery will lose its ability to perform at maximum capacity and will need to be replaced. This is normal for all batteries. To purchase a new battery pack, see your accessories information included with your computer, or visit the Toshiba Web site at accessories.toshiba.com. Refer to this site often to stay current on the most recent software and hardware options for your computer, and for other product information.
For more information on maintaining battery power, see “Charging batteries” on page 96.
Keyboard problems
If, when you type, strange things happen or nothing happens, the problem may be related to the keyboard itself.
The keyboard produces unexpected characters.
A keypad overlay may be on. If the numlock light or cursor control overlay light is on, press Fn + F10 to turn off the cursor control overlay light, or Fn + F11 to turn off the numlock light.
If the problem occurs when both the keypad overlays are off, make sure the software you are using is not remapping the keyboard. Refer to the software documentation and check that the program does not assign different meanings to any of the keys.
You have connected an external keyboard and the operating system displays one or more keyboard error messages.
You may need to update your keyboard driver. Refer to the documentation that came with the keyboard or to the keyboard manufacturer's Web site.
The keyboard you connected may be defective or incompatible with the computer. Try using a different make of keyboard.
Display problems
Here are some typical display problems and their solutions:
The screen is blank.
Display Auto Off may have gone into effect. Press any key to activate the screen.
You may have activated the instant password feature by pressing Fn and F1 simultaneously. If you have registered a password, press any key, type the password and press Enter. If no password is registered, press any key. The screen reactivates and allows you to continue working.
If you are using the built-in screen, make sure the display priority is not set for an external monitor. To do this, press Fn and F5 simultaneously (once). If this does not correct the problem, press Fn and F5 simultaneously again to return the display priority to its previous setting.
If you are using an external monitor:
◆ Check that the monitor is turned on.
Check that the monitor's power cord/cable is firmly plugged into a working power outlet.
- Check that the cable connecting the external monitor to the computer is firmly attached.
- Try adjusting the contrast and brightness controls on the external monitor.
◆ Press Fn and F5 simultaneously to make sure the display priority is not set for the built-in screen.
The screen does not look correct.
You can change the display settings by clicking a blank area of the desktop with the secondary control button, then clicking
Personalize. This opens the Personalization window. Choose a theme for your desktop background, under Colors, Sounds, and Screen Saver, or change the settings for each of these components individually. Click Display and then Change display settings to choose the screen resolution.
NOTE
To improve screen resolution and increase/decrease screen size, press Fn + 2 to zoom in and Fn + 1 to zoom out.
For more information, see the Windows ^® online Help.
A message displays saying that there is a problem with your display settings and that the adapter type is incorrect or the current settings do not work with your hardware.
Reduce the size of the color palette to one that is supported by the computer's internal display.
To change the display properties:
1 Right-click in a blank area of the Windows ^ desktop.
2 Click Personalize, and then Display.
3 Adjust the screen resolution and/or color quality.
4 Click OK.
The display mode is set to Simultaneous and the external display device does not work.
Make sure the external monitor is capable of displaying at resolutions of 800 x 600 or higher. Devices that do not support this resolution will only work in Internal/External mode, and not simultaneous mode.
Small bright dots appear on your TFT display when you turn on your computer.
Small bright dots may appear on your screen display when you turn on your computer. Your display contains an extremely large number of thin-film transistors (TFT) and is manufactured using high-precision technology. Any small bright dots that may appear on your display are an intrinsic characteristic of the TFT manufacturing technology. Over a period of time, and depending on the usage of the computer, the brightness of the screen will deteriorate. This is also an intrinsic characteristic of the screen technology. When the computer is operated on battery power, the screen will dim and you may not be able to increase the brightness of the screen while on battery power.
Disk or storage drive problems
Problems with the storage drive or with external media usually show up as an inability to access the drive or as sector errors. Sometimes a drive problem may cause one or more files to appear to have garbage in them. Typical problems are:
You are having trouble accessing a drive, or one or more files appear to be missing.
Make sure you are identifying the drive by its correct name (A: or C:).
Error-checking
NOTE
This feature is not available for optical disc drives.
Run Error-checking, which analyzes the directories and files on the storage drive and repairs any damage it finds.
To run Error-checking:
1 Click Start, and then Computer.
2 Right-click the drive you want to check.
3 On the pop-up menu, click Properties.
The drive's Properties box appears.
4 Click the Tools tab.
5 Click the Check now... button.
The Check Disk box appears.
6 You can choose one or both options:
◆ Automatically fix file system errors
◆ Scan for and attempt recovery of bad sectors
7 Click Start.
Error-checking tests and repairs the storage drive.
Your hard disk seems very slow.
If you have been using your computer for a long time, your files may have become fragmented. Run Disk Defragmenter.
To do this, click Start, All Programs, Accessories, System Tools, and then Disk Defragmenter. After it opens, click Defragment disk.
Your data files are damaged or corrupted.
Refer to your software documentation for file recovery procedures. Many software packages automatically create backup files.
You may also be able to recover lost data using utility software. Consult your network administrator.
Some programs run correctly but others do not.
This is probably a configuration problem. If a program does not run properly, refer to its documentation and check that the hardware configuration meets its needs.
Sound system problems
No sound is coming from the computer's speakers.
Adjust the volume control.
Try pressing Fn + Esc to see if volume mute is disabled.
Check that the volume control on the computer is turned up.
If you are using external headphones or speakers, check that they are securely connected to your computer.
The computer emits a loud, high-pitched noise.
This is feedback between the microphone and the speakers. It occurs in any sound system when input from a microphone is fed to the speakers and the speaker volume is too loud. Adjust the volume control.
Printer problems
This section lists some of the most common printer problems.
The printer will not print.
Check that the printer is connected to a working power outlet, turned on and ready (on line).
Check that the printer has plenty of paper. Some printers will not start printing when there are just two or three sheets of paper left in the tray.
Make sure the printer cable is firmly attached to the computer and the printer.
Run the printer's self-test to check for any problem with the printer itself.
Make sure you installed the proper printer drivers as shown in “Setting up a printer” on page 70 or in the instructions that came with the printer.
You may have connected the printer while the computer is on. Disable Sleep mode, turn off the computer, and turn off the printer. Turn the printer back on, make sure it is online, and then turn the computer back on.
Try printing another file. For example, you could create and attempt to print a short test file using Notepad. If a Notepad file prints correctly, the problem may be in your original file.
If you cannot resolve the problem, contact the printer's manufacturer.
The printer will not print what you see on the screen.
Many programs display information on the screen differently from the way they print it. See if your program has a print preview mode. This mode lets you see your work exactly as it will print. Contact the software manufacturer for more information.
Wireless networking problems
NOTE
This section provides general troubleshooting tips for networking problems, specifically wireless (Wi-Fi ^® ) networking.
The terms and concepts used assume a basic understanding of networks, and may be for more advanced users. If you need assistance or if you are not familiar with the terminology, please see Windows® Help and Support or contact your computer technician.
If your computer is equipped with an internal Wi-Fi ^ adapter, verify that the Wireless antenna is ON (the wireless indicator light will be lit).
- Verify that your computer can detect access points or routers. If it can detect a Wi-Fi® access point or router then it may be a configuration issue.
- Verify that signal strength is good using the utility provided with the Wi-Fi® adapter.
If another computer is on the same network, verify that it has network access, and can connect to the Internet. If, for example, the other computer cannot browse to a public Web site, the ISP's (Internet Service Provider) service may be disrupted.
- Verify that the Service Set Identifier (SSID), or network name, is correct - i.e., that it matches the SSID assigned to the access point you are attempting to connect through. SSIDs are case-sensitive.
Check the Windows ^ Control Panel's Device Manager to verify that the Wi-Fi ^ adapter is recognized by the Windows ^ operating system, and that the driver is loaded. To access the Device Manager, click Start, Control Panel, System and Security, and then System. Carefully note any error messages - these will be very helpful if you should confer with a support technician at a later time.
NOTE
To enable or disable wireless communication, use the Hot Key Fn + F8. For more information see "Hot Keys/TOSHIBA Cards" on page 161.
Use IPCONFIG to verify that the computer has a useful IP address - one other than the private address of 169.254.xxx.xxx assigned by Windows®.
1 Click Start to open the Start menu.
2 Type Cmd in the Search programs and files field.
3 Enter IPCONFIG /ALL and press Enter.
The IP address for each active network adapter will be displayed.
Connect your computer directly to your router or broadband modem, by plugging a standard CAT5 Ethernet patch cable (sold separately) into your computer's RJ45 Ethernet port. If your connection problem disappears, the problem lies in the Wi-Fi® part of your network.
If you have enabled any security provisions (closed system, MAC address filtering, Wired Equivalent Privacy [WEP], etc.), check the access point vendor's Web site for recent firmware upgrades. Problems with WEP keys, in particular, are frequently addressed in new firmware releases.
The Windows ^® operating system wireless management utility does not work.
If you are using an external Wi-Fi ^® adapter (a USB adapter, or other variety), check if the adapter comes with its own management utility. If it does, the utility may be disabling the Windows ^® operating system wireless management utility, in which case you must use the adapter's management utility. If the documentation that accompanies the adapter does not provide enough information to determine if this is the case, contact that vendor's support group for further advice.
Develop good computing habits
Save your work frequently.
You can never predict when your computer will lock, forcing you to close a program and lose unsaved changes. Many software programs build in an automatic backup, but you should not rely solely on this feature. Save your work! See “Computing tips” on page 83 for instructions.
On a regular basis, back up the information stored on your internal storage drive.
Here are some ways you can do this:
◆ Copy files to an external storage device.
Connect an optional external optical disc drive to the system and use specialized software to copy everything on the internal storage drive to an optical disc.
Connect your computer to the office network and copy files to your network partition.
Some people use a combination of these methods, backing up all files to tape weekly and copying critical files to external media on a daily basis.
If you have installed your own programs, you should back up these programs as well as your data files. If something goes wrong that requires you to reformat your internal storage drive and start again, reloading all your programs and data files from a backup source will save time.
Read the user's guides.
It is very difficult to provide a fail-safe set of steps you can follow every time you experience a problem with the computer. Your ability to solve problems will improve as you learn about how the computer and its software work together.
Get familiar with all the user's guides provided with your computer, as well as the manuals that come with the programs and devices you purchase.
Your local computer store or book store sells a variety of self-help books you can use to supplement the information in the manuals.
Data and system configuration backup in the Windows ^® operating system
The Windows ^® operating system offers some easy-to-use features for backing up your Windows ^® settings and your data - documents and other important files. Take advantage of these features to protect yourself from much more difficult and time-consuming restoration procedures, and to safeguard your valuable data from loss.
Saving system configuration with restore points
The System Restore feature of the Windows ^® operating system quickly creates restore points - ‘snapshots’ of your Windows ^® operating system configuration - and saves them for later recall. If you experience problems after installing some new hardware or software, you can easily select a previously established Control Point to ‘turn back the clock,’ restoring the Windows ^® operating system to the state it was in just prior to the installation. This is much easier and more effective than uninstalling the hardware or software, which often leaves behind unwanted files and settings. It is also easy to undo a restore point selection, if you change your mind.
Follow these steps to create a restore point using the System Restore utility:
1 Click Start, Control Panel, System and Security, and then System.
2 In the left pane, click System protection.
The System Protection tab of the System Properties window appears.
3 Click Create...
4 In the input field, enter a name that is descriptive enough to be easily understood in the future, such as “Before installing Brand X Accounting app.” Then click Create.
The Windows ^® operating system creates the restore point, automatically stamps it with the current date and time, and displays a message that the restore point was successfully created.
5 Click Close.
Then, at a later time, you can re-establish your Windows ^® configuration using the saved restore point. To do this:
1 Click Start, All Programs, Accessories, System Tools, and then System Restore.
2 Select Recommended restore or Choose a different restore point, and then click Next.
The timestamp and description of each restore point is displayed.
NOTE
This list may contain restore points that you did not create. Restore points labeled System Checkpoint were automatically created by the Windows® operating system. Other restore points may have been created automatically by applications when they were installed.
3 If you selected Choose a different restore point in step 2, select the restore point you want to use, and then click Next.
4 Verify that the restore point you selected is the correct one. If it is not, click Back to return to the previous step.
5 Close all programs and save all open files.
6 Click Finish, and then Yes to begin the system restore.
Your Windows ^® operating system configuration will now be restored to the state it was in when the chosen restore point was created, and then the computer will be automatically restarted.
Backing up your data or your entire computer with the Windows® operating system
The most valuable component of your computer system is the data you create and store on its internal storage drive. Since problems with either hardware or software can make the data inaccessible or even destroy it, the next most valuable component of your computer system may be a recent backup of your data.
Fortunately, the Windows ^® operating system offers a convenient way to back up your computer or just your important files to optical discs, or hard drives. An external hard drive is recommended in case the internal storage drive fails. No additional software is required. Most of the external optical disc drives that are now widely available can write to (or ‘burn’) as well as read from optical discs.
Follow these steps to back up your computer or files to optical discs, or a storage drive:
NOTE
You cannot back up the computer while running on battery power. Connect the AC adaptor before continuing.
1 Prepare your backup target by connecting it and/or inserting a blank optical disc in the optional external optical disc drive.
2 Click Start.
3 Click Control Panel.
4 Click Back up your computer under the System and Security heading. Follow the on-screen instructions to back up your files.
For more help, click Start, Help and Support, and search for “back up files.”
General tips for installing hardware and software
Here are a few tips to help ensure safe and easy installation of new hardware (printers, pointing devices, external hard drives, DVD writers, scanners, etc.) and software (applications like Microsoft® Office and Adobe® Photoshop®, or utility software such as special toolbars for your web browser).
- Create a restore point (refer to “Saving system configuration with restore points” on page 154). Before installing anything, use the System Restore utility to set a restore point (see the section titled restore points). If anything goes wrong, you will then be able to easily restore the Windows® operating system to the state it was in prior to the installation, undoing any changes that the installation process introduced.
- Back up your critical data (see “Backing up your data or your entire computer with the Windows® operating system” on page 155).
Have your back up DVD(s) on hand in case you need any files from them.
Do not guess - follow directions carefully! It is often necessary to run an installation utility first - before connecting a new hardware item to the computer. If the device is connected first, it may be very difficult to complete the installation successfully. Always carefully follow the installation instructions that accompany the hardware or software.
✿ Restart the Windows ^® operating system. Always restart the Windows ^® operating system after each installation, even if the installation utility does not prompt you to do so. This will ensure that the installation is completed, and will clean up anything that the installation utility left behind.
Do one installation at a time. If you have several new items to add to your computer system, install just one at a time, creating restore points immediately before each successive installation. This will make it much easier to determine the origin of any new problems. For best results, follow this sequence:
1 Back up critical data.
2 Create a restore point.
3 Install one item of hardware or software.
4 Restart the Windows ^® operating system.
5 Use the new hardware or software for a while, noting any new problems. Make sure that your critical applications (email, business applications, etc.) are working correctly, and verify that important devices are still functioning.
6 For each additional hardware or software item, repeat these steps, starting at step 1 if any of your critical data has changed, or starting at step 2 if no critical data has changed.
If you need further assistance
If you have followed the recommendations in this chapter and are still having problems, you may need additional technical assistance. This section contains the steps to take to ask for help.
Before you contact Toshiba
Since some problems may be related to the operating system or the program you are using, it is important to investigate other sources of assistance first.
Try the following before you contact Toshiba:
- Review the troubleshooting information in your operating system documentation.
If the problem occurs while you are running a program, consult the program's documentation for troubleshooting suggestions. Contact the software company's technical support group for their assistance.
Consult the dealer from whom you purchased your computer and/or program. Your dealer is your best source for current information.
For the detailed specifications for your computer, visit pcsupport.toshiba.com. Click Product Support, search for your model, and then click Detailed Specs.
Contacting Toshiba
If you still need help and suspect that the problem is hardware-related, Toshiba offers a variety of resources to help you.
Toshiba's Technical Support Web site
For technical support, or to stay current on the most recent software and hardware options for your computer, and for other product information, be sure to regularly check the Toshiba Web site at pcsupport.toshiba.com.
Toshiba voice contact
Before calling Toshiba, make sure you have:
- Your computer’s serial number
The computer and any optional devices related to the problem
◆ Backup copies of your Windows ^® operating system and all other preloaded software on your choice of media
Name and version of the program involved in the problem along with its installation media
Information about what you were doing when the problem occurred
◆ Exact error messages and when they occurred
For technical support, call the Toshiba Customer Support Center:
Within the United States at (800) 457-7777
Outside the United States at (949) 859-4273
Other Toshiba Internet Web sites
| toshiba.com | Worldwide Toshiba corporate site |
| laptops.toshiba.com | Marketing and product information in the USA |
| accessories.toshiba.com | Accessories information in the USA |
| www.toshiba.ca | Canada |
| www.toshiba-Europe.com | Europe |
| www.toshiba.co.jp/index.htm | Japan |
| pcsupport.toshiba.com | Mexico and all of Latin America |
| acclaim.toshiba.com | Toshiba USA Self-Service support web site |
| laptopforums.toshiba.com | Community discussion forums for Toshiba laptop users |
Toshiba's worldwide offices
Australia
Toshiba (Australia) Pty. Limited 84-92 Talavera Road North Ryde NSW 2113 Sydney Australia
France
Latin America and Caribbean
Toshiba America Information Systems 9740 Irvine Blvd. Irvine, California 92618 USA
800-457-7777 (within the US)
949-859-4273 (outside of the US - this call may incur long-distance charges)
Spain
Toshiba Information Systems (España) S.A. Parque Empresarial San Fernando Edificio Europa, 1a Planta Escalera A 28831 (Madrid) San Fernando de Henares Spain
Canada
Toshiba Canada Ltd. 191 McNabb Street Markham, Ontario L3R - 8H2 Canada
Germany
Toshiba Europe GmbH Leibnizstraße 2 D-93055 Regensburg Germany
Japan
Toshiba Corporation, PCO-IO 1-1, Shibaura 1-Chome Minato-Ku, Tokyo, 105-8001 Japan
Mexico
Toshiba de México S.A. de C.V. Sierra Candela No.111, 6to. Piso Col. Lomas de Chapultepec. CP 11000 Mexico, DF.
United Kingdom
Toshiba Information Systems (U.K) Ltd. Toshiba Court Weybridge Business Park Addlestone Road Weybridge, Surrey KT15 2UL United Kingdom
United States
Toshiba America Information
Systems, Inc.
9740 Irvine Boulevard
Irvine, California 92618
United States
The Rest of Europe
For more information on additional Toshiba worldwide locations, please visit: www.toshiba.co.jp/index.htm.
Appendix A
Hot Keys/TOSHIBA Cards
Hot keys and TOSHIBA Cards provide a quick way to modify selected system functions and to launch applications.
There are two types of TOSHIBA Cards: Hot Key Cards and Application Cards.
Hot Key Cards
The Hot Key Cards are used to set or modify the following system functions:
Mute
◆ Lock (Instant security)
Power Plan
Sleep
Hibernation
◆ Output (Display switch)
Brightness control
Wireless
TouchPad™
◆ Zoom (Display resolution)
Using the Hot Key Cards
The Hot Key Cards are normally hidden from view. The Cards appear when you press the Fn key.
NOTE
Hot keys are keys that, when pressed in combination with the Fn key, turn system functions on and off. Hot keys have a legend on the key indicating the option or feature the key controls.
To use the Hot Key Cards:
1 Press and hold the Fn key.
The TOSHIBA Cards appear along the top of the screen.

text_image
Esc Lock Power Plan Sleep Hikimate Output Brightness Wireless Touch Pad Zoom(Sample Image) Hot Key Card display
2 Select the desired option.
The selected Card is displayed full-size with its available options below it. All other Cards are again hidden from view.
To use a Hot Key Card using a hot key:
1 Press and hold the Fn key.
2 Press the hot key associated with the desired function.
The associated hot key card appears at the top of the screen with its available options below it.
3 To cycle through the displayed options, hold down Fn and press the hot key repeatedly. Release the Fn key when the desired option is selected.
Application Cards
The Application Cards are used to launch these applications:
TOSHIBA Assist
For more information, refer to "TOSHIBA Assist" on page 121.
PC Diagnostic Tool Utility
For more information, refer to “TOSHIBA PC Diagnostic Tool Utility” on page 130.
TOSHIBA Zooming Utility
For more information, refer to "TOSHIBA Zooming Utility" on page 134.
TOSHIBA Hardware Setup Utility
For more information, refer to "TOSHIBA Hardware Setup" on page 132.
NOTE
Not all functions are supported on all models.
Using the Application Cards
To launch an application using the Application Cards:
1 Press and hold the Fn key.
The TOSHIBA Cards display at the top of the screen.

text_image
Sleep Hibernate Output Brightness Wireless Touch Pad Zoom "stacked" Card(Sample Image) TOSHIBA Card display
2 Click the "stacked" card on the far right of the display. The Application Cards are hidden under this card.
The Application Cards appear, and the Hot Key Cards are stacked under the Card on the far left.

text_image
SPACE(Sample Image) Application Card display
3 Click the Card for the application Card to appear.
4 Click the full-size Card to launch the application.
Card Case
The Card Case feature allows you to choose which cards appear in the Application Card display (see “Using the Application Cards” on page 163). To use the Card Case:
1 Click Start, All Programs, TOSHIBA, Utilities, and then Settings for Flash Cards.
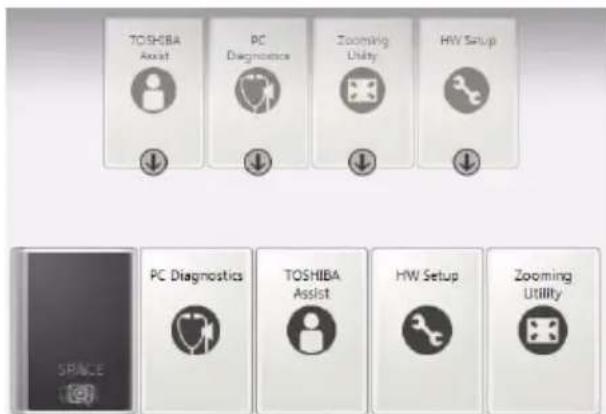
text_image
TOSHIBA Assist PC Diagnostics Zooming Utility HW Setup PC Diagnostics TOSHIBA Assist HW Setup Zooming Utility(Sample Image) Enabling and Disabling Application Cards
2 Click the Open cards case button.
3 The Card Case displays two rows of Cards.
Cards that appear solid (not transparent) in the bottom row are enabled and can be selected when the Application Cards are displayed. The top row contains all of the disabled cards.
4 To enable a card, drag it from the top row to the bottom row.
To disable the card, drag it from the bottom row to the top row.
5 To close the Card Case, click the ✗ icon in the top corner of the screen.
Hot key functions
Hot key functions are performed using either the Hot Key Cards or by pressing the associated hot key. This section lists the available hot key functions.
NOTE
Hot keys are keys that, when pressed in combination with the Fn key, turn system functions on and off. Hot keys have a legend on the key indicating the option or feature the key controls.
Volume Mute
or
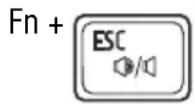
This TOSHIBA Card or hot key enables/disables volume mute on your computer.
When volume mute is enabled, no sound will come from the speakers or headphones.
Selecting this Card or pressing the hot key displays the following options:
text_image
ESC Mute Mute Off

(Sample Image) Volume Mute options
◆ To enable mute, select

◆ To disable mute, select

Lock (Instant security)
or
Fn +
This TOSHIBA Card or hot key blanks the display.
Selecting this Card or pressing the hot key displays the following options:
text_image
F1 Lock

(Sample Image) Security options
◆ To enable lock, select

To cancel, select

The Fn + F1 hot key function activates instant security. The user logon screen will appear and a user with a valid account will need to log back on to gain access to the computer.
Power plan
or
This TOSHIBA Card or hot key displays the power plans and cycles through the power plans.
The properties of each power plan, and the power plans that are displayed by this function, are set in the Power Options window.
Selecting this Card or pressing the hot key displays the currently selectable power plans:
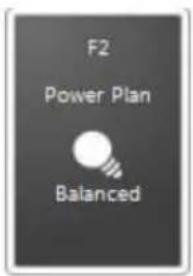
text_image
F2 Power Plan Balanced
(Sample Image) Power Plan options
Cycle through the power plans, then select the desired power plan.
Sleep mode
or
Fn +
This TOSHIBA Card or hot key places the computer into Sleep mode.
For more information about Sleep mode, please see “Using and configuring Sleep mode” on page 78.
Selecting this Card or pressing the hot key displays the following options:
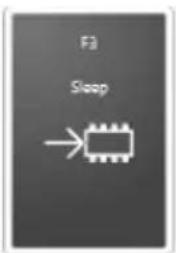
text_image
F3 Sleep

(Sample Image) Sleep options
To enable Sleep mode, select
To cancel, select .

Hibernation mode
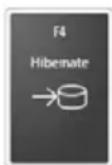
or
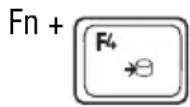
This TOSHIBA Card or hot key places the computer into Hibernation mode.
If Hibernation mode is disabled, this hot key will not respond. For more information on Hibernation mode, see “Using and configuring Hibernation mode” on page 76.
Selecting this Card or pressing the hot key displays the following options:
text_image
F4 Hibernate
(Sample Image) Hibernation options
◆ To enable Hibernation mode, select

To cancel, select

Output (Display switch)
or
Fn +
This TOSHIBA Card or hot key cycles through the power-on display options (only the first option is available when you do not have an external monitor attached) (the last option is available only if you are in Extended Display Mode).
NOTE
Some modes are only available with the appropriate device attached and turned on.
Built-in display only
Built-in display and external monitor simultaneously
◆ External monitor only
To use a simultaneous mode, you must set the resolution of the internal display panel to match the resolution of the external display device.
Selecting this Card or pressing the hot key displays the following options:
text_image
F5 Output LCD

(Sample Image) Display mode options window
Cycle through the display modes, then select the desired mode.
Not all functions are supported on all models.
NOTE
Some systems also support an additional Swap Image Display mode. This mode is available only if the current setting is an extended desktop mode (Built-in Display and External Monitor, or Built-in Display and TV). In extended desktop mode, the image is split into two sides, one side per display device. To swap sides, select Swap Image Display.
Display brightness
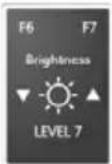
This TOSHIBA Card decreases or increases the screen brightness.
Fn + This hot key decreases the screen brightness.
Fn + This hot key increases the screen brightness.
Selecting this Card or pressing either hot key displays the following options:
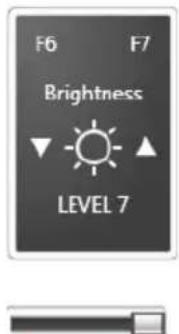
text_image
F6 F7 Brightness LEVEL 7(Sample Image) Display brightness
Move the slider or press the appropriate hot key repeatedly to decrease or increase the display brightness.
Disabling or enabling wireless devices
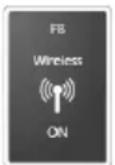
or
Fn +
This TOSHIBA Card or hot key enables/disables the optional wireless devices installed in your computer.
The available wireless mode is:
- Wi-Fi ^ enabled—Enables just the Wi-Fi ^ module.
Selecting this Card or pressing the hot key displays the following options:
text_image
F8 Wireless ON

(Sample Image) Wireless communication options
To enable Wi-Fi ^® , select

To cancel, select

NOTE
To enable or disable wireless communication, use the Hot Key Fn + F8.
Disabling or enabling the TouchPad™
or
This TOSHIBA Card or hot key enables/disables the TouchPad™.
For more information on using the TouchPad, see “Using the TouchPad™” on page 63.
Selecting this Card or pressing the hot key displays the following options:
text_image
F9 Touch Pad Enable

(Sample Image) Disable or Enable TouchPad options
To enable the TouchPad, select

◆ To disable the TouchPad, select

Zoom (Display resolution)
text_image
Fn + or [Space bar]This TOSHIBA Card or hot key switches screen resolution.
Selecting this Card or pressing the hot key displays the following options:
text_image
SPACE Zoom Normal
(Sample Image) Screen resolution options
Cycle through the screen resolutions, then select the desired resolution.
Keyboard hot key functions
Fn +
This hot key turns the cursor control overlay on and off.
Fn + This hot key turns the numeric overlay on and off.
Fn + This hot key turns the scroll lock feature on and off.
Fn + This hot key turns the TOSHIBA Zooming Utility to
zoom out.
Fn + This hot key turns the TOSHIBA Zooming Utility to
zoom in.
Fn + This hot key decreases the speaker volume.
Fn + This hot key increases the speaker volume.
Appendix B
Power Cord/Cable Connectors
Your computer ships with the correct power supply for the country of purchase. This appendix shows the shapes of the typical AC power cord/cable connectors for various parts of the world.
USA
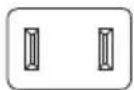
UL approved
Canada
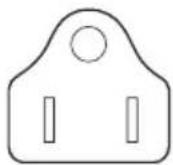
CSA approved
United Kingdom
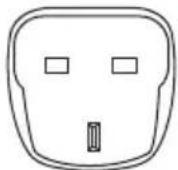
BS approved
Europe

VDA approved NEMKO approved
Australia
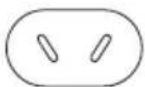
AS approved
Glossary

TECHNICAL NOTE: Some features defined in this glossary may not be available on your computer.
Acronyms
The following acronyms may appear in this user's guide.
AC Alternating Current
BIOS Basic Input/Output System
bps bits per second
CD Compact Disc
CD-ROM Compact Disc Read-Only Memory
CD-RW Compact Disc Rewrite Memory
CMOS Complementary Metal-Oxide Semiconductor
COM1 communications port 1 (serial port)
COM2 communications port 2 (serial port)
CPU Central Processing Unit
DC Direct Current
DMA Direct Memory Access
DIMM Dual Inline Memory Module
DOS Disk Operating System
DPI Dots Per Inch
DVD Digital Versatile (or Video) Disc
DVD-ROM Digital Versatile (or Video) Disc Read-Only Memory
EPROM Erasable Programmable Read-Only Memory
FATFile Allocation Table
FCC Federal Communications Commission
GB gigabyte
HDD Hard Disk Drive
HTML Hypertext Markup Language
IEEE Institute of Electrical and Electronics Engineers
I/O Input/Output
IRQ interrupt request
ISP Internet Service Provider
KB kilobyte
LAN Local Area Network
LCD Liquid Crystal Display
LED Light Emitting Diode
MB megabyte
MIDI Musical Instrument Digital Interface
PC Personal Computer
PCI Peripheral Component Interconnect
PCMCIA Personal Computer Memory Card International Association
RAM Random Access Memory
RGB Red, Green Blue light (monitor)
RFI Radio Frequency Interference
ROM Read-Only Memory
RTC Real-Time Clock
SD
Secure
Digital
SDRAM Synchronous Dynamic Random Access Memory
SSD
Solid
State
Drive
TFT
Thin
Film
Transistor
USB
Universal
Serial
Bus
URL Uniform Resource Locator
WANWide Area Network
www World Wide Web
Terms
The following terms may appear in this user's guide.
A
active-matrix display—A liquid crystal display (LCD) made from an array of liquid crystal cells using active-matrix technology. Also known as a “TFT display,” in its simplest form there is one thin film transistor (TFT) for each cell. This type of display works well with computers because of its shallow depth and high-quality color. Active-matrix displays are viewable from wider angles than most passive-matrix displays.
adapter—A device that provides a compatible connection between two units. For example, the computer's internal display adapter receives information from the software and translates it into images on the screen. An adapter can take a number of forms, from a microprocessor to a simple connector. An intelligent adapter (one that is capable of doing some processing) may also be called a controller.
Alternating Current (AC)—The type of power usually supplied to residential and commercial wall outlets. AC reverses its direction at regular intervals. Compare Direct Current (DC).
application—A computer program that you use to perform tasks of a specific type. Applications include word processors, spreadsheets, and database management systems. See also program.
B
backup—A copy of a file, usually on a removable disk, kept in case the original file is lost or damaged.
Basic Input/Output System (BIOS)—See BIOS.
baud rate—The speed at which a communication device, such as a printer or modem, transmits information. Baud rate is the number of signal changes per second (not necessarily the same as bits per second). See also bits per second.
BIOS (Basic Input/Output System)—Basic instructions, stored in read-only memory (ROM), containing the information the computer needs to check hardware and load the operating system when you start up the computer.
bits per second (bps)—A way of measuring the speed at which information is passed between two devices. This is the basic unit of measure used in modem communications, and is similar, but not identical, to the baud rate. See also baud rate.
boot—To start the computer. The term “boot” originates from bootstrap program (as in “pulling itself up by its bootstraps”), a program that loads and initializes the operating system. See also reboot.
boot disk—See system disk.
boot priority (startup sequence)—The order in which the computer accesses its internal storage drives to locate the startup files. Under the default startup sequence, the computer looks for the startup files in the external media before checking the internal storage drive.
bus—An electrical circuit that connects the central processing unit (CPU) with other parts of the computer, such as the video adapter, disk drives, and ports. It is the pathway through which data flows from one device to another. See also bus speed, frontside bus.
bus speed—The speed at which the central processing unit (CPU) communicates with the other parts of the computer.
C
cache—A section of very fast memory in which frequently used information is duplicated for quick access. Accessing data from cache is faster than accessing it from the computer's main memory. See also CPU cache, L1 cache, L2 cache.
CD—An individual compact disc. See also CD-ROM.
CD-ROM (Compact Disc Read-Only Memory)—A form of high-capacity storage that uses laser optics instead of magnetic means for reading data. See also CD. Compare DVD-ROM.
Central Processing Unit (CPU)—The chip that functions as the “brain” of the computer. It takes information from outside sources, such as memory or keyboard input, processes the information, and sends the results to another device that uses the information.
character—Any letter, number, or symbol you can use on the computer. Some characters are non-printing characters, such as a paragraph break in a word-processing program. A character occupies one byte of computer storage.
chip—A small piece of silicon containing computer logic and circuits for processing, memory, input/output, and/or control functions. Chips are mounted on printed circuit boards.
click—To press and release the pointing device’s primary button without moving the pointing device. In the Windows® operating system, this refers to the pointing device’s left button, unless otherwise stated. See also double-click.
color palette—A set of specified colors that establishes the colors that can be displayed on the screen at a particular time.
compatibility—The extent to which computers, programs, or devices can work together harmoniously, using the same commands, formats, or language as another.
configuration—(1) The collection of components that make up a single computer system. (2) How parts of the system are set up (that is, configured).
controller—A device that controls the transfer of data from a computer to a peripheral device and vice versa. For example, disk drives, monitors, keyboards, and printers all require controllers.
CPU—See Central Processing Unit (CPU).
CPU cache—A section of very fast memory residing between the CPU and the computer's main memory that temporarily stores data and instructions the CPU will need to execute commands and programs. See also cache, L1 cache, L2 cache.
cursor—An on-screen symbol (usually a flashing vertical line) that indicates the position where characters will appear when you enter data.
D
default—The setting selected by a program when the user does not specify an alternative setting.
device—A component attached to the computer. Devices may be external (outside the computer's case) or internal (inside the computer's case). Printers, disk drives, and modems are examples of devices.
device driver—A program (called a “driver”) that permits a computer to communicate with a device.
dialog box—An on-screen window displayed by the operating system or a program giving a direction or requesting input from the user.
Direct Current (DC)—The type of power usually supplied by batteries. DC flows in one direction. Compare Alternating Current (AC).
Direct Memory Access (DMA)—A dedicated channel, bypassing the CPU, that enables direct data transfer between memory and a device.
directory—See folder.
disable—To turn a computer option off. See also enable.
disc—A round, flat piece of material, designed to be read from and written to by optical (laser) technology, and used in the production of optical discs, such as CDs and DVDs. Compare disk.
disk—A round, flat piece of material that can be magnetically influenced to hold information in digital form, and used in the production of magnetic disks, such as hard disks. Compare disc. See also hard disk.
disk drive—The device that reads and writes information and programs on external media or hard disk. It rotates the disk at high speed past one or more read/write heads.
document—Any file created with an application and, if saved to disk, given a name by which it can be retrieved. See also file.
double-click—To press and release the pointing device's primary button rapidly twice without moving the pointing device. In the Windows® operating system, this refers to the pointing device's left button, unless otherwise stated.
download—(1) In communications, to receive a file from another computer through a modem or network. (2) To send font data from the computer to a printer. See also upload.
drag—To hold down the mouse button while moving the pointer to drag a selected object. In the Windows ^® operating system, this refers to the left mouse button, unless otherwise stated.
driver—See device driver.
DVD—An individual digital versatile (or video) disc. See also DVD-ROM.
DVD-ROM (Digital Versatile [or Video] Disc Read-Only
Memory)—A very high-capacity storage medium that uses laser optics for reading data. Each DVD-ROM can hold as much data as several CD-ROMs. Compare CD-ROM.
E
emulation—A technique in which a device or program imitates another device or program.
enable—To turn on a computer option. See also disable.
executable file—A computer program that is ready to run. Application programs and batch files are examples of executable files. Names of executable files usually end with a .bat or .exe extension.
expansion device—A device that connects to a computer to expand its capabilities. Other names for an expansion device are port expander, port replicator, docking station, or network adapter.
extension—See file extension.
external device—See device.
F
file—A collection of related information, saved on disk with a unique name. A file may be a program, information used by a program, or a document. See also document.
File Allocation Table (FAT)—The section of a storage drive that keeps track of the location of stored files.
file name—A set of characters that uniquely identifies a file within a particular folder. It consists of two parts: the actual name and the file name extension. See also file extension.
file extension—The three characters following the period (pronounced “dot”) at the end of a file name. The extension indicates the type of file. Examples are .exe for program files and .hlp for help files. See also file name.
folder—Also called directory. A container for organizing files saved to a disk. A folder is symbolized on screen by a graphical image (icon) of a file folder. A folder can contain files and other folders.
format—(verb) To prepare a blank disk for use with the computer's operating system. Formatting creates a structure on the disk so the operating system can write information to the disk or read information from it.
frontside bus—The primary pathway (bus) between the CPU and the computer's main memory. Also called “system bus.” See also bus.
function keys—The keys labeled F1 through F12, typically located on the keyboard. Their function is determined by the operating system and/or individual programs.
G ground—A conductor to which all components of an electric circuit are connected. It has a potential of zero (0) volts, is connected to the earth, and is the point of reference for voltages in the circuit.
hard disk—A storage device composed of a rigid platter or platters that can be magnetically coded with data. Hard disks hold much more information than some external media and are used for long-term storage of programs and data. The primary (or only) hard disk in a computer is usually fixed, but some computers have secondary hard disks that are removable.
hardware—The physical components of a computer system. Compare software.
Hibernation—A feature of many Toshiba computers that saves to the internal storage drive the current state of your work, including all open files and programs, when you turn the computer off. When you turn on the computer again, your work is returned to the same state it was when the computer was turned off. See also Sleep, Suspend.
hot key—(1) A feature in which certain keys in combination with the Fn key can set system options or control system parameters, such as the battery save mode. (2) A key or combination of keys that activates a memory resident program.
hot swapping—The ability to add or remove devices from a computer while the computer is running and have the operating system automatically recognize the change.
icon—A small image displayed on the screen that represents a function, file, or program.
interlaced—A method of refreshing a computer screen, in which only every other line of pixels is refreshed. Interlaced monitors take two passes to create a complete screen image. Compare non-interlaced.
internal device—See device.
Internet—The decentralized, world-wide network of computers that provides electronic mail, the World Wide Web, and other services. See also World Wide Web.
K keyboard shortcut—A key or combination of keys that you use to perform a task instead of using a pointing device such as a mouse.
L1 (level one) cache—Memory cache built into the processor to help improve processing speed. See also cache, CPU cache, L2 cache.
L2 (level two) cache—Memory cache installed on the motherboard to help improve processing speed. It is slower than L1 cache and faster than main memory. See also cache, CPU cache, L1 cache.
LAN (Local Area Network)—A group of computers or other devices dispersed over a relatively limited area and connected by a communications link that enables any device to interact with any other on the network.
LED (Light Emitting Diode)—A solid state lamp (SSL) that uses light-emitting diodes (LEDs) as the source of light, which offers long life and high efficiency output. Multiple diodes are used together, since the light created by individual light-emitting diodes is small compared to incandescent and compact fluorescent lamps.
LCD (Liquid Crystal Display)—A type of display that uses a liquid substance between two transparent electrode panels. When an electric current passes through the electrodes, the molecules in the liquid form a crystalline pattern that polarizes the light passing through it. A filter over the electrodes permits only non-polarized light to pass to the surface of the display, creating light and dark pixels.
load—To move information from a storage device (such as a hard disk) into memory for processing.
local area network—See LAN.
logical drive—A section of a disk that is recognized by the operating system as a separate disk drive. A system's logical drives may differ from its physical drives. For example, a single hard disk drive may be partitioned into two or more logical drives.
M
memory—Typically refers to the computer's main memory, where programs are run and data is temporarily stored and processed. Memory can be volatile and hold data temporarily, such as RAM, or it can be nonvolatile and hold data permanently, such as ROM. A computer's main memory is RAM. See also RAM, ROM.
microprocessor—See Central Processing Unit (CPU).
MIDI (Musical Instrument Digital Interface)—A standard for connecting musical instruments, synthesizers, and computers. The MIDI standard provides a way of translating music into a form computers can use, and vice versa.
modem—Short for “modulator/demodulator.” A device that converts information from digital to analog, and back to digital, enabling information to pass back and forth between digital computers and analog telephone lines.
motherboard—The computer's main circuit board that contains the processor, memory, and other primary components.
MS-DOS prompt—See system prompt.
multi-function drive—A DVD drive that can read and write to CD and DVD media.
multimedia—A combination of two or more media, such as sound, animation, and video in a computer program or presentation.
Musical Instrument Digital Interface—See MIDI.
N
network—A collection of computers and associated devices that are connected by communications facilities. A network allows you to share data and peripheral devices, such as printers, with other users and to exchange electronic mail.
non-interlaced—A method of refreshing a computer screen, in which each pixel of every line is refreshed as the electron beam scans across and down the screen. Compare interlaced.
non-system disk—A disk for storing programs and data that cannot be used to start the computer. Compare system disk.
online—Available through the computer. Online may refer to information being read from your own computer's internal storage drive, such as online documentation or online Help, or to information coming from another company on a company network or the Internet.
operating system—A set of programs that controls how the computer works. Examples of operating systems are the Windows Vista® Home Basic and Windows® 7 operating systems.
optical disc drive—A drive which reads plastic coated discs on which information is recorded digitally, and uses a laser to read data, music, or videos.
P palette—See color palette.
parallel—Processes that occur simultaneously. In communications, it means the transmission of more than one bit of information at a time. On your computer, the parallel port provides a parallel communications interface between the computer and an appropriate device. Most modern printers are parallel. Compare serial.
password—A unique string of characters entered by a user to verify his or her identity to the computer or the network.
PC Card—A credit-card-sized expansion card designed to increase the capabilities of computers. PC Cards provide functions such as modem, fax/modem, hard disk drive, network adapter, sound card, or SCSI adapter.
peripheral—Any device, such as a printer or joystick, that is attached to the computer and controlled by the computer's CPU.
pixel—Short for “picture element.” The smallest dot that can be produced on a screen or printer.
Plug and Play—Generally, refers to the computer's ability to automatically configure itself to work with peripheral devices. When capitalized, refers to a standard that, when followed by a device manufacturer, allows a computer to configure itself automatically to work with the device.
pointer—An icon (usually an arrow) that moves on the screen when you slide your finger across the TouchPad or move a mouse. Used to point to and select/activate on-screen items, such as icons, menu items, and buttons. The shape and purpose of the pointer varies depending on the program you are using and what you are doing.
pointing device—Any device, such as the TouchPad or a mouse, that enables you to move the pointer on the screen.
port—A socket on the computer where you plug in a cable for connection to a network or a peripheral device.
processor—See Central Processing Unit (CPU).
program—A set of instructions that can be executed by a computer. The general classes of programs (also called software) are operating system, application, and utility. See also operating system, application, utility.
properties—The attributes of an object or device. For example, the properties of a file include the file's type, size, and creation date.
R
RAM (Random Access Memory)—Volatile memory that can be written to as well as read. Volatile here means that information in RAM is lost when you turn off your computer. This type of memory is used for your computer's main memory. See also memory. Compare ROM.
Random Access Memory—See RAM.
Read-Only Memory—See ROM.
reboot—See boot, restart.
removable disk—A disk that can be removed from a disk drive. A Flash drive is one example of a removable disk.
resolution—A measure of the sharpness of the images that can be produced by a printer or displayed on a screen. For a printer, resolution is expressed in dots per inch (dpi). For a screen, it is expressed as the number of pixels available horizontally and vertically.
restart—Synonymous with reboot. To reset the computer by reloading the operating system without turning the computer off. See also boot.
RGB (Red, Green, Blue) monitor—A monitor that reproduces all colors by mixing red, green, and blue light in various combinations.
RJ11 connector—A modular connector used on most U.S. telephone systems and direct-connect modems. The RJ11 connector is a 6-wire connector.
RJ45 connector—An eight-wire connector used to connect a computer to a network.
ROM (Read-Only Memory)—Non-volatile memory that can be read but not written to. Non-volatile here means that information in ROM remains whether or not the computer is receiving power. This type of memory is used to store your computer's BIOS, which is essential instructions the computer reads when you start it up. See also BIOS, memory. Compare RAM.
S
Secure Digital (SD)—A small, portable, non-volatile memory card used to store and transfer data between digital products, providing encryption capability for content security.
select—To highlight or otherwise specify text, data, or graphics with the intent to perform some operation on it.
serial—Processes that occur one at a time. In communications, it means the transmission of one bit at a time sequentially over a single channel. On your computer, the serial port provides a serial interface between the computer and an appropriate device. Compare parallel.
shortcut—See keyboard shortcut.
Sleep—A feature of some Windows ^® operating systems that allows you to turn off the computer without exiting your open applications and to continue from where you left off when you turn the computer on again.
software—See program. Compare hardware.
solid state drive — A data storage device that utilizes solid-state memory as opposed to a hard disk (see also hard disk). Solid state drives hold a large amount of information and are used for storage of programs and data.
Suspend—A feature of some Windows ^® operating systems that allows you to turn off the computer without exiting your open applications and to continue from where you left off when you turn the computer on again.
system prompt—The symbol (in the MS-DOS ^® operating system, generally a drive letter followed by a “greater than” sign) indicating where users are to enter commands.
T U
TFT display—See active-matrix display.
Universal Serial Bus (USB)—USB is a serial bus that supports a data transfer rate of up to 480 Mbps (480 million bits per second). USB can connect up to 127 peripheral devices through a single all-purpose USB port. USB allows hot swapping of peripherals. See also bus, hot swapping, serial.
upload—To send a file to another computer through a modem or network. See also download.
USB—See Universal Serial Bus (USB).
USB Flash drive—A small, portable flash memory card that plugs into a computer's USB port and functions as a portable hard drive. They are smaller and more durable than an external hard drive because they do not contain any internal moving parts, but have less storage capacity. See also Universal Serial Bus (USB).
utility—A computer program designed to perform a narrowly focused operation or solve a specific problem. Utilities are often related to computer system management.
W
Web—See World Wide Web.
Wi-Fi ^® —A registered trademark term of the Wi-Fi Alliance that stands for Wireless Fidelity, and is another term for the communication protocol to permit an Ethernet connection using wireless communication components.
World Wide Web (www)—The worldwide network of Web sites linked together over the Internet. A user of the Web can jump from site to site regardless of the location of the computer hosting the site. See also Internet.
Index
A
AC adaptor 33
AC power 96
AC power light 33
accessing
network 115
adding
memory
check total memory 47
memory (optional) 39
optional external devices 38
adequate ventilation
cooling fan 32
adjusting
TouchPad™ settings 66
Application Cards 163
audio features 115
B
backing up files 84, 92
battery
battery life 95
Call2Recycle™ 110
care 107, 108
changing 104
charge indicator light 35
charge time 96
charger 96
charging 35, 96
charging the real-time clock (RTC) 97
conserving power 101
determine remaining power 100
disposal 109
indicator light 99
installation 104, 106
low charge 100
maintaining 108
maximum capacity 95
monitoring power 35, 98
optional secondary battery 96
power management 96
power options 101
power plan 167
real-time clock (RTC) 95
recharge time 95
removing 104
RTC memory 95
running computer on battery power 94
safety precautions 107
setting notifications 101
battery indicator light 99
BIOS Setup
see TOSHIBA Hardware Setup
button
power 37
Shut down 40, 73
start 113
C
Call2Recycle™
battery 110
caring for your computer 81
changing
battery 104
character keys 85
charging the battery 35
cleaning the computer 81
communications
set up 114
computer
caring for 81
cleaning 81
environmental precautions 110
moving 82
restarting 76
running on battery power 94
setting up 32
turning off 71
turning off more quickly 74
turning off options 71
computer lock 82
computer will not start
troubleshooting 138
computing habits
troubleshooting 152
computing tips 83
configuring
Hibernation mode 76
Hibernation mode options 76
Sleep mode 78
Sleep mode options 79
connecting
AC adaptor 33
AC adaptor cord to (DC-IN) 34
computer to a network 115
monitor 67
power cord/cable 34
power source 34
cooling fan
adequate ventilation 32
customize
computer settings 81
D
data/entire system backup
troubleshooting 155
desktop
creating new icon 112
exploring the 111
icons 112
recycle bin 112
standard features 112
Device Manager
fixing a problem 143
directing
display output 68
disabling
TouchPad™ 67, 173
display
troubleshooting 147
display devices
external 67
display output settings 68
display panel
opening 36
display, external
adjusting 69
disposal information 17
disposing of used batteries 109
E
emulate a full-size keyboard 85
enabling
TouchPad™ 67, 173
ENERGY STAR® 24
exploring
desktop 111
external devices
keyboard 69
mouse 69
external display, adjusting 69
F
file extensions
using 91
files
backing up 84, 92
file names 91
printing 91
restore 93
saving 90
using a file extension 91
function keys 85
H
headphones
using 116
Help and Support
troubleshooting 142
Hibernation mode 72
configuring 76
configuring options 76
hot key 169
powering down 76
Shut down 76
starting again from 78
using 76
hot key
disabling or enabling wireless
devices 172
display brightness 171
Hibernation mode 169
keyboard overlays 175
Lock (Instant security) 166
Output (Display switch) 170
power plan 167
Sleep mode 168
using to set a power plan 103
volume mute 165
Zoom (Display resolution) 174
zooming in 175
zooming out 175
Hot Key Cards 161
Hot key functions 165
|
icon
desktop 112
moving to desktop 112
recycle bin 112
safety 27
installation
memory module 39
installing
a charged battery 106
battery 104
memory modules 39
mouse 69
Instruction Manual for Safety and
Comfort 29
internal storage drive
recovery 47
K
keyboard
Alt keys 85
character keys 85
Ctrl keys 85
emulate a full-size 85
Fn key 85
function keys 85
hot keys 175
overlay keys 86
special Windows® keys 86
standard full-size 85
troubleshooting 146
using 84
keyboard, external 69
keys
Ctrl Fn Alt 85
function keys 85
overlay for cursor control 87
overlay keys 86
overlay to type numeric data 87
L
LEDs
system indicator lights 99
AC adaptor light 98
AC power light 33, 34
battery light 35
cursor control overlay light 87
numeric overlay light 87
ON/OFF light 37, 76, 78, 81
Web Camera light 117
lock
computer, using 82
M
maintaining your battery 108
memory
adding (optional) 39
check total memory 47
removing memory module slot cover 41
Memory card reader
inserting memory media 118
removing memory media 118
using 117
memory module
installation 39
inserting into socket 42
removing 45, 46
microphone
using 115
monitor
connecting 67
monitor problems
troubleshooting 147
monitoring battery power 98
mouse
installing 69
mouse utility 131
moving the computer 82
N
network
accessing 115
connecting your computer 115
networking
wireless 114
notification area 114
0
ON/OFF indicator light 99
online resources
Toshiba 93
optional external devices
adding 38
optional secondary battery 96
other documentation 28
P
password
deleting a supervisor 128
deleting a user 129
instant password 126
instant, using 126
power-on password 126
setting 126
setting a supervisor 127
setting a user 128
supervisor password 126
user password 126
power
connecting cable to AC adaptor 34
cord/cable 34
cord/cable connectors 176
energy-saving features 94
turning on 37
power button 37
power management 96
optimum performance 96
power plans
selecting power plan options 102
using a hot key 103
power saving options 101
powering down
using Hibernate 76
using Sleep 79
precautions
safety 30
printer
connecting 69
setting up 70
troubleshooting 150
USB-compatible 69
printing a file 91
problem solving
Startup options 141
program, starting 87
program, starting from Start menu 88
projector
connecting 67
R
real-time clock (RTC)
battery 95
recording sounds 115
recovery
checking internal storage drive operating status 62
creating recovery DVDs/media 56
erasing internal storage drive 61
installing drivers and applications 63
internal storage drive 47
out-of-box state 49
restoring from recovery DVDs/ media 59
to custom size partition 51
without changing drive partitions 54
recycle bin icon 112
registering computer 38
removing
battery from the computer 104
memory module 45
memory module slot cover41
restarting
computer 76
restore points
troubleshooting 154
restoring your work 93
running computer on battery power 94
S
safety
computer 110
disposing of batteries 109
icons 27
precautions 30
safety precautions
battery 107
saving files 90
Search programs and files field starting a program 89
selecting
power plan options 102
setting
low battery notifications 101
setting up
AC adaptor 33
adding memory (optional) 39
communications 114
computer 32
getting comfortable with your computer 29
software
Setup Wizard38
settings
customize computer settings 81
display output 68
Shut down
button 40, 73
command 73
computer 40, 73
Hibernation mode 76
Sleep mode 79
Sleep mode 72
configuring 78
configuring options 79
hot key 168
powering down 79
Shut down 79
starting again from 81
using 78
software
Setup Wizard 38
software program
starting 87
starting from Start menu 88
sounds
recording 115
speakers
using external 116
start button 113
starting a program 87
Search programs and files field 89
Windows® Explorer 88
Windows® Start menu 88
starting a program from Start 88
starting again from
Hibernation mode 78
Sleep mode 81
Startup menu
problem solving 141
supervisor password, deleting 128
supervisor password, set up 127
system indicator lights
AC power 33
LEDs 34, 35, 37, 76, 78, 81,
87, 98, 99, 117
T
taskbar 113
television
adjusting display 69
tips
for computing 83
Toshiba
online resources 93
registering computer
Toshiba Web site 38
worldwide offices 159
TOSHIBA Accessibility 135
Toshiba accessories
memory 39
TOSHIBA Application Installer 125
TOSHIBA Assist 121
Optimize tab 124
Protect & Fix tab 123
Secure tab 122
TOSHIBA Hardware Setup 132
TOSHIBA PC Diagnostic Tool Utility 130
TOSHIBA Recovery Media Creator 125
TOSHIBA Service Station 136
TOSHIBA Zooming Utility 134
TouchPad™
using 63
traveling tips 110
troubleshooting 146
AC power light is blinking 139
battery light is blinking 140
bookmarked site not found 142
computer will not start 138
contacting Toshiba 157
corrupted/damaged data files 149
data/entire system backup 155
Device Manager 143
Disk Defragmenter 149
display error message 147
display problems
screen is blank 146
error message, warning resume failure 139
Error-checking 148
external display problems 148
external keyboard 146
external monitor 147
good computing habits 152
hard disk drive is slow 149
Help and Support, Windows® operating system 142
high-pitched noise 149
installing hardware/software 156
keyboard 146
keyboard will not respond 138
memory problems 144
missing files/trouble accessing a drive 148
power and batteries 144
printer 150
program stops responding 137
restore points 154
screen does not look correct/ flickers 147
slow Internet connection 142
sound system/speakers 149
trouble running programs 149
URL address not found 142
Windows® operating system not working 140
wireless networking 151
turning off
computer 71
computer more quickly 74
options 71
turning on
power 37
U
USB-compatible
printer 69
user password, deleting 129
user password, setting 128
using
a microphone 115
computer lock 82
external display devices 67
Hibernation mode 76
hot key to set a power plan 103
Memory card reader 117
Shut down command 73
Sleep mode 78
TouchPad ^TM 63
Web Camera 117
using the keyboard 84
using the overlay for cursor control 87
Utilities 120
V
video projector
adjusting display 69
W
warranty
standard limited warranty 28
Web Camera
using 117
Wi-Fi®
wireless networking 114
Windows® Explorer
starting a program from 88
Windows® operating system
troubleshooting 140
Windows® Start menu
starting a program 88
wireless networking 114
troubleshooting 151