
LWC243NSMM1 - Air-conditioner LG - Free user manual and instructions
Find the device manual for free LWC243NSMM1 LG in PDF.


User questions about LWC243NSMM1 LG
0 question about this device. Answer the ones you know or ask your own.
Ask a new question about this device
Download the instructions for your Air-conditioner in PDF format for free! Find your manual LWC243NSMM1 - LG and take your electronic device back in hand. On this page are published all the documents necessary for the use of your device. LWC243NSMM1 by LG.
USER MANUAL LWC243NSMM1 LG
Room Air Conditioner (Window Type) OWNER'S MANUAL
WINDOW TYPE ROOM AIR CONDITIONER
- Please read carefully and thoroughly this manual before operating this unit.
- Contact the authorized SVC man for repair or maintenance of this unit.
- Contact the installer for installation of this unit.
- The appliance is not intended for use by young children or infirm persons without supervision.
- Young children should be supervised to ensure that they do not play with the appliance.
MODELS: LWC121CSAA0 LWC121CSMK0 (MODELOS) LWC123CSAA1 LWC123CSMK1 LWC183MSAB1 LWC183MSMM1 LWC243NSAB3 LWC243NSMM3

Write the model and serial numbers here:
Model #
Serial #
You can find them on a label on the side of each unit.
Dealer's Name
Date Purchased
■ Staple your receipt to this page in the event you need it to prove date of purchase or for warranty issues.

READ THIS MANUAL
Inside you will find many helpful hints on how to use and maintain your air conditioner properly. Just a little preventive care on your part can save you a great deal of time and money over the life of your air conditioner.
You'll find many answers to common problems in the chart of troubleshooting tips. If you review our chart of
Troubleshooting Tips first, you may not need to call for service at all.

PRECAUTION
- Contact the authorized service technician for repair or maintenance of this unit.
- Contact the installer for installation of this unit.
• The air conditioner is not intended for use by young children or invalids without supervision. - Young children should be supervised to ensure that they do not play with the air conditioner.
- When the power cord is to be replaced, replacement work shall be performed by authorized personnel only using only genuine replacement parts.
- Installation work must be performed in accordance with the National Electric Code by qualified and authorized personnel only.
natural_image
Simple line drawing of people enjoying a meal at a table with sun and palm trees (no text or symbols)To prevent injury to the user or other people and property damage, the following instructions must be followed.
■ Incorrect operation due to ignoring instruction will cause harm or damage. The seriousness is classified by the following indications.
WARNING
This symbol indicates the possibility of death or serious injury.
CAUTION
This symbol indicates the possibility of injury or damage to properties only.
■ Meanings of symbols used in this manual are as shown below.
| Be sure not to do. | |
| Be sure to follow the instruction. |

WARNING
Installation
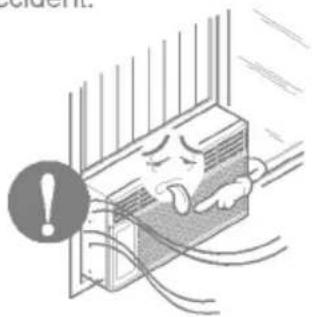
Always install the expansion panel(s).
- No installation may cause fire and electric shock accident.
natural_image
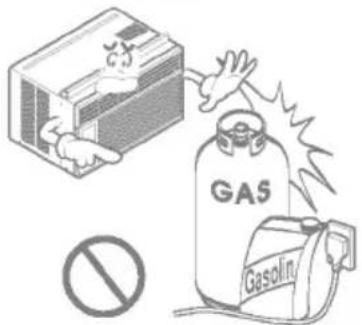
Illustration of a distressed air conditioner unit with warning symbol (no text or labels)Do not use the power cord near flammable gas or combustibles such as gasoline, benzene, thinner, etc.
• It may cause explosion or fire.
text_image
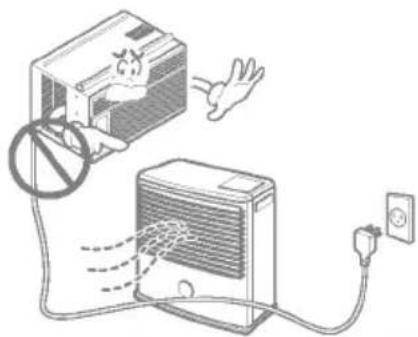
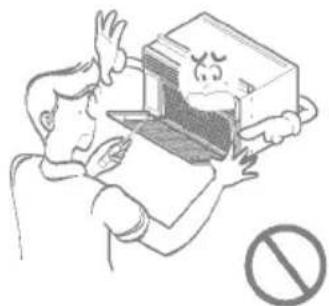
GAS GasolinDo not place the power cord near a heater.
• It may cause fire and electric shock.
natural_image
Illustration of a car air conditioner connected to a power outlet via cable, showing no text or symbols.• It may cause failure and electric shock.
natural_image
Illustration of a person reacting to a device with a warning symbol (no text or labels present)Operation
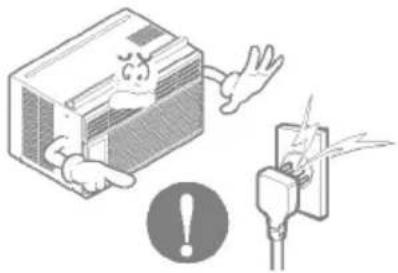
Plug in the power plug properly.
- Otherwise, it will cause electric shock or fire due to heat generation or electric shock.
natural_image
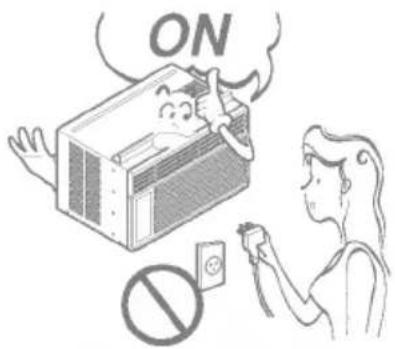
Illustration of a cartoon car being charged with an electric plug, no text or symbols presentDo not operate or stop the unit by inserting or pulling out the power plug.
- It will cause electric shock or fire due to heat generation.
text_image
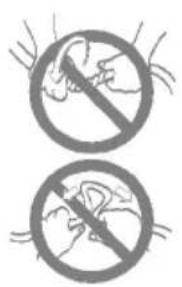
ONDo not damage or use an unspecified power cord.
- It will cause electric shock or fire.
text_image
Two circular signs with crossed-out hands holding a prohibition symbol, indicating no restrictions on the left side of each circle.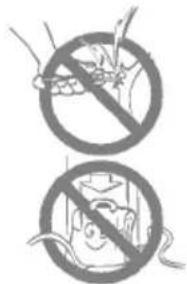
text_image
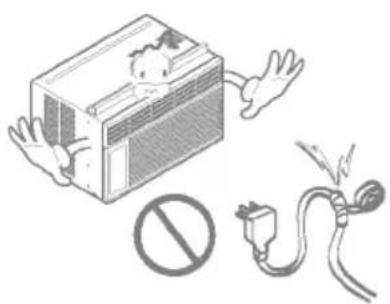
Two circular icons with prohibition symbols: one showing a hand holding a tool, the other showing a person inside a device.Do not modify power cord length.
- It will cause electric shock or fire due to heat generation.
natural_image
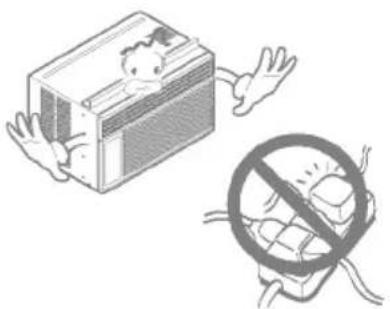
Illustration of an air conditioner unit with a warning symbol and electrical plug (no text or labels)Do not share the outlet with other appliances.
- It will cause electric shock or fire due to heat generation.
natural_image
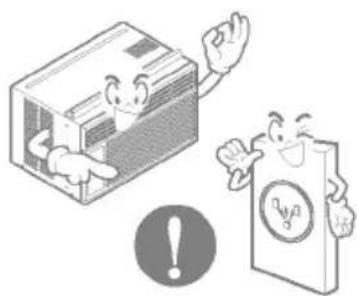
Illustration of a child inside a box and a prohibition sign with a crossed-out hand (no text or symbols)Always plug into a grounded outlet.
- No grounding may cause electric shock (See Installation Manual).
natural_image
Illustration of two cartoon characters: one inside a cardboard box with arms, the other smiling and waving, and a warning symbol (no text or labels)Unplug the unit if strange sounds, odors, or smoke come from it.
- Otherwise it may cause fire and electric shock accident.
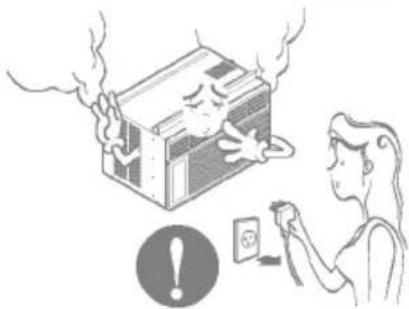
natural_image
Illustration of a person using a power cord to smoke or fire from a building, with an exclamation mark icon below (no text or symbols on main image)Do not use the socket if it is loose or damaged.
- It may cause fire and electric shock.
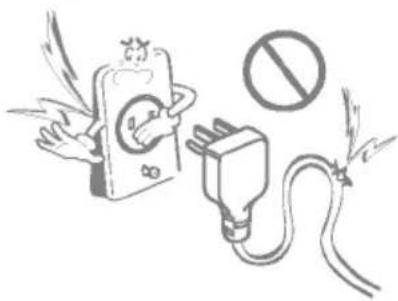
text_image
Illustration showing a cartoon electric shock with wings, a plug, and a prohibition symbolDo not operate with wet hands or in damp environment.
• It will cause electric shock.

text_image
Illustration showing a person holding a device with a prohibition symbol, next to a car with a 'No' sign.Do not allow water to run into electric parts.
• It will cause failure of machine or electric shock.
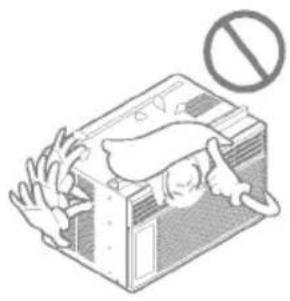
natural_image
Illustration of a person inside a box with arms raised, symbolizing insecurity or overload (no text or symbols present)Leave the door closed while the air conditioner is running.
- It is not designed to cool the entire house.
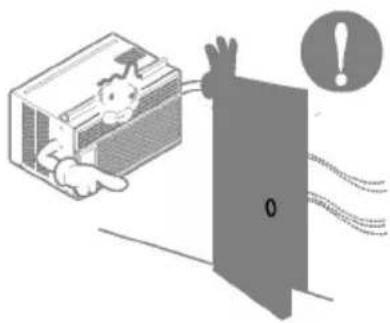
natural_image
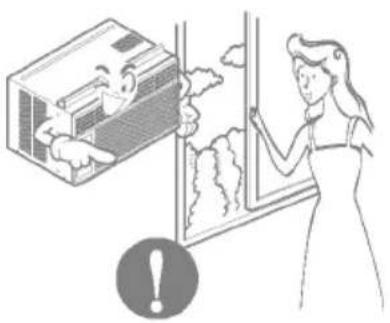
Illustration of a child inside an air conditioner with a warning symbol and smoke trail (no text or labels)Ventilate before operating air conditioner when gas goes out.
• It may cause explosion, fire, and burn.
natural_image
Illustration of a woman opening a window with a cartoon character inside, no text or symbols presentCAUTION
Installation
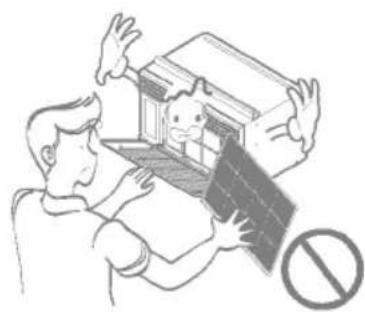
Never touch the metal parts of the unit when removing the filter.
• They are sharp and may cause injury.
natural_image
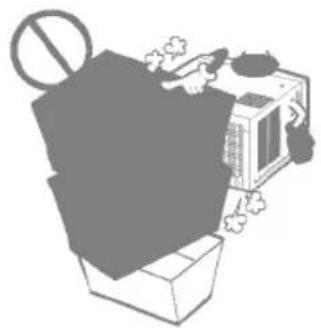
Illustration of two people interacting with a solar panel, no text or symbols present• It may cause failure of appliance or accident.
natural_image
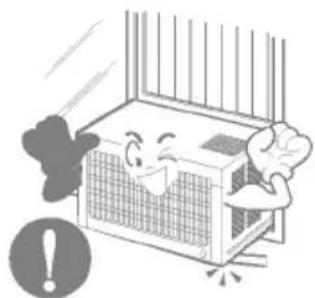
Illustration of a large box with a prohibition symbol and a small machine, surrounded by decorative flowers (no text or symbols)Ensure that the outer case is not damaged by age or wear.
• If leaving appliance damaged, there is concern of damage due to the falling of product.
natural_image
Cartoon illustration of a distressed air conditioner unit with exhaust smoke and warning symbol (no text or labels)Operation
Be cautious not to touch the sharp edges when installing.
- It may cause injury.
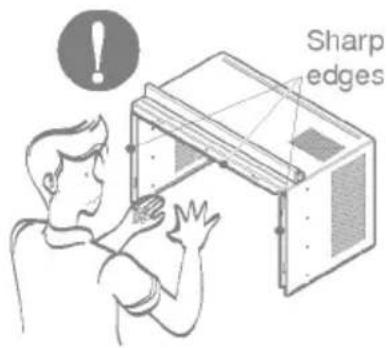
text_image
Sharp edgesHold the plug by the head when taking it out.
• It may cause electric shock and damage.
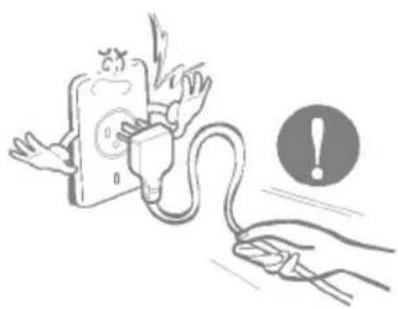
natural_image
Illustration of a hand holding an electrical plug connected to a fuse, with an exclamation mark in the background (no text or symbols on the diagram itself)Turn off the main power switch when not using it for a long time.
• Prevent accidental startup and the possibility of injury.
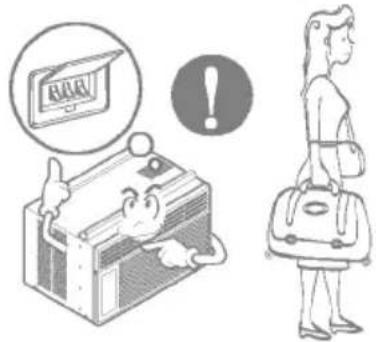
natural_image
Illustration of a person standing with a backpack and a computer monitor, with an exclamation mark in the background (no text or symbols)Do not place heavy object on the power cord and take care so that the cord should not be pressed.
• There is danger of fire or electric shock.
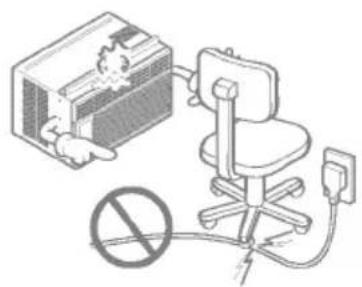
natural_image
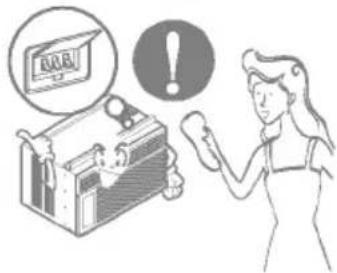
Illustration of a device connected to an office chair with a prohibition symbol (no text or labels present)Turn off the power and breaker firstly when cleansing the unit.
• Since the fan rotates at high speed during operation, it may cause injury.
text_image
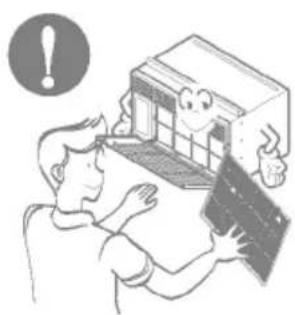
Illustration showing a person using a boxing glove next to a box with a warning sign and an exclamation mark.Always insert the filter securely. Clean it every two weeks.
• Operation without filters will cause failure.
natural_image
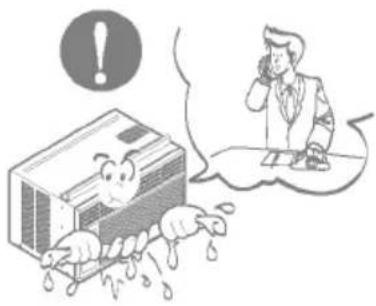
Illustration of a person using a computer with an exclamation mark icon (no text or symbols on the diagram itself)If water enters the product, turn off the the power switch of the main body of appliance. Contact service center after taking the power-plug out from the socket.
natural_image
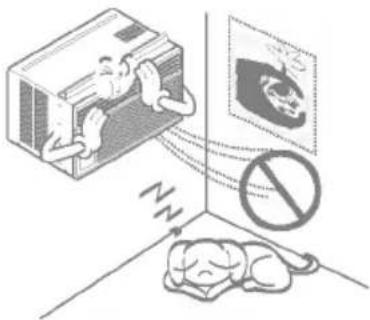
Illustration of a person reacting to a sad, anthropomorphic car with water droplets, next to a speech bubble (no text or symbols)Do not put a pet or house plant where it will be exposed to direct air flow.
• This could injure the pet or plant.

natural_image
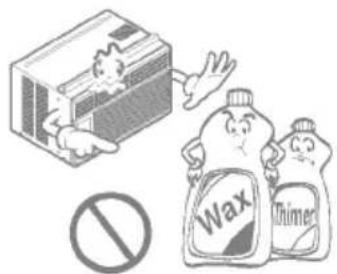
Illustration of a box with people reaching toward it, no text or symbols presentUse a soft cloth to clean. Do not use wax, thinner, or a strong detergent.
• The appearance of the air conditioner may deteriorate, change color, or develop surface flaws.
text_image
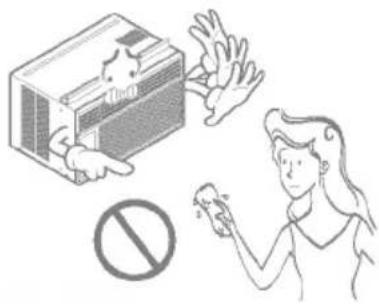
Illustration showing a washing machine with a prohibition symbol, accompanied by two cartoon characters labeled 'Wax' and 'Thimer'.Do not clean the air conditioner with water.
• Water may enter the unit and degrade the insulation. It may cause an electric shock.
text_image
Safety warning illustration showing a device emitting a barrier to a person holding a phone, with a prohibition symbol nearby.Do not use this appliance for special purposes such as pets, foods, precision machinery, or objects of art.
• It is an air conditioner, not a precision refrigeration system.
text_image
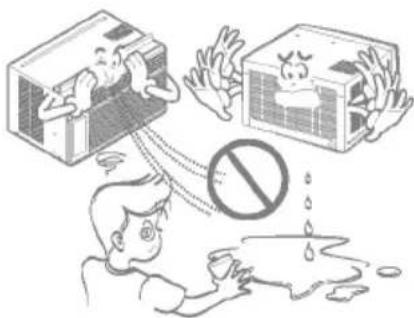
Safety warning illustration showing a person using an air conditioner to stop sleeping, with a no-smoking symbol nearby.Do not drink water drained from air conditioner. / Do not direct airflow at room occupants only.
- It contains containments and will make you sick. / This could damage your health.
text_image
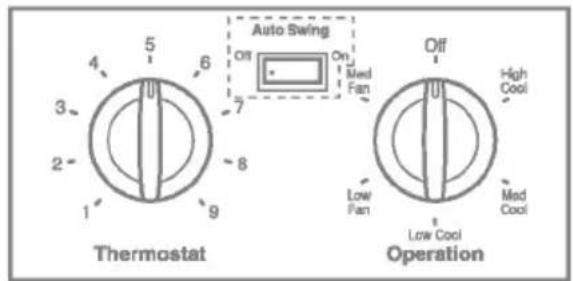
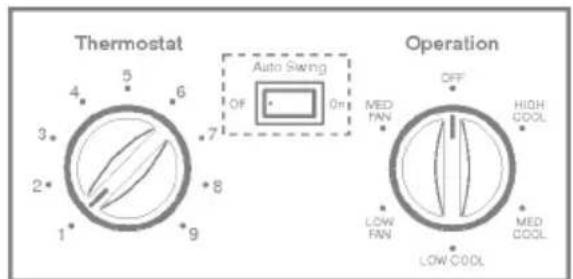
Illustration showing a person reacting to a shock with a 'no' symbol, while another person reacts with a device and another holds a shield.The controls will look like one of the following.
: Optional
text_image
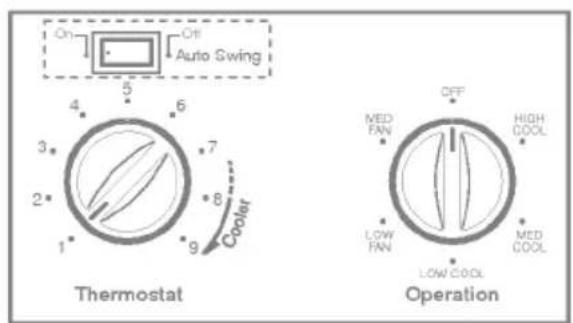
4 5 6 3 2 1 9 7 8 Thermostat Auto Swing Off On On Med Fan Off High Cool Operation Low Fan Low Cool Med Cool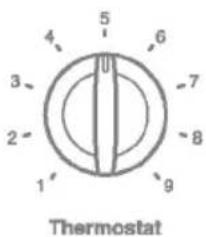
text_image
5 4 6 3 7 2 8 1 9 Thermostat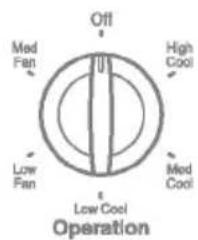
text_image
Off Med Fan High Cool Low Fan Low Cool Med Cool Operation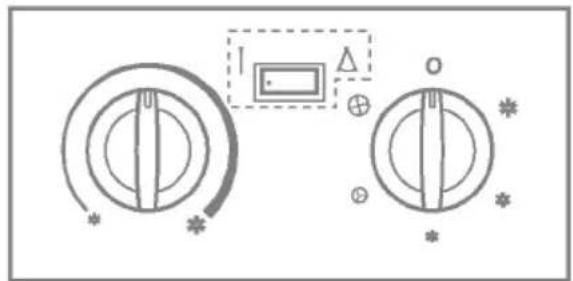
text_image
Diagram showing two circular gauges with symbols and a magnified inset highlighting a rectangular component with a triangle symbol.
text_image
On 5 4 6 3 7 2 8 1 9 Cooler Thermostat Operation OFF MED FAN HIGH COOL LOW FAN MED COOL LOW COOL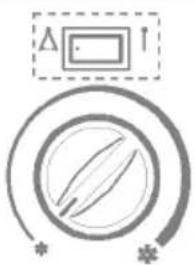
natural_image
Pure diagram of concentric circles with radial lines and small symbols, no text or labels present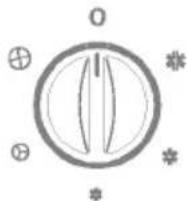
text_image
Thermostat 4 5 6 3 7 2 8 1 9 Auto Swing OFF 0m Operation OFF MED FAN HIGH COOL LOW FAN MED COOL LOW COOL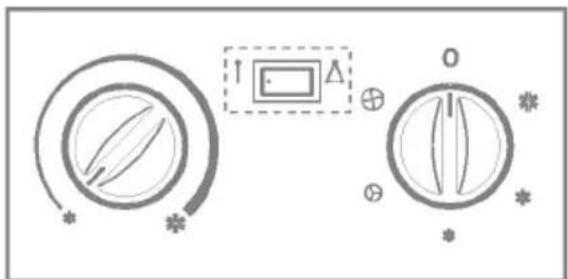
text_image
Diagram showing two circular gauges with internal blades and a zoomed-in section labeled with symbols like 'Δ' and 'O'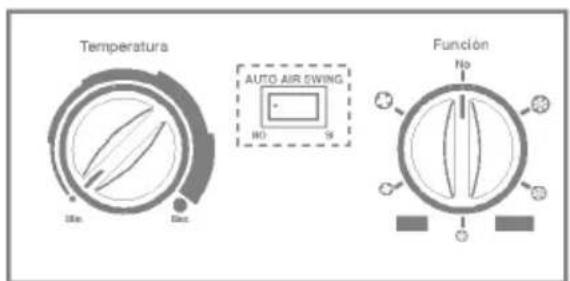
text_image
Temperatura Auto AIR SWING No Función No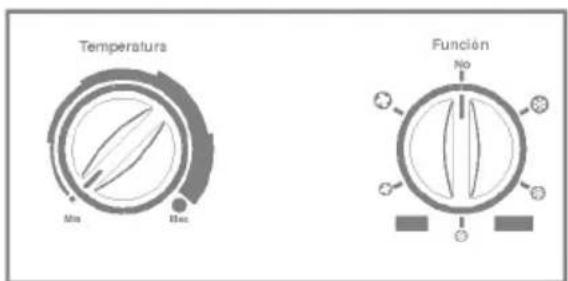
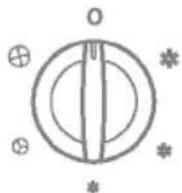
Low Cool ( * ) provide cooling with different fan speeds. Med Fan ( ⊕ ) or Low Fan ( ⊗ ) provides air circulation and filtering without cooling. Off ( O ) turns the air conditioner off.
NOTICE : If you move the switch from a cool setting to off or to a fan setting, wait at least 3 minutes before switching back to a cool setting.
Cooling Descriptions
For Normal Cooling- Select High Cool or Med Cool with the Operation knob at the midpoint of Thermostat knob.
For Maximum Cooling- Select High Cool with the Operation knob at the highest number available on your Thermostat knob.
For Quieter & Nighttime Cooling- Select Low Cool with the Operation knob at the midpoint of Thermostat knob.
THERMOSTAT
The THERMOSTAT is used to maintain the room temperature. The compressor will cycle on and off to keep the room at the same level of comfort. When you turn the knob to a higher number(the right side) and the indoor air will become cooler.
The 5 or 6 position (the middle position of arc) is a normal setting for average conditions.
■ AUTO SWING (Optional)
Auto swing switch controls the horizontal air direction by air swing system (not on all models).
ON (△): Auto swing is operated.
OFF (↑): Auto swing is not operated.

CAUTION: When the air conditioner has been performed its cooling operation and is turned off or set to the fan position, wait at least 3 minutes before resetting to the cooling operation again.
The controls will look like one of the following.
: Optional
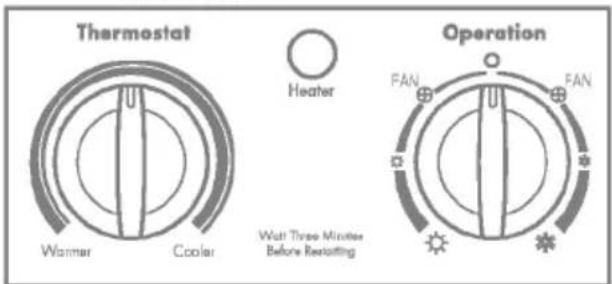
text_image
Thermostat Warrer Cooler Heater Operation Watt Three-Minister Before Resetting FAN FAN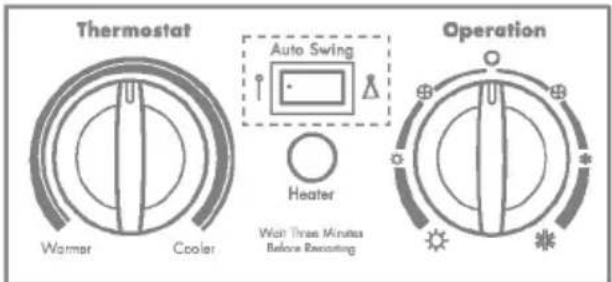
text_image
Thermostat Warmer Cooler Auto Swing Heater Won Three Minutes Before Recruiting Operation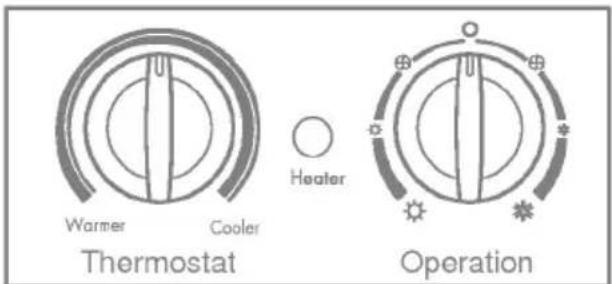
text_image
Warmer Cooler Heater Thermostat Operation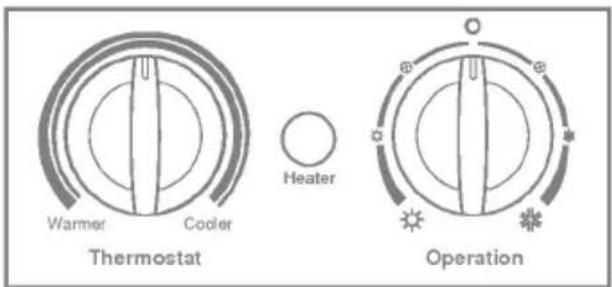
text_image
Warmer Cooler Heater Thermostat Operation■ AUTO SWING (Optional)
ON (△): Air swing is operated while OPERATION knob is set to the COOL or HEAT position.
OFF(↑): Stops the operation of air swing.
THERMOSTAT
Turn the thermostat control to the desired setting. The control position is a normal setting for average conditions. You can change this setting, if necessary, in accordance with your temperature preference.
The thermostat automatically controls cooling or heating, but the fan runs continuously whenever the air conditioner is in operation. If the room is too warm, turn the thermostat control clockwise. If the room is too cool, turn the thermostat control counterclockwise.
HEATER (☀️) LAMP
When the unit sets heating operation condition, the green lamp is lighted.
When the frost settles on the heat exchanger of the outside, defrosting is made automatically and the green lamp is turned off.
The unit may give a "hiss" and the fan motor stops for 1 to 10 minutes.
This should not be regarded as a problem.
After defrosting, the heating operation begins again.
OPERATION
OFF (O): Turns the air conditioner off.
LOW FAN (✗): Permits the low fan speed operation without cooling (heating).
LOW COOL ( * ) : Permits cooling with the low fan speed operation.
HIGH COOL (※): Permits cooling with the high fan speed operation.
LOW HEAT (☀️): Permits heating with the low fan speed operation.
HIGH HEAT (☀️): Permits heating with the high fan speed operation.

CAUTION: When the air conditioner has been performed its cooling operation and is turned off or set to the fan position, wait at least 3 minutes before resetting to the cooling operation again.
The controls will look like one of the following.
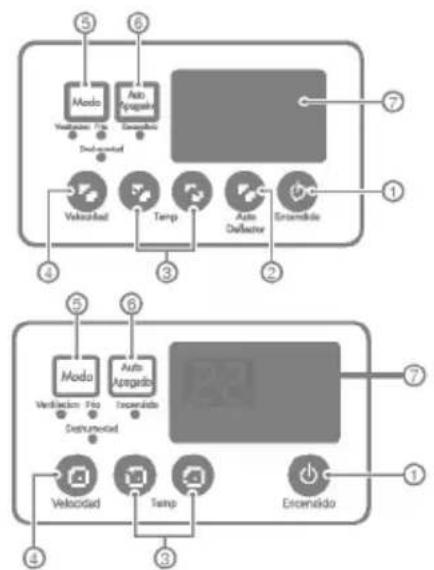
flowchart
graph TD
    A["Media"] --> B["Auto Navigation"]
    B --> C["Environment"]
    C --> D["Temp"]
    D --> E["Auto Deflator"]
    E --> F["Environment"]
    G["Verbalad"] --> H["Mode"]
    I["Verbalad Pro"] --> J["Auto Apgardo"]
    K["Departwood"] --> L["Environment"]
    M["Velocad"] --> N["Temp"]
    O["Dreinido"] --> P["Environment"]
    Q["Deut-agoado"] --> R["Environment"]
    S["7"] --> T["Environment"]
    U["4"] --> V["Environment"]
    W["6"] --> X["Environment"]
    Y["3"] --> Z["Environment"]
    AA["1"] --> AB["Environment"]
REMOTE CONTROL
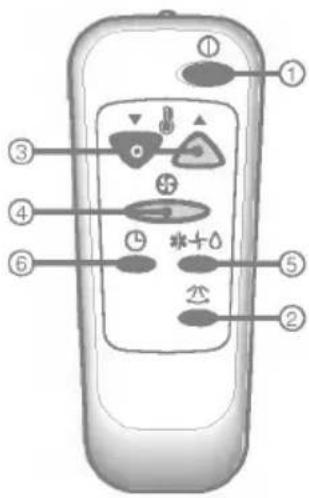
text_image
Diagram of a remote control with labeled buttons and icons for function keys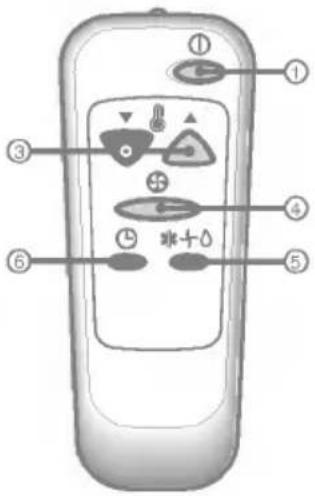
text_image
Diagram of a remote control device with labeled buttons and indicators for function keys and status
CAUTION: The Remote Control unit will not function properly if strong light strikes the sensor window of the air conditioner or it there are obstacles between the Remote Control unit and the air conditioner.
- POWER BUTTON
Operation starts, when this button is pressed and stops when you press the button again.
- AUTO SWING (Optional)
The vertical louver swings horizontally by the automatic system and stops when you press the button again.
- ROOM TEMPERATURE SETTING BUTTON
Control the room temperature within a range of 16°C to 30°C.
- FAN SPEED SELECTOR
Select the fan speed in three steps {High[F3] → Low[F1] → Med[F2] → High[F3]...}.
- OPERATION MODE SELECTION BUTTON
Select Cooling, Fan, or Dehumidification mode with this button.
- ON/OFF TIMER BUTTON
Set the time of starting and stopping operation. The timer is set by 1 hour.
- SIGNAL RECEIVER
In failure of electric power, the unit runs as previous setting operation.
-
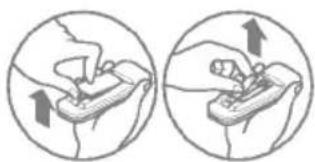
Remove the cover from the back of the remote controller.
-
Insert the two batteries.
-
Re-attach the cover.
- Do not use rechargeable batteries, such batteries differ from standard dry cells in shape, dimensions, and performance.
- Remove the batteries from the remote controller if the air conditioner is not going to be used for an extended length of time.
natural_image
Two circular diagrams showing hand positioning of a device, with arrows indicating movement direction (no text or symbols)Additional controls and important information.
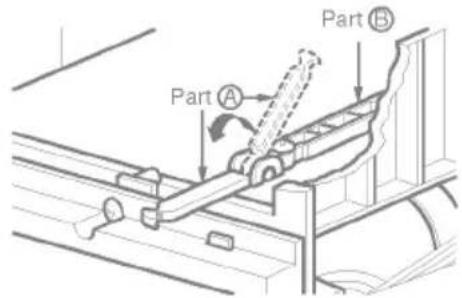
The ventilation lever must be in the CLOSE position in order to maintain the best cooling conditions. When fresh air is necessary in the room, set the ventilation lever to the OPEN position. The damper is opened and room air is drawn out.

text_image
CLOSE VENT OPENBefore using the ventilation feature, position the lever, as shown. First, pull down part Ⓐ to horizontal line with part Ⓑ.
text_image
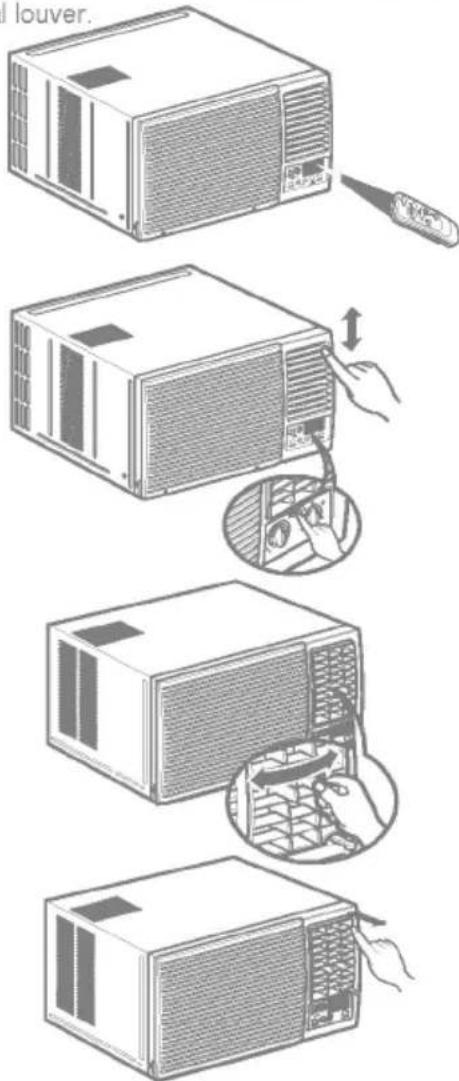
Part A Part BThe direction of air can be controlled whenever you want to cool by adjusting the horizontal louver and the vertical louver.
text_image
louver.• HORIZONTAL AIR DIRECTION CONTROL
To control horizontal direction of air flow, press the air flow direction control button and the air flow will be swept horizontally by the automatic air-swing system. If you want to stop the air flow from moving, press the button again at the desired position of the vane.
• VERTICAL AIR-DIRECTION CONTROL
The vertical air direction is adjusted by moving the horizontal louver.
• Auto Swing Models
The horizontal air direction is automatically controlled by setting the AUTO SWING switch to the ON position.
The air conditioner employs a proper drain method whereby the condensed water (moisture removed from the air) is drained to the outside.
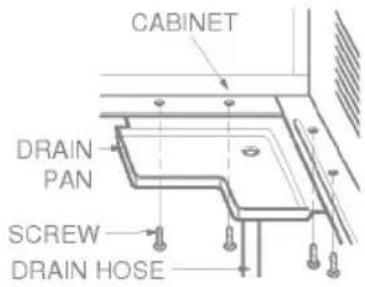
In very humid weather, (and for reverse cycle models in the reverse mode) excessive condensate water removed from the air may cause some water to collect. To remove this excess water you can install the drain pan as detailed below.
- Take the drain pan which is located in the air discharge.
- Remove the hole rubber from the base-pan (for some models).
- Install the drain pan to the right corner of the cabinet with 4 (or 2) screws.
- Connect the drain hose to the outlet located at the bottom of the drain pan. You can purchase the drain hose or tubing locally to satisfy your particular needs. (Drain hose is not supplied).
text_image
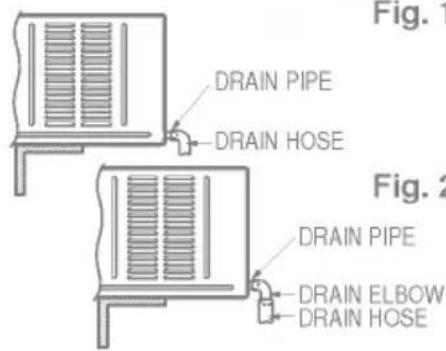
CABINET DRAIN PAN SCREW DRAIN HOSEA drain hole is provided at the rear of the air conditioner unit. Select a drain method according to the following.
- Remove the hole rubber from the base-pan. (for some models)
- Connect a drain hose to the drain pipe as shown in Fig. 1.
- Or connect a pipe elbow to the drain pipe, then connect a drain hose to the pipe elbow as shown in Fig. 2.
text_image
DRAIN PIPE DRAIN HOSE DRAIN PIPE DRAIN ELBOW DRAIN HOSE Fig. 1 Fig. 2Fig. 1
Fig. 2
TURN THE AIR CONDITIONER OFF AND REMOVE THE PLUG FROM THE POWER OUTLET.
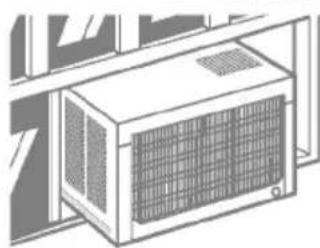
The coils on the outdoor side of the air conditioner should be checked regularly. If they are clogged with dirt or soot they may be professionally steam cleaned, a service available through a dealer.
natural_image
Illustration of a wall-mounted air conditioner unit with ventilation grilles (no text or symbols)The air filter should be checked at least twice a month to see if cleaning is necessary. Trapped particles in the filter will build up and block the airflow. This reduces the cooling capacity and also causes an accumulation of frost on the cooling coils.
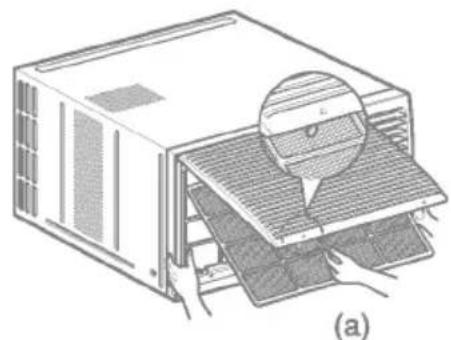
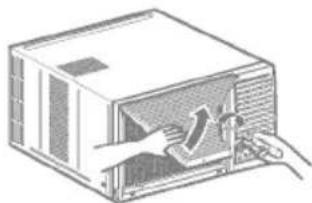
- Open the inlet grille upward by pulling out the bottom of the inlet grille.(a) In another case, you can open the inlet grille downward by pulling out the top of the inlet grille.(b)
- Remove the air filter from the front grille assembly by pulling the air filter up or down slightly.
- Wash the filter using lukewarm water below 40°C (104°F).(c)
- Gently shake the excess water from the filter completely. Replace the filter.
natural_image
Illustration of a server rack with a magnified inset showing internal components (no text or symbols)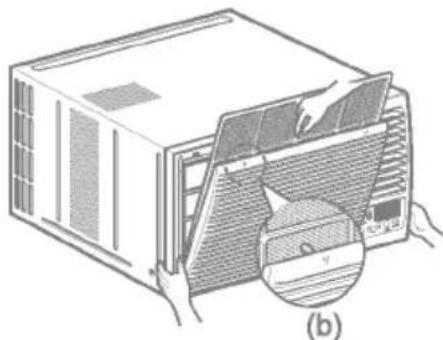
natural_image
Illustration of an air conditioner unit with a CD inside, showing internal components and airflow direction (no text or symbols)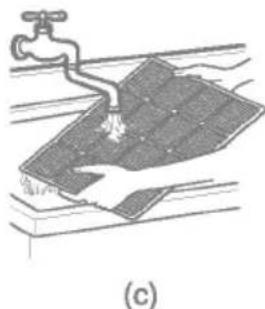
natural_image
Diagram of a faucet spraying water onto a surface with a tiled base, labeled (c) (no text or symbols on the diagram itself): Mark of inlet grille means opening direction.

CAUTION: DO NOT operate the air conditioner without a filter because dirt and lint will clog it and reduce performance.
natural_image
Diagram of an air conditioner unit with a downward arrow and grid panel (no text or symbols)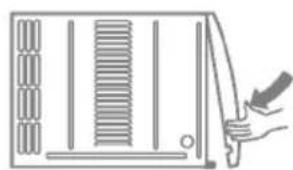
natural_image
Simple line drawing of a hand holding a knife next to a rectangular object with vertical bars (no text or symbols)- Open the inlet grille.
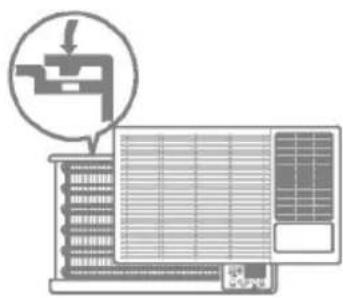
- Tighten the screw through the front grille into the plate of the evaporator.
- Close inlet grille.
natural_image
Line drawing of a computer oven with hands inserting a component (no text or symbols)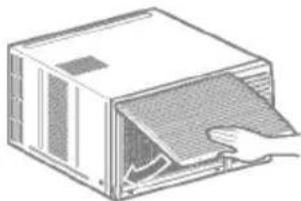
natural_image
Illustration of a computer tower with a hand inserting a card into the front panel (no text or symbols)Learning parts name prior to installation will help you understanding the installation procedure.
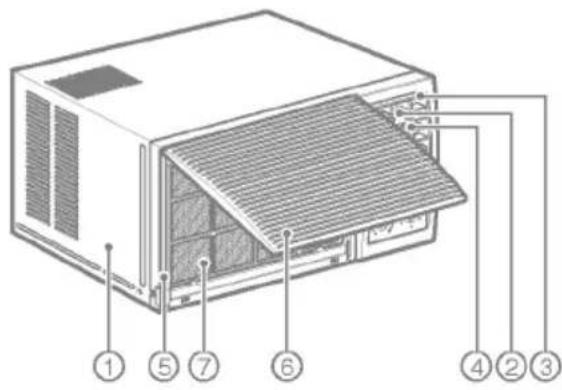
text_image
Diagram of an air conditioner unit with numbered labels pointing to internal components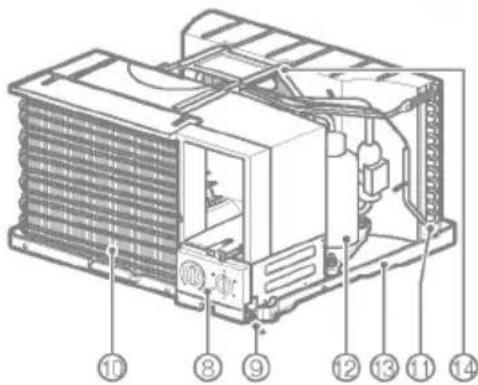
text_image
Technical diagram of an air conditioning unit with numbered components for identification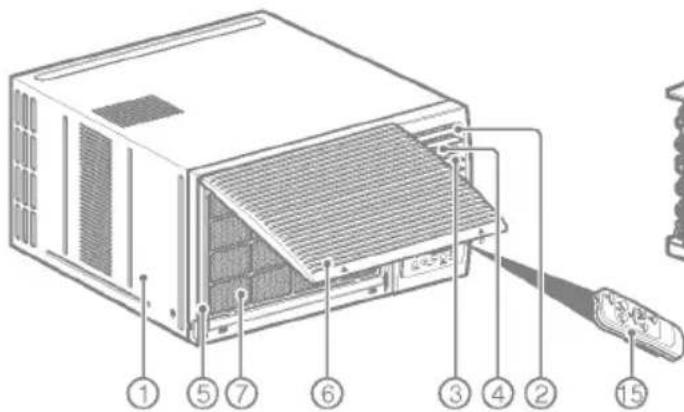
text_image
Diagram of a computer rack with numbered components for identification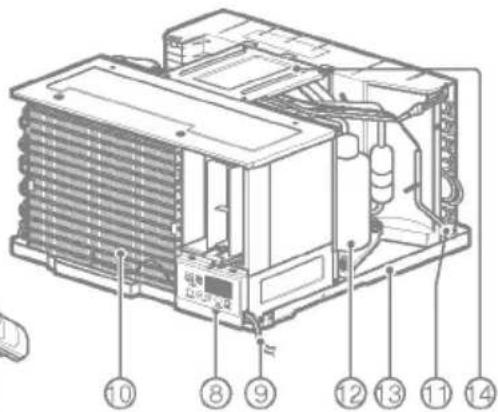
text_image
Technical diagram of an air conditioning unit with numbered components for identification- CABINET
- HORIZONTAL AIR DEFLECTOR (VERTICAL LOUVI)
-
VERTICAL AIR DEFLECTOR (HORIZONTAL LOUVER)
-
AIR DISCHARGE
- FRONT GRILLE
- AIR INTAKE(INLET GRILLE)
- AIR FILTER
- CONTROL BOARD
-
POWER CORD
-
EVAPORATOR
- CONDENSER
- COMPRESSOR
- BASE PAN
- BRACE
- REMOTE CONTROLLER
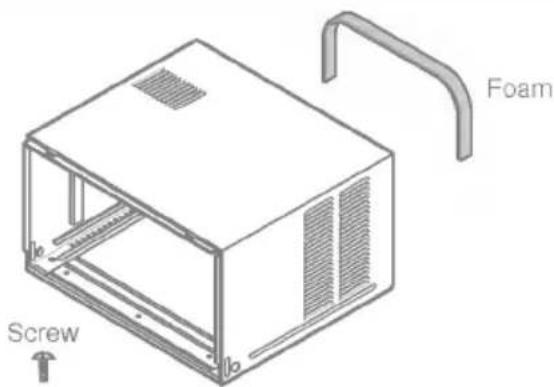
text_image
Screw FoamRead completely, then follow step-by step.
• The appliance shall be installed in accordance with national wiring regulation.
- If a power plug isn't to be used, provide a circuit breaker between power source and the unit, as following picture.
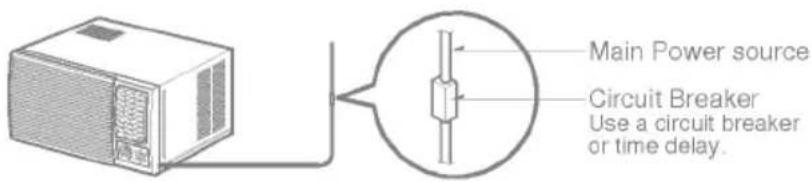
text_image
Main Power source Circuit Breaker Use a circuit breaker or time delay.- To prevent vibration and noise, make sure the unit is installed securely and firmly.
- Install the unit where the sunlight does not shine directly on the unit.
- There should be no obstacle, such as a fence or wall, within 50cm from the back of the cabinet because it will prevent heat radiation of the condenser. Restriction of outside air will greatly reduce the cooling efficiency of the air conditioner.
- Install the unit a little obliquely outward not to leak the condensed water into the room (about 10 \~ 15mm or 1/4 bubble with level).

CAUTION: All side louvers of the cabinet must remain exposed to the outside of the structure.
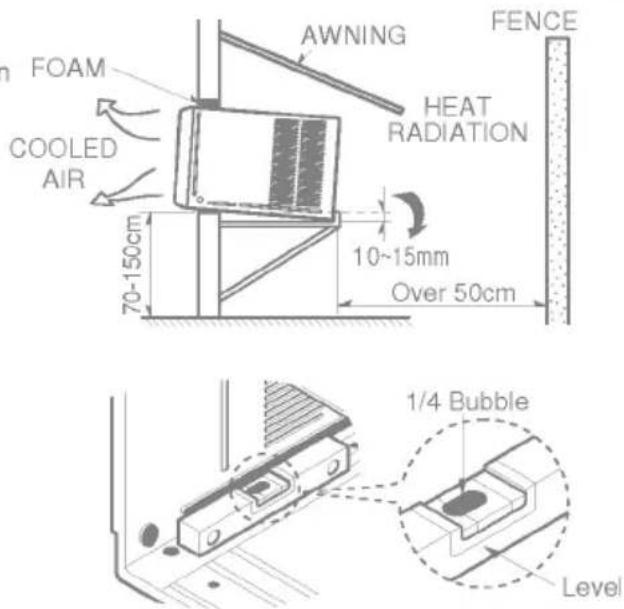
text_image
FOAM COOLED AIR 70-150cm AWNING HEAT RADIATION 10-15mm Over 50cm FENCE 1/4 Bubble Level- Remove the 2 shipping screws from the back of the case.
-
Remove the 2 screws on each side of the case. Keep these for later use.
-
Slide the air conditioner from the case by gripping the base pan handle and pulling forward while bracing the case.
-
Before installing the Air Conditioner back into the case, remove the white styrofoam shipping block from the compressor (Applicable for some models).
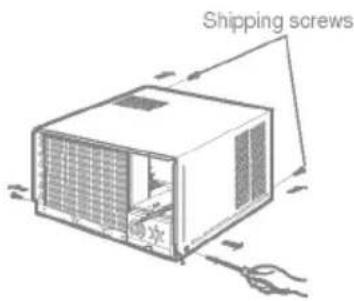
text_image
Shipping screws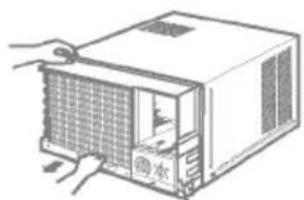
natural_image
Illustration of a computer unit with hands operating it, showing internal components and no visible text or symbols.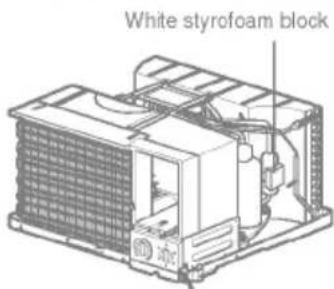
text_image
White styrofoam block- Slide the air conditioner into the case. Reinstall the 2 screws removed earlier on each side of the case.
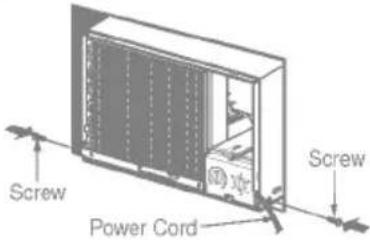
text_image
Screw Power Cord Screw
CAUTION: The power cord must be connected to an independent circuit. The green wire must be grounded.
- Stuff the foam between the top of the unit and the wall to prevent air and insects from getting into the
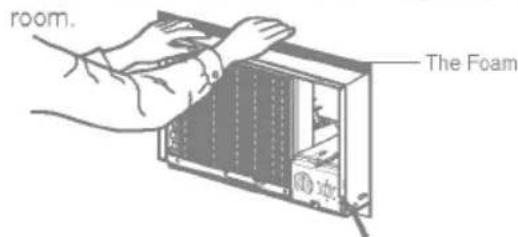
text_image
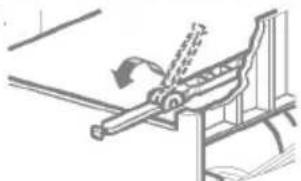
room. The Foam- Before installing the front grille, pull out the vent control lever located above the unit control knobs, as shown.
natural_image
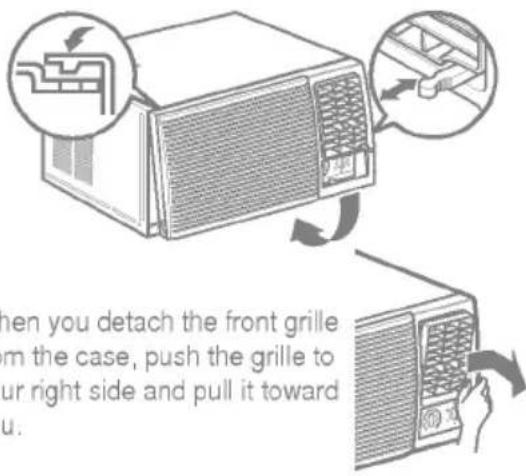
Technical line drawing of a mechanical assembly with lever and base (no text or symbols)- Attach the front grille to the case by inserting the tabs on the grille into the slots on the front of the case. Push the grille in until it snaps into place.
text_image
When you detach the front grille from the case, push the grille to our right side and pull it toward u.- Lift the inlet grill and secure the front grille with a screw. Lower the inlet grille into place.
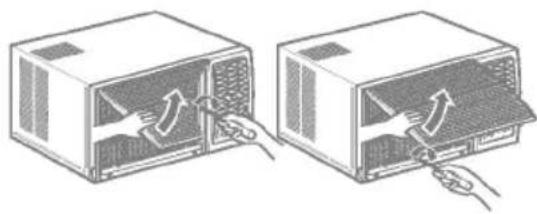
natural_image
Two identical diagrams of a microwave oven with heat exchangers and airflow arrows, no text or symbols present.-
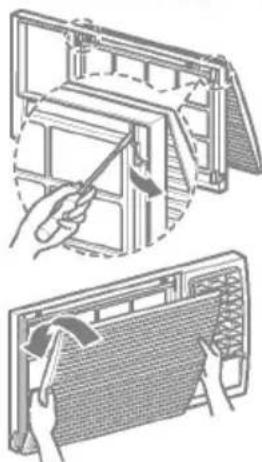
If you want to pull out the filter upward, open the inlet grille slightly. Turn inside out the front grille.
Disassemble the inlet grille from the front grille with separating the hinged part by inserting a "—" type screw-driver tip.
Rotate the inlet grille 180 degrees and insert the hooks into the lower holes of front grille.
Then, insert the filter -
If you want to pull out the filter downward, use the reversible inlet grille without change.(The grille is already assembled for that way.)
natural_image
Two-step diagram showing a hand holding a tool inside a device frame, with no visible text or symbols.Troubleshooting Tips
Save time and money! Review the chart below first and
you may not need to call for service.
Normal Operation
- You may hear a pinging noise caused by water being picked up and thrown against the condenser on rainy days or when the humidity is high. This design feature helps remove moisture and improve efficiency.
- You may hear the thermostat click when the compressor cycles on and off.
• Water will collect in the base pan during high humidity or on rainy days. The water may overflow and drip from the outdoor side of the unit.
• The fan may run even when the compressor does not.
Abnormal Operation
| Air conditioner does not start | ■ The air conditioner is unplugged. | · Make sure the air conditioner plug is pushed completely into the outlet. |
| ■ The fuse is blown/circuit breaker is tripped. | · Check the house fuse/circuit breaker box and replace the fuse or reset the breaker. | |
| ■ Power failure. | · If power failure occurs, push power button to OFF. When power is restored, wait 3 minutes to restart the air conditioner to prevent tripping of the compressor overload. | |
| Air conditioner does not cool as it should | ■ Airflow is restricted. | · Make sure there are no curtains, blinds, or furniture blocking the front of the air conditioner. |
| ■ The thermostat may not be set high enough. | · Turn the knob to a higher setting. The highest setting provides maximum cooling. | |
| ■ The air filter is dirty. | · Clean the filter at least every 2 weeks. See the operating instructions section. | |
| ■ The room may have been hot. | · When the air conditioner is first turned on you need to allow time for the room to cool down. | |
| ■ Cold air is escaping. | · Check for open furnace floor registers and cold air returns.· Set the air conditioner's vent to the closed position. | |
| ■ Cooling coils have iced up. | · See Air Conditioner Freezing Up below. | |
| Air conditioner freezing up | ■ Ice blocks the air flow and stops the air conditioner from cooling the room. | · Set the mode control at MED fan or high cool with the thermostat at 1 or 2 (Left side). |