
AMNH12GTUC0 - Air-conditioner LG - Free user manual and instructions
Find the device manual for free AMNH12GTUC0 LG in PDF.


User questions about AMNH12GTUC0 LG
0 question about this device. Answer the ones you know or ask your own.
Ask a new question about this device
Download the instructions for your Air-conditioner in PDF format for free! Find your manual AMNH12GTUC0 - LG and take your electronic device back in hand. On this page are published all the documents necessary for the use of your device. AMNH12GTUC0 by LG.
USER MANUAL AMNH12GTUC0 LG
Please read this manual carefully before operating your set and retain it for future reference.
CEILING CASSETTE
AMNH09GTUC0
AMNH12GTUC0
ATNH12GRLE2
ATNH18GQLE2
ATNH24GPLE2
Original instruction
TABLE OF CONTENTS
Safety Precautions......3
Prior to Operation ......9
Operating Instructions......10
Maintenance and Service ....36
Before you Call for Service 40
FOR YOUR RECORDS
Write the model and serial numbers here:
Model #
Serial #
You can find them on a label on the side of each unit.
Dealer's Name
Date Purchased
■ Staple your receipt to this page in the event you need it to prove date of purchase or for warranty issues.

READ THIS MANUAL
Inside you will find many helpful hints on how to use and maintain your air conditioner properly. Just a little preventive care on your part can save you a great deal of time and money over the life of your air conditioner.
You'll find many answers to common problems in the chart of troubleshooting tips. If you review our chart of
Troubleshooting Tips first, you may not need to call for service at all.

PRECAUTION
- Contact the authorized service technician for repair or maintenance of this unit.
- Contact the installer for installation of this unit.
- The air conditioner is not intended for use by young children or invalids without supervision.
- Young children should be supervised to ensure that they do not play with the air conditioner.
- When the power cord is to be replaced, replacement work shall be performed by authorized personnel only using only genuine replacement parts.
- Installation work must be performed in accordance with the National Electric Code by qualified and authorized personnel only.
natural_image
Simple line drawing of people enjoying a meal at a table with sun and palm trees in the background (no text or symbols)Safety Precautions
To prevent injury to the user or other people and property damage, the following instructions must be followed.
■ Incorrect operation due to ignoring instruction will cause harm or damage. The seriousness is classified by the following indications.

This symbol indicates the possibility of death or serious injury.

This symbol indicates the possibility of injury or damage to properties only.
■ Meanings of symbols used in this manual are as shown below.
 | Be sure not to do. |
 | Be sure to follow the instruction. |

WARNING
Installation
- Do not use a defective or underrated circuit breaker. Use this appliance on a dedicated circuit.
- There is risk of fire or electric shock.
- For electrical work, contact the dealer, seller, a qualified electrician, or an Authorized Service Center.
- Do not disassemble or repair the product. There is risk of fire or electric shock.
• Always ground the product. - There is risk of fire or electric shock.
- Install the panel and the cover of control box securely.
- There is risk of fire or electric shock.
- Always install a dedicated circuit and breaker.
- Improper wiring or installation may cause fire or electric shock.
- Use the correctly rated breaker or fuse.
- There is risk of fire or electric shock.
- Do not modify or extend the power cable.
-
There is risk of fire or electric shock.
-
Do not install, remove, or re-install the unit by yourself (customer).
- There is risk of fire, electric shock, explosion, or injury.
- Be cautious when unpacking and installing the product.
- Sharp edges could cause injury. Be especially careful of the case edges and the fins on the condenser and evaporator.
- For installation, always contact the dealer or an Authorized Service Center.
- There is risk of fire, electric shock, explosion, or injury.
- Do not install the product on a defective installation stand.
- It may cause injury, accident, or damage to the product.
- Be sure the installation area does not deteriorate with age.
- If the base collapses, the air conditioner could fall with it, causing property damage, product failure, and personal injury.
- Do not let the air conditioner run for a long time when the humidity is very high and a door or a window is left open.
- Moisture may condense and wet or damage furniture.
Operation
• Take care to ensure that power cable could not be pulled out or damaged during operation.
- There is risk of fire or electric shock.
- Do not place anything on the power cable.
- There is risk of fire or electric shock.
- Do not plug or unplug the power supply plug during operation.
- There is risk of fire or electric shock.
- Do not touch(operate) the product with wet hands.
- There is risk of fire or electrical shock.
- Do not place a heater or other appliances near the power cable.
- There is risk of fire and electric shock.
- Do not allow water to run into electric parts.
- It may cause There is risk of fire, failure of the product, or electric shock.
- Do not store or use flammable gas or combustibles near the product.
- There is risk of fire or failure of product.
- Do not use the product in a tightly closed space for a long time.
- Oxygen deficiency could occur.
- When flammable gas leaks, turn off the gas and open a window for ventilation before turn the product on.
- Do not use the telephone or turn switches on or off. There is risk of explosion or fire.
- If strange sounds, or small or smoke comes from product. Turn the breaker off or disconnect the power supply cable.
- There is risk of electric shock or fire.
- Stop operation and close the window in storm or hurricane. If possible, remove the product from the window before the hurricane arrives.
- There is risk of property damage, failure of product, or electric shock.
- Do not open the inlet grill of the product during operation.
(Do not touch the electrostatic filter, if the unit is so equipped.)
- There is risk of physical injury, electric shock, or product failure.
- When the product is soaked (flooded or submerged), contact an Authorized Service Center.
- There is risk of fire or electric shock.
- Be cautious that water could not enter the product.
- There is risk of fire, electric shock, or product damage.
- Ventilate the product from time to time when operating it together with a stove, etc.
- There is risk of fire or electric shock.
- Turn the main power off when cleaning or maintaining the product.
- There is risk of electric shock.
- When the product is not be used for a long time, disconnect the power supply plug or turn off the breaker.
- There is risk of product damage or failure, or unintended operation.
• Take care to ensure that nobody could step on or fall onto the outdoor unit.
- This could result in personal injury and product damage.
CAUTION
Installation
• Always check for gas (refrigerant) leakage after installation or repair of product.
- Low refrigerant levels may cause failure of product.
- Install the drain hose to ensure that water is drained away properly.
- A bad connection may cause water leakage.
- Keep level even when installing the product.
- To avoid vibration or water leakage.
- Do not install the product where the noise or hot air from the outdoor unit could damage the neighborhoods.
- It may cause a problem for your neighbors.
- Use two or more people to lift and transport the product.
- Avoid personal injury.
- Do not install the product where it will be exposed to sea wind (salt spray) directly.
- It may cause corrosion on the product. Corrosion, particularly on the condenser and evaporator fins, could cause product malfunction or inefficient operation.
Operation
- Do not expose the skin directly to cool air for long periods of time. (Don't sit in the draft.)
- This could harm to your health.
- Do not use the product for special purposes, such as preserving foods, works of art, etc. It is a consumer air conditioner, not a precision refrigeration system.
- There is risk of damage or loss of property.
- Do not block the inlet or outlet of air flow.
- It may cause product failure.
- Use a soft cloth to clean. Do not use harsh detergents, solvents, etc.
- There is risk of fire, electric shock, or damage to the plastic parts of the product.
- Do not touch the metal parts of the product when removing the air filter. They are very sharp!
- There is risk of personal injury.
- Do not step on or put anything on the product. (outdoor units)
- There is risk of personal injury and failure of product.
- Always insert the filter securely. Clean the filter every two weeks or more often if necessary.
- A dirty filter reduces the efficiency of the air conditioner and could cause product malfunction or damage. (Grill Type)
- Do not insert hands or other objects through the air inlet or outlet while the product is operated.
- There are sharp and moving parts that could cause personal injury.
- Do not drink the water drained from the product.
- It is not sanitary and could cause serious health issues.
- Use a firm stool or ladder when cleaning or maintaining the product.
- Be careful and avoid personal injury.
- Replace the all batteries in the remote control with new ones of the same type. Do not mix old and new batteries or different types of batteries.
- There is risk of fire or explosion
- Do not recharge or disassemble the batteries. Do not dispose of batteries in a fire.
- They may burn or explode.
- If the liquid from the batteries gets onto your skin or clothes, wash it well with clean water. Do not use the remote if the batteries have leaked.
- The chemicals in batteries could cause burns or other health hazards.
- If you eat the liquid from the batteries, brush your teeth and see doctor. Do not use the remote if the batteries have leaked.
- The chemicals in batteries could cause burns or other health hazards.
- This appliance is not intended for use by persons (including children) with reduced physical, sensory or mental capabilities or lack of experience and knowledge, unless they have been given supervision or instruction concerning use of the appliance by a person responsible for their safety. Children should be supervised to ensure that they do not play with the appliance.
- This appliance can be used by children aged from 8 years and above and persons with reduced physical, sensory or mental capabilities or lack of experience and knowledge if they have been given supervision or instruction concerning use of the appliance in a safe way and understand the hazards involved. Children shall not play with the appliance. Cleaning and user maintenance shall not be made by children without supervision.
Prior to Operation
Preparing for Operation
- Contact an installation specialist for installation.
- Use a dedicated circuit.
Usage
- Being exposed to direct airflow for an extended period of time could be hazardous to your health. Do not expose occupants, pets, or plants to direct airflow for extended periods of time.
- Due to the possibility of oxygen deficiency, ventilate the room when used together with stoves or other heating devices.
- Do not use this air conditioner for non-specified special purposes (e.g. preserving precision devices, food, pets, plants, and art objects). Such usage could damage the items.
Cleaning and Maintenance
- Do not touch the metal parts of the unit when removing the filter. Injuries can occur when handling sharp metal edges.
- Do not use water to clean inside the air conditioner. Exposure to water can destroy the insulation, leading to possible electric shock.
- When cleaning the unit, first make sure that the power and breaker are turned off. The fan rotates at a very high speed during operation. There is a possibility of injury if the unit's power is accidentally triggered on while cleaning inner parts of the unit.
Service
For repair and maintenance, contact your authorized service dealer.
Operating Instructions
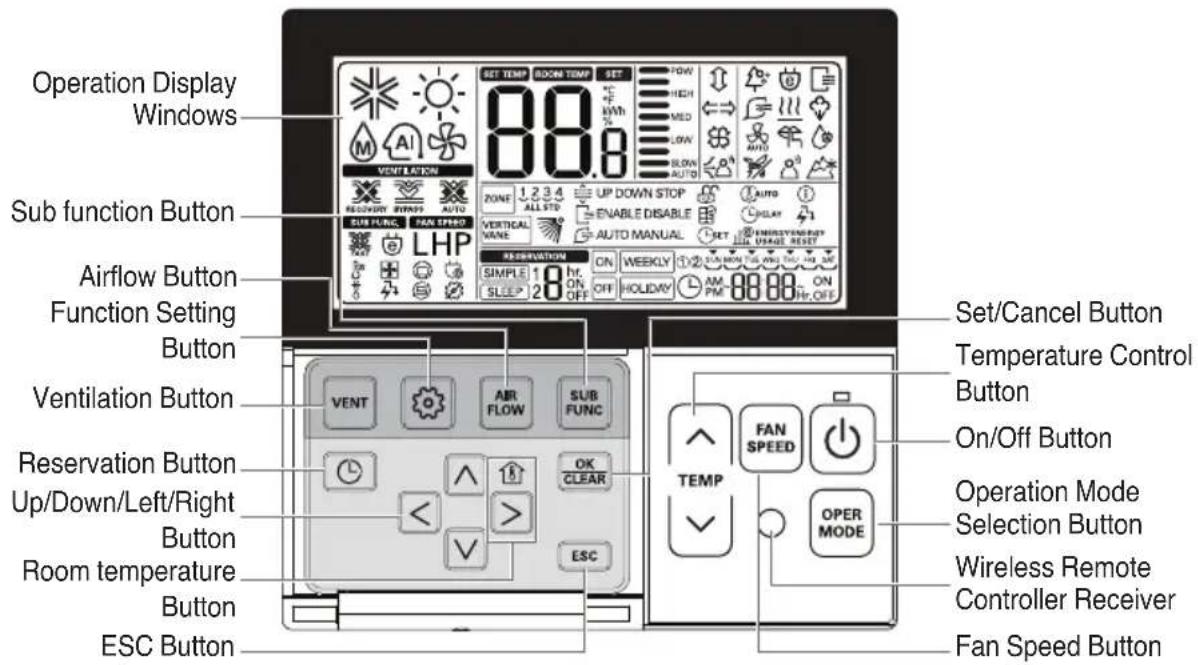
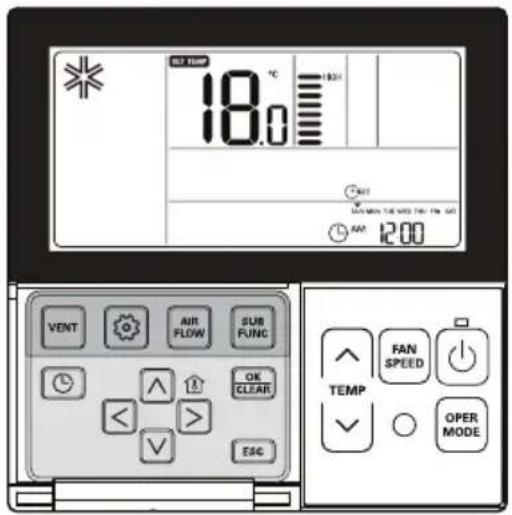
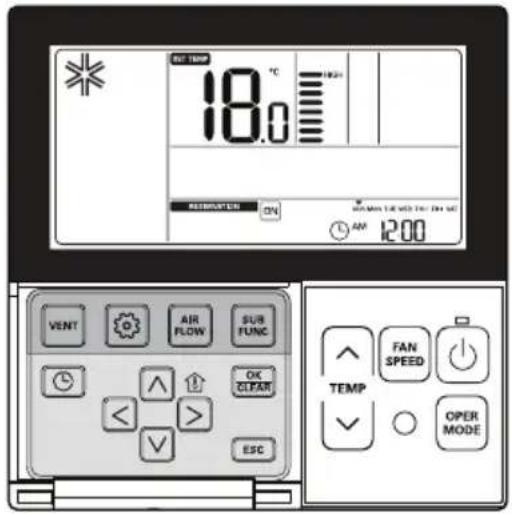
Name and function of wired remote controller
text_image
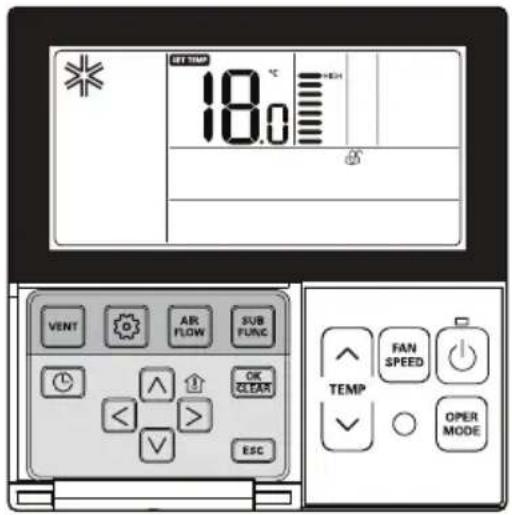
Operation Display Windows Sub function Button Airflow Button Function Setting Button Ventilation Button Reservation Button Up/Down/Left/Right Button Room temperature Button ESC Button SET TEMP ROOM TEM SET 88.8 ZONE 1.234 UP DOWN STOP ENABLE DISABLE VERTICAL NAME AUTO MANUAL SET RESERVATION ON WEEKLY AM PM 88.88 ON Hr.OFF SIMPLE 18 hr. SLC P 28 OFF ON OFF HOLIDAY Set/Cancel Button Temperature Control Button On/Off Button Operation Mode Selection Button Wireless Remote Controller Receiver Fan Speed ButtonOperation Display Windows : Displays the status of operation and settings
Ventilation Button : For interlocking operations of air-conditioner and ventilator
Function Setting Button : To select the additional operations function
Airflow Button : To select the airflows
Sub function Button : To select the additional operations function
Reservation Button : To program the schedule
Up/Down/Left/Right Button : To change the settings in the menu
Room temperature Button : To check the indoor temperature
ESC Button : To exit from the menu
Set/Cancel Button : To save the settings in the menu
Temperature Control Button : To change the desired temperature
Fan Speed Button : To select the fan speed
On/Off Button : To turn on/off with a remote controller
Mode Selection Button : To select the operating mode
Wireless Remote Controller Receiver
* Some functions may not be operated and displayed depending on the product type.
NOTE
* Display temperature can be different from actual room temperature if the remote controller is installed at the place where sun-rays are falling directly or the place nearby heat source.
* The actual product can be different from above contents depending upon model type.
When using simultaneous operation system, whenever press remote controller button, system will approximately operate after 1\~2 minutes.
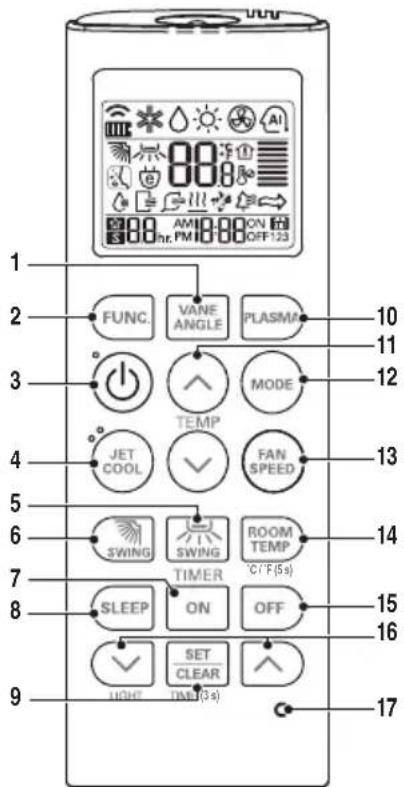
Name and function of wired remote controller(Optional)
text_image
1 2 3 4 5 6 7 8 9 FUNC. VANE ANGLE PLASMA 10 11 12 JET COOL TEMP MODE FAN SPEED 13 SWING SWING ROOM TEMP C/F(5s) 14 TIMER SLEEP ON OFF 15 SET CLEAR 16 17PQWRCQ0FDB (Cooling only) PQWRHQ0FDB (Heat pump)
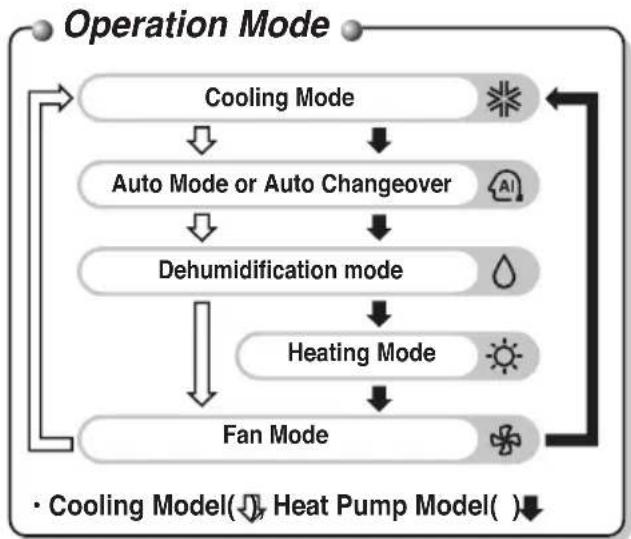
flowchart
graph TD
    A["Operation Mode"] --> B["Cooling Mode"]
    B --> C["Auto Mode or Auto Changeover"]
    C --> D["Dehumidification mode"]
    D --> E["Heating Mode"]
    E --> F["Fan Mode"]
    F --> A
    style A fill:#f9f,stroke:#333
    style B fill:#ccf,stroke:#333
    style C fill:#cfc,stroke:#333
    style D fill:#fcc,stroke:#333
    style E fill:#cff,stroke:#333
    style F fill:#ffc,stroke:#333
- VANE ANGLE Button
Used to set each vane angle. - FUNCTION SETTING Button
Used to set or clear Auto Clean, Smart Clean, Electric heater or Individual vane angle control. - ON/OFF Button
Used to turn on/off the unit. - JET COOL Button
Speed cooling operates super high fan speed. - LEFT/RIGHT AIRFLOW Button (OPTIONAL)
Used to set the desired left/right(horizontal) airflow direction. - UP/DOWN AIRFLOW Button
Used to stop or start louver movement and set the desired up/down airflow direction. - ON TIMER Button
Used to set the time of starting operation. - SLEEP TIMER Button
Used to set the time of sleeping operation. - SET / CLEAR Button
Used to set/clear the timer.
Used to set the current time(if it input for 3 s) - PLASMA Button (OPTIONAL)
Used to start or stop the plasma-purification function. - ROOM TEMPERATURE SETTING Button
Used to select the room temperature. - OPERATION MODE SELECTION Button
Used to select the operation mode. - INDOOR FAN SPEED SELECTION Button
Used to select fan speed in four steps low, medium, high and chaos. - ROOM TEMPERATURE CHECKING Button
Used to check the room temperature. - OFF TIMER Button
Used to set the time of stopping operation. - TIMER SETTING(Up/Down)/LIGHT Button
Used to set the timer.
Used to adjust the brightness.(if it is not time adjust mode) - RESET Button
Used to reset the remote controller.
Standard Operation - Standard Cooling
It cools the room by comfortable and clean wind.
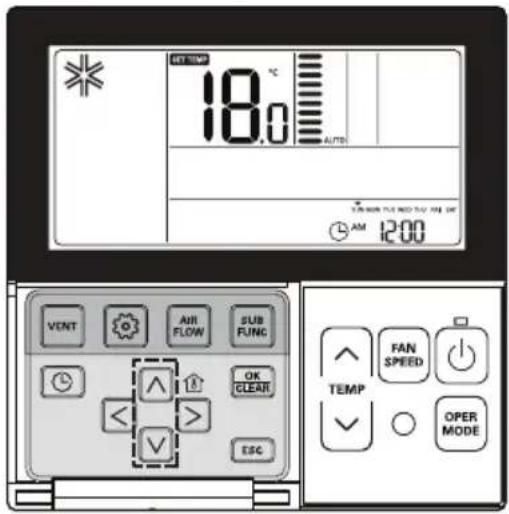
text_image
18.0°C VENT AIR FLOW SUB FUNC OK CLEAR FAN SPEED TEMP OPER MODE AM 12:00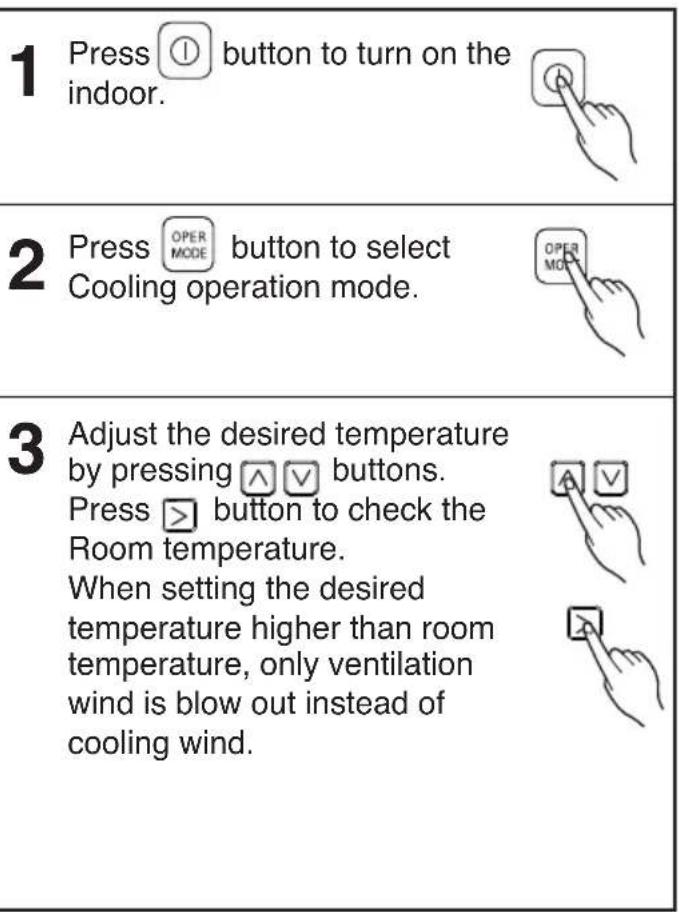
text_image
1 Press Ⓐ button to turn on the indoor. 2 Press OPER MODE button to select Cooling operation mode. 3 Adjust the desired temperature by pressing ▲ ▼ buttons. Press ▷ button to check the Room temperature. When setting the desired temperature higher than room temperature, only ventilation wind is blow out instead of cooling wind.* Setting Temp Range : 18 °C\~30 °C (64 °F\~86 °F)
Standard Operation - Power Cooling
It makes the room cool using pleasant and fresh air quickly

text_image
P0 FAN AM 12:00 VENT AIR SUB FLOW FUNC OK CLEAR < > ESC FAN SPEED TEMP OPER MODE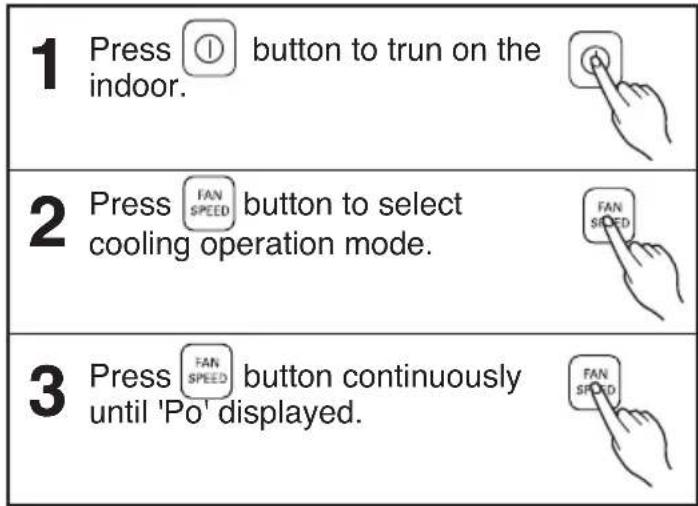
text_image
1 Press ① button to trun on the indoor. 2 Press FAN SPEED button to select cooling operation mode. 3 Press FAN SPEED button continuously until 'Po' displayed.What is Power Cooling?
• Desired temperature: Po (actually 18 °C)
• Wind flow: power wind
• Wind direction: fix to air-cooling position
It make room temperature drop fast by running
* Partial product has no power air-cooling function.
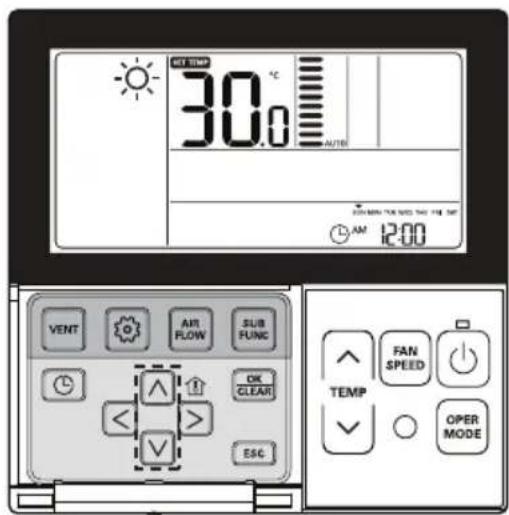
Standard Operation - Heating Mode
It supplies warm wind to the indoor
text_image
30.0°C AUTO AM 12:00 VENT AIR FLOW SUB FUNC OK CLEAR < > ESC FAN SPEED TEMP OPER MODE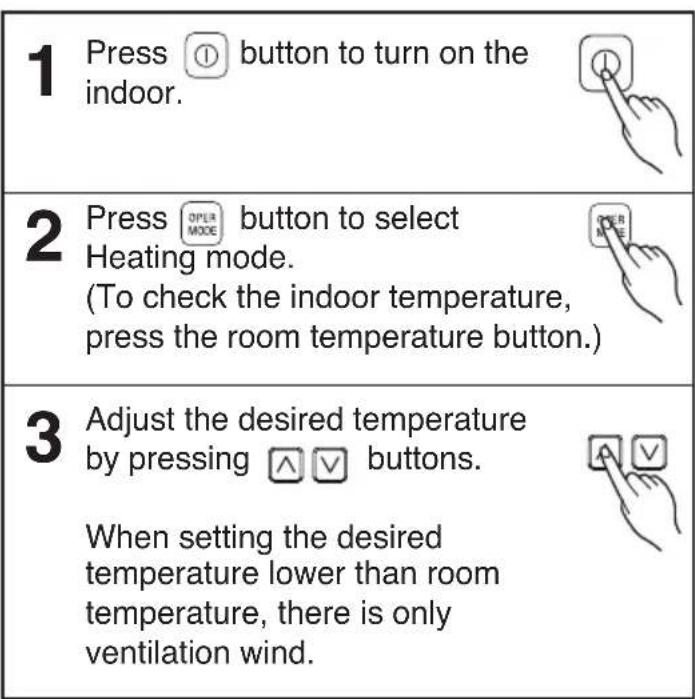
text_image
1 Press ⏻ button to turn on the indoor. 2 Press ⬆PLR MODE button to select Heating mode. (To check the indoor temperature, press the room temperature button.) 3 Adjust the desired temperature by pressing ∧ √ buttons. When setting the desired temperature lower than room temperature, there is only ventilation wind.- Heating drive only operates at the cooling and heating model.
- Heating doesn't operate at cooling exclusive model.
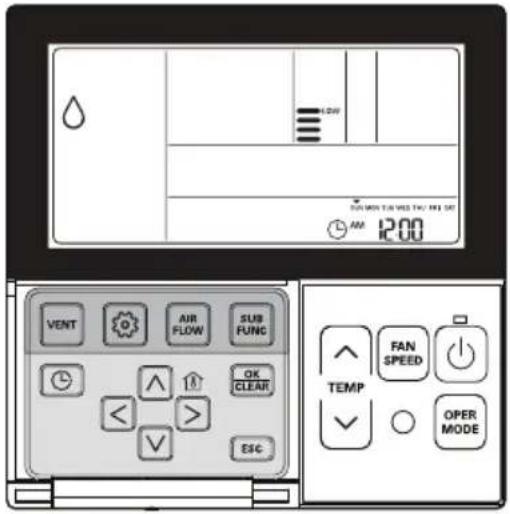
Standard Operation - Dehumidification Mode
It removes humidity while air-cooling weakly.
text_image
LOW SUN MON TURVED TWO FREE DAY AM 12:00 VENT AIR FLOW SUB FUNG OK CLEAR < > ESC FAN SPEED TEMP OPER MODE1
Press indoor

button to turn on the
2
Press

button to select cation mode.
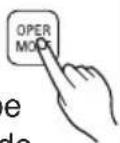
The temperature setting can not be adjusted during operation this mode.
3
Press
button to select
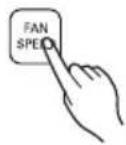
airflow rate feeble → weak → medium → strong → automatic. (The initial wind powerfulness of humidity removal drive is 'weak
- In rainy season or high humidity climate, it is possible to operate simultaneously dehumidifier and cooling mode to remove humidity effectively.
- The menu item of wind powerfulness might not be partially selected according to the product.
Standard Operation - Fan Mode
It blows the air as it is in the indoor, not the cold wind.
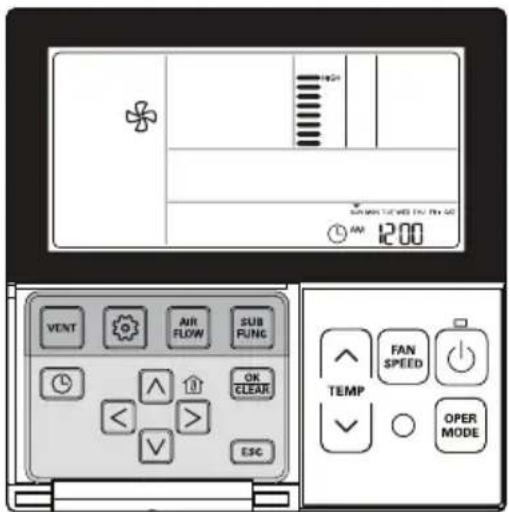
text_image
AIR 12:00 VENT AIR FLOW SUB FUNG FAN SPEED TEMP OPER MODE1
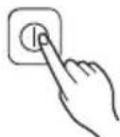
Press indoor

button to turn on the
2
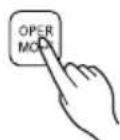
Press Mode

button to select Fan
3
Every time pressing

button, you
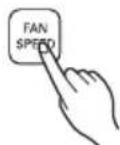
can select wind flow in order of feeble → weak → medium → strong → automatic.
When running ventilation, compressor of AHU doesn't work.
- Ventilation drive does not release cool wind but general fan
- Because it releases the wind that has no temperature difference from the room, it functions to circulate the inside air.
- The menu item of wind powerfulness might not be partially selected according to the product.
Standard Operation - Auto Operation Mode
text_image
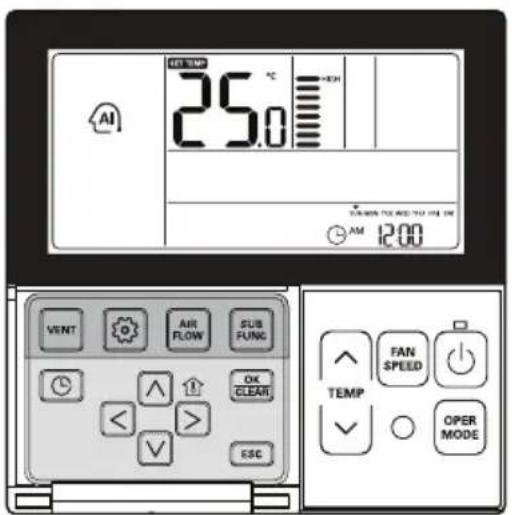
AI 25.0 °C SET TEMP AM 12:00 VENT AIR FLOW SUB FUNC FAN SPEED TEMP OPER MODE
text_image
1 Press ⏻ button to turn on the indoor. 2 Press OPER MODE button to select Artificial intelligence Mode. 3 You can adjust the temperature as the picture on the right for cooling and heating model. 4 For the case of cooling exclusive, as the picture on the right, you can adjust the temperature from hot to cold, from "-2" to "2" based on "00". When cold When cool When appropriate When warm When hotDuring operating Auto Operation mode:
• We can use the FAN SPEED button
• We can change manually to other operation mode.
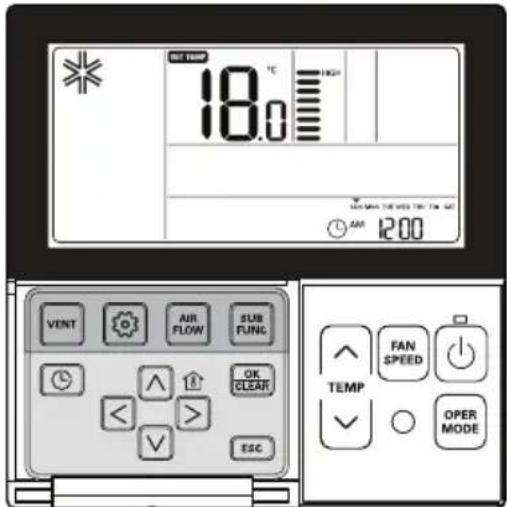
Standard Operation - Airflow Setting
text_image
18.0°C VENT AIR FLOW SUB FUNG OK CLEAR ESC TEMP FAN SPEED OPER MODEWind powerfulness : You can simply adjust desired wind powerfulness.
1 Please setup desired wind powerfulness by wind powerfulness button.
- Every time you press wind powerfulness, you can select the wind flow in order of 'feeble → weak → weak medium → medium → medium strong → strong → power → automatic'.
- The menu item might not be partially selected according to product function.
- Please refer to product manual for product's detailed function.
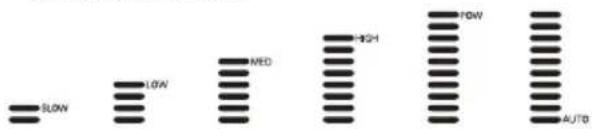
text_image
SLOW LOW MED HIGH FLOW AUTOWind direction : You can simply adjust desired wind direction.
1 Please set desired wind direction by pressing AIR FLOW button.
You can select wind direction of (comfortable wind → Up/Down and Right/Left → Right/Left → Up/Down) by pressing AIR FLOW button.
Partial item of wind directions might not be selected according to product function. Please refer to product manual for product's detailed function.


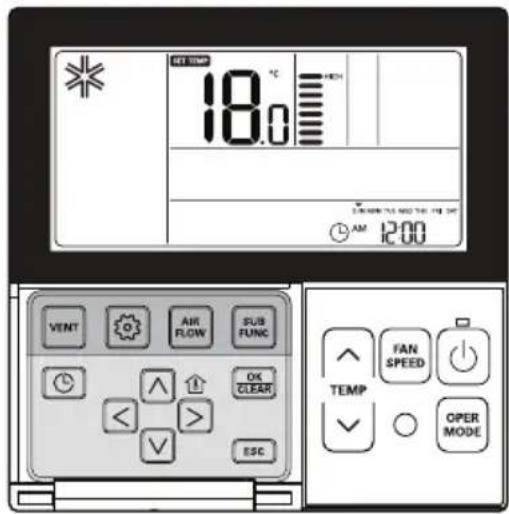
Standard Operation - Temperature Setting/Room Temperature Check
text_image
NET SINK 18.0 °C FRESH AM 12:00 VENT AIR FLOW SUB FUNC FAN SPEED TEMP OPER MODE < > ESCTemperature Setting
1 We can simply adjust the desired temperature.
- Press the △ √ buttons to adjust the desired temperature.
△: Increase 1 °C or 2 °F per one time pressing
√: Decrease 1 °C or 2 °F per one time pressing
- Room temp: Indicate the current room temperature.
- Set temp: Indicate the temperature that user want to set.
* Depend on what kind of controller, the desired temperature can be adjusted at 0.5°C or 1°F.
Cooling operation:
- The cooling mode doesn't work if desired temperature is higher than room temperature Please lower the desired temperature.
Heating operation:
- The heating mode doesn't work if desired temperature is lower than room temperature. Please increase the desired temperature.
Room Temperature Check
1 Whenever press ▶ button, the room temperature will be displayed within 5 seconds.
After 5 seconds, it turns to display the desired temperature.
Because of location of remote controller, the real room temperature and the this displayed value can be different
- For air-cooling drive, from 18 °C to 30 °C, and for heating drive, from 16 °C to 30 °C, you can select desired temperature.
- 5^ is proper for the difference between room and outside temperature.
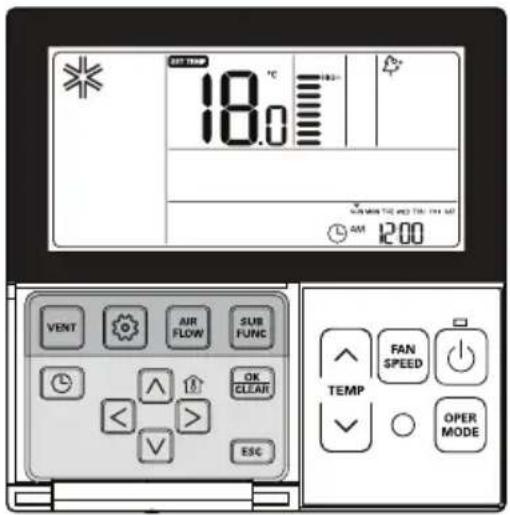
Sub function - Plasma Purification
Only products with humidifying function can use this.
text_image
SET TEM 18.0 °C AIR WITH THE END OF THE AIR AM 12:00 VENT AIR FLOW SUB FUNC OK CLEAR < > ESC FAN SPEED TEMP OPER MODEThe method to setup cleaning air
1 Repeat pressing button until icon flash.
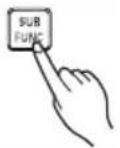
2 Operate or cancel Plasma Purification function by pressing button. ( icon appears/disappears on SUB FUNC. display part up to selection )
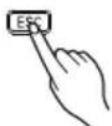
3 After setting, press ESC button to exit.
* After setup, it automatically gets out of setup mode if there is no button input for 25 seconds. * When exiting without pressing set button, the manipulated value is not reflected.
- Cleaning air function is additional function and it might not be indicated or operated at the partial product.
- Cleaning air function is possible only when product is running.
- If you want independent cleaning air drive, please setup cleaning air by pressing additional drive button at ventilation drive.
Function setting - Child Lock
It is the function to use preventing children or others from careless using.
text_image
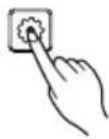
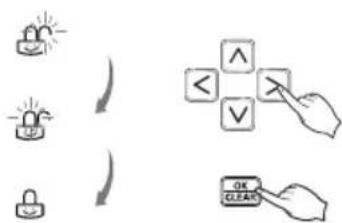
SET TWP 18.0 °C HVAC VENT AR FLOW SUB FUNC OK CLEAR FAN SPEED TEMP OPER MODE ESC1 Press 📋 button repeatedly until the 🔔 is flashing.
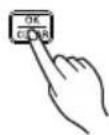
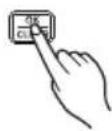
2 If moving to 'setup' icon area by using < > button, 'setup' icon blinks, and child lock function is setup if pressing OK CLEAR button at that time.
flowchart
graph TD
    A[" padlock icon "] --> B[" < "]
    B --> C[" ∧ "]
    B --> D[" ∨ "]
    E[" padlock icon "] --> F[" ↑ "]
    F --> G[" < "]
    G --> H[" ∨ "]
    I[" padlock icon "] --> J[" ↓ "]
    J --> K[" ∨ "]
    L[" hand gesture "] --> M[" OK "]
    M --> N[" CLEAR"]
3 When cancelling lock function, if moving to 'cancel' icon by pressing < > button and then, pressing OK button, child lock function is cancelled.
4 Press ESC button to exit.
* After setup, it automatically gets out of setup mode if there is no button input for 25 seconds.
When exiting without pressing set button, the manipulated value is not reflected.
Function Setting - Change Temp
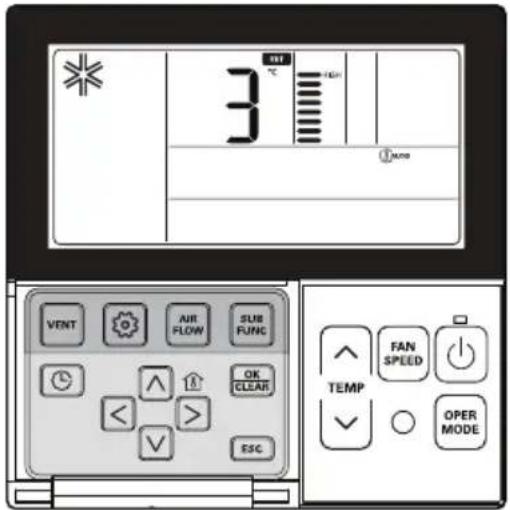
Change temperature is the function to setup air-cooling and heating drive automatically changeable according to the temperature at artificial intelligence drive mode.
text_image
3 VENT AIR FLOW SUB FUNC OK CLEAR < > ESC. TEMP FAN SPEED OPER MODE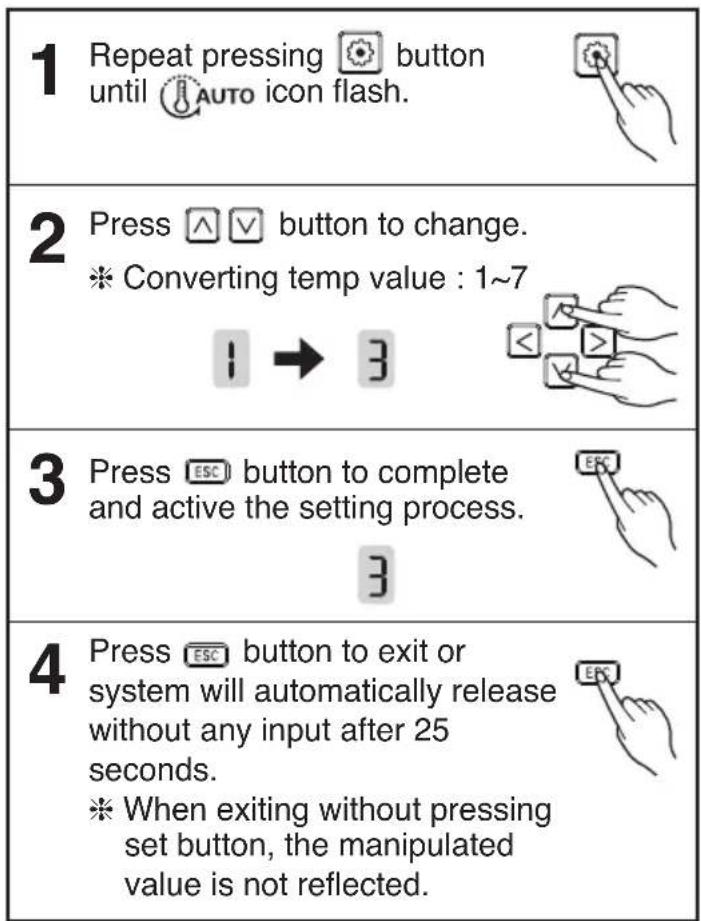
text_image
1 Repeat pressing button until icon flash. 2 Press button to change. ※ Converting temp value : 1~7 3 Press button to complete and active the setting process. 4 Press button to exit or system will automatically release without any input after 25 seconds. ※ When exiting without pressing set button, the manipulated value is not reflected.Function setting - Filter Sign Clear
This function is to clear the indicator of indoor filter cleaning.

text_image
18.0 2400Hz. VENT AIR FLOW SUB FUNC FAN SPEED TEMP OPER MODE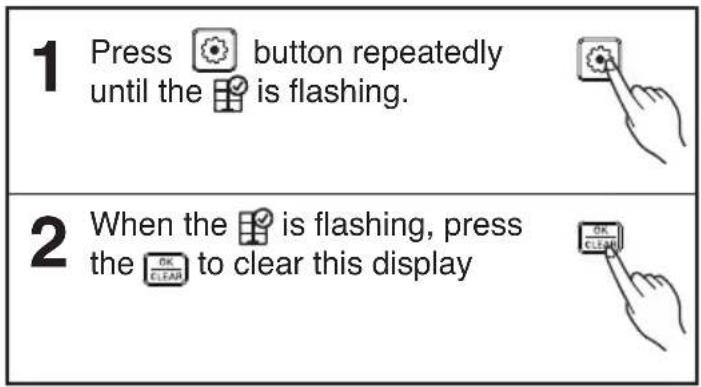
text_image
1 Press button repeatedly until the is flashing. 2 When the is flashing, press the to clear this display- When filter is covered by dust, it will reduce cooling/heating efficiency and accumulate more electric power. Therefore, do clean the filter whenever cleaning time is expired.
* Filter cleaning indication is automatically cancelled without the separate cancellation after certain period of time.
Function setting - Elevation Grill
This function is to move the indoor filter up/down for cleaning filter.

text_image
SPRING 18.0 °C HIGH UP DOWN STOP VENT AIR SUB FLOW FUNC OK CLEAR FAN SPEED TEMP OPER MODE ESC1 Press button Repeat pressing icon flash.
button until
2 Move to descent using < > button and press OK CLEAR button will display descent icon and the up/down grill will descent.
3 When up/down grill descents to the desired position, move to stop icon suing < > button and press OK CLEAR button to stop up/down grill.
4 When filter cleaning is finished, fix the filter to the up/down grill, move to ascent icon using < > button, and press OK CLEAN button to ascent up/down grill.
5 Press 📄 button to exit. ※ After setup, it automatically gets out of setup mode if there is no button input for 60 seconds.
When exiting without pressing set button, the manipulated value is not reflected.
- Elevation grill function only operates in the indoor unit with the elevation grill.
Function setting - Vane Angle Control
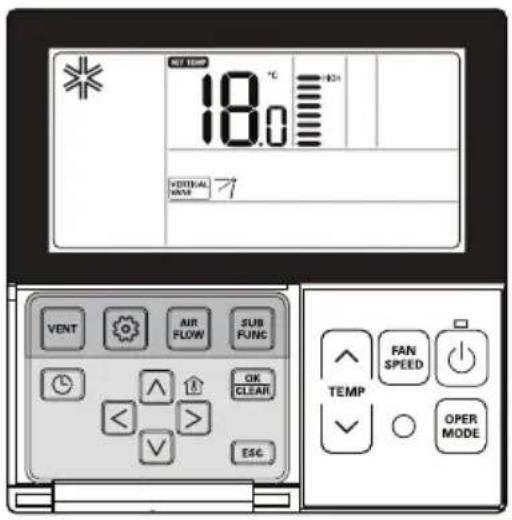
This function is to adjust angle at which airflow is blow out.
text_image
NET TEMP 18.0 °C +25s VERTICAL WINS + VENT AIR FLOW SUB FUNC OK CLEAR < ESC FAN SPEED TEMP OPER MODE1 Repeat pressing 📋 button untilicon flash.  |
| 2 Press ∧ √ button to select active vane : 1 / 2 / 3 / 4 / All / StandardSelect Vane number using < > buttons.※ Vane number : No. 1, 2., 3, 4, all, or standard- Selected vane is in operation.- Please verify the operating vane.- To set the angle of all the vanes,select 'all'.- To set as the factory default settings,select 'standard'. |
| 3 Select wind angle using ∧ √ button, and press ⬊CLARE button.- The boundary of wind angle settings can be changed to 5 levels or 6 levels according to the product.- When selecting 'standard' for Vane number, the wind angle does not move. |
| 4 Set the wind angles for the remaining vanes as the same as above.※ There are products with vanes with no. 1 and no. 2 only according to the product types. |
5 Press ⬊ESC button to exit.※ After setup, it automatically  gets out of setup mode if there is no button input for 60 seconds.※ When exiting without pressing set button, the manipulated value is not reflected. gets out of setup mode if there is no button input for 60 seconds.※ When exiting without pressing set button, the manipulated value is not reflected. |
6 Press ⬊CKCLEAR button to complete and active the setting process.(Airflow direction function will be released whenever setting vane a  |
7 Press ⬊ESC button to exit or system will automatically release without any input after 25 seconds.  |
Function setting - Changing Current Time
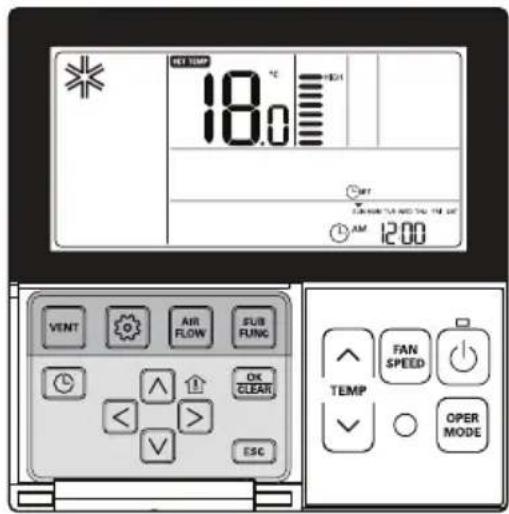
text_image
RET TEMP 18.0 °C H241 AM 12:00 VENT AIR FLOW SUB FUNG FAN SPEED TEMP OPER MODE<>1 Please press function setup button. If pressing function setup button repeatedly, it moves to time setup menu. 'Time setup' icon is indicated at that time and blinks at current time indication a Ex) Changing Current Time as 'Monday / AM 10:20'.
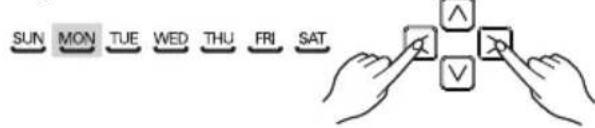
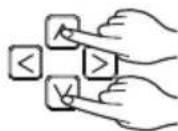
2 Press □ key to adjust the current day.
text_image
SUN MON TUE WED THU FRI SAT3 Press ▼ key to move to AM/PM setting mode (the 'AM/PM segment will flash).

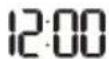
12:00
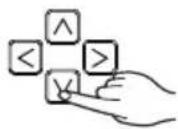
4 Setting AM/PM value by pressing ▲ ▼ button.
5 Press □ button to move to 'Hour' setting mode. (the 'Hour' segment will flash)

12:00
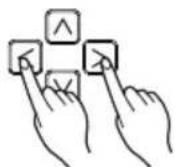
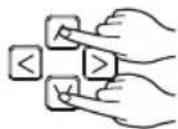
6 Setting Hour value by pressing button.


10:00
text_image
18.0 °C RET TEMP 18:30 RET MAX WITH THE WIND TWO BIG GAT AM 12:00 VENT AIR FLOW SUB FUNC OK CLEAR < > ESC FAN SPEED TEMP OPER MODE| 7 Press button to move to 'Minute' setting mode. (the 'Minute' segment will flash) |
| 8 Setting Minute value by pressing button. |
| 9 Press button to finish. |
| 10 In the process, press button to release and exit from setting mode.(In case of exit with incomplete information, it will return to the previous setting)※ When exiting without pressing set button, the manipulated value is not reflected. |
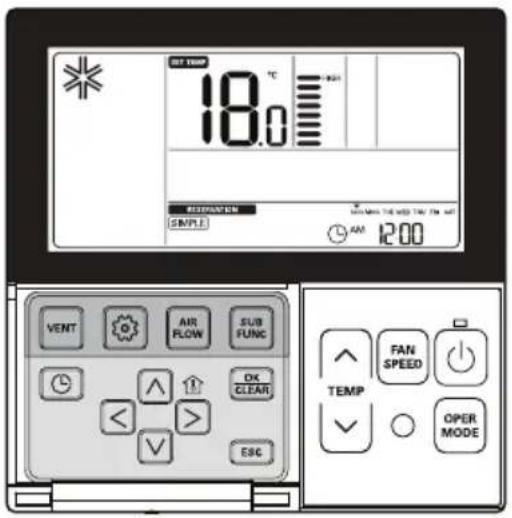
Programming - Simple Reservation
You can set the reservation conveniently in the units of 1 hour from 1 hour to 7 hours.
text_image
SET TEM 18.0 °C AIR RESISTANCE SIMPLE 4AM 12:00 VENT AIR FLOW SUB FUNC Δ OK CLEAR < > ESC FAN SPEED TEMP OPER MODE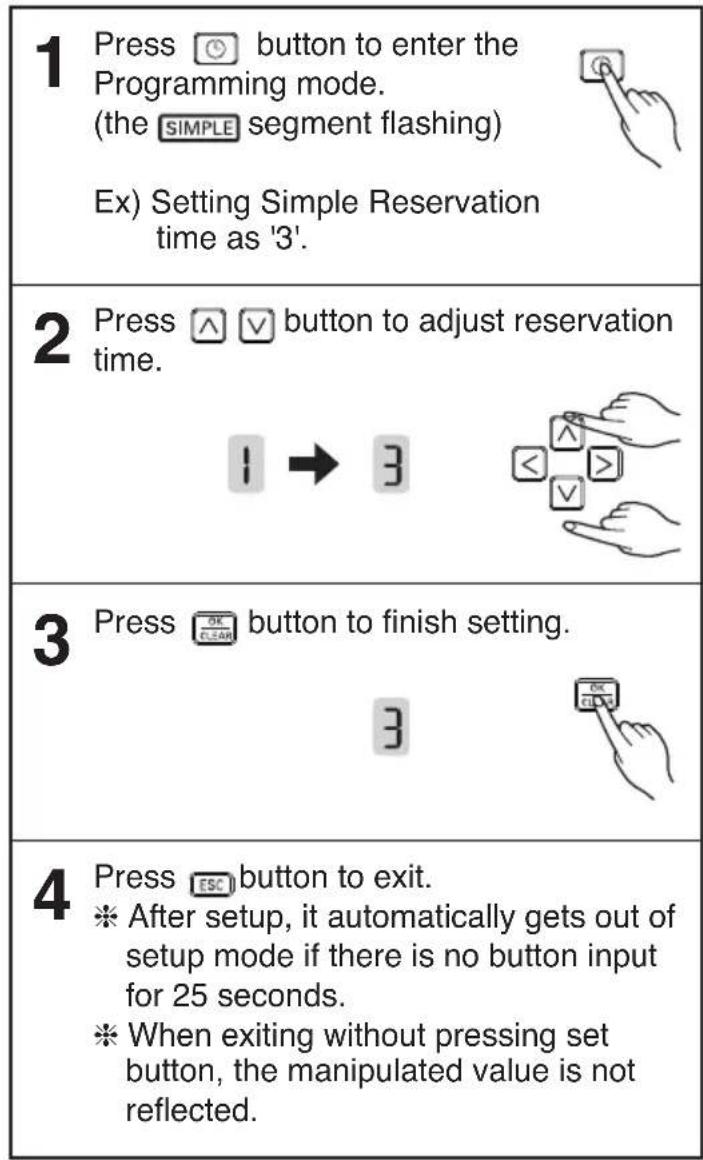
text_image
1 Press button to enter the Programming mode. (the SIMPLE segment flashing) Ex) Setting Simple Reservation time as '3'. 2 Press ▲ button to adjust reservation time. 3 Press button to finish setting. 4 Press button to exit. ※ After setup, it automatically gets out of setup mode if there is no button input for 25 seconds. ※ When exiting without pressing set button, the manipulated value is not reflected.When simple reservation setup, product automatically runs or stops after the time that is set.
Programming : Weekly Reservation
You can set the daily reservation in weekly unit.
Weekly reservation keeps operating until before you cancel it once you setup
| 1 Please move to reservation setup mode by pressing reservation button.※ You can setup two weekly reservations for one day, and up to fourteen reservations for a week.For example, to setup (Tuesday morning 11:30 turned on ~ afternoon 12:30 turned off), you setup in order below. | |
| 2 Please move to 'weekly' by repeatedly pressing reservation button. 'Weekly' blinks at this time. | 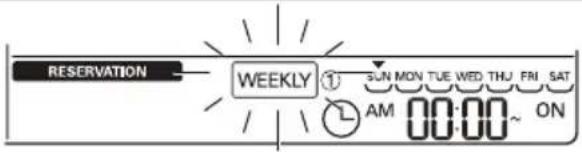 |
| 3 Please select weekly reservation or weekly reservation; by using ∧ √ button.※ You can setup two reservations, weekly reservation 1 and weekly reservation 2, for a day. | 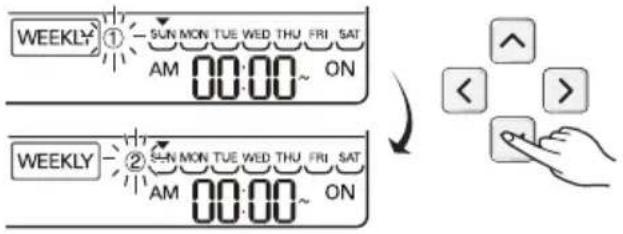 |
| 4 Please move to 'date' setup part by using ◀ ➞ button. If 'date' indication blinks, please setup date. You can setup date from Monday to Sunday. | 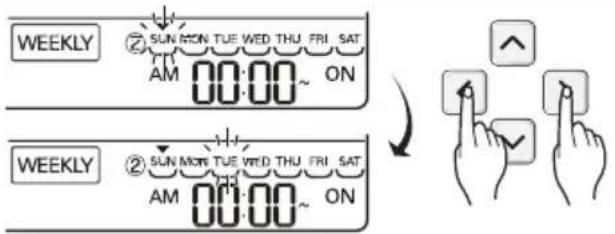 |
| 5 Please move to 'AM/PM' setup part of turning on by using ∧ √ button. | 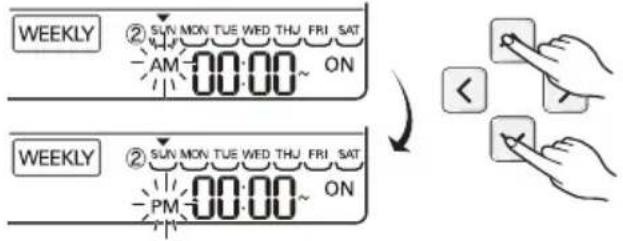 |
| 6 Please move to 'hour' setup part of turning on by using ◀ ➞ button.- It is the part to setup the time at which air-conditioner is turned on. | 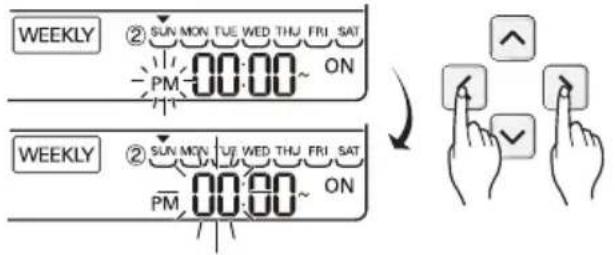 |
| 7 Please change time by using ∧ √ button.- You can setup hour 0~12. | |
| 8 Please move to 'minute' setup part of turning on by using ➞ button. | |
| 9 If 'minute' indication blinks, please setup 'minute' by using ∧ √ button | |
| 10 Please move to 'AM/PM' setup part of turning off by using ▶ button.- AM/PM setup is identical with turning on time setup. | 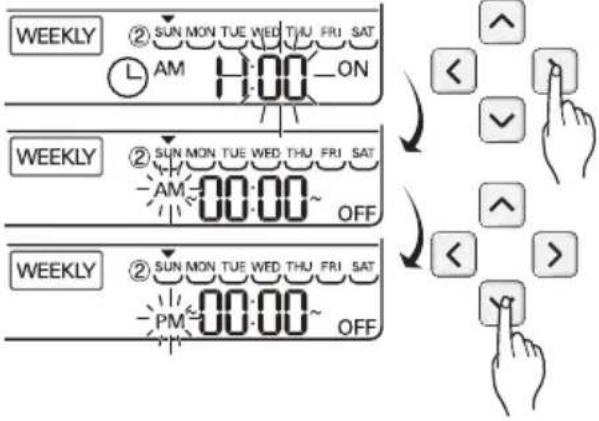 |
| 11 Please move to 'hour' setup part of turning off by using Right button.- It is the part to reserve the time at which air-conditioner is turned off.- If 'hour' indication blinks, please setup 'hour'.※ Please setup 'hour' and 'minute' identically with the method to setup turning on time. | 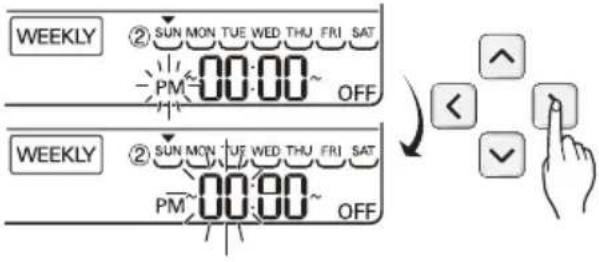 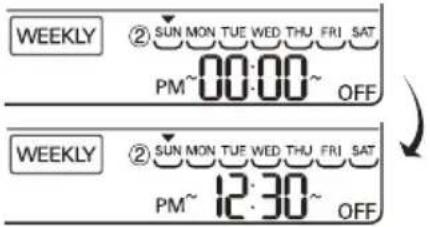 |
| 12 If finishing weekly reservation setup, please press setup/cancellation button.Weekly reservation setup for the day that you set is finished. | |
13 If you setup with the method identical with above by selecting the day that you'd like to setup, it operates weekly reservation.If you setup both turning on reservation time and turning off reservation time identically, it doesn't operate reservation drive.Weekly reservation explanation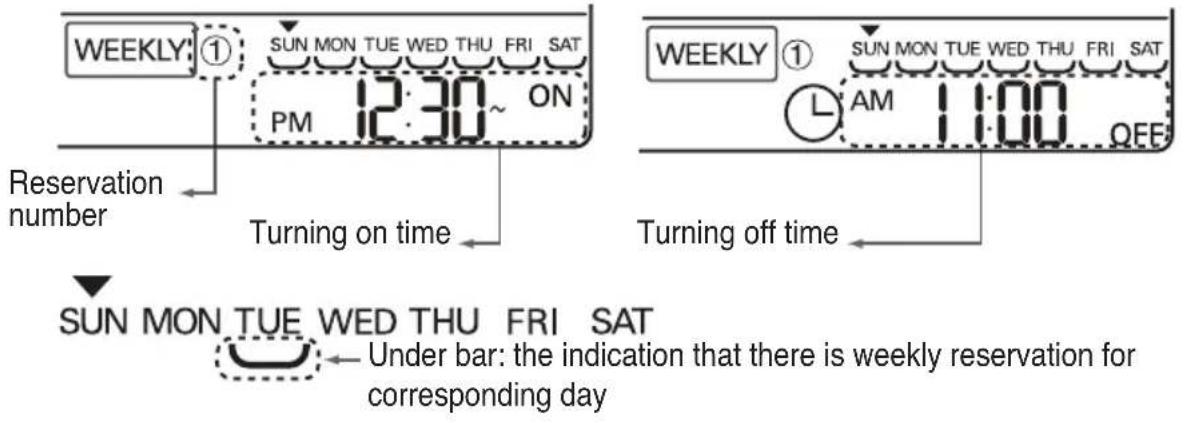 | |
10 Please move to 'AM/PM' setup part of turning off by using ▶ button.
Weekly reservation explanation
* Indoor unit is turned on to desired temperature if it is configured using up/down button during preset of weekly operation time.
(Temperature selection range : 18 °C\~30 °C)
- When desired temperature is not set, it is turned on automatically with desired temperature of previous operation.
Programming - Sleep Reservation
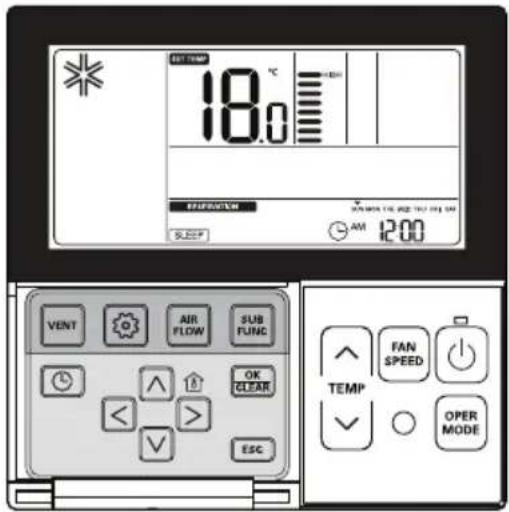
Sleep reservation is the function of air-conditioner to run and stop after certain period of time at sleep mode before sleep. When connected to a ventilation product and set the sleep reservation, when it goes to the sleep mode, after the set time has elapsed.
text_image
BOTTOM 18.0 °C TEMP SLEEP AM 12:00 VENT AIR FLOW SUB FUNG OK CLEAR FAN SPEED TEMP OPER MODE| 1 | Press button to enter the Programming mode.Ex) Setting Sleep Reservation time as '3'. | 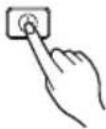 |
| 2 | Repeat pressing button to enter the SLEEP reservation setting mode.(SLEEP segment flashing) | |
| 3 | Press △ button to adjust reservation time.The SLEEP reservation time is from 1 to 7 hours. | |
| 4 | Press button to finish setting.Whenever reservation is done. | |
| 5 | Press button to exit.※ After setup, it automatically gets out of setup mode if there is no button input for 60 seconds.※ When exiting without pressing set button, the manipulated value is not reflected.- If reservation is setup, 'sleep' indication shows up at the lower part of LCD screen. | |
| 6 | If finishing sleep reservation setup, air-conditioner product operates sleep drive and stops after the time that is set. |
CAUTION
Please reserve proper time at sleeping. (Too much air-cooling is not good for your health.)
- Because it automatically adjusts desired temperature for comfortable air-cooling at sleep drive, there could be difference between remote controller's desired temperature and air-conditioner body's desired temperature.
- Sleep reservation operates as off reservation for the product whose temperature adjustment isn't controlled by unit of 0.5^ .
Programming - ON Reservation
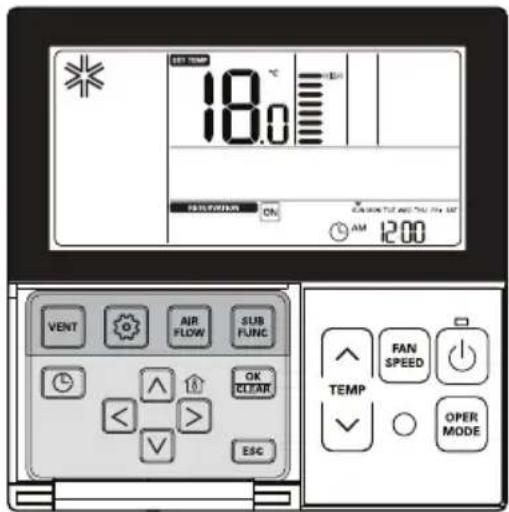
Automatically turned On at reserved time that you set.
text_image
18.0°C REF: TEM RESISTANCE ON AM 1200 VENT AIR SUR FLOW FUNC ✓ ✓ ✓ ✓ ✓ ✓ ✓ ✓ ✓ ✓ ✓ ✓ ✓ ✓ ✓ ✓ ✓ ✓ ✓ ✓ ✓ ✓ ✓ ✓ ✓ ✓ ✓ ✓ ✓ ✓ ✓ ✓ ✓ ✓ ✓ ✓ ✓ ✓ ✓ ✓ ✓ ✓ ✓ ✓ ✓ ✓ ✓ ✓ ✓ ✓ ✓ ✓ ✓ ✓ ✓ ✓ ✓ ✓ ✓ ✓ ✓ ✓ ✓ ✓ ✓ ✓ ✓ ✓ ✓ ✓ ✓ ✓ ✓ ✓ ✓ ✓ ✓ ✓ ✓ ✓ ✓ ✓ ✓ ✓ ✓ ✓ ✓ ✓ ✓ ✓ ✓ ✓ ✓ ✓ ✓ ✓ ✓ ✓ ✓ ✓ ✓ ✓ ✓ ✓ FAN SPEED ✓ ✓ ✓ ✓ ✓ ✓ ✓ ✓ ✓ ✓ ✓ ✓ ✓ ✓ ✓ ✓ ✓ ✓ ✓ ✓ ✓ ✓ ✓ ✓ ✓ ✓ ✓ ✓ ✓ ✓ ✓ ✓ ✓ ✓ ✓ ✓ ✓ ✓ ✓ ✓ ✓ ✓ ✓ ✓ ✓ ✓ ✓ ✓ ✓ ✓ #FAN SPEED OK CLEAR ESC TEMP OPER MODE1
Press ⏻ button.
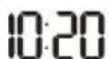
Ex) Setting ON Reservation Time as 'AM 10:20'.
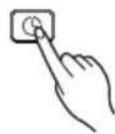
2
Repeat pressing ⏻ button to enter the ON reservation setting mode. (ON segment flashing)
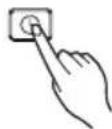
3
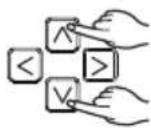
Press △ √ button to adjust AM/ PM setting.

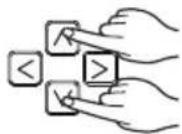
4
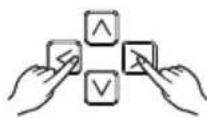
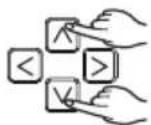
Press < > button to Hour setting mode. When the Hour icon flash, please setting time. The setting range is within 1\~12.


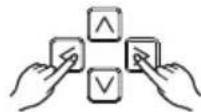

5
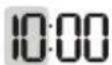
Press < > button to shift to Minute setting mode. When the Minute icon flash, please setting minute the setting range is within 00\~59.


6
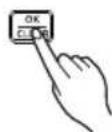
Press OK button to finish setting.

text_image
18.0 SET TEM AIR FLOW SUB FUNC VENT AIR FLOW OK CLEAR < > ESC FAN SPEED TEMP OPER MODE AM 12:007 Press [ESC] button to exit.
After setup, it automatically gets out of setup mode if there is no button input for 25 seconds.
When exiting without pressing set button, the manipulated value is not reflected.
- If reservation is set, 'turned on' indication shows up at the lower part of LCD screen, and air-conditioner product runs at the time that is set.
- If reservation is cancelled, 'turned on' indication disappears.
Programming - OFF Reservation
Automatically turned Off at reserved time that you set.
text_image
OFF TIMP 18.0 °C FRESH MATERIALS OFF AM 12:00 VENT AIR FLOW SUB FUNC OK CLEAR < > ESC FAN SPEED TEMP OPER MODE| 1 | Press button.Ex) Setting OFF Reservation Time as 'AM 10:20'. |  |
| 2 | Repeatedly pressing button to enter the OFF reservation setting mode.(OFFsegment flashing) |  |
| 3 | Press ▲ button to adjust AM/ PM setting.LAM 12:00 |  |
| 4 | Press < > button to shift to Hour setting mode. When the Hour icon flash, please setting time.The setting range is within 1~12.LAM 12:00 | 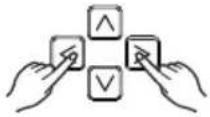 |
| LAM 10:00 |  | |
| 5 | Press < > button to shift to Minute setting mode. When the Minute icon flash, please setting minute the setting range is within 00~59.LAM 10:00 | 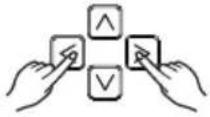 |
| LAM 10:20 |  | |
| 6 | Press OK button to finish setting.LAM 10:20 | 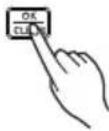 |
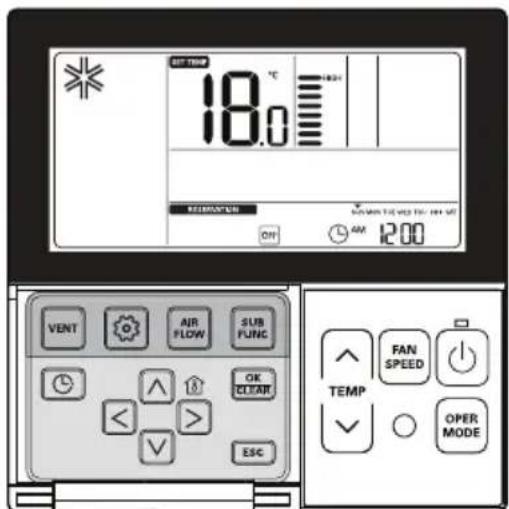
text_image
18.0°C TEMP/°C REFINANCE ON AM 12:00 VENT AIR FLOW SUB FUNC AV OK CLEAR < ESC FAN SPEED TEMP OPER MODE7 Press ESC button to exit.
* After setup, it automatically gets out of setup mode if there is no button input for 25 seconds.
When exiting without pressing set button, the manipulated value is not reflected.
- If reservation is set, 'turned off' indication shows up at the lower part of LCD screen, and air-conditioner product runs at the time that is set.
- If reservation is cancelled, 'turned off' indication disappears.
Programming : Holiday Reservation
It automatically stops at reserved day that you set.
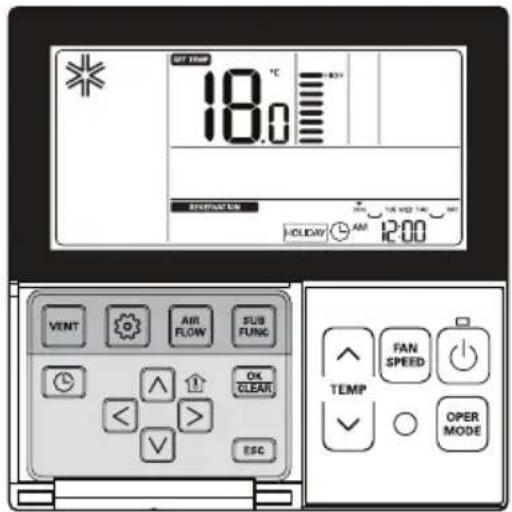
text_image
SIFT TIME 18.0 °C HOLICARY AM 12:00 VENT AM FLOW SUB FUNG FAN SPEED TEMP OPER MODE < > ESC1 Please press ⏻ button. It enters into reservation setup mode.
2 Please move to 'holiday' by repeatedly pressing 🔒 button.

text_image
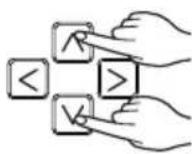
RESERVATION HOLIDAY SUNION TUE WED THU FRI SAT3 Please move to 'date' that you want to setup holiday by using ◀ ▶ button.
text_image
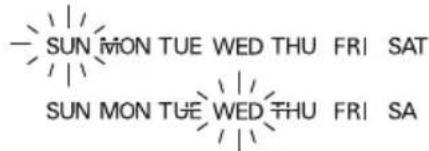
SUN MON TUE WED THU FRI SAT SUN MON TUE WED THU FRI SA4 Please appoint or cancel holiday by using △ ∨ or OK/ CLEAR button.
For example, when you setup Monday/Friday to holiday - 'Monday', 'Friday' letter disappears.

text_image
RESERVATION SUN TUE WED THU SAT HOLIDAY5 Please press ESC button if finishing holiday setup.
If it comes to appointed holiday, air-conditioner automatically stops. Once you setup holiday appointment, until before you cancel holiday setup, air-conditioner automatically stops within one hour even though you run air-conditioner.
Ventilation Kit Control(Optional)
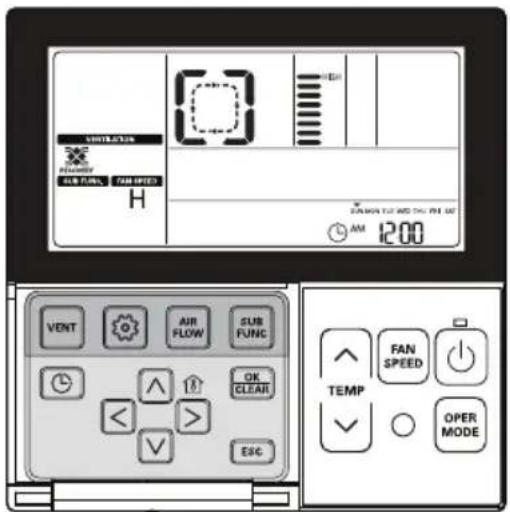
It is used when air conditioner is interlinked with ventilation product.
It is a function that cools and refreshes indoor air using the ventilation product at the same time operating the air conditioning function.
text_image
AVIATION AIR FLOW H EH SALON TUT AND DNG PHE 100 AM 12:00 VENT AIR FLOW SUB FUNC OK CLEAR < > ESC FAN SPEED TEMP OPER MODE| Ventilation interlinked operation | |
| 1 | Press VENT button on the remote controller control panel. 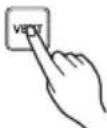 - It is only used when air conditioner and general ventilation is interlinked. - It is only used when air conditioner and general ventilation is interlinked. |
| 2 | Pressing 'Start/Stop' button at ventilation mode will start ventilation. |
| 3 | Pressing OPER MODE button will change the ventilation operation mode.  Pressing operation selection button will change the mode in the order of 'Heat exchange → normal → automatic'※ It only displays on the remote controller display when it is in ventilation mode, and it displays the desired temperature when it returns to air condition mode. Pressing operation selection button will change the mode in the order of 'Heat exchange → normal → automatic'※ It only displays on the remote controller display when it is in ventilation mode, and it displays the desired temperature when it returns to air condition mode. |
| 4 | Pressing FAN SPEED button in general ventilation mode will change airflow speed. Pressing airflow speed button will change the mode in the order of 'weak → strong → extra strong'. If CO2 sensor is installed, it can select from 'weak → strong → very strong → automatic'. |
| 5 | Changing back to air conditioner mode 1)Automatic Conversion: when no button is pressed for 15 seconds or longer, it automatically converts back to air conditioner mode. 2) Manual Conversion: Pressing VENT button in ventilation mode will manually convert. |
Forced Operation
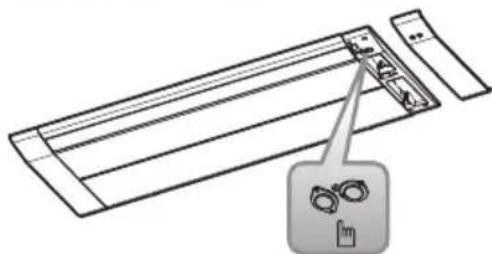
Operation procedures when the remote control can't be used. Press the tact switch (forced operation) for 2 seconds. If you want to stop operation, press again the tact switch. In case the power comes on again after power failure on the forced operation mode, the operating conditions are automatically set as follows: During forced operation, the initial mode continues.
natural_image
Diagram of a device with a magnified view showing a finger pointing to a circular component (no text or symbols present)Forced operation (Tact switch)
| Cooling model | Heat pump model | ||
| Room temperature Room ≥ set temperature -2 °C ≥ set temperature -2 °C | |||
| Operating mode Cooling | Cooling Heating | ||
| Indoor fan Speed High | Set available Set available | ||
| Setting temperature 22 | °C Set available Set available | ||
Auto Restart Function
In case the power comes on again after a power failure, auto restarting operation is the function to operate procedures automatically to the previous operating conditions.
Tips for Filter Sign LED (Grille Type)
- Filter sign lamp (LED) is on.
- If LED indicating filter sign lamp is on, clean the filter.
- After cleaning the filter, press the timer button and ◀ button of wired remote controller at the same time for 3 seconds. Then filter sign LED is off.
Maintenance and Service
CAUTION
Before performing any maintenance, turn off the main power to the system.
Grille, Case, and Remote Control
☐ Turn the system off before cleaning. To clean, wipe with a soft, dry cloth. Do not use bleach or abrasives.
NOTICE
Supply power must be disconnected before cleaning the indoor unit.
Air Filter
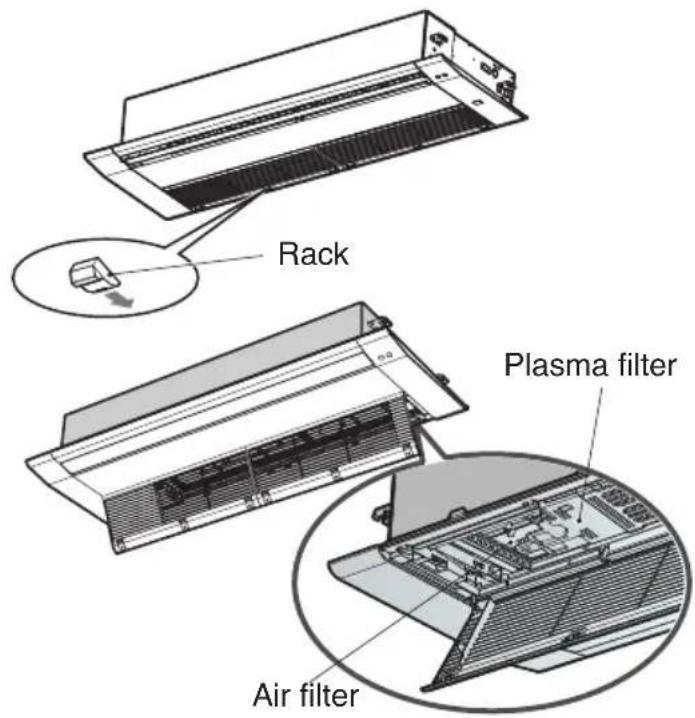
The air filters behind the front grille should be checked and cleaned once every 2 weeks or more often if necessary.
text_image
Rack Plasma filter Air filterTU chassis : 4 EA Rack
text_image
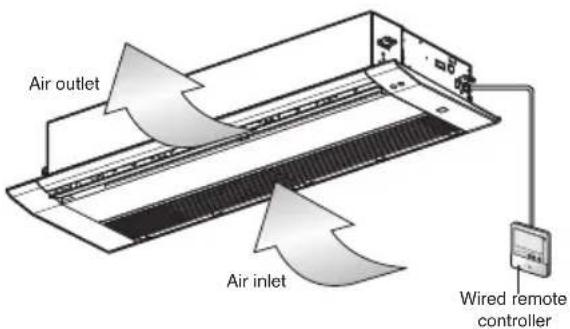
Air outlet Air inlet Wired remote controller1. Remove air filters.
☐ Take hold of the tab and pull slightly forward to remove the filter.
CAUTION
When the air filter is to be removed, do not touch the metal parts of the indoor unit. It may cause an injury.
2. Remove plasma filter.
☐ Unscrew 2 screws from plasma filter.
3. Clean dirt from the air filter using a vacuum cleaner or washing with water.
☐ If dirt is conspicuous, wash with a neutral detergent in lukewarm water.
☐ If hot water (50 °C or more) is used, it may be deformed.
4. After washing with water, dry well in the shade.
☐ Do not expose the air filter to direct sunlight or heat from a fire when drying it.
5. Install plasma filter and air filter.
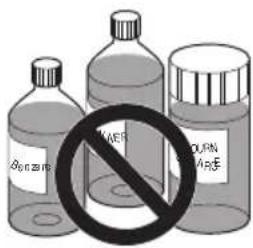
□ Never use any of the followings:
• Water hotter than 40 °C. Could cause deformation and/or discoloration.
• Volatile substances. Could damage the surfaces of the air conditioner.
text_image
BONAR BROWN AREIndoor Unit
Grille, Case and Remote Control
☐ Turn the system off before cleaning, To clean, wipe with a soft, dry cloth. Do not use bleach or abrasives.
NOTE
Supply power must be disconnected before cleaning the indoor unit.
Air Filters
The air filters behind the front grille should be checked and cleaned once every 2 weeks or more often if necessary.
natural_image
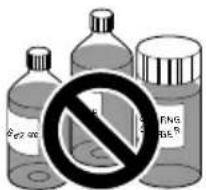
Close-up of a hand pressing down on a white ventilation grille (no text or symbols visible)■ Never use any of the followings:
• Water hotter than 40 °C. Could cause deformation and or discoloration.
• Volatile substances. Could damage the surfaces of the air conditioner.
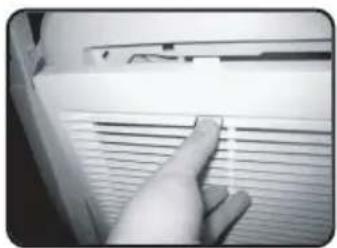
1 Remove the Air filters.
■ Take hold of the tab and pull slightly forward to remove the filter.

CAUTION: When the air filter is to be removed, do not touch the metal parts of the indoor unit. It may cause an injury.
2 Clean dirt from the air filter using a vacuum cleaner or washing with water.
■ If dirt is conspicuous, wash with a neutral detergent in lukewarm water.
■ If hot water (40 °C or more) is used, it may be deformed.
3 After washing with water, dry well in the shade.
■ Do not expose the air filter to direct sunlight or heat from a fire when drying it.
4 Install the air filter.
Purifying filter(Optional)
Cleaning
The PLASMA filter behind the air filters should be checked and cleaned once every 3 months or more often if necessary.
natural_image
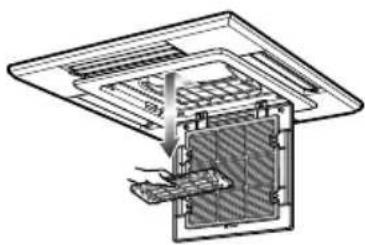
Technical line drawing of a mechanical assembly with internal components (no text or symbols)1 After removing the air filters, pull slightly forward to remove the PLASMA filter.
2 Dip the PLASMA filter into the water mixed with neutral detergent, for 20\~30 minutes.
3 Dry the PLASMA filter in the shade for a day (Especially, the humidity must be removed perfectly on this parts).
4 Note the cuts of electric discharge lines.
5 Re-install the PLASMA filter to the original position.

CAUTION: Don't touch this PLASMA Filter within 10 seconds after opening the inlet grille, it may cause an electric shock.
Replacement
- Recommended use period : About 2 years
1 Open front panel and remove air filter.
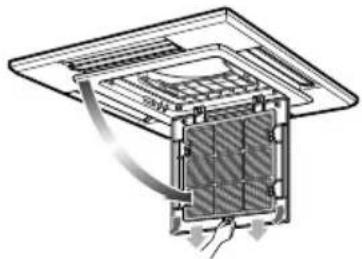
natural_image
Technical diagram of a mechanical assembly with layered components and directional arrows (no text or symbols)4 Reinsert air filter and close front panel.
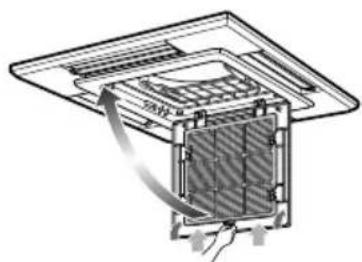
natural_image
Technical diagram of a mechanical assembly with layered components and a central component (no text or symbols)2 Remove air purifying filter.
3 Insert new air purifying filter.
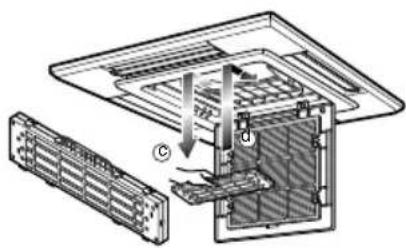
natural_image
Technical diagram of a device interior showing internal components and directional arrows (no text or symbols)When the air conditioner is not going to be used for a long time.
When it is not going to be used for a long time.

Operate the air conditioner at the following settings for 2 to 3 hours.
- Type of operation: Fan operation mode.
- This will dry out the internal mechanisms.

Turn off the breaker.

CAUTION
Turn off the breaker when the air conditioner is not going to be used for a long time.
Dirt may collect and may cause a fire.
Helpful information
The air filters and your electric bill. If the air filters become clogged with dust, the cooling capacity will drop, and 6% of the electricity used to operate the air conditioner will be wasted.
When the air conditioner is to be used again.

Clean the air filter and install it in the indoor unit.

Check that the air inlet and outlet of the indoor/outdoor unit are not blocked.

Check that the ground wire is connected correctly. It may be connect to the indoor unit side.
Operation Tips
Do not overcool the room.
This is not good for the health and wastes electricity.
Make sure that the doors and windows are shut tight.
Avoid opening doors and windows as much as possible to keep the cool air in the room.
Keep blinds or curtains closed.
Do not let direct sunshine enter the room when the air conditioner is in operation.
Clean the air filter regularly.
Blockages in the air filter reduce the airflow and lower cooling and dehumidifying effects. Clean at least once every two weeks.
Keep the room temperature uniform.
Adjust the vertical and horizontal airflow direction to ensure a uniform temperature in the room.
Ventilate the room occasionally.
Since windows are kept closed, it is a good idea to open them and ventilate the room now and then.
Before you call for service...

Troubleshooting Tips! Save time and money!
Check the following points before requesting repairs or service.... If the malfunction persist, please contact your dealer.
| The air conditioner does not operate. | The room has a peculiar odor. | It seems that condensation is leaking from the air conditioner. | Air conditioner does not operate for about 3 minutes when restart. |
| Have you made a mistake in timer operation?Has the fuse blown or has the circuit breaker been tripped? | Check that this is not a damp smell exuded by the walls, carpet, furniture or cloth items in the room. | Condensation occurs when the airflow from the air conditioner cools the warm room air. | This is the protector of the mechanism.Wait about three minutes and operation will begin. |
| Does not cool or heat effectively. | The air conditioner operation is noisy. | Crack sound is heard. | Remote control display is faint, or no display at all. |
| Is the air filter dirty?See air filter cleaning instructions.The room may have been very hot when the room air conditioner was first turned on. Allow time for it to cool down.Has the temperature been set incorrectly?Are the indoor unit's air inlet or outlet vents obstructed? | For a noise that sounds like water flowing.-This is the sound of freon flowing inside the air conditioner unit.For a noise that sounds like the compressed air releasing into atmosphere.-This is the sound of the dehumidifying water being processed inside the air conditioning unit. | This sound is generated by the expansion/ constriction of the front panel, etc. due to changes of temperature. | Are the batteries depleted?Are the batteries inserted in the opposite (+) and (-) directions? |
NOTICE
WATER RESISTANT: The outdoor side of this appliance is WATER RESISTANT. The indoor side is not water resistant and should not be exposed to excess water.

text_image
LG Life's GoodİTHALATÇI FİRMA
Changwon 2nd factory 84, Wanam-ro, Seongsan-gu, Changwon-si Gyeongsangnam-do, KOREA