
21FA2RG4AZ - TV LG - Free user manual and instructions
Find the device manual for free 21FA2RG4AZ LG in PDF.


User questions about 21FA2RG4AZ LG
0 question about this device. Answer the ones you know or ask your own.
Ask a new question about this device
Download the instructions for your TV in PDF format for free! Find your manual 21FA2RG4AZ - LG and take your electronic device back in hand. On this page are published all the documents necessary for the use of your device. 21FA2RG4AZ by LG.
USER MANUAL 21FA2RG4AZ LG
Location and function of controls 6
Remote control handset / Front panel
Basic operation 8
On and Off / Programme selection
Volume adjustment / Quick view Mute function
On screen menus 9
Menu selection
Setting up TV stations 10
Auto programme tuning / Manual programme tuning
Assigning a programme name / Fine tuning
Programme edit / Deleting a programme / Copying a programme
Moving a programme / Skipping a programme number
Favourite programme (option) / Calling The Programme
Selecting programme in the programme table
Paging through a programme table
Picture adjustment 15
XDP Demo (option) / PSM (Picture Status Memory) / CSM (Colour Status Memory)
Picture adjustment / Eye (option) / Excellent digital picture selection (option)
Picture format (option)
Sound adjustment (option) 17
Sound adjustment / Balance adjustment / Sound output selection
Woofer gain (option) / Excellent digital surround selection (option)
Stereo/Dual reception (option) / Mono sound selection
Language selection for dual language broadcast / Music Mode(Yellow Button)
Equalizer(option)(Red Button)
Other functions 19
Time functions / On/Off Time / Off Time / On Time / Auto sleep
Sleep timer / X-SORT (option) / Adding a program to a desired category
On screen language selection (option) / TV and AV Input (option)
Child lock / Blue Back / AVL (Auto Volume Leveler)(option)
Connection of external equipment 22
Aerial socket / Audio Video in/out sockets (option)
Euro scart socket (option) / S-video / Audio in sockets (S-AV) (option)
Component in sockets (option) / Headphone socket (option)
Troubleshooting check list 24
Warranty Card 25
Important Precautions
This unit has been engineered and manufactured to assure your personal safety, however improper use may result in potential electrical shock or fire hazards. In order to allow the proper operation of all safeguards incorporated in this TV set, observe the following basic rules for its installation, use and servicing. Keep it in an accessible place for future reference. (TV operating voltage is : 110V \~ 240V AC)
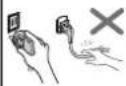
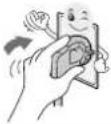 | Make sure to insert the power plug completely. If power cable is not fixed completely, a fire can break out . |
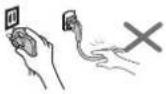 | Do not pull out the power cord. Always Pull out by the power plug. Do not touch the plug with wet hands. Do not damage the power cord. |
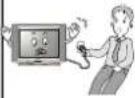
 | Do not unplug the power cord while the product is in use. Do not use the power plug to turn the product ON/OFF. Electric shock can damage the product. |
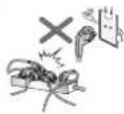
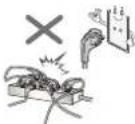 | Do not overload AC outlets by plugging too many appliances in the same socket or extension cords. They may result in a shock or fire hazard. |
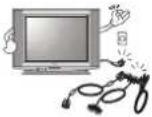 | Never leave the TV set “ON” - standby when leaving the house. Unplug the TV before moving it or if you are not going to use it for several days or during lightning storms. |
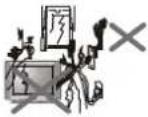 | For Own safety, Never touch any part of product, the power cord, and the antenna cable during lightning storms. You may be electrocuted. |
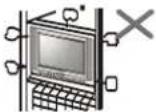 | TV set are provided with ventilation holes to allow the release of heat generated.Make sure that these holes are not blocked. Do not install the product in a confined place, such as book case or built in cabinet . |
 | Do not place any object filled with liquid such as Vases cup, glass etc on the TV set. Do not place the lighted candles on the TV set. This may cause fire or an electric shock hazard. |
Important Precautions
 | If you can smell a smoke or other odors or hear a strange sound unplug the power cord and contact the service center. If you continue to use, electric shock can occur. |
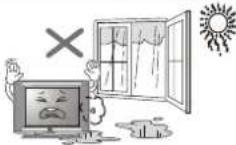 | Do not place the product where it might be exposed to excessive heat, sunlight, rain or moisture. |
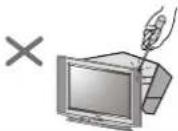 | Do not attempt to open the product. There are dangerous High Voltages inside. Refer to Servicing through Qualified Personnel if the TV is not operating properly. |
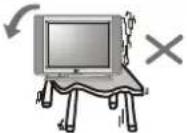 | Avoid personal injury / set damage by Installing the product on a flat and stable place that can support the weight of the set and has no risk of dropping the product. |
 | While cleaning the product, Unplug the Power cord and clean with dry & soft cloth. Do not use thinner, aerosol or any other chemical to clean . |
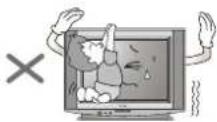 | Do not allow children to climb over it. If the product falls / collapses, you may be hurt. Do not drop or push objects (like coins, hair pins etc) into the TV cabinet openings. Some internal parts carry hazardous voltages. |
- Do Not use the stabilizer, as this set has a In built stabilizer. Use of External Inferior Quality stabilizer may damage your product.
Battery Installation: The remote control Handset is powered by two AA/ AAA batteries. To Load the Batteries, turn the remote control handset over and open the battery compartment. Install two batteries as per the polarity symbols (⊕ and ⊖) marked inside the battery compartment.
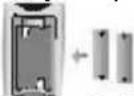
- To avoid battery leakage and damage to the remote, remove the batteries from the remote if you are not going to use it for several days. If any liquid leaks from the batteries and touch your skin, immediately wash it away with water.
I j {kk funi" k
Ni ; k [kn dke pkVl ; vkj mRi kn dko udl ku l :cpkuk l fuf' pr dj ud fy, bu fun" kle dk ge' kk i kyu dj sA
- fp=kvki d mRi knI FkkMk f-kUugkI drkg]D; kfd ; gflQfun'kkdkI e>u eennd fy, ,d mnkgj.kgA
• VhohdkvkijfVxokYVt gh 110-240V, l nA
• LVfcykbt j dki ; kx ugh dj ] D; kfd bl I V e fcYV bu LVfcykbt j gA ?kfV; k Dokfy Vh d ckgj h LVfcykbt j d i ; kx l vki d mRi kn dk udI ku i gp l dr k gA
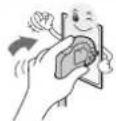 | I fu' pr dj fd i koj lyx vPNr jrgl yx x; kgA ; fn i koj lyx Brd l ugh yxk grk vx xy x l drh gA |  | Vnohl Vij ; krjy inkFkl Hkj h prt it l Qynku] di] fxykl vkfn ; k t yh gb ekecfUk; ku j[kA bl l vx yx l drh g ; k fct yh dk >Vdk yx l drk gA |
 | i koj dkM dk [kp ugnA ge'kk i koj lyx dk idMdj [khpA xhy gkFkk l lyx dk u N, A i koj dkM dk {kfr u igpk, A |  | vxj vki dk /k, dh ; k dkb vkj x/k vk, ; k dkb vt hc vkort l ukb n] rki kdjk dkM lyx l fudky n vkj l fol l Vj l l id djA vxj vk i blr eky t kj h j[kr grk fct yh dk >Vdk yx l drk gA |
 | t c mRikn dk bLreky dj jg gkr k i koj lyx dk u fudky A mRikn dk vku@vxQ dju d fy, i koj lyx dk bLreky u djA fct yh dk >Vdk mRikn dk {kfr igpk l drk gA | 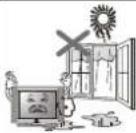 | mRikn dk ogk u j[k t gk ml ij cgn xehl /ki] o"kk ; k ueh dk vl j gk l drk gkA |
 | ,d gh l kdV vFlok , DI V'ku dkM e db mi dj.k yxkdj , l h vkmVy V dk vkoj ykM udjA ugh rk >Vdk yx l drk g ; k vkx yx l drh gA |  | mRikn dk [kyu ud h dkf'k'ku dj A bl d Hkhrj [krjukd gkb okYVt gkr ga vxj Vho Bnd l dke u dj jgk gk] rk ; KK; rki klrdfe; k l l offlx dj x, A |
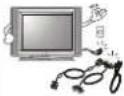 | ?kj l fudyrl e; Vhoh dk dHrk "vku" LVMck; u NkMA Vhoh dk f[kl dkul i gy vFlok ; fn vki dN fnuk rd Vhoh dk bLreky ugh dju oky g vFlok vk/kr&r Qku d nkju Vhoh dk lyx fudky nA | 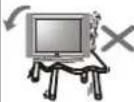 | [kn dk pkV@l V dk udl ku l cpku d fy, mRikn dk , l l ery vkj fLFkj LFkku ij j [k t k l V dk ot ul Hkky l drk gk vkj mRikn d fxju dk [krjk u gkA |
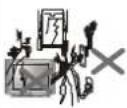 | vk/h&r Qku d nkju vi uh l j{kk d fy, ] mi dj.k d fdll hfgll dk] i koj dkM dk ; k , Vhuk drkj dk u N, A vki dk fct yh dk >Vdk yx l drk gA |  | mRikn dk l kQ djr l e; dkoj lyx fudky n vkj l kQ1 [k di M l ikNA l kQ dju d fy, fFkuj], vjk l ky ; k fdl h vU; dfedy dk i ; kx u djA |
 | i nk gku okyn xeh d fudyu d fy, Vhoh l Vk e ofVy'ku fNn cu gkr gA ; g l fu' pr dj fd ; fNn cn u gkA mRikn dk cd dl ; k fcYV bu dfcuV t l h cn t xgk ij bLVky u djA | 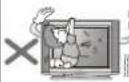 | cPpk dk bl d Âi j u p<unA vxj mRikn fxj rk@<g t krkg] rk vki dk pkV yx l drn gA Vhoh dfcuV d Nnk e dkb pit 'st l flDd] g; j fiu vkfnk u fxjk, vkj u ?kl k, A dN Hkhrjh i KVI e [krjukd okYVt gkr gA |
• cvjhyidt vkj fjekVkudl kul cpkud fy, ]t cvki fjekVkdkdb fnukrd bLreky ughdjuoky gkrkcvFj; kdkml e l fudky nA vxj cvfj; kl dkbrjy inkFkj dl dj vki dh Ropkij yxt krkg] rkr Rdky bl i kuhl /rk nA
Location and function of controls
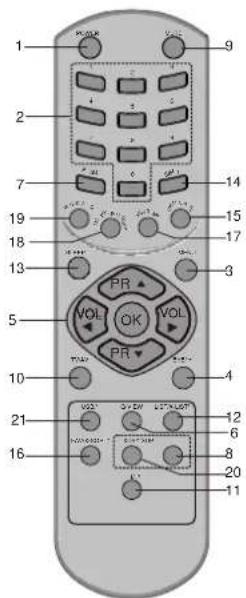
text_image
1 2 7 19 18 13 5 10 21 16 9 14 15 17 3 VOL OK VOL PR PR VOL VOL VOL VOL VOL VOL VOL VOL VOL VOL VOL VOL VOL VOL VOL VOL VOL VOL VOL VOL VOL VOL VOL VOL VOL VOL VOL VOL VOL VOL VOL VOL VOL VOL(Option-1)
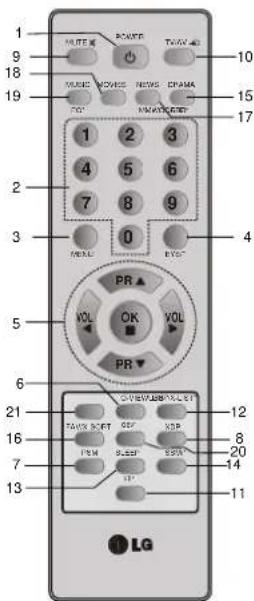
text_image
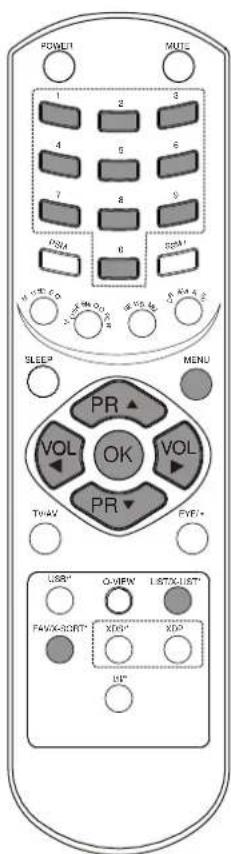
1 9 18 19 MUTE POWER TVW 10 15 17 1 2 3 4 5 6 7 8 9 0 YOUT YOUT 4 5 6 7 8 9 VOL OK VOL PR PR 21 16 7 13 TAWB SET OFF XBP 12 8 20 14 11 LG(Option-2)
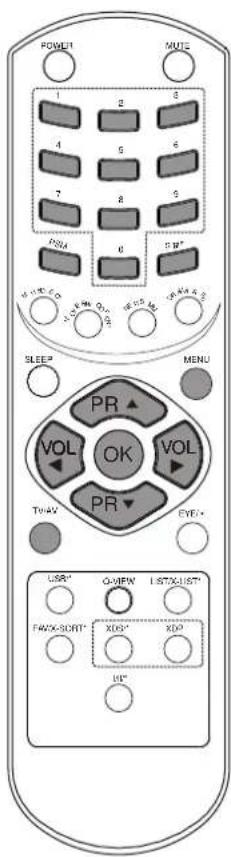
All the functions can be controlled with the remote control handset. Some functions can also be adjusted with the buttons on the front panel of the set. Remote control handset
Before you use the remote control handset, please install the batteries. See the previous page.
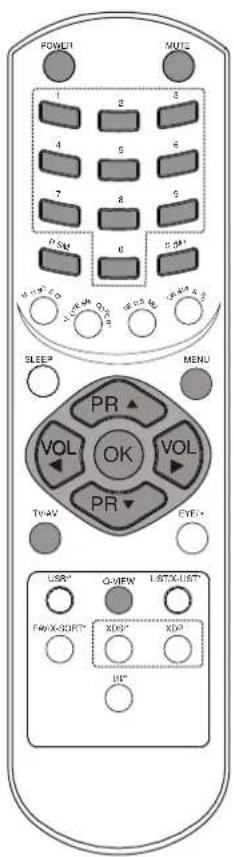
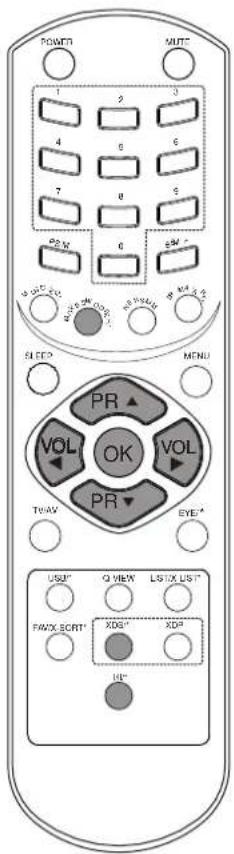
- POWER switches the set from On to standby or standby to On.
2. NUMBER BUTTONS
switches the set On from standby or directly select a Programme number.
- MENU selects a menu.
4. EYE/\* (option)
switches the eye function On or Off.
- ▲ / ▼ (Programme Up/Down) selects a programme or a menu item. switches the set On from standby. ◀/▶ (Volume Up/Down) adjusts the volume. adjusts menu settings. OK accepts your selection or displays
6. Q. VIEW
returns to the previously viewed programme.
7. PSM (Picture Status Memory)
recalls your preferred picture setting.
8. XDP
Select Excellent Digital Picture.
9. MUTE
switches the sound On or Off.
10. TV/AV
selects TV or AV mode.
switches the set On from Standby.
11. I/II/\* (option)
selects the language during dual language broadcast. (option)
selects the sound output in AV mode.
12. LIST/X-LIST\* (option)
displays the programme table. press LIST / X-LIST key again to clear the LIST / X-LIST table from the screen.
13. SLEEP
sets the sleep timer.
- SSM/* (option) (Sound Status Memory)
recalls your preferred sound setting.
15. ARC
change picture format (Normal/Zoom).
16. FAVOURITE (OPTION) / X-SORT (option)
pressing each time this button will select a stored favourite programme. X-SORT switches X- SORT (option) On/Off.
17. MM
select music mode.
18. WFR /\* (Woofer/\*option)
direct access key for woofer on/off.
19. EQ/\* (option)
direct access key to select EQ (Graphics Equalizer).
20. XDS/\*(option)
selects excellent digital surround.
21. USB/\* (option)
to enter into USB mode.
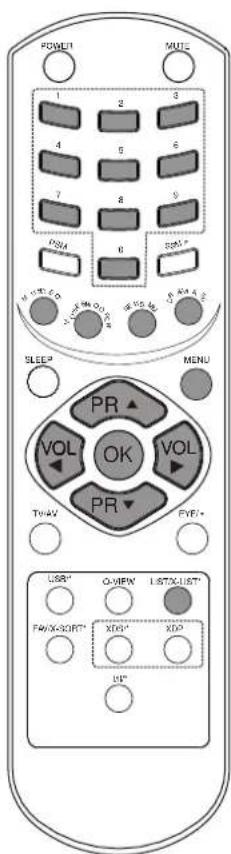
COLOURED BUTTONS : When Menu is On some of these buttons are used for programme edit.
Remarks: 1. Some keys in remote can be non-functional, these keys
are used in other models & marked with *.
- Colour keys will not work as direct access keys during X-Sort on mode.
# Remote Design / Aesthetic may vary from model to model.
# Turbo Sound is equivalent to XDS.
# When XDS is ON, SSM is not applicable.
Location and function of controls
FRONT PANEL / SIDE PANEL
Shown below is a simplified representation of front or side panel, here shown may be somewhat different from your set.
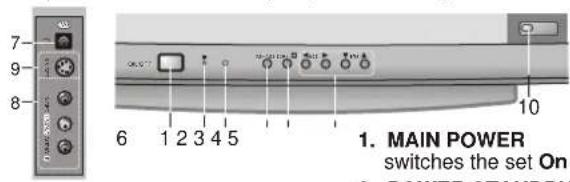
text_image
7 9 8 6 1 2 3 4 5 10 1. MAIN POWER switches the set On POWER STRAW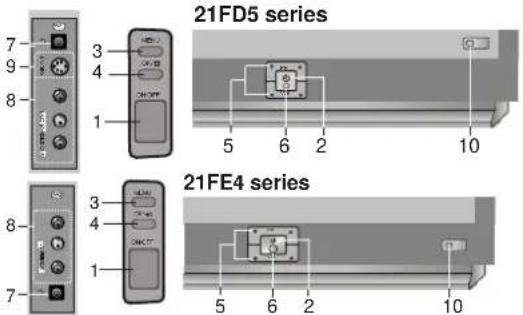
text_image
21FD5 series 21FE4 series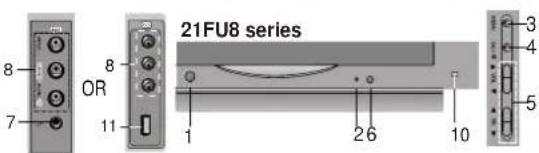
text_image
21FU8 series 8 7 OR 11 1 26 10 3 4 5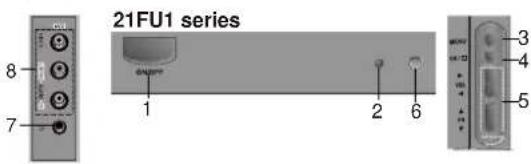
text_image
21FU1 series 8 7 1 2 6 3 4 5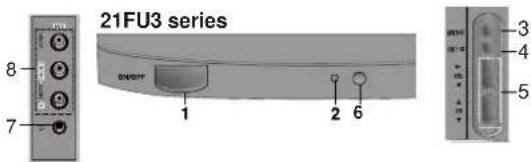
text_image
21FU3 series 8 7 QWOPF 1 2 6 3 4 5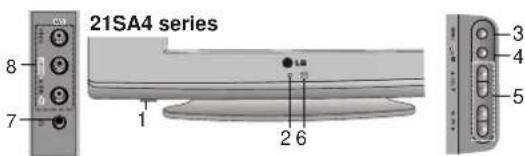
text_image
21SA4 series 8 7 1 2 6 3 4 5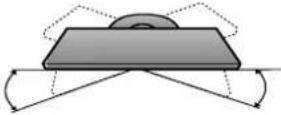
- MAIN POWER
switches the set On or Off. - POWER/STANDBY INDICATOR
illuminates brightly when the set is in standby mode. dims when the set is switched On. - MENU
selects a menu. - OK /
accepts your selection of current mode or to select AV/Component / RF mode.
5 ▲/▼ (Programme Up/Down)
selects a programme or a menu item. switches the set on from standby. If X-Sort is on, switch to the next prog. in same group.
◀/▶ (Volume Down/Up)
adjusts the volume.
adjusts menu settings. - REMOTE CONTROL SENSOR
Note : Only use the supplied remote control handset. (When you use other, they'll be not able to function). - HEADPHONE SOCKET (option)
Connect the headphone plug to this socket. - AUDIO/VIDEO IN SOCKETS (AV2/AV3) (option)
Connect the audio/video out sockets of External equipment to these sockets. - S-VIDEO/AUDIO IN SOCKETS (S-AV) (option)
Connect the video out socket of an S VIDEO VCR to the S-VIDEO socket. Connect the audio out sockets of the S-VIDEO VCR to the audio sockets as in Av3. - EYE (option)
adjusts picture according to the Surround- ding conditions. - USB - socket (option)
Connect the USB pen drive to this socket
Note : Do not place any heavy objects on the TV set.
This feature is available with 21SA4 model only. After installing the TV, you can adjust the TV set manually to the left or right direction by 15 degrees to suit your viewing position.
SWIVEL STAND
Basic operation
On and Off
- Press the main power button at front side of set to switch On.
- If the set is in standby mode, press the POWER, ▲/▼, TV/AV or NUMBER buttons on the remote control handset to switch it On fully.
- Press the POWER button on the remote control handset. The set reverts to standby mode.
- Press the main power button again to switch the set Off.
Note : while the set is switched On and mains plug is disconnected, if mains plugged again then set will switch to standby or power On.
Programme selection
You can select a programme number with the ▲/▼ or NUMBER Buttons.
Volume adjustment
Press the ◀/▶ button to adjust the volume.
Quick view
Press the Q.VIEW button to view the last viewed programme.
Mute function
Press the MUTE button. The sound is switched Off and the display 📋 appears.
You can cancel it by pressing the MUTE, ◀/▶, SSM, XDS, Woofer (option) button.
text_image
POWER MUTE 1 2 3 4 5 6 7 8 9 PSN 0 0.01 SLEEP MENU PR VOL OK VOL TWAV EYE+ PR USB* O-MEN LIST*X-UST* F4/FX-SORT* XOS* XDO US*On screen menus
The dialogue between you and your set takes place on screen with an operator menu. The buttons required for the operating steps are also displayed.
Menu selection
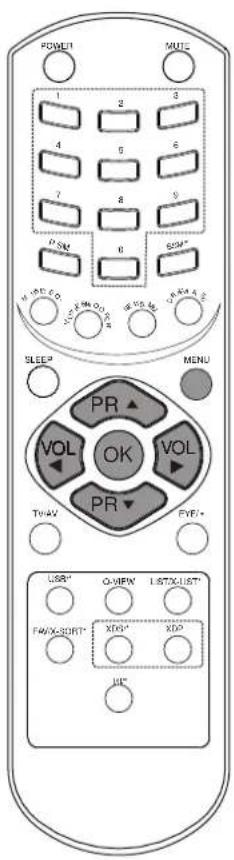
- Press the MENU button and then ▲/▼ button to display each menu.
- Press the ▶ button and then ▲/▼button to select a menu item.
- Press the ▶ button to display the sub menu or the pull-down menu.
4 Change the setting of an item in the sub or pull-down menu with ◀/► or ▲/▼. - Press OK button to save the setting mode.
- Repeatedly press the MENU or button to return to normal TV viewing.
Note :
a. In the AV mode the Programme Menu is not displayed.
b. In sound menu woofer gain & AVL is optional (In some models)
c. In programme menu favourite is optional (In some models)
d. In picture menu, XDP demo is optional in some models.
text_image
POWER MUTE 1 2 3 4 5 6 7 8 9 PSK 0 SOR* SLEEP MENU VOL OK VOL PR PR TWAV FYR+ USB+ Q-VIEW LIST/X-LIST+ F4/F-X-SPORT+ XOS+ XD+ IIS+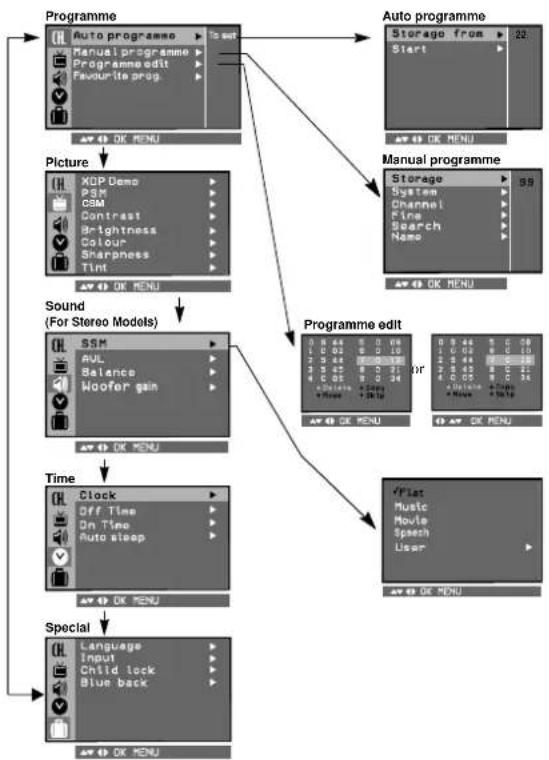
flowchart
graph TD
    A["Programme"] --> B["Auto programme"]
    A --> C["Picture"]
    A --> D["Sound (For Stereo Models)"]
    A --> E["Time"]
    A --> F["Special"]
    B --> G["Auto programme"]
    C --> H["Manual programme"]
    D --> I["Programme edit"]
    E --> J["Special"]
    F --> K["Programme"]
    style A fill:#f9f,stroke:#333
    style B fill:#ccf,stroke:#333
    style C fill:#cfc,stroke:#333
    style D fill:#fcc,stroke:#333
    style E fill:#cff,stroke:#333
    style F fill:#ffc,stroke:#333
Setting up TV stations
Programme
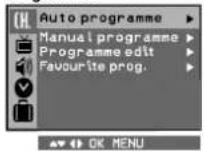
Up to 200 programmes can be stored by programme numbers (0 to 199). Once you have preset the stations you will be able to use the ▲/▼ or NUMBER buttons to scan the stations you programmed. Programmes can be tuned using automatic or manual modes.
Note : In some models up to 100 TV stations can be stored.
Auto programme tuning
All channel that can be received are stored by this method. It is recommended that you use auto programme during installation of this set.
text_image
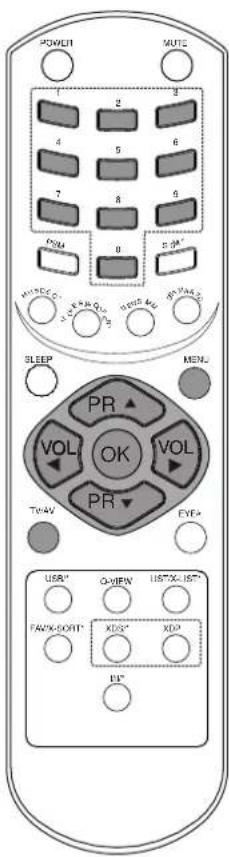
POWER MUTE 1 2 3 4 5 6 7 8 9 PUM 0 0.0M SLEEP MENU PR VOL OK VOL PR TV-AV EVE+ USB" Q-OPEN LIST"X-LIST" FAOK-GOINT XDS" XDP B" MUSTCLO 10 PAGA 10 PAGA MUX MUX MUX- Press the MENU button and then ▲/▼ button to select the Programme menu.
- Press the ▶ button and then ▲/▼ button to select Auto programme.
- Press the ▶ button to display the Auto programme menu.
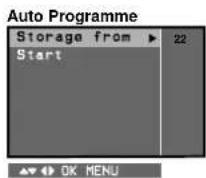
- Press the ▲/▼ button to select Storage from.
- Select the beginning programme number with the ◀/▶ button or NUMBER buttons on the Storage from pull-down menu. Any number under 10 is entered with a numeric '00' in front of it, i.e. '005' for 5. Press OK to store / save.
- Press the ▲/▼ button to select the start.
- Press the ▶ button to begin auto programming. All receivable stations are stored. To stop auto programming, press the MENU button. When auto programming is completed the Programme edit menu appears on the screen. See the 'Programme edit' sect to edit the stored programme.
- Repeatedly press the MENU or ◀button to return to normal TV viewing.
Setting up TV stations
Programme
Manual programme tuning
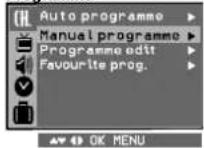
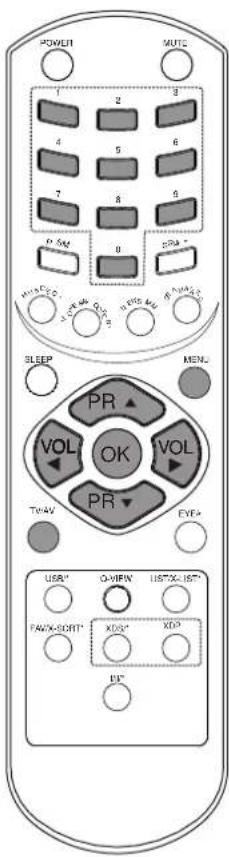
Manual programme offer you to manually tune and arrange the programme in whatever order you desire. Also you can assign a programme name with five characters to each.
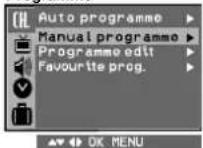
- Press the MENU button and select the Programme menu.
- Press the ▶ button and then ▲/▼ button to select Manual programme.
- Press the ▶ button to display the Manual programme menu.
text_image
POWER MUTS 1 2 3 4 5 6 7 8 9 P 5M 8 P 9M 10 M 11 M SLEEP MEN. PR VOL OK VOL PR TV-AV EYE USB" O-VIEW LIST"X1.15" FAW-X-CORI" XDS" XD" B"Manual programme
text_image
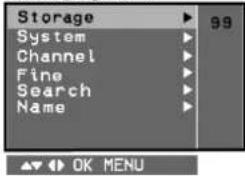
Storage System Channel Fine Search Name 99 OK MENU- Press the ▲/▼button to select Search. Press the ◀/▼button to commence searching on the Search pull-down menu. If a programme is found the search will stop. Press OK button to store the programme. If programme reception is poor go for fine tunning.
- If this station is the one required, press the ▲/▼ button to select Storage. Select the desired programme number (0 to 199) with the ◀/► button or NUMBER buttons on the Storage. pull-down menu. Any number under 10 is entered with a numeric '00' in front of it, i.e. '005' for 5. Press OK button to store the programme.
- Press the ▲/▼ button to select System. Select a TV system with the ▲/▼ button on the System pull-down menu;
BG : (India/New Zealand/M.East/Africa/Australia)
I : (Hong Kong/South Africa)
DK : (East Europe/China/Africa/CIS)
M : (USA/Korea/Philippines) (option)
- Press the ▲/▼ button to select Channel. Press ▶ button and then ▲/▼ to select V/UHF or Cable on the Channel pull-downmenu. If possible, select the channel number 1 to 69 (V/UHF) and 1 to 47 (cable) directly with the number buttons, Any number under 10 is entered with a numeric '0' in front of it i.e. '05' for 5.
- Press the OK button to store it. The display Stored will appear.
- To store another station, repeat steps 4 &5.
Setting up TV stations
Programme
text_image
POWER MUTE 1 2 3 4 5 6 7 8 9 P 5M 6 5M" SLEEP 0 1 2 3 VOL OK VOL TRAV PR FYE* USB* O/VIPW LISTX/LIST* FAX/SORT XDS* XDO UI*Assigning a programme name
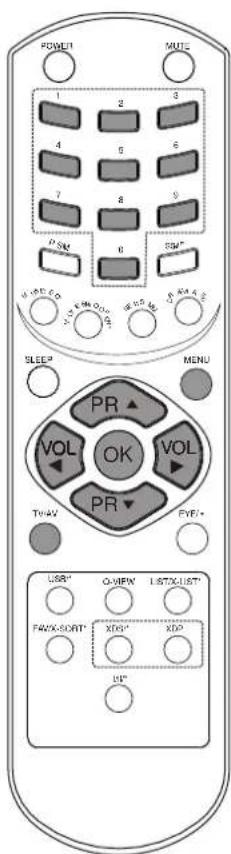
- Repeat the 'Manual programme tuning' steps 1 to 3.
- Press the ▲/▼ button to select Name.
- Press the ▲button on the Name pull-down menu. You can use a blank, +, -, the numeric 0 to 9 and the alphabet A to Z. With the ▼button you can select in the opposite direction.
- Select the next position by pressing the button and then take your choice of the second character, then press OK button.
- Repeatedly press the MENU or ◀button to return to normal TV viewing.
Fine tuning
Normally fine tuning is only necessary if reception is poor.
- Repeat the 'Manual programme tuning' steps 1 to 3.
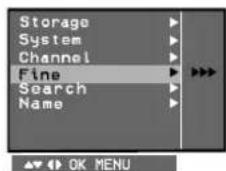
- Press the ▲/▼ button to select Fine.
- Press the ◀/▶ button to fine tune for the best picture and sound on the Fine pull-down menu, then press OK button to store the setting.
text_image
Storage System Channel Fine Search Name OK MENU- Repeatedly press the MENU or ◀button to return to normal TV viewing.
- Change of "▶▶" from Yellow to red indicates tuning is proper.
Setting up TV stations
Programme
text_image
POWER MUTE 1 2 3 4 5 6 7 8 9 VOL SWEI SWEI* SLEEP MENU PR VOL OK VOL PR TWAV FVEI* USB* O/VIEW* LISTA LIST* FAW/KORP* XDIS* XDID* UI*Programme edit
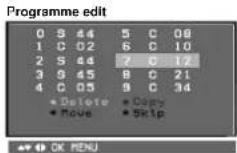
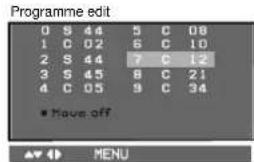
This function enables you to delete or skip or copy the stored programmes. Also you can move some stations to other programme numbers.
- Press the MENU button and then ▲/▼ button to select the Programme menu.
- Press the ▶ button and then ▲/▼ button to select programme edit.
- Press the ▶ button to display the Programme edit menu.
Deleting a programme
- Select a programme to be deleted with the ◀/▶ or ▲/▼ button.
- Press the RED button twice.
The selected programme is deleted, all the following programmes are shifted up one position.
Copying a programme
- Select a programme to be copied with the◀/▶ or▲/▼ button.
- Press the GREEN button.
All the following programmes are shifted down one position.
Moving a programme
- Select a programme to be moved with the ▶/▶ o▲/▼ button.
- Press the YELLOW button
- Move the programme to the desired programme number with the ▲/▼ or ◀/► button.
- Press the YELLOW button again to release this function.
text_image
Programme edit 0 S 44 5 C 08 1 C 02 6 C 10 2 S 44 7 C 12 3 S 45 8 C 21 4 C 05 9 C 34 ■ Have off MENUSkipping a programme number
- Select a programme number to be skipped with the ▲/▼ or ◀/▶ button.
- Press the BLUE button. The skipped programme turns to blue.
- Press the BLUE button again to release the skipped programme. When a programme number is skipped it means that you will be unable to select it using the ▲/▼ button during normal TV viewing. If you want to select the skipped programme, directly enter the programme number with the NUMBER buttons or select it in the programme edit or list menu. Skipped prog. No. appears BLUE.
- Skipped programmes can be selected in X-List.
Repeatedly press the MENU to return to normal TV viewing.
Setting up TV stations
Favourite Prog. (option)
This function lets you select your favourite programmes directly.
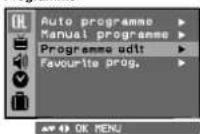
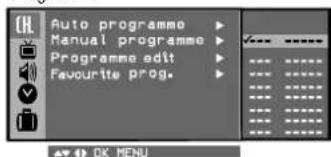
- Press the MENU button and then ▲/▼ button to select the Programme menu
- Press the ▶ button and then ▲/▼ button to select Favourite Prog.
- Press the OK button to display the Favourite Prog. menu.
Programme
text_image
Auto programme Manual programme Programme edit Favourite prog. OK MENU- Press the ▲/▼ button to select Favourite Prog. location.
- Select a desired programme with the ◀/▶button or NUMBER buttons. Any number under 10 is entered with a numeric '00' in front of it i.e '005' for 5.
- To store another programme repeat steps 4 to 5. You can store up to 8 programmes.
- Repeatedly press the MENU or ◀button to return to normal TV viewing.
Repeatedly press the FAVOURITE KEY button on remote to select stored favourite programmes.
Calling the programme List (option)
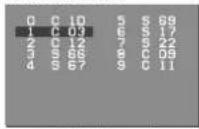
You can check the programmes stored in the memory by displaying the programme list.
Displaying programme List
Press the LIST button to display the Programme list menu. The programmeList appears on the screen. One programme list contains ten programmes as below.
OK MENU
Note :
a. You may find some blue programmes. They have been set up to be skipped by auto programming or in the programme edit mode.
b. Some programmes with the channel number shown in the programme list indicate there is no station name assigned.
Selecting a programme in the programme list
Select a programme with the ▲ / ▼ or ◀ / ▶ button. Then press the OK button.
The set switches to the chosen programme number.
Paging through a programme list
There are 10 (or 20) programme list pages which contain 100 (or 200) programmes.
Pressing the ▲ / ▼ or ◀ / ▶ button repeatedly turns the pages.
Press the LIST button to return to normal TV viewing.
text_image
POWER MUTE 1 2 3 4 5 6 7 8 9 VOL SOM SLEEP MENU PR VOL OK VOL PR TWAV FVEI* USB* O/VIPW LISTA/LIST* FAVING/SORTY* XTR* XTR* UI*Picture adjustment
XDP Demo (option)
- Press the MENU button and ▲/▼to select the picture menu.
- Press the ▶ to select XDP Demo.
- Screen splits for Demo.
- Press any button for XDP Demo exit.
PSM (Picture Status Memory)
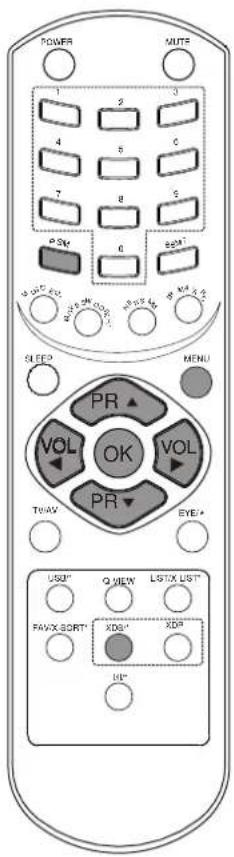
- Press the PSM button on the remote to change for desired PSM setting.
Note: PSM status change to user automatically when contrast, brightness, colour and sharpness set manually.
You can also recall a desired picture (Dynamic, Standard, Mild, Game, or User) with PSM button on the remote control. The picture Dynamic, Standard, Mild and Game are programmed for good picture reproduction at the factory and cannot be changed.
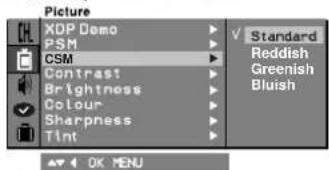
CSM (Colour Status Memory)
- Press the MENU button and then ▲ / ▼ button to select the Picture menu.
- Press the ▶ and ◆ button to select CSM.
- Press the ▶ button and then ▲ / ▼ button to select a picture setting on the CSM pull-down menu.
text_image
Picture XDP Demo PSM CSM Contrast Brightness Colour Sharpness Tint ✓ Standard Reddish Greenish Bluish OK MENU- Press the OK or ◀ button.
- Repeatedly press the MENU or ◀ button to return to normal TV viewing.
Picture adjustment
You can adjust picture contrast, brightness, colour, sharpness and Tint (NTSC input only) to the levels you prefer.
- Press the MENU button and then ▲/▼ button to select the Picture menu.
- Press the▶ button and then ▼ button to select Contrast, Brightness Colour, Sharpness or Tint.
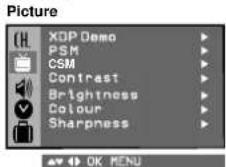
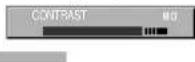
- Press the ◀/▶button to make appropriate adjustments on each sub menu.
You can also select User or standard PSM setting by directly pressing PSM button.
- Press the OK button to store it for the picture User.
- Repeatedly press the MENU or button to return to normal TV viewing.
text_image
TOWER MUTFR 1 2 3 4 6 5 7 8 5 PSM 0 8x8" SLEEP MENU PR VOL OK VOL TRAV EYE# XDS* USB" Q VIEW LISTX LIST" FAVIX SPORT" XDS" XDS" USB"Picture adjustment
Eye (option)
In some models, the set will automatically adjust the picture according to the surrounding conditions. This will enable you to enjoy the most suitable picture according to the surroundings.
Press the EYE/*button on remote to switch the eye function On or Off.

When the eye function is On, the most suitable picture is automatically adjusted according to the surrounding
At this time the display…… in green does not appear continuously but the display …… in yellow appears each time the picture condition changes.
Note : If PSM key is pressed or any of the picture setting are varied, then EYE automatically switches Off.
Excellent digital picture selection (option)
When this function is On, picture quality will be enhanced.
Repeatedly press the XDP button to switch On or Off.
Note : If you press the PSM or EYE /* button with the XDP function, the excellent digital picture function is automatically switched Off.
ARC
You can watch TV in various picture formats; Normal, Zoom. Repeatedly press the ARC button to select your desired picture format.
Normal (4:3)
This picture format is 4 : 3 of general TV.
Zoom (14:9)
You can enjoy the cinema in a vast screen through the Zoom mode. The screen 4:3 is magnified to the upper/lower sides so that the screen 16:9 is full. The bottom and top of the picture may be lost.
Note :
a. When you switch the set to Off, the Zoom picture format is reset to the Normal (4:3).
b. This OSD will appear only in English.
text_image
TOWER MUTR 1 2 3 4 5 6 7 8 9 PP M 6 80°* S L E F? MENU PR ▲ VOL OK VOL TR W A E Y E A* USB1° Q VIEW LISTX LIST* FAX X SORT* X D5° XD3° U1°Sound adjustment
Sound
text_image
POWER MUTE 1 2 3 4 5 6 7 8 9 P-5M 0 P-5M SLEEP MENU PR VOL OK VOL TV+4V EYE PR USB* O-HIPW LISTXK-ISP* FROV-SOFT* XDS* XDS* I3*Sound adjustment
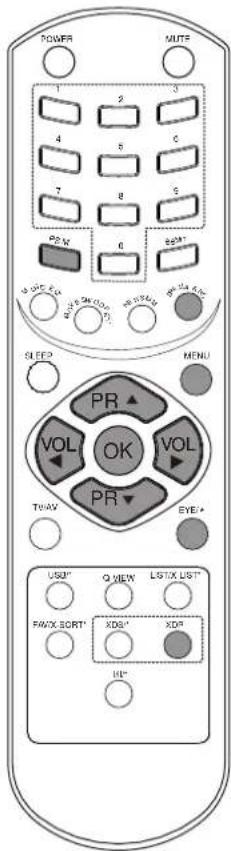
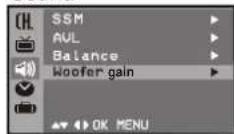
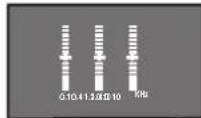
You can select your preferred sound setting: Flat, Music, Movie, User, Speech and you can also adjust the sound frequency of equalizers and balance. If you switch AVL (option) to On, the set automatically keeps on an equal volume level even if you change programmes. You can vary the woofer gain (option) to get woofer effect in sound withrich bass.
- Press the MENU button and then ▲/▼ button to select the Sound menu
- Press the ▶button and then ▲/▼button to select the desired sound item; SSM, AVL, Balance,Woofer gain.
- Press the ▶ button in SSM Press ▲/▼ to select Flat, Music, Movie, Speech or User.
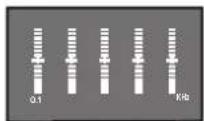
5 Band (option)
3 Band (option)
a. Select User by pressing the ▶ /OK button.
b. Select a sound band by pressing the ◀/▶ button.
c. Make appropriate sound level with the▲/▼ button.
d. Press the OK button to store it for the sound User. It will auto store.
To recall your preferred setting press the SSM/* button until the desired sound (Flat, Music, Movie, Speech or User) appears. The sound Flat, Music, Movie, and Speech are programmed for good sound reproduction at the factory and cannot be changed.
Notes :
- If you press the SSM/* button after making appropriate adjustment in Sound menu, the display User automatically appears even though you have already set a factory preset setting, Flat, Music, Movie or Speech.
- AVL and Woofer gain options will not be available in some models.
Balance adjustment
You can adjust balance.
- Press the MENU button and select the Sound menu.
- Press the▶ button and them▲/▼ button to select Balance.
- Make desired adjustment with the◀/▶ on the Balance pull-down menu.
- Repeatedly press the MENU or ◀ button to return to normal TV viewing.
Sound output selection
In AV mode, you can select output sound for the left and right speakers. Repeatedly press the I/II/* on remote button to select the sound output.
L+R : Audio signal from audio L input is sent to left speaker and audio signal from audio R input is sent to right speaker.
L+L : Audio signal from audio L input is sent to left and right speakers.
R+R : Audio signal from audio R input is sent to left and right speakers.
Sound adjustment
Woofer On/Off (option)
Press GREEN key on remote to switch Off/On Woofer.
Woofer gain (option)
Select woofer gain and press ◀/▶ to adjust woofer gain.
Excellent digital surround selection (option)
When this function is On, it will give surround effect as well as loudness will be increased.
Repeatedly press the XDS/* button to switch On or Off.

(XDS On)(XDS Off)
Stereo/Dual reception (option)
Stereo/dual is an optional function.
When a programme is selected, the sound information for the station appears after the programme number and station name disappear.
Broadcast On Screen Display
Mono MONO
Stereo STEREO
Dual DUALI
Mono sound selection
In stereo reception, if the stereo signal is weak, you can switch to mono by pressing the I/II/* button twice. In mono reception the depth of sound is improved. To switch back to stereo, press the I/II/* button twice again.
Language selection for dual language broadcast
If a programme received in two languages (dual language), you can switch to DUAL I, DUAL II or DUAL I+II by pressing the I/II/* button repeatedly.
DUAL I sends the primary broadcast language to the speakers.
DUAL II sends the secondary broadcast language to the speakers.
DUAL I+II sends a separate language to each speaker.
Music Mode(Yellow Button)
You can hear music while the tv screen is off using this function.
-
Press the yellow button to start the music mode.
-
Press any key to exit from music mode except vol. keys and yellow key.
-
Volume levels can be changed (Vol+/Vol-) in music mode.
Music Mode On
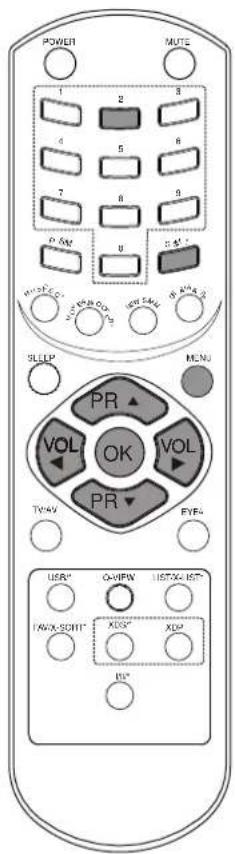
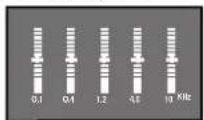
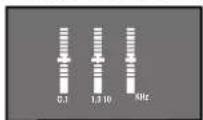
Equalizer(option)(Red Button)
Equalizer is displayed on the screen by pressing red button.
5 Band (option)
3 Band (option)
text_image
TOWN MUTC 1 2 3 4 6 5 7 8 5 PPM 6 5M S:O C:Y C:U S:W O:R N:W H:U S:E P: M:N U VOL OK VOL TRWV PR EYE* USER Q VIEW LISTX LIST* FAWX SCRT XDG XD UOther functions
Time
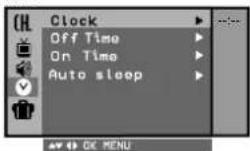
text_image
POWER MUTE 1 2 3 4 5 6 7 8 9 PSM 0 SPM SLEEP MENU PR VOL OK VOL TRAV EYE USB* O-MEN LISTA-UST* BACK-OUT* XDS* XD UPTime functions
The time uses 24 hrs. system and must be set to the correct time before operating the set.
- Press MENU and ◆ to select time menu.
- Press▶ button to select time menu.
- After selecting 'Time Function' press▶ key to enter 'Time'.
- Set Time using ◀/▶ and ▲/▼ keys.
- Press OK to store.
- Repeatedly press MENU or to return to normal TV viewing.
Note :
a. In the event of power interruption, time will be reset.
b. Time resets if mains is unplugged.
c. Timer accuracy is ± 15 sec.
On/Off Time
On/Off time function is used to automatically On/Off the set at preferred time.
Off Time
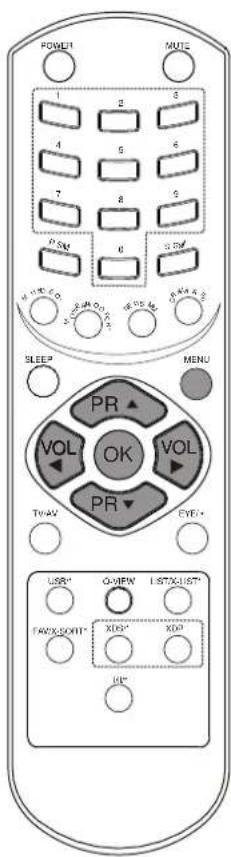
- Press the MENU button and then ▲/▼ button to select the Time menu.
- Press the ▶button and then ▲/▼ button to select Off Time.
- Press OK
- Select and adjust hour and minute by pressing the ◀/▶, ▲/▼button.
- Repeatedly press the ◀/▶ button to select Off Time.
- Press the ▼ button repeatedly to set Off Time On /Off.
- Repeatedly press the MENU or ◀ button to return to normal viewing.
On Time
- Press the MENU button and then ▲/▼button to select the Time menu.
- Press the ▶button and then ▲/▼ button to select On Time.
- Press OK
- Select and adjust hour and minute by pressing the ◀/▶, ▲/▼button.
- Press the ◀/▶ button to select On Time.
- Press the ▼ button repeatedly to set On Time On /Off.
- Repeatedly press the MENU or ◀ button to return to normal viewing.
Auto sleep
If you select Auto Sleep On the set will automatically switch itself to standby mode approximately ten minutes after a TV station stops Broadcasting.
- Press the MENU button and then ▲/▼button. to select the Time menu.
- Press the ▶ button and then ▲/▼ button to select Auto Sleep.
- Press the ▶ and ▲/▼button to select On/Off.
- Repeatedly press the MENU or button to return to normal TV viewing.
Note :
a. ON time function works only in standby mode.
b. To cancel the set On/Off time, set the On/Off timer off.
c To view the remaining On/Off time select the Time menu.
d. When you switch the main power Off, the Time is reset and the On/Off time is Off.
e. Timer accuracy is ±15 sec.
Other functions
Sleep timer
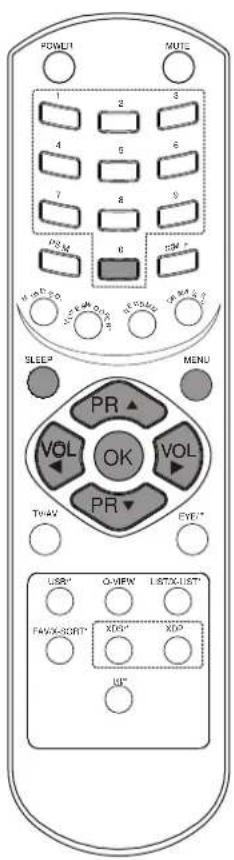
You don't have to remember to switch the set Off before you go to sleep. The sleep timer automatically switches the set to standby after the preset time elapses.
Press the SLEEP button to select the number of minutes. The display ^6 ---- will appear on the screen, followed by 10, 20, 30, 60, 90, 120, 180 and 240. The timer begins to count down from the number of minutes selected.
Note
a. To view the remaining sleep time, press the SLEEP button once.
b. To cancel the sleep time repeatedly press the SLEEP button until the display ---- appears.
c. When you switch the set off, the set releases the preset sleep time.
X-SORT (option)
You can select the different programmes and add them into different categories (Music, Movies, News, Drama).
Press X-SORT button on the remote to switch On/Off the X-SORT function.
X-Sort On Sel: Music
text_image
POWER MUTE 1 2 3 4 5 6 7 8 9 PWM 6 PWM SLEEP MENU PR VOL OK VOL TWAV EYE" USB" O-VIEW LIST/X-UST" FAW/K-SORT" XOS" XIO" US"Adding a program to a desired category
- Press the X- LIST button to display the list of the programme on the screen.
- Use ▲/▼or ◀/buttons to scrolls between the programmes and then press OK to select the desired programme.
- Press appropriate coloured key to add the selected programme in the desired category. Press again the coloured buttons to F RE E the programme from the X-Sort Categories.
X-Sort List
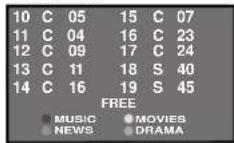
- Red button-For MUSIC programmes category.
- Green button- MOVIES programmes category.
- Yellow button-NEWS programmes category.
- Blue button- DRAMA programmes category.
If X-Sort is On, Press the coloured key repeatedly to switch to the next programme in the same group.
When X-SORT is On:
MUSIC (RED KEY) : Selects MUSIC channels group.
MOVIES (GREEN KEY) : Selects MOVIES channels group.
NEWS (YELLOW KEY) : Selects NEWS channels group.
DRAMA (BLUE KEY) : Selects DRAMA channels group.
PR+/- keys also change the channel for selected group only.
Note: X- LIST, X-SORT keys works only in RF mode (TV mode).
Other functions
Special
text_image
POWER MUTE 1 2 3 4 5 6 7 8 9 PMA 0 SW* SLEEP MENU PR VOL OK VOL TWAV EYE# USR* O-MEN LISTA-UST* FAVX-SORT* XOS* XD* US*On screen language selection (option)
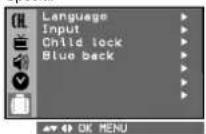
The menu can be displayed on the screen in desired language. First select your language.
- Press the MENU button and then ▲▼button to select the Special menu.
- Press the ▶ button and then the ▲/▼ button to select language in pull down menu.
- Press OK button. All the On screen displayed will appear in the selected language.
- Repeatedly press the MENU or viewing. Button to return normal TV viewing.
TV and AV Input (option)
Input can be set to TV or AV mode. AV mode is used when a videocassette recorder (VCR), or other equipment connected to the set.
Note: When a VCR is connected via the aerial socket; the set is used in TV mode. See the connection of external equipment' section.
- Press the menu button and then/▼ button to select the special menu
- Press the ▶button and then ▲/▼ button to select Input.
- Press the ▶ button and ◆ to select TV, AV1, AV2 (option), Component (option)
Note: Avoid giving input at Lout or Rout socket on the back of the set.
To return TV mode, press the ▲/▼ or NUMBER button. Alternatively you can select th TV or AV mode by pressing the TV/AV button on remote or by pressing OK / -□ button on front panel of TV set.
Child lock
The child lock can be set so that the remote control handset is needed to control. This feature can be used prevent unauthorized viewing.
- Press the MENU button and the ▼ button to select the special menu
- Press the ▶button and then ▲/▼ button to select the child lock.
- Press the ▶ and ▲/▼button on the remote control handset to select On.
- Repeatedly press the MENU or ◀ button to return to normal TV viewing.
With the lock On, the display Child Lock On appears on the screen if any button on the front panel is pressed while viewing the TV.
Note: The display Child Lock On will appear on the screen if any button on the front panel is pressed while displaying the menus.
Blue Back
If you select On on the blue back pull-down menu, the blue background appears on the screen when there is no or poor signal. 1. Press the MENU button and the ▲/▼ button to select the special menu.
- Press the ▶ button and then ▲/▼ button to select the Blue back.
-
Press the ▶ and ▲/▼ button on the remote control handset to select On.
-
Repeatedly press the MENU or ◀ button to return to normal TV viewing.
AVL (Auto Volume Leveler) (option)
If you select AVL On, the set automatically keeps On an equal volume level even if you change programmes.
- Press the MENU button and then ▲/▼ button to select the Special menu.
- Press the ▶ button and then▲/▼ button to select AVL
- Press the ▲/▼button to select On or Off on the AVL. Pull-down menu.
- Press the MENU button to return to normal TV viewing.
Connection of external equipment

flowchart
graph TD
    A["VCR"] --> B["Switch 1"]
    A --> C["Switch 2"]
    D["VCR"] --> E["Switch 3"]
    D --> F["Switch 4"]
    G["VCR"] --> H["Switch 5"]
    G --> I["Switch 6"]
    J["VCR"] --> K["Switch 7"]
    J --> L["Switch 8"]
    M["VCR"] --> N["Switch 9"]
    M --> O["Switch 10"]
    P["S-VIDEO VCR"] --> Q["Switch 11"]
    P --> R["Switch 12"]
    S["S-VIDEO VCR"] --> T["Switch 13"]
You can connect additional equipment, such as VCRs, camcorders etc. to your set. Here shown may be some what different from your set.
Aerial socket
- Connect the RF out socket of the VCR to the aerial socket on the back of the set.
- Connect the aerial cable to the RF aerial in socket of the VCR.
- Store the VCR channel on the programme number 0 using the 'Manual programme tuning' section.
- Select the programme number where the VCR channel is stored.
- Press the PLAY button on the VCR.
Audio / Video in / out sockets (option)
- Connect the audio/video out sockets of the VCR to audio/video in sockets of the set and in sockets of the VCR to out sockets of the set.
- If the VCR is connected to the AV sockets on the set, press the TV/AV button to select AV1, AV2 (option) or AV3 (option).
- Press the PLAY button on the VCR.
The VCR playback picture appears on the screen.
You can also record programme received by the TV on video tape via audio/video out sockets.
Euro scart socket (option)
- Connect the Euro scart socket of the VCR to the Euro scart socket of the set.
- Press the PLAY button on the VCR. If your VCR outputs a switching voltage when connected to Euro scart socket, the set will switch to AV 1 mode automatically. But if you want to keep on watching TV mode, press the ▲/▼ NUMBER buttons.
Otherwise press the TV/AV button on the remote control handset to select AV1. The VCR playback picture appears on the screen.
You can also record programme received by the TV on video tape.
Note : Signal type RGB, i.e. the signals red, green and blue can only be selected for the Euro scart socket. These signals are transmitted, for example, by a pay TV decoder, game machine or photo CD unit, etc.
S-video / Audio in sockets (S-AV) (option)
When connecting an S-VIDEO VCR to the S-VIDEO socket, the picture quality will be further improved.
- Connect the S-VIDEO socket of the VCR to the S-VIDEO socket of the set.
- Connect the audio cable from the S-VIDEO VCR to the AUDIO sockets of the set.
- Select S-VIDEO by pressing the TV/AV button repeatedly.
- Press the PLAY button on the VCR. The VCR playback picture appears on the screen.
Connection of external equipment
flowchart
graph TD
    A["Satellite"] --> B["COMPONENT"]
    B --> C["Central Device"]
    C --> D["Terminal"]
    D --> E["Control Unit"]
Component in sockets (option)
- Connect the COMPONENT video output sockets (Y Cb Cr/ Y Pb Pr) of the COMPONENT to the COMPONENT INPUT sockets (Y Pb Pr) on the set.
- Connect the audio cable from the COMPONENT to AUDIO IN socket of AV1.
- Press the TV/AV button to select COMPONENT.
- Press the PLAY button on the COMPONENT. The COMPONENT playback picture appears on the screen.
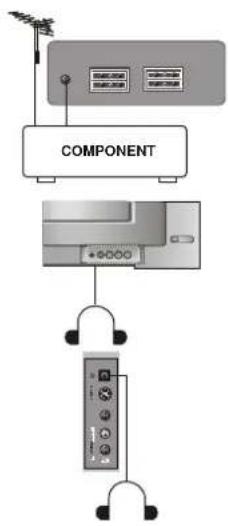
Headphone socket (option)
Some models which have a headphone socket can perform this function.
Insert the headphone plug to the headphone socket of the set. You can listen to the sound through the headphone. In this case main speaker sound will cut off. In woofer models when you plug headphone, woofer speaker is On.
If you press the MUTE button, the sound from the headphone is switched Off.
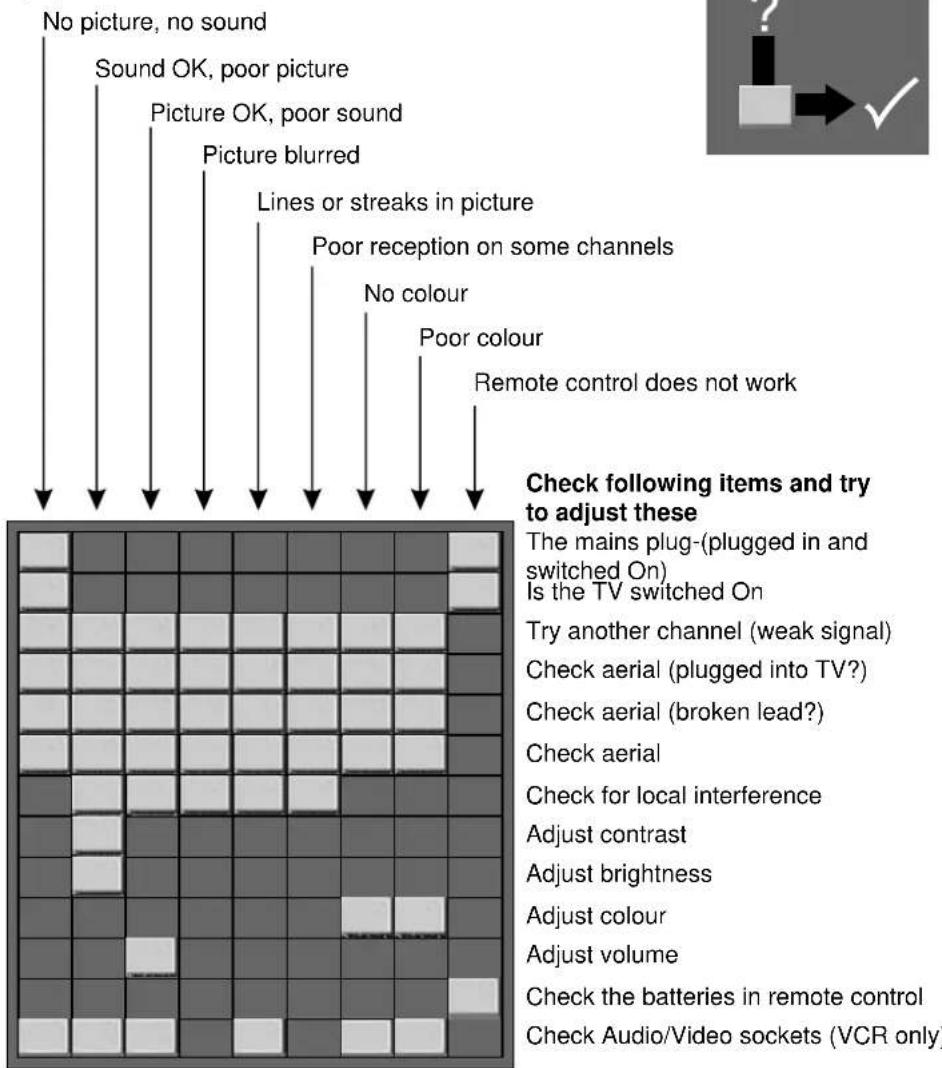
Troubleshooting check list
Symptoms
text_image
No picture, no sound Sound OK, poor picture Picture OK, poor sound Picture blurred Lines or streaks in picture Poor reception on some channels No colour Poor colour Remote control does not work Check following items and try to adjust these The mains plug-(plugged in and switched On) Is the TV switched On Try another channel (weak signal) Check aerial (plugged into TV?) Check aerial (broken lead?) Check aerial Check for local interference Adjust contrast Adjust brightness Adjust colour Adjust volume Check the batteries in remote control Check Audio/Video sockets (VCR only)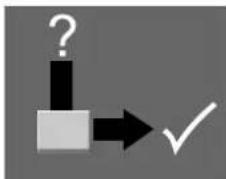
text_image
?NOTE :
i) Colour patch might appear in your TV set if you rotate or shift the position of the set while it is On or in standby mode. If patch appears in your TV set try the following before calling your service centre or dealer. Place the TV set in desired position and switch it Off by the main power switch. Allow the set to cool down for at least 30 minutes and then switch it On. The degaussing circuit (inbuilt) in your set will remove the patch automatically. Please call service only in case this operation does not help. ii) In case of no sound on all channels, check for system. It should be 'BG' for India. In case of some other system select 'BG' and do Auto Programming.
WARRANTY CARD
This LG Colour T.V. comes with a 12 months warranty on all parts from the date of purchase of the product, provided always that the warranty card bears the rubber stamp, date and signature of our Authorised Dealer.
Terms and Condition
- The warranty is confined to the first purchaser of the Colour Television only and is non-transferable.
- Repairs & replacements will be carried out by the dealer from whom the product has been purchased, or through the Authorized Service Centers of LGEIL. In case the customer shifts the place of residence during warranty period, it is advised to contact Authorized Service Centre directly or call our help line.
- Repairs under warranty shall be carried out by an authorized service personnel only. The details of centralized help lines are attached.
- For units installed beyond municipal limits of the jurisdiction of company's Authorized Service Center, it is responsibility of the purchaser to contact the nearest authorized service center and bring the unit to the authorized service center at its own cost and risk. All expenses incurred in collecting the units or parts thereof from the company's authorized service center, as well as expenses incurred with deputizing of service personnel/technicians towards conveyance and other incidentals etc. will be borne by the customer. Local Charges for transportation and handling charges may vary from location to location. Customers are advised to verify before. In case the customer desires to bring the unit on its own to the Authorized Service Centre, the same shall be at its own risks and consequences.
- The concerned authorized service center will advise the customer whether to effect the repairs at site or at the authorized service center.
- Call registered with the centralized helpline/Authorized service center, wherein only cleaning of the unit/parts in the unit due to dust accumulation on portions of the unit, general explanations/returning, are not to be considered as defects.
- In case of repairs or replacement of any part/s of the unit, this warranty will thereafter continue and remain in force only for the unexpired period of the warranty. Replacement of parts would be purely at the discretion of LGEIL alone. In case the replacement of the entire unit is being made, (subject to the sole discretion of LGEIL), the same model shall be replaced and in the event such model has been discontinued, it shall be replaced with the model of price equivalent at the time of purchase.
- In case of any damage to the product / customer abuse/ repairs by un-authorised personnel/ misuse detected/ by the Authorized Service Center personnel, the warranty conditions are not applicable and repairs will be done subject to availability of parts and on a chargeable basis only.
- This warranty shall not cover any consequential or resulting liability, damage or loss to property or life arising directly or indirectly out of any defect in the Colour Television. The company's obligation under this warranty shall be limited to repair or providing replacement of defective parts only under the warranty period.
- The company or its Authorized Service Center reserves the right to retain any part/s or component replaced at its discretion, in the event of a defect being noticed in the equipment during warranty period.
- While the company will make every effort to carry out repairs at the earliest, it however is made expressly clear that the company is under no obligation to do so in a specified period of time.
- Warranty does not cover accessories external to the equipment supplied by the dealer.
- If any coloured internal or external components are replaced, there will be commitment to ensure that the shades match with the original or other components. The replaced shades, patterns, tints may vary from the customer's unit due to continuous usage of the unit. Any matching components changed at customer's request will be on chargeable basis except the component which actually needed
Warranty is not applicable in any of the following cases :
- The warranty card is not completed properly at the time of purchase. 2. The completed warranty card is not presented to authorized service personnel at the time of service of the product. 3. The product is not operated according to instructions given in the Operating Instruction Booklet. 4. Defects are caused by improper or reckless use, which shall be determined by the company personnel. 5. Any repair work is carried out by persons other than authorized service personnel. 6. Defects are caused by due to causes beyond control like lightening, abnormal voltage, acts of God or while in transit to service center or purchaser's residence.
- The warranty is not valid in case, the serial number is deleted, defected or altered. 8. Damage to the product or any part/s due to transportation or shifting is not covered by warranty. 9. This warranty will automatically terminate on the expiry of the warranty period of 12 months, even if the Product may not be in use for any time during the warranty period for any reason. 10. Only courts in state of Delhi and places where LGEIL has its branch office shall have the jurisdiction for settling any claims, disputes arising under the warranty
CUSTOMER'S COPY
MODEL NO.:
DATE OF PURCHASE :
text_image
CUSTOMER NAME & ADDRESS _______________________________Customer's Signature
SERIAL NO.:
text_image
DEALER NAME & ADDRESS LG TEL: TEL:Dealer's Signature
This Card is valid only if it is filled in and stamped by our Authorised dealer on the date of purchase.
List of Branches with Address & Telephone No.
Branch Address
Ahmedabad LGEIL, 233-234, Platinum Plaza, No Judges Bunglow Cross Road, Bodakdev, Ahmedabad - 54, Tel: 40040013-14
Asansol LGEIL, Block-E.Ist Floor, P C Chattarjee Market, Rambandhu Tala, GT Road (E) Asansol-713303.
Tel: 3292009/3292010 (Fax No.) 2215170
Aurangabad LGEIL, 302 CIDCO No 3, Opp Hotel Ramgiri, Jalna Road, Aurangabad - 431003. Tel: 5625705/ (Fax No.) 2474055/32095436/ 32095437/32095438
Bangalore LGEIL, No. 914, 2nd Floor, Shri Venkateshwara Complex, Opp. IBP Petrol Pump, 80 feet Road, 6th Block, Koramangala - Bangalore - 560095.Tel: 41145145/41144750/41144751
Bhopal LGEII., 2nd Floor, Alankar Complex, Plot No.10, M.P. Nagar Zone - II, BHOPAL -PIN 462011, Tel: 4262847/4229861(Fax No.) 4262848
Bhubaneshwar LGEIL, Plot No.02.1st Floor, Bapuji Nagar. Bhubaneshwar- 751009, Tel: 2531430, 2534280
Calcutta LGEIL, 1, Ho-Chi-Min-Sarani, 6th Floor, Metro Towers, Calcutta-700071, Tel: 22883254 (Fax No.) 22883251.
Chandigarh LGEIL, SCO No. 142-143, 3rd Floor, Sector-34A, Chandigarh.-160002.Tel: 5087389:90 (Fax No.) 5089107
Chennai LGEIL, AA11, 2nd Avenue, Fatima Tower, Anna Nagar West, Chennai-600040, Tel: 65510501-04 (Fax No.) 26203506
Cochin LGEIL, 40/1270, Vasudeva Buildings, T.D. Road, Emakulam Cochin-682011, Tel: 2369765, 2369743, 2370744, 4027444, 4027555, (Fax No.) 2360977
Coimbalore LGEIL, 250A, Sanganur Main Road, Kannappa Nagar, Coimbalore-641027.Tel: 2332197, 2332195
Delhi LGEIL, A-27.Mohan Co-operative,Industrial Estate, New Delhi. Tel: 26991412/11/13. (Fax No.)26991410
Dehradun LGEIL, M - 22. Commercial Motors Compound, Mohabewala Indl. Area, Delhi-Saharanpur Road, Dehradun (Uttarakhand), Tel: 2644213/283
Gurgaon LGEIL, 2nd Floor, A Block, Centre Point Bldg, Sushant Lok, PH-I. Gurgaon-122001, Tel: 4047461-62-63/4272867. (Fax No.) 4047460
Ghaziabad LGEIL, J-10, RDC Rajnagar Ghaziabad - 201001.Tel: 9811354152/3/64/65/266
Guwahati LGEIL, Shanlineer Bhawan, C K Aggarwal Path, Chenikurthi, Guwahati-781003, Tel: 2663895/2666958/2665983/2668984-
Hyderabad LGEIL, 1st Floor, Survey No.54, Pulla Reddy Building, Vikarampuri Main Road Kharkhana, Secunderabad -500009, Tel: 27207504,05,06/27204094(Fax No.) 27201462
Hubli LGEIL,1st Floor, Above Bellad & Co., Near Bannigida Bus stop, Gokul Road Hubli-580030, Tel: 4250251/52
Indore LGEIL, 3rd Floor, 304 Bansi Trade Centre.581/5 M.G. Road, Indore-452003, Tel: 4065523-24, (Fax No.) 4082157
Jaipur LGEIL, B-71, Sahakar Marg, Lal Kothi Scheme, Jaipur-302015, Tel: 5111118/5113028/5105392 (Fax No.) 5111540
Jammu LGEIL Plot No -52 Yard No 6 Transport Nagar Narwal Jammu-180006 Tel: 2477420 2477419 2474396 2474384
Jodhour I GEIL. 22 (1-A)/21(2-B)/2. RIICO Heavy Industrial area. Jodhour - 342003. Tel: 2742384.392 (Fax No.) 5120030
Karnal LG ELECTRONICS INDIA PVT LTD. Super Tyre Building, Near New Anai Mandi. Opp , New World Restaurant.
G.T Road Karnal, Havana. Tel: 2219201 (Fax No.) 2219202
Lucknow I GFII. R-537 Hari Kuni. Keshav Nagar. Sitanur Road Lucknow -226020 Tel: 2757538.39 2759121/Fax No 1 2757559
Ludhiana LGEIL. Village Jhande. Near Badowal Railway Station. Ooo Ferozpur Road Ludhiana.. Tel: 2804412 - 19
Mumbai/N & Si LGEII Trade Star 4th Floor A Wing J.B Nagar Andheri Kurla Road Andheri (F) Mumbai-400059
Tel: 28352882-2887. (Fax No.) 28352889
Nagpur LGEIL, 5A,Road No.13,Behind Msrtc Workshop, MIDC Hinga, Nagpur-440016.Tel: 235120, 235122. (Fax No.) 234401
Patna LGEIL. 2nd Floor. Ankit Chandra Deep Complex. Bander Bageecha. Near Samrat Hotel. Patna- 800001.
Tel: 3298714. (Fax No.)2541845
Duna LCEII 105/106 Premium Point GM Road, Onn Modern High School, 2nd Floor, Shivii Mary, Duna A11005
Tel: 66030100 732/733/734/735. (Fax No.) 66030740
Raikot IGFII Sanskruti Apartment Onn Dr Amherkar Rhawan Near Atithi Chowk Akshar Road Raikot - 360004
Tel: 2481499 (Fax No.) 2467692
Bajur LGEIL 613 to 616 6th Floor Offizo Magneto - The Mall, GE Road, Bajur-Pln - 492001
Tel: 4053171/4037470 (Fax No.) 4038426/10/11
Ranchi LGEILI, 402.Commerce Tower. Opp. Gel Church Complex. Main Road. Ranchi. Tel: 3294026. 2331815
Sural I GEII 1001-1004 Ascon Plaza 2nd Four Anand Mahal Road Behind Rhulka Bhavan School Adaian Surat-395009
Tel: 2730982/83. (Fax No.)2730984
Thane I GFI . Gall Shop No - 206.207 . 2nd Floor. Sai Plaza . Above Viay Sales Onn. Cine Wonder Mall. Ghodbunder Road.
Thane(West)-400607.Tel: 25472633/2637. (Fax No.) 25472602
Varanasi LGEIL. Pama Complex. DLW. Lahartara Road. Shivdaspur. Manduadin. Varanasi UP-221002.Tel: 2373432/36/37
Viiavwada | GFII Door No 32.2/1-7 Ratnamamba Street Praiasakti Nagar Viiavwada . 520010 Andhra Pradesh
Tel: 2497283/87. (Fax No.) 2497284
Warangal LGEIL. House No. 1-8-598/1. 1st Floor. Beside HDFC Bank Nakkaloulla. Hanamakonda-506001 (Warangal). Tel: 2551453
Kozhikōde LGEIL. 3/568.Thripuri Building, Wavanadu Road, 1st Floor, Near K.S.F.E. East Nadakkavu, Calicut-11. Pin-673011.
Tel:2366755. 2366756. 2366678 (Fax No.) 2766678
Email : serviceindia@lge.com
Customer Information Center
For any query related to the after sales service you may please contact us on the numbers listed below.
text_image
LG 24 x 7 CALL CENTER 1800-180-9999 CALL (Toll Free) 5757554 SMI (Send SMS) www.lg.com serviceindia@lge.com CLICK
LG Electronics India Pvt. Ltd.
(Regd. Off.) : A-27, Mohan Cooperative Industrial Estate,
Mathura Road, New Delhi -110044


LG
Life's Good

24 x 7 CALL CENTER

1800-180-9999
(Toll Free)

5757554
(Send SMS)

www.ig.com
serviceindia@lge.com