21FX6AGE - TV LG - Free user manual and instructions
Find the device manual for free 21FX6AGE LG in PDF.


User questions about 21FX6AGE LG
0 question about this device. Answer the ones you know or ask your own.
Ask a new question about this device
Download the instructions for your TV in PDF format for free! Find your manual 21FX6AGE - LG and take your electronic device back in hand. On this page are published all the documents necessary for the use of your device. 21FX6AGE by LG.
USER MANUAL 21FX6AGE LG
Colour Television OWNER'S MANUAL

УКРСЕРТРЕА

BZ03
Please read this manual carefully before operating your set. Retain it for future reference.
Record model number and serial number of the set.
See the label attached on the back cover and quote this information to your dealer when you require service.
Model number :
Serial number :
Contents
Installation 3
Location and function of controls 4
Remote control handset
Battery installation / Front panel
Basic operation 8
On and off / Programme selection
Volume adjustment / Quick view
Mute function
On screen language selection (option)
On screen menus 9
Menu selection
Setting up TV stations 10
Auto programme tuning
Manual programme tuning
Programme edit
Favourite programme
Calling the programme table
Picture adjustment 16
PSM (Picture Status Memory)
CSM (Colour Status Memory)
Picture adjustment / Eye (option)
Turbo picture selection (option)
Sound adjustment (option) 18
SSM (Sound Status Memory) / Sound adjustment
X-WAVE (Wireless Sound) (option)
Turbo sound selection (option)
Sound output selection (option)
Stereo/Dual reception (option)
NICAM reception (option)
Time setting 21
Setting the clock
Setting the On/Off timer
Auto off
Other functions 22
TV and AV modes / Auto AV switching (option)
Child lock / Blue back (option)
Games (option) / Sleep timer
Connection of external equipment 25
Aerial socket
Audio/Video in/out sockets (option)
Euro scart socket (option)
S-video/Audio in sockets (S-AV) (option)
Component in sockets (option)
Headphone socket (option)
Troubleshooting check list 27
Installation
Power
This set operates on an AC mains supply, the voltage is as indicated on the label on the back cover. Never apply DC power to the set. In the event of thunderstorms or powercuts, please pull out the aerial and mains plugs.
Warning
To prevent fire or shock hazard, do not expose the set to rain or moisture.
Do not place anything containing liquid on top of the set, this may cause a fire or could give an electric shock.
Service
Never remove the back cover of the set as this can expose you to very high voltage and other hazards. If the set does not operate properly, unplug it and call your dealer.
Aerial
Connect the aerial cable to the socket marked 75 on the back cover. For the best reception an outdoor aerial should be used.
Location
Position your set so that no bright light or sunlight falls directly onto the screen. Care should be taken not to expose the set to any unnecessary vibration, moisture, dust or heat. Also ensure that the set is placed in a position to allow a free flow of air. Do not cover the ventilation openings on the back cover.
Location and function of controls
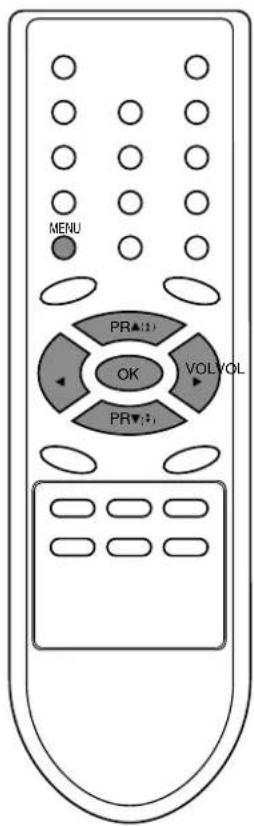
All the functions can be controlled with the remote control handset. Some functions can also be adjusted with the buttons on the front panel of the set.
Remote control handset
Before you use the remote control handset, please install the batteries. See the next page.
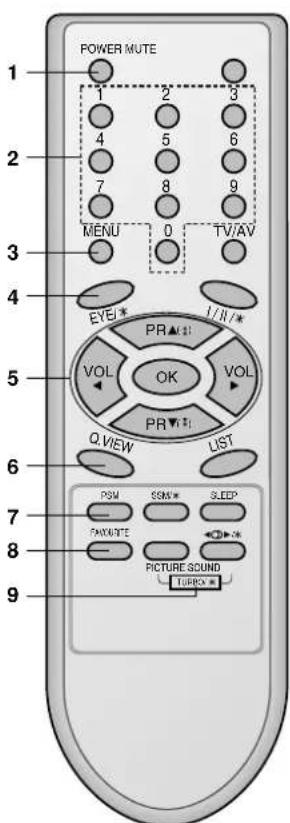
text_image
POWER MUTE 1 2 3 1 4 5 6 2 7 8 9 MENU 0 TV/AV EYE PR I/I/I* VOL OK VOL Q VIEW LIST PSM SSN* SLEEP PAYOUT PICTURE SOUND TURBO- POWER switches the set on from standby or off to standby.
-
NUMBER BUTTONS switches the set on from standby or directly select a number.
-
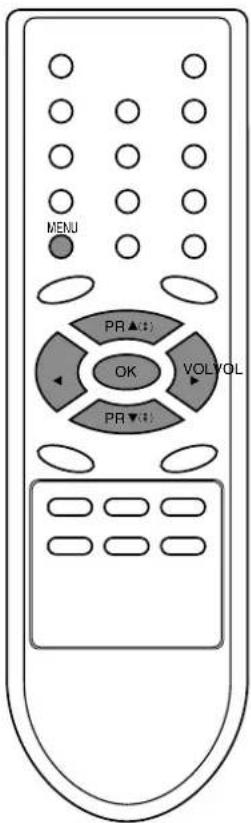
MENU selects a menu.
-
EYE/ * (option) switches the eye function on or off.
-
▲(▲) / ▼(▼) (Programme Up/Down) selects a programme or a menu item. switches the set on from standby. scans programmes automatically. ◀/▶ (Volume Up/Down) adjusts the volume. adjusts menu settings. OK accepts your selection or displays the current mode.
-
Q.VIEW returns to the previously viewed programme.
-
PSM (Picture Status Memory) recalls your preferred picture setting.
-
FAVOURITE selects a favorite programme.
-
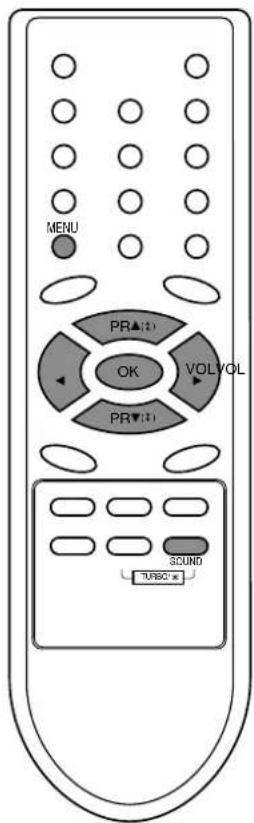
TURBO PICTURE / SOUND BUTTON (option) selects Turbo picture and sound.
Location and function of controls
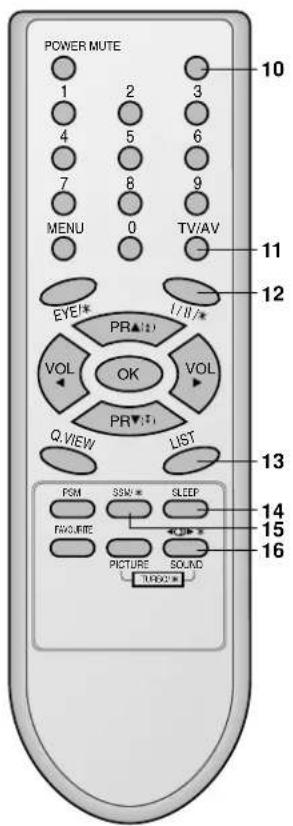
10. MUTE
switches the sound on or off.
11. TV/AV
selects TV or AV mode.
switches the set on from standby.
12. I/II/\* (option)
selects the language during dual language broadcast. (option) selects the sound output.
13. LIST
displays the programme table.
14. SLEEP
sets the sleep timer.
15. SSM/\* (Sound Status Memory) (option)
recalls your preferred sound setting.
16. SURROUND (◀○▶/★) (option)
selects surround sound.
\*: No function
COLOURED BUTTONS : These buttons are used for teletext (only TELETEXT models) or programme edit.
Battery installation
The remote control handset is powered by two AAA type batteries. To load the batteries, turn the remote control handset over and open the battery compartment. Install two batteries as indicated by the polarity symbols (⊕ and ⊙) marked inside the compartment.
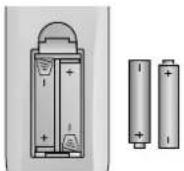
Note : To avoid damage from possible battery leakage, remove the batteries if you do not plan to use the remote control handset for an extended period of time.
text_image
POWER MUTE 1 2 3 4 5 6 7 8 9 MENU 0 TV/AV EYE PR ▲ I / II / * VOL OK VOL Q VIEW PR ▼ LIST LIST PSM SSW Sleep FROJERE ◯ ◯ ◯ ◯ ◯ ◯ ◯ ◯ ◯ ◯ ◯ ◯ ◯ ◯ ◯ ◯ ◯ ◯ ◯ ◯ ◯ ◯ ◯ ◯ ◯ ◯ ◯ ◯ ◯ ◯ ◯ ◯ ◯ ◯ ◯ ◯ ◯ ◯ ◯ ◯ ◯ ◯ ◯ ◯ ◯ ◯ ◯ ◯ ◯ ◯ ◉ PICTURE SOUND TURSDLocation and function of controls
Front panel
Location and function of controls
Front panel
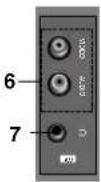
21FC1 series
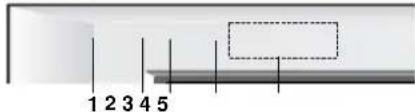
text_image
1 2 3 4 517/21FA3 series
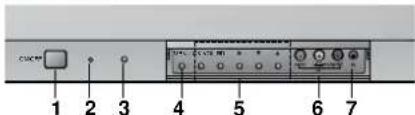
text_image
CUCP 1 2 3 4 5 6 715/21Q9 series
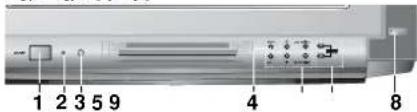
text_image
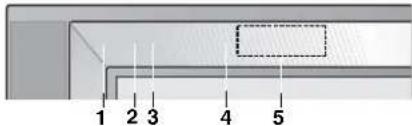
1 2 3 5 9 4 821FE6 series
text_image
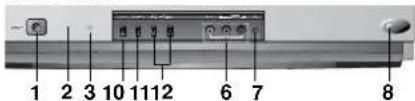
1 2 3 4 521Q6 series
text_image
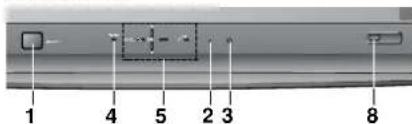
1 2 3 10 11 12 6 7 821Q4 series
text_image
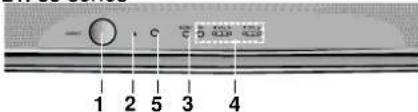
1 4 5 2 3 821FJ5 series
text_image
- ○ C 0 D 1 2 5 3 421FC9/21FD6 series
text_image
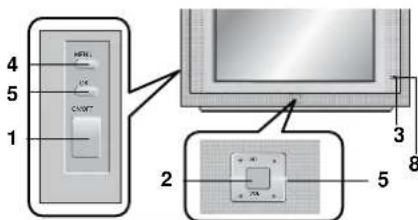
4 5 1 MFNL OK CNOT 2 3 8 5-
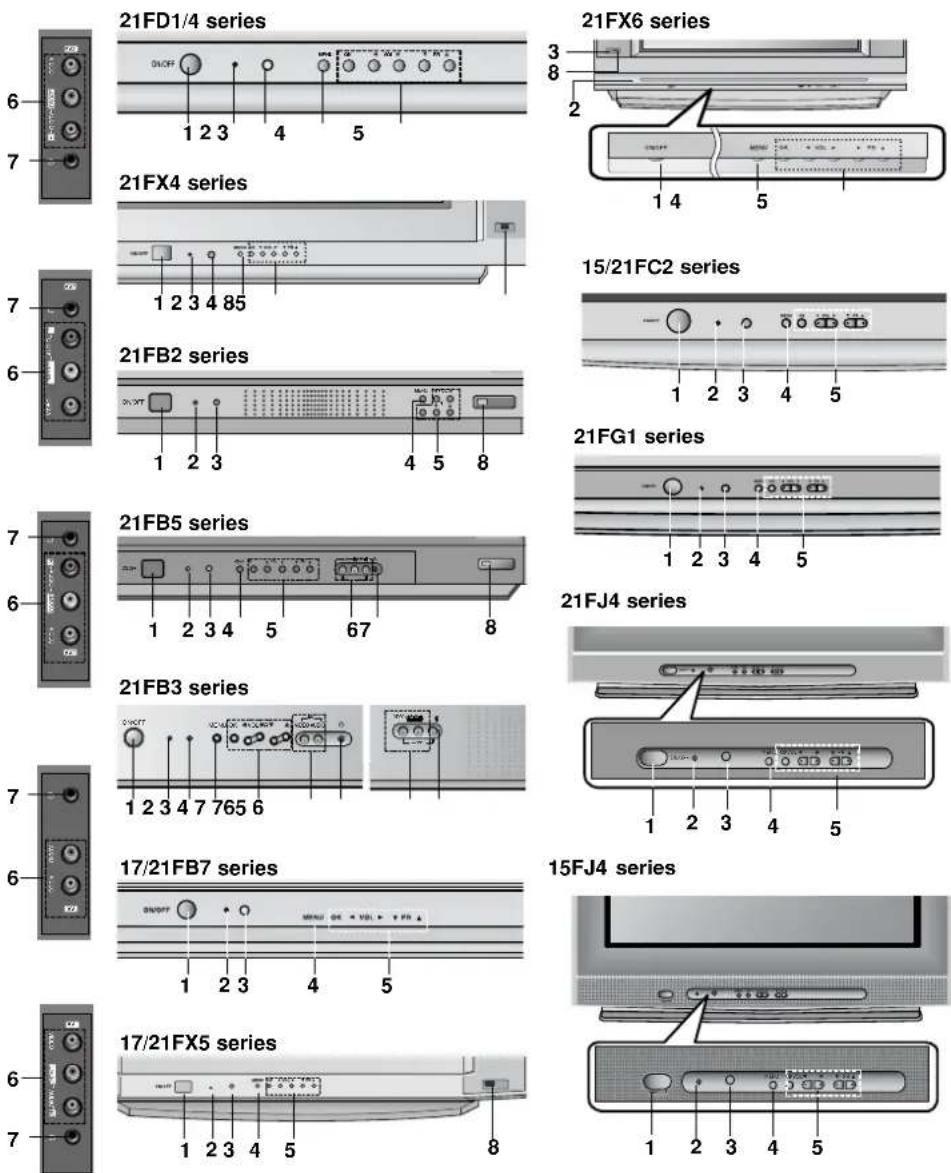
MAIN POWER (ON/OFF) switches the set on or off
-
POWER/STANDBY INDICATOR illuminates brightly when the set is in standby mode. dims when the set is switched on.
-
REMOTE CONTROL SENSOR Note : Only use the supplied remote control handset. (When you use others, they'll be not able to function.)
-
MENU (option) selects a menu.
-
OK (option) accepts your selection or displays the current mode.
◀ / ▶ (Volume Up/Down) (option) adjusts the volume. adjusts menu settings. ▲ / ▼ (Programme Up/Down) (option) selects a programme or a menu item. switches the set on from standby.
-
AUDIO (or AUDIO-L/R)/VIDEO IN SOCKETS (AV or AV2) (option) Connect the audio/video out sockets of external equipment to these sockets.
-
HEADPHONE SOCKET (option) Connect the headphone plug to this socket.
-
EYE (option) adjusts picture according to the surrounding conditions.
-
TURBO SOUND / PICTURE (option) switches Turbo sound or Turbo picture function on or off.
-
TV/AV (option) selects TV or AV mode. clears the menu from the screen. switches the set on from standby.
-
(Function) (option) selects volume, EYE (option), picture items or brief auto programme while the menus not display.
-
- / - (▲ / ▼) (option) adjusts the function or selects a programme. switches the set on from standby.
Note : Shown is a simplified representation of front or side panel. Here shown may be somewhat different from your set.
Basic operation
On and off
- Press the main power button to switch the set on.
- If the set is in standby mode, press the POWER, ▲▲▼, TV/AV or NUMBER buttons on the remote control handset to switch it on fully.
- Press the POWER button on the remote control handset. The set reverts to standby mode.
- Press the main power button again to switch the set off.
Note : If, while the set is switched on, the mains plug is disconnected the set will switch to standby or power on when the mains plug is replaced in the mains power socket.
Programme selection
You can select a programme number with the ▲/▼ or NUMBER buttons.
Volume adjustment
Press the ◀/▶ button to adjust the volume.
Quick view
Press the Q.VIEW button to view the previous programme you were watching.
Mute function
Press the MUTE button. The sound is switched off and the display appears.
You can cancel it by pressing the MUTE, ◀ / ▶, SSM★, I/II★, TURBO SOUND button.
On screen language selection (option)
The menu can be displayed on the screen in desired language. First select your language.
- Press the MENU button and then ▲/▼ button to select the Special menu.
- Press the ▶ button to select Language.
- Press the ▶ button and then ▲ ▼ button to select your desired language. All the on screen displays will appear in the selected language. Press the OK or ▶ button to select the Special menu.
- Repeatedly press the MENU button to return to normal TV viewing.
On screen menus
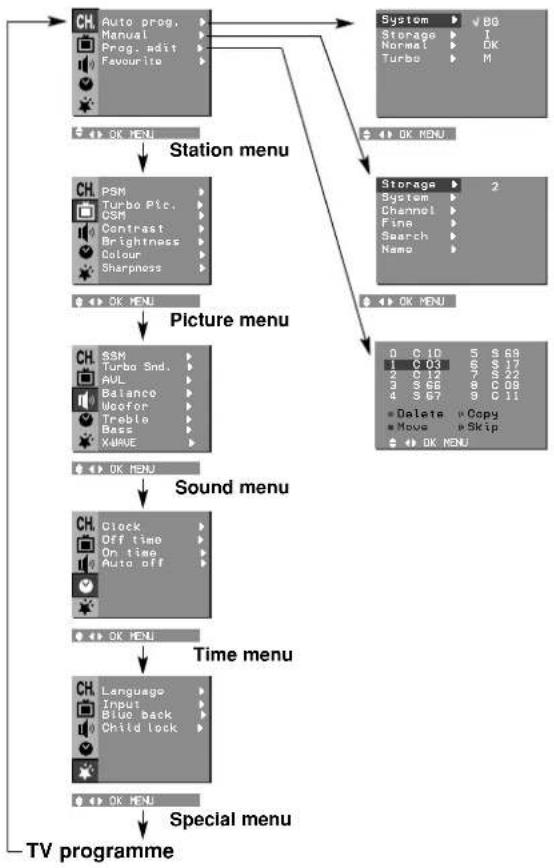
The dialogue between you and your set takes place on screen with an operator menu. The buttons required for the operating steps are also displayed.
Menu selection
- Press the MENU button and then ▲/▼ button to display each menu.
- Press the ▶ button and then ▲ △ ▼ button to select a menu item.
- Press the ▶ button to display the sub menu or the pull-down menu.
- Change the setting of an item in the sub or pull-down menu with
◀ 3 | ▶ for ▲ ∥ ▼.
You can move to the higher level menu with OK or ▶ button and to move to the lower level menu press the ▶ button.
Note :
a. In mono models, the Sound menu does not appear.
b. In some models. Turbo Pic. will not display in the Picture menu.
c. In some models, Turbo.Snd., AVL, Balance, Woofer, X-WAVE
or Treble, Bass will not display in the Sound menu.
d. In some models, Language, Blue back, Game, Booster will not display in the Special menu.
flowchart
graph TD
    A["Special menu"] --> B["Time menu"]
    B --> C["Sound menu"]
    C --> D["Picture menu"]
    D --> E["Station menu"]
    E --> F["TV programme"]

    subgraph Special menu
        G["Auto prog. Manual Prog. edit Favourite"]
        H["System BG Storage I Normal OK Turbo M"]
    end

    subgraph Time menu
        I["Language Input Blue back Child lock"]
        J["Clock Off time On time Auto off"]
        K["Balance Woofor Treble Bass X4AVE"]
        L["OK MENU"]
    end

    subgraph Sound menu
        M["Clock Off time On time Auto off"]
        N["OK MENU"]
    end

    subgraph Picture menu
        O["SSM Turbo Snd. AVL Balance Woofor Treble Bass X4AVE"]
    end

    subgraph Station menu
        P["PSM Turbo Plc. CSR Contrast Brightness Colour Sharpness"]
    end

    subgraph TV programme
        Q["OK MENU"]
    end

    style Special menu fill:#f9f,stroke:#333
    style Time menu fill:#ccf,stroke:#333
text_image
MENU PR▲12 OK VOLVOL PR▼1Setting up TV stations
text_image
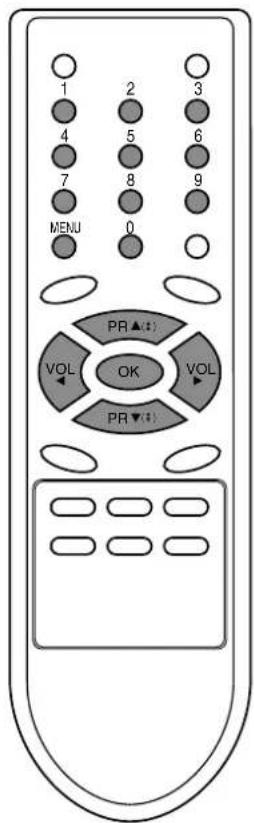
1 2 3 4 5 6 7 8 9 MENU 0 PR ▲(±) VOL OK VOL PR▼(±)Up to 100 TV stations can be stored by programme numbers (0 to 99). Once you have preset the stations, you will be able to use the ▲/▼ or NUMBER buttons to scan the stations you programmed. Stations can be tuned using automatic or manual modes.
Note : In some models up to 200 TV stations can be stored.
Auto programme tuning
All stations that can be received are stored by this method. It is recommended that you use auto programme during installation of this set.
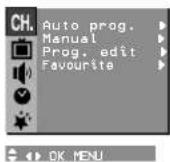
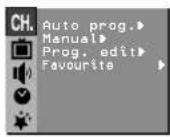
- Press the MENU button to select the Station menu.
- Press the button and then ▲/▼ button to select Auto prog..
- Press the ▶ button to display the Auto prog. menu.
OK MENU
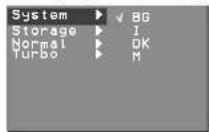
- Press the button. Select a TV system with the ▲/▼ button on the System pull-down menu;
BG : (Asia/New Zealand/M.East/Africa/Australia)
I: (Hong Kong/South Africa)
DK : (East Europe/China/Africa/CIS)
M : (USA/Korea/Philippines) (option)
- Press the OK or ◀ button.
- Press the ▲/▼ button to select Storage.
- Press the ▶ button. Select the beginning programme number with the ◀/▶ button or NUMBER buttons on the Storage from pull-down menu. Any number under 10 is entered with a numeric '0' (or '00') in front of it, i.e. '05' (or '005') for 5.
- Press the OK button.
- Press the ▲/▼ button to select Normal or Turbo.
Option: In some models, you can only select Start.
Note :
a. Turbo is faster than Normal and in some models, these searches will automatically store all receivable stations.
b. If the programmed station has poor quality sound, select the system again in the Manual menu.
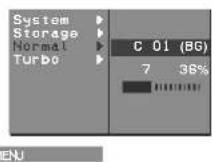
(Normal search)
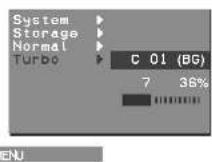
(Turbo search)
- Press the ▶ button to begin auto programming.
All receivable stations are stored.
To stop auto programming, press the MENU button.
When auto programming is completed, the Prog. edit menu appears on the screen. See the 'Programme edit' section to edit the stored programme.
- Repeatedly press the MENU button to return to normal TV viewing.
Setting up TV stations
Auto programme scan
To automatically scan the pictures of stored programmes, press the▲(▲) ▼(▼) button for about 3 seconds. The picture of stored programmes appears on the screen one by one.
To stop auto programme scanning, press any button except VCR buttons.
Manual programme tuning
Manual programme lets you manually tune and arrange the stations in whatever order you desire. Also you can assign a station name with five characters to each programme number.
- Press the MENU button to select the Station menu.
- Press the ▶ button and then ▲/▼ button to select Manual
- Press the ▶ button to display the Manual menu.
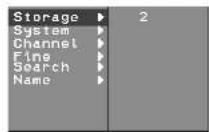
OK MENU
-
Press the ▲/▼ button to select Storage.
-
Press the ▶ button to select the programme number. Select the desired programme number (0 to 99) with the ◀ / ▶ button or NUMBER buttons on the Storage pull-down menu. Any number under 10 is entered with a numeric '0' (or '00') in front of it, i.e. '05' (or '005') for 5.
-
Press the OK button.
-
Press the ▲/▼ button to select System.
-
Press the ▶ button. Select a TV system with the ▲/▼ button on the System pull-down menu;
BG : (Asia/New Zealand/M.East/Africa/Australia)
I: (Hong Kong/South Africa)
DK : (East Europe/China/Africa/CIS)
M : (USA/Korea/Philippines) (option)
-
Press the OK or ◀ button.
-
Press the ▲/▼ button to select Channel.
- Press the ▶ button. Press the ▲ ▼ button to select V/UHF or Cable on the Channel pull-down menu. If possible, select the channel number directly with the number buttons. Any number under 10 is entered with a numeric '0' (or '00') in front of it, i.e. '05' (or '005') for 5.
- Press the OK or ◀ button.
- Press the ▲▼ button to select Search.
- Press the ▶ button. Press the ◀/ ▶ button to commence searching on the Search pull-down menu. If a station is found the search will stop.
- Press the OK button to store it. The display Stored will appear.
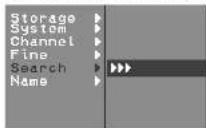
Stored
- To store another station, repeat steps 4 to 15.
- Repeatedly press the MENU button to return to normal TV viewing.
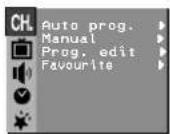
OK MENU
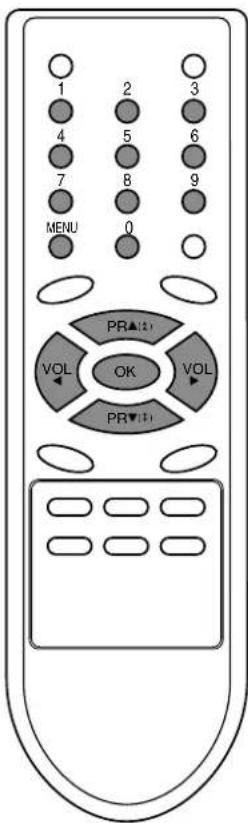
text_image
1 2 3 4 5 6 7 8 9 MENU 0 PR▲(2) VOL OK VOL PR▼(1)Setting up TV stations
OK MENU
text_image
MENU PR ▲:1 OK VOLVOL PR ▼:1Assigning a station name
- Repeat the 'Manual programme tuning' steps 1 to 3.
- Press the ▲/▼ button to select Name.
- Press the ▶ button on the Name pull-down menu.
- Press the ▲ button. You can use a blank, +, -, the numeric 0 to 9 and the alphabet A to Z.
With the ▼ button you can select in the opposite direction. - Select the position by pressing the ◀/▶ button and then take your choice of the second character, and so on.
- Press the OK button.
- Repeatedly press the MENU button to return to normal TV viewing.
Booster (option)
In some models, Booster is an optional function. Only a set with Booster can perform this function.
If the reception is poor at the fringe area of TV signal, select
Booster to On. When the picture condition is good, do not select Booster to On.
1 Repeat the 'Manual programme tuning' steps 1 to 3.
2. Press the ▲/▼ button to select Booster.
3. Press the ▶ button.
4. Press the ▲/▼ button to select On or Off on the Booster pull-down menu.
5. Press the OK button.
6. Repeatedly press the MENU button to return to normal TV viewing.
Setting up TV stations
Programme edit
This function enables you to delete or skip the stored programmes. Also you can move some stations to other programme numbers or insert a blank station data into the selected programme number.
-
Press the MENU button and then ▲/▼ button to select the Station menu.
-
Press the button and then ▲▼ button to select Prog. edit.
-
Press the ▶button to display the Prog. edit menu.
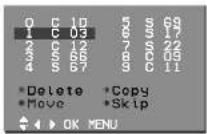
Deleting a programme
-
Select a programme to be deleted with the ▲/▼ or ◀/► button.
-
Press the RED button twice.
The selected programme is deleted, all the following programmes are shifted up one position.
Copying a programme
-
Select a programme to be copied with the ▲/▼ or ◀/► button.
-
Press the GREEN button.
All the following programmes are shifted down one position.
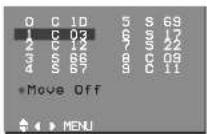
Moving a programme
-
Select a programme to be moved with the ▲/▼ or ◀/► button.
-
Press the YELLOW button.
-
Move the programme to the desired programme number with the ▲/▼ or ◀/▶ button.
-
Press the YELLOW button again to release this function.
Skipping a programme number
-
Select a programme number to be skipped with the ▲/▼ or ◀/▶ button.
-
Press the BLUE button. The skipped programme turns to blue.
-
Press the BLUE button again to release the skipped programme. When a programme number is skipped it means that you will be unable to select it using the ▲/▼ button during normal TV viewing. If you want to select the skipped programme, directly enter the programme number with the NUMBER buttons or select it in the programme edit or table menu.
Repeatedly press the MENU button to return to normal TV viewing.
text_image
1 2 3 4 5 6 7 8 9 MENU 0 PR▲(2) VOLVOL PR▼(5)Setting up TV stations
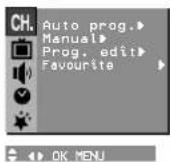
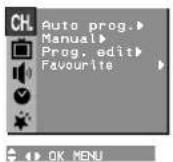
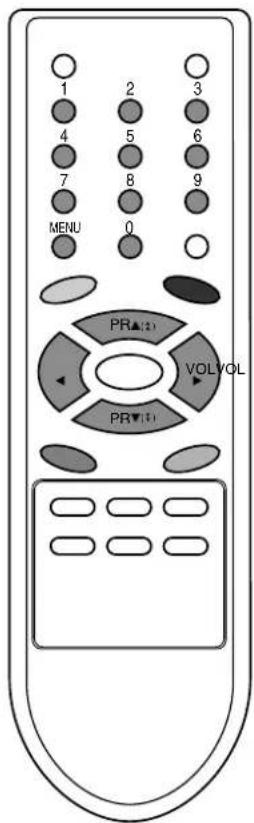
Favourite programme
This function lets you select your favourite programmes directly.
- Press the MENU button to select the Station menu.
- Press the button and then ▲/▼ button to select Favourite.
- Press the ▶ button to display the Favourite menu.
text_image
MENU PR ▲(1) OK VOLVOL PR ▼(1) PUSHARTE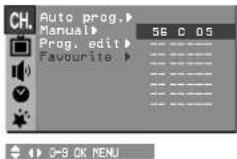
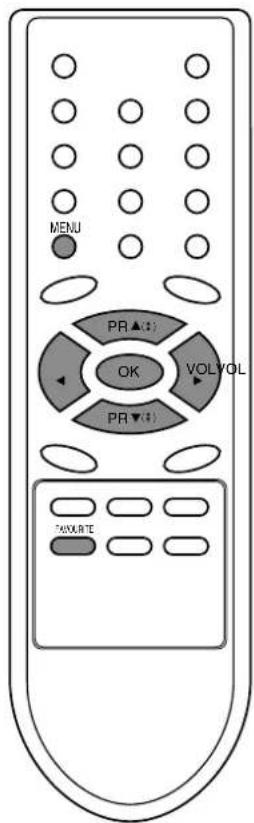
- Press the ▲/▼ button to select ----.
- Select a desired programme with the ◀/▶ button.
- To store another programme, repeat steps 4 to 5. You can store up to 8 programmes.
- Press the OK button.
- Repeatedly press the MENU button to return to normal TV viewing.
Repeatedly press the FAVOURITE button to select stored favourite programmes.
Setting up TV stations
Calling the programme table
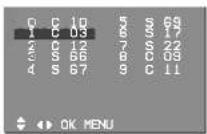
You can check the programmes stored in the memory by displaying the programme table.
Displaying programme table
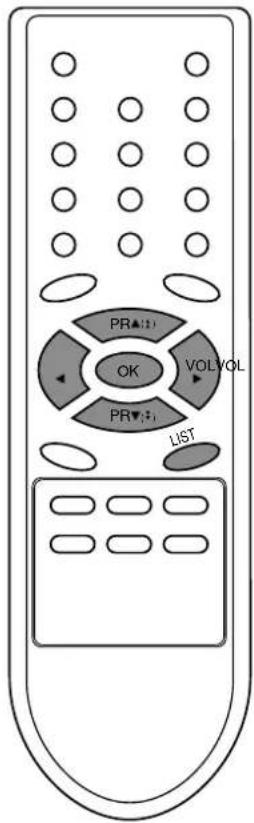
Press the LIST button to display the Programme table menu. The programme table appears on the screen. One programme table contains ten programmes as below.
Note :
a. You may find some blue programmes. They have been set up to be skipped by auto programming or in the programme edit mode.
b. Some programmes with the channel number shown in the programme table indicate there is no station name assigned.
Selecting a programme in the programme table
Select a programme with the ▲/▼ or ◀/► button. Then press the OK button. The set switches to the chosen programme number.
Paging through a programme table
There are 10 (or 20) programme table pages which contain 100 (or 200) programmes. Pressing the ▲/▼ or ◀/▶ button repeatedly turns the pages.
Press the LIST button to return to normal TV viewing.
text_image
PR▲12 OK VOLVOL PR▼1 LISTPicture adjustment
text_image
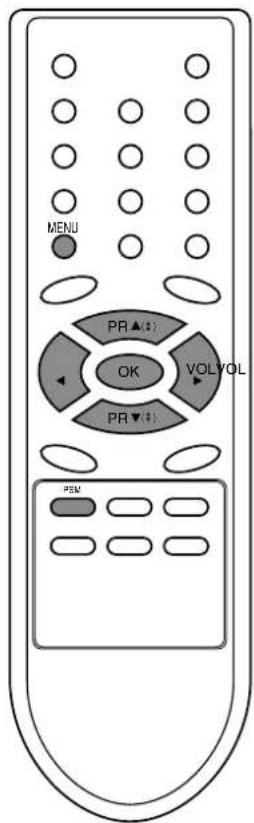
MENU PR ▲(●) OK VOLVOL PR ▼(●) PSMNote: Picture menu options are not available for RGB input source.
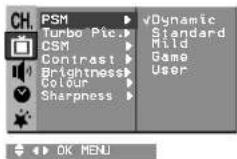
PSM (Picture Status Memory)
- Press the MENU button and then ▲ / ▼ button to select the Picture menu.
- Press the ▶ button to select PSM.
- Press the ▶ button and then ▲ / ▼ button to select a picture setting on the PSM pull-down menu.
-
Press the OK or ◀ button.
-
Repeatedly press the MENU button to return to normal TV viewing.
You can also recall a desired picture (Dynamic, Standard, Mild, Game or User) with PSM button on the remote control. The picture Dynamic, Standard, Mild and Game are programmed for good picture reproduction at the factory and cannot be changed.
CSM (Colour Status Memory)
You can select the picture colour status; standard, reddish, greenish or bluish, as you prefer.
- Press the MENU button and then ▲ / ▼ button to select the Picture menu.
- Press the ▶ button and then ▲ / ▼ button to select CSM.
- Press the ▶ button and then ▲ / ▼ button to select Standard, Reddish, Greenish or Bluish on the CSM pull-down menu.
- Repeatedly press the MENU button to return to normal TV viewing.
Picture adjustment
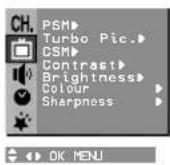
You can adjust picture contrast, brightness, colour intensity, sharpness and tint (NTSC input only) to the levels you prefer.
- Press the MENU button and then ▲ / ▼ button to select the Picture menu.
- Press the ▶ button and then ▲ / ▼ button to select Contrast, Brightness, Colour or Sharpness.
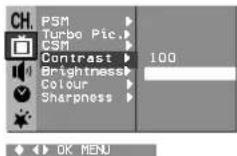
- Press the ▶ button and then ◀ / ▶ button to make appropriate adjustments on the each sub menu.

OK MENU
- Press the OK button to store it for the picture user.
- Repeatedly press the MENU button to return to normal TV viewing.
Picture adjustment
Eye (option)
Eye is an optional function. Only a set with eye option can perform this function.
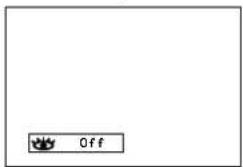
In some models, the set will automatically adjust the picture according to the surrounding conditions. This will enable you to enjoy the most suitable picture according to the surroundings.
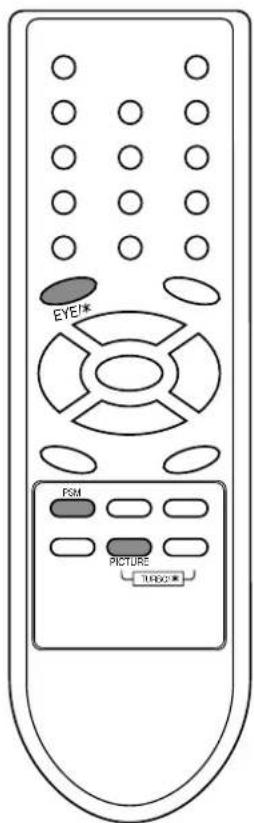
Press the EYE/*button to switch the eye function on or off.
text_image
Off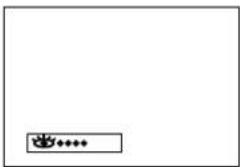
text_image
Image containing a small icon with a crown-like symbol and a plus symbol inside a rectangular box.When the eye function is on, the most suitable picture is automatically adjusted according to the surrounding conditions.
At this time the display •••••• in green does not appear continuously but the display ••••••• in yellow appears each time the picture condition changes.
Note :
a. If you press the PSM or TURBO PICTURE button with the eye function, the eye function is automatically switched off.
b. EYE function is not available for RGB input source.
Turbo picture selection (option)
When this function is on, the picture will be more brilliant and distinct than normal picture.
Repeatedly press the TURBO PICTURE button to switch on or off.
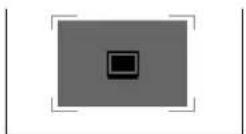
(Turbo Picture off)
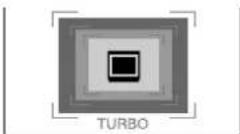
(Turbo Picture on)
text_image
EYE! FSM PICTURE TICKEDNote :
a. If you press the PSM button with the Turbo picture function, the Turbo picture function is automatically switched off.
b. TURBO PICTURE function is not available for RGB input source.
Sound adjustment (option)
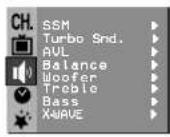
OK MENU
text_image
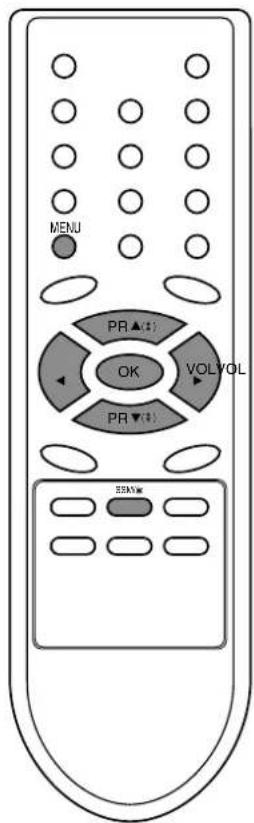
MENU PR ▲(●) OK VOLVOL PR ▼(●) ESMWSound adjustment is an optional function only a set with sound adjustment can perform this function.
SSM (Sound Status Memory)
You can select your preferred sound setting; Flat, Music, Movie or Speech and you can also adjust the sound frequency of equalizer.
-
Press the MENU button and then ▲▼ button to select the Sound menu.
-
Press the ▶ button to select SSM.
-
Press the ▶ button and then ▲ / ▼ button to select a sound setting on the SSM pull-down menu.
Sound Frequency Adjustment
a. Press the ▶ button in User to display the User sub menu. b. Select a sound band by pressing the ◀/▶ button.
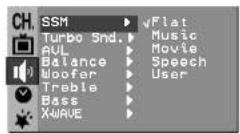
OK MENJ
c. Make appropriate sound level with the ▲/▼ button. d. Press the OK button to store it for the sound User.
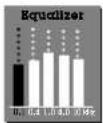
OK MENU
(RF STEREO, Flat)
Repeatedly press the MENU button to return to normal TV viewing.
You can also recall a desired sound (Flat, Music, Movie, Speech or User) with SSM/ button on the remote control. The sound Flat, Music, Movie and Speech are programmed for good sound reproduction at the factory and cannot be changed.
Note : If you press the SSM/ button after making appropriate adjustment on the User sub menu, the display User automatically appears even though you have already set a factory preset setting; Flat, Music, Movie or Speech.
Sound adjustment
- Press the MENU button and then ▲/▼ button to select the Sound menu.
- Press the ▶ button and then ▲ ▼ button to select the desired sound item; AVL (option), Balance, Treble, Bass or Woofer (option).
- Press the ▶button.
- Make desired adjustment with the ◀/ ▶, ▲/ ▼ or OK button on each pull-down menu.
- Repeatedly press the MENU button to return to normal TV viewing.
Sound adjustment (option)
X-WAVE (Wireless Sound) (option)
You can also listen to the sound through the FM receiver.
- Press the MENU button and then ▲/▼button to select the Sound menu.
- Press the ▶ button and then ▲ ▼ ▼ button to select X-WAVE.
- Press the ▶button and then ▲/▼ button to tune in a frequency on the X-WAVE pull-down menu.
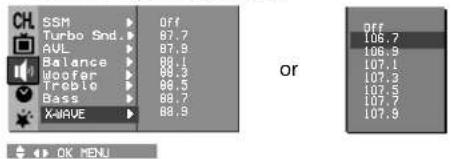
- Match the TV's frequency and the FM receiver's.
Some models are displayed as shown below.
-
Press the MENU button and then ▲/▼button to select the Sound menu.
-
Press the ▶ button and then ▲/▼ button to select X-WAVE.
-
Press the ▶ button and then ▲/▼ button to select Set Freq.
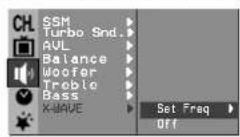

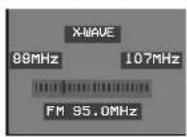

-
Press the ▶ button to tune in a frequency on the X-wave menu.
-
Use the number 0 to 9 or press the ◀/▶ button to match the TV's frequency and the FM receiver's.
Note:
a. If the reception is poor or weak, select a different frequency.
b. For best results, there should be no more than 5m (16.4ft) between the TV and FM Receiver.
c. In certain areas, the FM transmitter ability may be weak, such as near a broadcast tower.
d. The reception sensitivity may depend on the kinds of receiver (FM radio).
Turbo sound selection (option)
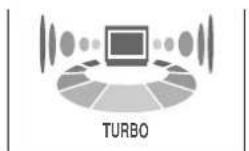
When this function is on, the sound will be more emphasized and amplified than normal sound.
Repeatedly press the TURBO SOUND button to switch on or off.
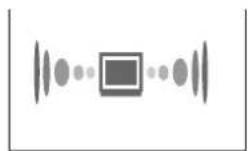
(Turbo Sound off)
(Turbo Sound on)

OK MENU
text_image
MENU PR▲(2) OK VOLVOL PR▼(1) SCUND TURBOSound adjustment (option)
Sound output selection (option)
In AV mode, you can select output sound for the left and right loud-speakers.
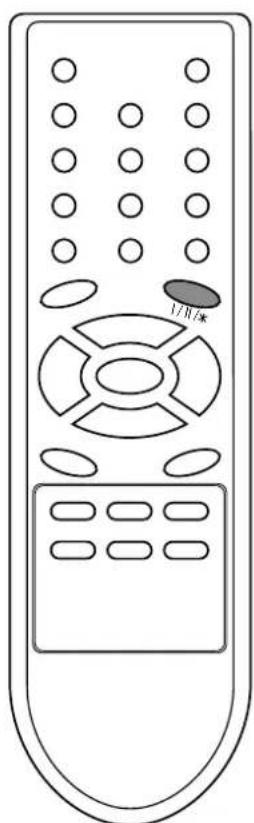
Repeatedly press the I/II/* button to select the sound output.
L+R: Audio signal from audio L input is sent to left loud-speaker and audio signal from audio R input is sent to right loud-speaker.
L+L: Audio signal from audio L input is sent to left and right loud-speakers.
R+R: Audio signal from audio R input is sent to left and right loud-speakers.
Stereo/Dual reception (option)
When a programme is selected, the sound information for the station appears after the programme number and station name disappear.
Broadcast
On Screen Display
Mono
MONO
Stereo
STEREO
Dual
DUAL I
natural_image
Line drawing of a remote control with buttons and dials (no text or symbols)Mono sound selection
In stereo reception if the stereo signal is weak, you can switch to mono by pressing the I/II/* button twice. In mono reception the depth of sound is improved. To switch back to stereo, press the I/II/* button twice again.
Language selection for dual language broadcast
If a programme received in two languages (dual language), you can switch to DUAL I, DUAL II or DUAL I+II by pressing the I/II/* button repeatedly.
DUAL I sends the primary broadcast language to the loudspeakers.
DUAL II sends the secondary broadcast language to the loudspeakers.
DUAL I+II sends a separate language to each loudspeaker.
NICAM reception (option)
If your set is equipped with the receiver for NICAM reception, the high quality NICAM (Near Instantaneous Companding Audio Multiplex) digital sound can be received.
Sound output can be selected according to the type of received broadcast as follows by pressing the I/II/* button repeatedly.
-
When NICAM mono is received, you can select NICAM MONO or FM MONO.
-
When NICAM stereo is received, you can select NICAM STEREO or FM MONO. If the stereo signal is weak, switch to FM mono.
-
When NICAM dual is received, you can select NICAM DUAL I, NICAM DUAL II or NICAM DUAL I+II or MONO. When FM mono is selected the display MONO appears on the screen.
Time Setting
Setting the clock
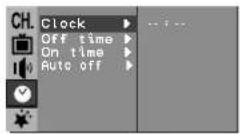
- Press the MENU button and then ▲/▼ button to select the Time menu.
- Press the button to select Clock.
- Press the button and then ▲/▼ button to adjust the hour.
OK MENU
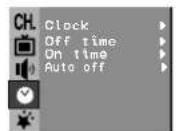
OK MENU
- Press the button and then ▲/▼button to adjust the minute.
- Press the OK button.
- Repeatedly press the MENU button to return to normal TV viewing.
Setting the On/Off timer
By using this function, the set automatically switches on or off at a preset time. You must set the time correctly before using on/off time function.
- Press the MENU button and then ▲/▼button to select the Time menu.
- Press the ▶▶ button and then ▲△/ ▼ button to select Off time/On time.
- Press the ▶ button and then ▲/▼ button to adjust the hour.
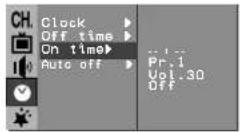
4 OK MENU
- Press the ▶ button and then ▲ ▼ button to adjust the minute.
- Only On time function; Press the ▶ button and then ▲ ▼ button to adjust programme number and volume level.
- Press the OK button.
- Repeatedly press the MENU button to return to normal TV viewing.
Note :
a. On time works only in standby mode.
b. To view the remaining on/off time, select the Time menu.
c. When you switch the main power off, the Clock is reset
d. Two hours after the set is switched on by the on time function it will automatically switch back to standby mode unless a button has been pressed.
Auto off
If you select On on the Auto off pull-down menu, the set will automatically switch itself to standby mode approximately ten minutes after a TV station stops broadcasting.
- Press the MENU button and then ▲/ ▼ button to select the Time menu.
- Press the ▶button and then ▲/▼button to select Auto off.
- Press the ▶ button and then ▲ /▼ button to select On or Off on the Auto off pull-down menu.
- Press the OK or ◀ button.
- Repeatedly press the MENU button to return to normal TV viewing.
text_image
MENU PR▲(2) OK VOLVOL PR▼(1)Other functions
text_image
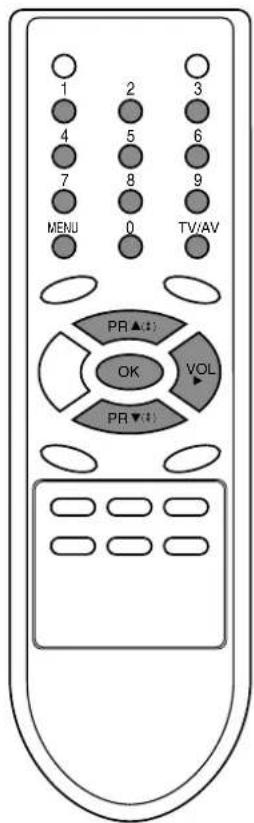
1 2 3 4 5 6 7 8 9 MENU 0 TV/AV PR ▲(●) OK VOL PR▼(●)TV and AV modes
Inputs can be set for TV or AV mode. AV mode is used when a video cassette recorder (VCR), or other equipment is connected to the set.
Note : When a VCR is connected via the aerial socket the set is used in TV mode. See the 'Connection of external equipment' section.
- Press the MENU button and then ▲/▼ button to select the Special menu.
- Press the ▶ button and then ▲/▼ button to select Input.
- Press the ▶ button and then ▲ ▼ button to select TV, AV (AV1 or AV2), AV3 (option), S-VIDEO (option) or COMPONENT (option) on the Input pull-down menu.
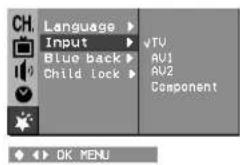
AV or AV1 : VCR connected to the Euro scart socket or phone jack of the set
AV2 : VCR connected to the AV2 sockets of the set (option) AV3 : VCR connected to the AV3 sockets of the set (option)
S-VIDEO : S-VIDEO socket of VCR connected to the Euro scart socket on the set (option)
COMPONENT : DVD Player connected to the COMPONENT sockets on the set (option)
- Repeatedly press the MENU button to return to normal TV viewing.
Alternatively you can select the TV or AV mode by pressing the TV/AV button.
In AV mode, to return to TV mode, press the ▲/▼ or NUMBER buttons.
Auto AV switching (option)
If your VCR outputs switching voltage when it is switched to playback with the VCR connected to the Euro scart socket. The set is automatically switched to AV or AV1 mode when an AV signal is input. But if you want to keep on watching TV mode, press the ▲/▼ or NUMBER buttons. Press the TV/AV button to return to AV modes.
Other functions
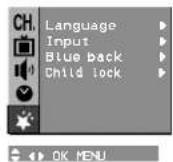
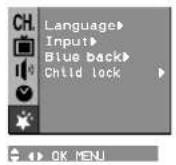
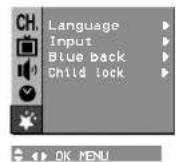
Child lock
The TV can be set so that the remote control handset is needed to control it. This feature can be used to prevent unauthorized viewing.
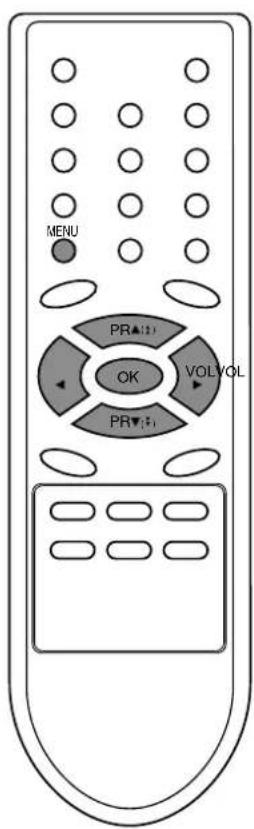
- Press the MENU button and then ▲/▼ button to select the Special menu.
- Press the ▶ button and then ▲/▼ button to select Child lock.
- Press the ▶ button and then ▲/▼ button to select On or Off on the Child lock pull-down menu.
- Press the OK or ◀ button.
- Repeatedly press the MENU button to return to normal TV viewing.
With the lock on, the display Child lock on appears on the screen if any button on the panel is pressed while viewing the TV.
Note : The display Child lock on will not appear on the screen if any button on the panel is pressed while displaying the menus.
Blue back (option)
If you select On on the Blue back pull-down menu, the blue background appears on the screen when there is no or poor signal.
- Press the MENU button and then ▲/▼ button to select the Special menu.
- Press the ▶ button and then ▲/▼ button to select Blue back.
- Press the ▶ button and then ▲/▼ button to select On or Off on the Blue back pull-down menu.
- Press the OK or ◀ button.
- Repeatedly press the MENU button to return to normal TV viewing.
Note : In the AV mode, Component mode, the blue background doesn't appear on the screen.
text_image
MENU PR▲(1) OK VOL/VOL PR▼(2)Other functions
text_image
MENU TV/AV PR ▲(●) VOL PR ▼(●) SLEEPGames (option)
Game is an optional function, only a set with game can perform this function by using the remote control handset.
- Press the MENU button and then ▲/▼ button to select the Special menu.
- Press the ▶ button and then ▲/▼ button to select Game.
- Press the ▶ button to enter the game mode.
- Press the ▲/▼ button to select a game and then press the OK button. You can enjoy the game by using the GAME owner's manual.
Note :
a. Press the TV/AV or MENU button to return to the normal TV viewing.
b. If you want a new game, press the RED button to start during the game.
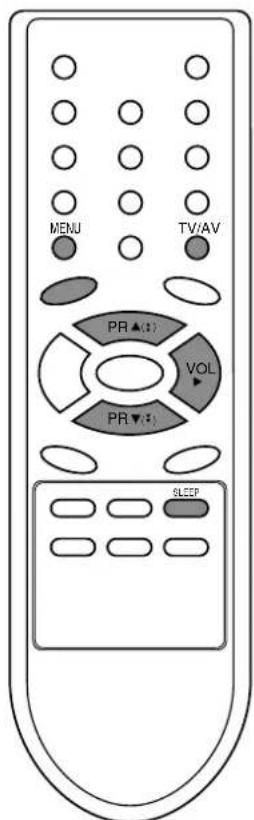
Sleep timer
You don't have to remember to switch the set off before you go to sleep. The sleep timer automatically switches the set to standby after the preset time elapses.
Press the SLEEP button to select the number of minutes. The display ⏻- will appear on the screen, followed by 10, 20, 30, 60, 90, 120, 180 and 240. The timer begins to count down from the number of minutes selected.
Note :
a. To view the remaining sleep time, press the SLEEP button once.
b. To cancel the sleep time, repeatedly press the SLEEP button until the display 🔍 - - appears.
c. When you switch the set off, the set releases the preset sleep time.
Connection of external equipment
You can connect additional equipment, such as VCRs, camcorders etc. to your set.
Here shown may be somewhat different from your set.
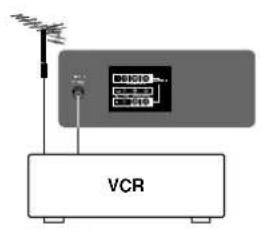
Aerial socket
- Connect the RF out socket of the VCR to the aerial socket on the back of the set.
- Connect the aerial cable to the RF aerial in socket of the VCR.
- Store the VCR channel on the programme number 0 using the 'Manual programme tuning' section.
- Select the programme number where the VCR channel is stored.
- Press the PLAY button on the VCR.
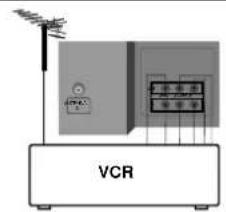
Audio/Video in/out sockets (option)
- Connect the audio/video out sockets of the VCR to audio/video in sockets of the set and in sockets of the VCR to out sockets of the set.
- If the VCR is connected to the AV sockets on the set, press the TV/AV button to select AV(or AV), AV 2.
- Press the PLAY button on the VCR. The VCR playback picture appears on the screen.
You can also record programmes received by the TV on video tape via audio/video out sockets.
Note : If you have a mono VCR, connect the audio cable from the VCR to the AUDIO L/MONO socket of the set.
Euro scart socket (option)
- Connect the Euro scart socket of the VCR to the Euro scart socket of the set.
- Press the PLAY button on the VCR. If your VCR outputs a switching voltage when connected to Euro scart socket, the set will switch to AV(or AV) mode automatically. But if you want to keep on watching TV mode, press the ▲/▼ or NUMBER buttons.
Otherwise press the TV/AV button on the remote control handset to select AV(or AVI). The VCR playback picture appears on the screen.
You can also record programmes received by the TV on video tape.
Note : Signal type RGB, i.e. the signals red, green and blue can only be selected for the Euro scart socket. These signals are transmitted, for example, by a pay TV decoder, game machine or photo CD unit, etc.
text_image
VCR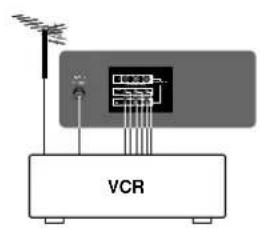
text_image
VCR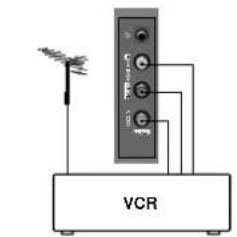
text_image
VCR
text_image
VCR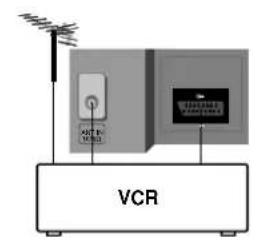
text_image
VCRConnection of external equipment
natural_image
Illustration of an electrical control unit (VCR) with antenna and internal components, no readable text or symbols beyond label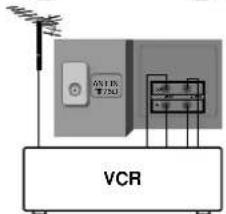
text_image
VCR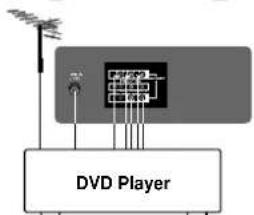
text_image
DVD Player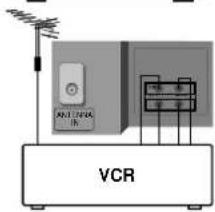
text_image
VCR AUTO TAPPA IN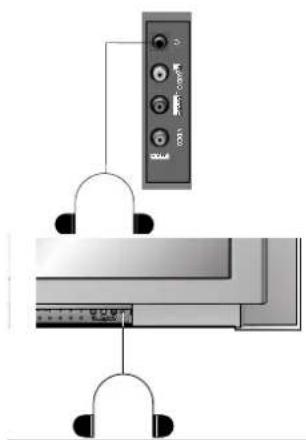
text_image
Diagram showing a device with labeled buttons and connectors, including 'SINR' and 'COSA'S-video / Audio in sockets (S-AV) (option)
When connecting the S-video socket of the VCR to the S-VIDEO socket of the set, the picture quality will be further improved.
- Connect the S-video socket of the VCR to the S-VIDEO socket of the set.
- Connect the audio cable from the VCR to the AUDIO sockets of the set.
- Select AV3 by pressing the TV/AV button repeatedly.
- Press the PLAY button on the VCR. The VCR playback picture appears on the screen.
Note : If both S-VIDEO and VIDEO sockets have been connected to the VCR simultaneously, only the S-VIDEO can be received.
Component in sockets (option)
- Connect the COMPONENT video output sockets (Y Cb Cr, Y Pb Pr or Y B-Y R-Y) of the DVD player to the COMPONENT INPUT sockets (Y Pb PR) on the set.
- Connect the audio cable from the DVD player to AUDIO IN sockets of AV (or AV1).
- Press the TV/AV button to select COMPONENT.
- Press the PLAY button on the DVD player. The COMPONENT playback picture appears on the screen.
Headphone socket (option)
Only models which have a headphone socket can perform this function. Insert the headphone plug to the headphone socket of the set. You can listen to the sound through the headphones. To adjust the headphone volume, press the ◀ / ▶ button.
If you press the MUTE button, the sound from the headphone's is switched off.
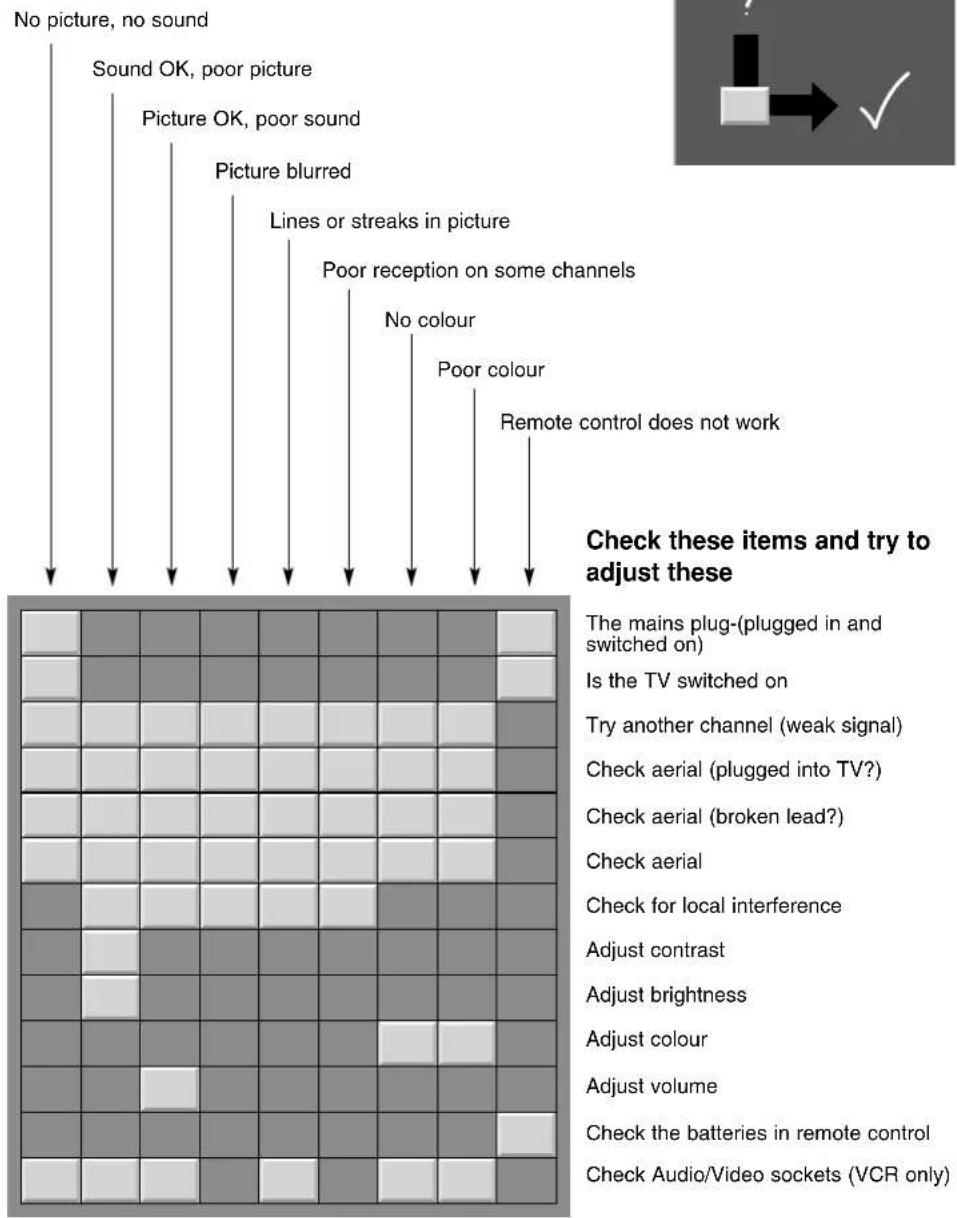
Troubleshooting check list
Symptoms
text_image
No picture, no sound Sound OK, poor picture Picture OK, poor sound Picture blurred Lines or streaks in picture Poor reception on some channels No colour Poor colour Remote control does not work Check these items and try to adjust these The mains plug-(plugged in and switched on) Is the TV switched on Try another channel (weak signal) Check aerial (plugged into TV?) Check aerial (broken lead?) Check aerial Check for local interference Adjust contrast Adjust brightness Adjust colour Adjust volume Check the batteries in remote control Check Audio/Video sockets (VCR only)
text_image
? → ✓