
7600 series 70PUN7625 - TV PHILIPS - Free user manual and instructions
Find the device manual for free 7600 series 70PUN7625 PHILIPS in PDF.


| Product Type | 70-inch 4K UHD LED TV |
| Model | 70PUN7625 |
| Brand | Philips |
| Display Resolution | 3840 x 2160 pixels (4K UHD) |
| Screen Size (Diagonal) | 70 inches |
| Sound Output | 8W x 2 (16W total) |
| Power Consumption | 240W (typical), Standby ≤0.5W |
| Power Supply | 220V, 60Hz |
| Weight (TV only) | 23 kg |
| VESA Mount Compatible | 300 x 300 mm |
| Tuner | ATSC (digital) |
| Connectors | 3x HDMI (1 with ARC), 1x USB, 1x AV (composite), 1x Optical audio out, Antenna |
| Smart Features | Smart Picture modes, Sleep Timer, Closed Caption, EasyLink (HDMI-CEC) |
| Supported USB Formats | JPEG, PNG, BMP, MP3, WAV, AAC, AC3, MPEG, H.264, HEVC |
| Menu Languages | Multiple languages selectable |
| Remote Control | 2x AAA batteries (included) |
| Operating Temperature | 5°C to 35°C |
| Warranty | Standard manufacturer warranty (refer to manual) |
Frequently Asked Questions - 7600 series 70PUN7625 PHILIPS
User questions about 7600 series 70PUN7625 PHILIPS
0 question about this device. Answer the ones you know or ask your own.
Ask a new question about this device
Download the instructions for your TV in PDF format for free! Find your manual 7600 series 70PUN7625 - PHILIPS and take your electronic device back in hand. On this page are published all the documents necessary for the use of your device. 7600 series 70PUN7625 by PHILIPS.
USER MANUAL 7600 series 70PUN7625 PHILIPS
Register your product and get support at
www.philips.com/TVsupport
50PUN7625/61
55PUN7625/61
65PUN7625/61
70PUN7625/61
50PUN7635/61
55PUN7635/61
65PUN7635/61
70PUN7635/61
50PUN7645/61
55PUN7645/61
65PUN7645/61
70PUN7645/61
EN User Manual
Contents
1 Notice 2
2 Important 3
3 TV Overview 6
Control Panel 6
Remote Control 6
Use of remote controller 7
4 Using TV 8
Switch on, off, or standby 8
Switch channels 8
Switch to a device 9
Adjust the TV volume 9
5 Using More Feature of your TV 10
Access the TV menu 10
Access the Setup menu 10
Change languages 10
Install channels 10
Change the picture settings 10
Change the sound settings 12
Use sleep timer 12
Use TV lock 12
Use closed caption 13
Updating the TV software 13
Reset to factory settings 13
6 Playing media 14
Play from a USB connection 14
Remove the USB storage device 15
Picture formats supported by USB 15
Audio formats supported by USB 15
Video formats supported by USB 16
7 Installing channels 17
Automatic channel search 17
Manually set the channel list 17
Adjust picture aspect ratio automatically
17
8 Connecting Devices 18
Bottom Connectors 18
Side Connectors 18
Connecting computers 19
Use Philips EasyLink 19
HDMI Ultra HD 20
9 Product Information 21
Display resolutions 21
Multimedia 21
Sound power 21
Intrinsic Resolution 21
Tuner / Reception / Transmission 21
Remote Control 21
Power 21
Supported TV Mounts 22
10 Trouble Shooting 23
General TV issues 23
TV channels have problems 23
Picture problem 23
Sound problem 24
HDMI connection problem 24
Computer connection problem 24
Contact Us 24
11 Software 25
Software end user license agreement 25
1 Notice
2020 © TP Vision Europe B.V. All Right Is Reserved. Specifications may be subject to change without prior notice. All trademarks are the properties of Koninklijke Philips N.V or their respective owners. TP Vision Europe B.V. reserves the right to change products at any time without the need to give response to early inventory adjustment. The content in this manual is suitable for this system. If the intended use of the product or its individual components or programs is not within the specified scope in this manual, you will have to ensure its effectiveness and applicability. TP Vision Europe B.V. ensures that the manual itself does not infringe any patents of the United States. Disclaimer of Express or Implied Warranties TP Vision Europe B.V. is not responsible for any errors in the contents of this document, as well as any problems caused due to the content of this document. Errors reported to Philips will be applied and published on the Philips support website as soon as possible.
Pixel Characteristics
This product has a high color pixels. Although it has effective pixels of 99.999% or higher, the screen may appear black or have bright spots (red, green, or blue). This is the structural properties of the display (within the common industry standards), and is not a fault.
Change components
Users are not allowed to change any components. Do not open or remove the back cover of the television and expose its inside. It must be repaired by Philips service centers and official repair shops. Otherwise, all declared or implied warranties will be invalidated.
Any operations specifically prohibited in this manual, any adjustments, or assembly procedures not recommended nor authorized in this manual are not within the scope of the warranty.
Copyright
All other registered and unregistered trademarks are the property of their respective owners.
® Kensington and Micro Saver are the trademarks registered by ACCO World Corporation in the United States and already registered and being applied for in other countries/regions of the world
Part of the copyright of this software belongs to © The FreeType Project (www.FreeType.org).

HIGH-DEFINITION MULTIMEDIA INTERFACE
HDMI, HDMI logo and High-Definition Multimedia Interface are the trademarks or registered trademarks of HDMI Licensing LLC.
DOLBY AUDIO™
Dolby, Dolby Audio, and the double-D symbol are trademarks of Dolby Laboratories. Manufactured under license from Dolby Laboratories. Confidential unpublished works. Copyright© 1992-2020 Dolby Laboratories. All rights reserved.


2.0+Digital Out
For DTS patents, see http://patents.dts.com. Manufactured under license from DTS Licensing Limited. DTS, the Symbol, DTS and the Symbol together, Digital Surround, and the DTS 2.0+Digital Out logo, are registered trademarks and/or trademarks of DTS, Inc. in the United States and/or other countries. © DTS, Inc. All Rights Reserved.
Philips and the Philips Shield Emblem are registered trademarks of Koninklijke Philips N.V. and are used under licence from Koninklijke Philips N.V.
2 Important
Before you start using the TV, please read and understand all instructions. If it is damaged due to failure to operate in accordance with the instructions, it is not covered by the warranty.
Safety
Risk of electric shock or fire!!
- Do not expose the TV set to rain or water. Do not place any liquid containers (such as vases) next to the TV. If liquid is spilled onto the surface or inside of the TV set, please power off the TV. Please contact Philips' customer service center, do not use the TV set before check.
- Do not put the TV, remote control or batteries near flame or heat source that is not isolated, nor directly expose it to sunlight.
- To avoid heat impact, keep the TV, remote control and batteries away from candles or other sources of ignition.

- Please do not insert any articles into TV vents or other openings.
- When the TV set runs, make sure that the power cord does not become too tight. If the power cable becomes too tight, the plug may become loose and experience arcing.
Risk of short circuit or fire!
- Do not expose remote control or batteries to rain, water or hot environments.
- Please avoid subject the power plug to external forces. A loose power plug may cause arcing or fire.
Risk of TV damage or destruction!
- The TV with a weight greater than 25 kilograms or 55 pounds needs to be handled by two persons.
- Upon mounting the straight stand on TV, be sure to use the attached base. Make sure that the straight stand can firmly support the TV set. Please place your TV on the flat surface that can support the total weight of the TV set and the straight stand.
- Upon wall-mounting the TV set, please be sure to use the bracket that can support the weight of the TV set. Fix the bracket firmly on the wall that can support the total weight of both the TV set and the bracket. TP Vision Europe B.V. does not bear any responsibility for accidents, damage or destruction due to incorrect wall mounting of the TV set.
- Some parts of this product may contain glass elements. Please exercise caution to avoid personal injury or mechanical damage.
Causing the risk of injury of children!
Please observe the following precautions to avoid TV fall and child injury:
- Do not place the TV set on the surface covered by the fabrics or other materials easy to pull.
- Ensure that TV set does not have any part of it protruded beyond the edge of the surface.
- To place the TV set on the top of a tall item of furniture (bookcases, for example), please be sure to fix the furniture and the TV set onto the wall or the appropriate support point.
- Tell your children that climbing onto furniture to touch the TV set is prone to danger.
Risk of overheating!
- Do not place the TV set in a narrow space. The TV must be reserved a space of at least 4 inches or 10 cm around it to ventilate. Make sure not to allow curtains or other objects to cover the vents of the TV set.
If inadvertently, the TV set may be damaged!
- Before connecting the TV set to a power outlet, make sure the outlet voltage is consistent with the values printed on the back of the TV set. If both voltage values do not match, do not connect the TV to the power outlet.
- If your TV needs to be moved into the storage room for storage, first remove its base from the TV set. Do not place the TV set flat against its back when its base is not removed.
Risk of injury, fire or power cord damage!
- Do not put the TV or any objects upon the power line.
- For easy removal of the TV's power cord from the power outlet, a smooth and easy access to the power cord should always be kept.
- When pulling out the power cord, be sure to pull it from its plug part, and never pull the cable.
- Before the thunderstorm comes, please cut off the connection between the TV set, the power outlet and the antenna. During a thunderstorm, do not touch any part, power cord or antenna cable of the TV set!
Risk of hearing loss!
- Do not set the headset volume too high and don't use the headset for a long time.
Low temperatures
- If the TV set is transported at an ambient temperature below 5 °C or 41 °F, please wait for some time after the TV is taken out of the box until the TV's temperature returns to room temperature before it is connected to the power outlet.

Warning
Stability Hazards
A television set may fall, causing serious personal injury or death. Many injuries, particularly to children, can be avoided by taking simple precautions such as:
- ALWAYS ensure the television set is not overhanging the edge of the supporting furniture.
- ALWAYS use cabinets or stands or mounting methods recommended by the manufacturer of the television set.
- ALWAYS use furniture that can safely support the television set.
- ALWAYS educate children about the dangers of climbing on furniture to reach the television set or its controls.
- ALWAYS route cords and cables connected to your television so they cannot be tripped over, pulled or grabbed.
- NEVER place a television set in an unstable location.
- NEVER place the television set on tall furniture (for example, cupboards or bookcases) without anchoring both the furniture and the television set to a suitable support.
- NEVER place the television set on cloth or other materials that may be located between the television set and supporting furniture.
- NEVER place items that might tempt children to climb, such as toys and remote controls, on the top of the television or furniture on which the television is placed.
If the existing television set is going to be retained and relocated, the same considerations as above should be applied.

Caution
Risk of Batteries
- Do not ingest the battery. Chemical burn hazard.
- The remote control may contains a coin/button cell battery. If the coin/button cell battery is swallowed, it can cause severe internal burns in just 2 hours and can lead to death.
- Keep new and used batteries away from children.
- If the battery compartment does not close securely, stop using the product and keep it away from children.
- If you think batteries might have been swallowed or placed inside any part of the body, seek immediate medical attention.
- Risk of fire or explosion if the battery is replaced by an incorrect type.
- Replacement of a battery with an incorrect type that can defeat a safeguard (for example, in the case of some lithium battery types).
- Disposal of a battery into fire or a hot oven, or mechanically crushing or cutting of a battery, that can result in an explosion.
• Leaving a battery in an extremely high temperature surrounding environment that can result in an explosion or the leakage of flammable liquid or gas. - A battery subjected to extremely low air pressure that may result in an explosion or the leakage of flammable liquid or gas.
Screen protection
- Please try to avoid rendering fixed images on the screen. A so-called fixed image means an image stays on the screen for a long time. For example, on-screen menus, black bars, and time display. If you must use fixed images, please reduce screen contrast and brightness to avoid screen damage.
- Remove the power cord before cleaning the TV.
- Use a slightly damp, soft cloth to clean the TV set and its frame. Do not use such substances as alcohol, chemicals or household cleaners to clean the TV set.
- If inadvertently, the TV screen may be damaged! Do not use items to touch, push, rub or strike the screen.
- To avoid warping and fading, please wipe the water droplets as soon as possible.

Note
Static images may cause permanent damage to the TV screen
- Do not display static images on the TV screen for more than two hours, as this can cause ghosting. To prevent ghosting, please reduce the brightness and contrast of the screen.
- Watching TV in 4:3 format for a long time may leave different marks on the left and right edges of the screen and the border of the image. Avoid using this mode for a long time.
- Long-term display of static images in videos and games or computers can cause some blurring and ghosting due to screen burn. Please correspondingly reduce the screen brightness and contrast when using the TV set in this way.
The ghosting, partial ghosting and other traces displayed on the TV screen for the above reasons are not within the scope of this warranty.
3 TV Overview
Congratulations for purchasing and using Philips product! In order to enjoy all the supports provided by Philips, please register your TV at www.philips.com/TVsupport.
Control Panel
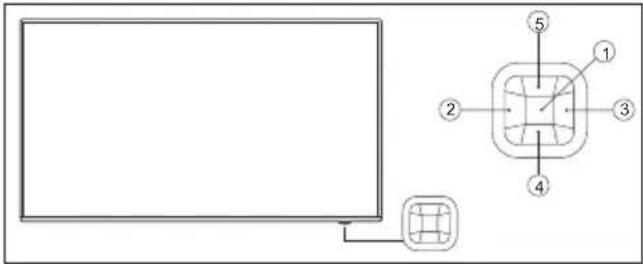
text_image
Diagram showing a monitor connected to a grid and a labeled diagram with numbered components.(Product shape may vary according to the different models, please refer to the actual models!)
① Open/close control menu:
- On the control menu, when the cursor is displayed in the volume, channel, signal sources, press this button to close the control menu.
- When the cursor is displayed as being shut down, press this button to shut down the TV set
- Upon operating the common interface, it can be used as an OK button.
② / ③
- Press to switch channels.
- When operating the common interface, you can move the cursor around.
④ / ⑤
- When the cursor appears in the volume, press this button to adjust the volume.
-
When the cursor is displayed in the channel, press this button to switch channels.
-
When the cursor is displayed in the signal source, press this button to switch the signal sources.
- Upon operating the common interface, you can move the cursor up and down.
Remote Control
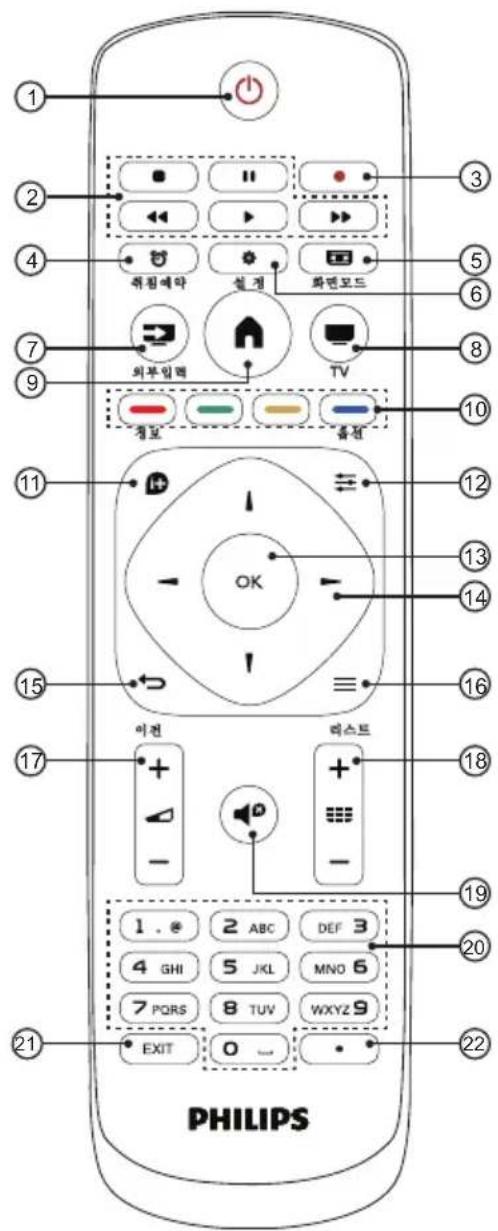
Control playback of multimedia files.
③

No function.
④
deep timer
Quickly start and set the sleep timer.
5
FORMAT
Change the picture format to suit the video source.
⑥
ETUP
Open the Settings menu. USB mode: No function.
⑦
URCES
Open or close the signal source menu, and select the connected device.
⑧

Switch back to the TV screen directly.
⑨

Open the Home menu.
10

Select corresponding tasks or options. USB mode: No function.
11

Display the related information about the signals of the currently played screen.
12
OPTIONS
Open or close the Options menu.
13
OK button
Confirm an entry or selection. To press 0-9 number keys and then press OK (confirm) when selecting channels.
14
▲ navigation button
Navigate through menus and select items.
15
BACK
Return to the previous level/page.
16
EST
Open or close the channel list.
17
Volume +/-
Adjust volume.
18
channel +/-
Switch the next or previous channel.
19

Select channels or enter text.
21
EXIT
Close the menu.
22
(Dot)
Enter digital sub-channels.
Use of remote controller
When using the remote control, press and hold it near the TV set, and point it to the remote control sensor.
Ensure furniture, walls or other objects have not blocked the sight between the remote control and the TV set.
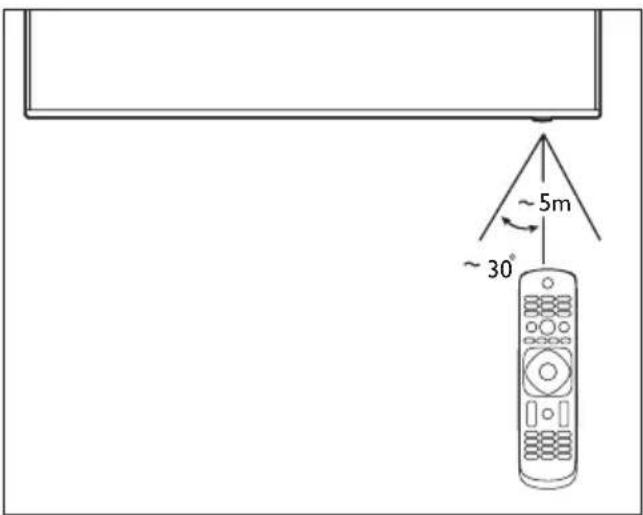
text_image
~5m ~30°(Product shape may vary according to the different models, please refer to the actual models!)
4 Using TV
This section introduces the basic operations of the TV.
Switch on, off, or standby
On or standby
Before you switch on the TV, make sure you plugged the power cord into the AC power outlet and on the back of the TV.
Turn on the TV
- With the TV in Standby, press (Standby-Power on) on the remote control to switch the TV on. You can also press the small joystick key on the back of the TV to switch the TV on in case you can't find the remote control or its batteries are empty
Switch to standby
- Press the ⏻ (Standby-Power on) on the remote control. You can also press the small joystick key on the back of the TV.

Tip
- In standby mode, the TV is still connected to the mains power but consumes very little energy.
• To switch off the TV completely, disconnect the power plug. - When disconnecting the power plug, always pull the power plug, never the cord. Ensure that you have full access to the power plug, power cord and outlet socket at all times.
Keys on TV
If you lost the remote control or its batteries are empty, you can still do some basic TV operations by using the joystick on the back of the TV.
Switch channels
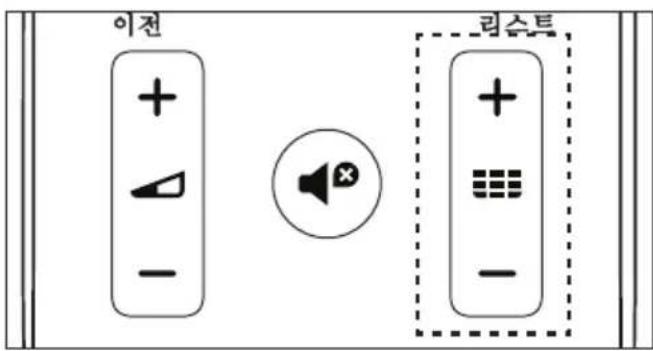
- Press Channel +/- on the remote control.
- Enter the channel number using the number keys on the remote control.
- Press ← BACK button on the remote control to switch back to the previous channel.
Switch channels from a channel list
You can use the channel list to watch all the channels that can be received.
1 Press≡ LIST.
→ To display the channel list.
2 Use navigation button to select channels.
3 Press OK to watch the selected channel.
To close the channel list without switching channels, press ST again.
Switch to a device

Note
- Before selecting an external signal source, please start up the external device.
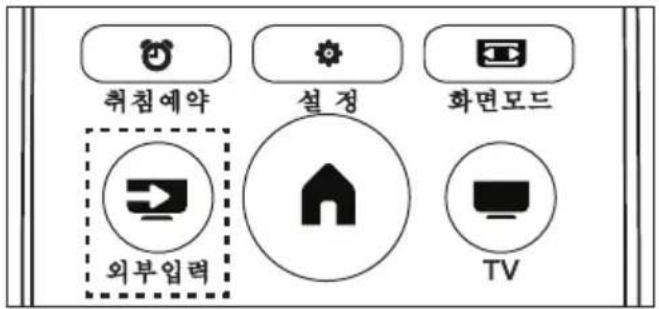
1 Press ➕ SOURCES to open the Source menu.
2 Select one of the item in the source list.
3 Press OK to select.
→ TV is switched to the selected device.
Adjust the TV volume
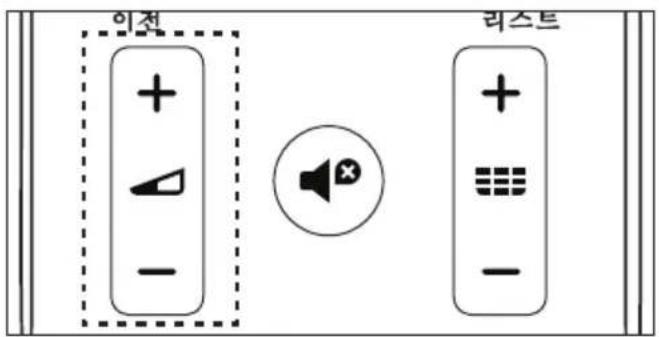
Increase or reduce the volume
- Press Volume +/- on the remote control.
Mute or Unmute
- Press Mute button on the remote control.
- Press Mute button on the remote control again to restore the sound.
5 Using More Feature of your TV
Access the TV menu
1 Press
→ Open the TV menu.
2 Select one of the following options, and press OK:
- [Channels]: Access the channels setting menu.
• [Sources]: Open the source list.
- [Settings]: Access the Settings menu.
Access the Setup menu
The menu can help you set channels, change the picture and sound settings, and set other features.
1 Press ⚙ SETUP.
→ Open the Settings menu.
2 Select one of the options and press OK to adjust the settings.
Change languages
You can select the language of the menus.
1 Press ⚙ SETUP, select [Settings] > [Menu languages], then press
2 Select the language you want, and then press OK.
Install channels
The first time you set up your TV, you are prompted to select a menu language and to install TV channels.
Automatic channel search
1 Press ⚙ SETUP.
2 Select [TV] > [Antenna Channel Search] or [Cable Channel Search] and press OK.
3 Press OK to start the automatic channel search.

- This feature can be used only in the TV mode.
Manually set the channel list
You can manually add or skip channels to the channel list.
1 Press ⚙ SETUP.
2 Select [TV] > [Add/Skip Channels] and press OK.
Adjust picture aspect ratio automatically
Automatically adjust the picture aspect ratio according to the TV program.
1 Press ⚙ SETUP.
2 Select [TV] > [Auto Aspect Ratio] and press OK.
3 Select [On].
Change the picture settings
Change the picture settings to suit your preferences. You can apply the predefined settings or change the settings manually.
Smart Picture
Apply a predefined picture setting options by using the Smart Picture.
1 Press ⚙ SETUP, and select [Picture] > [Smart Picture].
2 Select one of the following settings, and then press OK:
- [Vivid]: Application of dynamic and colorful settings, which is suitable for daytime watching.
- [Standard]: Adjust the picture settings to suit most types of video environments and types.
- [ECO]: Application of the low power settings.
• [Movie]: Application of movie-watching settings. - [Personal]: Use of custom picture settings.
Adjust the picture settings manually
1 Press ⚙ SETUP, select [Picture], and then press OK.
2 Select one of the following settings, and then press OK:
- [Backlight]: Adjust the backlight intensity.
- [Brightness]: Adjust the intensity and finesse of dark areas.
• [Video Contrast]: Adjust the contrast, to increase the intensity difference between highlight and dark.
• [Color]: Adjust the color saturation.
• [Tint]: The definition of tint temperature.
- [Sharpness]: Adjust the sharpness of the image.
- [Aspect Ratio]: Change the picture format.
• [Overscan]: Set the Overscan to Off to improve HDMI video quality. The default setting is On.
• [Color Temperature]: Set the picture to a preset color temperature for a better white balance.
- [Noise Reduction]: Filter and reduce the noises in an image.
- [Dynamic Contrast]: Set the level at which the TV automatically enhances the details in the dark, middle and light areas of the picture.
- [Reset Picture Settings]: Restore the picture settings to their default values.
Change the picture format
1 Press ⚙ SETUP, select [Picture] > [Aspect Ratio], and then press.
Picture format summary
You can configure the following picture settings.

Note
- Depending on the format of picture sources, some picture settings are not available.
[Normal]:
Display of the traditional 4:3 picture format.
![PHILIPS 7600 series 70PUN7625 - [Normal]: - 1](/content/2026/05/818201/images/c90dfc9e0c96969b32011c8775e4d635b841dd3602b9a2319416e1c88fd2437a.jpg)
[Zoom]:
Adjust the picture format from 4:3 to 14:9.
![PHILIPS 7600 series 70PUN7625 - [Zoom]: - 1](/content/2026/05/818201/images/2ef63cf9d7e009b970eb11a6b229856885f32e8888a25e00b0d70004a67773a4.jpg)
[Wide]:
Adjust the picture format from 4:3 to 16:9.
![PHILIPS 7600 series 70PUN7625 - [Wide]: - 1](/content/2026/05/818201/images/2f074d1823754898c1a3165c44f8ec29667e480624e9b875d61a923da434158d.jpg)
[1 : 1]:
Detects the resolution of the signal and displays the picture with the same number of pixels on the screen.
![PHILIPS 7600 series 70PUN7625 - [1 : 1]: - 1](/content/2026/05/818201/images/1ca06130c06d0ac4054b81d32ad819dda1b326c5ea3837c115aeb8430bfc0e9b.jpg)
[Auto]:
Adjust the picture to fill the screen (subtitles remain visible).
Change the sound settings
Change the sound settings to suit your preferences. You can apply the predefined settings or change the settings manually.
Sound mode
Apply a predefined sound setting options by using the sound mode.
1 Press ⚙ SETUP, and select [Sound] > [Smart Sound].
2 Select one of the following settings, and then press OK:
- [Standard]: Applies to the sound settings of most environments and types.
• [Movie]: Applies to the sound settings of movies.
• [Music]: Applies to the sound settings of music.
• [Speech]: Applies to the sound settings of speech program.
• [Personal]: Uses the custom sound settings set in the sound options.
Adjust the sound settings manually
1 Press ⚙ SETUP, select [Sound], and then press OK.
2 Select one of the following settings, and then press OK.
• [Balance]: Adjust the balance of left and right speakers.
- [Bass]: Adjust the level of low tones in the sound.
- [Treble]: Adjust the level of high tones in the sound.
• [TV Speakers]: Turn on or off the TV speakers.
- [SPDIF Mode]: Select the audio types passing the digital audio output interface.
- [Audio Language]: Select your preferred audio language if the TV channel broadcasts multiple or dual audio languages.
- [Reset Sound Settings]: Restore the sound settings to their default values.
Use sleep timer
The sleep timer can switch the TV to standby after a predefined time.

Tip
- You can turn off the TV in advance and reset the sleep timer during the countdown.
1 Press ⚙ SETUP, and select [Settings] > [Sleep Timer]
→ Display of sleep timer.
2 Select a preset time.
→ If the timer is set to Off, the sleep timer will be shut down.
3 Press OK to start the timer.
→ When the preset time is due, the TV set will switch to standby mode.
Use TV lock
Lock the TV to prevent children from watching certain TV shows or channels.
Set or change code
1 Press ⚙ SETUP, select [Parental] > [Change Password].
2 Enter your password using the number keys on your remote control.
→ Set or change your code following the instructions on the screen.

Tip
- If you have forgotten your code, please enter '8888' to overwrite the existing code.
Lock the channels
1 Press ⚙ SETUP, select [Parental] > [Channel Lock].
2 Enter your password using the number keys on your remote control.
3 Select the channel you want to lock or unlock.
→ The channel locking function will immediately take effect after setting.

Note
- When you use the channel list or number keys to select a locked channel, it will remind you that you need to enter a code.
Use closed caption
You can display closed captions at all times.

Note
- Digital TV interactive applications are not accessible when closed caption text is switched on.
- Not all TV programs, commercials and features include closed captioning information. See your local TV program listings about channels with closed captions. The captioned programs are typically listed with service marks, such as 'CC', in the TV listings.
Switch on closed captions
1 Press ⚙️ SETUP.
2 Select [Closed Caption] > [Caption Control] and press OK
3 Select [CC On].
Set the closed captions settings
1 Press ⚙ SETUP, select [Closed Caption], and then press OK
2 Select the correct type of closed captions, then press OK.
3 Select one of the settings, and then press OK.
Updating the TV software
Philips is continuously striving to improve its products, and we recommend updating your TV software after updates are launched.
Check the current software version
1 Press ⚙ SETUP, select [Settings] > [System Info], and then press OK. → Display the model name and current software version.
Updating software
You can use the USB flash drive to update software automatically.
1 Download the new software from the Philips website.
2 Unzip the file and copy the file onto USB flash drive.
3 Insert the USB flash drive into the TV. The update starts automatically.
Note
- Your USB memory stick should be removed after software update.
- For software update, please use the USB device. The hard disk may cause the update to fail and restart because of the excessive demand for the current.
Reset to factory settings
You can reset the TV to factory default.
1 Press ⚙ SETUP, and select [Settings] > [Reset to Default], and then press OK.
2 Select [OK], to start resetting the settings.
→ Restore all of the TV settings to their default values.
6 Playing media
Play from a USB connection
1 Turn on the TV.
2 Connect the USB storage device to the USB slot on the side of TV set.
3 Press → SOURCES.
4 Select [USB], and then press OK.
5 If there is more than one USB storage device, select the USB storage device to be read, and press OK.
→ The browse page opens.
View photos
1 Select [Folders] or [Photo] in the browse page, then press OK.
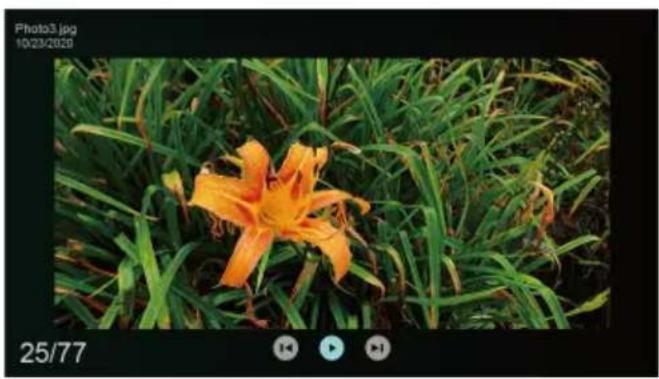
2 Select a photo and press OK.
→ Enlarge the picture to the full screen size.
natural_image
Close-up photo of an orange lily flower surrounded by green grass, captured in a video editing interface (no text or symbols on the flower itself)| ▶II | Start/Pause the slide show |
| ◀▶(Navigation button) | View the previous/next picture |
| ⇐ | Return to the browse page |
Change the slide show settings
1 Press ⚙Menu when playing a slide.
→ Display the list of slide show options, and browse photos in accordance with the instructions on the screen.

Note
• The information about the photos will only appear when the slide stops playing.
Listen to music
1 Select [Folders] or [Music] in the browse page, and then press OK to play.
→ Change the settings for playing music according to the instructions on the screen.
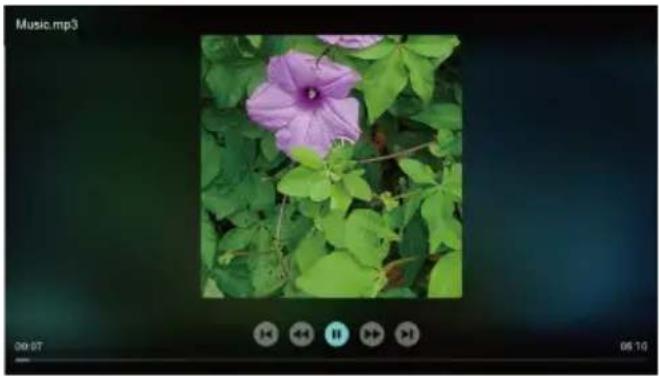
natural_image
Close-up photo of a purple morning glory flower surrounded by green leaves, captured within a video player interface (no text or symbols on the flower image itself)| ▶II | Start / Pause the music |
| Fast rewind/fast forward | |
| Return to the browse page |
Watch the movie
1 Select [Folders] or [Video] in the browse page.
2 Press OK to play the movie.
→ Change the settings for playing the movie according to the instructions on the screen.
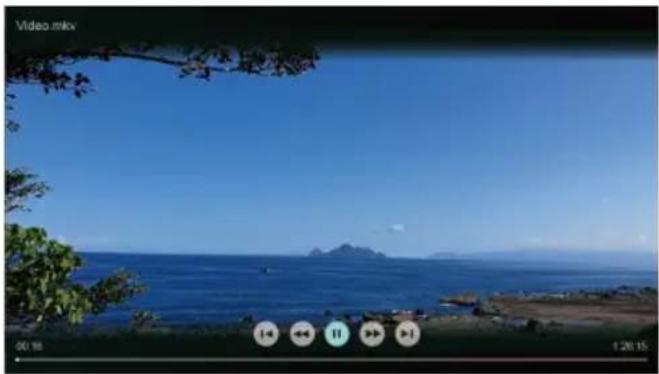
natural_image
Coastal landscape with blue sea, distant island, and tree branches (no text or symbols)| ▶II | Start / Pause the video. |
| Fast rewind/fast forward | |
| Return to the browse page |
Remove the USB storage device

Note
- Please follow the following steps to remove the USB storage device to prevent damage.
1 Press ← BACK to return or leave the main screen of the browse page.
2 Wait about five seconds, and then remove the USB storage device.
Picture formats supported by USB
| File Format | Photo Resolution | |
| JPEG | Base-line 15360 | 0x8640 |
| Progressive 1024 | 4x768 | |
| PNG | non-interlace | 9600x6400 |
| interlace | 1200x800 | |
| BMP | - | 9600x6400 |
Audio formats supported by USB
| File Format | Audio Codec | Sample rate | Code rate |
| mp3, wav | MPEG1/2 layer1 | 16KHz ~ 48KHz | 32Kbps ~ 448Kbps |
| MPEG1/2 layer2 | 16KHz ~ 48KHz | 8Kbps ~ 384Kbps | |
| mp3, wav, m4a | MPEG1/2 layer 3 | 16KHz ~ 48KHz | 8Kbps ~ 320Kbps |
| ac3, m4a | AC3 | 32KHz, 44.1KHz, 48KHz | 32Kbps ~ 640Kbps |
| aac, m4a | AAC | 8KHz ~ 48KHz | - |
Video formats supported by USB
| File formats | Video formats | Video Codec | Audio Codec | Frame rate | Resolution | Maximum code rate |
| dat, vob, mpg, mpeg | MPG, MPEG | MPEG1/2 | (work with video files) (work with video files) MP3, WAV, MP4, AC3, 1080p 50Mbps AAC | 30fps 1080p 40Mbps | 40Mbps | trp, tp MPEG -TS |
| mp4, mov, avi, mkv | MP4, AVI, MKV | |||||
| mpg, mpeg | MPG, MPEG | MPEG4 30fps 1080p 40Mbps | ||||
| mp4, avi, mkv | MP4, AVI, MKV | |||||
| ts, trp, tp MPE | EG -TS | H.264 30fps | ||||
| mp4, mov, avi, mkv | MP4, AVI, MKV | |||||
| ts, trp, tp MPE | EG -TS | HEVC 30fps 1080p 30Mbps | ||||
| mp4, mov, mkv | MP4, MKV | |||||
| mp4, mov, avi, mkv | MP4, AVI, MKV | Motion JPEG | 30fps 640x480 10Mbps | |||

Note
- If the content, packaging, or coding does not meet the standards, the video content may not play correctly. The failure to play due to some specific parameters of the sources that go beyond the decoding range is not a fault of the machine.
- The animated GIF pictures are not supported.
- Before connecting the device to the TV set, please back up your files to prevent file damage or data loss. For no support for USB storage devices, Philips assumes no responsibility, and shall not be liable for any damage or loss of data in the device.
- Some high-power USB devices might not be supported.(more than 0.5A).
- When connecting or using a USB device, if there is a power overload warning message, you may not be able to identify the device or the device may have problems.
7 Installing channels
The first time you set up your TV, you are prompted to select a menu language and to install TV channels.
Automatic channel search
1 Press ⚙ SETUP.
2 Select [TV] > [Antenna Channel Search] or [Cable Channel Search] and press OK.
3 Press OK to start the automatic channel search.

Note
- This feature can be used only in the TV mode.
Manually set the channel list
You can manually add or skip channels to the channel list.
1 Press ⚙ SETUP.
2 Select [TV] > [Add/Skip Channels] and press OK.
Adjust picture aspect ratio automatically
Automatically adjust the picture aspect ratio according to the TV program.
1 Press ⚙ SETUP.
2 Select [TV] > [Auto Aspect Ratio] and press OK.
3 Select [On].
8 Connecting Devices
This section describes how to connect devices with different connectors.

Note
- You can use different types of connectors to connect a device to your TV.
Bottom Connectors
① Optical
Transmit sound to digital audio signal, then connected audio device can play digital audio sound.
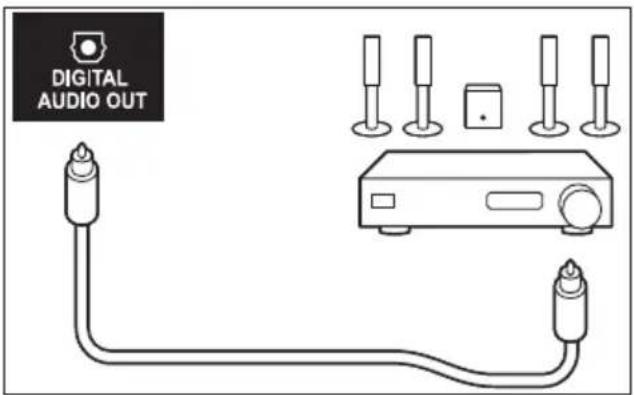
text_image
DIGITAL AUDIO OUT② HDMI 2 / HDMI 3
Digital audio and video input in Blu-ray disc player and other HD digital devices.

text_image
HDMI 3 HDMI 2 Blu-ray Disc
Note
- If there is no sound and picture displayed when connected to the HDMI 3. Please disconnect the device and re-connect it to the HDMI 1 and HDMI 2.
③ AV input
• Video: Composite video input from analogue devices such as VCR.
• Audio: Audio input from analogue devices connected to the video.
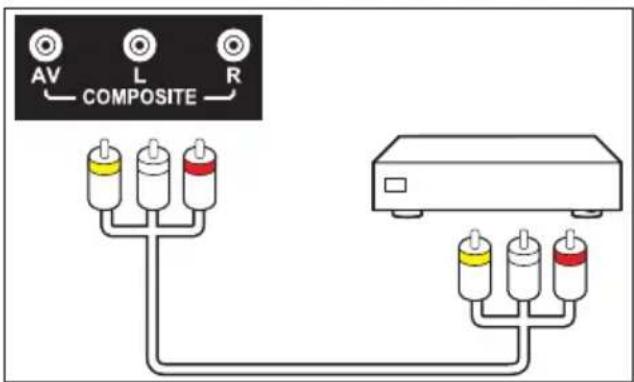
text_image
AV L R COMPOSITESide Connectors
① HDMI 1 (ARC)
Digital audio and video input from high definition digital devices such as Blu-ray players
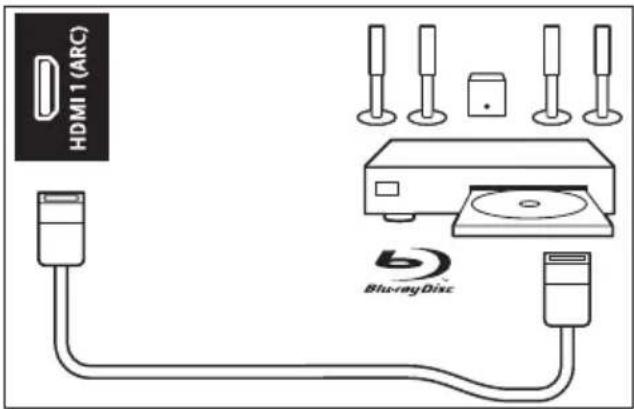
text_image
HDMI 1 (ARC) Blu-rayDisc② Antenna
Signal input from an antenna or cable.
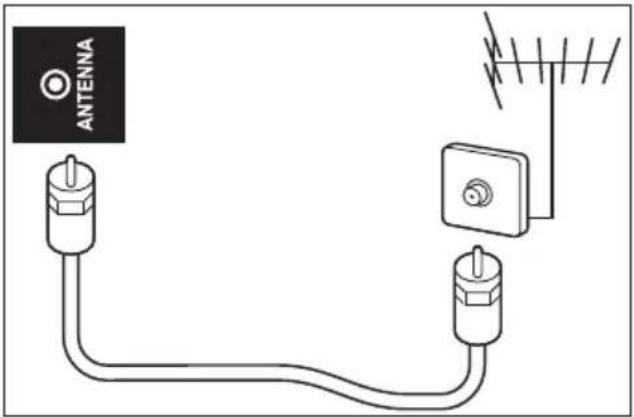
text_image
ANTENNA③ USB
Data input into USB storage devices.
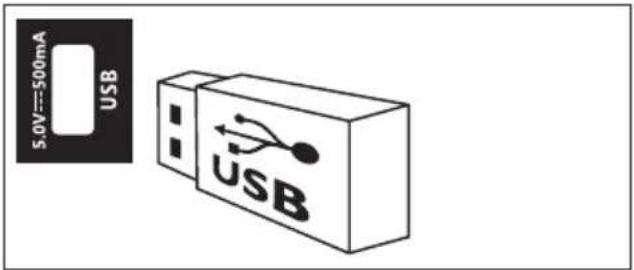
text_image
5.0V=500mA USB USBConnecting computers
Before you connect your computer to your TV.
- Set the refresh rate to 60Hz on the computer's screen.
- Select a supported screen resolution on your computer.
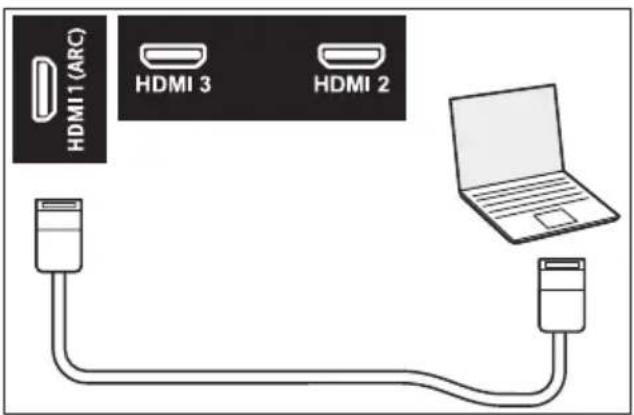
text_image
HDMI1(ARC) HDMI 3 HDMI 2Use Philips EasyLink
Taking full advantage of your Philips EasyLink HDMI-CEC compatible devices can enhance the control function and achieve the best possible results. HDMI-CEC compatible devices connected through the HDMI connector can be controlled by a TV remote control.
To enable Philips EasyLink, you need to:
• Make sure that each HDMI-CEC compatible device can run normally.
- Switch to EasyLink

Note
- EasyLink-compatible device must already be turned on and is selected as a signal source.
• Philips does not guarantee its 100% interoperability with all HDMI CEC devices.
Turn on or off EasyLink

Note
- Pease do not enable Philips EasyLink if you do not intend to use it.
1 Press ⚙ SETUP.
2 Select [EasyLink] > [HDMI CEC].
3 Select [On] or [Off] and press OK.
Use the CEC device list
1 Press ⚙️ SETUP.
2 Select [EasyLink] > [CEC Device List] and press OK.
→ The connected HDMI devices list display.
Use system audio control
Only HDMI 1 on the TV have HDMI ARC (Audio Return Channel).
If the device, typically a Home Theater System (HTS), also has the HDMI ARC connection, connect it to HDMI 1 connection on this TV. With the HDMI ARC connection, you do not need to connect the extra audio cable that sends the sound of the TV picture to the HTS. The HDMI ARC connection combines both signals.
1 Press ⚙ SETUP.
2 Select [EasyLink] > [HDMI ARC].
3 Select [Off] or [On] and press OK.
• [Off]: Use TV speakers.
• [On]: Disable the TV speakers and transmit the TV audio to the connected HDMI-CEC audio device.
HDMI Ultra HD
This TV can display Ultra HD signals. Some devices – connected with HDMI – do not recognise a TV with Ultra HD and might not work correctly or show distorted picture or sound.
If the device is not using Ultra HD signals, you can switch off Ultra HD for this HDMI connection.
1 Press ⚙ SETUP.
2 Select [HDMI Ultra HD] > [HDMI 1/HDMI 2/HDMI 3].
3 Select [Normal] or [UHD] and press OK.
• [Normal]: Watch videos with normal device.
• [UHD]: Watch videos with 4K device.
Supported format for HDMI Ultra HD options:
Resolution: 3840 x 2160
Frame rate (Hz): up to 60Hz

Note
- Supported only when HDMI Ultra HD is set to on.
9 Product Information
Product information may be subject to change without prior notice. For detailed product information, please go to www.Philips.com/TVsupport
Display resolutions
Computer Formats
• Resolution - refresh rate:
- 640 × 480 - 60Hz
- 800 × 600 - 60Hz
- 1024 × 768 - 60Hz
- 1280 × 800 - 60Hz
- 1280 × 960 - 60Hz
- 1280 × 1024 - 60Hz
- 1440 × 900 - 60Hz
- 1920 × 1080 - 60Hz
- 3840 × 2160 - 60Hz
Video Formats
• Resolution - refresh rate:
• 480i
• 480p
- 720p
• 1080i
• 1080p
- 3840 × 2160p - 24Hz, 25Hz, 30Hz, 50Hz, 60Hz

Note
- When the TV set does not support resolution and refresh rate, there will be a black screen or flower screen. Please switch to the TV set to display resolution and refresh rate.
Multimedia
- Supported storage device: USB (Supports FAT 32/FAT 16 USB storage devices.)
Sound power
- 8W x 2
Intrinsic Resolution
- 3840 × 2160
Tuner / Reception / Transmission
• Aerial input: 75 ohm coaxial (F type)
- TV system: ATSC
• Video playback: NTSC, PAL, SECAM
- Tuner bands: UHF, VHF
Remote Control
- Batteries: 2 × AAA
Power
- Mains: 220V, 60 Hz
- Standby power consumption: ≤ 0.5 W
• Ambient temperature: 5-35 °C
• Power consumption: - 50": 100W
- 55": 145W
- 65": 180W
- 70": 240W
Supported TV Mounts
To install the TV set, purchase a Philips TV mounting bracket.

Warning
- Please follow all the instructions provided with the TV mounting bracket. TP Vision Europe B.V. does not bear any responsibility for any accidents, personal injury or loss caused by improper TV mounting.
1 Please first lock the mount behind the TV.
2 To prevent damage to cables and connectors, be sure to leave a clearance of at least 2.2 inches or 5.5cm from the back of the locked TV (including the protruding parts of the speakers) to the wall.
3 Make sure that your mounting bolts follow these specifications:
| TV screen size (inch) | Weight (TV only) (kg) | Required VESA (mm) | Required mounting screws |
| 50 11.44 kg 200x200 | 4 x M6(Recommended length: 16-22 mm) | ||
| 55 11.84 kg 200x200 | 4 x M6(Recommended length: 14-16 mm) | ||
| 65 18.35 kg 300x300 | 4 x M6(Recommended length: 18-25 mm) | ||
| 70 23 kg 300x300 | 4 x M8(Recommended length: 10-22 mm) |
10 Trouble Shooting
This section describes the commonly encountered issues and accompanying solutions.
General TV issues
TV set cannot be started:
- Disconnect the power cord plug from the power outlet. Reconnect it one minute later.
- Check that the power cord is firmly connected.
The remote control does not function normally:
- Check that the +/- poles of the remote control battery are installed properly.
- If the remote control batteries are exhausted or leak, please replace it.
- Clean the remote control and TV sensor lens.
The TV standby light is blinking in red:
- Disconnect the power cord plug from the power outlet. Wait until the TV set cools down and then reconnect the cable. If the flashing still occurs, please contact the Philips customer service center.
Forget the code to unlock the TV lock:
- Input '8888'.
The TV menu's display language is wrong:
- Change the TV menu to the desired language.
Hear a squeak in the TV box after turning on/off the TV to standby state:
- You need not perform any action. Squeaking is a normal sound given from normal dilatation of the TV set during cooling and warming. This will not affect performance.
TV channels have problems
The previous channel installed does not appear in the channel list:
- Check that the selected channel list is correct.
Picture problem
The TV is on, but has no picture:
- Check that the antenna is not properly connected to the TV.
- Check that a correct device is selected as the TV signal source.
There is no sound nor picture:
- Check that the picture settings are correct.
Antenna connection causes bad reception of the TV set:
- Check that the antenna is not properly connected to the TV.
- Loudspeakers, unearthed audio devices, neon lights, high buildings and other large objects can affect the reception quality. If possible, try improving the reception quality by changing the antenna direction or keeping the above device away from the TV set.
- If there is only one channel having poor reception, please fine tune this channel.
Poor picture quality of the device connected thereto:
- Check the connection of the device.
- Check that the picture settings are correct.
The TV set has no settings for saving pictures:
- Check the TV location is set to home settings. This mode gives you the flexibility to change and save settings.
The picture does not fit on the screen, too large or small:
- Try using a different picture format.
The picture position is not correct:
- The picture signal in some devices may not fit the screen correctly. Check the signal output of the device.
Sound problem
There is a picture but the sound quality is poor:

Note
- If audio signal cannot be detected, the TV set will automatically switch off audio output - This does not indicate a failure.
- Check that all cables are properly connected.
- Check that the volume is not set to 0.
- Check the sound is not muted.
There is picture, but the sound quality is poor:
- Check that the sound settings are set properly.
There is a picture, but only one speaker has sound:
- Check that the sound balance is set to the middle.
HDMI connection problem
HDMI has a problem:
- Note that HDCP (high-bandwidth digital content protection) support may delay TV display of the time of the contents in the HDMI device.
- If the TV cannot recognize the HDMI device, and does not display, please attempt to switch the signal source from a device to another and switch back again.
- If the sound is on and off, please check the output of the HDMI device is set up correctly.
Computer connection problem
The computer display is unstable on the TV:
- Check that your PC uses a supported resolution and refresh rate.
- Set the TV picture format to no compression.
Contact Us
If you cannot resolve the problem, please refer to the frequently asked questions about the TV set in the following Web site: www.philips.com/TVsupport.
If the problem is still not resolved, please contact your local Philips customer service center.

Warning
- Do not attempt to repair the TV on your own. This may cause serious personal injury, and cause irreparable damage to the TV set or void the warranty.

Note
- Before you contact Philips customer service center, please record your TV models and serial numbers. The numbers are printed on the back and packaging of the TV set.
11 Software
Software end user license agreement
THIS SOFTWARE END USER LICENSE AGREEMENT (“THIS AGREEMENT”) IS A LEGAL AND BINDING AGREEMENT BETWEEN YOU (EITHER AN INDIVIDUAL OR ENTITY) AND TP VISION EUROPE B.V., A LIMITED LIABILITY COMPANY LOCATED AT PRINS BERNHARDPLEIN 200, 1097 JB, AMSTERDAM, THE NETHERLANDS, AND ITS AFFILIATED COMPANIES (TOGETHER REFERRED TO AS “TP VISION”). THIS AGREEMENT GIVES YOU THE RIGHT TO USE CERTAIN SOFTWARE (THE “SOFTWARE”) INCLUDING USER DOCUMENTATION IN ELECTRONIC FORM WHICH MAY HAVE BEEN PROVIDED SEPARATELY OR TOGETHER WITH A TP VISION PRODUCT (THE “DEVICE”) OR A PC. BY DOWNLOADING, INSTALLING OR OTHERWISE USING THE SOFTWARE, YOU ACCEPT AND AGREE TO BE BOUND BY ALL OF THE TERMS AND CONDITIONS OF THIS AGREEMENT. IF YOU DO NOT AGREE TO THESE TERMS AND CONDITIONS, DO NOT DOWNLOAD, INSTALL OR OTHERWISE USE THE SOFTWARE. IF YOU ACQUIRED THE SOFTWARE IN TANGIBLE MEDIA E.G. CD WITHOUT THE OPPORTUNITY TO REVIEW THIS LICENSE AND DO NOT ACCEPT THESE TERMS, YOU MAY RECEIVE A FULL REFUND OF THE AMOUNT, IF ANY, THAT YOU PAID FOR THE SOFTWARE IF YOU RETURN THE SOFTWARE UNUSED WITH PROOF OF PAYMENT WITHIN 30 DAYS FROM THE DATE OF PURCHASE.
- Grant of License. This Agreement grants you a non-exclusive, nontransferable, non-sub licensable license to install and use, on the Device or a PC, as applicable, one (1) copy of the specified version of the Software in object code format as set out in the user documentation solely for your personal use.
The Software is “in use” when it is loaded into the temporary or permanent memory (i.e. RAM, hard disk, etc.) of the PC or the Device.
-
Ownership. The Software is licensed and not sold to you. This Agreement grants you only the right to use the Software, but you do not acquire any rights, express or implied, in the Software other than those specified in this Agreement. TP VISION and its licensors retain all right, title, and interest in and to the Software, including all patents, copyrights, trade secrets, and other intellectual property rights incorporated therein. The Software is protected by copyright laws, international treaty provisions, and other intellectual property laws. Therefore, other than as expressly set forth herein, you may not copy the Software without prior written authorization of TP VISION, except that you may make one (1) copy of the Software for your back-up purposes only. You may not copy any printed materials accompanying the Software, nor print more than one (1) copy of any user documentation provided in electronic form, except that you may make one (1) copy of such printed materials for your back-up purposes only.
-
License Restrictions. Except as provided otherwise herein, you shall not rent, lease, sublicense, sell, assign, loan, or otherwise transfer the Software. You shall not, and you shall not permit any third party, to reverse engineer, decompile, or disassemble the Software, except to the extent that applicable law expressly prohibits the foregoing restriction. You may not remove or destroy any product identification, copyright notices, or other proprietary markings or restrictions from the Software. All titles, trademarks, and copyright and restricted rights notices shall be reproduced on your back up copy of the Software. You may not modify or adapt the Software, merge the Software into another program or create derivative works based upon the Software.
-
Termination of certain functionality. The Software may contain components of certain licensed software including software licensed from Microsoft Corporation ("Microsoft")
which implements Microsoft's digital rights management technology for Windows Media. Content providers are using the digital rights management technology for Windows Media ("WM-DRM") to protect the integrity of their content ("Secure Content") so that their intellectual property, including copyright, in such content is not misappropriated. Your Device may also use WM-DRM software to transfer or play Secure Content ("WM-DRM Software"). If the security of such WM-DRM Software is compromised, Microsoft may revoke (either on its own or upon the request of the owners of Secure Content ("Secure Content Owners")) the WM-DRM Software's right to acquire new licenses to copy, store, transfer, display and/or play Secure Content. Revocation does not alter the WM-DRM Software's ability to play unprotected content. A list of revoked WM-DRM Software is sent to your PC and/or your Device whenever you download a license for Secure Content. Microsoft may, in conjunction with such license, also download revocation lists onto your Device on behalf of Secure Content Owners, which may disable your Device's ability to copy, store, display, transfer, and/or play Secure Content. Secure Content Owners may also require you to upgrade some of the WM-DRM components distributed with this Software ("WM-DRM Upgrades") before accessing their content. When you attempt to play Secure Content, WM-DRM Software built by Microsoft will notify you that a WM-DRM Upgrade is required and then ask for your consent before the WM-DRM Upgrade is downloaded. WM-DRM Software built by TP VISION may do the same. If you decline the upgrade, you will not be able to access Secure Content that requires the WM-DRM Upgrade; however, you will still be able to access unprotected content and Secure Content that does not require the upgrade. WM-DRM features that access the Internet, such as acquiring new licenses and/or performing a required WM-DRM Upgrade, can be switched off. When these features are switched off, you will still be able to play Secure Content if you have a valid license for such content already stored on your Device. However, you will not be able to use certain of the WM-DRM Software features that require Internet access such as the ability to download content that requires the WM-DRM Upgrade. All title and intellectual property rights in and to the Secure Content is the property of the respective Secure Content owners and may be protected by applicable copyright or other intellectual property laws and treaties. This Agreement grants you no rights to use such Secure Content. To summarize, if the Software contains Microsoft WM-DRM components – Secure Content you desire to download, copy, store, display, transfer, and/or play is protected by the Microsoft WM-DRM components of the Software. Microsoft, Secure Content Owners, or Secure Content distributors may deny you access, or restrict your access, to Secure Content even after you have paid for, and/or obtained, it. Neither your consent nor the consent or approval of TP VISION is necessary for any of them to deny, withhold or otherwise restrict your access to Secure Content. TP VISION does not guaranty that you will be able to download, copy, store, display, transfer, and/or play Secure Content.
-
Open Source Software. (a) This software may contain components that are subject to open-source terms, as stated in the documentation accompanying the Device. This Agreement does not apply to this software as such. (b) Your license rights under this Agreement do not include any right or license to use, distribute or create derivative works of the Software in any manner that would subject the Software to Open Source Terms. “Open Source Terms” means the terms of any license that directly or indirectly (1) create, or purport to create, obligations for TP VISION with respect to the Software and/or derivative works thereof; or (2) grant, or purport to grant, to any third party any rights or immunities under intellectual property or proprietary rights in the Software or derivative works thereof.
-
Termination. This Agreement shall be effective upon installation or first use of the Software and shall terminate (i) at the discretion of TP VISION, due to your failure to comply with any term of this Agreement; or (ii) upon destruction of all copies of the Software
and related materials provided to you by TP VISION hereunder. TP VISION's rights and your obligations shall survive the termination of this Agreement.
-
Upgrades. TP VISION may, at its sole option, make upgrades to the Software available by general posting on a website or by any other means or methods. Such upgrades may be made available pursuant to the terms of this Agreement or the release of such upgrades to you may be subject to your acceptance of another agreement.
-
Support Services. TP VISION is not obligated to provide technical or other support (“Support Services”) for the Software. If TP VISION does provide you with Support Services, these will be governed by separate terms to be agreed between you and TP VISION.
-
Limited Software Warranty. TP VISION provides the Software ‘as is’ and without any warranty except that the Software will perform substantially in accordance with the documentation accompanying the Software for a period of one year after your first download, installation or use of the Software, whichever occurs first. TP VISION’s entire liability and your exclusive remedy for breach of this warranty shall be, at TP VISION’ option, either (i) return of the price paid by you for the Software (if any); or (b) repair or replacement of the Software that does not meet the warranty set forth herein and that is returned to TP VISION with a copy of your receipt. This limited warranty shall be void if failure of the Software has resulted from any accident, abuse, misuse or wrongful application. Any replacement Software will be warranted for the remainder of the original warranty period or thirty (30) days, whichever is longer. This limited warranty shall not apply to you if the Software was provided to you free of charge on an evaluation only basis.
-
NO OTHER WARRANTIES. EXCEPT AS SET FORTH ABOVE, TP VISION AND ITS LICENSORS DO NOT WARRANT THAT THE SOFTWARE WILL OPERATE ERROR FREE OR UNINTERRUPTED, OR WILL MEET
YOUR REQUIREMENTS. YOU ASSUME ALL RESPONSIBILITIES FOR SELECTION OF THE SOFTWARE TO ACHIEVE YOUR INTENDED RESULTS, AND FOR THE INSTALLATION OF, USE OF, AND RESULTS OBTAINED FROM THE SOFTWARE. TO THE MAXIMUM EXTENT PERMITTED BY APPLICABLE LAW, TP VISION AND ITS LICENSORS DISCLAIM ALL WARRANTIES AND CONDITIONS, WHETHER EXPRESS OR IMPLIED, INCLUDING BUT NOT LIMITED TO THE IMPLIED WARRANTIES OF MERCHANTABILITY, FITNESS FOR A PARTICULAR PURPOSE, AND ACCURACY OR COMPLETENESS OF RESULTS WITH RESPECT TO THE SOFTWARE AND THE ACCOMPANYING MATERIALS. THERE IS NO WARRANTY AGAINST INFRINGEMENT. TP VISION DOES NOT WARRANT THAT YOU WILL BE ABLE TO DOWNLOAD, COPY, STORE, DISPLAY, TRANSFER, AND/OR PLAY SECURE CONTENT.
-
LIMITATION OF LIABILITY. UNDER NO CIRCUMSTANCES WILL TP VISION OR ITS LICENSORS BE LIABLE FOR ANY CONSEQUENTIAL, SPECIAL, INDIRECT, INCIDENTAL OR PUNITIVE DAMAGES WHATSOEVER, INCLUDING, WITHOUT LIMITATION, DAMAGES FOR LOSS OF PROFITS OR REVENUES, BUSINESS INTERRUPTION, LOSS OF BUSINESS INFORMATION, LOSS OF DATA, LOSS OF USE OR OTHER PECUNIARY LOSS, EVEN IF TP VISION OR ITS LICENSORS HAVE BEEN ADVISED OF THE POSSIBILITY OF SUCH DAMAGES. IN NO EVENT SHALL TP VISION' OR ITS LICENSORS' AGGREGATE LIABILITY FOR DAMAGES ARISING OUT OF THIS AGREEMENT EXCEED THE GREATER OF THE PRICE ACTUALLY PAID BY YOU FOR THE SOFTWARE OR FIVE POUNDS STERLING (5.00).
-
Trademarks. Certain of the product and TP VISION names used in this Agreement, the Software, and the printed user documentation may constitute trademarks of the TP VISION, its licensors or other third parties. You are not authorized to use any such trademarks.
-
Export Administration. You agree that you will not directly or indirectly, export or re-
export the Software to any country for which the United States Export Administration Act, or any similar United States law or regulation requires an export license or other U.S. Government approval, unless the appropriate export license or approval has first been obtained. By downloading or installing the Software you agree to abide by this Export provision.
-
Governing law. This Agreement is governed by the laws of your country of residence, without reference to its conflict of laws principles. Any dispute between you and TP VISION regarding this Agreement shall be subject to the non-exclusive jurisdiction of the courts of your country of residence.
-
General. This Agreement contains the entire agreement between you and TP VISION and supersedes any prior representation, undertaking or other communication or advertising with respect to the Software and user documentation. If any part of this Agreement is held invalid, the remainder of this Agreement will continue in full force and effect. This Agreement shall not prejudice the statutory rights of any party dealing as a consumer.
May 2016

text_image
PHILIPSAll rights reserved.
Document order number:
Philips and the Philips' Shield Emblem are registered trademarks of Koninklijke Philips N.V. and are used under licence from Koninklijke Philips N.V.