
Eee PC 1016PT - Laptop ASUS - Free user manual and instructions
Find the device manual for free Eee PC 1016PT ASUS in PDF.


User questions about Eee PC 1016PT ASUS
0 question about this device. Answer the ones you know or ask your own.
Ask a new question about this device
Download the instructions for your Laptop in PDF format for free! Find your manual Eee PC 1016PT - ASUS and take your electronic device back in hand. On this page are published all the documents necessary for the use of your device. Eee PC 1016PT by ASUS.
USER MANUAL Eee PC 1016PT ASUS
natural_image
Line drawing of a laptop computer with visible keyboard, ports, and status LEDs (no text or symbols)Table of Contents
About This User's Manual iv
Notes for This Manual ......iv
Safety Precautions....v
Transportation Precautions ......vi
Charging Your Batteries......vii
Airplane Precautions ......vii
Chapter 1: Knowing the Parts
Top Side 1-2
Bottom Side....1-5
Front Side 1-6
Right Side 1-7
Left Side 1-8
Keyboard Usage....1-9
Special Function Keys 1-9
Touchpad Usage 1-11
Chapter 2: Getting Started
Powering on your Eee PC 2-2
First-time Startup 2-3
Desktop....2-5
Network Connection....2-6
Configuring a wireless network connection....2-6
Local Area Network 2-7
Browsing web pages 2-10
Chapter 3: Using the Eee PC
ASUS Update....3-2
Updating the BIOS through the Internet 3-2
Updating the BIOS through a BIOS file ....3-3
Bluetooth Connection(on selected models) 3-4
Super Hybrid Engine 3-6
Super Hybrid Engine Modes....3-6
Eee Docking 3-7
Access 3-7
Sharing 3-7
Experience (on selected models) 3-8
Tools 3-8
Boingo (on selected models)....3-8
Microsoft® Office Trial (on selected models) 3-9
Chapter 4: System Recovery
System Recovery....4-2
Boot Booster....4-5
Appendix
Declarations and Safety Statements ......A-2
FCC Radio Frequency (RF) Exposure Caution Statement ......A-3
Declaration of Conformity(R&TTE directive 1999/5/EC)......A-4
IC Radiation Exposure Statement for Canada ......A-4
CE Mark Warning ......A-6
Wireless Operation Channel for Different Domains ......A-7
France Restricted Wireless Frequency Bands ......A-7
UL Safety Notices....A-8
Power Safety Requirement ......A-9
REACH Notice....A-9
Global Environmental Regulation Compliance and Declaration .....A-10
Takeback Services....A-10
Nordic Lithium Cautions (for lithium-ion batteries)....A-11
Copyright Information......A-13
Limitation of Liability....A-14
Service and Support....A-14
About This User's Manual
You are reading the Eee PC User's Manual. This User's Manual provides information regarding the various components in the Eee PC and how to use them. The following are major sections of this User's Manual:
1. Knowing the Parts
Provides information on the Eee PC's components.
2. Getting Started
Provides information on getting started with the Eee PC.
3. Using the Eee PC
Provides information on using the Eee PC's utilities.
4. System Recovery
Gives you information on system recovery.
5. Appendix
Gives you safety statements.

The actual bundled applications differ by models and territories. There may be differences between your Eee PC and the pictures shown in this manual. Please accept your Eee PC as being correct.
Notes for This Manual
A few notes and warnings are used throughout this guide, allowing you to complete certain tasks safely and effectively. These notes have different degrees of importance as follows:

WARNING! Important information that must be followed for safe operation.

IMPORTANT! Vital information that must be followed to prevent damage to data, components, or persons.

TIP: Tips for completing tasks.

NOTE: Information for special situations.
Safety Precautions
The following safety precautions will increase the life of the Eee PC. Follow all precautions and instructions. Except as described in this manual, refer all servicing to qualified personnel. Do not use damaged power cords, accessories, or other peripherals. Do not use strong solvents such as thinners, benzene, or other chemicals on or near the surface.

Disconnect the AC power before cleaning. Wipe the Eee PC using a clean cellulose sponge or chamois cloth dampened with a solution of nonabrasive detergent and a few drops of warm water and remove any extra moisture with a dry cloth.
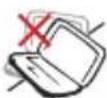
DO NOT place on uneven or unstable work surfaces. Seek servicing if the casing has been damaged.

DO NOT place or drop objects on top and do not shove any foreign objects into the Eee PC.
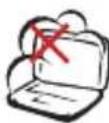
DO NOT expose to dirty or dusty environments. DO NOT operate during a gas leak.
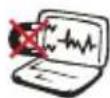
DO NOT expose to strong magnetic or electrical fields.

DO NOT press or touch the display panel. Do not place together with small items that may scratch or enter the Eee PC.
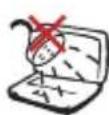
DO NOT expose to or use near liquids, rain, or moisture. DO NOT use the modem during electrical storms.
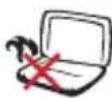
DO NOT leave the Eee PC on your lap or any part of the body to prevent discomfort or injury from heat exposure.

Battery safety warning: DO NOT throw the battery in fire. DO NOT short circuit the contacts. DO NOT disassemble the battery.
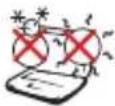
SAFE TEMP: This Eee PC should only be used in environments with ambient temperatures between 5°C (41°F) and 35°C (95°F).
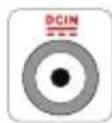
INPUT RATING: Refer to the rating label on the bottom of the Eee PC and be sure that your power adapter complies with the rating.
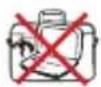
DO NOT carry or cover a Eee PC that is powered ON with any materials that will reduce air circulation such as a carrying bag.
Incorrect installation of battery may cause explosion and damage the Eee PC.
DO NOT throw the Eee PC in municipal waste. This product has been designed to enable proper reuse of parts and recycling. The symbol of the crossed out wheeled bin indicates that the product (electrical, electronic equipment and mercury-containing button cell battery) should not be placed in municipal waste. Check local regulations for disposal of electronic products.

DO NOT throw the battery in municipal waste. The symbol of the crossed out wheeled bin indicates that the battery should not be placed in municipal waste.
Transportation Precautions
To prepare your Eee PC for transport, you should turn it OFF and disconnect all external peripherals to prevent damage to the connectors. The hard disk drive's head retracts when the power is turned OFF to prevent scratching of the hard disk surface during transport. Therefore, you should not transport your Eee PC while the power is still ON. Close the display panel to protect the keyboard and display panel.
The Eee PC's surface is easily dulled if not properly cared for. Be careful not to rub or scrape surfaces when transporting your Eee PC. You can put your Eee PC in a carrying case for protection from dirt, water, shock, and scratches.
Charging Your Batteries
If you intend to use battery power, be sure to fully charge your battery pack before going on long trips. Remember that the power adapter charges the battery pack as long as it is plugged into the computer and an AC power source. Be aware that it takes much longer to charge the battery pack when the Eee PC is in use.
Remember to fully charge the battery (8 hours or more) before first use and whenever it is depleted to prolong battery life. The battery reaches its maximum capacity after a few full charging and discharging cycles.
Airplane Precautions
Contact your airline if you want to use the Eee PC on the airplane. Most airlines have restrictions for using electronic devices. Most airlines allow electronic use only between and not during takeoffs and landings.

There are three main types of airport security devices: X-ray machines (used on items placed on conveyor belts), magnetic detectors (used on people walking through security checks), and magnetic wands (hand-held devices used on people or individual items). You can send your Eee PC and diskettes through airport X-ray machines. However, it is recommended that you do not send your Eee PC or diskettes through airport magnetic detectors or expose them to magnetic wands.
Top Side
Bottom Side
Front Side
Right Side
Left Side
Keyboard Usage
Touchpad Usage
Knowing the Parts
Top Side
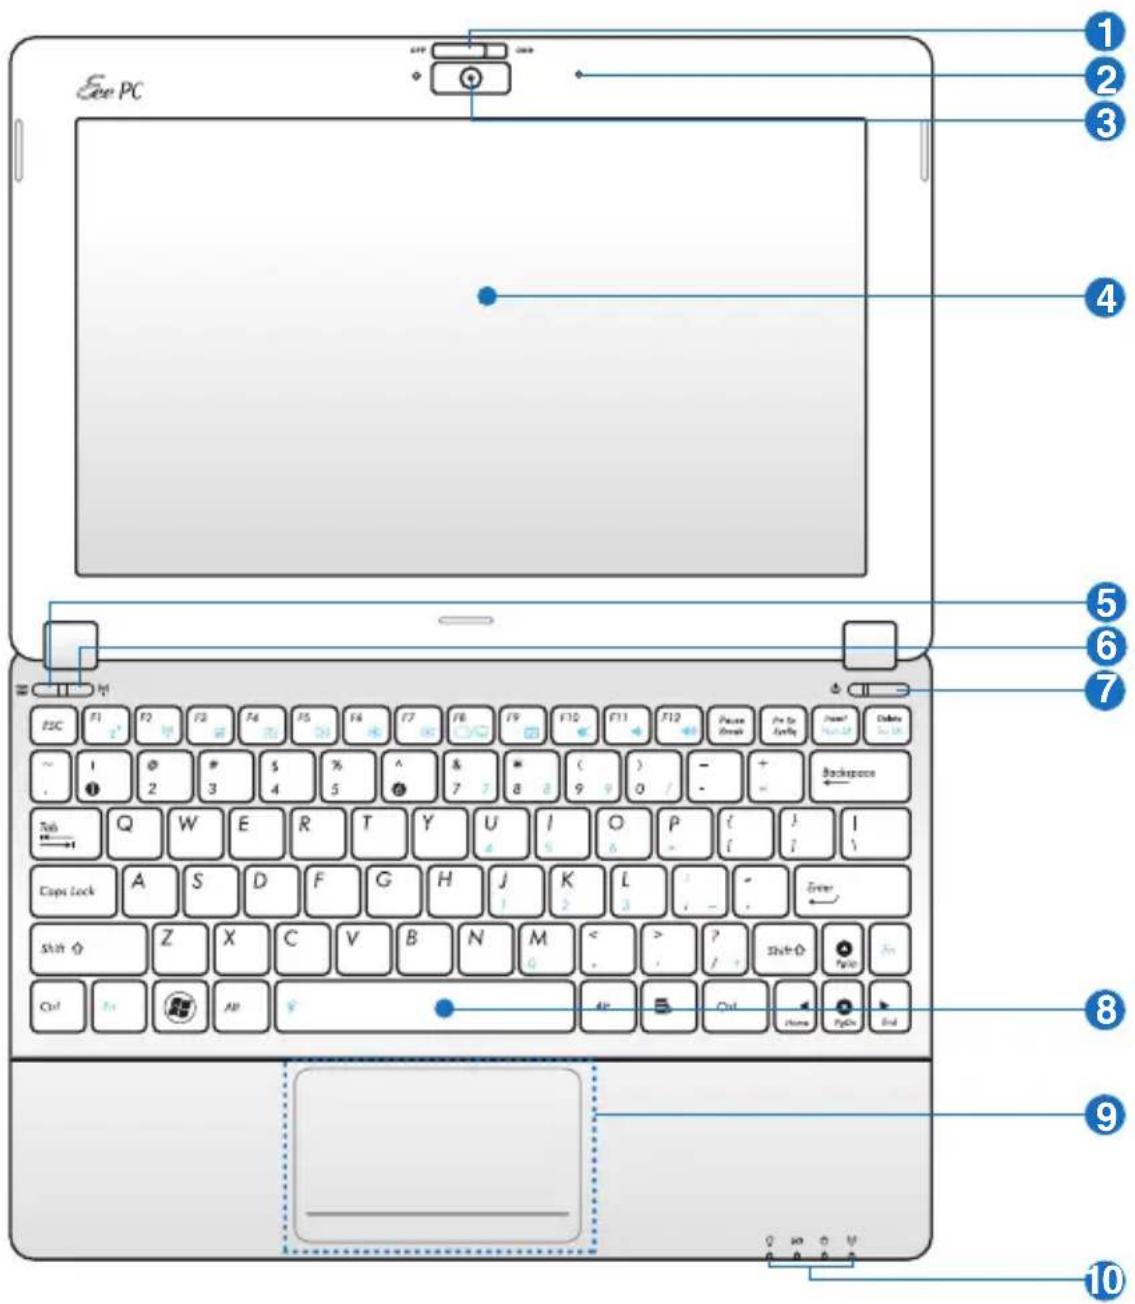
Refer to the diagram below to identify the components on this side of the Eee PC.

The top side may vary in appearance depending on models.
text_image
See PC F2C F1 F2 F3 F4 F5 F6 F7 F8 F9 F10 F11 F12 Place Break For To Apply Inside Digital Bus UK ~ 1 2 3 4 5 & 7 8 9 0 / + - Backspace Sub Q W E R T Y U I O P { } I Caps Lock A S D F G H J K L - Enter Shift ♦ Z X C V B N M < > ? Shift ♦ Pin Ctrl Alt Air Alt Ctrl Home Print End 1 2 3 4 5 6 7 8 9 10
The keyboard differs for each territory.
1 Camera Cover Switch
The camera cover switch allows you to open and close the protective camera cover. Slide the switch to the left to close the camera cover. Slide the switch to the right to open the camera cover.
2 Microphone (Built-in)
3 Built-in Camera
4 Display Panel
5 梁 Presentation Mode Button
This button offers quick access to the presentation mode. In the presentation mode, the screensaver is turned off automatically and your Eee PC is switched to LCD + CRT Mode directly if it is linked to an external monitor or a projector. Moreover, if you've opened your PowerPoint file firstly before pressing this button, this button functions as
6 Wireless/Bluetooth Button
The wireless/bluetooth button toggles the internal wireless LAN or Bluetooth ON or OFF. When enabled, the corresponding wireless/bluetooth indicator lights up.
You can also press
7 Power Switch (Windows)
The power switch allows powering ON and OFF the Eee PC and recovering from STR. Press the switch once to turn ON and hold it to turn OFF the Eee PC. The power switch only works when the display panel is opened.
Power Indicator
The power indicator lights when the Eee PC is turned ON and blinks slowly when the Eee PC is in the Save-to-RAM (Sleep) mode. This indicator is OFF when the Eee PC is turned OFF.
8 Keyboard

The keyboard differs for each territory.
9 Touchpad and Buttons
10 Status Indicators
Power Indicator
The power indicator lights when the Eee PC is turned ON and blinks slowly when the Eee PC is in the Save-to-RAM (Sleep) mode. This indicator is OFF when the Eee PC is turned OFF.
Battery Charge Indicator
The battery charge indicator (LED) shows the battery charging status as follows:
Powered ON
| With Adapter Without Adapter | ||
| High battery power (95%-100%) | Green ON Off | |
| Medium battery power (11%-94%) | Orange ON Off | |
| Low battery power (0%-10%) | Orange Blinking Orange Blinking | |
Powered OFF / Standby mode
| With Adapter Without Adapter | ||
| High battery power (95%-100%) | Green ON Off | |
| Medium battery power (11%-94%) | Orange ON Off | |
| Low battery power (0%-10%) | Orange Blinking Off | |
Hard Disk Drive (HDD) Indicator
The hard disk drive indicator blinks when data is written to or read from the disk drive.
Wireless/Bluetooth Indicator
This is only applicable on models with built-in wireless LAN/Bluetooth (on selected models). When the built-in wireless LAN/Bluetooth is enabled, this indicator lights.
Bottom Side
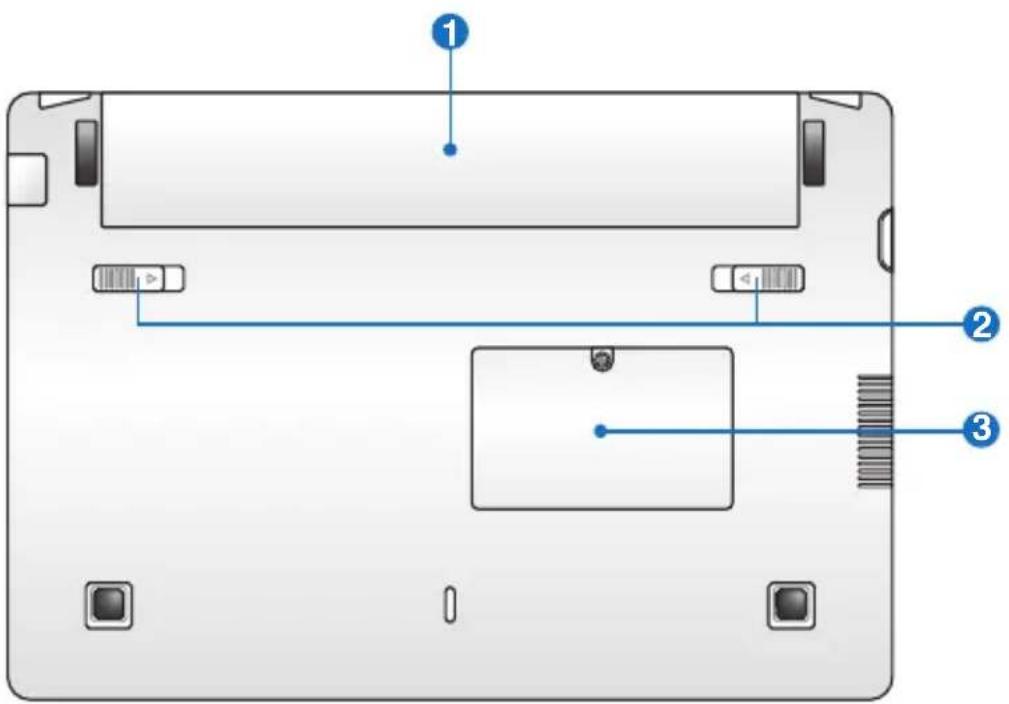
Refer to the diagram below to identify the components on this side of the Eee PC.

The bottom side may vary in appearance depending on model.
text_image
Laptop rear panel diagram with labeled components and connectors
The bottom of the Eee PC can get very hot. Be careful when handling the Eee PC while it is in operation or recently been in operation. High temperatures are normal during charging or operation. DO NOT USE ON SOFT SURFACES SUCH AS SOFAS OR BEDS, WHICH MAY BLOCK THE vENTS. DO NOT PUT THE Eee PC ON YOUR LAP OR OTHER PARTS OF THE BODY TO AvOID INJURY FROM THE HEAT.
1 Battery Pack
Battery time varies by usage and by the specifications for this Eee PC. The battery pack cannot be disassembled and must be purchased as a single unit.
② Battery Lock
The battery lock secures the battery pack. When the battery pack is properly installed, it automatically locks in place. To remove the battery pack, slide the battery lock inward.
③ Memory Compartment
The memory module is secured in a dedicated compartment.
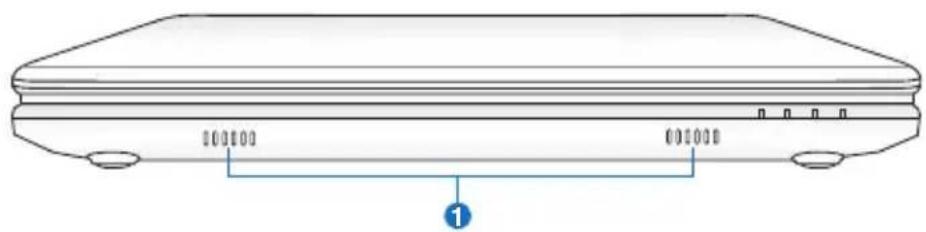
Front Side
Refer to the diagram below to identify the components on this side of the Eee PC.
natural_image
Line drawing of a laptop rear panel with labeled ports and indicator lights (no text or symbols on the body)1 Audio Speaker System
Audio features are software controlled.
Right Side
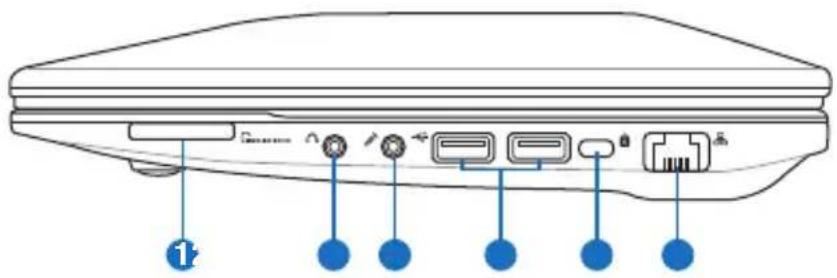
Refer to the diagram below to identify the components on this side of the Eee PC.
text_image
Diagram of a device rear panel with labeled ports and connectors, showing blue circular markers for ports 1 and 2.1 Memory Card Slot
The built-in memory card reader can read SD/SDHC/MMC cards.
② Headphone Output Jack
3 Microphone Jack
The microphone jack is designed to connect the microphone used for voice narrations or simple audio recordings.
4 USB Port (3.0/2.0/1.1 or 2.0/1.1)
The USB (Universal Serial Bus) port is compatible with USB 3.0, 2.0, or USB 1.1 devices such as keyboards, pointing devices, cameras, and storage devices, connected in a series up to 4.8Gbits/sec (USB 3.0), 480Mbits/sec (USB 2.0), and 12Mbits/sec (USB 1.1).
5 Kensington® Lock port
The Kensington® lock port allows the Eee PC to be secured using Kensington® compatible security products. These security products usually include a metal cable and lock that prevent the Eee PC to be removed from a fixed object.
6 LAN Port (10/100M bit or 10/100/1000M bit)
The eight-pin RJ-45 LAN port supports a standard Ethernet cable for connection to a local network.
Left Side
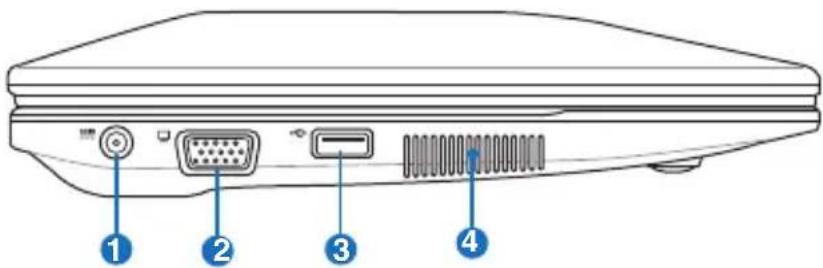
Refer to the diagram below to identify the components on this side of the Eee PC.
text_image
Diagram of a device rear panel with labeled ports and connectors, showing numbered labels 1 to 4.1 DCIN Power (DC) Input
The supplied power adapter converts AC power to DC power for use with this jack. Power supplied through this jack supplies power to the Eee PC and charges the internal battery pack. To prevent damage to the Eee PC and battery pack, always use the supplied power adapter.

THE ADAPTER MAY BECOME WARM TO HOT WHEN IN USE. BE SURE NOT TO COVER THE ADAPTER AND KEEP IT AWAY FROM YOUR BODY.
2 □ 15 pin D-Sub Display (Monitor) Output
3 USB Port (2.0/1.1)
4 Air vents
The air vents allow cool air to enter and warm air to exit the Eee PC.

Ensure that paper, books, clothing, cables, or other objects do not block any of the air vents or else overheating may occur.
Keyboard Usage
Special Function Keys
The following defines the colored hot keys on the Eee PC's keyboard. The colored commands can only be accessed by first pressing and holding the function key while pressing a key with a colored command. Some function icons appear in the Notification area after activation.


Z ^2 Icon (F1): Places the Eee PC in suspend mode
(Save-to-RAM).


Radio Tower (F2) (Wireless Models Only): Toggles the
internal wireless LAN or Bluetooth (on selected models) ON or OFF with an on-screen-display.
When enabled, the corresponding wireless indicator will light.


Touchpad (F3): Toggles the touchpad ON/OFF.


Resolution Selection (F4): Press to adjust the display resolution.


Sun Down Icon (F5): Decreases the display brightness.


Sun Up Icon (F6): Increases the display brightness.


Crossed Screen Icon (F7): Turns off the display backlight.


D/Monitor Icons (F8): Toggles between the Eee PC's LCD display and an external monitor.


Task Manager Icon (F9): Initiates the Task Manager to view the application process or terminates applications.


ssed Speaker Icon (F10): Mutes the speaker.


volume Down Icon (F11): Decreases speaker volume.


volume Up Icon (F12): Increases the speaker volume.


per Hybrid Engine (Fn+Space Bar): Toggles among
various power saving modes. The selected mode is shown on the display.


Num Lk (Insert): Toggles the numeric keypad
(number lock) ON and OFF. Allows use of a larger portion of the keyboard for number entering.


Scr Lk (Delete): Toggles the "Scroll Lock" ON and OFF.
Allows you to use a larger portion of the keyboard for cell navigation.


Pg Up (↑): Press to scroll up in documents or the web browser.


Pg Dn ( ↓ ): Press to scroll down in documents or the web browser.


Home ( ← ): Press to move the pointer to the beginning of the line.


End ( → ): Press to move the pointer to the end of the line.

s icon: Displays the start menu.

with pointer icon : Activates the properties menu
and is equivalent to right-clicking the touchpad/mouse on an object.
Touchpad Usage
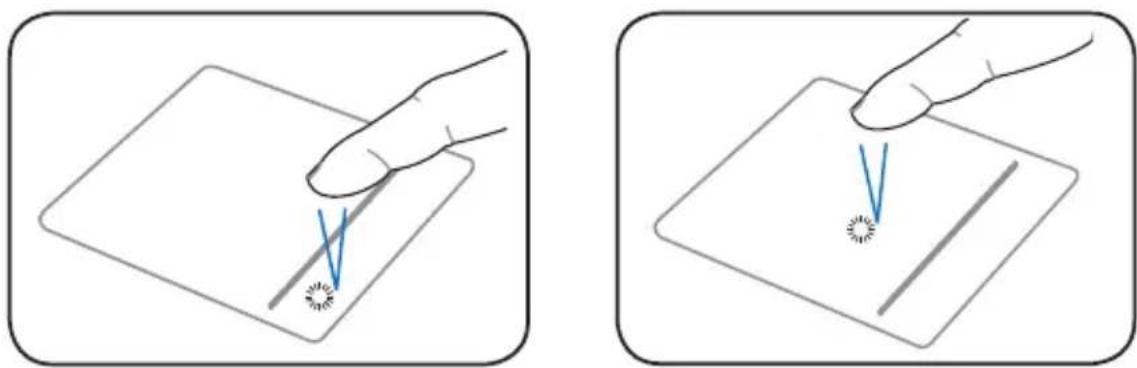
Clicking/Tapping - With the pointer over an item, press the left button or use your fingertip to touch the touchpad lightly, keeping your finger on the touchpad until the item is selected. The selected item will change color. The following 2 illustrations produce the same results.
natural_image
Two-step illustration showing a hand holding a small object with blue lines, being pointed at by using a tool (no text or symbols present)Double-clicking/Double-tapping - This is a common skill for launching a program directly from the corresponding icon you select. Move the pointer over the icon you wish to execute, press the left button or tap the pad twice in rapid succession, and the system launches the corresponding program. If the interval between the clicks or taps is too long, the operation will not be executed. The following 2 illustrations produce the same results.
natural_image
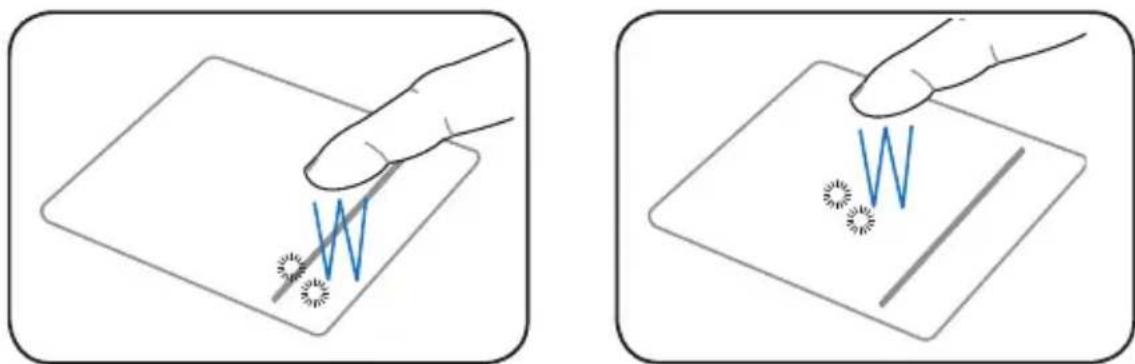
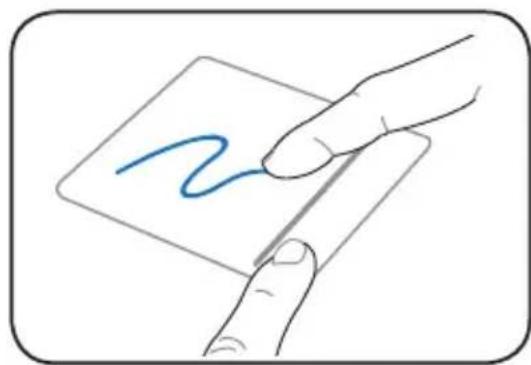
Two-step diagram showing a hand holding a W-shaped magnet above a surface, with no text or symbols present.Dragging - Dragging means to pick up an item and place it anywhere on the screen you wish. You can move the pointer over the item you select, and while keeping the left button depressed, moving the pointer to the desired location, then release the button. Or, you can simply double-tap on the item and hold while dragging the item with your fingertip. The following illustrations produce the same results.
natural_image
Illustration of a hand holding a pen writing on a square sheet with a blue wavy line (no text or symbols)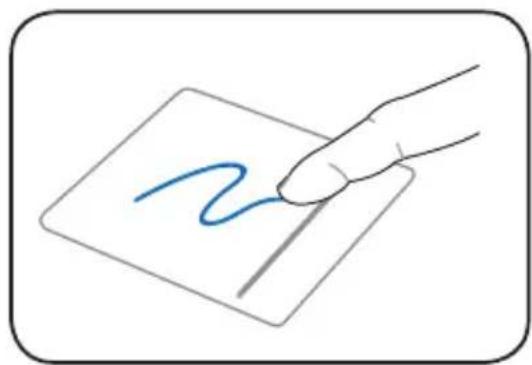
natural_image
Hand drawing a blue wavy line on a gray square surface (no text or symbols)Powering on your Eee PC
First-time Startup
Desktop
Network Connection
Getting Started
Powering on your Eee PC
These are only quick instructions for using your Eee PC.
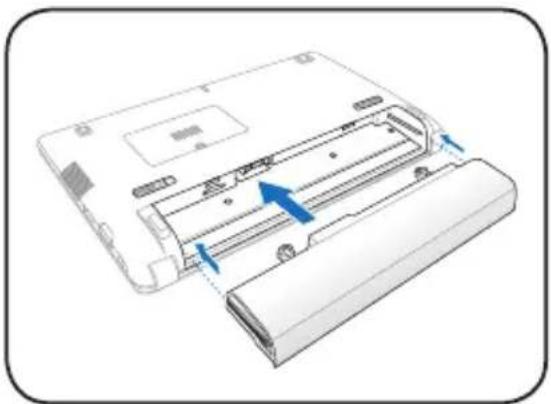
1. Install the battery pack 2. Connect the AC power adapter
natural_image
Diagram of a battery pack with internal components and blue arrows indicating flow direction (no text or symbols)
natural_image
Diagram of a device with labeled ports and cables, showing connections from a base to a terminal and cable (no text or symbols present)3. Turn ON the Eee PC

natural_image
Illustration of a hand pressing down on a laptop keyboard with a power button (no text or symbols)
Damage may occur if you use a different adapter to power the Eee PC. You may damage both your battery pack(s) and the Eee PC with a faulty AC-DC adapter.

- When you open the display panel, do not force it down to the table or else the hinges may break! Never lift the Eee PC by the display panel!
- Only use battery packs and power adapters supplied with this Eee PC or specifically approved by the manufacturer or retailer for use with this model or else damage may occur to the Eee PC. The input voltage range between the wall outlet and this adapter is AC 100V\~240V.
- Never attempt to remove the battery pack while the Eee PC is turned ON, as this may result in the loss of working data.

Remember to fully charge the battery before first use and whenever it is depleted to prolong battery life.
First-time Startup

The actual bundled OS version may differ by models and territories.
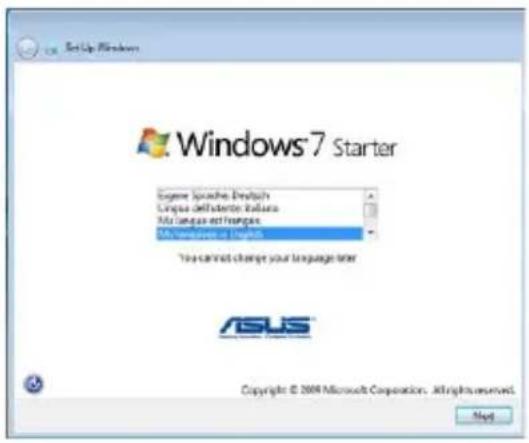
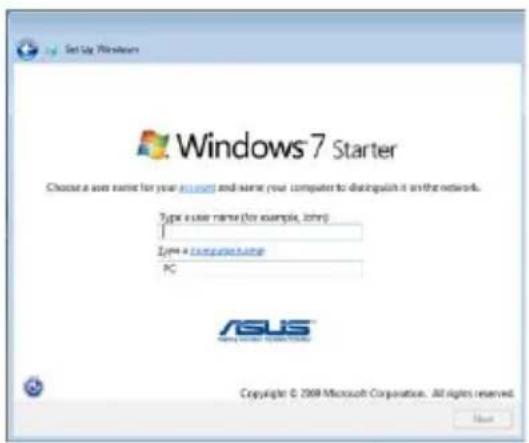
For the first time you start your Eee PC, the Windows wizard will launch automatically and lead you through setting up your preferences and some basic information.
Follow the wizard instructions to finish the initialization:
-
Select the language you use. Click Next to continue.
-
Select you system settings by specifying the region you are in, the time zone you are in, and the keyboard type you use. Click Next to continue.
text_image
Setup Windows Windows®7 Starter Supreme Spashe-Deutsch Linkus dell'Antonio Italia My language set frappes My language set frappes You cannot change your language later ASUS Copyright © 2008 Microsoft Corporation. All rights reserved. Next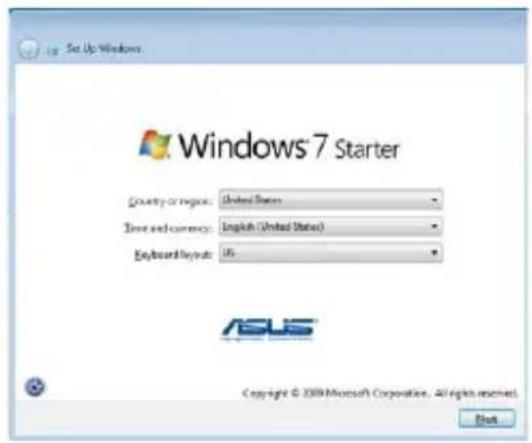
text_image
Set Up Windows Windows 7 Starter Country or region: United States Time and currency: English (United States) Keyboard Keynote: US ASUS Copyright © 2019 Microsoft Corporation. All rights reserved. Run-
Type your user account name and your computer's name, then click Next to continue.
-
Set a password for your user account if you want. Click Next to continue.
text_image
Set Up Windows Windows 7 Starter Choose a user name for your Windows and start your computer to distinguish it on the network. Type: user name (for example, print) Type: a ComputerName PC ASUS Copyright © 2009 Microsoft Corporation. All rights reserved. None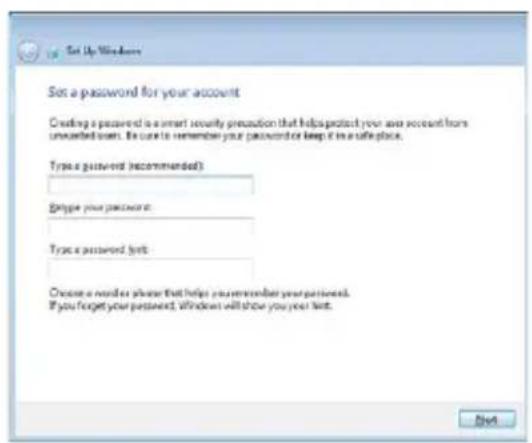
text_image
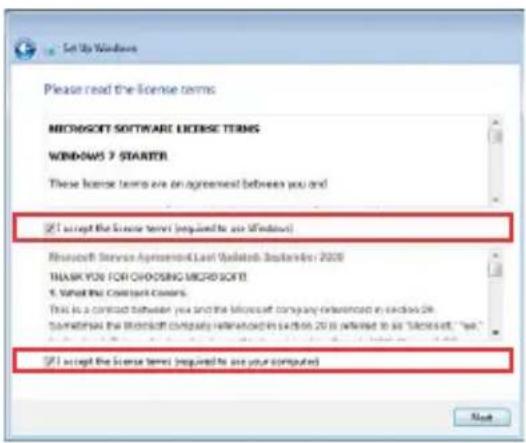
Set Up Windows Set a password for your account Creating a password is a smart security precaution that helps protect your own account from unwhisted users. Be sure to remember your password or keep it in a safe place. Type a password (recommended): Begin your password: Type a password (next): Choose a word or answer that helps you remember your password. If you forget your password, Windows will show you next next.- Read the end user license agreement and check the two boxes before I accept the license terms. Click Next to continue.
text_image
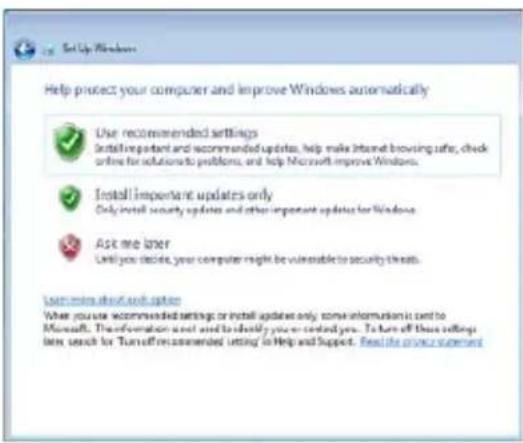
Set Up Windows Please read the license terms MICROSOFT SOFTWARE LICENSE TERMS WINDOWS 7 STARTER These license terms are an agreement between you and ✓ I accept the license term (required to use Windows) Microsoft Service Agreement Last Updated Wednesday 2009 THANK YOU FOR OHOSING MICROSOFT! 1. Will the Context covers. This is a contract between you and the Microsoft company referenced in exercise 26. Sometimes the Microsoft company references this section 26 is offered to us "Microsoft." We ✓ I accept the license term (required to use your computer)- Click Use recommended settings to get the latest important updates.
text_image
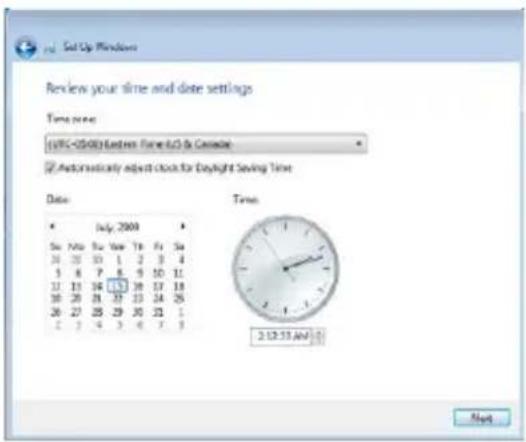
Help protect your computer and improve Windows automatically Use recommended settings Install important and recommended updates, help make Internet browsing safe, check online for solutions to problems, and help Microsoft improve Windows. Install important updates only Only install security updates and other important updates for Windows Ask me later Until you decide, your computer might be vulnerable to security threats. User needs about each other What you use recommended settings or install updates only, some information is sent to Microsoft. The information used and to identify your email you. To turn off these settings then, search for Turnoff recommended setting to Help and Support. Find the privacy statement- Specify the time zone you are in and the local date and time. Click Next to continue.
text_image
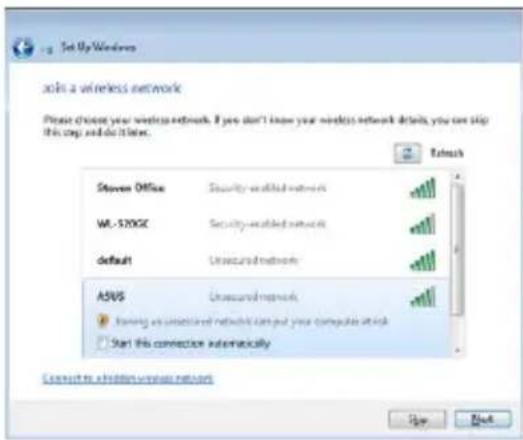
Set Up Windows Review your time and date settings Time point: (UTC-05:00) Eastern Time 8:30 & Cascade Automatically adjust clock for Daylight Saving Time Date: July 2000 Sat 100 Fri 11 Fri 24 25 26 27 28 29 30 31 32 33 34 3 4 5 6 7 8 9 10 11 11 12 13 14 15 16 17 18 20 21 22 23 24 25 26 27 28 29 30 31 32 2 3 4 5 6 7 8 Time: 2:12:55 AM Next- Connect to a wireless network and click Next to continue, or click Skip to set up the wireless connection later.
text_image
Set Up Windows join a wireless network Please choose your wireless network. If you don't know your wireless network details, you can stop this step and do it later. Steven Office Security-enabled network ML-520GC Security-enabled network default Unsecured network ASUS Unsecured network Starting an unsecured network can put your computer attack Start this connection automatically Consult to a hidden wireless network Up Next-
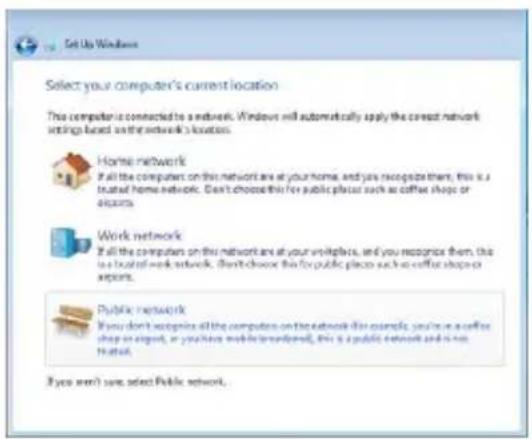
Select the network's location. Click Next to continue.
-
The initialization is finished.
text_image
Set Up Windows Select your computer's current location This computer is connected to a network. Windows will automatically apply the current network settings based on the network's location. Home network It all the computers on this network are at your home, and you recognize them, this is a trusted home network. Don't choose this for public places such as coffee shops or stores. Work network It all the computers on this network are at your workplace, and you recognize them, this is a trusted work network, then choose this for public places such as coffee shops or stores. Public network You don't recognize all the computers on the network (if examples, you're in a coffee shop or store), or you have mobile broadband, this is a public network and is not manual. If you aren't sure, select Public network.
text_image
Set Up Windows Windows® 7 Starter Windows a finalizing your settingsDesktop
There are several shortcuts on the desktop. Double-click them to launch the corresponding applications and enter the specified folders. Some applications would form minimized icons in the Notification area.

The actual Desktop screen may vary according to different models.
Network Connection
Configuring a wireless network connection
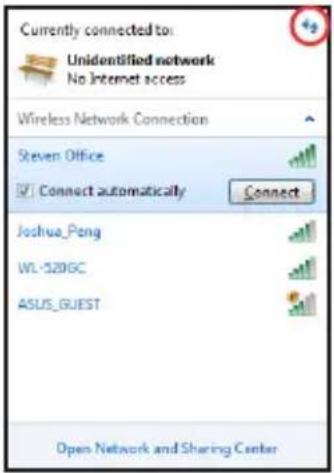
- Click the wireless network icon with an orange star in the Windows® Notification area.

If the wireless network icon with an orange star does not show in the Notification area, activate the wireless LAN function by pressing F_n + F_2 (
- Select the wireless access point you want to connect to from the list and click Connect to build the connection.

If you cannot find the desired access point, click the Refresh icon on the upper right corner to refresh and search in the list again.
text_image
Currently connected to: Unidentified network No Internet access Wireless Network Connection Steven Office Connect automatically Connect Joshua_Pong WL-52DGC ASUS_GUEST Open Network and Sharing Center- When connecting, you may have to enter a password.
- After a connection has been established, the connection is shown on the list.
- You can see the wireless network icon in the Notification area.

The crossed wireless network icon appears when you press
Local Area Network
To establish a wired network, follow the instructions below:
Using a dynamic IP / PPPoE network connection:
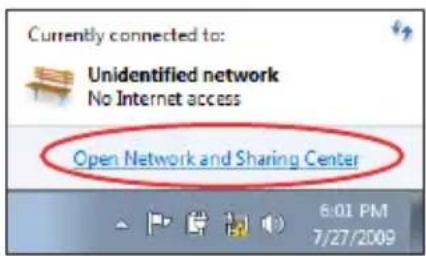
- Click the network icon with a yellow
warning triangle in the
Windows® Notification area and select Open Network and Sharing Center.
text_image
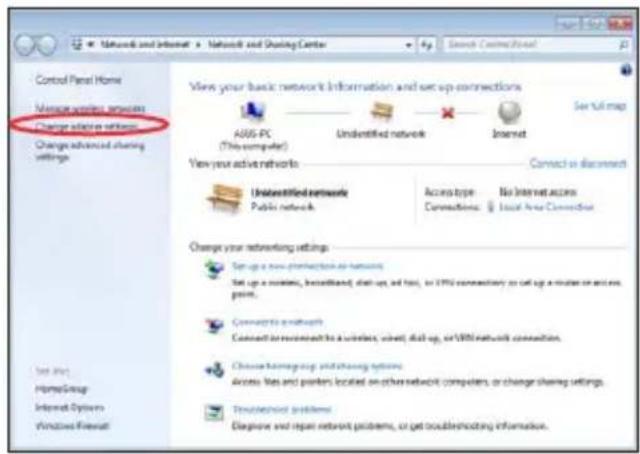
Currently connected to: Unidentified network No Internet access Open Network and Sharing Center 6:01 PM 7/27/2009- Click Change adapter settings in the left blue pane.
text_image
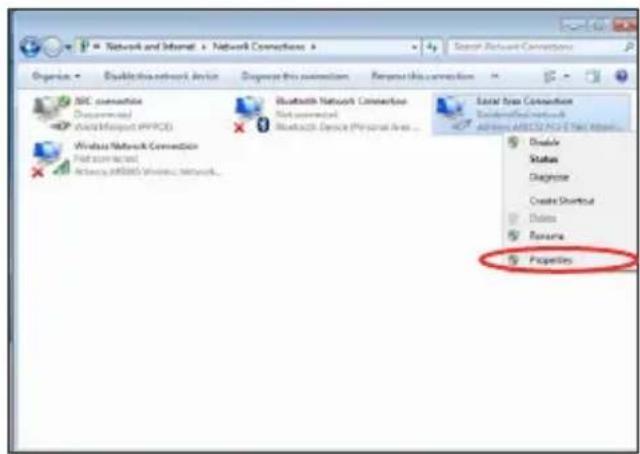
Control Panel Home Manage access services Change update settings Change advanced sharing settings Set up: HomeGroup Internet Options Virtuals Firewall Network and Internet > Network and Sharing Center View your basic network information and set up connections AOS-PC (This computer) Undidentified network Internet View your active networks Connect us download Undidentified network Public network Access type Connections: No Internet access Local Area Connection Change your networking settings Set up a new product or networks Set up a wireless, broadband, dial-up, and top, or WiFi connectivity to call up a router or arc port. Connect via network Connect to recommend for a wireless, wireless, dial-up, or WiFi network connection. Choose homegroup or switching options Access files and parkers located on other network computers, or change sharing settings. Transnational problems Describe and repair network problems, or get troubleshooting information.- Right-click Local Area Connection and select Properties.
text_image
Network and Internet > Network Connections > Organize > Disabling network device Choose this connection Choose this connection NRC connection Documental Auto-Intercept (APPRO) Bluetooth Network Connection Net connected Bluetooth Device (Physical Area... Social free Connection Unidentified network Advanced ABCD2 NCS & Net Interface... Disable Status Diagnose Create Shortset Delete Rename Properties- Click Internet Protocol Version 4(TCP/IPv4) and click Properties.

text_image
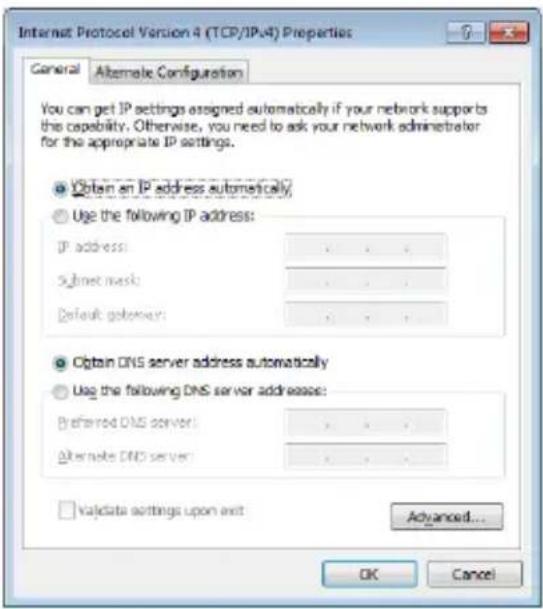
Local Area Connection Properties Networking Connect using: Atheros AR8132 PCI-E Fast Ethernet Controller Configure... This connection uses the following items: ✓ Client for Microsoft Networks ✓ Trend Micro NDIS 6.0 Filter Driver ✓ OoS Packet Scheduler ✓ File and Printer Sharing for Microsoft Networks ✓ Internet Protocol Version 6 (TCP/IPv6) ✓ Internet Protocol Version 4 (TCP/IPv4) ✓ Link-Layer Topology Discovery Mapper I/O Driver ✓ Link-Layer Topology Discovery Responder Install Install Properties Description Transmission Control Protocol/Internet Protocol. The default wide area network protocol that provides communication across diverse interconnected networks. OK Cancel- Click Obtain an IP address automatically and click OK.
text_image
Internet Protocol Version 4 (TCP/IPv4) Properties General Alternate Configuration You can get IP settings assigned automatically if your network supports the capability. Otherwise, you need to ask your network administrator for the appropriate IP settings. ● Obtain an IP address automatically ○ Use the following IP address: IP address: . Submit mask: . Default gateway: . ● Obtain DNS server address automatically ○ Use the following DNS server addresses: Preferred DNS server: . Alternate DNS server: . □ validate settings upon exit Advanced... OK Cancel(Continue the following steps if using PPPoE)
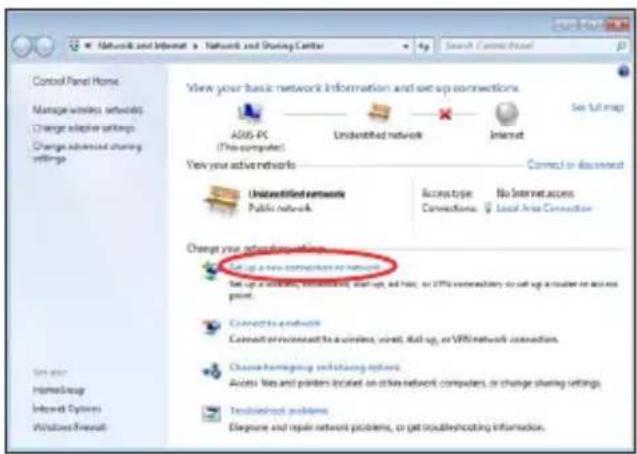
- Return to the Network and Sharing Center and then click Set up a new connection or network.
text_image
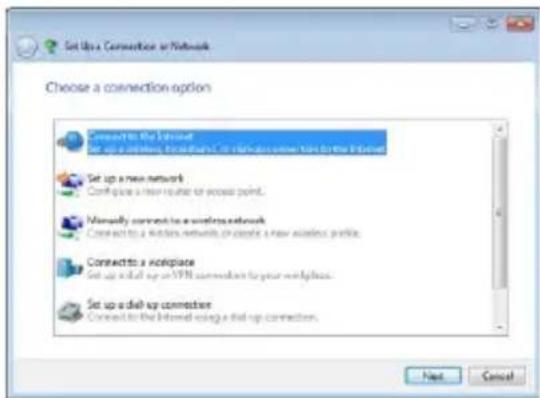
Control Panel Home Manage wireless networks Change adaptive settings Change advanced sharing settings View your basic network information and set up connections ASIS-PC (The-computer) Unidentified network Internet See full map View your active networks Connect or download Unidentified network Public network Access to Connections: No Internet access Local Area Connection Change your networking settings Set up a new connection by network Set up a network, which is open, add up, add back, or OFFS connectivity to set up a router or next port. Connect to a network Connect to account for a wireless, wireless, dial-up, or WiFi network connections. Change home/family networking options Access Web and problems located on other network computers, or change sharing settings. Text-based problems Delaware and repair network problems, or get troubleshooting information.7. Select Connect to the Internet and click Next.
text_image
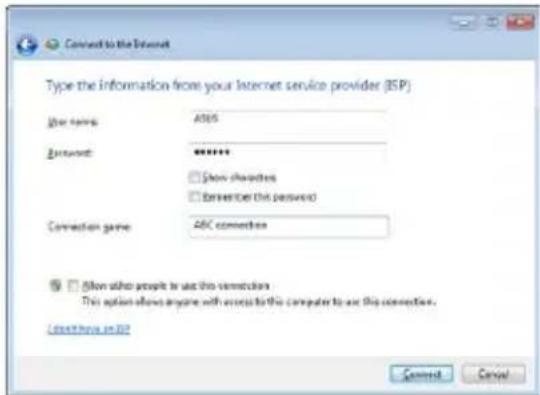
Set Up a Connection or Network Choose a connection option Connect to the Internet Set up a wireless network (or a network user link for the Internet) Set up a new network Configure a new router or access point. Mainly connect to a wireless network Connect to a wireless network or create a new wireless profile. Connect to a workplace Set up a dial-up or VPN connection to your workplace. Set up a dial-up connector Connect to the Internet using a dial-up connection.9. Enter your User name and, Password, and Connection name. Click Connect.
text_image
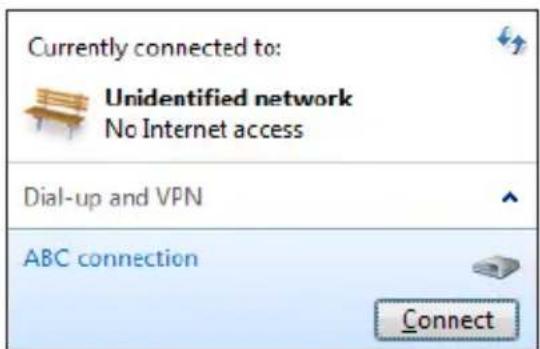
Connect to the Internet Type the information from your Internet service provider (BSP) Your name: ABC5 Amount: *****: Show characters Enter her this password Connection game: ABC connection Show who people to use this connection This option allows anyone with access to this computer to use this connection. Close here in BP Cancel Cancel11. Click the network icon in the taskbar and click the connection you just created.
text_image
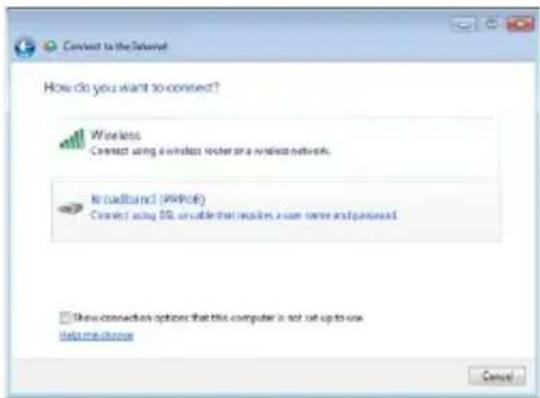
Currently connected to: Unidentified network No Internet access Dial-up and VPN ABC connection Connect8. Select Broadband (PPPoE) and click Next.
text_image
Connect to the Internet How do you want to connect? Wireless Connect using a wireless router or a network network. Broadband (PHPOR) Connect using SQL or cable that requires a user name and password. Show connection options that this computer is not set up to use help me change Cancel10. Click Close to finish the configuration.
text_image
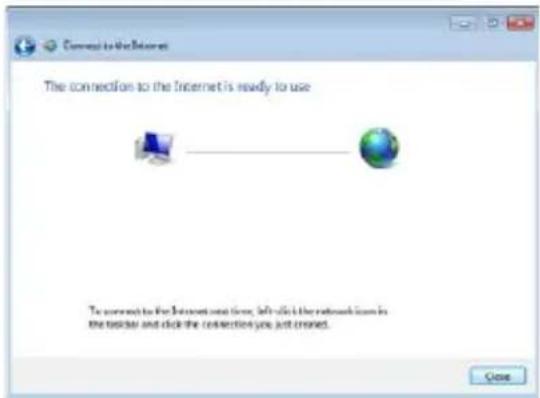
Connect to the Internet The connection to the Internet is ready to use To connect to the Internet user time, left click the network from the teacher and click the connection you just created. Close12. Enter your user name and password. Click Connect to connect to the Internet.
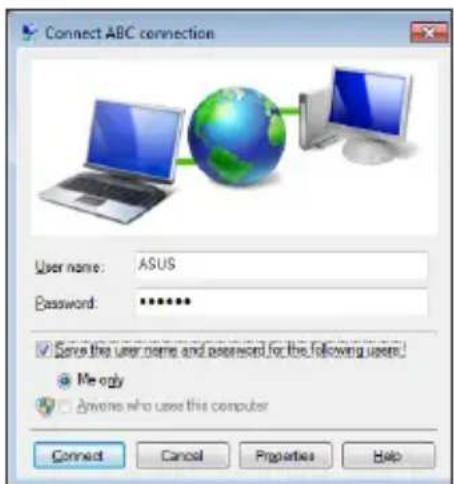
text_image
Connect ABC connection User name: ASUS Password: ****** ✓ Save the user name and assessed for the following users: ● Me only ○ Anyone who use this computer Connect Cancel Properties HelpUsing a static IP:
- Repeat the step 1–4 of Using a dynamic IP to start the static IP network configuration.
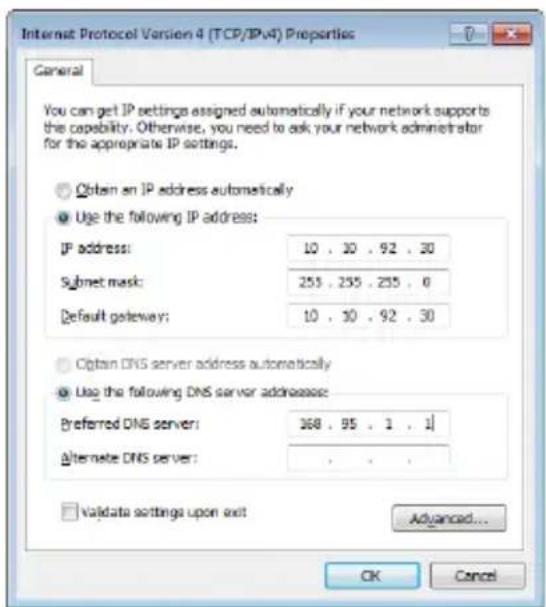
2 Click Use the following IP address.
-
Enter the IP address, Subnet mask and Gateway from your service provider.
-
If needed, enter the preferred DNS Server address and alternative address.
-
After entering all the related values, click OK to build the network connection.
text_image
Internet Protocol Version 4 (TCP/IPv4) Properties General You can get IP settings assigned automatically if your network supports the capability. Otherwise, you need to ask your network administrator for the appropriate IP settings. Obtain an IP address automatically Use the following IP address: IP address: 10 . 30 . 92 . 30 Subnet mask: 255 . 255 . 255 . 0 Default gateway: 10 . 30 . 92 . 30 Obtain DNS server address automatically Use the following DNS server addresses: Preferred DNS server: 368 . 95 . 1 . 1 Alternate DNS server: validate settings upon exit Advanced... OK Cancel
Contact your Internet Service Provider (ISP) if you have problems connecting to the network.
Browsing web pages
After you finish the network setup, click Internet Explorer on the desktop and start enjoying net surfing.

Visit our Eee PC homepage (http://eeepc.asus.com) to obtain the latest information and register at http://vip.asus.com for full service of your Eee PC.
ASUS Update
Bluetooth Connection
Super Hybrid Engine
Eee Docking
Boingo
Microsoft® Office Trial
Using the Eee PC
ASUS Update
The ASUS Update is a utility that allows you to manage, save, and update the Eee PC BIOS in Windows® environment. The ASUS Update utility allows you to:
- Save the current BIOS file
- Download the latest BIOS file from the Internet
- Update the BIOS from an updated BIOS file
- Update the BIOS directly from the Internet, and
• View the BIOS version information.
This utility is pre-loaded in your Eee PC.

ASUS Update requires an Internet connection either through a network or an Internet Service Provider (ISP).
Updating the BIOS through the Internet
To update the BIOS through the Internet
- Launch the ASUS Update utility from the Windows® desktop by clicking Start > All Programs > ASUS > ASUSUpdate for Eee PC> ASUSUpdate. The ASUS Update main window appears.
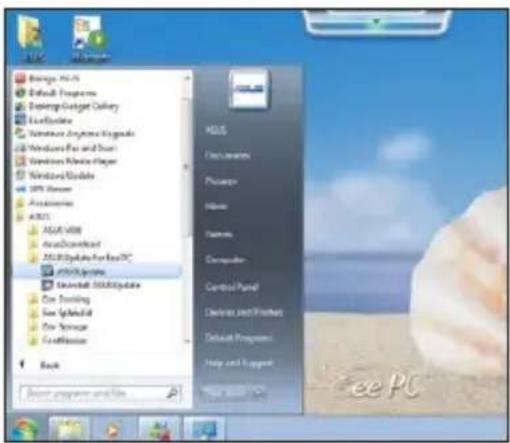
text_image
Start Menu Start Programs and Files ADUS Macromedia Windows Windows Update Windows Update Windows Update Windows Update Windows Update Windows Update Windows Update Windows Update Windows Update Windows Update Windows Update Windows Update Windows Update Windows Update Windows Update Windows Update Windows Update Windows Update Windows Update Windows Update Windows Update Windows Update Windows Update Windows Update Windows Update Windows Update Windows Update Windows Update Windows Update Windows Update Windows Update Windows Update Windows Update Windows Update- Select Update BIOS from Internet from the drop-down menu, then click Next.
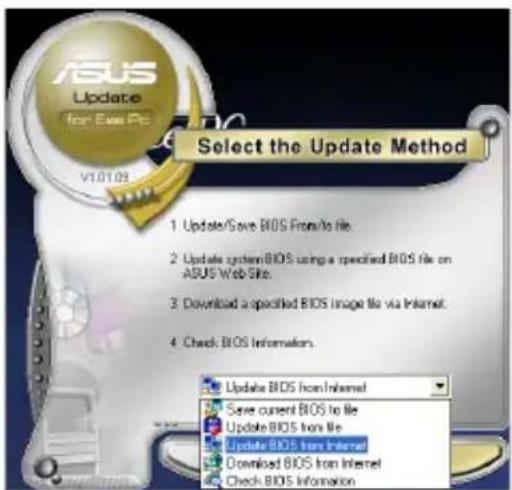
text_image
ASUS Update for Eas PC V1.01.03 Select the Update Method 1 Update/Save BIOS From/to file. 2 Update system BIOS using a specified BIOS file on ASUS Web Site. 3 Download a specified BIOS image file via Internet. 4 Check BIOS Information. Update BIOS from Internet Save current BIOS to file Update BIOS from file Update BIOS from Internet Download BIOS from Internet Check BIOS Information-
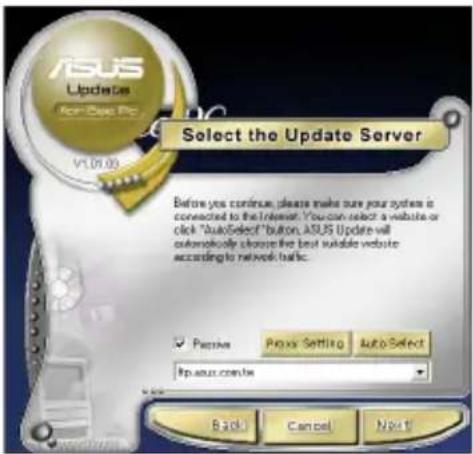
Select the ASUS FTP site nearest you to avoid network traffic, or click Auto Select. Click Next.
-
From the FTP site, select the desired BIOS version and click Next.
-
Follow the screen instructions to complete the update process.
text_image
ASUS Updates For Data Pro V1.05.03 Select the Update Server Before you continue, please make sure your system is connected to the Internet. You can select a website or click "AutoSelect" button, ASUS Update will automatically choose live best suitable website according to network habits. ✓ Passive Proxy Setting Auto Select http.asus.com.in Back Cancel Next
The ASUS Update utility is capable of updating itself through the Internet. Always update the utility to avail all its features.
Updating the BIOS through a BIOS file
To update the BIOS through a BIOS file:
-
Launch the ASUS Update utility from the Windows® desktop by clicking Start > Programs > ASUS > ASUSUpdate for EeePC> ASUSUpdate. The ASUS Update main window appears.
-
Select Update BIOS from file from the drop-down menu, then click Next.

text_image
ASUS Update for Web PC VI.01.03 Select the Update Method 1. Update/Save BIOS Flow/Workfile. 2. Update system BIOS using a specified BIOS file on ASUS Web Site. 3. Download a specified BIOS image file via Internet. 4. Check BIOS Information. Update BIOS from file Save current BIOS to file Update BIOS from file Update BIOS from Internet Download BIOS from Internet Check BIOS Information- Locate the BIOS file from the Open window, then click Open.
- Follow the screen instructions to complete the update process.
Bluetooth Connection (on selected models)

This device contains FCC ID: QDS-BRCM1043 or PPD-AR5B195 or QDS-BRCM1051 and IC ID: 4324A-BRCM1043 or 4104A-AR5B195 or 4324A-BRCM1051.
Bluetooth technology eliminates the need for cables for connecting Bluetooth-enabled devices. Examples of Bluetooth-enabled devices may be Notebook PCs, Desktop PCs, mobile phones, and PDAs.
To connect to a Bluetooth-enabled device:
-
Press
+ repeatedly until Bluetooth ON or WLAN & Bluetooth ON is shown. -
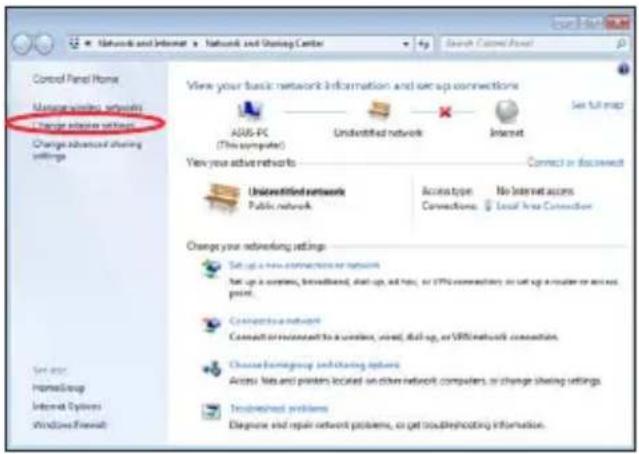
From Control Panel, go to Network and Internet > Network and Sharing Center and then click Change adapter settings in the left blue pane.
text_image
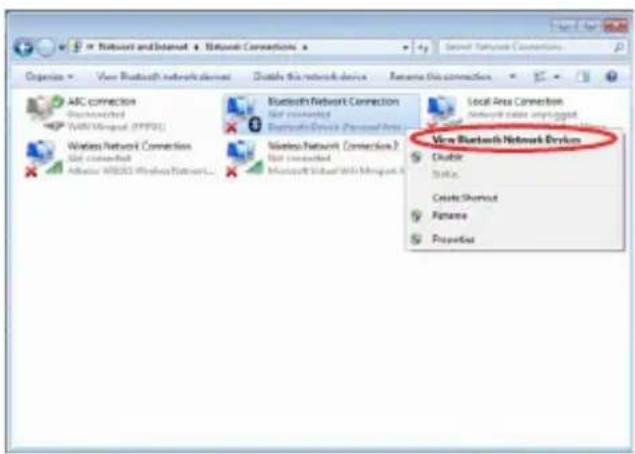
Control Panel Home Manage wireless networks Change wireless settings Change advanced sharing Settings View your basic network information and setup connections AUS-PC (This computer) Unidentified network Internet Set up map Connect or disconnect Connect or disconnect Connect or disconnect Connect or disconnect Connect or disconnect Connect or disconnect Connect or disconnect Connect or disconnect Connect or disconnect Connect or disconnect Connect or disconnect Connect or disconnect Connect or disconnect Connect or disconnect Connect or disconnect Connect or disconnect Connect or disconnect Connect or disconnect Connect or disconnect Connect or disconnect Connect or disconnect Connect or dis Connect Connect or dis Connect Connect or dis Connect Connect or dis Connect Connect or dis Connect Connect or dis Connect Connect or dis Connect Connect or dis Connect Connect or dis Connect Connect or dis Connect Connect or dis Connect Connect or dis Connect Connect or dis Connect Connect or dis Connect Connect or dis Connect Connect or dis Connect Connect or dis Connect Connect or dis Connect Connect or dis Connect Connect or dis Connect Connect or dis connect Connect or dis connect Connect or dis connect Connect or dis connect Connect or dis connect Connect or dis connect Connect or dis connect Connect or dis connect Connect or dis connect Connect or dis connect Connect or dis connect Connect or dis connect Connect or dis connect Connect or dis connect Connect or dis connect Connect or dis connect Connect or dis connect Connect or dis connect Connect or dis connect Connect or dis connect Connect or disconnect Connect or disconnect Connect or disconnect Connect or disconnect Connect or disconnect Connect or disconnect Connect or disconnect Connect or disconnect Connect or disconnect Connect or disconnect Connect or disconnect Connect or disconnect Connect or disconnect Connect or disconnect Connect or disconnect Connect or disconnect Connect or disconnect Connect or disconnect Connect or disconnect Connect or dis connect Connect or dis connect Connect or dis connect Connect or dis connect Connect or dis connect- Right-click Bluetooth Network Connection and select View Bluetooth Network Devices.
text_image
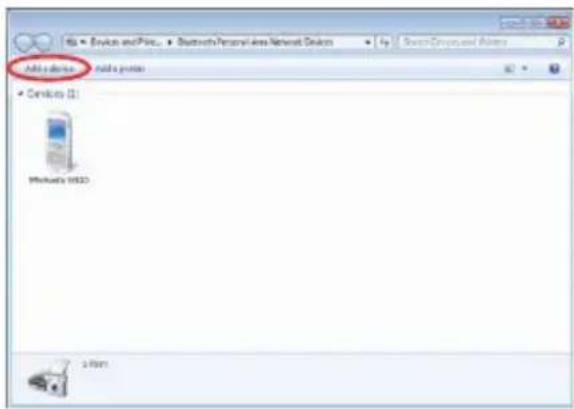
View Bluetooth Network Overlay Local Area Connection Network color unsupport Delete Delete Shroust Rename Properties- Click Add a device to look for new devices.
text_image
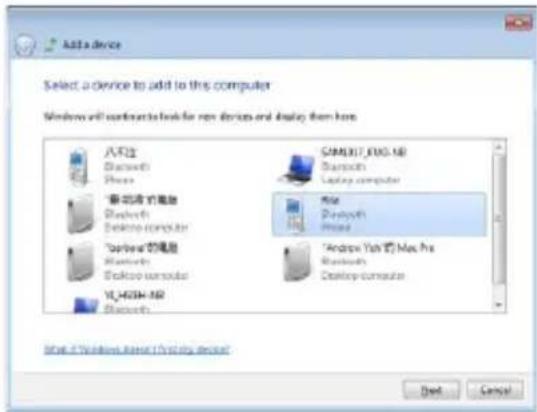
Add options Add points • Devices (I) Microsoft 1952 2 items- Select a Bluetooth-enabled device from the list and click Next.
text_image
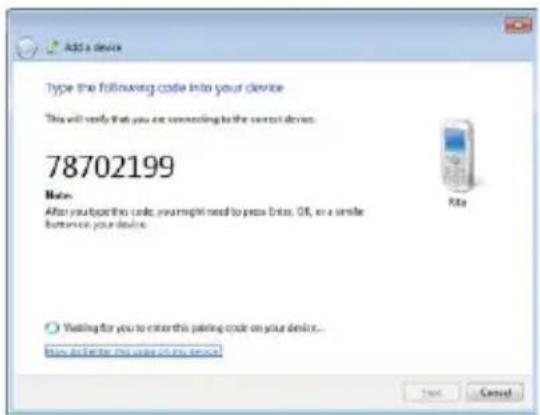
Add a device Select a device to add to this computer Windows will continue to look for new devices and display them here. A12 Bluetooth Phase *新功能的电脑 Bluetooth Desktop computer *Options 的电脑 Bluetooth Desktop computer YL403H-5B Bluetooth COMX37_000.5B Bluetooth Playtech computer Rise Playtech Phase *Android Yoh 的 Mac Pro Bluetooth Desktop computer Next of Windows about this device Add Cancel- Enter the Bluetooth security code into your device and start pairing.
text_image
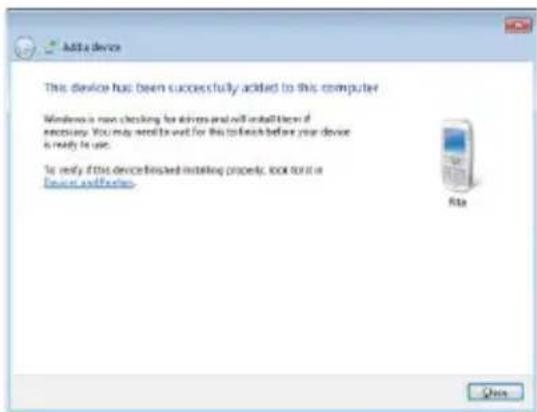
Add a device Type the following code into your device This will verify that you are connecting to the correct device. 78702199 Note: After your product code, your right need to press Drive, OR, or a similar button on your device. ○ Visiting for you to enter this pairing code on your device... How do better this image is on your device? Next Cancel- The paired relationship is successfully built. Click Close to finish the setting.
text_image
Add a device This device has been successfully added to this computer. Windows is now checking for drivers and will install them if necessary. You may need to wait for this to finish before your device is ready to use. To verify if this device finished installing properly, look forward in a software interface. FileSuper Hybrid Engine
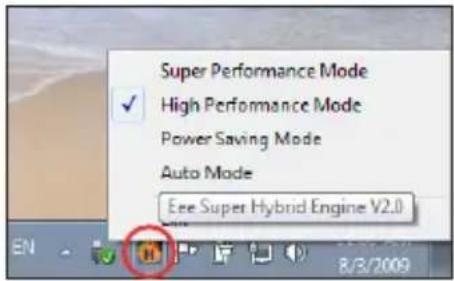
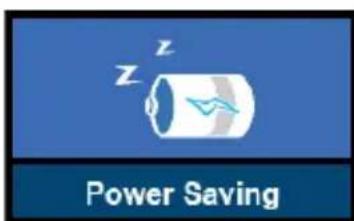
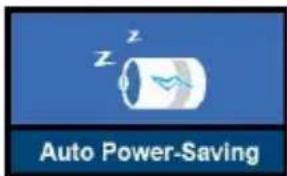
Super Hybrid Engine offers different power modes. The assigned instant key toggles power savings between various power saving modes. The power saving modes control many aspects of your Eee PC to maximize performance versus battery time. Applying or removing the power adapter will automatically switch the system between AC mode and battery mode. The selected mode is shown on the display.
To change the power mode
- Press
- Right-click the Super Hybrid Engine icon in the Notification area, and select a preferred power mode.
text_image
Super Performance Mode ✓ High Performance Mode Power Saving Mode Auto Mode Eee Super Hybrid Engine V2.0 EN 8/3/2009Super Hybrid Engine Modes
text_image
Power Saving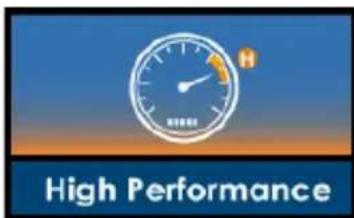
text_image
High Performance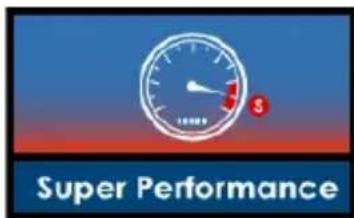
text_image
Super Performance
Auto High Performance and Auto Power-Saving mode are available only when applying or removing the power adapter.
text_image
Auto Power-Saving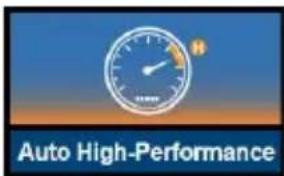
text_image
Auto High-Performance
If your external monitor functions abnormally in Power Saving mode at a resolution of 1024 x 768 pixels or higher, press
Eee Docking
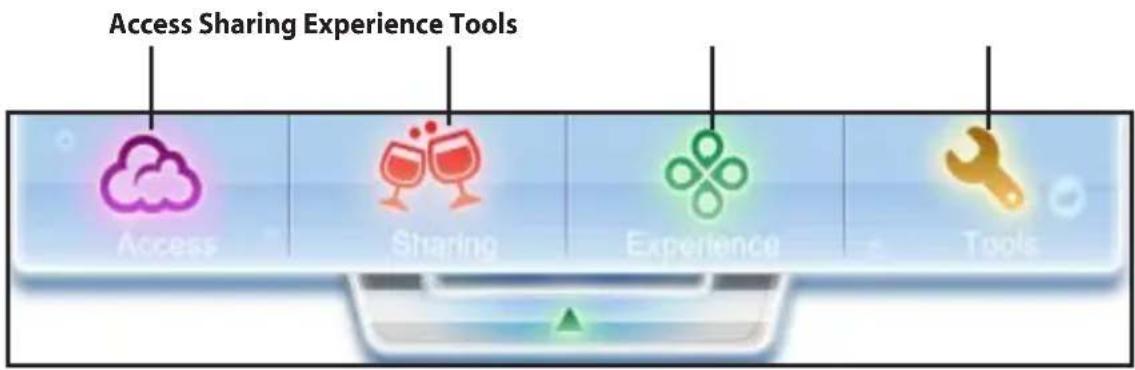
Eee Docking contains multiple useful applications. The Eee Docking tool bar is at the top of the desktop.
text_image
Access Sharing Experience Tools Access Sharing Experience Tools
- The applications in Eee Docking may vary depending on models.
- The names of the applications in Eee Docking are subject to change without notice.
Access

ASUS AP Bank
ASUS AP Bank offers various software applications and multimedia enjoyment online.
Sharing

Syncables Desktop DE (on selected models)
This application offers you an easy way to organize or migrate your data in applications such as emails, brower's My Favorite, instant messenger's chat history between your Eee PC and other notebook PCs/desktops.
E-Cam
E-Cam provides interesting effects and useful add-ons for your webcam.
Experience (on selected models)
Eee Splendid
Eee Splendid helps improve your Eee PC display in terms of the contrast, brightness, skin tone, and color saturation for red, green, and blue independently.
Tools

Live Update
Live Update keeps your Eee PC up-to-date by checking the online updates.
Font Resizer
Font Resizer allows you to adjust the font/text size on your Eee PC screen.
Docking Setting
Docking Setting allows you to configure the appearance and the position of the Eee Docking tool bar.
PowerRecover (on selected models)
You are able to back up your system partition to the local hard disk drive in your Eee PC or to a USB hard disk so that you could easily restore your Eee PC while any hardware or OS problem occurs.
Boingo (on selected models)
Boingo gives you easy access to global Wi-Fi services with a special price via the Boingo utility. Use one account at more than 100,000 hotspots around the world, including airports, hotels, cafes and restaurants.
Microsoft® Office Trial (on selected models)

Microsoft® Office Starter is installed on some models instead of Microsoft® Office Trial.
Eee PC users can enjoy Microsoft Office Suite free trial for 60 days. Do the following instructions to start the free trial.
-
Ensure that your Eee PC is connected to the Internet and double-click Microsoft Office 60 Day Trial - Online on the desktop.
-
Click TRY NOW.
-
Enter your E-mail address and click SUBMIT.
-
Copy your product key and click the link.
-
Enter your product key and follow the onscreen instructions to finish the activation process before starting the free trial.
text_image
Start Menu Options OK Cancel Help Help Add Help Add OK BUY Review Excellent Options Please click to the other items you want to add your product or download link. http://www.elsevier.com/Office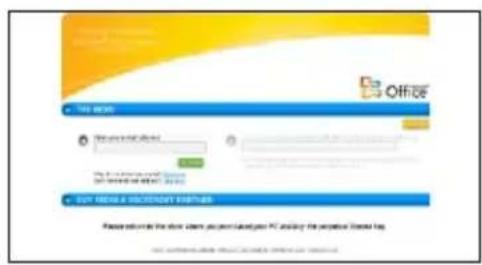
text_image
Office THE HEAD GO GO TO ENSINOY GO TO ENSINOY GO TO ENSINOY GO TO ENSINOY GO TO ENSINOY GO TO ENSINOY GO TO ENSINOY GO TO ENSINOY GO TO ENSINOY GO TO ENSINOY GO TO ENSINOY GO TO ENSINOY GO TO ENSINOY GO TO ENSINOY GO TO ENSINOY GPT TO ENSINOY GO TO ENSINOY GO TO ENSINOY GO TO ENSINOY GO TO ENSINOY GO TO ENSINOY GO TO ENSINOY GO TO ENSINOY GO TO ENSINOY GO TO ENSINOY GO TO ENSINOY GO TO ENSINOY GO TO ENSINOY GO TO ENSINOY GO TO TENO GO TO TENO GO TO TENO GO TO TENO GO TO TENO GO TO TENO GO TO TENO GO TO TENO GO TO TENO GO TO TENO GO TO TENO GO TO TENO GO TO TENO GO TO TENO GO TO TENO GO TO TENO GO TO TENO GO TO UNT GO TO UNT GO TO UNT GO TO UNT GO TO UNT GO TO UNT GO TO UNT GO TO UNT GO TO UNT GO TO UNT GO TO UNT GO TO UNT GO TO UNT GO TO UNT GO TO UNT GO TO UNT GO TO UNT GO TO UNT GO TO UNT GO TO UNT GO TO UINT GO TO UNT GO TO UNT GO TO UNT GO TO UNT GO TO UNT GO TO UNT GO TO UNT GO TO UNT GO TO UNT GO TO UNT GO TO UNT GO TO UNT GO TO UNT GO TO UNT GO TO UNT GO TO UNT GO TO UNT GO TO UNT GO TO UNT GO TO U NT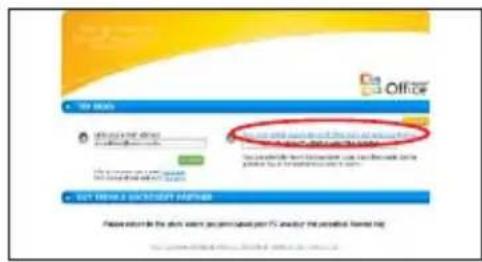
text_image
Office • 100 MBS • 6.5% (4.5%) (3.5%) (2.5%) (1.5%) (0.5%) (0.2%) (0.1%) (0.05%) (0.03%) (0.02%) (0.01%) (0.005%) (0.003%) (0.002%) (0.001%) (0.0005%) (0.0003%) • 6.5% (4.5%) (3.5%) (2.5%) (1.5%) (0.5%) (0.2%) (0.1%) (0.05%) (0.03%) (0.02%) (0.01%) (0.005%) (0.003%) (0.002%) (0.001%) (0.0008%) • 6.5% (4.5%) (3.5%) (2.5%) (1.5%) (0.5%) (0.2%) (0.1%) (0.05%) (0.03%) (0.02%) (0.01%) (0.005%) (0.003%) (0.002%) (0.001%) (0.01%)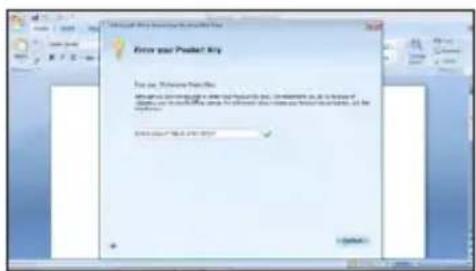
text_image
Enter your Product Key For you, Software Solutions If you are not able to get a new product file, then get an error on the product file. You can't have a product file for any other product file or the product file. OK
If you want to use other applications in the Microsoft Office Suite, click start and point to All Programs > Microsoft Office to select a desired application.
System Recovery
Boot Booster
System Recovery
System Recovery

Disable Boot Booster in BIOS setup before you perform system recovery from USB flash disk, external optical drive or hidden partition.

Ensure to connect your Eee PC to the AC power adapter before using F9 recovery to avoid recovery failure.
Using recovery partition (F9 Recovery)
- Press
during bootup.

Ensure to press
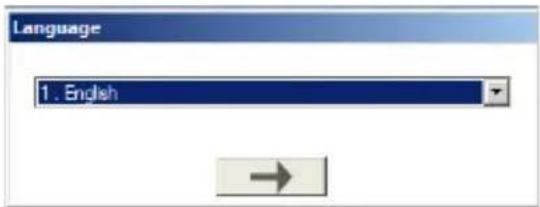
- Select the language you use and click → to continue.
text_image
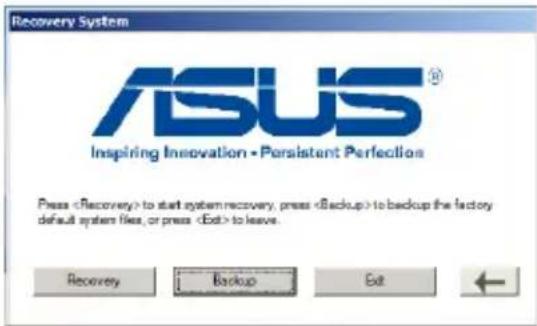
Language 1. English- Click Recovery in the Recovery System dialog box to start the system recovery.
text_image
Recovery System ASUS® Inspiring Innovation • Persistent Perfection Press- The system starts system recovery automatically and follows the onscreen instructions to complete the recovery process.
Back up the recovery files
- Repeat the step 1—2 in the previous section.
- Connect a USB storage device to your Eee PC and click Backup in the Recovery System dialog box to start the recovery files backup.

- The size of the connected USB storage device should be larger than 16GB.
• Memory cards are not supported for this function. - A dialog box appears as a reminder if you have not connected the USB storage device for system recovery backup to your Eee PC.
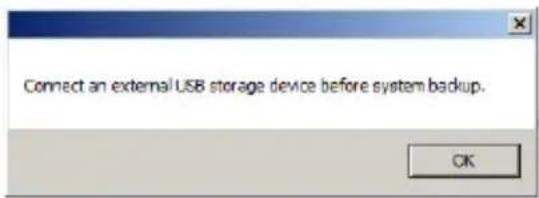
text_image
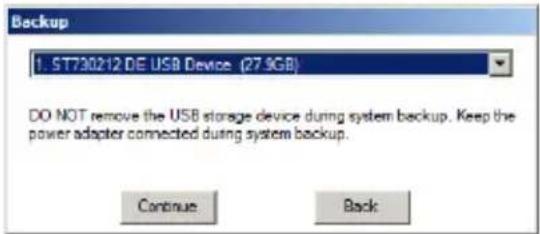
Connect an external USB storage device before system backup.- Select a desired USB storage device if more than one USB storage device is connected to your Eee PC and click Continue.
text_image
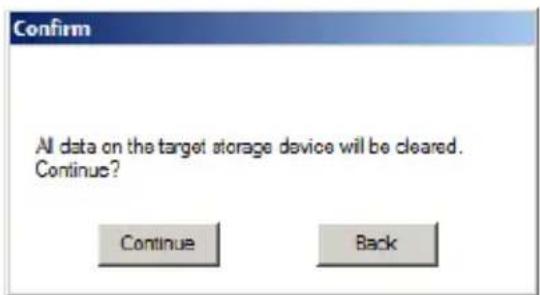
Backup 1. ST730212 DE USB Device (27.9GB) DO NOT remove the USB storage device during system backup. Keep the power adapter connected during system backup. Continue Back- All the data on the selected USB storage device will be cleared. Click Continue to start the backup or click Back to backup your important data.
text_image
Confirm All data on the target storage device will be cleared. Continue? Continue Back
You will lose all your data on the selected USB storage device. Ensure to back up your important data beforehand.
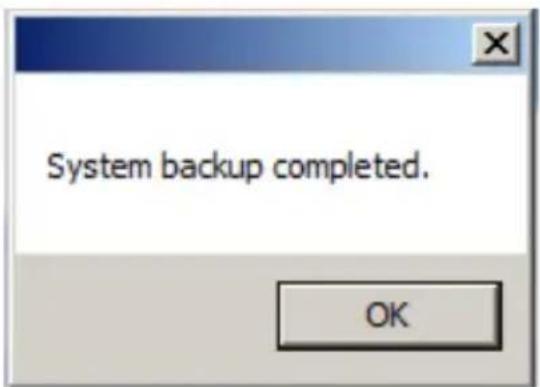
- The system backup starts and click OK when done.
text_image
System backup completed. OKUsing the USB storage device (USB recovery)
-
Connect the USB storage device that you backup the system recovery files.
-
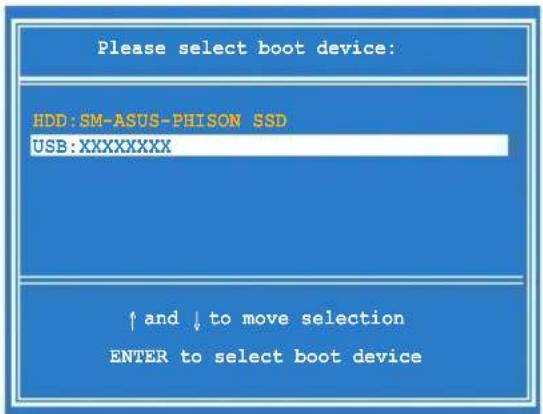
Press
on bootup and the Please select boot device screen appears. Select USB: XXXXXX to boot from the connected USB storage device.
text_image
Please select boot device: HDD: SM-ASUS-PHISON SSD USB: XXXXXXXX ↑ and ↓ to move selection ENTER to select boot device- Select the language you use and click
→ to continue.
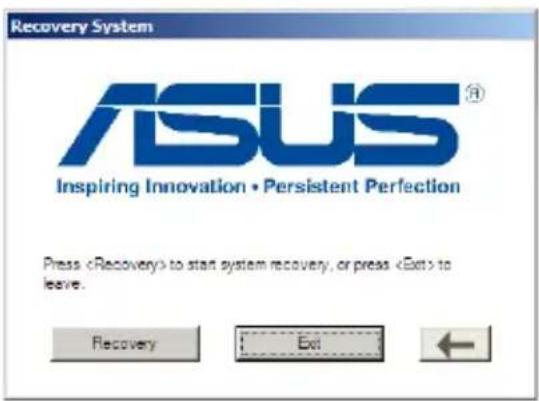
- Click Recovery to start system recovery.
text_image
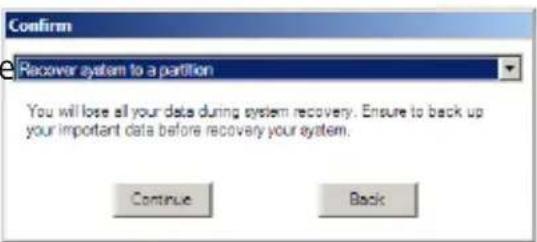
Recovery System ASUS® Inspiring Innovation • Persistent Perfection Press- Select a partition option and click Continue. Partition options:
• Recover system to a partition.
This option deletes all data on the system partition "C" and keeps the partition "D" unchanged.
text_image
Confirm Recover system to a partition You will lose all your data during system recovery. Ensure to back up your important data before recovery your system. Continue Back• Recover system to entire HD.
This option deletes all partitions
from your hard disk drive and creates a new system partition as drive "C" and a data partition as drive "D".
- Follow the onscreen instructions to complete the recovery process.
Boot Booster
The Boot Booster item in BIOS setup helps shorten your Eee PC bootup time. However, you MUST disable this BIOS item before you change any Eee PC components or perform system recovery (from USB flash disk, external optical drive or hidden partition). Follow the instructions below to disable Boot Booster:
-
Start the system and press
on bootup to show the POST screen. Press again to enter the BIOS setup. -
Set Boot Booster to [Disabled].

If you fail to see the POST screen or enter the BIOS setup by doing the instruction above, restart the system and try pressing
| Main Advanced Security Boot Exit | |
| ▶ Boot Device Priority ▶ Boot Settings Configuration OnBoard LAN Boot ROM [Enabled] Boot Booster [Disabled] | Specifies the Boot Device Priority sequence. A virtual floppy disk drive (Floppy Drive B: ) may appear when you set the CD-ROM drive as the first boot device. ←→ Select Screen ↑↓ Select Item Enter Go to Sub Screen F1 General Help F10 Save and Exit ESC Exit |
| v02.58 (C)Copyright 1985-2005, American Megatrends, Inc. | |
- Press
to save the configuration and restart Eee PC.

Remember to enable Boot Booster after you complete hardware change or system recovery.
Declarations and Safety Statements
Copyright Information
Limitation of Liability
Service and Support
Declarations and Safety Statements
Federal Communications Commission Statement
This device complies with FCC Rules Part 15. Operation is subject to the following two conditions:
- This device may not cause harmful interference, and
- This device must accept any interference received, including interference that may cause undesired operation.
This equipment has been tested and found to comply with the limits for a class B digital device, pursuant to Part 15 of the Federal Communications Commission (FCC) rules. These limits are designed to provide reasonable protection against harmful interference in a residential installation. This equipment generates, uses, and can radiate radio frequency energy and, if not installed and used in accordance with the instructions, may cause harmful interference to radio communications. However, there is no guarantee that interference will not occur in a particular installation. If this equipment does cause harmful interference to radio or television reception, which can be determined by turning the equipment off and on, the user is encouraged to try to correct the interference by one or more of the following measures:
- Reorient or relocate the receiving antenna.
- Increase the separation between the equipment and receiver.
- Connect the equipment into an outlet on a circuit different from that to which the receiver is connected.
- Consult the dealer or an experienced radio/TV technician for help.

The use of a shielded-type power cord is required in order to meet FCC emission limits and to prevent interference to the nearby radio and television reception. It is essential that only the supplied power cord be used. Use only shielded cables to connect I/O devices to this equipment. You are cautioned that changes or modifications not expressly approved by the party responsible for compliance could void your authority to operate the equipment.
(Reprinted from the Code of Federal Regulations #47, part 15.193, 1993. Washington DC: Office of the Federal Register, National Archives and Records Administration, U.S. Government Printing Office.)
FCC Radio Frequency (RF) Exposure Caution Statement

Any changes or modifications not expressly approved by the party responsible for compliance could void the user's authority to operate this equipment. "The manufacture declares that this device is limited to Channels 1 through 11 in the 2.4GHz frequency by specified firmware controlled in the USA."
This equipment complies with FCC radiation exposure limits set forth for an uncontrolled environment. To maintain compliance with FCC RF exposure compliance requirements, please avoid direct contact to the transmitting antenna during transmitting. End users must follow the specific operating instructions for satisfying RF exposure compliance.
Eee PC 1016 Series
Max. SAR Measurement 1g (W/kg)
| AW-NE785H A | W-NE762H AW | -NB047H AW-NB037H | |
| 802. 11b 0.049 0.052 Refer to the latest user | manual at ASUS Support Site. | ||
| 802. 11g 0.044 0.050 | |||
| 802. 11n (20M) 0.038 0.038 | |||
| 802. 11n (40M) 0.039 0.038 | |||
Declaration of Conformity (R&TTE directive 1999/5/EC)
The following items were completed and are considered relevant and sufficient:
• Essential requirements as in [Article 3]
- Protection requirements for health and safety as in [Article 3.1a]
- Testing for electric safety according to [EN 60950]
- Protection requirements for electromagnetic compatibility in [Article 3.1b]
- Testing for electromagnetic compatibility in [EN 301 489-1] & [EN 301 489-17]
• Effective use of the radio spectrum as in [Article 3.2]
• Radio test suites according to [EN 300 328-2]
IC Radiation Exposure Statement for Canada
This equipment complies with IC radiation exposure limits set forth for an uncontrolled environment. To maintain compliance with IC RF exposure compliance requirements, please avoid direct contact to the transmitting antenna during transmitting. End users must follow the specific operating instructions for satisfying RF exposure compliance.
Operation is subject to the following two conditions:
• This device may not cause interference and
- This device must accept any interference, including interference that may cause undesired operation of the device.
To prevent radio interference to the licensed service (i.e. co-channel Mobile Satellite systems) this device is intended to be operated indoors and away from windows to provide maximum shielding. Equipment (or its transmit antenna) that is installed outdoors is subject to licensing.
Eee PC 1016 Series
Max. SAR Measurement 1g (W/kg)
| AW-NE785H AW | W-NE762H AW | -NB047H AW | NB037H | |
| 802. 11b 0.049 0.052 Refer to the latest user | manual at ASUS Support Site. | |||
| 802. 11g 0.044 0.050 | ||||
| 802. 11n (20M) 0.038 0.038 | ||||
| 802. 11n (40M) 0.039 0.038 | ||||
This device and its antenna(s) must not be co-located or operating in conjunction with any other antenna or transmitter.
Country Code selection feature to be disabled for products marketed to the US/CANADA.
This Class [B] digital apparatus complies with Canadian ICES-003.
CE marking for devices without wireless LAN/Bluetooth
The shipped version of this device complies with the requirements of the EEC directives 2004/108/EC "Electromagnetic compatibility" and 2006/95/EC "Low voltage directive".

CE marking for devices with wireless LAN/Bluetooth
This equipment complies with the requirements of Directive 1999/5/EC of the European Parliament and Commission from 9 March, 1999 governing Radio and Telecommunications Equipment and mutual recognition of conformity.
Wireless Operation Channel for Different Domains
N. America 2.412-2.462 GHz Ch01 through CH11
Japan 2.412-2.484 GHz Ch01 through Ch14
Europe ETSI 2.412-2.472 GHz Ch01 through Ch13
France Restricted Wireless Frequency Bands
Some areas of France have a restricted frequency band. The worst case maximum authorized power indoors are:
- 10mW for the entire 2.4 GHz band (2400 MHz–2483.5 MHz)
• 100mW for frequencies between 2446.5 MHz and 2483.5 MHz

Channels 10 through 13 inclusive operate in the band 2446.6 MHz to 2483.5 MHz.
There are few possibilities for outdoor use: On private property or on the private property of public persons, use is subject to a preliminary authorization procedure by the Ministry of Defense, with maximum authorized power of 100mW in the 2446.5–2483.5 MHz band. Use outdoors on public property is not permitted.
In the departments listed below, for the entire 2.4 GHz band:
• Maximum authorized power indoors is 100mW
• Maximum authorized power outdoors is 10mW
Departments in which the use of the 2400–2483.5 MHz band is permitted with an EIRP of less than 100mW indoors and less than 10mW outdoors:
01 Ain 02 Aisne 03 Allier
05 Hautes Alpes 08 Ardennes 09 Ariège
11 Aude 12 Aveyron 16 Charente
24 Dordogne 25 Doubs 26 Drôme
This requirement is likely to change over time, allowing you to use your wireless LAN card in more areas within France. Please check with ART for the latest information (www.art-telecom.fr)

Your WLAN Card transmits less than 100mW, but more than 10mW.
UL Safety Notices
Required for UL 1459 covering telecommunications (telephone) equipment intended to be electrically connected to a telecommunication network that has an operating voltage to ground that does not exceed 200V peak, 300V peak-to-peak, and 105V rms, and installed or used in accordance with the National Electrical Code (NFPA 70).
When using the Eee PC modem, basic safety precautions should always be followed to reduce the risk of fire, electric shock, and injury to persons, including the following:
- DO NOT use the Eee PC near water, for example, near a bath tub, wash bowl, kitchen sink or laundry tub, in a wet basement or near a swimming pool.
- DO NOT use the Eee PC during an electrical storm. There may be a remote risk of electric shock from lightning.
- DO NOT use the Eee PC in the vicinity of a gas leak.
Required for UL 1642 covering primary (nonrechargeable) and secondary (rechargeable) lithium batteries for use as power sources in products. These batteries contain metallic lithium, or a lithium alloy, or a lithium ion, and may consist of a single electrochemical cell or two or more cells connected in series, parallel, or both, that convert chemical energy into electrical energy by an irreversible or reversible chemical reaction.
- Do not dispose the Eee PC battery pack in a fire, as they may explode. Check with local codes for possible special disposal instructions to reduce the risk of injury to persons due to fire or explosion.
- Do not use power adapters or batteries from other devices to reduce the risk of injury to persons due to fire or explosion. Use only UL certified power adapters or batteries supplied by the manufacturer or authorized retailers.
Power Safety Requirement
Products with electrical current ratings up to 6A and weighing more than 3Kg must use approved power cords greater than or equal to: H05VV-F, 3G, 0.75mm ^2 or H05VV-F, 2G, 0.75mm ^2 .
REACH Notice
Complying with the REACH (Registration, Evaluation, Authorisation, and Restriction of Chemicals) regulatory framework, we published the chemical substances in our products at ASUS REACH website at http://green.asus.com/english/REACH.htm.
Global Environmental Regulation Compliance and Declaration
ASUS follows the green design concept to design and manufacture our products, and makes sure that each stage of the product life cycle of ASUS product is in line with global environmental regulations. In addition, ASUS disclose the relevant information based on regulation requirements.
Please refer to http://csr.asus.com/english/Compliance.htm for information disclosure based on regulation requirements ASUS is complied with:
• Japan JIS-C-0950 Material Declarations
• EU REACH SVHC
- Korea RoHS
- Swiss Energy Laws
Takeback Services
ASUS recycling and takeback programs come from our commitment to the highest standards for protecting our environment. We believe in providing solutions for our customers to be able to responsibly recycle our products, batteries and other components as well as the packaging materials. Please go to http://csr.asus.com/english/Takeback.htm for detail recycling information in different region.
Nordic Lithium Cautions (for lithium-ion batteries)

CAUTION! Danger of explosion if battery is incorrectly replaced. Replace only with the same or equivalent type recommended by the manufacturer. Dispose of used batteries according to the manufacturer's instructions.
(English)

No part of this manual, including the products and software described in it, may be reproduced, transmitted, transcribed, stored in a retrieval system, or translated into any language in any form or by any means, except documentation kept by the purchaser for backup purposes, without the express written permission of ASUSTeK COMPUTER INC. ("ASUS").
ASUS PROVIDES THIS MANUAL "AS IS" WITHOUT WARRANTY OF ANY KIND, EITHER EXPRESS OR IMPLIED, INCLUDING BUT NOT LIMITED TO THE IMPLIED WARRANTIES OR CONDITIONS OF MERCHANTABILITY OR FITNESS FOR A PARTICULAR PURPOSE. IN NO EVENT SHALL ASUS, ITS DIRECTORS, OFFICERS, EMPLOYEES OR AGENTS BE LIABLE FOR ANY INDIRECT, SPECIAL, INCIDENTAL, OR CONSEQUENTIAL DAMAGES (INCLUDING DAMAGES FOR LOSS OF PROFITS, LOSS OF BUSINESS, LOSS OF USE OR DATA, INTERRUPTION OF BUSINESS AND THE LIKE), EVEN IF ASUS HAS BEEN ADVISED OF THE POSSIBILITY OF SUCH DAMAGES ARISING FROM ANY DEFECT OR ERROR IN THIS MANUAL OR PRODUCT.
Products and corporate names appearing in this manual may or may not be registered trademarks or copyrights of their respective companies, and are used only for identification or explanation and to the owners' benefit, without intent to infringe.
SPECIFICATIONS AND INFORMATION CONTAINED IN THIS MANUAL ARE FURNISHED FOR INFORMATIONAL USE ONLY, AND ARE SUBJECT TO CHANGE AT ANY TIME WITHOUT NOTICE, AND SHOULD NOT BE CONSTRUED AS A COMMITMENT BY ASUS. ASUS ASSUMES NO RESPONSIBILITY OR LIABILITY FOR ANY ERRORS OR INACCURACIES THAT MAY APPEAR IN THIS MANUAL, INCLUDING THE PRODUCTS AND SOFTWARE DESCRIBED IN IT.
Copyright © 2010 ASUSTeK COMPUTER INC. All Rights Reserved.
Limitation of Liability
Circumstances may arise where because of a default on ASUS' part or other liability, you are entitled to recover damages from ASUS. In each such instance, regardless of the basis on which you are entitled to claim damages from ASUS, ASUS is liable for no more than damages for bodily injury (including death) and damage to real property and tangible personal property; or any other actual and direct damages resulted from omission or failure of performing legal duties under this Warranty Statement, up to the listed contract price of each product.
ASUS will only be responsible for or indemnify you for loss, damages or claims based in contract, tort or infringement under this Warranty Statement.
This limit also applies to ASUS' suppliers and its reseller. It is the maximum for which ASUS, its suppliers, and your reseller are collectively responsible.
UNDER NO CIRCUMSTANCES IS ASUS LIABLE FOR ANY OF THE FOLLOWING: (1) THIRD-PARTY CLAIMS AGAINST YOU FOR DAMAGES; (2) LOSS OF, OR DAMAGE TO, YOUR RECORDS OR DATA; OR (3) SPECIAL, INCIDENTAL, OR INDIRECT DAMAGES OR FOR ANY ECONOMIC CONSEQUENTIAL DAMAGES (INCLUDING LOST PROFITS OR SAVINGS), EVEN IF ASUS, ITS SUPPLIERS OR YOUR RESELLER IS INFORMED OF THEIR POSSIBILITY.
Service and Support
Visit our multi-language web site at http://www.asus.com
| Manufacturer ASUSTek COMPUTER INC. | |
| Address, City No. 150, LI-TE RD., PEITOU, TAIPEI 112, TAIWAN R.O.C | |
| Country TAIWAN | |
| Authorized Representative in Europe | ASUS COMPUTER GmbH |
| Address, City HARKORT STR. 21-23, 40880 RATINGEN | |
| Country GERMANY | |