
D24M - Security Camera Mobotix - Free user manual and instructions
Find the device manual for free D24M Mobotix in PDF.


| Product Type | Security Camera |
| Brand | Mobotix |
| Model | D24M |
| Video Resolution | Up to 3 MP (2048x1536) |
| Field of View | 180° horizontal |
| Night Vision | IR LEDs up to 30m |
| Connectivity | Ethernet (PoE) |
| Power Supply | Power over Ethernet (PoE) or 12V DC |
| Dimensions (WxHxD) | 130 x 80 x 60 mm |
| Weight | 500 g |
| Ingress Protection | IP66 |
| Motion Detection | Yes, with customizable zones |
| Video Compression | H.264, MJPEG |
| Local Storage | MicroSD card slot, up to 128 GB |
| Audio | Built-in microphone and speaker |
| Mounting | Wall or ceiling (bracket included) |
| Operating Temperature | -20°C to 50°C |
| Maintenance | Clean lens with soft cloth; do not use water jets |
| Security | SSL/TLS encryption, password protection |
| Warranty | 2 years |
Frequently Asked Questions - D24M Mobotix
User questions about D24M Mobotix
0 question about this device. Answer the ones you know or ask your own.
Ask a new question about this device
Download the instructions for your Security Camera in PDF format for free! Find your manual D24M - Mobotix and take your electronic device back in hand. On this page are published all the documents necessary for the use of your device. D24M by Mobotix.
USER MANUAL D24M Mobotix
natural_image
Close-up of a white surveillance camera with a blue Micro 526 card attached, showing internal components and no visible text or symbols.Fits In. Watches Out.
The D24M MonoDome camera adapts perfectly to any task. Exchangeable lenses, various mounting and configuration options including Vandalism Set support unlimited possibilities.

natural_image
Close-up of a white surveillance camera with a circular lens (no text or symbols visible)Outdoor Wall Mount

natural_image
Front view of a white surveillance camera with a circular lens and control panel (no visible text or symbols)On-Wall Set 0°

natural_image
Close-up of a white surveillance camera head with lens and sensor array (no visible text or symbols)On-Wall Set 10°
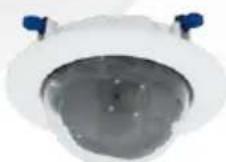
In-Ceiling Set
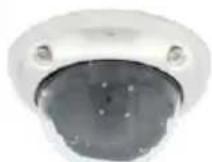
Vandalism Set
Latest PDF File:
www.mobotix.com > Support > Manuals
HiRes
3 Megapixel
2048×1536
Software zoom
Skyline
Format free
Each image format freely definable
30 Frames/s
VGA (640 x 480) 30F/s Mega
Virtual PTZ
Digital pan, tilt, zoom
Backlight
Safe using CMOS without mechanical iris
Internal DVR
Internal via Flash, external via Network
Win/Lin/Mac
Recording
via Network on PC up to 1 Terabyte
Microphone & speaker
Audio
bi-directional via IP, variable framerates
SIP Client with video
IP Telephony
Alarm notify, cam remote control
VideoMotion
Multiple windows precision pixel-base
-22 to +140 °F
Weatherproof
-30 to +60 °C, IP65, no heating necessary
IEEE 802.3of
PoE
Network power even in winter
Robust
No moving parts fiber glass housing
MxCC/MxEasy
Licence free
Video-Management-Software
HiRes Video Innovations
The German company MOBOTIX AG is known as the leading pioneer in network camera technology and its decentralized concept has made high-resolution video systems cost-efficient.
MOBOTIX AG • D-67722 Langmeil • Tel: +49 6302 9816-103 • Fax: +49 6302 9816-190 • info@mobotix.com
Enter your camera data here.
Camera model:
Camera name:
Factory IP address:
Current IP address:
DHCP:
Admin user name:
Admin password:
See Section 3.7.2

natural_image
Close-up of a surveillance camera mounted on a wall, showing its lens and screen (no text or symbols visible)Note
MOBOTIX offers inexpensive seminars that include workshops and practical exercises: Basic Seminar three days, Advanced Seminar two days.
For more information, please visit www.mobotix.com.
CONTENTS
Foreword 6
The MOBOTIX Concept 8
Superior Storage Solution 10
Added Security Value 12
Cost Benefits And Technical Advantages 14
1 INTRODUCTION 16
1.1 D24M Overview 16
1.2 D24M: The Next Generation HiRes Mono Dome Camera 23
1.3 General MOBOTIX Camera Functions 24
1.4 Lens Options, Hardware And Software Features 30
2 INSTALLATION 34
2.1 Preparing The Installation 34
2.1.1 Ceiling And Wall Mounting 35
2.1.2 Mounting Options For IT/Secure Models 37
2.1.3 Network Connection And Power Supply, UPS 38
2.1.4 Preparing The Camera Connections, Wall Outlets 39
2.1.5 Wiring, Fire Prevention, Lightning And Surge Protection 40
2.2 D24M IT/Secure: Delivered Parts, Components, Dimensions 42
2.2.1 Delivered Parts And Camera Components Of D24M IT/Secure 42
2.2.2 D24M IT/Secure Camera Housing And Connectors 43
2.2.3 Dimensions Of D24M IT/Secure 44
2.2.4 Drilling Template For The D24M IT/Secure Mounting Ring 45
2.3 D24M Basic: Delivered Parts, Components, Dimensions 46
2.3.1 Delivered Parts And Camera Components Of D24M Basic 46
2.3.2 D24M Basic Camera Housing And Connector 47
2.3.3 Dimensions Of D24M Basic 48
2.3.4 Drilling Template For The D24M Basic 49
2.4 Available D24M Accessories - Overview 50
2.5 Mounting The Camera Without Accessories 54
2.5.1 Mounting Instructions 54
© MOBOTIX AG • Security-Vision-Systems • Made in Germany
2.5.2 Required Tools 55
2.5.3 Overview: Procedure For All D24M Cameras 56
2.5.4 Procedure For D24M IT/Secure 57
2.5.5 Procedure For D24M Basic 58
2.6 Mounting The Camera With The On-Wall Set 60
2.6.1 Mounting Instructions 60
2.6.2 On-Wall Set 61
2.6.3 Procedure 64
2.7 Mounting The Camera With The In-Ceiling Set 66
2.7.1 Mounting Instructions 66
2.7.2 In-Ceiling Set 67
2.7.3 Procedure 70
2.8 Installing The Vandalism Set 72
2.8.1 Mounting Instructions 72
2.8.2 Scope Of Delivery And Required Parts 73
2.8.3 Procedure 75
2.9 Installing The Wall Mount 78
2.9.1 Mounting Instructions 78
2.9.2 Wall Mount 79
2.9.3 Procedure 82
2.10 Installing The Corner And Pole Mount 84
2.10.1 Mounting Instructions 84
2.10.2 Corner And Pole Mount 85
2.10.3 Mounting To A Pole 87
2.10.4 Mounting To A Wall Or Building Corner 88
2.10.5 Mounting The Wall Mount To The Corner And Pole Mount 89
2.11 Aiming And Adjusting The Lens 90
2.12 Replacing The MicroSD Card 92
2.12.1 Removing A MicroSD Card 92
2.12.2 Inserting A MicroSD Card 93
2.13 Network And Power Connection 94
2.13.1 Notes On Cable Lengths And Power Supply 94
2.13.2 PoE Variables 94
2.13.3 Power Supply Using A Switch 95
2.13.4 Power Supply When Connected Directly To A Computer 96
2.13.5 Power Supply (PoE IEEE 802.3af) Using Power-over-Ethernet Products 96
2.13.6 Camera Startup Sequence 97
3 OPERATING THE CAMERA 98
3.1 Manual And Automatic Operation - Overview 98
3.1.1 Manually Using A Computer In The 10.x.x.x IP Address Range 99
3.1.2 Automatically Using MxControlCenter Or MxEasy 100
3.1.3 Automatically Using DHCP 101
3.2 First Images And The Most Important Settings 102
3.2.1 Manually Setting Up The Network Parameters In A Browser 102
3.2.2 First Images And The Most Important Settings In The Browser 104
3.2.3 First Images And Network Parameter Configuration In MxControlCenter 106
3.2.4 First Images And Network Parameter Configuration In MxEasy 111
3.2.5 Starting The Camera With An Automatic IP Address (DHCP) 115
3.2.6 Starting The Camera With The Factory IP Address 116
3.3 Virtual PTZ 118
3.4 Correction Of Lens Distortion (L22 Only) 120
3.5 MicroSD Card Recording 122
3.5.1 Introduction 122
3.5.2 Formatting The Card 124
3.5.3 Activate Recording 125
3.5.4 Accessing Camera Data 126
3.5.5 Deactivating The Card Memory 126
3.5.6 Using A MicroSD Card In A Different MOBOTIX Camera 127
3.5.7 Limitations On Warranty When Using Flash Storage Devices 127
3.6 Full Image Storage 128
3.7 Configuration In The Browser 130
3.7.1 Overview 130
3.7.2 General Browser Settings 130
3.7.3 Additional Configuration Options 133
3.8 Additional Notes 134
3.8.1 Weatherproof Qualities 134
3.8.2 Password For The Administration Menu 134
3.8.3 Starting The Camera With The Factory IP Address 134
3.8.4 Reset The Camera To Factory Settings 134
3.8.5 Activate Event Control And Motion Detection 135
3.8.6 Deactivate Text And Logo Options 135
3.8.7 Deactivating The Daily Automatic Camera Reboot 135
3.8.8 Browser 136
3.8.9 Cleaning The Camera And Lens 136
3.8.10 Safety Warnings 136
3.8.11 Additional Information 137

FOREWORD
Dear MOBOTIX customer,
Congratulations on your decision to purchase an exceptionally powerful and compact network camera "Made in Germany." Like all MOBOTIX cameras, the D24M Mono Dome uses a high-resolution color image sensor with 3.1 megapixels as standard and offers premium quality combined with convincing features.
This Camera Manual will give you an initial overview of the superior and innovative MOBOTIX concept. This includes all the information you need to unpack a install the camera (Chapter 2) and to view initial images on a PC (Chapter 3).
Please see the Software Camera Manual Part 2, included in the camera packaging, for information on how to work with the many camera functions, such as e.g. event control or image storage.
If you would prefer to work with MxEasy or MxControlCenter instead of the browser controlled MOBOTIX camera software, you can download these programs for free including a manual (PDF) from the MOBOTIX website:
www.mobotix.com/eng\_US/Support/Software-Downloads
If you have any questions, our support and international sales staff are available at intl-support@mobotix.com from Monday to Friday, 8 a.m. to 6 p.m. (German time).
We would like to thank you for your trust and wish you all the best with your new high-performance D24M MonoDome MOBOTIX camera
Notes and Copyright Information
The enclosed Camera Software Manual contains detailed information on the camera software. Download the latest version of this manual and the MxEasy and MxControlCenter manuals as PDF files fronwww.mobotix.com (Support > Manuals) All rights reserved. MOBOTIX, MxControlCenter, MxEasy, ExtIO and CamIO are internationally protected trademarks of MOBOTIX AG. Microsoft, Windows and Window Server are registered trademarks of Microsoft Corporation. Apple, the Apple logo, Macintosh, OS X and Bonjour are trademarks of Apple Inc. Linux is a trademark of Linus Torvalds. All other brandnames mentioned herein may be trademarks or registered trademarks of the respective owners. Copyright © 1999-2009, Langmeil, Germany. Information subject to change without notice!
More information: www.mobotix.com

natural_image
Interior view of a modern service hall with self-service kiosks, a customer service counter, and a circular digital display (no visible text or symbols)D24M - high-resolution and discreet video monitoring in a bank
THE MOBOTIX CONCEPT
HiRes Video Innovations
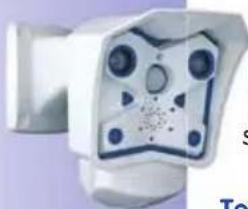
natural_image
Close-up of a white mechanical component with a central square and four circular features (no visible text or symbols)The German company MOBOTIX AG is known as the leading pioneer in network camera technology since its founding in 1999, and its decentralized concept has made high resolution video systems cost-efficient. Whether in embassies, airports, railway station ports, gas stations, hotels or on highways - over one hundred thousand MOBOTIX vic systems have been in operation on every continent for years.
Technology Leader Of Network Cameras
In a short time, MOBOTIX has gained the second place in Europe and the fourth place worldwide in terms of market share. MOBOTIX has been producing megapixel cameras exclusively for years and, in this area, ranks as the global market leader in high-resolution video systems with a market share of over 60%
Why High-Resolution Systems?
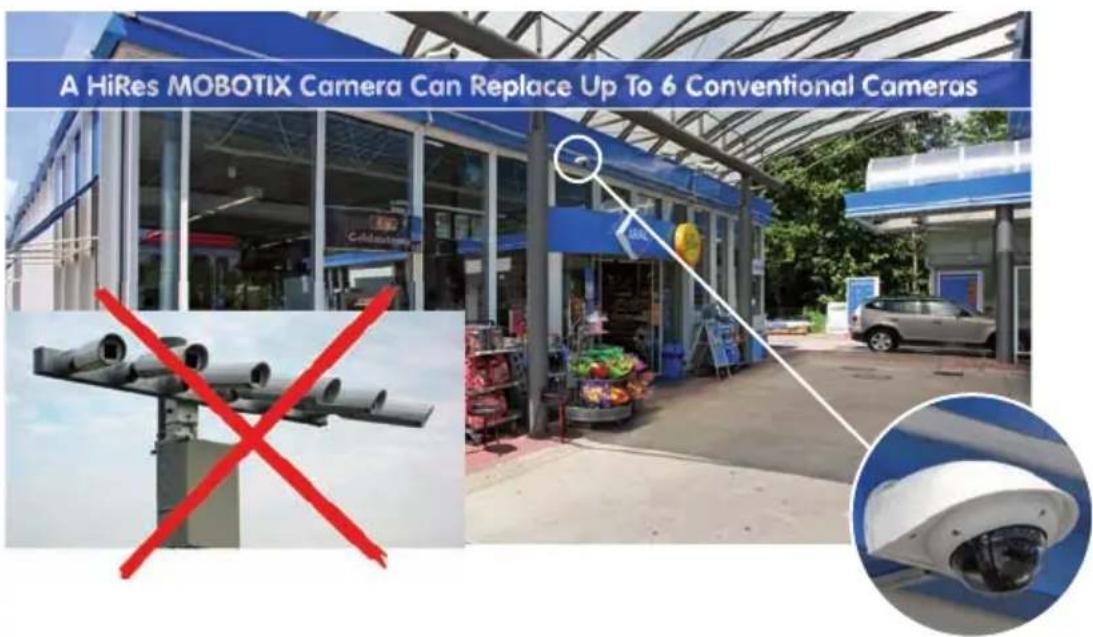
The higher the resolution, the more accurate the detail in the image. With the old analog technology, a live image has no more than 0.4 megapixels, and a recorded image generally 0.1 megapixels (CIF). On the contrary, one MOBOTIX camera with 3.1 megapixels records around 30 times more detail. As a result, larger image are with up to 360^ allround views are possible, thus reducing the number of cameras and therefore the costs. For example, four lanes of a gas station can be recorded with one MOBOTIX camera instead of four conventional cameras.
Disadvantages Of Old Centralized Solution
Usually, cameras only supply the images, while processing and recording take place later on a central PC using video management software. This traditional centralized structure has many limitations, since it requires high network bandwidth and the processing power is insufficient for several cameras. A HDTV MPEG4 film already provides considerable strain on a PC how can it be expected to process dozens of high-resolution links.
cameras? Traditional centralized systems are therefore less suitable and cost-effective than high-resolution systems due to the high number of PCs required.

flowchart
graph LR
    A["CMOS\n3.1 Megapixel"] --> B["Image Analysis"]
    B --> C["MicroSD\nRecording"]
    D["MOBOTIX Camera"] --> E["1.6G chip"]
    style A fill:#f9f,stroke:#333
    style B fill:#ccf,stroke:#333
    style C fill:#cfc,stroke:#333
The Decentralized MOBOTIX Concept
Unlike other systems, with the decentralized MOBOTIX concept, a high-speed computer and, it requested, digital memory (MicroSD/SD card) is built into every camera for long-term recording. The PC now serves purely for viewing, not for analysis or recording. As a result, MOBOTIX cameras can record in response to an event, even without the PC being switched on, and digitally store the videos with sound.
The Benefits
MOBOTIX video solutions theretore require significantly
- fewer cameras due to the more accurate detail of panoramic images with megapixel technology.
- fewer PCs/DVRs, because around 40 cameras can store high-resolution videos with sound efficiently on a single PC, or no PC at all when recording in the camera using digital memory (USB, MicroSD/SD card),
- lower network bandwidth, because everything is processed in the camera itself, the high-resolution images do not have to be constantly transported for and
Robust And Low-Maintenance
MOBOTIX cameras have no mechanical motors for lenses or for movement. Without any moving parts, therefore they are so robust that maintenance is reduced to a minimum. The unique temperature range from -30 °C to +60°C is achieved without heating or a ta at approximately 3 watts. Since no PC hard disk is necessary for recording, there are no parts that wear out in the entire video system.
Software Included - For Life
There are no software and licensing costs with MOBOTIX because the software is always supplied with the camera for an unlimited number of cameras and users. The software package supplied with the camera also includes professional control room software simi to that used in football stadiums, for example. Updates are supplied free of charge on the website. The system price for a weatherproof camera, including lens, query software and day-to-day recording on the MicroSD/SD card, is under 1,000 euro.

SUPERIOR STORAGE SOLUTION

The Market Demands Better Image Quality
When it comes to future-proof video surveillance systems, it is not a matter of analog or digital but whether it is high-resolution or not. It is important note that only HiRes video with decentralized network camera technolog can be implemented at a much lower cost than any other type of video surveillance system.
Central Storage As A Bottleneck
These days, video data is normally pre-processed and stored centrally on a PC or DVR using video management software. Video and audio streams from all installed cameras are directed to this central device. This system is comparable to a highway at rush hour: the more cameras there are, the taster data piles up on the PC or DVR. This means that despite HiRes cameras, the data is generally not stored in high-resolution format.

flowchart
graph LR
    A["Camera"] --> B["PC / DVR"]
    C["Camera"] --> B
    D["Camera"] --> B
    E["Camera"] --> B
    F["Camera"] --> B
    G["Server"] --> H["Storage"]
    style B fill:#f9f9f9,stroke:#333
    note right of B: Motion detection and pre-alarm buffer are in the PC (bottleneck)
    note right of H: Storage
Central PC is a bottleneck and represents a risk for the entire system
MOBOTIX Stores HiRes Cost-Efficiently
MOBOTIX solves the PC storage bottleneck problem using a currently unique and y amazingly effective method - through the camera itself. High-resolution video with lip-synchronized sound is saved either remotely over the network or locally on Flash memo devices (commercial SD/MicroSD or CF cards, USB memory)
Flash memory is a sophisticated form of semiconductor memory without mechani moving parts and represents the storage medium of the future thanks to its reliability, ease of use and low cost.
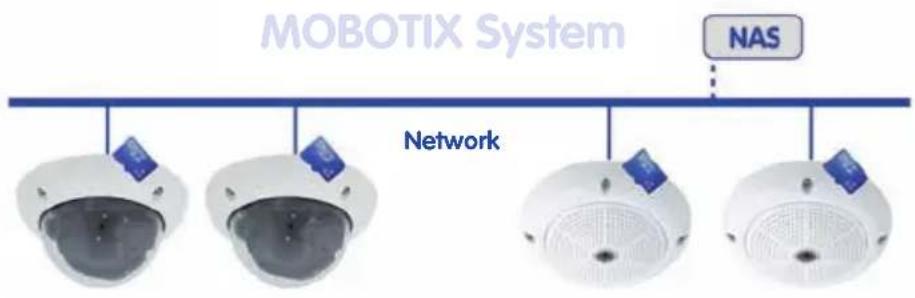
Software and storage integrated in MOBOTIX cameras
MOBOTIX Stores Data In Flash Memory
• No PC / network is required for continuous operations and there is no network load
- USB Flash media can be connected directly to the camera (instead of internal SD/MicroSD/CF card); no network is necessary
• Greater reliability (no hard disk drive)
- Ring buffer: Old images can be overwritten automatically or automatically deleted after a specified period of time
MOBOTIX Stores Data Reliably
The MOBOTIX Flash file system (MxFFS) prevents unauthorized persons from reading or transterring the internally stored data, even if the card is stolen.
MOBOTIX Only Saves What Is Necessary
The MOBOTIX system includes three important additional options that allow more data to be stored for a longer time:
- Only the relevant image sections are stored instead of the entire image (for example, sky or ceiling is removed)
• Video recording only begins when relevant events occur (such as movement in the image
• Temporarily increased frame rate during continuous recording of events
By connecting external memory over the network (NAS), the system can be expanded without limitations, even while it is running.
MOBOTIX Data Storage
• Inside the camera - one MicroSD card enough to record all day long, making centro data storage devices or PCs unnecessary
- In USB memory (connection via USB cable) data storage without mechanical moving parts or network load (greater protection against data theft)
- A file server NAS) car store around 10 time: more data from MOBCTIX HiRes cameras than usual because they use memory organization internally

ADDED SECURITY VALUE

natural_image
Exterior view of a modern blue and white station with glass windows and outdoor produce (no visible text or signage)Robust, Low-Maintenance Technology
The real added value of MOBOTIX products is reflected in characteristics such as enhanced functionality, long life and robustness. In general, MOBOTIX cameras have no moving parts. This makes the cameras very resistant to wear and tear, and reduces both maintenance costs and power consumption.
Alarm Management And Forwarding
Integrated sensors enable MOBOTIX cameras to recognize when an event has occurred. If desired, the cameras will respond immediately with an alarm tone and will establish a direct video and sound connection to a control room.

natural_image
Close-up of a white surveillance camera mounted on a blue industrial ceiling (no visible text or symbols)Absolute Data Security
The security barriers that are built into the camera are extremely secure. The camera images are only accessible to authorized persons and are encrypted via SSL when they are transferred over the network.
Notification Of Failure
MOBOTIX cameras will automatically report any impairment or failure. This ensures maximum reliability and readiness for use.
Subsequent Searches
Events rarely confine themselves to just one spot. So even when you are looking at an enlarged detail in live mode, it is always the full image that is recorded. And in this full image, any section can always be enlarged later or whenever necessary.
Floor plan and camera view in MxControlCenter (free control center software from MOBOTIX)

Sound Increases The Chance Of Detection
In the event of an alarm, MOBOTIX cameras can turn on their built-in microphones and record lip-synchronized sound. They are therefore an even greater help in analyzing a situation and easing clarification. In addition, the video system can be used for bidirectional communication via a loudspeaker/microphone.
No Problems With Backlight
MOBOTIX cameras are not adversely affected by the glare from direct sunlight. They deliver meaningful, detailed images all the time because the camera software supports easy programming of independent exposure windows to cope with specific situations. This makes them ideal for rooms with large glass fronts.

natural_image
Interior view of an office with a person seated in the foreground and floor, no visible text or signage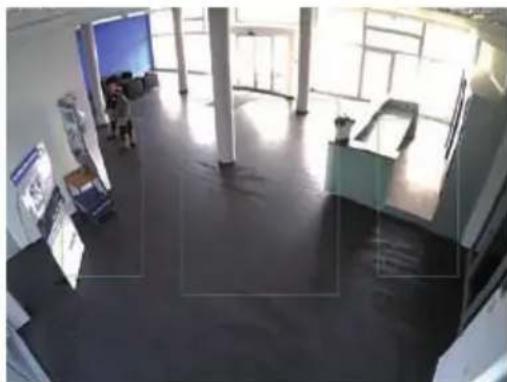
natural_image
Interior view of a modern office or service hall with large windows and minimal floors, featuring a reception desk and people (no visible text or signage)Vandalism-Proof Models
In critical environments or for outdoor use, it is often best to choose vandalism-protected MOBOTIX cameras. Their steel housing resists even the hard attacks, and the cameras will deliver a perfect picture of the attackers.
natural_image
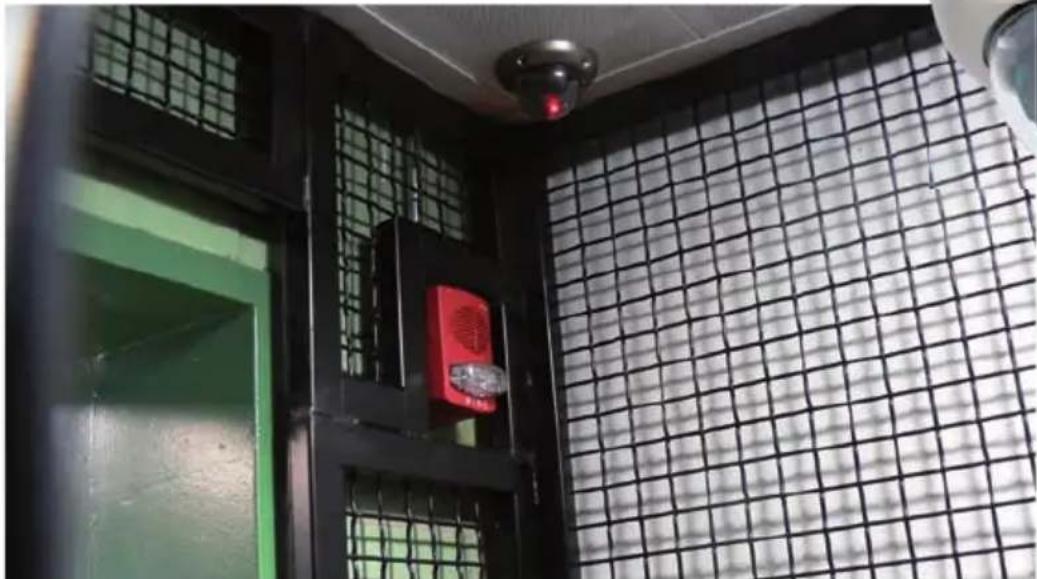
Interior view of a building with a red fire extinguisher and black grid-patterned wall (no visible text or symbols)Audio features for the D24M only available in combination with the ExtIO module (MOBOTIX accessory)
Placing the exposure window in the lower image area (left image) delivers less optimum results compared to moving three individual exposure windows up toward the windows (right image)
THE MOST IMPORTANT COST BENEFITS

Increased resolution reduces amount of cameras needed
1536-line, high-resolution sensors give a better overview and allow monitoring an entire room with just one camera from the corner

Reduced installation costs at any distance
Standard Ethernet connection enables the use of use of common network components such as fiber, copper and wireless (WLAN)

Intelligent recording technology reduces required storage
Decentralized recording technology in the camera software puts less strain on PCs and reduces the amount of storage PCs (DVRs) by 10 times

Event-controlled image rate minimizes storage costs
Event-driven, automatically adjusted recording frame rate based on event or sensor action reduces amount of data and storage costs

No additional power and no heating required
Anti-fogging without heating allows usage of standard PoE technology to power the system via network and saves costs of power cabling

Backup power requirement reduced by 8 times
Low power consumption, approx. 4 watts, enables year-round (no heating required) PoE with one centralized UPS from installation room via network

Robust and practically maintenance free
Fiberglass-reinforced composite housing with built-in cable protection and no mechanical moving parts (no auto iris) guarantees longevity

No software and no licence costs
Control and recording software is integrated in the camera and is free of charge; new functions are available via free software downloads

Unlimited scalability and high return of investment
While in use, more cameras and storage can be added at any time; image format, frame rate & recording parameters can be camera specific

Additional functions and other extras included
Audio support, lens, wall mount and weatherproof housing [-30°C... +60°C (-22°F... +140°F)] are included; microphone & speaker available in certain models
THE MOST IMPORTANT TECHNICAL ADVANTAGES
Progressive-scan instead of half-frame blur
Megapixel sensor and image processing inside camera with digital white balance generates sharp and true color images at every scale
1
Sun and backlight compensation
CMOS-sensor without auto iris, digital contrast enhancement and configurable exposure measurement zones guarantee optimal exposure control
2
Dual camera technology: 2-in-1
Two possible camera views with picture-in-picture technology or 180° panoramic view; one Dual-Fixdome camera with 2.5 megapixel is enough
3
Long-term, high-performance Terabyte recording included
Event detection and ring buffer recording by the camera itself allow recording of 40 smooth video streams on a single PC (1200 VGA images/s)
4
Simultaneous recording, event search and live viewing
Live video for multiple users, recording and event search simultaneously possible in seconds from anywhere in the world via network
5
Very low network load
Efficient MxPEG video codec, motion detection based recording and video buffering inside camera guarantee a very low network load
6
Bridging of recording during network failures
Internal camera ring buffer bridges network failures and bandwidth fluctuations of wireless links (WLAN/UMTS) for several minutes
7
Day & night maintenance free
Unique Day/Night camera technology without moving parts guarantees extreme light sensitivity and ensures long-term reliability
8
Audio and SIP telephony
Lip-synchronized audio (live & recording); each camera is a video IP telephone based on SIP standard with automatic alarm call and remote control
9
MxControlCenter included
Dual screen technology with building plans, free camera positioning, event search, image processing, lens distortion correction and PTZ support
10
1 INTRODUCTION
1.1 D24M Overview

With the D24M series, MOBOTIX offers extremely compact, versatile and cost-effective mono dome cameras with up to 1,536 scan lines, an integrated video sensor and long-term internal storage on a MicroSD card (not available in the basic model). The basic model, the D24M Basic, is designed for indoor use, comes with a 90° Wide Angle lens and is powered over Ethernet (PoE).
Original MOBOTIX D24M image
Size comparison: standard resolution (analog) with 288 scan lines (CIF) versus a MOBOTIX resolution with 1,536 scan lines

A Master Of Adaptability
All D24M models come with an easily interchangeable lenses and a robust 1.5 mm thick polycarbonate dome. An extensive range of accessories is also available for installing the camera in an application-optimized manner, for supplying power or expanding the functions of the camera. Furthermore, MOBOTIX customers can take advantage MxEasy or the professional control center software MxControlCenter tree of charge and with an unlimited user and camera license. It required, a D24M camera can even be upgraded function as a powerful intercom system by adding the MOBOTIX ExtIO module.
Robust And Elegant
The D24M is available in the Secure, IT or Basic models depending on the software features. Five high-performance lenses are currently available for the D24M in the compact M14 housing. Due to their low power consumption of only 3 watts, D24M cameras can operate in an extremely wide temperature range [-30^ to +60^ (-22°F... +140°F)]. Since MOBO cameras neither fog up nor require heating, power can be supplied via the network cable using standard PoE products. The D24M IT and Secure models are completely dust-proc and resistant to water jets (IP65; D24M Basic: IP54). The D24M Wall Mount makes the camera ideally suited for outdoor use and for installation over surface-mounted sockets so that the cabling remains thoroughly concealed.
High-Resolution Sees More And Costs Less
One D24M camera equipped with a 90° Wide Angle lens is usually all that is required to monitor either an entire room from a corner or the four lanes of a gas station. The high degree of image detail not only reduces the number of required cameras, but also minimizes system costs by reducing the wiring complexity, emergency power requirements and number of recording devices required. D24M cameras (IT and Secure) feature direct recording to integrated MicroSD cards or external USB drives. As a result, these cameras can be used in standalone operation with zero network load!

Universal Application From The Vacation Home To The Airport
MOBOTIX D24M cameras are suitable for use in large-scale facilities like airports given their unlimited scalability and high performance. However, they are equally suitable for use in small commercial or private buildings thanks to their integrated event, storage, alarm and telephony functions.
© MOBOTIX AG • Security-Vision-Systems • Made in Germany

With a D24M equipped with an L22 lens, the (slightly) distorted image can be corrected by software (see Section 3.4)
The Right Lens For Every Application
You can change the lens in the D24M camera models on site whenever necessary. Each lens is secured by a lock ring. Each camera has a factory-aligned and quality-tested lens, which makes on-site camera focusing unnecessary in most cases. The D24M cameras are available for delivery with a lens of your choosing or no lens at all.

The image area captured by the D24M varies depending on the selected lens (see Section 1.4). With a Super Wide Angle lens (L22 with 90°), for example, almost an entire room can be recorded from just one corner.
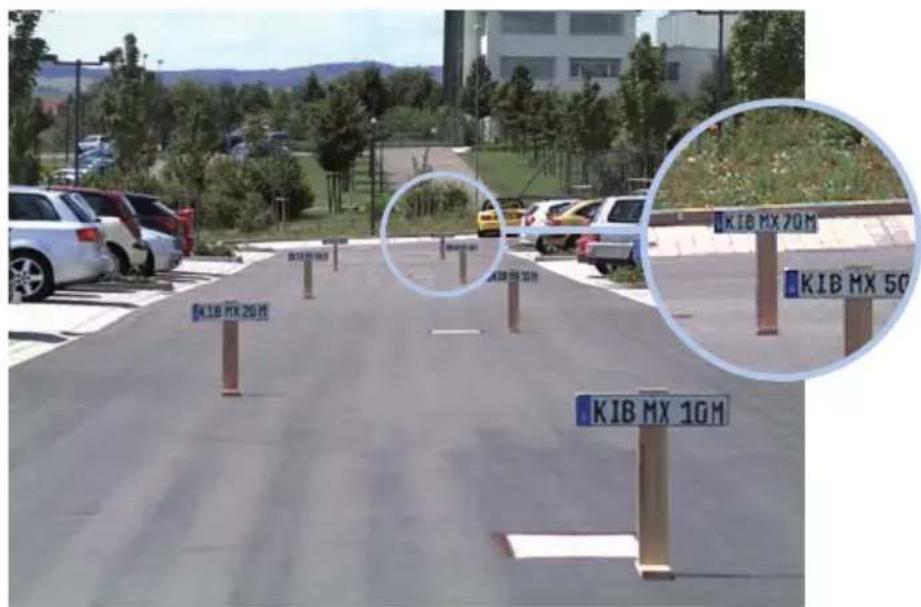
With an L135 Telephoto lens, a D24M camera with a high-resolution 3.1 megapixel sensor is capable of clearly recording a license plate number from a distance of 75 meters. Or even the serial number of a 5 euro bill from a distance of two meters!
© MOBOTIX AG • Security-Vision-Systems • Made in Germany
Virtual PTZ (vPTZ) – No Motor Required
The D24M can zoom in on detail as well. These vPTZ functions are a standard feature in the integrated D24M camera software. The image from the mono dome camera can be enlarged using e.g. the mouse wheel, a joystick or a software-controlled PTZ panel, and you can "move" the view to any section of the image. This provides the features of a mechanical PTZ camera without the disadvantages of maintenance and wear.

natural_image
Close-up of a red and black mechanical lever against a blue background (no text or symbols)
natural_image
Interior view of a modern office or library with people interacting, showing interior scenes and red arrows indicating movement or inspection (no visible text or symbols)This vPTZ functionality works differently depending on the camera operation platform (web browser, MxEasy, MxControlCenter). Virtual zoom, pan and tilt using MxEasy and MxControlCenter is very simple thanks to special software tools and the use of an optional joystick. However, a joystick may also be used even with pure browser-based operation from Internet Explorer (together with an ActiveX plug-in).
Quick and easy navigation with a USB joystick
Original D24M image with L22 lens (90°)
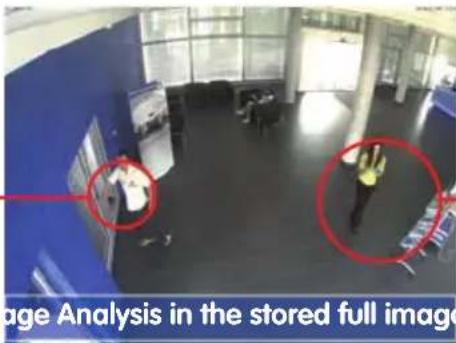
Integrated vPTZ functions allow the complete stored full image to be "analyzed" at a later point in time (in MxEasy and MxControlCenter)
Simultaneous Zoomed Live Image And Full Image Recording
All conventional, motorized PTZ cameras only store the image that is currently viewed as the live image live image recording). This has one serious disadvantage as the recording can only show what has happened in the "visible" portion of the image; the rest is lost and cannot be examined later on. For this reason, MOBOTIX has added the new full image recording feature to the D24M. This will not store the currently viewed image that reflect the pan/tilt position and the zoom setting chosen by the user, but the full sensor image without vPTZ settings. When examining the recorded images at a later point in time, the vPTZ features again come into play, as they allow the visible image to be zoomed and use the pan/tilt features to examine every corner of the recorded full image.
Example:
The people marked by the red circle in the middle area of the image would not have been recorded by a regular PTZ camera; the full image recording of the D24M allows you to determine, for example, the exact time at which these people entered the image area recorded by the camera. A browser (Internet Explorer with MxPEG ActiveX plug-in) MxControlCenter or MxEasy can be used to examine the recorded sequences.


natural_image
Interior view of a modern office or library space with a person standing and a red arrow indicating direction (no visible text or symbols)
natural_image
Interior view of a modern office or library space with blue walls, chairs, and large windows (no visible text or signage)The image distortion caused by the L22 90° Wide Angle lens can be corrected (see Section 3.4). Since this function requires more computing power, it should not be enabled the live image for applications that require a maximum frame rate. The image distortion in the recording can also be corrected at a later time.
Internal DVR
The D24M IT/Secure model features direct recording to integrated MicroSD cards, which makes the camera fully independent of any external storage media, even for longer periods of time. The camera internally stores high-resolution video, without requiring an external recording device or PC and therefore without overloading the network whatsoever. Old recordings may be overwritten automatically or automatically deleted after a specified period of time. A 16 GB MicroSD card, for example, allows the camera to store more than a quarter million event images in VGA format (640 x 480). For security reasons, the camera can even encrypt the stored data.
Power failures are not an issue, as the video and image sequences remain safely stored on the MicroSD card. Access to stored video sequences is possible at any time from the camera user interface in the browser, MxControlCenter or MxEasy. It you would like to archive sequences, you can store all of the data or only certain parts to a computer or a USB hard disk
High Frame Rates Of Up To 30 fps
Like all other MOBOTIX cameras, the D24M models can generate live video streams with high frame rates and a maximum image resolution of 3.1 megapixels (QXGA with 2048 x 1536 pixels). Up to 30 fps are generated at a megapixel resolution of 1280x960 pixels. Even at 3.1 megapixels, the camera will still generate up to 20 fps!
Robust And Maintenance-Free
Thanks to their low power consumption of approximately 3 watts and the total absence of mechanical moving parts, the D24M models feature the highest operating temperature range from -30^ to +60^ - 20^ to +140^) and are completely dust-proof and resistant to water jets (D24M IT/Secure IP65; D24M Basic IP54). Since the cameras neither fog up nor require heating, power can be supplied all year round via the Ethernet cabling using standard PoE products.
Camera Design Creates New Applications
Some application scenarios benefit from a surveillance camera that is present, but does not attract attention. The low-key elegance of the camera design, especially when installed with the In-Ceiling Set, makes the D24M the ideal solution where discreet design and inconspicuous look are important. For example, hotels and restaurants—not to mention installations in public buildings, waiting rooms and showrooms—present a suitable backdrop for this type of equipment.
4 GB MicroSD card pre-installed in the camera (D24M IT/Secure)
D24M with the In-Ceiling Set
The integrated DVR functionality with long-term storage on a MicroSD card also makes the camera an ideal solution for mobile applications since it only requires a power supply via the network cable (standard PoE) for full event-driven recording with video and audio, thus delivering a complete standalone product. Application examples in this context are installations in public transportation such as busses, trains, aboard ships, airplanes, etc.

natural_image
Close-up of ceiling-mounted security camera clips mounted on a textured wall (no text or symbols visible)Model Versions
The D24M is available in the Secure, IT or Basic models, which all come with different features. The D24M is delivered with an L22 Super Wide Angle lens (horizontal angle of 90°) as standard. Four additional lenses (Wide Angle and Telephoto) with viewing angles of 15°, 31°, 45° or 60° are available upon request. The standard IT and Secure models include a pre-formatted and pre-installed 4 GB MicroSD card. Audio features can be added at any time with the ExtIO module (not available for Basic model).
1.2 D24M: The Next Generation HiRes Mono Dome Camera
The D24M camera is the more powerful successor to the D22M and is delivered with a recording capacity of 4 GB integrated as standard. The D24M has a new microprocessor and a modified system platform. The result is more than twice the processing power, which enables smooth video frame rates, even in the high-resolution megapixel display.
Frames Rates Have Doubled
Even 3.1 megapixel camera images may be transferred at a rate of 20 frames per second, and megapixel images at up to 30 images per second.
4 GB MicroSD Card
Every D24M IT/Secure is delivered with a high-quality, factory-installed 4 GB MicroSD card (internal DVR) as a standard feature—sufficient for around 10 hours of HiRes continuous recording (at a rate of 4 fps).
Adjustable PoE Classes, 1 To 3
The PoE class of the camera may be raised or lowered from the default value of 2 to 1 or 3 from the camera software, to precisely adjust the functionality of the camera, its accessories and the PoE switch.
Only 3 Watt Power Consumption
Despite the use of a more powerful processor, the power consumption of the D24M is maintained at the extremely low level of only 3 watts.
New Connection Options
The MOBOTIX MiniUSB connector allows you to quickly and easily connect the MOBOTIX ExtIO module and possible future extensions (e.g. UMTS stick, MxBus, ...). This connector is not enabled in the Basic model.
24/146
D24-Camera Manual: INTRODUCTION
Audio features for the D24M only available in combination with the ExtIO module (MOBOTIX accessory)
Camera vPTZ functions can be controlled with a mouse or joystick
Using a joystick: Internet Explorer with activated MxPEG ActiveX plugin, MxControlCenter or MxEasy required
MxControlCenter and MxEasy can be downloaded free of charge at www.mobotix.com
1.3 General MOBOTIX Camera Functions
Like all other MOBOTIX cameras, the D24M models supports a range of (software) functions, such as video motion detection, long-term recording, alarm messaging and video IP telephony, to name but a few. Unlike in camera systems from other manufacturers, buying and installing additional software on the computer is unnecessary. Instead of using a web browser, you can also download the free MxControlCenter or MxEasy from the MOBOTIX website, which allow you to quickly display multiple cameras on a single monitor and enable alarm switching with audio or an easy event search.
vPTZ: Virtual Pan/Tilt/Zoom Features
While MxControlCenter has been providing virtual PTZ features for some time now, these features are now available directly in the MOBOTIX camera. This means that you can continuously zoom into or out of the live image using either the mouse wheel or a joystick. When storing images or video sequences, you can choose to store either the visible image area of the live image or the full sensor image (full image storage). This also allows you to examine parts of an image or video that had not been visible in the live image section on display at the time of the recording.
Automatic Image Correction (Only With The L22 Lens)
Another familiar problem from the field of photography is the distortion that result from using wide angle lenses. Straight lines near the image borders are bent outwards. The integrated distortion correction features of the camera (and of MxControlCenter) allow the curve of various lenses to be corrected using software functions.
Live Video With Up To 30 fps, Including Audio
MOBOTIX cameras deliver smooth live video with lip-synchronous audio, yet they keep network load to a minimum. Some analog systems may also be able to deliver this, but the recording quality is so much higher with MOBOTIX since the cameras efficiently store the high, live image resolution and frame rate without compromising image quality. MOBOTIX technology thus provides for continuous recording of simultaneous video from 30 cameras at 30 frames per second each, including audio, all on one standard PC.
Low Bandwidth Requirements
MOBOTIX's patent pending streaming format MxPEG enables fast live video with audio at extremely low network load (1 to 2 Mbps). Since the MOBOTIX camera itself detects movements in the image (and not the computer), video sequences are only transmitted when they are being stored externally.
Voice Over IP
Moreover, MxPEG provides for lip-synchronous live audio and two-way communication between the camera and a computer. Room surveillance is possible using a browser (Internet Explorer), MxControlCenter or MxEasy. Customized alarm notification on your mobile phone or via Internet telephony is just as easy as event-controlled voice messages directly from the camera.
Internet Telephony (SIP) And Video SIP
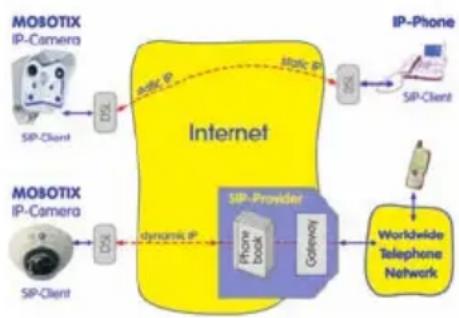
Video SIP allows establishing audio/video connections to the camera using Windows Messenger or similar applications (e.g. CounterPath X-Lite/Eyebeam). This feature also allows the camera to be remote controlled using the phone keys and the camera itself can place phone calls in case of alarms.
flowchart
graph LR
    subgraph MOBOTIX IP-Camera
        A["MOBOTIX IP-Camera"] -->|SIP-Client| B["Internet"]
        C["MOBOTIX IP-Camera"] -->|SIP-Client| D["Dynamic IP"]
        B --> E["SIP-Provider"]
        D --> E
        E --> F["Mobile app"]
        E --> G["IP-Phone"]
        E --> H["Gateway"]
        E --> I["Worldwide Telephone Network"]
    end
    style MOBOTIX IP-Camera fill:#f9f,stroke:#333
    style Internet fill:#ff9,stroke:#333
    style SIP-Provider fill:#bbf,stroke:#333
    style SIP-Provider fill:#bfb,stroke:#333
    style SIP-Provider fill:#ffb,stroke:#333
    style SIP-Provider fill:#fbf,stroke:#333
    style SIP-Provider fill:#ffb,stroke:#333
    style SIP-Provider fill:#bbf,stroke:#333
    style SIP-Provider fill:#bbf,stroke:#333
    style SIP-Provider fill:#bbf,stroke:#333
    style SIP-Provider fill:#bbf,stroke:#333
    style SIP-Provider fill:#bbf,stroke:#333
    style SIP-Provider fill:#bbf,stroke:#333
    style SIP-Provider fill::#dfd,stroke:#333
    style SIP-Provider fill:#dfd,stroke:#333
    style SIP-Provider fill:#dfd,stroke:#333
    style SIP-Provider fill:#dfd,stroke:#333
    style SIP-Provider fill:#dfd,stroke:#333
    style SIP-Provider fill:#dfd,stroke:#333
    style SIP-Provider fill:#dfd,stroke:#333
    style SIP-Provider fill:#dfd, stroke:#333
    style SIP-Provider fill:#dfd, stroke:#333
    style SIP-Provider fill:#dfd, stroke:#333
    style SIP-Provider fill:#dfd, stroke:#333
    style SIP-Provider fill:#dfd, stroke:#333
    style SIP-Provider fill:#dfd, stroke:#333
    style SIP-Provider fill:#dfd, stroke:#334
    style SIP-Provider fill:#dfd, stroke:#334
    style SIP-Provider fill:#dfd, stroke:#334
    style SIP-Provider fill:#dfd, stroke:#334
    style SIP-Provider fill:#dfd, stroke:#334
    style SIP-Provider fill:#dfd, stroke:#334
    style SIP-Provider fill:#dfd, stroke:#334
    style Worldwide Telephone Network fill:#dfd,stroke:#334
Long-Term Storage On File Servers Included
MOBOTIX cameras have an integrated long-term storage system for Linux, Windows and Mac OS X computers. Every camera manages its own ring buffer storage on the shared folder. Thanks to this decentralized approach, 30 live cameras can store images of up to 30 frames per second each, including audio, on a single computer.
Internal DVR: Storage On MicroSD Or CF Cards
MOBOTIX cameras support direct storage on an internal MicroSD/SD/CF card (basic models excluded). By using this integrated Flash card DVR, the camera is able to offer the following additional applications:
- Stand-alone use of the camera without a file server by recording to the MicroSD card.
- High-security application with recording on a file server or NAS/SAN in which the SD card serves as storage buffer. It can thus bridge longer network or file server failures without losing any video sequences (supported in a future software version).
- Event downloads from the MicroSD card for evaluation of the recorded sequences on a computer.
Internal DVR External USB Storage Remarks for USB Storage
| M12 optional | optional Adapter cable required | ||
| D12 optional | optional Adapter cable required | ||
| V12 optional | -- | ||
| M22M optional | optional Device can be connected directly | ||
| D24M | included | optional | Adapter cable required |
| Q24M | included | optional | Adapter cable required |
Internal DVR is either an option during order placement (e.g. M12 R8) or upgradeable later with an SD card
D24M IT/Secure: 4 GB MicroSD card included
No heating required - PoE is no problem, even in winter
Logo generator for displaying graphics already integrated in the live image
Event And Time-Controlled
Just like triggering event-controlled recording upon detecting movements in the image, the camera can also record when the volume detected by a microphone exceeds a certain trigger value. Using scheduled daily recording, time tasks can start or stop video recording, upload images to a website or send e-mails with video/audio clips. Vacation times and holidays can be programmed.
Remote Alerting
In case of an alarm, MOBOTIX cameras can automatically pop up windows or activate other functions at a remote security control center. The cameras can use network/wireless, GSM/GPRS/UMTS (3G) or Internet connections for this purpose.
Integrated Power-over-Ethernet
Power is supplied as Power over Ethernet via the network cabling using the MOBOTIX NPA-PoE-Set or from a PoE compatible switch (both according to the IEEE 802.3af PoE Standard).
Caution
Previous MOBOTIX network power accessories such as the NPA Set, Power Box and Power Rack (MX-NPA-Set, MX-NPR-4 and MX-NPR8/20) are not suitable for use with the D24M.
No heating is necessary thanks to the well-insulated plastic housing and anti-fogging properties. Due to their low power consumption (approx. 3 watts), MOBOTIX cameras, unlike those of other manufacturers, may be operated both indoors and outdoors using a PoE power supply.
Logos, Animated Or Freestyle
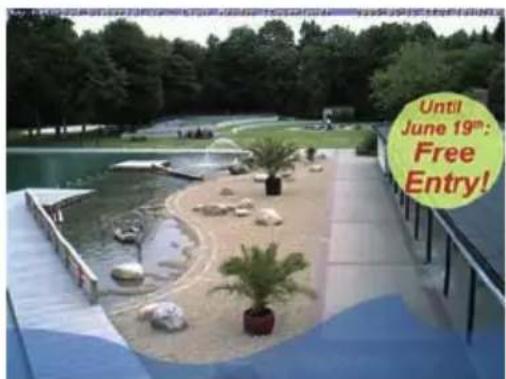
The MOBOTIX camera logo generator allows time-scheduled banners and graphics (including files loaded automatically from any URL) to be integrated into the current camera images. MOBOTIX cameras are the only network IP cameras supporting animated and transparent graphics.

30 Cameras Live Using MxControlCenter
Instead of using a web browser, you can also download the tree MxControlCenter from the MOBOTIX website, which allows you to quickly display up to 30 MOBOTIX cameras on one single monitor. In addition, MxControlCenter can process incoming alarms with sound from the cameras and allows you to conveniently search and evaluate alarm video clips (including audio). The integrated Layout Editor of MxControlCenter allows you to quickly create floor plans by simply dragging/dropping the cameras onto a background image. Load a floor plan as background image, drag & drop the cameras; done.

MxEasy – Intuitive Application For Windows, Macintosh And Linux
The new MOBOTIX MxEasy aims at easy operation of the most important camera functions through its intuitive user interface, thus creating a new user experience when viewing and controlling MOBOTIX cameras. The clear design allows up to 16 cameras to be managed, and the application can show up to four cameras at the same time.

© MOBOTIX AG • Security-Vision-Systems • Made in Germany
Free download at www.mobotix.com
Free download at www.mobotix.com
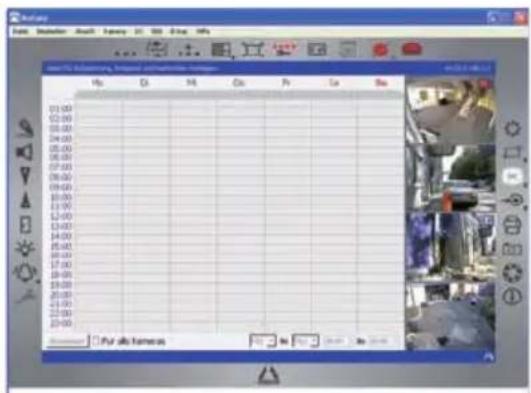
All settings selected in MxEasy (e.g. virtual camera position, zoom, brightness, volume, microphone sensitivity, image storage, signal outputs) are usable immediately and are stored instantly in the configuration of the corresponding camera. The calendar function
integrated in the Alarm Planner provides access to innovative features for schedule settings of one or more cameras
For the first time, this tool not only contro video and audio recording based on certain time and date information, but also allows features like video motion detection image brightness and the microphone to be activated/deactivated based on a data and time schedule.
MxEasy is available as a free-of-charge download for MS Windows and Mac OS X operating systems under www.mobotix.com. A Linux version will be available soon
Diverse Installation Options
Not only can MOBOTIX cameras be installed under almost all weather and temperature conditions, they also offer suitable installation materials from a wide range of accessories for any conceivable application scenario.
Audio features for the D24M only available in combination with the ExtIO module (MOBOTIX accessory)
Additional Camera Functions (Software)
- True software scaling to easily generate smaller image formats for PDAs (such as 320x240, 160x120, etc.)
- Audio video recording with three different recording modes: event recording with audio, continuous recording with variable frame rate and audio as well as event-controlled snapshot recording of JPEG images
- Storage failure detection can monitor a tile server (or a Flash device) and can use one or more of the defined messaging options for error notification
- Player of recorded images/video sequences with audio in the integrated video management system
- Multiwatcher screen can display and monitor several cameras over the Internet, with only one camera requiring access from the outside. This "proxy" camera uses only very little bandwidth, making it an ideal solution for low-bandwidth connection
• MultiView screen for displaying multiple camera or events in one browser window - Event notification by e-mail, SMS (using a provider), voice notification (Phone Call-Out), sounds and by visual means (e.g. red frame in live image) using two separate messaging paths.
-
Object tracing for analyzing the paths of objects that are moving in the image.
-
Time Tables with handling of customized holidays and vacations. The time tables are used to control the camera's arming, image recording messaging, logos, the obscure image function as well as other features.
- Remote signaling for master/slave cameras, with the master camera controlling the arming status of the slave cameras. This allows, for example, all slave cameras to be armed using a key switch connected to the master camera.
- Transfer profiles for comfortably controlling transmissions via FTP, e-mail, phone calls and network messages.
- Speakerphone* with speak, listen and intercom modes using a microphone and speaker.
- Phone Call-In* to remotely control the camera using a touchtone telephone (retrieve camera information, establish an Internet connection, announce the retrieved IP address, intercom feature, etc.).
- MxPEG video compression using MxControlCenter. The ActiveX plug-in for Internet Explorer users brings all advantages of MxPEG to the browser-based user interface (including the audio stream to and from the camera).
- Routing allows use of other network connections besides the standard route.
- DynDNS client for accessing the camera via the Internet using a symbolic name (e.g. mymobotixcam.dyndns.org), despite the provider assigning a new dynamic IP address every time the camera connects to the Internet.
- Non-voidable backup system starts the cameras in the original operating state if a software update fails, allowing the user to easily restart the update process.
- Enhanced startup options for the camera (obtain IP address via DHCP, announcement of IP address and other network data, reset to factory default settings).
- Notifications upon errors or when rebooting provide a method for executing one or more notifications (e.g. blinking of the camera LEDs, audio message, FTP, e-mail, phone call, network message).
- Extended security features protect the pages and features of the camera and prohibit unauthorized access (IP-level access control, intrusion detection). They also provide SSL-protected transmission of the video sequences and the data (using SSL encryption and X.509 certificates).
Free Software Updates (www.mobotix.com)
MOBOTIX provides software updates free of charge at regular intervals that improve and expand the camera's functionalities. Chapter 6, Software Update, in the Software Manual provides more information on the process.
1.4 Lens Options, Hardware And Software Features
MOBOTIX currently offers five standard lenses with M14 thread from the L22 Super Wide Angle lens with a 22 mm focal length through to the L135 Telephoto lens with a 135 mm focal length (equivalent to 35 mm camera). Since MOBOTIX cameras are backlight-proof, they not require a mechanical auto iris, making them extremely robust and maintenance-free
• L22 Super Wide Angle with 90° image angle (horizontal)
• L32 Wide Angle* with 60° image angle (horizontal)
• L43 Wide Angle with 45^ image angle (horizontal)
• L65 Telephoto with 31° image angle (horizontal)
• L135 Telephoto with 15° image angle (horizontal)
The L22 Super Wide Angle 90° lens has very little distortion and delivers good image quality, even when using the maximum digital zoom. If a camera with this lens has been mounted in the corner of a room, the complete room is visible on the image

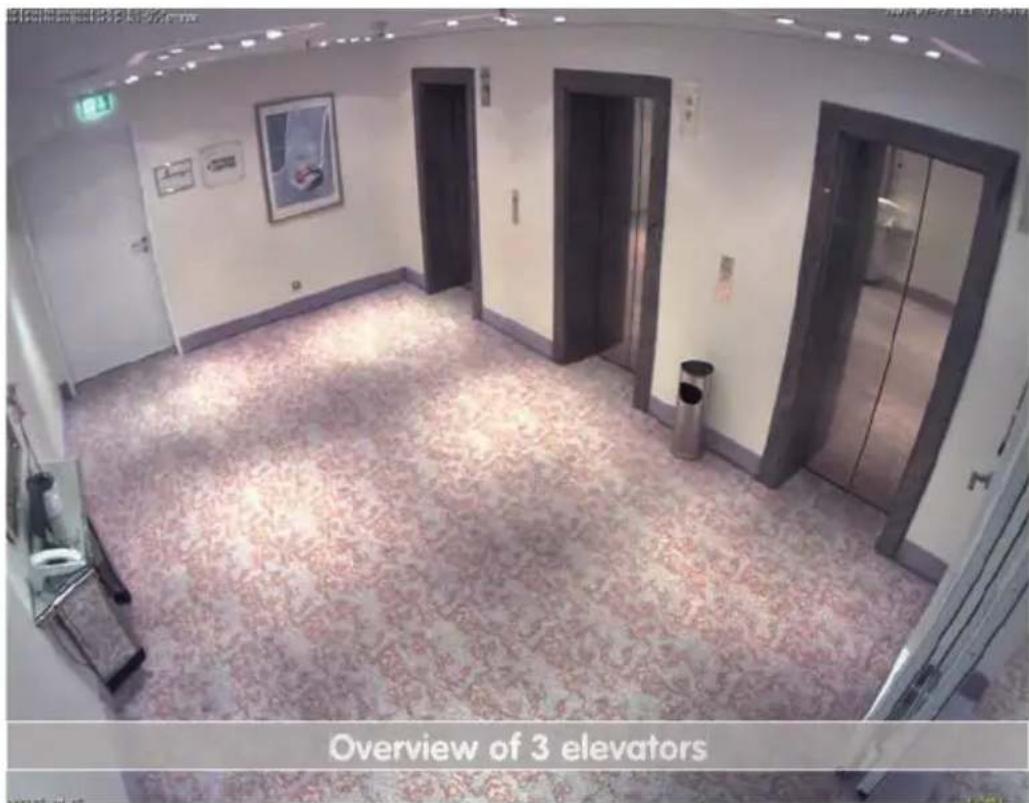
Original image from a D24M with 90° lens (L22)
© MOBOTIX AG • Security-Vision-Systems • Made in Germany
| Lens Table L22 L32 L43 L65 L135 | |||||
| Original image | |||||
| 35 mm equivalent focal length | 22 mm(1.26 in) | 32 mm(1.26 in) | 43 mm(1.69 in) | 65 mm(2.56 in) | 135 mm(5.31 in) |
| Actual focal length | 4 mm(0.16 in) | 6 mm(0.24 in) | 8 mm(0.31 in) | 12 mm(0.47 in) | 25 mm(0.98 in) |
| Aperture 2.0 2.0 2.0 2.0 2.5 | |||||
| Horizontal image angle 90° 60° 45° 31° 15° | |||||
| Vertical image angle 67° 45° 34° 23° 11° | |||||
| Distance 1 m (1.09 yd) m m m m | |||||
| Image width | 2.0 1.1 0.8 0.5 0.3 | ||||
| Image height | 1.3 0.8 0.6 0.4 0.2 | ||||
| Distance 5 m (5.47 yd) | m m m m m | ||||
| Image width | 10.0 | 5.7 4.1 | 2.7 1.3 | ||
| Image height | 6.6 4.1 3.0 2.0 1.0 | ||||
| Distance 10 m (10.94 yd) | m m m | m m | |||
| Image width | 20.0 11.5 8.2 | 5.5 2.6 | |||
| Image height | 13.3 | 8.2 6.1 4.0 1.9 | |||
| Distance 20 m (21.87 yd) | m m m m m | ||||
| Image width | 40.0 23.0 16 | 4 11.0 5.2 | |||
| Image height | 26.6 16.4 | 12.2 | 8.0 3.8 | ||
| Distance 50 m (54.68 yd) | m m m m m | ||||
| Image width | 100.0 | 57.5 | 41.0 | 27.5 | 13.0 |
| Image height | 66.0 | 41.0 | 30.5 | 20.0 | 9.5 |
Notes
The specified focal lengths of MOBOTIX lenses do not reflect the actual focal length of the lenses, but the focal length (Lxx mm) converted to 35 mm camera format. For example, the MOBOTIX Super Wide Angle lens has an actual focal length of 4 mm. This would be the equivalent of 22 mm on a 35 mm camera. This lens is thus called L22.
Since the image sensors in digital cameras have different sizes, converting the focal lengths to 35 mm camera as a known format allows the image formats and the fields of vision of the different lenses to be calculated and compared more easily. Another benefit is that you can easily set a 35 mm camera (analog or digital) to the same focal length as the MOBOTIX lens (Lxx) to obtain the same field of vision. This approach greatly facilitates lens selection.
*Special MiniUSB adaptor cable available as an accessory
**A 4 GB MicroSD card is included with all D24M IT/Secure models
MicroSD cards of up to 32 GB may be used (SDHC)
natural_image
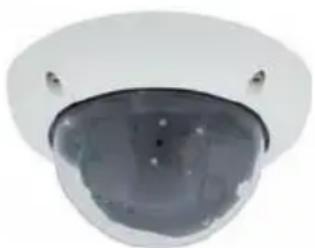
Close-up of a white surveillance camera with a dome lens and multiple sensors (no visible text or symbols)D24M Hardware Features
| Outdoor weatherproof IP54 IP65 IP65 IP65 | ||||
| Ethernet/MiniUSB* X/- X/X X/X X/X | ||||
| MicroSD slot - X X X | ||||
| Mono (M) / Dual (D) M M M M | ||||
| Image sensor Color Color Color B/W | ||||
| Lens L22 L22 L22 L22 | ||||
| Resolution | VGA | VGA | 3 MEGA | 1 MEGA |
| Resolution horizontal x vertical | 640x480 | 640x480 | 2048x1536 | 1280x960 |
| Max. frame rate CIF/VGA/MEGA/3MEGA (fps) | 16/16/-/- | 16/16/-/- | 30/30/30/20 | 30/30/30/- |
| Sensitivity at 1/60 second (lux) | 1 | 1 | 1 | 0.1 |
| Sensitivity at 1 second (lux) | 0.05 | 0.05 | 0.05 | 0.005 |
| RAM storage (MB) | 64 | 64 | 128 128 | |
| Temp. video storage, ring buffer (MB) | 2 | 32 | 64 | 64 |
| Internal DVR (MicroSD card), ring buffer (GB)** | - | up to 32 | up to 32 | up to 32 |
| • CIF images (for 32 GB int. DVR), approx. | - | 2 mil. | 2 mil. | 2 mil. |
| • VGA images (for 32 GB int. DVR), approx. | - | 1 mil. | 1 mil. | 1 mil. |
| • MEGA images (for 32 GB int. DVR), approx | - | - | 350,000 | 350,000 |
| • 3 MEGA images (for 32 GB int. DVR), approx. | - | - | 160,000 | - |
| External audio (optional with ExtIO) | - X X X | |||
| Warranty (months) | 12 | 12 | 12 | 12 |
| Concealed cabling | X X X X |
D24M Software Features
| Digital zoom (continuous) with panning | - XXX | |||
| Additional storable views | - XXX | |||
| Full image recording | - XXX | |||
| Video motion window | XXXX | |||
| Exposure windows | XXXX |
| M12 | D12 | Basic Model | Web Model | IT Model | Secure Model | |
| M22M | D24M | Q24M |
Software Features (All Models)
| Digital zoom (continuous) with panning X * X X X | ||||
| Motion JPEG/MxPEG video streaming X/X X/X X/X X/X | ||||
| Custom exposure windows XXXX | ||||
| Video motion detection XXXX | ||||
| Time and event control (FTP, e-mail, logos) XXXX | ||||
| Weekly schedules/holidays - X X X | ||||
| Web functionality (FTP, e-mail) XXXX | ||||
| Quad/MultiView in browser XXXX | ||||
| Recording/Playback in browser | XXXX | |||
| Logo generator, animated | - | X | X | X |
| Single image recording (pre-/post-alarm images) | 3 | 3 | 10 | 50 |
| Terabyte ring buffer (Win/Lin/Mac) via network | - | - | X | X |
| Continuous video/audio recording, 0.2 to 30 fps | - | - | X | X |
| Video/audio recording (event-triggered) | - | - | X | X |
| Event-controlled frame rate with continuous audio | - | - | X | X |
| Flexible event logic | - | - | - | X |
| Master/Slave arming by one camera | - | - | - | X |
| Time-scheduled privacy zones, several areas | - | - | - | X |
| Bidirectional audio (IP) from/to browser | - | - | X** | X** |
| Customized voice messages | - | - | X | X |
| VoIP telephony (Audio/Video, SIP) | - | - | X** | X** |
| Alarm calls to softphones (SIP) e.g. X-Lite | - | - | X | X |
| Remote alarm notification (via TCP/IP, IP Notify) | - | - | X | X |
| RS232 Data Logger/Terminal | - | - | X*** | X*** |
| Programming interface/HTTP API | - | - | X | X |
| Security features (HTTPS/SSL, IP-level access control, network authentication IEEE 802.1X) | X | X | X | X |
Model Feature List
| Image size | VGA | 3 Mega | VGA | 3 Mega |
| Image sensor | Color | Color | Color&BAW | Color&BAW |
| Standard lens for software version | L22 | L22 | L22 | L22 |
| Audio support (Microphone/Speaker) | -/L** | -/L** | M/L** | M/L** |
© MOBOTIX AG • Security-Vision-Systems • Made in Germany
The Web version is only available for the M12
The Basic version is only available for the D24M and Q24M
The IT version is not available for the Q24M
*Only available for Q24M
**D24M IT and Secure models allow an external speaker and microphone to be connected. D24M cameras are not delivered with a microphone or speaker.
***RS232 only for M12/D12
BW image sensors with megapixel resolution (1280x960 pixels)
M12 lenses included if requested by customer
2 INSTALLATION
Although the D24M is primarily designed for installation on walls and ceilings, it can also be mounted to a pole or the corner of a building, for example, using the appropriate MOBOTIX accessories. The different installation options are described in sections 2.4 and below, while the drilling templates can be found at the end of the manual.
2.1 Preparing The Installation
Before installing the MOBOTIX D24M, the following questions should be answered:
- Where will the camera be mounted?
Mounting to a ceiling or wall, see Section 2.1.1
- Which other mounting options are available?
On-wall mounting, in-ceiling mounting, vandalism protection, wall mounting, pole mounting, see Section 2.1.2
- How is the camera connected to the network and how is the power supplied?
MX-NPA-PoE or other PoE components (IEEE 802.3af), see Section 2.1.3
- How are the connections furnished from the building?
Sockets, see Section 2.1.4
- What cabling considerations are necessary?
Wiring, see Sections 2.1.5 and 2.13
The following sections contain a brief answer to each of these questions, as well as references to the relevant sections in this manual. For more information on the MOBOTIX D24M and available accessories, please see: www.mobotix.com.

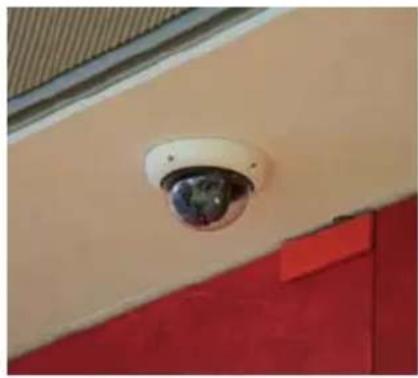
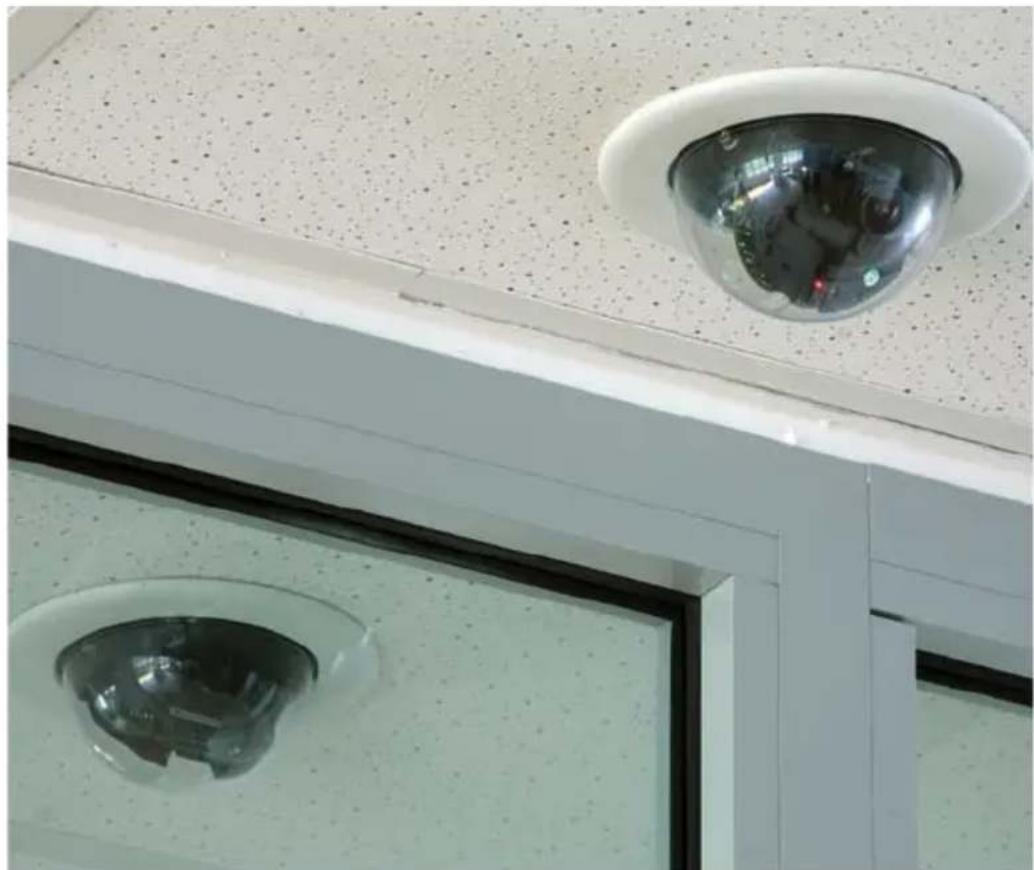
Like all MOBOTIX cameras, the D24M is extremely flexible in terms of how and where it can be installed (see Section 2.1.2). The Basic model meets the IP54 standard while the IT and Secure models are weatherproof in accordance with IP65. However, installations on a wall or ceiling are the most common mounting positions. In indoor spaces, the D24M is usually mounted from the ceiling. The Super Wide Angle lens (90°, L22) allows a room to be monitored almost entirely by a camera mounted in the corner. Using the PTZ software, you can easily zoom in on image details in either the live image or the recording.
natural_image
Close-up of a surveillance camera mounted on a wall, showing red and beige panels (no text or symbols visible)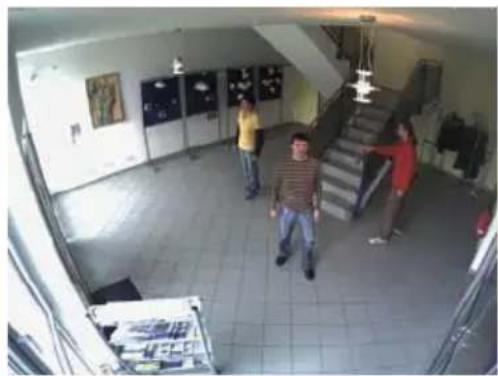
natural_image
Interior view of a modern indoor space with people walking and standing near stairs (no visible text or symbols)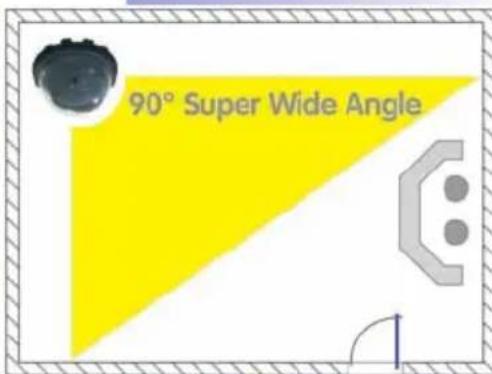
Ceiling Installation With The In-Ceiling Set
natural_image
Close-up of two security camera monitors mounted on a ceiling, no visible text or symbolsWall Installation Using The Outdoor Wall Mount
Outdoors, the D24M is usually mounted on a building wall. In principle, the camera can be installed without additional wall mounts, although the positional range of the lens m be limited as a result. We therefore recommend using the practical Wall Mount from the range of available accessories (Section 2.4). The cable exit of the D24M is located in the center of the housing's underside. For more detailed information on the installation process, see Sections 2.5 and above. The appropriate drilling templates can be found at the end of the manual

natural_image
Exterior view of a white surveillance camera mounted on a building facade with red, yellow, and white stripes (no text or symbols visible)One Camera For 4 Gas Pumps - Long-Term Recording Without Peripheral Devices

© MOBOTIX AG • Security-Vision-Systems • Made in Germany
2.1.2 Mounting Options For IT/Secure Models
On-Wall Installation (MX-OPT-AP)
The On-Wall Set can reliably protect external cables if the cables can be fed in the center below the camera housing. The On-Wall Mount also provides ample space for extra modules
On-Wall Installation With 10° Inclination (MX-OPT-AP-10DEG)
This On-Wall Set is identical to the regular On-Wall Set, except that it mounted camera is inclined by 10 degrees. The inclination makes it possible for the camera to deliver the best images even in demanding situations.
In-Ceiling Installation (MX-OPT-IC)
The In-Ceiling Set allows the D24M camera to be installed in suspend ceilings, for example. This type of installation provides optimal protection for the camera and reduces the visible profile to a minimum sin only the dome remains visible.
Vandalism Set (MX-D24M-Vandal)
The Vandalism Set provides added protection for D24M cameras. The set consists of a robust stainless steel cover (matt or polished) and an impact-resistant polycarbonate dome. A camera equipped with the Vandalism Set is perfectly suited for applications in demanding environments (such as prisons, trouble areas, train stations, etc.).
Wall Mount (MX-OPT-WH)
The Wall Mount is the ideal solution for mounting the D24M to walls indoor and outdoor applications. The camera is completely dust-pro- and resistant to water jets (IP65). The Wall Mount also covers RJ45 flush-mounted sockets and has ample space for additional module
Corner And Pole Mount (MX-OPT-MH)
The MOBOTIX Corner and Pole Mount is the ideal choice when mounting the MOBOTIX D24M to a pole or building corner. This mount can only be used in conjunction with the Wall Mount. For poles with a diameter ranging from 60 to 180 mm.
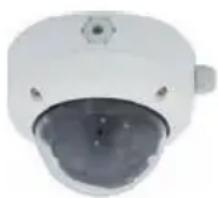
natural_image
Front view of a white surveillance camera with a dome lens and control panel (no visible text or symbols)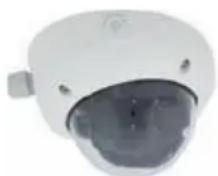

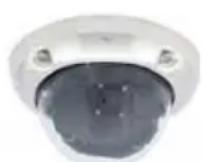
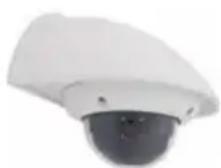

natural_image
Close-up of a white surveillance camera mounted on a green pole (no text or symbols visible)On-Wall Set (IP65, for outdoor applications)
10° On-Wall Set (IP65, for outdoor applications)
Discreet in-ceiling installation; decorative outer ring also available in stainless steel
Vandalism Set (IP65)
Wall Mount made from sturdy PBT-30GF (IP65)
Outdoor Corner and Pole Mount made from stainless steel (in conjunction with Wall Mount)
The D24M supports the Power over Ethernet standard IEEE 802.3af (PoE)
The Network Power Adapter replaces the crossover cable when directly connecting to a computer
For the D24M, you should use the new blue MX-NPA-PoE-Set - previous MOBOTIX network power accessories such as the NPA Set, Power Box and Power Rack (MX-NPA-Set, MX-NPR-4 and MX-NPR8/20) are not suitable for use with the D24M


2.1.3 Network Connection And Power Supply, UPS
Power over Ethernet (PoE Conforming To IEEE 802.3af)
All D24M models are supplied with power using the PoE standard. The Network Power Adapter (MX-NPA-PoE-Set) may be used for smaller installations. For larger installations it is worth investing in a PoE-capable supply device currently available on the market (PoE switch/router).

Caution
The maximum length of the network cable for power supply over an Ethernet cable is 100 m (109.36 yd).
Previous MOBOTIX network power accessories such as the NPA Set, Power Box or Power Rack (MX-NPA-Set, MX-NPR-4 and MX-NPR8/20) are not suitable for use with the D24M.
Note
The MOBOTIX D24M can be powered by switches or routers that support the PoE (Power-over-Ethernet) standard and conform to IEEE 802.3af
Sections 2.11 and above contain more information on the possible combinations of connecting the D24M and power supply options.
Advantages of PoE power supply:
• Advantages of centralized backup power supply are available via network
• Lower, more cost-effective power consumption
• Camera does not require an additional network connection
Using Uninterruptible Power Supplies (UPS)
In order to maintain a continuous power supply even when utility power fails, you should install an uninterruptible power supply (UPS). These devices also provide some protection against electrical surges and voltage fluctuations and thus enhance the reliability of the system as a whole.
By using a more powerful 19" rack-mounted UPS, you can also protect all other network components (e.g. switches, routers, PoE switches, etc.).
Since MOBOTIX cameras do not require any heating, even during winter, the average power consumption of approximately 3 watts is very low. This in turn means that you can centralize the USP-protected power supply by injecting power into the network cables (max. 100 m/109.36 yd). This kind of protected power supply can be used either with MOBOTIX PoE products (MX-NPA-PoE + Universal Power Supply) or with PoE-compliant switches according to IEEE 802.3at.

2.1.4 Preparing The Camera Connections, Wall Outlets
Once the camera position, the position of the cable outlets and the method of power supply have been decided upon, the cabling can be installed. Before mounting the MOBOTI D24M, you should make sure that the network connections have been properly tested to ensure that the camera functions correctly when it is installed.
UPS not only protect the camera against power failures, they also protect all other connected network devices against damage from voltage peaks and lows
19" system with UPS
Camera power supply using PoE enables centralized UPS via network (increased security)
2.1.5 Wiring, Fire Prevention, Lightning And Surge Protection
When installing the wiring inside or outside of buildings, make sure you always adhere to the relevant regulations on wiring, fire prevention and protection against lightning.
MOBOTIX cameras are protected against the effects of small electrical surges by a range of measures. These measures, however, cannot prevent the camera from being damaged when stronger electrical surges occur. Particular care should be taken when installing the camera outside to ensure proper protection against lightning, as this also protects the building and the entire network infrastructure.
MOBOTIX recommends having MOBOTIX cameras installed only by certified specialists accustomed to installing network devices and having proper respect for the applicable regulations regarding lightning protection and fire prevention as well as the current technology for preventing damages from electrical surges.
Wiring
When installing the wiring, make sure to follow these guidelines:
- Data cable: Make sure you only use double-shielded CAT5 or higher cable (S/STP) for Ethernet connections.
- Outdoors: Installing the camera outdoors requires special precautions and measures regarding the cables as well as lightning and surge protection (see below).
- Wire lengths: The cable segments must not exceed the maximum allowed cable lengths in order to ensure proper data transfer (see Section 2.11).
- Avoiding induction: When running data cables parallel to existing regular power lines or high-voltage wires, make sure you observe the minimum distances to the power cables.


Fire Prevention
When installing the power lines to the camera, make sure you always adhere to the country-specific regulations (e.g. VDE in Germany, IEEE in the USA) in effect on wiring and fire prevention at the site of the installation.
Lightning And Surge Protection
More information on preventing lightning or surge damage is available from organizations such as the International Electrotechnical Commission (www.iec.ch) or from the manufacturers of lightning and surge protectors such as Dehn (www.dehn.de).
Notes
2.2 D24M IT/Secure: Delivered Parts, Components, Dimensions
2.2.1 Delivered Parts And Camera Components Of D24M IT/Secure
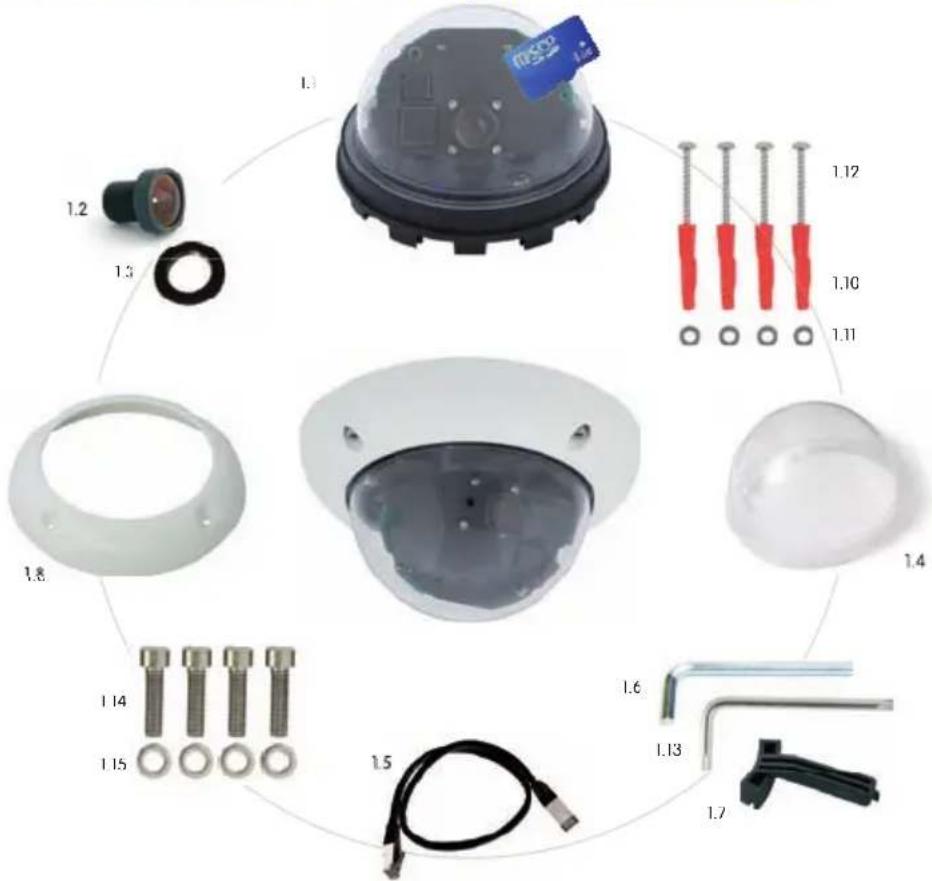
| Item Quantity Part Name | |
| 1.1 1 Camera housing | |
| 1.2 1 Lens | |
| 1.3 1 Lock ring | |
| 1.4 1 Dome, transparent | |
| 1.5 1 CAT5 Ethernet cable, 0.5 m, pre-installed | |
| 1.6 1 Allen wrench 3 mm | |
| 1.7 1 Hook wrench | |
| 1.8 1 Outer shell with rubber seal | |
| 1.9 1 Mounting ring (image not shown) | |
| 1.10 4 Universal screw anchors 8 mm | |
| 1.11 4 Stainless steel washers ∅ 5.3 mm | |
| 1.12 4 Stainless steel Torx screws 4.5x60 mm | |
| 1.13 1 Torx wrench TX20 | |
| 1.14 4 Allen screws M4x16 mm | |
| 1.15 4 Stainless steel washers ∅ 4.3 mm | |
2.2.2 D24M IT/Secure Camera Housing And Connectors
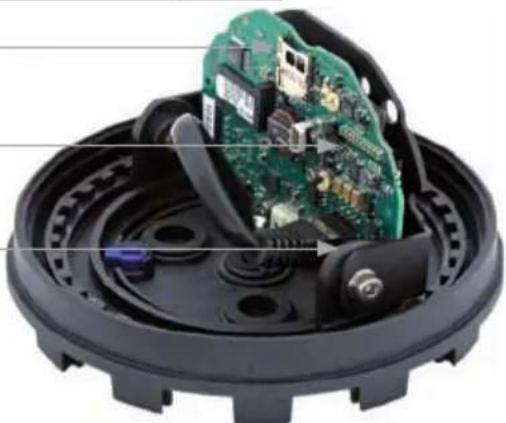
The MOBOTIX D24M IT/Secure consists of the camera housing (motherboard, lens, dom) the outer shell and the mounting ring.
Connections
• Network (Ethernet network incl. PoE supply)
- MiniUSB (e.g. for ExtIO)
- Slot for MicroSD card
Outer shell

natural_image
Close-up of a white surveillance camera head with transparent dome and circular lens (no text or symbols visible)Dome
Lens unit

natural_image
Interior view of a black mechanical device with visible components and mounting holes (no text or symbols)Key R
Key L
LEDs
Slot for MicroSD card
MiniUSB (e.g. for ExtIO)
Network Connection
natural_image
Interior view of a black circular device with exposed circuit board and mechanical components (no text or symbols visible)2.2.3 Dimensions Of D24M IT/Secure

natural_image
Close-up of a black electronic device with red motion arrows indicating rotational movement (no text or symbols)Camera module can be freely rotated and tilted
By rotating the camera module on both axes, you can aim the lens at the precise area you want to record.

natural_image
Close-up of a white spherical security camera with a transparent dome and internal components, labeled with 160 mm height and 85 mm width (no text or symbols on the device itself)2.2.4 Drilling Template For The D24M IT/Secure Mounting Ring

Notes
Use the folded drilling template at the end of the manual.
Make sure that the drilling template is not scaled or adjusted to the paper size when printing the PDF file (enlarged or reduced). When printing the PDF file, you should print two pages onto one using 100% scaling to obtain an unscaled printout of the drilling template.
Find the drilling templates (scale 1:1) at the end of the manual as a fold-out
2.3 D24M Basic: Delivered Parts, Components, Dimensions
2.3.1 Delivered Parts And Camera Components Of D24M Basic

| Item Quantity Part Name | |
| 2.1 1 Camera housing | |
| 2.2 1 Lens | |
| 2.3 1 Lock ring | |
| 2.4 1 Dome, transparent | |
| 2.5 1 CAT$ Ethernet cable, 0.5 m, pre-installed | |
| 2.6 1 Allen wrench 3 mm | |
| 2.7 1 Hook wrench | |
| 2.10 4 Universal screw anchors 8 mm | |
| 2.11 4 Stainless steel washers ∅ 5.3 mm | |
| 2.12 4 Stainless steel Torx screws 4.5x60 mm | |
| 2.13 1 Torx wrench TX20 | |
| 2.14 4 Allen screws M4x16 mm | |
| 2.15 4 Stainless steel washers ∅ 4.3 mm | |
2.3.2 D24M Basic Camera Housing And Connector
The MOBOTIX D24M Basic consists of the camera housing with the motherboard, the lens and the dome.
Connections
• Network (Ethernet network incl. PoE supply)

2.3.3 Dimensions Of D24M Basic

natural_image
Close-up of a mechanical device with red motion arrows indicating rotational movement (no text or symbols)Camera module can be freely rotated and tilted
By rotating the camera module on both axes, you can aim the lens at the precise area you want to record.
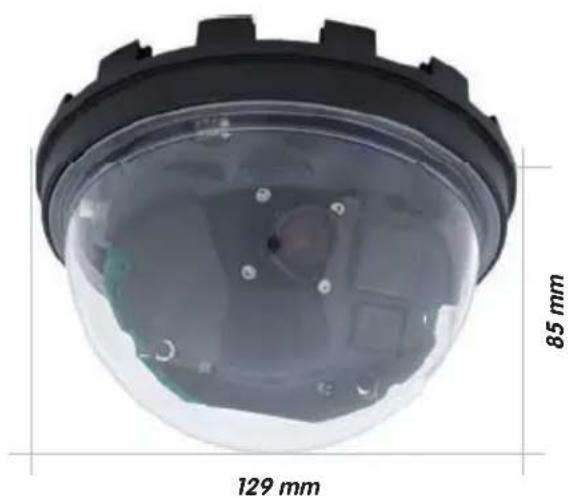
natural_image
Close-up of a camera lens with transparent dome and internal components, labeled with 85 mm height and 129 mm base (no text or symbols on the lens itself)2.3.4 Drilling Template For The D24M Basic

Find the drilling templates (scale 1:1) at the end of the manual as a fold-out
Notes
Use the folded drilling template at the end of the manual.
Make sure that the drilling template is not scaled or adjusted to the paper size when printing the PDF file (enlarged or reduced). When printing the PDF file, you should print two pages onto one using 100% scaling to obtain an unscaled printout of the drilling template.
2.4 Available D24M Accessories - Overview
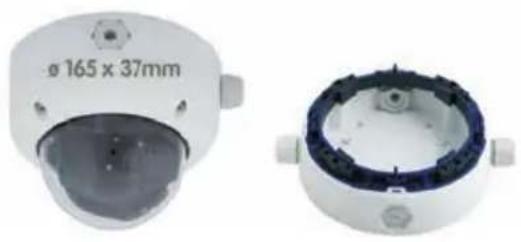
On-Wall Set (MX-OPT-AP)
Consists of On-Wall Mount and mounting supplies. Conforms to U.S. installation standards. Reliably protects the cabling and allow additional modules to be integrated within the On-Wall Mount (patch/installation cable connector, IO extensions, WLAN, battery, ...
natural_image
Two white industrial sensor modules with circular components and a 165x37mm specification label (no text or symbols on the modules themselves)10° On-Wall Set (MX-OPT-AP-10DEG)
Consists of On-Wall Mount and mounting supplies for inclined installation (10°) of camera. Conforms to U.S. installation standards. Reliably protects the cabling and allow additional modules to be integrated within the On-Wall Mount (patch/installation cable connector, IO extensions, WLAN, battery, ...

natural_image
Two white industrial sensor modules with black caps and a circular housing, shown from front and side views (no text or symbols visible)Vandalism Set (MX-D24M-Vandal)
Consists of a stainless steel ring, securit screws and reinforced dome (3 mm polycarbonate). Ideally suited for surveillance a critical locations

natural_image
Three electronic components with no visible text or symbols: a metallic dome, a black circular ring, and a white dome (no text or symbols on the main objects)In order for the camera to blend in better w its environment, the Vandalism Set is availab in five different finishes: matt stainless steel polished, white powder-coated, black pow der-coated, silver-gray powder-coated

natural_image
Six different plastic ring components with reflective surfaces, shown in grayscale and black tones (no text or symbols visible)In-Ceiling Set (MX-OPT-IC)
For simple installation in false ceiling tiles. Suitable for discreet surveillance. Optionally available with a stainless steel ring.

natural_image
Two identical white medical or laboratory equipment views showing a circular opening with blue connectors (no text or symbols visible)Outdoor Wall Mount (MX-OPT-WH)
Consists of Outdoor Wall Mount and mountain supplies. Covers RJ45 flush-mounted sockets Space for expansion modules (battery, UMTS WLAN, etc.). Easily mounted to poles using Pole Mount. Weatherproof IP65.
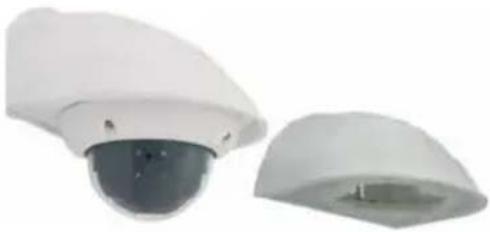
natural_image
Two white security cameras with lens caps, one open and one closed (no text or symbols visible)Corner And Pole Mount (MX-OPT-MH)
Flange for Outdoor Wall Mount. Can be mounted to wall corners or poles. 3 mr stainless steel, white. Wall Mount may be ordered separately or as a set.

natural_image
Two types of security cameras shown side by side: a white surveillance camera mounted on a vertical pole and a white rectangular enclosure with mounting holes (no text or symbols visible)Tinted Dome (MX-D24M-OPT-DCS)
Suitable for especially bright environments (e.g. under direct sunlight). A tinted dome reduce the glare from sunlight by 50% compared with the standard dome.
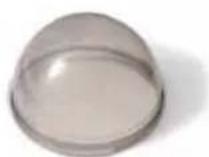
Network Power Adapter Set (MX-NPA-PoE-Set\*)
The Network Power Adapter Set is used to remotely power the MOBOTIX D24M over a network cable. This makes it possible to use the network cable to both connect the camera and remotely supply power (up to 100 m). The MOBOTIX Network Power Adapter Set including a power supply with RJ45 connector is required if you are not using a Pol compatible switch or router to supply power to the MOBOTIX camera.
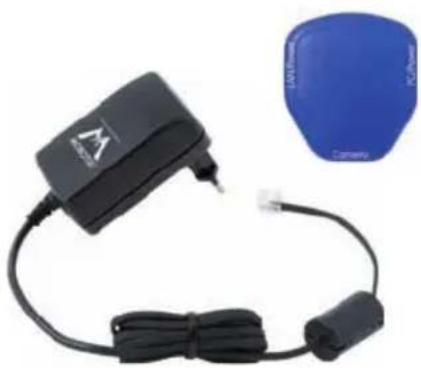
natural_image
Electric scooter charger with black body, cable, and blue safety patch (no visible text or symbols)Also suitable for mounting to drywall
ExtIO Function Extension (MX-ExtIO)
The ExtIO contains a powerful speaker, microphone, infra-red motion sensor, environmental temperature sensor, 2 input and 2 output contacts and 2 illuminated buttons. It is ideal for door communication, elevators, access control, etc.
The ExtIO may be operated directly with the D24M over a separately available MOBOTIX MiniUSB cable. The ExtIO can operate in two different modes:

natural_image
Circular white electronic device with perforated top and central button, mounted on a circular base with mounting holes (no text or symbols visible)- MiniUSB: Directly connected to the camera using a separately available cable (max. 5 m)
- Ethernet: Connect the ExtIO over a standard PoE switch; maximum length of network cable to camera 200 m

flowchart
graph TD
    A["MOBOTIX D24M"] -->|Action: Automatic "call softphone" "0 - door opens" key| B["X-Lite Softphone"]
    C["MOBOTIX ExtIO"] -->|Connection cable| D["Door bell"]
    B --> E["Logic Panel 3"]
    D --> F["Logic Panel 4"]
    F --> G["Logic Panel 2b"]
    G --> H["Logic Panel 2a"]
    style A fill:#f9f,stroke:#333
    style C fill:#f9f,stroke:#333
    style B fill:#ccf,stroke:#333
    style D fill:#ccf,stroke:#333
    style E fill:#cfc,stroke:#333
    style F fill:#fcc,stroke:#333
    style G fill:#fcc,stroke:#333
    style H fill:#fcc,stroke:#333
Mx2wire Media Converter (MX-2wire-Set-PW)
The Mx2wire system allows you to set up an Etherr network with PoE via two-wire telephone cables of up to 500 m in length. This allows an existing two-wire analog telephone line to be used to connect a 10/100 Mbps Ethernet device (e.g. PC, WLAN, IP camera, IP telephone or IP door station). The achievable data rate is up to 30 Mbps. Around 15 Mbps can be reached even with 5C mm of antenna cable.
An identical Mx2wire device is placed at the beginning and the end of the line. Configuration as sender or receiver is automatic. The Mx2wire units are supplied with power v PoE by the feeding network cable. The connected device are supplied with up to 7 watt over PoE, as the injected PoE signal is transmitted parallel to the network signal. Mx2wire is delivered in the standard wall outlet frame available in different designs, however, it can also be used with the on-wall outlet that is included.
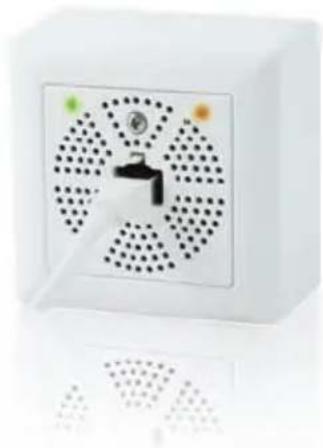
natural_image
White wall-mounted air purifier with circular vent pattern and central faucet (no text or symbols visible)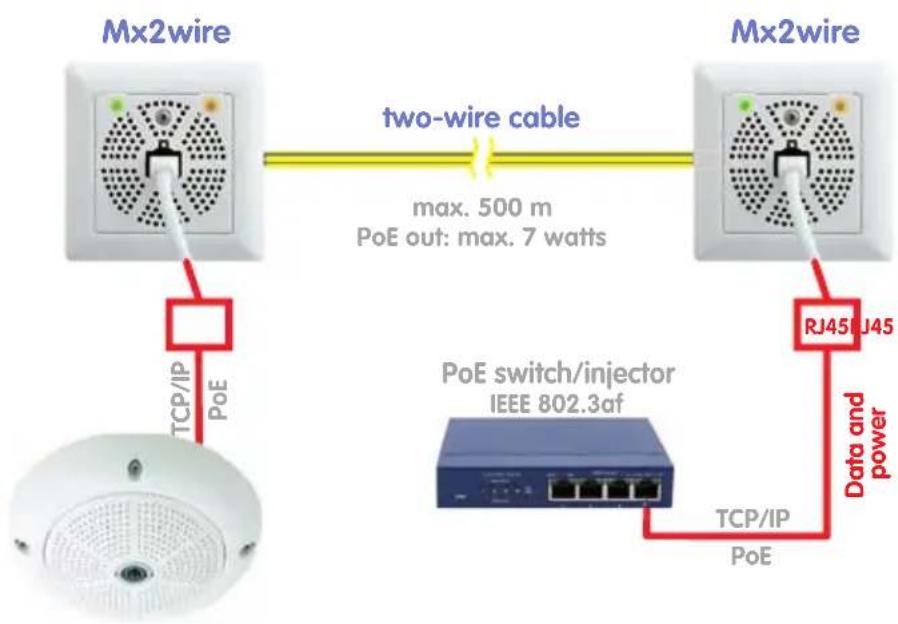
flowchart
graph TD
    A["Mx2wire"] -->|two-wire cable| B["Mx2wire"]
    A -->|TCP/IP, PoE| C["PoE switch/injector IEEE 802.3af"]
    B -->|Data and power| D["RJ45"]
    D -->|TCP/IP, PoE| A
    note1["max. 500 m\nPoE out: max. 7 watts"]
2.5 Mounting The Camera Without Accessories

natural_image
Close-up of a white surveillance camera with a blue 'MCS2' card attached on top, showing lens and camera (no text or symbols on the device itself)2.5.1 Mounting Instructions
As an allround camera, the D24M is primarily designed for installation on walls or ceilings. In general, direct installation of the camera without any accessories is always possible. However, to ensure a flush finish with the surface, you should first install a flush-mounted wall outlet (space for the connection cable).
If you choose to mount the camera directly to a wall without the MOBOTIX-recommende wall mount, you should position the camera in the center of the room to guarantee maximum coverage.

natural_image
Interior view of a modern indoor space with people walking and standing near a staircase (no visible text or symbols)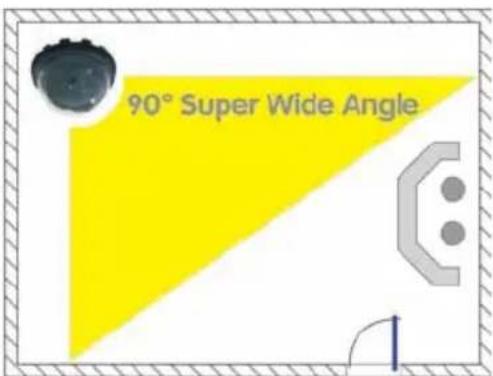
2.5.2 Required Tools
Please first check that all the components supplied with the camera are present in the original packaging (see Section 2.2 or 2.3).
The Following Additional Tools Are Required For Installation:
- Any additional materials for fastening the camera to a ceiling/wall, if necessary – 4 Torx screws incl. screw anchors and washers are included in the original packaging.
- Screwdriver
- Power drill for screw anchor holes needed for ceiling/wall mounting
• MOBOTIX drilling templates (at the end of this manual)
• Scissors to cut out the template - Pen to mark the drill holes
- Materials and any tools needed to connect the pre-installed MOBOTIX network cable in the camera with the on-site network cable.
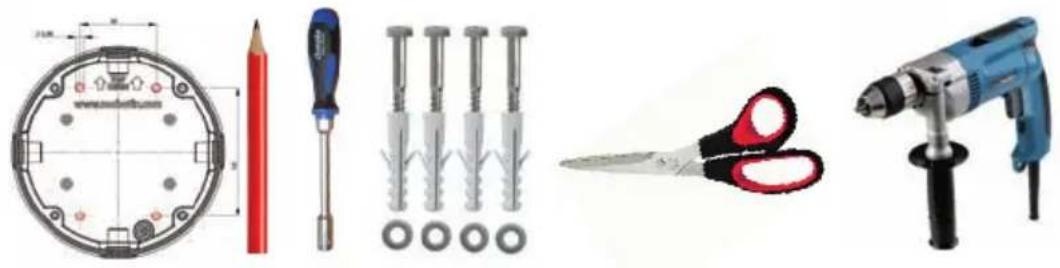
natural_image
Illustration of various electrical tools including screwdriver, screwdriver, screwdriver with screws, screwdriver with screws, and a power tool (no text or symbols present)2.5.3 Overview: Procedure For All D24M Cameras
Please be sure to install the camera in the following order:
- Install and prepare the network connection
- Drill the holes: Please use the enclosed screws and screw anchors whenever possible. It is essential that you use the supplied drilling template to ensure the precise alignment of holes for either the mounting ring of the D24M IT/Secure or the camera base of the D24M Basic (fold-out at the end of this manual).
- Hollow out background surface for the cable and connector or insert the cable behind the suspended ceiling or cable duct
- Connect the pre-installed network cable of the camera to the installation cable (adapter not included in delivery).
- Attach the camera to the ceiling or wall (see sections below).
- Aim and adjust the lens (see Section 2.11)
Caution
For safety reasons, only use the pre-installed MOBOTIX network cable that was included in the delivery. Always ensure that the rubber plug of the network cable reliably protects the outer shell from moisture entering the camera. All openings of the camera housing need to be properly sealed. This is the only way to guarantee that the camera remains weatherproof.
Notes
Network Connection Without Pre-Installed Cable:
The network cable is fed through the ceiling directly above the camera. Make sure the cable is completely sealed by the rubber gasket on the housing (do not bend the cable!) When preparing the installation, ensure that at least 15 cm of cable length (excluding the connector itself) remains inside the camera housing (similar to factory preinstallation). This will ensure that you can turn and tilt the lens mount freely later on.
Surface-Mounted Socket
If a surface-mounted socket is used, the camera must be mounted using the outdoor Wall Mount. The camera cannot be mounted directly on top of protruding, surface-mounted sockets.
2.5.4 Procedure For D24M IT/Secure

natural_image
Close-up of a white surveillance camera with a blue 'macc' card attached (no text or symbols on the device itself)- Install and prepare the network connection
- Install the flush-mounted socket: The pre-installed cable attached to the camera must be connected with the on-site network cable. For installation without accessories, a flush-mounted socket must be installed first to provide space for the connection. The cabling is now perfectly protected and cannot be seen or accessed from the outside. The camera cannot be mounted directly on top of protruding, surface-mounted sockets. Use the supplied camera drilling template (told-out at the end of this manual) to mark the position of the flush-mounted socket for the desired camera position
- Drill the holes: Drill the holes for the supplied screw anchors (see drilling template).
- Connect the cable Connect the on-site network cable to the camera patch cable using a standard connector.
- Attach the camera: Use the (included) screws to affix the mounting ring and the camera at the designated position.
- The outer shell is required at a later stage in the installation and is attached only when the dome has been removed and placed back after a lens adjustment.
- Proceed to Section 2.11, Aiming And Adjusting The Lens.
2.5.5 Procedure For D24M Basic
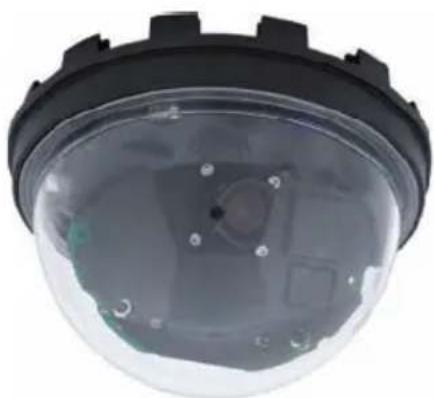
natural_image
Close-up of a transparent dome-shaped security camera with visible internal components and mounting holes (no text or symbols)1 Unscrew the transparent dome of the camera in a counter-clockwise direction. To keep the dome clean, use the enclosed plastic foil or a lint-free cotton cloth.

natural_image
Close-up of a camera lens with red rim and black lens (no text or symbols visible)- Unplug the pre-installed network cable from the network connector inside the camera. Never touch electronic components as the static electricity may damage them!

natural_image
Close-up of a green camouflage gear component mounted on a black circular base, with a red arrow pointing to it (no text or symbols visible)- Loosen the internal part of the camera by releasing the two blue clamps with the thin side of the hook wrench.

natural_image
Close-up of a mechanical component with visible wiring and components (no text or symbols)Now turn the toothed ring in a counter-clockwise direction using the other side of the hook wrench.
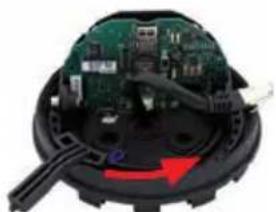
natural_image
Close-up of a circular electronic device with visible circuit board and mechanical components, no text or symbols present.- Remove the internal part of the camera with the lens mount from the base of the camera.

natural_image
Two black plastic mechanical components with circular bases and a circular housing (no text or symbols visible)- Position the base of the camera housing over the drilled holes and the prepared cable exit. Please make sure that the camera base is relatively flush with the surface. The network cable with connector should be flush with the ceiling or wall as a result. Since the three holes for the screws in the outer shell are factory sealed, they must broken open, for example, using a 5 mm drill bit.

natural_image
Circular device with three red circular holes and a cable, no visible text or symbols-
Tighten the base of the camera using the supplied screws. Depending on the installation site, the screw openings should be sealed shut (e.g. with silicon).
-
Insert the internal part of the camera with the lens mount into the attached outer shell and secure it by turning the two blue clamps in a clockwise direction using the supplied hook wrench or a screwdriver. This will prevent the internal part of the camera from falling out before it has been tightened into place.
-
Now secure the internal part of the camera by turning the toothed ring in a clockwise direction until you can still turn the internal part of the camera without much force.

natural_image
Close-up of a mechanical component with exposed circuit board and connectors (no visible text or symbols)- Connect the network cable to the network connector of the camera.

natural_image
Interior view of a smart home appliance showing exposed circuit board and wiring (no text or symbols visible)- Proceed to Section 2.11, Aiming And Adjusting The Lens.

natural_image
Close-up of a mechanical device with green circuit board and red directional arrow (no visible text or symbols)2.6 Mounting The Camera With The On-Wall Set
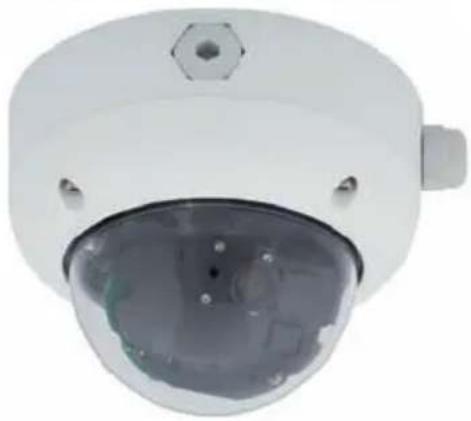
natural_image
Front view of a white surveillance camera with a clear lens and hexagonal button (no text or symbols visible)2.6.1 Mounting Instructions
On-Wall Sets available in 0° and 10° inclinations allow the D24M to be installed quickly and easily on the wall or ceiling of a room. When using the set outdoors (IP65), ensure that the screw holes on the rear of the camera housing are sealed with the included foam rubber washers. It is not possible to install the On-Wall Set directly above a surface- or flush-mounted socket.
The 10° On-Wall Set is the right choice if you want to mount the D24M on a wall with the lens pointing vertically downward (90° or more). If the 10° On-Wall Set is not used, then the angle of the lens may not exceed 80° for design-related reasons.
If the discreet appearance of the D24M is of particular importance, the In-Ceiling Set is ideal for mounting the camera on ceilings or drywalls (see Section 2.6).
The network connection and drill holes must be prepared correctly before installing the On-Wall Set (both indoors and outdoors)
- Network connection: You can use any one of the tour openings in the On-Wall Set to guide the cabling into the camera. The network cable must be fed through the opening without a connector. An additional connector to connect to the came cable is required.
- Preparing the drill holes: Use the supplied drilling template for the D24M On-Wall Set (fold-out at the end of this manual) to mark the exact position for drilling the anchor holes with regard to the camera position.
Caution
When using the On-Wall Set outdoors, ensure that the screw holes on the rear of the camera housing are sealed with the foam rubber washers included in delivery (IP6)
2.6.2 On-Wall Set
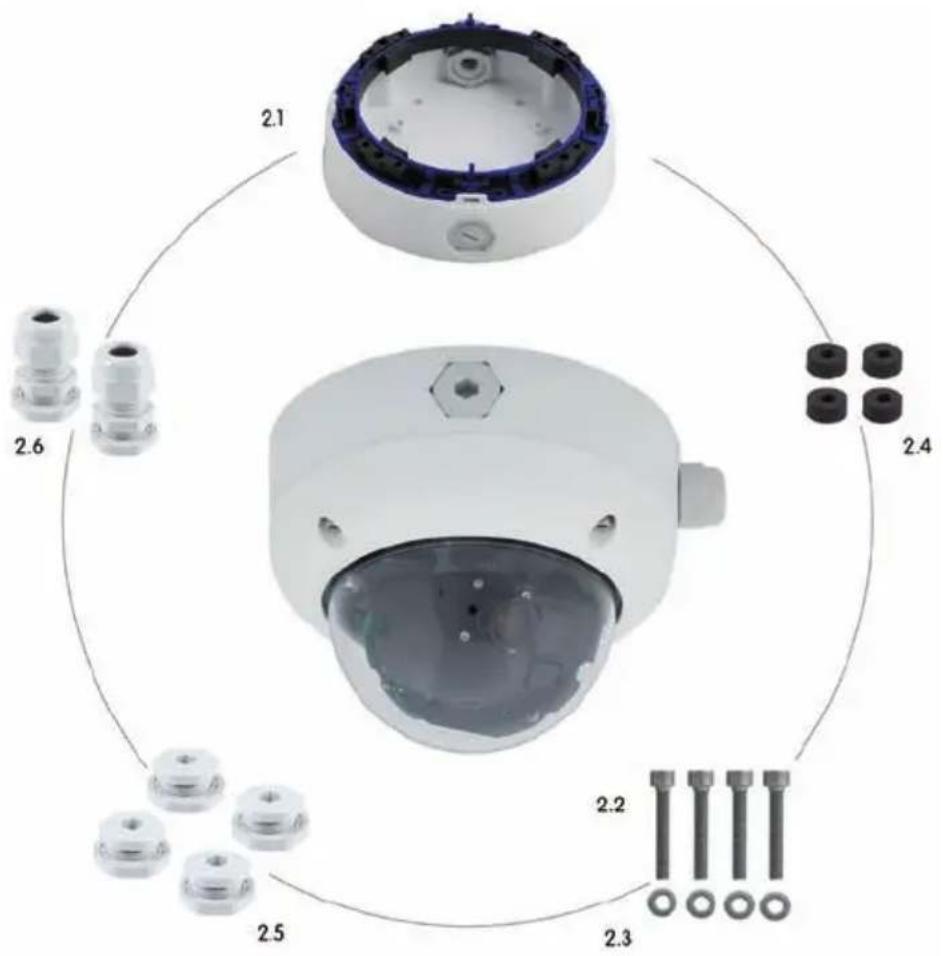
The On-Wall Set must be ordered separately from the camera
| Item Quantity Part Name | |
| 2.1 1 On-Wall Set housing | |
| 2.2 4 Stainless steel Allen screws M4x35 mm | |
| 2.3 4 Stainless steel washers ∅ 4.3 mm | |
| 2.4 4 Foam rubber washers | |
| 2.5 4 Lock screws with counter nuts | |
| 2.6 2 Cable fitting with counter nut and O-ring cord |
Find the drilling templates (scale 1:1) at the end of the manual as a fold-out
Drilling Template On-Wall Set

Notes
Use the fold-out template included at the end of the printed manual (valid for both 0° and 10° On-Wall Sets).
Make sure that the drilling template is not scaled or adjusted to the paper size when printing the PDF file (enlarged or reduced).
The maximum torque for all screws is 1 to 1.2 Nm.
Scope Of Delivery And Required Parts
Please first check that all components supplied with the On-Wall Set are present in the original packaging.
The Following Additional Tools Are Required For Installation:
- Suitable materials for ceiling/wall installation: 4 screws incl. screw anchors and washers (e.g. from the original camera packaging).
- Screwdriver
- Power drill for screw anchor holes needed for ceiling/wall mounting
• MOBOTIX drilling templates (at the end of this manual)
• Scissors to cut out the template - Pen to mark the drill holes
- Materials and tools needed to connect the pre-installed MOBOTIX network cable in the camera with the on-site network cable

natural_image
Illustration of various tools and components including screwdriver, screwdriver, screwdriver, and power tool (no text or symbols present)2.6.3 Procedure
- Attach washers: Prior to installation, stick a black foam rubber washer around each of the four screw holes on the rear side of the on-wall housing (remove the adhesive foil and press into place, surface must be clean and free of grease). This prevents water from entering the housing.

natural_image
Top-down view of a circular mechanical component with four black circular holes (no text or symbols visible)- Prepare the cabling: Insert the seal into the cable opening of the On-Wall Set such that the black rubber seal is on the outside. Fix it in place from the inside using a small hexagonal nut.
natural_image
Close-up of a mechanical component with a red-circled highlight on the top surface (no visible text or symbols)- Mount the On-Wall Set: Mount the On-Wall Set (without the camera) at the intended position using the Torx screws (included with D24M camera, items 1.10 - 1.12).

natural_image
Circular mechanical component with red circular markings and mounting base (no visible text or symbols)- Cable feeding: Attach the counter nut to the network cable, pass it through the seal from the outside and tighten the nut. The network cable is now screwed into the On-Wall Set, weatherproof. All unused openings must be sealed with the included sealant plugs. The cable passing into the housing must always be installed using the supplied three-part fittings.
natural_image
Circular mechanical component with a central yellow rod and blue frame, no visible text or symbols- Remove the camera outer shell: Remove all four Allen screws with the supplied Allen wrench and lift off the outer shell (not mounted upon delivery).

natural_image
Close-up of a white plastic housing with black insulation and a red downward arrow indicating a drop or change (no text or symbols)- Remove the mounting ring : Separate the black mounting ring from the camera housing (lift the spring clip). This ring is not required when mounting the camera to the On-Wall Set.

natural_image
Circular mechanical component with bolt holes and mounting holes (no text or symbols)- Connect the cable: Connect the on-site network cab to the network cable passing through the On-Wall Set using a standard connector. Make sure to leave enough unused cable inside the housing. This will ensure that you can turn and tilt the lens mount freely later on. Exce cable can be easily stored within the On-Wall Mount.

natural_image
Close-up of a mechanical device with exposed internal wiring and a transparent dome component (no visible text or symbols)- Attach the camera to the mount: Press the D24M so that it is seated firmly within the On-Wall Mount. The tapere guides at the back of the D24M housing fit exactly into the openings of the On-Wall Mount. Attach the white outer shell with the supplied Allen screws (without rubber seal) once the lens has been adjusted.

natural_image
Close-up of a mechanical component with a transparent cylindrical body and black textured base (no visible text or symbols)- Proceed to Section 2.11, Aiming And Adjusting The Lens.
The white decorative ring is also available in stainless steel
2.7 Mounting The Camera With The In-Ceiling Set

natural_image
Close-up of a white spherical device with a transparent dome and blue connectors (no visible text or symbols)2.7.1 Mounting Instructions
The In-Ceiling Set offers the most stylish installation option for the D24M. When properly installed, the only visible component is a particularly sleek and discreet dome camera, while most of the remaining components are concealed inside the ceiling. Only the compact dome and the thin decorative ring that conceals the screws can be seen
For these reasons, the D24M installed with the In-Ceiling Set is the preferred option for most indoor spaces frequented by customers or the general public (e.g. hotels, restaurants, banks, retail stores, public buildings, etc.).
The common use of suspended ceilings in commercial and public buildings is an addition reason to place a preference on in-ceiling installation. The installation process is also simplified, as the network cable may be laid without difficulty and only a 15 cm diameter hole must be cut in the ceiling or ceiling component.
Before installing the MOBOTIX D24M (IT/Secure) on an indoor ceiling with the In-Ceiling Set, you must prepare the network connection and drill a hole for the camera:
• Network connection: The network cable is fed through the ceiling directly above the camera. When preparing the installation, make sure that about 15 cm of cable remains unused.
- Cut a hole for installation: The hole should have (diameter of 150 mm (see drilling template at the end of the manual).
2.7.2 In-Ceiling Set
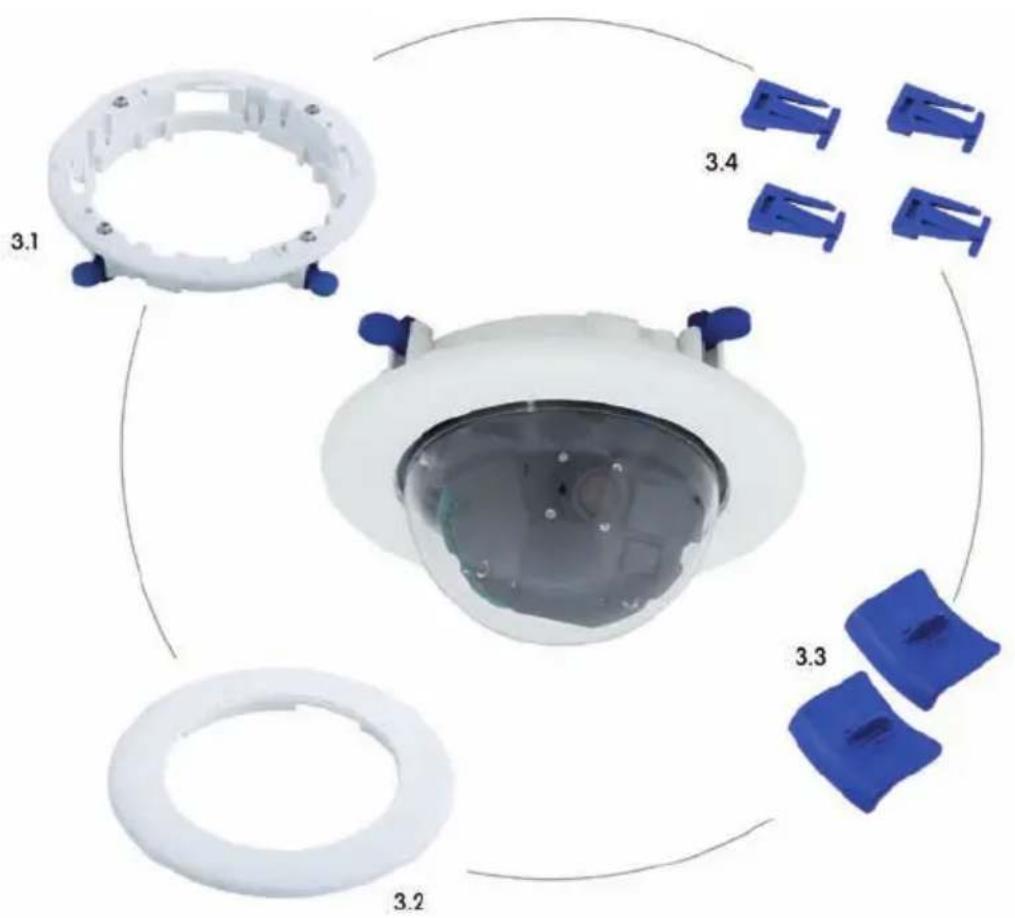
The In-Ceiling Set must be ordered separately from the camera
| Item Quantity Part Name | |
| 3.1 1 Ceiling mounting ring incl. 4 flat-head screws | |
| 3.2 1 Decoration ring | |
| 3.3 2 Wrench for In-Ceiling Mount | |
| 3.4 4 Clamps | |
Find the drilling templates (scale 1:1) at the end of the manual as a fold-out
D24M Drilling Template In-Ceiling Set

Notes
Find the folded drilling template at the end of the manual
Make sure that the drilling template is not scaled or adjusted to the paper size wh printing the PDF file (enlarged or reduced)
Scope Of Delivery And Required Parts
Please first check that all components supplied with the In-Ceiling Set are present in the original packaging.
The Following Additional Tools Are Required For Installation:
• Power drill with matching hole saw (150 mm diameter) or jigsaw
• MOBOTIX drilling templates (at the end of this manual)
• Scissors to cut out the template
- Pen to mark the hole positions
- Two blue In-Ceiling wrenches from the In-Ceiling Set
- Materials and tools needed to connect the pre-installed MOBOTIX network cable in the camera with the on-site network cable
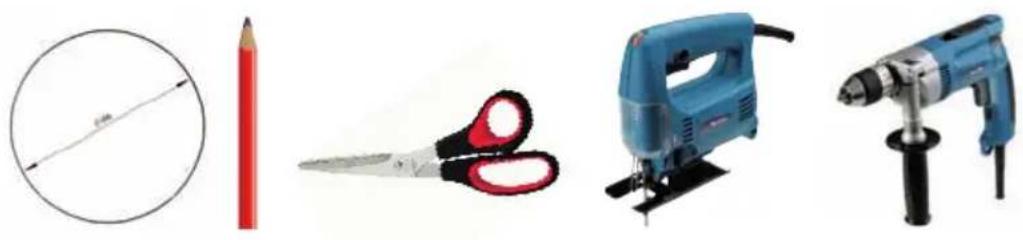
natural_image
Four different types of tools and a pencil: circle, pencil, scissors, flip-flop, and power tool (no text or symbols visible)2.7.3 Procedure
1 Prepare the network connection: Run the network cable above the suspende ceiling and ensure that enough cable slack is available.
-
Cut a hole for installation : Cut a round hole for camera installation (e.g. with a 150 mm hole saw). Use the supplied cutting template of the In-Ceiling Set (told-out at the end of the manual).
-
Remove the camera outer she: Remove all four Allen screws using the supplied Allen wrench and lift off the outer shell (not mounted upon delivery).
-
Remove the mounting ring: Separate the mounting ring from the camera housing. This ring is not required to mount the camera in the In-Ceiling Set.
5 Place the camera in the In-Ceiling Set : The dovetail guides at the back of the camera housing tit exactly into the openings of the In-Ceiling mounting ring. To make the camera even more secure (e.g. for mobile use), push the four clamps (item 3.4) into the square notches above the dovetail guides until you hear them click into place.
- Connect the cable: Connect the on-site network cable to the camera network cable using a standard connector.

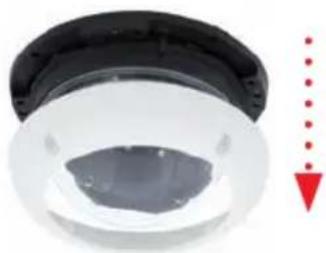
natural_image
Close-up of a white circular object with a black rim and a red downward arrow, no visible text or symbols.
natural_image
Circular mechanical component with bolt holes and concentric rings (no text or symbols)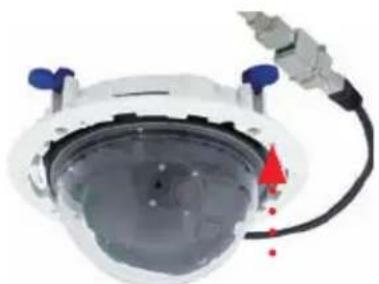
natural_image
Astronaut helmet with attached cable and red arrow indicator (no text or symbols)
natural_image
Close-up of a gray USB cable connector with black insulation (no text or symbols visible)
- Insert the camera and the In-Ceiling Set into the hole: Make sure that all winged cams are retracted before placing the In-Ceiling Set with the camera into the hole. Tightening the screws of the In-Ceiling Set extends the winged cams, thus firmly holding the set in place.

natural_image
Close-up of a surveillance camera mounted on a ceiling, showing red annotation and blue components (no text or symbols visible)
natural_image
Close-up of a blue and white mechanical component with a red circular border (no text or symbols visible)
natural_image
Close-up of a blue abstract shape inside a red circular border (no text or symbols)- Install the decorative ring: Use the two wrenches from the In-Ceiling Set to place the ring on the set as shown in the figure and turn the ring clockwise until it stops.

natural_image
Front view of a white and blue helmet with red triangular emblem and blue earments (no text or symbols visible)The two wrenches from the In-Ceiling Set are also used for dismounting. Insert them as shown and turn the ring counter-clockwise. Loosen the screws of the In-Ceiling Set; this will automatically retract the winged cams. You can now remove the In-Ceiling Set, with the camera still attached, from the ceiling.

natural_image
Front view of a white and blue helmet with red arrow and dotted line indicating motion (no text or symbols)- Proceed to Section 2.11, Aiming And Adjusting The Lens.
The blue winged cams (see left) automatically secure the In-Ceiling Set in the ceiling when tightening the screws
Installing the decorative ring: turn clockwise
Removing the decorative ring: turn counter-clockwise - only relevant when completely removing the camera
2.8 Installing The Vandalism Set

natural_image
Close-up of a white spherical security camera with a transparent dome and central lens (no visible text or symbols)2.8.1 Mounting Instructions
The Vandalism Set provides additional security and protection for D24M cameras with little effort and at a low cost. It is ideally suited for use under particularly demanding conditions (such as prisons, trouble areas, train stations, etc.). The set consists of a robust stainless steel outer shell that is available in five different colors and a reinforced plastic dome.
To install the Vandalism Set, replace the standard plastic outer shell supplied with the D24M IT/Secure with the stainless steel outer shell of the Vandalism Set (including the safety screws and four mounted spacers). In addition, replace the original dome of the D24M IT/Secure with the reinforced dome of the Vandalism Set
2.8.2 Scope Of Delivery And Required Parts
Please first check that all the components supplied with the Vandalism Set are present in the original packaging.

| Item | Quantity | Part Name |
| 5.1 1 Vandalism outer shell, 2 mm stainless steel | ||
| 5.2 4 Spacers for vandalism outer shell | ||
| 5.3 4 Security screws M4x16 mm | ||
| 5.4 1 Two-hole driver bit for security screws | ||
| 5.5 1 Reinforced dome, 3 mm polycarbonate | ||
Available Variants Of The MOBOTIX D24M Vandalism Outer Shell

The Following Additional Tools Are Required For Installation:
- Allen wrench for removing the standard outer shell (included in the D24M packaging)
- Screwdriver with bit receptacle for the two-hole driver bit

natural_image
Two types of screwdrivers: a flat L-shaped tool and a blue-handled screwdriver (no text or symbols visible)2.8.3 Procedure
- Remove the camera outer shell: Remove all four Allen screws using the supplied Allen wrench and lift off the outer shell.

natural_image
Close-up of a white circular mechanical component with a black outer ring and central opening (no text or symbols visible)- Remove the standard dome: Unscrew the dome from the housing (counter-clockwise). Package and store the standard dome for possible use at a later time.

natural_image
Circular mechanical component with concentric rings and mounting holes, no visible text or symbols- Aim and adjust the lens: When mounting the camera for the first time, please proceed to Section 2.11, Aiming And Adjusting The Lens.
- Mount the reinforced dome of the Vandalism Set. Tighten it in a clockwise direction using a soft cotton cloth. If necessary, clean the dome with a cotton cloth before installing it.

natural_image
Transparent, smooth, dome-shaped object with a soft shadow (no text or symbols)76/133
D24 Camera-Manual: INSTALLATION


natural_image
Two metallic mechanical components with circular ports, one showing a cross-section and the other a pointed tip (no text or symbols visible)- Insert the four spacers included in the Vandalism Set

natural_image
Close-up of a car head with blue plastic components and red arrows pointing to the component, showing structural details (no text or symbols)- Now attach the stainless steel outer sheel of the Vandalism Set using the safety screws. Tighten the screws into plac using the supplied two-hole driver bit.

natural_image
Close-up of a security camera lens with visible lens and mounting points (no text or symbols)
natural_image
Interior view of a building with a red fire extinguisher and a surveillance camera, set against a grid-patterned wall (no visible text or symbols)Notes
2.9 Installing The Wall Mount
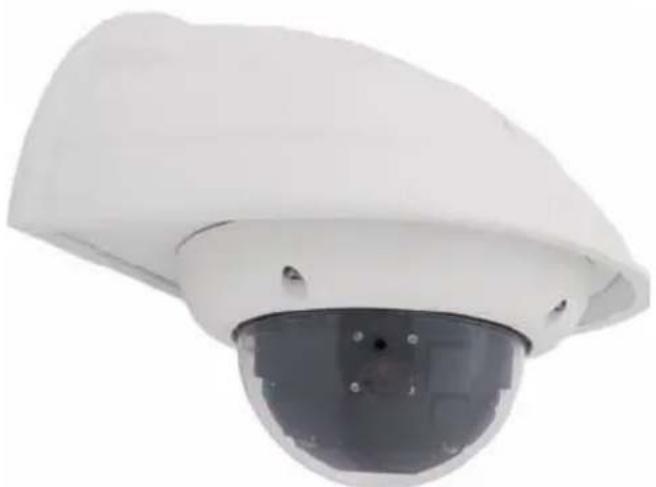
natural_image
White security camera with a dark lens, shown from the side (no text or symbols visible)2.9.1 Mounting Instructions
The Wall Mount allows you to easily mount D24M cameras to walls or extensions, both indoors or outdoors. The camera remains IP65 weatherproof (dust-proof and resistant to water jets). The Wall Mount also covers RJ45 flush-mounted sockets and has ample space for additional modules (Mx2wire, WLAN, batteries, etc.).
Before mounting the MOBOTIX D24M with the Wall Mount, you must prepare the network connection and drill the holes for the fixtures:
Direct installation over surface- and flush-mounted sockets
- The on-site network cabling is passed through the opening in the back of the Wall Mount. The cable and the required (standard) connector for the camera cable patch cable or ideally protected by a robust wall sealing made from toar rubber. Nothing is visible or accessible from the outside. The Wall Mount may be mounted directly on top of surface-c flush-mounted sockets. Maximum width x height of the socket: 88 mm x 80 mm.
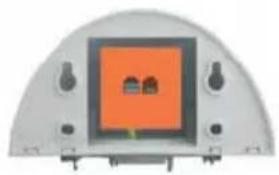
natural_image
Top-down view of a semi-circular electronic device with an orange central component and surrounding ports (no visible text or symbols)- Only use the factory installed patch cable of the D24M (50 cm cable length) or a MOBOTIX cable that is available as an accessory in various lengths.
- All openings of the camera housing need to be properly sealed. This is the only wo to guarantee that the camera remains weatherproof
- The supplied screw anchors should be used for the drill holes in the wall. Use the drilling template for the D24M Wall Mount (fold-out at the end of this manual) to mark the exact position for the drill holes and the holes through which the cables will later be fed
2.9.2 Wall Mount
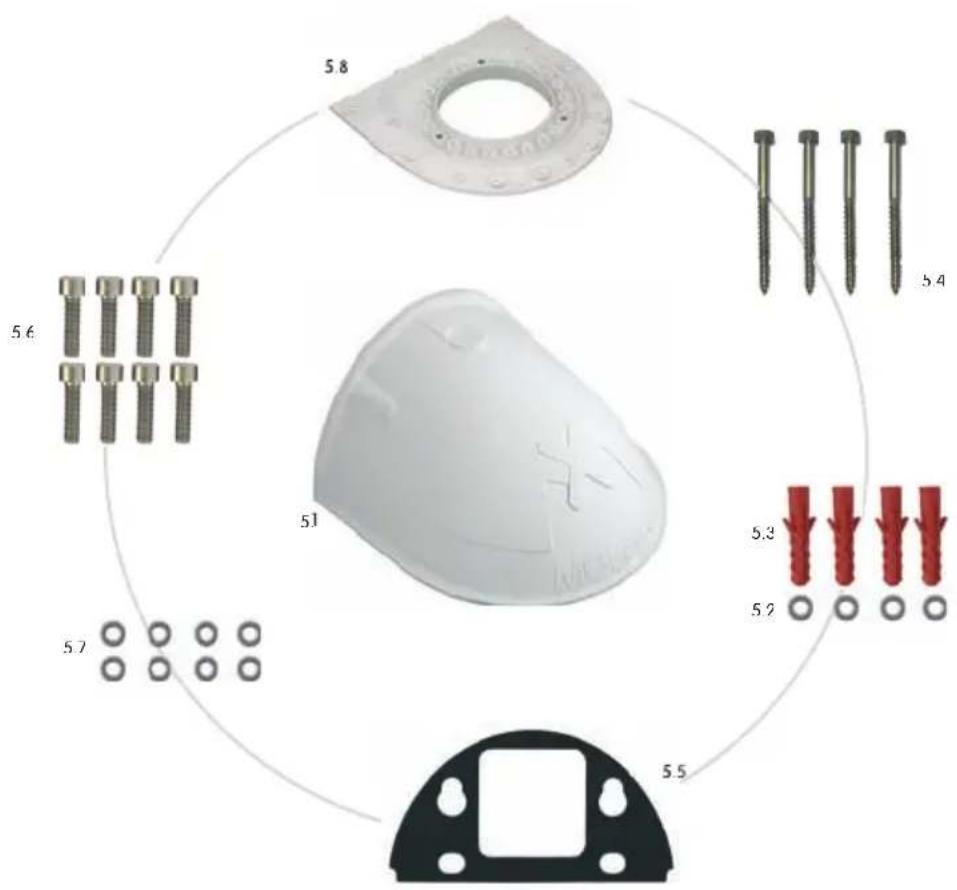
| Item Quantity Part Name | |
| 5.1 1 Wall Mount | |
| 5.2 4 Stainless steel washers ∅ 6.4 mm | |
| 5.3 4 Universal screw anchors 8 mm | |
| 5.4 4 Stainless steel Torx screws 6x50 mm | |
| 5.5 1 Wall sealing | |
| 5.6 8 Stainless steel Allen screws M4x16 mm | |
| 5.7 8 Stainless steel washers ∅ 4.3 mm | |
| 5.8 1 Bottom plate | |
Find the drilling templates (scale 1:1) at the end of the manual as a fold-out
Direct installation over surface- and flush-mounted sockets
Drilling Template Wall Mount


natural_image
Top-down view of a white electronic component with a central orange square and two small protrusions, labeled width 216 mm (no text or symbols on the component itself)Notes
Find the folded drilling template at the end of the manual.
Make sure that the drilling template is not scaled or adjusted to the paper size when printing the PDF file (enlarged or reduced).
Scope Of Delivery And Required Parts
Please first check that all the components supplied with the Wall Mount Set are present in the original packaging.
The Following Additional Tools Are Required For Installation:
• Power drill for screw anchor holes
- Screwdriver
• MOBOTIX drilling templates (at the end of this manual)
• Scissors to cut out the template
- Pen to mark hole positions
- Materials and tools needed to connect the pre-installed MOBOTIX network cable in the camera with the on-site network cable.
- Clean and soft cotton cloth

natural_image
Illustration of three different tools: a dome-shaped panel, a pencil, and a power tool (no text or symbols present)2.9.3 Procedure
- Remove the camera mounting ring: Separate the black mounting ring from the camera housing. This ring is not required when mounting the camera to the Wall Mount. If the D24M was not in its original packaging, then it may be necessary to remove the outer shell with the four Allen screws beforehand.

natural_image
Circular mechanical component with bolt holes and mounting holes (no text or symbols)- Separate the bottom plate form the Wall Mount: The bottom plate is used to hold the camera and is only attached and screwed into place during a later step.

natural_image
White dome-shaped object with internal compartments and a central screen (no visible text or symbols)- Pass the camera cable up through the bottom of the bottom plate: Ensure the orientation is correct. The spring clips should be on the underside of the bottom plate.
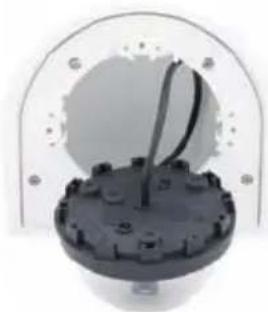
natural_image
Close-up of a mechanical component with a circular top and radial rod, enclosed in a transparent dome (no visible text or symbols)- Snap the camera into place on the bottom plate: Firmly push the camera into the Wall Mount. The plastic spring clips will snap into place when the trapezoidal elements on the rear of the camera housing exactly match up with the corresponding openings on the Wall Mount.

natural_image
Close-up of a circular mechanical component with concentric rings and mounting holes (no visible text or symbols)- Mount the Wall Mount (without camera): Stick the black wall sealing to the back of the Wall Mount (remove the adhesive toil first, the surface must be clean and free of grease). Pass the network cable through the large square opening and into the Wall Mount. Use the included screws to install the Wall Mount (without the camera) at the intended position. Pass the network cable through the large square opening on back side of the Wall Mount.
- Connect the cable: Prepare the on-site network cable for connection with the camera patch cable using a standard connector. Excess cable can be stored easily within the Wall Mount.
- Install the bottom plate with the camera in the Wall Mount: Connect the camera patch cable to the network cable. Then mount the bottom plate with the camera in the slots from below and fix it in place on the Wall Mount using the 4 Allen screws (Allen wrench included).
- Proceed to Section 2.11, Aiming And Adjusting The Lens

natural_image
Pure diagram of a curved black shape with a central rectangular element and two small protrusions (no text or symbols)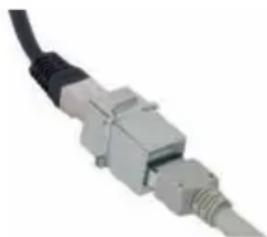
natural_image
Close-up of a gray network connector with black cable (no text or symbols visible)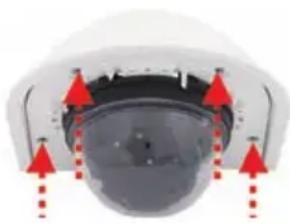
natural_image
Close-up of a black dome-shaped object with red arrows pointing upward, no visible text or symbols2.10 Installing The Corner And Pole Mount
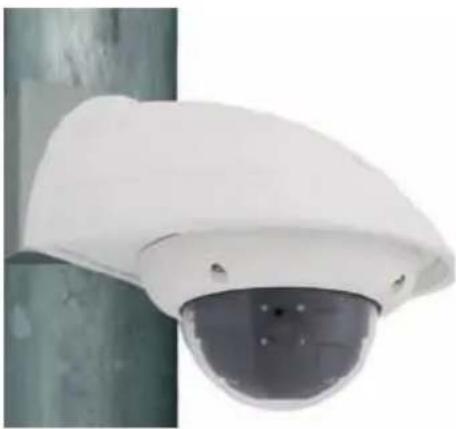
natural_image
Close-up of a white security camera mounted on a vertical pole against a green wall (no text or symbols visible)
natural_image
White surveillance camera mounted on a wall against a textured gray background (no text or symbols visible)2.10.1 Mounting Instructions
The 3 mm thick stainless steel Corner and Pole Mount is extremely robust and rust-proof. It is used (exclusively) in conjunction with the Wall Mount described in Section 2.9 in situations where you want to mount a D24M IT/Secure to a pole or wall corner. The Wall Mount required for complete installation must be ordered separately
The mounting pole should have a diameter of between 60 and 180 ~mm . Attaching the camera to the corner of a wall not only makes sense from an aesthetic perspective, but also allows you to monitor an area that is not specifically covered by the camera without incurring major building modification costs. In such cases, only the lens of the camera has to be repositioned.
By design, the Corner and Pole Mount does not allow the use of a flush-mounted socke
2.10.2 Corner And Pole Mount

| Item | Quantity | Part Name |
| 6.1 1 Pole | Mount, stainless steel, white powder-coated | |
| 6.2 4 Stainless steel | Allen screws M6x20 mm | |
| 6.3 4 Stainless steel | washers ∅ 6 mm | |
| 6.4 4 Stainless steel | lock nuts M6 | |
| 6.5 2 Stainless steel | straps | |
| 6.6 2 Cable | fitting with counter nut and O-ring cord | |
| 6.7 4 Torx | screws 6x80mm incl. screw anchors and washers | |

natural_image
White plastic enclosure with cutouts and a 130 mm height dimension label (no other text or symbols)Width: 218 mm

natural_image
Pure electrical circuit lines without any symbolsDepth: 92 mm
Scope Of Delivery And Required Parts
Please first check that all the components supplied with the Corner and Pole Mount Set are present in the original packaging.
The Following Additional Tools Are Required For Installation As A Pole Mount:
- Screwdriver
- Materials and tools needed to connect the pre-installed MOBOTIX network cable in the camera with the on-site network cable.
The Following Additional Tools Are Required For Installation Of The Corner Mount:
• Power drill for screw anchor holes
- Screwdriver
• Scissors to cut out the template
• Pen to mark hole positions
- Materials and tools needed to connect the pre-installed MOBOTIX network cable in the camera with the on-site network cable

natural_image
Illustration of four different tools and components: a pencil, screwdriver, scissors, and a blue drill (no text or symbols present)2.10.3 Mounting To A Pole

natural_image
White security camera mounted on a vertical pole against a green wall (no text or symbols visible)Use the supplied stainless steel straps to affix the Corner and Pole Mount to a pole.
- Guide the supplied stainless steel straps through the openings in the Corner and Pole Mount as shown in the diagram. Make sure that you are using the slots of the mount that best tilt for the thickness of the pole. The stainless steel straps allow attaching the mount to pole with diameters between 60 and 180 mm.
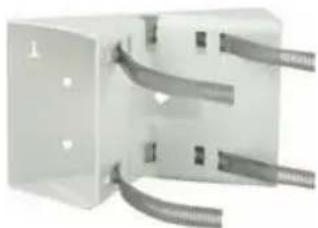
natural_image
White electrical outlet box with three gray cables, no visible text or symbols- Guide the on-site network cable from behind through one of the large round holes of the Corner and Pole Mount. In order to properly protect the cabling, it is best to pass the cabling from the inside of the pole through the Corner and Pole Mount directly into the camera (concealed cabling). Note: The cable length from the pole should be at least 80 cm!

natural_image
White electrical outlet with a wooden screw inserted into the outlet (no text or symbols visible)- Tighten the stainless steel straps on the Pole Mount with a screwdriver. If necessary, the ends of the straps can be cut off.

natural_image
Close-up of a metallic cylindrical component with two metal clips attached (no visible text or symbols)2.10.4 Mounting To A Wall Or Building Corner

natural_image
White surveillance camera mounted on a textured wall (no text or symbols visible)Use the supplied screw anchors, screws and washers to affix the Corner and Pole Mount to a building corner.
- Mark the four screw anchor holes on the corner of the building, ensuring that the arrows on the mount point upwards. Drill the holes with a 10 mm wall drill.

natural_image
Two vertical panels with four red dots on a textured gray background (no text or symbols)- Pass the on-site network cable through one of the large round holes at the back of the Corner and Pole Mount, then through one of the 16 mm diameter holes on the front of the mount. In order to properly protect the cabling, you should let the cabling run from the inside of the building through the Corner and Pole Mount directly into the camera (concealed cabling). Note: The cable length from the building corner should be at least 80 cm!
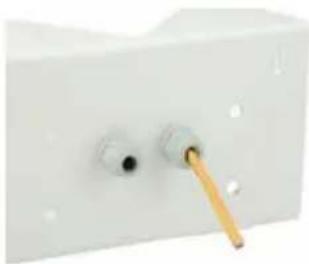
natural_image
Close-up of a white electrical outlet with a yellow cable inserted (no text or symbols visible)- Place the included wall anchors in the drilled holes and screw the Corner and Pole Mount into place on the corner of the building using the Torx screws and washers. Use the supplied drilling template (fold-out at the end of this manual) to mark the exact positions for the drill holes.
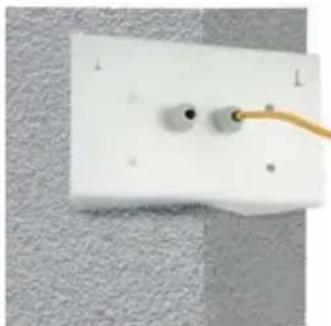
natural_image
White electrical outlet with two small components and a yellow cable inserted, mounted on a textured wall (no text or symbols visible)2.10.5 Mounting The Wall Mount To The Corner And Pole Mount
- Feed the network cables through the appropriate hole at the back of the Outdoor Wall Mount. The wall sealing on the Wall Mount must be in place already (see Section 2.9.3).

natural_image
White electrical outlet with a wooden screw inserted into the wall (no text or symbols visible)- Use the 6 x 20 mm Allen screws, ∅ 6 mm washers and M6 nuts included with the Corner and Pole Mount and attach the Wall Mount to the Corner and Pole Mount.

natural_image
Close-up of a white plastic electronic device with a yellow cable inserted, showing internal components (no visible text or symbols)- Then continue with the remaining work steps described in Section 2.9.3, Mounting The Camera With The Wall Mount!
2.11 Aiming And Adjusting The Lens
Establishing A Connection To The Camera
- Establish a connection to the camera as described in Section 3.2 First Images And The Most Important Settings
Aiming And Adjusting The Lens, Visual Inspection
Make sure that you see the live image of the camera on the monitor of your computer or laptop. Now adjust the lens mount until you see the desired image area on your monitor:
- Remove the camera dome. Use the supplied plastic foil or a cotton cloth to remove the dome by turning it in a counter-clockwise direction. With IT/Secure models, you may have to remove the outer shell first.

natural_image
Close-up of a circular mechanical component with red and black arrows indicating direction (no text or symbols)- Loosen the toothed ring slightly by turning it in a counterclockwise direction using the supplied hook wrench. In addition, loosen the two Allen screws on both sides of the lens mount slightly by turning them in a counter-clockwise direction using the supplied Allen wrench.
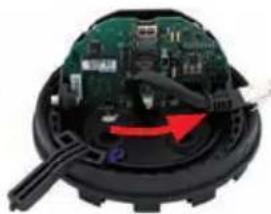
natural_image
Close-up of a small electronic device with exposed circuit board and mechanical components (no text or symbols visible)Loosen the ring and screws until you are still able to pan and rotate the internal part of the camera with the lens without much force but not so far that the lens is unable to move on its own.
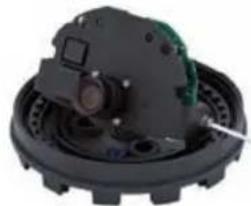
natural_image
Close-up of a mechanical component with a green and black housing, no visible text or symbols- Now aim the camera by rotating and panning the lens mount (Note: the MicroSD card slot must point downward for the camera's live image to be displayed properly). Never use force when adjusting the direction of the camera, as this could damage the camera beyond repair.
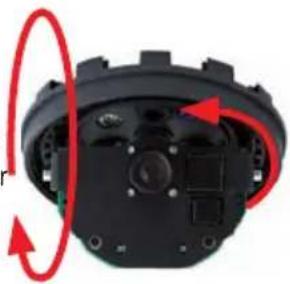
natural_image
Close-up of a black mechanical component with red circular arrows indicating rotational motion (no text or symbols)- Once the camera has been aimed, tighten the Allen screws at both sides of the lens mount (in a clockwise direction) and the toothed ring (in a clockwise direction) with the supplied hook wrench. Do not use excessive force when doing so as this may damage the camera.

natural_image
Close-up of a mechanical component with green and black parts, no visible text or symbols- Adjustment: Release the lock ring of the lens and adjust the image focus by rotating the lens in its socket. Check
the image on the computer monitor. Make sure that you tighten the lock ring again once you are finished. To avoid damaging the lens mount, never turn the lens too far or with force.
Caution (only for 135 mm Telephoto lens)
Image Focus: Due to the lens effect of the dome, the focus of the 135 mm Telephoto lens shifts slightly once the dome has been mounted. Before mounting the dome, the Telephoto lens should be rotated by about 90° in a counter-clockwise direction (against the direction in which the lens is screwed). Make sure that you check the focus of the live image with the dome installed and re-adjust the lens, if required.
- Mount the dome. Use the supplied foil or a lint-free cotton cloth to insert the dome into its seat and turn it in a clockwise direction. Once again, check the focus of the camera image on a computer monitor.
If required, gently clean the front of the lens using a soft cotton cloth before installing the dome. Do not apply excessive pressure to the surface of the glass when cleaning the lens.
natural_image
Close-up of a camera lens with red and black casing, showing internal components (no text or symbols)- Attach the rubber seal (IT/Secure models only): Place the rubber seal with the groove around the edge of the black mounting ring of the camera.

natural_image
Circular mechanical component with concentric rings and mounting holes (no visible text or symbols)- Attach the outer shell (IT/Secure models only): Replace the outer shell and screw all four Allen screws tight using the supplied Allen wrench. Ensure that the rubber seal is properly positioned.

natural_image
Close-up of a white circular mechanical component with a black cylindrical top and central recess (no text or symbols visible)2.12 Replacing The MicroSD Card
The camera must be taken down to remove, insert or replace a MicroSD card. To avoid data loss, be sure to deactivate MicroSD card recording in the camera software and reb the MOBOTIX camera before removing the card.
Caution
A MicroSD card may only be removed from the camera after you have deactivated recording to a Flash device and rebooted the camera. Failing to do so may lead to data loss! Before inserting the MicroSD card, make sure that it is not write-protect
2.12.1 Removing A MicroSD Card
- Deactivate recording: Recording to MicroSD card must be deactivated Admin Menu > Storage on External File Server / Flash Device ). If MicroSD card recording is still active, deactivate recording and reboot the camera. Section 3.4, Micro SD Cc Recording, contains more information on this topic
- Remove the outer shel: Remove all four Allen screws using the supplied Allen wrench and lift off the outer shell.
- Remove the dome of the camera. Use the supplied plastic foil or a lint-free cotton cloth to remove the dome by turning it in a counter-clockwise direction
- Remove the MicroSD card : Gently push on the MicroSD card in the card slot of the camera. The card will be released from the slot and can then be removed from the camera.
natural_image
Close-up of a white circular mechanical component with a black inner ring and a central recessed cavity (no text or symbols visible)
natural_image
Close-up of a speaker grille with black and red circular components (no visible text or symbols)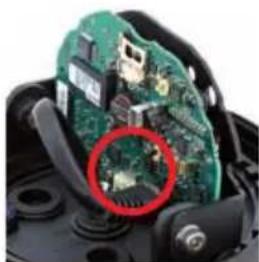
natural_image
Close-up of a green circuit board component being held in a black plastic housing, with a red circle highlighting a specific part (no text or symbols visible)Push-push function: only remove the MicroSD card after first gently pushing it in

2.12.2 Inserting A MicroSD Card
- Insert the MicroSD card: Push the MicroSD card into the card slot as shown, until an audible and perceptible click indicates it is in place.
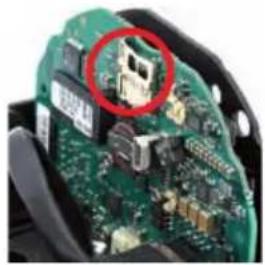
natural_image
Close-up of a green printed circuit board with a red circle highlighting a component (no visible text or symbols)Push-push function: insert the MicroSD card and push it gently
- Mount the dome of the camera. Use the supplied foil or a lint-free cotton cloth to insert the dome into its seat and turn it in a clockwise direction.

natural_image
Close-up of a circular mechanical component with red and black markings, no visible text or symbols.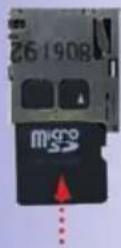
- Attach the outer shell : Replace the outer shell and screw all four Allen screws tight using the supplied Allen wrench. Ensure that the rubber seal is properly positioned.

natural_image
Close-up of a white plastic housing with a black circular component, no visible text or symbols- Activate recording: If you have inserted a MicroSD card that has already been MxFI formatted, you can activate recording under Admin Menu > Storage on External File Server / Flash Device. Once the camera has been rebooted, it automatically activates recording.
- If you have inserted a new MicroSD card, it must first be formatted as described in Section 3.5, MicroSD Card Recording.
2.13 Network And Power Connection
2.13.1 Notes On Cable Lengths And Power Supply
- Power may only be supplied to the camera via its Ethernet connector. A MOBOTIX Power Adapter or similar high-quality PoE product is recommended to provide the power supply via the network cable (see Section 2.4 Available D24M Accessories):
• one camera: with the Network Power Adapter (MX-NPA-PoE) - multiple cameras: with quality PoE products conforming to IEEE 802.3af
- The maximum length of the network cable for power supply over an Ethernet cable is 100 m.
- Make sure that you only use switches or routers that support the 10/100 Mbps Ethernet interface of the camera. Check for LED activity on the corresponding port of the switch or router. When deploying several cameras, read the notes in Section 4.11 Operating Multiple Cameras in the Software Manual.
- It is highly recommend to use uninterruptible power supplies (UPS) to provide back up power.
- If you are using IEEE 802.3af Power over Ethernet network components to supply power to MOBOTIX cameras, make sure, if possible, that these components do not have a fan. Since the power consumption of MOBOTIX cameras is very low compared to other products, the reliability of the entire system is increased, thus extending the life of these components.
2.13.2 PoE Variables
The power consumption of the camera depends on the functions in use as well as any connected expansion modules (see table). PoE classes 1, 2 or 3 may be selected in the browser-based user interface in order to optimally adjust the camera to your system design (PoE switch in use, emergency power concept, etc.).
PoE Power Level Classes (IEEE 802.3af standard):
| Class Max. Power Consumption Possible Operating Modes | ||
| 1 0.44 W - 3.84 | W | Normal operation without USB devices |
| 2 | 3.84 W - 6.49 W (factory default) | Normal operation with USB devices |
| 3 6.49 W - 12.95 | W Like Class 2 and also with MxBus devices | |
The MOBOTIX factory default is Class 2
Variable PoE: multiple cameras can be operated simultaneously from the same switch
The MOBOTIX factory default is Class 2. This default is usually fine and nothing needs to be changed. However, if the lower power level Class 1 is sufficient for your application it may be advantageous – due to possible internal power distribution schemes among the ports of the PoE switch in use – to change the PoE power level class in the browser:
- Select Admin Menu > Network Setup > Ethernet interface (for experts).
- L nder Power Supply, click Change.
- A Power Wizard will appear to guide you through the PoE configuration steps
- The camera will then need to be restarted via a hard reboot: Disconnect the camera from the power supp, then reconnect it, for example, by disconnecting and then reconnect it the network cable at the PoE switch.

2.13.3 Power Supply Using A Switch
- Connect the factory pre-installed cable of the camera to the Camera connector of the Network Power Adapter.
- Connect the LAN/Power connector of the NPA to the switch/router or the Ethernet socket using an Ethernet connector.
- Plug the RJ45 connector of the external power unit into the PC/Power connector of the Network Power Adapter.

flowchart
graph TD
    A["LAN"] -->|1.1 Patch-Cable| B["Power Supply MX-NPA-PoE-Set"]
    B --> C["PC/PCI Camera"]
    C -->|1:1 Patch-Cable| D["Network Power-Adapter (MX-NPA-PoE)"]
    D --> E["LAN/Power"]
    E --> F["10.8.0.99"]
    G["10.8.0.11"] -->|1.1 Patch-Cable| B
    H["Hub/Switch 10/100 Mbit Network(TCP/IP)"] --> I["RJ45 RJ45 RJ45 RJ45 RJ45"]
    I --> J["1:1 Patch-Cable"]
The IP addresses in the diagram are shown only as an example
For the D24M, you should use the new blue MX-NPA-PoE-Set - previous MOBOTIX network power accessories such as the NPA Set, Power Box and Power Rack (MX-NPA-Set, MX-NPR-4 and MX-NPR8/20) are not suitable for use with the D24M


The IP addresses in the diagram are shown only as an example
For the D24M, you should use the new blue MX-NPA-PoE-Set - previous MOBOTIX network power accessories such as the NPA Set, Power Box and Power Rack (MX-NPA-Set, MX-NPR-4 and MX-NPR8/20) are not suitable for use with the D24M

The IP addresses in the diagram are shown only as an example
2.13.4 Power Supply When Connected Directly To A Computer
1 Connect the factory pre-installed cable of the camera to the Camera connector of the Network Power Adapter.
2. Connect the PC/Power connector of the Network Power Adapter to the Ethernet port of the computer.
3. F lug the RJ45 connector of the external power unit into the LAN/Power connector of the Network Power Adapter.

flowchart
graph LR
    A["Power Supply MX-NPA-PoE-Set"] --> B["Network Power-Adapter (MX-NPA-PoE)"]
    B --> C["Camera"]
    C --> D["1:1 Patch-Cable"]
    C --> E["10.8.0.99"]
    E --> F["10.8.0.11 (255.0.0.0)"]
    B --> G["1:1 Patch-Cable"]
    G --> H["Laptop"]
2.13.5 Power Supply (PoE IEEE 802.3af) Using Power-over-Ethernet Products
Connect the factory pre-installed cable of the camera to the Ethernet connector of the PoE switch/router. The switch/router must support the PoE standard IEEE 802.3af
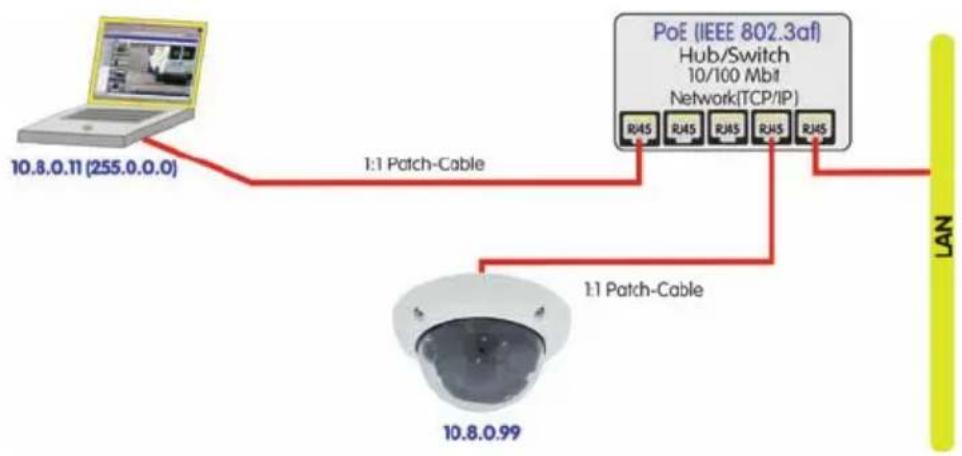
flowchart
graph TD
    A["10.8.0.11 (255.0.0.0)"] -->|1:1 Patch-Cable| B["PoE (IEEE 802.3af)\nHub/Switch\n10/100 Mbit\nNetwork(TCP/IP)"]
    B --> C["RJ4S"]
    B --> D["RJ4S"]
    B --> E["RJ4S"]
    B --> F["RJ4S"]
    B --> G["RJ4S"]
    B --> H["RJ4S"]
    B --> I["RJ4S"]
    J["10.8.0.99"] -->|1:1 Patch-Cable| K["Router"]
    K --> L["LAN"]
2.13.6 Camera Startup Sequence
As soon as the camera's power supply has been established, the two LEDs will show the progress of the startup sequence (see Section 5.4.3 LED Signals and LED Configuration in the Software Manual).
- Startup sequence: Immediately after connecting the power supply, the red LED lights up, blinks for two seconds, then stays on permanently. The camera's boot loader checks the hardware, unpacks and starts the operating system. Next, the camera checks all of its applications for errors. In case of an error, the camera will start using the backup operating system. Afterwards, both LEDs light up for four seconds.
- Waiting for key pressed: Both LEDs light up for four seconds. If you press the R or L key of the camera during this time, the camera will execute the corresponding function (see Sections 3.2.5 and 3.2.6).
- Ready: Once the camera software has been started, the green LED is on permanently and the red LED blinks. You can now reach the camera via the network using a browser.
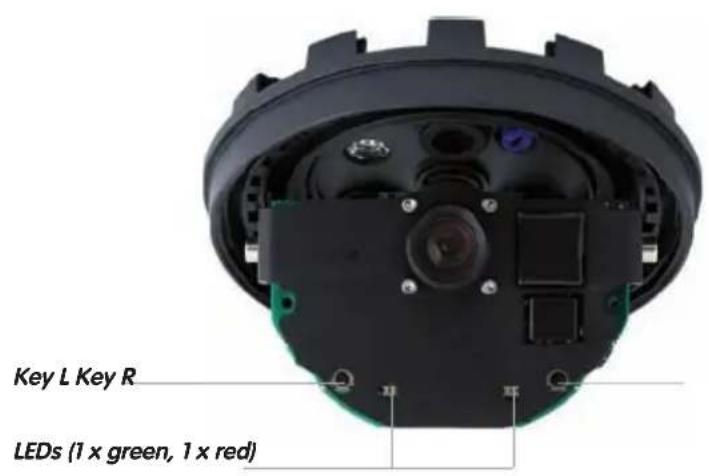
Notes
During the startup sequence of the camera, the LEDs will always light up, even if they have been deactivated in Admin Menu > LED Setup.
- Start
- Key?

- Ready
Download the MxEasy and MxControlCenter software for free at www.mobotix.com
Camera software in the browser
MOBOTIX cameras do not require any extra software. Thus, you can set up and operate the MOBOTIX camera using a JavaScript-enabled browser on all common operating systems (such as Window, Linux, Macintosh, etc.). As an alternative, you can also use the MOBOTIX applications MxControlCenter and MxEasy. Follow these steps to set up the camera:
- Connect the camera to the network. Power is supplied directly via the network cable (see Section 2.13)
- Set up the camera's network parameters:
• Manually using a web browser (see Section 3.2.1, then Section 3.2.2)
- Automatically using MxControlCenter/MxEasy (see Sections 3.2.3 and 3.2.4) or via DHCP (see Section 3.2.5)
- Configure the camera using the browser-based user interface.
Every MOBOTIX camera comes preconfigured with a fixed IP address in the 10.x.x range (e.g. 10.8.0.99). However, local computer networks usually have IP addresses in the 172 or 192 ranges. In order to access a MOBOTIX camera via the network, the camera needs to obtain an IP address in the same address range. You can set up the network parameters of the MOBOTIX camera using one of the following methods: Manually, using MxCC and MxEasy or by DHCP.

3.1.1 Manually Using A Computer In The 10.x.x.x IP Address Range
You can set up the camera's network parameters using a browser and the embedded camera software. To do this, connect the camera to a computer or a network that is using a 10.x.x.x IP address range (see Section 3.2.1 Manually Setting Up The Network Interface. Once this has been completed, you can enter the camera's default IP address in the browser address bar of the computer (see Section 3.2.2 The First Images And The Most Important Settings In The Browser). Next, click the Admin Menu button to open the camera's Quick Installation in the browser's user interface. This is where you can configure the desired network parameters of the camera. Once you have completed the Quick Installation, you can connect the camera with its new network parameters to the desired network.

The default IP address of your camera is printed on a sticker on the back of the camera
Advantages
- The camera does not need to be physically accessible, i.e. it can remain mounted to a pole, for example.
- No additional software is required.
- The network parameters can be set flexibly through manual entry.
Disadvantages
- The computer or the network need to operate in the 10.x.x.x IP address range or need to be able to access such a network.
• The setup does not work automatically. - You need to know the relevant network parameters.
MxControlCenter software (free download from www.mobotix.com)
MxEasy (free download from www.mobotix.com)
3.1.2 Automatically Using MxControlCenter Or MxEasy
You can set up the camera's network parameters using the free of charge video management software MxControlCenter or MxEasy (see Sections 3.2.3 and 3.2.4). You can also use one of these applications to automatically contigure the network parameters of MOBO cameras that are not operating on the same IP address range as the computer
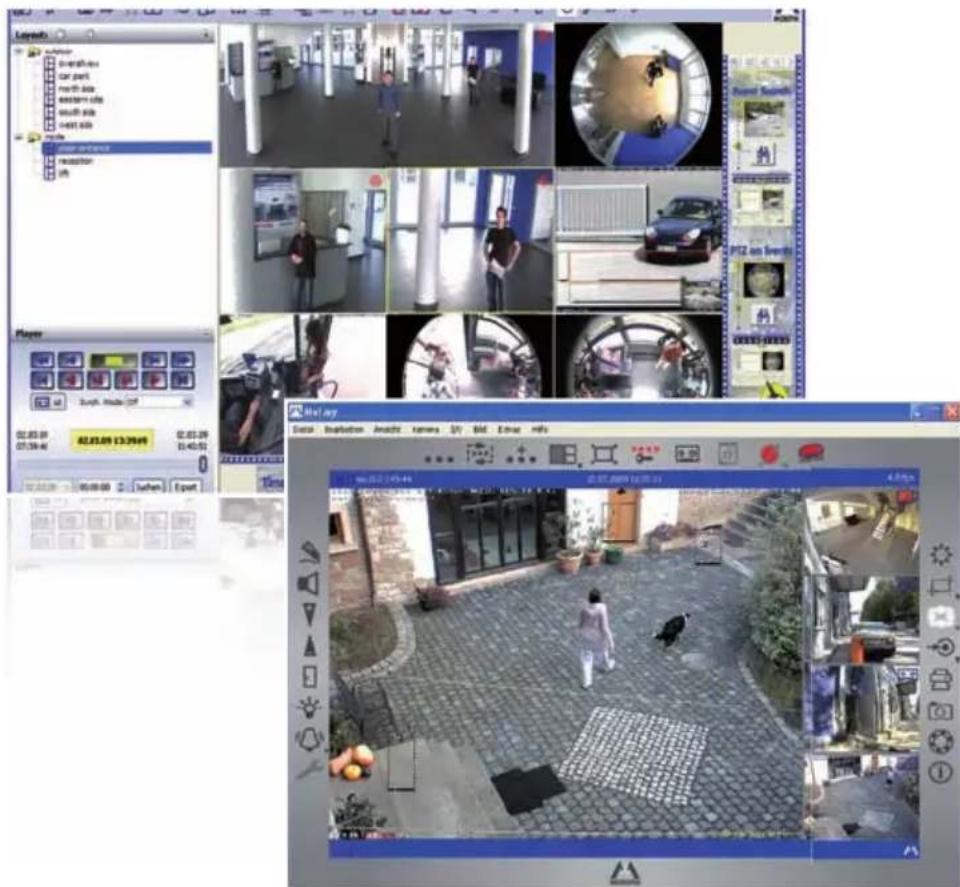
Advantages
• You can connect the camera directly to the target network.
- The camera does not need to be physically accessible, i.e. it can remain mounted to a pole, for example.
• The camera can be configured to automatically receive an IP address (optional).
• The network parameters can be manually set (optional).
• You do not need to access the camera user interface.
Requirement
- The MxControlCenter or MxEasy video management software needs to be installed on the computer
3.1.3 Automatically Using DHCP
The camera can automatically obtain its network parameters using DHCP. This requires the network to have a functioning DHCP server (e.g. a DSL router with activated DHCP server) and the camera must be booted using DHCP (see Section 3.2.5 Starting the Camera With an Automatic IP Address (DHCP)). The IP address automatically assigned by the DHCP server can be announced via the speaker of an activated ExtIO that is connected to the D24M as soon as the camera has booted successfully.
Advantages
- You can connect the camera directly to the target network.
• Network parameters are automatically assigned. - No additional software is required.
- You do not need to access the camera user interface.
Disadvantages
- The camera needs to be physically accessible as you need to press a key on the camera housing to boot it using DHCP.
- Requires a running DHCP server on the network.
- The IP address must be determined by the administrator.
The ExtIO module is available from the MOBOTIX accessories program
3.2 First Images And The Most Important Settings
Once the camera has been connected to the network, you need to set up the camera's network interface accordingly. This step involves setting up and checking the network parameters of the camera. If your network is already using an IP address in the .x.x.x range with a255.0.0.0 network mask, you do not need to change the camera's network parameters. You can access the camera directly (see Section 3.2.2). If your network or computer does not use an IP address in the 10.x.x.x range (e.g. in the 192 or 172 ranges), you should follow one of the following methods for changing the camera's network parameters:
• Manual Setup (Section 3.2.1)
• Automatic Setup using MxControlCenter or MxEasy (Sections 3.2.3 and 3.2.4)
Notes
For the following examples, we will use a camera with the factory address 0.8.0.99. Replace this IP address with the IP address of your camera. You will find the IP address of your camera on a small sticker on the camera. Make sure that the IP addresses used in the following examples are not already being used by other devices in the network.
Hint: Pressing the R key on the camera (see Section 2.2.2) prompts the camera to announce its current IP address over a speaker.
3.2.1 Manually Setting Up The Network Parameters In A Browser
In order to manually set up the network parameters of the MOBOTIX camera, you need a computer that is using a 10.x.x.x IP address. The computer's network parameters usually have to be changed for this purpose.
1. Change The Network Parameters Of Your Computer:
Windows (2000, XP and Vista):
- Open Start > Settings > Control Panel > Network Connections. Clicking Properties opens the dialog shown.
- Double-click Internet Protocol (TCP/IP). On the General tab, activate the Use the following IP address option. Enter an IP address in the 10.x.x.x range in this field (e.g. 10.8.0.11).
- Once all dialogs have been closed, the computer will have the IP address 10.8.0.11.

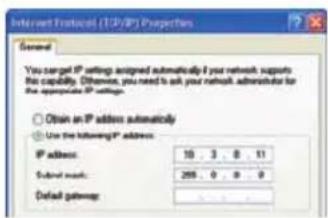
Linux/Unix:
- Open a terminal as root user.
- Enter the following command: ifconfig eth0:1 10.8.0.11
- The computer is now also using the IP address 10.8.0.11
Mac OS X:
- Open System Properties > Network.
- Select Ethernet. In the Configuration field, select Manual and enter a 10.x.x.x IP address (e.g.10.8.0.11)
- Click Apply on the bottom right-hand side of the dialog to assign the computer the IP address 10.8.0.11.

2. Set Up The Target Network Parameters Of The Camera:
-
Open a web browser on the computer and enter the default IP address of the MOBOTIX camera in the address bar of the browser (e.g. 10.8.0.99). Pressing Enter displays the user interface of the MOBOTIX camera (see also Section 3.2.2 First Images And The Most Important Settings In The Browser
-
Click the Admin Menu softbutton in the user interface of the MOBOTIX camera.
The Quick Installation starts automatically once the admins user has logged on.
Note: The Quick Installation can also be executed at
a later stage by opening Admin Menu > Network Setup > Quick Installation (see also Section 5.2 Quick Installation in the Camera Software Manual Part 2).
- Enter the target network parameters of the camera on the appropriate page of the Quick Installation assistant. Note: The network parameters can also be accessed at a later stage by opening Admin Menu > Network Setup > Quick Installation.

- Once you have completed the Quick Installation and rebooted the camera, the new network parameters will be activated. The camera can now be connected to the target network and, if required, further configured.
3.2.2 First Images And The Most Important Settings In The Browser
Once the MOBOTIX camera has been connected to the power supply and to the network, you can access the user interface with the live camera image in the web browser. Internet Explorer, Firefox, Safari, Konqueror, Opera, Camino or any other graphical browser with activated JavaScript is suitable. It does not matter which operating system is used.
After entering the camera's IP address in the browser address bar, you will see the live screen of the MOBOTIX camera with its user interface controls, such as softbuttons, buttons for the different camera screens, pull-down menus (Quick Controls), symbols for accessing the online help and the camera status as well as status information elements above and below the live image.

Notes
Default access credentials for the Administration Menu
User Name: admin
Password: meinsm
Camera Screens: Live, Player, MultiView
The MOBOTIX camera automatically displays the live screen when it starts up (factory default setting). You can set a different start page in Admin Menu > Language and Start Page(e.g. the Guest screen) to allow a restricted access to the live image.

The other available standard screens include Player (playback of recorded images and video sequences) and the MultiView screen (displays several cameras with live or recorded images).

MultiView allows you to view several cameras via a "proxy" camera (especially useful if you want to access your cameras from outside of the network with reduced bandwidth) and the PDA mode provides a special screen for mobile devices.


Live screen:
http://

Player screen:
http://

MultiView screen: http://
PDA screen: http://
PDA Event List: http://
Guest screen:
http://
Note
For more information on camera screens, see Section 4.1. Camera Screens in the Browser the Camera Software Manual Part 2 or the online help of the camera's browser interface.
Download MxControlCenter for free from www. mobotix.com
3.2.3 First Images And Network Parameter Configuration In MxControlCenter

Installation
If you have a MxControlCenter installation CD, insert it into the CD/DVD drive of your compu
If you do not have the installation CD or just want to install an update, you can download the latest Windows installer from the MOBOTIX website as a MST file and install it manually. The latest versions are available at www.mobotix.com in the Support > Software Downloads > MxControlCenter.
If you insert the installation CD, the installation process will start automatically and you will be guided through the necessary steps. If you have downloaded the latest Windows installer, double-click the MS1 file to initiate the installation process.
The Installer copies the selected files to the computer (older versions will be removed automatically) and then creates the designated shortcuts during the installation process (Desktop, Start Menu, etc.).
Caution
MxControlCenter will automatically attempt to find all MOBOTIX cameras in 1 physically connected network (i.e. even a MOBOTIX camera with a factory IP address of 10 x x x). Make sure that the firewall settings on your computer are lo enough so that MxControlCenter is not blocked. If MOBOTIX cameras are found, MxControlCenter can automatically reconfigure them so that they are available in the current subnet of the computer. If you do not have permission to modify these settings on your computer, contact your system administrator for assistance
MOBOTIXSearching and Displaying MOBOTIX Cameras
Launch MxControlCenter after successful installation (see section Installation) by double-clicking the shortcut that was created by the Installer or the executable MxCC.exe file in the installation directory on your computer.
When MxControlCenter is launched for the first time, the Add Cameras: Search and Select dialog opens and the application automatically searches for MOBOTIX cameras in the local network. To perform a camera search at a later time, select Video Source > Add from the menu.
If your MOBOTIX camera is properly connected, it should appear together with the existing video sources in the following list:

Video sources Legend Camera Preview
Note
Video sources in this context not only refer to MOBOTIX cameras, but also to third-party IP cameras, file server paths, MxPEG clips and analog cameras connected via MxServer (e.g. analog dome cameras). These video sources are not found automatically and need to be added manually.
Cameras Are Found But Are Located In A Different Subnet
The symbols in the first column and the legend in the dialog indicate whether you can access a particular camera directly from the MxControlCenter, which is the case for all cameras designated with (OK). Cameras designated with (different subnet) are located in a different subnet. This usually applies to new cameras or cameras that have been reset to their factory settings.
Note
The MxControlCenter finds all MOBOTIX cameras, even when the computer and th cameras are not located in the same subnet.
Select the cameras that you would like to display in a Layout (a view with cameras) and click Add selected video sources.
The Create new layout? dialog will appear. You can choose to either create a new layout with the cameras that have been found or simply add those cameras to the MxControlCen

If some of the selected cameras are in different subnets, MxControlCenter displays the following dialog:

Click Yes to reconfigure the cameras for your specific network area
Reconfiguring Cameras In A Different Subnet
In most networks, c DHCP server will automatically assign the IP addresses to network devices so that you can apply the default settings in the Configure camera dialog Get IP address automatically). It you would like all cameras to obtain IP addresses automatically select the Apply to all selected cameras checkbox.
If the IP addresses for devices on the network are permanently assigned, ask your network administrator to the appropriate IP addresses for the
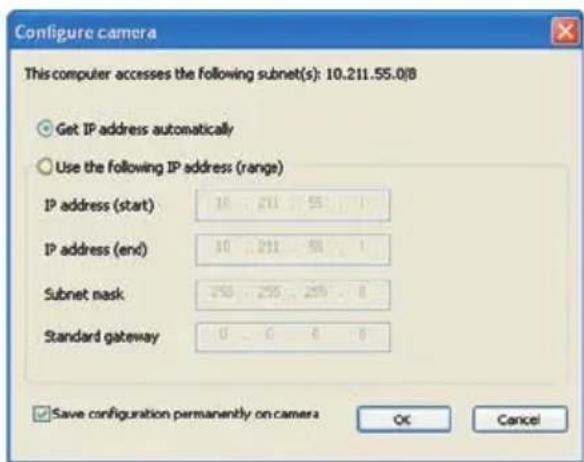
cameras. Once you have that information, enter the correct IP address and subnet mask for each camera in the Use the following IP address option.
Make sure that the Save configuration permanently on camerc checkbox is selected so that the cameras can be found at the designated IP address when you restart your computer.
Now wait until MxControlCenter has modified the network settings of the cameras and restarted the computer. The status of the reconfigured cameras changes from (different subnet) to (OK). Confirm the Open Video Sources dialog again by clicking OK
Defining Additional Video Sources
In addition to the MOBOTIX cameras that are found automatically, you can also manual add video sources to the list of video sources for MxControlCenter.
- Camera: Here, you can enter the known IP address of DNS name of a MOBOTIX camera or a third-party IP camera if it was not found by the automatic search feature
- MxPEG-Clip: Adds an MxPEG video clip previously recorded by a MOBOTIX camera as a video source.
- Recording path Adds the path of an external tile serve where a MOBOTIX camera has recorded audio/video data. The videos or images recorded at that location can now be played back using the Player or Video Search.

Selecting Video Sources
In this list you can now select the video sources that you would like to display and manage in MxControlCenter.
Camera Preview
If you select one camera with the statusOK, MxControlCenter automatically displays the live images from that camera in the preview window. If you are using [Ctrl]-click to select additional cameras, the image from the camera selected last is shown in the preview window. This feature makes it easier for you to identify the cameras you that would like to use.

Editing The Video Source List
Right-click this list to open a shortcut menu from which you can select all video sources or cancel the selection. You can also use this method to remove from the list some or all of the video sources that you would not like to display or manage in MxControlCenter.
If you have cancelled the camera configuration process or need a password that differs from the camera's factory default password, you can also configure the camera from the shortcut menu at a later date and enter the user name and password required for reconfiguration at that time.

It is also possible to open the Configure selected cameras dialog using the shortcut menu in order to change the camera network parameters.
Adding Selected Video Sources In A New Layout
Click OK to add the selected cameras in MxControlCenter. If you select the Generate new grid for selected cameras option in the Create New Grid Layout dialog, MxControlCenter will automatically create a grid layout that displays all selected video sources in equal-sized windows.
Otherwise, the selected video sources will only be added to the MxCC system and can then be used to create layouts at a later date.
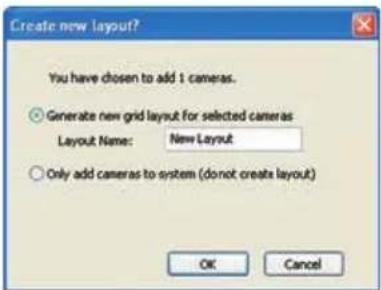
3.2.4 First Images And Network Parameter Configuration In MxEasy

Installing MxEasy
If you have an MxEasy installation CD, insert it into your CD/DVD drive. The assistant will guide you through the installation process. It this is not the case or if you would like to update to a newer version, you can download the latest MxEasy version for your operat system from the MOBOTIX website www.mobotix.com > Support > Software Downloads in the MxEasy section).
Using MxEasy For The First Time
To start MxEasy, double-click the shortcut or the program file itself.
Automated Search For MOBOTIX Cameras
If you start MxEasy for the first time on a computer, the Camera Selection dialog w appear, showing all detected MOBOTIX cameras. The camera list will be update automatically as soon as new cameras are connected to or removed from the network
MxEasy also automatically monitors and displays the operating status of all cameras. Cameras that are not on the same subnet as the computer will get a differently colored symbol than the cameras that are on the same subnet. Likewise, the cameras that
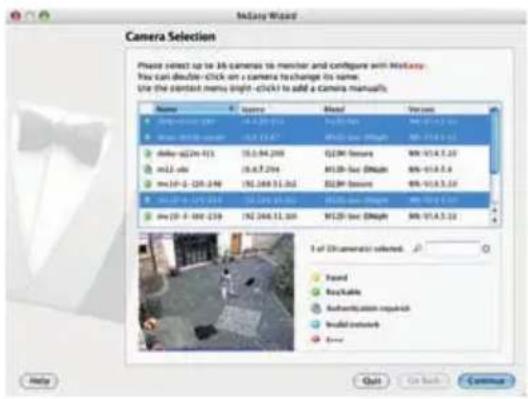
Download MxEasy for free from www.mobotix.com
have an unknown password or for which no user name/password combination has been specified in MxEasy will be displayed in a different color.
If all the desired MOBOTIX cameras are highlighted as Accessible in the video source list, you can proceed to theSelecting Cameras section below. Cameras with the status Invalid Network can be reconfigured for the "proper" subnet, as described in the following section.
Configuring MOBOTIX Cameras For A Different Network
Camera on a different subnet
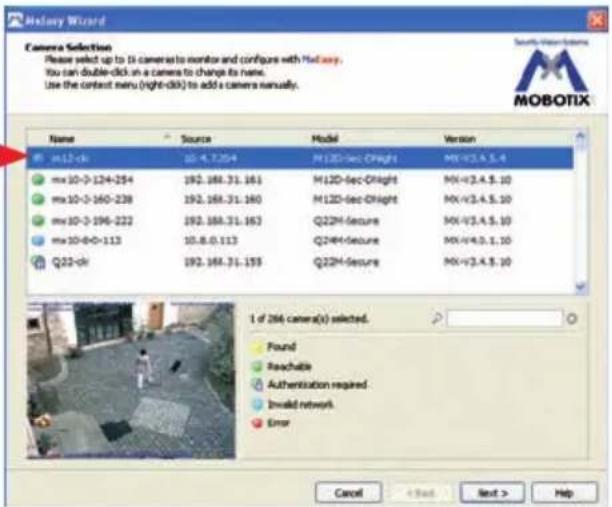
Using Bonjour, MxEasy finds not only cameras on the same network as your computer, but also MOBOTIX cameras located in other subnets (Status Invalid Network). In such a case, you would not be able to establish any connection to cameras in a different network or subnet (without going into much further detail about the specific details TCP/IP network configurations). This is possible, for example, when a camera with a factory IP address is connected to a network in which a DHCP server automatically assigns the IP addresses. MxEasy can automatically configure such a camera so that it is "integrated" into your existing network. To do so, simply highlight the desired camera in the list.
Clicking Next displays a security prompt; if you click OK, the dialog for reconfiguring the selected camera will appear.
If your computer automatically obtains its IP address from a DHCP server, then this is certainly the best choice

The MOBOTIX IP camera(s)
-m12-cki
-doku-d12d-180
has/have not been set up correctly for access from within your local network. Would you like to change the camera network configuration now?
Cancel
OK
for that specific camera and most likely for all other cameras that have been found in a different subnet (Get IP address automatically option).
If you have assigned dixed IP address to your computer, you will probably want to assign fixed IP addresses (issued by your system administrator) to every camera (the Use this IP address option). Here, for the most part, you should either enter a similar configuration as in the network settings of your computer.
The camera "m12-cki" with IP address "10.4.7.204" has not been set up correctly for access from within your local network. Would you like to change the network configuration of the camera now?
Get IP address automatically
□ Apply to all selected cameras
○ Use the following IP address
P address 192.168.30
Subnet mask 255.255.254.0
This computer accesses the following subsets: 192.168.30.0, 10.37.129.0, 10.211.55.0
Cancel
OK
Once you click OK, the selected cameras will be reconfigured automatically. All reconfigured cameras will then be running in the same subnet as the computer and are displayed as Accessible in the camera list.

Do you really want to manage the following MOBOTIX IP camera(s)?
- mx10-3-124-254
-doku-m12d-secdn
-doku-d12d-180
Please note that the current configuration of the camera(s) may be changed!
You can restore the current configuration at any time when removing the camera(s) from MxEasy!
Selecting Cameras
You can highlight the cameras that you would like to display and manage in MxEasy. If you select a camera with the status OK, MxEasy automatically displays the live images from that camera in the preview window. If you are using [Ctrl]-click to select additional cameras, the image from the camera selected last is shown in the preview window.
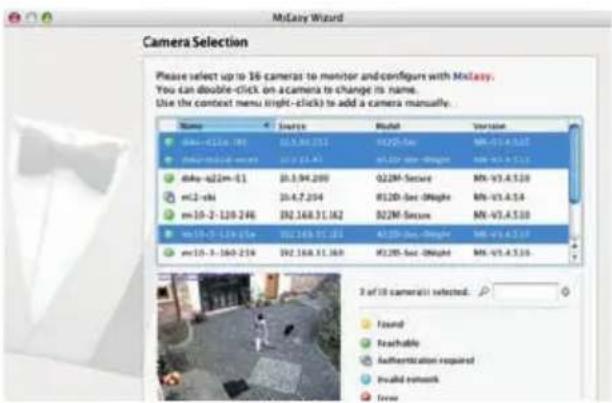
Editing The Camera List
Use the shortcut menu commands (right-click) to add MOBOTIX cameras to or remove them from the list. In addition, you can display further information of a camera and change the user name/password of a camera. For more information on this topic, see the MxEasy User Manual.
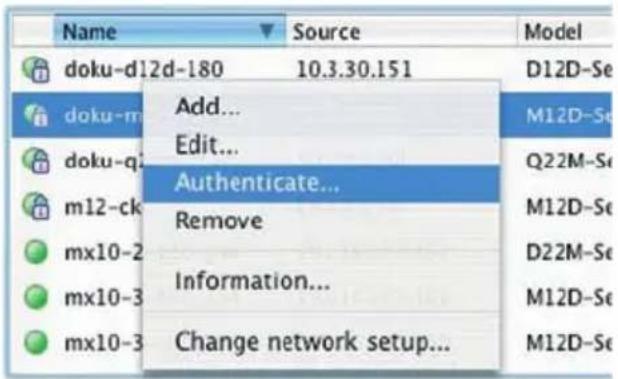
Using The Selected Cameras

Clicking OK prompts MxEasy to use the selected cameras and to generate a screen with the live images of the four cameras that you selected first.

"Add cameras" button (marked red)
Last event image (marked red)
The panel at the bottom right-hand corner always displays the most recent event image of whatever camera is visible in the large panel. Double-click on a small camera panel 1 move this camera's live image to the large panel. Click the Add cameras button at any time to add MOBOTIX cameras to MxEasy (max. 16 cameras in total).
3.2.5 Starting The Camera With An Automatic IP Address (DHCP)
If your network has a DHCP server, you can start the MOBOTIX camera with DHCP support. In this case, the DHCP server automatically assigns an IP address.
Once startup has been completed, the camera automatically announces its IP address, its network mask and its MAC address. Note that this announcement function only works with cameras with a loudspeaker (not the D24M!) and can be deactivated (Admin Menu > Loudspeaker and Microphone).
- If the camera is running, disconnect the camera's power supply.
- Reconnect the power supply of the camera.
- Wait until both LEDs light up simultaneously for the first time. Press the camera's R key within four seconds.
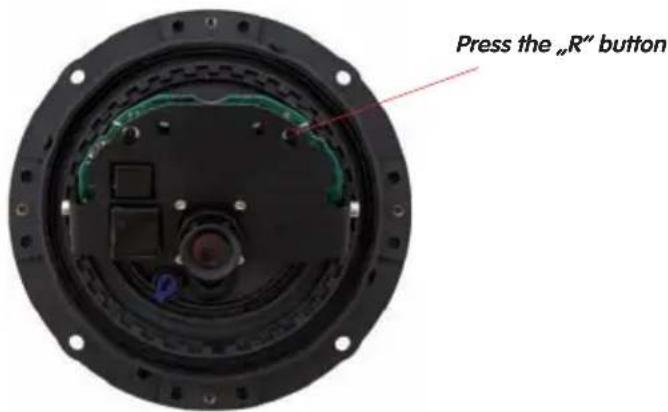
- After about two more seconds, the camera plays a sound ("Boing, Boing").
- After about another 15 seconds, the camera will automatically announce its network data (only with ExtIO). You can now access the camera using this IP address.
Note
If you would like to have a running camera repeat its network settings, simply press the camera's R key once (ExtIO must be connected and activated).
Caution
When starting the camera with DHCP support, make sure that the network has a functioning DHCP server. If this is not the case, the camera cannot obtain a valid IP address and will use its last IP address.
You should also make sure that the cameras always obtain the same IP addresses by assigning the MAC addresses of the cameras to the desired IP addresses.
The procedure described here is only suitable for D24M installations in which an ExtIO module has already been connected and activated
The ExtIO module is available from the MOBOTIX accessories program
3.2.6 Starting The Camera With The Factory IP Address
Under certain circumstances, you may have to reset the camera to its factory IP address. This could be the case, for example, if the IP address has been lost or the camera does not respond to the last known IP address.
- If the camera is running, disconnect the camera's power supply.
- Reconnect the power supply of the camera.
- Wait until both LEDs light up simultaneously for the first time.
- Press the camera's L key within four seconds.
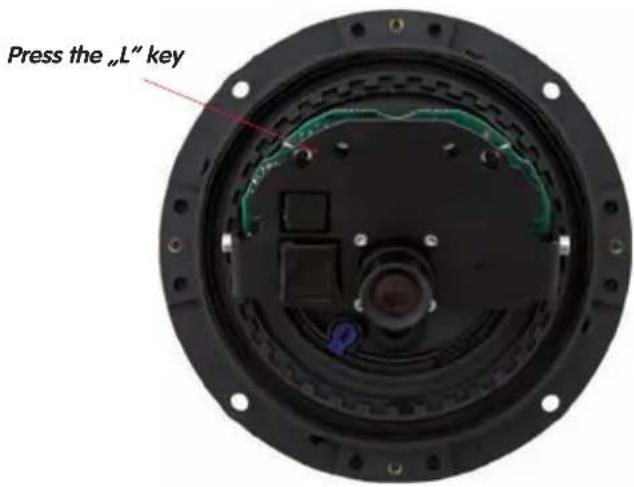
- After about two more seconds, the camera is accessible via its factory IP address (see label on the camera housing).
Note
If you use the camera's L key to load the factory network configuration, this configuration is not automatically saved in the camera's Flash memory. When the camera is next rebooted without using L key, the last stored network configuration will be used. To permanently store the new network configuration in the camera's Flash memory, open Admin Menu > Store.
Caution
As opposed to resetting the camera using Admin Menu > Reset configuration to factory defaults, the user information will not be reset if the camera is booted using the factory IP address.
Notes
3.3 Virtual PTZ
The virtual PTZ function allows you to use a mouse or joystick to continuously zoom in on images from the selected video source and "virtually" move the enlarged image section within the entire image sensor area.
USB joystick offers greater ease of use

natural_image
Close-up of a red and black joystick controller (no visible text or symbols)
natural_image
Interior view of a modern office with people walking and interacting, showing interior scenes and red arrows indicating movement or focus (no visible text or symbols)Operation Using The Mouse And Scroll Wheel
The vPTZ function of the D24M can be controlled in the browser using the mouse. By clicking any position on the image displayed on the monitor, this position becomes the new image center. The image moves and is corrected accordingly. The scroll wheel can be used to control the zoom function. This functionality is disabled in the default settings of the camera and must therefore first be activated. To do so, go to Setup Menu > vPTZ Settings and uncheck the Lock Mouse Wheel Zoom item. Then save the settings by clicking Set and Close. You can now use the scroll wheel to zoom + (roll upwards) or zoom - (roll downwards).
© MOBOTIX AG • Security-Vision-Systems • Made in Germany
Operation Using USB Joystick
A standard USB joystick can drastically facilitate vPTZ operation for the user – in the browser, in MxEasy and in the MxControlCenter (however, MxCC is also equipped with a virtual joystick that can be operated using the mouse). Please first install the joystick on the PC according to the manufacturer's instructions.
In order to use a USB joystick in the browser, make sure that you have a PC with a Windows operating system and the latest version of Internet Explorer and that the "ActiveX" mode in the camera software (browser) is activated:
- Switch to "Browser" in the Quick Control.
- Under "Browser", select the "ActiveX" option. The USB joystick can then be used until the browser is closed.
- To store the setting permanently, ActiveX must be activated in the Admin Menu. To do so, use "Language and Start Page" in the Admin Menu.
- Under the page options, select the "ActiveX" operating mode.
- Store the settings permanently by clicking "Set" and "Close" in the Admin Menu.
• The joystick can now be used.

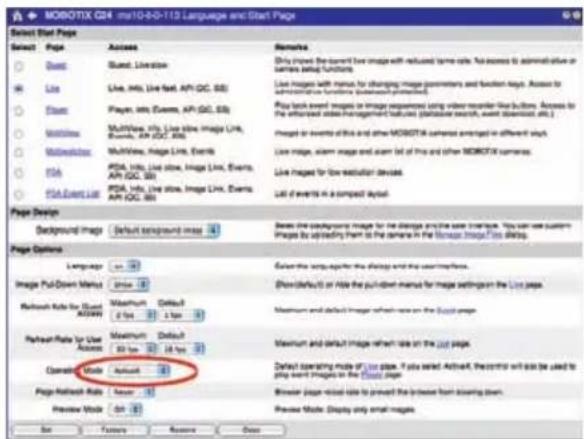
Notes
You will find more information and details on vPTZ in the Camera Software Manual Part 2, Section 4.3.6 (Virtual PTZ), the MxEasy manual, Section 2.4.1 (Activating the PTZ Features), the MxControlCenter manual, Section 2.4.6 (Using the vPTZ Features) and Section 3.1.4 ("PTZ Controls" in the sidebar panel).
The latest versions of all manuals are available at www.mobotix.com, Support > Manuals.
3.4 Correction Of Lens Distortion (L22 Only)
If you are using a D24M with the L22 90° wide-angle lens, the image, particularly the edges, may be slightly distorted due to the extreme angle of the lens.

natural_image
Interior view of a modern building lobby with two people, one standing and one in safety vest, no visible text or signage.You can suppress this effect using software (e.g. in the browser) so that a new and appropriately corrected image can be displayed live. A side effect of this correction, however, is that a cushion shape appears around the edges of the image.
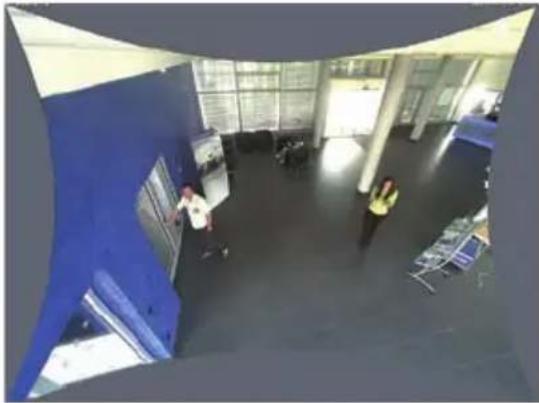
natural_image
Interior view of a modern office or exhibition space with blue walls and two people in safety vests (no visible text or signage)To hide this cushion effect, you simply have to zoom in on the image slightly. Although this reduces the size of the captured area, the image is almost distortion-free compared to the original.

natural_image
Interior view of a modern office or campus space with two people standing near large windows and blue walls (no visible text or symbols)Since activated lens distortion correction requires additional processing power, you should consider disabling it in situations where it is not really necessary. You will only notice a minimal distortion of the image, especially if you use the zoom. However, the maximum frames rate for high resolution may be reduced, which means you have to choose between maximum distortion correction or maximum frame rate.


We recommend activating lens distortion correction, especially for applications with a low frame rate and non-zoomed images (e.g. when using the D24M as a webcam). However, images can usually be corrected at a later point in time when searching recorded images. This saves on processing power during recording and increases the frame rate. The more you zoom in on the image, the less distorted the image should appear.
Activate/Deactivate Lens Distortion Correction In The Browser
To activate this option, first specify the lens you are using in the Admin Menu > Camera Administration > Lens Configuration dialog (this setting is saved until the camera is reset to its default configuration). Select "L22 (4.0 mm)" option from the 'Lens Type Selector' field and then click "Apply" followed by 'Restart'.
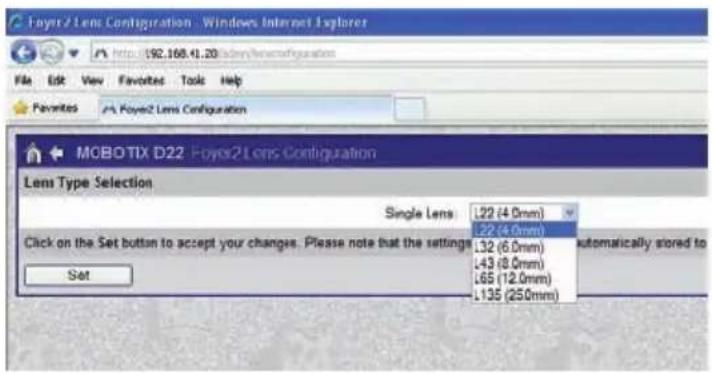
Now select the "Lens Distortion Correction" option in the "Display Mode" Quick Control panel. An automatically corrected (live) image is displayed that can be panned, tilted or zoomed. Switching to the "Full Image" option will deactivate the automatic distortion correction function
Flash memory devices: more robust than hard drives
3.5 MicroSD Card Recording
3.5.1 Introduction
Flash-based storage devices (MicroSD cards, USB sticks and solid-state drives) do not contain any moving parts as compared to the commonly used hard drives. Flash-based storage devices are compact and highly resistant to moisture and vibrations. They feature low energy consumption and they do not lose any data in the event of a power failure, meaning that they are ideal for use with MOBOTIX cameras.
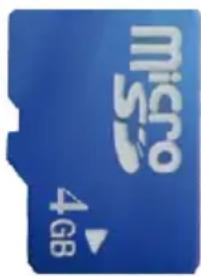
Number Of Write/Delete Cycles Per Flash Storage Cell
The number of write/delete cycles of every storage cell of a flash device is limited. The controller of the flash device automatically
detects individual flash cells that are no longer functioning. The contents of the faulty cell will then be rebuilt using a checksum and will be moved to a properly working spare cell. The faulty storage cell will be marked as "bad" and will no longer be used. No data is lost in this process.
In addition, MOBOTIX cameras constantly monitor activated flash storage devices. MOBOTIX has developed a technology to test the wear of the flash device by logging the number of write/delete cycles (patent pending). The flash memory wear is automatically displayed in the status bar in the live camera image but it can also be viewed at any time in the Admin Menu > Camera Status dialog box.
Conservative Memory Usage Thanks To MOBOTIX MxFFS File System
MxFFS formatting of the MicroSD card means that MOBOTIX camera software will use the flash device as evenly as possible, thus allowing for the maximum possible number of write/delete cycles. This also means that all storage cells of the flash device will be written and deleted with the same frequency, if possible. MOBOTIX technology increases the life of the flash device considerably and also improves the security and the reliability of the storage process.
Storage Requirements And Life Expectancy Of MicroSD Cards
The life expectancy of a MicroSD card increases proportionally to the storage capacity, since the camera software will execute fewer write/delete cycles on each storage cell. The first deletion will begin once the SD card has been filled to capacity (first full cycle).
32 GB MicroSD Card: Storage Requirements
| 6 fps CIF 6 fps VGA 1 fps MEGA 1 fps QXGA | |||||
| M-JPEG M-JPEG MxPEG M-JPEG M-JPEG | |||||
| File size single image 15 kB 45 | kB – 120 kB 240 kB | ||||
| Storage required per second 90 | kB 270 kB 75 | kB 120 kB 240 kB | |||
| Storage required per 24 hrs 7.8 | GB 23.5 GB | 6.5 GB 10.4 | GB 20.8 GB | ||
| Time for one full cycle | 4 days | 1.3 days | 4.8 days | 3 days | 1.5 days |
4 GB MicroSD Card: Storage Requirements
| 6 fps CIF | 6 fps VGA | 1 fps MEGA 1 fps | QXGA | ||
| M-JPEG | M-JPEG | MxPEG M-JPEG | M-JPEG | ||
| File size single image 15 kB 45 | kB – 120 kB 240 kB | ||||
| Storage required per second 90 kB 270 kB 75 | kB 120 kB 240 kB | ||||
| Storage required per 24 hrs 7.8 GB | 23.5 GB | 6.5 GB | 10.4 GB 20 | 8 GB | |
| Time for one full cycle | 12 hours | 4 hours | 14.4 hours | 9.2 hours | 4.4 hours |
Caution
The MicroSD card's service life depends on production quality and frequency of use. Set the type of recording (event-controlled or continuous recording, frame rate, resolution) according to your specific requirements.
We recommend changing the pre-installed, high-quality 4 GB MicroSD card once a year if you have it constantly set to continuous recording.
Monitoring The Cell Wear Of Flash Storage Devices (Patent Pending)
MOBOTIX uses its own technology for this purpose and has a pending patent. You can view the flash wear in the status bar of the live image or by opening Admin Menu > Camera Status. In addition, the camera can send a warning message (for example, via e-mail) if it detects a critical error while storing data (Admin Menu >
Error Notification). You can then exchange the MicroSD card in order to secure the stored data.

Formatting the card: Admin Menu > Storage on External File Server / Flash Device
The Safe Formatting option takes several hours. You can also use suitable applications on Windows, Linux/UNIX and Mac OS X computers to safely format the MicroSD card
3.5.2 Formatting The Card
Before a MOBOTIX camera can store image and video sequences on a MicroSD card, it needs to be formatted as MxFFS (MicroSD cards delivered with MOBOTIX cameras are already MxFFS-formatted). The following steps are necessary to format a storage device (Admin Menu > Storage on External File Server / Flash Device):
- Make sure that there is a MicroSD card in the card slot of the MOBOTIX camera.
- Click the Format button under SD Flash Card.
- Select the Quick Format option and confirm by clicking OK.
Note: In contrast to the Quick Format option, the Safe Format option will make sure that the data on the MicroSD card is overwritten completely so that the data cannot be recovered in any way. However, keep in mind that the Safe Format takes considerably more time.


- Enter the user name and the password of a user of the admins group in the dialog that opens and click OK to confirm. The MOBOTIX camera now starts formatting the card. It usually takes between 5 and 12 minutes to format an 8 GB MicroSD card using theQuick Format option and 3 to 14 hours using theSafe Format option.

Once the formatting has been completed, you can activate the MicroSD card for recording (see next section).
Caution
Make sure that you always wait until the formatting process has been completed before accessing the camera again. This usually takes only a few minutes when using the Quick Format option! You can only access the MicroSD card once MxFFS formatting has been completed!
The Safe Formatting option can take several hours. You can also use suitable applications on Windows, Linux/UNIX and Mac OS X computers to safely format the MicroSD card.
3.5.3 Activate Recording
Follow these steps to activate the recording to a MicroSD card that has already been MxFFS-formatted (Admin Menu > Storage on External File Server / Flash Device):
- Make sure that there is a MicroSD card in the card slot of the MOBOTIX camera.
- Make sure that the MicroSD card has been MxFFS-formatted (see Section 3.4.2 Formatting the Card).
- Activate the SD Flash Card option.
- Click Set, then Close to store the configuration.
- Reboot the camera (Admin Menu > Reboot Camera).
- Once the camera has rebooted, make sure that the camera displays the FR REC symbols in its live image. If this is the case, the camera uses the MicroSD card as recording target. If not, you can activate the recording (see below).
Activating The Recording
If the symbols FR REC are not visible in the camera's live image after rebooting, you need to activate the recording using one of the following methods:
- In the web browser: Automatic activation by clicking the Arm & Record softbutton. Confirm this in the Easy Dialog by clicking Yes.
- In the web browser: Manual activation via the Quick Control Recording > Recording on or in Setup Menu > Recording.
- MxEasy: You can use the MxEasy Alarm Planner feature to activate recording based on time and date (see also Section 2.5 Setting Up Alarms and Recordings in the MxEasy User Manual).
Activating Encryption And Authentication
If security is an issue, you can opt to store only encrypted video data on the MicroSD card. If you would like to use encryption, make sure that you activate this option when formatting the card. Note that you also need to enter an Authentication password. Switching from encrypted to unencrypted storage (and back) is not possible without reformatting the card.
Activating the storage device: Admin Menu > Storage on External File Server / Flash Device
This feature will be available in future software versions
3.5.4 Accessing Camera Data
The following options facilitate access to the stored image and video sequences on a MicroSD card:
- In the web browser: Play back the recorded event images without audio directly from the MicroSD card using the Playback view of the camera software.
- In MxEasy: Play back the recorded video sequences with audio by accessing the MicroSD card in the MOBOTIX camera via the camera.
- In MxControlCenter: Play back the recorded video sequences with audio by accessing the MicroSD card in the MOBOTIX camera via the camera or with a direct access to the MicroSD card via a card reader connected to the computer. Access the card by setting the MicroSD card's drive/volume as a "directory" in MxControlCenter.
If the MicroSD card's contents are encrypted, you need to enter the corresponding password before you can access the recorded video data. A dialog will automatically appear in MxControlCenter or MxEasy.
Caution
When using the MicroSD card from one MOBOTIX camera in another MOBOTIX camera, you need to make sure that the time on the original camera is in sync with the new camera. It is recommended to use automatic time synchronization via a time server (Admin Menu > Date and Time).
3.5.5 Deactivating The Card Memory
Follow these steps to deactivate the memory on a MicroSD card (Admin Menu > Storage on External File Server / Flash Device):
- Activate the None option.
- Click on Set button at the bottom of the dialog and then Close.
- Reboot the camera (Admin Menu > Reboot Camera).
- Once the camera has rebooted, make sure that the symbol FR REC is no longer visible in the bottom right-hand corner of the live image.
- You can now safely remove the MicroSD card from the camera (see Section 2.12).
Caution
A MicroSD card may only be removed from the camera after you have deactivated. Recording to MicroSD Card and rebooted the camera. Failing to do so may lead to data loss!
Removing connected Flash storage devices from the camera without properly deactivating them may lead to data loss and/or destroy certain areas of the storage device. Due to MxFFS formatting, this is limited to 4 MB of lost data per incident.
3.5.6 Using A MicroSD Card In A Different MOBOTIX Camera
A MicroSD card containing recorded video data from a MOBOTIX camera can be inserted into any MicroSD card-enabled MOBOTIX camera. Once MicroSD card recording has been activated (requires a reboot), the "new" MOBOTIX camera automatically synchronizes with the card and resumes recording. No data is lost in this process. Make sure that you deactivate MicroSD card recording before removing the card and reboot the MOBOTIX camera!
If the MicroSD card's contents are encrypted, you need to enter the correct password in the "new" camera in the Admin Menu > Storage on External File Server / Flash Device dialog. Otherwise, the camera cannot access the MicroSD card.
3.5.7 Limitations On Warranty When Using Flash Storage Devices
MOBOTIX will not assume any responsibility for Flash storage devices (e.g. MicroSD cards or connected USB storage devices) delivered with or integrated into MOBOTIX cameras. The same applies to damage to Flash storage devices or damage resulting from the use of devices that are not supplied by MOBOTIX.
3.6 Full Image Storage
It is possible to store a full image, regardless of the live image stream that is being displayed. This ensures that the recording always contains the full image of the lens used, even though the operator may have used the vPTZ features to zoom into the image in order to examine a specific detail.

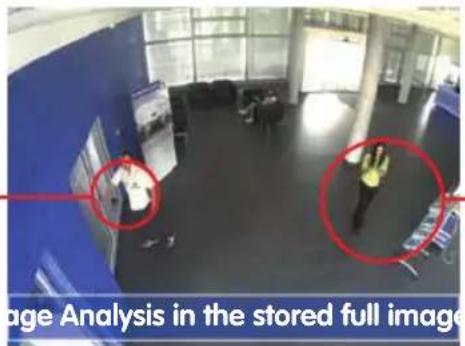
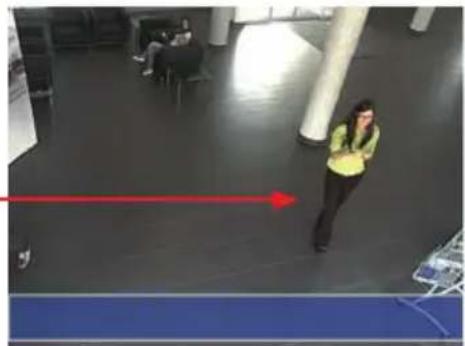
natural_image
Interior view of a modern office space with a person standing near a large wall, red arrow indicating direction, and blue carpet below (no visible text or symbols)This means that you can use the vPTZ features in VGA resolution to pan, tilt and zoom the live image while the camera is e.g. recording full images at 1 fps in MEGA or QXGA resolutic
When using MxEasy or MxControlCenter, the recorded full images may be prepared for the user using vPTZ functions (e.g. panning and zooming in on an image detail such as a doorway)
It full image storage is not activated, only the last displayed live image will be saved (save what is seen). The main benefit of live image storage is to ensure that the full power of the camera processor is used for live image correction and maximum image rates
The main advantage of full image storage lies in the special functionality of the D24M, i that it can always maintain availability of a maximum size (full) image for later investigation, despite vPTZ actions carried out on the live image. The mechanical limitations of motor-driver PTZ cameras mean that they simply cannot provide this unique advantage to the user!
Activate/Deactivate Full Image Storage In The Browser
To configure this feature, open the Setup Menu > Event Control > Recording dialog and activate or deactivate the "Full Image Recording" option.
![MOBOTIX Q24 rx10-8-0-113 Recording General Settings Value Explanation Arming Enable Are Recording: Control camera recording: Enable active recording: Off流动性 recording: SI Recording armed by signal input. CB Recording armed by custom signal as defined in General Event Settings from master records recording arming state from master camera. Time Table Portie: Time table price for time-controlled recording (Time Tables) no time table Digital Signing Off Digitar Signing: Digitary sign the recorded image files using the X.Sub certificate or the web server. Manager X.500 certificate of the web user Recording Status Symbol Off Activate Recording Status Symbol: On will draw a symbol in the image to visualize the current arming and recording status Full Image Recording On Activate Full Image Recording: On will draw a record the full image of the sensor with the video and video encoding. On will record the video images. Terminate Recording (TR) Off Activate Terminate Recording: Terminate recording if an event is detected. Use this option to freeze stored images Can here to remove recording. Storage Settings Value Explanation Recording (REC) Event Recording Recording Mode: Type of event and story recording: Snap Shot Recordings stored single JPEG pictures. Event Recordings: streams stream files for every event using MxPEQ codec. Continuous Recordings: continuous streams video data to stream files using MxPEQ codec. Include audio Start Recording: Select the events which will start recording. Use [O:] Click to select more than one event. Events in brackets need to be activated first. EC or EI, for filtered events. Start Recording: Select the events which will start recording. Use [O:] Click to select more than one event. Events in brackets need to be activated first. EC or EI, for filtered events. Set Factory Restore Close Less](/content/2026/05/817929/images/84ca683e3635798395bee36afe0ac581794880375aff6514ba2bd59af1fe1eab.jpg)

Notes
Post-event search in the full image: If you are using Full Image Recording on D24M cameras, you should use at least MEGA resolution when storing. This will facilitate later searches in MxControlCenter or MxEasy. The advanced distortion correction features require this function to deliver satisfactory image quality.
Full Image Recording On: Due to its increased computing power, full image recording reduces the data rate of the live image stream, which may drop by about 10 to 30 percent. It is therefore recommended to reduce the image rate for storage as much as possible, so as to affect the live image stream as little as possible.
Full Image Recording Off: The event that triggered a video motion (VideoMotion VM) window may not be in the recorded sequences as the window was not displayed at the time.
3.7 Configuration In The Browser

3.7.1 Overview
A MOBOTIX camera can be completely configured using a JavaScript-enabled browser on all common operating system (such as Windows, Linux, Macintosh, etc.). The camera provides a HTML-based user interface for this purpose. The camera executes the change you make to the camera configuration via HTTP commands using programs and scripts the embedded software. The settings are stored in the camera's Flash memory.
This section contains an overview of the general browser settings of the MOBOTIX came as well as further configuration options. The Software Camera Manual Part 2 contains more detailed descriptions of the software features
3.7.2 General Browser Settings
- Run the Quick Installation: After booting the MOBOTIX camera for the first time, accessing the administration menu ( Admin Menu button) will automatically start the Quick Installation. The Quick Installation assistant helps you in setting the most important parameters of the camera. For security reasons, you should set your own administrator password and disable public access to the camera.
=> (Software Camera Manual Part 2, Section 5.2)
- Disable public access: Guest users are only allowed to access the Guest screen of the camera without entering a password. If this is not desired, you should deactivate public access (Quick Installation or Admin Menu > Users and Passwords).
=> (Software Camera Manual Part 2, Section 5.4.1)
- Add users and assign access rights: Similar to a computer operating system, you can add users and user groups and assign the desired rights (Admin Menu > Users and Passwords, Admin Menu > Group Access Control Lists (ACL)). This allows you to assign or deny individual access rights to specific camera functions.
=> (Software Camera Manual Part 2, Section 5.4.1)
- Deactivate the automatic reboot: In its factory state, every MOBOTIX camera will automatically reboot every morning at 3:36 a.m. All images in the camera's storage buffer will be deleted during this reboot. Images stored on external file servers, internal Flash storage or SD cards will NOT be affected by this reboot. Make sure that you deactivate the automatic reboot if this is not desired (Admin Menu > Time Tasks).
=> (Software Camera Manual Part 2, Section 7.9.2)
- Optimize the image settings: The factory image settings of MOBOTIX cameras deliver excellent images for most application scenarios and should not be changed. If you do wish to make changes, your changes should be minor and gradual. You should, however, set an image program according to the application scenario of the camera. Image programs provide a quick and simple method for adjusting the camera to the application scenario as they perform several configuration steps at once (Image Programs Quick Control).
=> (Software Camera Manual Part 2, Section 5.5.2)
- Set the resolution of the live image: By factory default, all MOBOTIX cameras are delivered with an image resolution of 640x480 pixels. You can select the desired resolution using the Resolution Quick Control.
=> (Software Camera Manual Part 2, Section 4.3.3)
- Adjust the exposure: The automatic exposure control of the MOBOTIX camera uses individually configurable windows to determine the best image exposure. Open the Exposure Control Quick Control and select a predefined set of exposure windows. If required, you can also define custom exposure windows (Setup Menu > Exposure Settings).
=> (Software Camera Manual Part 2, Section 5.7)
- Activate event control and recording: By factory default, the MOBOTIX camera's event control is disabled. Click the Arm & Record button to activate event control. This will activate video motion detection and recording. Cameras with integrated Flash memory (MOBOTIX R models and models with SD card) will use the Flash memory by default to store the image and video data (recording target). If desired, you can set additional events and adjust the settings of the recording and storage parameters (Setup Menu > Event Settings, Setup Menu > Recording and Admin Menu > Recording to External File Server / Flash Device).
=> (Software Camera Manual Part 2, Chapter 7 and Chapter 8)
- Set up actions/messaging: Upon detecting an event, the MOBOTIX camera can trigger alarms. These alarms can be adjusted to your needs and you can assign them to one or more events: playing back a sound alarm on the camera speaker, showing the visual alarm in the camera live image, sending an e-mail or network message with the alarm image, placing a phone call, uploading an alarm image to an FTP server, switching a signal output line of the camera (e.g. for switching on the lights/opening a door). To change the corresponding settings, refer to the following dialogs: Setup Menu > Actions, Setup Menu > Messaging and Messaging 2 and Setup Menu > Enhanced Signal Out Options.
=> (Software Camera Manual Part 2, Chapter 7)
3.7.3 Additional Configuration Options
- Administering the camera: You can modify the camera configuration in the Administration menu or the Setup menu.
- Admin Menu: This menu contains the basic configuration dialogs of the camera (e.g. passwords, interfaces, software update).
- Setup Menu: This menu contains the dialogs for configuring the image, event and recording parameters. Some of these settings can be changed using the corresponding Quick Controls in the live screen.
- Resetting changes: If you would like to reset some larger changes in one dialog window without resetting the complete configuration, you can use the Default button at the bottom of the dialog to reset only this dialog's settings to the factory defaults. If you would like to reset all image settings, you can do so using the Manage Settings >Restore Image Settings of the Quick Control in the live image of the camera.
- Storing changes permanently: Once you have finished configuring the camera, you should always store the settings in the camera's permanent memory. You can do so in each dialog (clicking the Set button at the bottom of each dialog will temporarily implement the change; when you click Close, you will be asked to store the complete configuration in the camera's permanent memory) or in the admin menu (Admin Menu > Store current configuration into Flash memory). The Configuration section of the administration menu provides more functions for storing, copying and managing camera settings. For more information on this topic, see Chapter 5Basic Camera Configuration in the Camera Software Manual Part 2.
- Time tasks and time synchronization: Apart from a multitude of possibilities for controlling the camera using time (time tables, holiday and vacation, scheduled tasks, etc.), the camera can also synchronize its internal clock. This allows you to manually synchronize the camera with a computer or automatically using a time server or another MOBOTIX camera. The camera can use either NTP time servers or Time Protocol servers. For additional information, see Section 5.4.2 Date and Time/Time Zones and Time Servers in the Camera Software Manual Part 2.
- The "More" and "Less" buttons: When opening some of the camera dialogs, the camera only shows the most important parameters. These dialogs have a More button in the bottom right-hand corner; click it to display additional options. If all options are displayed, click the Less button to hide the additional options.
User Name: admin Password: meinsm
Admin Menu
Setup Menu
Make sure to permanently store changed parameters!
Automatic time synchronization using a time server
More: Display advanced features
Less: Hide advanced features
3.8 Additional Notes
3.8.1 Weatherproof Qualities
The MOBOTIX D24 IT/Secure models have been certified weatherproof according to IP65 (absolutely dust-proof and resistant to water jets) and can also be wall-mounted outdoors. The MOBOTIX D24 Basic has attained a protection class of IP54.
3.8.2 Password For The Administration Menu
Accessing the administration menu of the camera (Admin Menu button) is only possible after entering a user name and password.
• Factory default user name is admin
• Factory default password is meinsm
The Quick Installation assistant automatically appears when the administration menu is accessed for the first time. It provides an easy method to adjust the basic camera settings to the current application scenario. For security reasons, it is highly recommended to change the default administrator password after the camera has been properly configured.
Enter the user name and password exactly as shown above. Note that all entries are case-sensitive.
Caution
Make sure that you store information on user names and passwords in a secure place. If you lose the administrator password and cannot access the Administration menu, the password can only be reset at the factory. This service is subject to a service charge!
3.8.3 Starting The Camera With The Factory IP Address
If the camera's IP address is not known, you can start the camera with its factory IP address. Section 3.2.6 Starting the Camera with the Factory IP Address describes this procedure in more detail.
3.8.4 Reset The Camera To Factory Settings
All settings of the MOBOTIX camera can be permanently reset to the factory default settings. This makes sense if, for example, you have obtained a camera without any information or you would like to reset all settings after testing the camera. In order to perform this procedure, you need to have access to the administration area of the camera (admins group). Open Admin Menu > Reset to reset the camera to factory defaults.
Note: All defined users will be deleted and the admin password will be reset to the factory default when you reset the camera using Admin Menu > Reset. If you want to maintain existing users, use the method described in Section 3.2.6 Starting the Camera with the Factory IP Address.
3.8.5 Activate Event Control And Motion Detection
In its default configuration, the camera's event control and video motion detection features are not enabled. In order to activate event-controlled recording, open Setup Menu > General Event Settings and activate the Arming switch. Another method is to click the Arm & Record softbutton in the browser's user interface. The camera displays the video motion detection window in the live image (dotted frame in the center) and the camera automatically stores images as soon as the video motion window detects movements.
3.8.6 Deactivate Text And Logo Options
As the camera arming is deactivated in its default configuration (see preceding section), the MOBOTIX camera only displays the Text WWW.MOBOTIX.COM, the time stamp and the MOBOTIX logo at the top of the image. Once the camera arming has been activated, the text at the bottom of the live image (event, action, messaging and recording symbols) will also appear.
You can deactivate the status bar at the bottom of the live image and the text bar in the top left corner by setting Text Display in the Setup Menu > Text & Display Settings dialog to Off. Setting Text Display toDate & Timewill only display the time stamp in the live image.
To hide the logo in the live image, open Admin Menu > Logo Profiles and set Logo Display to Disable.
3.8.7 Deactivating The Daily Automatic Camera Reboot
Per factory default, the MOBOTIX camera automatically reboots every morning at 3:36 a.m. The reason for this is that in some rare cases external influences (e.g. radiation in high locations) can lead to camera malfunctions. The automatic reboot will refresh the camera's memory and will ensure proper operation without requiring any interaction on the part of the user. If desired, you can deactivate the automatic reboot of the camera in the Admin Menu > Time Tasks dialog.
If the dotted rectangle in the live image is visible, the camera is armed
Text and logos can also be deactivated or customized
3.8.8 Browser
Current Internet browsers (Internet Explorer, Netscape, Mozilla Firefox, Safari, Konqueror, Opera, ...) with enabled JavaScript can display the camera's live images with their standard settings. Text-based browsers (e.g. lynx) cannot display the user interface and are not suitable for operating the camera.
Section 4.1.3 Browser Settings in the Camera Software Manual contains more detailed information on possible browser problems.
3.8.9 Cleaning The Camera And Lens
If the lens becomes dirty during the installation process, clean the lens using a lint-free cotton cloth. Make sure that the lens is still in focus after cleaning and adjust its focus if required.
Cleaning The Dome:
- In order to protect the dome from being scratched and from getting dirty, only handle the dome using a soft cotton cloth or the protective plastic of the camera's shipping box.
- You should clean the dome at regular intervals. Always use a soft, lint-free cotton cloth for this purpose.
- If the dirt is more persistent, add a mild alcohol-free detergent without abrasive particles.
- Make sure you instruct cleaning personnel on how to clean the camera.
3.8.10 Safety Warnings
Electrical surges can be induced by other electrical appliances, improper wiring, but also from the outside (e.g. lightning strikes to phone or power lines).
MOBOTIX cameras are protected against the effects of small electrical surges by a range of measures. These measures, however, cannot prevent the camera from being damaged when stronger electrical surges occur. Particular care should be taken when installing the camera outside to ensure proper protection against lightning, as this also protects the building and the entire network infrastructure.
MOBOTIX recommends having MOBOTIX cameras installed only by specialists accustomed to installing network devices and who have proper respect for the pertinent regulations lightning protection and fire prevention, as well as the current technology for preventing damages from electrical surges.
Due to the high computing power of the D24M and the corresponding environmental conditions at the installation site, the temperature of the sensor board may rise to a relatively high level. However, this does not affect the functionality of the camera. Never touch the black metal plate of the sensor board directly while the camera is running with its dome removed.
© MOBOTIX AG • Security-Vision-Systems • Made in Germany
3.8.11 Additional Information
For more information, see the News and Functional Overview pages in the online help of the camera's browser interface. Click the symbol to open the camera's help section.
Furthermore, detailed information on the camera and its current configuration is displayed in the Camera Status dialog. Click the symbol to open the relevant page.
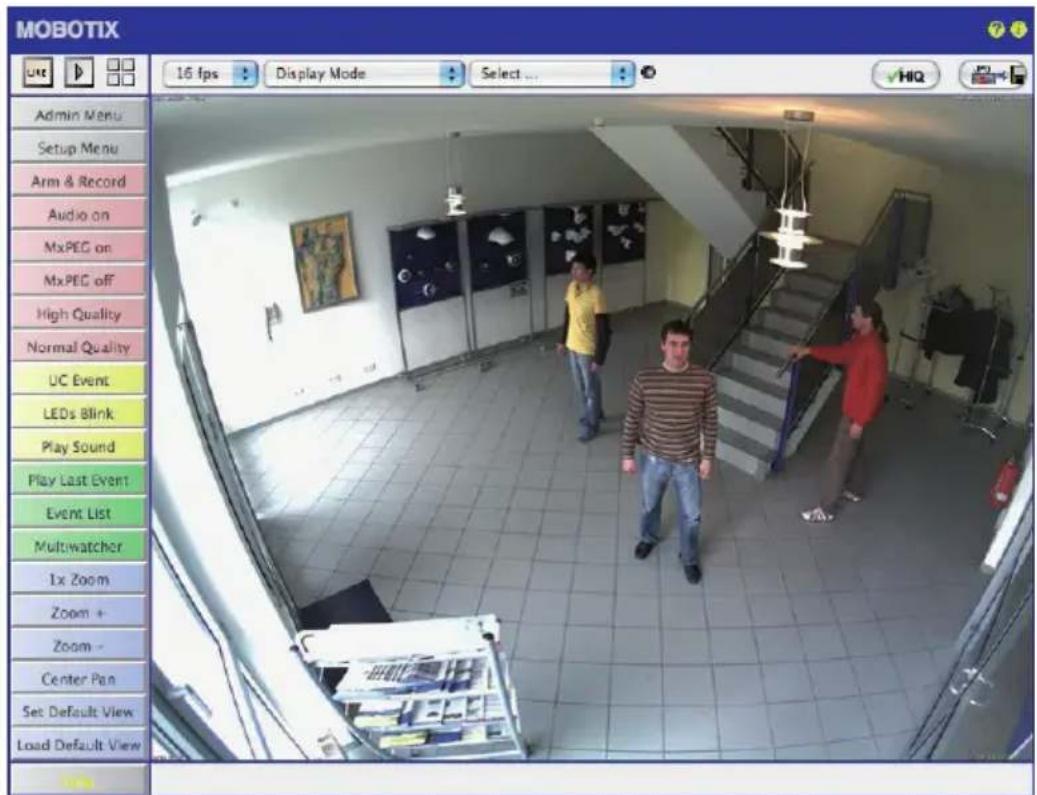
MOBOTIX Glossary
ActiveX
Control element on Windows computers which may also be used in other programs (including Windows Internet Explorer) to run special tasks. The MxPEG ActiveX control element allows video and audio data from MOBOTIX cameras to be displayed in other applications (including Internet Explorer).
Arming
This refers to the process of activating an alarm system so that events trigger the appropriate alarms. Traditional alarm systems can be armed using a key switch or by entering a code on a keyboard. MOBOTIX cameras can be armed using a „software switch.”
Assistant
Refers to a software component that helps the user install or set up a particular program and guides the user through the configuration process by means of simple questions.
Auto Grid
Automatically generated grid used for displaying the live images from all cameras.
Bonjour
(French for "hello") is a technology developed by Apple based on the Zeroconf protocol, which is a method to automatically recognize network services on IP networks. For example, you can find a printer or a network camera on the local network without knowing the exact IP address of the device you are looking for.
CamIO
MOBOTIX signal module that the camera uses to directly operate lamps, sirens and access controls, as well as external audio components (speakers and microphones).
CCTV
Abbreviation for Closed-Circuit Television. A television system in which the analog video signal is only transmitted to monitors (for example, a building). The term CCTV is often used for video surveillance systems.
CF Card
Abbreviation for Compact Flash Card. An ultra-compact, digital (random access) memory device based on Flash memory modules and commonly used as a storage medium for digital cameras.
CIF, 2CIF, 4CIF (in accordance with PAL TV standard)
Common Intermediate Format. Corresponds to 1/4 TV image with 288 rows and 352 pixels (0.1 megapixel). 2CIF (1/2 TV image) has the same small number of rows (288), but 704 pixels (0.2 megapixel). 4CIF corresponds to the image quality of a traditional TV image with 576 rows and 704 pixels (0.4 megapixel).
CMOS Sensor
Abbreviation for Complementary Metal Oxide Semiconductor Sensor. Sensor for energy-efficient digitalization of image information. CMOS sensors are used as image sensors in digital cameras.
© MOBOTIX AG • Security-Vision-Systems • Made in Germany
DevKit
Camera installation kit with independent image sensors based on MOBOTIX M12D or M22M, intended for concealed installation in other devices.
DHCP
Abbreviation for Dynamic Host Configuration Protocol. Allows a server to automatically assign devices in the network with the appropriate configuration (including the IP address, DNS server and gateway), as opposed to fixed IP addresses on the individual network devices.
DNS
Abbreviation for Domain Name Service. Allows the domain names of servers on the Internet (e.g. www.mobotix.com) to be linked ("resolved") to their corresponding IP addresses (e.g. 212.89.150.84).
Dome Camera
Most often refers to cameras with a round and compact design. The lens can be freely positioned and is protected by a transparent dome-shaped plastic housing.
DSL
Abbreviation for Digital Subscriber Line. Denotes a fast Internet connection capable of providing bandwidth of up to 16 Mbps for a typical household.
DualDome
Dome camera with two lenses and image sensors such as the MOBOTIX D12D. These lenses can deliver Wide Angle and Telephoto images independently of one another.
DVR
Abbreviation for Digital Video Recorder.
DynDNS
Abbreviation for Dynamic DNS (or DDNS, Dynamic Domain Name Service). Similar to DNS, this links domain names (e.g. mydomain.com) with IP addresses, whereby the IP addresses may change at any time. This service provides a convenient method to access your MOBOTIX cameras from home or work if the camera Internet connection is not through a router that assigns a fixed IP address, but instead over a DSL connection with a dynamically assigned IP address from the provider. A well-known provider of this (free) service is www.dyndns.org.
Events
An event refers to a situation when something happens or changes. In terms of video surveillance, this means a change in the status of an area that is being monitored. This may be movement of a person, a change in brightness, a drop in ambient temperature, the detection of a noise via a microphone, an electrical signal at a signal input, the manual operation of a button, etc.
Ethernet
The most common technology for communication within a wired network. It facilitates data exchange between all all devices (computers, printers, IP cameras, etc.) connected in a local network (LAN).
ExtIO
MOBOTIX signal module that the camera uses to directly operate lamps, sirens and door openers, as well as external audio components (speakers and microphones).
Fixdome
Camera without moving parts in a dome-shaped housing.
Flash Memory
See CF Card.
fps
Abbreviation for frames per second. See Frame Rate.
Frame rate
The frame rate specifies how many frames per second (fps) are generated and sent by the camera. The human eye perceives movement as a fluid video sequence when more than 12 image per second are produced.
HDTV
Abbreviation for High Definition TV.
HiRes
Abbreviation for High Resolution. Refers to high-resolution images (above 1 megapixel).
Image compression
Image compression reduces the file size of an image. This is particularly important when transferring and saving files.
Image processing
Digital image processing. The goal is to correct errors made during image generation (caused by overexposure, underexposure, blurring, weak contrast, image noise, etc.) in order to create a "better" image.
IP Network
Data network based on the Internet protocol (TCP/IP).
IP Telephone
See VoIP.
JPEG
Abbreviation for Joint Photographic Experts Group, responsible for the development of the JPEG standard method for image compression. JPEG is the most common lossy image format for photos on the Internet. Loss in image quality is barely noticeable at compression rates between 99% and 60%.
Latency
Time interval elapsed between the time an image is captured by a camera and when that same image is displayed on the monitor.
Layout
Describes the layout of video sources on a screen in MxControlCenter. When displaying images
© MOBOTIX AG • Security-Vision-Systems • Made in Germany
from network cameras, the layout determines the positions and resolutions of the images displayed on the monitor. In addition to the actual video images, you can also incorporate graphic elements such as the location of the cameras, etc.
LED
Abbreviation for Light Emitting Diode. An electronic semiconductor component built into MOBOTIX cameras and add-on modules that emits light when a current flows through the component in the correct direction.
Linux
Free and open source operating system. Serves as the operating system for all MOBOTIX cameras.
Megapixel
Images that have more than 1 million pixels.
MonoDome
Dome camera with one lens, such as the MOBOTIX D22M.
Motion Detection
Action of sensing a movement within a particular area. MOBOTIX cameras use algorithmic methods to detect changes from image to image in predefined areas, while taking preset conditions into account. If a camera detects a movement, it signals an event and triggers an alarm.
Motion JPEG (M-JPEG)
A video compression method where each individual image is compressed separately as a JPEG image. Unlike MPEG, the quality of M-JPEG recordings is not dependent on movement within the image.
MPEG
Motion Pictures Expert Group. Standard for compressing and saving image and video data, resulting in quality loss. Originally created for playing entertainment content on PCs, MPEG concentrates on displaying still image material and compromises the quality of moving image material in order to increase the transmission speed.
MxControlCenter
MOBOTIX video management software for professional control of medium-sized and large camera networks.
MxEasy
MOBOTIX video management software for small and compact camera networks of up to 16 cameras.
MxPEG
MOBOTIX-developed method for compression and storage of image and video data with minimal network load and high image quality. The MxPEG ActiveX control element allows video and audio data from MOBOTIX cameras to be displayed in other applications (including Internet Explorer).
NAS
Abbreviation for Network Attached Storage, a storage system connected via an Ethernet cable. All network devices (cameras) have access to this storage system.
Network
A group of computers that are connected via various cables and share access to data and devices such as printers and IP cameras.
PIR
Passive Infrared Sensor for motion detection.
PoE
Power over Ethernet. A technology for supplying network-enabled devices (e.g. IP cameras) with power via the Ethernet data cable.
PTZ
Abbreviation for Pan/Tilt/Zoom. Refers to the movement of a video camera to the left and right, up and down, and to the camera's ability to enlarge an image.
Quad Display
Layout in which the images from four cameras are displayed in one window.
Resolution
Indicates the number of pixels used to produce an image. The more pixels an image has, the greater the detail when the image is enlarged. The resolution is expressed as the number of pixel columns times pixel rows or as a total number of pixels. A VGA image has 640 columns and 480 rows (640 x 480 pixels), which equals 307,200 pixels or approximately 0.3 megapixels.
RoHS
Abbreviation for Restriction of Hazardous Substances Directive and refers to EC Directive 2002/95/EC, which prohibits the use of certain hazardous substances when manufacturing products and components. The goal of this directive is to prevent these substances from harming the environment when the products are disposed of later.
Router
Network device that connects multiple networks with one another. The router establishes a physical connection between the devices in different networks (like a hub), analyzes the relevant data packets and forwards ("routes") these packets to the correct target network.
SD Card
SD Memory Card (Secure Digital Memory Card). A digital storage medium based on Flash storage modules such as USB sticks.
Search
Monitoring of recordings or searching for a particular event.
Sequencer
Feature that automatically switches the camera displayed in the main window after a specific time delay.
Signal Input/Signal Output
Coupling a system that triggers an alarm (for example, a fire alarm system or a network camera) to a control center or another type of transmitter (for example, a telephone or IP network). A typical signal input/output scenario in video surveillance progresses as follows: an event triggers an alarm. This alarm then displays the video image from the network camera that triggered the alarm on the monitor at a control center. Snapshot Photograph of a situation created spontaneously and directly with a mouse click.
SIP
Session Initiation Protocol. Network protocol for setting up, controlling and terminating a communication connection via a computer network. SIP is frequently used in conjunction with IP telephony.
Switch
Hardware used to connect multiple network devices (computers, cameras, printers, etc.) within a network. A PoE switch can also supply the cameras with power over an Ethernet cable.
UPS
Uninterruptible Power Supply. Refers to devices that continue to supply power in the event of a sudden power failure. These devices usually operate using a battery. UPS is installed on the power lines of devices and systems in order to protect them in the event of a power failure.
VoIP
Voice over IP. Telephony using computer networks.
WLAN
Wireless Local Area Network. Used to provide Internet connections without the need for cables.
Declaration of Conformity
The product identified above complies with the essential requirements of the relevant standard, when used for its intended purpose:
Low-voltage directive
Directive basse-tension
Harmonised standards applied:
Harmonised standards applied:
EN 55024:1998+A1:2001+A2:2003
Other harmonised standards applied:
CFR 47, FCC Part 15B
C-Tick AS/NZS 3548 CISPR 22:2005 (mod.)
Anschrift:
MOBOTIX AG
Address:
Kaiserstrasse
Adresse :
67722 Langmeil
Germany
Place & date of issue
Lieu et date

Dr. Ralf Hinkel
Vorstand/CEO, MOBOTIX AG
Manufacturer Executive Board
MOBOTIX AG
Dr. Ralf Hinke
Kaiserstrasse
67722 Langmeil, Germany
Registration Office: Kaiserslautern Local Cour
Germany
Registration Number: HRB 3724
Tel: +49 6302 9816-C
Tax Code: 19/650/0812/
Fax: +49 6302 9816-103
Tax Office: Kaiserslautern, Germany
http://www.mobotix.com VAT ID:
sales@mobotix.com
DE202203501
You can find the latest version of this document at www.mobotix.com under Support

Technical specifications subject to change without notice
© MOBOTIX AG • Security-Vision-Systems • Made in Germany
Notes
Notes
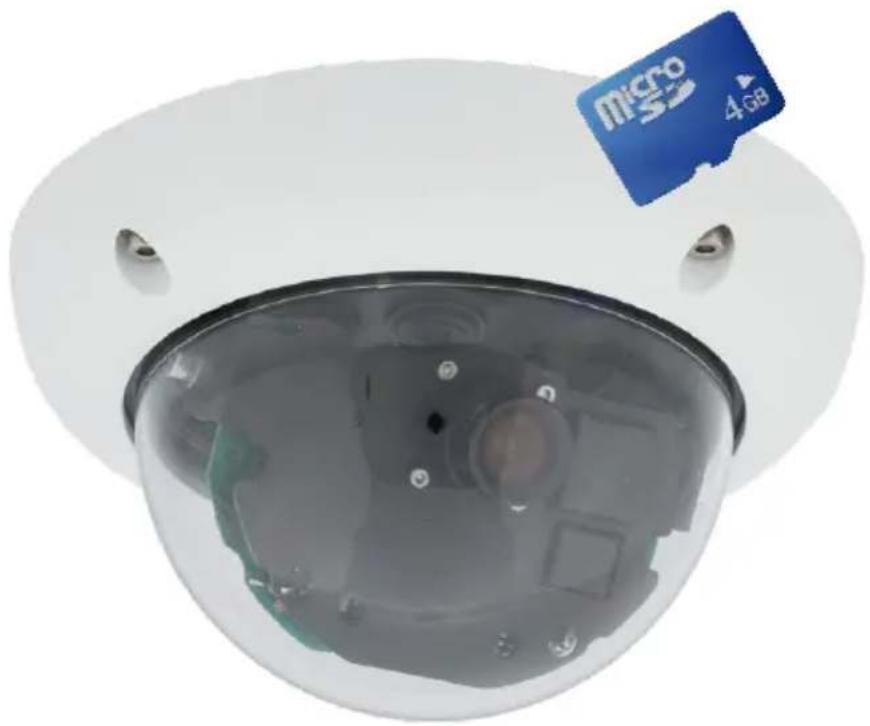
natural_image
Close-up of a white surveillance camera with a blue Micro 526 card attached, showing internal components and no visible text or symbols.Fits In. Watches Out.
The D24M MonoDome camera adapts perfectly to any task. Exchangeable lenses, various mounting and configuration options including Vandalism Set support unlimited possibilities.

natural_image
Close-up of a white surveillance camera with a dark lens (no visible text or symbols)Outdoor Wall Mount

natural_image
Front view of a white surveillance camera with a circular lens (no visible text or symbols)On-Wall Set 0°

natural_image
Close-up of a white surveillance camera head with lens and sensor array (no visible text or symbols)On-Wall Set 10°

In-Ceiling Set

Vandalism Set
Latest PDF File:
www.mobotix.com > Support > Manuals
HiRes
3 Megapixel
2048×1536
Software zoom
Skyline
Format free
Each image format freely definable
30 Frames/s
VGA (640 x 480) 30F/s Mega
Virtual PTZ
Digital pan, tilt, zoom
Backlight
Safe using CMOS without mechanical iris
Internal DVR
Internal via Flash, external via Network
Win/Lin/Mac
Recording
via Network on PC up to 1 Terabyte
Microphone & speaker
Audio
bi-directional via IP, variable framerates
SIP Client with video
IP Telephony
Alarm notify, cam remote control
VideoMotion
Multiple windows precision pixel-base
-22 to +140 °F
Weatherproof
-30 to +60 °C, IP65, no heating necessary
IEEE 802.3of
PoE
Network power even in winter
Robust
No moving parts fiber glass housing
MxCC/MxEasy
Licence free
Video-Management-Software
HiRes Video Innovations
The German company MOBOTIX AG is known as the leading pioneer in network camera technology and its decentralized concept has made high-resolution video systems cost-efficient.
MOBOTIX AG • D-67722 Langmeil • Tel: +49 6302 9816-103 • Fax: +49 6302 9816-190 • info@mobotix.com
- Fits In. Watches Out.
- Megapixel
- Format free
- Frames/s
- Virtual PTZ
- Backlight
- Internal DVR
- Recording
- Audio
- IP Telephony
- VideoMotion
- Weatherproof
- PoE
- Robust
- Licence free
- HiRes Video Innovations
- Note
- CONTENTS
- Foreword 6
- The MOBOTIX Concept 8
- Superior Storage Solution 10
- Added Security Value 12
- Cost Benefits And Technical Advantages 14
- INTRODUCTION 16
- INSTALLATION 34
- Mounting The Camera With The On-Wall Set 60
- Mounting The Camera With The In-Ceiling Set 66
- Installing The Vandalism Set 72
- Installing The Wall Mount 78
- Installing The Corner And Pole Mount 84
- Aiming And Adjusting The Lens 90
- Replacing The MicroSD Card 92
- Network And Power Connection 94
- OPERATING THE CAMERA 98
- Manual And Automatic Operation - Overview 98
- First Images And The Most Important Settings 102
- Virtual PTZ 118
- Correction Of Lens Distortion (L22 Only) 120
- Full Image Storage 128
- Additional Notes 134
- FOREWORD
- www.mobotix.com/eng\_US/Support/Software-Downloads
- Notes and Copyright Information
- THE MOBOTIX CONCEPT
- Technology Leader Of Network Cameras
- Why High-Resolution Systems?
- Disadvantages Of Old Centralized Solution
- The Decentralized MOBOTIX Concept
- The Benefits
- Robust And Low-Maintenance
- Software Included - For Life
- SUPERIOR STORAGE SOLUTION
- The Market Demands Better Image Quality
- Central Storage As A Bottleneck
- MOBOTIX Stores HiRes Cost-Efficiently
- MOBOTIX Stores Data In Flash Memory
- MOBOTIX Stores Data Reliably
- MOBOTIX Only Saves What Is Necessary
- MOBOTIX Data Storage
- ADDED SECURITY VALUE
- Robust, Low-Maintenance Technology
- Alarm Management And Forwarding
- Absolute Data Security
- Notification Of Failure
- Subsequent Searches
- Sound Increases The Chance Of Detection
- No Problems With Backlight
- Vandalism-Proof Models
- THE MOST IMPORTANT COST BENEFITS
- Increased resolution reduces amount of cameras needed
- Reduced installation costs at any distance
- Intelligent recording technology reduces required storage
- Event-controlled image rate minimizes storage costs
- No additional power and no heating required
- Backup power requirement reduced by 8 times
- Robust and practically maintenance free
- No software and no licence costs
- Unlimited scalability and high return of investment
- Additional functions and other extras included
- THE MOST IMPORTANT TECHNICAL ADVANTAGES
- Progressive-scan instead of half-frame blur
- Sun and backlight compensation
- Dual camera technology: 2-in-1
- Long-term, high-performance Terabyte recording included
- Simultaneous recording, event search and live viewing
- Very low network load
- Bridging of recording during network failures
- Day & night maintenance free
- Audio and SIP telephony
- MxControlCenter included
- INTRODUCTION
- D24M Overview
- A Master Of Adaptability
- Robust And Elegant
- High-Resolution Sees More And Costs Less
- Universal Application From The Vacation Home To The Airport
- The Right Lens For Every Application
- Virtual PTZ (vPTZ) – No Motor Required
- Simultaneous Zoomed Live Image And Full Image Recording
- Example:
- High Frame Rates Of Up To 30 fps
- Robust And Maintenance-Free
- Camera Design Creates New Applications
- Model Versions
- D24M: The Next Generation HiRes Mono Dome Camera
- Frames Rates Have Doubled
- GB MicroSD Card
- Adjustable PoE Classes, 1 To 3
- Only 3 Watt Power Consumption
- New Connection Options
- 24/146
- D24-Camera Manual: INTRODUCTION
- General MOBOTIX Camera Functions
- vPTZ: Virtual Pan/Tilt/Zoom Features
- Automatic Image Correction (Only With The L22 Lens)
- Live Video With Up To 30 fps, Including Audio
- Low Bandwidth Requirements
- Voice Over IP
- Internet Telephony (SIP) And Video SIP
- Long-Term Storage On File Servers Included
- Internal DVR: Storage On MicroSD Or CF Cards
- Event And Time-Controlled
- Remote Alerting
- Integrated Power-over-Ethernet
- Caution
- Logos, Animated Or Freestyle
- Cameras Live Using MxControlCenter
- MxEasy – Intuitive Application For Windows, Macintosh And Linux
- Diverse Installation Options
- Additional Camera Functions (Software)
- Free Software Updates (www.mobotix.com)
- Lens Options, Hardware And Software Features
- Notes
- INSTALLATION
- Preparing The Installation
- Wall Installation Using The Outdoor Wall Mount
- Mounting Options For IT/Secure Models
- On-Wall Installation (MX-OPT-AP)
- On-Wall Installation With 10° Inclination (MX-OPT-AP-10DEG)
- In-Ceiling Installation (MX-OPT-IC)
- Vandalism Set (MX-D24M-Vandal)
- Wall Mount (MX-OPT-WH)
- Corner And Pole Mount (MX-OPT-MH)
- Network Connection And Power Supply, UPS
- Power over Ethernet (PoE Conforming To IEEE 802.3af)
- Advantages of PoE power supply:
- Using Uninterruptible Power Supplies (UPS)
- Preparing The Camera Connections, Wall Outlets
- Wiring, Fire Prevention, Lightning And Surge Protection
- Wiring
- Fire Prevention
- Lightning And Surge Protection
- D24M IT/Secure: Delivered Parts, Components, Dimensions
- D24M IT/Secure Camera Housing And Connectors
- Connections
- Dimensions Of D24M IT/Secure
- Drilling Template For The D24M IT/Secure Mounting Ring
- D24M Basic: Delivered Parts, Components, Dimensions
- Delivered Parts And Camera Components Of D24M Basic
- D24M Basic Camera Housing And Connector
- Dimensions Of D24M Basic
- Drilling Template For The D24M Basic
- Available D24M Accessories - Overview
- On-Wall Set (MX-OPT-AP)
- 10° On-Wall Set (MX-OPT-AP-10DEG)
- In-Ceiling Set (MX-OPT-IC)
- Outdoor Wall Mount (MX-OPT-WH)
- Tinted Dome (MX-D24M-OPT-DCS)
- Network Power Adapter Set (MX-NPA-PoE-Set\*)
- ExtIO Function Extension (MX-ExtIO)
- Mx2wire Media Converter (MX-2wire-Set-PW)
- Mounting The Camera Without Accessories
- Mounting Instructions
- Required Tools
- The Following Additional Tools Are Required For Installation:
- Overview: Procedure For All D24M Cameras
- Please be sure to install the camera in the following order:
- Network Connection Without Pre-Installed Cable:
- Surface-Mounted Socket
- Procedure For D24M IT/Secure
- Procedure For D24M Basic
- Mounting The Camera With The On-Wall Set
- Mounting Instructions
- On-Wall Set
- Scope Of Delivery And Required Parts
- Procedure
- Mounting The Camera With The In-Ceiling Set
- Mounting Instructions
- In-Ceiling Set
- Procedure
- Installing The Vandalism Set
- Mounting Instructions
- Scope Of Delivery And Required Parts
- Available Variants Of The MOBOTIX D24M Vandalism Outer Shell
- Procedure
- 76/133
- D24 Camera-Manual: INSTALLATION
- Installing The Wall Mount
- Mounting Instructions
- Wall Mount
- Procedure
- Installing The Corner And Pole Mount
- Mounting Instructions
- The Following Additional Tools Are Required For Installation As A Pole Mount:
- The Following Additional Tools Are Required For Installation Of The Corner Mount:
- Mounting To A Pole
- Mounting To A Wall Or Building Corner
- Mounting The Wall Mount To The Corner And Pole Mount
- Aiming And Adjusting The Lens
- Establishing A Connection To The Camera
- Aiming And Adjusting The Lens, Visual Inspection
- Caution (only for 135 mm Telephoto lens)
- Replacing The MicroSD Card
- Removing A MicroSD Card
- Inserting A MicroSD Card
- Network And Power Connection
- Notes On Cable Lengths And Power Supply
- PoE Variables
- Power Supply Using A Switch
- Power Supply When Connected Directly To A Computer
- Power Supply (PoE IEEE 802.3af) Using Power-over-Ethernet Products
- Camera Startup Sequence
- Manually Using A Computer In The 10.x.x.x IP Address Range
- Advantages
- Disadvantages
- Automatically Using MxControlCenter Or MxEasy
- Requirement
- Automatically Using DHCP
- First Images And The Most Important Settings
- Manually Setting Up The Network Parameters In A Browser
- Change The Network Parameters Of Your Computer:
- Windows (2000, XP and Vista):
- Linux/Unix:
- Mac OS X:
- Set Up The Target Network Parameters Of The Camera:
- First Images And The Most Important Settings In The Browser
- Camera Screens: Live, Player, MultiView
- First Images And Network Parameter Configuration In MxControlCenter
- Installation
- MOBOTIXSearching and Displaying MOBOTIX Cameras
- Cameras Are Found But Are Located In A Different Subnet
- Reconfiguring Cameras In A Different Subnet
- Defining Additional Video Sources
- Selecting Video Sources
- Camera Preview
- Editing The Video Source List
- Adding Selected Video Sources In A New Layout
- First Images And Network Parameter Configuration In MxEasy
- Installing MxEasy
- Using MxEasy For The First Time
- Automated Search For MOBOTIX Cameras
- Configuring MOBOTIX Cameras For A Different Network
- Selecting Cameras
- Editing The Camera List
- Using The Selected Cameras
- Starting The Camera With An Automatic IP Address (DHCP)
- Starting The Camera With The Factory IP Address
- Virtual PTZ
- Operation Using The Mouse And Scroll Wheel
- Operation Using USB Joystick
- Correction Of Lens Distortion (L22 Only)
- Activate/Deactivate Lens Distortion Correction In The Browser
- MicroSD Card Recording
- Introduction
- Number Of Write/Delete Cycles Per Flash Storage Cell
- Conservative Memory Usage Thanks To MOBOTIX MxFFS File System
- Storage Requirements And Life Expectancy Of MicroSD Cards
- Monitoring The Cell Wear Of Flash Storage Devices (Patent Pending)
- Formatting The Card
- Activate Recording
- Activating The Recording
- Activating Encryption And Authentication
- Accessing Camera Data
- Deactivating The Card Memory
- Using A MicroSD Card In A Different MOBOTIX Camera
- Limitations On Warranty When Using Flash Storage Devices
- Full Image Storage
- Activate/Deactivate Full Image Storage In The Browser
- Configuration In The Browser
- Overview
- General Browser Settings
- Additional Configuration Options
- Additional Notes
- Weatherproof Qualities
- Password For The Administration Menu
- Starting The Camera With The Factory IP Address
- Reset The Camera To Factory Settings
- Activate Event Control And Motion Detection
- Deactivate Text And Logo Options
- Deactivating The Daily Automatic Camera Reboot
- Browser
- Cleaning The Camera And Lens
- Cleaning The Dome:
- Safety Warnings
- Additional Information
- MOBOTIX Glossary
- ActiveX
- Arming
- Assistant
- Auto Grid
- Bonjour
- CamIO
- CCTV
- CF Card
- CIF, 2CIF, 4CIF (in accordance with PAL TV standard)
- CMOS Sensor
- DevKit
- DHCP
- DNS
- Dome Camera
- DSL
- DualDome
- DVR
- DynDNS
- Events
- Ethernet
- ExtIO
- Fixdome
- Flash Memory
- fps
- Frame rate
- HDTV
- HiRes
- Image compression
- Image processing
- IP Network
- IP Telephone
- JPEG
- Latency
- Layout
- LED
- Linux
- Megapixel
- MonoDome
- Motion Detection
- Motion JPEG (M-JPEG)
- MPEG
- MxControlCenter
- MxEasy
- MxPEG
- NAS
- Network
- PIR
- PTZ
- Quad Display
- Resolution
- RoHS
- Router
- SD Card
- Search
- Sequencer
- Signal Input/Signal Output
- SIP
- Switch
- UPS
- VoIP
- WLAN
- Declaration of Conformity
- Manufacturer Executive Board
Brand : Mobotix
Model : D24M
Category : Security Camera