Yard Master 2 - Projection screen Elite Screens - Free user manual and instructions
Find the device manual for free Yard Master 2 Elite Screens in PDF.


User questions about Yard Master 2 Elite Screens
0 question about this device. Answer the ones you know or ask your own.
Ask a new question about this device
Download the instructions for your Projection screen in PDF format for free! Find your manual Yard Master 2 - Elite Screens and take your electronic device back in hand. On this page are published all the documents necessary for the use of your device. Yard Master 2 by Elite Screens.
USER MANUAL Yard Master 2 Elite Screens
Section 1: Screen Design
1.1 What is it for?
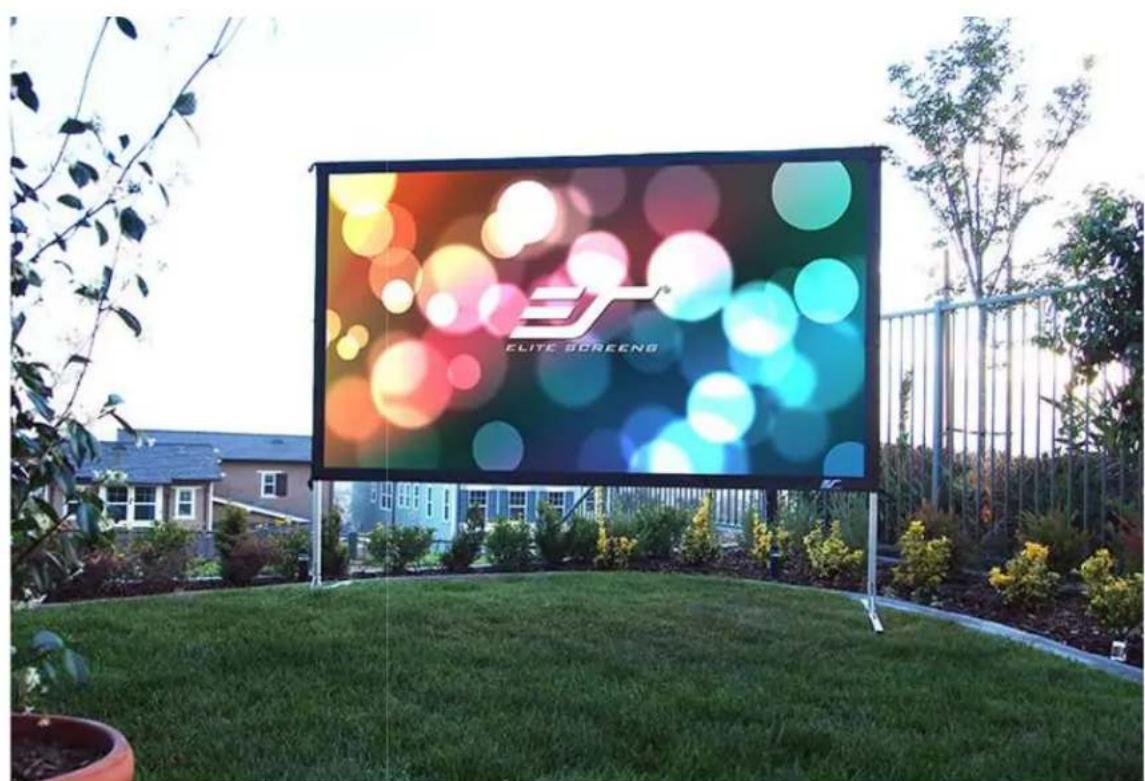
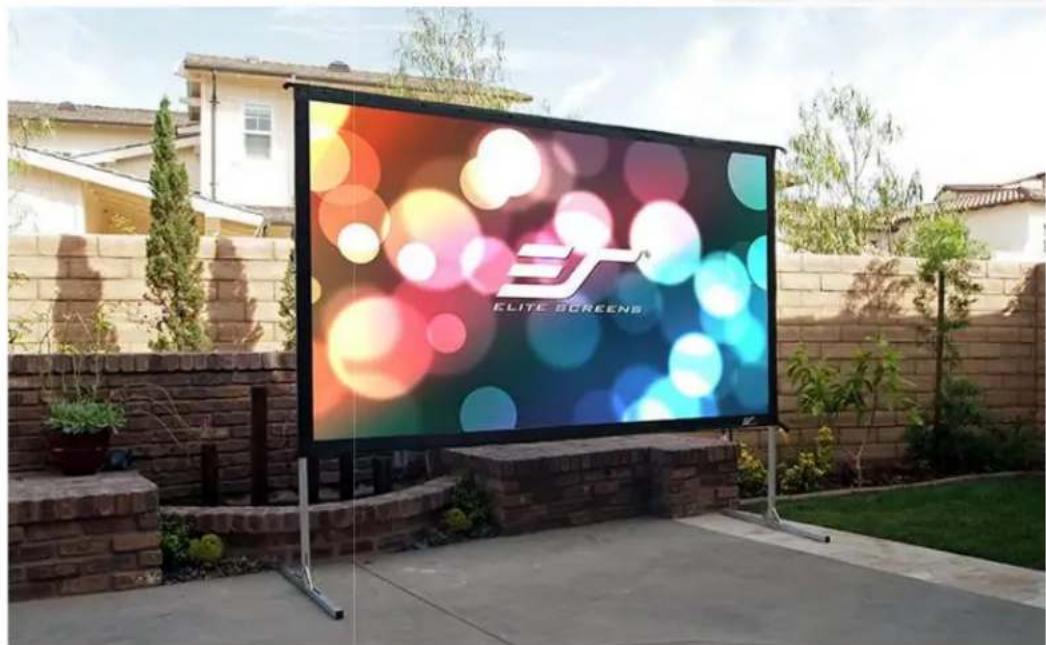
The Yard Master 2 is a folding-frame outdoor projection screen. Its light-weight aluminum frame allows it to be set up in minutes. Simply, unfold the frame, attach the material and legs, then project. The Yard Master2 is the perfect companion for outdoor presentations with front or rear projection materials available.
1.2 How does it work?
The Yard Master consists of a black metal frame with T-legs that support Elite's WraithVeil screen material fabric with all-weather nylon-stitched reinforcements. It has a high gain performance for applications with a high ambient light intrusion. Its 2.2 gain configuration is ideal for events such as clubs, restaurants, trade shows, meeting rooms, and outside evening presentations. Its special surface coating enhances color reproduction and black level contrast with wide uniformity for large audiences.
Section 2: Product Features
2.1 Characteristics
Screen Material
• CineWhite™ tensioned front projection material
• WraithVeil tensioned rear projection material
• 4K Ultra HD and Active 3D Ready
- Black masking borders enhance picture contrast
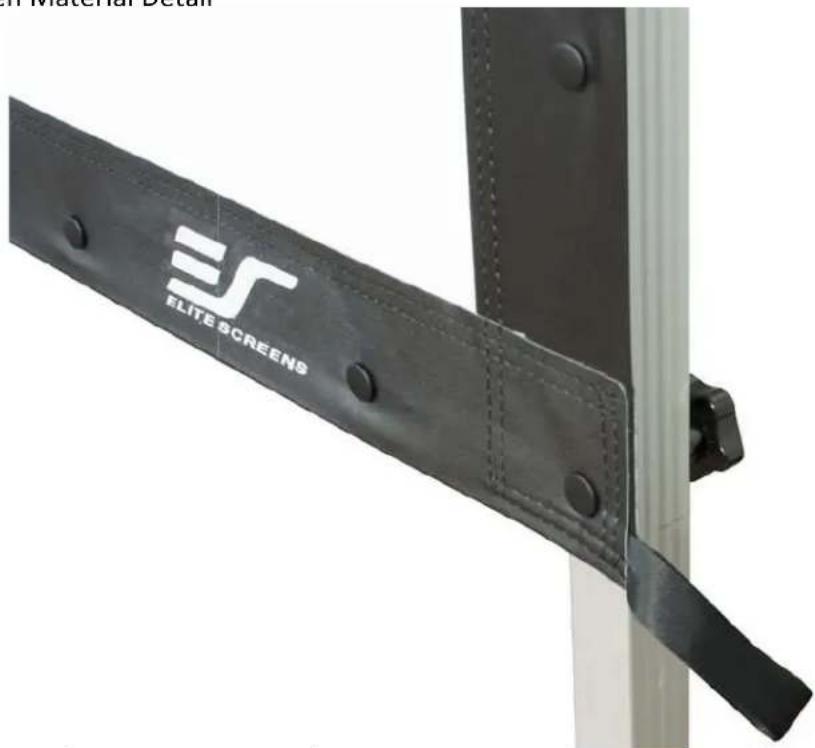
• Corner pull- tabs make installation easier
- Snap- button attachments on material
Design and Assembly
• Light- weight aluminum square tube construction
- Single-piece frame system unfolds effortlessly
• Detachable T-legs included
• Assembles in minutes with no tools required
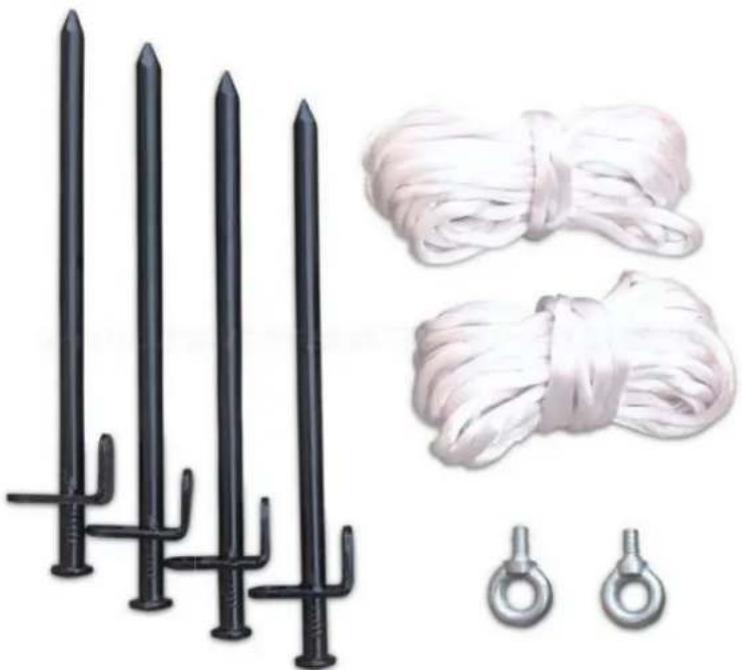
• Stakes, rope, and support rings included for additional support and stability
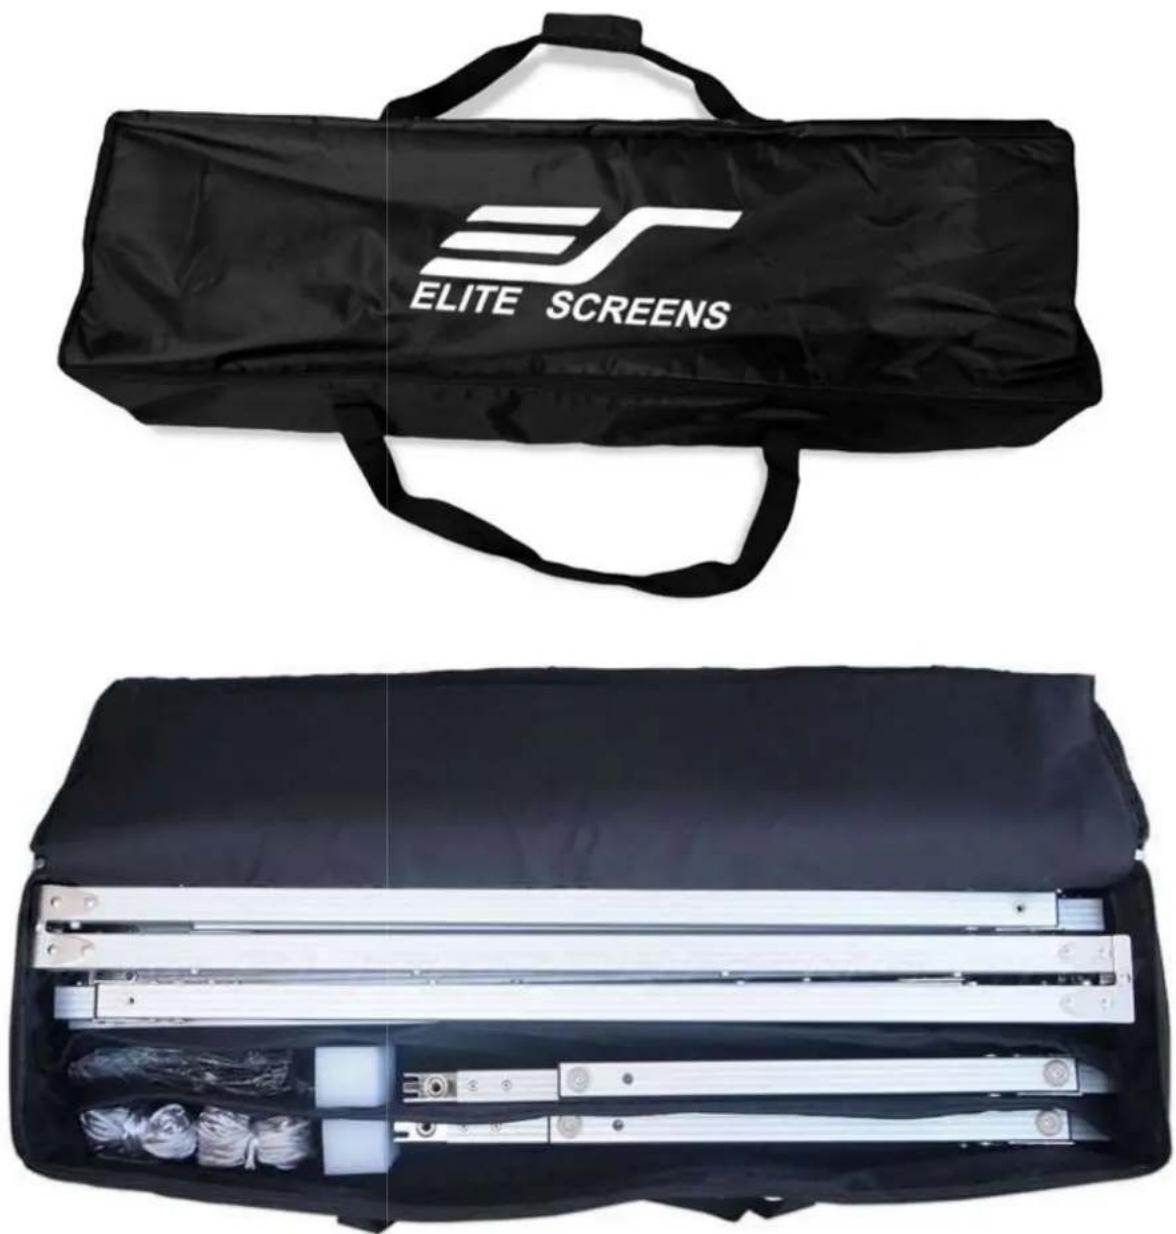
- Soft- padded carrying bag stores entire product for portability
2.2 Model Numbers
| Model Number | Diag. Size | Aspect Ratio | Viewing Height (in) | Viewing Width (in) | Screen Material | Gain | Frame Color | N.W. (Ibs) | G.W. (Ibs) | Packaging Dimensions (LxWxH) |
| OMS90H2 90" 16:9 | 44.1 | 78.4 | CineWhiteTM | 1.1 | Silver | 19 | 23.1 | 34.3"x11.2"x7.7" | ||
| OMS100H2 100" 16:9 | 49.0 | 87.1 | CineWhiteTM | 1.1 | Silver | 20.3 | 24.7 | 37.8"x11.2"x7.7" | ||
| OMS110H2 110" 16:9 | 53.9 | 95.9 | CineWhiteTM | 1.1 | Silver | 21.4 | 26.0 | 40.2"x11.2"x7.7" | ||
| OMS120H2 120" 16:9 | 58.8 | 104.6 | CineWhiteTM | 1.1 | Silver | 22.5 | 27.6 | 42.9"x11.2"x7.7" | ||
| OMS135H2 135" 16:9 | 66.1 | 117.7 | CineWhiteTM | 1.1 | Silver | 29.3 | 34.6 | 47.2"x11.2"x7.7" | ||
| OMS90V2 90" 4:3 | 54.0 | 72.0 | CineWhiteTM | 1.1 | Silver | * | * | * | ||
| OMS100V2 100" 4:3 | 60.0 | 80.0 | CineWhiteTM | 1.1 | Silver | 20.7 | 25.4 | 39.4"x11.2"x7.7 | ||
| OMS110V2 110" 4:3 | 66.0 | 88.0 | CineWhiteTM | 1.1 | Silver | * | * | * | ||
| OMS120V2 120" 4:3 | 72.0 | 96.0 | CineWhiteTM | 1.1 | Silver | 22.9 | 29.1 | 45.3"x11.2"x7.7" | ||
| OMS135V2 135" 4:3 | 81.0 | 108.0 | CineWhiteTM | 1.1 | Silver | 29.8 | 34.8 | 49.2"x11.2"x7.7" | ||
| OMS90HR2 90" 16:9 | 44.1 | 78.4 WraithVeil | 2.2 | Silver | 19.0 | 23.1 | 34.3"x11.0"x7.5" | |||
| OMS100HR2 100" 16:9 | 49.0 | 87.1 WraithVeil | 2.2 | Silver | 20.3 | 24.7 | 37.8"x11.0"x7.5" | |||
| OMS110HR2 110" 16:9 | 53.9 | 95.9 WraithVeil | 2.2 | Silver | 21.4 | 26 | 40.2"x11.0"x7.5" | |||
| OMS120HR2 120" 16:9 | 58.8 | 104.6 WraithVeil | 2.2 | Silver | 22.5 | 27.6 | 42.9"x11.0"x7.5" | |||
| OMS135HR2 135" 16:9 | 66.1 | 117.7 WraithVeil | 2.2 | Silver | 29.3 | 34.6 | 47.2"x11.0"x7.5" | |||
| OMS90VR2 90" 4:3 | 54.0 | 72.0 WraithVeil | 2.2 | Silver | * | * | * | |||
| OMS100VR2 100" 4:3 | 60.0 | 80.0 WraithVeil | 2.2 | Silver | 20.7 | 25.4 | 39.4"x11.2"x7.7 | |||
| OMS110VR2 110" 4:3 | 66.0 | 88.0 WraithVeil | 2.2 | Silver | * | * * | Info coming soon | |||
| OMS120VR2 120" 4:3 | 72.0 | 96.0 WraithVeil | 2.2 | Silver | 22.9 | 29.1 | 45.3"x11.2"x7.7" | |||
| OMS135VR2 135" 4:3 | 81.0 | 108.0 WraithVeil | 2.2 | Silver | 29.8 | 34.8 | 49.2"x11.2"x7.7" |
Section 3: Screen Material Specifications
3.1 Characteristics
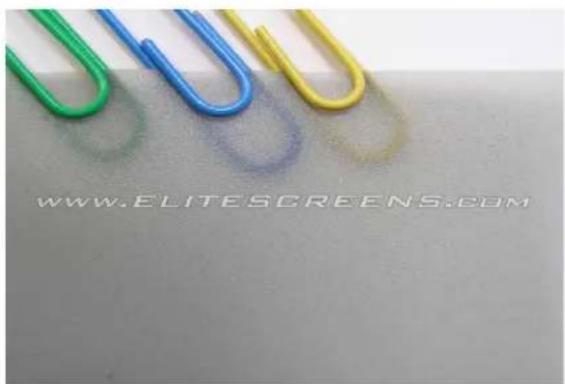
WraithVeil is our rear projection screen material. It has a high gain performance for applications with a high ambient light intrusion. Its 2.2 gain configuration is ideal for events such as clubs, restaurants, trade shows, meeting rooms, and outside evening presentations. Its special surface
text_image
WWW.ELITESCREEN.S.COMcoating enhances color reproduction and black level contrast with wide uniformity for large audiences. Seamless screen sizes are available in sizes up to 200".
Features & Benefits
• Textured PVC with surface coating
- Gain 2.2
• Viewing angle: 160^ ( 80^ ± LR )
• Screen surface can be easily cleaned with mild soap and water
- Mildew resistant
• 4K Ultra HD and Active 3D Ready
| Specifications | |
| Thickness | 0.36 mm |
| Weight | 350 g/m^2 |
| Maximum Height | 3.2 M |
| On-axis Gain | 1.0 |
| Half-Gain Angle | Does not reach half gain |
3.2 Gain and Viewing Angle Chart
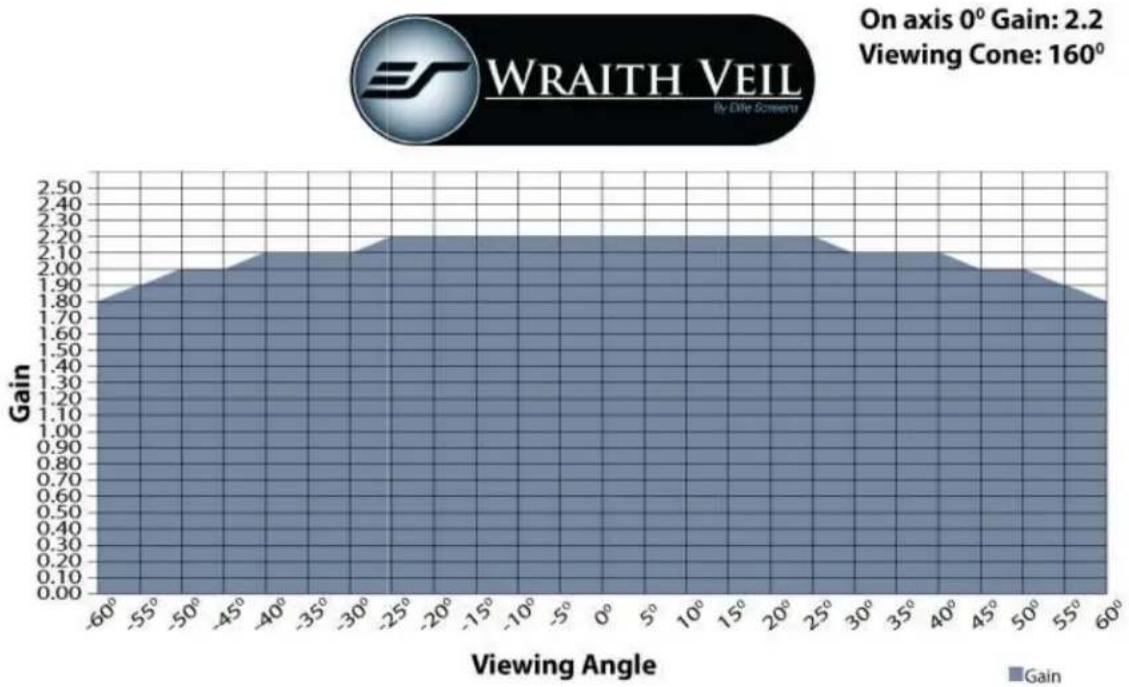
area
| Viewing Angle | Gain | |---|---| | -60° | 1.80 | | -55° | 2.00 | | -50° | 2.10 | | -45° | 2.10 | | -40° | 2.10 | | -35° | 2.10 | | -30° | 2.10 | | -25° | 2.20 | | -20° | 2.20 | | -15° | 2.20 | | -10° | 2.20 | | -5° | 2.20 | | 0° | 2.20 | | 5° | 2.20 | | 10° | 2.20 | | 15° | 2.20 | | 20° | 2.20 | | 25° | 2.10 | | 30° | 2.10 | | 35° | 2.10 | | 40° | 2.00 | | 45° | 2.00 | | 50° | 1.90 | | 55° | 1.80 | | 60° | 1.70 |3.3 Characteristics
CineWhite™ (Tension Matte White) has broad light dispersion through diffusion uniformity, black & white contrast and true color rendition making it the most versatile in Elite's tensions screen product lines. This tension PVC surface is the best choice for today's high-contrast ratio projectors in commercial or residential
natural_image
Close-up of a sharpened orange pencil tip against a plain white background (no text or symbols)presentations. The CineWhite™ material equals the performance to our MaxWhite product, but improves the experience with the superior surface flatness. Uniform diffusion surface has black-backing to eliminate light penetration and is easily washable with mild soap and water.
Features & Benefits
- Multi-layer PVC (Polyvinyl chloride) with texture and surface coating
- Gain: 1.1
• View Angle: 180^ ( 90^ ± LR )
• Full Lambertian Diffuser- no half gain drop
• Produces exceptional picture quality for any presentation - Mildew Resistant
• Active 3D and 4K Ultra HD ready
• Surface can be cleaned with (water) moist cotton cloth
| Specifications | |
| Thickness | 0.27 mm |
| Weight | 350 g/m ^2 |
| Maximum Height | 3.2 M |
| On-axis Gain | 1.1 |
| Half-Gain Angle | Does not reach half gain |
3.4 Gain and Viewing Angle Chart
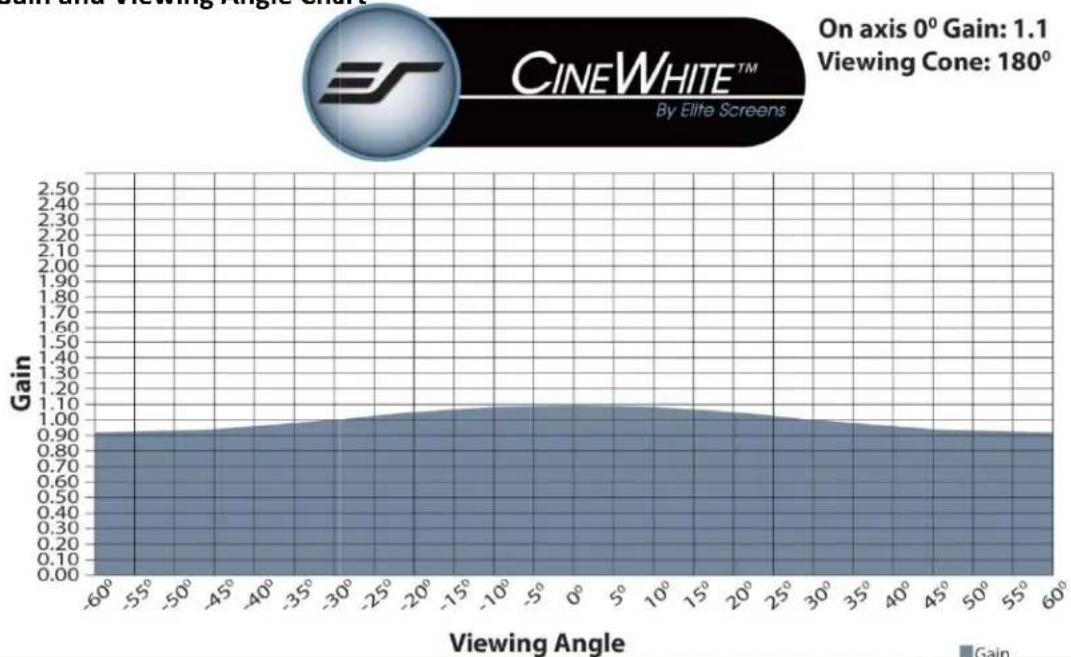
area
| Viewing Angle | Gain | | ------------- | ---- | | -60° | 0.90 | | -55° | 0.90 | | -50° | 0.90 | | -45° | 0.90 | | -40° | 0.90 | | -35° | 0.90 | | -30° | 0.90 | | -25° | 0.90 | | -20° | 0.90 | | -15° | 0.90 | | -10° | 0.90 | | -5° | 0.90 | | 0° | 0.90 | | 5° | 0.90 | | 10° | 0.90 | | 15° | 0.90 | | 20° | 0.90 | | 25° | 0.90 | | 30° | 0.90 | | 35° | 0.90 | | 40° | 0.90 | | 45° | 0.90 | | 50° | 0.90 | | 55° | 0.90 | | 60° | 0.90 |Section 4: Execution
4.1 Care & Use Instructions
- Please be sure to distinguish between the front and back of the screen fabric when setting up the projection screen. CineWhite™ (front projection) has a black backing and WraithVeil (rear projection) is labeled front, back. - Dust, dirt and scratches on the projection surface will affect the picture quality, please take note of the points below to prevent that from occurring:
- Do not touch the projection surface with your hands
- Do not write or draw on the projection surface
- Do not use fingers or sharp objects to point on the projection surface; this will damage the screen material.
- Use a soft-damp cloth to clean the projection surface; do not use chemical cleaning agents or alcohol.
- Use clean water when dampening the cleaning cloth and do not rub against the material to clean it.
◆After using the screen, disassemble it and store it in the carrying bag provided.
◆ To avoid damage and injury, the screen should only be operated by adults.
PRODUCT WHITE PAPER
http://www.elitescreens.com
4.2 Product Description
Design: The aluminum frame is designed to be light weight and easily operated making it easy to carry, assemble and disassemble.
Screen Fabric: The screen fabric is attached to the rectangular frame and held in place by several press studs, which ensure an evenly stretched and flat surface. The CineWhite™ (front projection) and WraithVeil (rear projection) screen materials are durable and can be folded many times without causing damage or distortion to the surface.
Correct usage of the projection screen will ensure better viewing results.
For front projection, assemble and view the screen as indicated in Fig.1.
For rear projection, assemble and view the screen as indicated in Fig.2.
4.3 Submittals
Content and accessories list: When unpacking the screen, check that all parts are included Parts Diagram
A. Folding frame x1
B. Left and right folding legs x2
C. Screen material bag x1
D. Projection screen material x 1
E. Knob screw x2
F. Eyebolt x2
G. Rope x2
H. Carrying Bag x 1
I. Stakex4
Note: The parts list above is subject to change without notice.
PRODUCT WHITE PAPER
http://www.elitescreens.com
4.4 Frame Assembly and Screen Material Attachment
- Take the folding frame (A) out of the carrying bag (H) and place it on a flat surface. Unfold the longer sections first as shown in Fig.3-4.
Fig. 3 Fig. 4
- Unfold the frame until the latch on the hinge "clicks" into place. Repeat the procedure for the shorter sections.(Fig. 5-6)
Fig. 5
Fig. 6
- Make sure all 4 corners of the frame are at a 90^ angle and the hinged support bar is straight and not bending. (Fig. 7-9)
Fig.7
Fig.8
Fig.9
- Insert the frame legs (B) into the openings located at the left and right bottom sides of the folding frame (A). Secure them by fastening the knob screw (E) into the adjacent hole. Next, screw the eyebolts (F) into the openings located at the top of the frame (Fig.10).
Fig.10
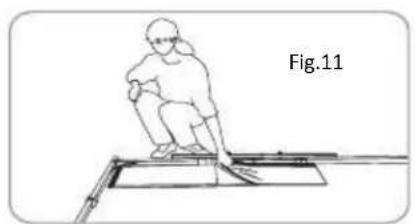
- Take the screen material (D) out of the screen material bag (C) and align the corners of the screen material with the inside corners of the frame. Unfold as shown in the diagram (Fig.11-12).
natural_image
Line drawing of a person sitting on a bench with a ladder, labeled Fig.11 (no text or symbols in the diagram itself)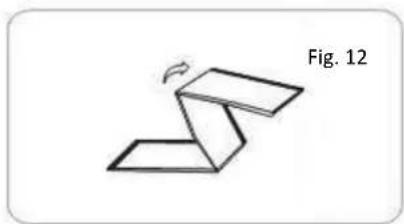
natural_image
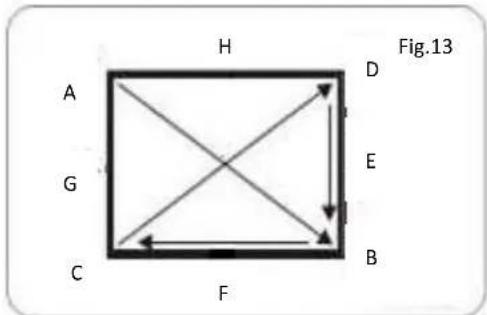
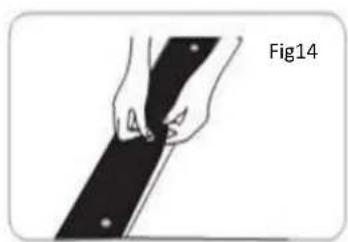
Simple line drawing of a folded paper or sheet with a label 'Fig. 12' (no other text or symbols)- Once the screen material (D) is fully extended, secure the material by snapping the buttons onto the frame studs as shown in Fig. 13-15. Fasten the buttons in the following order AB→CD→EF→GH.
flowchart
graph TD
    A["A"] --> H["H"]
    G["G"] --> H["H"]
    C["C"] --> H["H"]
    F["F"] --> H["H"]
    D["D"] --> H["H"]
    E["E"] --> H["H"]
    B["B"] --> H["H"]
    style H fill:#f9f,stroke:#333
    style A fill:#ccf,stroke:#333
    style G fill:#ccf,stroke:#333
    style C fill:#ccf,stroke:#333
    style F fill:#ccf,stroke:#333
    style D fill:#ccf,stroke:#333
    style E fill:#ccf,stroke:#333
    style B fill:#ccf,stroke:#333
    style B fill:#ccf,stroke:#333
    style F fill:#ccf,stroke:#333
natural_image
Illustration of a hand holding a black object with a small mark, labeled Fig14 (no text or symbols on the object itself)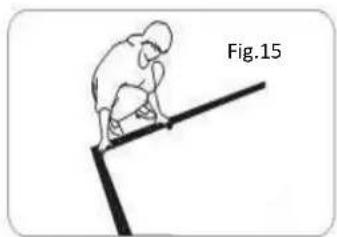
natural_image
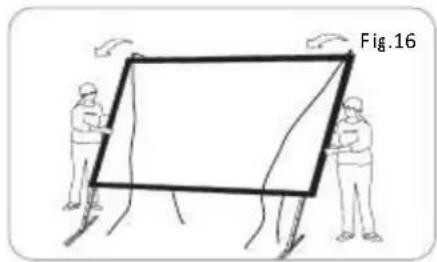
Simple line drawing of a person climbing a ladder (no text or symbols)- Tie 4 pieces of rope (2 on the left and 2 on the right) to the eyebolts (F) that are located at the top of the frame. Next, lift the screen up while simultaneously opening the frame legs. Two people are needed for this step. Fig.16-17
natural_image
Illustration of two workers installing or maintaining a large rectangular frame, labeled Fig.16 (no text or symbols on the diagram itself)
natural_image
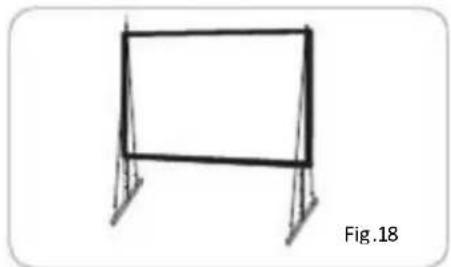
Pure technical diagram showing a vertical line intersecting two parallel lines with no text or symbols- To secure the frame, place a stake (I) into each hole located on the frame footing, and hammer it into the ground. Finally, tie the 4 ropes (G) to the stakes to prevent the screen from tilting or falling over. As shown in Fig.18.
natural_image
Simple line drawing of a rectangular frame mounted on a stand, labeled Fig.18 (no text or symbols on the diagram itself)Screen Disassembly
- Remove ropes (G) and stakes (I) from the ground.
- Unlatch the hinged support bars on front side of each leg so that it is bent and fold that half of the legs up for the next step.
-
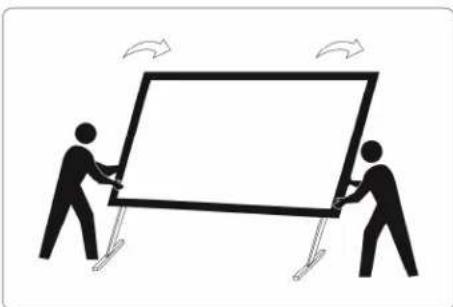
Slowly lower the screen to the ground (towards the closed legs). Two people are needed for this step.
-
Unlatch the hinged support bars and fold down other half of legs.
-
Loosen and remove the ropes, knob screws (E) and eyebolts (F) from each leg.
natural_image
Two stick figures holding a blank board with arrows indicating rotation (no text or symbols)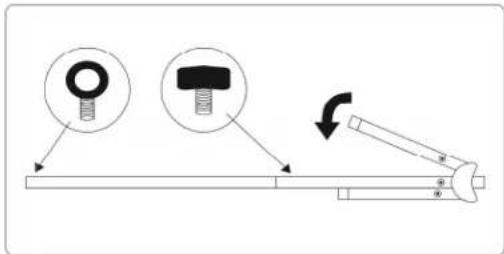
text_image
Diagram illustrating mechanical assembly with labeled parts and directional arrow indicating motion- Remove the frame legs (B) from the folding frame (A).
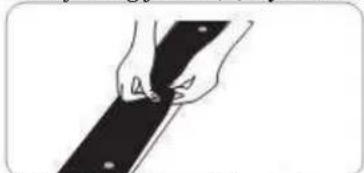
- Detach the screen material (D) from the folding frame (A) by carefully unsnapping each button as shown.
natural_image
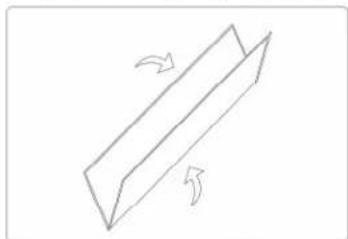
Illustration of hands holding a black strip with small dots, no text or symbols present- Fold screen material (D) in half, folding the bottom of the screen towards the top. Then, fold in half again in the same way. Lastly, fold the material into thirds to condense the length, see Fig. 19 - 21.
*If you prefer to roll the material, instead of folding into thirds, roll from one end to the other after folding in half
twice.
natural_image
Simple line drawing of a 3D rectangular block with two curved arrows indicating rotation or flow (no text or symbols)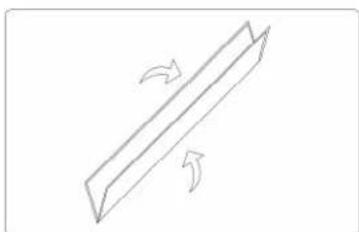
natural_image
Simple line drawing of a rectangular object with two curved arrows indicating rotation or movement (no text or symbols)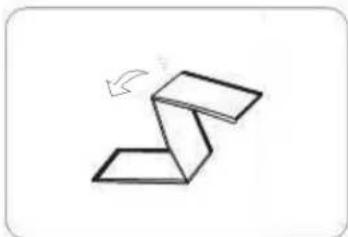
natural_image
Simple line drawing of a folded paper or sheet structure with an arrow indicating rotation (no text or symbols)- Unlatch the hinged support bars in each corner of the folding frame (A).
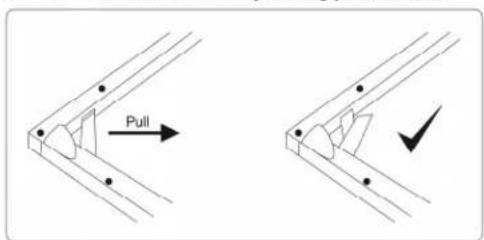
text_image
Pull- Press in the silver locking buttons, near the folding joints, and s lowly gather the sides of the folding frame
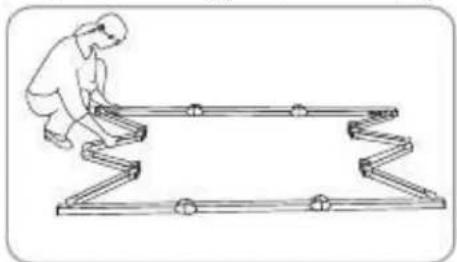
natural_image
Illustration of a person climbing a zigzag metal structure (no text or symbols)- Again, press in the silver locking buttons. Then, pick up one end of the folding frame, and walk it to the other end, folding the longer sections into thirds.
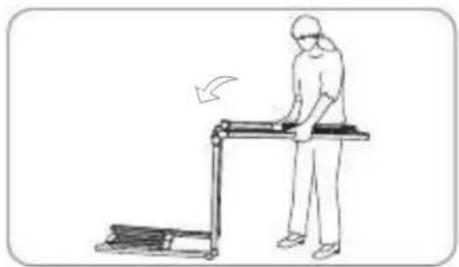
natural_image
Line drawing of a person using a treadmill with an arrow indicating motion (no text or symbols)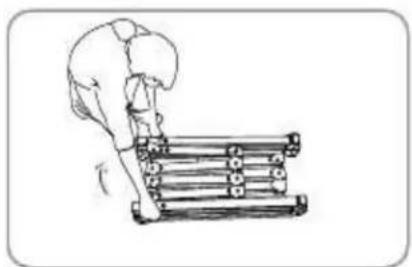
natural_image
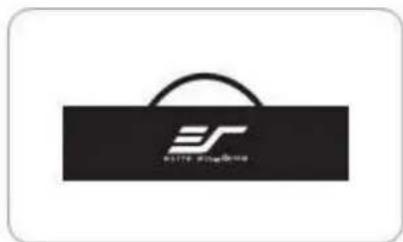
Illustration of a person climbing a wooden beam with weights, no text or symbols present- Store the screen in the provided carrying bag (h). Be sure to place folding frame, legs, and smaller parts into the carrying bag first and place the material on top to keep material from creasing or tearing.
text_image
BUTTER TECHNOLOGYSection 5: Product Specifications
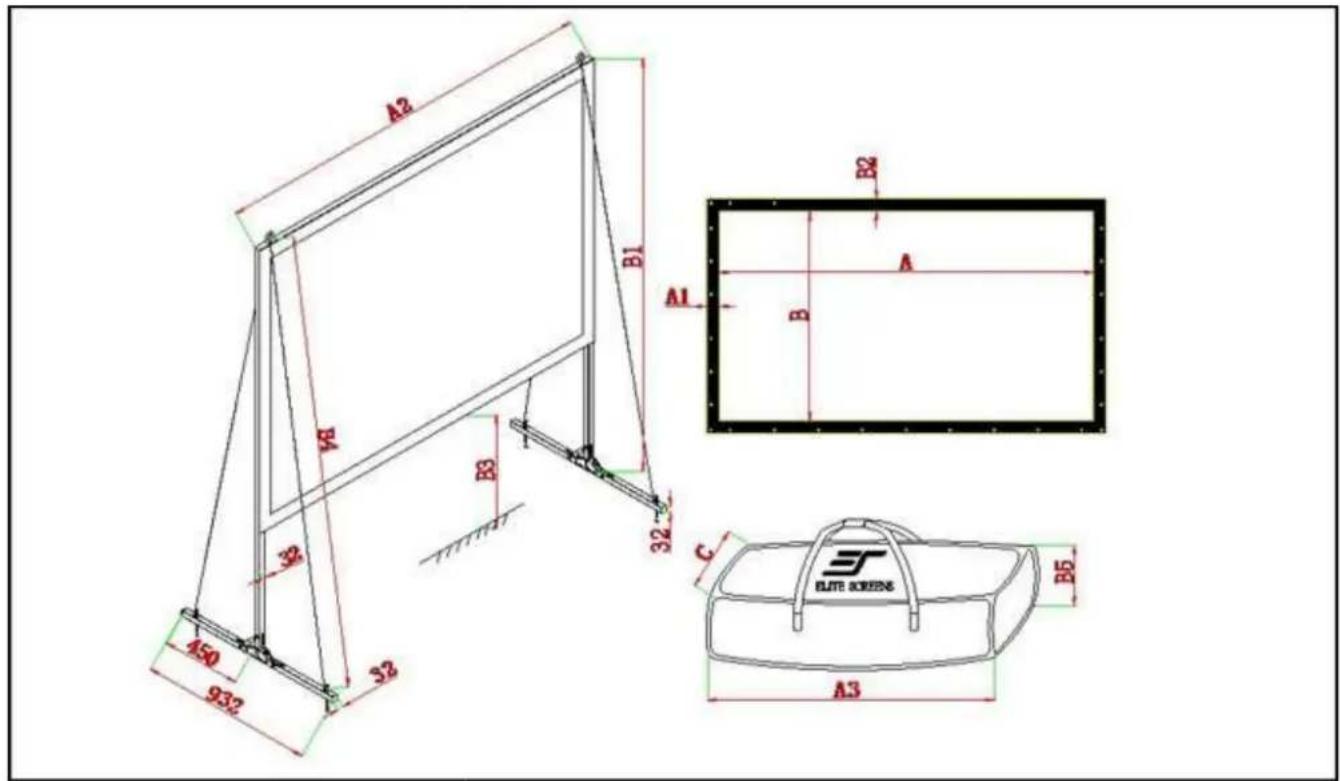
5.1 Dimensions
| Model Number | Screen Diag. & Aspect Ratio | View Width (A) | L/R Border (A1) | Frame length (A2) | View Height (B) | Frame Height (B1) | Top/Bottom Border (B2) | B3 | Rope Length (B4) | A3 | B5 | C | Frame/ Tube Width |
| Unit: Inches | |||||||||||||
| OMS90H2 90" (16:9) 78.4 3.0 | 83.6 | 44.1 | 74.1 | 3.0 | 24.1 | 76.4 | 29.9 7.1 | 9.8 | 1.3 | ||||
| OMS100H2 100" (16:9) 87.1 | 3.0 | 92.3 | 49.0 | 79.1 | 3.0 | 24.1 | 81.2 | 32.7 7.1 | 9.8 | 1.3 | |||
| OMS110H2 110" (16:9) 95.9 | 3.0 | 101.1 | 53.9 | 83.9 | 3.0 | 24.1 | 85.9 | 35.8 7.1 | 9.8 | 1.3 | |||
| OMS120H2 120" (16:9) 104.6 | 3.0 | 109.8 | 58.8 | 88.9 | 3.0 | 24.1 | 90.7 | 38.6 7.1 | 9.8 | 1.3 | |||
| OMS135H2 135" (16:9) 117.7 | 3.0 | 122.9 | 66.1 | 96.2 | 3.0 | 24.1 | 97.9 | 42.9 | 7.1 | 9.8 | 1.3 | ||
| OMS90V2 90" (4:3) 72.0 3.0 | 77.2 | 54.0 | 84.1 | 3.0 | 24.1 | 86.0 | 31.9 | 7.1 | 9.8 | 1.3 | |||
| OMS100V2 100" (4:3) 80.0 | 3.0 | 85.2 | 60.0 | 90.0 | 3.0 | 24.1 | 91.9 | 35.0 | 7.1 | 9.8 | 1.3 | ||
| OMS110V2 110" (4:3) 88.0 | 3.0 | 93.2 | 66.0 | 96.0 | 3.0 | 24.1 | 97.8 | 37.8 | 7.1 | 9.8 | 1.3 | ||
| OMS120V2 120" (4:3) 96.0 | 3.0 | 101.2 | 72.0 | 102.0 | 3.0 | 24.1 | 103.7 | 40.7 | 7.1 | 9.8 | 1.3 | ||
| OMS135V2 135" (4:3) 108.0 | 3.0 | 113.2 | 81.0 | 111.0 | 3.0 | 24.1 | 112.5 | 44.9 | 7.1 | 9.8 | 1.3 | ||
| OMS90HR2 | 90" (16:9) 78.4 3.0 | 83.6 | 44.1 | 74.1 | 3.0 | 24.1 | 76.4 | 29.9 | 7.1 | 9.8 | 1.3 | ||
| OMS100HR2 | 100" (16:9) 87.1 3.0 | 92.3 | 49.0 | 79.1 | 3.0 | 24.1 | 81.2 | 32.7 | 7.1 | 9.8 | 1.3 | ||
| OMS110HR2 | 110" (16:9) 95.9 3.0 | 101.1 | 53.9 | 83.9 | 3.0 | 24.1 | 85.9 | 35.8 | 7.1 | 9.8 | 1.3 | ||
| OMS120HR2 | 120" (16:9) 104.6 3.0 | 109.8 | 58.8 | 88.9 | 3.0 | 24.1 | 90.7 | 38.6 | 7.1 | 9.8 | 1.3 | ||
| OMS135HR2 | 135" (16:9) 117.7 3.0 | 122.9 | 66.1 | 96.2 | 3.0 | 24.1 | 97.9 | 42.9 | 7.1 | 9.8 | 1.3 | ||
| OMS90VR2 | 90" (4:3) 72.0 3.0 | 77.2 | 54.0 | 84.1 | 3.0 | 24.1 | 86.0 | 31.9 | 7.1 | 9.8 | 1.3 | ||
| OMS100VR2 100" (4:3) 80.0 | 3.0 | 85.2 | 60.0 | 90.0 | 3.0 | 24.1 | 91.9 | 35.0 | 7.1 | 9.8 | 1.3 | ||
| OMS110VR2 110" (4:3) 88.0 | 3.0 | 93.2 | 66.0 | 96.0 | 3.0 | 24.1 | 97.8 | 37.8 | 7.1 | 9.8 | 1.3 | ||
| OMS120VR2 120" (4:3) 96.0 | 3.0 | 101.2 | 72.0 | 102.0 | 3.0 | 24.1 | 103.7 | 40.7 | 7.1 | 9.8 | 1.3 | ||
| OMS135VR2 135" (4:3) 108.0 | 3.0 | 113.2 | 81.0 | 111.0 | 3.0 | 24.1 | 112.5 | 44.9 | 7.1 | 9.8 | 1.3 | ||
| Unit: mm | |||||||||||||
| OMS90H2 | 90" (16:9) 1992 | 75 | 2124 | 1120 | 1883 | 75 | 613 | 1940 | 760 180 | 250 | 32 | ||
| OMS100H2 100" (16:9) | 2214 | 75 | 2346 | 1245 | 2008 | 75 | 613 | 2061 | 830 180 | 250 | 32 | ||
| OMS110H2 110" (16:9) | 2435 | 75 | 2567 | 1368 | 2131 | 75 | 613 | 2181 | 910 180 | 250 | 32 | ||
| OMS120H2 120" (16:9) | 2657 | 75 | 2790 | 1494 | 2257 | 75 | 613 | 2305 | 980 180 | 250 | 32 | ||
| OMS135H2 135" (16:9) | 2990 | 75 | 3122 | 1680 | 2443 | 75 | 613 | 2487 | 1090 180 | 250 | 32 | ||
| OMS90V2 90" (4:3) 18 | 29 | 75 | 1961 | 1372 | 2135 | 75 | 613 | 2185 | 810 180 | 250 | 32 | ||
| OMS100V2 100" (4:3) 2032 | 75 | 2164 | 1524 | 2287 | 75 | 613 | 2334 | 890 180 | 250 | 32 | |||
| OMS110V2 110" (4:3) 2235 | 75 | 2367 | 1676 | 2439 | 75 | 613 | 2483 | 960 180 | 250 | 32 | |||
| OMS120V2 120" (4:3) 2438 | 75 | 2570 | 1829 | 2592 | 75 | 613 | 2634 | 1035 180 | 250 | 32 | |||
| OMS135V2 135" (4:3) 2743 | 75 | 2875 | 2057 | 2820 | 75 | 613 | 2858 | 1140 180 | 250 | 32 | |||
| OMS90HR2 | 90" (16:9) 1992 | 75 | 2124 | 1120 | 1883 | 75 | 613 | 1940 | 760 180 | 250 | 32 | ||
| OMS100HR2 100" (16:9) 2214 | 75 | 2346 1245 | 2008 | 75 613 | 2061 | 830 | 180 | 250 | 32 | ||||
| OMS110HR2 110" (16:9) 2435 | 75 | 2567 1368 | 2131 | 75 613 | 2181 | 910 | 180 | 250 | 32 | ||||
| OMS120HR2 120" (16:9) 2657 | 75 | 2790 1494 | 2257 | 75 613 | 2305 | 980 | 180 | 250 | 32 | ||||
| OMS135HR2 135" (16:9) 2990 | 75 | 3122 1680 | 2443 | 75 613 | 2487 | 1090 | 180 | 250 | 32 | ||||
| OMS90VR2 90" (4:3) 1829 | 75 | 1961 1372 | 2135 | 75 613 | 2185 | 810 | 180 | 250 | 32 | ||||
| OMS100VR2 100" (4:3) 2032 | 75 | 2164 1524 | 2287 | 75 613 | 2334 | 890 | 180 | 250 | 32 | ||||
| OMS110VR2 110" (4:3) 2235 | 75 | 2367 1676 | 2439 | 75 613 | 2483 | 960 | 180 | 250 | 32 | ||||
| OMS120VR2 120" (4:3) 2438 | 75 | 2570 1829 | 2592 | 75 613 | 2634 | 1035 | 180 | 250 | 32 | ||||
| OMS135VR2 135" (4:3) 2743 | 75 | 2875 2057 | 2820 | 75 613 | 2858 | 1140 | 180 | 250 | 32 | ||||
5.2 Drawings
text_image
A2 B1 A1 B2 A B3 32 32 32 450 932 B5 C ELITE SCREENS A35.3 Pictures
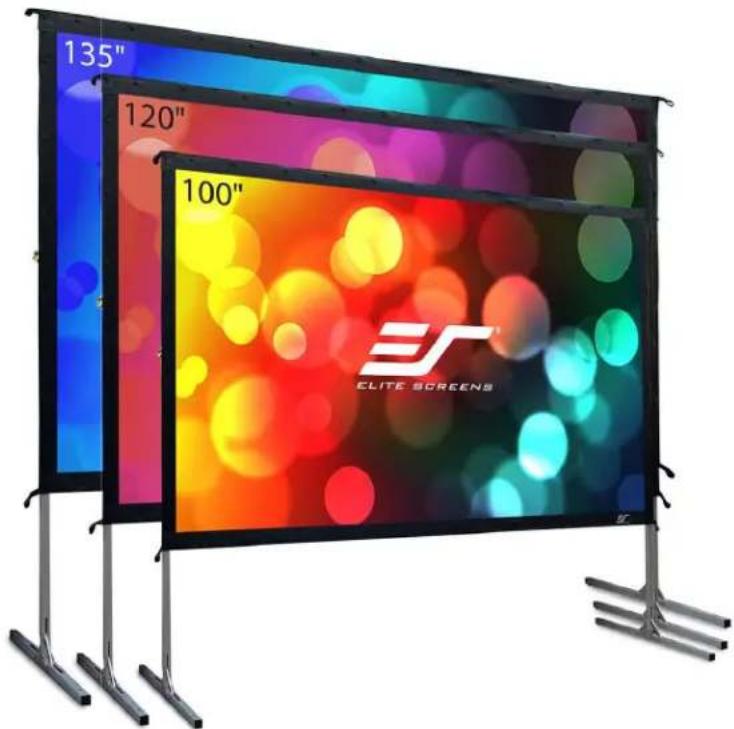
Yard Master 2 Series Sizes
text_image
135" 120" 100" ELI 3D SREEN 3CFrame and Screen Material Detail
text_image
ELITE SCREENS ESElite Screens Inc. | Elite Screen GmbH | Elite ScreFrance SAS | Elite Screens India | Elite Screens China Ltd.
Elite Seens Taiwan Corp. | Elite Screens Japan | Elite Screens Australia
Carrying Bag Detail
natural_image
Two black plastic bags labeled 'ELITE SCREENS' and an open case with metal hardware (no text on bags or interior)Stake, Rope, and Eyebolt Detail
natural_image
Illustration of three black metal tools with threaded tips and two white yarn tied in bundles, accompanied by two hanging rings (no text or symbols)Life Style
text_image
ELITE SCREENSElite Screens Inc. | Elite Screen GmbH | Elite ScreFrance SAS | Elite Screens India | Elite Screens China Ltd.
Elite Seens Taiwan Corp. | Elite Screens Japan | Elite Screens Australia
text_image
ELITE SCREENSSection 6: About Elite Screens
6.1 Company Description
Elite Screens Inc. is a California based company that specializes in making quality commercial and home-theater projection screens for the retail and custom install sales channels. Our company began as an innovative venture into the projection market by manufacturing veterans from the AV/IT industry. Elite Screens quickly established itself as an entry level commercial and home theater screen manufacturer. This was accomplished by making a quality product cost effective with a focus on mass-producing screen material, sizes and aspect ratios that were most commonly preferred by AV customers in general. We focused on uniformity with what would match the mainstream demographic while including extra features that are not usually included by other manufacturers. In time, we progressed from just retail sales into the realm of custom installer/integrator manufacture as our numerous reviews and awards will attest. We stand behind our product and are so certain of customer satisfaction with the quality of our product that we offer a 2-year manufacturer's warranty which is twice the industry standard.
In our continued devotion to excellence in products and service, we are committed to implementing green practices with our production. We have adopted manufacturing methods that promote conservative regulation of our energy needs. Our simple product designs combined with the expertise of our permanent staff ensures that our entire line of products are made by experienced hands devoted to the high standards of today's audio-video consumer.
###