
LRI2854310 - Washing machine BLOMBERG - Free user manual and instructions
Find the device manual for free LRI2854310 BLOMBERG in PDF.


User questions about LRI2854310 BLOMBERG
0 question about this device. Answer the ones you know or ask your own.
Ask a new question about this device
Download the instructions for your Washing machine in PDF format for free! Find your manual LRI2854310 - BLOMBERG and take your electronic device back in hand. On this page are published all the documents necessary for the use of your device. LRI2854310 by BLOMBERG.
USER MANUAL LRI2854310 BLOMBERG
natural_image
Simple line drawing of a T-shirt with abstract circular elements above it, resembling a stylized icon (no text or symbols)LRI2854310
Please read these instructions first before using your appliance
Dear Customer,
Thank you for choosing a Blomberg appliance. Please take some time to read this user manual before using your appliance, to ensure you know how to safely operate the controls and functions. Carefully follow all unpacking and installation instructions to ensure the appliance is correctly connected and fitted prior to use. Please write your product model and serial number on the last page of this user manual, and store in a safe location close to the appliance for easy future reference. This user manual may also be applicable for several other models. Differences between models will be listed. If you have any questions or concerns, please call our contact centre or find help and information online at www.beko.co.uk Explanation of symbols used throughout this User Manual

DANGER!
- Warning for electric shock.

DANGER!
• Product weight warning

DANGER!
- Fire risk warning.

CAUTION!
- Warning for hazardous situations with regard to life and property.

PRECAUTION!
- Precautions that need to be taken.

INFORMATION
- Important information or useful hints about usage.
- Read user manual.

- Packaging materials of the product are manufactured from recyclable materials in accordance with regulations. - Do not dispose of the Packaging materials together with the domestic or other wastes. Take them to the packaging material collection points designated by the local authorities.
1 Important instructions for safety and environment
Thissectioncontainssafetyinstructions that will help protect from risk of personal injury or property damage. Failure to follow these instructions shall invalidate any warranty.
1.1 General safety

CAUTION!
- This product can be used by childrenatandabove8yearsold and by persons whose physical, sensory or mental capabilities were not fully developed or who lack experience and knowledge provided that they aresupervised or trained on the safe usage of the product and other risks it brings out. Children should not play with the device. Cleaning and maintenance work should not be performed by children unless they are supervised by someone. Children under the age of 3 should be kept away unless continuously supervised.

PRECAUTION!
- Never place the product on a carpet-coveredfloor. Otherwise, lackofairflowbeneaththemachine will cause electrical parts to overheat. This will cause problems with your product.

INFORMATION
• Always have the installation procedures carried out by the competentpersons.Manufacturer shallnotbeheldliablefordamages that may arise from procedures carriedoutbyunauthorisedpersons.

PRECAUTION!
- If the product will be used inside awardrobe/cabinet/module, it is recommended to keep the door of the wardrobe/cabinet/module open during operation in cases where there are no opening stop provide sufficient air circulation.
1.1.1 Electrical safety

DANGER!
- If the product has a failure, it should not be operated unless it is repaired by the Authorised Service Agent. There is the risk of electric shock!
- Never wash the product by spreadingorpouringwaterontoit! There is the risk of electric shock!

CAUTION!
- If the power cable is damaged, it must be replaced by the manufacturer, after sales service or a similarly qualified person (preferably an electrician) or someonedesignated by the importer in order to avoid possible risks.
A
PRECAUTION!
- Unplugtheproductwhenitisnot in use.
- Nevertouchtheplugwithwethands! Neverunplugbypullingonthecable, alwaysunplugbyholdingtheplug.
- Product should be unplugged during installation, maintenance, cleaning and repair procedures.
- Do not make connections via extensioncablesormulti-plugs.
C
INFORMATION
- Thisproductisdesignedtoresume operatingintheeventofpowering onafterapowerinterruption.Ifyou wishtocanceltheprogramme,see "Cancellingtheprogramme"section.
1.1.2 Product safety
B
DANGER!
- Never open the loading door or remove the filter while there is stillwaterinthedrum. Otherwise, riskofflooding and injury from hot water will occur.
A
CAUTION!
- The water supply and draining hoses must be securely fastened and remain undamaged. Otherwise, there is the risk of water leakage.
A
PRECAUTION!
- Theproductshouldbeusedwithout removing the upper plate.
C
INFORMATION
- Do not force open the locked loadingdoor.Doorcanbeopened a few minutes after the washing cycleends.Ifthemachinehasnot cooled enough at the end of the programme,loadingdoorcannot beopened.Donotforcetheloading doortoopen.Itmustbelefttocool itself.Theloadingdoorandthelock mechanism may get damaged.
- In the installation location of this product, there must not be a lockable, sliding or hinged do that will restrict the full opening of the loading door.
- Followtheinstructionsonthetextile tagsandonthedetergentpackage.
- Useonlydetergents,softenersand supplementssuitableforwashing machines.
- Donotinstallorleavethisproduct inplaceswhereitmightbeexposed to outdoor conditions.
• Controlsmustnotbetamperedwith.
- Ifanon-self-resettingthermalcut-out is required in order to comply with the standard then the instructions for appliances incorporating anon-self-resettingthermalcutout that is reset by disconnection of the supply mains shall contain the substance of the following:
CAUTION: Inordertoavoidahazard duetoinadvertentresetting of the thermalcut-out, this appliance must not be supplied through an external switching device, such as a timer, or connected to a circuit that is regularly switched on and off by the utility.
1.1.3 Warnings for drying

DANGER!
- Laundrythatispreviouslywashed, cleaned, soiled or stained with petrol / gasoline, dry cleaning solvents or other flammable or explosivesubstancesmustnotbedriedinthemachineastheygive outflammableorexplosivesteam. It may cause fire risk.

DANGER!
- Laundry stained with Liquid cooking oil, acetone, alcohol, petrol, kerosene, spotremovers, turpentine, waxes and wax removers must bewashed in hot water with plenty of detergent before drying. It may cause firerisk.
- Foamrubber(latexfoam), shower caps, waterproof textiles, clothes or pillows with rubbersupportor rubber foam pads must not be dried with drying function. It may cause fire risk.
- If you use washing ball, detergent scale, laundry clothing cages and balls in your machine, they can melt during drying. Do not use these products if drying option will be selected. It may cause firerisk.
- Whenyouuseindustrialchemicals for cleaning, do not use drying function. It may cause fire risk.
B
DANGER!
- Donottouch loading doorglass withbarehandsafterdrying.There is the risk of getting burnt.
- In order to maintain laundry in a temperature that will prevent them from getting damaged, a cooling step is performed as a final step. You may be exposed to hot steam if you open the door before cooling is complete. There is the risk of scalding.
B
DANGER!
- If the drying programmes are interrupted(asaresultofprogramme cancellationorpowerfailure),laundry inthemachinecanbehot.Becareful.
A
CAUTION!
- Do not stop the machine before dryingprogrammeiscompleted. If you have to stop the machine, removealllaundryandlaythemina suitableplacetoletthemcooldown.
- Yourproductissuitabletooperatein ambienttemperaturesbetween0°C and +35°C.

CAUTION!
- Ambienttemperaturesbetween15°C and +25°Careidealtemperatures for your product.
- Do not let pets enter the product. Checkinsidetheproductbeforeusing.
- Do not overload the machine for drying. Observethemaximumload levels specified for drying.

PRECAUTION!
- Donotdryleatherlaundryorlaundry thatcontainsleather(suchasleather jeanslabel).ThecolourfromLeather parts can run into other textiles.
- Infailuresthatcannotberepaired usinginformationgiveninsafety instructions,turnoffthemachine, unplugthepowercableandcallthe Authorised Service Agent.
- You can just wash laundry, just dry laundry or wash and dry laundry in your washer-dryer. Machinemust not be used only to dry wet loads for a long time. When machine is used only for drying, it must be operated empty without loading laundry in a short wash programme after every 15 operation.
- Checkall clothes before loading them into the machine and ensure that they donothave objects such as lighters, coins, metal pieces, needles in the pockets or inside.
- Underwearwithmetalsupportsmust not be dried in the machine. Metal supportsmightcomeoffduringdrying andcauseddamageinthemachine. Place in a bag or pillowcase.

PRECAUTION!
- Donotdrylargelaundrysuchastulle curtain,curtain,bedding,blanket,rug inthemachine.Yourlaundrymightget damaged.

INFORMATION
- Donotdryunwashedlaundryinthe machine.
- Donotusefabricsoftenersorstatic preventersinthemachineunless recommendedbythemanufacturer.
- Productssuchasfabricsofteners mustbeusedinaccordancewith manufacturer's instructions.
- Donotdrysensitiveclothessuchassilk, wool, etc. in the machine. Otherwise, woolclothesmaygetshrunkenandother sensitive clothes may get damaged.
- Checksymbolsonthegarmenttag before washing and drying.
1.2 Intended use

INFORMATION
- Thisproducthasbeendesignedfor domestic use. It is not suitable for commercial use and it must not be used out of its intended use.
- The product must only be used for washing, rinsing and drying of textile product that are remarked accordingly.
- The manufacturer waives any responsibilityarisenfromincorrect usage or transportation.
- The service life of your product is 10 years. During this period, original spare parts will be available to operate the product properly.
- This appliance is intended to be used in household and similar applications such as:
–staffkitchenareasinshops,offices and otherworkingenvironments; - farm houses;
– by clients in hotels, motels and otherresidentialtypeenvironments; - bed and breakfast type environments;
-areasforcommunaluseinblocks of flats or in launderettes.
1.3 Children's safety

CAUTION!
• Childrenbelowtheageof3mustbe keptawayfromthemachineunless theyarecontinuouslysupervised.
- Packagingmaterialsaredangerousto children.Keeppackagingmaterialsin a safe place away from reach of the children.
- Electrical products are dangerous for the children. Keep children away from the product when it is in use. Donot allow them to play with the product. Use child lock to prevent children from intervening with the product.
- Do not forget to close the loading doorwhenleavingtheroomwhere the product is located.
- Storealldetergentsandadditivesin asafe placeawayfromthereach of thechildrenbyclosingthecoverof thedetergentcontainerorsealingthe detergent package.
1.4 Compliance with WEEE Directive and disposing of the waste product
This product does not contain harmful and forbidden materials described in the "Regulation on the Control of the Waste Electrical and Electronic Equipment". It complies with the WEEE Directive.
| This product has been manufactured with high quality parts and materials which can be reused and are suitable for recycling. Therefore, do not dispose the product with normal domestic waste at the end of its service life. Take it to a collection point for the recycling of electrical and electronic equipment. Please consult your local authorities to learn the nearest collection point. |
Help protect the environment and natural resources by recycling used products. For children's safety, cut the power cable and break the locking mechanism of the loading door so that it will be non-functional before disposing of the product. Compliance with RoHS Directive: The product you have purchased complies with EU RoHS Directive (2011/65/EU). It does not contain harmful and prohibited materials specified in the Directive.
1.5 Package information
Packaging materials of the product are manufactured from recyclable materials in accordance with our National Environment Regulations. Do not dispose of the packaging with normal domestic waste. Take them to the packaging material collection points designated by the local authorities.
2 Your washer-dryer
2.1 Overview
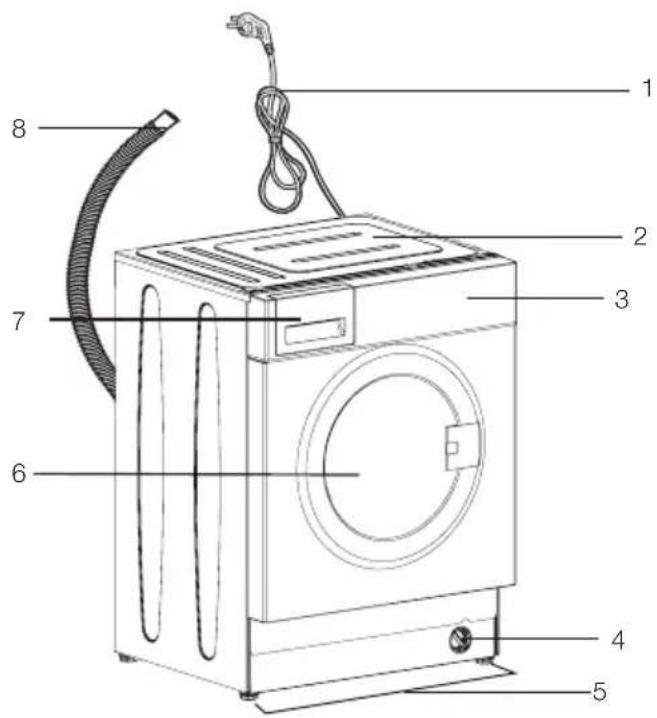
text_image
Labeled diagram of a washing machine with numbered parts for identification1- Power cable
2- Top panel
3- Control panel
4- Filter cover
5- Adjustable feet
6- Loading door
7- Detergent drawer
8- Water discharge hose
2.2 Package contents
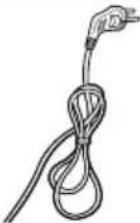 | Power cable | 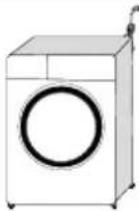 | 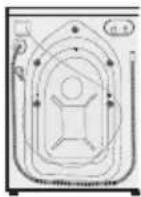 |
 | Water discharge hose | 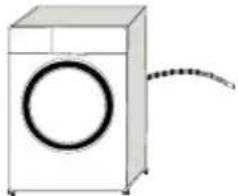 | 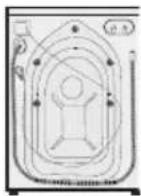 |
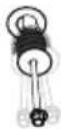 | Transit bolts | 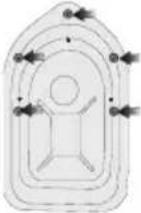 | |
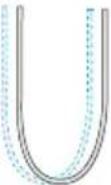 | Mains water inlet hose | 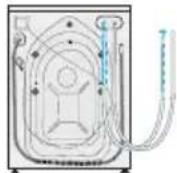 | 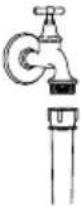 |
 | User manual | ||
 | Plastic plug group | 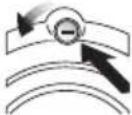 | |
 NOTE NOTE | • Figures in this manual are schematic and may not match the product exactly. | ||
NOTE
2.3 Technical specifications
| Supplier name or trademark BLOMBERG | |
| Model name | LRI2854310 |
| 7162544000 | |
| Maximum spin speed (rpm) 1400 | |
| Washing capacity (cotton) (kg) 8 | |
| Drying capacity (cotton) (kg) 5 | |
| Built-in Yes | |
| Height (cm) 82 | |
| Width (cm) 60 | |
| Depth (cm) 55 | |
| Single Water inlet / Double Water inlet | •/ - |
| • Available | |
| Electrical input (V/Hz) 230 V / 50Hz | |
| Total current (A) 10 | |
| Total power (W) | 2200 |
| Main model code | 9620 |

INFORMATION
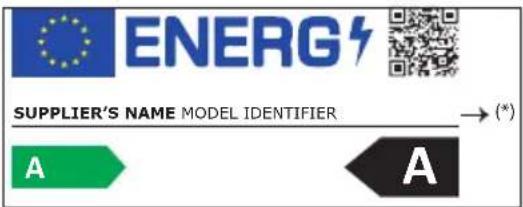
text_image
ENERG SUPPLIER'S NAME MODEL IDENTIFIER → (*) A A- The model information as stored in the product database can be reached by entering following website and searching for your model identifier (*) found on energy label.
https://eprel.ec.europa.eu/
Symbols Table
 |  |  |  |  |  |  |  |  |  |  |  |  |  |  |
| Prewash | Fast | Fast+ | Extra Rinse | Extra Water | Anti Crease | Pet Hair Removal | Steam | Night Modu | Soaking | Rinse Hold | Steeping | AutoDose | Liquid Detergent Selection | Softener Selection |
 |  |  |  |  |  | [YSXK] |  |  |  |  |  |  |  |  |
| Rinse | Spin+Drain | Drain | Temperature | Spin | No Spin | Tap Water (Cold) | No Water | Time Delay | Door Lock | Child Lock | On/Off | Start / Pause | Soil Level | Add Garment |
 |  |  |  |  |  |  |  |  |  | |||||
| Wash | Ok(End) | Cancel | AntiCrease+ | Drying | Extra Dry | Cupboard Dry | Iron Dry | Timed Drying | Clean& Wear |
3 Installation
To make the product ready for use, review the information in the user manual and make sure that the electricity, tap water supply and water drainage systems are appropriate. If they are not, call a qualified technician and plumber to have any necessary arrangements carried out.
B
DANGER!
- Make sure that the installation and electrical connections of the product are performed by competent persons. Manufacturer shall not be held liable for damages that may arise from procedures carried out by unauthorised persons.

DANGER!
- Your product is too heavy for one person to carry.

CAUTION!
- Prior to installation, visually check if the product has any defects on it. If so, do not have it installed. Damaged products cause risks for your safety.

PRECAUTION!
- Preparation of the location and electrical, tap water and waste water installations at the place of installation is under customer's responsibility.
- Make sure that the water inlet and discharge hoses as well as the power cable are not folded, pinched or crushed while pushing the product into its place after installation or cleaning procedures.
3.1 Appropriate installation location
- Place the product on a solid and level floor. Do not place it onto a carpet with high pile or other similar surfaces.
- Do not place the product close to the edge if the floor contains steps. Do not also place the product on a platform.
- Do not place the product on the power cable.
- Do not install the product in environments where the temperature falls below 0 °C.(See. Warnings for Drying)
• Leaving a gap at the sides of the machine is suggested to reduce vibration and noise - In the area where this product is installed, there must not be a lockable, sliding or hinged door that will restrict the full opening of loading door.
- Operate the product in a well ventilated and dust free environment.
- Do not place heat sources such as Hobs, Irons, Ovens, etc. on the washing machine and do not use them on the product
3.2 Removing packaging reinforcement
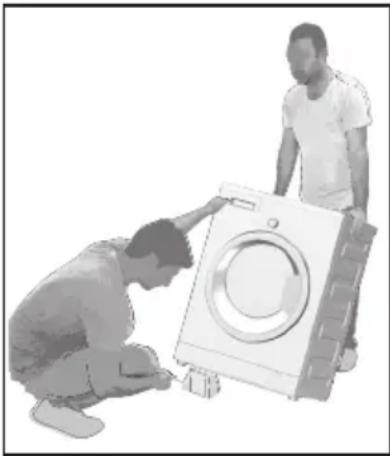
natural_image
Two people inspecting a large washing machine, one kneeling and the other standing beside it (no text or symbols visible)Tilt the machine backwards to remove the packaging reinforcement. Remove the packaging reinforcement attached to the ribbon.
B
DANGER!
- Your product is heavy. Remove packaging reinforcement as displayed in the figure.
- Be careful not to get your hand caught under the machine during this procedure.
3.3 Removing the transit bolts

PRECAUTION!
- Do not remove the transit bolts before removing the packaging reinforcement.
- Remove the transit bolts before operating the washing machine! Otherwise, the product will get damaged.
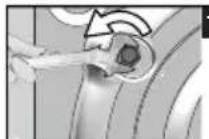
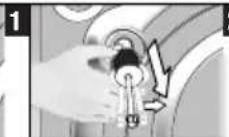
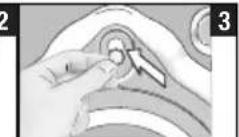
1 Use a tool to loosen all bolts until they rotate freely.
2 Remove the transit bolts by turning them slightly.
3 Attach the plastic covers supplied in the user manual bag into the holes on the rear panel.

INFORMATION
- Keep the transit bolts in a safe place to reuse when the product needs to be moved again in the future.
- Never move the product without the transit bolts properly fixed in place!
3.4 Connecting water supply

INFORMATION
- The water supply pressure required to run the product is between 1 to 10 bars (0.1 – 1 MPa). It is necessary to have 10 – 80 liters of water flowing from the fully open tap in one minute to have your product run smoothly. Attach a pressure reducing valve if water pressure is higher.

CAUTION!
- Models with a single water inlet should not be connected to the hot water tap. In such a case the laundry will get damaged or the product will switch to protection mode and will not operate.
- Do not use old or used water inlet hoses on the new product. It may cause stains on your laundry.
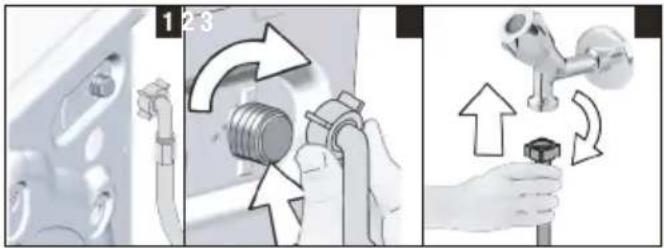
text_image
Diagram illustrating three-step installation of a mechanical component with directional arrows indicating motion or assembly.1 Connect the special hose supplied with the product to the water inlet on the product.

CAUTION!
- Ensure that the cold water connection is made correctly when installing the product. Otherwise, your laundry will come out hot at the end of the washing process and wear out.
2 Tighten the hose nuts securely by hand. Never use a tool when tightening the nuts.
3 Open the taps completely after making the hose connection to check for water leaks at the connection points. If any leak occurs, turn off the tap and remove the nut. Retighten the nut carefully after checking the seal. In order to prevent the water leaks, keep the taps closed when you do not use the product.
3.5 Connecting to the drain
- Attach the end of the drain hose directly to waste water drain, sink or bathtub.

CAUTION!
- Your house will be flooded if the hose comes out of its housing during water discharge. Moreover, there is risk of scalding due to high washing temperatures! To prevent such situations and to ensure smooth water intake and discharge of the machine, fix the end of the discharge hose tightly so that it cannot displace.
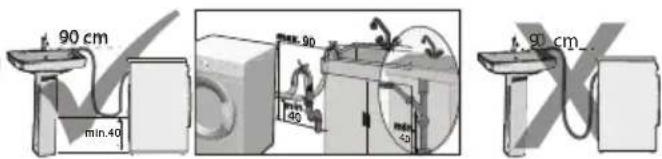
text_image
90 cm min.40 max.90 min.40 min.50 90 cm- Connect the hose to a minimum height of 40 cm and a maximum height of 90 cm.
- If the hose is run along the floor (or at less than 40 cm above it) and raised later on, water drain becomes difficult and laundry may come out extremely wet. Therefore, observe the heights described in the figure.
- To prevent flowing of dirty water back into the machine and to allow for easy discharge, do not immerse the hose end into the dirty water or do not drive it in the drain more than 15 cm. If it is too long, cut it short.
- The end of the hose should not be bent, it should not be stepped on and the hose must not be pinched between the drain and the machine.
- If the length of the hose is too short, add an original extension hose. Length of the hose may not be longer than 3.2 m. To avoid water leak failures, the connection between the extension hose and the drain hose of the product must be fitted well with an appropriate clamp as not to come off and leak.
3.6 Adjusting the feet
natural_image
Four-panel diagram showing mechanical assembly with rotational arrows indicating motion (no text or symbols)
CAUTION!
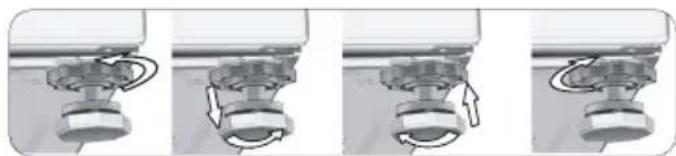
- Adjust feet so that the product will be balanced in the location it will be used.
• Balance the machine by adjusting the feet. - Check for any play by pressing the product from upper diagonal edges.
- Otherwise, the product may move from its place and cause crushing, noise and vibration problems.
- Do not use any tools to loosen the lock nuts. Otherwise, the lock nuts may get damaged.
a) Loosen the lock nuts on the feet by hand.
b) Adjust the feet until the product stands level and balanced.
c) Tighten all lock nuts again by hand.
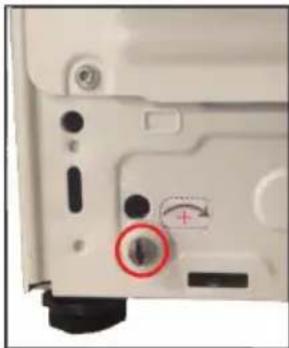
Adjusting Rear Feet
natural_image
Close-up of a device rear panel showing a button labeled '↓' with a red circle and plus sign, no readable text or symbols present.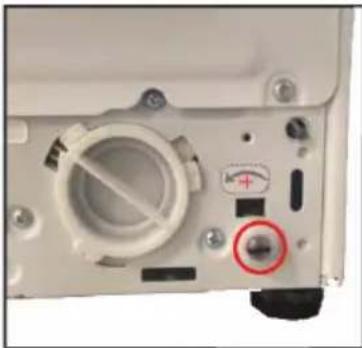
natural_image
Close-up of a mechanical device's front panel showing a rotary knob and adjustment knob (no text or symbols visible)- When you turn the knob (visible in the circle) in the direction of the arrow, the machine will be elevated by 0.3 mm. When you turn it in the opposite direction of the arrow, the machine will be lowered by 0.3 mm.
- Do not adjust the rear feet by using chargeable devices. Use a screwdriver instead.
3.7 Electrical connection
Connect the product to a grounded outlet protected by a 13 A fuse. Our company shall not be liable for any damages that will arise when the product is used without grounding in accordance with the local regulations.
- Connection must comply with national regulations.
- The wiring for the electrical outlet circuit must be sufficient to meet the appliance requirements. Use of a Groud Fault Circuit Interrupter (GFCI) is recommended.
- Power cable plug must be within easy reach after installation.
- If the current value of the fuse or breaker in the house is less than 13 Amps, have a qualified electrician install a 13 Amp fuse.
- The voltage specified in the "Technical specifications" section must be equal to your mains voltage.

DANGER!
- Damaged power cables must be replaced by the Authorised Service Agent.
Important
Fitting a different plug
As the colours of the wires in the mains lead of this appliance may not correspond with the coloured markings identifying the terminals on your plug, proceed as follows:
1 Connect the green - yellow or green (earth) wire to the terminal in the plug marked 'E' or with the symbol f or coloured green and yellow or green.
2 Connect the blue (neutral) wire to the terminal in the plug marked 'N' or coloured black.
3 Connect the brown (live) wire to the terminal in the plug marked 'L' or coloured red.
With the alternative plugs a 13A fuse must be fitted either in the plug or adaptor or in the main fuse box. If in doubt contact a qualified electrician.
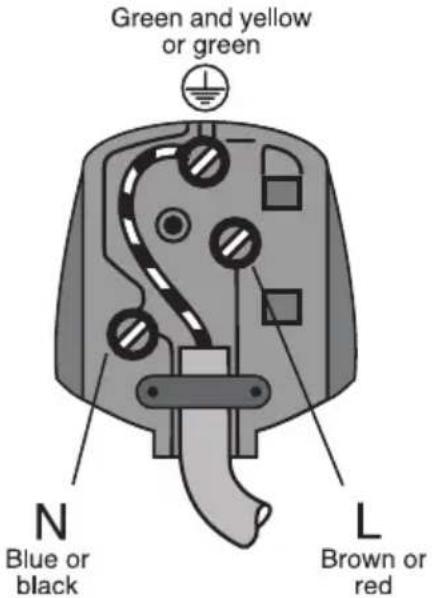
text_image
Green and yellow or green N Blue or black L Brown or red3.8 Transportation of the product
1 Unplug the product before transporting it.
2 Remove water drain and water supply connections.
3 Drain all water that has remained in the product. See 6.5
4 Install the transit bolts in reverse order of the disassembly procedure. See 3.3
B
DANGER!
- Your product is too heavy for one person to carry.
- Your product is heavy; two persons must carry it and extra precaution taken on stairs. If your product falls on you, it may cause injuries.
A
CAUTION!
- Packaging materials are dangerous to children. Keep packaging materials in a safe place away from reach of the children.
C
INFORMATION
- Never move the product without the transit bolts properly fixed in place!
4 Preparation
4.1 Sorting the laundry
* Sort laundry according to type of fabric, colour, and degree of soiling and allowable water temperature.
* Always observe the instructions given on the garment care labels.
4.2 Preparing laundry for washing
- Laundry items with metal attachments such as, underwired bras, belt buckles or metal buttons will damage the machine. Remove the metal pieces or wash such clothes by putting them in a cotton laundry bag or cotton pillow case. Also these type of clothes can heat too much during drying and damage your other clothes. Do not dry such laundry in the machine.
- Put small size clothes such as infant's socks and nylon stockings in cotton a laundry bag or cotton pillow case.
- Place curtains in without compressing them. Remove curtain attachment items. Do not dry tulle curtains in your machine.
- Fasten zips, sew loose buttons and mend rips and tears.
- Wash "machine washable" or "hand washable" labelled products only with an appropriate programme. Dry these type of clothes by hanging or laying down. Do not dry them in the machine.
- Do not wash colours and whites together. New, dark coloured cottons release a lot of dye. Wash them separately.
- Only use the dyes / colour changers and descaling agents which are appropriate to machine wash. Always follow the instructions on the package.
C
INFORMATION
- Laundry that is subjected to heavy deposits of materials such as flour, lime dust, milk powder, etc. Must be shaken off before placing into the machine. Such dusts and powders on the laundry may build up on the inner parts of the product in time and can cause damage.
- Keep laundry items made of Angora wool in the freezer for a few hours before washing. This will reduce pilling.
- Wash trousers and delicate laundry turned inside out.
- Tough stains must be treated properly before washing. If unsure, check with a dry cleaner.
• Take out all substances in the pockets such as coins, pens and paper clips, and turn pockets inside out and brush. Such objects may damage the product or cause noise problem.
4.3 Tips for energy and water saving
Following information will help you use the product in an ecological and energy/water-efficient manner.
- Operate the product in the highest load capacity allowed for the programme you have selected, but do not overload. See, "Programme and consumption table".
- Observe the temperature instructions on the detergent packaging.
- Wash slightly soiled laundry at low temperatures.
- Use faster programmes for small quantities of lightly soiled laundry.
- Do not use prewash and high temperatures for laundry that is not heavily soiled or stained.
- If you plan to dry your laundry in a dryer, select the highest spin speed recommended during washing process.
- Do not use more detergent than the recommended on the detergent packaging.
4.4 Initial use
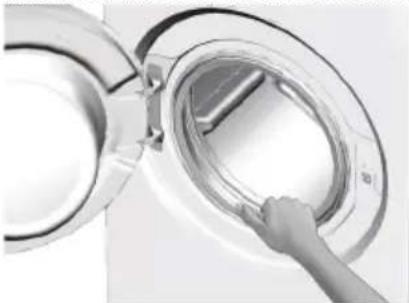
Before starting to use the product make sure that all preparations are made in accordance with the "Important safety and environment instructions" and the instructions in the "Installation" section. To prepare the product for washing laundry, perform first operation in Drum Cleaning programme. If this programme is not available in your machine, apply the method which is described in the section 6.2.
natural_image
Close-up of a hand inserting a circular device into a large appliance (no visible text or symbols)
INFORMATION
- Use an anti-limescale product suitable for the washing machines.
- Some water may remain in the product due to the quality control processes in the production. It is not harmful for the product.
4.5 Correct load capacity
The maximum load capacity depends on the type of laundry, the degree of soiling and the desired washing programme.
The product automatically adjusts the water amount according to the weight of the laundry put inside it.

CAUTION!
- Follow the information in the "Programme and consumption table". When overloaded, machine's washing performance will drop. Moreover, noise and vibration problems may occur. For a successful drying performance, do not dry more laundry than stated.
| Laundry type | Weight (g) | Laundry type | Weight (g) |
| Bathrobe 1200 | Hand to | wel 100 | |
| Fabric napkin 1 | 100 | Women's night gown | 200 |
| Bed sheet 700 | Underclothing 100 | ||
| Bed sheet 500 | Men's overalls 600 | ||
| Pillowcase 200 | Men's shirt 200 | ||
| Tablecloth 250 | Men's pyjamas 500 | ||
| Towel | 200 | Blouses | 100 |
4.6 Loading the laundry
-
Open the loading door.
-
Put the laundry items into the product in a loose manner.
-
Push the loading door to close until you hear a locking sound. Ensure that no items are caught in the door.

INFORMATION
- The loading door is locked while a programme is running. The loading door is unlocked a while after the programme comes to an end. If the inside part of the machine is too hot at the end of the programme, loading door will not open until the temperature decreases.

CAUTION!
- If the laundry is misplaced, noise and vibration problems may occur in the machine.
4.7 Using detergent and softener

INFORMATION
- When using detergent, softener, starch, fabric dye, bleach and descaling agents; read the manufacturer's instructions written on the package and follow the dosages specified. Use a measuring cup if available.
4.7.1 Detergent drawer
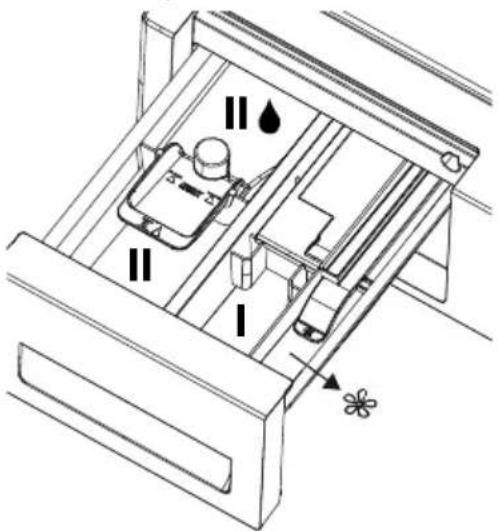
The detergent drawer is composed of four compartments:
text_image
Technical diagram of a mechanical device with labeled parts and directional arrows indicating flow or movement.1) Left compartment with number "II" (Main wash compartment for powder detergent or powder bleach/stain remover)
2) Left compartment with number "II" (Main wash compartment for liquid detergent or liquid stain remover)
3) Middle compartment with number "I" (pre-wash compartment for powder detergent, powder stain remover or liquid bleach - liquid bleach must be added either during the pre-wash or during the first rinsing step of the washing Programme). Liquid bleach must be added manually while the machine takes in water.
4) Right compartment with ' symbol (liquid softener compartment) (in addition, there is a siphon piece in the softener compartment.

INFORMATION
- Never leave the detergent drawer open while the washing programme is running!
- When using a programme without prewash, do not put any detergent into the prewash compartment (compartment nr. "I").
- Do not select a programme with prewash if you are using a detergent bag or dispensing ball. Place the detergent bag or the dispensing ball directly among the laundry in the machine. Remove these if drying
- When machine is in Drying step, do not add any washing chemicals (Liquid detergent, Softener, etc.).
4.7.2 Main Wash Compartment
Before starting the washing Programme, put powder detergent into the left compartment with number "II". Powder bleach/stain remover must also be put into this compartment.
Put the liquid detergent into the main wash compartment with number "ll" before starting the washing Programme. Liquid stain remover must be put into this compartment.
Put the suggested amount of liquid detergent into the left compartment with "ll" symbol and dilute it to the maximum filling level line (max. ll) with warm water.
Particularly the concentrated detergents must be diluted with warm water; otherwise, the siphon may get clogged in time.
Do not fill the detergent above the maximum filling level line; otherwise the excess amount of detergent will reach the laundry without water and may cause stains on the garments. In this case you will need to refill the compartment. Do not pour the detergent onto the laundry directly since this may cause stains on the garments.
4.7.3 Liquid Softener Compartment
Put the suggested amount of liquid softener into the right compartment with "
✿” symbol and dilute it to the maximum filling level line (max. ✦ with warm water.
Particularly the concentrated softeners must be diluted with warm water; otherwise, the siphon may get clogged in time.
Do not fill the softener above the maximum filling level line; otherwise the excess amount of softener will get mixed with the washing water and you will need to refill the compartment. Do not pour the softener onto the laundry directly since this may cause stains on the garments. Liquid softener will be dispensed automatically at the final rinsing step of the washing Programme.
4.7.4 Pre-Wash Compartment
Put the powder pre-wash detergent or powder stain remover into the middle compartment with number "I".
You can also put liquid bleach into this compartment while the machine takes in water during pre-wash or first rinsing step. Adding the liquid bleach while the machine takes in water allows it to be diluted before it is poured onto the laundry.
You must select extra rinsing option if you use liquid bleach in a washing Programme. Bleach must be removed from the laundry with rinsing; otherwise it may cause itching on the skin.

INFORMATION
- Read the dosage instructions and label of your garments carefully before using the liquid bleach.
4.7.5 Choosing the detergent type
Detergent type to be used depends on the washing programme, fabric type and color.
- Use different detergents for coloured and white laundry.
- Wash your delicate clothes only with special detergents (liquid detergent, wool shampoo, etc.) intended solely for delicate clothes and at suggested programmes.
- When washing dark coloured clothes and quilts, it is recommended to use liquid detergent.
- Wash woolens at suggested programme with special detergent made specifically for woolens
- Please review the program descriptions part for suggested program for different textiles.
- All recommendations about detergents are valid for selectable temperature range of programmes.

CAUTION!
- Use only detergents manufactured specifically for washing machines.
- Do not use Powdered Soap.
4.7.6 Adjusting the amount of detergent
The amount of washing detergent to be used depends on the amount of laundry, the degree of soiling and water hardness.
- Do not use amounts exceeding the dosage quantities recommended on the detergent package to avoid problems of excessive foam, poor rinsing, financial savings and finally, environmental protection.
- Use lesser detergent for small amounts or lightly soiled clothes.
4.7.7 Using gel and tablet detergent
- If the gel detergent thickness is fluidal and your machine does not contain a special liquid detergent cup, put the gel detergent into the main wash detergent compartment during first water intake. If your machine contains a liquid detergent container, fill the detergent into this container before starting the programme.
- If the gel detergent thickness is not fluidal or in the shape of capsule liquid tablet, put it directly into the drum before washing.
- Put tablet detergents into the main wash compartment (compartment nr. "2") or directly into the drum before washing.

INFORMATION
- Tablet detergents may leave residues in the detergent compartment. If you notice such residues, place the tablet detergent between the laundry, close to the lower part of the drum in future washings.
- Use the tablet or gel detergent without selecting the prewash function.
- Bear in mind that any plastic detergent cup, bowl etc in the drum should be removed before drying..
4.7.8 Using laundry starch
- Add liquid starch, powder starch or the dyestuff into the softener compartment.
- Do not use softener and starch together in a washing cycle.
- Wipe the inside of the machine with a damp and clean cloth after using starch.
4.7.9 Using bleaches
- Select a programme with prewash and add the bleach at the beginning of the prewash. Do not put detergent in the prewash compartment. As an alternative application, select a programme with extra rinse, add the bleach into an empty detergent drawer compartment and also add 1 glass of water from the same compartment when you see the rinsing step on the display for the first time.
-
Do not use bleach and detergent by mixing them.
-
Use just a little amount (approx. 50 ml) of bleaching agent and rinse the clothes very well as it causes skin irritation. Do not pour the bleach onto the laundry and do not use it with the coloured items.
- When using oxygen-based whitener, select a programme which washes the laundry at a low temperature.
- Oxygen-based whitener can be used with the detergent; however, if it is a different consistency, first put detergent in the compartment number "II" in the detergent dispenser and wait for the machine to flush the detergent when taking in water. While the product continues taking in water, add whitener in the same compartment.
4.7.10 Using limescale remover
- When required, use limescale removers manufactured specifically for washing machines only.
4.8 Tips for efficient washing
| Clothes | |||||
| Light Colours and Whites | Colours | Black/Dark Colours | Delicates/Woollens/Silks | ||
| (Recommendedtemperaturerange based on soiling level: 40-90°C) | (Recommendedtemperaturerange based on soiling level:cold-40°C) | (Recommended temperaturerange based onsoilinglevel:cold-40°C) | (Recommended temperature rangebasedonsoilinglevel: cold -30°C) | ||
| Soiling Level | Heavily Soiled(difficult stains such as grass, coffee, fruits and blood.) | Itmaybenecessarytopre-treatthe stainsorperformprewash.Powder andliquiddetergentsrecommended for whites can be used at dosages recommended for heavily soiled clothes.Itisrecommended to use powderdetergentstocleanclayand soil stains and the stains that are sensitive to bleaches. | Powder and liquid detergents recommended for coloured laundry can be used at dosages recommended for heavily soiled clothes.Itisrecommended to use powderdetergentstocleanclayand soil stains and the stains that are sensitive to bleaches.Detergents whichdonotcontainbleachshould be used. | Liquiddetergentssuitable for colours and dark colours can be used at dosagesrecommendedfor heavily soiled clothes. | Prefer liquid detergents produced for delicate clothes.Woollen and silk clothesmustbewashedwith specialwoollendetergents. |
| Normally Soiled(For example, stains caused by body on collars and cuffs) | Powder and liquid detergents recommended for whites can be usedatdosagesrecommendedfor normally soiled clothes. | Powder and liquid detergents recommendedforcolours can be usedatdosagesrecommendedfor normallysoiledclothes.Detergents whichdonotcontainbleachshould be used. | Liquiddetergentssuitable for colours and dark colours can be used at dosagesrecommendedfor normally soiled clothes. | Prefer liquid detergents produced for delicate clothes.Woollen and silk clothesmustbewashedwith specialwoollendetergents. | |
| Lightly Soiled(No visible stains exist.) | Powder and liquid detergents recommended for whites can be usedatdosagesrecommendedfor lightly soiled clothes. | Powder and liquid detergents recommendedforcolours can be usedatdosagesrecommendedfor lightly soiled clothes.Detergents whichdonotcontainbleachshould be used. | Liquiddetergentssuitable for colours and dark colours can be used at dosagesrecommendedfor lightly soiled clothes. | Prefer liquid detergents produced for delicate clothes.Woollen and silk clothesmustbewashedwith specialwoollendetergents. | |
4.9 Tips for correct drying
| Programmes | ||||||
| Cottons Drying Synthetics Drying Babyprotect + W | Washing and Drying Wash&Wear | |||||
| Types of Clothes | Durable Clothes with Cotton-Content | Sheet, bedding, baby clothes,t-shirts,sweatshirts, durableknitclothing,jeans, canvas trousers, shirts, cotton socks etc. | Not recommended! | Washes and dries respectively! Sheet, bedding,babyclothes, t-shirts, sweatshirts, durable knit clothing, jeans, canvas trousers, shirts,cottonsocksetc. | Washesanddriesrespectively! Sheet,bedding,babyclothes, t-shirts,sweatshirts,durable knit clothing, jeans, canvas trousers,shirts,cottonsocksetc. | Stainlessclothesthathas beenwornforashorttime such as shirts, t-shirts, sweatshirts A very small amountoflaundrymust be loaded. |
| Synthetics Clothes (Polyester, nylon, etc.) | Not recommended! | It is recommended for the polyester,nylon,polyacetate, acrylic-contentclothes.Drying is not recommended for the viscose-contentclothes.Drying explanationsinthemaintenance label should be taken into account. | It is recommended for polyester, nylon, polyacetate, acrylic content clothes at low temperatures,takinginto accountthewashingand dryingwarningsonthe care label. | It is recommended for polyester,nylon,polyacetate, acryliccontentclothesatlow temperatures, taking into account the washing and dryingwarningsonthecare label. | Lightlysoiledandstainless shirts, t-shirts and synthetic-contentclothes. A very small amount of laundryshouldbeloaded. | |
| Delicate(Silk,Woollens, Cashmere,Angorawool, etc. content) Clothes | Not recommended! Not recommended! Not recommended! Not recommended! Not recommended! Not recommended! Not recommended! Not recommended! Not recommended! Not recommended! Not recommended! Not recommended! Not recommended! Not recommended! Not recommended! Not recommended! Not recommended! Not recommended! Not recommended! Not recommended! Not recommended! Not recommended! Not recommended! Not recommended! Not recommended! Not recommended! Not recommended! Not recommended! Not recommended! Not recommended! Not recommended! Not recommended! Not recommended! Not recommended! Not Recommended! Not recommended! Not recommended! Not recommended! Not recommended! Not recommended! Not recommended! Not recommended! Not recommended! Not recommended! Not recommended! Not recommended! Not recommended! Not recommended! Not recommended! Not recommended! Not recommended! Not recommended! Not recommended! Not recommended! Not recommended! Not recommended! Not recommended! Not recommended! Not recommended! Not recommended! Not recommended! Not recommended! Not recommended! Not recommended! Not recommended! Not recommended! Not recommended! Not recommended: Not recommended! Not recommended! Not recommended! Not recommended! Not recommended! Not recommended! Not recommended! Not recommended! Not recommended! Not recommended! Not recommended! Not recommended! Not recommended! Not recommended! Not recommended! Not recommended! Not recommended! Not recommended! Not recommended! Not recommended! Not recommended! Not recommended! Not recommended! Not recommended! Not recommended! Not recommended! Not recommended! Not recommended! Not recommended! Not recommended! Not recommended! Not recommended! Not recommended!Not recommended! Not recommended! Not recommended! Not recommended! Not recommended! Not recommended! Not recommended! Not recommended! Not recommended! Not recommended! Not recommended! Not recommended! Not recommended! Not recommended! Not recommended! Not recommended! Not recommended! Not recommended! Not recommended! Not recommended! Not recommended! Not recommended! Not recommended! Not recommended! Not recommended! Not recommended! Not recommended! Not recommended! Not recommended! Not recommended! Not recommended! Not recommended! Not recommended!Not recommendation! Not recommended! Not recommended! Not recommended! Not recommended! Not recommended! Not recommended! Not recommended! Not recommended! Not recommended! Not recommended! Not recommended! Not recommended! Not recommended! Not recommended! Not recommended! Not recommended! Not recommended! Not recommended! Not recommended! Not recommended! Not recommended! Not recommended! Not recommended! Not recommended! Not recommended! Not recommended! Not recommended! Not recommended! Not recommended! Not recommended! Not recommended! Not recommended! Not recommended!!Not recommended! Not recommended! Not recommended! Not recommended! Not recommended! Not recommended! Not recommended! Not recommended! Not recommended! Not recommended! Not recommended! Not recommended! Not recommended! Not recommended! Not recommended! Not recommended! Not recommended! Not recommended! Not recommended! Not recommended! Not recommended! Not recommended! Not recommended! Not recommended! Not recommended! Not recommended! Not recommended! Not recommended! Not recommended! Not recommended! Not recommended! Not recommended! Not recommended! Not recommended! Not recommended! Not recommended! Not recommended! Not recommended! Not recommended! Not recommended! Not recommended! Not recommended! Not recommended! Not recommended! Not recommended! Not recommended! Not recommended! Not recommended! Not recommended! Not recommended! Not recommended! Not recommended! Not recommended! Not recommended! Not recommended! Not recommended! Not recommended! Not recommended! Not recommended! Not recommended! Not recommended! Not recommended! Not recommended! Not recommended! Not recommended! Not recommended! Not recommend! Not recommended! Not recommended! Not recommended! Not recommended! Not recommended! Not recommended! Not recommended! Not recommended! Not recommended! Not recommended! Not recommended! Not recommended! Not recommended! Not recommended! Not recommended! Not recommended! Not recommended! Not recommended! Not recommended! Not recommended! Not recommended! Not recommended! Not recommended! Not recommended! Not recommended! Not recommended! Not recommended! Not recommended! Not recommended! Not recommended! Not recommended! Not recommended! Not recommended !Not recommended! Not recommended! Not recommended! Not recommended! Not recommended! Not recommended! Not recommended! Not recommended! Not recommended! Not recommended! Not recommended! Not recommended! Not recommended! Not recommended! Not recommended! Not recommended! Not recommended! Not recommended! Not recommended! Not recommended! Not recommended! Not recommended! Not recommended! Not recommended! Not recommended! Not recommended! Not recommended! Not recommended! Not recommended! Not recommended! Not recommended! Not recommended! Not recommended!Not recommended! Not recommended! Not recommended! Not recommended! Not recommended! Not recommended! Not recommended! Not recommended! Not recommended! Not recommended! Not recommended! Not recommended! Not recommended! Not recommended! Not recommended! Not recommended! Not recommended! Not recommended! Not recommended! Not recommended! Not recommended! Not recommended! Not recommended! Not recommended! Not recommended! Not recommended! Not recommended! Not recommended! Not recommended! Not recommended! Not recommended! Not recommended! Not recommended!Not recommendations! Not recommended! Not recommended! Not recommended! Not recommended! Not recommended! Not recommended! Not recommended! Not recommended! Not recommended! Not recommended! Not recommended! Not recommended! Not recommended! Not recommended! Not recommended! Not recommended! Not recommended! Not recommended! Not recommended! Not recommended! Not recommended! Not recommended! Not recommended! Not recommended! Not recommended! Not recommended! Not recommended! Not recommended! Not recommended! Not recommended! Not recommended! Not recommended! Not recommended! N or N or N or N or N or N or N or N or N or N or N or N or N^2 or N^2 or N^2 or N^2 or N^2 or N^2 or N^2 or N^2 or N^2 100% or N^2 or N^2 or N^2 or N^2 or N^2 or N^2 or N^2 or N^2 or dry^2 or dry^2 or dry^2 or dry^2 or dry^2 or dry^2 or dry^2 or dry^2 or dry^2 dry^2 dry^2 dry^2 dry^2 dry^2 dry^2 dry^2 dry^2 dry^2 dry^2 dry^2 dry^2 dry^2 dry^2 dry^2 dry^2 dry^2 dry^2 dry^2 dry^2 dry^2 dry^2 dry^ dry^2 dry^2 dry^2 dry^2 dry^2 dry^2 dry^2 dry^2 dry^2 dry^2 dry^2 dry^2 dry^2 dry^2 dry^2 dry^2 dry^2 dry^2 dry^2 dry^2 dry^2 dry^2 dry^2 dry^2 dry^2 dry^2 dry^2 dry^2 dry^2 dry^2 dry^2 dry^2 dry^ dry^2 dry^2 dry^2 dry^2 dry^2 dry^2 dry^2 dry^2 dry^2 dry^2 dry^2 dry^2 dry^2 dry^2 dry^2 dry^2 dry^2 dry^2 dry^2 dry^2 dry^2 dry^2 dry^2 dry^2 dry^2 dry^2 dry^2 dry^2 dry^2 dry^2 dry^2 dry^2 dry^ dry^2 dry^2 dry^2 dry^2 dry^2 dry^2 dry^2 dry^2 dry^2 dry^2 dry^ or N^2 or N^2 or N^2 or N^2 or N^2 or N^2 or N^2 or N^2 dry^2 dry^2 dry^2 dry^2 dry^2 dry^2 dry^2 dry^2 dry^2 dry^2 dry_N dry^2 dry^2 dry^2 dry^2 dry^2 dry^2 dry^2 dry^2 dry^2 dry^2 dry^2 dry^ dry^ dry^ dry^ dry^ dry^ dry^ dry^ dry^ dry^ dry^ dry^ dry^ dry^ dry^ dry^ dry^ dry^ dry^ dry^ dry^ dry^ dry^ dry^ dry^ dry^ dry^ dry^ dry^ dry^ dry^ dry^ dry^ dry^ dry^ dry^ dry^ dry^ dry>^ dry^ dry^ dry^ dry^ dry^ dry^ dry^ dry^ dry^ dry^ dry^ dry^ (1)\=1,n=1,n=1,n=1,n=1,n=1,n=1,n=1,n=1,n=1,n=1,n=1,n=1,n=1,n=1,n=1,n=1,n=1,n=1,n=1,n=1,n=1,n=1,n=1,n=1,n=1,n=1,n=1,n=1,n=1,n=1,n=1,n=1,n=1,n = 1,n=1,n=1,n=1,n=1,n=1,n=1,n=1,n=1,n=1,n=1,n=1,n=1,n=1,n=1,n=1,n=1,n=1,n=1,n=1,n=1,n=1,n=1,n=1,n=1,n=1,n=1,n=1,n=1,n=1,n=1,n=1,n=1,n=2,n=1,n=1,n=1,n=1,n=1,n=1,n=1,n=1,n=1,n=1,n=1,n=1,n=1,n=1,n=1,n=1,n=1,n=1,n=1,n=1,n=1,n=1,n=1,n=1,n=1,n=1,n=1,n=1,n=1,n=1,n=1,n=1,n=1,N=1,N=1,N=1,N=1,N=1,N=1,N=1,N=1,N=1,N=1,N=1,N=1,N=1,N=1,N=1,N=1,N=1,N=1,N=1,N=1,N=1,N=1,N=1,N=1,N=1,N=1,N=1,N=1,N=1,N=1,N=1,N=1,N=1,N=\( N or N or N or N or N or N or N or N or N or N or N or N or N or N or N or N or N or N or N or N or N or N or n or n or n or n or n or n or n or n or n or n or n or n or n or n or n or n or n or n or n or n or N or N or N or N or N or N or N or N or N or N or N~N~N~N~N~N~N~N~N~N~N~N~N~N~N~N~N~N~N~N~N~N~N~N~N~N~N~N~N~N~N~N~N~N~N~ | Not recommended! Not recommended! Not recommended! Not recommended! Not recommended! Not recommended! Not recommended! Not recommended! Not recommended! Not recommended! Not recommended! Not recommended! Not recommended! Not recommended! Not recommended! Not recommended! Not recommended! Not recommended! Not recommended! Not recommended! Not recommended! Not recommended! Not recommended! Not recommended! Not recommended! Not recommended! Not recommended! Not recommended! Not recommended! Not recommended! Not recommended! Not recommended! Not recommended ! Not recommended! Not recommended! Not recommended! Not recommended! Not recommended! Not recommended! Not recommended! Not recommended! Not recommended! Not recommended! Not recommended! Not recommended! Not recommended! Not recommended! Not recommended! Not recommended! Not recommended! Not recommended! Not recommended! Not recommended! Not recommended! Not recommended! Not recommended! Not recommended! Not recommended! Not recommended! Not recommended! Not recommended! Not recommended! Not recommended! Not recommended! Not recommended! Not recommended! N N N N N N N N N N N N N N N N N N N N N N N N N N N N N N N N N N N N N N N N N N N N N N N N N N N N N N N N N N N N N N N N N N N N N N N N N N N N N N N N N N N N N N N N N N N N N N N N N N N N | Not recommended! Not recommended! Not recommended! Not recommended! Not recommended! Not recommended! Not recommended! Not recommended! Not recommended! Not recommended! Not recommended! Not recommended! Not recommended! Not recommended! Not recommended! Not recommended! Not recommended! Not recommended! Not recommended! Not recommended! Not recommended! Not recommended! Not recommended! Not recommended! Not recommended! Not recommended! Not recommended! Not recommended! Not recommended! Not recommended! Not recommended! Not recommended! Not recommended: ! Not recommended! Not recommended! Not recommended! Not recommended! Not recommended! Not recommended! Not recommended! Not recommended! Not recommended! Not recommended! Not recommended! Not recommended! Not recommended! Not recommended! Not recommended! Not recommended! Not recommended! Not recommended! Not recommended! Not recommended! Not recommended! Not recommended! Not recommended! Not recommended! Not recommended! Not recommended! Not recommended! Not recommended! Not recommended! Not recommended! Not recommended! Not recommended! Not recommended: ! N N N N N N N N N N N N N N N N N N N N N N N N N N N N N N N N N N N N N N N N N N N N N N N N N N N N N N N N N N N N N N N N N N N N N N N N N N N N N N N N N N N N N N N N N N N N N N N N N N N-N-N-N-N-N-N-N-N-N-N-N-N-N-N-N-N-N-N-N-N-N-N-N-N-N-N-N-N-N-N-N-N-N-N-N-N-N-N-N-N-N-N-N-N-N-N-N-N-N-N-N-N-N-N-N-N-N-N-N-N-N-N-N-N-N-N-N-N-N-N-N-N-N-N-N-N-N-N-N-N-N-N-N-N-N-N-N-N-N-N-N-N-N-N-N-N-N-N-N-N,N-N-N-N-N-N-N-N-N-N-N-N-N-N-N-N-N-N-N-N-N-N-N-N-N-N-N-N-N-N-N-N-N-N-N-N-N-N-N-N-N-N-N-N-N-N-N-N-N-N-N-N-N-N-N-N-N-N-N-N-N-N-N-N-N-N-N-N-N-N-N-N-N-N-N-N-N-N-N-N-N-N-N-N-N-N-N-N-N-N-N-N-N-N-N-N-N-N-N-N/N-N-N-N-N-N-N-N-N-N-N-N-N-N-N-N-N-N-N-N-N-N-N-N-N-N-N-N-N-N-N-N-N-N-N-N-N-N-N-N-N-N-N-N-N-N-N-N-N-N-N-N-N-N-N-N-N-N-N-N-N-N-N-N-N-N-N-N-N-N-N-N-N-N-N-N-N-N-N-N-N-N-N-N-N-N-N-N-N-N-N-N-N-N-N-N-N-N-N-N-S | |||
4.10 Displayed Programme Time
You can see the programme duration on the display of your machine while selecting a programme. Depending on the amount of laundry you have loaded into your machine, foaming, unbalanced load conditions, fluctuations in power supply, water pressure and programme settings, the programme duration is automatically adjusted while the programme is running.
SPECIAL CASE: At programme start of Cottons and Cotton Eco programmes, display shows the duration of half load, which is the most common use case. After programme starts, in 20-25 minutes actual load is detected by the machine. And if the detected load is higher than half load; washing programme will be adjusted accordingly and programme duration increased automatically. You may follow this change on the display.
5 Operating the product
5.1 Control panel
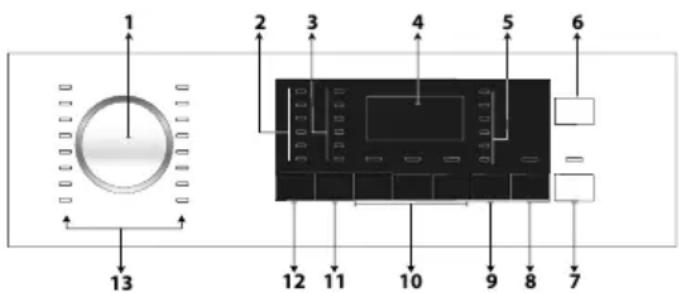
text_image
1 2 3 4 5 6 13 12 11 10 9 8 71 - Programme selection knob
2 - Temperature selection lights
3 - Spin speed selection lights
4 - Display
5 - Drying Programme Lights
6 - On / Off button
7 - Start / Pause button
8 - End Time Adjustment button
9 - Drying Level Adjustment button
10 - Auxiliary Function buttons
11 - Spin Speed Adjustment button
12 - Temperature Adjustment button
13 - Programme Selection lights
5.2 Display symbols
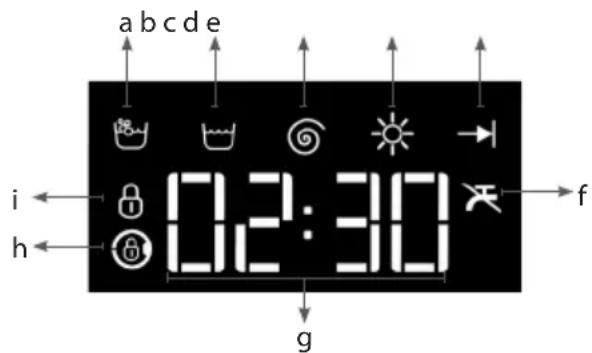
text_image
a b c d e i ← h ← 02:30 g → fa- Washing indicator
b - Rinsing indicator
c - Spinning indicator
d- Drying indicator
e- End indicator
f- No Water indicator
g - Duration Information display
h- Loading Door Lock indicator
i- Child Lock indicator
5.3 Preparing the machine
- Check if the hoses are connected tightly.
- Plug in your machine.
- Turn the tap on completely.
- Place the laundry in the machine.
- Add detergent and fabric softener.
5.4 Selecting the washing programme
- Determine the programme suitable for the type, quantity and soiling level of the laundry in accordance with the "Programme and consumption table".
- Select the desired programme with the Programme Selection knob.

INFORMATION
- Programmes are limited with the highest spin speed appropriate for that particular type of fabric.
- When selecting a programme, always consider the type of fabric, colour, soiling level and permissible water temperature.
5.5 Washing programmes
Depending on the type of fabric, use the following main programmes.

INFORMATION
- You can set you machine to switch to drying step at the end of washing cycle by pressing the Drying button after you have selected the washing programme for your laundry. Each time you press the button, info line shows at which step the drying process will take place and the relevant symbol will turn on. If you want, by continuing to press the button, you can perform drying for the maximum period of time allowed by the machine for drying.
- Symbols in the display are schematic and may not match the product exactly.
- When you will perform washing and drying by using the Drying function of your machine, load maximum 5 kg of laundry into the machine. If you load excessively, your laundry will not dry and machine will operate for a long time and consume more energy.
• Cottons
Use for your cotton laundry (such as bed sheets, duvet and pillowcase sets, towels, bathrobes, underwear, etc.). Your laundry will be washed with vigorous washing action for a longer washing cycle.

INFORMATION
- You can dry your laundry after the washing cycle without any interruption (automatic or timed drying can be performed after washing). For this, you must also select the Drying function before starting the washing programme.
- According to the drying selections which you will add to the washing programmes, you can see when the programme will end on the display of the machine.
- If you don't want drying to take place after the programme you have selected, press and hold the Drying auxiliary function button until the Drying light is turned off.
- Synthetics
Use to wash your synthetic clothes (shirts, blouses, synthetic/cotton blends, etc.). Your laundry will be washed with a gentle action for a shorter washing cycle when compared to the Cottons programme.

INFORMATION
- You can dry your laundry after the washing cycle without any interruption (automatic or timed drying can be performed after washing). For this, you must also select the Drying function before starting the washing programme.
- According to the drying selections which you will add to the washing programmes, you can see when the programme will end on the display of the machine.
- If you don't want drying to take place after the programme you have selected, press and hold the Drying auxiliary function button until the Drying light is turned off.
• Woollens
Use to wash your woollen laundry. Select the appropriate temperature complying with the tag of your clothes. Use appropriate detergents for woollens.

INFORMATION
- Drying function cannot be selected for the woollen wash programme.
- Eco 40-60
The eco 40-60 programme is able to clean normally soiled cotton laundry declared to be washable at 40^ or 60^ , together in the same cycle, and that this programme is used to assess the compliance with the EU ecodesign legislation.
Although it washes longer than all other programmes, it provides high energy and water savings. Actual water temperature may be different from the stated wash temperature. When you load the machine with less laundry (e.g. 12 capacity or less), periods in programme stages may automatically get shorter. In this case, energy and water consumption will decrease.
Cupboard drying fuction should be selected with eco 40-60 to perform wash and dry cycle to assess the compliance with the EU ecodesign legislation.
The wash and dry cycle is able to clean normally soiled cotton laundry declared to be washable at 40 °C or 60 °C , together in the same cycle, and to dry it in such a way that it can be immediately stored in a cupboard.

INFORMATION
- You can dry your laundry after the washing cycle without any interruption (automatic or timed drying can be performed after washing). For this, you must also select the Drying function before starting the washing programme.
- According to the drying selections which you will add to the washing programmes, you can see when the programme will end on the display of the machine.
- If you don't want drying to take place after the programme you have selected, press and hold the Drying auxiliary function button until the Drying light is turned off.
- Delicates
Use to wash your delicate laundry. Your laundry will be washed with more gentle washing action compared to the Synthetics programme.
- Hand Wash
Use to wash woollen/delicate laundry that bear "not machine-washable" care labels and for which hand wash is recommended. Your laundry will be washed with a very gentle washing action in order not to damage the clothes.
- Fast Full Load
Use to wash your lightly soiled and unstained cotton laundry in a short time.

INFORMATION
- You can dry your laundry after the washing cycle without any interruption (automatic or timed drying can be performed after washing). For this, you must also select the Drying function before starting the washing programme.
- According to the drying selections which you will add to the washing programmes, you can see when the programme will end on the display of the machine.
- If you don't want drying to take place after the programme you have selected, press and hold the Drying auxiliary function button until the Drying light is turned off.
- Mini 14'
Use it to wash a small amount of lightly soiled cotton laundry in a short time. This programme washes your laundry in 14 minutes.

INFORMATION
- You can dry your laundry after the washing cycle without any interruption (automatic or timed drying can be performed after washing). For this, you must also select the Drying function before starting the washing programme.
- According to the drying selections which you will add to the washing programmes, you can see when the programme will end on the display of the machine.
- If you don't want drying to take place after the programme you have selected, press and hold the Drying auxiliary function button until the Drying light is turned off.
- Shirts
Use to wash the shirts made of cotton, synthetic and synthetic blended fabrics together.

INFORMATION
- You can dry your laundry after the washing cycle without any interruption (automatic or timed drying can be performed after washing). For this, you must also select the Drying function before starting the washing programme.
- According to the drying selections which you will add to the washing programmes, you can see when the programme will end on the display of the machine.
- If you don't want drying to take place after the programme you have selected, press and hold the Drying auxiliary function button until the Drying light is turned off.
- Rinse
Use when you want to rinse or starch separately.
- Spin+Pump
Use to drain the water in the machine.
5.6 Temperature selection
natural_image
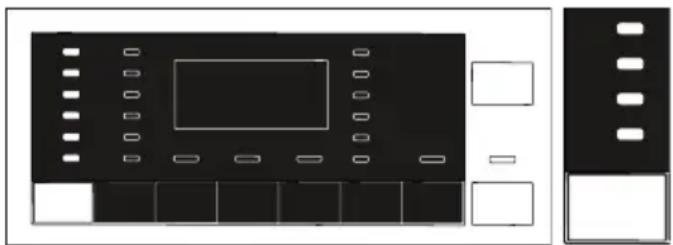
Pure electrical circuit lines without any symbolsWhenever a new programme is selected, the recommended temperature for the programme appears on the temperature indicator. It is possible that the recommended temperature value is not the maximum temperature that can be selected for the current programme. Press the Temperature Adjustment button to change the temperature.

INFORMATION
- Temperature Adjustment button works only backwards. For example, when you want to select 60 °C when the display shows 40 °C you need to press the button for several times until you reach 60 °C by going backwards from 40 °C.

INFORMATION
- If you scroll to Cold Wash option and press Temperature Adjustment button again, the recommended maximum temperature for the selected programme is displayed. Press the Temperature Adjustment button again to decrease the temperature.
Finally, Cold light indicating the cold wash option appears on the display. You can also change the temperature after the washing has started. You can select the desired temperature after washing starts but you must do this before heating step starts.
5.7 Spin speed selection
natural_image
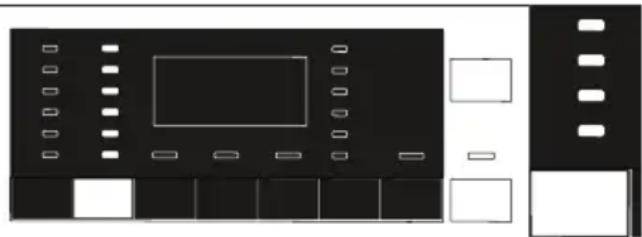
Pure electrical circuit lines without any symbolsWhenever a new programme is selected, the spin speed recommended for the selected programme is displayed on the Spin Speed indicator.

INFORMATION
- It is possible that the recommended spin speed value is not the maximum spin speed that can be selected for the current programme.
Press the Spin Speed Adjustment button to change the spin speed. Spin speed decreases gradually. Then, depending on the model of the product, "Rinse Hold" and "No Spin" options appear on the display.

INFORMATION
- Spin Speed Adjustment button works only backwards. For example, when you want to select 1000 rpm when the display shows 800 rpm, you need to press the button for several times until you reach 1000 rpm by going backwards from 800 rpm.

INFORMATION
- Rinse Hold option is indicated with “💡” symbol and No Spin option is indicated with “💡symbol.
5.7.1 If you want to spin your laundry after the Rinse Hold function:
natural_image
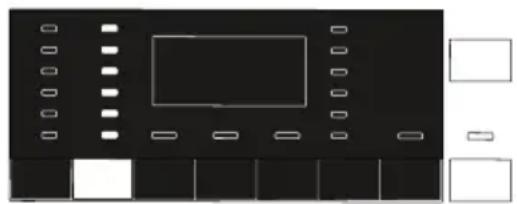
Pure electrical circuit lines without any symbols- Adjust the Spin Speed. - Press Start / Pause / Cancel button. The programme resumes. Machine drains the water and spins the laundry. If you want to drain the water at the end of the programme without spinning, use No Spin function.

INFORMATION
- In programmes that do not allow spin speed adjustment, when Spin Speed adjustment button is pressed, spin speed light does not change and the buzzer is heard.
You can also change the Spin Speed after the washing starts. You can select spin speed by pressing spin speed adjustment button after washing has started but before the spinning step.
5.7.2 Auxiliary function selection for drying
When a new programme is selected, press Auxiliary Function Selection button to adjust the drying option that is suitable for the selected washing programme.

INFORMATION
- In programmes that do not allow drying adjustment, when Drying auxiliary function button is pressed drying light does not change and the buzzer is heard.

INFORMATION
- Only for drying programmes, press Auxiliary Function Selection button to adjust the suitable drying option.
5.8 Drying programmes

CAUTION!
• Machine cleans the lint coming off the laundry automatically during the drying cycle. Machine uses water during drying. For this reason, water tap of the machine should be open also in the drying programmes.
- When a new programme is selected, press Auxiliary Function Selection button to adjust the drying option that is suitable for the selected washing programme.

INFORMATION
- Drying programmes contain spinning step. Your machine performs this process in order to shorten the drying time. When drying is selected, spin speed setting is in Maximum spin speed range.
- In programmes that do not allow drying adjustment, when Drying auxiliary function button is pressed drying light does not change and the buzzer is heard.
- Only for drying programmes, press Auxiliary Function Selection button to adjust the suitable drying option.
- While there is a water cut, both washing and drying could not be performed.
- Synthetic Dry
Use to dry damp synthetic laundry equivalent to 3 kg dry weight. This programme performs drying only.

INFORMATION
- For the dry weights of the laundry, see Section 4, Step 4.5
- Cotton Dry
Use to dry damp cotton laundry equivalent to 5 kg dry weight. This programme performs drying only.

INFORMATION
- In order to dry the laundry which contains only towels and bathrobes, load 4 kg laundry maximum.
- For the dry weights of the laundry, see Section 4, Step 4.5
5.9 Washing and drying programmes

CAUTION!
- Machine cleans the lint coming off the laundry automatically during the drying cycle. Machine uses water during drying. For this reason, water tap of the machine should be open also in the drying programmes.
- 5 Kg Wash & Dry
Use to wash cotton laundry up to 5 kg and dry it right after the washing cycle without making any other selection.

INFORMATION
- When this programme is selected, external Drying auxiliary function cannot be selected.
natural_image
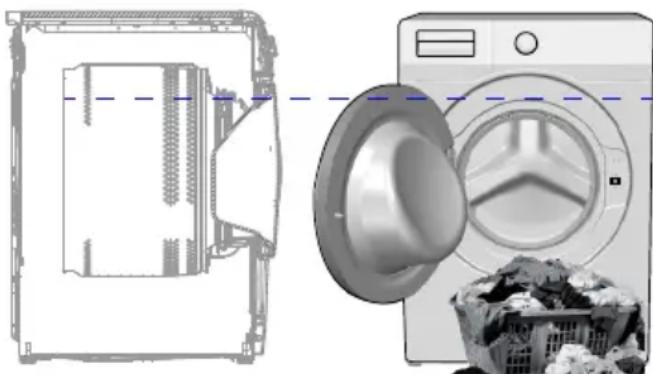
Illustration of a washing machine with a door panel and a close-up of its lid, accompanied by a basket of flowers (no text or symbols)In 5kg Wash & 5kg Dry programme, it is recommended to load laundry until the level indicated in the above figure for ideal drying conditions (you will see the level arrow when you open the loading door).
- Wash & Wear
Use to wash and dry 0.5 kg laundry (2 shirts) in 40 minutes or 1 kg laundry (5 shirts) in 60 minutes.

INFORMATION
- Wash&Wear programme is intended to quickly wash and dry the daily clothes which were worn for a short period of time and are not soiled. This programme is suitable for the laundry which contains thin-texture and can dry quickly. (shirts, t-shirts)
- Other drying options or programmes should be used for the thick texture laundry which take longer to dry.
- Hygiene+ Wash&Dry
Use to wash and then immediately dry your laundry up to 2 kg which requires an anti-allergic and hygienic washing (baby clothes, bed sheets, bedding, underpants, etc. cotton items).
5.10 Programme and consumption table (for washing)
| EN Auxiliaryfunctions | ||||||||||
| Programme (°C) | Max. Load (kg) | Water Consumption (l) | EnergyConsumption(kWh) | Max. Speed | Prewash | Shorter Wash | Rinse Plus | Drying | Selectable temperature range °C | |
| Cottons | 90 8 9 | 0 2,50 | 1400 | ···90-Cold | ||||||
| 60 8 9 | 0 1,80 | 1400 | ···90-Cold | |||||||
| 40 8 8 | 8 0,97 | 1400 | ···90-Cold | |||||||
| Eco 40-60 | 40 *** 8 | 54 0,9 | 55 14 | 00 · 40-60 | ||||||
| 40 *** 4 | 35 0,5 | 50 14 | 00 · 40-60 | |||||||
| 40 *** 2 | 28 0,3 | 20 14 | 00 · 40-60 | |||||||
| 60 ** 8 | 47 0,7 | 60 14 | 00 · 40-60 | |||||||
| Eco 40-60 + Cupboard Dry | 40 *** 5 | 61 3,2 | 15 14 | 00 | · 40-60 | |||||
| 40 *** 2 | 5 42 1 | 780 1 | 400 · 40-60 | |||||||
| Synthetics | 60 3 6 | 0 1,35 | 1000 | ···60-Cold | ||||||
| 40 3 5 | 8 0,85 | 1000 | ···60-Cold | |||||||
| Woollens | 40 | 1,5 5 | 5 0,50 | 1000 | · | 40-Cold | ||||
| Delicates | 40 | 3,5 5 | 5 0,72 | 1000· | 40-Cold | |||||
| Hand Wash | 30 1 5 | 5 0,50 | 1000 | 30-Cold | ||||||
| Shirts | 60 | 3,5 4 | 5 0,85 | 800 | · | · | · | 60-Cold | ||
| Mini 14' | 30 2 4 | 0 0,15 | 1400 | · | 30-Cold | |||||
| Fast Full Load | 90 8 6 | 8 1,90 | 1400 | ··90-Cold | ||||||
| 60 8 6 | 8 1,10 | 1400 | ··90-Cold | |||||||
| 30 8 6 | 8 0,18 | 1400 | ··90-Cold | |||||||
- : Selectable.
* : Automatically selected, no cancelling.
**: Eco 40-60 with 60 °C temperature selection is the washing performance test program in accordance with EN 50229:2015 and energy label test program in accordance with Commission Delegated Regulation (EU) 96/60/EC. Cottons Drying with Extra Dry selection is the drying performance test program in accordance with EN 50229:2015 and energy label test program in accordance with Commission Delegated Regulation (EU) 96/60/EC. The maximum washing load must be divided into groups as the maximum drying load and the remaining drying load, and then each load must be dried using the option Cottons Drying with Extra Dry selection.
***: Eco 40-60 with 40 °C temperature selection is the washing performance test program in accordance with EN 62512 and energy label test program in accordance with Commission Delegated Regulation (EU) 2019/2014 Eco 40-60 with 40 °C temperature and cup board dry selection is the wash and dry cycle test program in accordance with EN 62512 and energy label test program in accordance with Commission Delegated Regulation (EU) 2019/2014.
- : See the programme description for maximum load.

INFORMATION
- The auxiliary functions in the table may vary according to the model of your machine.
- Water and power consumption may vary subject to the changes in water pressure, water hardness and water temperature, ambient temperature, type and amount of laundry, selection of auxiliary functions and spin speed, and changes in the mains voltage.
- When selecting a programme, you can see the washing duration on the display of your machine. Depending on the amount of laundry you have loaded into the machine, there might be a difference of 1 to 1.5 hours between the duration shown on the display and the actual duration of the washing programme. The duration will be corrected automatically right after the washing programme has started.
- "Auxiliary function selection modes can be changed by the manufacturing company. New selection models may be added, or the existing ones may be removed."
- "Spin speed of your machine may vary depending on the programme; the spin speed cannot exceed the maximum spin speed of your machine."
- Always select the lowest appropriate temperature. The most efficient programmes in terms of energy consumption are generally those that perform at lower temperatures and longer duration.
- Noise and remaining moisture content are influenced by the spinning speed: the higher the spinning speed in the spinning phase, the higher the noise and the lower the remaining moisture content.
Programme and consumption table (for drying)
| EN | Auxiliary functions | Drying level | ||||||||||||
| Programme (°C) | Max. Load (kg) | Water Consumption (l) | Energy Consumption (kWh) | Max. Speed | Prewash | Shorter Wash | Rinse Plus | Drying | Extra Dry | Cupboard Dry | Iron Dry | Time based drying-minutes | Selectable temperaturerange °C | |
| Cotton Dry - 5 45 3,20 1400 *··· | - | |||||||||||||
| Synthetic Dry - 3 30 2,10 - * | ···- | |||||||||||||
| Hygiene+ Wash&Dry | 60 | 2 | 120 | 3,80 | 1400 | * | * | • | • | • | • | 90-30 | ||
| 5 Kg Wash&Dry | 60 | 5 | 94 | 5,00 | 1400 | * | • | • | • | • | 60-Cold | |||
| Wash&Wear | 30 | 0,5 | 35 | 0,60 | 1000 | • | * | • | 30-Cold | |||||
| Wash&Wear | 30 | 1 | 44 | 1,00 | 1000 | • | * | • | 30-Cold | |||||
| Consumption Values (EN) | ||||||||
| Temperature Selection (°C) | Spin Speed (rpm) | Capacity (kg) | Programme Duration (hh:mm) | Energy Consumption (kWh/cycle) | Water Consumption (L/cycle) | Laundry Temperature (°C) | Remaining Moisture Content (%) | |
| Eco 40-60 | 40 1400 | 8 03:38 | 0,955 54 | 40 53 | ||||
| 40 1400 | 4 02:47 | 0,550 35 | 32 53 | |||||
| 40 1400 | 2 02:47 | 0,320 28 | 23 53 | |||||
| Cottons 20 1400 8 03:40 | 0,600 88 | 20 53 | ||||||
| Cottons 60 1400 8 03:40 | 1,800 90 | 60 53 | ||||||
| Synthetics 40 1200 3 02: | 25 0,850 | 58 40 40 | ||||||
| Fast Full Load 30 1400 | 8 00:28 | 0,180 68 23 62 | ||||||
| Eco40-60+CupboardDry | 40 1400 | 5 07:55 3,2 | 15 61 25 53 | |||||
| 40 1400 | 2,5 05:50 1 | ,780 42 24 53 | ||||||
5.11 Auxiliary function selection
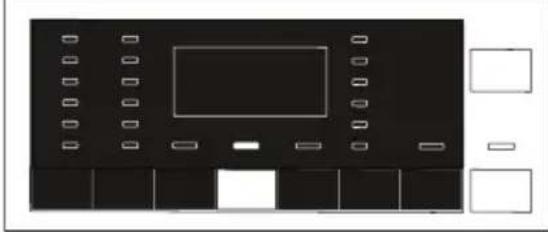
Select the desired auxiliary functions before starting the programme. Whenever a programme is selected, lights of the auxiliary functions that can be selected together with that programme illuminate.
natural_image
Pure electrical circuit lines without any symbols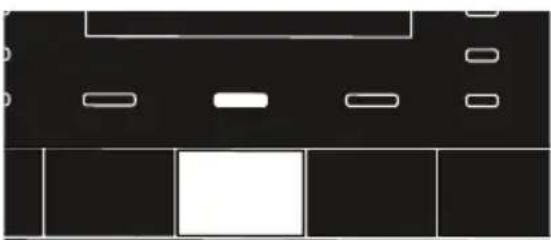
natural_image
Pure electrical circuit lines without any symbols
INFORMATION
• Light of the auxiliary function that cannot be selected with the selected programme does not illuminate. When you press the buttons of these auxiliary functions, buzzer is heard and selection is prohibited.
If the wash cycle has reached a point where you cannot select the auxiliary function, the function cannot be selected.

INFORMATION
- Some functions cannot be selected together. If a second auxiliary function conflicting with the first one is selected before starting the machine, the function selected first will be cancelled and the second auxiliary function selection will remain active. For example, if you want to select Quick Wash after you have selected the Prewash, Prewash will be cancelled and Quick Wash will remain active.
- An auxiliary function that is not compatible with the programme cannot be selected. (See "Programme and consumption table")
- Some programmes have auxiliary functions that must be operated with the selected programme. Those functions cannot be cancelled. Auxiliary function light is already selected.

INFORMATION
- If the selected dampness level (Iron Dry, Wardrobe Dry, Extra Wardrobe Dry) cannot be reached at the end of the drying cycle, your machine will extend the programme duration automatically. Programme will last longer.
- If Timed-Drying is selected, programme is finished at the end of the drying period even if the laundry does not get dry.
- If the selected dampness level (Iron Dry, Wardrobe Dry, Extra Wardrobe Dry) is reached during drying cycle, or extra dryness is detected in the timed-drying options, programme will take a shorter time. Time decrease will be shown on the display.
- Prewash
A Prewash is only worthwhile for heavily soiled laundry. Not using the Prewash will save energy, water, detergent and time.
- Shorter Wash
This function can be used in Cottons and Synthetics programmes. It decreases the washing times and also the number of rinsing steps for lightly soiled laundry.

INFORMATION
- When you select this function, load your machine with half of the maximum laundry specified in the programme table.
- Rinse Plus
This function enables the product to make another rinse in addition to the one already made after the main wash. Thus, the risk for sensitive skins (babies, allergic skins, etc.) to be effected by the minimal detergent remnants on the laundry can be reduced.

INFORMATION
- Pressing for the first time will add single rinse, a second press will add double rinse. The third press will cancel it.
• Drying
This function enables drying of the laundry after washing. Check with which programmes this auxiliary function can be selected, from the programme table.
5.12 Drying steps
5.12.1 Iron Dry
Drying is performed until the drying level reaches Iron Dry step.
5.12.2 Cupboard Dry

Drying is performed until the drying level reaches Wardrobe Dry step.
5.12.3 Extra Dry

Drying is performed until the drying level reaches Extra Wardrobe Dry step.

INFORMATION
- Dryness level may change according to the mixture, material types, amount and dampness level of the laundry.
- Items which contain accessories such as lace, tulle, stones, beads, spacer, wire, etc. and high silk-content items should not be dried in the machine.
5.12.4 Time based drying-minutes
In order to reach the desired drying level at low temperature, you select any of 30, 90 and 150 minutes of drying periods.

INFORMATION
- When drying small amount of laundry (up to maximum 2 pieces), timed-drying steps in the Cottons or Synthetics drying programmes should be selected.
- If the laundry is not at the desired dryness level at the end of the drying programme, timed-drying can be selected to finish the process.
- When this function is selected, machine performs drying for the adjusted time irrespective of the drying level.
5.13 Time display
Remaining time for the completion of the programme while it is running is displayed as "01:30" in hours and minutes format.

INFORMATION
- Programme time may differ from the values in section "Programme and consumption table" depending on the water pressure, water hardness and temperature, ambient temperature, amount and the type of laundry, auxiliary functions selected and the changes at the mains voltage.
5.14 End Time
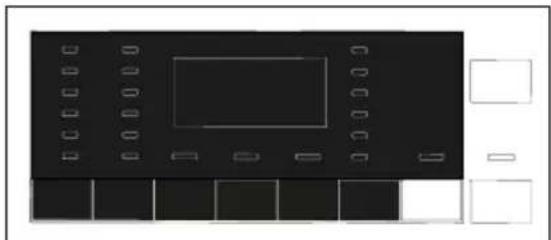
natural_image
Pure electrical circuit lines without any symbolsWith the End Time function, the startup of the programme can be delayed up to 24 hours. After pressing End Time button, the programme's estimated ending time is displayed. If the End Time is adjusted, End Time light illuminates. In order for the End Time function is activated and the programme is completed at the end of the specified time, you must press Start / Pause button after adjusting the time. Start / Pause button stops flashing and remains illuminated continuously. If you want to cancel End Time function, press End Time button until the End Time light turns off or press On / Off button to turn off and on the machine.
- Open the loading door, place the laundry and put detergent, etc.
- Select the washing programme, temperature, spin speed and, if required, the auxiliary functions.
- Set the end time of your choice by pressing the End Time button. End Time light is illuminated.
- Press Start / Pause button. Time countdown starts. ":" symbol in the middle of the end time on the display starts flashing.

INFORMATION
- Do not use liquid detergents when you activate End Time function! There is the risk of staining of the clothes.
- Door keeps locked during the End Time countdown period. In order to unlock the door, machine should be switched to the pause mode by pressing the programme start/pause button. At the end of the countdown, End Time indicator turns off, washing cycle starts and the time of the selected programme appears on the display.
- When the End Time selection is completed, the time appearing on the display consists of end time plus the duration of the selected programme.
5.15 Starting the programme
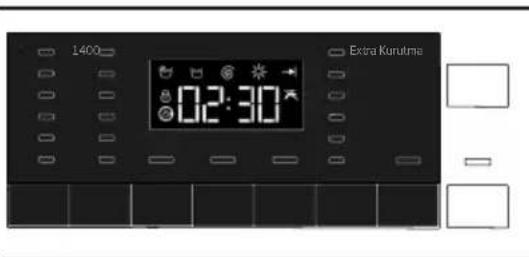
text_image
1400 02:30 Extra Kurutma- Press Start / Pause button to start the programme.
- The light of Start / Pause button which was flashing starts to illuminate steadily now, indicating that the programme has started.
- Loading door is locked. "Locking the Door" appears on the display when the door is being locked.
5.16 Loading door lock
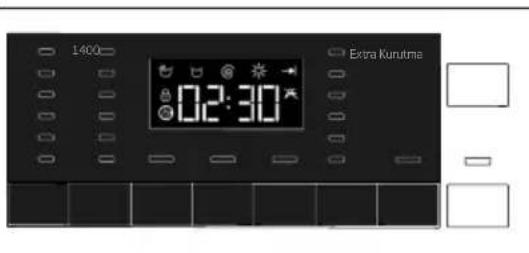
text_image
1400 10:2:30° Extra KunutmaThere is a locking system on the loading door of the machine that prevents opening of the loading door in cases when the water level is unsuitable for door opening. "Loading door locked" light in the panel turns on when the loading door is locked.
5.17 Changing the selections after programme has started
5.17.1 Adding laundry after the programme has started:
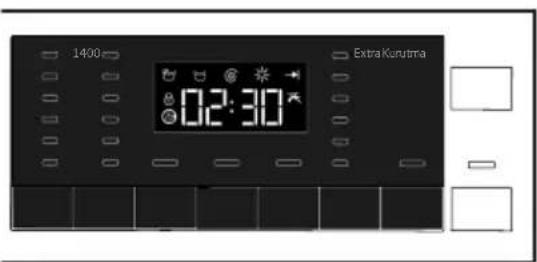
text_image
1400 Extra Konutma 02:30If the water level in the machine is suitable when you press Start / Pause button, "Loading door locked" light on the panel is turned off. If the water level in the machine is not suitable when you press Start / Pause button, the panel will indicate that the loading door is locked.
5.17.2 Switching the machine to pause mode:
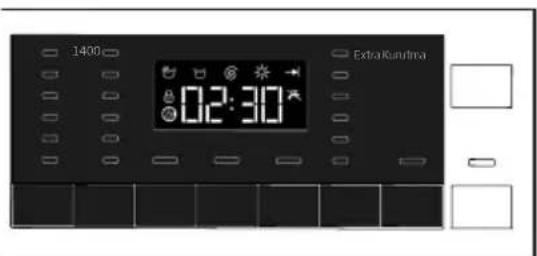
text_image
1400 Extra Kunulna 02:30Press the Start / Pause button to switch the machine to pause mode.
5.17.3 Changing the programme selection after programme has started:
Changing the programme is not allowed when a programme is already running. If you turn the Programme Selection knob while the programme is running, buzzer is heard and change is prohibited. You can select the new programme after switching the current programme to pause mode.

INFORMATION
- The newly selected programme starts from beginning.
5.17.4 Changing the auxiliary function, spin speed and temperature
Depending on the step the programme has reached, you can cancel or select auxiliary functions. See, "Auxiliary function selection". Also, you can change the spin speed, temperature and drying settings. See, "Spin speed selection" and "Temperature selection".

INFORMATION
- The loading door will not open if the water temperature in the machine is high or the water level is above the loading door baseline.
5.18 Child Lock
Use Child Lock function to prevent children from tampering with the machine. Thus you can avoid any changes in a running programme.

INFORMATION
- You can switch the machine on and off with On / Off button when the Child Lock is active. When you switch on the machine again, programme will resume from where it has stopped. - Machine will give an audio alarm when the buttons are pressed if the child lock is active.
5.18.1 To activate the child lock:
natural_image
Pure electrical circuit lines without any symbolsPress and hold 2nd and 3rd auxiliary function buttons for 3 seconds. After the countdown as "Child Lock 3-2-1" on the display is over, "Child Lock Enabled" appears on the display. You can release 2nd and 3rd Auxiliary Function buttons when this warning is displayed.
5.18.2 To deactivate the child lock:
natural_image
Pure architectural floor plan lines without any text, numbers, or symbolsPress and hold 2nd and 3rd auxiliary function buttons for 3 seconds. After the countdown as "Child Lock 3-2-1" on the display is over, "Child Lock Enabled" is turned off on the display.
5.19 Cancelling the programme
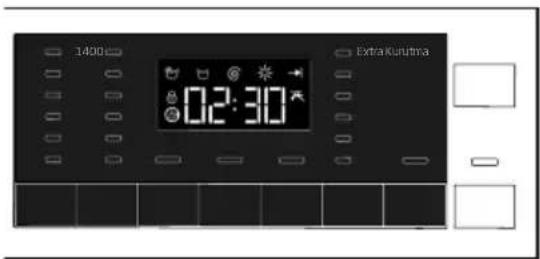
text_image
1400 02:30 Extra KunutraThe programme is cancelled when the machine is turned off and on again. Press and hold On / Off button for 3 seconds. After the countdown as "3-2-1" on the display is over, the machine turns off.

INFORMATION
- If you press On / Off button when the Child Lock is active, the programme will not be cancelled. You should cancel the child lock first. Countdown as "3-2-1" appears on the display.
- If you want to open the loading door after you have cancelled the programme but it is not possible to open the loading door since the water level in the machine is above the loading door baseline, then turn the Programme Selection knob to Pump+Spin programme and drain the water in the machine.
5.20 End of programme
When the programme is over the End of Programme indicator illuminates and a buzzer is heard.
If you do not press any button for 2 minutes, the machine will switch to standby mode. Display and all indicators are turned off. If you press any button or turn the Programme Selection knob when the machine is in standby mode, programme steps that are completed will appear on the display.
5.21 Your machine features a "Standby Mode".
After you switch on your machine with On-Off button, if no programme is started or no other procedure is performed at the selection step or no action is taken within approx. 2 minutes after the selected programme ends, your machine will switch to energy saving mode automatically. Also, if your product has a display that shows programme time, this display will be completely turned off. If you turn the Programme Selection knob or touch any button, lights and display will switch back to previous condition. The selections which you make when exiting from the energy efficiency may change. Please check the correctness of your selections before starting the programme. If necessary, please make your settings again. This is not an error.
6 Maintenance and cleaning
Service life of product extends and frequently experienced problems will be reduced if it is cleaned at regular intervals.
6.1 Cleaning the detergent drawer
Remove any powder residue buildup in the drawer. To do this;
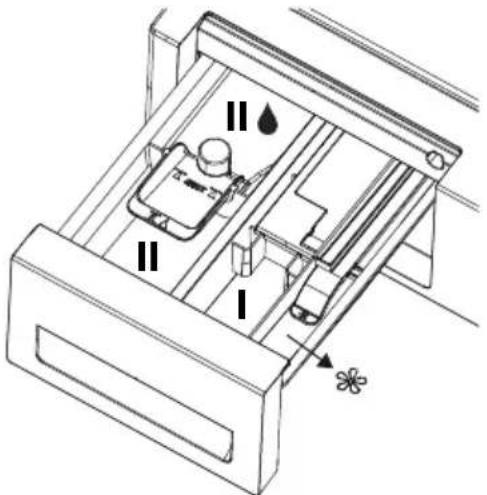
text_image
Technical diagram of a mechanical device with labeled parts and directional arrows indicating flow or movement.- You can remove the detergent drawer by pulling it towards yourself strongly.

INFORMATION
- If more than a normal amount of softener and liquid detergent mixture starts to remain in the softener compartment, the siphon must be cleaned.
-
Wash the drawer and the siphon with plenty of lukewarm water in a washbasin. Wear protective gloves or use an appropriate brush to avoid touching the residues in the drawer when cleaning.
-
Replace the drawer into its housing after cleaning. Check if the siphon is in its original location.
6.2 Cleaning the loading door and the drum
For products with drum cleaning programme, please see Operating the product - Programmes.
For products without drum cleaning programme, follow the below steps to clean the drum: Select Additional Water or Extra Rinse auxiliary functions. Use Cottons programme without pre-wash. Set the temperature to the level recommended on the drum cleaning agent which can be found in the detergent aisle in supermarkets. Apply this procedure without any laundry in the product. Before starting the programme, put 1 pouch of special drum cleaning agent (if the special agent could not be supplied, put max. 1 tea-cup of (max. 100 g) of antilimescale powder) into the main wash detergent compartment. If the antilimescale is in tablet form, put only one tablet into the main wash compartment no. "2". Dry the inside of the bellow with a clean piece of cloth after the programme has come to an end.

INFORMATION
- Repeat Drum Cleaning process in every 2 months.
- Use an anti-limescale suitable for the washing machines.
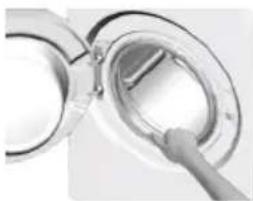
natural_image
Close-up of a metallic ring component with a hand adjusting it (no visible text or symbols)After every washing and drying make sure that no foreign substance is left in the drum. If the holes on the bellow shown in the figure are blocked, open the holes using a toothpick.

INFORMATION
- Foreign metal substances will cause rust stains in the drum. Clean the stains on the drum surface by using cleaning agents for stainless steel. Never use steel wool or wire wool.

CAUTION!
- Never use sponge or scrub materials. These will damage the painted, chrome and plastic surfaces.
6.3 Cleaning the body and control panel
Wipe the body of the machine with soapy water or non-corrosive mild gel detergents as necessary, and dry with a soft cloth. Use only a soft and damp cloth to clean the control panel.
6.4 Cleaning the water intake filters
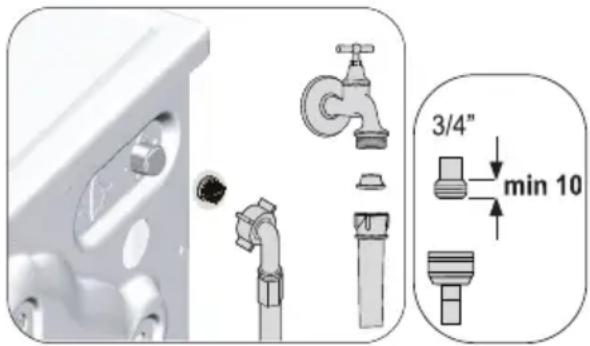
text_image
3/4" min 10There is a filter at the end of each water intake valve at the rear of the machine and also at the end of each water intake hose where they are connected to the tap. These filters prevent foreign substances and dirt in the water to enter the washing machine. Filters should be cleaned if they are dirty.
- Close the taps.
- Remove the nuts of the water intake hoses to access the filters on the water intake valves. Clean residues on them with an appropriate brush. If the filters are too dirty, remove them from their places with a pliers and clean in this way.
- Take out the filters on the flat ends of the water intake hoses together with the gaskets and clean thoroughly under running water.
- Replace the gaskets and filters carefully in their places and tighten the hose nuts by hand.
6.5 Draining remaining water and cleaning the pump filter
The filter system in your machine prevents solid items such as buttons, coins and fabric fibers clogging the pump impeller during discharge of washing water. Thus, the water will be discharged without any problem and the service life of the pump will extend. If the machine fails to drain water, the pump filter is clogged. Filter must be cleaned whenever it is clogged or in every 3 months. Water must be drained off first to clean the pump filter. In addition, prior to transporting the machine (e.g., when moving to another house) and in case of freezing of the water, water may have to be drained completely.

CAUTION!
- Foreign substances left in the pump filter may damage your product or may cause noise problem.
- If the product is not being used, shut the tap, remove mains hose and drain the water inside the machine in places where there is the risk of the product freezing.
• After each use, turn off the water tap to which the mains hose is connected.
In order to clean the dirty filter and discharge the water:
- Unplug the machine to cut off the supply power.

CAUTION!
- Temperature of the water inside the machine may rise up to 90 °C. To avoid burning risk, filter must be cleaned after the water in the machine cools down.
- Some of our products have emergency draining hose and some does not have. Follow the steps below to discharge the water.
Discharging the water when the product does not have an emergency draining hose:
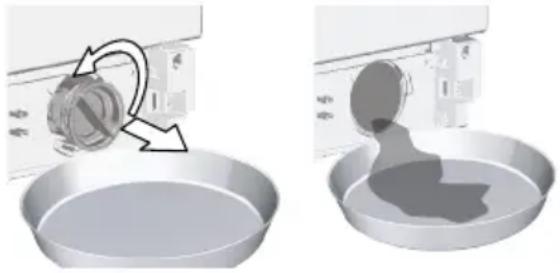
natural_image
Two-step diagram showing a washing machine's internal components before and after cleaning, with no text or symbols present.a. Place a large container in front of the filter to catch water from the filter.
b. Loosen pump filter (anticlockwise) until water starts to flow. Fill the flowing water into the container you have placed in front of the filter. Always keep a piece of cloth handy to absorb any spilled water.
c. When the water inside the machine is finished, take out the filter completely by turning it.
3. Clean any residues inside the filter as well as fibers, if any, around the pump impeller region.
4. Install the filter, turn clockwise to ensure it is closed and watertight.
7 Troubleshooting
Programmes do not start after the loading door is closed.
- Start/Pause/Cancelbuttonisnotpressed.>>*PressStart/Pause/Cancel button.
- Itmaybedifficulttoclosetheloadingdoorincaseofexcessive loading.>>>*Reducetheamountoflaundryandmakesure that the loading door is closed properly.
Programme cannot be started or selected.
- Washingmachinehasswitchedtoselfprotectionmodedueto asupplyproblem(linevoltage,waterpressure,etc.>>>Press andholdOn/Offbuttonfor3secondstoresetthemachineto factory settings. (See. "Cancelling the programme")
Water in the machine.
- Somewater may remain in the product due to the quality control processes in the production. >>> This is not a failure; water is not harmful to the machine.
There is water leaking from the bottom of the machine.
- Thereisaproblemwithhosesorthepumpfilter.>>> Besure thesealsofthewaterinlethosesaresecurelyfitted.Attachthe hose to the tap tightly.
- Pumpfilterisnotclosedsecurely.>>> Makesurethatthe pump filter is closed securely.
Machine does not fill with water.
- Tap is turned off. >>> Turn on the taps.
• Water inlet hose is bent. >>> Flatten the hose.
• Water inlet filter is clogged. >>> Clean the filter. - Loading door is not closed. >>> Close the loading door.
Machine does not drain water.
- Waterdrainhoseiscloggedortwisted.>>> Cleanorflatten the hose.
- Pump filter is clogged. >>> Clean the pump filter.
Machine vibrates or makes noise.
- Machineisstandingunbalanced.>>> Adjustthefeettolevel the machine.
- Ahardsubstancehasenteredintothepumpfilter.>>> Clean the pump filter.
-Transitboltsarenotremoved.>>> Removethetransitbolts. - Laundryquantityinthemachineistoolittle.>>> Addmore laundry to the machine.
- Machineisoverloadedwithlaundry.>>> Takeoutsomeof thelaundryfromthemachineordistributetheloadbyhandto balance it.
- Machineisincontactwitharigidsurface.>>> Makesurethat the machine is not contacting anything.
Machine stopped shortly after the programme started.
- Machinehasstoppedtemporarilyduetolowvoltage.>>> It willresumerunningwhenthevoltagerestorestothenormal level.
Machine directly discharges the water it takes in.
- Draininghoseisnotatadequateheight.>>> Connectthe water draining hose as described in the user manual.
No water can be seen in the machine during washing.
- The water level is not visible from outside of the washing machine. This is not a failure.
Loading door cannot be opened.
- Loadingdoorlockisactivatedbecauseofthewaterlevelinthe machine.>>>DrainthewaterbyrunningthePumporSpin programme.
- Machineisheatingupthewateroritisatthespinningcycle. >>> Wait until the programme completes.
- Loading door lock is engaged. Loading door lock will be deactivatedacoupleofminutesaftertheprogrammecomes toanend.>>>Waitforacoupleofminutesfordeactivationof the loading door lock.
- Loading door may be stuck because of the pressure it is subjected to.>>>Grabthehandleandpushandpullthe loading door to release and open it.
Washing takes longer than specified in the user manual.(*)
- Water pressure is low. >>> Machine waits until taking in adequate amount of watertopreventpoor washing quality due to the decreased amount of water. Therefore, the washing time extends.
•Voltageislow.>>> Washingtimeisprolongedtoavoidpoor washing results when the supply voltage is low.
- Inputtemperatureofwaterislow.>>> Requiredtimetoheat upthewaterextendsincoldseasons. Also, washingtimecan be lengthened to avoid poor washing results.
- Numberofrinsesand/oramountofrinsewaterhaveincreased. >>>Machineincreasestheamountofrinsewaterwhengood rinsingisneededandaddsanextrarinsingstepifnecessary.
- Excessive foam has occurred and automatic foam absorption system has been activated but to do much detergent usage. >>> Use recommended amount of detergent.
Programme time does not countdown. (On models with display) (*)
- Timermaystopduringwaterintake.>>> Timerindicatorwill notcountdownuntilthemachinetakesinadequateamountof water.Themachinewillwaituntilthereissufficientamountof watertoavoidpoorwashingresultsduetolackofwater.Timer indicator will resume countdown after this.
- Timermaystopduringheatingstep.>>> Timerindicator willnotcountdownuntilthemachinereachestheselected temperature.
- Timer may stop during spinning step. >>> Automatic unbalancedloaddetectionsystemmightbeactivateddueto the unbalanced distribution of the laundry in the drum.
Programme time does not countdown. (*)
- Laundry is unbalanced in the machine. >>> Automatic unbalancedloaddetectionsystemmightbeactivateddueto the unbalanced distribution of the laundry in the drum.
Machine does not switch to spinning step. (*)
- Laundry is unbalanced in the machine. >>> Automatic unbalancedloaddetectionsystemmightbeactivateddueto the unbalanced distribution of the laundry in the drum.
- Themachinewillnotspinifwaterisnotdrainedcompletely. >>> Check the filter and the draining hose.
- Excessive foam has occurred and automatic foam absorption system has been activated but to room much detergent usage. >>> Use recommended amount of detergent.
Washing performance is poor: Laundry turns grey. (**)
- Insufficientamountofdetergenthasbeenusedoveralong period of time. >>> Use the recommended amount of detergentappropriateforwaterhardnessandthelaundry.
- Washinghasbeenperformedatlowtemperaturesforalong time.>>>Selectthepropertemperatureforthelaundrytobe washed.
- Insufficientamountofdetergentisusedwithhardwater.>>> Usinginsufficientamountofdetergentwithhardwatercauses thesoiltoaccumulateontheclothesovertimeandturnsthem grey.Itisdifficulttoeliminategreyingonceithappens.Use therecommendedamountofdetergentappropriateforwater hardness and the laundry.
- Excessiveamountofdetergenthasbeenused.>>> Use the recommendedamountofdetergentappropriateforwater hardness and the laundry.
Washing performance is poor: Stains persist or the laundry is not whitened. (**)
- Insufficient amount of detergent is used. >>> Use recommended amount of detergent appropriate forthelaundry.
- Excessive laundry is loaded in.>>> Donot load them machine in excess. Load with amounts recommended in the "Programme and consumption table".
- Wrongprogrammeandtemperaturewereselected.>>> Selecttheproperprogrammeandtemperatureforthelaundry to be washed.
- Wrongtypeofdetergentisused.>>> Useoriginaldetergent appropriate for the machine.
- Detergentisputinthewrongcompartment.>>> Putthe detergentinthecorrectcompartment.Donotmixthebleaching agent and the detergent with each other.
Washing performance is poor: Oily stains appeared on the laundry. (**)
- Regulardrumcleaningisnotapplied.>>> Cleanthedrum regularly. For this, please see 6.2.
Washing performance is poor: Clothes smell unpleasantly. (**)
- Odoursandbacteriallayersareformedonthedrumasaresult ofcontinuouswashingatlowertemperaturesand/orinshort programmes.>>>Leavethedetergentdraweraswellasthe loadingdoorofthemachineajaraftereachwashing.Thus,a humidenvironmentfavorableforbacteriacannotoccurinthe machine.
Colour of the clothes faded. (\*\*)
- Excessive laundry was loaded in.>>> Donotloadthemachine in excess.
- Detergentinuseisdamp.>>> Keepdetergentsclosed in anenvironmentfreeofhumidityanddonotexposethemto excessive temperatures.
- A higher temperature is selected.>>> Select the proper programme and temperature according to the type and soiling level of the laundry.
Washing machine does not rinse well.
•Theamount,brandandstorageconditionsofthedetergent usedareinappropriate.>>>Useadetergentappropriatefor thewashingmachineandyourlaundry.Keepdetergentsclosed inanenvironmentfreeofhumidityanddonotexposethemto excessive temperatures.
- Detergentisputinthewrongcompartment.>>> Ifdetergent isputintheprewashcompartmentalthoughprewashcycleis notselected,machinecantakethisdetergentduringrinsingor softenersteps.Putthedetergentinthecorrectcompartment.
- Pump filter is clogged. >>> Check the filter.
- Drain hose is folded. >>> Check the drain hose.
Laundry became stiff after washing. (\*\*)
- Insufficientamountofdetergentisused.>>> Usinginsufficient amountofdetergentforthewaterhardnesscancausethe laundrytobecomestiffintime.Useappropriateamountof detergent according to the water hardness.
- Detergentisputinthewrongcompartment.>>> Ifdetergent isputintheprewashcompartmentalthoughprewashcycleis notselected,machinecantakethisdetergentduringrinsingor softenersteps.Putthedetergentinthecorrectcompartment.
- Detergentwasmixedwiththesoftener.>>>Donotmixthe softenerwithdetergent.Washandcleanthedrawerwithhotwater.
Laundry does not smell like the softener. (\*\*)
- Detergentisputinthewrongcompartment.>>> Ifdetergent isputintheprewashcompartmentalthoughprewashcycleis notselected,machinecantakethisdetergentduringrinsingor softenersteps.Washandcleanthedrawerwithhotwater.Put the detergent in the correct compartment.
- Detergentwasmixedwiththesoftener.>>>Donotmixthe softenerwithdetergent.Washandcleanthedrawerwithhotwater.
Detergent residue in the detergent drawer. (\*\*)
- Detergentwasputinwetdrawer.>>> Drythedetergent drawer before putting in detergent.
- Detergenthasgottendamp.>>> Keepdetergentsclosedin anenvironmentfreeofhumidityanddonotexposethemto excessive temperatures.
• Water pressure is low. >>> Check the water pressure. - The detergent in the main wash compartment got wet while taking in the prewash water. Holes of the detergent compartment are blocked. >>> Check the holes and clean if they are clogged.
- Thereisaproblemwiththedetergentdrawervalves.>>> Call the Authorised Service Agent.
- Detergentwasmixedwiththesoftener.>>>Donotmixthe softenerwithdetergent.Washandcleanthedrawerwithhotwater.
There is detergent left on the laundry. (\*\*)
- Excessive laundry was loaded in.>>> Donotloadthemachine in excess.
- Wrongprogramme and temperature were selected. >>> Select the proper programme and temperature forthelaundry to be washed.
- Wrongdetergentwasused.>>> Selecttheproperdetergent for the laundry to be washed.
Too much foam forms in the machine. (\*\*)
- Improperdetergentsforthewashingmachineisused.>>> Use detergents appropriate for the washing machine.
- Excessiveamountofdetergentisused.>>> Useonlysufficient amount of detergent.
- Detergent was stored under improper conditions. >>> Storedetergentinaclosedanddrylocation.Donotstorein excessively hot places.
- Some meshed laundry such as tulle may foam too much because of their texture. >>> Use smaller amounts of detergent for this type of item.
- Detergentwasputinthewrongcompartment.>>> Putthe detergent in the correct compartment.
- Softenerisbeingtakenearly.>>> Theremaybeproblem inthevalvesorinthedetergentdrawer.CalltheAuthorised Service Agent.
Foam is overflowing from the detergent drawer.
- Excessive amount of detergent is used. >>>>Mix 1 tablespoonfulsoftenerand ^1/2 Lwaterandpourintothemain wash compartment of the detergent drawer.
- Putdetergentintothemachinesuitablefortheprogrammes and maximum loads indicated in the "Programme and consumptiontable".Whenyouuseadditionalchemicals(stain removers,bleachesandetc),reducetheamountofdetergent.
- Excessive foam has occurred and automatic foam absorption system has been activated but to room much detergent usage. >>> Use recommended amount of detergent.
Laundry remains wet at the end of the programme. (\*)
Drying lasts too long.
- Excessive laundry loaded.>>> Donotloadthemachine in excess.
- Laundryisnotspunenough.>>>Spinatahigherspin speed in washing step in the Dryer-Washing Machine.
- Tap is turned off. >>> Turn on the taps.
Laundry is still damp after drying.
- Anappropriateprogrammeaccordingtolaundry typemightisnotselected.>>>Checkcarelabelson clothesandselectanappropriateprogrammeorusetimed programmes in addition.
- Excessive laundryloaded.>>>Donotloadthemachine in excess.
- Laundryisnotspunenough.>>>Spinatahigherspin speed in washing step in the Dryer-Washing Machine.
Machinedoesnotstartorprogrammecannotbested.
- Powercableisnotconnected.>>>Makesurethepower cable is connected.
- ProgrammeisnotsetorStart/Pause/Cancelbutton isnotpressed.>>>Makesuretheprogrammeissetand it is not in Stand-by mode.
- Child lock enabled. >>> Disable Child lock.
Laundry is shrunken, pale, matted or damaged.
- Anappropriateprogrammeaccordingtolaundrytypeis notselected.>>>Checkcarelabelsonclothesandselectan appropriateprogrammeorusetimedprogrammesinaddition. You must not dry clothesthata are not suitable for drying.
Machine does not dry.
- Laundryisnotdriedordryingstepisnotenabled.>>> Checkifdryingfunctionisselectedaftertheselectedwashing programme.
Loading door cannot be opened.
Your machine's door is not opened for safety reasons.>>>Ifdoorlockedindicatorisstillactiveondisplay afterdrying,machinekeepstheloadingdoorlockeduntilcools for your safety.
(*) Machine does not switch to spinning step when the laundry is not evenly distributed in the drum to prevent any damage to the machine and to its surrounding environment. Laundry should be rearranged and re-spun.
(**) Regular drum cleaning is not applied.
Clean the drum regularly. See 6.2

CAUTION!
- If you cannot eliminate the problem although you follow the instructions in this section, consult your dealer or the Authorised Service Agent. Never try to repair a nonfunctional product yourself.
8 Built-in installation guide
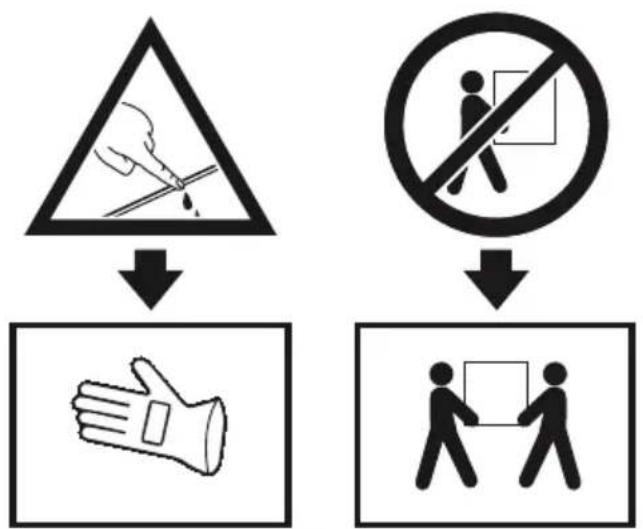
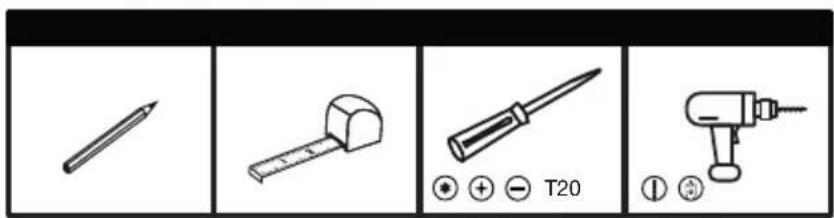
text_image
Diagram showing four types of tools: pencil, hammer, screwdriver, and drill bit with T20 indicator
text_image
ab x8 x2 x6 Ø 4 x 16mm M 5 x 10mm x2 x2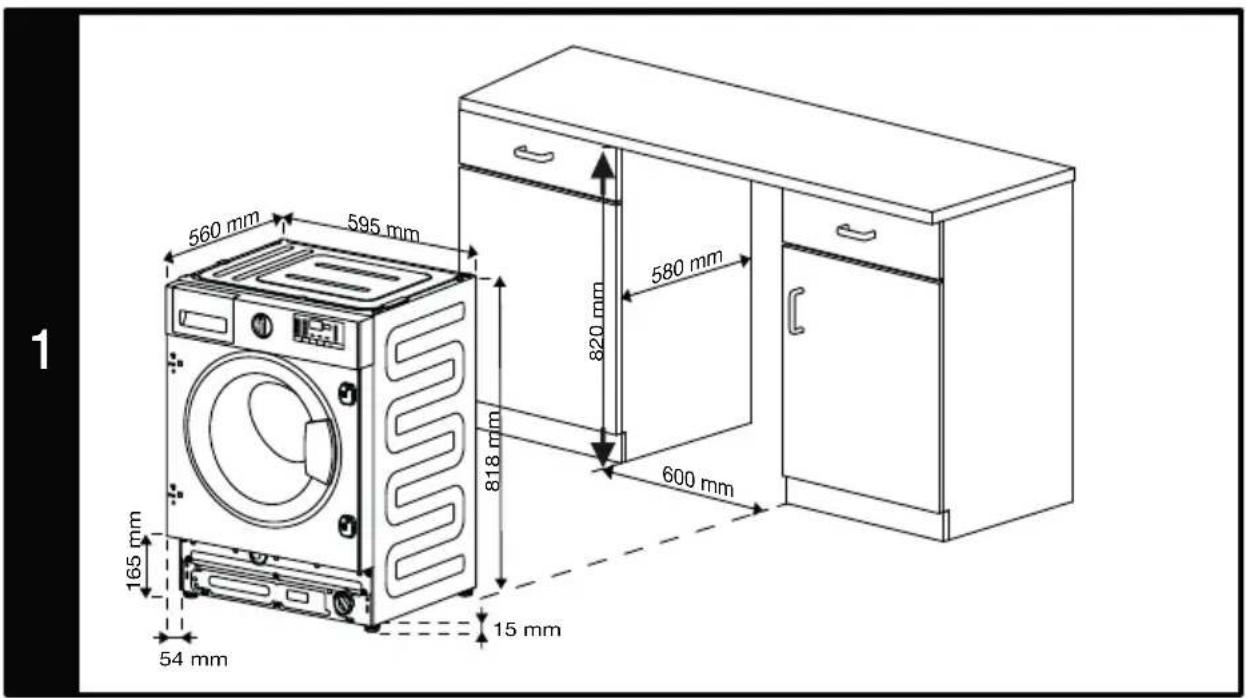
text_image
1 560 mm 595 mm 820 mm 580 mm 818 mm 600 mm 165 mm 54 mm 15 mm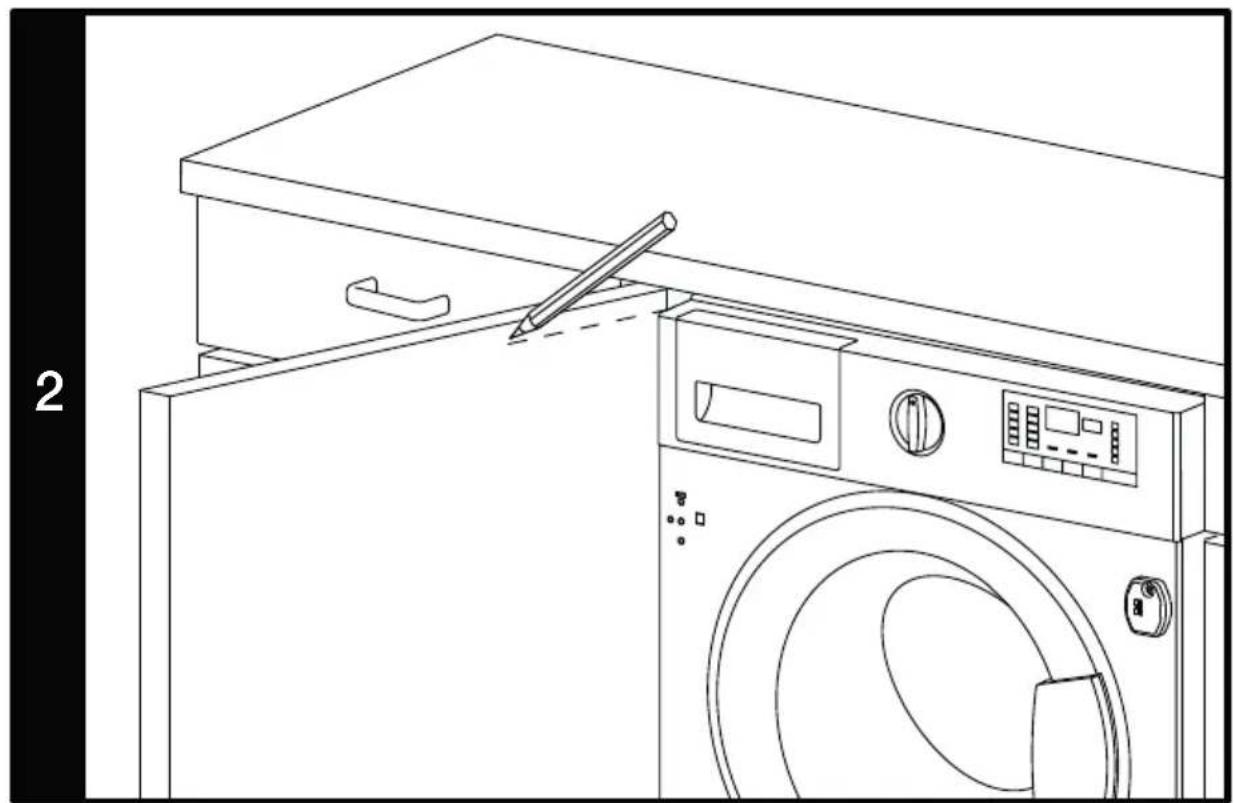
natural_image
Line drawing of a washing machine with a hand tool inserted, no text or symbols present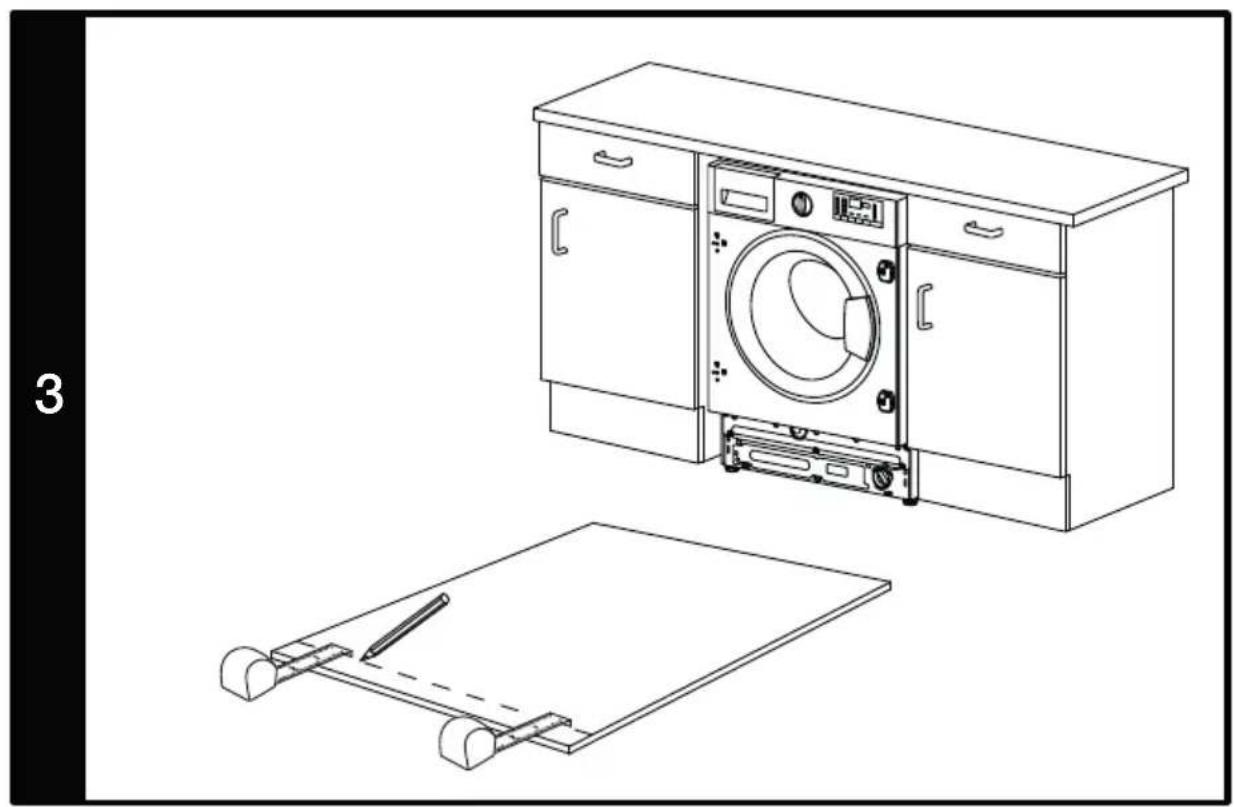
natural_image
Line drawing of a washing machine and its corresponding flatboard assembly (no text or symbols)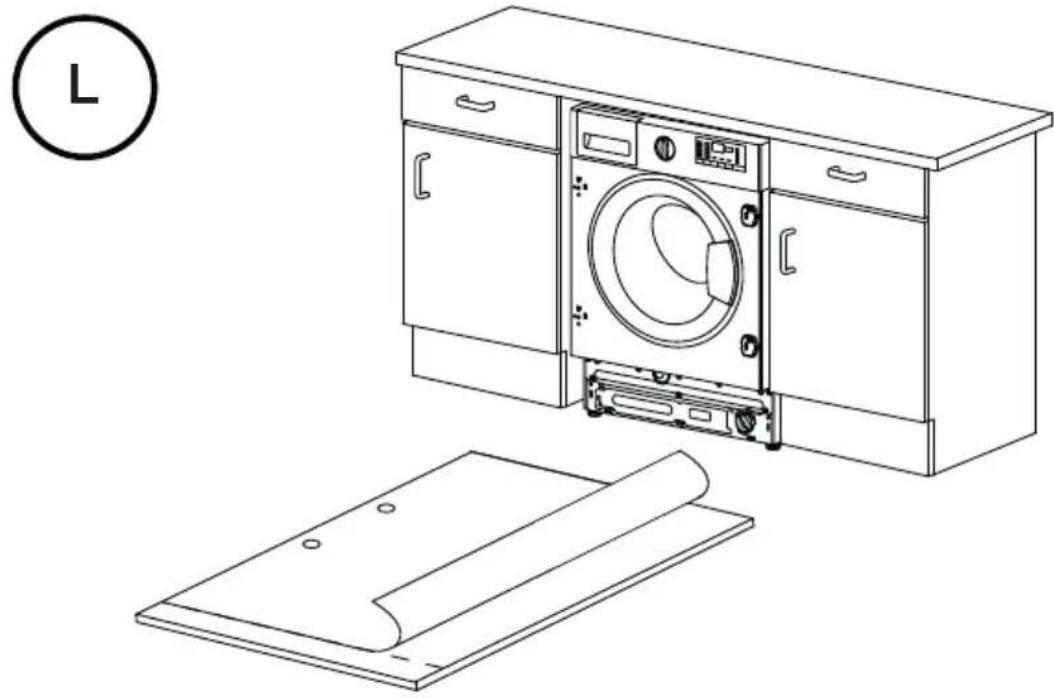
natural_image
Line drawing of a washing machine with front panel and side cover, shown in isometric view (no text or symbols)4
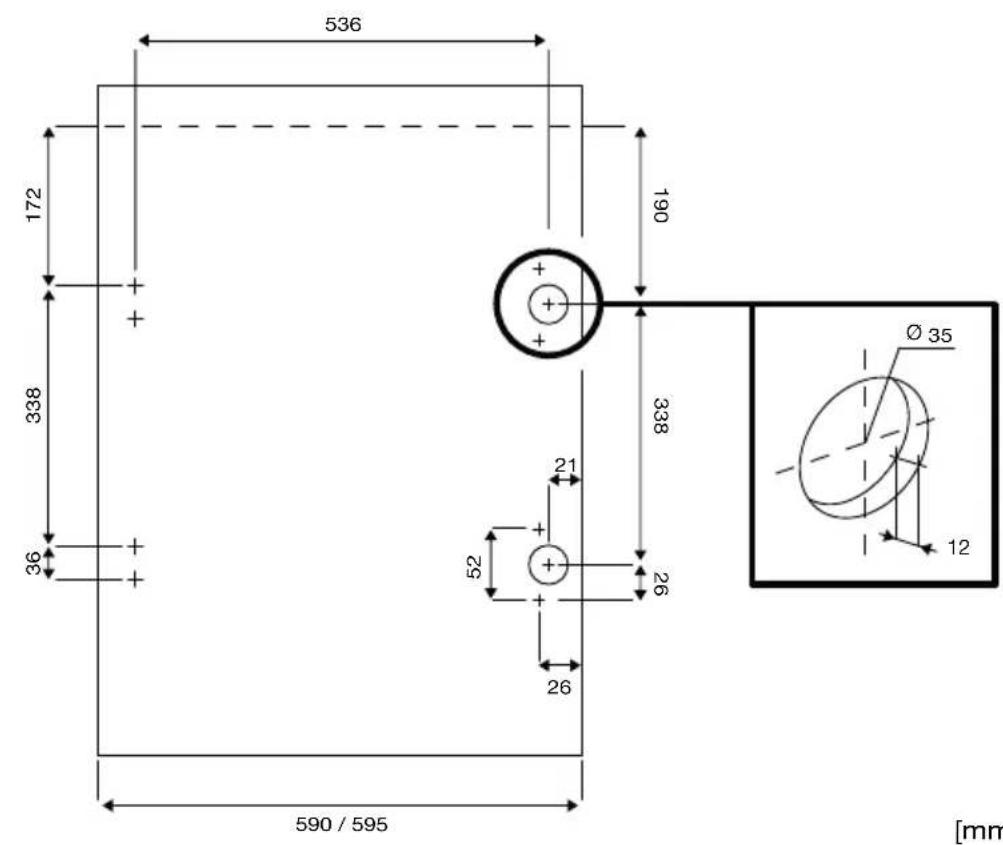
text_image
536 172 + + 338 36 + 590 / 595 190 338 21 52 + 26 Ø 35 12 [mm4
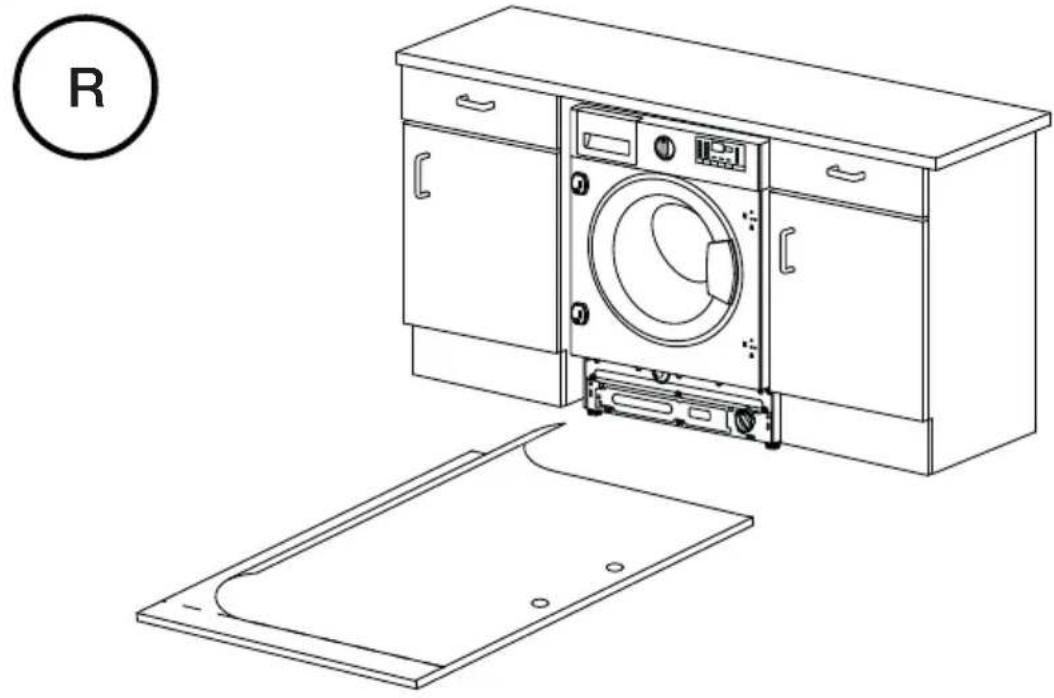
natural_image
Line drawing of a washing machine with open lid and side panel, no text or symbols present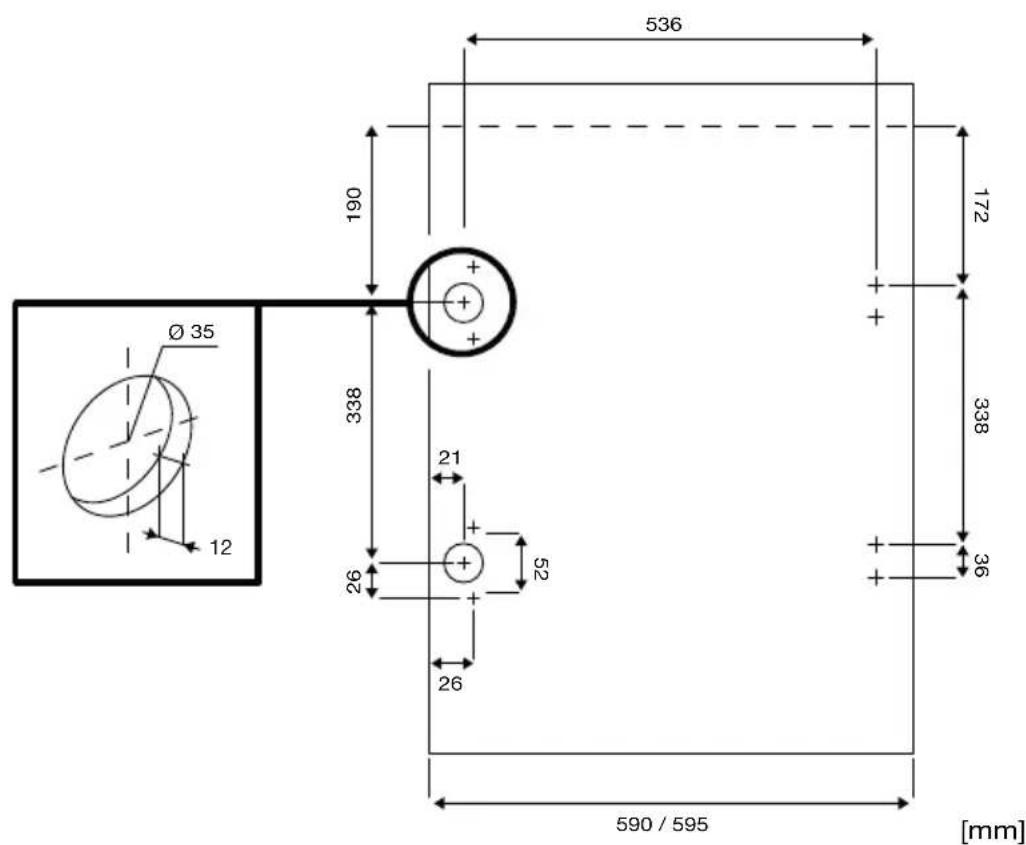
text_image
Ø 35 12 190 338 536 172 338 21 52 26 26 590 / 595 [mm]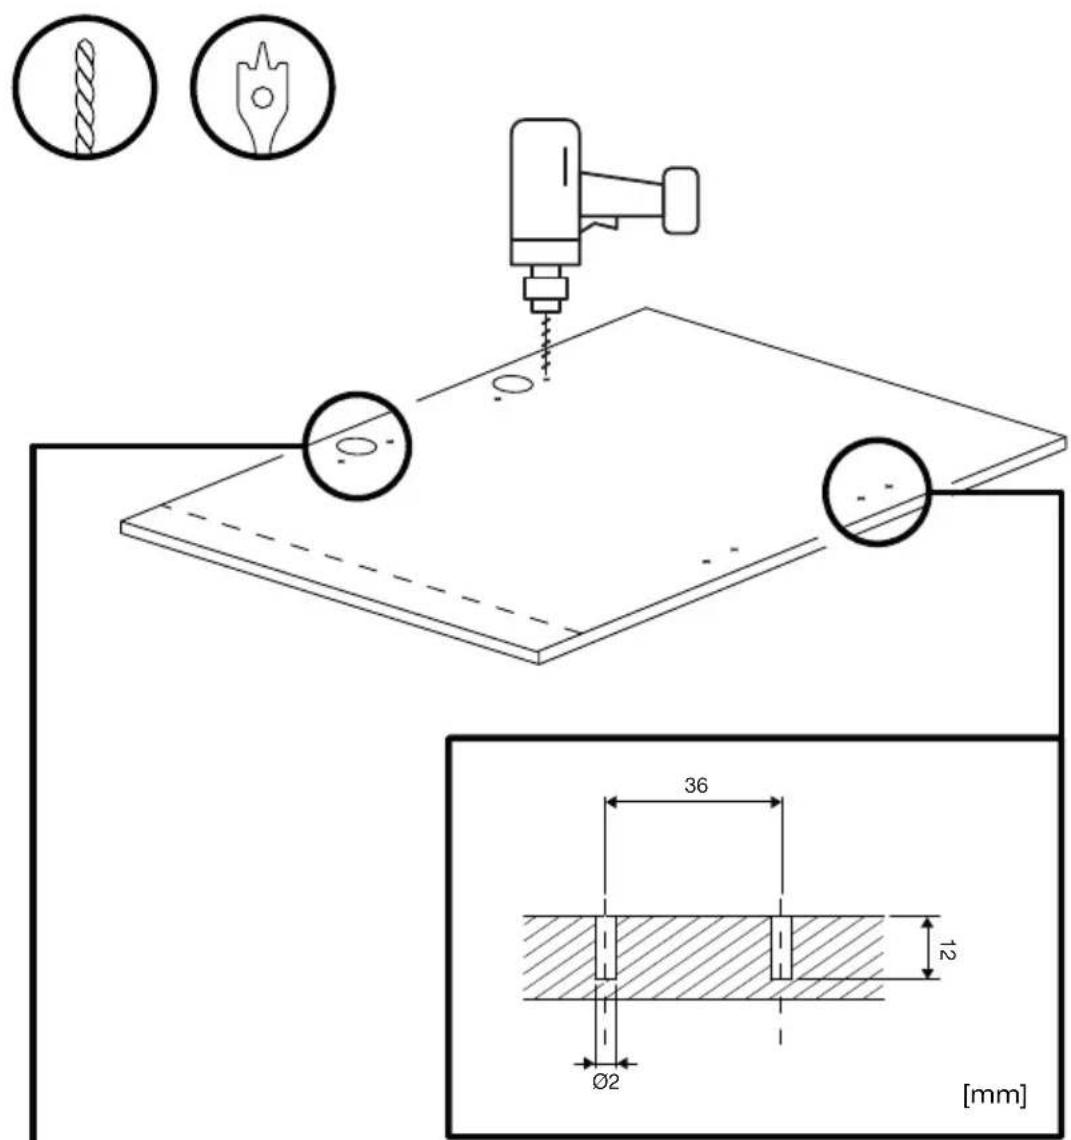
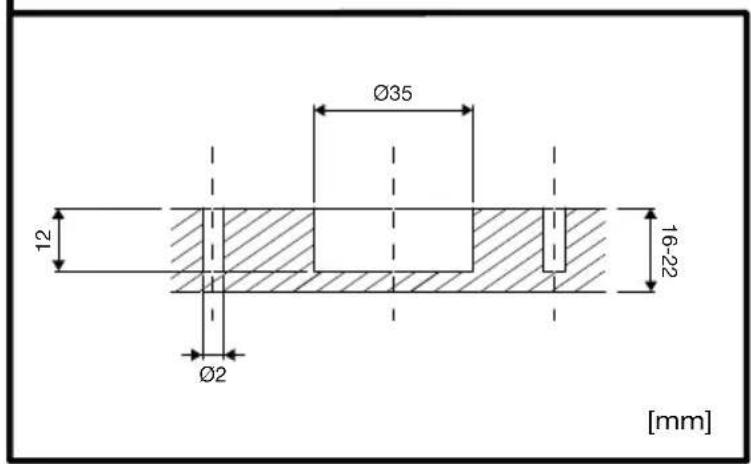
text_image
Ø35 12 Ø2 16-22 [mm]6
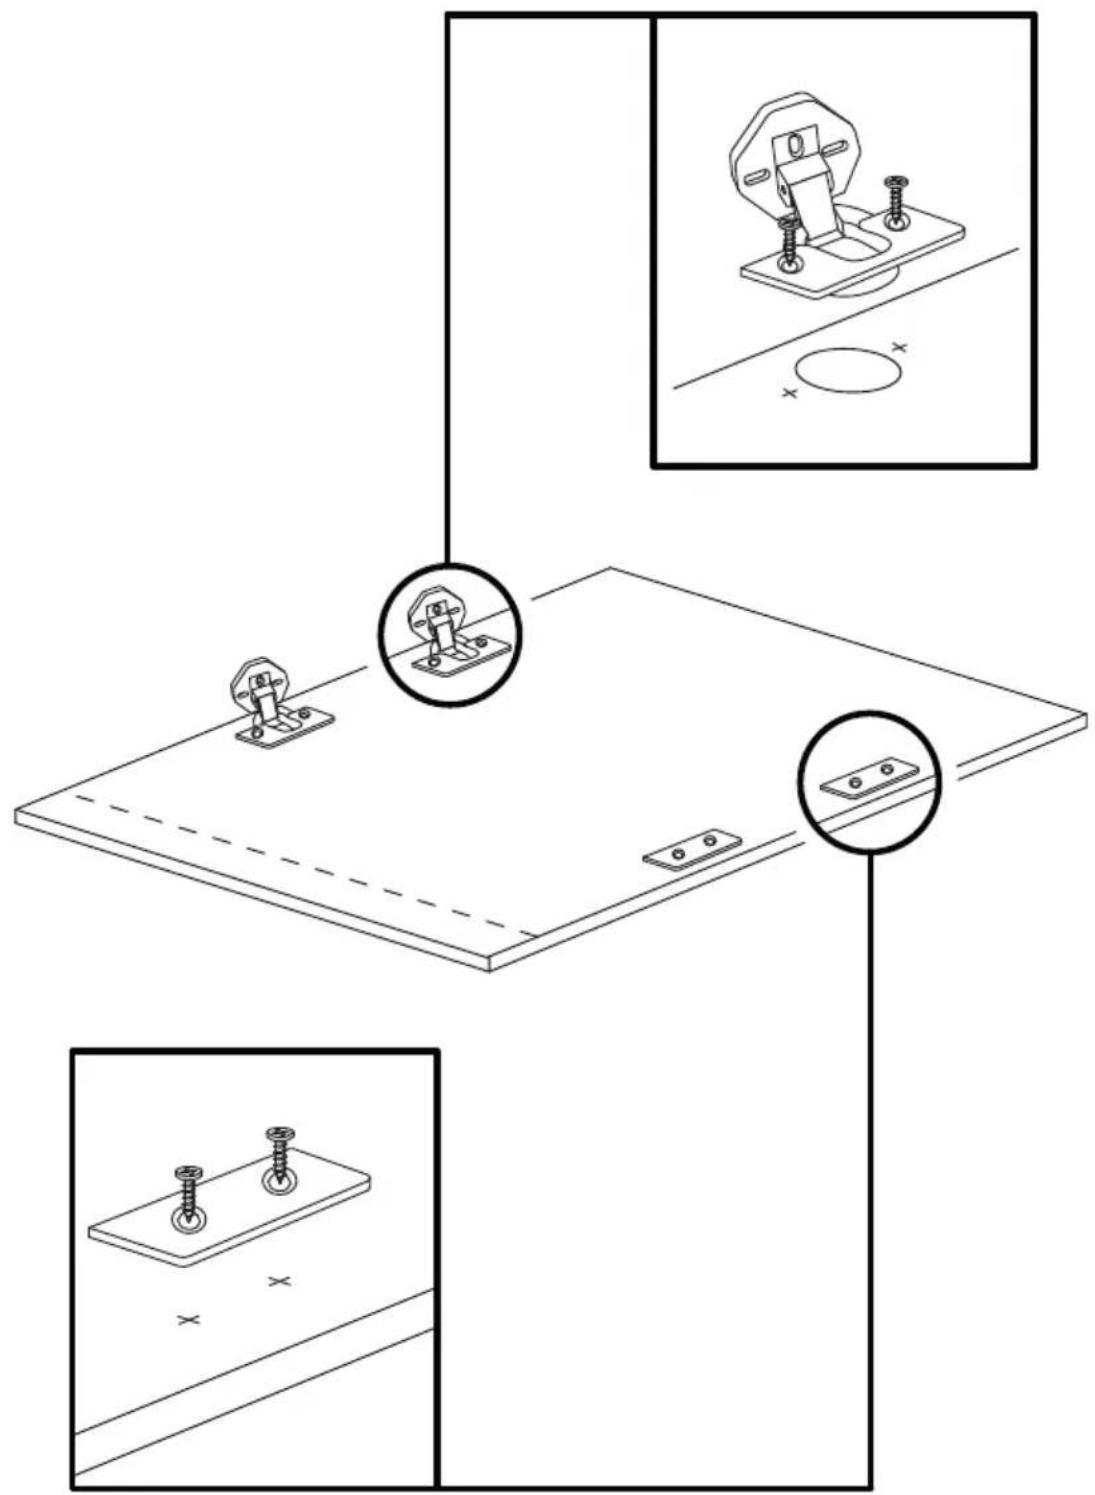
text_image
Technical diagram showing three stages of a mechanical assembly with bolted components and cross-sectional views7
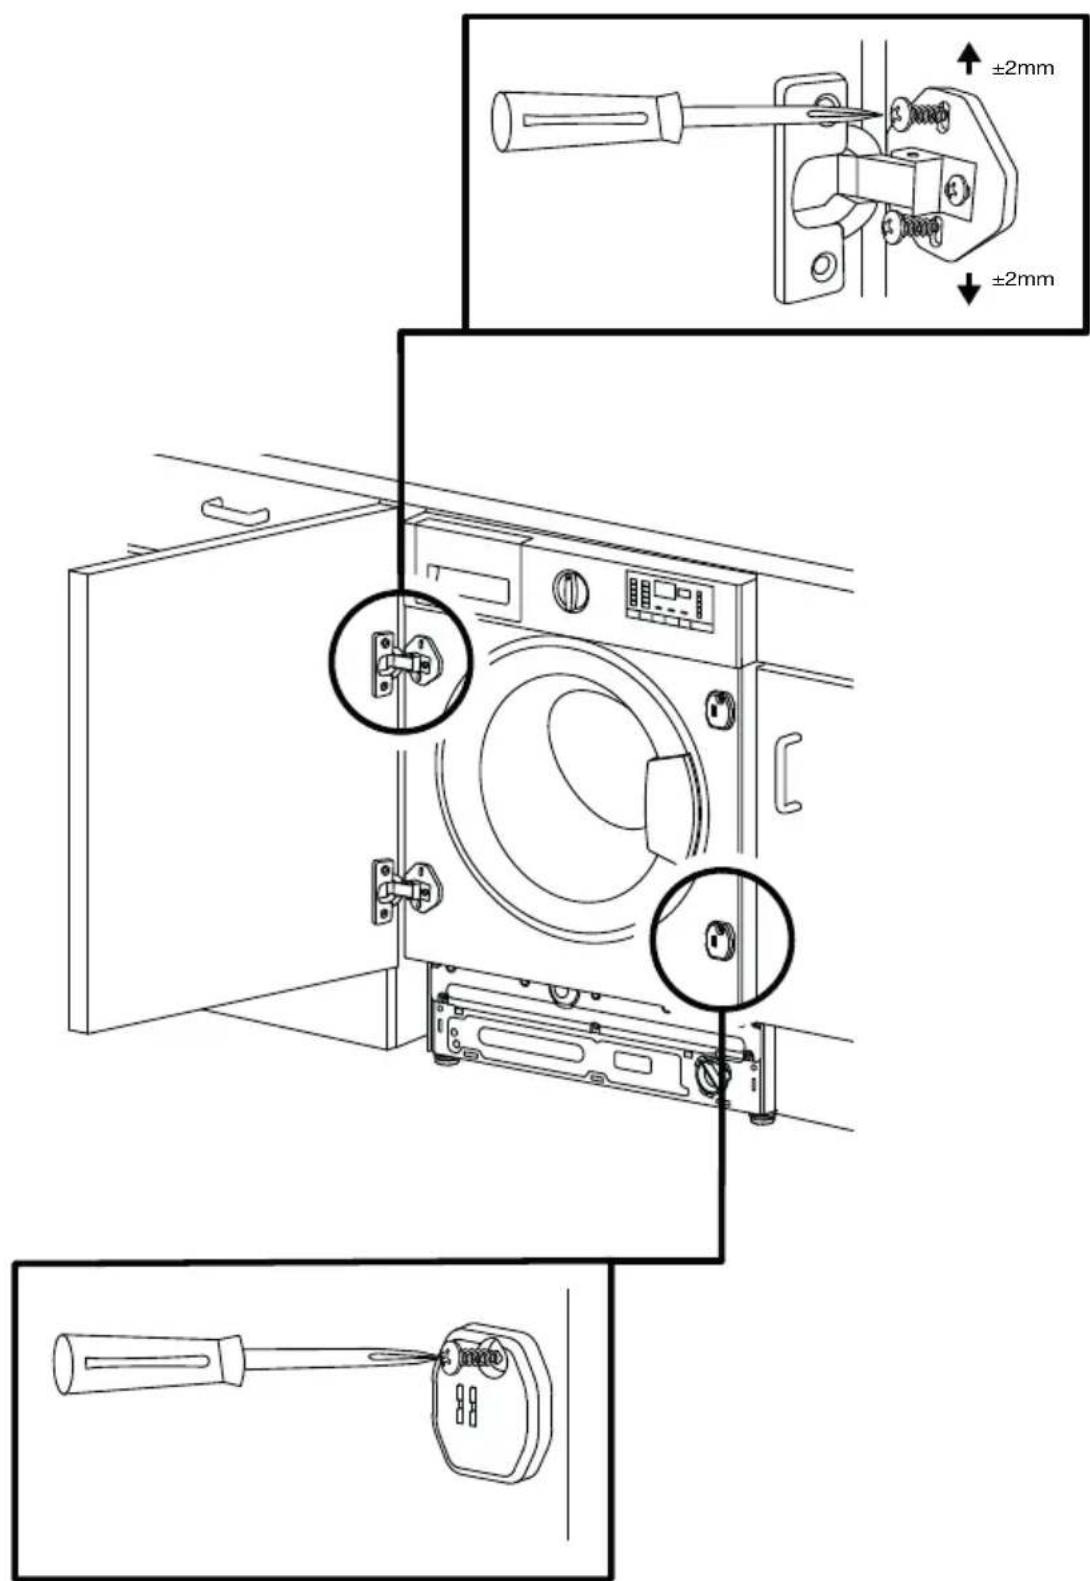
text_image
Technical diagram showing a washing machine with two close-up views of the door and a pull-up mechanism, annotated with ±2mm measurements.BLOMBERG UK AND IRELAND STANDARD MANUFACTURER GUARANTEE TERMS AND CONDITIONS
Your new Blomberg product is guaranteed against faulty materials, defective components or manufacturing defects.
The standard guarantee starts from the date of original purchase of the product, and lasts for a period of thirty six (36) months unless Beko plc (the “Manufacturer”) agrees to extend the guarantee for the product in writing.
If you have any questions about the guarantee on your product (including how long it is valid), please contact your retailer or our contact centre on 0333 207 9870 (UK and Northern Ireland) or 01 691 0160 (Republic of Ireland)
This guarantee does not in any way diminish or affect your statutory rights in connection with the product. This guarantee is in addition to your statutory rights as a consumer. If you have any questions about these rights, please contact the retailer from which you purchased the product. In certain circumstances, it is possible that your statutory rights may offer additional or higher levels of protection than those offered under the terms of this guarantee.
What is covered by this guarantee?
• Repairs to the product required as a result of faulty materials, defective components or manufacturing defects.
• Functional replacement parts to repair a product.
• The costs of a Blomberg Approved Engineer to carry out the repair.
What is not covered?
• Transit and delivery damage.
• Cabinet or appearance parts, including but not limited to control knobs, flaps and handles.
- Accessories and/or consumable items including but not limited to ice trays, scrapers, cutlery baskets, filters and light bulbs.
• Repairs necessary as a direct or indirect result of:
- Accidental damage, misuse or abuse of a product.
- An attempted repair of a product by anyone other than a Blomberg Approved Engineer (the "Engineer").
- Installation or use of a product where such installation or use fails to meet the requirements contained in this guarantee or the User Instructions Booklet.
- Repairs to a product operated at any time on commercial or non-residential household premises (unless we have previously agreed to the installation environment).
This guarantee is limited to the cost of repairing the product. To the extent permitted by law, the Manufacturer does not accept and will not be held liable for any financial loss incurred in connection with the failure of any product to operate in accordance with the expected standards. Such financial loss includes but is not limited to loss arising from:
• Time taken off work.
• Damaged food, clothing or other items.
- Meals taken at restaurants or from takeaways.
- General compensation for inconvenience.
Important Notes
- Your product is designed and built for domestic household use only.
- The guarantee will automatically be void if the product is installed or is used in commercial or non-residential domestic household premises, unless we have previously agreed to the installation environment.
- The product must be correctly installed, located and operated in accordance with the instructions contained in the User Instructions Booklet provided with your product.
- Professional installation by a qualified Electrical Domestic Appliance Installer is recommended for all Washing Machines, Dishwashers and Electric Cookers (as incorrect installation may result in you having to pay for the cost of repairing the product).
- Gas Cookers must be professionally installed by a Gas Safe (or Gas Networks Ireland for Republic of Ireland) registered gas installer.
- This guarantee is given in respect of products purchased and used within the United Kingdom and the Republic of Ireland.
- This guarantee is effective from the initial date of purchase of a new product from an authorised retailer and will be void if the product is resold.
- This guarantee does not apply to graded sales (where the product is purchased as a "second").
- Possession of a copy of these terms and conditions does not necessarily mean that a product has the benefit of this guarantee. If you have any questions, please call our Call Centre on the number set out above.
-
The Manufacturer reserves the right to terminate the guarantee if its staff or representatives are subjected to physical or verbal abuse in the course of carrying out their duties.
-
Optional extras, where available (i.e. extendable feet) are supplied on a chargeable basis only.
Does Blomberg offer replacements?
This is a repair-only guarantee. On occasion, the Manufacturer may at its sole discretion, replace your product with a new product instead of carrying out a repair. Where a replacement is offered, this would normally be an identical model but when this is not possible, a model of similar specification will be provided. The Manufacturer will cover the costs and arrange for the delivery of the new product and for the return of the old product. Any costs related to disconnecting the faulty product and installing the replacement product will not be borne by the Manufacturer unless previously agreed to in writing. The original guarantee will continue to apply to the replacement product; the new product will not come with a new guarantee.
When will the repair take place?
Our Engineers work Monday to Friday 9.00am to 5.00pm. Appointments outside these hours may be possible at the sole discretion of the Manufacturer but cannot be guaranteed. Whilst our Engineers will endeavour to minimize inconvenience and to meet requests for specific timed appointments, this cannot be guaranteed. We will not be liable for delays or if it is unable to carry out a repair because a convenient appointment cannot be arranged.
Will there be any charge for the repairs?
It is your responsibility to provide evidence to the Engineer that your product is covered by this guarantee with a proof of purchase. The Manufacturer reserves the right to charge for the reasonable cost of any service call if:
• You cannot provide evidence that your product is covered by this guarantee.
• Where a service call has been made and the engineer finds that there is no fault with your product.
• That your product has not been installed or operated in accordance with the User Instructions Booklet.
• That the fault was caused by something other than faulty materials, defective components or manufacturing defects.
- For missed appointments.
Payment of these costs are due immediately upon the Engineer providing you with an invoice. The Manufacturer reserves the right to terminate the guarantee if you fail to pay the costs for the service call in a timely manner.
If you are a resident of the United Kingdom, this guarantee will be governed by English law and subject to the English Courts, save where you live in another part of the United Kingdom, in which case the law and courts of that location will apply.
If you are resident in the Republic of Ireland, this guarantee will be governed by Irish law and the Irish courts will have jurisdiction.
This guarantee is provided by Beko plc. Beko House, 1 Greenhill Crescent, Watford, Hertfordshire. WD18 8QU.
Beko plc is registered in England and Wales with company registration number 02415578.
BLOMBERG UK AND IRELAND OPTIMA INVERTER MOTOR GUARANTEE TERMS AND CONDITIONS
This 10 year guarantee relates to Blomberg products that feature the Optima Inverter Motor.
The Optima Motor guarantee terms and conditions are in addition to our Standard guarantee terms and conditions detailed in the previous section.
In order to activate the 10 year guarantee you MUST register the appliance within 90 days of the original purchase date. You can register by first visiting blomberguk.com/register and by following the online instructions.
All Blomberg appliances come with a 3 year parts and labour guarantee as standard. When you register your appliance for the Optima Inverter Motor 10 year guarantee, you are also registering your appliance for the standard 3 year parts and labour guarantee.
Blomberg built-in or integrated products purchased from Euronics agents come with a 3 year parts and labour guarantee which is extended to 5 years, free of charge, upon registration of the appliance. When you register your appliance for this additional 2 years, you will automatically activate the Optima Inverter Motor 10 year guarantee. You do not need to register twice. To make a claim against your Blomberg Optima Inverter Motor Guarantee (the "Guarantee"), all customer and product details must be registered with Beko plc using the procedure outlined below.
- This extra 7 years or 5 years (for built-in appliances from Euronics agents) Guarantee is only effective after the expiration of the standard manufacturer's guarantee.
- It is only valid for the Optima Inverter motors of selected washing machines, washer-dryers, tumble dryers and dishwashers. It does not cover any labour charge or any other components of the product. In addition, it is only valid for one replacement of the Optima motor during the extra 9-year (for free standing appliances) or 8 year (for built-in appliances) guarantee period.
- To activate your guarantee, you MUST register your appliance within 90 days of the original purchase date, by visiting blomberguk.com/register.
- Customers will receive a unique reference code as proof of guarantee validation by email or post, which must be quoted at the time of a claim being made.
- Any repair/replacement of the Optima Inverter motor must only be carried out by an authorised Blomberg Service Agent (the "Service Agent").
- Labour for the repair/replacement of the Optima Inverter motor is not included in this guarantee and is chargeable directly by the Service Agent.
- Any additional components fitted to the product at any time will not be covered by this guarantee and will be chargeable directly by the Service Agent.
- The guarantee is not transferable and cannot be exchanged for cash.
- There are no alternative or additional offers to this Guarantee.
- The guarantee is exclusive of the manufacturer's standard guarantee
- The Terms and Conditions shown above are in addition to the standard terms and conditions of your product guarantee. Please read and refer to such Terms and Conditions when making any claim.
- We may use the information you provide for marketing purposes and to analyse your purchasing preferences. We may keep your information for a reasonable period for these purposes in accordance with the applicable Data Protection Laws and General Data Protection Regulations (GDPR). You can opt into this service during the registration process. Further details are available at http://www.blomberguk.com/cookie-and-privacy.
- These Terms and Conditions are governed by the laws of England and Wales; manufacturer: Beko plc, Beko House, 1 Greenhill Crescent, Watford WD18 8QU. Company Registration Number: 02415578.
HOW TO OBTAIN SERVICE FOR YOUR APPLIANCE
Please keep your purchase receipt or other proof of purchase details in a safe place; you will need to have this documentation available should the product require attention under guarantee.
Please take a few moments to complete the details below, as you will need this information when you call us, or to use our online services. When you call us you may be required to input your serial number into your telephone keypad. For help please visit Blomberguk.com/support/model-finder
• The product model number is printed on the Operating Instruction Booklet / User guide
• The product model and serial number is printed on the Rating Label affixed to the appliance.
- The Retailer (Purchased from) and Date of purchase will be printed on your purchase receipt or other proof of purchase paperwork
Recording of these details alone will not count as proof of purchase. A valid proof of purchase is required for requesting service under guarantee.
| Model number | Serial number | Purchased from | Date of purchase |
For service under guarantee or for product advice please call our Contact centre
Before requesting service please check the troubleshooting guide in the Operating Instructions booklet, as a charge may be levied where no fault is found, and even though your product may still be under guarantee.
After arranging service the area around the product must be easily accessible to the Engineer, without the need for cabinets or furniture to be removed or moved.
It is your responsibility to ensure our Engineers have a clean and safe environment to carry out any repairs.
Please have your Model number and Serial number available when you call us, as you may be required to input your serial number into your telephone keypad during your call.
UK Mainland & Northern Ireland:
0333 207 9870
Landline or mobile calls to 0333 numbers cost no more than calls to geographic numbers 01 or 02, and are charged at the basic rate. Calls from landlines and mobiles are included in free call packages but please check with your telephone service provider for exact call charges.
Republic of Ireland:
01 691 0160
Service once the manufacturers guarantee has expired
If you have purchased an extended guarantee please refer to the instructions contained within the extended guarantee agreement document, otherwise please call us using the appropriate number above, where service can be obtained at a charge.
Should you experience any difficulty in obtaining service please call us on 0333 207 9870 or 01 691 0160
Contact us though our website
Send us a secure message through our online contact us form. Please visit our website, click Contact Us and choose a product support topic from the list of options. Complete the required details and click send message.
Product registrations
For UK and Republic of Ireland product registrations please visit blomberguk.com/register
DISCLAIMER / WARNING (EN)
Some (simple) failures can be adequately handled by the end-user without any safety issue or unsafe use arising, provided that they are carried out within the limits and in accordance with the following instructions (see the "Self-Repair" section).
Therefore, unless otherwise authorized in the “Self-Repair” section below, repairs shall be addressed to registered professional repairers in order to avoid safety issues. A registered professional repairer is a professional repairer that has been granted access to the instructions and spare parts list of this product by the manufacturer according to the methods described in legislative acts pursuant to Directive 2009/125/EC.
However, only the service agent (i.e. authorized professional repairers) that you can reach through the phone number given in the user manual/warranty card or through your authorized dealer may provide service under the guarantee terms. Therefore, please be advised that repairs by professional repairers (who are not authorized by Blomberg) shall void the guarantee.
Self-Repair
Self-repair can be done by the end-user with regard to the following spare parts: door, door hinge and seals, other seals, door locking assembly and plastic peripherals such as detergent dispensers (an updated list is also available in support.blombergappliances.com as of 1st of March 2021).
Moreover, to ensure product safety and to prevent risk of serious injury, the mentioned self-repair shall be done following the instructions in the user manual for self-repair or which are available in support.blombergappliances.com. For your safety, unplug the product before attempting any self-repair.
Repair and repair attempts by end-users for parts not included in such list and/or not following the instructions in the user manuals for self-repair or which are available in support. blombergappliances.com, might give raise to safety issues not attributable to Blomberg, and will void the warranty of the product.
Therefore, it is highly recommended that end-users refrain from the attempt to carry out repairs falling outside the mentioned list of spare parts, contacting in such cases authorized professional repairers or registered professional repairers. On the contrary, such attempts by end-users may cause safety issues and damage the product and subsequently cause fire, flood, electrocution and serious personal injury to occur.
By way of example, but not limited to, the following repairs must be addressed to authorized professional repairers or registered professional repairers: motor, pump assembly, main board, motor board, display board, heaters etc.
The manufacturer/seller cannot be held liable in any case where end-users do not comply with the above.
The spare part availability of the washing machine or washer-dryer that you purchased is 10 years. During this period, original spare parts will be available to operate the washing machine or washer-dryer properly.