
ML-4050ND - Printer SAMSUNG - Free user manual and instructions
Find the device manual for free ML-4050ND SAMSUNG in PDF.


User questions about ML-4050ND SAMSUNG
0 question about this device. Answer the ones you know or ask your own.
Ask a new question about this device
Download the instructions for your Printer in PDF format for free! Find your manual ML-4050ND - SAMSUNG and take your electronic device back in hand. On this page are published all the documents necessary for the use of your device. ML-4050ND by SAMSUNG.
USER MANUAL ML-4050ND SAMSUNG
This manual is provided for information purposes only. All information included herein is subject to change without notice. Samsung Electronics is not responsible for any direct or indirect damages, arising from or related to use of this manual.
© 2007 Samsung Electronics Co., Ltd. All rights reserved.
- ML-4050N is trademark of Samsung Electronics Co., Ltd.
• Samsung and Samsung logo are trademarks of Samsung Electronics Co., Ltd. - Centronics is a trademark of Centronics Data Computer Corporation.
• IBM and IBM PC are trademarks of International Business Machines Corporation. - PCL and PCL 6 are trademarks of Hewlett-Packard company.
- Microsoft, Windows, Windows 98, Windows Me, Windows 2000, Windows NT 4.0, Windows XP, Windows 2003 and Vista are registered trademarks of Microsoft Corporation.
• PostScript 3 is a trademark of Adobe System, Inc. - UFST® and MicroType™ are registered trademarks of Monotype Imaging Inc.
- TrueType, LaserWriter, and Macintosh are trademarks of Apple Computer, Inc.
- All other brand or product names are trademarks of their respective companies or organizations.
CONTACT SAMSUNG WORLD WIDE
If you have any comments or questions regarding Samsung products, contact the Samsung customer care center.
| Country Customer Care Center Web Site | ||
| ARGENTINE 0800-333-3733 www.samsung.com/ar | ||
| AUSTRALIA 1300 | 362 603 www.samsung.com/au | |
| BELGIUM 02 201 | 2418 www.samsung.com/be | |
| BRAZIL 0800-124 | 421 | www.samsung.com/br |
| 4004-0000 | ||
| CANADA 1-800-SAMSUNG (7267864) www.samsung.com/ca | ||
| CHILE 800-726-7864 (SAMSUNG) www.samsung.com/cl | ||
| CHINA | 800-810-5858 | www.samsung.com.cn |
| 010- 6475 1880 | ||
| COLOMBIA 01-800-112-112 www.samsung.com/co | ||
| COSTA RICA | 0-800-507-7267 | www.samsung.com/latin |
| CZECH REPUBLIC | 844 000 844 | www.samsung.com/cz |
| Distributor pro Českou republiku : Samsung Zrt., Česka organizační složka Vyskočilova 4, 14000 Praha 4 | ||
| DENMARK | 70 70 19 70 | www.samsung.com/dk |
| ECUADOR | 1-800-10-7267 | www.samsung.com/latin |
| EL SALVADOR | 800-6225 | www.samsung.com/latin |
| ESTONIA | 800-7267 | www.samsung.ee |
| KAZAHSTAN | 8-800-080-1188 | www.samsung.kz |
| FINLAND | 030-6227 515 | www.samsung.com/fi |
| FRANCE | 3260 SAMSUNG or 08 25 08 65 65 (€ 0,15/min) | www.samsung.com/fr |
| GERMANY | 01805 - 121213(€ 0,14/min) | www.samsung.de |
| GUATEMALA | 1-800-299-0013 | www.samsung.com/latin |
| HONG KONG | 3698 4698 | www.samsung.com/hk |
| HUNGARY | 06-80-SAMSUNG (7267864) | www.samsung.com/hu |
| INDIA | 3030 8282 | www.samsung.com/in/ |
| 1800 110 011 | ||
| INDONESIA | 0800-112-8888 | www.samsung.com/id |
| ITALIA | 800-SAMSUNG(7267864) | www.samsung.com/it |
| JAMAICA | 1-800-234-7267 | www.samsung.com/latin |
| JAPAN | 0120-327-527 | www.samsung.com/jp |
| LATVIA | 800-7267 | www.samsung.com/lv/index.htm |
| Country | Customer Care Center | Web Site |
| LITHUANIA | 8-800-77777 | www.samsung.com/lt |
| LUXEMBURG | 0032 (0)2 201 24 18 | www.samsung.lu |
| MALAYSIA | 1800-88-9999 | www.samsung.com/my |
| MEXICO | 01-800-SAMSUNG(7267864) | www.samsung.com/mx |
| NETHERLANDS | 0900 20 200 88 (€ 0,10/min) | www.samsung.com/nl |
| NORWAY | 815-56 480 | www.samsung.com/no |
| PANAMA 800-7267 | www.samsung.com/latin | |
| PHILIPPINES | 1800-10-SAMSUNG(7267864) | www.samsung.com/ph |
| POLAND | 0 801 801 881 | www.samsung.com/pl |
| PORTUGAL | 80 8 200 128 | www.samsung.com/pt |
| PUERTO RICO | 1-800-682-3180 | www.samsung.com/latin |
| REP.DOMINICA | 1-800-751-2676 | www.samsung.com/latin |
| Republic ofIreland | 0818 717 100 www.samsung.com/uk | |
| RUSSIA 8-800-200 | 0-0400 www.samsung.ru | |
| SINGAPORE | 1800-SAMSUNG (7267864) | www.samsung.com/sg |
| SLOVAKIA | 0800-SAMSUNG (726786) | www.samsung.com/sk |
| SOUTHAFRICA | 0860 726 7864 (SAMSUNG) | www.samsung.com/za |
| SPAIN | 902 10 11 30 | www.samsung.com/es |
| SWEDEN | 0771-400 200 | www.samsung.com/se |
| Switzerland | 0800-7267864 | www.samsung.com/ch/ |
| TAIWAN | 0800-329-999 | www.samsung.com/tw |
| THAILAND | 1800-29-323202-689-3232 | www.samsung.com/th |
| TRINIDAD &TOBAGO | 1-800-7267-864 | www.samsung.com/latin |
| U.A.E | 800-SAMSUNG (7267864) | www.samsung.com/mea |
| U.K | 0870 SAMSUNG (7267864) | www.samsung.com/uk |
| U.S.A | 1-800-SAMSUNG (7267864) | www.samsung.com |
| UKRAINE | 8-800-502-0000 | www.samsung.com/ur |
| UZBEKISTAN | 8-800-120-0400 | www.samsung.com.uz |
| VENEZUELA | 0-800-100-5303 | www.samsung.com/latin |
| VIETNAM | 1 800 588 889 www.samsung.com/vn | |
CONTENTS
1. Introduction
Special features 1.1
Printer overview 1.3
Finding more information 1.4
Selecting a location 1.5
2. System setup
Using control panel menus 2.1
Menu overview 2.2
Printing a demo page 2.6
Changing the display language 2.6
Using toner save mode 2.6
3. Software overview
Supplied software 3.1
Printer driver features 3.2
System requirements 3.2
4. Network setup
Introduction 4.1
Supported operating systems 4.2
Configuring TCP/IP 4.2
Configuring EtherTalk 4.2
Configuring IPX frame types 4.3
Setting Ethernet speed 4.3
Restoring the network configuration 4.3
Printing a network configuration page 4.3
5. Loading print media
Selecting print media 5.1
Loading paper 5.4
Selecting an output location 5.8
6. Basic printing
Printing a document 6.1
Canceling a print job 6.1
7. Ordering supplies and accessories
Toner cartridges 7.1
Accessories 7.1
How to purchase 7.2
8. Maintenance
Printing information pages 8.1
Cleaning the printer 8.1
Maintaining the toner cartridge 8.3
Maintenance parts 8.6
9. Troubleshooting
Clearing paper jams 9.1
Troubleshooting checklist 9.5
Understanding the status LED 9.6
Understanding display messages 9.6
Toner cartridge-related messages 9.8
Solving general printing problems 9.9
Solving print quality problems 9.11
Common Windows problems 9.13
Common PostScript problems 9.13
Common Linux problems 9.14
Common Macintosh problems 9.14
10. Installing accessories
Precautions when installing accessories 10.1
Installing a memory DIMM 10.1
Installing a wireless network interface card 10.3
Using the hard disk 10.5
11. Specifications
Printer specifications 11.1
Safety and Regulatory Information
Important Precautions and Safety Information
When using this machine, these basic safety precautions should always be followed to reduce risk of fire, electric shock, and injury to people:
1 Read and understand all instructions.
2 Use common sense whenever operating electrical appliances.
3 Follow all warnings and instructions marked on the machine and in the literature accompanying the machine.
4 If an operating instruction appears to conflict with safety information, heed the safety information. You may have misunderstood the operating instruction. If you cannot resolve the conflict, contact your sales or service representative for assistance.
5 Unplug the machine from the AC wall socket before cleaning. Do not use liquid or aerosol cleaners. Use only a damp cloth for cleaning.
6 Do not place the machine on an unstable cart, stand or table. It may fall, causing serious damage.
7 Your machine should never be placed on, near or over a radiator, heater, air conditioner or ventilation duct.
8 Do not allow anything to rest on the power cable. Do not locate your machine where the cords will be abused by persons walking on them.
9 Do not overload wall outlets and extension cords. This can diminish performance, and may result in the risk of fire or electric shock.
10 Do not allow pets to chew on the AC power or PC interface cords.
11 Never push objects of any kind into the machine through case or cabinet openings. They may touch dangerous voltage points, creating a risk of fire or shock. Never spill liquid of any kind onto or into the machine.
12 To reduce the risk of electric shock, do not disassemble the machine. Take it to a qualified service technician when repair work is required. Opening or removing covers may expose you to dangerous voltages or other risks. Incorrect reassembly could cause electric shock when the unit is subsequently used.
13 Unplug the machine from the PC and AC wall outlet, and refer servicing to qualified service personnel under the following conditions:
- When any part of the power cord, plug, or connecting cable is damaged or frayed.
- If liquid has been spilled into the machine.
- If the machine has been exposed to rain or water.
- If the machine does not operate properly after instructions have been followed.
- If the machine has been dropped, or the cabinet appears damaged.
- If the machine exhibits a sudden and distinct change in performance.
14 Adjust only those controls covered by the operating instructions.
Improper adjustment of other controls may result in damage, and may require extensive work by a qualified service technician to restore the machine to normal operation.
15 Avoid using this machine during a lightning storm. There may be a remote risk of electric shock from lightning. If possible, unplug the AC power for the duration of the lightning storm.
16 If you continuously print multiple pages, the surface of the output tray may become hot. Be careful not to touch the surface, and keep children away from the surface.
17 The Power cord supplied with your machine should be used for safe operation. If you are using a cord which is longer than 2 m with 110 V machine, then it should be 16 AWG ^1 or bigger.
18 SAVE THESE INSTRUCTIONS.
Environmental and Safety Consideration
Laser Safety Statement
The printer is certified in the U.S. to conform to the requirements of DHHS 21 CFR, chapter 1 Subchapter J for Class I(1) laser products, and elsewhere, is certified as a Class I laser product conforming to the requirements of IEC 825.
Class I laser products are not considered to be hazardous. The laser system and printer are designed so there is never any human access to laser radiation above a Class I level during normal operation, user maintenance, or prescribed service condition.
Warning
Never operate or service the printer with the protective cover removed from Laser/Scanner assembly. The reflected beam, although invisible, can damage your eyes.
When using this product, these basic safety precautions should always be followed to reduce risk of fire, electric shock, and injury to persons:
text_image
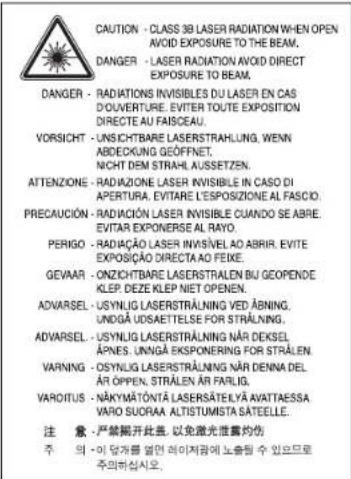
CAUTION - CLASS 30 LASER RADIATION WHEN OPEN AVOID EXPOSURE TO THE BEAM. DANGER - LASER RADIATION AVOID DIRECT EXPOSURE TO BEAM. DANGER - RADIATIONS INVISIBLES DU LASER EN CAS DO UVERTURE. EVITER TOUTE EXPOSITION DIRECTE AU FAISCEAU. VORSICHT - UNSCHTBARE LASER STRAHLUNG. WENN ABDECKUNG GEÖFFNET. NCHT DEM STRAHL AUSSETZEN. ATTENZIONE - RADIAZIONE LASER INVISIBLE IN CASO DI APERTURA. EVITARE L'ESPOSIZIONE AL FASCIO. PRECAUCIÓN - RADIACIÓN LASER INVISIBLE CUANDO SE ABRE. EVITAR EXPONERSE AL RAYO. PERIGO - RADIÇÃO LASER INVISÍVEL AO ABRIR. EVITE EXPOSICÍO DIRECTA AO FEIXE. GEVAAR - ONZICHTBARE LASER STRALEN BU GEOPENDE KLEP. DEZE KLEP NIET OPENEN. ADVARSEL - USYNLIG LASER STRÁLNING VED ÅBNING, UNDGÅ UDSAETTELSE FOR STRÁLNING. ADVARSEL - USYNLIG LASER STRÁLNING NÄR DEKSEL ÄPNES. UNNGÅ EKSPONERING FOR STRÅLEN VARNING - OSYNLIG LASER STRÁLNING NÄR DENNA DEL ÄR OPPEN. STRÅLEN ÄR FARLIG. VAROITUS - NÄKYMÄTÖNTA LASERSÄTELYÄ AVATTAESSA VARO SUORAAL ALTISTUMISTA SATEELLE. 注意:严禁揭开此盖,以免激光泄露灼伤 주의 이 담거를 열면 레이저감에 노출될 수 있으므로 주의하십시오.Ozone Safety

During normal operation, this machine produces ozone. The ozone produced does not present a hazard to the operator. However, it is advisable that the machine be operated in a well ventilated area.
If you need additional information about ozone, please contact your nearest Samsung dealer.
Power Saver
This printer contains advanced energy conservation technology that reduces power consumption when it is not in active use.
When the printer does not receive data for an extended period of time, power consumption is automatically lowered.
Recycling

Please recycle or dispose of packaging materials for this product in an environmentally responsible manner.
Correct Disposal of This Product (Waste Electrical & Electronic Equipment)
(Applicable in the European Union and other European countries with separate collection systems)

This marking shown on the product or its literature, indicates that it should not be disposed with other household wastes at the end of its working life. To prevent possible harm to the environment or human health from uncontrolled waste disposal, please separate this from other types of wastes and recycle it responsibly to promote the sustainable reuse of material resources.
Household users should contact either the retailer where they purchased this product, or their local government office, for details of where and how they can take this item for environmentally safe recycling.
Business users should contact their supplier and check the terms and conditions of the purchase contract. This product should not be mixed with other commercial wastes for disposal.
Radio Frequency Emissions
FCC Regulations
This device complies with Part 15 of the FCC Rules. Operation is subject to the following two conditions:
• This device may not cause harmful interference, and
- This device must accept any interference received, including interference that may cause undesired operation.
This device has been tested and found to comply with the limits for a Class A digital device, pursuant to Part 15 of the FCC rules. These limits are designed to provide reasonable protection against harmful interference in a residential installation. This equipment generates, uses and can radiate radio frequency energy and, if not installed and used in accordance with the instructions, may cause harmful interference to radio communications. However, there is no guarantee that interference will not occur in a particular installation. If this equipment does cause harmful interference to radio or television reception, which can be determined by turning the equipment off and on, the user is encouraged to try to correct the interference by one or more of the following measures:
- Reorient or relocate the receiving antenna.
- Increase the separation between the equipment and receiver.
- Connect the equipment into an outlet on a circuit different from that to which the receiver is connected.
- Consult the dealer or an experienced radio/TV technician for help.
Caution:
Changes or modifications not expressly approved by the manufacturer responsible for compliance could void the user's authority to operate the equipment.
Canadian Radio Interference Regulations
This digital apparatus does not exceed the Class A limits for radio noise emissions from digital apparatus as set out in the interference-causing equipment standard entitled "Digital Apparatus", ICES-003 of the Industry and Science Canada.
United States of America
Federal Communications Commission (FCC)
Intentional emitter per FCC Part 15
Low power, Radio LAN type devices (radio frequency (RF) wireless communication devices), operating in the 2.4 GHz/5 GHz Band, may be present (embedded) in your printer system. This section is only applicable if these devices are present. Refer to the system label to verify the presence of wireless devices.
Wireless devices that may be in your system are only qualified for use in the United States of America if an FCC ID number is on the system label.
The FCC has set a general guideline of 20 cm (8 inches) separation between the device and the body, for use of a wireless device near the body (this does not include extremities). This device should be used more than 20 cm (8 inches) from the body when wireless devices are on. The power output of the wireless device (or devices), which may be embedded in your printer, is well below the RF exposure limits as set by the FCC.
This transmitter must not be collocated or operation in conjunction with any other antenna or transmitter.
Operation of this device is subject to the following two conditions:(1) This device may not cause harmful interference, and(2) this device must accept any interference received, including interference that may cause undesired operation of the device.

Wireless devices are not user serviceable. Do not modify them in any way. Modification to a wireless device will void the authorization to use it. Contact manufacturer for service.

FCC Statement for Wireless LAN use:
"While installing and operating this transmitter and antenna combination the radio frequency exposure limit of 1mW/cm2 may be exceeded at distances close to the antenna installed. Therefore, the user must maintain a minimum distance of 20cm from the antenna at all times. This device can not be colocated with another transmitter and transmitting antenna."
Declaration of Conformity (European Countries)
Approvals and Certifications

The CE marking applied to this product symbolises Samsung Electronics Co., Ltd. Declaration of Conformity with the following applicable 93/68/EEC Directives of the European Union as of the dates indicated:
January 1, 1995: Council Directive 73/23/EEC Approximation of the laws of the member states related to low voltage equipment.
January 1, 1996: Council Directive 89/336/EEC (92/31/EEC), approximation of the laws of the Member States related to electromagnetic compatibility.
March 9, 1999: Council Directive 1999/5/EC on radio equipment and telecommunications terminal equipment and the mutual recognition of their conformity.
A full declaration, defining the relevant Directives and referenced standards can be obtained from your Samsung Electronics Co., Ltd. representative.
EC Certification
Certification to 1999/5/EC Radio Equipment & Telecommunications Terminal Equipment Directive (FAX)
This Samsung product has been self-certified by Samsung for pan-European single terminal connection to the analogue public switched telephone network (PSTN) in accordance with Directive 1999/5/EC. The product has been designed to work with the national PSTNs and compatible PBXs of the European countries:
In the event of problems, you should contact the Euro QA Lab of Samsung Electronics Co., Ltd. in the first instance.
The product has been tested against TBR21 and/or TBR 38. To assist in the use and application of terminal equipment which complies with this standard, the European Telecommunication Standards Institute (ETSI) has issued an advisory document (EG 201 121) which contains notes and additional requirements to ensure network compatibility of TBR21 terminals. The product has been designed against, and is fully compliant with, all of the relevant advisory notes contained in this document.
European Radio Approval Information (for products fitted with EU-approved radio devices)
This Product is a printer; low power, Radio LAN type devices (radio frequency (RF) wireless communication devices), operating in the 2.4 GHz/5 GHz band, may be present (embedded) in your printer system which is intended for home or office use. This section is only applicable if these devices are present. Refer to the system label to verify the presence of wireless devices.
Wireless devices that may be in your system are only qualified for use in the European Union or associated areas if a CE mark with a Notified Body Registration Number and the Alert Symbol is on the system label.
The power output of the wireless device or devices that may be embedded in you printer is well below the RF exposure limits as set by the European Commission through the R&TTE directive.
European States qualified under wireless approvals:
EU Austria, Belgium, Cyprus, Czech Republic, Denmark, Estonia, Finland, France (with frequency restrictions), Germany, Greece, Hungary, Ireland, Italy, Latvia, Lithuania, Luxembourg, Malta, The Netherlands, Poland, Portugal, Slovakia, Slovenia, Spain, Sweden and the U.K.
EEA/EFTA countries Iceland, Liechtenstein, Norway and Switzerland
European States with restrictions on use:
EUn France, the frequency range is restricted to 2446.5-2483.5 MHz for devices above 10 mW transmitting power such as wireless
EEA/EFTA countries No limitations at this time.
Regulatory Compliance Statements
Wireless Guidance
Low power, Radio LAN type devices (radio frequency (RF) wireless communication devices), operating in the 2.4 GHz/5 GHz Band, may be present (embedded) in your printer system. The following section is a general overview of considerations while operating a wireless device.
Additional limitations, cautions, and concerns for specific countries are listed in the specific country sections (or country group sections). The wireless devices in your system are only qualified for use in the countries identified by the Radio Approval Marks on the system rating label. If the country you will be using the wireless device in, is not listed, please contact your local Radio Approval agency for requirements. Wireless devices are closely regulated and use may not be allowed.
The power output of the wireless device or devices that may be embedded in your printer is well below the RF exposure limits as known at this time. Because the wireless devices (which may be embedded into your printer) emit less energy than is allowed in radio frequency safety standards and recommendations, manufacturer believes these devices are safe for use. Regardless of the power levels, care should be taken to minimize human contact during normal operation.
As a general guideline, a separation of 20 cm (8 inches) between the wireless device and the body, for use of a wireless device near the body (this does not include extremities) is typical. This device should be used more than 20 cm (8 inches) from the body when wireless devices are on and transmitting.
This transmitter must not be collocated or operation in conjunction with any other antenna or transmitter.
Some circumstances require restrictions on wireless devices. Examples of common restrictions are listed below:

Radio frequency wireless communication can interfere with equipment on commercial aircraft. Current aviation regulations require wireless devices to be turned off while traveling in an airplane. IEEE 802.11 (also known as wireless Ethernet) and Bluetooth communication devices are examples of devices that provide wireless communication.

In environments where the risk of interference to other devices or services is harmful or perceived as harmful, the option to use a wireless device may be restricted or eliminated. Airports, Hospitals, and Oxygen or flammable gas laden atmospheres are limited examples where use of wireless devices may be restricted or eliminated. When in environments where you are uncertain of the sanction to use wireless devices, ask the applicable authority for authorization prior to use or turning on the wireless device.

Every country has different restrictions on the use of wireless devices. Since your system is equipped with a wireless device, when traveling between countries with your system, check with the local Radio Approval authorities prior to any move or trip for any restrictions on the use of a wireless device in the destination country.

If your system came equipped with an internal embedded wireless device, do not operate the wireless device unless all covers and shields are in place and the system is fully assembled.

Wireless devices are not user serviceable. Do not modify them in any way. Modification to a wireless device will void the authorization to use it. Please contact manufacturer for service.

Only use drivers approved for the country in which the device will be used. See the manufacturer System Restoration Kit, or contact manufacturer Technical Support for additional information.
Replacing the Fitted Plug (for UK Only)
Important
The mains lead for this machine is fitted with a standard (BS 1363) 13 amp plug and has a 13 amp fuse. When you change or examine the fuse, you must re-fit the correct 13 amp fuse. You then need to replace the fuse cover. If you have lost the fuse cover, do not use the plug until you have another fuse cover.
Please contact the people from you purchased the machine.
The 13 amp plug is the most widely used type in the UK and should be suitable. However, some buildings (mainly old ones) do not have normal 13 amp plug sockets. You need to buy a suitable plug adaptor. Do not remove the moulded plug.
Warning
If you cut off the moulded plug, get rid of it straight away.
You cannot rewire the plug and you may receive an electric shock if you plug it into a socket.
Important warning: You must earth this machine.
The wires in the mains lead have the following color code:
- Green and Yellow: Earth
•
Blue:
Neutral
- Brown:
Live
If the wires in the mains lead do not match the colors marked in your plug, do the following:
You must connect the green and yellow wire to the pin marked by the letter "E" or by the safety 'Earth symbol' or colored green and yellow or green.
You must connect the blue wire to the pin which is marked with the letter "N" or colored black.
You must connect the brown wire to the pin which is marked with the letter "L" or colored red.
You must have a 13 amp fuse in the plug, adaptor, or at the distribution board.

ELECTRONICS
EU Declaration of Conformity (R&TTE)
We, Samsung Electronics Co., Ltd.
of Samsung Electronics Co., Ltd.
259, Gongdan-dong, Gumi-si Gyeongsanbuk-do [730-030] Korea
of Samsung Electricis Shandong Digital Printing Co., Ltd.
Sanxing Road, Weihai Hi-Tech IDZ, Shandong Province 264209, China
(factory name, access)
declare under our sole responsibility that the product
LaserBeam Printer
model "ML-4050N"
to which this declaration relates is in conformity with
R&TTE Directive 1999/5/EC (Annex IV)
Low Voltage Directive 2006/95/EC
EMC Directive 89/336/EEC, 92/31/EEC
By application of the following standards,
RF : IN 300 32B V1 4 1
IND : IN COED-1 2001-All
BC IN 5022 19841 20042 2003
IN 57081 1988-A1 2001-A2 2003
EN6100-3-2 200
ENIXOD 3-3 1955-A1 2001
IN 301 489-17 V1 2 1
(Manufacturer)
Samsung Electronics Co., Ltd. #259.
Gurçdan-Dung, Gumi-Si Gyeongsangbuk-dol 1730-0131 Korea
2007.02.05
(place and date of issue)
![SAMSUNG ML-4050ND - 259, Gongdan-dong, Gumi-si Gyeongsanbuk-do [730-030] Korea - 1](/content/2026/05/817695/images/ded5621c412cf54e9e4b2f519f58e07e2b61827a2d5460f9e052e8baa8d5764c.jpg)
Whan-Soon Yim / Senior Manager
(name and signature of authorized person)
(Representative in the EU)
Samsung Electronics Euro QA Lab.
Brock bushie Business Park, Surrey Way Yateley, Hampshire, CA46 6CC. UK
2007 02 05
(plate and date of issue)
![SAMSUNG ML-4050ND - 259, Gongdan-dong, Gumi-si Gyeongsanbuk-do [730-030] Korea - 2](/content/2026/05/817695/images/f773bc8b7b1090550388458b59ad1d797c3f656c7287e9c61b8fc5c96a85cdbb.jpg)
Yong-Sang Park / Manager
(name and signature of authorized person)
1 Introduction
Congratulations on the purchase of your printer!
This chapter includes:
- Special features
- Printer overview
• Finding more information - Selecting a location
Special features
Your new printer is equipped with several special features that improve the print quality. You can:
Print with excellent quality and high speed

- You can print up to 1200 x 1200 dpi effective output. See the Software section.
- Your printer prints A4-sized paper at up to 38 ppm ^a and letter-sized paper at up to 40 ppm. For duplex printing, your printer prints A4-sized paper at up to 26 ipm ^b and letter-sized paper at up to 27 ipm.
Handle paper flexibly
- The multi-purpose tray supports letterheads, envelopes, labels, transparencies, custom-sized materials, postcards, and heavy paper. The multi-purpose tray holds up to 100 sheets of plain paper.
- The 500-sheet standard tray 1 supports plain paper in various sizes.
- The 500-sheet optional tray support plain paper in various sizes. You can install up to 3 additional trays.
- Two output tray; select either the output tray (face-down) or the rear cover (face-up) for the most convenient access.
- Straight-through paper path capability from the multi-purpose tray to the rear cover.
Create professional documents

- Print Watermarks. You can customize your documents with words, such as "Confidential." See the Software section.
- Print Posters. The text and pictures of each page of your document are magnified and printed across the sheet of paper and can then be taped together to form a poster. See the Software section.
a. pages per minute
b. images per minute
Save time and money
- This printer allows you to use toner save mode to save toner. See page 2.6.
- You can print on both sides of the paper to save paper (double-sided printing).
- You can print multiple pages on a single sheet of paper to save paper (N-Up printing). See the Software section.
- You can use preprinted forms and letterhead with plain paper. See the Software section.
- This printer automatically conserves electricity by substantially reducing power consumption when not in use.
Expand the printer capacity
- Your printer has 64 MB of memory which can be expanded to 512 MB. See page 10.1.
- You can also add an optional wireless network interface card and hard disk.
- You can add 500-sheet optional trays to your printer. These trays let you add paper to the printer less often.
- Zoran IPS Emulation compatible with PostScript 3 Emulation ^* (PS) enables PS printing.
* Zoran IPS Emulation compatible with PostScript 3

• © Copyright 1995-2005, Zoran Corporation. All rights reserved. Zoran, the Zoran logo, IPS/PS3 and Onelmage are trademarks of Zoran Corporation.
* 136 PS3 fonts
- Contains UFST and MicroType from Monotype Imaging Inc.
Use the optional hard disk
You can install an optional hard disk in your printer.
- The 40 GB hard disk can store the data from your computer in the print queue. This decreases the workload of the computer.
- You can use various print features, such as storing a job in the hard disk, proofing a job, and printing private documents.
- You can manage the print jobs in the print queue of the printer hard disk.
For details, see page 10.5.
Print in various environments

- You can print in Windows 98/Me/NT 4.0/2000/XP/2003/Vista.
- Your printer is compatible with Linux and Macintosh.
- Your printer comes with both Parallel and USB interfaces.
- You can also use a network interface.
Printer overview
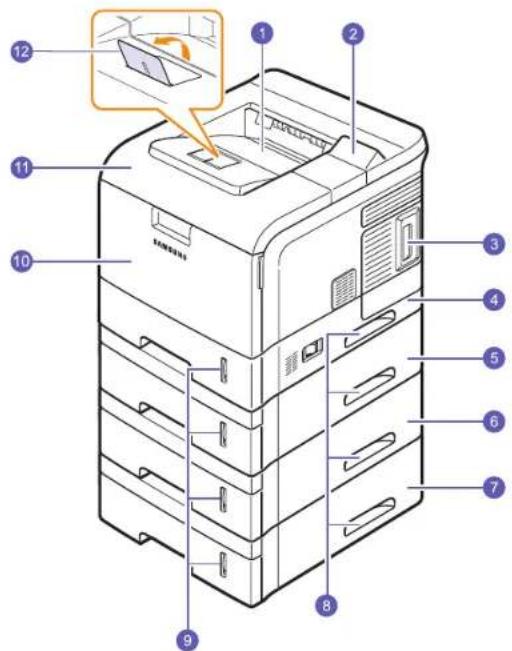
Front view
text_image
Technical diagram of a multi-tiered printer with numbered parts and an inset showing a device's internal structure.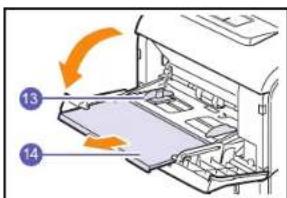
text_image
Diagram of a printer's internal structure with numbered parts and directional arrows indicating motion or movement.* The figure above shows an ML-4050N with all available options.
| 1 | output tray | 8 | handle |
| 2 | control panel | 9 | paper level indicator |
| 3 | control board cover | 10 | multi-purpose tray |
| 4 | tray 1 | 11 | top cover |
| 5 | optional tray 2 | 12 | output support |
| 6 | optional tray 3 | 13 | multi-purpose tray paper width guides |
| 7 | optional tray 4 | 14 | multi-purpose tray extension |
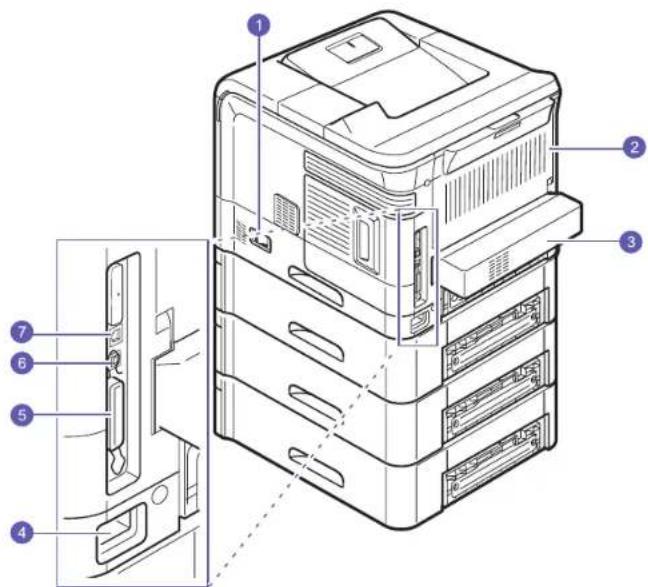
Rear view
text_image
Technical diagram of a server rack with numbered components and labeled parts in Chinese* The figure above shows an ML-4050N with all available options.
| 1 | power switch | 5 | parallel port |
| 2 | rear cover | 6 | USB port |
| 3 | duplex unit | 7 | network port |
| 4 | power receptacle |
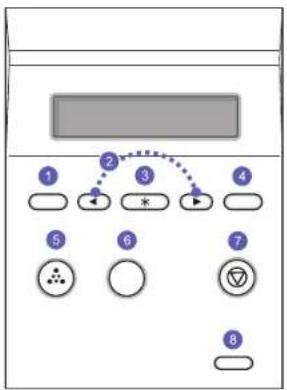
Control panel overview
flowchart
graph TD
    A["1"] --> B["2"]
    B --> C["3"]
    C --> D["4"]
    D --> E["5"]
    E --> F["6"]
    F --> G["7"]
    G --> H["8"]
| 1 | Menu: Enters Menu mode and scrolls through the available menus. |
| 2 | Scroll buttons: Scroll through the options available in the selected menu, and increase or decrease values. |
| 3 | OK: Confirms the selection on the display. |
| 4 | Back: Sends you back to the upper menu level. |
| 5 | Toner Save: Allows you to save on toner by using less toner in printing. See page 2.6. |
| 6 | Demo: Prints a demo page. |
| 7 | Stop: Stops an operation at any time. |
| 8 | Status: Indicates the status of your printer. See page 9.6. |
| Finding more information | |
| You can find information for setting up and using your printer from the following resources, either printed or onscreen. | |
Quick Install Guide | Provides information on setting up your printer and, therefore, be sure to follow the instructions in the guide to get the printer ready. |
Online User's Guide | Provides you with step-by-step instructions for using your printer's full features, and contains information for maintaining your printer, troubleshooting, and installing accessories.This user's guide also contains the Software section providing you with information on how to print documents with your printer on various operating systems, and how to use the supplied software utilities.Note• You can access the user's guides in other languages from the Manual folder on the printer driver CD. |
Network Printer User's Guide | Contained on the network utilities CD, provides you with information on setting up and connecting your printer to a network. |
Printer Driver Help | Provides you with help information on printer driver properties and instructions for setting up the properties for printing. To access a printer driver help screen, click Help from the printer properties dialog box. |
| Samsung Website | If you have Internet access, you can get help, support, printer drivers, manuals, and order information from the Samsung website,www.samsungprinter.com |
Selecting a location
Select a level, stable place with adequate space for air circulation. Allow extra space for opening covers and trays.
The area should be well-ventilated and away from direct sunlight or sources of heat, cold, and humidity. Do not set the printer close to the edge of your desk or table.
Clearance space
Front: 482.6 mm (enough space so that trays can be opened or removed)
Back: 320 mm (enough space to allow opening of the rear cover or the duplex unit)
Right: 100 mm (enough space to allow opening of the control board cover)
Left: 100 mm (enough space for ventilation)
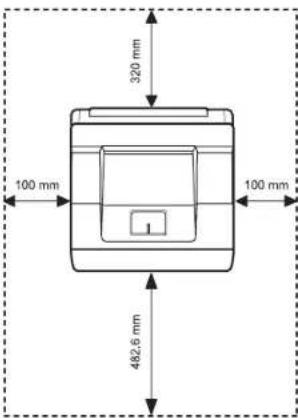
text_image
320 mm 100 mm 100 mm 482.6 mm
Note
- When you move the printer, do not tilt or turn it upside down, otherwise the inside of the printer may be contaminated by toner, which can cause damage to the printer or bad printing quality.
2 System setup
This chapter shows menus you can set and provides basic settings for your printer.
This chapter includes:
• Using control panel menus
- Menu overview
- Printing a demo page
- Changing the display language
• Using toner save mode
Using control panel menus
A number of menus are available to make it easy for you to change the printer settings. The diagram on the next column shows the menus and all of the menu items available in each menu. The items in each menu and the options you can select are described in more detail in the tables beginning on page 2.2.
Accessing control panel menus
You can control your printer from the printer's control panel. You can also set the control panel menus while printing.
1 Press Menu until the menu you want appears on the bottom line of the display and press OK.
2 Press the Scroll buttons until the desired menu item appears and press OK.
3 If the menu item has sub menus, repeat step 2.
4 Press the Scroll buttons to access the desired setting option or the required value.
5 Press OK to save your selection.
An asterisk (*) appears next to the selection on the display, indicating that it is now the default.
6 Press Stop to return to Standby mode.

Note
- Print settings made from the printer driver on a connected computer override the settings on the control panel.
Menu overview
The control panel menus are used to configure the printer. The control panel provides access to the foling menus.
The menus in the colored characters appear only when the optional items are installed.
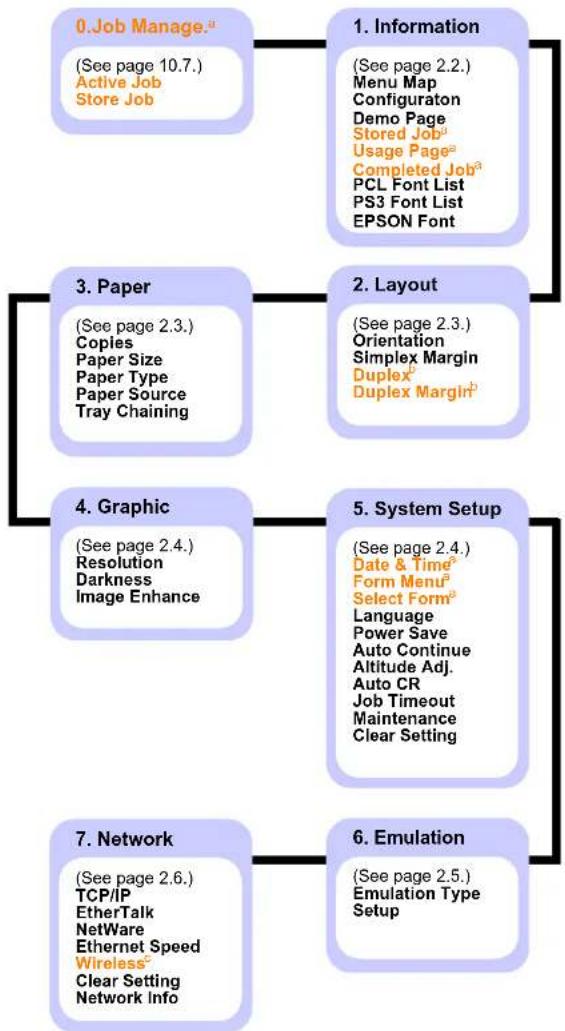
flowchart
graph TD
    A["0. Job Manage.a\n(See page 10.7.)\nActive Job\nStore Job"] --> B["1. Information\n(See page 2.2.)\nMenu Map\nConfiguration\nDemo Page\nStored Joba\nUsage Pagea\nCompleted Joba\nPCL Font List\nPS3 Font List\nEPSON Font"]
    B --> C["2. Layout\n(See page 2.3.)\nOrientation\nSimplex Margin\nDuplexb\nDuplex Marginb"]
    C --> D["3. Paper\n(See page 2.3.)\nCopies\nPaper Size\nPaper Type\nPaper Source\nTray Chaining"]
    D --> E["4. Graphic\n(See page 2.4.)\nResolution\nDarkness\nImage Enhance"]
    E --> F["5. System Setup\n(See page 2.4.)\nDate & Timea\nForm Menua\nSelect Forma\nLanguage\nPower Save\nAuto Continue\nAltitude Adj.\nAuto CR\nJob Timeout\nMaintenance\nClear Setting"]
    F --> G["6. Emulation\n(See page 2.5.)\nEmulation Type\nSetup"]
    G --> H["7. Network\n(See page 2.6.)\nTCP/IP\nEtherTalk\nNetWare\nEthernet Speed\nWirelessc\nClear Setting\nNetwork Info"]
a. Available with an optional hard disk.
b. Available with an optional duplex unit.
c. Available with optional wireless network interface.

Note
- The default settings and available values of your printer could differ from this guide.
Job manager menu
This menu is available when the optional hard disk is installed.
| Item Explanation | |
| Active Job This menu shows the print jobs waiting to be printed. See page 10.7. | |
| Store Job This menu shows the print jobs stored in the installed hard disk. See page 10.6. |
Information menu
This menu allows you to print printer information pages that give details about the printer and its configuration.
| Item Explanation | |
| Menu Map The menu map shows the layout and current settings of the control panel menu items. | |
| Configuraton The configuration page shows the printer's current configuration. | |
| Demo Page The demo page allows you to check if your printer properly performs printing. See page 2.6. | |
| Stored Job The stored job page shows the print file list stored in the optional hard disk.NoteThis menu item is available when the optional hard disk is installed. | |
| Usage Page The usage page contains the total number of pages printed by person or group. This page can be used for cost accounting.NoteThis menu item is available when the optional hard disk is installed. | |
| Completed Job The Completed Job page shows the list of completed print jobs. The list contains up to 50 files from the latest print jobs. | |
| PCL Font List PS3 Font List EPSON Font | The font sample list shows all of the fonts currently available for the selected language. |
Layout menu
Use the Layout menu to define all settings relating to output.
| Item Explanation | |
| Orientation Choose the default orientation of the print image on the page. | |
  Portrait Landscape Portrait Landscape | |
| Simplex Margin | Set the margin of print materials for one-sided printing. You can increase or decrease the value in 0.1 mm increments.Top Margin: Set the top margin.Left Margin: Set the left margin. |
| Duplex To print on both sides of paper, choose the binding edge as follows.Long Edge: Flip on the long edge.Short Edge: Flip on the short edge. | |
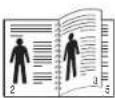 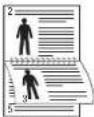 Long Edge in the Portrait orientation Long Edge in the Landscape orientation Long Edge in the Portrait orientation Long Edge in the Landscape orientation 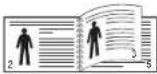 Short Edge in the Portrait orientation Short Edge in the Landscape orientationSelect Off to print on one side of the paper.NoteThis menu item is available when the optional duplex unit is installed. Short Edge in the Portrait orientation Short Edge in the Landscape orientationSelect Off to print on one side of the paper.NoteThis menu item is available when the optional duplex unit is installed. | |
| Item Explanation | |
| Duplex Margin | In this menu, you can set the margins for double-sided printing. You can increase or decrease the value in 0.1 mm increments.Top Margin: Set the top margin.Left Margin: Set the left margin.Short Binding: Set the bottom margin of the back of the page for short binding.Long Binding: Set the right margin of the back of the page for long binding.NoteThis menu item is available when the optional duplex unit is installed. |
Paper menu
Use the Paper menu to define all settings relating to print materials such as paper feed and exit, as well as size and type the specific print materials you are using with your printer.
| Item Explanation | |
| Copies Set the default number of copies by selecting any number from 1 to 999. | |
| Paper Size Depending on the paper source or duplex setting, available options vary.Select the paper size currently loaded in the tray. | |
| Paper Type Select the paper type currently loaded in the tray. | |
| Paper Source | Select which tray you want to use.If you selectAuto, the printer can automatically determine the source.SelectMP TrayorManual Feederto use the multi-purpose tray. If you selectManual Feeder, you need to pressOKeach time you print a page.Tray 2, Tray 3, or Tray 4is available only when the corresponding tray is installed. |
| Tray Chaining | When you select any other value exceptAutofrom Paper Sourceand the selected tray is empty, you can set the printer automatically to print from other trays.If this menu item is set toOff, the default LED lights red and the printer doesn't work until you insert paper into the specified tray. |
Graphic menu
Use the Graphic menu to change settings affecting the quality of the printed characters and images.
| Item Explanation | |
| Resolution Specify the number of dots printed per inch (dpi).The higher the setting, the sharper printed characters and graphics.If your print jobs are mostly text, select 600dpi-Normal for the highest quality printing.Se I 1200dpi-Best when your job contains bitmapped images, such as scanned photos or some graphics, that will benefit from enhanced line screening. | |
| Darkness You can lighten or darken the print on the page by changing the toner density setting. The Normal setting usually produces the best result. Use the Light toner density setting to save toner. | |
| ImageEnhance | This item enhances the print quality.Normal Doesn't enhance the quality.Text Enhance: Enhances letters and simple figures. |
System Setup menu
Use the System Setup menu to configure a variety of printer features.
| Item Explanation | |
| Date & TimeForm MenuSelect Form | See page 10.6 and 10.8.Note[2274] • This menu item is available when the optional hard disk is installed. |
| Language This setting determines the language of the text that appears on the control panel display and information printing. | |
| Power Save When the printer does not receive data for an extended period of time, power consumption is automatically lowered. You can set how long the printer waits before going to power save mode. | |
| Item Explanation | |
| Auto Continue | This item determines whether or not the printer continues printing when it detects the paper unmatched to your paper setting.Off: If a paper mismatch occurs, an error message will remain on the display and the printer will remain off-line until you insert the correct paper.On: If the paper mismatch occurs, an error message will display. The printer will go offline for 30 seconds, then automatically clear the message and continue printing. |
| Altitude Adj. You | can optimize print quality according to your altitude. |
| Auto CR This item | allows you to append the required carriage return to each line feed.Refer to the following samples: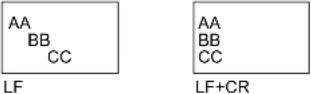 |
| Job Timeout You | can set the length of time the printer waits before printing the last page of a print job that does not end with a command to print the page.When a print time-out occurs, the printer prints the page in the print buffer. |
| Maintenance This | item allows you to maintain your printer.Clean Drum: Cleans the OPC drum of the toner cartridge and produces a cleaning sheet with toner debris on it.Clean Fuser: Cleans the fuser unit inside of the printer and produces a cleaning sheet with toner debris on it.CLR Empty MSG: Prevents the Toner Low Replace Toner message from appearing on the display. Once you have selected On, this setting will be permanently written to the memory of the toner cartridge, and this menu will be disappeared from the Maintenance menu.Supplies Life: Allows you to check how many pages have been printed and how much toner are left in the cartridge. |
| Clear Setting This | menu item allows you to restore the printer's factory default settings. |
Emulation menu
Use the Emulation menu to configure printer language emulation.
| Item Explanation | |
| Emulation Type | The printer language defines how the computer communicates with the printer.If you selectAuto, your printer can change the printer language automatically. |
| Setup See the following tables to configure properties of the printer language. | |
PCL
This menu sets the PCL emulation configuration. You can set the font type, symbol type, lines per page, and font size.
| Item Explanation | |
| Typeface You can select the standard font to be used in PCL emulation.PCL1~PCL7's interval between letters is fixed, and PCL8~PCL45's interval is proportional to the font type and font size. You can adjust the font size of PCL1~PCL7 using the Pitch item, and PCL8~PCL45 can do using Point Size item.PCL46~PCL54's interval and font size are fixed. | |
| Symbol This item selects the symbol set to be used in PCL emulation. The symbol is the group of numbers, marks, and special signs being used when printing letters.Depending on the Typeface setting, available symbol sets vary. | |
| Point Size When you select one between PCL8 and PCL45 from the Typeface menu, you can determine the font size by setting the height of the characters in the font. | |
| Courier This item lets you select the version of Courier font to use. | |
| Pitch When you select one between PCL1 and PCL7 from the Typeface menu, you can determine the font size by setting the number of characters that will print in one horizontal inch of type. The default value, 10 is the best size. | |
| Lines This item allows you to set vertical spacing from 5 to 128 lines for the default paper size. The default number of lines may differ according to the paper size and printing orientation. |
PostScript
This menu provides you with the Print PS Error menu item.
| Item Explanation | |
| Print PS Error | You can select whether your printer prints an error list when a PS error occurs.SelectOnto print PS 3 emulation errors. If an error occurs, the job stops processing, the error message prints, and the printer flushes the job.If this menu is set toOff, the job is flushed without an indication of the error. |
EPSON
This menu sets the EPSON emulation configuration.
| Item Explanation | |
| Font You can select the default font will be used in EPSON emulation. | |
| Character Set | This item allows you to select a character set of the desired language. |
| Character Tab. | This item selects the character set. |
| Pitch You can determine the font size by setting the number of characters that will print in one horizontal inch of type. | |
| LPI You can set the number of lines printed in one vertical inch. | |
| Auto Wrap | This item determines whether or not the printer automatically performs line feed when the data overflows the printable area of the print materials. |
Network menu
This menu lets you configure the network interface installed in your printer. You can reset the network interface and print a configuration page. For details, see page 4.1.
| Item Explanation | |
| TCP/IP This item | allows you to manually set the TCP/IP addresses or receive the addresses from the network.DHCP: The DHCP server allots the IP address to you automatically.BOOTP: The BOOTP server allots the IP address to you automatically.Static: You can enter IP Address, Subnet Mask, and Gateway manually. |
| EtherTalk This | item lets you select whether or not you use the EtherTalk protocol. SelectOnto use the protocol. |
| NetWare This | item lets you select the IPX frame type.Auto: You can set the printer to select the frame type automatically.802.2: Select this value to use the IEEE 802.2 frame type.802.3: Select this value to use the IEEE 802.3 frame type.Ethernet II: Select this value to use the Ethernet 2 frame type.SNAP: Select this value to use the SNAP frame type.Off: You can disable the NetWare protocol. |
| Ethernet Speed | This item allows you to select the ethernet speed. |
Wireless Configure the wireless network environments.See 10.4.Note This menu only appears when an optional wireless network interface card has been installed. This menu only appears when an optional wireless network interface card has been installed. | |
| Clear Setting | This item performs a simple reset and restores the factory default settings for the network configuration. This setting will only take effect after you restart the printer. |
| Network Info | This item prints a page showing the network parameters you set. |
Printing a demo page
After setting up your printer, print a demo page to make sure that the printer is operating correctly.
Press and hold Demo for about 2 seconds.
Or,
1 Press Menu and then OK when Information appears.
2 Press the Scroll buttons until Demo Page appears and press OK.
3 Press OK when Yes appears.
A demo page prints out.
Changing the display language
To change the language that is displayed on the control panel, follow these steps:
1 Press Menu until System Setup appears on the bottom line of the display and press OK.
2 Press the Scroll buttons until Language appears and press OK.
3 Press the Scroll buttons to select the language you want and press OK.
4 Press Stop to return to Standby mode.
Using toner save mode
Toner save mode allows the printer to use less toner on each page. Activating this mode extends the life of your toner cartridge and reduces your cost per page beyond what one would experience in the normal mode, but it reduces print quality.
There are two ways to enable this mode:
Using the control panel button
Press Toner Save on the control panel. The printer must be in Standby mode; the Status LED lights green and Ready is shown on the display.
- If the button backlight is on, the mode is enabled and the printer uses less toner to print a page.
- If the button backlight is off, the mode is disabled and the printer prints in normal mode.
From the software application
You can set toner save mode from the printer properties window on your printer driver. See the Software section.
3 Software overview
This chapter gives you an overview of the software that comes with your printer. Further details about installing and using the software are explained in the Software section.
This chapter includes:
- Supplied software
- Printer driver features
- System requirements
Supplied software
You must install the printer software using the supplied CDs after you have set up your printer and connected it to your computer.
Each CD provides you with the following software:
| CD Contents | ||
| printer software CD | Windows • | Printer driver: Use this driver to take full advantage of your printer's features.• Smart Panel: This program allows you to monitor the printer's status and alerts you when an error occurs during printing.• Direct Printing Utility: This program allows you to print PDF files easily.• Postscript Printer Description (PPD) file: Use the PostScript driver to print documents with complex fonts and graphics in the PostScript language.• User's Guide in PDF |
| Linux • Printer driver: Use this driver to run your printer from a Linux computer and print documents.• Smart Panel: This program allows you to monitor the printer's status and alerts you when an error occurs during printing. | ||
| Macintosh • | Printer driver: Use this driver to run your printer from a Macintosh computer and print documents.• Smart Panel: This program allows you to monitor the printer's status and alerts you when an error occurs during printing. | |
| network utilities CD | Windows • | SyncThruTM Web Admin Service: Use this web-based program to remotely manage, monitor, and troubleshoot network printers.• SetIP: Use this program to set your printer's TCP/IP addresses.• Network Printer User's Guide in PDF |
Printer driver features
Your printer drivers support the following standard features:
• Paper source selection
• Paper size, orientation and media type
• Number of copies
In addition, you can use various special printing features. The following table shows a general overview of features supported by your printer drivers:
| Feature | PCL 6 PostScript | |||
| Windows Windows Macintosh Linux | ||||
| Toner save O O | O O | |||
| Print quality option | O | O | O | O |
| Poster printing | O | X X X | ||
| Multiple pages per sheet (N-up) | O O O O | (2, 4) | ||
| Fit to page printing | O | O | O | O |
| Scale printing | O O O O | |||
| Different source for first page | O | X | O | X |
| Watermark | O | X X X | ||
| Overlay | O | X X X | ||

Note
- Overlay is not supported in Windows NT 4.0.
System requirements
Before you begin, ensure that your system meets the following requirements:
Windows
| Item | Requirements | Recommended | |
| Operating system | Windows 98/Me/NT 4.0/2000/XP/2003/Vista | ||
| CPU | Windows 98/Me/NT 4.0/2000 | Pentium II400 MHz or higher | Pentium III933 MHz |
| Windows XP/2003/Vista | Pentium III933 MHz or higher | Pentium IV1 GHz | |
| RAM | Windows 98/Me/NT 4.0/2000 | 64 MB or more | 128 MB |
| Windows XP/2003 | 128 MB or more | 256 MB | |
| Windows Vista | 512 MB or more | 1 GB | |
| Free disk space | Windows 98/Me/NT 4.0/2000 | 300 MB or more | 1 GB |
| Windows XP/2003 | 1 GB or more | 5 GB | |
| Windows Vista | 15 GB | 15 GB or more | |
| Internet Explorer | Windows 98/Me/NT 4.0/2000/XP/2003 | 5.0 or higher | |
| Windows Vista | 7.0 or higher | ||

Note
- For Windows NT 4.0/2000/XP/2003/Vista, users who have an administrator right can install the software.
Linux
| Item Requirements | |
| Operating system • Red Hat 8.0 ~ 9.0• Fedora Core 1 ~ 4• Mandrake 9.2 ~ 10.1• SuSE 8.2 ~ 9.2 | |
| Processor Pentium IV 1 GHz or higher | |
| RAM 256 MB or higher | |
| Free disk page 1 GB or higher | |
| Software • Linux Kernel 2.4 or higher• Glibc 2.2 or higher• CUPS |
Macintosh
| Item Requirements | |
| Operating system 8.6 | ~ 9.2 and 10.1 ~ 10.4 |
| RAM 128 MB | |
| Free disk space 200 MB | |
| Connection USB interface, Network interface | |
4 Network setup
This chapter gives you step-by-step instructions for setting up your printer for network connections.
This chapter includes:
- Introduction
• Supported operating systems - Configuring TCP/IP
- Configuring IPX frame types
- Setting Ethernet speed
- Restoring the network configuration
- Printing a network configuration page
Introduction
Once you have connected your printer to a network with an RJ-45 Ethernet cable, you can share the printer with other network users.
You need to set up the network protocols on the printer to use it as your network printer. Protocols can be set up by the following two methods:
Via network administration programs
You can configure your printer's print server settings and manage the printer via the following programs that came with your printer:
- SyncThru™ Web Admin Service: A web-based printer management solution for network administrators. SyncThru™ Web Admin Service provides you with an efficient way of managing network devices and lets you remotely monitor and troubleshoot network printers from any site with corporate intranet access.
- SyncThru™ Web Service: A web server embedded to your network print server, which allows you to configure the network parameters necessary for the printer to connect to various network environments
- SetIP: A utility program allowing you to select a network interface and manually configure the addresses for use with the TCP/IP protocol.
For further details, refer to the user's guide on the network utilities CD that came with your printer.
Via the control panel
You can set up the following basic network parameters through the printer's control panel:
- Configure TCP/IP
- Configure IPX frame types for NetWare
- Configure EtherTalk
Supported operating systems
The following table shows the network environments supported by the printer:
| Item Requirements | |
| Network interface • 10/100 Base-TX• IEEE 802.11 b/g Wireless LAN (optional) | |
| Network operating system | • Novell NetWare 4.x, 5.x, 6.x• Windows 98/Me/NT 4.0/2000/XP/2003/Vista• Various Linux OS• Macintosh OS 8.6 ~ 9.2 and 10.1 ~ 10.4 |
| Network protocols • NetWare IPX/SPX• TCP/IP• E t h e r T a l k• H T T P 1 . 1• S N M P | |
| Dynamic addressing server | • DHCP, BOOTP |
- IPX/SPX: Internet Packet eXchange/Sequenced Packet eXchange
- TCP/IP: Transmission Control Protocol/Internet Protocol
- DHCP: Dynamic Host Configuration Protocol
• BOOTP: Bootstrap Protocol
Configuring TCP/IP
Your printer can be set up with a variety of TCP/IP network information, such as an IP address, a subnet mask, a gateway, and DNS addresses. There are several ways in which your printer can be assigned a TCP/IP address, depending on your network.
- Static addressing: A TCP/IP address is assigned manually by the system administrator.
- Dynamic addressing via BOOTP/DHCP (default): A TCP/IP address is assigned automatically by the server.

Note
- Before configuring TCP/IP, you need to set the network protocol to TCP/IP.
Static addressing
To enter a TCP/IP address from your printer's control panel, take the following steps:
1 Press Menu until Network appears on the bottom line of the display and press OK.
2 Press OK when TCP/IP appears.
3 Press the Scroll buttons until Static appears and press OK.
4 Press OK when IP Address appears.
5 Set the first byte between 0 and 255 using the Scroll buttons and press OK to move to the next byte.
Repeat this to complete the address from the 1st byte to the 4th byte.
6 When you have finished, press OK.
7 Repeat step 5 and 6 to configure the other TCP/IP parameters: Subnet Mask and Gateway address.
8 Press Stop to return to Standby mode.
Dynamic addressing (BOOTP/DHCP)
To have a TCP/IP address assigned automatically by the server, take the following steps:
1 Press Menu until Network appears on the bottom line of the display and press OK.
2 Press OK when TCP/IP appears.
3 Press the OK. Scroll buttons until DHCP or BOOTP appears and press
4 Press Stop to return to Standby mode.
Configuring EtherTalk
EtherTalk is AppleTalk used in an Ethernet network. This protocol is widely used in Macintosh network environments. To use EtherTalk, take the following steps:
1 Press Menu until Network appears on the bottom line of the display and press OK.
2 Press the Scroll buttons until EtherTalk appears and press OK.
3 Press the Scroll buttons until On appears and press OK.
4 Press Stop to return to Standby mode.
Configuring IPX frame types
To use IPX/SPX protocol networks (for example, Novell NetWare), the format of the network communication frames must be specified for the printer. In most cases, you can keep the Auto setting. However, you can manually set the frame type format, if required. Take the following step to change the frame type format:
1 Press Menu until Network appears on the bottom line of the display and press OK.
2 Press the Scroll buttons until NetWare appears and press OK.
3 Press the Scroll buttons until the desired frame type appears.
- Auto: Automatically senses and limits the frame type to the first one detected.
- 802.2: Limits the frame type to IPX over IEEE 802.2 with IEEE 802.3 frames. All others will be discarded.
- 802.3: Limits the frame type to IPX over IEEE 802.3 frames. All others will be discarded.
- Ethernet II: Limits the frame type to IPX over Ethernet Frames. All others will be discarded.
- SNAP: Limits the frame type to IPX over SNAP with IEEE 802.3 frames. All others will be discarded.
- Off: Disables the IPX/SPX protocol.
4 Press OK to save the selection.
5 Press Stop to return to Standby mode.
Setting Ethernet speed
You can select the communication speed for Ethernet connections.
1 Press Menu until Network appears on the bottom line of the display and press OK.
2 Press the Scroll buttons until Ethernet Speed appears and press OK.
3 Press the Scroll buttons until the speed you want appears and press OK.
4 Press Stop to return to Standby mode.
Restoring the network configuration
You can return the network configuration to its default settings.
1 Press Menu until Network appears on the bottom line of the display and press OK.
2 Press the Scroll buttons until Clear Setting appears and press OK.
3 Press OK when Yes appears to restore the network configuration.
4 Power the printer off and back on.
Printing a network configuration page
The network configuration page shows how the network interface card on your printer is configured.
1 Press Menu until Network appears on the bottom line of the display and press OK.
2 Press the Scroll buttons until Network Info appears and press OK.
3 Press OK when Yes appears.
The network configuration page prints out.
5 Loading print media
This chapter will help you understand types of paper you can use with your printer and how to properly load paper in the different paper trays for the best print quality.
This chapter includes:
- Selecting print media
- Loading paper
- Selecting an output location
Selecting print media
You can print on a variety of print media, such as plain paper, envelopes, labels, and transparencies. Always use print media that meet the guidelines for use with your printer. Print media that does not meet the guidelines outlined in this user's guide may cause the following problems:
- Poor print quality
- Increased paper jams
• Premature wear on the printer
Properties, such as weight, composition, grain, and moisture content, are important factors that affect the printer's performance and the output quality. When you choose print media, consider the following: - The type, size and weight of the print media for your machine are described later in this section.
- Desired outcome: The print media you choose should be appropriate for your project.
- Brightness: Some print media are whiter than others and produce sharper, more vibrant images.
- Surface smoothness: The smoothness of the print media affects how crisp the printing looks on the paper.

Notes
- Some print media may meet all of the guidelines in this section and still not produce satisfactory results. This may be the result of improper handling, unacceptable temperature and humidity levels, or other variables over which Samsung has no control.
- Before purchasing large quantities of print media, ensure that it meets the requirements specified in this user's guide.

Caution
- Using print media that does not meet these specifications may cause problems, requiring repairs. Such repairs are not covered by Samsung's warranty or service agreements.
Supported sizes of paper
| Type Size Dimensions Weight | a | Capacityb | ||
| Plain paper | Letter | 216 x 279 mm (8.5 x 11 inches) | · 60 to 105 g/m2(16 to 28 lb bond) for the tray· 60 to 163 g/m2(16 to 43 lb bond) for the multi-purpose tray | · 500 sheets of 75 g/m2(20 lb bond) paper for the tray· 100 sheets for the multi-purpose tray |
| Legal 216 x 356 mm (8.5 x 14 inches) | ||||
| Folio 216 x 330.2 mm (8.5 x 13 inches) | ||||
| Oficio 216 x 343 mm (8.5 x 13.5 inches) | ||||
| A4 210 x 297 mm (8.27 x 11.69 inches) | ||||
| JIS B5 | 182 x 257 mm (7.18 x 10.12 inches) | |||
| ISO B5 | 176 x 250 mm (6.93 x 9.84 inches) | |||
| Executive | 184.2 x 266.7 mm (7.25 x 10.5 inches) | |||
| A5 148.5 x 210 mm (5.85 x 8.27 inches) | ||||
| A6 105 x 148.5 mm (4.13 x 5.85 inches) | ||||
| Envelope | Envelope B5 | 176 x 250 mm (6.93 x 9.84 inches) | 60 to 90 g/m2(16 to 24 lb) | 10 sheets of 75 g/m2(20 lb) in the multi-purpose tray |
| Envelope Monarch | 98.4 x 190.5 mm (3.88 x 7.5 inches) | |||
| Envelope COM-10 | 105 x 241 mm (4.12 x 9.5 inches) | |||
| Envelope DL | 110 x 220 mm (4.33 x 8.66 inches) | |||
| Envelope C5 | 162 x 229 mm (6.38 x 9.02 inches) | |||
| Envelope C6 | 114 x 162 mm (4.49 x 6.38 inches) | |||
| Transparency | Letter, A4 | Refer to the Plain paper section | 138 to 146 g/m2(37 to 39 lb) | 50 sheets of 75 g/m2(20 lb) in the multi-purpose tray |
| Labels | Letter, Legal, Folio, Oficio, A4, JIS B5, ISO B5, Executive, A5, A6 | Refer to the Plain paper section | 120 to 150 g/m2(32 to 40 lb) | 25 sheets of 75 g/m2(20 lb) in the multi-purpose tray |
| Card stock | Letter, Legal, Folio, Oficio, A4, JIS B5, ISO B5, Executive, A5, A6 | Refer to the Plain paper section | 60 to 163 g/m2(16 to 43 lb) | 10 sheets of 75 g/m2(20 lb) in the multi-purpose tray |
| Minimum size (custom) | 76 x 127 mm (3 x 5 inches) | 60 to 163 g/m2(16 to 43 lb) | Refer to the above Capacity sections | |
| Maximum size (custom) | 216 x 356 mm (8.5 x 14 inches) | |||
a. If media weight is over 28 lb (105 g/m²), use the multi-purpose tray.
b. Maximum capacity may differ depending on media weight, thickness, and environmental conditions.
Print media for duplex printing
| Type | Size | Weight |
| Plain paper | A4, Letter, Oficio, Legal, and Folio | 60 ~ 105 g/m ^2 (16 to 28 lb) |
Guidelines for selecting and storing print media
When selecting or loading paper, envelopes, or other print media, keep these guidelines in mind:
- Always use print media that conform with the specifications listed on the next column.
- Attempting to print on damp, curled, wrinkled, or torn paper can cause paper jams and poor print quality.
-
For the best print quality, use only high quality copier grade paper specifically recommended for use in laser printers.
-
Avoid using the following media types:
- Paper with embossed lettering, perforations, or a texture that is too smooth or too rough
- Erasable bond paper
- Multi-paged paper
- Synthetic paper and thermally reactive paper
- Carbonless paper and Tracing paper.
- Use of these types of paper could result in paper jams, chemical smells, and damage to your printer.
- Store print media in its ream wrapper until you are ready to use it. Place cartons on pallets or shelves, not on the floor. Do not place heavy objects on top of the paper, whether it is packaged or unpackaged. Keep it away from moisture or other conditions that can cause it to wrinkle or curl.
- Store unused print media at temperatures between 15^ and 30^ (59°F to 86°F). The relative humidity should be between 10% and 70%.
- Store unused print media in a moisture-proof wrap, such as a plastic container or bag, to prevent dust and moisture from contaminating your paper.
- Load special media types one sheet at a time through the multi-purpose tray to avoid paper jams.
- To prevent print media, such as transparencies and label sheets, from sticking together, remove them as they print out.
Guidelines for special print media
Media type Guidelines
Envelopes • Successful printing on envelopes depends upon the quality of the envelopes. When selecting envelopes, consider the following factors:
- Weight: The weight of the envelope paper should not exceed 90 g/m^2 (24 lb) or jamming may occur.
- Construction: Prior to printing, envelopes should lie flat with less than 6 mm (0.25 inches) curl, and should not contain air.
- Condition: Envelopes should not be wrinkled, nicked, or otherwise damaged.
- Temperature: You should use envelopes that are compatible with the heat and pressure of the printer during operation.
- Use only well-constructed envelopes with sharp and well creased folds.
- Do not use stamped envelopes.
- Do not use envelopes with clasps, snaps, windows, coated lining, self-adhesive seals, or other synthetic materials.
- Do not use damaged or poorly made envelopes.
- Be sure the seam at both ends of the envelope extends all the way to the corner of the envelope.
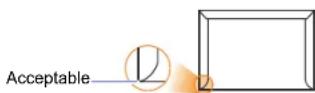
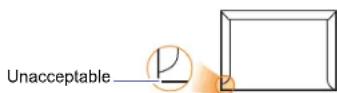
- Envelopes with a peel-off adhesive strip or with more than one flap that folds over to seal must use adhesives compatible with the printer's fusing temperature of 195^ (383° F) for 0.1 second. The extra flaps and strips might cause wrinkling, creasing, or jams, and may even damage the fuser.
- For the best print quality, position margins no closer than 15 mm (0.6 inches) from the edges of the envelope.
- Avoid printing over the area where the envelope's seams meet.
| Media type Guidelines | |
| Transparencies | To avoid damaging the printer, use only transparencies designed for use in laser printers.Transparencies used in the printer must be able to withstand 195°C (383°F), the printer's fusing temperature.Place them on a flat surface after removing them from the printer.Do not leave them in the paper tray for long periods of time. Dust and dirt may accumulate on them, resulting in spotty printing.To avoid smudging caused by fingerprints, handle them carefully.To avoid fading, do not expose printed transparencies to prolonged sunlight.Ensure that transparencies are not wrinkled, curled, or have any torn edges. |
| Labels • To avoid | damaging the printer, use only labels designed for use in laser printers.When selecting labels, consider the following factors:- Adhesives: The adhesive material should be stable at 195°C (383°F), the printer's fusing temperature.- Arrangement: Only use labels with no exposed backing between them. Labels can peel off sheets that have spaces between the labels, causing serious jams.- Curl: Prior to printing, labels must lie flat with no more than 13 mm (5 inches) of curl in any direction.- Condition: Do not use labels with wrinkles, bubbles, or other indications of separation.Make sure that there is no exposed adhesive material between labels. Exposed areas can cause labels to peel off during printing, which can cause paper jams. Exposed adhesive can also cause damage to printer components.Do not run a sheet of labels through the printer more than once. The adhesive backing is designed for only a single pass through the printer.Do not use labels that are separating from the backing sheet or are wrinkled, bubbled, or otherwise damaged. |
| Card stock or custom-sized materials | Do not print on media smaller than 76 mm (3 inches) wide or 127 mm (5 inches) long.In the software application, set margins at least 6.4 mm (0.25 inches) away from the edges of the material. |
| Media type Guidelines | |
| Preprinted paper | Letterhead must be printed with heat-resistant ink that will not melt, vaporize, or release hazardous emissions when subjected to the printer's fusing temperature of 195°C (383°F) for 0.1 second.Letterhead ink must be non-flammable and should not adversely affect printer rollers.Forms and letterhead should be sealed in a moisture-proof wrapping to prevent changes during storage.Before you load preprinted paper, such as forms and letterhead, verify that the ink on the paper is dry. During the fusing process, wet ink can come off preprinted paper, reducing print quality. |
Loading paper
Load the print media you use for the majority of your print jobs in the tray 1. The tray 1 can hold a maximum of 500 sheets of 75g / m^2 (20 lb) plain paper.
You can purchase optional trays and attach them below the standard tray to load an additional 500 sheets of paper for each tray. You can attach up to three additional trays. For order information for optional trays, see page 7.1.
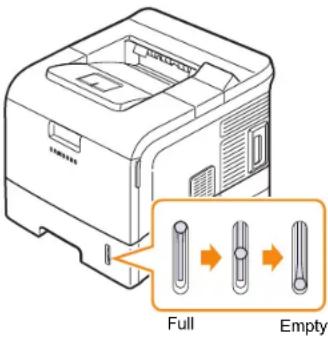
The paper level indicator on the front of the tray 1 and the optional trays shows the amount of paper currently left in the tray. When the tray is empty, the indicator of the bar is completely lowered.
text_image
Full EmptyUsing the standard tray or the optional trays
Load the print media you use for the majority of your print jobs in the standard tray. The standard tray can hold a maximum of 500 sheets of 75 g/m ^2 (20 lb) paper.
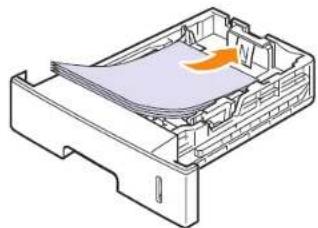
To load paper, pull open the tray and load paper with the side to be printed on face down.
natural_image
3D diagram of a computer motherboard showing internal components and a highlighted area (no text or symbols)You can load letterhead paper with the design side face down. The top edge of the sheet with the logo should be placed at the front of the tray.

Notes
- If you experience problems with paper feed, place one sheet at a time in the multi-purpose tray.
- You can load previously printed paper. The printed side should be facing up with an uncurled edge at the front of the tray. If you experience problems with paper feed, turn the paper around. Note that the print quality is not guaranteed.
Changing the size of the paper in the tray
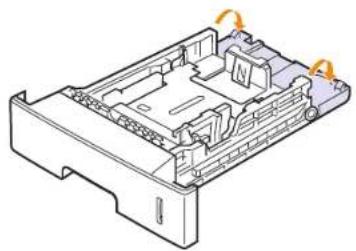
The tray is preset to Letter or A4 size, depending on your country. To change the size, you need to adjust the paper guides.
1 Push the back plate of the tray outwards completely so that it can extend the length of the tray.
natural_image
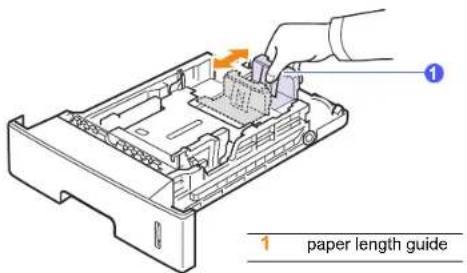
3D technical diagram of a mechanical housing or enclosure with internal components and directional arrows indicating rotation (no text or symbols)2 Squeeze the paper length guide and slide it to the correct position for the paper size you are loading, which is marked at the bottom of the tray.
text_image
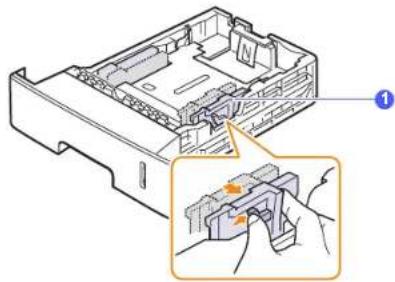
1 paper length guide3 Squeeze the paper width guides and slide them to the desired paper size marked at the bottom of the tray.
text_image
Technical diagram showing a device interior with labeled components and an inset view of the internal component being inserted.1 paper width guide

Notes
- Do not push the paper width guide far enough to cause the media to warp.
- If you do not adjust the paper width guide, it may cause paper jams.
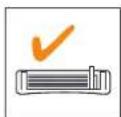
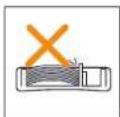
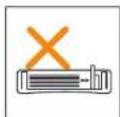
4 Load paper with the print side down.
Using the multi-purpose tray
The multi-purpose tray can hold special sizes and types of print media, such as transparencies, postcards, note cards, and envelopes. It is useful for single page printing on letterhead or colored paper.
To load paper in the multi-purpose tray:
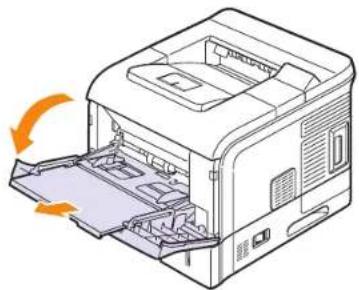
1 Pull the multi-purpose tray down towards you and pull the multi-purpose tray extension to hold longer paper.
natural_image
Illustration of a printer with an open lid and internal compartments, showing a circular arrow indicating rotation (no text or symbols present)2 If you are using paper, flex or fan the edge of the paper stack to separate the pages before loading.

text_image
Diagram illustrating the process of folding or shifting a document, showing hand positioning and directional arrow.For transparencies, hold them by the edges and avoid touching the print side. Oils from your fingers can cause print quality problems.
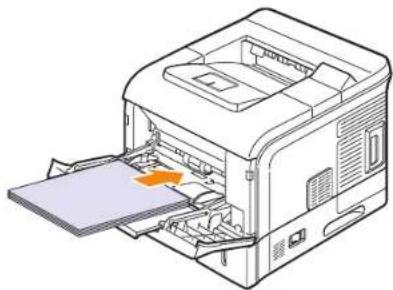
3 Load the paper with the side to be printed on facing up.
natural_image
Illustration of a printer with paper feed and paper tray, showing internal components (no text or symbols)Depending on the media type you are using, keep the following loading guidelines:
- Envelopes: Flap side down and with the stamp area on the top left side.

Note
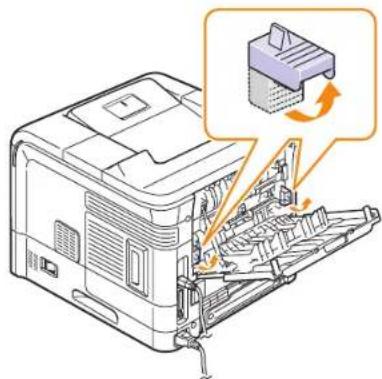
- To print on envelopes, you must open the rear cover and push the fuser levers upwards. The print quality will be enhanced.
natural_image
Diagram of a printer internal structure with a magnified view showing the printer's internal components (no text or symbols present)- Transparencies: Print side up and the top with the adhesive strip entering the printer first.
- Labels: Print side up and the top short edge entering the printer first.
- Preprinted paper: Design side up and the top edge entering the printer first.
- Card stock: Print side up and the short edge entering the printer first.
- Previously printed paper: Previously printed side down and an uncurled edge entering the printer first.

Note
- Make sure that you have not loaded too much print media. The print media buckles if you load a stack that is too deep or if you push it in too far.

Caution
- When you print on special media like envelopes, labels, transparencies, or cards, the output location should be the rear cover. Open the rear cover to use it. See page 5.8.
4 Squeeze the multi-purpose tray paper width guides and adjust them to the width of the paper. Do not force too much, or the paper will be bent, which will result in a paper jam or skew.
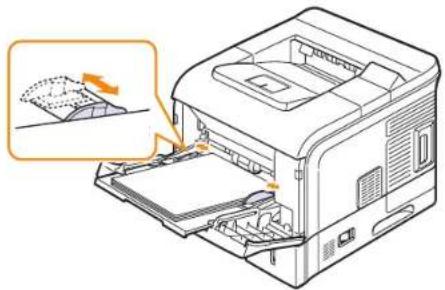
natural_image
Illustration of a printer with paper being inserted, showing internal structure and page loading (no text or symbols)5 When you print a document, set the paper source and type in the software application. See the Software section.
For information about setting the paper source and type on the control panel, see page 2.3.
6 After printing, put the multi-purpose tray extension back to its place and close the multi-purpose tray.
Tips on using the multi-purpose tray
- Load only one size of print media at a time in the multi-purpose tray.
• To prevent paper jams, do not add paper when there is still paper in the multi-purpose tray. This also applies to other tray. - Print media should be loaded face up with the top edge going into the multi-purpose tray first and be placed in the center of the tray.
• Always load only the print media specified in page 5.2 to avoid paper jams and print quality problems. - Flatten any curl on postcards, envelopes, and labels before loading them into the multi-purpose tray.
- When you print on 76 mm x 127 mm (3 x 5 inches) sized media on the multi-purpose tray, open the rear cover for straight paper path to avoid paper jams.
- When you print on transparencies, open the rear cover. If not they may tear while exiting the printer.
Using manual feed mode
You can manually load a sheet of print media in the multi-purpose tray if you select Manual Feed in the Source option from the Paper tab when you change print settings to print a document. See the Software section. Manually loading paper can be helpful when you want to check the print quality after each page is printed.
This loading procedure is almost the same as the procedure for loading in the multi-purpose tray, except you load paper sheet-by-sheet in the tray, send print data to print the first page, and press Stop on the control panel to print each following page.
1 Load the paper with the side to be printed on facing up.
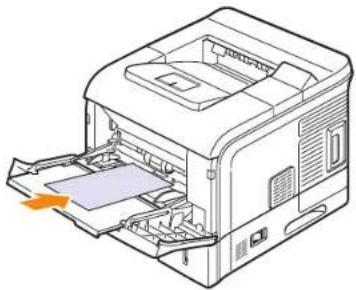
natural_image
Line drawing of a printer with internal components and an orange arrow indicating motion (no text or symbols)2 Squeeze the multi-purpose tray paper width guides and adjust them to the width of the paper. Do not force too much, or the paper will be bent, which will result in a paper jam or skew.
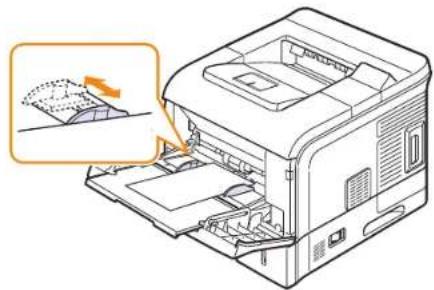
natural_image
Diagram of a printer with paper feed and paper roll, showing internal structure and a magnified view of the paper's edge (no text or symbols present)3 When you print a document, set the paper source to Manual Feed and select the appropriate paper size and type in the software application. See the Software section.
4 Print a document.
The display shows a message prompting you to load paper and press Stop.
5 Press Stop.
The printer picks up the print media and prints. After one page is printed, the message appears again.

Note
- If you do not press the button, after a pause the printer will automatically pick the print media.
6 Insert the next sheet into the multi-purpose tray and press Stop. Repeat this step for every page to be printed.
Selecting an output location
The printer has two output locations; the rear cover (face up) and the output tray (face down).
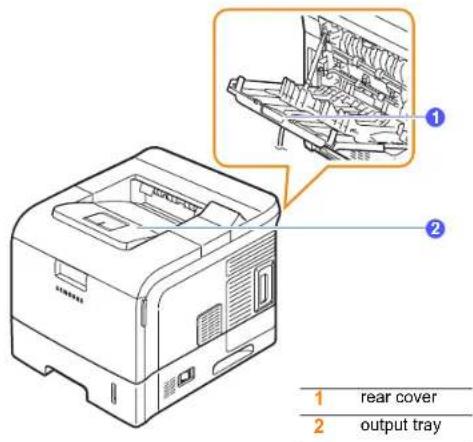
text_image
1 rear cover 2 output trayThe printer sends output to the output tray by default. To use the output tray, make sure that the rear cover is closed.

Notes
- If paper coming out of the output tray has problems, such as excessive curl, try printing to the rear cover.
- To avoid paper jams, do not open or close the rear cover while the printer is printing.
Printing to the output tray (Face down)
The output tray collects paper face down, in the order in which the sheets were printed. The tray should be used for most print jobs.
Printing to the rear cover (Face up)
Using the rear cover, paper comes out of the printer face up.
Printing from the multi-purpose tray to the rear cover provides a straight paper path. Using the rear cover might improve the output quality with special print media.
To use the rear cover, open it by pulling down and pull the rear cover extension.
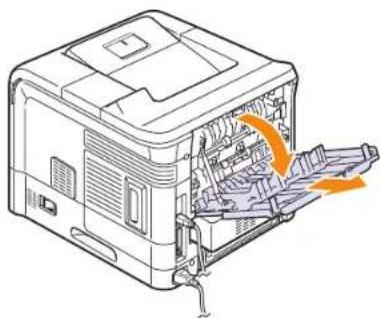
natural_image
Technical line drawing of a printer internal structure with orange arrows indicating flow or movement (no text or symbols)
Caution
- The fuser area inside the rear cover of your printer becomes very hot when in use. Take care when you access this area.
6 Basic printing
This chapter explains common printing tasks.
This chapter includes:
- Printing a document
- Canceling a print job
Printing a document
This printer allows you to print from various Windows, Macintosh, or Linux applications. The exact steps for printing a document may vary depending on the application you use.
For details about printing, see the Software section.
Canceling a print job
If the print job is waiting in a print queue or print spooler, such as the printer group in Windows, delete the job as follows:
1 Click the Windows Start button.
2 For Windows 98/Me/NT 4.0/2000, select Settings and then Printers.
For Windows XP/2003, select Printers and Faxes.
For Windows Vista, select Control Panel → Hardware and Sound → Printers.
3 Double-click the Samsung ML-4050 Series PCL 6 or Samsung ML-4050 Series PS icon.
4 From the Document menu, select Cancel Printing (Windows 98/Me) or Cancel (Windows NT 4.0/2000/XP/2003/Vista).

Note
- You can access this window simply by double-clicking the printer icon at the bottom right corner of the Windows desktop.
You can also cancel the current job by pressing Stop on the control panel of your printer.
7 Ordering supplies and accessories
This chapter provides information on purchasing toner cartridges and accessories available for your printer.
- Toner cartridges
- Accessories
• How to purchase
Toner cartridges
When the toner runs out, you can order the following types of toner cartridges for your printer:
| Type Yield | a | Part number |
| Standard yield Approx.10,000 pages ML-D4550A | ||
| High yield Approx.20,000 pages ML-D4550B | ||
a. Declared yield value in accordance with ISO/IEC 19752.
Accessories
You can purchase and install accessories to enhance your printer's performance and capacity.
The following accessories are available for your printer:
| Accessory Description Part number | ||
| Optional Tray If you are experiencing frequent paper supply problems, you can attach additional 500 sheet trays up to three. You can print documents on various sizes and types of print media. | ML-S4050A | |
| Memory DIMM | Extends your printer's memory capacity. | • ML-MEM110: 32 MB• ML-MEM120: 64 MB• ML-MEM130: 128 MB• ML-MEM140: 256 MB |
| IEEE 802.11 b/g Wireless LAN card ^a | Allows you to connect your printer to a wireless network and share it with other people over the network. | ML-NWA10L |
| Duplex Unit Allows you to print on both sides of the paper. | ML-U4050A | |
| Hard Disk | Allows you to enhance the printer's capability and print in various ways. | ML-3560MH |
a. Depending on your country, wireless LAN cards may not be available. Contact your local Samsung dealer or the retailer where you bought your printer.
How to purchase
To order Samsung-authorized supplies or accessories, contact your local Samsung dealer or the retailer where you purchased your printer, or visit www.samsungprinter.com and select your country/region for information on calling for technical support.
8 Maintenance
This chapter provides information for maintaining your printer and the toner cartridge, as well as suggestions for high-quality and economical printing.
This chapter includes:
- Printing information pages
- Cleaning the printer
- Maintaining the toner cartridge
- Maintenance parts
Printing information pages
From the printer's control panel, you can print pages that give detailed information about the printer. They can help you check your printer's status and maintain the printer.
1 Press Menu until Information appears on the bottom line of the display and press OK.
2 Press the Scroll buttons until the information page you want appears and press OK.
3 Press OK when Yes appears.
A page prints out.
Cleaning the printer
During the printing process, paper, toner, and dust particles can accumulate inside the printer. This buildup can cause print quality problems, such as toner specks or smearing. Your printer has a cleaning mode that can correct and prevent these types of problems.

Caution
- Cleaning the cabinet of the printer with cleaning materials containing large amounts of alcohol, solvents, or other strong substances can discolor or crack the cabinet.
Cleaning the outside of the printer
Clean the cabinet of the printer with a soft, lint-free cloth. You can dampen the cloth slightly with water, but be careful not to let any water drip onto or into the printer.
Cleaning the inside of the printer
There are two methods to clean the inside of the printer:
- Clean the inside manually.
- Print a cleaning sheet, which can be done from the control panel.
Cleaning the inside of the printer manually
1 Turn the printer off and unplug the power cord. Wait for the printer to cool down.
2 Open the top cover and pull the toner cartridge out. Set it on a clean flat surface.
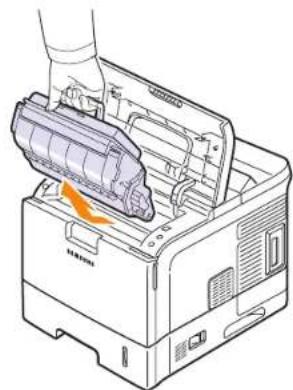
natural_image
Illustration of a printer's internal structure with a hand inserting a paper into it (no text or symbols visible)
Caution
- To prevent damage to the toner cartridge, do not expose it to light for more than a few minutes. Cover it with a piece of paper, if necessary.
- Do not touch the green surface underside of the toner cartridge. Use the handle on the cartridge to avoid touching this area.
3 With a dry lint-free cloth, wipe away any dust and spilled toner from the toner cartridge area and the toner cartridge cavity.
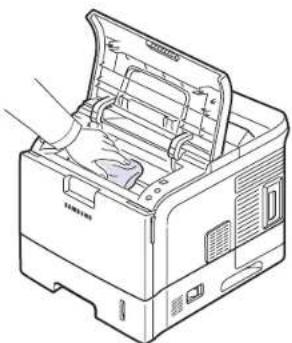
natural_image
Line drawing of a printer with open lid and internal compartments (no text or symbols)
Caution
- While cleaning the inside of the printer, be careful not to touch the transfer roller, located underneath the toner cartridge. Oil from your fingers can cause print quality problems.
4 Gently swab the long strip of glass (LSU) inside the top of the cartridge cavity and check for dirt or dust.
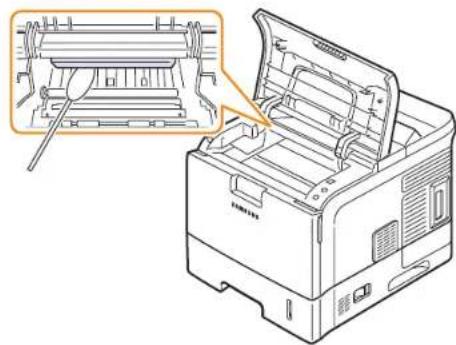
natural_image
Technical line drawing of a printer with open lid and internal structure, showing internal components (no text or symbols)
Note
• The long strip of glass is hard to locate.
5 Locate the PTL lens by flipping up the guide feed and gently swab the lens with the pointed white cotton.
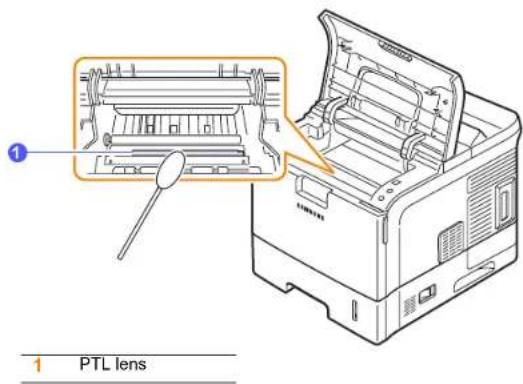
text_image
1 PTL lens6 Reinsert the toner cartridge and close the top cover.
7 Plug in the power cord and turn the printer on.
Printing a cleaning sheet
If you are experiencing blurred, faded, or smeared printouts, you can clear the problem by printing a cleaning sheet, provided by your printer. You can print:
- OPC cleaning sheet: cleans the OPC drum of the toner cartridge.
- Fuser cleaning sheet: cleans the fuser unit inside the printer.
This process will produce a page with toner debris, which should be discarded.
1 Make sure that the printer is turned on with paper loaded in the tray.
2 Press Menu until System Setup appears on the bottom line of the display and press OK.
3 Press the Scroll buttons until Maintenance appears and press OK.
4 Press the Scroll buttons until Clean Fuser or Clean Drum appears and press OK.
Your printer automatically picks up a sheet of paper from the tray and prints out a cleaning sheet with dust or toner particles on it.
Maintaining the toner cartridge
Toner cartridge storage
To get the most from the toner cartridge, keep the following guidelines in mind:
- Do not remove the toner cartridge from its package until ready for use.
- Do not refill the toner cartridge. The printer warranty does not cover damage caused by using a refilled cartridge.
- Store toner cartridge in the same environment as the printer.
- To prevent damage to the toner cartridge, do not expose it to light for more than a few minute.
Expected cartridge yield
The toner cartridge yield depends on the amount of toner that print jobs require. The actual number may also be different depending on the print density of the pages you print on, and the number of pages may be affected by operating environment, printing interval, media type, and media size. If you print a lot of graphics, you may need to change the cartridge more often.
Saving toner
To save toner, press Toner Save on the control panel. The button backlight turns on.
Using this feature extends the life of the toner cartridge and reduce your cost per page, but it also reduces print quality.
Checking the remaining toner
You can check the level of toner left in the cartridge.
If you are having print quality problems, this can help you determine if the problem is caused by low toner.
1 Press Menu until System Setup appears on the bottom line of the display and press OK.
2 Press the Scroll buttons until Maintenance appears and press OK.
3 Press the Scroll buttons until Supplies Life appears and press OK.
4 Press the Scroll buttons until Toner Remains appears and press OK.
The display shows the percentage of the remaining toner.

Note
While the following messages are appearing on the display, the sub-menu(s) under Supplies Life can be changed:
- Invalid Toner, NonGenuine Toner, Replace Toner, Toner Exhausted
Redistributing toner cartridge
When the toner cartridge is near the end of its life:
- White streaks and light printing occur.
- Toner Low appears on the display.
• The Status LED blinks red.
If this happens, you can temporarily reestablish print quality by redistributing the remaining toner in the cartridge. In some cases, white streaks or light printing will still occur even after you have redistributed the toner.
1 Open the top cover.
2 Pull the toner cartridge out.
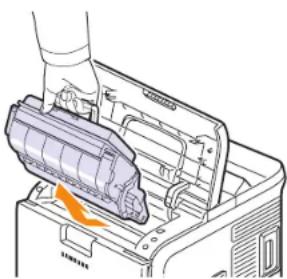
natural_image
Diagram of a printer's internal structure showing paper feeding into a printer (no text or symbols visible)
Caution
- Avoid reaching too far into the printer. The fusing area may be hot.
- To prevent damage to the toner cartridge, do not expose it to light for more than a few minutes. Cover it with a piece of paper, if necessary.
- Do not touch the green surface underside of the toner cartridge. Use the handle on the cartridge to avoid touching this area.
3 Thoroughly shake the cartridge 4 or 6 times to distribute the toner evenly inside the cartridge.
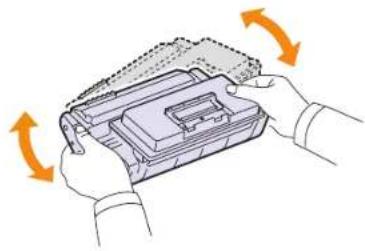
natural_image
Illustration of hands holding a device with orange arrows indicating rotation (no text or symbols)
Note
- If toner gets on your clothing, wipe it off with a dry cloth and wash clothing in cold water. Hot water sets toner into fabric.
4 Hold the toner cartridge by the handle and slowly insert the cartridge into the opening in the printer.
Tabs on the sides of the cartridge and corresponding grooves within the printer will guide the cartridge into the correct position until it locks into place completely.
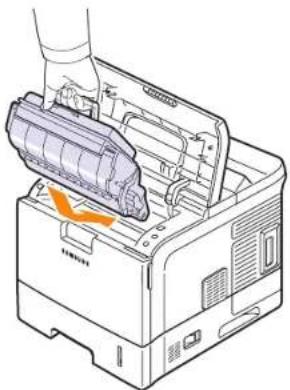
natural_image
Illustration of a printer's internal structure with a hand inserting a component (no text or symbols visible)5 Close the top cover. Make sure that the cover is securely closed.
Replacing the toner cartridge
When the toner cartridge is completely empty:
- Toner Empty appears on the display.
• The Status LED lights red.
At this stage, the toner cartridge needs to be replaced. For order information for toner cartridges, see page 7.1.
1 Open the top cover.
2 Pull the toner cartridge out.
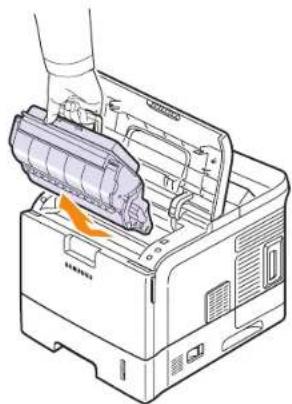
natural_image
Illustration of a printer's internal structure with a hand inserting a component (no text or symbols visible)3 Remove the new toner cartridge from its bag.
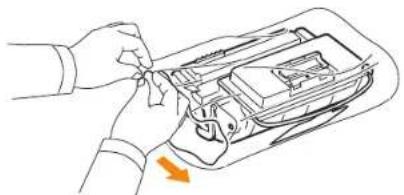
natural_image
Illustration of hands installing or adjusting a device component with an orange arrow indicating rotation (no text or symbols present)
Caution
- Do not use sharp objects, such as a knife or scissors, to open the toner cartridge package. They might scratch the drum of the cartridge.
4 Locate the sealing tape at the end of the toner cartridge. Carefully pull the tape completely out of the cartridge and discard it.
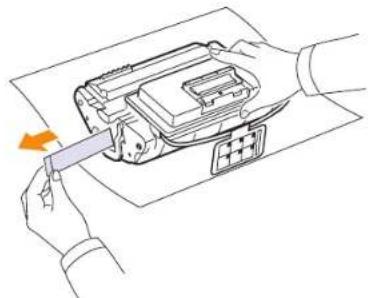
natural_image
Line drawing of hands holding a device with an orange arrow indicating direction (no text or symbols)
Note
- The sealing tape should be longer than 60 cm when correctly removed.
- Holding the toner cartridge, pull the sealing tape straight to remove it from the cartridge. Be careful not to cut the tape. If this happens, you cannot use the toner cartridge.
- Refer to the helpful pictures on the cartridge wrapping paper.
5 Thoroughly shake the cartridge 4 or 6 times to distribute the toner evenly inside the cartridge.
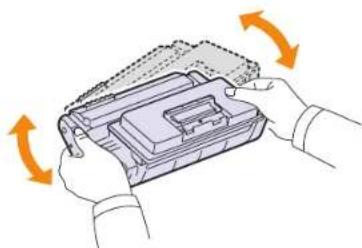
natural_image
Illustration of hands holding a device with orange arrows indicating rotation (no text or symbols)Thoroughly roll the cartridge to assure maximum copies per cartridge. Save the box and the plastic bag for shipping.

Caution
- If toner gets on your clothing, wipe it off with a dry cloth and wash clothing in cold water. Hot water sets toner into fabric.
- To prevent damage to the toner cartridge, do not expose it to light for more than a few minutes. Cover it with a piece of paper, if necessary.
- Do not touch the green surface underside of the toner cartridge. Use the handle on the cartridge to avoid touching this area.
6 Remove the flexible plastic holder out of the toner cartridge.
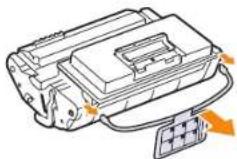
7 Hold the toner cartridge by the handle and slowly insert the cartridge into the opening in the printer.
Tabs on the sides of the cartridge and corresponding grooves within the printer will guide the cartridge into the correct position until it locks into place completely.
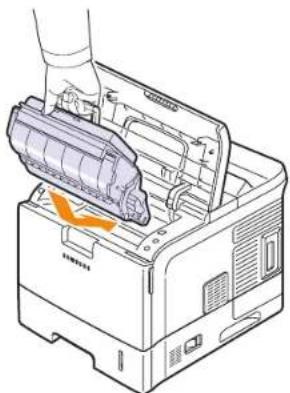
natural_image
Illustration of a printer's internal structure with a hand operating it, showing no text or symbols.8 Close the top cover. Make sure that the cover is securely closed.
Clearing the Toner Low Replace Toner message
When the Toner Low Replace Toner message appears you can configure not to see this message again not to disturb you.
1 Press Menu until System Setup appears on the bottom line of the display and press OK.
2 Press the Scroll buttons until Maintenance appears and press OK.
3 Press the Scroll buttons until CLR Empty Msg. appears and press OK.
4 Select On and press OK.
5 Now the Toner Low Replace Toner message does not appear but the Replace Toner message will remain for reminding you that the new cartridge needs to be installed for quality.

Caution
- Once you have selected On, this setting will be permanently written to the memory of the toner cartridge, and this menu will be disappeared from the Maintenance menu.
Maintenance parts
To avoid print quality and paper feed problems resulting from worn parts and to maintain your printer in top working condition, the following items will need to be replaced when the specified number of pages have been printed or when the life span of each item has expired.
| Items Yield (Average) |
| Transfer roller Approx.150,000 pages |
| Fuser unit Approx.150,000 pages |
| Paper feeding roller Approx.150,000 feeds |
| Rubber pad Approx.150,000 feeds |
Samsung highly recommends that an authorized service provider, dealer or the retailer where you bought printer performs this maintenance activity.
9 Troubleshooting
This chapter provides helpful information for what to do if you encounter an error while using your printer.
This chapter includes:
- Clearing paper jams
- Troubleshooting checklist
• Understanding the status LED
• Understanding display messages - Toner cartridge-related messages
- Solving general printing problems
- Solving print quality problems
• Common Windows problems
• Common Macintosh problems
• Common PostScript problems
• Common Linux problems
Clearing paper jams

Note
- When removing paper that is jammed in the printer, if possible always pull the paper in the direction that it normally moves so as not to damage internal components. Always pull firmly and evenly; do not jerk the paper. If the paper tears, ensure that all fragments of paper are removed; otherwise a jam will occur again.
When a paper jam occurs, the Status LED lights red. Open and close the top cover. The jammed paper automatically exits the printer.
If the paper does not exit, check the display on the control panel. The message indicating the corresponding location of the paper jam appears. Refer to the table below to locate the paper jam and to clear it:
| Message Location of Jam Go To | ||
| Paper Jam 0Open/Close Door | In the paper feed area(tray 1, optional tray 2,optional tray 3, optional tray 4,multi-purpose tray) | the next column |
| Paper Jam 1Open/Close Door | Around the toner cartridge page | 9.3 |
| Paper Jam 2Check Inside | In the paper exit area page 9.4 | |
| Paper Exit Jam 1Open/Close Door | Between the toner cartridgeand the paper exit area | page 9.3 |
| Paper Tray 2 JamOpen Tray 2 | In the optional tray 2 page 9.2 | |
| Paper Tray 3 JamOpen Tray 3 | In the optional tray 3 page 9.2 | |
| Paper Tray 4 JamOpen Tray 4 | In the optional tray 4 page 9.2 | |
| Duplex Jam 0^a Check Inside | In the duplex area page 9.4 | |
| Duplex Jam 1^a Open/Close Door | In the duplex area page 9.5 | |
a. Available with the optional duplex unit.
In the paper feed area
In the tray 1
1 Pull the tray 1 open.
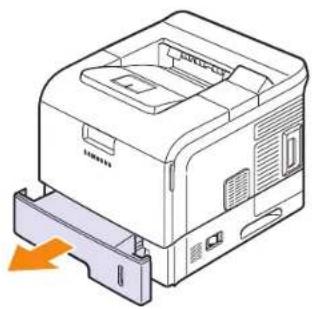
natural_image
Illustration of a printer with an orange arrow indicating compression or disassembly (no text or symbols present)2 Remove the jammed paper by gently pulling it straight out. Make sure that all of the paper is properly aligned in the tray 1.
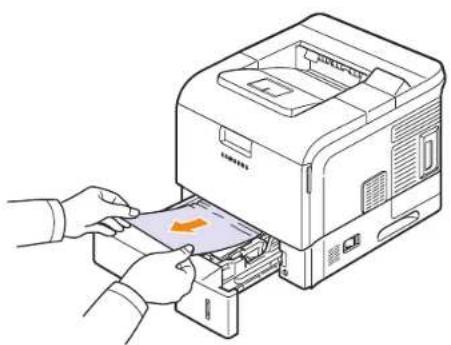
natural_image
Illustration of hands inserting a card into a printer (no text or symbols visible)If the paper does not move when you pull, or if you do not see the paper in this area, check the fuser area around the toner cartridge. See page 9.3.
3 Insert the tray 1 into the printer until it snaps into place. Printing automatically resumes.
In the optional tray
1 Pull the optional tray open.
2 Remove the jammed paper from the printer.
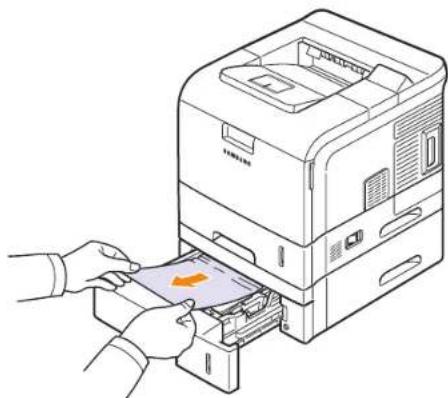
natural_image
Illustration of hands inserting a card into a printer (no text or symbols visible)If the paper does not move when you pull, or if you do not see the paper in this area, stop and go to step 3.
3 Pull the upper tray half way out.
4 Pull the jammed paper straight up and out.
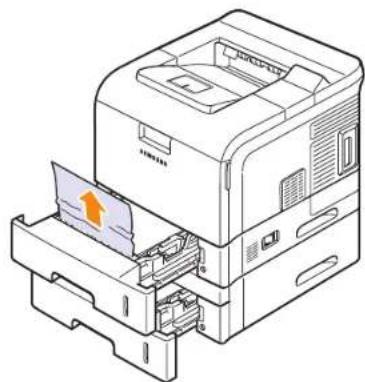
natural_image
Technical line drawing of a printer with paper feed and paper holder (no text or symbols)5 Fully insert the trays back into the printer. Printing automatically resumes.
In the multi-purpose tray
1 If the paper is not feeding properly, pull the paper out of the printer.
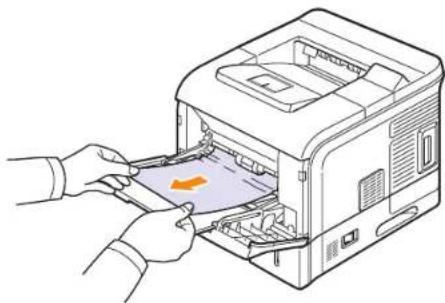
natural_image
Illustration of hands inserting a card into a printer (no text or symbols visible)2 Open and close the top cover to resume printing.
Around the toner cartridge

Caution
- The fuser area is hot. Take care when removing paper from the printer.
- To prevent damage to the toner cartridge, do not expose it to light for more than a few minutes. Cover it with a piece of paper, if necessary.
- Do not touch the green surface underside of the toner cartridge. Use the handle on the cartridge to avoid touching this area.
1 Open the top cover and pull the toner cartridge out.
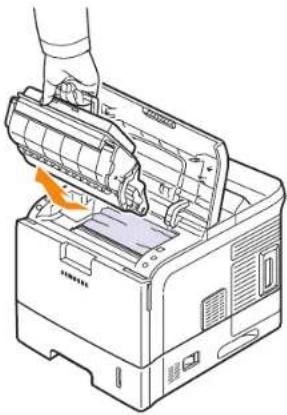
natural_image
Illustration of a printer's internal structure with a hand holding the lid (no text or symbols visible)2 Carefully lift up the guide feed.
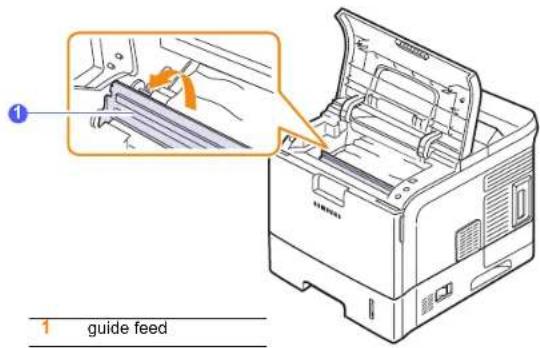
text_image
1 guide feed3 Remove the jammed paper by gently pulling it straight out.
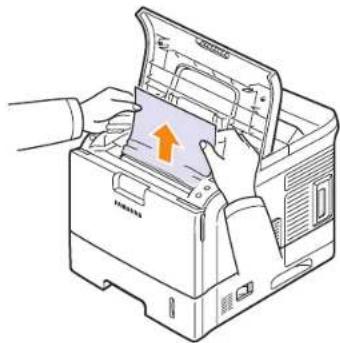
natural_image
Illustration of hands inserting a card into a printer (no text or symbols visible)If you do not see the jammed paper or if there is any resistance removing the paper, stop pulling and go to the paper exit area. See page 9.4.
4 Flip down the guide feed.
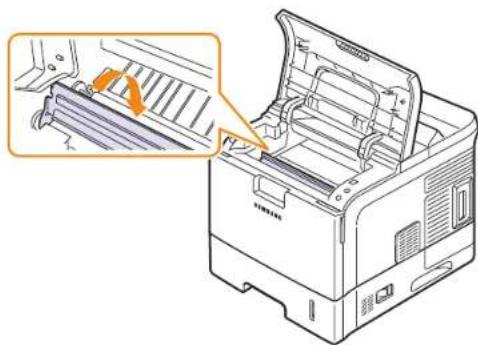
natural_image
Illustration of a printer with a close-up view of its internal structure (no text or symbols visible)5 Replace the toner cartridge and close the top cover. Printing automatically resumes.

Note
- If it is difficult to reinstall the toner cartridge, make sure that the guide feed has been flipped back down into position.
In the paper exit area
1 Open and close the top cover. The jammed paper is automatically ejected from the printer.
2 Gently pull the paper out of the output tray.
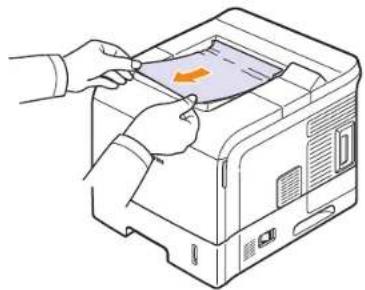
natural_image
Illustration of hands operating a printer with an orange arrow indicating the print direction (no text or symbols present)If you do not see the jammed paper or if there is any resistance when you pull, stop and go to the next step.
3 Open the rear cover.
4 By pushing the fuser levers upwards, loosen the jammed paper. Then gently pull the paper straight out.
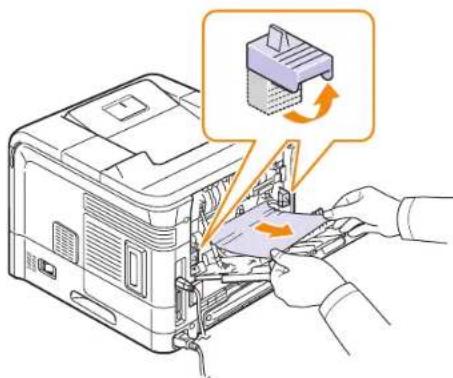
text_image
Diagram illustrating printer operation with labeled components and directional arrows indicating process flow5 Put the fuser levers to their original position and close the rear cover. Printing automatically resumes.
In the duplex unit area
The improper installation of the duplex unit may cause paper jam. Check the error message on the display and follow the appropriate procedure to remove the jammed paper.

Note
• The duplex unit is optional depending on your machine.
Duplex jam 0
1 Lift up the duplex unit, and pull it out of the printer.
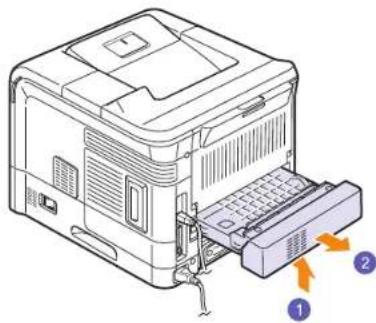
natural_image
Diagram of a printer with internal components and labeled parts (no text or symbols present)2 Locate the jammed paper and remove it.
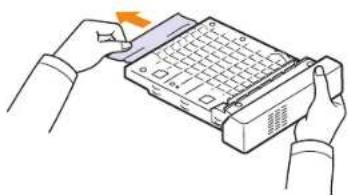
natural_image
Illustration of hands inserting a card into a device (no text or symbols visible)3 Insert the duplex unit into the slot.
4 Open and close the top cover. The printer will resume printing.
Duplex jam 1
1 Open the rear cover.
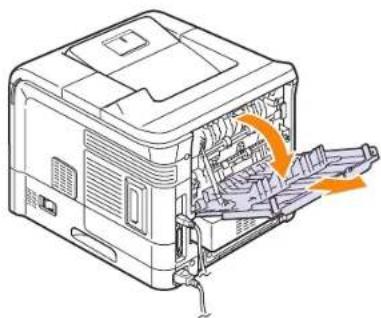
natural_image
Technical line drawing of a mechanical device with internal components and airflow direction (no text or symbols)2 Gently pull the jammed paper straight up.
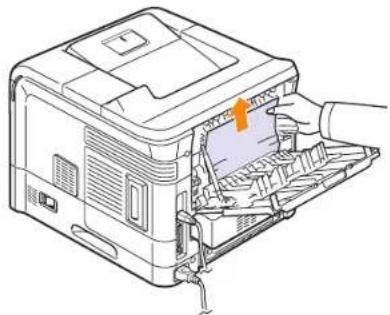
natural_image
Line drawing of an open industrial machine with a hand inserting a component (no text or symbols visible)3 Close the rear cover.
4 Open and close the top cover. The printer will resume printing.
Tips for avoiding paper jams
By selecting the correct media types, most paper jams can be avoided. When a paper jam occurs, follow the steps outlined on page 9.1.
- Follow the procedures on page 5.5. Ensure that the adjustable guides are positioned correctly.
- Do not overload the tray. Ensure that the paper level is below the paper capacity mark on the inside wall of the tray.
- Do not remove paper from the tray while your printer is printing.
• Flex, fan, and straighten paper before loading. - Do not use creased, damp, or highly curled paper.
- Do not mix paper types in a tray.
- Use only recommended print media. See page 5.1.
- Ensure that the recommended print side of print media is facing down in the tray, or facing up in the multi-purpose tray.
Troubleshooting checklist
If the printer is not working properly, consult the following checklist. If the printer does not pass a step, follow the corresponding suggested solutions.
| Condition Suggested solutions | |
| Make sure that the Status LED on the control panel lights green and Ready is shown on the display. | ·If the Status LED is off, check the power cord connection. Check the power switch. Check the power source by plugging the power cord into another outlet.·If the Status LED lights red, check the display message. See page 9.6. |
| Print a demo page to verify that the printer is feeding paper correctly. See page 2.6. | ·If a demo page does not print, check the paper supply in the tray.·If the paper jams in the printer, see page 9.1.·If an error message appears on the display, see page 9.6. |
| Check the demo page to see if it printed correctly. | If there is a print quality problem, see page 9.11. |
| Print a short document from a software application to verify that the computer and printer are connected and are communicating correctly. | ·If the page does not print, check the cable connection between the printer and the computer.·Check the print queue or print spooler to see if the printer has been paused.·Check the software application to ensure that you are using the proper printer driver and communication port. If the page is interrupted during printing, see page 9.9. |
| If completing the checklist does not resolve the printer problem, check the following troubleshooting sections. | ·“Understanding the status LED” on page 9.6.·“Understanding display messages” on page 9.6.·“Solving general printing problems” on page 9.9.·“Common Windows problems” on page 9.13.·“Common PostScript problems” on page 9.13.·“Common Linux problems” on page 9.14.·“Common Macintosh problems” on page 9.14. |
Understanding the status LED
| Status Description | ||
| Off • The printer is powerd off. | ||
| Green On | The printer | is on-line and can receive data from the computer. |
| Blinking • When the backlight blinks slowly, the printer is receiving data from the computer.When the backlight blinks quickly, the printer is printing data. | ||
| Red On | • The toner | is totally exhausted. Remove the old toner cartridge and install a new one.See page 8.4.A paper jam has occurred. To solve the problem, see page 9.1.The top cover is open. Close the top cover.There is no paper in the tray. Load paper in the tray.The toner cartridge installed is not a genuine cartridge, and you selectedStopat the NonGenuine Toner prompt. See page 9.6.The lifespan of the toner cartridge is reached, and you selectedStopat the Toner Exhausted prompt. See page 9.6.The printer has stopped printing due to a major error. Check the display message. See page 9.6 for details on the meaning of the error message. |
| Blinking • A minor error is occurring and the printer is waiting for the error to be cleared. Check the display message. When the problem is cleared, the printer resumes printing.The toner cartridge is low. Order a new toner cartridge. You can temporarily improve print quality by redistributing the toner. See page 8.3. | ||
Understanding display messages
Messages appear on the Smart Panel program window or the control panel display to indicate the printer's status or errors. Refer to the tables below to understand the messages' meaning and correct the problem if necessary. Messages and their meanings are listed in alphabetical order.

Note
- When you call for service, it is very convenient to tell the service representative the display message.
| Message Meaning Suggested solutions | ||
| ADC Not Confirm Error | There is a problem in your printer system. | Unplug the power cord and plug it back in. If the problem persists, please call for service. |
| Door Open The top cover or rear cover is not securely latched. | Close the cover until it locks into place. | |
| Duplex Jam 0 Check Inside | Paper has jammed during duplex printing. | Clear the jam. See page 9.4. |
| Duplex Jam 1 Open/Close Door | Paper has jammed during duplex printing. | Clear the jam. See page 9.5. |
| Fuser Door Open The fuser door is not securely latched. | Open the rear cover and close the fuser door until it locks into place. | |
| Fuser is Cleaning | Your printer is printing a Cleaning sheet now. | Please wait a few minutes. |
| Inner Temp. Open Cycle Power | There is a problem in your printer system. | Unplug the power cord and plug it back in. If the problem persists, please call for service. |
| Inner Temp. Error Cycle Power | There is a problem in your printer system. | Unplug the power cord and plug it back in. If the problem persists, please call for service. |
| Load[Size] In [Tray] | The paper sizespecified in the printer properties does not match the paper you are loading. | Load the correct paper in the tray. |
| Load Manual Press Stop Key | The multi-purpose tray is empty in manual feed mode. | Load a sheet of print media and pressStop. You need to pressStopeach page to be printed. |
| Low Heat Error Cycle Power | There is a problem in the fuser unit. | Unplug the power cord and plug it back in. If the problem persists, please call for service. |
| LSU Motor Error Cycle Power | A problem has occurred in the LSU (Laser Scanning Unit). | Unplug the power cord and plug it back in. If the problem persists, please call for service. |
| MP Tray Paper Empty | There is no paper in the multi-purpose tray. | Load paper in the multi-purpose tray. See page 5.6. |
| OPC is Cleaning Your print er is printing a cleaning sheet now. | Please wait a few minutes. | |
| Open Heat Error Cycle Power | There is a problem in the fuser unit. | Unplug the power cord and plug it back in. If the problem persists, please call for service. |
| Out-Bin Full The output tray is full. | It can hold up to 250 sheets of plain paper. Once the paper is removed from the output tray, the printer resumes printing. | |
| Over Heat Error Cycle Power | There is a problem in the fuser unit. | Unplug the power cord and plug it back in. If the problem persists, please call for service. |
| Paper Exit Jam 1 Open/Close Door | Paper has jammed before reaching to the exit sensor. | Clear the jam. See page 9.3. |
| Message Meaning Suggested solutions | ||
| Paper Jam 0Open/Close Door | Paper has jammed in the feeding area of the tray. | Clear the jam. See page 9.2. |
| Paper Jam 1Open/Close Door | Paper has jammed in the fuser area. | Clear the jam. See page 9.3. |
| Paper Jam 2Check Inside | Paper has jammed in the paper exit area. | Clear the jam. See page 9.4. |
| Paper [Tray] Jam Open [Tray] | Paper has jammed in the displayed optional tray. | Clear the jam. See page 9.2. |
| Printing... The printer is printing jobs. | Complete your printing. | |
| Ready The printer is on-line and ready to print. | Use your printer. | |
| Self Diagnostic LSU | The LSU (Laser Scanning Unit) in your printer is checking some problems detected. | Please wait a few minutes. |
| Self Diagnostic Temperature | The engine in your printer is checking some problems detected. | Please wait a few minutes. |
| Sleeping... The printer is in power save mode. | When data is received, it switches to on-line automatically. | |
| [Tray] Cassette Out | The displayed tray is open. | Close the tray until it locks into place. |
| [Tray] Paper Empty | There is no paper in the tray. | Load paper in the tray. See page 5.5. |
| Warming Up Please Wait... | Your printer is warming up now. | Please wait a few minutes. |
Toner cartridge-related messages
| Message Meaning Suggested solutions | ||
| Install Toner | The toner cartridge is installed improperly, or not installed. | Reinstall the toner cartridge two or three times. If the problem persists, the toner cartridge is not being detected. Please contact the service representatives. |
| Invalid Toner | The toner cartridge you have installed is not for your printer. | Install a Samsung-genuine toner cartridge, designed for your printer. |
| Toner Low The toner | cartridge is almost empty. | Take out the toner cartridge and thoroughly shake it. By doing this, you can temporarily reestablish printing operations. |
| NonGenuine Toner◀ Stop ▶ | The toner cartridge installed is not a genuine cartridge. | You can select either Stop or Continue. If you do not select any, the printer will work as Stop is selected.If you select Stop, you cannot print until the genuine cartridge is installed. However, you can still print any kind of reports.If you select Continue, you can keep printing but the quality cannot be guaranteed, and the product support is no longer provided.If you want to change the selection, turn the printer off and on to have this message appear again, and then re-select Stop or Continue. |
| NonGenuine Toner Replace Toner1 | The toner cartridge installed is not a genuine cartridge. | This message appears when you selected Stop at the NonGenuine Toner prompt.Install the genuine toner cartridge. |
| NonGenuine Toner Replace Toner | The toner cartridge installed is not a genuine cartridge. | This message appears when you selected Continue at the NonGenuine Toner prompt.Install the genuine toner cartridge. |
| Toner Low Replace Toner | The toner in the cartridge has run out. | Install a new genuine toner cartridge.You can keep printing but the quality cannot be guaranteed, and the product support is no longer provided.You can configure not to see the Toner Low Replace Toner message. See page 8.3. |
| Replace Toner The toner | in the cartridge has run out. | This message appears when you turned off the Toner Low Replace Toner message. See page 8.3.Install a new genuine toner cartridge.You can keep printing but the quality cannot be guaranteed, and the product support is no longer provided. |
| Toner Exhausted◀ Stop ▶ | The lifespan of the toner cartridge is reached. | You can select either Stop or Continue. If you do not select any, the printer will work as Stop is selected.If you select Stop, you cannot print until the genuine cartridge is installed.If you select Continue, you can keep printing but the quality cannot be guaranteed, and the product support is no longer provided.If you want to change the selection, turn the printer off and on to have this message appear again, and then re-select Stop or Continue. |
| Toner Exhausted Replace Toner1 | The lifespan of the toner cartridge is reached. | This message appears when you selected Stop at the Toner Exhausted prompt.Install the genuine toner cartridge. |
| Toner Exhausted Replace Toner | The lifespan of the toner cartridge is reached. | This message appears when you selected Continue at the Toner Exhausted prompt.Install the genuine toner cartridge. |
Solving general printing problems
For problems with the operation of your printer, refer to the table for suggested solutions.
| Condition Possible cause Suggested solutions | ||
| The printer does not print. | The printer is not receiving power. | Check the power cord connections. Check the power switch and the power source. |
| The printer is not selected as the default printer. | Select Samsung ML-4050 Series PCL 6 or Samsung ML-4050 Series PS as your default printer. | |
| The printer cover is not closed. | Close the printer cover. | |
| Paper is jammed. | Clear the paper jam. See page 9.1. | |
| No paper is loaded. | Load paper. See page 5.4. | |
| The toner cartridge is not installed. | Install the toner cartridge. | |
| The printer may be in manual feed mode and out of paper. | Check the display message, add paper to the multi-purpose tray, and press OK on the printer's control panel. | |
| The connection cable between the computer and the printer is not connected properly. | Disconnect the printer cable and reconnect it. | |
| The connection cable between the computer and the printer is defective. | If possible, attach the cable to another computer that is working properly and try to print a document. You can also try using a different printer cable. | |
| The port setting is incorrect. | Check the Windows printer setting to make sure that the print job is sent to the correct port. If the computer has more than one port, make sure that the printer is attached to the correct one. | |
| Condition Possible cause Suggested solutions | ||
| The printer does not print. (Continued) | The printer may be configured incorrectly. | Check the printer properties to ensure that all of the print settings are correct. |
| The printer driver may be incorrectly installed. | Reinstall the printer driver; See the Software section. Try printing a test page. | |
| The printer is malfunctioning. | Check the display message on the control panel to determine if the printer is indicating a system error. | |
| Printer selects print media from the wrong paper source. | The paper source selection in the printer properties may be incorrect. | For many software applications, the paper source selection is found under the Paper tab within the printer properties. Select the correct paper source. See the Software section. |
| Paper does not feed into the printer. | Paper has not been loaded correctly. | Remove paper from the tray and reload it correctly. Check that the paper size guides are set correctly. |
| There is too much paper in the tray. | Remove excess paper from the tray. | |
| The paper is too thick. | Use only paper that meets printer specifications. | |
| Print job is extremely slow. | The job may be very complex. | Reduce the complexity of the page(s) or try adjusting the print quality settings. To adjust the print quality settings, reduce the resolution. If you have set the resolution to 1200 dpi (Best), change it to 600 dpi (Normal). See the Software section. Change the port setting to the USB or network port to improve print speed. |
| Print job is extremely slow.(Continued) | If using Windows 98/Me, the Spooling Setting may be set incorrectly. | From the Start menu, choose Settings and Printers. Right-click the Samsung ML-4050 Series PCL 6 printer icon, choose Properties, click the Details tab, and then choose the Spool Settings button. Select the desired spool setting. |
| The computer may have insufficient random-access memory (RAM). | Install more memory in your printer. See page 10.1. | |
| Half the page is blank. | The page layout is too complex. | Simplify the page layout and remove any unnecessary graphics from the document. Install more memory in your printer. See page 10.1. |
| The page orientation setting may be incorrect. | Change the page orientation in your application. See the Software section. | |
| The paper size and the paper size settings do not match. | Ensure that the paper size in the printer driver settings matches the paper in the tray. Or, ensure that the paper size in the printer driver settings matches the paper selection in the software application settings you use. | |
| The paper keeps jamming. | There is too much paper in the tray. | Remove excess paper from the tray. If printing on special media, use the multi-purpose tray and open the rear cover. |
| An incorrect type of paper is being used. | Use only paper that meets printer specifications. If printing on special media, use the multi-purpose tray and open the rear cover. | |
| An incorrect output method is being used. | Special print media, such as thick paper, should not be printed using the output tray (face-down). Use the rear cover (face-up) instead. | |
| There may be debris inside the printer. | Open the top cover and remove the debris. | |
| Condition Possible cause Suggested solutions | ||
| The printer prints, but the text is wrong, garbled, or incomplete. | The printer cable is loose or defective. | Disconnect and reconnect the printer cable. Try a print job that you have already printed successfully. If possible, attach the cable and printer to another computer and try a print job that you know works. Finally, try a new printer cable. |
| The wrong printer driver was selected. | Check the application's printer selection menu to ensure that your printer is selected. | |
| The software application is malfunctioning. | Try printing a job from another application. | |
| The operating system is malfunctioning. | If printing from Windows (any version), exit to a DOS prompt and verify functionality with the following command: At a C:\ prompt, type Dir LPT1, and press Enter. (This assumes you are connected to LPT1.) Exit Windows and reboot the computer. Turn the printer off and then back on again. | |
| Pages print, but are blank. | The toner cartridge is defective or out of toner. | Redistribute the toner cartridge. See page 8.3. If necessary, replace the toner cartridge. See page 8.4. |
| The file may have blank pages. | Check the file to ensure that it does not contain blank pages. | |
| Some parts, such as the controller or the board, may be defective. | Contact a service representative. | |
| The illustrations print incorrectly in Adobe Illustrator. | The setting in the software application is wrong. | Select Download as Bitmap in the Advanced Options window of the graphic properties. Print the document again. |
| PDF file does not print correctly-some parts are missing in the graphics, text or illustrations. | Incompatibility between the PDF file and the Acrobat products. | Printing the PDF file as an image may enable the file to print. Turn on Print As Image from the Acrobat printing options.Note: It will take longer to print when you print a PDF file as an image. |
Solving print quality problems
Dirt inside of the printer or improper paper loading may reduce print quality. See the table below to troubleshoot problems.
| Condition Suggested solutions | |
| Light or faded print \ AaBbCc\ AaBbCc\ AaBbCc\ AaBbCc | If a vertical white streak or faded area appears on the page:The toner supply is low. You may be able to temporarily extend the toner cartridge life. See page 8.3. If this does not improve print quality, install a new toner cartridge.The paper may not meet paper specifications (for example, the paper is too moist or too rough). See page 5.3.If the entire page is light, the print resolution setting is too light or toner save mode is on. Adjust the print resolution and toner save mode in the printer properties. See the Software section.If the entire page is faded with "Toner Low Replace Toner" message on LCD, set "CLR Empty Msg." to "On" referring to page 8.6. In this case, you can keep printing but the quality cannot be guaranteed, and the product support is no longer provided.A combination of faded or smeared defects may indicate that the printer needs cleaning. See page 8.1.The surface of LSU may be dirty. Clean the LSU. See page 8.2. |
| Toner spots • The \ AaBbCc\ AaBbCc\ AaBbCc\ AaBbCc | paper may not meet specifications (for example, the paper is too moist or too rough). See page 5.3.The transfer roller or paper path may be dirty. See page 8.1. |
| Condition Suggested solutions | |
| Dropouts If generally rounded, faded areas occur randomly on the page:A single sheet of paper may be defective. Try reprinting the job.The moisture content of the paper is uneven or the paper has moist spots on its surface. Try a different brand of paper. See page 5.3.The paper lot is bad. The manufacturing processes can cause some areas to reject toner. Try a different kind or brand of paper.The toner cartridge may be defective. See "Vertical repetitive defects" on the next page.If these steps do not correct the problems, contact a service representative. | |
| Vertical lines If black vertical streaks appear on the page:AaBbCcAaBbCcAaBbCcAaBbCcAaBbCc | The drum inside the toner cartridge has probably been scratched. Install a new toner cartridge. See page 8.4.If white vertical streaks appear on the page:The surface of the LSU part inside the printer may be dirty. Clean the LSU. See page 8.2. |
| Gray backgroundAaBbCcAaBbCcAaBbCcAaBbCcAaBbCc | If the amount of background shading becomes unacceptable, the procedures below may fix the problem.Change to lighter weight pages. See page 5.3.Check the printer's environment; very dry (low humidity) or high humidity (higher than 80% RH) conditions can increase the amount of background shading.Remove the old toner cartridge and install a new one. See page 8.4. |
| Toner smear • Clean the inside of the printer. See page 8.1.AaBbCcAaBbCcAaBbCcAaBbCcAaBbCc | Check the type and quality. See page 5.2.Remove the toner cartridge and install a new one. See page 8.4. |
Vertical repetitive defects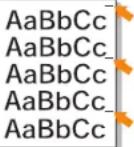 | If marks repeatedly appear on the printed side of the page at even intervals:The toner cartridge may be damaged. If a repetitive mark occurs on the page, print a cleaning sheet several times to clean the cartridge; see page 8.3. After the printout, if you still have the same problems, install a new toner cartridge. See page 8.4.Parts of the printer may have toner on them. If the defects occur on the back of the page, the problem will likely correct itself after a few more pages.The fusing assembly may be damaged.Contact a service representative. |
Background scatter | Background scatter results from bits of toner distributed on the printed page.The paper may be too damp. Try printing with a different batch of paper. Do not open packages of paper until necessary so that the paper does not absorb too much moisture.If background scatter occurs on an envelope, change the printing layout to avoid printing over areas that have overlapping seams on the reverse side. Printing on seams can cause problems.If background scatter covers the entire surface area of a printed page, adjust the print resolution through your software application or via the printer properties window. |
Misformed characters | If characters are improperly formed and producing hollowed images, the paper stock may be too slick. Try a different paper. See page 5.3.If characters are improperly formed and producing a wavy effect, the scanner unit may need service. Verify that it also occurs on a demo page (see page 2.6). For service, contact a service representative. |
Page skew• Ensure that the paper is loaded properly.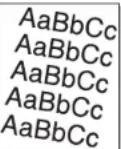 | Check the paper type and quality. See page 5.2.Ensure that the paper or other media is loaded correctly and the guides are not too tight or too loose against the paper stack. |
| Condition Suggested solutions | |
Curl or wave • Ensure that the paper is loaded properly.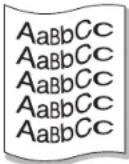 | • Check the type and quality. Both high temperature and humidity can cause paper curl. See page 5.2.• Turn over the stack of paper in the tray. Also try rotating the paper 180^ in the tray.• Try printing to the rear cover (face-up). |
Wrinkles or creases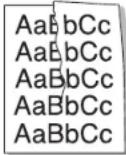 | • Ensure that the paper is loaded properly.• Check the paper type and quality. See page 5.2.• Open the rear cover and try printing to the rear cover (face-up).• Turn over the stack of paper in the tray. Also try rotating the paper 180^ in the tray. |
Back of printouts are dirty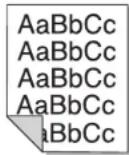 | • The transfer roller may be dirty. See page 8.1.• Check for leaking toner. Clean the inside of the printer. |
Black pages • The toner cartridge may not be installed properly. Remove the cartridge and reinsert. | • The toner cartridge may be defective and need replacing. Install a new toner cartridge.• The printer may require repair. Contact a service representative. |
Loose toner • Clean the inside of the printer.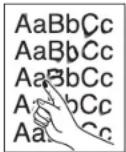 | • Check the paper type and quality. See page 5.2.• Install a new toner cartridge. See page 8.4.• If the problem persists, the printer may require repair. Contact a service representative. |
Character Voids  | Character voids are white areas within characters that should be solid black:If you are using transparencies, try another type of transparency. Because of the composition of the transparency, some character voids may be normal.You may be printing on the wrong surface on the paper. Remove the paper and turn it around.The paper may not meet paper specifications. See page 5.3. |
Horizontal stripes 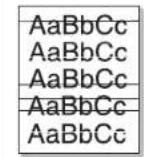 | If horizontally aligned black streaks or smears appear:The toner cartridge may be installed improperly. Remove the cartridge and reinsert.The toner cartridge may be defective. Install a new toner cartridge. See page 8.4.If the problem persists, the printer may require repair. Contact a service representative. |
Curl If the printed paper is curled or paper does not feed into the printer: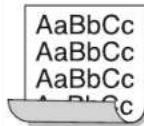 | Turn over the stack of paper in the tray. Also try rotating the paper 180^ in the tray.Try printing to rear cover (face up). |
| An unknown image repetitively appears on a next few sheets or loose toner, light print or contamination occurs. | Your printer is probably being used at an altitude of 2,500 m (8,200 ft) or above.The high altitude may affect the print quality such as loose toner or light imaging. You can set this option through Printer Settings Utility or Printer Tab in printer driver's properties. Refer to the Software section for details. |
Common Windows problems
| Condition Suggested solutions | |
| "File in Use"message appearsduring installation. | Exit all software applications. Remove allsoftware from the StartUp Group, then restartWindows. Reinstall the printer driver. |
| Condition Suggested solutions | |
| "Error Writing to LPTx" message appears. | · Ensure that the cables are connected correctly, the printer is on.· If bi-directional communication is not turned on in the driver, it will also cause this message. |
| "General Protection Fault", "Exception OE", "Spool32", or "Illegal Operation" messages appear. | Close all other applications, reboot Windows, and try printing again. |
| "Fail To Print," "A printer timeout error occurred," messages appear. | These messages may appear during printing. Just keep waiting until the printer finishes printing. If the message appears in standby mode or after printing has been completed, check the connection and/or whether an error has occurred. |

Note
• Refer to Microsoft Windows 98/Me/NT 4.0/2000/XP/2003/Vista User's Guide that came with your PC for further information on Windows error messages.
Common PostScript problems
The following situations are PostScript language specific and may occur when several printer languages are being used.

Note
- To receive a printed or screen displayed message when PostScript errors occur, open the Print Options window and click the desired selection next to the PostScript errors section.
| Condition Possible cause Suggested solutions | ||
| PostScript file can not be printed. | The PostScript driver may not be installed correctly. | Print a configuration page and verify that the PostScript version is available for printing.Install the PostScript driver; to installing the PS printer driver, see the Software section.If problem consists, contact a service representative. |
| “Limit Check Error” message appears. | The print job was too complex. | You might need to reduce the complexity of the page or install more memory. |
| A PostScript error page prints. | Print job may not be PostScript. | Make sure that the print job is a PostScript job. Check to see whether the software application expected a setup or PostScript header file to be sent to the printer. |
| The optional tray 2 (tray 3 or tray 4) is not selected in the driver. | The printer driver has not been configured to recognize the optional tray 2 (tray 3 or tray 4). | Open the PostScript driver properties, select the Device Settings tab, and set the Tray2 (Tray3 or Tray4) option of the Installable Options section to Installed. |
| When print a document in Macintosh with Acrobat Reader 6.0 or higher, colors print incorrectly. | The resolution setting in the printer driver may not be matched with that in Acrobat Reader. | Make sure that the resolution setting in your printer driver matches that in Acrobat Reader. |
Common Linux problems
| Condition Suggested solutions | |
| The printer doesn't print. | Check if the printer driver is installed in your system. Open Unified Driver Configurator and switch to the Printers tab in Printers configuration window to look at the list of available printers. Make sure that your machine is displayed on the list. If not, please, invoke Add new printer wizard to set up your device.Check if the printer is started. Open Printers configuration and select your machine on the printers list. Look at the description in the Selected printer pane. If its status contains “(stopped)” string, please, press the OK button. After that normal operation of the printer should be restored. The "stopped" status might be activated when some problems in printing occurred. |
| Condition Suggested solutions | |
| I encounter error “Unable to open mfp port device file!” when printing a document. | Please avoid changing print job parameters (via LPR GUI, for example) while a print job is in progress. Known versions of CUPS server break the print job whenever print options are changed and then try to restart the job from the beginning. Since Unified Linux Driver locks mfp port while printing, the abrupt termination of the driver keeps the port locked and therefore unavailable for subsequent print jobs. If this situation occurred, please, try to release the mfp port. |
| PDF file does not print correctly-some parts are missing in the graphics, text or illustrations. | Incompatibility between the PDF file and the Acrobat products.Printing the PDF file as an image may enable the file to print. Turn on Print As Imagefrom the Acrobat printing options.Note: It will take longer to print when you print a PDF file as an image. |
Common Macintosh problems
| Condition Suggested solutions | |
| PDF file does not print correctly-some parts are missing in the graphics, text or illustrations. | Incompatibility between the PDF file and the Acrobat products.Printing the PDF file as an image may enable the file to print. Turn onPrint As Imagefrom the Acrobat printing options.Note: It will take longer to print when you print a PDF file as an image. |
| The document has printed, but the print job has not disappeared from the spooler in Mac OS 10.3.2. | Update your Mac OS to OS 10.3.3 or higher. |
| The printer does not print a document from Illustrator on IPP printing. | Change theData typeoption in the Adobe Illustrator print menu toBinary.Or, you can use Appletalk printing. |
| Some letters are not displayed normally during theCover Sheet printing. | This problem is caused because Mac OS cannot find the font during theCover Sheetprinting. English alphabet and numbers are displayed normally at the Cover Sheet. |
10 Installing accessories
Your printer is a full-featured laser printer that has been optimized to meet the majority of your printing needs. Recognizing that each user may have different requirements, however, Samsung makes several accessories available to enhance the printer's capabilities.
This chapter includes:
- Precautions when installing accessories
- Installing a memory DIMM
- Installing a wireless network interface card
- Using the hard disk
Precautions when installing accessories
Disconnect the power cord:
Never remove the control board cover while the printer is plugged in.
To avoid the possibility of an electrical shock, always disconnect the power cord when installing or removing ANY internal or external accessories.
Discharge static electricity:
The control board and internal accessories (Wireless network interface card, DIMM, and hard disk) are sensitive to static electricity. Before installing or removing internal accessories, discharge static electricity from your body by touching something metal, such as the metal back plate on any device plugged into a grounded power source. If you walk round before finishing installation, discharge any static electricity once again.
Installing a memory DIMM
Your printer has a dual in-line memory module (DIMM) slot. Use this DIMM slot to install additional memory.
Your printer has 64 MB of memory which can be expanded to 512 MB. For information about ordering optional DIMMs, see page 7.1.
1 Turn the printer power off and unplug the power cord and printer cable from the printer.
2 Remove the duplex-slot cover or the duplex unit from the back of the printer.
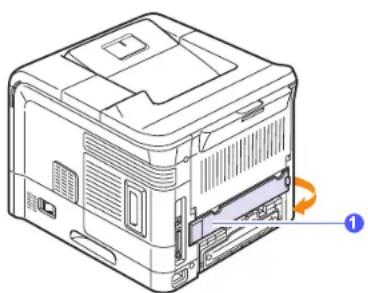
natural_image
Technical line drawing of a computer case with an internal drive and labeled component (no text or symbols present)1 duplex-slot cover
3 Grasp the control board cover and remove it.
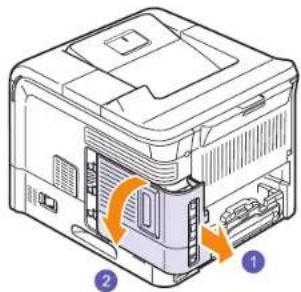
natural_image
Diagram of a computer printer internal structure showing two labeled parts (1 and 2), with no visible text or symbols.4 Completely open the latches on each side of the DIMM slot.
5 Remove the memory DIMM from its antistatic package. Locate the alignment notches on the bottom edge of the DIMM
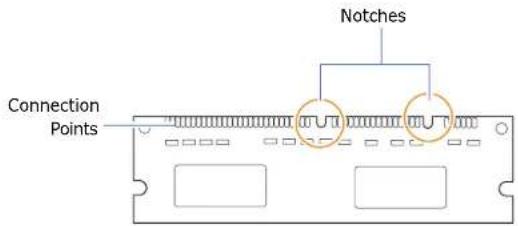
text_image
Connection Points Notches6 Holding the memory DIMM by the edges, align the notches on the memory DIMM with the grooves on the memory DIMM slot.
7 Push the DIMM straight into the DIMM slot until it snaps into place. Make sure the latches fit over the notches located on either side of the DIMM.
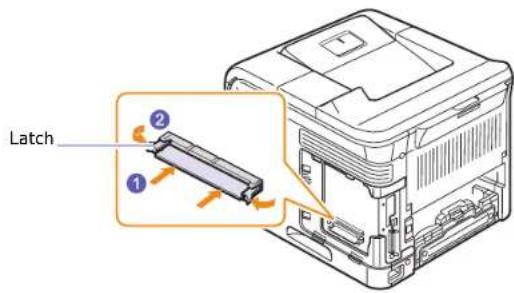
text_image
Latch ① ②8 Close the control board cover by aligning the groove on it with the notch on the printer and sliding it.
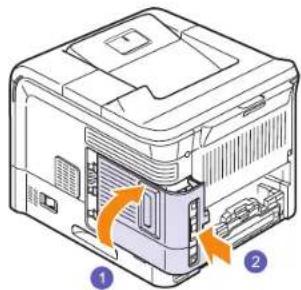
natural_image
Diagram of a printer internal structure showing internal components and two labeled parts (1 and 2), with no readable text or symbols.9 Reinstall the duplex-slot cover or the duplex unit.
10 Reconnect the power cord and printer cable, and turn the printer on.
Setting the memory in the PostScript printer properties
After installing the DIMM, you need to select it in the printer properties of the PostScript printer driver to enable its use.
1 Make sure that the PostScript printer driver is installed on your computer. To install the PostScript printer driver, see the Software section.
2 Click the Windows Start menu.
3 For Windows 98/Me/NT 4.0/2000, select Settings and then Printers.
For Windows XP/2003, select Printers and Faxes.
For Windows Vista, select Control Panel → Hardware and Sound → Printers.
4 Select the Samsung ML-4050 Series PS printer.
5 Click the right mouse button on the printer icon and select Properties.
6 For Windows 98/Me, select the Device Option tab.
For Windows NT 4.0/2000/XP/2003/Vista, select the Device Settings tab.
7 Select the amount of memory you installed from Printer Memory in the Installable Options section.
For Windows 98, select Installable Options → VMOption → change setting for: NMOption → change memory.
8 Click OK.
Removing a DIMM
To expand the printer memory to 512 MB, you need to remove the preinstalled 64 MB DIMM and install two 256 MB DIMMs into the DIMM slots.
Push the latches at both ends of the DIMM slot away to remove the DIMM and pull out the DIMM.
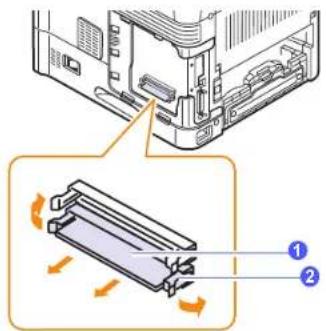
text_image
Technical diagram showing a device with internal components and a schematic view of a mechanical component with labeled parts 1 and 2.| 1 | DIMM |
| 2 | latch |
Installing a wireless network interface card
The machine is equipped with a network interface which allows you to use your printer on a network. You can also purchase a wireless network interface card to enable the use of the printer in wireless network environments. For information about installing the network printer server, see the network printer server user's guide.
The order information is provided for optional wireless network interface card. (Page 7.1)
1 Turn the printer power off and unplug the power cord and printer cable from the printer.
2 Remove the duplex-slot cover or the duplex unit from the back of the printer.
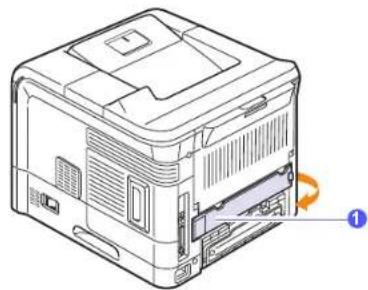
natural_image
Technical line drawing of a computer case with an internal drive and labeled component (no text or symbols present)1 duplex-slot cover
3 Grasp the control board cover and remove it.
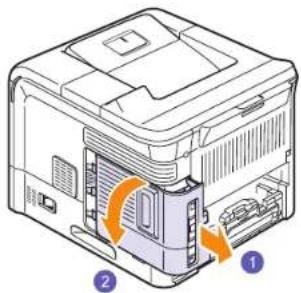
natural_image
Diagram of a computer printer internal structure showing internal components and labeled parts (no text or symbols present)4 Align the wireless network interface card into the guide, and align the connector on the card with the connector on the control board. Push the card firmly into the connector until it is completely and securely in place.
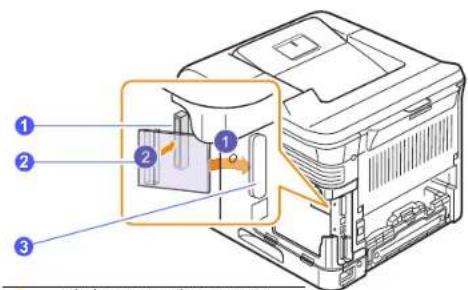
text_image
Diagram of a printer internal structure with numbered components and directional arrows indicating assembly or movement.| 1 | wireless network connector |
| 2 | wireless network interface card |
| 3 | wireless network interface card guide |
5 Close the control board cover by aligning the groove on it with the notch on the printer and sliding it.
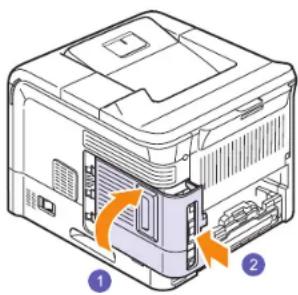
natural_image
Diagram of a printer internal structure with labeled parts (no text or symbols present)6 Reinstall the duplex-slot cover or the duplex unit.
7 Reconnect the power cord and printer cable (if necessary), and turn the printer on.
Configuring the wireless network parameters
After installing the wireless network card, you must configure the appropriate network parameters to use your printer in a wireless network. To do this, you can use both control panel and SyncThru Web Service, an embedded web site of your printer. This section gives you basic information on 802.11b/g network parameters which can be configured from the control panel. See the supplied Network Printer User's Guide.
Configuring basic network settings
You can configure basic wireless settings, such as SSID, Operation Mode, and channels. You can retrieve basic settings by selecting a wireless network or manually configure them as you need.
1 Press Menu until Network appears on the bottom line of the display and press OK.
2 Press the Scroll buttons until Wireless appears and press OK.
3 Press OK when WLAN Basic appears.
4 Press the Scroll buttons to select the setup method you want and press OK.
- Search List: The wireless network interface card on your printer searches for wireless networks in the area and shows the results.
- Custom: You can configure the wireless settings according to your needs.
5 If you selected Search List, press the Scroll buttons to select a network and press OK.
If you selected Custom, set each network options:
- Edit SSID: Enter the SSID, the name that identifies a wireless network. SSID is case-sensitive so you need to enter it.
- Operation Mode: Select the type of wireless connections. In Ad-Hoc mode, wireless cards communicate directly each other. In Infrastructure mode, network cards communicate with each other through an access point, which allows both wireless and cabled cards to send files to the printer. If you select Auto, the printer selects the operation mode automatically, according to the network cable's connection each time it boots up.

Note
In Ad-Hoc mode, even if the network cable is connected, your printer will use the wireless interface.
- Channel: This option is available only in the Ad-Hoc mode. In most cases, you will not need to change this setting. The printer will scan all available channels for the specified network and will adapt its channel to the one detected.
6 When you have finished, press Stop button to return to Standby mode.
Selecting the authentication type
Authentication is a process of identifying the legitimacy of an user to access a network. You can select whether or not authentication is used.
1 Press Menu until Network appears on the bottom line of the display and press OK.
2 Press the Scroll buttons until Wireless appears and press OK.
3 Press the Scroll buttons until WLAN Security appears and press OK.
4 Press the Scroll buttons until Static WEP appears and press OK.
5 Press the Scroll buttons until Authentication appears and press OK.
6 Press the Scroll buttons to select the type you want.
- Open System: Authentication is not used.
- Shared Key: Authentication is used.
7 Press OK to save your selection.
8 Press Stop button to return to Standby mode.
Setting Encryption
If your network uses WEP encryption keys, you can must select the appropriate encryption type and configure encryption keys. You can configure up to four keys. The active key must match the key value and key position (for example, Key 1) configured on other wireless devices in the network.
1 Press Menu until Network appears on the bottom line of the display and press OK.
2 Press the Scroll buttons until Wireless appears and press OK.
3 Press the Scroll buttons until WLAN Security appears and press OK.
4 Press the Scroll buttons until Static WEP appears and press OK.
5 Press the Scroll buttons until Encryption appears and press OK.

Note
If you have set the authentication type to Open System, the Encryption menu does not display.
6 Set each encryption option and press OK.
- Encrypt. Type: Select an encryption type: 64-bit WEP, or 128-bit WEP.
• Key Type: Select the key type of your network.
- Using Key: Select the key to be used in your network.
- Edit Key: Enter the key number for the selected key position. The numbers you can enter as follows:
| Hexadecimal Alphanumeric | ||
| 64-bit WEP 10 digits 5 characters | ||
| 128-bit WEP 26 digits 13 characters | ||
When you have finished, press Stop button to return to Standby mode.
Restoring default values for wireless networking
If the problem occurs when you use or set up the wireless network values, take following stops to restore factory default values. Generally, factory values of wireless networking are optimized for your printer.
1 Press Menu until Network appears on the bottom line of the display and press OK.
2 Press the Scroll buttons until Wireless appears and press OK.
3 Press the Scroll buttons until WLAN Default appears and press OK.
4 When Restore appears on the bottom line of the display, press OK. The printer starts restoring the default values.
Using the hard disk
Installing the hard disk allows the data from your computer to be sent to the print queue of the printer hard disk. This decreases the workload of the computer. You can also use various print features, such as storing a job in the hard disk, proofing a job, and printing private documents.
Installing the hard disk
For order information, see page 7.1.
Review the precautions on page 10.1.
1 Turn the printer power off and unplug the power cord and printer cable from the printer.
2 Remove the duplex-slot cover or the duplex unit from the back of the printer.
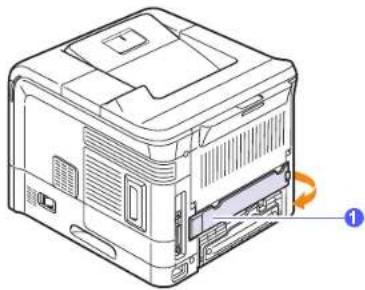
natural_image
Technical line drawing of a mechanical device with labeled component (no text or symbols present)1 duplex-slot cover
3 Grasp the control board cover and remove it.
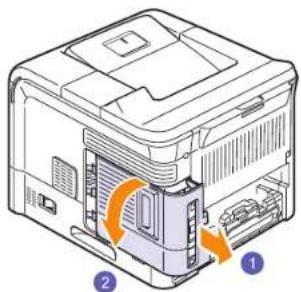
natural_image
Diagram of a computer printer internal structure showing internal components and labeled parts (no text or symbols present)4 Align the connector on the hard disk with the connector on the control board. Push the hard disk in until it is latched into place.
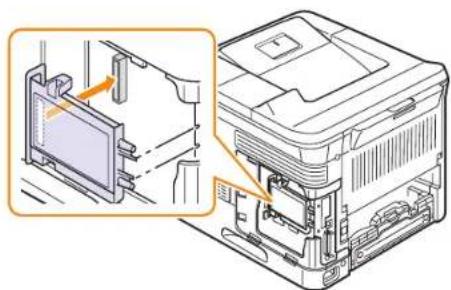
natural_image
Technical illustration of a mechanical assembly with an inset showing a component detail (no text or symbols present)5 Fasten the four screws supplied with your new hard disk.
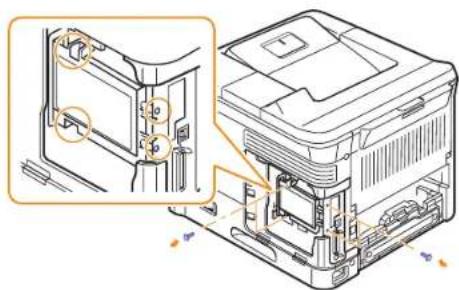
natural_image
Technical line drawing of a computer chassis with an inset showing internal components (no text or symbols)6 Close the control board cover by aligning the groove on it with the notch on the printer and sliding it.
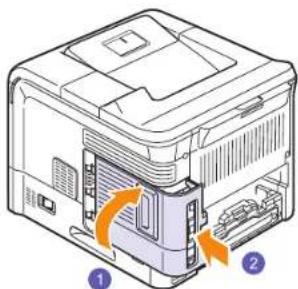
natural_image
Diagram of a printer internal structure showing two labeled parts (1 and 2), with no visible text or symbols.7 Reinstall the duplex-slot cover or the duplex unit.
8 Reconnect the power cord and printer cable, and turn the printer on.
9 Print a configuration page from the control panel to check if the hard disk is correctly installed. See page 8.1.
Setting the hard disk in the printer properties
After installing the hard disk, you need to select it in the printer properties to enable its use. Take the following steps:
1 Click the Windows Start menu.
2 For Windows 98/Me/NT 4.0/2000, select Settings and then Printers.
For Windows XP/2003, select Printers and Faxes.
For Windows Vista, select Control Panel → Hardware and Sound → Printers.
3 Select the Samsung ML-4050 Series PCL 6 printer icon or Samsung ML-4050 Series PS printer icon.
4 Click the right mouse button on the printer icon and select Properties.
5 In PCL 6 Properties, click the Printer tab and then check Optional Hard Disk Drive (HDD).
In PS Properties, click the Device Option or Device Settings tab and set the Optional Hard Disk Drive (HDD) option to Installed.
6 Click OK.
Printing with the optional hard disk
After installing the optional hard disk, you can use advanced printing features, such as storing or spooling a print job to the hard disk, proofing a job, and specifying of printing a private job in the printer properties window.
Once you have stored files in the hard disk, you can easily print or delete the stored files using the control panel of your printer.
Setting the time and date
1 Press Menu until System Setup appears on the bottom line of the display and press OK.
2 Press OK when Date & Time appears.
3 Press the Scroll buttons until the digit you want appears and press OK.
You can enter from 2000 to 2065 in the year input section. The cursor moves to the next position.
4 Repeat step 3 until all digits appear correctly.
5 Press OK.
Storing a job
You can store jobs in the installed hard disk.
1 Open the file you want to store.
2 Select Print from the File menu. The Print window displays.
3 Click Properties. If you see Setup, Print or Options, click the button instead.
4 Click the Extra tab and click Print and Hold.
5 Select the print mode you want from the drop-down list.
• Normal: prints in normal mode.
- Proof: prints the first file and after a pause prints the next file.
- Confidential: stores the files, securing them with a password.
- Store: stores the file to the hard disk.
- Spool: spools the file into the hard disk and prints it from the hard disk queue.
- Delay: prints the file at a specified time.
6 Enter the user's name and file name.
7 Click OK until the Print window is displayed.
8 Click OK or Print to start printing.
Printing a stored job
You can print jobs currently stored in the hard disk.
1 Press Menu until Job Manage. appears on the bottom line of the display and press OK.
2 Press the Scroll buttons until Store Job appears and press OK.
3 Press the Scroll buttons until the user's name and file name you want appear and press OK.
4 If the select file is a confidential print job, enter the specified 4-digit password.
Press the Scroll buttons to enter the first digit and press OK. The cursor automatically moves to the next digit position. Enter the 2nd, 3rd, and 4th digit in the same way.
5 When Print appears, press OK.
If you enter the incorrect password, Invalid Password appears. Reenter the correct password.
6 Press the Scroll buttons until the number of copies you want appears and press OK.
7 Press OK. Printing starts.
Deleting a stored job
You can delete jobs currently stored in the hard disk.
1 Press Menu until Job Manage. appears on the bottom line of the display and press OK.
2 Press the Scroll buttons until Store Job appears and press OK.
3 Press the Scroll buttons until the user's name and file name you want appear and press OK.
4 If the select file is a confidential print job, enter the specified 4-digit password.
Press the Scroll buttons to enter the first digit and press OK. The cursor automatically moves to the next digit position. Enter the 2nd, 3rd, and 4th digit in the same way.
5 Press the Scroll buttons until Delete appears and press OK.
If you enter the incorrect password, Invalid Password appears. Reenter the correct password.
6 When Yes appears, press OK.
Controlling the active job queue
All of the print jobs waiting to be printed are listed in the Active Job Queue in the order you sent them to the printer. You can delete a job from the queue before printing, or promote a job to print sooner.
To delete a file from the queue:
1 Press Menu until Job Manage. appears on the bottom line of the display and press OK.
2 Press the Scroll buttons until Active Job appears and press OK.
3 Press the Scroll buttons until the user's name and file name you want appear and press OK.
4 If the select file is a confidential print job, enter the specified 4-digit password.
Press the Scroll buttons to enter the first digit and press OK. The cursor automatically moves to the next digit position. Enter the 2nd, 3rd, and 4th digit in the same way.
5 Press the Scroll buttons until Cancel appears and press OK.
If you enter the incorrect password, Invalid Password appears. Reenter the correct password.
6 Press the Scroll buttons until Yes appears and press OK.
To promote a file from the queue:
You can select a job waiting in the Active Job Queue and change its print order so that it can be printed sooner.
1 Press Menu until Job Manage. appears on the bottom line of the display and press OK.
2 Press the Scroll buttons until Active Job appears and press OK.
3 Press the Scroll buttons until the user's name and file name you want appear and press OK.
4 If the select file is a confidential print job, enter the specified 4-digit password.
Press the Scroll buttons to enter the first digit and press OK. The cursor automatically moves to the next digit position. Enter the 2nd, 3rd, and 4th digit in the same way.
5 Press the Scroll buttons until Promote appears and press OK.
If you enter the incorrect password, Invalid Password appears. Reenter the correct password.
To print a file immediately:
You can print a job scheduled to be printed at a specified time immediately. In this case, the job currently printing is stopped and the selected job will be printed. This function is available when the job is scheduled for later printing.
1 Press Menu until Job Manage. appears on the bottom line of the display and press OK.
2 Press the Scroll buttons until Active Job appears and press OK.
3 Press the Scroll buttons until the user's name and file name you want appear and press OK.
4 If the select file is a confidential print job, enter the specified 4-digit password.
Press the Scroll buttons to enter the first digit and press OK. The cursor automatically moves to the next digit position. Enter the 2nd, 3rd, and 4th digit in the same way.
5 Press the Scroll buttons until Release appears and press OK.
This option appears only when you select a Delay print job. See page 10.6.
If you enter the incorrect password, Invalid Password appears. Reenter the correct password.
Printing using the form files
You can store up to 10 form files in the hard disk and make them printed with your document.
First, you need to create a form file using the printer driver. See the Software section.
1 Press Menu until System Setup appears on the bottom line of the display and press OK.
2 Press the Scroll buttons until Form Menu appears and press OK.
3 Press the Scroll buttons until the form you want appears and press OK.
- Off: prints in normal mode.
- Single Form: prints all page using the first form.
- Double Form: prints the front page using the first form and the back page using the second form.
4 Press Back to return to the upper menu level.
5 Press the Scroll buttons until Select Form appears and press OK.
6 Press OK when 1st Form appears.
7 Press the Scroll buttons until the form file you want appears and press OK. If you select Double Form, continue the next step.
8 Press the Scroll buttons until 2nd Form appears and press OK.
9 Press the Scroll buttons until the form file for the second form appears and press OK.
11 Specifications
Printer specifications
| Item Specifications and Description | |
| Printing speed^a | Up to 38 ppm in A4 (40 ppm in Letter)Duplex: 26 ipm in A4 (27 ipm in Letter) |
| Resolution Up to 1 | 200 x 1200 dpi effective output |
| Warm-up time | Less than 40 seconds |
| First print out time | 9 seconds (From Ready)Sleep mode: 40 seconds |
| Power rating | 110 - 127 VAC or 220 - 240 VACSee the Rating label on the machine for the correct voltage, frequency (hertz) and type of current for your machine. |
| Power consumption | Average: 650 WPower save mode: Less than 13 W |
| Noise levelb | Standby mode: Less than 35 dBAPrinting mode: Less than 56 dBA |
| Toner cartridge yieldc | 10,000 or 20,000 pages. |
| Duty cycle Monthly | Up to 200,000 pages |
| Weight | 21.2 Kg (including consumables) |
| Package weight | Paper: 2.8 Kg, Plastic: 0.7 Kg |
| External dimensions(W x D x H) | 396 X 453 X 353 mm(15.6 X 17.8 X 13.9 inches) |
| Operating environment | Temperature: 50°F to 90°F (10°C to 32.5°C)Humidity: 20% to 80% RH |
| Printer language P | CL 6d, PostScript 3, IBM, EPSON |
| Memory | 64 MB (Max. 512 MB) |
| 32, 64, 128, or 256 MB optional memory availableUse only the Samsung-approved DIMM. | |
| Display 16 characters x 2 lines | |
| Fonts | 1 bitmap, 45 scalable, 136 PostScript 3 fonts,OCR fonts |
| Item Specifications and Description | |
| Interface • IEEE 1284 Bidirectional Parallel Standard- Modes supported: Compatible, Nibble, Byte, ECP• USB Interface Standard- USB 2.0 compliant- 480 Mbps 1 port• Network Interface- ethernet 10/100 Base TX wired LAN- 802.11b/g wireless LAN (optional) | |
| OS compatibility | • Windows 98/Me/NT 4.0/2000/XP/2003/Vista• Various Linux OS• Macintosh OS 8.6 to 9.2/10.1 to 10.4 |
| Printer drivers ^e | • PCL driver: Windows 98/Me/NT 4.0/2000/XP/2003/Vista• PostScript driver: Windows 98/Me/NT 4.0/2000/XP/2003/Vista, Various Linux OS, Macintosh OS 8.6 to 9.2/10.1 to 10.4 |
a. Print speed will be affected by operating system used, computing performance, application software, connection method, media type, media size, and job complexity.
b. Sound pressure Level, ISO7779
c. Average cartridge yield declared in accordance with ISO/IEC 19752. The number of pages may be affected by operating environment, printing interval, media type, and media size.
d. Compatible with PCL6 Version 2.1
e. Please visit www.samsungprinter.com to download the latest software version.
INDEX
A
accessories
installing
DIMM 10.1
hard disk 10.5
network interface card/device 10.3
order information 7.1
C
cleaning
drum 8.3
inside 8.1
outside 8.1
cleaning sheet, print 8.3
component location 1.3
control panel
buttons 1.4
menus 2.1
status LED 9.6
D
demo page, print 2.6
DIMM, install 10.1
display language, change
control panel 2.6
display messages 9.6
drum, clean 8.3
E
error messages 9.6
H
hard disk
installing 10.5
use 10.6
I
installing accessories
hard disk 10.5
memory 10.1
network interface card/device 10.3
J
jam, clear 9.1
L
Linux problems 9.14
loading paper
multi-purpose tray 5.6
tray 5.5
M
Macintosh problems 9.14
maintenance parts 8.6
manual feed mode 5.7
memory 10.1
multi-purpose tray 5.6
N
network interface card/device, install 10.3
network setup
EtherTalk 4.2
IPX frame types 4.3
operating systems 4.2
TCP/IP 4.2
wireless 10.4
0
output location, select 5.8
output tray 5.8
P
paper guidelines 5.3
paper jam, clear
around the toner cartridge 9.3
duplex area 9.4
multi-purpose tray 9.3
optional tray 2 9.2
optional tray 3 9.2
optional tray 4 9.2
paper exit area 9.4
tray 1 9.2
paper level indicator 5.4
paper load
multi-purpose tray 5.6
tray 5.5
paper size
setting 2.3
specifications 5.2
paper type
setting 2.3
specifications 5.2
PostScript problems 9.13
print quality problems, solve 9.11
printing
demo page 2.6
information page 8.1
problems 9.9
problem, solve
checklist 9.5
error messages 9.6
Linux 9.14
Macintosh 9.14
paper jams 9.1
printing 9.9
printing quality 9.11
PS errors 9.13
Windows 9.13
Q
quality problems 9.11
R
rear cover, use 5.8
redistributing, toner cartridge 8.3
replacing, toner cartridge 8.4, 8.6
S
special print media, guidelines 5.3
specification, printer 11.1
status LED, meaning 9.6
supplies
checking life 8.3
order information 7.1
system requirements
Linux 3.3
Macintosh 3.3
Windows 3.2
T
toner cartridge
checkig remaining toner 8.3
cleaning 8.3
maintaining 8.3
redistributing 8.3
replacing 8.4, 8.6
toner save mode, use 2.6
troubleshooting 9.1
W
Windows problems 9.13
wireless network setup 10.4

Samsung Printer
Software section
SOFTWARE SECTION
CONTENTS
Chapter 1: INSTALLING PRINTER SOFTWARE IN WINDOWS
Installing Printer Software 4
Installing Software for Local Printing 4
Installing Software for Network Printing 7
Changing the Software Language 10
Reinstalling Printer Software 10
Removing Printer Software 11
Chapter 2: BASIC PRINTING
Printing a Document 12
Printer Settings 13
Layout Tab 13
Paper Tab 14
Graphics Tab 15
Extras Tab 16
About Tab 17
Printer Tab 17
Using a Favorite Setting 17
Using Help 17
Chapter 3: ADVANCED PRINTING
Printing Multiple Pages on One Sheet of Paper (N-Up Printing) 18
Printing Posters 19
Printing Booklets 19
Printing on Both Sides of Paper 20
Printing a Reduced or Enlarged Document 20
Fitting Your Document to a Selected Paper Size 20
Using Watermarks 21
Using an Existing Watermark 21
Creating a Watermark 21
Editing a Watermark 21
Deleting a Watermark 21
Using Overlays 22
What is an Overlay? 22
Creating a New Page Overlay 22
Using a Page Overlay 22
Deleting a Page Overlay 22
Chapter 4: USING WINDOWS POSTSCRIPT DRIVER
Printer Settings 23
Advanced 23
Using Help 23
Chapter 5: USING DIRECT PRINT UTILITY
Overview Direct Print Utility 24
Printing 24
From the Direct Print Utility window 24
Using the shortcut icon 24
Using the right-click menu 24
Chapter 6: SHARING THE PRINTER LOCALLY
Setting Up a Host Computer 25
Setting Up a Client Computer 25
Chapter 7: USING SMART PANEL
Understanding Smart Panel 26
Opening the Troubleshooting Guide 27
Using Printer Settings Utility 27
Using Onscreen Help File 27
Changing the Smart Panel Program Settings 27
Chapter 8: USING YOUR PRINTER IN LINUX
Getting Started 28
Installing the Unified Linux Driver 28
Installing the Unified Linux Driver 28
Uninstalling the Unified Linux Driver 29
Using the Unified Driver Configurator 30
Opening the Unified Driver Configurator 30
Printers Configuration 30
Ports Configuration 31
Configuring Printer Properties 31
Printing a Document 32
Printing from Applications 32
Printing Files 32
Chapter 9: USING YOUR PRINTER WITH A MACINTOSH
Installing Software for Macintosh 33
Setting Up the Printer 34
For a Network-connected Macintosh 34
For a USB-connected Macintosh 34
Printing 35
Printing a Document 35
Changing Printer Settings 35
Printing Multiple Pages on One Sheet of Paper 36
Duplex Printing 37
1 Installing Printer Software in Windows
This chapter includes:
• Installing Printer Software
- Changing the Software Language
• Reinstalling Printer Software
- Removing Printer Software
Installing Printer Software
You can install the printer software for local printing or network printing. To install the printer software on the computer, perform the appropriate installation procedure depending on the printer in use.
A printer driver is software that lets your computer communicate with your printer. The procedure to install drivers may differ depending on the operating system you are using.
All applications should be closed on your PC before beginning installation.
Installing Software for Local Printing
A local printer is a printer directly attached to your computer using the printer cable supplied with your printer, such as a USB or parallel cable. If your printer is attached to a network, skip this step and go to "Installing Software for Network Printing" on page 7.
You can install the printer software using the typical or custom method.
NOTE: If the "New Hardware Wizard" window appears during the installation procedure, click in the upper right corner of the box to close the window, or click Cancel.
Typical Installation
This is recommended for most users. All components necessary for printer operations will be installed.
1 Make sure that the printer is connected to your computer and powered on.
2 Insert the supplied CD-ROM into your CD-ROM drive. If you use Windows Vista, when you are asked to allow the installation, click continue.
The CD-ROM should automatically run, and an installation window appears.
If the installation window does not appear, click Start and then Run. Type X:\Setup.exe, replacing "X" with the letter which represents your drive and click OK.
If you use Windows Vista, click Start → All Programs → Accessories → Run, and type X:\Setup.exe.
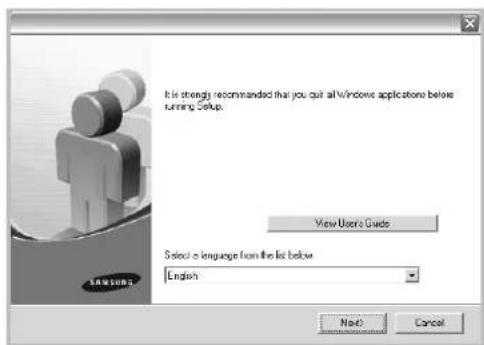
text_image
It is strongly recommended that you exit all Windows applications before running Setup. View User's Guide Select a language from the list below English Next Cancel3 Click Next.
- If necessary, select a language from the drop-down list.
- View User's Guide: Allows you to view the User's Guide. If your computer doesn't have Adobe Acrobat, click on this option and it will automatically install Adobe Acrobat Reader for you.
4 Select Typical installation for a local printer. Click Next.
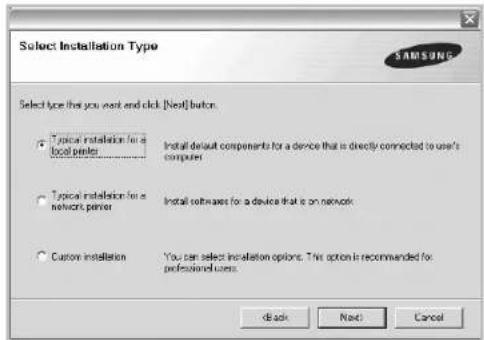
text_image
Select Installation Type SAMSUNG Select type that you want and click [Next] button. Typical installation for a local printer Install default components for a device that is directly connected to user's computer Typical installation for a network printer Install softwares for a device that is on network Custom installation You can select installation options. This option is recommended for professional users. Back Next CancelNOTE: If your printer is not already connected to the computer, the following window will appear.
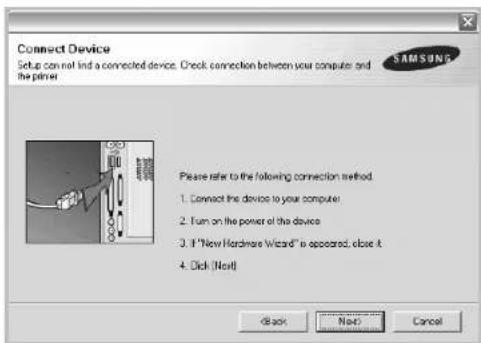
text_image
Connect Device Setup can not find a connected device. Check connection between your computer and the printer. Please refer to the following connection method: 1. Connect the device to your computer. 2. Turn on the power of the device 3. If "New Hardware Wizard" is appeared, close it 4. Click (Next) Back Next Cancel• After connecting the printer, click Next.
- If you don't want to connect the printer at this time, click Next, and No on the following screen. Then the installation will start and a test page will not be printed at the end of the installation.
- The installation window that appears in this User's Guide may differ depending on the printer and interface in use.
5 After the installation is finished, a window asking you to print a test page appears. If you choose to print a test page, select the checkbox and click Next. Otherwise, just click Next and skip to step 7.
6 If the test page prints out correctly, clickYes. If not, click No to reprint it.
7 To register yourself as a user of Samsung Printers in order to receive information from Samsung, select the checkbox and click Finish. You are now sent to the Samsung web site.
Otherwise, just click Finish.
text_image
Setup Completed Online Registration You will get the opportunity to receive free newsletters with exclusive tips and promotions. Do you will get more customer care. Would you like to register for the Samsung Photo Memberships? □ Free, I'd like to register it FinishNOTE: After setup is complete, if your printer driver doesn't work properly, reinstall the printer driver. See "Reinstalling Printer Software" on page 10.
Custom Installation
You can choose individual components to install.
1 Make sure that the printer is connected to your computer and powered on.
2 Insert the supplied CD-ROM into your CD-ROM drive. If you use Windows Vista, when you are asked to allow the installation, click continue.
The CD-ROM should automatically run, and an installation window appears.
If the installation window does not appear, click Start and then Run. Type X:\Setup.exe, replacing "X" with the letter which represents your drive and click OK.
If you use Windows Vista, click Start → All Programs → Accessories → Run, and type X:\Setup.exe.
text_image
It is strongly recommended that you do all windows applications below running Setup. View Users Guide Select a language from the list below English Next Cancel3 Click Next.
- If necessary, select a language from the drop-down list.
- View User's Guide: Allows you to view the User's Guide. If your computer doesn't have Adobe Acrobat, click on this option and it will automatically install Adobe Acrobat Reader for you.
4 Select Custom installation. Click Next.
text_image
Select Installation Type Select type that you want and click [Next] button. Typical installation for a local panel Install default components for a device that is directly connected to user's computer Typical installation for a network panel Install softwares for a device that is on network Custom installation You can select installation options. This option is recommended for professional users. Back Next Cancel5 Select your printer and click Next.
text_image
Select Printer Port Select a port that will be used for your printer Local or TCP/IP Port Sheet1 Printer (UNC) Add TCP/IP Port Select a printer from the list below. If you don't see your printer below, click [Update] to refresh the list. Printer Name IP/Port Name Update Set IP Address CBack Next CancelNOTE: If your printer is not already connected to the computer, the following window will appear.
text_image
Connect Device Setup can not find a connected device. Check connection between your computer and the printer. Please refer to the following connection method: 1. Connect the device to your computer 2. Turn on the power of the device 3. If "New Hardware Wizard" is approved, close it 4. Click (Next) Back Next Cancel• After connecting the printer, click Next.
- If you don't want to connect the printer at this time, click Next, and No on the following screen. Then the installation will start and a test page will not be printed at the end of the installation.
- The installation window that appears in this User's Guide may differ depending on the printer and interface in use.
6 Select the components to be installed and click Next.
text_image
Select components that you would like to install SAMSUNG Select components Select components that you would like to install Choose Destination Folder Browse Back Next CancelNOTE: You can change the desired installation folder by clicking [Browse].
7 After the installation is finished, a window asking you to print a test page appears. If you choose to print a test page, select the checkbox and click Next.
Otherwise, just click Next and skip to step 9.
8 If the test page prints out correctly, click Yes. If not, click No to reprint it.
9 To register yourself as a user of Samsung Printers in order to receive information from Samsung, select the checkbox and click Finish. You are now sent to the Samsung web site.
Otherwise, just click Finish.
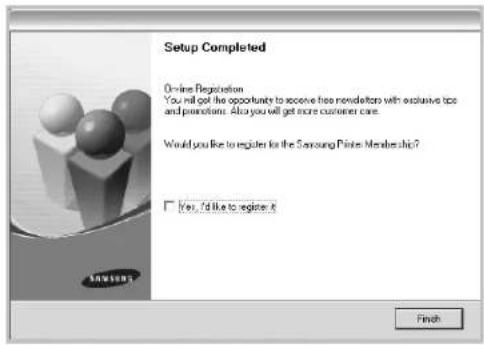
text_image
Setup Completed Online Registration You will get the opportunity to receive free newsletters with exclusive tips and promotions. Also you will get more customer care. Would you like to register for the Samsung Piote Membership? Yes, I'd like to register it FinishInstalling Software for Network Printing
When you connect your printer to a network, you must first configure the TCP/IP settings for the printer. After you have assigned and verified the TCP/IP settings, you are ready to install the software on each computer on the network.
You can install the printer software using the typical or custom method.
Typical Installation
This is recommended for most users. All components necessary for printer operations will be installed.
1 Make sure that the printer is connected to your network and powered on. For details about connecting to the network, see the supplied printer's User's Guide.
2 Insert the supplied CD-ROM into your CD-ROM drive. If you use Windows Vista, when you are asked to allow the installation, click continue.
The CD-ROM should automatically run, and an installation window appears.
If the installation window does not appear, click Start and then Run. Type X:\Setup.exe, replacing "X" with the letter which represents your drive and click OK.
If you use Windows Vista, click Start → All Programs → Accessories → Run, and type X:\Setup.exe.
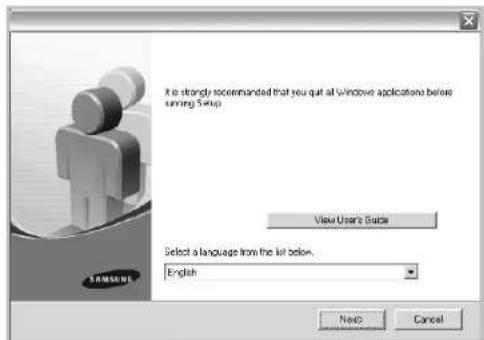
text_image
It is strongly recommended that you quit all windows applications before running Setup View User's Guide Select a language from the kit below. English Next Cancel3 Click Next.
- If necessary, select a language from the drop-down list.
- View User's Guide: Allows you to view the User's Guide. If your computer doesn't have Adobe Acrobat, click on this option and it will automatically install Adobe Acrobat Reader for you.
4 Select Typical installation for a network printer. Click Next.
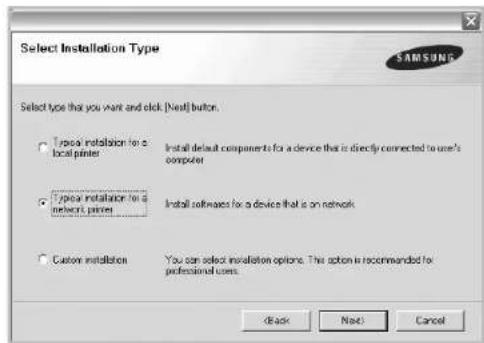
text_image
Select Installation Type Select type that you want and click [Next] button. Type1 installation for a local printer Install default components for a device that is directly connected to use's computer Type2 installation for a network printer Install softmaxes for a device that is on network Custom installation You can select installation options. This option is recommended for professional users. Back Next Cancel5 The list of printers available on the network appears. Select the printer you want to install from the list and then click Next.
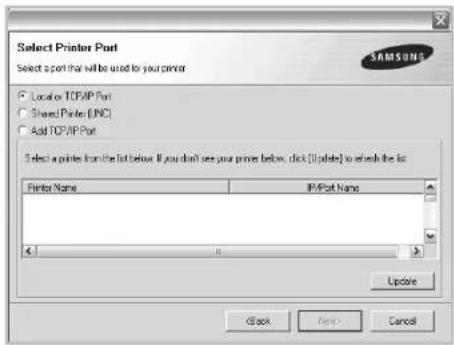
text_image
Select Printer Port Select a port that will be used to your printer Local or TCP/IP Port Shared Printer (UNC) Add TCP/IP Port Select a port from the list below. If you don't see your printer below, click [Update] to select the list Printer Name IP/Port Name Update Back Help> Cancel- If you do not see your printer on the list, click Update to refresh the list, or select Add TCP/IP Port to add your printer to the network. To add the printer to the network, enter the port name and the IP address for the printer.
- To find a shared network printer (UNC Path), select Shared Printer [UNC] and enter the shared name manually or find a shared printer by clicking the Browse button.
6 After the installation is finished, a window appears asking you to print a test page and to register yourself as a user of Samsung Printers in order to receive information from Samsung. If you so desire, select the corresponding checkbox(es) and click Finish.
Otherwise, just click Finish.
text_image
Setup Completed Online Registration You will get the opportunity to receive free newsletter with exclusive tips and promotions. Also you will get more customer care. Would you like to register for the Samsung Printer Membership? □ Yes, I'll like to replace it □ It's like to print a tool page FinishNOTE: After setup is complete, if your printer driver doesn't work properly, reinstall the printer driver. See "Reinstalling Printer Software" on page 10.
Custom Installation
You can choose individual components to install and set a specific IP address.
1 Make sure that the printer is connected to your network and powered on. For details about connecting to the network, see the supplied printer's User's Guide.
2 Insert the supplied CD-ROM into your CD-ROM drive. If you use Windows Vista, when you are asked to allow the installation, click continue.
The CD-ROM should automatically run, and an installation window appears.
If the installation window does not appear, click Start and then Run. Type X:\Setup.exe, replacing "X" with the letter which represents your drive and click OK.
If you use Windows Vista, click Start → All Programs → Accessories → Run, and type X:\Setup.exe.
text_image
It is strongly recommended that you quit all windows applications before running Setup. View Users Guide Select a language from the list below English Next Cancel3 Click Next.
- If necessary, select a language from the drop-down list.
- View User's Guide: Allows you to view the User's Guide. If your computer doesn't have Adobe Acrobat, click on this option and it will automatically install Adobe Acrobat Reader for you.
4 Select Custom installation. Click Next.
text_image
Select Installation Type SAMSUNG Select type that you want and click (Next) button. Typical installation for a local printer Install default components for a device that is directly connected to use's computer Typical installation for a network printer Install softwares for a device that is on network Custom installators You can select installation options. This option is recommended for professional users. < Back Next Cancel5 The list of printers available on the network appears. Select the printer you want to install from the list and then click Next.
text_image
Select Printer Port Select a port that will be used for your printer Local or TCP/IP Port Shared Printer (LINC) Add TCP/IP Port Select a printer from the list below. If you don't see your printer below, click [Update] to reteach the list. Printer Name IP/Port Name Update Set IP Address Cancel Next Cancel- If you do not see your printer on the list, click Update to refresh the list, or select Add TCP/IP Port to add your printer to the network. To add the printer to the network, enter the port name and the IP address for the printer.
- To find a shared network printer (UNC Path), select Shared Printer [UNC] and enter the shared name manually or find a shared printer by clicking the Browse button.
TIP: If you want to set a specific IP address on a specific network printer, click the Set IP Address button. The Set IP Address window appears. Do as follows:
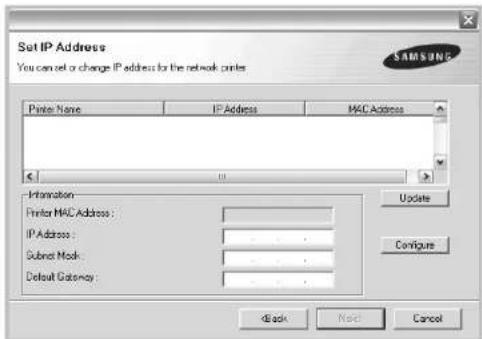
text_image
Set IP Address You can set or change IP address for the network printer Printer Name IP Address MAC Address Information Printer MAC Address: Update IP Address: Configure Submit Mask: Configure Default Gateway: Configure Back Next Cancela. Select a printer to be set with a specific IP address from the list. To verify your printer's IP address or MAC address, print a Network Configuration page.
b. Configure an IP address, subnet mask, and gateway for the printer manually and click Configure to set the specific IP address for the network printer.
c. Click Next.
6 Select the components to be installed. After selecting the components, the following window appears. You can also change the printer name, set the printer to be shared on the network, set the printer as the default printer, and change the port name of each printer. Click Next.
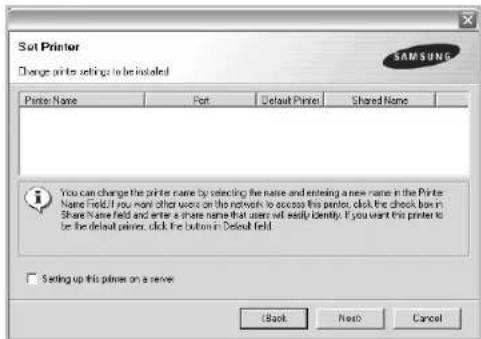
text_image
Sut Printer Change prints settings to be installed Printer Name Port Default Printer Shared Name You can change the printer name by selecting the name and entering a new name in the Printer Name field. If you want other words on the network, you access this printer, click the check box in Share Name field and enter a share name that users will easily identify. If you want this printer to be the default printer, click the button in Default field. Setting up this printer on a server (Back Next CancelTo install this software on a server, select the Setting up this printer on a server checkbox.
7 After the installation is finished, a window appears asking you to print a test page and to register yourself as a user of Samsung Printers in order to receive information from Samsung. If you so desire, select the corresponding checkbox(es) and click Finish.
Otherwise, just click Finish.
text_image
Setup Completed Online Regulation You will get the opportunity to receive free newsletters with exclusive tips and promotions. Also you will get more customer care. Would you like to register for the Samsung Printer Membership? Yes/If I like to register it It's like to print a tool page. FinishNOTE: After setup is complete, if your printer driver doesn't work properly, reinstall the printer driver. See "Reinstalling Printer Software" on page 10.
Changing the Software Language
After installation of the software, you can change the display language.
1 Click the Windows Start menu.
2 Select Programs or All Programs and then your printer driver name.
3 Select Language Selection.
4 Select the desired language from the language selection window, and click OK.
Reinstalling Printer Software
You can reinstall the software if installation fails.
1 Start Windows.
2 From the Start menu select Programs or All Programs → your printer driver name → Maintenance.
3 Select Repair and click Next.
4 The list of printers available on the network appears. Select the printer you want to install from the list and then click Next.
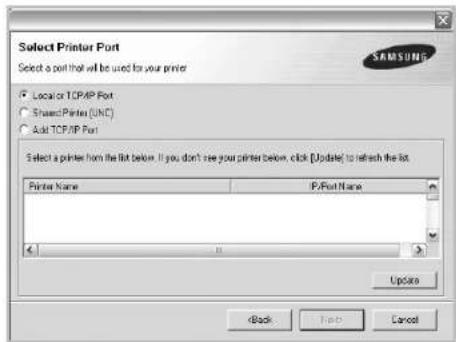
text_image
Select Printer Port Select a port that will be used for your printer ● Local or TCP/IP Port ○ Select Printer (UNC) ● Add TCP/IP Port Select a printer from the list below. If you don't see your printer below, click [Update] to refresh the list. Printer Name IP/Port Name Update < Back Next Cancel- If you do not see your printer on the list, click Update to refresh the list, or select Add TCP/IP Port to add your printer to the network. To add the printer to the network, enter the port name and the IP address for the printer.
- To find a shared network printer (UNC Path), select Shared Printer [UNC] and enter the shared name manually or find a shared printer by clicking the Browse button.
You will see a component list so that you can reinstall any item individually.
NOTE: If your printer is not already connected to the computer, the following window will appear.
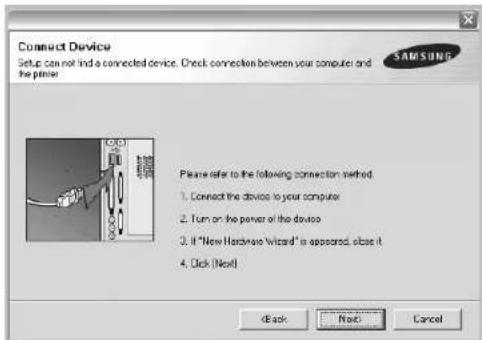
text_image
Connect Device Setup can not find a connected device. Check connection between your computer and the printer. Please refer to the following connection method: 1. Connect the device to your computer 2. Turn on the power of the devices 3. If "New Hardware Wizard" is appeared, close it 4. Click (Next) Back Next Cancel• After connecting the printer, click Next.
- If you don't want to connect the printer at this time, click Next, and No on the following screen. Then the installation will start and a test page will not be printed at the end of the installation.
- The reinstallation window that appears in this User's Guide may differ depending on the printer and interface in use.
5 Select the components you want to reinstall and click Next.
If you installed the printer software for local printing and you select your printer driver name, the window asking you to print a test page appears. Do as follows:
a. To print a test page, select the check box and click Next.
b. If the test page prints out correctly, click Yes. If it doesn't, click No to reprint it.
6 When the reinstallation is done, click Finish.
Removing Printer Software
1 Start Windows.
2 From the Start menu select Programs or All Programs → your printer driver name → Maintenance.
3 Select Remove and click Next.
You will see a component list so that you can remove any item individually.
4 Select the components you want to remove and then click Next.
5 When your computer asks you to confirm your selection, click Yes.
The selected driver and all of its components are removed from your computer.
6 After the software is removed, click Finish.
2 Basic Printing
This chapter explains the printing options and common printing tasks in Windows.
This chapter includes:
- Printing a Document
-
Printer Settings
-
Layout Tab
- Paper Tab
- Graphics Tab
- Extras Tab
- About Tab
- Printer Tab
- Using a Favorite Setting
- Using Help
Printing a Document
NOTES:
- Your printer driver Properties window that appears in this User's Guide may differ depending on the printer in use. However the composition of the printer properties window is similar.
- Check the Operating System(s) that are compatible with your printer. Please refer to the OS Compatibility section of Printer Specifications in your Printer User's Guide.
- If you need to know the exact name of your printer, you can check the supplied CD-ROM.
The following procedure describes the general steps required for printing from various Windows applications. The exact steps for printing a document may vary depending on the application program you are using. Refer to the User's Guide of your software application for the exact printing procedure.
1 Open the document you want to print.
2 Select Print from the File menu. The Print window is displayed. It may look slightly different depending on your application.
The basic print settings are selected within the Print window. These settings include the number of copies and print range.
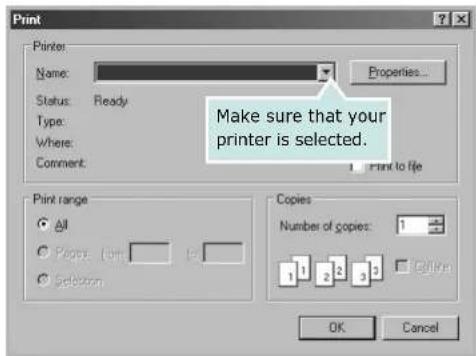
text_image
Print Printer: Name: Status: Ready Type: Where: Comment: Properties... Make sure that your printer is selected. Print range All Pages: 100 Selection Copies Number of copies: 1 OK Cancel3 Select your printer driver from the Name drop-down list.
4 To take advantage of the printer features provided by your printer driver, click Properties or Preferences in the application's Print window. For details, see "Printer Settings" on page 13.
If you see Setup, Printer, or Options in your Print window, click it instead. Then click Properties on the next screen.
5 Click OK to close the printer properties window.
6 To start the print job, click OK or Print in the Print window.
Printer Settings
You can use the printer properties window, which allows you to access all of the printer options you need when using your printer. When the printer properties are displayed, you can review and change the settings needed for your print job.
Your printer properties window may differ, depending on your operating system. This Software User's Guide shows the Properties window for Windows XP.
Your printer driver Properties window that appears in this User's Guide may differ depending on the printer in use.
If you access printer properties through the Printers folder, you can view additional Windows-based tabs (refer to your Windows User's Guide) and the Printer tab (see "Printer Tab" on page 17).
NOTES:
- Most Windows applications will override settings you specify in the printer driver. Change all print settings available in the software application first, and change any remaining settings using the printer driver.
- The settings you change remain in effect only while you are using the current program. To make your changes permanent, make them in the Printers folder.
-
The following procedure is for Windows XP. For other Windows OS, refer to the corresponding Windows User's Guide or online help.
-
Click the Windows Start button.
-
Select Printers and Faxes.
-
Select your printer driver icon.
-
Right-click on the printer driver icon and select Printing Preferences.
-
Change the settings on each tab, click OK.
Layout Tab
The Layout tab provides options to adjust how the document appears on the printed page. The Layout Options includes Multiple Pages per Side and Poster Printing. See "Printing a Document" on page 12 for more information on accessing printer properties.
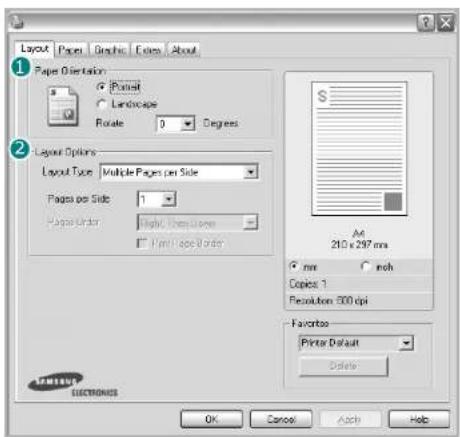
text_image
Layout Page Graphic Colors About 1 2 1 1 1 Page Orientation ● Portrait ○ Landscape ○ Rotate 0 Degrees 2 Layout Options Layout Type Multiple Pages per Side Pages per Side 1 Pages Under Right, Bottom Down □ Full Page Order S A4 210 x 297 mm ● mm inch Copies 1 Resolution: 300 dpi Favorites Printer Default Delete OK Cancel Apply HelpPaper Orientation
Paper Orientation allows you to select the direction in which information is printed on a page.
- Portrait prints across the width of the page, letter style.
- Landscape prints across the length of the page, spreadsheet style.
- Rotate allows you to rotate the page the selected degrees.

▲ Portrait

▲ Landscape
Layout Options
Layout Options allows you to select advanced printing options. You can choose Multiple Pages per Side and Poster Printing
- For details, see "Printing Multiple Pages on One Sheet of Paper (N-Up Printing)" on page 18.
- For details, see "Printing Posters" on page 19
Double-sided Printing
Double-sided Printing allows you to print on both sides of paper. If this option does not appear, your printer does not have this feature.
- For details, see "Printing on Both Sides of Paper" on page 20.
Paper Tab
Use the following options to set the basic paper handling specifications when you access the printer properties. See "Printing a Document" on page 12 for more information on accessing printer properties.
Click the Paper tab to access various paper properties.

text_image
Layout Paper Graphic Edges About Copies (1:990) Type Options Size A4 Custom Source Auto Selection Type Printer Default Scaling Printing Printing Type None S 210 x 297 mm max inch Copies 1 Resolution: 600 dpi Favorites Printer Default Options OK Cancel Apply Help1 Copies
Copies allows you to choose the number of copies to be printed. You can select 1 to 999 copies.
2 Size
Size allows you to set the size of paper you loaded in the tray. If the required size is not listed in the Size box, click Custom. When the Custom Paper Setting window appears, set the paper size and click OK. The setting appears in the list so that you can select it.
3 Source
Make sure that Source is set to the corresponding paper tray. Use Manual Feeder when printing on special materials like envelopes and transparencies. You have to load one sheet at a time into the Manual Tray or Multi-Purpose Tray. If the paper source is set to Auto Selection, the printer automatically picks up print material in the following tray order: Manual Tray or Multi-Purpose Tray, Tray n.
4 Type
Set Type to correspond to the paper loaded in the tray from which you want to print. This will let you get the best quality printout. If not, print quality may not be achieved as you want. Cotton: 20 lb to 24 lb (75\~90 g/m2) cotton paper such as Gilbert 25 % and Gilbert 100 %. Plain Paper: Normal plain paper. Select this type if your printer is monochrome and printing on the 16 lb (60 g/m2) cotton paper. Recycled Paper: 20 lb to 24 lb (75\~90 g/m2) recycled paper. Color Paper: 20 lb to 24 lb (75\~90 g/m2) color-backgrounded paper.
First Page
This property allows you to print the first page using a different paper type from the rest of the document. You can select the paper source for the first page. For example, load thick stock for the first page into the Multi-purpose Tray, and plain paper into Tray n. Then, select Tray n in the Source option and Multi-Purpose Tray in the First Page option. Some printers do not support this feature.
⑤ Scaling Printing
Scaling Printing allows you to automatically or manually scale your print job on a page. You can choose from None, Reduce/Enlarge, and Fit to Page
- For details, see "Printing a Reduced or Enlarged Document" on page 20.
- For details, see "Fitting Your Document to a Selected Paper Size" on page 20.
Graphics Tab
Use the following Graphic options to adjust the print quality for your specific printing needs. See "Printing a Document" on page 12 for more information on accessing printer properties. Click the Graphic tab to display the properties shown below..
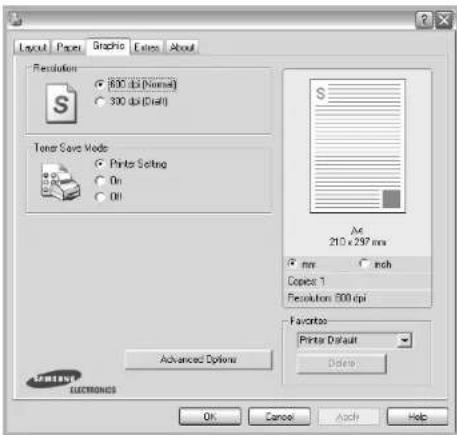
text_image
Layout Paper Graphic Clips About Resolution 600 dpi (Normal) 300 dpi (Draft) Temp Save Mode Print Setting On Off Advanced Options A6 210 x 297 mm mm inch Copies 1 Revisions 800 dpi Favorite Print Default Delete OK Cancel Apply HelpResolution
The Resolution options you can select may vary depending on your printer model. The higher the setting, the sharper the clarity of printed characters and graphics. The higher setting also may increase the time it takes to print a document.
Image Mode
The available options are Normal and Text Enhance. Some printers do not support this feature.
- Printer Setting: If you select this option, this feature is determined by the setting you've made on the control panel of the printer.
• Normal(1,2,3): This setting is for normal documents.
Text Enhancement: Image Mode allows the user to enhance printouts.
Toner Save Mode
Selecting this option extends the life of your toner cartridge and reduces your cost per page without a significant reduction in print quality. Some printers do not support this feature.
- Printer Setting: If you select this option, this feature is determined by the setting you've made on the control panel of the printer.
- On: Select this option to allow the printer to use less toner on each page.
- Off: If you don't need to save toner when printing a document, select this option.
Advanced Options
You can set advanced settings by clicking the Advanced Options button.
- TrueType Options: This option determines what the driver tells the printer about how to image the text in your document. Select the appropriate setting according to the status of your document. This option may be available only in Windows 9x/Me, depending on your particular printer model.
- Download as Outline: When this option is selected, the driver will download any TrueType fonts that are used in your document not already stored (resident) on your printer. If, after printing a document, you find that the fonts did not print correctly, choose Download as bit image and resubmit your print job. The Download as bit image setting is often useful when printing Adobe. This feature is available only when you use the PCL printer driver.
- Download as Bitmap: When this option is selected, the driver will download the font data as bitmap images. Documents with complicated fonts, such as Korean or Chinese, or various other fonts, will print faster in this setting.
- Print as Graphics: When this option is selected, the driver will download any fonts as graphics. When printing documents with high graphic content and relatively few TrueType fonts, printing performance (speed) may be enhanced in this setting.
- Print All Text To Black: When the Print All Text To Black option is checked, all text in your document prints solid black, regardless of the color it appears on the screen.
Extras Tab
You can select output options for your document. See "Printing a Document" on page 12 for more information about accessing the printer properties.
Click the Extras tab to access the following feature:
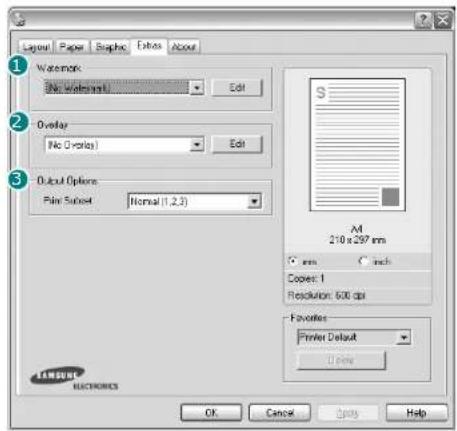
text_image
Layer Paper Graphic Extras About Watermark No. Watermark Edit Overlay No Overlay Edit Output Options Pain Subset Normal (1, 2, 3) M 210 x 297 mm C mm C inch Copies: 1 Resolution: 500 dpi Favorites: Printer Default OK Cancel Apply Help1 Watermark
You can create a background text image to be printed on each page of your document. For details, see "Using Watermarks" on page 21.
2 Overlay
Overlays are often used to take the place of preprinted forms and letterhead paper. For details, see "Using Overlays" on page 22.
③ Output Options
- Print Subset: You can set the sequence in which the pages print. Select the print order from the drop-down list.
- Normal(1,2,3): Your printer prints all pages from the first page to the last page.
- Reverse All Pages(3,2,1): Your printer prints all pages from the last page to the first page.
- Print Odd Pages: Your printer prints only the odd numbered pages of the document.
- Print Even Pages: Your printer prints only the even numbered pages of the document.
-
Information Page: Select Banner Page to print a banner sheet containing the printer name, the network user ID, job name before printing the document. When several users send a print job to the printer, this option allows you to easily find your printing from the output tray. Some printers do not support this feature.
-
Use Printer Fonts: When Use Printer Fonts is checked, the printer uses the fonts that are stored in its memory (resident fonts) to print your document, rather than downloading the fonts used in your document. Because downloading fonts takes time, selecting this option can speed up your printing time. When using Printer fonts, the printer will try to match the fonts used in your document to those stored in its memory. If, however, you use fonts in your document that are very different from those resident in the printer, your printed output will appear very different from what it looks like on the screen. This feature is available only when you use the PCL printer driver.
- Save as Form for Overlay: Select Save as Form for Overlay to save the document as a form file (C:\FORMOVER*.FOM). Once this option is selected, the printer driver requires the file name and the destination path each time you print. If you want to preset the file name and specify the path, click on the button in the Output to area, and type the file name and specify the path. This feature is available only when you use the PCL printer driver.
4 Job Setting
Print and Hold dialog allows you to select how to print or save the printing file by using the optional HDD. Some printers do not support this feature.
Using Onscreen Help File
- For more information about Job Setting, click at the top right corner of the window. The Job Setting Help window opens and allows you to view onscreen help supplied on the Job Setting.
About Tab
Use the About tab to display the copyright notice and the version number of the driver. If you have an Internet browser, you can connect to the Internet by clicking on the web site icon. See "Printing a Document" on page 12 for more information about accessing printer properties.
Printer Tab
If you access printer properties through the Printers folder, you can view the Printer tab. You can set the printer configuration.
The following procedure is for Windows XP. For other Windows OS, refer to the corresponding Windows User's Guide or online help.
1 Click the Windows Start menu.
2 Select Printers and Faxes.
3 Select your printer driver icon.
4 Right-click on the printer driver icon and select Properties.
5 Click the Printer tab and set the options.
Using a Favorite Setting
The Favorites option, which is visible on each properties tab, allows you to save the current properties settings for future use.
To save a Favorites item:
1 Change the settings as needed on each tab.
2 Enter a name for the item in the Favorites input box.
text_image
Copies 1 Resolution: 600 dpi Favorites Untitled Save OK Cancel Apply Help3 Click Save.
When you save Favorites, all current driver settings are saved.
To use a saved setting, select the item from the Favorites drop down list. The printer is now set to print according to the Favorites setting you selected.
To delete a Favorites item, select it from the list and click Delete.
You can also restore the printer driver's default settings by selecting Printer Default from the list.
Using Help
Your printer has a help screen that can be activated by clicking the Help button in the printer properties window. These help screens give detailed information about the printer features provided by the printer driver.
You can also click from the upper right corner of the window, and then click on any setting.
3 Advanced Printing
This chapter explains printing options and advanced printing tasks.
NOTE:
- Your printer driver Properties window that appears in this User's Guide may differ depending on the printer in use. However the composition of the printer properties window is similar.
- If you need to know the exact name of your printer, you can check the supplied CD-ROM.
This chapter includes:
- Printing Multiple Pages on One Sheet of Paper (N-Up Printing)
- Printing Posters
- Printing Booklets
- Printing on Both Sides of Paper
- Printing a Reduced or Enlarged Document
• Fitting Your Document to a Selected Paper Size - Using Watermarks
- Using Overlays
Printing Multiple Pages on One Sheet of Paper (N-Up Printing)
You can select the number of pages to print on a single sheet of paper. To print more than one page per sheet, the pages will be reduced in size and arranged in the order you specify. You can print up to 16 pages on one sheet.
1 To change the print settings from your software application, access printer properties. See "Printing a Document" on page 12.
2 From the Layout tab, choose Multiple Pages per Side in the Layout Type drop-down list.
3 Select the number of pages you want to print per sheet (1, 2, 4, 6, 9, or 16) in the Pages per Side drop-down list.
4 Select the page order from the Page Order drop-down list, if necessary.
Check Print Page Border to print a border around each page on the sheet.
5 Click the Paper tab, select the paper source, size, and type.
6 Click OK and print the document.

Printing Posters
This feature allows you to print a single-page document onto 4, 9, or 16 sheets of paper, for the purpose of pasting the sheets together to form one poster-size document.
1 To change the print settings from your software application, access printer properties. See "Printing a Document" on page 12.
2 Click the Layout tab, select Poster Printing in the Layout Type drop-down list.
3 Configure the poster option:
You can select the page layout from Poster<2x2>, Poster<3x3>, or Poster<4x4>. If you select Poster<2x2>, the output will be automatically stretched to cover 4 physical pages.
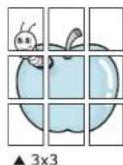
Specify an overlap in millimeters or inches to make it easier to pasting the sheets together.
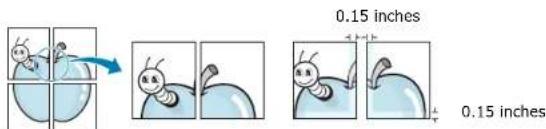
text_image
0.15 inches 0.15 inches4 Click the Paper tab, select the paper source, size, and type.
5 Click OK and print the document. You can complete the poster by pasting the sheets together.
Printing Booklets
This printer feature allows you to print your document on both sides of the paper and arranges the pages so that the paper can be folded in half after printing to produce a booklet.
1 To change the print settings from your software application, access the printer properties. See "Printing a Document" on page 12.
2 From the Layout tab, choose Booklet Printing from the Type drop-down list.
NOTE: The booklet printing option is available when A4, Letter, Legal, or Folio size is selected in the Size option on the Paper tab.
3 Click the Paper tab, and select the paper source, size, and type.
4 Click OK and print the document.
5 After printing, fold and staple the pages.
Printing on Both Sides of Paper
You can print on both sides of a sheet of paper. Before printing, decide how you want your document oriented.
The options are:
- Printer Setting, if you select this option, this feature is determined by the setting you've made on the control panel of the printer. If this option does not appear, your printer does not have this feature.
- None
- Long Edge, which is the conventional layout used in book binding.
- Short Edge, which is the type often used with calendars.
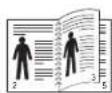
Long Edge
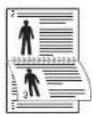

Short Edge
- Reverse Duplex, allows you to select general print order compare to duplex print order. If this option does not appear, your printer does not have this feature.
NOTE:
- Do not print on both sides of labels, transparencies, envelopes, or thick paper. Paper jamming and damage to the printer may result.
- To use double-sided printing, you can use only the following paper sizes: A4, Letter, Legal, and Folio, with a weight of 20\~24 lbs (75\~90 g/m²).
1 To change the print settings from your software application, access printer properties. "Printing a Document" on page 12.
2 From the Layout tab, select the paper orientation.
3 From the Double-sided Printing section, select the binding option you want.
4 Click the Paper tab and select the paper source, size, and type.
5 Click OK and print the document.
NOTE: If your printer does not have a duplex unit, you should complete the printing job manually. The printer prints every other page of the document first. After printing the first side of your job, the Printing Tip window appears. Follow the on-screen instructions to complete the printing job.
Printing a Reduced or Enlarged Document
You can change the size of a page's content to appear larger or smaller on the printed page.
1 To change the print settings from your software application, access printer properties. See "Printing a Document" on page 12.
2 From the Paper tab, select Reduce/Enlarge in the Printing Type drop-down list.
3 Enter the scaling rate in the Percentage input box. You can also click the ▼ or button.
4 Select the paper source, size, and type in Paper Options.
5 Click OK and print the document.
Fitting Your Document to a Selected Paper Size
This printer feature allows you to scale your print job to any selected paper size regardless of the digital document size. This can be useful when you want to check fine details on a small document.
1 To change the print settings from your software application, access printer properties. See "Printing a Document" on page 12.
2 From the Paper tab, select Fit to Page in the Printing Type drop-down list.
3 Select the correct size from the Target Page drop-down list.
4 Select the paper source, size, and type in Paper Options.
5 Click OK and print the document.
Using Watermarks
The Watermark option allows you to print text over an existing document. For example, you may want to have large gray letters reading "DRAFT" or "CONFIDENTIAL" printed diagonally across the first page or all pages of a document.
There are several predefined watermarks that come with the printer, and they can be modified, or you can add new ones to the list.
Using an Existing Watermark
1 To change the print settings from your software application, access printer properties. See "Printing a Document" on page 12.
2 Click the Extras tab, and select the desired watermark from the Watermark drop-down list. You will see the selected watermark in the preview image.
3 Click OK and start printing.
NOTE: The preview image shows how the page will look when it is printed.
Creating a Watermark
1 To change the print settings from your software application, access printer properties. See "Printing a Document" on page 12.
2 Click the Extras tab, and click the Edit button in the Watermark section. The Edit Watermark window appears.
3 Enter a text message in the Watermark Message box. You can enter up to 40 characters. The message displays in the preview window.
When the First Page Only box is checked, the watermark prints on the first page only.
4 Select watermark options.
You can select the font name, style, size, or grayscale level from the Font Attributes section and set the angle of the watermark from the Message Angle section.
5 Click Add to add a new watermark to the list.
6 When you have finished editing, click OK and start printing.
To stop printing the watermark, select
Editing a Watermark
1 To change the print settings from your software application, access printer properties. See "Printing a Document" on page 12.
2 Click the Extras tab and click the Edit button in the Watermark section. The Edit Watermark window appears.
3 Select the watermark you want to edit from the Current Watermarks list and change the watermark message and options.
4 Click Update to save the changes.
5 Click OK until you exit the Print window.
Deleting a Watermark
1 To change the print settings from your software application, access printer properties. See "Printing a Document" on page 12.
2 From the Extras tab, click the Edit button in the Watermark section. The Edit Watermark window appears.
3 Select the watermark you want to delete from theCurrent Watermarks list and click Delete.
4 Click OK until you exit the Print window.
Using Overlays
What is an Overlay?
An overlay is text and/or images stored in the computer hard disk drive (HDD) as a special file format that can be printed on any document. Overlays are often used to take the place of preprinted forms and letterhead paper. Rather than using preprinted letterhead, you can create an overlay containing the exact same information that is currently on your letterhead. To print a letter with your company's letterhead, you do not need to load preprinted letterhead paper in the printer. You need only tell the printer to print the letterhead overlay on your document.
Creating a New Page Overlay
To use a page overlay, you must create a new page overlay containing your logo or image.
1 Create or open a document containing text or an image for use in a new page overlay. Position the items exactly as you wish them to appear when printed as an overlay.
2 To save the document as an overlay, access printer properties. See "Printing a Document" on page 12.
3 Click the Extras tab, and click Edit button in the Overlay section.
4 In the Edit Overlay window, clickCreate Overlay.
5 In the Create Overlay window, type a name of up to eight characters in the File name box. Select the destination path, if necessary. (The default is C:\Formover).
6 Click Save. The name appears on the Overlay List box.
7 Click OK or Yes to finish creating.
The file is not printed. Instead it is stored on your computer hard disk drive.
NOTE: The overlay document size must be the same as the documents you print with the overlay. Do not create an overlay with a watermark.
Using a Page Overlay
After an overlay has been created, it is ready to be printed with your document. To print an overlay with a document:
1 Create or open the document you want to print.
2 To change the print settings from your software application, access printer properties. See "Printing a Document" on page 12.
3 Click the Extras tab.
4 Select the desired overlay from the Overlay drop-down list box.
5 If the overlay file you want does not appear in the Overlay list, click Edit button and Load Overlay, and select the overlay file.
If you have stored the overlay file you want to use in an external source, you can also load the file when you access the Load Overlay window.
After you select the file, click Open. The file appears in the Overlay List box and is available for printing. Select the overlay from the Overlay List box.
6 If necessary, click Confirm Page Overlay When Printing. If this box is checked, a message window appears each time you submit a document for printing, asking you to confirm your wish to print an overlay on your document.
If this box is not checked and an overlay has been selected, the overlay automatically prints with your document.
7 Click OK or Yes until printing begins.
The selected overlay downloads with your print job and prints on your document.
NOTE: The resolution of the overlay document must be the same as that of the document you will print with the overlay.
Deleting a Page Overlay
You can delete page overlays that you no longer use.
1 In the printer properties window, click the Extras tab.
2 Click the Edit button in the Overlay section.
3 Select the overlay you want to delete from the Overlay List box.
4 Click Delete Overlay.
5 When a confirming message window appears, click Yes.
6 Click OK until you exit the Print window.
4 Using Windows PostScript Driver
If you want to use the PostScript driver provided with your system CD-ROM to print a document.
PPDs, in combination with the PostScript driver, access printer features and allow the computer to communicate with the printer. An installation program for the PPDs is provided on the supplied software CD-ROM.
This chapter includes:
Printer Settings
You can use the printer properties window, which allows you to access all of the printer options you need when using your printer. When the printer properties are displayed, you can review and change the settings needed for your print job.
Your printer properties window may differ, depending on your operating system. This Software User's Guide shows the Properties window for Windows XP.
Your printer driver Properties window that appears in this User's Guide may differ depending on the printer in use.
NOTES:
- Most Windows applications will override settings you specify in the printer driver. Change all print settings available in the software application first, and change any remaining settings using the printer driver.
- The settings you change remain in effect only while you are using the current program. To make your changes permanent, make them in the Printers folder.
-
The following procedure is for Windows XP. For other Windows OS, refer to the corresponding Windows User's Guide or online help.
-
Click the Windows Start button.
- Select Printers and Faxes.
- Select your printer driver icon.
- Right-click on the printer driver icon and select Printing Preferences.
- Change the settings on each tab, click OK.
Advanced
You can use advanced settings by clicking the Advanced button.
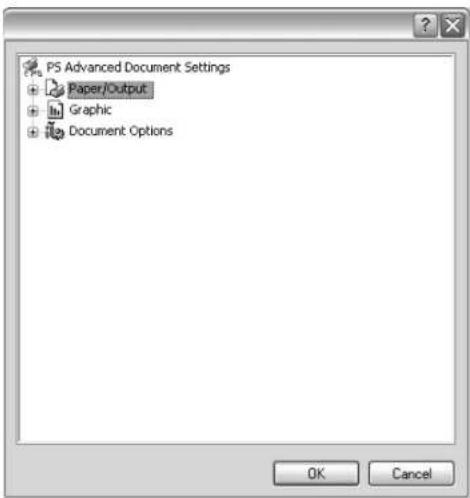
text_image
PS Advanced Document Settings Paper/Output Graphic Document Options OK Cancel- Paper/Output this option allows you to select the size of the paper loaded in the tray.
- Graphic this option allows you to adjust the print quality for your specific printing needs.
- Document Options this options allow you to set the PostScript options or printer features.
Using Help
You can click from the upper right corner of the window, and then click on any setting.
5 Using Direct Print Utility
This chapter explains how to use Direct Print Utility to print PDF files without having to open the files.
CAUTION
- You can not print PDF files that are restricted to print. Deactivate the printing restriction feature, and retry printing.
- You can not print PDF files that are restricted by a password. Deactivate the password feature, and retry printing.
- Depending on how a PDF file was created, it may not be able to be printed using the Direct Print Utility program.
- Depending on the memory size supported by your printer, PDF files can not be printed using the Direct Print Utility program. Expand the memory.
- T h Direct Print Utility program supports PDF version 1.4 and below. For a higher version, you must open the file to print it.
Overview Direct Print Utility
Direct Print Utility is a program that sends a PDF file directly to your printer without having to open the file. It sends data through the Windows spooler using the port of the printer driver. It only supports PDF format.
To installing this program, you should select Custom and put a check mark in this program when you install the printer driver.
Printing
There are several ways you can print using Direct Print Utility.
From the Direct Print Utility window
1 From the Start menu select Programs or All Programs → Direct Print Utility → Direct Print Utility.
Or, double-click the Direct Print Utility shortcut icon on your desk top.
The Direct Print Utility window opens.
2 Select the printer you will use in the Select Printer section and click Browse.
3 Select the PDF file you will print and clickOpen. The PDF file is added in the Select Files section.
4 Customize the printer settings for your needs. See the next column.
5 Click Print.
The selected PDF file is sent to the printer.
Using the shortcut icon
1 Select the PDF file you will print and by dragging drop it to the Direct Print Utility shortcut icon on your desk top.
The selected PDF file is sent to the default printer.
NOTE : If the default printer does not support Direct Print Utility, the message window alerting you to select the appropriate printer opens. Select the appropriate printer in the Select Printer section.
2 Customize the printer settings for your needs.
3 Click Print
The selected PDF file is sent to the printer.
Using the right-click menu
1 Right-click on the PDF file you will print and selecDirect Printing.
The Direct Print Utility window opens with the PDF file is added.
2 Select the printer you will use.
3 Customize the printer settings for your needs. See the below part.
4 Click Print.
The selected PDF file is sent to the printer.
6 Sharing the Printer Locally
You can connect the printer directly to a selected computer, which is called "host computer," on the network.
The following procedure is for Windows XP. For other Windows OS, refer to the corresponding Windows User's Guide or online help.
NOTES:
- Check the Operating System(s) that are compatible with your printer. Please refer to the OS Compatibility section of Printer Specifications in your Printer User's Guide.
- If you need to know the exact name of your printer, you can check the supplied CD-ROM.
Setting Up a Host Computer
1 Start Windows.
2 From the Start menu select Printers and Faxes.
3 Double-click your printer driver icon.
4 From the Printer menu, select Sharing.
5 Check the Share this printer box.
6 Fill in the Shared Name field, and then click OK.
Setting Up a Client Computer
1 Right-click the Windows Start button and select Explorer.
2 Open your network folder in the left column.
3 Click the shared name.
4 From the Start menu select Printers and Faxes.
5 Double-click your printer driver icon.
6 From the Printer menu, select Properties.
7 From the Ports tab, click Add Port.
8 Select Local Port and click New Port.
9 Fill in the Enter a port name field with the shared name.
10 Click OK and click Close.
11 Click Apply and click OK.
7 Using Smart Panel
Smart Panel is a program that monitors and informs you of the status of the printer, and allows you to customize the printer's settings. Smart Panel is installed automatically when you install the printer software.
NOTES:
• To use this program, you need:
- Windows 98 or higher (Windows NT 4.0 can be used only for network-supported printers.) To check for Operating System(s) that are compatible with your printer, refer to Printer Specifications in your Printer User's Guide.
- Mac OS X 10.3 or higher
- Linux. To check for Linux systems that are compatible with your printer, refer to Printer Specifications in your Printer User's Guide.
- Internet Explorer version 5.0 or higher for flash animation in HTML Help.
- If you need to know the exact name of your printer, you can check the supplied CD-ROM.
Understanding Smart Panel
If an error occurs while printing, Smart Panel appears automatically, showing the error.
You can also launch Smart Panel manually. Double-click the Smart Panel icon on the Windows task bar (in Windows), or Notification Area (in Linux). You can also click it on the status bar (in Mac OS X).
Double-click this icon in Windows.
Click this Icon In Mac OS X.

Click this icon in Linux.

If you are a Windows user, from the Start menu, select
Programs or All Programs → your printer driver name → Smart Panel.
NOTES:
- If you have already installed more than one Samsung printer, first select the printer model you want in order to use the corresponding Smart Panel. Right-click (in Windows or Linux) or click (in Mac OS X) the Smart Panel icon and select your printer name.
- The Smart Panel window and its contents shown in this Software User's Guide may differ depending on the printer or Operating System in use.
The Smart Panel program displays the current status of the printer, the level of toner remaining in the toner cartridge(s) and various other information. You can also change settings.
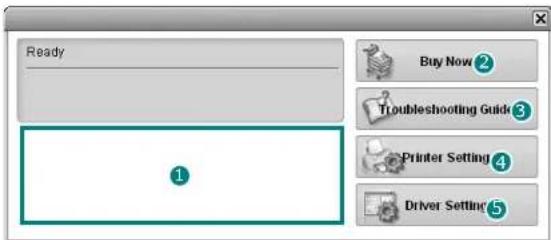
text_image
Ready Buy Now 2 Troubleshooting Guide 3 Printer Setting 4 Driver Setting 5 11 Toner Level
You can view the level of toner remaining in the toner cartridge(s). The printer and the number of toner cartridge(s) shown in the above window may differ depending on the printer in use. Any printers do not have this feature.
2 Buy Now
You can order replacement toner cartridge(s) online.
③ Troubleshooting Guide
You can view Help to solve problems.
4 Printer Setting
You can configure various printer settings in the Printer Settings Utility window. Any printers do not have this feature.
NOTE: If your printer is connected to a network and you are a Windows user, the SyncThru Web Service window appears instead of the Printer Settings Utility window. Mac OS X and Linux do not support network environments.
⑤ Driver Setting (Only for Windows)
You can use the printer properties window, which allows you to access all of the printer options you need for using your printer. For details, See "Printer Settings" on page 13.
Opening the Troubleshooting Guide
Using the troubleshooting guide, you can view solutions for error status problems.
Right-click (in Windows or Linux) or click (in Mac OS X) the Smart Panel icon and select Troubleshooting Guide.
Using Printer Settings Utility
Using the Printer Settings Utility, you can configure and check print settings.
1 Right-click (in Windows or Linux) or click (in Mac OS X) the Smart Panel icon and select Printer Setting.
2 Change the settings.
3 To send the changes to the printer, click theApply button.
NOTES: If your printer is connected to a network, the SyncThru Web Service window appears instead of the Printer Settings Utility window.
Using Onscreen Help File
For more information about Printer Settings Utility, click ?
Changing the Smart Panel Program Settings
Right-click (in Windows or Linux) or click (in Mac OS X) the Smart Panel icon and select Options.
The following window opens.
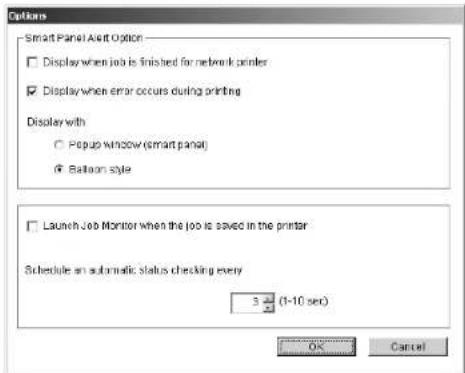
text_image
Customs Smart Panel Alert Option □ Display when job is finished for network printer ☑ Display when error occurs during printing Display with ○ Populo Window (smart panel) ● Balloon style □ Launch Job Monitor when the job is saved in the printer Schedule an automatic status checking every 3 (1-10 sec) OK Cancel- Display when job is finished for network printer: The computer shows the Smart Panel popup window or balloon when your job is complete in Windows. (Only for Windows network-supported printers.)
- Display when error occurs during printing The computer shows the Smart Panel popup window or balloon when an error occurs during printing.
- Display with: You can select how the computer shows you a message. If you select Popup window (smart panel), the message appears in the Smart Panel popup window in Windows and Mac OS X.
- Launch Job Monitor when the job is saved in the printer: If you store print jobs on the printer's hard disk, the computer opens the Job Monitor window in Windows. (Only for Windows network-supported printers with built-in hard disks.)
- Schedule an automatic status checking every: The computer updates the printer status regularly. Setting the value close to 1 second causes the computer to check the printer status more frequently, thereby allowing a faster response to any printer error.
8 Using Your Printer in Linux
You can use your machine in a Linux environment.
This chapter includes:
- Getting Started
• Installing the Unified Linux Driver
• Using the Unified Driver Configurator - Configuring Printer Properties
- Printing a Document
Getting Started
The supplied CD-ROM provides you with Samsung's Unified Linux Driver package for using your machine with a Linux computer.
After the driver is installed on your Linux system, the driver package allows you to monitor a number of machine devices via fast ECP parallel ports and USB simultaneously.
The Unified Linux Driver package is supplied with a smart and flexible installation program. You don't need to search for additional components that might be necessary for the Unified Linux Driver software: all required packages will be carried onto your system and installed automatically; this is possible on a wide set of the most popular Linux clones.
Installing the Unified Linux Driver
Installing the Unified Linux Driver
1 Make sure that you connect your machine to your computer. Turn both the computer and the machine on.
2 When the Administrator Login window appears, type in root in the Login field and enter the system password.
NOTE: You must log in as a super user (root) to install the printer software. If you are not a super user, ask your system administrator.
3 Insert the printer software CD-ROM. The CD-ROM will automatically run.
If the CD-ROM does not automatically run, click the icon at the bottom of the desktop. When the Terminal screen appears, type in:
If the CD-ROM is secondary master and the location to mount is /mnt/cdrom,
[root@localhost root]#mount -t iso9660 /dev/hdc /mnt/cdrom
[root@localhost root]# cd /mnt/cdrom/Linux
[root@localhost root]# ./install.sh
NOTE: The installation program runs automatically if you have an autorun software package installed and configured.
4 When the welcome screen appears, click Next.
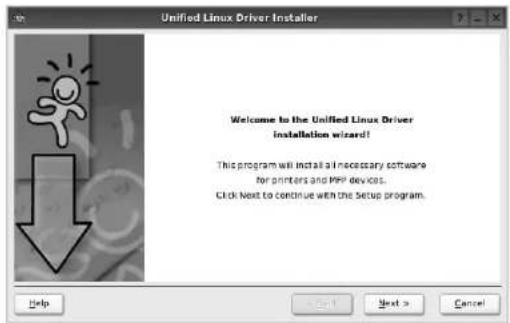
text_image
Unified Linux Driver Installer Welcome to the Unified Linux Driver installation wizard! This program will install a necessary software for printers and PPP devices. Click Next to continue with the Setup program.5 When the installation is complete, click Finish.
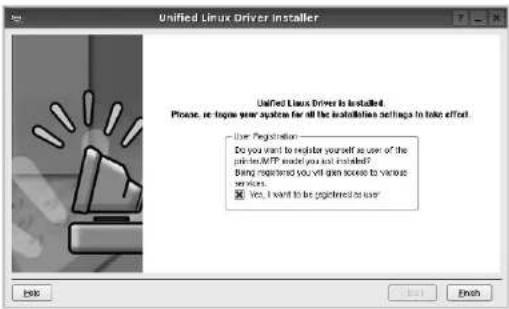
text_image
Unified Linux Driver Installer Unified Linux Driver is installed. Please, we log your system for all the installation actions to take effect. User: Registration Do you want to register yourself as user of the printer/MFTP model you not installed? Bring registered you will gain access to various services. ✓ Yes, I want to be registered as user!The installation program has added the Unified Driver Configurator desktop icon and Samsung Unified Driver group to the system menu for your convenience. If you have any difficulties, consult the onscreen help that is available through your system menu or can otherwise be called from the driver package windows applications, such as Unified Driver Configurator.
Uninstalling the Unified Linux Driver
1 When the Administrator Login window appears, type in root in the Login field and enter the system password.
NOTE: You must log in as a super user (root) to install the printer software. If you are not a super user, ask your system administrator.
2 Insert the printer software CD-ROM. The CD-ROM will automatically run.
If the CD-ROM does not automatically run, click the icon at the bottom of the desktop. When the Terminal screen appears, type in:
If the CD-ROM is secondary master and the location to mount is /mnt/cdrom,
[root@localhost root]#mount -t iso9660 /dev/hdc /mnt/cdrom
[root@localhost root]# cd /mnt/cdrom/Linux
[root@localhost root]# ./uninstall.sh
NOTE: The installation program runs automatically if you have an autorun software package installed and configured.
3 Click Uninstall.
4 Click Next.
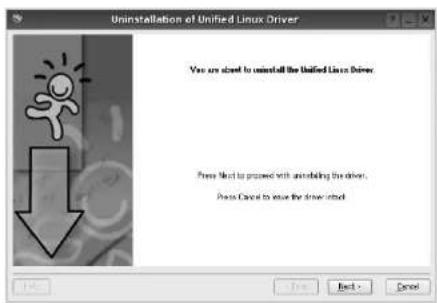
text_image
Uninstallation of Unified Linux Driver You are about to uninstall the Unified Linux Driver. Press Next to proceed with installing the driver. Press Cancel to issue the driver's back.5 Click Finish.
Using the Unified Driver Configurator
Unified Linux Driver Configurator is a tool primarily intended for configuring Printer.
After installing the Unified Linux driver, the Unified Linux Driver Configurator icon will automatically be created on your desktop.
Opening the Unified Driver Configurator
1 Double-click Unified Driver Configurator on the desktop.
You can also click the Startup Menu icon and select Samsung Unified Driver and then Unified Driver Configurator.
2 Press each button on the Modules pane to switch to the corresponding configuration window.
Printers Configuration button
Scanners Configuration button (for MFP device only)
Ports Configuration button
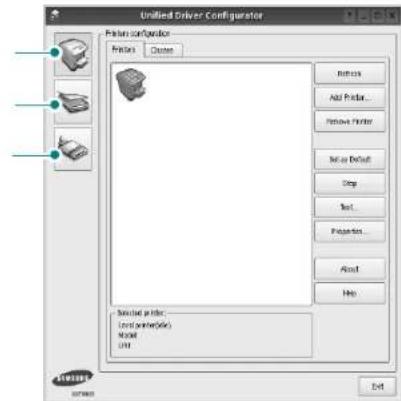
text_image
Unified Driver Configurator Printer configuration Printers Delete Remove Add Printer... Remove Printer Not in Default Copy Text... Properties... About Help Newed printer: New printer(sks) New Unit EditYou can use the onscreen help by clicking Help.
3 After changing the configurations, click Exit to close the Unified Driver Configurator.
Printers Configuration
Printers configuration has the two tabs: Printers and Classes.
Printers Tab
You can see the current system's printer configuration by clicking on the printer icon button on the left side of the Unified Driver Configurator window.
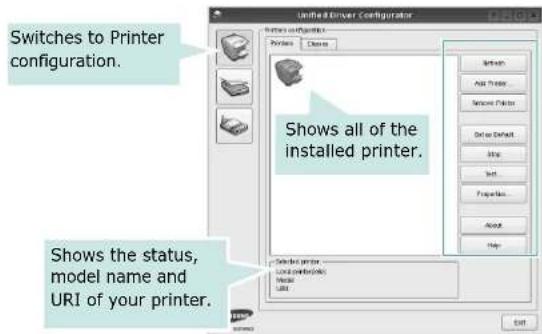
text_image
Switches to Printer configuration. Shows all of the installed printer. Shows the status, model name and URI of your printer.You can use the following printer control buttons:
- Refresh: renews the available printers list.
- Add Printer: allows you to add a new printer.
- Remove Printer: removes the selected printer.
- Set as Default: sets the current printer as a default printer.
- Stop/Start: stops/starts the printer.
- Test: allows you to print a test page to check if the machine is working properly.
- Properties: allows you to view and change the printer properties. For details, see page 31.
Classes Tab
The Classes tab shows a list of available printer classes.
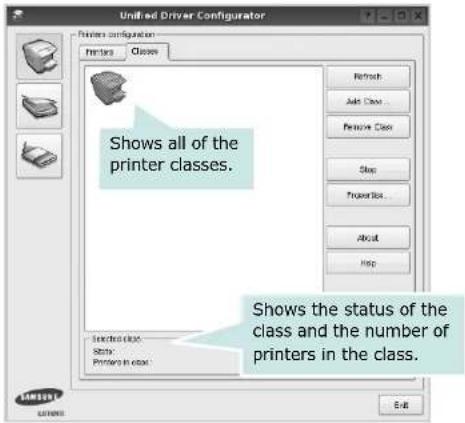
text_image
Unified Driver Configurator Printer configuration Printers Classes Shows all of the printer classes. Search Class Status Printers in class Shows the status of the class and the number of printers in the class.- Refresh : Renews the classes list.
- Add Class... : Allows you to add a new printer class.
- Remove Class : Removes the selected printer class.
Ports Configuration
In this window, you can view the list of available ports, check the status of each port and release a port that is stalled in busy state when its owner is terminated for any reason.
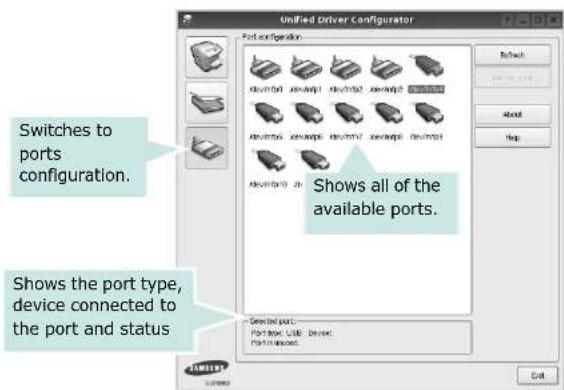
text_image
Unified Driver Configurator Port configuration Switches to ports configuration. Shows all of the available ports. Shows the port type, device connected to the port and status Device port... Port name: USB Device Port location: Edit- Refresh : Renews the available ports list.
- Release port : Releases the selected port.
Configuring Printer Properties
Using the properties window provided by the Printers configuration, you can change the various properties for your machine as a printer.
1 Open the Unified Driver Configurator.
If necessary, switch to Printers configuration.
2 Select your machine on the available printers list and click Properties.
3 The Printer Properties window opens.
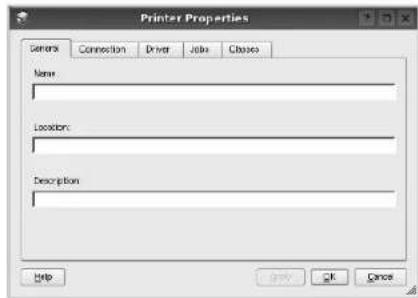
text_image
Printer Properties General Connection Driver Jabs Close Name Location: Description Help OK CancelThe following five tabs display at the top of the window:
- General: allows you to change the printer location and name. The name entered in this tab displays on the printer list in Printers configuration.
- Connection: allows you to view or select another port. If you change the printer port from USB to parallel or vice versa while in use, you must re-configure the printer port in this tab.
- Driver: allows you to view or select another printer driver. By clicking Options, you can set the default device options.
- Jobs: shows the list of print jobs. Click Cancel job to cancel the selected job and select the Show completed jobs check box to see previous jobs on the job list.
- Classes: shows the class that your printer is in. Click Add to Class to add your printer to a specific class or click Remove from Class to remove the printer from the selected class.
4 Click OK to apply the changes and close the Printer Properties Window.
Printing a Document
Printing from Applications
There are a lot of Linux applications that you are allowed to print from using Common UNIX Printing System (CUPS). You can print on your machine from any such application.
1 From the application you are using, select Print from the File menu.
2 Select Print directly using lpr.
3 In the LPR GUI window, select the model name of your machine from the Printer list and click Properties.
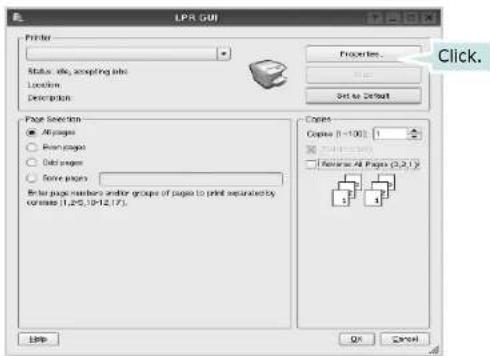
text_image
LPR GUI Printer Properties... Status: w/o, accepting sites Location: Set to Default Page Selection All pages Print pages Edit pages Save pages Print pages numbers and/or groups of pages to print separately by correspond (1,25,19-12,7). Copies Copies (1=100) P = 1.000000 P = P = 1.000000 P = P = 1.000000 P = P = 1.000000 P = P = 1.000000 OK Cancel Click.4 Change the printer and print job properties.
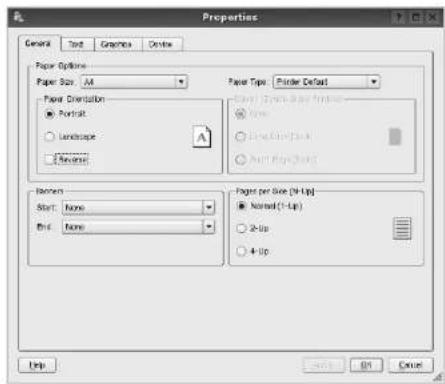
text_image
Properties General Text Graphics Centre Paper Options Paper Size Alt Paper Direction • Portrait ○ Landscape ○ Reverse Paper Type: Border Default □ None ○ Inside Page1 ○ Inside Page2 ■ Paper per Size (H-Up) ● Normal (T-Up) ○ 3-Up ○ 4-Up ■ Start: None End: None Help Edit CancelThe following four tabs display at the top of the window.
- General - allows you to change the paper size, the paper type, and the orientation of the documents, enables the duplex feature, adds start and end banners, and changes the number of pages per sheet.
- Text - allows you to specify the page margins and set the text options, such as spacing or columns.
- Graphics - allows you to set image options that are used when printing images/files, such as color options, image size, or image position.
- Device: allows you to set the print resolution, paper source, and destination.
5 Click Apply to apply the changes and close the Properties window.
6 Click OK in the LPR GUI window to start printing.
7 The Printing window appears, allowing you to monitor the status of your print job.
To abort the current job, click Cancel.
Printing Files
You can print many different types of files on the Samsung machine device using the standard CUPS way - directly from the command line interface. The CUPS lpr utility allows you do that. But the drivers package replaces the standard lpr tool by a much more user-friendly LPR GUI program.
To print any document file:
1 Type lpr
When you type only lpr and press Enter, the Select file(s) to print window appears first. Just select any files you want to print and click Open.
2 In the LPR GUI window, select your printer from the list, and change the printer and print job properties.
For details about the properties window, see page 32.
3 Click OK to start printing.
9
Using Your Printer with a Macintosh
Your machine supports Macintosh systems with a built-in USB interface or a 10/100 Base-TX network interface card. When you print a file from a Macintosh computer, you can use the PostScript driver by installing the PPD file.
NOTE: Some printers do not support a network interface. Make sure that your printer supports a network interface by referring to Printer Specifications in your Printer User's Guide.
This chapter includes:
• Installing Software for Macintosh
- Setting Up the Printer
- Printing
Installing Software for Macintosh
The PostScript driver CD-ROM that came with your machine provides you with the PPD file to use the PS driver, Apple LaserWriter driver, for printing on a Macintosh computer.
1 Connect your machine to the computer using the USB cable or the Ethernet cable.
2 Turn on your computer and the machine.
3 Insert the PostScript driver CD-ROM which came with your machine into the CD-ROM drive.
4 Double-click the CD-ROM icon on your Macintosh desktop.
5 Double-click the MAC_Installer folder.
6 Double-click the MAC_Printer folder.
7 For Mac OS 8.6\~9.2, double-click the Samsung LBP Installer Classic icon.
For Mac OS 10.1 or higher, double-click the Samsung LBP Installer OSX icon.
8 Click Continue.
9 Click Install.
10 After the installation is finished, click Quit.
Setting Up the Printer
Set up for your printer will be different depending on which cable you use to connect the printer to your computer—the network cable or the USB cable.
For a Network-connected Macintosh
NOTE: Some printers do not support a network interface. Before connecting your printer, make sure that your printer supports a network interface by referring to Printer Specifications in your Printer User's Guide.
Mac OS 8.6 \~ 9.2
1 Follow the instructions on "Installing Software for Macintosh" on page 33 to install the PPD file on your computer.
2 From the Apple menu, select Chooser.
3 Click LaserWriter 8 (the PostScript driver provided with your Macintosh).
The name of your machine appears on the list.
4 Select SEC000xxxxxxxxxx from the printer box (where the xxxxxxxxx varies depending on each of the machines) and Click Select.
If Auto Setup does not work properly, click Select PPD, choose your printer name, and click OK.
5 When the setup is complete, you see your machine icon created as a desktop printer.
6 Close the Chooser.
7 When a message window appears telling you that you have changed your current machine, click OK.
Mac OS 10.1 or higher
1 Follow the instructions on "Installing Software for Macintosh" on page 33 to install the PPD file on your computer.
2 Open Print Center or Printer Setup Utility from the Utilities folder.
3 Click Add on the Printer List.
4 Select the AppleTalk tab.
The name of your machine appears on the list. Select SEC000xxxxxxxxx from the printer box, where the xxxxxxxxxxxx varies depending on your machine.
5 Click Add.
6 If Auto Select does not work properly, select Samsung in Printer Model and your printer name in Model Name. Your machine appears on the Printer List and is set as the default printer.
For a USB-connected Macintosh
Mac OS 10.1 or higher
1 Follow the instructions on "Installing Software for Macintosh" on page 33 to install the PPD file on your computer.
2 Open Print Center or Printer Setup Utility from the Utilities folder.
3 Click Add on the Printer List.
4 Select the USB tab.
5 Select your printer name and click Add.
6 If Auto Select does not work properly, select Samsung in Printer Model and your printer name in Model Name. Your machine appears on the Printer List and is set as the default printer.
Printing
NOTES:
- The Macintosh printer's properties window that appears in this User's Guide may differ depending on the printer in use. However the composition of the printer properties window is similar.
- You can check your printer name in the supplied CD-ROM.
Printing a Document
When you print with a Macintosh, you need to check the printer software setting in each application you use. Follow these steps to print from a Macintosh.
1 Open a Macintosh application and select the file you want to print.
2 Open the File menu and click Page Setup (Document Setup in some applications).
3 Choose your paper size, orientation, scaling, and other options and click OK.
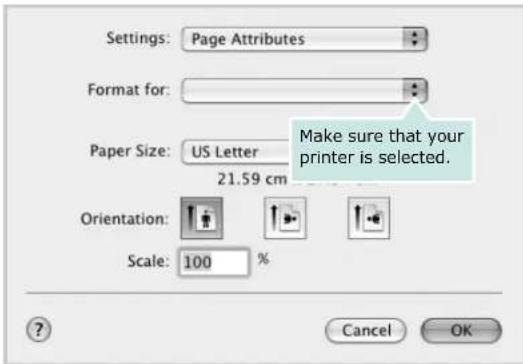
text_image
Settings: Page Attributes Format for: Paper Size: US Letter 21.59 cm Orientation: Scale: 100 % Make sure that your printer is selected. Cancel OK▲ Mac OS 10.3
4 Open the File menu and click Print.
5 Choose the number of copies you want and indicate which pages you want to print.
6 Click Print when you finish setting the options.
Changing Printer Settings
You can use advanced printing features when using your printer.
From your Macintosh application, select Print from the File menu. The printer name which appears in the printer properties window may differ depending on the printer in use. Except for the name, the composition of the printer properties window is similar.
Layout Setting
The Layout tab provides options to adjust how the document appears on the printed page. You can print multiple pages on one sheet of paper.
Select Layout from the Presets drop-down list to access the following features. For details, see "Printing Multiple Pages on One Sheet of Paper" on the next column.
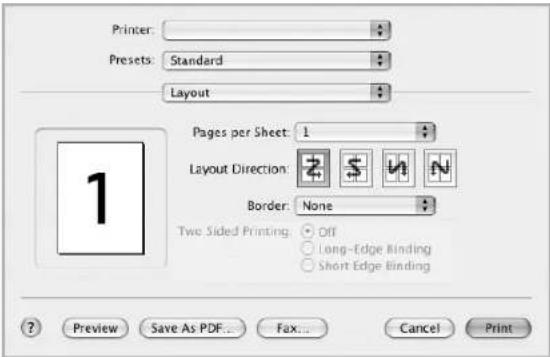
text_image
Printer: Presets: Standard Layout Pages per Sheet: 1 Layout Direction: Border: None Two Sided Printing: Off Long-Edge Binding Short Edge Binding ? Preview Save As PDF... Fax... Cancel Print▲ Mac OS 10.3
Printer Features Setting
The Printer Features tab provides options for selecting the paper type and adjusting print quality.
Select Printer Features from the Presets drop-down list to access the following features:
text_image
Printer: Presets: Standard Printer Features▲ Mac OS 10.3
Reverse Duplex
Allows you to select general print order compare to duplex print order.
Image Mode
Image Mode allows the user to enhance printouts. The available options are Normal and Text Enhance.
Fit to Page
This printer feature allows you to scale your print job to any selected paper size regardless of the digital document size. This can be useful when you want to check fine details on a small document.
Paper Type
Set Type to correspond to the paper loaded in the tray from which you want to print. This will let you get the best quality printout. If you load a different type of print material, select the corresponding paper type.
Resolution(Quality)
The Resolution options you can select may vary depending on your printer model. You can select the printing resolution. The higher the setting, the sharper the clarity of printed characters and graphics. The higher setting also may increase the time it takes to print a document.
Printing Multiple Pages on One Sheet of Paper
You can print more than one page on a single sheet of paper. This feature provides a cost-effective way to print draft pages.
1 From your Macintosh application, select Print from the File menu.
2 Select Layout.
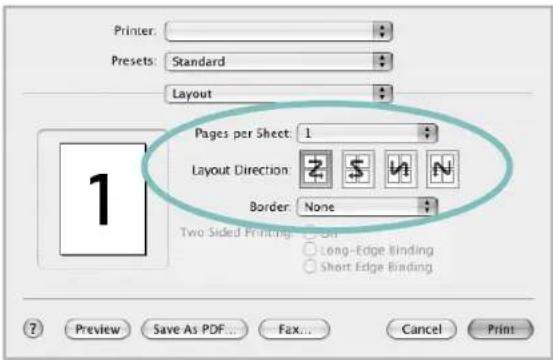
text_image
Printer: Presets: Standard Layout Pages per Sheet: 1 Layout Direction: Border: None Two Sided Printing: ON Long-Edge Binding Short Edge Binding Preview Save As PDF... Fax... Cancel Print▲ Mac OS 10.3
3 Select the number of pages you want to print on one sheet of paper on the Pages per Sheet drop-down list.
4 Select the page order from the Layout Direction option. To print a border around each page on the sheet, select the option you want from the Border drop-down list.
5 Click Print, and the printer prints the selected number of pages on one side of each page.
Duplex Printing
You can print on both sides of the paper. Before printing in the duplex mode, decide on which edge you will be binding your finished document. The binding options are:
Long-Edge Binding: Which is the conventional layout used in book binding.
Short-Edge Binding: Which is the type often used with calendars.
1 From your Macintosh application, select Print from the File menu.
2 Select the Layout.
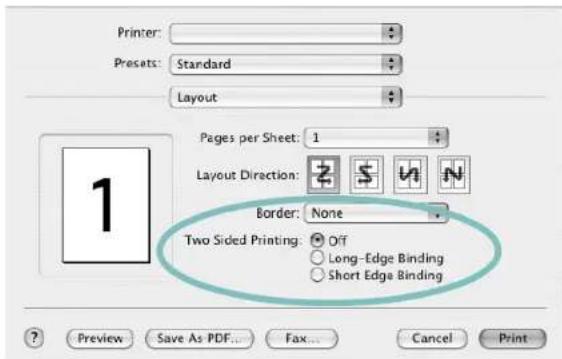
text_image
Printer: Presets: Standard Layout Pages per Sheet: 1 Layout Direction: Border: None Two Sided Printing: Off Long-Edge Binding Short Edge Binding Preview Save As PDF... Fax... Cancel Print▲ Mac OS 10.3
3 Select a binding orientation from Two Sided Printing option.
4 Click Print and the printer prints on both sides of the paper.
CAUTION: If you have selected duplex printing and then try to print multiple copies of a document, the printer may not print the document in the way you want. In case of "Collated copy", if your document has odd pages, the last page of the first copy and the first page of the next copy will be printed on the front and back of one sheet. In case of "Uncollated copy", the same page will be printed on the front and back of one sheet. Therefore, if you need multiple copies of a document and you want those copies on both sides of the paper, you must print them one at a time, as separate print jobs.
SOFTWARE SECTION
INDEX
A
advanced printing, use 18
B
booklet printing 19
D
document, print
Macintosh 35
Windows 12
double-sided printing 20
E
Extras properties, set 16
F
favorites settings, use 17
G
Graphics properties, set 15
H
help, use 17, 23
I
install
printer driver
Macintosh 33
Windows 4
installing
Linux software 28
L
language, change 10
Layout properties, set
Macintosh 35
Windows 13
Linux
driver, install 28
printer properties 31
printing 32
M
Macintosh
driver
install 33
printing 35
setting up the printer 34
MFP driver, install
Linux 28
N
n-up printing
Macintosh 36
Windows 18
0
orientation, print 32
Windows 13
overlay
create 22
delete 22
print 22
P
Paper properties, set 14
paper size, set 14
print 32
paper source, set 32
Windows 14
paper type, set
Macintosh 36
print 32
poster, print 19
PostScript driver
installing 23
document 12
fit to page 20
from Macintosh 35
from Windows 12
N-up
Macintosh 36
Windows 18
overlay 22
scaling 20
watermark 21
print resolution 32
printer driver, install
Linux 28
printer properties
Linux 32
printer properties, set
Macintosh 35
Windows 13, 23
printer resolution, set
Macintosh 36
Windows 15
printer software
install
Macintosh 33
Windows 4
uninstall
Windows 11
printing
booklets 19
double-sided 20
from Linux 32
R
resolution
printing 32
S
setting
darkness 15
favorites 17
image mode 15
resolution
Macintosh 36
Windows 15
toner save 15
true-type option 15
software
install
Macintosh 33
Windows 4
reinstall
Windows 10
system requirements
Macintosh 33
uninstall
Windows 11
status monitor, use 26
T
toner save, set 15
U
uninstall, software
Windows 11
uninstalling
MFP driver
Linux 29
W
watermark
create 21
delete 21
edit 21
print 21
www.samsungprinter.com