
Apollo - Uncategorized Westcott - Free user manual and instructions
Find the device manual for free Apollo Westcott in PDF.


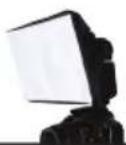
| Product Type | Umbrella-style softbox / light modifier |
| Model Series | Micro Apollo, Mini Apollo, Medium Apollo, Apollo Strip, Apollo Orb, Mega JS Apollo, Halo |
| Open Size (Micro Apollo) | 5" x 7.75" x 3.75" (12.7 x 19.69 x 9.53 cm) |
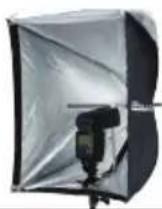
| Open Size (Mini Apollo) | 16" x 16" x 14" (40.64 x 40.64 x 35.56 cm) |
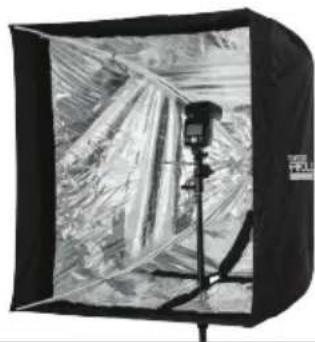
| Open Size (Medium Apollo) | 28" x 28" x 35" (71.12 x 71.12 x 88.9 cm) |
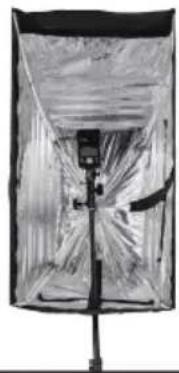
| Open Size (Apollo Strip) | 16" x 30" x 23.5" (40.64 x 76.20 x 59.69 cm) |
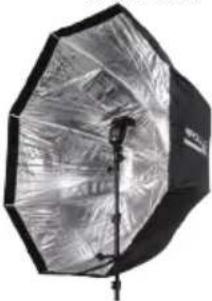
| Open Size (Apollo Orb) | 43.5" x 43.5" x 25" (110.49 x 110.49 x 63.5 cm) |
| Open Size (Mega JS Apollo) | 50" x 50" x 28.25" (127 x 127 x 71.76 cm) |
| Open Size (Halo) | 45" x 45" x 27.25" (114.3 x 114.3 x 69.22 cm) |
| Weight (Micro Apollo) | 0.5 lbs (0.23 kg) |
| Weight (Mini Apollo) | 0.7 lbs (0.32 kg) |
| Weight (Medium Apollo) | 0.95 lbs (0.43 kg) |
| Weight (Apollo Strip) | Not directly specified (similar to Orb/Mega) |
| Weight (Apollo Orb) | Not directly specified |
| Weight (Mega JS Apollo) | Not directly specified |
| Weight (Halo) | Not directly specified |
| Framework | Metal frame; some models (Mini, Medium, Strip, Orb, Mega) have fiberglass ribs |
| Maximum Wattage Support (Micro Apollo) | Camera flash only |
| Maximum Wattage Support (Mini Apollo) | 250 W |
| Maximum Wattage Support (Medium Apollo and larger) | 500 W |
| Key Features | Eliminates red-eye, softens harsh light, quick setup like umbrella, fits virtually any studio light, pairs with speedlites |
| Diffusion Panel | Removable front diffusion panel (1-stop fabric loss) |
| Lighting Modes | Indirect diffusion (bounce off silver interior) or direct diffusion (specular highlights) |
| Mounting | Umbrella shaft receptacle; compatible with adjustable shoe mount bracket #5015 and umbrella tilter bracket #1080 |
| Warranty | 1-year limited warranty (details in manual) |
| Country of Origin | Not specified; manufactured for Westcott, USA |
Frequently Asked Questions - Apollo Westcott
User questions about Apollo Westcott
0 question about this device. Answer the ones you know or ask your own.
Ask a new question about this device
Download the instructions for your Uncategorized in PDF format for free! Find your manual Apollo - Westcott and take your electronic device back in hand. On this page are published all the documents necessary for the use of your device. Apollo by Westcott.
USER MANUAL Apollo Westcott
Quick setup and long-lasting results
• Built on an umbrella frame
• Quick set up and teardown
• Fits virtually any studio light
• Pairs perfect with speedlites
Warranty: 1-year (details on p. 15)
Front diffusion: 1-stop fabric
Base fabric: Silver ripstop
natural_image
Black-and-white photo studio setup with a camera on a tripod, no visible text or symbols| PRODUCT | Micro Apollo | Mini Apollo | Medium Apollo |
| ITEM NUMBER | #2200 #2218 #2334, #2335 (Mono) | ||
| PRODUCT FEATURES | Eliminates red-eye and softens harsh lightInstalls quickly and requires no bracketsWorks with manual or auto flashFits any battery powered strobe | Pairs perfect with speedlites on-locationFits easily into a backpack or gear bagFacing the light source forward provides specular highlightsSofter, more even light when facing the back | Perfect main or fill light for portraits and small groupsRecessed edge provides wrap-around lightingLight fits directly inside the standard ApolloMono version allows access to the light controls |
| OPEN SIZE (IN) | 5" x 7.75" x 3.75" | 16" x 16" x 14" | 28" x 28" x 35" |
| OPEN SIZE (CM) | 12.7cm x 19.69cm x 9.53cm | 40.64cm x 40.64cm x 35.56cm | 71.12cm x 71.12cm x 88.9cm |
| COLLAPSED SIZE (IN) | 5" x 7.75" x 0.5" | 2" x 2" x 19.5" | 3.5" x 3.5" x 35.25" |
| COLLAPSED SIZE (CM) | 12.7cm x 19.69cm x 1.27cm | 5.08cm x 5.08cm x 49.53cm | 8.89cm x 8.89cm x 89.53cm |
| WEIGHT | 0.5 lbs (0.23 kg) | 0.7 lbs (0.32 kg) | 0.95 lbs (0.43 kg) |
| FRAMEWORK | Metal Metal | Metal frame, fiberglass ribs | |
| MAXIMUM WATTS | Camera flash only | 250 | 500 |
2 FJWESTCOTT.COM
natural_image
Interior view of a studio lighting setup with a camera and stand (no visible text or symbols)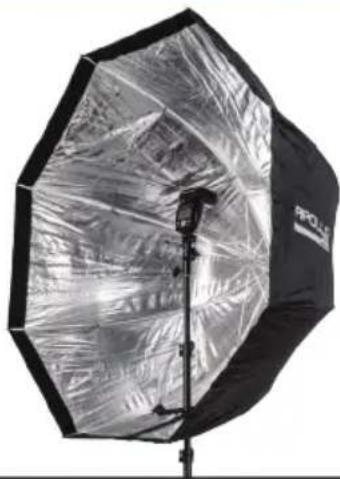
natural_image
Black and silver photo studio umbrella with reflective cover, no visible text or symbols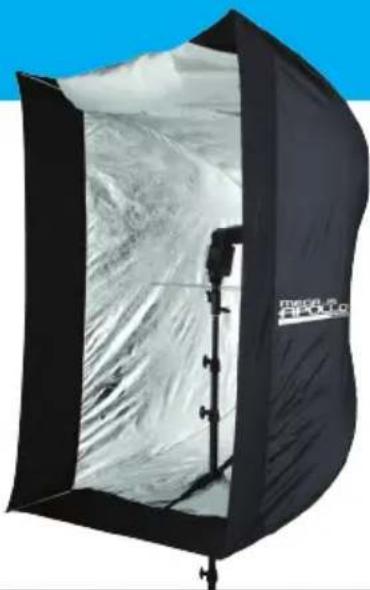
natural_image
Black and white photo studio lighting box with reflective material, no visible text or symbols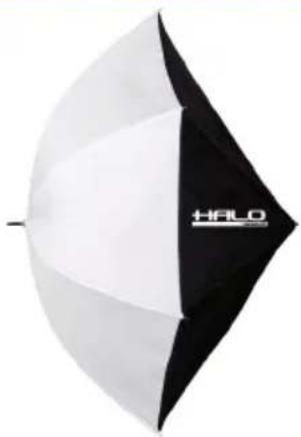
natural_image
Black and white semi-angelated umbrella with 'HALO' branding on the side (no additional text or symbols)2337 #2336 #2348 #2025, #2026 Mono
• Vertical or horizontal mounting options
- Narrow profile makes it an ideal hair, rim or accent light
• Recessed edge offers beautiful wrap-around lighting for control
-
Deep profile projects light evenly for maximum output
• Simulates a round catch light in the eyes
• Diffusion panel can be recessed for even more directional control -
Largest Apollo
• Perfect main light for portraits and groups -
Recessed edge provides control and creates beautiful wrap-around lighting
-
Ideal main or fill light for portrait and group photography
• Light fits directly inside standard Halo, while the Mono allows access to the light controls - Provides 140-degrees of wrap-around lighting
16" × 30" × 23.5"
43.5" × 43.5" × 25"
50" × 50" × 28.25"
45" × 45" × 27.25"
40.64cm x 76.20cm x 59.69cm
Metal frame, fiberglass ribs
Metal frame, fiberglass ribs
Metal
Metal
250
500
500
500
Awestcott.
MICRO APOLLO™ SETUP AUSAGE
2200 CONTAINS: (1) Micro Apollo (1) Piece hook-and-loop tape
1
natural_image
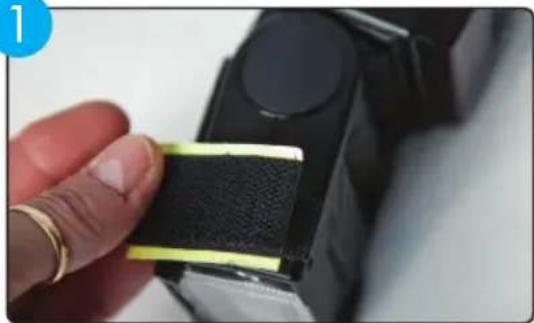
Close-up of a hand holding a black plastic strip with yellow tape, next to a camera lens (no visible text or symbols)Clean sides of flash unit with rubbing alcohol. Cut the included self-adhering hook-and-loop tape in half and place on each side of your flash unit. For maximum adhesion, allow it to cure for 24 hours before attaching the Apollo.
2
natural_image
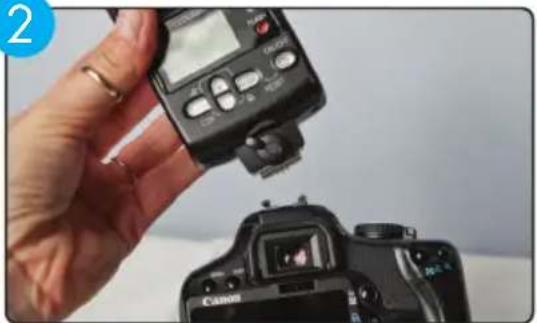
Close-up of a hand holding a digital camera controller next to a Canon DSLR camera (no visible text or symbols on device)Remove flash unit from the camera. Do not attach the Micro Apollo while flash is mounted to the camera.
natural_image
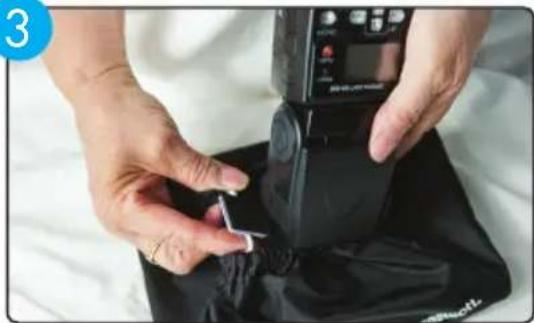
Close-up of hands using a black sewing machine to press down fabric (no visible text or symbols)Place the Micro Apollo face down on a flat surface. Lift up one side arm and attach swivel-pad with hook and loop tape to the hook and loop tape on the side of the flash unit. Repeat this step with the other side arm.
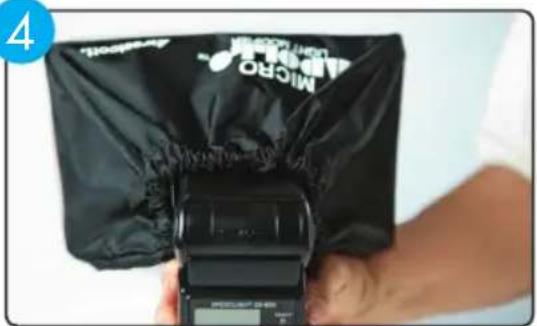
Adjust the Micro Apollo so it is evenly mounted on the flash unit and faces straight ahead. Press the swivel-pads firmly against the sides of the flash unit to insure a firm attachment. Make sure the cloth cover is stretched tight and the elastic opening is closed around the flash unit. Mount flash unit on camera and you're ready to go.
M TTL AUTO
MANUAL FLASH-UNITS
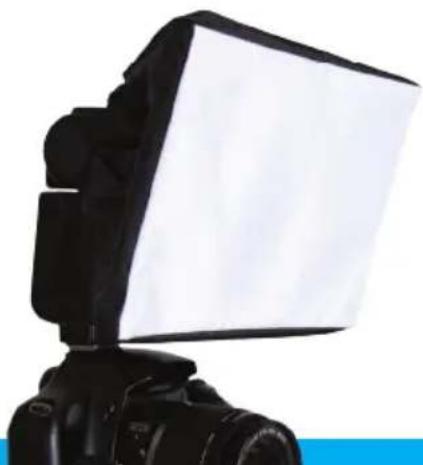
With the Micro Apollo attached to your flash-unit, set your shutter-speed and aperture as you normally would, then open the aperture up a minimum of 1-stop.
Example: If your flash-unit indicates an aperture setting of f/11 for a subject being photographed at 10 feet, then open the aperture to at least f/8 with the Micro Apollo attached.
natural_image
Close-up of a DSLR camera with a white studio lighting module (no text or symbols visible)TTL FLASH UNITS
No compensation is needed using the Micro Apollo with TTL cameras and flash units. The camera automatically adjusts the flash unit for the proper exposure. A reduction will be found in effective range of the flash unit.
Example: If your flash-unit indicates a range of 40 feet at a particular setting, when the Micro Apollo is attached, the range will be reduced to approximately 30 feet.
AUTOMATIC FLASH UNITS
Non-TTL flash units have to be used in the manual mode, unless the flash unit is equipped with a "bounce" or tilting head. To retain automatic functions with the "bounce" head flash unit, tilt the head up to either a 45-degree or 60 degree angle. Attach the Micro Apollo, so that even with the flash head tilted upward, the Micro Apollo faces straight ahead. If your Micro Apollo clears the LIGHT SENSING "EYE" located on the front of your flash-unit, automatic functions will be retained. If not, then you will either need a remote sensor (available for some flash units) or use your flash unit in the manual mode (see #1 Manual flash units).
APOLLO™ SETUP AUSAGE
2218, 2334, 2335, 2337, 2336 & 2348 EACH CONTAIN: (1) Apollo (1) Diffusion Panel (1) Mounting Arm (#2335 only)
natural_image
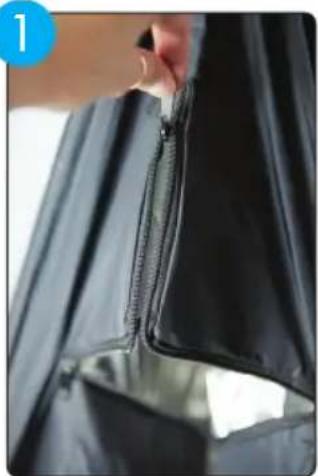
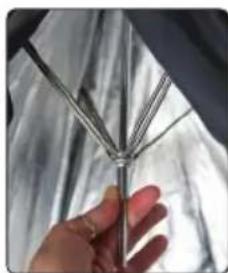
Close-up of a hand holding a black zipper, showing zipper and coat details (no text or symbols visible)To mount the Apollo light modifier onto your light, open the zipper at the bottom of the unit. Open the Apollo just like an umbrella. It is helpful to push slightly against the top
of the unit with one hand while raising the slider up the center shaft to lock into place. Note: When using the #5015 Adjustable Shoe Mount Bracket, attach your speedlite to the bracket before assembling your modifier.
natural_image
Close-up of a hand holding a metallic string against a blurred background (no text or symbols visible)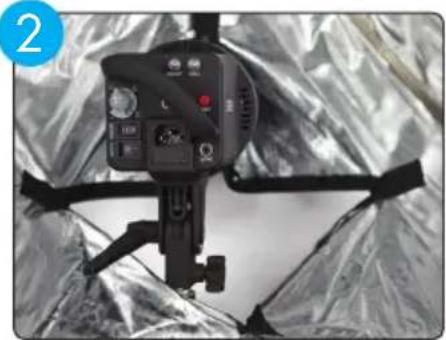
natural_image
Close-up of a camera mounted on a tripod against a metallic foil-covered background (no visible text or symbols)With the Apollo open, place it over top of your light by inserting your light through the bottom zipper.
natural_image
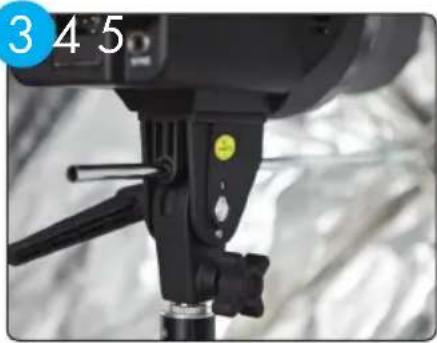
Close-up of a camera setup with tripod and lever mechanism (no visible text or symbols)Next, slide the umbrella shaft through the umbrella receptacle of the light. Tighten the setscrew onto the shaft. Do not over tighten!
natural_image
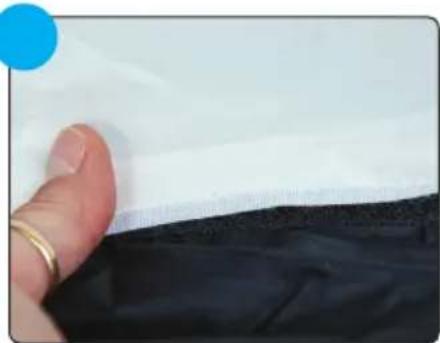
Close-up of a finger pressing down on a white fabric with a black band (no text or symbols visible)After the Apollo is secure, insert the diffusion panel using the hook and loop tape. Close the bottom zipper opening around the light stand or boom arm.
natural_image
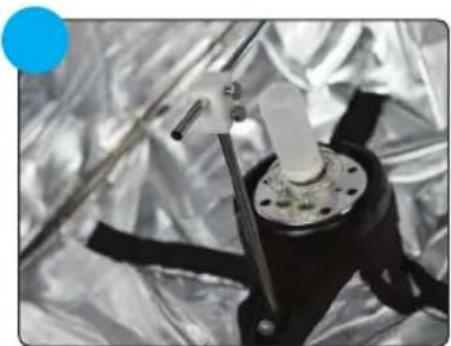
Close-up of a mechanical device with metallic components and a transparent cylindrical component, set against a reflective metallic background (no visible text or symbols)For #2335 Only: When using the mono version, place the #1080 Mounting Rod through the light head umbrella receptacle. Using the white block, mount the Apollo. Tighten thumbscrew to lock in place. Note: The light will be facing the side of the softbox.
6 FJWESTCOTT.COM
Lighting for Indirect Diffusion or Soft Highlights
natural_image
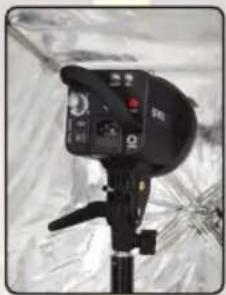
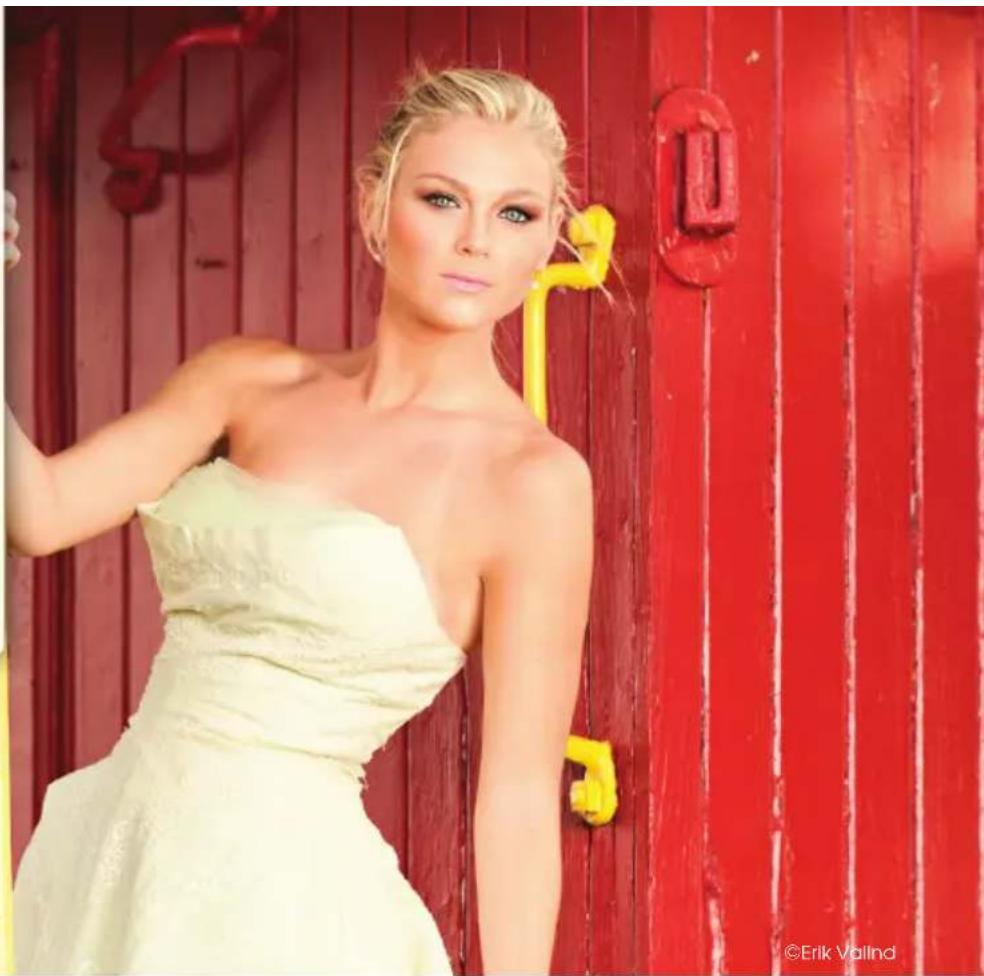
Close-up of a black camera lens mounted on a tripod against a white fabric background (no visible text or symbols)For indirect diffusion, mount the Apollo with the light facing towards the back of the light modifier. With the light source in this position, the light
will bounce off the silver lining of the unit and produce a more uniform, softer light.
natural_image
Woman in a white strapless dress posing against a red wooden door with decorative elements (no text or symbols visible)
natural_image
Close-up portrait of a woman in a white dress with a close-up of her face, no visible text or symbolsLighting for Direct Diffusion or Specular Highlights
natural_image
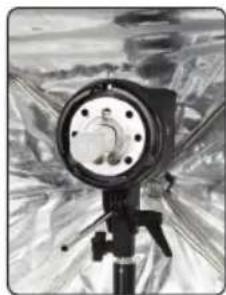
Black-and-white illustration of a vintage camera on a tripod, with abstract background (no text or symbols)For direct diffusion with specular highlights, position the light facing the white diffusion panel. The light will have a bright center with a softer edge. The distance of the light to the diffusion panel will govern the brightness of the center of the light. Caution: positioning the light or other hot objects too close or in contact with the fabric of the Mini Apollo may cause damage.
△westcott.
HALO™ SETUP AUSAGE
2025, 2026 EACH CONTAIN: (1) Halo (1) Diffusion Panel
1 2 3
natural_image
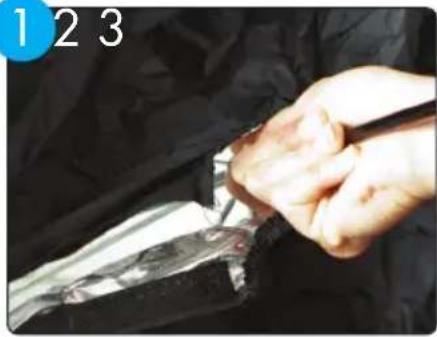
Close-up of a hand holding a thin object over a dark fabric, with no visible text or symbols.To mount the standard Halo light modifier onto your light, open the hook and loop tape opening and open the frame.*
natural_image
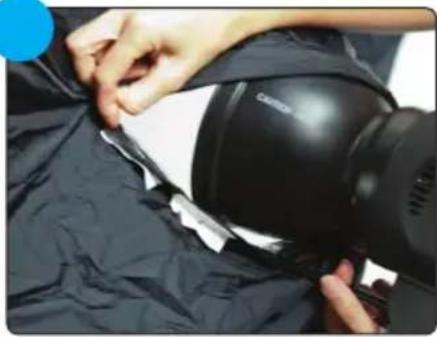
Person adjusting a black hairnet on a dark fabric garment (no visible text or symbols)Place the light inside of the opening of the Halo and insert the umbrella shaft through the light's umbrella receptacle. Position the light anywhere along the umbrella shaft to create different lighting effects.

natural_image
Close-up of a hand adjusting a black SPROJET device with a tool (no visible text or symbols)Tighten the setscrew against the shaft. Do not over tighten! This could damage the umbrella shaft.
4
natural_image
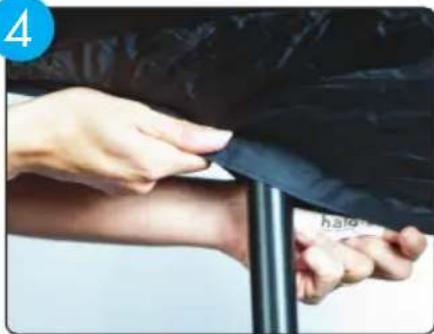
Close-up of hands applying a black bandage to a person's arm (no visible text or symbols)After the Halo is securely in place, carefully stretch the black back section over the end of the umbrella shaft. Over stretching may cause damage to the fabric or frame.
5
natural_image
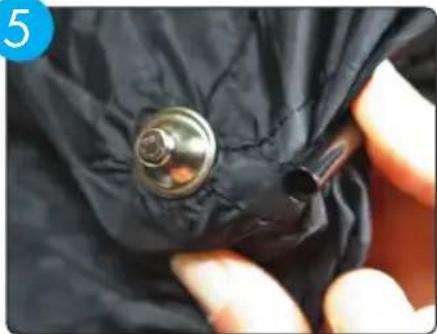
Close-up of hands adjusting a black fabric with a metallic knob (no text or symbols visible)Secure the light modifier by putting the tip of the umbrella shaft into the metal cup. Close the lower hook and loop tape opening around the light stand.
*Note: When using the #5015 Adjustable Shoe Mount Bracket, attach your speedlite to the bracket before assembling your modifier.
8 FJWESTCOTT.COM
Lighting for Indirect Diffusion or Soft Highlights
natural_image
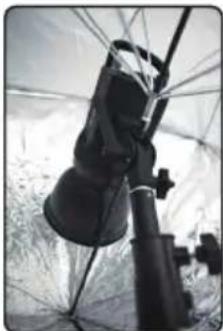
Close-up of a black mechanical device mounted on a stand, possibly a lamp or detector, against a blurred background (no visible text or symbols)For indirect diffusion of light, purchase an optional Reflector Plate (#2875). The anodized aluminum plate is mounted on the center shaft just in front of the flash tube. This allows the light to bounce off the reflector plate, into the silver metallized material and then
out through the diffusion panel. The Reflector Plate can be adjusted along the center shaft closer or further from the flash tube to control the amount of light that is reflected off the silver interior of the Halo.

natural_image
Close-up of a smiling woman with closed eyes, no visible text or symbols
natural_image
Portrait of a smiling woman with dark hair and green makeup (no text or symbols visible)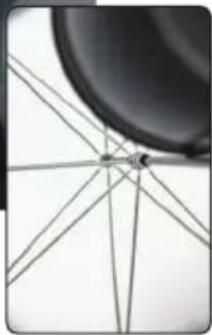
natural_image
Close-up of a black circular object with intersecting lines, possibly a lens or camera frame (no text or symbols visible)Lighting for Direct Diffusion or Specular Highlights
For direct diffusion, position the light facing the white diffusion panel. The light will have a bright center with a softer edge. The distance the light is to the diffusion panel will govern the brightness of the center of the light. Caution: Do not over tighten! Overtightening may cause damage to the umbrella shaft. See the first part of the above paragraph to explain placement of the light along the umbrella shaft for direct diffusion of light. Position the elastic collar on the back of the Halo Mono around the front portion of the mono light. With the mono light standard reflector in place, the flash tube and reflector should be inside the Halo and the controls should be outside. Finish mounting the Halo Mono by closing the hook and loop tape opening creating a snug fit.
△westcott.
APOLLO™ KITS
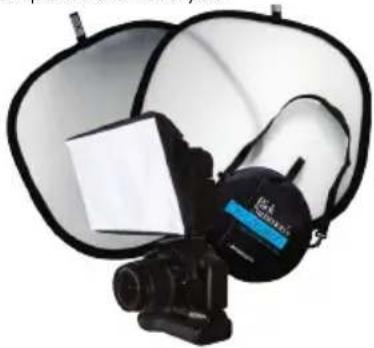
Rick Sammon On-Location Kit A NATURE LOVER'S DREAM
Be prepared for anything nature throws your way with the Rick Sammon On-Location Kit. Includes a diffuser to soften harsh sunlight, a reflector to fill in shadows and a Micro Apollo to diffuse your
on-camera flash and eliminate red-eye. A compact tote bag stores all of these accessories.
natural_image
Product photo of a black and white photography studio lamp with a camera module (no visible text or symbols)#1018 CONTAINS:
(1) 30" Diffuser
(1) 30" Silver/Sunlight Reflector
(1) Micro Apollo
(1) 12" Lightweight Tote
TM Kit
QUICK SOLUTION, LONG-LASTING RESULTS
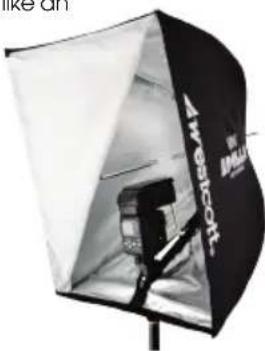
Small enough to fit into a backpack, the Mini Apollo opens up quickly like an umbrella and offers the same control as a softbox. Works as an ideal main or fill light. Includes an adjustable bracket that allows for attachment of an off-camera flash.
natural_image
Black studio lighting box with 'AMERICAN' branding and camera module (no readable text or symbols)#2219 CONTAINS:
(1) 16" x 16" Mini Apollo
(1) Shoe Mount Bracket
(1) L-Shaped Centering Bracket
Speedlite 2-Light Kit THE ULTIMATE TRAVEL KIT
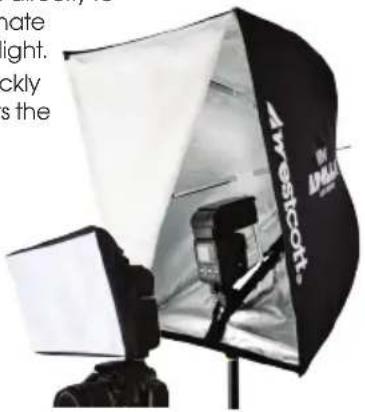
The perfect 2-light camera flash setup. The Micro Apollo attaches directly to any camera flash to eliminate red-eye and soften harsh light. The Mini Apollo opens quickly like an umbrella and offers the same control as a softbox.
#2201 CONTAINS:
(1) Micro Apollo
(1) 16" x 16" Mini Apollo
(1) Shoe Mount Bracket
(1) L-Shaped Centering Bracket
(1) 8' Light Stand
28" Apollo™ KitMini Apollo BIG MODIFIER. SMALL PACKAGE.
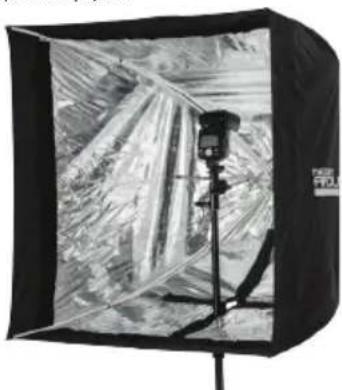
The 28" Apollo offers the beauty of a large softbox in a compact design. It opens up just like an umbrella making setup and tear down a breeze. The unique design allows for the flash to either be bounced towards the back of the Apollo for a soft indirect light source, or directly through the front diffusion panel for more specular highlights.
natural_image
Black-and-white photo of a studio lighting setup with a camera and stand (no visible text or symbols)#2202 CONTAINS:
(1) 28" x 28" Apollo
(1) Shoe Mount Bracket
ACCESSORIES AND SPARE PARTS
natural_image
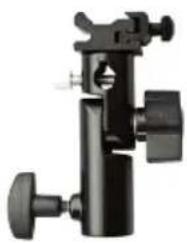
Close-up of a black adjustable camera or clamp device with no visible text or symbolsADJUSTABLE SHOE MOUNT BRACKET #5015
Secure virtually all speedlites or hot shoe mount flash units to a light stand using this adjustable bracket.
natural_image
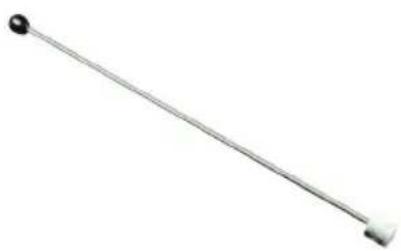
Simple line drawing of a rod with two ends, one black and one white, against a white background (no text or symbols)UMBRELLA TILTER BRACKET #1080
Easily mount a studio light into an Apollo while retaining access to it's controls.
natural_image
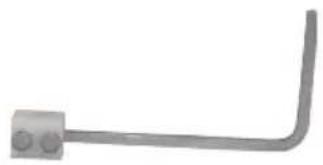
Simple line drawing of a bent pipe or rod with two circular ends (no text or symbols)L-MOUNTING BRACKET #8519
For centering a speedlite in a 16" Mini Apollo.
Spare Parts
| PART # DESCRIPTION | |
| MDAPFR | Diffusion Front for 28" Westcott Medium Recessed Apollo #2334, 2335 |
| SMAPFR | Diffusion Front for 16" Westcott Mini Apollo #2218 |
| STAPFR | Diffusion Front for 16"x30" Westcott Apollo Strip #2337 |
| ORAPFR | Diffusion Front for 36" Westcott Apollo Orb #2336 |
| LGAPFR | Diffusion Front for 50" Westcott Mega Apollo JS #2348 |
| APLTIP | 7 mm tip insert to fit European Lights #2218, 2334, 2335, 2336, 2337, 2025, 2026 |
| APLBLK | White Block for Westcott Medium 28" Apollo Mono Mounting Arm #1080 |
| APLKNOB | Black Rounded Knob for Westcott Medium 28" Apollo Mono Mounting Arm #1080 |
| APLSCR | Hex Screw set for Westcott Medium 28" Apollo Mono Mounting Arm #1080 |
ADJUSTABLE BRACKET SETUP AUSAGE
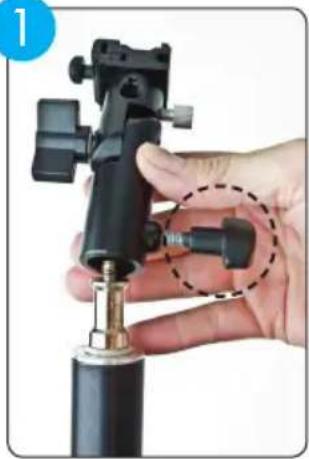
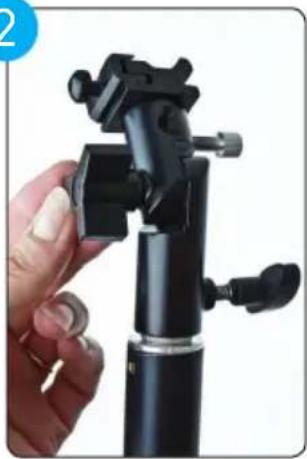
ADJUSTABLE SHOE MOUNT BRACKET #5015
natural_image
Close-up of a hand holding a black tripod-mounted device with a dashed circular annotation highlighting the handle (no text or symbols visible)Locate the tightening knob at the base of the unit and unscrew fully. Place shoe mount umbrella bracket on top of light stand and screw tightening knob to secure in place.
2
natural_image
Close-up of a hand holding a black tripod-mounted camera mount (no text or symbols visible)To tilt, simply loosen the tightening knob in the middle of the unit and tilt to your desired angle. Re-tighten the knob to secure in place.
3
natural_image
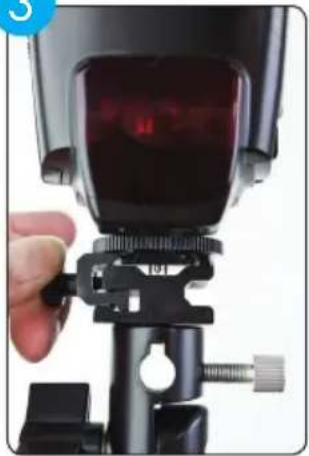
Close-up of a black camera lens mounted on a tripod, showing adjustment knobs and a red laser screen (no text or symbols visible)At the top of the unit loosen the tightening mechanism to separate the shoe mount receptacle. Slide the shoe mount on the base of your flash into the shoe mount receptacle and tighten fully to secure in place. Gently wiggle the unit in all directions to ensure the flash is fully tightened and attached to the shoe mount umbrella bracket.
4
natural_image
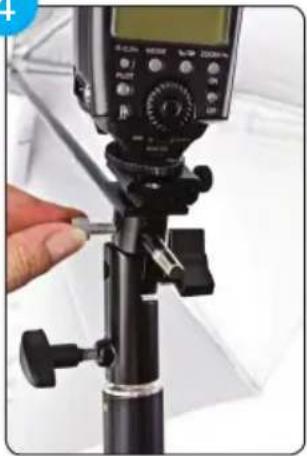
Close-up of a hand adjusting a black tripod-mounted camera setup with a digital display (no visible text or symbols)To attach an umbrella or Apollo series of umbrella style Softboxes, locate and unscrew the silver tightening knob. Slide the shaft of your modifier into the umbrella receptacle and re-tighten the silver knob until secure.
12 FJWESTCOTT.COM
Medium Apollo™
natural_image
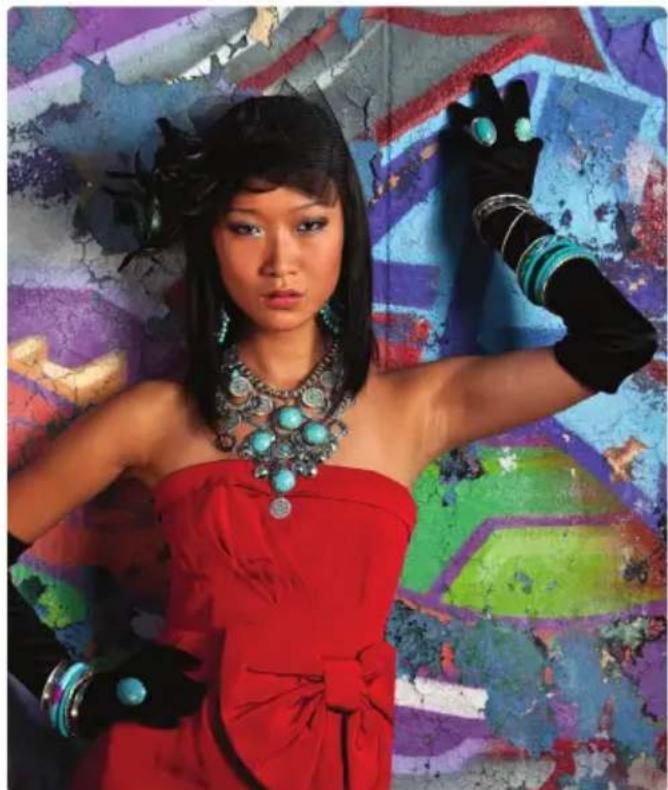
Woman in red strapless dress with turquoise accessories and black gloves, posing against a colorful abstract background (no text or symbols visible)©Rick Sammon
natural_image
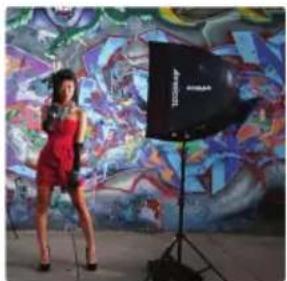
Woman in red dress posing with studio equipment against a colorful abstract wall (no visible text or symbols)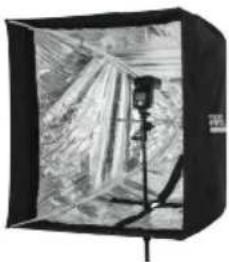
natural_image
Black-and-white photo of a studio lighting setup with a camera and umbrella (no visible text or symbols)Apollo™ Strip & Apollo Orb

natural_image
Portrait of a woman in a black strapless dress against a dark background (no text or symbols visible)©Erik Valind

natural_image
Woman posing in a studio with black lighting equipment and a studio backdrop (no visible text or symbols)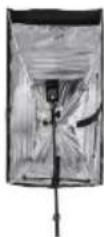
natural_image
Black and white photo studio umbrella with transparent cover, no visible text or symbolsAwestcott.
Mega JS Apollo™

natural_image
Woman sitting on a stone beach at sunset with ocean waves in the background (no text or symbols visible)Halo™

natural_image
Portrait of a smiling woman with dark hair and makeup, smiling (no text or symbols visible)©Terry White©Tomer Jac

natural_image
Two people filming at sunset with a large umbrella and beach lights (no text or symbols visible)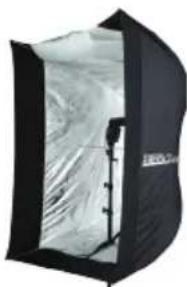
natural_image
Black studio lighting box with white film and transparent cover (no visible text or symbols)
natural_image
Woman standing next to a black garment with embossed text (no visible signage or symbols)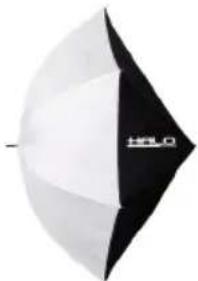
natural_image
Black and white abstract umbrella-shaped object with 'HELLO' text on the side (no other symbols or text)WARRANTY
Westcott One (1) Year Limited Warranty
Westcott's warranty obligations for this product are limited to the terms set forth below: The F.J. Westcott Company ("Westcott") warrants this Westcott branded product against defects in materials and workmanship under normal use for a period of ONE (1) YEAR from the date of retail purchase by the original end-user purchaser ("Warranty Period"). If a defect arises and a valid claim is received within the Warranty Period, at its option and to the extent permitted by law, Westcott will either (1) repair the defect at no charge, using new or refurbished replacement parts, or (2) exchange the product with a product that is new or which has been manufactured from new or serviceable used parts and is at least functionally equivalent to the original product. This Limited Warranty applies only to products manufactured by or for Westcott that can be identified by the "Westcott" trademark, trade name, or logo affixed to them.
This warranty does not apply: (a) to damage caused by accident, abuse, misuse, flood, fire, earthquake or other external causes; (b) to damage caused by operating the product outside the permitted or intended uses described by Westcott; (c) to a product or part that has been modified to alter functionality or capability without the written permission of Westcott; or (d) to cosmetic damage, including but not limited to scratches, dents and broken plastic.
Please contact Westcott's Repair Department for a Return Authorization Number "RMA" prior to requesting warranty service. This RMA must be clearly written on the outside of the box to the left of the shipping label. Any items sent in without pre-authorization or that do not fall under the ONE (1) YEAR limited warranty will be returned at the expense of the sender.
Products may be registered at FJWESTCOTT.COM/WARRANTY
Westcott Repair Department: 800-886-1689 / 419-243-7311 (International)
E-Mail: INFO@FJWESTCOTT.COM SUBJECT: ATTN. REPAIR DEPT.
Shipping: F.J. Westcott Company, 1425-B Holland Rd., Maumee, Ohio 43537
BECONNECTED
BROWSE & COMPARE

FJWESTCOTT.COM

PHOTOBASICS.NET

RENTSCENICS.COM
EDUCATION & INSPIRATION

FJWESTCOTT.COM/BLOG

WESTCOTT LIGHTING

FJWESTCOTT
NETWORK & CONNECT

WESTCOTT

WESTCOTTCO
TOP-NOTCH SERVICE

INFO@FJWESTCOTT.COM (USA)
INTERNATIONAL@FJWESTCOTT.COM

800.886.1689 (USA)
419.243.7311 (INTERNATIONAL)

1425-B HOLLAND ROAD
MAUMEE, OH 43537
westcott®
All ® and ™ are ©Copyright F.J. Westcott Co.
© The F.J. Westcott Co. All rights reserved.
- Quick setup and long-lasting results
- #2336 #2348 #2025, #2026 Mono
- MICRO APOLLO™ SETUP AUSAGE
- CONTAINS: (1) Micro Apollo (1) Piece hook-and-loop tape
- M TTL AUTO
- MANUAL FLASH-UNITS
- TTL FLASH UNITS
- AUTOMATIC FLASH UNITS
- APOLLO™ SETUP AUSAGE
- 2218, 2334, 2335, 2337, 2336 & 2348 EACH CONTAIN: (1) Apollo (1) Diffusion Panel (1) Mounting Arm (#2335 only)
- Lighting for Indirect Diffusion or Soft Highlights
- Lighting for Direct Diffusion or Specular Highlights
- HALO™ SETUP AUSAGE
- 2025, 2026 EACH CONTAIN: (1) Halo (1) Diffusion Panel
- 2 3
- 4
- 5
- APOLLO™ KITS
- Rick Sammon On-Location Kit A NATURE LOVER'S DREAM
- #1018 CONTAINS:
- TM Kit
- QUICK SOLUTION, LONG-LASTING RESULTS
- #2219 CONTAINS:
- Speedlite 2-Light Kit THE ULTIMATE TRAVEL KIT
- #2201 CONTAINS:
- 28" Apollo™ KitMini Apollo BIG MODIFIER. SMALL PACKAGE.
- #2202 CONTAINS:
- ACCESSORIES AND SPARE PARTS
- ADJUSTABLE SHOE MOUNT BRACKET #5015
- UMBRELLA TILTER BRACKET #1080
- L-MOUNTING BRACKET #8519
- ADJUSTABLE BRACKET SETUP AUSAGE
- WARRANTY
- Westcott One (1) Year Limited Warranty
- BECONNECTED
- BROWSE & COMPARE
- EDUCATION & INSPIRATION
- NETWORK & CONNECT
- TOP-NOTCH SERVICE
- westcott®
Brand : Westcott
Model : Apollo
Category : Uncategorized