
LaserJet CM1017 - Printer HP - Free user manual and instructions
Find the device manual for free LaserJet CM1017 HP in PDF.


User questions about LaserJet CM1017 HP
0 question about this device. Answer the ones you know or ask your own.
Ask a new question about this device
Download the instructions for your Printer in PDF format for free! Find your manual LaserJet CM1017 - HP and take your electronic device back in hand. On this page are published all the documents necessary for the use of your device. LaserJet CM1017 by HP.
USER MANUAL LaserJet CM1017 HP
HP Color LaserJet CM1015/CM1017 MFP User Guide

text_image
+hp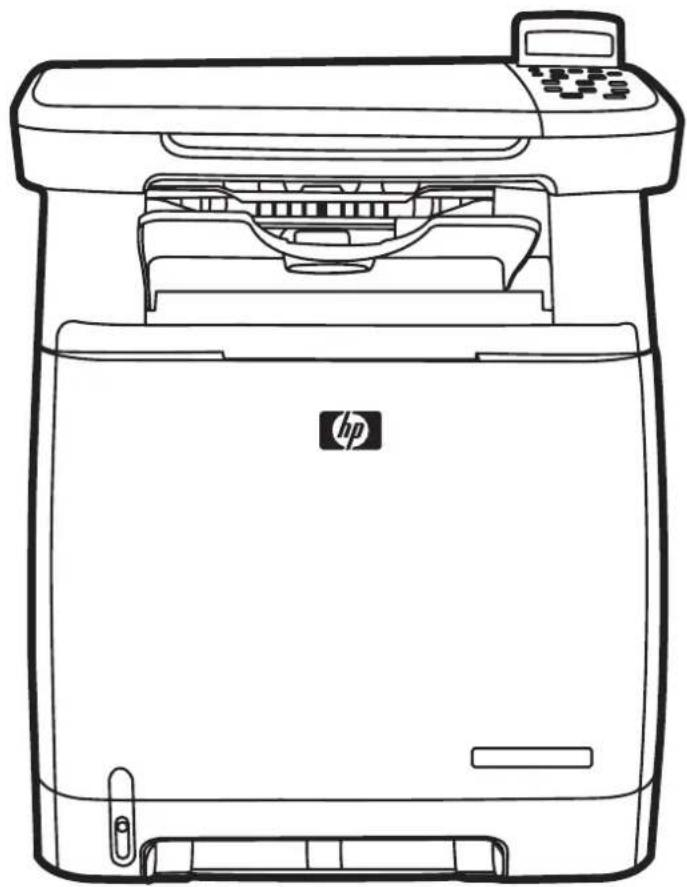
natural_image
Line drawing of a HP printer with front panel and control panel (no text or symbols)HP Color LaserJet CM1015/CM1017 MFP
User Guide
Copyright and License
© 2006 Copyright Hewlett-Packard Development Company, L.P.
Reproduction, adaptation, or translation without prior written permission is prohibited, except as allowed under the copyright laws.
The information contained herein is subject to change without notice.
The only warranties for HP products and services are set forth in the express warranty statements accompanying such products and services. Nothing herein should be construed as constituting an additional warranty. HP shall not be liable for technical or editorial errors or omissions contained herein.
Part number CB394-90907
Edition 1, 10/2006
Trademark Credits
Adobe Photoshop® and PostScript® are trademarks of Adobe Systems Incorporated.
Microsoft® and Windows® are U.S. registered trademarks of Microsoft Corporation.
Netscape™ and Netscape Navigator™ are U.S. trademarks of Netscape Communications Corporation.
UNIX® is a registered trademark of The Open Group.
ENERGY STAR® and the ENERGY STAR logo® are U.S. registered marks of the United States Environmental Protection Agency. Details on the proper use of the marks are explained in the “Guidelines for Proper use of the ENERGY STAR® Name and International Logo.”

Table of contents
1 Multifunction peripheral (MFP) basics
HP Color LaserJet CM1015/CM1017 MFP Series configurations 2
HP Color LaserJet CM1015/CM1017 MFP Series features 3
Walkaround 5
Software 8
Software and supported operating systems 8
Install software 9
Software tips 10
Download the latest printing software 10
What other software is available? 10
2 Print media
Media supported on this MFP 12
Select print media 14
Media that can damage the printer 14
Media to avoid 14
Special media for printing 15
Envelopes 15
Labels 15
Transparencies 16
Glossy paper and photo paper 16
Letterhead or preprinted forms 16
Heavy paper 16
3 Control panel
HP Color LaserJet CM1015 MFP control panel features 18
Use the two-line display (HP Color LaserJet CM1015 MFP) 20
Use the control-panel arrows to navigate on the HP Color LaserJet CM1015 MFP ...... 20
HP Color LaserJet CM1017 MFP control panel features 21
Use the graphical display (HP Color LaserJet CM1017 MFP) 23
Use the control-panel arrows to navigate on the HP Color LaserJet CM1017 MFP ...... 23
Control-panel menus 24
Use the control-panel menus 24
Control-panel menu map 24
4 Software for Windows
Printer driver recommendations 30
User assistance 30
Install the PostScript driver using Add Printer 31
Software 32
Other software 33
Change from a direct-connected shared MFP to a network port-connected MFP configuration ..... 34
Uninstall the printing software 35
Uninstall Windows software via the Program group 35
Uninstall Windows software using Add or Remove Programs 35
Uninstall a Recommended or Custom installation 36
Delete printer drivers from the printers folder 36
Windows 2000 or Windows XP 36
5 Software for Macintosh
Macintosh utility and application support 38
Install Macintosh printing system software for networks 38
Install Macintosh printing system software for direct connections (USB) 39
Macintosh printer drivers 40
Supported printer drivers 40
Open the printer drivers 40
Use features in the Macintosh printer driver 41
Create and use presets in Mac OS X 41
Print a cover page 41
Print multiple pages on one sheet of paper 41
Print on both sides of the paper 42
Set the color options 42
Enable memory 43
Manage MFP color options on Macintosh computers 44
Print Color as Gray 44
Advanced color options for text, graphics, and photographs 44
HP Device Configuration (Mac OS X V10.3 and Mac OS X V10.4) 45
Solve common Macintosh problems 46
Solve Problems with Mac OS X 46
6 Print
Load trays 50
Load tray 1 (single-sheet feed tray) 50
Load tray 2 51
Print on special media 56
Control print jobs 57
Selecting print media settings 57
Printer-driver features 58
Restore the default printer-driver settings 58
Print from Windows 59
Printer-driver settings 59
Print on both sides of the paper 60
Cancel a print job 62
7 Color
Overview 64
HP ImageREt 2400 64
Media selection 64
Color options 64
Manage color options 65
Print in Grayscale 65
Automatic versus Manual color adjustment 65
Change color options 65
Halftone options 65
Edge Control 66
Standard red-green-blue (sRGB) 66
RGB Color 66
Neutral Grays 67
Match colors 68
8 Copy
Basic copy functions 70
Start a copy job 70
Change the number of copies for the current job 70
Cancel a copy job 70
Copy paper 71
Set the MFP to make only black and white copies 71
Adjust copy quality 71
Adjust the color balance in copies 72
Set color balance on a per-job basis 73
Adjust the lighter/darker (contrast) setting 73
Reduce or enlarge copies 74
Copy edge-to-edge originals 75
9 Scan
Scan methods 78
Supported file types 79
Scan from the device control panel 80
Program the device Scan To button from the control panel 80
Scan by using HP Solution Center (Windows) 82
To view HP Solution Center 82
Scan from the device and HP Director (Macintosh) 83
Scanning tasks 83
Scan using TWAIN-compliant and WIA-compliant software 84
Use TWAIN-compliant and WIA-compliant software 84
Scan from a TWAIN-enabled program 84
Scan from a WIA-enabled program (Windows XP only) 84
Scan by using optical character recognition (OCR)
software 84
Readiris 84
Scan a photo 85
Scan edge-to-edge originals 85
Cancel a scan job 85
Scanner resolution and color 85
Resolution and color guidelines 86
Color 86
10 Photo
Insert a memory card 88
View or rotate photos from the memory card 90
Create a photo slideshow on the graphical display screen 91
Enable or disable a memory card 92
Print photos directly from the memory card 93
Print and scan photos from a proof sheet 94
Save photos to the workstation from a memory card 95
Print photos using the Photo Features button 96
Print a memory card index 97
11 Network Setup and Administration (HP Color LaserJet CM1017 MFP)
Set up the MFP and use it on the network 100
Configure a network port-connected MFP configuration (direct mode or peer-to-peer printing) 100
Configure a direct-connected shared MFP (client server printing) 100
Manage the network 101
View network settings 101
Restore the network defaults 101
Change network settings 101
Change from a direct-connected shared MFP to a network port-connected MFP configuration .... 101
Use the control panel 102
Network configuration page 102
Configuration page 102
IP configuration 102
Manually configure a static IP address 102
Automatic configuration 103
Link speed settings 103
Supported network protocols 104
TCP/IP 105
Internet Protocol (IP) 105
Transmission Control Protocol (TCP) 105
User Datagram Protocol (UDP) 105
IP address 105
Configure IP parameters 106
Dynamic Host Configuration Protocol (DHCP) 106
BOOTP 106
Subnets 106
Subnet mask 106
Gateways 107
Default gateway 107
Problem Solving 107
Verify that the MFP is on and online 107
Resolve communication problems with the network 108
12 How do I?
Control panel and other settings: How do I? 112
HP Color LaserJet CM1017 MFP control panel features 112
Use the graphical display (HP Color LaserJet CM1017 MFP) 113
Use the control-panel arrows to navigate on the HP Color LaserJet CM1017
MFP 114
Control-panel menus 115
Use the control-panel menus 115
Control-panel menu map 115
Print: How do I? 120
System Settings 120
Device information 120
Paper handling 121
Print quality 121
Print density 121
Set the system password 122
Paper types 123
System setup 123
Service 123
Device Polling Page 123
Print Settings 123
Printing 123
PCL5c 124
PostScript 124
Memory card (HP Color LaserJet CM1017 MFP only) 124
Control print jobs 124
Selecting print media settings 125
Printer-driver features 125
Restore the default printer-driver settings 126
Print from Windows 126
Printer-driver settings 126
Special media for printing 127
Envelopes 127
Labels 128
Transparencies 128
Glossy paper and photo paper 128
Letterhead or preprinted forms 128
Heavy paper 129
Copy and Scan: How do I? 130
Scan from the device control panel 130
Program the device Scan To button from the control panel 130
Set the MFP to make only black and white copies 131
Photo: How do I? (HP Color LaserJet CM1017 MFP only) 132
Print photos directly from the memory card 132
Enable or disable a memory card 132
Print and scan photos from a proof sheet 132
Save photos to the workstation from a memory card 133
Network: How do I? (HP Color LaserJet CM1017 MFP only) 134
Find the network IP address 134
Restore the network defaults 134
Maintenance: How do I? 135
Set the system password 135
Clean the scanner glass 136
Change MFP toner warnings 136
Calibrate the MFP 136
Calibrate the MFP from the front control panel 137
Calibrate the MFP from the HP ToolboxFX 137
Clean the MFP 137
Clean the paper path using HP ToolboxFX 138
13 Managing and maintaining the multifunction peripheral (MFP)
Information pages 140
Demo page 140
Configuration page 140
Supplies Status page 142
Networking page (HP Color LaserJet CM1017 MFP only) 143
Fonts pages 144
Usage page 144
Menu map 146
HP ToolboxFX 147
View HP ToolboxFX 147
Status 148
Event log 148
Alerts 149
Set up status alerts 149
Set up e-mail alerts 149
Help 149
System Settings 150
Device information 150
Paper handling 151
Print quality 151
Print density 151
Set the system password 152
Paper types 153
System setup 153
Service 153
Device Polling Page 153
Print Settings 153
Printing 153
PCL5c 154
PostScript 154
Memory card (HP Color LaserJet CM1017 MFP only) 154
Network settings 154
Use the embedded Web server 155
Access the embedded Web server using a network connection 155
Information tab 156
Settings tab 156
Networking tab 157
Other links found in HP ToolboxFX 157
Manage supplies 158
Supplies life 158
Check and order supplies 158
Check supply status and order using the control panel 158
Check and order supplies using HP ToolboxFX 158
Check and order supplies using HP Solution Center 159
Supplies Storage Guidelines .... 159
Replace and recycle supplies 159
HP policy on non-HP supplies 159
Reset the MFP for non-HP supplies 159
HP anti-counterfeit supplies Web site 160
Clean the scanner glass 161
Clean the MFP 162
Clean the paper path using HP ToolboxFX 162
Cartridge-out override 163
Configuration 163
On-going operation 163
Change print cartridges 164
Change the print cartridge 164
Calibrate the MFP 168
Calibrate the MFP from the front control panel 168
Calibrate the MFP from the HP ToolboxFX 168
14 Problem solving
Problem solving process 170
Problem solving checklist 170
Control-panel messages 172
Solve print problems 179
Print-quality problems 179
Identifying and correcting print defects 179
Print-quality checklist 179
General print quality issues 179
Solve issues with printing color documents 183
Media-handling problems 185
Print-media guidelines 185
Solve print-media problems 185
Performance problems 187
Resolve copy problems 189
Resolve scanning problems 191
The device control panel display has black lines or dots, or becomes blank 194
Was the device exposed to an electric or magnetic field? 194
Clear paper jams 195
Where to look for jams 195
Clear jams from inside the MFP 196
Clear jams from tray output area 198
Clear jams from the back of the MFP 199
Clear jams from tray 2 or optional tray 3 ....200
Additional problem solving tools 202
Device pages and reports 202
Demo page 202
Configuration page 202
Supplies Status page 202
HP ToolboxFX 202
View HP ToolboxFX 202
Service menu 202
Restore the factory-set defaults 202
Clean the paper path 203
Calibrate the MFP 203
15 Work with memory
MFP memory 206
Install memory DIMMs 207
Check DIMM installation 211
Enable memory 211
Appendix A Accessories and supplies information
Supplies 214
Memory 214
Cable and interface accessories 215
Paper handling accessories 215
Paper and other print media 216
User-replaceable parts 216
Supplementary Documentation 217
Appendix B Service and support
Hewlett-Packard limited warranty statement 220
Print Cartridge Limited Warranty Statement 221
HP Customer Care 222
Availability of support and service 223
HP Care Pack™ Services and Service Agreements 223
Repacking the MFP 224
Repack the MFP 224
Service information form 225
Appendix C Specifications
Multifunction peripheral (MFP) specifications 228
Appendix D Regulatory information
Introduction 232
FCC regulations 233
Environmental Product Stewardship program 234
Protecting the environment 234
Ozone production 234
Power consumption 234
HP LaserJet printing supplies 234
Disposal of waste equipment by users in private households in the European Union .... 236
Material safety data sheet 236
Declaration of conformity 237
Country/region-specific safety statements 238
Laser safety statement 238
Canadian DOC statement 238
Korean EMI statement 238
VCCI statement (Japan) 238
Japanese Power Cord Statement 239
Finnish laser statement 240
Index 241
1 Multifunction peripheral (MFP) basics
• HP Color LaserJet CM1015/CM1017 MFP Series configurations
HP Color LaserJet CM1015/CM1017 MFP Series features
Walkaround
- Software
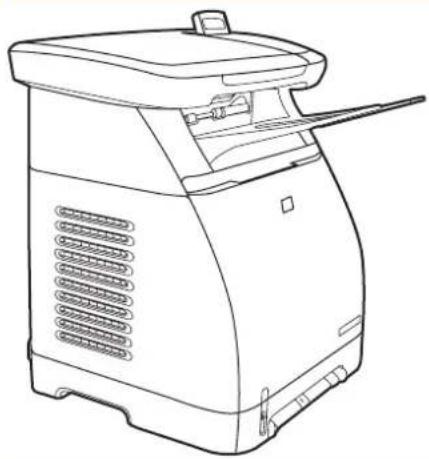
HP Color LaserJet CM1015/CM1017 MFP Series configurations
HP Color LaserJet CM1015 MFP HP Color LaserJet CM1017 MFP
natural_image
Line drawing of a portable electronic device with ventilation grilles and a handle (no text or symbols)
natural_image
Line drawing of a generic printer or scanner device with no visible text or symbols• Speed. Prints 8 pages per minute (ppm) in color or monochrome (black).
- Trays. The MFPs include a single-sheet priority-feed slot (tray 1) and a 250-sheet universal tray (tray 2)
• Connectivity. Hi-Speed USB 2.0 port
• Memory. 96 MB of synchronous dynamic random-access memory (SDRAM).
• Display. Tilt screen two-line display
All the HP Color LaserJet CM1015 MFP features plus the following:
• Memory. Four memory card slots
• Display. Tilt screen graphical display
• Connectivity. On-board networking
natural_image
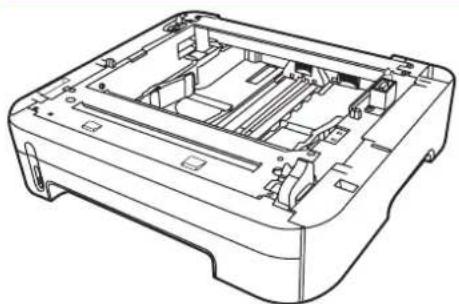
Technical line drawing of a mechanical device casing with internal compartments and mounting holes (no text or symbols)Optional 250-sheet tray 3
HP Color LaserJet CM1015/CM1017 MFP Series features
| HP Color LaserJet CM1015/CM1017 MFP Series | |
| Color printing | Full color laser printing using the four process colors: cyan, magenta, yellow, and black (CMYK). |
| Excellent print quality | HP print cartridges with ColorSphere toner achieve high gloss for a range of bright colors.ImageREt 2400 is a system of key color laser technologies that offer excellent print quality.True 600 by 600 dots per inch (dpi) text and graphics.Adjustable settings to optimize print quality. |
| Ease of use | The few supplies are easy to install.Convenient access to MFP information and settings using the HP Solution Center and HP ToolboxFX software.Convenient access to all supplies and to the paper path through the front door.HP Photosmart PremierAdjust paper trays with one hand. |
| Flexible paper handling | Trays 1 and 2 for letterhead, envelopes, labels, transparencies, custom-sized media, postcards, HP LaserJet glossy paper, HP LaserJet Tough paper, heavy paper, and HP Laser Photo paper.A 125-sheet top output bin.Print on Both Sides (manually). SeePrint on both sides of the paper. |
| Printer drivers | HP PCL6HP PostScript® Level 3 emulationIncludes 35 built-in HP PostScript Level 3 language fonts. |
| Interface connections | Hi-Speed 2.0 USB port.Built-in internal print server for connecting to a 10/100Base-T network. (HP Color LaserJet CM1017 MFP only) |
| Energy savings | The MFP automatically conserves electricity by substantially reducing power consumption when it is not printing.Meets ENERGY STAR® guidelines for energy efficiency. |
| Economical printing | N-up printing (printing more than one page on a sheet) and Printing on Both Sides features save paper. SeePrint on both sides of the paper. |
| Archive printing When printing pages that are to be stored long-term, this optionsets the printer to a mode that reduces toner smearing and dusting.The default setting is Off. | |
| Supplies | A Supplies Status page with print cartridge gauges that estimate remaining supply level. Not available for non-HP supplies.No-shake cartridge design.Authentication for original HP print cartridges.Easy ordering for replacement supplies. |
| Accessibility | Online user guide compatible with text screen-readers.All doors and covers can be opened by using one hand. |
| Expandability | Optional tray 3. This 250-sheet universal tray prevents the need to frequently add paper to the MFP. Only one additional 250-sheet tray can be installed on the MFP.One DIMM slot for adding memory. |
| Memory card slots (HP Color LaserJet CM1017 MFP only) | Supports a variety of memory cards. See thePhotochapter for more information. |
| Copy | Provides full-color copying from letter/A4-sized scanner glass.Control panel buttons available for color and monochromatic copying. |
| Scan | Provides 1200 pixels per inch (ppi), 24-bit full-color scanning from letter/A4-sized scanner glass.Scan-to E-mailScan-to Folder |
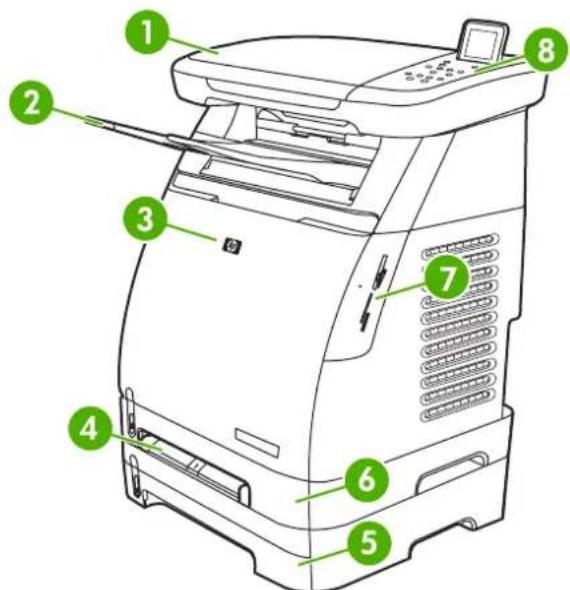
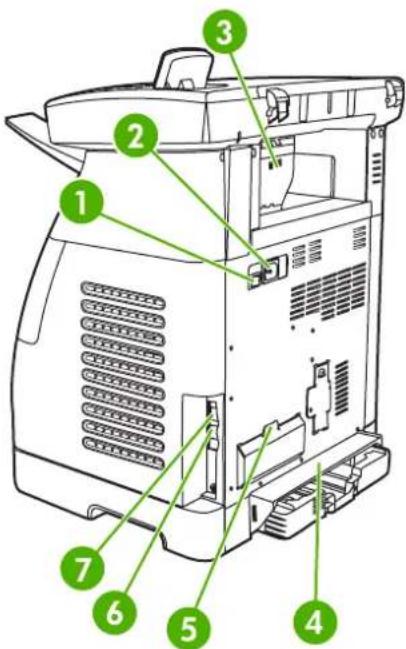
Walkaround
The following figures show the locations and names of key MFP components.
text_image
Diagram of a printer with numbered parts for identification and assembly reference.Figure 1-1 Front view (HP Color LaserJet CM1017 MFP shown)
| 1 Scanner |
| 2 Output bin |
| 3 Front door |
| 4 Tray 1 (single sheet priority feed slot) |
| 5 Tray 3 (optional; 250 sheets) |
| 6 Tray 2 (250 sheets) |
| 7 Memory card slots (HP Color LaserJet CM1017 MFP) |
| 8 MFP control panel |
text_image
Diagram of a device rear panel with numbered components for identificationFigure 1-2 Back and side view
1 On/off switch
2 Power connection
3 Jam access door
4 Dust cover
5 DIMM access door
6 Network connection to 10/100 Base-T network (HP Color LaserJet CM1017 MFP only)
7 USB connection
text_image
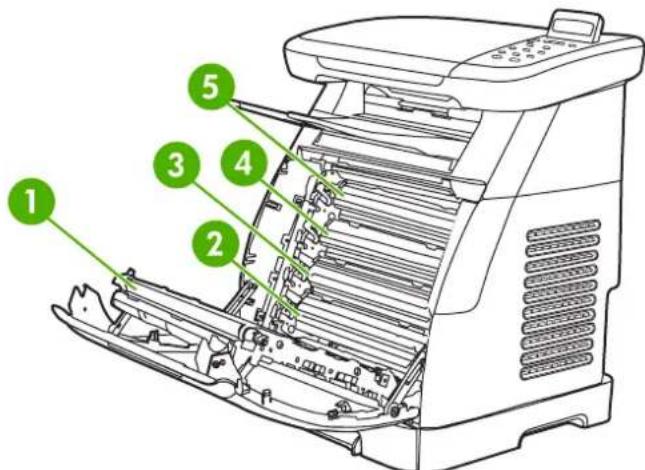
1 2 3 4 5Figure 1-3 Transfer belt view (HP Color LaserJet CM1015 MFP)
1 Transfer belt (ETB)
2 Magenta cartridge
3 Cyan cartridge
4 Yellow cartridge
5 Black cartridge

CAUTION Do not place anything on the transfer belt, located on the inside of the front door. Otherwise, the MFP can be damaged, adversely affecting print quality.
Software
Software and supported operating systems
For MFP setup and access to the full range of MFP features, HP strongly recommends installing the software provided. Not all software is available in all languages. See the Getting Started Guide for installation instructions, and see the Install Notes file for the latest software information.
The most recent drivers, additional drivers, and other software are available from the Internet and other sources. When Internet access is not available, see HP Customer Care.
The MFP supports the following operating systems:
• Microsoft® Windows® 2000 and Windows XP (32-bit and x64-bit support)
• Macintosh OS X V10.3 and later
• Microsoft® Windows Server 2003–32-bit and x64-bit support (for drivers only)

NOTE Download the printer driver at http://www.hp.com/support/cljCM1015_CM1017.
Table 1-1 HP Color LaserJet CM1015/CM1017 MFP software
| Feature Microsoft Windows Server 2003 | Windows 2000 and XP Macintosh OS X V10.3 and later | ||
| Windows Installer | ✓ | ||
| HP PCL6 printer driver | ✓ | ✓ | |
| HP PostScript Level 3 emulation printer driver | ✓ | ✓ | |
| HP ToolboxFX software | ✓ | ||
| HP imaging software (HP Color LaserJet CM1017 MFP only) | ✓ | ||
| Macintosh Installer | ✓ | ||
| Macintosh printer drivers | ✓ | ||
| Scan driver | ✓ | ✓ | ✓ |
| Mass Storage Driver (HP Color LaserJet CM 1017 MFP only and with USB connection) | ✓ | ✓ | ✓ |
| HP Solution Center | ✓ | ||
| HP Director | ✓ | ||
Install software
The HP installer provides two workstation software installation options: Recommended or Custom. A Recommended installation installs software based on the workstation's operating system processor, memory, and disk space. A Custom installation installs only user-specified software options.
The system requirements for the installed software is:
• 300 MB free hard disk space
CD-ROM drive
• USB port and USB cable or network RJ45 and cable
Requirements for PC systems:
- Windows® 2000, XP, 2003 Server: any Pentium® II processor (Pentium® III or greater recommended), 192 MB RAM (full install).
G3 processor (G4 processor recommended) 128 MB RAM, 100 MB hard disk space, Mac OS X V10.3 or above.
| Software Installation option Description | ||
| HP printer driver | Recommended and Custom | Allows applications to print to the device |
| HP Document Viewer Custom View and mark up digital | photos or scanned documents | |
| HP Photosmart Premier Custom Easily use and manage digital | photos and scanned images | |
| HP Photosmart Transfer Recommended (when supported by the operating system, memory, and disk space.) | Provides the capability to easily upload and save images from the device photo card slot. (HP Color LaserJet CM1017 MFP only.) | |
| HP Product Assistant Recommended (when supported by the operating system, memory, and disk space.) | Detects certain software or device events and attempts to provide solutions | |
| HP Software Update Recommended (when supported by the operating system, memory, and disk space.) | Updates software capability after installation | |
| HP Solution Center Recommended (when supported by the operating system, memory, and disk space.) | Provides one place to access MFP capabilities | |
| HP ToolboxFX Recommended (when supported by the operating system, memory, and disk space.) | Provides status, troubleshooting help and product configuration and also enables scanning from the MFP front panel | |
| HP ReadIris Pro | On separate CD | Provides capability to convert images to text |
| HP Scan driver Recommended | Allows applications to scan from the device | |
Software tips
Use these tips to learn more about the MFP software.
Download the latest printing software
Check for and install upgrades to the printing software by downloading the drivers from the World Wide Web or HP's file transfer protocol (FTP) servers.
Download drivers
-
Go to http://www.hp.com/support/cljCM1015 CM1017. Click support & drivers block.
-
The Web page for the drivers might be in English, but the drivers themselves can be downloaded in several languages.
When Internet access is not available, contact HP Customer Care. (See HP Customer Care or the flyer that came in the MFP box.) See the Install Notes file for additional release information.
What other software is available?
See the Install Notes file that is provided on the HP Color LaserJet CM1015/CM1017 MFP CD-ROM for information about additional included software.
2 Print media
• Media supported on this MFP
- Select print media
• Special media for printing
Media supported on this MFP
Before purchasing large quantities of print media, always test a sample and make sure that the print media meets the requirements specified in this user guide and in the HP LaserJet Printer Family Print Media Guide at http://www.hp.com/support/ljpaperguide. For ordering information, see Accessories and supplies information.

CAUTION Using print media that does not meet HP specifications can damage the MFP, requiring repair. This repair is not covered by the Hewlett-Packard warranty or service agreements.
CAUTION Do not use HP Inkjet photo paper with this MFP.

NOTE Remember to choose the correct printer-driver settings and paper settings from the control panel or the HP ToolboxFX when using special media. See Print on special media.
This MFP accepts these types of media:
Letter
- Legal
A4
Executive
Com10 envelope
Monarch
C5 envelope
DL envelope
B5 (ISO)
B5 envelope
• Custom (3"x5"-8.5"x14")
JIS B5
J-Postcard
J-Double Postcard
A5
8.5"x13"
16K (7.75" x 10.75")
16K (184 x 260 mm)
16K (195 x 270 mm)
Table 2-1 Tray specifications
| Media Type Dimensions | 1 | Weight Capacity | 2 |
| Paper Minimum: 76 x 127 mm | (3 x 5 inches) | 60 to 163 g/m2 (16 to 43 lb) | Tray 1: Single sheet of paper |
| Maximum: 216 x 356 mm (8.5 x 14 inches) | Up to 176 g/m2 (47 lb) for postcards | Tray 2: Up to 250 sheets | |
| Tray 3 (optional): Up to 250 sheets | |||
| [2K24] NOTE Tray 3 does not accept postcards, envelopes, or other special media. | |||
| HP LaserJet glossy paper and HP LaserJet Photo paper4 | Identical to Paper | 75 to 220 g/m2 (20 to 58 lb) | Tray 1: Single sheet of HP LaserJet glossy paper or HP LaserJet Photo paper |
| Tray 2: Up to 25 mm (0.99 inch) stack height | |||
| HP Premium Cover paper4 | Identical to Paper | 200 g/m2 (53 lb) cover | Tray 1: Single sheet of HP Cover paper |
| Tray 2: Up to 25 mm (0.99 inch) stack height | |||
| Transparencies and opaque film | Identical to Paper Thickness: 0.10 to 0.13 mm (3.9 to 5.1 mils) | Tray 1: Single sheet of transparency or opaque film | |
| Tray 2: Up to 50 sheets for tray 2 | |||
| Labels3 | Identical to Paper Thickness: up to 0.23 mm (up to 9 mils) | Tray 1: Single sheet of labels | |
| Tray 2: Up to 25 mm (0.99 inch) stack height | |||
| Envelopes | Up to 90 g/m2 (up to 24 lb) | Tray 1: Single envelope | |
| Tray 2: Up to ten envelopes | |||
1 The MFP supports a wide range of standard and custom sizes of print media. Check the printer driver for supported sizes.
2 Capacity can vary depending on media weight and thickness, and environmental conditions.
^3 Smoothness: 100 to 250 (Sheffield).
4 Hewlett-Packard does not guarantee results when printing with other types of heavy paper.
Select print media
Consider these factors when choosing print media.
Media that can damage the printer
Do not use media that can damage the printer.
• Do not use media with staples attached.
- Do not use transparencies, labels, photo, or glossy paper designed for inkjet printers or other low temperature printers. Use only media that is specified for use with HP Color LaserJet printers.
- Do not use paper that is embossed or coated and is not designed for the temperatures of the fuser.
- Do not use letterhead paper with low temperature dyes or thermography. Preprinted forms or letterhead must use inks that are designed for the temperatures of heat of the fuser.
- Do not use any media that produces hazardous emissions, or that melts, offsets, or discolors when exposed to the temperature of the fuser.
To order HP LaserJet printing supplies, go to http://www.hp.com/go/ljsupplies/ in the U.S. or to http://www.hp.com/ghp/buyonline.html/worldwide.
Media to avoid
Media outside the printer specifications will cause a loss of print quality and increase the occurrence of jams.
- Do not use paper that is too rough. Use paper less than 250 Sheffield smoothness tested.
- Do not use paper with cutouts or perforations other than standard 3-hole punched paper.
• Do not use multi-part or multi-page forms.
• To ensure even color, do not use paper with a watermark if printing solid patterns.
Special media for printing
This MFP supports printing on special media.
For tray, media orientation, and driver settings, see Print on special media.
For instructions on loading envelopes, see Load tray 1 (single-sheet feed tray) or Load tray 2.
Envelopes
- Store envelopes flat.
- Envelopes should not be wrinkled, nicked, stuck together, or otherwise damaged. Do not use envelopes that have clasps, snaps, windows, coated linings, self-stick adhesives, or other synthetic materials.
- Only use envelopes where the seam extends all the way to the corner of the envelope as indicated in the following illustration.
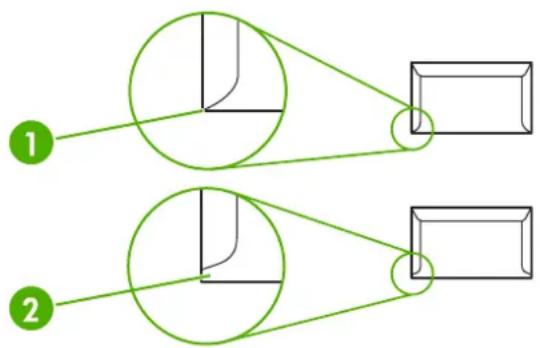
text_image
1 21 Acceptable
2 Unacceptable
- Envelopes with a peel-off adhesive strip or with more than one flap that folds over to seal must use adhesives that are compatible with the heat and pressure in the fuser.

CAUTION Failure to follow the guidelines above can result in jams.
Labels
When selecting labels, consider the quality of each component:
• For tray, media orientation, and driver settings, see Print on special media.
• Only use labels with no exposed backing between them.
- Labels must lie flat.
• Do not use labels that have wrinkles, bubbles, or are damaged.
• Use only full sheets of labels; this MFP does not support print partial sheets of labels.
• Use only labels specified for use with HP Color LaserJet printers.
For instructions on loading labels, see Load tray 1 (single-sheet feed tray) or Load tray 2.
Transparencies
• Use only tray 1 or tray 2 to print on transparencies.
• For tray, media orientation, and driver settings, see Print on special media.
- Place transparencies on a flat surface after removing from the MFP.
• Use only transparencies specified for use with HP Color LaserJet printers.

CAUTION To avoid MFP damage, only use transparencies that are recommended for use in laser MFPs. See Accessories and supplies information.
Transparent print media not designed for LaserJet printing melts in the fuser, and damages the fuser.
Glossy paper and photo paper
- Handle glossy paper and HP LaserJet Photo paper by the edges.
- For tray, media orientation, and driver settings, see Print on special media.
• Use only glossy paper and photo paper specified for use with HP Color LaserJet printers.
Letterhead or preprinted forms
- Avoid using raised or embossed letterhead.
• Use only non-flammable inks that do not damage the print rollers. - For tray, media orientation, and driver settings, see Print on special media.
For instructions on loading letterhead, see Load tray 1 (single-sheet feed tray) and Load tray 2.
Heavy paper
- Do not use paper that is heavier than the recommended media specification for this MFP. See Media supported on this MFP for more information.
- For tray, media orientation, and driver settings, see Print on special media.
3 Control panel
• HP Color LaserJet CM1015 MFP control panel features
• Use the two-line display (HP Color LaserJet CM1015 MFP)
• HP Color LaserJet CM1017 MFP control panel features
• Use the graphical display (HP Color LaserJet CM1017 MFP)
• Control-panel menus
HP Color LaserJet CM1015 MFP control panel features
The HP Color LaserJet CM1015 MFP contains the following lights and buttons on the control panel:

NOTE Print a demo page by pressing the Scan To and Start Scan buttons simultaneously.
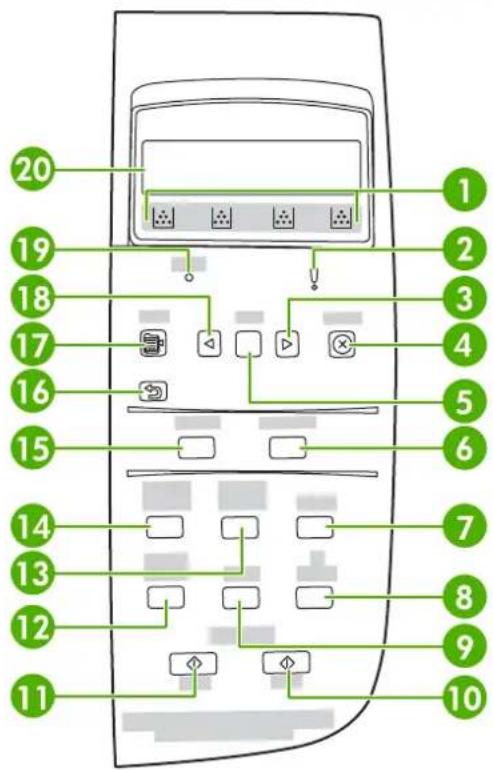
text_image
20 19 18 17 16 15 14 13 12 11 1 2 3 4 5 6 7 8 9 101
Supplies gauges: Displays consumption levels of print cartridges. Appears when the MFP shows the Ready state with no warnings, or when the MFP shows a warning or error message pertaining to a print cartridge or multiple supplies. When the supply is empty the gauge displays as empty. Flashing indicates a single supply is empty. These messages can display when:
- Missing cartridges
• Incorrectly placed cartridges
• Cartridges with an error
• Some non-HP cartridges

CAUTION Printing may continue when a non-HP supply is empty. To prevent MFP damage, frequently check the status of non-HP supplies. See Hewlett-Packard limited warranty statement.

NOTE When a “?” displays on-screen, it may be because the supply is missing, it is a non-HP supply, or the status is being determined by the MFP.
2
Amber activity light: An error has occurred. Printer requires attention.
3
Right arrow (>) : Press to navigate to the next submenu or the next value in the menu selection list. Also allows cursor movement forward a single position, or increments a numeric entry.
| 4 | Cancel (X) : Whenever the Ready light blinks, press to cancel a print job. Pressing this button also exits the control-panel menus. |
| 5 OK:Selects a menu itemClears some printer-errorsAcknowledges use of a non-HP supply | |
| 6 | Start Scan: Starts scanning to the previously selected e-mail or folder destination. The MFP can also start a scan if a destination is not specified. |
| 7 | Quality: Press the Left arrow or the Right arrow to control copy quality. |
| 8 | # of Copies: Press the Left arrow or the Right arrow to increase or decrease the number of copies produced. |
| 9 | Paper: Select the correct output paper size and type settings for the copy. |
| 10 | Press Start Copy Color to begin a color copy job. |
| 11 | Press Start Copy Black to begin a monochrome copy job. |
| 12 | Copy Features: Displays a menu of copy features. |
| 13 | Lighter/Darker: Press the Left arrow to lighten the copy or the Right arrow to darken the copy. |
| 14 | Reduce/Enlarge: Press the Left arrow to reduce the copy size or the Right arrow to enlarge the copy. |
| 15 | Scan To: Displays a list of pre-configured folders and e-mail destinations. To create a new destination, set up the Scan To destination on the workstation. |
| 16 | Return to previous menu or menu item button: Backs up one menu screen or one step in the current menu structure. |
| 17 | Menu: Opens the main menu system. |
| 18 | Left arrow (<): Press to navigate to the previous submenu or the previous value in the menu selection list. Also allows cursor movement back a single position, deletes the previous character, or decrements a numeric entry. |
| 19 | Ready light (green): Green light is steady when the MFP can accept print jobs or blinks when the MFP receives print data. |
| 20 | Message area. Displays two lines of 16 characters each. |
Use the two-line display (HP Color LaserJet CM1015 MFP)
The two-line display shows menus, and messages. The display can be pulled up and angled for better viewing. Use the arrows on the control panel to navigate the menus on the control panel. Status and error messages will be displayed on the screen.
Use the control-panel arrows to navigate on the HP Color LaserJet CM1015 MFP
- Press the Left arrow or Right arrow to navigate through all control panel menus.
- Press Back to return to the previous menu.
- Press OK to make a selection.
HP Color LaserJet CM1017 MFP control panel features
The HP Color LaserJet CM1017 MFP contains the following lights and buttons on the control panel:

NOTE Print a demo page by pressing the Scan To and Start Scan buttons simultaneously.
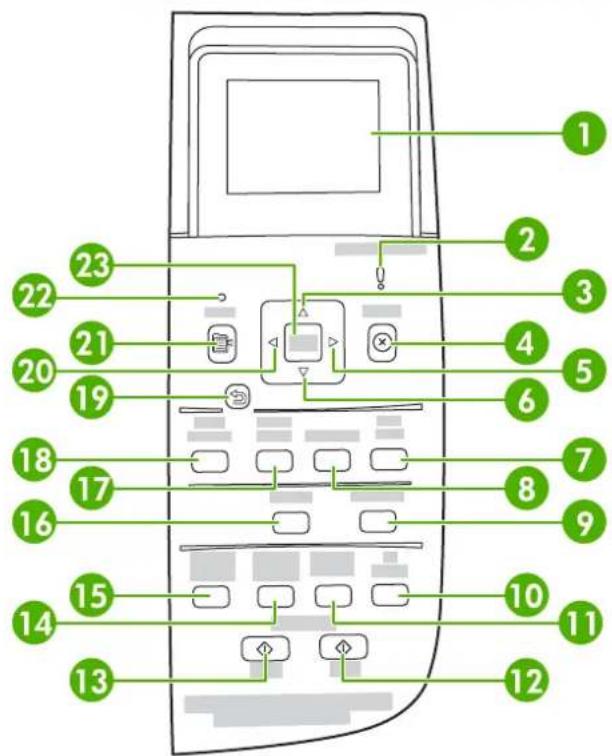
text_image
1 2 3 4 5 6 7 8 9 10 11 12 13 14 15 16 17 18 19 20 21 22 231 Graphical display. Message, menus, and supply gauge area.
Supplies gauges: Displays consumption levels of print cartridges. Appears when the MFP shows the Ready state with no warnings, or when the MFP shows a warning or error message pertaining to a print cartridge or multiple supplies. When the supply is empty the gauge displays as empty. Flashing indicates a single supply is empty. These messages can display when:
- Missing cartridges
• Incorrectly placed cartridges
• Cartridges with an error
• Some non-HP cartridges

CAUTION Printing may continue when a non-HP supply is empty. To prevent MFP damage, frequently check the status of non-HP supplies. See Hewlett-Packard limited warranty statement.

NOTE When a “?” displays on-screen, it may be because the supply is missing, it is a non-HP supply, or the status is being determined by the MFP.
| 2 | Amber activity light: An error has occurred. Printer requires attention. |
| 3 | Up arrow (^): Press to enter the main menu system or navigate to the previous menu item, or previous item in the selection list. |
| 4 | Cancel (X): Whenever the Ready light blinks, press to cancel a print job. Pressing this button also exits the control-panel menus. |
| 5 | Right arrow (>): Press to navigate to the next submenu or the next value in the menu selection list. Also allows cursor movement forward a single position, or increments a numeric entry. |
| 6 | Down arrow (v): Press to navigate to the menu item below the current menu item. |
| 7 Start Photo: Press to print one or more photos. | |
| 8 Proofsheet: Press to print a proofsheet. | |
| 9 | Start Scan: Starts scanning to the previously selected e-mail or folder destination. The MFP can also start a scan if a destination is not specified. |
| 10 | # of Copies: Press the navigation arrows to increase or decrease the number of copies produced. |
| 11 | Lighter/Darker: Press Left arrow to lighten the copy or the Right arrow to darken the copy. |
| 12 | Press Start Copy Color to begin a color copy job. |
| 13 | Press Start Copy Black to begin a monochrome copy job. |
| 14 | Reduce/Enlarge: Displays a list of temporary copy and size changes. |
| 15 Copy Features: | Displays a menu of copy features. |
| 16 | Scan To: Displays a list of pre-configured folders and e-mail destinations. To create a new destination, set up the Scan To destination on the workstation. |
| 17 Select Photos: | Press to choose one or more photos. |
| 18 | Photo Features: Press to navigate to select photo features. |
| 19 | Return to previous menu or menu item: Backs up one menu screen or one step in the current menu structure. |
| 20 | Left arrow (<): Press to navigate to the previous submenu or the previous value in the menu selection list. Also allows cursor movement back a single position, deletes the previous character, or decrements a numeric entry. |
| 21 Menu: Opens the main menu system. | |
| 22 | Ready light (green): Green light is steady when the MFP can accept print jobs or blinks when the MFP receives print data. |
| 23 OK: | |
| Selects a menu itemClears some printer-errorsAcknowledges use of a non-HP supply | |
Use the graphical display (HP Color LaserJet CM1017 MFP)
The color graphics display shows menus, photos, and messages. The display can be pulled up and angled for better viewing. Use the arrows on the control panel to navigate the menus on the control panel and to select photos on the panel for printing. Status and error messages will be displayed on the screen.
After 60 minutes of inactivity, the color graphics display goes into Sleep State and the screen shuts off completely. The display turns back on when you perform an operation, such as pressing a control panel button, or inserting a memory card, accessing the HP All-in-One from a connected computer.
Use the control-panel arrows to navigate on the HP Color LaserJet CM1017 MFP
- Press the Up arrow or Down arrow to navigate through all control panel menus.
- Press Back to return to the previous menu.
- Press OK to make a selection.
Press the Left arrow or Right arrow to complete the following tasks:
- Increase or decrease values on the horizontal scroll bar on various copy and photo menus.
- Browse photos on the graphical display from your memory card.
- Enter an IP address.
Control-panel menus
Use the control-panel menus
To gain access to the control-panel menus, use the following steps.
-
Press Menu.
-
On the HP Color LaserJet CM1015 MFP, press Left arrow or Right arrow to navigate the listings. On the HP Color LaserJet CM1017 MFP, press Up arrow or Down arrow to navigate the listings.
-
Press OK to select the appropriate option.
- Press Back to move to the previous menu.
- Press Cancel to cancel an action or return to the Ready state.
Control-panel menu map
These menus are available from the control panel Main menu:
• Use the Copy setup menu to configure basic copy default qualities.
• Use the Reports menu to print reports that provide information about the printer.
• Use the Photo setup menu to configure defaults for photo printing.
- Use the System setup menu to establish basic printer settings. The System setup has several sub-menus. Each is described in the table.
- Use the Service menu to restore default settings, clean the printer, and activate special modes that affect print output.
• Use the Network config. menu to configure network settings.
Table 3-1 Copy Setup Menu
| Menu item | Sub-menu item | Sub-menu item | Description |
| Default Quality | Sets the default copy quality. | ||
| Default light/dark | Sets the default lighter/darker | option. | |
| Default Reduce/Enlarge | Sets the default percentage to reduce or enlarge a copied document. | ||
| Default # of copies | Sets the default number of | copies. | |
| Advanced Color Balance Red | Increases or decreases the amount of these colors in the output. | ||
| Green | |||
| Blue | |||
| Background | Increases or decreases the | background color in a copy. | |
| Contrast Increases or decreases the | differences between whites and blacks of a copy. | ||
| Lightness Increases or decreases the | background color in a copy. | ||
| Grayness Increases or decreases the | color in the color copy of a black and white original. | ||
| Sharpen Increases or decreases the | reproduction details in a copy. | ||
| Restrict color Permits the enabling or | disabling of color copies. | ||
| Restore defaults | Sets | all settings to the factory default values. | |
Table 3-2 Reports Menu
| Menu Item Description | |
| Demo page Prints a color page that demonstrates print quality. | |
| Menu structure | Prints a control-panel menu layout map.The active settings for each menu are listed. |
| Configuration report | Prints a list of all the printer settings.Includes network information when the printer is connected to the network. |
| Supplies status page | Prints the status of each print cartridge.Includes this information:Estimated pages remainingSerial numberNumber of pages printed |
| Network report | Displays status for:Network hardware configurationEnabled featuresTCP/IP and SNMP informationNetwork statistics |
| Usage page | Displays number of pages printed by the MFP. |
| PCL font list | Prints a list of all installed PCL fonts. |
| PS font list | Prints a list of all installed PS fonts. |
Table 3-2 Reports Menu (continued)
| Menu Item Description |
| PCL6 font list Prints a list of all installed PCL6 fonts. |
| Service page Starts the cleaning mode and restoresfactory settings. |
Table 3-3 Photo Setup Menu (Available only from HP Color LaserJet CM1017 MFP)
| Menu Item Description |
| Default image size Set up default image size. |
| Default light/dark |
| Default # of copies Set up default number of copies. |
| Default output color Set up default output color. |
| Restore defaults Resets all photo items to their factory defaults. Machine does not power cycle. |
Table 3-4 System Setup Menu
| Menu Item | Sub-menu item | Sub-menu item | Description |
| Language Select the language in which | the control panel displays messages and printer reports. | ||
| Paper setup Default paper size Letter | Select the size for printing internal reports or any print job that does not specify a size. | ||
| Default paper type | Lists available media types. | Select the type for printing internal reports or any print job that does not specify a type. | |
| Tray 1 | Paper size | Paper type | From the displayed list, select the default size and type for tray 1. |
| Tray 2 | Paper size | Paper type | From the displayed list, select the default size and type for tray 2. |
| Tray 3 (optional) | Paper size | From the displayed list, select the default size and type for optional tray 3. | |
| Paper type | |||
| Paper-out action | Wait forever | Override | Determines how the printer reacts when a print job requires a size or type that is unavailable or when a specified tray is empty. |
| Cancel job | Select Wait forever to make the printer wait until the correct media is loaded. | ||
| Press OK to select the default setting.Select Override to print on a different size paper after a specified delay.Select Cancel job to automatically cancel the print job after a specified delay.If either Override or Cancel job is chosen, the control panel prompts for the number of seconds to delay. Press the Right arrow to increase the time up to 3600 seconds. Press Left arrow to decrease the time. | |||
| Print quality | |||
| Calibrate color Calibrate now | Power-on calibration | Calibrate now: Directs the printer to immediately calibrate. When a job is processing, the printer calibrates after the job is complete. When an error message displays, clear the error before continuing.Power-on calibration: Select how quickly the printer should calibrate after it is powered on. The default setting is 15 minutes. | |
| Cartridge low Signals that the cartridge is | almost empty. | ||
| Replace supplies Displays message that a | supply or supplies need to be replaced. | ||
| Courier font | Select | courier | |
Table 3-5 Service Menu
| Menu item Description | |
| Cleaning mode This options cleans the printer when specks or other marksappear on printed output. The cleaning process removes dust and excess toner from the paper path.When selected, the printer prompts to load plain paper in tray 1 and then press OK to begin the cleaning process. Wait until the process completes. Discard the page that prints. | |
| Restore defaults Sets all customized settings to the factory default values.USB speed | |
| Less paper curl When printed pages are consistently curled, this option sets the printer to a mode that reduces curl. | |
| Archive print When printing pages that will be stored for a long time, this option sets the printer to a mode that reduces toner smearing and dusting. | |
Table 3-6 Network Configuration Menu (Available only on HP Color LaserJet CM1017 MFP Series)
| Menu item Sub-menu item Description | ||
| TCP/IP configuration Automatic | Manual | Select Automatic to automatically configure all the TCP/IP settings. |
| Select Manual to manually configure the IP address, subnet mask, and default gateway. | ||
| The control panel prompts you to specify values for each address section. Press Right arrow to increase the value. Press Left arrow to decrease the value. Press OK to accept the value and move the cursor to the next field. | ||
| As each address is completed, the printer prompts for address confirmation before moving to the next one. After all three addresses are set, the printer automatically restarts. | ||
| Select Reset TCP/IP to restore all the TCP/IP settings to the default values. | ||
| Link speed Automatic | The printer automatically detects the correct link speed for the network. Use this menu to set the link speed manually if needed. | |
| 10T Full | ||
| 10T Half | ||
| 100TX Full | After setting the link speed, the printer automatically restarts. | |
| 100TX Half | ||
| Memory card Sets memory card slots. | ||
| Restore defaults Resets all network configurations to their | factory defaults. | |
4 Software for Windows
When installing Windows software, directly connect the MFP to a computer using a USB cable, or connect the MFP to a network using HP built-in networking. See the Getting Started Guide for installation instructions, and see the Install Notes file for the latest software information.
Software is available to all users, regardless of whether a connection to the computer is established through the MFP directly using a USB cable, or to the network through the HP built-in networking internal print server. See Install software for more information.
• Printer driver recommendations
• Install the PostScript driver using Add Printer
- Software
- Other software
• Change from a direct-connected shared MFP to a network port-connected MFP configuration
• Uninstall the printing software
Printer driver recommendations
A printer driver allows printing from an application.
Select a printer driver based on the MFP usage.
• To print only in black and white, use the PCL6 printer black and white driver.
The PCL6 printer driver is recommended to take full advantage of all MFP features.
- The HP PostScript Level 3 emulation print driver is required for compatibility with HP PostScript needs. Certain printer features are not available in this driver. The MFP automatically switches between HP PostScript Level 3 and PCL printer languages depending on the driver selected.
User assistance
The print driver has Help dialog boxes that are activated from the question mark symbol (?) in the upper-right corner of the properties of the print-driver. Right click on the MFP in the Printers and Faxes folder and then select Properties.
Install the PostScript driver using Add Printer
The PostScript driver can only be installed using the Microsoft Windows Add Printer wizard. For additional help, see the Microsoft help or go to http://www.hp.com/go/support.
Software
This MFP supports these software components:
| Software Description | |
| HP Color LaserJet CM1015/CM1017 MFP drivers | Installs basic driver software your HP Color LaserJet MFP needs to print and scan. |
| HP Color LaserJet CM1015/CM1017 MFP software | HP Solution Center. Transfer or scan images to the workstation, use the HP photo software, access other HP products and supplies, change product settings and update product software to the latest version available.HP ToolboxFX for product status and configuration, help and troubleshooting, and supplies reordering.HP ScanTo setup to enable starting scans from the product control panel. |
| HP Customer Participation Program | This software provides additional benefits only available to HP printing customers. Once installed, use this software to participate in market research designed to improve HP products and experiences. An invitation will appear on the screen in a few weeks and you can choose whether or not to participate at that time. Customers who do a lot of printing may also receive an invitation to participate in programs with benefits such as special offers, awards and enhanced technical support. NOTE Participation is completely voluntary. This program will provide a full disclosure at the time of invitation. If at that time you choose to participate, the software may occasionally connect to HP when you are online, but will have a negligible impact on processing and connection speed. Personal information is never sent to HP unless you give permission. IP address will be used only to enable the connection and for security purposes. This software is governed by the HP Privacy Policy located at http://www.hp.com/go/privacy. NOTE Participation is completely voluntary. This program will provide a full disclosure at the time of invitation. If at that time you choose to participate, the software may occasionally connect to HP when you are online, but will have a negligible impact on processing and connection speed. Personal information is never sent to HP unless you give permission. IP address will be used only to enable the connection and for security purposes. This software is governed by the HP Privacy Policy located at http://www.hp.com/go/privacy. |
| HP Software Update This program can automatically download software updatesand onscreen Help updates from the HP Web site. This ensures you have the latest versions. You can reset the HP Software Update tool for manual updates if needed. | |
| HP Photosmart Premier View photographs, (thumbnails to full-size photos) as slideshows with music, or use very simple one-click editing or more advanced edit tools. | |
| HP Document Viewer View and manage scanned documents by reviewing them asthumbnails or full-size pages, and zoom in to magnify key parts of any page. Add annotations to a document and even select groups of documents for collectively printing and sending in e-mails, and more. Converting scanned documents to text is also easy. | |
| HP Photosmart Transfer Use this software to transfer photos from the MFP to a workstation. | |
Other software
The MFP provides additional software to monitor and control print features:
• See HP ToolboxFX.
• See Use the embedded Web server.
Change from a direct-connected shared MFP to a network port-connected MFP configuration
To change from a direct connection to a network configuration, complete the following steps.
- Uninstall the printing software for the connected MFP. See Uninstall the printing software.
- Install the software choosing the network as the connection type, then follow the directions in Manage the network.
Uninstall the printing software
Uninstall Windows software via the Program group

NOTE Uninstalling the software from Windows 2000 and XP requires administrator privileges.
- Close all applications.
- On the Start menu, point to Programs, HP, HP Color LaserJet CM1015/CM1017, and click Uninstall.
- On the Setup screen, click Next.
- Click Next, and follow the directions on the screen. If the message The following file is a shared file but is not used by any other programs. Would you like to delete it? appears, click Yes to All. The system finishes removing files.
- If prompted to restart the computer, click OK.
Uninstall Windows software using Add or Remove Programs
An alternate method for uninstalling the MFP software is to use the Add or Remove Programs method. This method does not require access to the software CD.
- Click Start, select Settings (for Windows 2000 only), and open the Control Panel.
- Click Add or Remove Programs.
- Scroll through the list of software programs and click HP Color LaserJet CM1015/CM1017 or HP Color LaserJet CM1015/CM1017 PCL6 MFP.
- Click Remove.
When uninstalling HP Color LaserJet CM1015/CM1017 MFP software, the printing-system, scanning, and HP ToolboxFX software is uninstalled. The uninstall does not delete the following software features:
HP Solution Center
HP Document Viewer
HP Software Update
HP PhotoSmart Premier
HP System Diagnostics
For problem solving purposes, it is not necessary to uninstall all software that is associated with the MFP. This software functions independently of the product and can be associated with other HP products and system devices.
To uninstall these programs, use the Add/Remove Programs feature in Windows. When choosing to uninstall the software, there may be warnings that features associated with the software might not function correctly if you proceed.
Uninstall a Recommended or Custom installation
The following methods can be used to uninstall a Recommended or Custom installation:
HP Color LaserJet CM1015/CM1017 MFP software Uninstall component (recommended)
• Windows Add or Remove programs component

NOTE When uninstalling the software for problem solving purposes, try uninstalling only specific MFP printer or scan drivers. The shared software programs, such as HP PhotoSmart Premier, HP Solution Center, and HP Document Viewer, are unlikely to be the cause of product-specific problems. These shared software programs should not need to be uninstalled, especially if they are being used by another HP product.
Delete printer drivers from the printers folder
Windows 2000 or Windows XP
- Click Start, click Settings, and then click Printers.

NOTE For Windows XP, click Start, and then click Printers.
- Right-click the icon for the HP Color LaserJet CM1015/CM1017 MFP and click Delete. This removes the icon for the product only, but it does not remove the associated files.
- To remove the associated files, click File from inside the Printers folder, then click Server Properties.
- Click the Driver tab, click the MFP, then click Remove. When prompted to confirm the deletion, click Yes.
- Click Close to close the Server Properties dialog box and then close the Printers folder.
5 Software for Macintosh
• Macintosh utility and application support
• Macintosh printer drivers
• Use features in the Macintosh printer driver
- Manage MFP color options on Macintosh computers
HP Device Configuration (Mac OS X V10.3 and Mac OS X V10.4)
- Solve common Macintosh problems
Macintosh utility and application support
The HP Installer provides PostScript Printer Description (PPD) files, Printer Dialog Extensions (PDEs), and the Macintosh Configure Device for use with Macintosh computers.
If both the MFP and the Macintosh computer are connected to a network, use the MFP embedded Web server (EWS) to configure the MFP. For more information, see HP Device Configuration (Mac OS X V10.3 and Mac OS X V10.4) and Use the embedded Web server.
Install Macintosh printing system software for networks
The printing system software supports Mac OS X V10.3 and later.
• Install PostScript Printer Description (PPD) files
The PPDs, in combination with the Apple PostScript printer drivers, provide access to MFP features. An installation program for the PPDs and other software is provided on the compact disc (CD) that came with the MFP. Use the Apple PostScript printer driver that comes with the computer.
HP Device Configuration
The Macintosh Configure Device provides access to features that are not available in the printer driver. These are examples of things that can be done using the Macintosh Configure Device:
- Name the printer.
- Assign an internet protocol (IP) address to the MFP.
- Configure and set the MFP for network printing.
Use the Macintosh Configure Device when the MFP uses a universal serial bus (USB) or is connected to a TCP/IP-based network.
For more information about using the Macintosh Configure Device, see HP Device Configuration (Mac OS X V10.3 and Mac OS X V10.4).
Install printer drivers for Mac OS X V10.3 and later
- Connect the network cable between the HP Color LaserJet CM1015/CM1017 MFP and a network port.
- Insert the CD into the CD-ROM drive and double-click the CD icon on the desktop.
- Double-click the Installer icon in the HP LaserJet Installer folder.
- Follow the instructions on the computer screen.
- On the computer hard drive, open Applications, open Utilities, then open Print Center or Printer Setup Utility.
- Click Add Printer.
- Select Rendezvous or Bonjour as the connection type.
- Select the printer from the list.
- Click Add Printer.
- Close the Print Center or the Printer Setup Utility by clicking the close button in the upper-left corner.
Install Macintosh printing system software for direct connections (USB)
Install the Apple PostScript driver that came with the Macintosh computer to use the PPD files.
To install the printing system software
- Connect a USB cable between the USB port on the MFP and the USB port on the computer. Use a standard 5-meter (16.4 feet) or less, certified USB cable.
- Insert the MFP CD into the CD-ROM drive and run the installer.
Double-click the CD icon on the desktop.
- Double-click the Installer icon in the HP LaserJet Installer folder.
- Follow the instructions on the computer screen.

NOTE For Mac OS X v10.3 and later: USB queues are created automatically when the MFP is attached to the computer. However, the queue uses a generic PPD if the installer has not been run before the USB cable is connected. To change the queue PPD, open the Print Center or MFP Setup Utility, select the correct MFP queue, then click Show Info to open the Printer Info dialog box. In the pop-up menu, select Printer Model, then, in the pop-up menu in which Generic is selected, select the correct PPD for the MFP.
- Print a test page or a page from any software program to make sure that the software is correctly installed.
Macintosh printer drivers
The MFP comes with printer-driver software that uses a printer language to communicate with the MFP. Printer drivers provide access to MFP features, such as printing on custom-sized paper, resizing documents, and inserting watermarks.
Supported printer drivers
A Macintosh printer driver and the necessary PPD files are included with the MFP.

NOTE The most recent drivers are available at http://www.hp.com/support/cljCM1015_CM1017.
Open the printer drivers
Use one of these methods to open the printer drivers from the computer.
| Operating System To change the settings for all print jobs until the software program is closed | To change the print job default settings (for example, turn on Print on Both Sides by default) | To change the configuration settings (for example, add a physical option such as a tray, or turn on or off a driver feature such as Allow Manual Duplexing) | |
| Mac OS X v10.3 or 10.4 | 1. On the File menu, click Print.2. Change settings on the various pop-up menus. | 1. On the File menu, click Print.2. Change settings on the various pop-up menus, then, on the Presets pop-up menu, click Save as and type a name for the preset.These settings are saved in the Presets menu. To use the new settings, select the saved preset option every time you open a program and print. | 1. Open Printer Setup Utility by selecting the hard drive, clicking Applications, clicking Utilities, then double-clicking Printer Setup Utility.2. Click on the print queue.3. On the Printers menu, click Show Info.4. Click the Installable Options menu. |
Use features in the Macintosh printer driver
Create and use presets in Mac OS X
Use presets to save the current driver settings for reuse.
To create a preset
- Open the printer driver (see Open the printer drivers).
- Select the print setting to use.
- In the Presets box, click Save As..., and type a name for the preset (for example "Quarterly Report" or "My Project Status").
- Click OK.
To use presets
- Open the printer driver (see Open the printer drivers).
- In the Presets menu, select the preset to use.

NOTE To restore printer-driver default settings, select Standard from the Presets pop-up menu.
Print a cover page
Optionally, print a separate cover page for the document that includes a message (such as "Confidential").
To print a cover page
- Open the printer driver (see Open the printer drivers).
- On the Cover Page or Paper/Quality pop-up menu, select whether to print the cover page Before Document or After Document.
- In the Cover Page Type pop-up menu, select the message to be printed on the cover page.

NOTE To print a blank cover page, select Standard as the Cover Page Type.
Print multiple pages on one sheet of paper
A cost-effective way to print documents, including draft pages, is to print more than one page on a single sheet of paper.
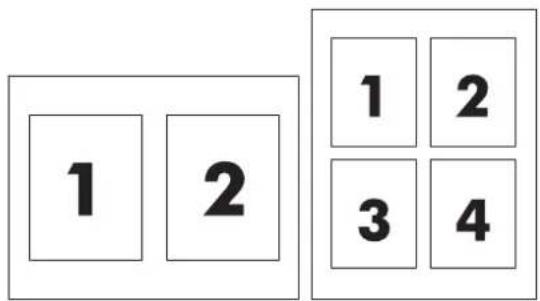
text_image
1 2 1 2 3 4To print multiple pages on one sheet of paper
- Open the printer driver (see Open the printer drivers).
- Click the Layout pop-up menu.
- Next to Pages per Sheet, select the number of pages to print on each sheet (1, 2, 4, 6, 9, or 16).
- If the number of pages is greater than 1, next to Layout Direction, select the order and placement of the pages on the sheet.
- Next to Borders, select the type of border to print around each page on the sheet.
Print on both sides of the paper
To print on both sides manually
-
Insert enough paper into one of the trays to accommodate the print job. When loading special paper such as letterhead, load it in one of the following ways:
-
For tray 1, load the letterhead paper with the front side up and the bottom-edge feeding into the MFP first.
-
For all other trays, load the letterhead paper with the front side down, and the top-edge at the back of the tray.
-
Open the printer driver (see Open the printer drivers).
- On the Finishing pop-up menu, select the Manual Duplex option.
- Click Print.
- Go to the MFP. Remove any blank paper that is in tray 2. Insert the printed stack with the printed side up and the bottom-edge feeding into the MFP first. Print the second side from tray 2. Follow the instructions in the pop-up window that appears before replacing the output stack in tray 2 for printing the second half.
- If a prompt appears on the control-panel display, press a control-panel button to continue.
Set the color options
Use the Color Options pop-up menu to control how colors are interpreted and printed from software programs.

NOTE For more information about colors and color options, see Color options and Manage MFP color options on Macintosh computers.
To set the color options
- Open the printer driver (see Open the printer drivers).
- Select Color Options.
- Click Show Advanced Options.
- Manually adjust the individual settings for text, graphics, and photographs.
Enable memory
- Open Print Center or Print Setup Utility.
- Click HP LaserJet print queue to highlight it.
- Choose Show Info.
- On the Name and Location drop-down list, choose Installable Options.
- On the Total Printer Memory list, choose the range which applies to the MFP.
- Click Apply to save the changes.
Manage MFP color options on Macintosh computers
For many documents, setting the color options manually can enhance the way the document appears. Examples of these documents include marketing brochures that contain many images or documents that are printed on a media type that is not listed in the printer driver.
Print color as gray or change the color options using Printer Features and Color Options pop-up menu in the Print dialog box.
For more information about how to gain access to the printer drivers, see Open the printer drivers.
Print Color as Gray
Selecting the Print Color as Gray option from the printer driver prints a document in black and shades of gray. This option is useful for previewing preliminary copies of slides and hardcopy output, or for printing color documents that are photocopied.
Advanced color options for text, graphics, and photographs
Use manual color adjustment to adjust the Color (or Color Map) and Halftoning options for a print job.
For more information on color selection, see Color options.
HP Device Configuration (Mac OS X V10.3 and Mac OS X V10.4)
HP Device Configuration is a software program that provides access to information about the MFP (for example, information about supplies status and MFP settings). Use the HP Device Configuration to monitor and manage the MFP from the computer.

NOTE Perform a complete software installation to use the HP Device Configuration.
- Check the MFP status and print information pages.
- Check and change MFP system settings.
• Check default MFP settings. - Check and change network settings, including Advanced, Bonjour printer name, SNMP, network configuration, and password.
View the HP Device Configuration when an MFP is directly connected to a computer or when it is connected to the network.

NOTE Internet access is not required to open and use the HP Device Configuration.
To view HP Device Configuration when the MFP is directly connected to the computer
- Open HP Director by clicking the HP Director icon in the dock.
- In HP Director, click Settings.
- Select Configure device to open the HP Device Configuration home page in a browser.
To view HP Device Configuration when the MFP is connected to a network
-
Open one of the following supported Web browsers:
-
Safari 1.2 or later
• Microsoft Internet Explorer 5.0 or later
• Netscape Navigator 4.75 or later - Opera 6.05 or later
-
FireFox 1.5 or later
-
Enter the IP address of the MFP into the Web browser to open the HP Device Configuration home page.
Solve common Macintosh problems
This section lists problems that can occur when using Mac OS X.
Solve Problems with Mac OS X
Table 5-1 Problems with Mac OS X
The printer driver is not listed in the Print Setup Utility.
| Cause | Solution |
| The MFP software has not been installed or was installed incorrectly. | Ensure the printer PPD is in the following hard-drive folder:Library/Printers/PPDs/Contents/Resources/.lproj, whereis the two-letter language code for the language that you are using. If necessary, reinstall the software.See the Getting Started Guide for instructions. |
| The PPD file is corrupt. | Delete the PPD file from the following hard-drive folder: Library/Printers/PPDs/Contents/Resources/.lproj,whereis the two-letter language code for the language that you are using. Reinstall the software. See the Getting Started Guide for instructions. |
The MFP name, IP address, or Rendezvous or Bonjour host name does not appear in the MFP list in the Printer Setup Utility.
| Cause | Solution |
| The MFP might not be ready. | Ensure cables are correctly connected, the MFP is on, and the ready light is on. When connecting through a USB or Ethernet hub, try connecting directly to the computer or use a different port. |
| The wrong connection type might be selected. | Verify that USB, IP Printing, or Rendezvous or Bonjour is selected, depending on the type of connection that exists between the MFP and the computer. |
| The wrong MFP name, IP address, or Rendezvous or Bonjour host name is being used. | Print a configuration page to check the MFP name, IP address, or Rendezvous or Bonjour host name. Verify that the name, IP address, or Rendezvous or Bonjour host name on the configuration page matches the MFP name, IP address, or Rendezvous or Bonjour host name in the Printer Setup Utility. |
| The interface cable might be defective or of poor quality. | Replace the interface cable. Make sure to use a high-quality cable. |
The printer driver does not automatically set up the selected MFP in the Print Setup Utility.
| Cause | Solution |
| The MFP might not be ready. | Verify that cables are correctly connected correctly, the MFP is on, and the ready light is on. When connecting through a USB or Ethernet hub, try connecting directly to the computer or use a different port. |
| The MFP software has not been installed or was installed incorrectly. | Verify that the MFP PPD is in the following hard-drive folder:Library/Printers/PPDs/Contents/Resources/.lproj, whereis the two-letter language code for the language that you are using. If necessary, reinstall the software. See the Getting Started Guide for instructions. |
| The PPD file is corrupt. | Delete the PPD file from the following hard-drive folder: Library/Printers/PPDs/Contents/Resources/.lproj, whereis the two-letter language code for the language that you are using. Reinstall the software. See the Getting Started Guide for instructions. |
| The interface cable might be defective or of poor quality. | Replace the interface cable. Make sure to use a high-quality cable. |
A print job was not sent to the correct MFP.
| Cause | Solution |
| The print queue might be stopped. | Restart the print queue. Openprint monitorand selectStart Jobs. |
| The wrong MFP name or IP address is being used. Another MFP with the same or similar name, IP address, or Rendezvous or Bonjour host name might have received the print job. | Print a configuration page to check the MFP name, IP address, or Rendezvous or Bonjour host name. Verify that the name, IP address, or Rendezvous or Bonjour host name on the configuration page matches the MFP name, IP address, or Rendezvous or Bonjour host name in the Printer Setup Utility. |
Unable to print from a third-party USB card.
| Cause | Solution |
| Occurs when the USB software is not installed on the MFP. | When adding a third-party USB card, try using the Apple USB Adapter Card Support software. The most current Version of this software is available from the Apple Web site. |
When connected with a USB cable, the MFP does not appear in the Printer Setup Utility after the MFP is selected.
| Cause | Solution |
| This problem is caused by either a software or a hardware component. | Resolve software problemsVerify that the Macintosh supports USB.Verify that the Macintosh operating system is Mac OSX V10.3 or later.Verify that the Macintosh has the appropriate USB software from Apple. |
| Resolve hardware problemVerify that the MFP is turned on.Verify that the USB cable is connected correctly.Verify the use of the appropriate high-speed USB cable.·Ensure there are not too many USB devices drawing power from the chain. Disconnect all of the devices from the chain, and connect the cable directly to the USB port on the host computer.·Check to see if more than two nonpowered USB hubs are connected in a row on the chain. Disconnect all of the devices from the chain and connect the cable directly to the USB port on the host computer. | |
| NOTE The iMac keyboard is a nonpowered USB hub. |
6 P r i n t
- Load trays
• Print on special media
• Control print jobs
• Print on both sides of the paper - Cancel a print job
The HP ToolboxFX provides information about managing the MFP and its settings. See HP ToolboxFX.
Load trays
Use special print media, such as envelopes, labels, HP LaserJet glossy paper, HP LaserJet Photo paper, and transparencies only in tray 1 and tray 2.

NOTE Tray 3 is an accessory. It is referred to as optional tray 3 in this guide.

CAUTION Do not fan paper before loading it into trays. Avoid overloading trays.
CAUTION Do not reuse paper that has been stapled. Staples that remain in reused paper causes damage to the MFP and requires repairs that are not covered under the warranty.
Load tray 1 (single-sheet feed tray)
- Media guides ensure that the media is correctly fed into the MFP and that the print is not skewed (crooked on the media). Slide the media-width guides slightly wider than the print media.
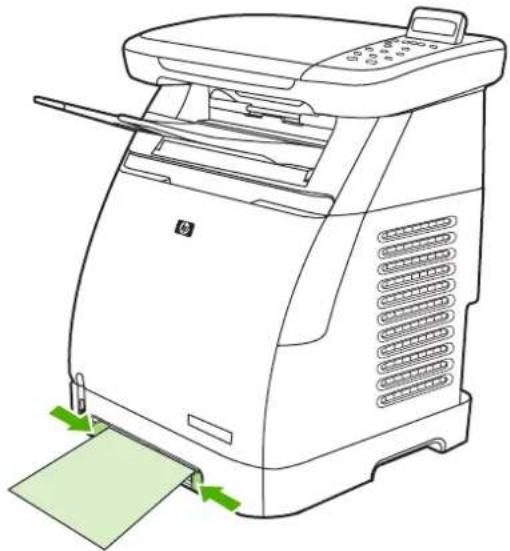
natural_image
Line drawing of a printer with green arrows indicating printing process (no text or symbols)- Feed print media into tray 1 with the side to be printed down, and the top, short edge in first. Make sure that the media is inserted far enough into the MFP for the paper-feed mechanism to grab the media.
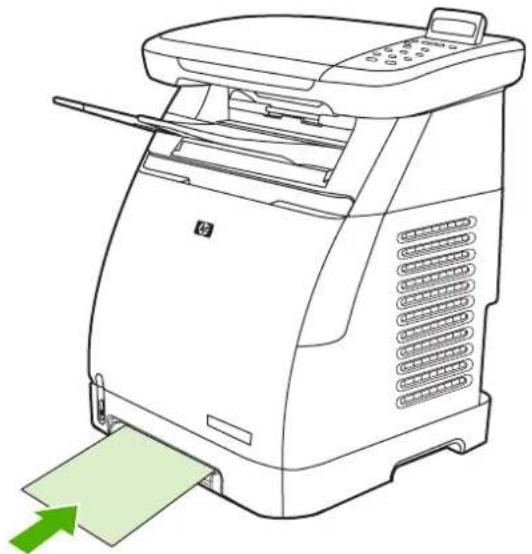
natural_image
Line drawing of a printer with paper feed and green arrow indicating print direction (no text or symbols)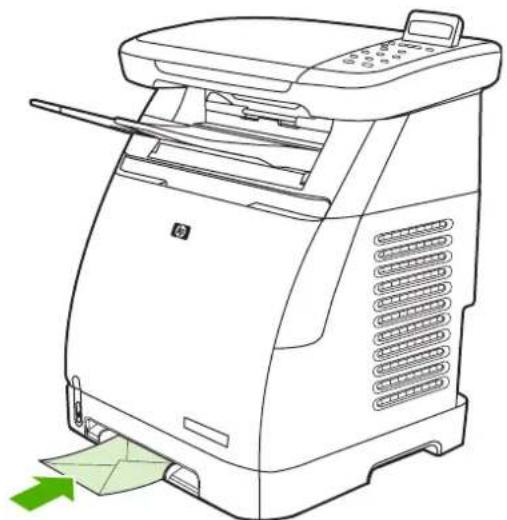
natural_image
Line drawing of a printer with a green arrow pointing to the paper feed (no text or symbols present)
NOTE There is a short pause before the paper is picked up.
NOTE When printing on both sides, see Print on both sides of the paper for loading instructions.
Load tray 2
Access tray 2 and optional tray 3 from the front of the MFP. Each tray holds up to 250 sheets of paper. Tray 2 also supports other media such as envelopes, postcards, transparencies, HP LaserJet glossy paper, and HP LaserJet Photo paper.

NOTE Tray 3 is optional on the HP Color LaserJet CM1015/CM1017 MFP.
- Pull tray 2 or optional tray 3 out of the MFP and remove any paper.
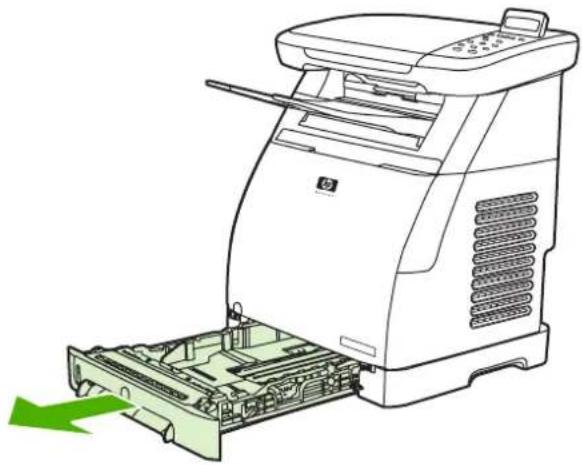
natural_image
Line drawing of a HP printer with an open drive showing internal components (no text or symbols)- Move the rear guides to match the paper size. Tray 2 and optional tray 3 accept several standard paper sizes.
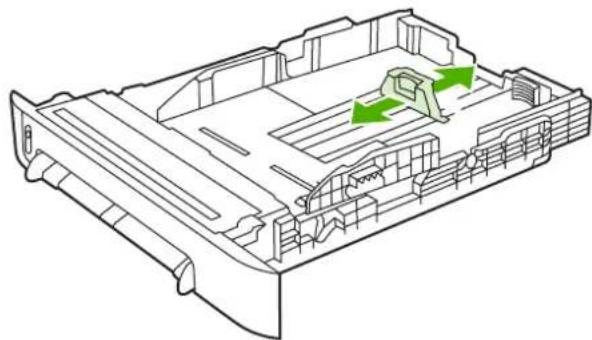
natural_image
Technical line drawing of a mechanical assembly with green directional arrows indicating motion or movement (no text or symbols)- When printing paper longer than Letter/A4, extend the rear of the tray until it matches the paper size.
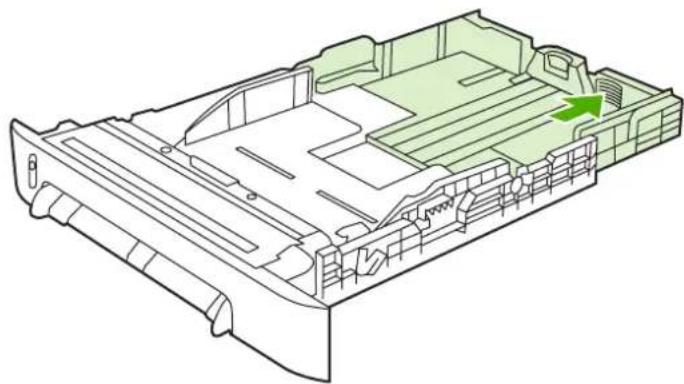
natural_image
Technical line drawing of a vehicle chassis frame with internal compartments and a green arrow indicating a specific area (no text or symbols present)- Slide the media-width guides slightly wider than the print media.
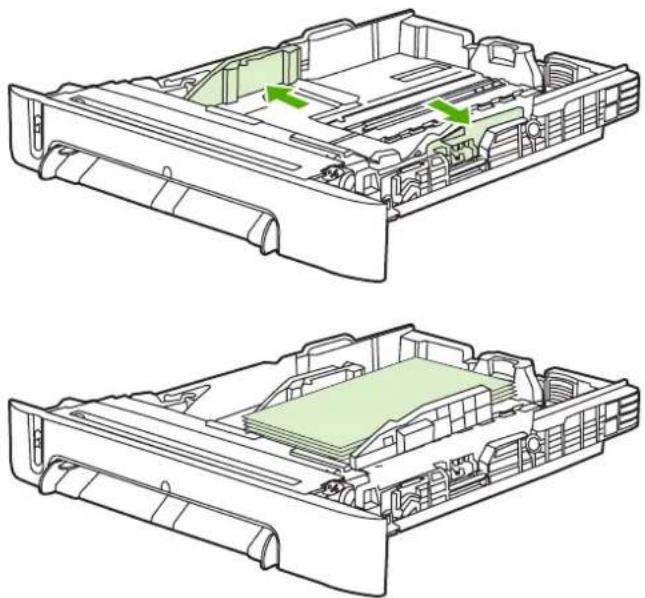
natural_image
Technical line drawing of a mechanical assembly showing two views of internal components with green arrows indicating motion or flow (no text or symbols)
NOTE Load a maximum of 10 envelopes into tray 2 with the flaps on the right side, the side to be printed facing up, and with the short edge leading into the MFP. If the envelope has a flap on a short edge, this edge must enter the MFP first.
- Load the media.


NOTE If this is special paper such as labels, transparencies, HP LaserJet glossy paper, HP LaserJet Photo paper, and letterhead or printed forms, load it with the side to be printed on facing up and the top edge toward the front of the tray. For additional information about printing on special print media, see Print on special media.
- Make sure that the stack of paper is flat in the tray at all four corners, and keep it below the height tabs on the media-length guide in the rear of the tray.
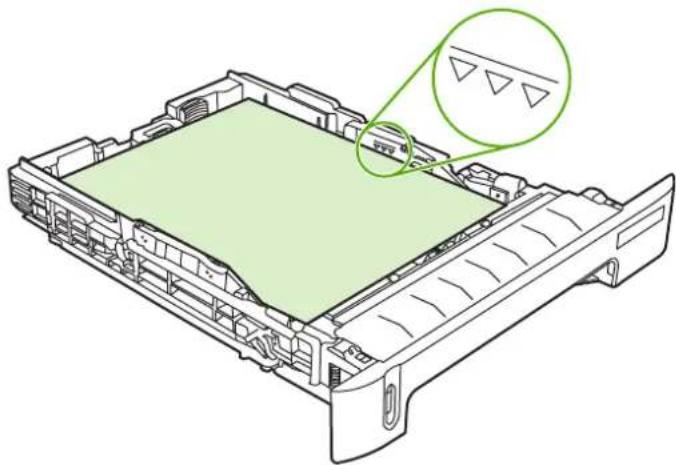
natural_image
Technical line drawing of a mechanical component with green structural layers and a magnified inset showing triangular features (no text or symbols)- Slide the tray into the MFP. The back of the tray protrudes from the back of the MFP.
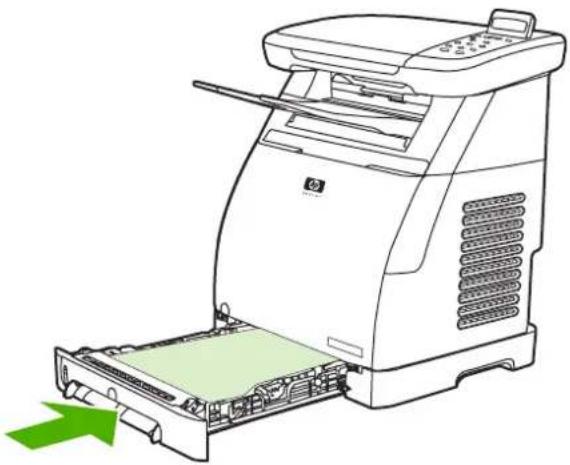
natural_image
Line drawing of a HP printer with a green arrow indicating the process (no text or symbols present)
NOTE When printing on both sides, see Print on both sides of the paper for loading instructions.
Print on special media
Table 6-1 Special media printing guidelines provides guidelines for printing on special media. When printing on a special type of media, printing speeds might be automatically changed to improve the output quality for that specific media.
• See Multifunction peripheral (MFP) specifications for media that is recommended for this MFP.
- See Media supported on this MFP for information about the size, weight, and capacity of paper and other print media that the trays support.
• See Load tray 1 (single-sheet feed tray) or Load tray 2 for instructions on loading the trays.
Table 6-1 Special media printing guidelines
| Paper type Maximum amount that can be loaded into tray 2 or optional tray 3 | Driver settings, paper quality, type is | Tray 1 paper orientation | Tray 2 or optional tray 3 paper orientation | |
| Normal | Up to 250 sheets | Plain or unspecified | Side to be printed face down | Side to be printed face up |
| Envelopes | Up to 10 envelopes | Envelope | Short edge leading, flap on right side facing down | Short edge leading, flap on right side facing up |
| Heavy envelopes | Up to 10 envelopes | Heavy envelope | Short edge leading, flap on right side facing down | Short edge leading, flap on right side facing up |
| Labels Up to 25 mm (0.99 inch) stack height | Labels Side to be printed face down | Side to be printed face up | ||
| Transparencies | Up to 50 sheets | Transparencies | Side to be printed face down | Side to be printed face up |
| Glossy Up to 25 mm (0.99 inch) stack height | Light glossy, glossy, or heavy glossy | Side to be printed face down | Side to be printed face up | |
| Letterhead | Up to 250 sheets | Letterhead | Side to be printed face down, top of page inserted in MFP | Side to be printed face up, top of page at front of tray |
| Cardstock | Up to 25 mm (0.99 inch) stack height | Cardstock or heavy | Side to be printed face down | Side to be printed face up |
Control print jobs
When changing print settings, follow the hierarchy of how changes are prioritized. (Note that the names of commands and dialog boxes might vary depending on the software program.)
- Application Settings dialog box. This dialog box opens when you click Application Settings or a similar command on the File menu in the software program. This dialog box is part of the program in which you are working. Settings that are changed here override settings that are changed anywhere else.
- Print dialog box. This dialog box opens when you click Print, Print Setup, or a similar command on the File menu in the software program. It is also part of the program, but it has a lower priority than the Application Settings dialog box. Settings that are changed in the Print dialog box do not override settings that are changed in the Application Settings dialog box. Settings that are changed here do override settings that are changed in the printer driver.
- Printer driver. The printer driver opens when you click Properties in the Print dialog box. Settings that are changed here do not override settings that are changed anywhere else.
Selecting print media settings
When a job is sent to the printer, the printer driver controls what paper tray is used to pull media through the printer. By default, the printer automatically selects the tray, but a specific tray can be chosen based on three user specified settings: Source, Type, and Size. These settings are available from the Application Setting dialog box, the Print dialog box, or the printer driver.
Setting Description
Source Directs the printer to pull paper from a user-specified tray. The
printer tries to print from this tray, no matter what type or size media is loaded in it. However, if the selected tray is configured from the HP ToolboxFX for a type or size and that does not match the print job, the printer does not print automatically. To begin printing, load the selected tray with the correct type or size of print media for the print job. When loading the tray, the printer begins printing. If the printer does not begin printing:
- Verify the tray configuration matches the size or type of the print job.
- Press OK to have the printer try to print from another tray.
Type or Size Directs the printer to pull paper or print media from the first tray
that is loaded with the type or size that you selected. Always print by Type for special print media such as labels or transparencies.

NOTE When the trays have not been configured for a certain type or size from the HP ToolboxFX, load the paper or print media into a tray then select the Type or Size from the Page Setup dialog box, the Print dialog box, or the printer driver.
Setting Description

NOTE An Administrator or individual user can set the HP ToolboxFX to direct the MFP to pull from a tray that is pre-configured for a specified Type or Size. This is helpful when frequently printing on the same type of media; a dedicated tray is already pre-configured for printing.
Printer-driver features
Some printer drivers and some operating systems do not support all of these MFP features.
| Task Driver Tab Option | |||
| Set custom paper Paper Size is | |||
| Print in grayscale Color Print in Grayscale | |||
| Create and use watermarks | Effects Watermark | ||
 | NOTE For Windows 2000 and XP environments, Administrator privileges are required to create watermarks but are not required to add existing watermarks to documents. | ||
| Print multiple pages on one sheet of paper (N-up printing) | Finishing Pages per sheet | ||
| Reduce or enlarge a document before printing | Effects Fit to Page | ||
| Print the first page on different paper | Paper/Quality | Appropriate paper size | |
| Change color settings Color Settings | |||
| Create and use Quick Sets. Quick Sets save the current print-driver settings such as the page orientation, N-up printing, or the paper source for later use. Save up to 30 sets. | All. To later retrieve settings, choose Finishing | ||
| NOTE In the Windows 2000 environment, Administrator privileges are required to save Quick Sets. | |||
For printing using the Print on Both Sides (manually) feature, see Print on both sides of the paper.
Restore the default printer-driver settings
This feature might be useful when experiencing quality issues, or if the print media is not being selected from the correct tray.
Select Defaults in the Quick Sets dialog box on the Finishing tab of the printer driver.
Print from Windows
- Load the print media.
- On the File menu of your application, click Page Setup or a similar command. Ensure the settings are correct for this document.
- From the File menu, click Print, Print Setup, or a similar command. The Print dialog box opens.
- Select the correct MFP and change settings as necessary. Do not change any settings, such as page size or orientation, that were previously set in the Application Settings dialog box.
- If this print job is to be printed on a non-standard size or weight of paper, see Selecting print media settings for more information.
- If not already done, click Properties. The printer driver opens.
- On the various tabs, set additional settings that did not appear in the Application Settings or Print dialog box. For more information about printer-driver settings, see Printer-driver features.
- Select the Print command to print the job.
Printer-driver settings
The printer driver is a software component that controls, through user-specified options, common printing features when sending print jobs to the MFP. Changes to printer-driver settings can be temporary for print jobs that are run while the program is still open, or changes to the default settings can be permanent; they are in effect now and in the future.
| Operating System Temporarily change settings for jobs that are printed now | Permanently change default settings1 | Change configuration settings(For example, to add an optional tray or to enable or disable a driver feature such as “Allow manual duplexing”) | |
| Windows 2000 and XP (Classic Start Menu) | On the File menu, click Print, select this printer, then click Properties or Preferences. (The actual steps can vary; this is the most common method.) | Click Start, point to Settings, then click Printers or Printers and Faxes. Right-click the printer icon, then click Printing Preferences. | Click Start, point to Settings, then click Printers or Printers and Faxes. Right-click the printer icon, then click Properties. Click the Configure tab. |
| Windows XP | On the File menu, click Print, select this printer, then click Properties or Preferences. (The actual steps can vary; this is the most common method.) | Click Start, click Printers and Faxes, right-click the printer name or icon, then click Printing Preferences. | Click Start then click Printers and Faxes. Right-click the printer icon, then click Properties. Click the Configure tab. |
1 Access to default MFP settings might be restricted and therefore unavailable.
Print on both sides of the paper

NOTE For 2-sided printing, load a pre-printed form and letterhead into tray 1 face-up with the top edge of the page loaded into the MFP. Load preprinted forms and letterhead into tray 2 and tray 3 face-down with the top edge at the front of the tray.
NOTE Feeding pre-printed forms and letterhead is different than loading for 1-sided printing.

CAUTION Do not print on both sides of labels or transparencies. This can damage the MFP and result in jams.
To print on both sides (manually)
- Insert enough paper into tray 2 or optional tray 3 to accommodate the print job.
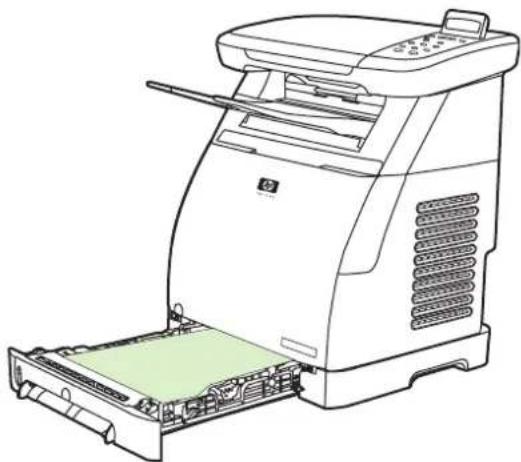
natural_image
Line drawing of a HP printer with a green internal tray and drive mechanism (no text or symbols)- In Windows, Print on both sides (manually) must be enabled to complete these instructions.
- In the printer driver, select the Finishing tab, select the Print on both sides (manually) option, then send the job to print.
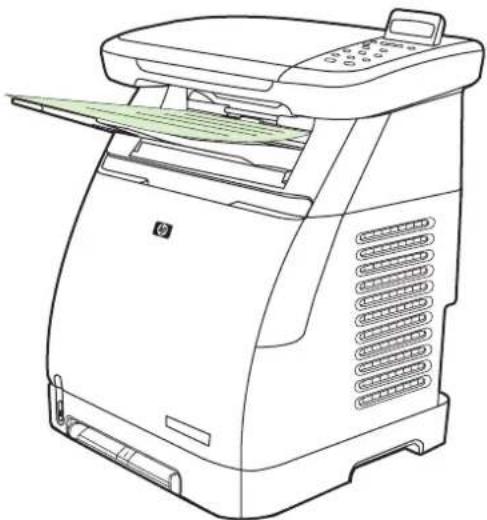
natural_image
Line drawing of a HP printer with paper feed and control panel (no text or symbols)
NOTE Flip paper before continuing.
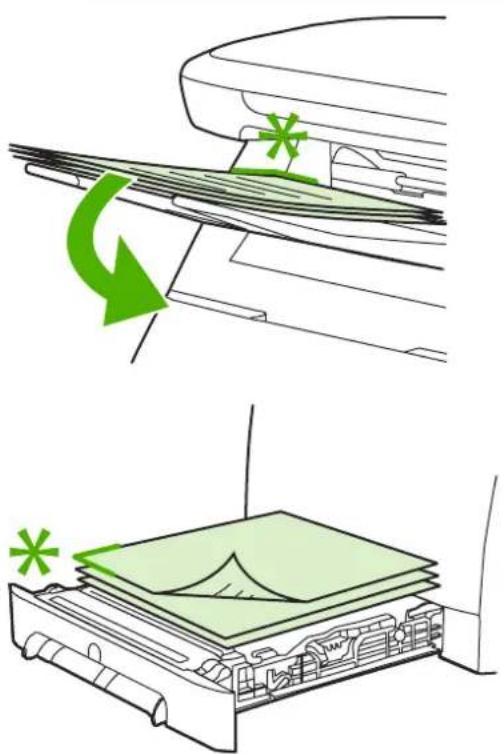
natural_image
Diagram showing two steps of a device processing process: top panel with green arrows indicating rotation, bottom panel with green asterisks highlighting a component (no text or symbols)- After the job is finished printing, remove any blank paper as prompted by the control panel. Lift the printed stack from the output bin and insert the printed stack without rotating the stack over into the tray that was used for the first part of the job.
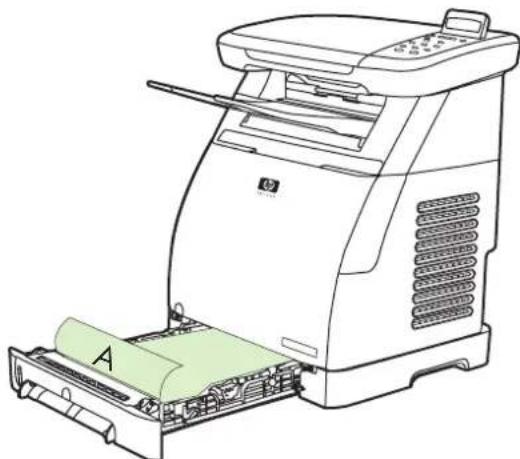
natural_image
Line drawing of a HP printer with paper feed and paper clip labeled 'A' (no text or symbols beyond label)- Press OK to continue printing on the second side.
Cancel a print job
A print job can be canceled from:
A program
A print queue
• The Cancel button

NOTE When a print job appears to have started (it shows in the queue), cancel it from the workstation.
Considerations when canceling printing
- If the MFP has not started printing, cancel the job within the program that sent the print job.
- If the print job is waiting in a print queue or print spooler in Windows 2000 or Windows XP, try to delete the job from the print spooler.
- If the print job is already printing, press Cancel. The MFP finishes printing any pages that are already moving through the MFP and deletes the remainder of the print job.
• If more than one print job is in memory, press Cancel once for each job after the job starts printing.
The Ready light blinks and Canceling print displays in the message area.
7 Color
Overview
- Manage color options
- Match colors
Overview
The MFP provides carefully designed and tested color tables to provide smooth, accurate color rendition of all printable colors.
HP provides online tools to help businesses of all sizes with their color printing. HP's Office Color Printing Center (http://www.hp.com/go/color) identifies solutions and information on creating finished projects.
HP ImageREt 2400
ImageREt 2400 is a system of key color laser technologies that offer excellent print quality. At the foundation of the system are imaging enhancements, HP Smart supplies, and high-resolution imaging. Optimized for printing on HP color laser high-gloss papers, HP ImageREt provides superior results on all supported media and under a variety of environmental conditions. For more information, see http://www.hp.com and search on ImageREt 2400.
Media selection
For the best color and image quality, select the appropriate media type from the printer-driver properties. See Media supported on this MFP for more information.
Color options
In the Windows environment, the Automatic and Manual color options are on the Color tab in the printer driver.
Color options use object tagging, which allows optimal color settings to be used for different objects (text, graphics, and photos) on a page. The printer driver determines which objects are used on a page and uses color settings that provide the best print quality for each object. Object tagging, combined with optimized default settings, produces great color from the MFP without having to establish any special settings.
Manage color options
Setting color options to Automatic typically produces the best possible print quality for color documents. However, in some situations, you might want to print a color document in grayscale (black and shades of gray) or to change one of the MFP's color options.

NOTE For additional information about modifying color when copying, see Adjust copy quality and Adjust the color balance in copies.
Print in Grayscale
Selecting the Print in Grayscale option from the printer driver prints a document in black and shades of gray. This option is useful for printing color documents that are to be photocopied.
Selecting Print in Grayscale in the Print Quality options on the Paper Quality tab allows for changing the settings to accommodate different types of jobs.
Automatic versus Manual color adjustment
The Automatic color adjustment option optimizes the neutral gray color treatment, and the edge enhancements that are used for each element in a document. For more information, see the printer driver online Help.

NOTE Automatic is the default setting and is recommended for printing all color documents.
Use the Manual color adjustment option to adjust the neutral gray color treatment, and the edge enhancements for text, graphics, and photographs. To gain access to the Manual color options, on the Color tab, click Manual, then click Settings.
Change color options
Use the Manual color adjustment to adjust the Color (or Color Map) options.

NOTE Some software programs convert text or graphics to raster images. In these cases, the Photographs setting also controls the text and graphics.
Halftone options
Halftoning is the method by which the MFP mixes the four primary colors (cyan, magenta, yellow, and black) in varying proportions to create millions of colors. Halftone options affect the resolution and clarity of the color output. The two halftone options are Smooth and Detail.
- The Smooth option provides better results for large, solid-filled print areas. It also enhances photos by smoothing out fine color gradations. Choose this option when uniform and smooth area fills are the most important attributes.
- The Detail option is useful for text and graphics that require sharp distinctions among lines or colors, or images that contain a pattern or a high level of detail. Choose this option when sharp edges and details are the most important attributes.
Edge Control
The Edge Control setting determines how edges are rendered. Edge Control consists of two components: Adaptive Halftoning and Trapping. Adaptive Halftoning increases the edge sharpness. Trapping reduces the effect of color-plane misregistration by slightly overlapping the edges of adjacent objects. The following levels of edge control are available:
• Off sets Trapping and Adaptive Halftoning to Off.
• Normal provides the default trapping settings. Adaptive Halftoning is set to On.
• Maximum provides the most trapping. Adaptive Halftoning is set to On.
Standard red-green-blue (sRGB)
Standard red-green-blue (sRGB) is a worldwide color standard that was originally developed by HP and Microsoft as a common color language for monitors, input devices (scanners and digital cameras), and output devices (MFPs and plotters). It is the default color space that is used for HP products, Microsoft operating systems, the World Wide Web, and most office software that is sold today. The sRGB standard is representative of the typical Windows computer monitor and is the convergence standard for high-definition television.

NOTE Factors such as the type of monitor used and the room's lighting can affect the appearance of colors on the screen. For more information, see Match colors.
The latest Versions of Adobe® PhotoShop®, Microsoft Office, and many other applications use sRGB to communicate color. Most importantly, as the default color space in Microsoft operating systems, sRGB has gained broad adoption as a way to exchange color information between software programs and devices by using a common definition that assures typical users experience greatly improved color matching. The sRGB standard improves the ability to match colors between the MFP, the computer monitor, and other input devices (scanners and digital cameras) automatically, without the need to become a color expert.
RGB Color
The RGB Color option determines how colors are rendered.
- Select Default (sRGB) for most printing needs. This setting instructs the MFP to interpret RGB color as sRGB, which is the accepted standard of Microsoft and the World Wide Web Organization.
- Select AdobeRGB for documents that use the AdobeRGB color space rather than sRGB. For example, some digital cameras capture images in AdobeRGB, and documents that are produced with Adobe PhotoShop use the AdobeRGB color space. When printing from a professional software program that uses AdobeRGB, it is important to turn off the color management in the software program and allow the MFP software to manage the color space.
- Photo Image interprets the RGB color as if it were printed as a photograph by using a digital mini-lab. It is designed to render the deeper, more saturated colors differently than Default mode. Use this setting for printing photos.
- Device sets the MFP to print RGB data in raw device mode. To render photographs properly when this option is selected, manage color through the software program or in the operating system.
- Vivid instructs the MFP to increase the color saturation in the midtones. Less colorful objects are rendered more colorfully. This value is recommended for printing business graphics.
Neutral Grays
The Neutral Grays setting determines the method for creating gray colors that are used in text, graphics, and photographs.
- Black Only generates neutral colors (grays and black) by using only black toner. This option guarantees that neutral colors do not have a color cast.
- 4-Color generates neutral colors by combining all four colors of toner. This option produces smoother gradients and transitions to non-neutral colors. It also produces the darkest possible black.
Match colors
Matching MFP output color to the computer screen is complex because MFPs and computer monitors use different methods of producing color. Monitors display colors by light pixels using an RGB (red, green, blue) color process, but MFPs print colors using a CMYK (cyan, magenta, yellow and black) process.
The following factors can influence the ability to match printed colors to those on the screen:
- Print media
• MFP colorants (inks or toners, for example)
• Printing process (inkjet, press, or laser technology, for example)
• Overhead lighting - Programs
Printer drivers
• Computer operating system
Monitors
• Video cards and drivers
• Operating environment (very humid or very dry)
• Personal differences in perception of color
Variations between RGB and CMYK color processing.
Sometimes colors on the screen do not perfectly match the printed colors. The best method for matching colors on the screen to the MFP is to print sRGB colors. The MFP uses sRGB and automatically optimizes color output.
Use the HP ToolboxFX software to print a palette of the Microsoft Office Basic Colors. The palette is used to select the final color in the printed document.
- In HP ToolboxFX, select the Help folder.
- In the Print Quality Troubleshooting section, select Print Basic Colors.
This palette shows the actual printed color seen when the basic color option is selected in the Microsoft Office application.
For more information about solving issues that are related to color output, see Solve issues with printing color documents.
8 C o p y

NOTE The HP Color LaserJet CM1015/CM1017 MFP does not support copying slides or photo negatives.
• Basic copy functions
- Copy paper
Basic copy functions
This MFP can complete these basic copy functions.
Start a copy job
-
Load the original document onto the flatbed scanner face-down (one page at a time) with the upper-left corner of the document located in the lower-right corner of the glass.
-
Press Start Copy Black or Start Copy Color on the control panel to start copying.
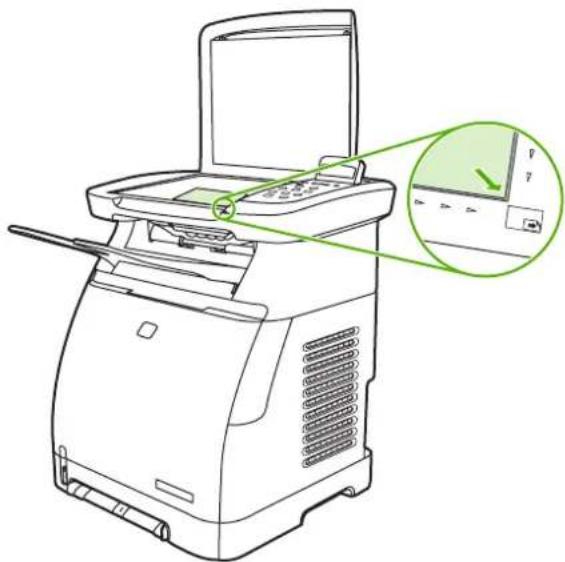
natural_image
Line drawing of a printer with a green circular annotation highlighting a small screen (no text or symbols present)- Repeat the process for each copy.
Change the number of copies for the current job
-
Press # of Copies to select the number of copies (between 1 and 99) to make for this current job.
-
Press Start Copy Black or Start Copy Color to begin copying the job.

NOTE The change in the setting remains active for about two minutes after the copy job has been completed. During this time, Settings=Custom appears on the MFP control-panel display.
Cancel a copy job
To cancel a copy job, press Cancel. If more than one process is running, pressing Cancel clears the process that currently appears on the control-panel display. When a copy job is canceled, clear the original document from the flatbed scanner.
Copy paper
This MFP supports:
| Paper type Supported paper type | |
| Letter | Pre-printed |
| Legal | Letterhead |
| A4 | Transparencies |
| Pre-punched | |
| Labels | |
| Bond | |
| Recycled | |
| Color | |
| Light | |
| Heavy | |
| Cardstock | |
| Glossy | |
| Heavy glossy | |
| Tough paper | |
| Envelope | |
| Heavy envelope | |
| Light glossy | |
| HP Premium Cover | |
| HP Laser Photo | |
Set the MFP to make only black and white copies
- Press Menu, select Copy setup, and click on Start Copy Color.
- Press the navigation arrows and select On or Off. When set to Off, the control panel displays Restrict color if Start Copy Black or Start Copy Color is pressed.
- Press OK.
Adjust copy quality
Set the quality to describe the original that is being copied.
Table 8-1 Copy Quality Settings (use the Quality button on the HP Color LaserJet CM1015 MFP)
| Input type Description |
| Mixed Documents that include both text and graphics. This is the default. |
| Picture Copy a printed picture other than a photograph. |
| Film photo Copying a processed photograph |
| Text Copy jobs that mainly contain text |
Adjust the copy quality for the current job
- For the HP Color LaserJet CM1015 MFP, on the control panel press Quality to see the current quality setting for the copy. For the HP Color LaserJet CM1017 MFP, press Copy Features and from the menu, choose the Copy Quality option.
- Press the navigation arrows to scroll through the options.
- Choose a setting, press Start Copy Black or Start Copy Color to save the selection and immediately start the copy job, or press OK to save the selection without starting the job.

NOTE The change in the setting remains active for about two minutes after the copy job has been completed. During this time, Settings=Custom appears on the device control-panel display.
Adjust the default copy quality
- On the control panel, press Menu.
- Press the navigation arrows to select Copy setup, then press OK.
- Press OK to choose Default Quality.
- Press the navigation arrows to scroll through the choices.
- Press OK to save the selection.
Adjust the color balance in copies
Adjusting the color balance settings provide additional control over final print quality.
To adjust color balance settings
- Press Menu
- Press OK to select Copy setup then press OK.
- Press the navigation arrows to select Advanced, then press OK.
- Press the navigation arrows to select Color Balance.
- Press the navigation arrows to select one of the color balance options listed in the table below.
- For the selected color, press Left arrow or Right arrow to adjust the color.
- When the color is adjusted, press OK.
| Color balance option Description | |
| Blue | Increases or decreases the amount of this color in a copy output. |
| Red | |
| Green | |
| Background | Increases or decreases the background color in a copy. For instance, if you are making a copy of a document that was printed on pink paper, this increases or decreases that color in the copy. |
| Contrast Increases or decreases the differences between the whites and blacks in the copy. | |
| Lightness Increases or decreases the lightness of all colors in a copy. | |
| Grayness Increases or decreases the color in a color copy of a black and white original. | |
| Sharpen Increases or decreases the reproduction of details in a copy. | |
Set color balance on a per-job basis
- Press Copy Features and use the navigation arrows to select Color Balance. Press OK.
- Press the navigation arrows and select one of the color balance options and press OK.
- For the selected color balance option, press the Left arrow or Right arrow to enhance or subtract that color from the copy. Press OK.
- Press the navigational arrows or the Back button to select another Copy enhancement option, then press Start Copy Black or Start Copy Color to make a copy.
Adjust the lighter/darker (contrast) setting
To adjust the default lighter/darker setting for all copy jobs
- On the control panel, press Menu.
- Press the navigation arrows to select Copy setup, then press OK.
- Press the navigation arrows to select Default light/dark, then press OK.
- Press Left arrow or Right arrow to adjust the setting. Move the slider to the left to make all of the copies lighter than the original, or move the slider to the right to make all of the copies darker than the original.
- Press OK to save the selection.
To adjust the lighter/darker setting for the current job only
- On the control panel, press Lighter/Darker to see the current contrast setting.
- Press Left arrow or Right arrow to adjust the setting. Move the slider to the left to make the copy lighter than the original, or move the slider to the right to make the copy darker than the original.
- Press Start Copy Black or Start Copy Color to save the selection and immediately start the copy job, or press OK to save the selection without starting the job.
Reduce or enlarge copies
To change the default copy size

NOTE The default copy size is the size to which copies are normally reduced or enlarged. When keeping the factory default size setting of Original=100%, all copies are the same size as the original document.
- On the control panel, press Menu.
- Press the navigation arrows to select Copy setup, then press OK.
- Press the navigation arrows to select Default Reduce/Enlarge, then press OK.
- Press the navigation arrows to select one of these options for reducing or enlarging copies:
• Original=100%
A4 > Letter=94%
- Letter > A4=97%
Full Page=91%
• Fit to page
• Custom: 25 to 400%
When Custom: 25 to 400% is selected, type in the percentage of the original size that you normally want for copies.
- Press OK to save the selection.
Change copy size for the current job
- On the device control panel, press Reduce/Enlarge.
- Press Left arrow or Right arrow to select the size to reduce or enlarge the copies. Select one of these sizes:
• Original=100%
A4 > Letter=94%
- Letter > A4=97%
• Full Page=91%
• Fit to page
• Custom: 25 to 400%
- Press Start Copy Black or Start Copy Color to save the selection and immediately start the copy job, or press OK to save the selection without starting the job.

NOTE The change in the setting remains active for about two minutes after the copy job has been completed. During this time, Settings=Custom appears on the device control-panel display.
Change the default media size in the media input tray to match the output size, or part of the copy can be cut off.
Copy edge-to-edge originals

NOTE The printed or copied page has a border of approximately 4 mm (1/6 of an inch). The HP Color LaserJet CM1015/CM1017 MFP does not support edge-to-edge printing or copying.
Considerations for printing or scanning documents with cropped edges:
- When the original is smaller than the output copy size, move the original 4 mm (1/6 inch) away from the bottom and right edges of the scanner glass. Recopy or scan in this position.
- When the original is the size of the desired output, make a copy with smaller edges by:
- Select Reduce/Enlarge, and press the navigation arrows to select Full Page=91%, then press Start Copy Black or Start Copy Color.
The edges and the copy are reduced in size by up to 2 mm.
9 S c a n

NOTE The HP Color LaserJet CM1015/CM1017 MFP does not support scanning slides or photo negatives.
- Scan methods
• Supported file types - Scan from the device control panel
• Scan by using HP Solution Center (Windows)
• Scan from the device and HP Director (Macintosh) - Scan using TWAIN-compliant and WIA-compliant software
Scan methods
There are several ways to scan a document.
- Scan from the device control panel: Start scanning directly using the control-panel scan buttons Press Scan To to scan to a folder (Windows only) or to scan to e-mail.
For more information, see Scan.
- Scan from HP Solution Center (Windows): From the workstation start the HP Solution Center software. Pressing Start Scan to start the HP Solution Center software is not supported when the device is connected to a network (direct-connect only.) It is also possible to click on the HP Solution Center icon to start the HP Solution Center software directly from the computer. See Scan by using HP Solution Center (Windows).
- Scan from HP Director (Macintosh): Start the HP Director by clicking the Dock alias (Macintosh OS 10.3 or later). See Scan from the device and HP Director (Macintosh).
- Scan from TWAIN-compliant or Windows Imaging Application (WIA)-compliant software. The device scanning software is TWAIN-compliant and WIA-compliant. For more information, see Scan using TWAIN-compliant and WIA-compliant software.
- Scan from optical character recognition (OCR) software: Use third-party OCR software to import scanned text into a word-processing program for further editing.
Supported file types
HP scanning software supports these file types for scans initiated from the control panel:
.bmp
• .gif
.jpg
.pdf
.png
• .tif (compressed)
.tif
In addition, HP Solution Center also supports these file types for scans initiated from the workstation:
. .rtf
. fpx
.htm
. pcx
.txt
Scan from the device control panel
Use the following instructions to scan directly from the device control panel.

NOTE The computer connected to the device must be turned on.
Program the device Scan To button from the control panel
E-mail addresses and folders must be set up prior to using the Scan To button on the control panel. Use HP Solutions Center to program the e-mail and folders for scanning.
Set up pre-configured destinations on the MFP
- Open HP Solution Center and select Settings, Scan Settings, then press Scan.
- Select the checkbox Allow me to scan by pressing the scan-to button on the MFP.
- The MFP is pre-configured with the following three destinations in the dialog box.
- Scan a document and attach it to an e-mail
- Scan a photo and attach it to an e-mail
-
Scan a photo and save it as a file
-
Highlight a destination and click Right arrow to move to the destinations currently on the MFP dialog box. Repeat for all three destinations.
-
Click Update.
Add folder destinations
- Open HP Solution Center and select Settings, Scan Settings, then press Scan.
- Select the checkbox Allow me to scan by pressing the scan-to button on the MFP and click on New.
- Select Save it to my computer, then click Next.
- Enter the file destination name or check to set up the destination on the MFP. Name the default destination and click Next.
- Select the quality and click Next.
- Verify the selections, click Save, and then close HP Solution Center.
Add e-mail destinations
- Open HP Solution Center and select Settings, Scan Settings, then press Scan.
- Select the checkbox Allow me to scan by pressing the scan-to button on the MFP and click on New.
On the device control panel, press Scan To. -
Select Attach to a new e-mail and click Next.
-
Select Save it to my computer and press Next. Type the e-mail address, subject, and note in the text box and click Next.
- Select the quality and click Next.
- Type the e-mail address in the text box. Select the box for Send the new destination to the MFP. Type a new name that appears on the MFP control panel and click Next.
Delete destinations
- From the Set up the
list for the All-in-One, select one of the Available Destinations on this PC and click Delete. The Delete Destination dialog box displays. - From the Delete Destination dialog box, highlight the destination to delete and click Next. The Confirmation dialog box displays.
- Click Delete to perform the deletion, or click Cancel to choose another destination.
Scan by using HP Solution Center (Windows)
Use the HP Solution Center software program to scan a document or photo.
To view HP Solution Center
• Double-click the HP Solution Center icon on the Windows desktop.
OR
- On the Windows taskbar, click Start, Programs (or All Programs in Windows XP), HP, then HP Solution Center.
For detailed instructions about scanning from HP Solution Center, see the HP Solution Center online Help.
Scan from the device and HP Director (Macintosh)
The procedures described in this section are for Macintosh OS X V10.3 and V10.4.
For more information about tasks and settings described in this section, see the HP Director online Help.
Scanning tasks
To scan to a software program, scan an item using the program itself. Any TWAIN-compliant program can scan an image. If the program is not TWAIN-compliant, save the scanned image to a file then place, open, or import the file in the software program. For more information, see Scan using TWAIN-compliant and WIA-compliant software.
Use page-by-page scanning
- Lift the flatbed scanner lid and load the original that is to be scanned face-down on the flatbed scanner with the upper-left corner of the document at the lower-right corner of the glass. Gently close the lid.
- Double-click the HP Director desktop alias.
- Click the HP Director, click Scan to open the HP dialog box.
- Click Scan.
- To scan multiple pages, load the next page and click Scan. Repeat until all pages are scanned.
- Click Finish then Destinations.
Scan to file
- In Destinations, choose Save To File(s).
- Name the file and specify the destination location.
- Click Save. The original is scanned and saved.
Scan to e-mail
- In Destinations, choose E-mail.
- A blank e-mail opens with the scanned document as an attachment.
- Enter an e-mail recipient, add text, or other attachments, then press Send.
Scan using TWAIN-compliant and WIA-compliant software
The MFP is TWAIN-compliant and Windows Imaging Acquisition (WIA)-compliant for Windows XP and beyond. The MFP also supports TWAIN-compliant Macintosh applications.
Use TWAIN-compliant and WIA-compliant software
When in a TWAIN-enabled or WIA-enabled program, access the scanning feature and scan an image directly into the open program. For more information, see the Help file or the documentation that came with the TWAIN-compliant or WIA-compliant software program.
Scan from a TWAIN-enabled program

NOTE The Windows and Macintosh device software complies with TWAIN Version 1.9 requirements.
Generally, a software program is TWAIN-enabled if it has a command such as Acquire, File Acquire, Scan, Import New Object, Insert from, or Scanner. When uncertain whether or not the program is compliant or do not know what the command is called, see the software program Help or documentation.
Start the scan from within the TWAIN-enabled program. See the software program Help or documentation for information about the commands and steps to use.
Scan from a WIA-enabled program (Windows XP only)
WIA is another way to scan an image directly into a software program, such as Microsoft Word. WIA uses Microsoft software to scan, instead of scanning software.
Generally, a software program is WIA-enabled if it has a command such as Picture/From Scanner or Camera in the Insert or File menu. If you are unsure whether the program is WIA-enabled, see the software program Help or documentation.
- Start the scan from within the WIA-enabled program. See the software program Help or documentation for information about the commands and steps to use.
- In the Cameras and Scanner folder, double-click the device icon. This opens the standard WIA-enabled software program, which enables a file to be scanned.
Scan by using optical character recognition (OCR) software
Third-party OCR software (available on a separate CD-ROM) is available to import scanned text into the preferred word-processing program for editing.
Readiris
The MFP software includes a separate CD-ROM for the Readiris PRO 10 OCR software. To use the Readiris program, install it from the appropriate software CD-ROM, then follow the instructions in the online Help.
Scan a photo
- Place the photo on the flatbed scanner with the picture-side down and the upper-left corner of the photo in the lower-right corner of the glass.

natural_image
Line drawing of a printer with a green magnified inset showing a screen and control panel (no text or symbols)-
Gently close the lid.
-
Scan the photo using one of the scanning methods. See Scan methods for more information.
Scan edge-to-edge originals
For information about copying and scanning edge-to-edge originals, see Copy edge-to-edge originals.
Cancel a scan job
To cancel a scan job, use one of these procedures.
• On the control panel, press Cancel.
- Click Cancel in the onscreen dialog box.
When canceling a scan job, remove the original from the flatbed scanner.

NOTE These procedures vary with Macintosh operating systems.
Scanner resolution and color
To improve the print resolution or color for a scanned image, select a resolution or color setting that matches your needs in the scanner software. Resolution and color affect the following features of scanned images:
- Image clarity
• Texture of gradations (smooth or rough) - Scan time
File size
Scanning resolution is measured in pixels per inch (ppi). Color, grayscale, and black and white define the number of colors possible. Adjust the scanner hardware resolution to up to 1200 ppi. The software can perform an enhanced resolution up to 19,200 ppi. Also, set color and grayscale at 1 bit (black and white), or at 8 bit (256 levels of gray) to 24 bit (true color).
The resolution and color guidelines table lists simple scanning tips.

NOTE Setting the resolution and color to a high value can create large files that take up disk space and slow the scanning process. Before setting the resolution and color, determine how the scanned image is being used.
Resolution and color guidelines
This table describes the recommended resolution and color settings for different types of scan jobs.
| Intended use Recommended resolution Recommended color settings | |
| Display on screen 75 ppi | Black and White for textGrayscale for graphics and photosColor, if the image is in color |
| Print (graphics or text) 600 ppi for complex graphics, or to significantly enlarge the document300 ppi for normal graphics and text150 ppi for photos | Black and White for text and line artGrayscale for shaded or colored graphics and photosColor, if the image is in color |
| Edit text 300 ppi | Black and White |
| E-mail 150 ppi | Black and White, if the image does not require smooth gradationGrayscale, if the image requires smooth gradationColor, if the image is in color |
Color
Set the color values using these settings when scanning.
| Setting Recommended use |
| Color Use this setting for high-quality color photos or documents in which the color is important. |
| Black and White Use this setting for text documents. |
| Grayscale Use this setting when file size is an issue or when a document or photograph needs to be scanned quickly. |
10 Photo

NOTE This section applies only to the HP Color LaserJet CM1017 MFP.
NOTE This MFP supports only JPEG format.
- Insert a memory card
• View or rotate photos from the memory card
• Create a photo slideshow on the graphical display screen - Enable or disable a memory card
• Print photos directly from the memory card
• Print and scan photos from a proof sheet
• Save photos to the workstation from a memory card
• Print photos using the Photo Features button
• Print a memory card index
Insert a memory card
The HP Color LaserJet CM1017 MFP can read the following memory-card types:
- CompactFlash
• Memory Stick and Memory Stick PRO
• MultiMedia - Secure Digital (SD)
SmartMedia
xD

NOTE The memory card may have unlimited memory, but the MFP only recognizes up to 9,999 photos per card.
NOTE The HP Color LaserJet CM1017 MFP memory card reader recognizes only files in JPEG file format when printing from the control panel. To print other file types, use software such as HP Photosmart Premier, provided on the CD-ROMs that is included with the MFP. See the software online Help for information about how to print photos from the computer. Windows operating system users also can use Windows Explorer to move other file types to their computer then print the files from the computer.
Based on the illustration below, insert the memory card into the appropriate slot on the MFP.
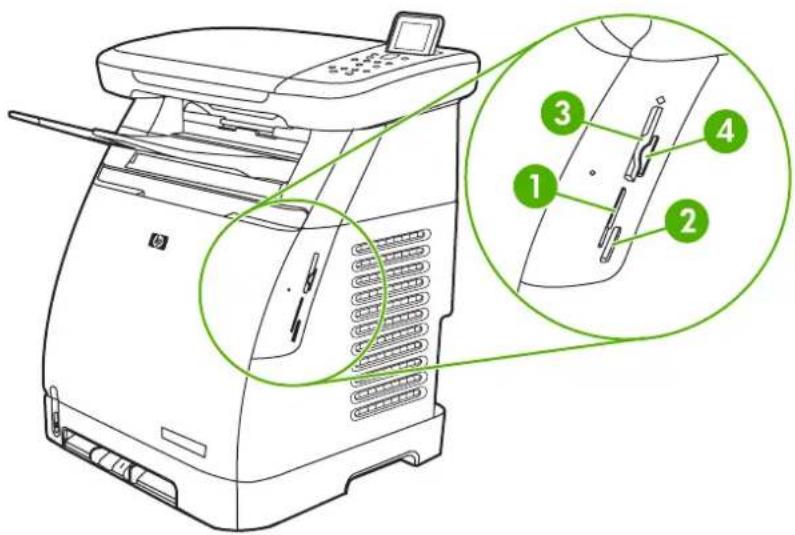
text_image
Technical diagram of a HP printer with numbered parts highlighting internal structure and component alignment1 Accepts xD and SmartMedia memory cards.
2 Accepts MultiMedia, Memory Stick, and Memory Stick PRO memory cards.
3 Accepts CompactFlash memory cards.
4 Accepts Secure Digital memory cards.
The MFP reads the card, then the control panel displays X photos found on card, where X is the number of recognized JPEG files found on the memory card.
Now print photos using the HP Color LaserJet CM1017 MFP.

NOTE Insert only one memory card into the MFP at a time. If two or more are inserted, the MFP displays an error message. For more information about memory-card messages, see Control-panel messages.
View or rotate photos from the memory card
After a memory card is inserted into the correct slot, the MFP reports the number of photos on the memory card and shows the first photo on the card in the display screen.

NOTE If any buttons or keys are not pressed for five minutes the display screen goes blank. To reactivate the display screen, press Photo Features.
To view or rotate photos from the memory card:
- Press Left arrow or Right arrow to scroll through the images on the card.
- Press OK to select or deselect images on the display screen.
- To rotate an image, choose the Rotate photo option under Photo Features.

NOTE Rotating an image does not alter the original image or print the photo in a rotated view.
Create a photo slideshow on the graphical display screen
After a memory card is inserted into the correct slot, the MFP can read the images to display a slideshow.
To create a slideshow
- Press Photo Features and choose Slideshow. Each image is displayed one-by-one.
- Press Cancel to end the slideshow.
Enable or disable a memory card
- In the embedded Web server, select Print and Memory Card.
- Select or deselect the label Enable Memory Card. When this box is not selected the control panel display says Memory card slots are disabled when a memory card is inserted.
Print photos directly from the memory card
-
After inserting the memory card into the MFP (see Insert a memory card), select photos by:
-
Press the Left arrow or the Right arrow to scroll through the images.
-
Press OK to select or deselect the images.
-
You can also press Select Photos from the control panel.
Press Up arrow or Down arrow to select one of the following menu items, and then press OK.
- From display: Select this option if the memory card was not recently inserted.
- All photos: X represents the number of JPEG files the MFP detects on the card. Selecting this option prints all of the JPEG files on the memory card. Press OK again to confirm the print job.
-
Individual: Select this option to choose and print an individual photo. The photos are numbered, starting with number 1.
-
Press Up arrow or Down arrow to increase or decrease the photo number.
- Press OK to select the photo to print.
- From a range: Select this option to choose a range of photos to print. The MFP prompts for the first photo number and the last photo number.
- Press Up arrow or Down arrow to increase or decrease the photo numbers.
-
Press OK to select the range of photos to print.
-
Press Start Photo to print the photos.

NOTE The JPEG files on the memory card are numbered in alphabetical order. If you do not know the order of the photos on the memory card, print an index that shows the photo order. For more information about printing an index, see Print a memory card index.
Print and scan photos from a proof sheet
Preview images and print photos from a proof sheet. A proof sheet can contain as many as 20 images. This feature has been optimized and tested for use with Genuine HP Toner Supplies.
- Insert the memory card into the device. See Insert a memory card.
- Press Proofsheet then Print.
-
If more than 20 JPEG files exist on the memory card, press Up arrow or Down arrow to select one of the following menu items, then press OK.
-
All photos: X represents the number of JPEG files the MFP detects on the card. Selecting this option prints all JPEG files on the memory card. Press OK again to confirm the print job.
- Last 20: Prints the last 20 JPEG files from the alphabetized list on the memory card.
-
Custom: Select one or more photos to print by pressing OK.
-
Color in the oval or bubble using a dark blue or black pen. Also fill bubbles to indicate the image layout and media type.
- Place the proof sheet face-down on the flatbed scanner, with the upper-left corner of the document located in the lower-right corner of the glass.
- Press Proofsheet.
- Press the Up arrow or Down arrow, select Start Scan, then press OK. The MFP scans the proof sheet and prints the marked photos. Repeat steps 5 through 7 for each proof sheet.

NOTE Photos printed using a proofsheet can only be printed in color.
NOTE JPEG files on the memory card are displayed in alphabetical order. When the order of photos on the memory card is unknown, print an index. See Print a memory card index.
NOTE Photos are still printed in color even when the Color copy option is set to no.
Save photos to the workstation from a memory card
-
Insert the memory card into the MFP. See Insert a memory card.
-
From the workstation, click on My Computer and look for the removable drive (memory card). If My Computer does not recognize the memory card, enter a IP address (an example, \192.168.0.15) into the address line. Access the images by clicking Memory card and moving to the subfolders containing the images. Map the memory card to a driver letter on the workstation using this method.
-
Use drag and drop or HP Photosmart Transfer to move the photos from the memory card to a folder.
Print photos using the Photo Features button
- Insert the memory card into the MFP. See Insert a memory card.
- Press Photo Features and select Easy photo print.
-
Press Up arrow or Down arrow to select one of the following menu items, then press OK.
-
All photos: X represents the number of JPEG files the MFP detects on the card. Selecting this option prints all of the JPEG files on the memory card. Press OK again to confirm the print job.
-
Individual: Select this option to choose and print an individual photo. The photos are numbered, starting with number 1.
-
Press Up arrow or Down arrow to increase or decrease the photo number.
- Press OK to select the photo to print.
- From a range: Select this option to choose a range of photos to print. The MFP prompts for the first photo number and the last photo number.
- Press Up arrow or Down arrow to increase or decrease the photo numbers.
-
Press OK to select the range of photos to print.
-
Press Start Photo to print the photos.
Print a memory card index
-
Insert the memory card into the MFP. See Insert a memory card. Press Photo Features to choose one of these options:
-
Index print
Best Photo -
Fast
-
Press Up arrow or Down arrow to select Index print then press OK.
- Press Up arrow or Down arrow to select either Best Photo or Fast, then press OK.
The MFP prints an index that includes small preview images for each photo on the memory card. Each index page can contain as many as 30 preview images.
11 Network Setup and Administration (HP Color LaserJet CM1017 MFP)
- Set up the MFP and use it on the network

NOTE Configuring TCP/IP settings are complicated and should only be performed by experienced network administrators. In order for automatic TCP/IP configuration to take place, either a BOOTP or DHCP Server must be present. For additional help or network configuration, contact the network administrator.
NOTE This MFP does not support HP Jetdirect devices.
Set up the MFP and use it on the network
Hewlett-Packard recommends using the HP software installer available on the MFP CD-ROMs to install necessary software in the following network setups.
Configure a network port-connected MFP configuration (direct mode or peer-to-peer printing)
In this configuration, the MFP is connected directly to the network, and all computers on the network print directly to the MFP.

NOTE This mode is the recommended network configuration for the MFP.
- Connect the MFP directly to the network by inserting a network cable into the MFP network port. Then power on the MFP.
- At the MFP, print a configuration report. See Networking page (HP Color LaserJet CM1017 MFP only).
- Insert the MFP CD-ROM into the computer. If the MFP is already set up, click Install Software to start the software installer. If the software installer does not start, navigate to the hpzsetup.exe file on the CD-ROM and double-click the file.
- On the Welcome screen, click Next and follow the prompts.
- For Windows 2000 and XP, on the Installation Options screen, choose the installation option. Hewlett-Packard suggests a recommended installation, if the system supports it.

NOTE For Windows Server 2003, use Add Printer Wizard to install the print driver. Scanning is not supported in this network configuration for Windows Server 2003.
-
On the Connection Type screen, select Through the network, then click Next.
-
On the Identify Printer screen, identify the MFP either by searching or by specifying a hardware or IP address, which is listed on the Configuration page printed earlier. Click Next.
-
Allow the installation process to complete.

NOTE To install additional printer drivers (PS or PCL6 black and white) use the Add Printer Wizard and choose the network port that was created during the network installation from the MFP CD-ROM. Additional printer drivers are located on the MFP CD-ROM in the Drivers folder.
Configure a direct-connected shared MFP (client server printing)
In this configuration, the MFP is connected to a computer through a USB cable, the computer is connected to the network, and the MFP is shared with other computers on the network.

NOTE This configuration supports printing from the client workstations. Client are not able to initiate a scan from the MFP.
- Insert the MFP CD-ROM into the computer. If the MFP is already set up, click Install Software to start the software installer. If the software installer does not start, navigate to the hpzsetup.exe file on the CD-ROM and double-click the file.
- On the Welcome screen, click Next and follow the prompts.
- For Windows 2000, on the Installation Options screen, choose the installation option. Hewlett Packard suggests a recommended installation, if the system supports it.
- On the Connection Type screen, select Directly to this computer, then click Next.
- Connect the USB cable when prompted by the software.
- Allow the installation process to complete.
- On the Windows taskbar, click Start, click Settings, then click Printers.
• In Windows XP, click Start, click Control Panel, then double-click Printers. - In the dialog box, right-click the printer-driver icon, and select Sharing.
- Select Share this Printer, type the MFP name if necessary, then click OK.
Manage the network
View network settings
Use the embedded Web server or HP ToolboxFX to view the IP configuration settings. For more information, see HP ToolboxFX or Use the embedded Web server.
Restore the network defaults
- On the control panel, press Menu.
- Press the navigation arrows to select Network config.
- Press the navigation arrows to select Restore defaults.
- Press OK.
Change network settings
Use the embedded Web server or HP ToolboxFX to change the IP configuration settings. For more information, see HP ToolboxFX or Use the embedded Web server.
Change from a direct-connected shared MFP to a network port-connected MFP configuration
To change from a direct connection to a network configuration, complete the following steps.
- Uninstall the printing software for the connected MFP. See Uninstall the printing software.
- Install the software choosing the network as the connection type, then follow the directions in Manage the network.
Use the control panel
• Network configuration page
- Configuration page
IP configuration
- Link speed settings
Network configuration page
The Network configuration page lists the current network settings and other MFP properties. To print the Network configuration page from the MFP:
- On the control panel, press Menu.
- Press the navigation arrows to select Reports, then press OK.
- Press the navigation arrows to select Network report, then press OK.
Configuration page
The Configuration page lists the current MFP settings and properties. It is possible to print a Configuration page from the MFP or HP ToolboxFX. To print the Configuration page from the MFP:
- On the control panel, press Menu.
- Press the navigation arrows to select Reports, then press OK.
- Press the navigation arrows to select Configuration report, then press OK.
IP configuration
It is possible to configure the IP address manually or automatically.
Manually configure a static IP address

CAUTION Do not assign identical TCP/IP addresses to two network devices on the same network.
To manually configure a static IP address from the control panel:
- On the control panel, press Menu
- Press the navigation arrows to select Network config.
- Press OK.
- Press the navigation arrows to select the TCP/IP configuration menu.
- Press OK.
- Press the navigation arrows to select Manual.
- Press and hold OK.
-
Press Left arrow or Right arrow to decrement or increment each triplet value.
-
Press OK to move the cursor to the next triplet. When the address is complete press OK to bring up the confirmation screen.
- The graphical screen displays Yes. Press OK to save the configuration, or to delete and re-enter another IP address, press Left arrow or Right arrow, which changes the display to No.
- After selecting the IP address, enter the subnet mask and default gateway by repeating steps 8–10. To get subnet mask and default gateway information in Windows XP Pro:
- Click on Start, select All Programs, Accessories, then System Tools.
- Click System Information, Components, Network, then Adapter. The current PC settings information is displayed. Obtain subnet mask and default gateway information.
- When all information is entered, the MFP may power cycle.
- If at any time during the configuration Cancel is pressed, the system exits the menu and the addresses are not saved.
Automatic configuration
- On the control panel, press Menu.
- Press the navigation arrows to select Network config. then press OK.
- Press the navigation arrows to select TCP/IP configuration, then press OK.
- Press the navigation arrows to select Automatic, then press OK.
It can take several minutes before the automatic IP address is ready for use.

NOTE To disable or enable specific automatic IP modes (such as BOOTP, DHCP, or AutoIP), use options provided in the embedded Web server or HP ToolboxFX only.
Link speed settings

NOTE Incorrect changes to the link speed and duplex settings might prevent the MFP from communicating with other network devices. For most situations, the MFP should be left in automatic mode. Also note that changes may cause the MFP to power cycle; makes changes only while the MFP is idle.
- On the control panel press Menu.
- Press the navigation arrows to select Network config. then press OK.
-
Press the navigation arrows to select Link speed, then press OK.
-
Press the navigation arrows to select one of the following settings.
-
Automatic
10T Full
10T Half
100T Full
100T Half
5. Press OK. The MFP may power cycle.
Supported network protocols
This table lists the networking services/protocols supported on the HP Color LaserJet CM1017 MFP.
Table 11-1 Printing
| Service name Description |
| port9100 (Direct Mode) Printing service |
| Line printer daemon (LPD) Printing service |
Table 11-2 Network device discovery
| Service name Description | |
| SLP (Service Location Protocol) Device Discovery Protocol, used to help find and configure network devices. Used primarily by Microsoft based applications. | |
| Bonjour, (commonly referred to as Rendezvous or mDNS (multicast Domain Name Service)) | Device Discovery Protocol, used to help find and configure network devices. Used primarily by Apple Macintosh based Applications. For more information, see Software for Macintosh. |
Table 11-3 Messaging and management
| Service name Description | |
| HTTP (Hyper Text Transfer Protocol) Allows web browsers to communicate with embedded Web server. | |
| SNMP (Simple Network Management Protocol) | Used by network applications for device management. SNMP v1 and standard MIB-II (Management Information Base) objects are supported. |
Table 11-4 IP addressing
| Service name Description | |
| DHCP (Dynamic Host Configuration Protocol) | For Automatic IP address assignment. DHCP server provides device with IP address. Generally requires no user intervention for MFP to obtain IP address from a DHCP server. |
| BOOTP (Bootstrap Protocol) For Automatic IP address assignment. BOOTP server provides device with IP address. Requires administrator to input devices MAC hardware address on BOOTP server in order for MFP to obtain an IP address from that server. | |
| Auto IP For Automatic IP address assignment. If neither a DHCP server nor a BOOTP server is present, this service allows the | |
| MFP to generate a unique IP address. For example, the IP address 169.254.0.10 represents a series of triplets ranging from 0 to 254; this address is not manually configurable. | |
TCP/IP
TCP/IP (Transmission Control Protocol/Internet Protocol) is a suite of protocols designed to define the way computers and other devices communicate with each other over a network.
TCP/IP is rapidly becoming the most used set of protocols because the Internet is based on TCP/IP. If there is a network that you want to connect to the Internet, use TCP/IP to communicate.

NOTE This MFP does not support IP V6.
Internet Protocol (IP)
When information is sent across the network, the data is broken down into small packets. Each packet is sent independently of one another. Each packet is encoded with IP information, such as the IP address of the sender and receiver. IP packets can be routed over routers and gateways, devices that connect a network with other networks.
IP communications is connectionless. When IP packets are sent, there is no guarantee that they arrive at their destination in the proper sequence. That task can be performed by higher level protocols and applications thereby allowing IP communications to be efficient.
Each node or device that communicates directly onto the network requires an IP address.
Transmission Control Protocol (TCP)
TCP handles breaking the data into packets and recombining the packets on the receiving end by providing a connection-oriented, reliable, and guaranteed delivery service to another node on the network. When data packets are received at their destination, TCP calculates a checksum for each packet to verify the data is not corrupt. If the data in the packet has been corrupted during transmission, TCP discards the packet and requests that the packet be resent.
User Datagram Protocol (UDP)
UDP provides similar services to TCP. However, UDP does not acknowledge data receipt and supports request/reply transactions with no added reliability or guarantee of delivery. UDP is used when acknowledgment and reliability are not required, such as during a “discovery broadcast.”
IP address
Every host (workstation or node) on an IP network requires a unique IP address for each network interface. This address is a software address that is used to identify both the network and specific hosts located on that network. Each IP address can be divided into two separate parts: the network portion and the host portion. It is possible for a host to query a server for a dynamic IP address each time the device boots up (for example, using DHCP and BOOTP).
NOTE When assigning IP addresses, always consult the IP address administrator. Setting the wrong address can disable other equipment operating on the network or interfere with communications.
Configure IP parameters
TCP/IP parameters (such as IP address, subnet mask, default gateway) can be configured on the MFP manually (for example, through the embedded Web server, and HP management software), or automatically downloaded using DHCP or BOOTP each time the MFP is turned on.
When powered on, a new MFP that is unable to retrieve a valid IP address from the network automatically assigns itself a default IP address. The default IP address depends on the type of network to which the MFP is connected. On a small private network, a technique called link-local addressing is used to assign a unique IP address in the range of 169.254.1.0 to 169.254.254.255, which should be valid. The IP address configured on the MFP can be determined by inspecting the Network Configuration page.
Dynamic Host Configuration Protocol (DHCP)
DHCP allows a group of devices to use a set of IP addresses that are maintained by a DHCP server. The device or host sends a request to the server, and if an IP address is available, the server assigns it to that device.
BOOTP
BOOTP is a bootstrap protocol used to download configuration parameters and host information from a network server. BOOTP uses UDP for its transport. In order for devices to boot and load configuration information into RAM, they must communicate through the bootstrap protocol BOOTP as a client with their server.
To configure the device, the client broadcasts a boot request packet containing at least the hardware address of the device (MFP hardware address). The server answers with a boot reply packet containing the information the device needs to configure.
Subnets
When an IP network address for a particular network class is assigned to an organization, no provision is made for more than one network being present at that location. Local network administrators use subnets to partition a network into several different subnetworks. Splitting a network into subnets can result in better performance and improved use of limited network address space.
Subnet mask
The subnet mask is a mechanism used to divide a single IP network into several different subnetworks. For a given network class, a portion of an IP address that would normally be used to identify a node is used, instead, to identify a subnetwork. A subnet mask is applied to each IP address to specify the portion used for subnetworks, and the portion used to identify the node. See Manually configure a static IP address for more information about obtaining subnet mask data.
Table 11-5 Example: Subnet mask 255.255.0.0 applied to class A network
| Class A Network Address Network 15 xxx xxx xxx | |
| Subnet Mask 255 255 0 0 | |
| IP Address fields with Subnet Mask applied | Network Subnet Host Host |
Table 11-5 Example: Subnet mask 255.255.0.0 applied to class A network (continued)
| Class A Network Address | Network 15 | xxx | xxx | xxx |
| Example of a node's IP Address on Subnet 1 | 210 1 25 7 | |||
| Example of a node's IP Address on Subnet 254 | 210 254 64 2 |
The Class A IP network address 210 has been assigned to company ABC. To allow additional networks at company ABC's site, the subnet mask of 255.255.0.0 is used. This subnet mask specifies that the second byte of the IP address is used to identify up to 254 subnets. Using this designation, each device is uniquely identified on its own subnet, but company ABC can incorporate up to 254 subnetworks without violating their assigned address space.
Gateways
Gateways are used to connect networks together. Gateways are devices that act as translators between systems that do not use the same communication protocols, data formatting, structures, languages, or architectures. Gateways repackage the data packets and change the syntax to match that of the destination system. When networks are divided into subnets, gateways are required to connect one subnet to another. A typical gateway IP address could be 192.168.0.1. See Manually configure a static IP address for more information about obtaining gateways data.
Default gateway
The default gateway is the gateway that, if not specified, is used to move packets between networks. It is specified by an IP address.
If multiple gateways exist, then the default gateway is typically the address of the first, or nearest, gateway. If no gateways exist, then the default gateway typically assumes the IP address of the network node (such as the workstation or MFP).
Problem Solving
Verify that the MFP is on and online
Check the following items to make sure the MFP is ready to print.
Resolve communication problems with the network
Check the following items to verify the MFP is communicating with the network. This information assumes a Network configuration page has already been printed. See Networking page (HP Color LaserJet CM1017 MFP only).
- Are the network cables connected properly?
Ensure that the MFP is attached to the network using the appropriate port and cable. Verify each cable connection to make sure it is secure and in the right place. If the problem continues, try a different cable or ports on the hub or transceiver. The amber activity light should be blinking and the green link status light should be solid next to the port connection on the MFP back.
-
Review the information on the Network Hardware Configuration page. Start with the Network Hardware section:
-
Initializing: If the printer has not obtained a valid IP address, wait four minutes and reprint the Network Hardware Configuration page.
- Not Connected: a printer-cable is not connected to the printer or a cable is defective. Change the network cable and verify that it is properly connected into the network. Verify hub or switch are on and working properly.
- Connected: The printer has been assigned a TCP/IP address from BOOTP, DHCP, or AUTOIP.
- Duplicate IP address detected: Another networked device has the same IP address assigned. Contact the network administrator to resolve this issue.
Review under the TCP/IP section of the Network Hardware Configuration page the IP configured by method:
- Manual: User entered information. Verify the TCP/IP address, subnet mask, and default gateway are correct.
- DHCP: Automatically assigned TCP/IP address by the dynamic host controller protocol (DHCP) server.
- BOOTP: Manually assigned TCP/IP address by the BOOTP server.
-
AUTOIP: Default address assigned for Link Local connection (no DHCP or BOOTP server available).
-
Can you "ping" the MFP?
Use the command prompt to ping the MFP from the computer. For example:
ping 192.168.0.10
Ensure that the ping displays round-trip times.
If you can ping the MFP, verify that the IP address configuration for the MFP is correct on the workstation. If it is correct, uninstall and re-install the MFP software.
If the ping command failed, verify that the network hubs are on, then verify that the network settings, the MFP, and the computer are all configured for the same network.
- Are other MFPs able to print?
If yes, the problem is workstation-specific. Verify that both workstations are using the same network settings.

CAUTION Do not assign identical TCP/IP addresses to two network devices on the same network.
- If network communication is not resolved by using steps 1 through 3, or if other users can not print, reset all network configuration settings to factory-defaults by selecting Restore defaults from the control panel. After the MFP automatically power cycles, wait four to six minutes and verify that the network functionality is working properly. Contact the network administrator for more information.
12 How do I?
Use this section to perform basic tasks with the HP Color LaserJet CM1015/CM1017 MFP Series.
• Control panel and other settings: How do I?
• Control-panel menus
• Print: How do I?
• Copy and Scan: How do I?
• Photo: How do I? (HP Color LaserJet CM1017 MFP only)
• Network: How do I? (HP Color LaserJet CM1017 MFP only)
• Maintenance: How do I?
Control panel and other settings: How do I?
This section discusses control-panel settings.
HP Color LaserJet CM1017 MFP control panel features
The HP Color LaserJet CM1017 MFP contains the following lights and buttons on the control panel:

NOTE Print a demo page by pressing the Scan To and Start Scan buttons simultaneously.
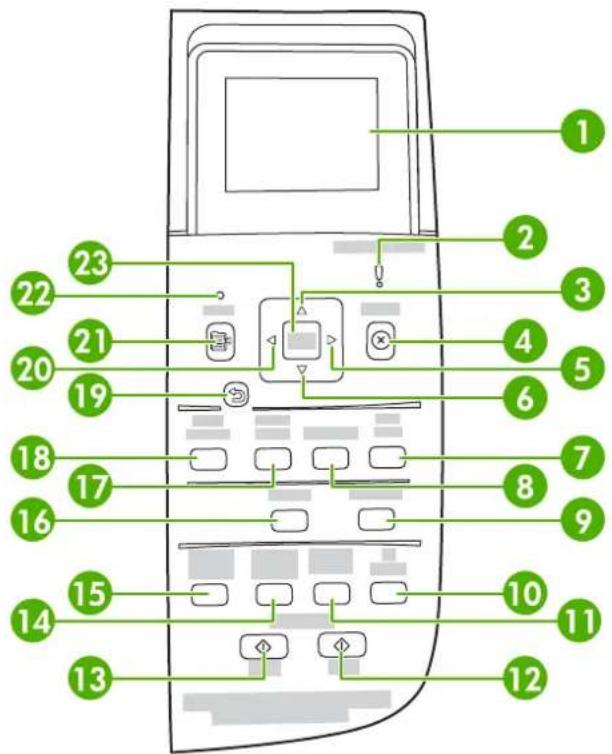
text_image
Diagram of a mobile phone keypad with numbered labels pointing to various ports and function keys.1 Graphical display. Message, menus, and supply gauge area.
Supplies gauges: Displays consumption levels of print cartridges. Appears when the MFP shows the Ready state with no warnings, or when the MFP shows a warning or error message pertaining to a print cartridge or multiple supplies. When the supply is empty the gauge displays as empty. Flashing indicates a single supply is empty. These messages can display when:
- Missing cartridges
• Incorrectly placed cartridges
• Cartridges with an error
• Some non-HP cartridges

CAUTION Printing may continue when a non-HP supply is empty. To prevent MFP damage, frequently check the status of non-HP supplies. See Hewlett-Packard limited warranty statement.

NOTE When a “?” displays on-screen, it may be because the supply is missing, it is a non-HP supply, or the status is being determined by the MFP.
| 2 | Amber activity light: An error has occurred. Printer requires attention. |
| 3 | Up arrow (^): Press to enter the main menu system or navigate to the previous menu item, or previous item in the selection list. |
| 4 | Cancel (X): Whenever the Ready light blinks, press to cancel a print job. Pressing this button also exits the control-panel menus. |
| 5 | Right arrow (>) : Press to navigate to the next submenu or the next value in the menu selection list. Also allows cursor movement forward a single position, or increments a numeric entry. |
| 6 | Down arrow (v): Press to navigate to the menu item below the current menu item. |
| 7 Start Photo: Press to print one or more photos. | |
| 8 Proofsheet: Press to print a proofsheet. | |
| 9 | Start Scan: Starts scanning to the previously selected e-mail or folder destination. The MFP can also start a scan if a destination is not specified. |
| 10 | # of Copies: Press the navigation arrows to increase or decrease the number of copies produced. |
| 11 | Lighter/Darker: Press Left arrow to lighten the copy or the Right arrow to darken the copy. |
| 12 | Press Start Copy Color to begin a color copy job. |
| 13 | Press Start Copy Black to begin a monochrome copy job. |
| 14 | Reduce/Enlarge: Displays a list of temporary copy and size changes. |
| 15 Copy Features: | Displays a menu of copy features. |
| 16 | Scan To: Displays a list of pre-configured folders and e-mail destinations. To create a new destination, set up the Scan To destination on the workstation. |
| 17 Select Photos: | Press to choose one or more photos. |
| 18 | Photo Features: Press to navigate to select photo features. |
| 19 | Return to previous menu or menu item: Backs up one menu screen or one step in the current menu structure. |
| 20 | Left arrow (<): Press to navigate to the previous submenu or the previous value in the menu selection list. Also allows cursor movement back a single position, deletes the previous character, or decrements a numeric entry. |
| 21 Menu: Opens the main menu system. | |
| 22 | Ready light (green): Green light is steady when the MFP can accept print jobs or blinks when the MFP receives print data. |
| 23 OK: | |
| Selects a menu itemClears some printer-errorsAcknowledges use of a non-HP supply | |
Use the graphical display (HP Color LaserJet CM1017 MFP)
The color graphics display shows menus, photos, and messages. The display can be pulled up and angled for better viewing. Use the arrows on the control panel to navigate the menus on the control panel and to select photos on the panel for printing. Status and error messages will be displayed on the screen.
After 60 minutes of inactivity, the color graphics display goes into Sleep State and the screen shuts off completely. The display turns back on when you perform an operation, such as pressing a control panel button, or inserting a memory card, accessing the HP All-in-One from a connected computer.
Use the control-panel arrows to navigate on the HP Color LaserJet CM1017 MFP
- Press the Up arrow or Down arrow to navigate through all control panel menus.
- Press Back to return to the previous menu.
- Press OK to make a selection.
Press the Left arrow or Right arrow to complete the following tasks:
- Increase or decrease values on the horizontal scroll bar on various copy and photo menus.
- Browse photos on the graphical display from your memory card.
- Enter an IP address.
Control-panel menus
Use the control-panel menus
To gain access to the control-panel menus, use the following steps.
- Press Menu.
-
On the HP Color LaserJet CM1015 MFP, press Left arrow or Right arrow to navigate the listings. On the HP Color LaserJet CM1017 MFP, press Up arrow or Down arrow to navigate the listings.
-
Press OK to select the appropriate option.
- Press Cancel to cancel an action or return to the Ready state.
- Press Back to move to the previous menu.
Control-panel menu map
These menus are available from the control panel Main menu:
• Use the Copy setup menu to configure basic copy default qualities.
• Use the Reports menu to print reports that provide information about the printer.
• Use the Photo setup menu to configure defaults for photo printing.
- Use the System setup menu to establish basic printer settings. The System setup has several sub-menus. Each is described in the table.
- Use the Service menu to restore default settings, clean the printer, and activate special modes that affect print output.
• Use the Network config. menu to configure network settings.
Table 12-1 Copy Setup Menu
| Menu item | Sub-menu item | Sub-menu item | Description |
| Default Quality | Sets the default copy quality. | ||
| Default light/dark | Sets the default lighter/darker | option. | |
| Default Reduce/Enlarge | Sets the default percentage to reduce or enlarge a copied document. | ||
| Default # of copies | Sets the default number of | copies. | |
| Advanced Color Balance Red | Increases or decreases the amount of these colors in the output. | ||
| Green | |||
| Blue | |||
| Background | Increases or decreases the | background color in a copy. | |
| Contrast Increases or decreases the differences between whites and blacks of a copy. | |||
| Lightness Increases or decreases the background color in a copy. | |||
| Grayness Increases or decreases the color in the color copy of a black and white original. | |||
| Sharpen Increases or decreases the reproduction details in a copy. | |||
| Restrict color Permits the enabling or disabling of color copies. | |||
| Restore defaults Sets all customized copy settings to the factory default values. | |||
Table 12-2 Reports Menu
| Menu Item Description | |
| Demo page Prints a color page that demonstrates print quality. | |
| Menu structure Prints a control-panel menu layout map.The active settings for each menu are listed. | |
| Configuration report Prints a list of all the printer settings.Includes network information when the printer is connected to the network. | |
| Supplies status page Prints the status of each print cartridge.Includes this information:Estimated pages remainingSerial numberNumber of pages printed | |
| Network report | Displays status for:Network hardware configurationEnabled featuresTCP/IP and SNMP informationNetwork statistics |
| Usage page | Displays number of pages printed by the MFP. |
| PCL font list | Prints a list of all installed PCL fonts. |
| PS font list | Prints a list of all installed PS fonts. |
Table 12-2 Reports Menu (continued)
| Menu Item Description |
| PCL6 font list Prints a list of all installed PCL6 fonts. |
| Service page Starts the cleaning mode and restoresfactory settings. |
Table 12-3 Photo Setup Menu (Available only from HP Color LaserJet CM1017 MFP)
| Menu Item Description |
| Default image size Set up default image size. |
| Default light/dark |
| Default # of copies Set up default number of copies. |
| Default output color Set up default output color. |
| Restore defaults Resets all photo items to their factory defaults. Machine does not power cycle. |
Table 12-4 System Setup Menu
| Menu Item | Sub-menu item | Sub-menu item | Description |
| Language Select the language in which | the control panel displays messages and printer reports. | ||
| Paper setup | Default paper size | LetterA4Legal | Select the size for printing internal reports or any print job that does not specify a size. |
| Default paper type | Lists available media types. | Select the type for printing internal reports or any print job that does not specify a type. | |
| Tray 1 | Paper size | Paper type | From the displayed list, select the default size and type for tray 1. |
| Tray 2 | Paper size | Paper type | From the displayed list, select the default size and type for tray 2. |
| Tray 3 (optional) | Paper sizePaper type | From the displayed list, select the default size and type for optional tray 3. | |
| Paper-out action | Wait forever | OverrideCancel job | Determines how the printer reacts when a print job requires a size or type that is unavailable or when a specified tray is empty.Select Wait forever to make the printer wait until the correct media is loaded.Press OK to select the default setting.Select Override to print on a different size paper after a specified delay.Select Cancel job to automatically cancel the print job after a specified delay.If either Override or Cancel job is chosen, the control panel prompts for the number of seconds to delay. Press the Right arrow to increase the time up to 3600 seconds. Press Left arrow to decrease the time. |
| Print quality | |||
| Calibrate color Calibrate now | Power-on calibration | Calibrate now: Directs the printer to immediately calibrate. When a job is processing, the printer calibrates after the job is complete. When an error message displays, clear the error before continuing.Power-on calibration: Select how quickly the printer should calibrate after it is powered on. The default setting is 15 minutes. | |
| Cartridge low | Signals that the cartridge is almost empty. | ||
| Replace supplies Displays message that a | supply or supplies need to be replaced. | ||
| Courier font Select courier font values. | |||
Table 12-5 Service Menu
| Menu item Description | |
| Cleaning mode This options cleans the printer when specks or other marksappear on printed output. The cleaning process removes dust and excess toner from the paper path.When selected, the printer prompts to load plain paper in tray 1 and then press OK to begin the cleaning process. Wait until the process completes. Discard the page that prints. | |
| Restore defaults Sets all customized settings to the factory default values.USB speed | |
| Less paper curl When printed pages are consistently curled, this option sets the printer to a mode that reduces curl. | |
| Archive print When printing pages that will be stored for a long time, this option sets the printer to a mode that reduces toner smearing and dusting. | |
Table 12-6 Network Configuration Menu (Available only on HP Color LaserJet CM1017 MFP Series)
| Menu item Sub-menu item Description | ||
| TCP/IP configuration Automatic | Manual | Select Automatic to automatically configure all the TCP/IP settings. |
| Select Manual to manually configure the IP address, subnet mask, and default gateway. | ||
| The control panel prompts you to specify values for each address section. Press Right arrow to increase the value. Press Left arrow to decrease the value. Press OK to accept the value and move the cursor to the next field. | ||
| As each address is completed, the printer prompts for address confirmation before moving to the next one. After all three addresses are set, the printer automatically restarts. | ||
| Select Reset TCP/IP to restore all the TCP/IP settings to the default values. | ||
| Link speed Automatic | The printer automatically detects the correct link speed for the network. Use this menu to set the link speed manually if needed. | |
| 10T Full | ||
| 10T Half | ||
| 100TX Full | After setting the link speed, the printer automatically restarts. | |
| 100TX Half | ||
| Memory card Sets memory card slots. | ||
| Restore defaults Resets all network configurations to their | factory defaults. | |
Print: How do I?
Use this section to answer printing questions.
System Settings
The HP ToolboxFX System Settings folder contains links to the following main pages:
- Device information. View information about the MFP, such as the description and a contact person.
- Paper handling. Change the MFP paper-handling settings, such as default paper size and default paper type.
• Print quality. Change the MFP print-quality settings. - Print density. Change the print density settings, such as contrast, highlights, midtones, and shadows.
- Paper types. Change the MFP mode settings for each media type, such as letterhead, prepunched, or glossy paper.
• System Setup. Change the MFP system settings, such as MFP language and jam recovery.
• Service. Gain access to various procedures required to maintain the MFP. - Device Polling. The HP ToolboxFX periodically communicates with your device to determine device status and enabled features.
- Save and restore settings. Save the current MFP settings to a file on the computer. Use this file to load the same settings onto another printer or MFP to restore these settings to this MFP at a later time.
- Password. If set, the password must be entered to change any of the HP ToolboxFX system settings, email alerts, or network settings.
Device information
Save the HP ToolboxFX Device information for future reference about the MFP. The information that is typed in these fields appears on the Configuration page. It is possible to type any character in each of these fields.

NOTE Click Apply to make the changes take effect.
Paper handling
Use the HP ToolboxFX paper-handling options to configure the default settings. These are the same options that are available on the System setup and Paper setup menus on the control panel. For more information, see Control-panel menus.
Three options accommodate handling print jobs when the product is out of media:
- Select Wait for paper to be loaded.
- Select Cancel from the Paper out action drop-down list to cancel the print job.
- Select Override from the Paper out time drop-down list to send the print job to another paper tray.
The Paper out time field specifies how long the MFP waits before acting on your selections. It is possible to specify from 0 to 3600 seconds.

NOTE Click Apply to make the changes take effect.
Print quality
Use the HP ToolboxFX print-quality options to improve the print job appearance. These same options are available on the System setup and Print quality menu on the control panel. For more information, see Control-panel menus.
These options control print quality.
• Color Calibration.
• Power On Calibration
- Calibration Timing
- Calibrate Now
- Grayscale Printing.
Grayscale printing options Description
Resolution Select 600 resolution for average print jobs and Fast Res
1200 for higher-quality print jobs. Select ProRes 1200 for the highest-quality print job, but a longer printing time.
REt Choose REt which HP provides for improved print quality.

NOTE Click Apply to make the changes take effect.
Print density
The print density settings control making fine adjustments to the density (amount) of Cyan, Magenta, Yellow, and Black toner in images, pages, and documents.
Print density settings Description
Contrasts Contrast is the density difference between light (highlight) and
dark (shadow) colors. To increase the difference between light and dark colors (equivalent to a negative highlight adjustment
| Print density settings Description | |
| and a positive shadow adjustment), use a positive contrast setting. To decrease the difference between light and dark colors (equivalent to a positive highlight adjustment and a negative shadow adjustment), use a negative contrast setting. | |
| Highlights Highlight colors are colors near white. To make highlight colors | darker, use a positive highlight setting, and to make highlight colors lighter use a negative highlight setting. This adjustment does not affect midtone or shadow colors. |
| Midtones Midtone colors are about halfway between white and solid density. To make midtone colors darker, use a positive midtone setting, and to make midtone colors lighter use a negative highlight setting. This adjustment does not affect highlight or shadow colors. | |
| Shadows Shadow colors are colors near solid density. To make shadow colors darker, use a positive shadow setting, and to make shadow colors lighter use a negative shadow setting. This adjustment does not affect highlight or midtone colors. | |
Set the system password
Use HP ToolboxFX to set a system password.
- Open HP ToolboxFX and click System Settings.

NOTE If a password has been set for the MFP previously, you are prompted to type the password. Type the password, then click Apply.
-
Click Password.
-
In the Password box, type the exact password to set, then in the Confirm password box, type the same password again to confirm the choice.
-
Click Apply to save the password.
To remove the system password
- Open HP ToolboxFX and click System Settings.

NOTE If a password has been set for the MFP previously, you are prompted to type the password. Type the password, then click Apply.
-
Click Password.
-
Delete all characters from both the Password field and the Confirm password field.
-
Click Apply to remove the password.
To reset all MFP settings to factory defaults
If you forget or lose your password, use the following steps to reset all your MFP settings to factory defaults.

WARNING! Following these steps will clear the password and all of the changes you have made to the MFP settings.
- On the control panel, press Menu.
- Press the navigation arrows to select the Service menu.
- Press OK.
- Press the navigation arrows to select the Restore defaults menu.
- Press OK.
- Press OK again to confirm restoring the defaults.
Paper types
Use these HP ToolboxFX Paper types options to configure print modes that correspond to the various media types. When selecting Restore modes, all of the modes are reset to the factory settings.

NOTE Click Apply to make the changes take effect.
System setup
Use the HP ToolboxFX system settings options to configure miscellaneous print settings. These settings are not available from the control panel.

NOTE Click Apply to make the changes take effect.
Service
During the printing process, paper, toner, and dust particles can accumulate inside the MFP. Over time, this buildup can cause print-quality problems such as toner specks or smearing. HP ToolboxFX provides an easy method for cleaning the paper path. For more information, see Clean the paper path using HP ToolboxFX.
Device Polling Page
The HP ToolboxFX periodically communicates with your device to determine device status and enabled features. Use the Polling Page to turn off pop-up alerts and the Scan To and Start Scan buttons located on the device.
Print Settings
The HP ToolboxFX Print Settings folder contains links to the following main pages:
Printing
Use the HP ToolboxFX printing settings options to configure the settings for all print functions. These are the same options that are available on the Print settings menu on the control panel. For more information, see Control-panel menus.

NOTE Click Apply to make the changes take effect.
PCL5c
Configure these PCL5c settings:
- Font number
- Font pitch
- Font point size
Symbol set - Append CR to LF
Form length
PostScript
Use the PostScript option when using the PostScript print personality. When the Print PostScript error option is turned on, the PostScript error page automatically prints when PostScript errors occur.

NOTE Click Apply to make the changes take effect.
Memory card (HP Color LaserJet CM1017 MFP only)
Use the three HP ToolboxFX memory card options to configure print settings when using memory cards.
• Photo image size. Select the size photos to print from the drop-down list.
• Photo number of copies. Type the number of copies from 0 to 99 to print for each image.
• Photo output color. Select either Color or Monochrome from the drop-down list.
Click the Enable memory cards checkbox to save the settings.
Control print jobs
When changing print settings, follow the hierarchy of how changes are prioritized. (Note that the names of commands and dialog boxes might vary depending on the software program.)
- Application Settings dialog box. This dialog box opens when you click Application Settings or a similar command on the File menu in the software program. This dialog box is part of the program in which you are working. Settings that are changed here override settings that are changed anywhere else.
- Print dialog box. This dialog box opens when you click Print, Print Setup, or a similar command on the File menu in the software program. It is also part of the program, but it has a lower priority than the Application Settings dialog box. Settings that are changed in the Print dialog box do not override settings that are changed in the Application Settings dialog box. Settings that are changed here do override settings that are changed in the printer driver.
- Printer driver. The printer driver opens when you click Properties in the Print dialog box. Settings that are changed here do not override settings that are changed anywhere else.
Selecting print media settings
When a job is sent to the printer, the printer driver controls what paper tray is used to pull media through the printer. By default, the printer automatically selects the tray, but a specific tray can be chosen based on three user specified settings: Source, Type, and Size. These settings are available from the Application Setting dialog box, the Print dialog box, or the printer driver.
Setting Description
Source Directs the printer to pull paper from a user-specified tray. The
printer tries to print from this tray, no matter what type or size media is loaded in it. However, if the selected tray is configured from the HP ToolboxFX for a type or size and that does not match the print job, the printer does not print automatically. To begin printing, load the selected tray with the correct type or size of print media for the print job. When loading the tray, the printer begins printing. If the printer does not begin printing:
- Verify the tray configuration matches the size or type of the print job.
- Press OK to have the printer try to print from another tray.
Type or Size Directs the printer to pull paper or print media from the first tray
that is loaded with the type or size that you selected. Always print by Type for special print media such as labels or transparencies.

NOTE When the trays have not been configured for a certain type or size from the HP ToolboxFX, load the paper or print media into a tray then select the Type or Size from the Page Setup dialog box, the Print dialog box, or the printer driver.

NOTE An Administrator or individual user can set the HP ToolboxFX to direct the MFP to pull from a tray that is pre-configured for a specified Type or Size. This is helpful when frequently printing on the same type of media; a dedicated tray is already pre-configured for printing.
Printer-driver features
Some printer drivers and some operating systems do not support all of these MFP features.
Task Driver Tab Option
Set custom paper Paper Size is
Print in grayscale Color Print in Grayscale
Create and use watermarks
Effects Watermark

NOTE For Windows 2000 and XP environments, Administrator privileges are required to create watermarks but are not required to add existing watermarks to documents.
| Task Driver Tab Option | ||
| Print multiple pages on one sheet of paper (N-up printing) | Finishing Pages per sheet | |
| Reduce or enlarge a document before printing | Effects Fit to Page | |
| Print the first page on different paper | Paper/Quality | Appropriate paper size |
| Change color settings Color Settings | ||
| Create and use Quick Sets. Quick Sets save the current print-driver settings such as the page orientation, N-up printing, or the paper source for later use. Save up to 30 sets. | All. To later retrieve settings, choose Finishing | |
| NOTE In the Windows 2000 environment, Administrator privileges are required to save Quick Sets. | ||
For printing using the Print on Both Sides (manually) feature, see Print on both sides of the paper.
Restore the default printer-driver settings
This feature might be useful when experiencing quality issues, or if the print media is not being selected from the correct tray.
Select Defaults in the Quick Sets dialog box on the Finishing tab of the printer driver.
Print from Windows
- Load the print media.
- On the File menu of your application, click Page Setup or a similar command. Ensure the settings are correct for this document.
- From the File menu, click Print, Print Setup, or a similar command. The Print dialog box opens.
- Select the correct MFP and change settings as necessary. Do not change any settings, such as page size or orientation, that were previously set in the Application Settings dialog box.
- If this print job is to be printed on a non-standard size or weight of paper, see Selecting print media settings for more information.
- If not already done, click Properties. The printer driver opens.
- On the various tabs, set additional settings that did not appear in the Application Settings or Print dialog box. For more information about printer-driver settings, see Printer-driver features.
- Select the Print command to print the job.
Printer-driver settings
The printer driver is a software component that controls, through user-specified options, common printing features when sending print jobs to the MFP. Changes to printer-driver settings can be
temporary for print jobs that are run while the program is still open, or changes to the default settings can be permanent; they are in effect now and in the future.
| Operating System Temporarily change settings for jobs that are printed now | Permanently change default settings1 | Change configuration settings(For example, to add an optional tray or to enable or disable a driver feature such as “Allow manual duplexing”) | |
| Windows 2000 and XP (Classic Start Menu) | On the File menu, click Print, select this printer, then click Properties or Preferences. (The actual steps can vary; this is the most common method.) | Click Start, point to Settings, then click Printers or Printers and Faxes. Right-click the printer icon, then click Printing Preferences. | Click Start, point to Settings, then click Printers or Printers and Faxes. Right-click the printer icon, then click Properties. Click the Configure tab. |
| Windows XP | On the File menu, click Print, select this printer, then click Properties or Preferences. (The actual steps can vary; this is the most common method.) | Click Start, click Printers and Faxes, right-click the printer name or icon, then click Printing Preferences. | Click Start then click Printers and Faxes. Right-click the printer icon, then click Properties. Click the Configure tab. |
1 Access to default MFP settings might be restricted and therefore unavailable.
Special media for printing
This MFP supports printing on special media.
For tray, media orientation, and driver settings, see Print on special media.
For instructions on loading envelopes, see Load tray 1 (single-sheet feed tray) or Load tray 2.
Envelopes
- Store envelopes flat.
- Envelopes should not be wrinkled, nicked, stuck together, or otherwise damaged. Do not use envelopes that have clasps, snaps, windows, coated linings, self-stick adhesives, or other synthetic materials.
- Only use envelopes where the seam extends all the way to the corner of the envelope as indicated in the following illustration.
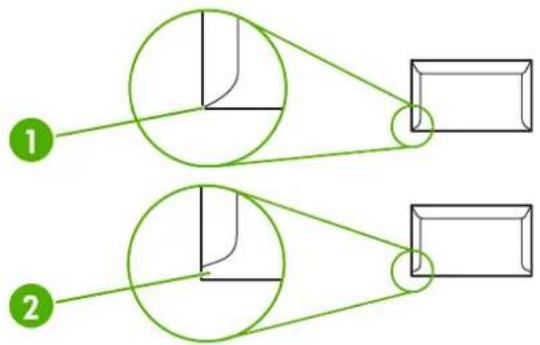
text_image
1 21 Acceptable
2 Unacceptable
- Envelopes with a peel-off adhesive strip or with more than one flap that folds over to seal must use adhesives that are compatible with the heat and pressure in the fuser.

CAUTION Failure to follow the guidelines above can result in jams.
Labels
When selecting labels, consider the quality of each component:
• For tray, media orientation, and driver settings, see Print on special media.
• Only use labels with no exposed backing between them.
- Labels must lie flat.
- Do not use labels that have wrinkles, bubbles, or are damaged.
• Use only full sheets of labels; this MFP does not support print partial sheets of labels.
• Use only labels specified for use with HP Color LaserJet printers.
For instructions on loading labels, see Load tray 1 (single-sheet feed tray) or Load tray 2.
Transparencies
• Use only tray 1 or tray 2 to print on transparencies.
• For tray, media orientation, and driver settings, see Print on special media.
- Place transparencies on a flat surface after removing from the MFP.
• Use only transparencies specified for use with HP Color LaserJet printers.

CAUTION To avoid MFP damage, only use transparencies that are recommended for use in laser MFPs. See Accessories and supplies information.
Transparent print media not designed for LaserJet printing melts in the fuser, and damages the fuser.
Glossy paper and photo paper
- Handle glossy paper and HP LaserJet Photo paper by the edges.
- For tray, media orientation, and driver settings, see Print on special media.
• Use only glossy paper and photo paper specified for use with HP Color LaserJet printers.
Letterhead or preprinted forms
- Avoid using raised or embossed letterhead.
• Use only non-flammable inks that do not damage the print rollers. - For tray, media orientation, and driver settings, see Print on special media.
For instructions on loading letterhead, see Load tray 1 (single-sheet feed tray) and Load tray 2.
Heavy paper
- Do not use paper that is heavier than the recommended media specification for this MFP. See Media supported on this MFP for more information.
- For tray, media orientation, and driver settings, see Print on special media.
Copy and Scan: How do I?
Use this section to answer copy and scanning questions.
Scan from the device control panel
Use the following instructions to scan directly from the device control panel.

NOTE The computer connected to the device must be turned on.
Program the device Scan To button from the control panel
E-mail addresses and folders must be set up prior to using the Scan To button on the control panel. Use HP Solutions Center to program the e-mail and folders for scanning.
Set up pre-configured destinations on the MFP
- Open HP Solution Center and select Settings, Scan Settings, then press Scan.
- Select the checkbox Allow me to scan by pressing the scan-to button on the MFP.
-
The MFP is pre-configured with the following three destinations in the dialog box.
-
Scan a document and attach it to an e-mail
- Scan a photo and attach it to an e-mail
-
Scan a photo and save it as a file
-
Highlight a destination and click Right arrow to move to the destinations currently on the MFP dialog box. Repeat for all three destinations.
-
Click Update.
Add folder destinations
- Open HP Solution Center and select Settings, Scan Settings, then press Scan.
- Select the checkbox Allow me to scan by pressing the scan-to button on the MFP and click on New.
- Select Save it to my computer, then click Next.
- Enter the file destination name or check to set up the destination on the MFP. Name the default destination and click Next.
- Select the quality and click Next.
- Verify the selections, click Save, and then close HP Solution Center.
Add e-mail destinations
- Open HP Solution Center and select Settings, Scan Settings, then press Scan.
- Select the checkbox Allow me to scan by pressing the scan-to button on the MFP and click on New.
On the device control panel, press Scan To.
- Select Attach to a new e-mail and click Next.
- Select Save it to my computer and press Next. Type the e-mail address, subject, and note in the text box and click Next.
- Select the quality and click Next.
- Type the e-mail address in the text box. Select the box for Send the new destination to the MFP. Type a new name that appears on the MFP control panel and click Next.
Delete destinations
- From the Set up the
list for the All-in-One, select one of the Available Destinations on this PC and click Delete. The Delete Destination dialog box displays. - From the Delete Destination dialog box, highlight the destination to delete and click Next. The Confirmation dialog box displays.
- Click Delete to perform the deletion, or click Cancel to choose another destination.
Set the MFP to make only black and white copies
- Press Menu, select Copy setup, and click on Start Copy Color.
- Press the navigation arrows and select On or Off. When set to Off, the control panel displays Restrict color if Start Copy Black or Start Copy Color is pressed.
- Press OK.
Photo: How do I? (HP Color LaserJet CM1017 MFP only)
Use this section to answer photo questions.
Print photos directly from the memory card
-
After inserting the memory card into the MFP (see Insert a memory card), select photos by:
-
Press the Left arrow or the Right arrow to scroll through the images.
-
Press OK to select or deselect the images.
-
You can also press Select Photos from the control panel.
Press Up arrow or Down arrow to select one of the following menu items, and then press OK.
- From display: Select this option if the memory card was not recently inserted.
- All photos: X represents the number of JPEG files the MFP detects on the card. Selecting this option prints all of the JPEG files on the memory card. Press OK again to confirm the print job.
-
Individual: Select this option to choose and print an individual photo. The photos are numbered, starting with number 1.
-
Press Up arrow or Down arrow to increase or decrease the photo number.
- Press OK to select the photo to print.
- From a range: Select this option to choose a range of photos to print. The MFP prompts for the first photo number and the last photo number.
- Press Up arrow or Down arrow to increase or decrease the photo numbers.
-
Press OK to select the range of photos to print.
-
Press Start Photo to print the photos.

NOTE The JPEG files on the memory card are numbered in alphabetical order. If you do not know the order of the photos on the memory card, print an index that shows the photo order. For more information about printing an index, see Print a memory card index.
Enable or disable a memory card
- In the embedded Web server, select Print and Memory Card.
- Select or deselect the label Enable Memory Card. When this box is not selected the control panel display says Memory card slots are disabled when a memory card is inserted.
Print and scan photos from a proof sheet
Preview images and print photos from a proof sheet. A proof sheet can contain as many as 20 images. This feature has been optimized and tested for use with Genuine HP Toner Supplies.
- Insert the memory card into the device. See Insert a memory card.
-
Press Proofsheet then Print.
-
If more than 20 JPEG files exist on the memory card, press Up arrow or Down arrow to select one of the following menu items, then press OK.
-
All photos: X represents the number of JPEG files the MFP detects on the card. Selecting this option prints all JPEG files on the memory card. Press OK again to confirm the print job.
- Last 20: Prints the last 20 JPEG files from the alphabetized list on the memory card.
-
Custom: Select one or more photos to print by pressing OK.
-
Color in the oval or bubble using a dark blue or black pen. Also fill bubbles to indicate the image layout and media type.
-
Place the proof sheet face-down on the flatbed scanner, with the upper-left corner of the document located in the lower-right corner of the glass.
-
Press Proofsheet.
-
Press the Up arrow or Down arrow, select Start Scan, then press OK. The MFP scans the proof sheet and prints the marked photos. Repeat steps 5 through 7 for each proof sheet.

NOTE Photos printed using a proofsheet can only be printed in color.
NOTE JPEG files on the memory card are displayed in alphabetical order. When the order of photos on the memory card is unknown, print an index. See Print a memory card index.
NOTE Photos are still printed in color even when the Color copy option is set to no.
Save photos to the workstation from a memory card
-
Insert the memory card into the MFP. See Insert a memory card.
-
From the workstation, click on My Computer and look for the removable drive (memory card). If My Computer does not recognize the memory card, enter a IP address (an example, \192.168.0.15) into the address line. Access the images by clicking Memory card and moving to the subfolders containing the images. Map the memory card to a driver letter on the workstation using this method.
-
Use drag and drop or HP Photosmart Transfer to move the photos from the memory card to a folder.
Network: How do I? (HP Color LaserJet CM1017 MFP only)
Use this section to answer network questions.
Find the network IP address
The network IP address is located on the Network report page. To print a Network report page from the control panel:
- On the control panel, press Menu.
- Press Left arrow or Right arrow to select the Reports menu.
- Press OK.
- Press Left arrow or Right arrow to select Network report.
- Press OK to print the Network Configuration Report page.
Restore the network defaults
- On the control panel, press Menu.
- Press the navigation arrows to select Network config.
- Press the navigation arrows to select Restore defaults.
- Press OK.
Maintenance: How do I?
Use this section to answer MFP maintenance questions.
Set the system password
Use HP ToolboxFX to set a system password.
- Open HP ToolboxFX and click System Settings.

NOTE If a password has been set for the MFP previously, you are prompted to type the password. Type the password, then click Apply.
-
Click Password.
-
In the Password box, type the exact password to set, then in the Confirm password box, type the same password again to confirm the choice.
-
Click Apply to save the password.
To remove the system password
- Open HP ToolboxFX and click System Settings.

NOTE If a password has been set for the MFP previously, you are prompted to type the password. Type the password, then click Apply.
-
Click Password.
-
Delete all characters from both the Password field and the Confirm password field.
-
Click Apply to remove the password.
To reset all MFP settings to factory defaults
If you forget or lose your password, use the following steps to reset all your MFP settings to factory defaults.

WARNING! Following these steps will clear the password and all of the changes you have made to the MFP settings.
- On the control panel, press Menu.
- Press the navigation arrows to select the Service menu.
- Press OK.
- Press the navigation arrows to select the Restore defaults menu.
- Press OK.
- Press OK again to confirm restoring the defaults.
Clean the scanner glass
Dirty glass from debris may cause scan and copy image defects.
- Turn device off, unplug the power cord from the electrical socket, and raise the lid.
- Clean the glass by using a soft lint-free cloth that has been moistened with nonabrasive glass cleaner.
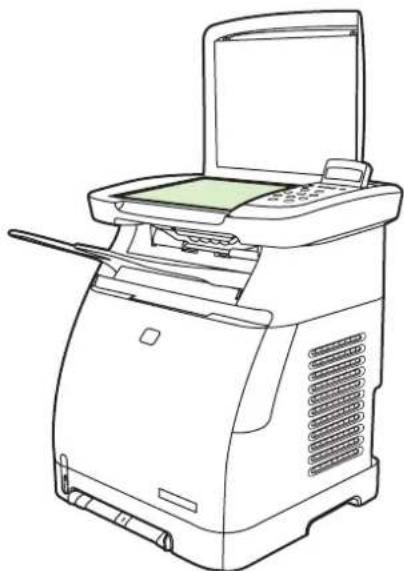
natural_image
Line drawing of a printer with open lid and control panel (no text or symbols)
CAUTION Do not use abrasives, acetone, benzene, ammonia, ethyl alcohol, or carbon tetrachloride on any part of the device; these can damage the device. Do not place liquids directly on the glass. They might seep under it and damage the device.
- To prevent spotting, dry the glass using a soft lint-free cloth.
Change MFP toner warnings
Supplies gauges display consumption levels of print cartridges. The display appears when the MFP shows the Ready state with no warnings, or when the MFP shows a warning or error message pertaining to a print cartridge or multiple supplies. When the supply is empty the gauge displays as empty. Flashing indicates a single supply is empty. These messages can display when:
Missing cartridge
• Incorrectly placed cartridges
• Cartridges with an error
• Some non-HP cartridges
Calibrate the MFP
The MFP automatically self-calibrates, but calibration settings can be manually adjusted by using the HP ToolboxFX.
Environmental differences or aging print cartridges might cause fluctuations in image density. The MFP accounts for this with image stabilization control. The MFP automatically calibrates at various times to maintain the highest level of print quality. Also request a calibration by using the HP ToolboxFX.
The MFP does not interrupt a print job to calibrate. It waits until the job is complete before calibrating or cleaning. While the MFP is calibrating, it pauses printing for the time that is required to complete the calibration.

NOTE This calibration process calibrates the printer. It does not calibrate the image scanner.
Calibrate the MFP from the front control panel
- Press Menu.
- Press the navigation arrows until the display reads System setup. Press OK.
- Press the navigation arrows until the display reads Print quality. Press OK.
- Press the navigation arrows until the display reads Calibrate color. Press OK.
- Press the navigation arrows until the display reads Calibrate now. Press OK.
- Press OK to confirm Calibrate now.
Calibrate the MFP from the HP ToolboxFX
-
Open the HP ToolboxFX in one of these ways:
-
On the desktop, double-click the HP ToolboxFX icon.
-
On the Windows Start menu, click Programs (All Programs in Windows XP), click HP, click HP Color LaserJet CM1015/CM1017 Series, click HP ToolboxFX, then click Help.
-
Click the System Settings tab then click Print Quality.
- In the Calibration section, click Calibrate.
Clean the MFP
During the printing process, paper, toner and dust particles can accumulate inside the MFP. Over time, this buildup can cause print-quality problems such as toner specks or smearing. This MFP has a cleaning mode that can correct and prevent these types of problems.
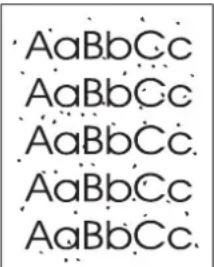
text_image
AaBbCc AaBbCc AaBbCc AaBbCc AaBbCc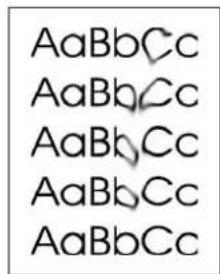
text_image
AaBbCc AaBbCc AaBbCc AaBbCc AaBbCcClean the paper path using HP ToolboxFX

NOTE Use the following procedure to clean the paper path using the HP ToolboxFX. To clean the engine when the computer is running an operating system that does not support HP ToolboxFX, find \util\cleanpage on the MFP CD-ROM for instructions on the cleaning page.
- Ensure the MFP is turned on and in the Ready state.
- Open the HP ToolboxFX.
- On the Help tab, click Troubleshooting. Follow the instructions under the Cleaning Page section.
13 Managing and maintaining the multifunction peripheral (MFP)
This MFP includes several software tools that help monitor, troubleshoot problems, and maintain the MFP. Information about using these tools is in the following sections:
• Information pages
- Menu map
HP ToolboxFX
• Use the embedded Web server
- Manage supplies
• Clean the scanner glass
Clean the MFP
• Cartridge-out override
• Change print cartridges
• Calibrate the MFP
Information pages
Special pages reside within the MFP memory. These pages help diagnose and solve MFP problems.
If the MFP language was not correctly set during installation, set the language manually so that the pages print in one of the supported languages. Change the language by using the HP ToolboxFX.
Demo page
To print the Demo page, press Scan To and Start Scan simultaneously. A demo page can also be printed from the HP ToolboxFX.
Configuration page
The Configuration page lists the current MFP settings and properties. Print a Configuration page from the MFP or the HP ToolboxFX.
To print the Configuration page from the control panel
- Press Menu.
- Use the navigation arrows to select the Reports menu.
- Press OK.
- Press Left arrow or Right arrow to select Configuration report.
- Press OK to print the Configuration Report page.
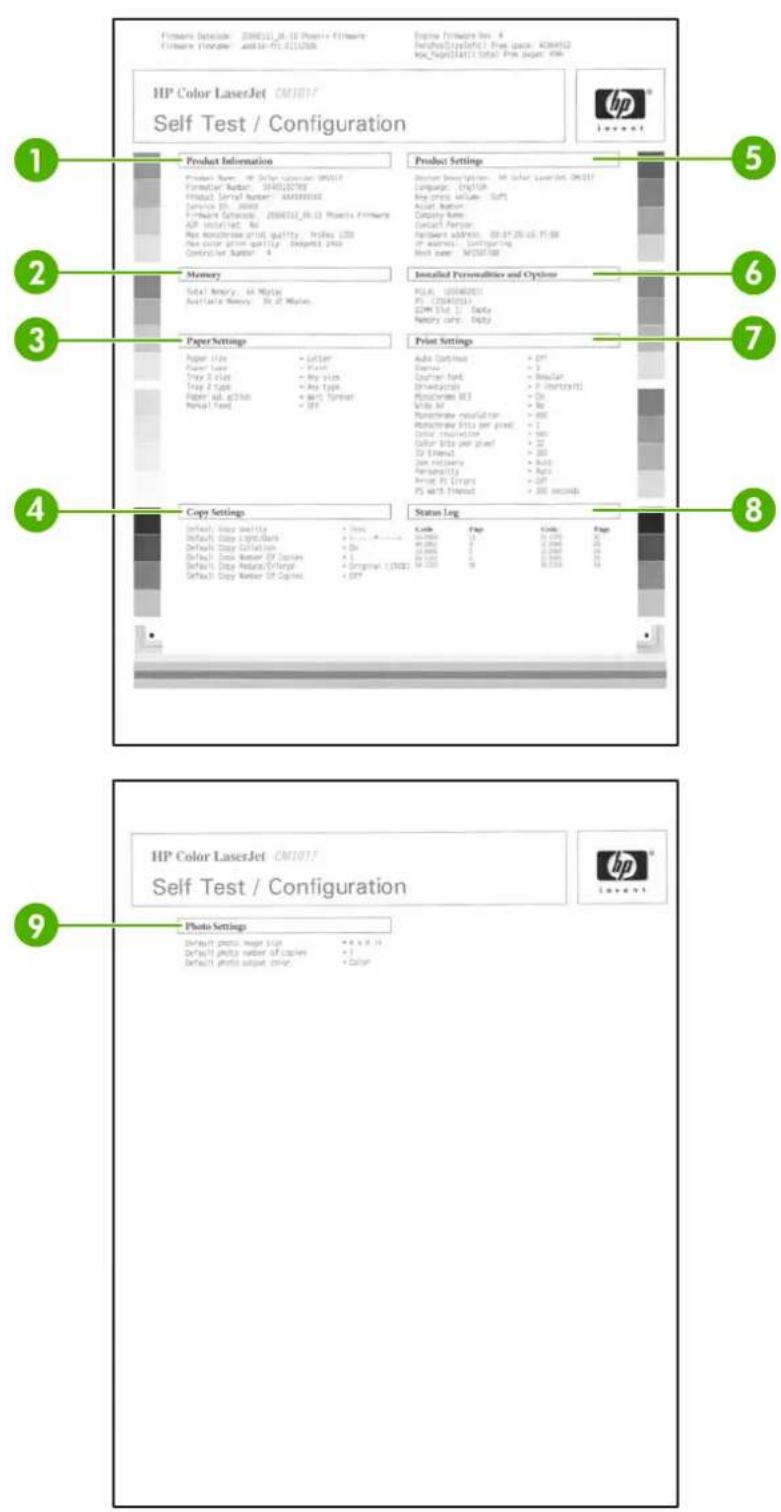
text_image
HP Color LaserJet CM101F Self Test / Configuration Product Information Product Name: HP Color LaserJet CM101F Formular Number: 504020798 Product Serial Number: AM3885165 Service ID: 00000 Product Description: 20060102_R0.13 Projects Firmware ASP installation: No Max Monochrome print quality: Highes LDO Max color print quality: Default PBO Controller Number: 4 Memory Total Memory: 64 Mplus Available Memory: 3x 25 Mplus Paper Settings Paper Size = Letter Paper Type = Plant Tray Size = My size Tray Type = Key type Paper size/Action = with format Manual Field = Off Print Settings Audio Content = 2m Exercise = 2 Counter port = Regular Drivestation = P (Shortfall) Monochrome RCE = 0m W/O bit = 0m Monochrome resolution = 600 Monochrome bits per pixel = 1 Color resolution = 600 Color bits per pixel = 32 CD Ethernet = 300 Sim recovery = Auto Personality = Auto Drive PS Error = 547 PS with Ethernet = 200 seconds Copy Settings Default Copy quality: - Tools Default Copy LightBank: - Windows Default Copy Digital: - Open Default Copy Number OF Colors: - 1 Default Copy Modulation/Charges: - Original U3023 Default Copy Number of Colors: - Off Status Leg Code Page Code Page 40.000 14 2.000 2.000 40.000 14 2.000 2.000 40.000 14 2.000 2.000 40.000 14 2.000 2.000- Product Information. Displays basic information about the MFP, such as the product name and the serial number.
-
Memory. Lists memory-related information, such as the total memory that is installed.
-
Paper Settings. Lists information about the media type for each tray and about the type settings for all the media that the MFP supports.
- Copy Settings. Lists current MFP default copy information.
- Product Settings. Lists information about the MFP, including the language and the company name.
- Installed Personalities and Options. Contains current MFP font, DIMM memory, and memory card information.
- Printer Settings. Displays MFP printer settings, such as color options, copies, and jam recovery information.
- Status Log. Displays information about MFP errors.
- Photo Settings. Displays default photo information such as image size, number of copies, and output color.
Supplies Status page
The Supplies Status page lists the remaining life of HP print cartridges. It also lists the estimated pages remaining, number of pages printed, and other supplies information. A Supplies Status page can be obtained from the MFP or the HP ToolboxFX.
To print the Supplies Status page from the control panel
- Press Menu.
- Use the navigation arrows to select the Reports menu.
- Press OK.
- Use the navigation arrows to select Supplies status page.
- Press OK to print the Supplies Status page.

NOTE Supplies information is also available through the HP ToolboxFX.
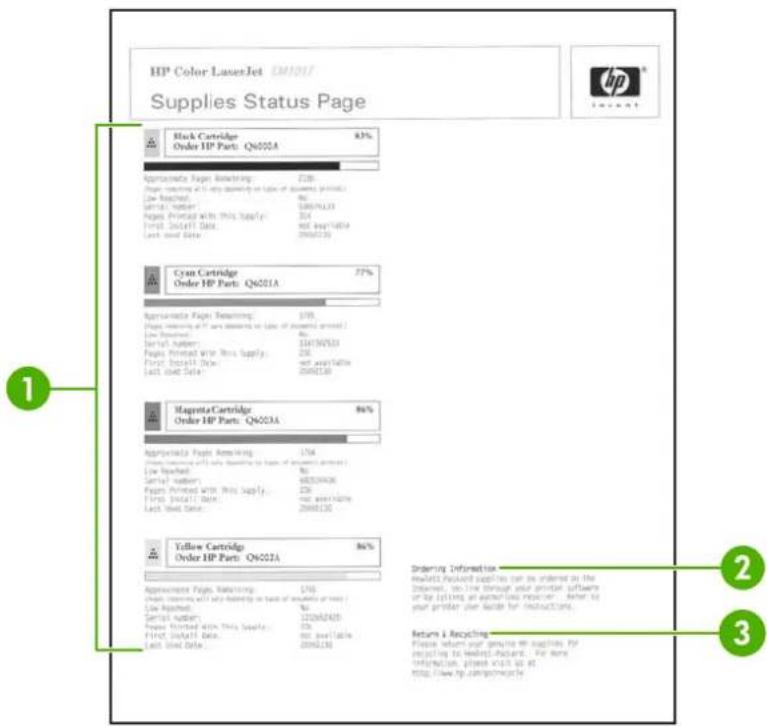
text_image
HP Color LaserJet EM1017 Supplies Status Page Black Cartridge Order HP Parts: Q6021A 83% Applicable Page Remaining: 2GB. Page Remaining will only be displayed or type of software printed: Low Adjusted: No Serial Number: 53897633 Pages Printed with This Supply: 2GB First Install Date: Not available Last Sold Date: 2008/1/20 Cyan Cartridge Order HP Parts: Q6021A 77% Applicable Page Remaining: 1GB. Page Remaining will only be displayed or type of software printed: Low Adjusted: No Serial Number: 114139553 Pages Printed with This Supply: 2GB First Install Date: Not available Last Sold Date: 2008/1/20 Magneto Cartridge Order HP Parts: Q6021A 86% Applicable Page Remaining: 1GB. Page Remaining will only be displayed or type of software printed: Low Adjusted: No Serial Number: 68359426 Pages Printed with This Supply: 2GB First Install Date: Not available Last Sold Date: 2008/1/20 Yellow Cartridge Order HP Parts: Q6021A 86% Applicable Page Remaining: 1GB. Page Remaining will only be displayed or type of software printed: Low Adjusted: No Serial Number: 112368435 Pages Printed with This Supply: 2GB First Install Date: Not available Last Sold Date: 2008/1/20 Ordering Information Newell Packaged Supplies can be ordered on the Directors, so I live through your printset software or the printing an adapter class reader can. Note to your printer use outside for instructions. Return & Receiving Please return your genuine HP supplies. IP requiring its newell Packaged. For any information, please visit us at: http://www.hp.com/gp/packyard/ 1 2 3- Print cartridge area. Displays a section for each of the print cartridges and provides information about HP print cartridges. This information includes the part number for each print cartridge, whether each print cartridge is low, and the life remaining for each print cartridge, which is expressed as a percentage, as a graphic, and as the estimated number of pages remaining. This information might not be provided for non-HP supplies. In some cases, if a non-HP supply is installed, an alert message displays instead.
- Ordering Information. Displays basic information about how to order new HP supplies.
- Return & Recycling. Displays a link to the Web site that contains information about recycling.
Networking page (HP Color LaserJet CM1017 MFP only)
The Networking report option prints a Network configuration report.
To print the Network configuration report from the control panel
- Press Menu.
- Press the navigation arrows to select the Reports menu.
- Press OK.
- Press the navigation arrows to select Network report.
- Press OK to print the Network Configuration page.
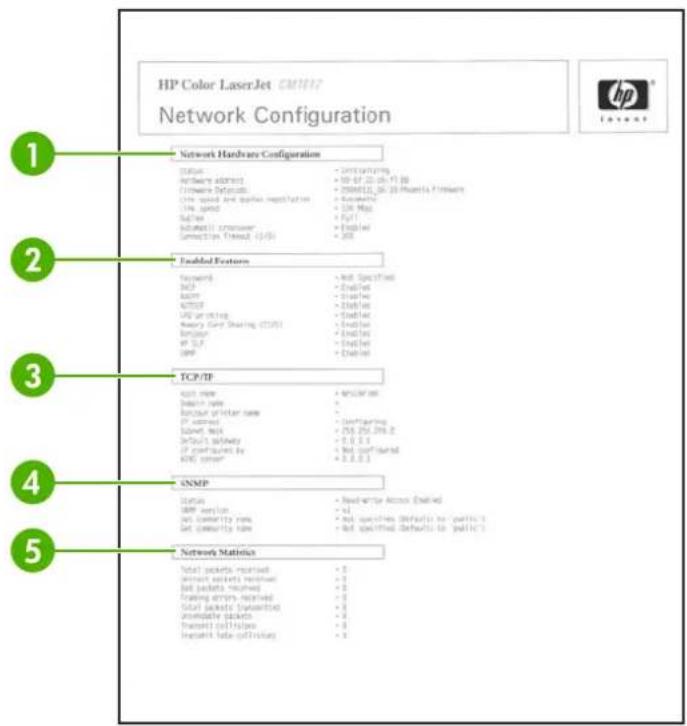
text_image
HP Color LaserJet CMH17 Network Configuration 1 Network Hardware Configuration Status - Defaulting No. 67.20 db/130 + 90-67.20 db/130 Hardware Defaults - 2006E11.06 (30 Phants Firmware) One speed and power installation - Automatics Line speed - 50 Mbps Ruler - Full Absolute crossover - Enabled Connection Thread (JDS) - 200 2 Enabled Features Password - Not Specified NCD - Enabled ADNT - Enabled ACTSIP - Enabled USB micro - Enabled Binary Grid Sharing (CSPS) - Enabled Bipolar - Enabled IP SLF - Enabled SNP - Enabled TCP/IP GPT now - Normalization Diasin now - Biosur printer now - IP current - Offspring Screw, disk - PS 254.298.2 Default subway - 0.0.0.1 IP configuration by KNE system - Not Confused SNMP - 0.0.0.1 Status - Newuser Access Enabled SNP version - x1 on community now - Not specified defaults to defaults: Set community now - Not specified defaults to policies: 5 Network Statistics Total packets received - 0 out packets received - 0 Bad packets received - 0 Floating errors received - 0 Total packets transmitted - 0 Available packets - 0 Through packets - 0 Invent data transmitted - 0- Network Hardware Configuration. Displays current MFP hardware configuration such as status, hardware address, firmware datecode, link speed information, and connection timeout.
- Enabled Features. Displays password, network protocol, memory card, LPD printing, Bonjour, and HPSLP settings.
- TCP/IP. Displays host, domain, and printer name, and other IP information.
- SNMP. Displays status, version, and set/get community names.
- Network Statistics. Displays packet and collision information.
Fonts pages
The Fonts pages provide lists of the available fonts on the MFP, including HP PostScript Level 3 fonts, PCL fonts, and PCL6 fonts.
To print a fonts page from the control panel
- Press Menu.
- Use the navigation arrows to select the Reports menu.
- Press OK.
- Use the navigation arrows to select PS font list, or PCL font list.
- Press OK to print the selected Fonts page.
Usage page
The Usage Page provides information on the number and types of pages printed by the MFP.
Print the usage page by:
- Press Menu.
- Press the navigation arrows to select the Reports menu.
- Press OK.
- Press the navigation arrows to select the Usage page.
- Press OK to print the Usage Page.
Menu map
The menu map lists the menu structure for each option available on the control panel.
To print a menu map
- Press Menu.
- Use the navigation arrows to select the Reports menu.
- Press OK.
- Use the navigation arrows to select Menu structure.
- Press OK to print the Menu map.
HP ToolboxFX
HP ToolboxFX is a software program that performs these tasks:
- Checks the MFP status.
- Configures the MFP settings.
• Displays problem solving information.
• Displays online documentation.
View the HP ToolboxFX when the MFP is directly connected to the computer or when it is connected to the network. Perform a software installation using the HP ToolboxFX.

NOTE HP ToolboxFX is not supported for Windows Server 2003 or Macintosh operating systems.
NOTE Internet access is not required to open and use the HP ToolboxFX.
View HP ToolboxFX
Open HP ToolboxFX in one of these ways:
• In the Windows program group entry and the system tray icon, double-click HP ToolboxFX icon.
- On the Windows Start menu, click Programs (or All Programs in Windows XP), click HP, then click HP ToolboxFX.
The HP ToolboxFX software contains the following sections:
Status
Alerts
Help
System Settings
- Print Settings
• Network settings
Status
The HP ToolboxFX Status folder contains links to the following main pages:
- Device Status: View MFP status information. This page indicates MFP conditions such as a jam or an empty tray. When a problem is corrected with the MFP, click Refresh button to update the MFP status.
• Supplies Status Page: View detailed supplies status such as the estimated percent of toner remaining in the print cartridge and the number of pages that have been printed with the current print cartridge. This page also has links to order supplies and to find recycling information.
• Device Configuration: View a detailed description of the current MFP configuration, including the amount of memory installed and whether optional trays are installed.
• Network configuration: View a detailed description of the current network configuration, including the IP address and network status. - Print Info Pages: Print the Configuration page and various other information pages that are available for the MFP, such as the Supplies Status page and the Demo page.
• Event Log: View a history of MFP errors. The most recent error is at the top of the list.
Event log
The Event log is a four-column table where the MFP events are logged for reference. The log contains codes that correspond to the error messages that appears on the MFP control-panel display. The number in the Page Count column specifies the total number of pages that the MFP had printed when the error occurred. The Event log also contains a brief description of the error. For more information about error messages, see Control-panel messages.
Alerts
The HP ToolboxFX Alerts folder contains links to the following main pages:
- Set Up Status Alerts: Set up the MFP to send pop-up alerts for certain events, such as low toner levels.
- Set Up Email Alerts: Set up the MFP to send e-mail alert messages for certain events, such as low toner levels.
Set up status alerts
Use the HP ToolboxFX to set up the MFP so that it issues pop-up alerts to the computer when certain events occur. Events that trigger alerts include jams, low levels of toner in HP print cartridges, non-HP print cartridge in use, empty input trays, and specific error messages.
Select the pop-up format, the system tray icon format, the desktop format, or all three for the alerts. The pop-up alerts only appear when the MFP is printing from the computer on which you set up the alerts.

NOTE Click Apply to make the changes take effect.
Set up e-mail alerts
Use HP ToolboxFX to configure a maximum of two e-mail addresses to receive alerts when certain events occur. It is possible to specify different events for each e-mail address. Enter the information for the e-mail server that will send out the e-mail alert messages for the MFP.

NOTE Click Apply to make the changes take effect.
Help
The HP ToolboxFX Help folder contains links to the following main pages:
- Troubleshooting: Print troubleshooting pages, clean the MFP, and display Microsoft Office Basic Colors. For more information on Microsoft Office Basic colors, see Match colors.
• How Do I: View the How Do I? Help.
• Animated Demonstrations - User Guide: View information about the MFP usage, warranty, specifications, and support. The user guide is available in both HTML and PDF format.
System Settings
The HP ToolboxFX System Settings folder contains links to the following main pages:
- Device information. View information about the MFP, such as the description and a contact person.
- Paper handling. Change the MFP paper-handling settings, such as default paper size and default paper type.
• Print quality. Change the MFP print-quality settings. - Print density. Change the print density settings, such as contrast, highlights, midtones, and shadows.
- Paper types. Change the MFP mode settings for each media type, such as letterhead, prepunched, or glossy paper.
• System Setup. Change the MFP system settings, such as MFP language and jam recovery.
• Service. Gain access to various procedures required to maintain the MFP. - Device Polling. The HP ToolboxFX periodically communicates with your device to determine device status and enabled features.
- Save and restore settings. Save the current MFP settings to a file on the computer. Use this file to load the same settings onto another printer or MFP to restore these settings to this MFP at a later time.
- Password. If set, the password must be entered to change any of the HP ToolboxFX system settings, email alerts, or network settings.
Device information
Save the HP ToolboxFX Device information for future reference about the MFP. The information that is typed in these fields appears on the Configuration page. It is possible to type any character in each of these fields.

NOTE Click Apply to make the changes take effect.
Paper handling
Use the HP ToolboxFX paper-handling options to configure the default settings. These are the same options that are available on the System setup and Paper setup menus on the control panel. For more information, see Control-panel menus.
Three options accommodate handling print jobs when the product is out of media:
- Select Wait for paper to be loaded.
- Select Cancel from the Paper out action drop-down list to cancel the print job.
- Select Override from the Paper out time drop-down list to send the print job to another paper tray.
The Paper out time field specifies how long the MFP waits before acting on your selections. It is possible to specify from 0 to 3600 seconds.

NOTE Click Apply to make the changes take effect.
Print quality
Use the HP ToolboxFX print-quality options to improve the print job appearance. These same options are available on the System setup and Print quality menu on the control panel. For more information, see Control-panel menus.
These options control print quality.
• Color Calibration.
• Power On Calibration
- Calibration Timing
- Calibrate Now
- Grayscale Printing.
Grayscale printing options Description
Resolution Select 600 resolution for average print jobs and Fast Res
1200 for higher-quality print jobs. Select ProRes 1200 for the highest-quality print job, but a longer printing time.
REt Choose REt which HP provides for improved print quality.

NOTE Click Apply to make the changes take effect.
Print density
The print density settings control making fine adjustments to the density (amount) of Cyan, Magenta, Yellow, and Black toner in images, pages, and documents.
Print density settings Description
Contrasts Contrast is the density difference between light (highlight) and
dark (shadow) colors. To increase the difference between light and dark colors (equivalent to a negative highlight adjustment
| Print density settings Description | |
| and a positive shadow adjustment), use a positive contrast setting. To decrease the difference between light and dark colors (equivalent to a positive highlight adjustment and a negative shadow adjustment), use a negative contrast setting. | |
| Highlights Highlight colors are colors near white. To make highlight colors | darker, use a positive highlight setting, and to make highlight colors lighter use a negative highlight setting. This adjustment does not affect midtone or shadow colors. |
| Midtones Midtone colors are about halfway between white and solid density. To make midtone colors darker, use a positive midtone setting, and to make midtone colors lighter use a negative highlight setting. This adjustment does not affect highlight or shadow colors. | |
| Shadows Shadow colors are colors near solid density. To make shadow colors darker, use a positive shadow setting, and to make shadow colors lighter use a negative shadow setting. This adjustment does not affect highlight or midtone colors. | |
Set the system password
Use HP ToolboxFX to set a system password.
- Open HP ToolboxFX and click System Settings.

NOTE If a password has been set for the MFP previously, you are prompted to type the password. Type the password, then click Apply.
-
Click Password.
-
In the Password box, type the exact password to set, then in the Confirm password box, type the same password again to confirm the choice.
-
Click Apply to save the password.
To remove the system password
- Open HP ToolboxFX and click System Settings.

NOTE If a password has been set for the MFP previously, you are prompted to type the password. Type the password, then click Apply.
-
Click Password.
-
Delete all characters from both the Password field and the Confirm password field.
-
Click Apply to remove the password.
To reset all MFP settings to factory defaults
If you forget or lose your password, use the following steps to reset all your MFP settings to factory defaults.

WARNING! Following these steps will clear the password and all of the changes you have made to the MFP settings.
- On the control panel, press Menu.
- Press the navigation arrows to select the Service menu.
- Press OK.
- Press the navigation arrows to select the Restore defaults menu.
- Press OK.
- Press OK again to confirm restoring the defaults.
Paper types
Use these HP ToolboxFX Paper types options to configure print modes that correspond to the various media types. When selecting Restore modes, all of the modes are reset to the factory settings.

NOTE Click Apply to make the changes take effect.
System setup
Use the HP ToolboxFX system settings options to configure miscellaneous print settings. These settings are not available from the control panel.

NOTE Click Apply to make the changes take effect.
Service
During the printing process, paper, toner, and dust particles can accumulate inside the MFP. Over time, this buildup can cause print-quality problems such as toner specks or smearing. HP ToolboxFX provides an easy method for cleaning the paper path. For more information, see Clean the paper path using HP ToolboxFX.
Device Polling Page
The HP ToolboxFX periodically communicates with your device to determine device status and enabled features. Use the Polling Page to turn off pop-up alerts and the Scan To and Start Scan buttons located on the device.
Print Settings
The HP ToolboxFX Print Settings folder contains links to the following main pages:
Printing
Use the HP ToolboxFX printing settings options to configure the settings for all print functions. These are the same options that are available on the Print settings menu on the control panel. For more information, see Control-panel menus.

NOTE Click Apply to make the changes take effect.
PCL5c
Configure these PCL5c settings:
- Font number
- Font pitch
- Font point size
Symbol set - Append CR to LF
Form length
PostScript
Use the PostScript option when using the PostScript print personality. When the Print PostScript error option is turned on, the PostScript error page automatically prints when PostScript errors occur.

NOTE Click Apply to make the changes take effect.
Memory card (HP Color LaserJet CM1017 MFP only)
Use the three HP ToolboxFX memory card options to configure print settings when using memory cards.
• Photo image size. Select the size photos to print from the drop-down list.
• Photo number of copies. Type the number of copies from 0 to 99 to print for each image.
• Photo output color. Select either Color or Monochrome from the drop-down list.
Click the Enable memory cards checkbox to save the settings.
Network settings
The network administrator can use the HP ToolboxFX Network Settings Tab folder to control the network-related MFP settings when it is connected to an IP-based network.
The settings are:
IP Configuration
- Advanced
SNMP
• Network Configuration
Use the embedded Web server
When the MFP is directly connected to a computer, use the HP ToolboxFX to view Web pages for the MFP status.
When the MFP is connected to the network, the embedded Web server is automatically available. Access the embedded Web server from any supported browser.
The embedded Web server displays MFP and network status and manages printing functions from the computer instead of using the control panel. Below are examples of embedded Web server functions:
• View MFP status information.
- Set the type of paper loaded in each tray.
• Determine the remaining life on all supplies and order new ones.
• View and change tray configurations.
• View and change MFP settings.
• View and print internal information pages.
• View and change network configuration.
The embedded Web server supports these browsers for Windows:
Windows Macintosh
| Microsoft Internet Explorer 6.0 and later Safari 1.2 or later |
| Netscape 7.0 or later Netscape 7.0 or later |
| Opera 7.0 or later Opera 7.0 or later |
| Firefox 1.0 or later Firefox 1.0 or later |
| Mozilla 1.6 or later Mozilla 1.6 or later |
The embedded Web server works when the MFP is connected to an IP-based network. The embedded Web server does not support IPX-based or AppleTalk MFP connections. Internet access is not required to open and use the embedded Web server.
Access the embedded Web server using a network connection
Using a supported Web browser, type the IP address for the MFP in the address/URL field. (To find the IP address, print a configuration page. For more information about printing a configuration page, see Configuration page.)

NOTE If there is no access to the embedded Web server using the IP address, try using the host name.
- The embedded Web server has three tabs that contain MFP settings and information:
• Information tab
- Settings tab
- Networking tab
- Click the appropriate tab.
Information tab
The Information pages group consists of the following pages.
- Device Status: Displays MFP status and shows the remaining life of HP supplies. Zero percent (0%) indicates that a supply is empty. The page also displays the type and size of print media set for each tray.
- Configuration: Displays the network and product information found on the MFP Configuration page, such as page counts, print settings, and paper options.
- Supplies Status: Displays the remaining life of HP supplies. Zero percent (0%) indicates that a supply is empty. This page also displays supplies part numbers. To order new supplies, click Order Supplies in the Other Links area on the left side of the window. Internet access is required to visit any Web site.
• Print Info Pages: Provides a remote way to print an internal page for a MFP.
Settings tab
This tab allows MFP configuration from a computer. The Settings tab can be password protected. If this MFP is networked, always consult with the MFP administrator before changing settings on this tab.
The Settings tab contains these pages
• Paper Handling: Configure paper handling settings from this page.
- Printing: Configure the IO Timeout from this page.
• Print Quality: Configure color calibration and optimize settings.
- Print Density: Configure print density settings including contrast, highlights, midtones, and shadows.
• Paper Type Settings: Configure paper types
• Print Modes: Configure print mode settings.
- System Setup: Sets up system settings, including jam recovery, auto continue, display contrast, and MFP language.
• Service: Starts the cleaning mode and restores factory settings.
• Password: Sets or changes the administrator password.
Networking tab
This tab allows the network administrator to control MFP network-related settings when it is connected to an IP-based network.
• IP Configuration: Sets the IP configuration.
- Advanced: Enables network features such as SLP Config, DHCP, BOOTP, and AutoIP.
• mDNS: Sets the mDNS. These settings to turn on or off Rendezvous or Bonjour discovery.
• SNMP: Sets SNMP protocols.
Other links found in HP ToolboxFX
Internet access is required to use any of these links. When using a dial-up connection and a connection to the embedded web server was not first opened, connect to the embedded Web server before visiting these Web sites. Connecting might require closing and reopening the embedded Web server.
HP Instant Support™: Connects to the HP Web site to help find solutions. This service analyzes the MFP error log and configuration information to provide diagnostic and support information specific to the MFP.
• Product Registration: Click to connect with the HP Web site to register the product.
- Order Supplies: Click to connect with the HP Web site and order genuine HP supplies, such as print cartridges and paper.
- Product Support: Connects to the support site for the HP Color LaserJet CM1015/CM1017 MFP to search for help regarding general topics.
Manage supplies
For warranty information about these supplies, see Print Cartridge Limited Warranty Statement.
Supplies life
The life of a print cartridge depends on the amount of toner that print jobs require. When printing text at approximately 5% coverage, a cyan, magenta, or yellow print cartridge for the HP Color LaserJet CM1015/CM1017 MFP lasts an average of 2,000 pages, and a black print cartridge lasts an average of 2,500 pages. A typical business letter has 5% coverage.
Check and order supplies
Check the supplies status from the control panel by printing a Supplies Status page, or viewing the HP ToolboxFX; Hewlett-Packard recommends placing an order for a replacement print cartridge when the Low message for a print cartridge first displays. For typical use, the Order message indicates that approximately two weeks of life remains. When using a new, authentic HP print cartridge, it is possible to obtain the following types of supplies information:
• Amount of cartridge remaining
• Estimated number of pages remaining
• Number of pages printed
• Other supplies information

NOTE If the MFP is connected to the network, it is possible to set the HP ToolboxFX to send e-mail notification when a print cartridge is low or is near the end of its useful life. If the MFP is directly connected to a computer, set the HP ToolboxFX to notify you when supplies are low.
Check supply status and order using the control panel
Do one of the following:
- Check the supplies status gauges on the control panel. These gauges indicate when a print cartridge is low or empty. The “?” also indicates when a non-HP print cartridge is first installed.
- To print the Supplies Status page from the MFP, select Reports Menu, then Supplies Status. See Supplies Status page for more information.
If the supplies levels are low, reorder supplies through the local HP dealer, by telephone, or online. See Accessories and supplies information for part numbers. See http://www.hp.com/go/ljsupplies to order online.
Check and order supplies using HP ToolboxFX
Configure the HP ToolboxFX to send an alert when the supplies are low. Receive alerts as an e-mail, a pop-up message, or a taskbar icon. Order supplies from the HP ToolboxFX by choosing from the Other Links area, and clicking Order supplies. Internet access is required to connect to the web site.
For more information, see HP ToolboxFX.
Check and order supplies using HP Solution Center
In HP Solution Center, select the MFP. The device status page shows supplies information. To order use the HP ToolboxFX.
Supplies Storage Guidelines
Follow these guidelines for storing print cartridges:
- Do not remove the print cartridge from its package until it is ready for use.

CAUTION To prevent damage, do not expose the print cartridge to light for more than a few minutes.
• See Table C-5 Environmental specifications for operating and storage temperature ranges.
• Store the supply in a horizontal position.
- Store the supply in a dark, dry location away from heat and magnetic sources.
Replace and recycle supplies
When installing a new HP print cartridge, follow the instructions included on the new supply's box, or see the Getting Started Guide.
When recycling supplies:
- Place the used supply in the box in which the new supply arrived
• Complete the enclosed return label - Send the used supply to HP for recycling
For complete information, see the recycling guide included with each new HP supply item. See HP LaserJet printing supplies for more information about HP's recycling program.
HP policy on non-HP supplies
Hewlett-Packard Company cannot recommend the use of non-HP supplies, either new or remanufactured. When they are not HP products, HP cannot influence the product design or quality. Service or repair required as a result of using a non-HP supply is not covered under the MFP warranty.
When inserting a supply into the MFP, the MFP displays whether or not the supply is a genuine HP supply. When a genuine HP is inserted and that supply has reached the low state from another HP MFP, the MFP identifies the supply as non-HP. Simply return the supply to the original MFP to reactivate HP features and functionality.
Reset the MFP for non-HP supplies
When a non-HP print cartridge is installed, a question mark appears in the displays above the cartridge that is non-HP. To print with this supply press OK the first time this non-HP supply is installed. The status gauges do not indicate when this type of supply is low or empty.

CAUTION The MFP may not stop printing with non-HP supplies. MFP damage can occur if the MFP prints with an empty print cartridge. See Hewlett-Packard limited warranty statement and Print Cartridge Limited Warranty Statement.
HP anti-counterfeit supplies Web site
Visit the HP anti-counterfeit supplies Web site at http://www.hp.com/go/anticounterfeit if the supplies status gauges or HP ToolboxFX indicates that the print cartridge is not an HP print cartridge and you think that it is genuine.
Clean the scanner glass
Dirty glass from debris may cause scan and copy image defects.
-
Turn device off, unplug the power cord from the electrical socket, and raise the lid.
-
Clean the glass by using a soft lint-free cloth that has been moistened with nonabrasive glass cleaner.
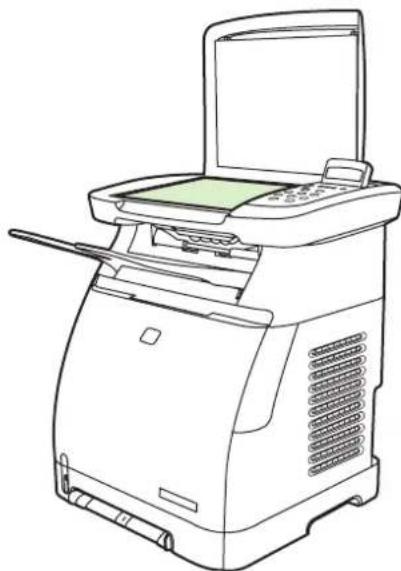
natural_image
Line drawing of a printer with front panel and control panel (no text or symbols)
CAUTION Do not use abrasives, acetone, benzene, ammonia, ethyl alcohol, or carbon tetrachloride on any part of the device; these can damage the device. Do not place liquids directly on the glass. They might seep under it and damage the device.
- To prevent spotting, dry the glass using a soft lint-free cloth.
Clean the MFP
During the printing process, paper, toner and dust particles can accumulate inside the MFP. Over time, this buildup can cause print-quality problems such as toner specks or smearing. This MFP has a cleaning mode that can correct and prevent these types of problems.
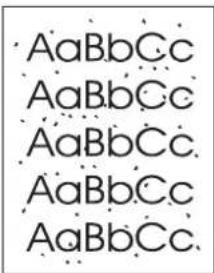
text_image
AaBbCc AaBbCc AaBbCc AaBbCc AaBbCc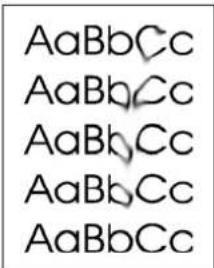
text_image
AaBbCc AaBbCc AaBbCc AaBbCc AaBbCcClean the paper path using HP ToolboxFX

NOTE Use the following procedure to clean the paper path using the HP ToolboxFX. To clean the engine when the computer is running an operating system that does not support HP ToolboxFX, find \util\cleanpage on the MFP CD-ROM for instructions on the cleaning page.
- Ensure the MFP is turned on and in the Ready state.
- Open the HP ToolboxFX.
- On the Help tab, click Troubleshooting. Follow the instructions under the Cleaning Page section.
Cartridge-out override
The HP Color LaserJet CM1015/CM1017 MFP displays an Order supplies message when a cartridge is running low and a Replace supplies message when a cartridge has been depleted. To ensure optimal print quality, HP recommends replacing a cartridge when the Replace supplies message is displayed. Replacing the cartridge at this point can help prevent waste of media or other cartridges when one cartridge produces poor print quality.
The Cartridge-out override feature allows the MFP to continue to use a cartridge that has reached the recommended replacement point.

WARNING! Using override can result in unsatisfactory print quality and unavailability of certain features (such as toner remaining information).
WARNING! All print defects or supply failures incurred when an HP supply is used in override are not considered defects in materials or workmanship in the supply under HP's Print Cartridge Limited Warranty Statement. For Warranty information, see Print Cartridge Limited Warranty Statement.
Configuration
Cartridge-out override can only be enabled from the control-panel menu.
- From the main menu, press the navigation arrows to choose System setup and press OK.
- Press the navigation arrows to choose Print quality and press OK.
- Press the navigation arrows to choose Replace supplies and press OK.
- Press the navigation arrows to choose Override out and press OK.
- Press OK.
If Stop at out is chosen, the MFP stops printing when a cartridge reaches the recommended replacement point. When Override out is selected, the MFP continues printing when a cartridge reaches the recommended replacement point. The factory default setting is Stop at out.
On-going operation
Override can be enabled or disabled at any time, and does not have to be re-enabled for each cartridge. The MFP automatically continues printing when a cartridge reaches recommended replacement. The MFP displays the message Replace supply. Override in use. while a cartridge is used in Override mode. When the cartridge is replaced with a new supply, Override de-activates until another cartridge reaches recommended replacement.
Change print cartridges
When a print cartridge approaches the end of useful life, the control panel displays a message recommending ordering a replacement. The MFP can continue to print using the current print cartridge until the control panel displays a message instructing cartridge replacement.
The MFP uses four colors and has a different print cartridge for each color: black (K), cyan (C), magenta (M), and yellow (Y).

NOTE In order to print, this MFP requires all print cartridges to be installed.
Replace the appropriate color print cartridge when the control panel displays one of the following messages:
- Replace yellow cartridge
- Replace magenta cartridge
- Replace cyan cartridge
- Replace black cartridge
The control panel display also indicates the color that should be replaced (unless a genuine HP cartridge is not currently installed).
Change the print cartridge
- Open the front door.
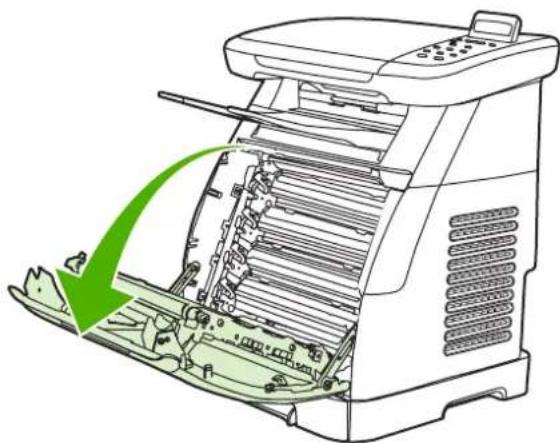
natural_image
Diagram of a printer with green arrow indicating process flow (no text or symbols)
CAUTION Do not place anything on the transfer belt (ETB), which is located on the inside of the front door.
- Remove the used print cartridge from the MFP.
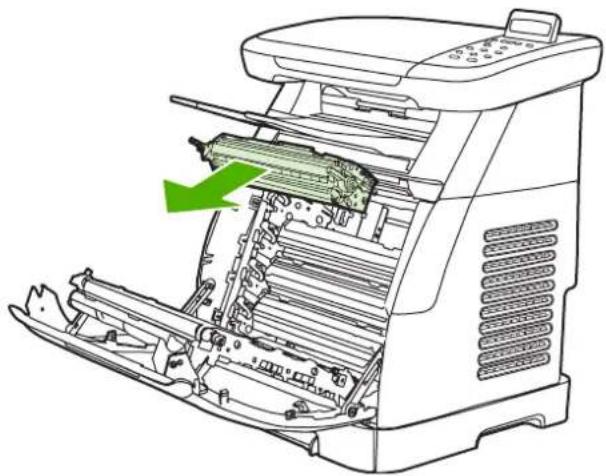
natural_image
Line drawing of a printer's internal structure showing internal components and a green arrow indicating a component (no text or symbols present)- Remove the new print cartridge from the bag. Place the used print cartridge in the bag for recycling.
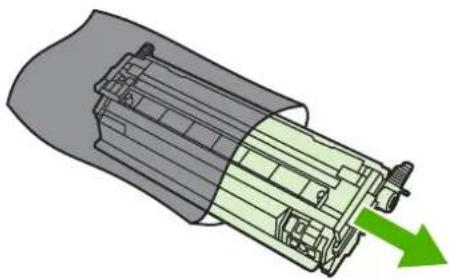
natural_image
3D diagram of a mechanical assembly with a green arrow indicating direction (no text or symbols)- Grasp both sides of the print cartridge by the blue handles and distribute the toner by gently rocking the print cartridge from side to side.

CAUTION Do not touch the shutter or the surface of the roller.
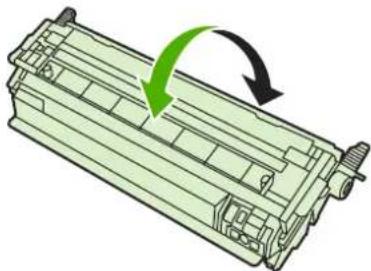
natural_image
Diagram of a mechanical component with green and black arrows indicating rotation or movement (no text or symbols)- Remove the shipping locks and the shipping tape from the new print cartridge. Discard the shipping tape and shipping locks according to local regulations.
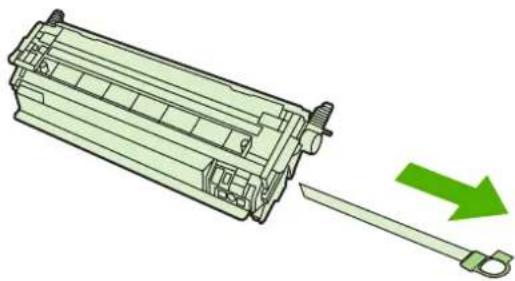
natural_image
Diagram of a mechanical component with a green arrow indicating direction (no text or symbols present)- Align the print cartridge with the tracks inside the MFP, and using the handles, insert the print cartridge until it is firmly seated.
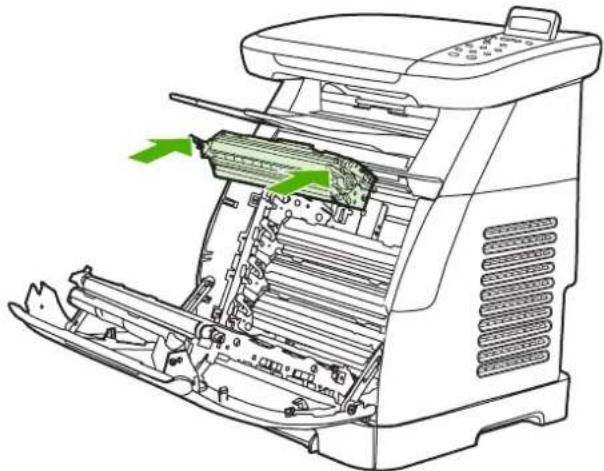
natural_image
Line drawing of a printer internal structure with green arrows indicating parts (no text or symbols)- Firmly close the front door.
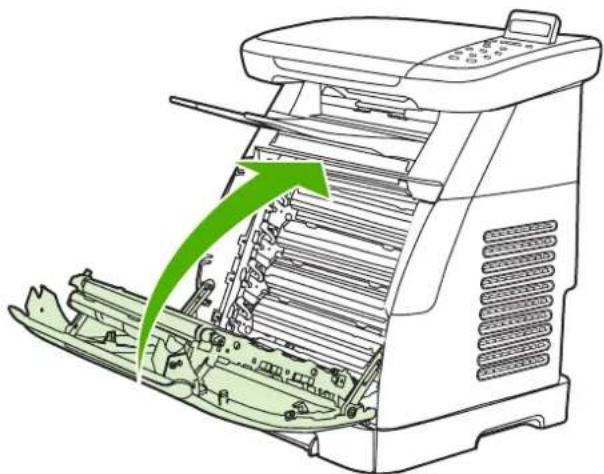
natural_image
Diagram of a printer's internal structure showing green arrows indicating assembly or process flow (no text or symbols present)After a short time, the control panel should display Ready.

NOTE If a cartridge is in the wrong slot or is the wrong type for the MFP, the control panel displays one of the following messages: Incorrect yellow cartridge, Incorrect magenta cartridge, Incorrect cyan cartridge, Incorrect black cartridge, or Incorrect supplies.
- Installation is complete. Place the used print cartridge in the box in which the new cartridge arrived. See the enclosed recycling guide for recycling instructions.
- When using a non-HP print cartridge, check the MFP control panel for further instructions.
For additional help, go to http://www.hp.com/support/clj1015_1017.

NOTE After replacing or changing a black print cartridge, a cleaning page automatically prints. This helps prevent speckles on the front or back of printed documents. For a more thorough cleaning, see Clean the paper path using HP ToolboxFX.
Calibrate the MFP
The MFP automatically self-calibrates, but calibration settings can be manually adjusted by using the HP ToolboxFX.
Environmental differences or aging print cartridges might cause fluctuations in image density. The MFP accounts for this with image stabilization control. The MFP automatically calibrates at various times to maintain the highest level of print quality. Also request a calibration by using the HP ToolboxFX.
The MFP does not interrupt a print job to calibrate. It waits until the job is complete before calibrating or cleaning. While the MFP is calibrating, it pauses printing for the time that is required to complete the calibration.

NOTE This calibration process calibrates the printer. It does not calibrate the image scanner.
Calibrate the MFP from the front control panel
-
Press Menu.
-
Press the navigation arrows until the display reads System setup. Press OK.
- Press the navigation arrows until the display reads Print quality. Press OK.
- Press the navigation arrows until the display reads Calibrate color. Press OK.
- Press the navigation arrows until the display reads Calibrate now. Press OK.
- Press OK to confirm Calibrate now.
Calibrate the MFP from the HP ToolboxFX
-
Open the HP ToolboxFX in one of these ways:
-
On the desktop, double-click the HP ToolboxFX icon.
-
On the Windows Start menu, click Programs (All Programs in Windows XP), click HP, click HP Color LaserJet CM1015/CM1017 Series, click HP ToolboxFX, then click Help.
-
Click the System Settings tab then click Print Quality.
-
In the Calibration section, click Calibrate.
14 Problem solving
• Problem solving process
• Control-panel messages
- Solve print problems
- Resolve copy problems
- Resolve scanning problems
- The device control panel display has black lines or dots, or becomes blank
Clear paper jams
• Additional problem solving tools
Problem solving process
Use the problem solving checklist to resolve MFP issues.
Problem solving checklist
Follow these steps when trying to solve an MFP problem.
| Step number | Verification step Possible problems Solutions | |||
| 1 Is the power on? | No power due to failed power source, cable, switch, or fuse. | 1. Verify that the MFP is plugged in.2. Verify that the power cable is functional and that the power switch is on.3. Check the power source by plugging the MFP directly into the wall or into a different outlet.4. Test the outlet or connect another device to the outlet to verify that the outlet is functioning. | ||
| 2 | Does Ready appear in the control panel or screen?The control panel should function without error messages. | Control panel shows an error. | See Control-panel messages for a list of common messages that can help correct the error.If the error persists, contact HP Customer Care. See HP Customer Care or the support flyer that came in the MFP box. | |
| 3 Do information pages print?Print a Configuration page. | Control panel displays an error message. | See Control-panel messages for a list of common messages that can help correct the error. | ||
| Media does not move smoothly through the MFP paper path. | Clean the paper path. | |||
| Poor print quality. | See Print-quality problems.If the error persists, contact HP Customer Care. See HP Customer Care or the support flyer that came in the MFP box. | |||
| 4 Does the device copy?Place the Configuration page onto the flatbed glass and make a copy.Copies should print without print-quality problems. | Poor copy quality from flatbed. | 1. If the print quality from the internal tests and the copy from the scanner were acceptable, clean the flatbed glass.2. If, after performing maintenance, the problem persists, see Resolve copy problemsIf the problem persists, contact HP Customer Care. See HP Customer Care or the support flyer that came in the MFP box. | ||
| 5 Does the MFP print from the computer? | Connect the network cable or USB cable to the MFP and the computer. Use a word-processing application to send a print job to the MFP. | Software is not installed correctly or an error occurred during software installation. | Run the uninstall via the program group. Reinstall using the software CD. | |
| The cable is not connected correctly. Reconnect the cable. | ||||
| An incorrect driver is selected. Select the proper driver. | ||||
| Other devices are connected to the USB port. | Disconnect the other devices and try again to print. | |||
| There is a port driver problem in Microsoft Windows. | Run the uninstall via the program group. Reinstall using the software CD. | |||
| If the error persists, contact HP Customer Care. See HP Customer Care or the support flyer that came in the MFP box. | ||||
| 6 Does the device scan to the computer? | Initiate a scan from the desktop software on the workstation. | The cable is not connected properly. Reconnect the cable. | ||
| Software is not installed correctly or an error occurred during software installation. | Run the uninstall via the program group. Reinstall using the software CD. | |||
| If the error persists, turn off the device, then turn the device on again. | ||||
| If the error still persists, contact HP Customer Care. See HP Customer Care or the support flyer that came in the device box. | ||||
| 7 Does the MFP recognize and print from a memory card? | Insert a memory card and print an index page. | The MFP does not recognize the card. Remove the card and reinsert it into the memory card slot. Verify that the card is fully inserted into the slot. | ||
| The MFP does not print certain images. Verify that the files on the memory card are in the correct format. The MFP recognizes only SRGB format JPEG files. | ||||
Control-panel messages
The following are control-panel warning icons that may be seen on the HP Color LaserJet CM1017 MFP.
 | General error |
 | Memory card error |
 | Paper error |
 | Paper jam |
 | Attention |
 | Scanner error |
The majority of the control-panel messages are intended to guide the user through typical operation. The control-panel messages indicate the status of the current operation, and include a page count on the second line of the display, if appropriate. In addition, alert messages, warning messages, and critical error messages indicate situations that might require some action.
Alert and warning messages appear temporarily and might require the user to acknowledge the message by pressing OK to resume or by pressing Cancel to cancel the job. With certain warnings, the job might not complete or the print quality might be affected. If the alert or warning message is related to printing and the auto-continue feature is on, the MFP attempts to resume the printing job after the warning has appeared for 10 seconds without acknowledgement.
Critical error messages can indicate some kind of failure. Cycling the power might fix the problem. If a critical error persists, the MFP might require service.
| Control panel message Description Recommended action | ||
| 10.000x Supply Error E-label cannot be read or print cartridge is not properly installed. | 10.0000 = Black print cartridge | 1. Remove the print cartridge and verify that the E-label reader guide pin is not broken. |
| 10.0001 = Cyan print cartridge | 2. Reinstall print cartridge. | |
| 10.0002 = Magenta print cartridge | 3. Turn on the printer. | |
| 10.0003 = Yellow print cartridge | 4. If the problem is not solved, replace the cartridge. | |
| 10.100x Supply Error | A print cartridge is missing. | Install the correct print cartridge. |
| Reinstall | 10.1000 = Black print cartridge | |
| The supplies gauge displays the consumption levels of print cartridges. | 10.1001 = Cyan print cartridge | |
| 10.1002 = Magenta print cartridge | ||
| 10.1003 = Yellow print cartridge | ||
| 50.x Fuser Error The device has experienced an internal hardware error. | 50.1 Fuser Error—low temperature | Turn off the power by using the power switch and if a surge protector is being used, remove it. Plug the device directly into the wall socket. Use the power switch to turn on the device. |
| 50.3 Fuser Error—slow fuser | Turn off the device, wait at least 25 minutes, then turn on the device. | |
| 50.2 Fuser Error—high temperature | If the error persists, contact HP customer support. SeeHP Customer Careor the support flyer that came in the MFP box. | |
| 51.20 Error The device has experienced an internal hardware error. | 51.20 Error—black scanner error | Turn off the power by using the power switch, wait at least 30 seconds, then turn on the power and wait for the device to initialize. |
| 51.21 Error—cyan scanner error | Turn off the power by using the power switch and if a surge protector is being used, remove it. Plug the device directly into the wall socket. Use the power switch to turn the device on. | |
| 51.22 Error—magenta scanner error | If the error persists, contact HP customer support. SeeHP Customer Careor the support flyer that came in the MFP box. | |
| 51.23 Error—yellow scanner error | ||
| 54.xx Error | Toner sensor error. | Turn off the device, wait at least 30 seconds, then turn on the power and wait for the device to initialize. If the error persists, contact HP Customer Care. SeeHP Customer Careor the support flyer that came in the device box. |
| 55.0 Error DC controller error. The device has experienced an internal hardware error. | Turn off the power by using the power switch, wait at least 30 seconds, then turn on the power and wait for the device to initialize. | |
| Turn off the power by using the power switch and if a surge protector is being used, remove it. Plug the device directly into the wall socket. Use the power switch to turn the device on. | ||
| If the error persists, contact HP customer support. SeeHP Customer Careor the support flyer that came in the MFP box. | ||
| 57 Fan ErrorTurn off then turn on | The device has experienced a problem with its internal fan. | Turn off the power by using the power switch, wait at least 30 seconds, then turn on the power and wait for the device to initialize.If the error persists, contact HP customer support. SeeHP Customer Careor the support flyer that came in the MFP box. |
| 59.xx Error The device has experienced an internal hardware error. | Turn off the power by using the power switch, wait at least 30 seconds, and then turn on the power and wait for the device to initialize.If a surge protector is being used, remove it. Plug the device directly into the wall socket. Use the power switch to turn the device on.If the error persists, contact HP Customer Care. SeeHP Customer Careor the support flyer that came in the device box. | |
| 79 ErrorTurn off then turn on | The device has experienced an internal firmware error. | Turn off the power by using the power switch, wait at least 30 seconds, and then turn on the power and wait for the device to initialize.If you have recently installed a memory DIMM in the device, turn off the device, remove the memory DIMM, reinstall the DIMM to verify that it is seated properly, and then turn on the device.Turn off the power by using the power switch and if a surge protector is being used, remove it. Plug the device directly into the wall socket. Use the power switch to turn the device on.If the error persists, upgrade the firmware.SeeHP Customer Careor the support flyer that came in the device box.If the error persists, replace the formatter.SeeHP Customer Careor the support flyer that came in the device box. |
| Calibrating... | The printer is calibrating. | No action is required. This task may take several minutes. |
| Cleaning... | The printer is in cleaning mode. | No action is required. This task may take several minutes. |
| Device error.Press [OK]. | An internal error occurred in the device. | Press OKto resume the job. Turn off the power by using the power switch, wait at least 30 seconds, then turn on the power and wait for the device to initialize. If these actions do not resolve the problem, contact HP Customer care. SeeHP Customer Careor the support flyer that came in the MFP box. |
| Door open | The MFP door is open. | The door must be closed before printing can continue. |
| Engine communication error | The device experienced an internal communication error. | This is a warning message only. Job output might be affected. |
| HP supplies installed | The printer transitioned from having one or more non-HP supplies to having all HP supplies installed. | No action required. |
| Incorrect cartridge The print cartridge may be crooked, or installed in the wrong print cartridge slot.One of the following messages may display:Incorrect black cartridgeIncorrect cyan cartridgeIncorrect magenta cartridgeIncorrect yellow cartridge | Reinstall theprint cartridge. | |
| Insert only 1 memory card at a time More than one memory card has been inserted. | Remove all but one memory card. | |
| Install cartridgeThe supply gauge indicates the supply or supplies that are out of toner. | One of the following messages may display:• Install black cartridge• Install cyan cartridge• Install magenta cartridge• Install yellow cartridge | The supply or supplies must be installed before printing can continue. |
| Install suppliesThe supplies gauge displays the consumption levels of print cartridges. | Multiple supplies are not installed. Install correct print cartridges. | |
| Invalid driver. Press [OK]. | The printer driver is incorrect. | Re-select the printer driver appropriate for the device. |
| Invalid entry | Invalid data or response. | Correct the entry. |
| Jam in... A jam occurred in: | the print/paper pathtray 1tray 2output bin | Clear the jam, then press OK. |
| Load paper The HP Color LaserJet CM1015/CM1017MFP is out of paper. | Please load specified paper type into the tray indicated. | |
| Load Tray X[TYPE] [SIZE] | The MFP is processing the job, but the tray indicator is empty. | Please load specified paper type and size into the tray indicated. |
| Manual feedPress [OK] | The MFP is waiting for paper in the tray indicated. | Load the paper as indicated. |
| Memory card is in backwards The memory card was inserted backwards into the card slot. | Remove, turn, and reinsert the card. | |
Control panel message Description Recommended action
| Memory card is unsupported The memory card that you have inserted is not a type that is supported. | Insert a card that is supported. The HP Color LaserJet CM1017 MFP supports the following cards:CompactFlashUltra CompactFlashSmart MediaMemory StickSecure DigitalMulti Media CardxD Card | |
| Memory card slots are disabled | The memory card slots have been disabled. Contact your system administrator. | |
| Memory is low. Press [OK].Press [OK] | The device memory has been almost completely filled or is full. | Allow the device to finish the job, or press OK to cancel the job.Power cycle the machine.Break the job into smaller jobs that contain fewer pages.If the error persists, add a memory DIMM to the printer. For more information, see http://www.hp.com for more information about DIMMs and accessories. |
| Memory low.Only one copy made. | The device does not have enough memory to complete the collated copy job. | Break the job into smaller jobs that contain fewer pages.If the error persists, turn off the device and then turn on the device.If the error persists, add memory to the device. |
| Misprint. Press [OK].Press [OK] | The printed pages have been incorrectly placed on the paper. | To continue, press OK. |
| No media pickup.Press [OK]. | The print engine has failed to pick up a piece of media. | In tray 1, verify that the media was inserted far enough into the tray. In tray 2 or optional tray 3, verify that the paper-length guide is in the correct position for the media size that being used.Reload the media in the input tray and press OK to continue the job.If the error persists, contact HP Customer Care. See HP Customer Care or the support flyer that came in the MFP box. |
| Control panel message Description Recommended action | ||
| Non-HPinstalled A non-HP cartridge is installed.Displays one of the following messages:Non-HP black installed. Press OK to accept.Non-HP magenta installed. Press OK to accept.Non-HP cyan installed. Press OK to accept.Non-HP yellow installed. Press OK to accept. | If you believe you purchased an HP supply, please visit the HP fraud Web site at http://www.hp.com/go/anticounterfeitService or repairs required as a result of using non-HP supplies is not covered under HP warranty. NOTE Any printer repair required as a result of using a non-HP or unauthorized supply is not covered under warranty.Verify that all cartridges are installed in the correct slot.To use this cartridge, override by pressing OK.Replace the supply NOTE Any printer repair required as a result of using a non-HP or unauthorized supply is not covered under warranty.Verify that all cartridges are installed in the correct slot.To use this cartridge, override by pressing OK.Replace the supply | |
| Non-HP supplyin useReadyThe supplies gauge displays the consumption levels of print cartridges. | A non-HP (cloned or refilled) supply has been installed and was overridden. | If you believe you purchased an HP supply, please visit the HP fraud Web site at http://www.hp.com/go/anticounterfeit.Service or repairs required as a result of using non-HP supplies is not covered under HP warranty. |
| Order suppliesReadyThe supplies gauge displays the consumption levels of print cartridges. | Multiple supplies are low. For more information go to the HP ColorLaserJet CM1015/CM1017 MFP toolbox and click Supplies Status. To order supplies online, click Order Supplies. | |
| Page too complex.Press [OK]. | The device could not print the current page because of its complexity. | Press OK to clear the message.Allow the device to finish the job, or press OK to cancel the job. |
| Replace cartridge The print cartridge is low. One of the following messages may display:Order black cartridge. Ready light is on.Order cyan cartridge. Ready light is on.Order magenta cartridge. Ready light is on.Order yellow cartridge. Ready light is on. | For more information go to the HP Color LaserJet CM1015/CM1017 MFP toolbox and click Supplies Status. To order supplies online, click Order Supplies. | |
| Replace suppliesThe supplies gauge displays the consumption levels of print cartridges. | The cartridge is out of toner. Replace the supplies that are low. | |
| Replace supplies.Override in use. | Supply override in use. The user has decided to continue printing beyond the out point. A | Replace the supplies that are low. |
Control panel message Description Recommended action
| ReadyThe supplies gauge displays the consumption levels of print cartridges. This is the message that displays when the non-HP supply is first installed. | supply is low and using Override may result in unsatisfactory print quality.This message displays the entire time multiple non-HP supplies are used in the MFP. | |
| Replace supply.Override in use.ReadyThe supplies gauge displays the consumption levels of print cartridges. | This message displays the entire time a single non-HP supply is used. It displays after the Unauthorized Supply message displays and after the user presses the override.Supply override in use. The user has decided to continue printing beyond the out point. A supply is low and using Override may result in unsatisfactory print quality. | Replace the supply. |
| Scanner Error X | The device experienced a scanner error. | Turn off the power by using the power switch, wait at least 30 seconds, and then turn on the power and wait for the device to initialize. If the error persists, contact HP Customer Care. SeeHP Customer Careor the support flyer that came in the device box. |
| Scanning errorCannot connect. | The device cannot transmit scan information to a computer. | Verify that network or USB cables are securely connected and that the MFP software is properly installed. |
| Unauthorizedsupply in usealternates withReadyThe supplies gauge displays the consumption levels of print cartridges. | Displays this message when the non-HP supply is first installed:A new non-HP supply has been installed and was overridden. | If you believe you purchased an HP supply, please visit the HP fraud Web site athttp://www.hp.com/go/anticounterfeit.Service or repairs required as a result of using non-HP supplies is not covered under HP warranty. |
| UnauthorizedA new non-HP supply has been installed.One of these four messages is displayed until an HP supply is installed or until OK is pressed.Unauthorized black cartridgeUnauthorized magenta cartridgeUnauthorized cyan cartridgeUnauthorized yellow cartridge | One of these four messages is displayed until an HP supply is installed or until OK is pressed.Unauthorized black cartridgeUnauthorized magenta cartridgeUnauthorized cyan cartridgeUnauthorized yellow cartridge | If you believe you purchased an HP supply, please visit the HP fraud Web site athttp://www.hp.com/go/anticounterfeit.Service or repairs required as a result of using non-HP supplies is not covered under HP warranty.To continue printing, press OK. |
| Unexpected sizein tray X | Unexpected paper size error. The media size loaded in the tray does not match the media size configured for the tray. | Verify that the print settings are set to the specified media in the tray. |
| Unknown Memory Card Error There is an issue with either the memory card or the device memory-card reader. | Reinsert the card. If the error persists, insert a different card. | |
Solve print problems
Print-quality problems
The following sections help identify and resolve print-quality issues.
Identifying and correcting print defects
Use the checklist and print-quality issues charts in this section to solve print-quality problems.
Print-quality checklist
Resolve general print-quality problems by using this checklist:
- Ensure the paper or print media used meets specifications. Generally, smoother paper provides better results.
- When using a special print media such as labels, transparencies, glossy, or letterhead, ensure that you have printed by type.
-
Remove any toner build-up and run a cleaning page.
-
Print a Configuration page and Supplies Status page at the MFP. See Information pages.
-
Check the Supplies Status page to verify that supplies are not low or empty. No information is provided for non-HP print cartridges.
-
If the Configuration and Supplies Status pages do not print correctly, suspect a problem with the MFP printing components. Contact HP Customer Care. See HP Customer Care or the flyer that came in the MFP box.
-
Print a Demo page from the HP ToolboxFX. If the page prints, the problem is with the printer driver. Try printing from the other printer driver. For example, when using the PCL6 printer driver, print from the HP PostScript level 3 printer driver.
Use the Add Printer Wizard in the Printers folder in Windows XP dialog box to install the HP PostScript level 3 driver.
-
Try printing from a different program. If the page prints correctly, the problem is with the program from which you were printing.
-
Restart the computer and the MFP and try printing again. If the problem is not resolved, choose one of these options:
-
If the problem is affecting all printed pages, see General print quality issues.
- If the problem is affecting only pages printed in color, see Solve issues with printing color documents.
General print quality issues
The following examples depict letter-size paper that has passed through the MFP short edge first. These examples illustrate problems that could affect all of the pages that printed, whether it is color printing or black only. These topics list the typical cause and solution for each of these examples.
| Problem Cause Solution | ||
| Print is light or faded. The media might not meet HP specifications. | Use media that meets HP specifications. | |
| AaBbCcAaBbCcAaBbCcAaBbCcAaBbCc | One or more print cartridges might be low. When using non-HP print cartridges, no messages appear on the control panel or in the HP ToolboxFX. | Replace any low print cartridges.If none of the print cartridges is low or empty, remove the print cartridges one at a time and inspect the toner roller in each to see if the roller is damaged. If so, replace the print cartridge. |
| Print the Supplies Status page to check the remaining life. SeeSupplies Status page. | ||
| Toner specks appear. The media might not meet HPSpecifications. | Use media that meets HP specifications. | |
| AaBbCcAaBbCcAaBbCcAaBbCcAaBbCc | The paper path might need cleaning. Clean the paper path. See the HP ToolboxFX online Help. | |
| Dropouts appear. A single sheet of print media might be defective. | Try reprinting the job. | |
| AaBbCcAaBbCcAaBbCcAaBbCcAaBbCcAaBbCc | The moisture content of the paper is uneven or the paper has moist spots on its surface. | Try different paper, such as high-quality paper that is intended for color laser MFPs. |
| The paper lot is flawed. The manufacturing processes can cause some areas to reject toner. | Try different paper, such as high-quality paper that is intended for color laser MFPs. | |
| Vertical streaks or bands appear on the page. | One or more print cartridges might be low or defective. If non-HP print cartridges are used, no messages appear on the control panel or in the HP ToolboxFX. | Replace any low print cartridges. |
| The amount of background toner shading becomes unacceptable. | The media might not meet HP specifications. | Use a different paper with a lighter basis weight. |
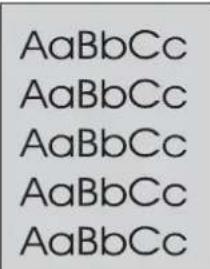 | Very dry (low humidity) conditions can increase the amount of background shading. | Check the MFP environment. |
| One or more print cartridges might be low. If non-HP print cartridges are used, no messages appear on the control panel or in the HP ToolboxFX. | Replace any low print cartridges. | |
| Toner smears appear on the media. The media might not meet HP specifications. | Use media that meets HP specifications. | |
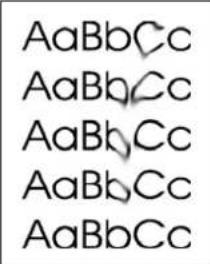 | If toner smears appear on the leading edge of the paper, the media guides are dirty, or debris has accumulated in the print path. | Clean the media guides and the paper path. |
| The toner smears easily when touched. The MFP is not set to print on the type of media on which you want to print. | In the printer driver, select the Paper tab and set Type is to match the type of media on which you want to print. Print speed might be slower when using heavy paper. | |
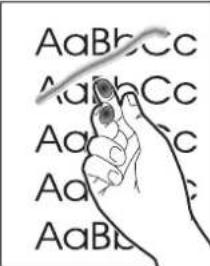 | The media might not meet HP specifications. | Use media that meets HP specifications. |
| The paper path might need cleaning. Clean the MFP. | ||
| Marks repeatedly appear at even intervals on the printed side of the page. | The MFP is not set to print on the type of media on which you want to print. | In the printer driver, select the Paper tab and set Type is to match the type of media on which you want to print. Print speed might be slower when using heavy paper. |
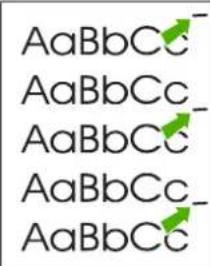 | Internal parts might have toner on them. The problem typically corrects itself after a few more pages. | |
| The paper path might need cleaning. Clean the MFP. | ||
| The fuser might be damaged or dirty. Clean using instructions in HP ToolboxFX. | ||
| Contact HP Customer Care. See HP Customer Care or the support flyer that came in the MFP box. | ||
| A print cartridge might have a problem. To determine which cartridge has a problem, print the PQ diagnostics page from HP ToolboxFX. | ||
| Marks repeatedly appear at even intervals on the unprinted side of the page. | Internal parts might have toner on them. The problem typically corrects itself after a few more pages. | |
| The paper path might need cleaning. Clean the MFP. | ||
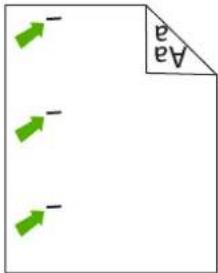 | The fuser might be damaged or dirty. Clean using instructions in HP ToolboxFX.Contact HP Customer Care. SeeHP Customer Careor the support flyer that came in the MFP box. | |
| The printed page contains misformed characters. | The media might not meet HP specifications. | Use a different paper, such as high-quality paper that is intended for color laser MFPs. |
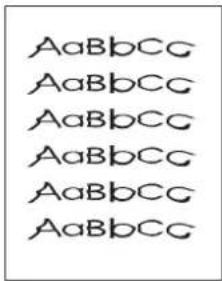 | If characters are incorrectly formed so that they produce a wavy effect, the laser scanner might need service. | Verify that the problem also occurs on the Configuration page. If so, contact HP Customer Care. SeeHP CustomerCareor the support flyer that came in the MFP box. |
| The printed page is curled or wavy. The MFP is not set to print on the type of media on which you want to print. | In the printer driver, select thePaper tab and setType isto match the type of paper on which you want to print. Print speed might be slower when using heavy paper. | |
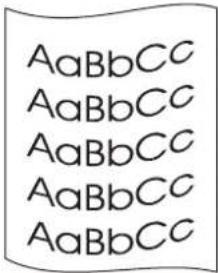 | The media might not meet HP specifications. | Use a different paper, such as high-quality paper that is intended for color laser MFPs. |
| Both high temperature and humidity can cause paper curl. | Check the MFP environment. | |
| Text or graphics are skewed on the printed page. | The media might be loaded incorrectly. Make sure that the paper or other print media is loaded correctly and that the media guides are not too tight or too loose against the stack. SeeLoad trays. | |
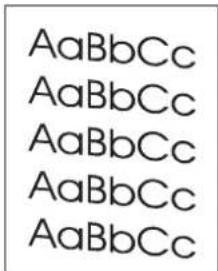 | The media might not meet HP specifications. | Use a different paper, such as high-quality paper that is intended for color laser MFPs. |
| The printed page contains wrinkles or creases. | The media might be loaded incorrectly. | Verify that the media is loaded correctly and that the media guides are not too tight or too loose against the stack.SeeLoad trays. |
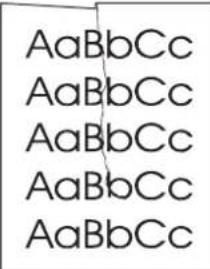 | Turn over the stack of paper in the input tray, or try rotating the paper 180° in the input tray. | |
| The media might not meet HP specifications. | Use a different paper, such as high-quality paper that is intended for color laser MFPs. | |
| Toner appears around the printed characters. | The media might be loaded incorrectly. | Turn over the stack of paper in the tray. |
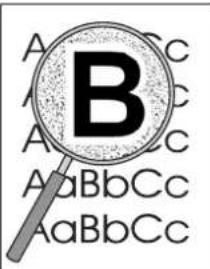 | If large amounts of toner have scattered around the characters, the paper might have high resistivity. | Use a different paper, such as high-quality paper that is intended for color laser MFPs. |
| An image that appears at the top of the page (in solid black) repeats farther down the page (in a gray field). | Software settings might affect image printing. | In the software program, change the tone (darkness) of the field in which the repeated image appears. |
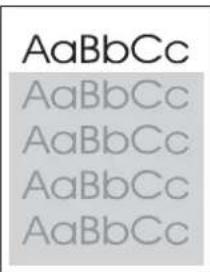 | In the software program, rotate the whole page 180° to print the lighter image first. | |
| The order of images printed might affect printing. | Change the order in which the images are printed. For example, have the lighter image at the top of the page, and the darker image farther down the page. | |
| A power surge might have affected the MFP. | If the defect occurs later in a print job, turn the MFP off for 10 minutes, then turn on the MFP to restart the print job. | |
Solve issues with printing color documents
This section describes issues that can occur when printing in color.
| Problem Cause Solution | ||
| Only black is printing when the document should be printing in color. | Color mode is not selected in the program or printer driver. | Select color mode instead of grayscale mode. |
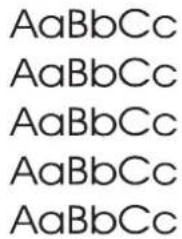 | The correct printer driver might not be selected in the program. | Select the correct printer driver. |
| The MFP might not be correctly configured. | Print a Configuration page. If no color appears on the Configuration page, contact HP Customer Care. SeeHP Customer Careor the support flyer that came in the MFP box. | |
| One or more colors are not printing, or are inaccurate. | Sealing tape might be on the print cartridges. | Verify that the sealing tape has been completely removed from the print cartridges. |
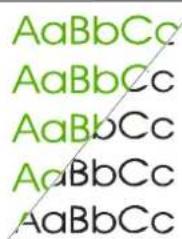 | The media might not meet HP specifications. | Use a different paper, such as high-quality paper that is intended for color laser MFPs. |
| The MFP might be operating in excessively humid conditions. | Verify that the MFP environment is within humidity specifications. | |
| One or more print cartridges might be low. When using non-HP print cartridges, no messages appear on the control panel or in the HP ToolboxFX. | Replace any low print cartridges. | |
| The control panel is set for override. Replace low or empty print cartridges. | ||
| A color is printing inconsistently after loading a new print cartridge. | Another print cartridge might be low. When using a non-HP print cartridge, it might be low or empty but you receive no indication. | Remove the print cartridge for the color that is printing inconsistently and reinstall it. |
 | The control panel is set for override. Replace low or empty print cartridges. | |
| The colors on the printed page do not match the colors as they appear on the screen. | The colors on the computer monitor might differ from the MFP output. | Select Screen Matchin theColortab of the printer driver. |
  | If extremely light colors or extremely dark colors on screen are not printing, the software program might interpret extremely light colors as white or extremely dark colors as black. | If possible, avoid using extremely light or extremely dark colors. |
| The media might not meet HP specifications. | Use a different paper, such as high-quality paper that is intended for color laser MFPs. | |
Problem Cause Solution
The finish on the printed color page is inconsistent.
The media might be too rough. Use a smooth paper or print media, such as a high-quality paper that is made for color laser MFPs. Generally, smoother media produces better the results.
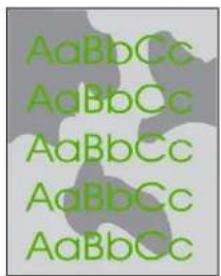
text_image
AaBbCc AaBbCc AaBbCc AaBbCc AaBbCcThe finish on the printed or copied color page has light colored spots.
The media may have been bent when loaded, or the ETB may be damaged.
Load new paper and reprint or copy the document.
If the problem persists, contact HP Customer Care. See HP Customer Care or the support flyer that came in the MFP box.
Media-handling problems
Use the information in this section when the MFP experiences media-handling problems.
Print-media guidelines
For best results, make sure that the paper is of good quality, and free of cuts, nicks, tears, spots, loose particles, dust, wrinkles, voids, staples, and curled or bent edges.
- For best-quality color printing, use a smooth type of paper. Generally, smoother media produces better results.
- Check the paper package label to ensure the type of paper you are loading (such as bond or recycled) is correct.
- Do not use media that is designed for Inkjet MFPs only. Use media that is designed for color LaserJet MFPs.
- Do not use letterhead paper that is printed with low-temperature inks, such as those used in some types of thermography.
• Do not use raised or embossed letterhead.
- The MFP uses heat and pressure to fuse toner to the paper. Make sure that any colored paper or preprinted forms use inks that are compatible with this fusing temperature 210^ C (410°F) for 0.1 seconds).

CAUTION Failure to follow these guidelines could cause jams or damage to the MFP.
Solve print-media problems
The following problems with paper cause print-quality deviations, jamming, or even damage to the MFP.
| Problem Cause Solution | ||
| Poor print quality or toner adhesion The paper is too moist, too rough, too heavy or too smooth, or it is embossed or from a faulty paper lot. | Verify that the appropriate media type was selected in the printer driver.Try another kind of paper, between 100 and 250 Sheffield, 4% to 6% moisture content. | |
| Dropouts, jamming, or curl | The paper has been stored incorrectly. | Store paper flat in its moisture-proof wrapping. |
| The paper has variability from one side to the other. | Turn the paper over. | |
| Excessive curl The paper is too moist, has the wrong grain direction, or is of short-grain construction. | Verify that the appropriate media type was selected in the printer driver.Try printing on media from a new or different package.Use long-grain paper. | |
| Jamming, damage to MFP | The paper has cutouts or perforations. | Use paper that is free of cutouts or perforations. |
| Problems with feeding | The paper has ragged edges. | Use high-quality paper that is made for color laser printers. |
| The paper varies from side-to-side. Turn the paper over. | ||
| The paper is too moist, too rough, too heavy or too smooth, has the wrong grain direction, or is of short-grain construction or it is embossed or from a faulty paper lot. | Try another kind of paper, between 100 and 250 Sheffield, 4 to 6% moisture content.Use long-grain paper. | |
| Print is skewed (crooked) The media guides might be incorrectly adjusted. | Remove all media from the input tray, straighten the stack, then load the media in the input tray again. Adjust the media guides to the width and length of the media being used and try printing again. | |
| More than one sheet feeds at one time. | The media tray might be overloaded. | Remove some of the media from the tray.SeeLoad trays. |
| The media might be wrinkled, folded, or damaged. | Verify that the media is not wrinkled, folded, or damaged. Try printing on media from a new or different package. | |
| MFP does not pull media from the media input tray. | The MFP might be in manual feed mode. | If Manual feed appears on the MFP control-panel display, press OK to print the job.Verify that the MFP is not in manual feed mode and print the job again. |
| The media tray might be overloaded. Remove some of the media from the tray.See Load trays. | ||
| The paper-length adjustment control in tray 2 or optional tray 3 is set at a length that is greater than the media size. | Adjust the paper-length adjustment control to the correct length. | |
| The pickup roller might be dirty or damaged. | Contact HP Customer Care. See HP Customer Care or the support flyer that came in the MFP box. | |
Performance problems
Try the tips in this section if pages exit the MFP but have nothing printed on them, or when the MFP does not print any pages.
| Problem Cause Solution | ||
| Pages print but are totally blank. The sealing tape might still be in the print cartridges. | Verify that the sealing tape has been completely removed from the print cartridges. | |
| The document might contain blank pages. | Check the document that is printing to see if content appears on all of the pages. | |
| The MFP might be malfunctioning. To check the MFP, print a Configuration page. | ||
| Pages print very slowly. Heavier media types can slow the print job. | Print on a different type of media. | |
| Complex pages print more slowly. Proper fusing requires a slower print speed to ensure the best print quality. | ||
| Pages did not print. | The MFP might not be pulling media correctly. | See Media-handling problems. |
| The media is jamming in the MFP. Clear the jam. | ||
| The USB cable might be defective or incorrectly connected. | · Disconnect the USB cable at both ends and reconnect it.· Try printing a job that has printed in the past.· Try using a different USB cable. | |
| Other devices are running on the computer. | The device might not share a USB port. When there is an external hard drive or network switchbox connected to the same port as the MFP, the other device might be interfering. To connect and use the MFP, disconnect the other device or use two USB ports on the computer. | |
Resolve copy problems
The following are a few simple steps that can improve copy quality:
• Use quality originals.
- Adjust the control-panel settings for the type of original.
- Use the Text setting for items that contain mostly text.
- Use the Film photo setting when making a copy of a photograph.
• Use Picture when making a copy of a graphic. - Use the Mixed setting for documents that include both text and graphics.
Use the table to Identify and resolve imaging problems.
Problem Cause Solution
| Copy edges are cropped. Original is edge-to-edge or has margins smaller than those supported by this MFP. | 1. Position the original 1/6" away from the top and right edges of the scanner glass. | |
| 2. Select Reduce/Enlarge, and press the navigation arrows to select Full Page=91%, then press Start Copy Black or Start Copy Color. | ||
Images are missing or faded. See Calibrate the MFP.
| One or more print cartridges might be low. | Replace any low print cartridges. |
| The device might have calibrated incorrectly after installing a print cartridge. | Calibrate the device. See Calibrate the MFP. |
| The original might be of poor quality. | If the original is too light or damaged, the copy might not be able to compensate, even when adjusting the contrast. If possible, find an original document in better condition. |
| The original might have a colored background. | Colored backgrounds might cause images in the foreground to blend into the background, or the background might appear in a different shade. If possible, use an original document without a colored background. |
| Problem Cause Solution | ||
| Vertical white or faded stripes appear on the copy. | The media might not meet HP specifications. | Use media that meets HP specifications. See Media supported on this MFP. |
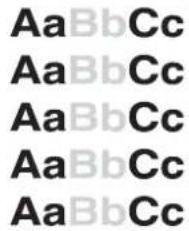 | One or more print cartridges might be low. | Replace any low print cartridges. If the error persists, inspect the print cartridges for defects in the printing area. |
| If the error persists contact HP customer support. See HP Customer Care. or the support flyer that came in the MFP box. | ||
| Unwanted lines appear on the copy. | Tray 1 might not be placed correctly. | Verify that tray 1 is in place. |
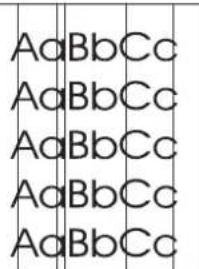 | The flatbed scanner might be dirty. | Clean the paper path. See Clean the MFP. |
| An image exists on the back of the original, or defects exist on the scanner cover. | On the flatbed scanner, place three sheets of clean paper on top of the original, close the flatbed scanner cover, then re-scan the original. | |
| If the error persists, contact HP customer support. See HP Customer Care. or the support flyer that came in the MFP box. | ||
| Black dots or streaks appear on the copy. | Ink, glue, correction fluid, or an unwanted substance might be on the flatbed scanner. | Clean the device. See Clean the MFP. |
| Copies are too light or dark. The device settings may be | incorrect. | Verify that the quality settings are correct on the device control panel. See the device software Help for more information about changing the settings. |
| The device might not be calibrated correctly. | Calibrate the device. See Calibrate the MFP. | |
| Text is unclear. The device settings may be | incorrect. | Verify that the quality settings are correct on the device control panel. See the device software Help for more information about changing the settings. |
| The device might not be calibrated correctly. | Calibrate the device. See Calibrate the MFP. | |
| The original is of poor quality. Try copying another document. If the copy is free of defects, obtain a better-quality original. | ||
| If the error persists contact HP customer support. See HP Customer Care. or the support flyer that came in the MFP box. | ||
Resolve scanning problems
Use the table to solve image-scan issues.
| Problem Cause Solution | |
| The scanned image is of poor quality. The original might be a second-generation photo or picture. | To eliminate the patterns, try reducing the size of the image after scanning.Print the scanned image to see if the quality is better.Verify that the resolution and color settings are correct for the type of scan job being performed. |
| If the scanned page has a background but the original document does not, the original might be too thin to scan or copy cleanly. | On the flatbed scanner, place three sheets of clean paper on top of the original, close the flatbed scanner cover, then re-scan the original. |
| The image that appears on the screen might not be an accurate representation of the quality of the scan. | Try adjusting the computer monitor settings to use more colors (or levels of gray). Make this adjustment by opening Display in Windows Control Panel.Try adjusting the resolution and color settings in the scanner software. |
| The original might have been loaded incorrectly. | Verify originals are properly loaded onto the flatbed scanner. See Scan methods. |
| The scanner might be dirty. Clean the scanner. | |
| The graphics settings might not be suitable for the type of scan job that being performed. | Try changing the graphics settings or the scan mode. |
| Part of the image did not scan. The original might have been loaded incorrectly. | Verify originals are properly loaded onto the flatbed scanner. |
| A colored background might be causing images in the foreground to blend into the background. | Try adjusting the settings before scanning the original or enhancing the image after scanning the original. |
| The original is longer than 298 mm (11.75 in). | The maximum flatbed scannable length is 298 mm (11.75 in). If the page exceeds the maximum length, the scanner stops. |
| The original is too small. The minimum size that the flatbed scanner supports is 25 by 25 mm (1 by 1 inches). | |
| The media size is incorrect. In Scan settings, make sure that the input media size is large enough for the document that being scanned. | |
| Problem Cause Solution | ||
| The scan takes too long. | The resolution or color level is set too high. | Change the resolution and color level settings to the correct settings for the job. |
| The software is set to scan in color. The system default is color, which takes longer to scan even when scanning a monochrome original. If you acquire an image through TWAIN or WIA, you can change the settings so that the original scans in grayscale or black-and-white. See the device software Help for details. | ||
| A print job or copy job was sent before you tried to scan. | If someone sent a print job or copy job before you tried to scan, the scan starts if the scanner is not busy. However, because the printer and scanner share memory, the scan might be slower. | |
Resolve scan-quality problems using the table.
| Problem Cause Solution | ||
| Blank pages The original might have been loadedupside down. | On the flatbed scanner, place the original document face-down with the upper-left corner of the document at the lower-right corner of the glass. | |
| The scanner bulb might not be working. If the scanner bulb does not light, verify that the cables from the scanner to the formatter are connected correctly. If the error persists, replace parts one at a time in the following order until the problem is resolved: scanner assembly, and finally the formatter. | ||
| Too light or dark The resolution and color levels may be set incorrectly. | Verify the resolution and color settings.Use the Text setting for items that contain mostly text.Use the Film photo setting when making a copy of a photograph.Use Picture when making a copy of a graphic.Use the Mixed setting for documents that include both text and graphics.Use the Draft setting if conserve toner or if the copy quality is not as important. | |
| Black dots or streaks Ink, glue, correction fluid, or an unwanted substance might be on the glass. | Clean the flatbed scanner surface. | |
| Unclear text The resolution and color levels may be set incorrectly. | Verify the correct resolution and color settings. | |
| The scanned page has a background but the original document does not. | The original might be too thin to scan cleanly. | On the flatbed scanner, place three sheets of clean paper on top of the |
Problem Cause Solution
original, close the flatbed scanner cover, then re-scan the original.
The device control panel display has black lines or dots, or becomes blank

CAUTION Static electricity can cause unexpected black lines or dots to appear on the device control panel display. Do not touch the device control panel display if there is a chance that you have collected a static electric charge (for example, by walking on carpet in a low-humidity environment).
Was the device exposed to an electric or magnetic field?
Unexpected lines or dots might appear on the device control panel display, or the display might become blank if the device is exposed to an electric or magnetic field. To resolve this problem, perform the following procedure:
- Turn the device off.
- Remove the device from the electric or magnetic field.
- Turn the device on again.
Clear paper jams
Occasionally, paper or other print media can become jammed during a print job. Some causes include the following events:

CAUTION Do NOT use any tool or sharp object to help remove paper jams.
• The input trays are loaded improperly or overfilled.
- Tray 2 or optional tray 3 is opened during a print job.
• Too many sheets accumulated in the output area, or sheets blocked the output area.
• The print media being used does not meet HP specifications. See Print on special media.
- The environment in which the print media was stored is too humid or too dry. See Print on special media.
Where to look for jams
Jams can occur in these locations:
• Inside the MFP. See Clear jams from inside the MFP.
• In input areas. See Clear jams from tray 2 or optional tray 3.
• In the output area. See Clear jams from tray output area.
Find and remove the jam by using the instructions on the following pages. If the location of the jam is not obvious, first look inside the MFP.
Loose toner might remain in the MFP after a jam. This problem should resolve itself after a few sheets have been printed.
Each section below corresponds to an area where a paper jam could occur. Use the following procedures to clear the jam. In all cases, grasp the jammed paper by both corners and pull slowly to remove the paper.
Clear jams from inside the MFP

CAUTION Jams in this area might result in loose toner on the page. If toner gets on clothes or hands, wash them in cold water. (Hot water sets the toner into the fabric.)
- Open the front door.
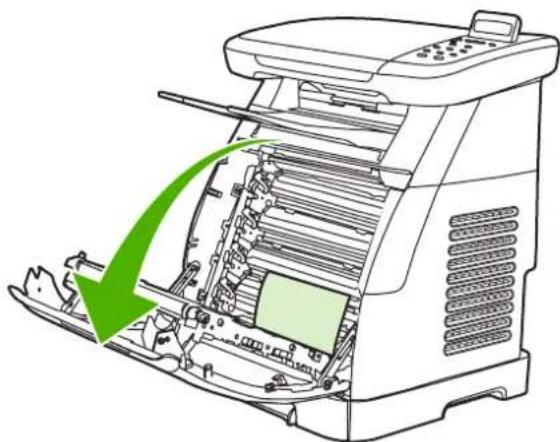
natural_image
Diagram of a printer internal structure with a green arrow indicating the process (no text or symbols present)
CAUTION Do not place anything on the transfer belt, which is located on the inside of the front door. Otherwise the MFP can be adversely damaged, affecting print quality.
- Carefully grasp the jammed paper by both corners and pull slowly to remove the paper.
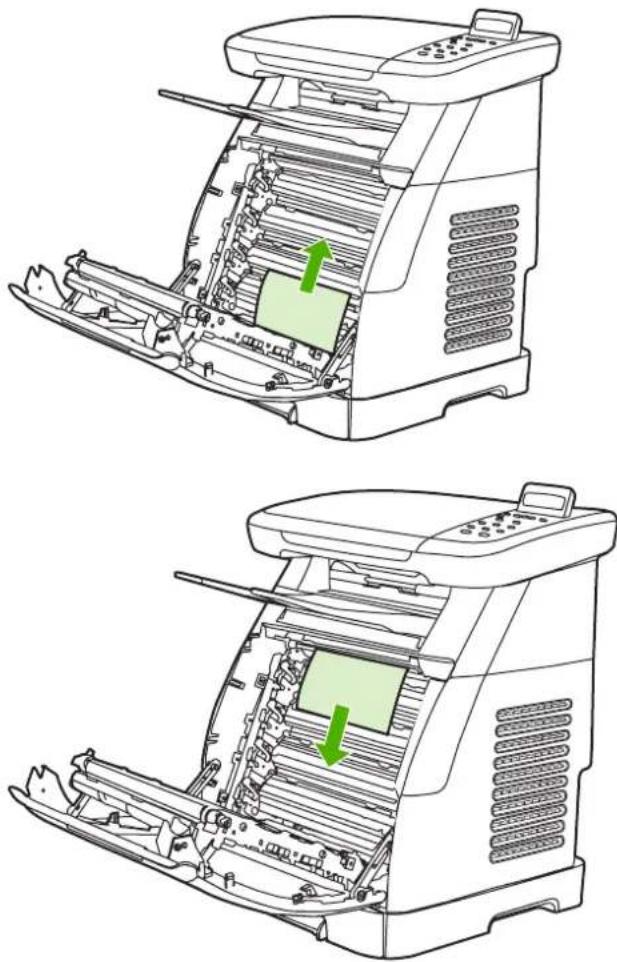
natural_image
Two technical line drawings of a device with internal components and green arrows indicating parts of the interior (no text or symbols present)- Close the front door.
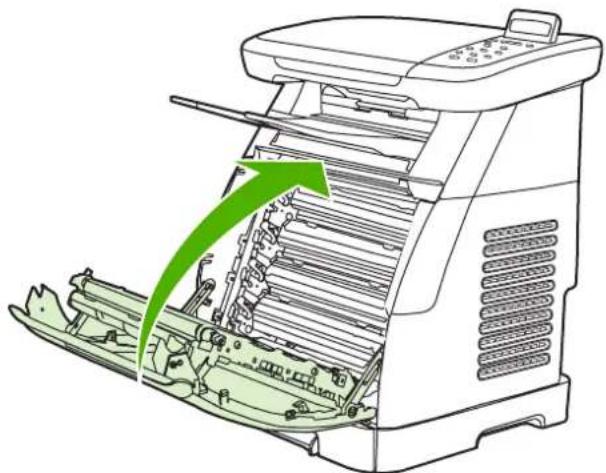
natural_image
Diagram of a printer's internal structure showing blade, frame, and paper feeding (no text or labels)Clear jams from tray output area

CAUTION Jams in these areas might result in loose toner on the page. If toner gets on clothes or hands, wash them in cold water. (Hot water sets the toner into the fabric.)
- Carefully grasp the jammed paper by both corners and pull slowly to remove the paper from the top bin.
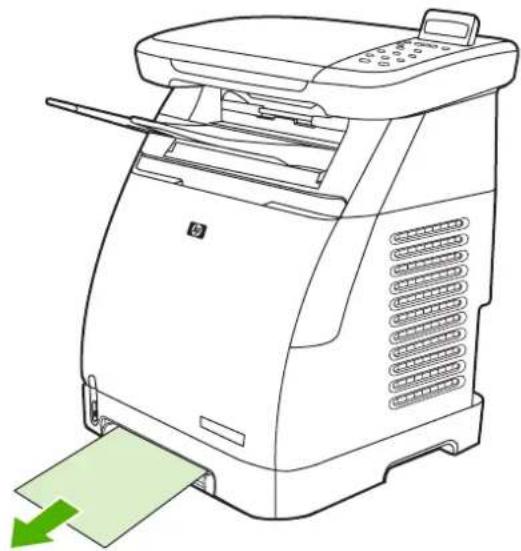
natural_image
Line drawing of a printer with paper feed and green arrow indicating print (no text or symbols)- Open and close the front door.
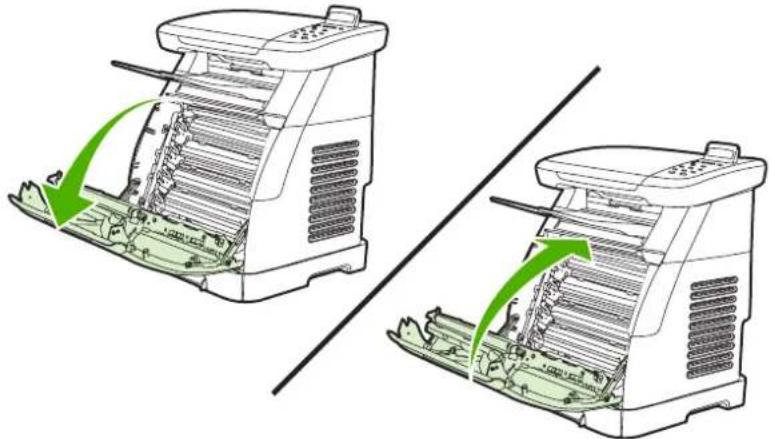
natural_image
Two line drawings of a printer with green arrows indicating process flow (no text or symbols)Clear jams from the back of the MFP
- Open the back cover.
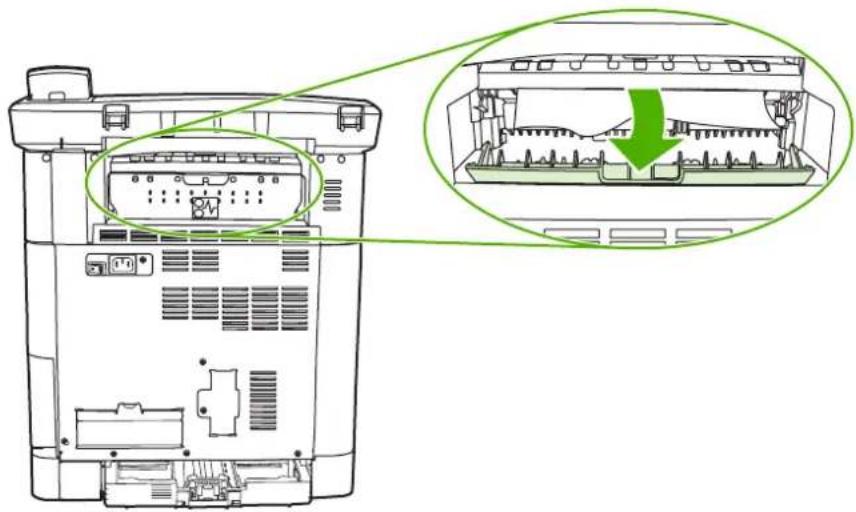
natural_image
Technical line drawing of a device rear panel with internal components and a magnified inset showing internal structure (no text or symbols)- Remove any jammed paper.
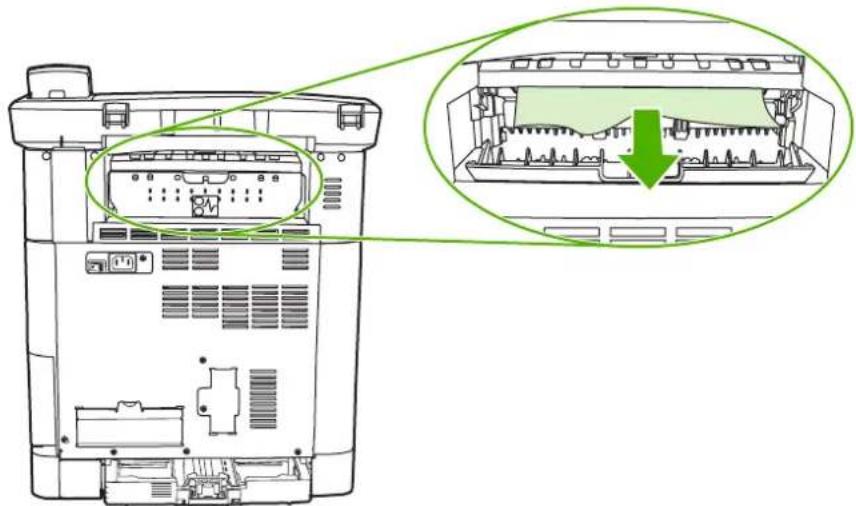
natural_image
Technical diagram of a device rear panel with internal components and a magnified inset showing internal structure (no text or symbols)- Close the back cover.
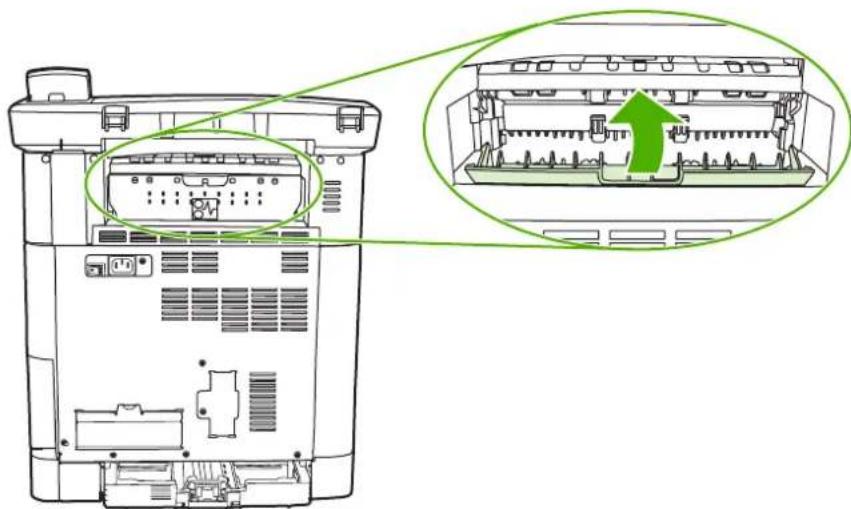
natural_image
Diagram of a server rack with an inset showing internal components and a green arrow indicating a specific location (no text or symbols present)Clear jams from tray 2 or optional tray 3

NOTE Before attempting to clear jams from tray 2 or optional tray 3, remove any jams inside the MFP.
- Pull tray 2 or optional tray 3 out of the MFP.
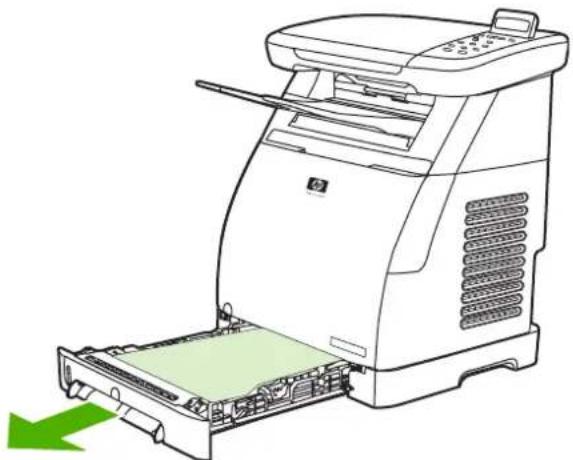
natural_image
Line drawing of a HP printer with a green arrow indicating compression or disassembly (no text or symbols present)-
Carefully grasp the jammed paper by both corners and pull slowly to remove the paper.
-
Slide the tray into the MFP.
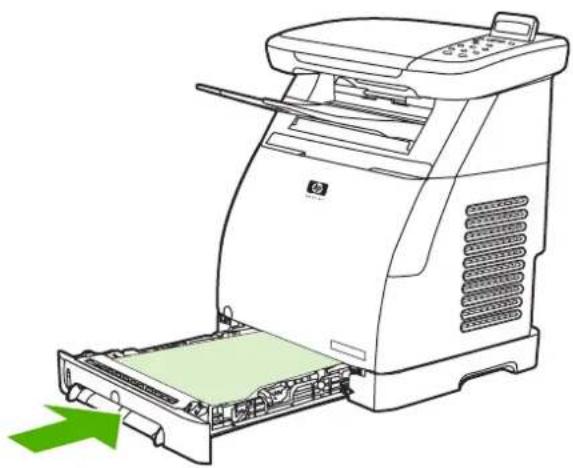
natural_image
Line drawing of a HP printer with a green arrow indicating the paper feed (no text or symbols present)- Open and close the front door.
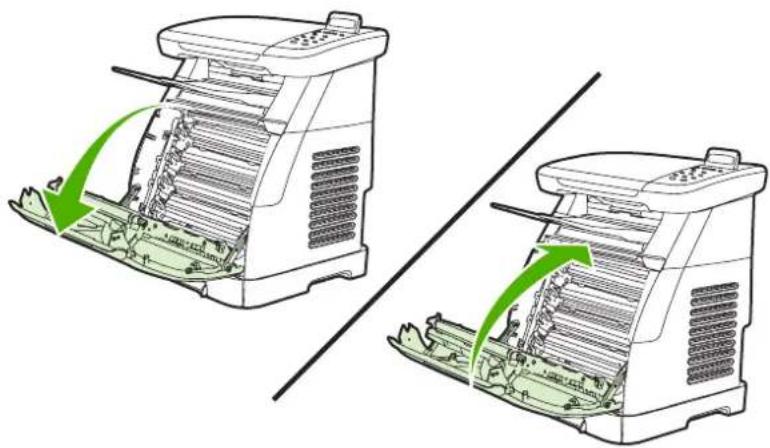
natural_image
Two line drawings of a cleaning machine with green arrows indicating internal components (no text or symbols)Additional problem solving tools
The section describes the tools that can help solve problems with the MFP.
Device pages and reports
This section describes the pages and reports that help diagnose and solve MFP problems.
Demo page
To verify that the MFP is functioning properly, print a Demo page. For more information about the Demo page, see Demo page.
Configuration page
The Configuration page lists the current settings and properties of the MFP. Use this page to check for color plane registration and cartridge half tones. It is possible to print a Configuration page from the MFP or HP ToolboxFX.
For more information about the Configuration page, see Configuration page.
Supplies Status page
The Supplies Status page lists the remaining life of the HP print cartridges. It also lists the estimated pages remaining, number of pages printed, and other supplies information. Print a Supplies Status page from the MFP or HP ToolboxFX.
For more information about the Supplies Status page, see Supplies Status page.
HP ToolboxFX
HP ToolboxFX is a software application used for problem solving tasks.
View HP ToolboxFX
Open HP ToolboxFX in one of these ways:
- On the Windows desktop, double-click the HP ToolboxFX system tray icon or program group entry.
- On the Windows Start menu, click Programs (All Programs in Windows XP), click HP, click HP Color LaserJet CM1015/CM1017 Series, click HP ToolboxFX, then click Help.
Service menu
Use the control-panel Service menu to troubleshoot MFP problems.
Restore the factory-set defaults
Restoring the factory-set defaults returns all of the settings to the factory defaults.
To restore the factory-set defaults
- Press Menu.
- Press the navigation arrows to select Service, then press OK.
- Press the navigation arrows to select Restore defaults, then press OK.
The MFP automatically restarts.
Clean the paper path
The MFP features a special cleaning mode to clean the paper path.

NOTE If you have access to HP ToolboxFX, HP recommends cleaning the paper path by using HP ToolboxFX.
To clean the paper path
- Press Menu.
- Press the navigation arrows to select Service, then press OK.
- Press the navigation arrows to select Cleaning mode, then press OK.
A page feeds slowly through the MFP. Discard the page when the process is completed.
- Load plain letter or A4 paper when prompted.
- Press OK again to confirm and begin the cleaning process.
A page feeds through the MFP slowly. Discard the page when the process is completed.
Calibrate the MFP
Calibrations are performed at regular intervals. For best print quality, a calibration can be performed from the control panel. For more information about calibrating the MFP, see Calibrate the MFP from the front control panel.
15 Work with memory
This section provides information about the following topics:
MFP memory
• Install memory DIMMs
- Check DIMM installation
- Enable memory
MFP memory
The HP Color LaserJet CM1015/CM1017 MFP has one dual inline memory module (DIMM) slot for upgrading the MFP capabilities with the following options:
• More MFP memory. DIMMs are available in 64 MB, 128 MB, and 256 MB for a maximum of 354 MB.
• DIMM-based macros, and patterns
Consider adding more memory to the MFP if print jobs often include complex graphics or HP PostScript Level 3 documents, or use many downloaded fonts. Additional memory also allows the MFP to print multiple, collated copies at the maximum speed.
Before ordering additional memory, see how much is currently installed by printing a Configuration page. Press OK and Cancel simultaneously, or use the HP ToolboxFX. To order DIMMs, see Accessories and supplies information. Single inline memory modules (SIMMs) used on previous HP LaserJet MFPs are not compatible with the MFP.
Install memory DIMMs
When installing more memory for the MFP, it is possible to install a DIMM to print characters for languages such as Chinese, or for the Cyrillic alphabet.

CAUTION Static electricity can damage DIMMs. When handling DIMMs, wear an antistatic wrist strap, or frequently touch the surface of the DIMM antistatic package then touch bare metal on the MFP.
- Print a Configuration page by pressing OK and Cancel simultaneously. (A Supplies Status page may also print.) If the Configuration page does not print in your language, see Information pages.
- After the Configuration page prints, turn the MFP off and disconnect the power cable.
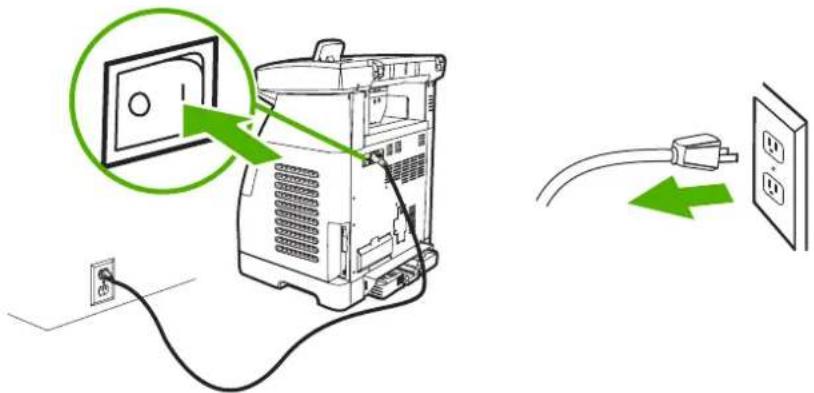
text_image
Diagram showing installation of a power outlet with green arrows indicating connection to an electrical outlet, alongside a cable.- On the left rear side of the MFP, open the DIMM door.
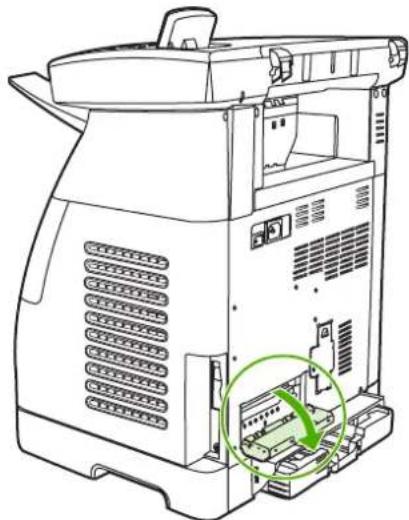
natural_image
Line drawing of a server rack with a highlighted internal component (no text or symbols)- Release the locks on each side of the DIMM slot.
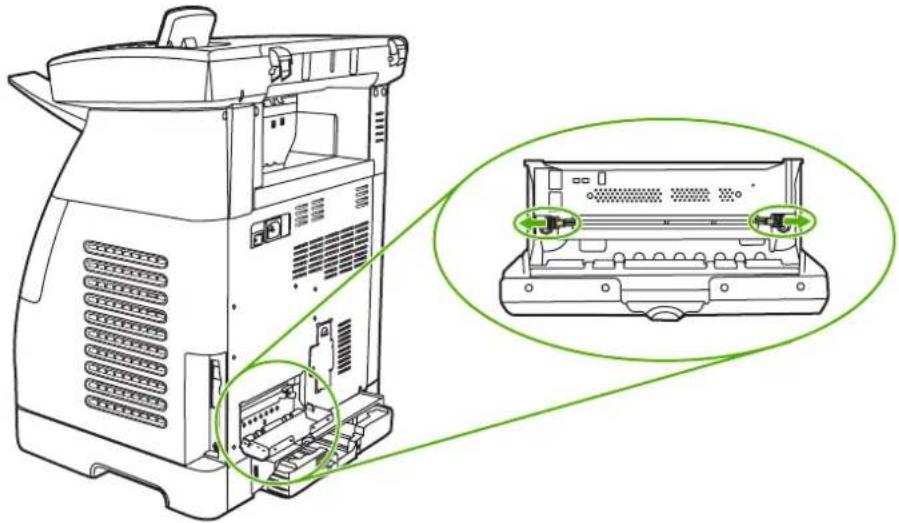
natural_image
Line drawing of a server rack with internal components and a magnified inset showing internal structure (no text or symbols)- Remove the DIMM from the antistatic package.
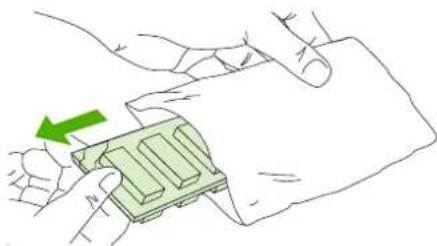
natural_image
Illustration of hands holding a green mechanical component with a green arrow indicating direction (no text or symbols)- Holding the DIMM by the edges as shown in the illustration, align the notches on the DIMM with the DIMM slot.
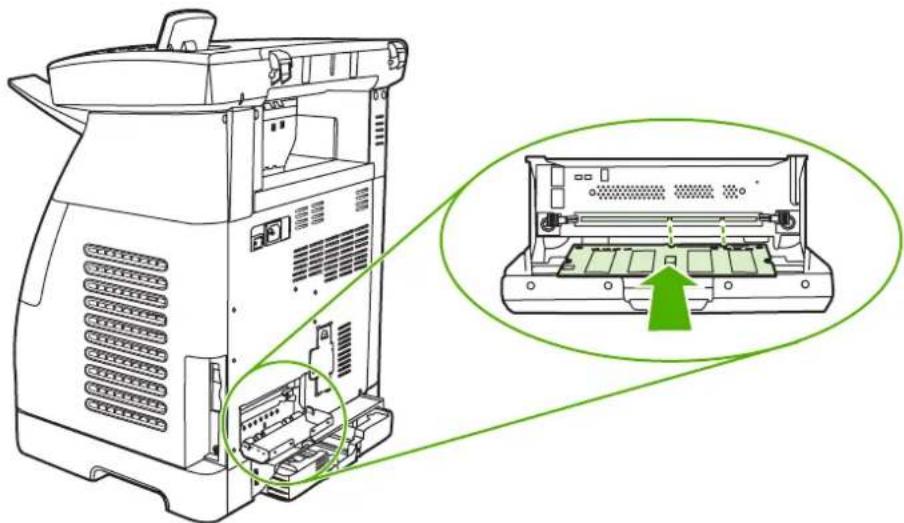
natural_image
Technical line drawing of a server rack with an inset showing internal components (no text or symbols)- Firmly press the DIMM straight into the slot. Firmly close the locks on each side of the DIMM until they snap into place.
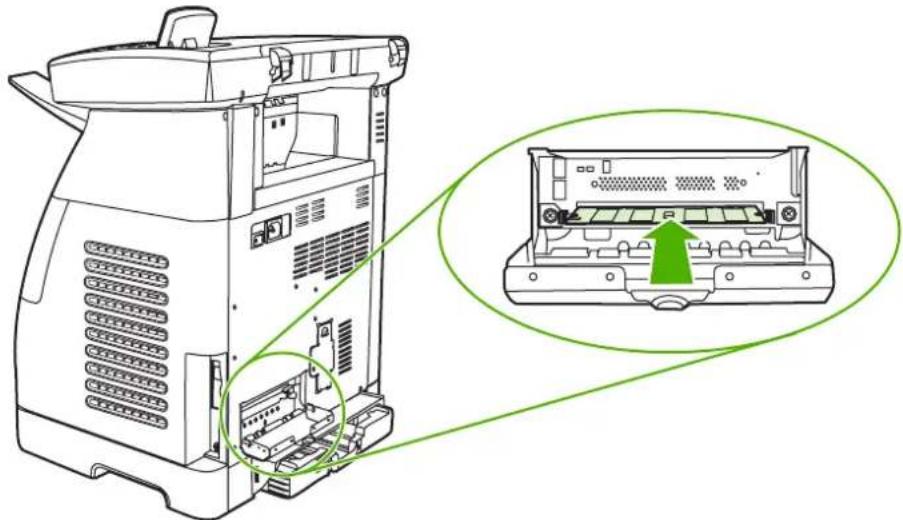
natural_image
Line drawing of a server rack with an inset showing internal components (no text or symbols)- Close the DIMM door.
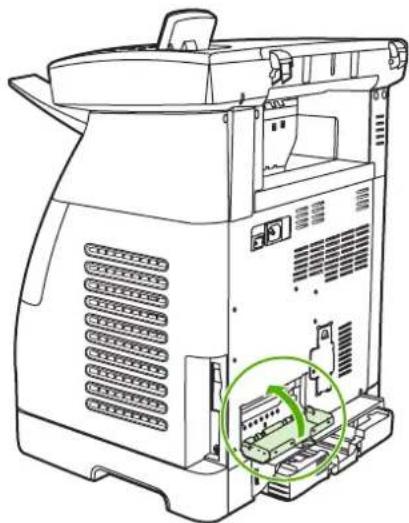
natural_image
Line drawing of a server rack with a highlighted internal component (no text or symbols)- Reconnect the power cable and turn on the MFP.
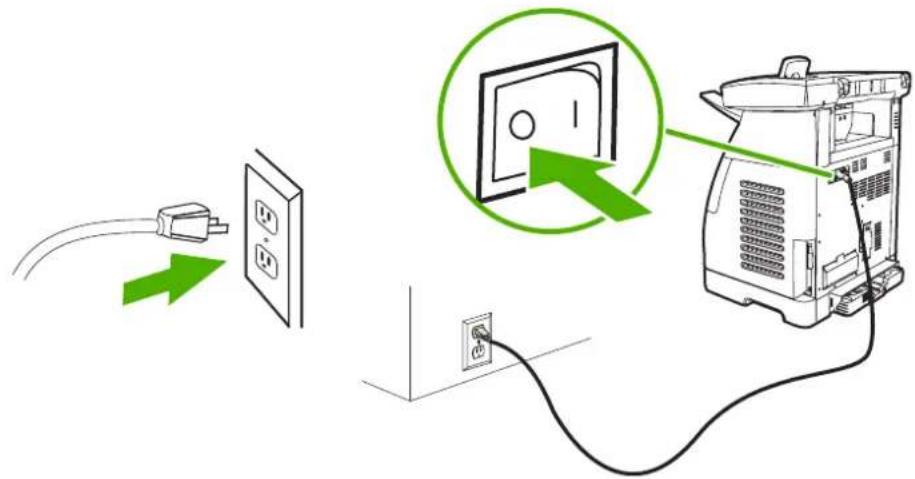
text_image
Diagram illustrating the connection between a power outlet, a switch, and an electronic device with a magnified view highlighting the switch.- Go to Check DIMM installation.
Check DIMM installation
Check that the DIMMs are installed correctly and working.
- Turn the MFP on. Check that the Ready light is on after the MFP has completed the startup sequence. If an error message appears, a DIMM might have been incorrectly installed.
- Print a Configuration page by pressing OK and Cancel simultaneously. (A Supplies Status page may also print.)
- Check the Installed Personalities and Options section on the Configuration page and compare it with the Configuration page printed before the DIMM installation.
- If the amount of recognized memory has not increased or the DIMM is not recognized, the following conditions might exist:
- The DIMM might not be installed correctly. Repeat the installation procedure.
-
The DIMM might be defective. Try installing a different DIMM.
-
After the DIMM is installed correctly, go to Enable memory if a memory DIMM was installed.
Enable memory
If the MFP has a new memory DIMM installed, all Windows users of the MFP must set the printer driver to recognize the newly added memory. Macintosh computers automatically recognize new memory.
To enable memory for Windows
- On the Start menu, point to Settings, and click Printers or Printers and Faxes.
- Select this MFP and select Properties.
- On the Configure tab, click More.
- In the Total Memory field, type the total amount of memory that is now installed.
- Click OK.
A Accessories and supplies information
The lists of accessories in this section was current at the time of printing. Ordering information and availability of the accessories might change during the life of the MFP. For the most current ordering information, visit http://www.hp.com.
Supplies
• Memory
• Cable and interface accessories
• Paper handling accessories
• Paper and other print media
• User-replaceable parts
• Supplementary Documentation
Supplies
| Product name Description Part number | |
| Black print cartridge Life of 2,500 pages at approximately 5% coverage. | Q6000A |
| Cyan print cartridge Life of 2,000 pages at approximately 5% coverage. | Q6001A |
| Yellow print cartridge Life of 2,000 pages at approximately 5% coverage. | Q6002A |
| Magenta print cartridge Life of 2,000 pages at approximately 5% coverage. | Q6003A |

NOTE Actual yields vary according to usage.
Memory

NOTE There is no limitation on memory for photos, but there is a photo card limit of 9,999 photos per card.
| Product name Description Part number | ||
| Memory upgrades (DIMMs) | 64 MB-100 pin, 100 MHz SDRAM DIMM | Q7708A |
| Memory upgrades (DIMMs) | 128 MB-100 pin, 100 MHz SDRAM DIMM | Q7709A |
| Memory upgrades (DIMMs) | 256 MB 32bit 100 pin SDRAM | |
Cable and interface accessories
Product name Description Part number
USB cable 2-meter standard USB-compatible
device connector
C6518A
Paper handling accessories
Product name Description Part number
Tray 3 (Optional) Optional 250-sheet universal input tray
Q6459A
(included with the HP Color LaserJet
CM1015/CM1017). Only one optional
250-sheet tray can be installed.
Paper and other print media
| Product name Description Part number | ||
| HP Multipurpose paper | 75 g/m2(20 lb), 96 bright | HPM1120(letter) |
| HPM1420(legal) | ||
| HP All-in-One Printing Paper | 81 g/m2(22 lb), 96 bright | HPT 115 (letter) |
| HP LaserJet Paper | 90 g/m2(24 lb), 96 bright | HPJ1124 (letter) |
| 90 g/m2(24 lb), 153 whiteness | CHP310 (A4) | |
| HPJ1424 (legal) | ||
| HP Premium Choice Paper | 120 g/m2(32 lb), 98 bright | HPU1132(letter) |
| 120 g/m2(32 lb), 158 whiteness | CHP410 (A4) | |
| HP Presentation Laser Paper, glossy | 130 g/m2(34 lb), 96 bright | Q2546A (letter) |
| HP Professional Paper, glossy | 130 g/m2(34 lb), 130 whiteness | Q2552A (A4) |
| HP Photo & Imaging Laser Paper, matte | 200 g/m2(54 lb), 96 bright | Q6549A (letter) |
| HP Brochure laser paper, matte | 160 g/m2(52 lb), 96 bright | Q6543A (letter)150 sheets |
| HP Tough paper 5 mil thick, Water/Tear proof Q1298A (letter) | ||
| Q1298B (A4) | ||
| HP Color LaserJet transparencies 5 mil thick C2934A (letter) | ||
| 50 sheets | ||
| C2936A (A4) | ||
| 50 sheets | ||
User-replaceable parts
| Product name Description Part number | ||
| Separation pad and pick-up rollers Replace when the MFP is picking up multiple sheets or no sheets. Trying different paper did not resolve the problem. | Q5956-67902 | |
| Paper tray A 250-sheet paper tray cassette. Q5956-67901 | ||
| Dust cover Protects the output of paper cassette from dust. | Q5956-67903 | |
| Scanner flatbed cover Replacement part CB394-60106 | ||
| Control-panel over lay (various countries/regions) | Replacement part (localized) | Order at http://www.hp.com/support/cljCM1015_CM1017 |
| Output tray | Replacement part | Order at http://www.hp.com/support/cljCM1015_CM1017 |
Supplementary Documentation
A printed copy of this user guide is available in the following languages.
Table A-1 User guides
| Language Part number | |
| English CB394-90907 | |
| Catalan CB394-90908 | |
| Chinese (Simplified) CB394-90928 | |
| Chinese (Traditional) CB394-90929 | |
| Czech CB394-90909 | |
| Danish CB394-90910 | |
| Dutch CB394-90919 | |
| Finnish CB394-90913 | |
| French CB394-90914 | |
| German CB394-90911 | |
| Hungarian CB394-90915 | |
| Indonesian (Bahasa) CB394-90916 | |
| Italian CB394-90917 | |
| Korean CB394-90918 | |
| Norwegian CB394-90920 | |
| Portuguese (Brazilian) CB394-90922 | |
| Polish | CB394-90921 |
| Romanian | CB394-90923 |
| Russian CB394-90924 | |
| Spanish CB394-90912 | |
| Swedish | CB394-90925 |
| Thai | CB394-90926 |
| Turkish CB394-90927 | |
B Service and support
Hewlett-Packard limited warranty statement
HP PRODUCT DURATION OF LIMITED WARRANTY
HP Color LaserJet CM1015/CM1017 MFP 1 year, Limited Warranty
HP warrants to you, the end-user customer, that HP hardware and accessories will be free from defects in materials and workmanship after the date of purchase, for the period specified above. If HP receives notice of such defects during the warranty period, HP will, at its option, either repair or replace products which prove to be defective. Replacement products can be either new or equivalent in performance to new.
HP warrants to you that HP software will not fail to execute its programming instructions after the date of purchase, for the period specified above, due to defects in material and workmanship when properly installed and used. If HP receives notice of such defects during the warranty period, HP will replace software which does not execute its programming instructions due to such defects.
HP does not warrant that the operation of HP products will be uninterrupted or error free. If HP is unable, within a reasonable time, to repair or replace any product to a condition as warranted, you will be entitled to a refund of the purchase price upon prompt return of the product.
HP products contain remanufactured parts equivalent to new in performance or have been subject to incidental use.
Warranty does not apply to defects resulting from (a) improper or inadequate maintenance or calibration, (b) software, interfacing, parts or supplies not supplied by HP, (c) unauthorized modification or misuse, (d) operation outside of the published environmental specifications for the product, or (e) improper site preparation or maintenance.
TO THE EXTENT ALLOWED BY LOCAL LAW, THE ABOVE WARRANTIES ARE EXCLUSIVE AND NO OTHER WARRANTY OR CONDITION, WHETHER WRITTEN OR ORAL, IS EXPRESSED OR IMPLIED AND HP SPECIFICALLY DISCLAIMS ANY IMPLIED WARRANTIES OR CONDITIONS OF MERCHANTABILITY, SATISFACTORY QUALITY, AND FITNESS FOR A PARTICULAR PURPOSE. Some countries/regions, states or provinces do not allow limitations on the duration of an implied warranty, so the above limitation or exclusion might not apply to you. This warranty gives you specific legal rights and you might also have other rights that vary from country/region to country/region, state to state, or province to province. HP's limited warranty is valid in any country/region or locality where HP has a support presence for this product and where HP has marketed this product. The level of warranty service you receive vary according to local standards. HP will not alter form, fit or function of the product to make it operate in a country/region for which it was never intended to function for legal or regulatory reasons.
TO THE EXTENT ALLOWED BY LOCAL LAW, THE REMEDIES IN THIS WARRANTY STATEMENT ARE YOUR SOLE AND EXCLUSIVE REMEDIES. EXCEPT AS INDICATED ABOVE, IN NO EVENT WILL HP OR ITS SUPPLIERS BE LIABLE FOR LOSS OF DATA OR FOR DIRECT, SPECIAL, INCIDENTAL, CONSEQUENTIAL (INCLUDING LOST PROFIT OR DATA), OR OTHER DAMAGE, WHETHER BASED IN CONTRACT, TORT, OR OTHERWISE. Some countries/regions, states or provinces do not allow the exclusion or limitation of incidental or consequential damages, so the above limitation or exclusion not apply to you.
THE WARRANTY TERMS CONTAINED IN THIS STATEMENT, EXCEPT TO THE EXTENT LAWFULLY PERMITTED, DO NOT EXCLUDE, RESTRICT OR MODIFY AND ARE IN ADDITION TO THE MANDATORY STATUTORY RIGHTS APPLICABLE TO THE SALE OF THIS PRODUCT TO YOU.
Print Cartridge Limited Warranty Statement
This HP product is warranted to be free from defects in materials and workmanship.
This warranty does not apply to products that (a) have been refilled, refurbished, remanufactured or tampered with in any way, (b) experience problems resulting from misuse, improper storage, or operation outside of the published environmental specifications for the MFP product or (c) exhibit wear from ordinary use.
To obtain warranty service, please return the product to place of purchase (with a written description of the problem and print samples) or contact HP Customer Support. At HP's option, HP will either replace products that prove to be defective or refund your purchase price.
TO THE EXTENT ALLOWED BY LOCAL LAW, THE ABOVE WARRANTY IS EXCLUSIVE AND NO OTHER WARRANTY OR CONDITION, WHETHER WRITTEN OR ORAL, IS EXPRESSED OR IMPLIED AND HP SPECIFICALLY DISCLAIMS ANY IMPLIED WARRANTIES OR CONDITIONS OF MERCHANTABILITY, SATISFACTORY QUALITY, AND FITNESS FOR A PARTICULAR PURPOSE.
TO THE EXTENT ALLOWED BY LOCAL LAW, IN NO EVENT WILL HP OR ITS SUPPLIERS BE LIABLE FOR DIRECT, SPECIAL, INCIDENTAL, CONSEQUENTIAL (INCLUDING LOST PROFIT OR DATA), OR OTHER DAMAGE, WHETHER BASED IN CONTRACT, TORT, OR OTHERWISE.
THE WARRANTY TERMS CONTAINED IN THIS STATEMENT, EXCEPT TO THE EXTENT LAWFULLY PERMITTED, DO NOT EXCLUDE, RESTRICT OR MODIFY AND ARE IN ADDITION TO THE MANDATORY STATUTORY RIGHTS APPLICABLE TO THE SALE OF THIS PRODUCT TO YOU.
HP Customer Care
Online services
For 24-hour access to information by using a modem or Internet connection
World Wide Web: Updated HP MFP software, product and support information, and printer drivers in several languages can be obtained from http://www.hp.com/support/cljCM1015_CM1017. (The site is in English.)
Online troubleshooting tools
HP Instant Support Professional Edition (ISPE) is a suite of Web-based problem solving tools for desktop computing and printing products. ISPE helps you quickly identify, diagnose, and resolve computing and printing problems. The ISPE tools can be accessed from http://instantsupport.hp.com.
Telephone support
Hewlett-Packard provides free telephone support during the warranty period. When you call, you will be connected to a responsive team that is waiting to help you. For the telephone number for your country/region, see the flyer that came in the box with the product, or visit http://www.hp.com then click Contact HP. Before calling HP, have the following information ready: product name and serial number, date of purchase, and description of the problem.
You can also find support on the Internet at http://www.hp.com/support/cljCM1015_CM1017. Click the support & drivers block.
Software utilities, drivers, and electronic information
Go to http://www.hp.com/support/cljCM1015_CM1017. (The site is in English, but printer drivers can be downloaded in several languages.)
For information over the telephone, see the flyer that came in the box with the MFP.
HP direct ordering for accessories or supplies
Order supplies from the following Web sites:
North America: https://www.hp.com/post-embed/ordersupplies-na
Latin America: https://www.hp.com/post-embed/ordersupplies-la
Europe and Middle East: https://www.hp.com/post-embed/ordersupplies-emea
Asia Pacific countries/regions: https://www.hp.com/post-embed/ordersupplies-ap
Order accessories from http://www.hp.com and click Supplies & Accessories. For more information, see Accessories and supplies information.
To order supplies or accessories over the telephone, call the following numbers:
United States: 1-800-538-8787
Canada: 1-800-387-3154
To find the telephone numbers for other countries/regions, see the flyer that came in the box with the MFP.
HP service information
To locate HP-Authorized Dealers in the United States or Canada, call 1-800-243-9816 (United States) or 1-800-387-3867 (Canada). Or, go to http://www.hp.com/go/cposupportguide.
For service for your HP product in other countries/regions, call the HP Customer Support telephone number for your country/region. See the flyer that came in the box with the MFP.
HP service agreements
Call: 1-800-HPINVENT [1-800-474-6836 (U.S.)] or 1-800-268-1221 (Canada).
Out-of-Warranty Service: 1-800-633-3600.
Extended Service: Call 1-800-HPINVENT [1-800-474-6836 (U.S.)] or 1-800-268-1221 (Canada). Or, go to the HP Supportpack and Carepaq™ Services Web site at http://www.hpexpress-services.com/10467a.
HP ToolboxFX
To check the MFP status and settings and to view problem solving information and online documentation, use the HP ToolboxFX software. You can view the HP ToolboxFX when the MFP is directly connected to your computer or when it is connected to a network. You must have performed a complete software installation to use the HP ToolboxFX. See Managing and maintaining the multifunction peripheral (MFP).
Availability of support and service
Around the world, HP provides a variety of service and support options for purchase. Availability of these programs will vary depending upon your location.
HP Care Pack™ Services and Service Agreements
HP has various service and support options that meet a wide range of needs. These options are not part of the standard warranty. Support services vary by location. For most MFPs HP offers both in-warranty and post-warranty HP Care Pack Services and Service Agreements.
To identify service and support options for this MFP go to http://www.hpexpress-services.com/10467a and type the MFP model number. In North America, Service Agreement information can be obtained through HP Customer Care. Call 1-800-HPINVENT [1-800-474-6836 (U.S.)] or 1-800-268-1221 (Canada). In other countries/regions please contact your country/region specific HP Customer Care Center. See the inbox flyer or go to http://www.hp.com for the HP Customer Care telephone number in your country/region.
Repacking the MFP
If your MFP needs to be moved or shipped to another location, perform the following procedure to repack the MFP.

CAUTION Shipping damage as a result of inadequate packing is the customer's responsibility. To ensure proper protection during shipment, the MFP must be repackaged properly using the original cushions.
Repack the MFP

CAUTION It is extremely important to remove the print cartridges before shipping the MFP. Print cartridges left in the MFP during shipping will leak and entirely cover the MFP engine and other parts with toner.
To prevent damage to the print cartridge, avoid touching the roller, and store the print cartridge in its original packing material or so that it is not exposed to light.
- Remove all four print cartridges.
- If you have added optional tray 3, remove and retain.
- Remove and retain the power cable and interface cable.
- Remove and retain the output tray.
- If possible, include print samples and 50 to 100 sheets of paper or other print media that did not print correctly.
- Use the original shipping container and packing material, if possible. If you have already disposed of the MFP packing material, contact a local mailing service for information about repacking the MFP. HP recommends insuring the equipment for shipment.
- Include a completed copy of the Service information form.
Service information form
WHO IS RETURNING THE EQUIPMENT? Date:
| Person to contact: Phone: | |
| Alternate contact: Phone: | |
| Return shipping address: | Special shipping instructions: |
WHAT ARE YOU SENDING?
| Model name: | Model number: Serial number: |
Please attach any relevant printouts. Do NOT ship accessories (manuals, cleaning supplies, and so on) that are not required to complete the repair.
HAVE YOU REMOVED THE PRINT CARTRIDGES?
| You must remove them before shipping the MFP, unless a mechanical problem prevents you from doing so. |
| [ ] Yes. | [ ] No, I cannot remove them. |
WHAT NEEDS TO BE DONE? (Attach a separate sheet if necessary.)
-
Describe the conditions of the failure. (What was the failure? What were you doing when the failure occurred? What software were you running? Is the failure repeatable?)
-
If the failure is intermittent, how much time elapses between failures?
-
If the unit connected to any of the following, give the manufacturer and model number.
Personal computer: Modem: Network:
- Additional comments:
HOW WILL YOU PAY FOR THE REPAIR?
| [ ] Under warranty | Purchase/received date: |
| (Attach proof of purchase or receiving document with original received date.) |
[ ] Maintenance contract number:
[ ] Purchase order number:
Except for contract and warranty service, a purchase order number and/or authorized signature must accompany any request for service. If standard repair prices do not apply, a minimum purchase order is required. Standard repair prices can be obtained by contacting an HP-authorized repair center.
Authorized signature: Phone:
Billing address: Special billing instructions:
C Specifications
This section contains information about MFP specifications.
• Multifunction peripheral (MFP) specifications
Multifunction peripheral (MFP) specifications
Table C-1 Physical Specifications
| Specifications | HP Color LaserJet CM1015 MFP | HP Color LaserJet CM1017 MFP |
| Device weight (without cartridges) | 19.4 kg (42.75 lb) | 19.6 kg (43.2 lb) |
| Device weight, including 4 cartridges | 22 kg (48.5 lb) 22.2 kg (48.9 lb) | |
| Device height, desktop to top of fully tilted display ^ | 525 mm (20.7 in) 540 mm (21.3 in) | |
| Device height, desktop to top of scanner cover with display folded down | 490 mm (19.3 in) 490 mm (19.3 in) | |
| Device height, desktop to top edge of open scanner lid | 750 mm (29.55 in) 750 mm (29.55 in) | |
| Depth from front of removable face up output tray to the back of the main input tray, letter paper (input tray extended) | 508 mm (20.0 in) 508 mm (20.0 in) | |
| Depth, from front of removable face up output tray to back of main input tray, legal paper (input tray extended) | 563 mm (22.2 in) 563 mm (22.2 in) | |
| Depth, from front of fully extended open input tray to back of device | 790 mm (31.1 in) 790 mm (31.1 in) | |
| Device width at the scanner 437 mm (17.25 in) 437 mm (17.25 in) | ||
Only dimensional difference between HP Color LaserJet CM1015 MFP and HP Color LaserJet CM1017 MFP.
Table C-2 Supplies specifications
| Print-cartridge life (based on approximately 5% coverage) Black: 2,500 pages |
| Yellow, cyan, and magenta: 2,000 pages each |
Table C-3 Electrical specifications
| Item 110-Volt models 220-Volt models | ||
| Power requirements^1 | 110-127V (+/-10%) | 220-240V (+/-10%) |
| 50/60 Hz (+/- 2 Hz) | 50/60 Hz (+/- 2 Hz) | |
| Rated current 4.0 Amps 2.5 Amps | ||
Table C-4 Power consumption (average, in watts) ^1
| Product model | Printing (Color) ^2 | Printing (Black and White) ^2 | Copying ^2 | Ready ^2 | Power Save Off |
| HP Color LaserJet CM1015 MFP | 200 W 190 W 150 W 18 W 18 W 0 W | ||||
| HP Color LaserJet CM1017 MFP | 200 W 190 W 150 W 18 W 18 W 0 W |
1 Values subject to change, see http://www.hp.com/support/cljCM1015_CM1017 for current information.
2 Power reported is highest values measured for color and monochrome printing/copying using all standard voltages.
^3 Default time from Ready Mode to Power Save = 0 minutes.
4 Recovery time from Power Save to start of printing = 14 seconds
5 Maximum heat dissipation for all models in Ready Mode = 62 BTU/Hour
6 HP Color LaserJet CM1015 MFP and HP Color LaserJet CM1017 MFP speed is 8 PPM Letter and A4 size.

WARNING! Power requirements are based on the country/region where the MFP is sold. Do not convert operating voltages. This can damage the MFP and void the product warranty.
Table C-5 Environmental specifications
| Recommended1 | Operating1 | Storage1 | |
| (MFP and print cartridge) | 20° to 27°C (68° to 81°F) | 15° to 32.5°C (59° to 90.5°F) | -20° to 40°C (-4° to 104°F) |
| Temperature | |||
| Relative humidity | 20% to 70% | 10% to 80% | 95% or less |
1 Values are subject to change. See http://www.hp.com/support/cljCM1015_CM1017 for current information.
Table C-6 Acoustic emissions ^1
| Sound Power Level Declared Per ISO 9296 | |
| Printing/Copying (8 PPM) ^2 | L_WAd = 5.8 Bels (A) [58 dB (A)] |
| Ready | Inaudible |
| Sound Pressure Level (SPL)-Bystander Position Declared Per ISO 9296 | |
| Printing/Copying (8 PPM) ^2 | L_pAm = 46 dB(A) |
| Ready | Inaudible |
1 Values are subject to change. See http://www.hp.com/support/cljCM1015 CM1017 for current information.
2 Configuration tested: HP Color LaserJet CM1017 MFP, continuous monochrome printing on A4 paper at 8 PPM.
3 HP Color LaserJet CM1015 MFP and HP Color LaserJet CM1017 MFP speed is 8 PPM Letter and A4 size.
Table C-7 Paper and print media support specifications table
| Category Specifications |
| Acid content 5.5 pH to 8.0 pH |
| Caliper 0.094 to 0.18 mm (3.0 to 7.0 mils) |
| Curl in ream Flat within 5 mm (0.2 inch) |
| Cut-edge conditions Cut with sharp blades with no visible fray |
| Fusing compatibility Must not scorch, melt, offset, or release hazardous emissions when heated to 210°C (410°F) for 0.1 second |
| Grain Long Grain |
| Moisture content 4% to 6% by weight |
| Smoothness 100 to 250 Sheffield |
For complete print media specifications for all HP LaserJet Printers, see the HP LaserJet PrinterFamily Print Media Guide. To download the guide in PDF format, go to http://www.hp.com/support/lipaperguide.
D Regulatory information
This section contains the following information:
Introduction
• FCC regulations
• Environmental Product Stewardship program
• Declaration of conformity
• Country/region-specific safety statements
Introduction
This section contains the following regulatory information:
• FCC regulations
• Environmental Product Stewardship program
• Service and support
• Declaration of conformity
• Laser safety statement
• Canadian DOC statement
• Korean EMI statement
• VCCI statement (Japan)
• Finnish laser statement
FCC regulations
This equipment has been tested and found to comply with the limits for a Class B digital device, pursuant to Part 15 of the FCC rules. These limits are designed to provide reasonable protection against harmful interference in a residential installation. This equipment generates, uses, and can radiate radio frequency energy. If this equipment is not installed and used in accordance with the instructions, it can cause harmful interference to radio communications. However, there is no guarantee that interference will not occur in a particular installation; the presence of interference can be determined by turning the equipment off and on. If this equipment does cause harmful interference to radio or television communications, the user is encouraged to try to correct the interference by one or more of the following measures:
• Reorient or relocate the receiving antenna.
- Increase distance between equipment and receiver.
- Connect equipment to an outlet on a circuit different from that to which the receiver is located.
- Consult your dealer or an experienced radio/television technician.

NOTE Any changes or modifications to the MFP that are not expressly approved by HP could void the user's authority to operate this equipment.
Use of a shielded interface cable is required to comply with the Class B limits of Part 15 of FCC rules.
Environmental Product Stewardship program
Protecting the environment
Hewlett-Packard Company is committed to providing quality products in an environmentally sound manner. This product has been designed with several attributes to minimize impacts on our environment.
Ozone production
This product generates no appreciable ozone gas ( O_3 ).
Power consumption
Power usage drops significantly while in sleep mode, which saves natural resources and saves money without affecting the high performance of this product. This product qualifies for ENERGY STAR® (Version 3.0), which is a voluntary program to encourage the development of energy-efficient office products.

ENERGY STAR® and the ENERGY STAR mark are U.S. registered marks. As an ENERGY STAR® partner, Hewlett-Packard Company has determined that this product meets ENERGY STAR® Guidelines for energy efficiency. For more information, see http://www.energystar.gov/.
Paper use
This product's duplex feature (two-sided printing); see Print on both sides of the paper and N-up printing [multiple pages printed on one page] capability can reduce paper usage and the resulting demands on natural resources.
Plastics
Plastic parts over 25 grams are marked according to international standards that enhance the ability to identify plastics for recycling purposes at the end of the product's life.
HP LaserJet printing supplies
It is easy to return and recycle your empty HP LaserJet print cartridges—free of charge—with HP Planet Partners. HP is committed to providing inventive, high-quality products and services that are environmentally sound, from product design and manufacturing to distribution, operation and recycling processes. We ensure your returned HP LaserJet print cartridges are recycled properly, processing them to recover valuable plastics and metals for new products and diverting millions of tons of waste from landfills. Since this cartridge is being recycled and used in new materials, it will not be returned to you. Your empty HP LaserJet print cartridges are recycled responsibly when you participate in the HP Planet Partners program. Thank you for being environmentally responsible!
In many countries/regions, this product's printing supplies (for example, print cartridge) can be returned to HP through the HP Printing Supplies Returns and Recycling Program. An easy-to-use and free takeback program is available in over 35 countries/regions. Multi-lingual program information and instructions are included in every new HP LaserJet print cartridge and supplies package.
HP Printing Supplies Returns and Recycling Program Information
Since 1992, HP has offered HP LaserJet supplies return and recycling free of charge. In 2004, HP Planet Partners for LaserJet Supplies was available in 85% of the world market where HP LaserJet supplies are sold. Postage-paid and pre-addressed labels are included within the instruction guide in most HP LaserJet print cartridge boxes. Labels and bulk boxes are also available through the Web site: http://www.hp.com/recycle.
Use the label to return empty, original HP LaserJet cartridges only. Please do not use this label for, non-HP cartridges, refilled or remanufactured cartridges or warranty returns. Printing supplies or other objects inadvertently sent to the HP Planet Partners program cannot be returned.
More than 10 million HP LaserJet print cartridges were recycled globally in 2004 through the HP Planet Partners supplies recycling program. This record number represents 26 million pounds of print cartridge materials diverted from landfills. Worldwide, in 2004, HP recycled an average of 59% of the print cartridge by weight consisting primarily of plastic and metals. Plastics and metals are used to make new products such as HP products, plastic trays and spools. The remaining materials are disposed of in an environmentally responsible manner.
U.S. returns
For a more environmentally responsible return of used cartridges and supplies, HP encourages the use of bulk returns. Simply bundle two or more cartridges together and use the single, pre-paid, pre-addressed UPS label that is supplied in the package. For more information in the U.S., call 1-800-340-2445 or visit the HP Printing Supplies Returns and Recycling Program Web site at: http://www.hp.com/go/recycle.
Non-U.S. returns
Non-U.S. customers should visit the http://www.hp.com/go/recycle Web site for further information regarding availability of the HP Supplies Returns and Recycling program.
Paper
This product is capable of using recycled papers, when the paper meets the guidelines outlined in the HP LaserJet Printer Family Print Media Guide. Go to http://www.hp.com/support/ljpaperguide to download this guide in PDF format. This product is suitable for the use of recycled paper according to EN12281:2002.
Material restrictions
This product does not contain added mercury.
This product does not contain batteries.
For recycling information, you can contact http://www.hp.com/go/recycle or contact your local authorities or the Electronics Industry Alliance at http://www.eiae.org.
Disposal of waste equipment by users in private households in the European Union

natural_image
Symbol of a trash bin crossed with no visible text or labelsThis symbol on the product or on its packaging indicates that this product must not be disposed of with your other household waste. Instead, it is your responsibility to dispose of your waste equipment by handing it over to a designated collection point for the recycling of waste electrical and electronic equipment. The separate collection and recycling of your waste equipment at the time of disposal will help to conserve natural resources and ensure that it is recycled in a manner that protects human health and the environment. For more information about where you can drop off your waste equipment for recycling, please contact your local city office, your household waste disposal service or the shop where you purchased the product.
Material safety data sheet
Material Safety Data Sheets (MSDS) for supplies containing chemical substances, such as toner, can be obtained by contacting the HP Web site at http://www.hp.com/go/msds or http://www.hp.com/hpinfo/community/environment/productinfo/safety.
Extended warranty
HP Care Pack provides coverage for the HP hardware product and all HP supplied internal components, excluding consumable items. The hardware maintenance covers a specified period of time from date of the HP product purchase. The customer can either purchase HP Care Pack within the standard HP product warranty period, or purchase a post-warranty Care Pack if the standard warranty has expired. For more information, contact the HP Customer Care Service and HP Customer Support group.
Spare parts and consumable supplies for this product will be available for at least five years after production has stopped.
For more information
To obtain information about these environmental topics:
• Product environmental profile sheet for this and many related HP products
• HP's commitment to the environment
• HP's environmental management system
HP's end-of-life product return and recycling program
- MSDS
See: http://www.hp.com/go/environment or http://www.hp.com/hpinfo/community/environment/productinfo/safety.
Declaration of conformity
Declaration of Conformity
according to ISO/IEC Guide 22 and EN 45014
Manufacturer's Name: Hewlett-Packard Company
Manufacturer's Address: 11311 Chinden Boulevard,
Boise, Idaho 83714-1021, USA
declares, that the product
Product Name: HP Color LaserJet CM1015/CM1017 MFP
Regulatory Model Number ^3) :
BOISB-0409-03
Including: Q6459A —Optional 250-Sheet Input Tray
Product Options: All
Print Cartridges: Q6000A, Q6001A, Q6002A, Q6003A
conforms to the following Product Specifications:
Safety: IEC 60950-1:2001 / EN60950-1:2001 +A11
IEC 60825-1:1993 +A1 +A2/
EN 60825-1:1994 +A1 +A2 (Class 1 Laser/LED Product)
GB4943-2001
EMC: CISPR22:1993 +A1 +A2 / EN55022:1994 +A1 +A2 Class B ^1)
EN 61000-3-2:2000
EN 61000-3-3:1995 +A1
EN 55024:1998 +A1 +A2
FCC Title 47 CFR, Part 15 Class B ^2) / ICES-003, Issue 4
GB9254-1998, GB17625.1-2003
Supplementary Information:
The product herewith complies with the requirements of the EMC Directive 89/336/EEC and the Low Voltage Directive 73/23/EEC, and carries the CE-Marking accordingly.
1) The product was tested in a typical configuration with Hewlett-Packard Personal Computer Systems.
2) This Device complies with Part 15 of the FCC Rules. Operation is subject to the following two Conditions: (1) this device may not cause harmful interference, and (2) this device must accept any interference received, including interference that may cause undesired operation.
3) For regulatory purposes, this product is assigned a Regulatory model number. This number should not be confused with the product name or the product number(s).
Boise, Idaho 83714-1021, USA
January 4, 2006
For regulatory topics only:
Australia Contact: Product Regulations Manager, Hewlett-Packard Australia Ltd., 31-41 Joseph Street, Blackburn, Victoria 3130, Australia.
European Contact: Your Local Hewlett-Packard Sales and Service Office or Hewlett-Packard GmbH, Department HQ-TRE / Standards Europe, Herrenberger Strasse 140, D-71034 Böblingen, Germany, (FAX: +49-7031-14-3143)
USA Contact: Product Regulations Manager, Hewlett-Packard Company, PO Box 15, Mail Stop 160, Boise, Idaho 83707-0015, USA, (Phone: 208-396-6000)
Country/region-specific safety statements
Laser safety statement
The Center for Devices and Radiological Health (CDRH) of the U.S. Food and Drug Administration has implemented regulations for laser products manufactured since August 1, 1976. Compliance is mandatory for products marketed in the United States. The MFP is certified as a "Class 1" laser product under the U.S. Department of Health and Human Services (DHHS) Radiation Performance Standard according to the Radiation Control for Health and Safety Act of 1968.
Since radiation emitted inside the MFP is completely confined within protective housings and external covers, the laser beam cannot escape during any phase of normal user operation.

WARNING! Using controls, making adjustments, or performing procedures other than those specified in this user guide can result in exposure to hazardous radiation.
Canadian DOC statement
Complies with Canadian EMC Class B requirements.
Korean EMI statement
B급 기기 (가정용 정보통신기기)
VCCI statement (Japan)
Japanese Power Cord Statement
Finnish laser statement
LASERTURVALLISUUS
LUOKAN 1 LASERLAITE
KLASS 1 LASER APPARAT
specifications 13, 15, 128
agreements, maintenance 223, 236
alerts, setting up 148
B
background, gray 181
bands, resolve problems 180
battery specifications 235
bins, output
features 3
jams, clearing 198
black and white printing
resolve problems 184
black and white scanning 86
Black cartridge
life expectancy 158
part number 214
Black Only option 67
blank pages, resolve problems 187
blank scans, resolve
problems 192
BOOTP 106
both sides, printing on 42, 60
built-in networking
information page, printing 140
buttons, control panel 18
buttons, HP Color LaserJet
CM1017 MFP control panel 21, 112
C
cables
USB, resolve problems 188
calibrating MFP 136, 168
Cancel Job 62
canceling
scan jobs 85
cardstock
specifications 13
cartridge out override 163
cartridges
HP fraud hotline 160
life expectancy 158
part numbers 214
recycling 234
replacing 159
status page, printing 142
status, viewing with
HP ToolboxFX 148
storage specifications 229
characters, resolve problems 182
checking DIMM installation 211
clearing jams
common locations 195
input areas 200
inside MFP 196, 199
output areas 198
color
calibration 136, 168
features 64
HP ImageREt 2400 64
managing options 44
Manual adjustment options 65
matching 68
printing in grayscale 44
resolve problems 183
scanning settings 85
setting options 43
settings, changing 65
sRGB 68
Color tab settings 42
components
locating 5
Configuration page
printing 140
configurations
network 99
configurations, MFP 2
consumables
life expectancies 158
part numbers 214
recycling 234
specifications 228
status page, printing 142
contracts, maintenance 223, 236
contrast settings
copy 73
control panel
HP ToolboxFX settings 123, 153
messages, resolve
problems 172
scanning from (Macintosh) 83
scanning from (Windows) 80, 130
copies
lines, unwanted 190
copying
cancel a job 70
contrast, adjusting 73
enlarging 74
quality, adjusting 71 reducing 74
cover pages 41
covers 41
covers, document paper specifications 13
creases, resolve problems 183
crooked pages 182, 186
curled media 182
customer support maintenance
agreements 223, 236
repacking MFP 224
service information form 225
Cyan cartridge life expectancy 158 part number 214
D
dark copies, resolve problems 190
darkness, contrast settings copy 73
declaration of conformity 237
default settings, restoring 58, 126
deleting print jobs 62
Demo page, printing 140
destinations to e-mail (Windows) 80, 130
destinations, add folder Windows 80, 130
Detail halftone option 65
device discovery 104
digital cameras, color matching 68
DIMM checking installation 205, 211
documentation 217
Documentation tab, HP ToolboxFX 149
dots per inch (dpi) HP ImageREt 2400 64 specifications 3
dots, resolve problems 180
double-sided printing 42, 60
downloading drivers 10
dpi (dots per inch) HP ImageREt 2400 64 specifications 3
drivers
accessing 40
downloading 10
features 41, 58, 125
Macintosh, resolve problems 46
opening 57, 124
operating systems supported 8
presets 41
restoring default settings 58, 126
settings, changing 59, 126
uninstalling 35
Windows, features 30
duplex-printing accessory loading 42
duplexing 60
E
E-label reader 173
Edge Control 66
electrical specifications 228
embedded Web server using 155
enabling memory Windows 211
energy consumption 228
engine, cleaning 137, 162
enlarging copies 74
envelopes
printing 56
specifications 13, 15, 127
environmental features 23
MFP specifications 229
error messages control panel
Event log 148
extended warranty 223, 236
e-mail alerts, setting up 148
e-mail, add scanning destinations Windows 80, 130
e-mail, scanning to
Macintosh 83
resolution settings 86
F
faded print 180
FCC statements 233
features
color 64
drivers 41, 58, 125
feeding problems, resolve problems 186
file, scanning to
Macintosh 83
first page, use different paper 41
4-Color option 67
fraud hotline 160
G
gateways
overview 107
gray background, resolve problems 181
grayscale
resolve problems 184 scanning 86
grayscale printing 44
H
halftone options 65
heavy paper specifications 13
Help tab, HP ToolboxFX 149
HP built-in networking information page, printing 140
HP Color LaserJet CM1015 MFP control panel lights and buttons, description 18
HP Color LaserJet CM1017 MFP control panel lights and buttons, description 21, 112
HP customer care 222
HP Device Configuration 45
HP Director 8
HP fraud hotline 160
HP ImageREt 2400 64
HP LaserJet glossy paper printing 16, 128
HP LaserJet paper 216
HP LaserJet photo paper media 16, 128
HP LaserJet Tough paper 16, 129
HP multipurpose paper 216
HP Printing Supplies Returns and Recycling Program 234
HP Solution Center 8
HP SupportPack 223, 236
HP ToolboxFX
calibrating MFP 136, 137, 168
Documentation tab 149
Help tab 149
Network Settings tab 154
operating systems supported 8
Status tab 148
System Settings tab 120, 150
toner level, checking from 158
humidity specifications
MFP environment 229
|
image quality
HP ImageREt 2400 64
HP ToolboxFX settings 121, 151
print, resolve problems 179
scans, resolve problems 191
ImageREt 2400 64
index printing 87
index, photo 97
information pages
Configuration 102
Network configuration 102
information pages, printing 140
input trays
features 3
feeding problems, resolve problems 186
jams, clearing 200
loading 50
part numbers 215
installing
Macintosh printer drivers 38
Macintosh software 38, 39
installing DIMM 207
installing memory 207
interface ports
cables, ordering 215
types included 3
Internet protocol (IP)
overview 105
IP address
BOOTP 106
Macintosh, resolve
problems 46
overview 105
IP addressing 104
J
jams
back of MFP 199
causes of 195
input areas 200
inside MFP 196
output areas 198
top output area 199
K
keys, control panel 18
keys, HP Color LaserJet CM1017
MFP control panel 21, 112
L
labels
specifications 13, 15, 128
language
information pages 140
laser safety statements 238
LaserJet paper 216
letterhead
printing 16, 128
life expectancies, supplies 158
light copies, resolve
roblems 190
light print, resolve problems 180
lightness
copy contrast 73
faded print resolve
problems 180
lights
locating 18, 21, 112
lines
copies 190
lines, resolve problems
printed pages 180
loading media
tray 1 50
tray 2 51
loose toner, resolve
problems 181
M
Macintosh
drivers 8
drivers, accessing 40
drivers, resolve problems 46
features supported 8
MFP software 37
problems, resolve 46
scan driver 8
scanning from control panel 83
scanning from TWAIN-compliant software 84
scanning page-by-page 83
scanning to e-mail 83
scanning to file 83
USB card, resolve problems 47
Macintosh Installer
operating systems supported 8
Magenta cartridge
life expectancy 158
part number 214
mailing labels
specifications 13, 15, 128
maintenance
agreements 223, 236
replacing print cartridges 158
managing network 101
Manual color options 65
manual duplexing 60
manuals 217
matching, color 68
Material Safety Data Sheet 236
media
curled, resolve problems 182
envelopes 15, 56, 127
first page 41
HP LaserJet glossy paper 16, 128
HP LaserJet photo paper 16, 128
HP Solution Center settings 123, 153
HP, ordering 216
jams 195
labels 15, 128
letterhead 16, 128
loading trays 50
pages per sheet 41
resolve problems 185
selecting 12
specifications 229
transparencies 16, 128
types that may damage the printer 14
types to avoid 14
wrinkled 183
memory
enabling 43, 205, 211
installation 205
installing 207
slots 4
working with 205
memory card
view photo 90
memory cards
error messages 178
memory cards insertion 87
memory cards, photo inserting 88
mercury specifications 235
messages
control panel 172
messaging and management, network 104
MFP
drivers 40
MFP memory
addition 206
MFP software
Macintosh 37
monitors, color matching 68
multiple pages per sheet 41
multipurpose paper, HP 216
N
n-up printing 41
network
configuration 99
configuring 99
device discovery 104
IP address 134
IP addressing 104
messaging and
management 104
MFP control panel 99
resolve problems 99
supported protocols 99, 104
using MFP control panel 102
network configuration
direct printing 100
making changes 34, 101
shared printing 100
Network configuration page 102
network password
changing 101
setting 101
network settings
changing 101
viewing 101
Network Settings tab, HP ToolboxFX 154
network setup 100
networks
information pages, printing 140
Neutral Grays options 67
non-HP print cartridges 159
O
OCR software
installing 84
on-site service agreements 236
online customer support 222
operating environment, specifications 229
operating systems supported 8
optical character recognition software installing 84
ordering accessories
information 213
ordering supplies and accessories 214
output bin
features 3
output bin extender 5
output bins
jams, clearing 198
output quality
HP ImageREt 2400 64
HP ToolboxFX settings 121, 151
print, resolve problems 179
scan, resolve problems 191
overhead transparencies
specifications 13, 16, 128
ozone specifications 234
P
packaging MFP 224
Page Setup 57, 124
page-by-page scanning (Macintosh) 83
pages
blank 187
not printing 188
printing slowly 187
skewed 182, 186
pages per sheet 41
paper
curled, resolve problems 182
first page 41
HP LaserJet Tough paper 16, 129
HP Solution Center settings 123, 153
HP, ordering 216
jams 195
letterhead 16, 128
loading trays 50
pages per sheet 41
resolve problems 185
selecting 12
specifications 229
wrinkled 183
paper input trays
features 3
feeding problems, resolve problems 186
jams, clearing 200
loading 50
part numbers 215
paper output bin features 3
paper output bins
jams, clearing 198
part numbers
accessories 213
parts
part numbers 214
user-replaceable 216
phone numbers
HP fraud hotline 160
HP Printing Supplies Returns and Recycling Program 235
support 222
photo
rotate from display screen 90
view from memory card 90
photo index 87
photo memory cards 4
photo printing 87
photos
memory cards, inserting 88
printing an index 97
printing directly from the memory card 93, 132
photos, resolve problems
scanning 191
pick-up rollers, ordering 216
pixels per inch (ppi)
scanning 85
platforms supported 8
ports
cables, ordering 215
solve Macintosh problems 47
types included 3
PostScript driver, HP ToolboxFX
settings 124, 154
power
requirements 228
ppi (pixels per inch)
scanning 85
preprinted paper
printing on 16, 128
presets 41
print cartridge
replacing 164
print cartridges
HP fraud hotline 160
life expectancy 158
part numbers 214
recycling 234
replacing 159
status page, printing 142
status, viewing with
HP ToolboxFX 148
storage specifications 229
Print dialog box 57, 124
print driver
PostScript 3
print quality
HP ImageREt 2400 64
HP ToolboxFX settings 121, 151
resolve problems 179
specifications 3
print servers
information page, printing 140
printer drivers
Macintosh 38
uninstalling 35
printer-drivers
downloading 10
features 58, 125
opening 57, 124
operating systems
supported 8
restoring default settings 58, 126
settings, changing 59, 126
Windows, features 30
printing
both sides 60
canceling 62
photos, from the memory card 93, 132
photos, index of 97
resolve problems 187, 188
Windows 59, 126
printing environment 104
Q
quality
HP ImageREt 2400 64
HP ToolboxFX settings 121, 151
print, resolve problems 179
scans, resolve problems 191
specifications 3
R
Readiris OCR software
installing 84
rear output door
features 3
recycling
plastics 234
print cartridges 234
reducing
copies 74
refilled print cartridges 159
refilling paper 50
regulatory statements
declaration of conformity 237
FCC 233
laser safety 238
Material Safety Data Sheet 236
repacking MFP 224
repetitive defects, resolve problems 183
replacing print cartridges 159
reports, MFP
Configuration page 102
Network configuration page 102
reports, printing 140
resizing documents copying 74
resolution
HP ImageREt 2400 64
scanning 85
specifications 3
resolve problems
blank pages 187
calibrating MFP 136, 168
color 183
Configuration page, printing 102, 140
control panel messages 172
curled media 182
Demo page, printing 140
faded print 180
feeding problems 186
jams 195
lines, printed pages 180
loose toner 181
Network configuration page, printing 102
pages not printing 188
pages printing slowly 187
paper 185
print quality 179
repetitive defects 183
replacing print cartridges 159
scan quality 191
skewed pages 182, 186
text 182
toner scatter 183
toner smear 181
toner specks 180
USB cables 188
wrinkles 183
restoring default settings 58, 126
RGB color options 66, 68
rollers, ordering 216
S
scaling documents
copying 74
Scan To button,
programming 80, 130
scanners, color matching 68
scanning
black and white 86
blank pages, resolve
problems 192
canceling 85
color 85
from device control panel
(Macintosh) 83
from device control panel
(Windows) 80, 130
grayscale 86
HP Solution Center
(Windows) 82
methods 78
page-by-page (Macintosh) 83
photos 85
quality, resolve problems 191
resolution 85
speed, resolve problems 192
to e-mail (Macintosh) 83
to file (Macintosh) 83
TWAIN-compliant software 84
WIA-compliant software 84
scatter, resolve problems 183
screen color matching 68
selection guidelines
media 12
separation pad, ordering 216
servers
information page, printing 140
service
agreements 223, 236
HP ToolboxFX settings 123, 153
information form 225
part numbers 214
repacking MFP 224
settings
changing 59, 126
color 65
Configuration page 102
driver presets 41
HP ToolboxFX 120, 150
Network configuration page 102
restoring defaults 58, 126
shipping MFP 224
size, copy
reducing or enlarging 74
sizes, media
selecting trays 57, 125
skewed pages 182, 186
slots
memory 4
slow speed, resolve problems scanning 192
smeared toner, resolve
problems 181
Smooth halftone option 65
software
downloading 10
features 58, 125
HP Device Configuration 45
HP ToolboxFX 147
Macintosh 38
operating systems supported 8
Readiris OCR, installing 84
scanning from TWAIN or WIA 84
settings, changing 59, 126
uninstalling 35
Windows, features 30
solve problems
Macintosh 46
special media
envelopes 15, 56, 127
HP LaserJet glossy paper 16, 128
labels 15, 128
letterhead 16, 128, 129
specifications 13
transparencies 16, 128
specifications
envelopes 15, 127
environmental 229
labels 15, 128
Material Safety Data
Sheet 236
MFP 228
MFP features 3
paper 229
transparencies 16, 128
specks, resolve problems 180
speed
scanning, resolve
problems 192
spots, resolve problems 180
sRGB 66, 68
status
alerts, HP ToolboxFX 148
Supplies Status page,
printing 142
viewing with
HP ToolboxFX 148
Status tab, HP ToolboxFX 148
stopping printing 62
storing
MFP 229
print cartridges 159
streaks, resolve problems 180
subnet mask
overview 106
subnets
overview 106
Supplementary Documentation
part numbers 213
supplies
life expectancies 158
recycling 234
specifications 228
status page 142
status, viewing with
HP ToolboxFX 148
supplies and consumables
part numbers 213
support
maintenance
agreements 223, 236
part numbers 214
repacking MFP 224
service information form 225
supported network protocols 104
SupportPack, HP 223, 236
System Settings tab,
HP ToolboxFX 120, 150
T
technical support
maintenance
agreements 223, 236
part numbers 214
repacking MFP 224
service information form 225
telephone numbers
HP fraud hotline 160
HP Printing Supplies Returns and Recycling Program 235
support 222
temperature specifications
MFP environment 229
text, resolve problems
misformed characters 182
toner
loose, resolve problems 181
scatter, resolve problems 183
smeared, resolve
problems 181
specks, 180
Toolbox. See HP ToolboxFX
top output bin
features 3
Transmission Control Protocol (TCP)
overview 105
transparencies
specifications 13, 16, 128
Trapping options 66
tray 1
loading 50
tray 2
loading 51
tray 3
loading 51
part number 215
trays
double-sided printing 42
features 3
feeding problems, resolve problems 186
jams, clearing 200
loading 50
part numbers 215
TWAIN-compliant software, scanning from 84
two-sided printing 42, 60
types, media
HP Solution Center
settings 123, 153
selecting trays by 57, 125
U
uninstalling software
using Windows OS 35
USB port
resolve problems 188
solve Macintosh problems 47
type included 3
User Datagram Protocol (UDP) overview 105
user guide
part numbers 217
user-replaceable parts 213, 216
V
vertical lines, resolve problems 180
vertical white or faded stripes 190
voltage requirements 228
W
warranty
extended 223, 236
print cartridge 221
product 219, 220
watermarks
cover page 41
wavy paper, resolve problems 182
Web sites
customer support 222
HP Printing Supplies Returns and Recycling Program 235
Material Safety Data Sheet 236
white or faded stripes 190
WIA-compliant software, scanning from 84
Windows
add scan-to e-mail or folder destinations 80, 130
add scanning e-mail destinations 80, 130
driver features 58, 125
enabling memory 211
printing from 59, 126
scan by using HP Solution Center 82
scan driver 8
scanning from device control panel 80, 130
scanning from TWAIN or WIA software 84
uninstalling software 35
Versions supported 8
wrinkles, resolve problems 183
Y
Yellow cartridge
life expectancy 158
part number 214
© 2006 Hewlett-Packard Development Company, L.P.
www.hp.com